Play Horse Barn
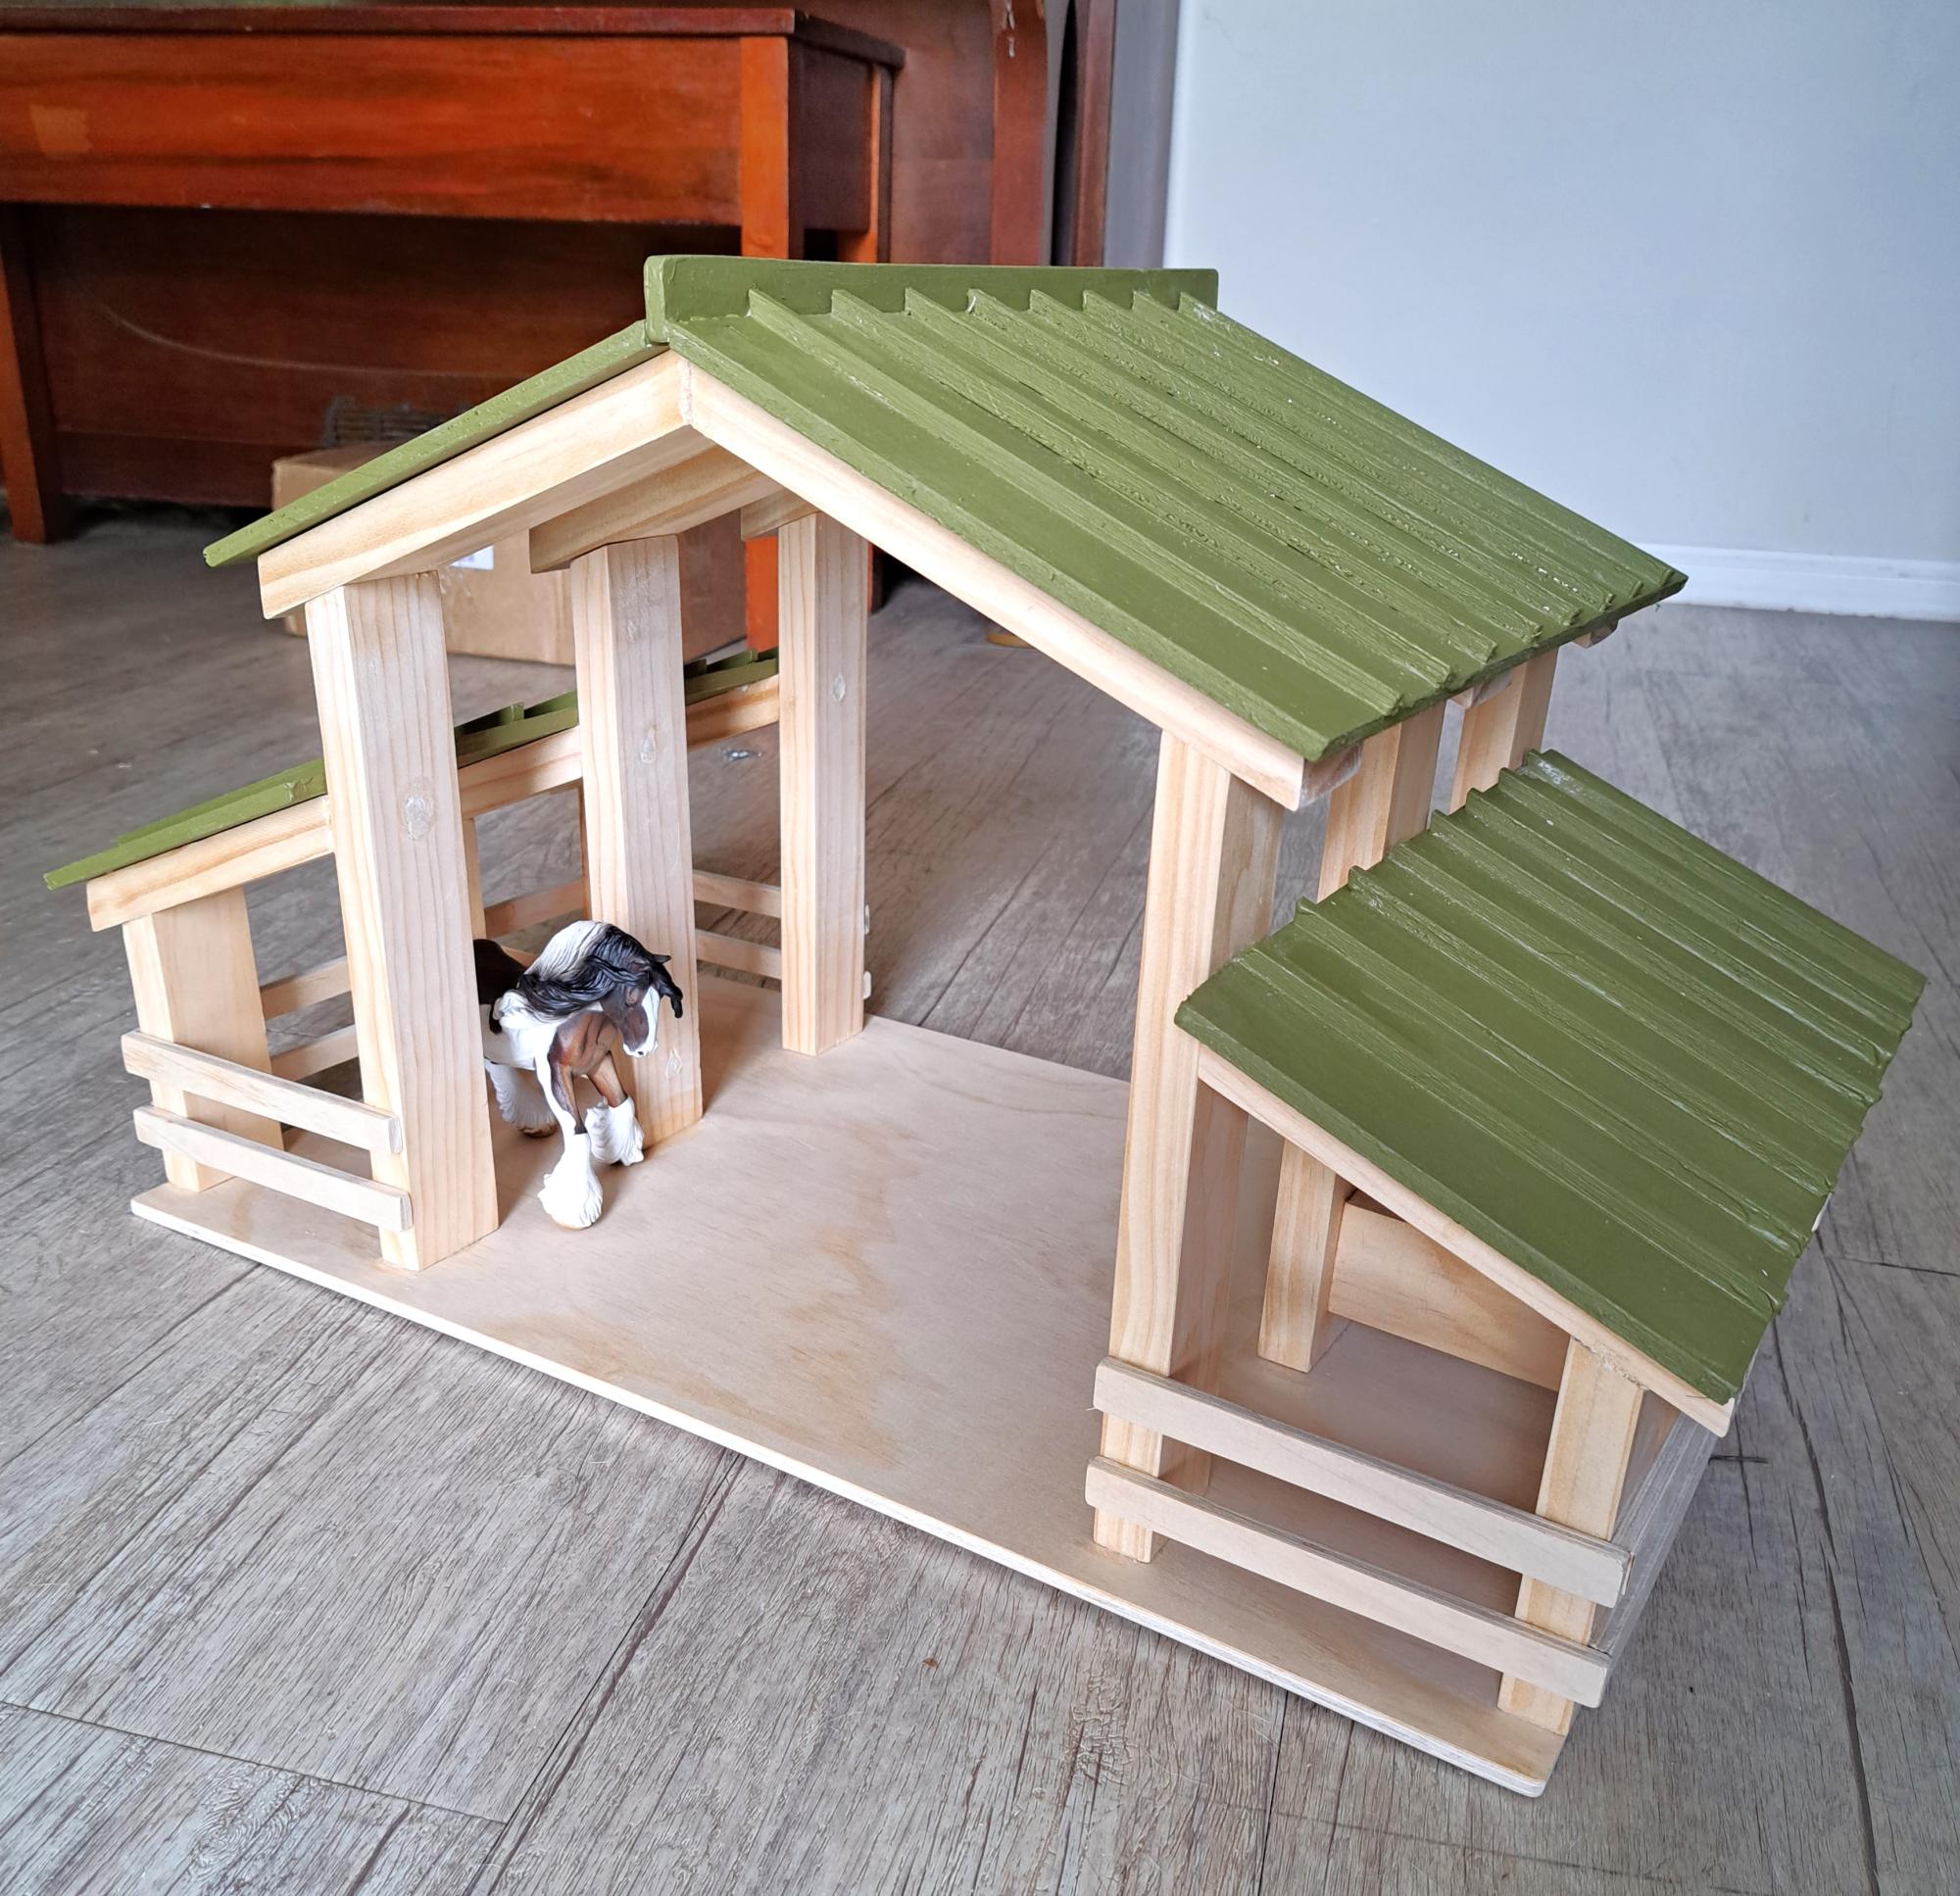
Hello from Australia! I had to change the dimensions a little to convert this to a metric friendly build. I also added a roof line beam to neaten up the top. Great project and the barn looks a treat.
Chella
Built from Plan(s)
Hello from Australia! I had to change the dimensions a little to convert this to a metric friendly build. I also added a roof line beam to neaten up the top. Great project and the barn looks a treat.
Chella
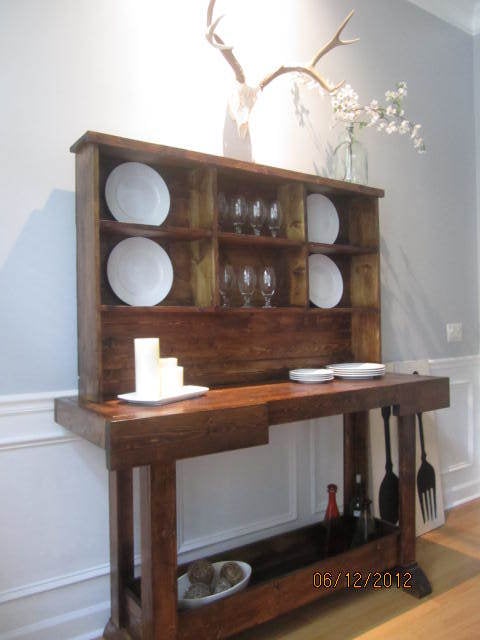
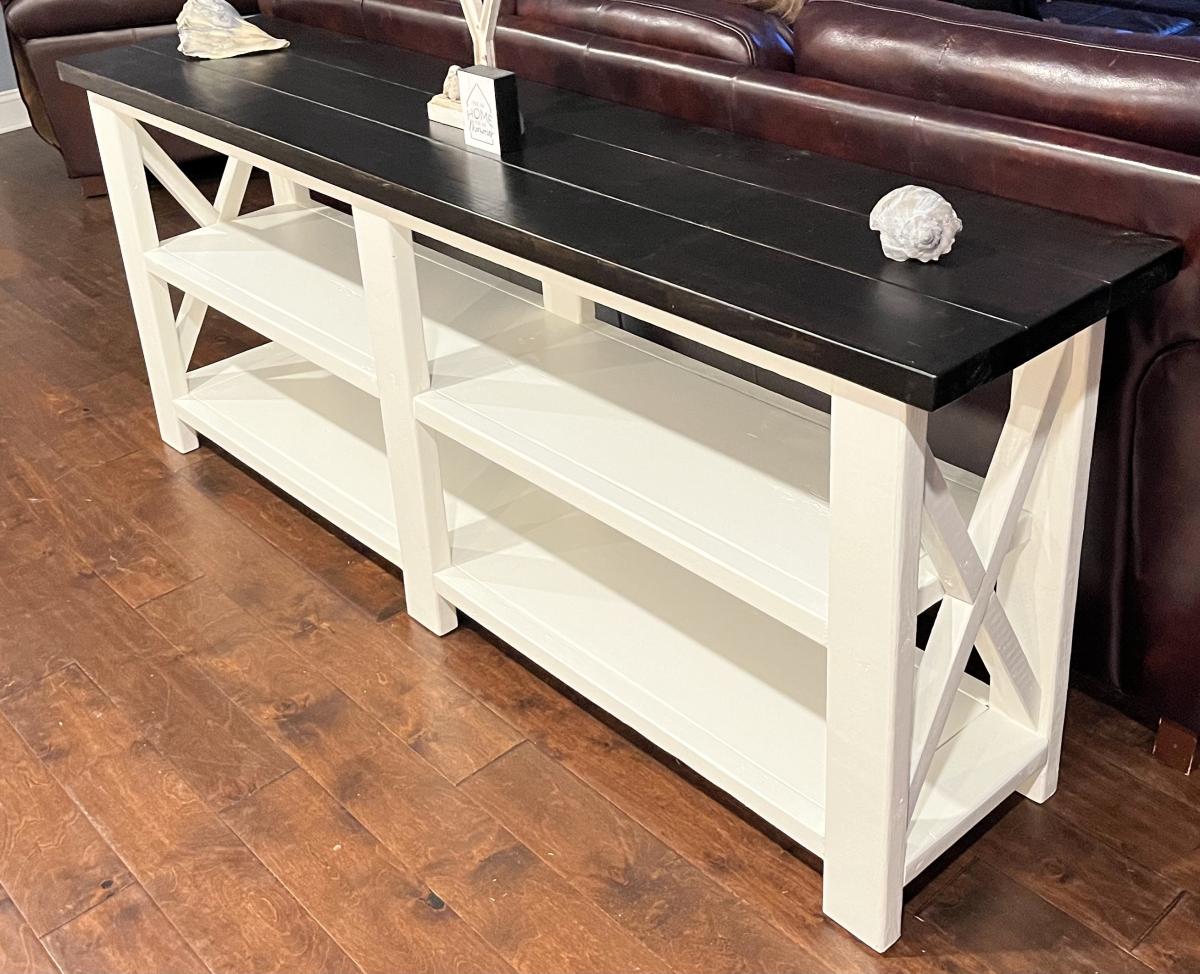
I love this antique workbench console b/c it's the perfect mix between my desire for beautiful and my husband's desire for rustic hunting lodge. (Southern girl meets Minnesota hunter - LOL). It's just a gorgeous antique look, but for far less money. I have haven't put the towel bar on the front yet b/c I keep forgetting to buy it (it's amazing how shopping with toddlers can do that to you). And in my area, mounted bottle openers are only available online, so we need to order one. I used standard stud grade 2x4's for the console, and 1x6's for the planked backing of the hutch. I also dropped the bottom shelf to the natural resting place at the bottom of the legs/top of the feet. It was so much easier for me that way as a beginner, and I really think it still looks great. This was my first Kreg Jig project - and it was so so easy. Ana is totally telling you the truth when she says it's completely worth the money to buy one. My father-in-law is a very well seasoned carpenter and wanted one after he saw some of the furniture I've built with it as a beginner! (We bought him one, of course, b/c he's awesome.)
Mon, 07/02/2012 - 12:10
This is an awesome project. I love the finish. I can just imagine how wonderful it looks with your dining table! Great job.
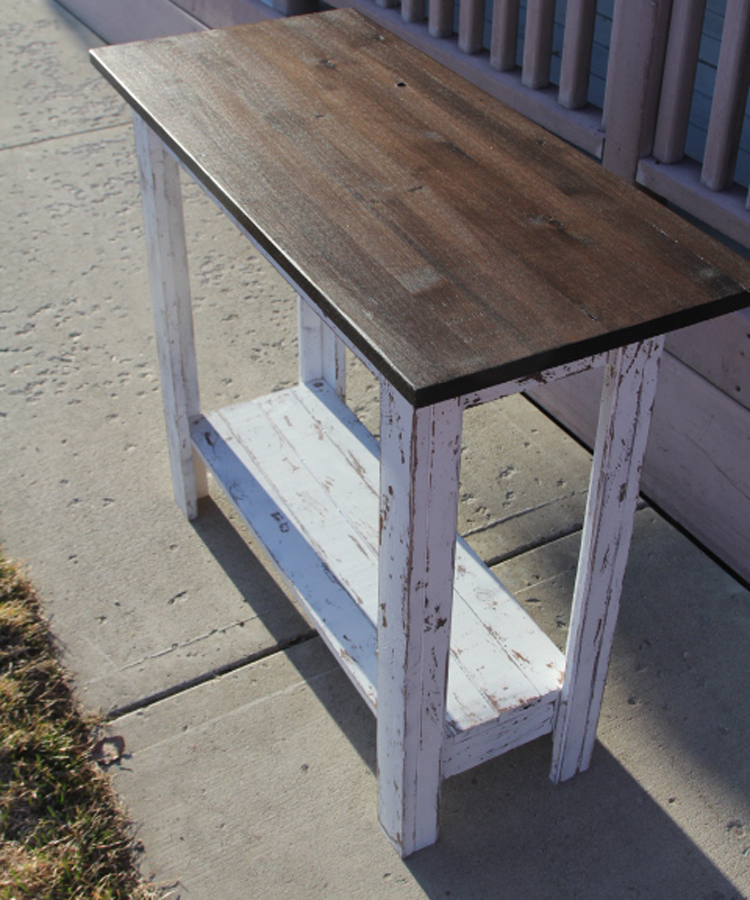
First furniture project with my Kreg Jig. Went smoothly. Loved the plans and how descriptive they were. This is a great beginner project. It only took me about 2 hours to complete.

Sun, 04/06/2014 - 06:33
Congrats on your first furniture project, great job! Your distressed finish and stained top are awesome. Love the Kona stain color, and I think it is the perfect amount of distressing on the paint. Beautiful!
Slight modification to the original plans. Used all 2x6's across the top and added capped ends. Used 2x3s instead of 1x3s. Cuts and assembly were not time consuming, sanding was!!
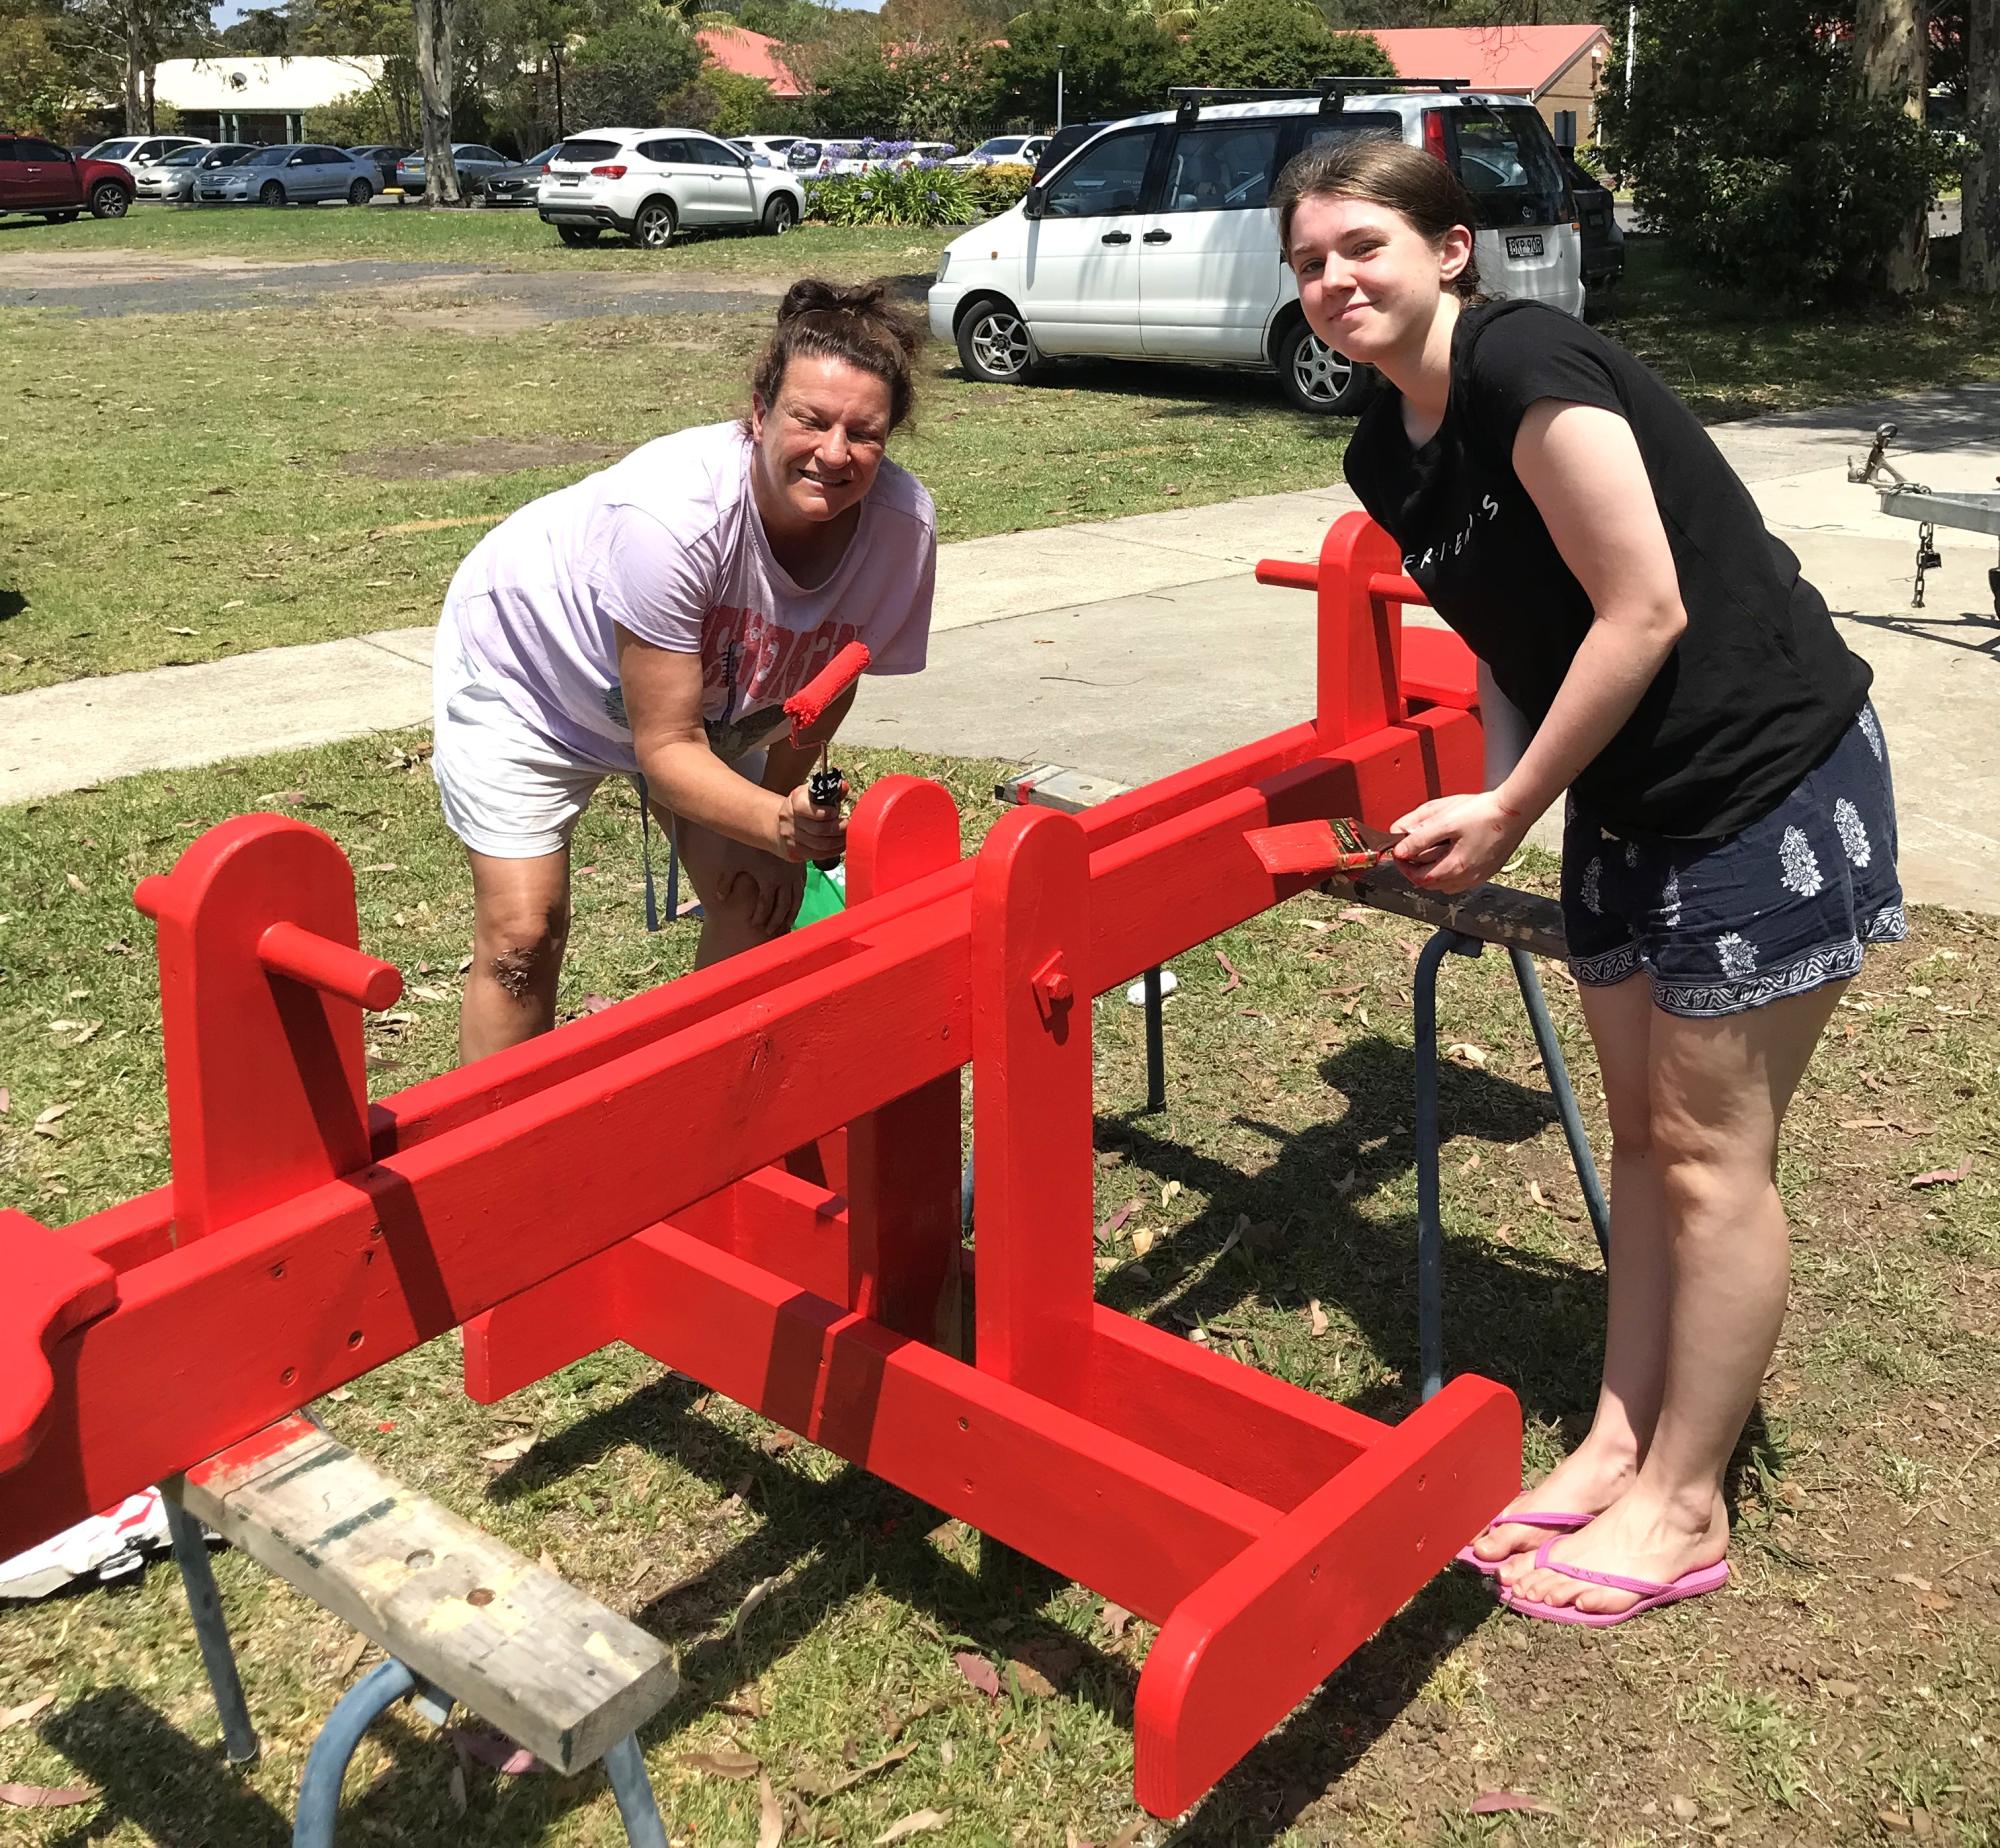
DIY Teeter Totter Culburra Beach and Districts Mens Shed
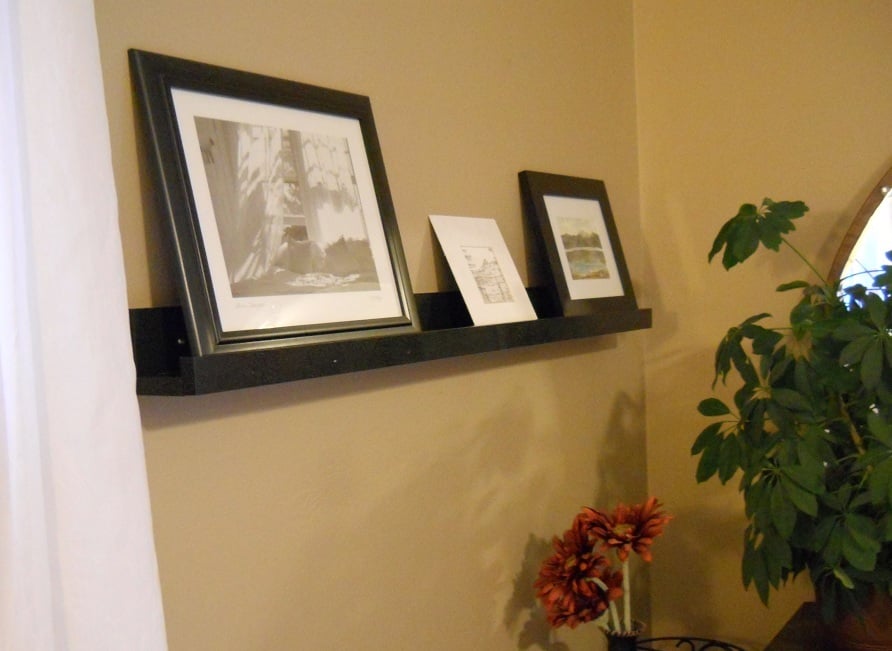
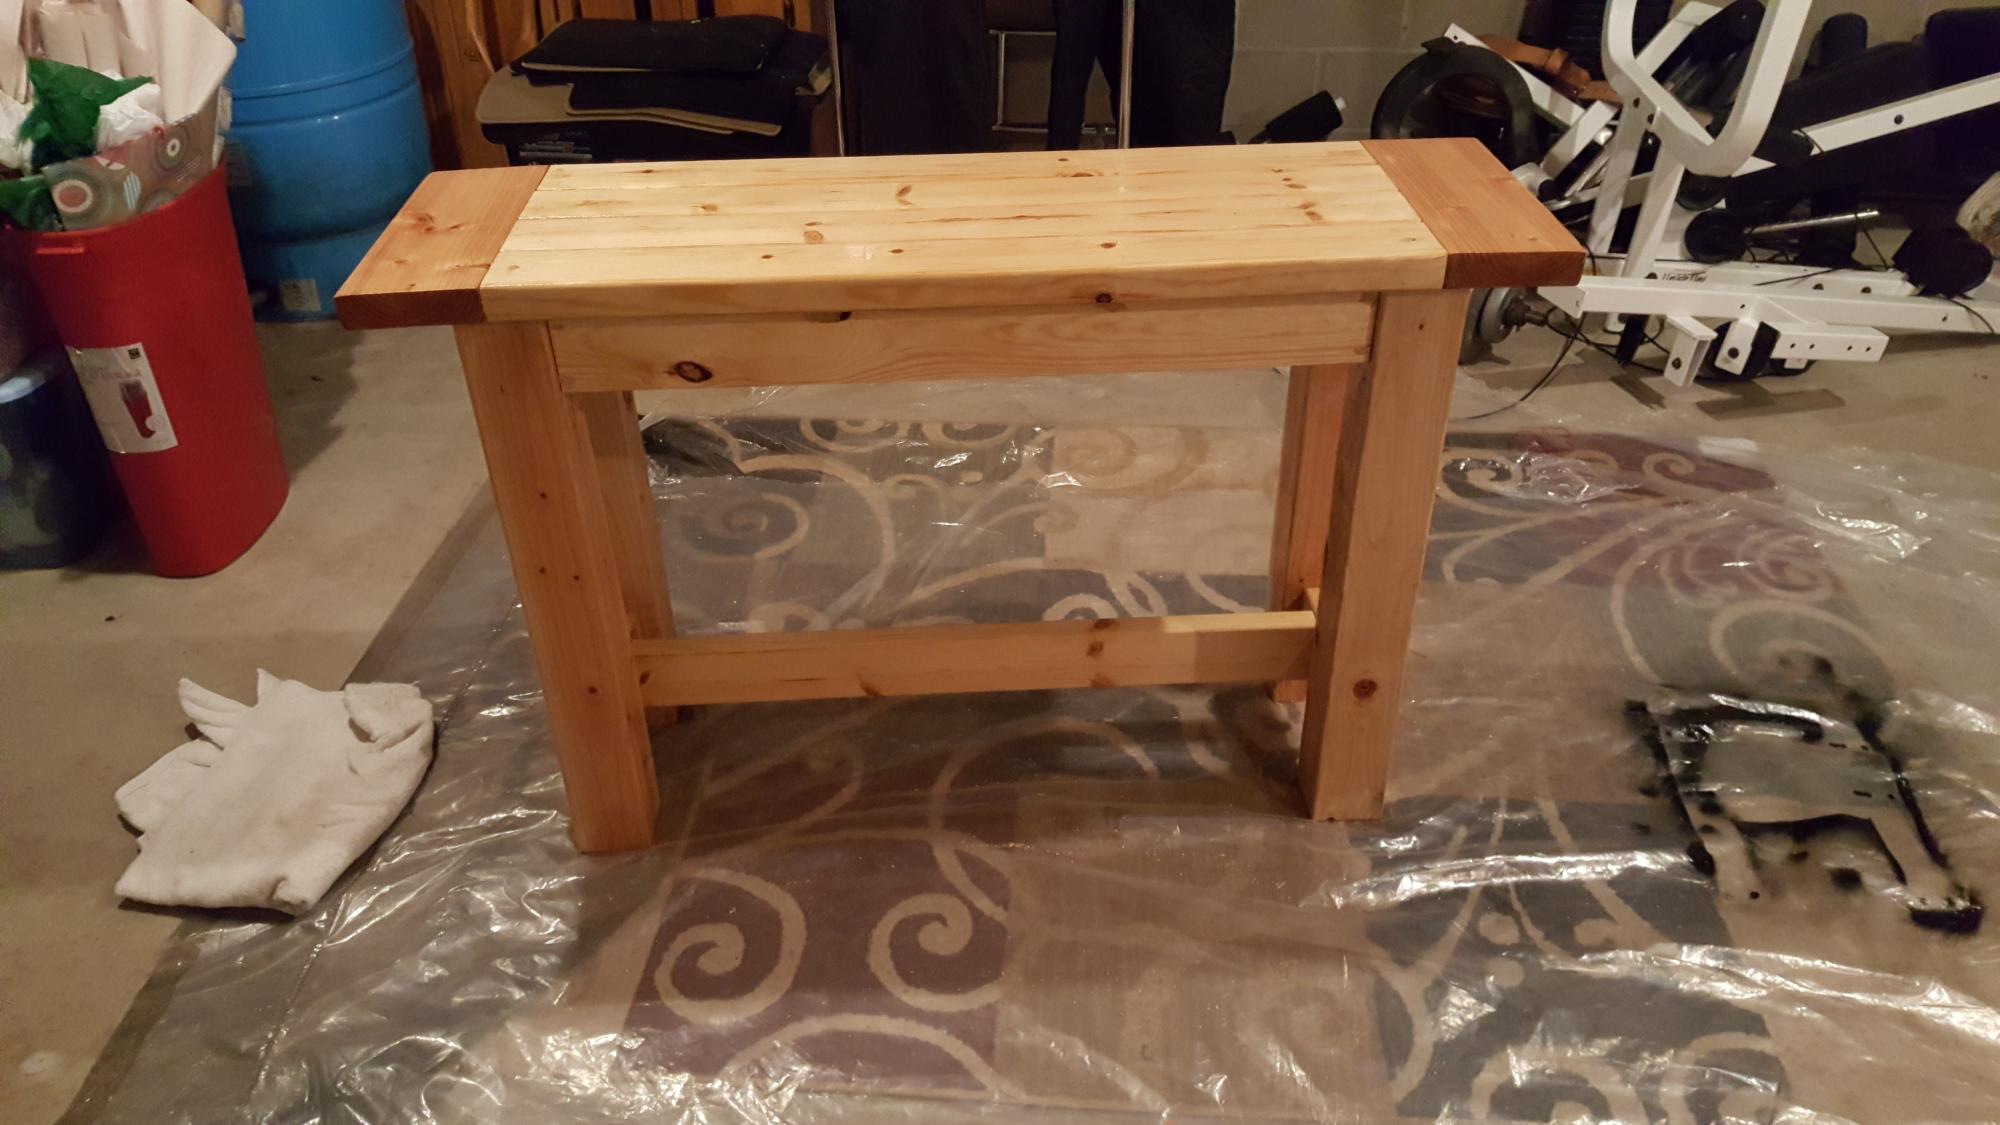
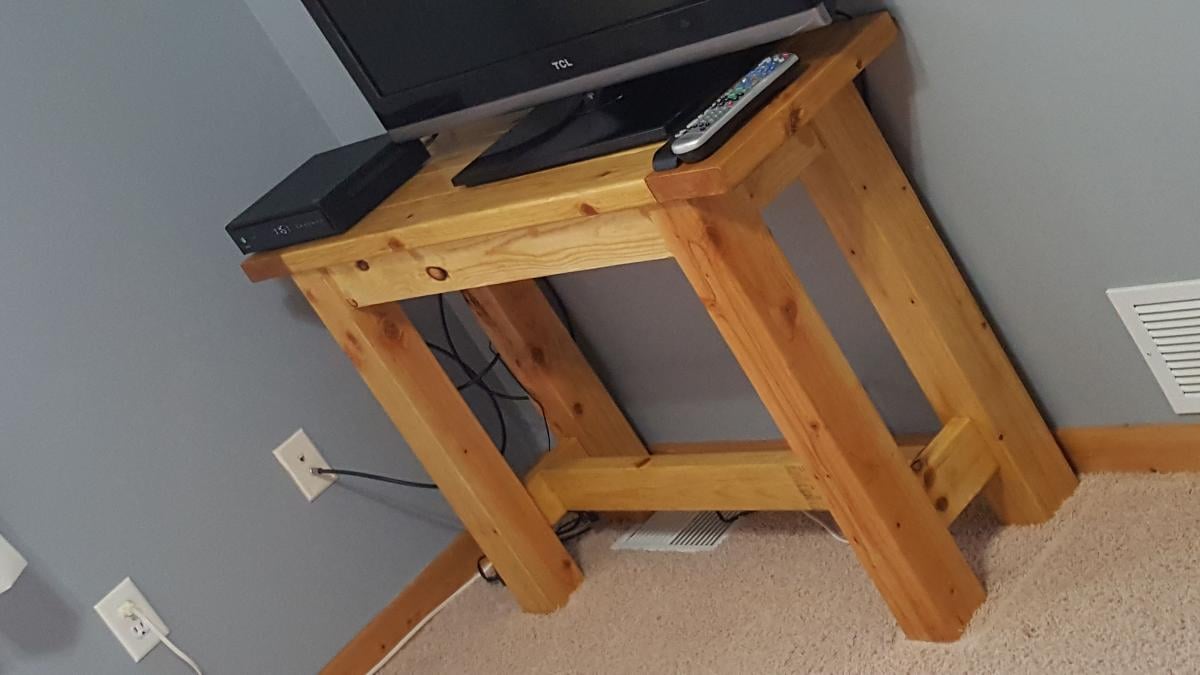
This is the first Ana White plan I've used and my first project with a Kreg Jig. It was so easy! I used 6' long lumber. This ledge is 4' long and I have a 2' ledge in the living room.
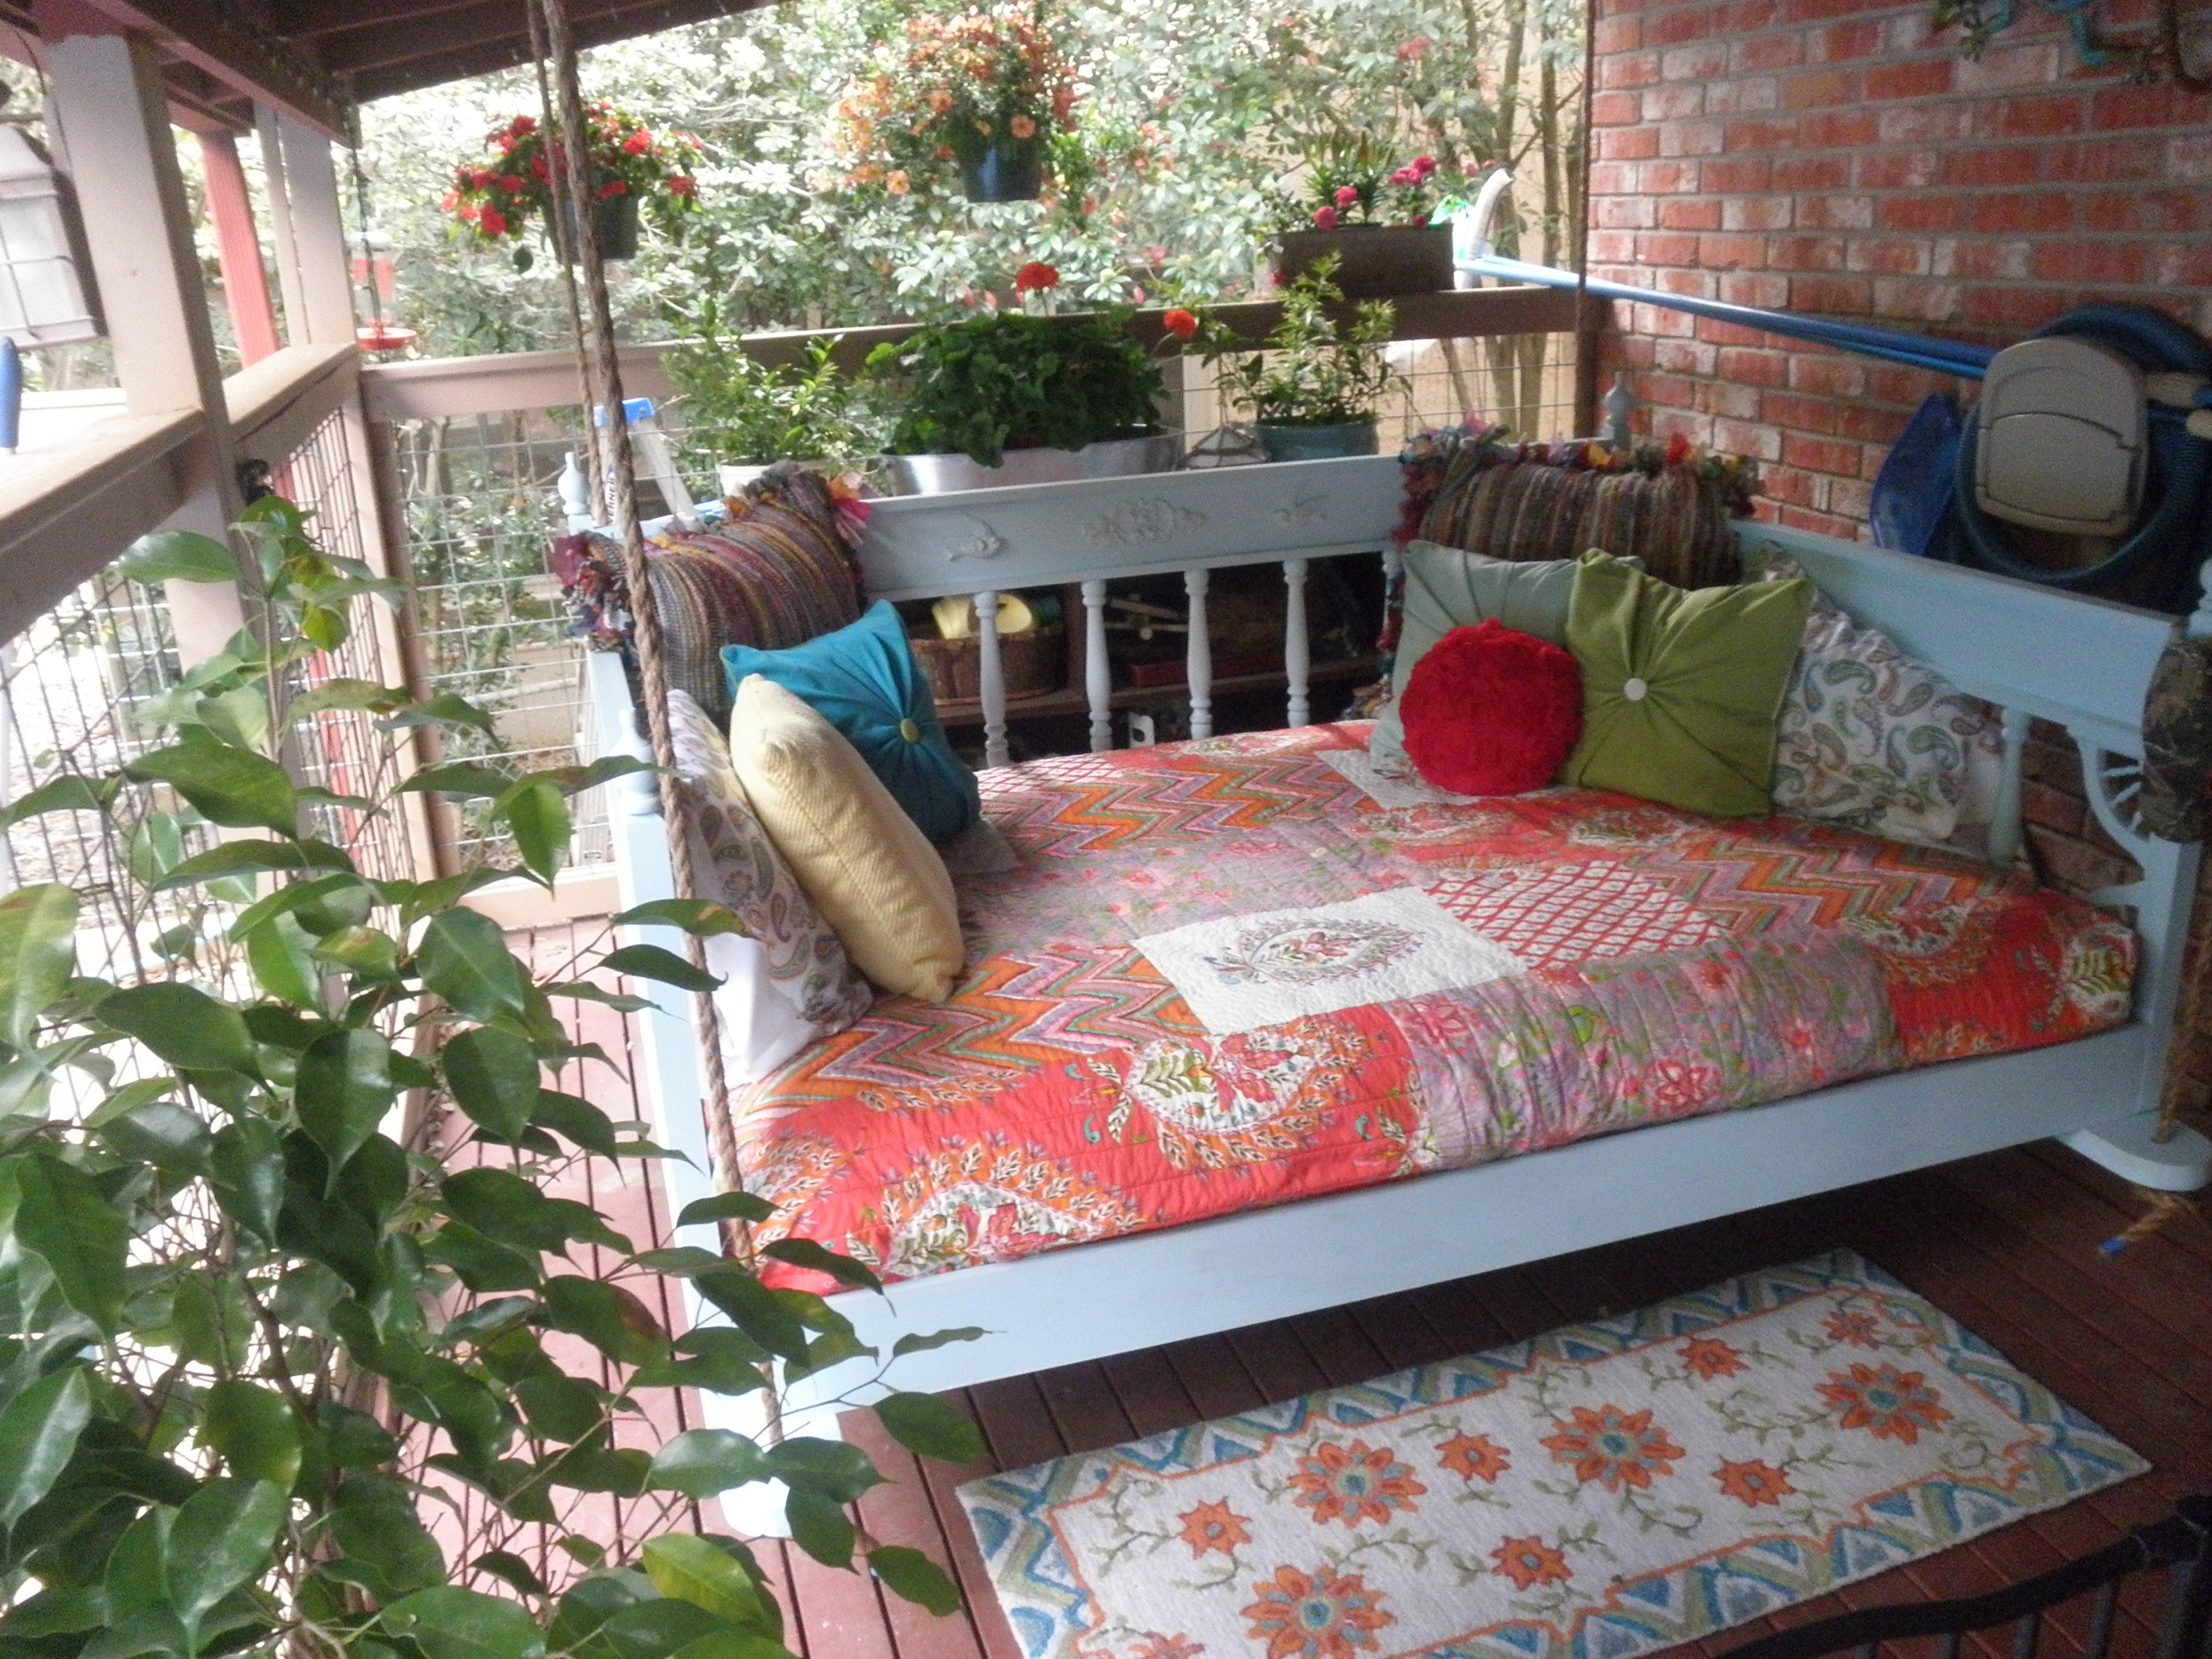
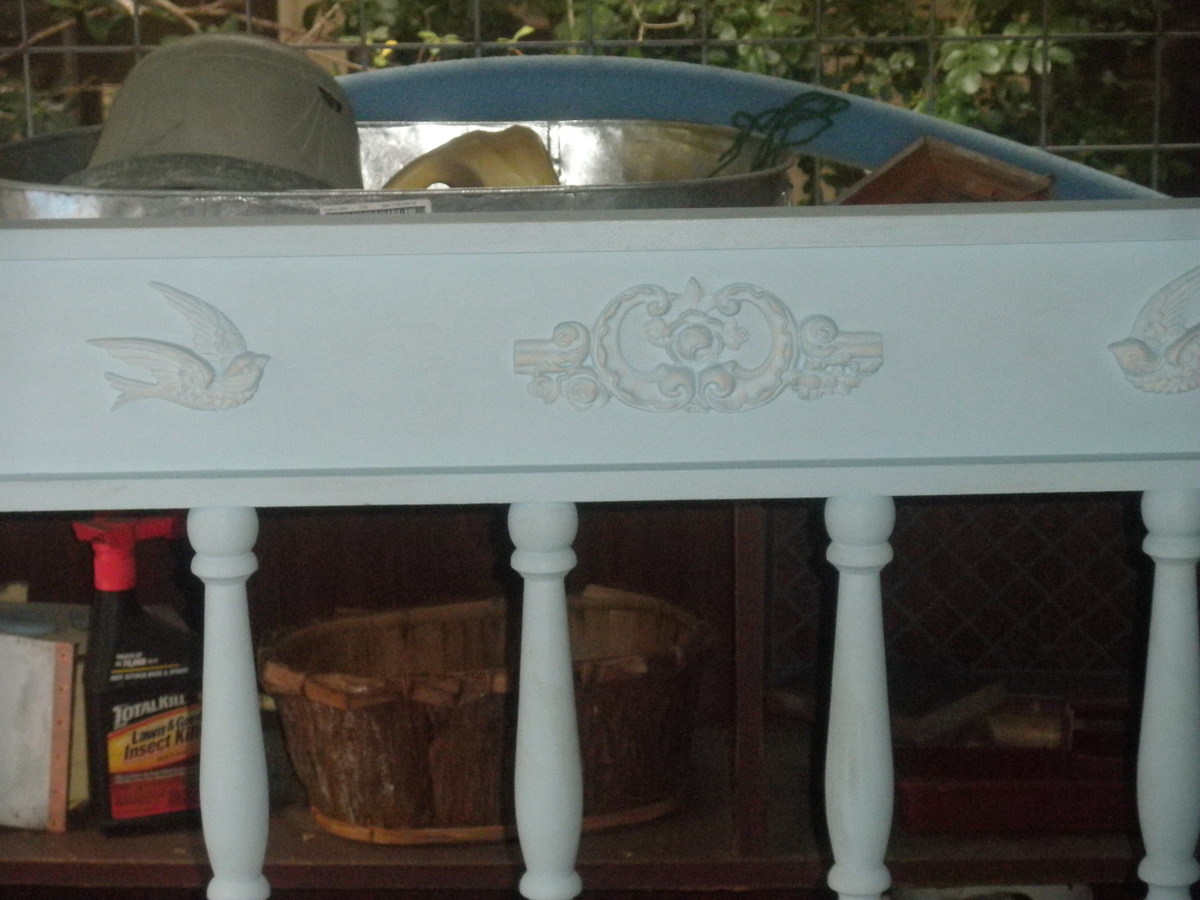
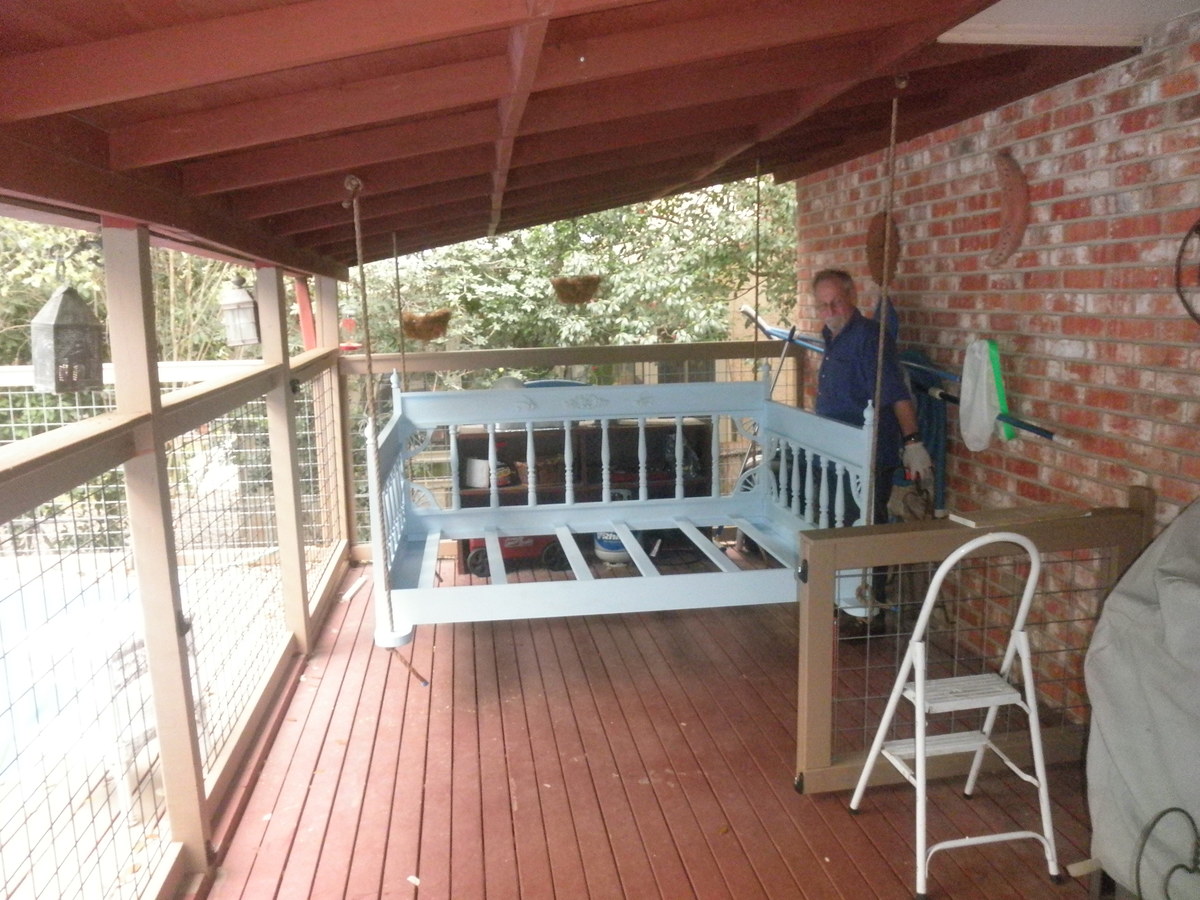
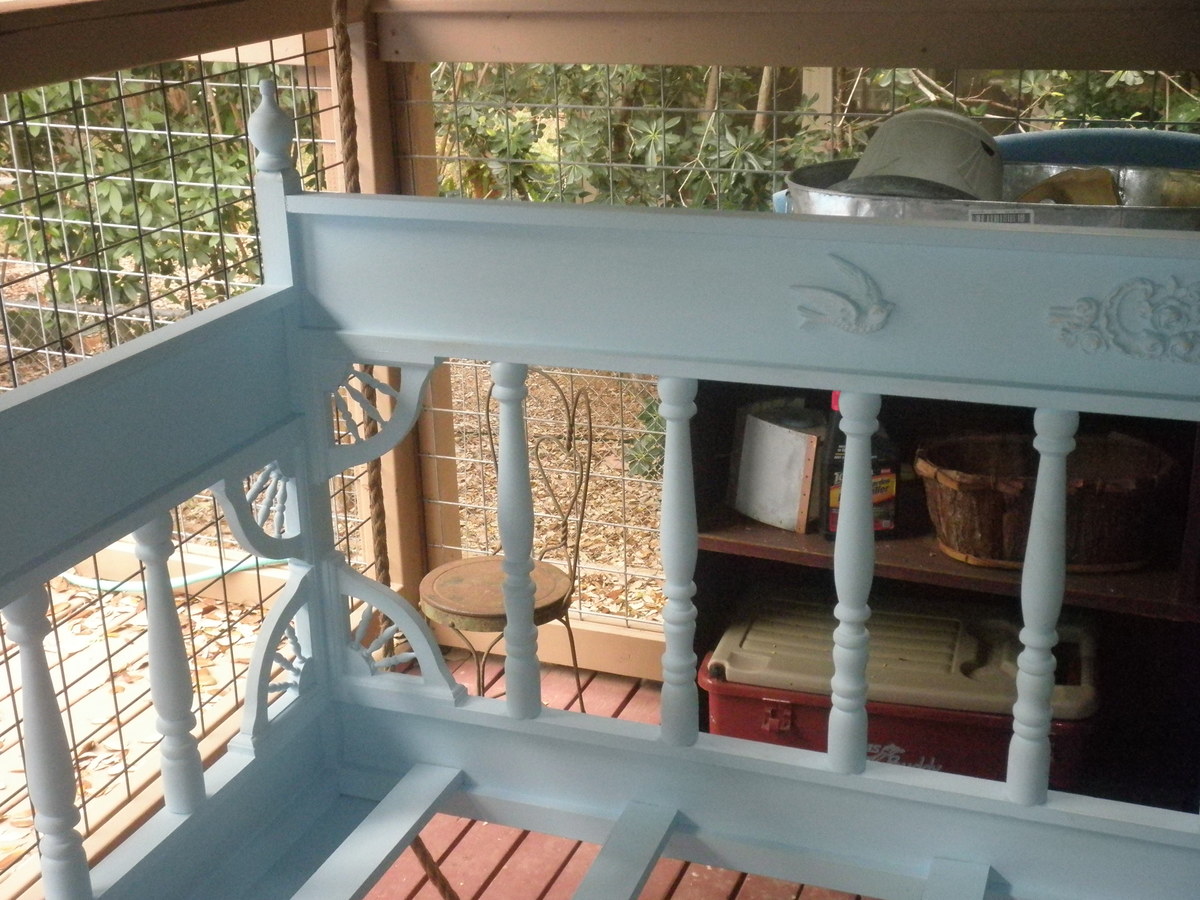
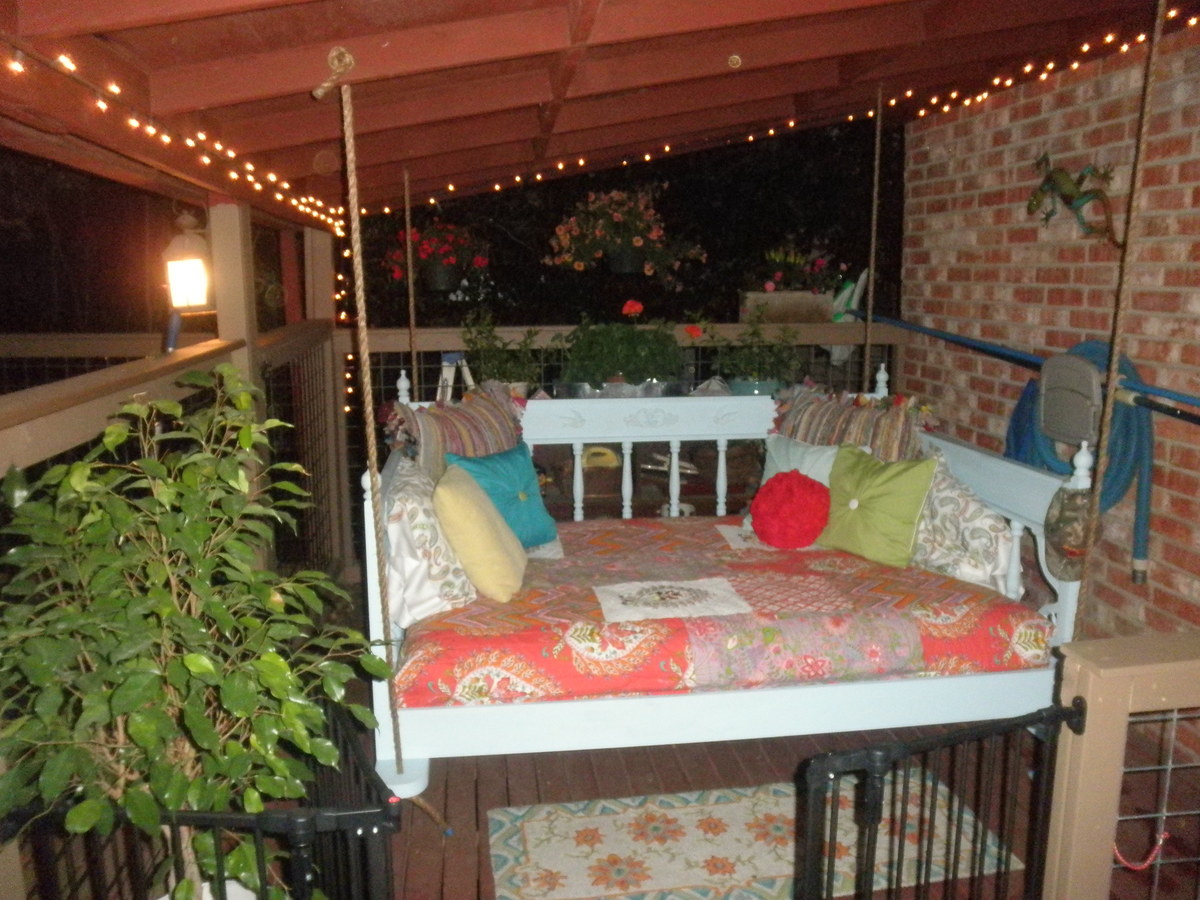
I have wanted a swing bed for ages and got hubby on board with this. We built a full size bed (plenty of room for me and all 3 grandkids!) using poplar. I had the turned dowels from a major score at my Habitat Store several years ago. $2 per dowel! I wanted an old fashioned look and so added the corner brackets to all sides and the resin appliques on the back.
I primed with cream colored ceiling paint, an "Oops" paint from my neighborhood home improvement store. The baby blue was another "Oops" paint - another score- only $5 for a gallon of Valspar eggshell. After a very light distressing, I finished it with a paste wax.
I make the design and drawing and Hubby makes all the cuts. I joined all with biscuit joinery for a strong and solid piece.
We hung it from the ceiling joists with 1" manila ropes, added lots of pillows and plants and it is my happy place. A night blooming jasmine adds a heady fragrance that puts me right at peace ... A great refuge from a crazy work day!!!

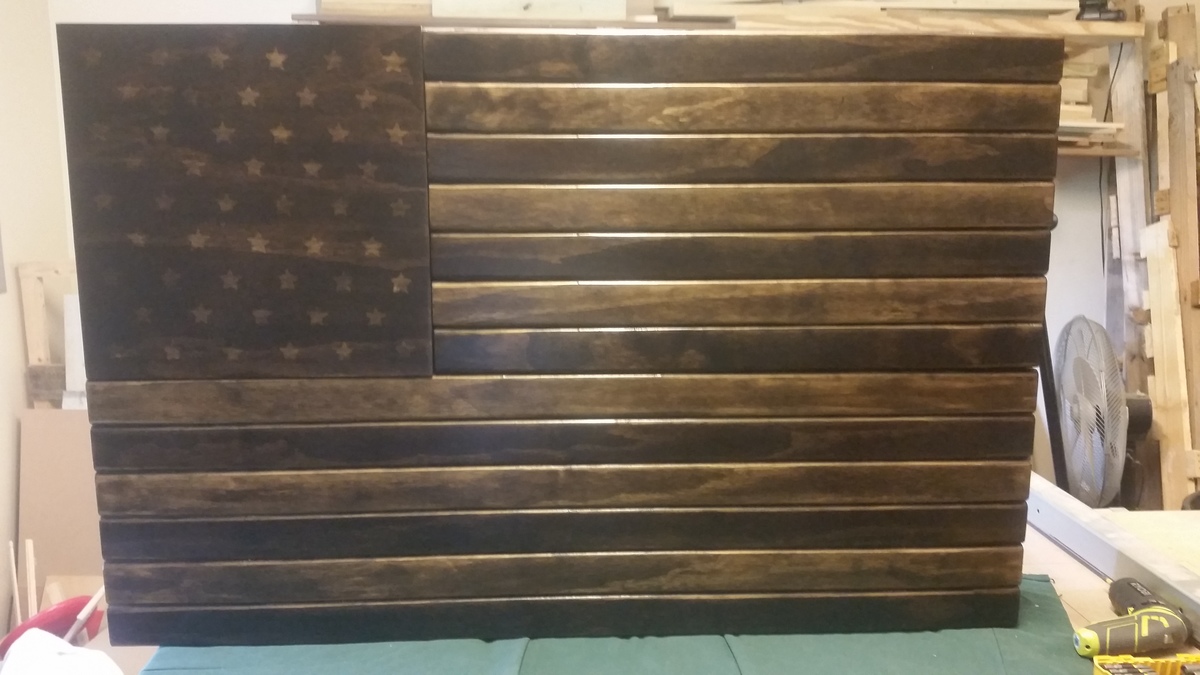
I threw some plans together for this. Going to make another one and tweak it a little but overall I'm happy with the way it turned out. I used dark walnut stain and 4 coats of poly.

Fri, 12/25/2020 - 07:20
looks amazing i would love to see some plans for that
This was my first build. I've learned a lot since then!
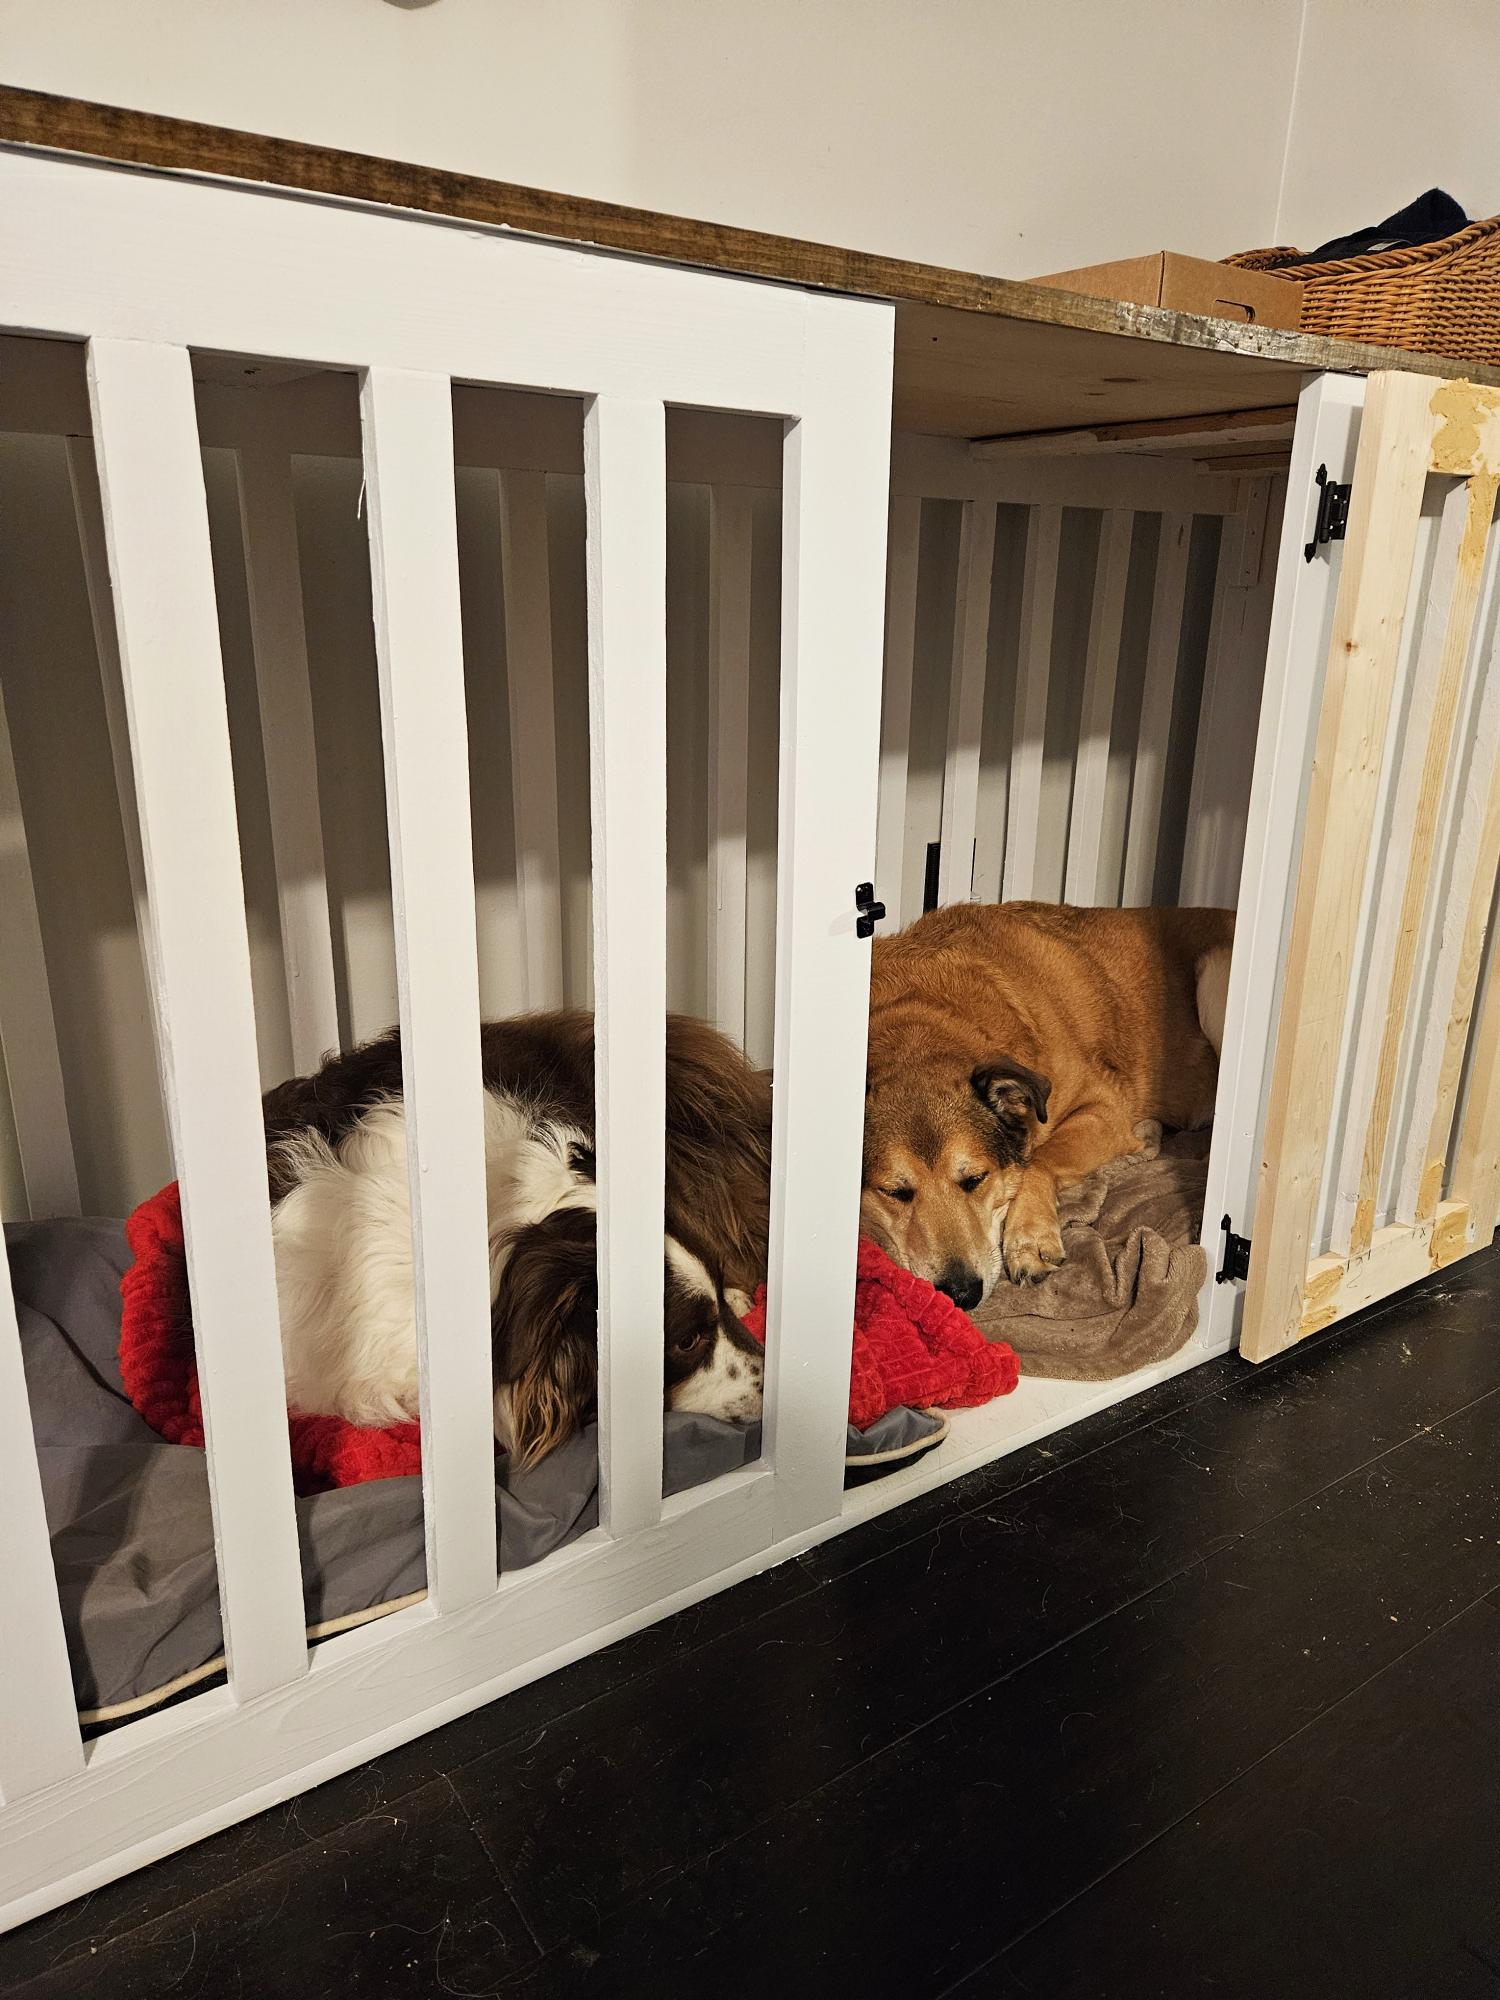
Double sized dog crate adapted from dog crate plan.
Michelle

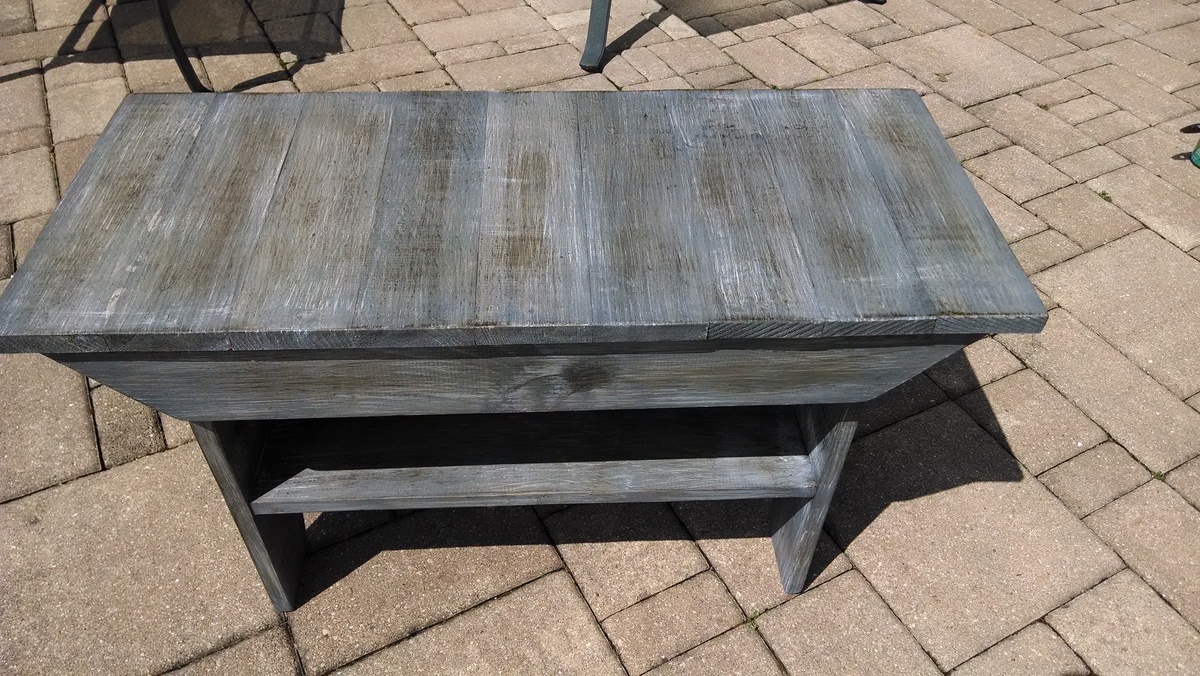
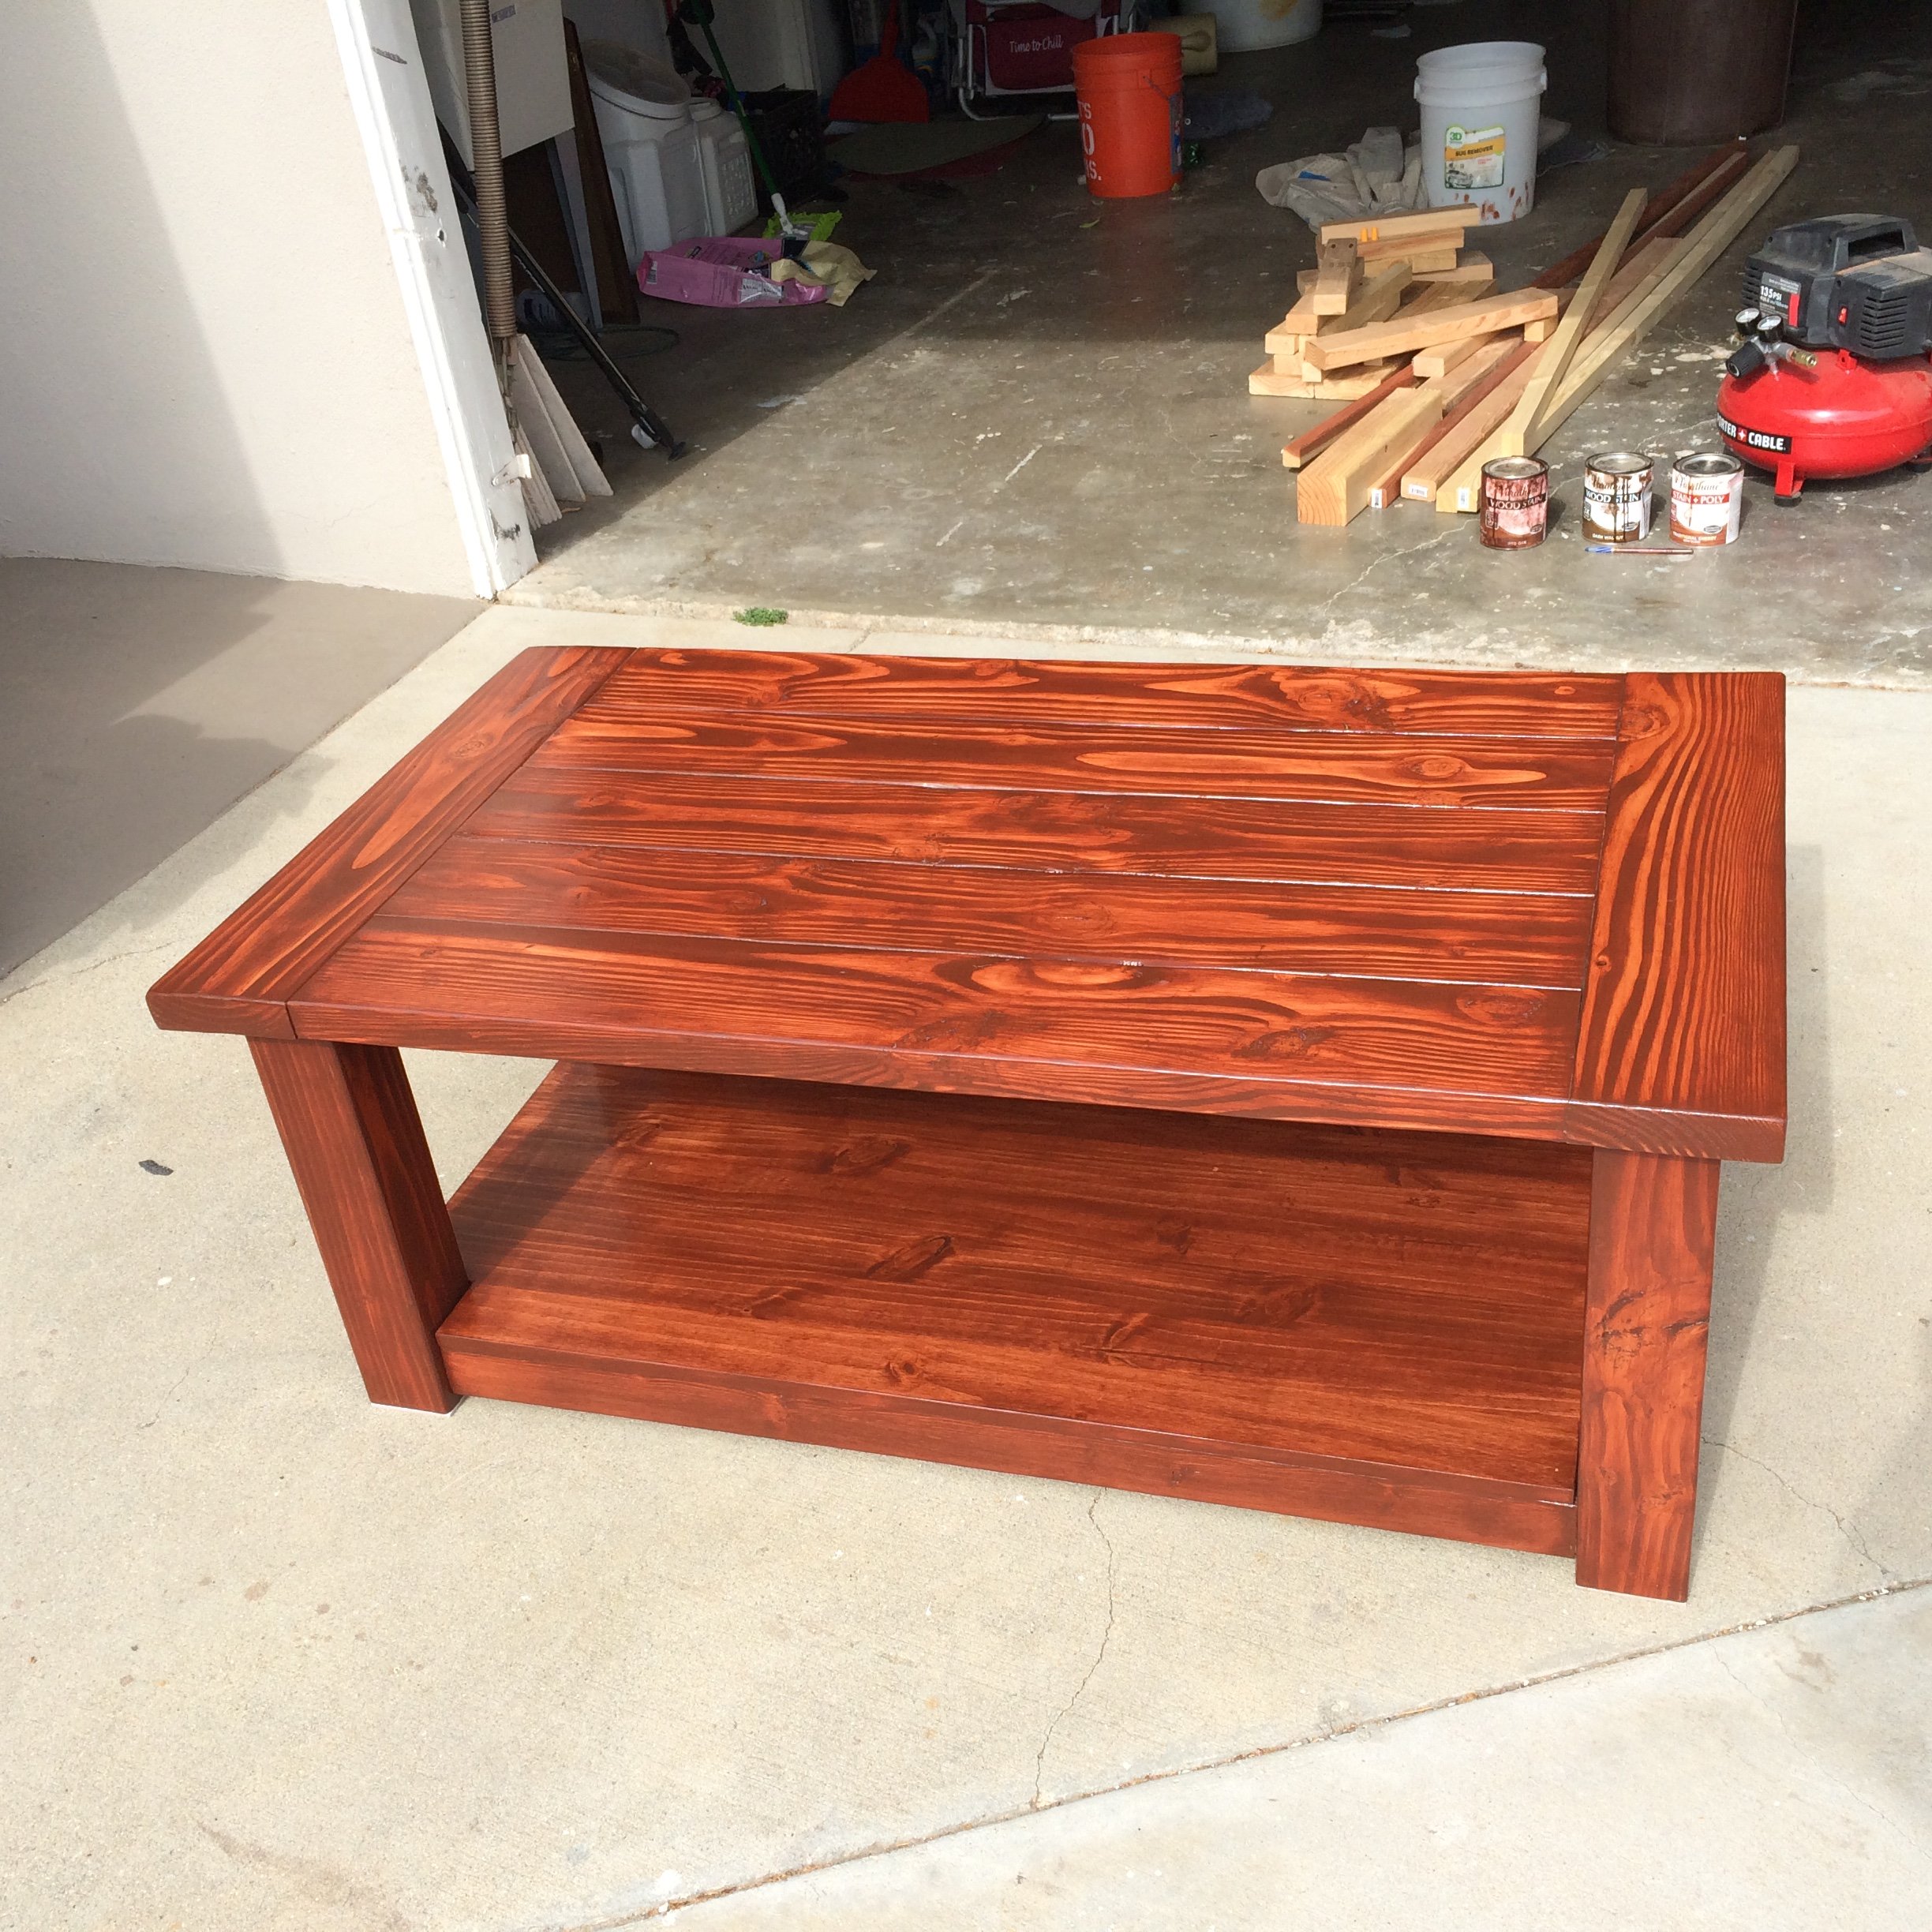
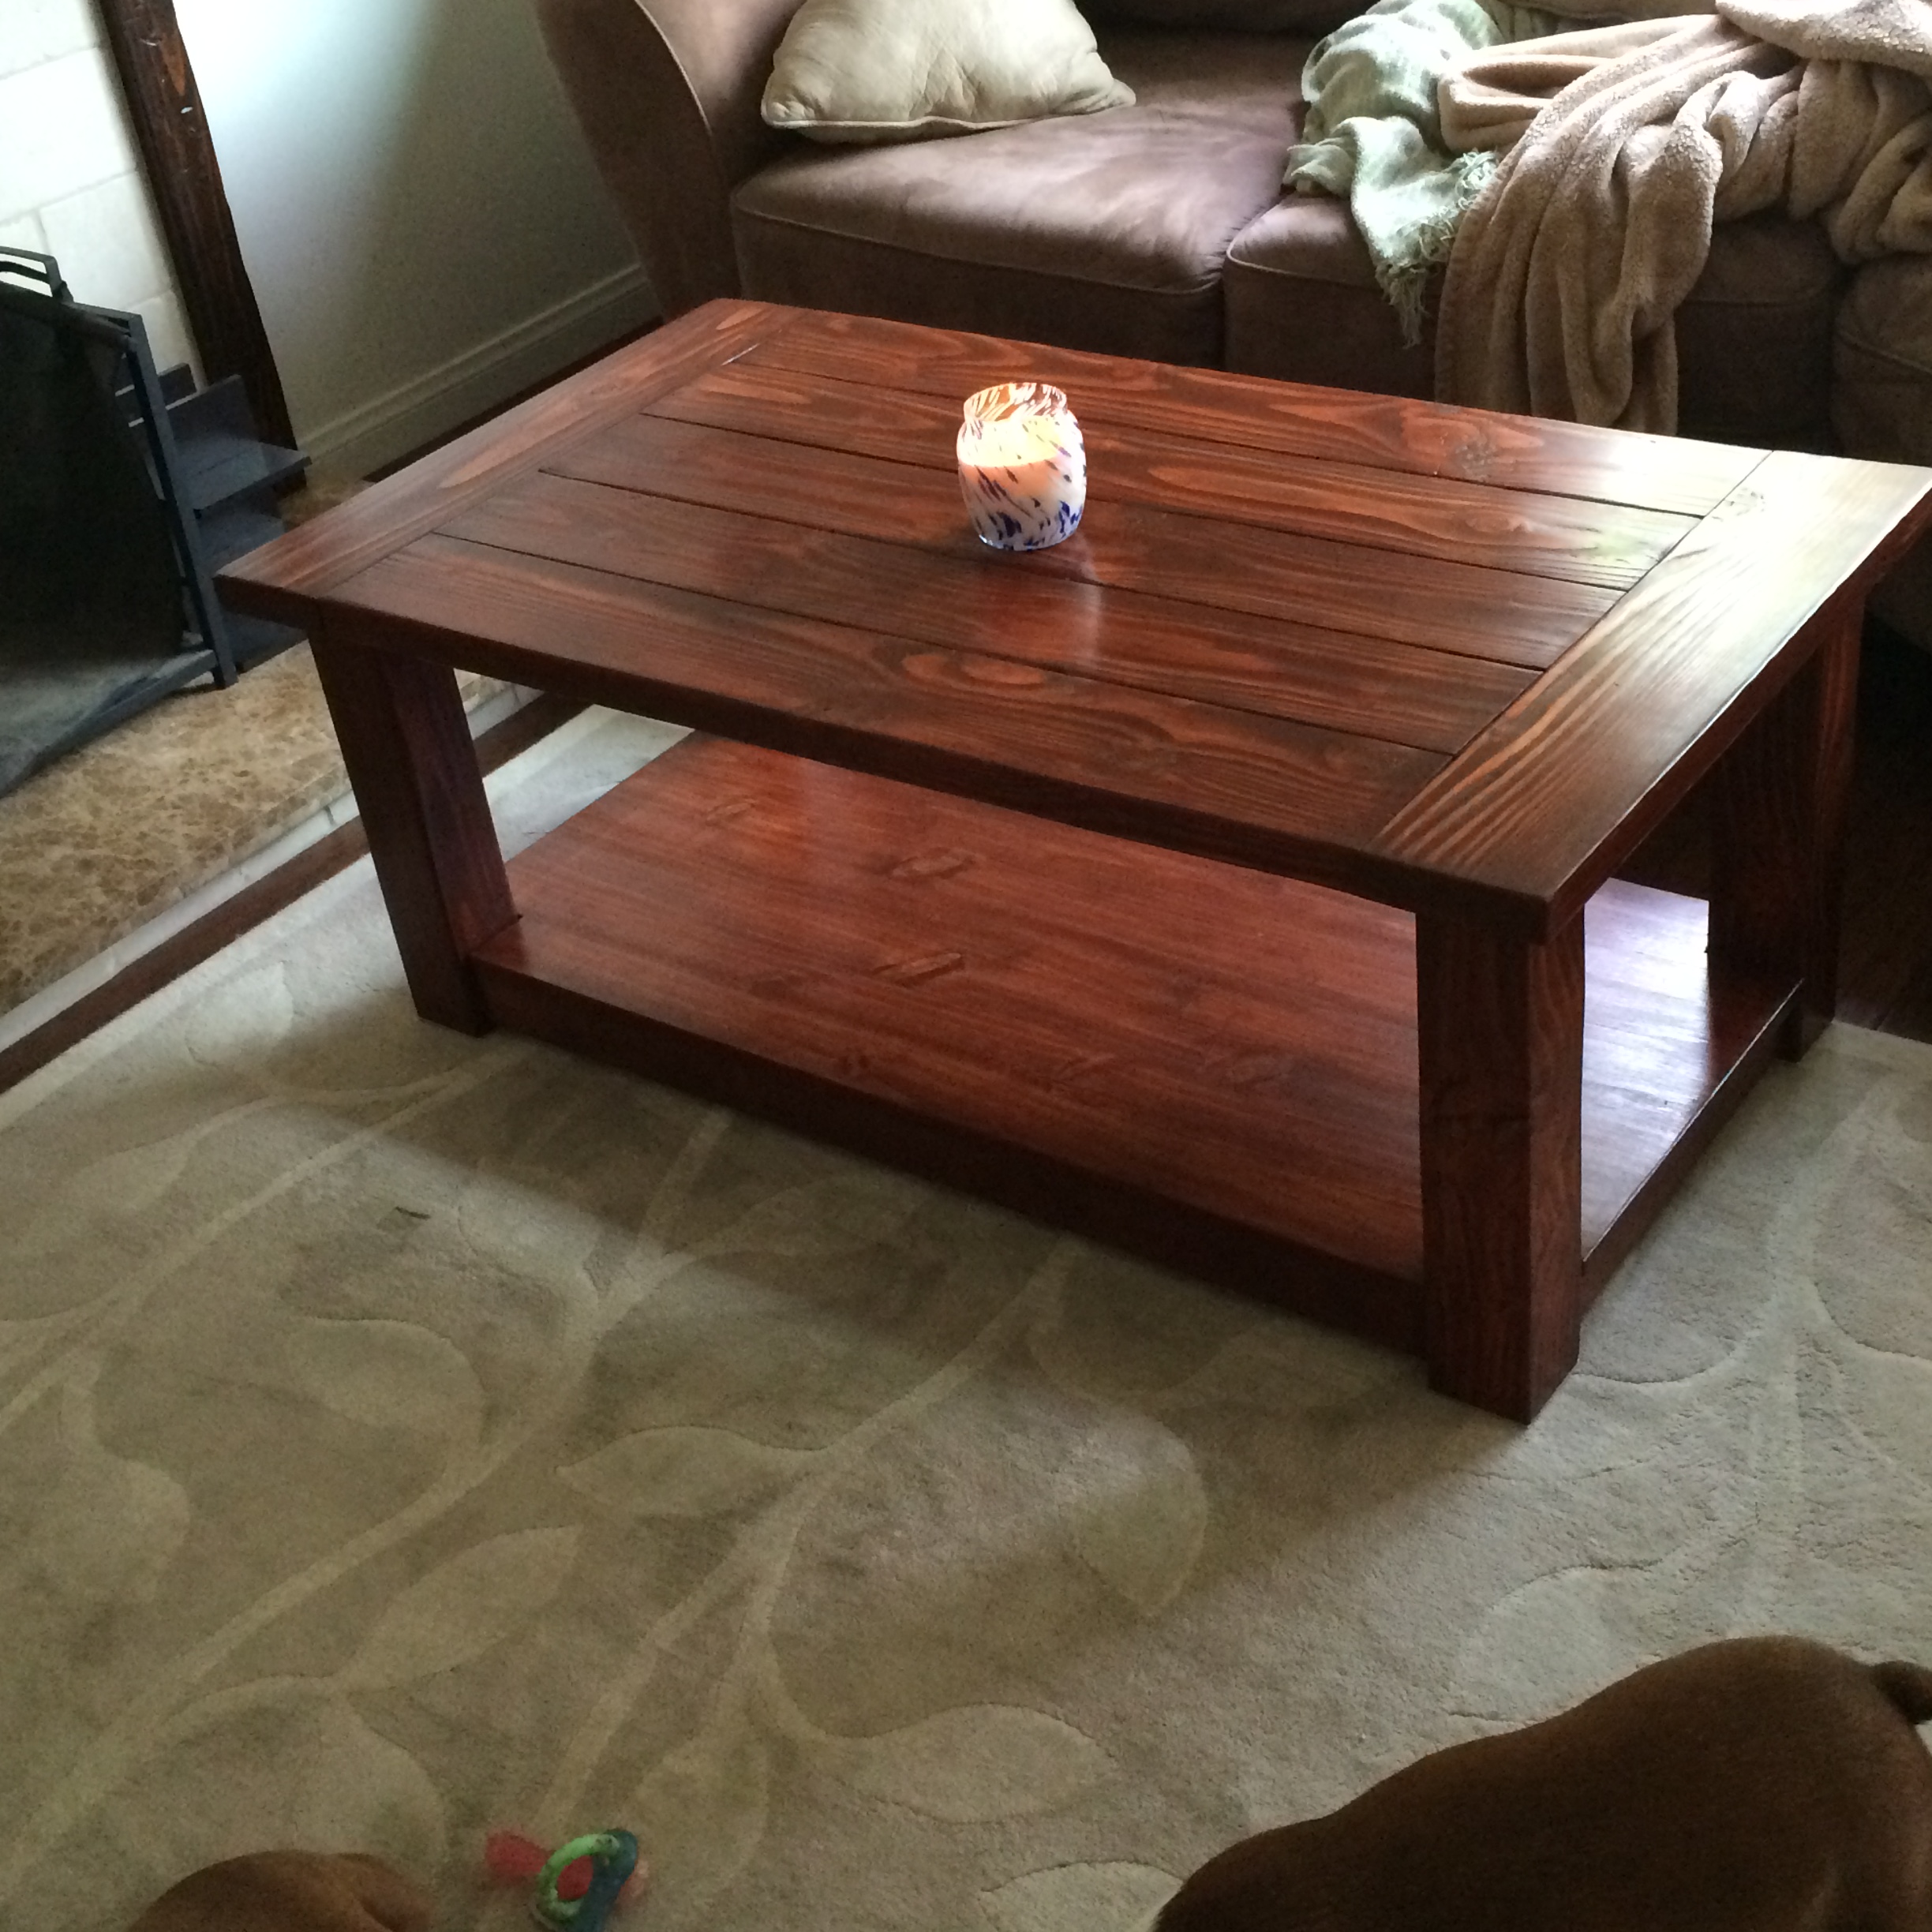
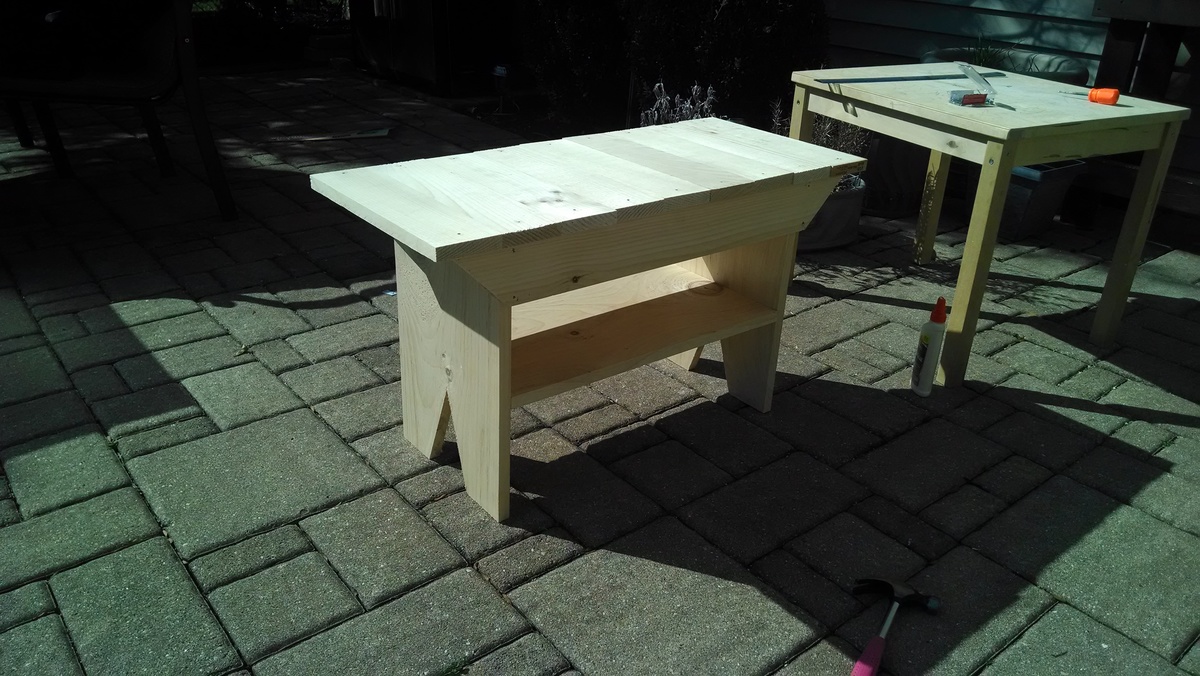
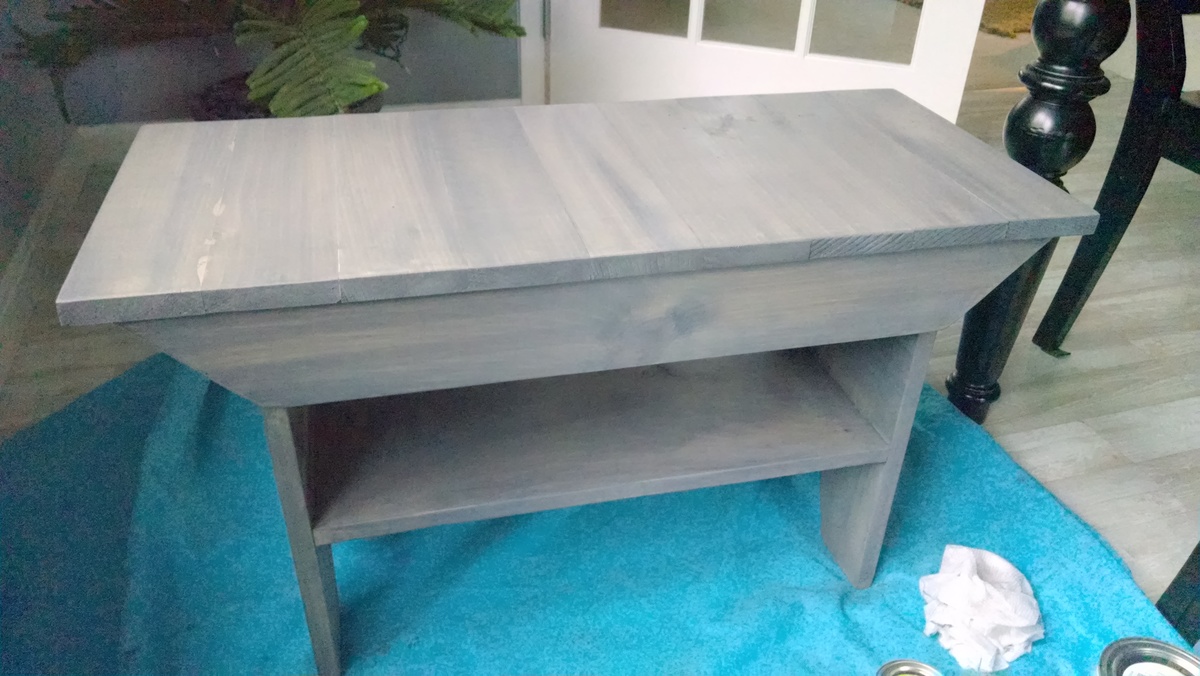
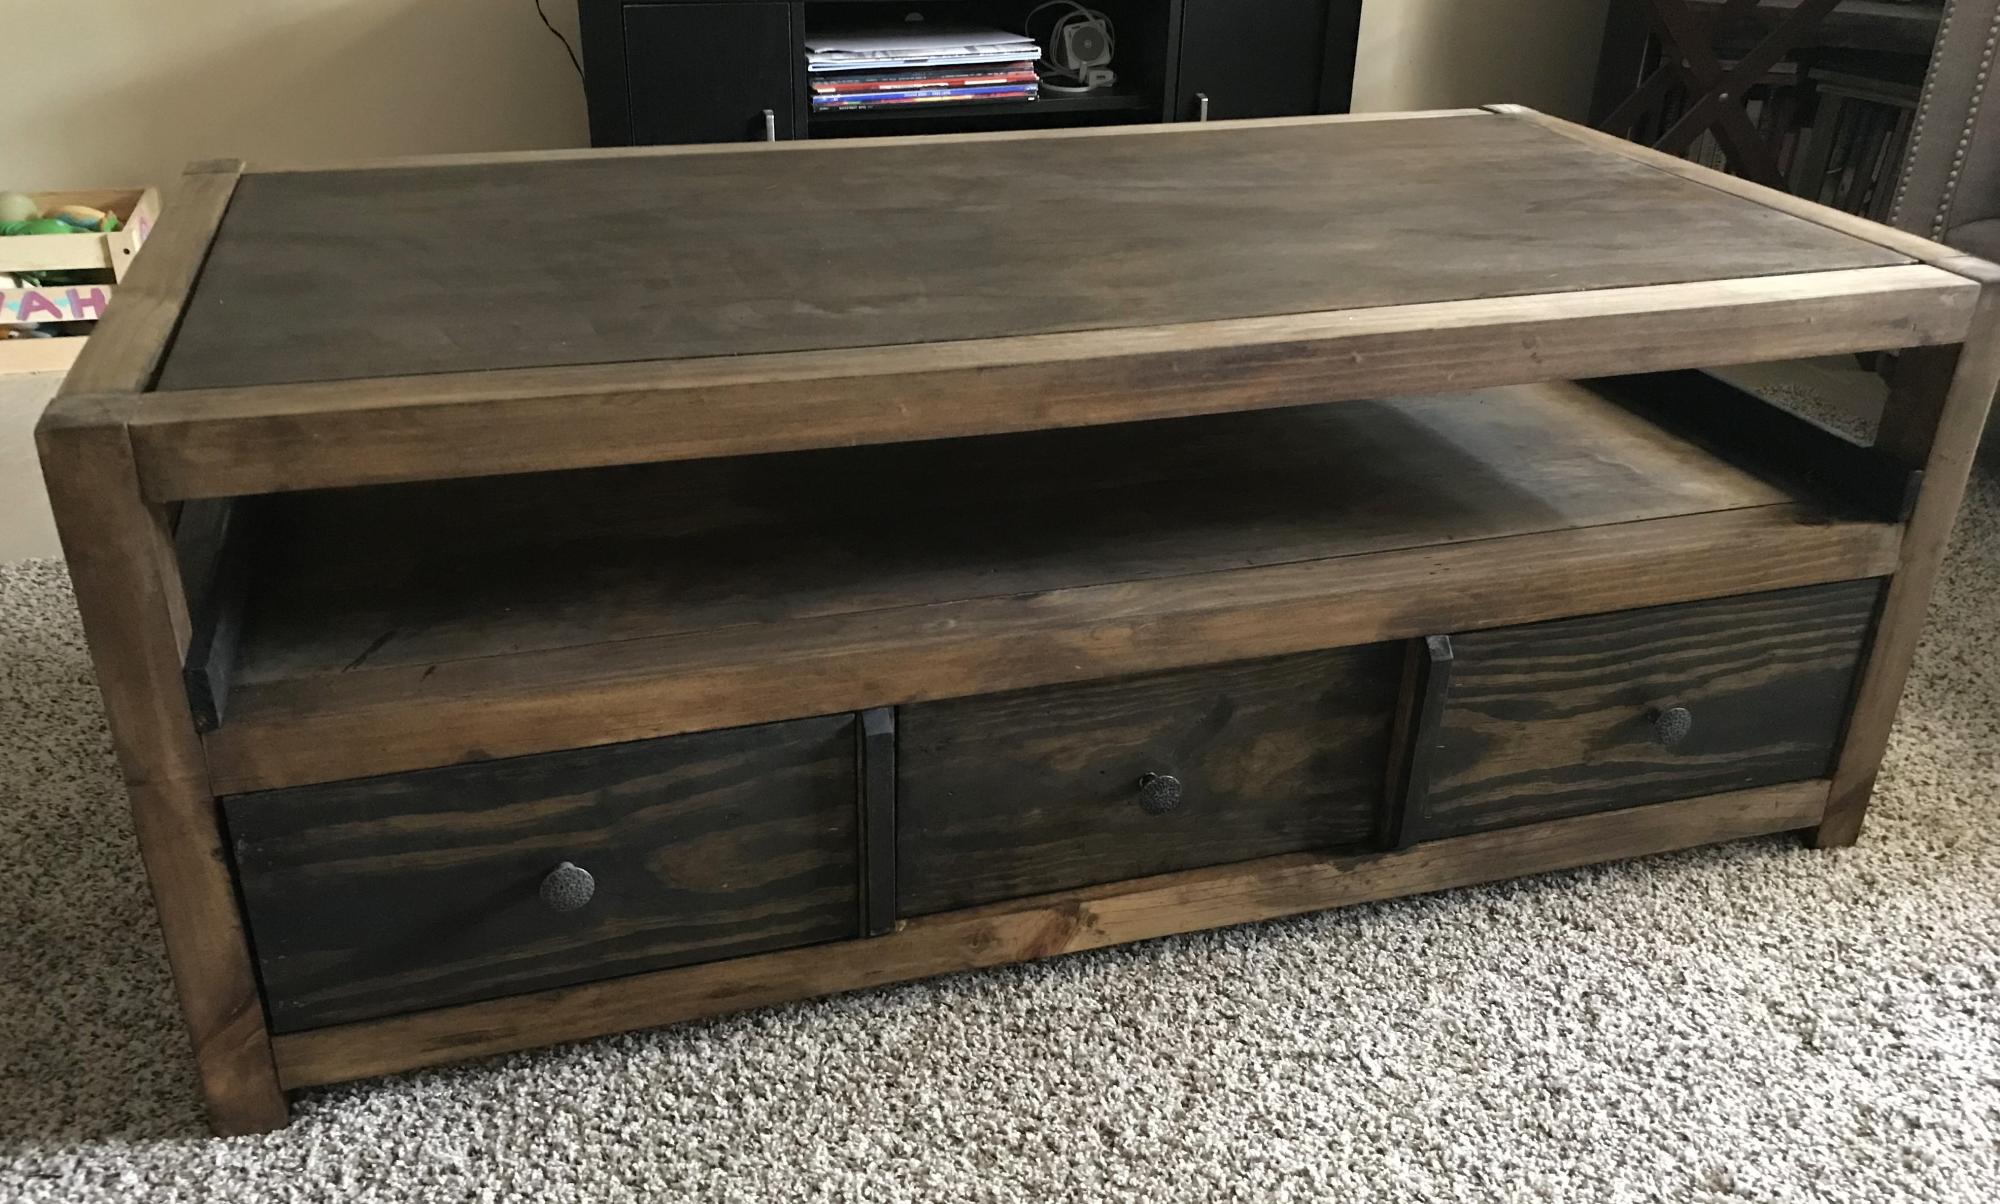
This was my first attempt to use real power tools and make furniture. After being inspired by Ana, I purchased my Kreg Jig and got to work! I needed a coffee table so I tweaked this one to fit my needs. I ended up staining it with Minwax Gray, but it wasn't rich enough for me. So I took white, black and brown pain and dry brushed it to give it that old barn wood look.....OMG I LOVE IT! It came out perfect. So much better than in the photos even! Thank you for the inspiration Ana.....What will I make next???? Hmm......


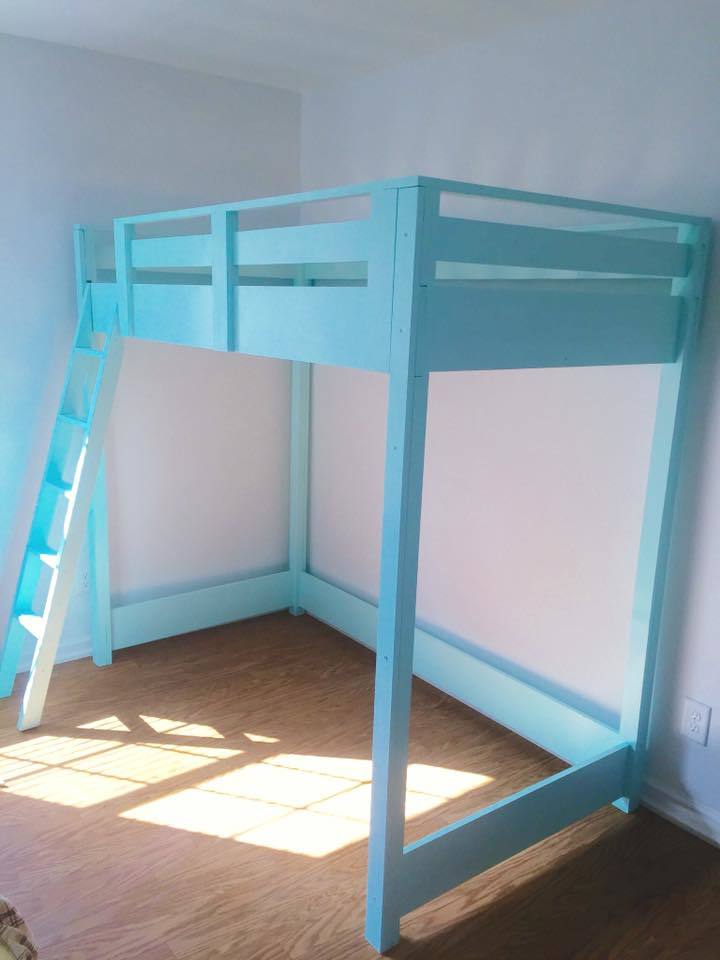
I absolutely loved this project! My first advanced' leveled project! I was afraid it would be to big for my room so I went 10" smaller in the width only. It surprisingly turned out well proportioned! Thanks Ana! I feel like a women with power!!
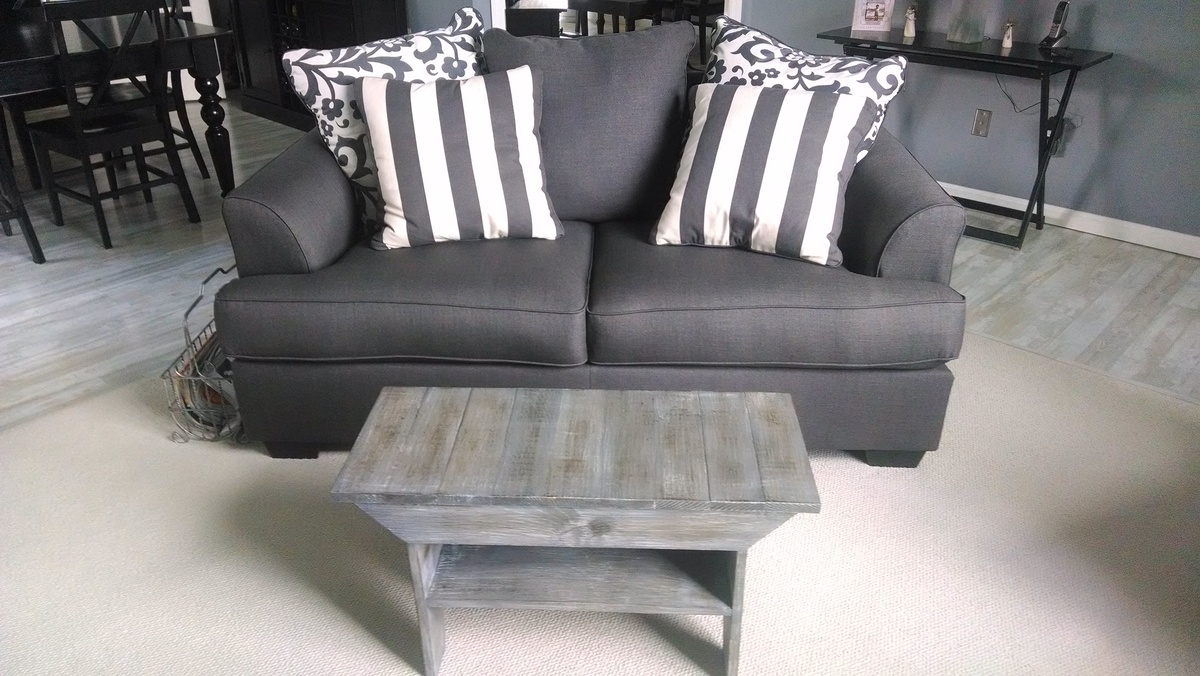
Love love love this sofa!
First time building a piece of furniture. Definitely get a small Kreg Jig for the project. Built it for my wife for Christmas. She loves it. A lot of imperfections, but not too bad and very sturdy.
We made this a bit taller then the plan. But everything worked out well. It was our first project. I would NOT recommend this as a first project. Also, wipe the stain off quickly. We let it sit way too long and it came out very dark. It took us a long time to build because we both work. And, Home Depot didn't cut miters so we had to get a neighbor to do it.... fyi
I love it though.
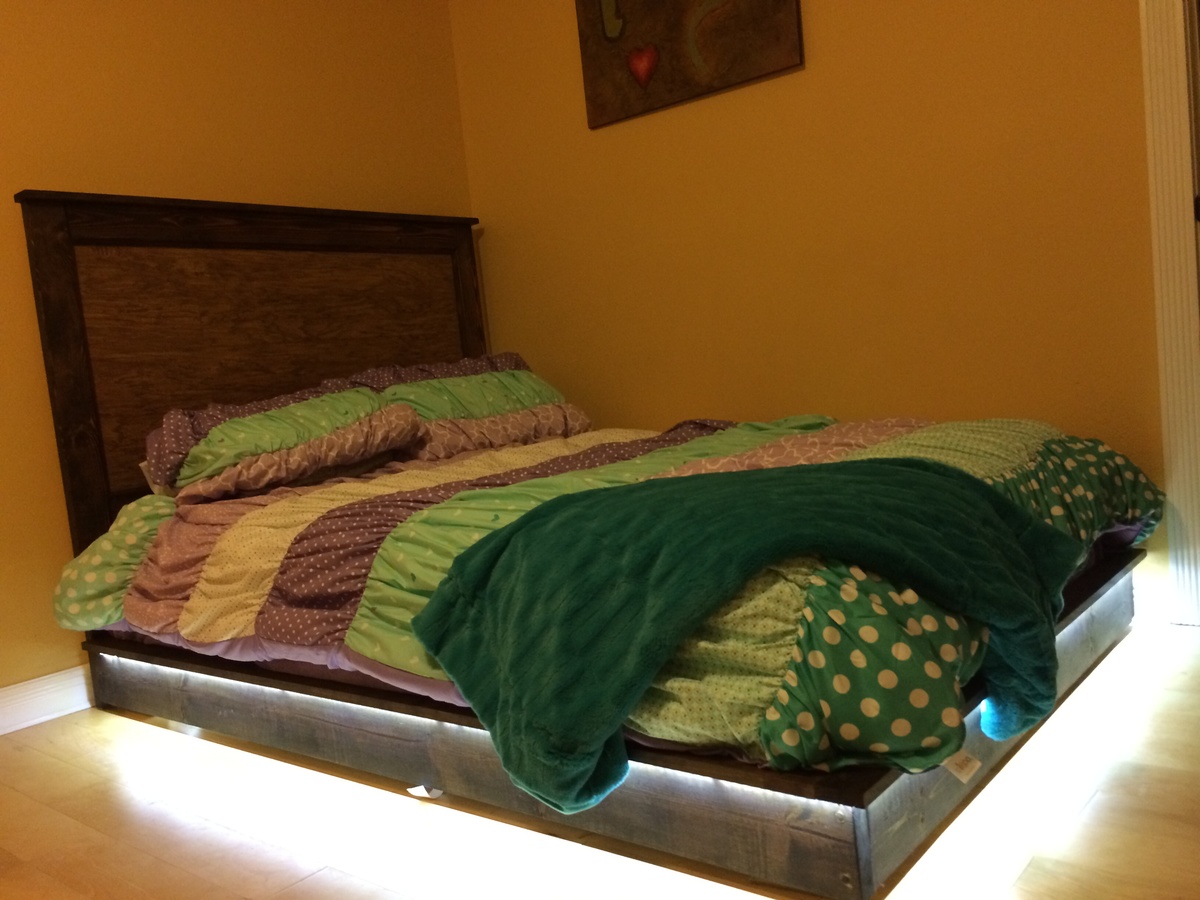
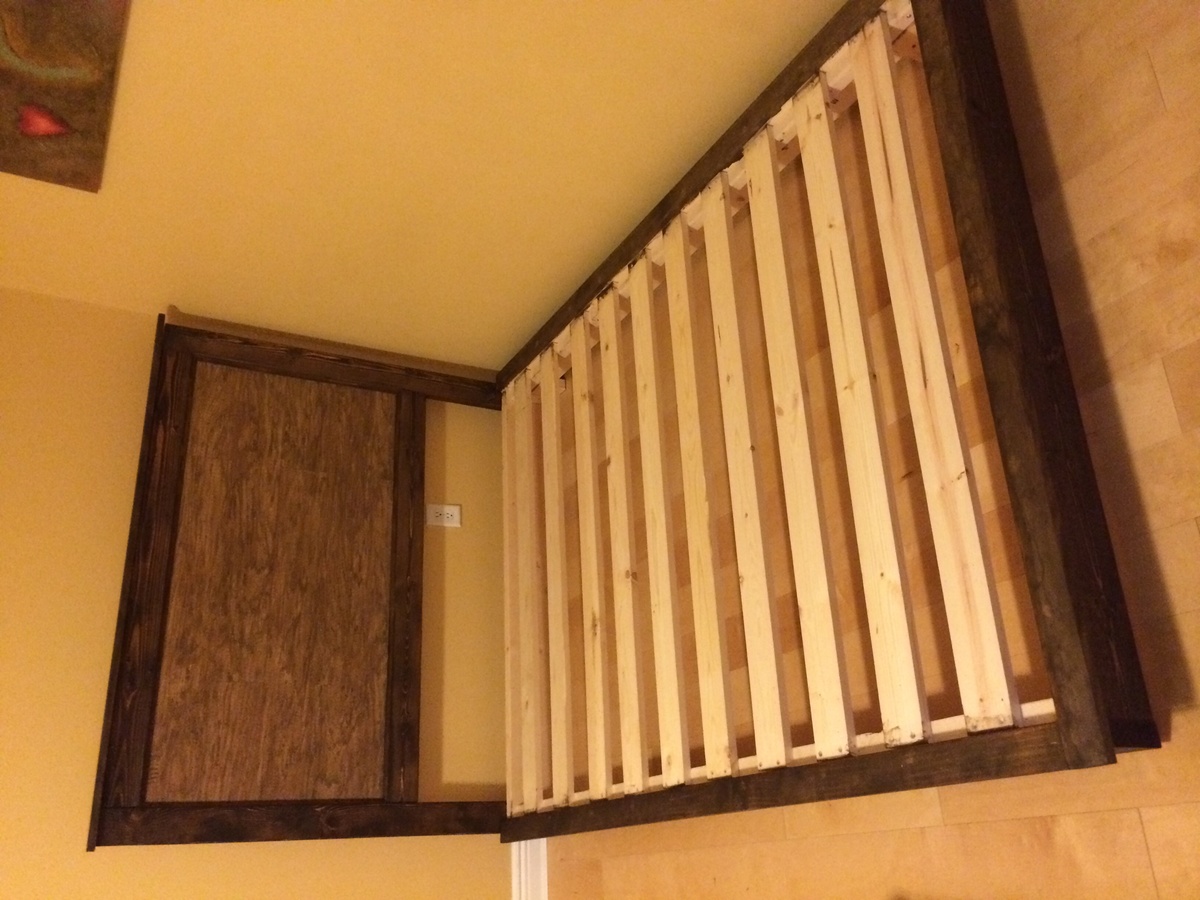
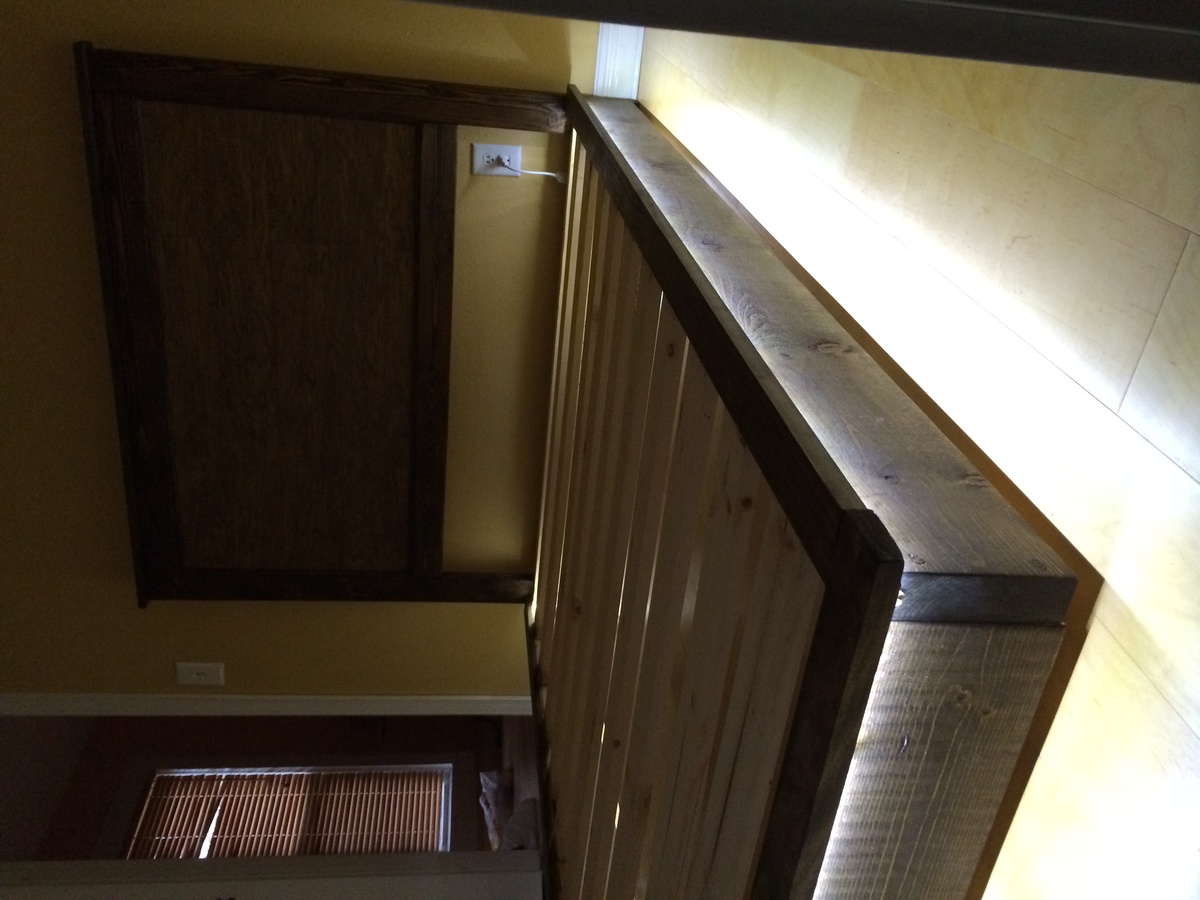
Modified the plans for a full size mattress, also used 2x6 lumber for the main frame. Installed LED strip lighting around the perimeter for a night light. Also built my own headboard, modified for the full size. I used laminate flooring for the center inlay.
Fun project, about 6 hours to build, total cost around $200 with the lighting.
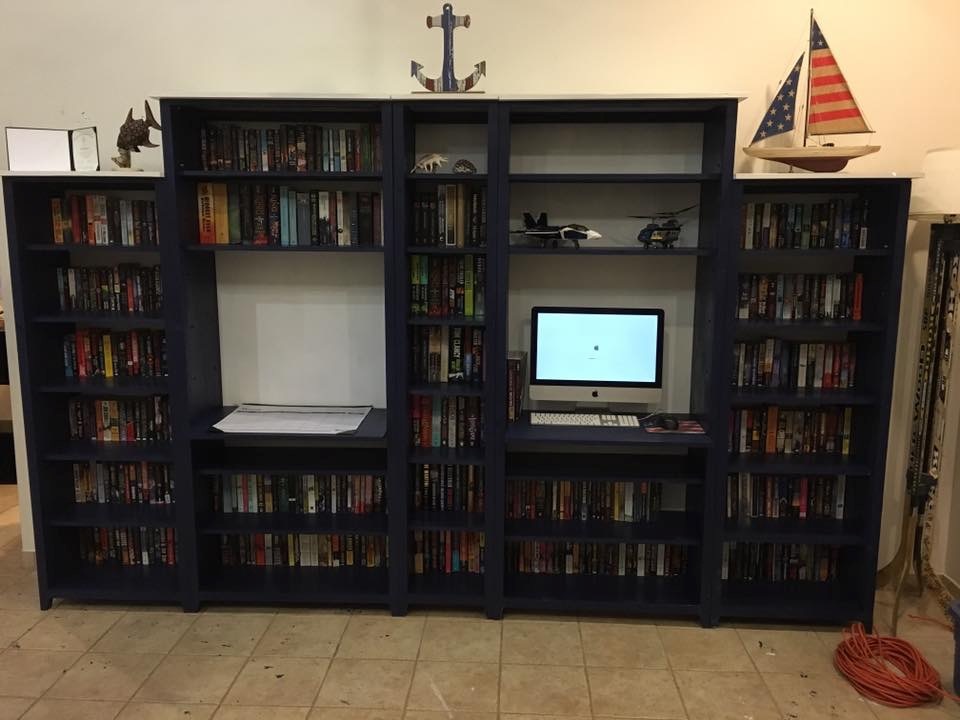
Wife wanted bookcases for all our books and a desk/work area for her calendar. I decided to modify the Channing Bookcase to suit our needs. We built 5 of them to fit the wall. We did not attach the back trim piece on the shelves to give them a recessed look. Convinced the wife to let me buy the Kreg K4 system, which saved my sanity for the over 500 pocket holes we had to drill in this project. Thanks for the plans!
Tue, 05/26/2020 - 14:10
Lovely! This gives me hope that I may be able to create the piece I want for my living room space. We own so many books.
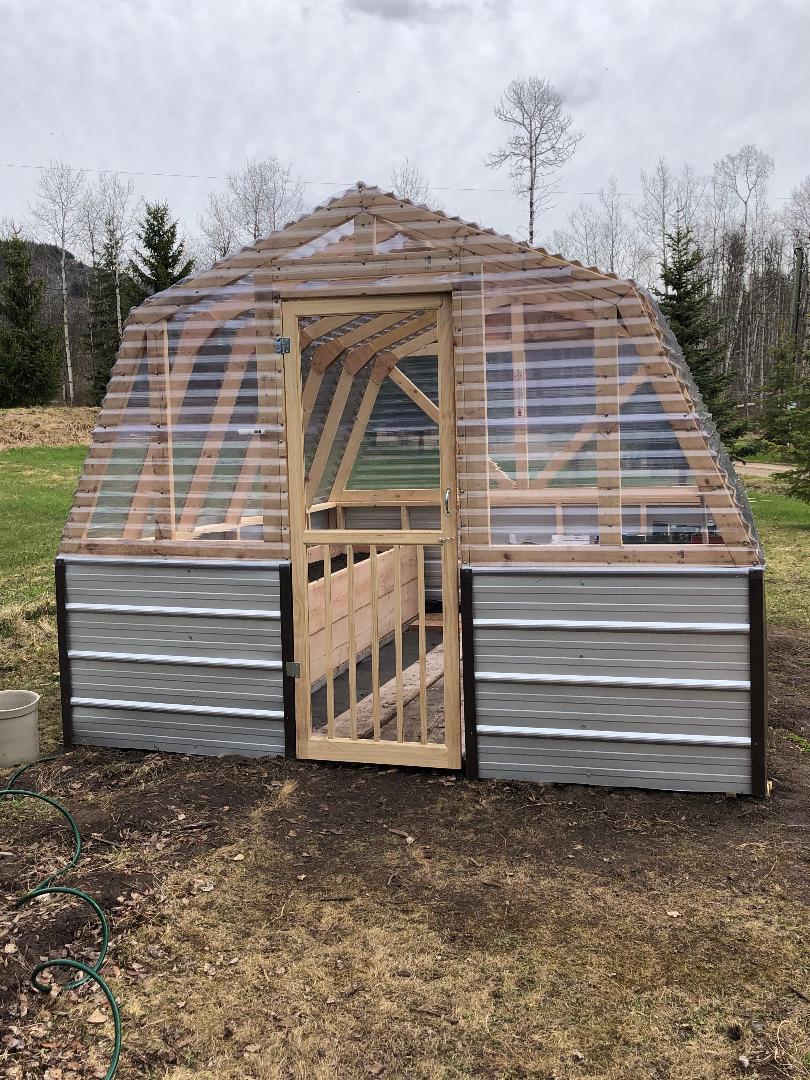
When the Covid quarantine hit we decided to build a greenhouse - it's been on our To Do list for 9 years. The DIY Greenhouse was the first design I found via Google search and it looked so easy and has all the materials listed so we just had the materials delivered and dived right in! It took us 5 days, about 4 hours per day. The smartest thing we did was borrow a mitre chop-saw. There's a lot of 22 degree angles to cut. Other than that it was easy peasy as long as you follow directions. Also got a skill saw blade that cut both the plastic and the tin. It cost us about a grand Canadian, but the closest kit I found online was smaller and was $1500 US. I'm already growing stuff in it and the temperature here in Northern BC gets below freezing at night (around -1C) but everything is ok. The current temp outside is 15, but it's 30 in the greenhouse. We cut a few vents in the back wall panel to allow for airflow and I'm going to purchase a solar muffin fan to move the air a bit. Highly recommend this unit!

Built this gorgeous table from Ana’s plan. Had to build two more for my grands.
Debbie Cutts
This was my first project! WIth some guidance from my husband, we were able to complete this during naptime (minus paint, of course). It was a fun project and I can't wait to try a different one! (Not sure why it looks so crooked in this picture! It looks nice and even in person.)
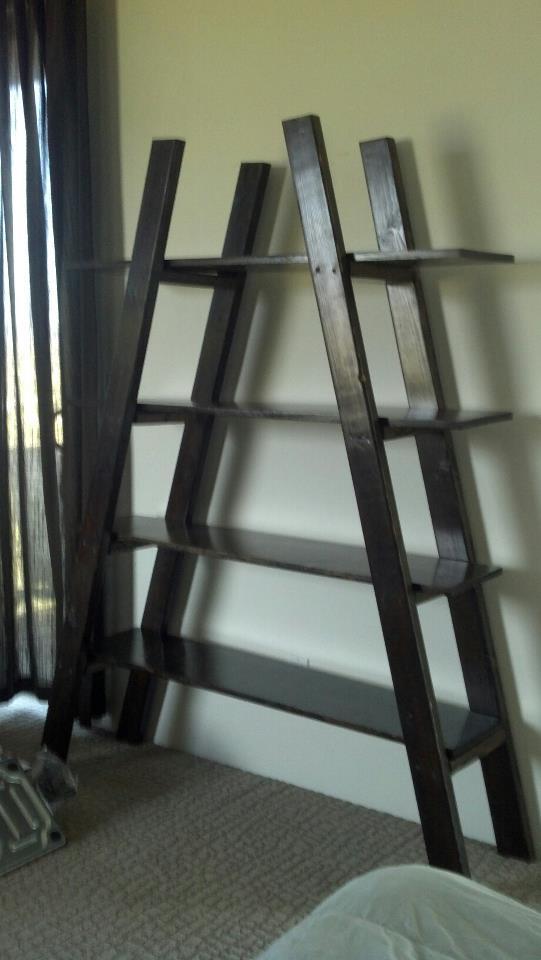
Those angles on the ladder are challenging. This is our first time building any furniture. Thak you Ana W