Community Brag Posts
Ledge Shelves & Modular cabinet
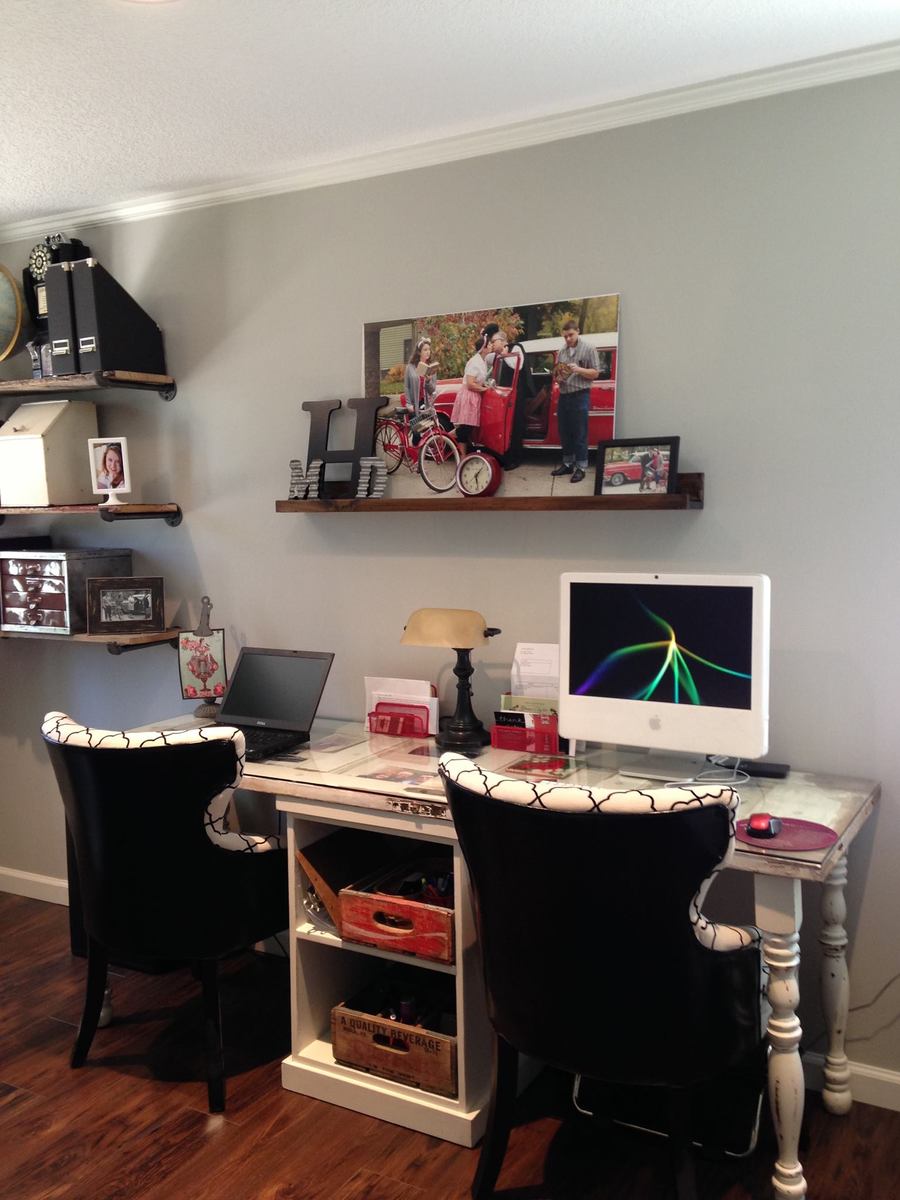
I love this site! I used the Modular Office- Narrow Open File Base under an old 5 panel door added some old table legs and voila new desk for two!
I thought the perfect thing to go above the desk was the $10 ledge shelf. I actually had the wood and the stain already...so this project was basically free...just my time.
Built from Plan(s)
Estimated Time Investment
Day Project (6-9 Hours)
Finish Used
DIY chalk paint on desk. Old Masters Dark Maple on ledge shelf.
Recommended Skill Level
Beginner
Camp loft bed with stairs
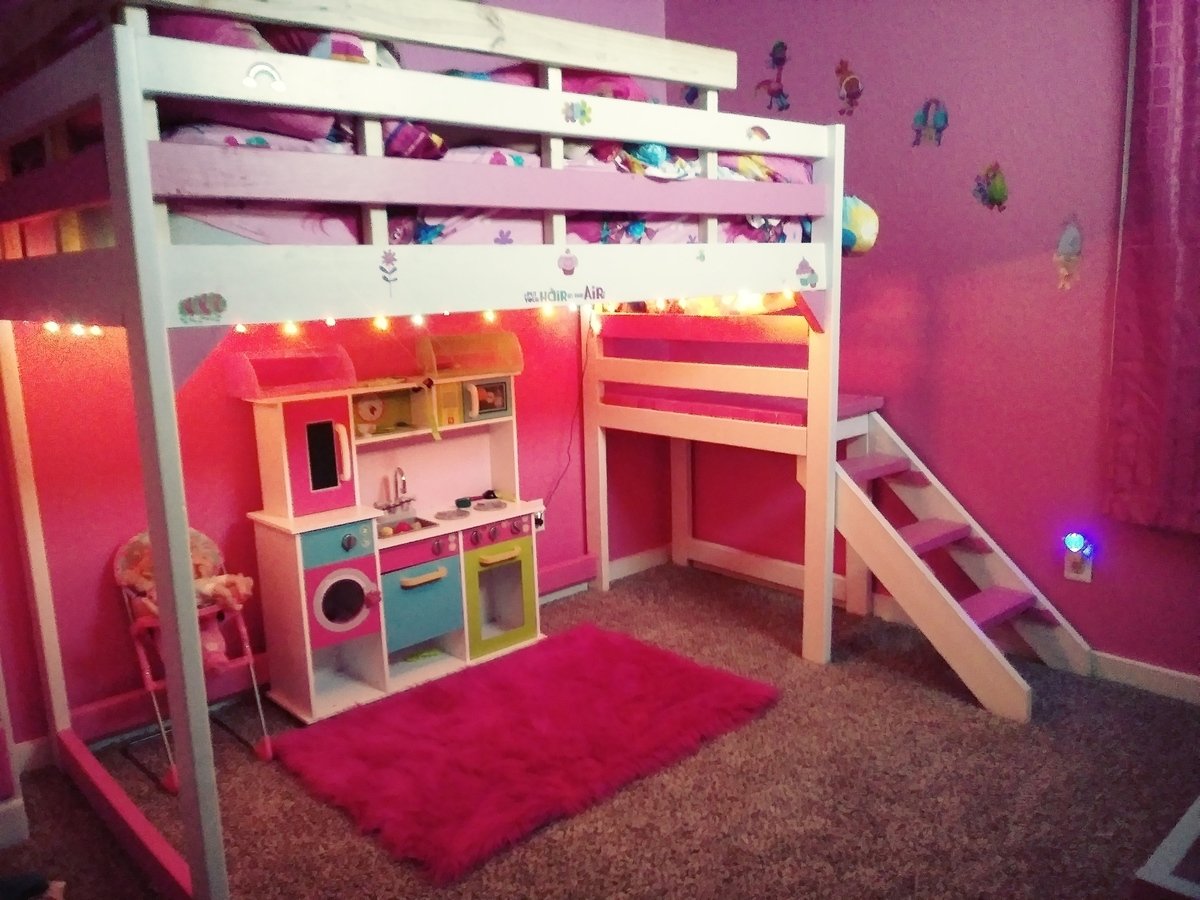
Super easy build, had to make a few adjusments because of the size of the room. My daughter absolutely loves it. Thanks Ana White for these awesome plans!!
Built from Plan(s)
Estimated Cost
$120
Estimated Time Investment
Afternoon Project (3-6 Hours)
Recommended Skill Level
Starter Project
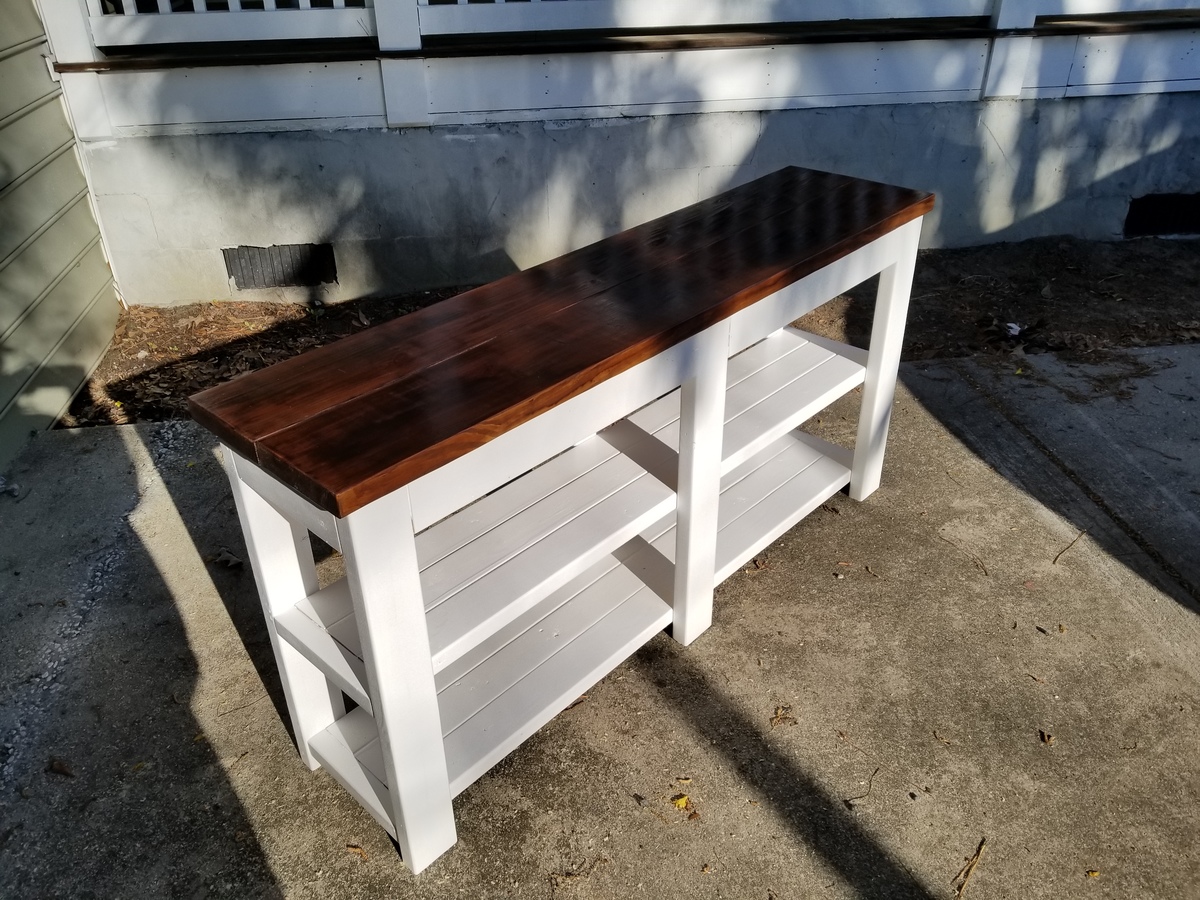
DIY Wooden bench
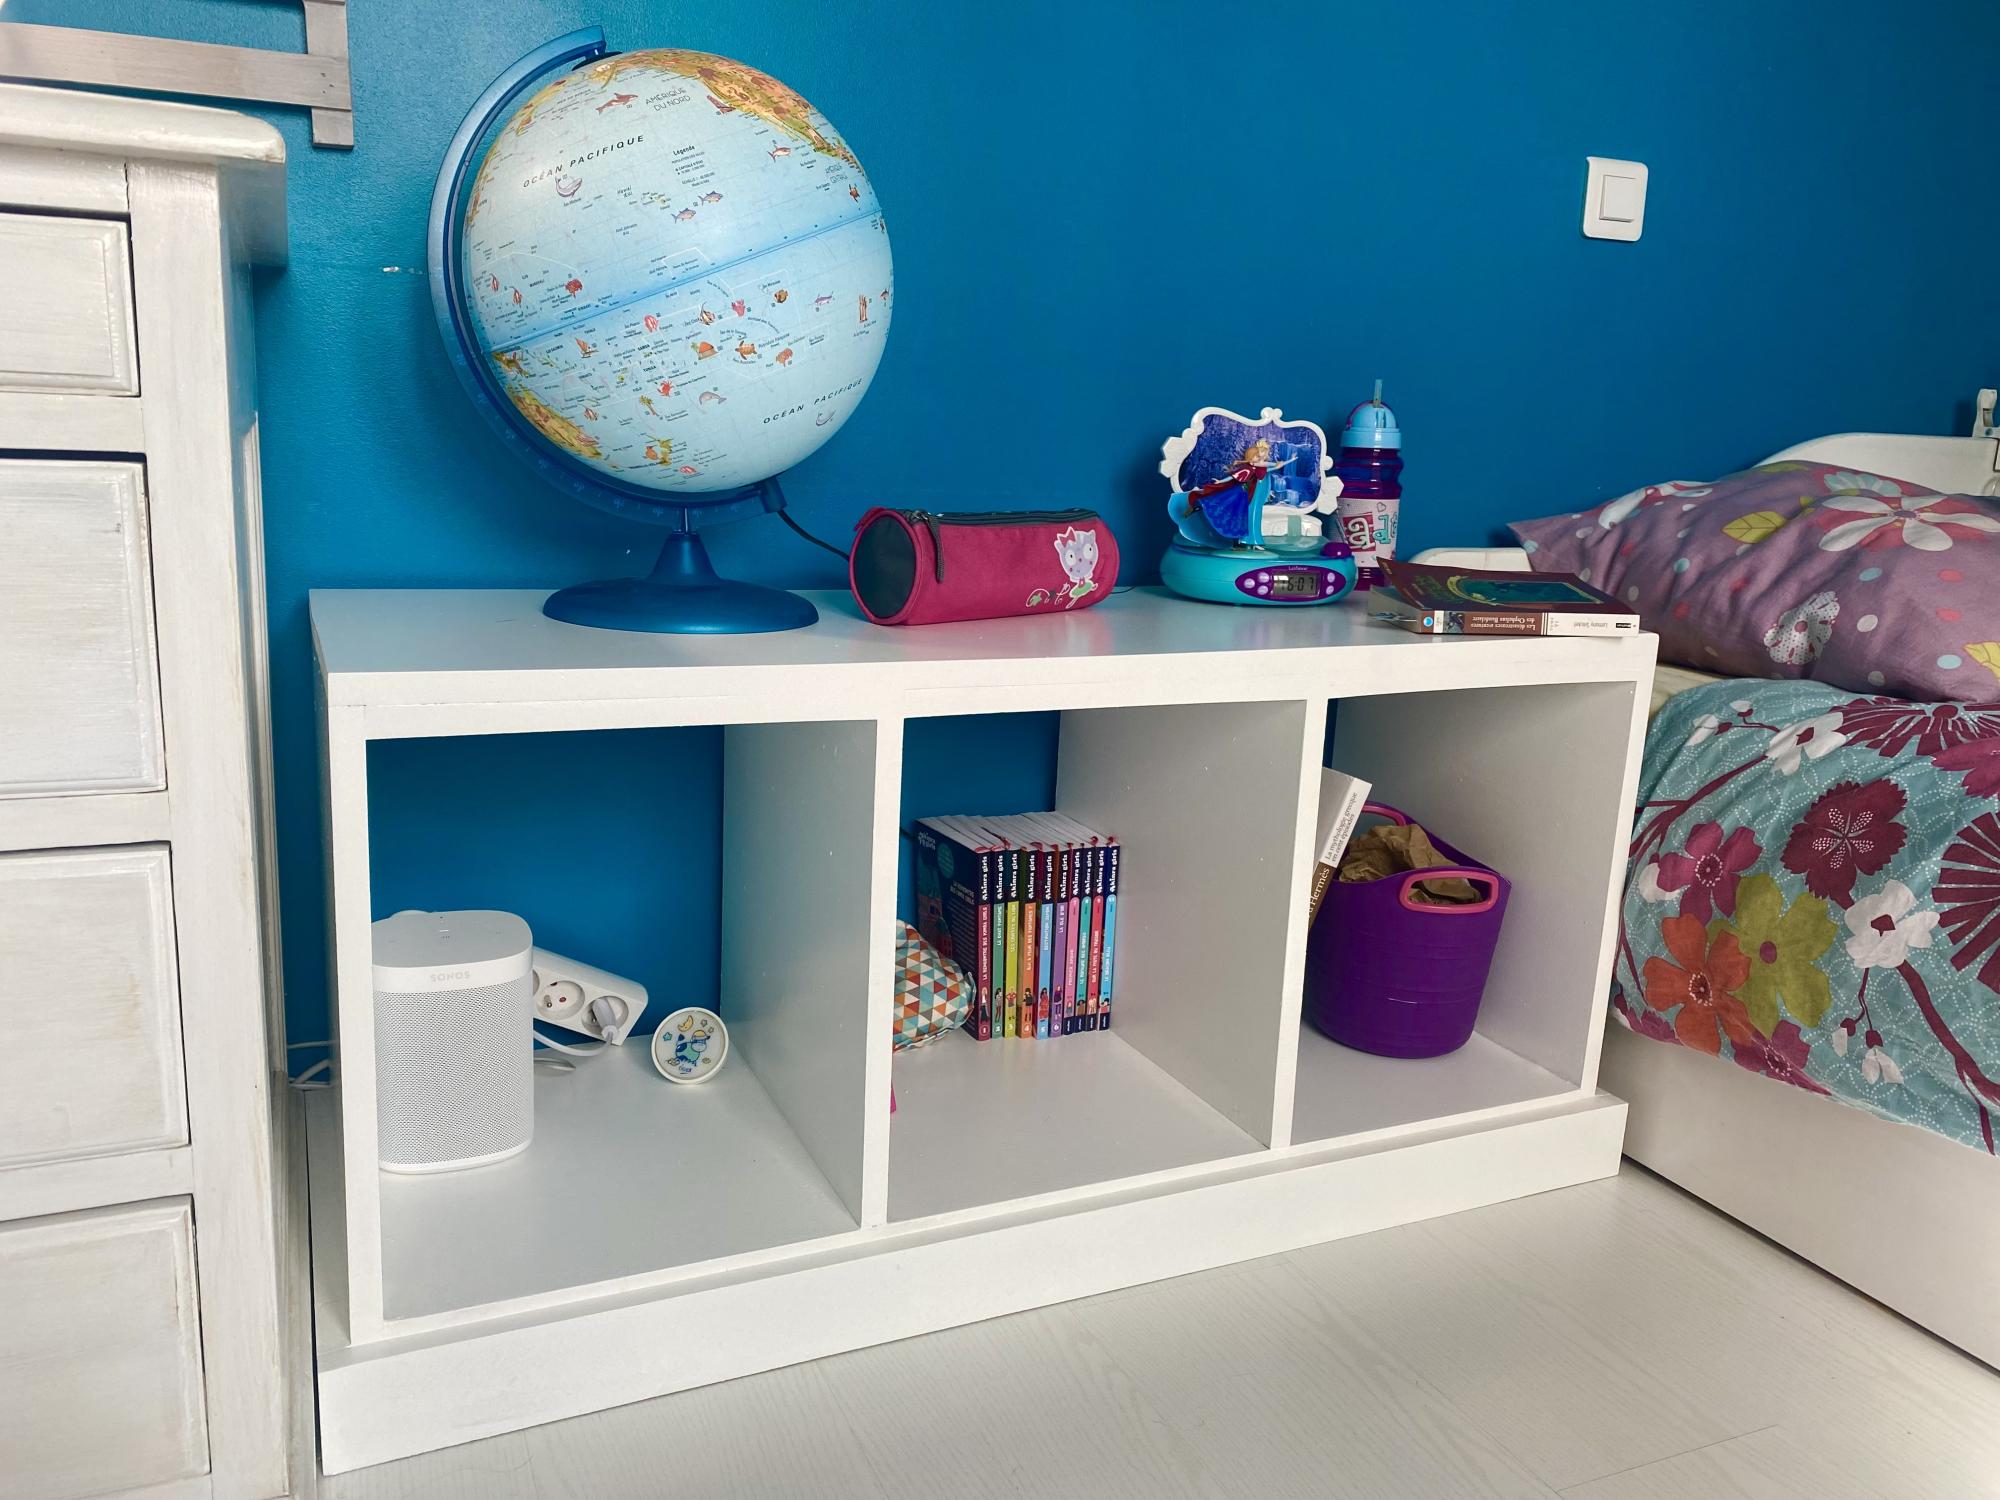
Thanks Ana for the plans. A new bench / bookshelves for our daughter's bedroom.
Built from Plan(s)
Comments
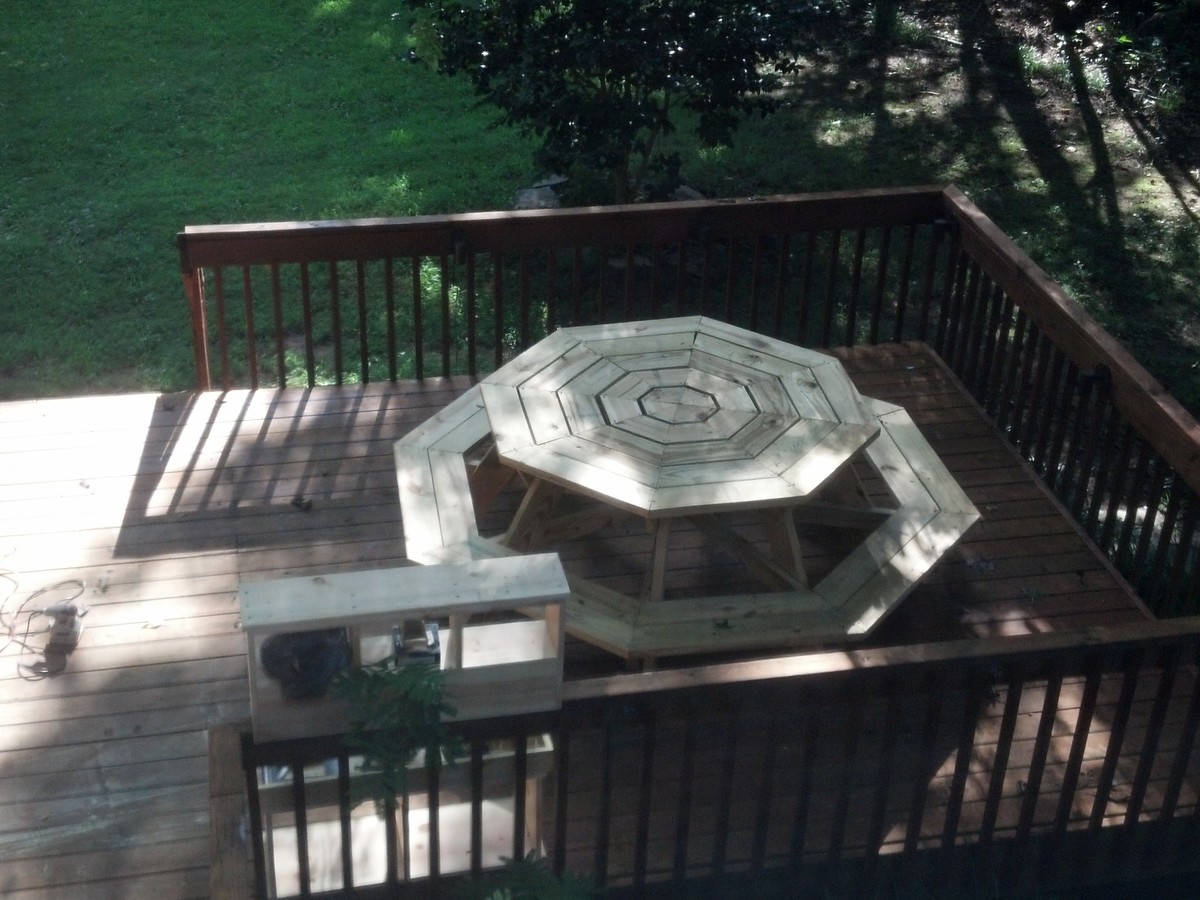
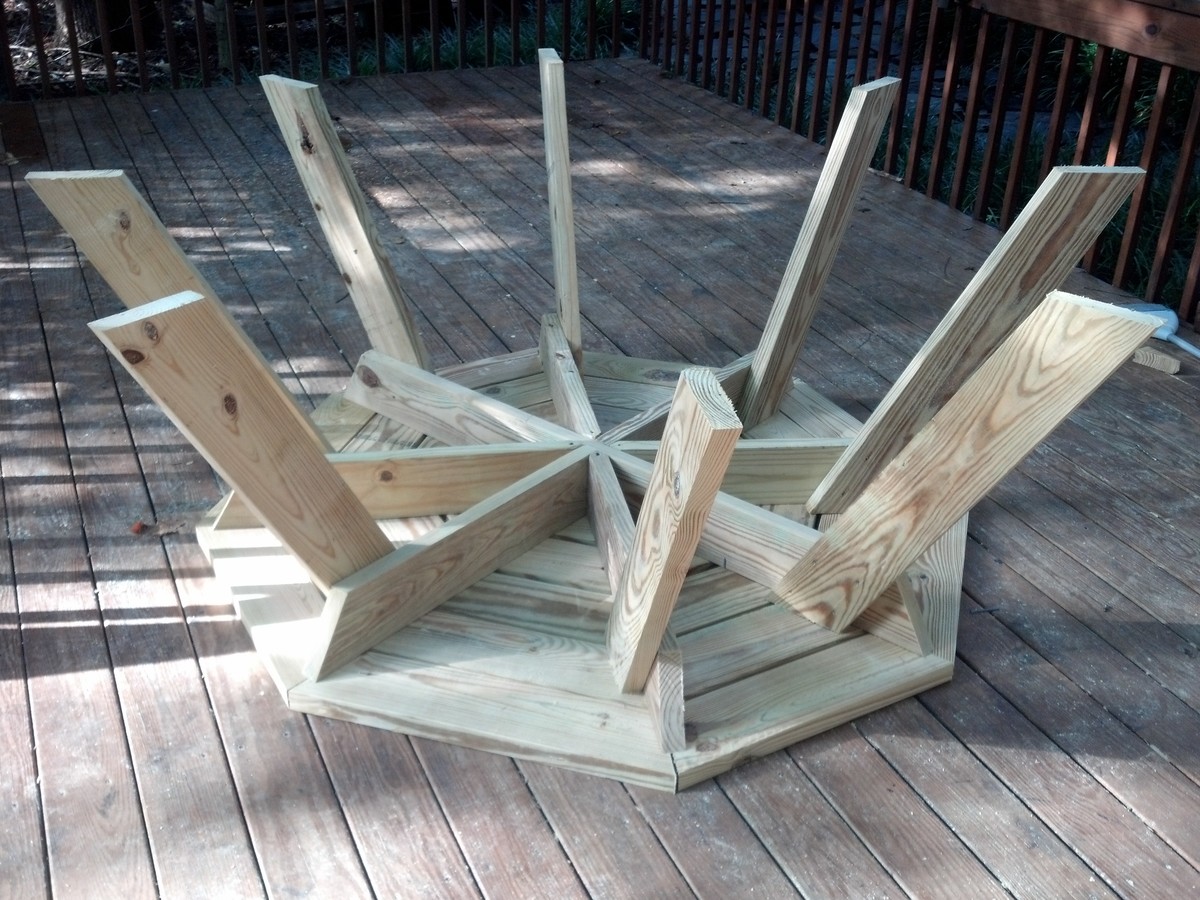
Exactly what I wanted
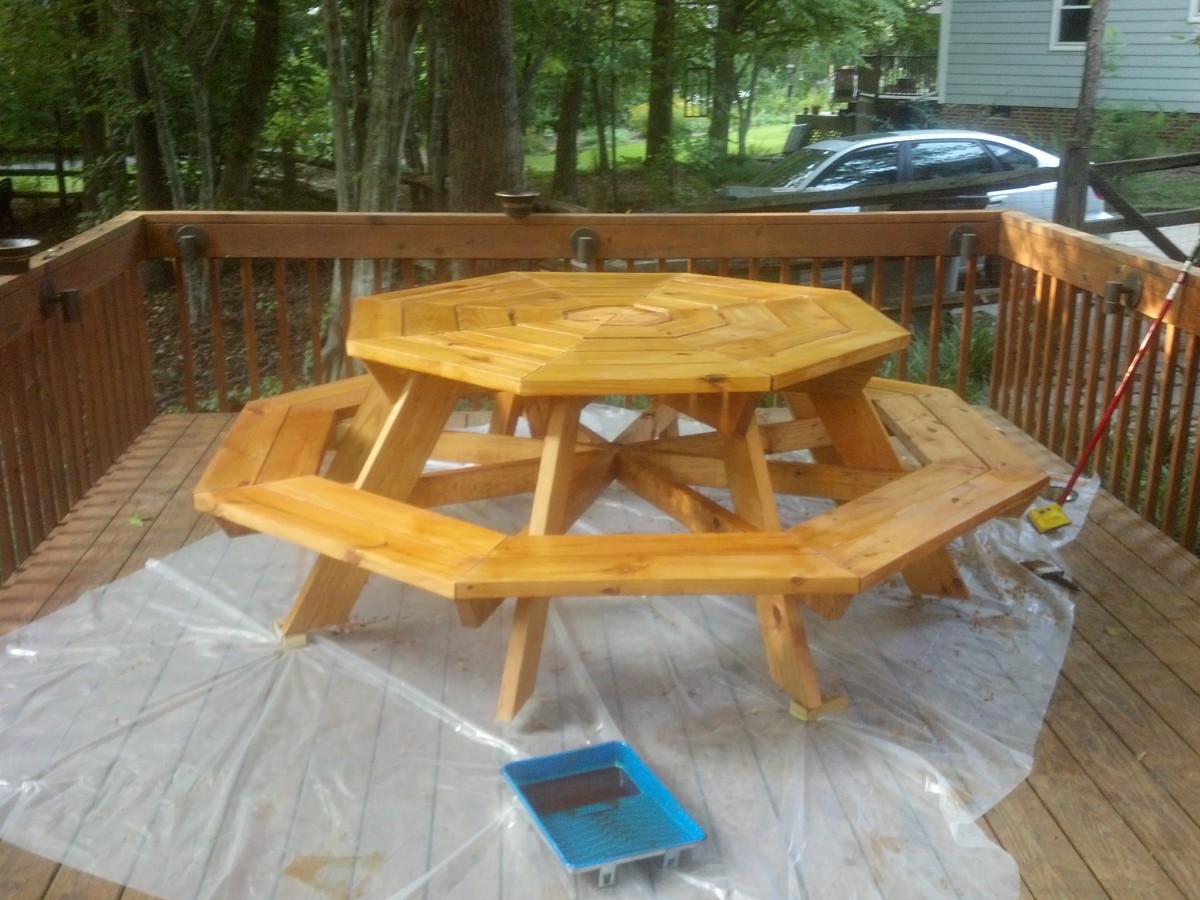
I stumbled upon the octagon picinic table almost by mistake. I set out to just find a blueprint for a standard picnic table to know how much materials I needed and this came up in the top of the Google search. As soon as I saw it I knew it would be perfect for my backyard. It looks great and the neighbors are quiet jealous!
In the first additional photo you will also see the entry way bench and storage shelf (http://ana-white.com/2009/11/plans-for-entry-storage-benchshelf_2314.ht…) that I worked on when I wanted a break from the table.
Estimated Time Investment
Weekend Project (10-20 Hours)
Finish Used
Olympic Redwood Naturaltone Semi-transparent Deck stain/seal
Recommended Skill Level
Intermediate
Comments
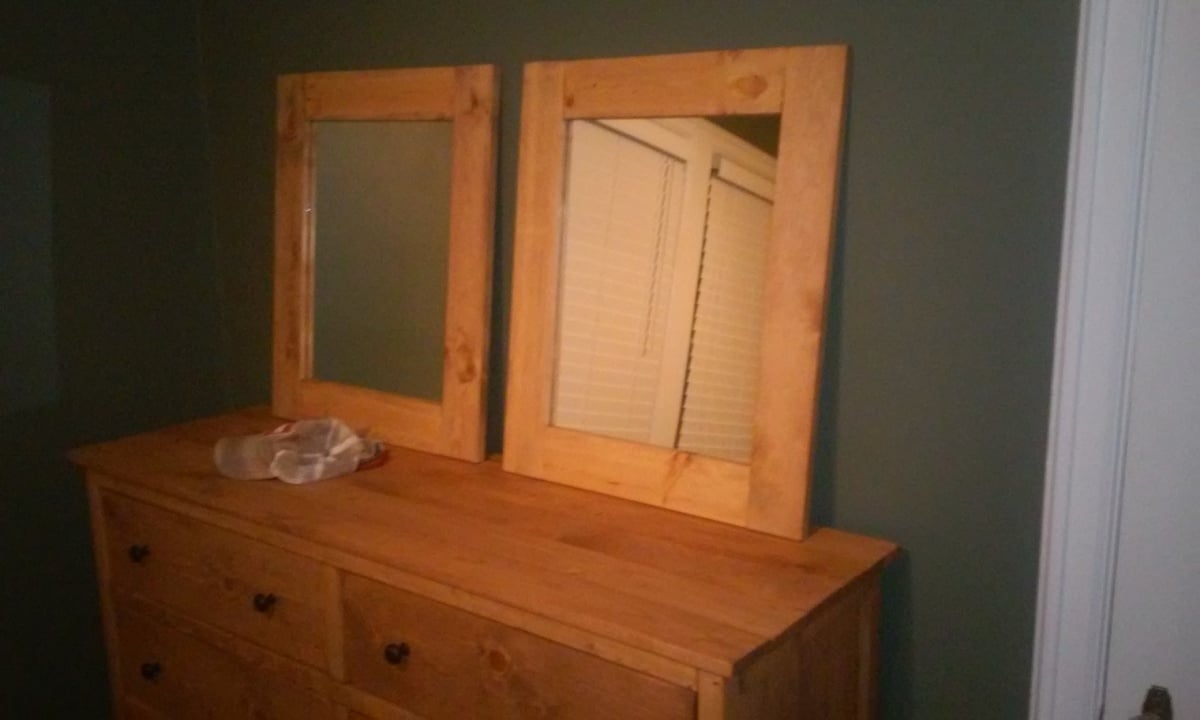
Modified Reclaimed wood Look Bedside -- Dresser
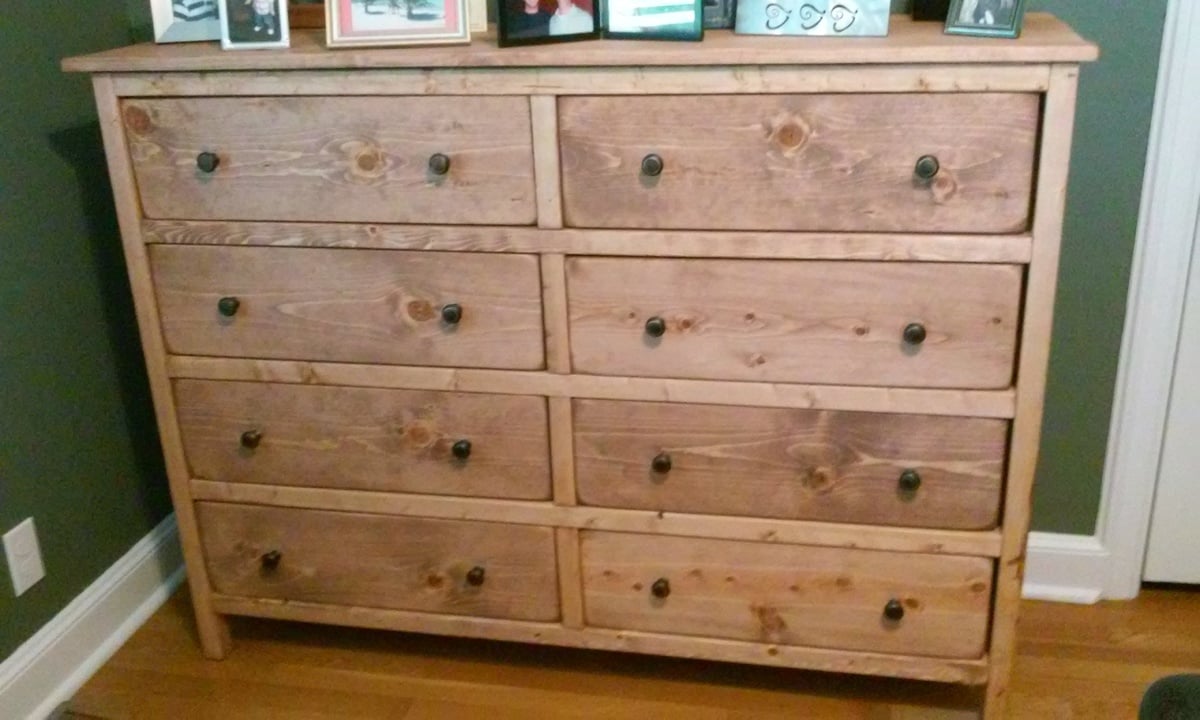
I loved the Reclaimed Wood Night Stand so much that I needed a dresser to match. Virtually the same just added a single drawer height and widened.
Built from Plan(s)
Estimated Cost
Cost about 75 bucks for wood and 20 for the hardware.
Estimated Time Investment
Day Project (6-9 Hours)
Finish Used
Cherry Minwax finish
Recommended Skill Level
Intermediate
Comments
Fri, 08/07/2015 - 11:12
looks great!
I am looking to build something exactly like this, can you share plans or any suggestions, thanks!
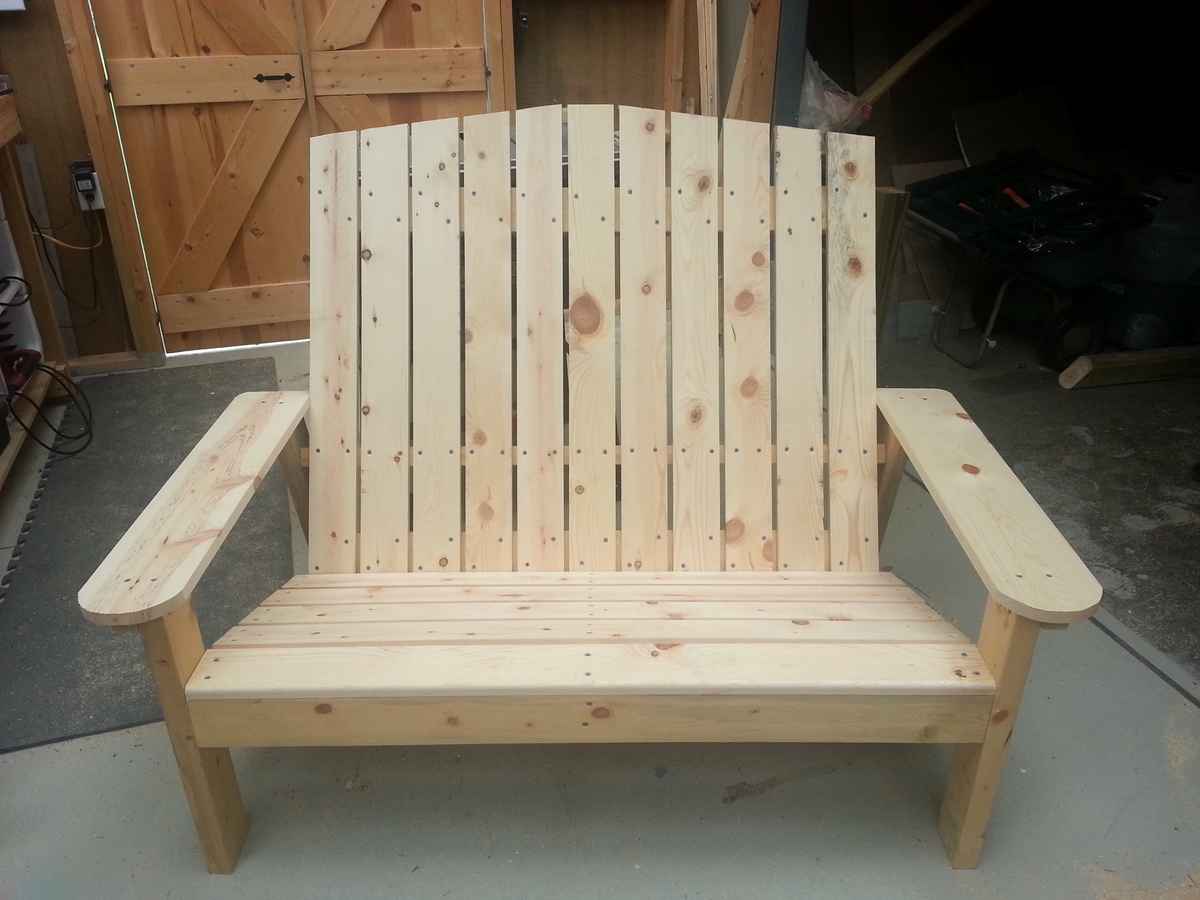
Garden bench - Adirondack style
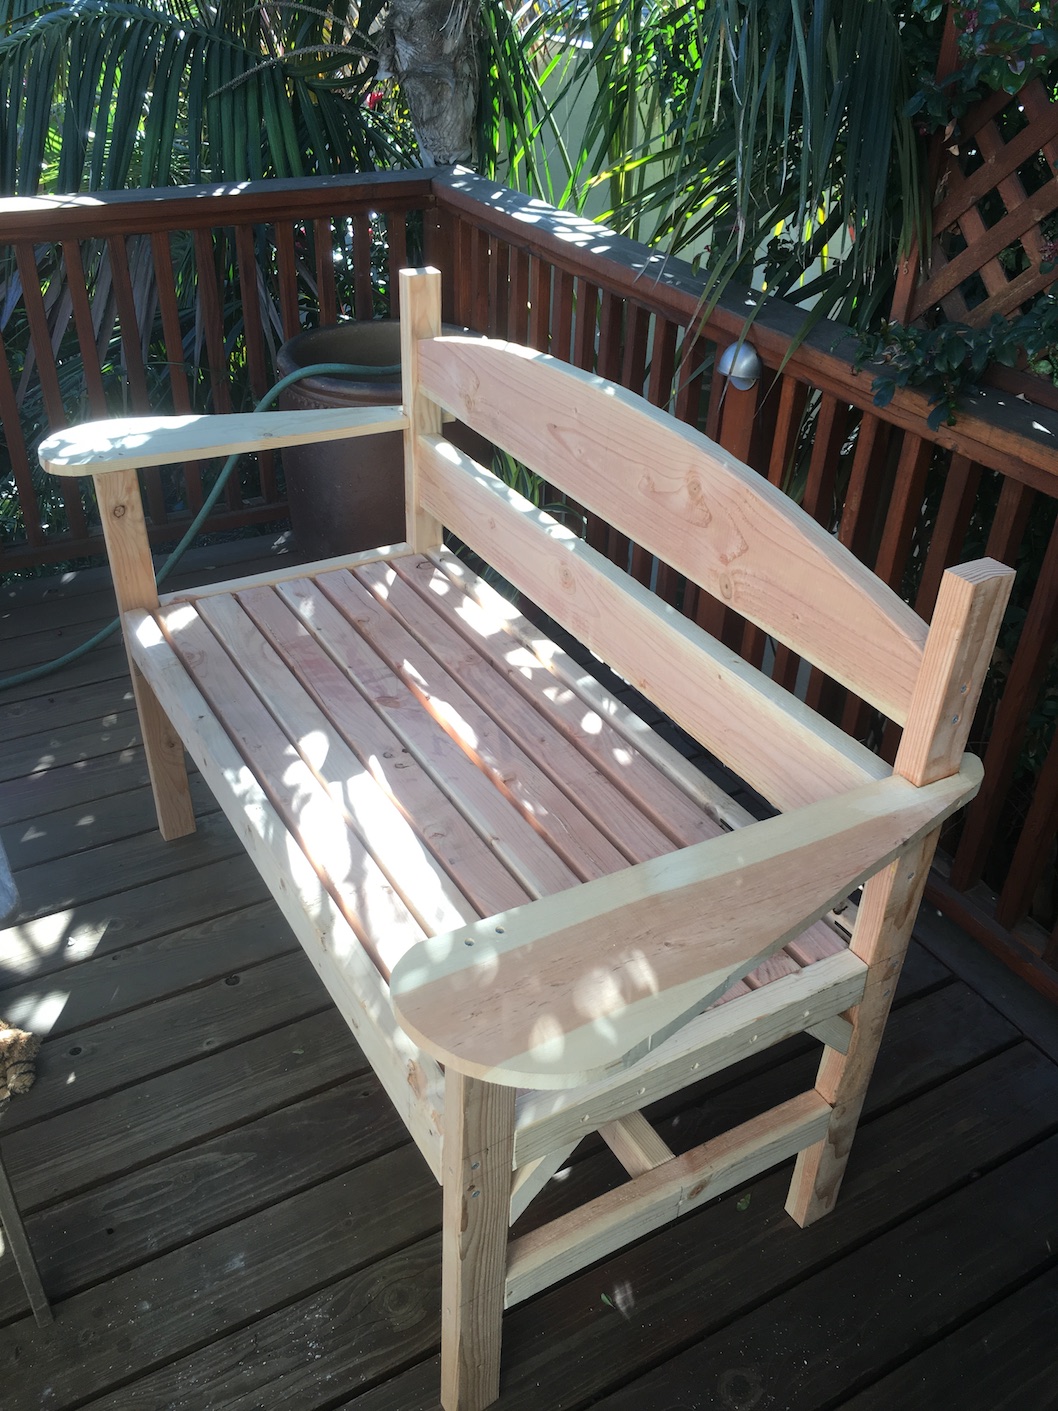
Hi Ana! Thank you so much for creating all these wonderful woodworking plans. My wife and I wanted a garden bench, and I thought it would be so much more fun to make one than to buy one, so voila! Couldn't have done it without your plans. I made a couple modifications to make it more "Adirondack" style, with the paisley-shaped armrests and curved backpiece. Great plans, thrilled with how easy they were to follow and how well the bench came out!
Thanks -
Bruce
Built from Plan(s)
Estimated Cost
$100
Estimated Time Investment
Weekend Project (10-20 Hours)
Finish Used
Spar urethane
Recommended Skill Level
Intermediate
Comments
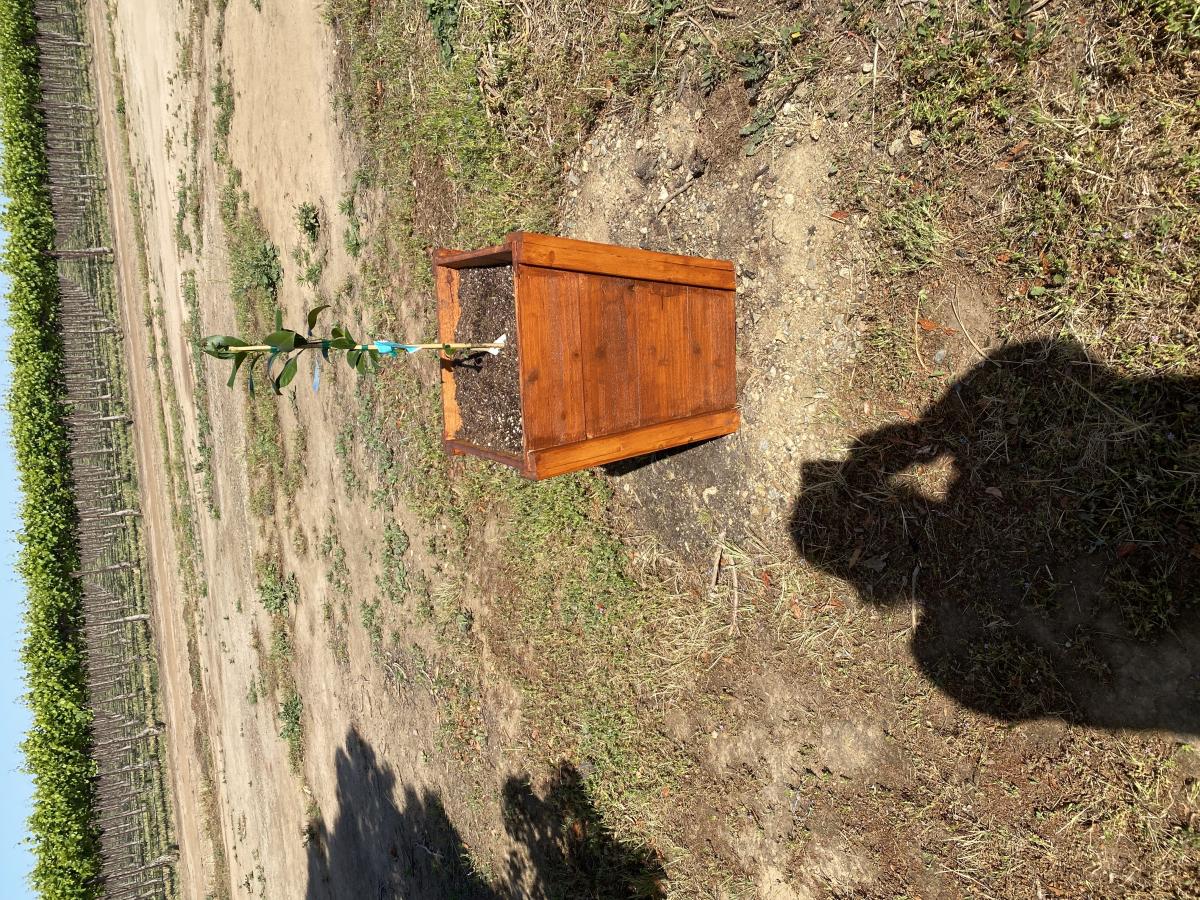
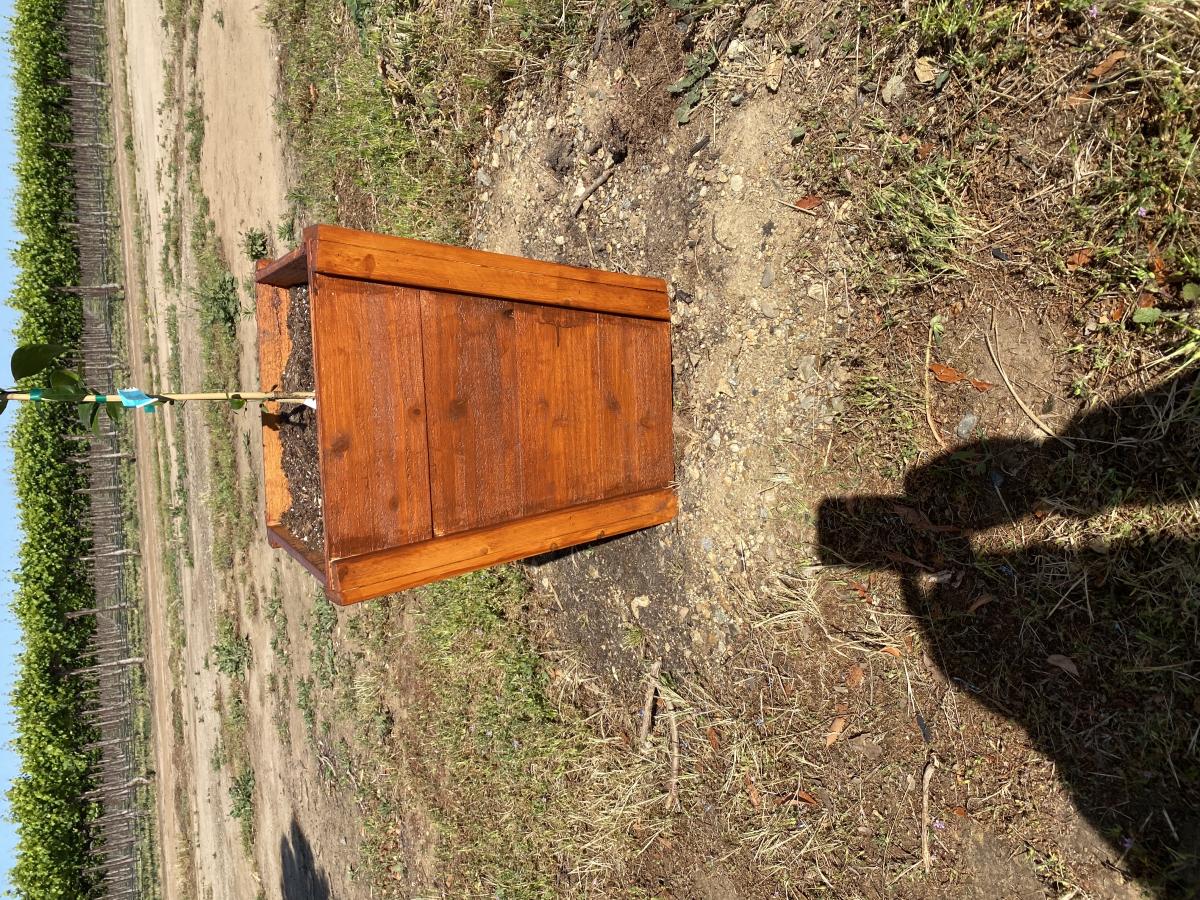
Your tall planter

Made your tall planter. Love all your builds
Built from Plan(s)
Comments
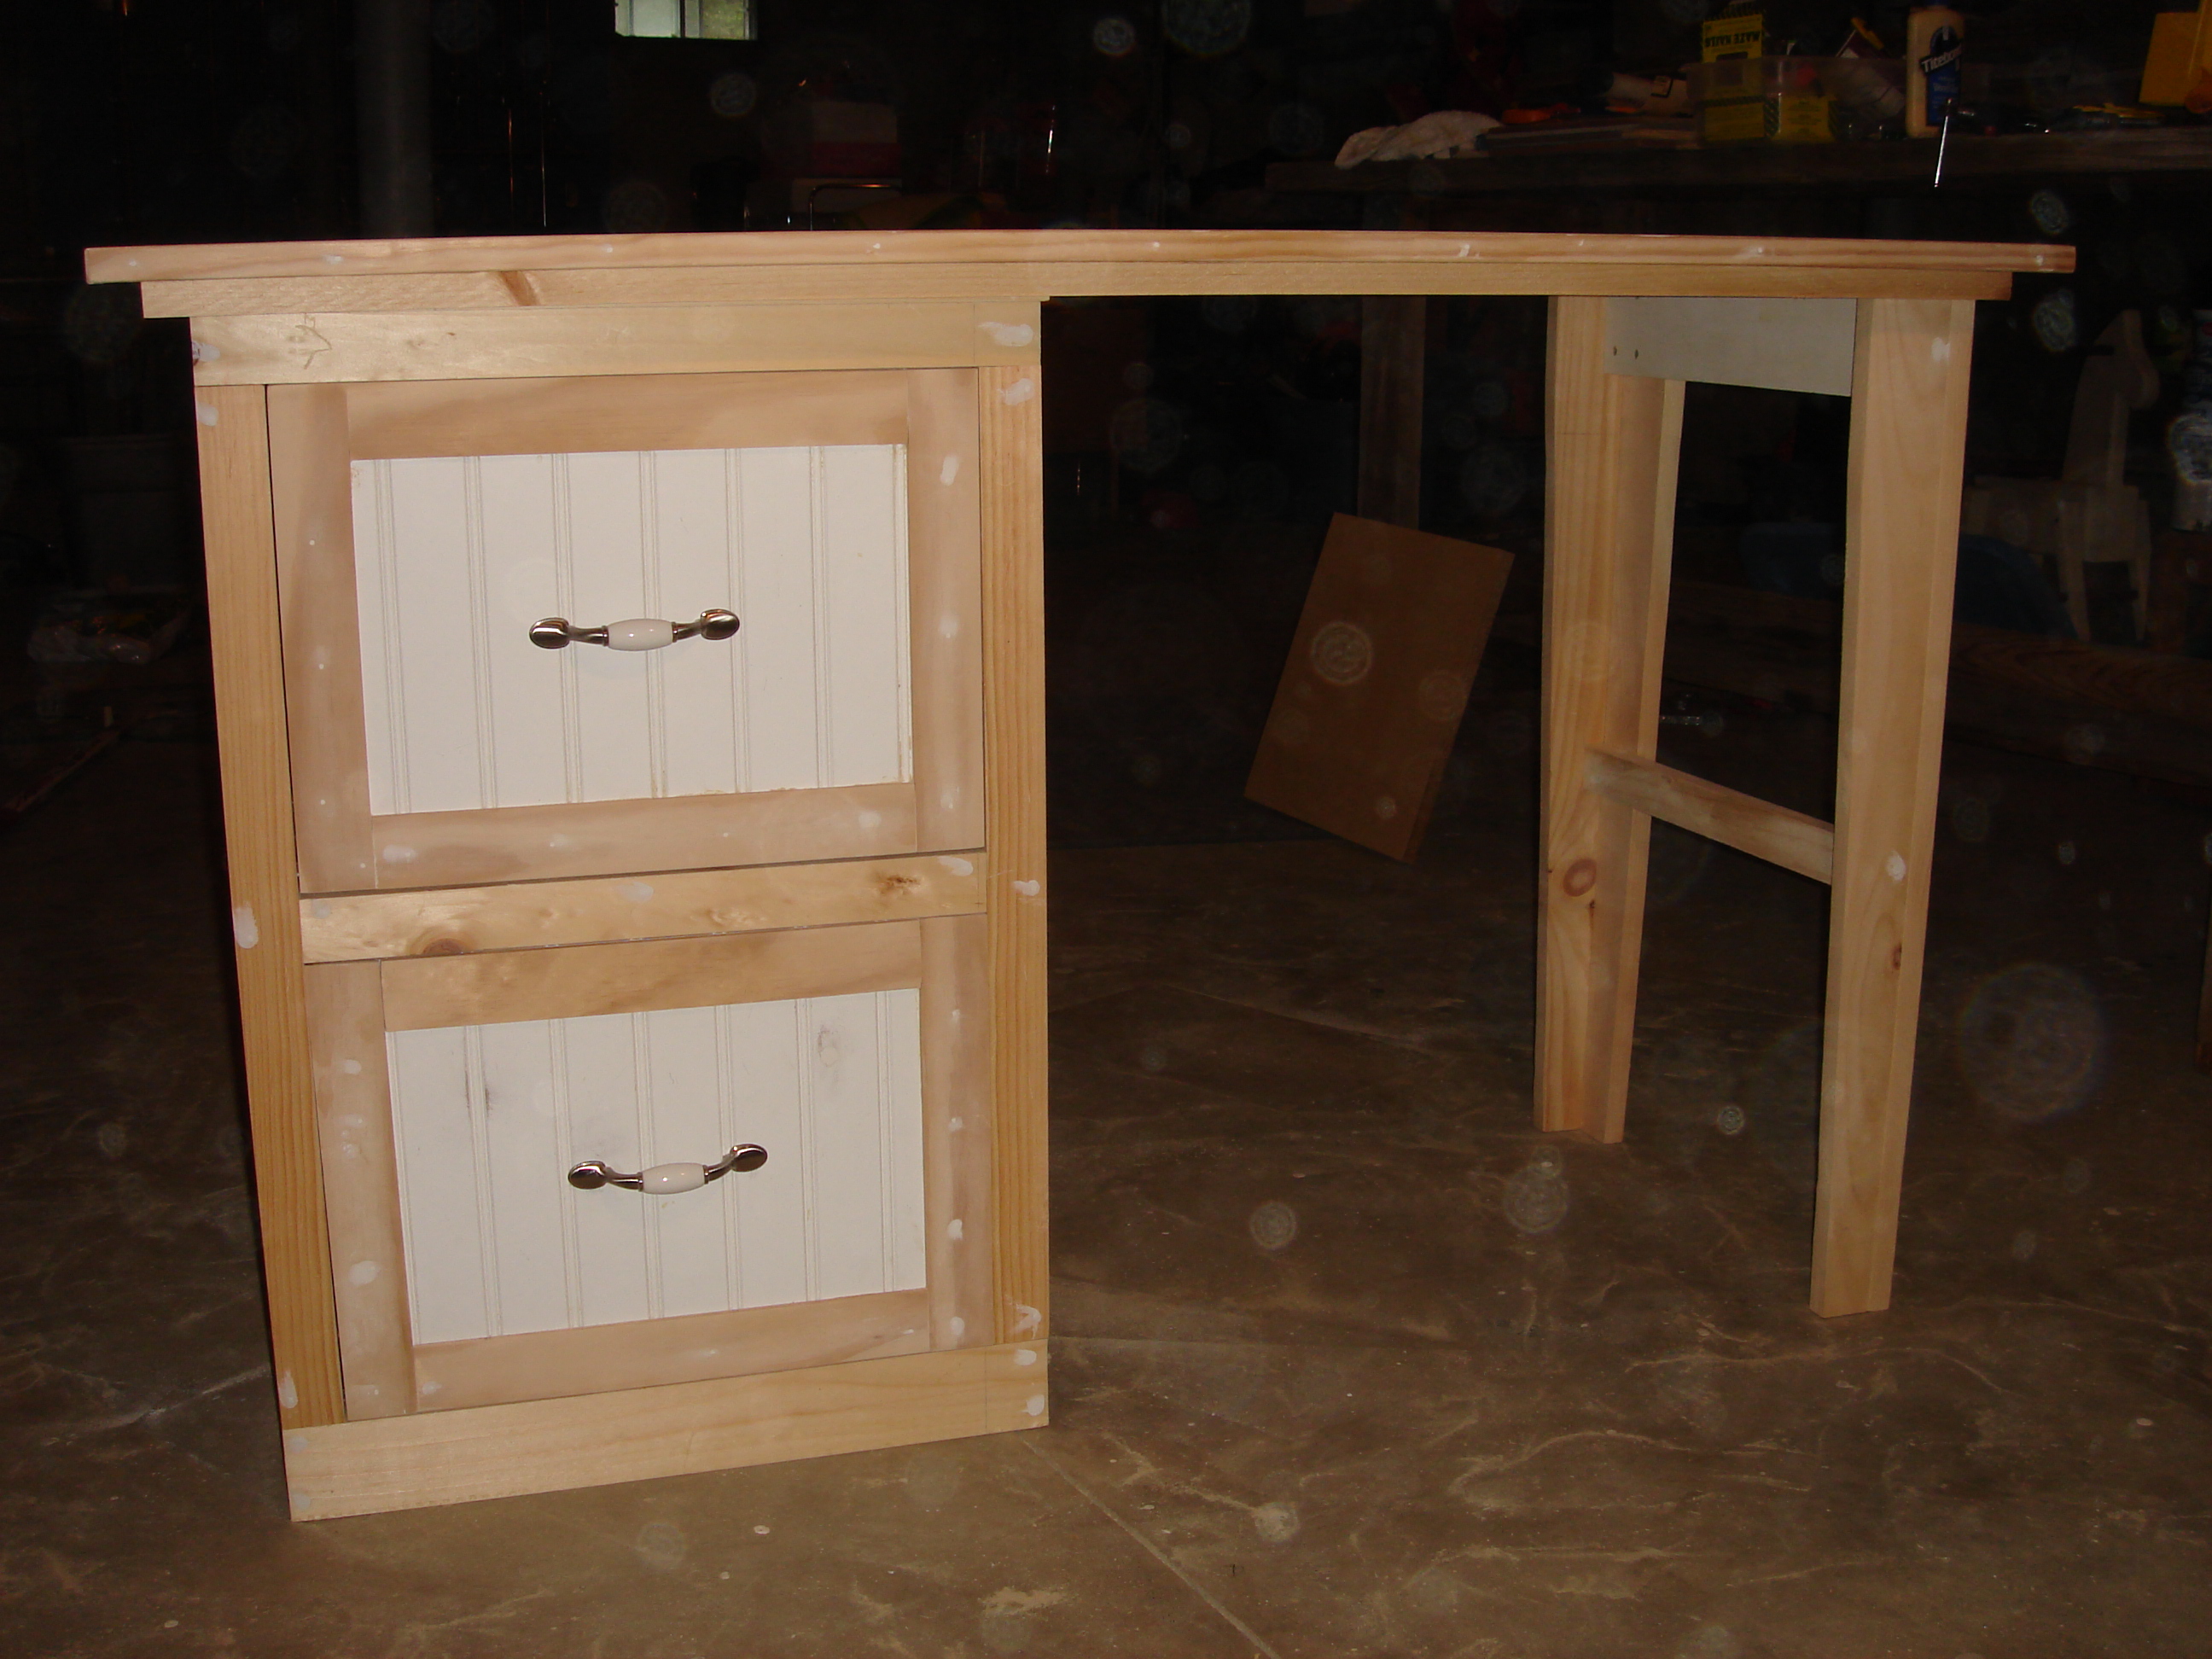
Modular office small desktop/Narrow file drawer base unit
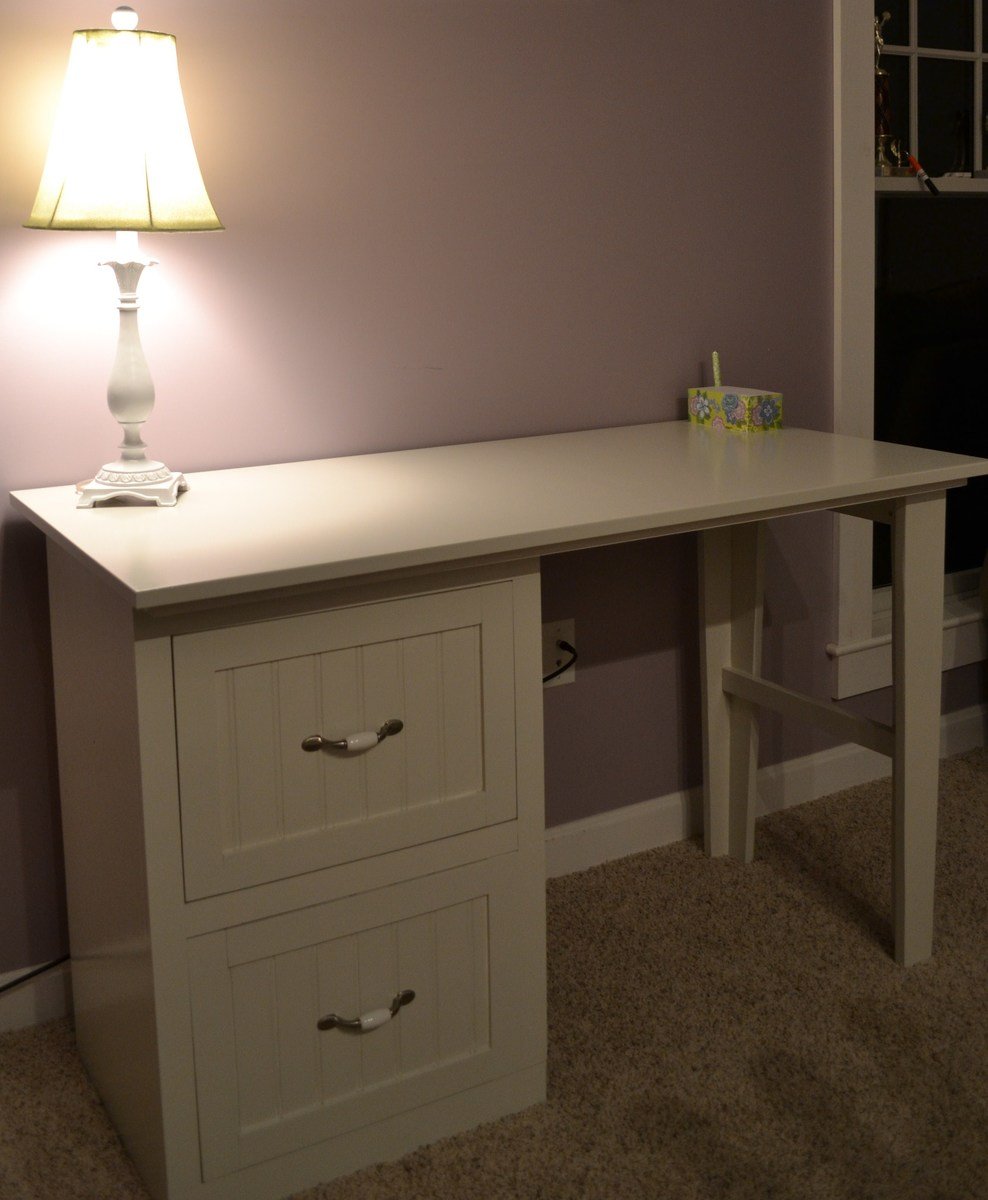
Combined the modular office small desktop with the Narrow file drawer base unit to suit my needs/space requirements. Used the legs from the narrow farmhouse table because I just loved them! Added beadboard for the drawer faces because it matches the rest of our house.
Built from Plan(s)
Estimated Time Investment
Week Long Project (20 Hours or More)
Finish Used
painters touch and minwax polycrylic
Recommended Skill Level
Intermediate
Comments

Mon, 04/28/2014 - 22:18
I am about to start on a very
I am about to start on a very similar 4 draw version of this, do you have any more information? In particular I was wondering how the drawer slides were fitted - are the side or bottom fitting? Cheers and well done!
Bathroom Vanity - This one's Josephine!
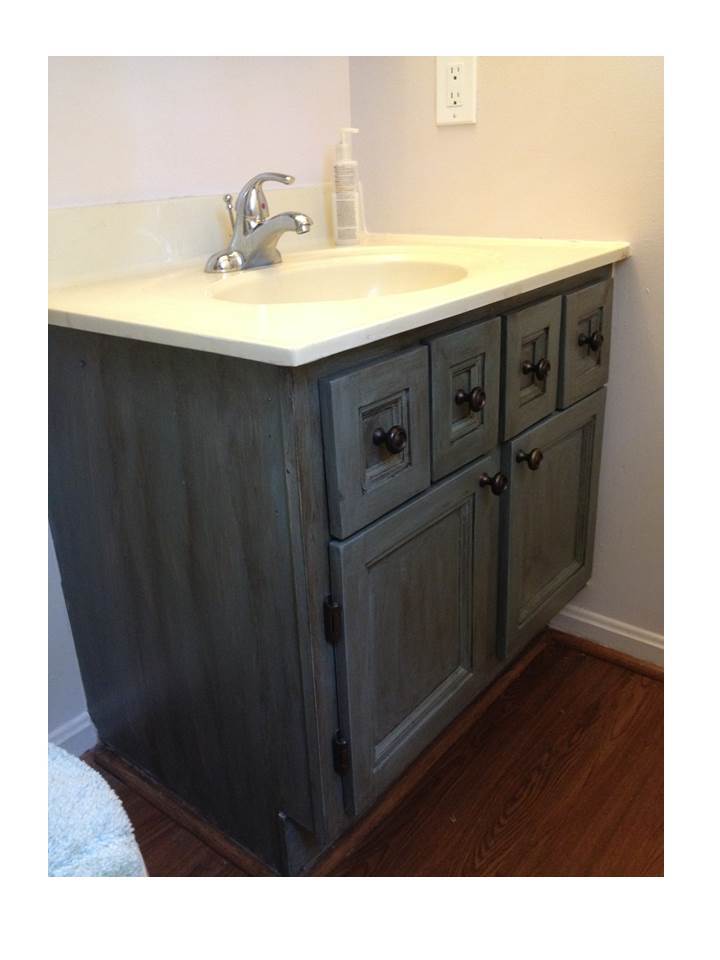
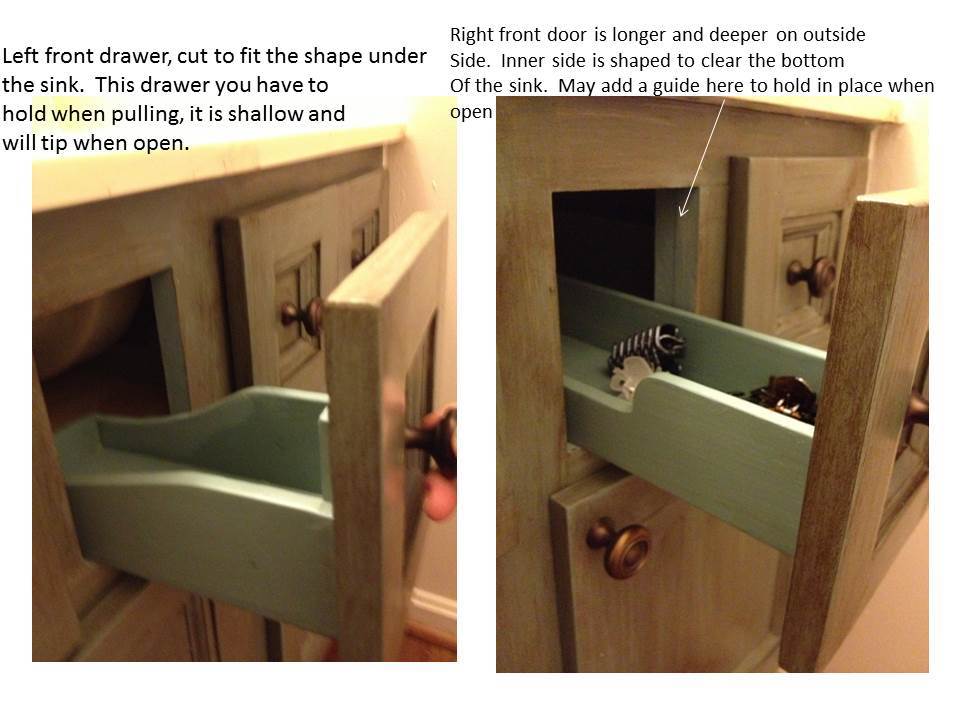
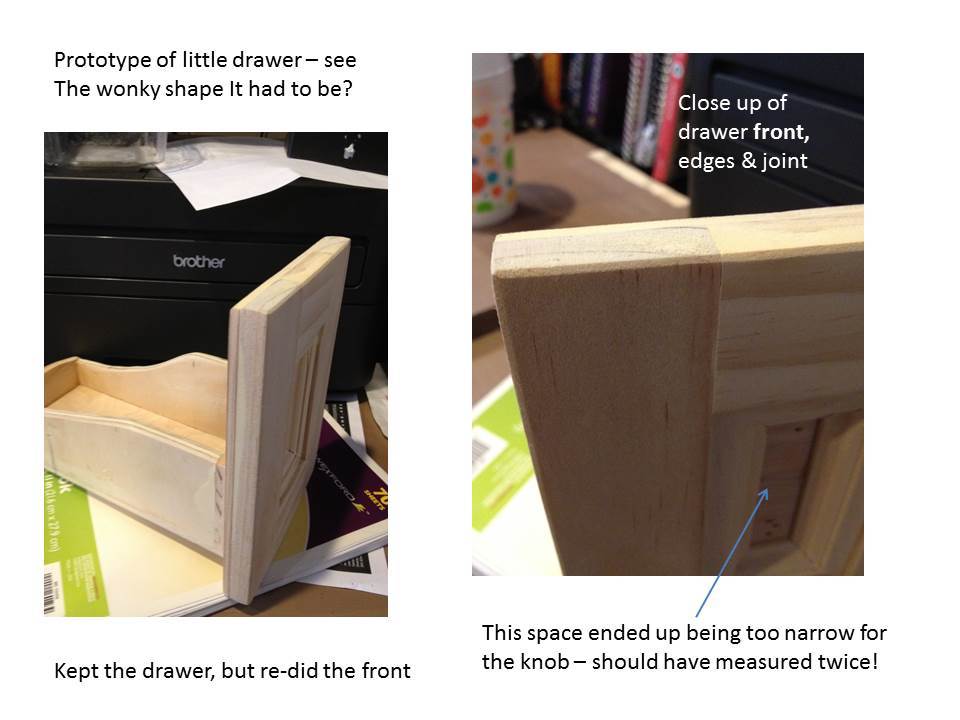
Converted an ordinary bathroom vanity into a Napoleon sink console/vanity. This is the second one I’ve completed, the first was in the hall bathroom which Hubby calls “his” bathroom. Since this one for the master bath is more feminine, I’m calling her Josephine! This was approximately a day and a half project, but spread out over several weekends. I had originally planned to put a faux drawer in front of the sink, and had the drawer front made, but then decided I’d like to try to make some custom drawers in front of the sink to utilize that space. I ended up doing the center drawer fronts twice – on the first try the space in the center was a little too narrow for the knob once the trim was in place. Since the vanity is in a corner, the sink doesn’t fall exactly in the center of the vanity cabinet, leaving it left of center by about an inch. This required different middle drawer sizes with interesting shapes.
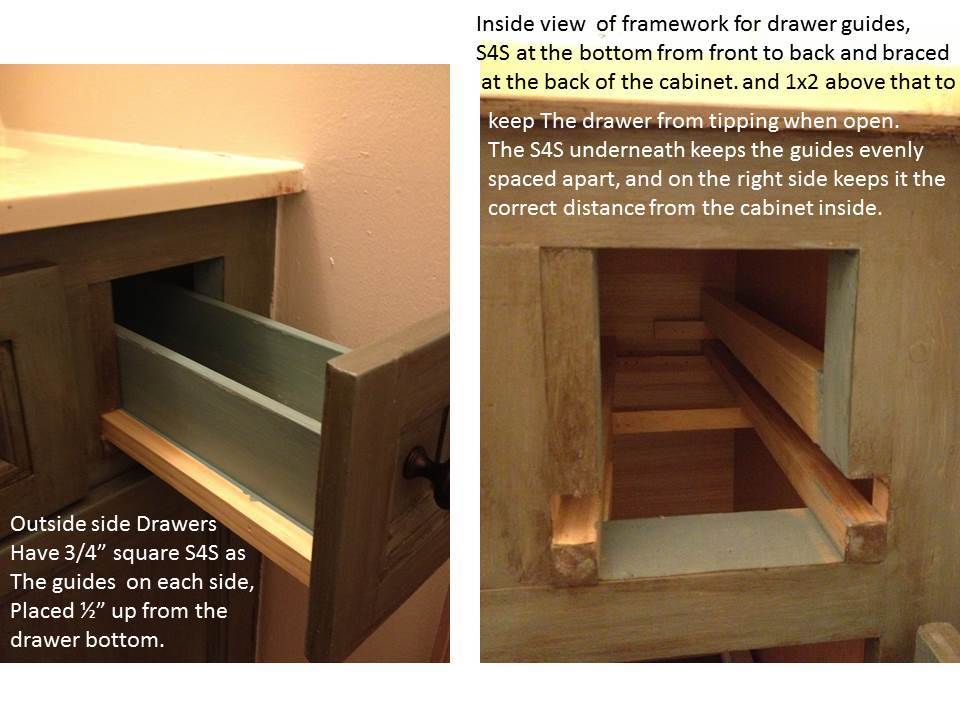
The drawers are made from a combination of 3/8” craft boards and 3/8” plywood, ½” craft board, and some ¼” plywood for the bottoms (all of them except the one right of center – that has ¾” plywood for the bottom). The 2 outer drawers also have ¾” S4S as guides.
The doors and drawer fronts are ¼” birch plywood cut to size, with ½” x 1 ½” craft boards glued to the fronts for rails and stiles (I added a few pin nails from the back side also). Inside these, mitered pieces of mini-stop moulding were glued in place. The whole thing received some putty on the edges and joints, and thorough sanding with 80-grit, then 220-grit.
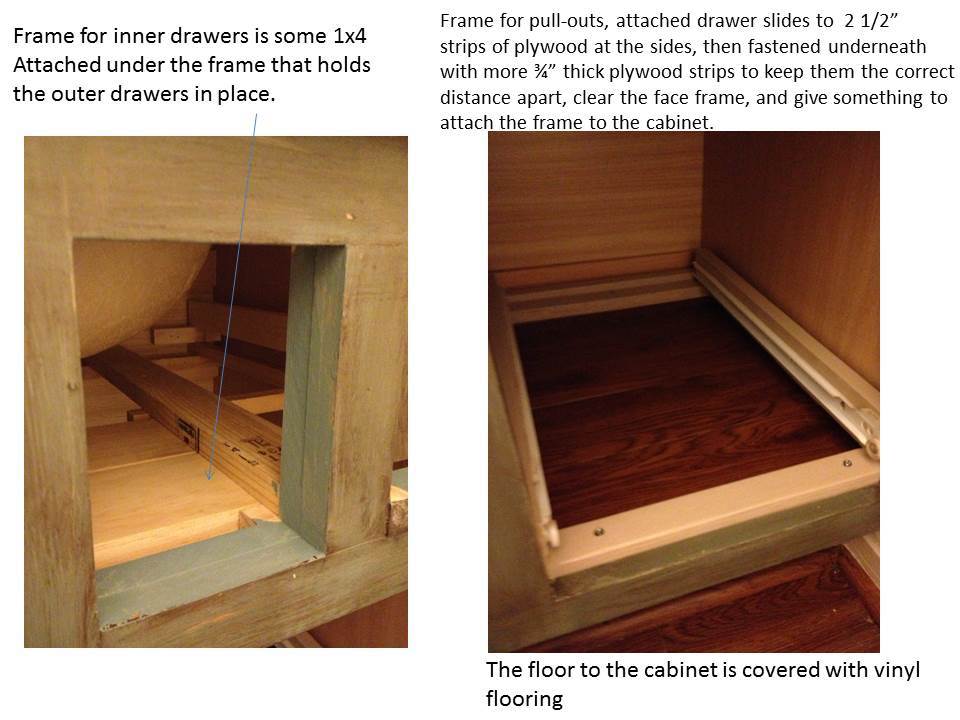
The inside frames are made from S4S, 1x2, and some scraps of 1x4 cut to size. If I were doing this in a newly constructed vanity without the sink already in place, the setup for the drawers would have been much simpler. But, we weren’t ready to buy new yet, so necessity was the mother of invention and we have this. I re-used the hinges and 2 of the knobs from the original, and I bought 4 more and the hardware for the drawers.
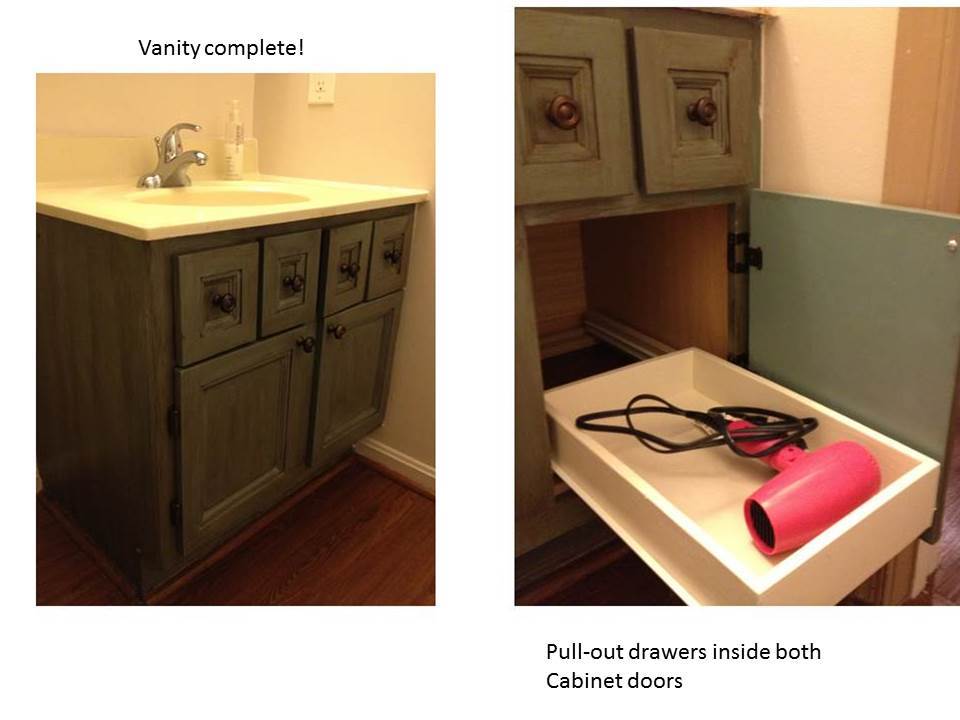
The pull-outs in the bottom are made from plywood scraps, thoroughly sanded and painted. These are based on Ana’s wood pull out cabinet drawer organizer, with added supports across the bottom to make the drawer clear the lip of the face frame, keeping them the correct distance apart, and giving something to attach to the cabinet floor.
For the inside floor of the cabinet, I got this Idea from Yvonne at Sunnyside Up-Stairs in this post:
http://sunnysideup-stairs.blogspot.com/2013/06/progress-installed-dishw…
Left over flooring was placed on the cabinet floor to give it a fresh new look and protect the cabinet bottom. Our house is 21 years old, so you can imagine the floor of the vanity cabinet had seen some wear and tear. Now it looks new!
Built from Plan(s)
Estimated Cost
$45 (hardware, craft boards, trim, already had the finishing materials and the rest was scrap on hand)
Estimated Time Investment
Weekend Project (10-20 Hours)
Finish Used
This was my first try at home made chalk paint (2 coats). I got a free quart of Clark & Kensington flat paint at Ace, and had them tint it to Benjamin Moore’s Blue Echo color. I made the chalk paint by mixing the paint with some water and plaster of paris. I love how it dries so quickly and covers well, but I missed the sheen of a satin or semi gloss. The glaze is some Minwax Express Color in Walnut. Once everything was dry, it received a top coat of Minwax water based poly. I ran out of that right as I was doing the center drawers, so those have some Oil-modified water based poly. Pull-out drawers are some left over cream paint, and the frames are Ace Royal semigloss in Wishbone. Overall I’m very happy with the finish.
Recommended Skill Level
Intermediate
Comments

Sun, 07/28/2013 - 12:25
Fabulous!
I love your vanity. Something about it helps me imagine a British nobleman's home, or since she is Josephine, I suppose it would be in the home of a French duchess. =D I really do like the idea of having that pull out drawer on the bottom of the vanity.
I am definitely going to give glazing and distressing a try sometime. I just have to find the right project for the look. Lest I forget, thank you for sharing the link to my site. :)

Sun, 07/28/2013 - 15:57
Thank you!
Thank you so much for the nice comments! I love the idea of a Duchess, I think I'll nickname this finish Duchess Blue! :) I was happy to share your blog link, the idea about the vinyl flooring in the vanity worked like a charm, I'm going to do that in my kitchen and the other bathrooms too.
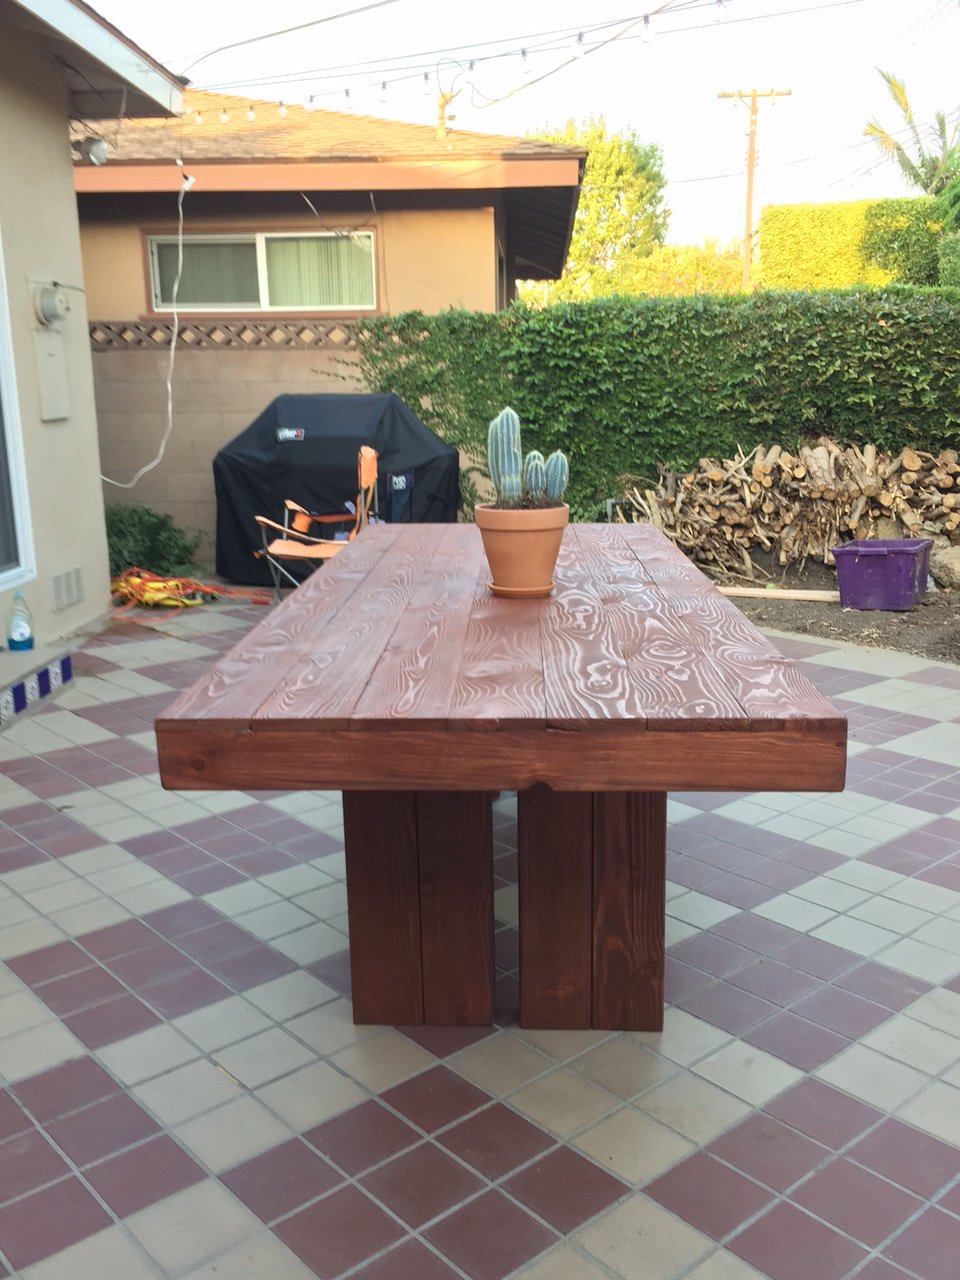
Modern Outdoor Patio Table with Alt Stain
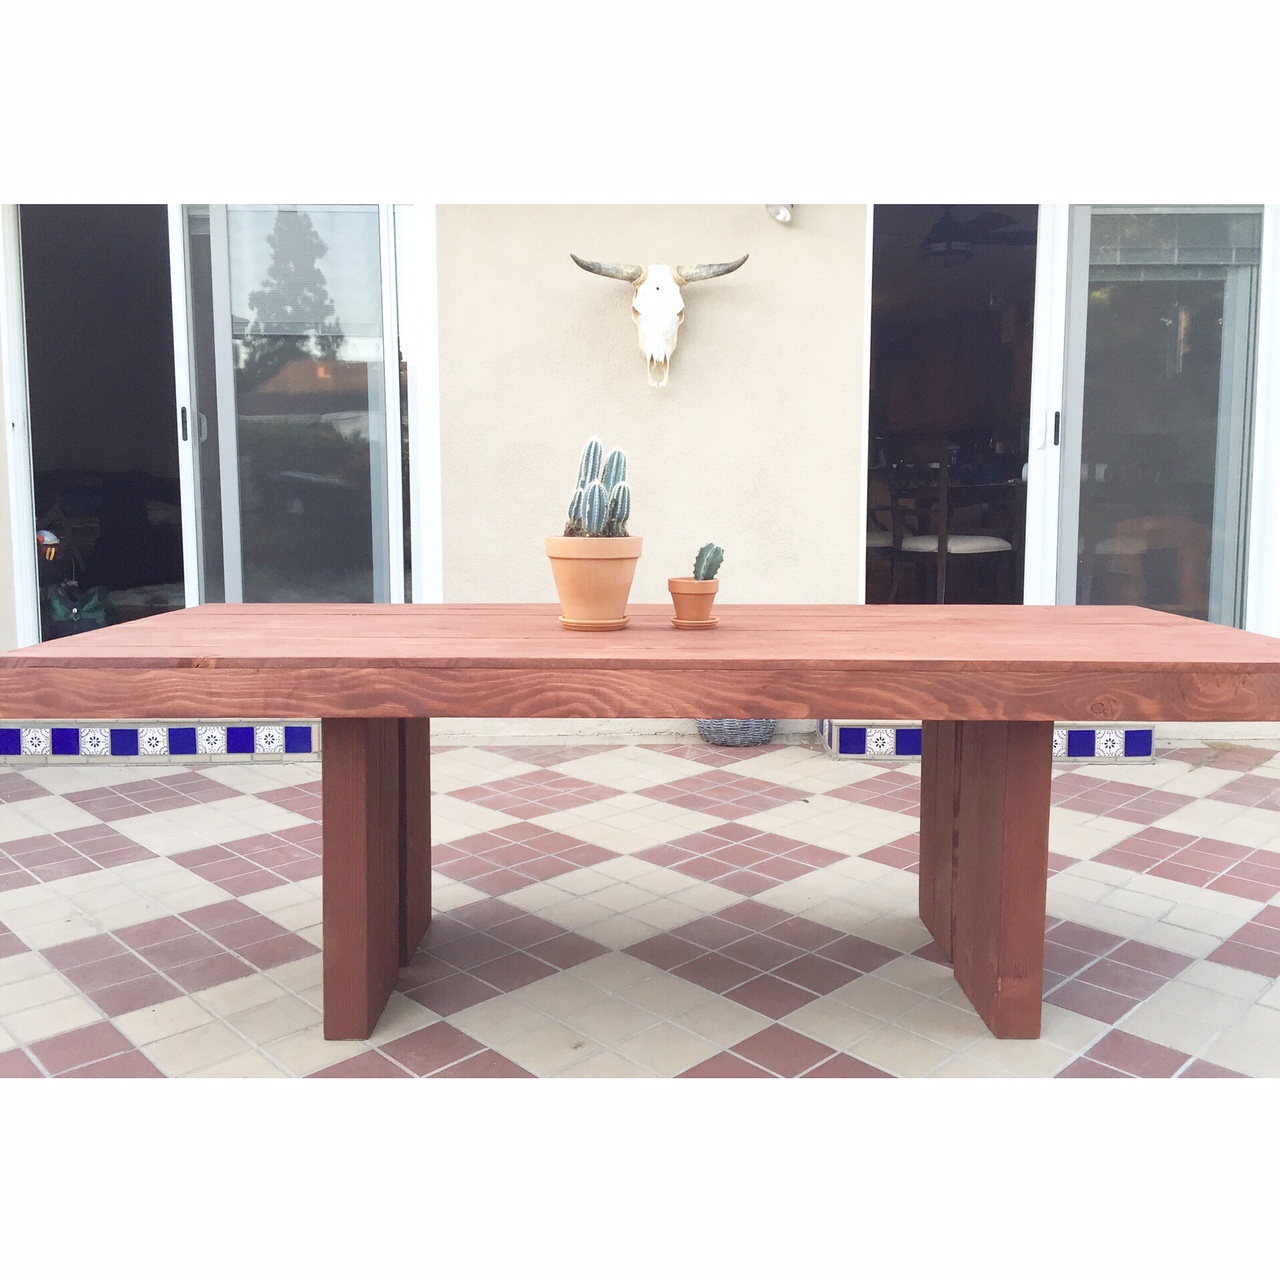
Followed the plan exactly, with the exception of the stain. I mixed a walnut and rosewood stain to give it a little more warmth/red.
Built from Plan(s)
Estimated Cost
~$150-$200
Estimated Time Investment
Weekend Project (10-20 Hours)
Finish Used
I mixed 75% Olympic Walnut 708 and 25% Rosewood 728. I mixed these at home and made sure to stir thoroughly and do several tests on scrap wood pieces until the ratio was just right.
Recommended Skill Level
Beginner
Custom Reclaimed Barn Wood Dog Crate
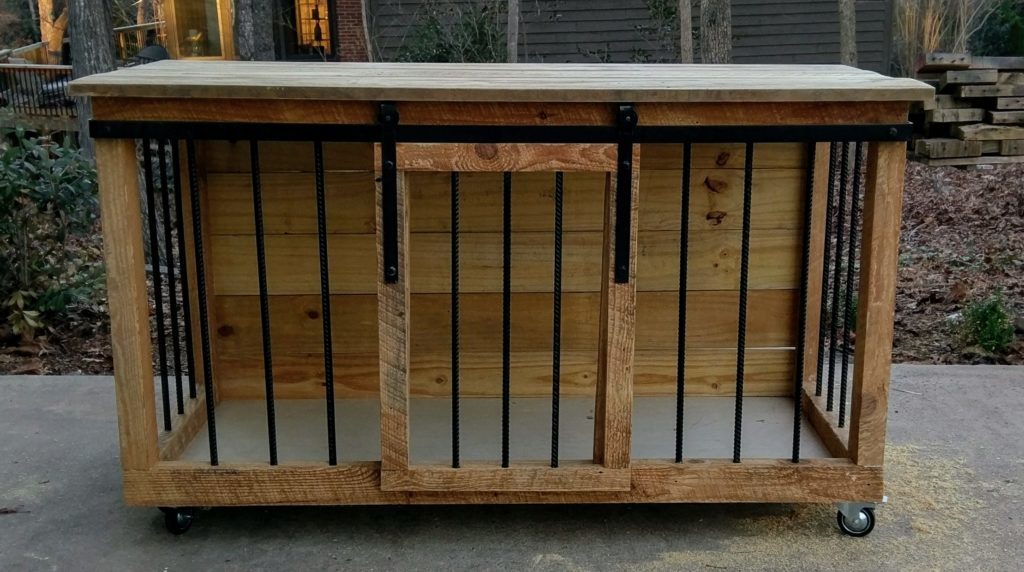
Here is a custom rustic barn wood dog crate we built for our friends – with the majority of the barn wood reclaimed from their own barn. The piece is approximately 36″ high, 60″ wide, and 29″ deep; with interior dimensions of 30″ x 56″ x 26″ – plenty of room for a large dog to move around and stretch out. Of course, it is on locking casters too so it can be easily moved around.
The frame of this piece is made from the reclaimed barn wood, which was 2 x 6 stock resawn down to 2 x 3. The sliding barn door also started as 2 x 6 material which we cut down to 1 x 2 stock. The barn door was the only piece of this where we used a Kreg jig and pocket hole screws. The rest of this custom rustic barn wood dog crate used miter joints for the front corner, while the back and bottom were attached in rabbets we cut in the outer frame.
The spindles are standard 1/2″ rebar, cut to the appropriate length and painted with a hammered black spray paint. They are are recessed about 1″ into the wooden frame to ensure the dog can’t push them out or crack the wood while leaning on them.
This custom rustic barn wood dog crate also includes custom, hand made barn door hardware we made ourselves. Yes, we do some metal work too! We made this barn door hardware from standard flat bar steel and pulley wheels. We even made custom clevis pins from 5/8″ steel rod to hold the wheels in place.
Estimated Time Investment
Weekend Project (10-20 Hours)
Finish Used
none. it's all natural
Recommended Skill Level
Intermediate
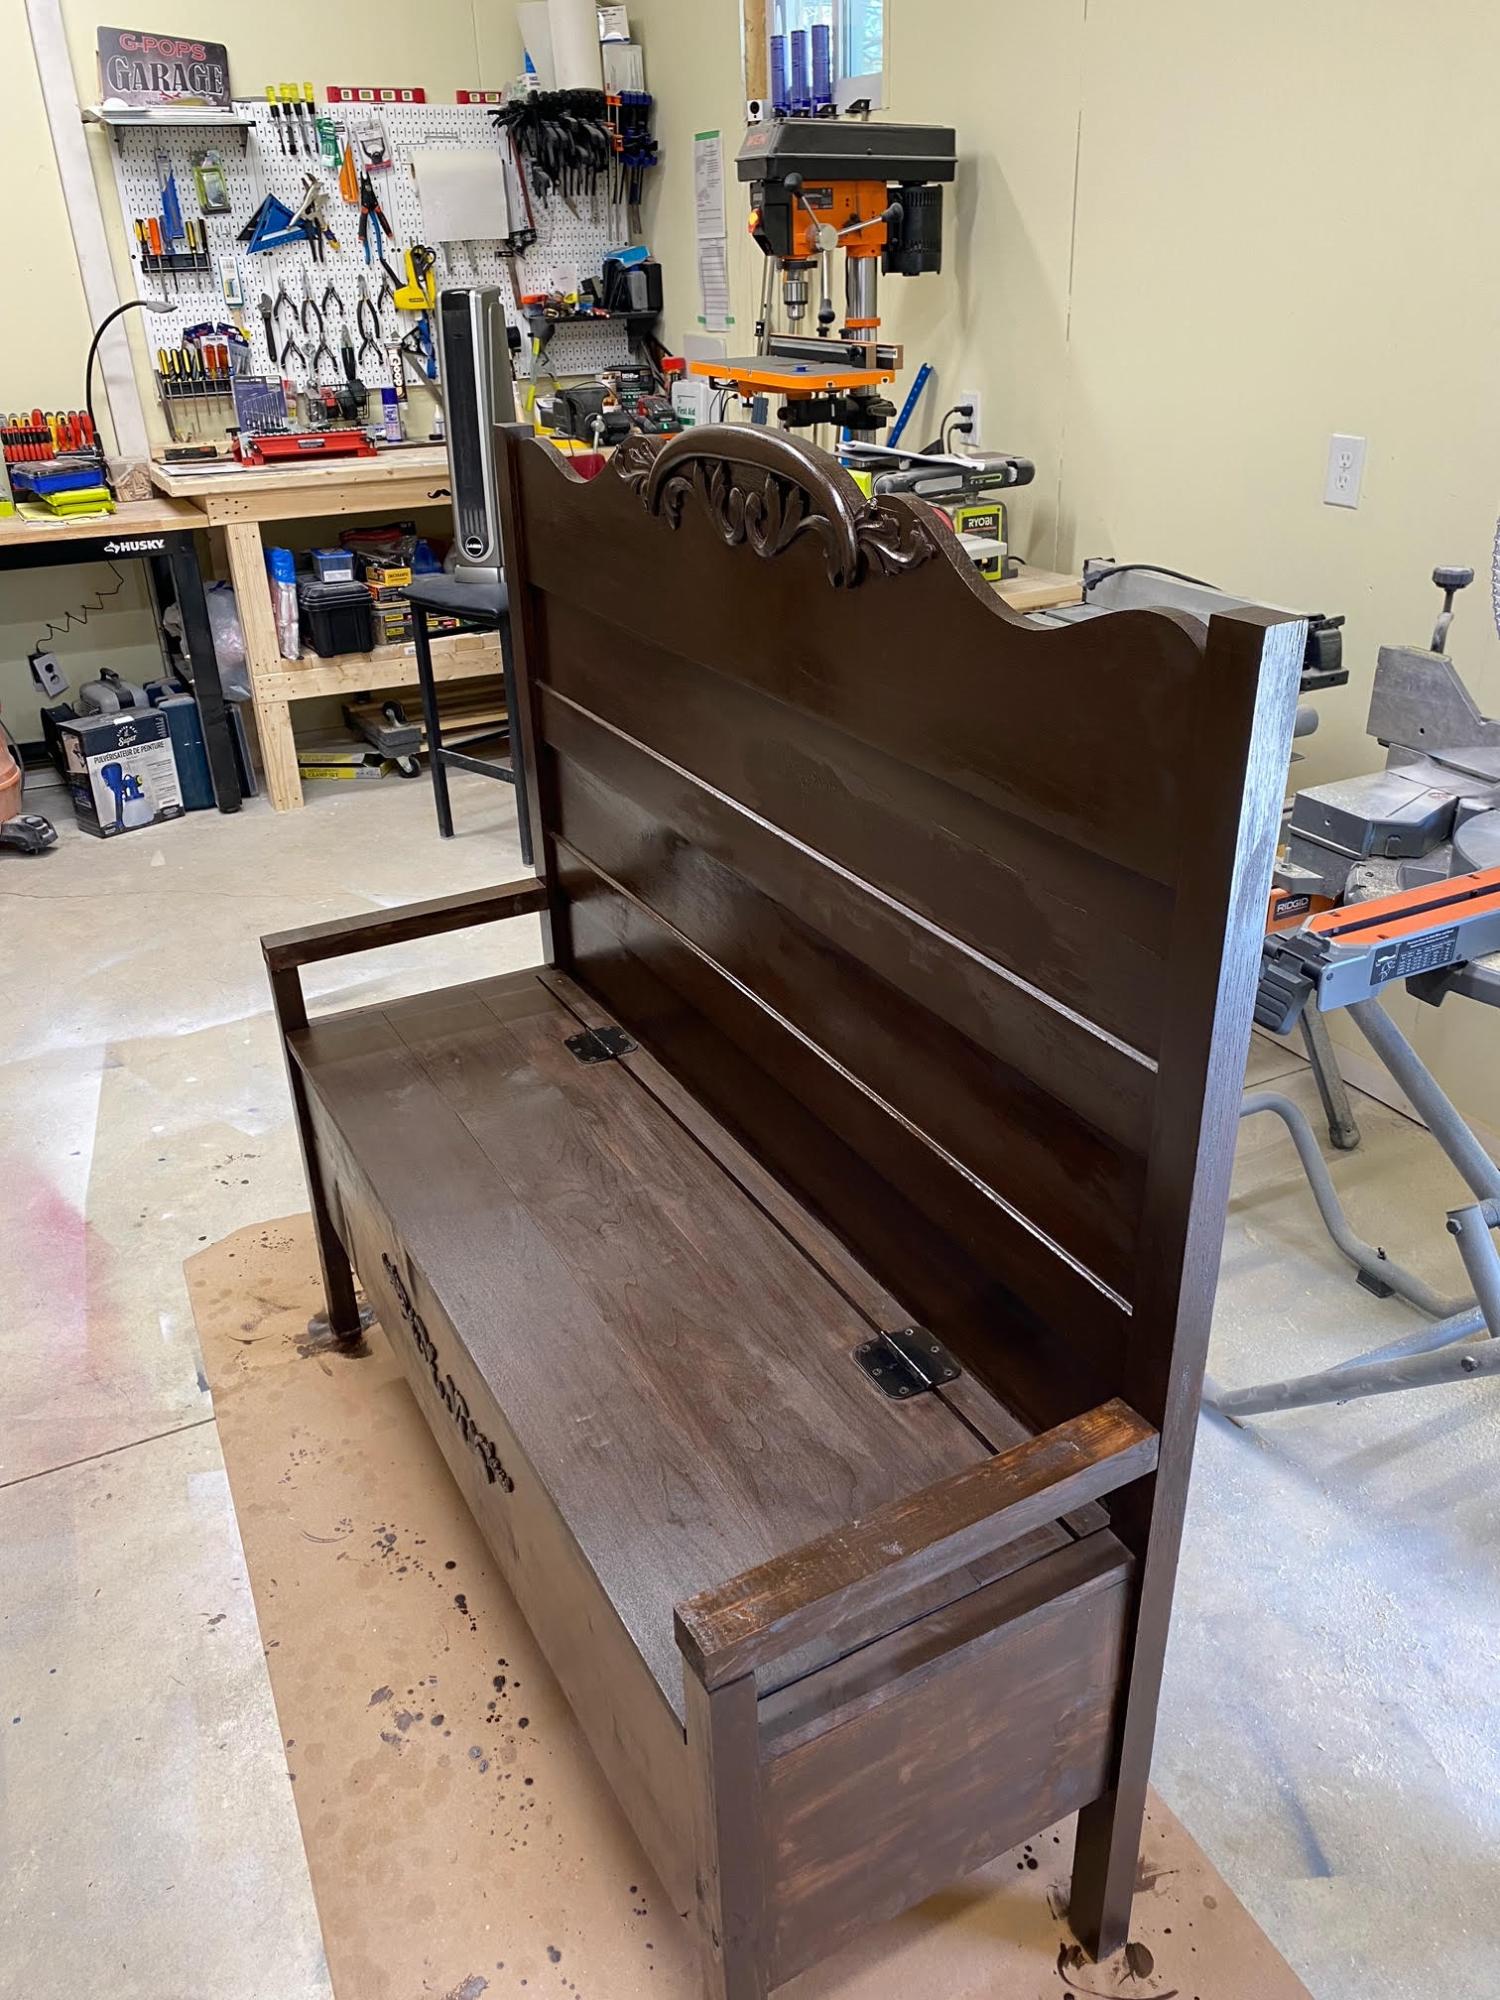
Barn Door Console
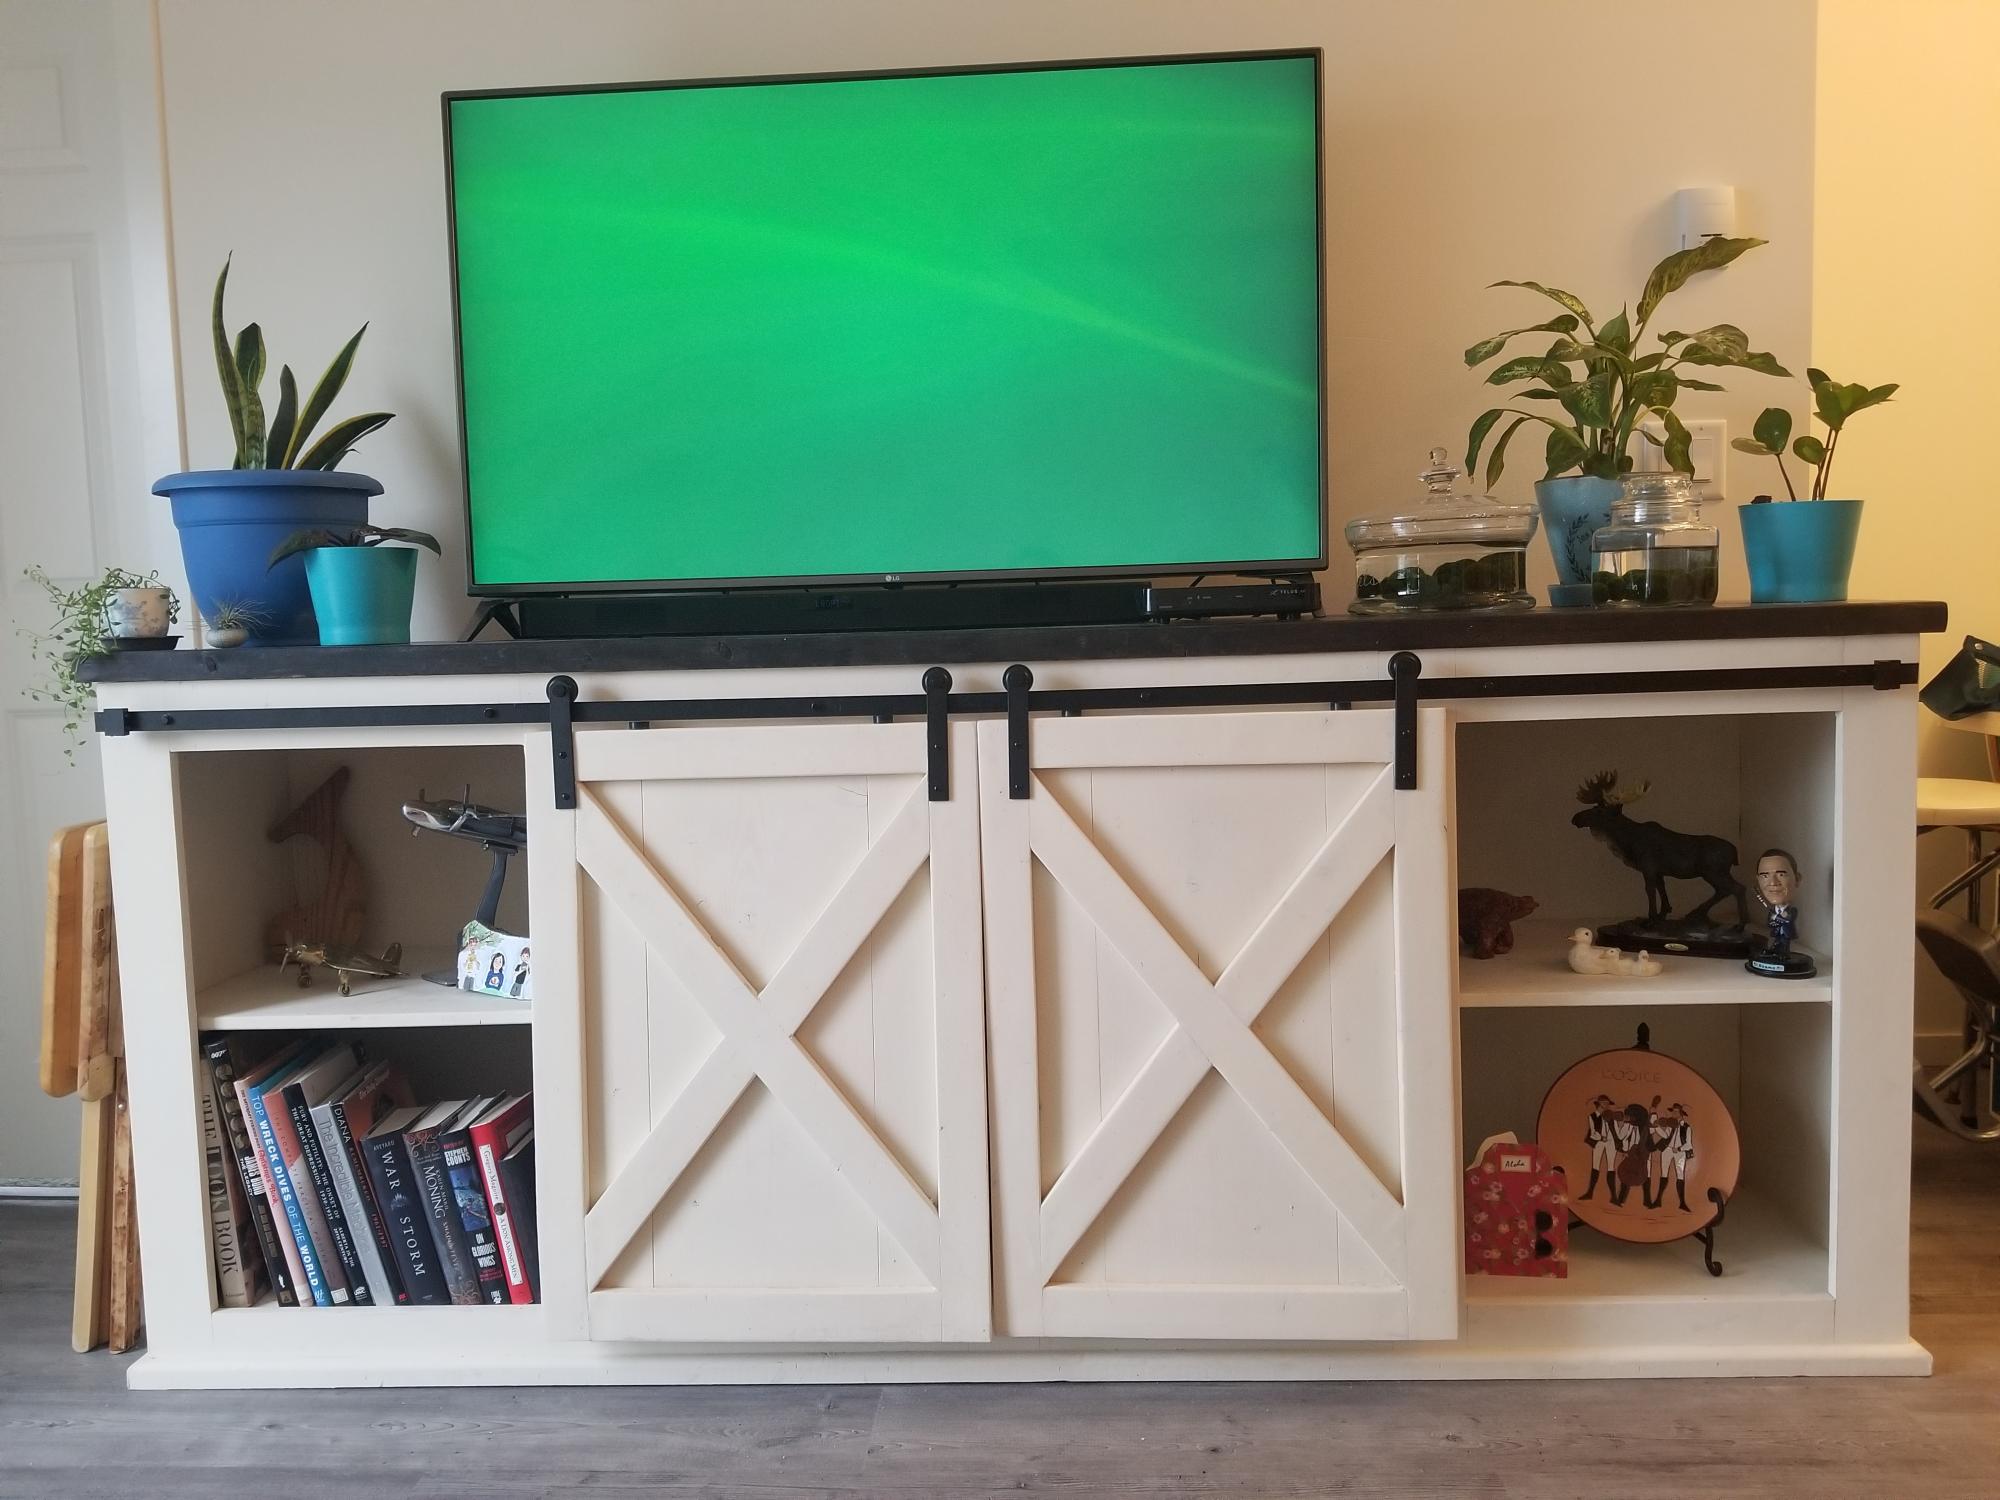
Barn Door Console by David!
Built from Plan(s)
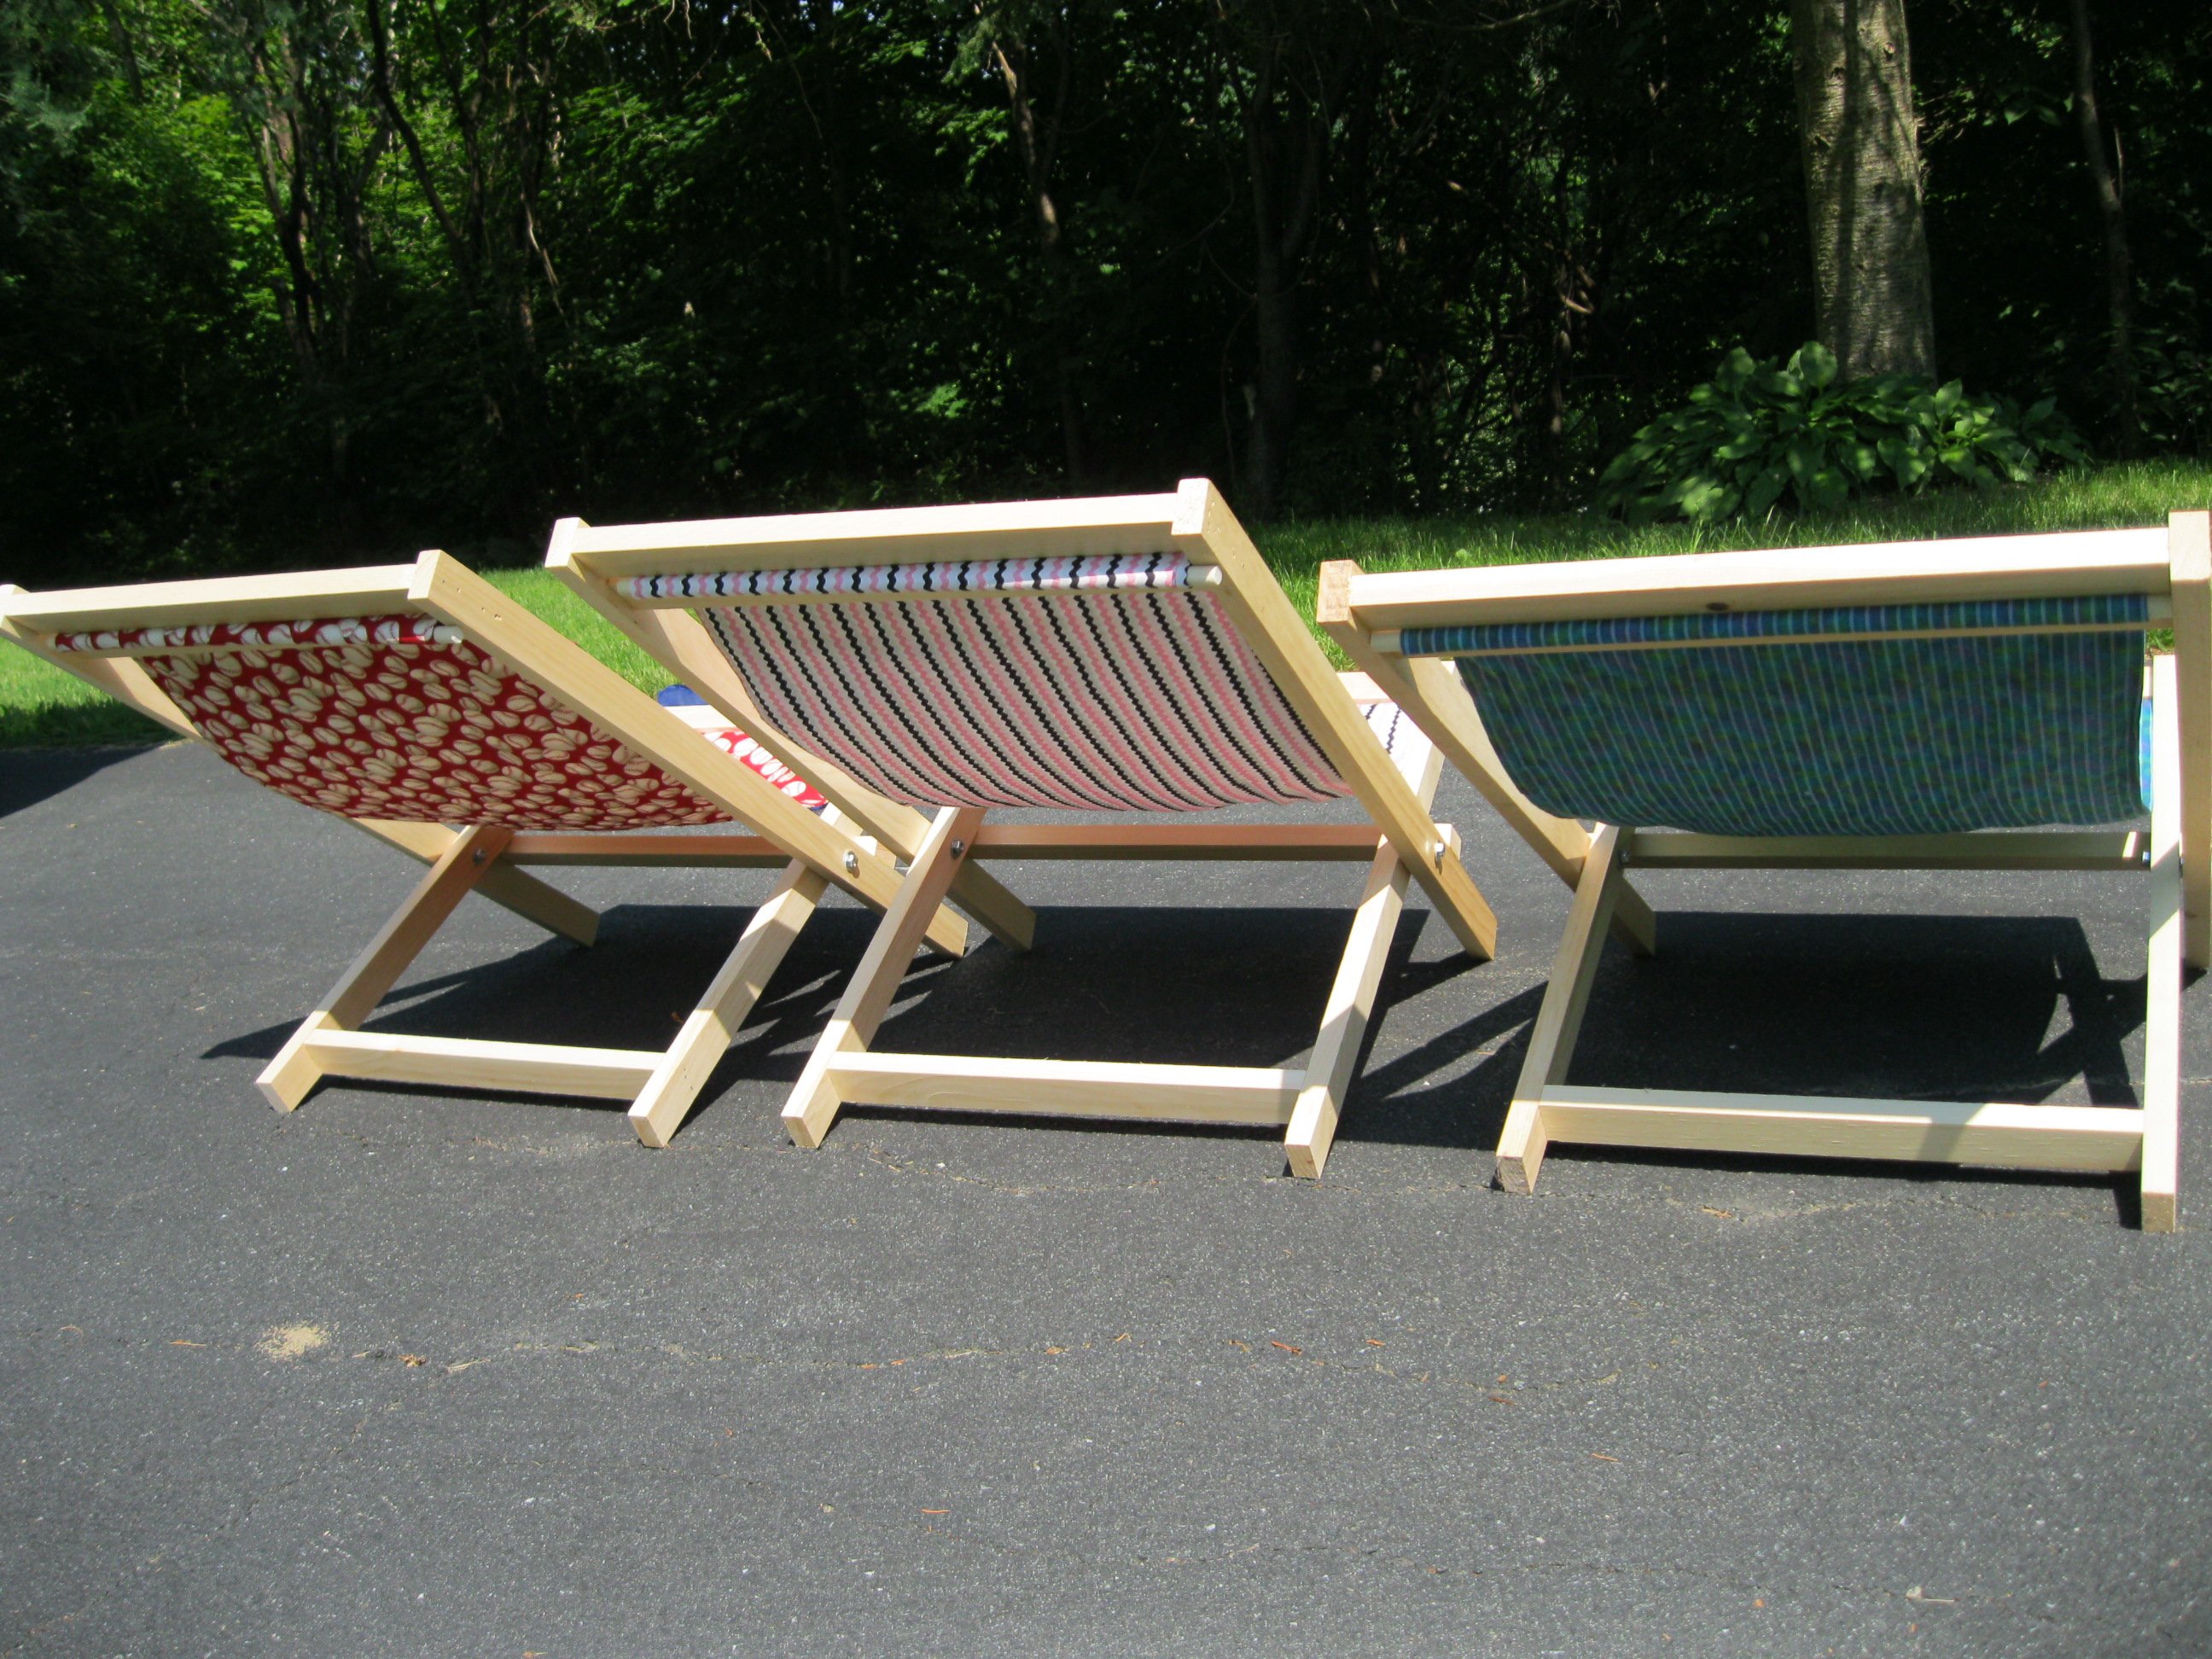
Three Little Sling Chairs
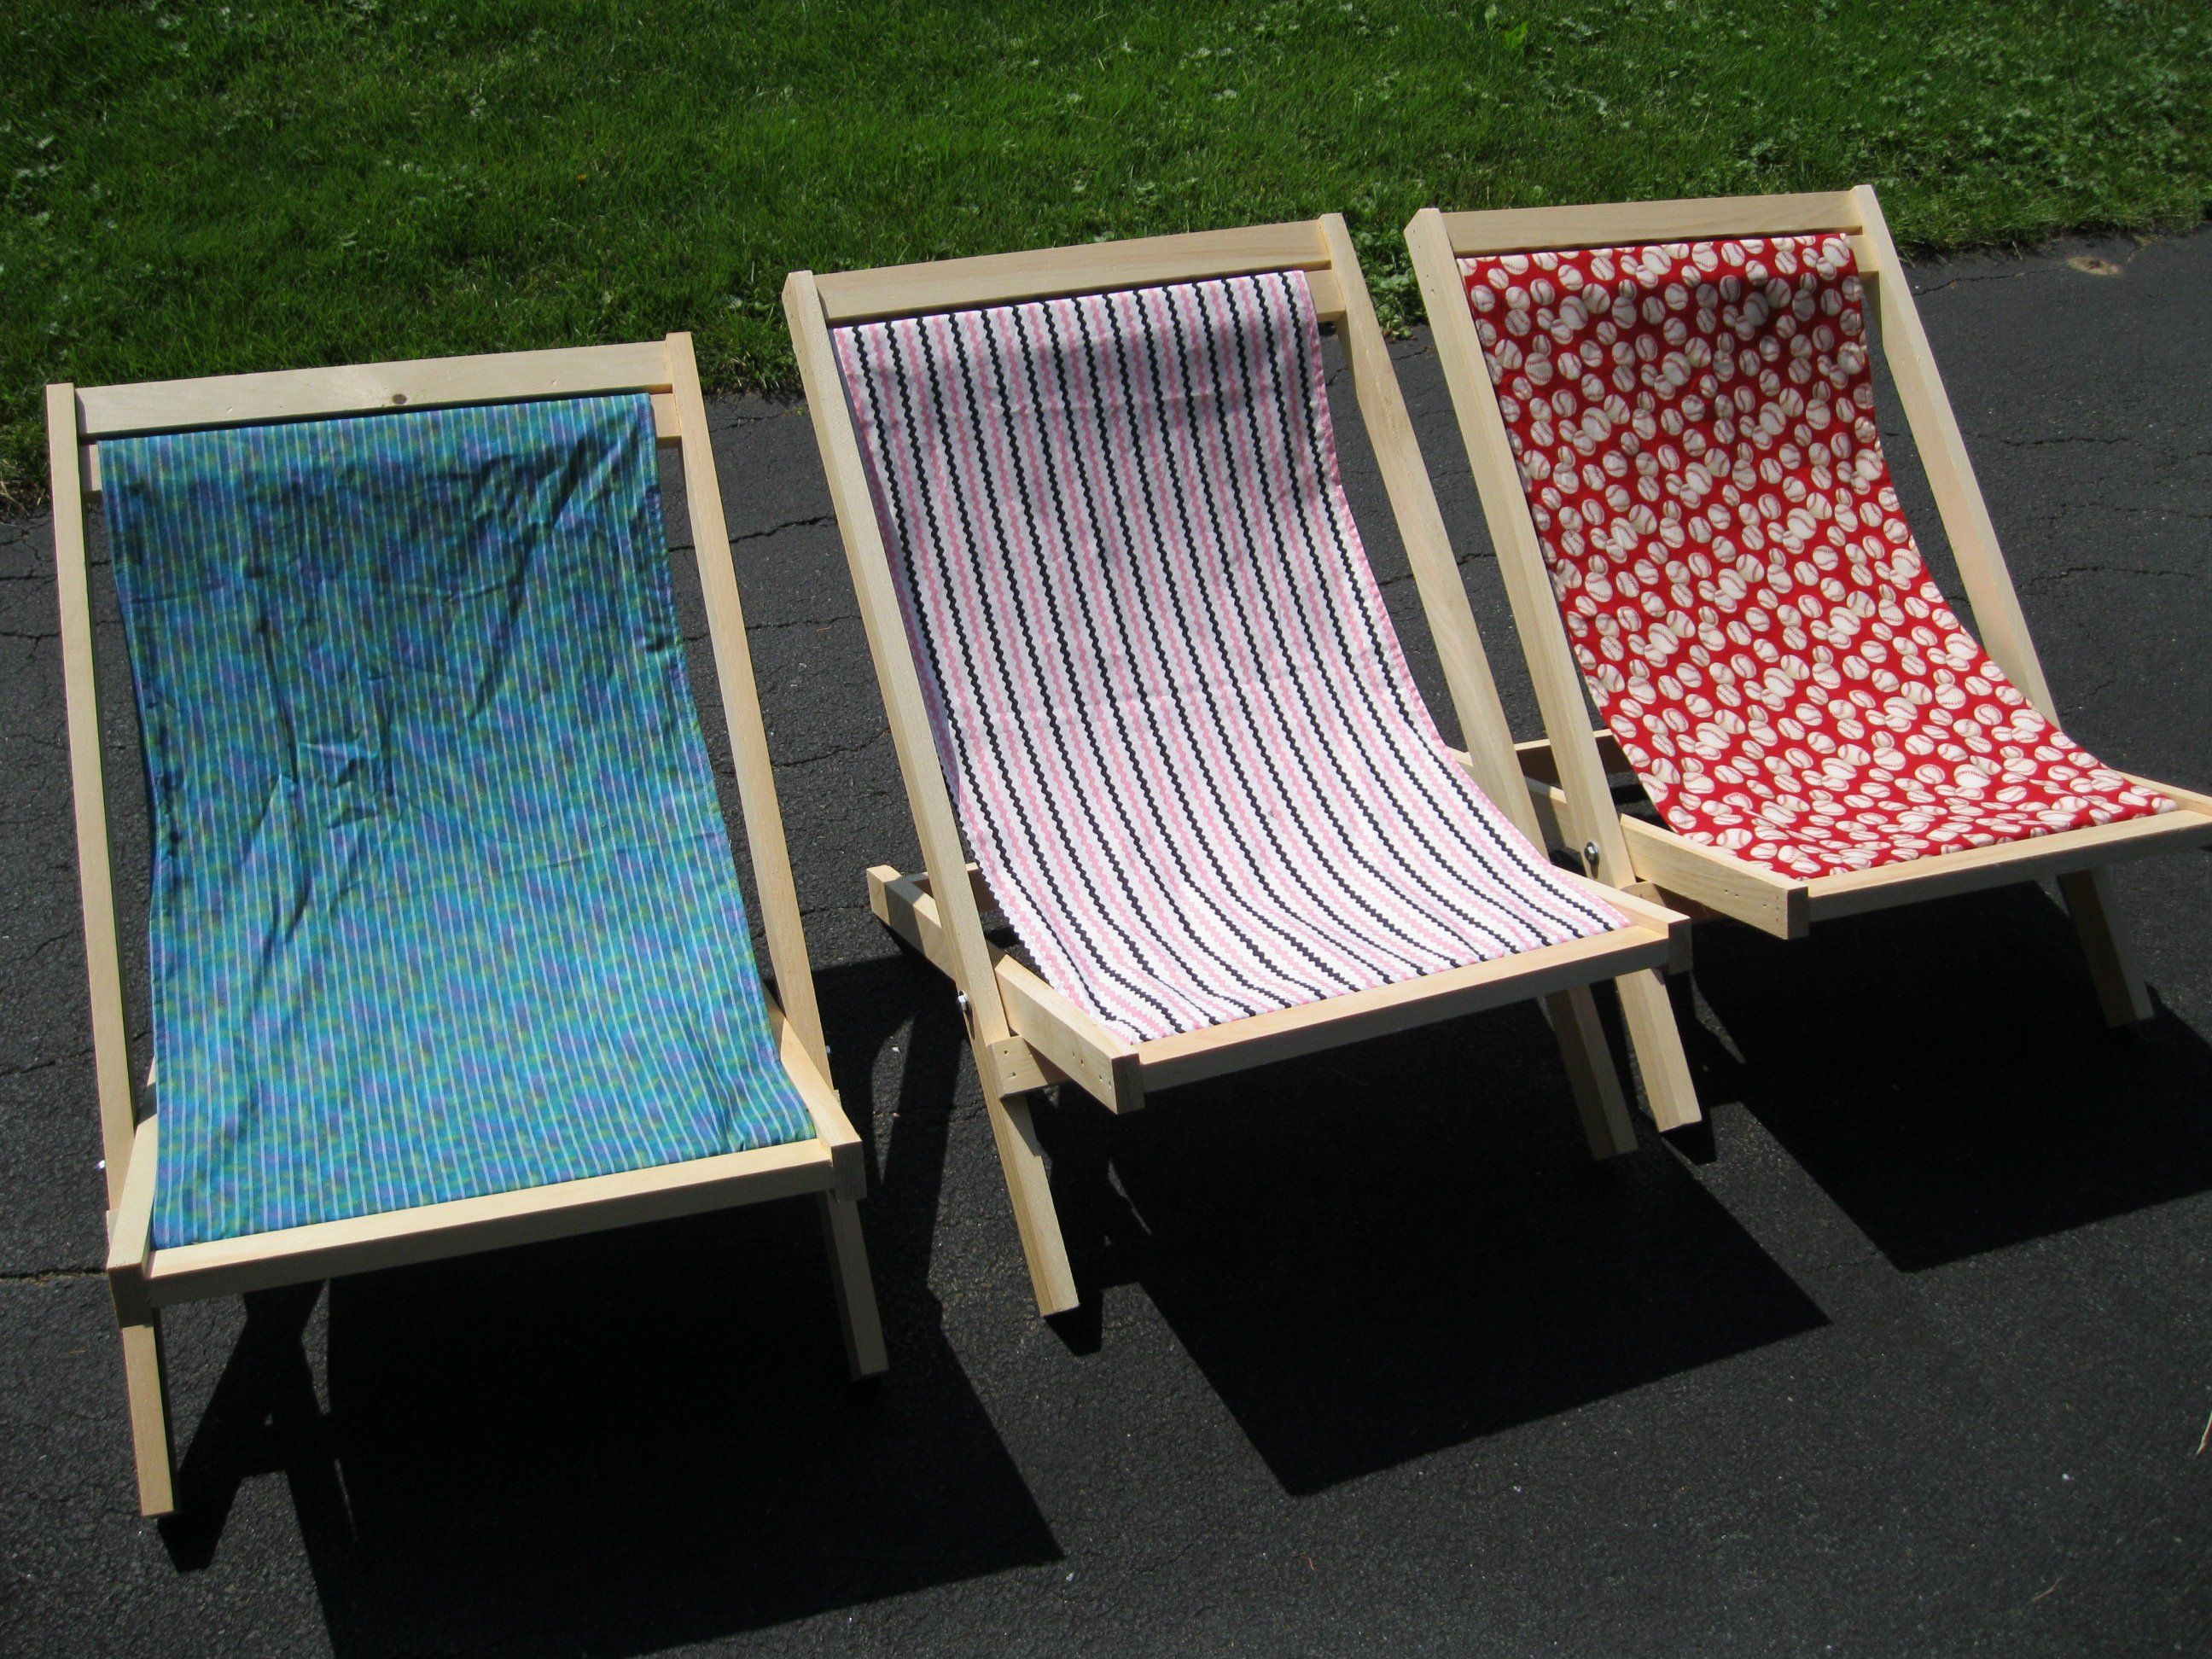
My first non-home-repair project. Made three of the sling chairs for my kids. They each picked out their own fabric (regular fabric). We still have not sanded, filled and painted but are hoping to do so this weekend. The kids were very excited to have them. I have been reading your website for months now wishing I had time to make something, and these chairs fit the bill. Thank you!

Estimated Time Investment
Afternoon Project (3-6 Hours)
Finish Used
Still unfinished. Undecided on how we are going to do each chair.
Recommended Skill Level
Starter Project
Comments
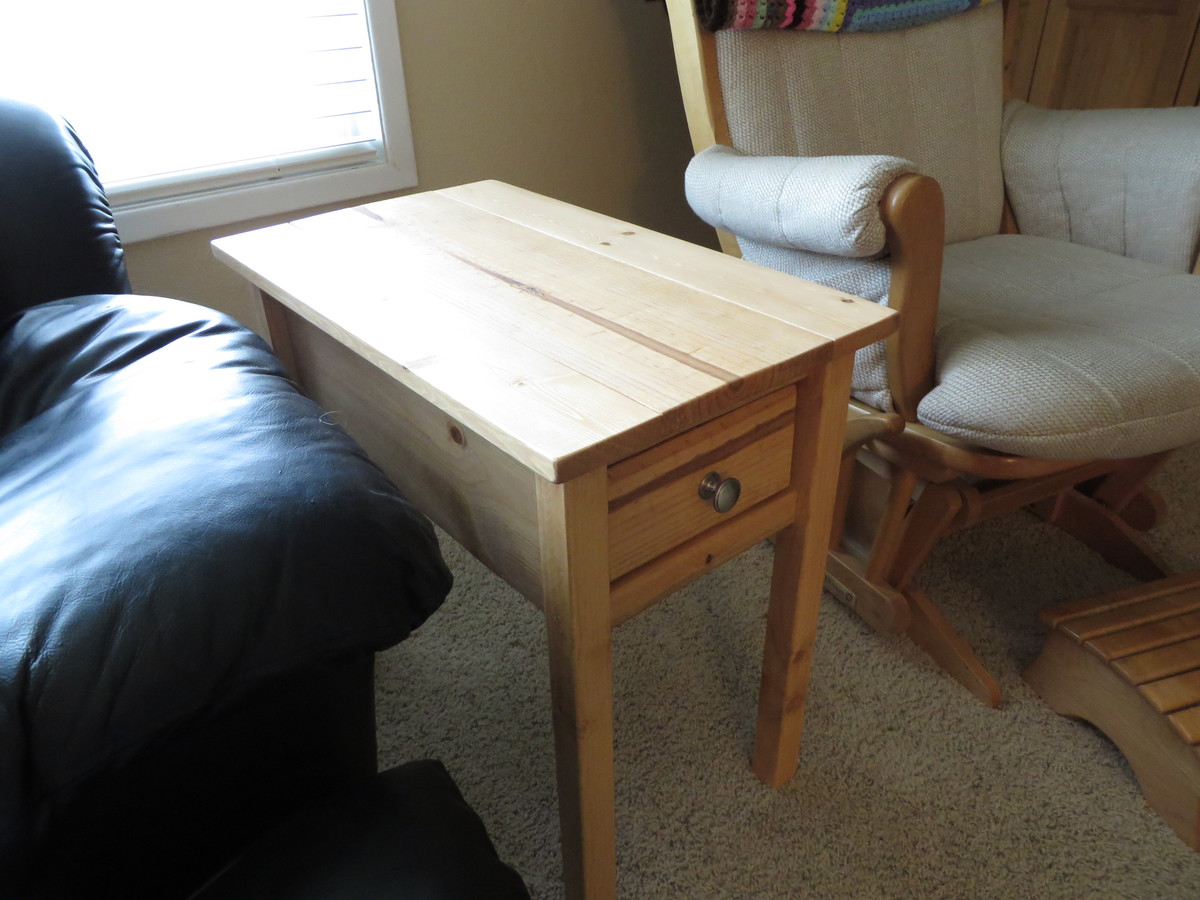
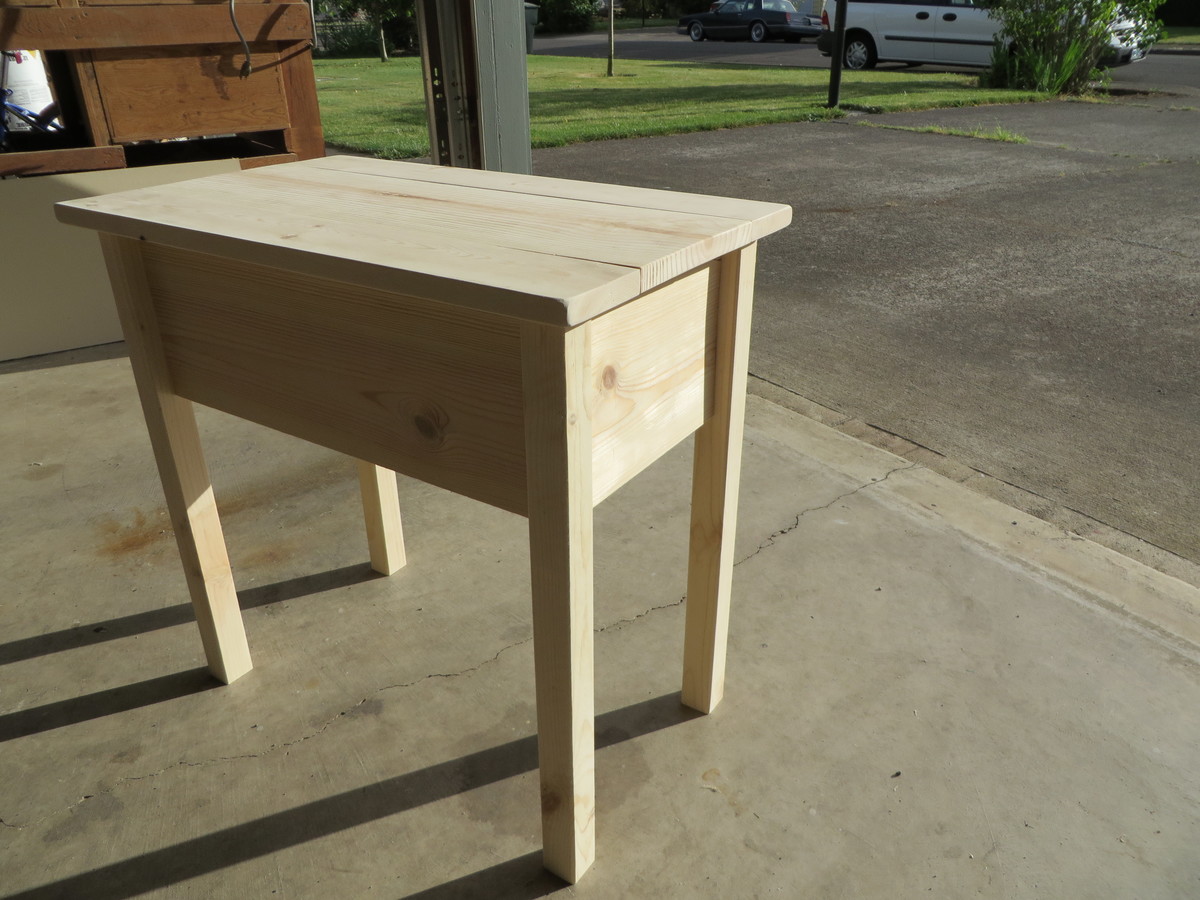
Narrow Cottage End Table

I built matching side tables using Ana's Narrow Cottage End Table plan. I changed the height to suit the arms of my furniture. They fit our tight space and look fantastic with our existing wood pieces. Very easy to build, even the drawers! I used a router to finish the edge on the drawers, to make them stand out a little more. I learned to put my pocket holes on the outside of the drawer, since the back one is in the back, and the front one is covered by the separate drawer front piece. A Kreg jig makes this a very simple project. Also, I sanded my boards before assembly, then did touch-ups before finishing the project.
Built from Plan(s)
Estimated Cost
$50 total for two
Estimated Time Investment
Day Project (6-9 Hours)
Finish Used
One coat Minwax Ipswich Pine Stain. One coat Minwax finishing paste, hand rubbed.
Recommended Skill Level
Intermediate
Stackable Children Chairs
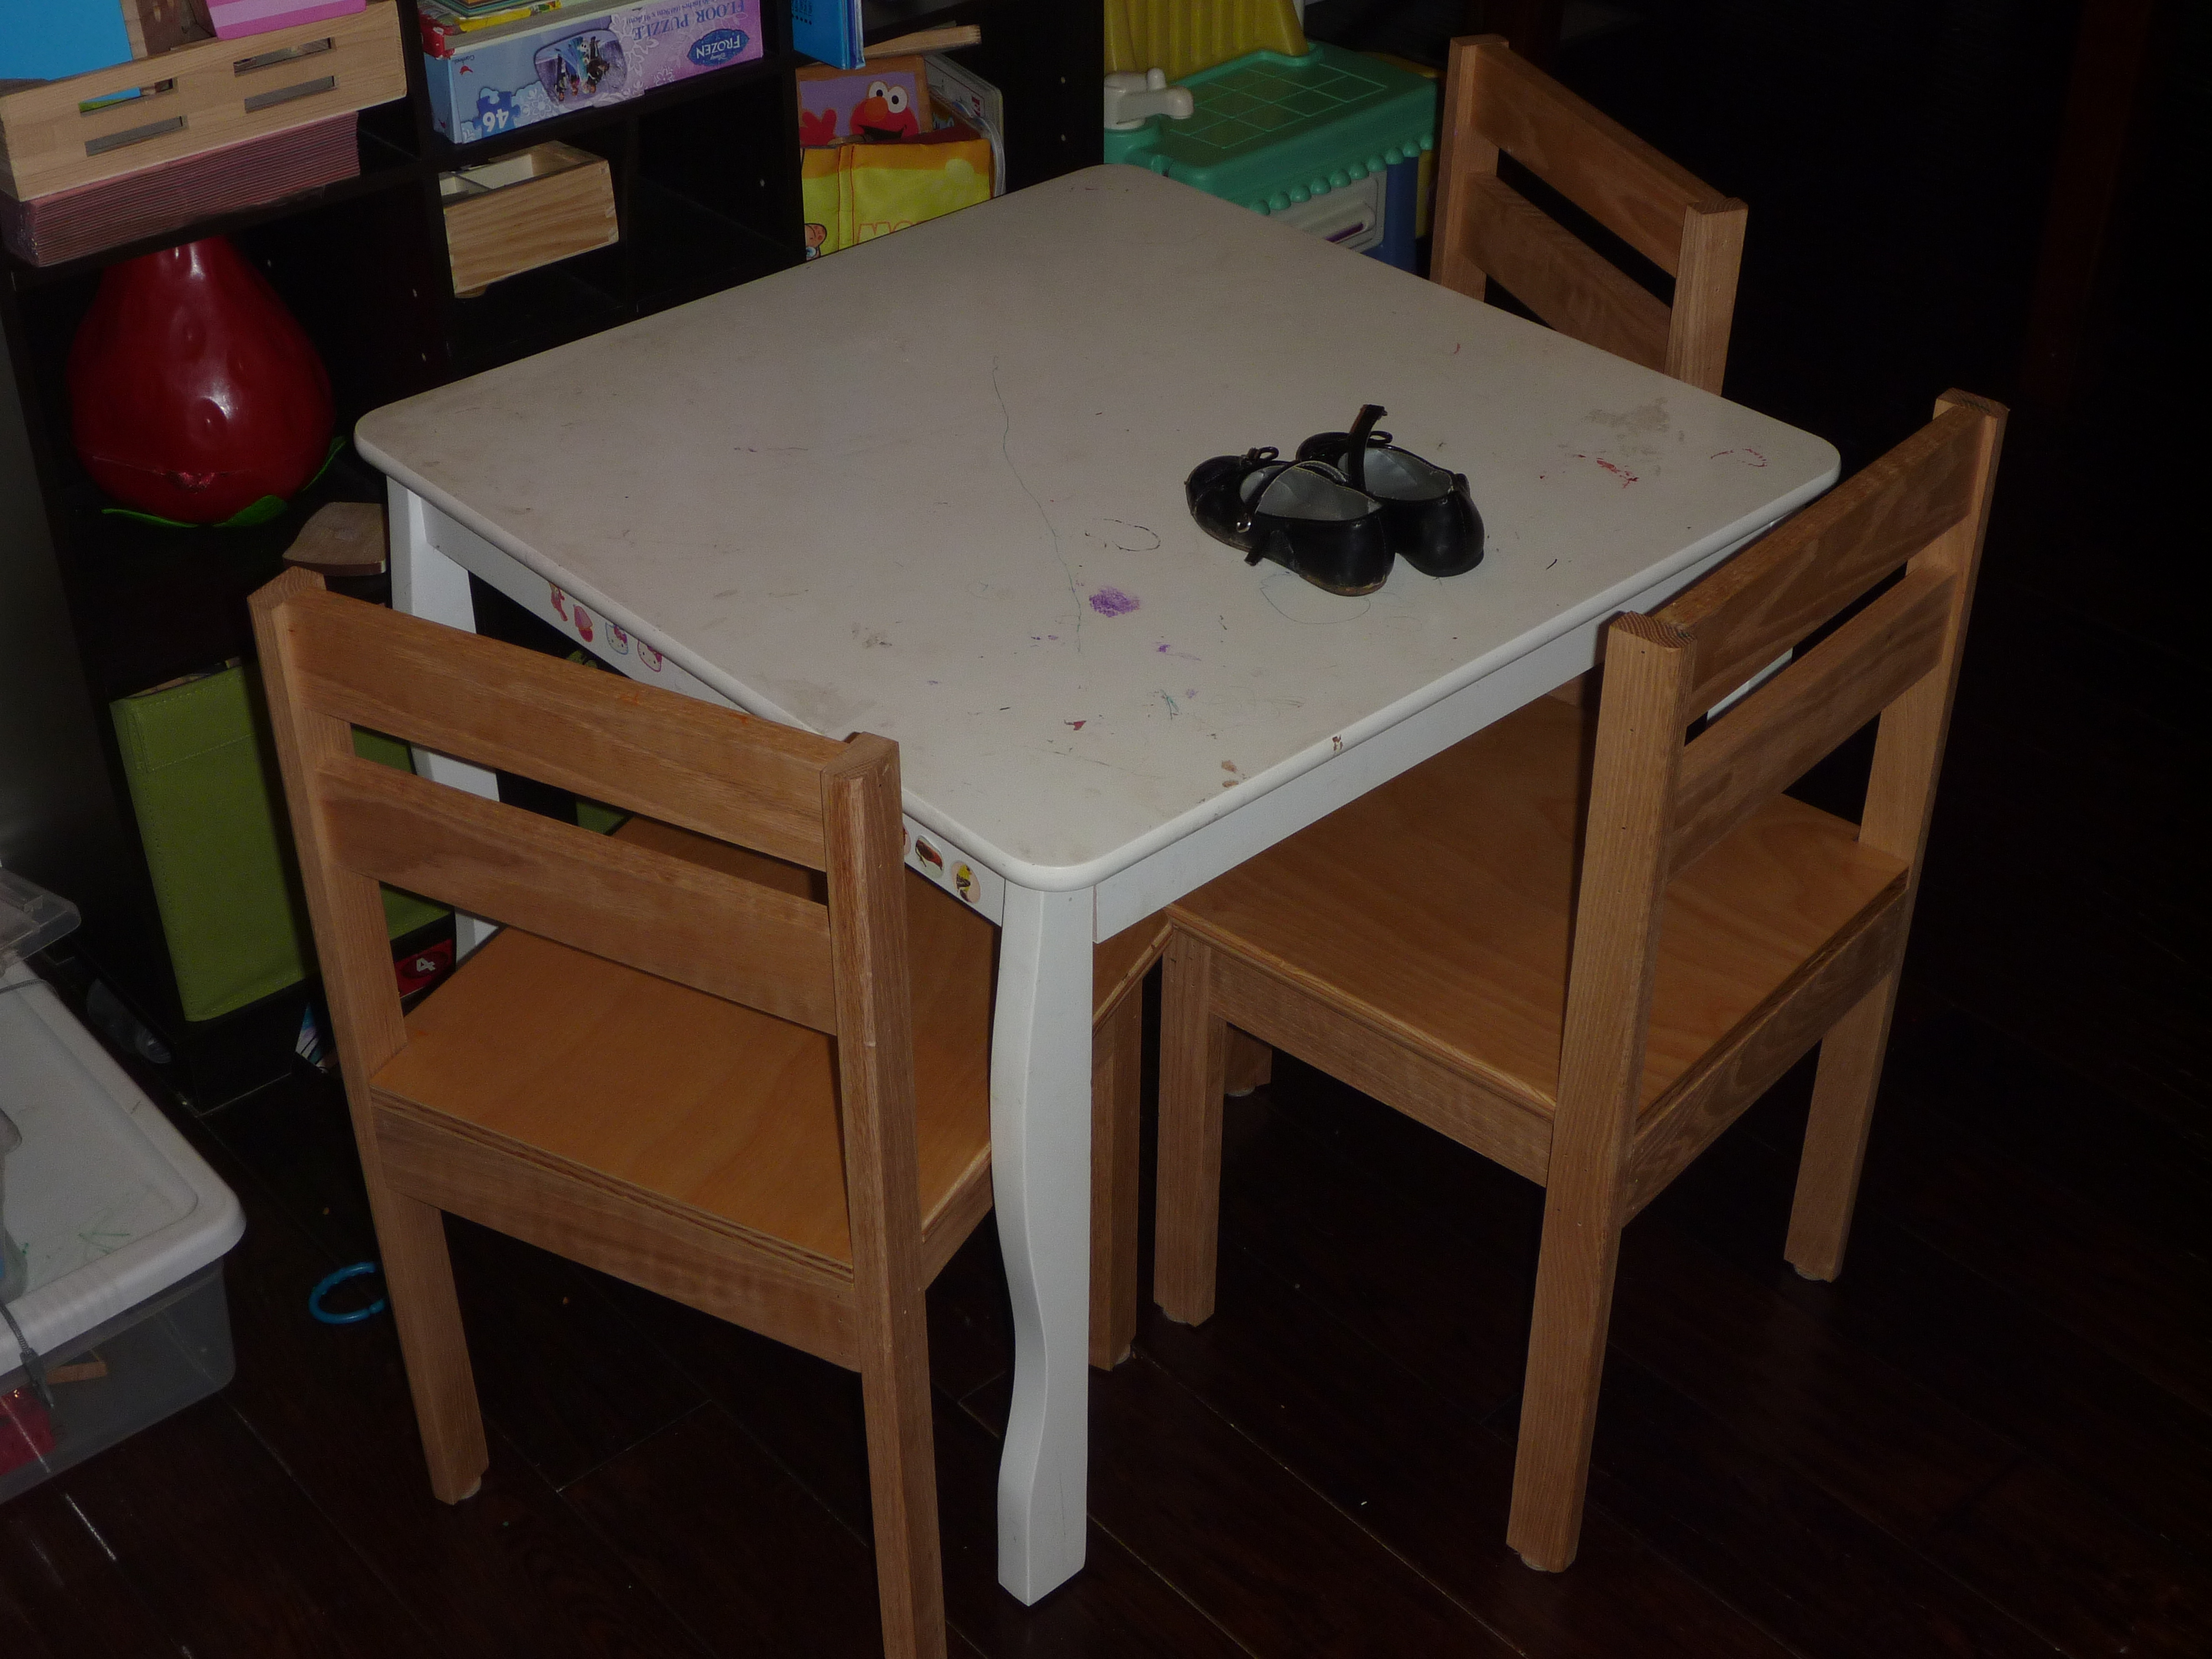
We had some additional kids coming over and I needed to build them quickly.
Built from Plan(s)
Estimated Time Investment
Day Project (6-9 Hours)
Recommended Skill Level
Beginner
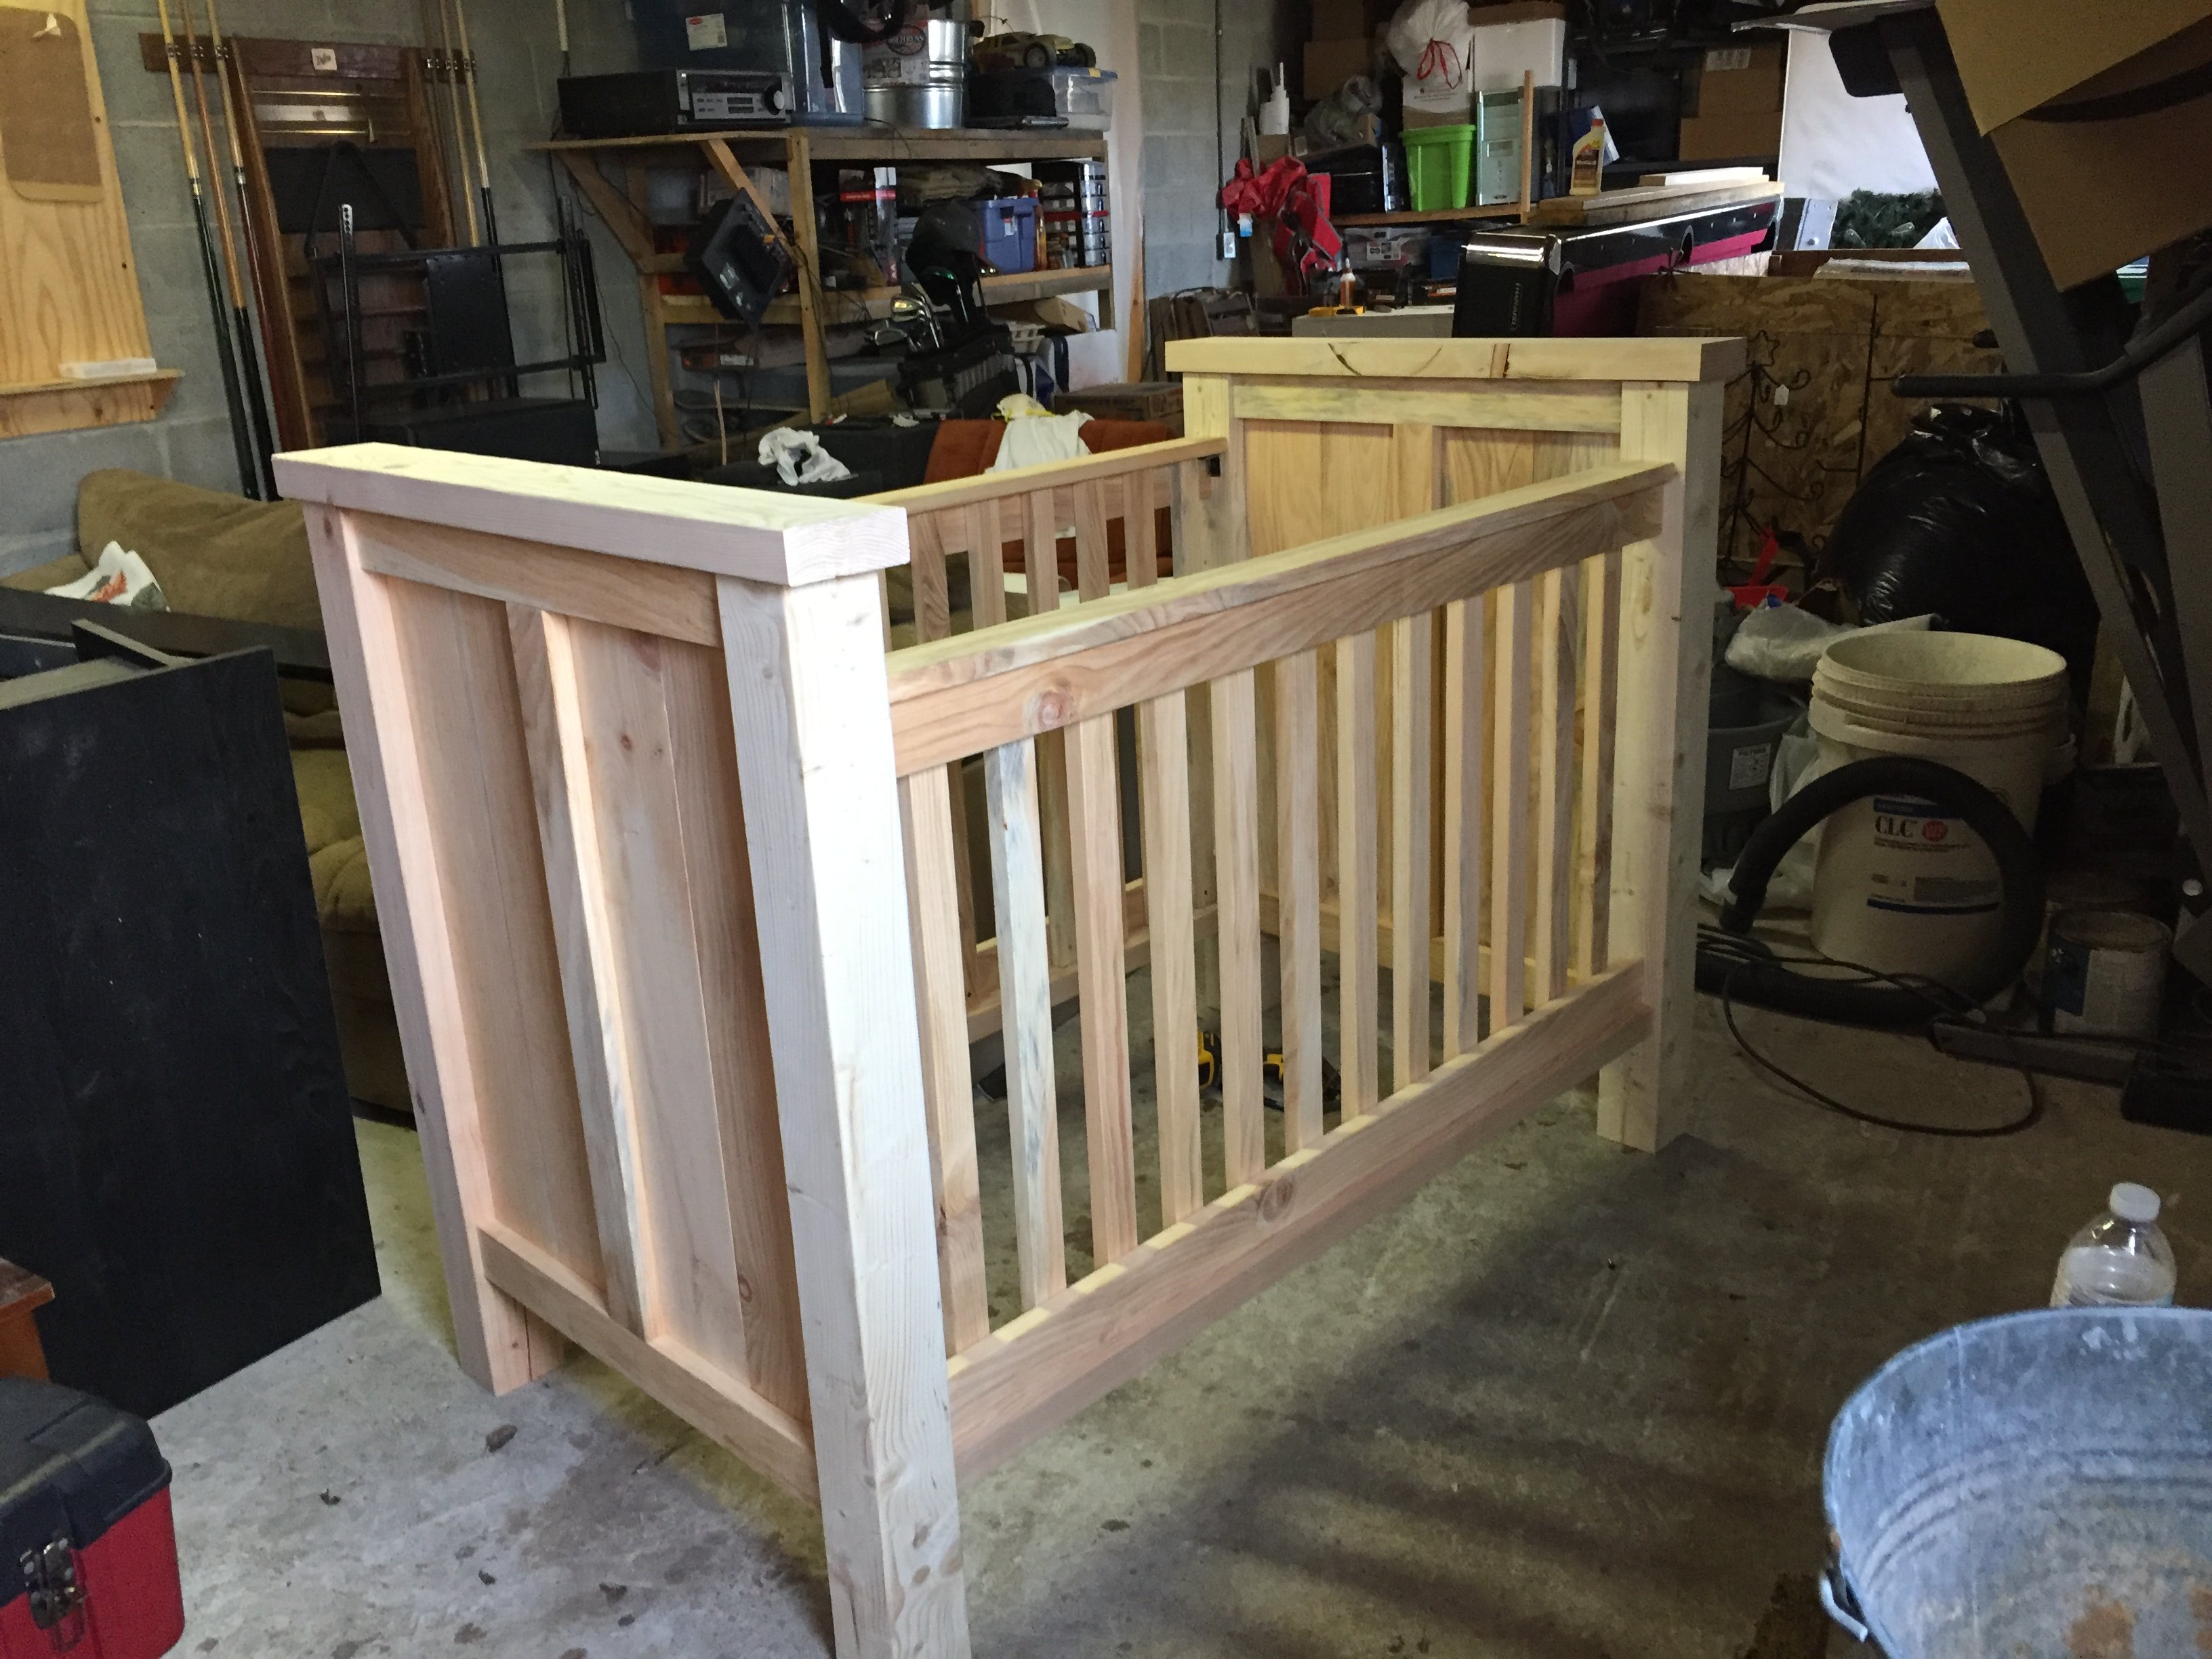
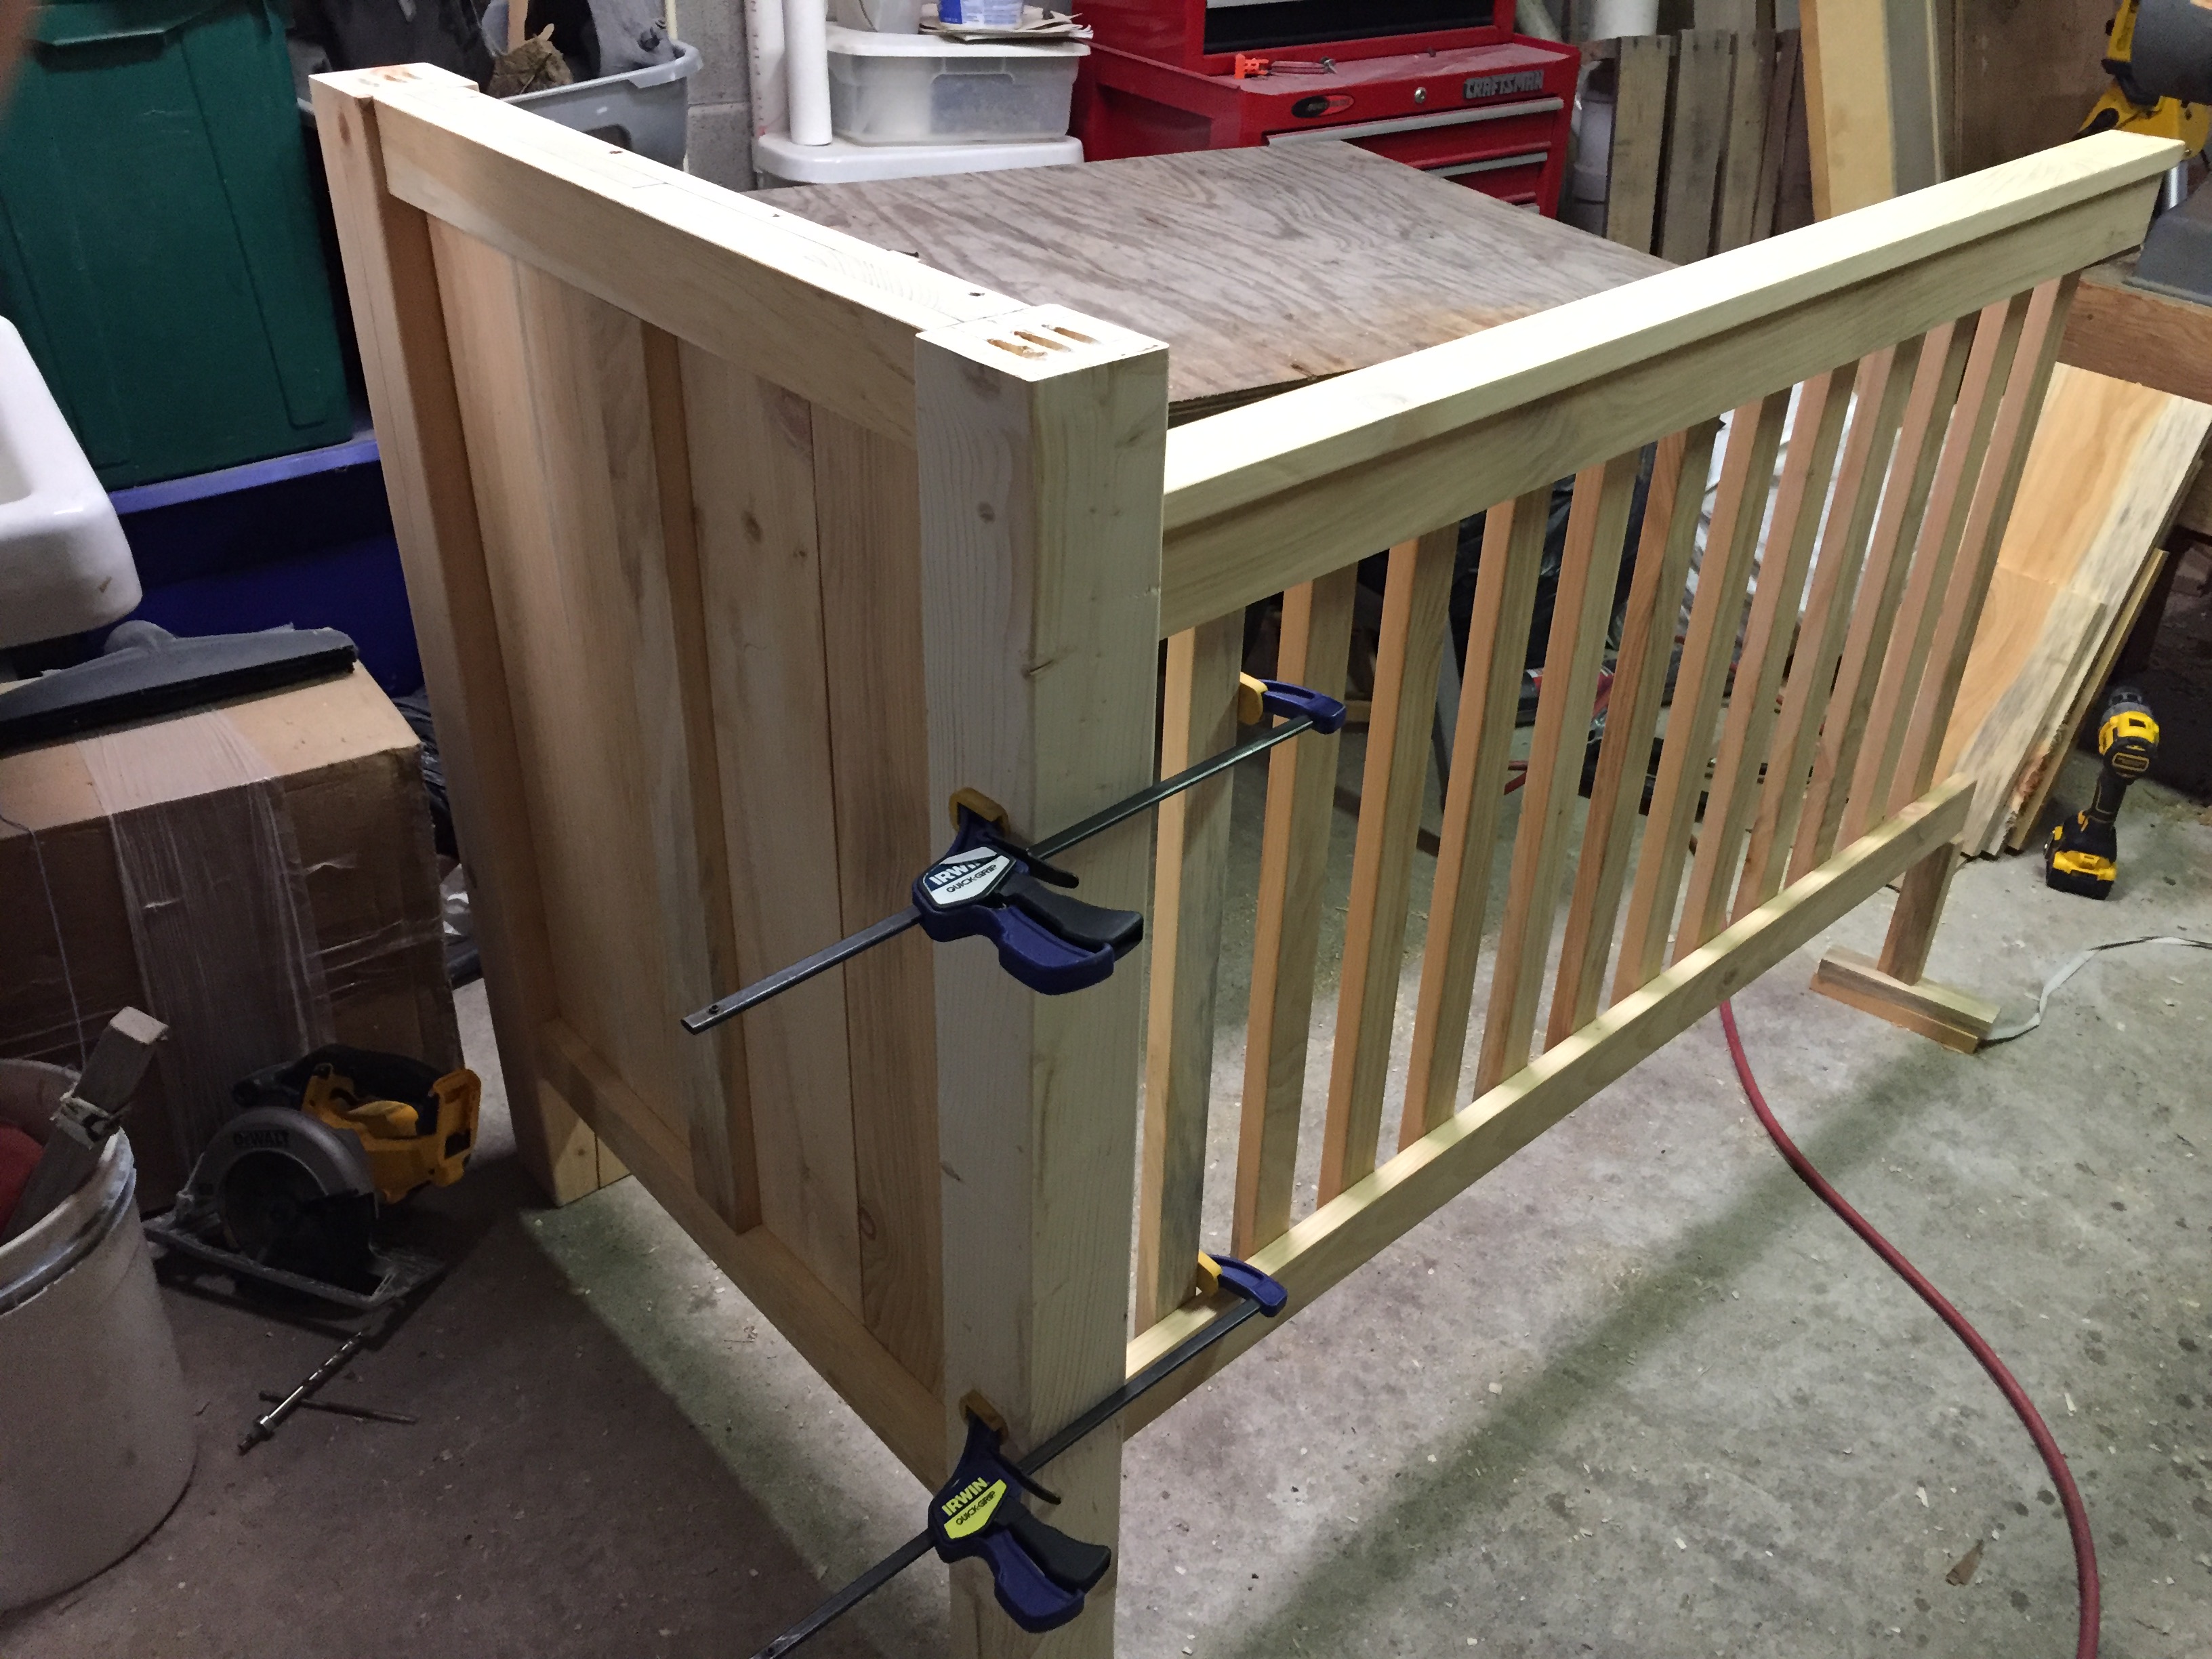
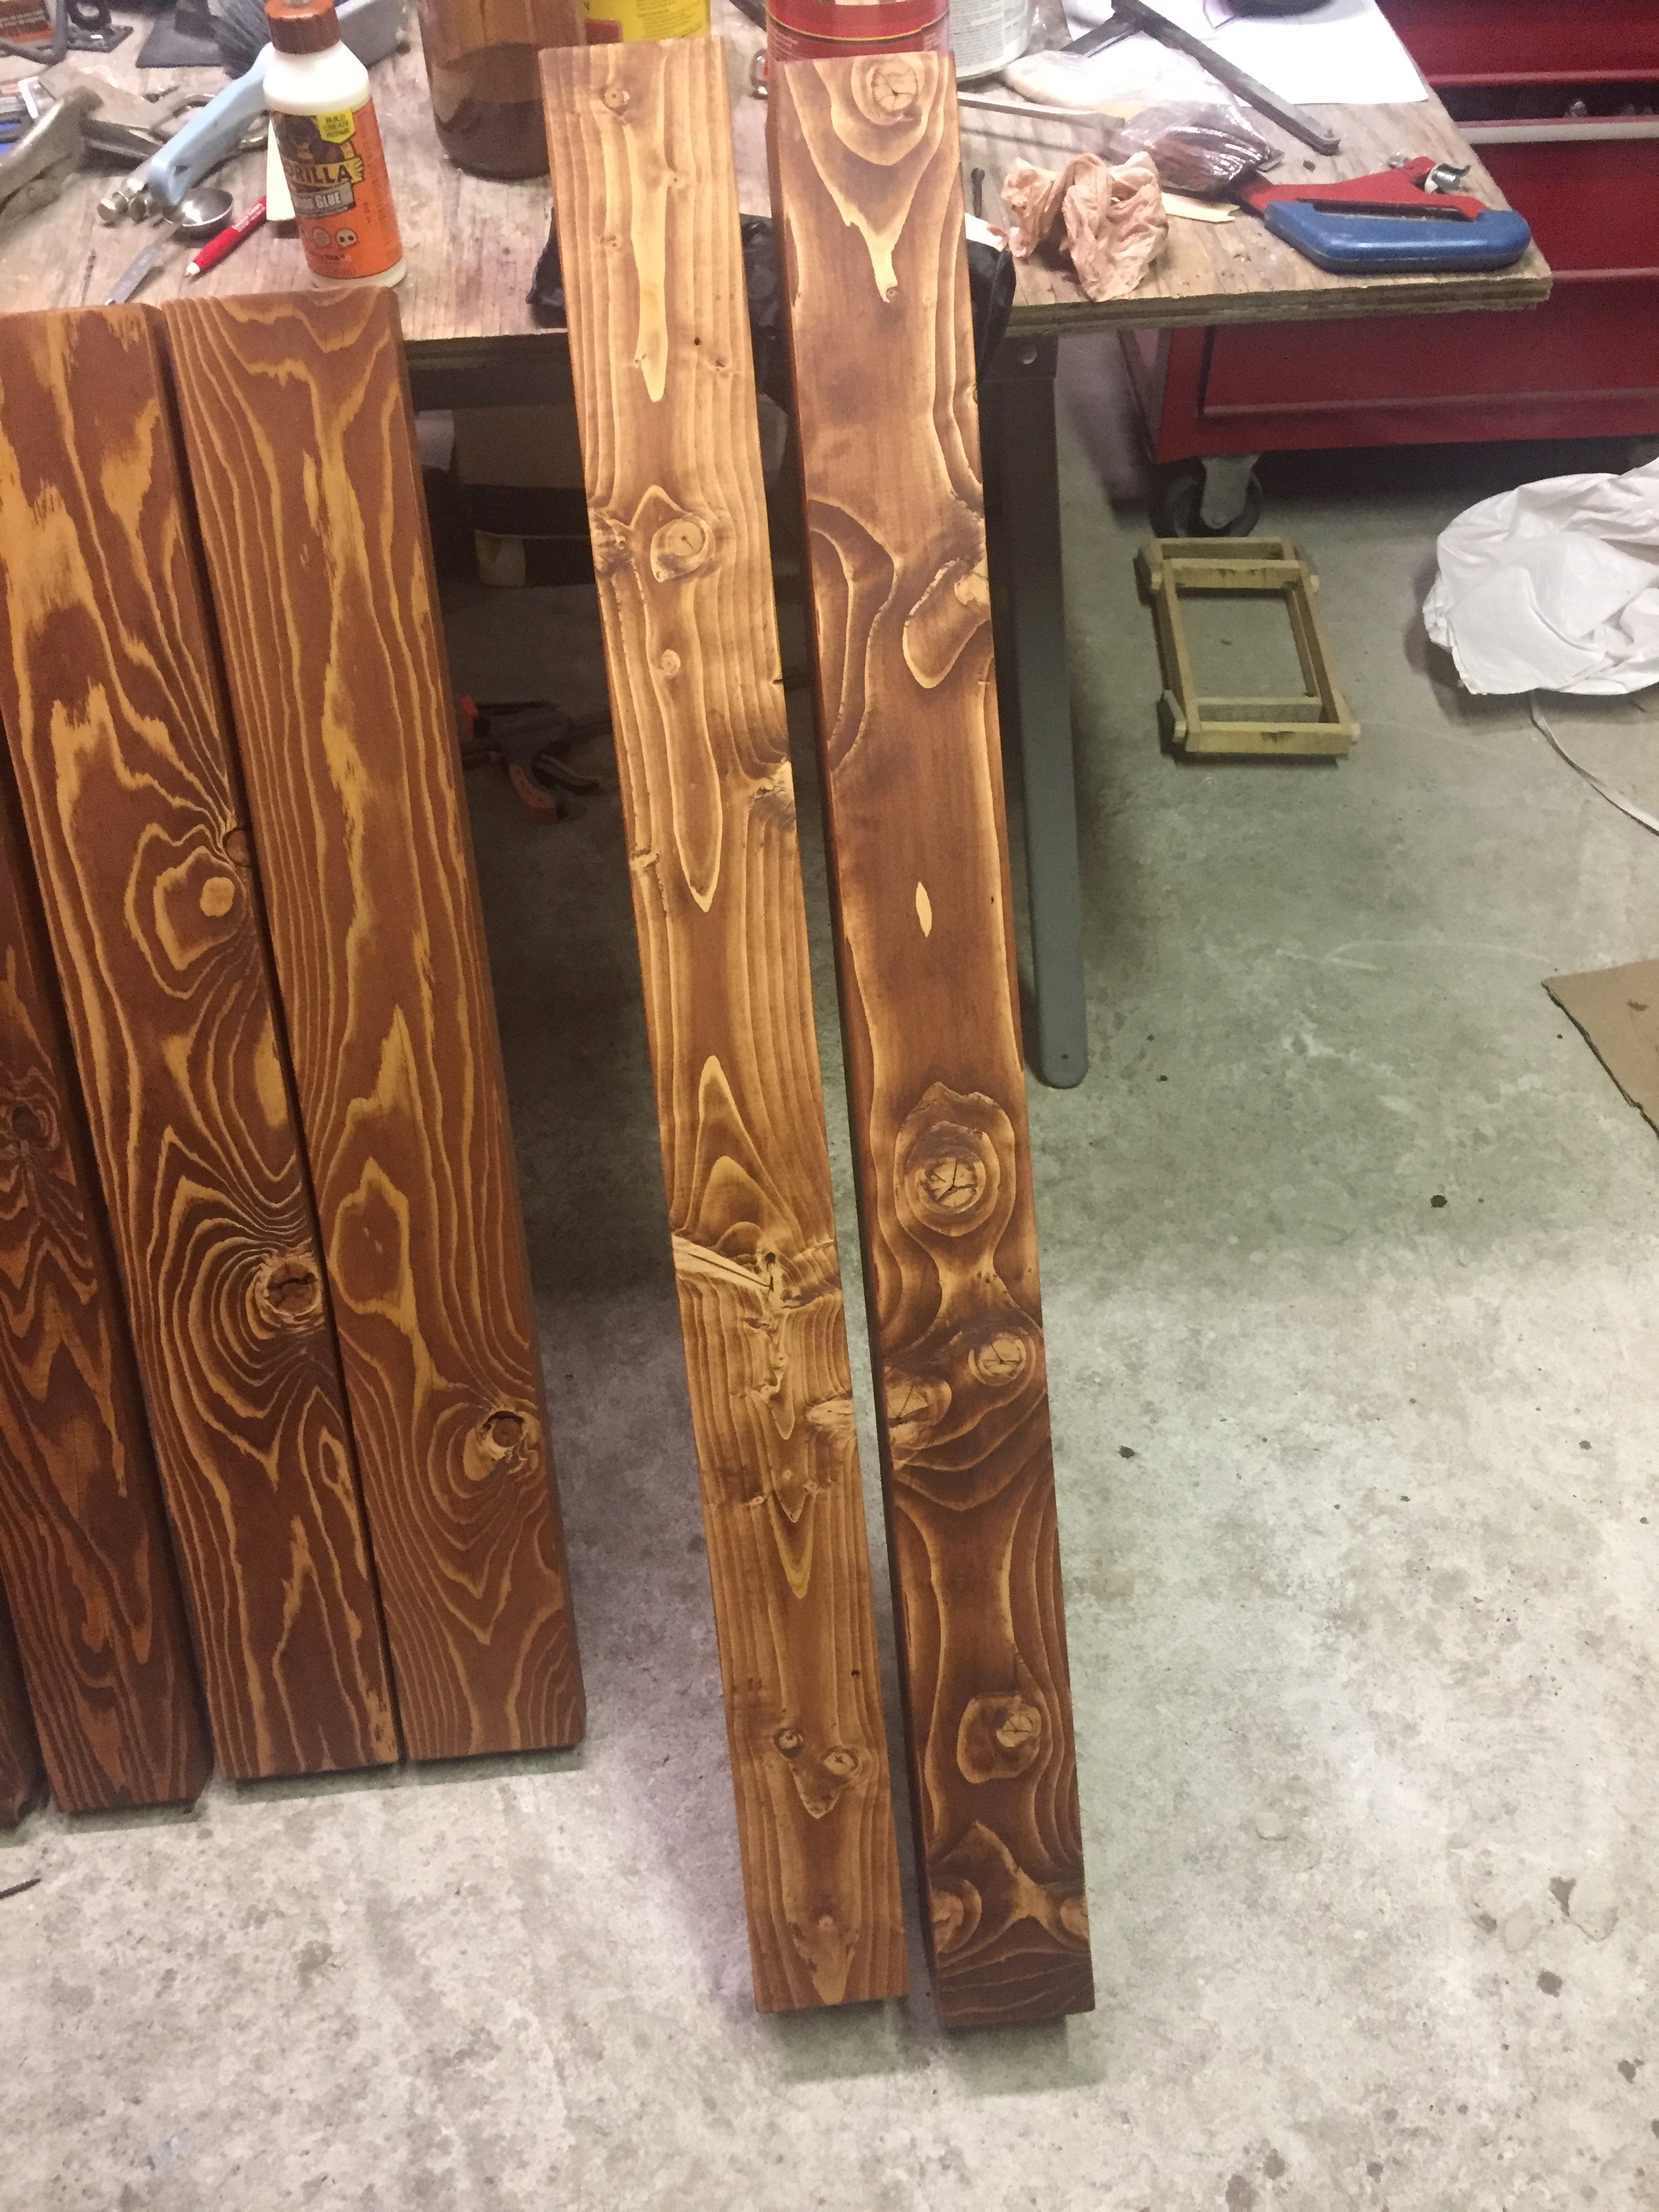
Crib for new baby!
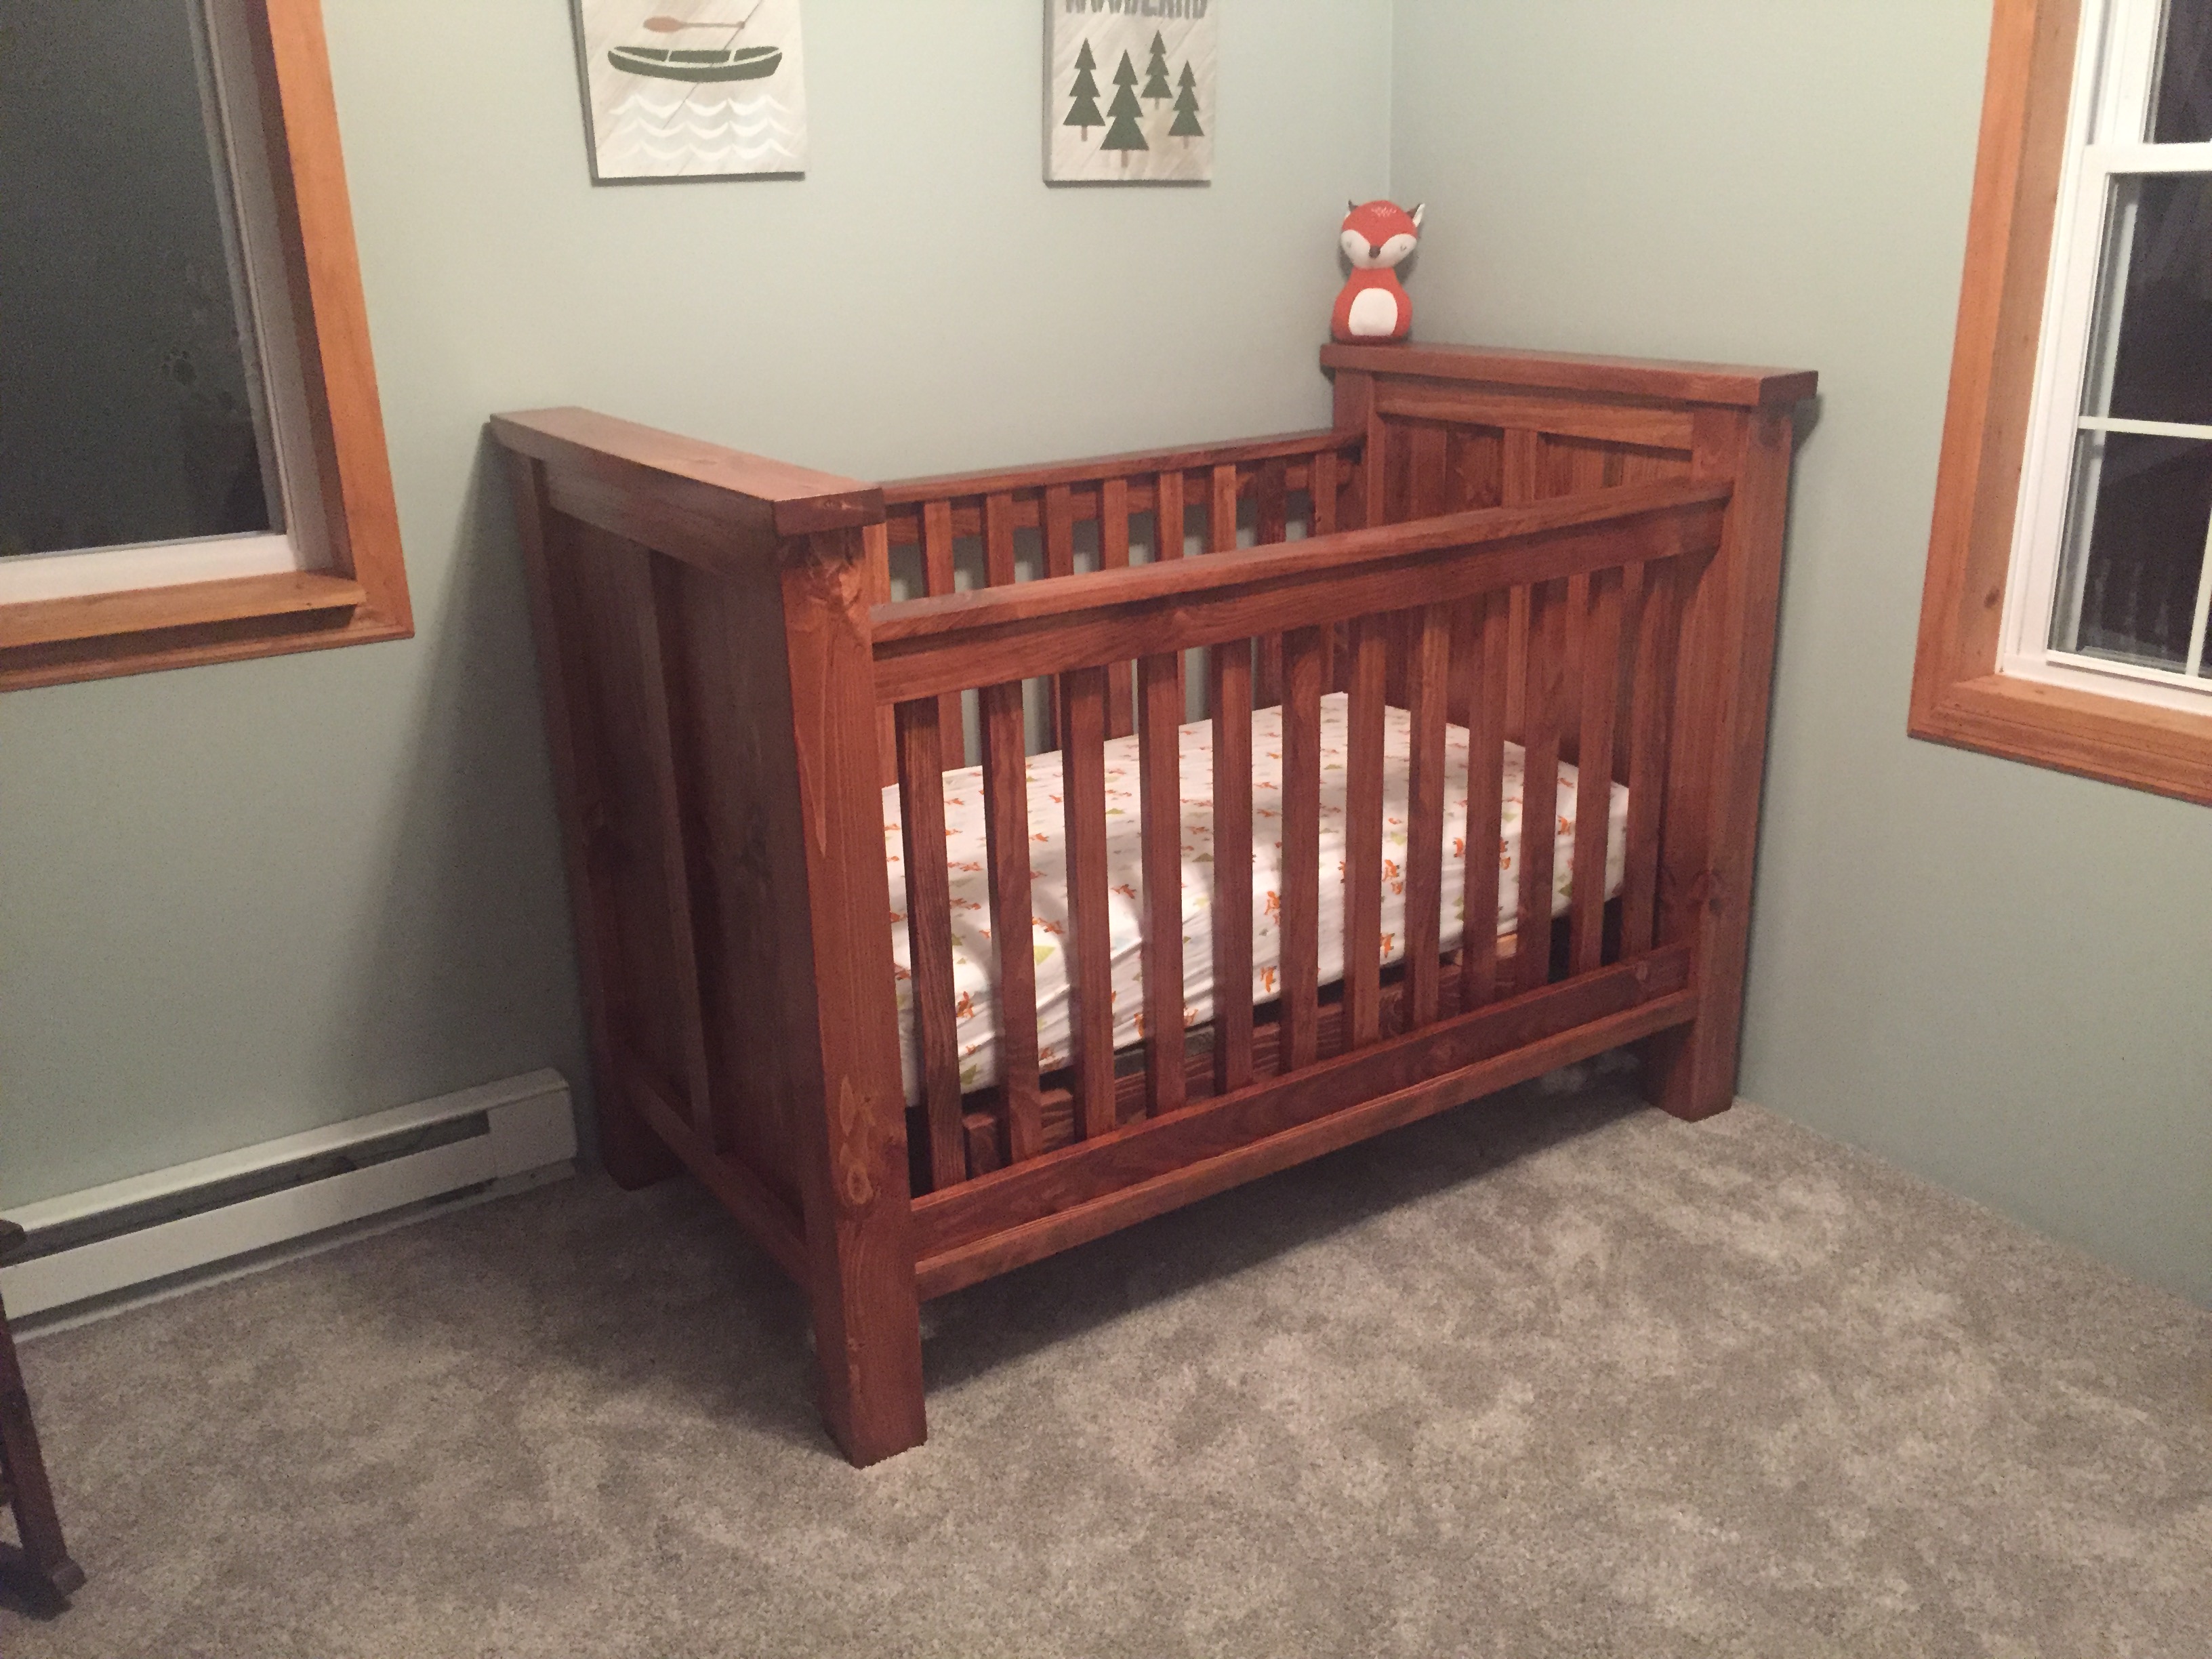
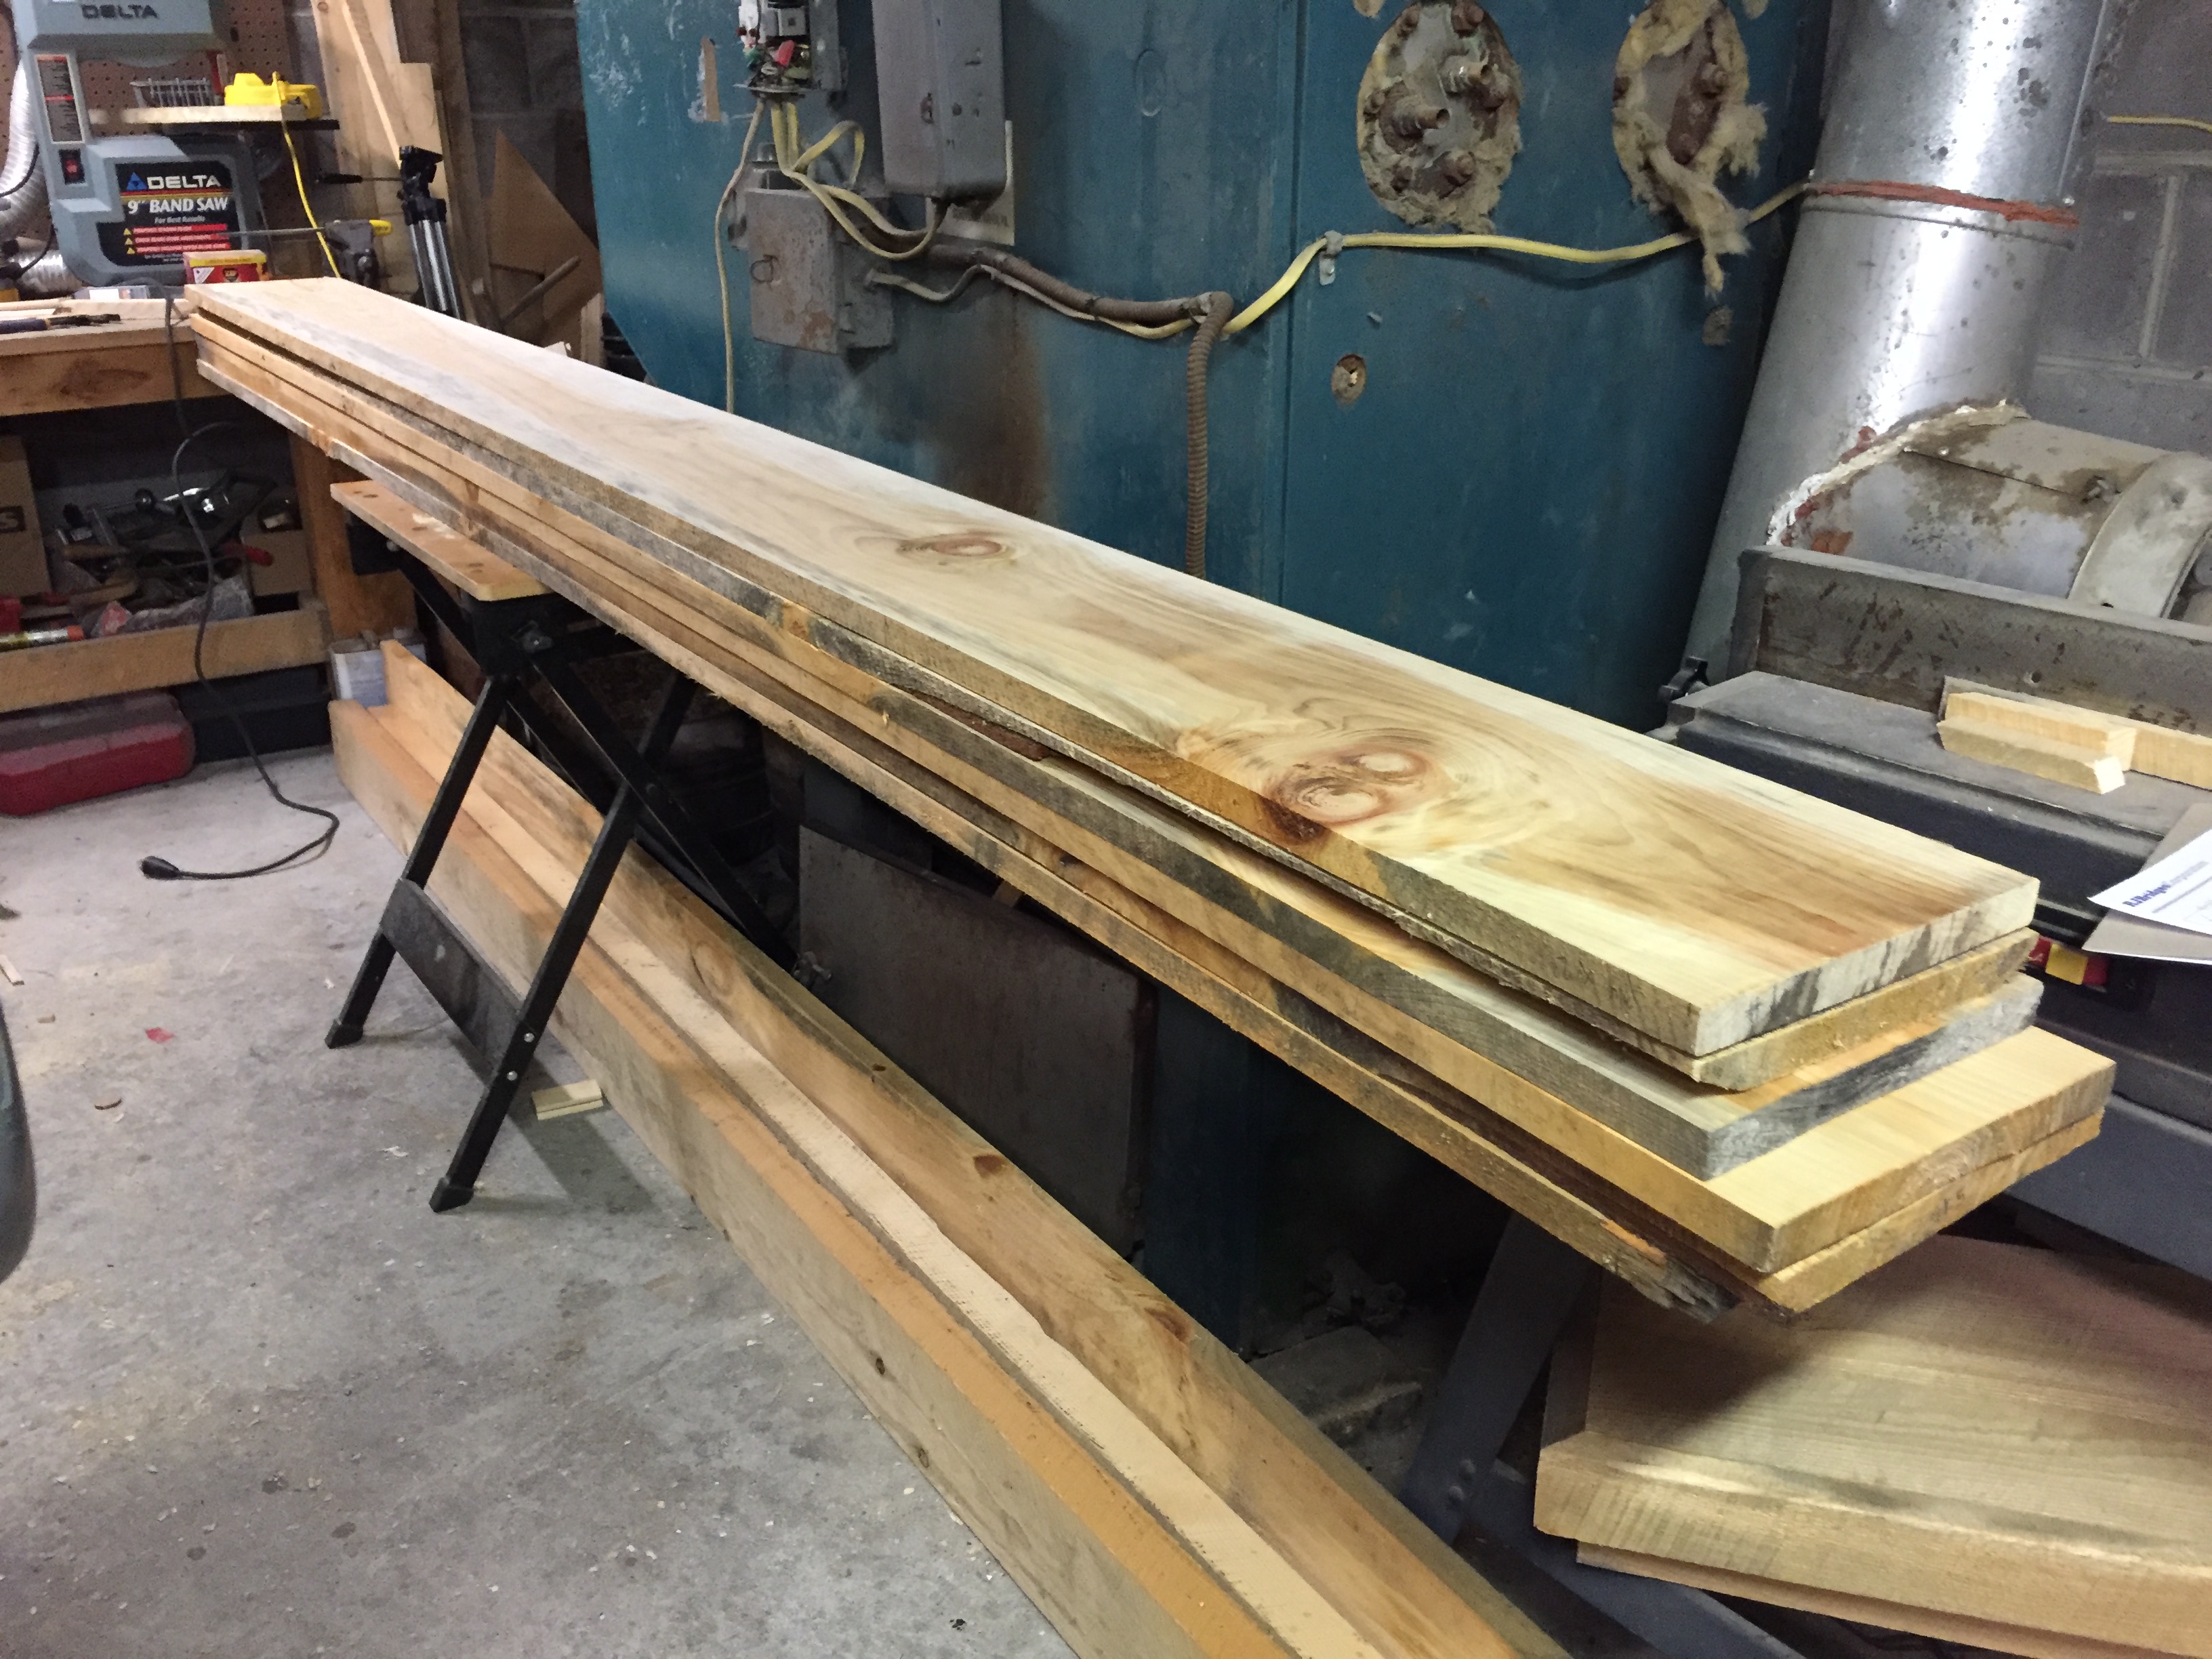
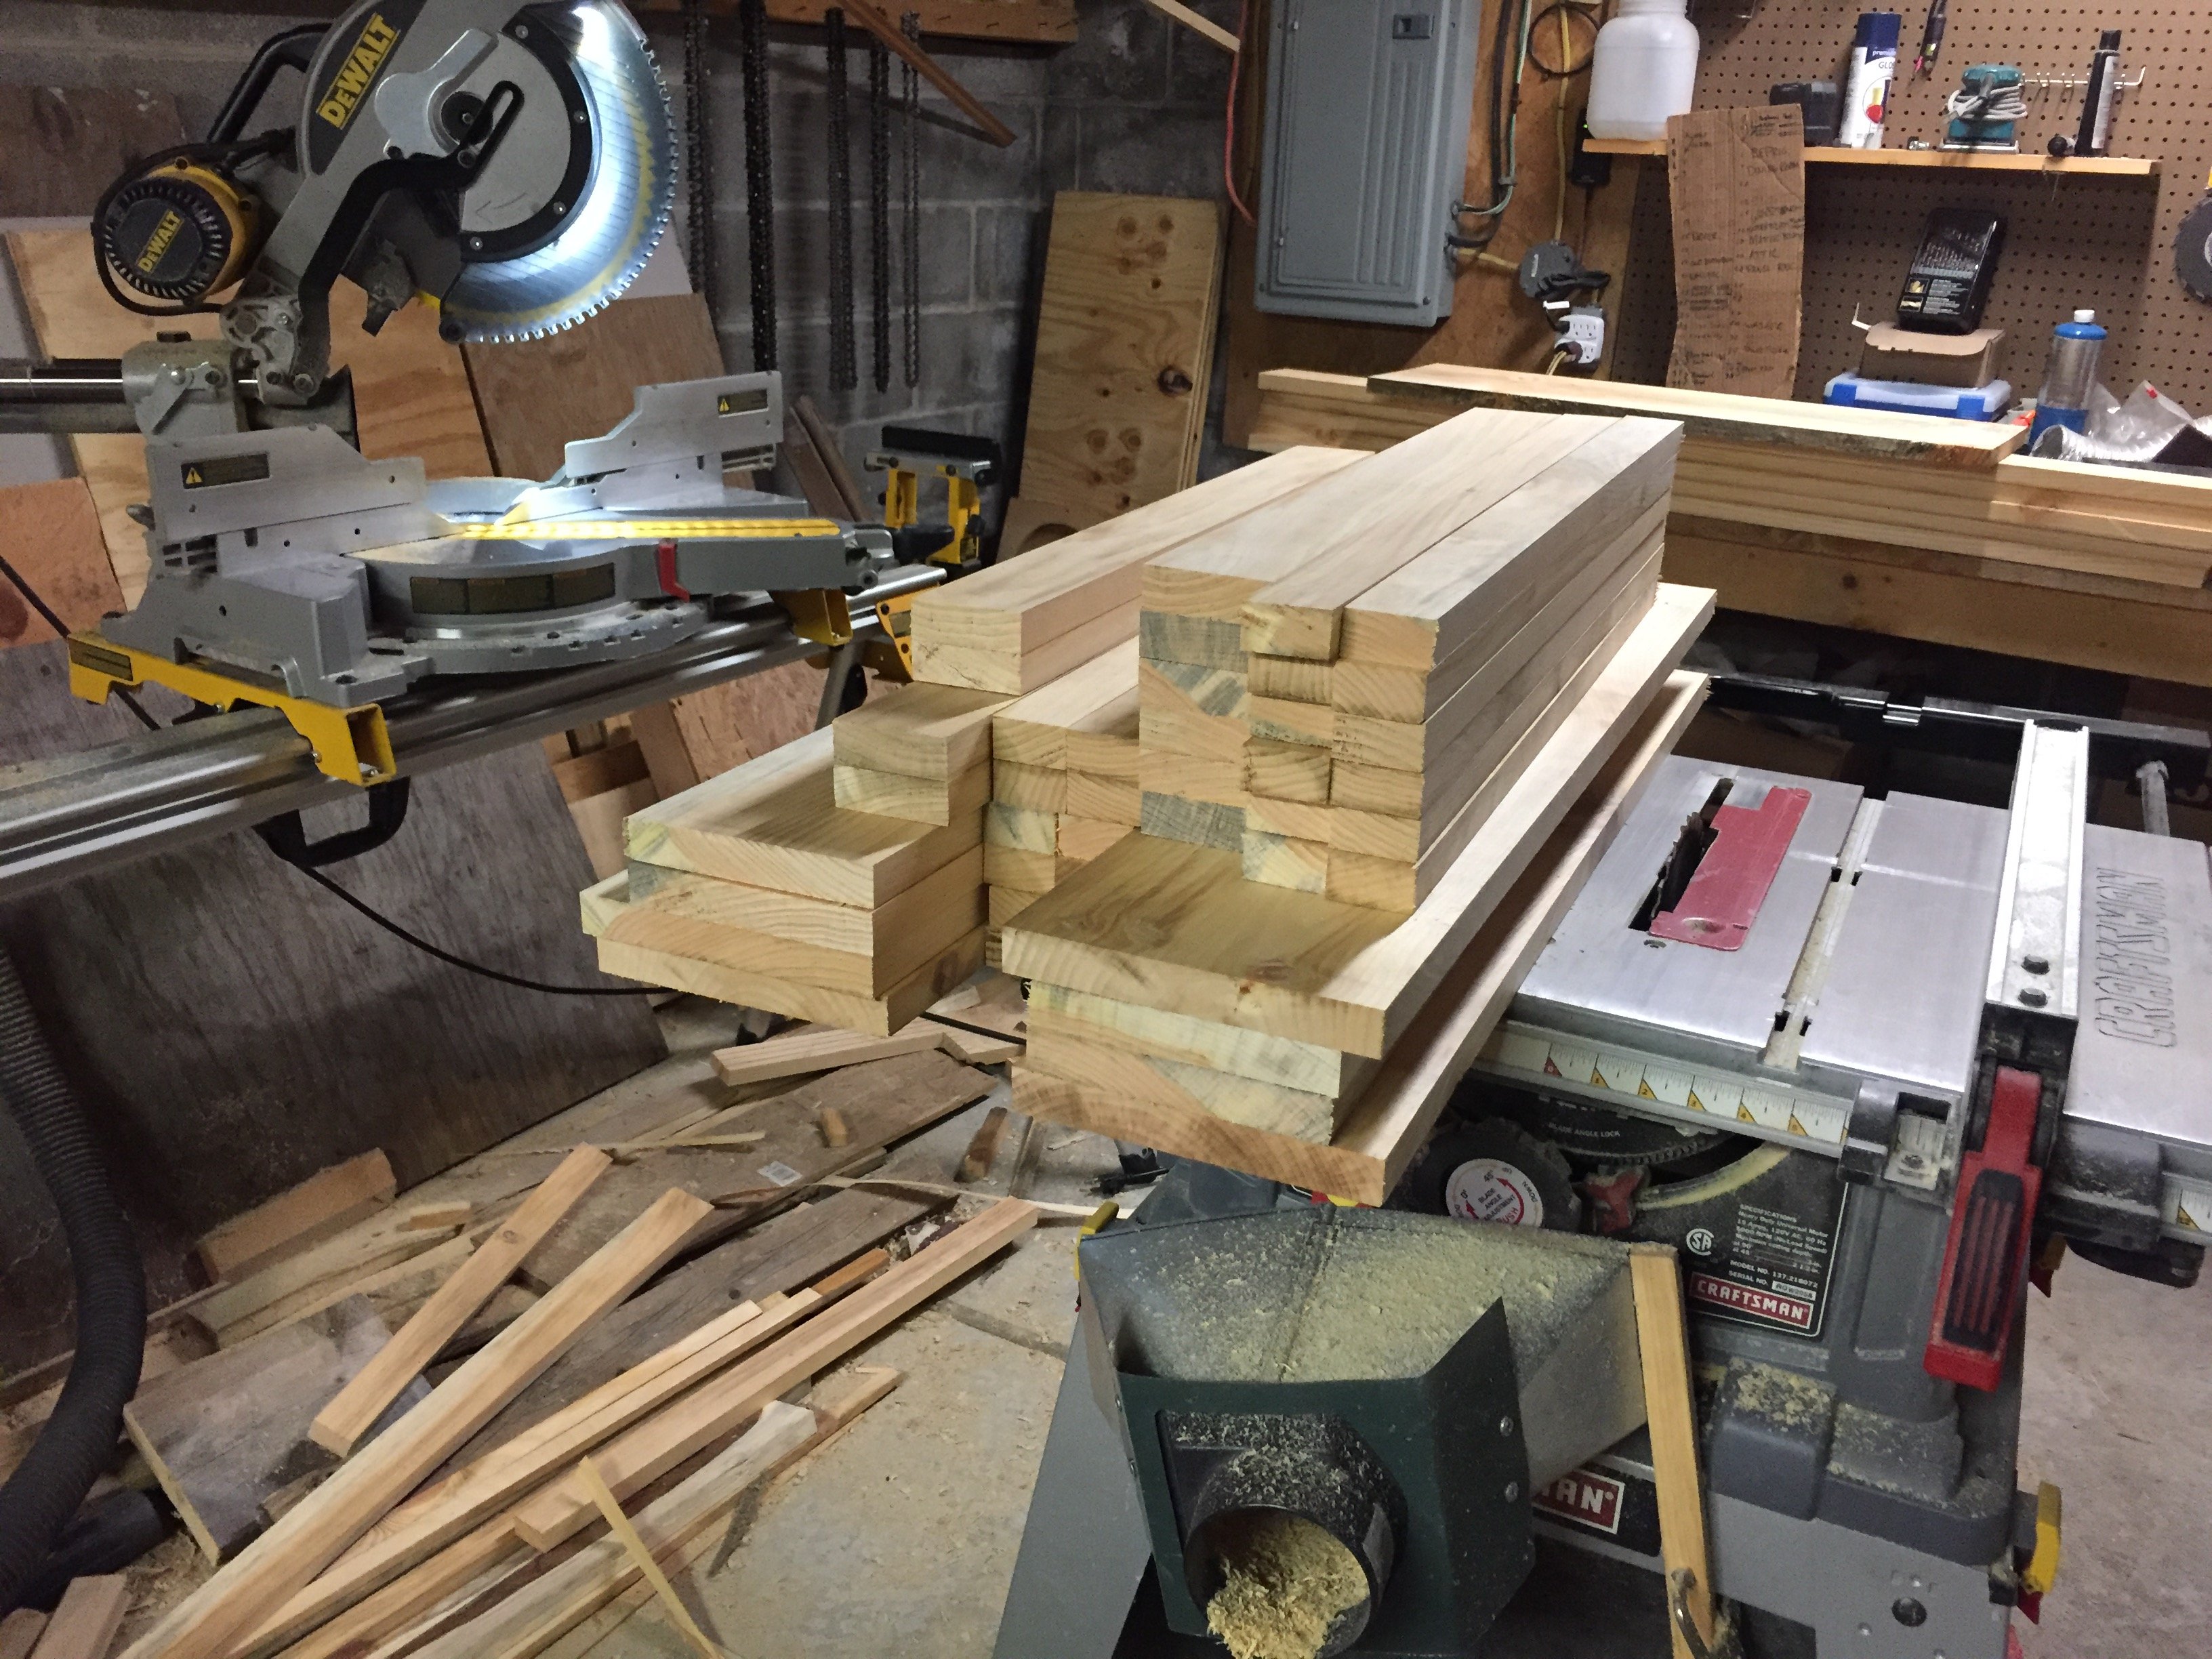
From a pine tree in the back yard to a great looking crib that will hopefully stay in the family for generations.
We had to take down a pine in the back yard to make room for a barn so I had it milled into lumber for future projects. I was able to get the majority of the lumber I needed from that tree, everything except for the 4x4's and 2x6's. I got what I thought was pine but after staining it I quickly realized that it was not (maybe hemlock?). The grain didnt match at all so I had to track down some new wood and remake the pieces. Boy was that frustrating! I also bothered myself to hide as many fasteners from (finished) view as possible. It made the project a bit more involved but the finished product made it all worth it.
Built from Plan(s)
Estimated Cost
$80
Estimated Time Investment
Week Long Project (20 Hours or More)
Finish Used
Minwax Stain- 1/2 Red Chestnut 1/2 English Chestnut mixed (to match dry sink converted into changing table).
Minwax Polyurethane- Clear Satin (2 coats with a light sanding with a scotch pad between coats).
Minwax Polyurethane- Clear Satin (2 coats with a light sanding with a scotch pad between coats).
Recommended Skill Level
Intermediate
Play Kitchen
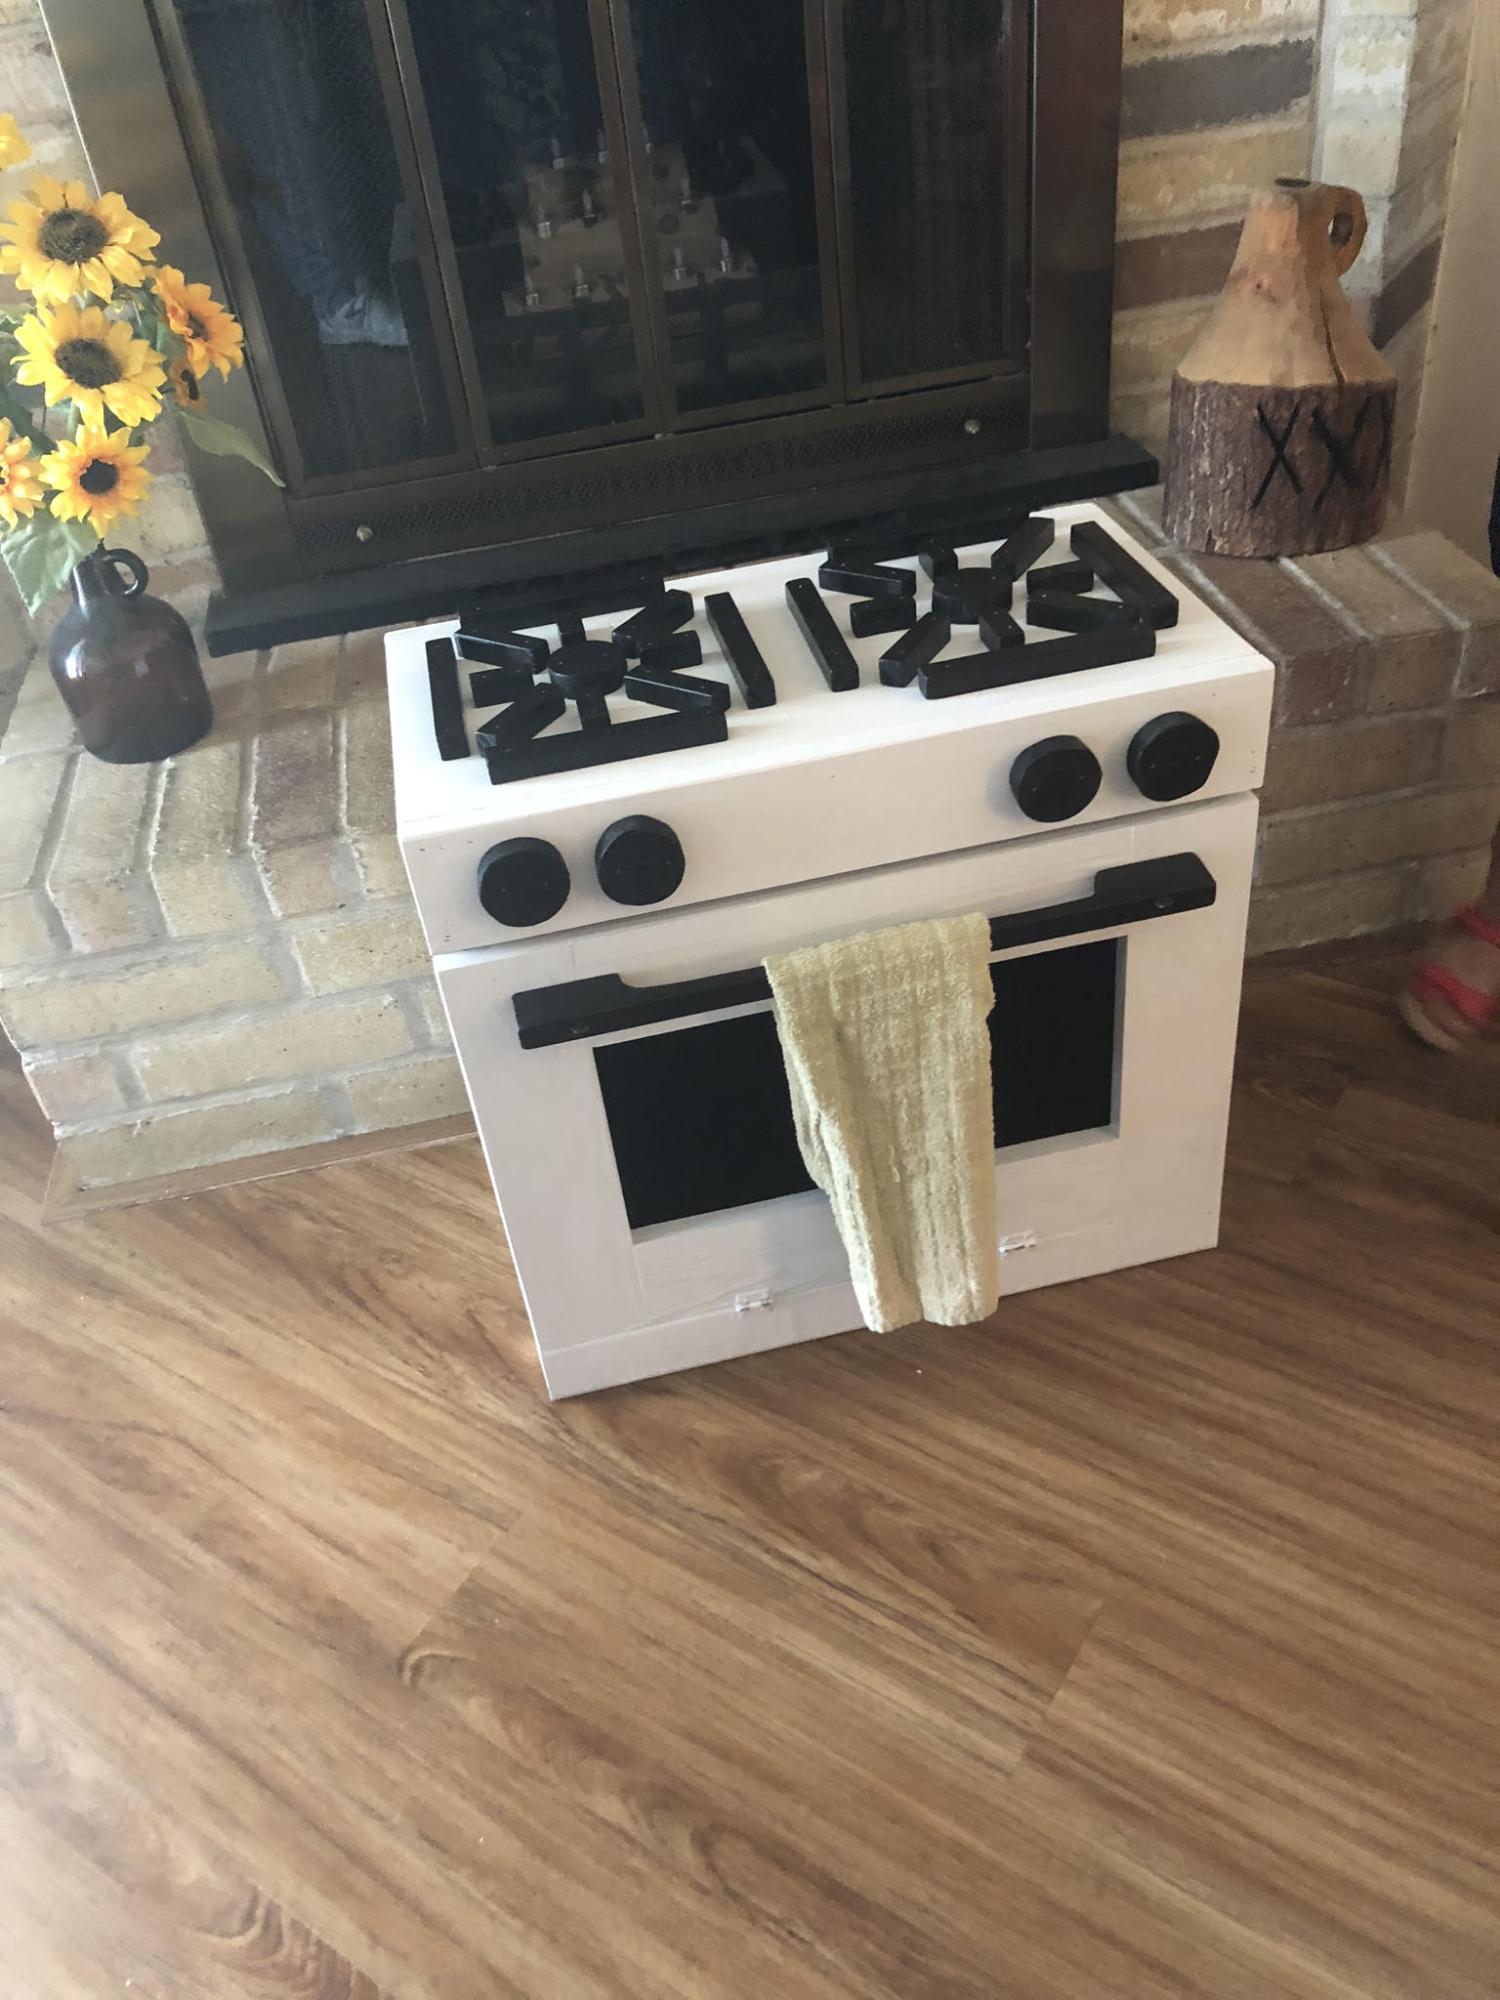
Cute play stove!
by Larry
Built from Plan(s)
Farmhouse Twin Bed
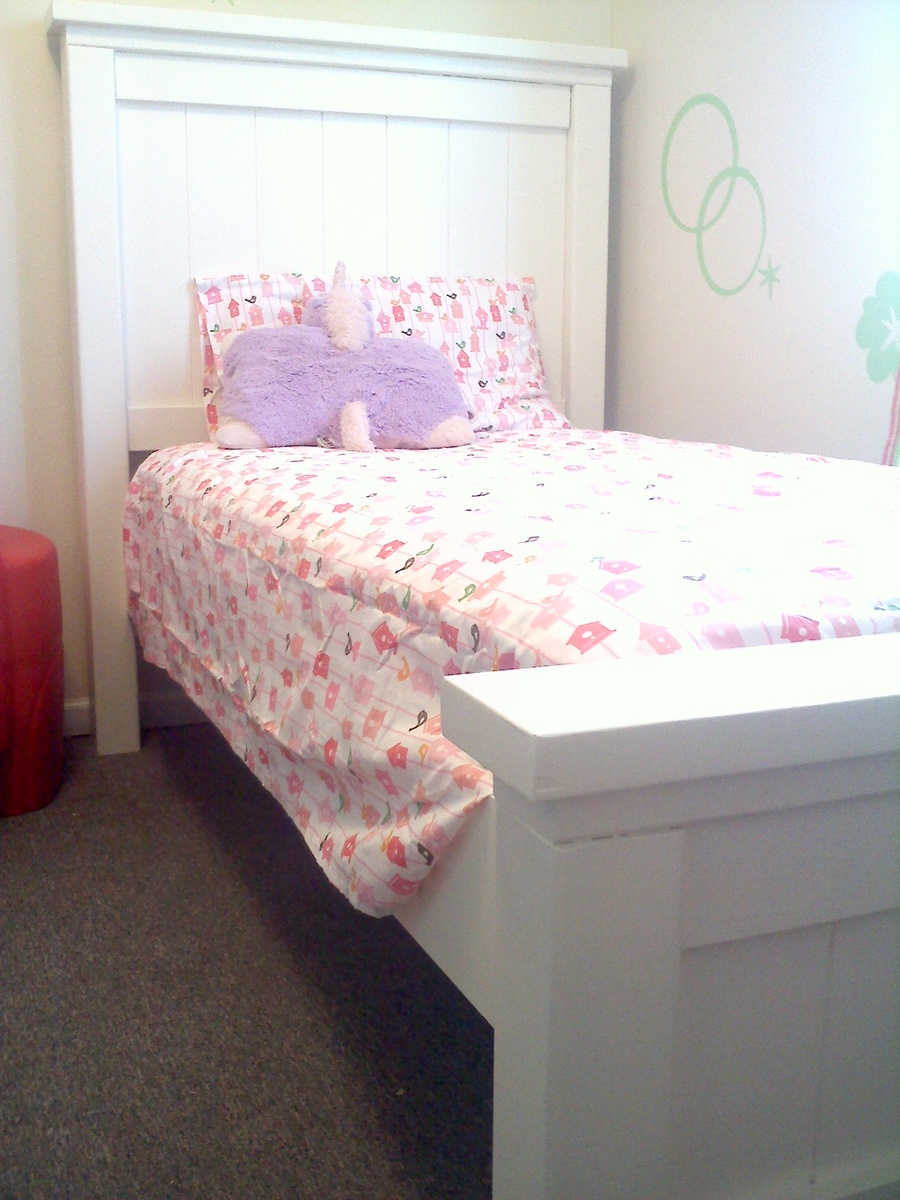
After making the sling chairs, I decided to give the Farmhouse twin bed a whirl for my daughter. I absolutely love it! It ended up costing us $225 for all of the supplies needed. The only issue we had in making this was trying to make it easy to disassemble. This was fun to make!

Built from Plan(s)
Estimated Cost
$225
Estimated Time Investment
Weekend Project (10-20 Hours)
Finish Used
Behr Creamy Almond Paint
Recommended Skill Level
Beginner
Comments
Mokman88
Sat, 05/03/2014 - 19:40
Actual plans for this
Actual plans for this loveseat/bench are not showing unfortunately :(