Community Brag Posts

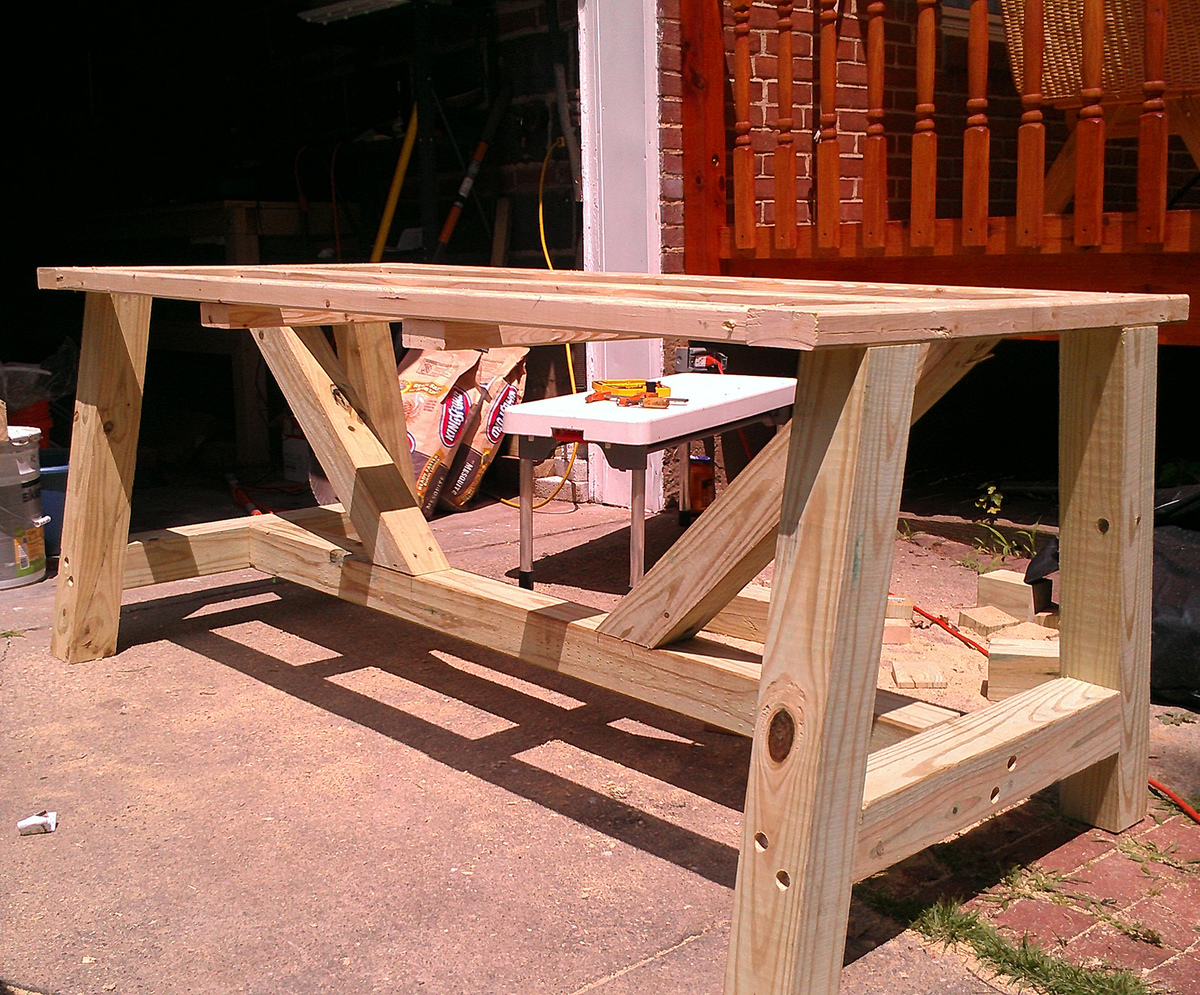
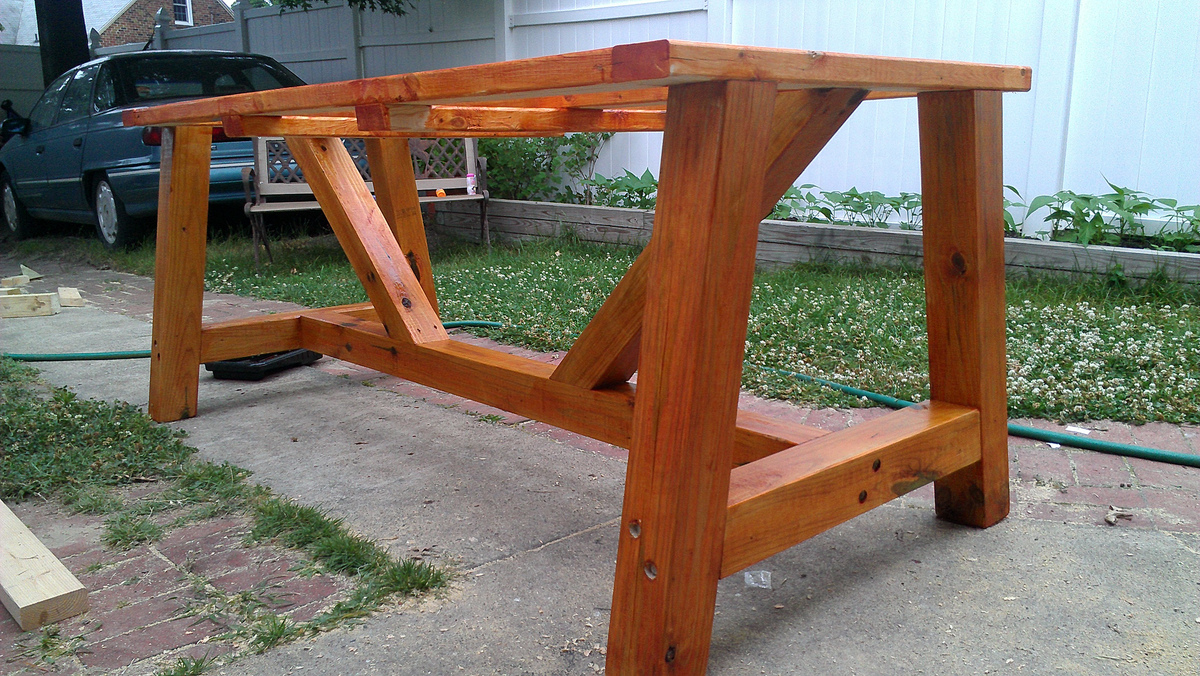
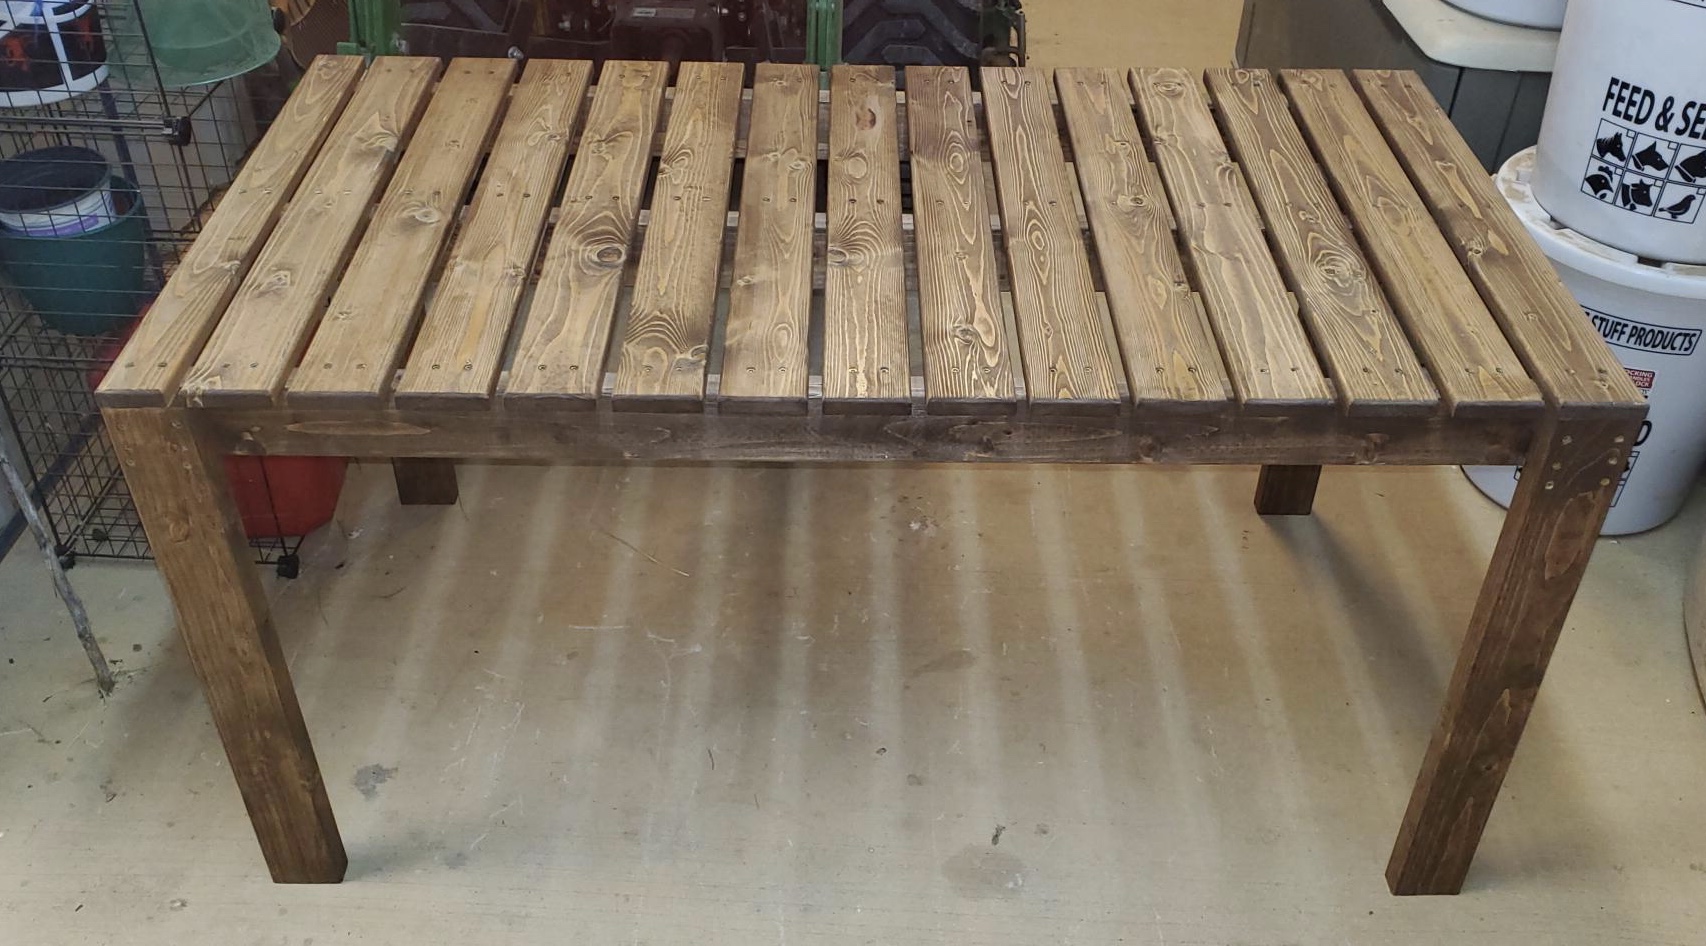
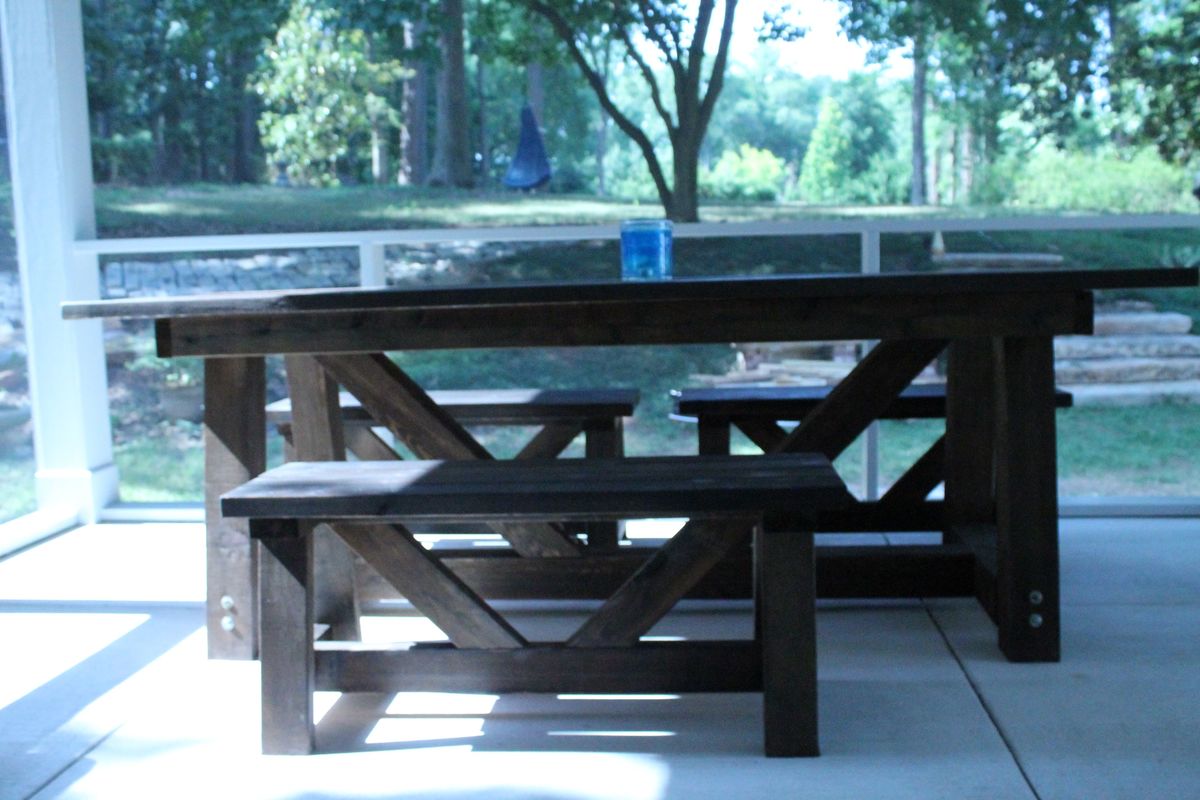
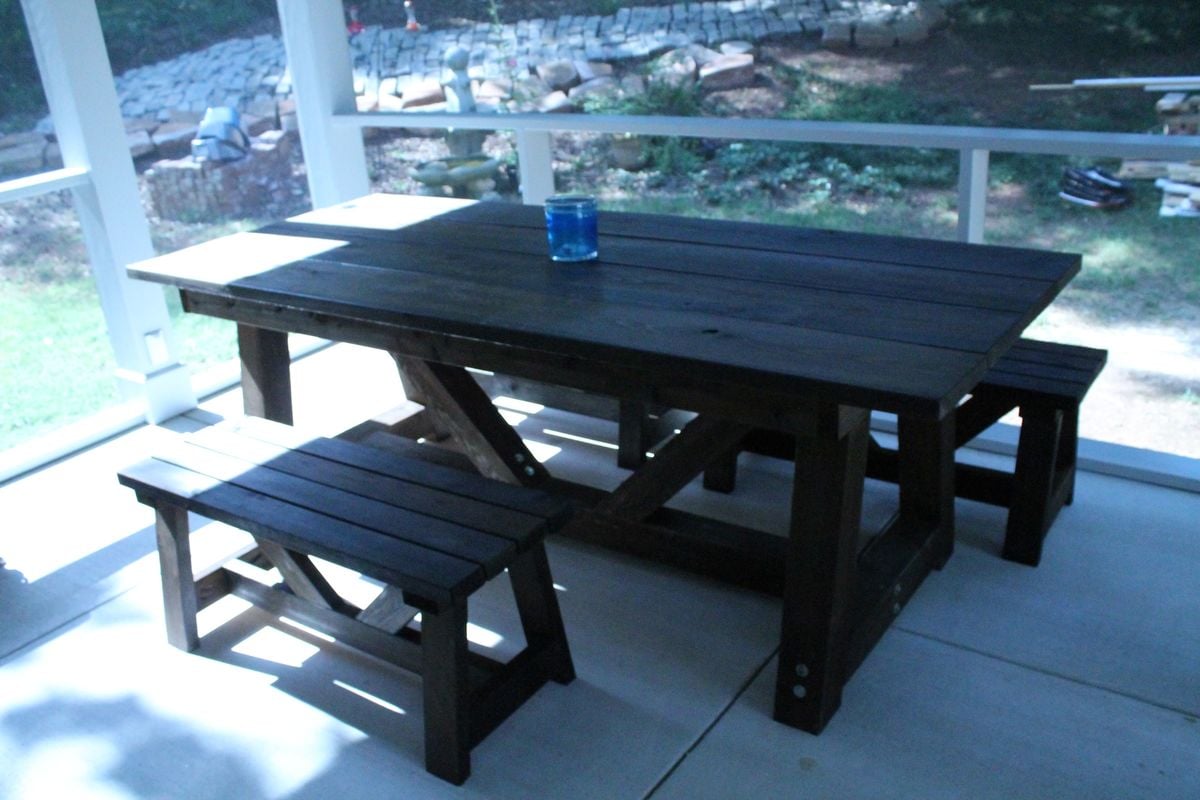
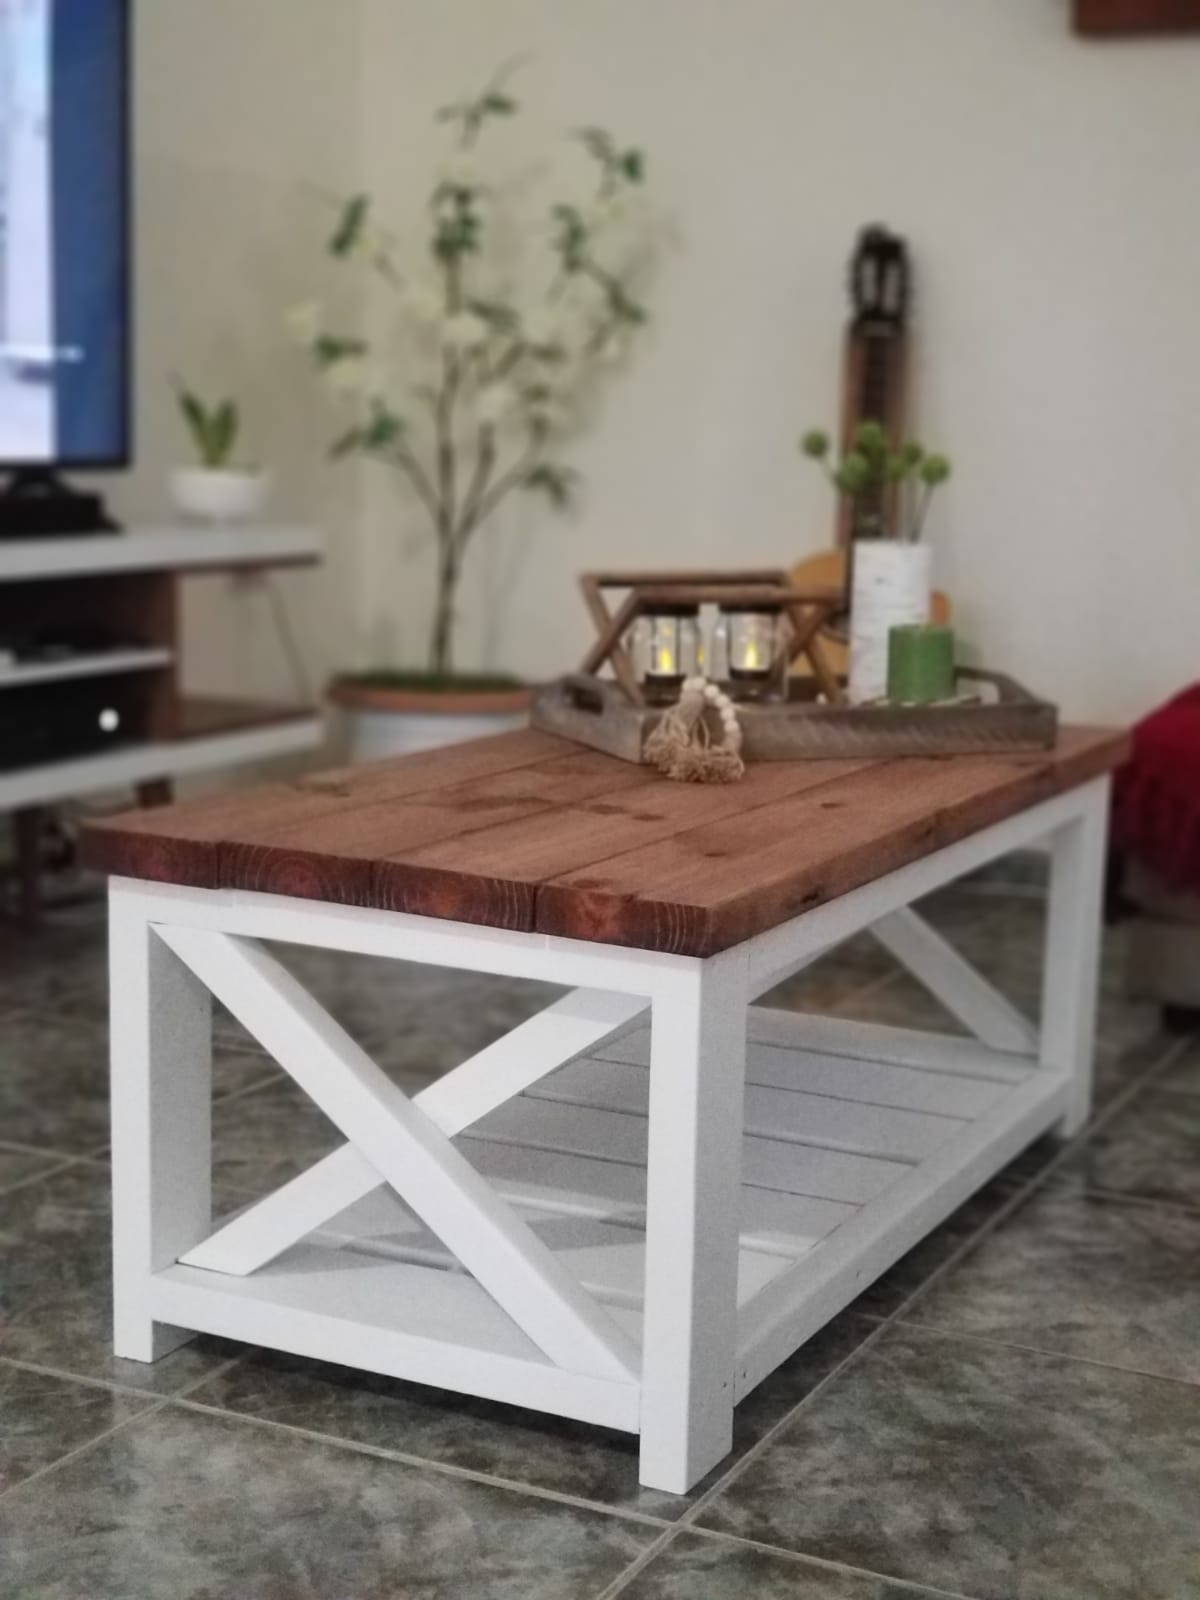
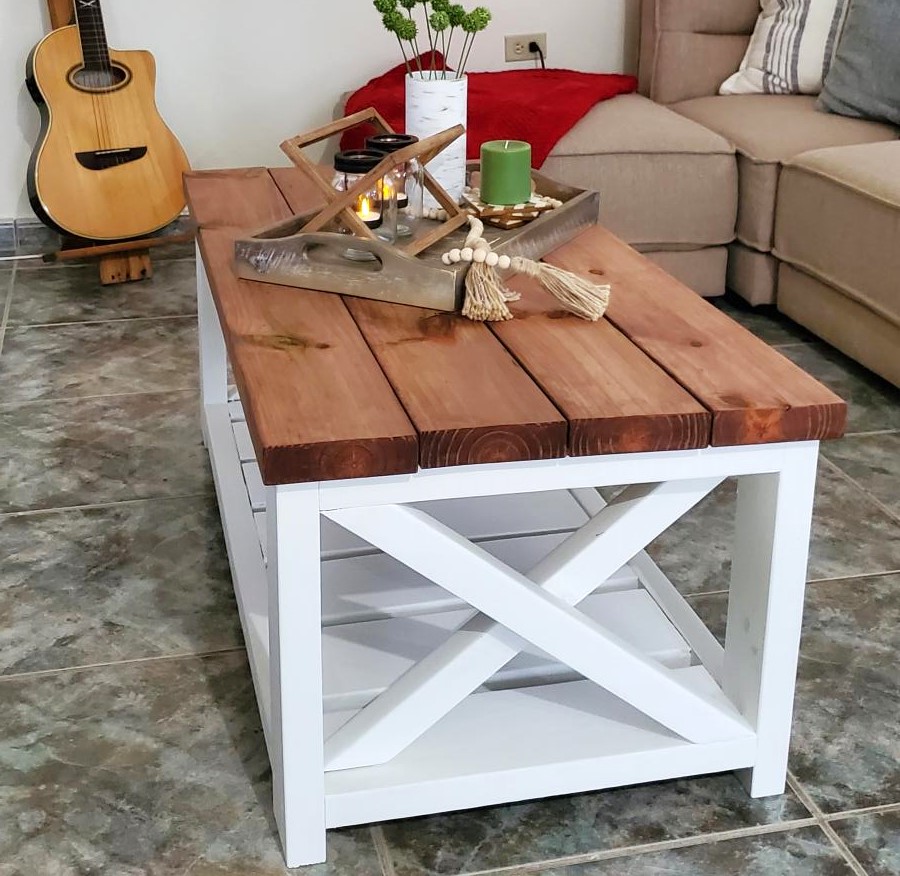
4x4 table with tiled top

Submitted by tomekg35 on Thu, 06/28/2012 - 06:18

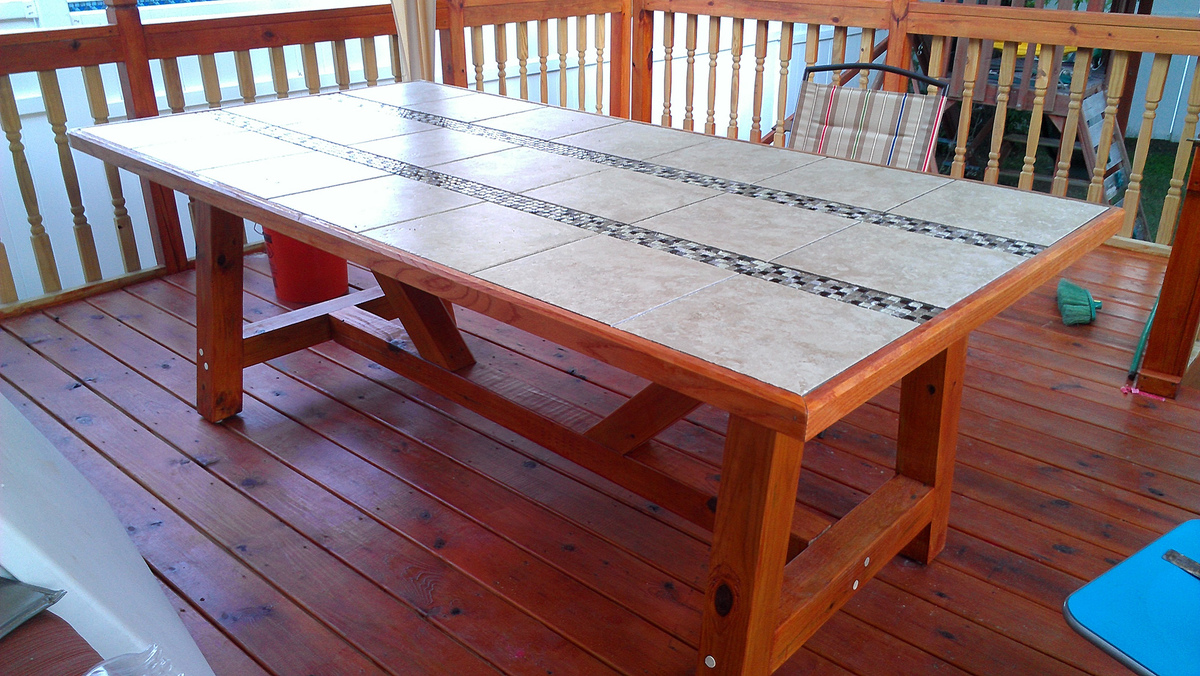
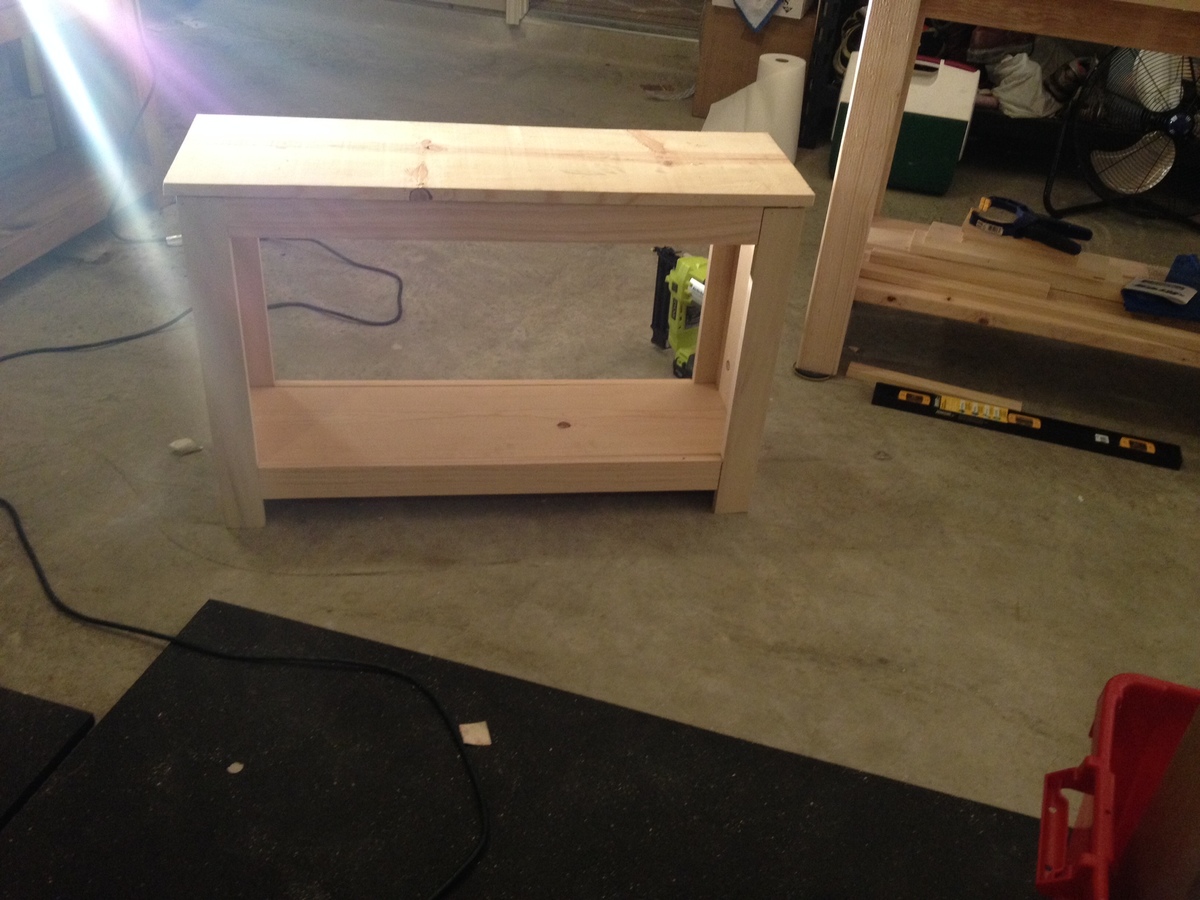
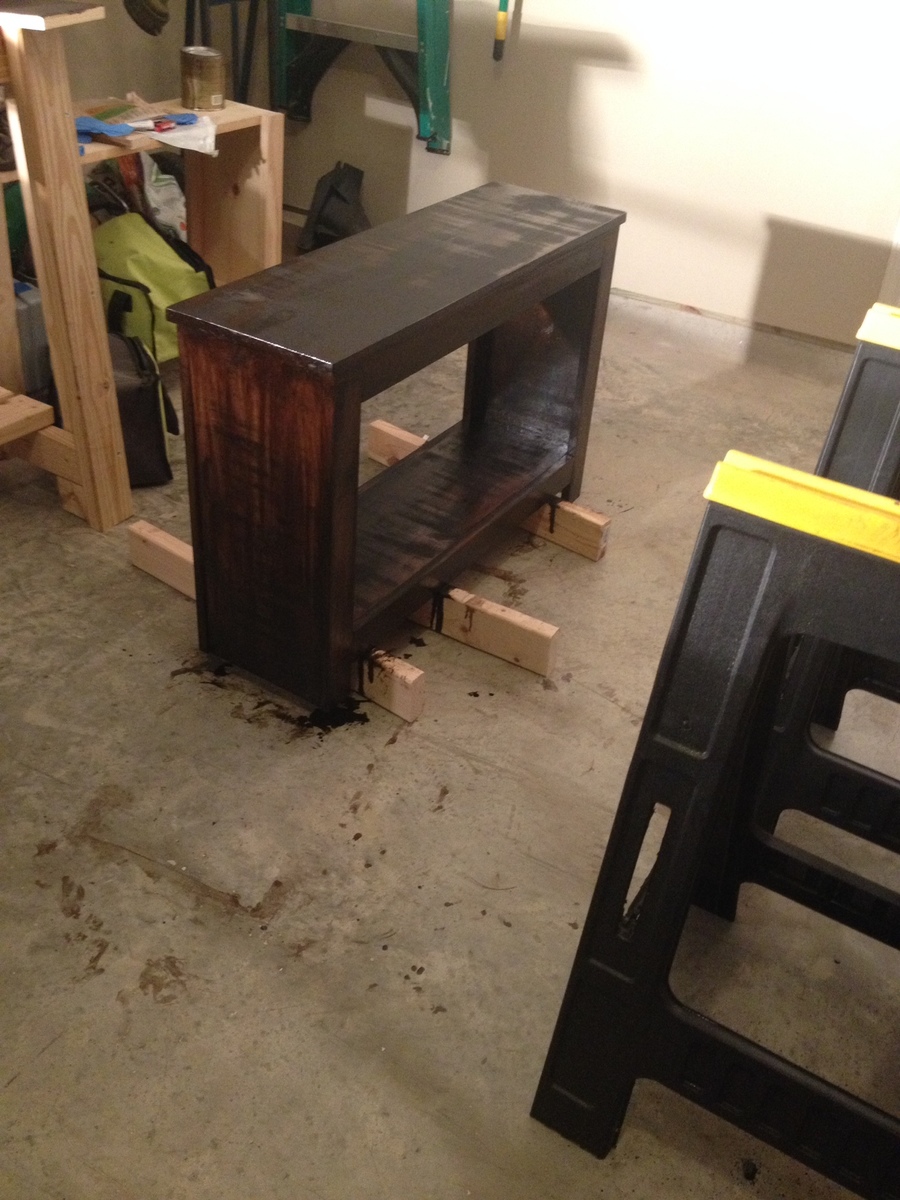
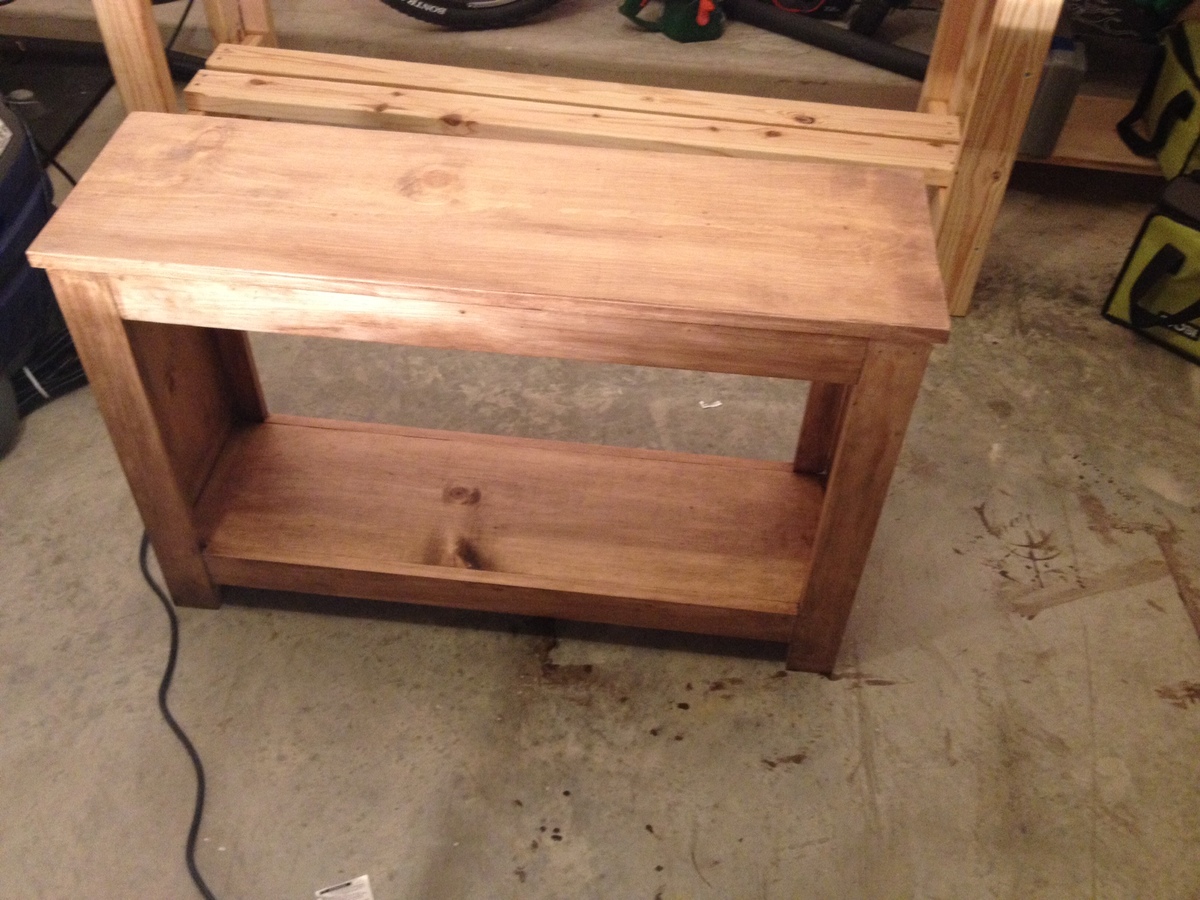
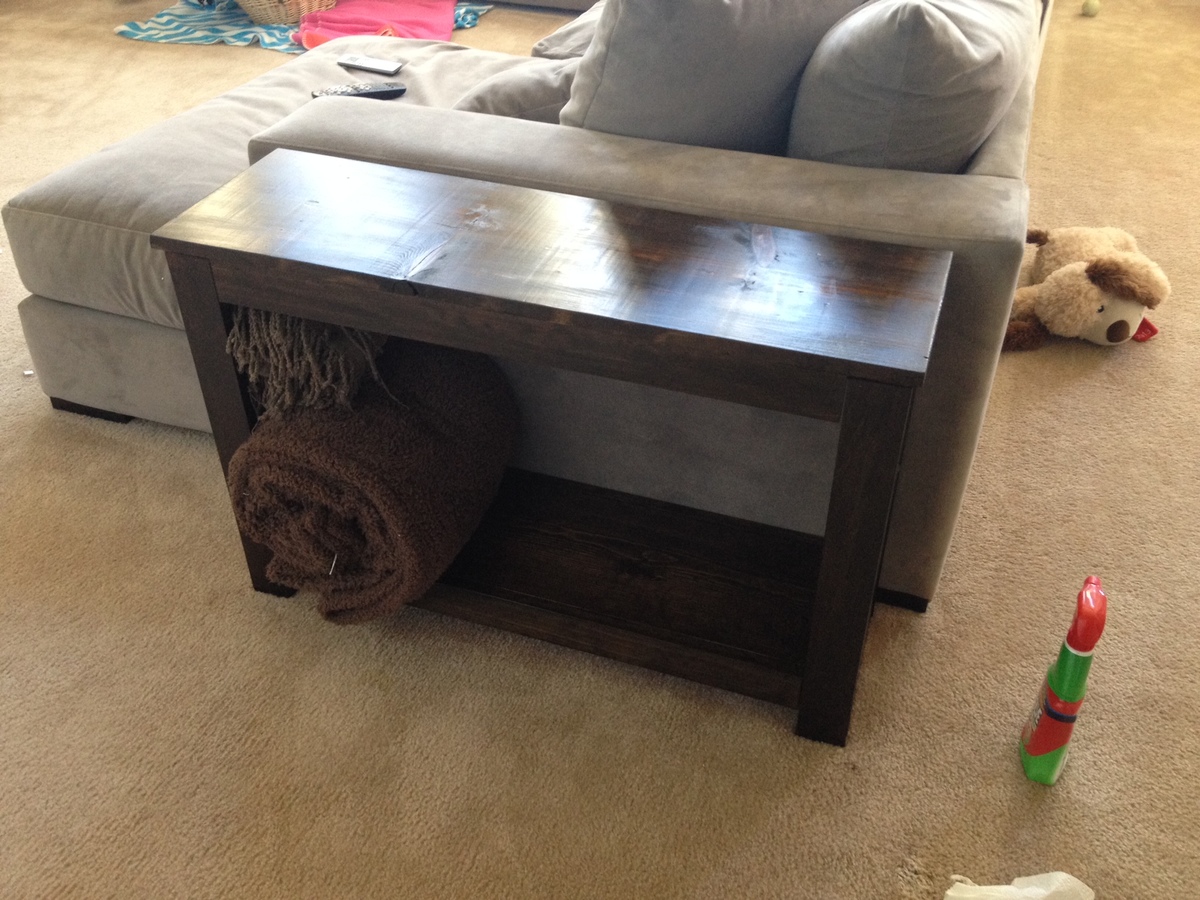
Wanted a nice big table, but couldn't find one in local stores. Decided to build one after seeing a small tiled table at Home Depot. This is my first project like this. I am a network engineer not a carpenter, but the table turned out great.

Estimated Cost
$400-$500
Estimated Time Investment
Week Long Project (20 Hours or More)
Finish Used
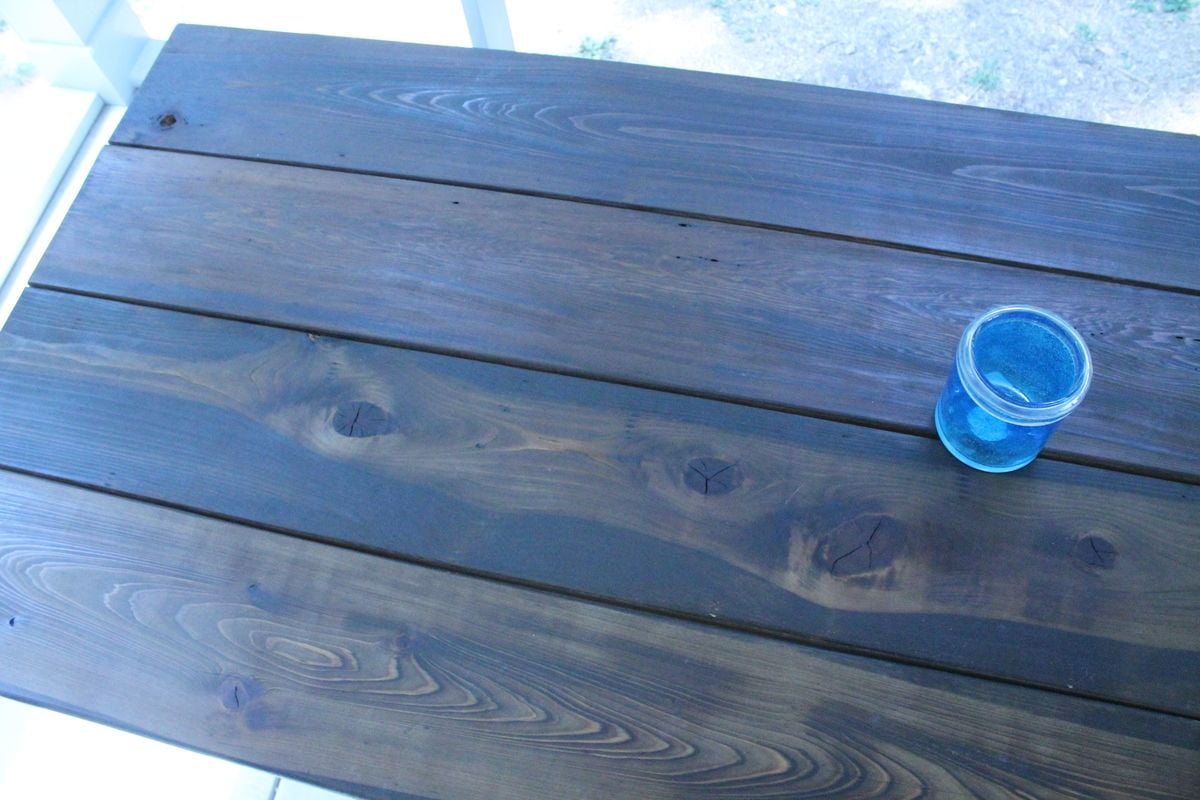
tiles and epoxy grout.
Recommended Skill Level
Intermediate

Comments

tomekg35

Fri, 06/29/2012 - 06:14

This is my first ever project like this... but I just found out that I like doing this kind of stuff.
Already have some more ideas in mind, and once the weather cools down from the upper 90's we are having right now, I will probably do many more projects.

rudy (not verified)

Mon, 10/15/2012 - 20:41

Great job!

Can you tell us more on how you built this table and provide additional photos from different angles?

I'm want to mimic your design and see how accurate I am to your original piece.

Thanks,

Rudy

Standup Desk built from Modified Farmhouse Potting Bench Plans

Submitted by Anonymous (not verified) on Fri, 05/08/2020 - 08:31

Hello! I used the plans for the Farmhouse Potting Bench and modified them to make a standup desk. This has been awesome for making a simple but effective desk during the quarantine.

Built from Plan(s)
Estimated Cost
$50
Estimated Time Investment
Weekend Project (10-20 Hours)
Finish Used
Golden Oak by Varathane
Recommended Skill Level
Beginner

Comments

CreativeNest

Tue, 07/14/2020 - 07:10

This is great! I was thinking of modifying the potting bench plans as well, to build a kitchen unit. My stove recently bit the dust, and seeing as I never use the oven anyway, I'm hoping to build a convection plate cooking unit to put in the old stove's place. I'll probably pop some doors onto it and have closed storage underneath.

Holiday Fence Picket Planters

Submitted by Anonymous (not verified) on Wed, 01/03/2024 - 07:36

I built these picket fence planters with my husband. They were very easy to build. I can use them all year around. I’ll add flowers in the spring and summer and mums in the fall and Christmas trees in the Winter. I’m definitely building more for my back porch. Happy building! - Celines

Seasonal And Holiday

Art Supplies Caddy

I built this caddy to celebrate a 4th birthday party for a sweet little girl. I used pine scraps, painted it with some leftover pink paint, and then created some name artwork and a little logo with her initial. I made the art on my computer (in Adobe Illustrator) held up a piece of notebook paper to the screen and traced it with a pencil. Then I held it on my caddy and used a mechanical pencil with the lead down to press the indent into the wood. Filled that in with a silver paint pen and traced it with a fine tip black sharpie. Then filled each cubby with a large mason jar from Walmart (about 50 cents each) and filled them with art supplies. It turned out so cute! And it's a great way to use up some scraps.

Built from Plan(s)
Estimated Cost
free, from scraps
Estimated Time Investment
An Hour or Two (0-2 Hours)
Finish Used
two coats of pink latex paint
Recommended Skill Level
Starter Project

Kids Easy Bike Rack

A few weekends ago, I went into our tool house to get my bike out so I could ride to work, and I had to remove so many obstacles, that I was too late to ride to work, and as a result, boiling mad. Several of the objects I had to move out of my way were my kids bikes that don't have kick stands, which my kids just haphazardly dump on their sides on the floor of the shed.

I had had the idea to build a bike rack out of spare 2x4s for the kids' bikes for a while, but this incident cemented my resolve to finish it quickly.

I had some scrap 2x4s and 2x6 wood left over from another project, which I used to compose my bike rack. It has 4 slots for 4 bikes.

I did some light sanding to prevent splinters, but I did not apply any finish because of the way it was going to be used and it would not be exposed to the elements.

It took very little time to put together. If I had more claps, I could have done it more quickly.

If you are interested in making something that looks just like mine, stop by my blog to get the details.

Estimated Cost
$10 - $15
Estimated Time Investment
An Hour or Two (0-2 Hours)
Finish Used
None
Recommended Skill Level
Starter Project

Hanna Canopy Bed

This was a fun and relatively easy weekend project. Shaping the legs and getting the rounded header and footer were the only challenging parts. A good stretch project for the novice DIYer. 

Built from Plan(s)
Estimated Cost
$100
Estimated Time Investment
Weekend Project (10-20 Hours)
Finish Used
White paint/ primer combo. Three coats.
Recommended Skill Level
Intermediate

Simple Table

This table is very nice and so simple and inexpensive. Just choose your lumber selectively. I used prime 2x4's for higher quality.

Built from Plan(s)
Estimated Cost
$50.00
Estimated Time Investment
Afternoon Project (3-6 Hours)
Finish Used
Screen porch table.
Recommended Skill Level
Beginner

cypress providence table for screened porch

Provence table knockoff from restoration hardware (aka: providence) with 4x4s and providence benches

table modified to 90 inch length, benches to 42 inches

used lag bolts with a washer on 4x4's that show, kreg pocket screws everywhere else

note: the free-diy plans listed last have an issue with the table height. It came out 1 1/2" too high, so we made a change that I like better: we modified the table top to have a 2x4 skirt held together with kreg pocket screws that drops over the 2x4 frame above legs. we left about 3/8" gap between the skirt and framing so the framing would fit in easily. The top actually just sits on the frame so it is possible to move it in two pieces. It is so heavy and stable that we didn't worry about screwing it together.

we love it! perfect for 2 families to eat dinner together. my husband calls it Thor's table because it looks so tough.

Estimated Cost
330
Estimated Time Investment
Weekend Project (10-20 Hours)
Finish Used
I really wanted it to look old but hold up to my kids and the weather, so I used a chemical aging process followed by antiquing oil (from minwax)


Chemical aging solution is white vinegar (large plastic jug from the grocery store which cost $1.87) with a ball of steel wool shoved in it. Let it react for a couple days. Then drench the wood surface while you wear gloves (use paintbrush, roller, toothbrush or best: a sponge). It makes rust spots, so use a drop cloth and wear old clothes. The color shows up in a few minutes. Kind of like magic paint :) next day oiled it, one coat everywhere except table top which got 2 coats. rubbed surface with a cloth a few minutes after applying oil. Think linseed oil would work just a well.

It came out dark and old looking, kind of a grey/brown color with nice wood color showing through. The table top has beautiful knots. Our porch will get a little wet in blowing storms plus direct sun for a few hours each day, so I didn't want to put wax on it (would melt) or a stain (would make rings from water if sealer failed). Think we might have to reapply oil every couple years which is no big deal. The cypress should hold up nicely outside. So far it has not made any spots or rings since the surface is already pre-damaged with the aging solution. I don't think you can hurt this beast of a table.
Recommended Skill Level
Intermediate

Comments

spiceylg

Thu, 07/05/2012 - 11:35

This is gorgeous! I definitely prefer the chunkier leg you used and love the hardware showing as well. That was smart the way you made the top for easier moving, too. Great job! I think you should have added the link for the plans, this way your picture will always show up above the plans in order for everybody to see it each time. :)

Bailey console table

Submitted by Anonymous (not verified) on Thu, 07/21/2016 - 13:05

Bailey Console table from the #igbuilderschallenge

built by Instagram: @sawdustandperfume 

built to be used in an buisness office that a former cattle rancher conducts buisness. 

Built from Plan(s)
Estimated Cost
Lumber was about $50 but I used scraps I already had as well.
Estimated Time Investment
Week Long Project (20 Hours or More)
Finish Used
I painted layers of different colors on the top and then sanded down to the wood again in most spots to get the barn look. I then used a dark stain called Jacob bean.
Recommended Skill Level
Intermediate

Jelly Cabinet

Submitted by Anonymous (not verified) on Tue, 01/09/2024 - 08:48

BUILT FROM PLAN(S)
Patrick's Jelly Cupbard

ESTIMATED COST
$155.00 (wood alone was $145.00 from Homedepot)

ESTIMATED TIME INVESTMENT
Weekend project - about 10 hours

FINISH USED:
I used white beadboard for the backing and the door inserts. I stained the rest with Minwax Provincial stain. I will be adding black metal stars to the doors to break up the white.

RECOMMENDED SKILL LEVEL:
Intermediate

AAA Farm Tables - AAAFarmTables.com

Built from Plan(s)

Comments

Double Pallirondack Settee

This is a Double Pallirondack Settee, an Adirondack-styled set of chairs connected by a two-shelf table that is also an umbrella holder. It is made 100% from recycled wooden pallets (thus the name). It took approximately four full pallets to make the settee. The finished picture was taken by its new owners after they stained it with a cedar-colored sealer and added an umbrella.

The other two images show it before I had added the bottom shelf of the table and it finished before staining. I just finished a second settee and will be selling that to someone who saw the original one at a party.

The design is based on a couple different plans -- one for the chairs and one for the table/umbrella holder. I modified both plans to make them work together. Great fun. If I could have worked on it straight through, it probably would have taken 2 full days, starting with pallet deconstruction, then cutting pieces, sanding, assembly of chairs and, finally, assembly of the connecting table.

Estimated Cost
$20-$30
Estimated Time Investment
Weekend Project (10-20 Hours)
Finish Used
It now occupies the corner of my friends' pool area.
Recommended Skill Level
Intermediate

Comments

Pallirondack

Thu, 07/12/2012 - 13:51

Unfortunately, no. I actually took the plans for a chair and mixed it with the plans of another settee. Essentially, the "inside" arms of the chairs do not get shaped at all. The front of the chairs are 12" apart (15 degree miter) and the backs are 27" apart if I remember correctly. I added 4" 2x4 blocks to the outside of the bottom back legs and that is what the bottom back table support is attached to on the settee. The the three center boards are cut to fit (1/2" in the front, 5.5" in the back and spaced equally. 1.5" hole for the umbrella holder in the center board, top and bottom.

Spa Bench turned End Table

I was wanting long, skinny end tables for my couch and when I came upon the spa bench plan I knew it was perfect length and size for what I wanted. I only altered the plans by making it taller to fit my couch. This was my second build and I learned a lot through the process so these are not perfect but I love the imperfections. I also didn't like the first stain that I put on the tables and when I tried taking it off my sander made weird marks but it gave it a more rustic look which I ended up loving. (Which I could never recreate on purpose)

Built from Plan(s)
Estimated Time Investment
Afternoon Project (3-6 Hours)
Finish Used
Minwax Polyshade Antique Walnut sanded down and then 3 coats of Minwax Ebony which 2 coats of Minwax Fast-Drying Polyurethane Satin
Recommended Skill Level
Beginner

Bed Bridge Bookcase

Submitted by Anonymous (not verified) on Sat, 07/23/2016 - 19:06

I hacked three IKEA bookcases into this beautiful bed for my princess of a daughter who was getting her first apartment in Orlando, FL, because she got a full-time dream job with Disney. Full details at http://handydad.tv/ikea-hack-bed-bridge-bookcase/.

Estimated Cost
$390
Estimated Time Investment
Weekend Project (10-20 Hours)
Finish Used
White paint
Recommended Skill Level
Intermediate

Raised Small Dog Bowl Holder

Submitted by Anonymous (not verified) on Thu, 05/14/2020 - 16:24

This was one of my first wood working projects. It taught me so much and it also helped me to realize that I really do love wood working! I think in the future I'd probably paint the bottom more of a light grey color to cut down on the contrast between the stained top and the painted bottom. Overall, I love it and my Sadie pup will be happy to have some new bowls to eat out of!

Built from Plan(s)

Playhouse

Submitted by nikjwil on Sat, 07/07/2012 - 20:57

It was a big project, and my husband did all the main stuff!
I still have to paint the inside. Since we aren't building a deck yet, we are putting it on some pavers. We bought 40 12x12 pavers and will push that out on in the next couple of days. I also will eventually attach a window box with plants. I'm planning on painting a couple of the inside walls with chalkboard paint.
It was seriously worth every amount of time and energy. If you are thinking of doing this, do it! You can, it's a great plan. Thanks Ana for the plans!

Estimated Cost
$350
Estimated Time Investment
Week Long Project (20 Hours or More)
Finish Used
valspar outdoor primer, then white paint on trim, light lavender on walls and pink door
Recommended Skill Level
Beginner

Boost stool

Submitted by jandmhough on Thu, 04/24/2014 - 18:22

We built a toybox for our son and discovered that he isn't quite tall enough yet to really get into it. So, to remedy the problem I put together a stool for him. I modified the "simplest stool" plan to make it short and wide. Perfect as a little boost to get into the toybox. We also use it in the bathroom as a little step stool for the sink.

Built from Plan(s)
Estimated Cost
used scraps from the toybox (one 1x4 and one 2x2 if buying new) under $7
Estimated Time Investment
An Hour or Two (0-2 Hours)
Finish Used
Painted it with leftover chalkboard paint and covered with a clear coat to give it a finish like a regular paint.
Recommended Skill Level
Beginner

Farmhouse Coffee Table

Submitted by Anonymous (not verified) on Sun, 05/17/2020 - 20:03

This is my first time making this kind of project and it turn out amazing!!! Looking forward to built some end tables with this same design!!!

Estimated Cost
$70.00
Estimated Time Investment
Weekend Project (10-20 Hours)
Finish Used
White acrylic flat and red wood varnish and polyurethane

TV Console Cabinet

Submitted by Anonymous (not verified) on Tue, 01/16/2024 - 15:40

This is a TV console I made using Anna White’s techniques, which make woodworking achievable even for the novice builder.

Elizabeth Ashcraft

Tidy up Coffee Table

I Loved the idea of this table! It is in the kids' living room/game room. This room is usually cluttered with blankets for friends, games, game controllers and so on! I was thinking about building a storage chest for their coffee table, then I saw these plans! It is perfect! The boys even use it to clean up...WITHOUT ME FORCING THEM! Oh yeah!!!!

I wanted my table to appear to have three drawers instead of two, so I modified a bit. I also opted out on the breadboard ends and just made the top boards a little longer.

Estimated Time Investment
Afternoon Project (3-6 Hours)
Finish Used
I made stripes, alternating early american stain by rustoleum with natural wood, followed by two coats of satin poly
Recommended Skill Level
Beginner
Back