Community Brag Posts

Pergola Swing

Submitted by grarob1956 on Thu, 04/23/2020 - 17:59

I saw this project on YouTube under Arbor Pergola Swing. It did not mention any specific detailed plans or cut list but it was enough to get me started. I began with (2) 10' 6" x 6" post. buried each 24" and cemented. I cut the post tops at 83" from ground line. The rafter consist of (2) 10' 2"x 6". I used the leftovers of the 6" x 6" post tops in the middle of my rafters to hang the swing from with 1/2 " eye bolt. Then I used (9) 2" x 2 " x 8' and cut each at 36" to finish off the top and (2) 2x6x8 for the 4 rafter supports. I drew out the designs of the rafters and top ends free hand and at made a template for the cuts with s jigsaw.

The entire cost including hardware minus the swing was $170. My wife had purchased the swing last Fall at a clearance for $40 brand new.

Built from Plan(s)
Estimated Cost
$170.00
Estimated Time Investment
Weekend Project (10-20 Hours)
Finish Used
Valspar Duramax Special Walnut
Recommended Skill Level
Intermediate

Garden Tool Shed (based on plans for Small Outdoor Shed)

Submitted by aceecee on Tue, 09/22/2020 - 14:07

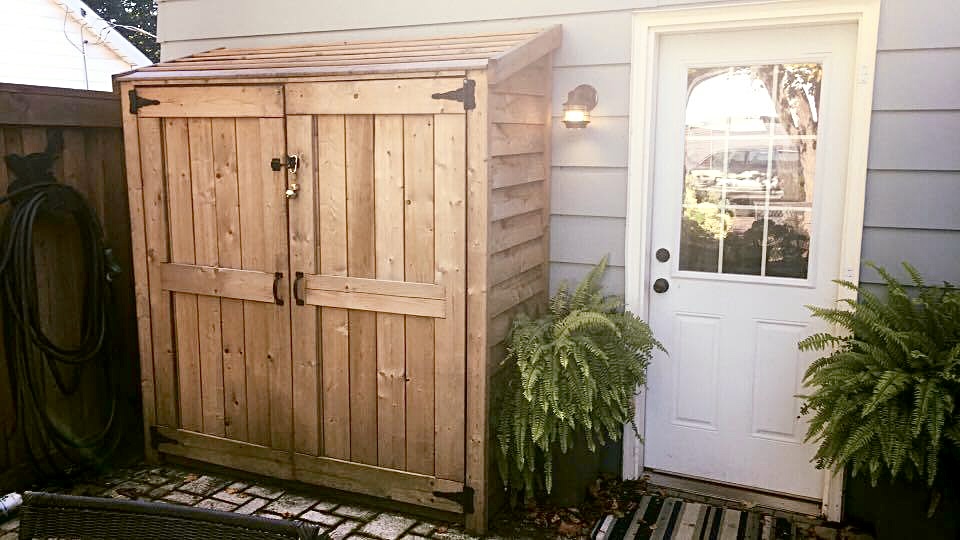
My husband and I built a garden tool shed using your plans for a "Small Outdoor Shed or Closet." We needed exactly this size for our available space. (THANK YOU! The video was really helpful and the plans were very detailed.) We are not handy at ALL, and are definitely beginners when it comes to woodworking. But, when the person who was supposed to build it for us was delayed, we thought we could try it, or at least START.

We bought a lower-end Kreg pocket jig and a secondhand mitre saw, and set to work, using T1-11 siding. We ended up building the entire shed ourselves, and were very surprised at the end result (and proud too!). The hardest part was building the doors, since we weren't really sure how to construct them to keep them from bowing. We ended up putting trim all around the edges of the T1-11 plywood doors, inside and out. (We were too far into building them when we realized we probably should have done it differently.) We also couldn't figure out how to get the double doors to stay tightly shut, but ended up using a rotating block (see picture) at the bottom and it works great, especially given that one of the doors had a slight bow at the bottom.

I think the only ways in which we deviated from the plan were that we added trim, an additional 2x4 up high across the back of the shed (for hanging long-handled tools), and two interior shelves on the left (from leftover siding). We used colored corrugated polycarbonate sheeting over the roof instead of asphalt shingles. (Unfortunately you have to use specific screws for the sheeting and one length was too short and the other too long and protrudes through the roofing slightly, into the interior. But we like the pop of color the sheeting adds, and REALLY didn't want to do shingles for such a small area, nor did we know how to do shingles.)

My final suggestions would be that a mitre saw and pocket jig are REALLY helpful and using star head screws is easier. I would also suggest that you paint everything (prime and color coat) before assembly and just touch up afterwards, especially if you use a lot of trim as we did. We primed and painted the siding but just primed the trim, and it was a real pain to put the color coat on all that 1x3 trim after construction.

This plan is listed as an "intermediate" project and I think that's probably a correct designation. As beginners, it just took BOTH of us to figure it all out (we work really well together) and to build it, and it took a much longer time than it would for someone with more experience.

Estimated Cost
I think we probably spent between $300 and $400 on lumber, hardware and paint, not counting buying the secondhand mitre saw and the Kreg jig.
Estimated Time Investment
Week Long Project (20 Hours or More)
Finish Used
Primed and painted, green and tan. (We bought the green and had the tan on hand.)
Recommended Skill Level
Intermediate

Comments

laurawelsh

Tue, 10/06/2020 - 15:56

Well done! I love this! Can I ask what dimension your garden tool shed is? And how did you decide on the new roof size/angle? I have a similar space and am contemplating something similar. Thanks!!

laurawelsh

Tue, 10/06/2020 - 15:56

Well done! I love this! Can I ask what dimension your garden tool shed is? And how did you decide on the new roof size/angle? I have a similar space and am contemplating something similar. Thanks!!

Ultimate Workbench Set Up

Submitted by Anonymous (not verified) on Mon, 05/05/2025 - 12:33

Built the Ana White “Ultimate tool bench with rolling carts” plan! Works great in my small garage! - Diane Aimes Facebook Community

Comments

DIY Breakfast Nook with Storage

Submitted by jfelker on Wed, 10/23/2013 - 08:54

DIY Breakfast Nook

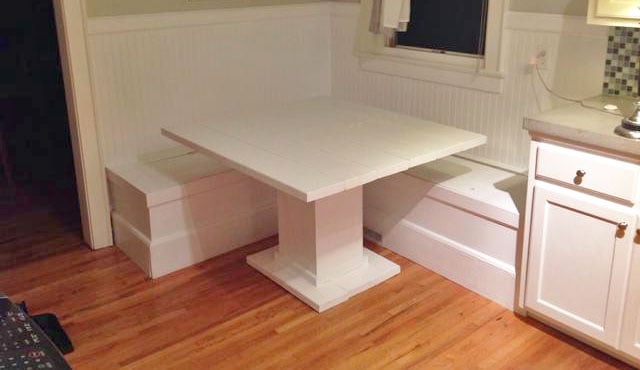
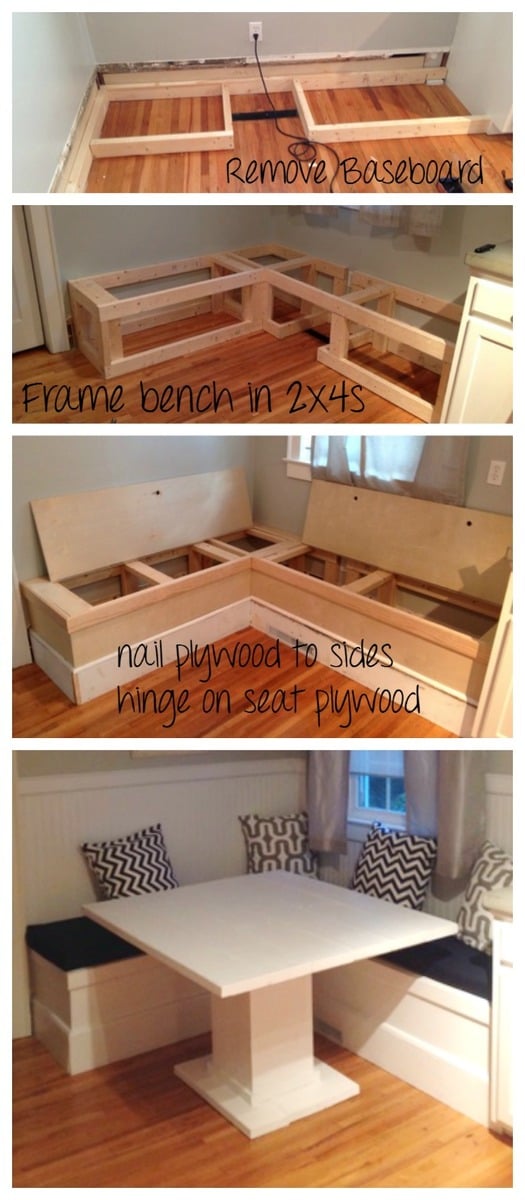
I completed this project in a weekend, over 2 days. The space was an empty void in the corner of our kitchen, so I decided to fill with a functional seating and eating space.

I first removed the trim from the wall, so I could reuse it on the front of the box later, to make the bench match the rest of the kitchen. One challenge I came across was rerouting the a/c vent through the front of the box so we didn't lose that circulation.

My sister-in-law chipped in to make the cushions and pillows to soften it up. I added the DIY table, and further defined the space with wainscoting and trim.

Estimated Cost
$500
Estimated Time Investment
Weekend Project (10-20 Hours)
Finish Used
Semi-gloss trim paint was use, to have the ability to clean later after meals, etc.
Recommended Skill Level
Intermediate

Comments

homeideas5099

Wed, 10/23/2013 - 10:10

Looks fantastic. Love how you reused the trim to have the whole unit blend in with the rest of the kitchen. Well done.

PDubs74

Sun, 01/09/2022 - 16:45

Hey there,
Absolutely love your DIY breakfast nook. Unfortunately the additional blog/info link is no longer working as I'm trying to gather more information. Would anyone be able to send the instructions and/or new link?
Thank you

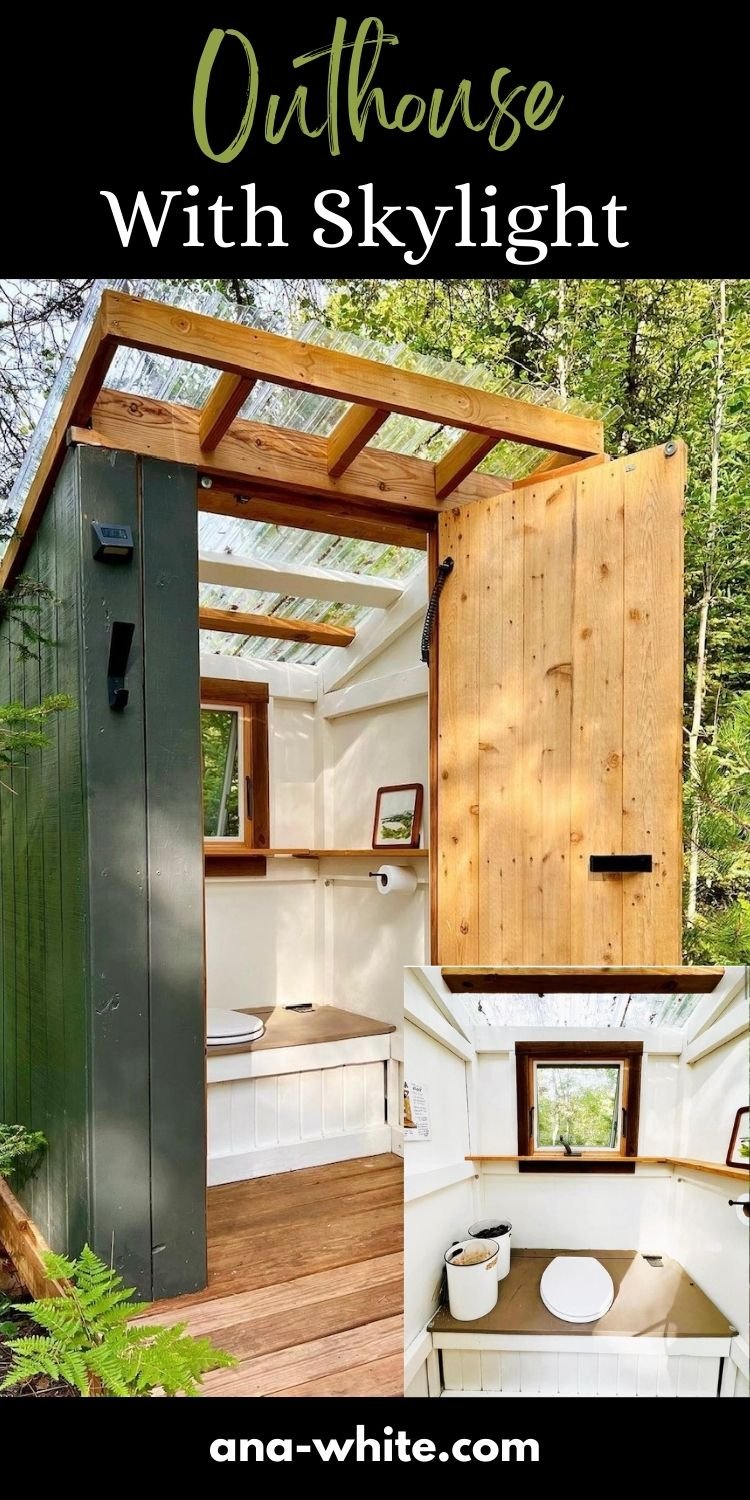
Outhouse with Skylight

Submitted by Anonymous (not verified) on Fri, 08/04/2023 - 11:03

Our favorite throne in town.

My daughter and I built the outhouse in the snow a few years ago. Once the TwoGa was named after the Stuga, the outhouse quickly became “The PooGa” (aka “The Ash-Hole “🤣). We use ash in the winter and sawdust in the summer, to keep away the stink, which works like a charm.

This is an adaptation to an Ana White outhouse design.


Pin For Later!

Outhouse with Skylight

Built from Plan(s)

Comments

Washer & Dryer Pedestal / Platform with Drawers

Submitted by dmccoy on Tue, 03/12/2013 - 10:26

Platform (Pedestal) with Drawers for front-loader Washer & Dryer. Cheaper than buying the manufacturer's plastic pedestals and more fun to build anyway! The drawers are also much wider and deeper than the manufacturer's pedestals. We can usually fit about 3 full loads of laundry in each drawer. (That's 6 loads of laundry before we have to start folding!) It's a very easy and basic DIY project. I made a 2nd one for my brother using these plans (sans the drawers). I gotta say, the drawers are SO nice to have though. But you could just leave the front open, without drawers, and slide some laundry baskets underneath for an even quicker project. We've been using this platform now for over 2 years and there is still no squeaking or rattling. The washer & dryer haven't moved from the vibration even in the slightest. They're exactly where I placed them on the pedestal 2 years ago. There's also zero problem with the weight of the washer either...it really is a strong frame. (After finishing, I jumped up and down on it!) A couple small tweaks I would make doing it over is raising the drawers a 1/2" in. off the floor to tuck a rug underneath (as is, they sit about 1/8" in. off the floor). Also, I would cut out a couple of square holes in the back panel to access those socks that fall behind (I can't access the sides of my W&D in our particular laundry room). Lastly, I would have painted with a quality paint (I just used a few cans of white spray paint to be quicker). Step-by-Step Plans and Materials List (PDF) and many more photos found at the Blog Link below...I'm certainly no professional "Plans Writer" so email if you have questions! Happy DIY-ing! Estimated Cost: ~$200 (2x6 lumber, plywood, drawer trim, nails, screws, paint)

Estimated Time Investment
Weekend Project (10-20 Hours)
Finish Used
White spray paint
Recommended Skill Level
Beginner

Comments

nikolegraves@h…

Wed, 03/13/2013 - 10:12

I have wanted to do the pedestal project for quite a while. I am so glad I held off though. Yours are fantastic! I would never have thought of drawers to hide the dirty laundry! Love it!

gmccoy20

Tue, 04/02/2013 - 11:06

Really appreciate the help with mine brotha! We really like them (even without the drawers) and are glad you had these plans to go off of for ours.

I'll be calling you for our next project!

strahmers8

Fri, 02/07/2014 - 17:05

Hello this looks great and for the amateur carpenter I am but one item I need clarified "the top measurement at 64" is .25" greater than the bottom at 63.75"

Please explain if I am missing something
Thanks

dwm22

Mon, 02/10/2014 - 15:33

Not sure what measurement you mean that's 63.75" since there's no "bottom" to the pedestals. Or do you mean 1/4" wider than the sides? The top panel should overhang both sides by 1/4" each so that when the side plywood is attached, it will be flush. Hopefully that helps? (If I'm understanding the question correctly)

jmkc

Mon, 02/24/2014 - 10:29

Could leave the back panel of plywood out so you could reach what may fall behind? Then you would just have to pull the drawers out?

heverest

Wed, 06/22/2016 - 16:35

Back panel is very very structural and provides lot of strength. If i wanted more access than the 5-7 inch of duct space behind the pedestal gives me, then i would replace the back panel with a long 2x6, that holds the three legs from going in different directions due to all that weight.

dmccoy

Mon, 12/12/2016 - 14:58

This is the one modification I could make if i could redo these plans...I would still put on the back panel of plywood as it stabilizes the pedestal, I would just have cut out a rectangle (behind each drawer) so that I could remove the drawers and stick my hand/arm through to grab fallen clothes or vacuum the lint.

dachiri

Mon, 12/18/2017 - 19:17

Rather than cut holes in the back, I just cut the back and side boards a little small and left a gap around the bottom the whole way around.  That way I can get a vaccuum hose in there or reach through and get lost items.  Because my washer and dryer seem to be deeper than yours (I needed at least 33" depth, so I went with 3'), that also worked out well in getting the most out of the boards.  I could do the top, back, and sides out of one single sheet of good 3/4" plywood just leaving those small gaps at the bottom for clean-up and retreival.

Jperera

Fri, 11/20/2015 - 05:23

Hello,

I downloaded the pdf but have exactly the same information that the website html, where can I find a solution step by step guide?

Thank you for all the interesting posts.

How to Build a Raised Balance Beam for $60

Submitted by Anonymous (not verified) on Thu, 01/31/2019 - 14:49

From watching Olympic gymnast Simone Biles on the television to running, flipping and twirling all around our living room — my girls LOVE everything gymnastics. Both girls began competing with a local gymnastics club. Now that my oldest has moved up and is pretty serious about practicing her beam handstands and dismounts, she begged me to build a raised balance beam with suede covering so it would have a similar feel to her beam at the gym.

If you can relate to this, or even if you have a new gymnast (like my youngest in the pic above) wanting to improve their skills at home, then this comprehensive tutorial on how to build a raised balance beam is for you.

Full plans available on my blog The Creative 'Carr'penter. You can also find and pin this tutorial on Pinterest here.

Estimated Cost
Cost of materials were about $60. Could vary depending on materials used.
Estimated Time Investment
Afternoon Project (3-6 Hours)
Finish Used
I used an outdoor flat paint to finish the exposed pieces of wood. The remainder was covered in padding and suede fabric.
Recommended Skill Level
Beginner

Comments

2x4 Essential Adirondack Chair

Submitted by mricks1960 on Mon, 11/16/2020 - 11:31

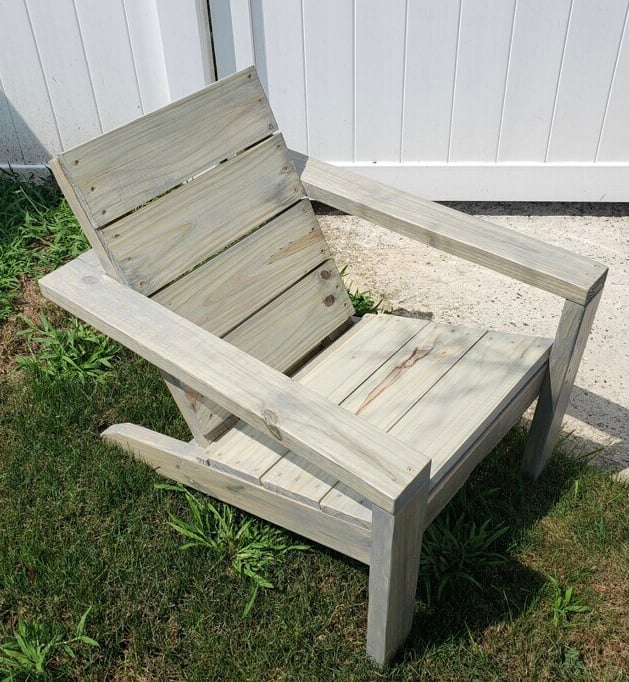
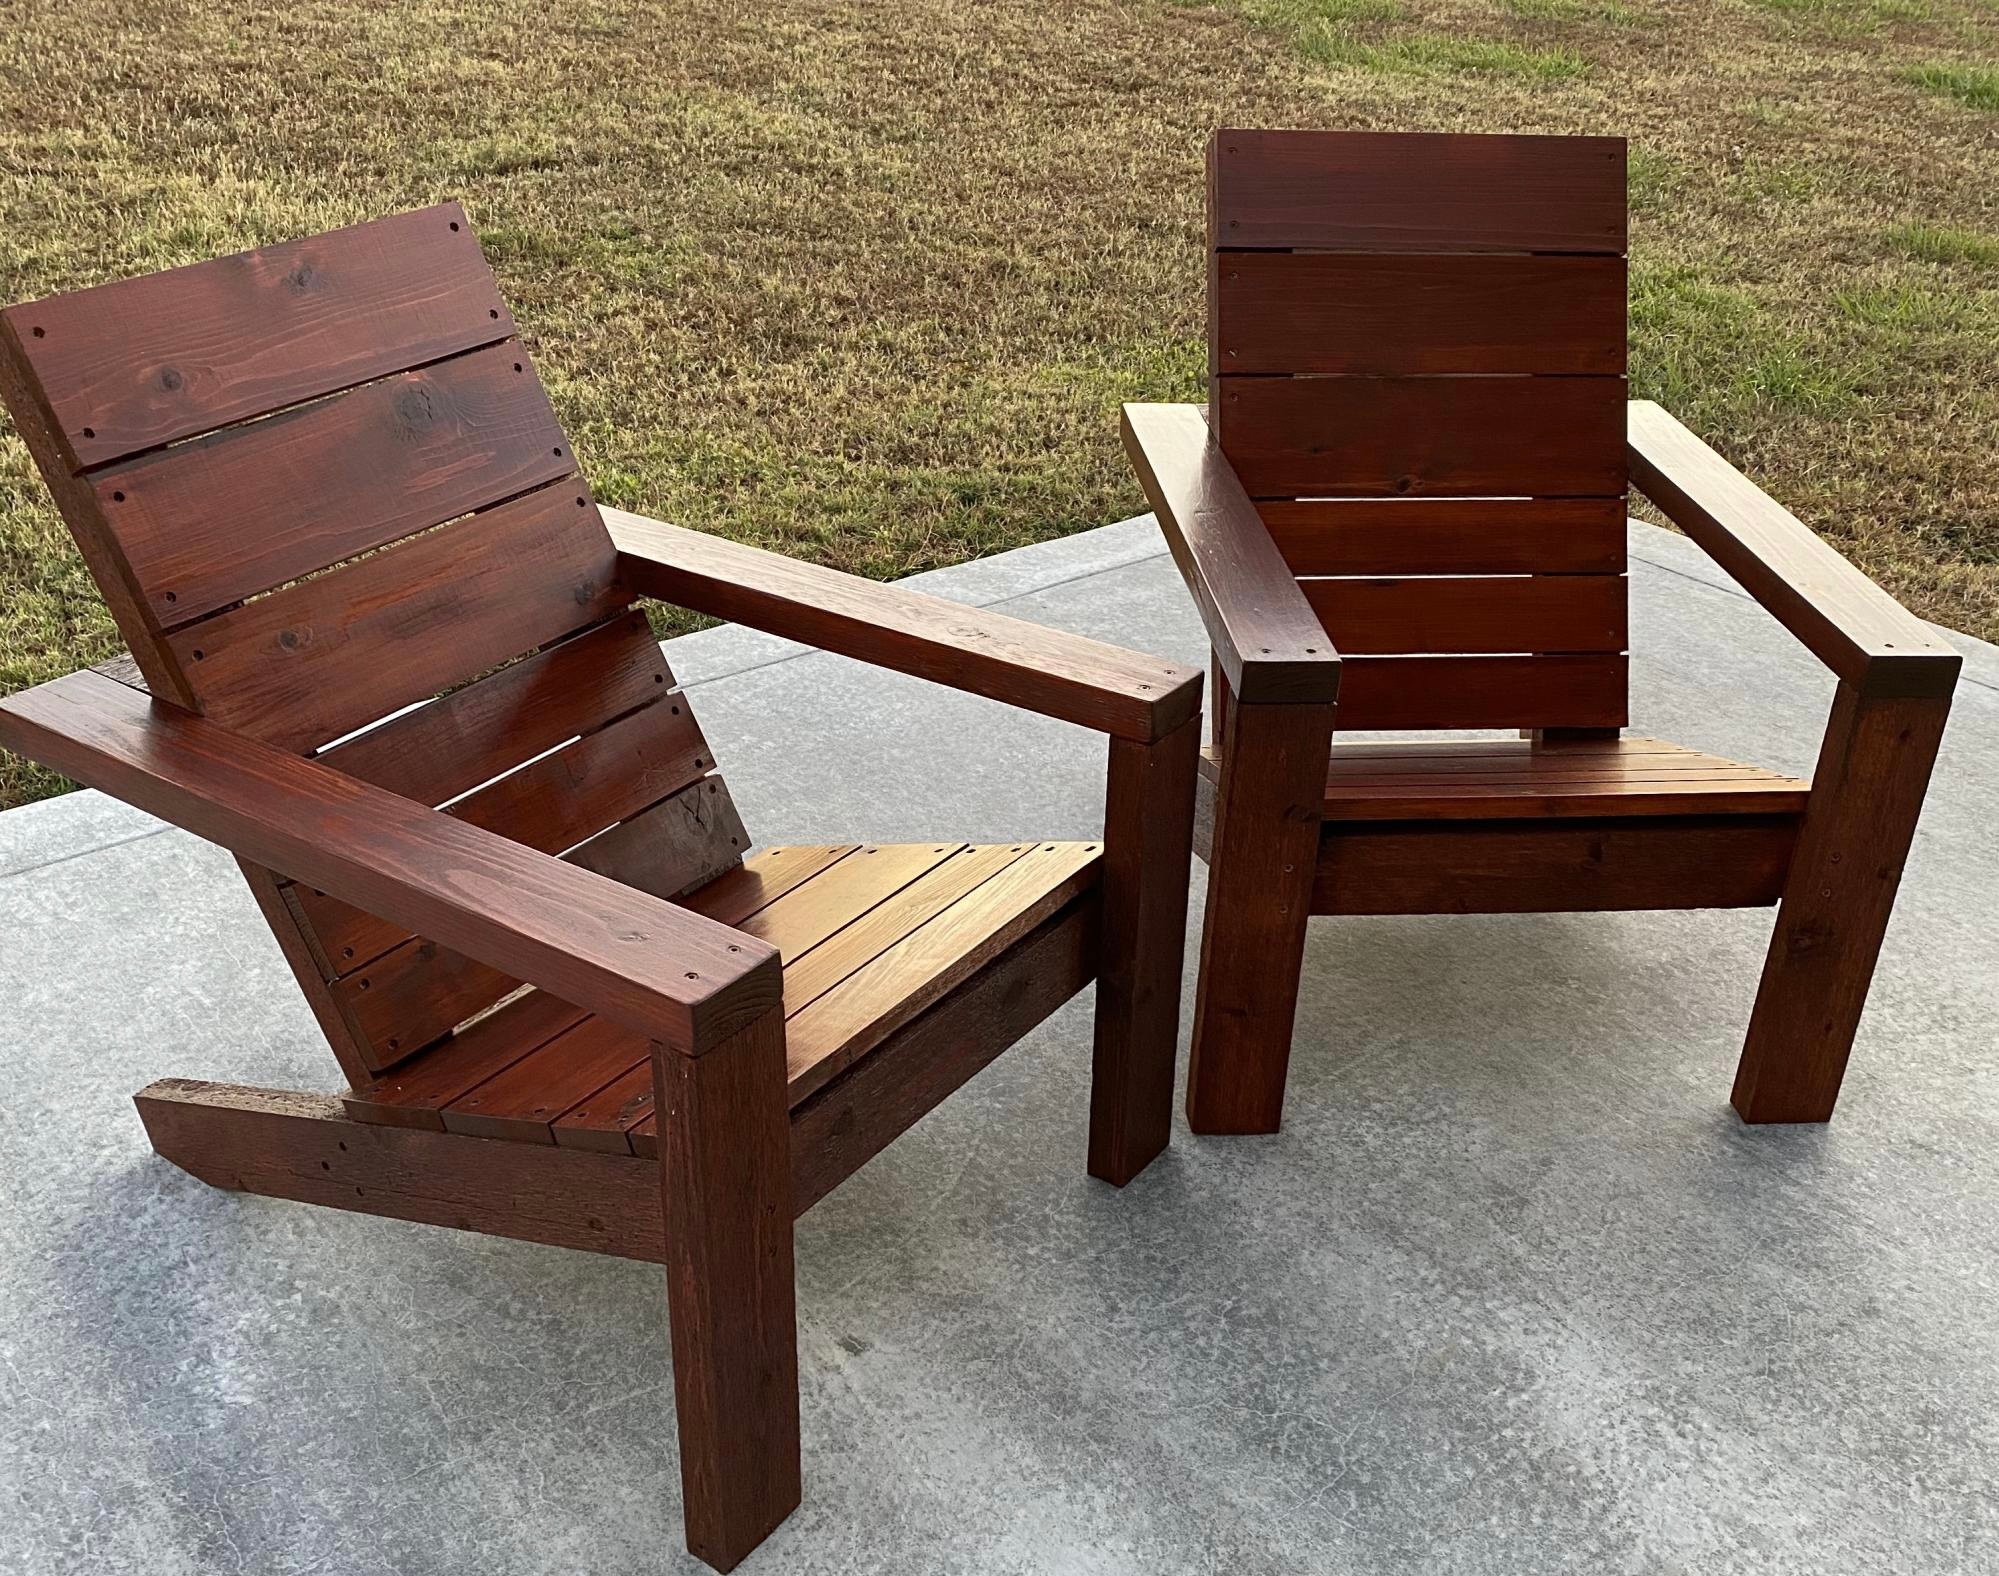
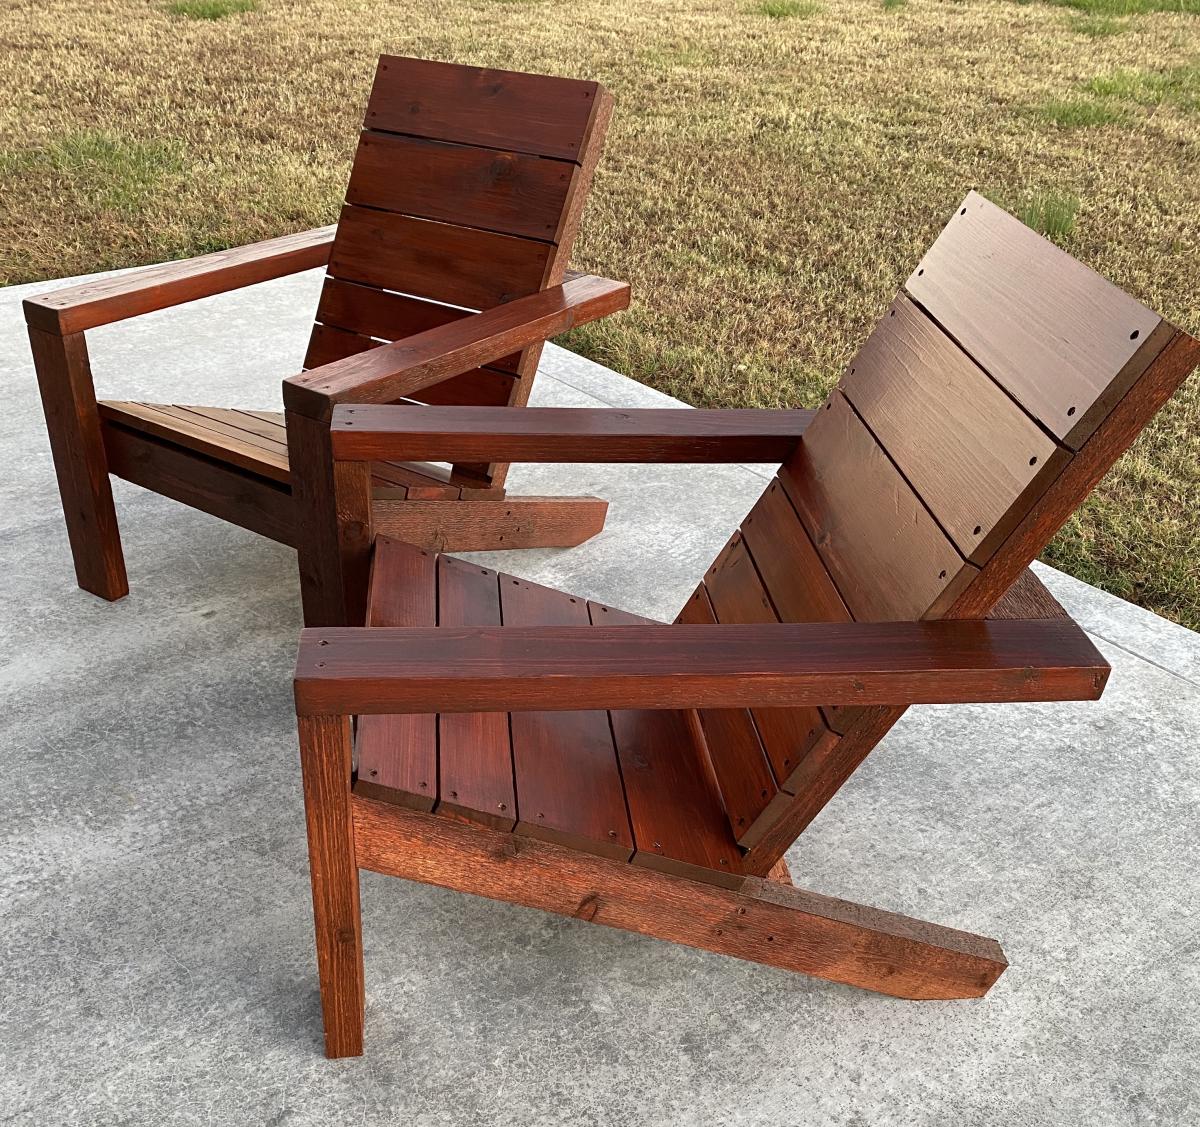
I used Western red cedar to build my chairs. The build was a little more expensive but well worth it. The chairs were stained with Cabot’s Australian Timber Oil ( Jarrah Brown). Thanks for the plans Ana, your site is awesome and you do a great job! Mark


Comments

6' Square Sandbox

I've been wanting to buy or make a sandbox for my son for a couple of years now. Since seeing this on Ana White I knew I had to make it. My son is 4 yo and I didn't think the 4' square sandbox would be big enough for him, so I made it bigger. Ours is 6' square. Materials: 4@1x8x6' 12@1x6x6' 2x4 - used leftovers from another project 8 hinges 4 handles decking screws Cut lengths: 2@1x8 cut to 71.5 (long sides of the box) 2@1x8 cut to 70.5 (short sides of the box) did not cut the 1x6 boards (top planks) - actually designed the other boards to fit their length to prevent cutting (saving time) (note that original plan uses 1x4 planks - I used 1x6s so I could use the same number of planks but cover a larger area) 4@2x4 cut to 11.5 (arm rests) 4@2x4 cut to 18.5 (back supports) followed instructions for assembly otherwise. At my husbands suggestion we put the handles on the sides and can easily open from either side - prevents having to lean over to the middle to open (back saver) I finished the project in 4 hours including clean up and a couple of small breaks. This is my first Ana White project. It was a lot of fun to build and I hope my son will enjoy it for years to come!

Built from Plan(s)
Estimated Cost
$190
Estimated Time Investment
Day Project (6-9 Hours)
Finish Used
Sand and stain with sealer included
Recommended Skill Level
Beginner

Comments

Mrs. Chellebelle

Sat, 09/01/2012 - 20:59

Wow, this is just what I need! I've been wanting to make a sandbox for under the playhouse but the other plan was too small. This would be great for the little guys. Thanks!

Lift Top Coffee Table

Submitted by JJones0925 on Fri, 03/16/2018 - 20:48

Instead of attaching the top to the coffee table base as done in the plans, the top is attached using a set of coffee table lift top hinges. 

Built from Plan(s)
Estimated Time Investment
Weekend Project (10-20 Hours)
Recommended Skill Level
Beginner

Comments

Barbecue/BBQ Quick Built-in

This was just a standard BBQ with an attached folding table. I used a combo of Ana's plans to add a little character and style to the BBQ and it made a huge difference in not only the BBQ, but also the backyard. 

Estimated Time Investment
Weekend Project (10-20 Hours)
Finish Used
Golden Oak
Recommended Skill Level
Beginner

Comments

mdwstgrl

Mon, 05/23/2016 - 12:29

Hello:  Very interested in which plans you used to build the BBQ Built In. Thank you.

Lean-To Shed

Submitted by Anonymous (not verified) on Fri, 03/24/2023 - 13:17

I’m a first year teacher of construction class at Waterloo High School in Illinois. We recently used your Small Cedar shed instructions with some modifications for a class project. It’s a bear getting cedar right now, so we used T1-11 for the outside and 2x4 for the frame.

Built from Plan(s)

Comments

Simple Square Cedar Outdoor Dining Table

Submitted by Finns-Dad on Mon, 03/12/2012 - 17:58

I've been planning on building a patio table for this coming spring and summer, but didn't know where to begin. I found Ana's wonderful site and now I don't know where to stop! So many great ideas.
After seeing ewood's great table I decided to make one similar. I made my square table based on Ana's and ewood's basic designs. Thank you both. I also made a bench based on Ana's design.

Built from Plan(s)
Estimated Cost
300--475
Estimated Time Investment
Weekend Project (10-20 Hours)
Finish Used
Semigloss Spar Urethane
Recommended Skill Level
Beginner

Comments

7CsShepherds (not verified)

Thu, 03/29/2012 - 07:37

I have a family of 7 (soon to be 8, I hope), and was trying to figure out how to fit us all on the rectangular table. This is the solution! I can simply make 4 benches to go with it! Thanks for the idea and the picture!

Guest (not verified)

Mon, 04/09/2012 - 07:24

Love this table and your modifications to ewood's table. I was wondering what size are the legs on your table - I can't tell if they are 4x4s...which is sort of what I'd like to have on mine. And they are under mounted, which I love because I want to make ours with the ability to remove the legs for reduced storage space in the winter. If you could would you mind putting a few close up photos of how the outside corner came out and the underside of the corners. It would be much appreciated.

K_W (not verified)

Mon, 04/09/2012 - 07:27

Love this table and your modifications to ewood's table. I was wondering what size are the legs on your table - I can't tell if they are 4x4s...which is sort of what I'd like to have on mine. And they are under mounted, which I love because I want to make ours with the ability to remove the legs for reduced storage space in the winter. If you could would you mind putting a few close up photos of how the outside corner came out and the underside of the corners. It would be much appreciated.

In reply to by K_W (not verified)

Finns-Dad

Sat, 04/14/2012 - 13:35

Hi - sorry it took a little while to get back to you. Yes the legs are 4x4's. I used knotted cedar 4x4's for the legs and made them 29" tall. I wanted to be able to disassemble the table and put it away for winter, so I attached the legs using carriage bolts, 2 per side (4 total per leg). I drilled holes using a pilot bit, then used a spatter bit to make the larger holes for the carriage bolt.

I didn't bother to counter sink them, but if I made another I think I would try that to make a more polished look. The legs are sturdy, the table doesn't wobble at all, but I am sure that someone with more furniture building experience might have a different/better idea.

I've added a couple more photos showing the corners, outside and underneath. I've also added my very basic plans that I used to make the table, one of these days I will study Ana's post of how to use sketch-up, until then this is what I worked with.

Joni

Wed, 06/06/2012 - 09:26

Can you tell me what size (width) boards you used on the frame pieces of the table, and what size on the inner boards? From your diagrams, it looks like the frame is made of 1x4s, but the inner pieces look smaller. Thank you !!!

Your table is absolutely beautiful. It looks like a very high-end piece of furniture. One of my favorite things is how the carriage bolts are installed -- I wouldn't change a thing on them!

In reply to by Joni

Finns-Dad

Tue, 07/30/2013 - 16:36

Sorry it took so long to reply - I didn't see your post. So far the table is holding up well.

You're right, the top is made from 1x4's, including the inlaid slats. To support the top, I cut 1x4's down to 1x3's so they remain hidden by the side 1x4's of the frame.

Aussie Paul (not verified)

Tue, 10/16/2012 - 18:02

Love the table - looks absolutely fantastic! I have been looking for a decent square outdoor table for ages and this one certainly fits the bill.

Can you please add a photo of the underside of the table and advise how you fastened inner boards on table top. Thanks.

In reply to by Aussie Paul (not verified)

Finns-Dad

Tue, 07/30/2013 - 16:40

I added a new photo of the bottom. Hopefully this will help show how I attached the top. I have a number of additional photo's I can send to you if you like - this site limits the number of photos I can add.

Everything is attached from the bottom to hide the screws. I used a kreg jig and it helped so much - i really recommend it.

Belmo

Wed, 08/14/2013 - 12:35

I love the look of this table, man - I think I'm gonna steal some ideas from this.

I have a question about your top, though. The slats look to be 1x4s, which I can understand, but the edges seem to be a bigger size.

Did you use 1x6 boards for the edges? 1x8s? Something else?

Thanks for your help.

Finns-Dad

Mon, 09/02/2013 - 11:03

Thank you - please take any ideas from it that you can. That is what I love that about Ana's site. You can take these great ideas and make them fit your own style...

You're right - the table top is made of 1x4's and 1x6's. When i put the top together I made the frame first. Then I added the exterior 1x6's. Next I added the center 1x6. Lastly I cut each 1x4 to size and added them.

livingston.140

Sat, 05/17/2014 - 07:15

This is an amazing table, it is beautiful! I am somewhat new to wood working and was wondering if there was a material list? I plan on creating this in AutoCAD first, so I have a visual to work off of. Also what did you use for spacing in between the boards or what was the allowance of space.

Thanks again, your work is beautiful!

leitaf

Wed, 04/22/2020 - 20:37

In looking at the plans and the underside of the table, there are some measurements missing that make it a little hard to decipher. It would be good to know the lumber sizes e.g. 1x4x8 etc. the underneath side seems to have some additional boards that don’t seem to be in the drawing. I was just wondering if it might be possible to get some additional details?

@njhorseplayer

Sun, 05/24/2020 - 08:05

This is a beautiful table and I'm going to try and replicate in a rectangular version. Primary question I have is what length screws you used to affix the framing pieces underneath to the top side so that the wood doesn't split and that the screws don't pop thru the top. Any help you can provide would be appreciated, if even you still look at this page. Thanks in advance!

Cedar Garden Shed

We needed a way to get all of the lawn & garden stuff out of our garage and organized. I found Ana's plans for the Small Cedar Shed & adjusted them to fit our space. We used 2x4s as our studs & added front walls on the sides. Our shed measures 9.5'x30". We had a concrete slab poured for our foundation. We are experienced DIYer's but had never taken on a project of this scale from scratch. This project was much easier than I was anticipating, and we were able to complete it in one weekend! Similar shed kits were way more expensive and not the size that we were looking for. Thank you so much for the inspiration!

Built from Plan(s)

Comments

Seasonal And Holiday

Sandbox with Benches

Submitted by cscottrun on Mon, 04/13/2015 - 10:33

We altered the original plan by enlarging the sandbox (approx 5' x 6') which made for wider benches that can comfortably seat an adult.  The benches and back rests are three boards deep instead of two.  We added 2x12 supports under the benches for additional support, as well as another 2x4 support in the middle of the backrest.

Built from Plan(s)
Estimated Time Investment
Day Project (6-9 Hours)
Finish Used
None
Recommended Skill Level
Beginner

Comments

Seasonal And Holiday

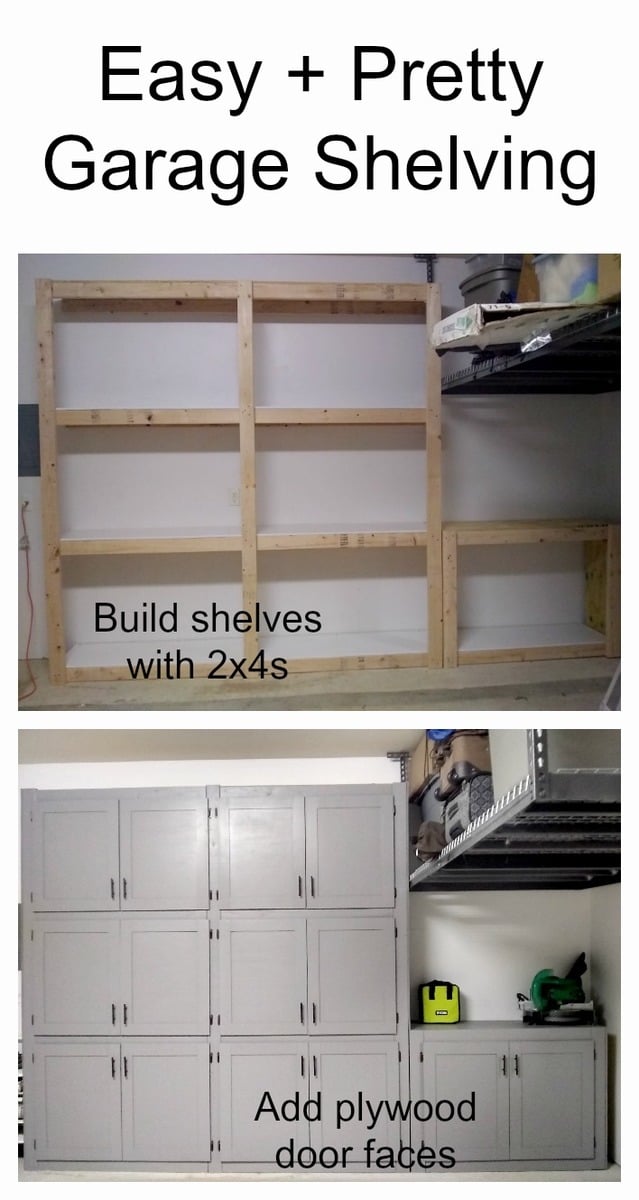
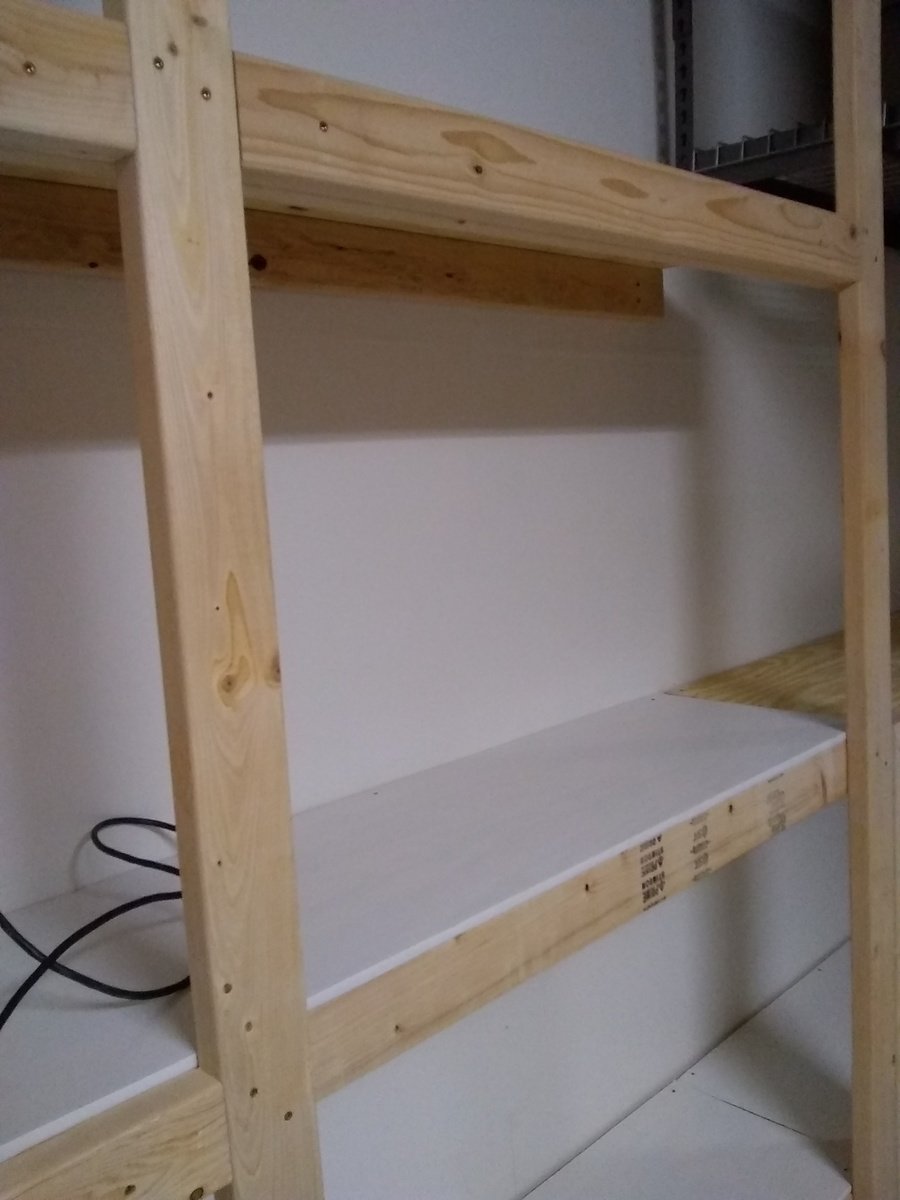
Garage Shelving - Some minor mods to Ana's great basic plan

My father-in-law and I knocked this project out in about 5 hours including the trip to the lumber yard. You've got a great basic design here! A few modifications we made:

1. I thought the depth of the shelves in the original plan was a little too shallow so I used 3 2"X6"s instead of the 4 2"x4"s. That made the shelves 1 1/2" deeper. Although 2"x6"s are obviously more expensive, the overall cost for the project didn't change much because we only had to use 3 boards per shelf instead of 4. This also reduced the amount of screwing and made it easier to position the shelf boards without taking measurements since we only had one middle board to deal with (instead of 2 with the 2"x4"s). We just eyeballed the spacing of the middle shelf board as we worked.

2. Since our garage has a 10' ceiling, I decided to go 8' tall with the unit. This allowed us to add a 5th shelf.

3. Some oversized tubs can be 18-20" high or more so I varied the height of each shelf -- 24" at the bottom, then 20", 18" and 16". There's approx. 24" available between the top shelf and the ceiling.

4. Due to the position of the garage door track, I had to notch out a couple feet at one side. The end support piece is only 6' high.

5. Since many storage tubs can be 16-18" wide, I made sure that there was at least 54" between 3 of the vertical support structures. This will allow us to store 3 tubs side-by-side and maximize storage. You might notice that I have two vertical supports that appear to be very close together near the back wall. I did this so I would have something on that side to attach more shelving to on that short wall where the garage door opener is. 

The only cuts we had to make for this entire project were for the 18 1/2" 'braces' or support pieces on the vertical ladder structures. The shelves are either 14' or 12' (top shelf only) and the vertical 2"x4"s are either 8' or 6'. Most lumber yards will carry these lengths in either 2"x4"s or 2"x6"s. 

We didn't use any wood glue, and I admit this may come back to haunt me. However, to get a good fit and eliminate gaps, I used clamps I already owned to squeeze the boards together before adding the screws. Everything feels very solid and sturdy to me. 

Because of the extra height compared with the original plan, I was worried about it possibly tipping over (we have a 10-year-old who likes to climb frown) so I made sure that 3 of the supports are lined up with the wall studs. After leveling the entire unit, I plan to anchor it to the wall using 3 1/2" screws.

So for about $187 in lumber and maybe $20 in construction screws, I've got 76 feet of STURDY shelving that should accommodate hundreds of pounds! Not a bad investment at all...


Estimated Cost
$187 lumber + $20 construction screws
Estimated Time Investment
Afternoon Project (3-6 Hours)
Finish Used
None right now, but my wife wants to sand it and apply marine varnish to give it a shiny, yet still unfinished, look.
Recommended Skill Level
Beginner

Comments

Letter press rustic x coffee table

Submitted by kasiwalker on Tue, 08/06/2013 - 11:34

I used the Rustic x coffee table plan and modified the top. I used 2x2's to make a frame and a router to make notches for plywood under the letters and glass to fit inset on top. The letters are antique letterpress blocks that I obtained on ebay and at antique shops.

Estimated Time Investment
Day Project (6-9 Hours)
Finish Used
Minwax Aged Oak.
Recommended Skill Level
Starter Project

Comments

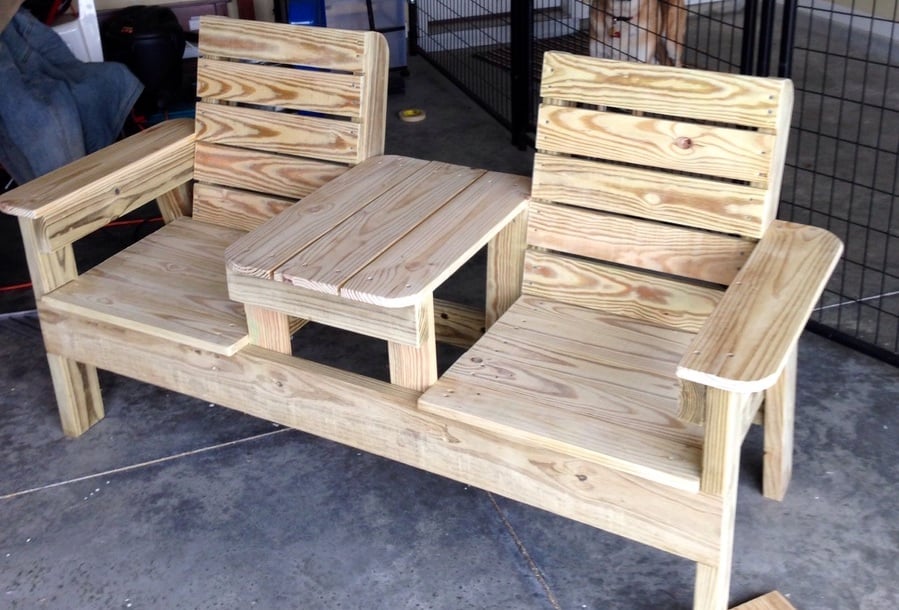
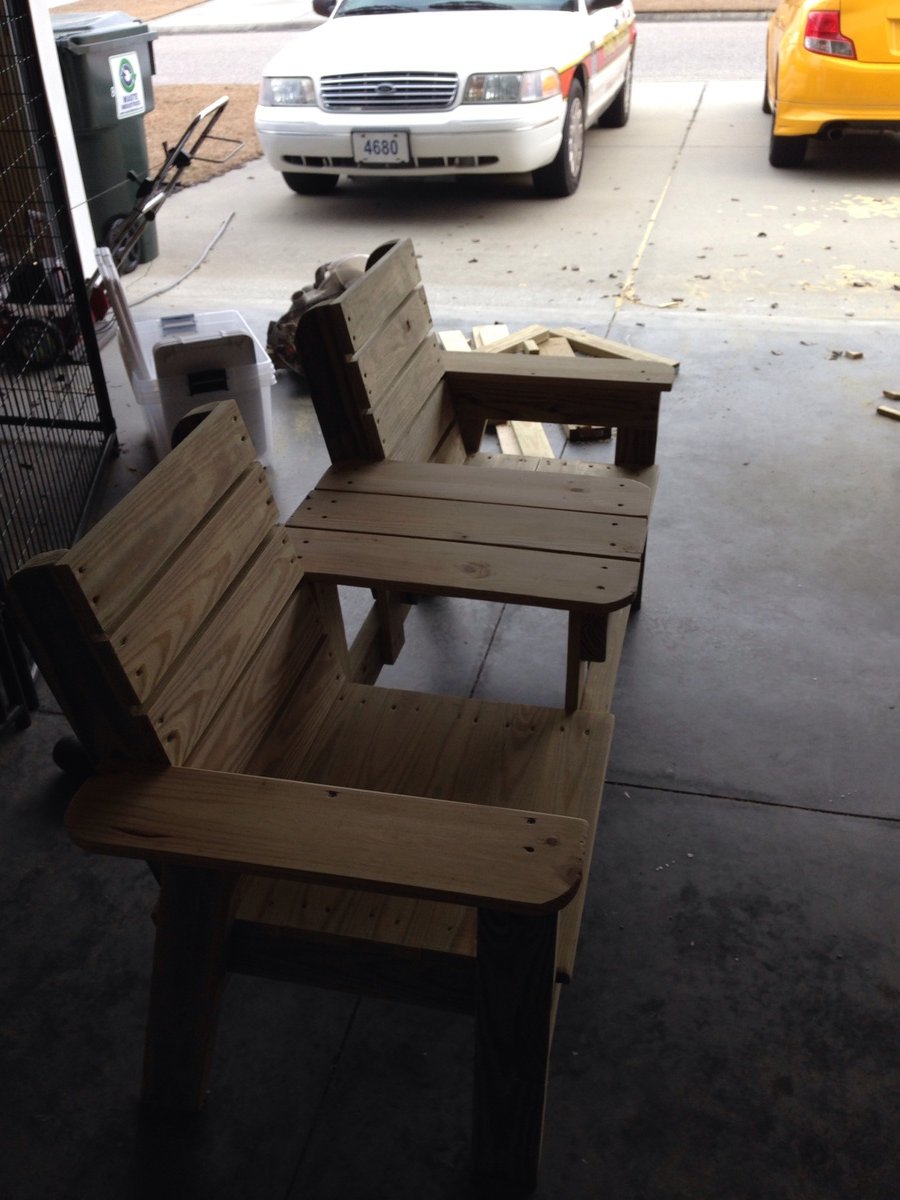
Deck Chairs

Submitted by mgb11184 on Thu, 07/21/2022 - 19:54

I made a couple of additions/modifications

I also made a couple of side tables and foot stools for the chairs. A total of four chairs, two tables and two foot stools for the deck set.

Comments