Easy to Build Outdoor Wood Furniture
Really easy to follow instructions. Thank you!
Built from Plan(s)
Really easy to follow instructions. Thank you!
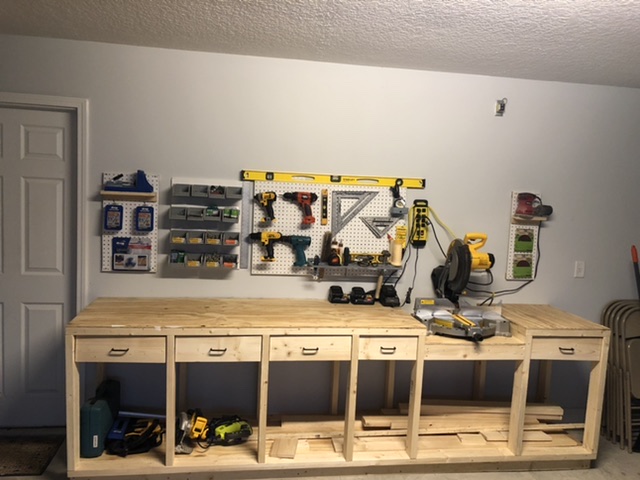
Had to size the project done to fit my garage wall.
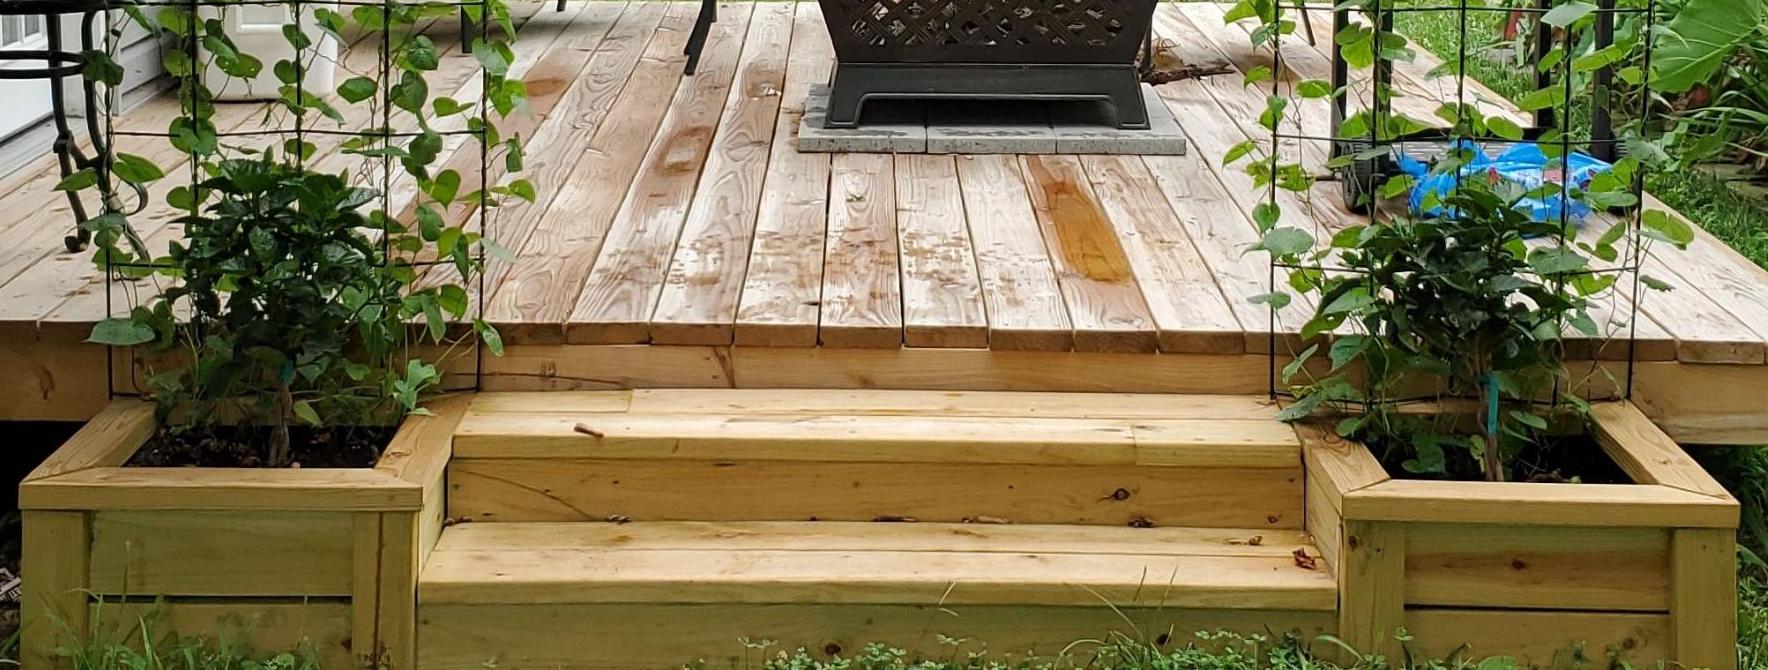
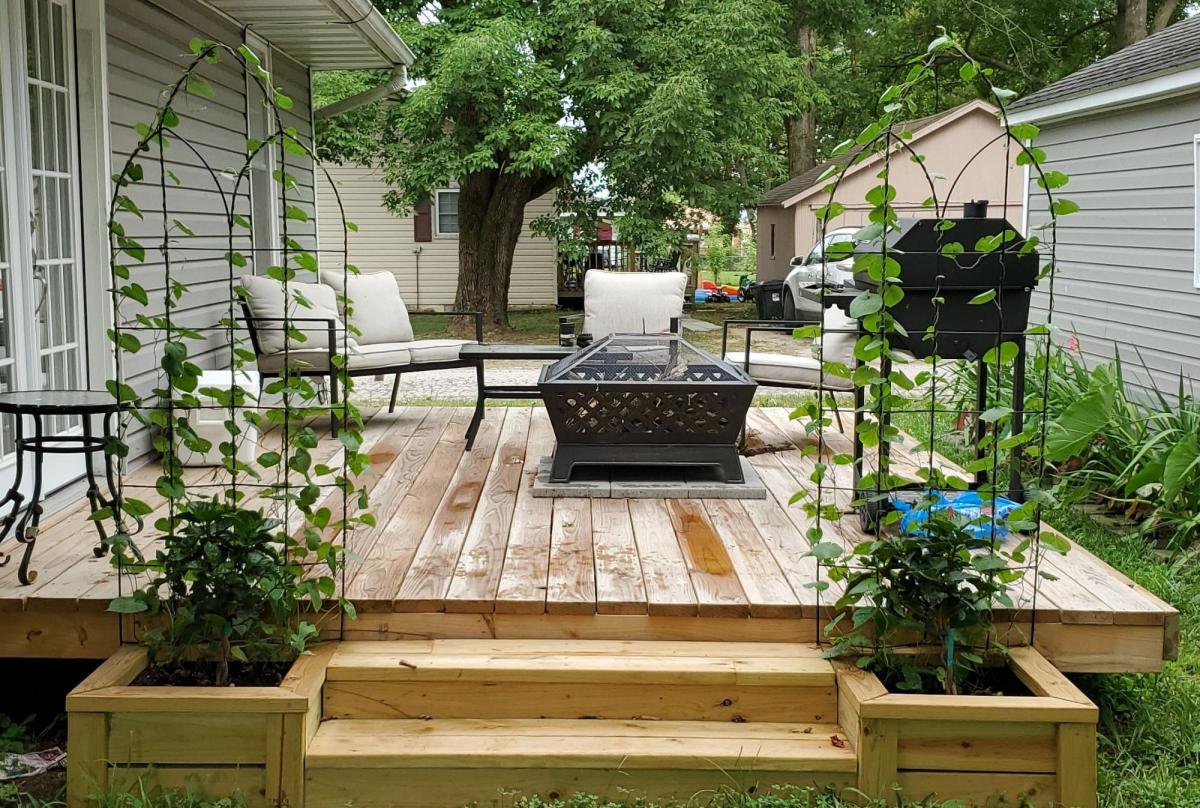
Left the sides open to use as storage for wood.
Overall Everything worked out, love it!
Directions worked like a charm, thank you, Ana for what you do!
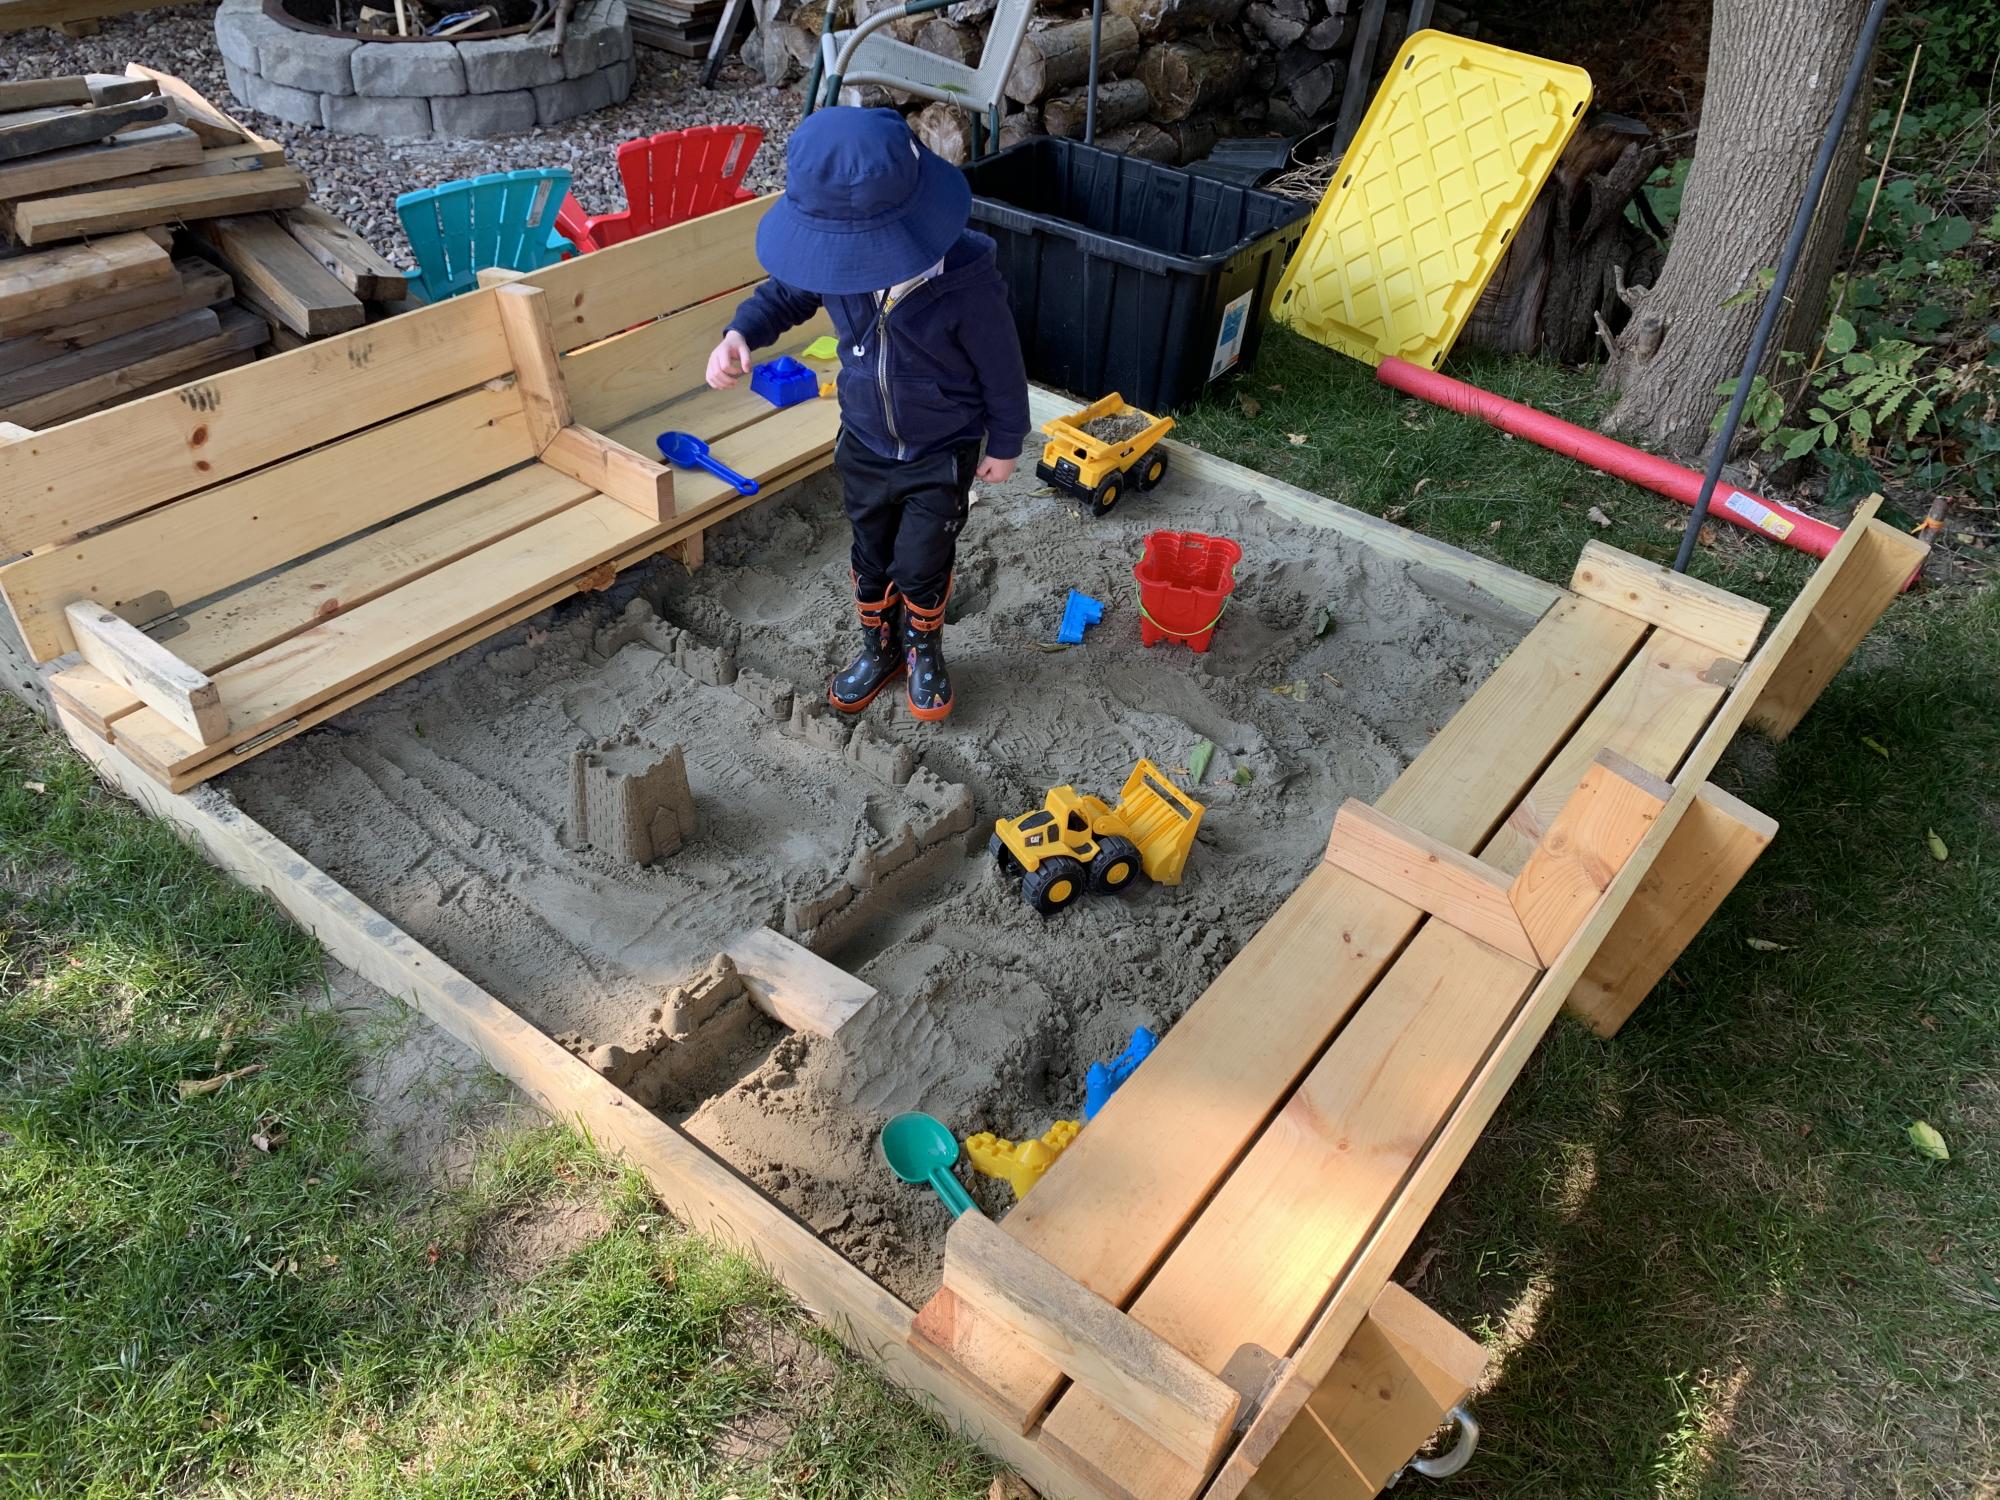
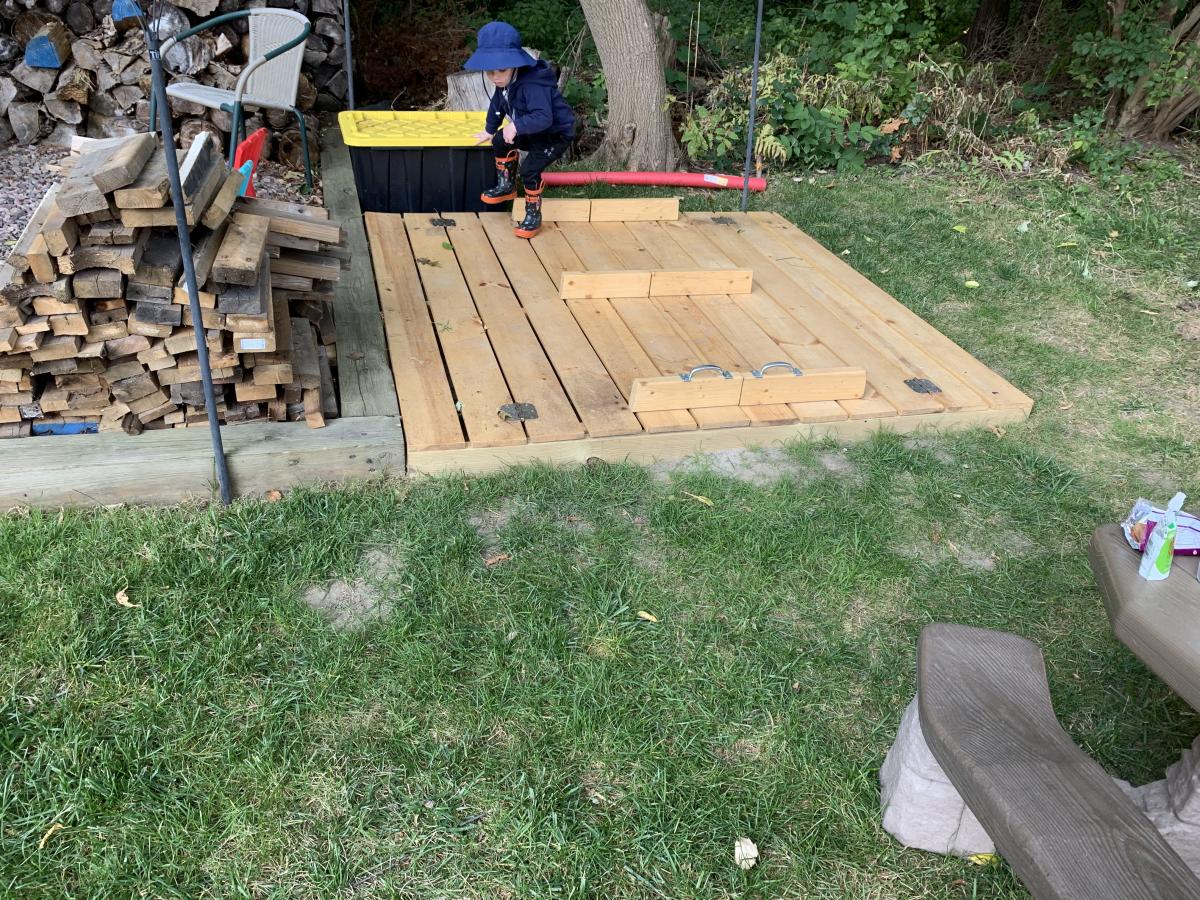
Made the sandbox 6x6. Recessed it so it sits flush with the timber’s around our fire pit area. I added extra armrests in the middle that double as supports when the lid is closed in case anyone wants to walk on it. Filled the sandbox full enough that the armrests sit on the sand when closed. It’s very sturdy now for walking on and the kids have tons of room to play. Thanks for a great plan to work from.
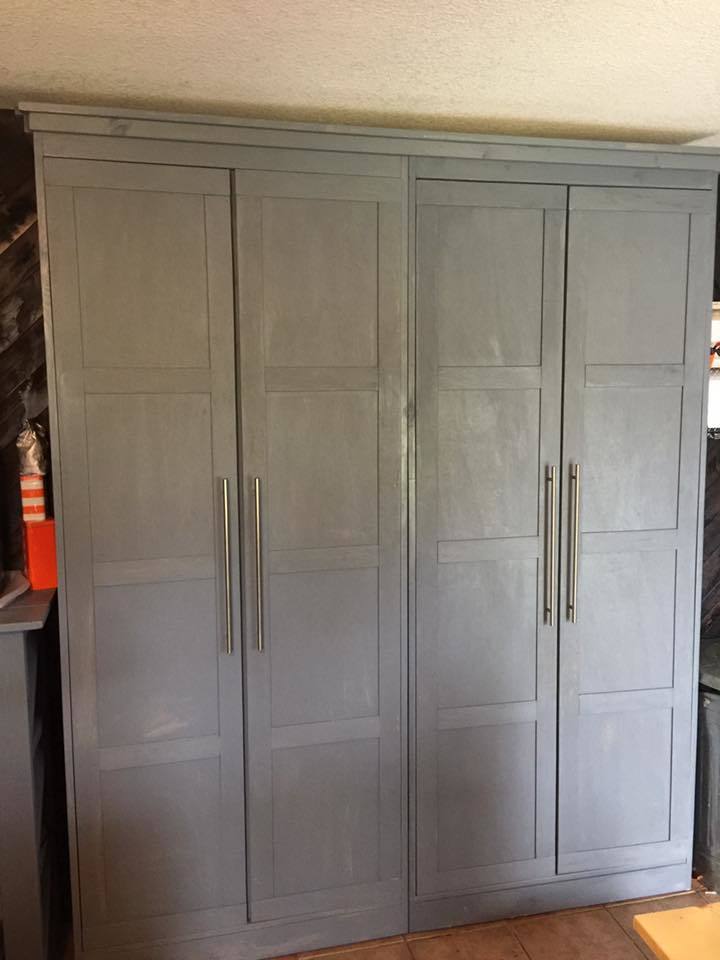
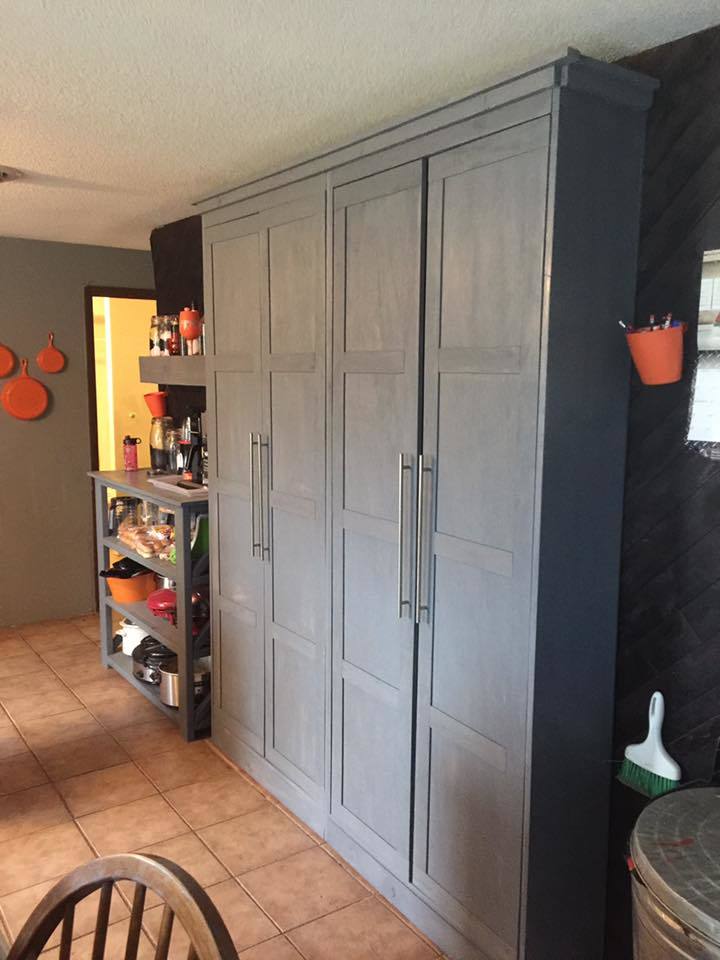
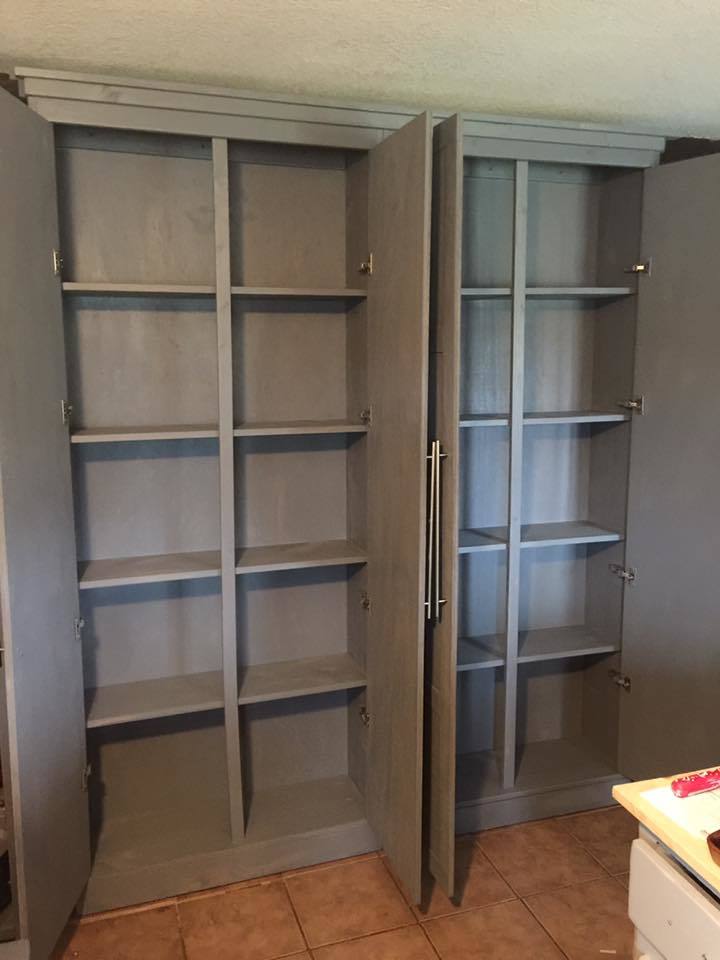
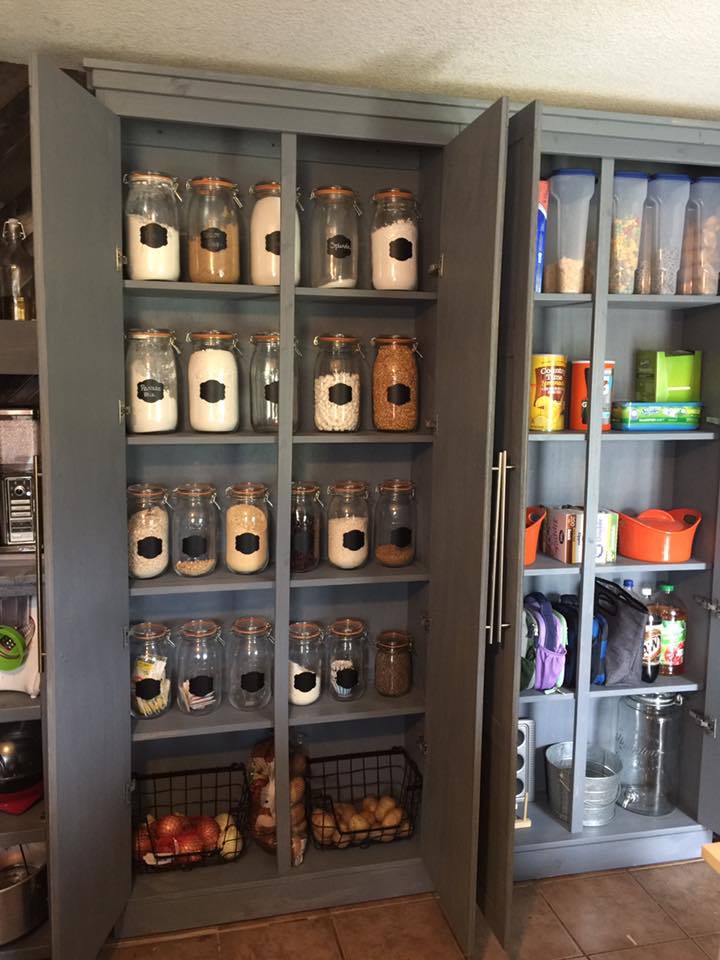
I modified the origianl plans by making the cabinet taller. I also built 2 cabinets and trimmed them both together to make it appear as if it is 1 giant cabient. It measure over 7 feet tall and just over 6 feet wide. I did add an additional 1x2 brace in the center of the cabinet to help support. I also cut an additional 1x4 to use a brace when anchoring it to the wall. I also chose to add an additional 2 trim pieces to each door because they are much taller than the original plan doors.


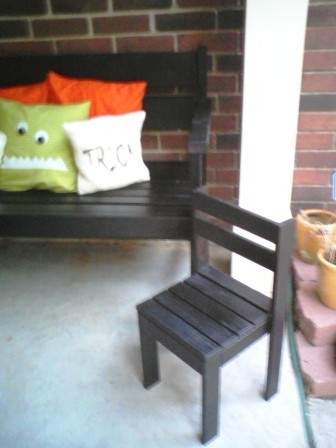
I recently found this plan and decided to build it for my front porch. I am so happy to have finished this project (my second build) and look forward to decorating it for each holiday! I did not angle to the top of the bench because I wanted it to match my first build, the $4.00 chair.

Tue, 11/01/2011 - 12:30
Your bench looks really nice. I built this same bench for my mom for Christmas. It is sitting in my garage waiting to be sanded and then stained. So nice to see other's projects. Thanks for sharing!
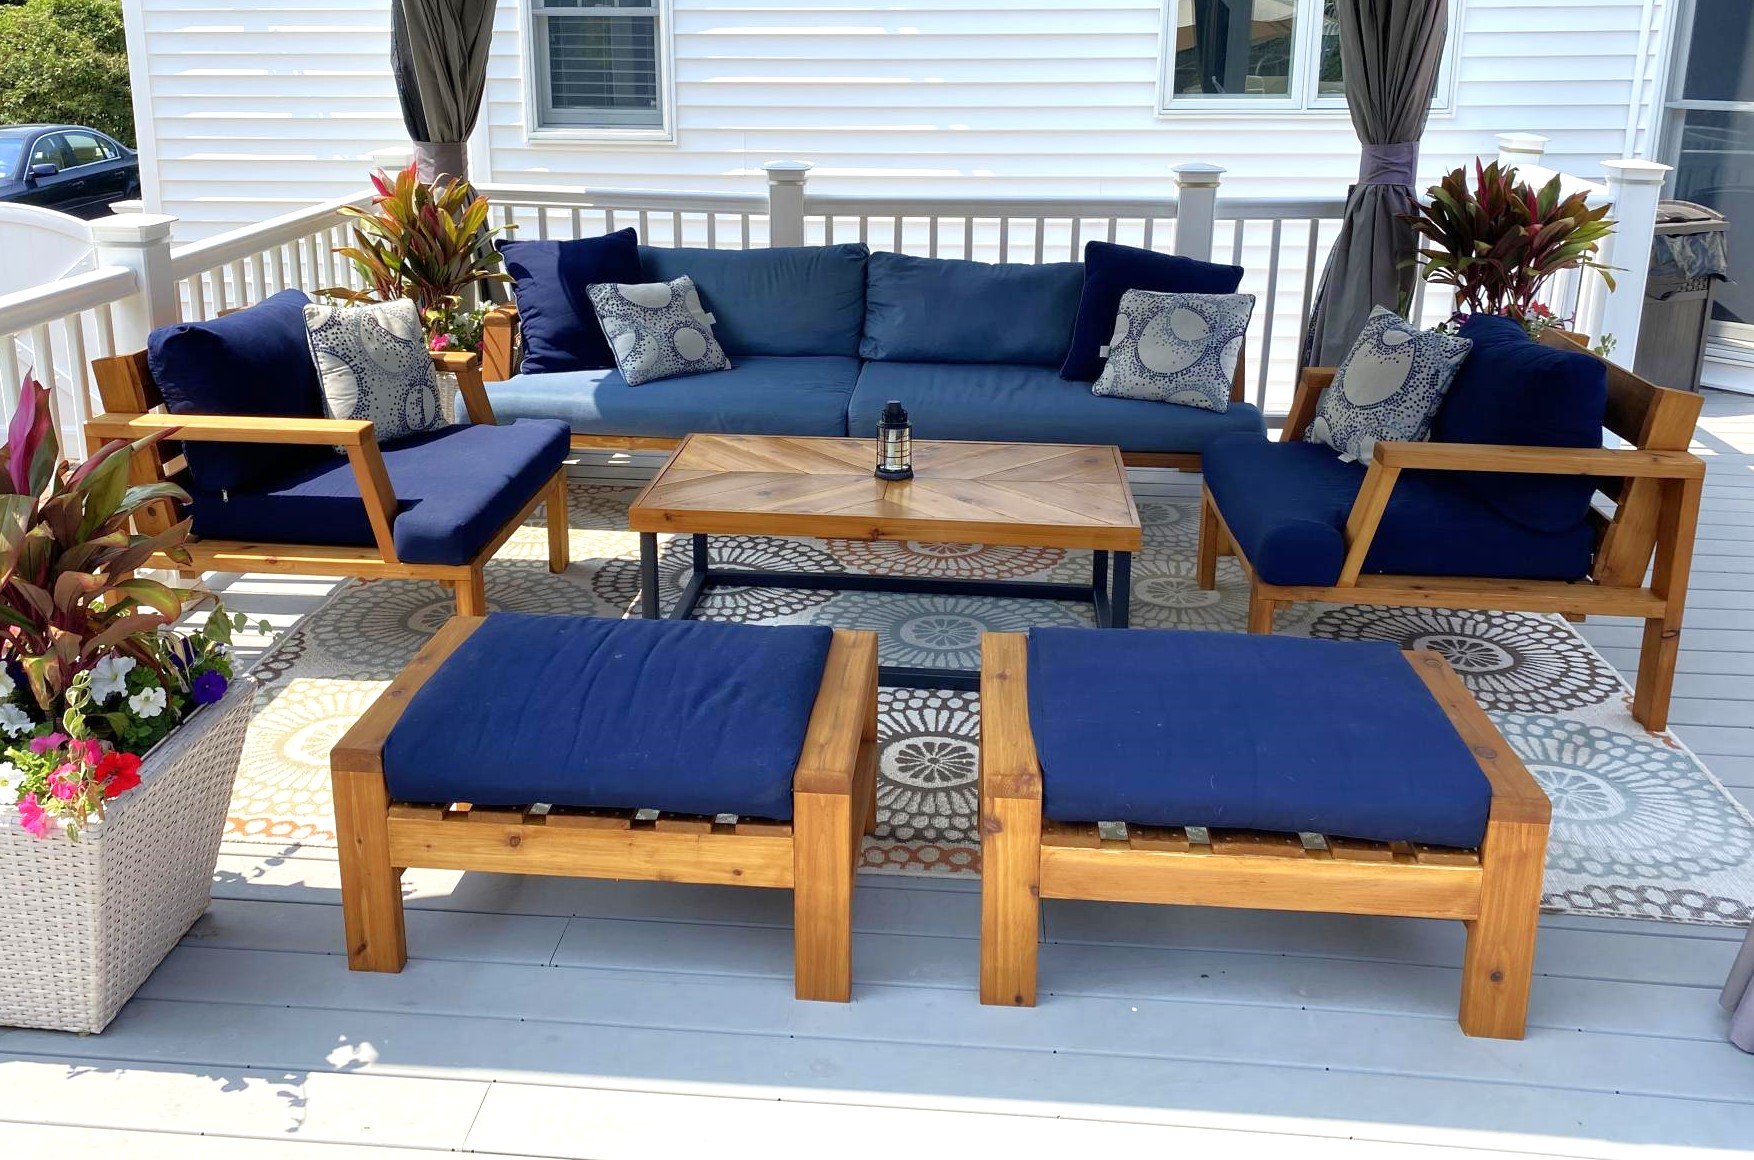
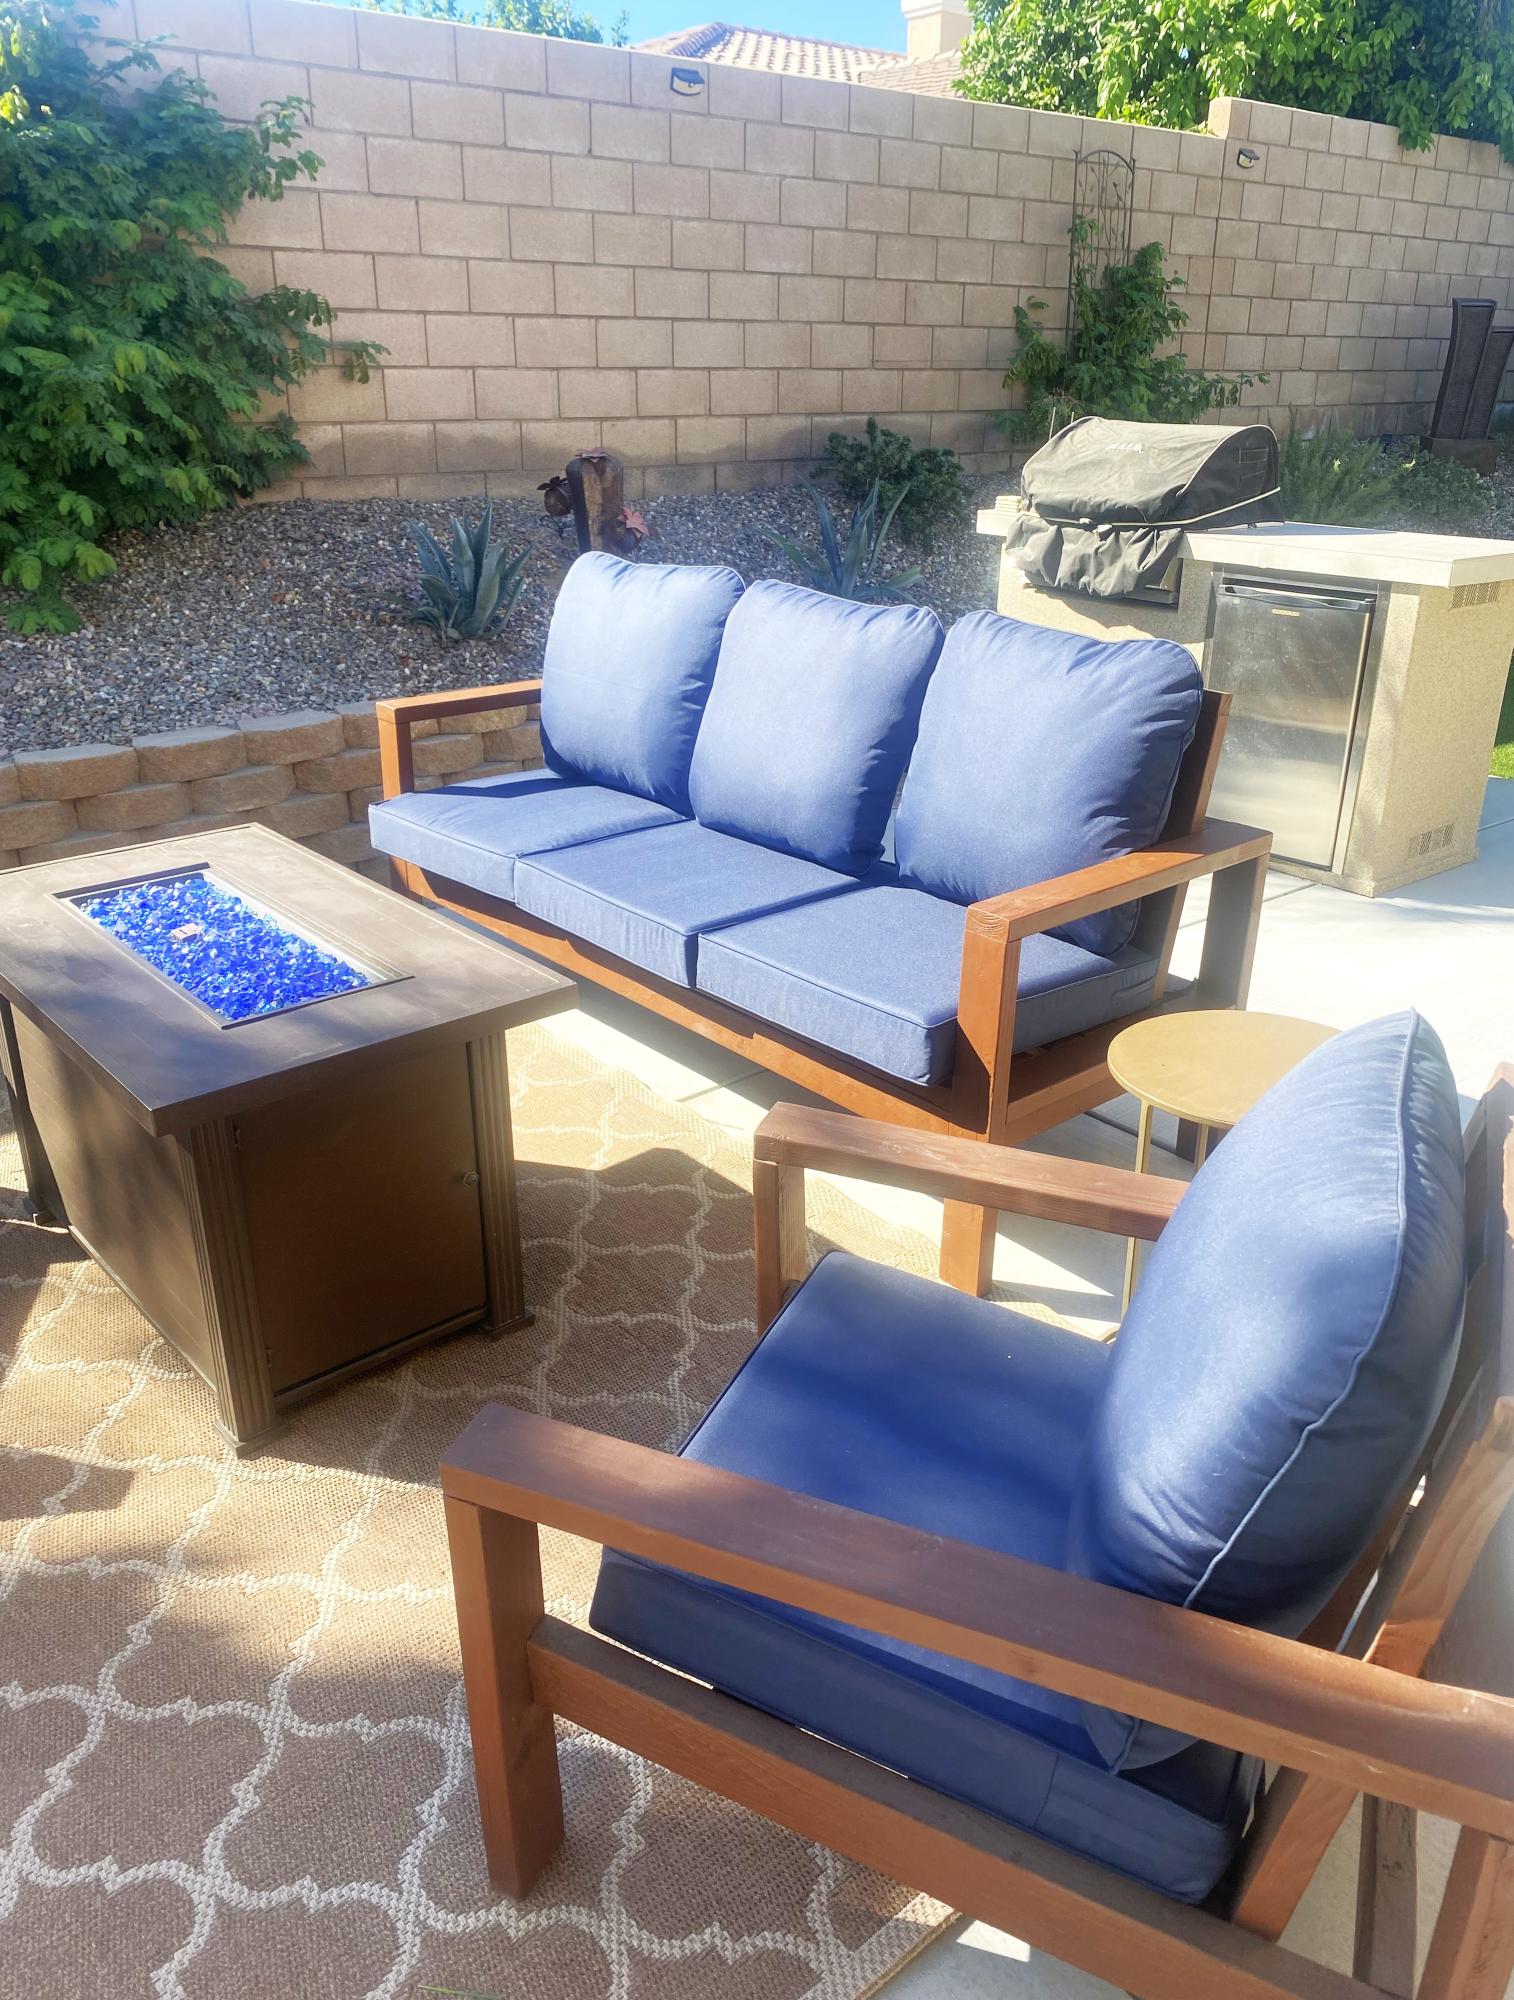
Our outdoor furniture from Costco was falling apart but the cushions were still in great shape so I decided to design the furniture around the existing cushion dimensions. I used all Cedar wood and stained it with Australian Timber Oil Honey Teak stain. The table design was from a picture I saw on another site.
Tue, 06/20/2023 - 12:56
Excellent idea to design the size around the cushions you had! Thanks for sharing ❤️
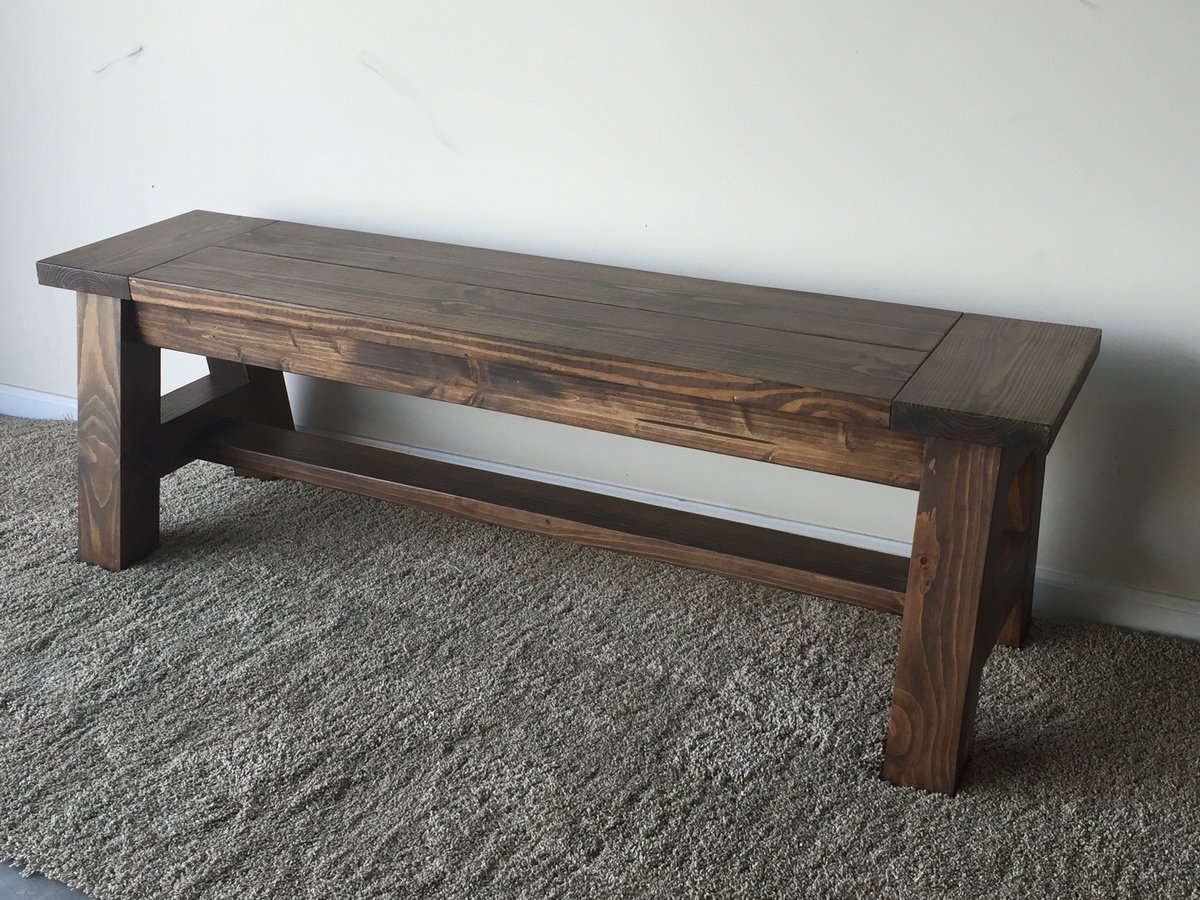
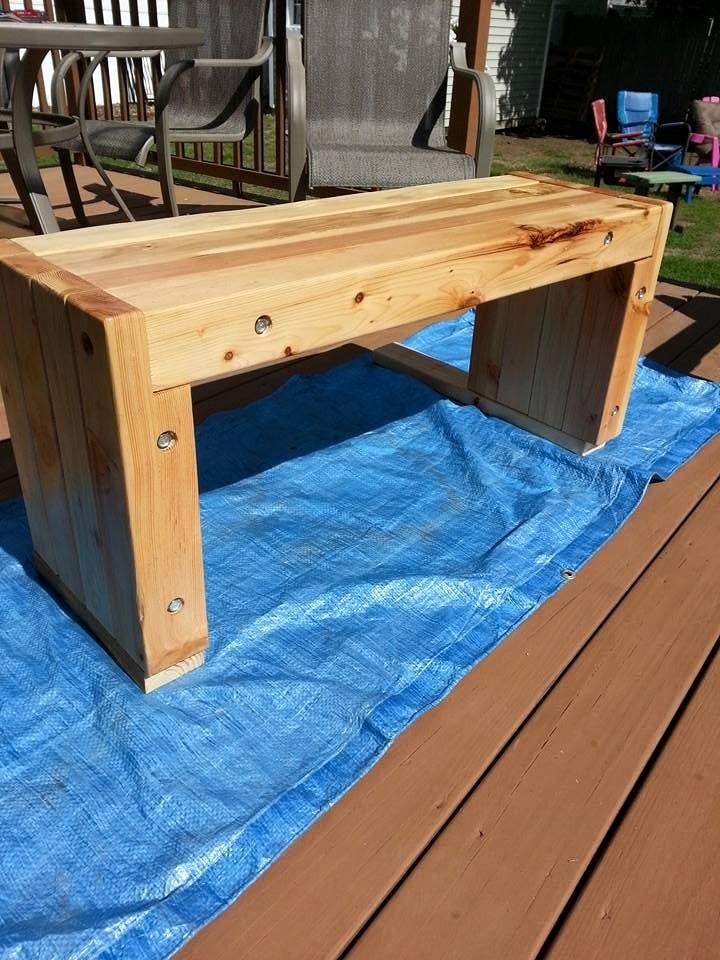
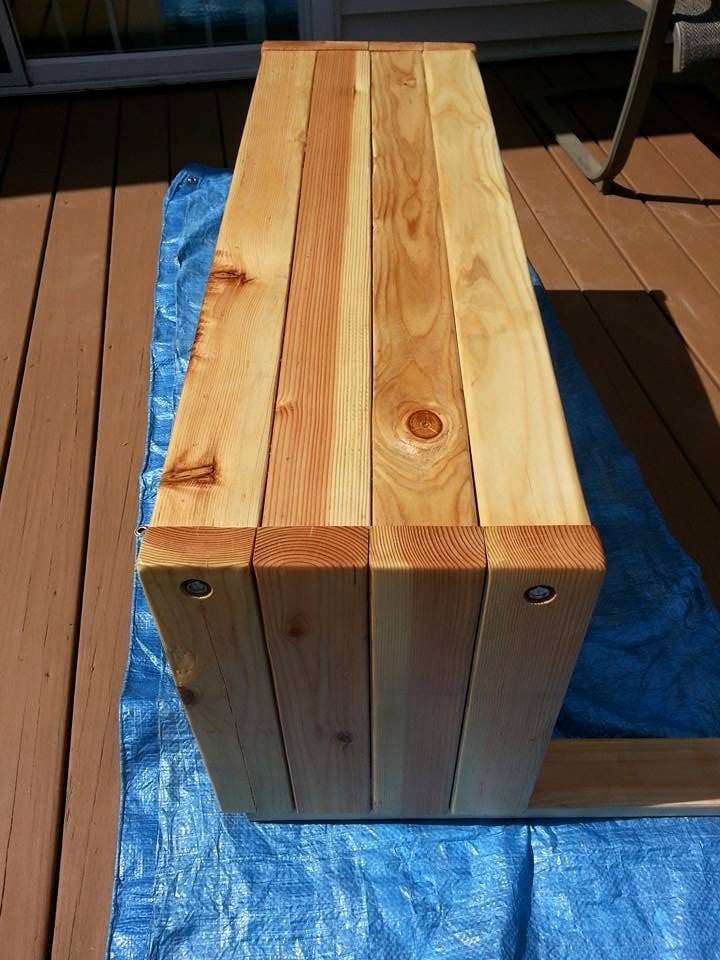
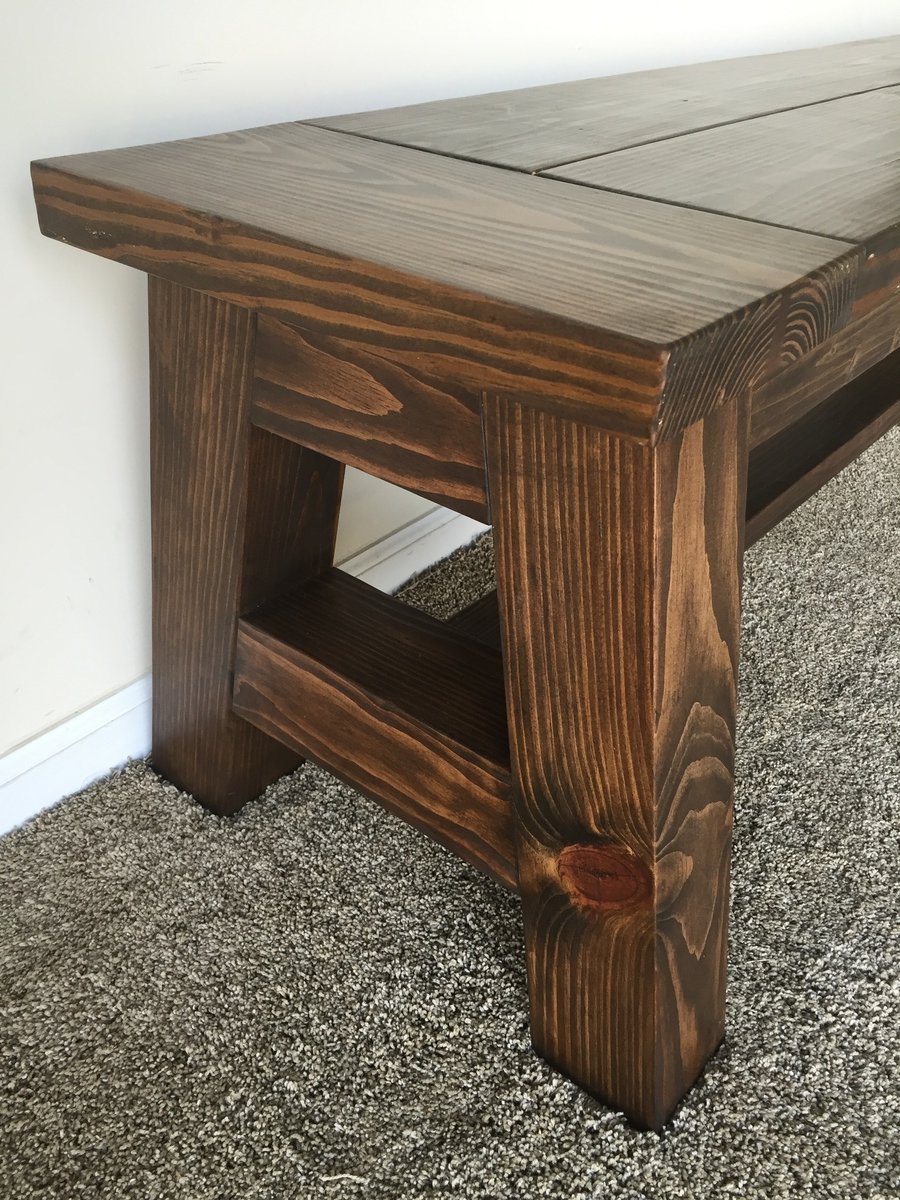
Bench made with A frame ends. 5 feet long, 17 inches high and 14.5 inches wide.
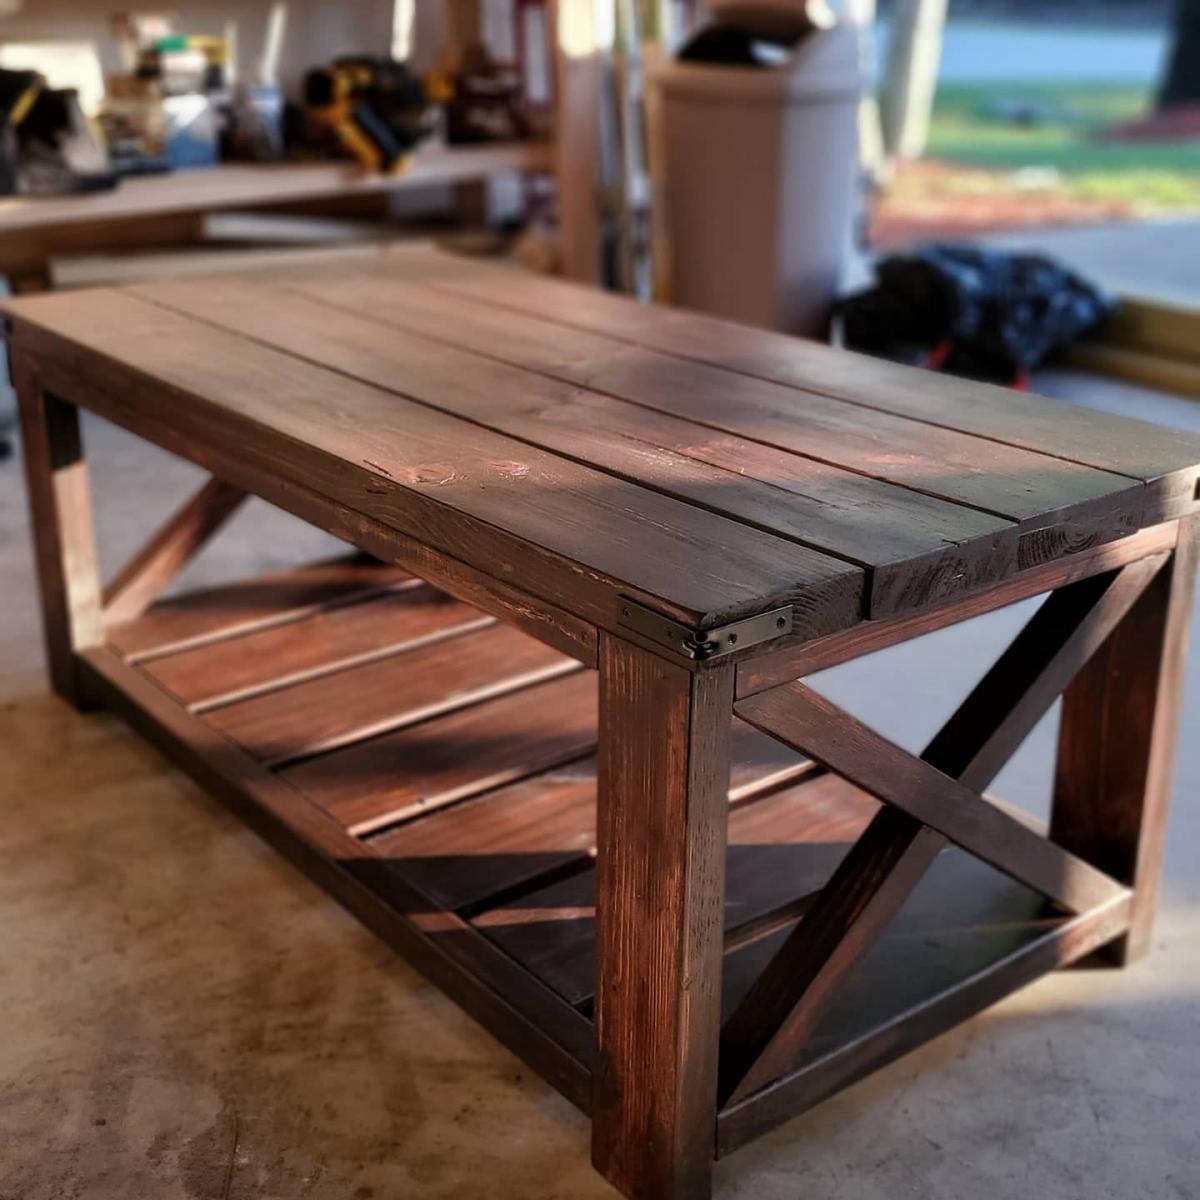
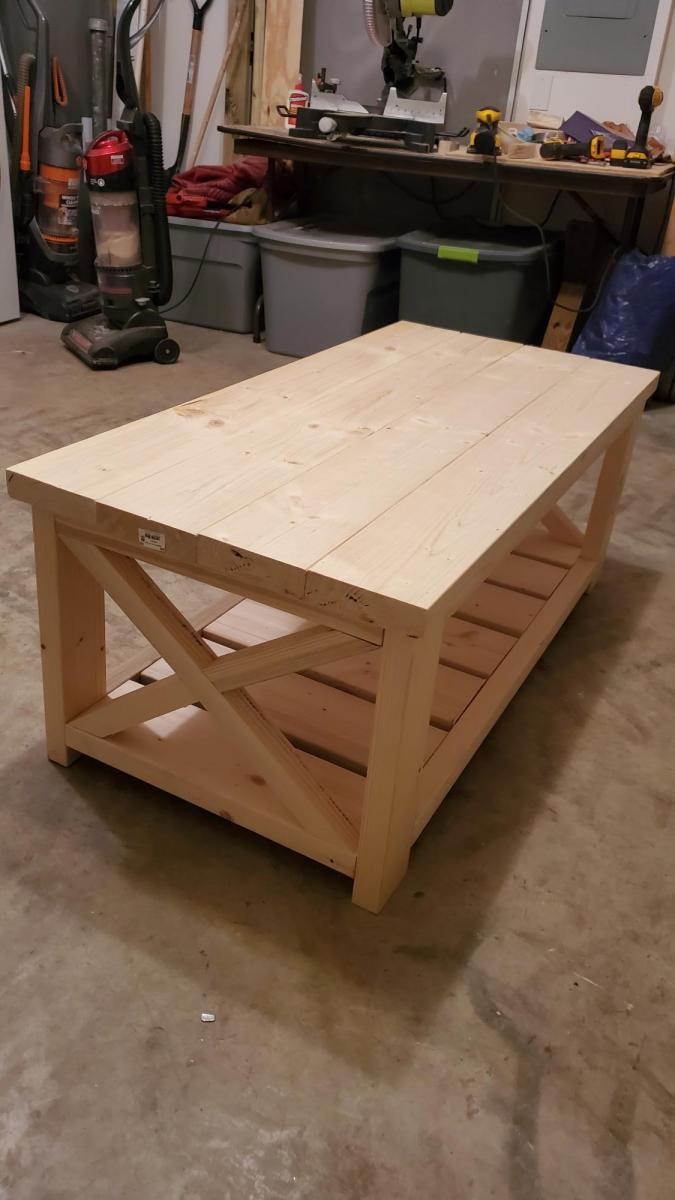
Thank you for the awesome coffee table plan. Love the finished project on it. Can't wait to do something else.

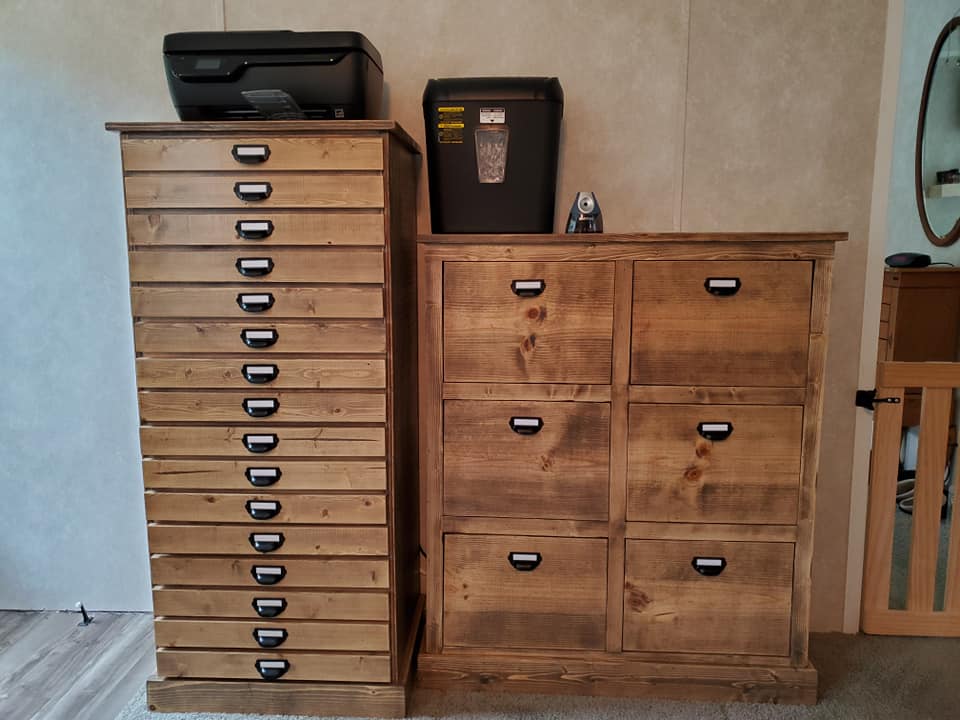
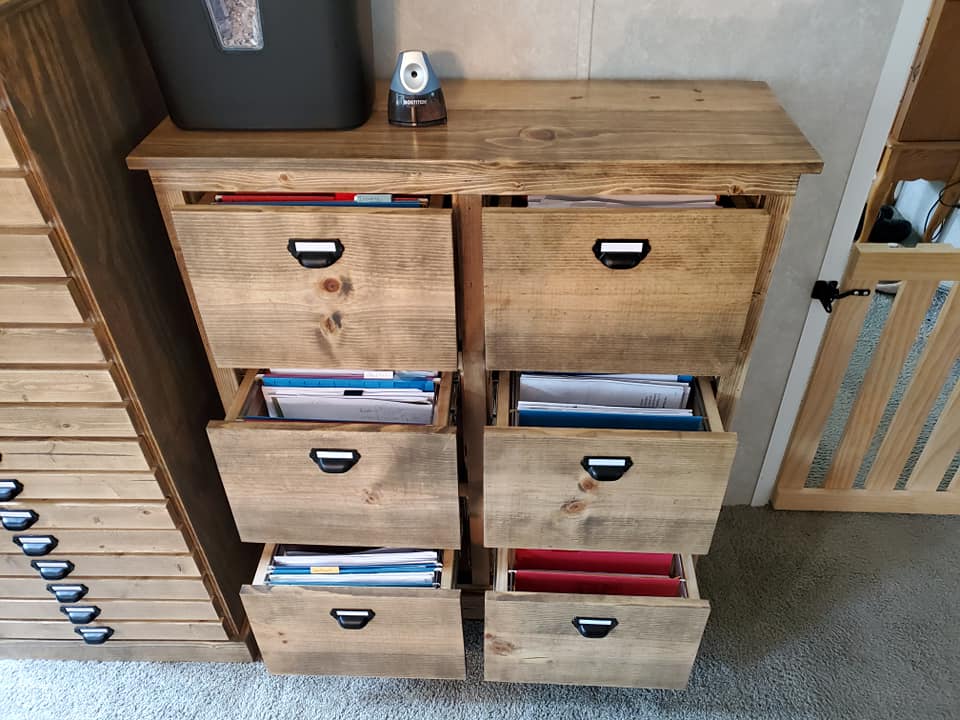
I made it a little taller and it is all a filing cabinet.


Tue, 09/15/2020 - 06:51
Did you build the tall cabinet? Do you have plans for it?
Thanks!
Sat, 09/19/2020 - 13:17
Sun, 02/14/2021 - 15:27
Wow! These are amazing! Thanks for sharing! What finish did you use? And how tall did you make the filing cabinet? Thanks!!

I was looking for a small folding chair that I could put in the back of my small WW2 airplane (1942 US Army L-3) when I came across this website. This little chair is exactly what I was looking for, and I had all the materials needed in my shop. I made a few minor changes like angling the ends of the 2x2s and adding lightening holes in the cross pieces (mainly because it looked cool) and added a handle cutout at the top. I then gave it a military paint job and stencil markings, and then hit it with sandpaper to distress it. Wax finish on the unpainted cedar. - Jerry at SkywaySign.com


My version of the tall privacy planter. I made a row of ten along the roadside of my property in place of a fence. The reversed board on the top is to hang string for climbing plants. No, I didn’t trim off the dog ears; at some point I may add a finishing trim but time and budget was a factor. These cost ~$50 each. - Rachel Vallance Facebook Community

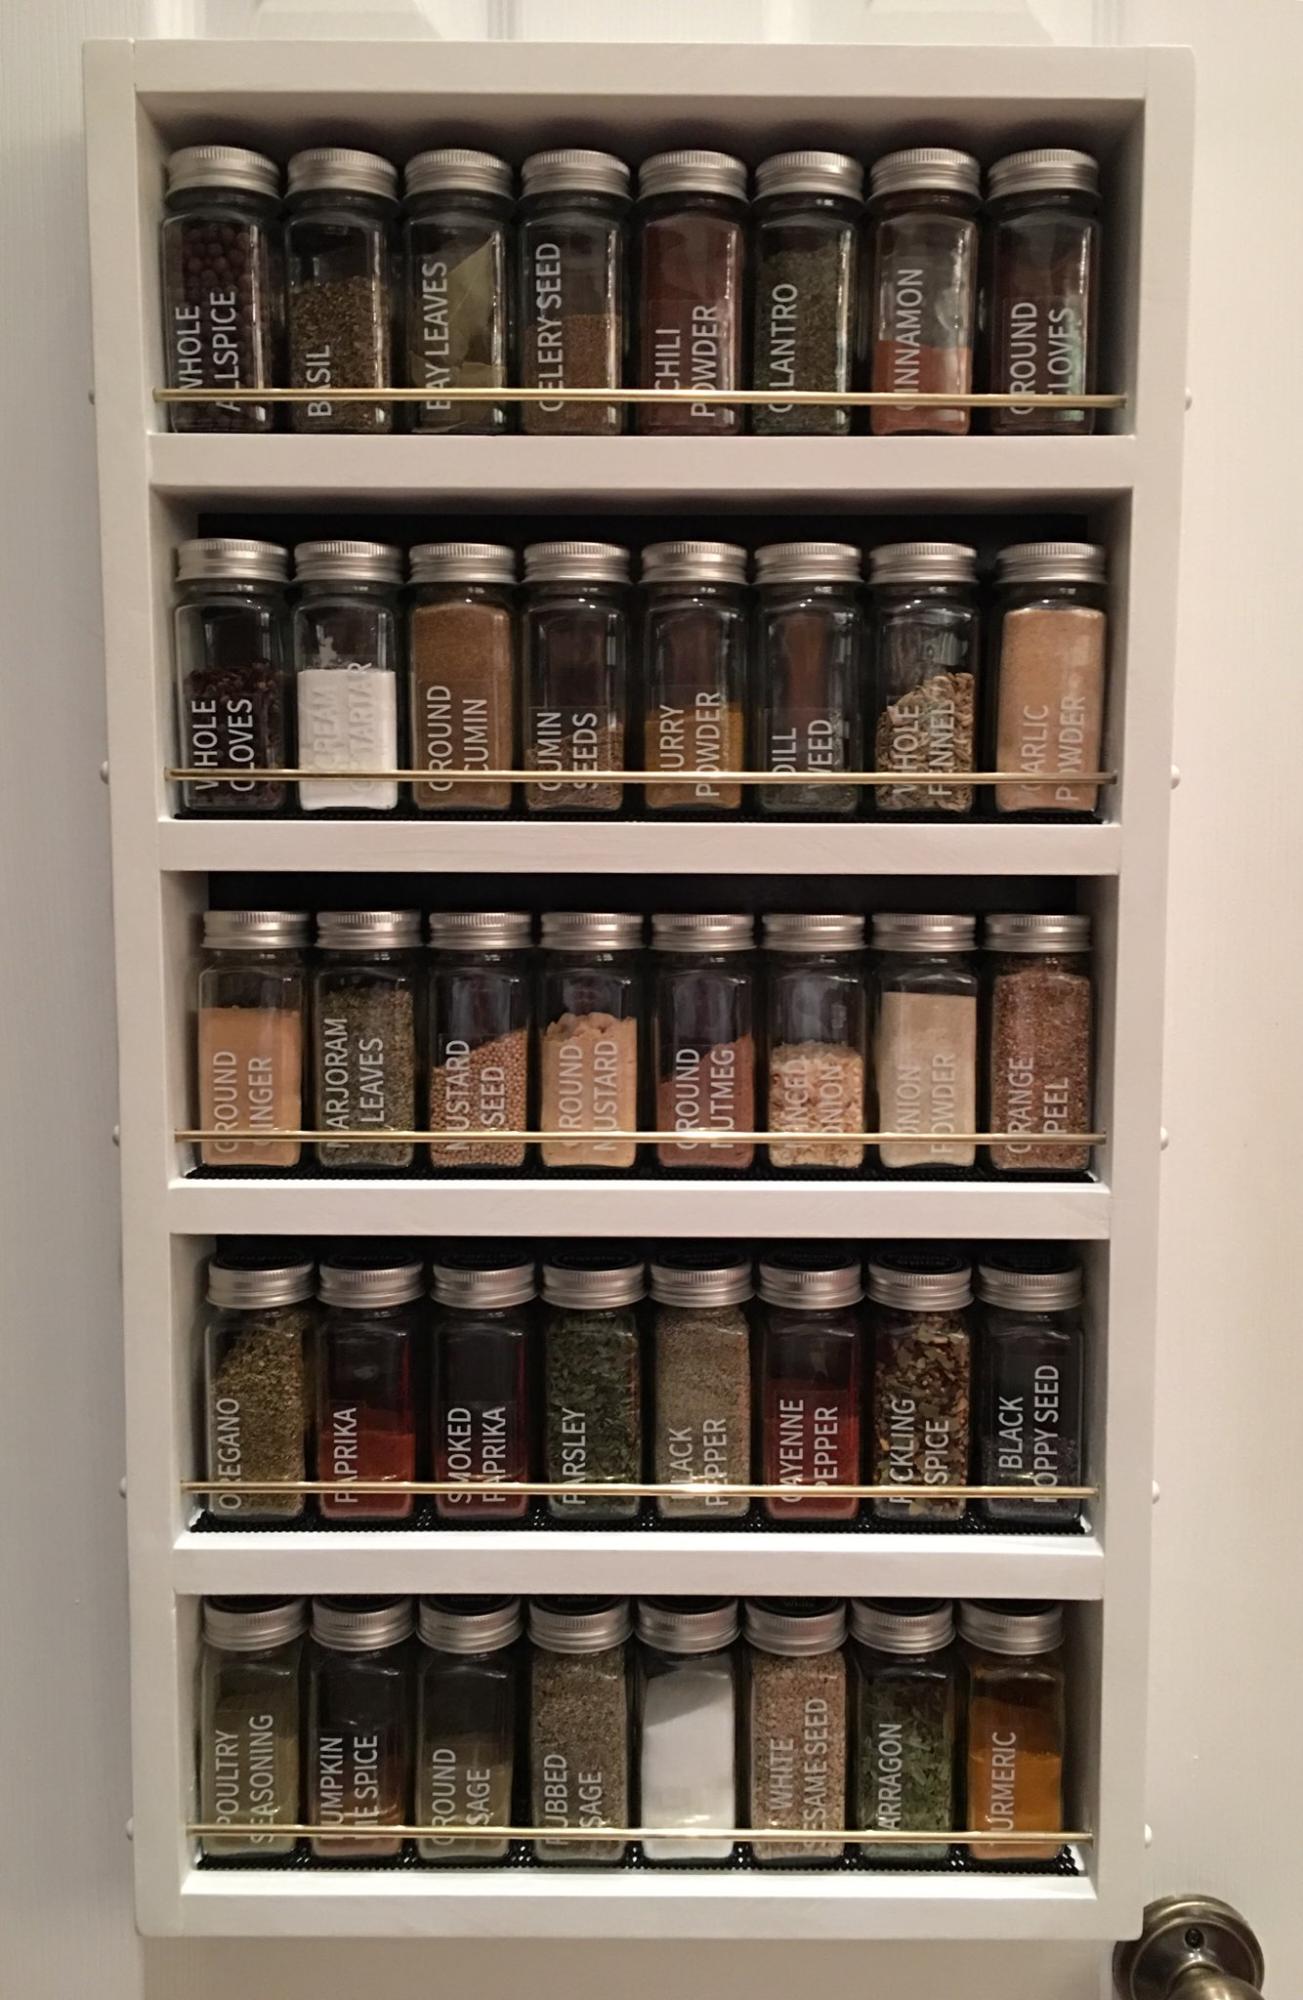
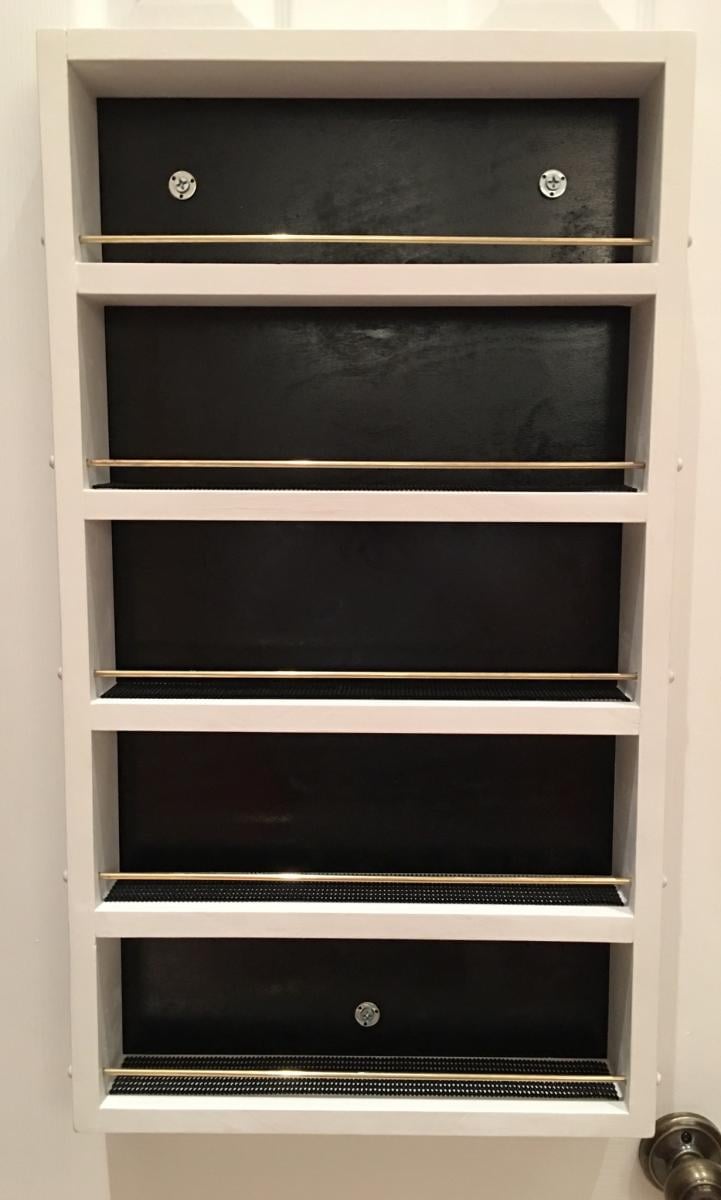
After special ordering glass spice jars for my cupboard I came across your plans for this spice rack and decided to attempt the build. Plans were very well written and easy to execute with a few customizations. I opted for brass rods to hold the jars in place and lined each shelf with shelf liner to ensure the jars don’t move when the pantry door swings. I am very pleased with the outcome and will be making a matching rack for my aluminum foil, plastic wrap, etc.
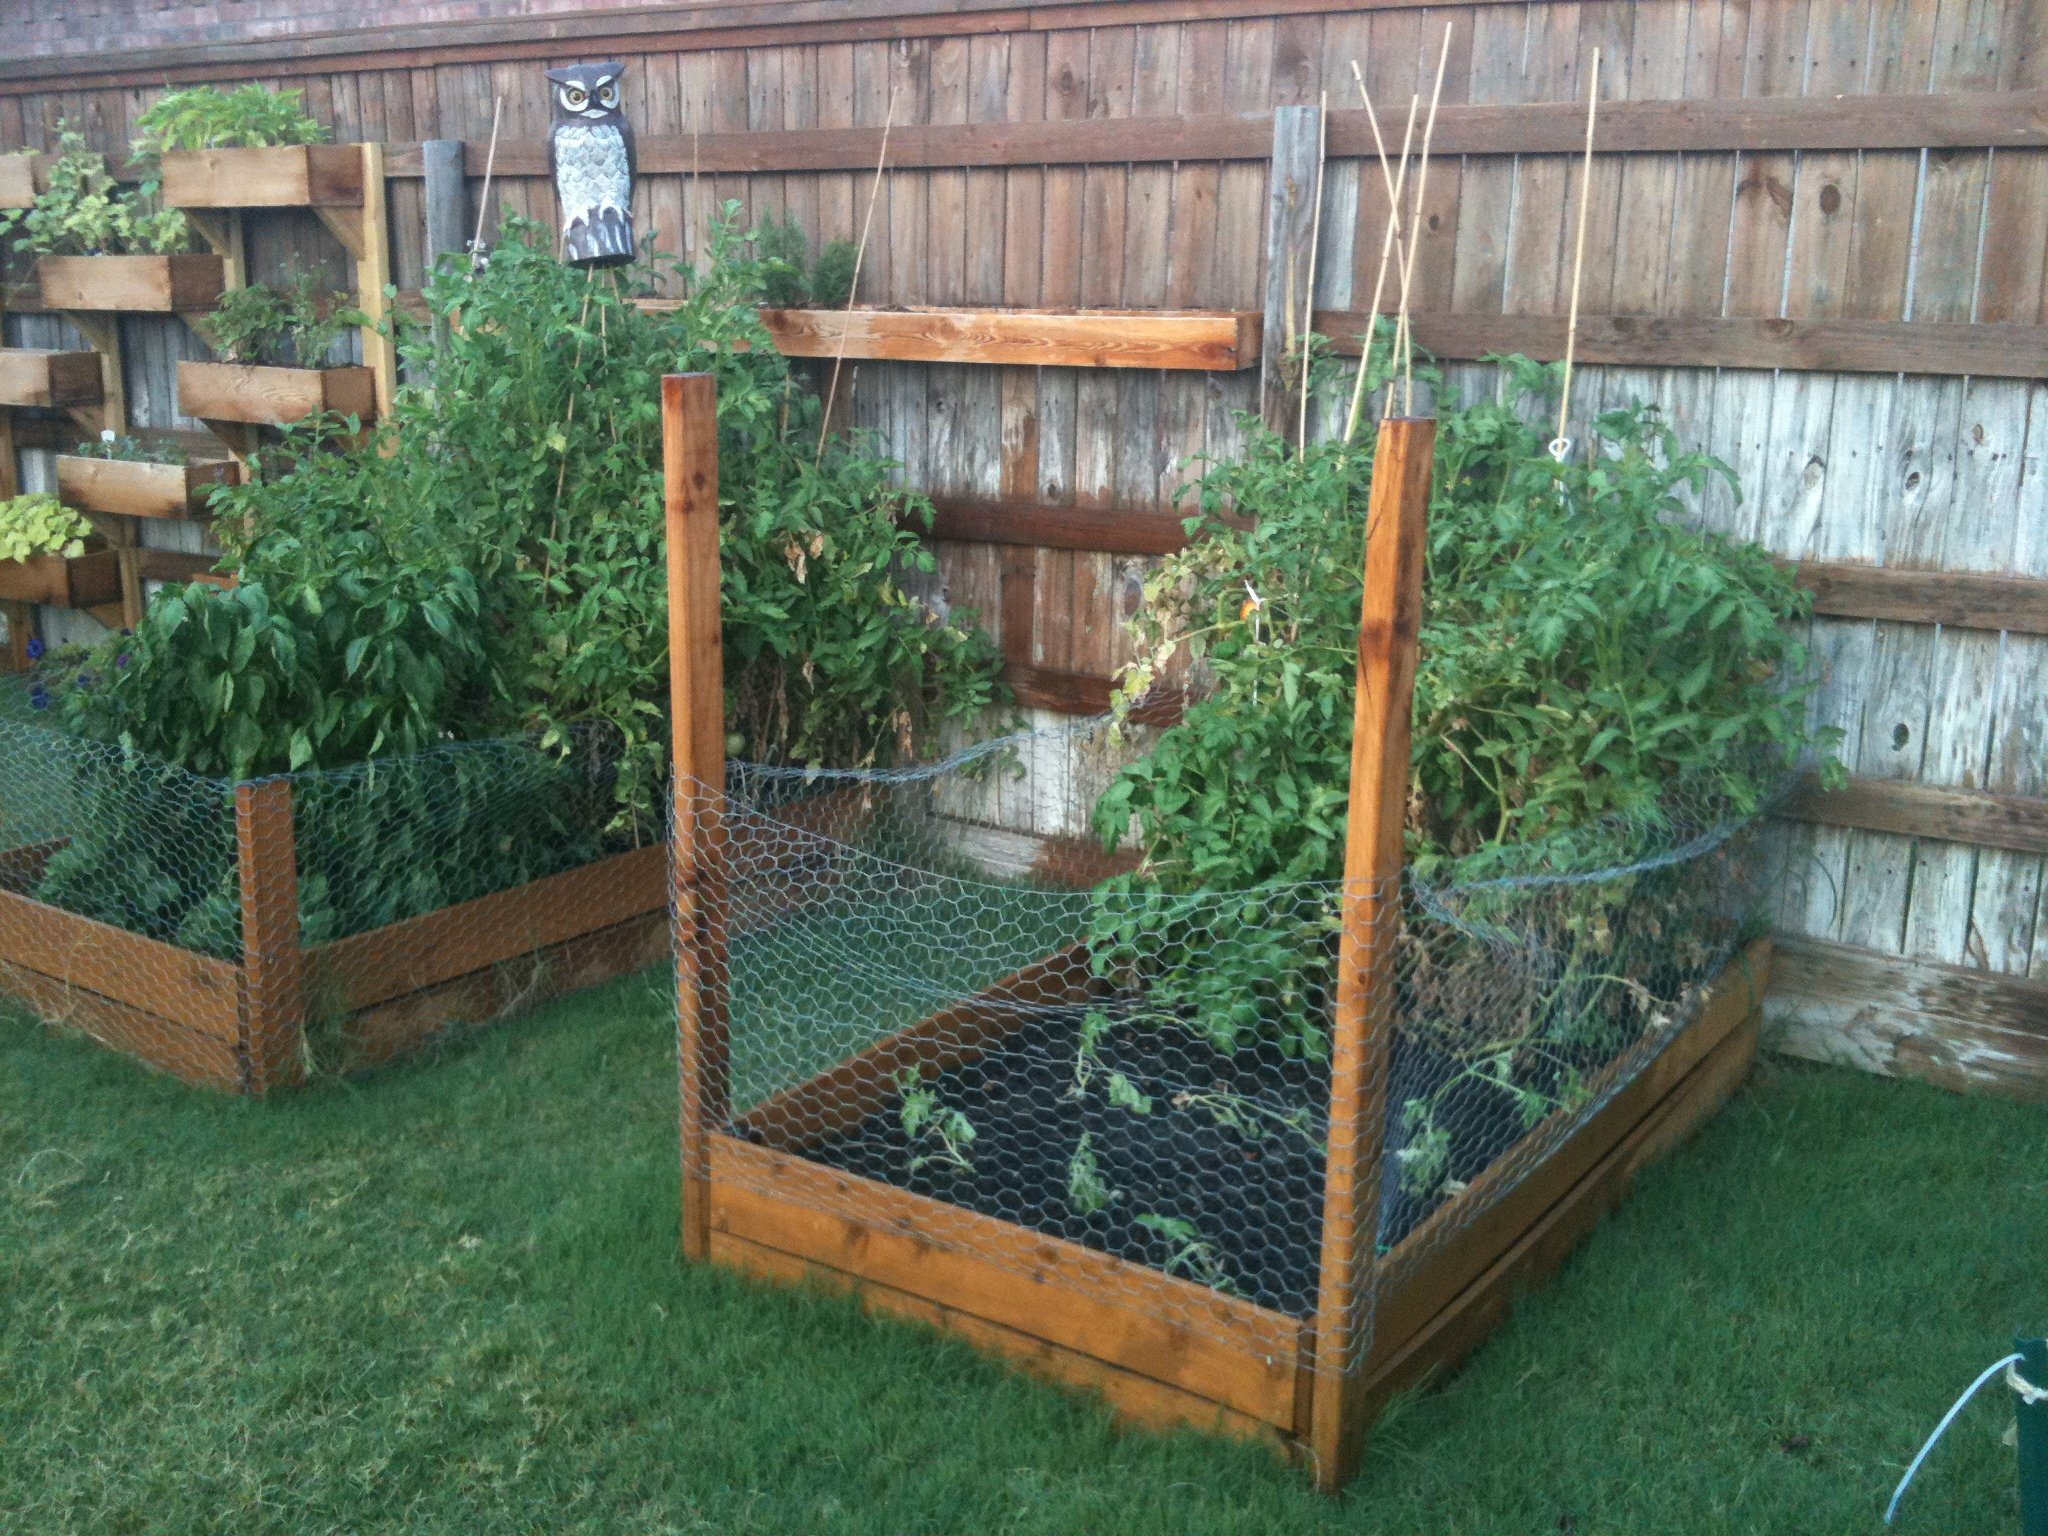
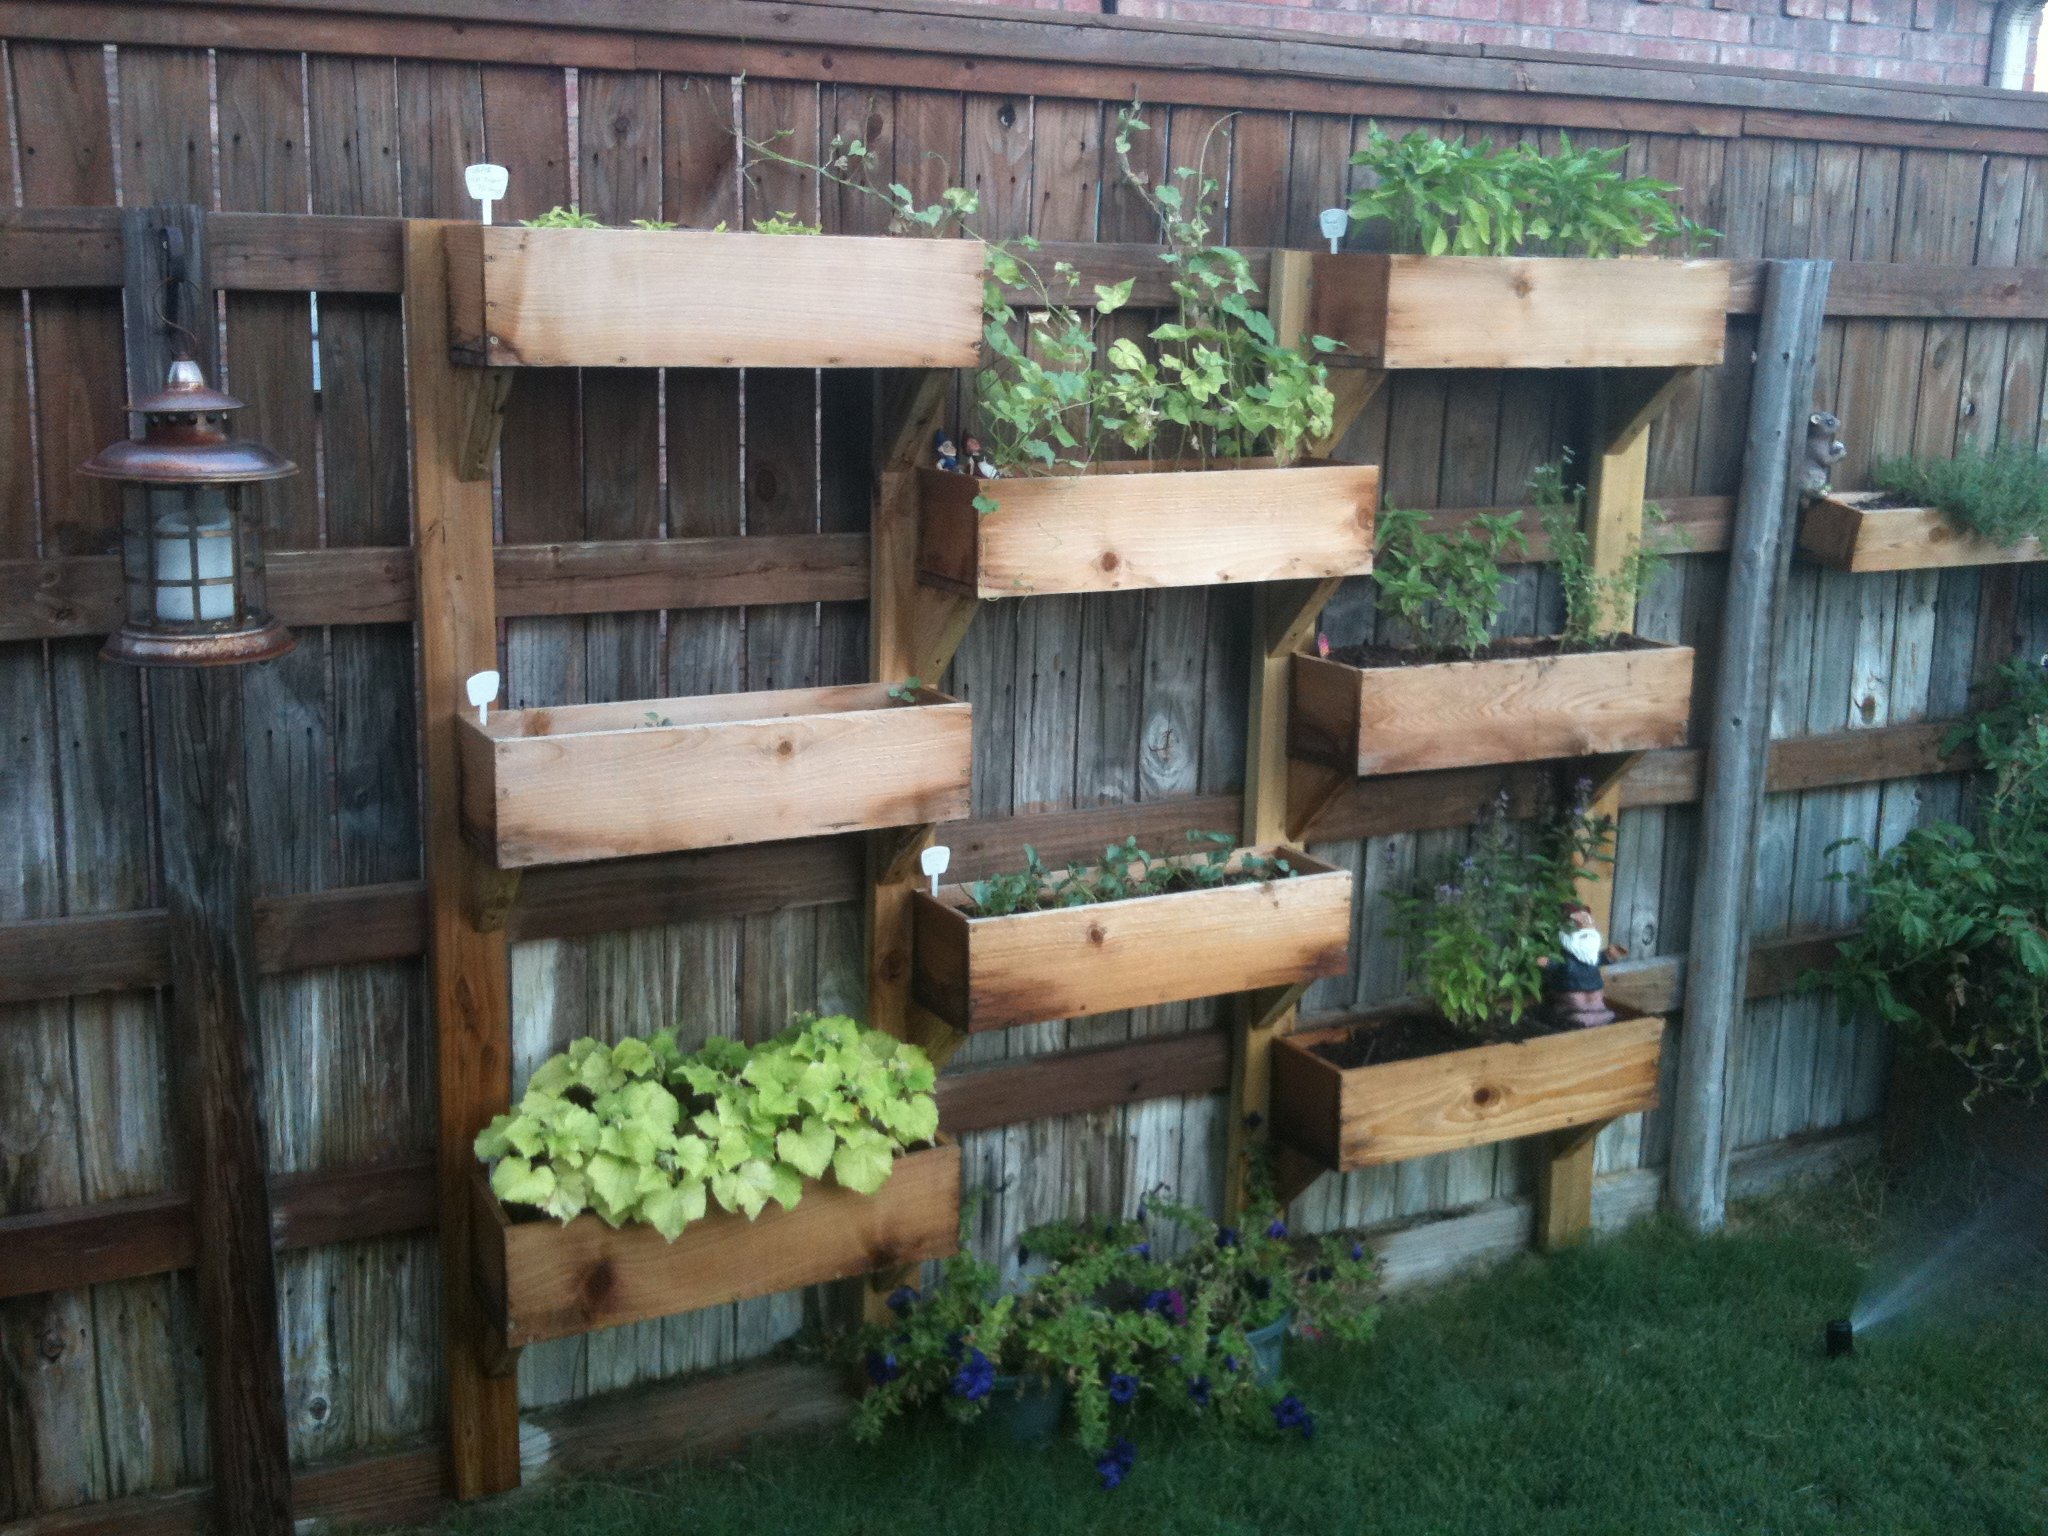
We built these before we saw these plans, but they are pretty much the same... We added the chicken wire to keep the rabbits (and our dog) out of the garden. We added the owl to keep the birds out. We've gotten a ton of tomatoes, onions, and bell peppers so far. Next year, we'll add a few more beds. We also added the verticle garden to take up less space, but its not deep enough. We'll make the next one deeper.

Sun, 07/10/2011 - 14:19
Love the vertical garden! What a wonderful idea! Did you line the boxes with plastic??
Thu, 11/17/2011 - 07:59
We ended up getting a ton of tomoatoes and green peppers from the garden boxes. We've actually built a couple more. We'll probably double again before next spring. We're looking at adding more veggies.
We now have ton of stuff planted for the fall...
Tue, 04/03/2012 - 06:19
i love the vertical boxes. I am just trying my hand at the world with a green thumb and could use as much advice as possible about how to make as well as to line the boxes or not to line them. All advice appreciated!
Fri, 11/23/2012 - 21:53
Hi, my name is berman. I found you pin from my pinterest and your box garden is so great. I am a newbie in this field and so interested to build garden in my house. If i can ask you some question, could you please to answer that?
cheers,
berman
Tue, 03/10/2015 - 21:19
Hello! Do you mind sharing the Vertical Box Instructions? I absolutely love this idea!
Sun, 05/31/2015 - 21:00
Came across this beautiful design while searching for my next diy garden idea. Wondering if there are blueprints available
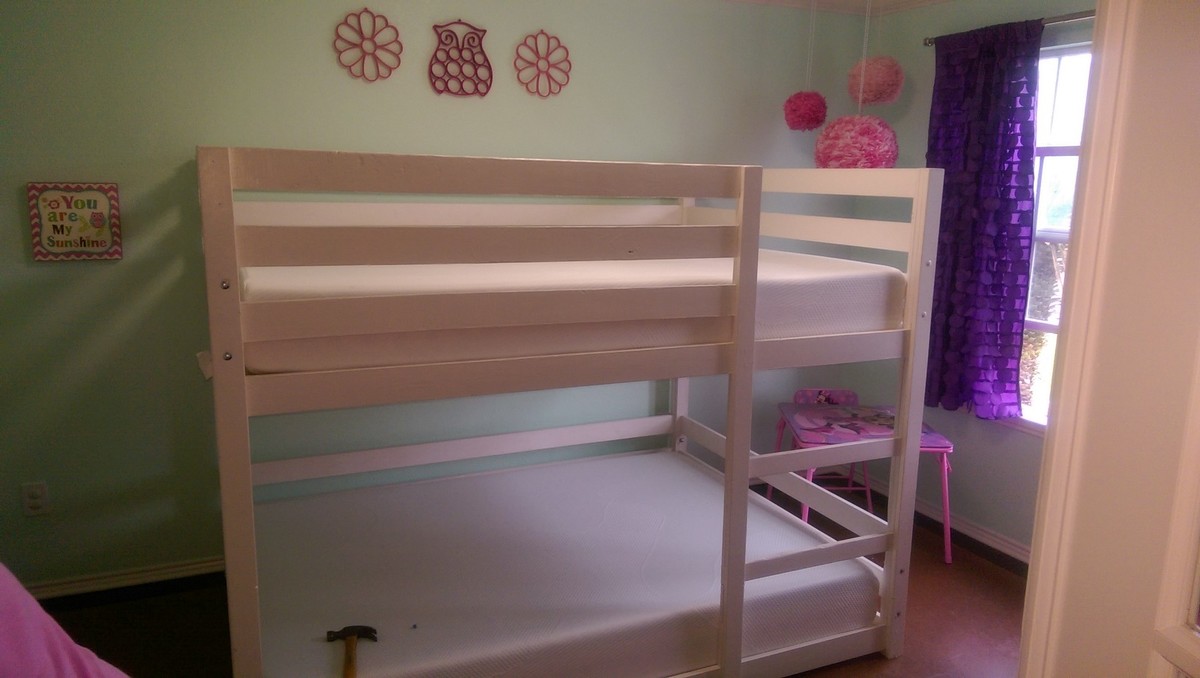
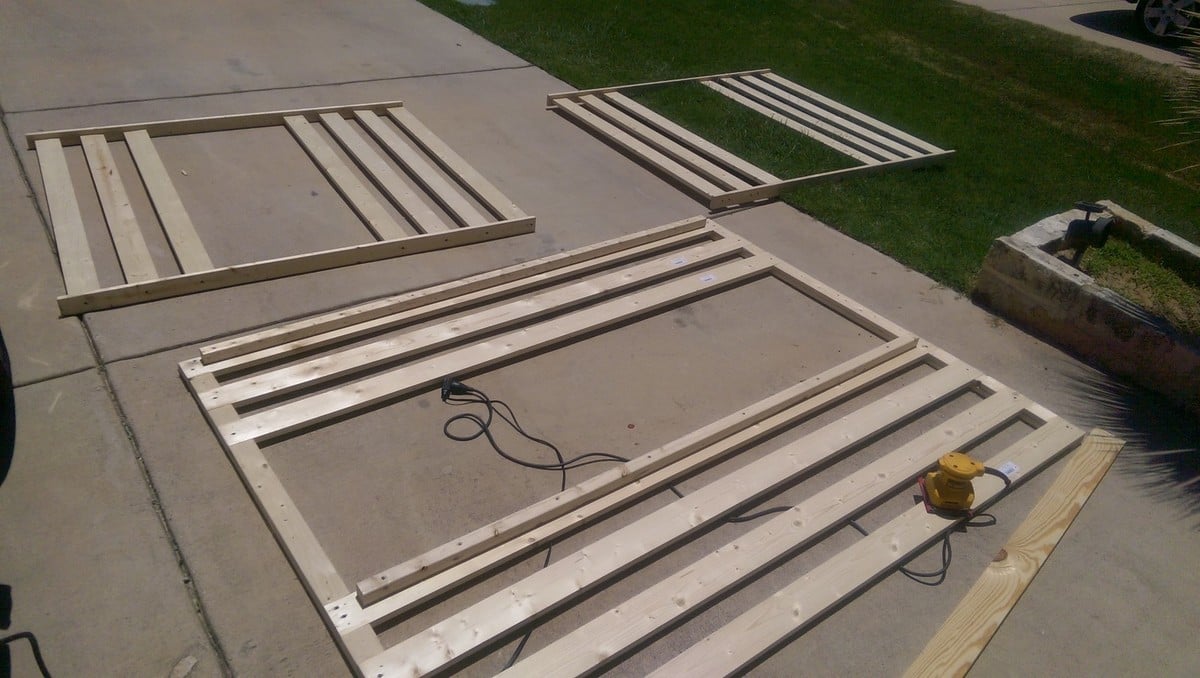
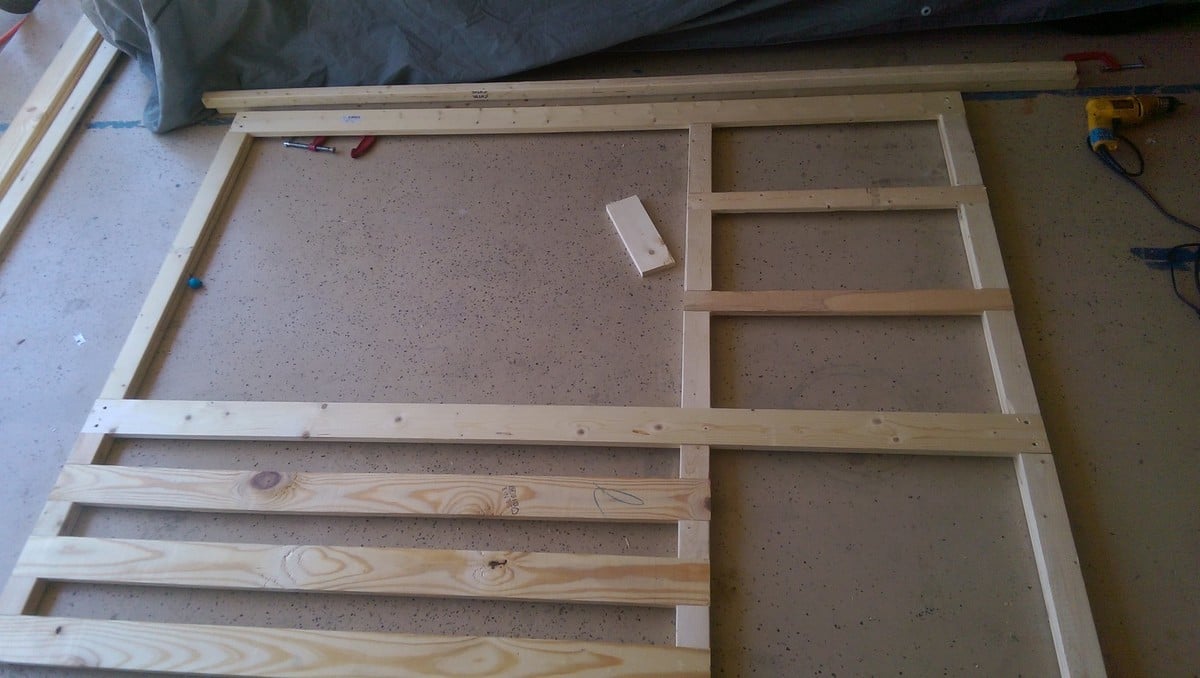
Full over Full bunk beds. Adjusted for Full from a twin measurement. only 1" off floor for more head room.extra rail bar coverage upstairs for my daughter who rolls out of bed regularly.
Wed, 12/30/2020 - 12:15
Would also love to know dimensions used for the full! Thanks for sharing your amazing talent!
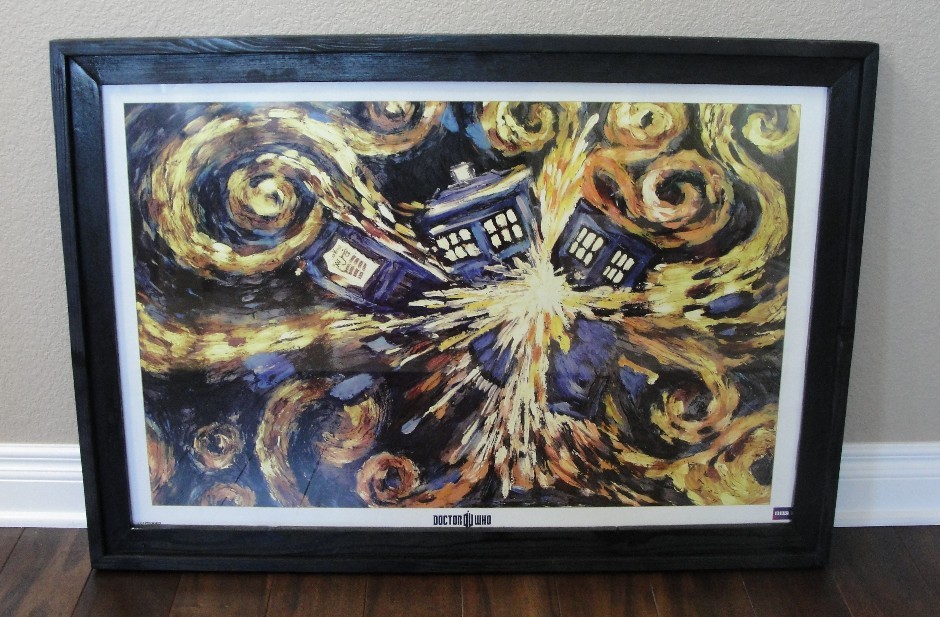
Our family loves Doctor Who, and I had given my son 2 posters as gifts. Apparantly keeping them rolled up in the tube would not do, so I tackled a frame.
One of things that I did to make the frame more difficult to build was to use the table saw to cut the angles. I did use the angle guide on the wood pusher, but the pieces were too long to lean against the fence. So, I was aiming the sawblade at my mark. The angle was good, but it was difficult to get the 2 pieces exactly the same length. Next time I will cut the 2 pieces at the same time so they match. I think a miter saw would be the saw of choice here.
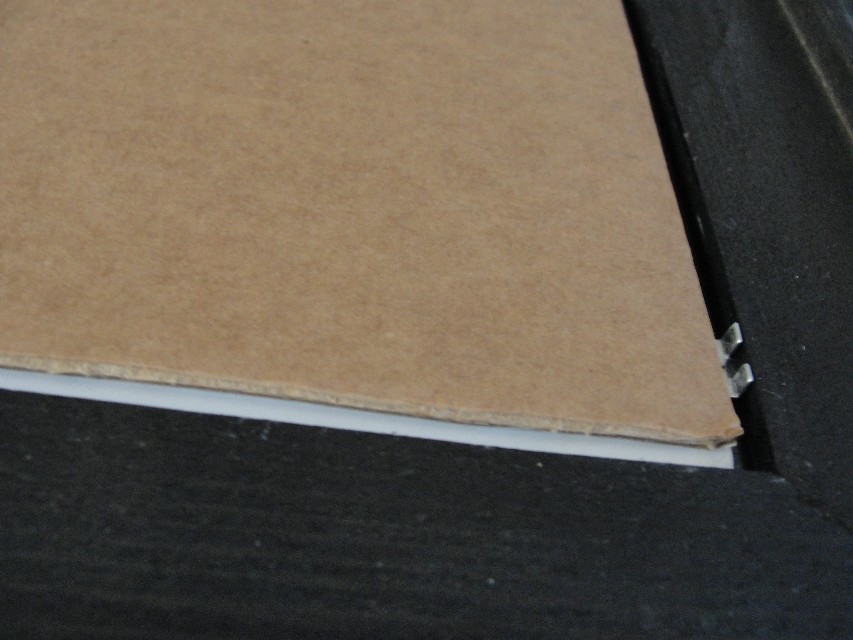
Also, I wanted to use glass. To inset the glass on the back I had to learn to use the router. That added a bit of time to the project. But me and my router are friends now, so the next one should go quicker. I cut a 1/4 groove on the inside edge on the back where I could add the glass. I used glazing points, sold by the glass at the depot, to hold the glass in the frame.
Blanket chest made for my mom. Used a plan of Anna's and just doubled the size because she needed a taller box to store all her blankets and sheets.- Dawn Lonak

My first project with more expensive wood
Top - Cherry wood with White Oak in the middle
Frame- Red Oak
Feet - Black walnut
Feet supports - Maple - Ray C


I know I once said I had enough seats in Tahiti 💁 ♀️🤨. But now it was just that I have a lot of old (and still good) wood in the garage 🙈. And it's just fun to build chairs 🤩
The instructions are once again from @anawhiteplans. And even if I'm not going to start a campfire in Tahiti, the Ultimate Firepit Chair fits perfectly 👌 I'm sure of that 💯 - das_tahiti_projekt
Modified the Cherished Bliss plan a bit to include Carriage bolts instead of pocket holes and I notched the top of the legs to make a shelf for the top.
Legs were cut at 18" and the top is 40". The two center 4x4's are connected with two internal (and smaller diameter) carriage bolts and glued together. The end 4x4's are glued and then a 1/2 x 6" carriage bolt with a pre-drilled "Head" hole (using 1" paddle bit).
Very easy to make but this baby is heavy!!!