Garage Shelves Plan with Added Doors - Built and shared by Jeremy Doyle
Garage Shelves Plan with Added Doors - Built and shared by Jeremy Doyle

Built from Plan(s)
Garage Shelves Plan with Added Doors - Built and shared by Jeremy Doyle
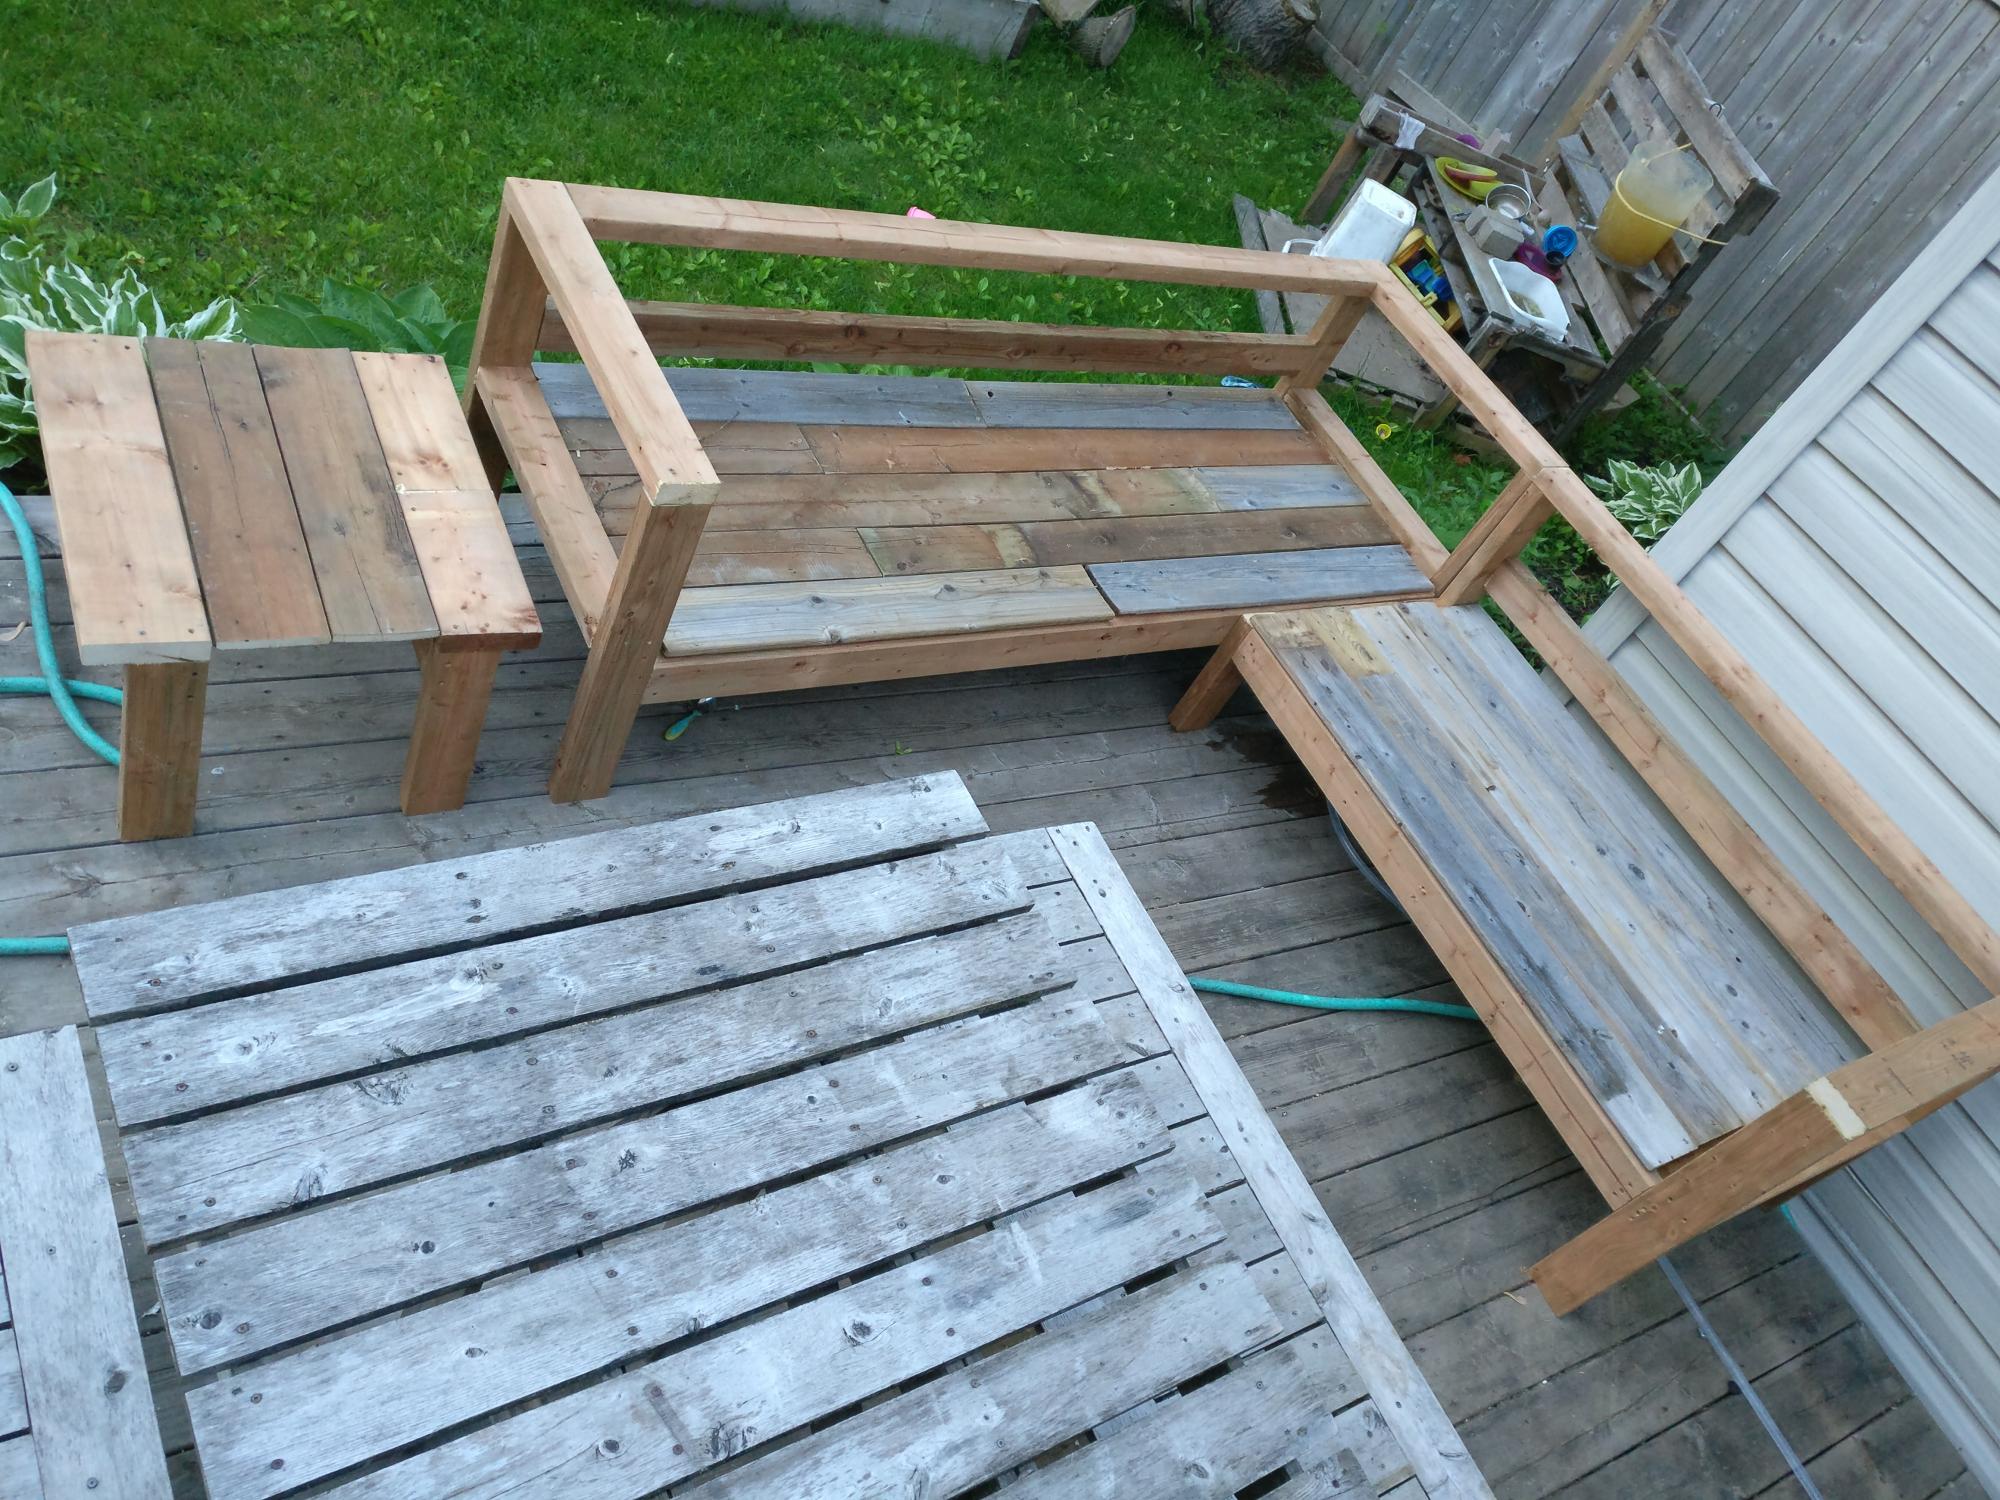
Bought enough lumber for one sofa but ended up using old fence boards for the decking so had enough lumber to make the sectional and a shortened coffee table.
Great way to save some cash even if u have to buy the fence posts.
Added a reinforcing piece to the one armed sofa between the legs using a kreg jig to stabilize the legs a bit more.
Waiting on my foam from Amazon to finish off this project!
Used inspiration from the beer/wine cooler patio table and made the middle of the table removable to add a buck underneath later.
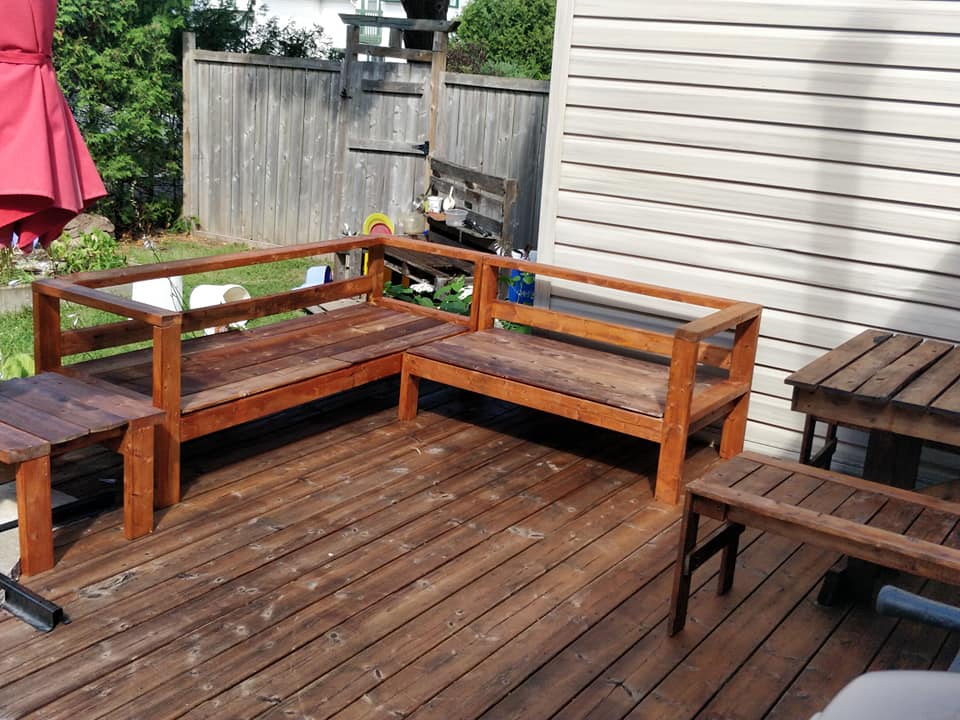
Note the 5 year old patio set, also an ana white project from back in the day!
Super quick build!
I did find that the measurements for customizing it for your cushion size seemed about 1.5 inches too big for all the depth pieces so I sized down but I haven't received my foam yet so maybe I'm wrong but Smth to think about. I didn't want my cushions to slide around so I took that into consideration when building.
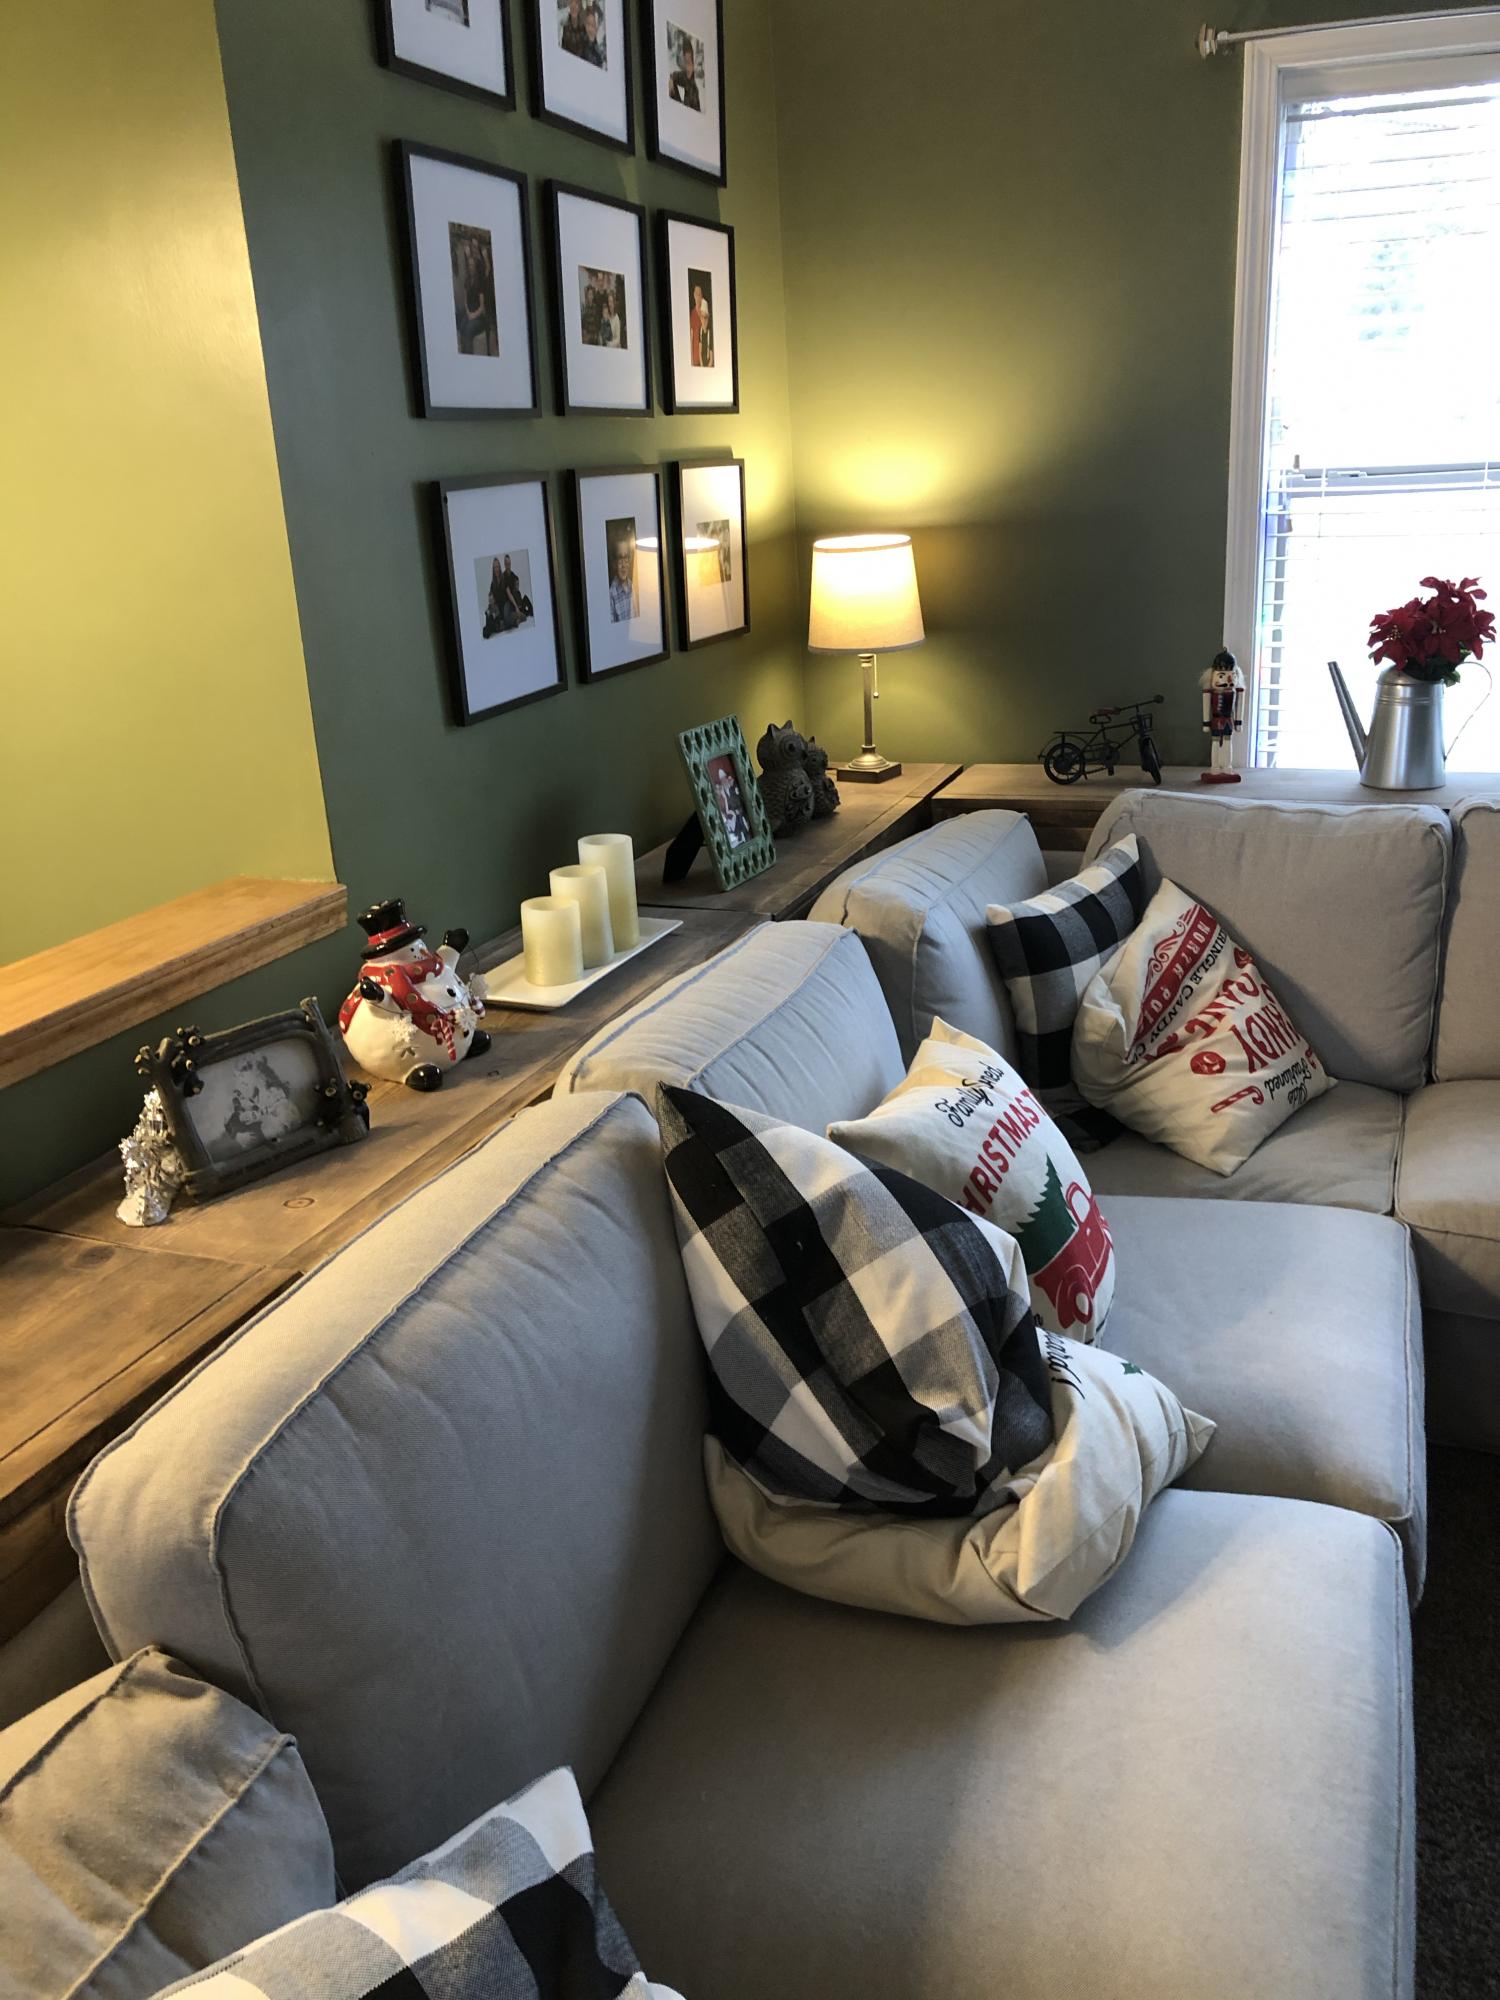
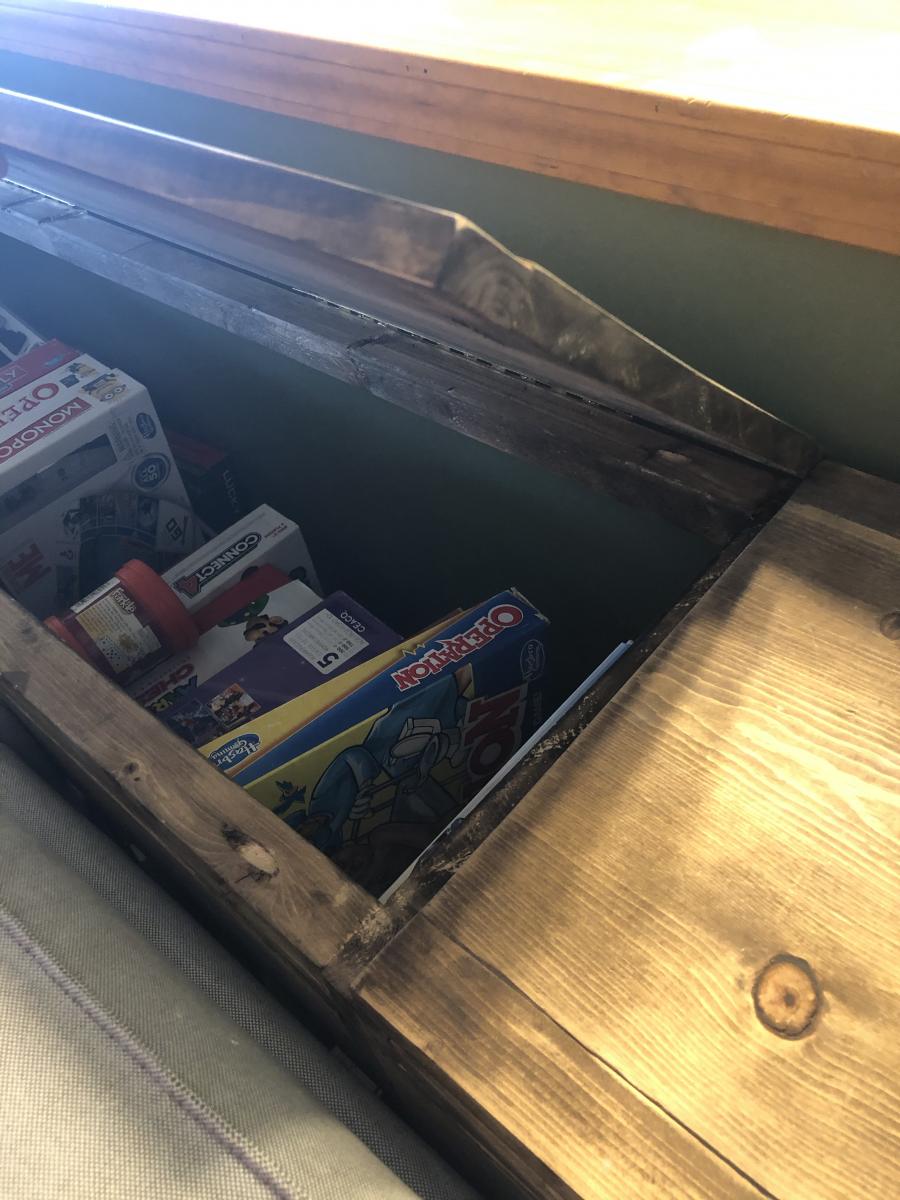
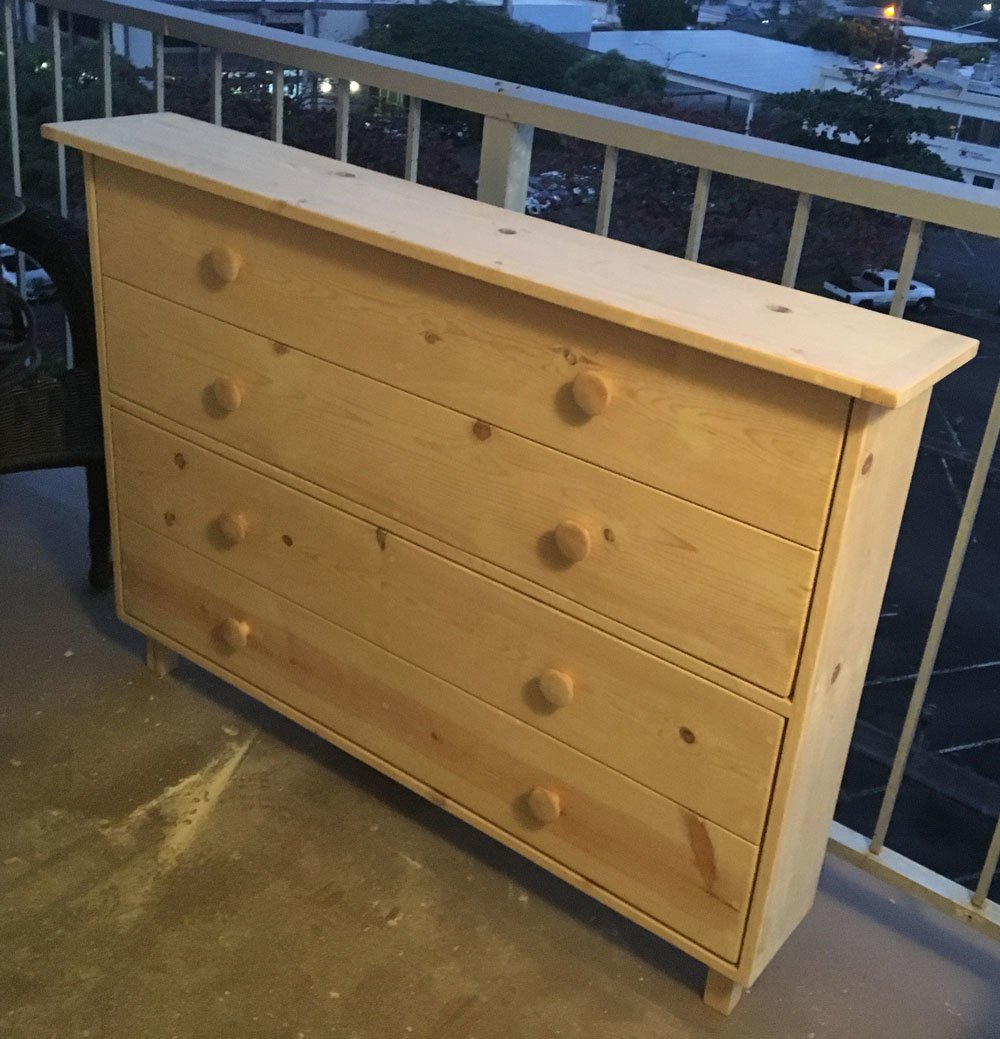
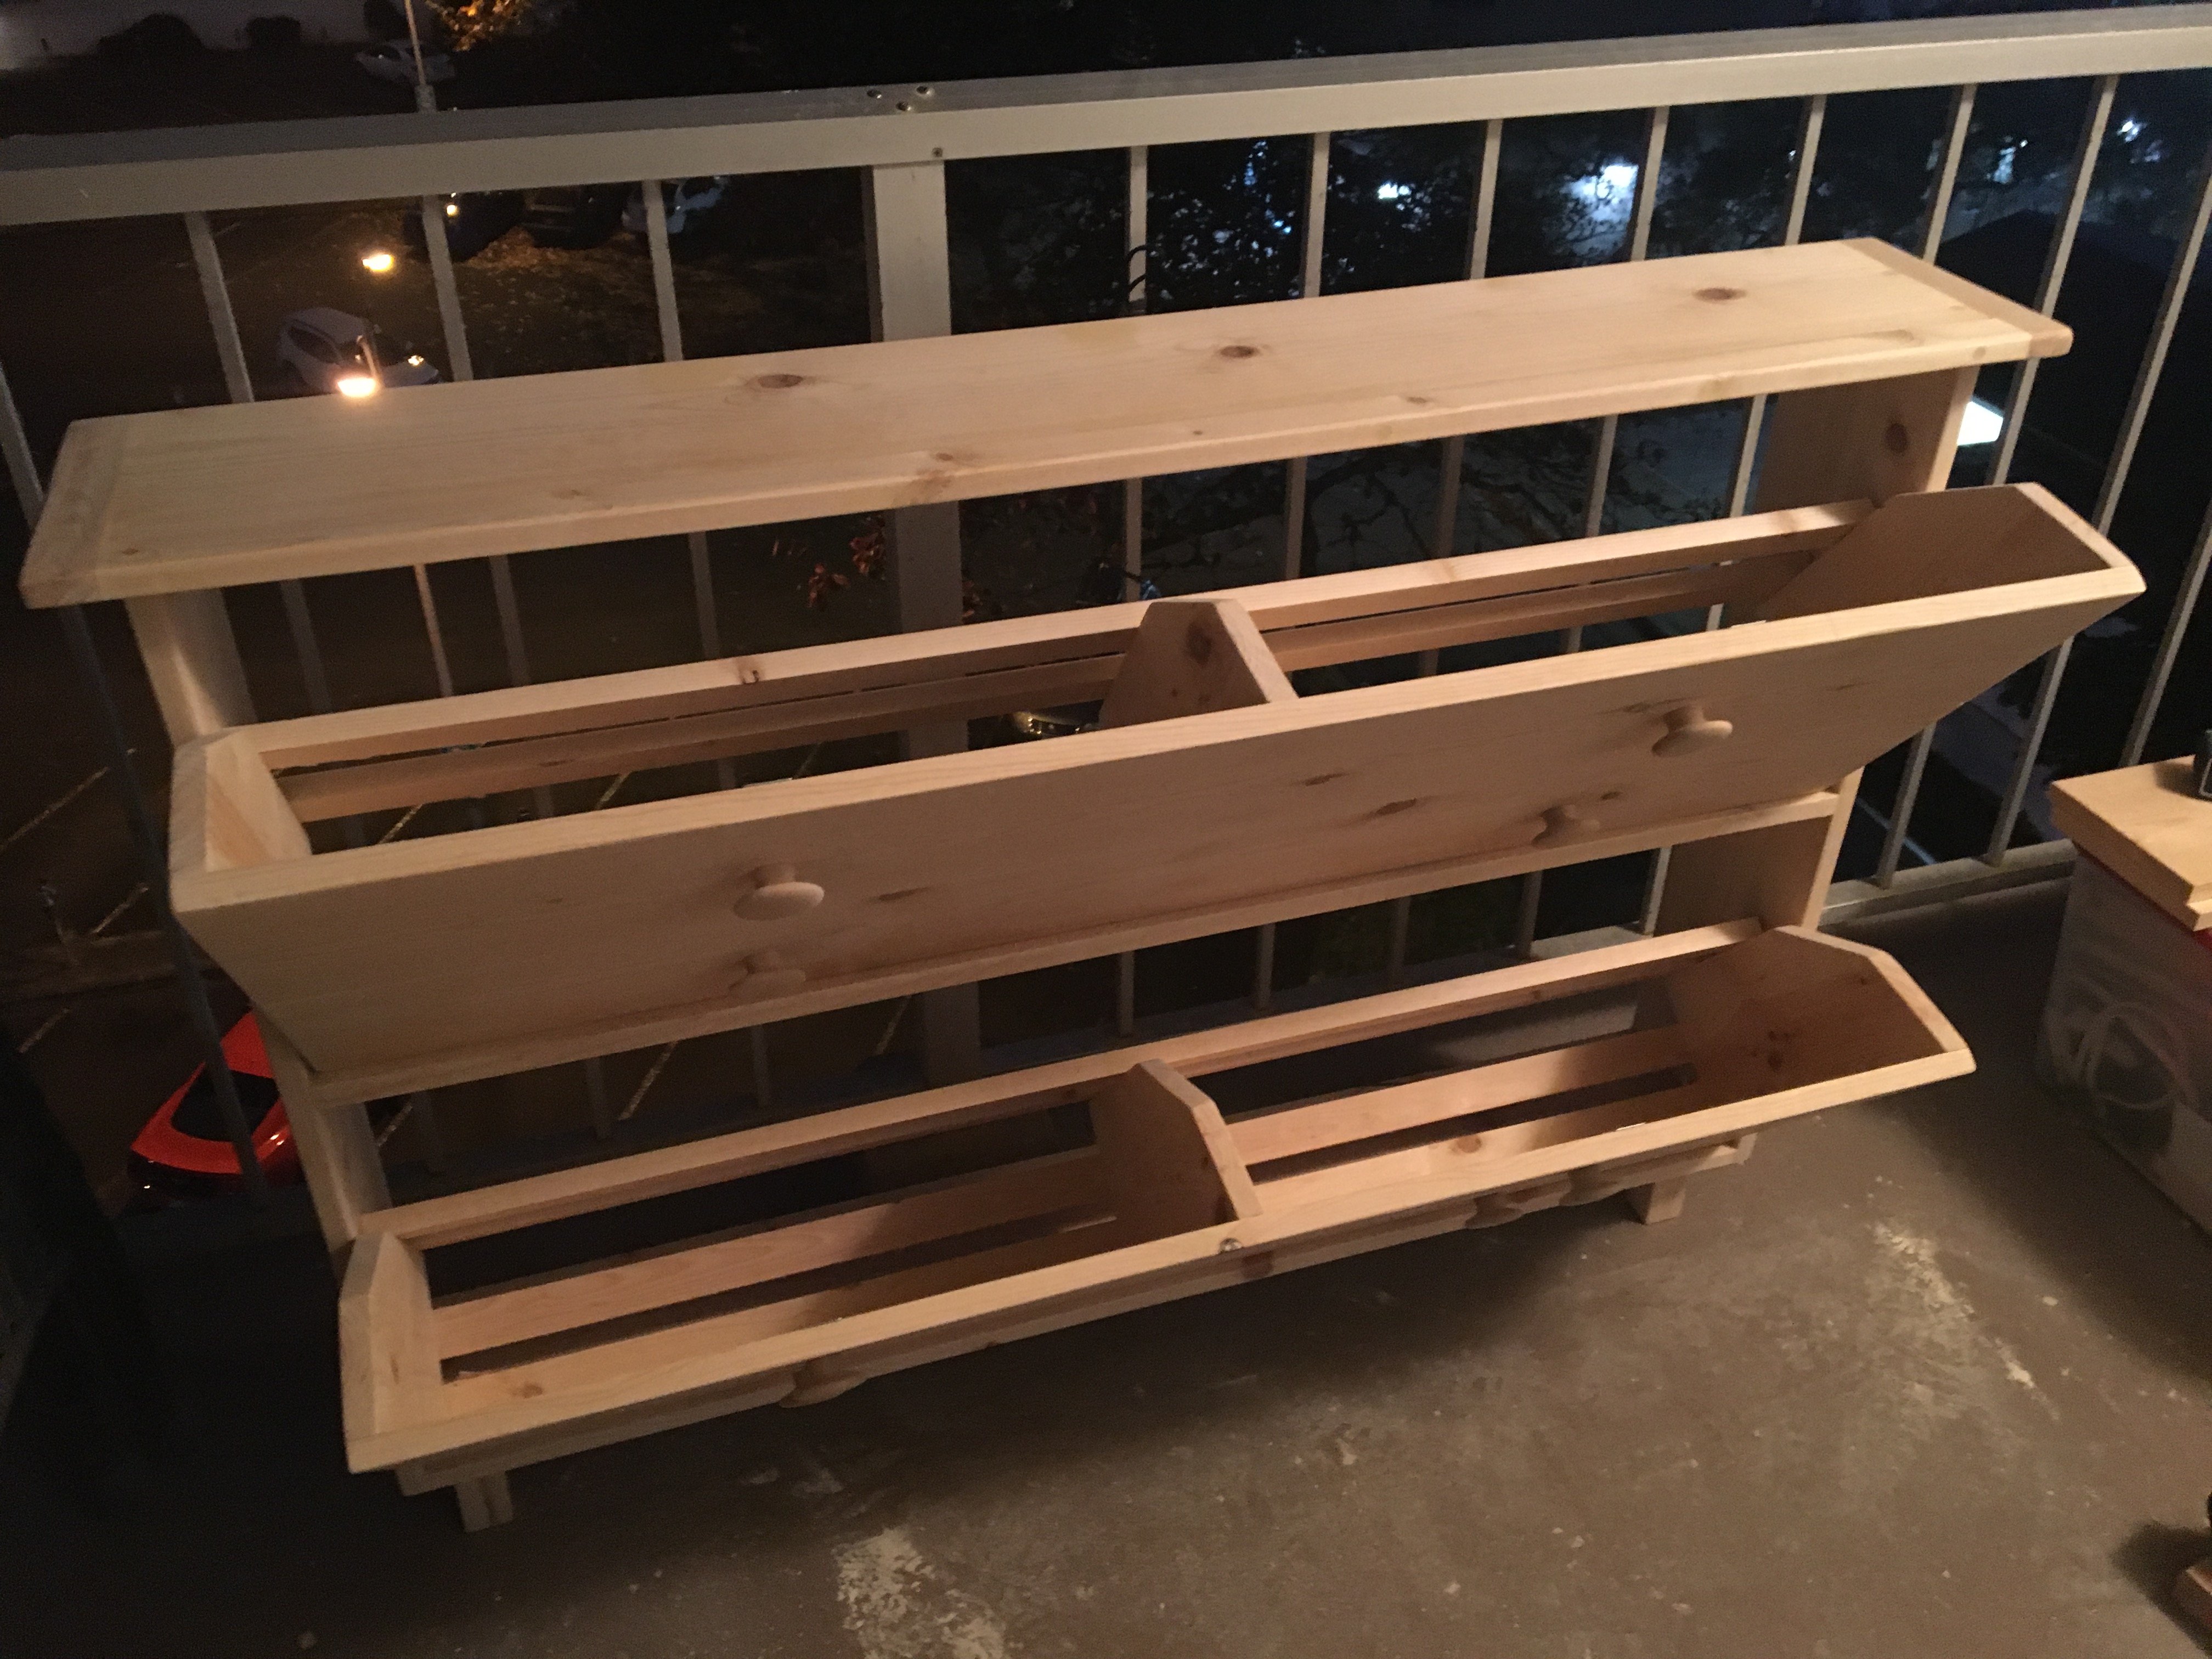
Our living room has no closets or storage. As a family we love to play board games and we love to cuddle on the couch with blankets. So, I was trying to come up with a sofa table for our large couch that also had a ton of storage. I looked all over the internet and could not come up with a solution. So, I decided to try here on Ana White and I found plans for a bookshelf. I adjusted the height to be just below the back cushions and went for it. I am not going to lie, it was not easy for me to adjust these plans and I DID make several small mistakes, but I am so glad I made this. We use it daily and it makes life so much easier. The only add I will do in the future is to add stoppers so when you raise the lid, it doesn't fall on your head. It makes life interesting though at the Van Lente household lol

Tue, 02/09/2021 - 22:53
I love this idea! Just curious - did you keep the bottom shelf of the bookshelves, or did you leave that off since it's not accessible behind your sectional?
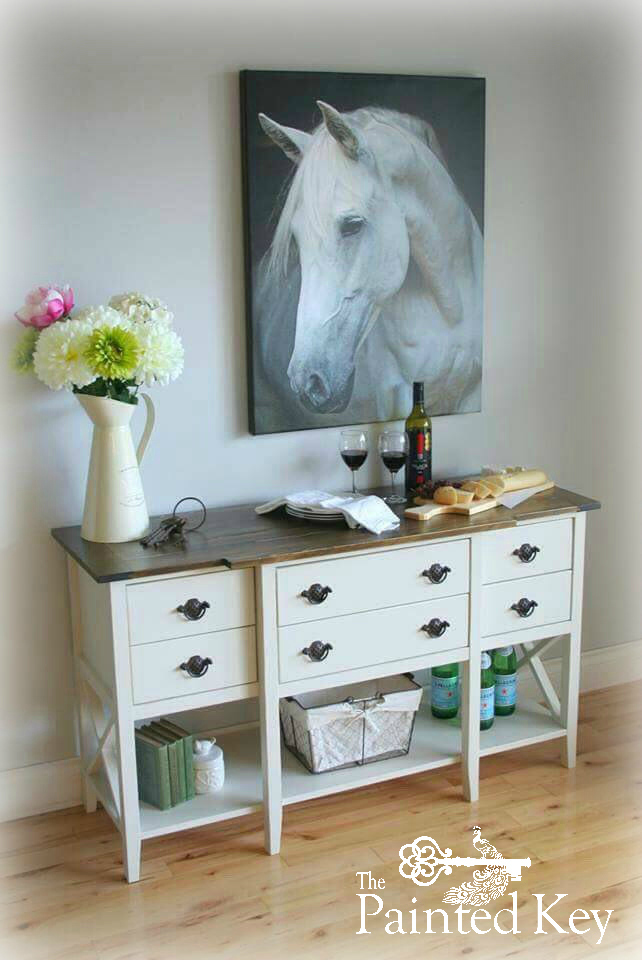
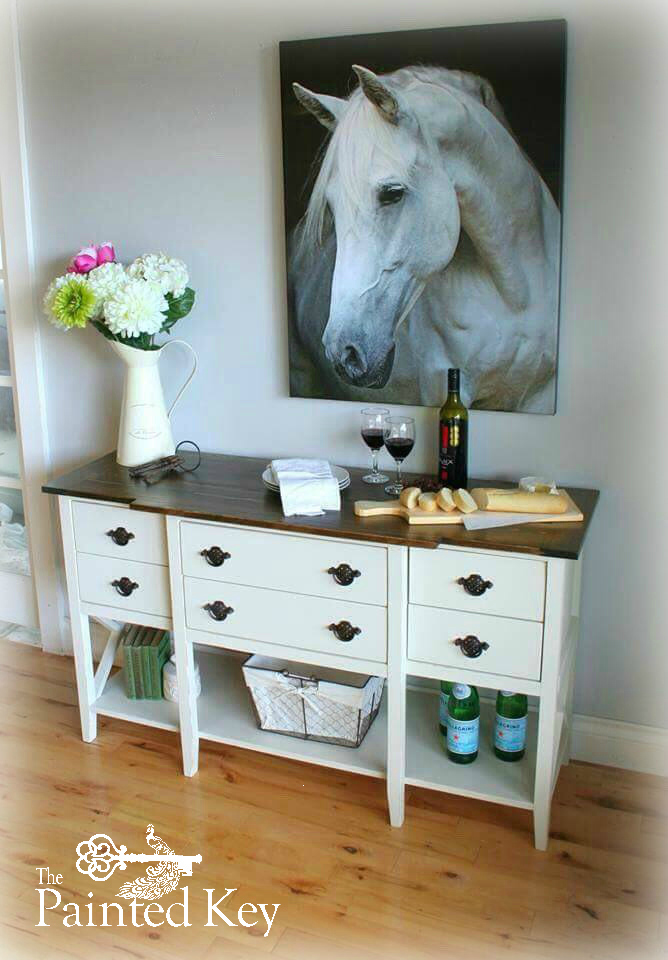
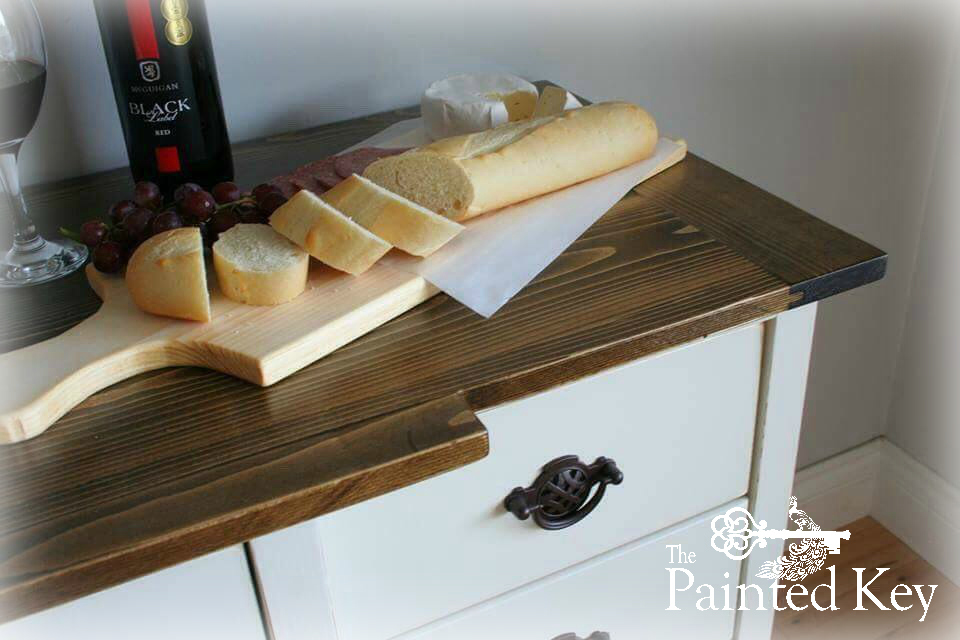
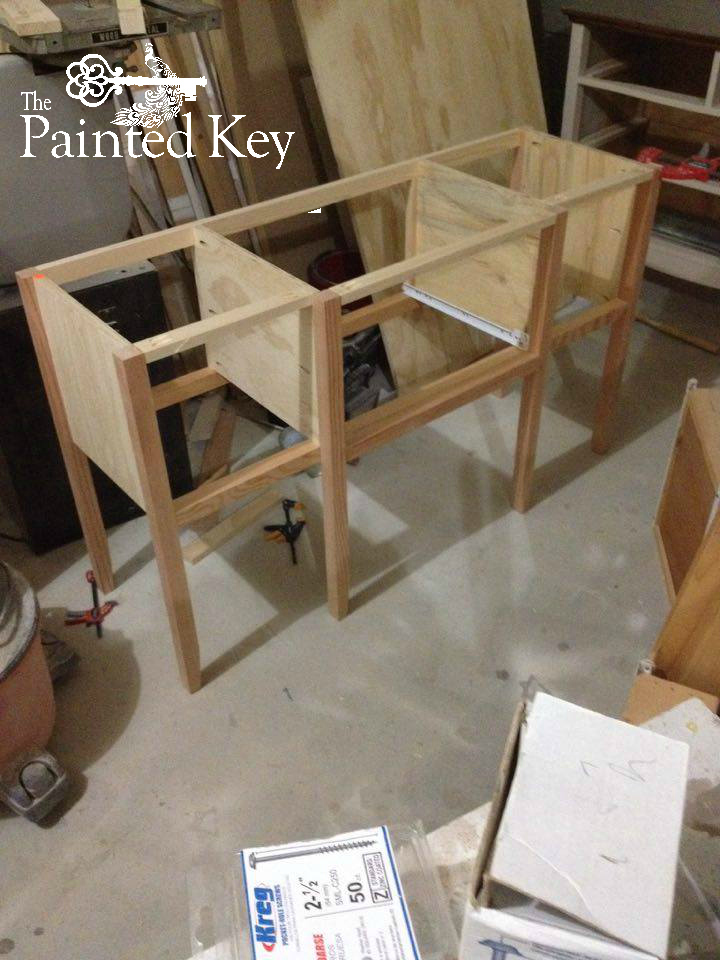
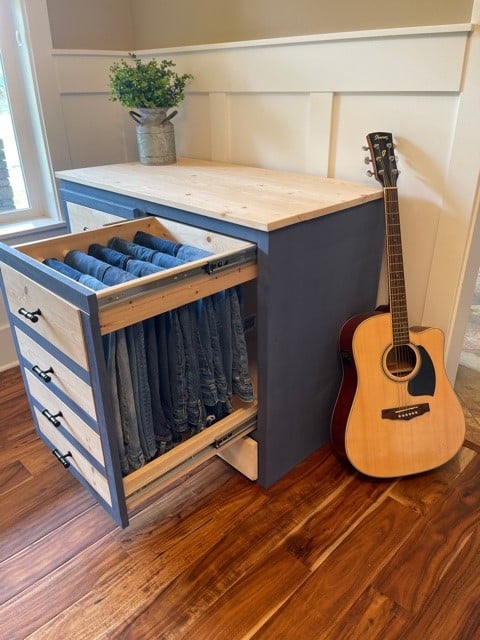
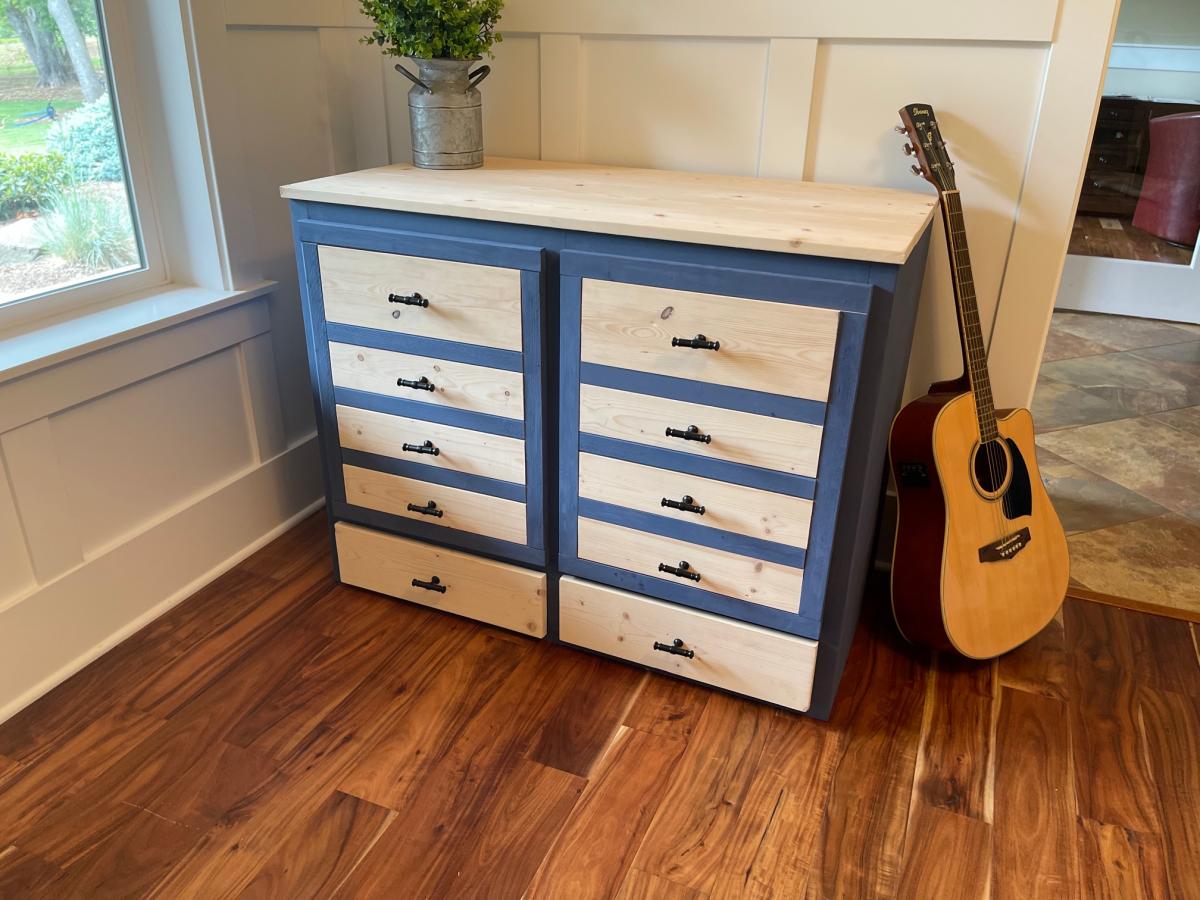
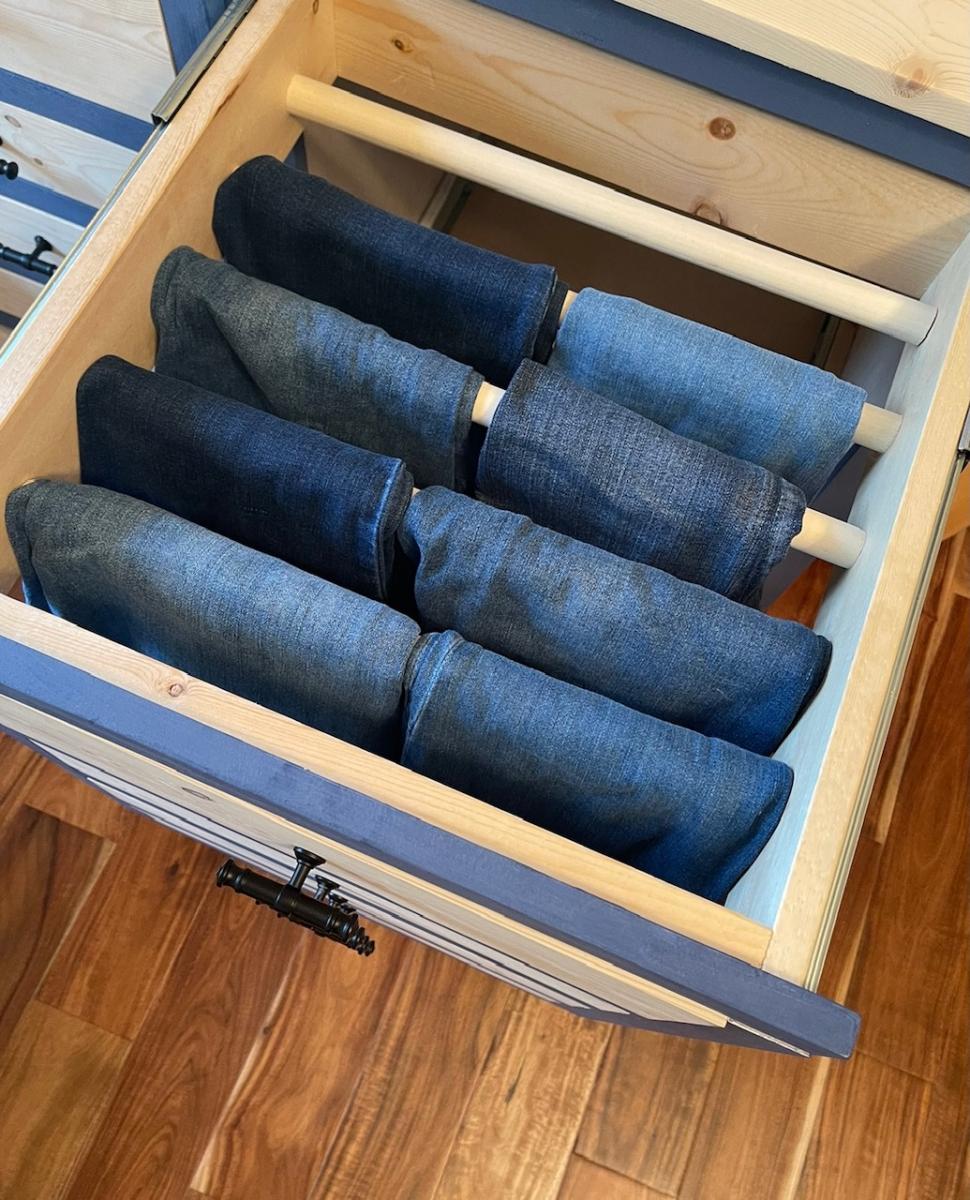
I was so excited to participate in the #IGBuildersChallenge! My modifications included reducing the width a few inches so I could cut two boards from a single 8' length for both the top as well as the bottom shelf. I added two additional legs to the front so I could divide the table into three drawer sections. I also decided to make it two thinner drawers as well. I added the x's on the sides to match the x coffee table I built for our home last month! I used tongue and groove to attach the breadboard ends which is something I'd never attempted before and is something I will try again. The top is stained in Minwax Jacobean and topped with a satin wipe-on poly. The base is painted Ashwood which is a Benjamin Moore colour I had colour matched at Home Depot in their Behr Premium Plus line and then topped in a satin polycrylic. I'm thrilled with how my table turned out and have already received a request from a friend to build her one for their home.


In reply to I love your version of the by handmadewithash
Sun, 07/24/2016 - 19:19
Thank you so much Ashley!!! :) It was such a fun challenge!
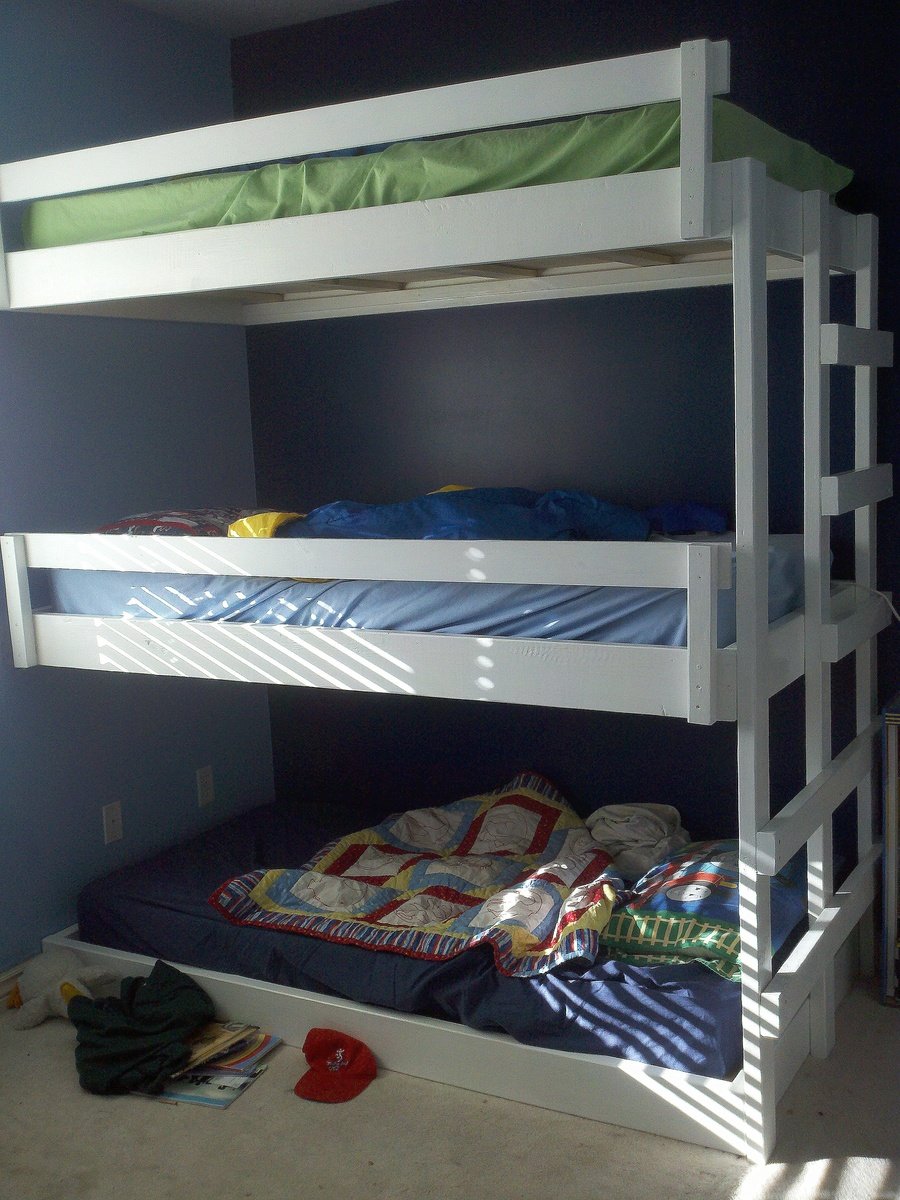
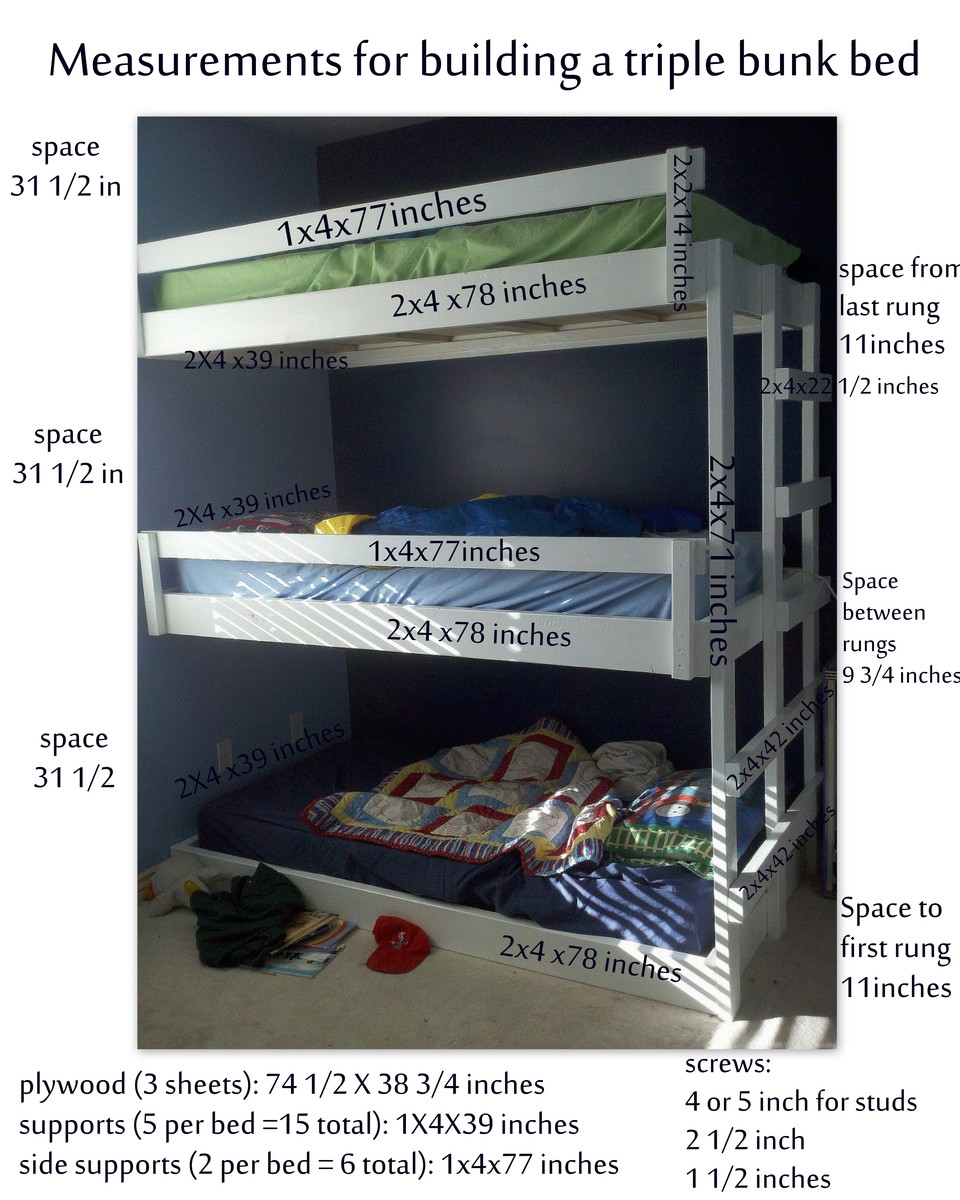
More info on these Triple Bunk Bed Plans on my blog: http://myhomedonemyway.blogspot.com/2013/03/triple-bunk-bed-finished.ht…)
1. Build the Bed Frames: (I will explain the process for one bed...do it three times if you want three beds)
2. Add Side Supports: ( Also do this step three times for three beds. We did it later but would be easier to do now)
3. Add Roll Guard: (do twice...once for each top bunk. We did this later but can be done now)
4. Build Ladder:
5. Paint desired color (you don't have to paint the sides that will be screwed into the wall).
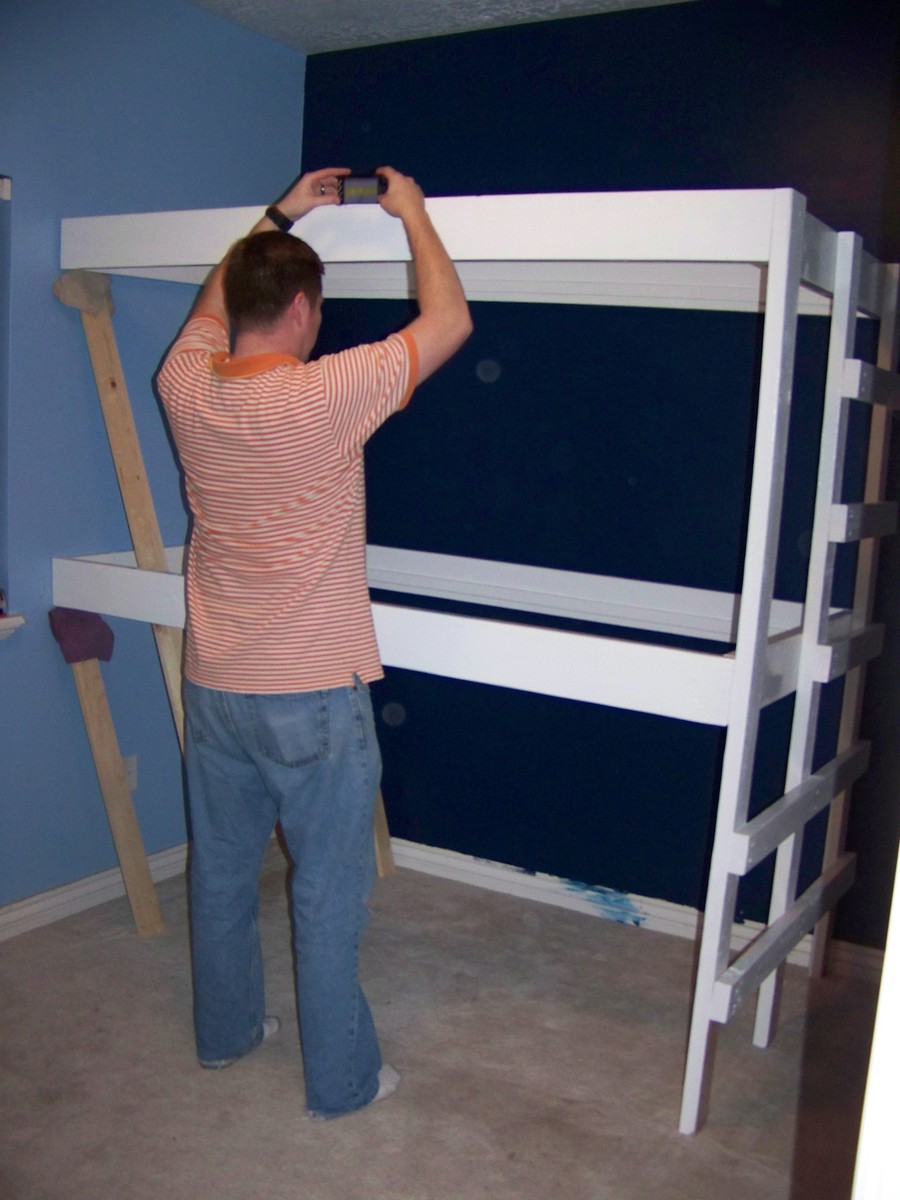
6. Install into the wall in desired bedroom
7. Add Supports (do three times for three beds)
8. Add Plywood (do three times for three beds) 9. Finish

Mon, 04/28/2014 - 13:28
I hope you all enjoy these triple bunk bed plans. The instructions should be easy to follow to make your own!

In reply to Easy Built in Triple Bunk Bed Plans by myhomedonemyway
Sun, 01/22/2017 - 11:06
Thank you so much for sharing your plans! This is great, well built, but still easy to do!
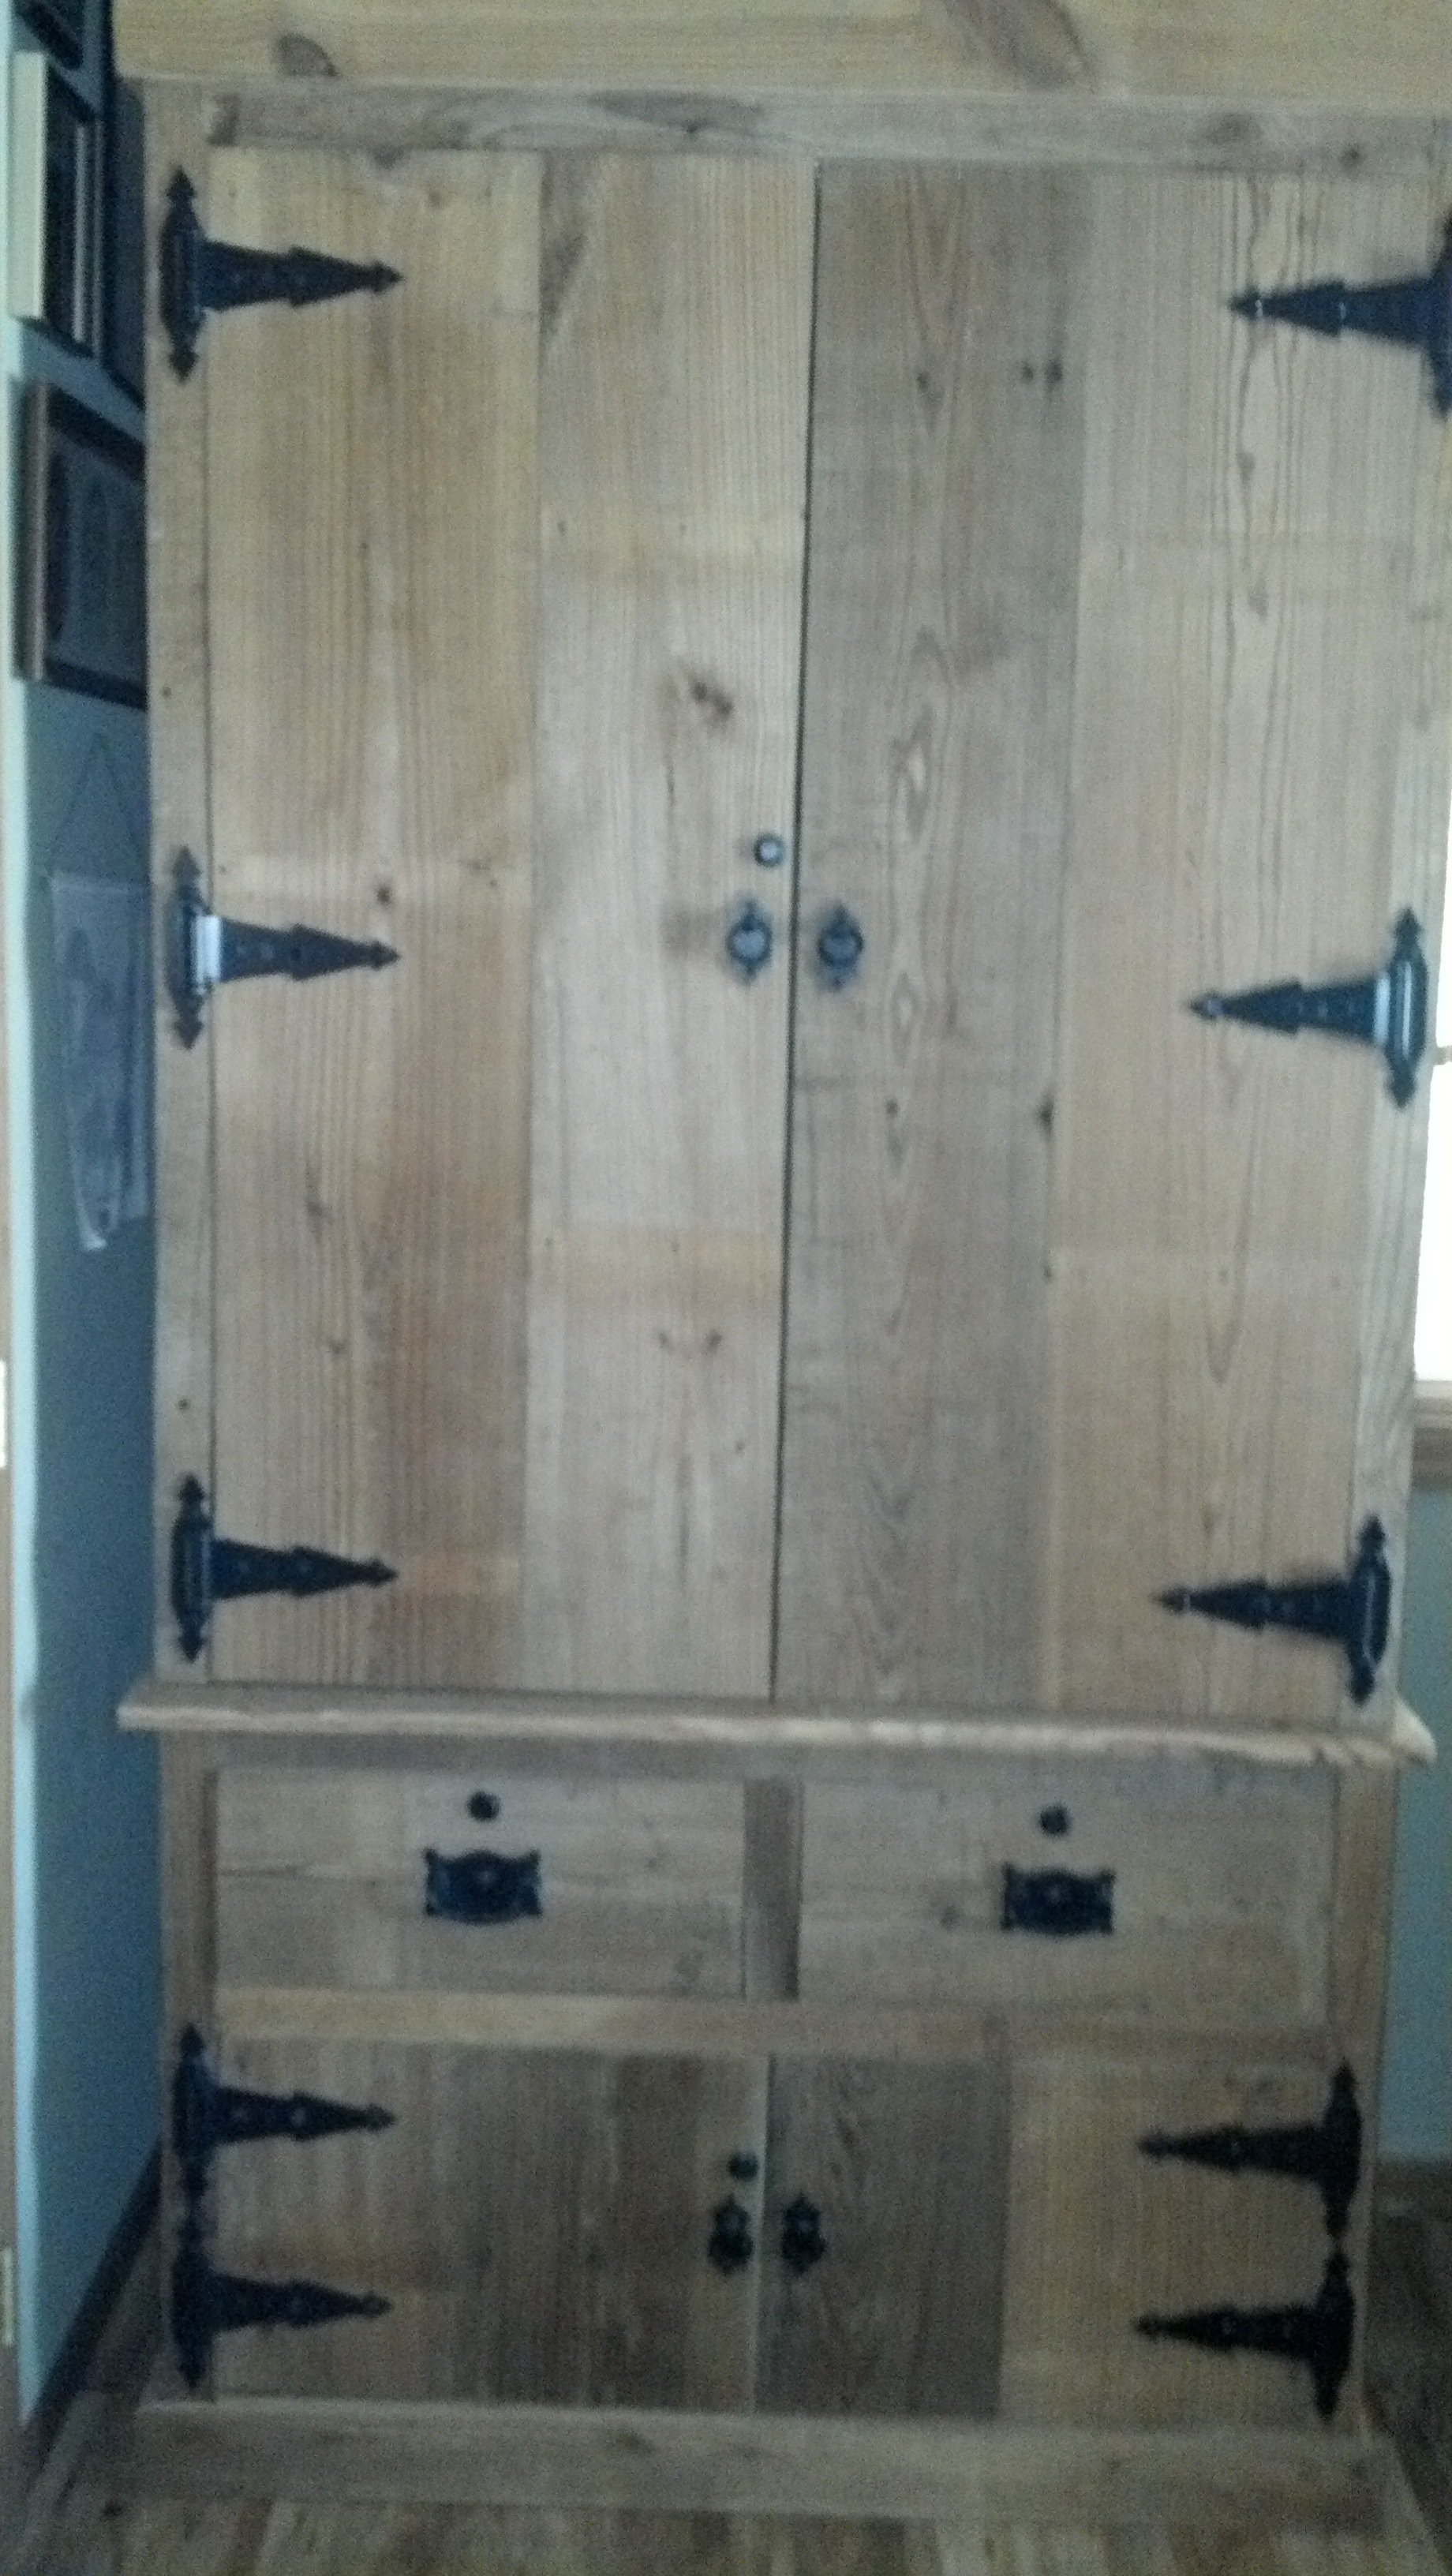
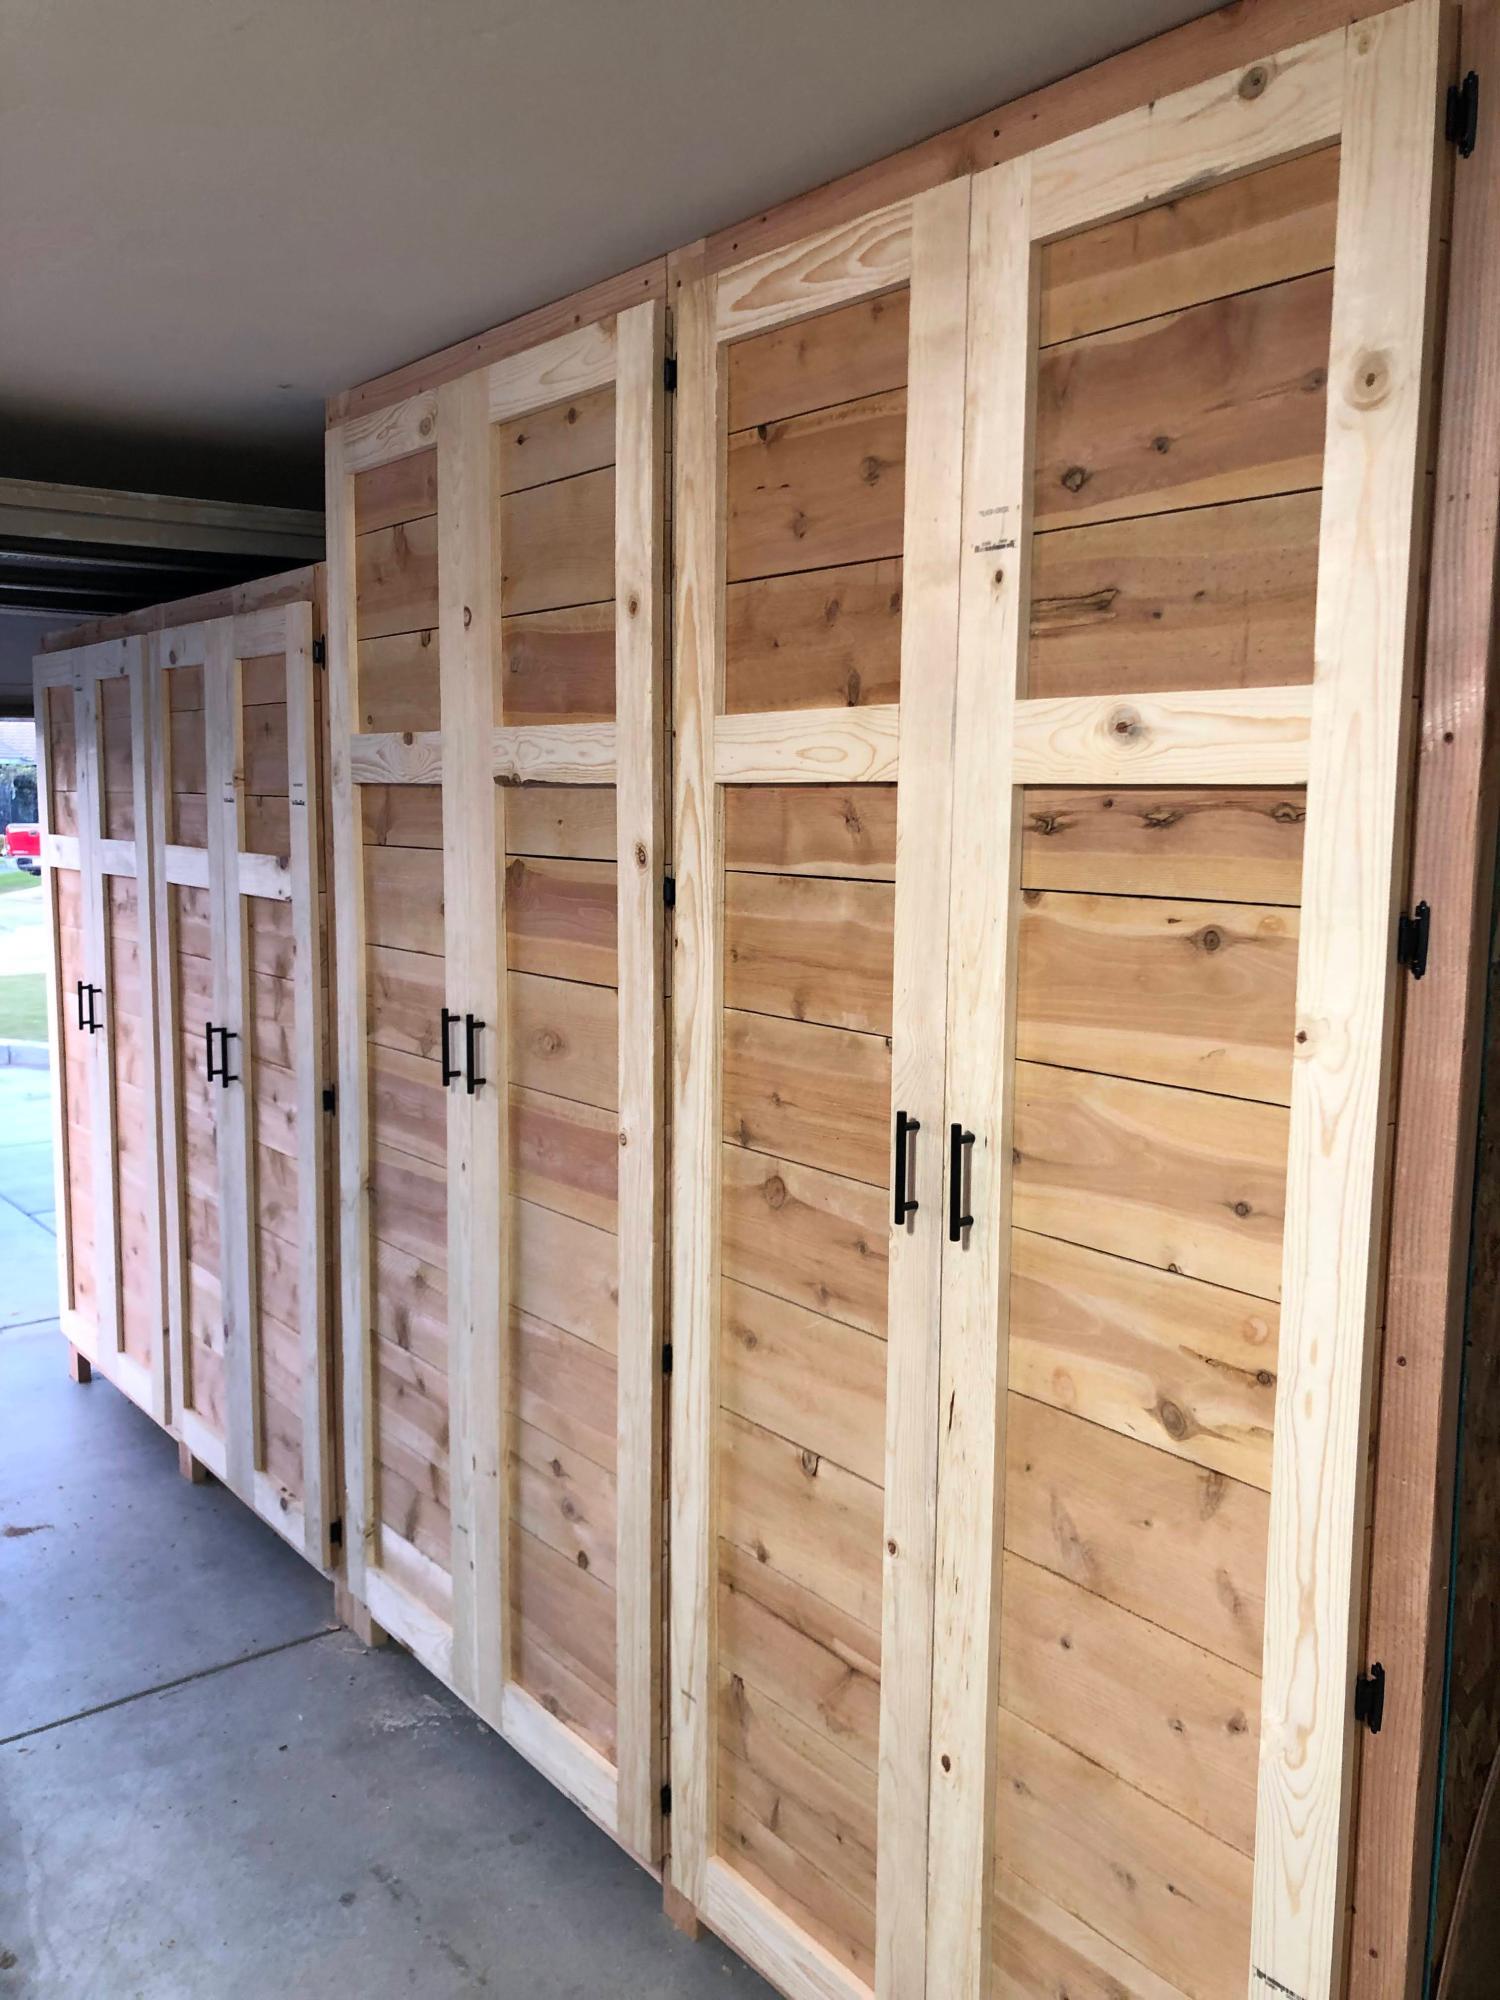
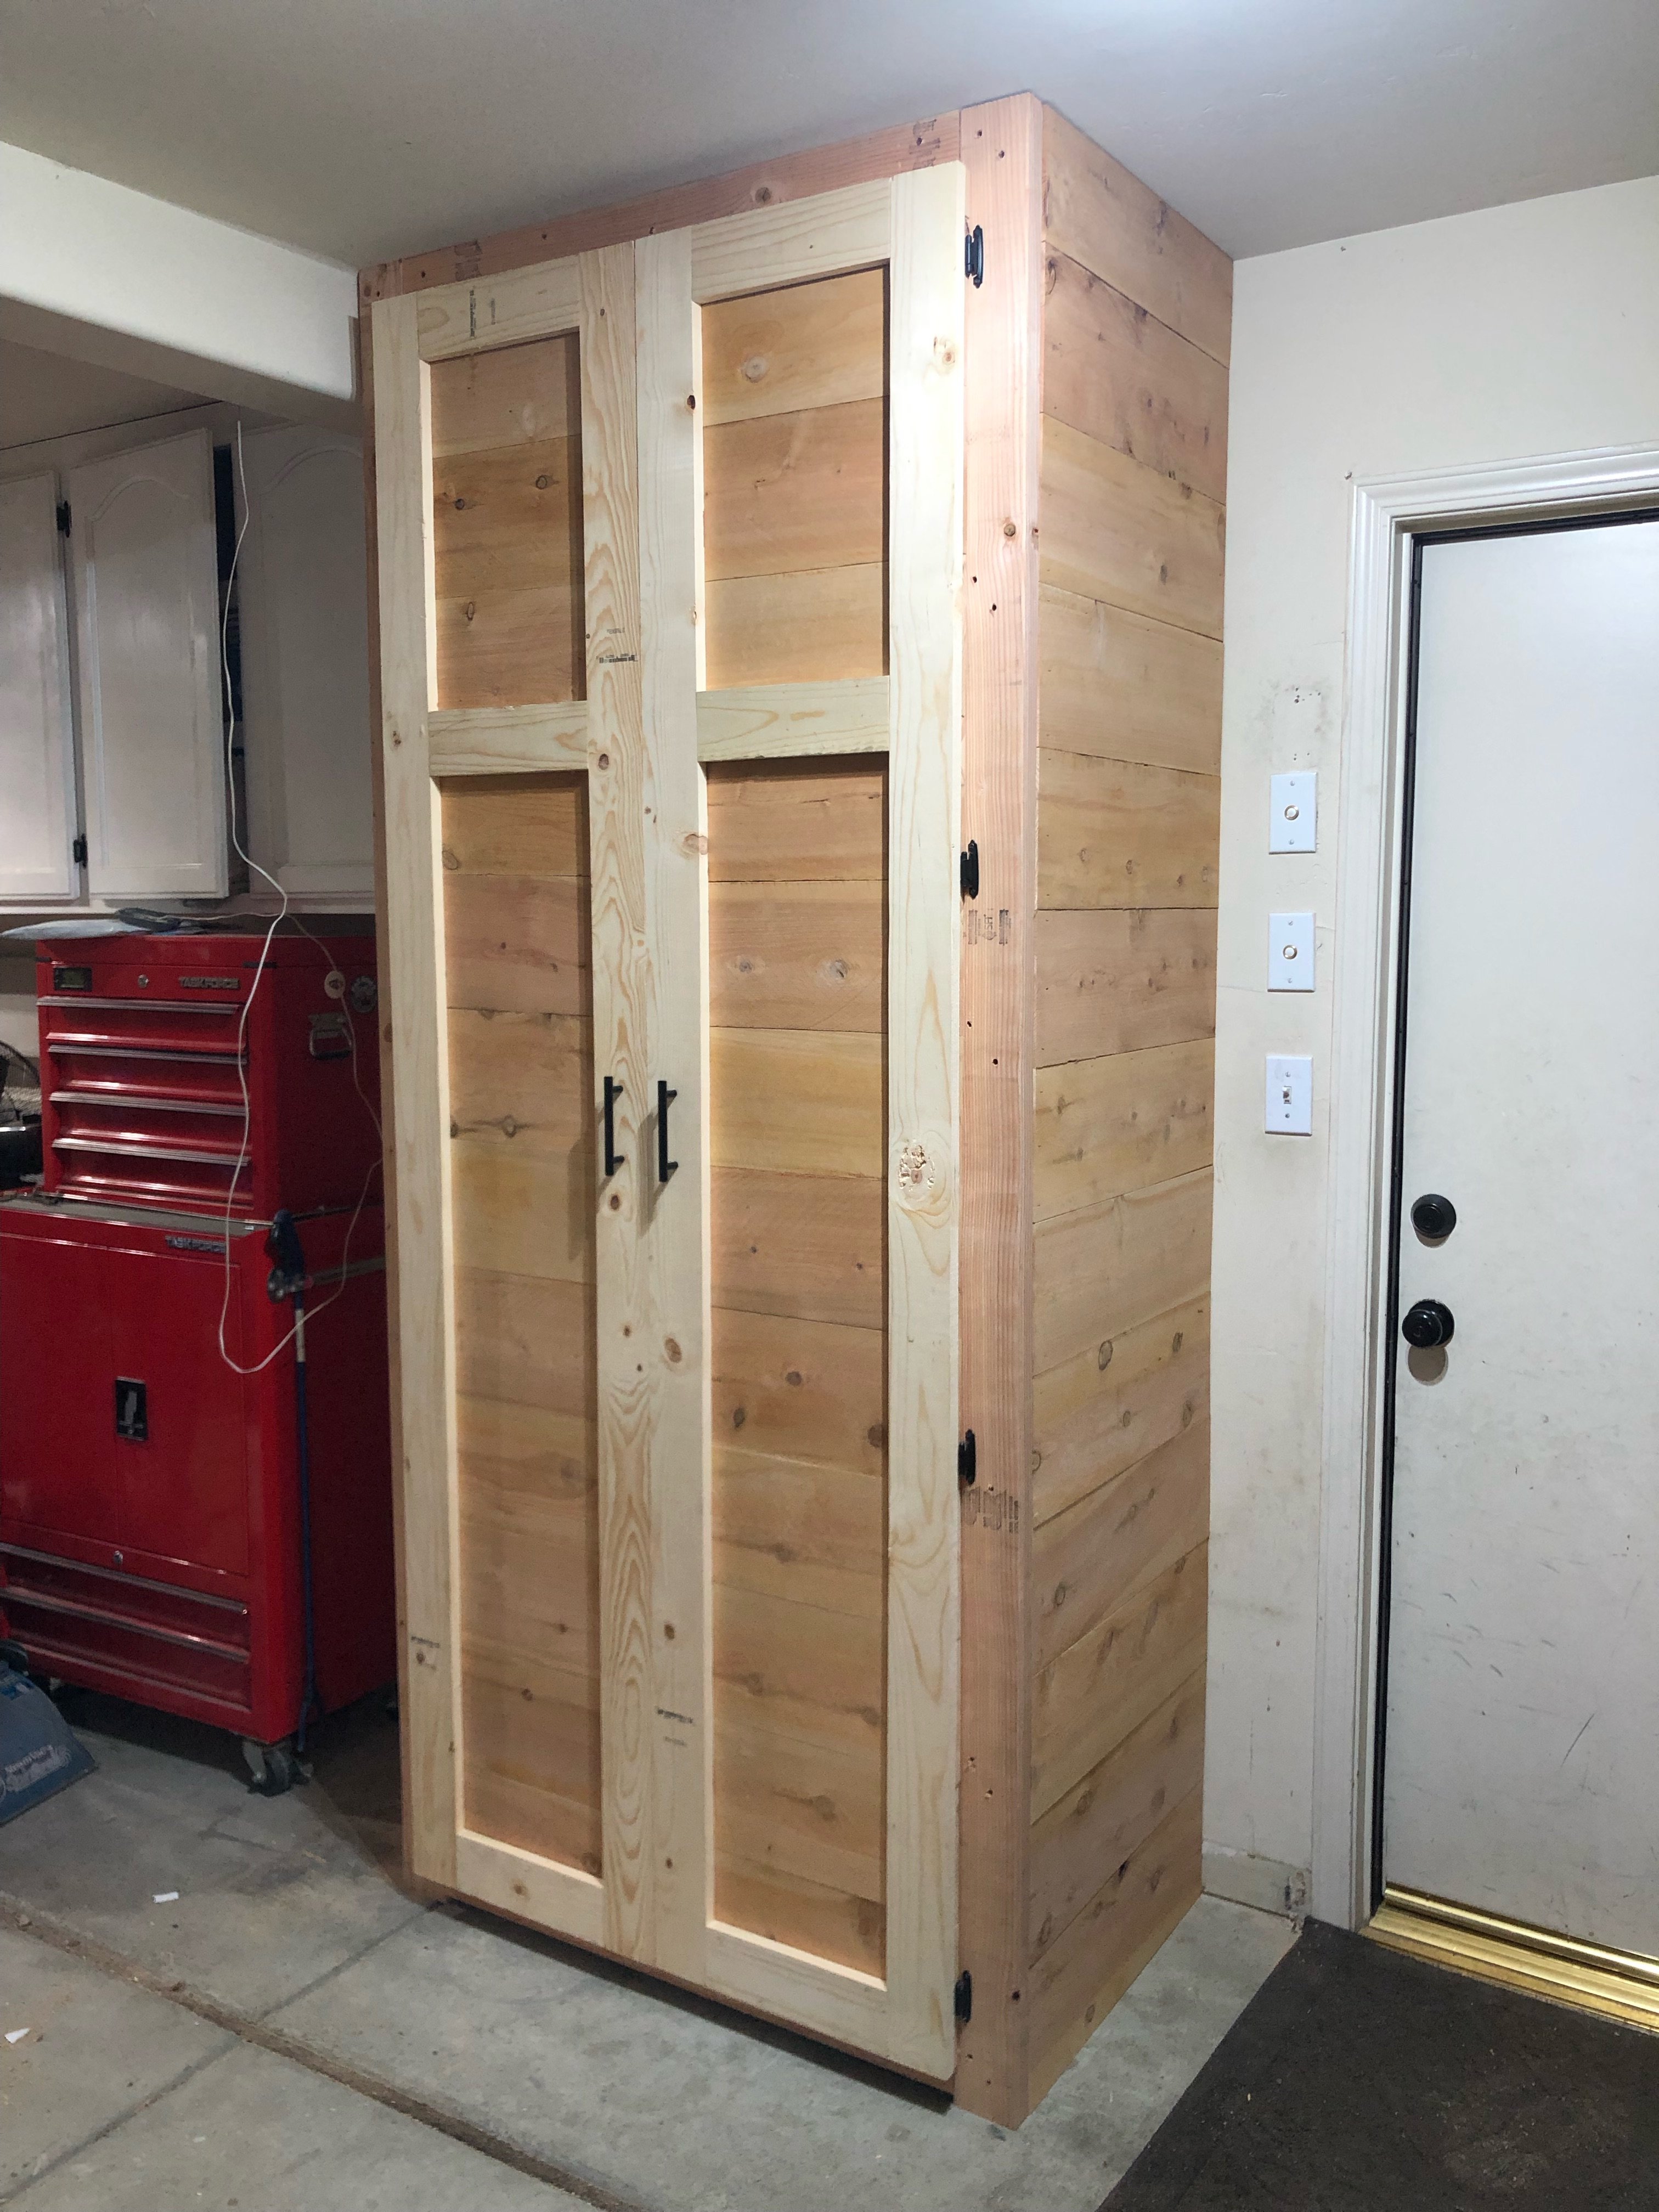
This is a gun cabinet I made for my dad out of old barn wood.
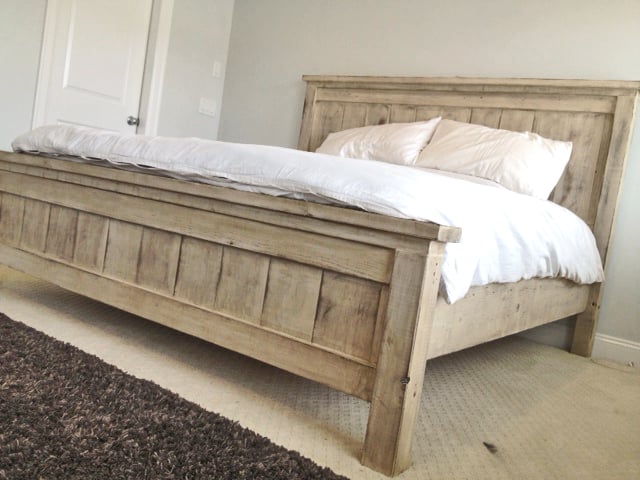
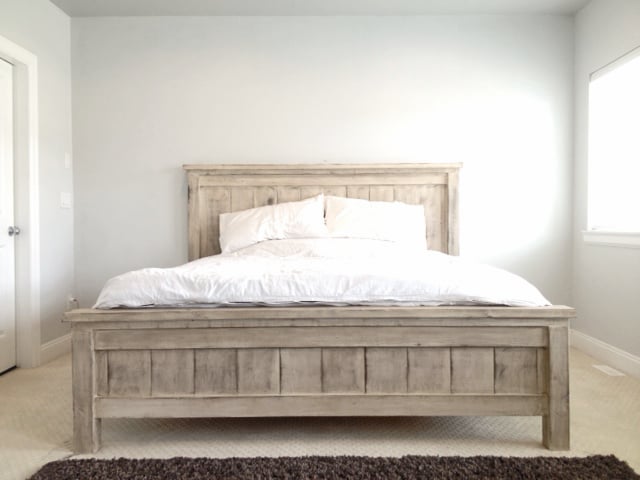
Second project ive completed from Ana White, and I am very happy with how this bed turned out! The only thing I would fix would be the finish, I wanted it a bit whiter. not so creamy. Otherwise very quick and easy fun project to do. =)

Thu, 05/22/2014 - 16:34
Thank you for sharing all of these awesome projects. I was always hesitant when it came to wood, but now I cant seem to stop!
Tue, 06/10/2014 - 08:13
How exactly did you achieve this finish? sand first, paint second, sand again and then stain?
In reply to More about your finish by JGoates
Wed, 06/11/2014 - 13:43
(You can do all this before or after your project is put together or not.)
Be sure to do a test piece before hand so you can see exactly what your getting :)
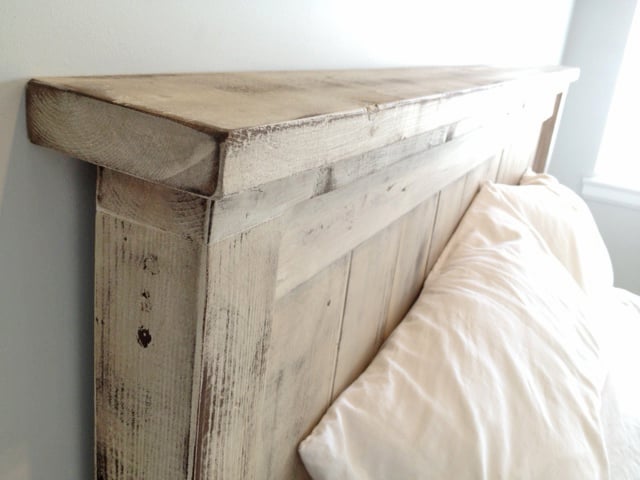
The first step I did once the head board and foot board were put together, was to sand any sharp edges or corners. I liked mine rounded and worn looking. I did not sand anything else.
Second step is to paint 1 even coat of a basic white latex paint.
Third step is to sand away some white paint. because we didnt sand it before hand the grains in the wood will be very bumpy. so the paint on the grains will sand off while the paint lower than the grain will remain. makes sense? hopefully i explained that right!
Fourth step is to now wipe on the stain of your choice. I went with Dark walnut. It stains the paint a bit bringing the white to a gray/brown tone. and stains the wood dark walnut so the grain patterns show up dark.
Let me know if you have any other questions and good luck!

Thu, 01/29/2015 - 07:49
What grit of sand paper did you use to sand off the white paint? and did you sand it by hand? Also, for the dark walnut stain, did you wipe off immediately or leave it on for a bit before wiping? Beautiful bed, I want to achieve this look!
Fri, 02/06/2015 - 09:15
Hi jbogan15, thank you!
For sanding I used a palm sander with 120 grit to get the job done a bit quicker, than went over lightly with 220. When staining I actually just dipped a rag in the stain and would wipe the stain on. =)
Good luck!
Justin
Fri, 01/27/2017 - 11:05
Love this look! Exactly what I am trying to achieve...A few questions about the side rails. How high did you connect them to the 4x4 posts and exactly how did you connect them? Did you use brackets or screw right into the posts? Thank You!
Thu, 09/05/2019 - 15:07
I have seen several beds from Anna White. I was wondering if the frame require a box spring mattress or not. If not, are the beds lower than what a traditional mattress and box springs are. Thanks !
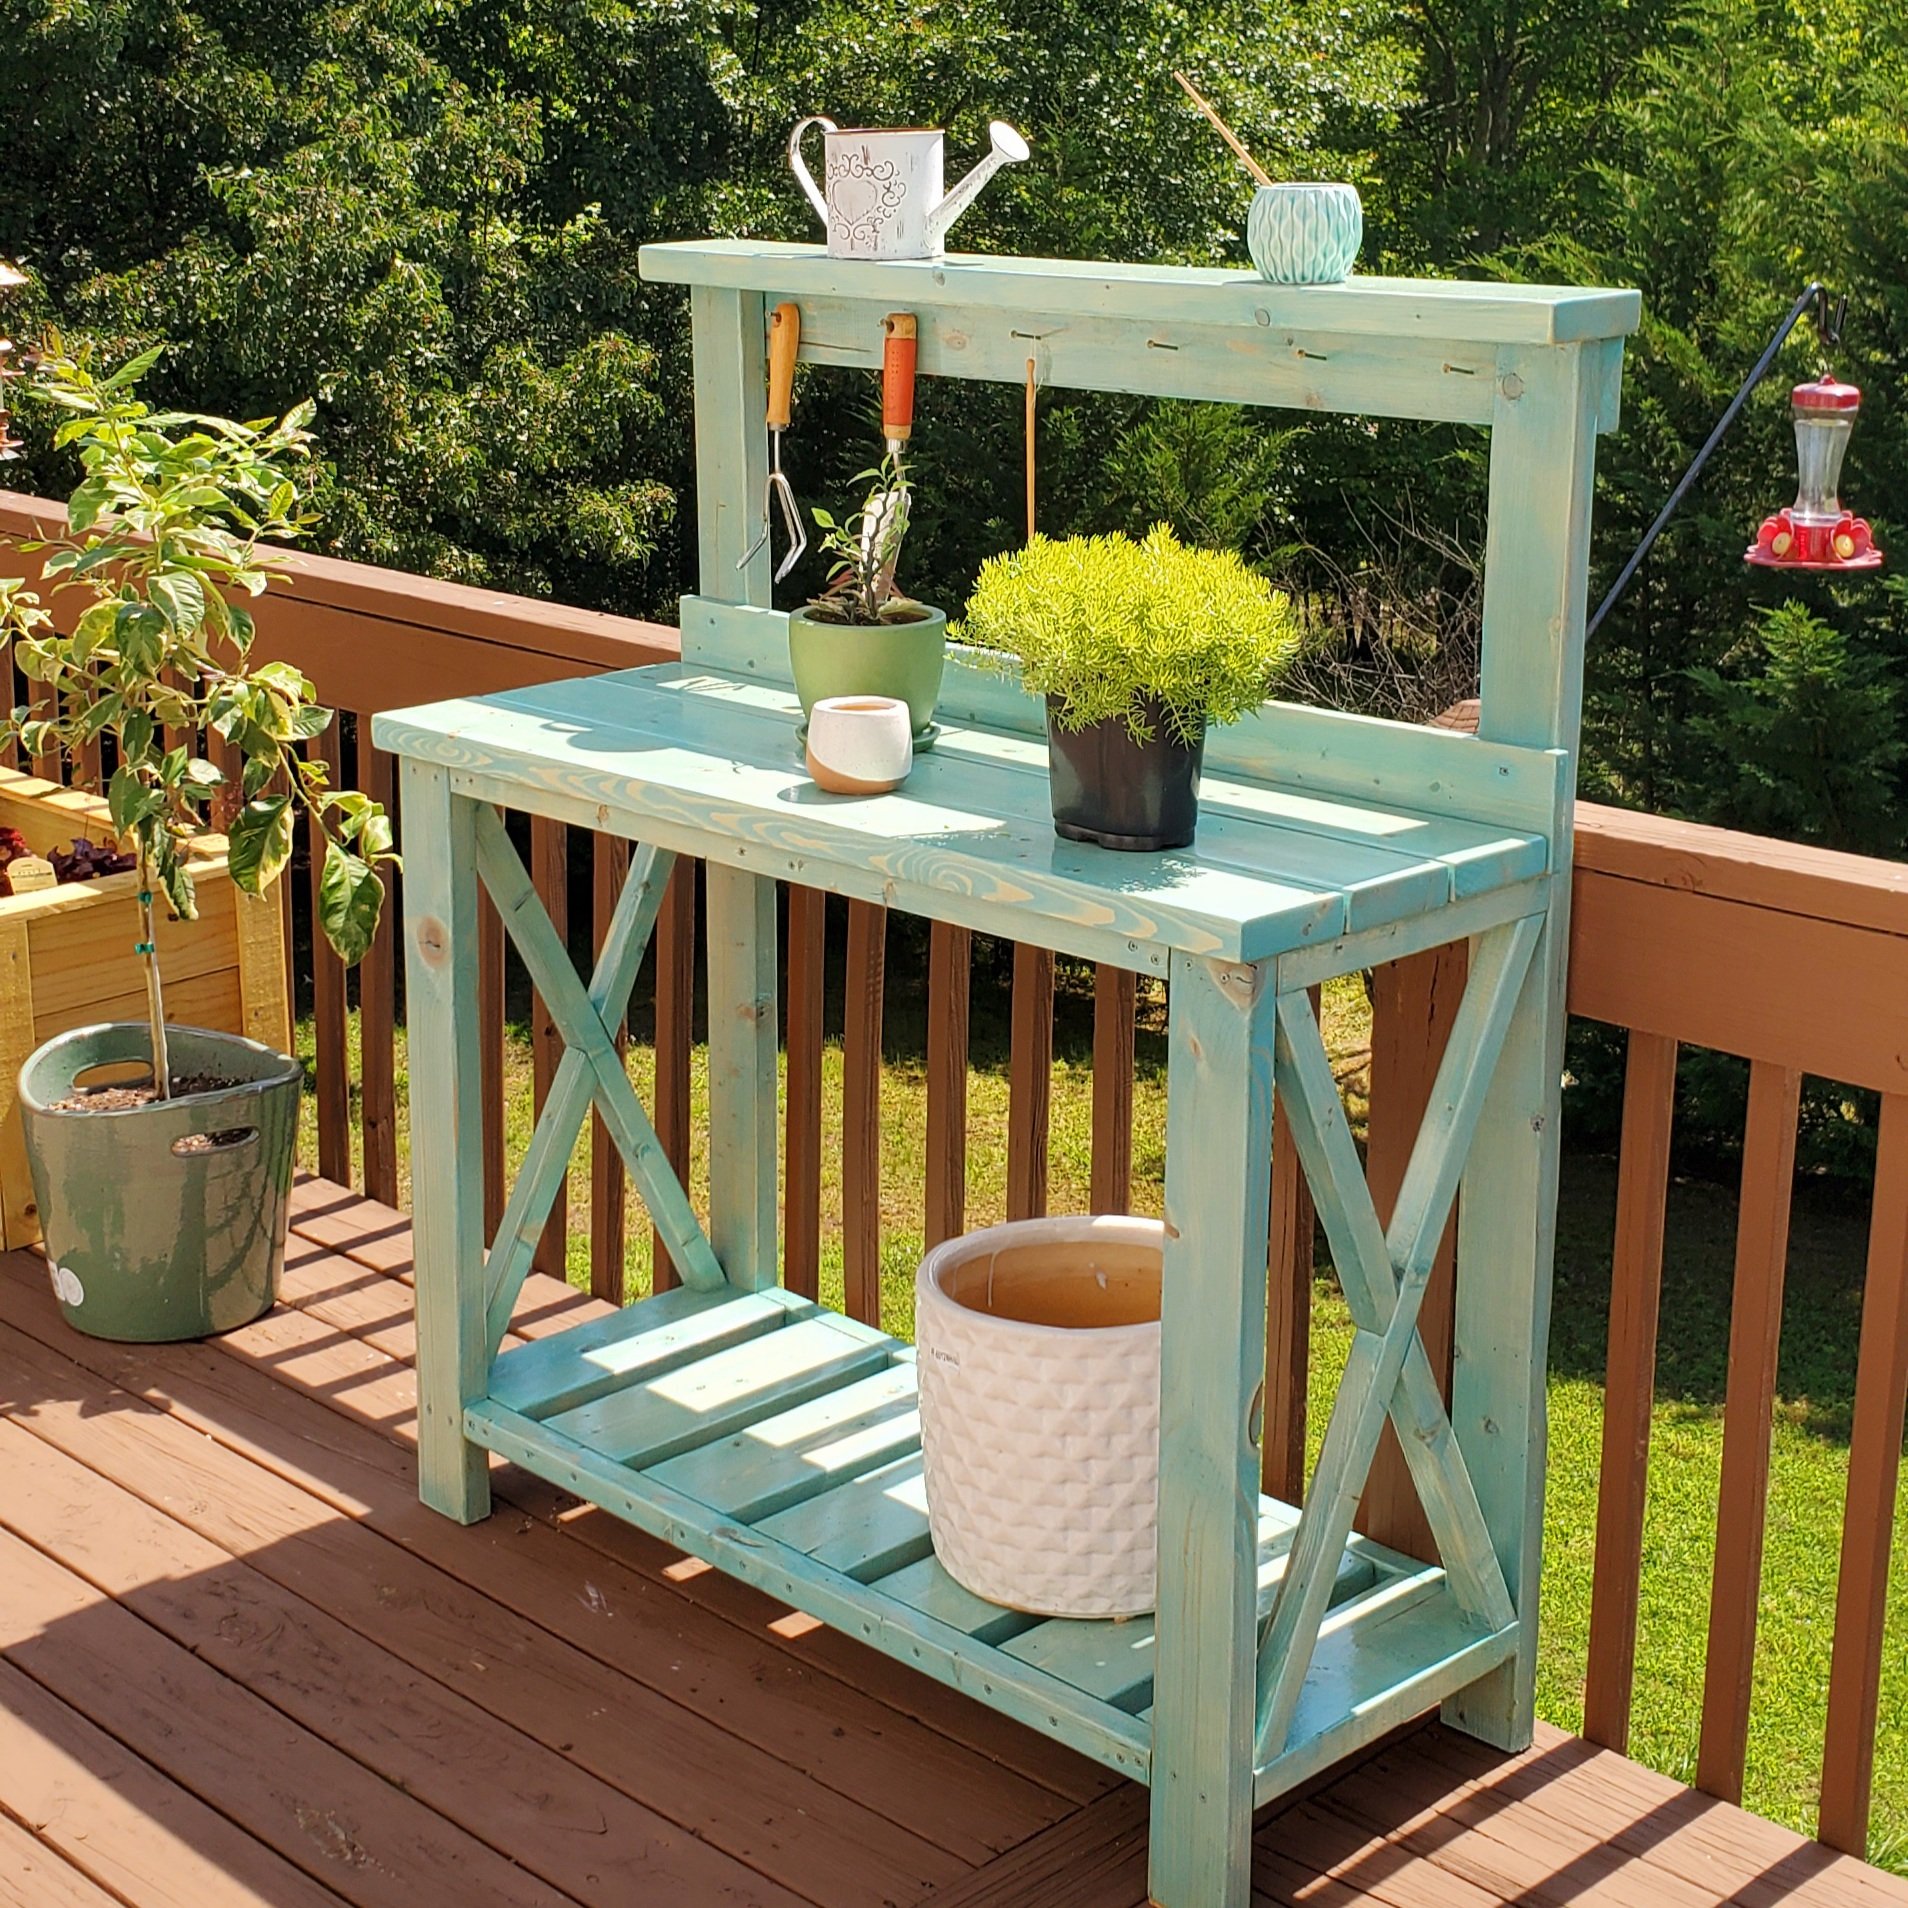
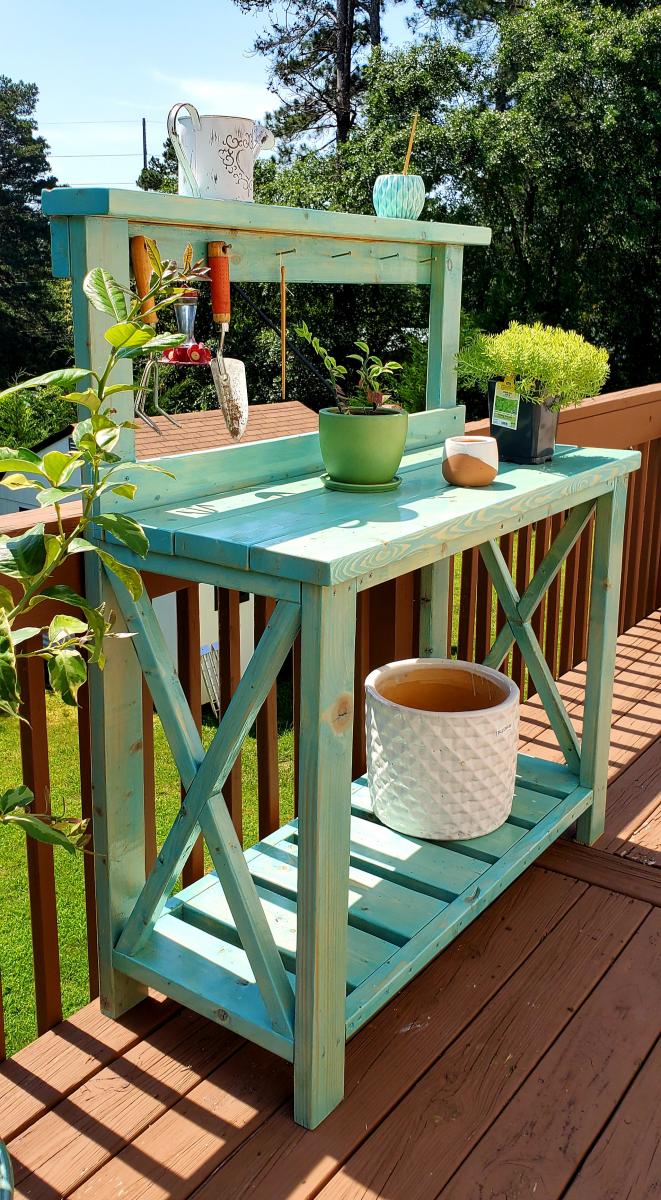
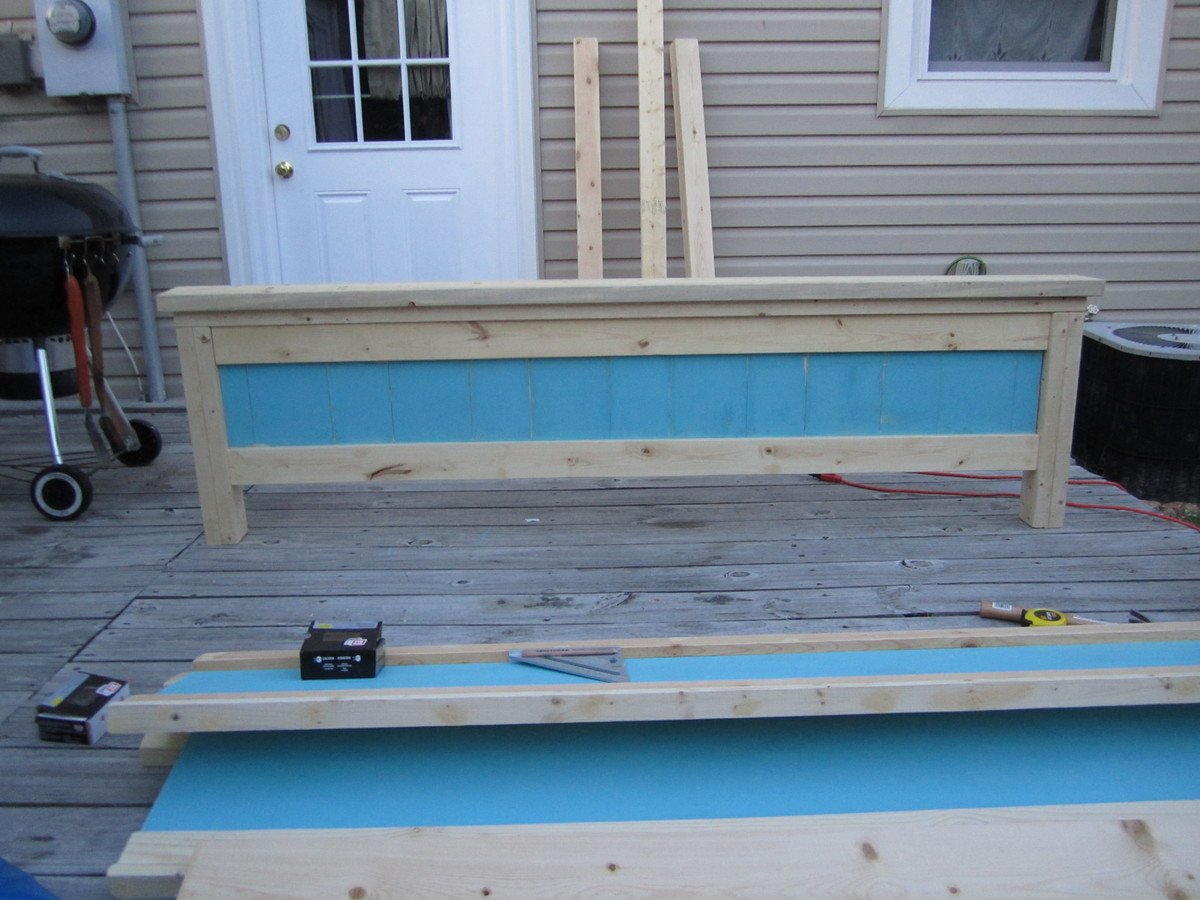
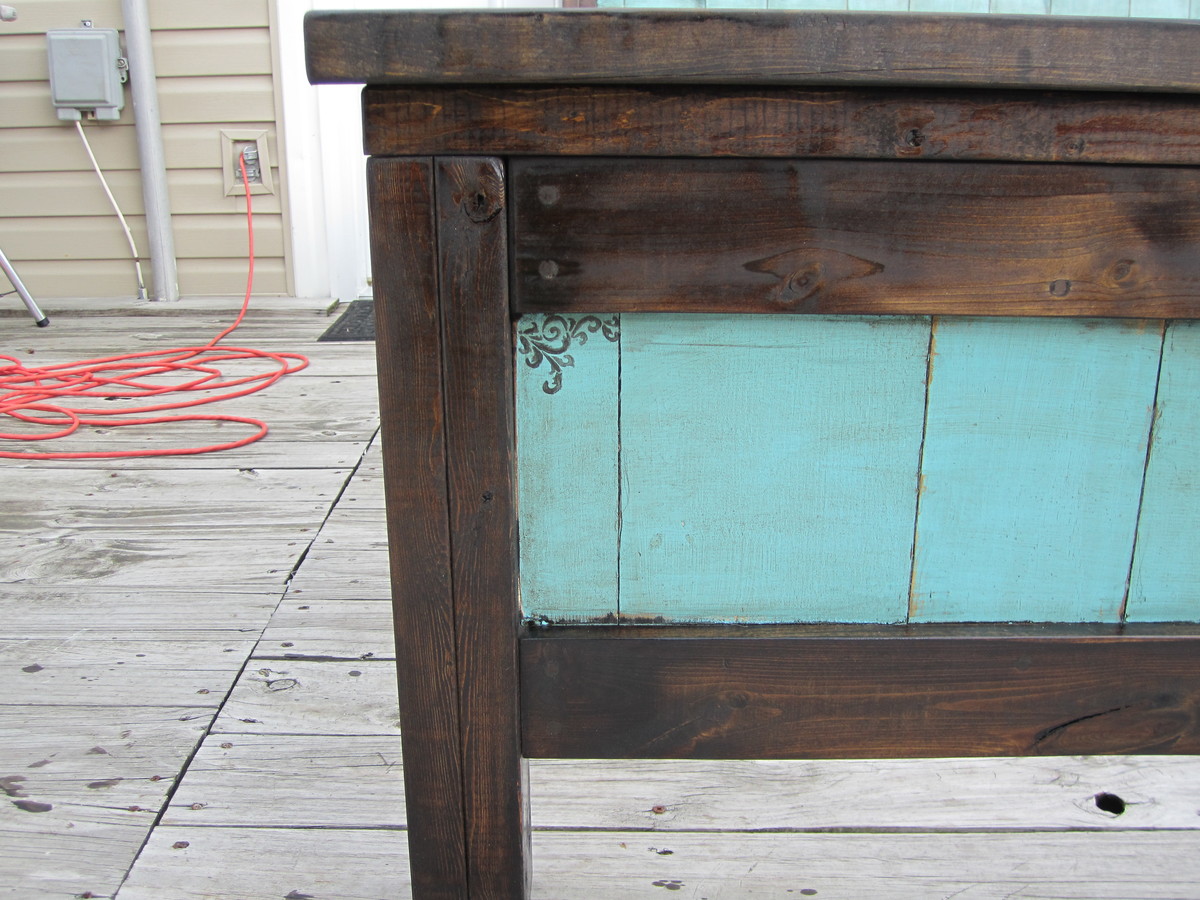
Built this for my girlfriend's birthday present. Added a 1x4 backsplash and a 2x6 for the top shelf to give a little more shelf room instead of the 2x4 called for in the plan. Stained with Varathane "Vintage Aqua" color and then 3 coats of Helmsman Spar Urethane for outdoor durability. Set the whole thing on caster wheels (not pictured) so she can move around the deck as needed.

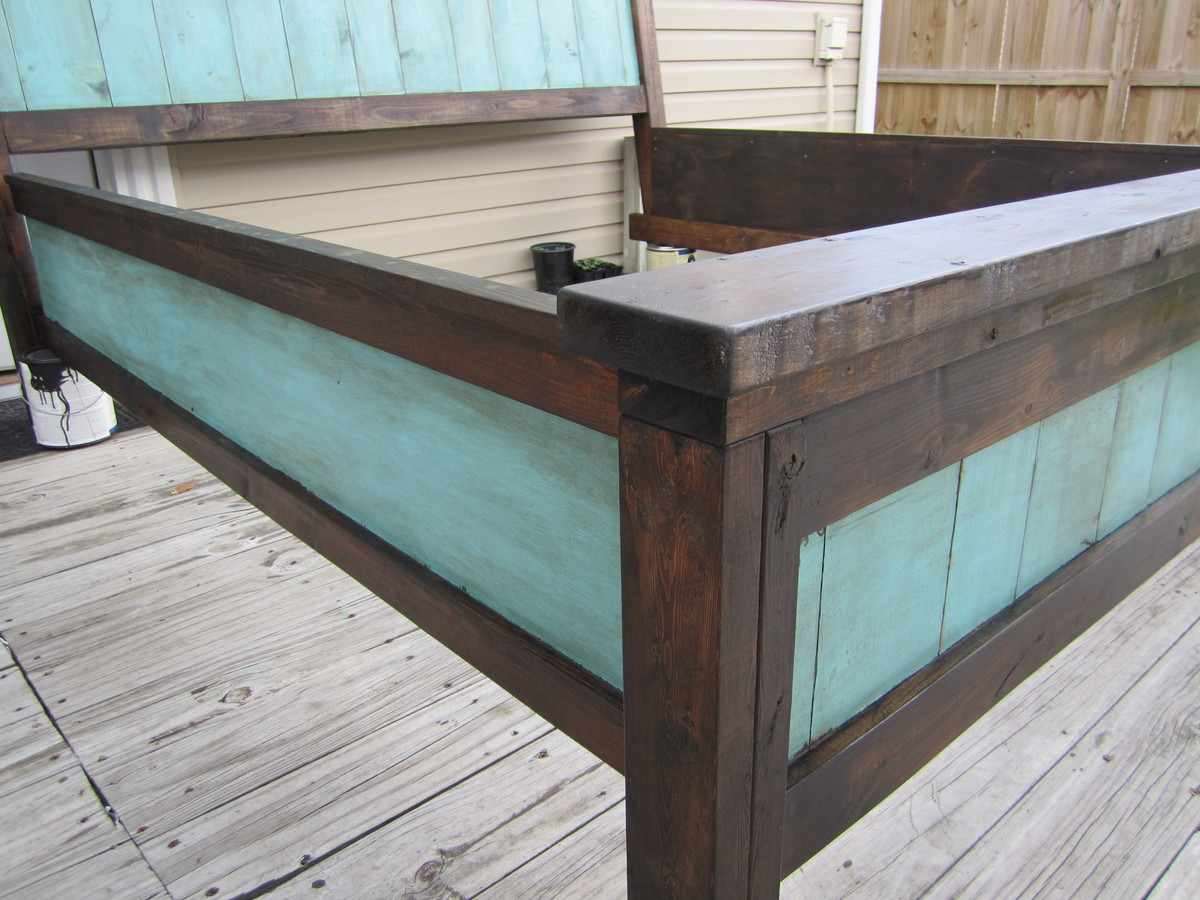
This was our first build alone. I've helped my dad build various things through out the years but was this first time me and my husband built something together.
The bed plans were great and it went together easily. We couldn't find untreated 4x4 posts so we went with two 2x4 sandwiched together, and then we bolted the headboard posts to the footboards. The side rails are plywood trimmed with 1x3's and topped with a 1x2. We also used L brackets to attach the side rails to the head and footboards and addition to bolts on the headboard and 2" screws on the footboard. We needed to assemble the bed in a way we could easily disassemble because we are moving soon.


Wed, 08/15/2012 - 14:46
I LOVE the turquoise finish! It looks like a piece of jewelry for your bedroom!
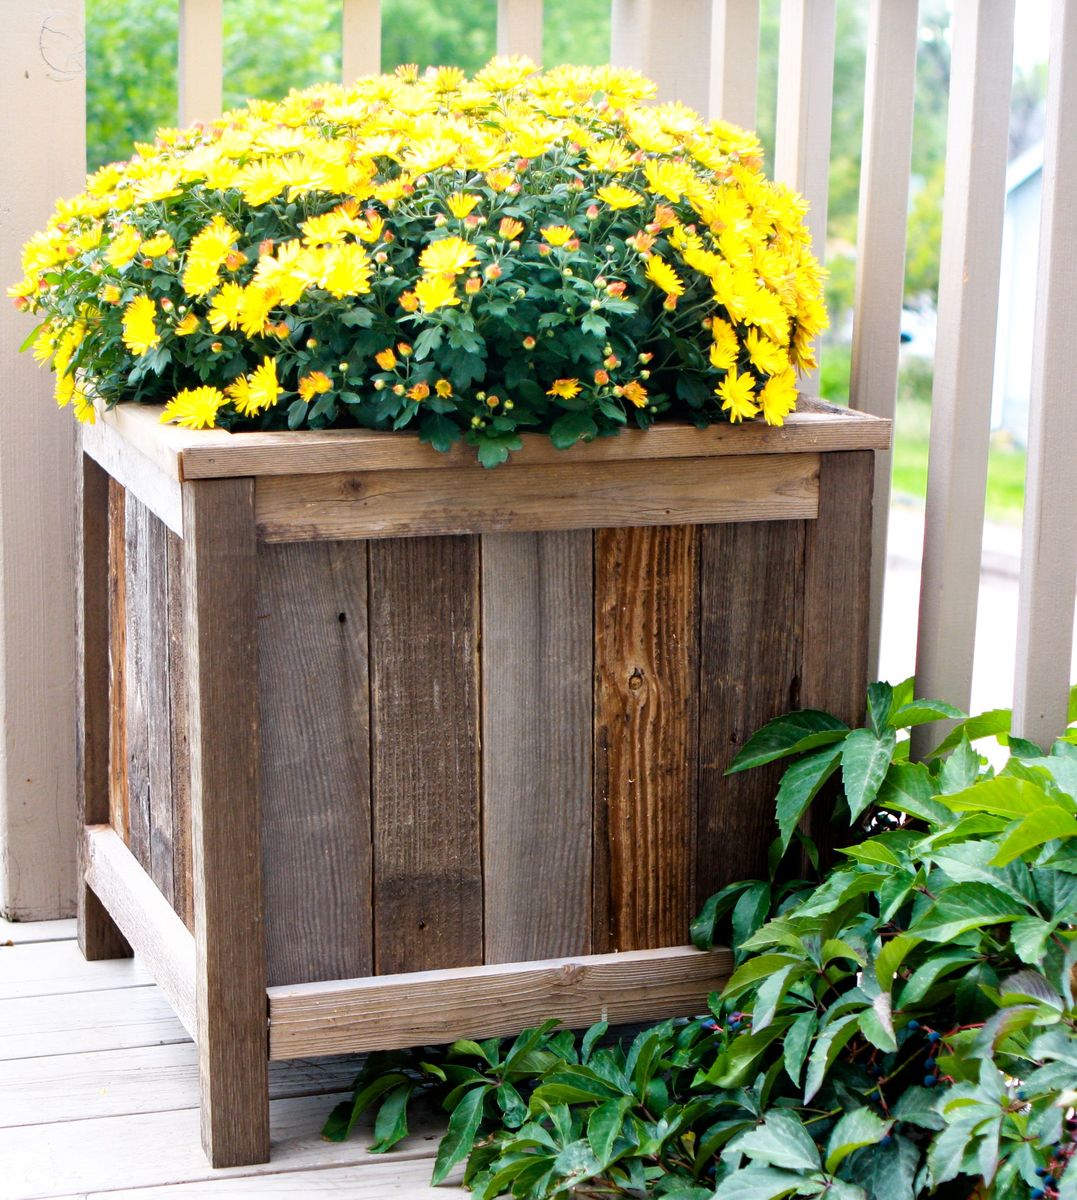
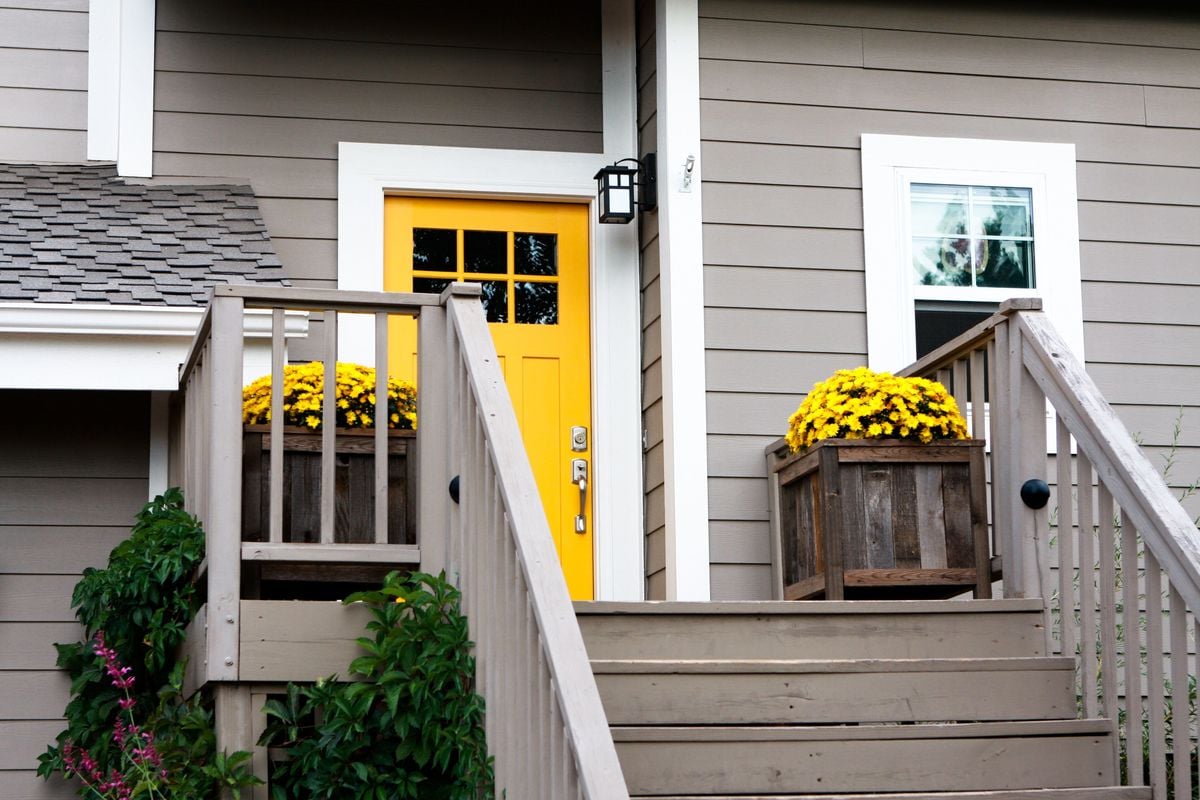
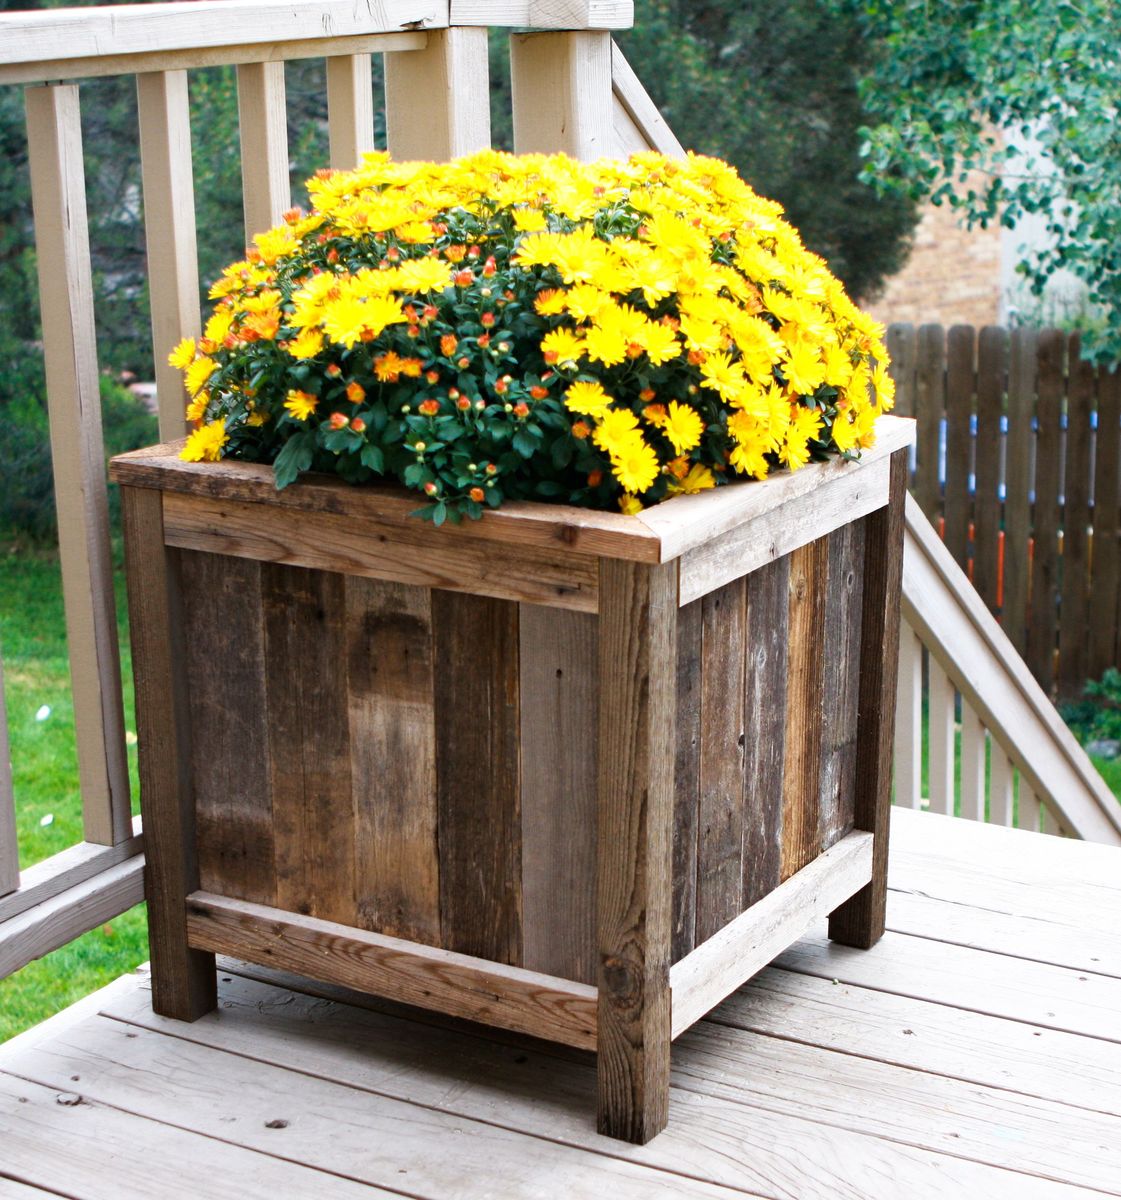
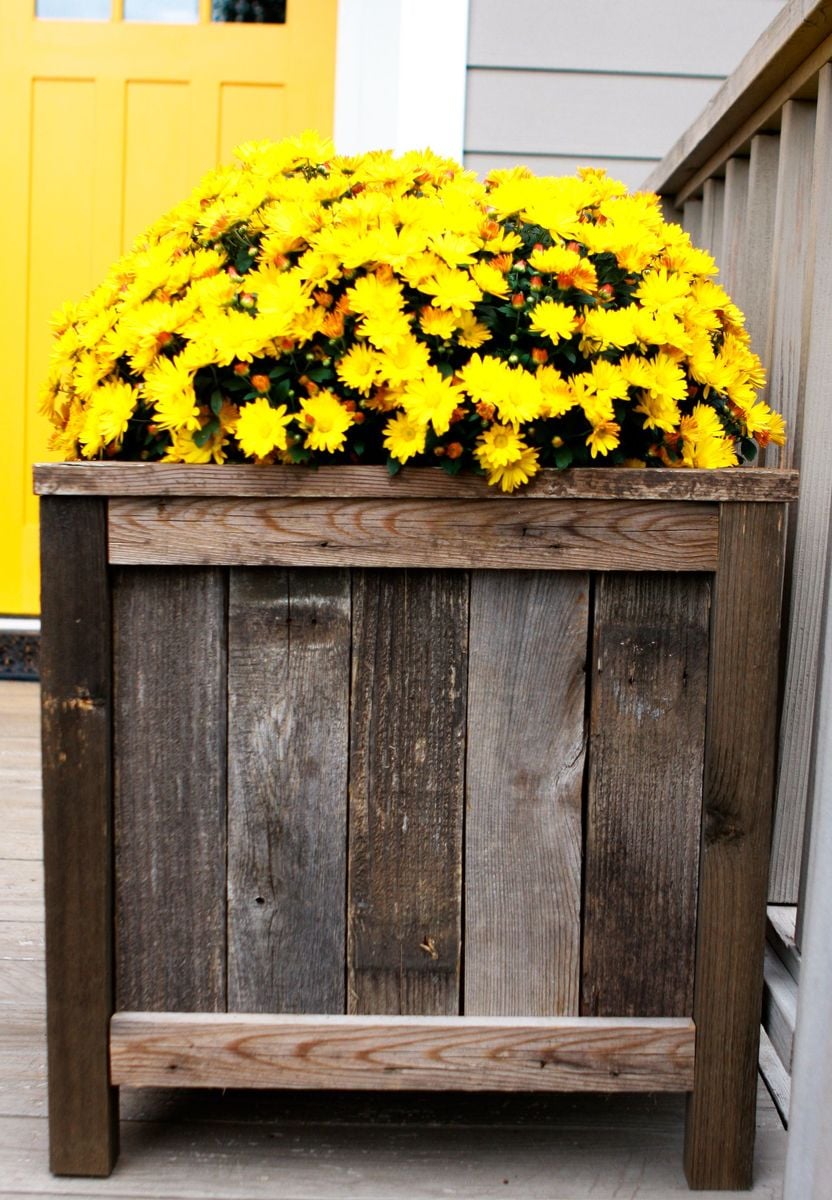
I built Ana's under $20 cedar planters for free. Or, almost free! I had to buy some more wood glue, but I had some of the wood on hand and took some from a friend's pile of old fence wood. It took me about five hours to build both planters from start to finish. See the blog link below for more info.

Tue, 09/08/2020 - 16:12
This is great. I just tore down my old fence and have tons of old cedar pickets. I want to make some planters for my new patio.

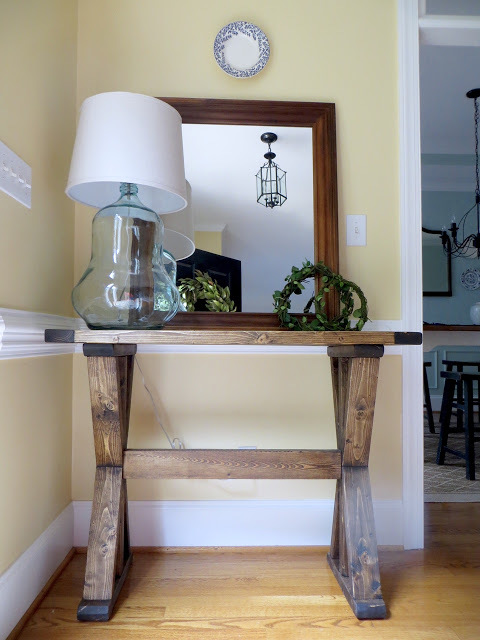
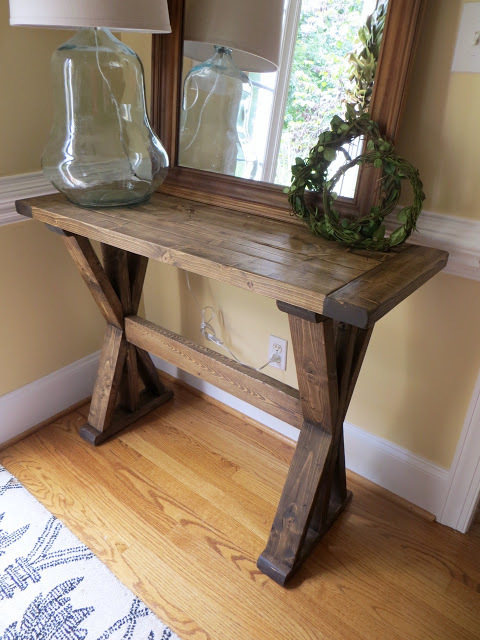
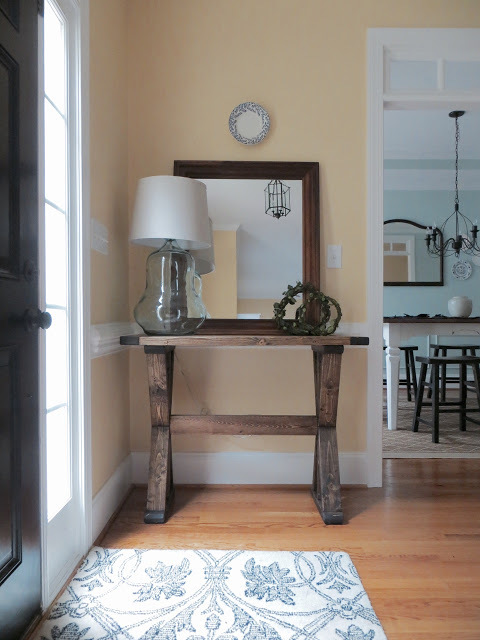
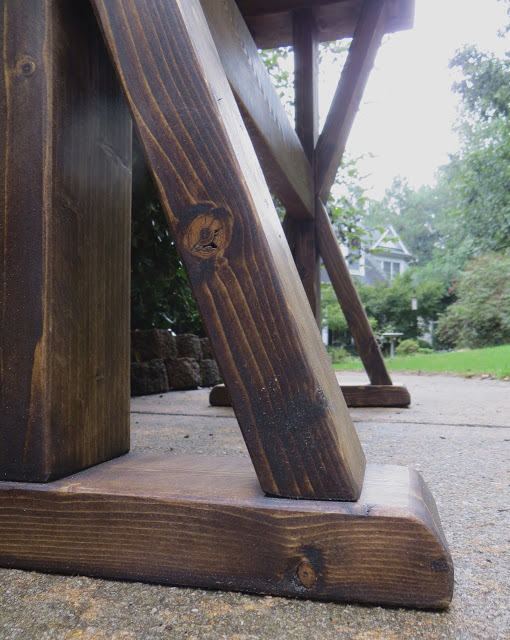
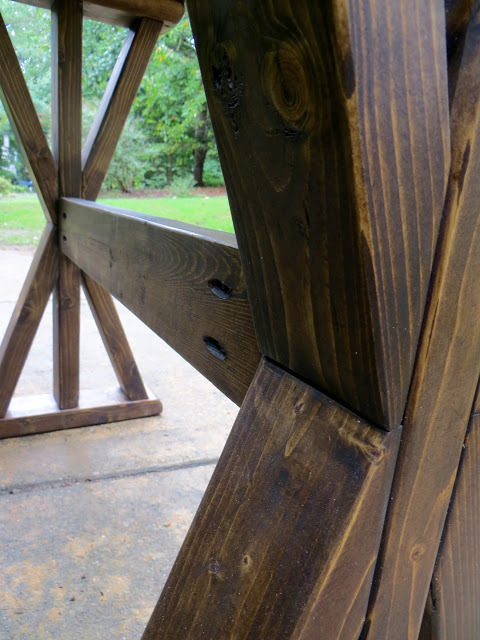
This table is built out of only 2x4's - that's 5 boards for about $15! It was pretty easy and took half a day. If the fancy angles are too hard to cut safely I recommend doing 45-degree angles! I'm happy to have a nice entryway - first time my whole life! :)
I've created a post on my project blog wth instructions & pictures for anyone to make their own.

Sun, 09/25/2016 - 09:42
Your entryway is beautiful! Love this console, it is gorgeous!

In reply to Your entryway is beautiful! by Ana White
Tue, 09/27/2016 - 12:16
Thank you Ana! You made my day! It was such a treat to see it posted on your Facebook page! I told my husband that NOW that "I am famous" (haha) that I should be able to get the jointer & planer I've been begging him to let me buy! I'm thinking maybe a direct message from you would be just the trick! :)
Wed, 01/29/2020 - 13:54
What angle were the leg cuts? More than 50* because my saw wont go that far. Please let me know.
Super easy and done in 1/2 a day

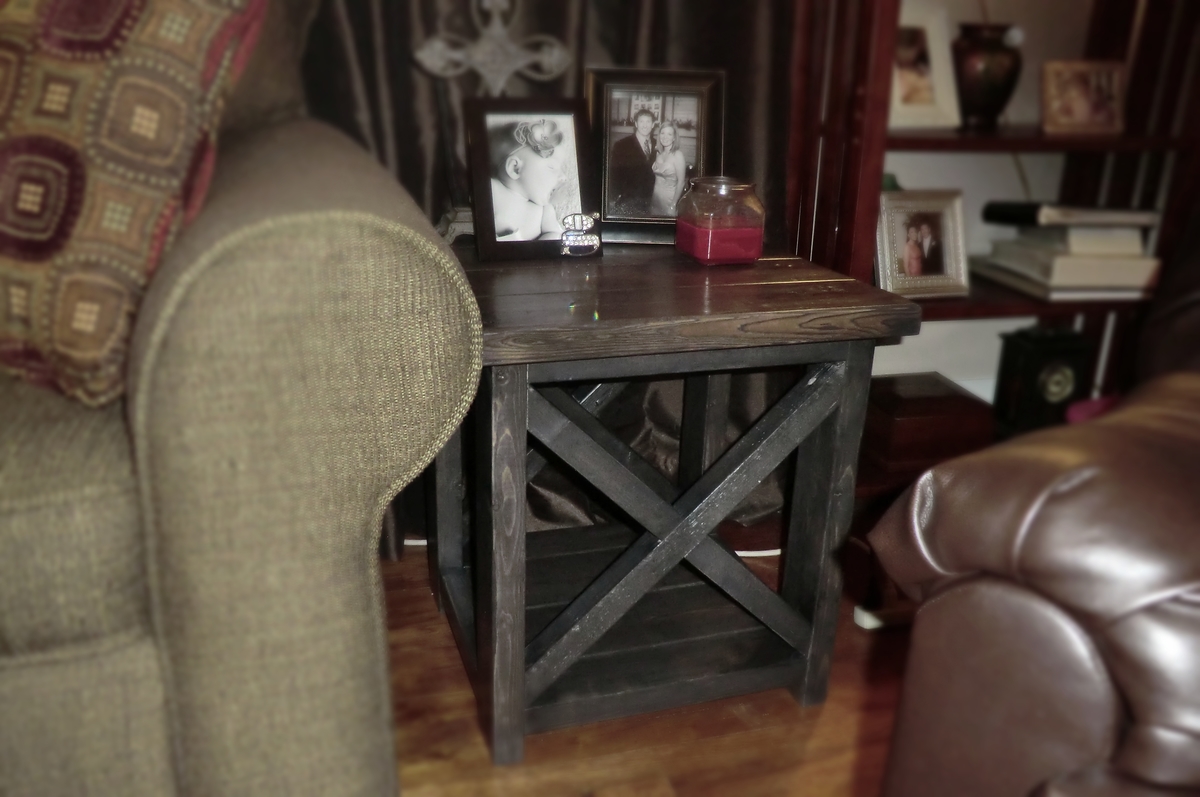
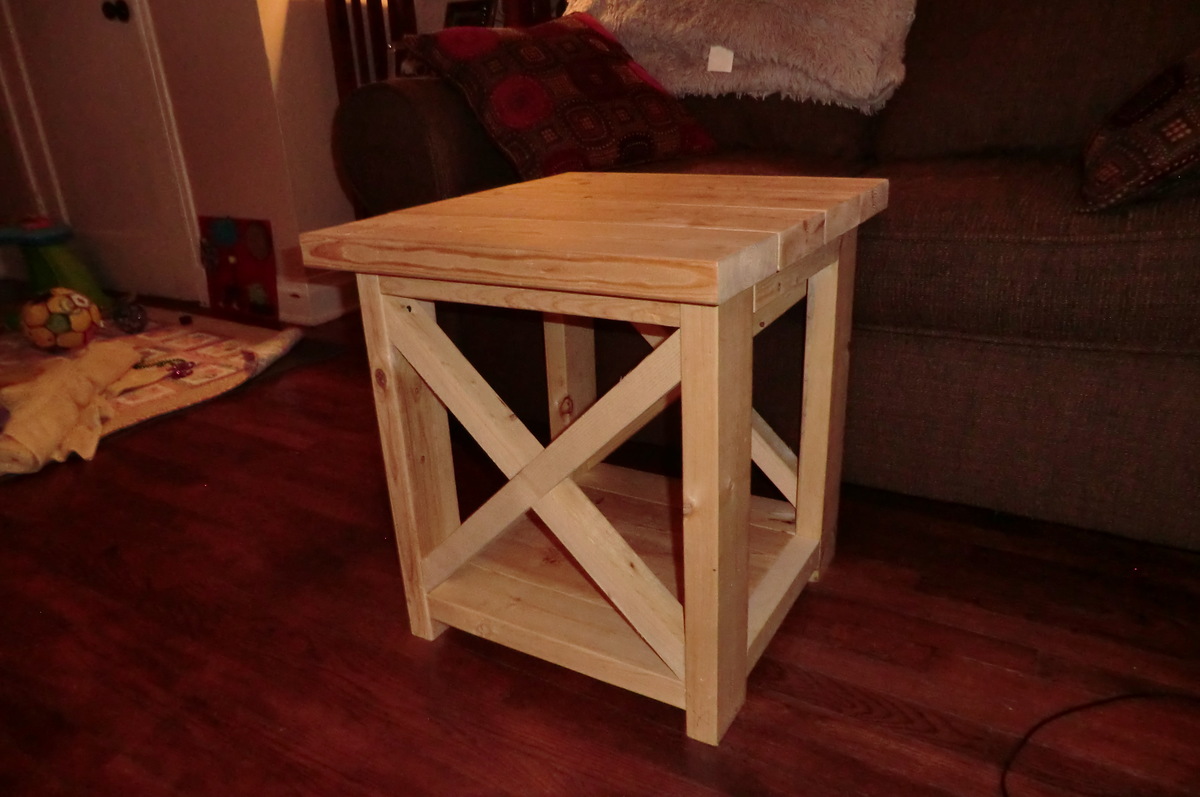
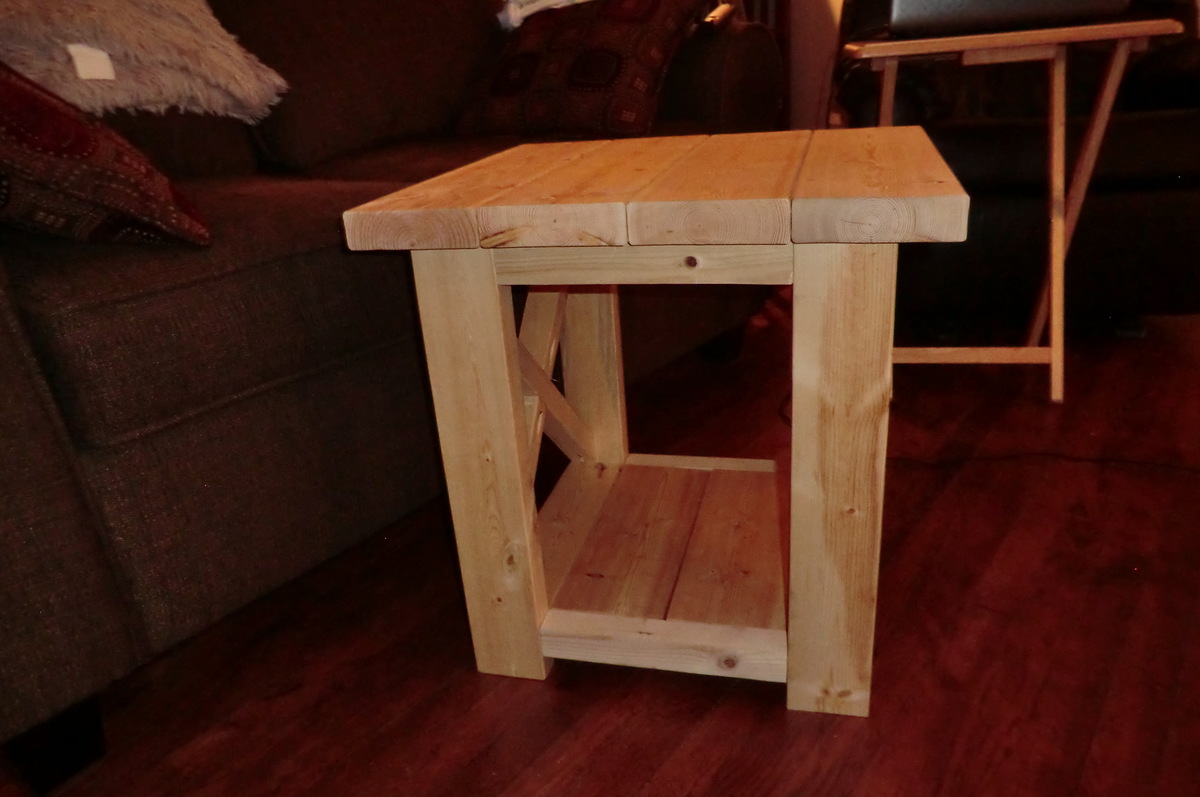
I built these two end tables from the rustic x end table plans. I tweaked the original plan to make them smaller. I only used 4 - 2x6's for the top instead of using 5, and I used 2 - 2x6's for the bottom shelf instead of using the 2 - 1x12's. My top is 20x22.5 and the base is 18x18.
Fri, 09/28/2012 - 10:36
Great job ! these Rustic table are good for interior design and make a good look .I read this , have good price ,timing ,wood and also your hard work .

Wed, 04/20/2016 - 05:43
i love this! we just built the bigger one to find out it was a bit too big but we were still able to find a place for it. my husband and I are going to build your smaller version cant wait!

Mon, 06/13/2016 - 12:46
I made the original and found it larger than I wanted. I was going to do a smaller version like you did. How tal is yours?
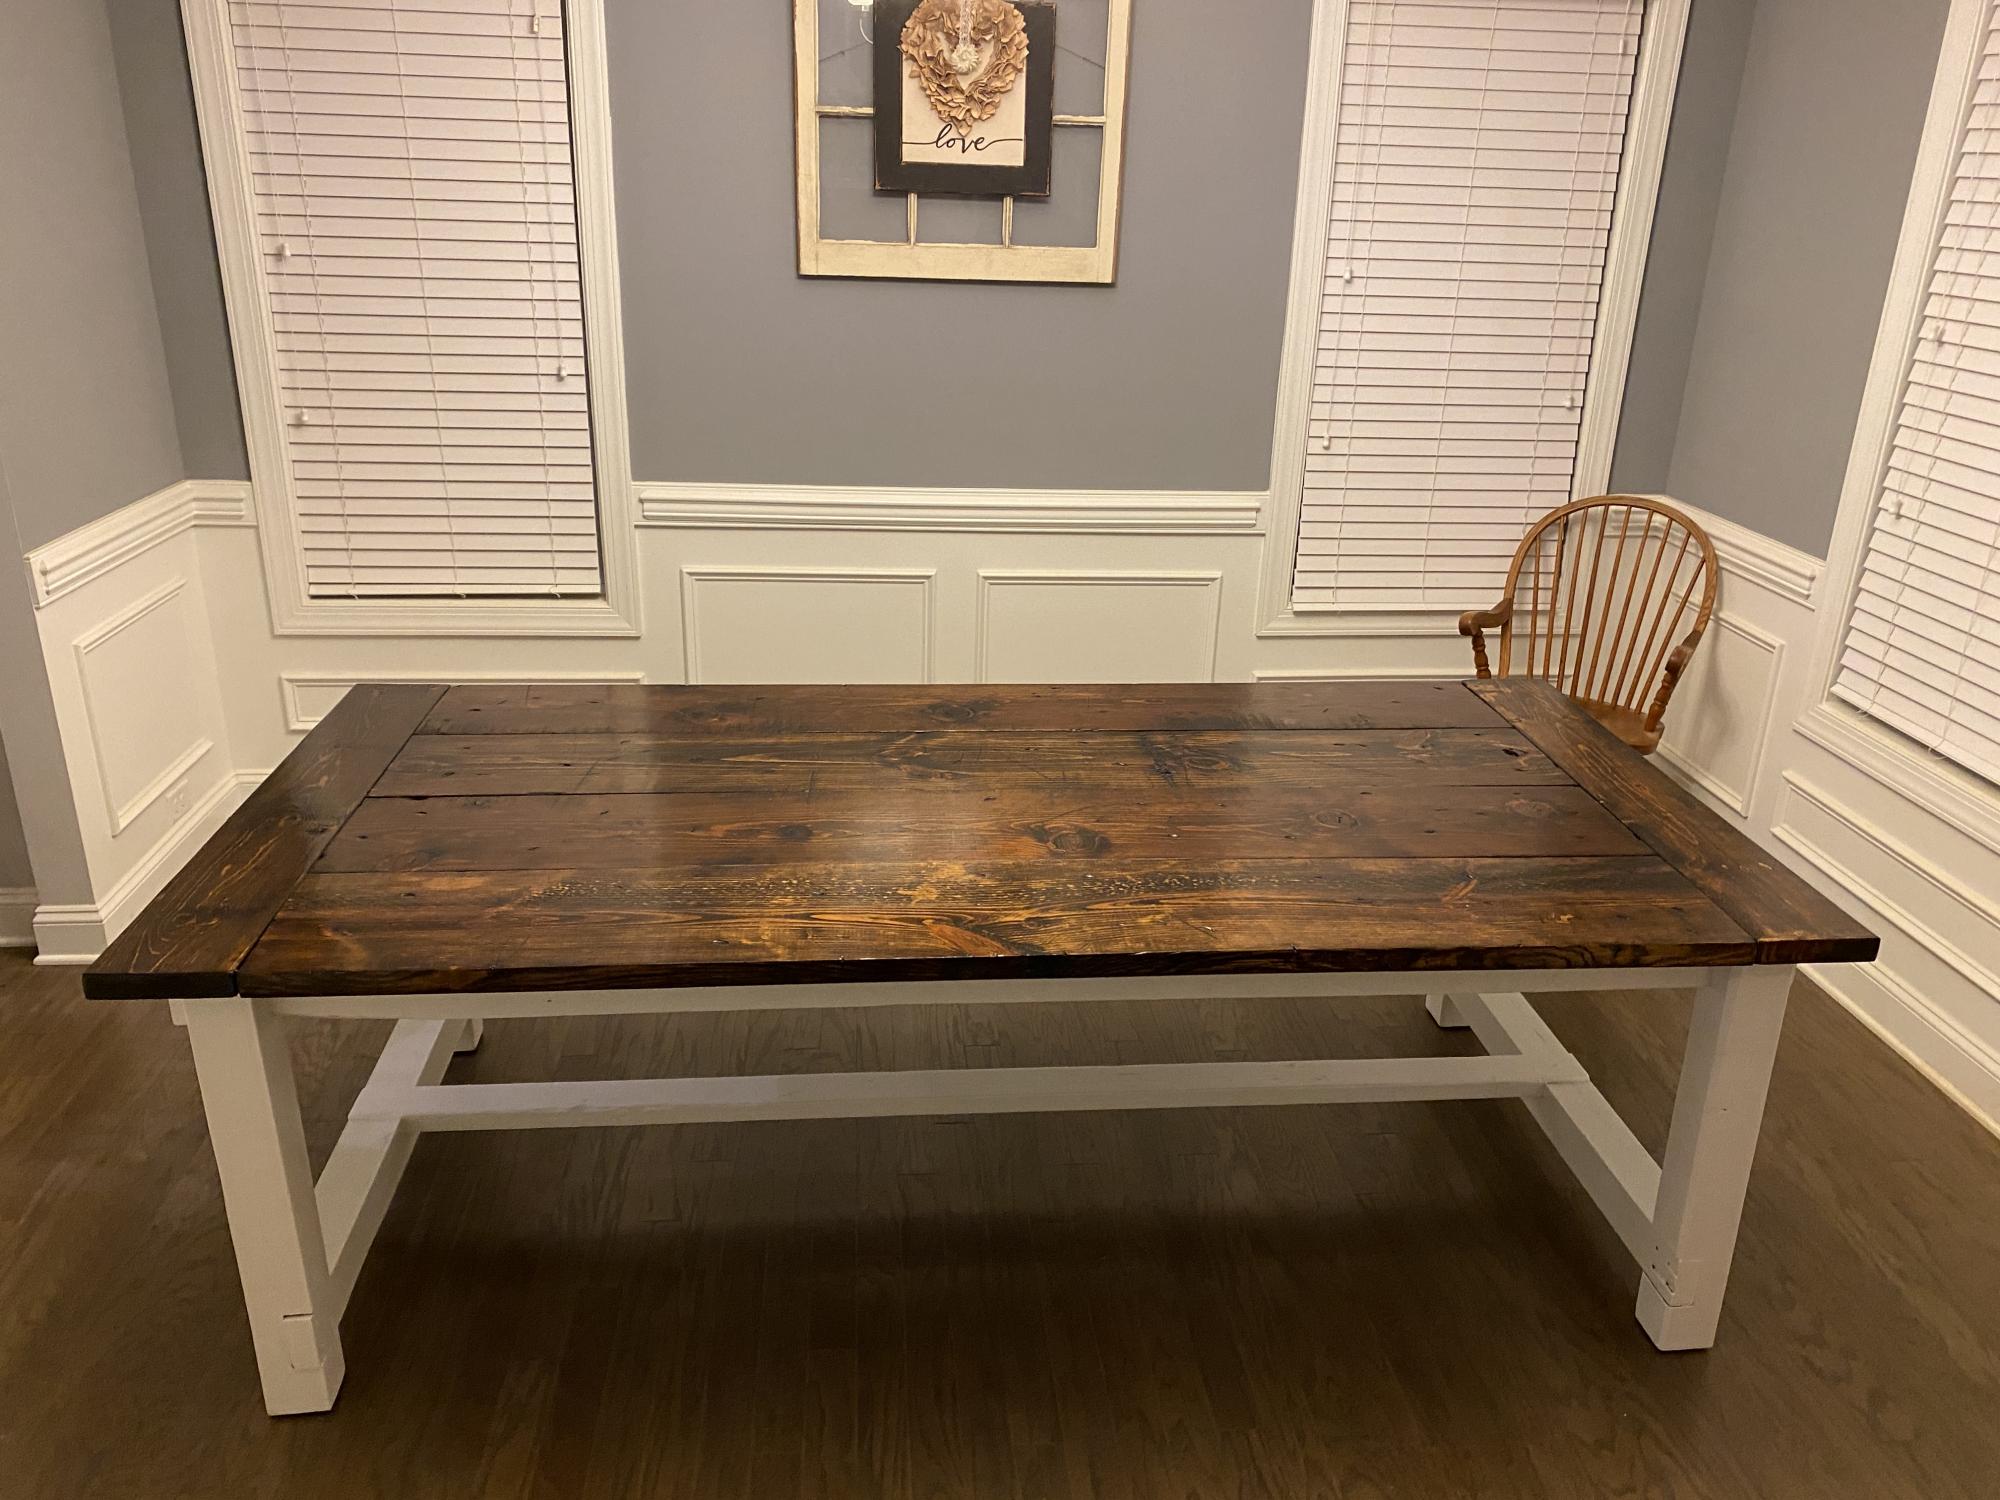
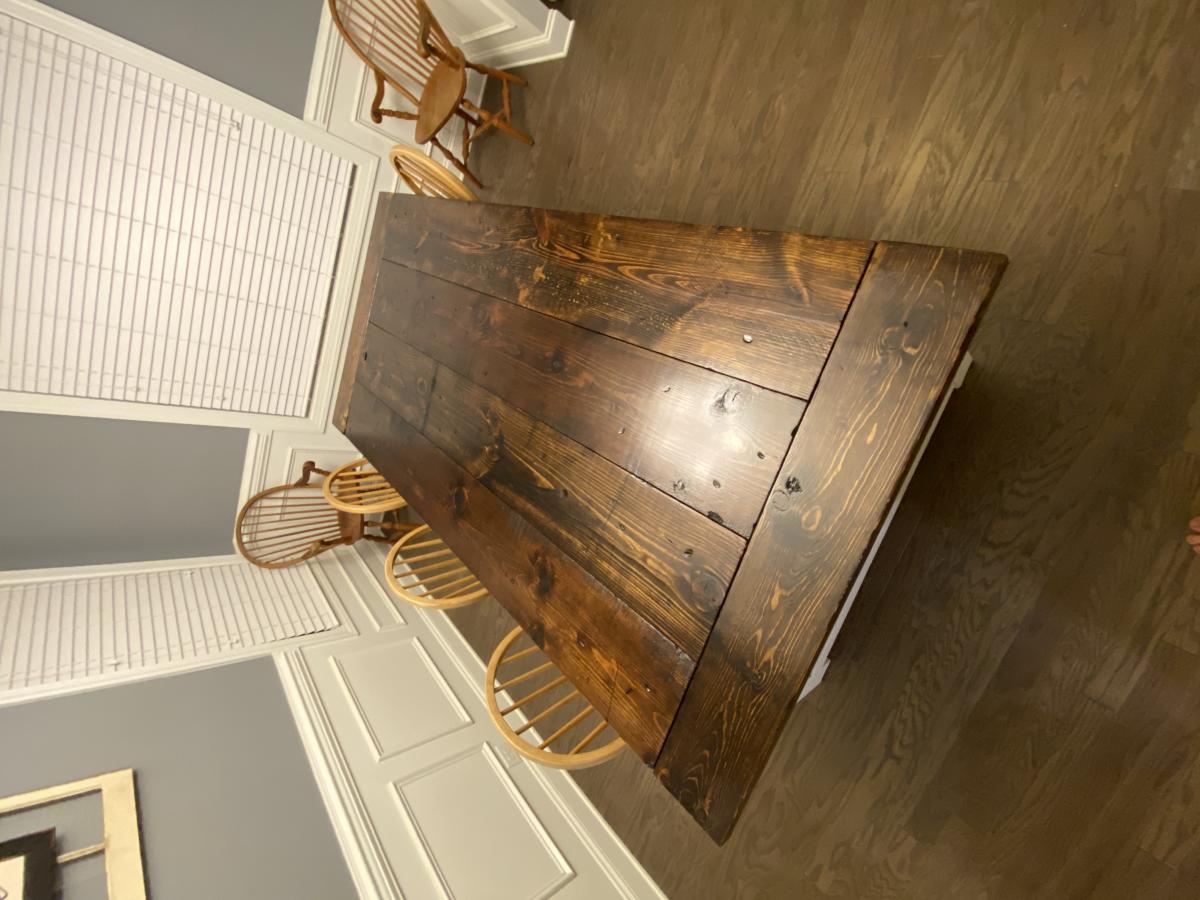
My wife wanted a Farmhouse table for as long as I can remember. When we bought our first house it was the first project I undertook. I finished building it in time for all 15 members of our extended family to come for Thanksgiving but didn't have time to stain it. After the holidays I went back to school and staining it went to the back burner. When I finished my degree three years later it was time to finish the table. The end result was worth the wait according to my wife.

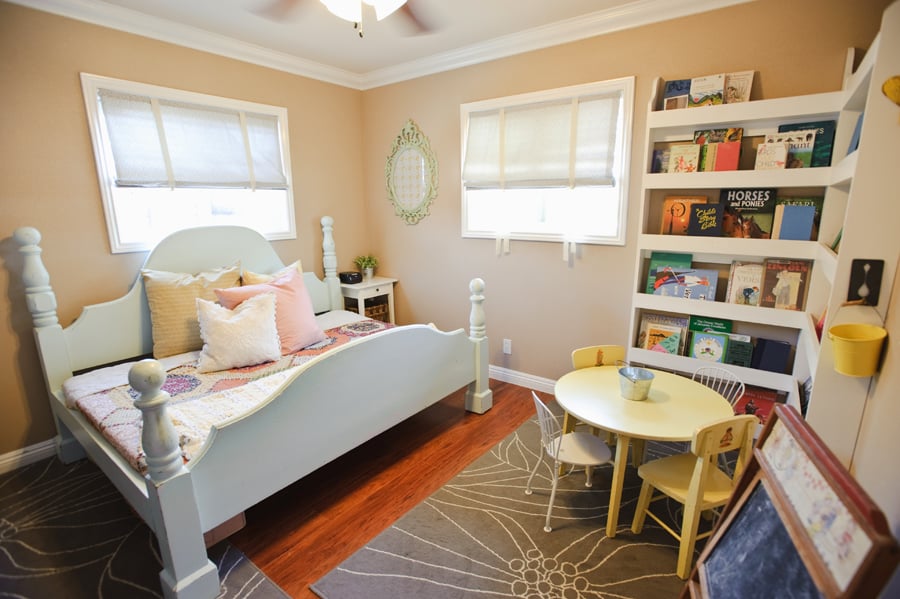
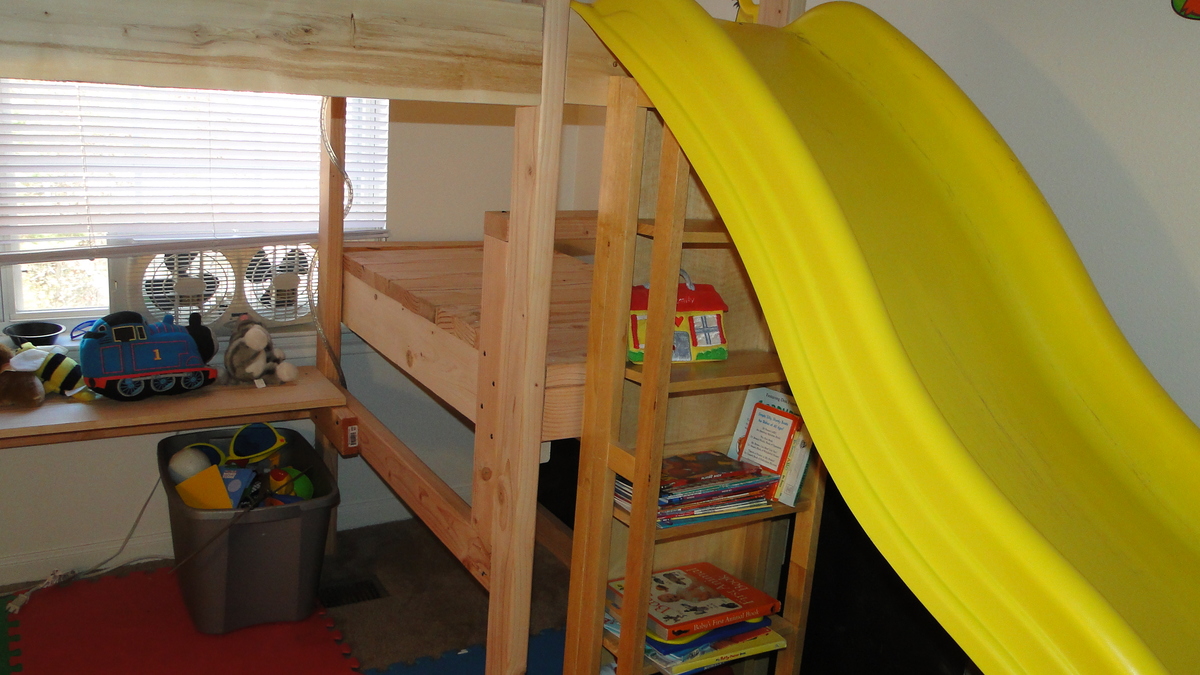
I used the plans from the Camp Loft bed and adjusted to exactly what I needed. Two twin beds in a small bedroom without losing any floor space. I found the slide on craigslist while I was building this and it made the best addition. I also added a shelf along the base of one bed for the boys to have a play table and adds stability to the base of the bed to keep it from rocking.
Mon, 11/05/2012 - 17:38
Great Bed! Can I get the plans the way that they were modified? I am a beginner and definately need the step by step plans. This would be great for my nephew's!
Wed, 11/07/2012 - 14:09
I just made the first bed as the plans had. Instead of doing the stairs I just did an extra 2x4 across the legs so they can get up onto the platform. For the 2nd bed I followed the same instructions as the first but only doing one end and the rails (made a giant L) then flipped and screwed right into the side of the other bed. I used pocket holes all around so it went together very quickly.
Wed, 11/07/2012 - 20:57
I really like this bed!my boys will love it! I am a beginner can I please get the plans and tell me how to make the bed with 5 feet high for more space
It will be my first time I can't wait. Thank you !
Mon, 06/24/2013 - 10:36
I have scoured the web for this loft for my two youngest girls! As I am terribly untalented at drawing up plans PRETTY PRETTY PLEASE WITH SUGAR ON TOP make your adjusted plans available? I have until the end of next month to build this for my princesses birthday and I'm more than a touch frazzled that I cannot find these plans anywhere. Take pity on the less talented and please post your plans? Or email them? [email protected]
Thank a ton in advance!
Mon, 12/08/2014 - 13:48
Great work with the modifications! Can you please share the new plans for the changes you made or let me know what exactly that you did to achieve the finished results. Thanks in advanced!
Mon, 12/08/2014 - 13:48
Great work with the modifications! Can you please share the new plans for the changes you made or let me know what exactly that you did to achieve the finished results. Thanks in advanced!
Thu, 06/30/2016 - 20:16
I know it's been a while, but if you would share your finished plans, that would be great. We have the original camp loft, bought from someone else who built it, and we'd like to modify it to be an L-shape loft.
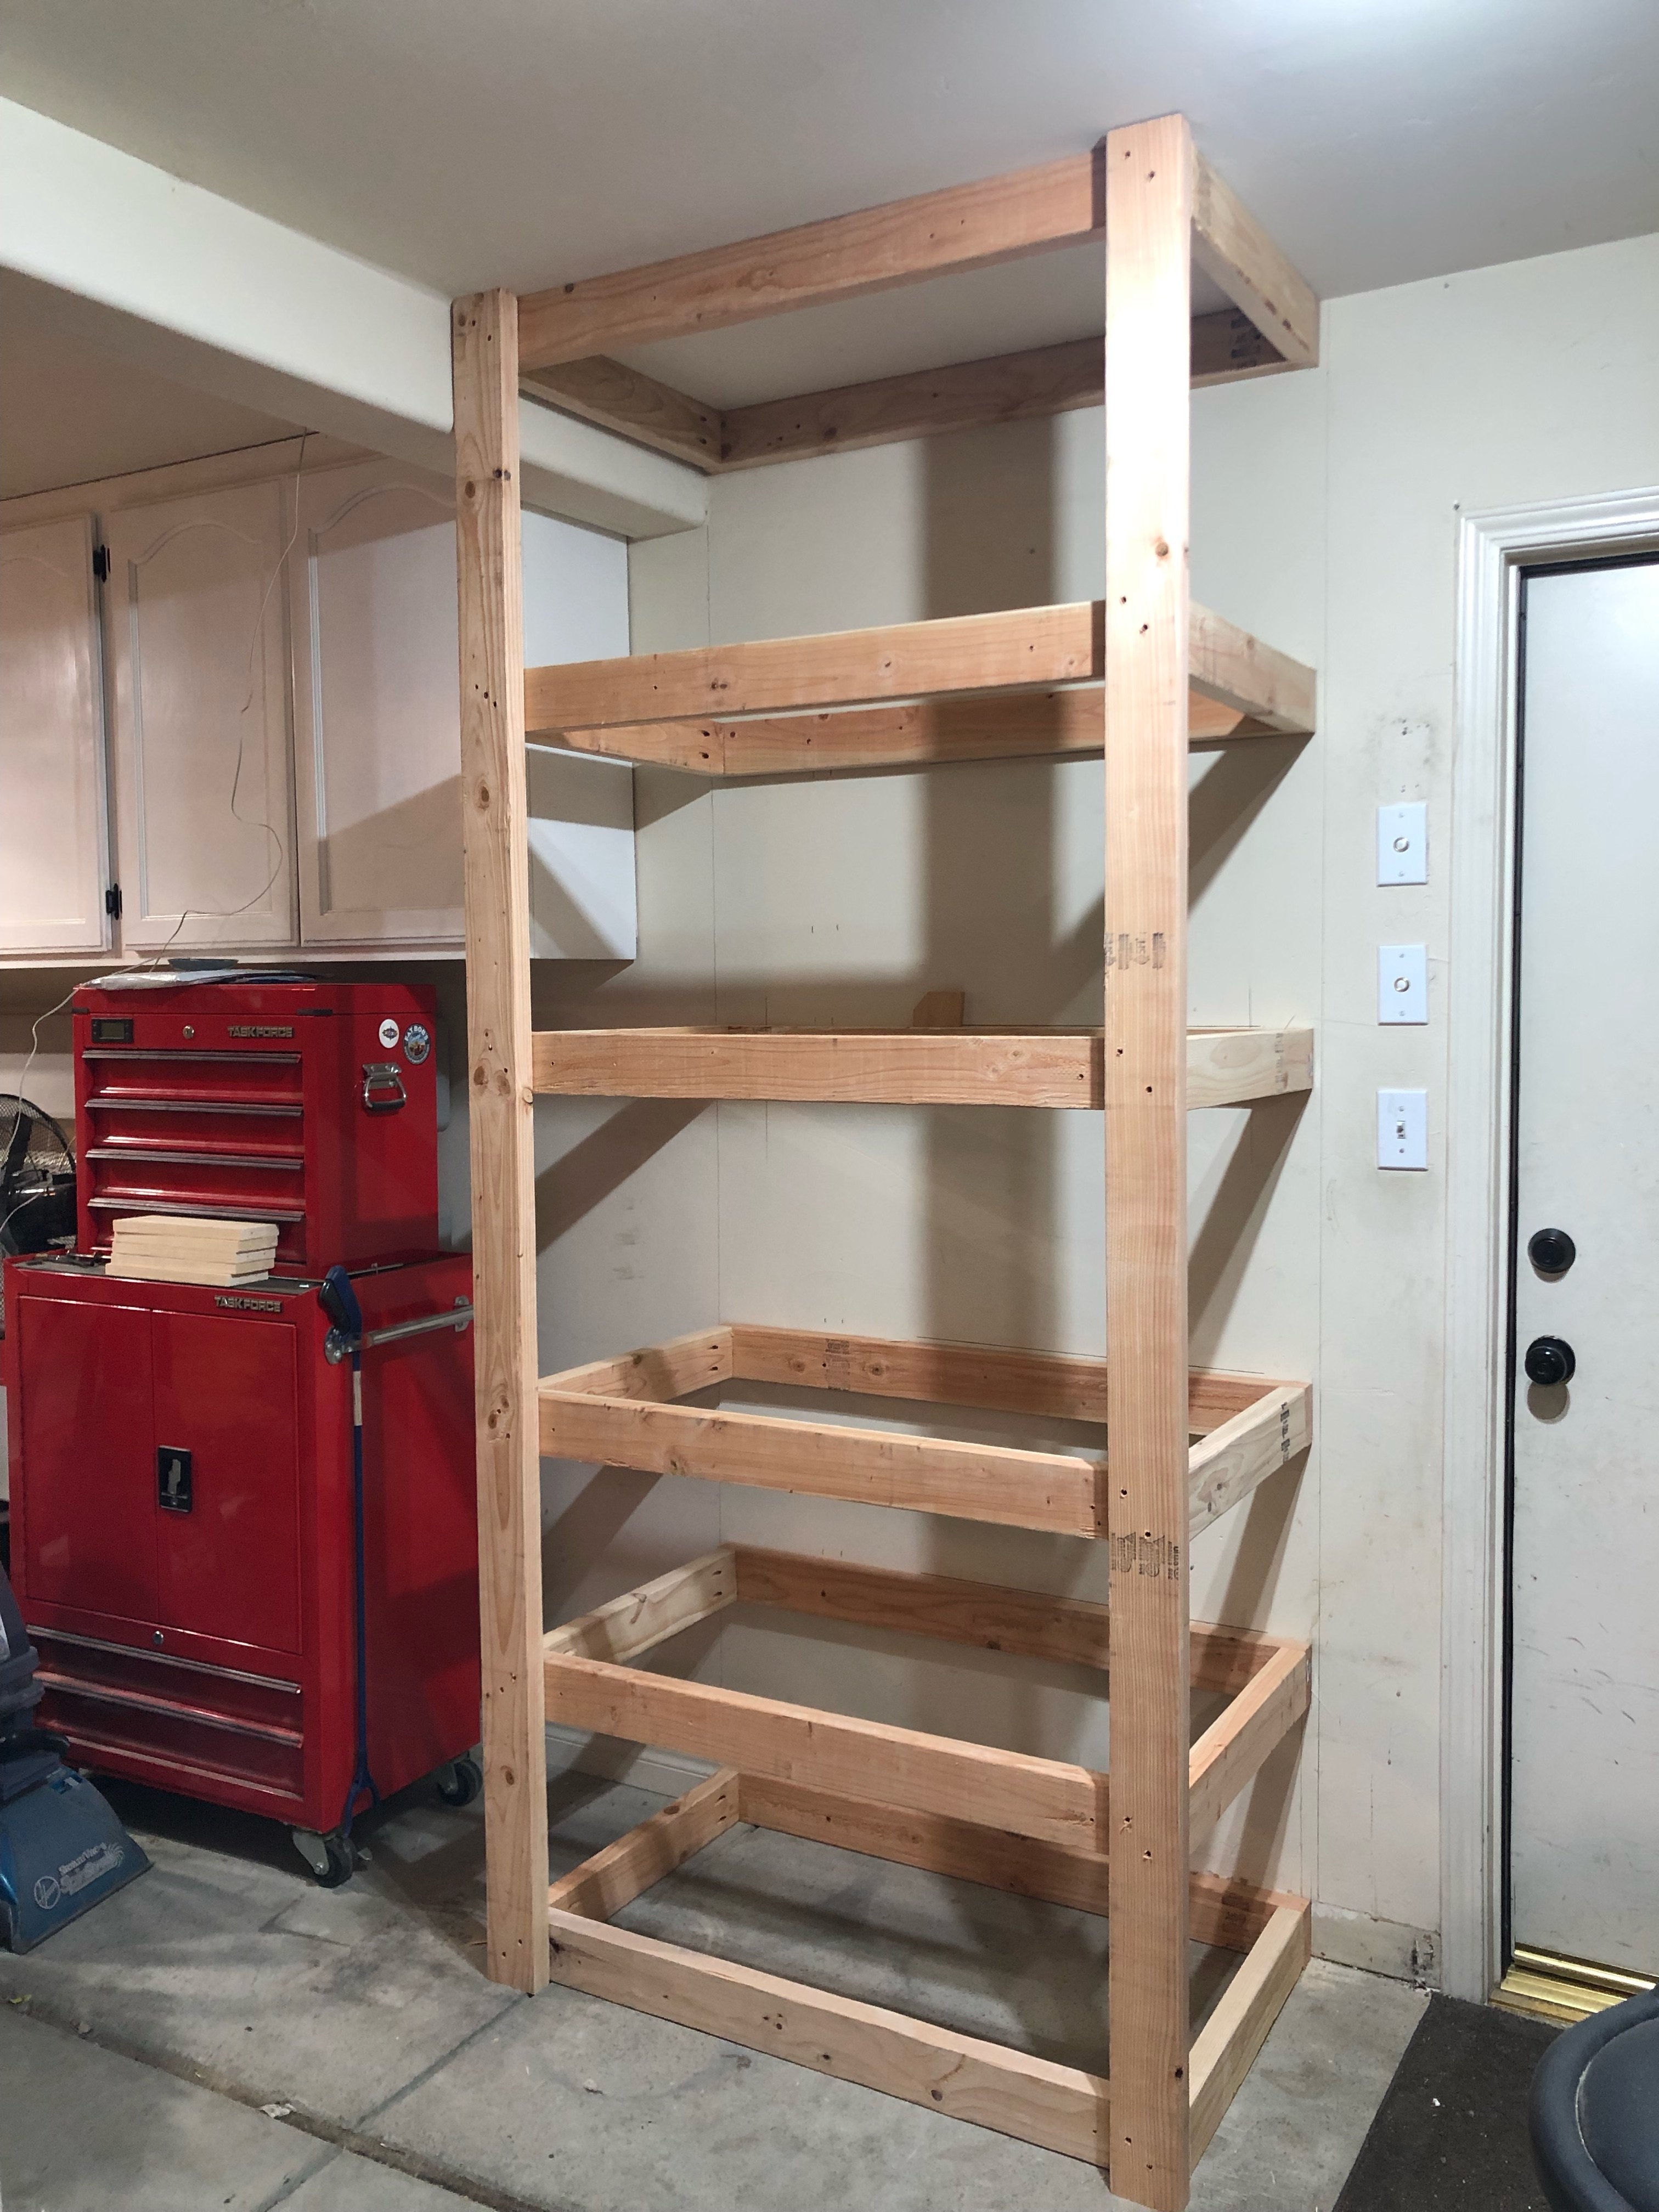
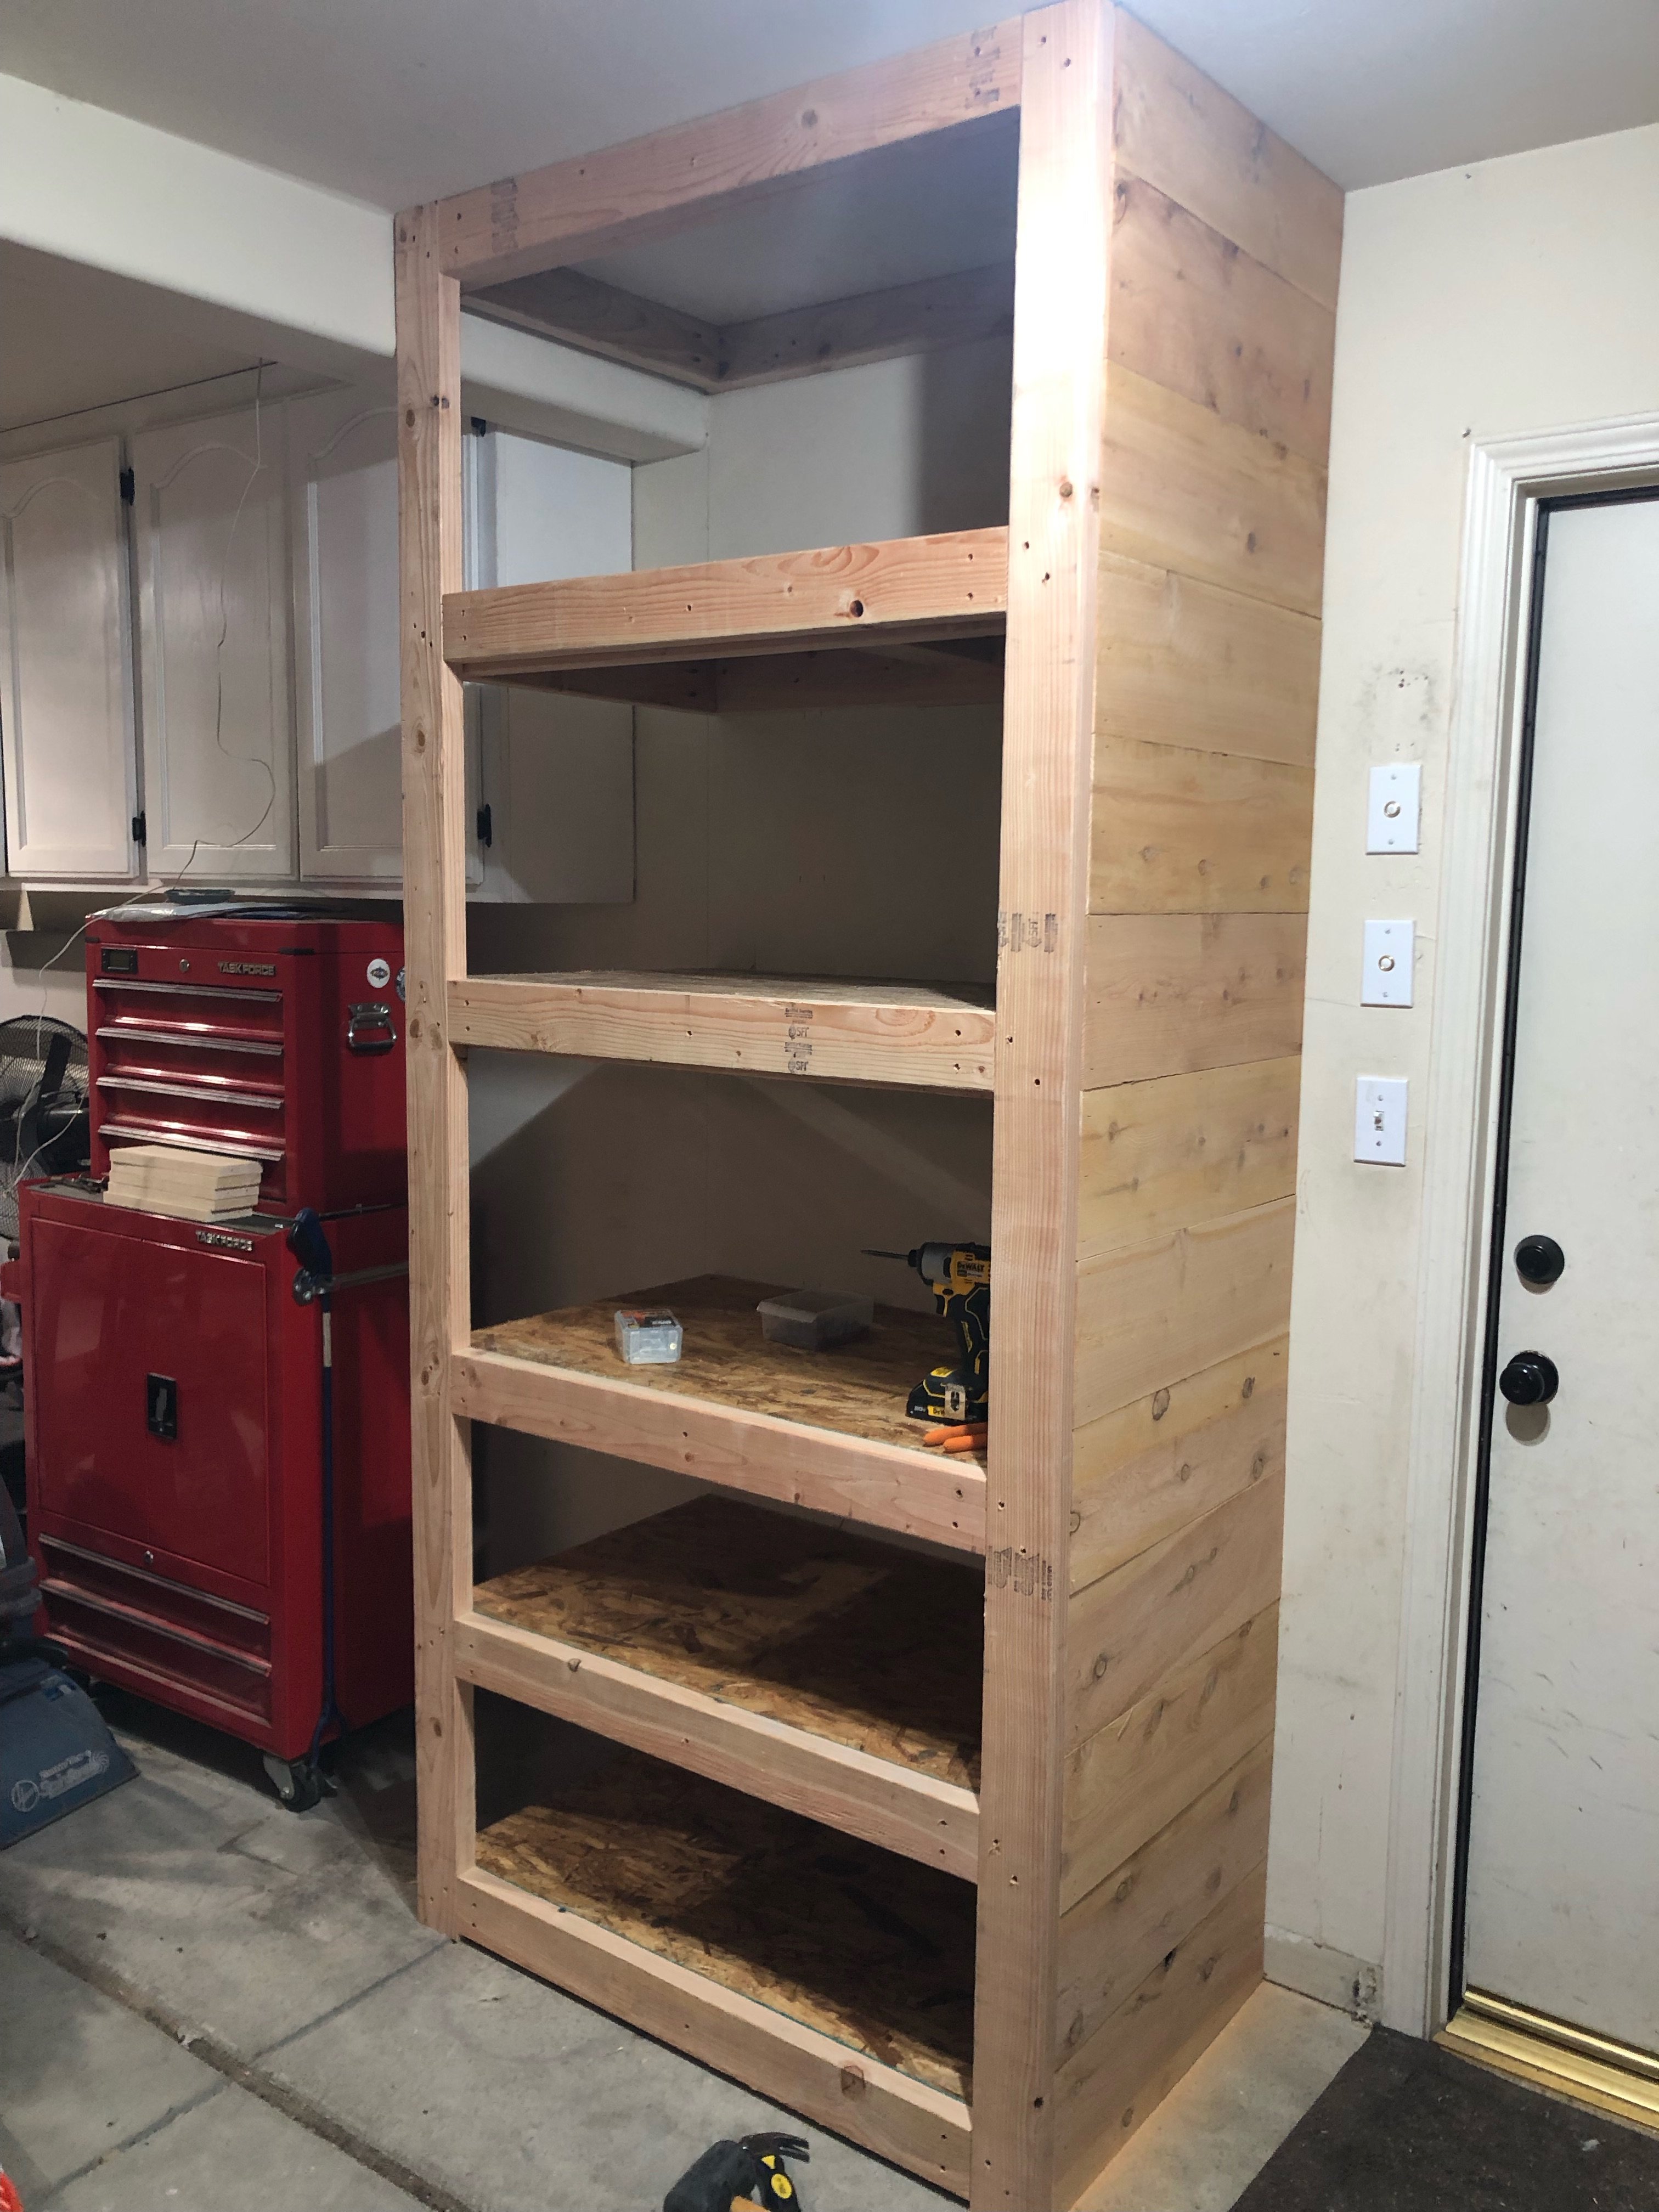
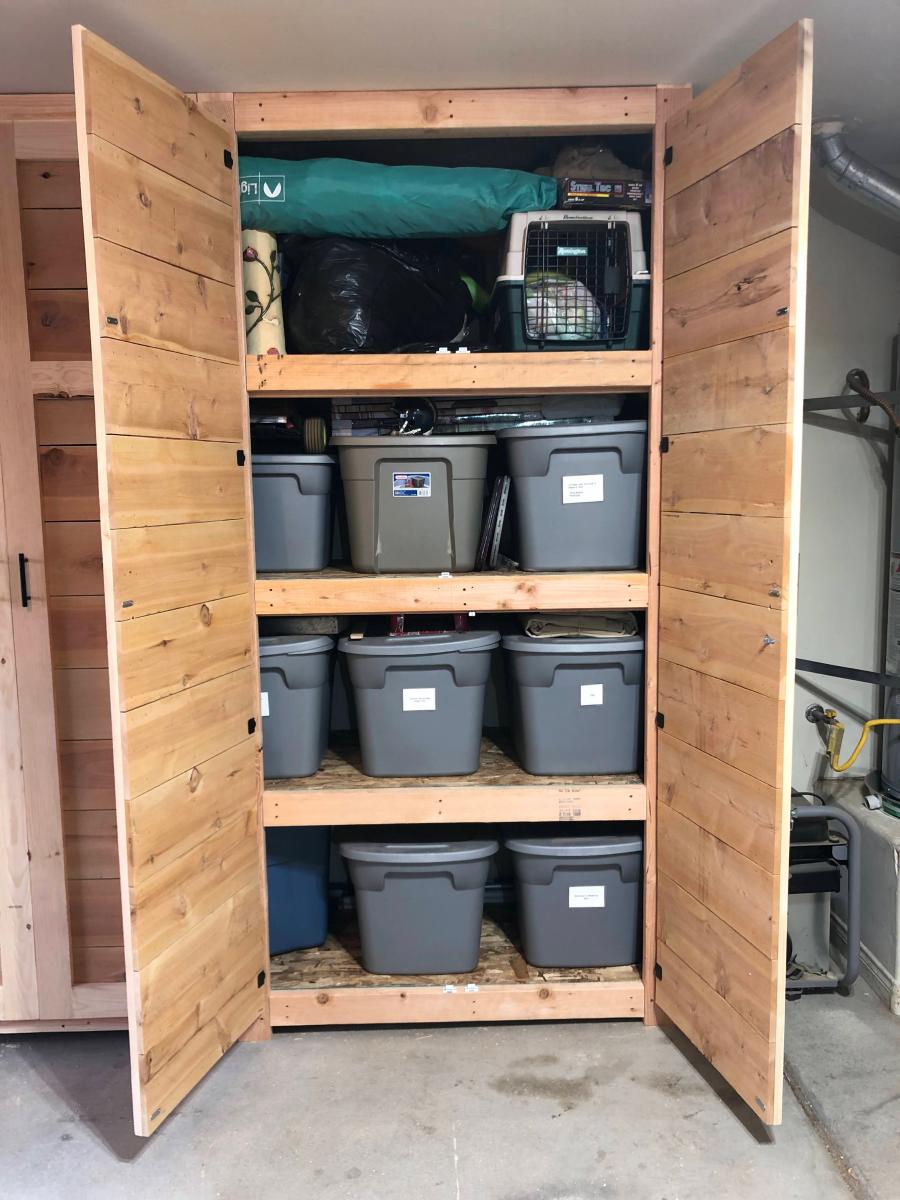
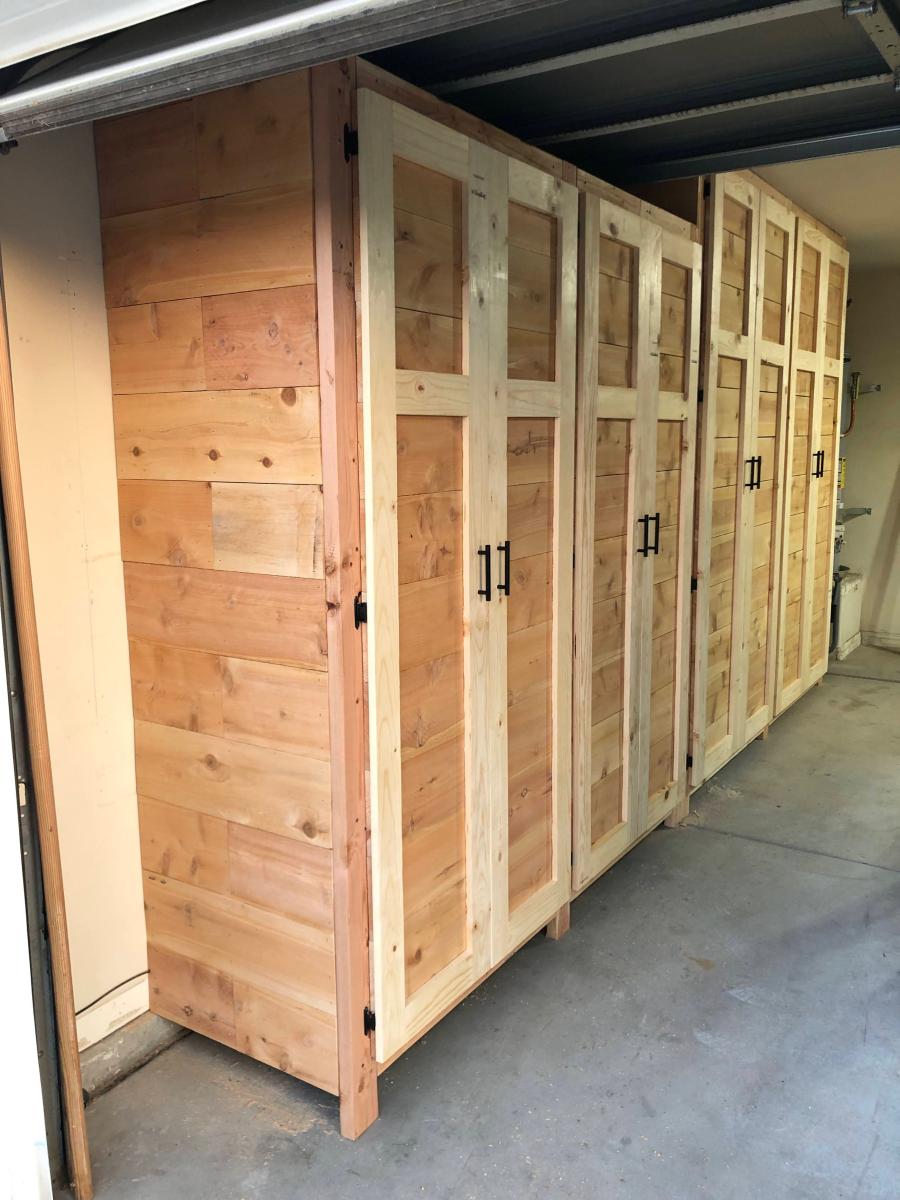
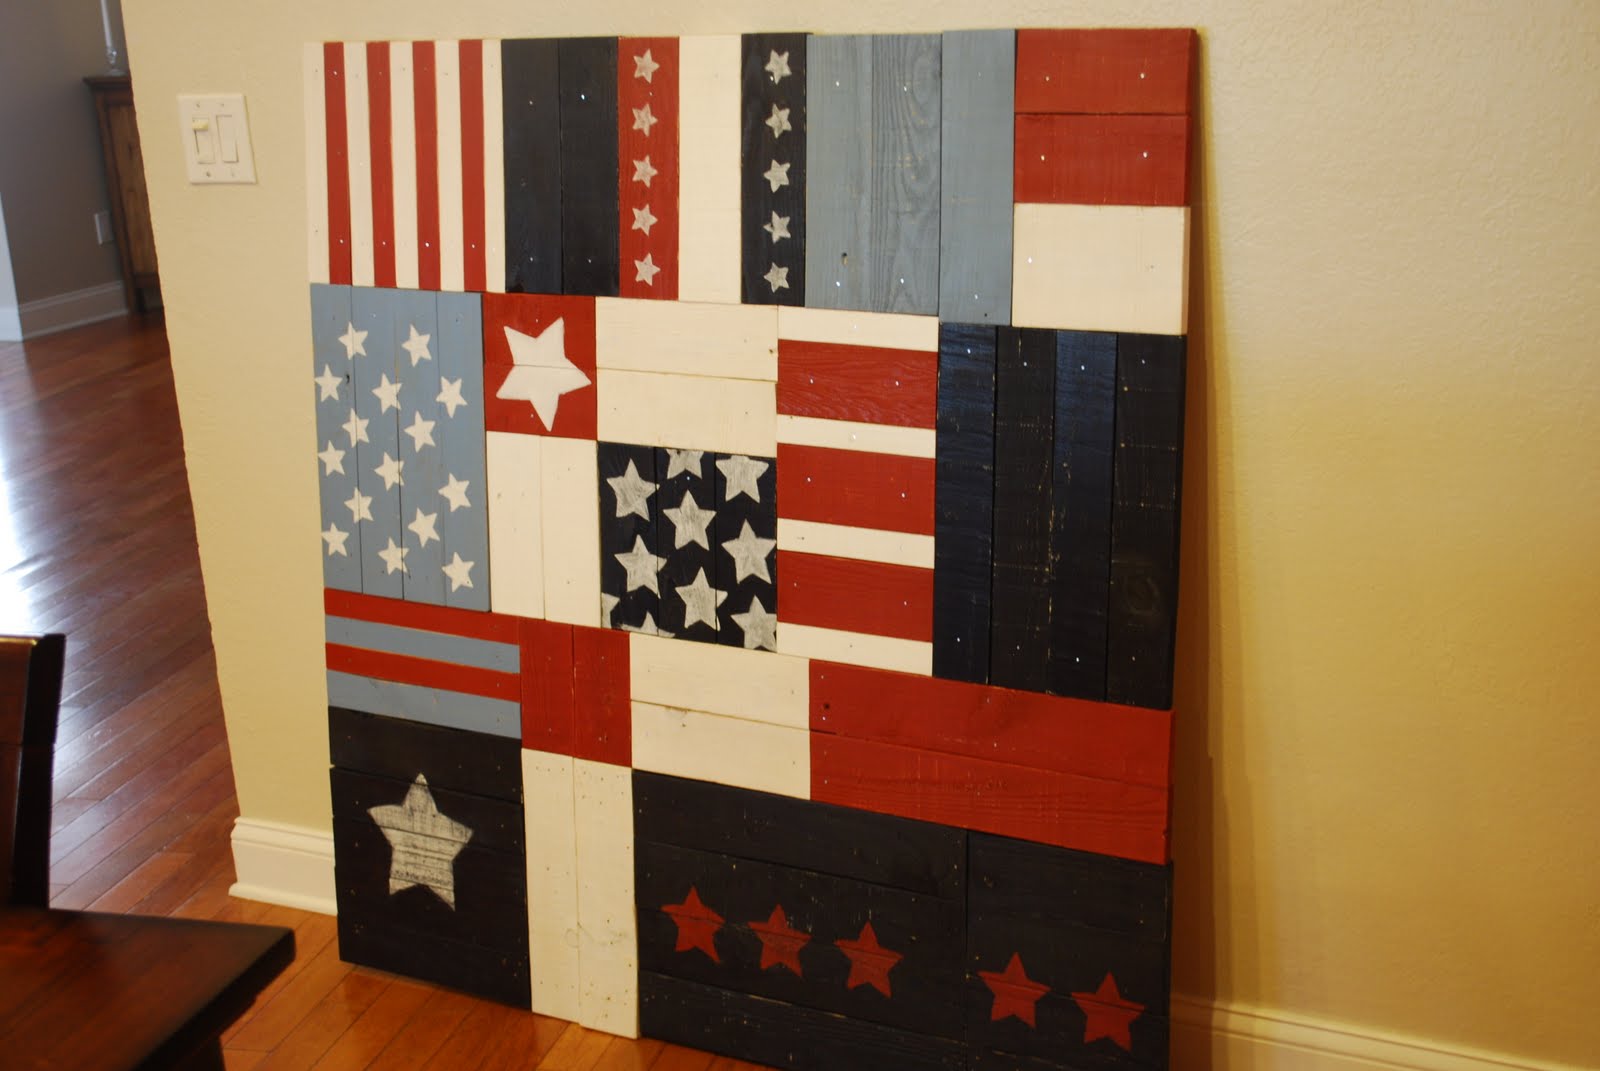
Created my own version out this plan.
I used Shelf Help for the plywood pieces and a mash up of Ana's plans for the rest. I shared a video on my family page for steps used here https://www.youtube.com/watch?v=urFoX5j4J0s
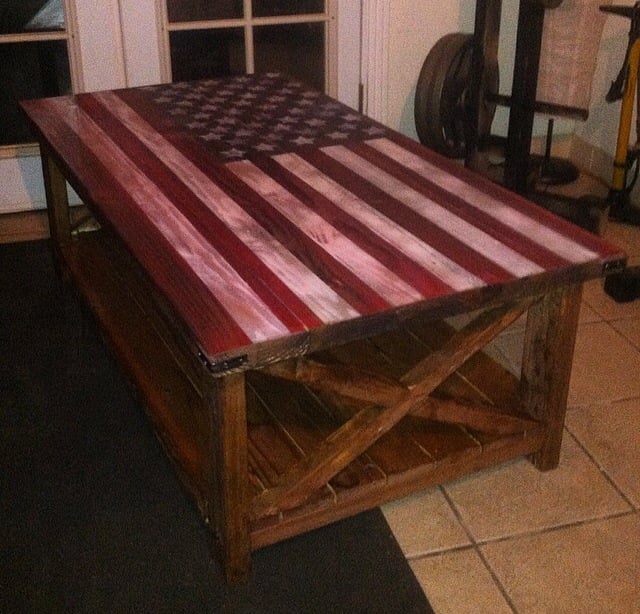
Thanks so much for the plan!
Fri, 02/20/2015 - 09:35
This looks INCREDIBLE!!!!! I was hoping you could possibly share how you painted on the American Flag, and gave it the rustic look to match the coffee table? I'm new to this site, so I'm not sure if you can reply directly to this comment or not. If you can't, would you mind emailing me at [email protected]?
Thank you so much!
Wed, 10/07/2015 - 13:59
Hi. I love this coffee table. I have read through all the directions. I have one quick question. After I have built the coffee table and then oxidize the wood, do I then paint the flag with regular red white and blue paint and then seal it with the wax? Thank you
I printed off your instructions and I had all the wood in the garage already. My husband and son finished this in a day and a half. I love it! I painted it. Still not sure what I want to do instead of the planters. I like that idea but I like to have access if I need to clean it. I love all the ideas on this site.
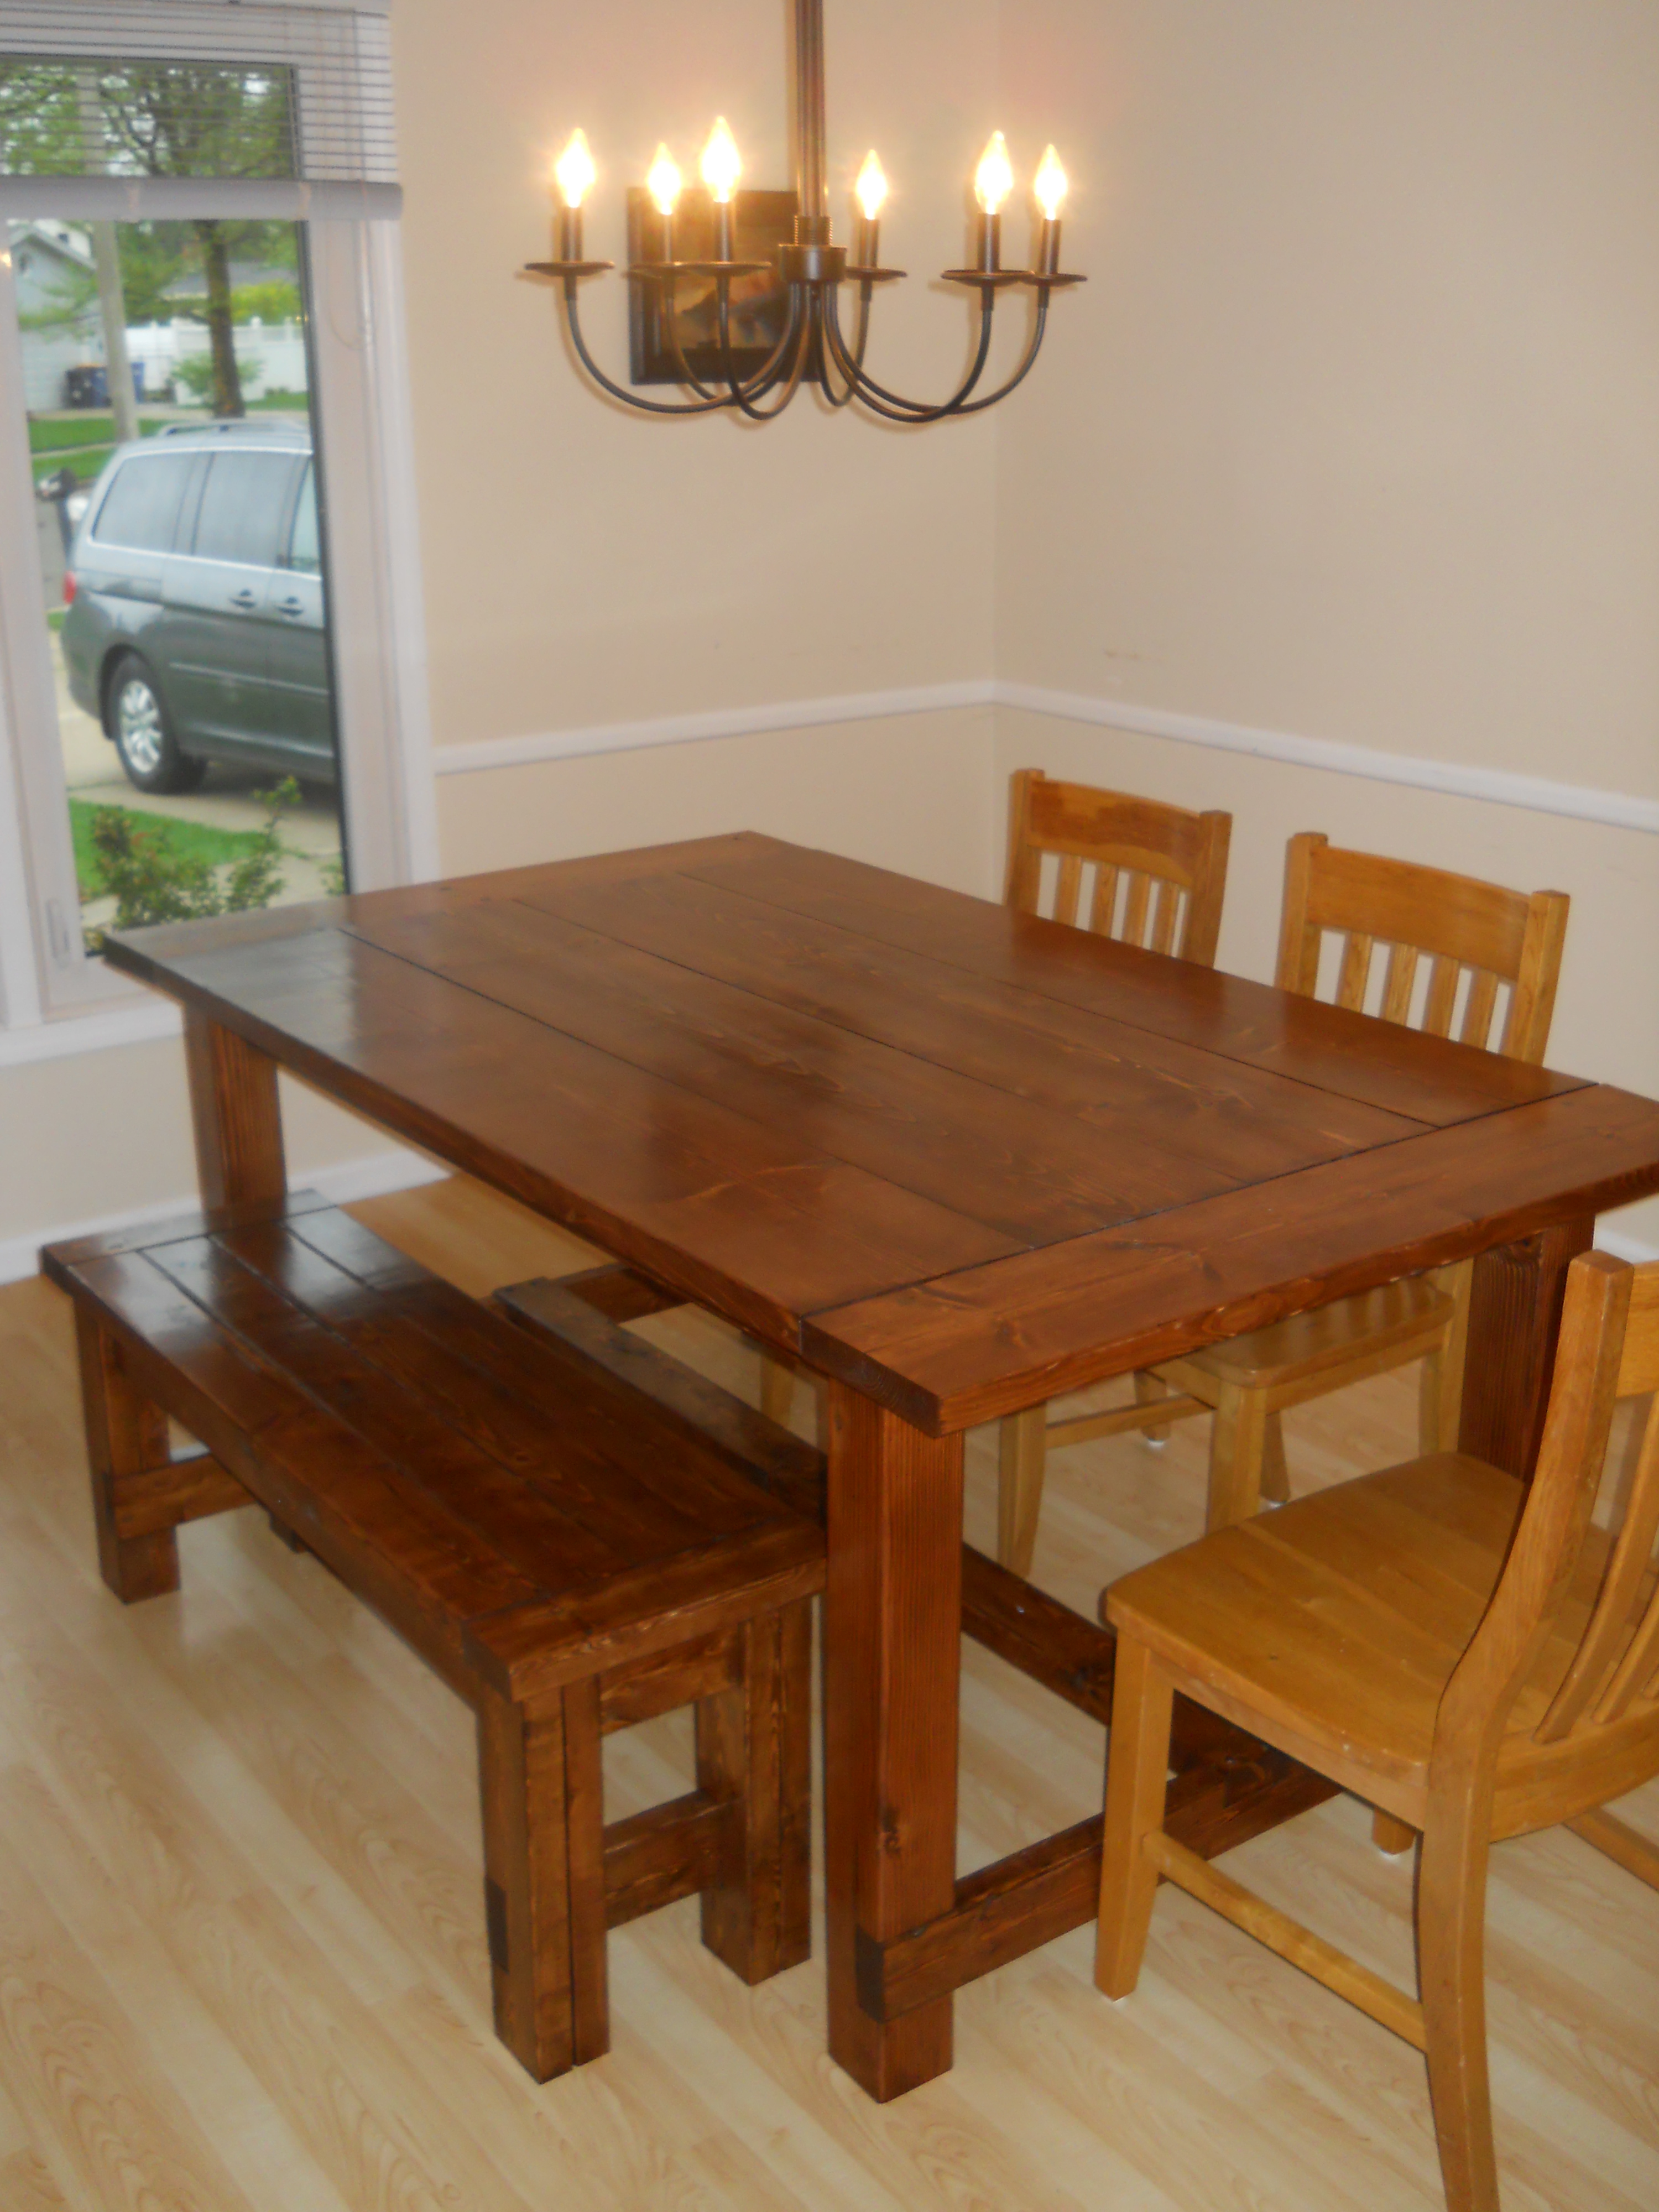
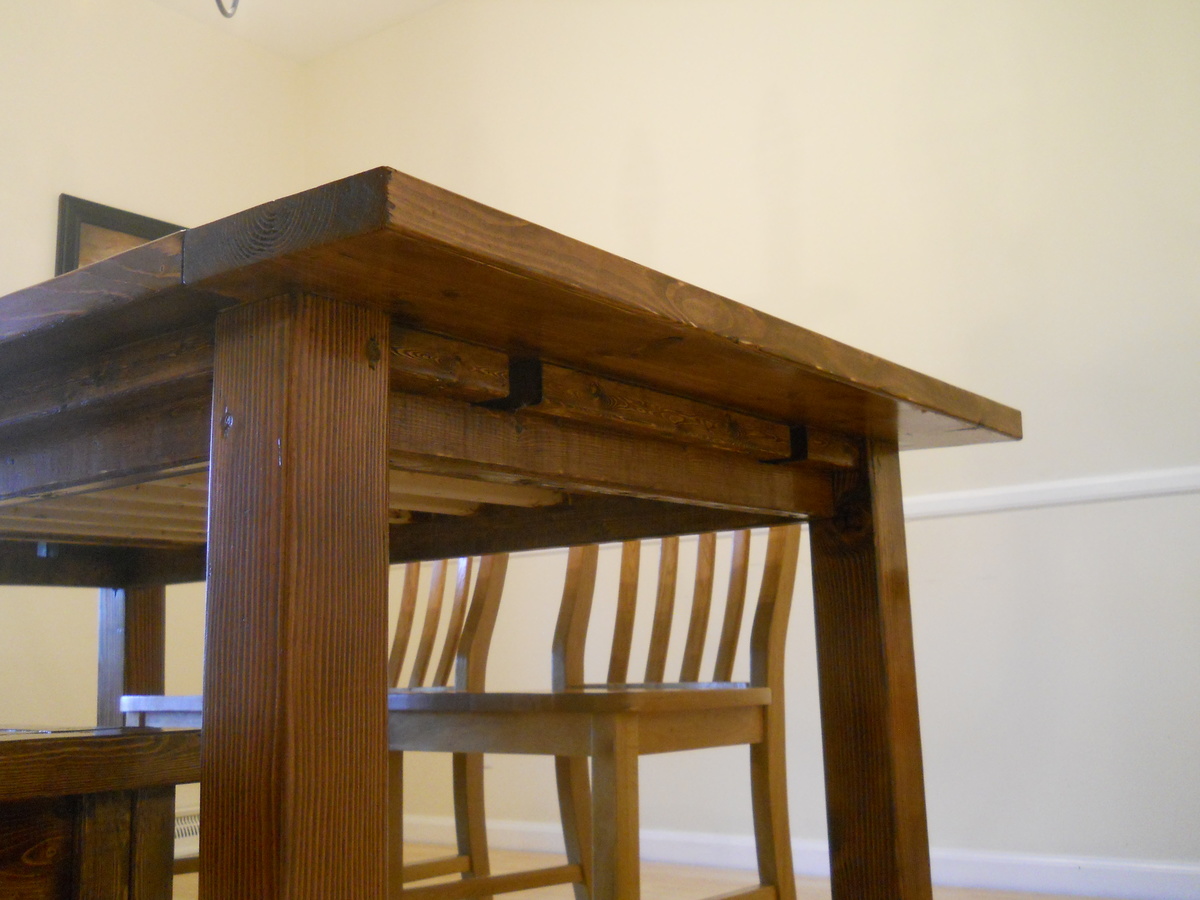
This is a modified plan for Ana White's Farm House Table.
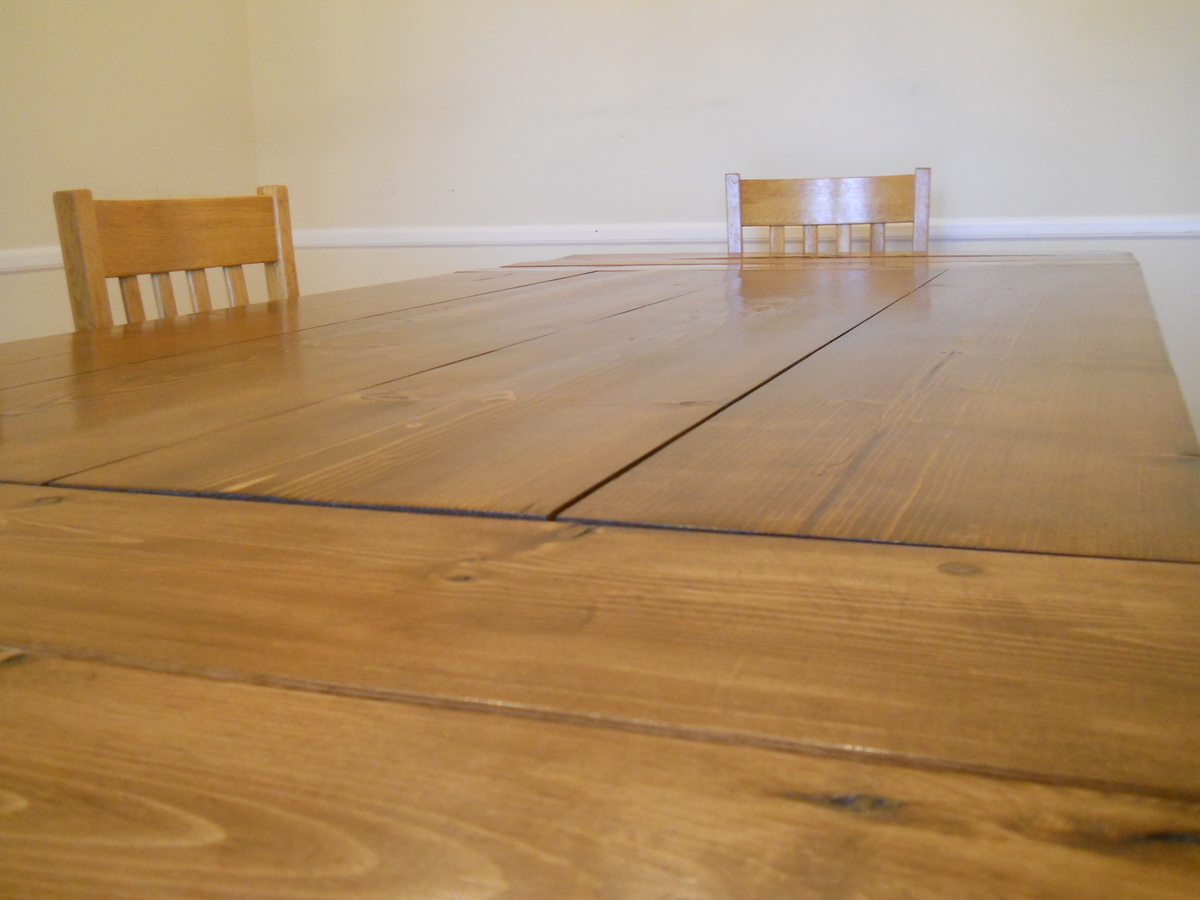
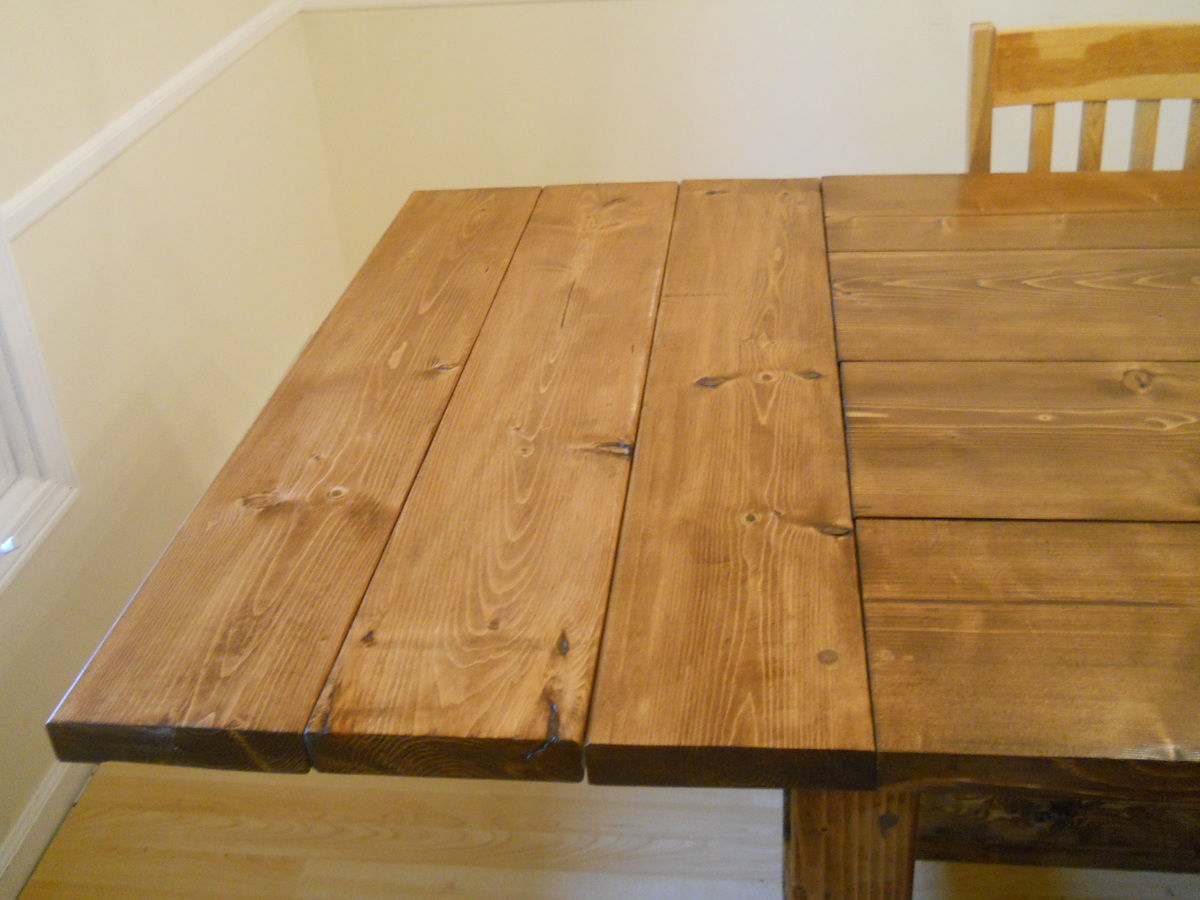
I shortened the table to about 72 inches with breadboards on the ends and added removable breadboard extensions for a total of about 100 inches of table for a 12x11 room. I also built the Farm House bench but shortened it to 48 inches.
The wood is white pine and Douglas Fir 4x4 legs. The total cost was $198 for the wood/screws and about $30 for the stain and sand paper. I bought an additional set of countersink bits for holes.
I used the following tools:
It took about 35 hours of work.
The stain is English Chestnut and we pretreated the wood to accept the stain by using wood conditioner. This made a dramatic difference in leveling out the stain between the white pine and Douglas Fir. I used 3 coats of clear polyurethane and 2 coats of satin on the top with gentle sanding in between coats.

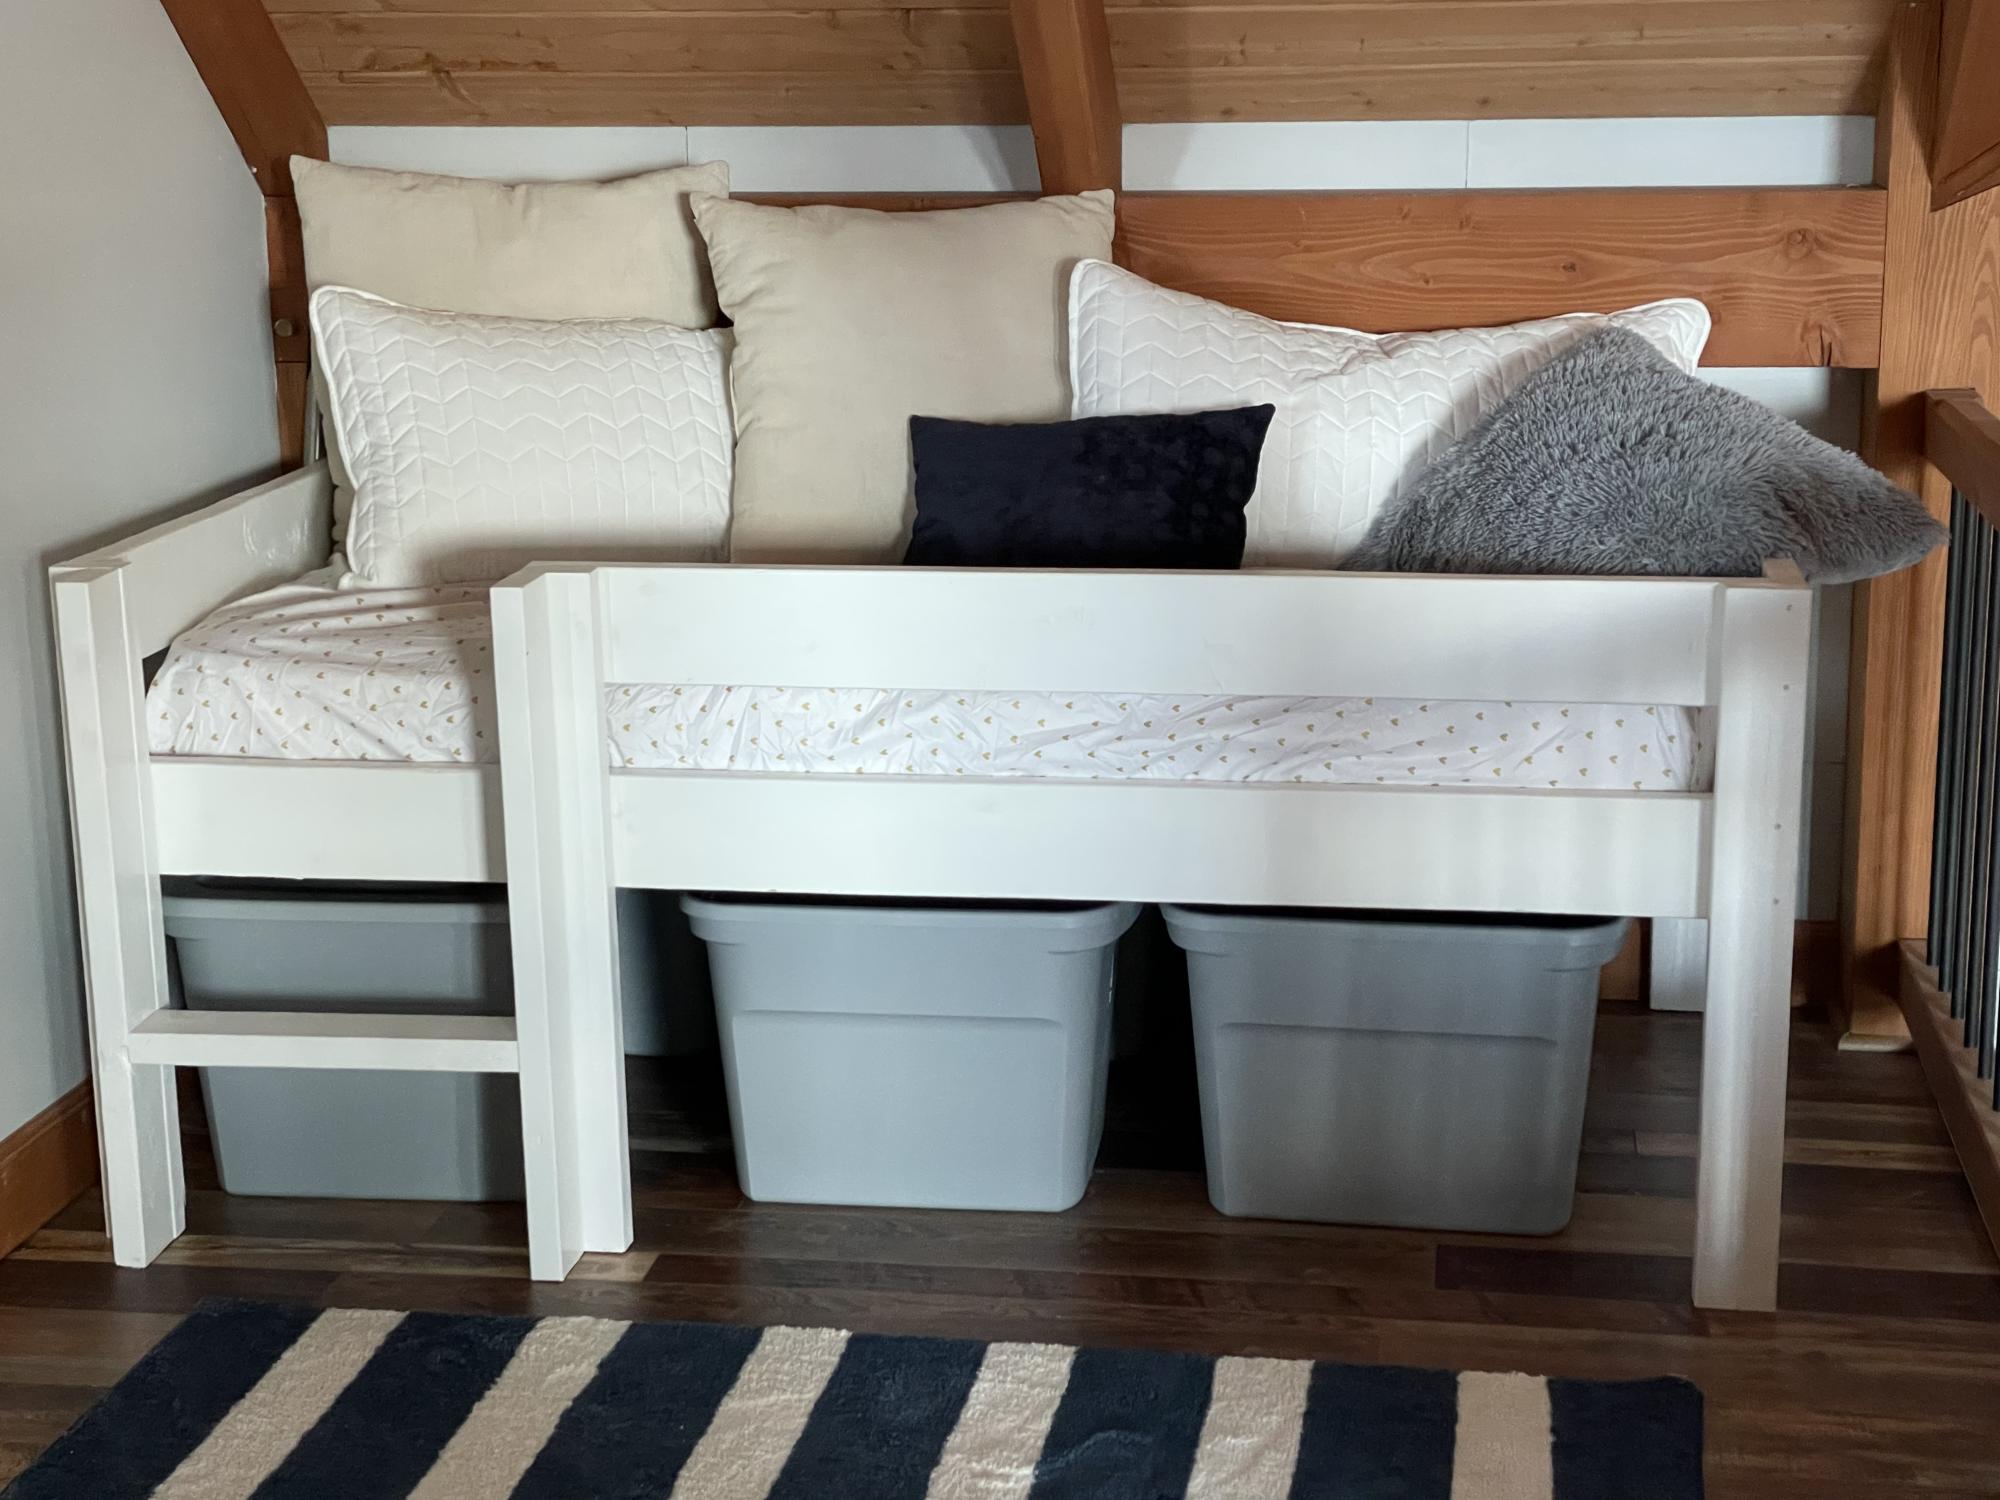
Shortened the essential loft bed up so legs are 32” long. This is the perfect height for putting totes underneath. I fit six totes easily.
The back row of totes is out of season/size/etc stuff. The front totes don’t have lids on them and the kids use them for toy boxes.
The bed itself is at a nice height. It’s easy to put kids in bed and make the bed. The guardrail is great for keeping pillows blankets and kids on the bed. Kids also love the ladder and bunk feel!
This is a great bed that I couldn’t recommend enough. It could easily last from toddler to teen. Very sturdy and comfortable.