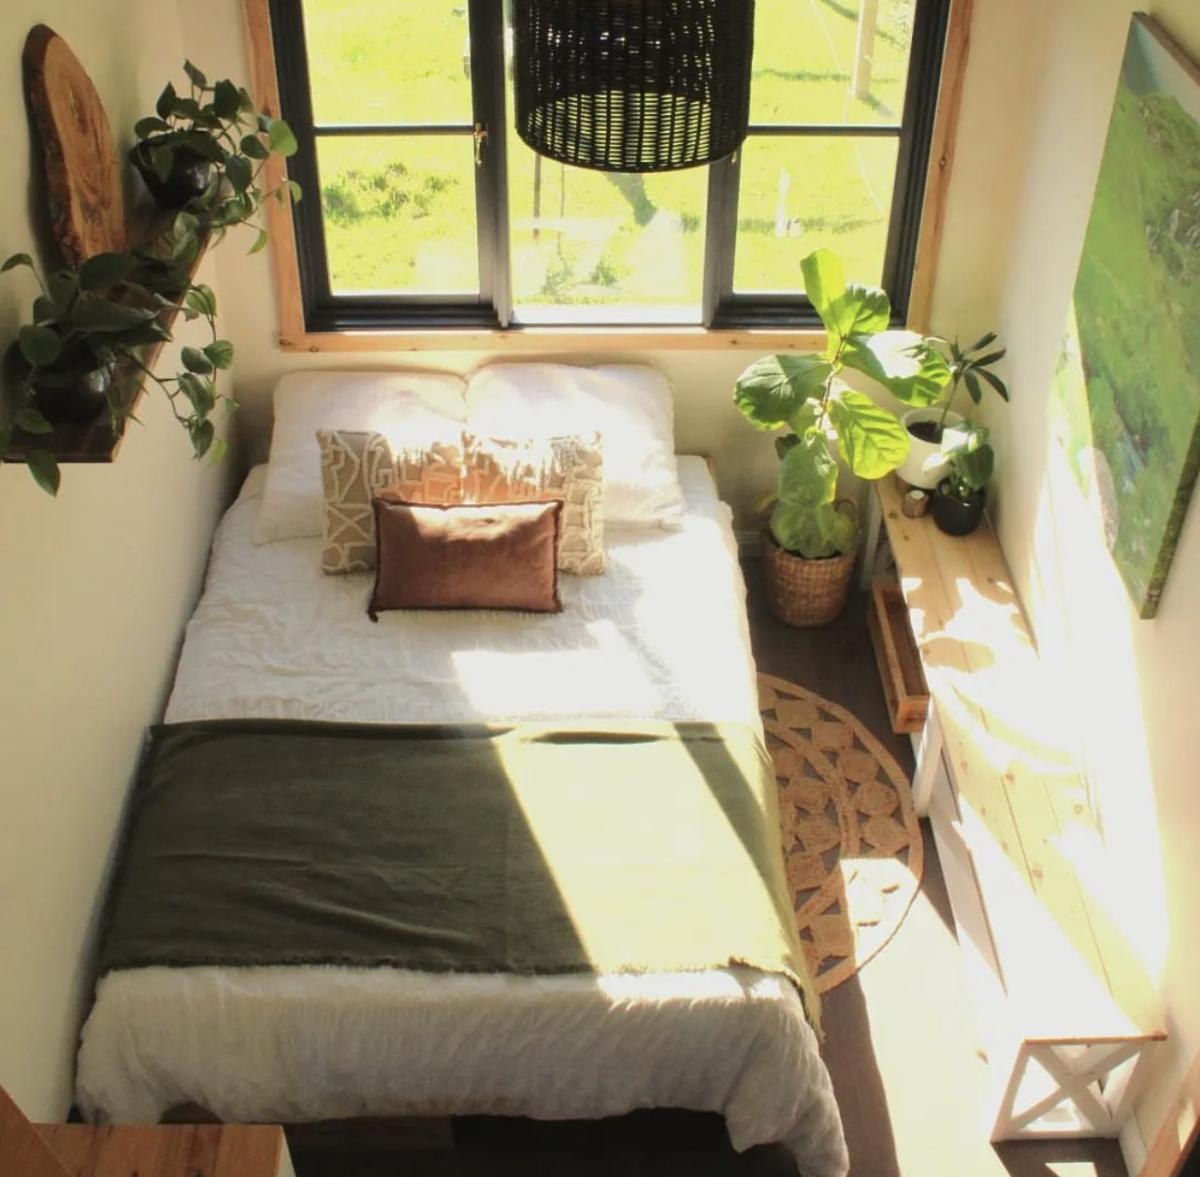
Tiny House Flip Sofa Bed - by Deirdre
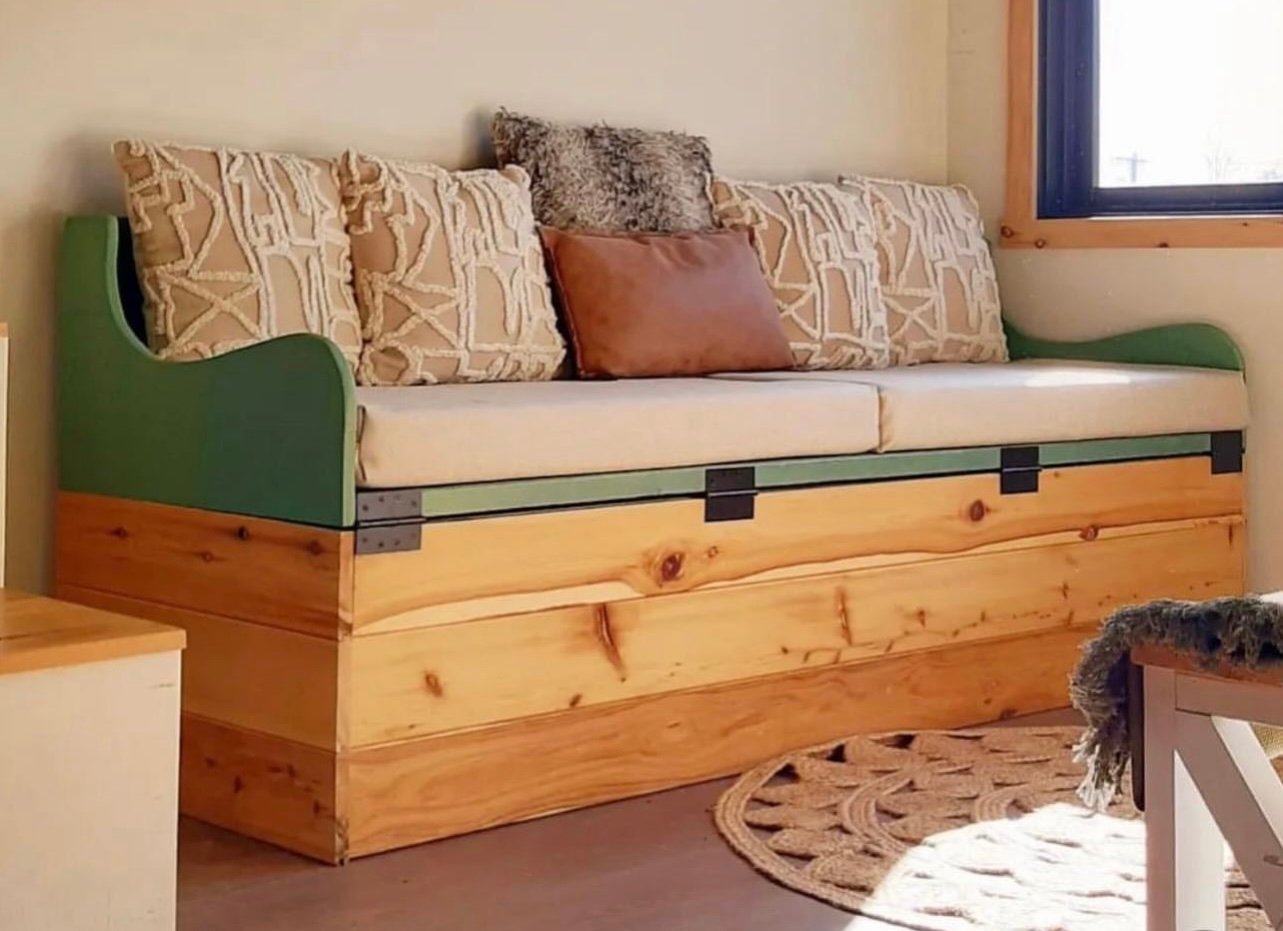
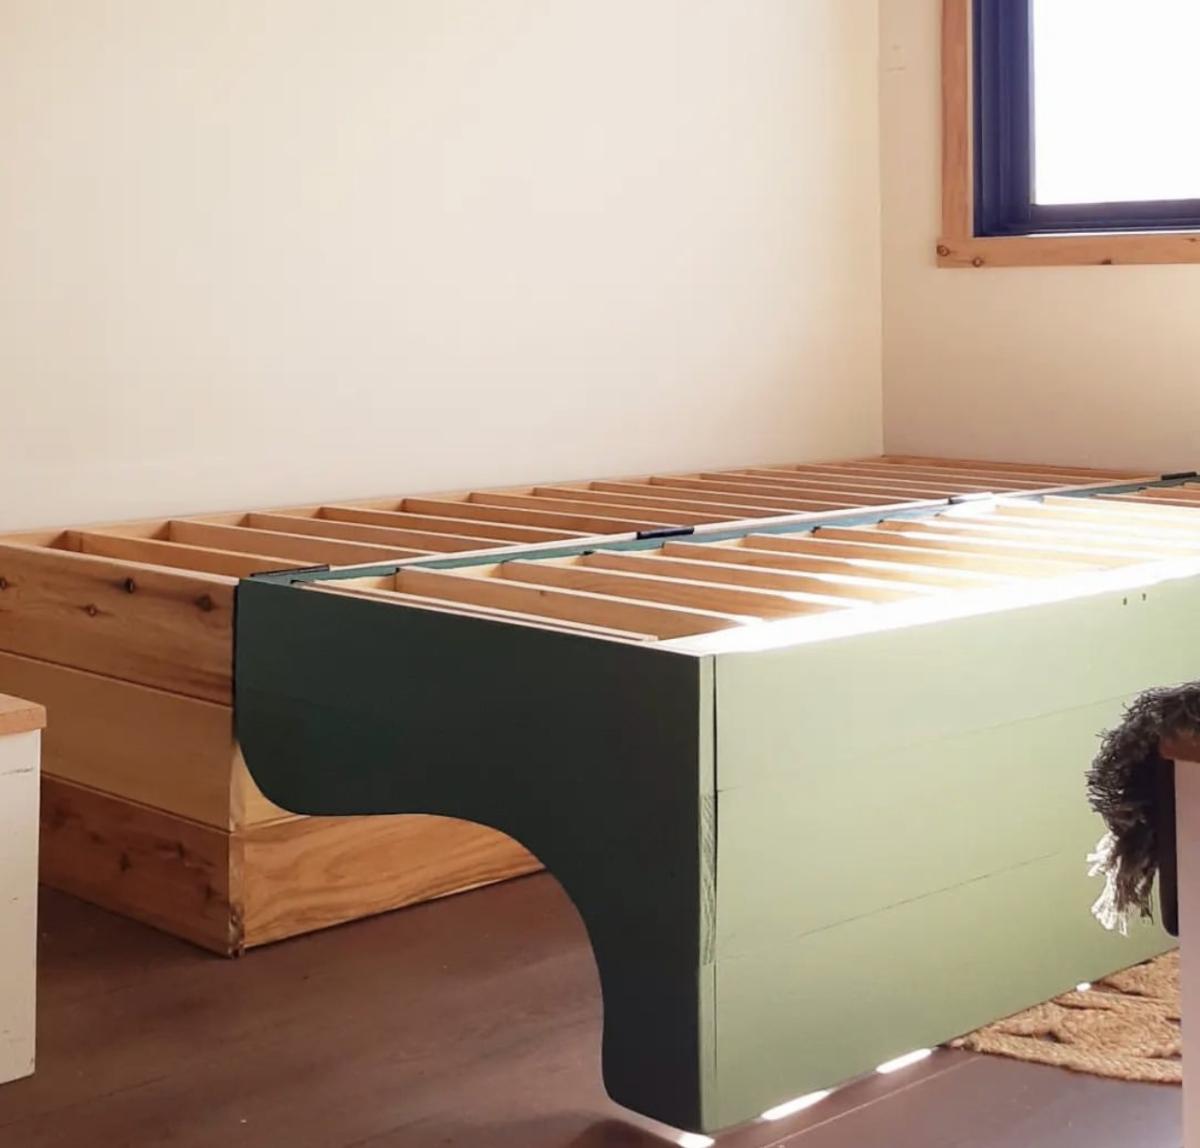
Modified from our twin sleeper chair plan, this amazing hinged sofa bed was built and shared by #tinybuilderau
Built from Plan(s)
Modified from our twin sleeper chair plan, this amazing hinged sofa bed was built and shared by #tinybuilderau
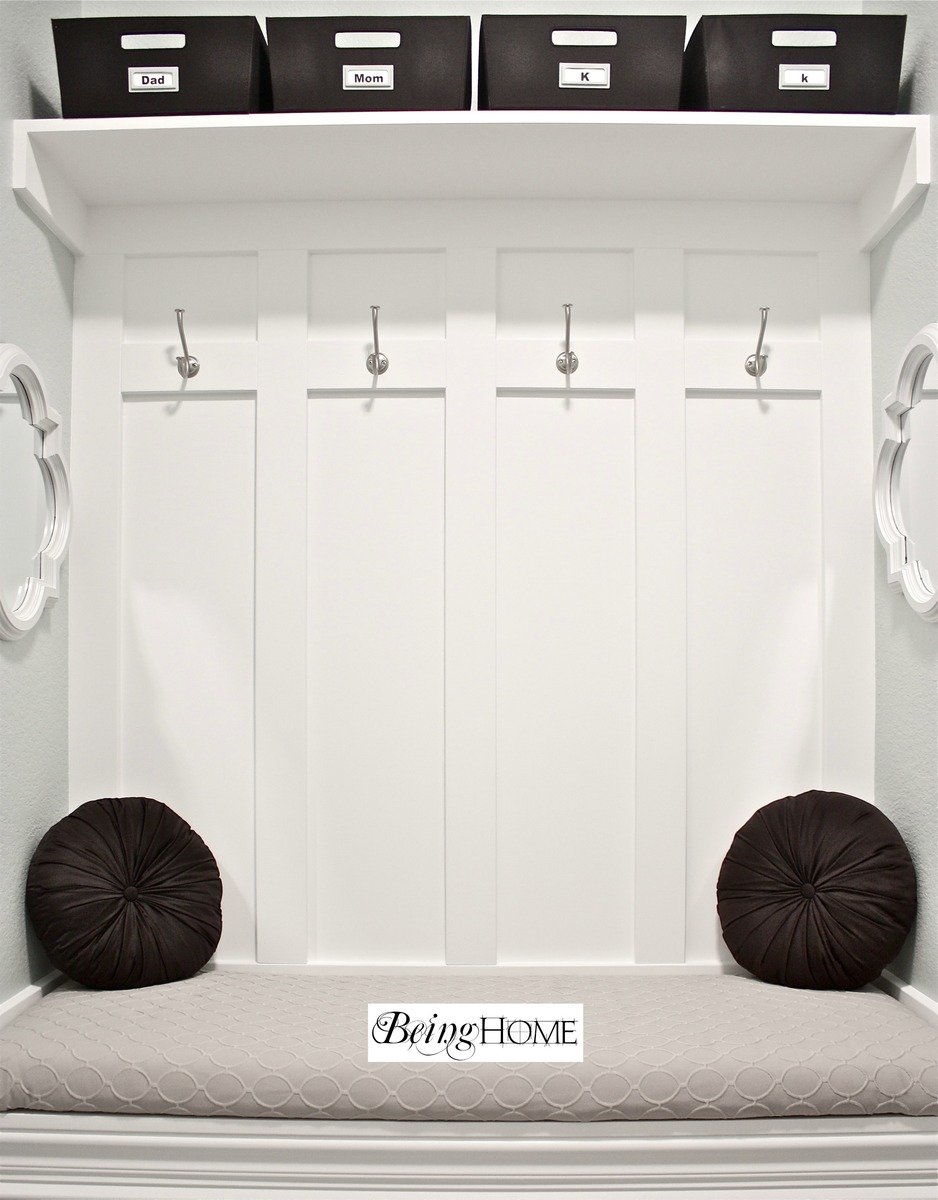
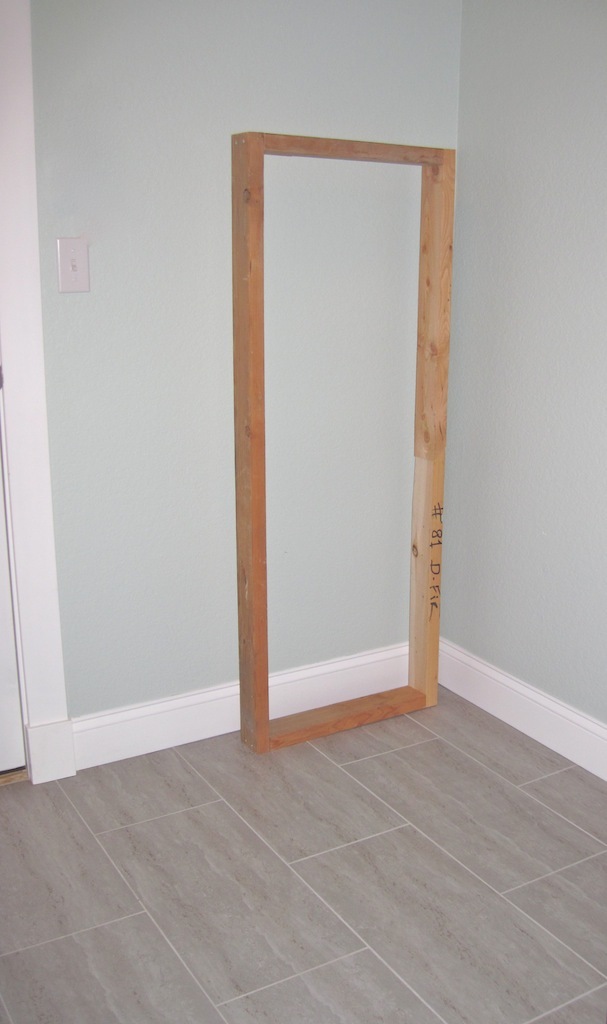
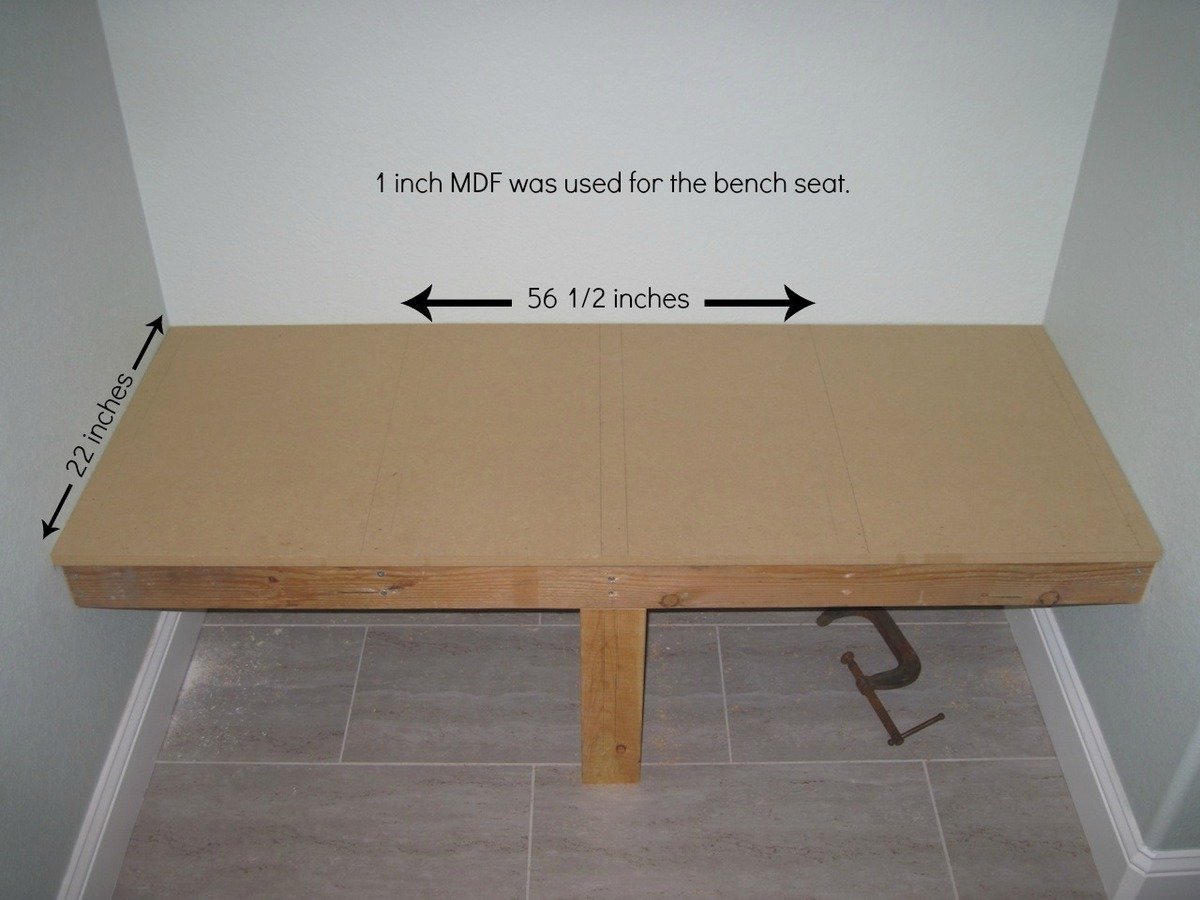
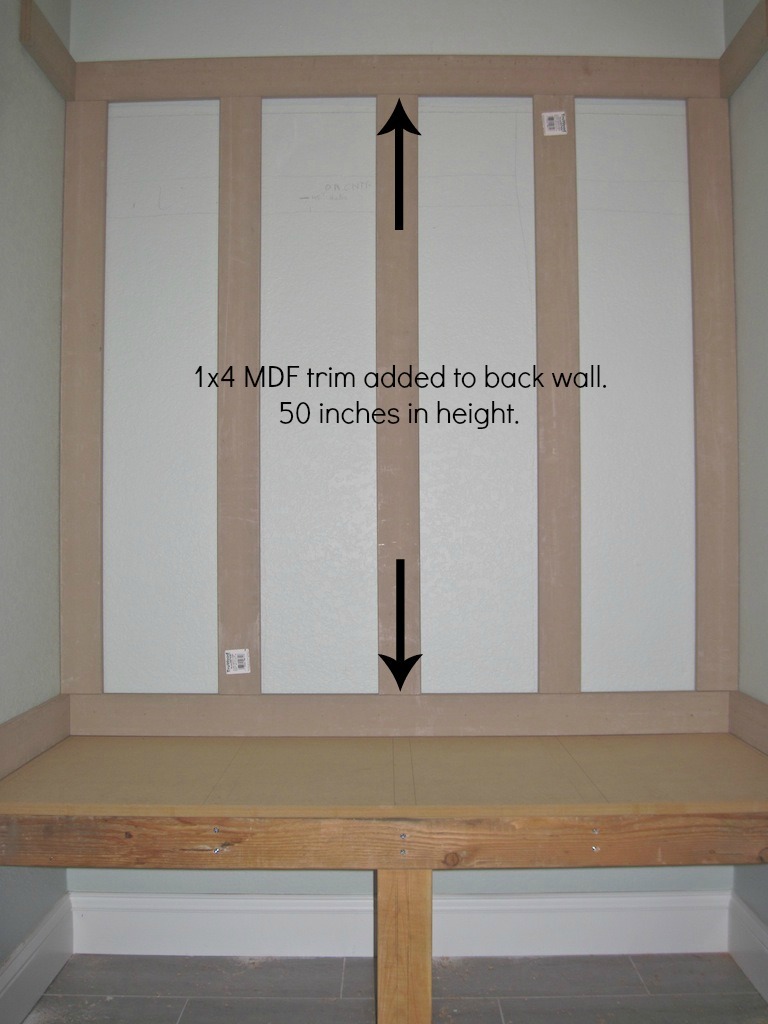
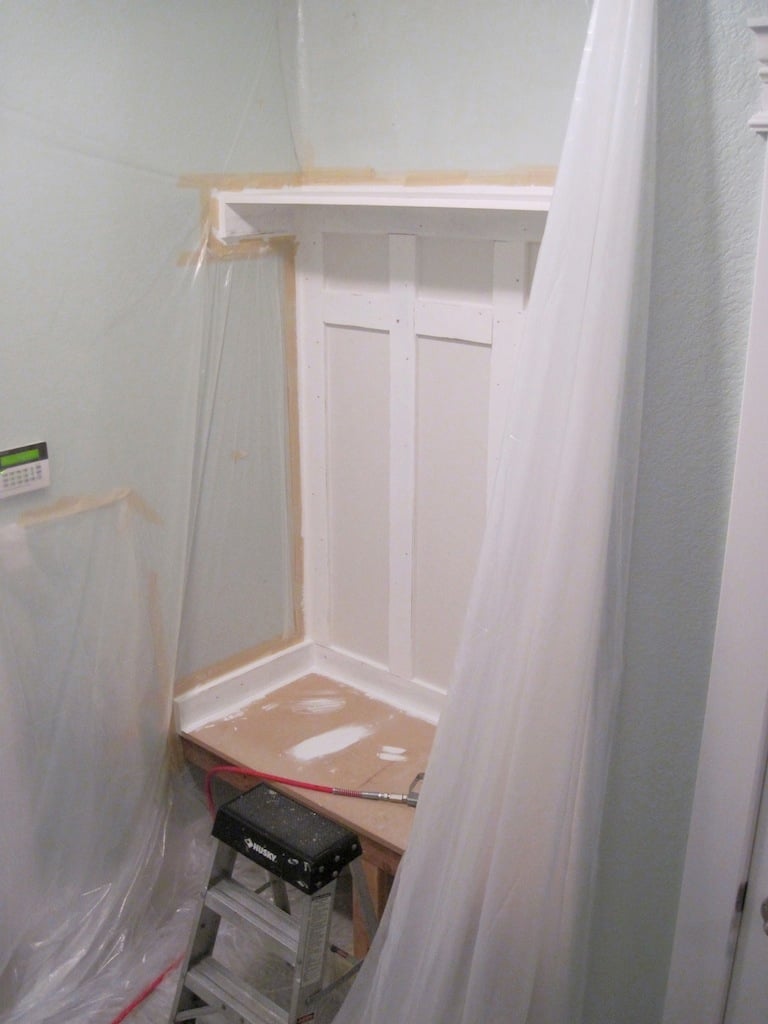
With much needed seating in the mudroom, an unused space (nook) was used to build a mudroom bench and shelf. No plans were used. I basically looked on-line and mentally drew up an idea of how I wanted the final product to look.
There were some setbacks such as not like the knock down textured walls (after partially painting the bench). I ended up covering the textured walls with hardboard and repainted.
A bench cushion was made for added comfort and style.
Complete tutorial for the bench is here and the bench cushion tutorial is here.
Thank you.
Julie

Thu, 05/16/2013 - 13:48
Thank you so much for the idea and plan. I used it to turn an extra laundry room that we have off of our garage into a much needed mudroom. The most challenging project I have ever done before is hanging blinds. But with your help and some from the Home Depot employees, I did it! Our family is more than happy with it. Thanks!!!
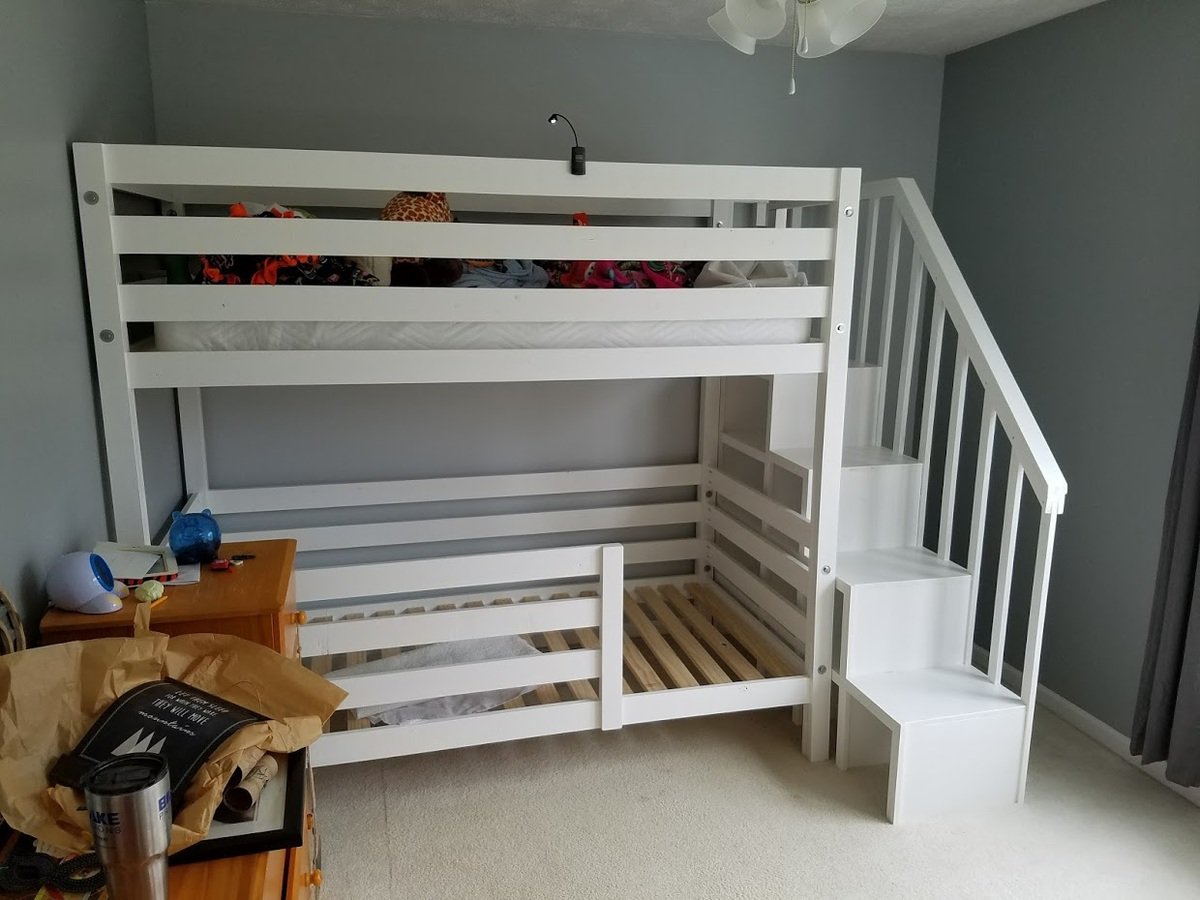
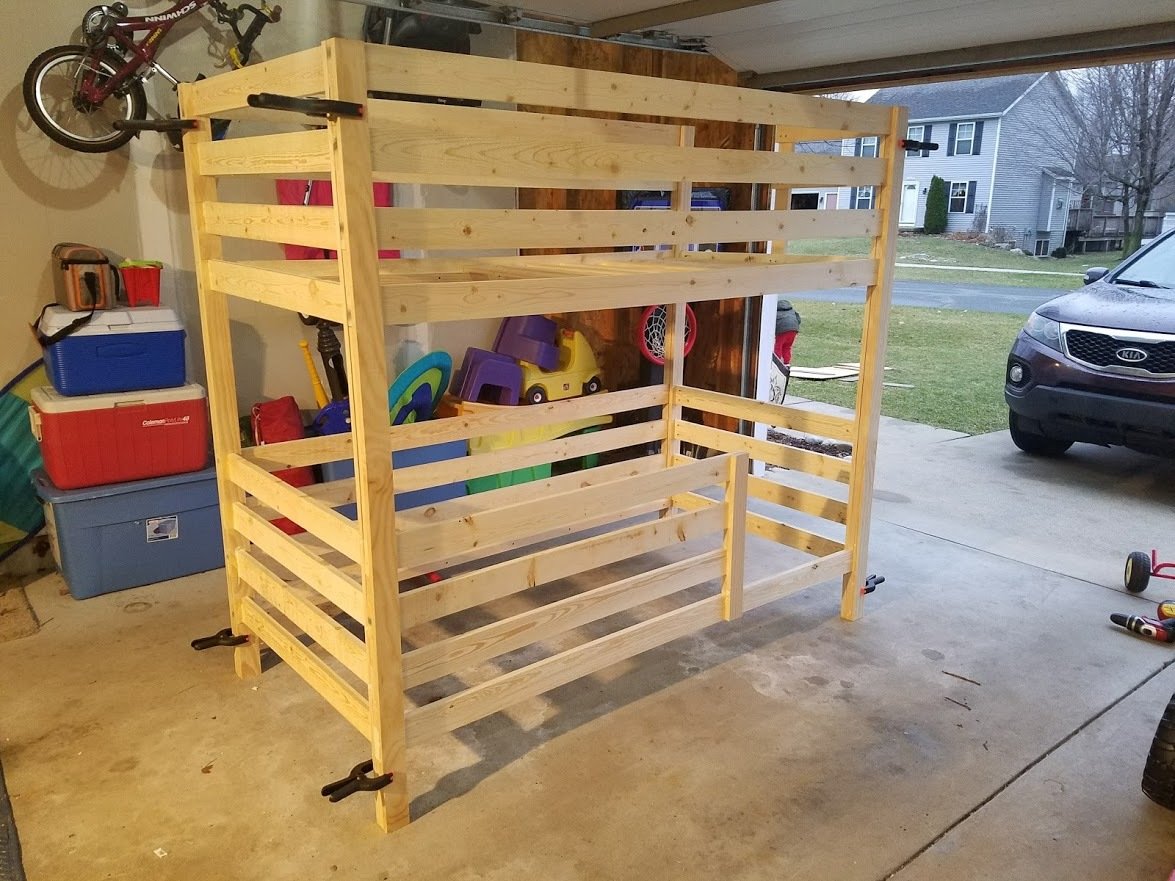
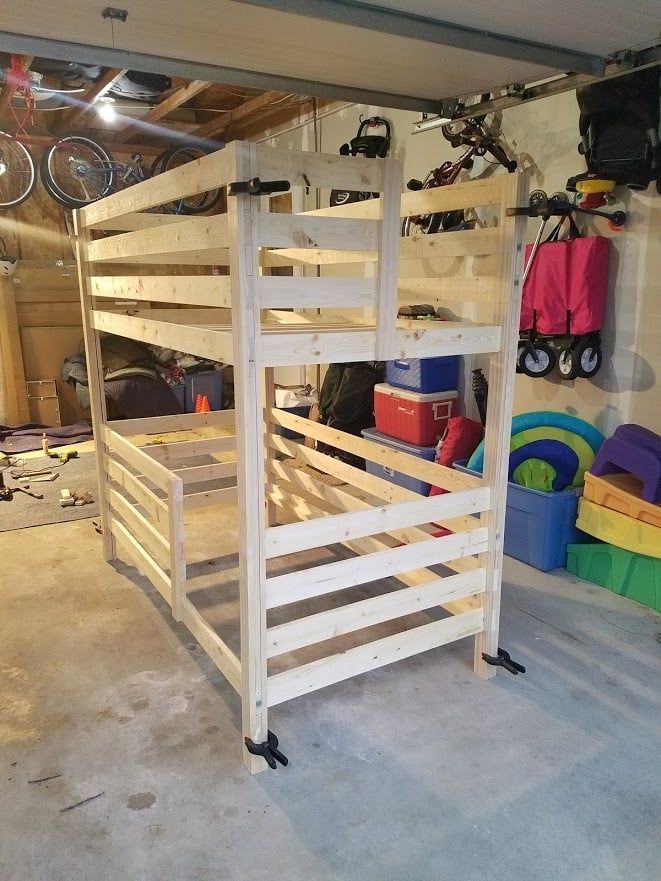
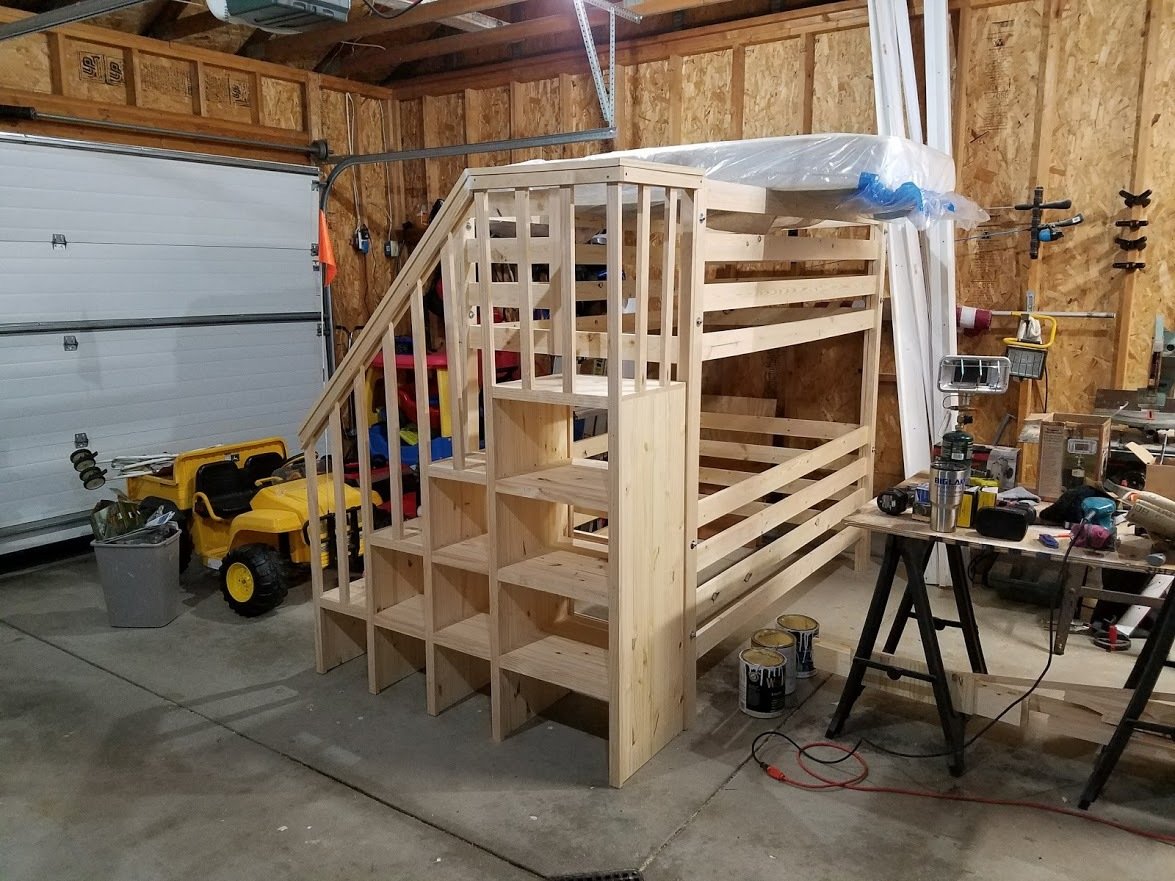
I modified the plans for the Classic Bunk beds by making them 74" tall instead of 63" and added a fourth slat all the way around to add more protection from potential falls. I created one opening in the front for my youngest to get into the bottom bunk, and built slats about 2/3's across the front to act as a gaurd rail. I created another opening on the side for my oldest to get into the top bunk with stairs instead of ladders to again prevent falls. I had to modify the Sweet Pea stairs to accomodate for the extra height in the bunk beds, simplified the railings, and I created each cubby to be big enough to use cloth storage totes that were 11x11x11. Sanded the whole bed and stairs so the corners and edges were all rounded and smooth, and put two coats of white Deck and Porch paint to stand up to the the boys running up and down. I used brackets to secure the stairs to the bed, and sixteen 3" bolts to bind the bed together. Precut and drilled 17 slats for each bed seperated them 2" apart. Spent a few hours every night during the week measuring, cutting, glueing, drilling and assembling the bed and stairs. Spent an entire weekend sanding and painting. Very happy with the way these beds turned out. Overall cost of the project including the paint was around $400.

We did it in MDF as suggested, used piano hinges, and changed the height to 36" because I'm used to work at counter height and wanted a larger surface, plus I don't mind sewing sitting on my stool. We had the store cut all the pieces, but this table is very heavy using this material. We also made the legs at 4" considering the weight. The only disadvantage of making it 36" high is that the legs will stick out once folded, unless you have the room and adjust the depth at 36" as well. I overlooked that detail but in the end, I don't mind since this table is stored away out of the view when not used. It did soak up a lot of paint... Already used it and it's great to have my space ready to use roll away, not having to clear the counter or dining table to work.
Tue, 01/28/2014 - 05:11
Do you happen to have the new measurement layout for what you did????!!
I was trying to work it out, but math isn't my strongest suit!
Also-- did you consider making it wider so the legs wouldn't stick out??
(I am planning for plywood instead of mdf)
thanks!
This was my second build from Ana White. If I could learn how to do the finishes better, I could get a table like this done in a few hours instead of a few weeks!
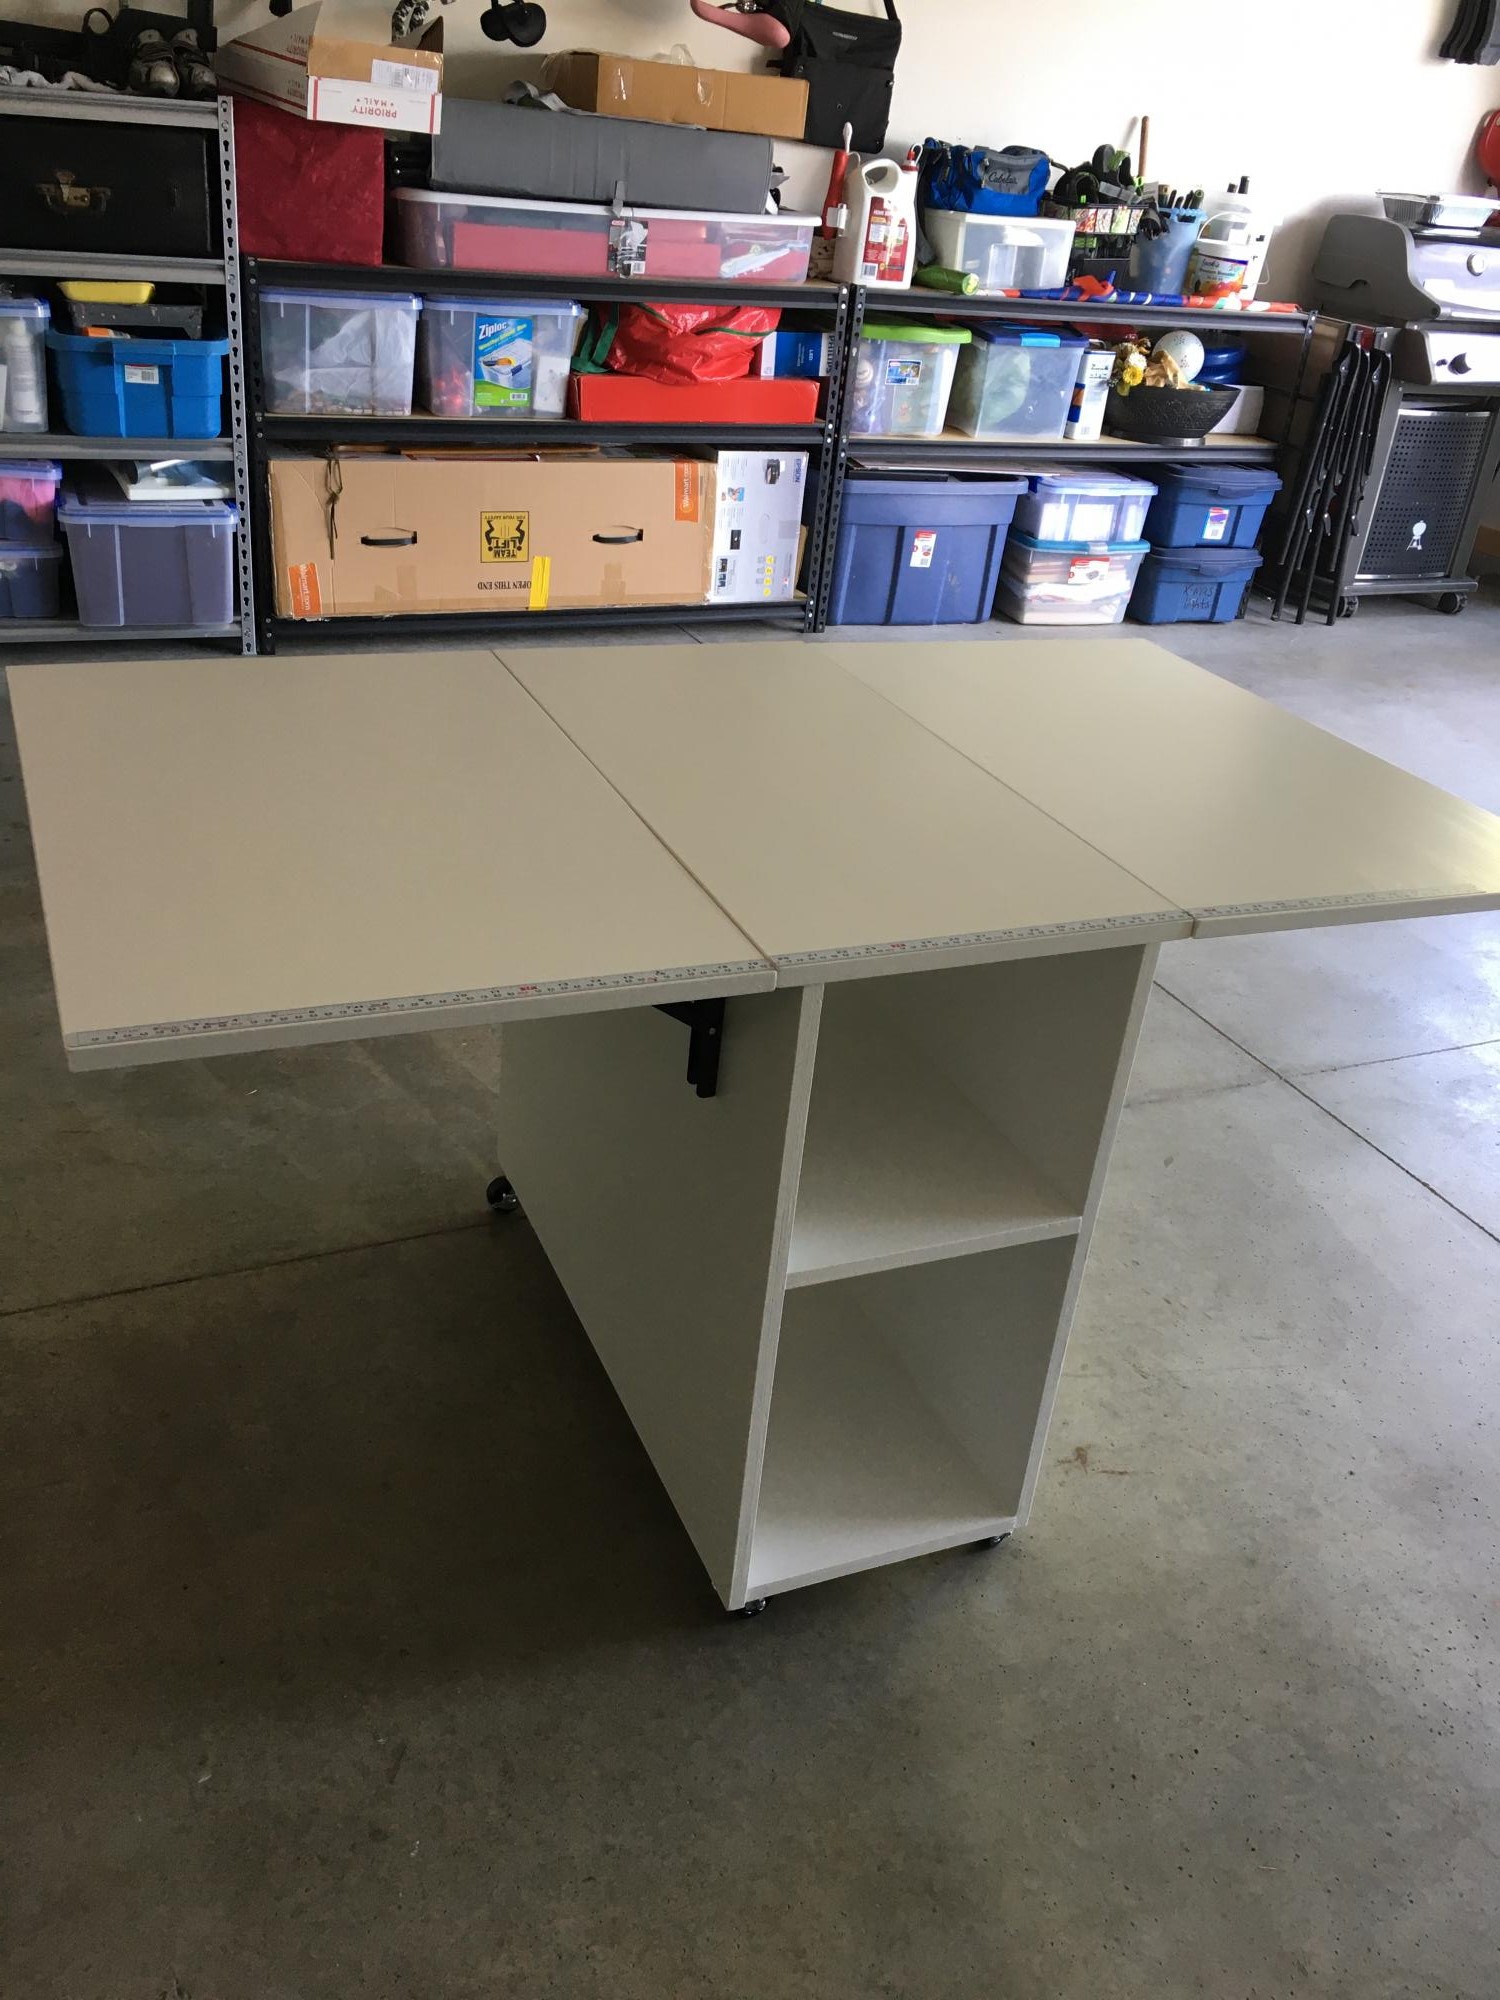
Love this plan! I used locking hinges instead of legs because it will overlap a bed in our guest room when in use. The hinges are rated for 250lbs and have held both of my sewing machines with no issues. I placed the middle shelf to fit my machines on the lower and standard fabric storage cubes on the upper. A metal adhesive measuring tape was added to the edge for convenience. This table will also be used as a buffet for family/group gatherings.
Wed, 12/02/2020 - 09:09
Hi! I need my sewing cart to be used without legs as well and have search everywhere for an appropriate hinge. Could you share with me what type & size you used? Did you change the sizes of the top to accommodate at all? Thanks!
Just finished up my Murphy Bed project. Hope you like.

Mon, 03/09/2020 - 20:30
Amazing. I’ve seen these and have been looking for plans. May just have to dive in and interpret from pictures. You did a really great job, nice work.
Wed, 12/22/2021 - 14:06
The plans are for a different bed than the one in the picture.
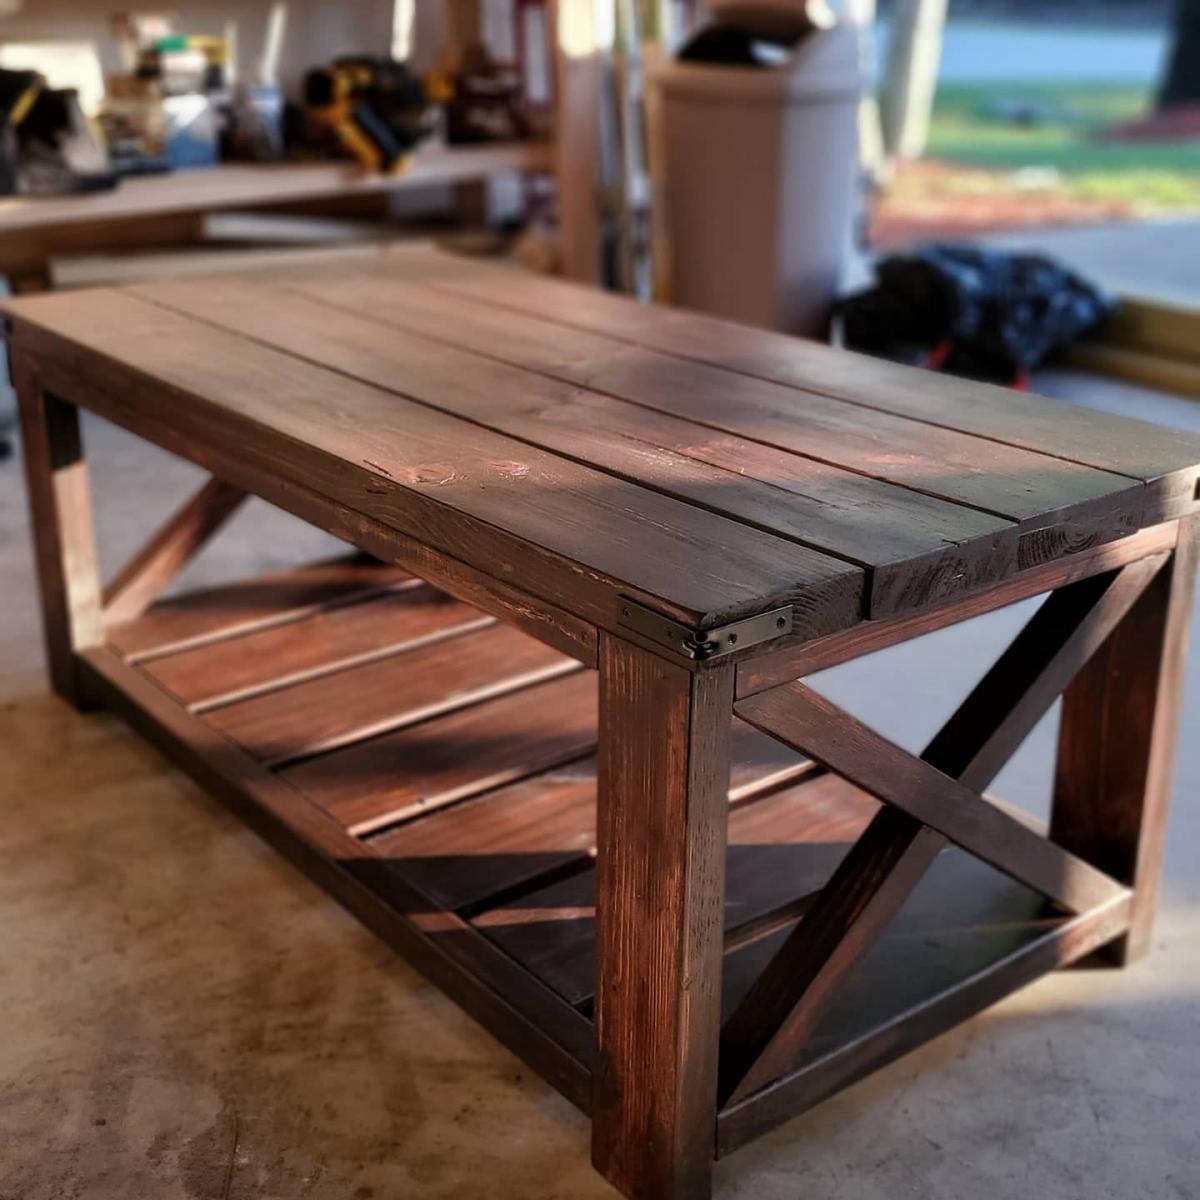
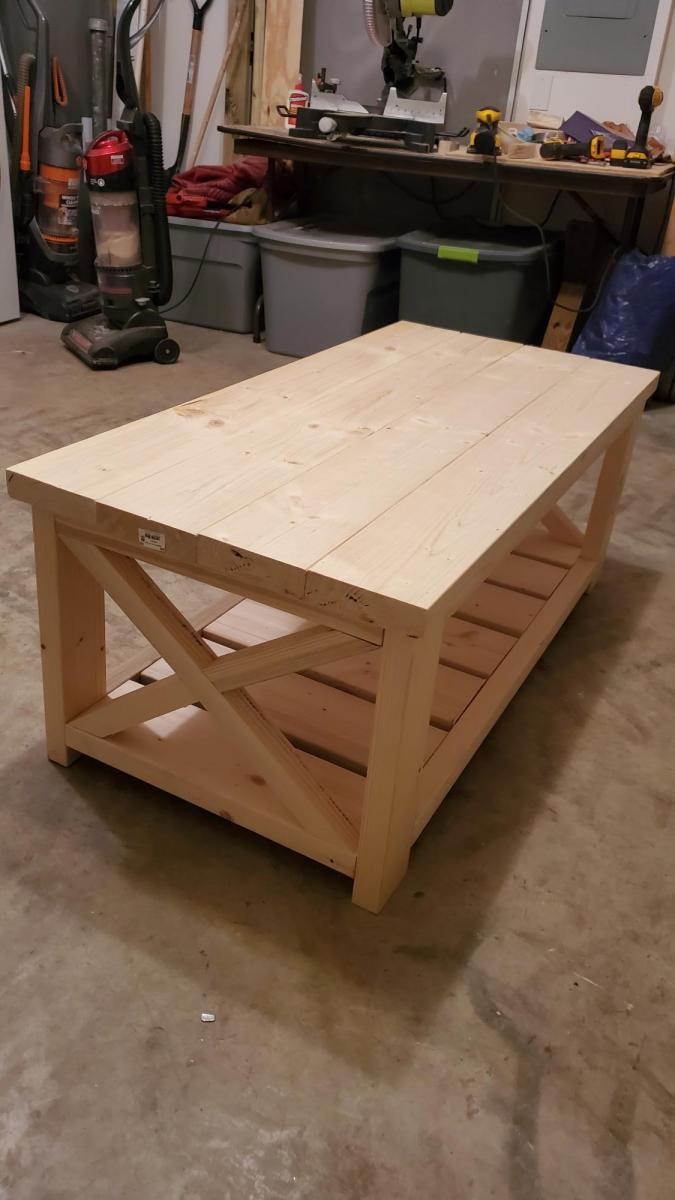
Thank you for the awesome coffee table plan. Love the finished project on it. Can't wait to do something else.


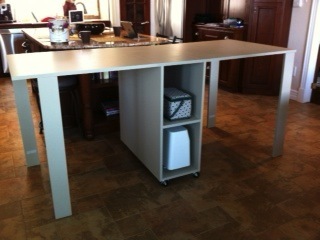
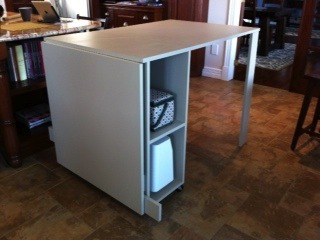
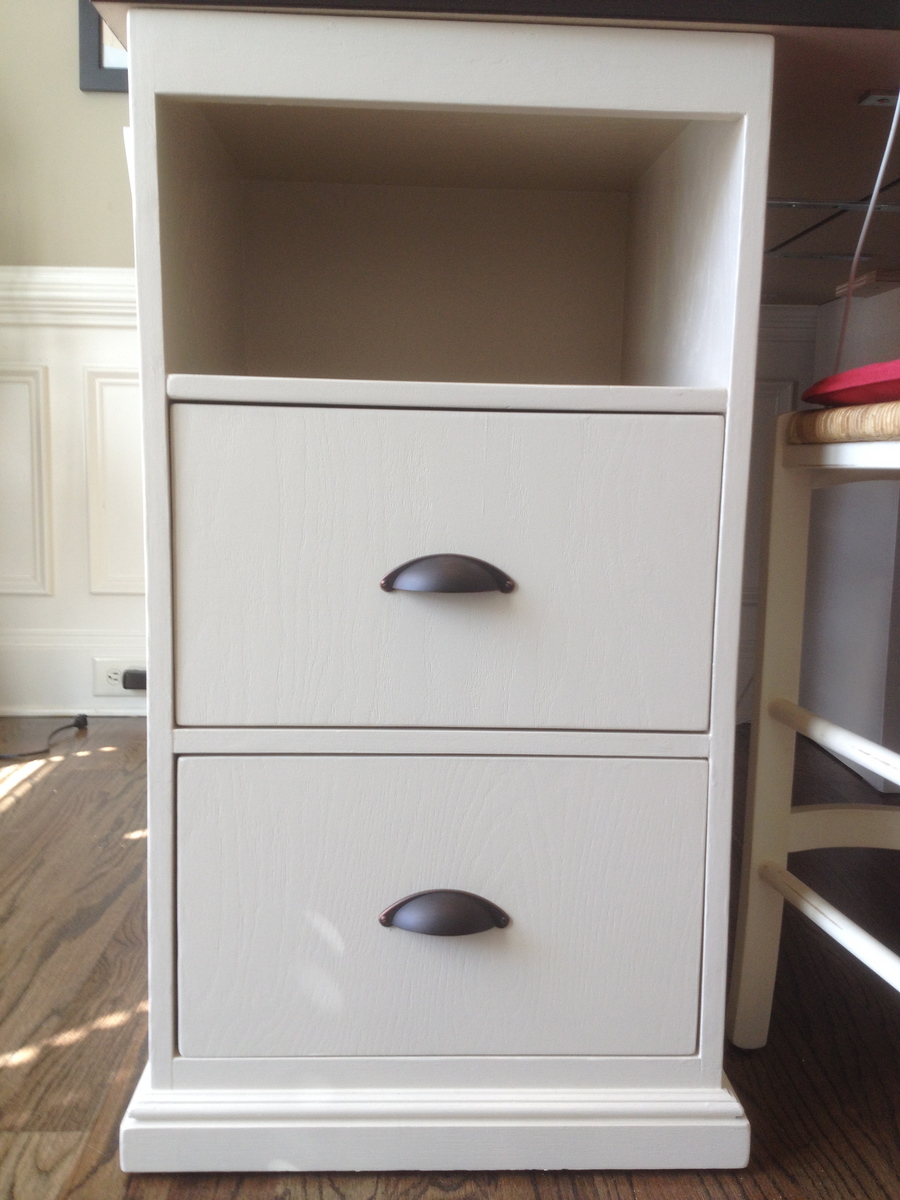
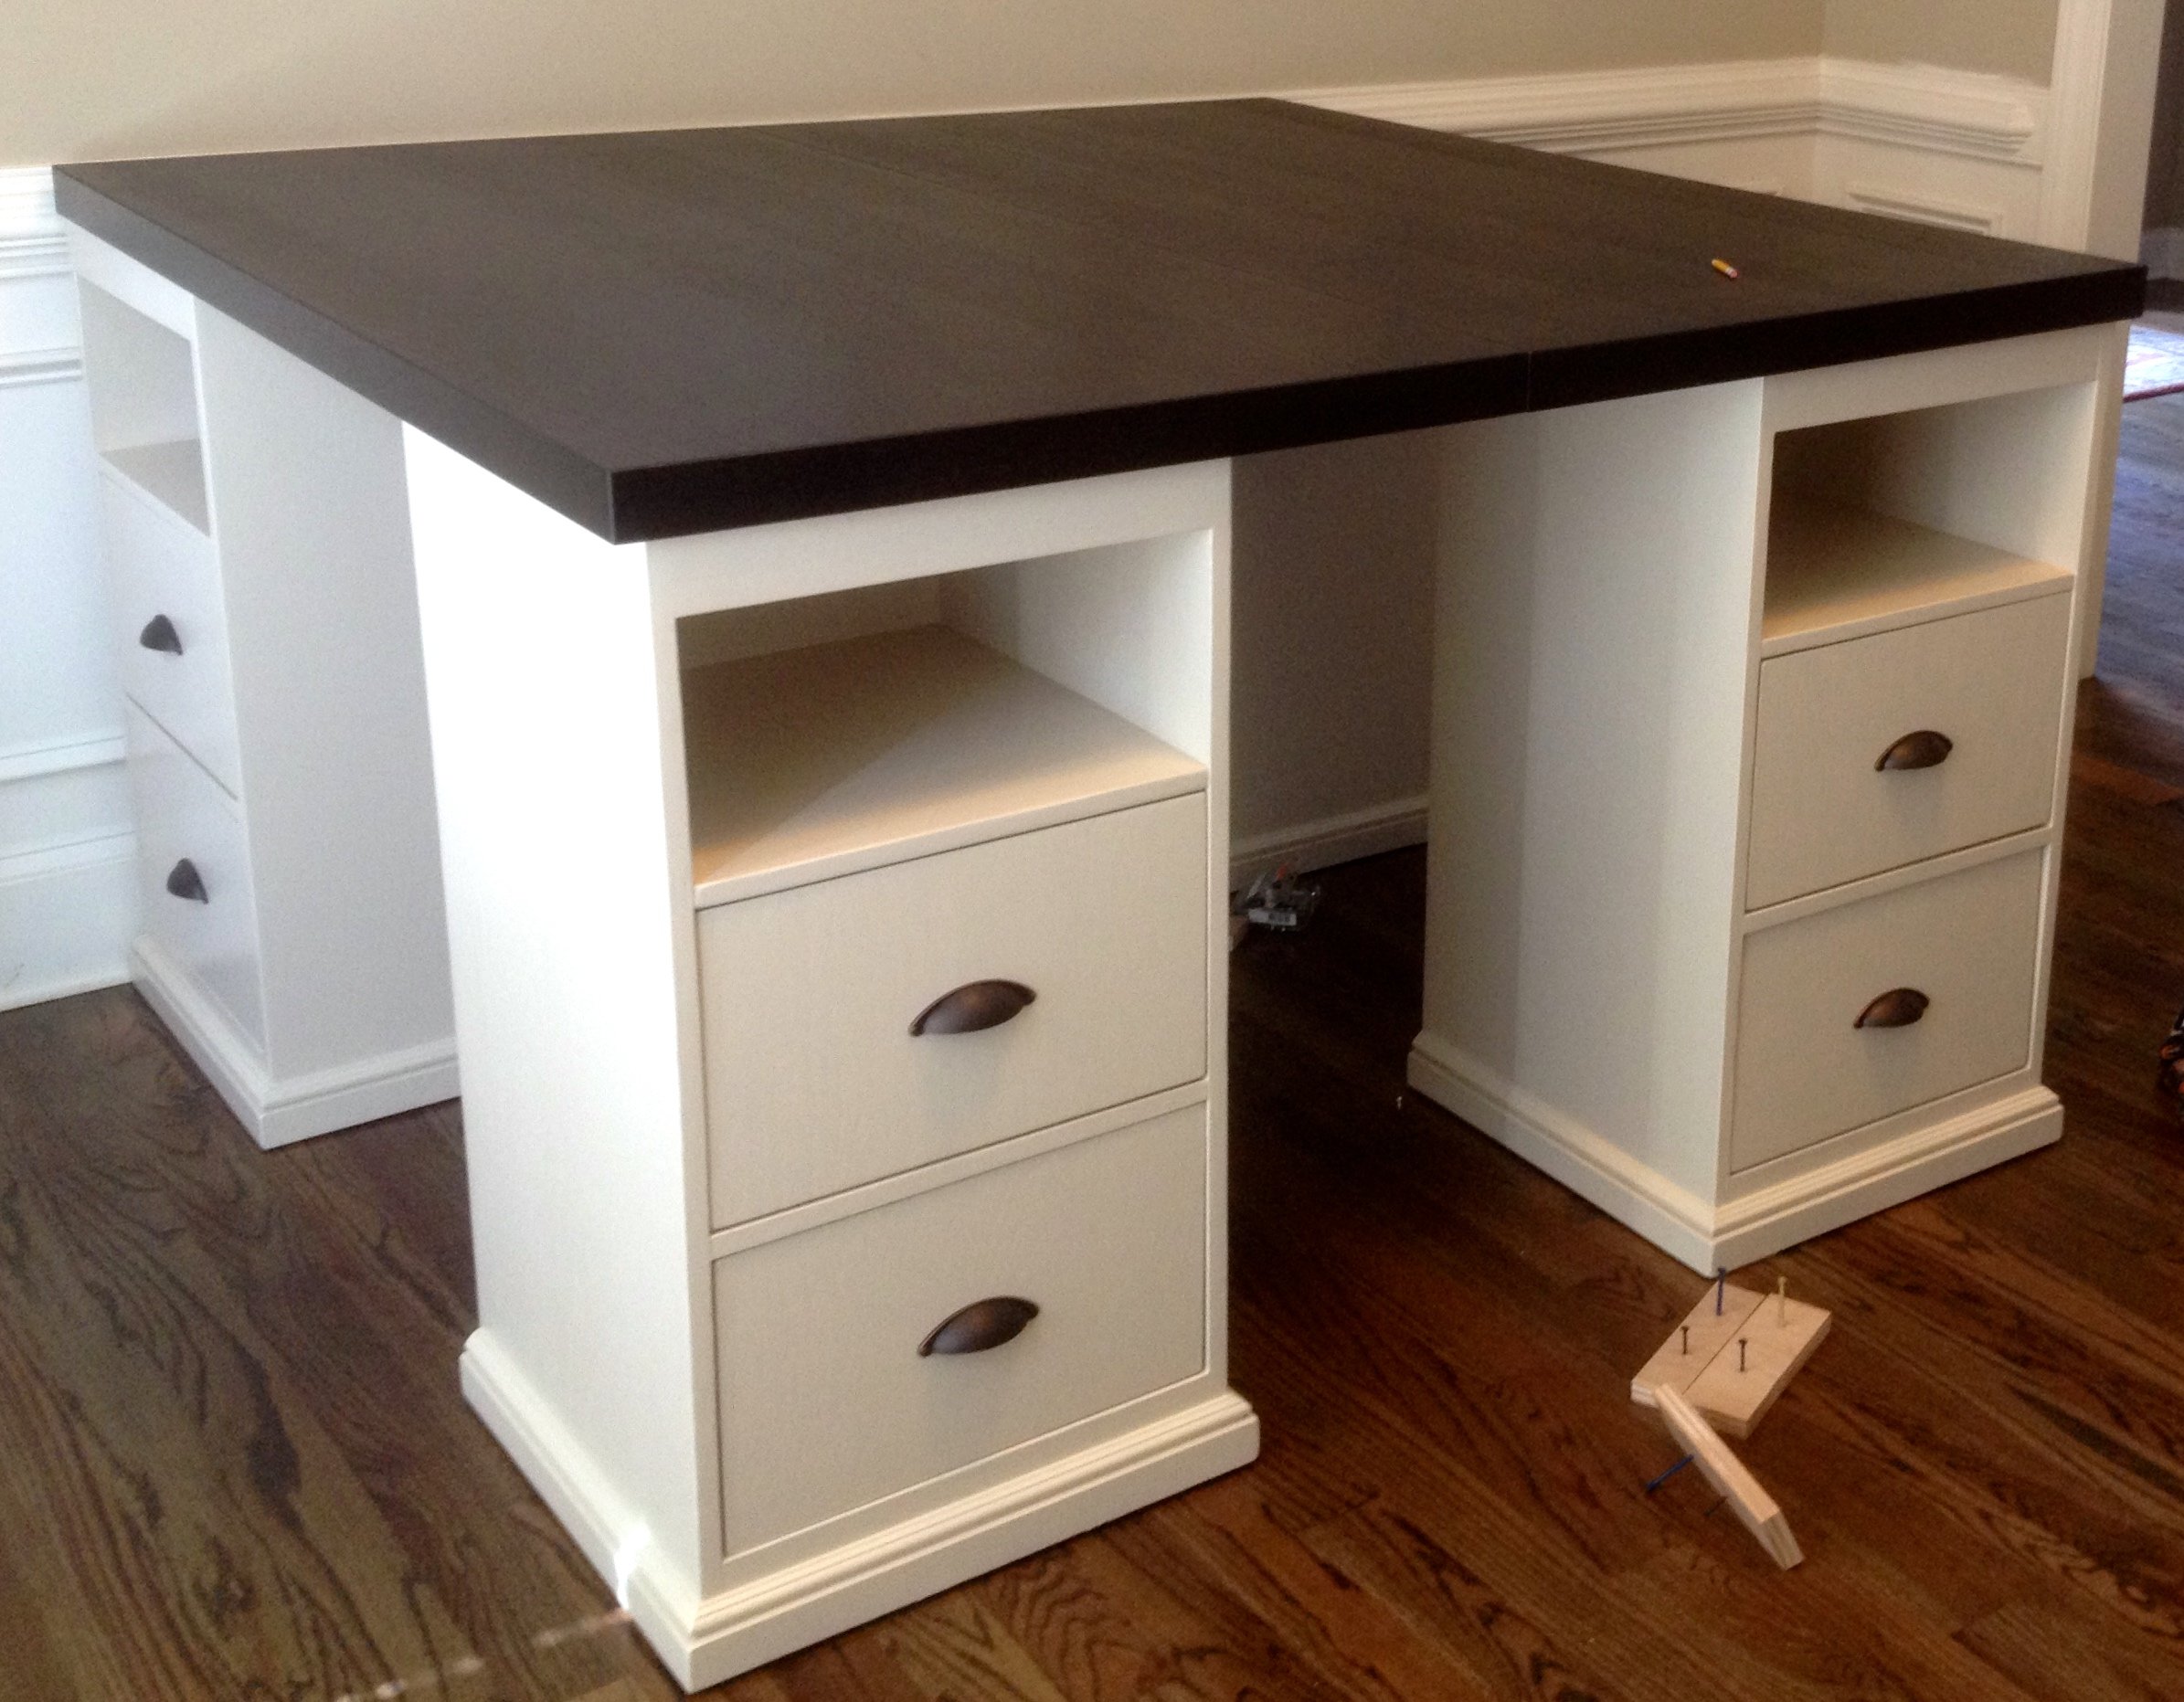
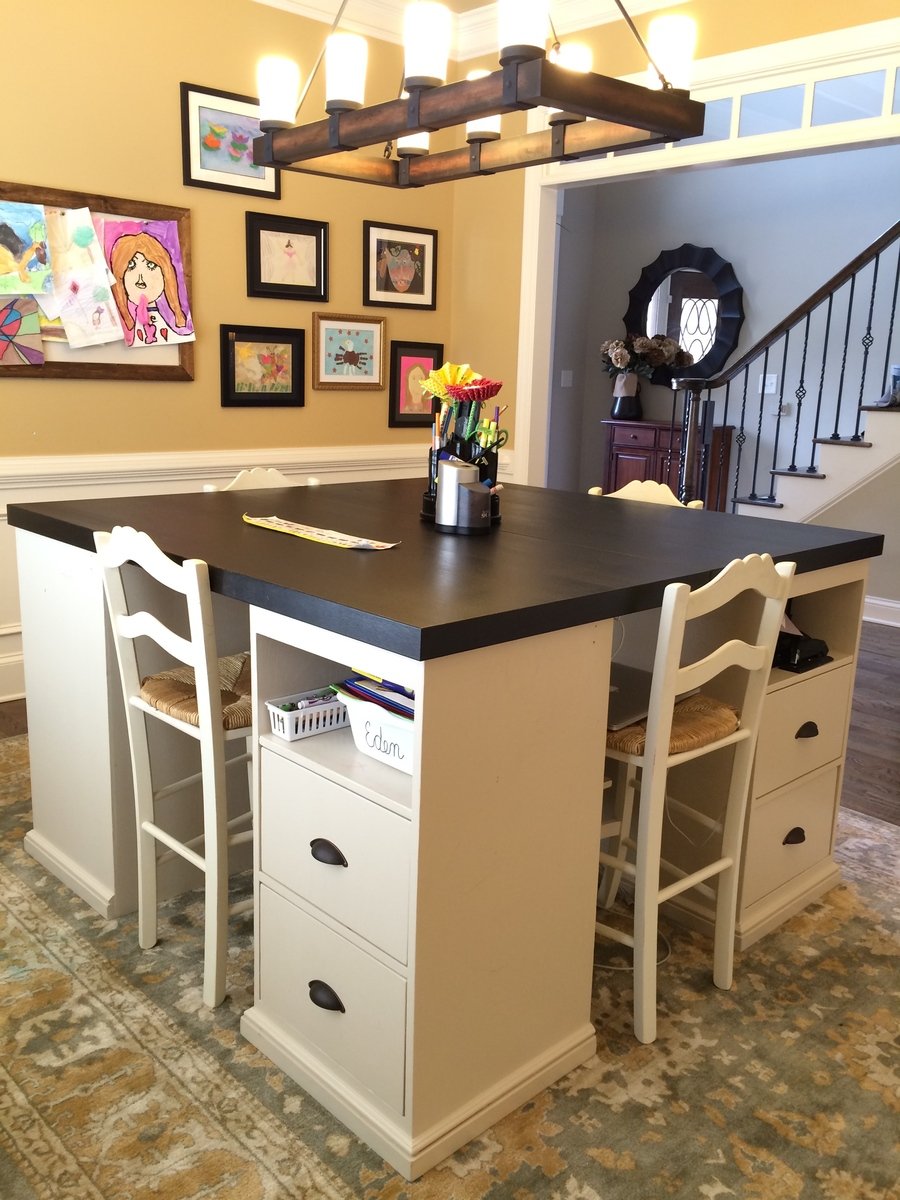
I really liked the PB mega desk, but I didn't want to spend $1600 on it. After seeing someone's post here (a couple years ago...) asking for plans on that desk, I decided to do it myself. I took these two plans and made 4 base units. They are 18" square at the top and 34" tall. I used 2 IKEA table tops connected underneath for the top, to make a total height of 36" - counter stool height. I constructed them a little differently than the plans, but no matter how you make them, the idea is the same. The plan is to take them apart and make 2 desks once everyone is too old and cool to do homework/artwork together.

Mon, 03/16/2015 - 20:39
this is really awesome! What a cool work area :)

Sun, 08/02/2015 - 11:39
Where did you get the chairs to complete your project? And how much were they?
Sat, 08/15/2015 - 04:33
Just seeing your comment...sorry for the delay! I got the stools and the light fixture at a Ballard Backroom (outlet) store near me. 3 of the stools ended up being about $40 each with the sale they had at the time, and the 4th was $60? - bought at a later time than the first 3.
Sun, 08/30/2015 - 13:54
Could we get more detail on how this was built? The base units, for instance.
Thanks!
Wed, 11/04/2015 - 07:40
How did you connect the table tops from the bottom so that the tables were secure together? I'm curious what's the best way to do this. Since two of the four seats will be where the seam is, I want to make sure I secure it properly so it's not wobbly. Thanks so much.
Sat, 01/09/2016 - 05:06
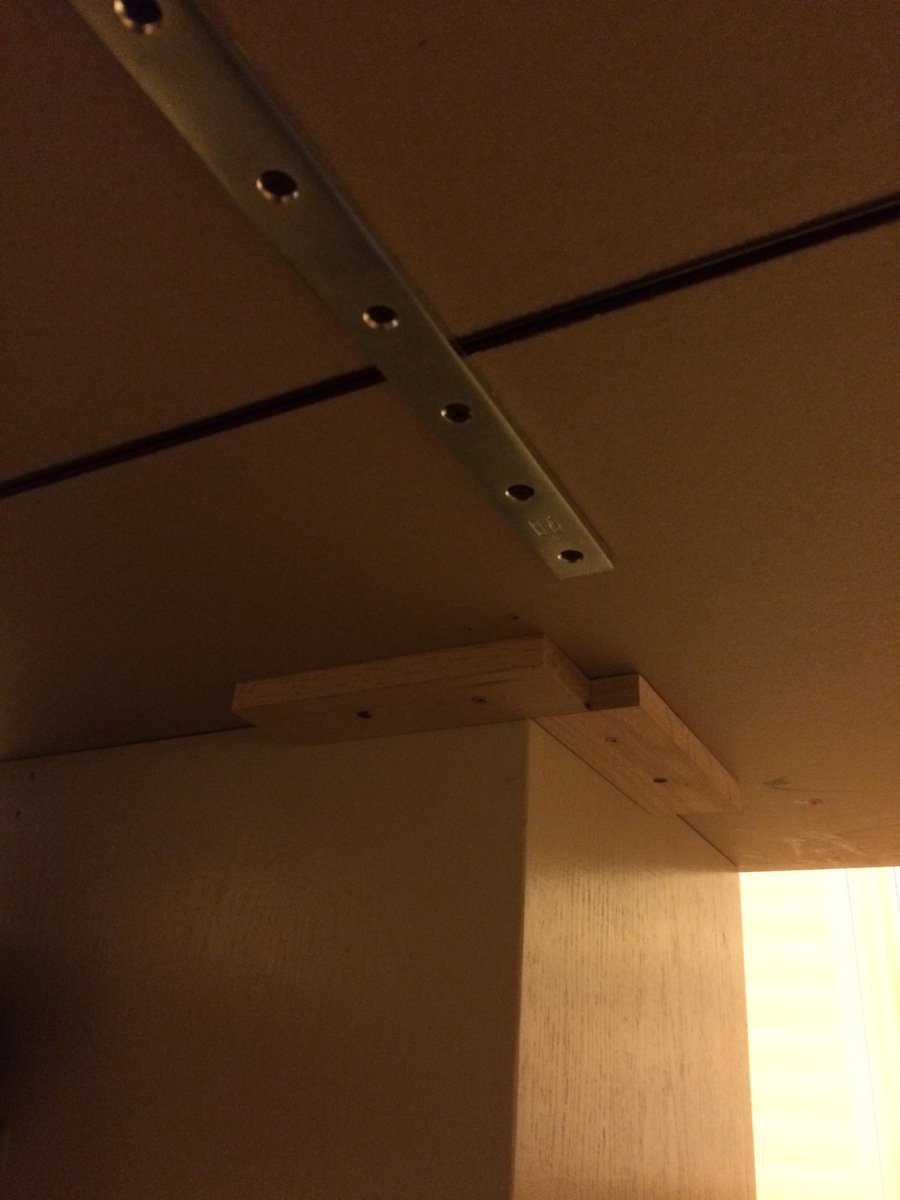
I'm just seeing these latest comments for the first time, so you may have long finished this project already! The tops were surprisingly sturdy but I did reinforce them. I placed the tops on the floor upside down and screwed some metal brackets (about 12" long each) across the joint in four places. I just screwed them in through holes already in the brackets. This wasn't the most stable because those tops are particle board and don't hold screws very well... But since it was already pretty sturdy, I figured it would do. It has been fine, even with standing on the top (kids who get up there and me hanging the light fixture above).
Once the tops were joined, I placed the bases so there was about a 1" overhang on the top. To hold the top in place, I used small pieces of wood screwed to the underside of the top at the inside corner to act as a placement stop. The top is pretty big and heavy even though they are IKEA tops, so they don't have a tendency to move or slide at all anyway. I'm going to try to figure out how to post another picture of the braces and corner stops...we'll see if I can do it! Let me know if you have any more questions...again, sorry I didn't see this in a more timely manner!
Sat, 01/02/2016 - 05:55
Is the photo above the Pottery Barn version or your product result? I'm trying to figure out the dimensions for the drawer and shelf configurations. Thanks! BTW, I'm totally addicted to your style and personality...my husband loves the productivity inspiration I've received. :-)
Sat, 01/09/2016 - 10:17
Hi!
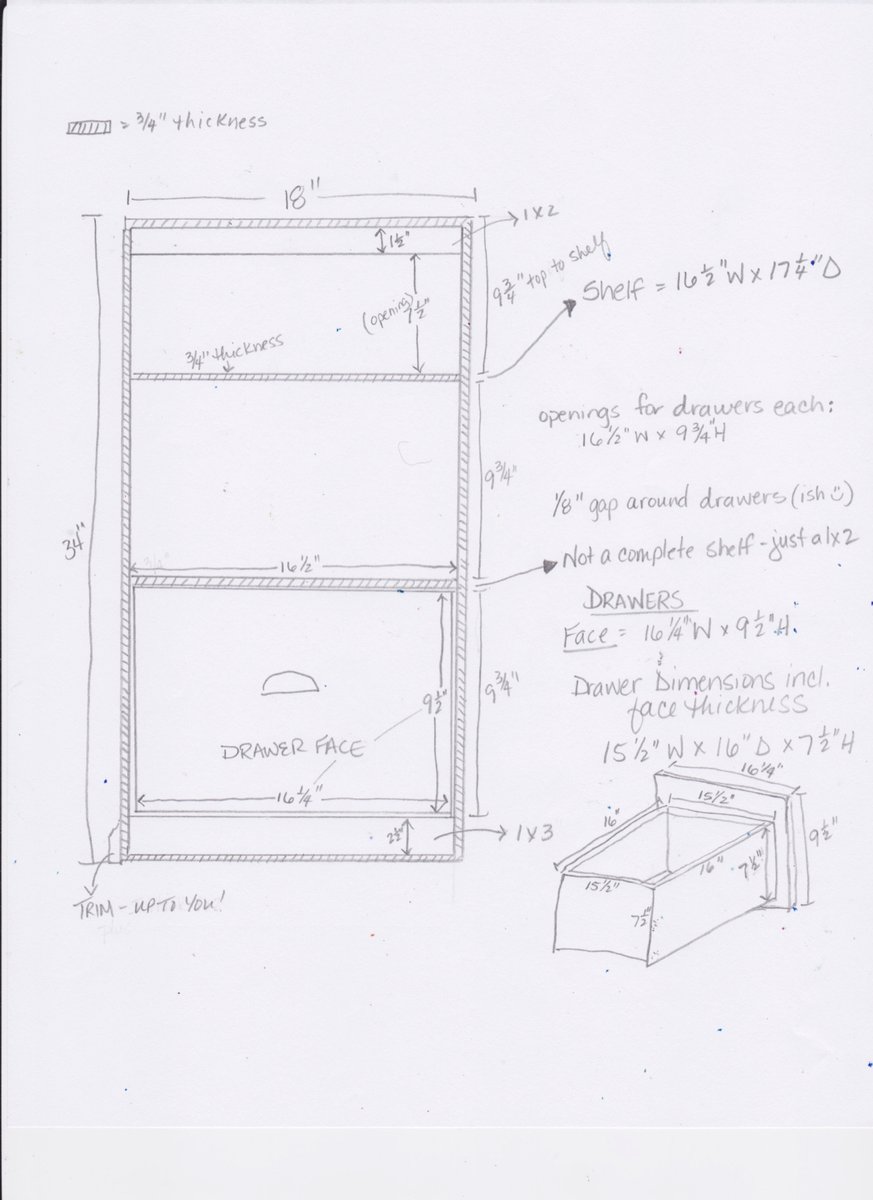
I'm glad you like the desk! The one in the picture is the one I built, not the pottery barn one! My dimensions were a good bit different than the PB desk - square bases instead of rectangular and counter stool height instead of desk/table height. So, I have no idea if I have my plans for this anymore, so I went and measured it again for you!
So each base is 18" x 18" square and 34" high so that with the 2" top the total height is 36".
Each base was made of oak plywood that made with 3 sides, a top and a bottom. All edges were rabbit joints (3/8" deep in thickness of boards and probably 3/8" wide - not 100% on width of rabbits). It's kind of a pain to do rabbit joints if you don't have a dado blade for your table saw, so you could use pocket hole screws instead. I glued and nailed these joints with a finish nailer, I believe.
I figured a diagram with measurements would be easier than trying to write descriptions...so I'm adding another pic with the dimensions outlined. Drawing is NOT to scale, so sorry about that! I really need to learn to use SketchUp. Let me know if you have any questions!
Sat, 01/09/2016 - 07:57
Hi!
I'm glad you like the desk! The one in the picture is the one I built, not the pottery barn one! My dimensions were a good bit different than the PB desk - square bases instead of rectangular and counter stool height instead of desk/table height. So, I have no idea if I have my plans for this anymore, so I went and measured it again for you!
So each base is 18" x 18" square and 34" high so that with the 2" top the total height is 36".
Each base was made of oak plywood that made with 3 sides, a top and a bottom. All edges were rabbit joints (3/8" deep in thickness of boards and probably 3/8" wide - not 100% on width of rabbits). It's kind of a pain to do rabbit joints if you don't have a dado blade for your table saw, so you could use pocket hole screws instead. I glued and nailed these joints with a finish nailer, I believe.
I figured a diagram with measurements would be easier than trying to write descriptions...so I'm adding another pic with the dimensions outlined. Drawing is NOT to scale, so sorry about that! I really need to learn to use SketchUp. Let me know if you have any questions!
Wed, 06/22/2016 - 15:26
Can you buy the bases from ikea? or did you build them from scratch?
Thu, 07/28/2016 - 14:13
No you can't buy them from Ikea. I bought the table tops from Ikea, but I built the bases. The dimensions for the bases are in one of the additional pictures with the post if you want to see them!
Mon, 10/10/2016 - 07:41
What are the total dimensions of the table top? Thinking of building something like this, but want to make sure it will fit in my space.
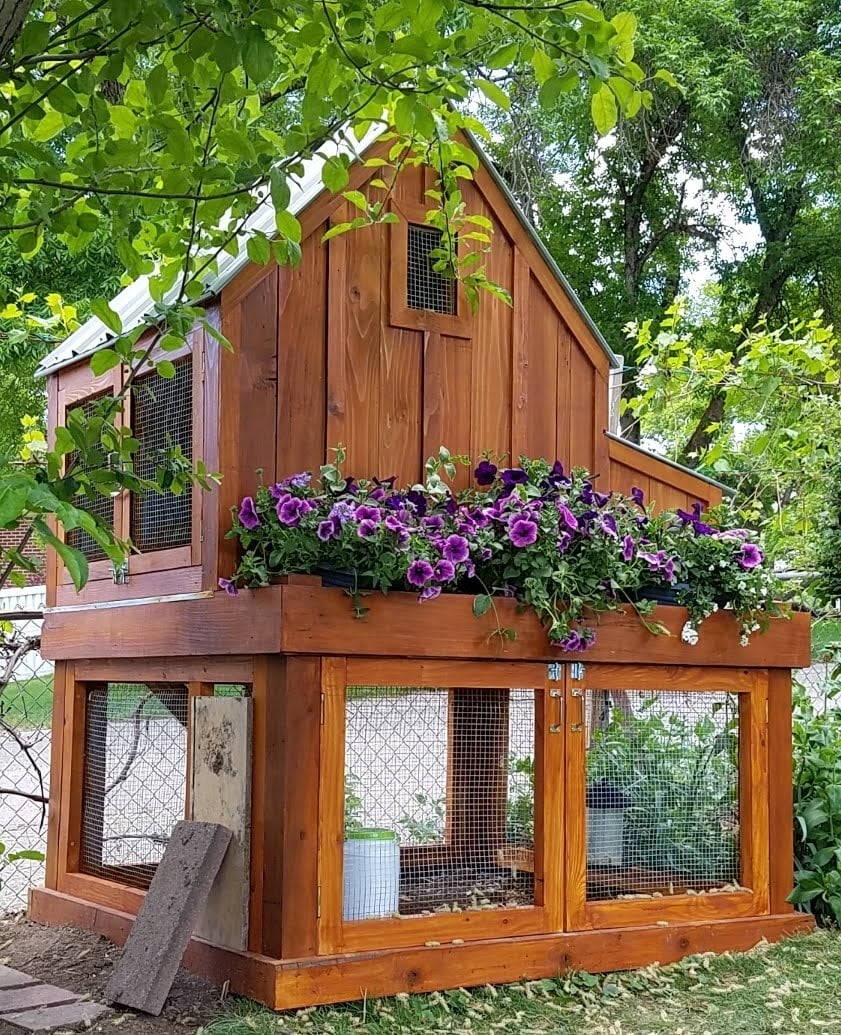
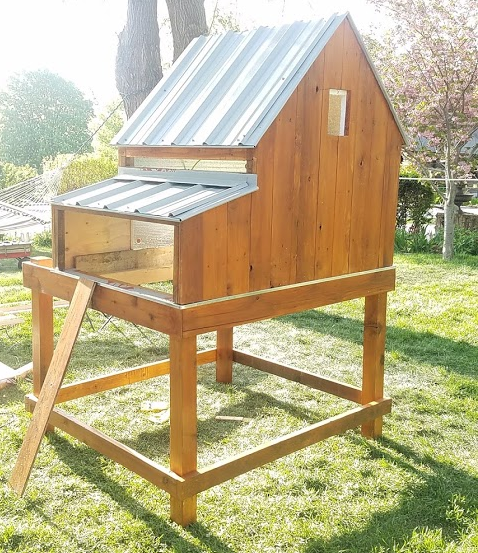
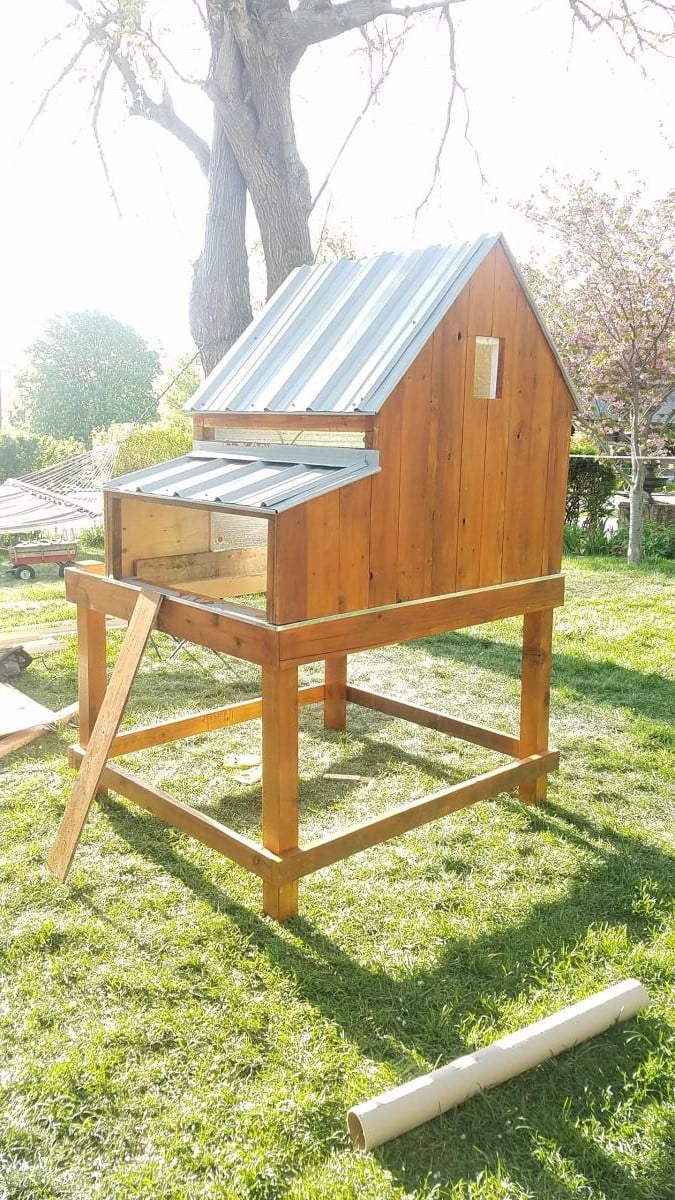
Watts Built on Wolfe Way
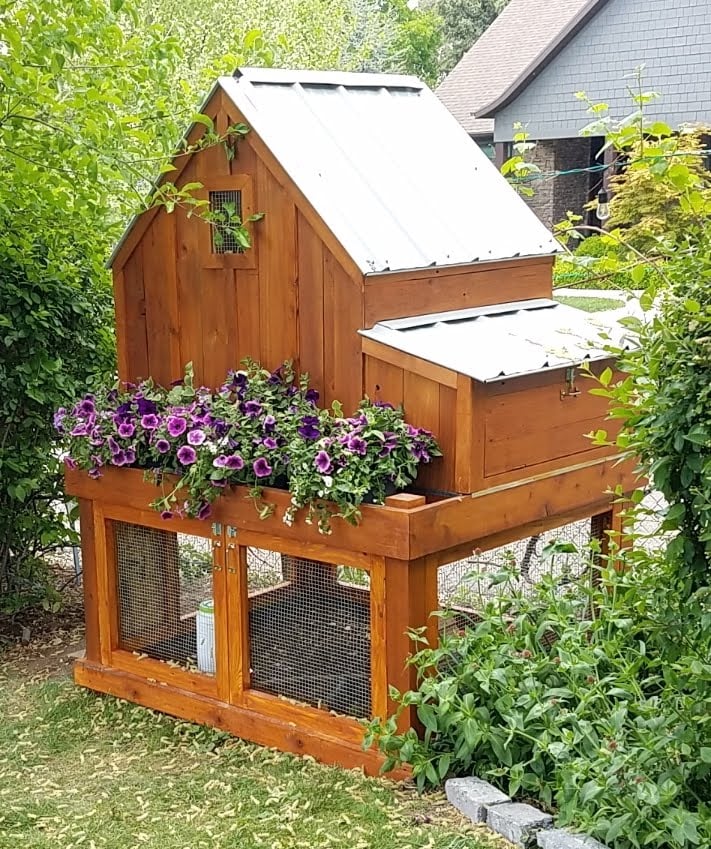
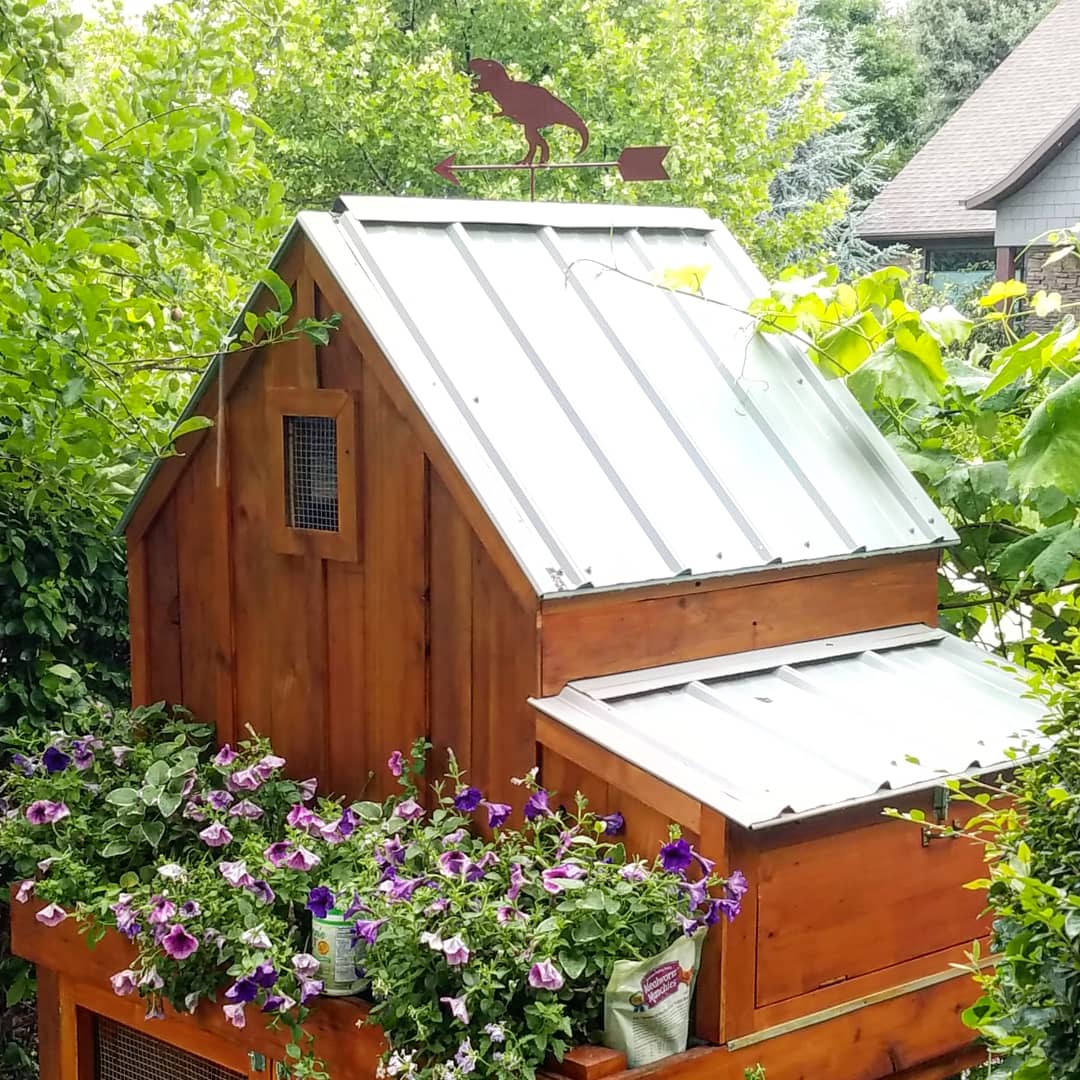
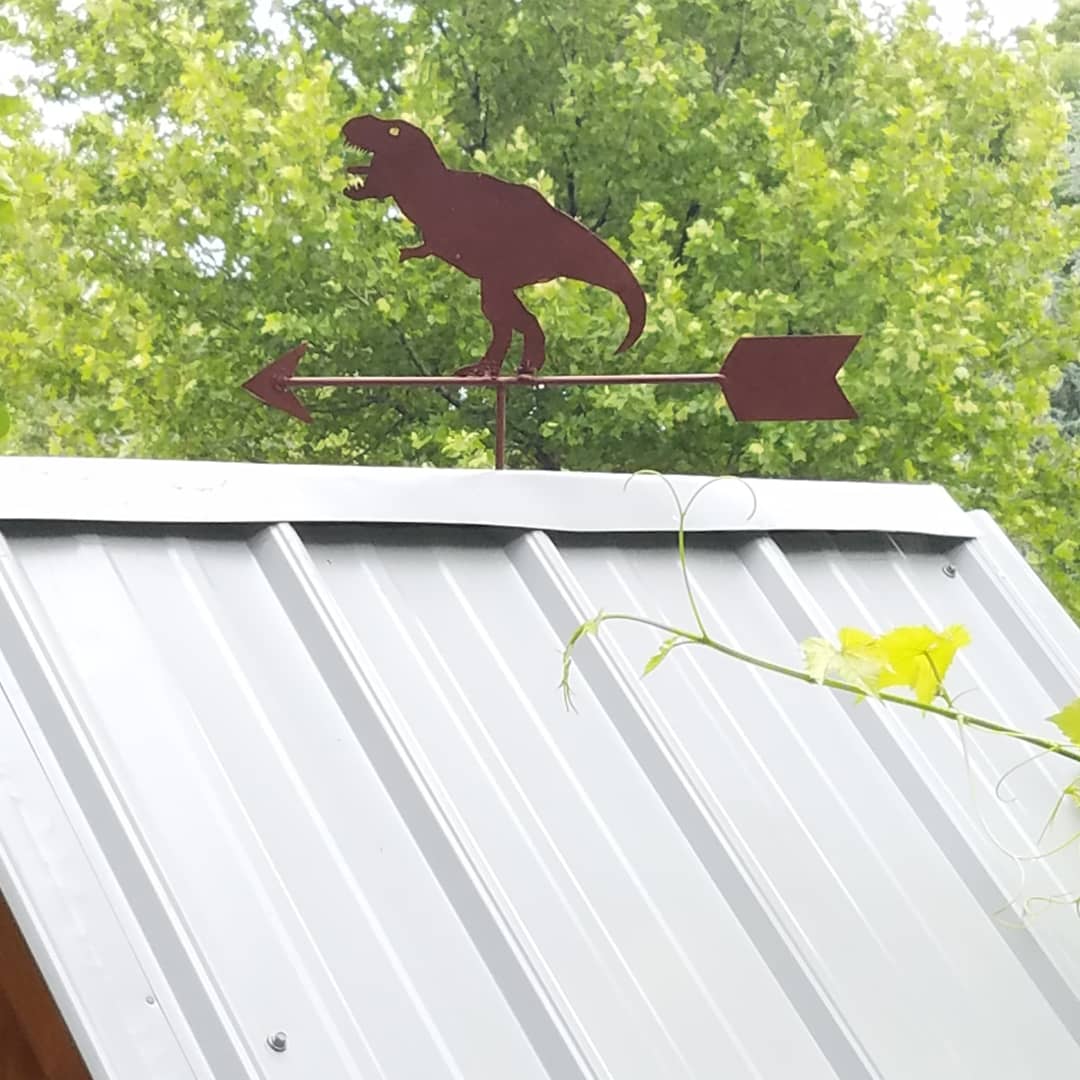
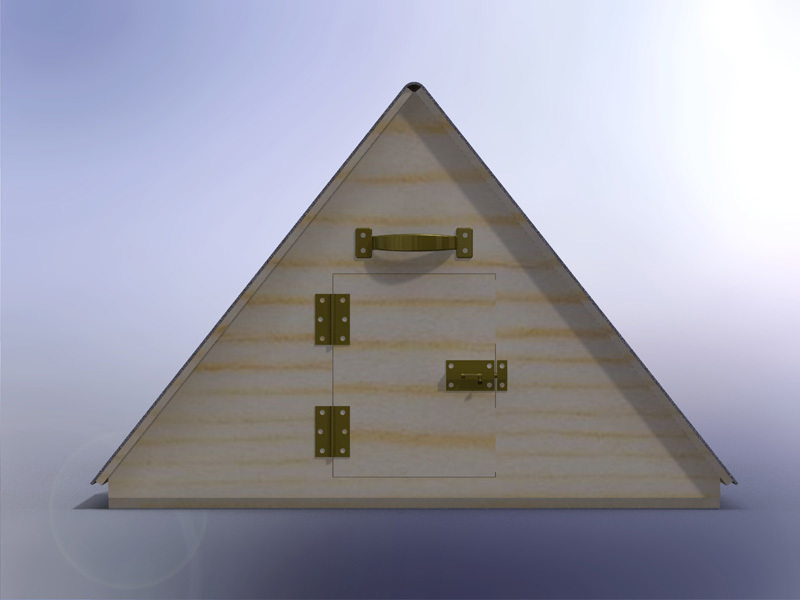
Modified to make the coop bigger and the planter smaller. Added 1" foam insulation on the inside and changed the design to use the "deep litter" method. This means the coop bottom goes all the way to the bottom of the support beam rather than using a removable tray. Added a steel roof with a ridge vent at the top. The chicken run under the coop is lined with buried hardware cloth so no animals can dig under the coop. All hinges are mortised and doors flush mounted. The coop is wired for power for a heat lamp. The planter is lined with a metal tray. The coop can be separated into two pieces so you can move it or rotate the top 180 deg if needed (so you can get to the eggs from the left or right side). Great plans, thanks Ana!

Tue, 05/12/2020 - 15:09
Amazing! Thank you so much for sharing a photo, this is truly beautiful!
Sun, 09/27/2020 - 14:42
Do you have the exact measurements that you used for this one?
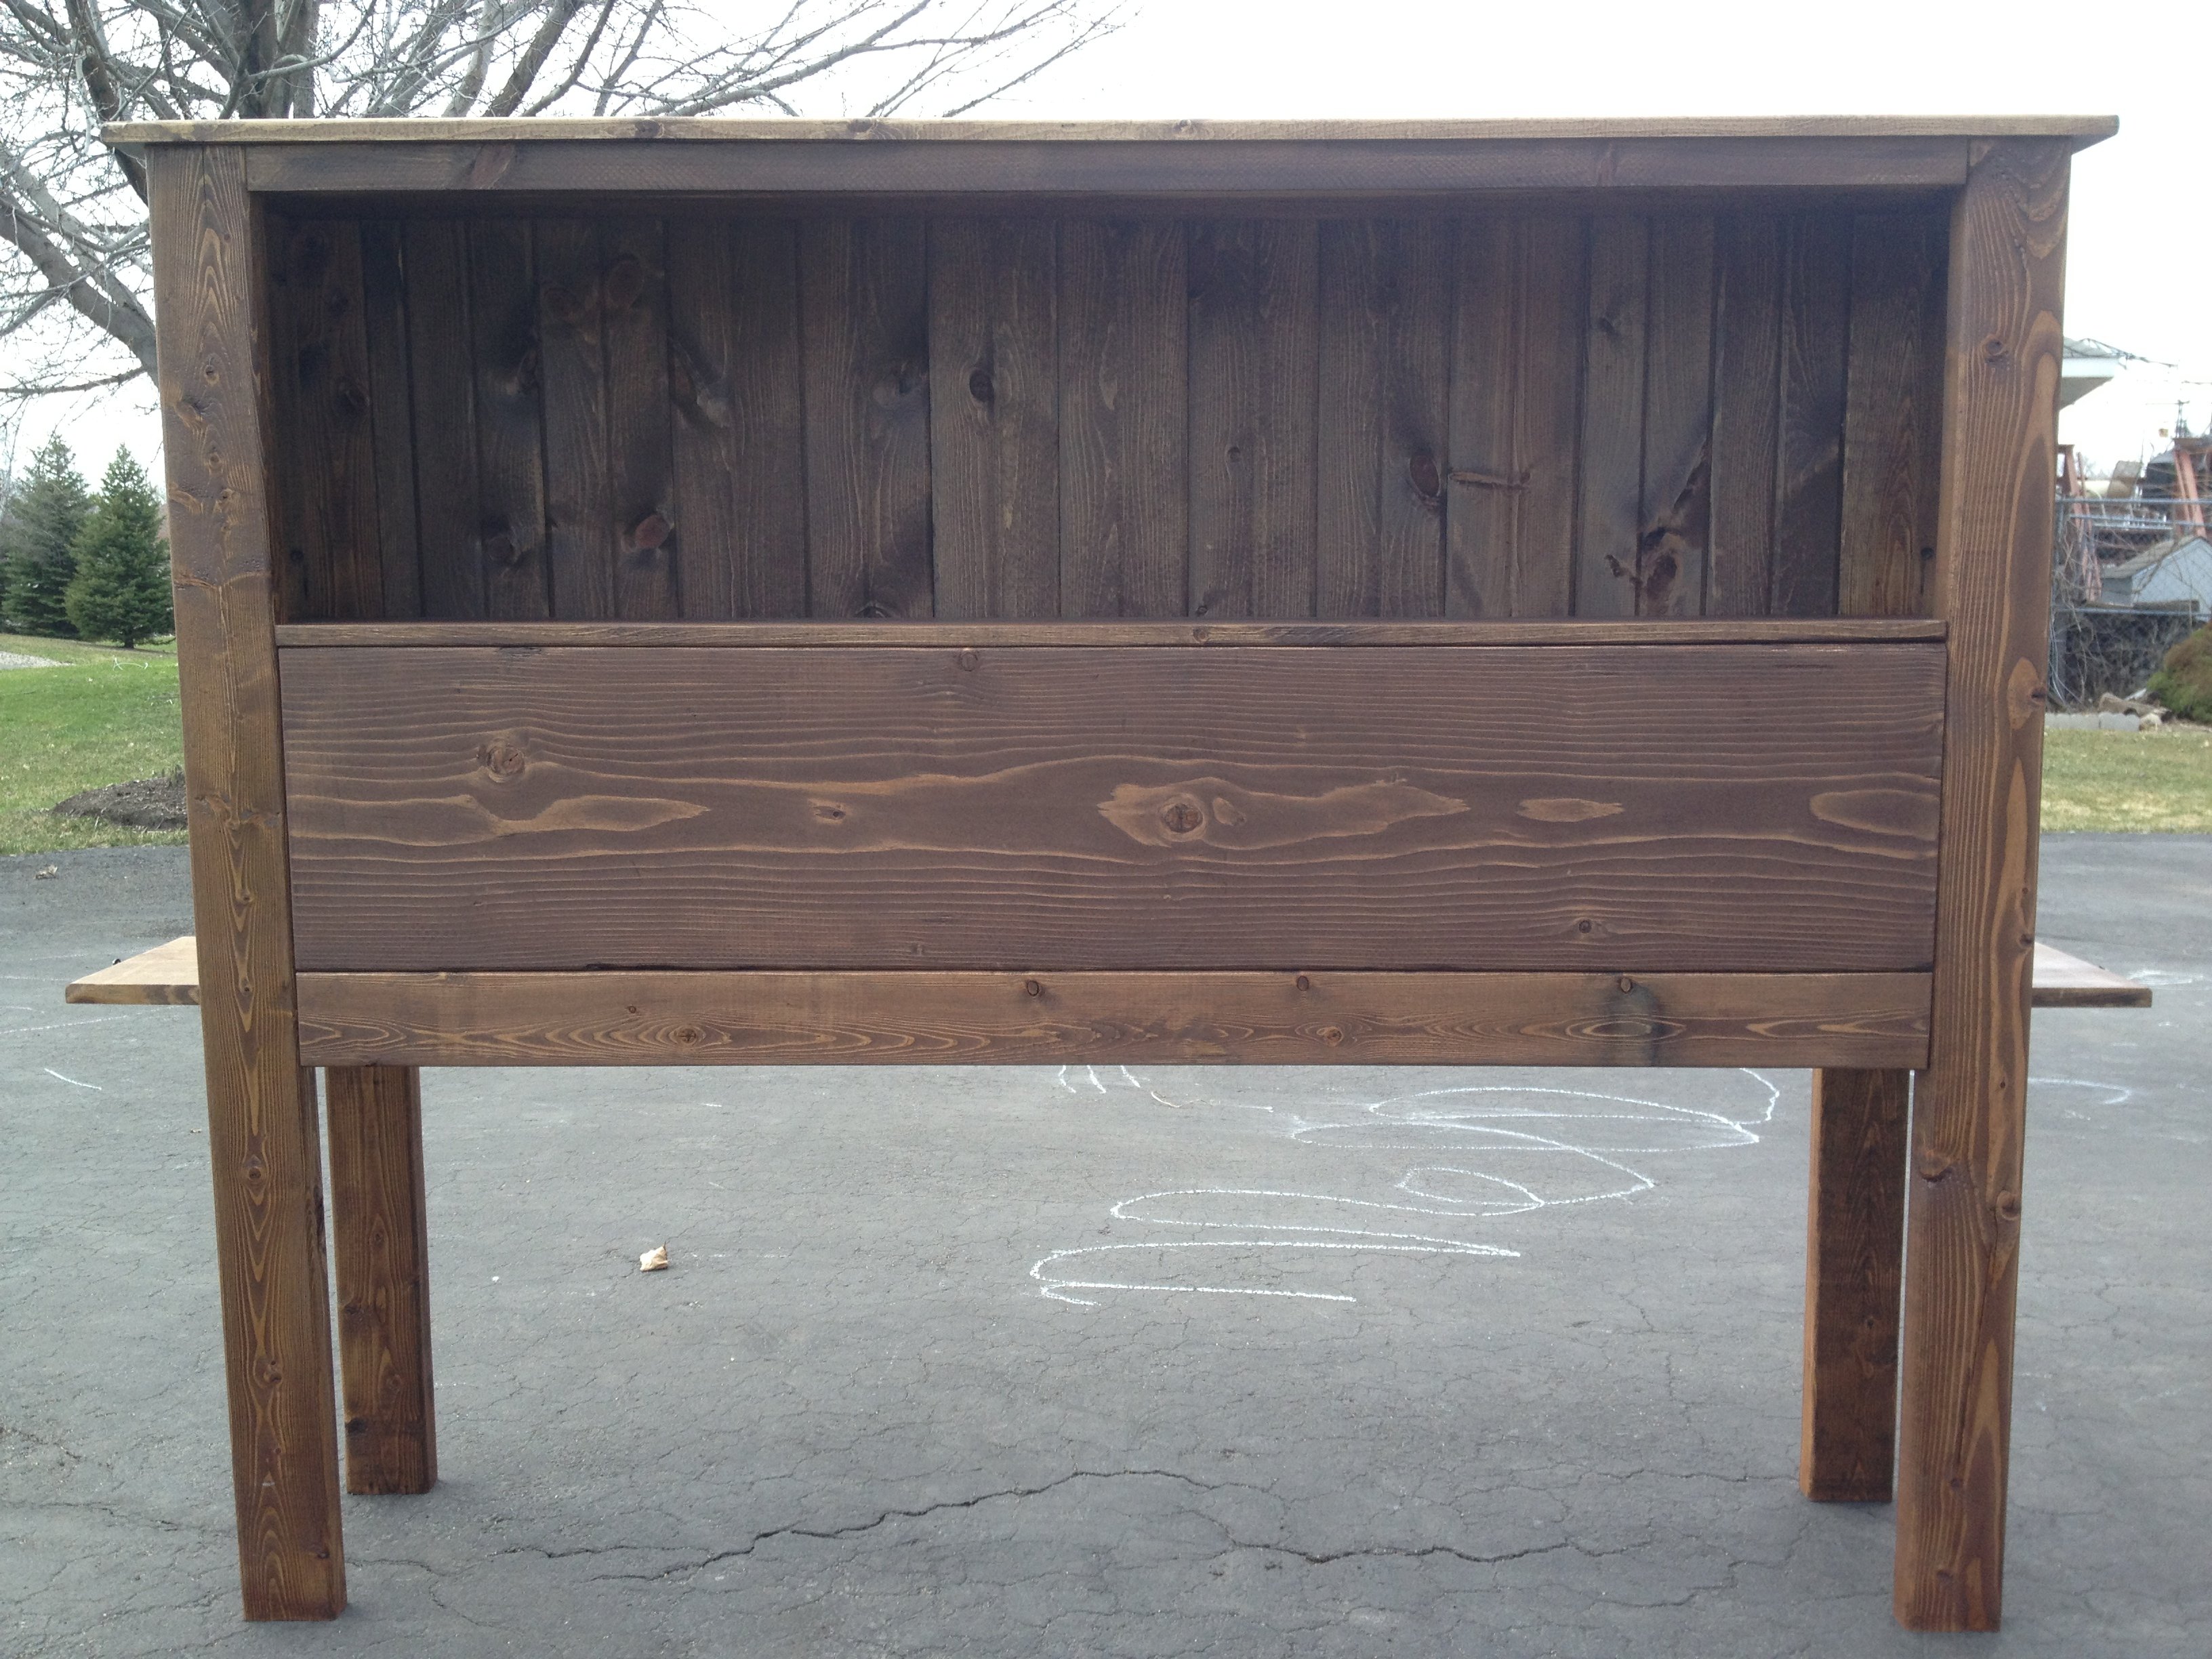
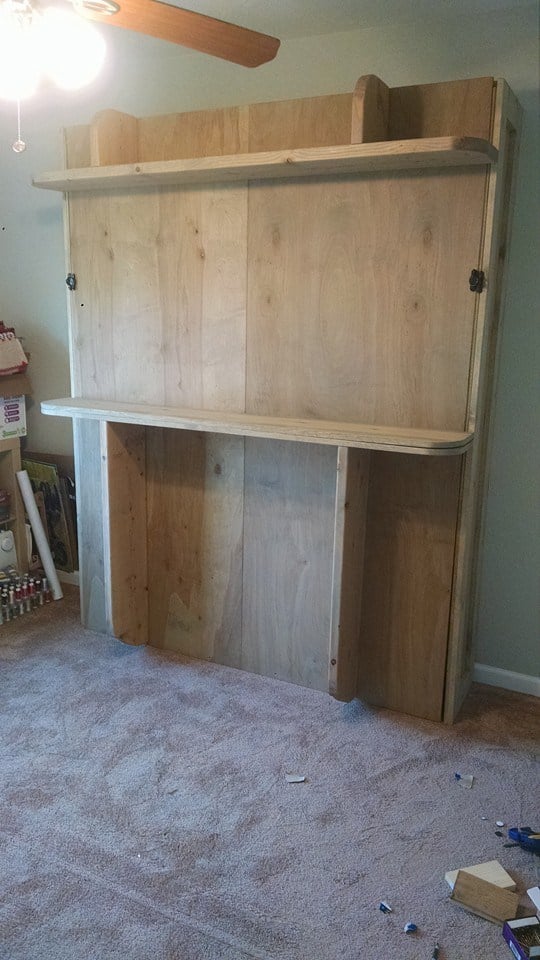
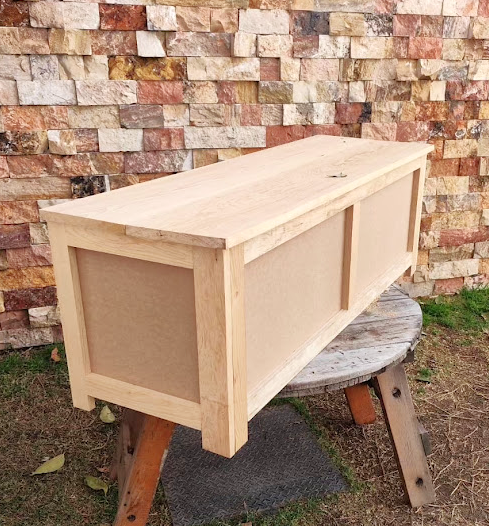
Although I didn't build this from a plan I wanted to be sure and share it as it is because of my experience building from Ana's plans that I felt comfortable giving this a shot.
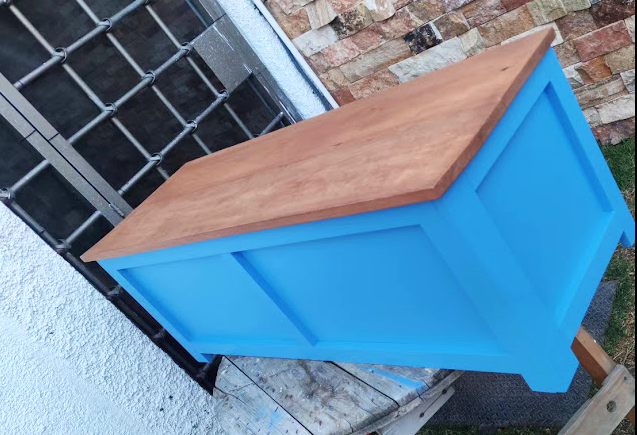
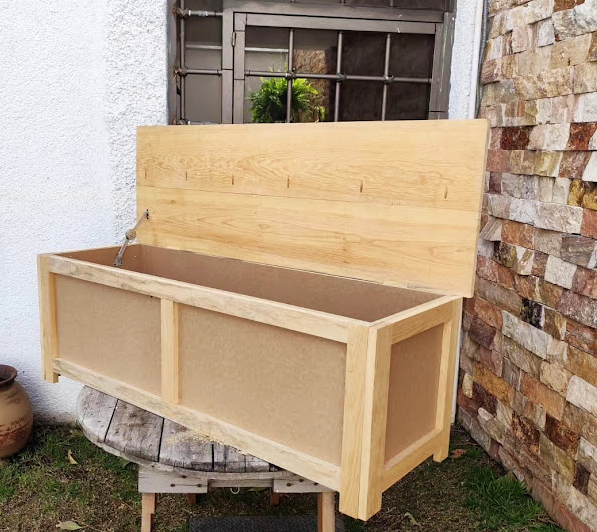
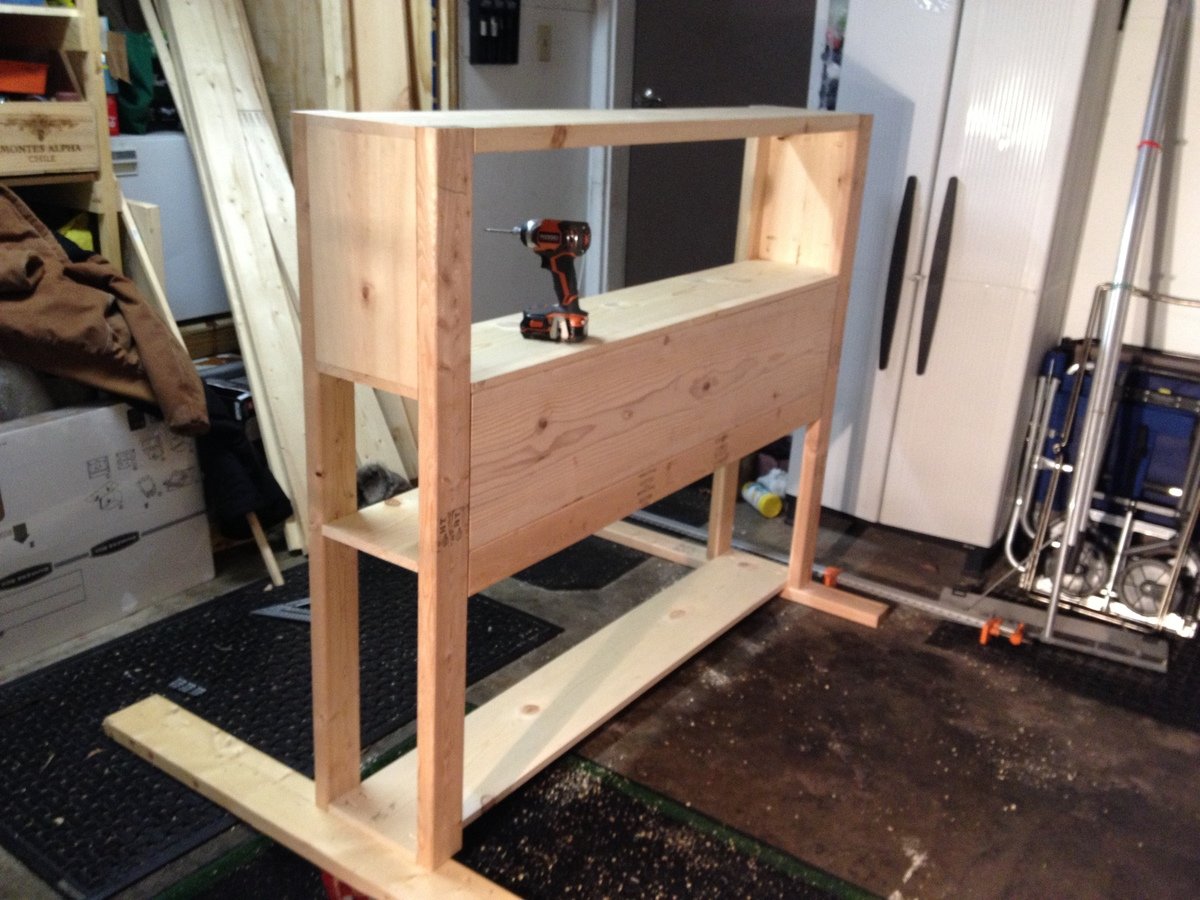
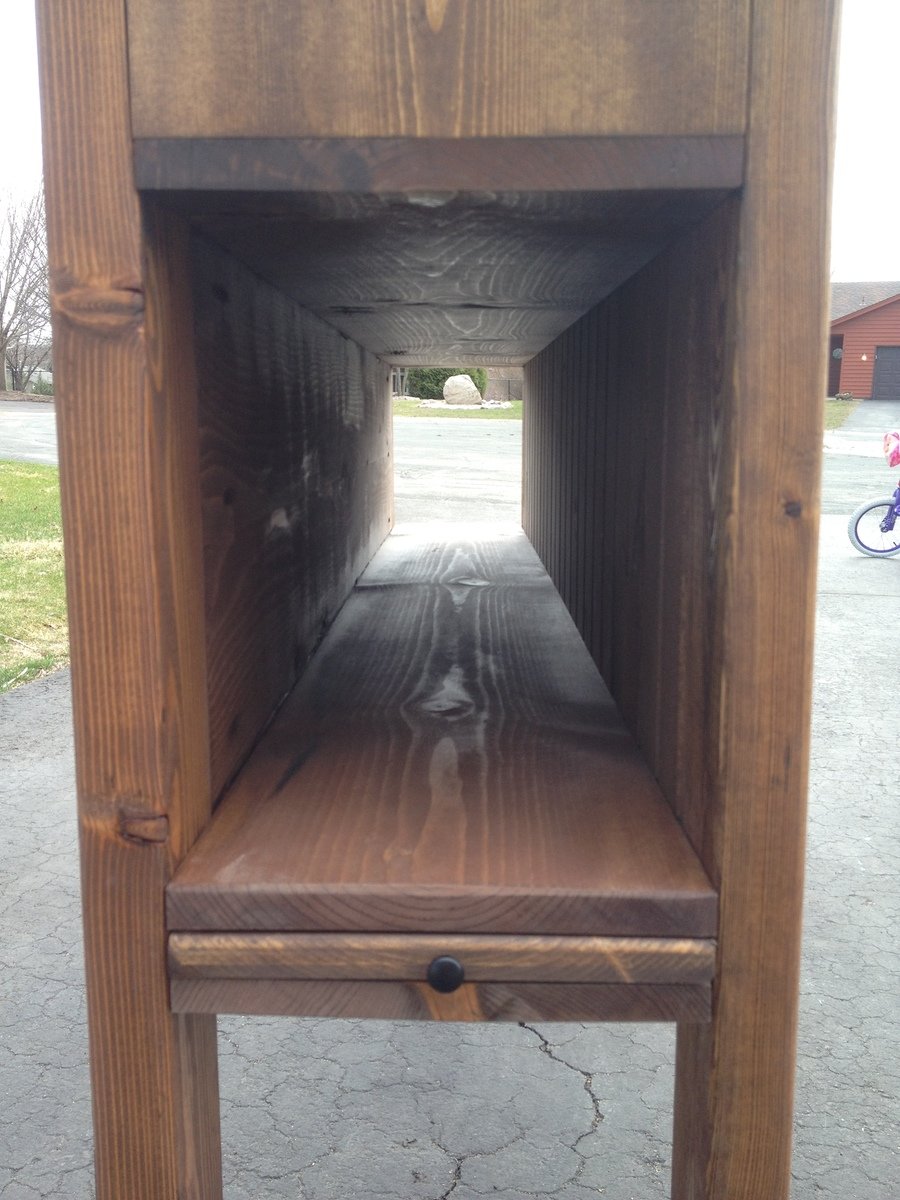
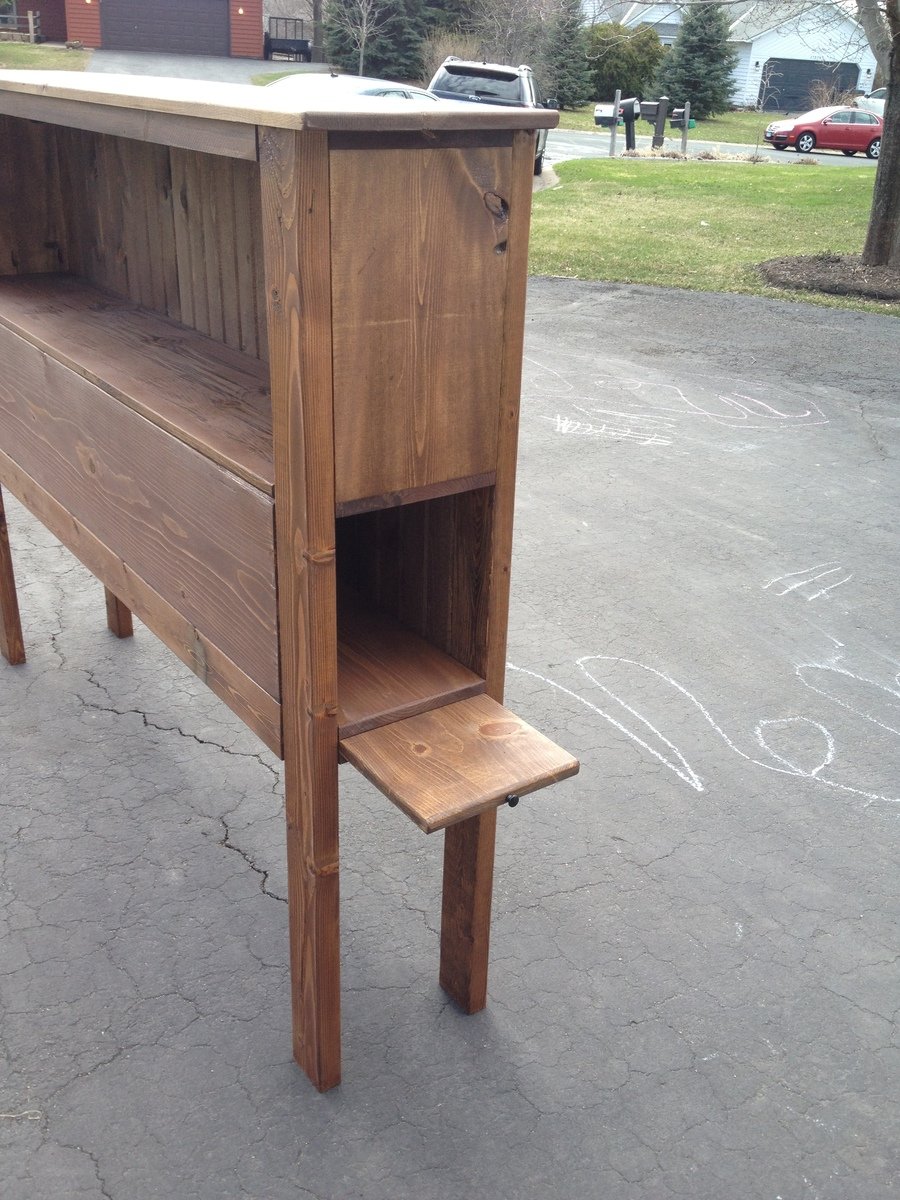
My in-laws were just updated their lake cabin and wanted a storage headboard as space is a premium and it will be the only furniture in the guest rooms. It is unique as it has shelves on either side which can pull out to function as a small night stand, perfect for cell phones, books etc. The back of the piece is tongue and groove knotty pine which for the more rustic look they wanted.
I will probably do things a little different when I build the next headboard but overall I am satisfied with the end result. I chose not to do a lower storage area, mainly to keep the cost down. It could be done very easily but this piece is already very heavy and that there is plenty of storage.
Sun, 01/17/2021 - 15:15
Is it possible to get the plans for this headboard. My teenage son really wants a head board with storage.

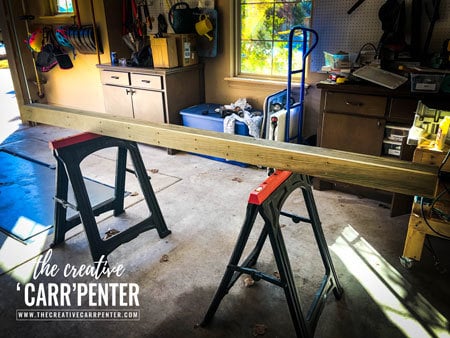
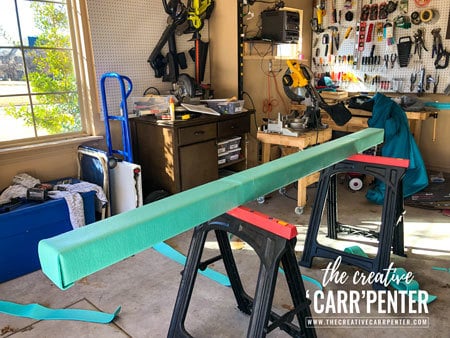
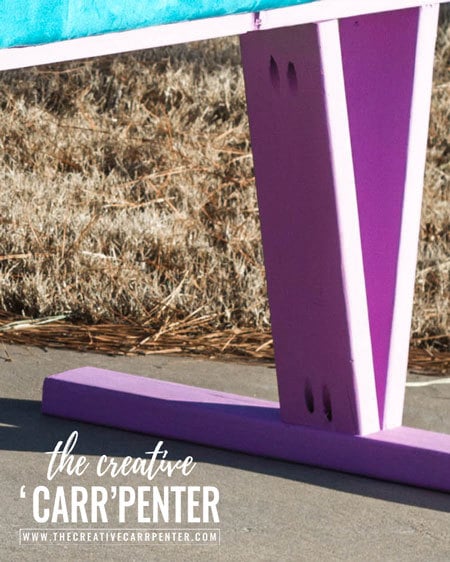
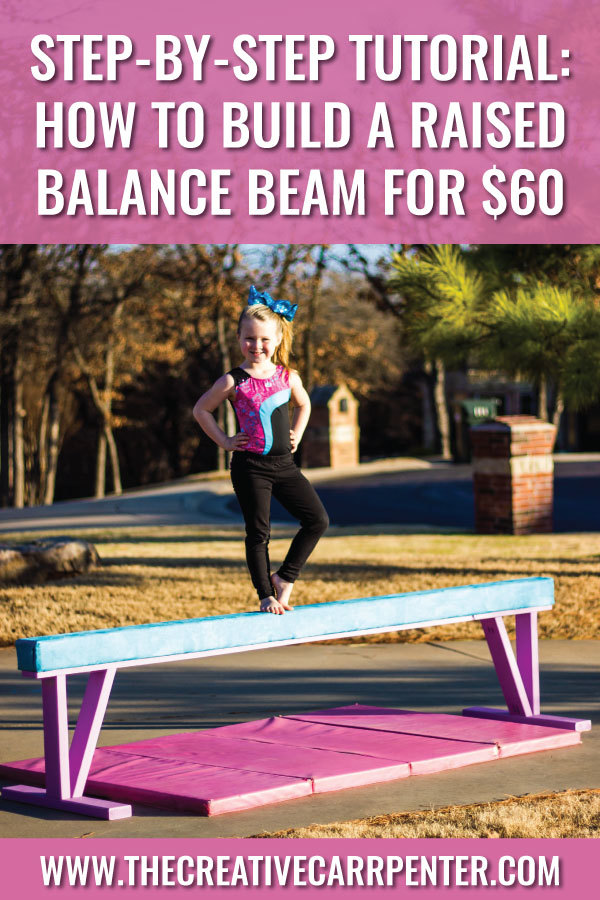
From watching Olympic gymnast Simone Biles on the television to running, flipping and twirling all around our living room — my girls LOVE everything gymnastics. Both girls began competing with a local gymnastics club. Now that my oldest has moved up and is pretty serious about practicing her beam handstands and dismounts, she begged me to build a raised balance beam with suede covering so it would have a similar feel to her beam at the gym.
If you can relate to this, or even if you have a new gymnast (like my youngest in the pic above) wanting to improve their skills at home, then this comprehensive tutorial on how to build a raised balance beam is for you.
Full plans available on my blog The Creative 'Carr'penter. You can also find and pin this tutorial on Pinterest here.
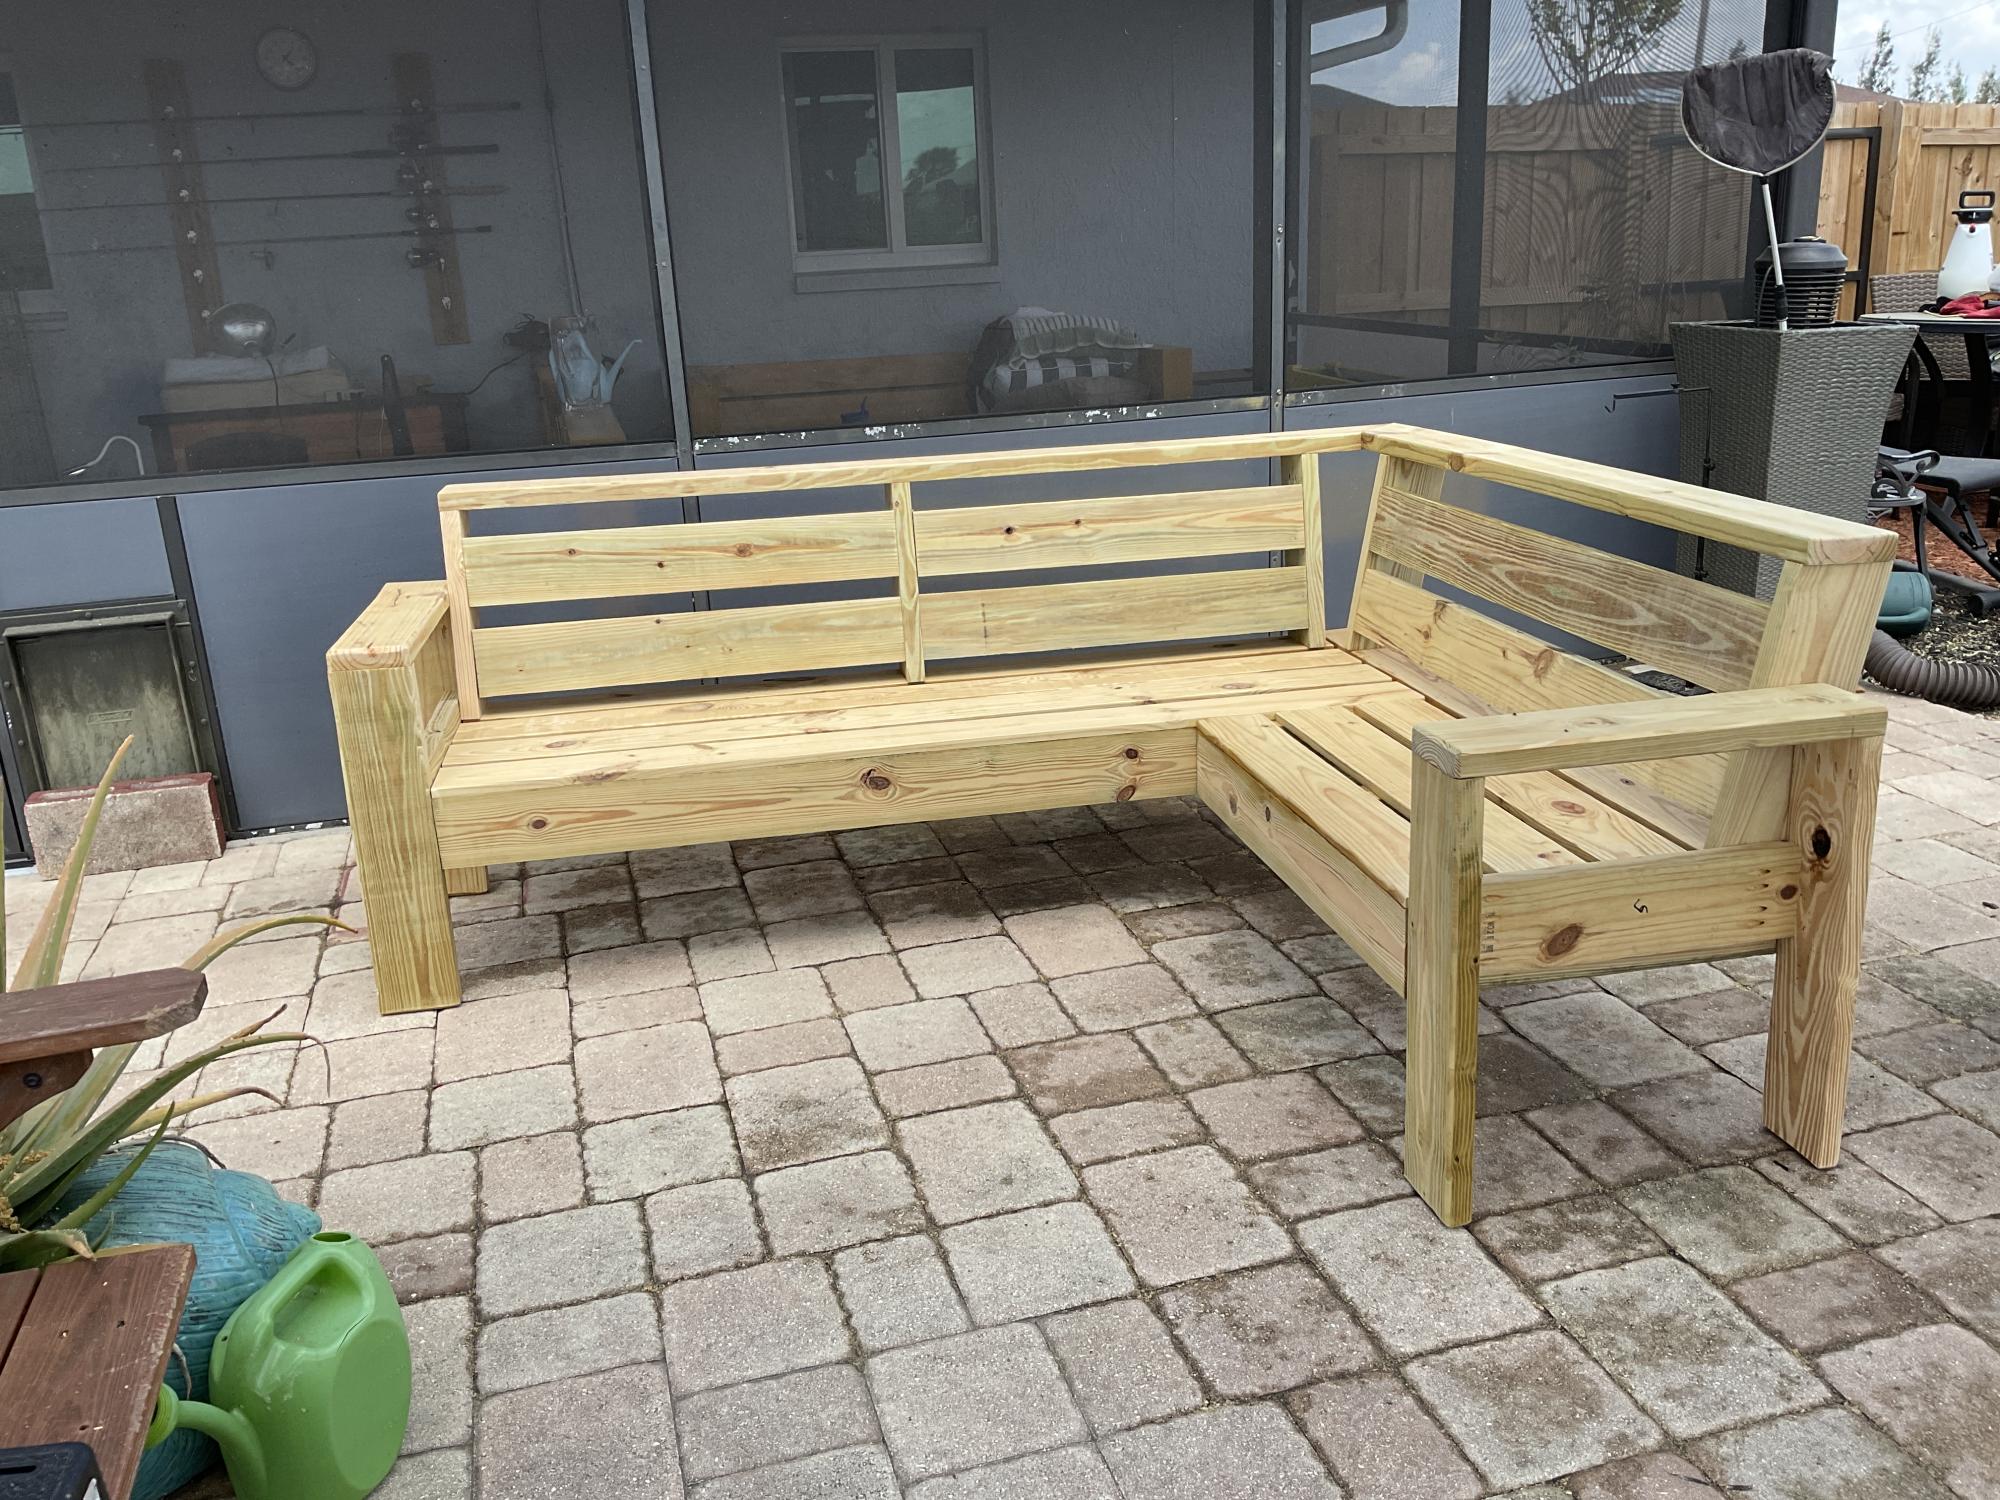
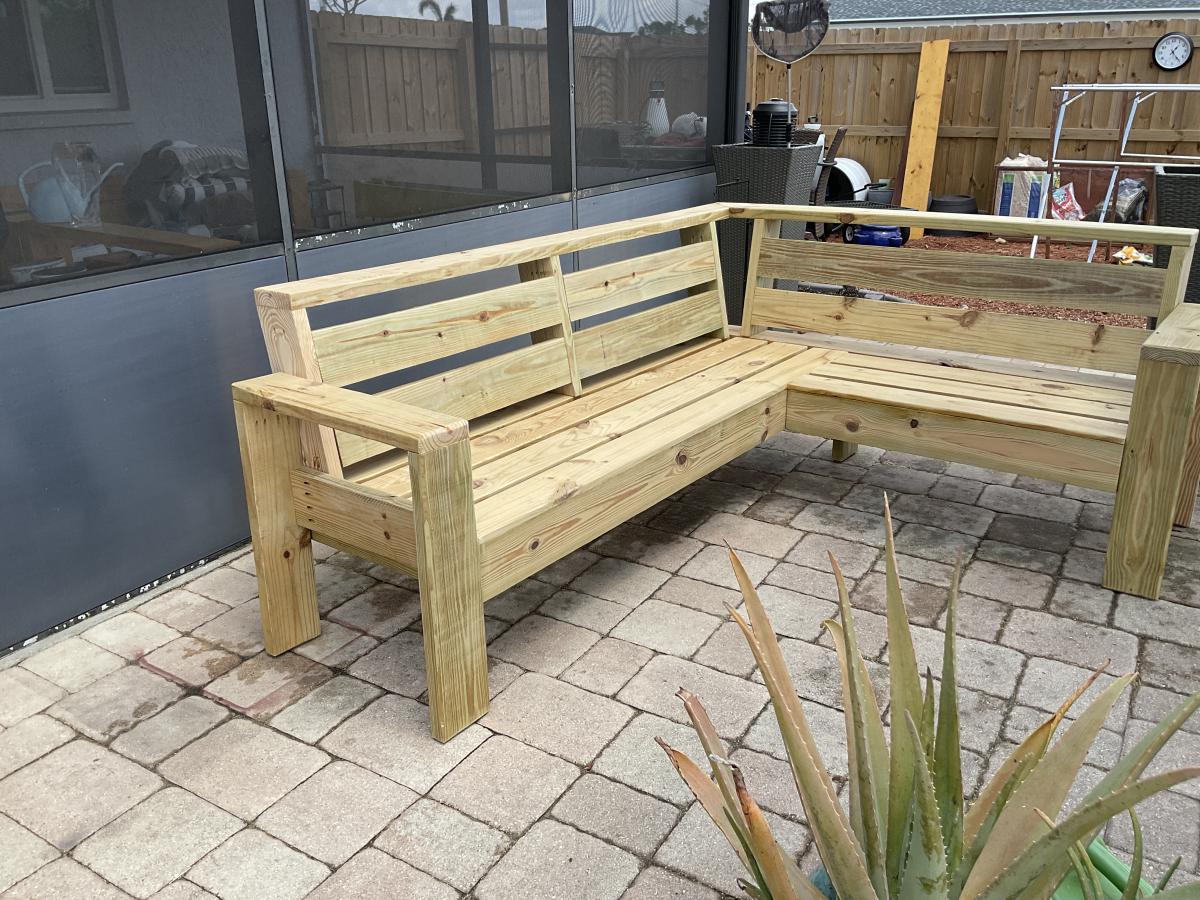
This was my seventh outdoor couch but my first sectional. My very first couches were all inspired by Ana White's plans and I have gotten so much better with my skills that I building other things as well. Thanks Ana for all your inspiration!

I used the basic framing plan for the project, but extended roof overhangs, added engineered siding / trim and cedar shake roofing. I put 2x4 bracing on for the platform.


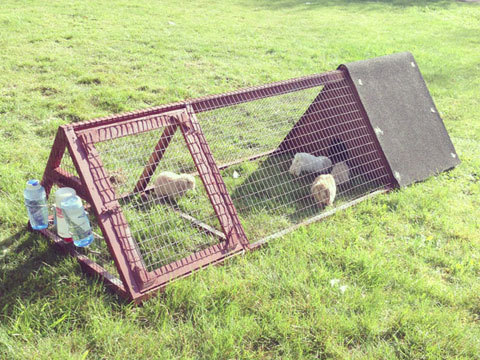
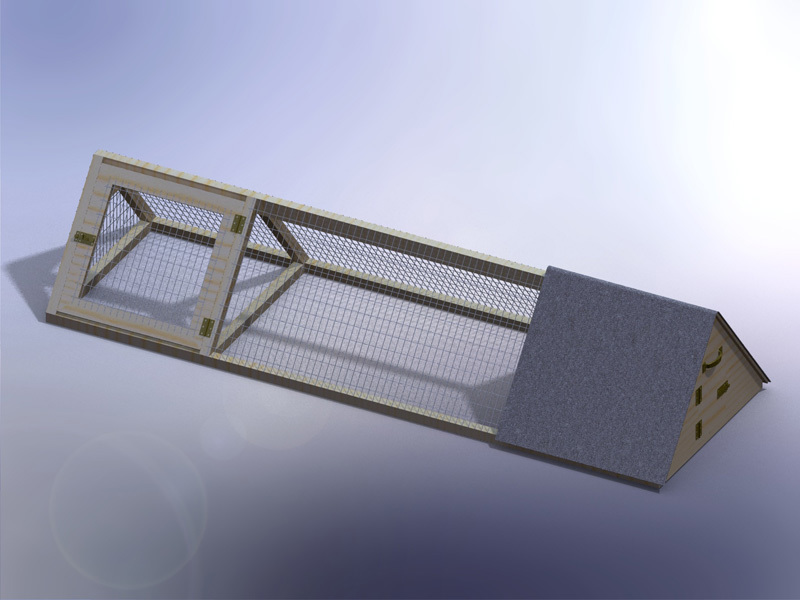
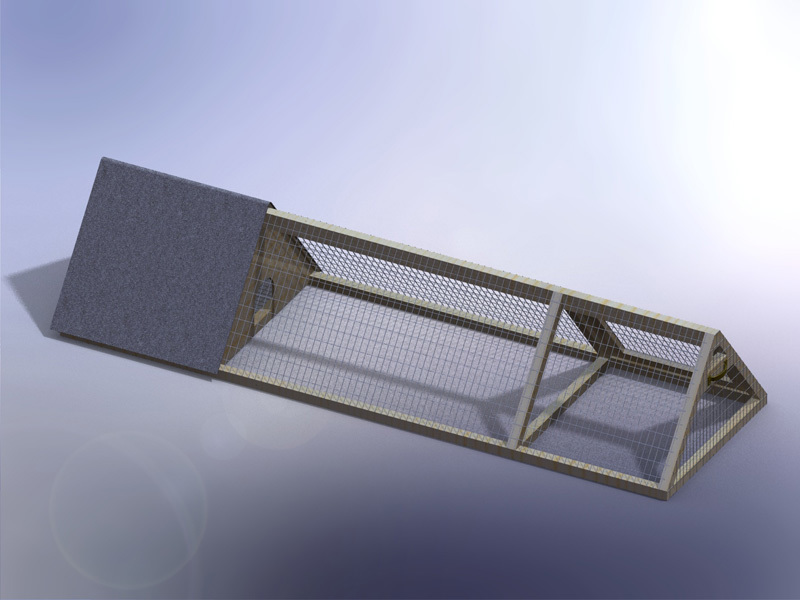
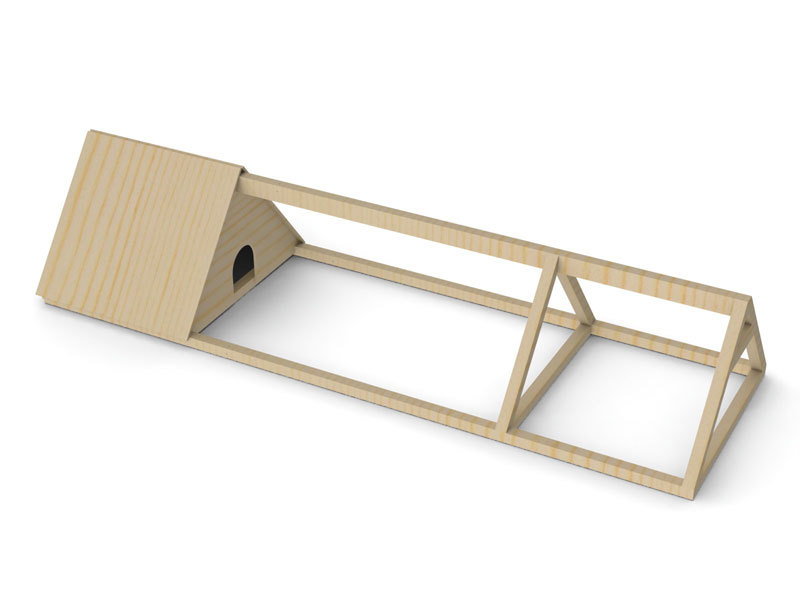
This is a rabbit hutch I created for my kids 5 rabbits. The thing that makes this hutch really nice is if you have a large lawn you can just move the hutch a little bit every day and the lawn gets mowed, fertilized and you don't have to worry about cleaning up all the rabbit droppings. I also mounted a rabbit feeder on the inside of the house door to keep the food dry, which has worked really well.
Here is a short blog of all the steps in its construction:
http://design.medeek.com/gallery/RH3080_COPALIS_2013/RH3080_COPALIS_201…

Sun, 05/05/2013 - 01:52
I apologize I haven't got the completed planset up for this project yet but I will try to get it up in the next couple of weeks as well as a very complete materials list. You will need to go to a farm/feed store to get the correct 1"x2" wire and 1/2"x1" wire for the floor. Do not go to Home Depot and use the cow wire they have or the hardware cloth for the floor, neither of which are the correct choice. Home Depot has the lumber but not the wire. If you have any questions or even improvements to my design I would be interested in hearing from you.
Sun, 09/13/2015 - 19:18
Finally got around to uploading the plans. I still need to create a material list for this plan but the basics are there now. We've had rabbits in it for about a year but recently we've tried some guinea pigs and it works great for that as well. The guinea pigs can pretty much live off just the grass and dandelions but you do need to move it daily to give them plenty to eat.
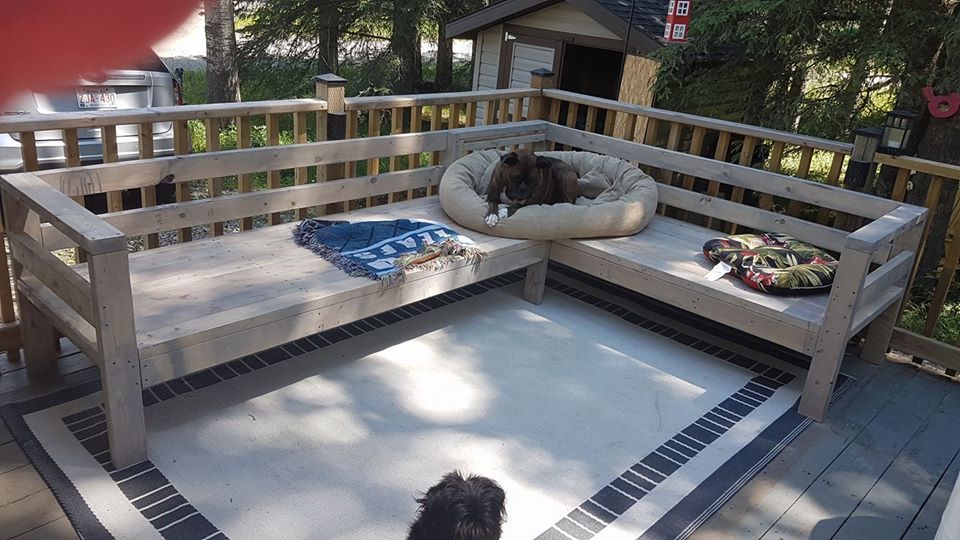
I haven't really done anything like this, came out quite well. I modified the back for what I think is better comfort, added side supports to hold throw pillows in place and added 2 extra 2x4's to seating surfaces. The sofa I built in an afternoon with an extra pair of hands to line things up and hold them in place. The sectional took a little longer to complete as my helper was off building his own couch (after he saw how simple it was to do). I also didn't use a pocket jig (couldn't find one in rural hardware store) but a countersink drill bit for all screw holes.
Fri, 06/28/2019 - 09:39
I love the changes! I wish I thought of them myself.
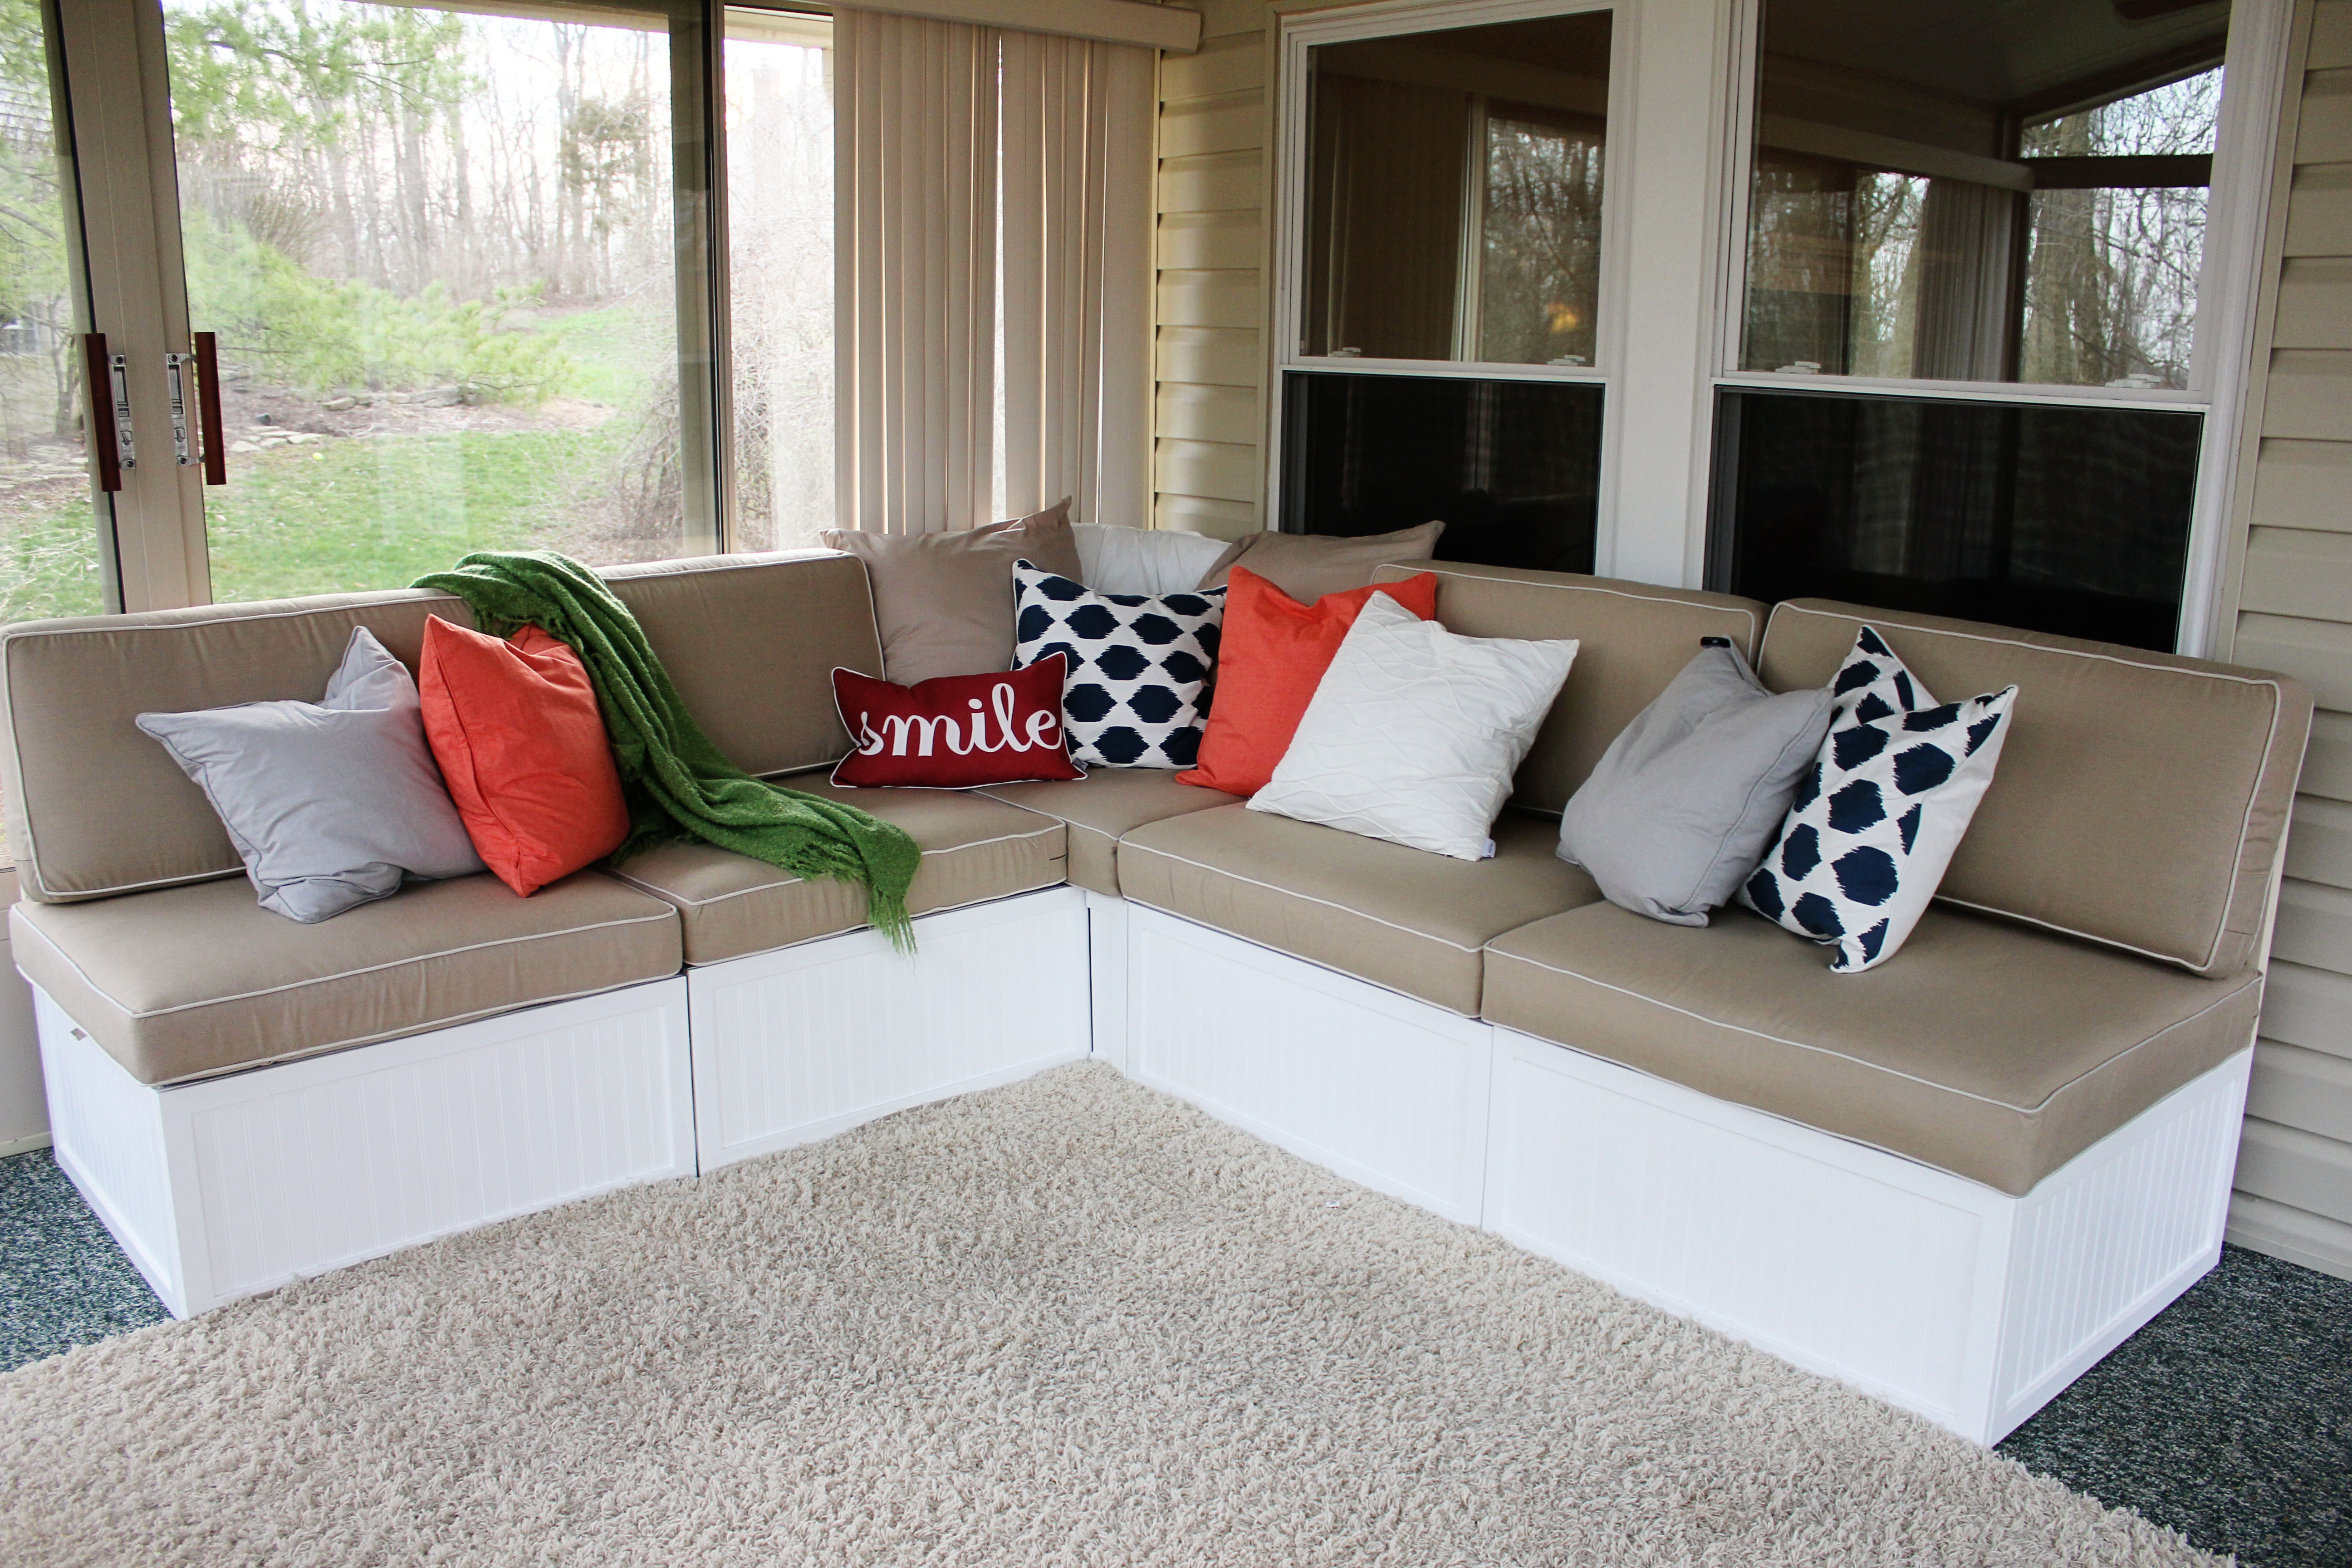
We followed the outdoor sectional plan from Ana Whites blog to create this outdoor sectional. First we bought the cushions and custom built this sectional to fit the cushions. We used 2x4's and the kreg jig for pocket screws, then covered the base in beadboard and some pine trim, gave it a good sanding and a nice paint job.

Fri, 04/12/2013 - 05:46
Thanks! We built the frame according to Ana's design (customized dimensions for our cushions) and then covered the base in bead board and used pine trim around the edges. The cushions are from the Frontgate Outlet in Cincinnati.
Wed, 05/07/2014 - 15:34
Is there a link to the side/corner section of this so I do not have to guess. Thanks.
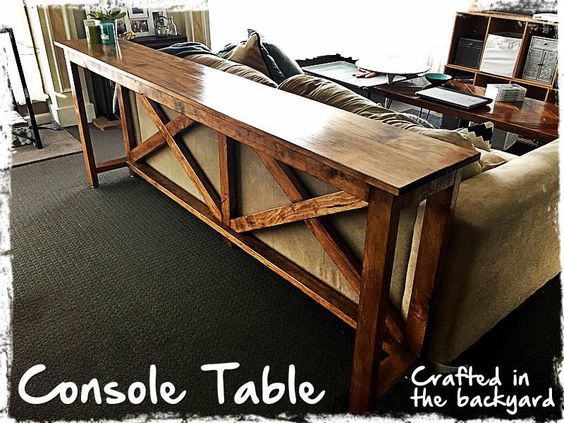
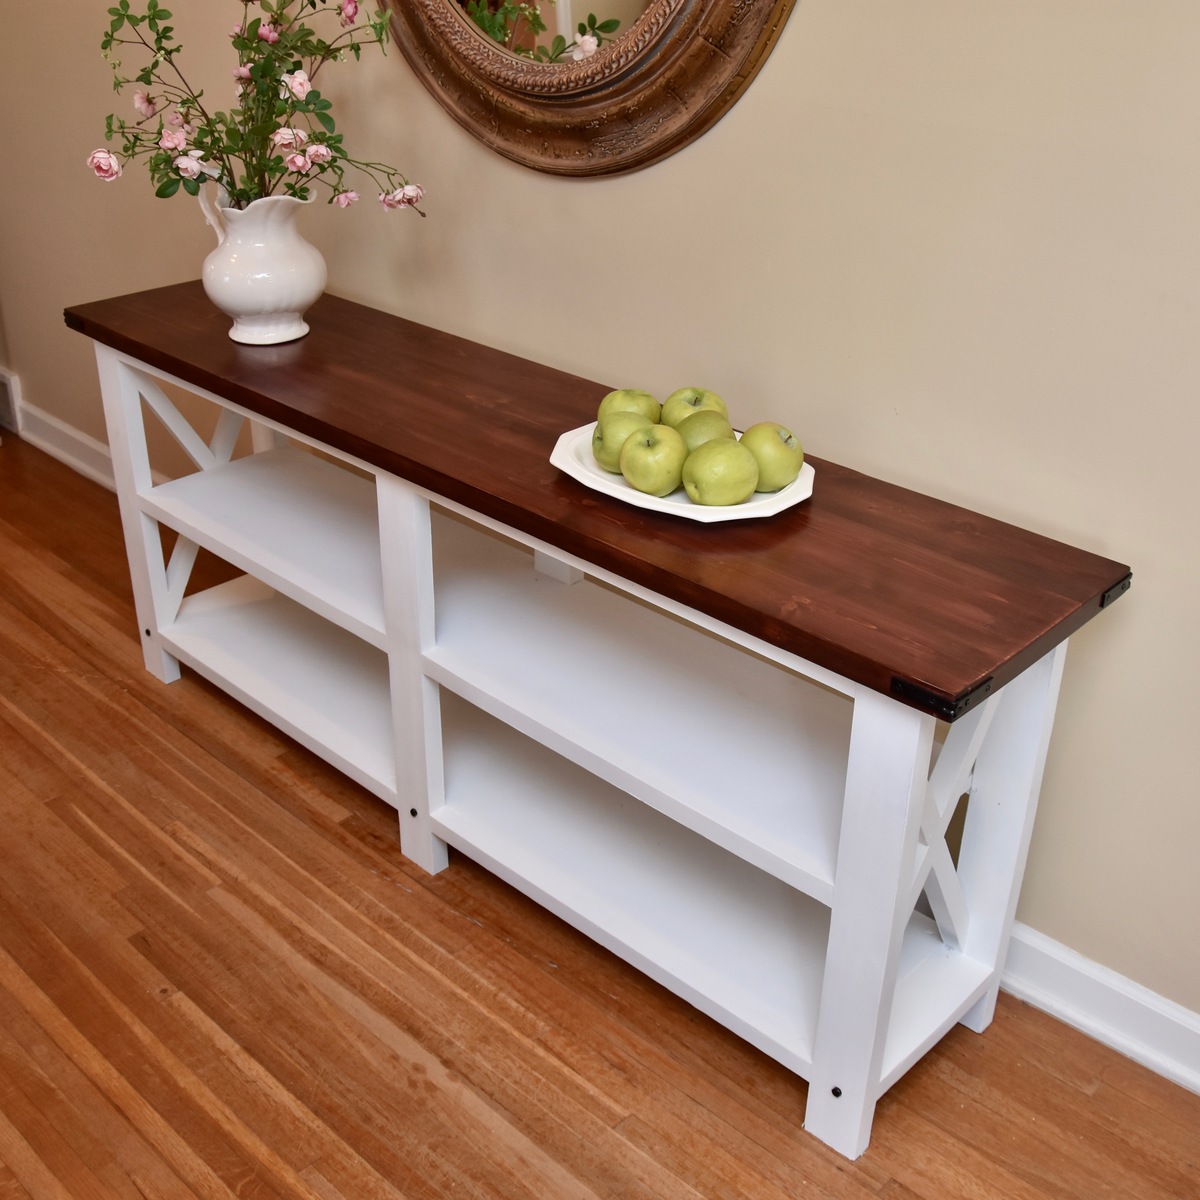
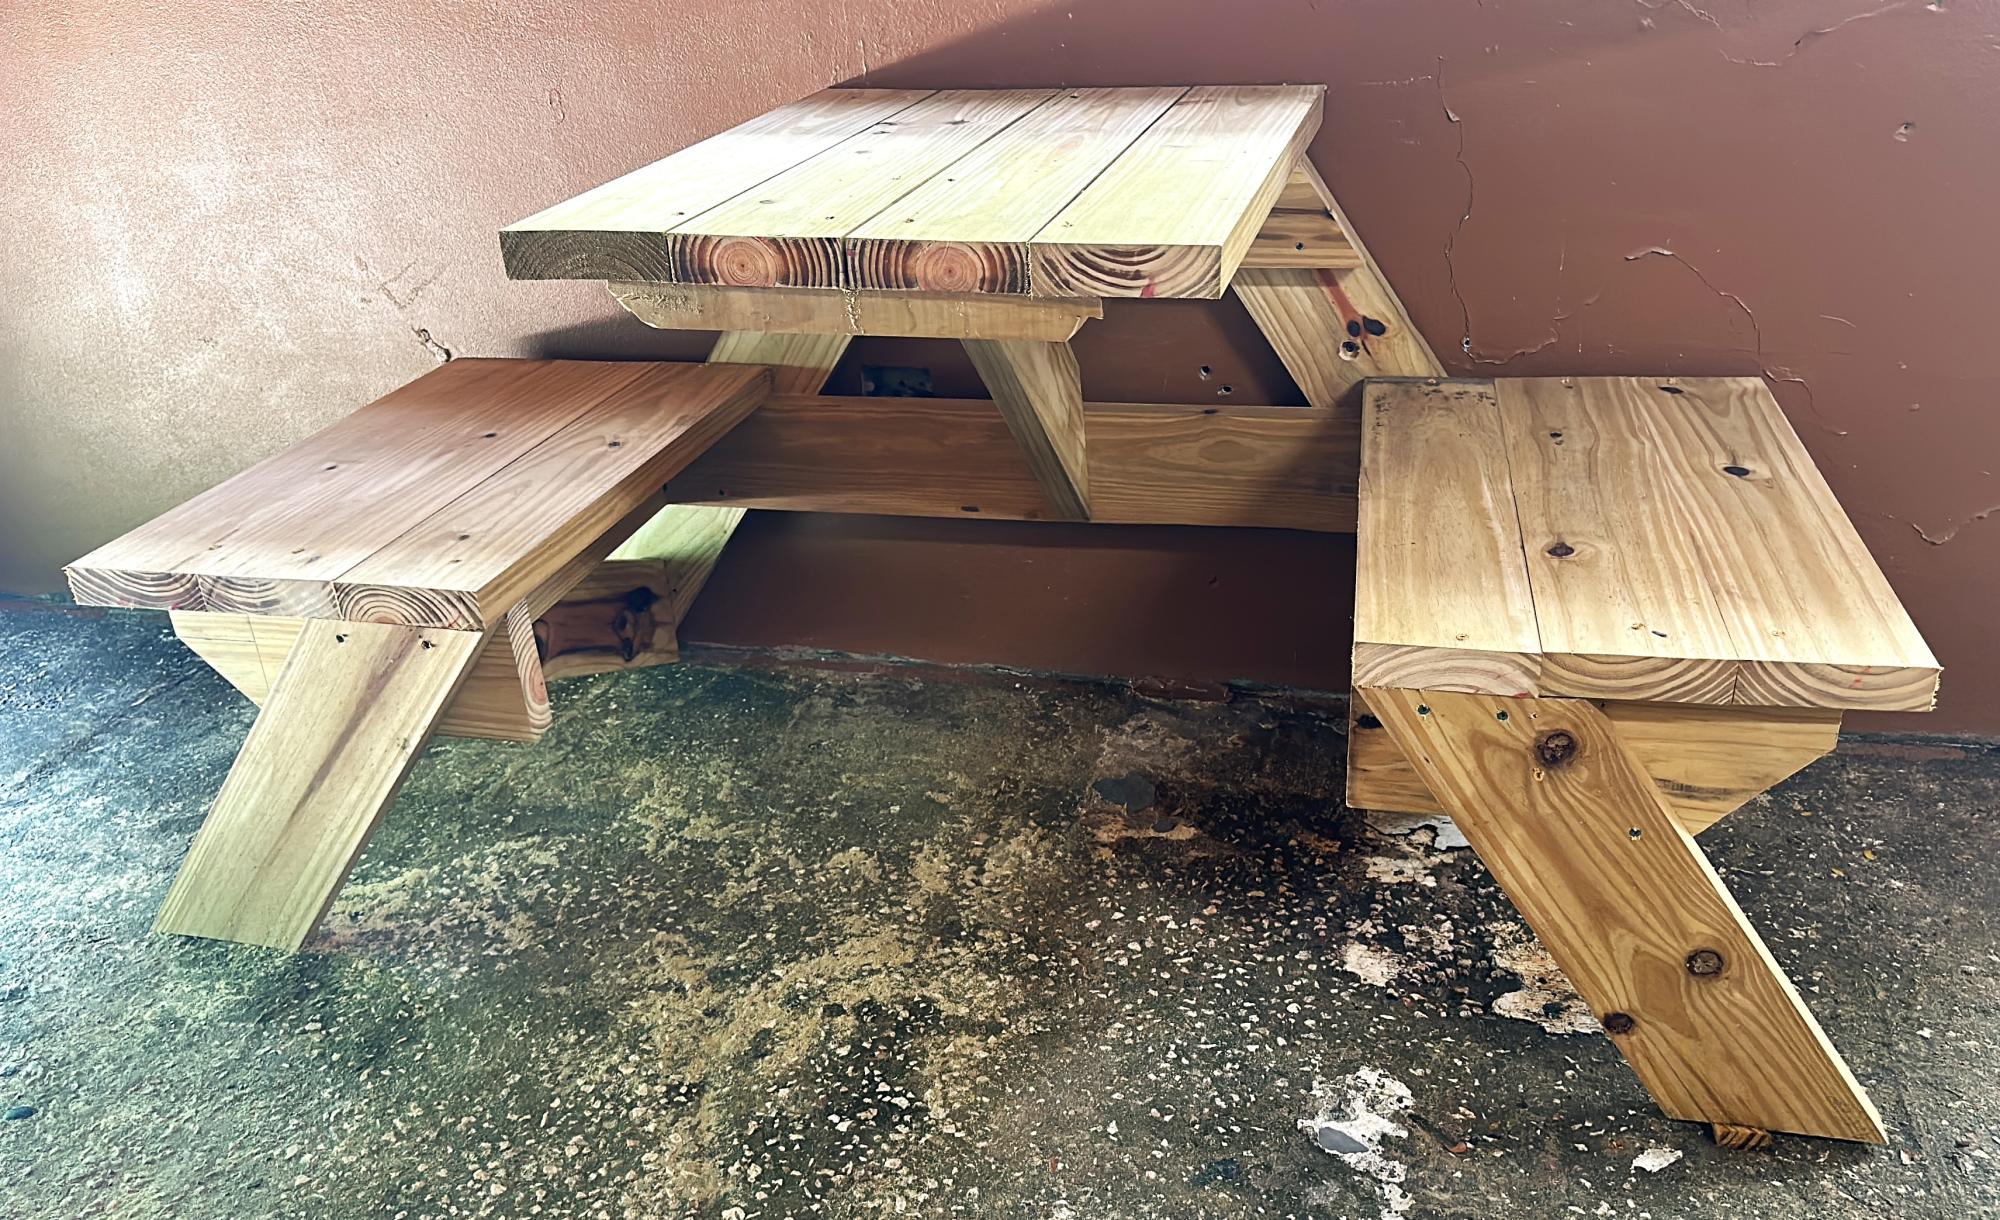
Made from the modified Ana White Rustic X-Console Table.
I made this console table to fit the length of my sons couch. It's about 6 foot long.
It was really easy to make. My only tip is to sand all your timber before assembling. Getting into the tight spots with a sander is quite difficult. I hae now made 4 of these tables and sanding first saves so much time and headaches. The other 3 I have made were painted white and had stained tops.
Wed, 09/09/2020 - 09:03
Plans
do you have the plans for this? i've been looking and looking for what i needed and this is it!!
Made 2 of these for my coffee shop in Puerto Rico. Easy instructions. Thank you!
Javiel Cardona
A toy box, im not a profesional, but its a grate hobby. Regards from Hidalgo, México.
Herwin