Community Brag Posts


Farmhouse Style Toy Box / Blanket Chest

I built this for my daughter after Christmas sinse she had the living room covered in toys. The dimensions are 37" x 18" x 20"
Built from Plan(s)
Estimated Cost
$75
Estimated Time Investment
Weekend Project (10-20 Hours)
Finish Used
Watco Danish Oil - Medium Walnut (2 coats) with a light sanding between coats with 220 grit, I allowed 24 hours between each coat to dry. To protect the surface I used water based polyurathane matte finish (3 coats) with a light sanding - 400 grit.
Recommended Skill Level
Beginner
Comments
Tue, 01/09/2018 - 05:51
More details!
HI Anna,
Can you provide more pictures or instructions on how you assembled this toy box? i want to make one just like it!
Thanks!
Wed, 03/10/2021 - 16:31
Pronounced panel edges
Looking at the wall panels they look like the long edge of each panel has a small bevel cut on it. This gives each panel edge a more pronounced or well-defined edge? Is this true? Was it done with a router?
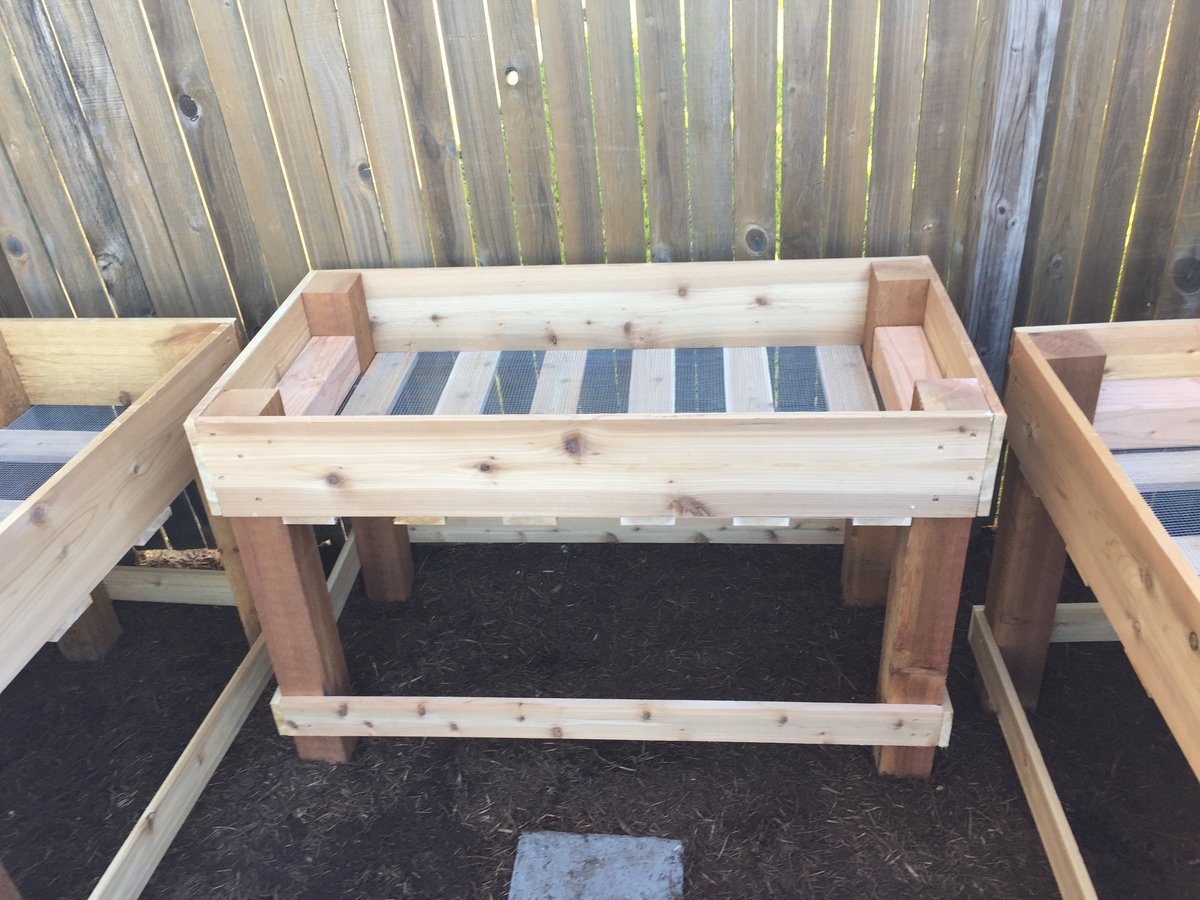
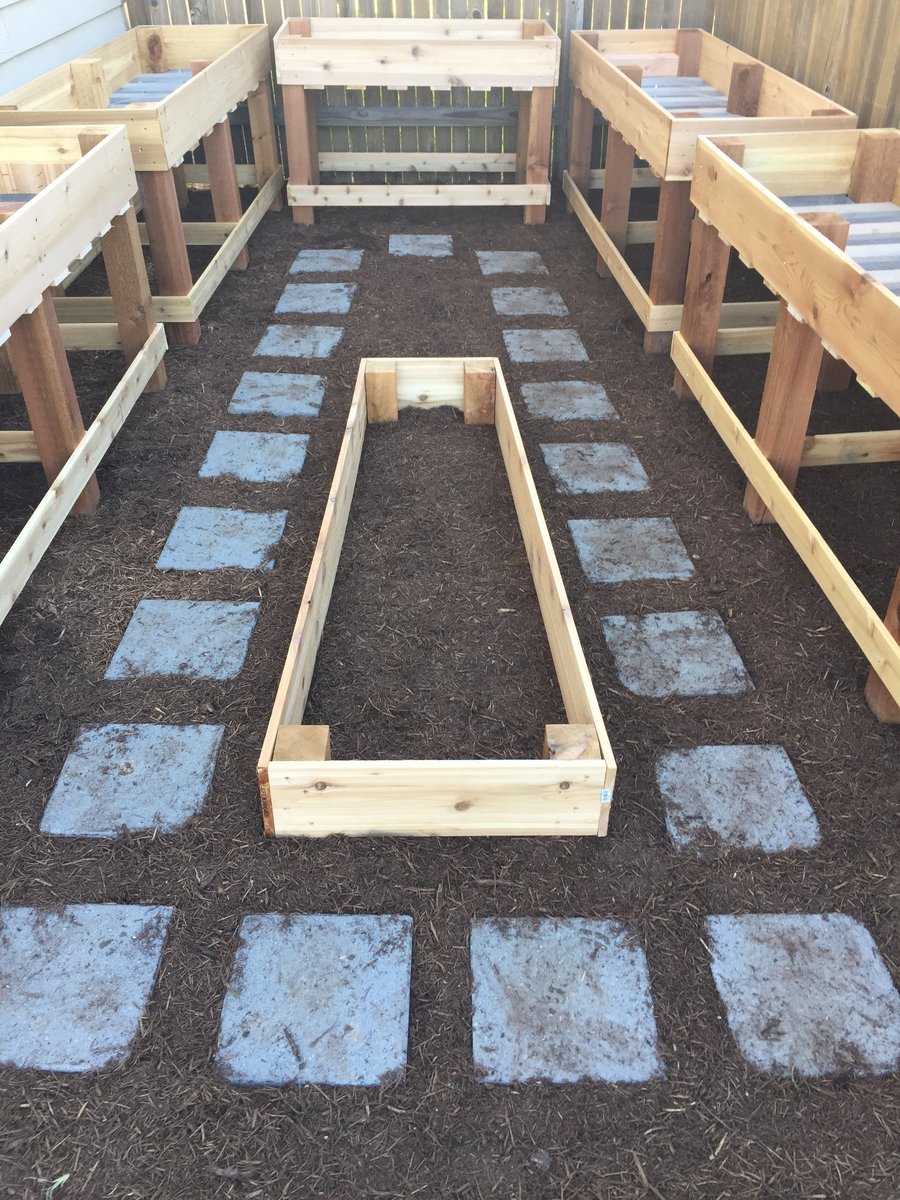
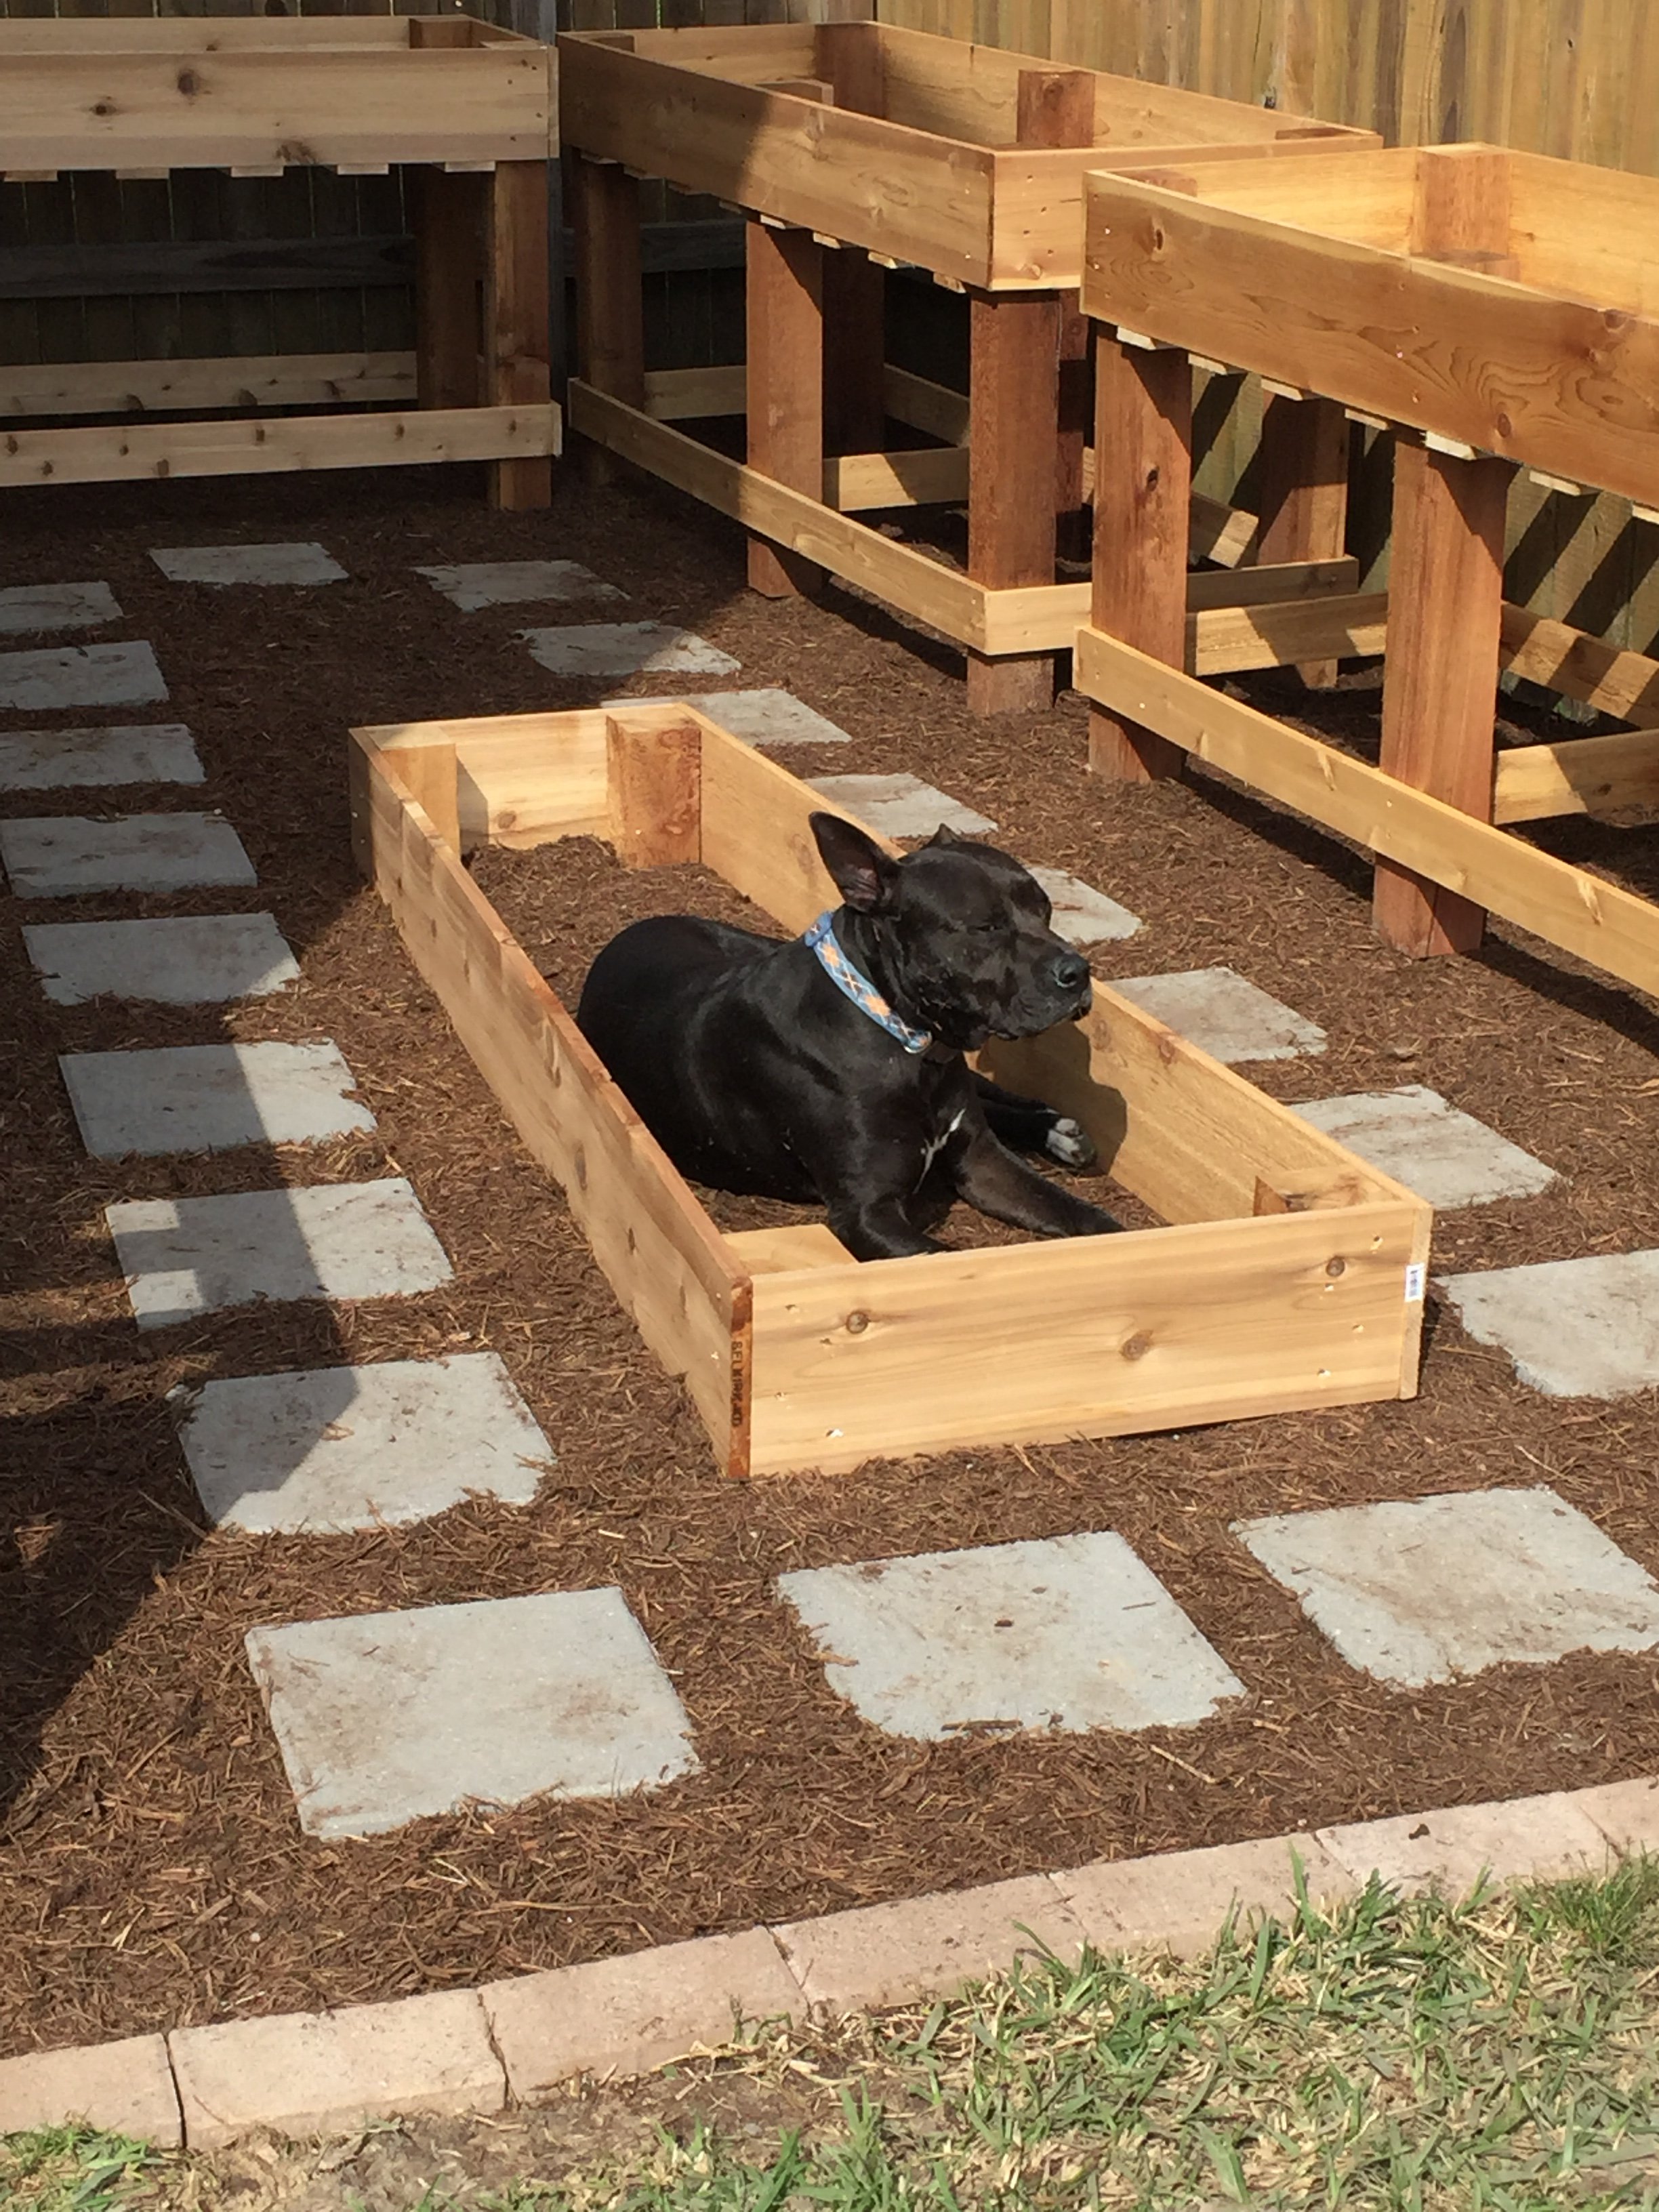
Custom Counter Height Garden Boxes
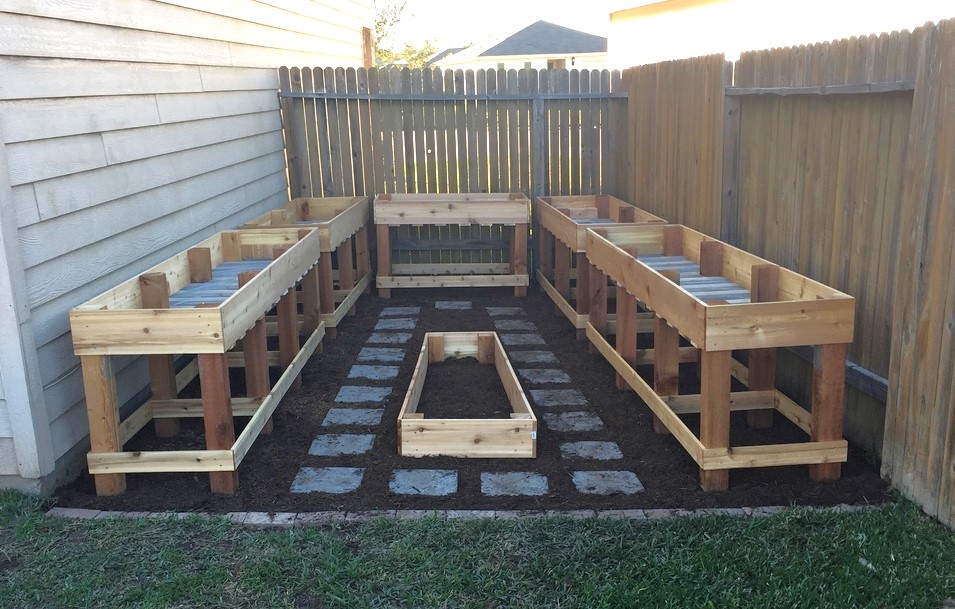
Click the blog link for a full description of this project. Thanks for looking! - Clint


Built from Plan(s)
Estimated Time Investment
Weekend Project (10-20 Hours)
Finish Used
None
Recommended Skill Level
Beginner
My Garden Shed
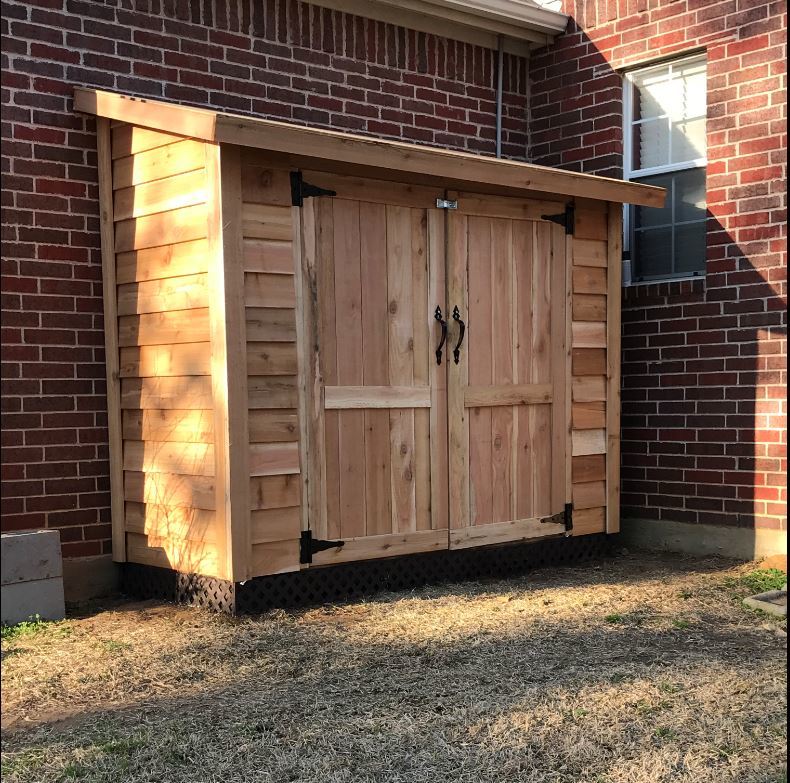
I used these plans of this project. Only differences are I used 2X3 studs. I also made the shed longer,, its 3ft X 8ft.. Also on the back I used two siding sheets since it wouldnt be seen. Did it over the weekend. Just needs shingles and stain. Anyway I love it. Had a spot behind the house where it fits perfectly. Thanks
Built from Plan(s)
Estimated Time Investment
Weekend Project (10-20 Hours)
Recommended Skill Level
Intermediate
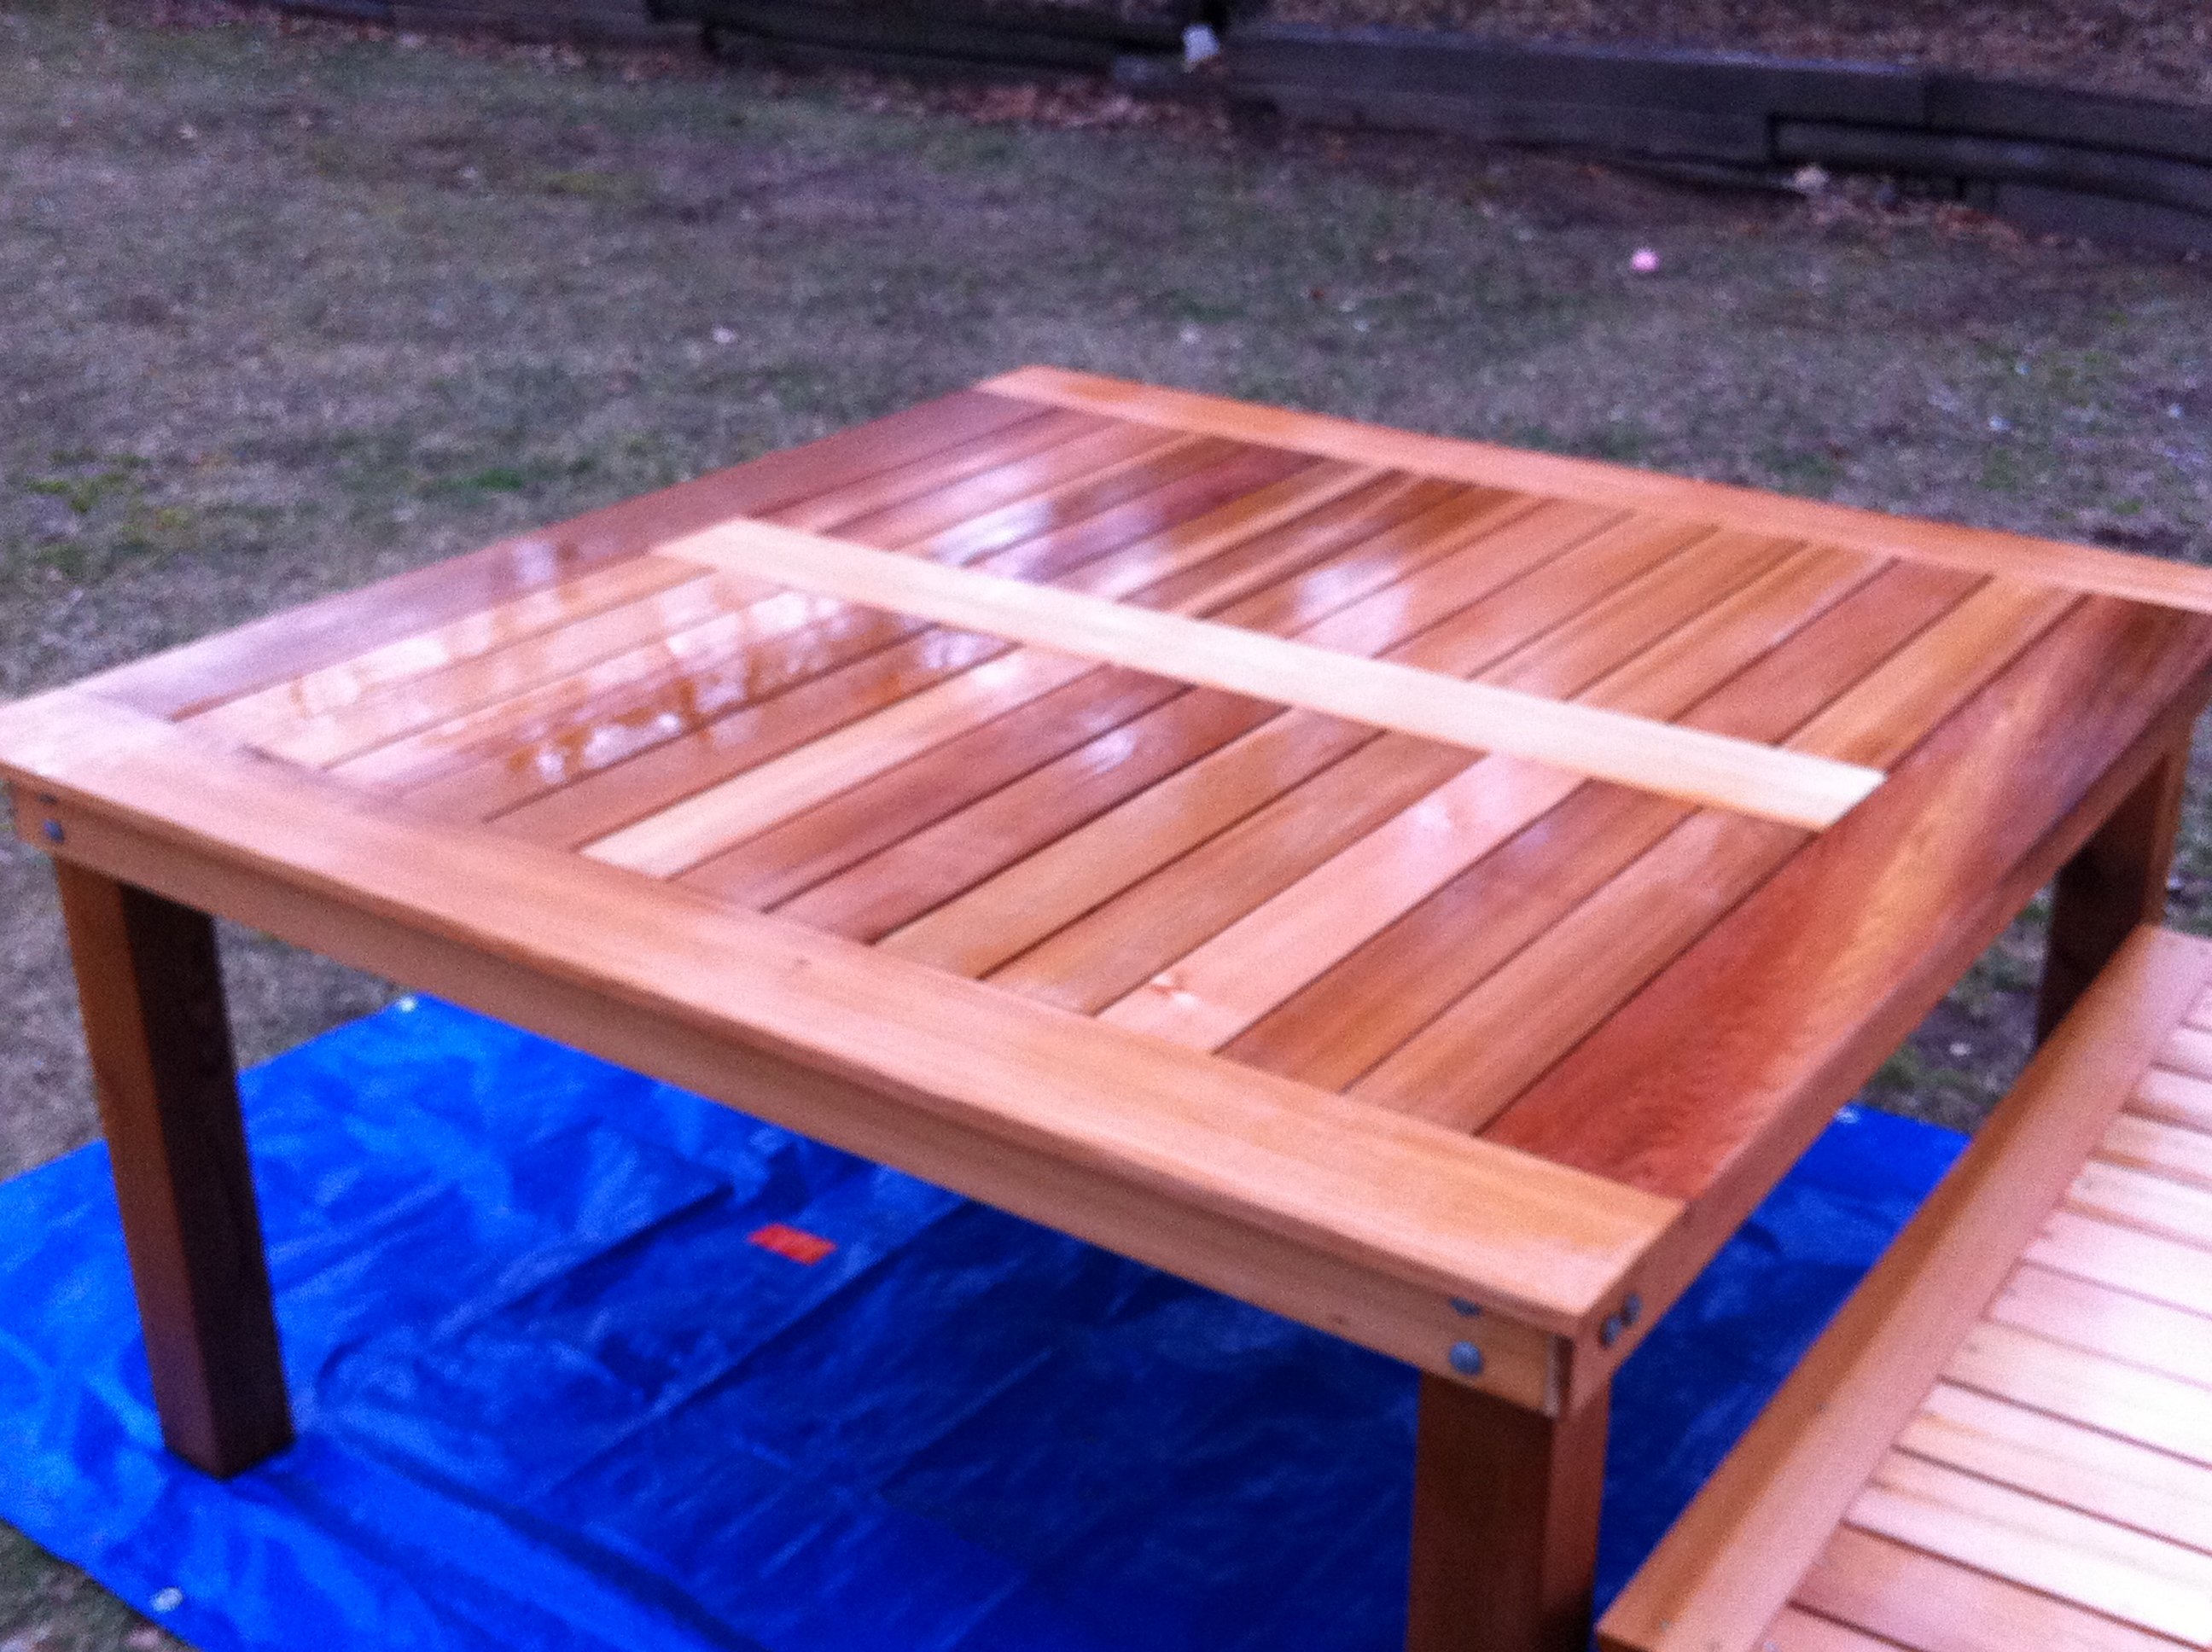
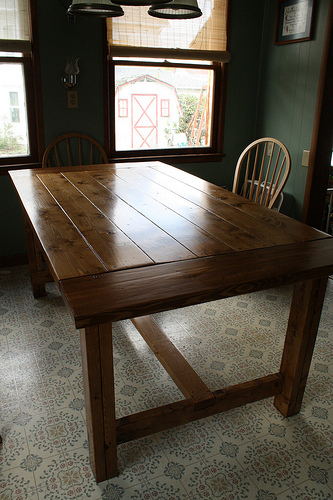
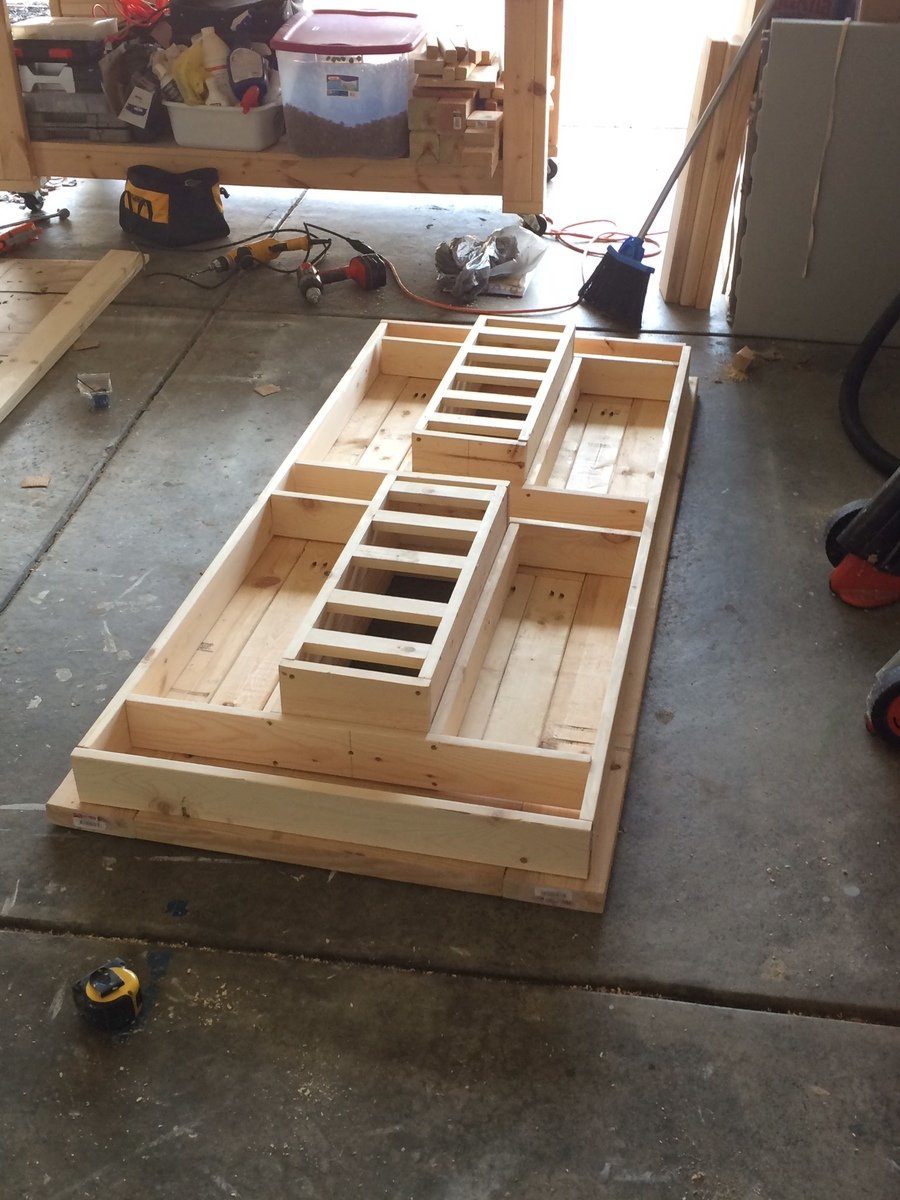
Simple Square Cedar Outdoor Dining Table

I've been planning on building a patio table for this coming spring and summer, but didn't know where to begin. I found Ana's wonderful site and now I don't know where to stop! So many great ideas.
After seeing ewood's great table I decided to make one similar. I made my square table based on Ana's and ewood's basic designs. Thank you both. I also made a bench based on Ana's design.

Built from Plan(s)
Estimated Cost
300--475
Estimated Time Investment
Weekend Project (10-20 Hours)
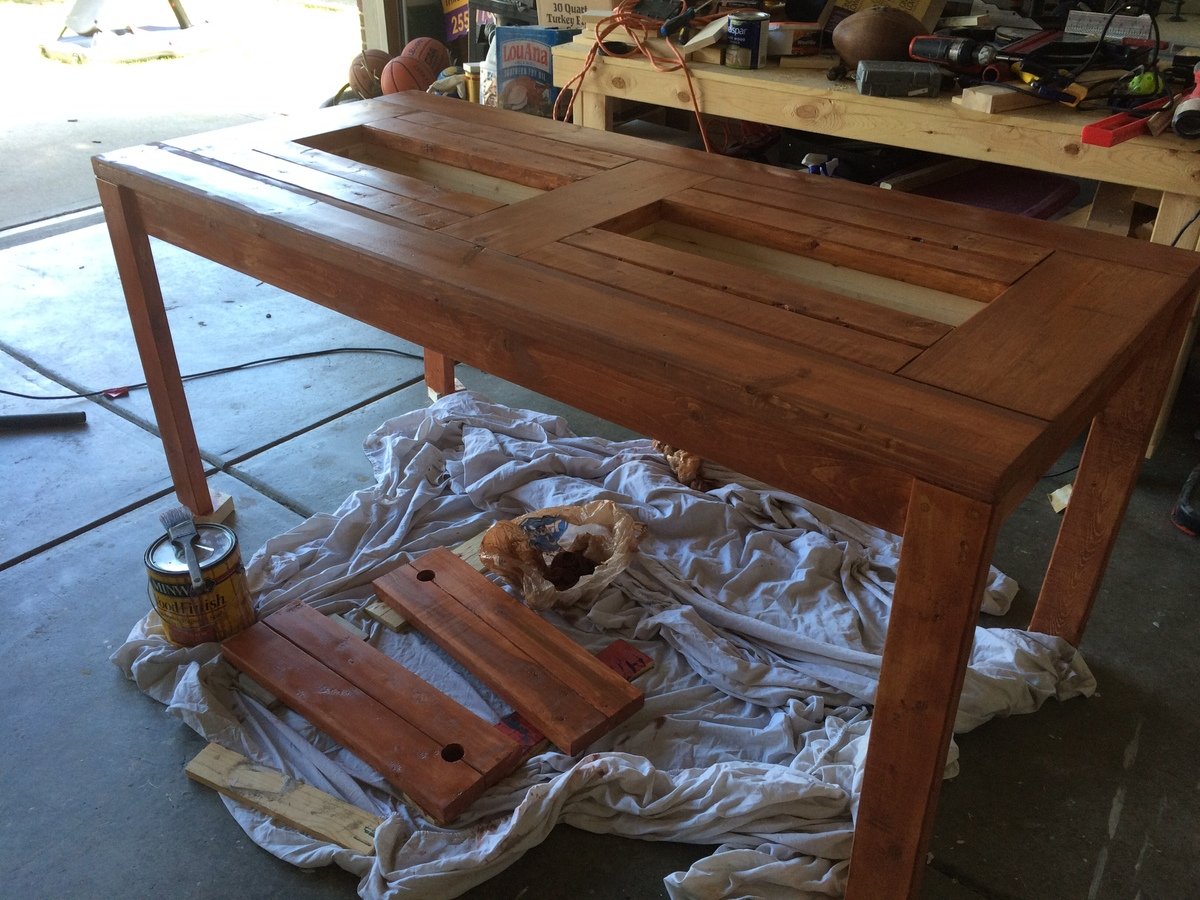
Finish Used
Semigloss Spar Urethane
Recommended Skill Level
Beginner
Comments
Sun, 03/18/2012 - 16:36
Beautiful and Solid!
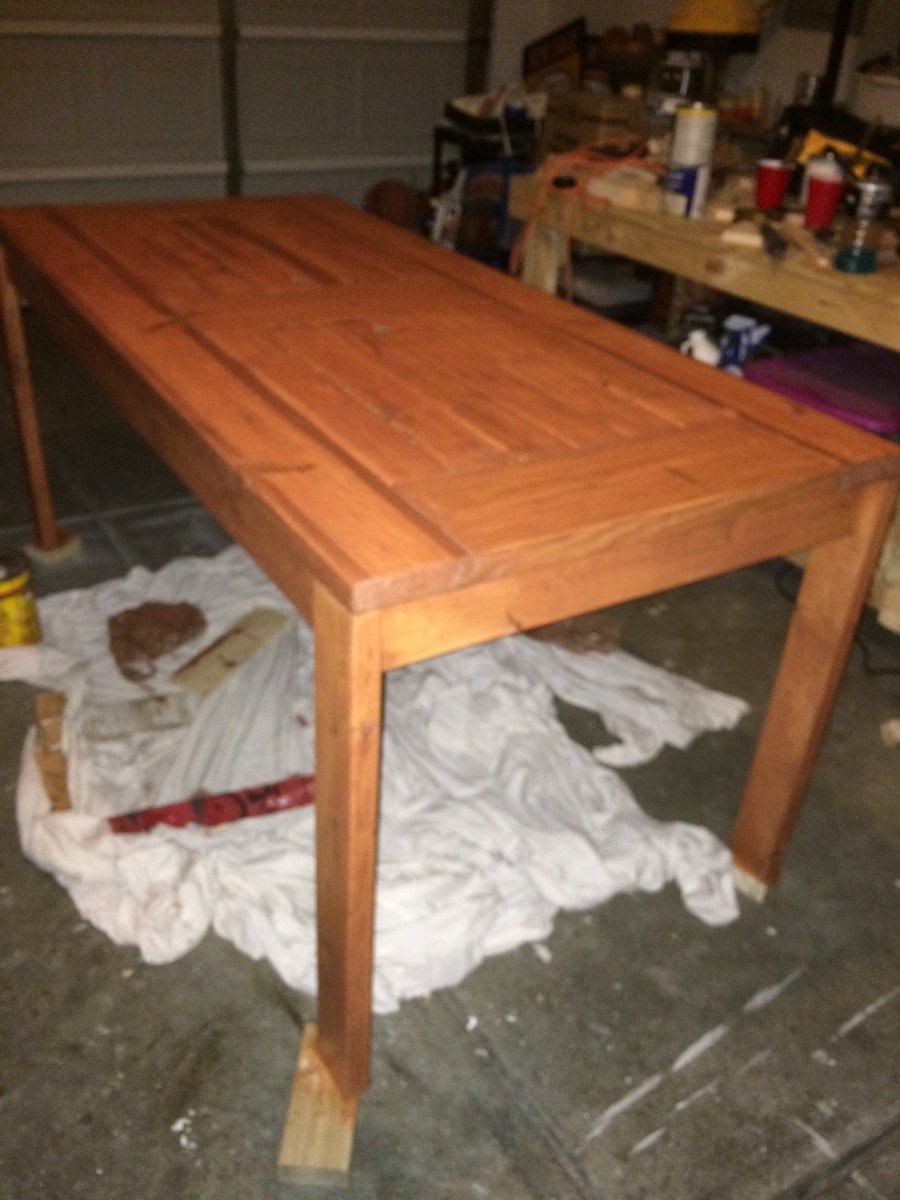
That looks like it could handle a big and boisterous group. The cedar and the finish are beautiful.
Thu, 03/29/2012 - 07:37
Great for larger families!
I have a family of 7 (soon to be 8, I hope), and was trying to figure out how to fit us all on the rectangular table. This is the solution! I can simply make 4 benches to go with it! Thanks for the idea and the picture!
Mon, 04/09/2012 - 07:24
Questions :)
Love this table and your modifications to ewood's table. I was wondering what size are the legs on your table - I can't tell if they are 4x4s...which is sort of what I'd like to have on mine. And they are under mounted, which I love because I want to make ours with the ability to remove the legs for reduced storage space in the winter. If you could would you mind putting a few close up photos of how the outside corner came out and the underside of the corners. It would be much appreciated.
Mon, 04/09/2012 - 07:27
Questions :)
Love this table and your modifications to ewood's table. I was wondering what size are the legs on your table - I can't tell if they are 4x4s...which is sort of what I'd like to have on mine. And they are under mounted, which I love because I want to make ours with the ability to remove the legs for reduced storage space in the winter. If you could would you mind putting a few close up photos of how the outside corner came out and the underside of the corners. It would be much appreciated.

In reply to Questions :) by K_W (not verified)
Sat, 04/14/2012 - 13:35
Yes - I used 4x4 legs
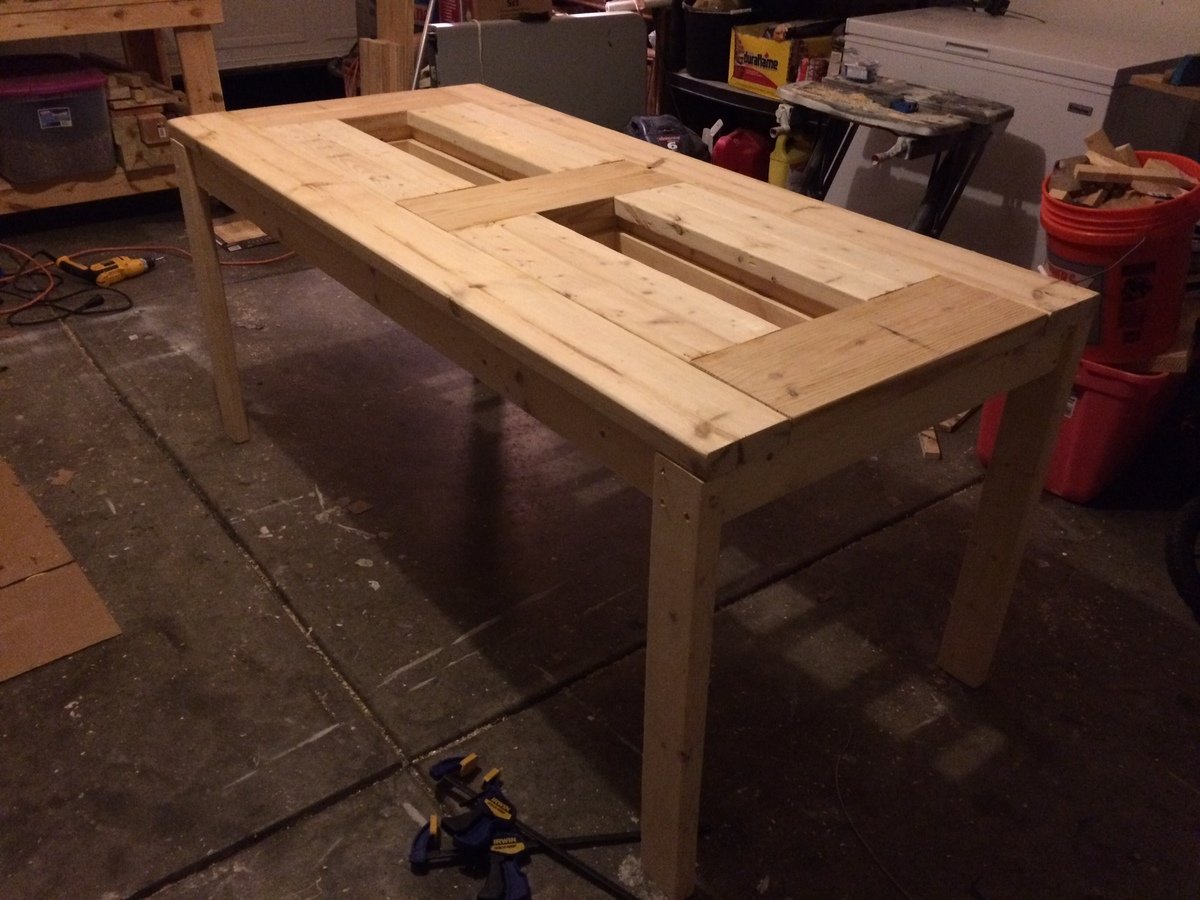
Hi - sorry it took a little while to get back to you. Yes the legs are 4x4's. I used knotted cedar 4x4's for the legs and made them 29" tall. I wanted to be able to disassemble the table and put it away for winter, so I attached the legs using carriage bolts, 2 per side (4 total per leg). I drilled holes using a pilot bit, then used a spatter bit to make the larger holes for the carriage bolt.
I didn't bother to counter sink them, but if I made another I think I would try that to make a more polished look. The legs are sturdy, the table doesn't wobble at all, but I am sure that someone with more furniture building experience might have a different/better idea.
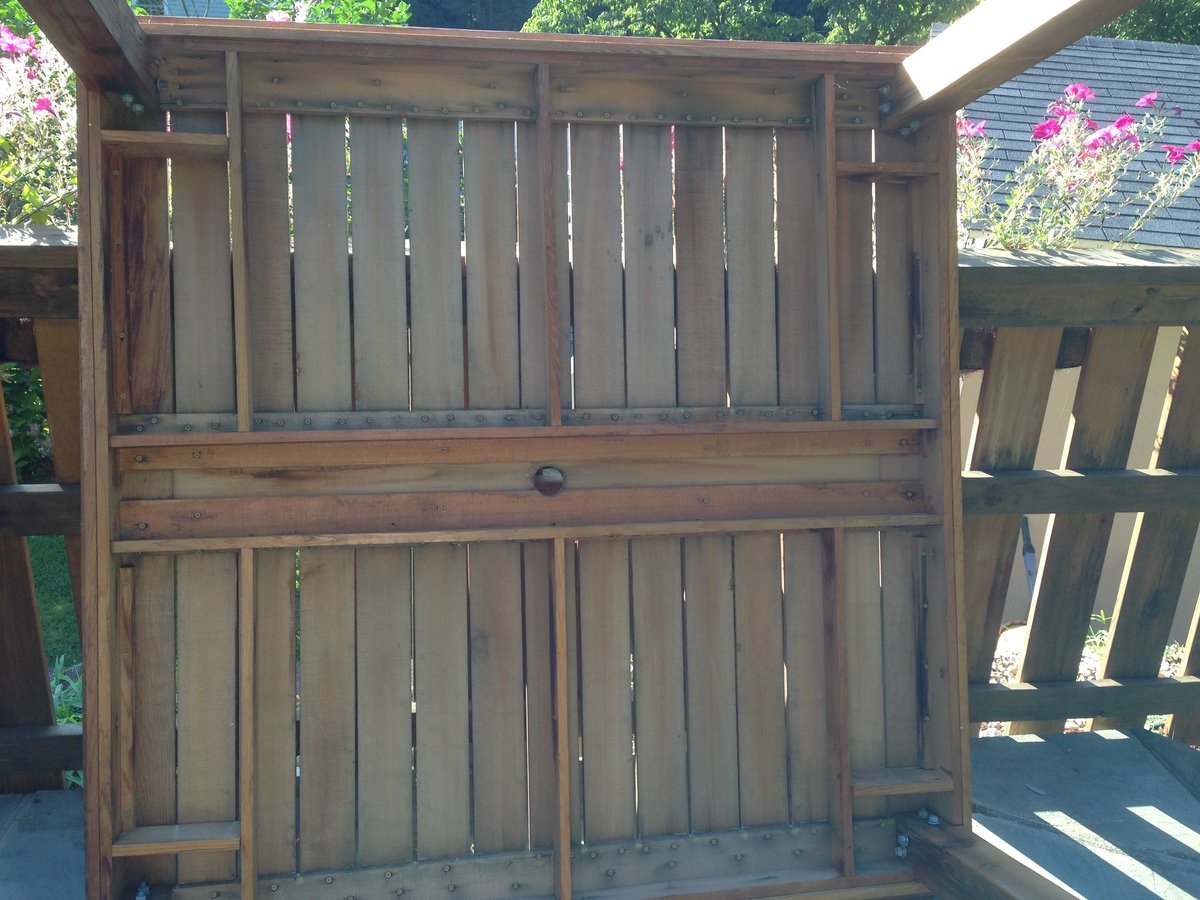
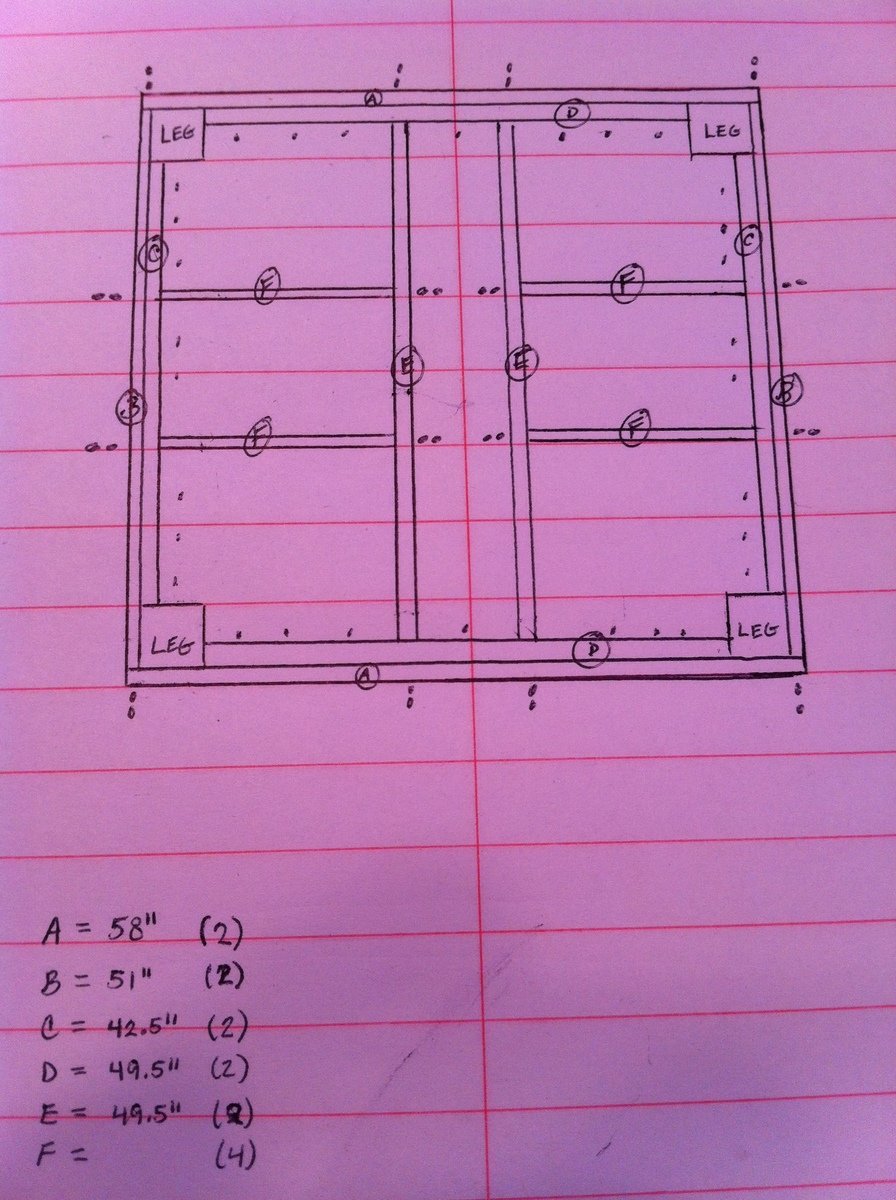
I've added a couple more photos showing the corners, outside and underneath. I've also added my very basic plans that I used to make the table, one of these days I will study Ana's post of how to use sketch-up, until then this is what I worked with.

Wed, 06/06/2012 - 09:26
Question
Can you tell me what size (width) boards you used on the frame pieces of the table, and what size on the inner boards? From your diagrams, it looks like the frame is made of 1x4s, but the inner pieces look smaller. Thank you !!!
Your table is absolutely beautiful. It looks like a very high-end piece of furniture. One of my favorite things is how the carriage bolts are installed -- I wouldn't change a thing on them!
Tue, 07/30/2013 - 16:36
Sorry it took so long to
Sorry it took so long to reply - I didn't see your post. So far the table is holding up well.
You're right, the top is made from 1x4's, including the inlaid slats. To support the top, I cut 1x4's down to 1x3's so they remain hidden by the side 1x4's of the frame.
Tue, 10/16/2012 - 18:02
Question
Love the table - looks absolutely fantastic! I have been looking for a decent square outdoor table for ages and this one certainly fits the bill.
Can you please add a photo of the underside of the table and advise how you fastened inner boards on table top. Thanks.
In reply to Question by Aussie Paul (not verified)
Tue, 07/30/2013 - 16:40
new photo of bottom
I added a new photo of the bottom. Hopefully this will help show how I attached the top. I have a number of additional photo's I can send to you if you like - this site limits the number of photos I can add.
Everything is attached from the bottom to hide the screws. I used a kreg jig and it helped so much - i really recommend it.
Wed, 08/14/2013 - 12:35
Table plans
I love the look of this table, man - I think I'm gonna steal some ideas from this.
I have a question about your top, though. The slats look to be 1x4s, which I can understand, but the edges seem to be a bigger size.
Did you use 1x6 boards for the edges? 1x8s? Something else?
Thanks for your help.
Mon, 09/02/2013 - 11:03
table top
Thank you - please take any ideas from it that you can. That is what I love that about Ana's site. You can take these great ideas and make them fit your own style...
You're right - the table top is made of 1x4's and 1x6's. When i put the top together I made the frame first. Then I added the exterior 1x6's. Next I added the center 1x6. Lastly I cut each 1x4 to size and added them.
Sat, 05/17/2014 - 07:15
Materials List
This is an amazing table, it is beautiful! I am somewhat new to wood working and was wondering if there was a material list? I plan on creating this in AutoCAD first, so I have a visual to work off of. Also what did you use for spacing in between the boards or what was the allowance of space.
Thanks again, your work is beautiful!
Wed, 06/17/2015 - 11:48
Material List
Great table…any chance you can share the plan and material list? Cheers

Wed, 04/22/2020 - 20:37
Question for Plans for Simple Outdoor Table
In looking at the plans and the underside of the table, there are some measurements missing that make it a little hard to decipher. It would be good to know the lumber sizes e.g. 1x4x8 etc. the underneath side seems to have some additional boards that don’t seem to be in the drawing. I was just wondering if it might be possible to get some additional details?
Sun, 05/24/2020 - 08:05
Question on underneath tabletop screws
This is a beautiful table and I'm going to try and replicate in a rectangular version. Primary question I have is what length screws you used to affix the framing pieces underneath to the top side so that the wood doesn't split and that the screws don't pop thru the top. Any help you can provide would be appreciated, if even you still look at this page. Thanks in advance!
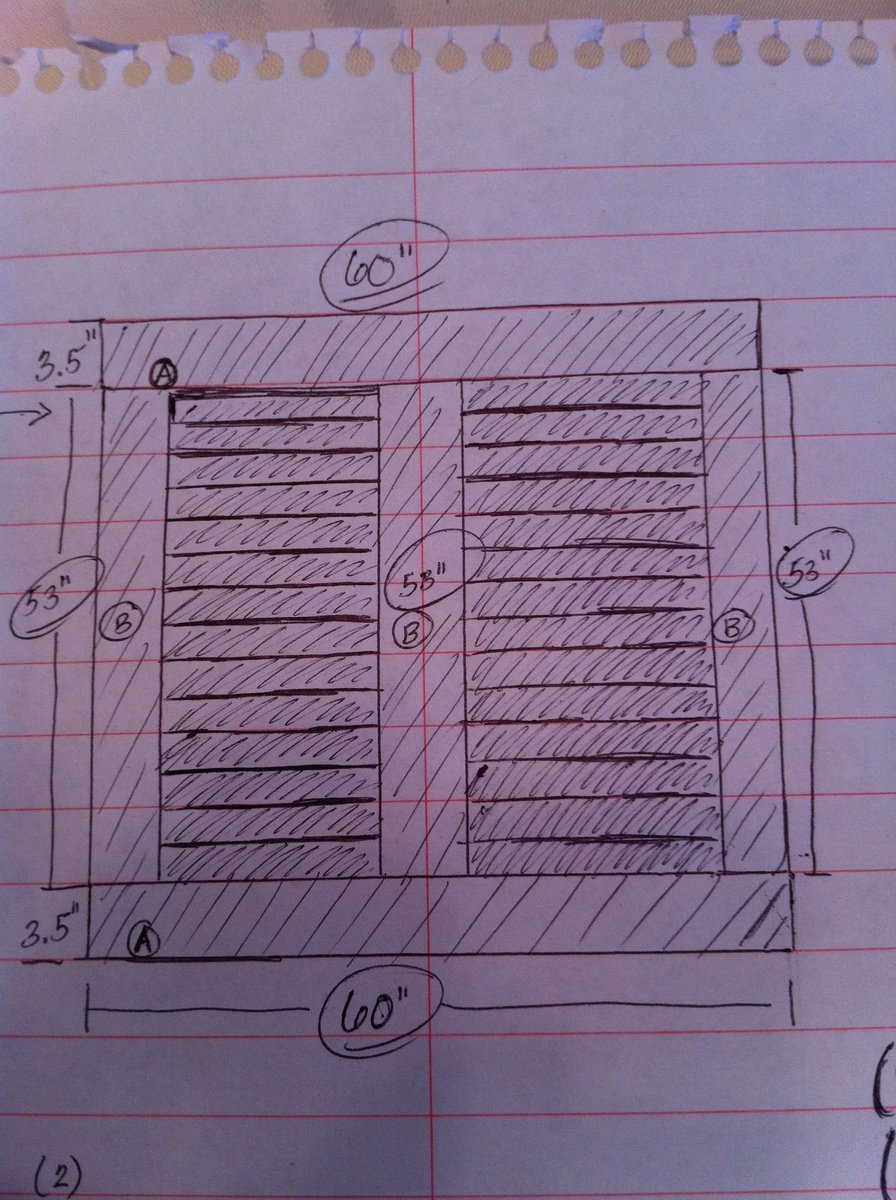
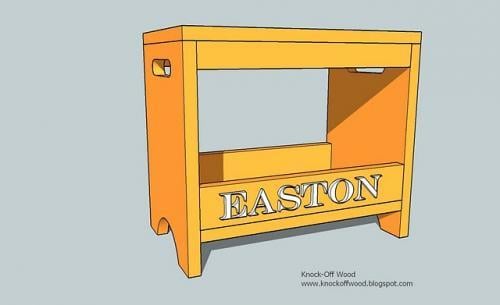
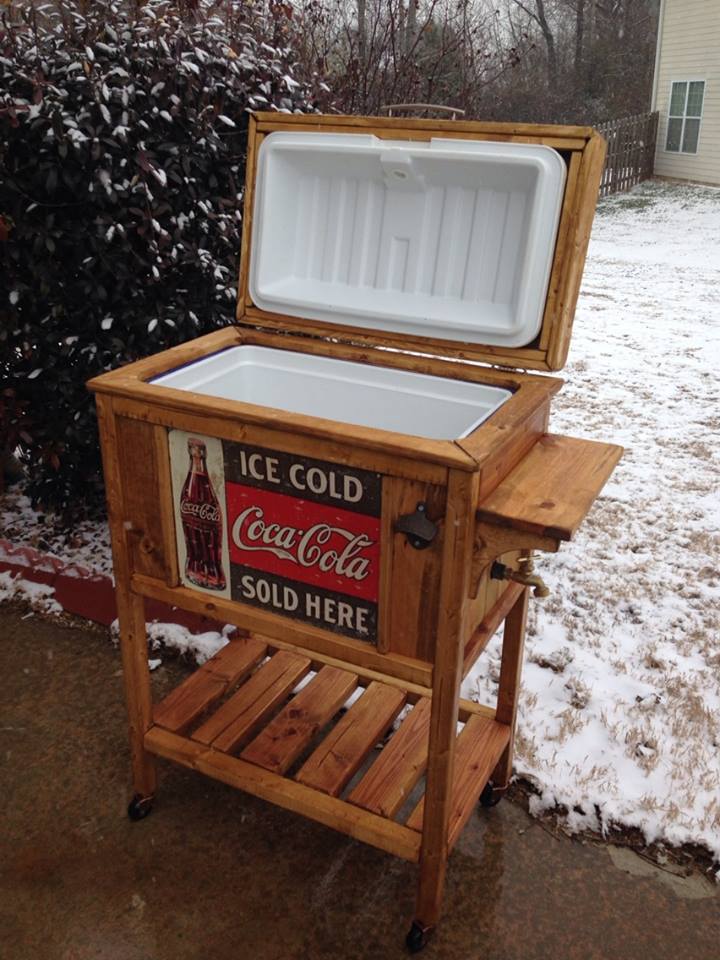
DIY Wooden Cooler Stand - Vintage Look
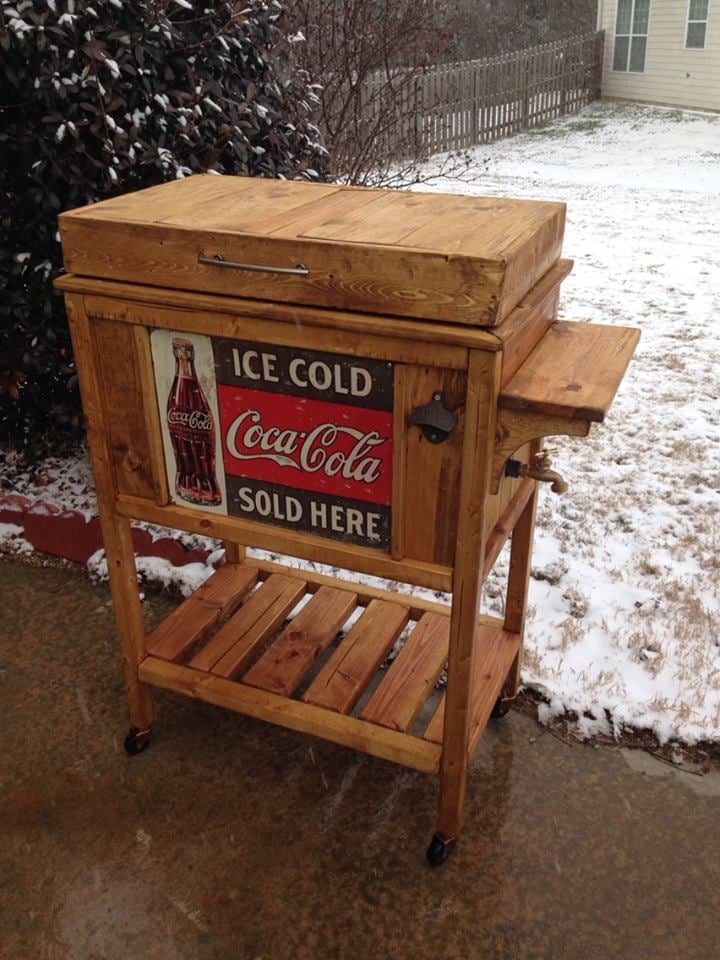
Got this idea from the blue cooler project - but decided to deck it out with vintage trimmings. Everyone who has seen it loves it! Very fun project.
Estimated Cost
70.00
Estimated Time Investment
Weekend Project (10-20 Hours)
Finish Used
Minwax Summer Oak - followed with polycryllc and johnson's furniture wax.
Recommended Skill Level
Intermediate
Comments

Tue, 02/04/2014 - 21:32
Very Nice!!!
I'm in the process of building one out of this plan too except I'm trying to use pallet wood. I love how your cooler turned out so I hope you don't mind that I use the same Coke sign. Awesome job!
DIY Bar Cabinet
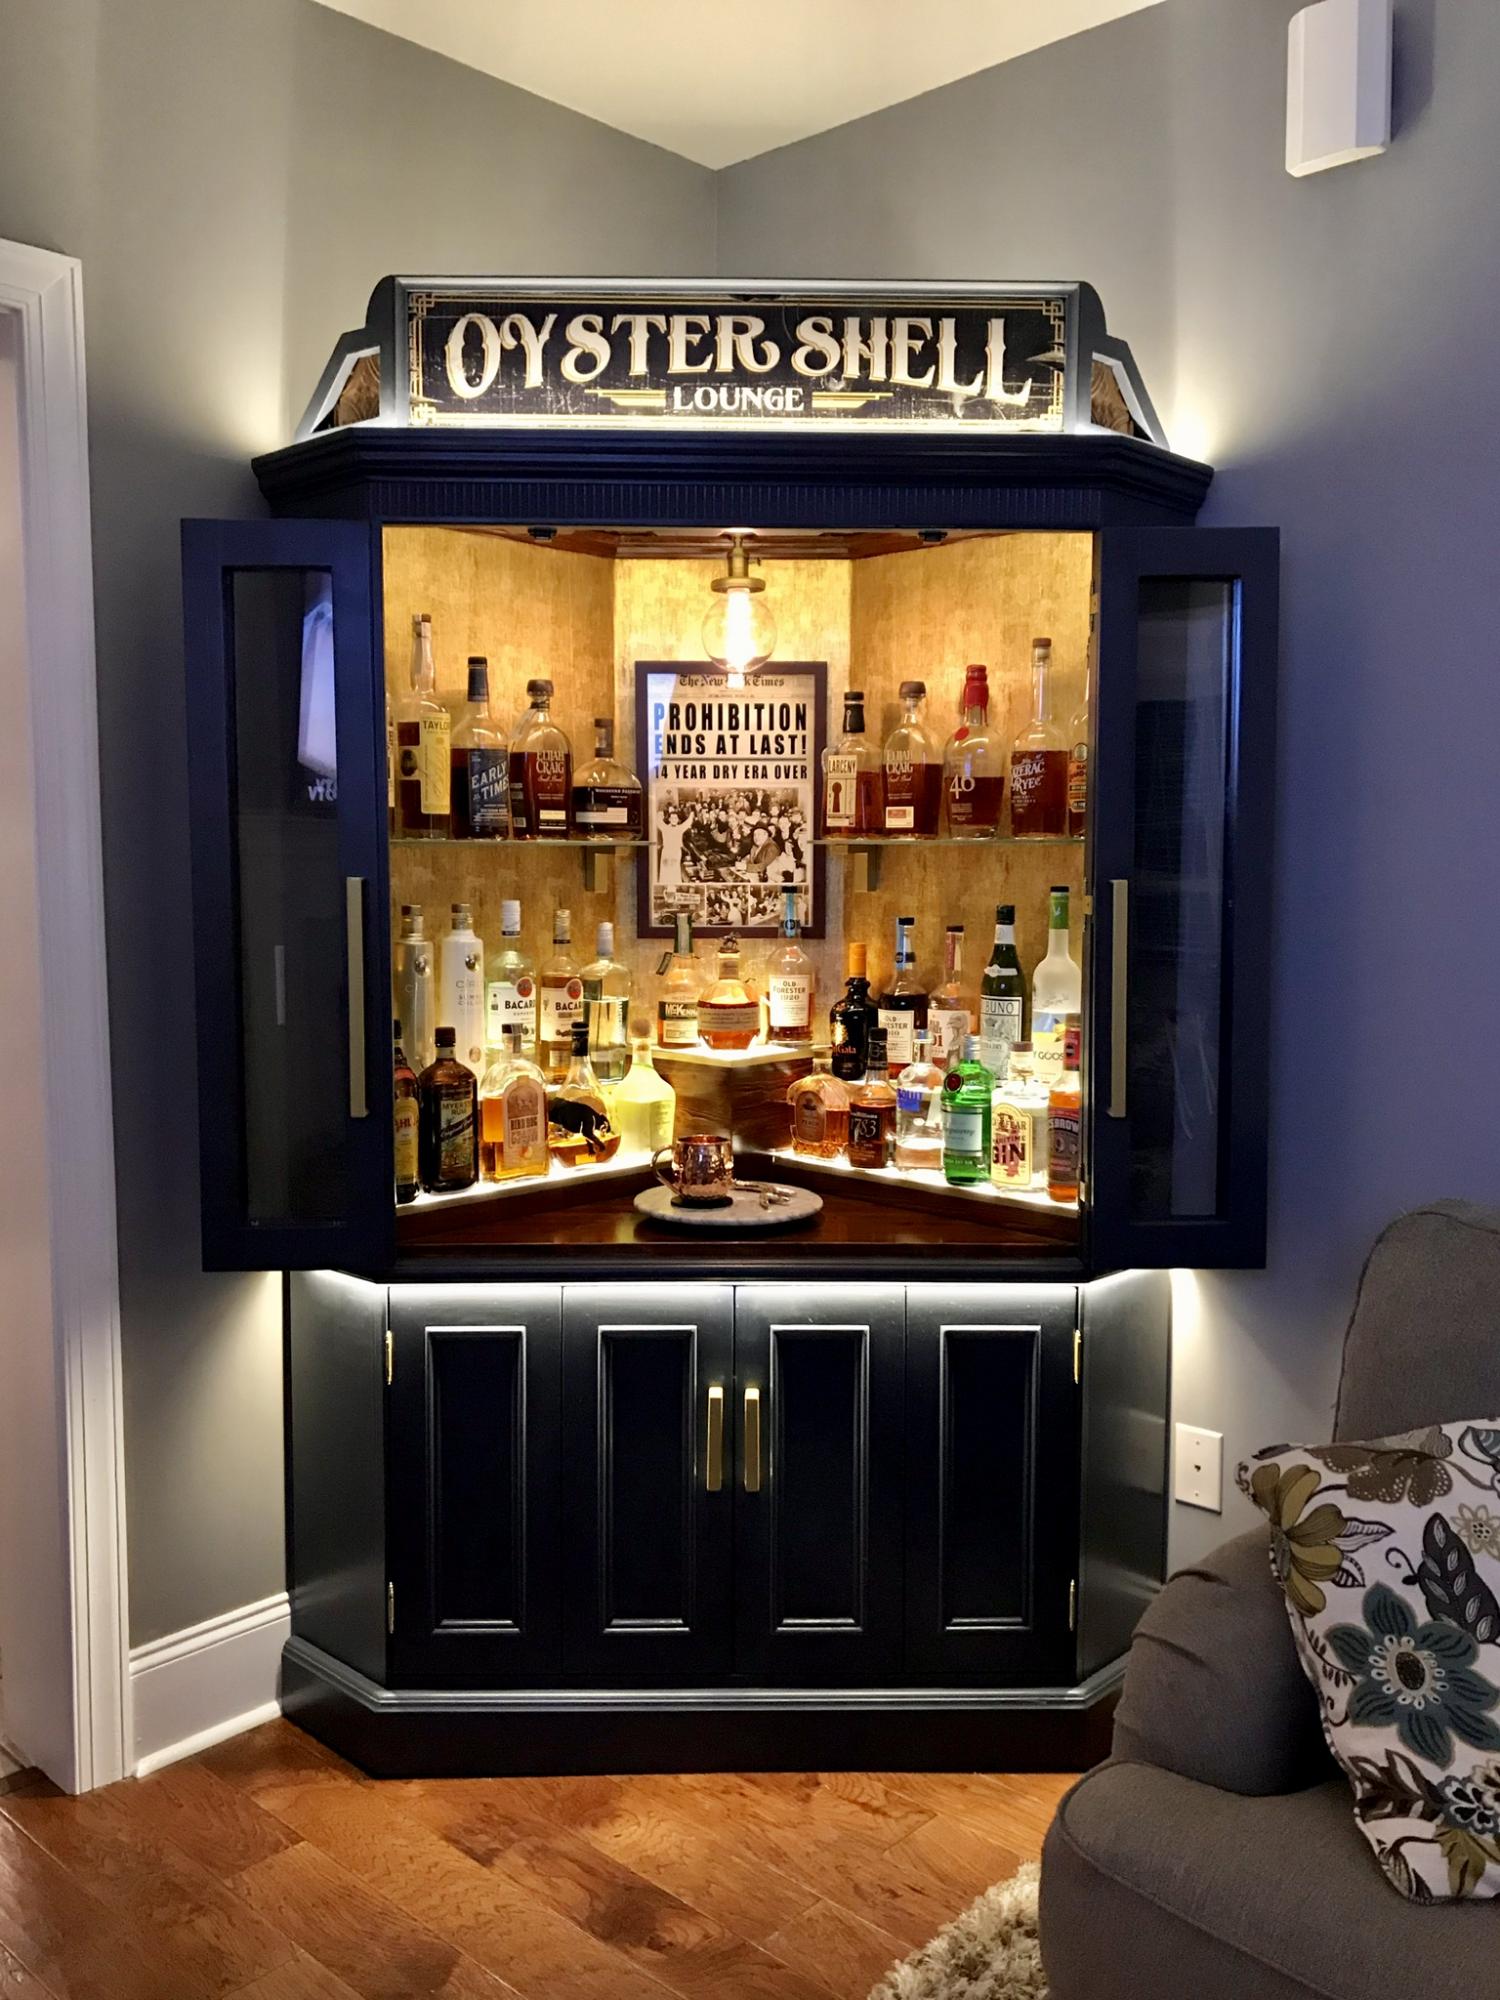
I bought this tv corner cabinet for $40. I spent many hours turning into my perfect bar cabinet. I built a custom lighted liquor display. I have posted photos of the transformation.
Estimated Cost
$1000
Estimated Time Investment
Week Long Project (20 Hours or More)
Finish Used
Benjamin Moore- hale navy
Recommended Skill Level
Intermediate
Comments
Thu, 03/18/2021 - 00:07
Wow that beautiful do you…
Wow that beautiful do you have directions on what you did?
Tue, 07/06/2021 - 19:04
Is this your project?
So this is not your project? Because there isn't much information or a before and after picture. This gave me an idea for our home.
Sun, 08/15/2021 - 18:34
Yes, this is my project…
Yes, this is my project. What would you like to know?
Wed, 12/29/2021 - 06:41
This looks beautiful and…
This looks beautiful and authentic at the same time. Love how it gives me a theatre vibe! cabinet makers mornington
Patio Table

Project took a lot more time and patience than the last few little ones that I have done. I like the simple outdoor table but wanted a little bit more. I used the basic concept and mixed it with a patio table from PB that I really enjoyed but didnt want to pay $800 for. The table looks fantastic and am still debating on what type of finish, if any, to use. Hoping to make the matching bench soon for one of the sides of the table.
Built from Plan(s)
Estimated Cost
Around $120 including the carriage bolts so I can take off the legs.
Estimated Time Investment
Weekend Project (10-20 Hours)
Finish Used
None as of yet, leaning towards Thompsons clear waterproofer
Recommended Skill Level
Intermediate
Comments
Wed, 06/13/2012 - 19:43
Your table looks beautiful!
Your table looks beautiful! Have you consider Teak Oil?
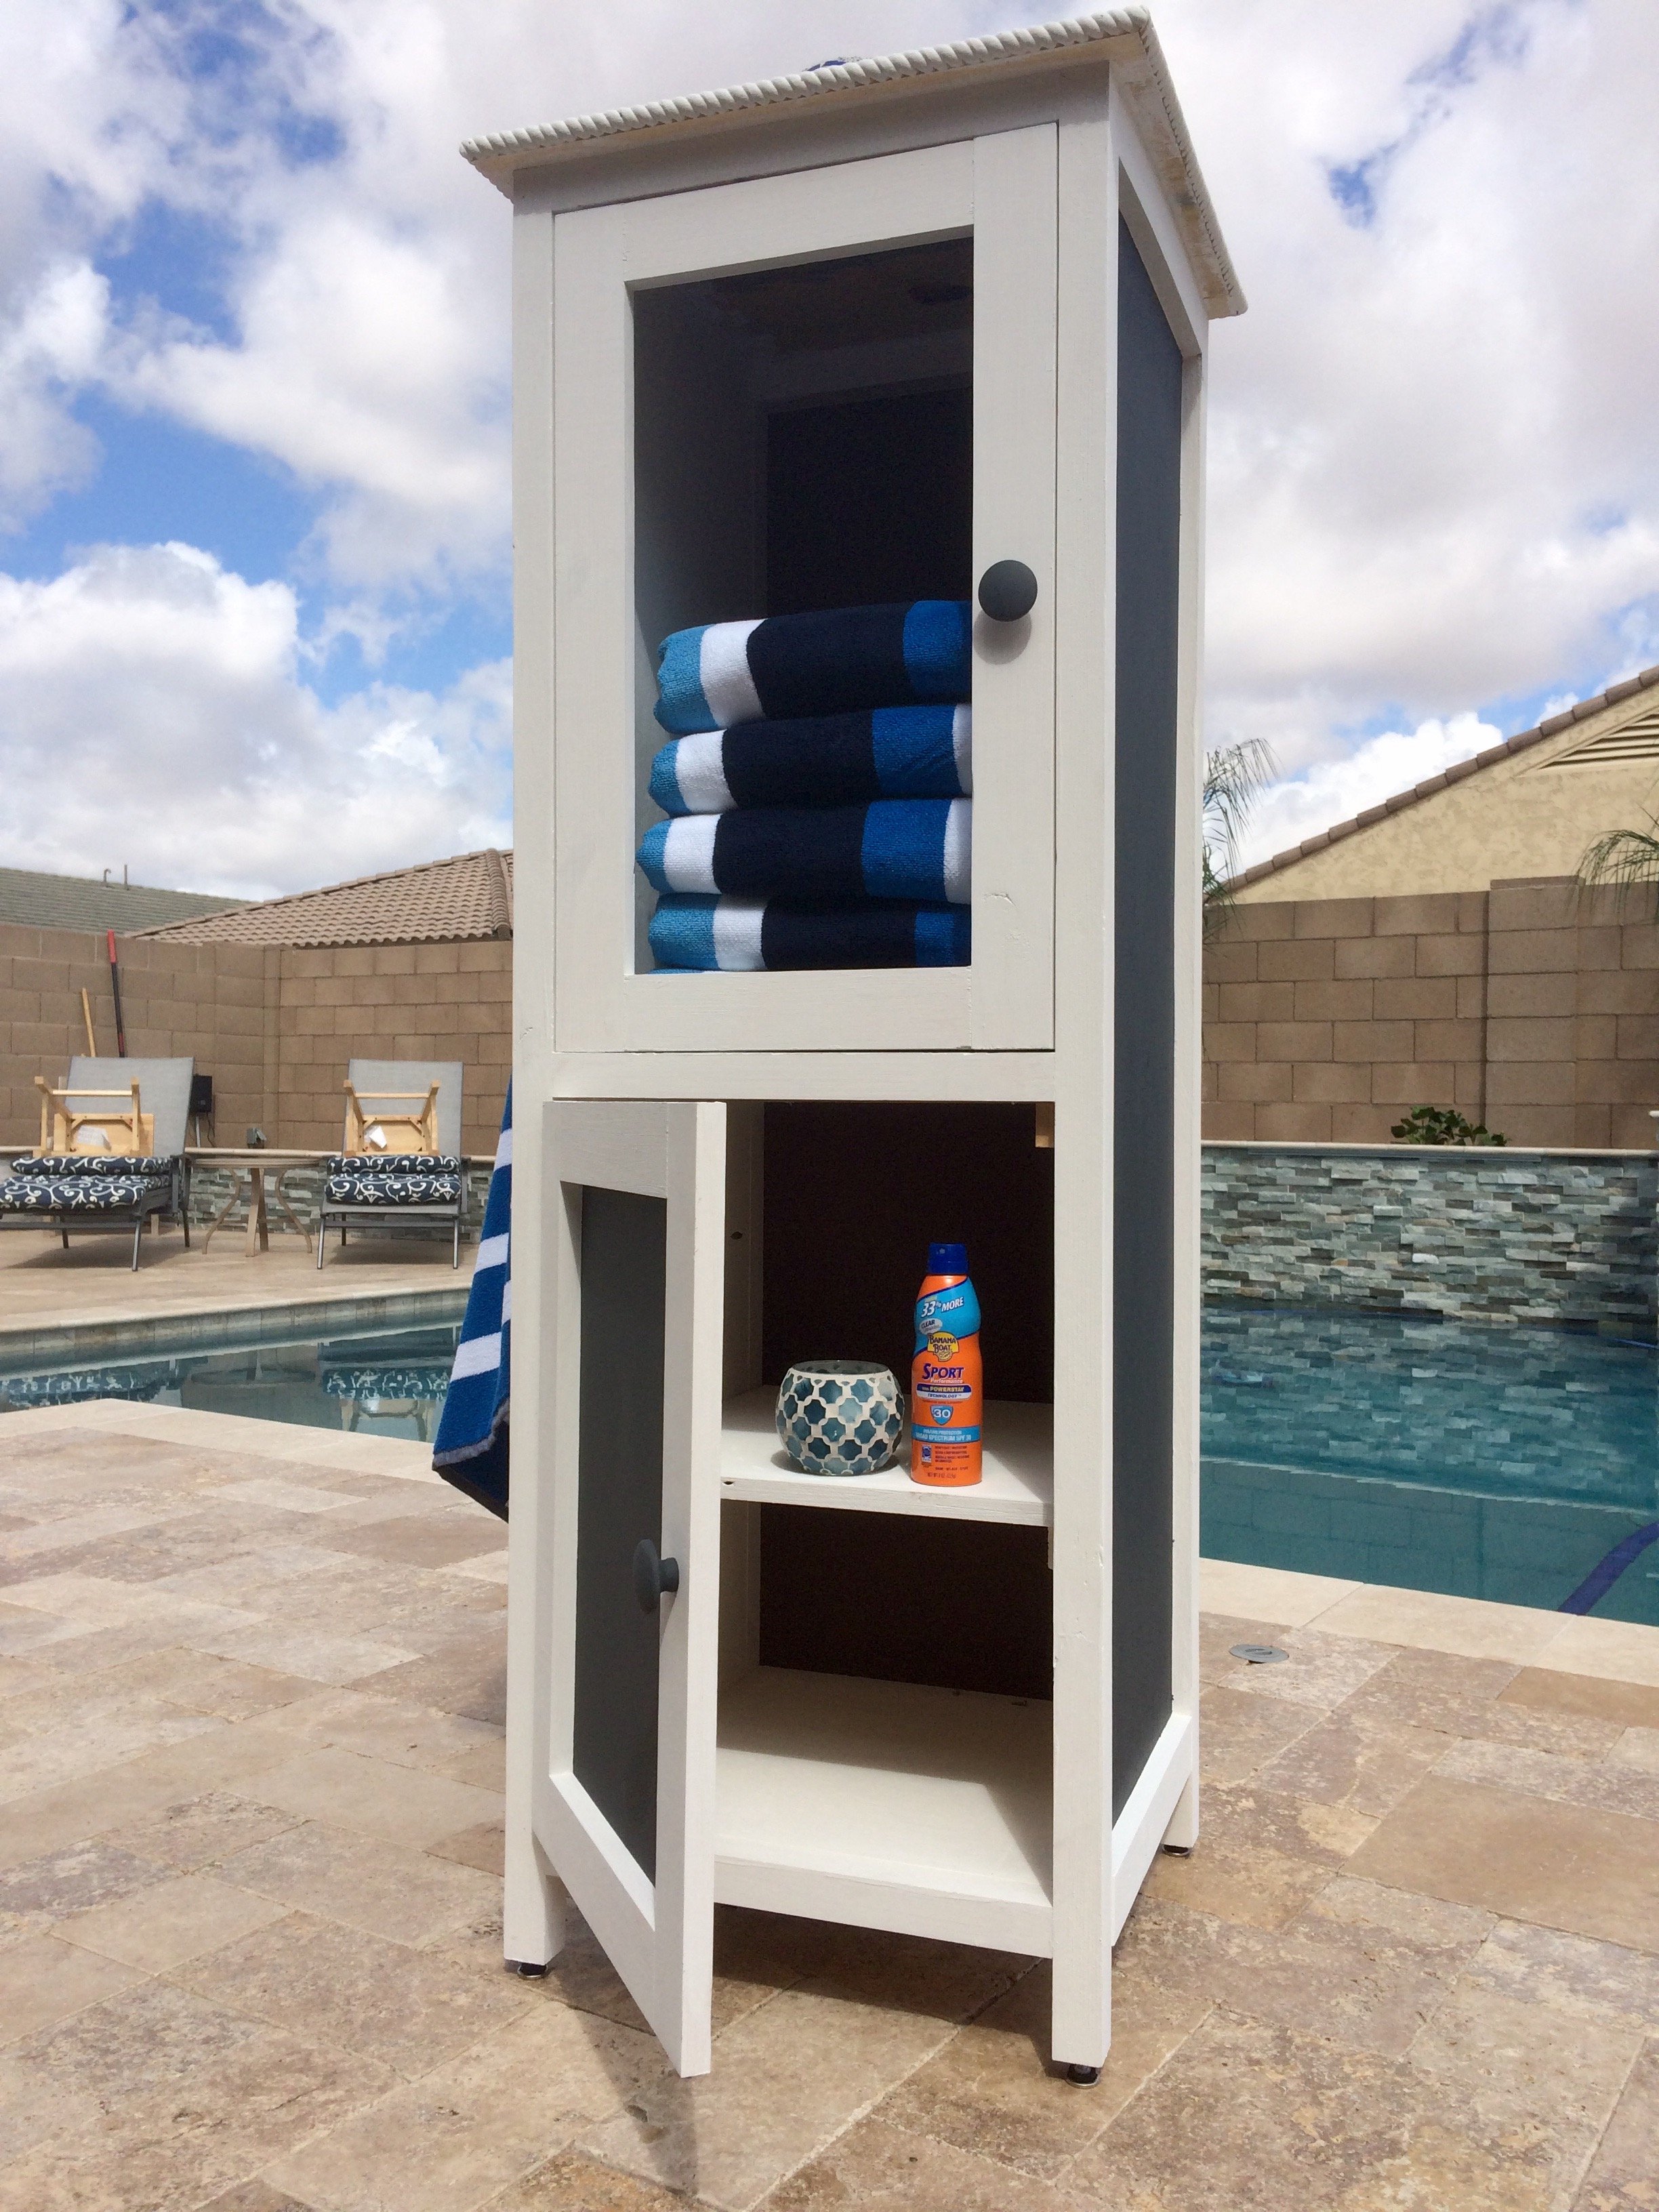
Poolside Towel Cabinet from Benchmark Cabinet Plan
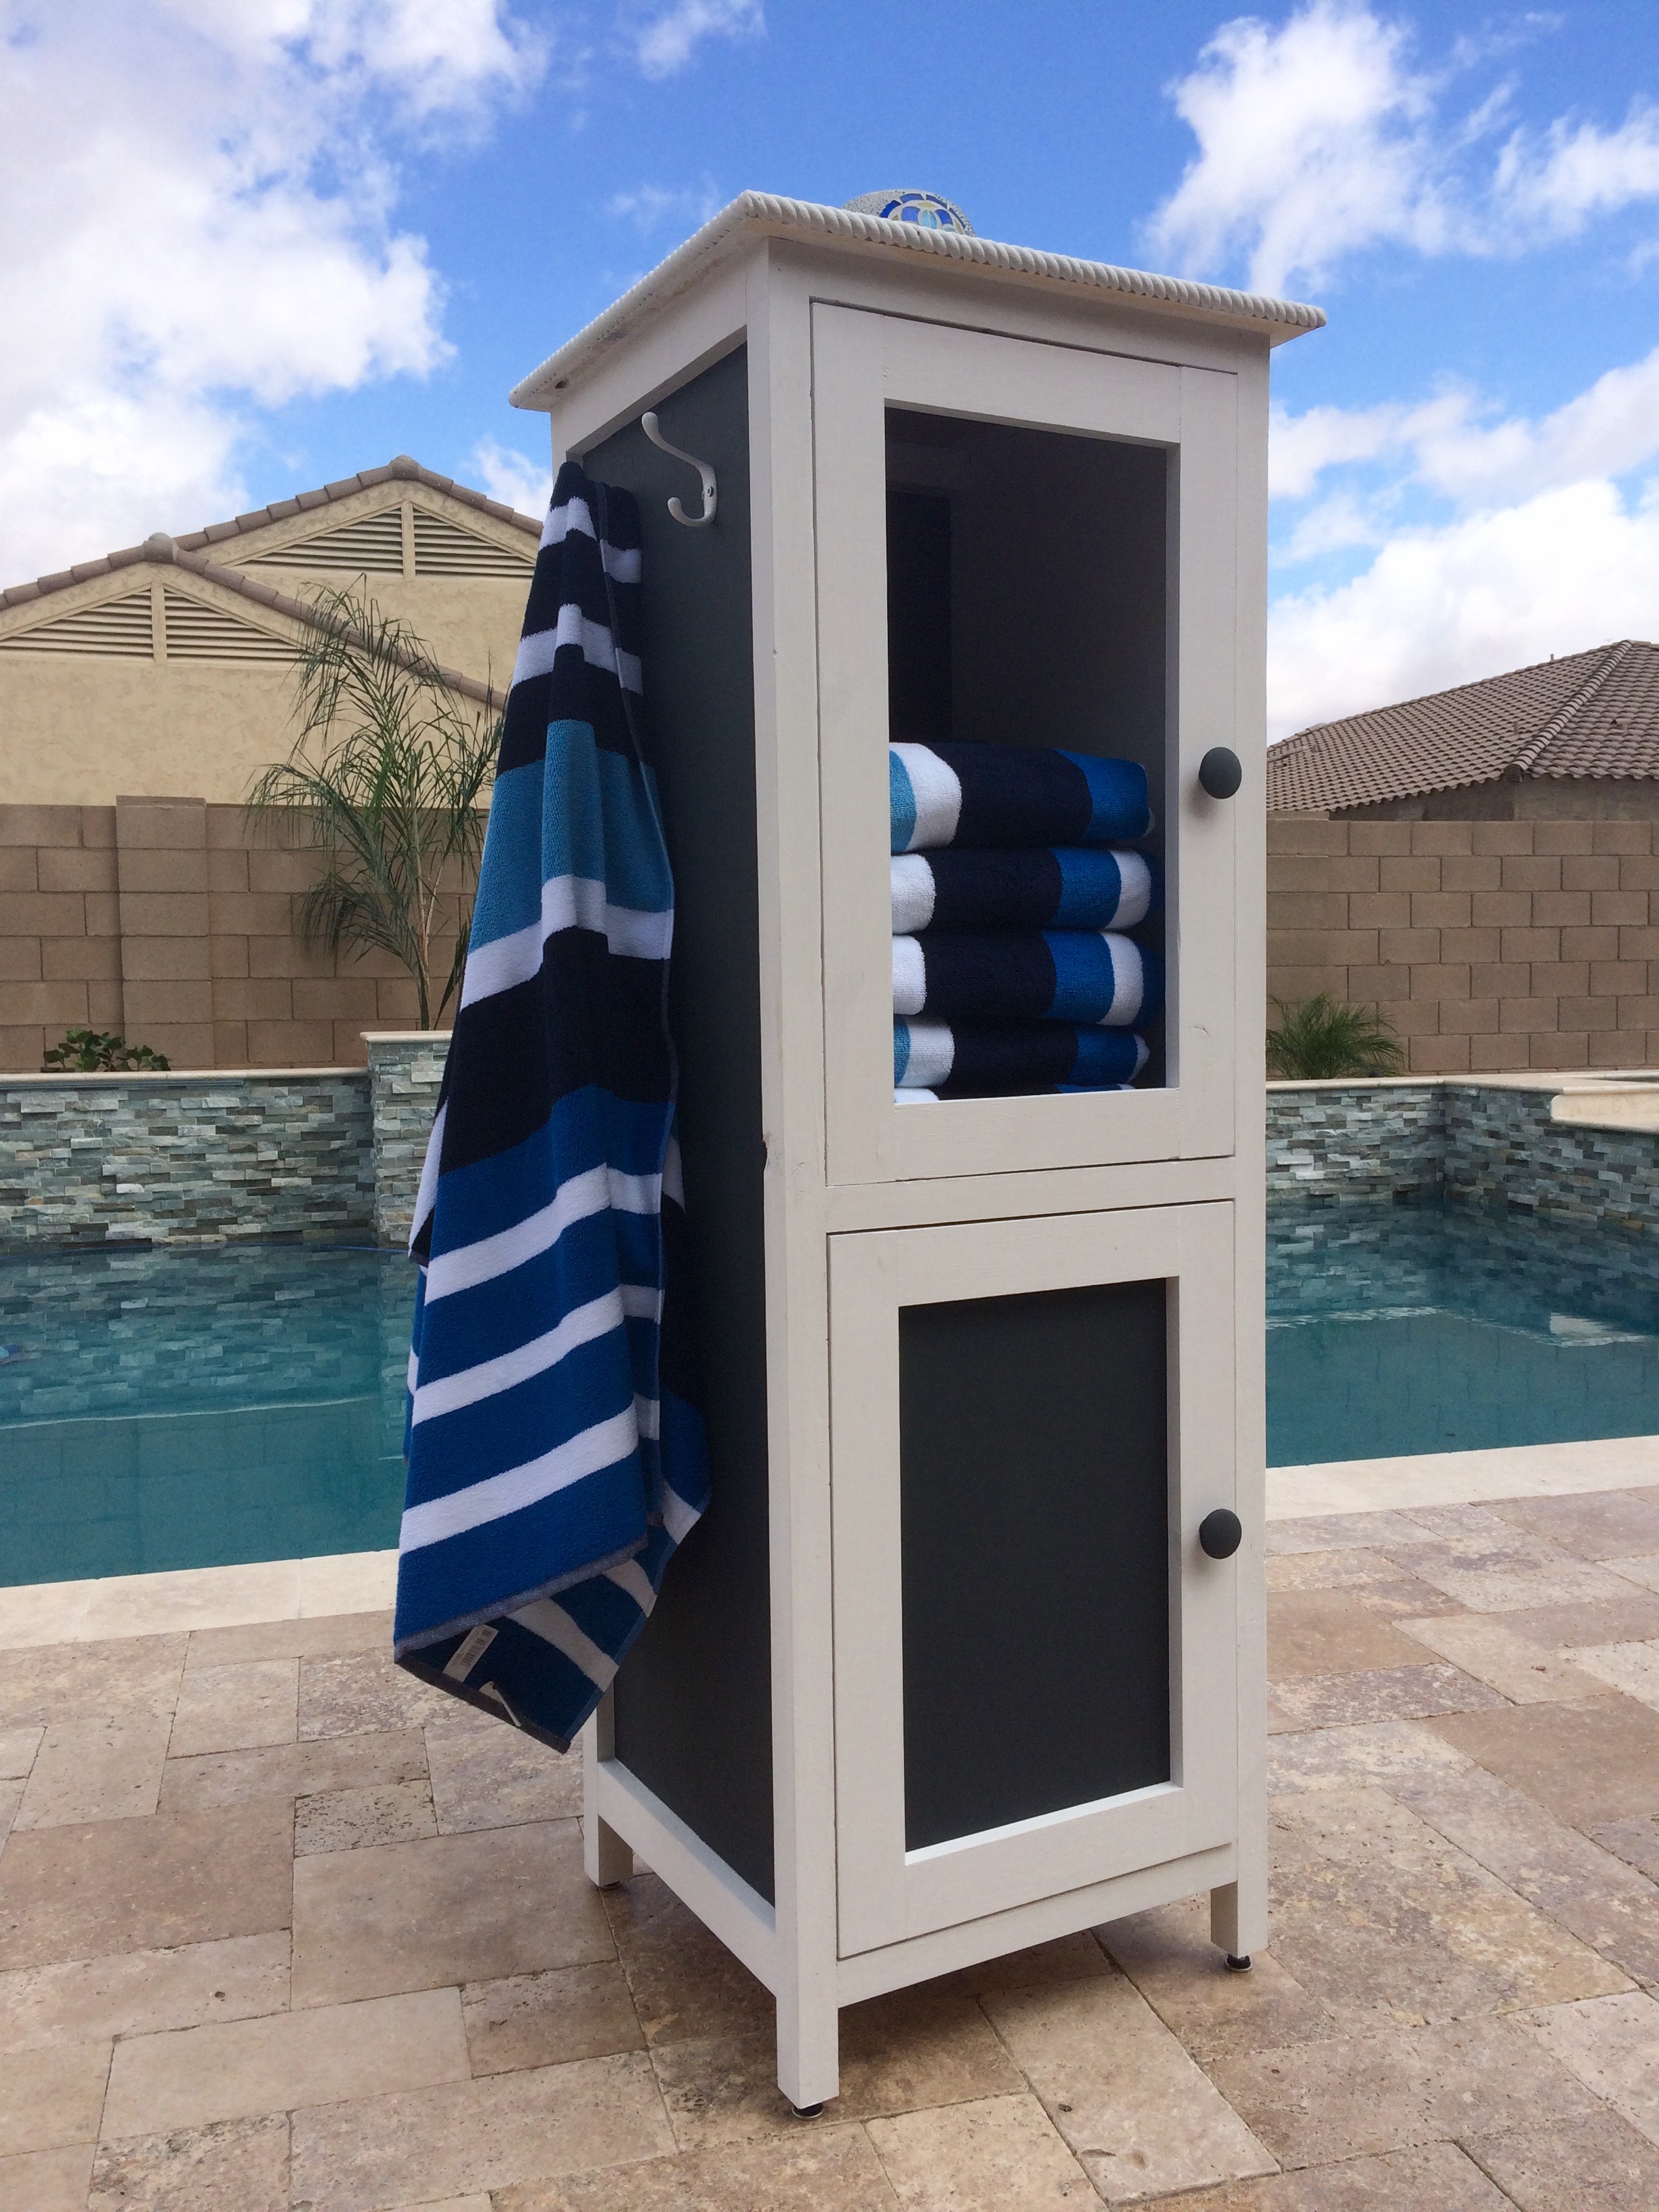
My father and I made this awesome poolside towel cabinet using the Benchmark Cabinet plans. A super easy 1 day build and it looks amazing on the patio. Bring on the pool weather!
Built from Plan(s)
Estimated Cost
$60
Estimated Time Investment
Day Project (6-9 Hours)
Finish Used
Chalk paint/Poly topcoat
Recommended Skill Level
Beginner
Drop Leaf Mobile Kitchen Island

This was born out of the need for more counter space in our galley kitchen. We don't have the space to add an island. Especially around the holidays, it would be great to have extra space for making cookies, serving big meals, etc. I used Ana's Small Kitchen Island Prep Cart plans for inspiration. I adapted the dimensions to fit at the end of our counters when not in use and added a drop leaf to give us almost 4 additional feet of butcher block counter top when we need it. I used scrap lumber that I had for the cabinet and had an extra drawer handle that matches our kitchen cabinets but bought the butcher block, locking casters, drawer slide and hardware for the legs. Also, the weight of the butcher block makes it want to tip when it's away from the cabinet with the drop leaf down so I added a lead counter weight inside the drawer.


Built from Plan(s)
Estimated Cost
$150-200
Estimated Time Investment
Weekend Project (10-20 Hours)
Finish Used
Behr paint for the cabinet, food grade mineral oil and cutting board wax for the butcher block
Recommended Skill Level
Advanced
Comments
Tue, 04/27/2021 - 18:09
I am so interested in doing…
I am so interested in doing this, but would like more details on how the drop leaf was constructed. Would it be possible to get more information?

In reply to I am so interested in doing… by haartd
Sat, 07/24/2021 - 16:59
Sure! I used a 4 foot…
Sure! I used a 4 foot butcher block and cut it down. The horizontal part is 13 1/2" and the drop leaf part is 32 1/8" attached with a piano hinge. The legs need to be cut and hinged to fit when folded up. This one is made so that the drop leaf fits right under the overhang of the kitchen countertop that it is next to so it's snug against the cabinet and not an issue but, if you want it to be freestanding, the weight of the butcher block will pull it over if you don't weight the cabinet down with something as well. I got a 5 pound lead bar from Amazon in case we need to use it somewhere else. I hope that helps! Let me know if you have any other questions.
Simple Outdoor Collection

The outdoor bench was my first Ana project. It was so easy and rewarding that I immediately set out to build the rest of the set!
Built from Plan(s)
Estimated Time Investment
Weekend Project (10-20 Hours)
Finish Used
dark deck stain
Recommended Skill Level
Starter Project
Comments
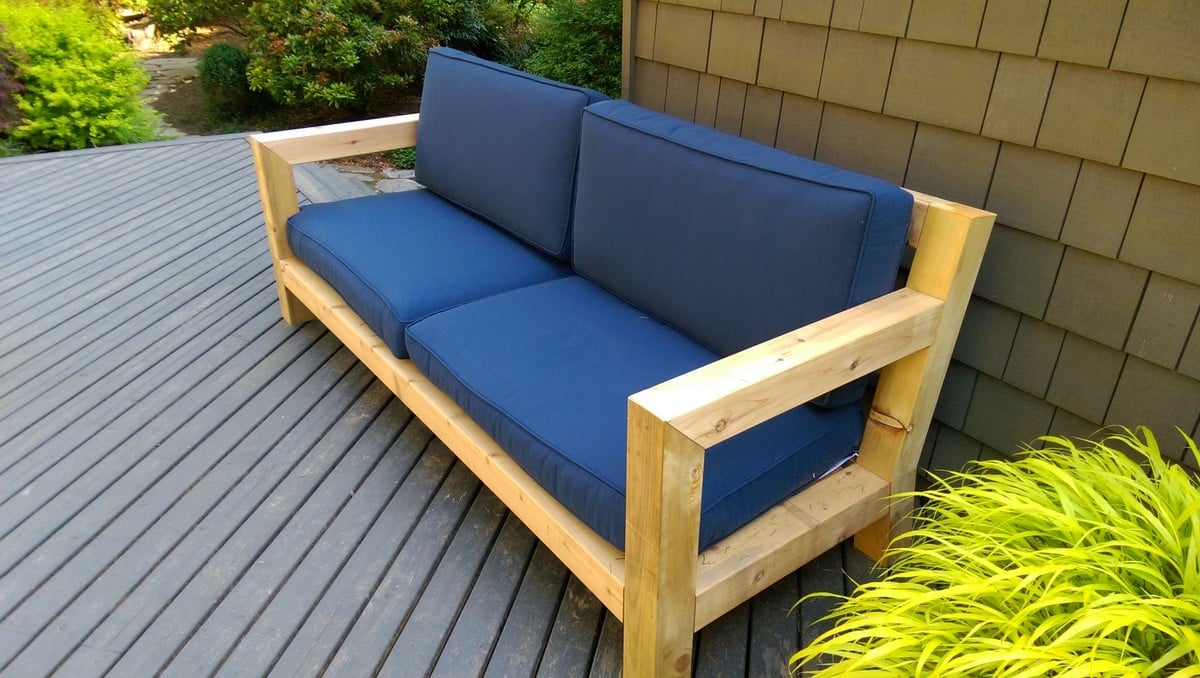
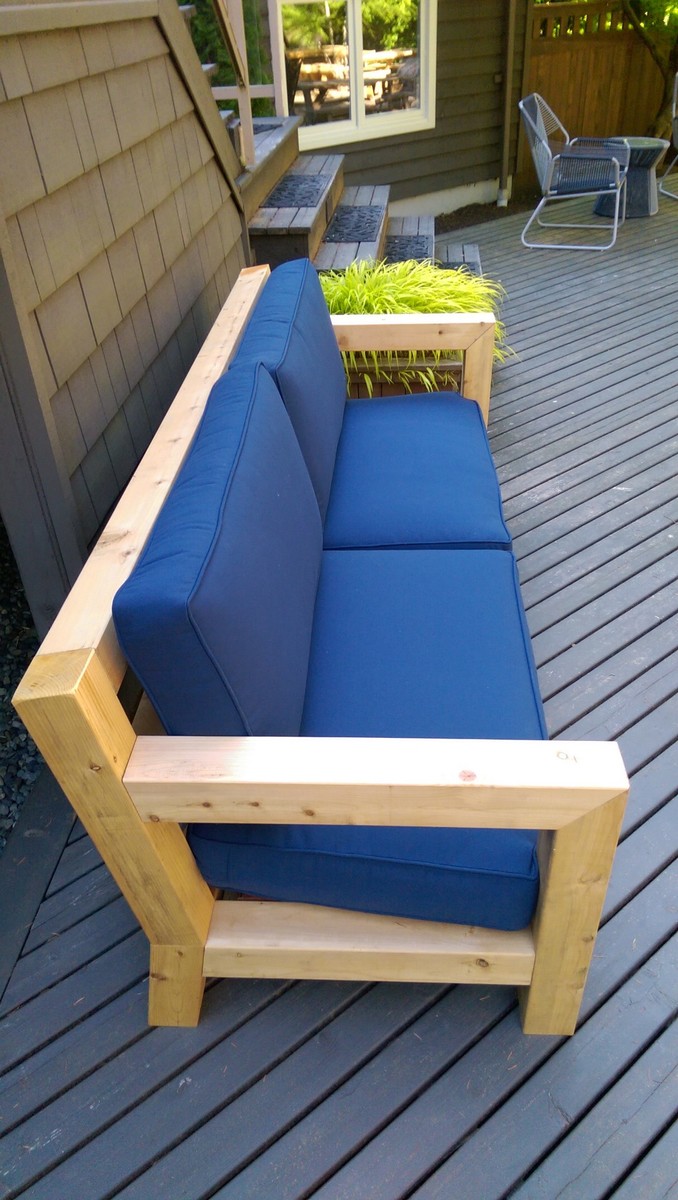
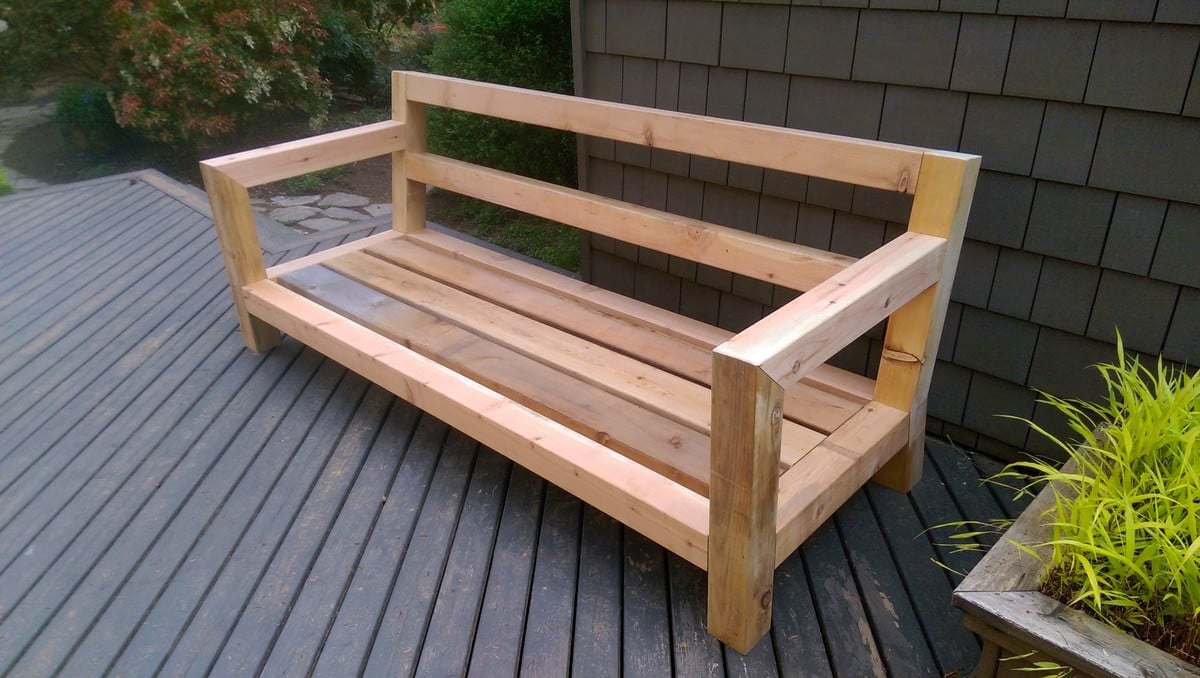
Modern Rustic Outdoor Sofa Inspired by RH Merida
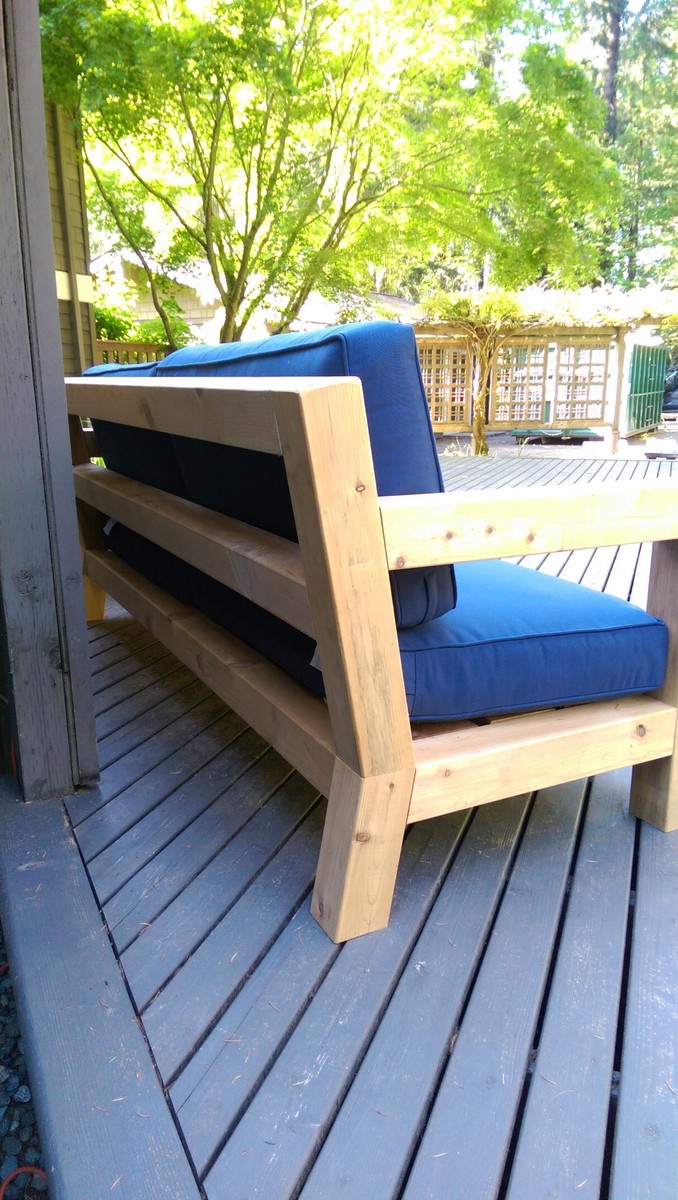
I was in love with the RH Merida set because of its clean lines and modern style. Also, the plan seemed simple enough that I could re-create it without a pattern. The only thing that I did not like about it is the lack of arms. I really like to have a place to put my arm or my beverage :) - so I added arms to the design.
Estimated Cost
$150
Estimated Time Investment
Day Project (6-9 Hours)
Finish Used
Natural
Recommended Skill Level
Intermediate
Comments

Thu, 05/30/2019 - 18:45
It’s beautiful! Do you have…
It’s beautiful! Do you have a set of plans that you might be willing to share?
Wed, 05/20/2020 - 10:45
stuck in the middle.
This is Awesome. I'm halfway in the middle as i thought I could complete without plans. Do you have any plans could share. Please....
Fri, 06/19/2020 - 15:54
plans for the RH Merida
were you able to get plans? I would LOVE plans too! we want to try and re-create this and would prefer NOT to get stuck!
Fri, 06/19/2020 - 15:55
Would LOVE to get plans,…
Would LOVE to get plans, would even pay for them! Found rough drawings online but they are chicken scratch and hard to interpret!
Mushroom Side Table
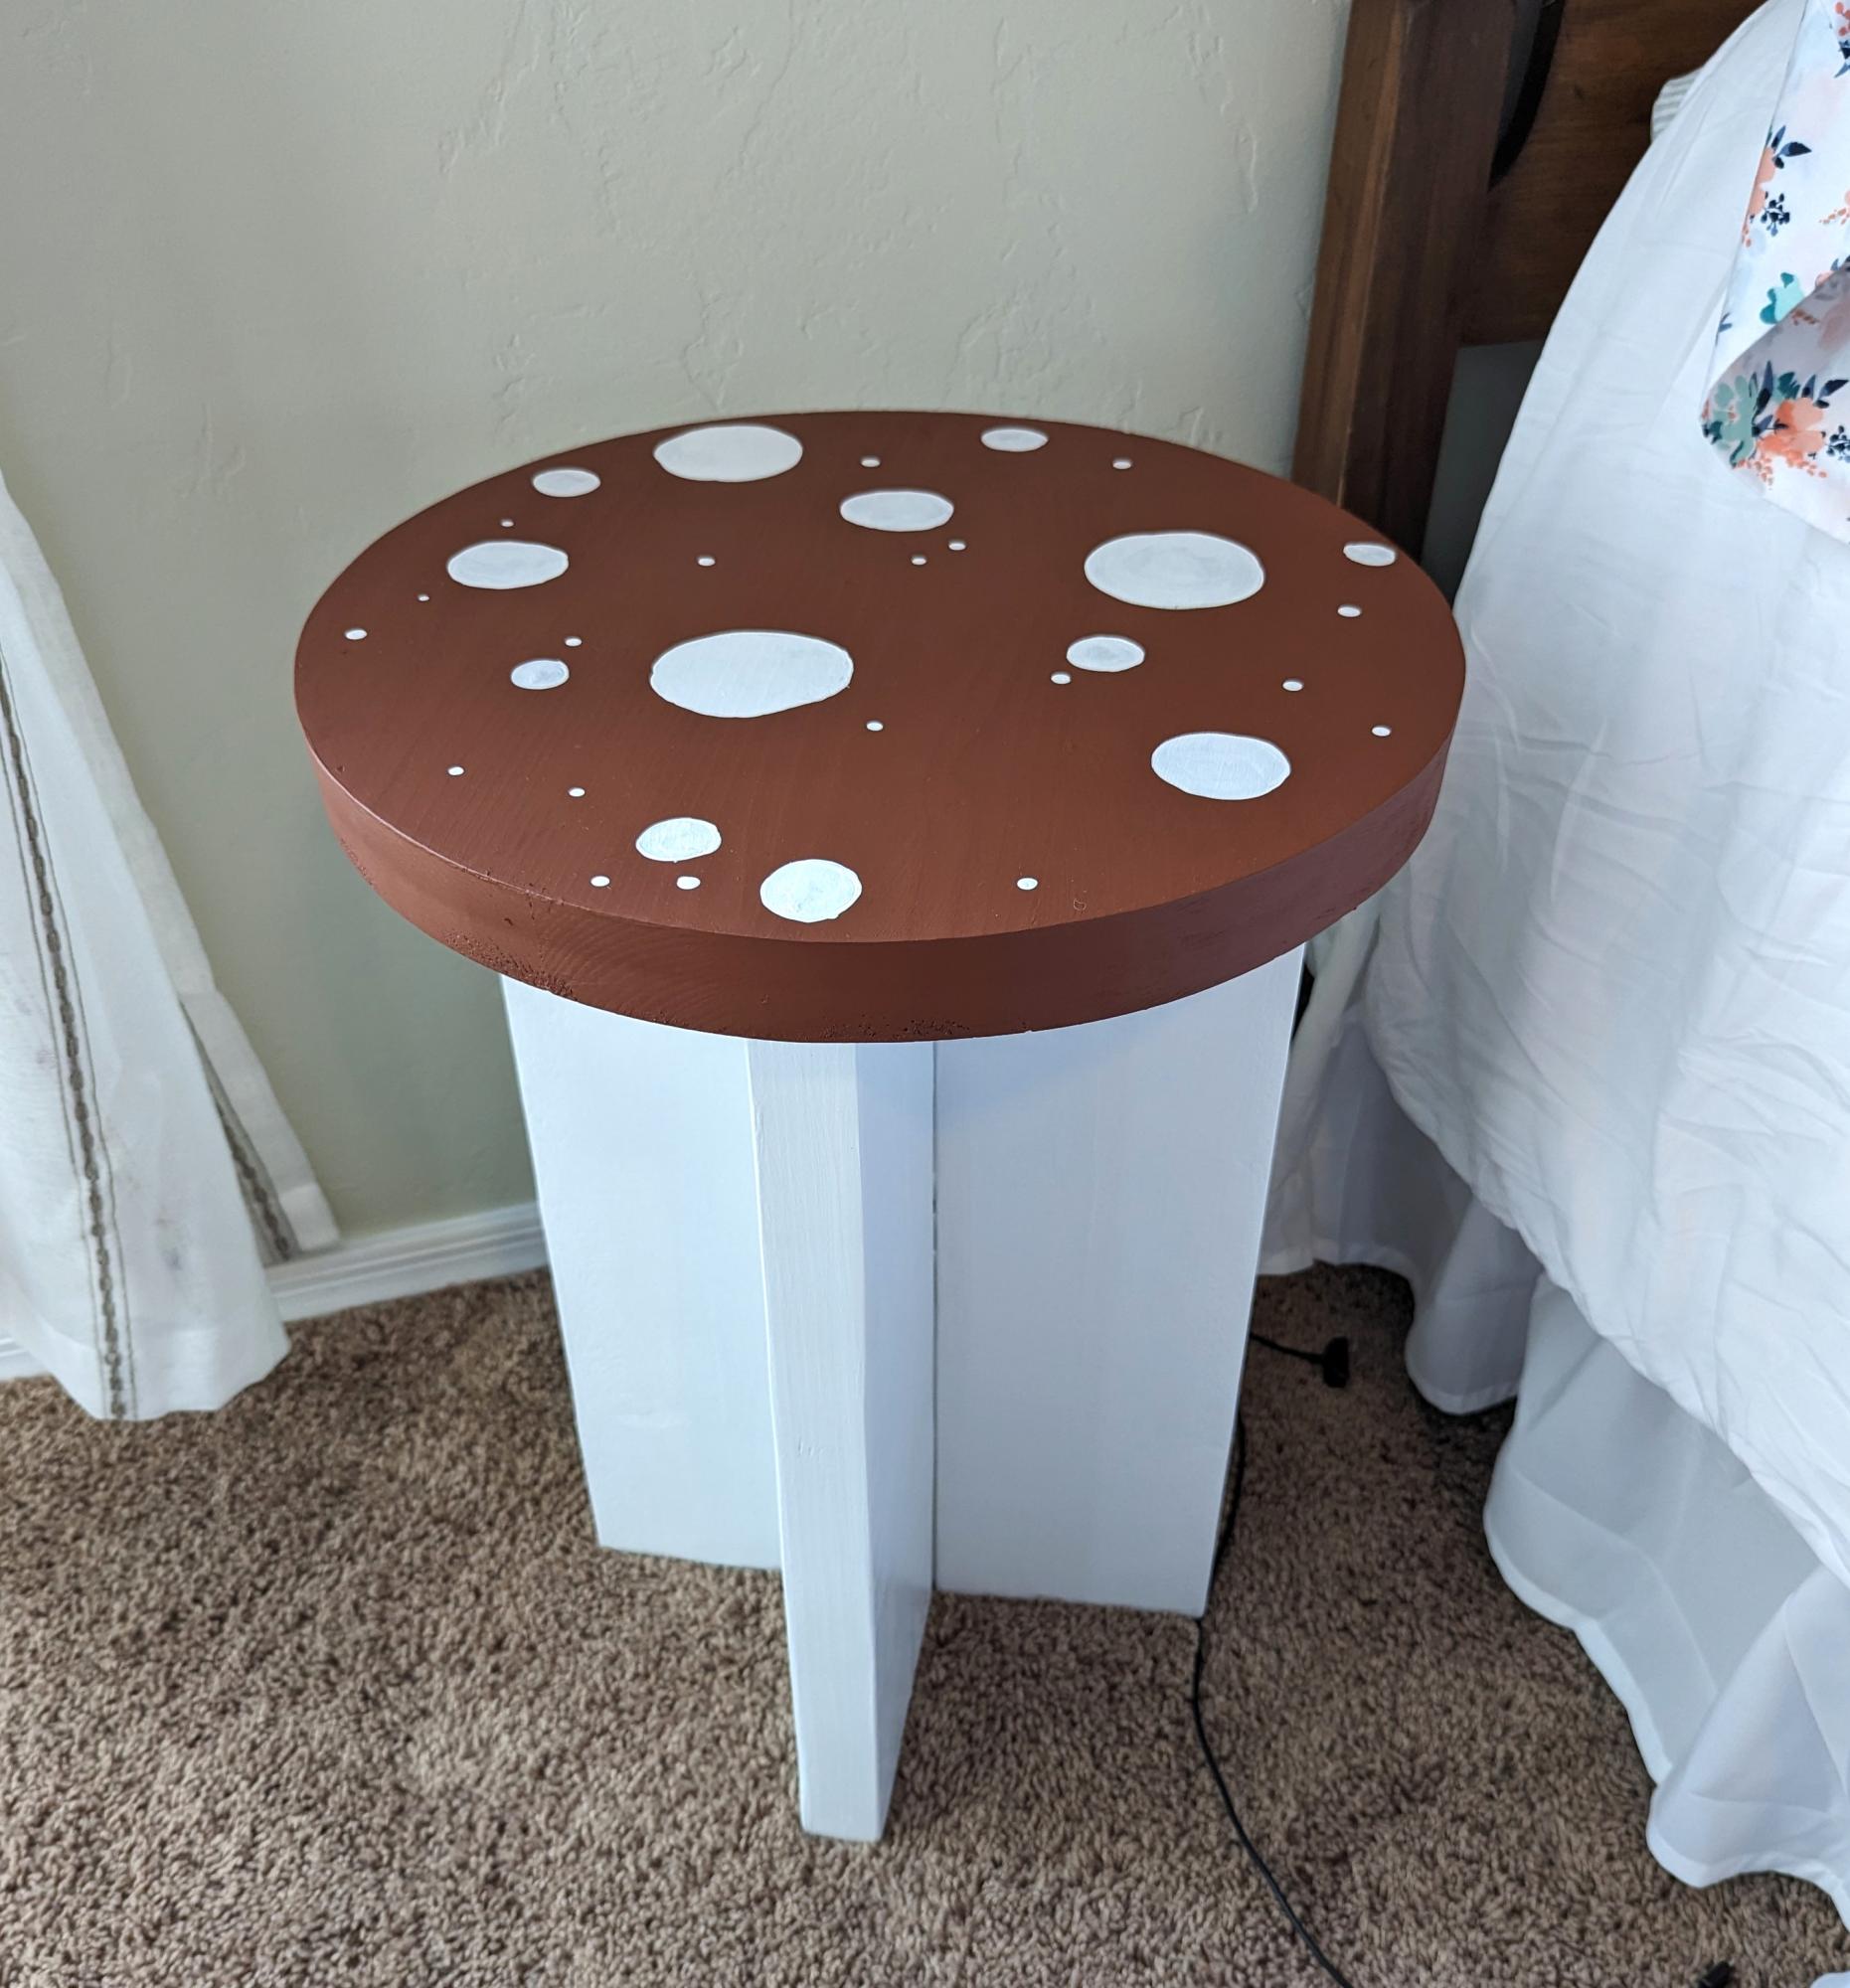
We made this for our daughter, and our other daughter wanted to paint it to look like a mushroom. We are very happy with how it turned out.
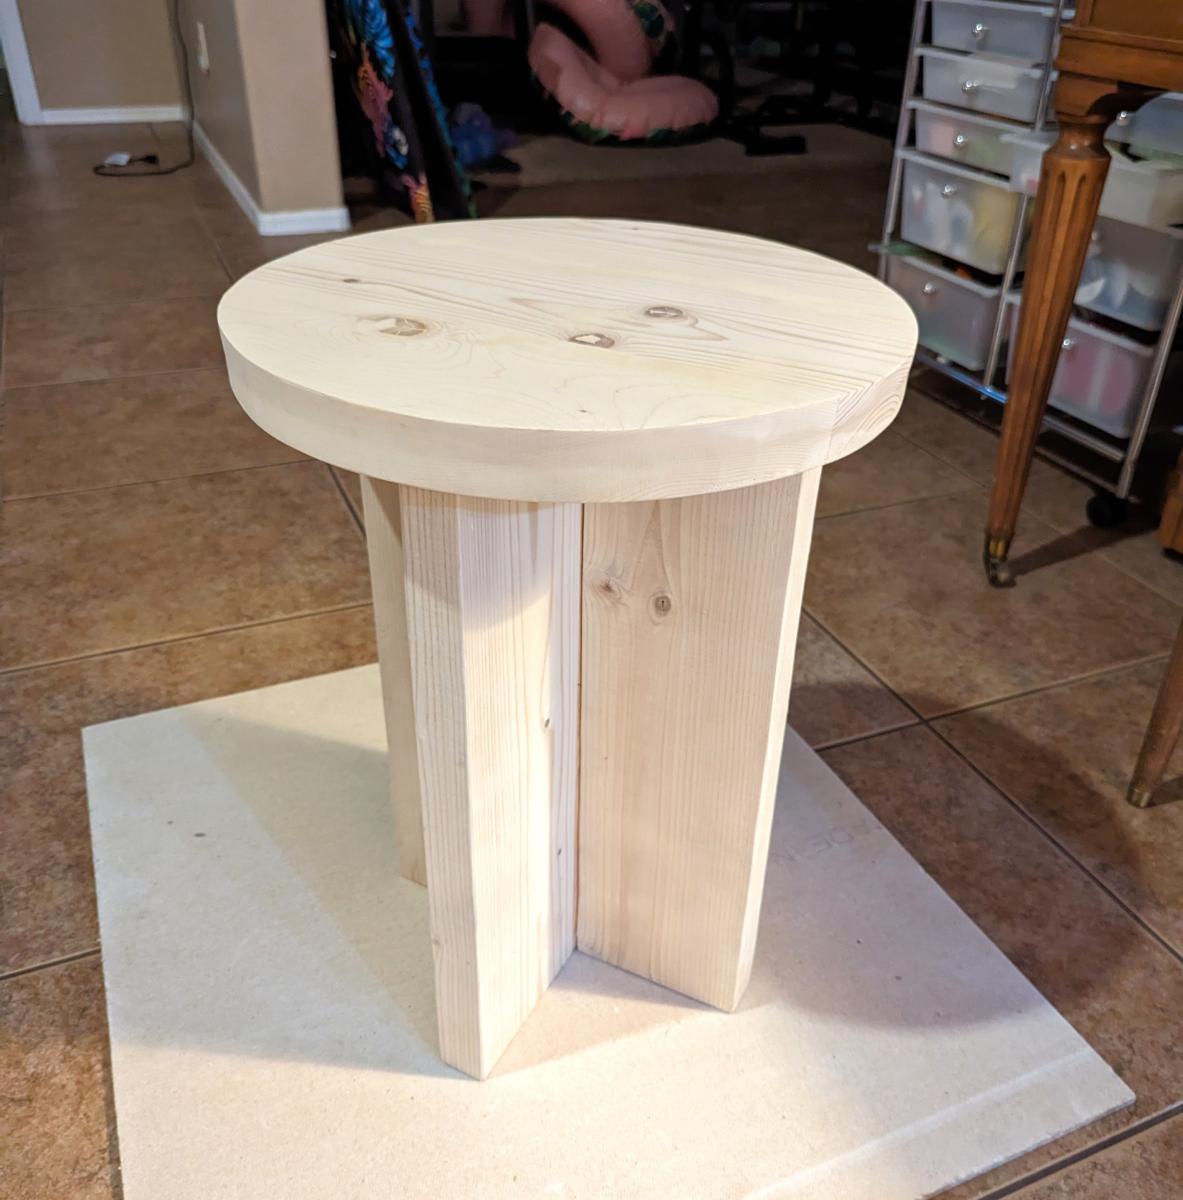
Built from Plan(s)
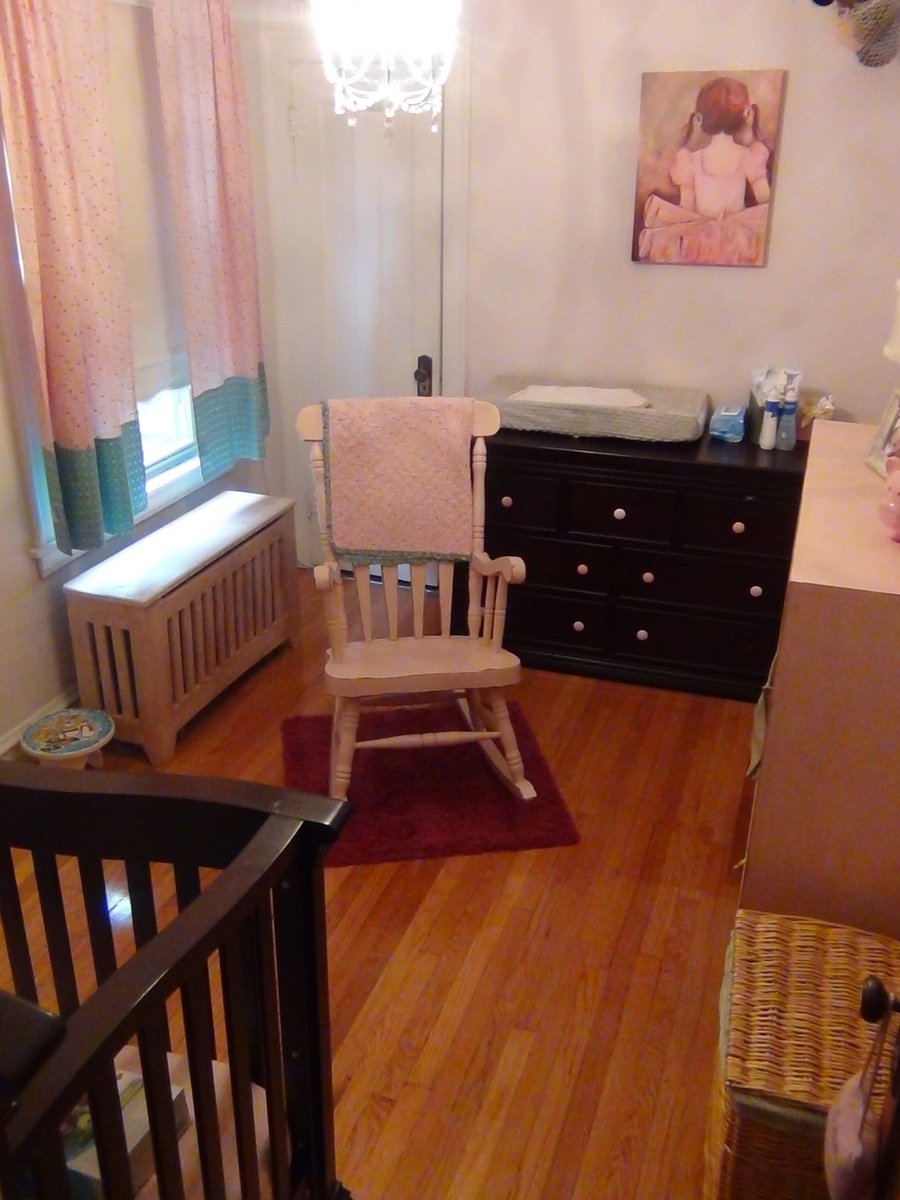
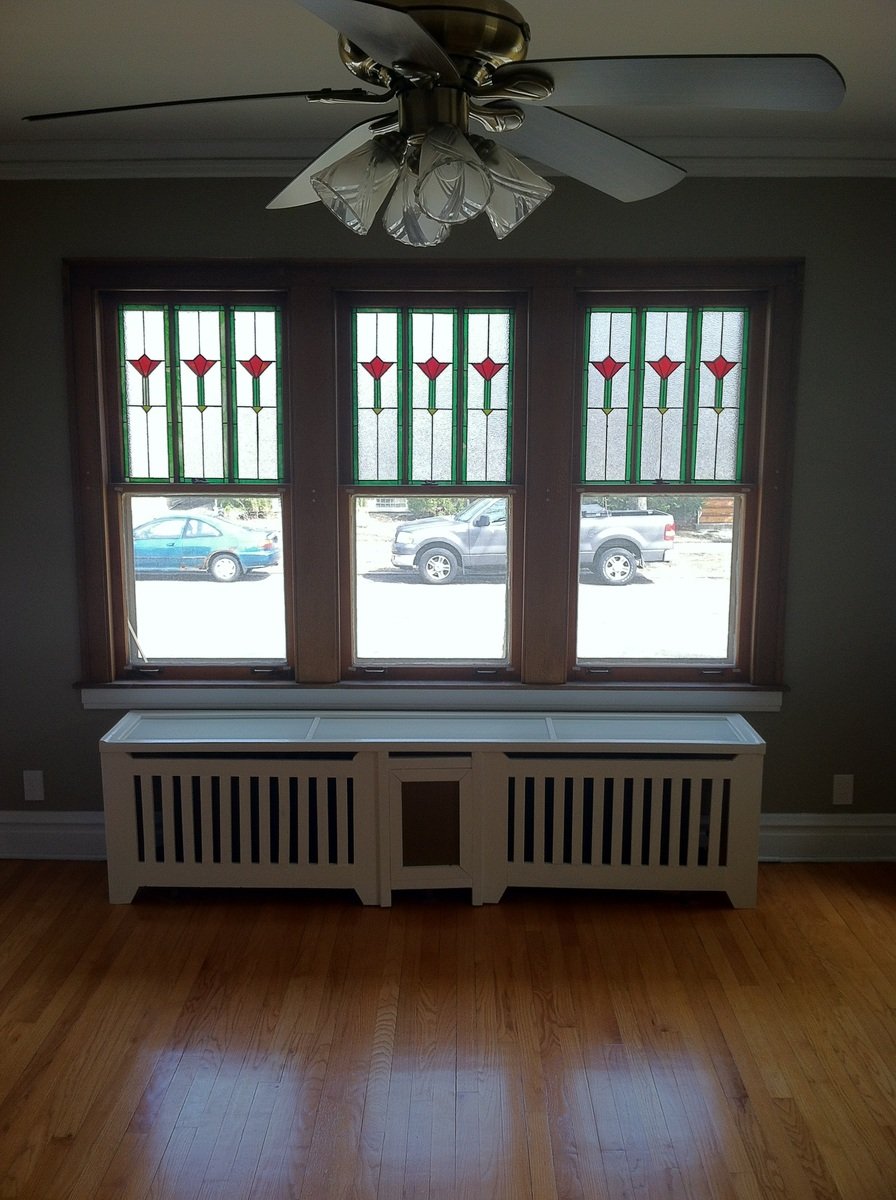
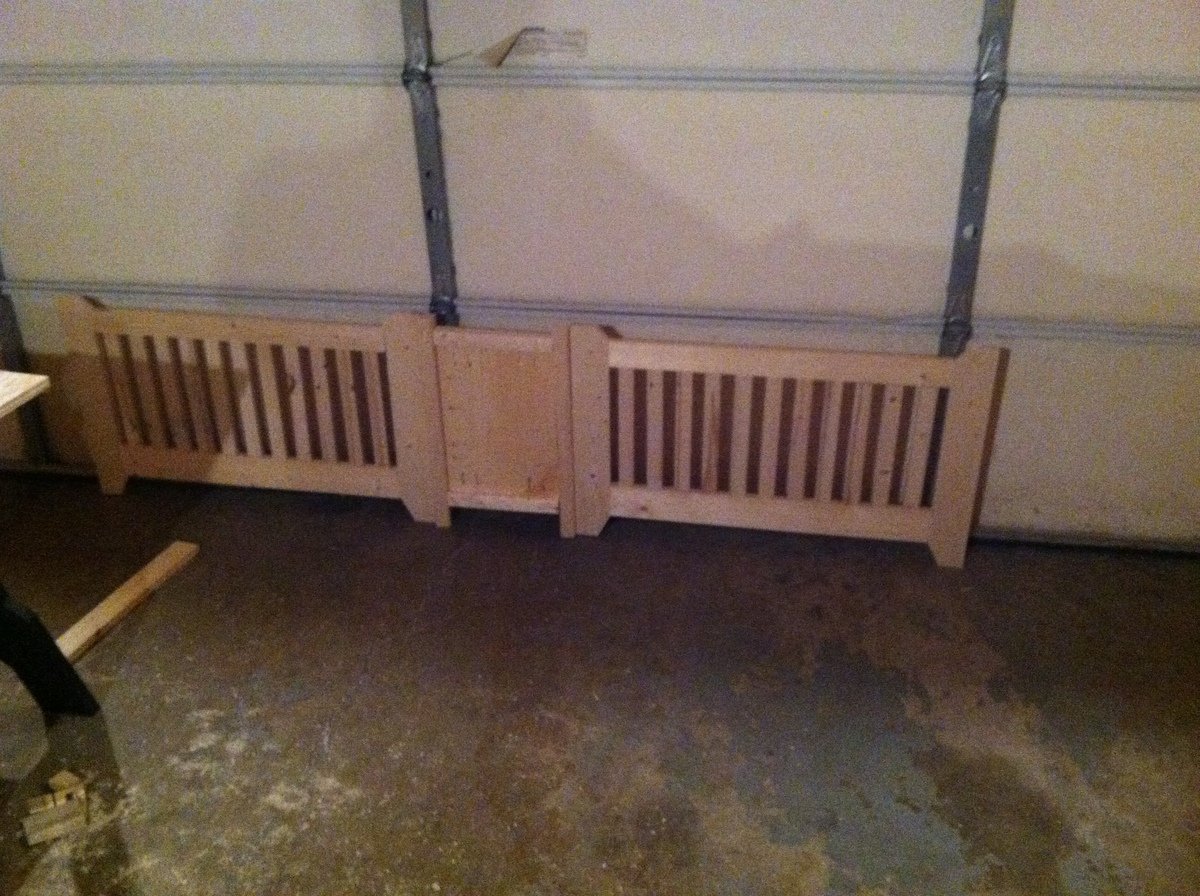
Radiator Covers
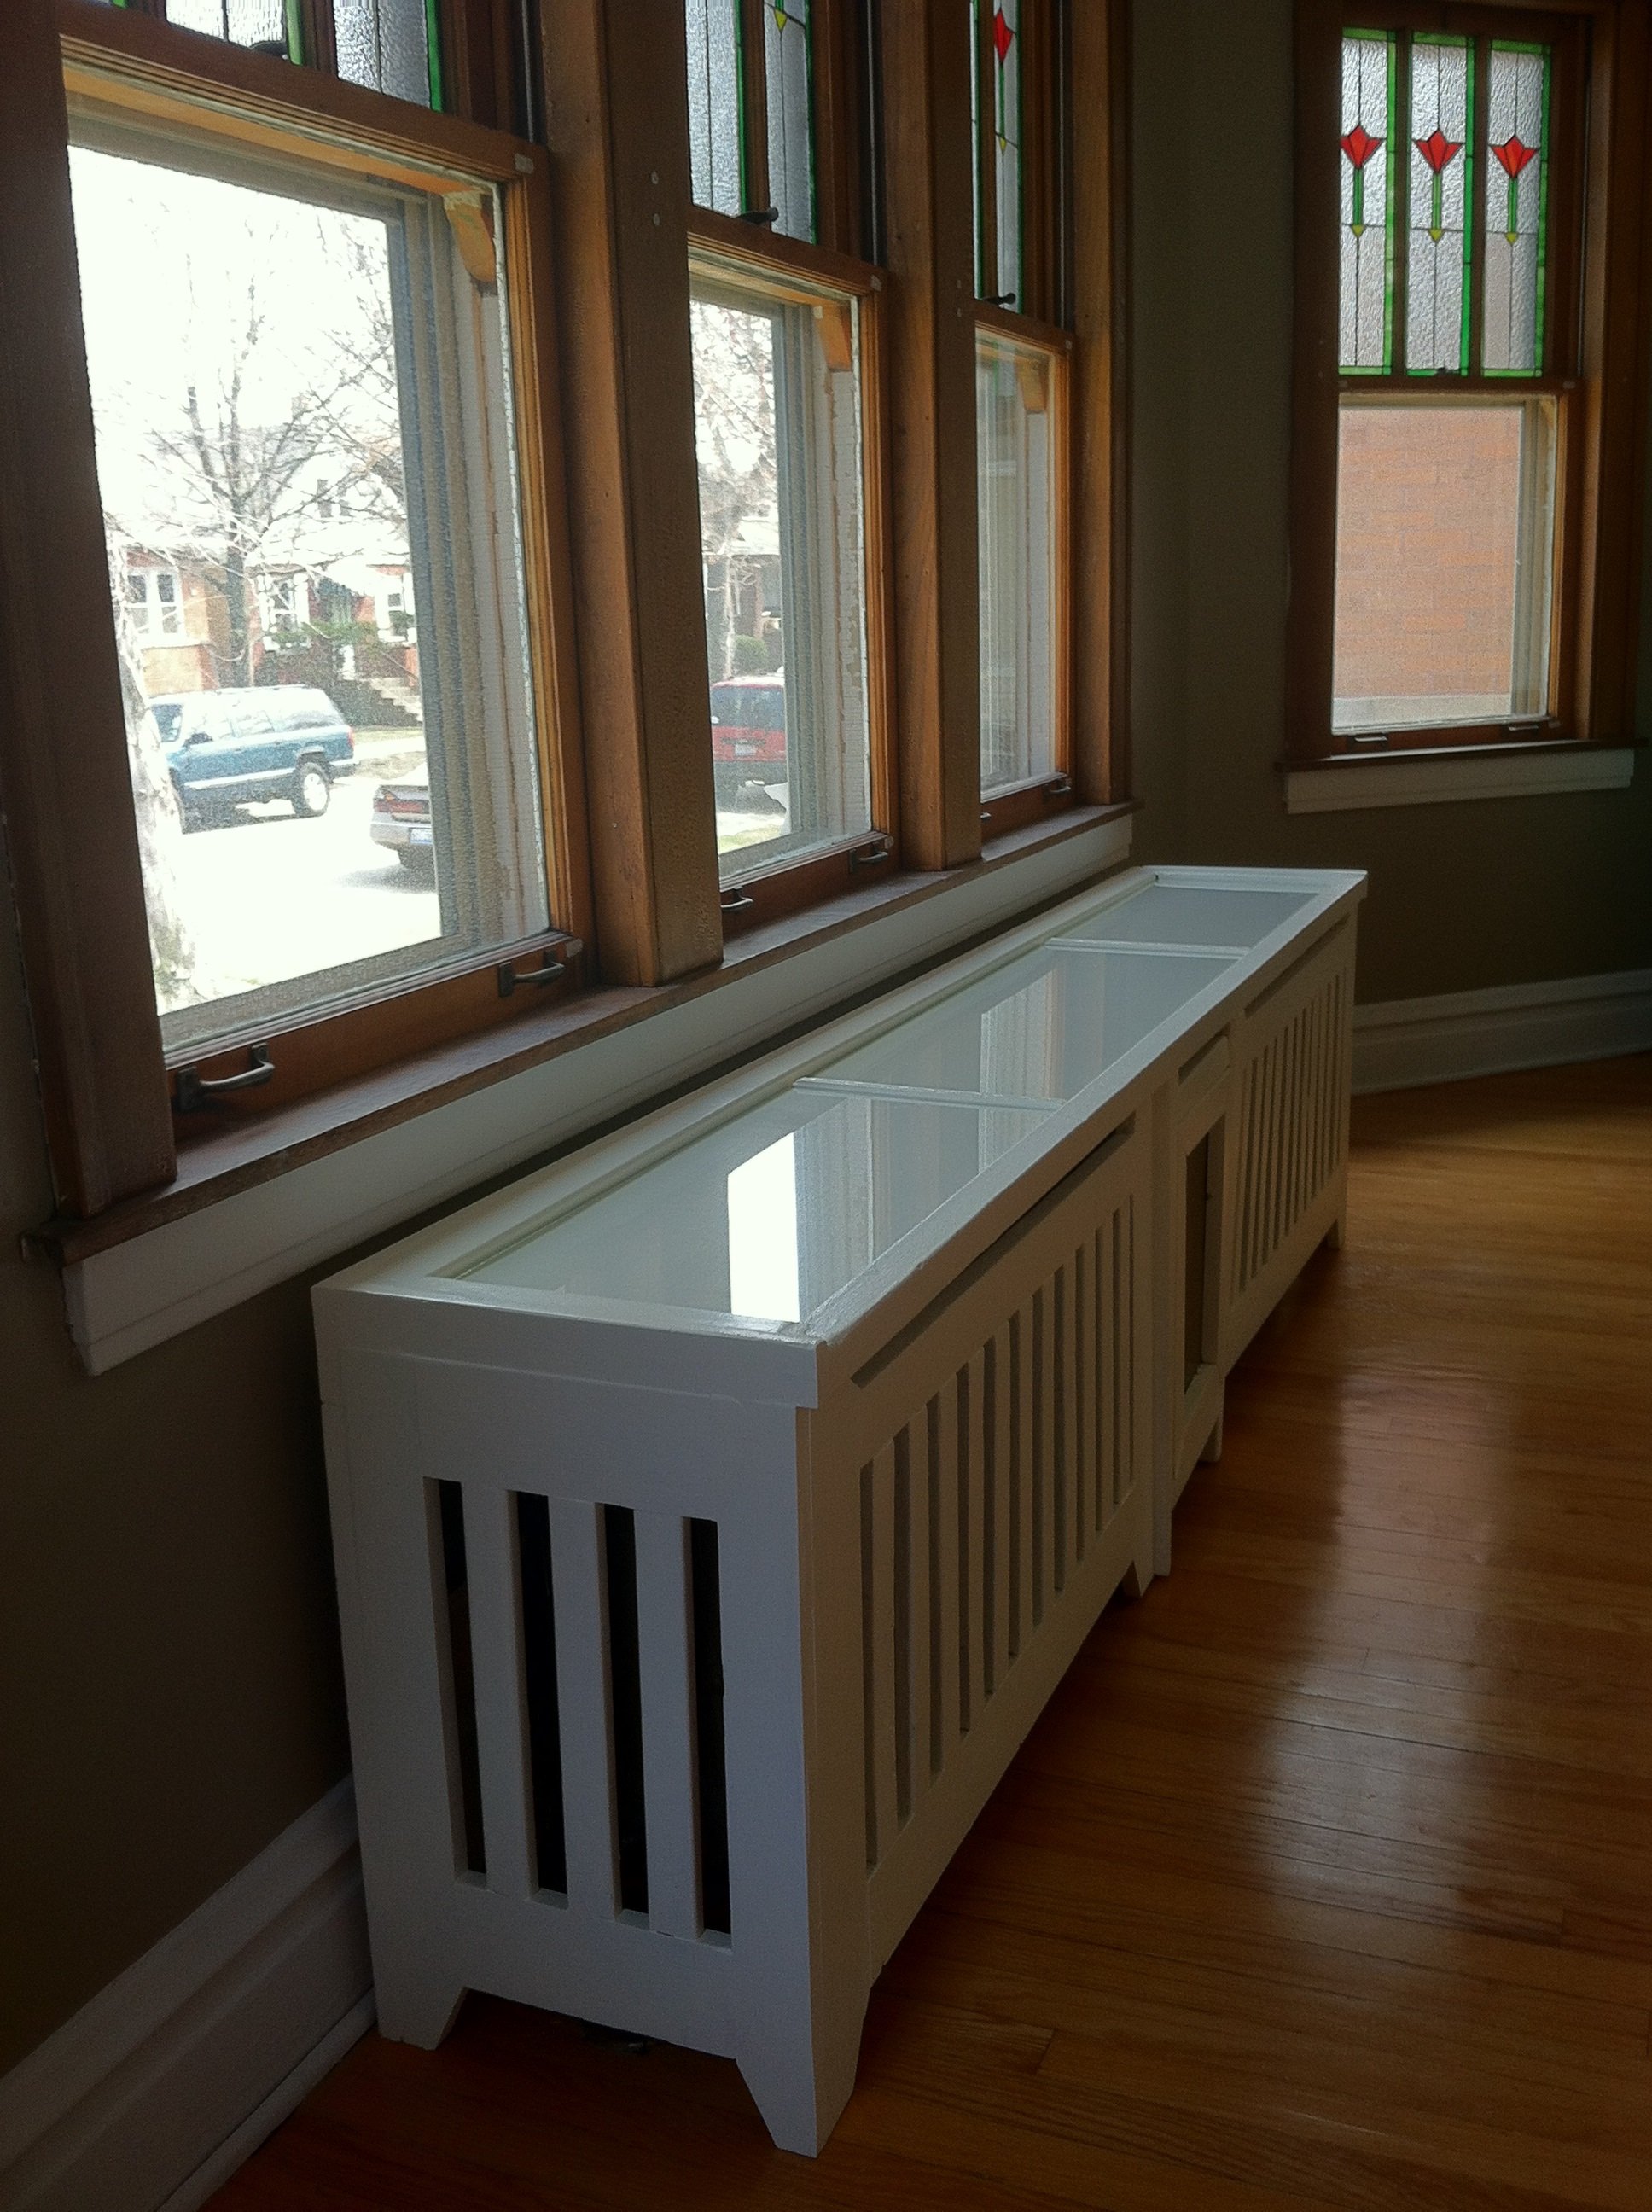
We loved the radiant air in our new early 20th century house, but as our daughter learned to crawl, we needed to prevent her little fingers from touching the two radiators that were still uncovered. After I finished my first few builds, I custom designed these radiator covers with 1x2s, 1x3s 2x2s and 1x12s. Needless to say, I got a ton of use out of my Kreg Jig. On the middle panel of the larger cover, I used a bit of decorative metal that they sell at the Big Box stores (of course, it would have been easier to use more of it, but I am a bit paranoid about little fingers touching a metal cover). For a final touch, I covered the top of the larger cover with decorative glass. For the smaller cover, I matched the distressed pink throughout the rest of my daughter's nursery.

Estimated Cost
200
Estimated Time Investment
Weekend Project (10-20 Hours)
Finish Used
Behr camembert paint (for the larger living room) and Behr Kashmir pink paint with distressed w/Martha Stewart vintage gold specialty finish (for the nursery)
Recommended Skill Level
Intermediate
Weatherly Pergola with Hammocks
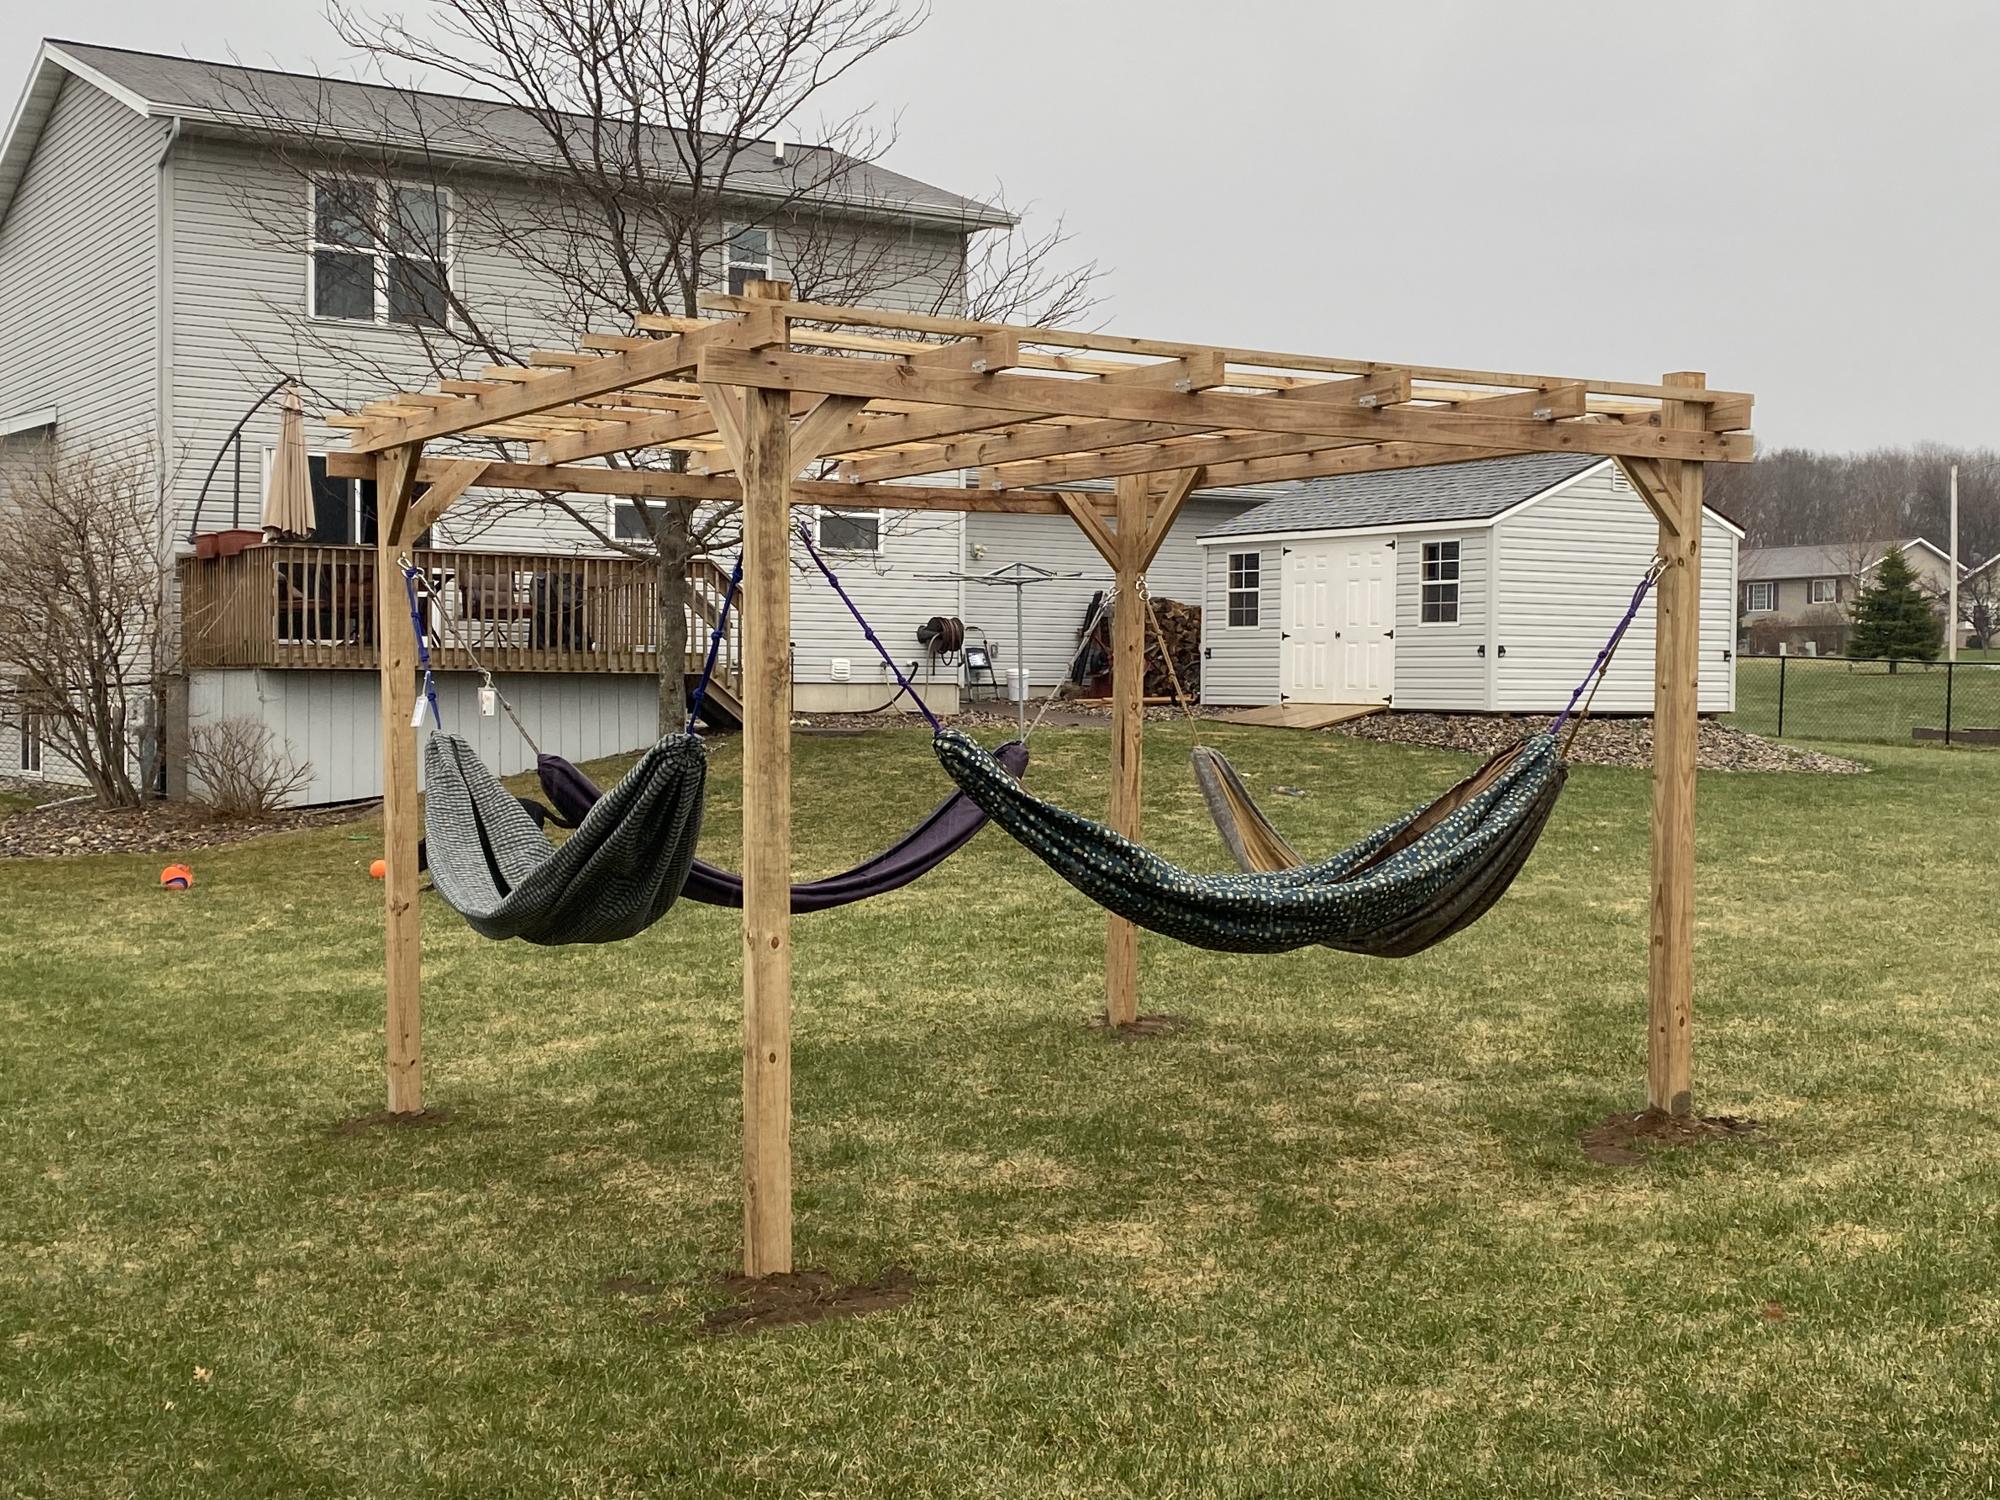
I've wanted a place to hang our hammocks for a few years now. We have some really nice hammocks from a local artisan. This past weekend, we built the framing with intentions of making it a pergola at a later time. With encouragement of my son & boyfriend, we decided to add the pergola on Sunday. I liked this plan because it wasn't as complicated or expensive as a lot of other plans out there that use 2x6s instead of 2x4s. Adding the angle brackets really solidified the whole structure. I'm so thrilled with this project! Unfortunately, today (Monday), it's raining, so I can't go hang out there.
Built from Plan(s)
Estimated Cost
300
Estimated Time Investment
Weekend Project (10-20 Hours)
Finish Used
We will allow the wood to dry most of the summer before finishing.
Recommended Skill Level
Intermediate
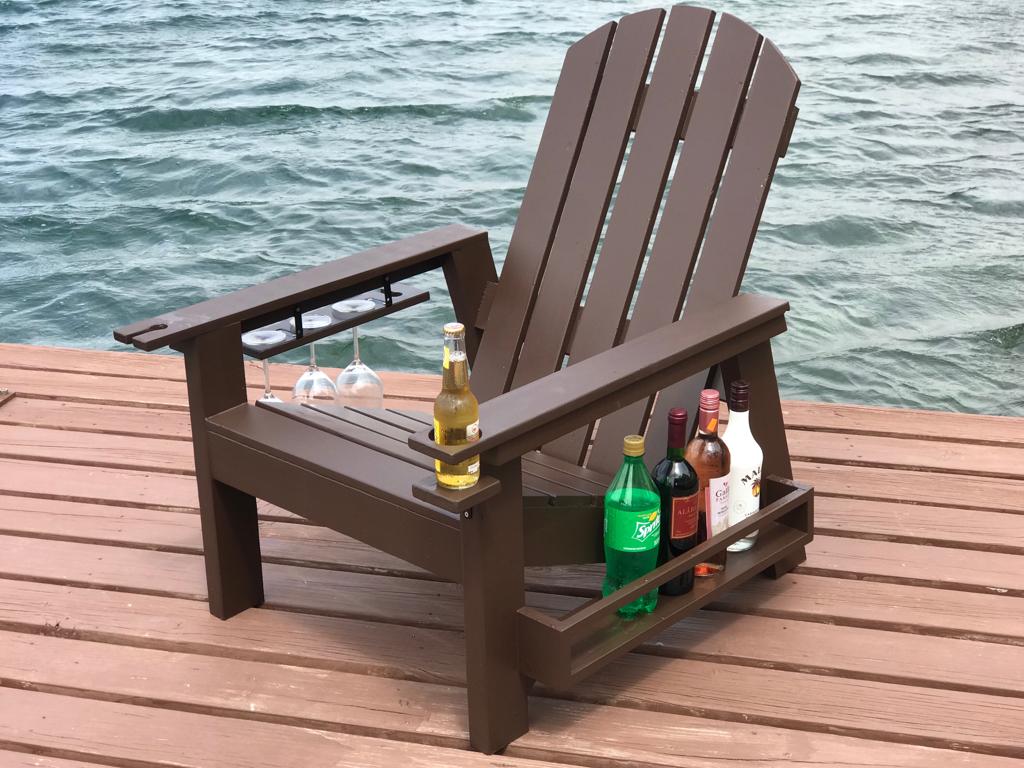
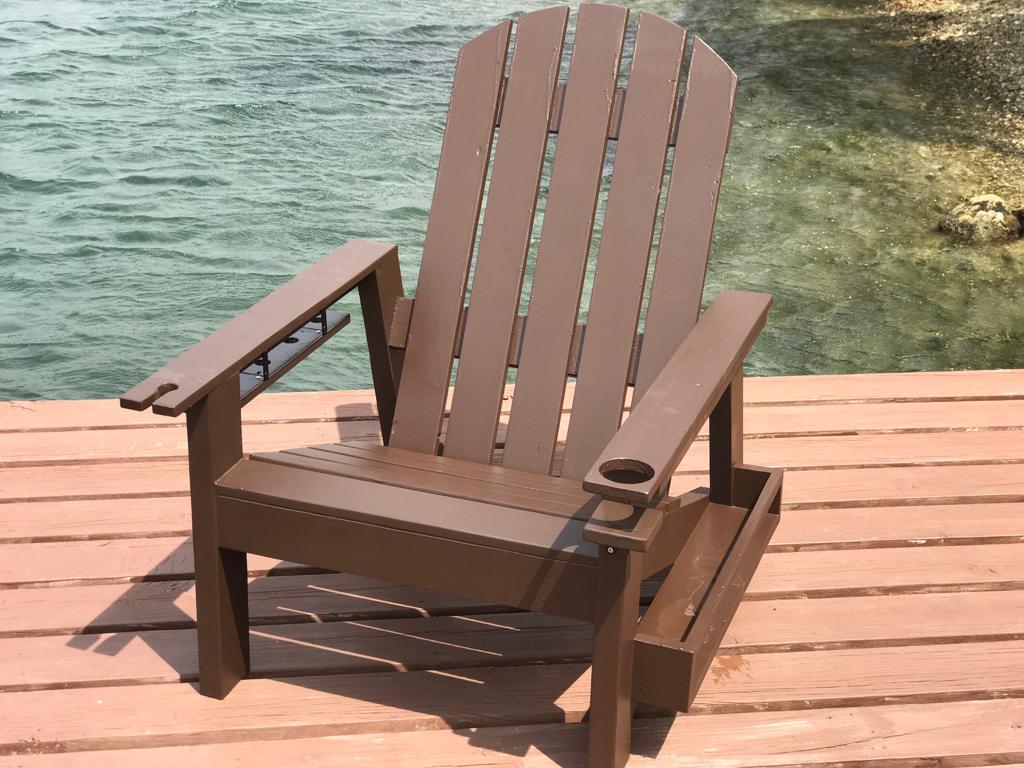
Adirondack chair
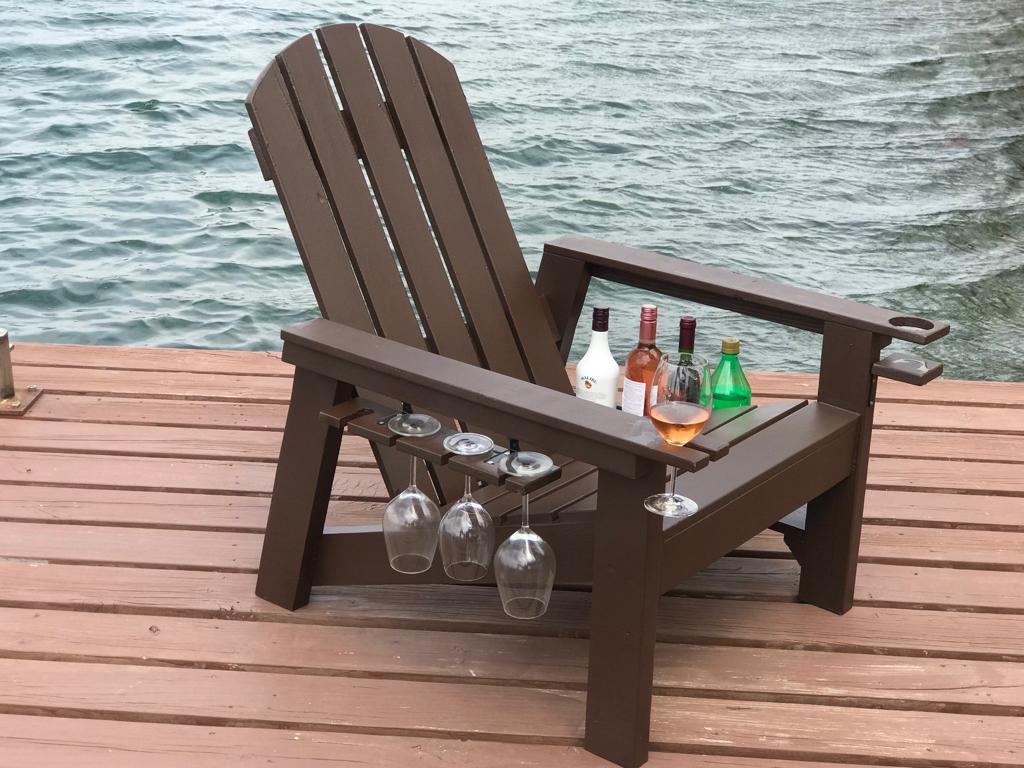
These are the adirondack chairs and I took the basic model and added a wine glass holder and also a bottle/snack bag holder.
Built from Plan(s)
Estimated Time Investment
Weekend Project (10-20 Hours)
Finish Used
Benjamin Moore wood primer and then Benjamin Moore oil based paint.
Recommended Skill Level
Beginner
Comments
Fri, 08/21/2020 - 20:10
Any chance on sharing your…
Any chance on sharing your plan for what you added on? I’d love to make this as a gift for my MIL!
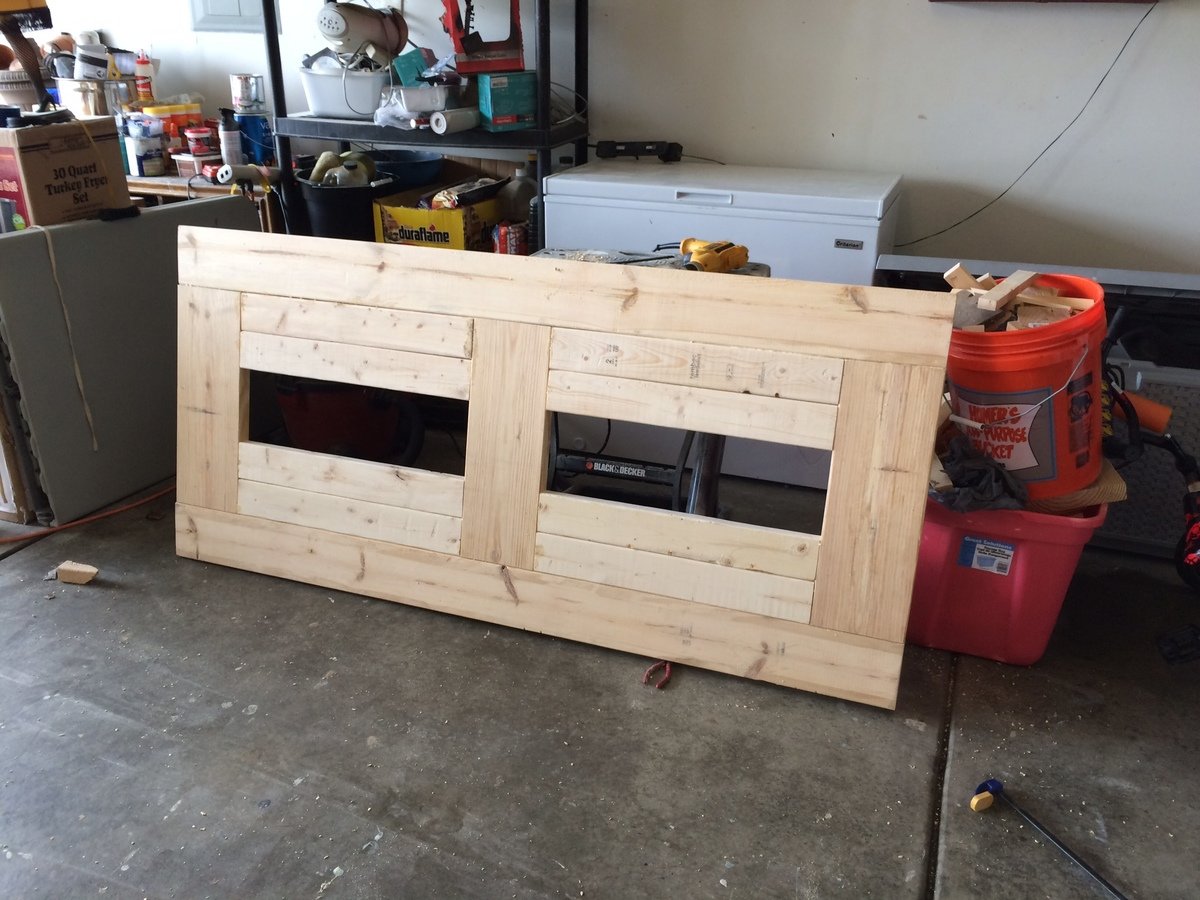
Outside table with built in cooler
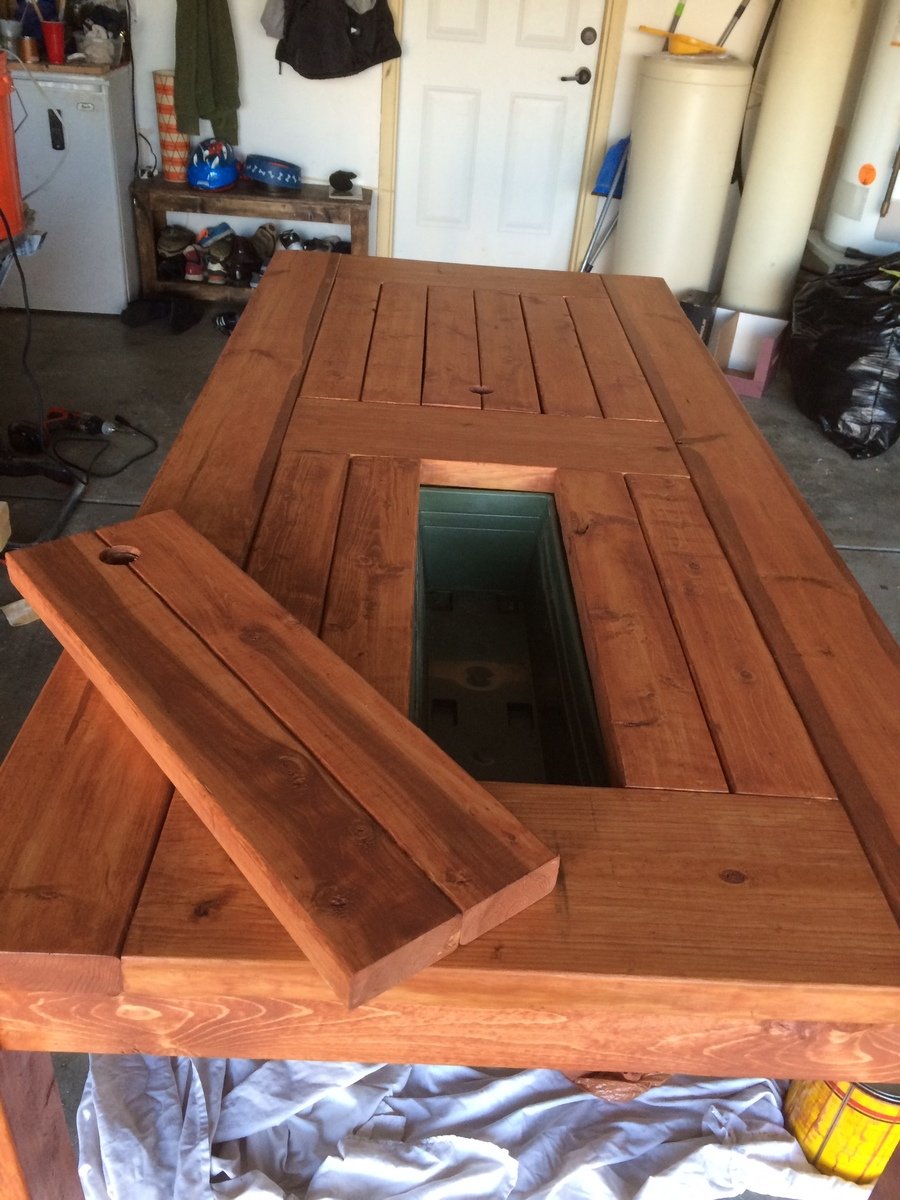
I made this table for a friend of mine. I'm a Realtor and he used me to help purchase his home. Instead of a boring house warming gift, I made him this table instead!
Built from Plan(s)
Estimated Cost
$75
Estimated Time Investment
Weekend Project (10-20 Hours)
Finish Used
Colonial maple stain.
Recommended Skill Level
Intermediate
Barn Style Coop
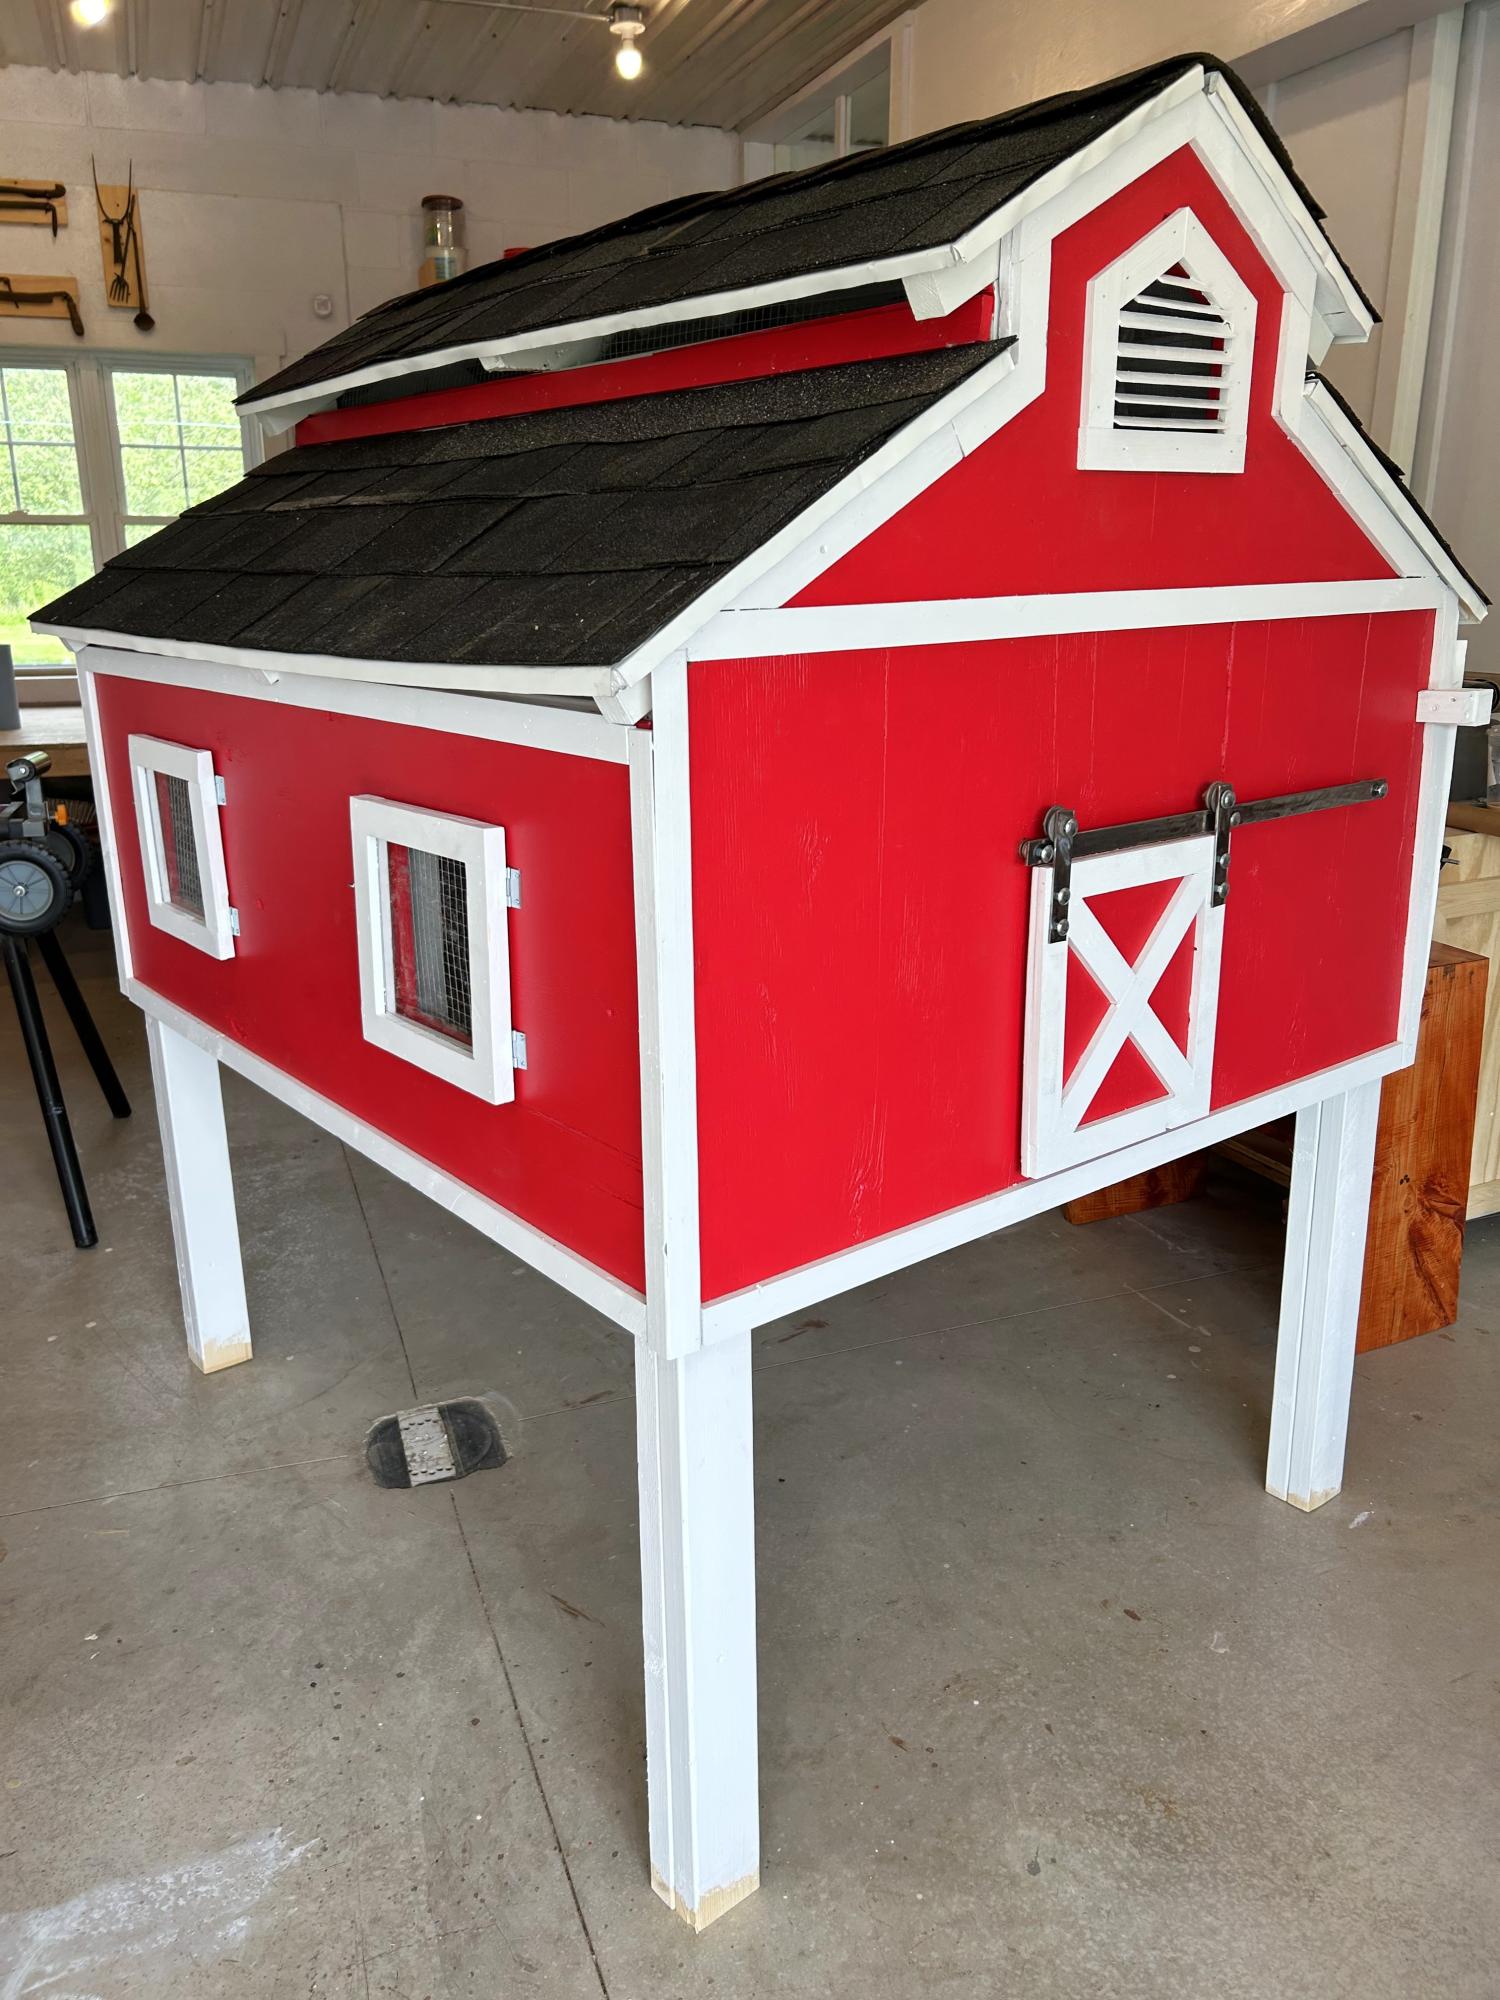
Chicken coop I made to look like a little red barn complete with a working barn door. We have seven girls and they love their lovely barn home.
Sue Laidacker
Built from Plan(s)
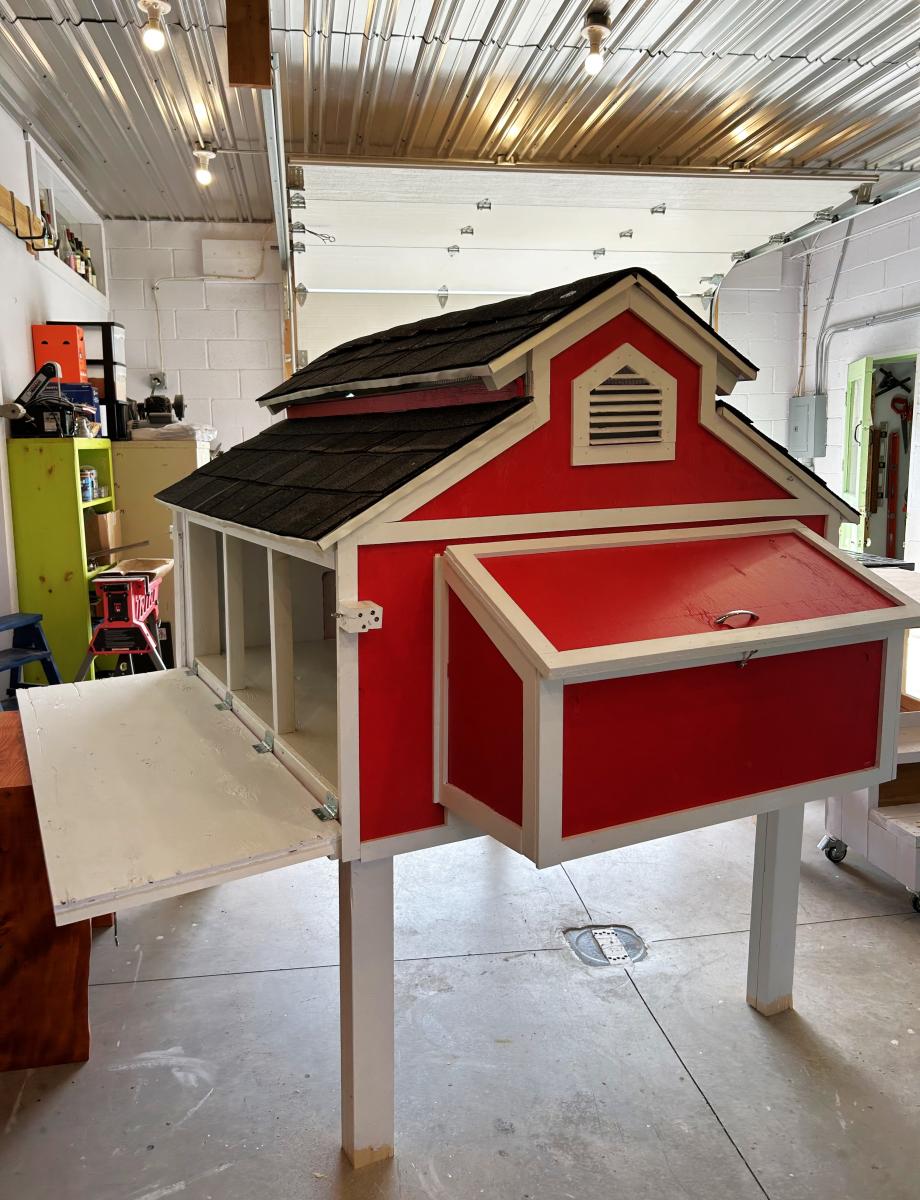
Small Chicken Coop with Planter
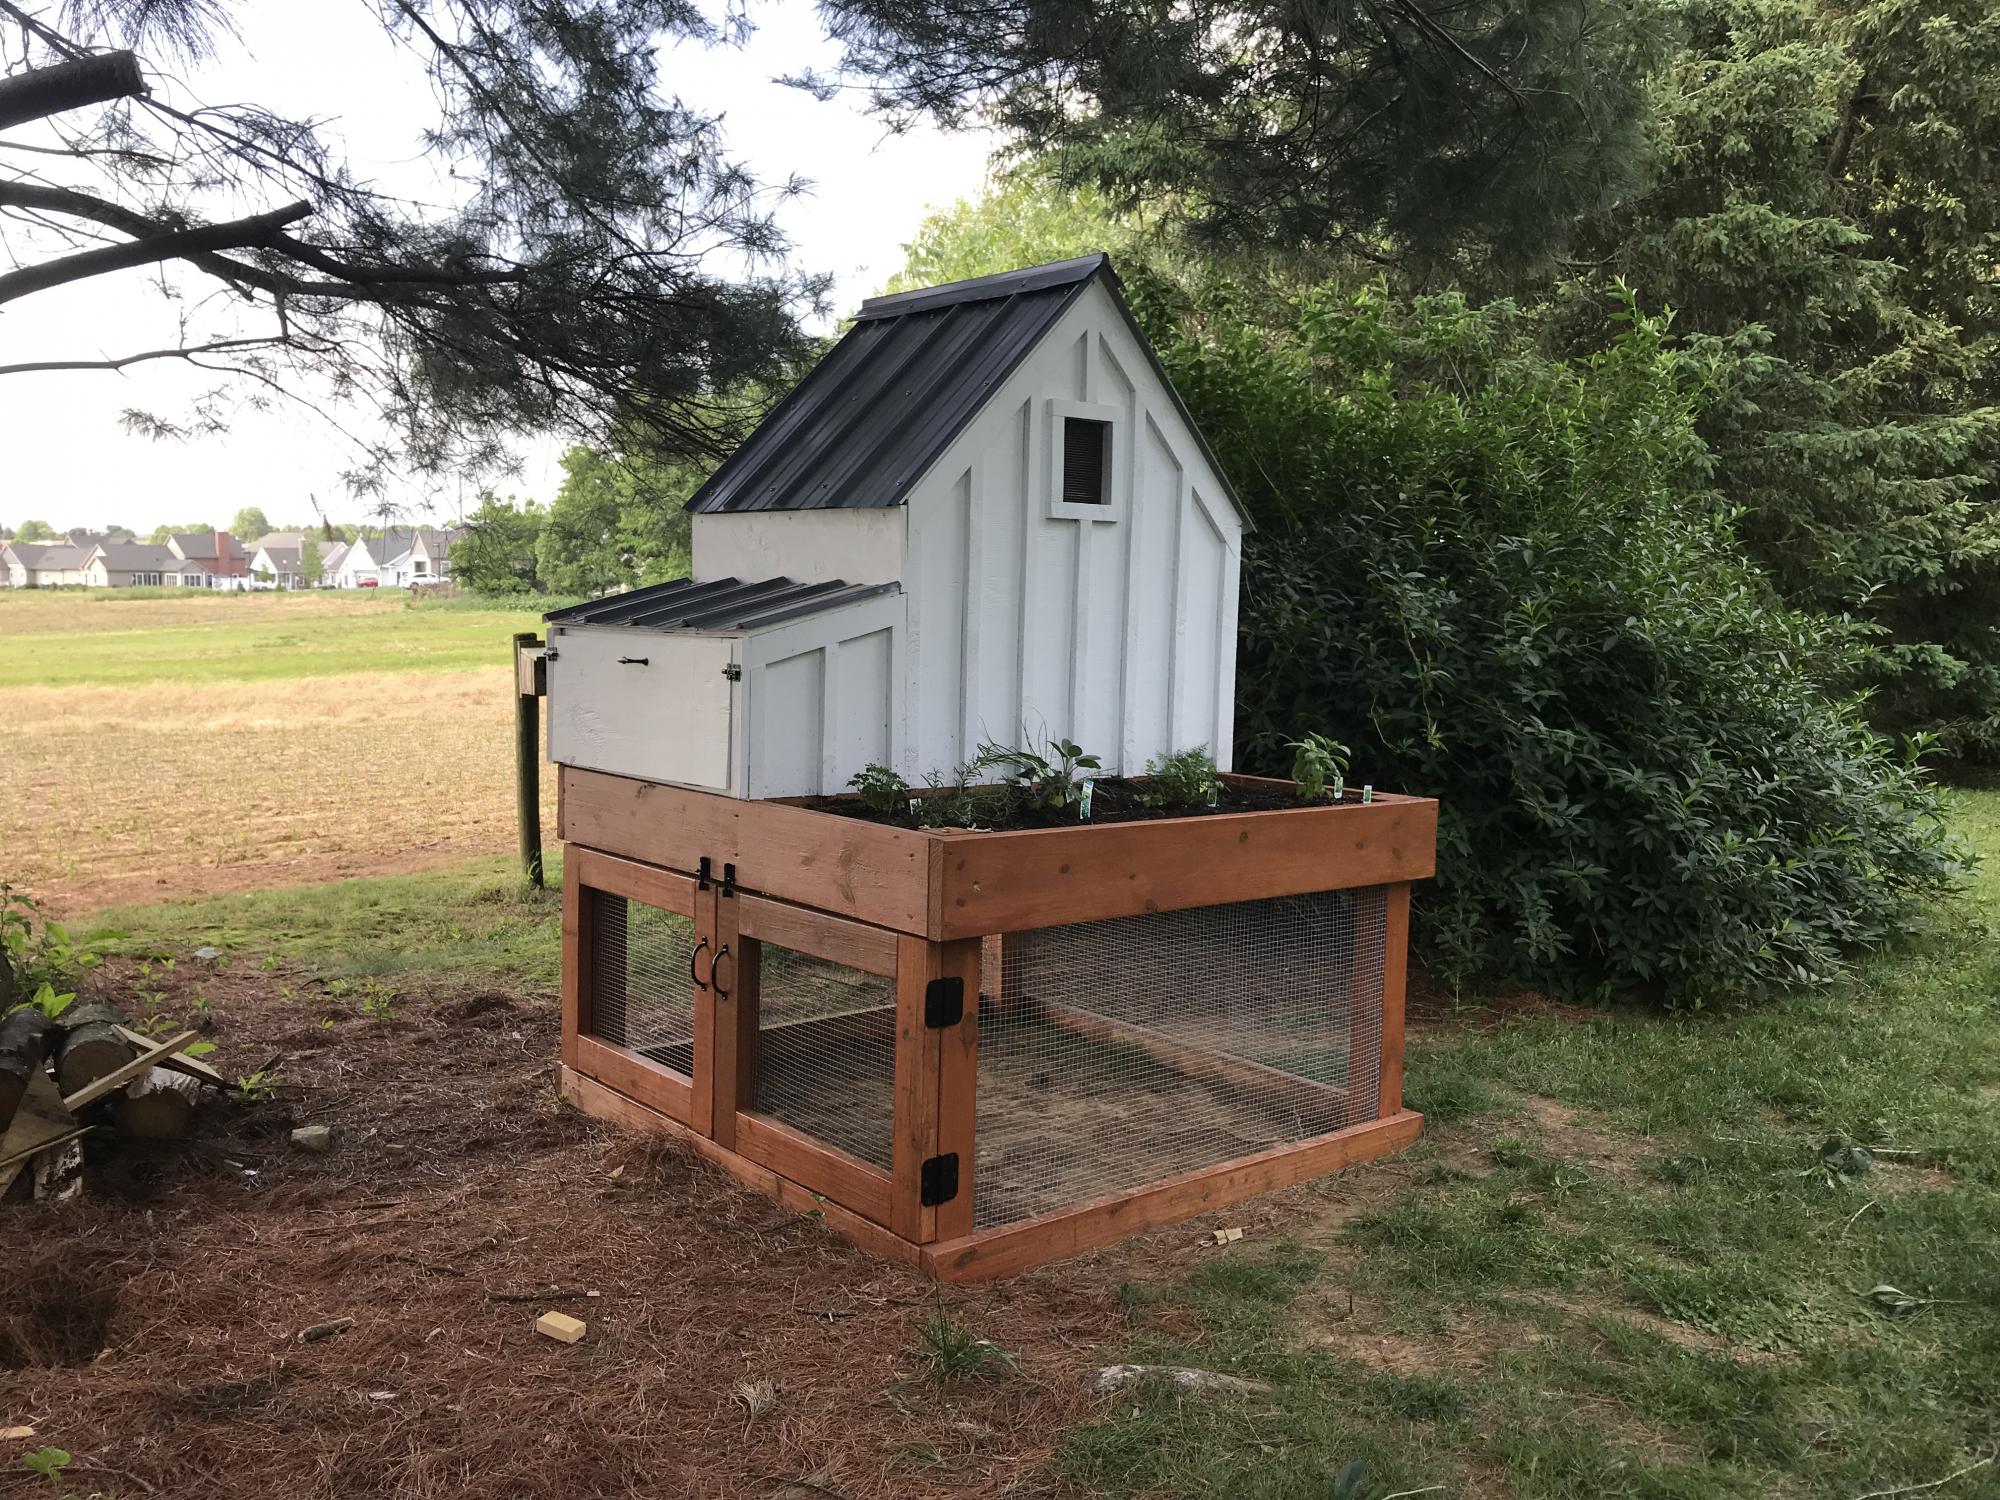
Great plans! Fun project
Built from Plan(s)
Estimated Time Investment
Weekend Project (10-20 Hours)
Recommended Skill Level
Advanced
Comments

Sat, 05/25/2019 - 19:34
Farmhouse Chicken Coop
Your chicken coop is beautiful! I love the farmhouse feel of it! Thank you so much for sharing a picture! Ana
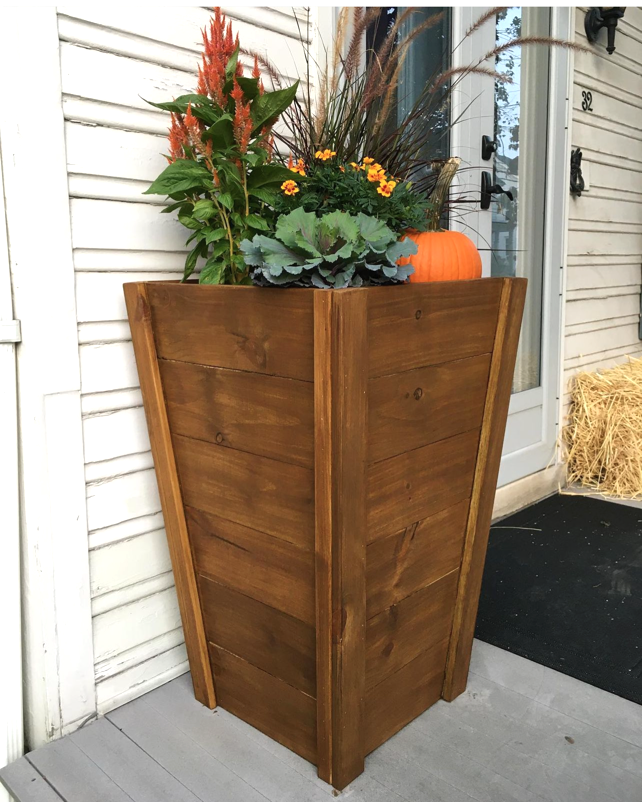
Tall Cascading Planter
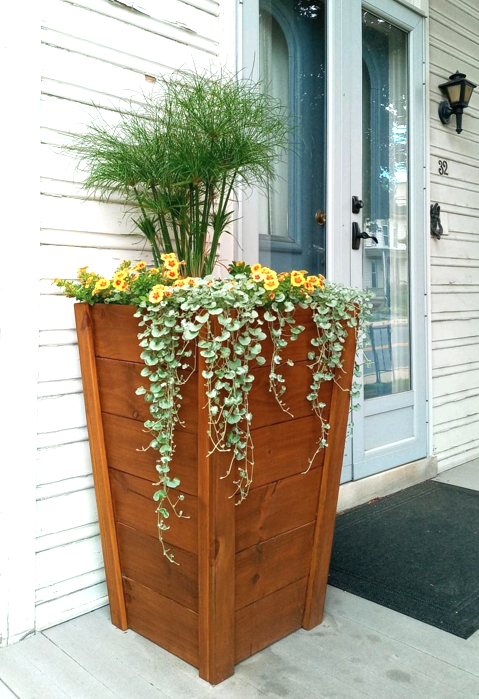
Check out this beautiful tapered Ana White planter that I made! Her videos are amazing and simple to follow be sure to check her out.
Alex
Built from Plan(s)
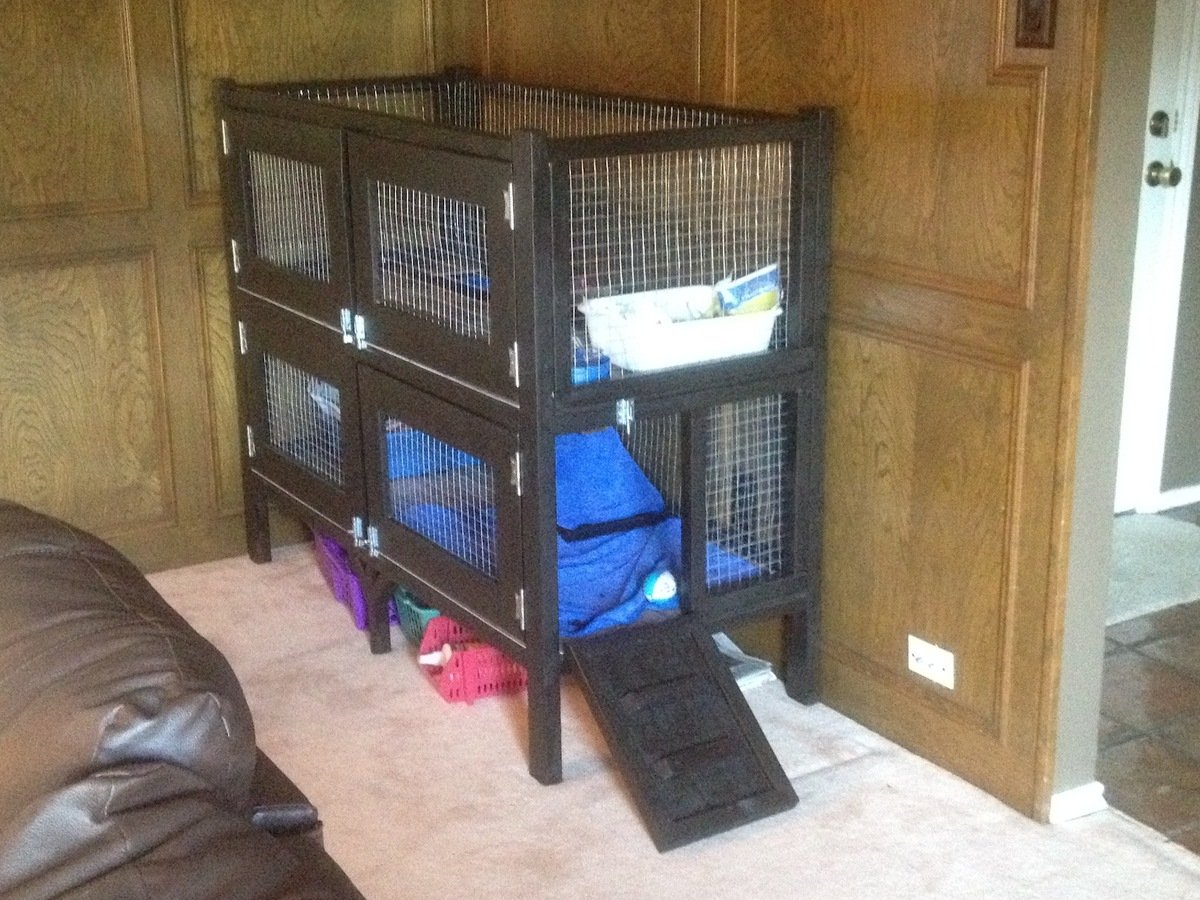
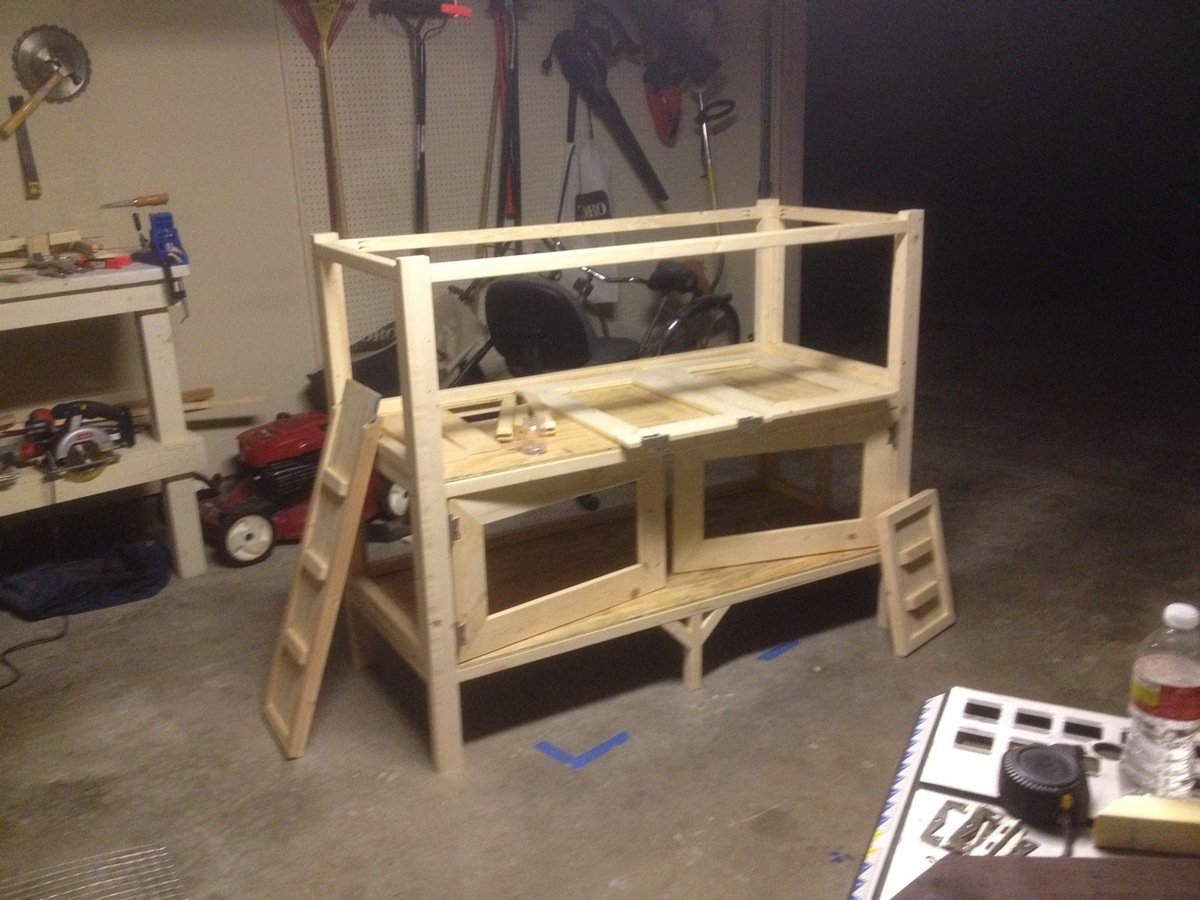
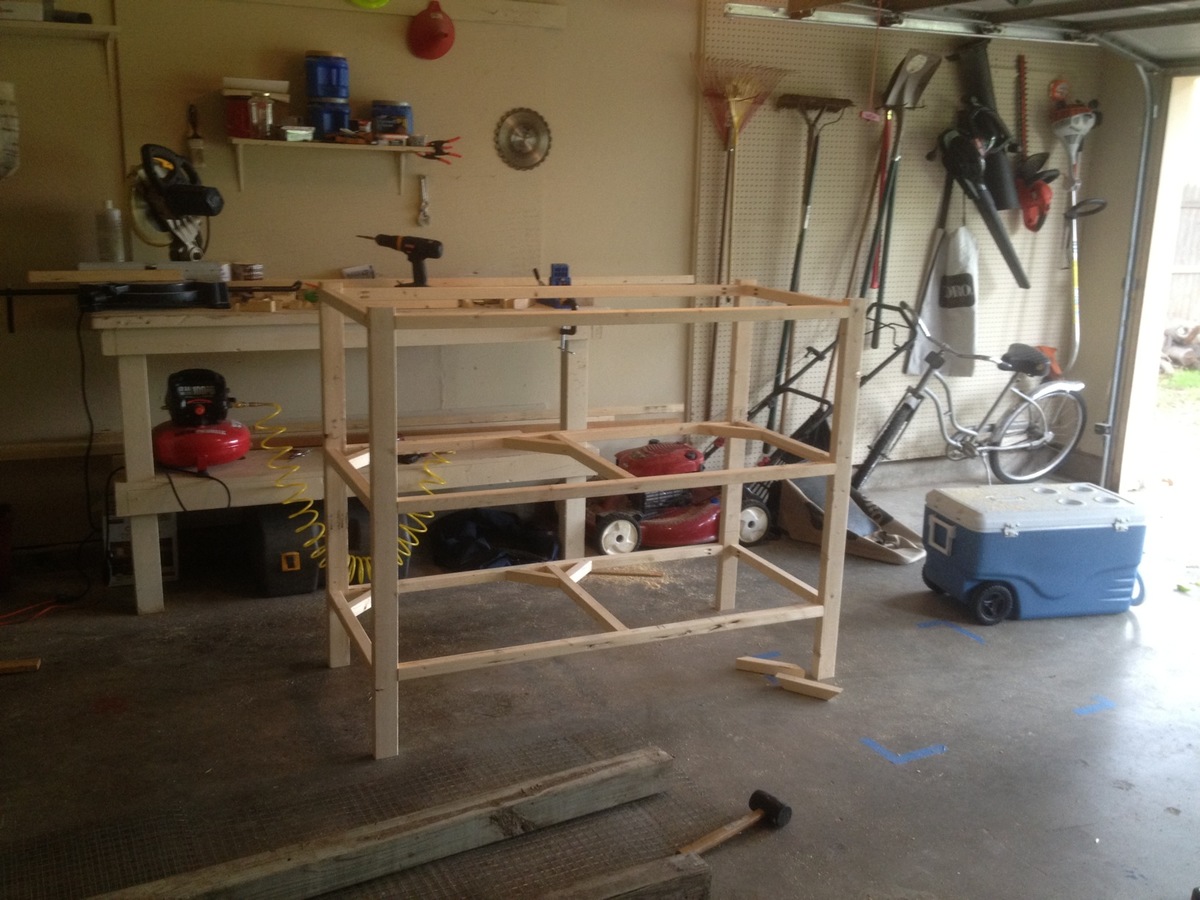
Two Story Rabbit Hutch

For my first woodworking project, I foolishly decided to build a rabbit hutch without plans for my daughters new Easter Bunny. So I literally scratched some ideas on my wood working bench and started going to work. I did some construction over a decade ago, but never attempted to build any furniture before, so I'm pretty happy with how this came out.
I spent a few days researching various rabbit cages and for our place we needed something that was ascetically pleasing and functional as it was going in our living room. I got some ideas from the web and decided the best thing for us would be to have an entry ramp, 2 sets of barn doors for each level (for easy cleaning) and an open roof. We went with linoleum floors since she's already litter trained. The floors could easily be modified to add 1/2" wire mesh if we decide to change things down the line. Also, we chose an espresso finish with silver hardware to accent the wire mesh
I pretty much crashed and burned on the staining as I've never done that before, but it ended up looking ok after all. I did a light sanding, but will probably invest in a planer and jointer to get my wood in better shape before assembling in the future. Also, I'll probably lightly dab some stain on ends of wood before final assembly as it made it difficulty trying to hide the white pine with the dark stain.
Other cages I saw ran around $200-$350.00 so i don't feel so bad about the cost. It's really the time that it took learning and making mistakes. I'm sure if I had plans I could of cut my time in 1/2.
Total Cost came out to around $150.00 but probably would of been cheaper if I had some plans to go by. I probably wasted a few 2x2s and accidentally mis-cut a scrap piece of 1/4"plywood which added another $16.00 to the bottom line.
Here's a breakdown of my total cost.
Hardware - $30.00
Includes 5 latches, 4 sets of hinges (8 total) and a 3' piano hinge
Stain - $8.00
Linoleum Tile @ ¢.69 sq ft - $16
Brushes, Stain Rags - $5.00
Screws - $6.00
Wire Mesh Roll $30.00
Needed 2 rolls at $15.00 each. I used 1" Wire Mesh measuring 2'x15'
Total Wood $50.00-$60
I used 2x3's for the legs - 2 @ 8' - $2.00 each ($4.00)
probably 15-20 2x2's - $1.52 each - can't remember how many I used to be honest ($30.00)
and a few 1x6's for the Doors - $2.00 each ($6.00)
Sheet of 1/4 plywood - $12.00


Estimated Cost
$150
Estimated Time Investment
Week Long Project (20 Hours or More)
Recommended Skill Level
Intermediate
Comments
Thu, 05/03/2012 - 06:24
I bet your rabbit is pumped!
I bet your rabbit is pumped! What a nice house. Good Job.

In reply to I bet your rabbit is pumped! by Aargh (not verified)
Thu, 05/03/2012 - 06:57
Thanks! The rabbit definitely
Thanks! The rabbit definitely seems happy.
Thu, 05/03/2012 - 08:09
I love it!
I also have been thinking with the idea of building a two story hutch for our rabbit. I love your ideas so now i have a new project to work on. Thanks for sharing!
Mon, 10/08/2012 - 12:46
I LOVE your cage! We have 2
I LOVE your cage! We have 2 rabbits and 2 Guinea pigs which means we have 2 ugly cages in our living room. We are planning something similar, but a bit bigger (but lower if that makes sense). And we'll put a 3rd story on for our Guinea pigs. So we have everyone on the same patch of real estate so to speak. I was going to do 3 solid walls with wire "windows" too keep all the hay, poops and such contained. I am also going to put lockable wheels underneath, so I can move it to my office if I ever need to (parties and renovations).
Is there anything that you can now think of that you would like to change on yours? R my research purposes.. :) It looks awesome, I'm just picking your brain for "hindsight" tips.
Comments
Ana White Admin
Sat, 11/18/2023 - 12:49
Great Golf Storage!
Great build, love it! Thanks for sharing.:)