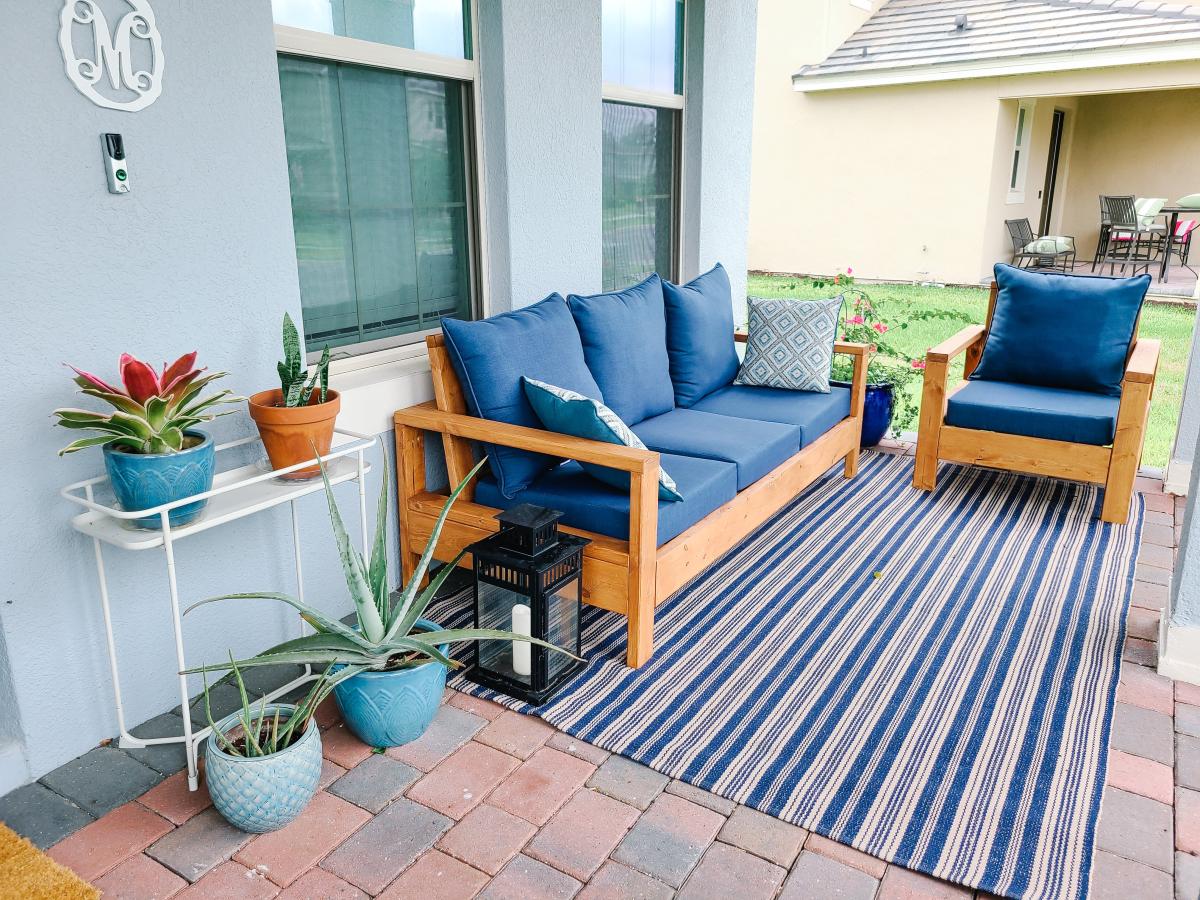
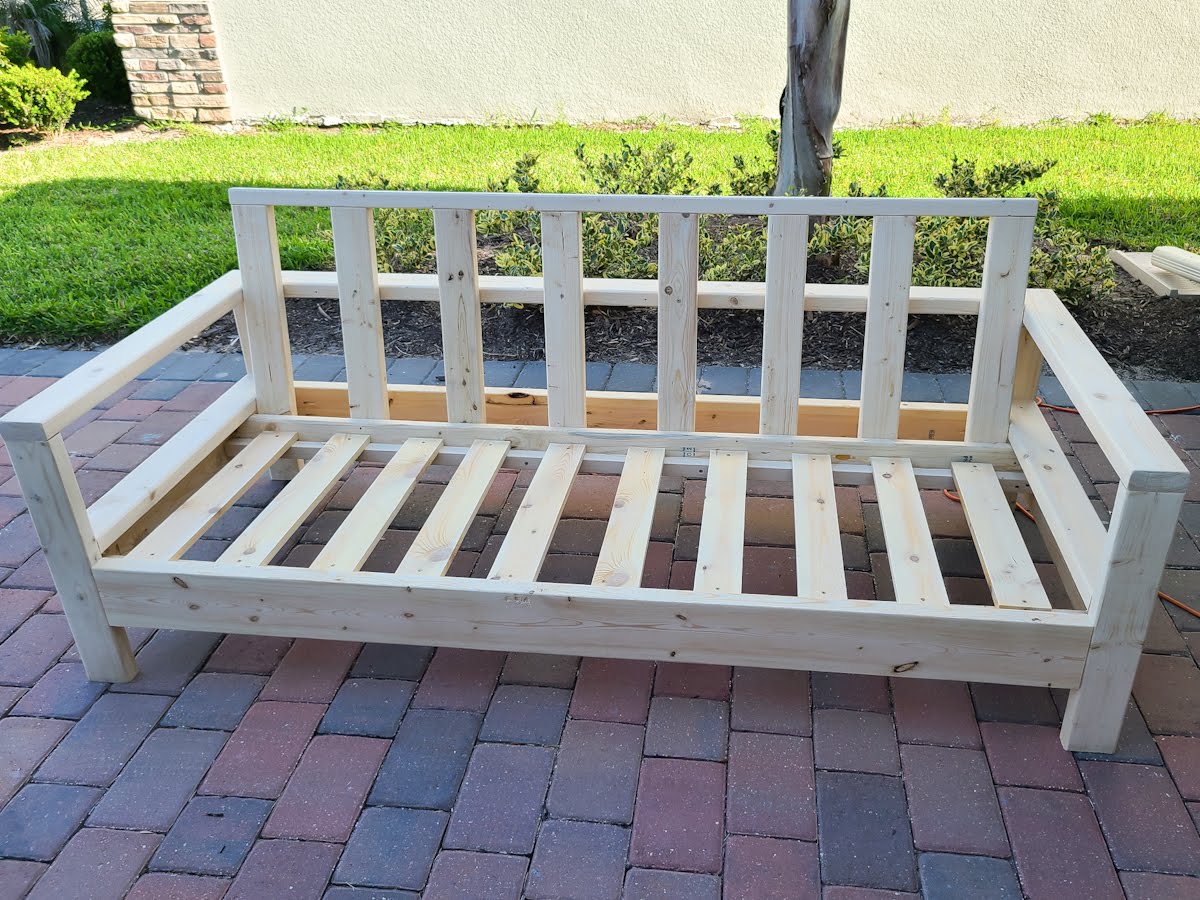
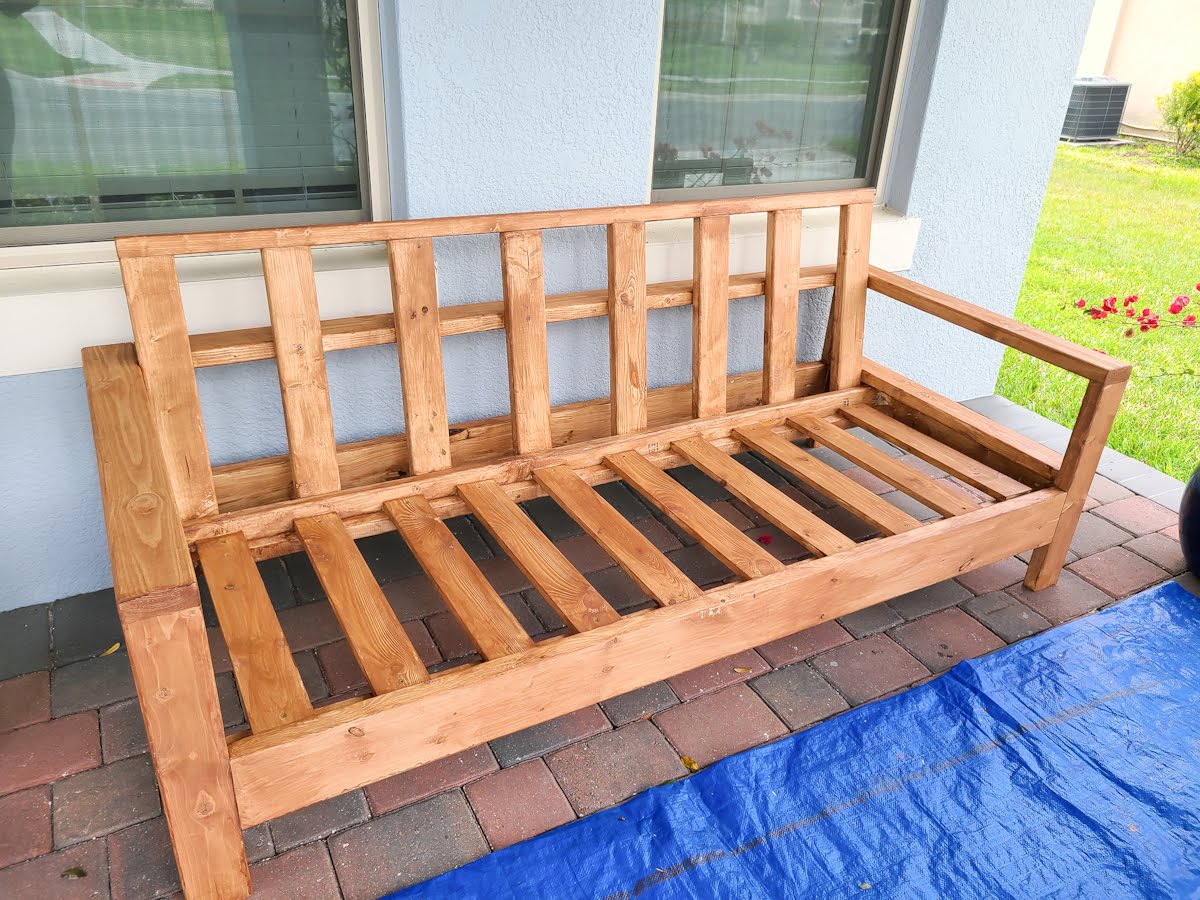
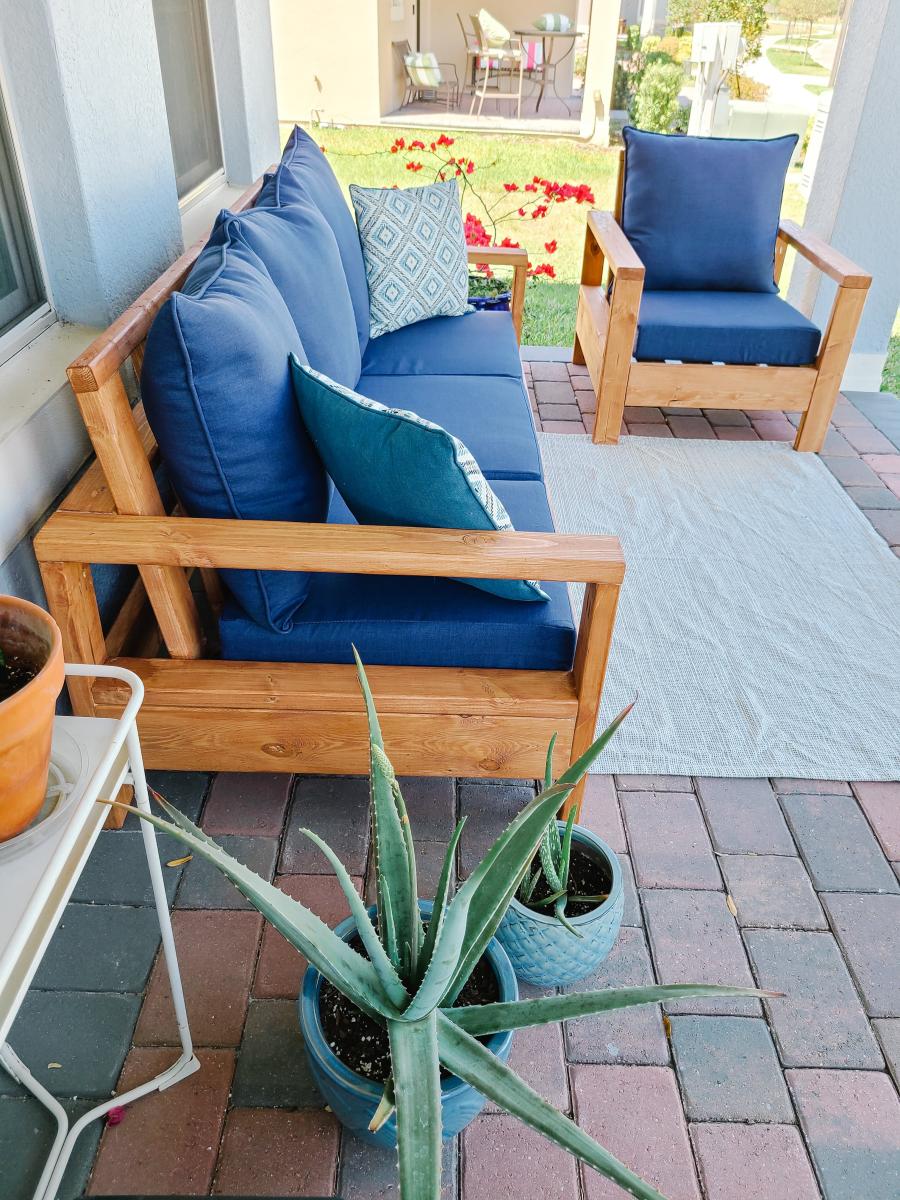
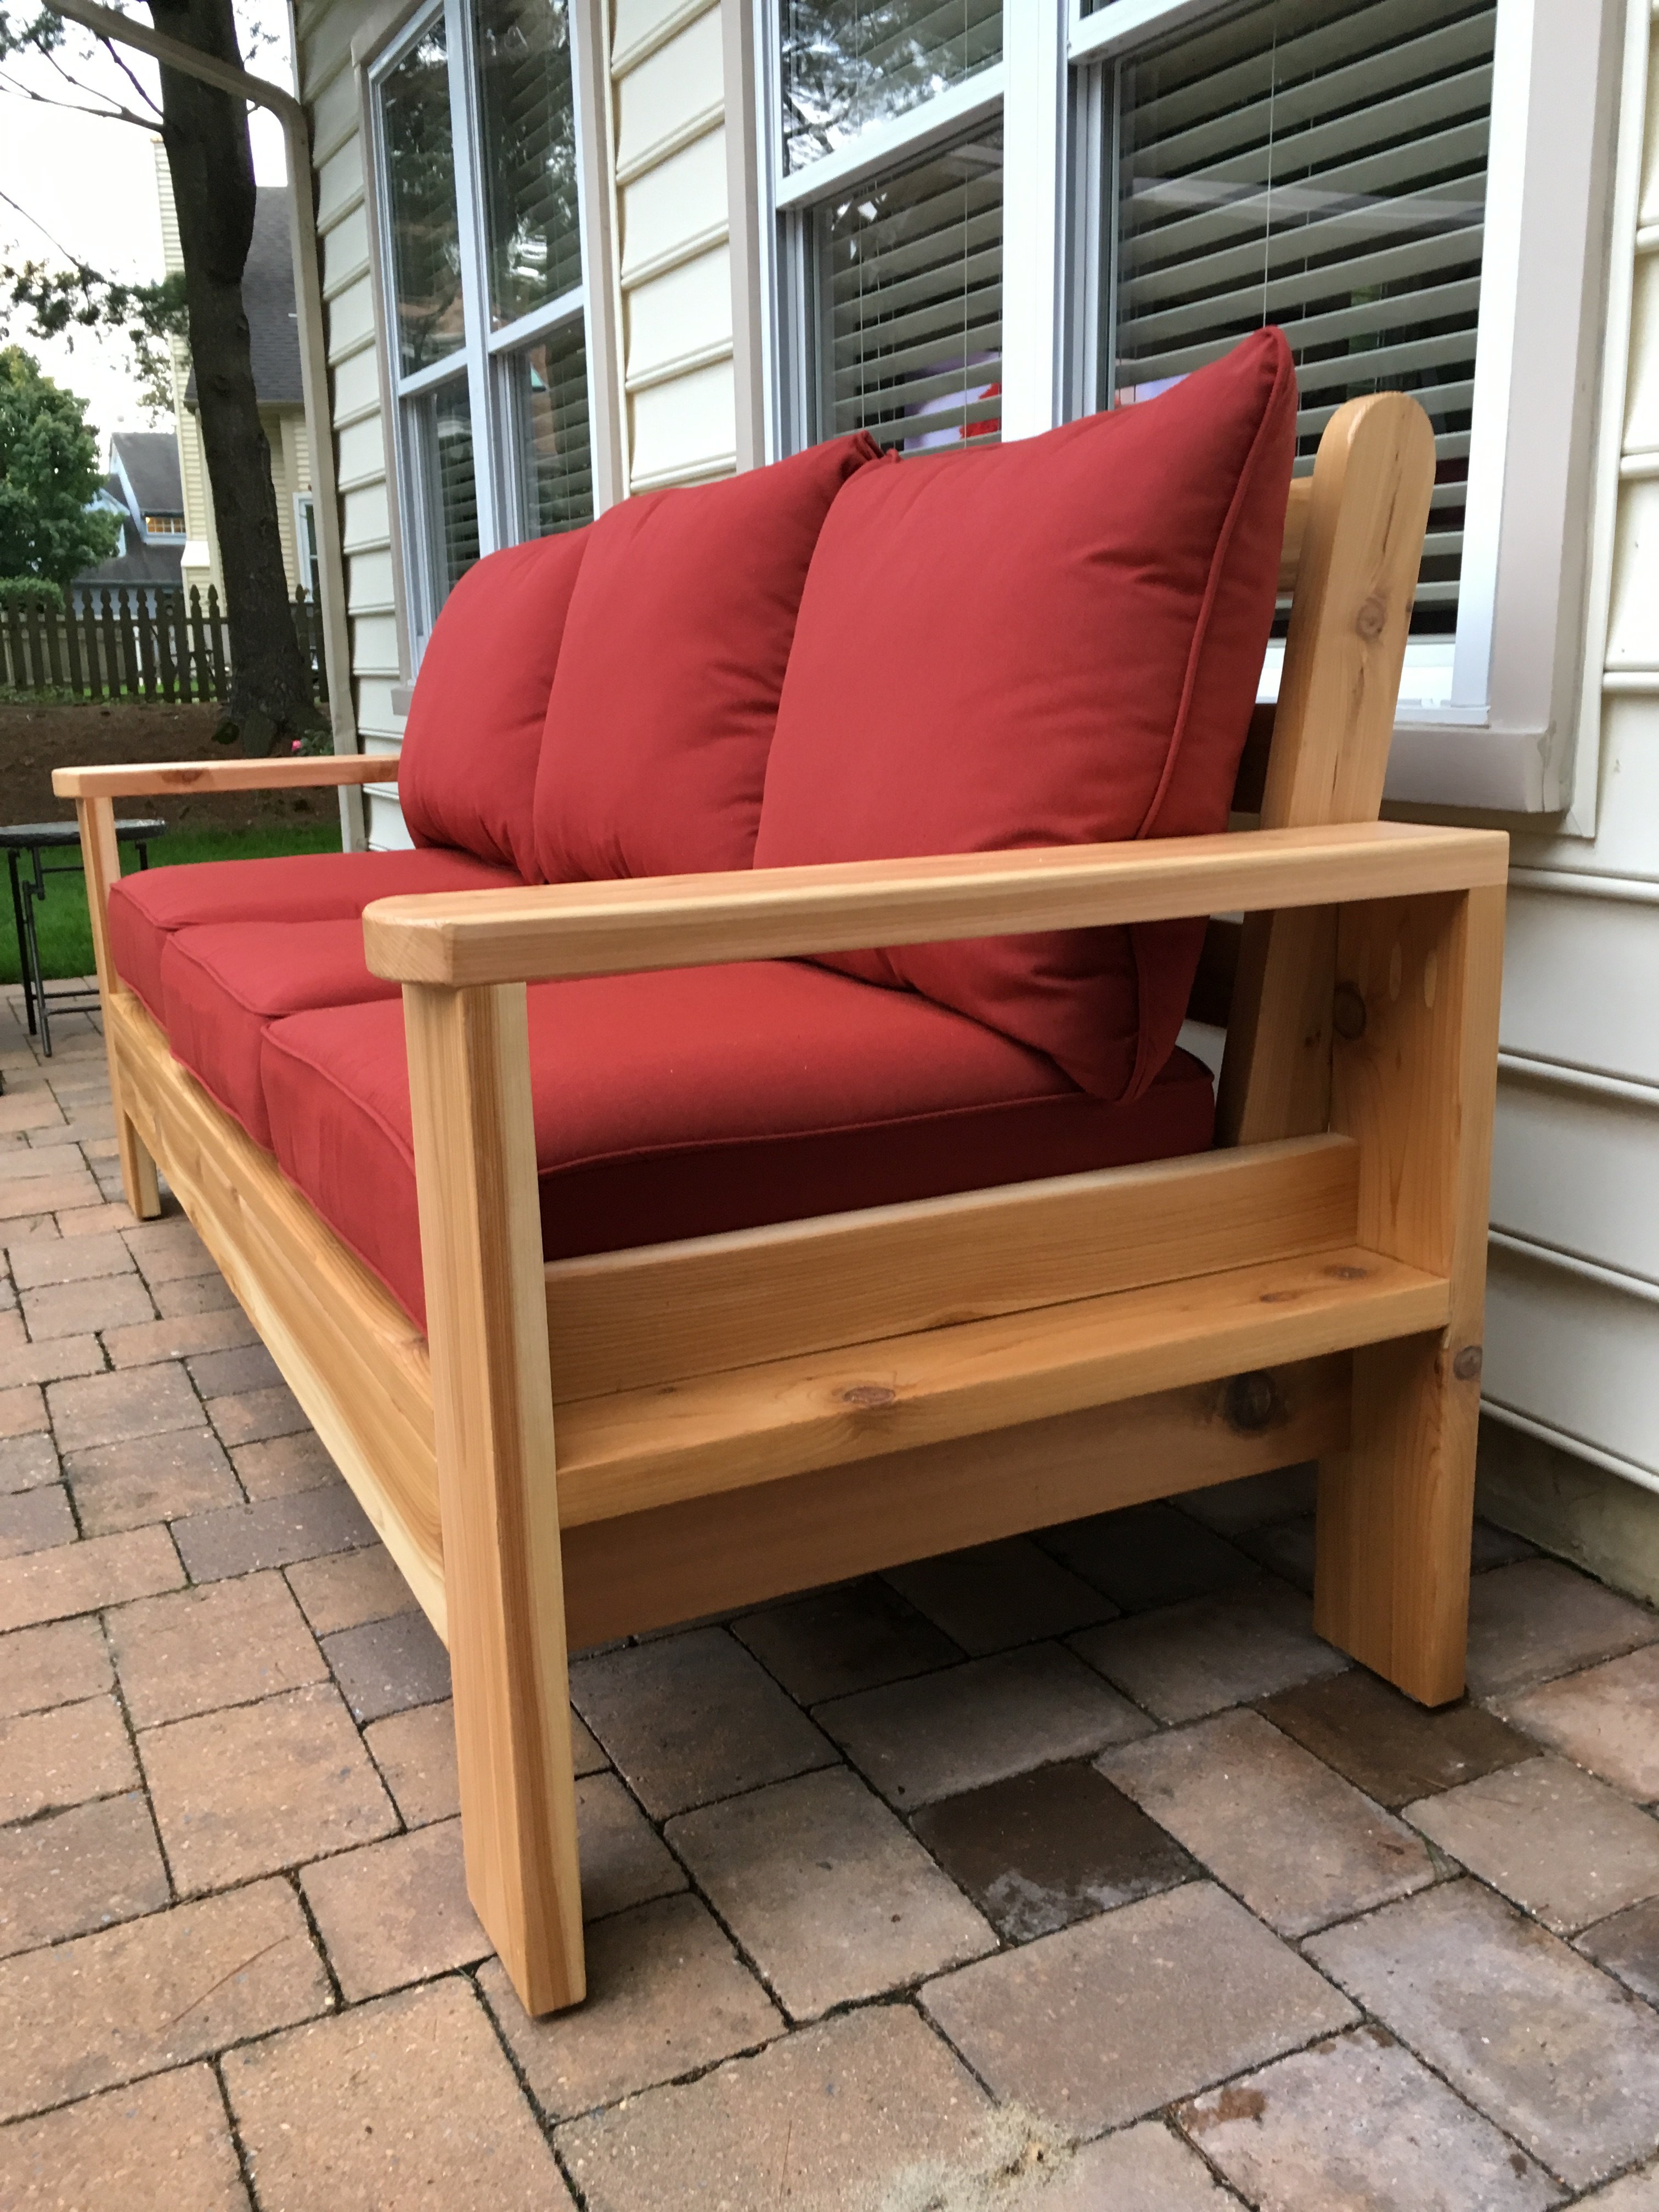
Outdoor Sectional
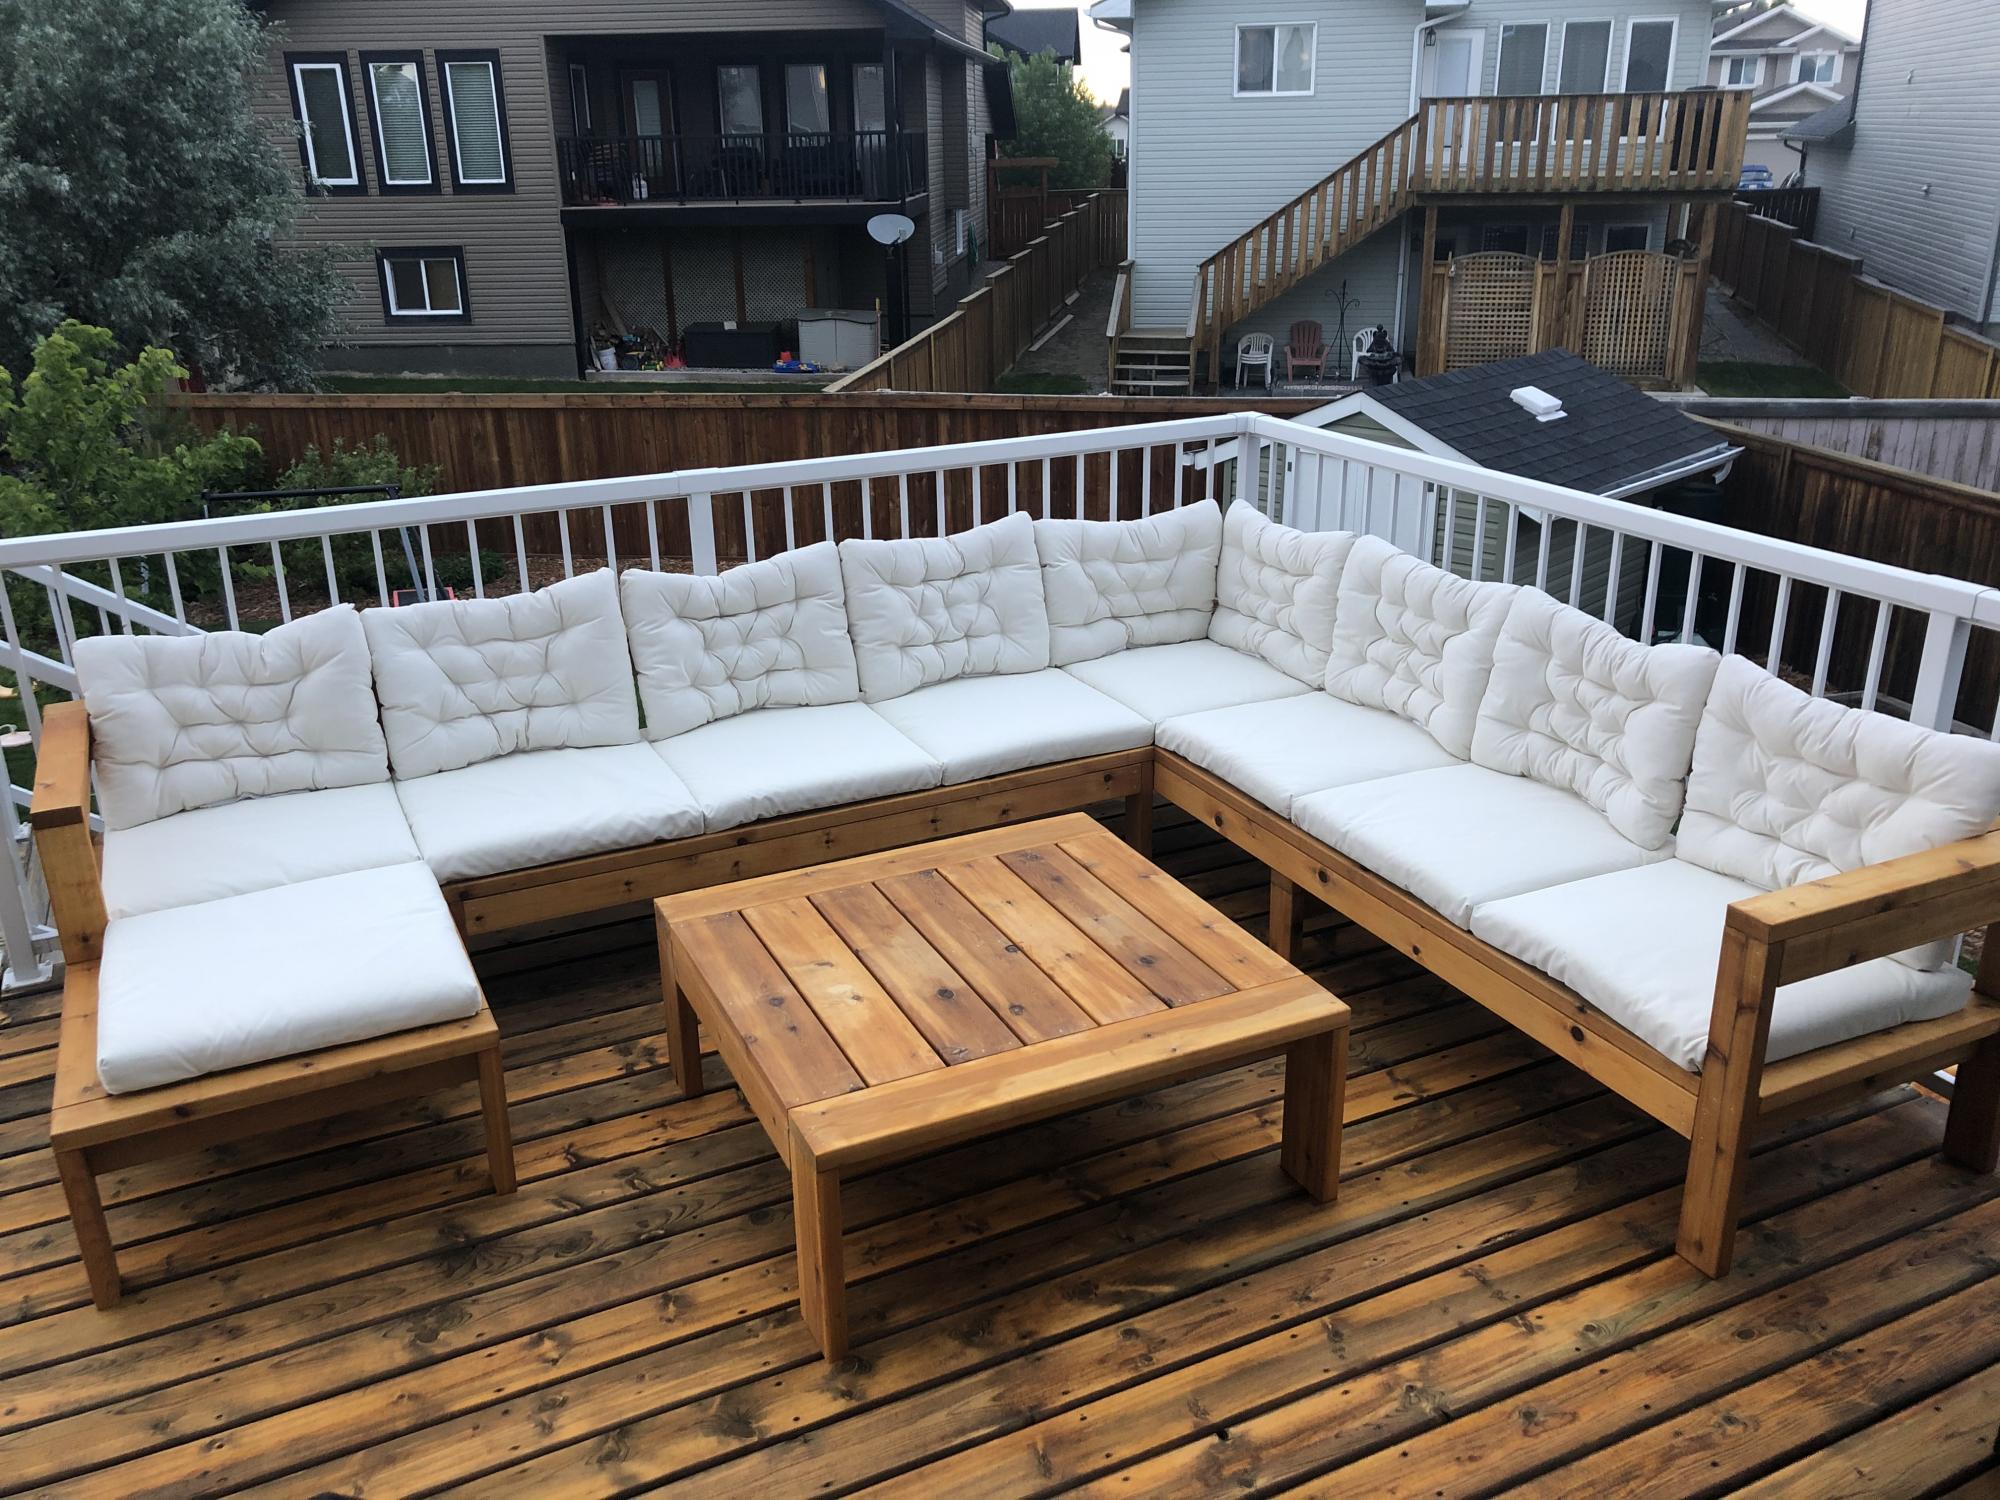
Modified the plans of the outdoor sofa and sectional piece to create this set, then added cushions from IKEA.
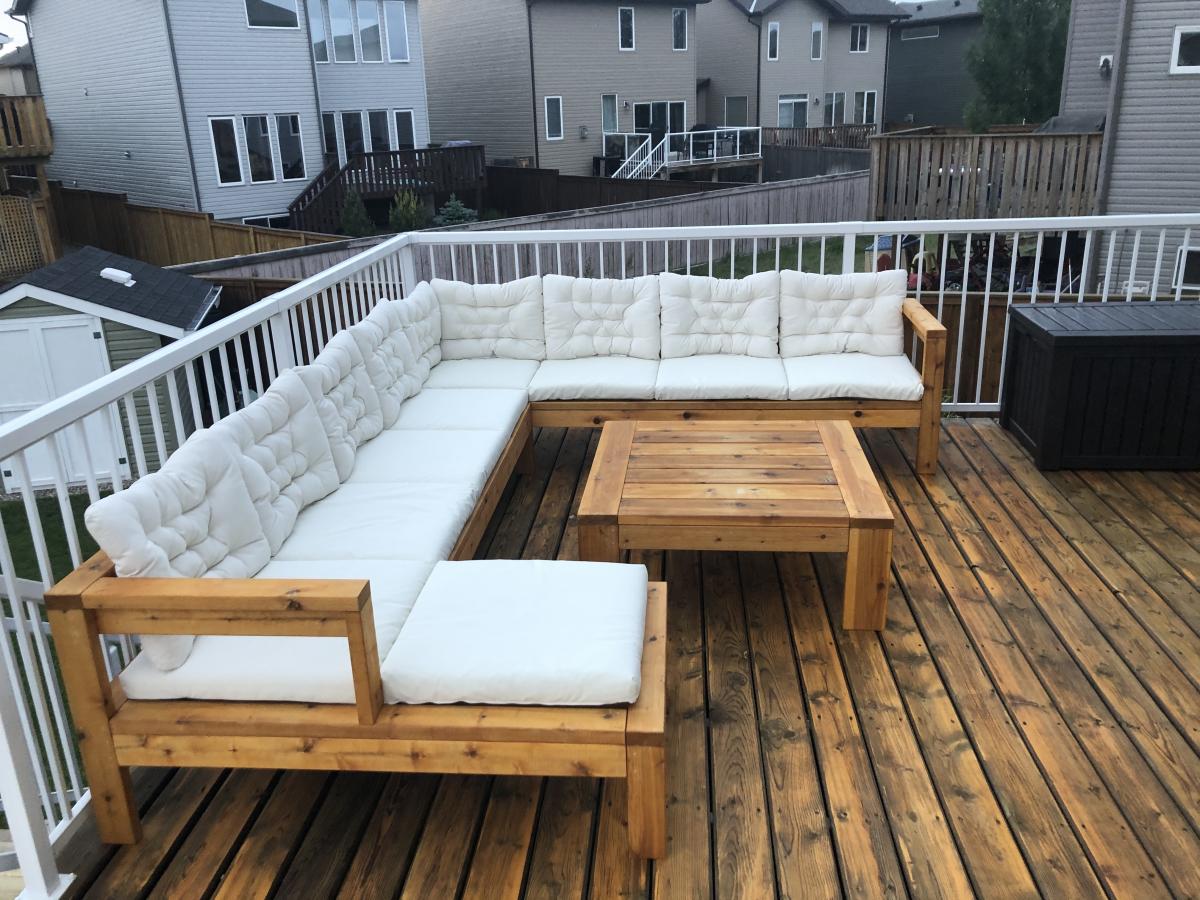
Built from Plan(s)
Finish Used
SuperDeck Cedar Tone Natural
Modified the plans of the outdoor sofa and sectional piece to create this set, then added cushions from IKEA.
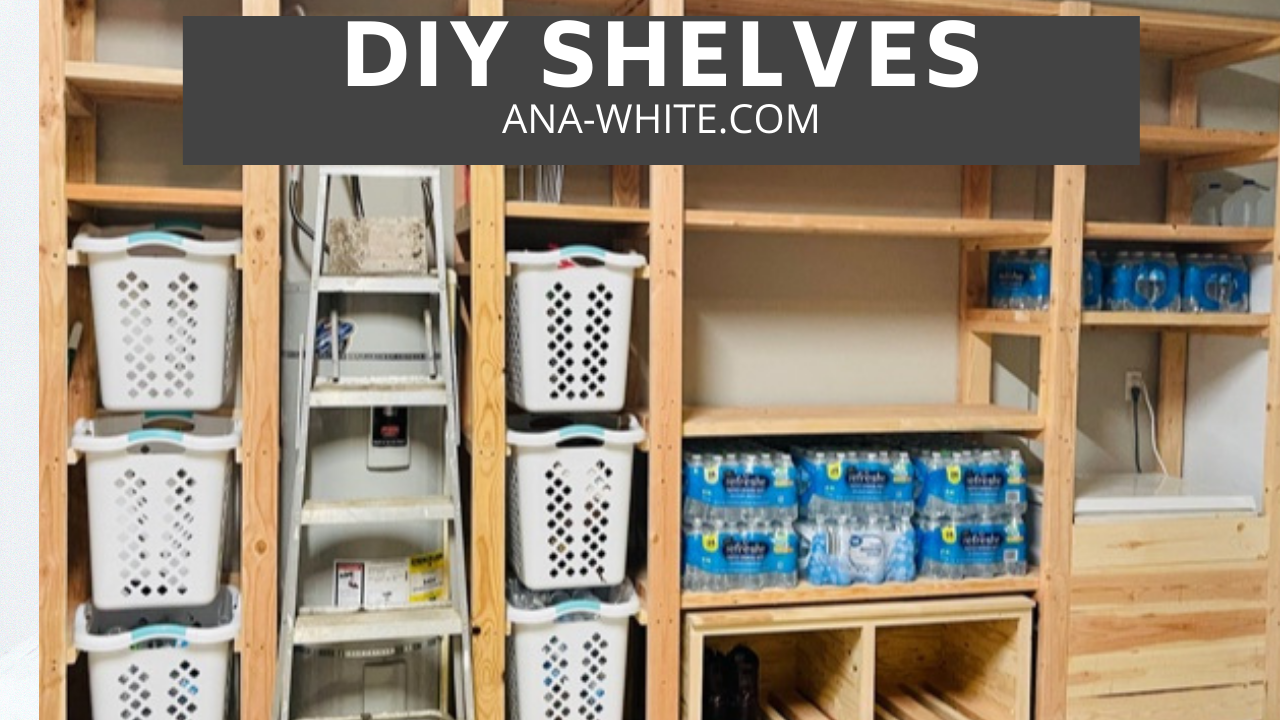
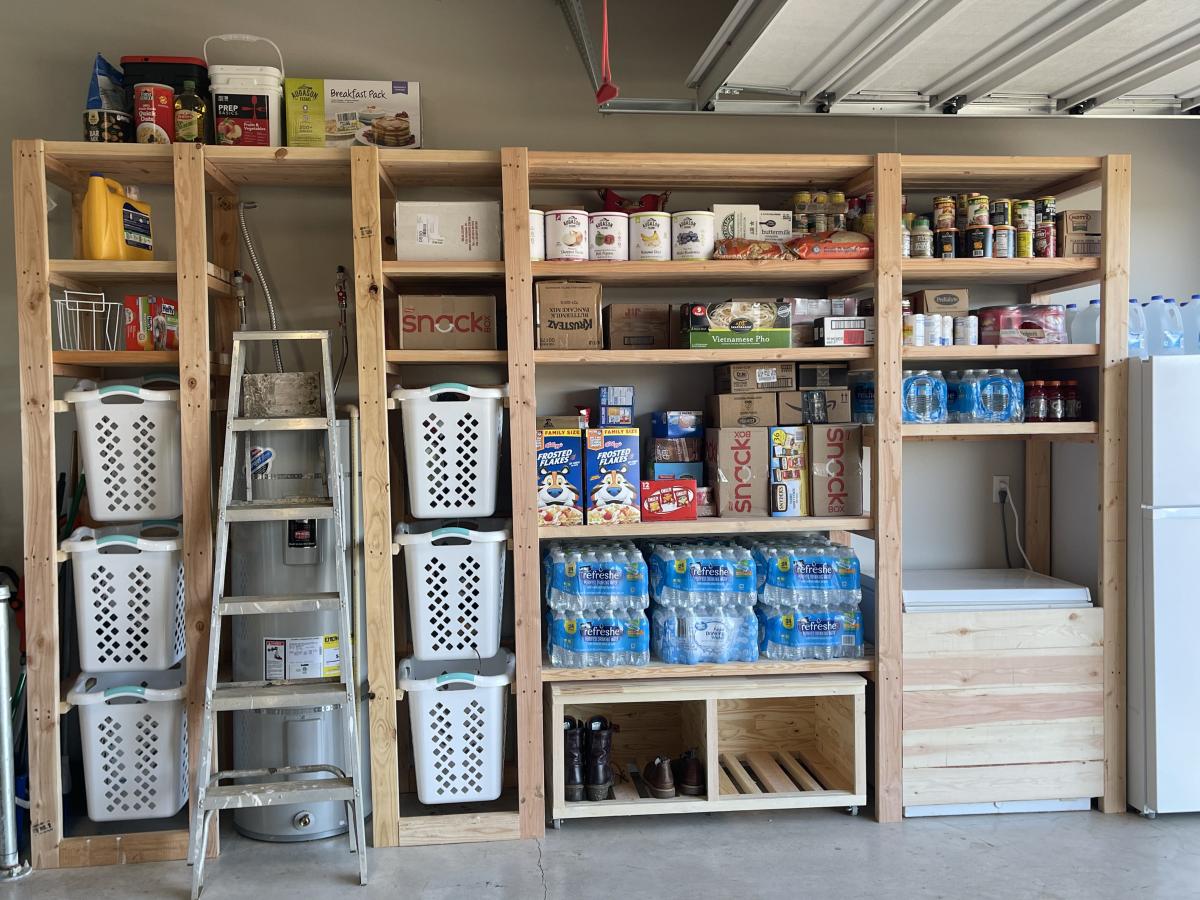
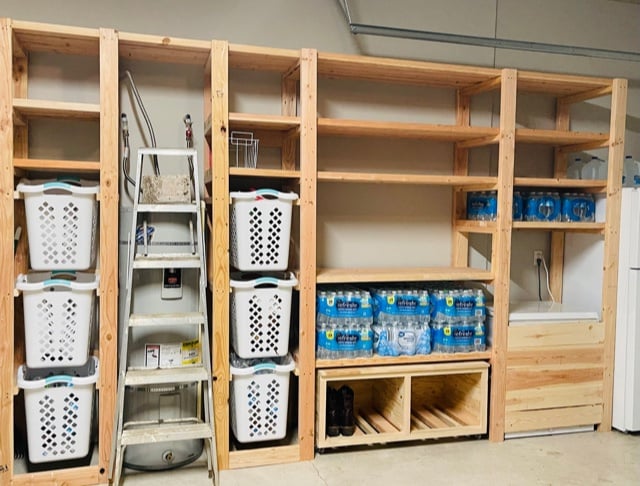
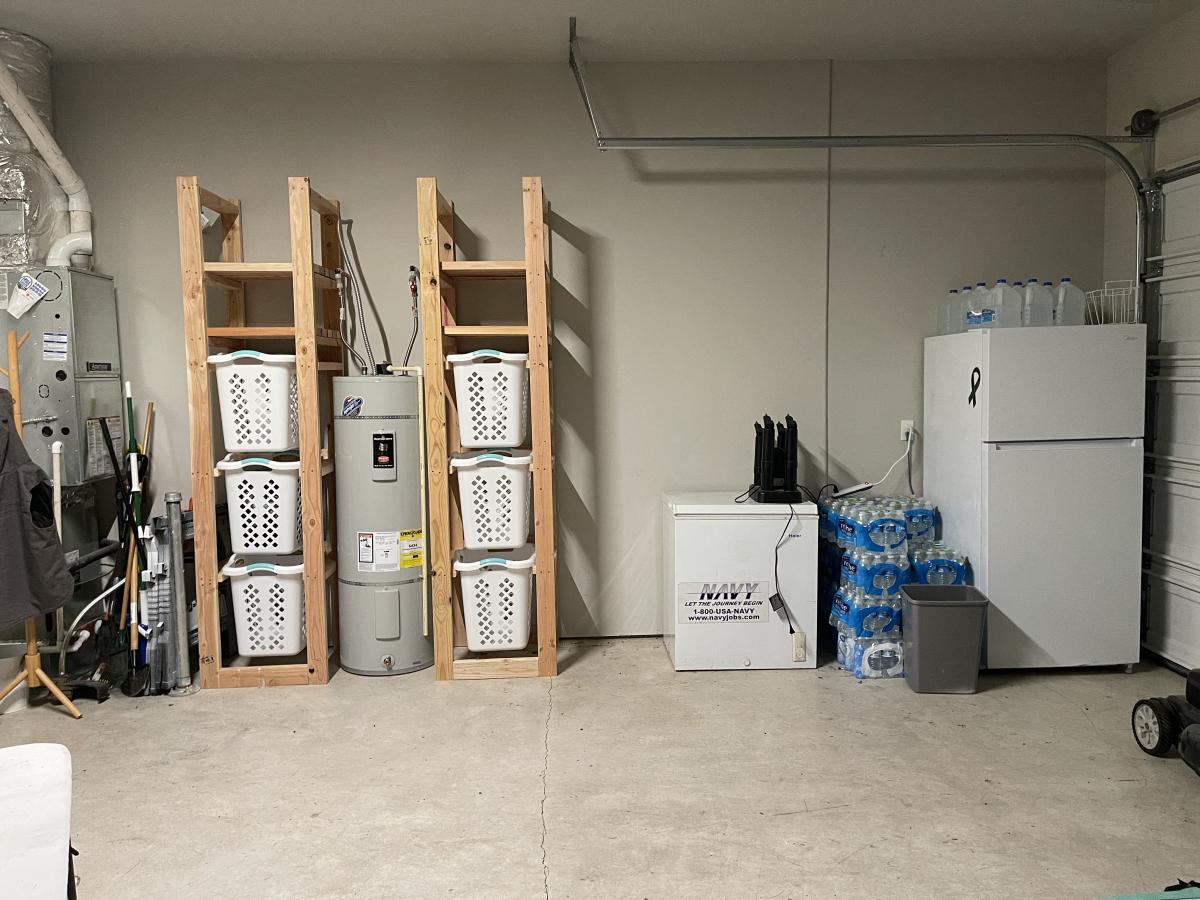
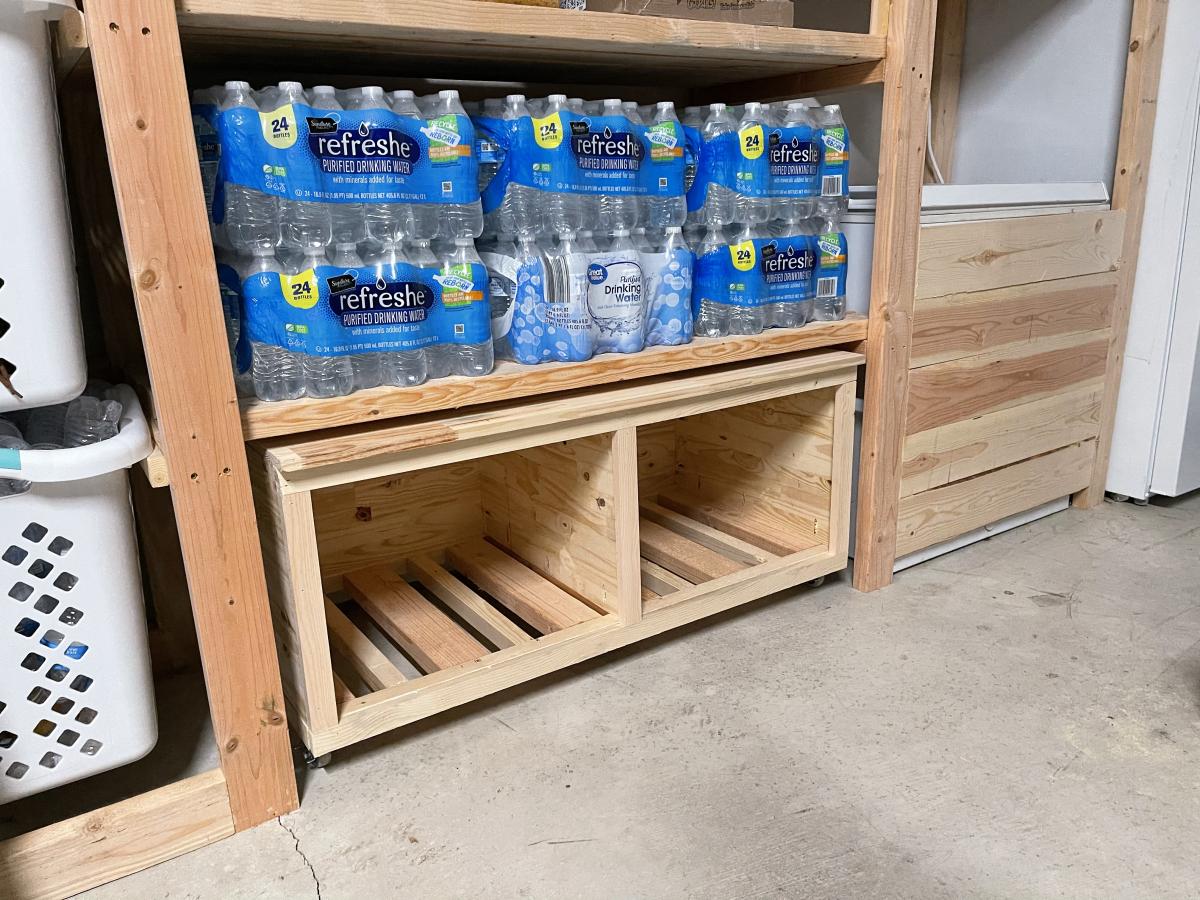
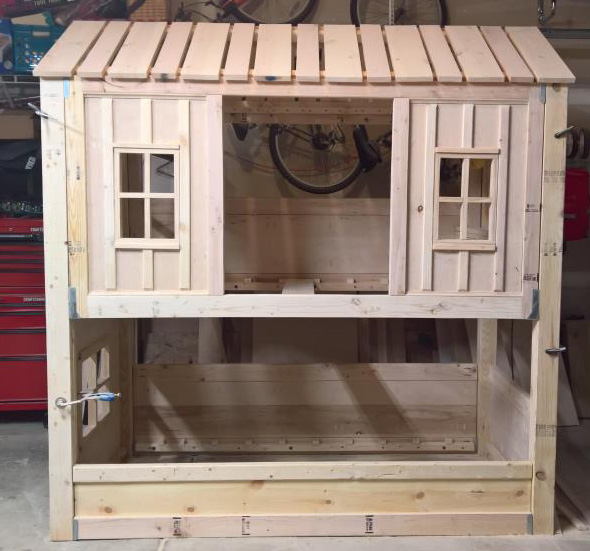
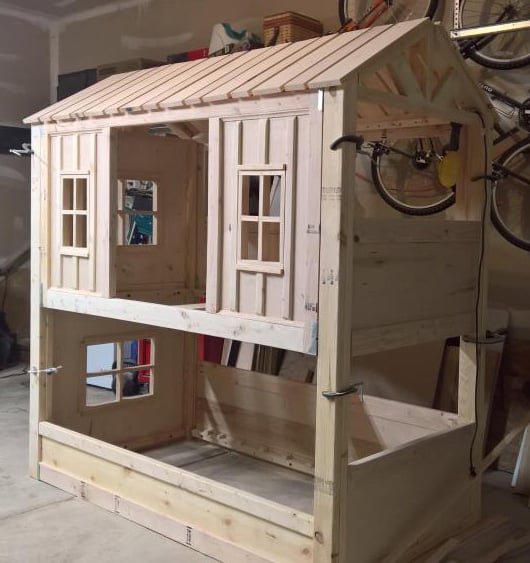
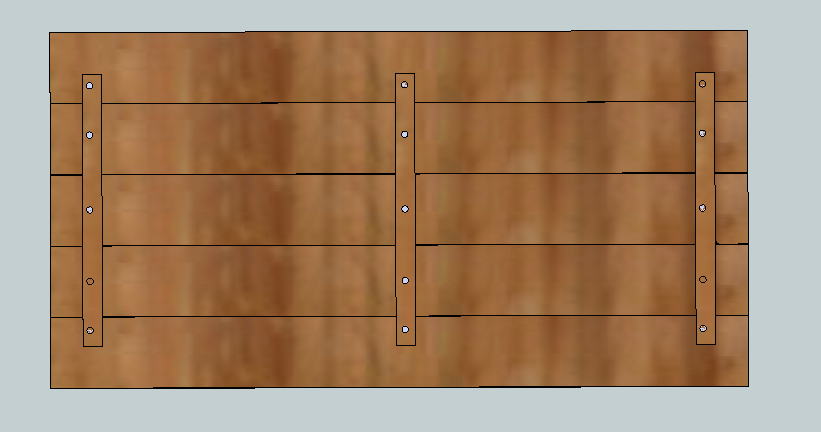
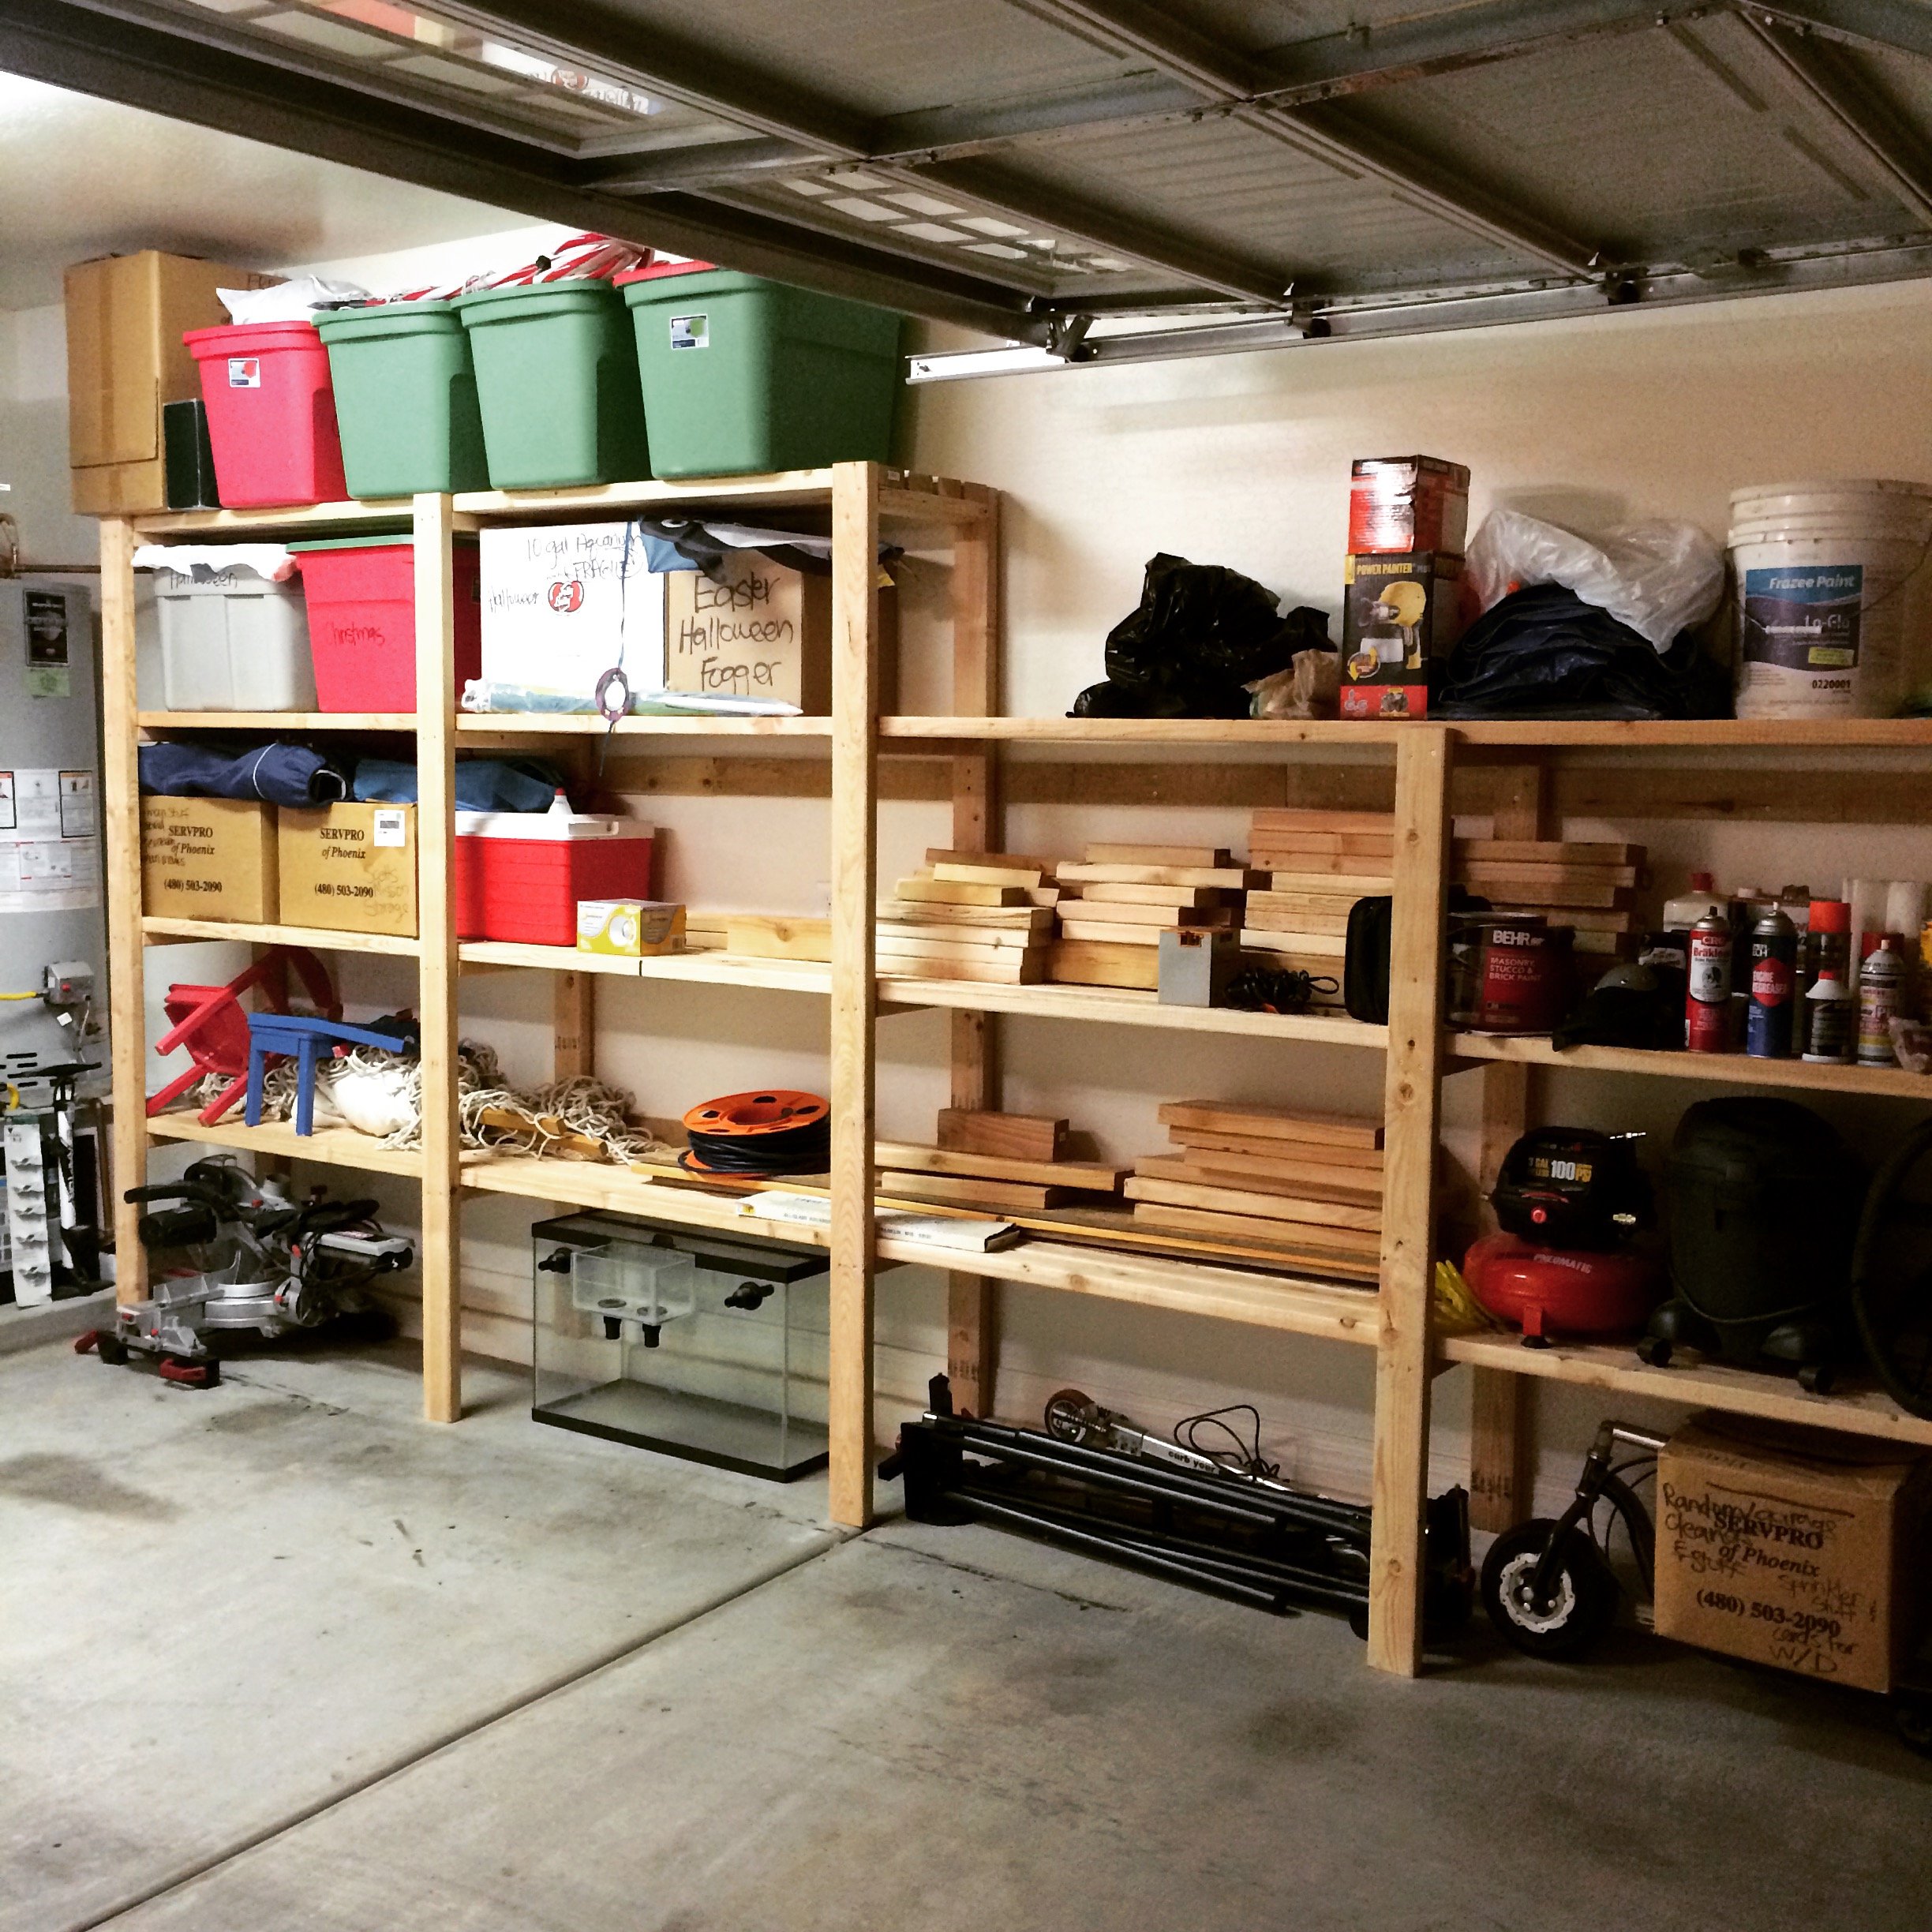
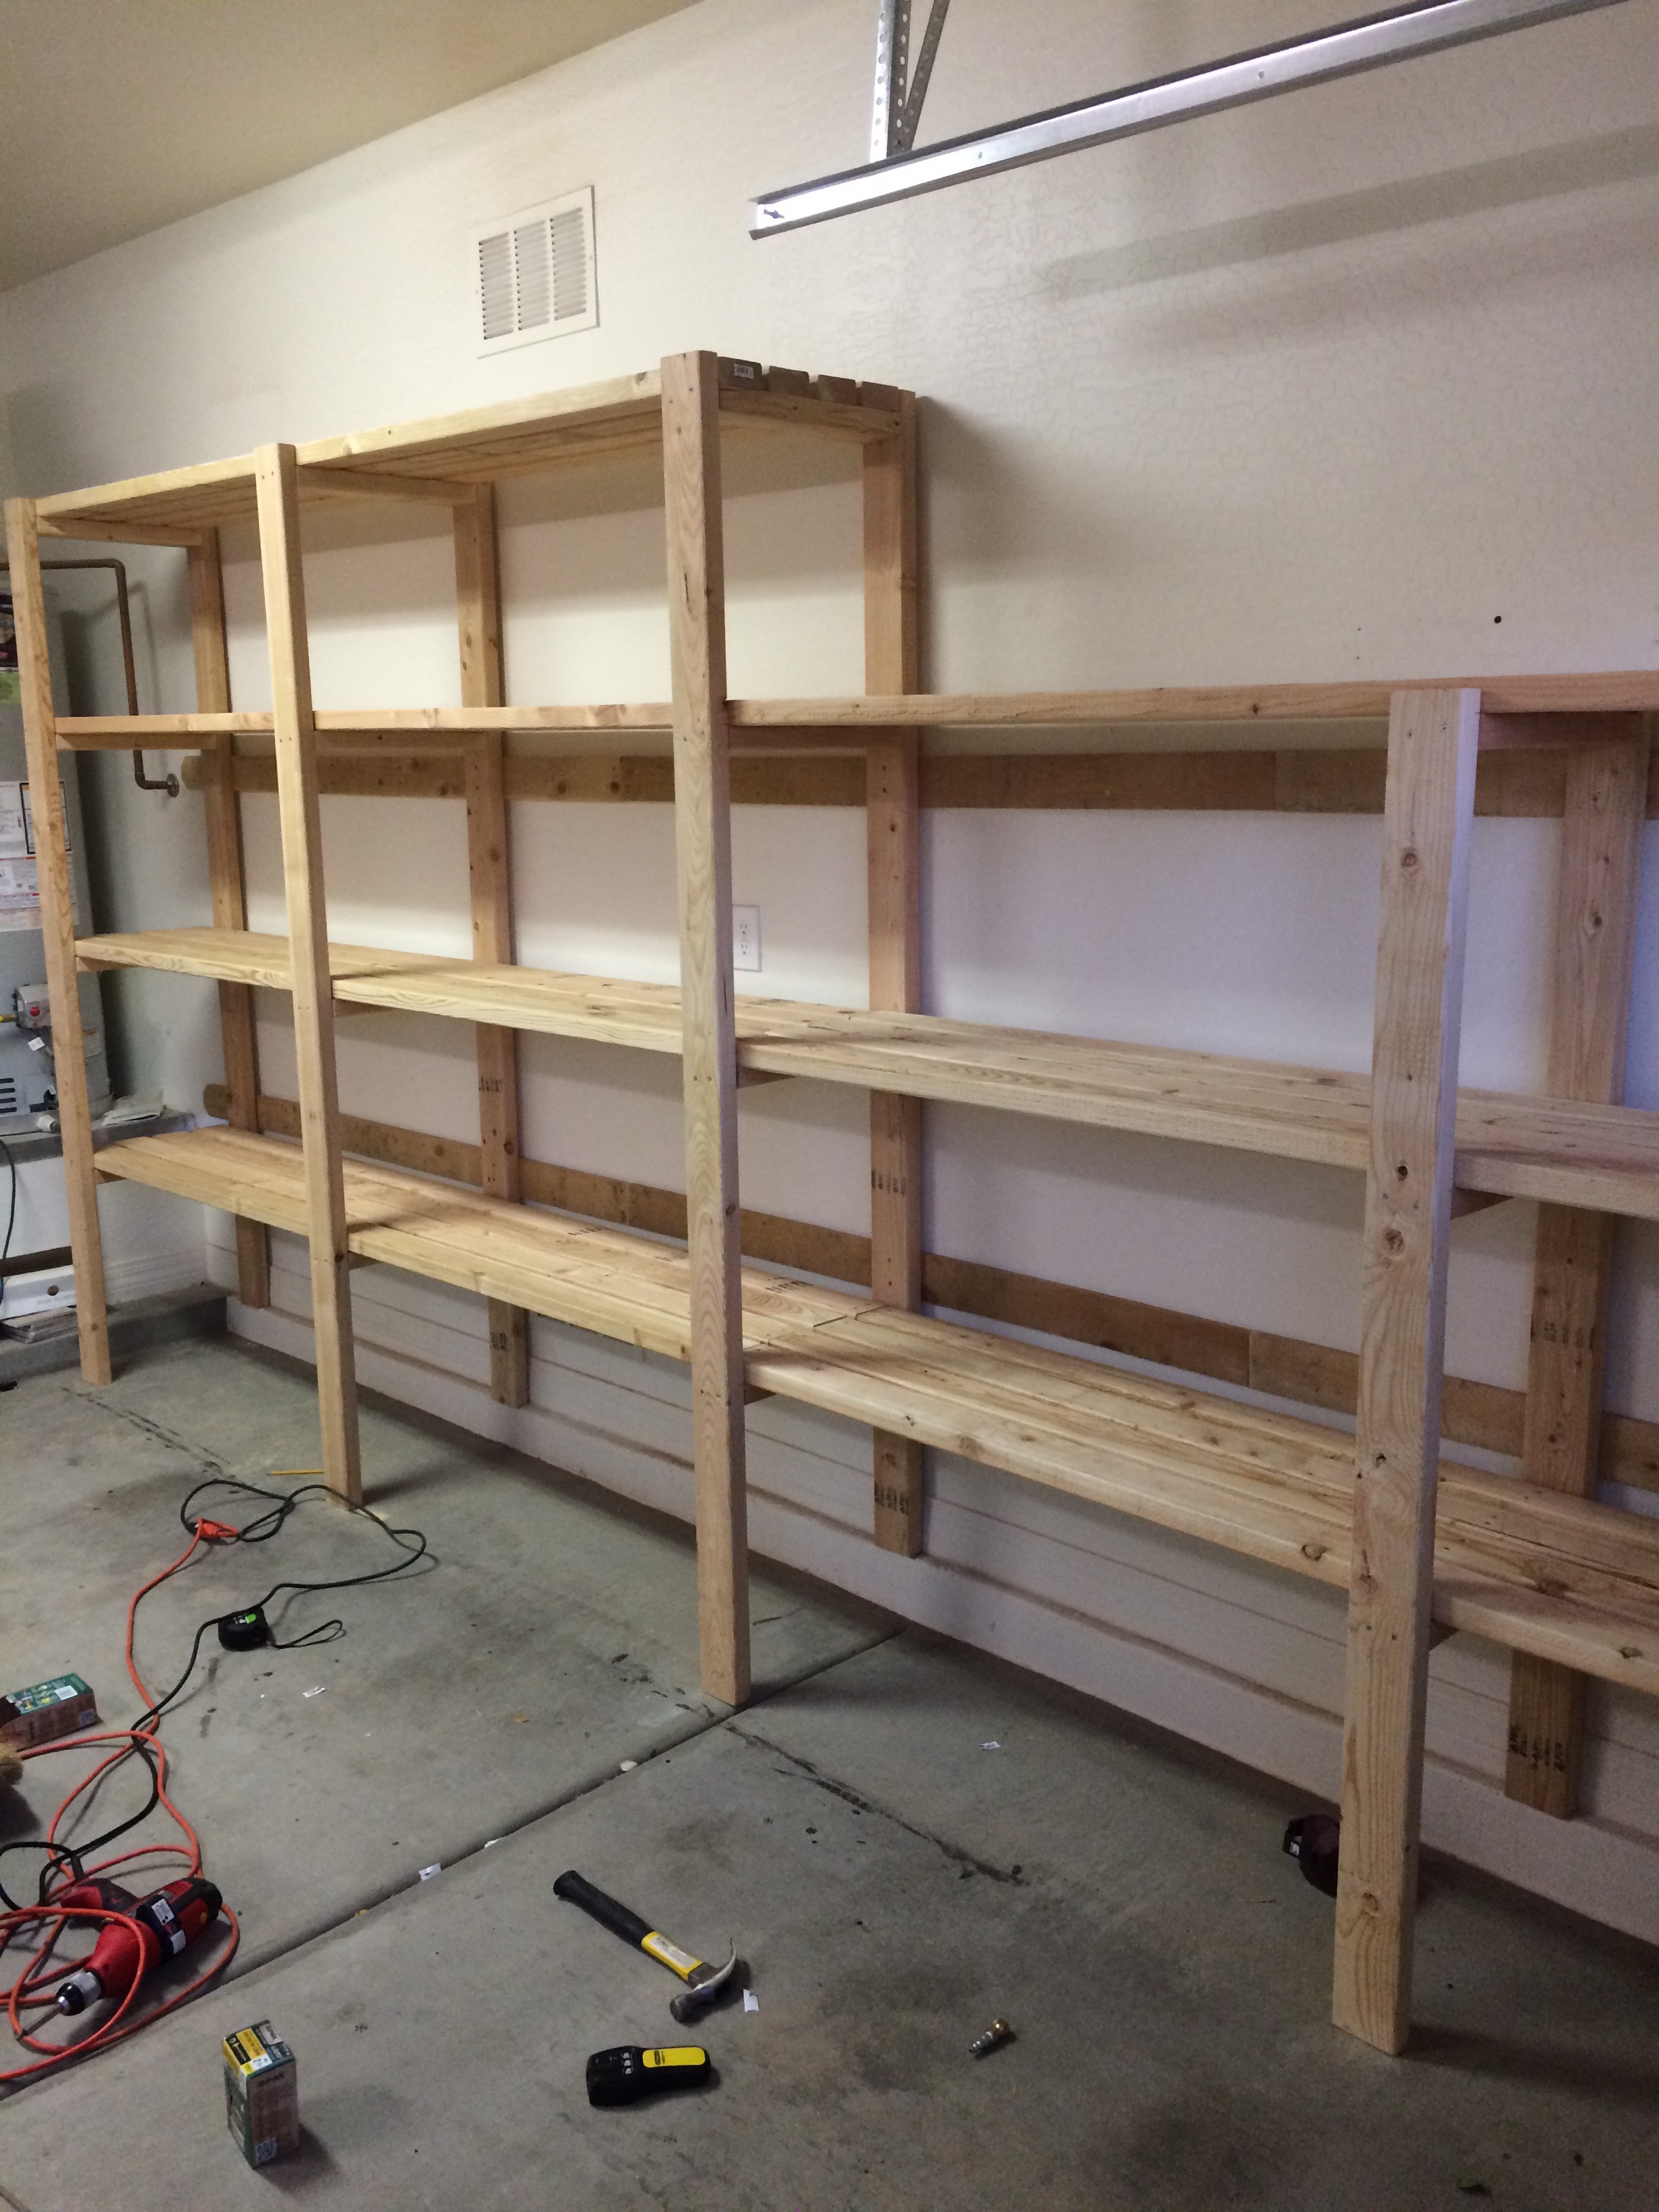
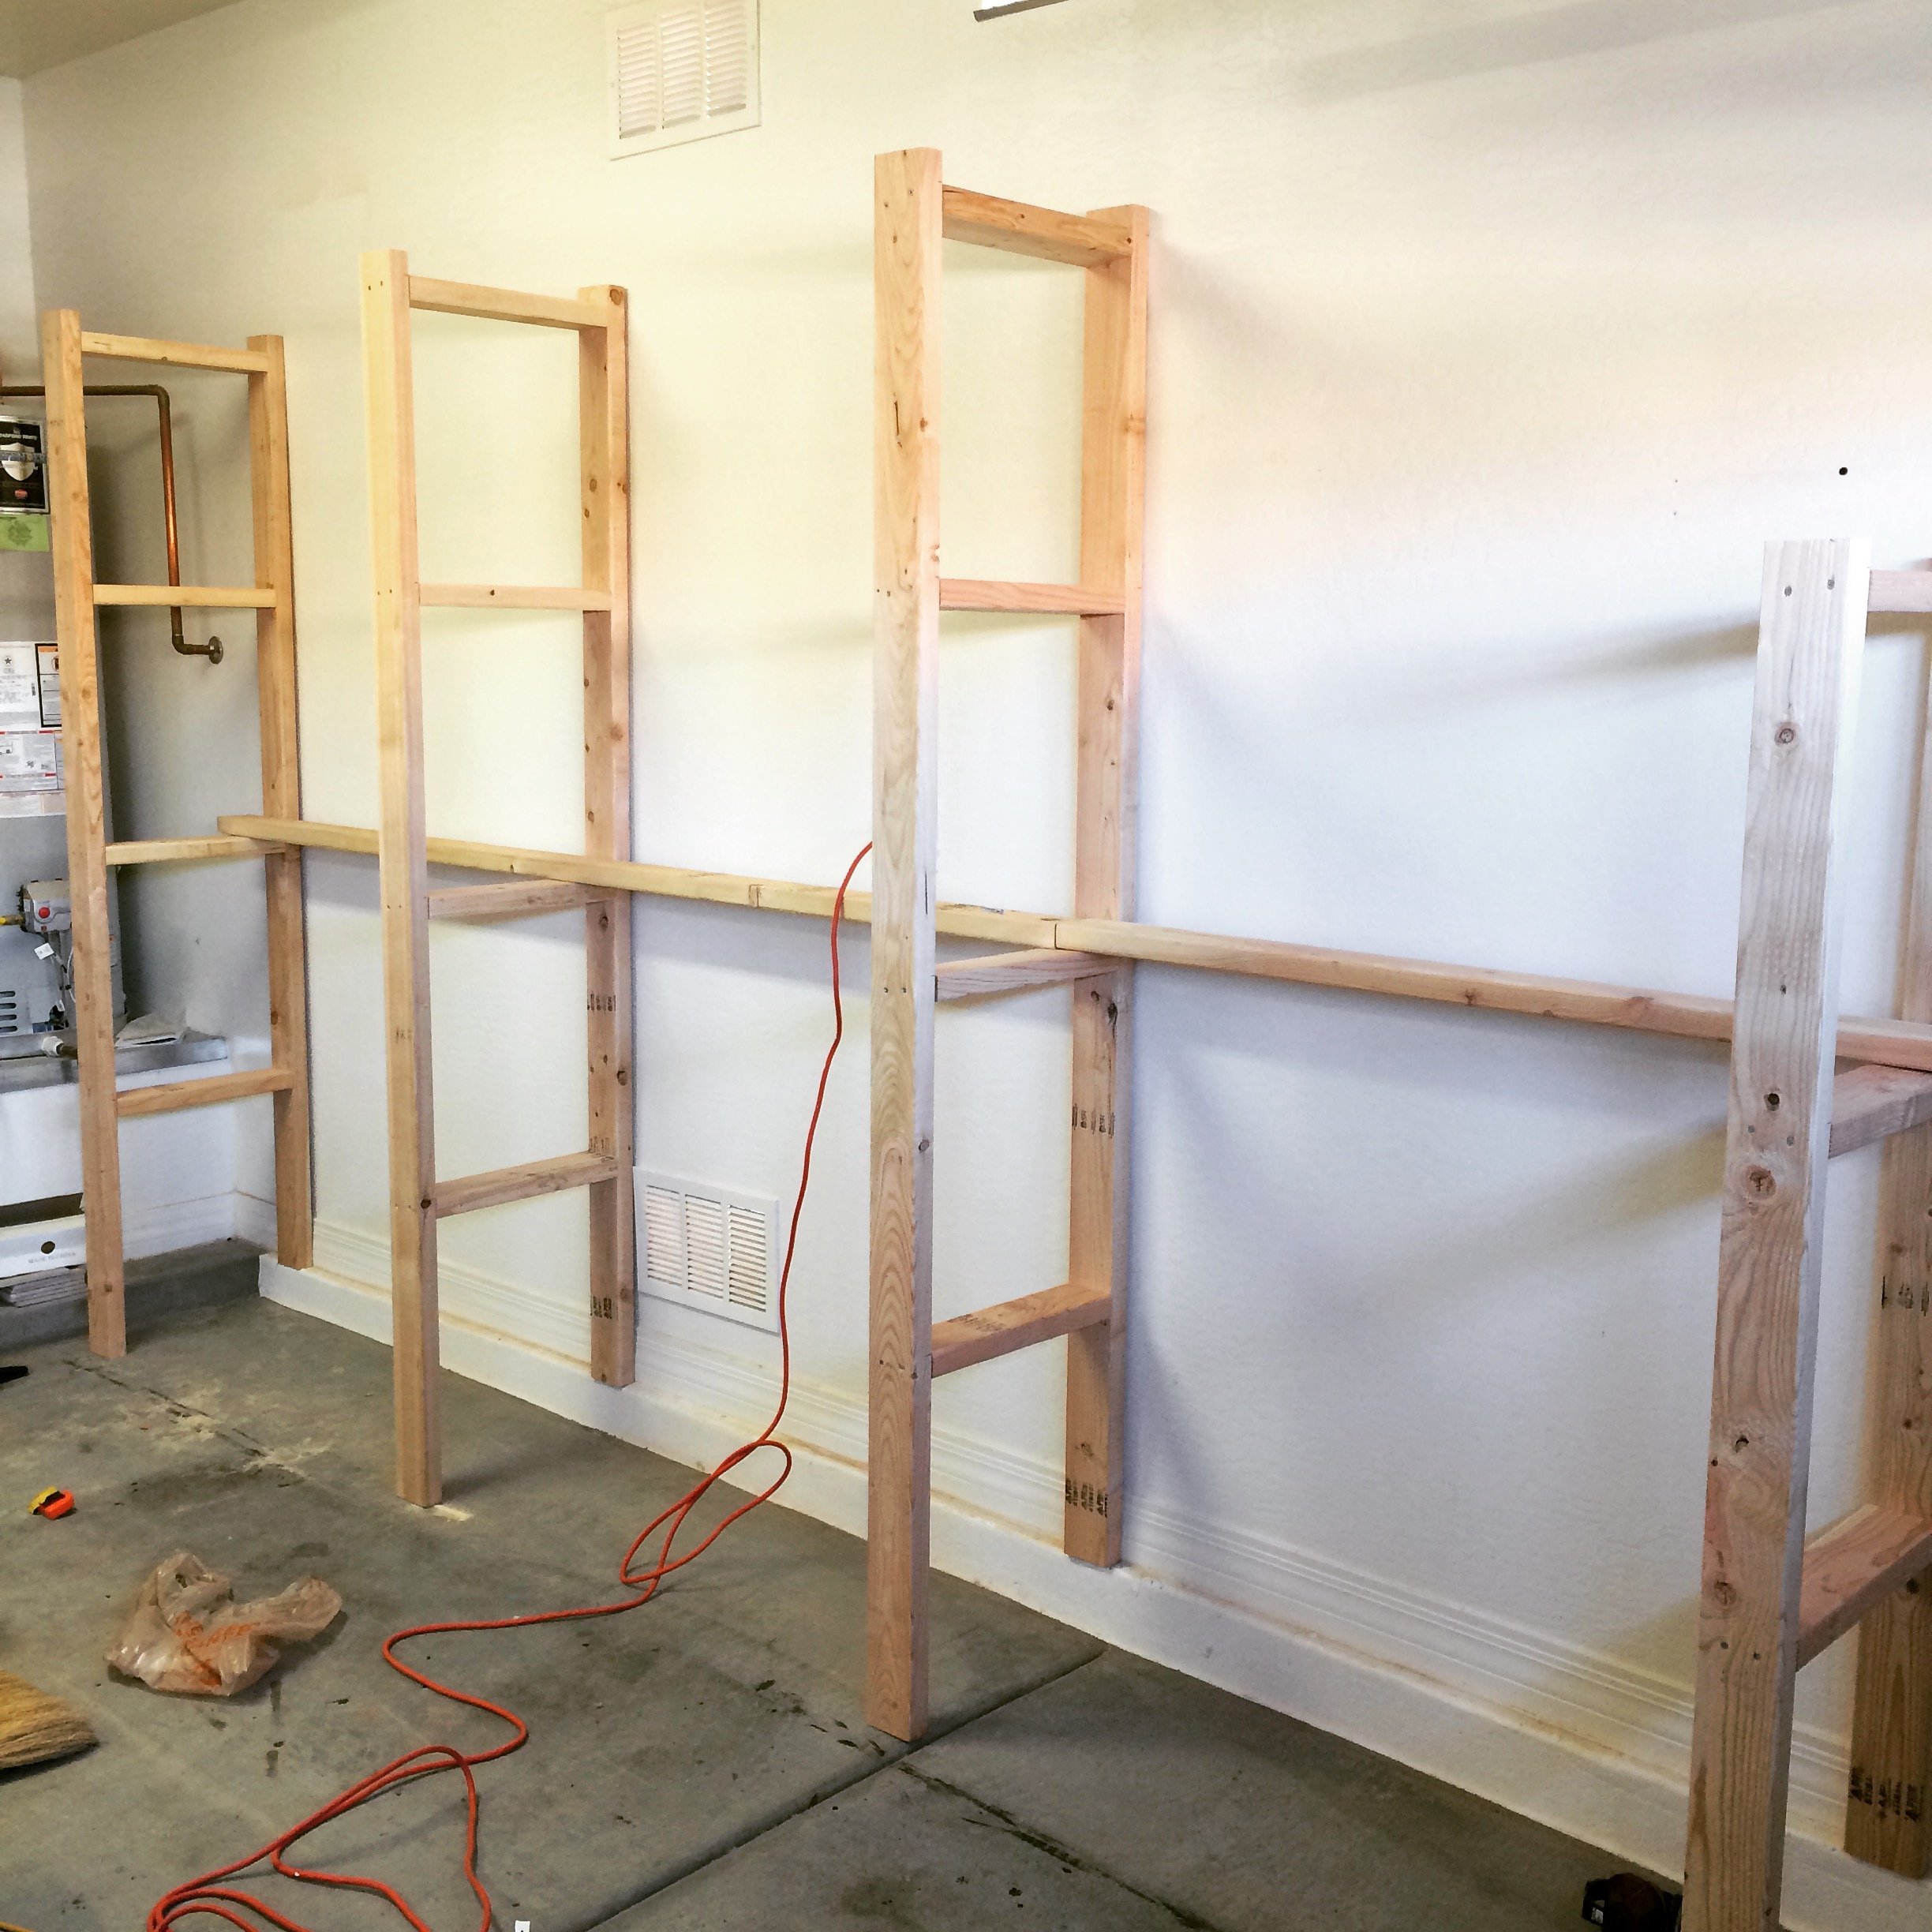
I used Ana's Freestanding Shelf plan and customized it to fit my needs. I incorporated laundry and recycle storage, a rolling bench and built in for our chest freezer. If you want to see it being built with some added tips, that video is available here https://www.youtube.com/watch?v=N8w7XGiVMbs&t=258s
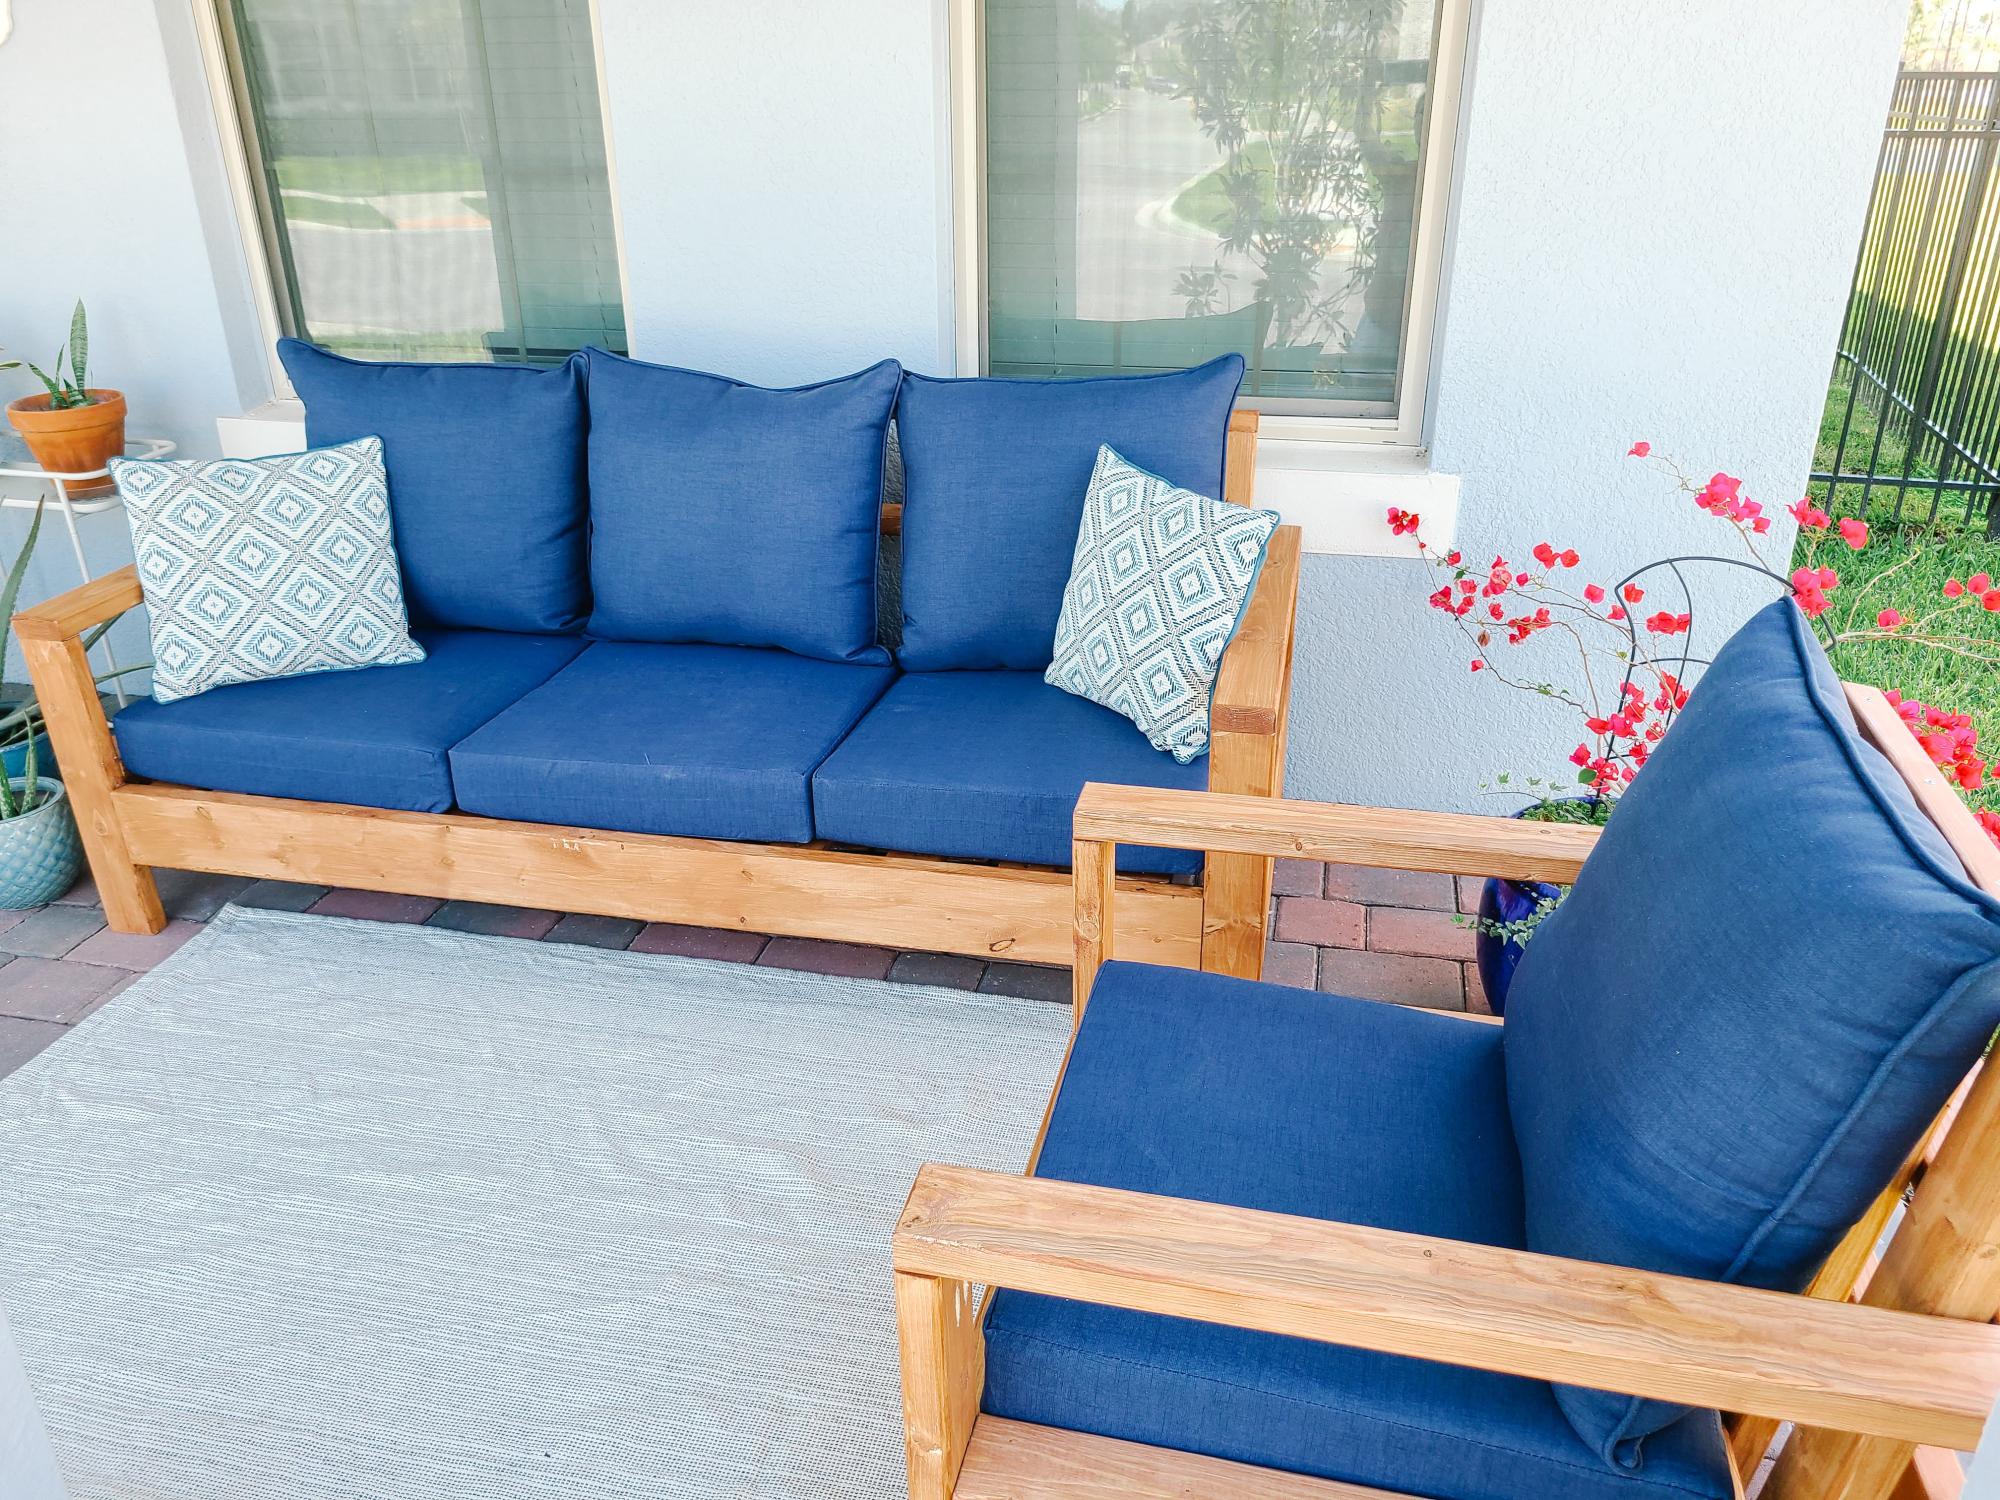
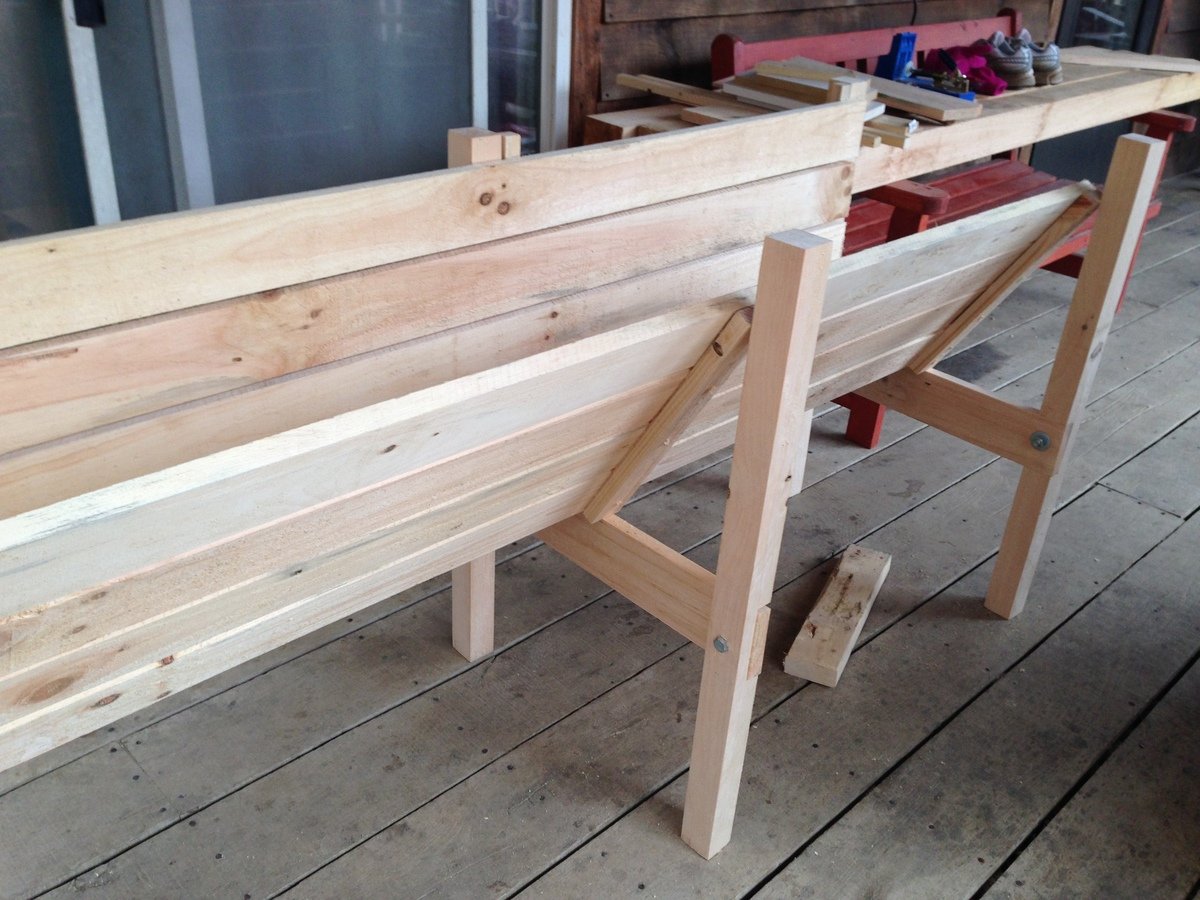
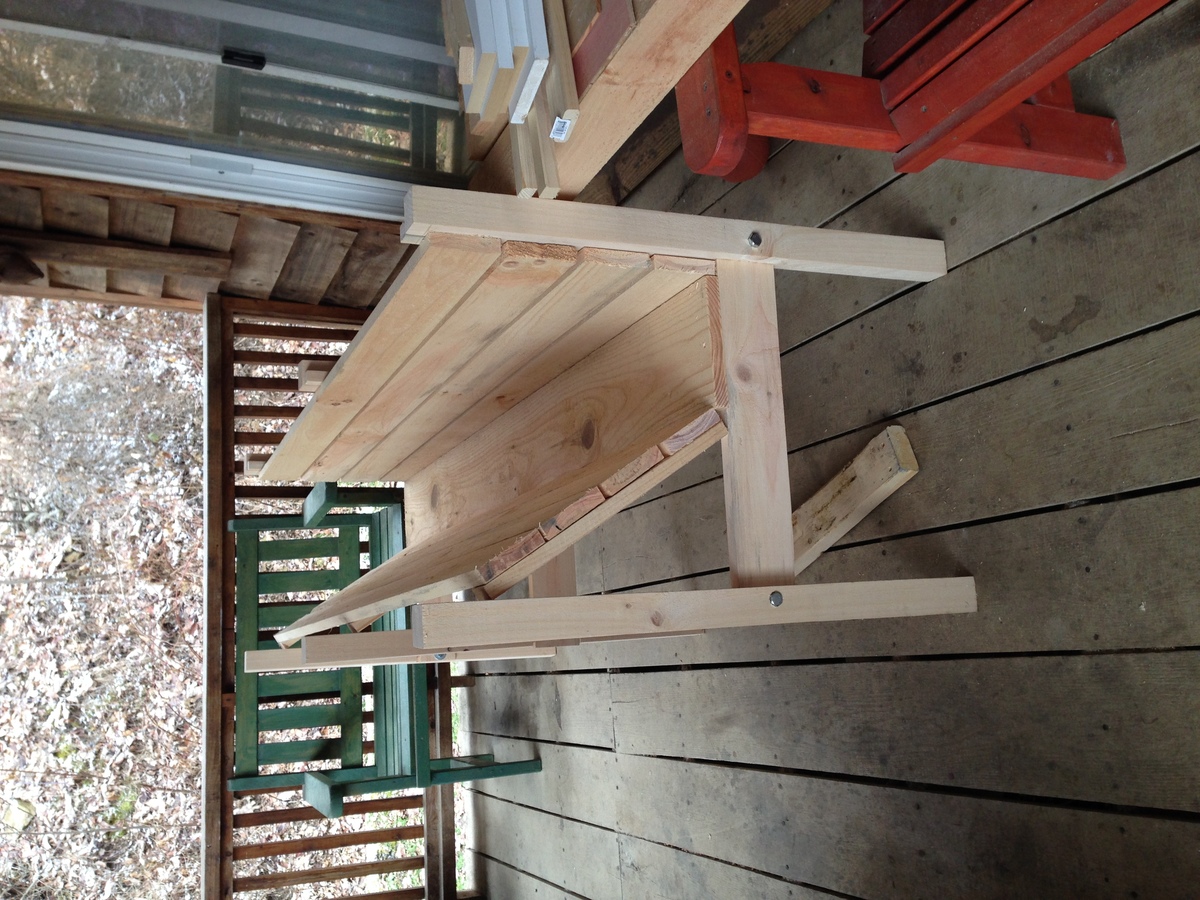
OK, I think this build may be my biggest project yet! It is definitely the heaviest. With the strong winds we can get here in Florida we needed substantial outdoor furniture.
I did make some modifications along the way measurement-wise so the sofa would fit my front porch better. All in all, this took 2 full days. I built the sofa first, stained it the next day and then decided (due to trying to get stain in all the nooks and crannies) to stain the chair pieces first before putting it together.
I am so happy with the results and so far, almost a year later, this furniture looks great and hasn't moved an inch in any of the thunderstorms we've had! Thank you Ana!!


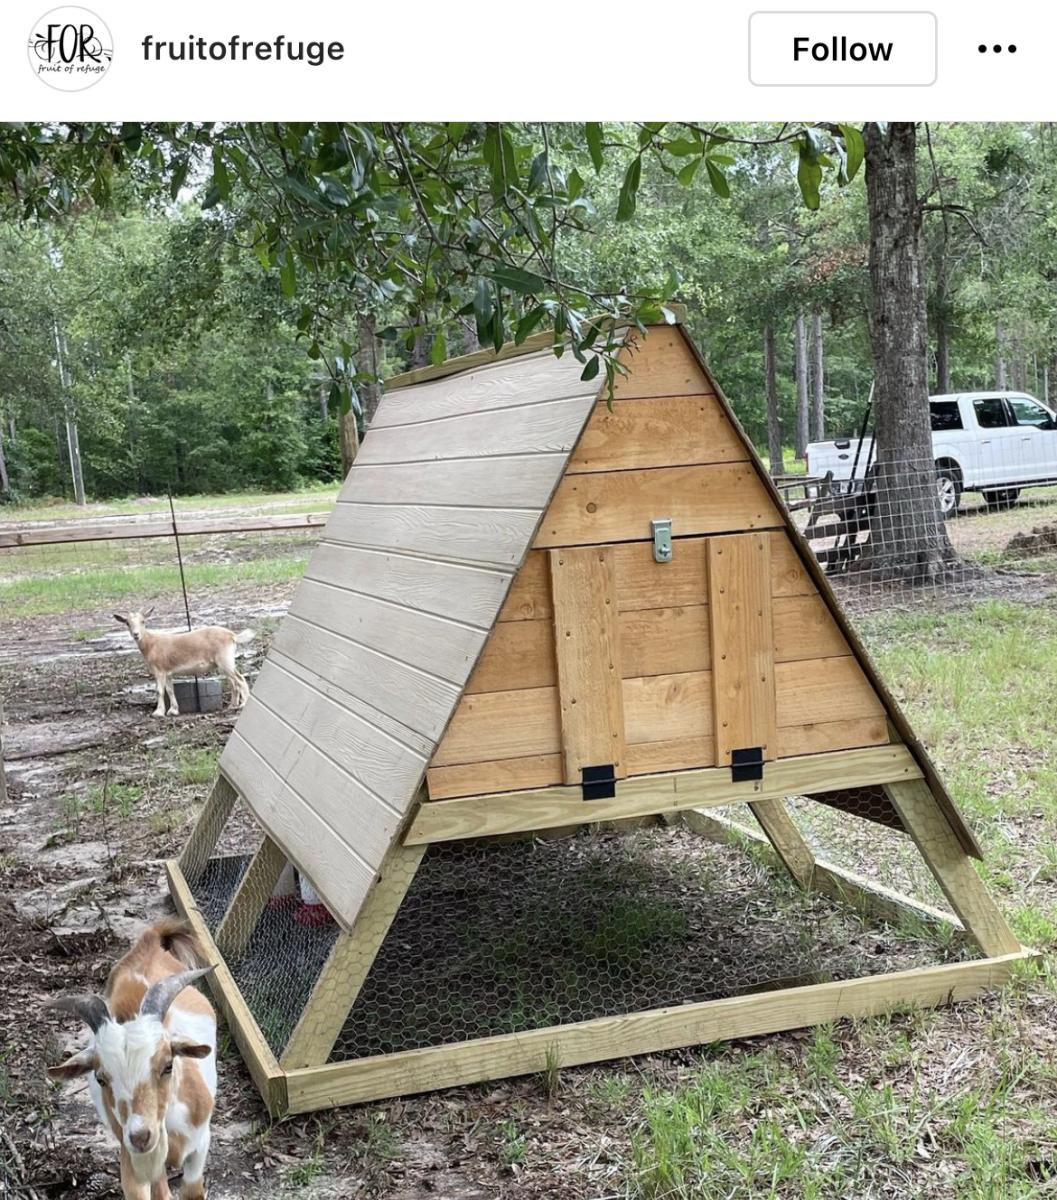
Great for a small flock of 5 or less.


I'm happy to share with everyone my IKEA hack 6" tray cabinet.
I found a 24" cabinet box in IKEA's As-Is section and took it home for half price ($23)! I would have preferred plywood, but my table saw is a little small and cutting large sheets of plywood is a little scary. When I deconstructed the cabinet, it sustained some damage (as its particleboard), so if you try this at home, be careful! I ended up changing the depth to 22" in order to cut off the damaged piece, but that shouldnt be noticeable with average trays and cutting boards.
I used Ana's 6" tray cabinet plan and modified the dimensions a little for my planned space. It still needs the back, face frame and door (which will be a replacement drawer front from the cabinet manufacturer). I plan on building the face frame at the time the cabinets are installed, since this will go in between the 36" corner easy-reach and the 36" sink base. Once its done, I'll post updated pics!
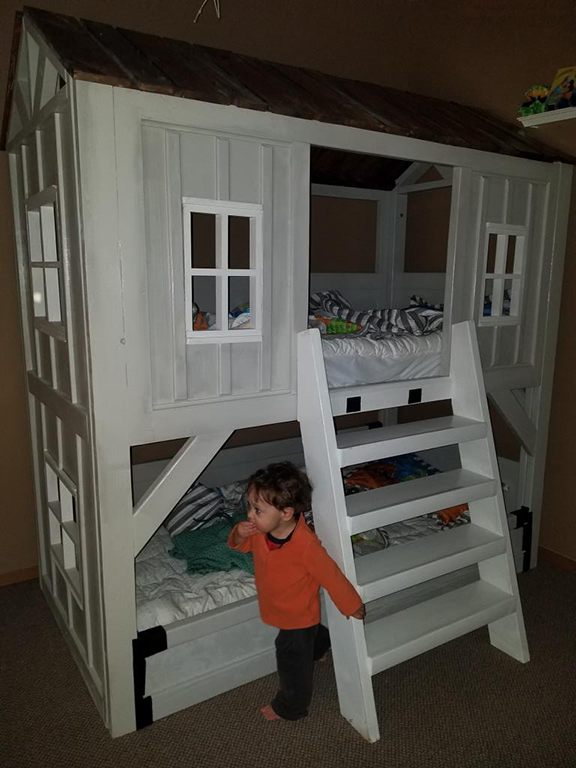
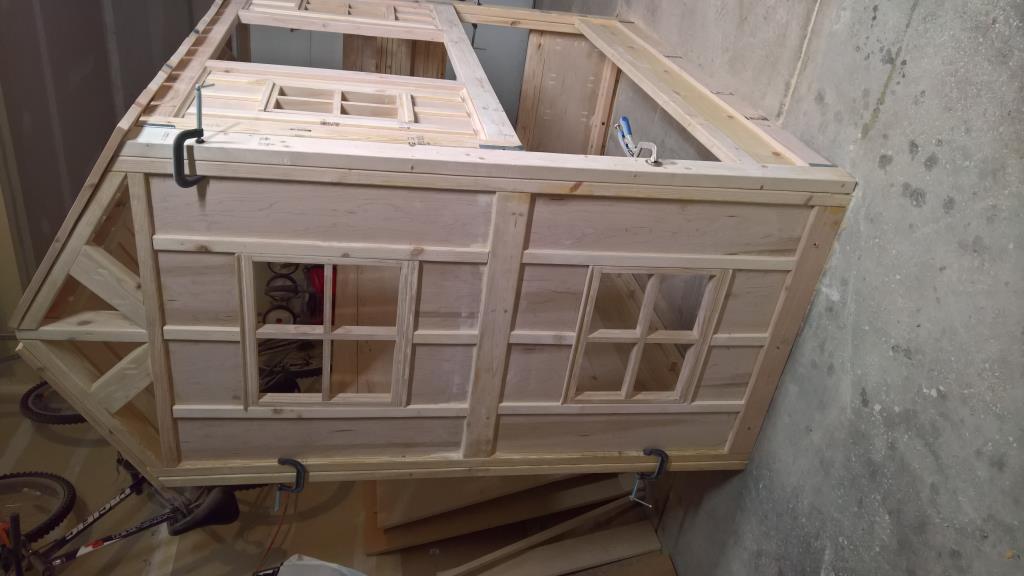
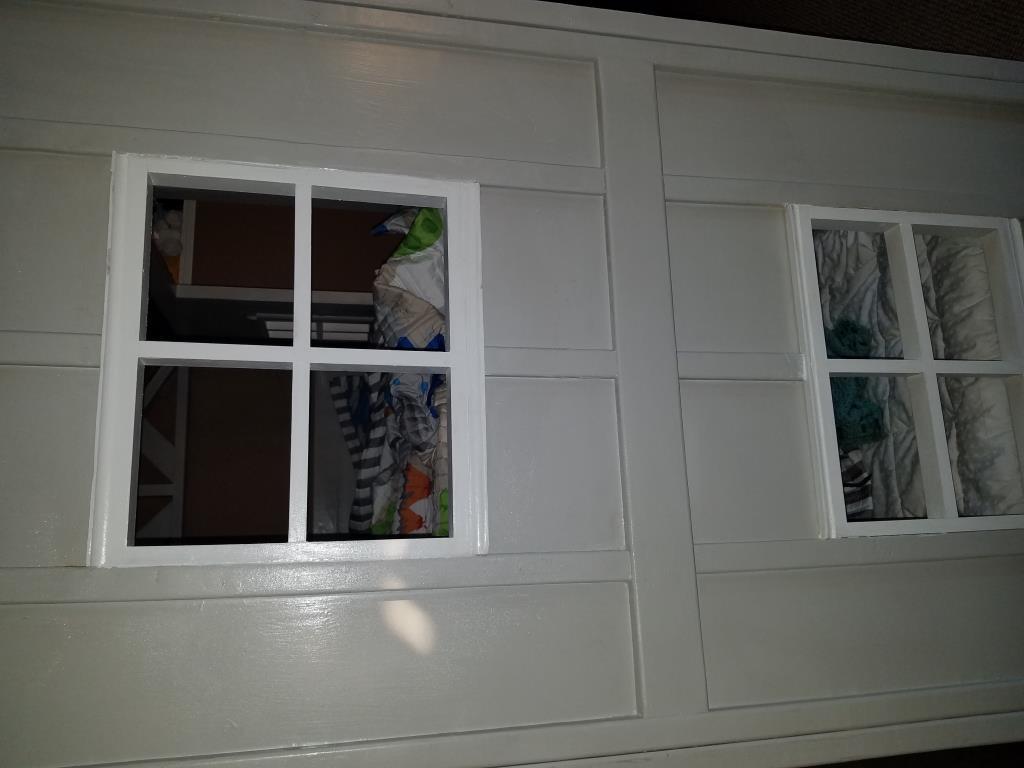
Fell in love with Cabin Bed by Jen Woodhouse but really needed bunk beds for my grand kids. So I modified the plans just a little.
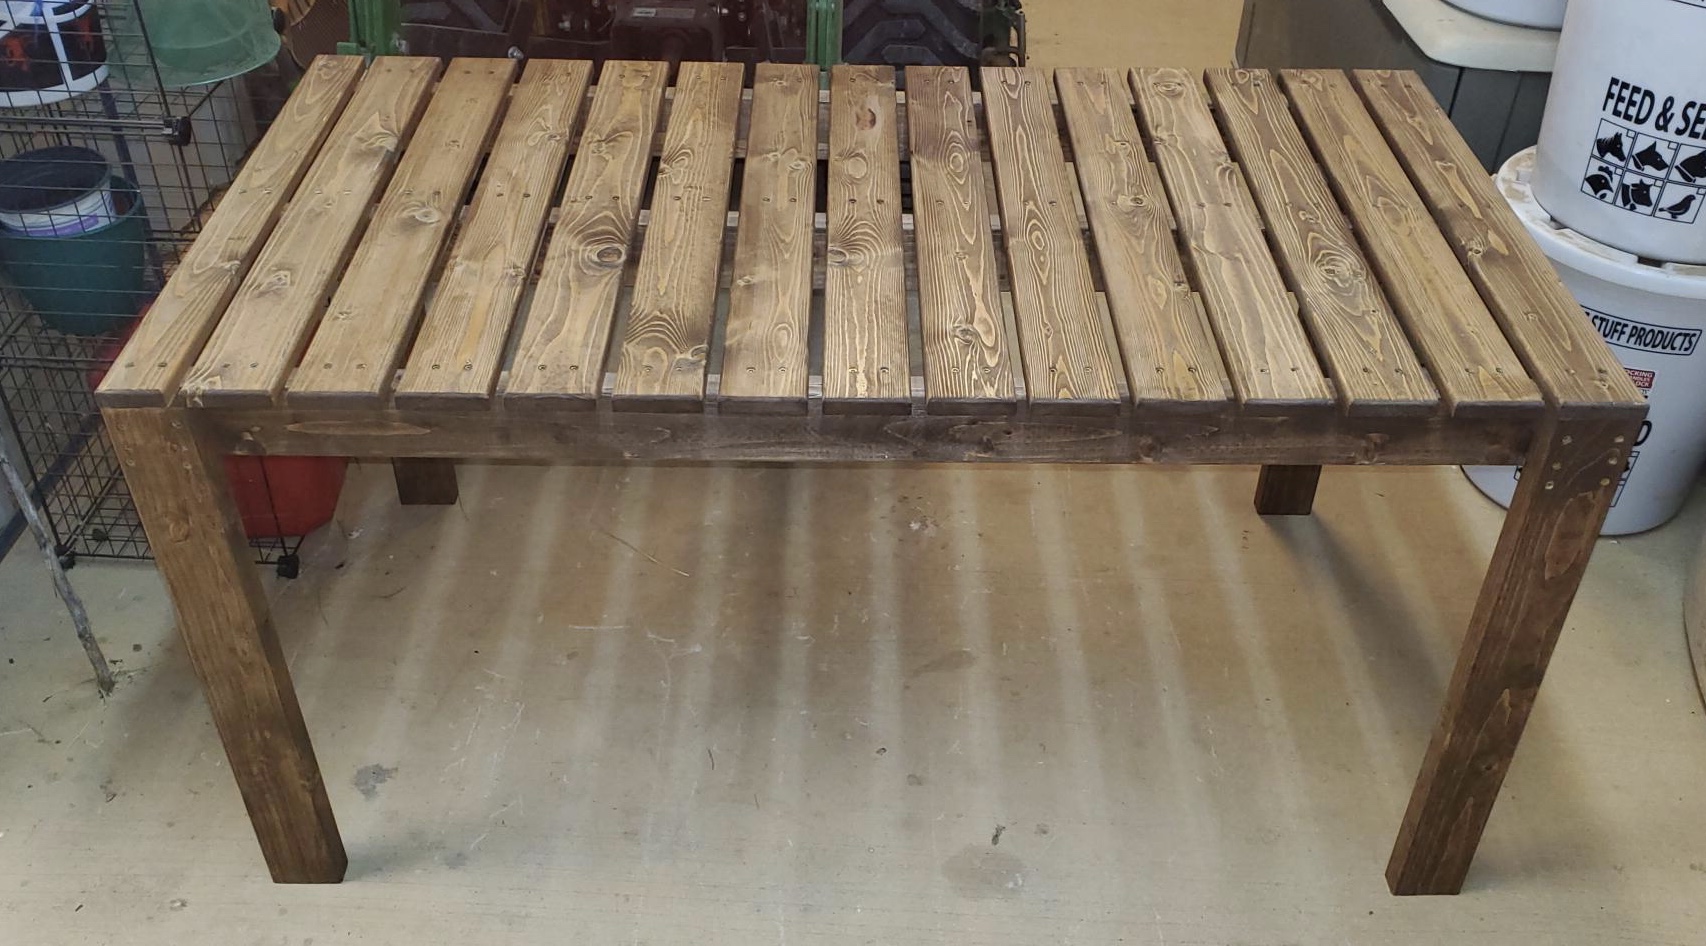
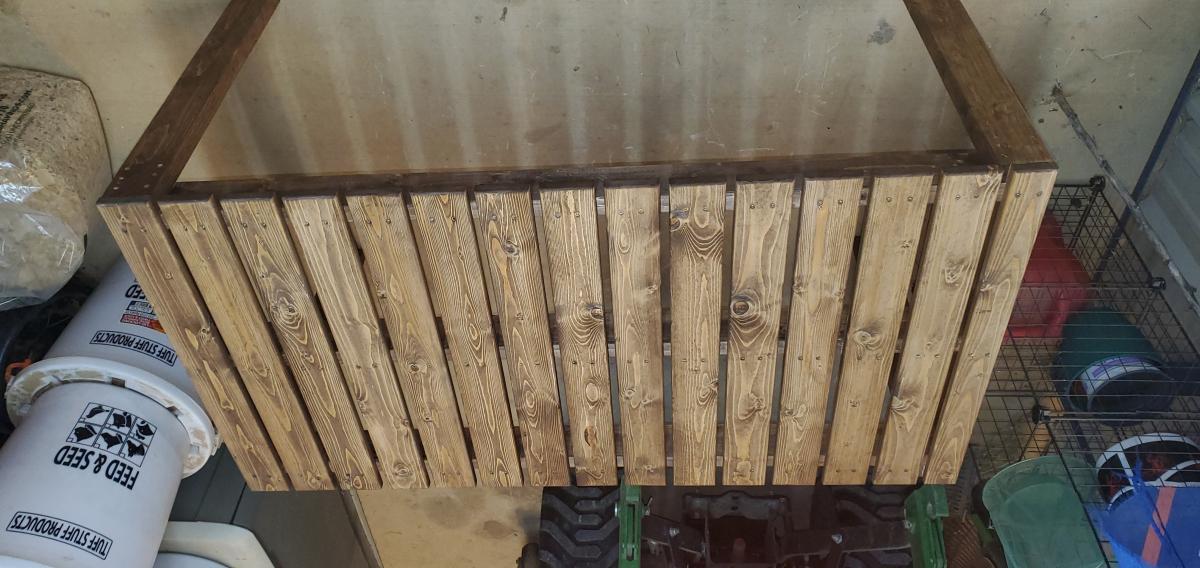
This table is very nice and so simple and inexpensive. Just choose your lumber selectively. I used prime 2x4's for higher quality.
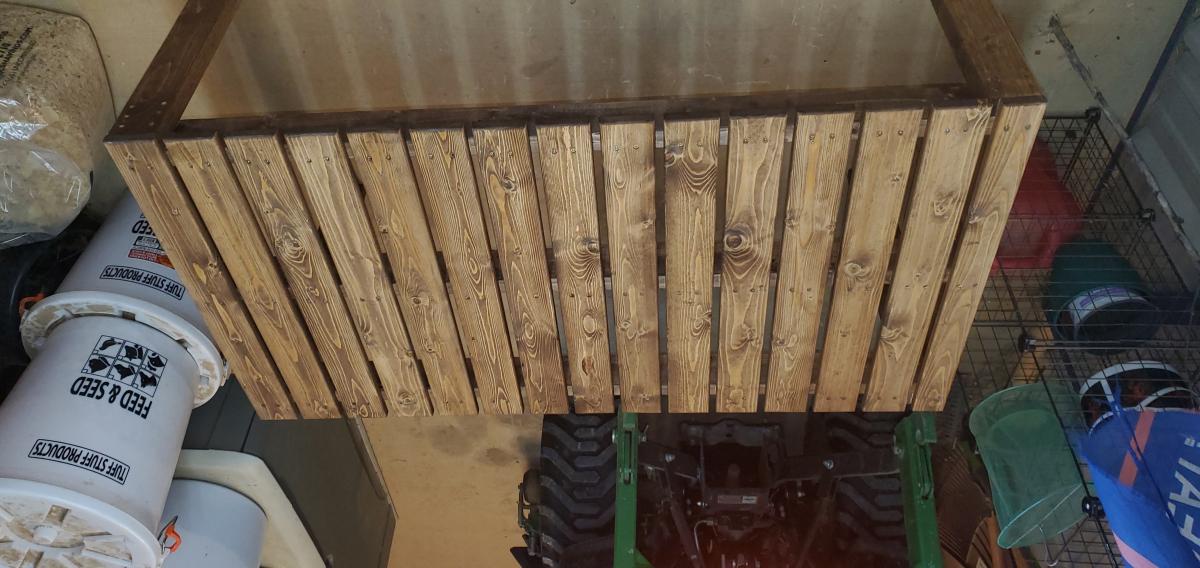
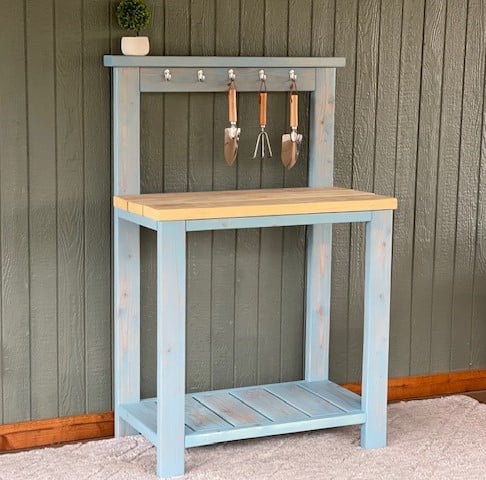
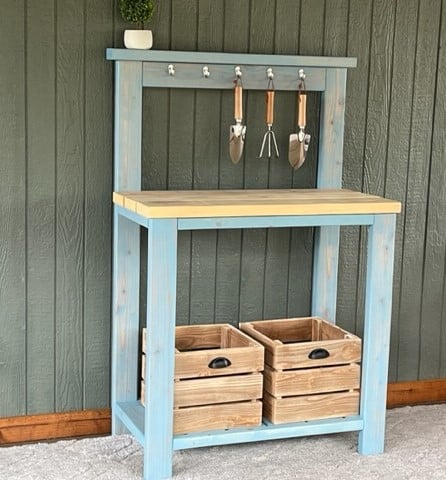
I used Ana's Farmhouse Potting Bench plans and modified it to be more compact and left out the x detail. I built it for under $40 in material.
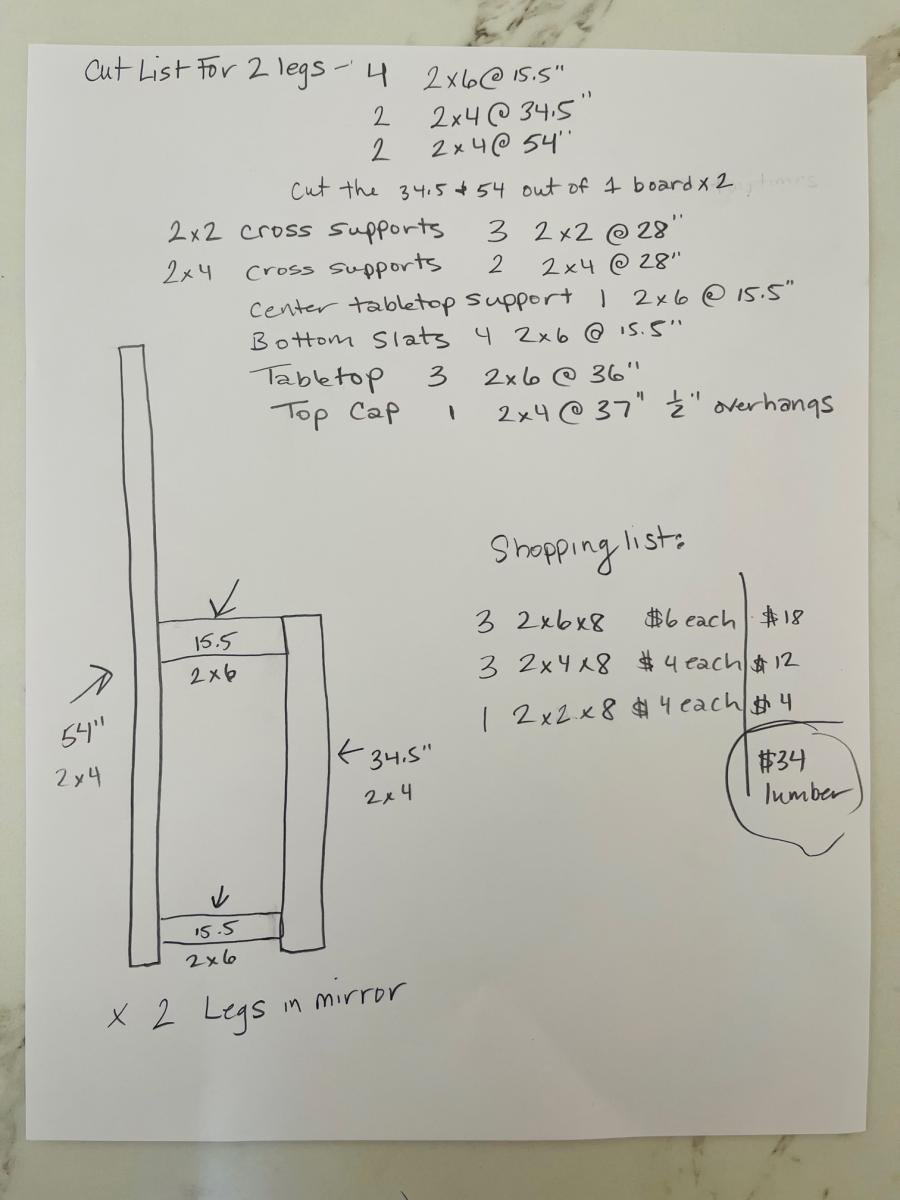
Modifications for Shopping and Cut List - Construction and placement is same as Ana's original plan, so make sure you look that over.
3 - 2x6x8
3 - 2x4x8
1 - 2x2x8
FOR 2 Legs
4 2x6 @15.5"
2 2x4 @34.5"
2 2x4 @54"
(cut the 34.5 and 54 out of 1 board and repeat)
2x2 Cross Supports
3 2x2@28"
2x4 Cross Supports
2 2x4@28"
Center Tabletop Support
1 [email protected]"
Bottom Slats
4 [email protected]"
Tabletop Boards
3 2x6@36"
Top Cap Board
1 2x4@37" leaving 1/2" overhangs

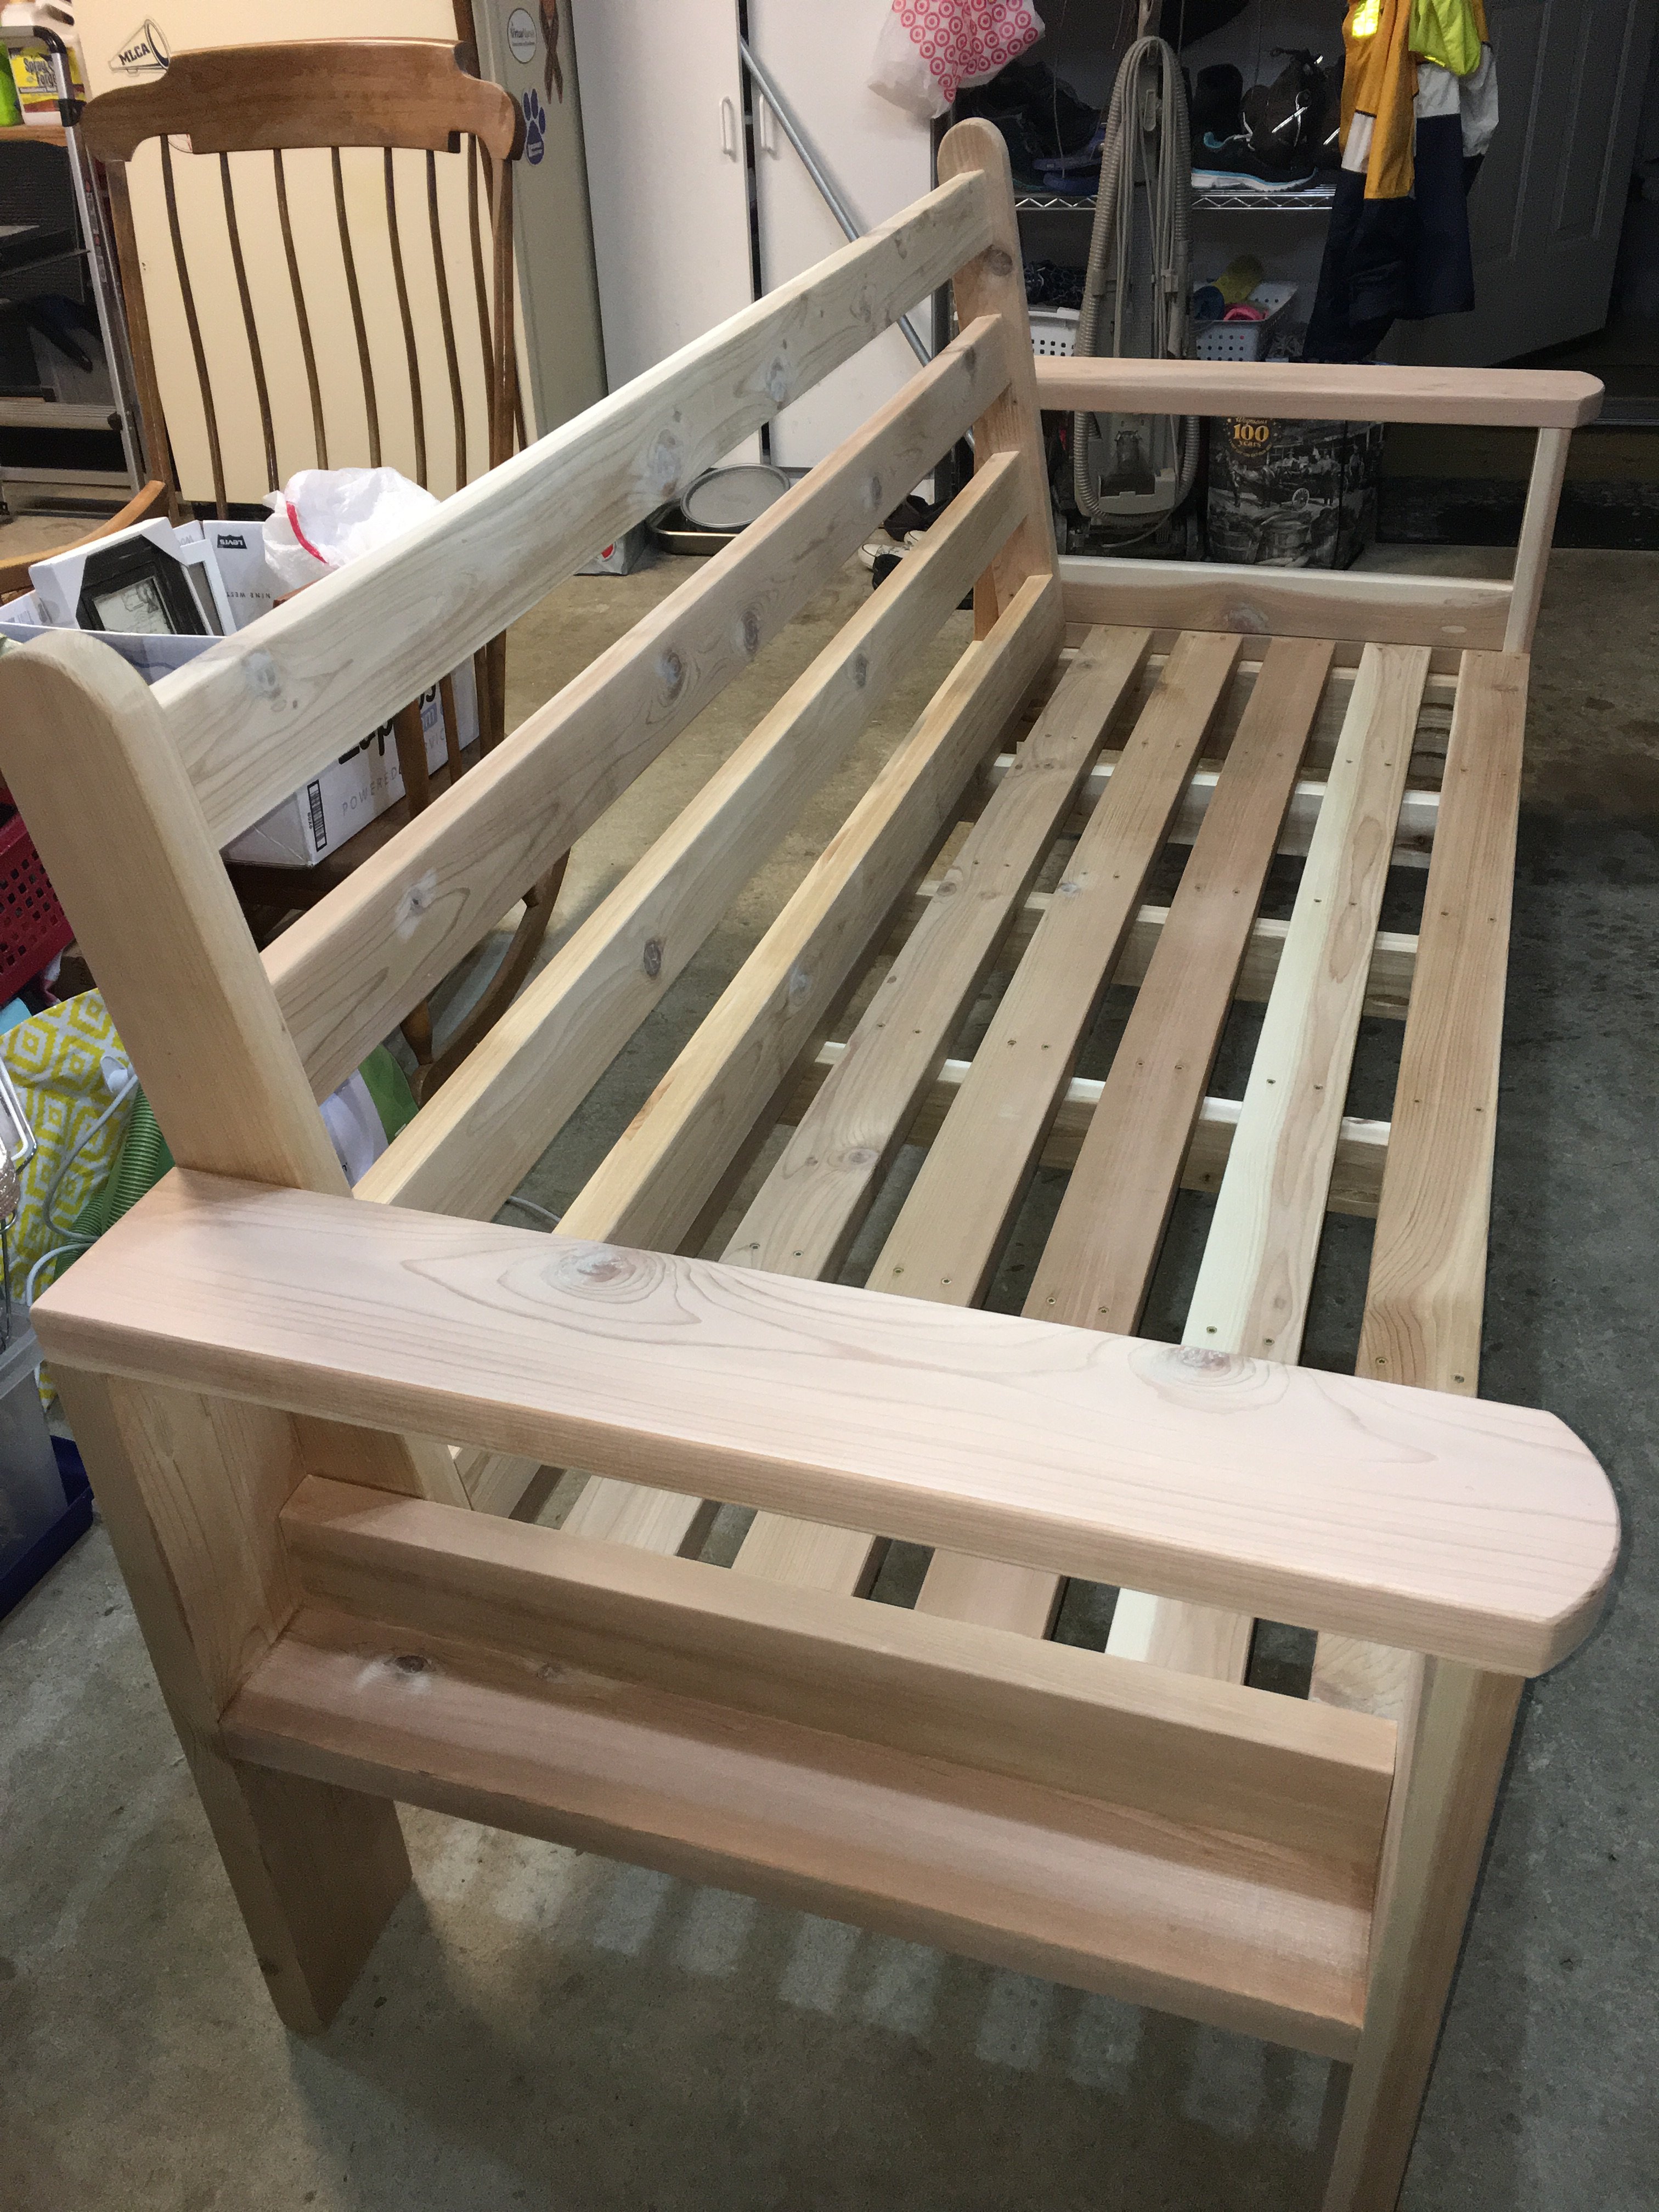
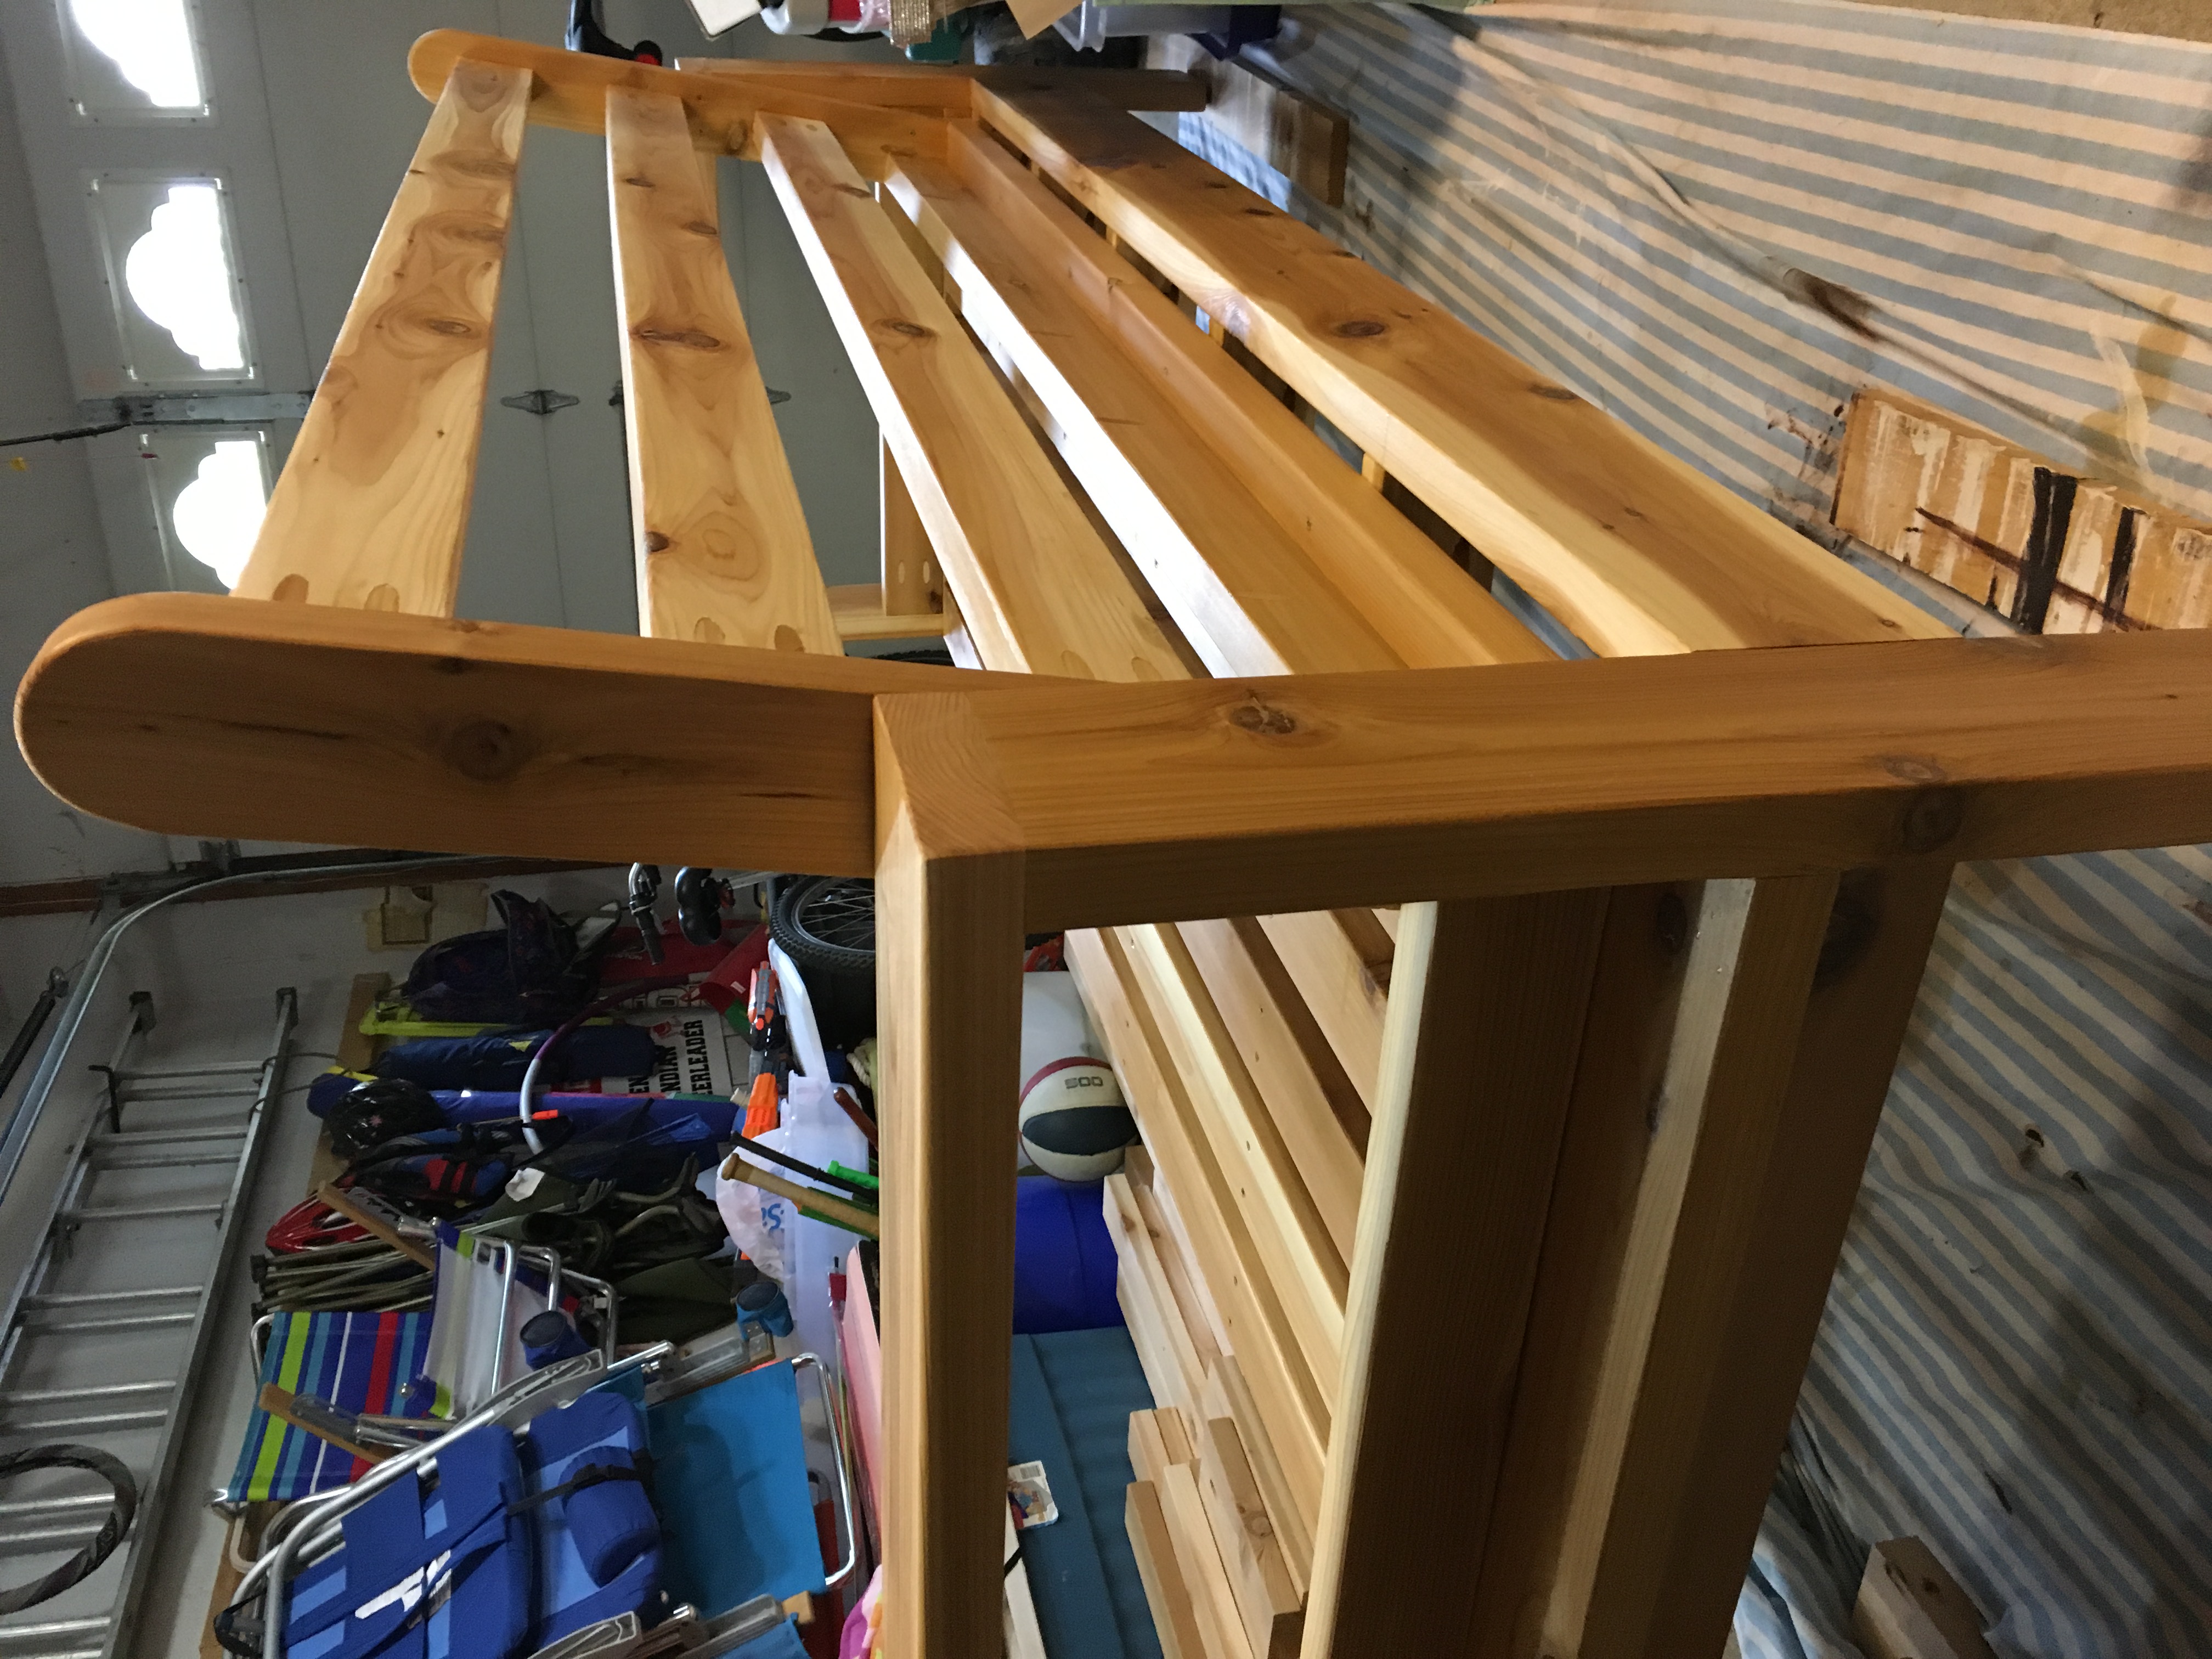
Made an outdoor sofa inspired by Ana White's plan. I made a few modifications including using 2x6's, hiding more of the non-pocket hole screws, using HD pocket holes in more areas and building an incline for the backrest. Cushions are Sunbrella from Lowe's.

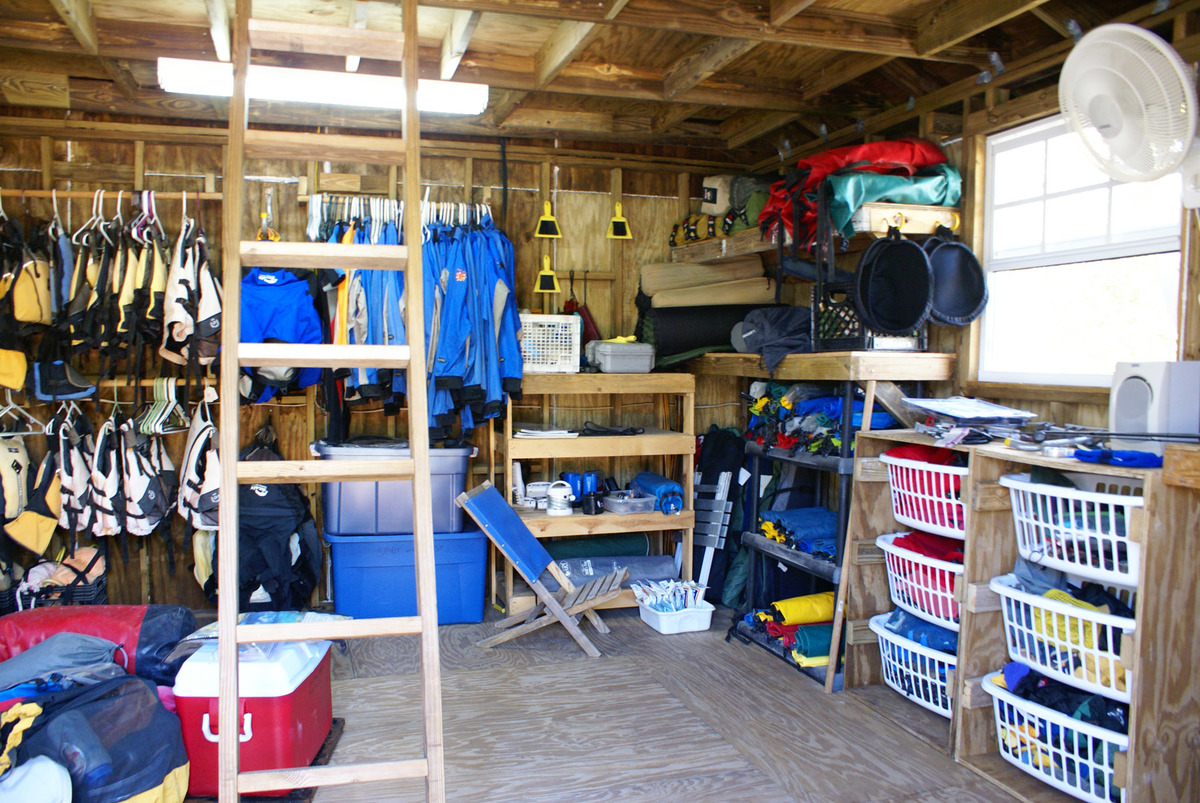
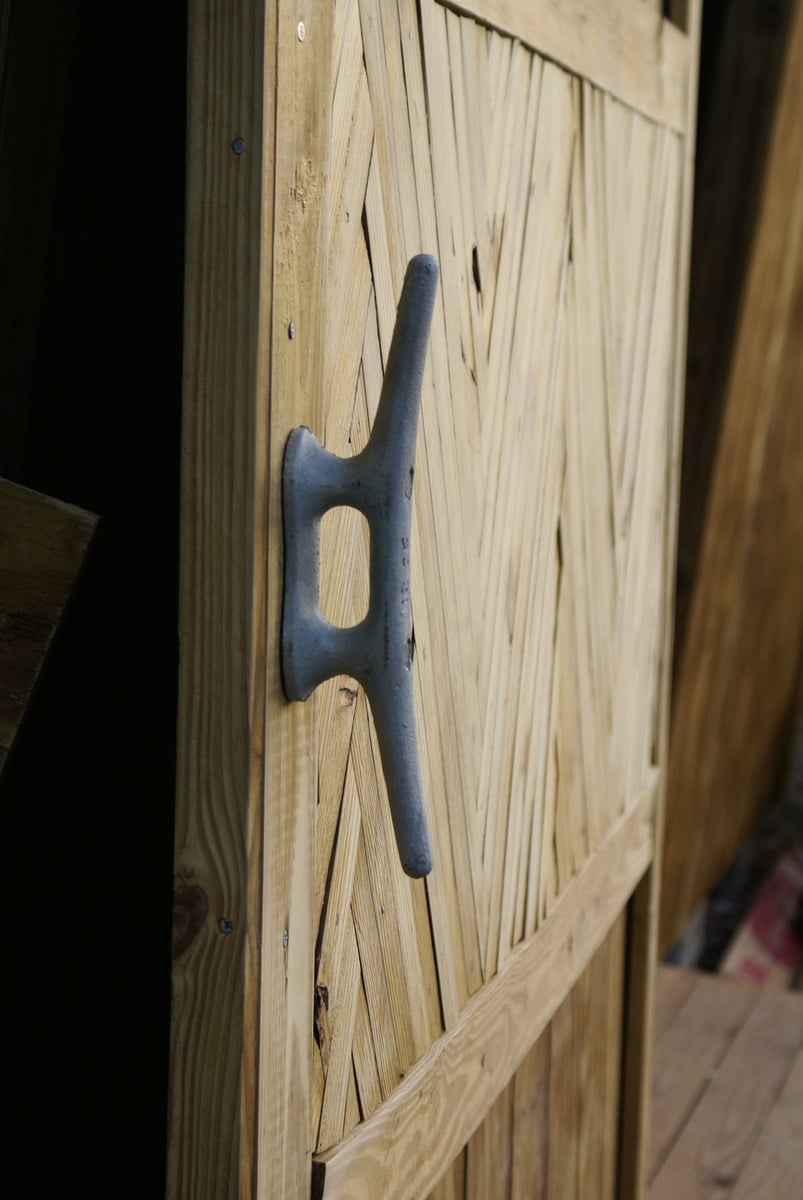
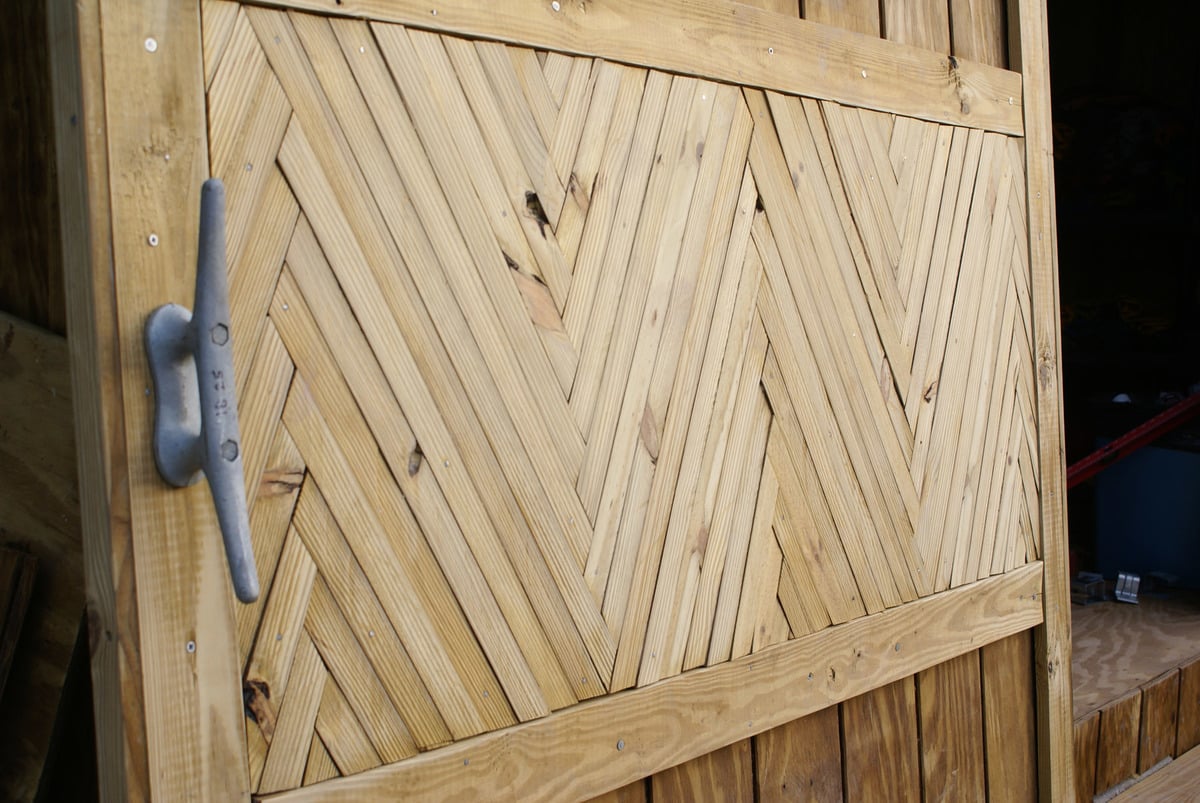
Thanks to the tips and tricks we picked up from Ana here, we were able to build our very own storage shed. We use it for storing our kayaking, sailing and camping gear for our company down here in the Bahamas (which is still a bit unorganized in the photo). It works so much better than what we had before in multiple kit sheds. We even have a loft up top for extra storage, electricity in there with a fan, fridge and lights... MAJOR UPGRADE :) We still need to paint it and finish a few things, but we are very thankful to have it up and being used.
My favorite thing is the door handle (a boat cleat) sliding barn door and the herringbone design for 'eye candy' :)
Thanks go out to Ana and her wonderful site! I would have never attempted this without the foundation I built here!
Sun, 04/14/2013 - 20:37
What did you use to make the sliding door? Can you upload pics? I really want to make one for my bathroom but all the hardware I find is really expensive.

In reply to Sliding door by jbayer80
Mon, 04/15/2013 - 11:29
I've read on some blogs people have found theirs at Lowes or Tractor Supply.
Mon, 04/15/2013 - 06:05
We built the door out of some T1-11 Siding, 1x4's and various scrap pieces. The hardware we used is this Stanley set here: http://www.stanleyhardware.com/default.asp?CATEGORY=HDW+BARN+BOX+TRACK&… Then we bought the steel track separately. This door is super heavy, but it rolls like a charm on the track. Does this help any? Good luck!
Mon, 04/15/2013 - 11:42
And they work perfectly for our camping gear and kayaking gear too :)
Sun, 05/05/2013 - 13:58
Not really any plans that would help. We just drew some rough sketches up some paper and kind of went from there. Between Ana's site here and this book: http://www.amazon.co.uk/Building-Shed-Build-Like-Pro/dp/1561586196 we just pieced things together with the space and money we had. The book just helped me a lot to plan it out, and then all of the building techniques Ana has taught me on here came in handy. It's a group effort :) Hope this helps!
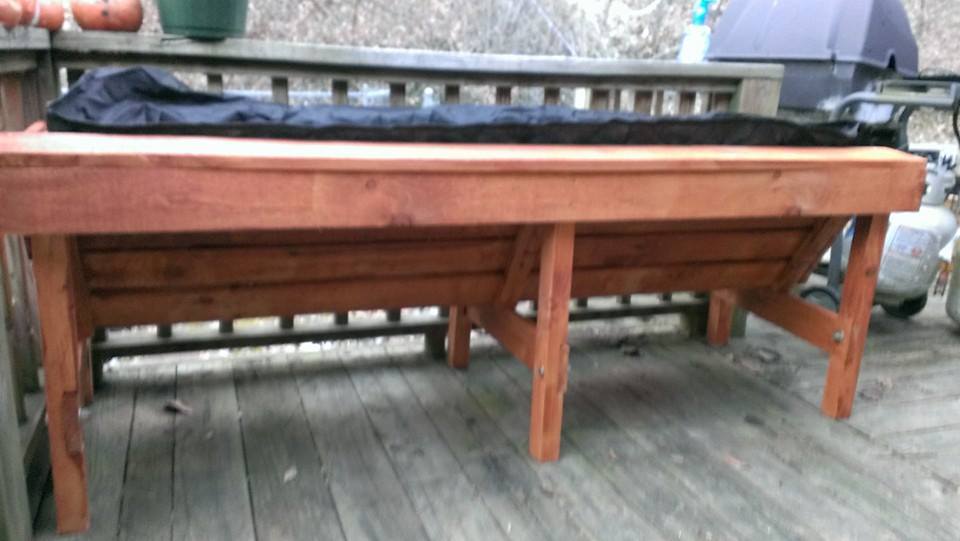
A friend needed a raised garden bed for her husband who is in a wheel chair. I searched and found the VegTrug's. It took a lot of trial and error. I based it off Williams Sonoma's pictures. I wouldn't of attempted this with out a plan if it weren't for Ana's website.
Tue, 03/11/2014 - 09:57
Dear CaronGirls, Are plans available for this?
Tue, 05/19/2015 - 06:54
This looks great - I would love to try this...are there plans available?
Sun, 04/24/2016 - 06:25
All the responses say to go to the plan catalog. Link does not work. I looked for an hour. Please help, I really want this plan!,
Wed, 05/18/2016 - 21:45
Not sure what the story is here, Maybe she got in trouble for saying Vegtrug? I would like plans for a DIY Raised planter bed like the above.
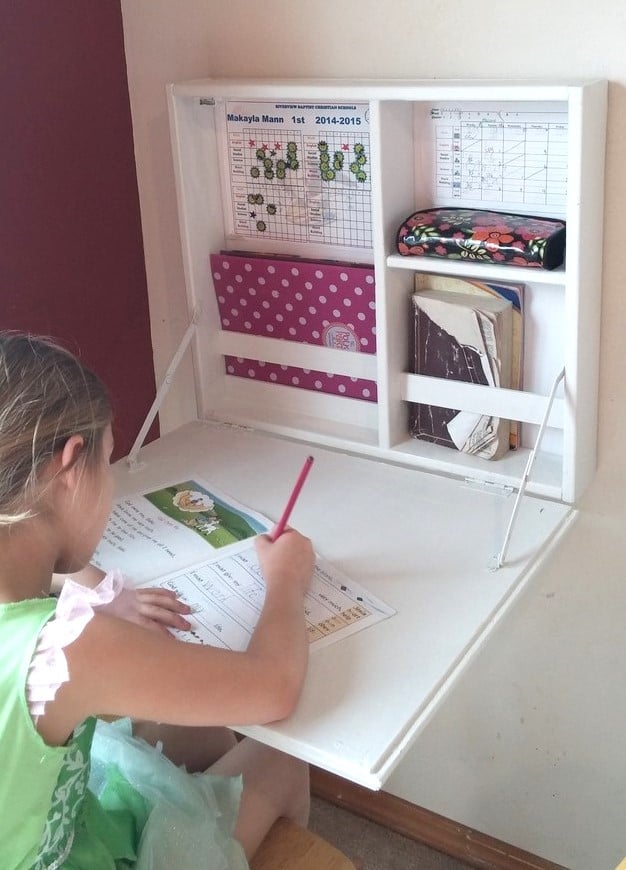
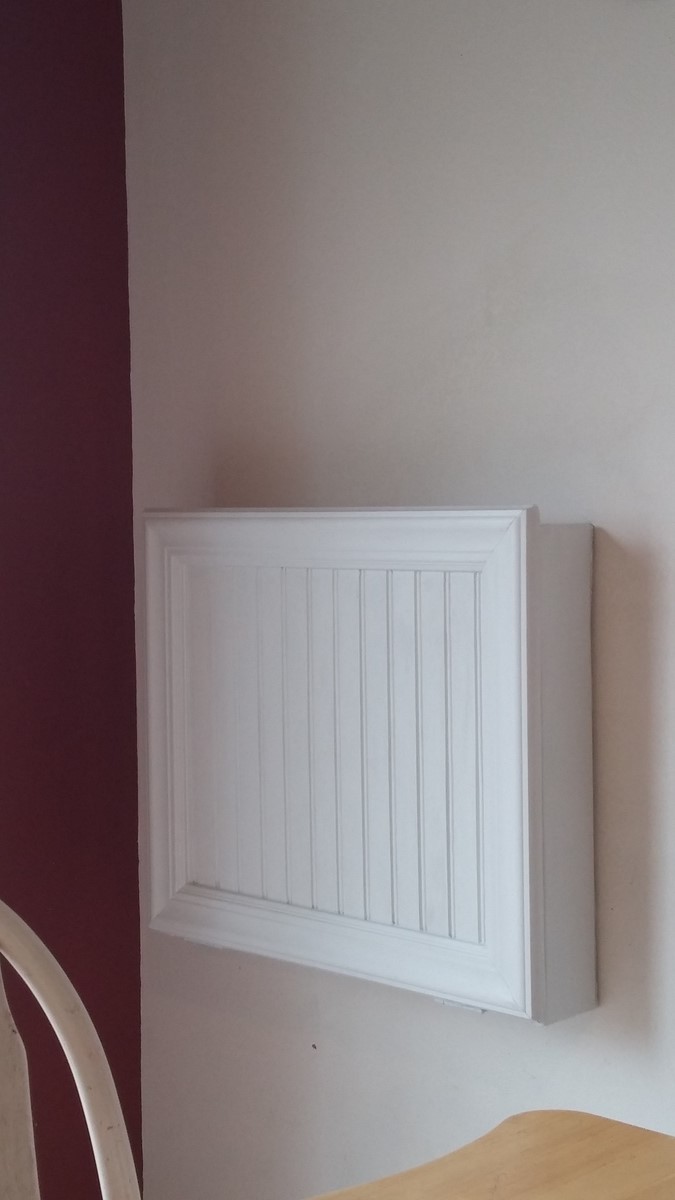
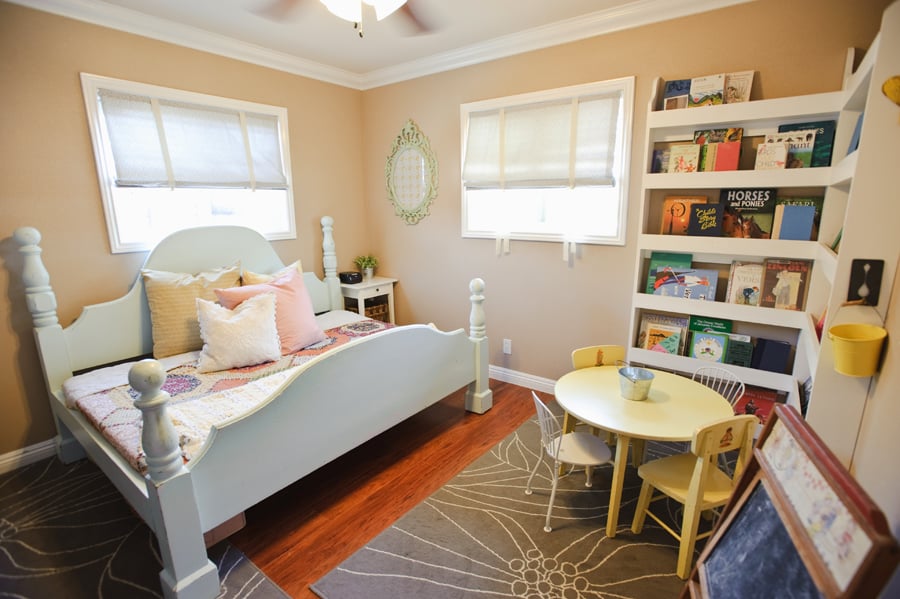
This was just what I needed! My daughter started homeschooling and we needed a place to neatlly contain her school stuff. I had her working at the kitchen table next to me, but it still felt like it lacked the school atomosphere. I removed the area for the paper holder and instead added a few support scraps to hold her folders and books upright.
It did take me awhile to get the support hinges placed correctly (I almost gave up and went with a rope or chain) but I finally got them placed correctly after placing a pencil mark on where they could lie correctly open and closed - seriously this took me awhile because just when I thought I had it, the brackets when closed would be to deep for the desk or when I placed it it correctly inside when open it wasn't 90 degrees.
The only thing I wish was that I had made it slightly shorter, because when it is open it is a little hard for her to reach the top shelf, but its not to bad and that is the height my scrap bead board was and I was to lazy to cut it =)
I had a magnetic clasp left over from another project and that has worked well to keep it closed nice and tight, I also used some foam board I had lying around for the back so that her things were not tapped/pinned on my wall. I choose the bead board on the front because A: it is what I had lying around and B: it is in my dining room so I wanted it looking a little nicer.
I had everything on hand excpet for the support brackets which cost me 2 something each at Lowes. YAY for projects under $10 bucks! Thank you so much Ana!

Thu, 08/15/2019 - 12:45
What a beautiful desk! I'm so glad you got the brackets to work, they look awesome!

A frame chicken coop with a few modifications- metal roof, insulation and slightly larger second floor.
By Chrystal

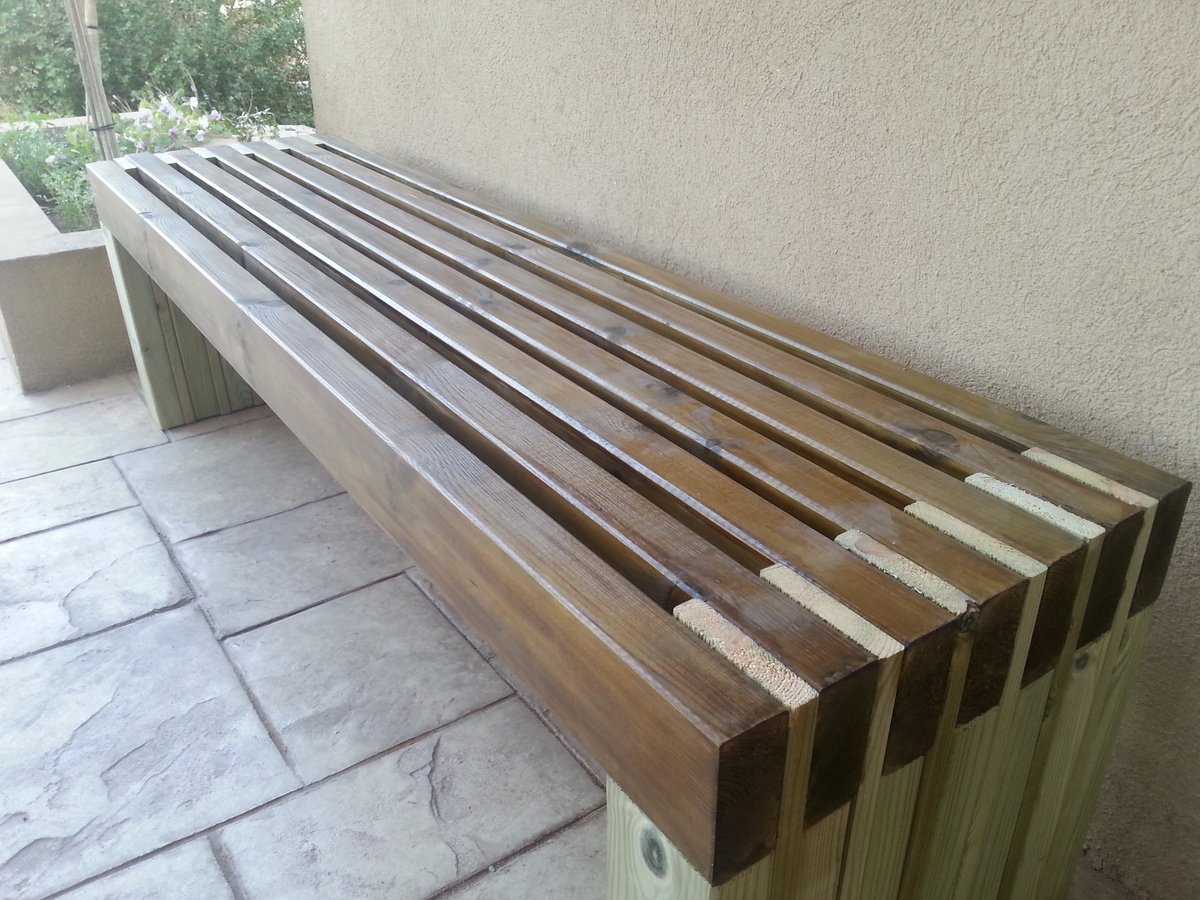
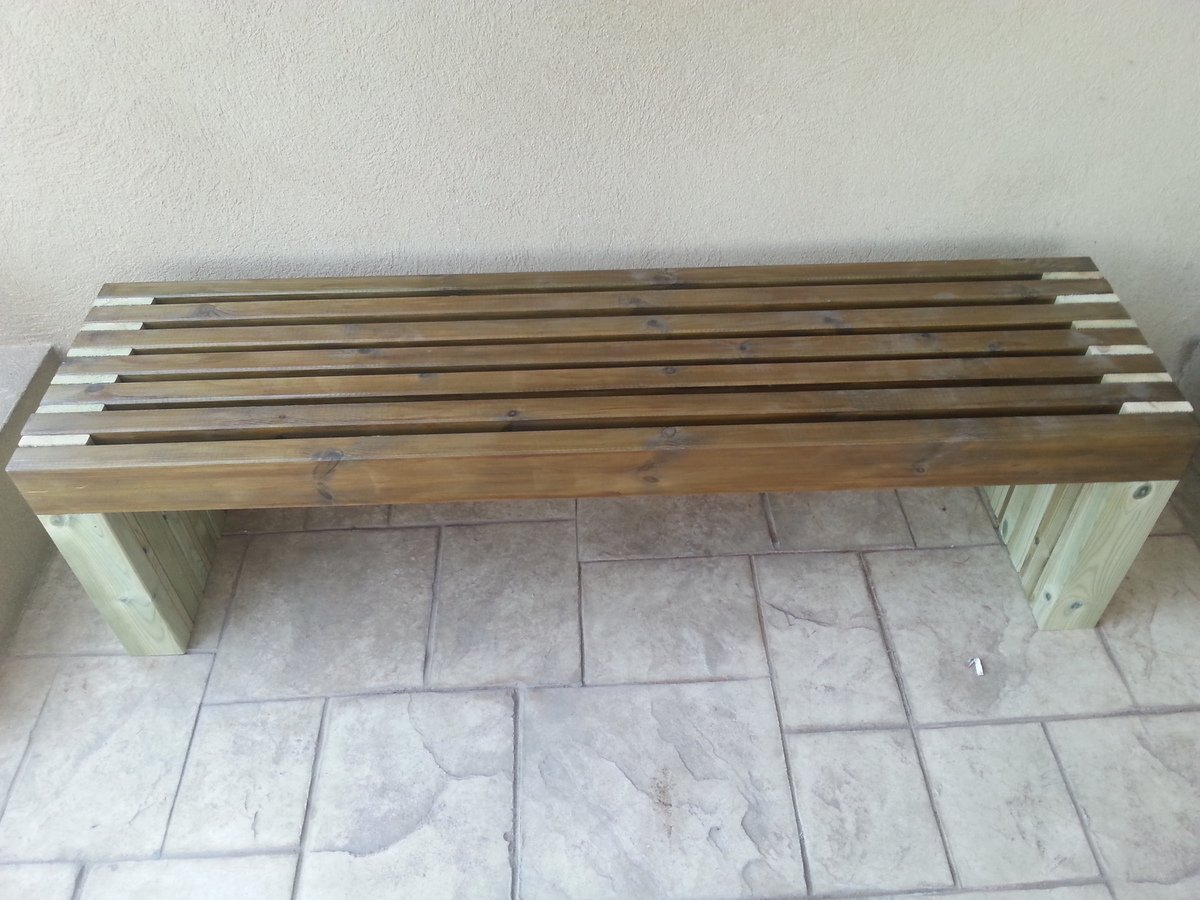
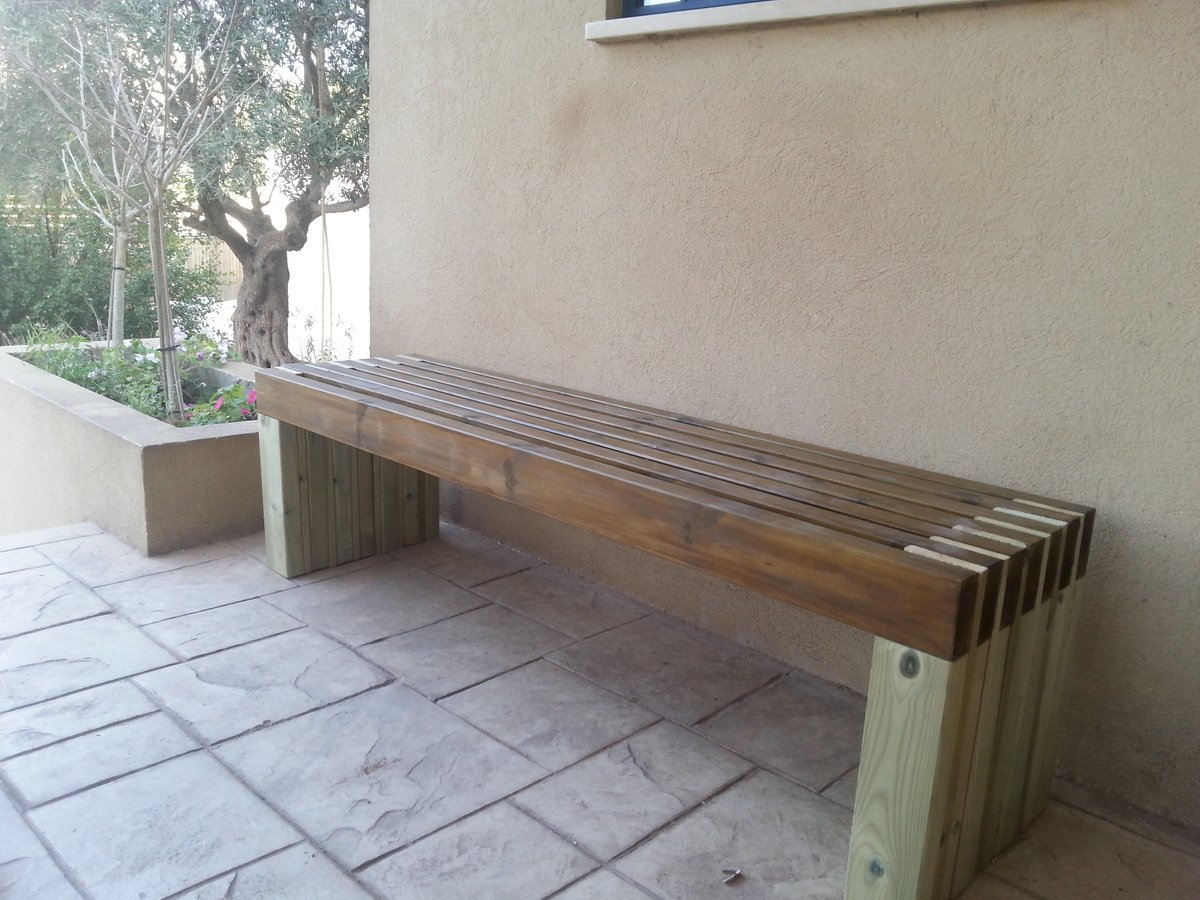
Thank you for the easy and fun bench plan.
It was really easy to install.
Even my 2 little daughters had fun (-:

Thu, 04/24/2014 - 08:06
I love the finish you did on the bench. Thanks for sharing!

I love how this bed frame turned out! Everywhere that has stain is cedar and the rest is all scrap spruce. Thanks for another great plan Ana!


I built a big kids see saw using 2x6's all around with a 2x8 seat. The center post is 30"h.


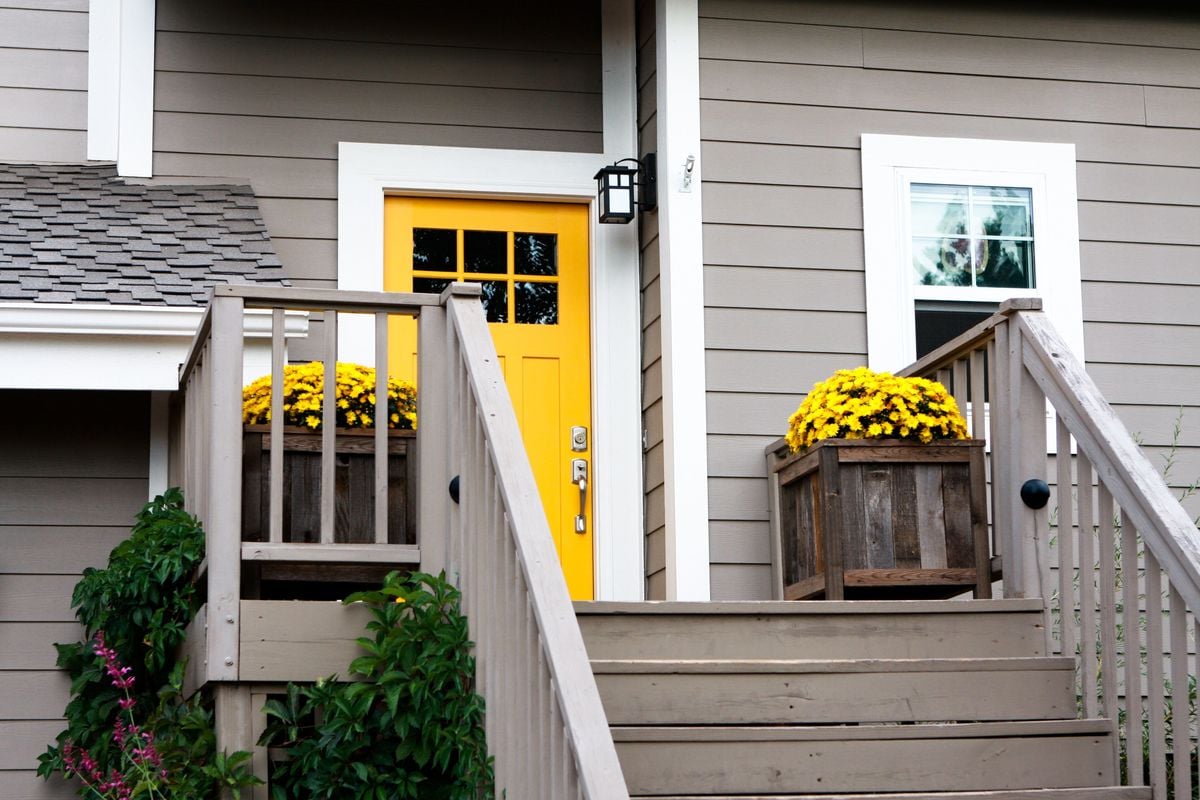
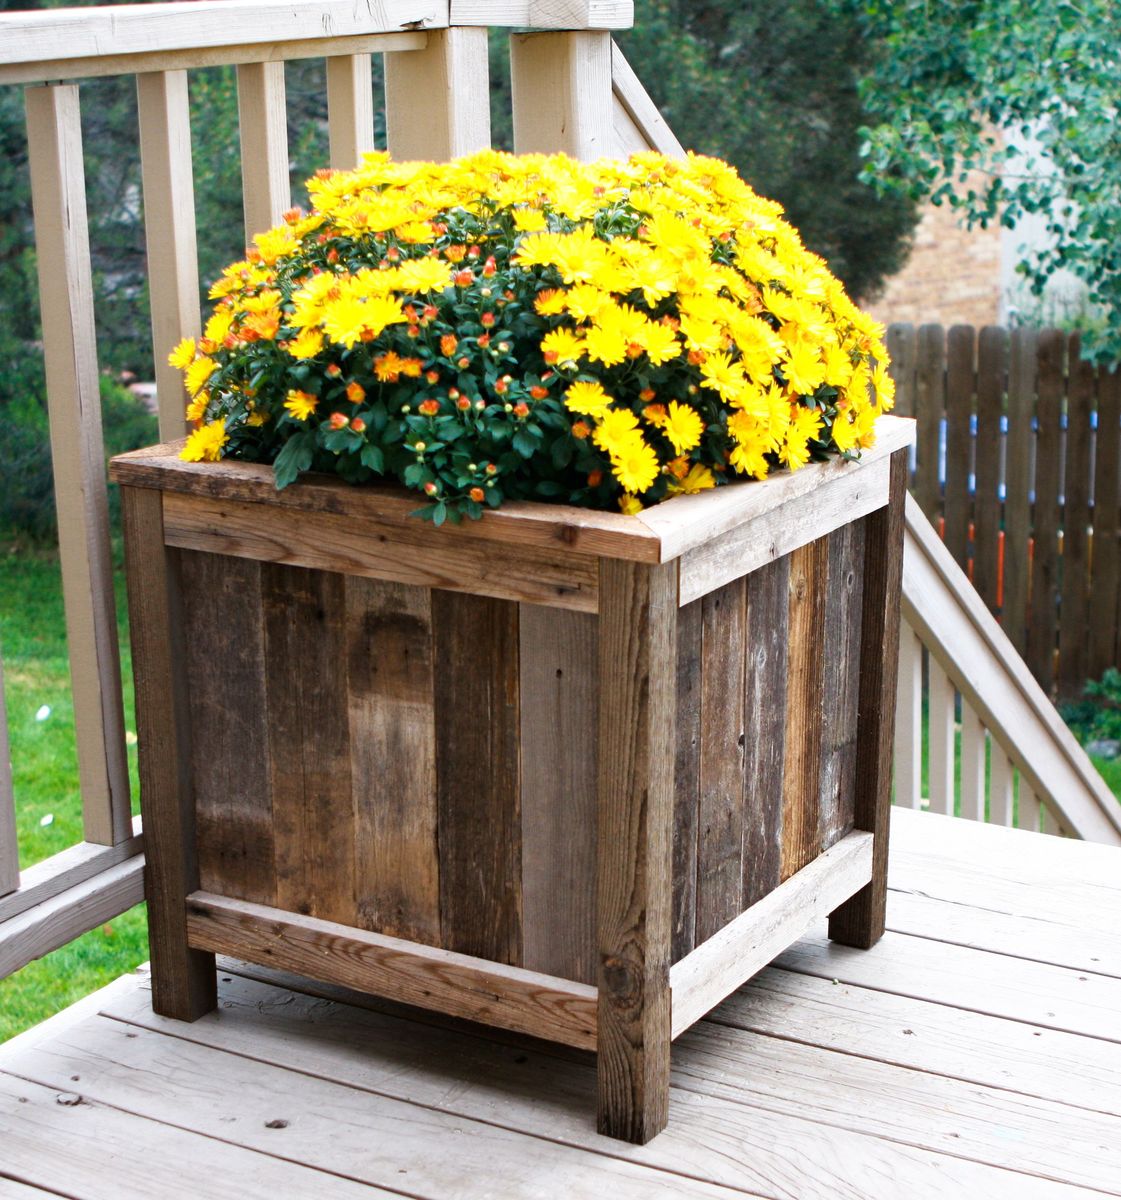
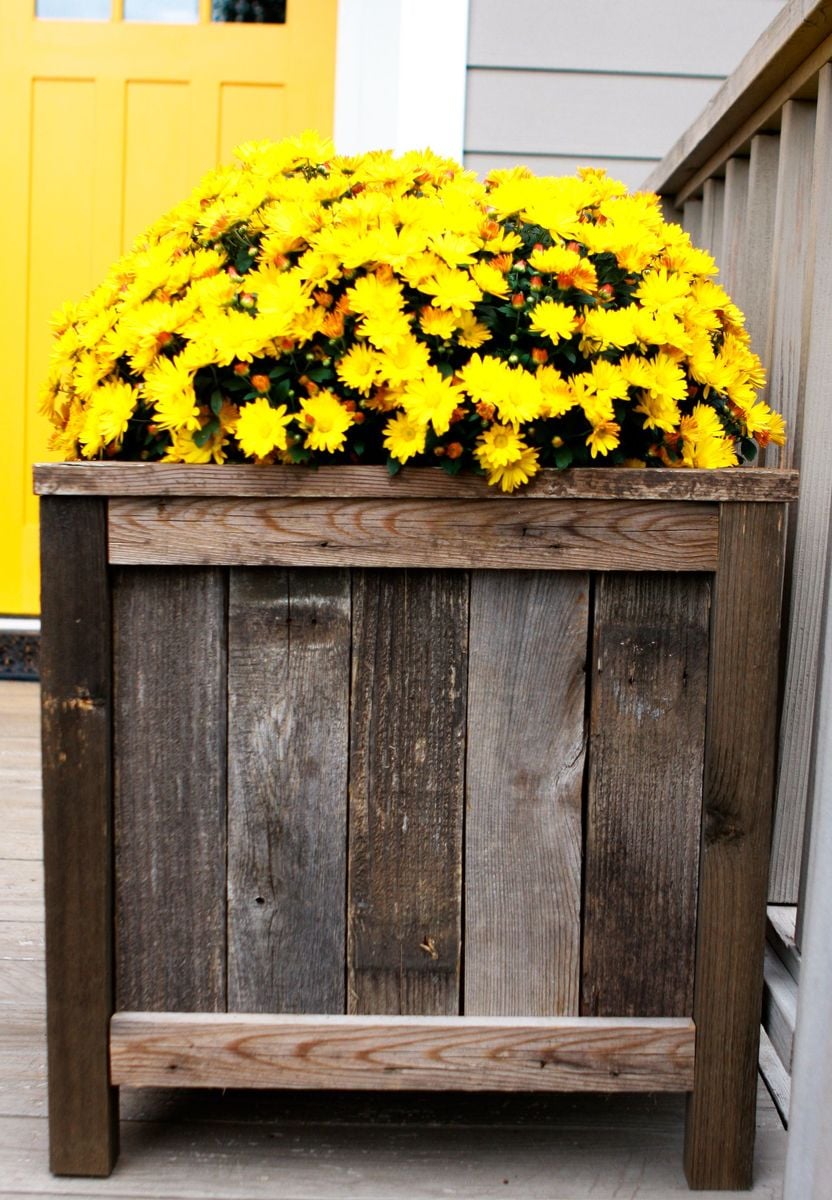
I built Ana's under $20 cedar planters for free. Or, almost free! I had to buy some more wood glue, but I had some of the wood on hand and took some from a friend's pile of old fence wood. It took me about five hours to build both planters from start to finish. See the blog link below for more info.

Tue, 09/08/2020 - 16:12
This is great. I just tore down my old fence and have tons of old cedar pickets. I want to make some planters for my new patio.
I changed the plans a little bit to add on the extra shelf on top as well as making the shelves an inch narrower than the plans. The project was actually pretty easy and really only took me about a days worth of work.

Utilized the plan for the Locker Book Shelf-Full Size and modified it a bit to convert to a golf club locker. Definitely keeps all the clubs, shoes, and accessories organized and eliminates the clutter. My wife loves it, course she added the baskets, which makes it look awesome! Actually this is how I stumbled upon Ana White's website. I was looking high and low for a plan for golf club lockers, and found Ana's website as part of the process. Best google search I've ever done!
Mon, 04/11/2022 - 14:51
WOW, that looks awesome and is the perfect storage solutions for all the golf gear! Thank you for sharing.:)
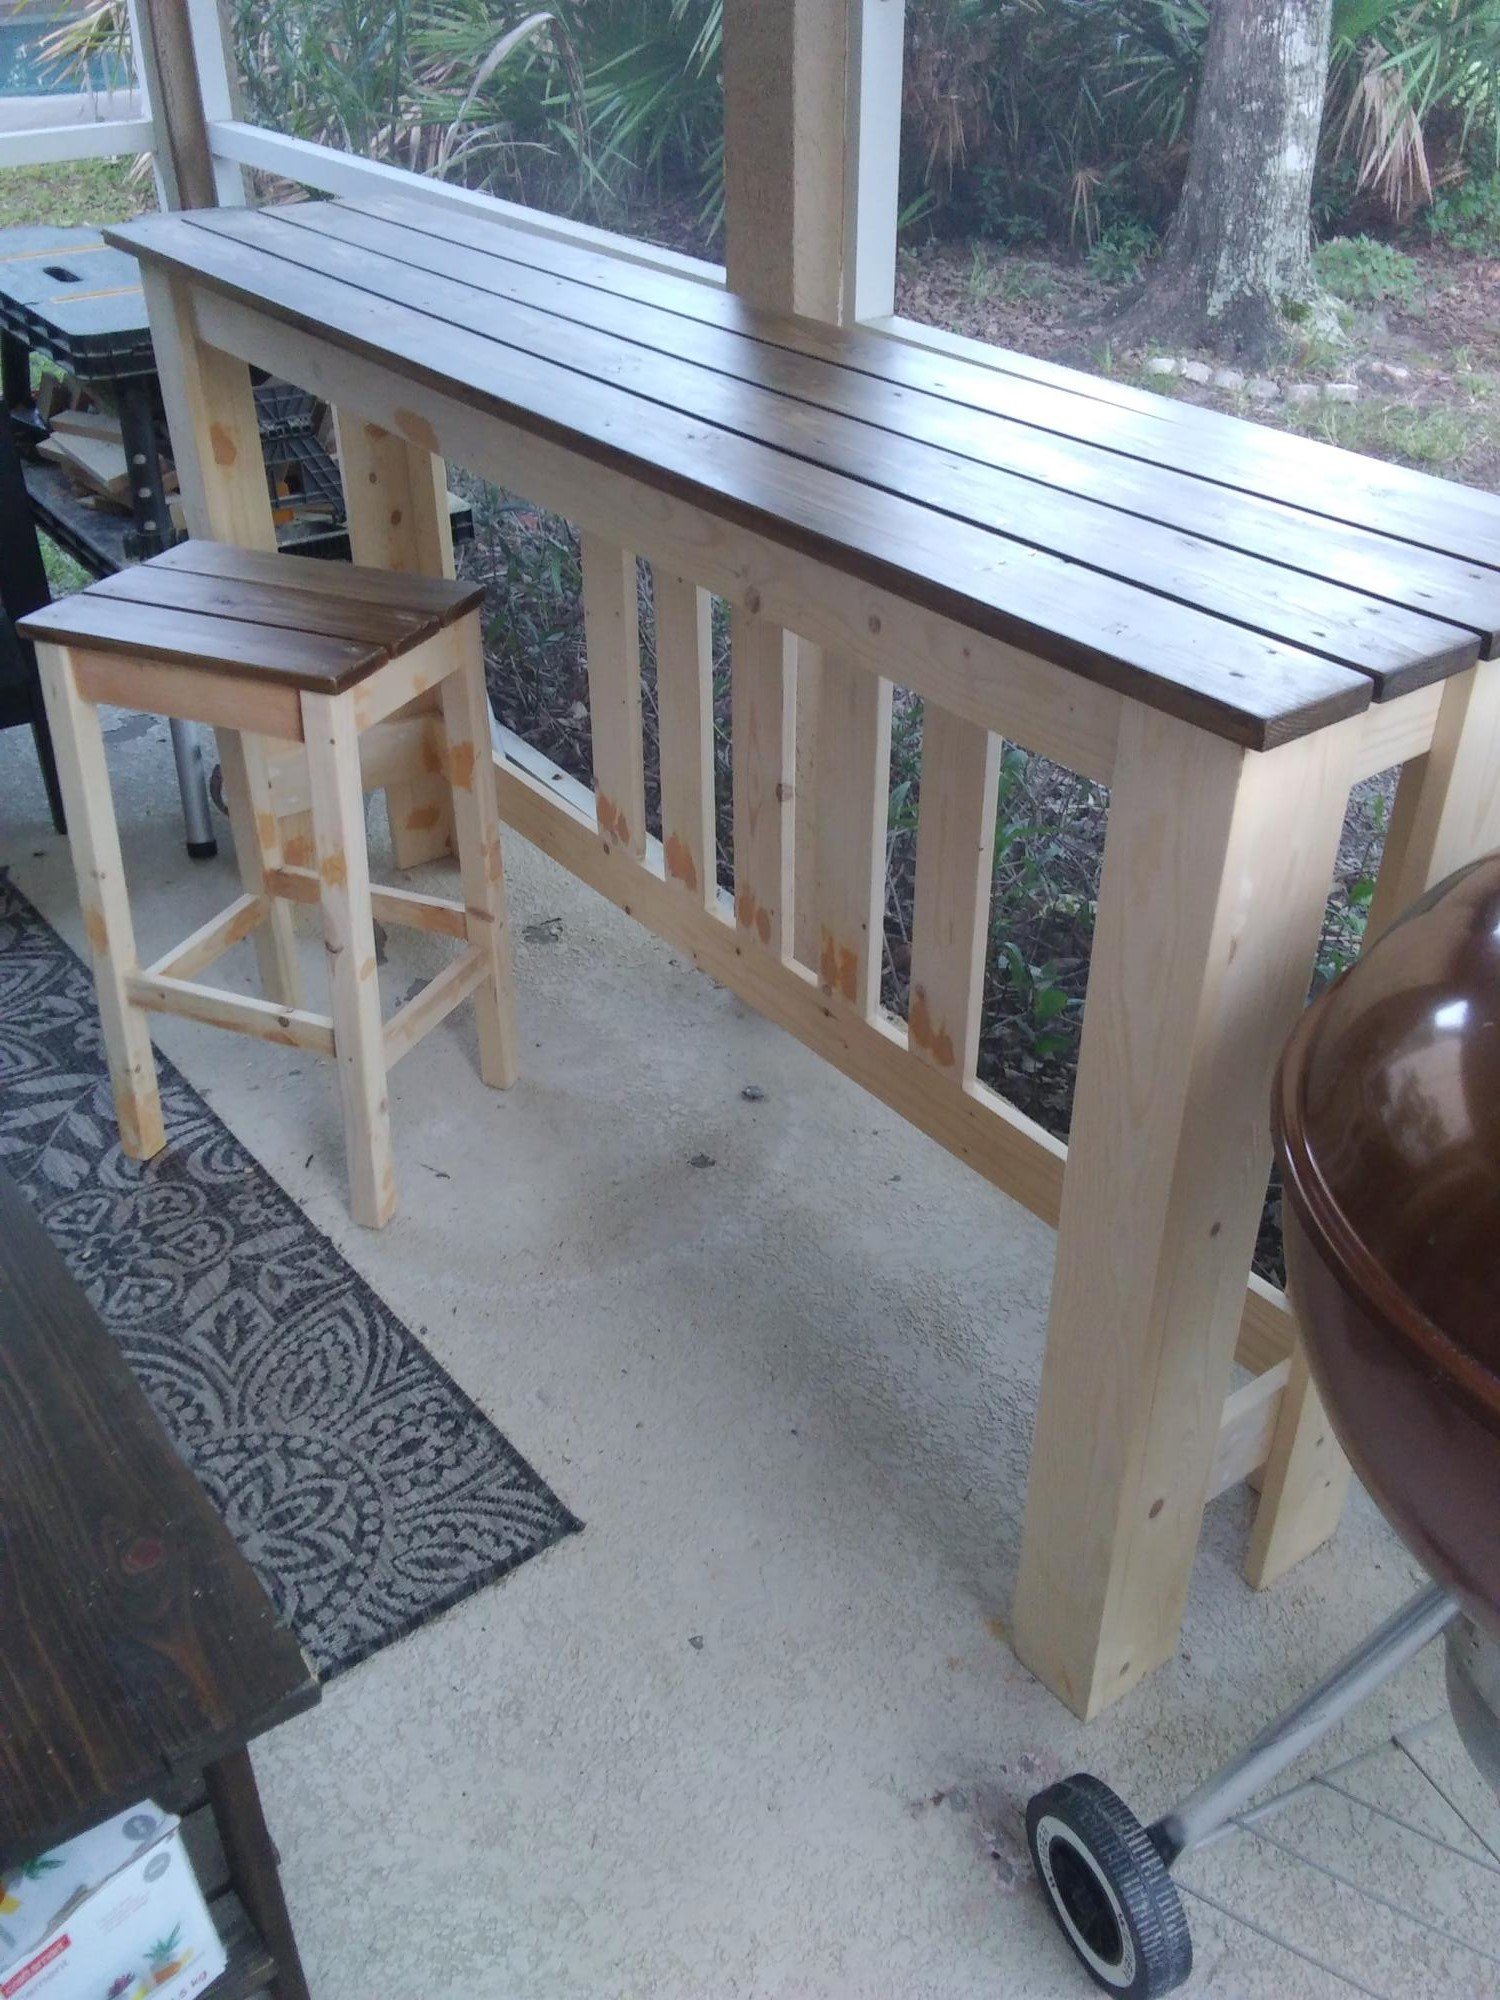
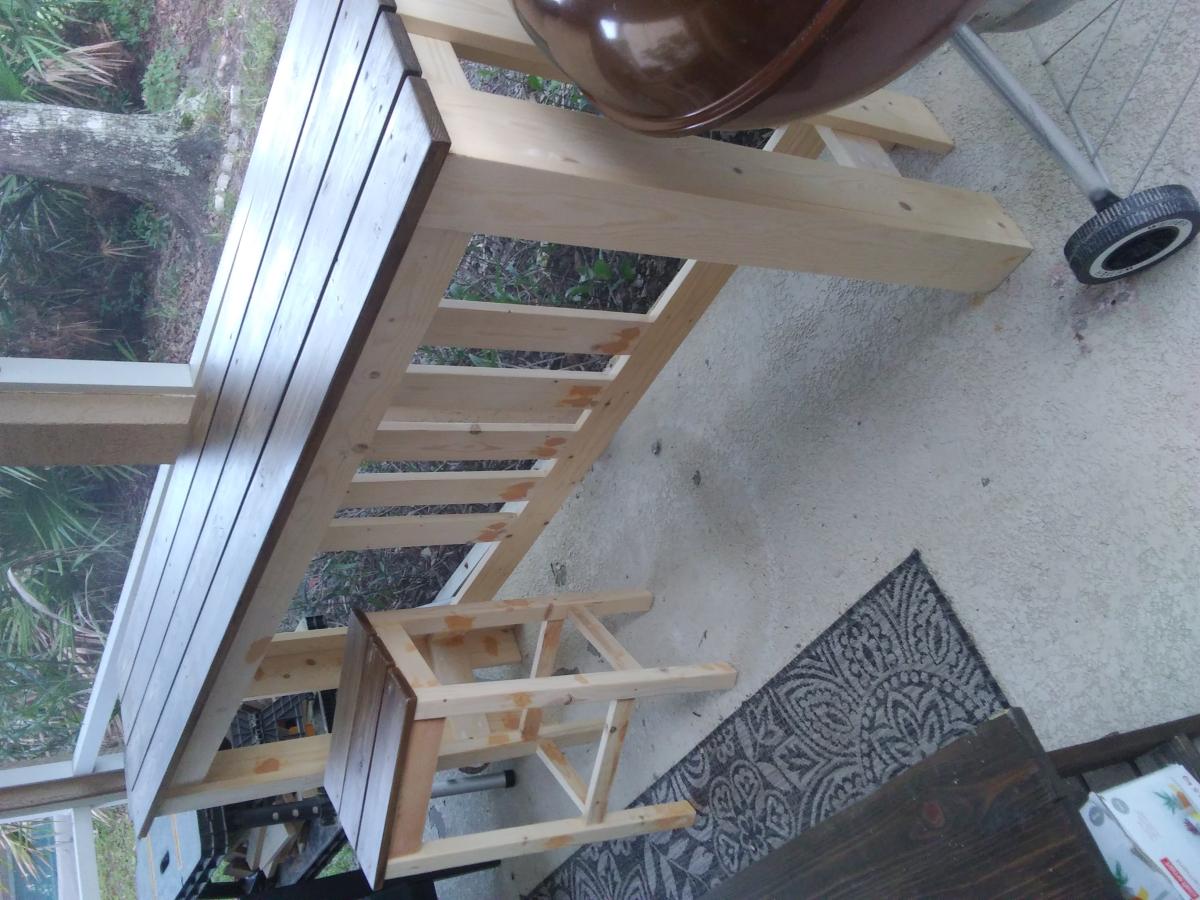
I love this bar table! I needed something long and narrow for our small patio - just deep enough to fit a plate and a drink, or a laptop, and long enough to fit three stools, so I modified Ana's dimensions. Also, living in Florida, we occasionally need to bring our furniture inside for hurricanes, so I made it a lighter by using 1x3s and 1x4s instead of 2x or 4x4s. I still need to paint the bottoms a cream color and build two more stools, but I already use it a lot. Thanks Ana! (The photo was upright on my computer, but I didn't see how to rotate it once it was uploaded)
Comments
Juan Butler
Wed, 02/21/2024 - 10:27
I'm building the sectional…
I'm building the sectional this weekend, and saw your addition to the end piece and am going to steal your idea. Very nice.