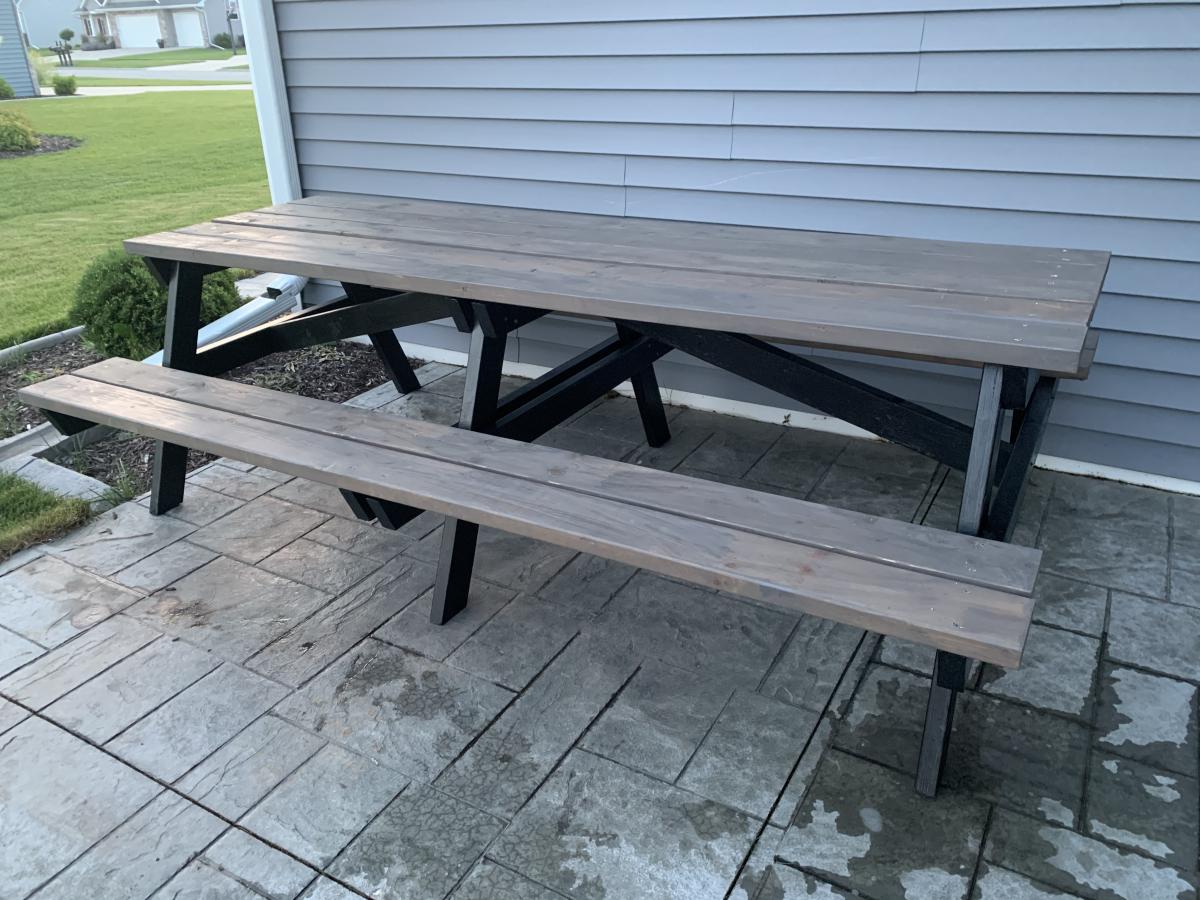
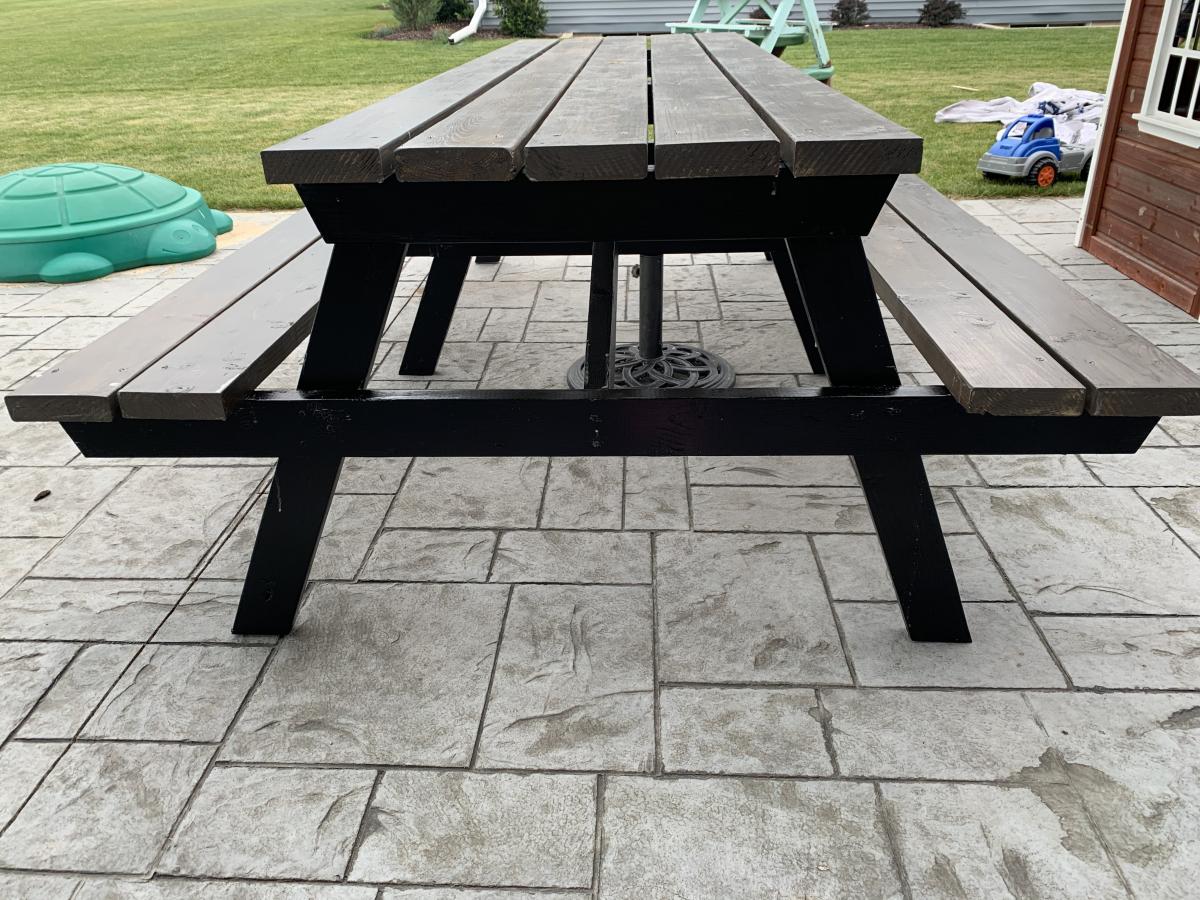
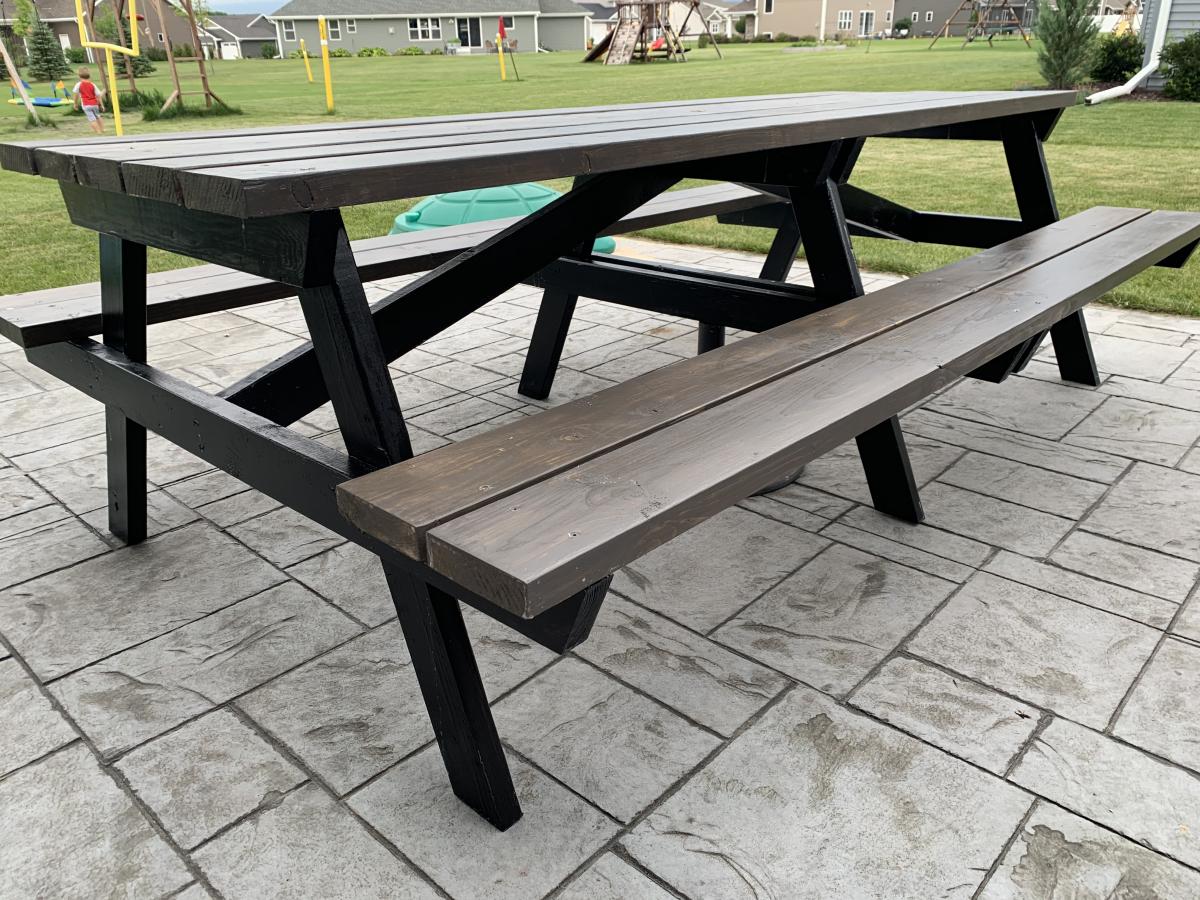
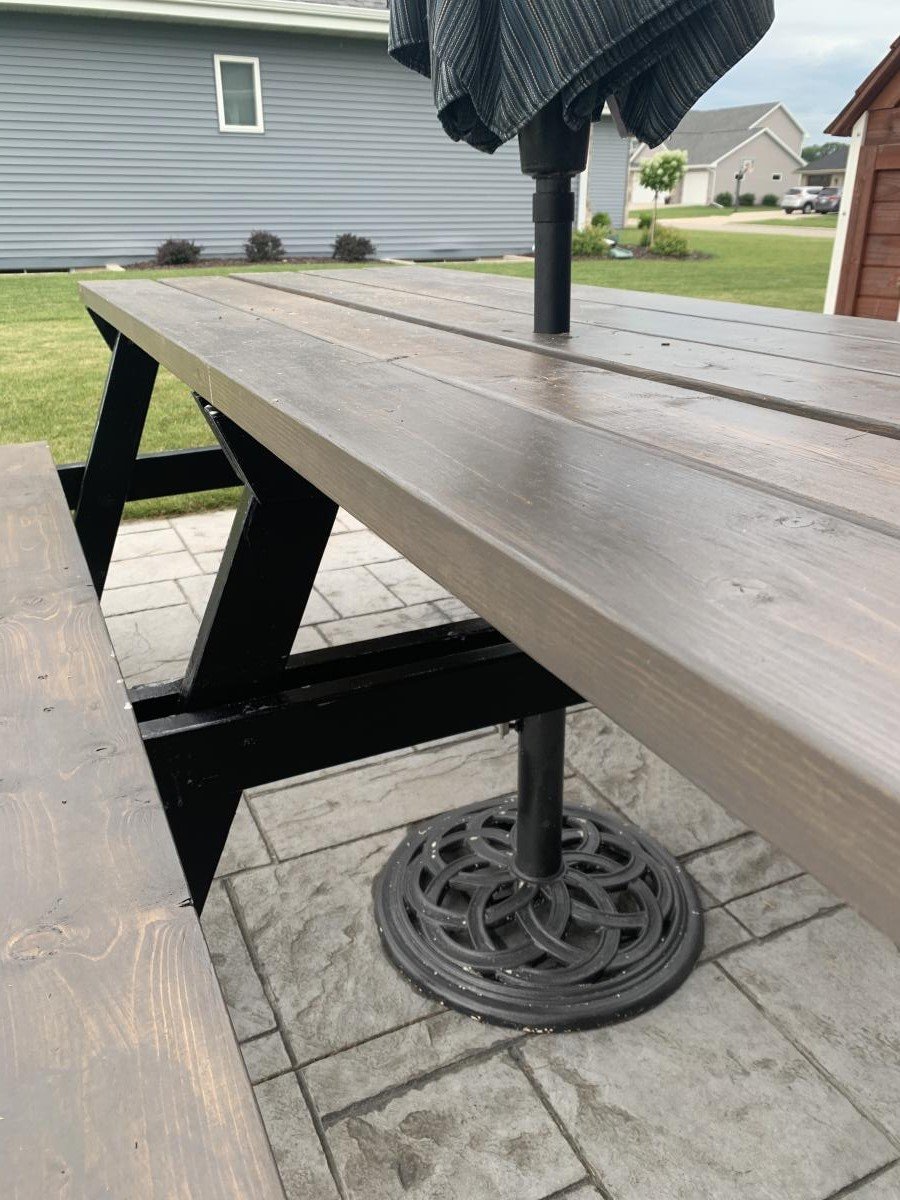
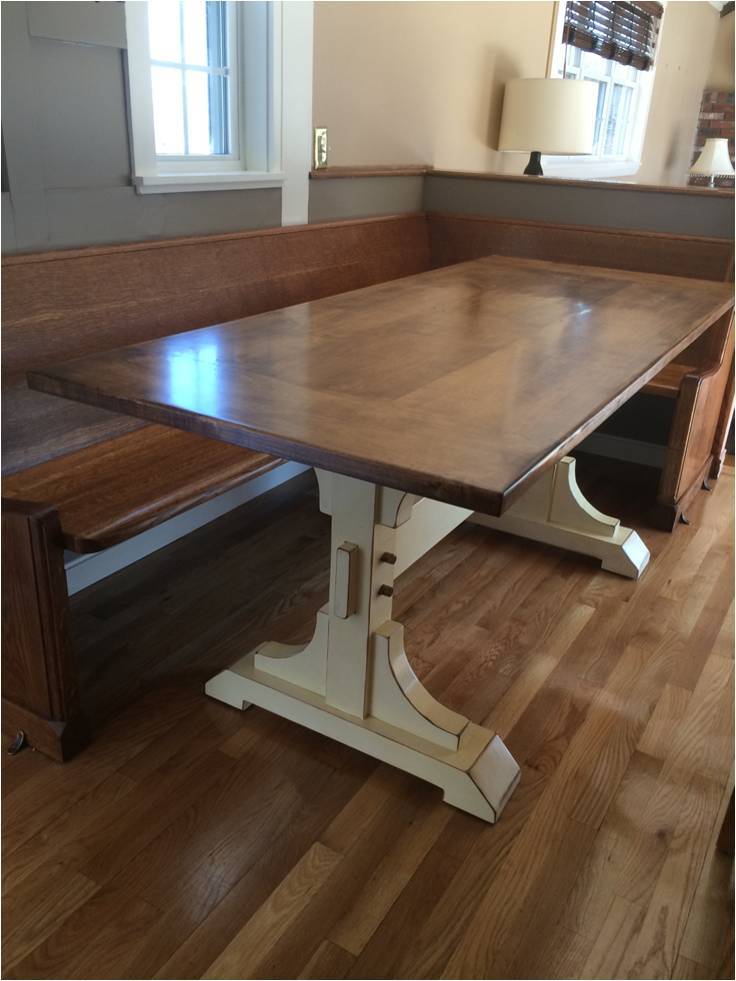
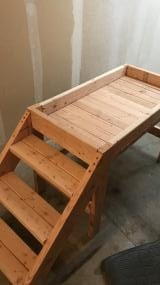
Community Brag Posts

8 foot picnic table

Submitted by Abby721 on Sat, 07/18/2020 - 08:40

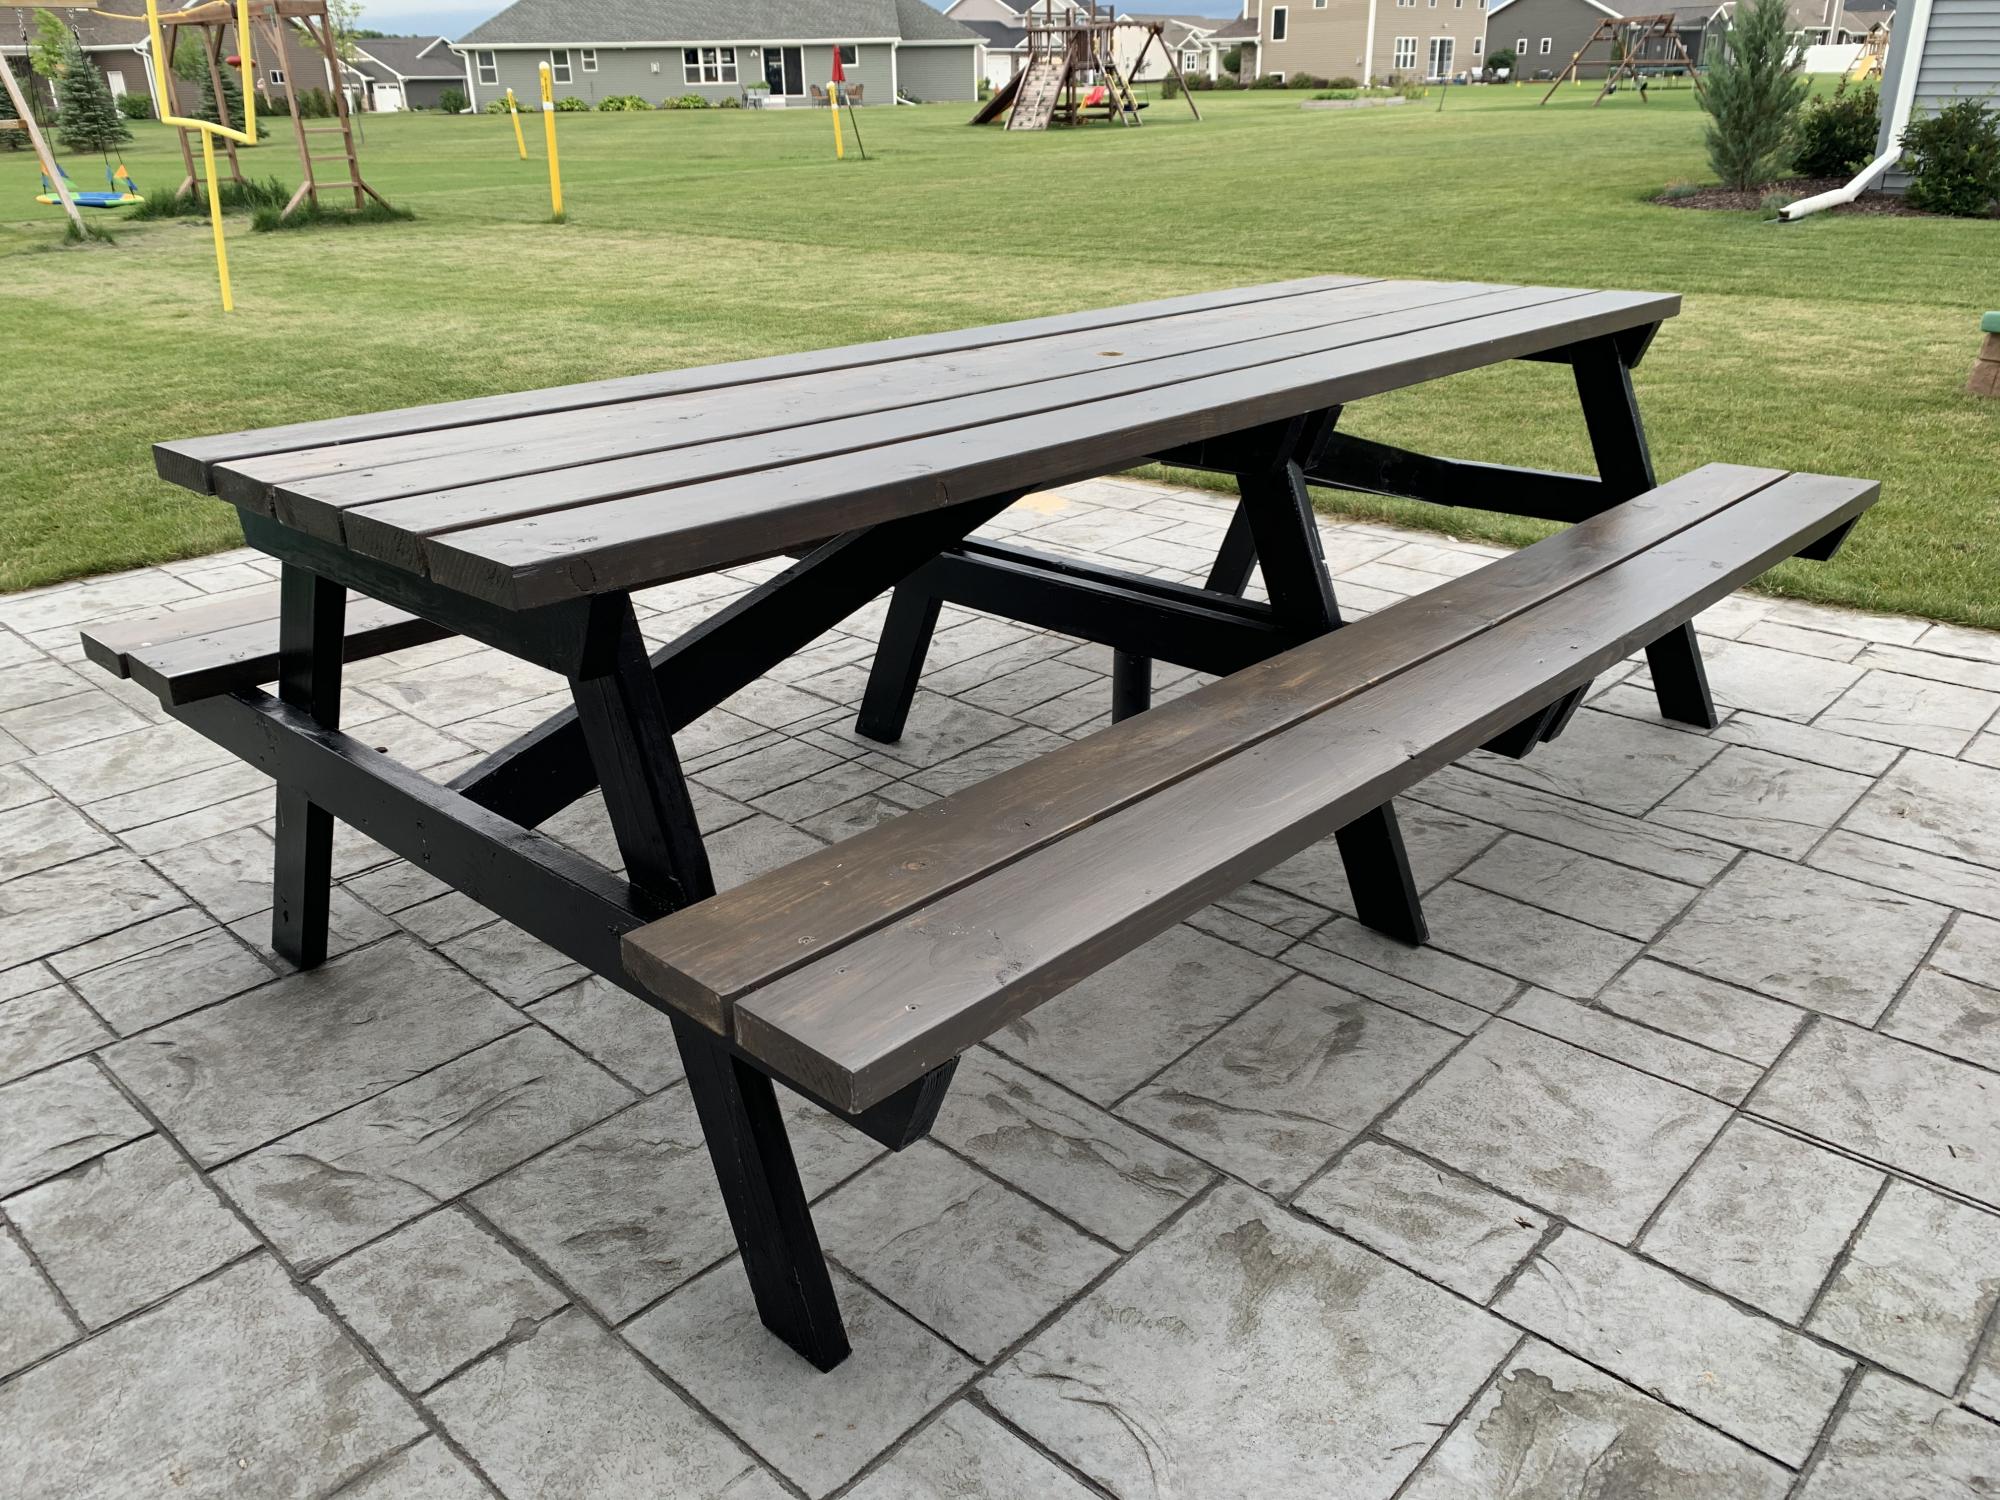
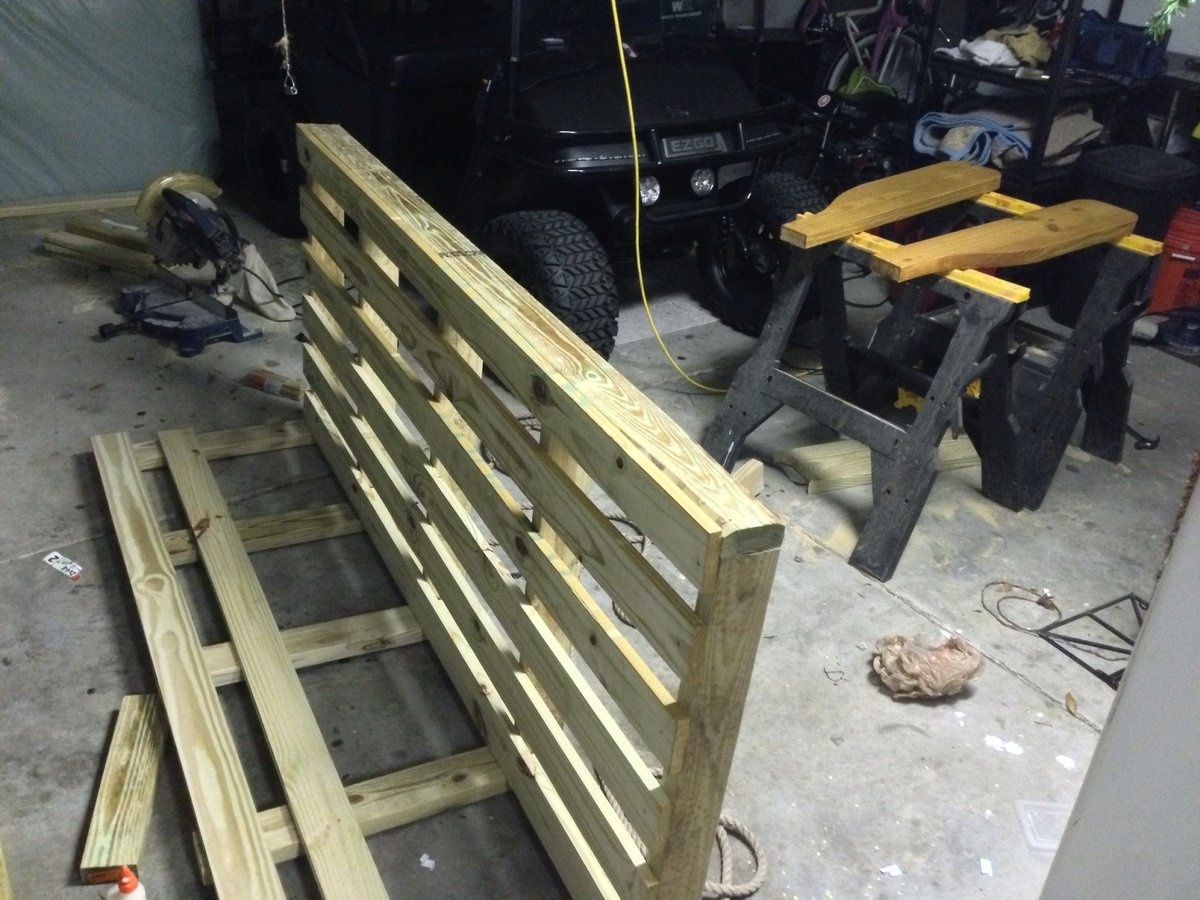
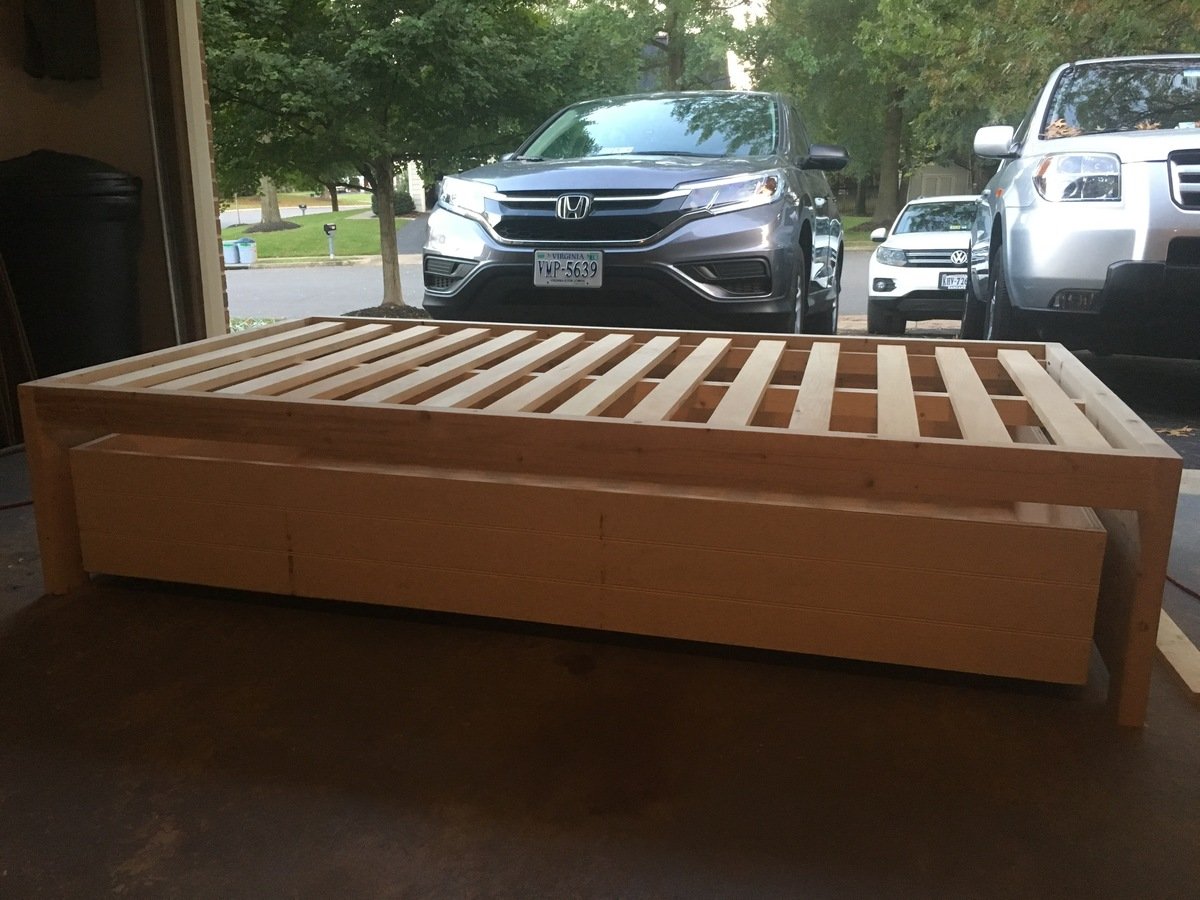
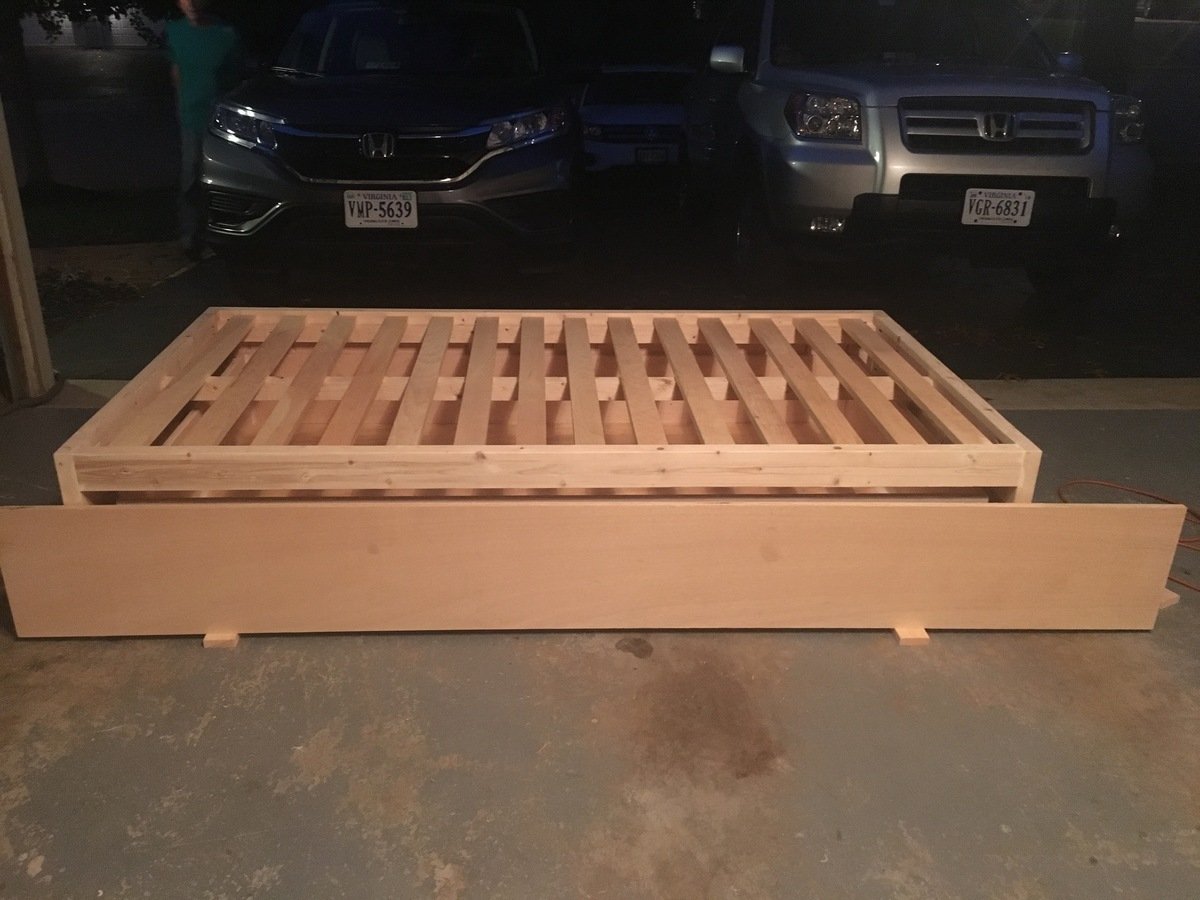
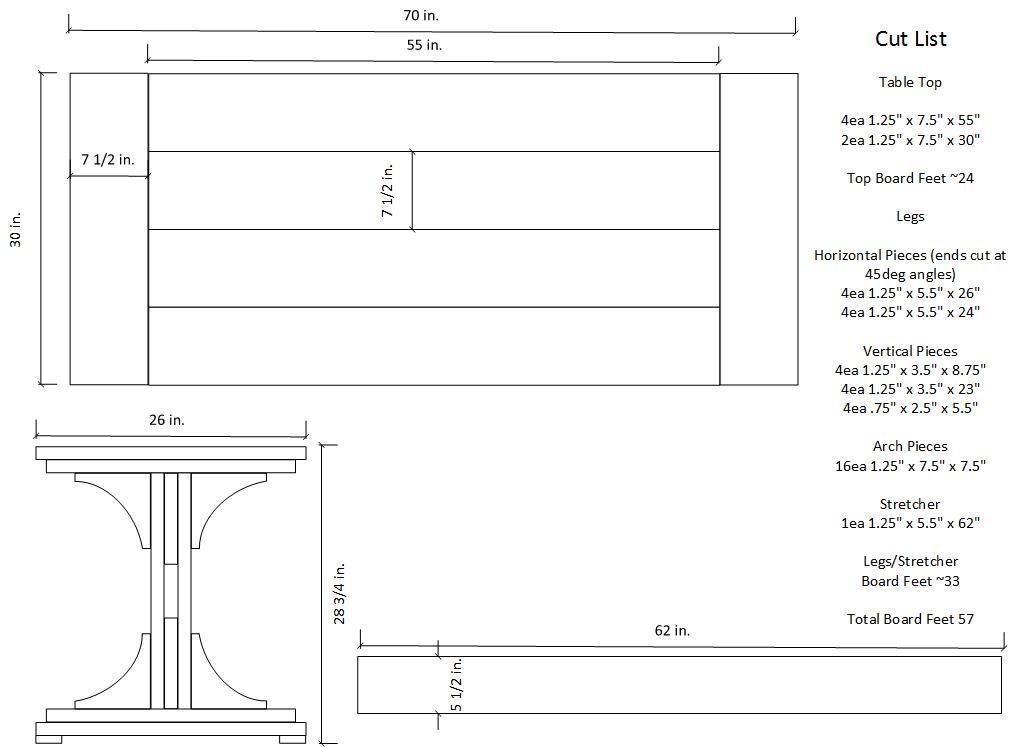
This picnic table was a quick build and turned out amazing. I modified the center base support by adding an extra table top support and seat support board to the opposite side of the center legs to give the table symmetry to accommodate an umbrella hole. I also shortened both cross supports by an inch to make sure the base wouldn’t be longer than the top boards. The space between the center table support boards and seat support boards is the perfect size to fit a standard umbrella. I used a 1 3/4” hole saw to make the umbrella hole. The build and stain/paint took me about 5 hours but additional time is needed to properly seal the table. I used untreated pine. Treated pine may give the table longevity but it would also add a lot of weight to an already heavy table. This was a relatively easy and quick build and is a great size to fit my whole family plus a couple guests! I’m happy with how it turned out and would recommend this build to anyone looking for a budget friendly and simple patio table.

Built from Plan(s)
Estimated Cost
$75
Estimated Time Investment
Day Project (6-9 Hours)
Finish Used
Varathane Briarsmoke for the top and Rustoleum Canyon Black Satin for the base. Sealed with 2 coats of Varathane Helmsman Spar Urethane
Recommended Skill Level
Beginner

Comments

Seasonal And Holiday

Timber Cabin Chicken Coop

Submitted by Julie101 on Thu, 12/02/2021 - 19:14

I had to convert all the measurements from inches to mm, but it was worth the brain drain. I didn't add the garden, but extended out the chicken coop. I am thrilled with the results! Thank you!

Comments

Ana White Admin

Fri, 12/03/2021 - 07:39

WOW, definitely worth the extra effort, just beautiful! I wish we could offer metric plans, may need to figure that out.

Seasonal And Holiday

DIY Convertible Bar / Pub Table

Submitted by susanshamp on Thu, 07/30/2015 - 16:38

This rustic modern version of a pub table has multiple uses - it can rest along a wall to make a 16 foot long bar, or rolled together to form an 8 foot long pub table. It is standard counter height 36" and will accomodate seating for 8-10 counter stools. If you don't have live edge wood slabs, you can also use construction lumber (2x8s or 2x12s) to achieve similar dimensions and versatile use in a more cost effective way.

Estimated Cost
Using construction lumber, approx. cost is $50 per table
Estimated Time Investment
Afternoon Project (3-6 Hours)
Finish Used
Poly on slabs, distressed black paint on base
Recommended Skill Level
Beginner

Comments

kev117s

Fri, 07/31/2015 - 04:10

Awesome idea! I think I will have to try for a dining table version of this table. Do you happen to have a way to lock the 2 pieces together? 

Porch swing bed

Submitted by Beaulook on Tue, 01/28/2014 - 16:29

Started off with the original design but enlarged it to fit an oversize single mattress. The mattress cost me $35 from a local faith farm, while the materials came in around $200. I decided to hang under my backyard pergola. Fun and easy project.

Built from Plan(s)
Estimated Cost
$250
Estimated Time Investment
Day Project (6-9 Hours)
Finish Used
Cedar stain
Recommended Skill Level
Beginner

Comments

bhammond

Tue, 01/28/2014 - 21:10

Wow this looks so inviting I might just have to make one too! Nice work-- it looks great!

Shorty

Tue, 01/28/2014 - 21:26

Really great job on your porch swing bed AND an awesome looking patio/yard. Looks amazing all around!

Debbie Perkins

Mon, 07/27/2015 - 22:45

I want this!  I just made a couple of plant stands for my front porch.  My husband asked me what my next project was, why, a swing bed.  (This was only my second project!)  I want to put cup holders in those big ole arms!  We have a house at the beach in South Alabama, so, you gotta "hydrate."  This is an awesome swing.  I can't wait to do mine...pillows to rest on, one foot on the concrete pushing me in a slow swing. Cold beverage in my hand or in my cup holder. Yep, southern girl has a new project.  Love it!

Drop-Down Door Hutch Desk

Submitted by danicarby on Thu, 05/14/2015 - 13:47

I designed this desk from another desk I built. With this one, I wanted the overall foot-print smaller but still something that was able to organize all our office stuff and be able to close everything to keep it clutter-free. We have a small apartment, and although this desk is about the size of an up-right piano, it works perfectly into our living space!

I made it out of raw hardwood (Ash) and because I knew just the wood alone would make this desk heavy/bulky to move I made the top hutch removable. It's held in place by wood pegs (dominos). All the shelves are adjustable and the drawers are full-extension (something I've never had - wahoo)! The drop-down door is help up by 2 pull-out boards on each side (my first desk had chains). I spend a lot of money on this desk because I knew it was a chance in a lifetime to make and wanted it to be perfect and something that would last generations.

I built the main carcass off of plans/measurements I designed, but then all the insides, drawers, shelves, doors, etc where made as I built (because just a millimeter difference in building changes everything)!

If you want more pictures/descriptions of the building process I wrote about it in a 4-part series on my blog.

Estimated Cost
$1,000 for all wood & supplies
Estimated Time Investment
Week Long Project (20 Hours or More)
Finish Used
To achieve the ash gray color I used "General Finishes" brand water-based stains (equal mixtures of Walnut, Antique Oak & Whitewash) with 1/2 ratio of Pre-Stain Conditioner (bought from Woodcraft). I did 2-3 coats stain, lightly sanded and sprayed 2 coats of Ceramithane clearcoat using HVLP sprayer (sanding with 550 grit paper in between).
Recommended Skill Level
Intermediate

Comments

wooden cooler stand

Submitted by stealth517 on Sat, 04/18/2015 - 20:48

This is the cooler stand presented by Jenny from Birdsandsaoap. Very easy to build and always ends up with someone asking to buy it or have you make them one.

Built from Plan(s)
Estimated Cost
$120.00
Estimated Time Investment
Week Long Project (20 Hours or More)
Finish Used
Minwax gloss polyurethane.
Recommended Skill Level
Intermediate

Comments

Bike Storage

Submitted by vendo on Wed, 10/13/2021 - 10:10

I live in a smaller rental with limited garage space, so I needed a place for my kids bikes. This is what I came up with. It required minimal screw holes in the treated fence posts and I attached a rail system(rubbermaid fasttrak) for the bikes to hang from. I used Ana's easy shelves plan for the upright supports and then just added some corrugated roofing and cedar fence pickets (which I had on hand) to finish off the top.

Daybed with Storage Trundle

Submitted by Crafty-Mom on Sat, 01/27/2018 - 10:38

This was my first project from Ana's website and I'm hooked! I'm a beginner, but thank goodness for my Dad's help because I have a lot of learning to do!

I wanted the drawer to be 1 drawer instead of 3. I feel like it looks cleaner (without having to adjust 3 drawers constantly to make it look good when you push them in). I was thinking the bed could actually be used as a trundle bed in the future too! I use this to store toys right now and it is Awesome!

I increased the bed size to fit a twin mattress and increased the height of the bed slightly so that the drawer would be a little bit deeper. We also added a back to the bed and carried around the trim to make all sides look the same. We added a bumper to the back and sides of the inside of the bed so the drawer is easy to push in and fits in snug. Finally we reinforced the bottom of the drawer with more 1x4 boards so that if a child does sleep in it, it would be more sturdy. I now have kids come over and jump into the drawer (literally) and I'm glad we reinforced it.

The changes we made did add to the cost and our time (as well as being newbies), but I think it's worth it and the bed turned out beautiful!

Estimated Cost
$180
Estimated Time Investment
Weekend Project (10-20 Hours)
Finish Used
Behr Marquee (I'll have to find the name of the white color we used). We almost went with chalk paint, but after talking to the HD guy, he talked me into this paint and I'm glad we used it! So much cheaper and turned out beautiful.
Recommended Skill Level
Beginner

Comments

Nisssc

Mon, 10/12/2020 - 07:51

This looks great! Any suggestion if I want cubbies instead of a trundle? Also, cubbies only on side as bed would be against the wall. Thanks for the inspiration!
Sandy

Custom Modern Chicken Coop

Submitted by Anonymous (not verified) on Wed, 08/30/2023 - 08:49

I made this coop twice as wide like Ana suggested since I have 4 chickens and wanted to make sure there was some extra wiggle room in case “chicken math” got the best of us. I made a nesting box to mount on the outside. I also used plywood for the sides like Ana did in the video. I installed a Run Chicken automatic door that opens at sunrise and closes at sunset. I added some hasps and clasps to make sure all my doors would close tightly. I put hardware cloth across the top before installing the roof panels. I stapled and buried hardware cloth around the perimeter for predator protection. I also spray painted the hardware cloth flat black so that it would be easier for us to see inside the coop. I stained the rest of the wood with Varathane Semi-Transparent stain, color “Carbon Gray.” I also added some roosts and cedar shingle siding for some extra protection during our New England winters at to match our house. Working 2-4 hours a day, off and on, with a bum shoulder and weak hands, this took me about a week! Thanks for the great plan, Ana!

Built from Plan(s)

Comments

Seasonal And Holiday

Double Pedestal 6' Farmhouse Table

Submitted by g82martin on Sat, 05/17/2014 - 20:38

Farmhouse table made from distressed (worm hole) maple.

My neighbor was able to get me the 5/4 distressed maple for about $2/bd ft - I ended up buying 100 board feet and had plenty leftover. The finished board feet for this project was about 60 if I remember correctly. So the $200 was the bulk of the expense. The only other costs were sand paper, I bought a Kreg Jig, screws, Minwax Marker, paint, stain and urethane (much of which I already had).

It came out better than I anticipated. The antique white finish was not difficult at all.

Tip - When following the instructions for the finish here, I applied the first coat of urethane with a brush almost immediately after applying the Minwax marker to all of the sanded edges. I did this in haste, but ended up with some unexpected results that really added a nice touch. The stain from the marker incorporated a bit into the urethane as I brushed it giving it an antique, yellow hue. At first I thought I made a big mistake, but it turned out to add a really nice look.

Built from Plan(s)
Estimated Cost
$250
Estimated Time Investment
Week Long Project (20 Hours or More)
Finish Used
Antique White using Minwax Stain Marker - http://ana-white.com/2012/09/antique-white-using-minwax-stain-marker
Recommended Skill Level
Intermediate

Comments

g82martin

Mon, 05/19/2014 - 07:29

CSaintD - The top can be removed as I did not glue it. I set 3 dowels on top of each of the 2 legs so that the top would always lign up correctly if disassembled and reasembled. The stretcher could be removed, but would probably cause some damage to the finish as it was a tight fight when I finished it. The stretcher would be removed by removing the dowel pegs that I fabricated on each leg.

g82martin

Mon, 05/19/2014 - 08:26

I cheated a bit on the top. My neighbor who got me the wood works in a furniture reupholsery shop. He planed and joined the boards for me, which saved me a good amount of time. I'm confident I could have done this at home with my table saw, miter saw and hand plane, but what he did in 2 hours probably would have taken me 10.

bclute

Mon, 05/19/2014 - 08:06

Table looks great! Great antique finish on the base and your table top looks nice a smooth.

bclute

Mon, 05/19/2014 - 08:06

Table looks great! Great antique finish on the base and your table top looks nice a smooth.

KathrynK13

Fri, 01/01/2016 - 12:00

I love the table...but I wanted to ask about the booth?  Is that a church pew?  Did you make it?  Any tips for recreating it?

Lenaluv87

Fri, 08/05/2016 - 20:35

Love the dowels you added! Planning on building this exact table pretty close to your dimensions and have a very long church pew as well! Trying to decide between L-ing my pew and cutting to straigjy 6'. Do you mind sharing the dimensions of your pew? And how did you miter the pew?

Modern Outdoor Chair with Backrest

Submitted by PoppaZotch on Mon, 08/17/2020 - 11:53

Per request of my wife, I opted to add a backrest to the chair. I feel as though my backrest design keeps with the style of the original build. I accomplished this by cutting the 2x4 vertical arms of the backrest at 13 inches with a 10 deg miter cut at the base. This allows you to keep with the 3/4" on the 2x6 backrest slats. I finished it off with a 2x4 top plate. I'd also note that I made slight modifications to the plans to accommodate 24" cushions.

Estimated Cost
$100
Estimated Time Investment
Afternoon Project (3-6 Hours)
Finish Used
sanded to a 220 grit
Recommended Skill Level
Intermediate

Master Bath Barn Door

Submitted by Anonymous (not verified) on Fri, 03/17/2017 - 16:34

Created this door with pine wood tongue and groove lumber and pine wood planks. Purchase barn door hardware / track from Jet.com and door handles from Hobby Lobby. 


This replaced my Master bath door and I think came out pretty good. Thank you for the ideas!!!  Jeff M.   Brownstown, Mi

Estimated Cost
Wood 55.00
Handles 2 for 8.00
Stain ( left overs)
Barn door track 54.00

Total $117.00 and 10 % Military discount at lowes
Estimated Time Investment
Weekend Project (10-20 Hours)
Finish Used
Minwax. Mix of Kona and Driftwood Grey
Recommended Skill Level
Intermediate

Queen Murphy Bed

Submitted by Jenga on Sun, 12/06/2015 - 12:59

Not too bad of a project but had to a good bit of guess work so I could changed the plans for a queen size bed and flip in on its side.

Estimated Cost
$200 if you already have the bed
Estimated Time Investment
Week Long Project (20 Hours or More)
Finish Used
White Paint and laminate flooring left over from the floor.
Recommended Skill Level
Beginner

Comments

Arilie

Sun, 05/29/2016 - 18:50

Good evening!

I am new at wood working, and would be very interrested in knowing the different measurements you changed to get from a twin to queen murphy bed. If it is posted on this page, I tried but couldn't find it. Thank you for your help. Have a good day.

Marie-Julie

Pantry Cabinet

Submitted by JoanneS on Mon, 03/05/2012 - 16:57

Pantry cabinet, with lots of room, Ana-inspired. We combined ideas from the Momplex kitchen, simple armoire, and benchmark storage, and we are super pleased with how this turned out. We built it in 2 pieces, attached together and then secured to the base and wall studs so it’s a ‘built-in’. Then we added lots of trim and painted to match the dining room. The opening at the left is large enough to fit pretty much any size microwave, and there’s a dedicated outlet behind it in the opening. The shelves are spaced wide enough apart for tall cereal boxes, tall bottles, and chip bags to stand upright. Overall finished cabinet size is 48" wide and 95 3/4" tall. This took us several days to complete. Since the doors are tall and kind of heavy, we added the Blum cabinet door dampeners from Rockler (these things really work!). Ana, thank you so much for the inspiration. I don’t think we would have tried this if it wasn’t for you. We love our new pantry!

Estimated Cost
$600
Estimated Time Investment
Week Long Project (20 Hours or More)
Finish Used
Ace Royal semi-gloss in Wishbone (front and bottom side), and in Crushed Peanut (upper side). We did 3 coats, sanding in between coats.
Recommended Skill Level
Intermediate

Comments

Debi_G (not verified)

Wed, 03/07/2012 - 00:05

Fantastic!

yogashell

Sat, 07/21/2012 - 07:44

It looks amazing! What a great idea to add it as a built-in. Nice modification for the microwave.

Just a beginner! Second Project

Submitted by Rifka on Tue, 06/21/2016 - 18:35

Great first project!

Built from Plan(s)
Estimated Cost
$20
Estimated Time Investment
Afternoon Project (3-6 Hours)
Finish Used
Annie Sloan chalk paint with clear wax.
Works great for outside too.
Recommended Skill Level
Beginner

Big Boy Toddler Loft Bed!

You can see the final project here: http://crabandfish.blogspot.com/2012/10/lil-archers-bed-its-done-its-do…

It was time for our son to move to a big-boy bed! We looked at tons of plans, but none were quite what I wanted. In the end, fish modified plans for Ana White's Camp Loft Bed with Stair. We wanted to make it a bit shorter because we only have 8' ceilings and there is a ceiling fan in the room. We spent about $80 for the lumber and invested in a kreg jig as well. The bed is stained with Minwax Golden Oak. We bought a 10" deep twin-sized foam mattress for the bed - if you are adding a coil mattress and boxspring, the bedside rails would definitely need to be higher.

Our son LOVES it! He is almost three and is easily able to navigate the stairs, which I don't believe will become too "baby-ish" as he grows older. If they do, the steps can easily be removed from the frame without losing structural integrity.

The underbed area has a great "cool" factor - we hang blankets to create forts, and it has become a place our son gravitates to for reading, playing, anything!

Estimated Cost
$100 for lumber and stain. Also invested in kreg jig.
Estimated Time Investment
Week Long Project (20 Hours or More)
Finish Used
Minwax Golden Oak
Recommended Skill Level
Beginner

Comments

DIY sofa couch / slide in coffee table

Ana has great instructions, definitely have been using her alot. During the pandemic picked up a couple new hobbies and tools. I did the sofa couch from her plans. The coffee table I created off the whim but used her basic instructions on how to make table tops / benches. These came out super nice, surprised me and my wife :)

Estimated Time Investment
Weekend Project (10-20 Hours)
Finish Used
Sanded several times varying 120 / 180 / 220. Stained with Valspar semi-transparent natural redwood naturaltone.
Recommended Skill Level
Beginner

Comments

Doggy loft bed!

Submitted by Anonymous (not verified) on Sat, 06/03/2017 - 17:31

My dog loves to people watch all day while I'm at work and she needed a new bed so I took the plans for the lower platform and modified them so it would stand alone. Took the platform and put it on the bottom so that her bed would sit inside instead of on top where she could more easily fall off.

I tried building without PH screws at first and all I ended up with was a lot of cracked and wasted lumber. Got the PH jig and finished the whole build myself in 2 hours. Sanding, staining, and sealing tomorrow but I'm just so excited about it I had to post now!

Estimated Cost
With the two sets of lumber, having to buy the jig, hardware, stain, and electric sander it cost me about $130
Estimated Time Investment
Afternoon Project (3-6 Hours)
Recommended Skill Level
Beginner

Comments

Twin Storage Beds

Submitted by anne_c on Thu, 08/07/2014 - 07:36

This was really my first build and it stemmed from not being able to find the kind of beds I wanted for my girls. My brother helped me cut the wood and assemble the first one and my husband and I did the second together. It was so rewarding to make them and I love how they turned out! You can store so much and they are sturdy pieces. My girls love them too. (bedding is from Pottery Barn) I would stay this is a beginner's project. You don't need any specialized tools. it was a lot of fun and now I'm it itching to buy a Kreg Jig so I can complete many more projects!

Estimated Cost
$150-$175 per bed
Estimated Time Investment
Weekend Project (10-20 Hours)
Finish Used
After they were built, I sanded them and primed. The paint I chose was Polar Bear, which is a pretty true white, Behr brand from Home Depot. I used 2 coats of water based polyeurethane (Verathane brand), which has really protected it from knicks and scratches
Recommended Skill Level
Beginner