Mothers Day
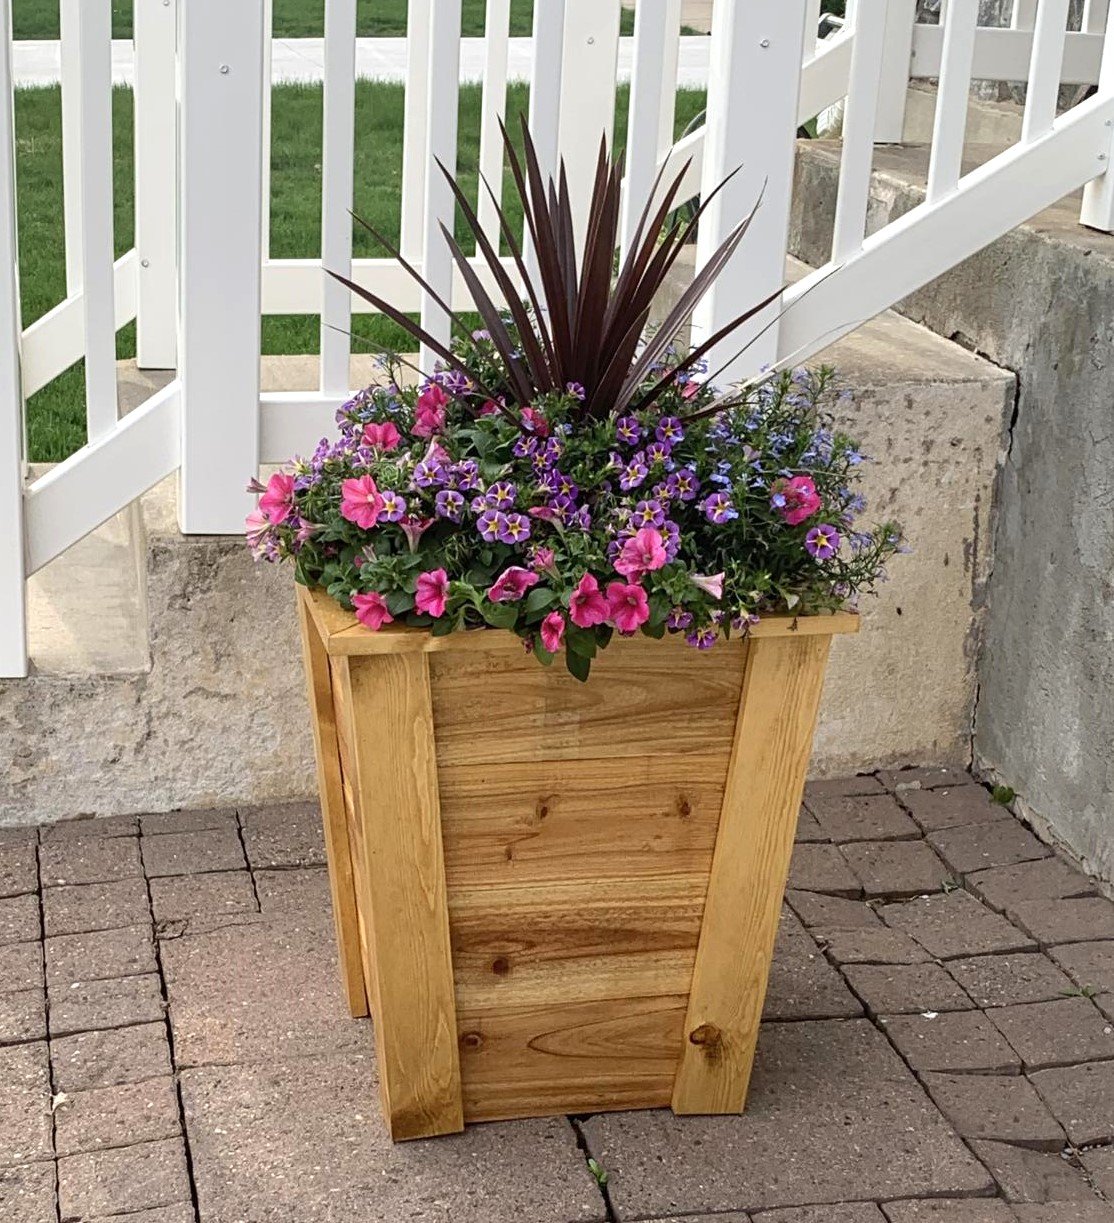
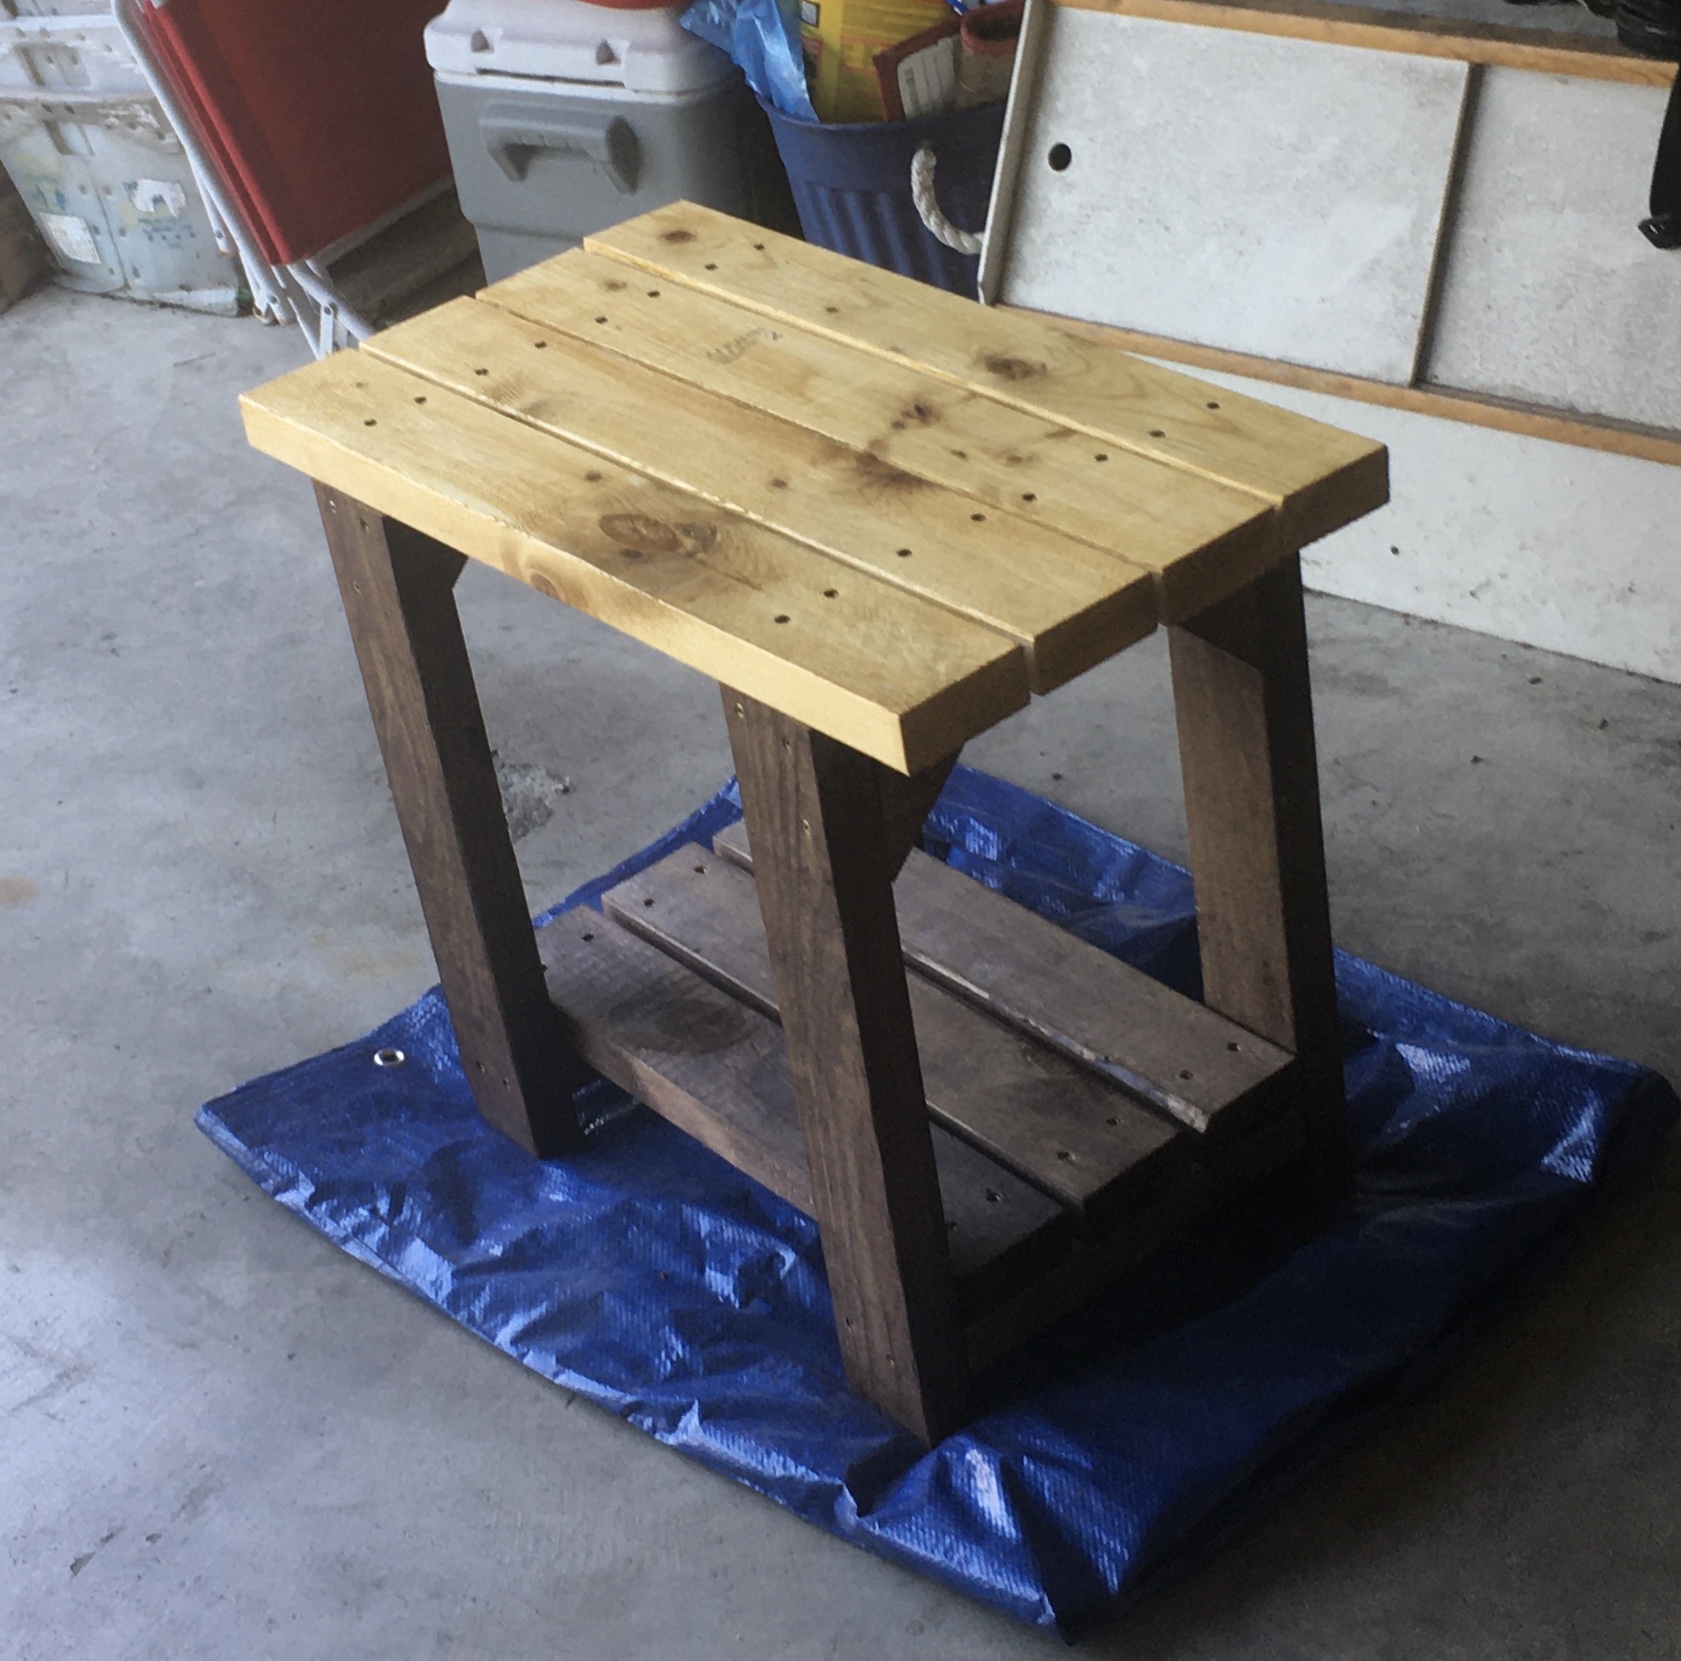
I made this tall planter for my Mom for Mothers Day. She loves it!
Built from Plan(s)
I made this tall planter for my Mom for Mothers Day. She loves it!
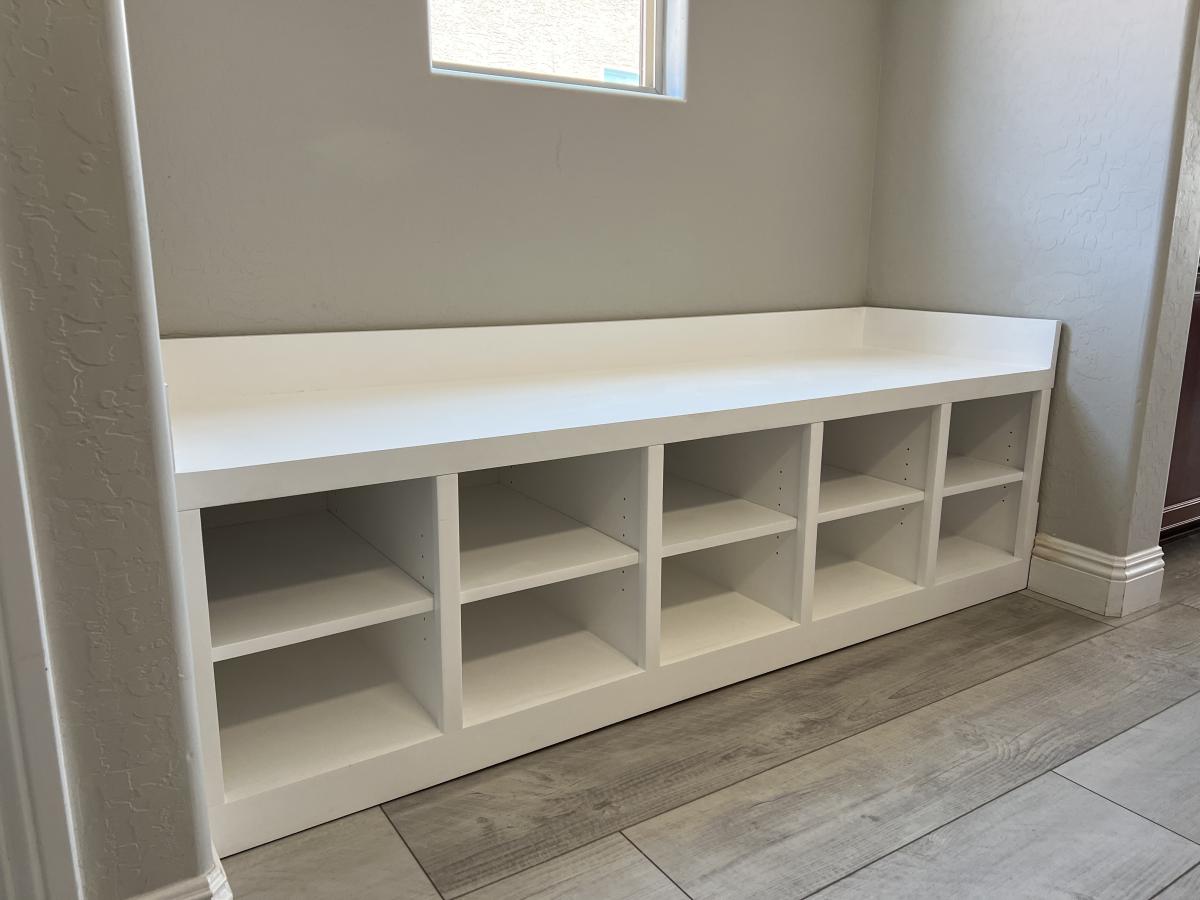
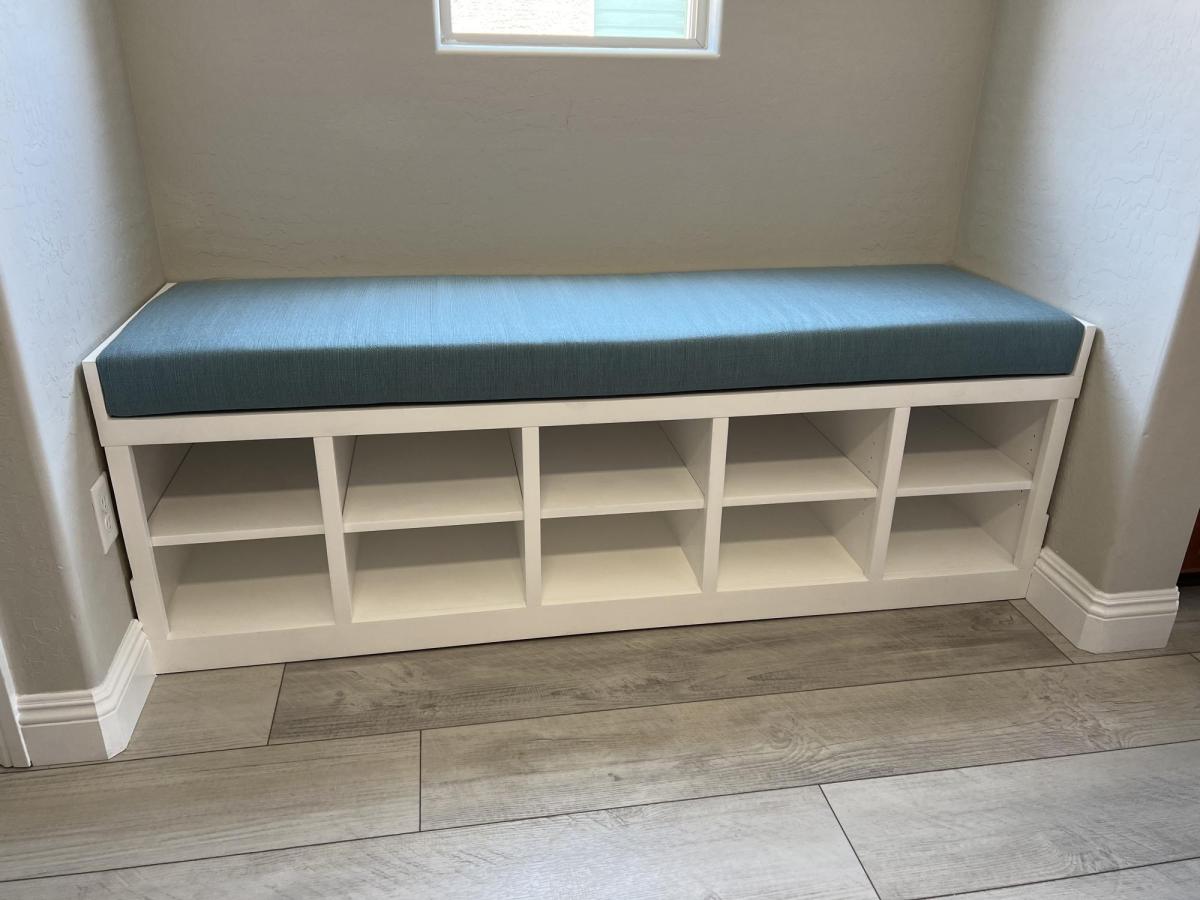
Worked with a client to create a boot bench with adjustable shelves. The Essential Entryway Bench was a perfect starting point! I extended the top trim to home the 4” cushion. I love Ana’s plans! Thank you!!!

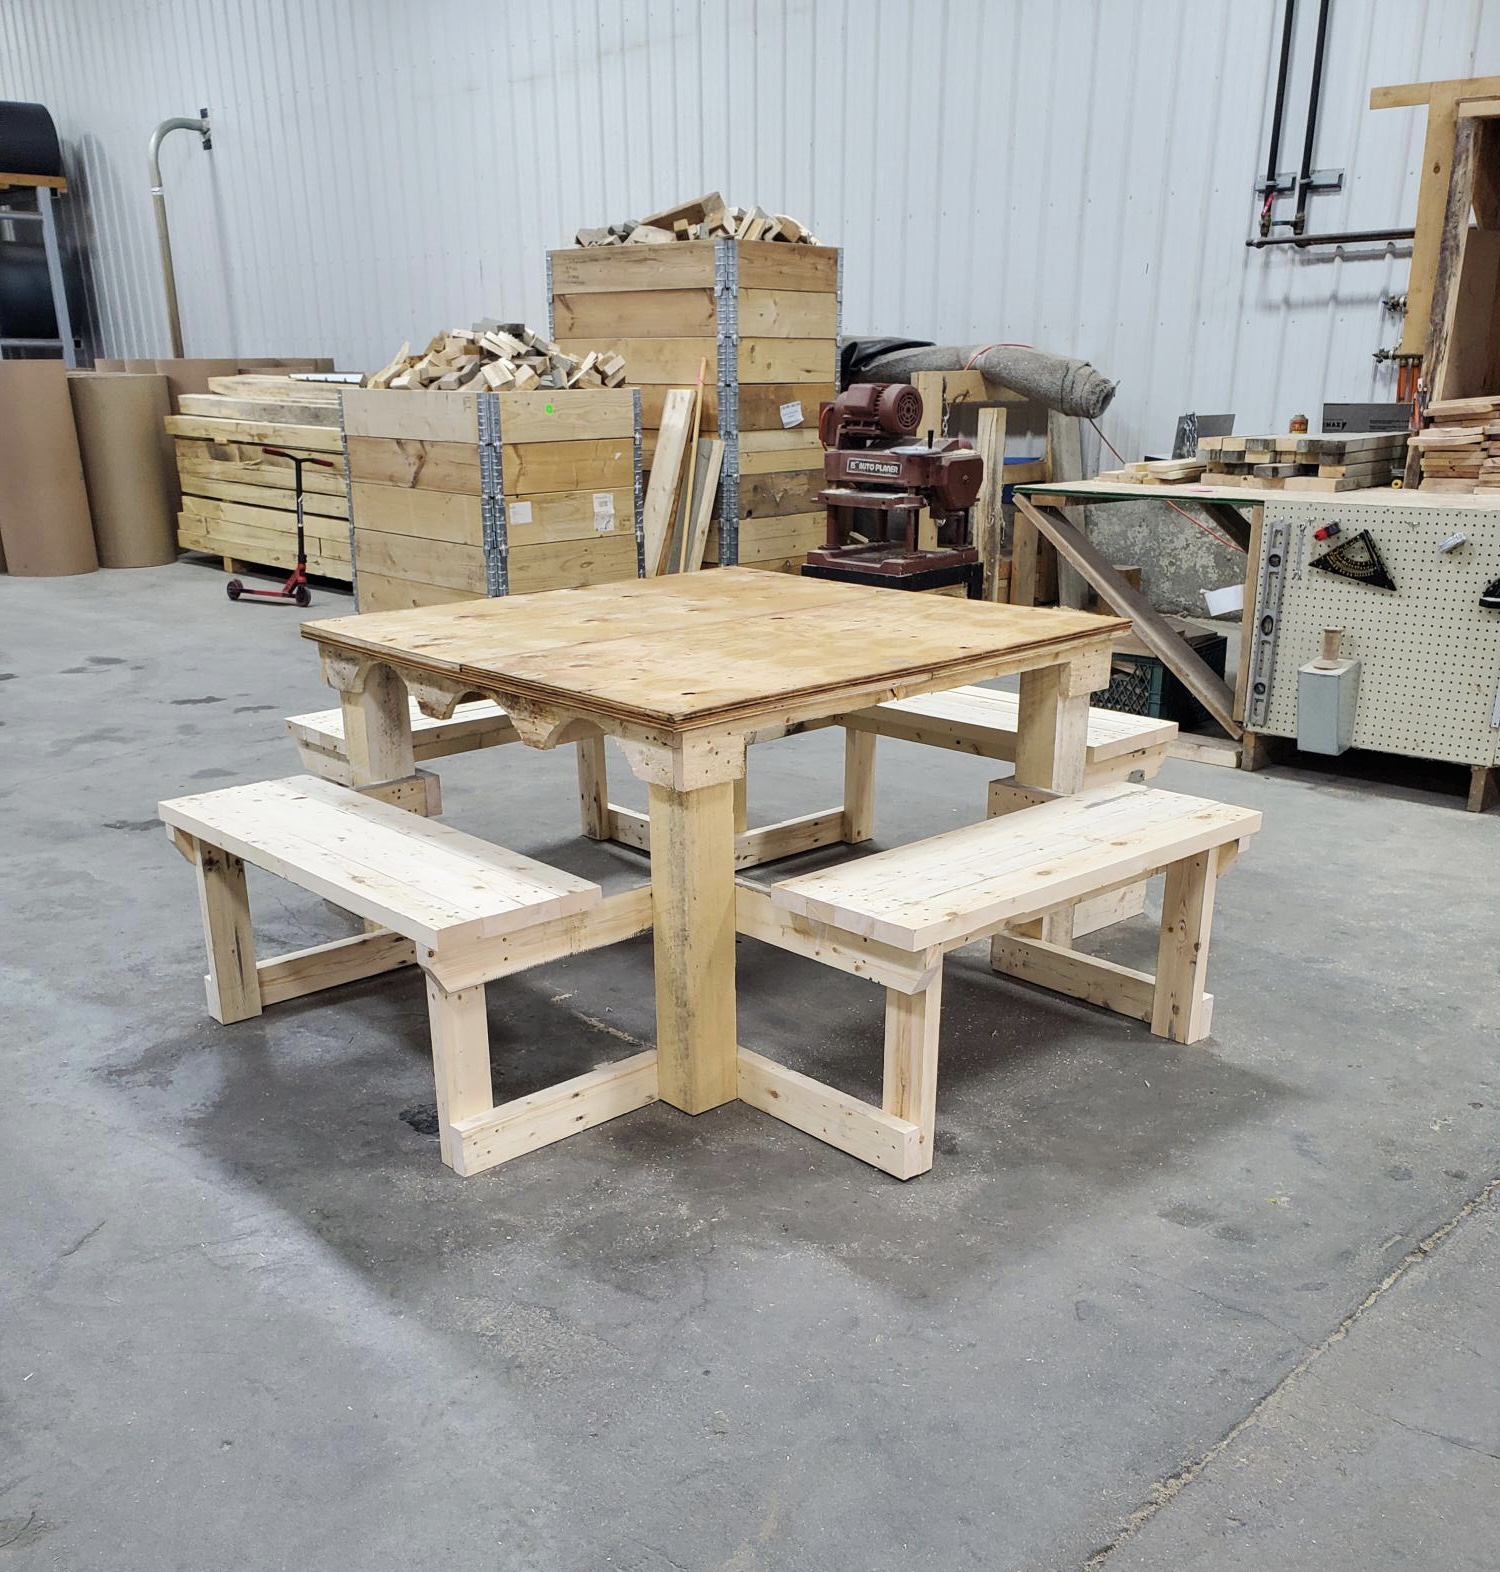
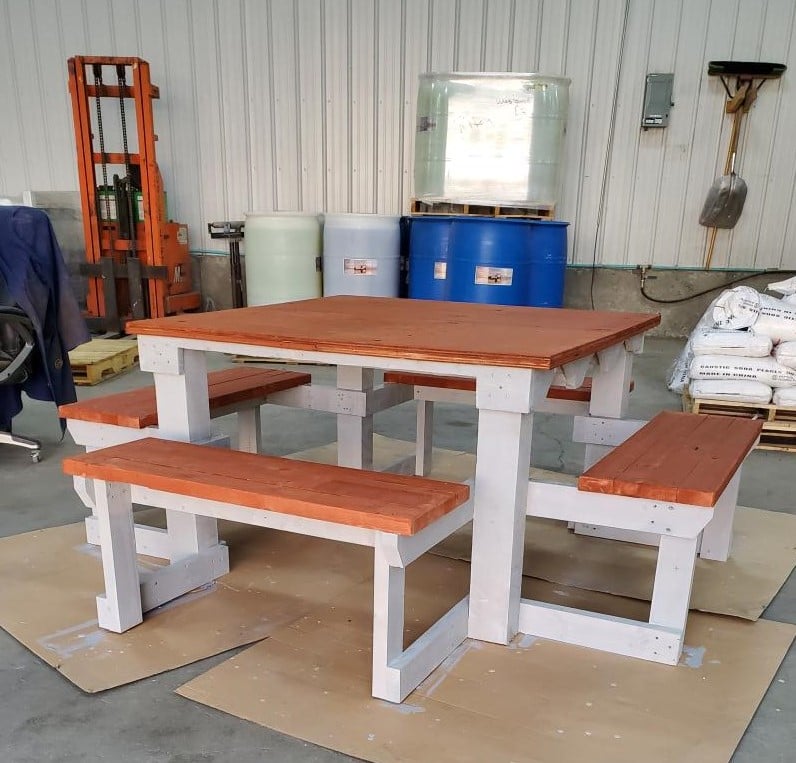
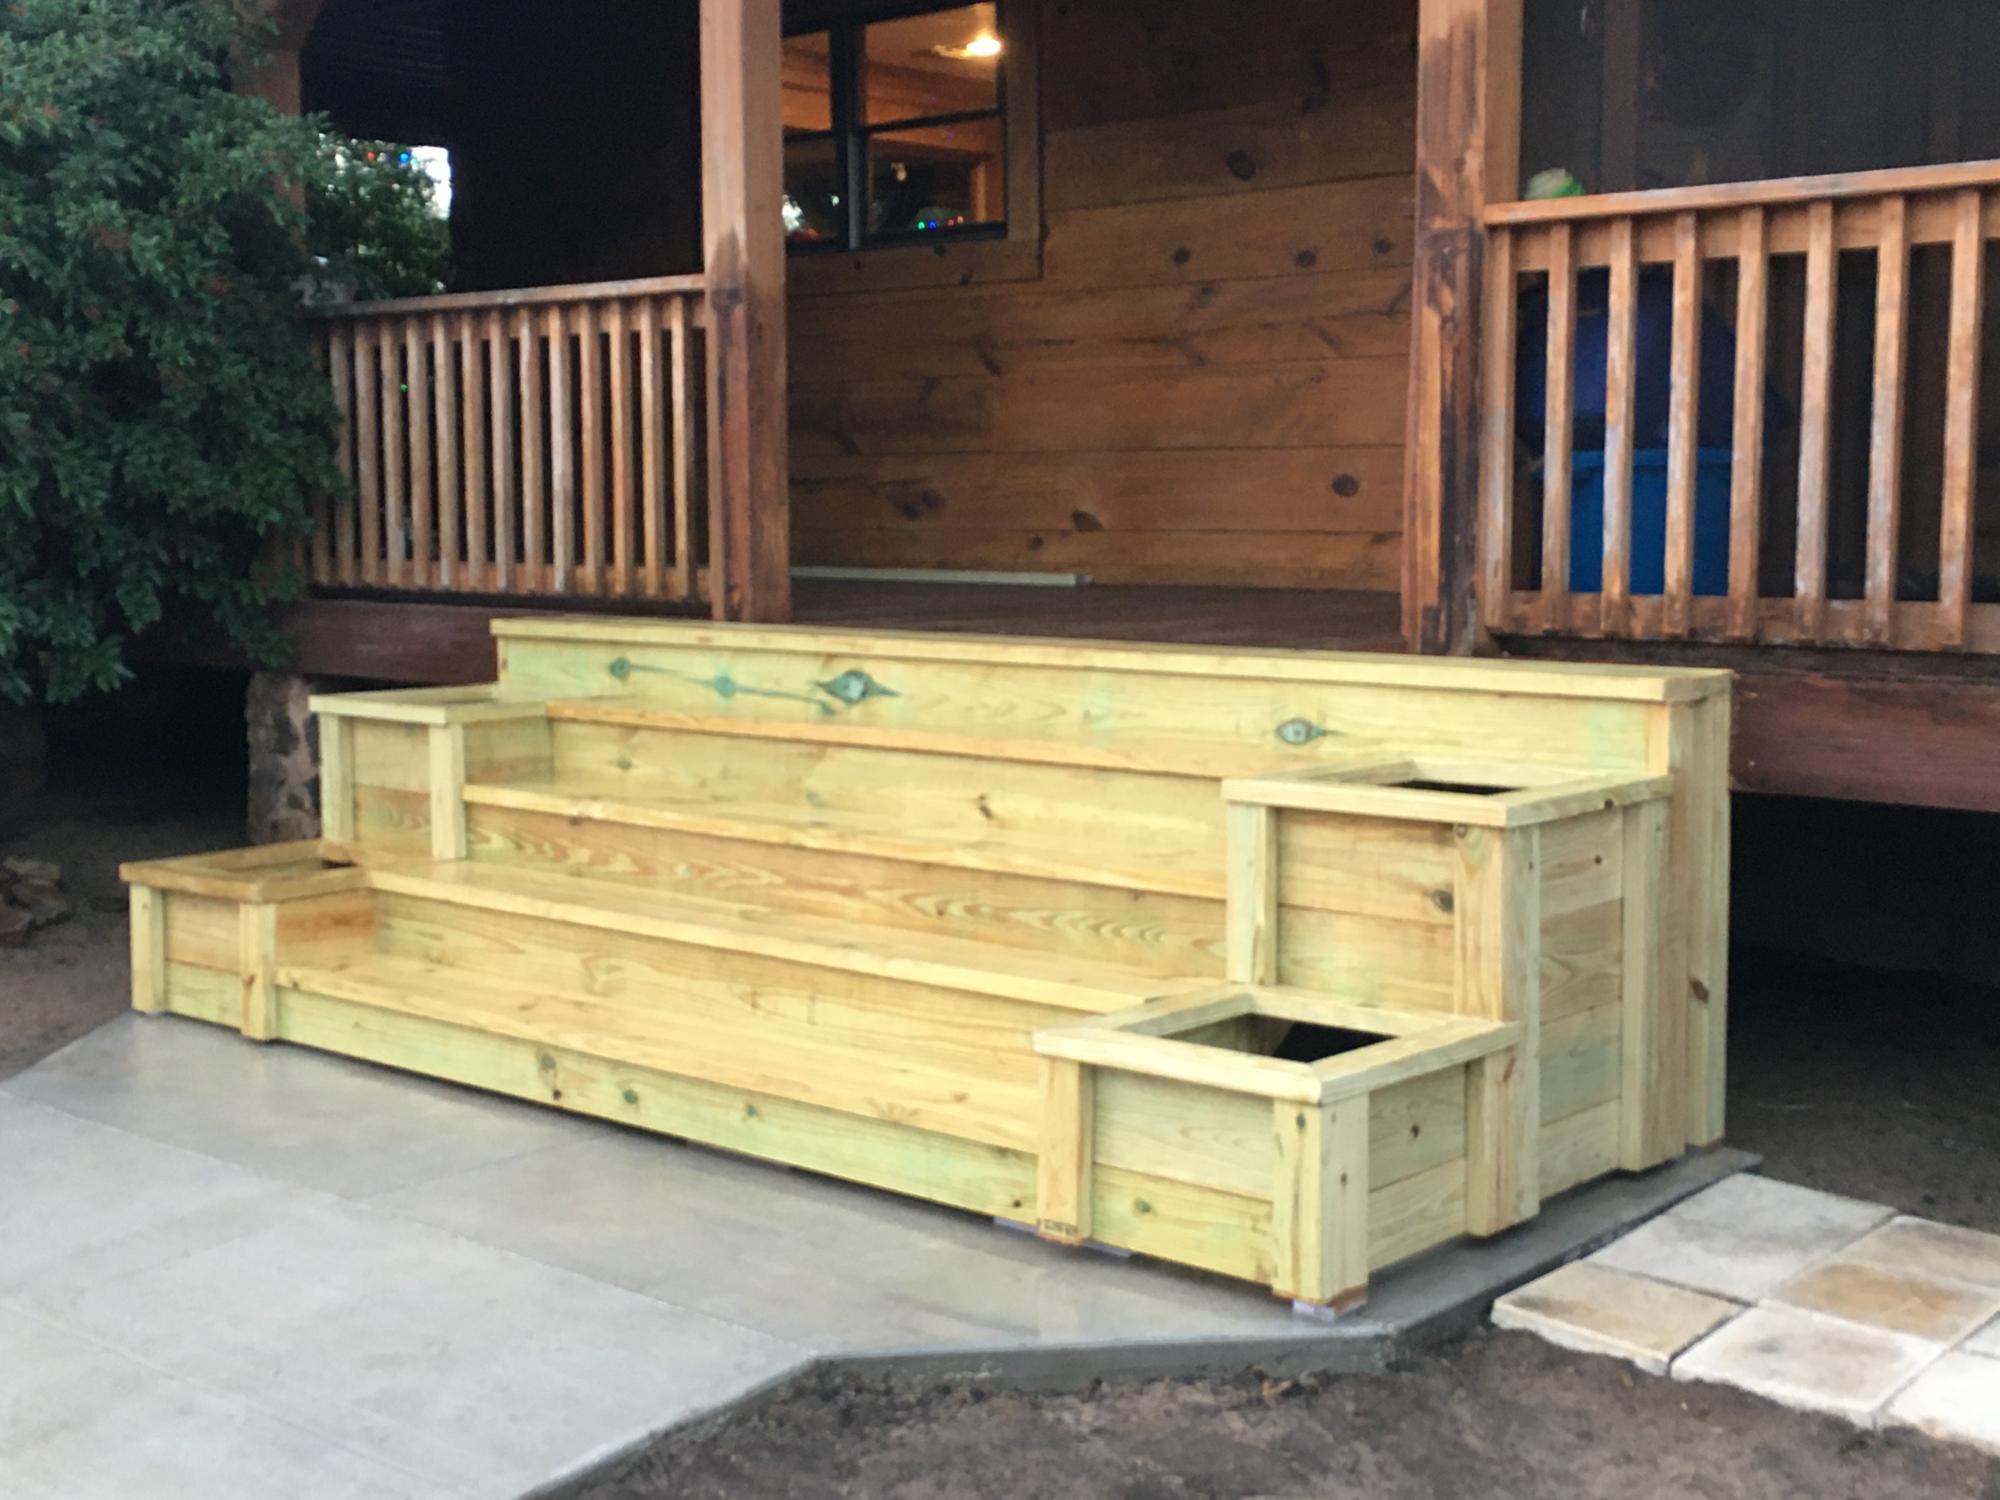
4 sides for the whole family to sit.
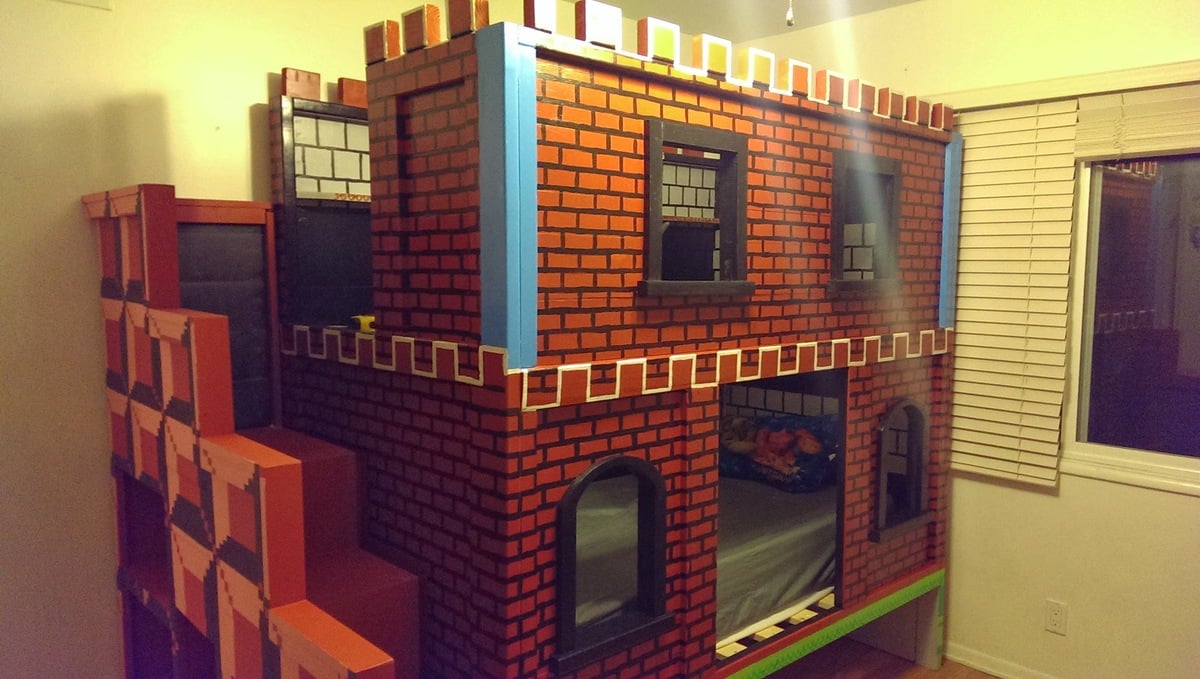
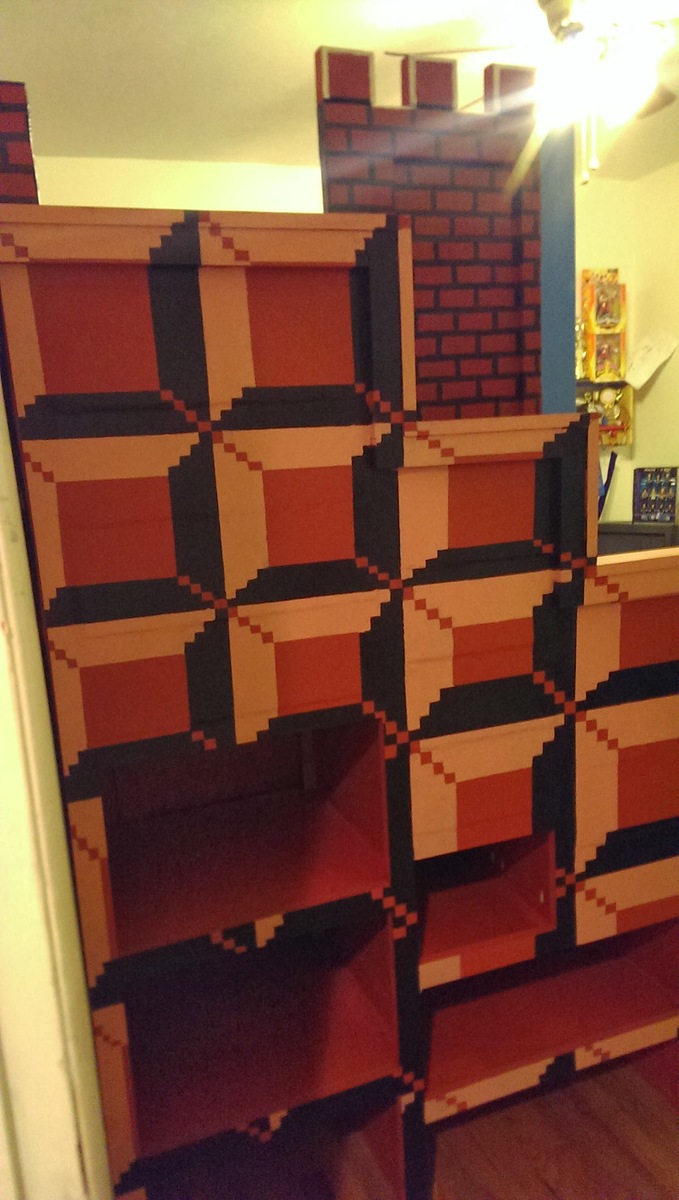
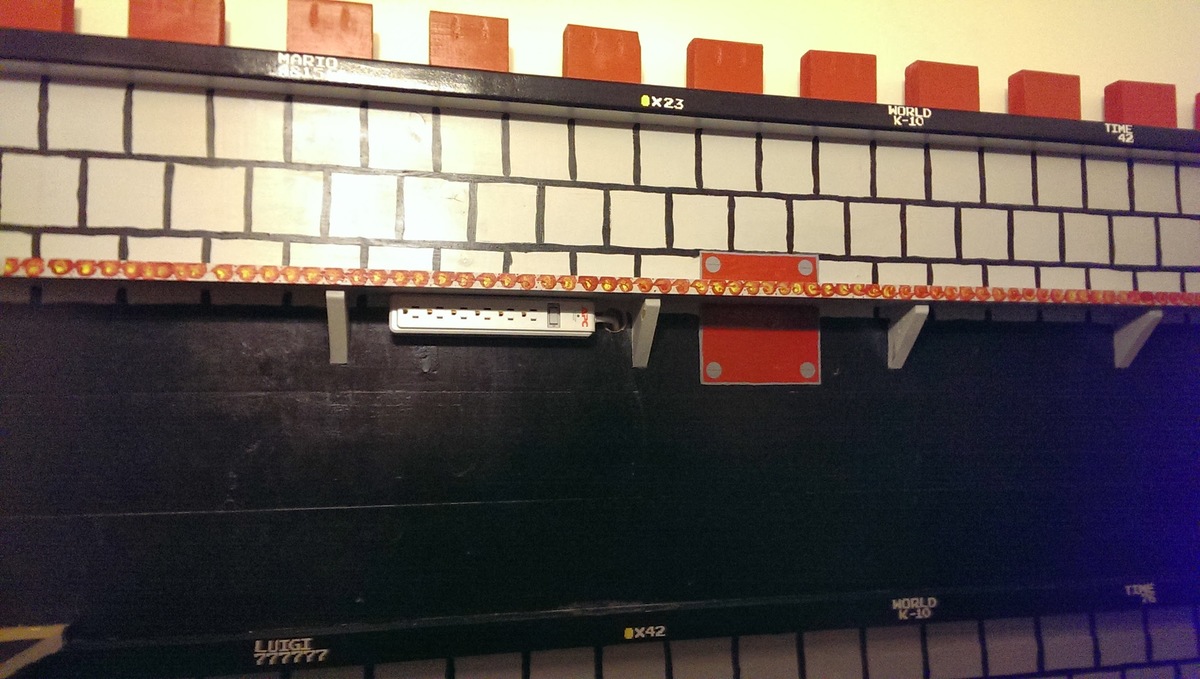
So my son needed a bunk bed and we came upon the sweet pea bed. It was too girly for him so we decided to go with a theme that would be timeless, something he wouldn't mind having when he is 18 (or older, he is 10 now). What is better than Mario! (We are a house full of gamers, my 17 year old is super jealous of this bed lol). The build was fairly easy and the plans were straight forward enough, the time consuming part was the painting (without all the painting we could have probably build this in a long weekend). We changed a few things, like not arching the top windows, adding the 4 inch 2x4 squares to the top to give the castle look and stairs are made to look like stairs from the side so we stepped out the banister instead of angling it.

Wed, 01/01/2014 - 06:11
This is the coolest bed I have ever seen! I wish I could make this for my youngest. I could probably build it, but I 'm pretty sure it would go downhill when I started painting it. You did an amazing job and your son is a very lucky boy!
Wed, 01/01/2014 - 16:10
You can totally do it! I am a horrible painter (I'm too impatient) and you can't tell with this because of how forgiving the design ends up being. There is so much going on it's hard to pinpoint the mistakes. :)

Wed, 01/01/2014 - 06:31
Super creative. I can't think of a word to say just how cool this is! Wow!
Wed, 01/01/2014 - 06:58
That is the most spectacular bed I've ever seen. I have a 5 year old son. :) You are a genius.
Wed, 01/01/2014 - 16:07
Thanks so much! This was the first thing we ever built (although my husband did a lot of building stuff in his youth we have never done anything together and I was a total beginner) so we are very happy with it. :D I appreciate all the kind words.

Wed, 01/01/2014 - 18:27
Wow! I'm super impressed, your version is awesome! The stairs are very cool- well done!

Tue, 08/08/2017 - 05:14
This looks amazing! :o The kid version of myself would adore this. (haha no the adult version would too)
Fri, 05/03/2019 - 22:00
We are super excited to build this for our 9 year old son. To make this a Full size bed am I correct in thinking that I only need to alter the side panels by adding 15inches? I am paranoid about building it and the mattress not fitting. Thanks so much!

Aiden's Clubhouse.
I can't even believe I was able to build this! Everyone thought I was crazy for undertaking such a huge project. I made it a queen size because my son would always sleep in my bed anyways... so I just gave it to him. The bed took 4 weeks because I could only work on it on Saturday afternoons. The first week, I made a frame with cleats on the wall. The second week I built the house and stairs. The third week I built the slide and did some of the painting. Today, I finished painting and trim.
I did modify the plans and merged the plan for the slide into my plan, which was a last minute addition. As such, I had to "measure-and-cut-as-you-go" build this bed. I would highly recommend to anyone considering such a task, don't do that. Make a plan, cut all your wood, paint before assembly, and stick to the plan. My stairs all lift up, and under the top landing there is also a cut out inside Aiden's clubhouse-you can see it behind him in the picture below. Also under the slide is a cut out for storage. I have not done anything with the inside of the clubhouse yet. Someday...
I designed the bed specifically so that I could take it apart if we ever move... we live in an apartment. The stairs/stairwell are only connected to the rest of the bed with a single screw. The other wall is a bit more difficult to remove, but not impossible.
I learned a few things doing this, that I want to share with you all..
1. The Kreg-Jig is the best thing ever.
2. I LOVE LOVE LOVE power tools.
3. 4x4 sheets of MDF are difficult to carry upstairs by myself.
4. I can do anything.
I hope you all like it. This was my son's 4th birthday present and he really loves it.
It isn't finished yet though. The far wall in the room is about 2 ft away from the bed, and I haven't decided what to do with that side of the bed, so it's still plain. I would love some ideas! What do you think?


Sat, 03/10/2012 - 21:56
This is awesome. I love the way the slide goes across the front. It looks so compact and functional.
Sun, 03/11/2012 - 06:30
I did make a couple mistakes with the slide. I made it too narrow. Right now it is 1 foot wide. Next time I would do 1 1/2 feet wide. I also would make the landing at the top bigger. I like the angle of the slide now at 45 degrees, but my son did have to learn how to slide down it without falling foward at the bottom. So, a more well designed slide would be less steep, wider, and with a bigger landing at the top. Another tip... for the top of the stairs, take extra care to make sure they swing straight and are about 1/2 inch less wide than the space so they don't scrape the side of the stairwell walls.
Sun, 03/11/2012 - 06:32
Technically, I did finish the ten dollar ledge above his bed earlier this week, before I completed the bed, but it was all part of the same project! :) The only other thing I've built is 2x4s slapped together to hold aquariums. My other hobby is breeding fish. :)
Mon, 03/12/2012 - 11:29
Yes I actually made a whole frame. Basically just studs - on the walls they are just screwed into studs in the wall, then the other two sides are supported by the walls of the house and a vertical frame piece also. There are two stud slats connected to that, so that bed isn't going anywhere. This is the same method I use for supporting 1500 pound aquariums. I have a bunch of 1x3 slats in there as well...
So, if I want to move the bed, I would remove the side with the stairs (~62 inches)- that whole side is one unit, secured to the frame with one screw, and secured to the other wall by about 5 finish nails and one screw. The longer wall (~85 inches) is secured to the frame by 6 screws.
Queen mattresses are HEAVY. :) I learned that too.
Sun, 01/06/2013 - 08:21
we're making the Playhouse Loft Bed for a queen bed as well. Maybe you can answer a question for me. Are the dimensions to fit a queen size bed as written, or do we need to convert them. A queen mattress is 75 x 80 and it looks like that's what this is made to fit, but I don't wanna find out i'm wrong after I already have that thing hoisted up over my head :) Thanks for any advice you can offer!
Plan modified to be built on stringers due to hight.
Fri, 07/07/2023 - 15:22
Do you have an illustration or instructions on the exact modifications you used for this project?
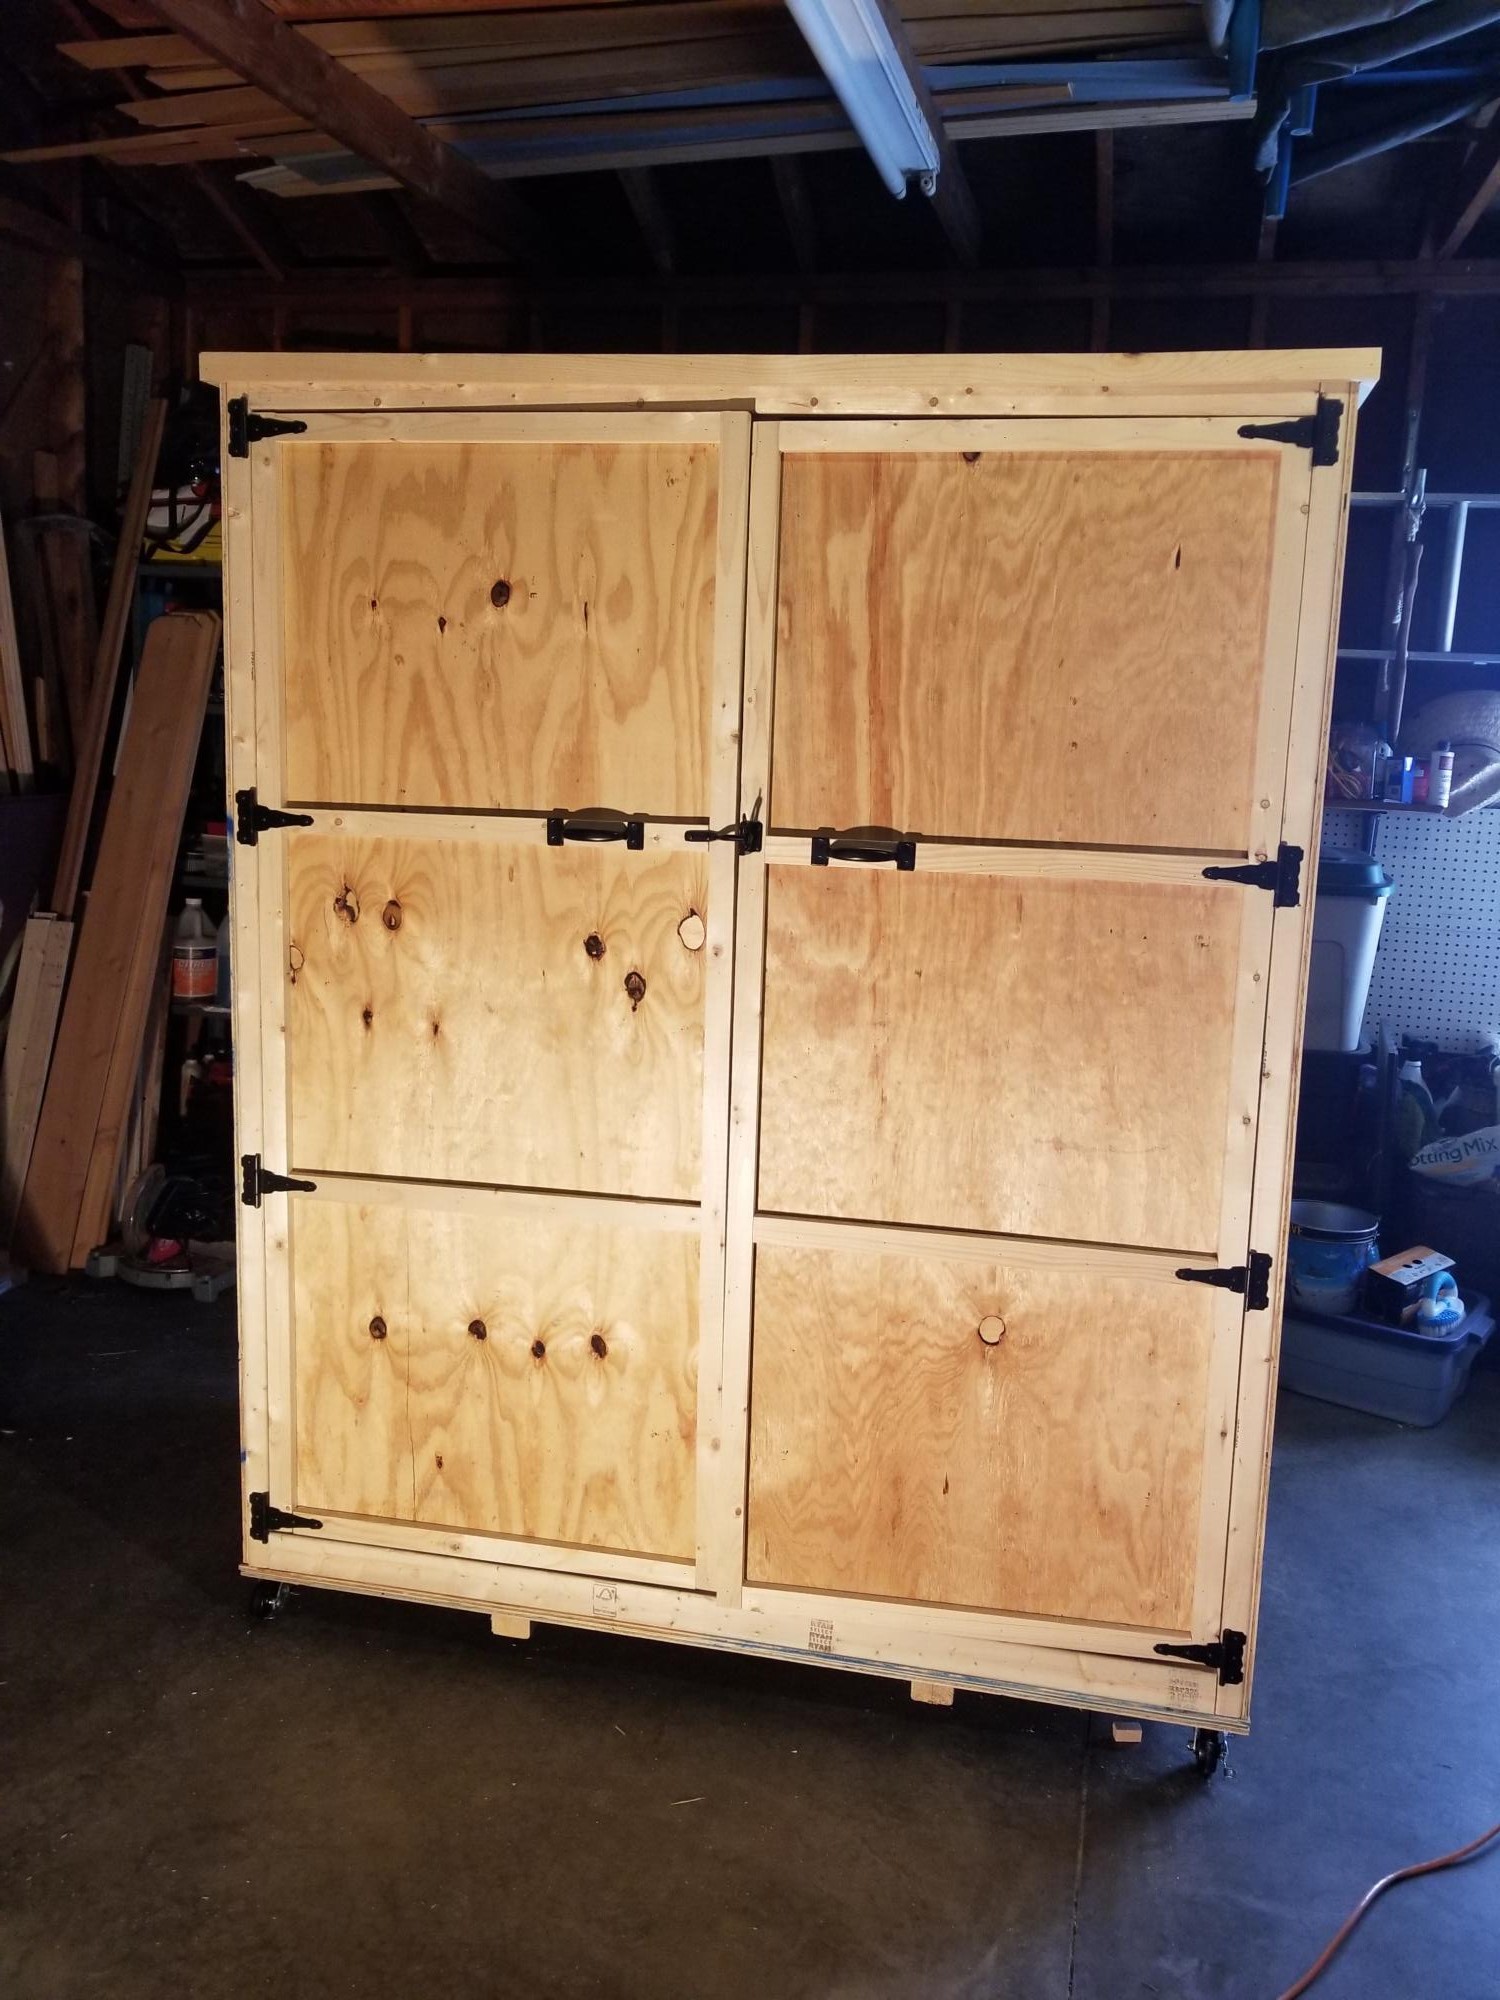
We did some conversions to the smokehouse plans to make a locker for all of my horse tack! :)
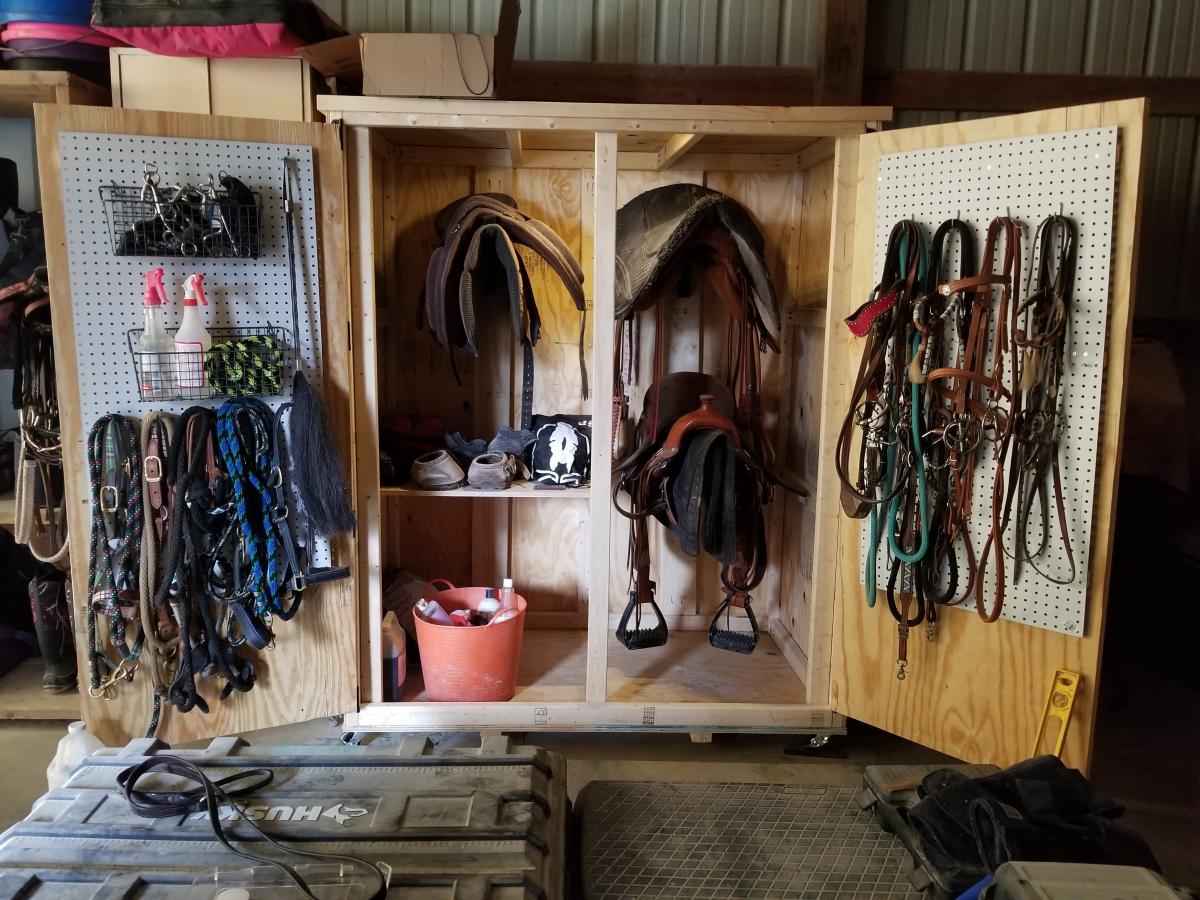
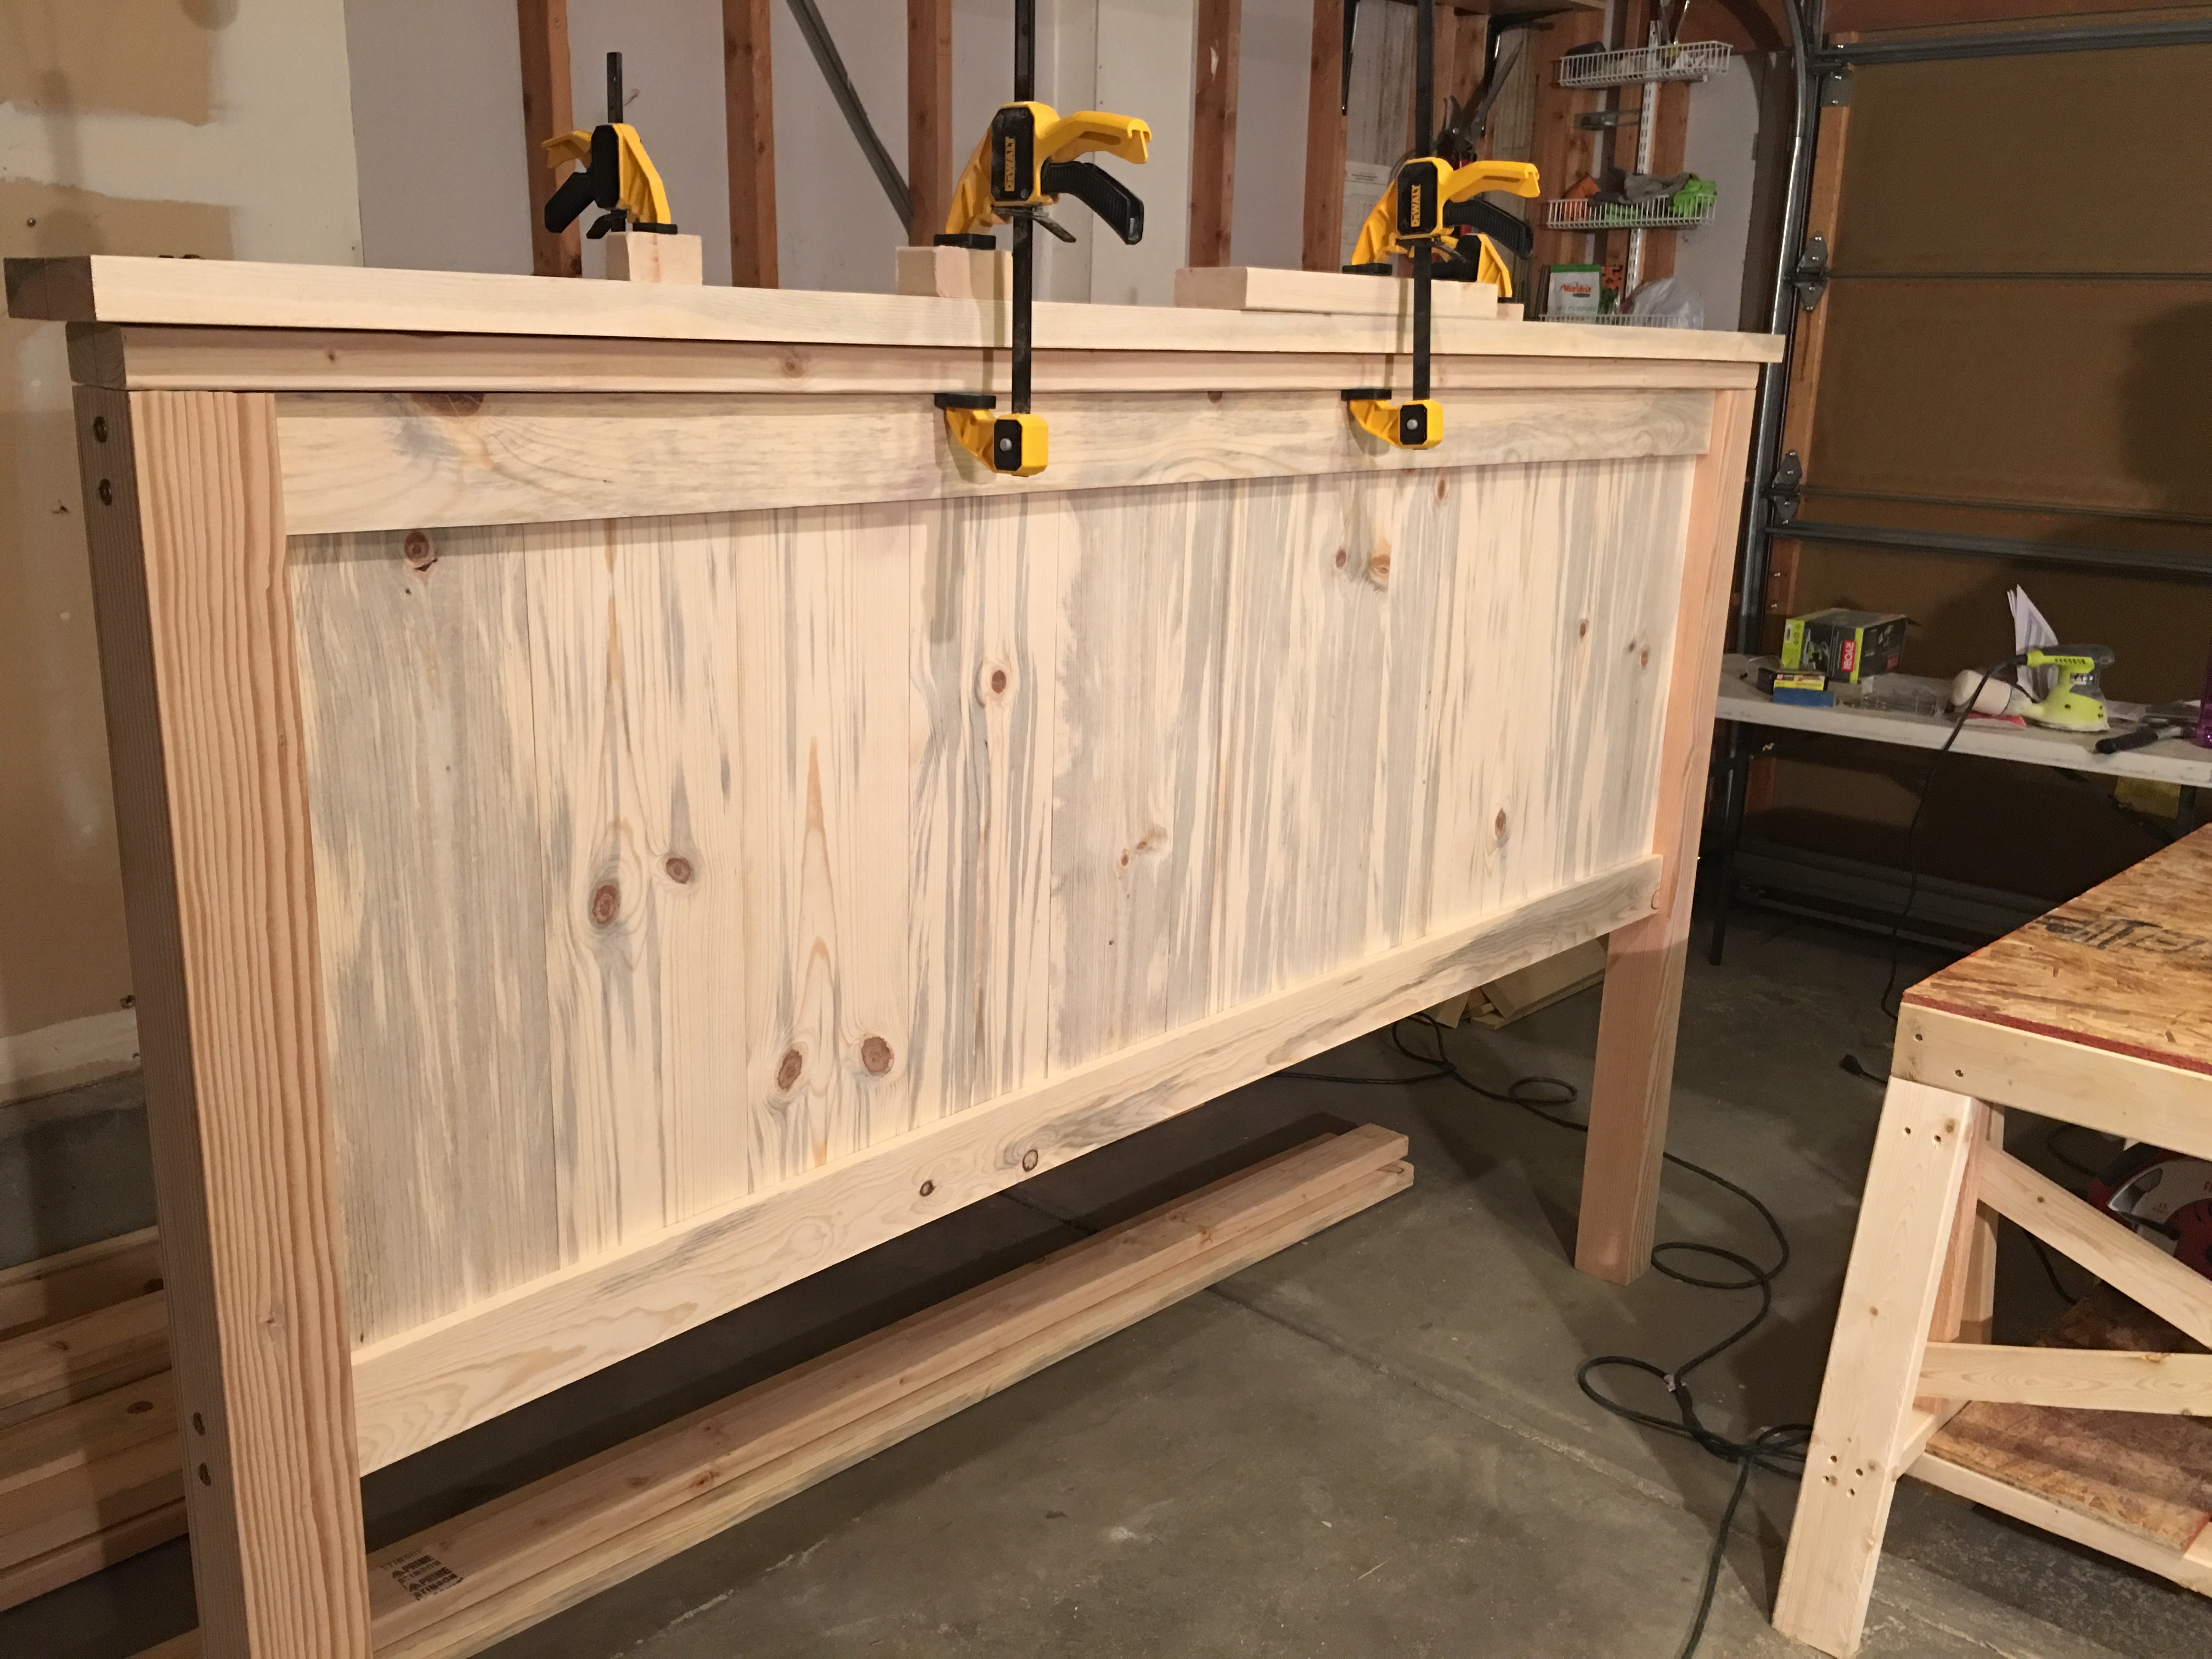
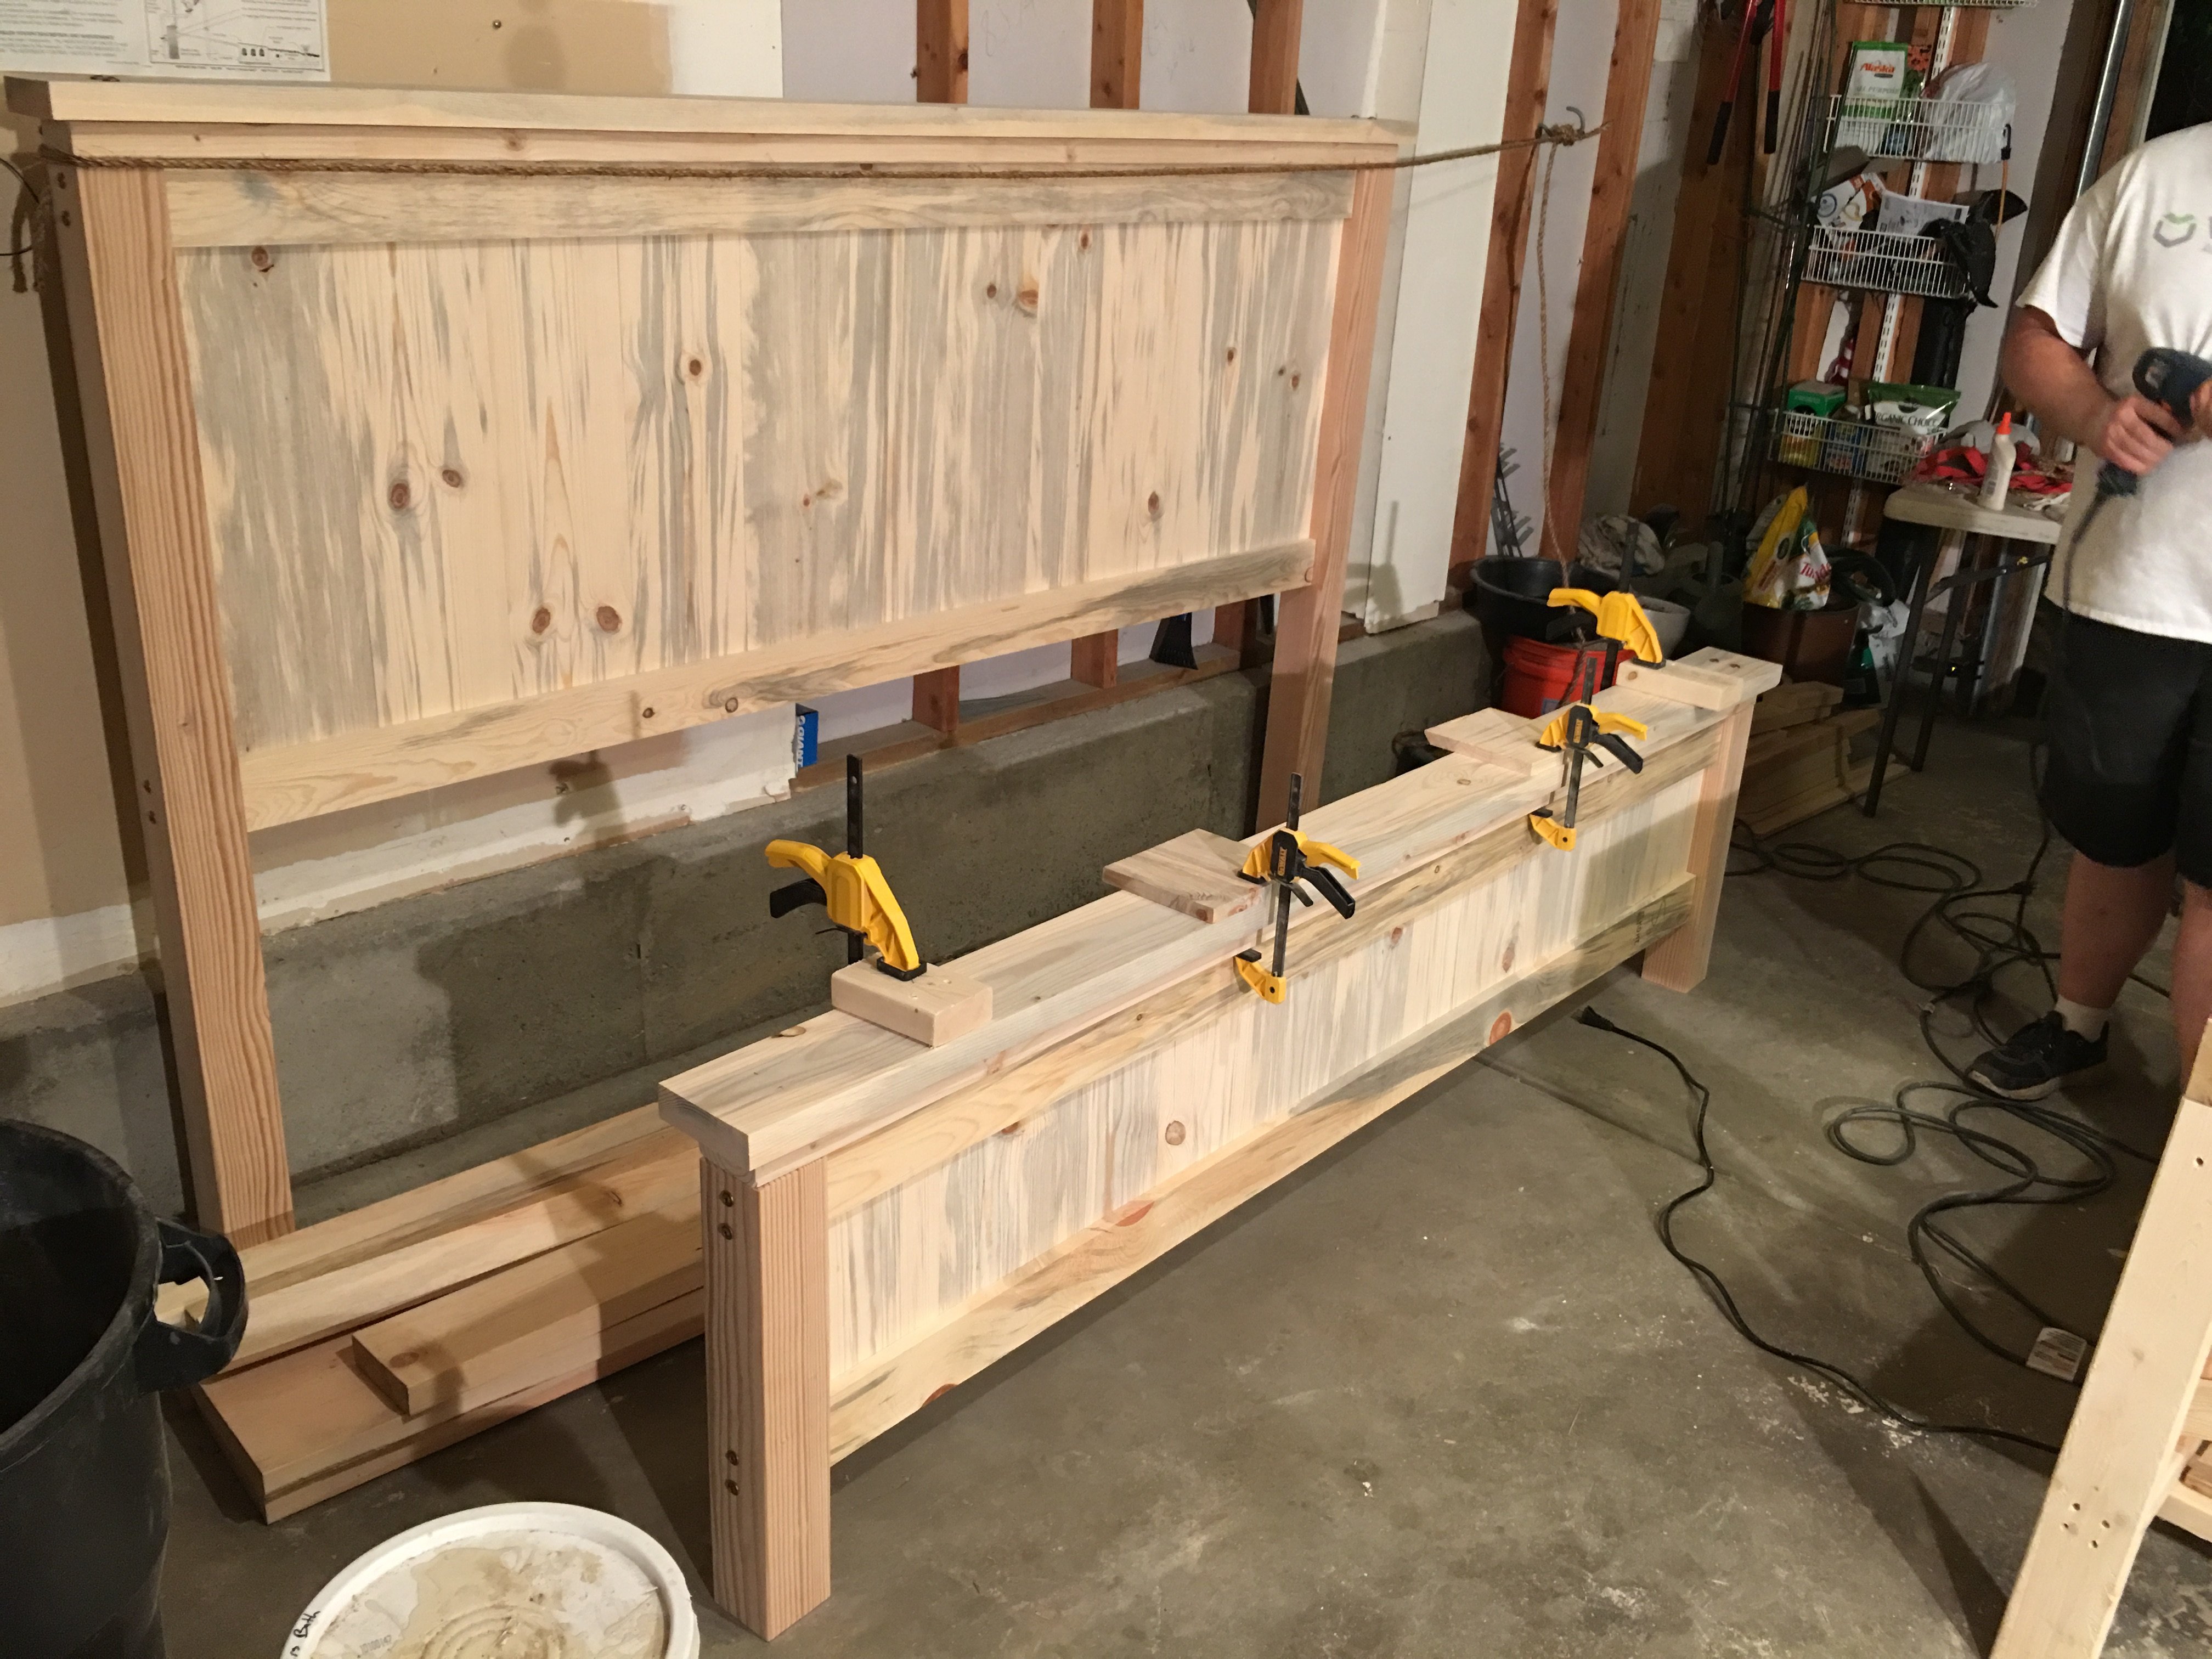
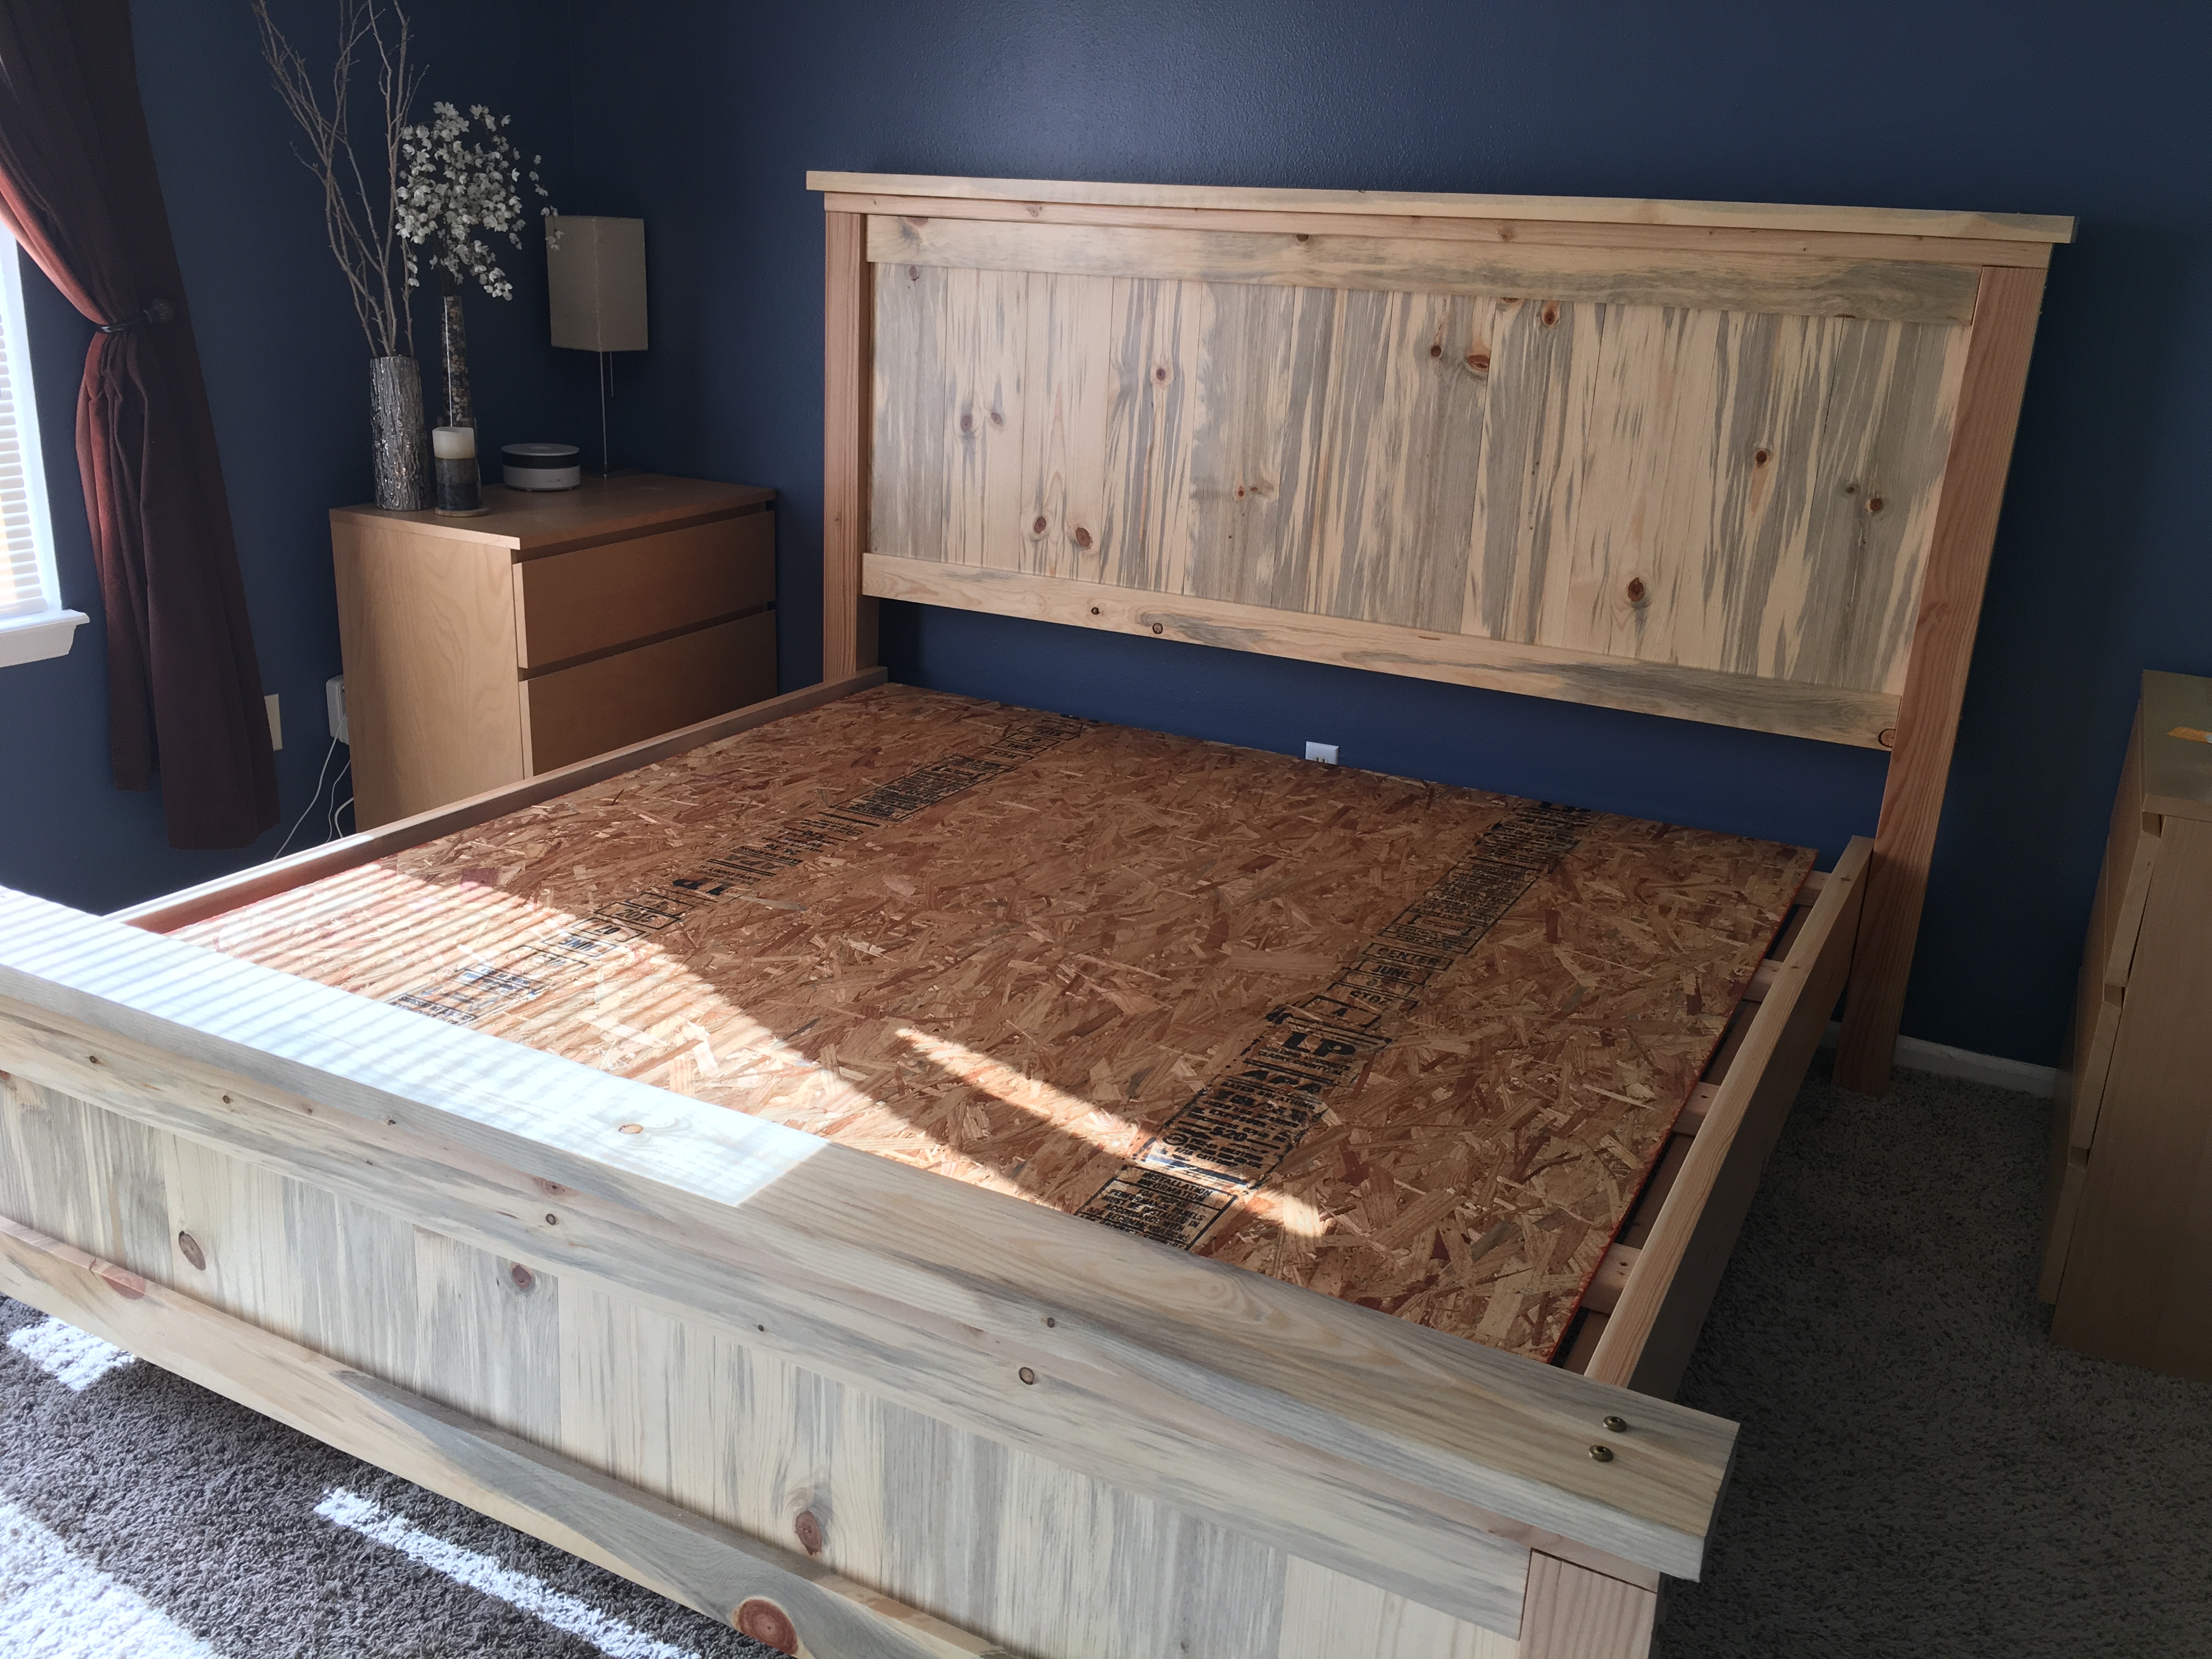
This was our first build and it was quite a big project to take on to start with. We had so much fun and learned so much along the way.
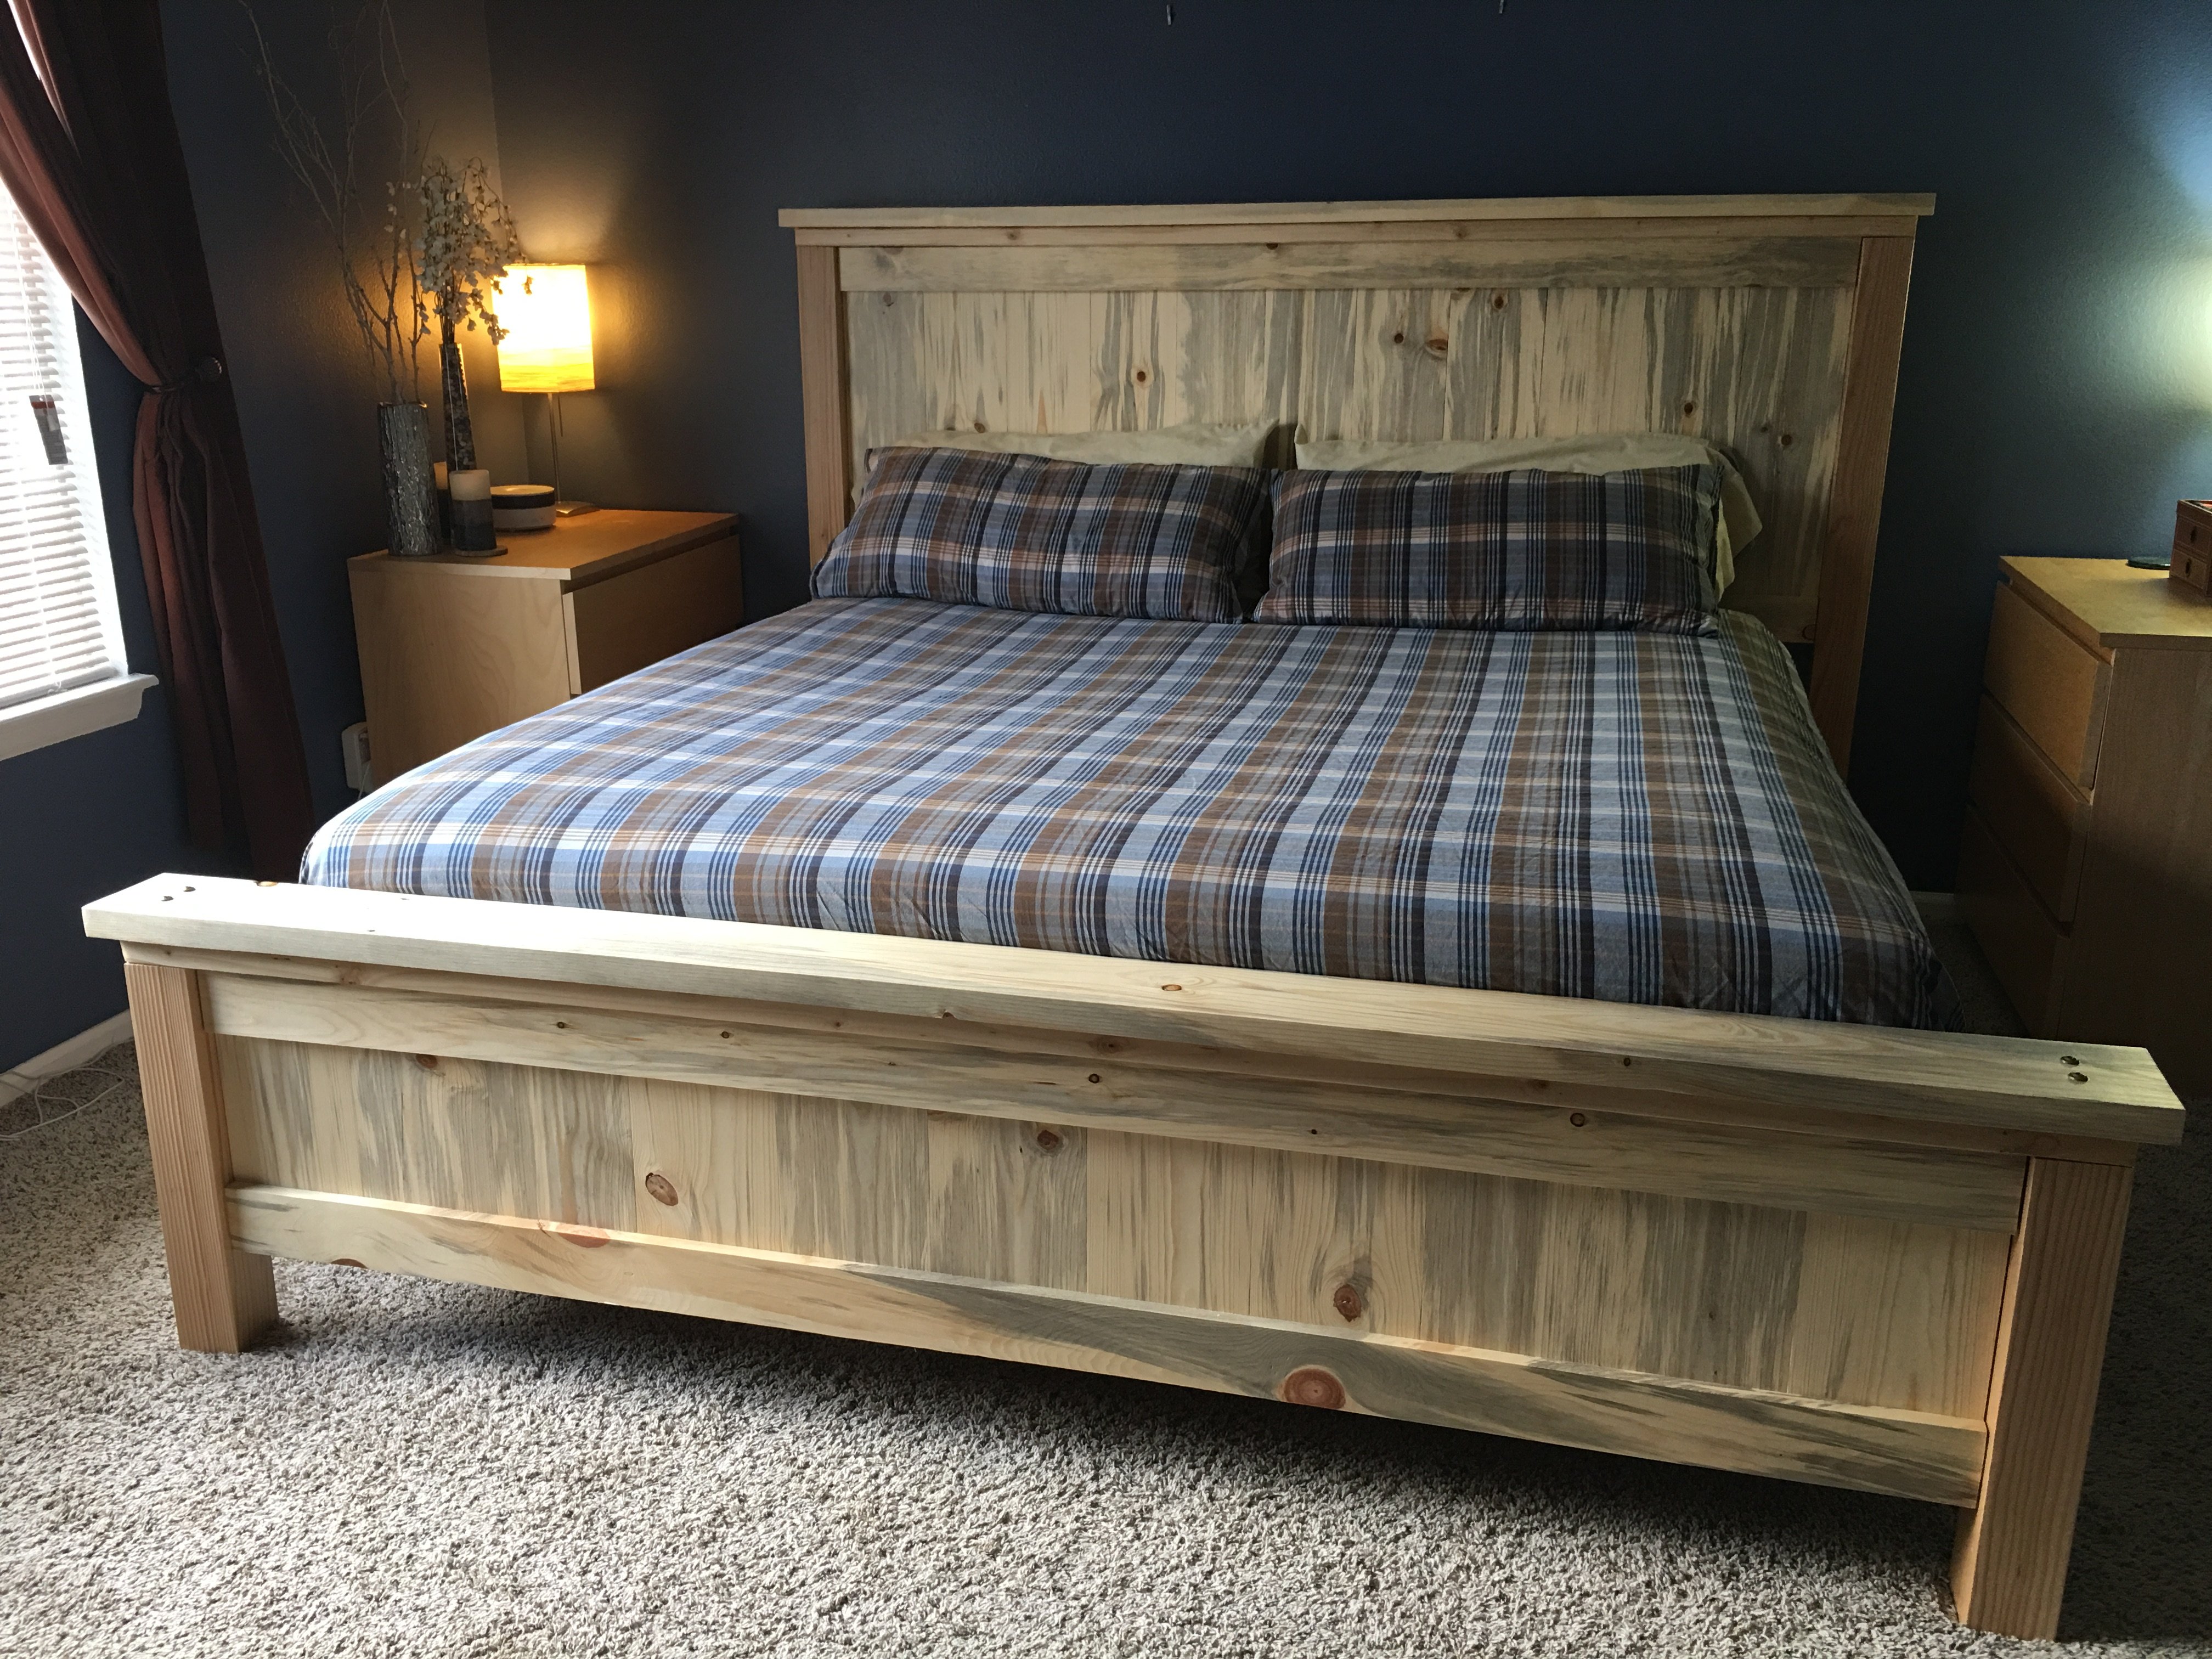
Our biggest lessons were to hand pick our wood and make sure we get the straightest pieces possible. We had to wrestle some wood to make this bed work! Clamp everything especially when using large bolts as the pieces would pull apart from each other. We even used a ratchet strap at one point becuase our small clamps weren't cutting it. I'm sure there's a better way and we'd love to hear about it but we made what we had work. We also had to figure out how to attach the side rails and at what height. We ended up using 3 4-inch screws on each end to screw them into the posts.
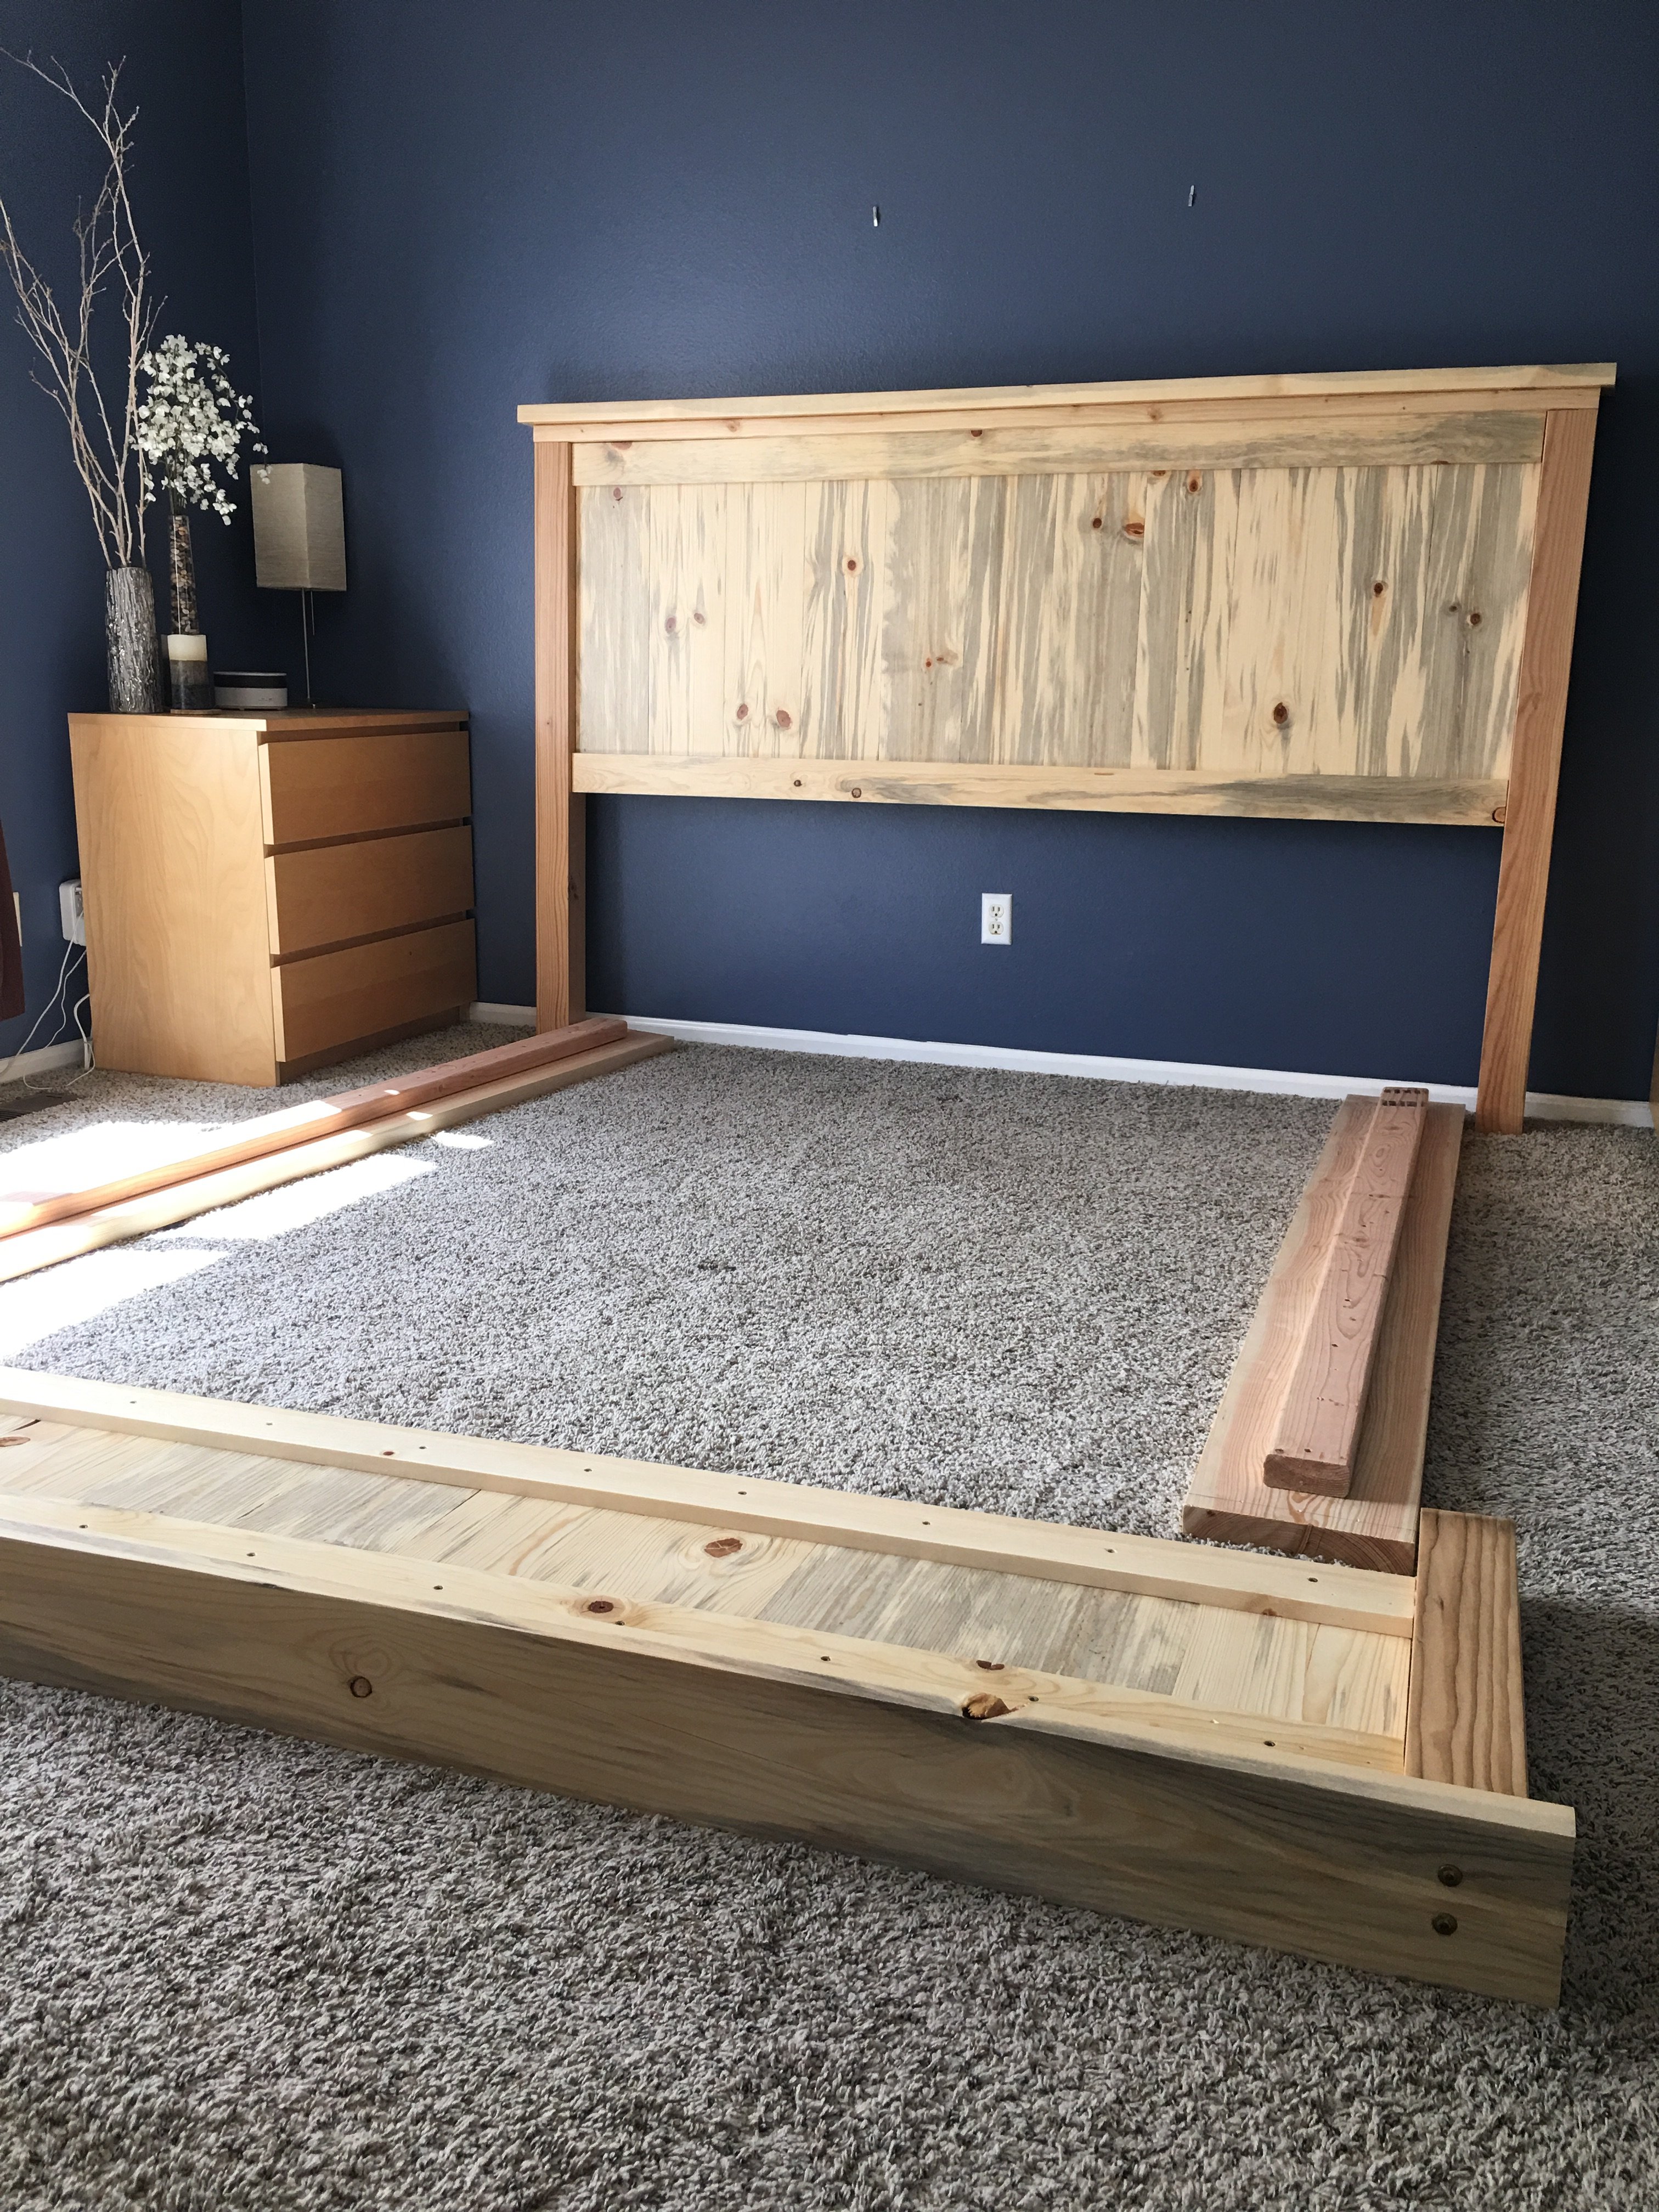
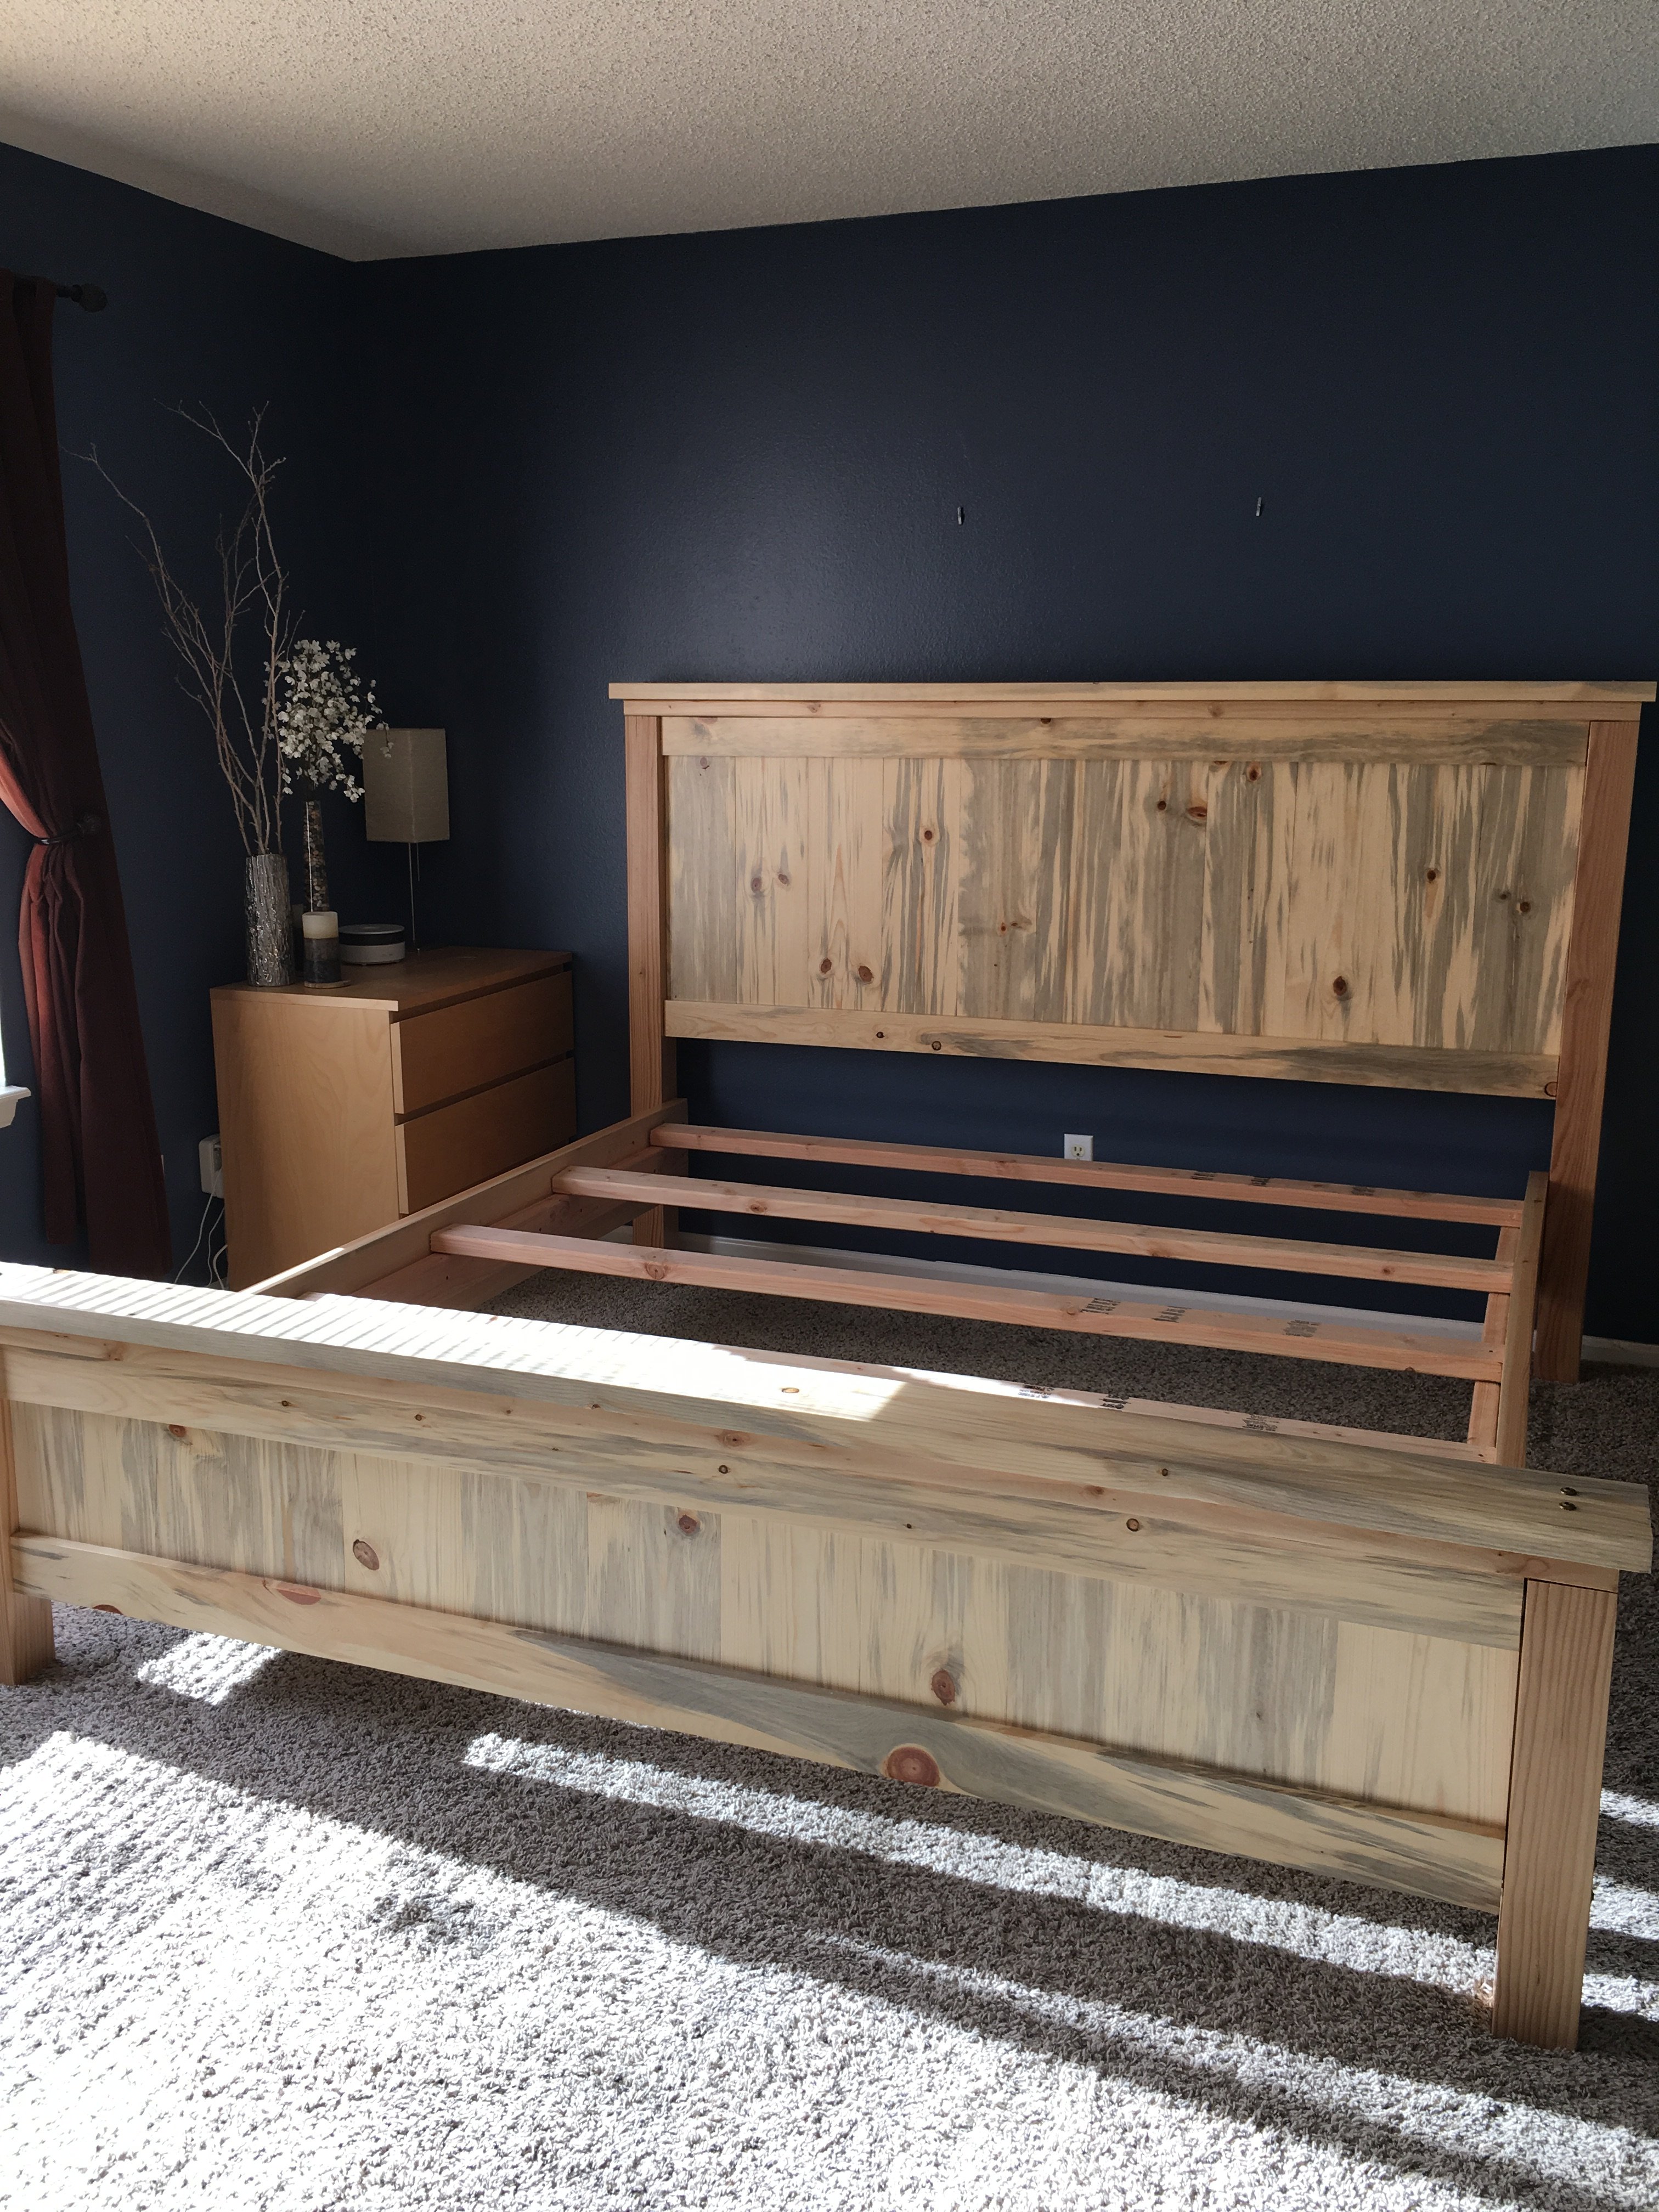
We love this bed not only because it was a labor of love but because its such a solid beautiful piece.

Sun, 03/01/2020 - 11:29
Very nice! I love the lighter wood too, but my wife likes the darker stain, so we compromised in the middle for the finish. Why arethe post always so red? I can appreciate the natural tendency of nature to add color, but the 4*4's are always red-er in color. Do they always use a different pine or certain part of the tree for those?
Mon, 01/18/2021 - 11:27
I believe the posts are actually Douglas fir and not pine judging by the look and color of the grains.
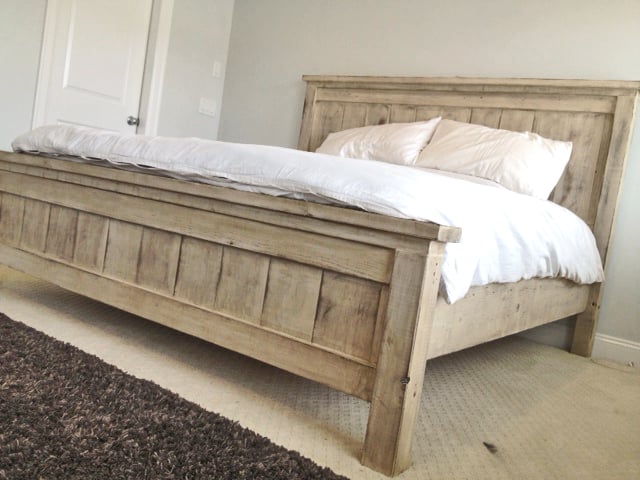
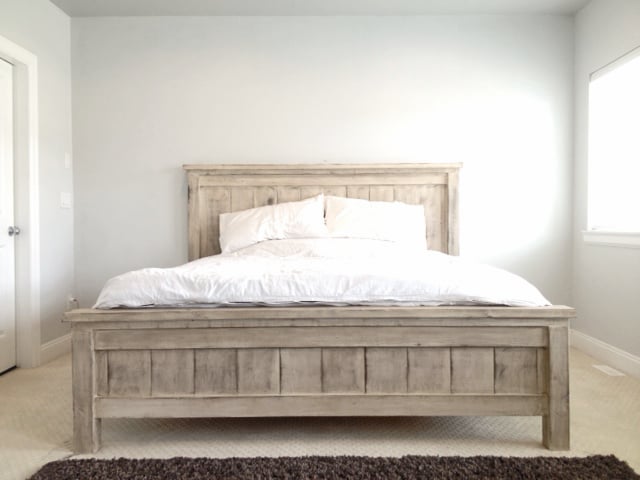
Second project ive completed from Ana White, and I am very happy with how this bed turned out! The only thing I would fix would be the finish, I wanted it a bit whiter. not so creamy. Otherwise very quick and easy fun project to do. =)

Thu, 05/22/2014 - 16:34
Thank you for sharing all of these awesome projects. I was always hesitant when it came to wood, but now I cant seem to stop!
Tue, 06/10/2014 - 08:13
How exactly did you achieve this finish? sand first, paint second, sand again and then stain?
In reply to More about your finish by JGoates
Wed, 06/11/2014 - 13:43
(You can do all this before or after your project is put together or not.)
Be sure to do a test piece before hand so you can see exactly what your getting :)
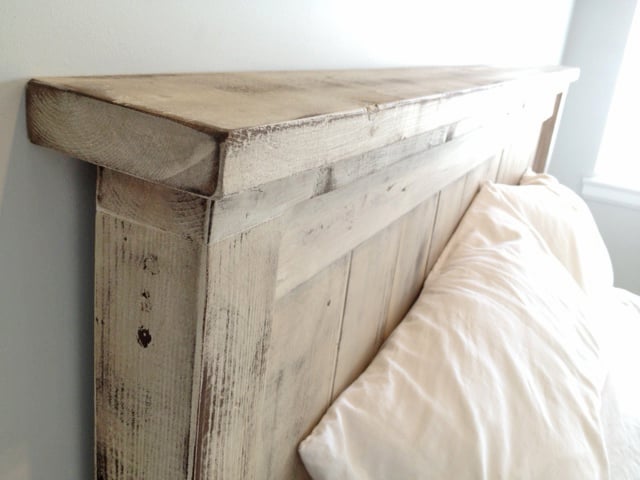
The first step I did once the head board and foot board were put together, was to sand any sharp edges or corners. I liked mine rounded and worn looking. I did not sand anything else.
Second step is to paint 1 even coat of a basic white latex paint.
Third step is to sand away some white paint. because we didnt sand it before hand the grains in the wood will be very bumpy. so the paint on the grains will sand off while the paint lower than the grain will remain. makes sense? hopefully i explained that right!
Fourth step is to now wipe on the stain of your choice. I went with Dark walnut. It stains the paint a bit bringing the white to a gray/brown tone. and stains the wood dark walnut so the grain patterns show up dark.
Let me know if you have any other questions and good luck!

Thu, 01/29/2015 - 07:49
What grit of sand paper did you use to sand off the white paint? and did you sand it by hand? Also, for the dark walnut stain, did you wipe off immediately or leave it on for a bit before wiping? Beautiful bed, I want to achieve this look!
Fri, 02/06/2015 - 09:15
Hi jbogan15, thank you!
For sanding I used a palm sander with 120 grit to get the job done a bit quicker, than went over lightly with 220. When staining I actually just dipped a rag in the stain and would wipe the stain on. =)
Good luck!
Justin
Fri, 01/27/2017 - 11:05
Love this look! Exactly what I am trying to achieve...A few questions about the side rails. How high did you connect them to the 4x4 posts and exactly how did you connect them? Did you use brackets or screw right into the posts? Thank You!
Thu, 09/05/2019 - 15:07
I have seen several beds from Anna White. I was wondering if the frame require a box spring mattress or not. If not, are the beds lower than what a traditional mattress and box springs are. Thanks !

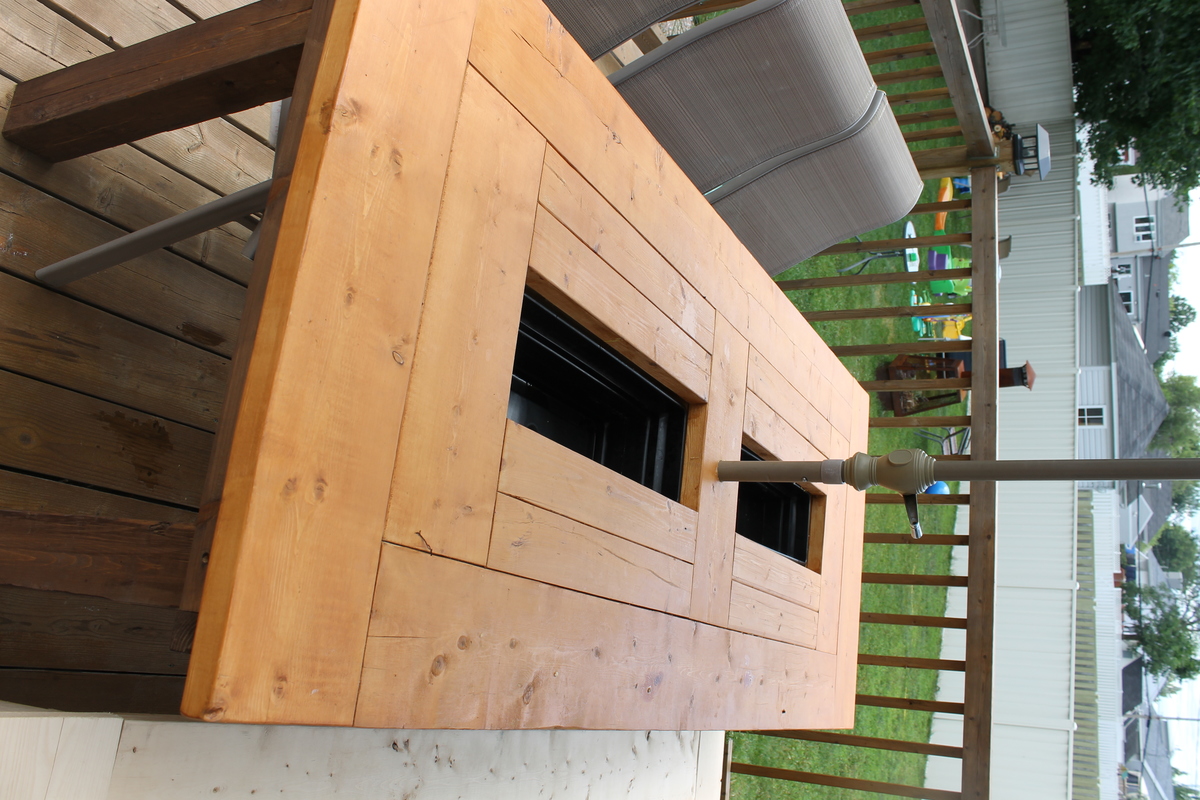
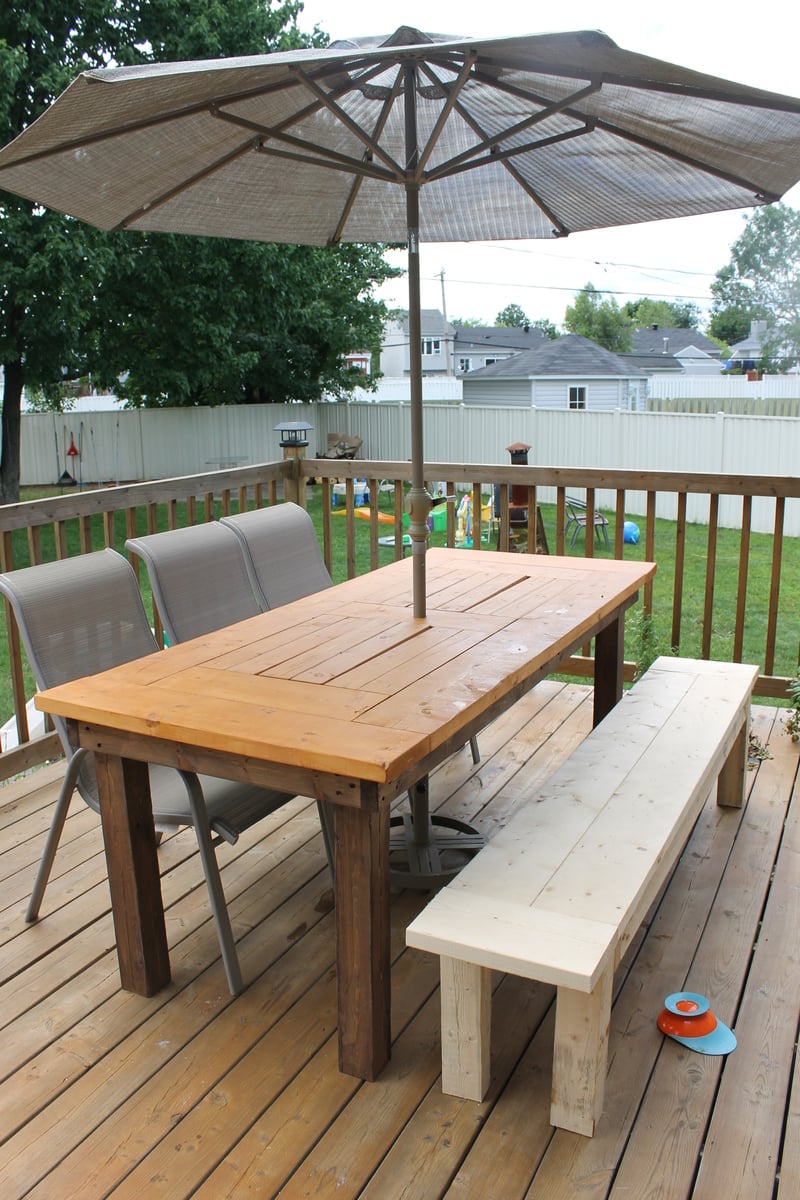
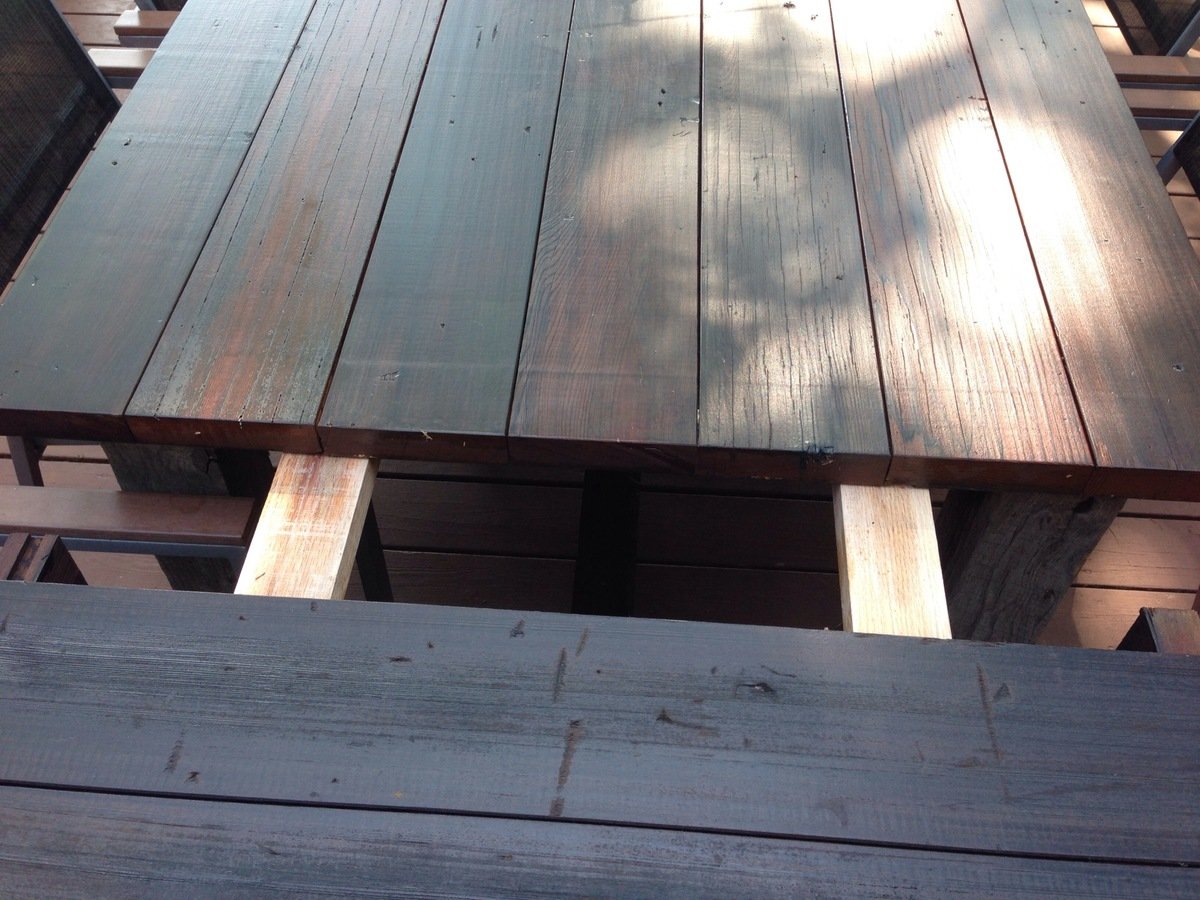
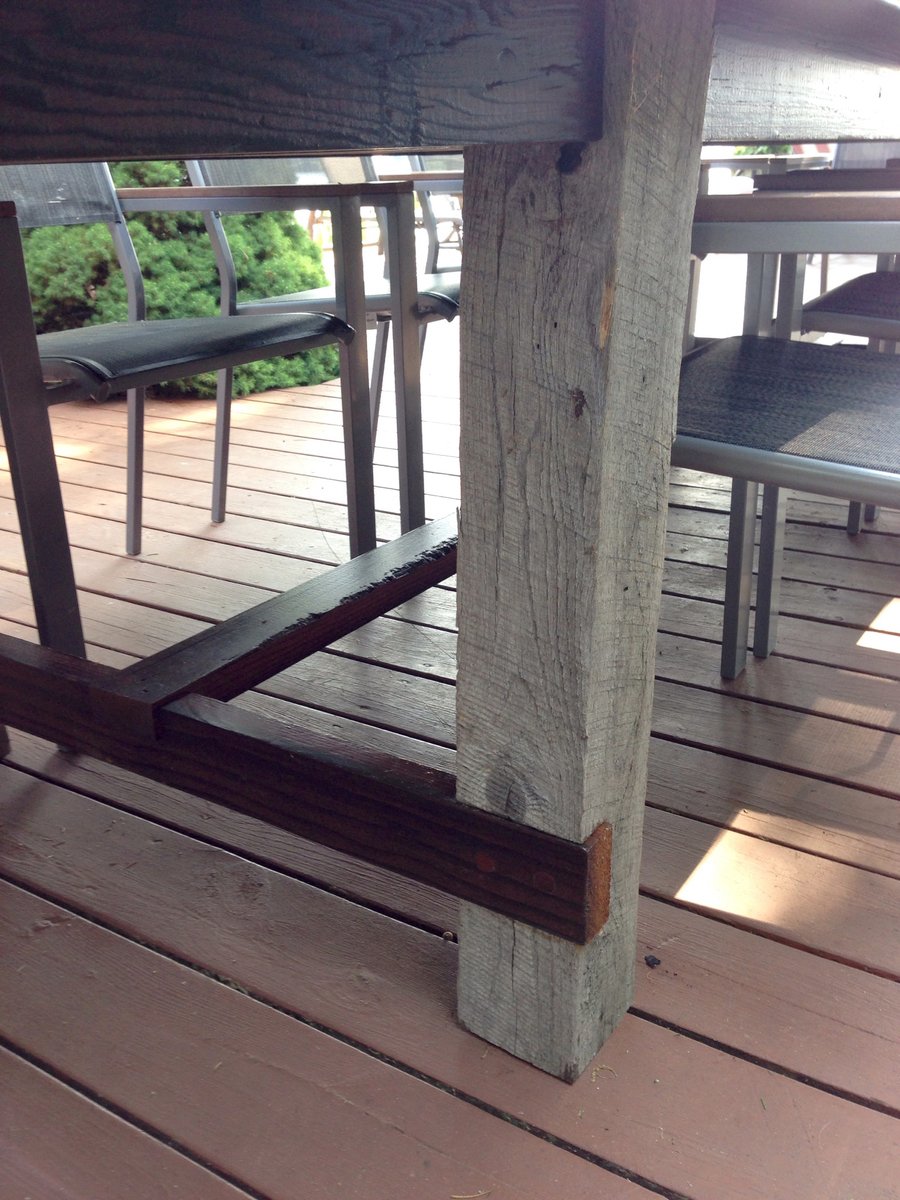
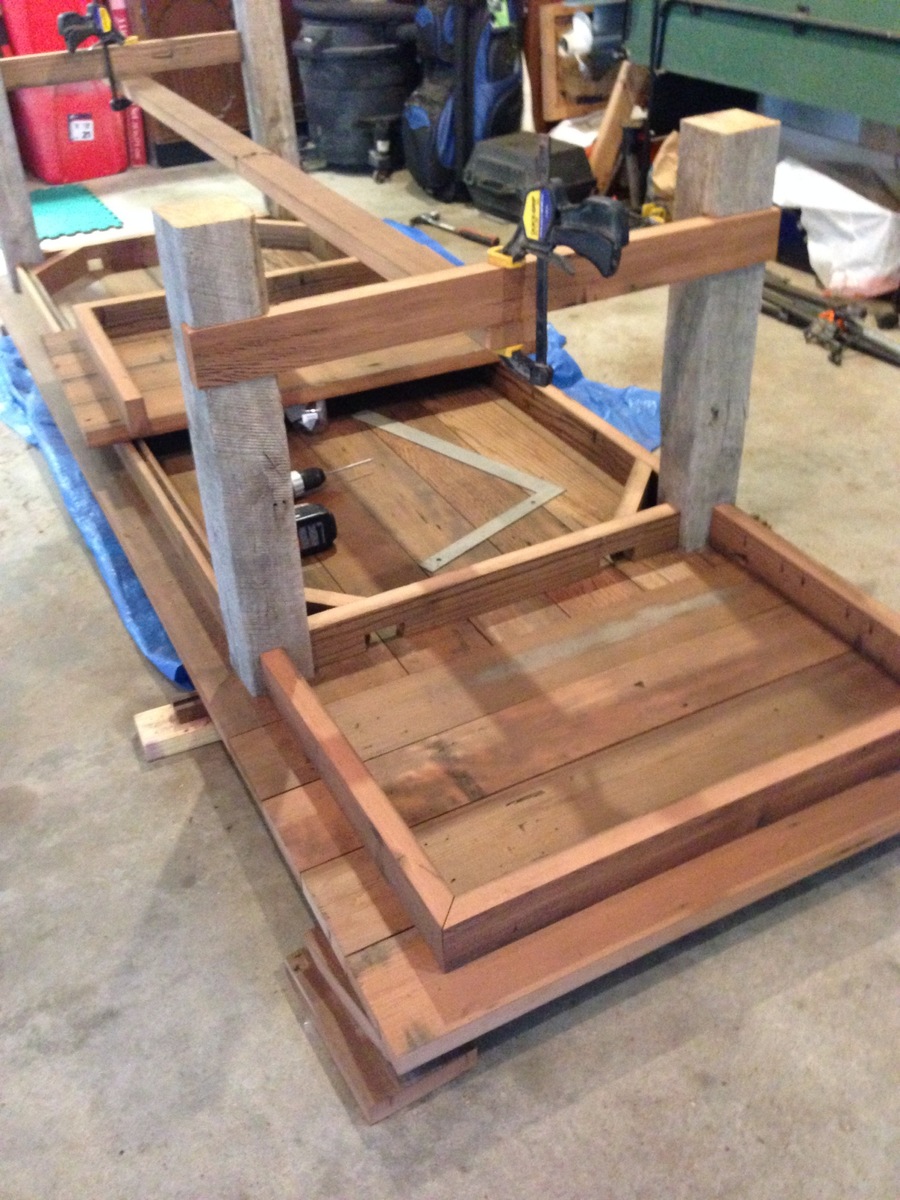
My sister was in love with my 4x4 truss table i made and needed a patio table so we decided to take one day to make 2 tables, one for each. We convinced both daddys to take care of the kids while we made the table by telling them the tables were gonna have beer coolers inside! Attaching the to of the table was a lot a job. If you plan of doing this you really want to have a kreg jig. It works well, we love it. I made a bench to go with it. I made my how plan for it.
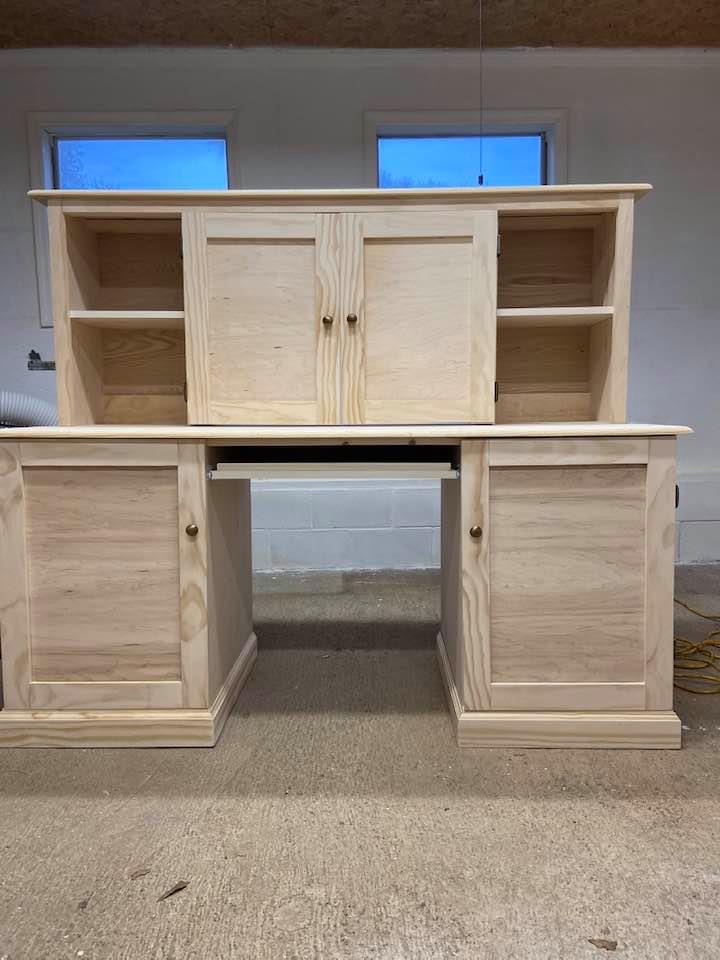
My cousin needed a computer desk but wanted it to look like a piece of furniture when not in use since they have limited space. The left side stores her tower, the right side has a pullout shelf for her printer and storage for printer paper & supplies. She works with 2 monitors so the center on the hutch will accommodate both but be hidden when she isn't working. This was a fun project and using Shelfhelp made it a joy to build. They will be my "go-to" place when building large pieces of furniture.
Sat, 12/19/2020 - 10:30
Thank you for using Shelf Help! It looks fantastic:)
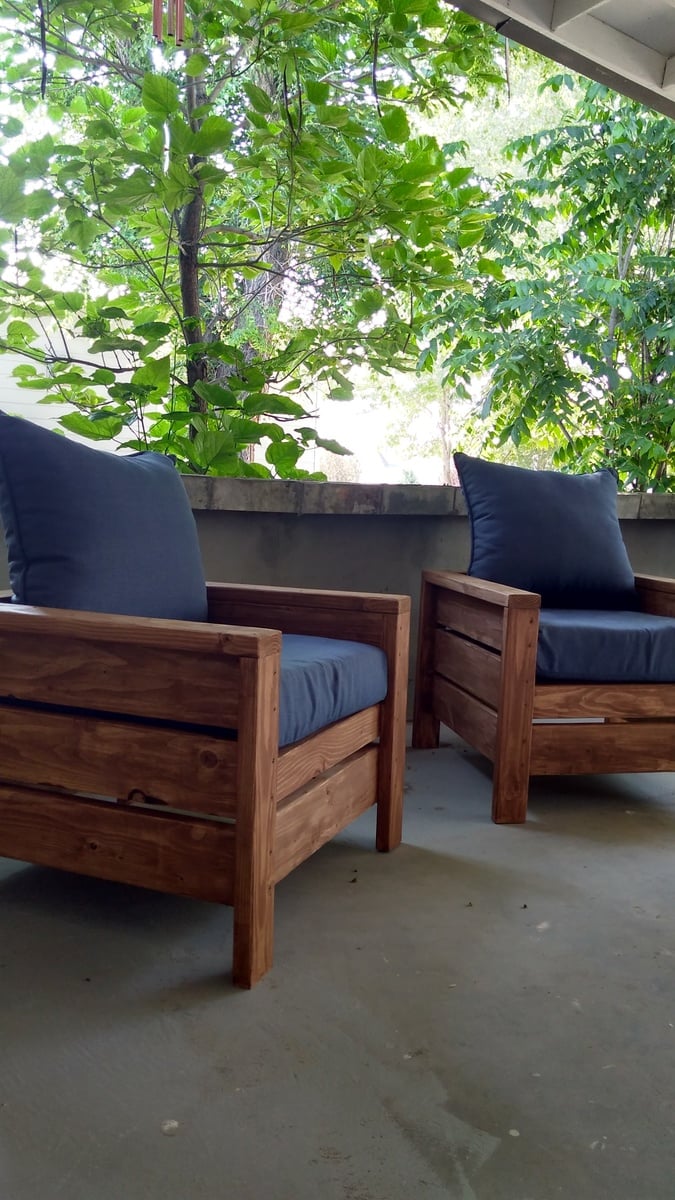
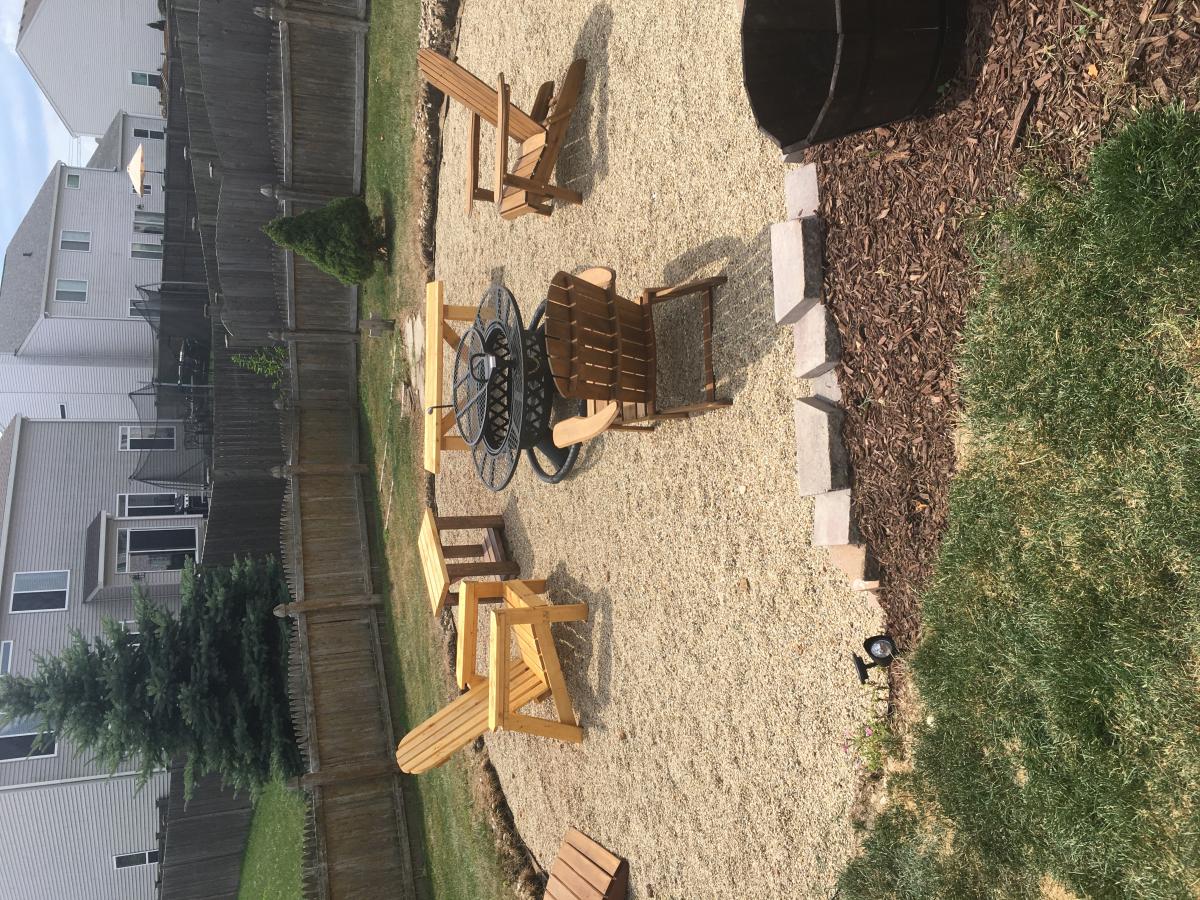
Chairs turned out nicely! Adjusted for cushions from home Depot (24x24)
Will also make a little table to set between soon. Thanks for the plans.
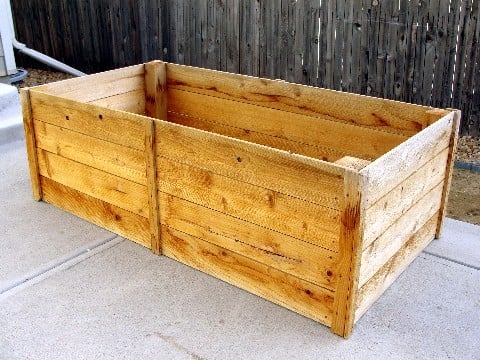
I made these last summer for my sister. And she didn't even use them yet! Very easy to make. She did want them taller, so that is the only modifacation I made. We're hoping the bunnies won't notice all the yummy veggies up this high :) I know, probably wishful thinking. Makes a great kid corral too.


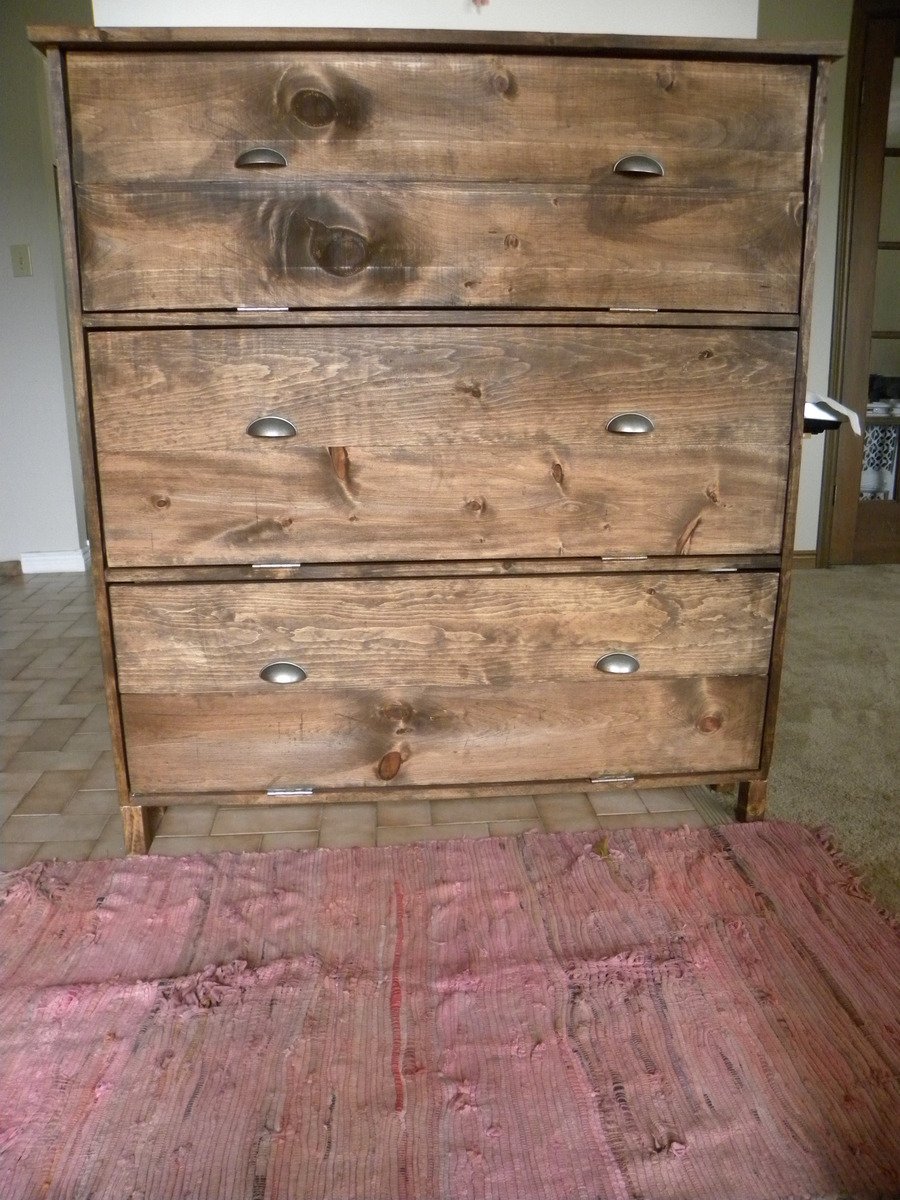
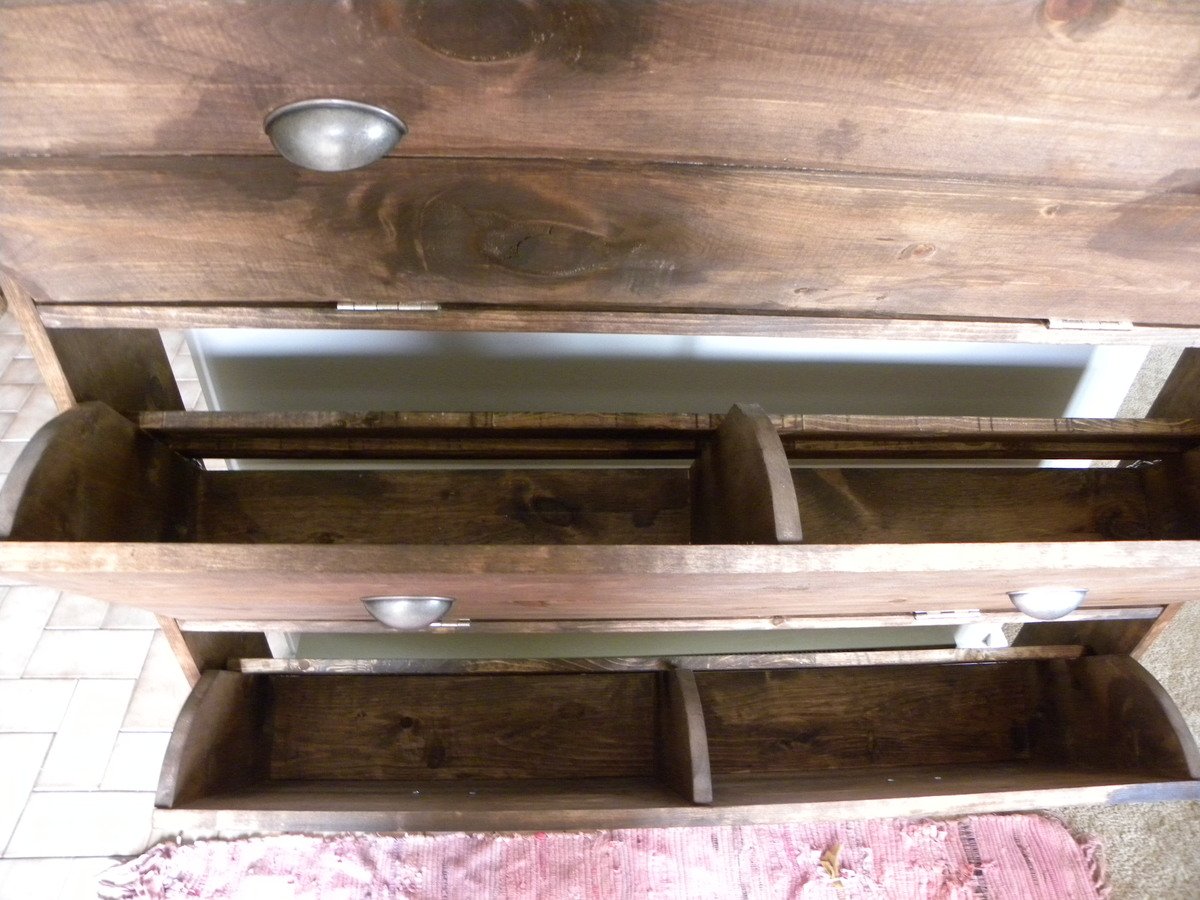
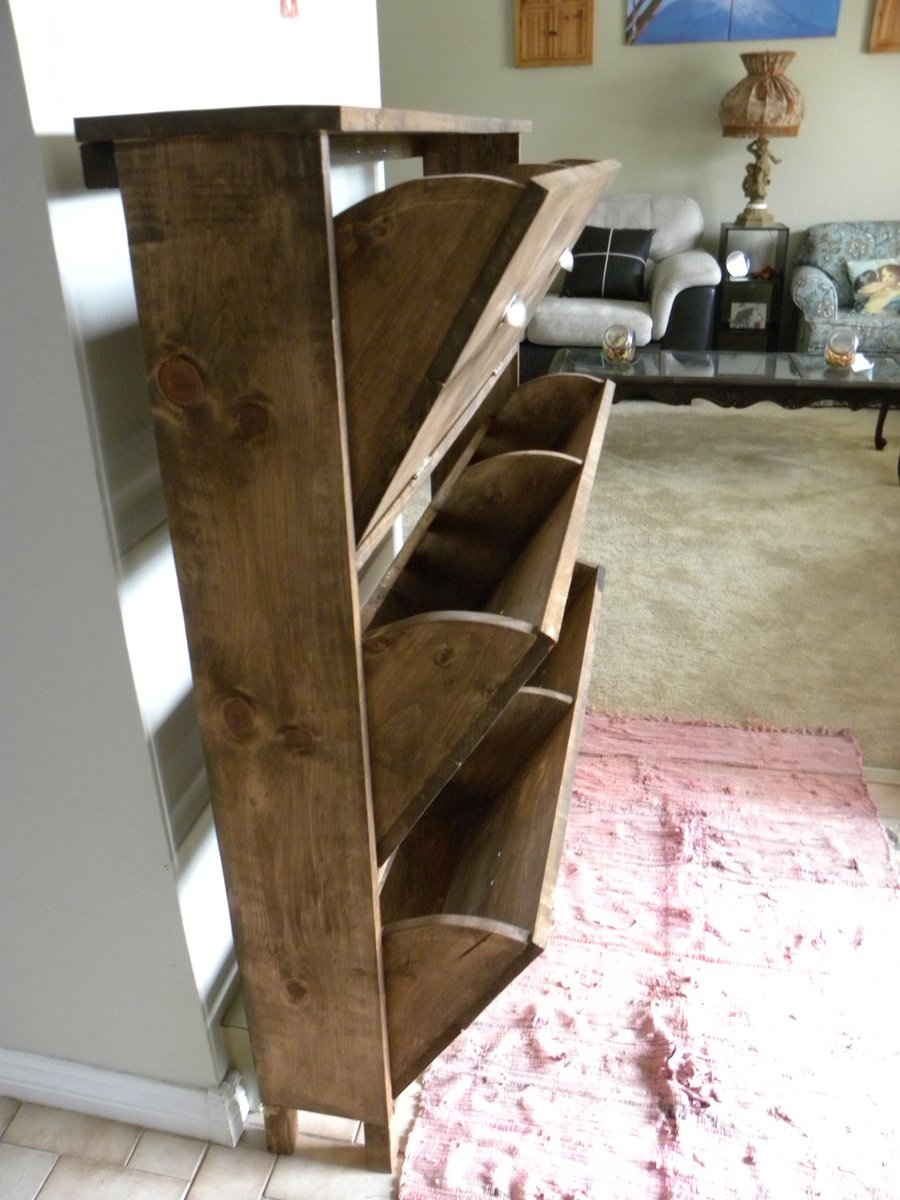
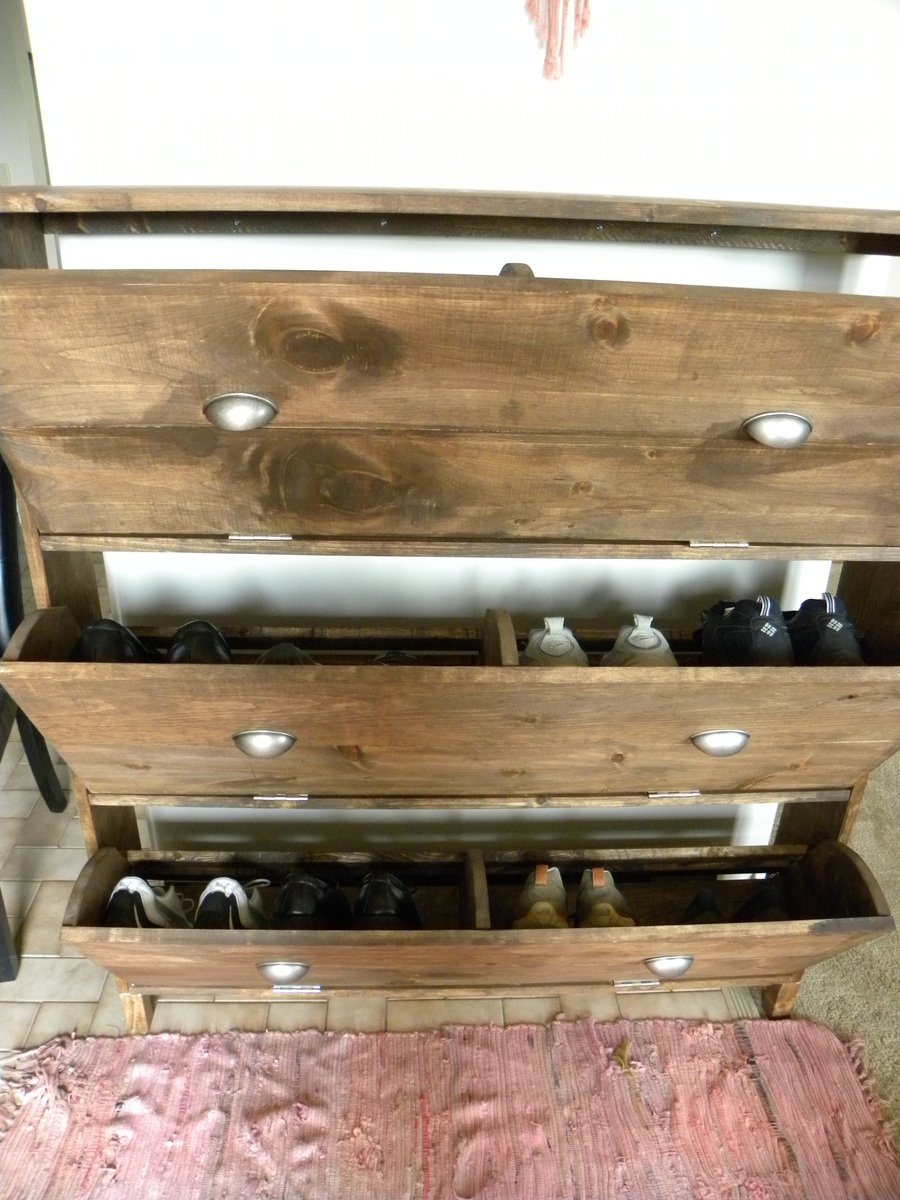
I didn't build this shoe dresser because I particularly needed one, but it looked so lovely that I couldn't resist.
- I modified the plans by building 3 bins instead of 2 so it could hold more shoes.
- I decided against the dowel stick and opted for hinges instead, which were surprisingly not too difficult to assemble. I found that I didn't even need the magnets after installing the hinges as the doors stay closed.
- I used 7" chains on both sides of each bin instead of a belt to make it extra sturdy.
- I added two back legs.
Et voila! This is the end result. I'm very pleased.
PS. Those flopping bins are a pain when you're trying to build!! An extra pair of hands is definitely recommended.
Fri, 07/05/2013 - 22:49
Pretty :) Good Job. Now if I only had the space for one thats 10 rows high :P I like the stain color too. Shanty 2 Chic always uses Rust-o-leum. I think its called dark walnut. Dont quote me though. I love the stain and spray paint combo colors they use.
~Melody
In reply to Nice Job by SoCaliforniaMel
Sat, 07/06/2013 - 20:00
Rust-o-leum, that's the one!
Yes, if only every woman could own a 10-row cabinet for all her shoes! :)
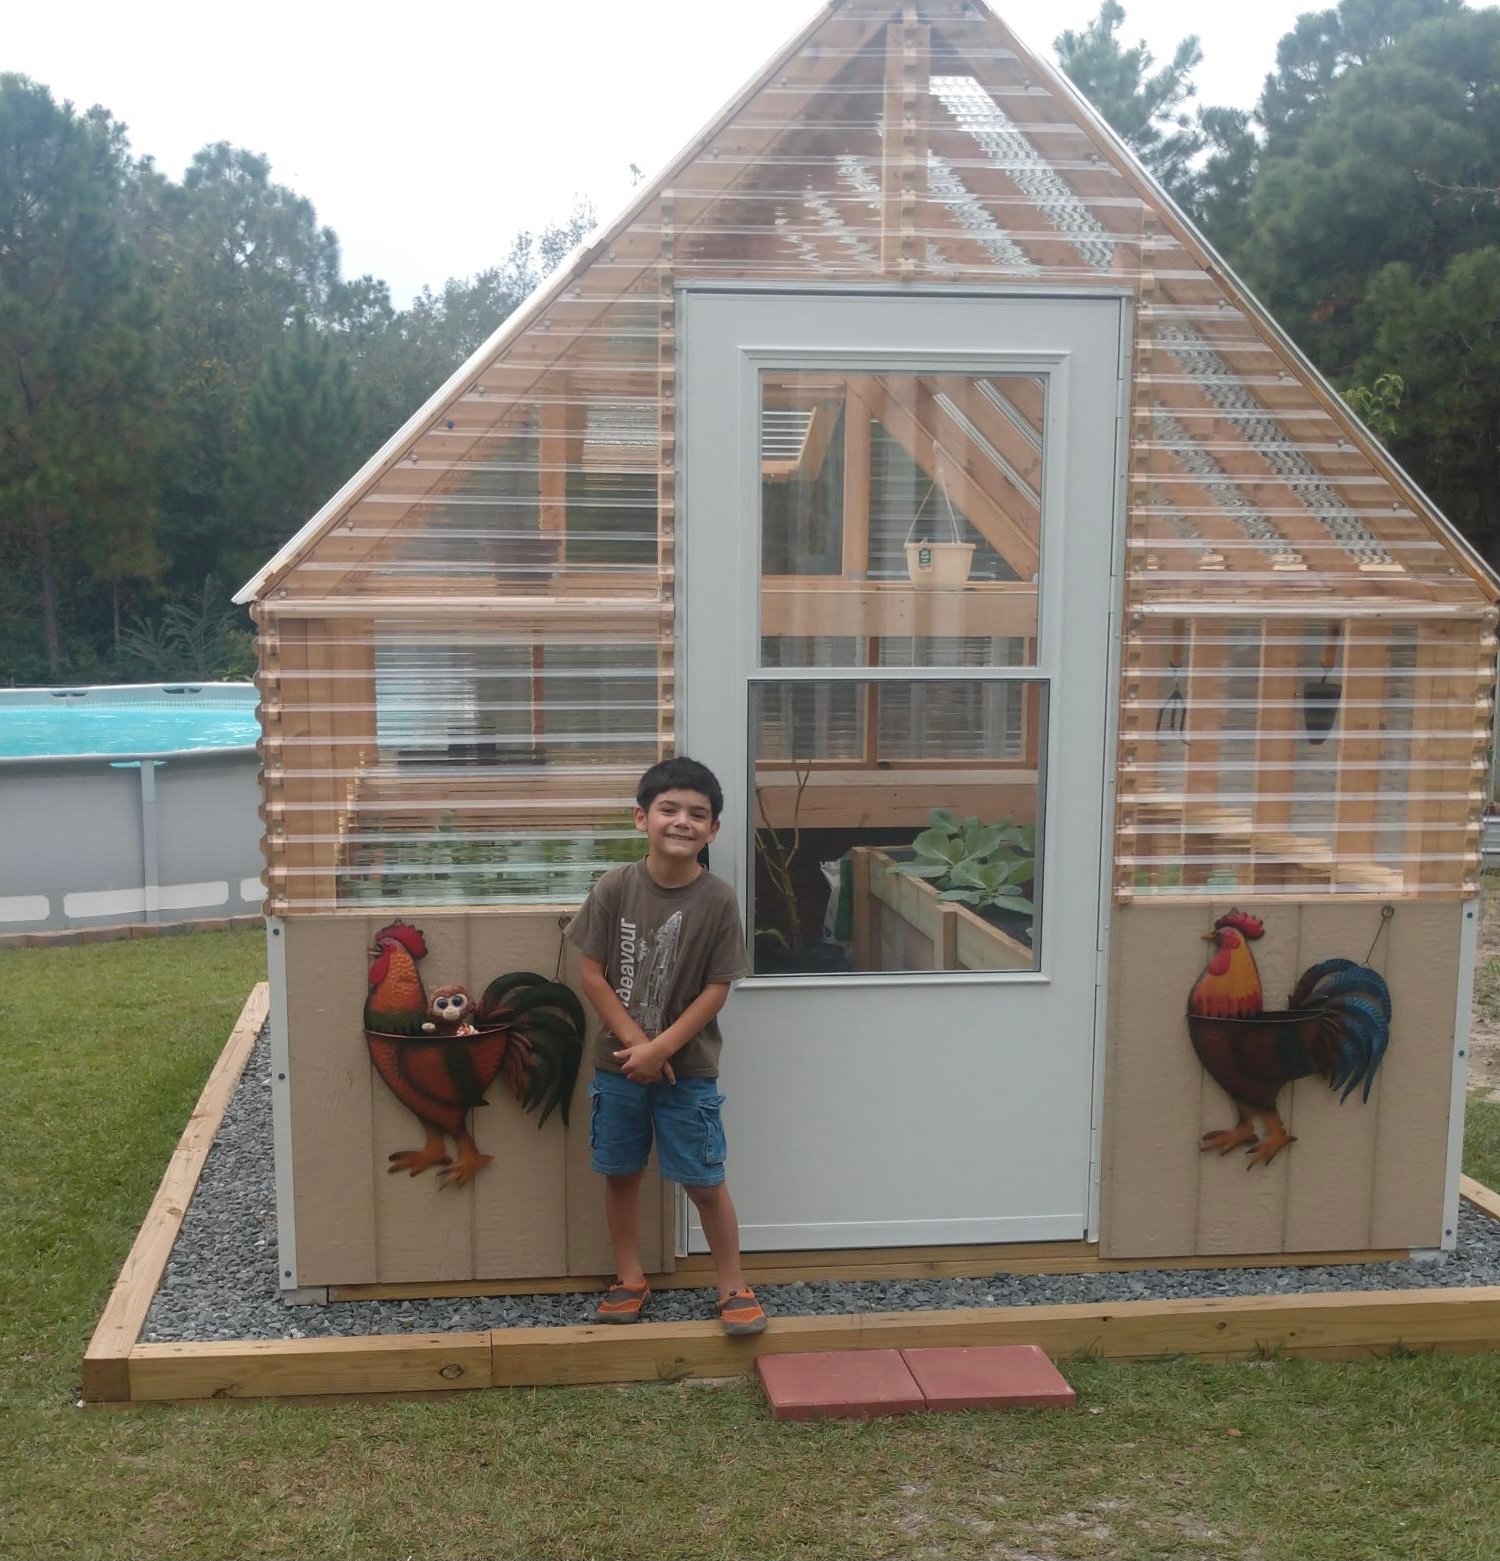
Built the greenhouse from Ana Whites plan
She did the plan really well..
Mon, 01/03/2022 - 12:26
Thank you for sharing, it looks perfect, love the happy face!

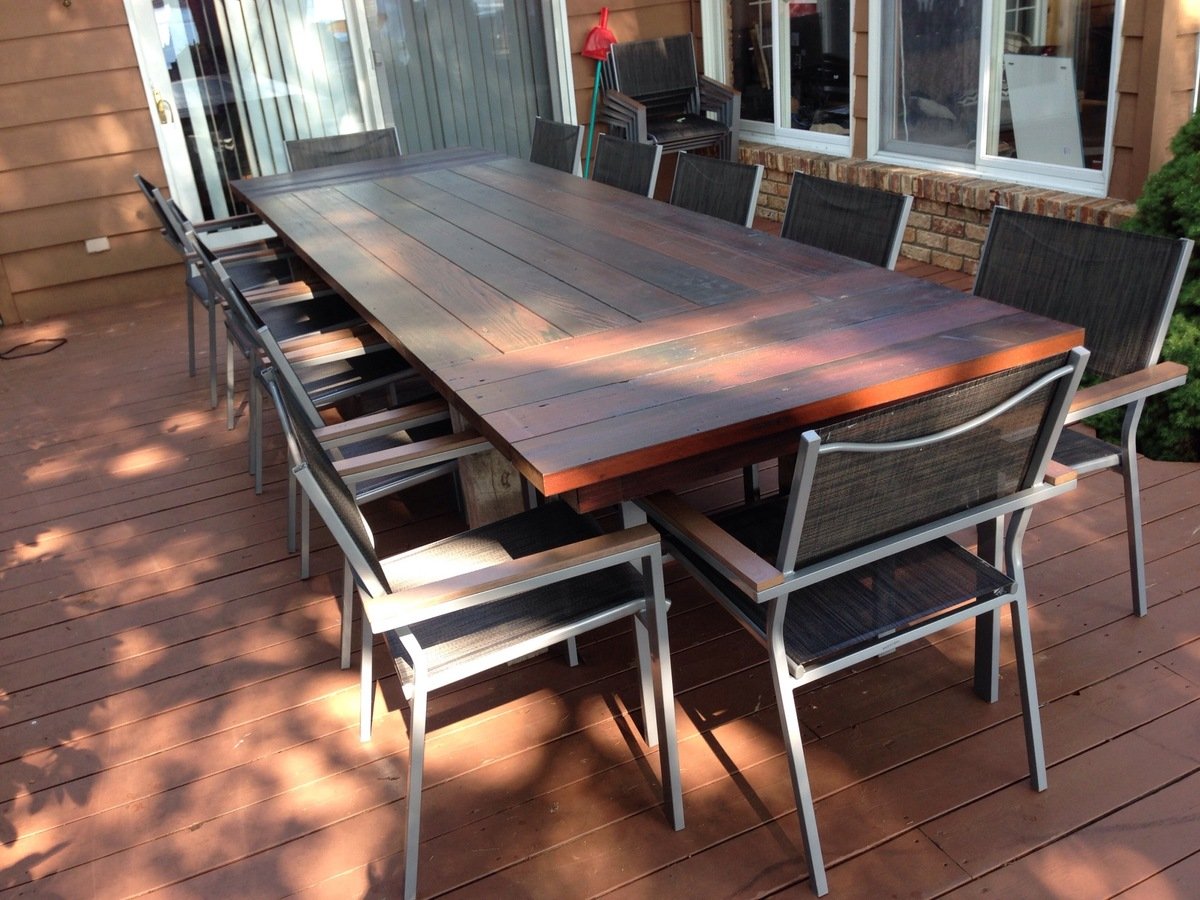
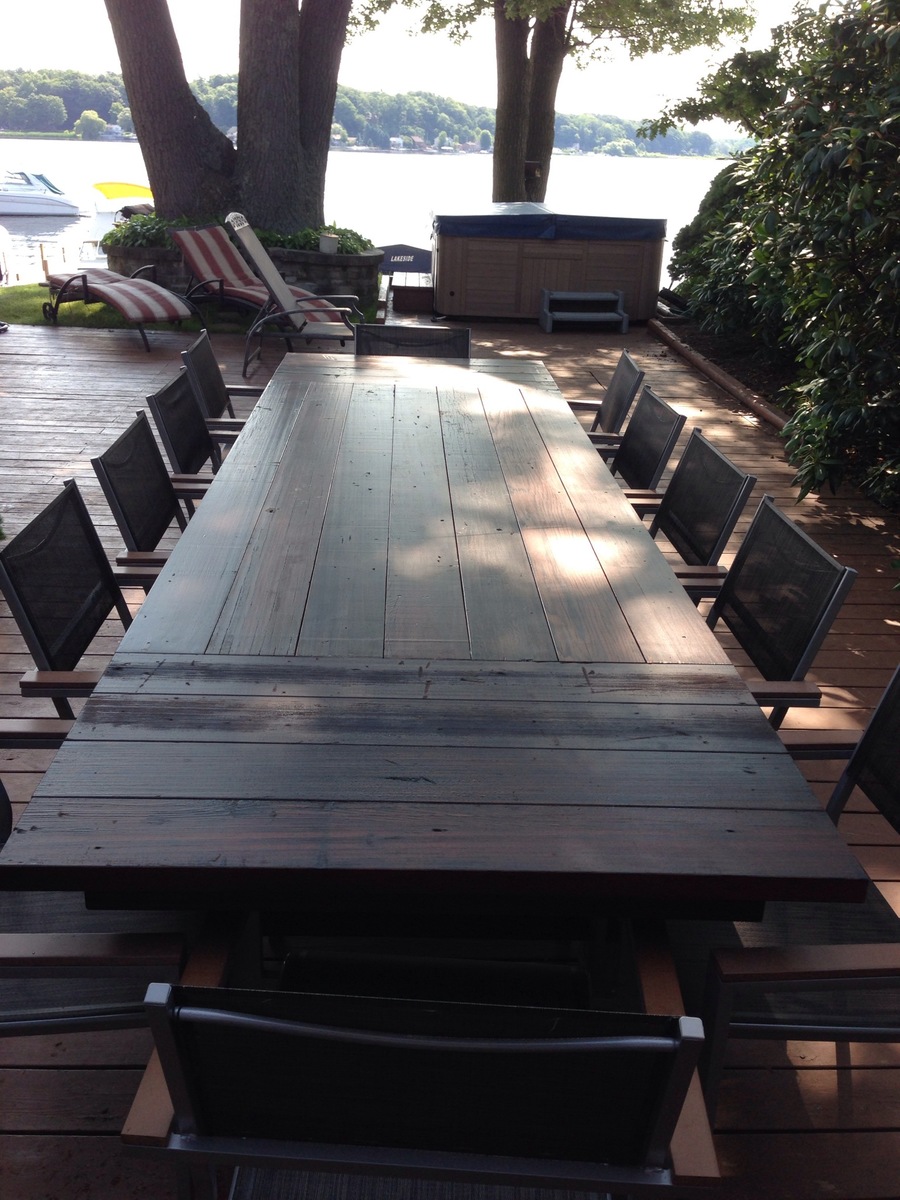
I had no experience building furniture prior to this project but I wanted a 12 ft outdoor table and could not find one. This tables center section is 8 ft and was built roughly following the plans for the farmhouse table. I added two 2 ft extensions at each end making the overall table 12 ft. The extensions included aprons so when installed they look to be part of the table. The extensions just plug into the end apron of the center section with 2x4 oak braces which engage in the apron and under the table approximately 2 ft from end. There is no visual sagging of the extensions. I finished the table with Sikkens DEK finish.
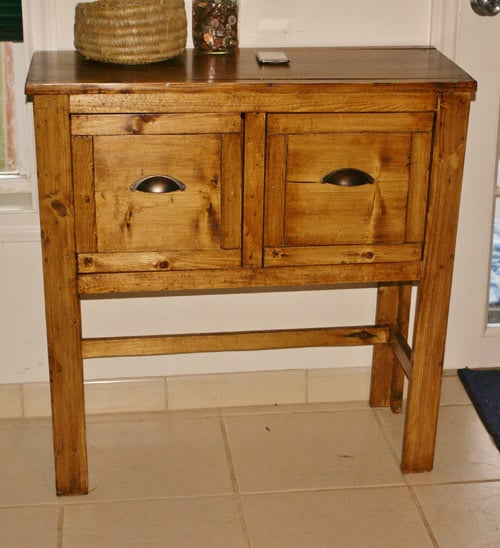
Loved Ana's Balin Console, but the space I had available for this piece was only big enough for two drawers, so I attempted to change it. A few minor mistakes called for a few other modifications as well (the drawer fronts), but overall I am still happy with the product. The first nail and hammer only project I've completed (other than the ten dollar ledges). The passion for this new-found hobby continues, THANKS ANA!
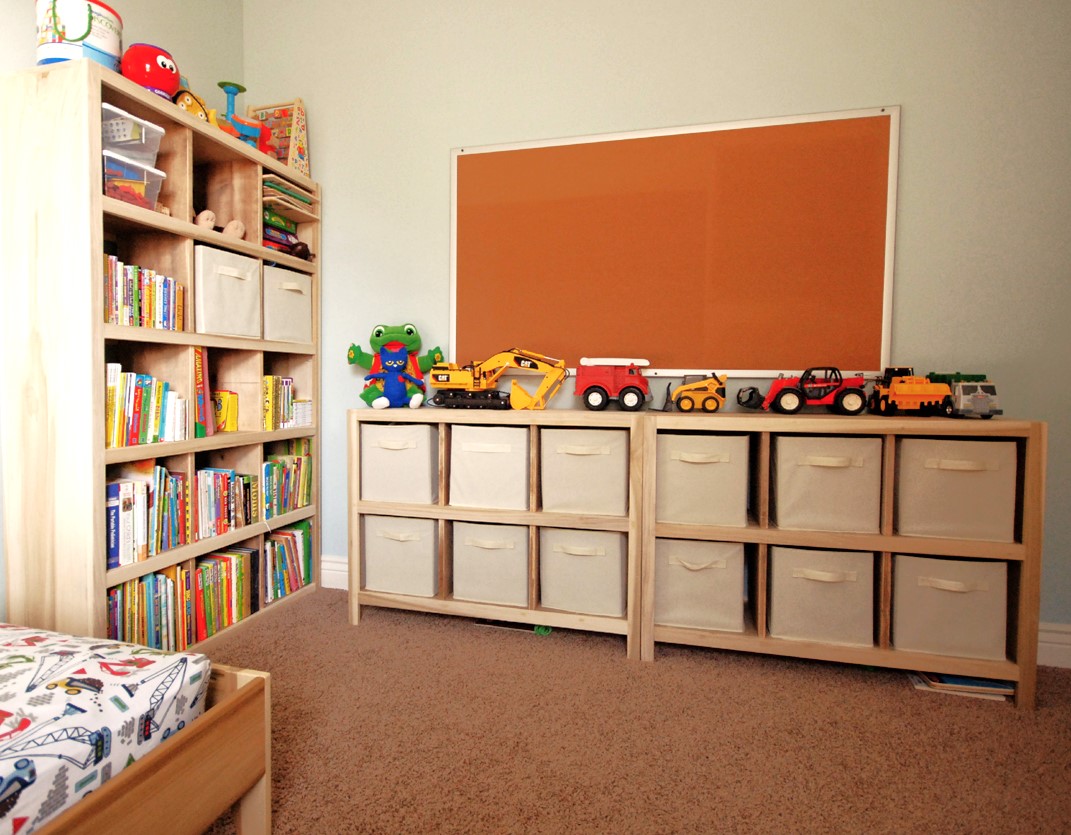
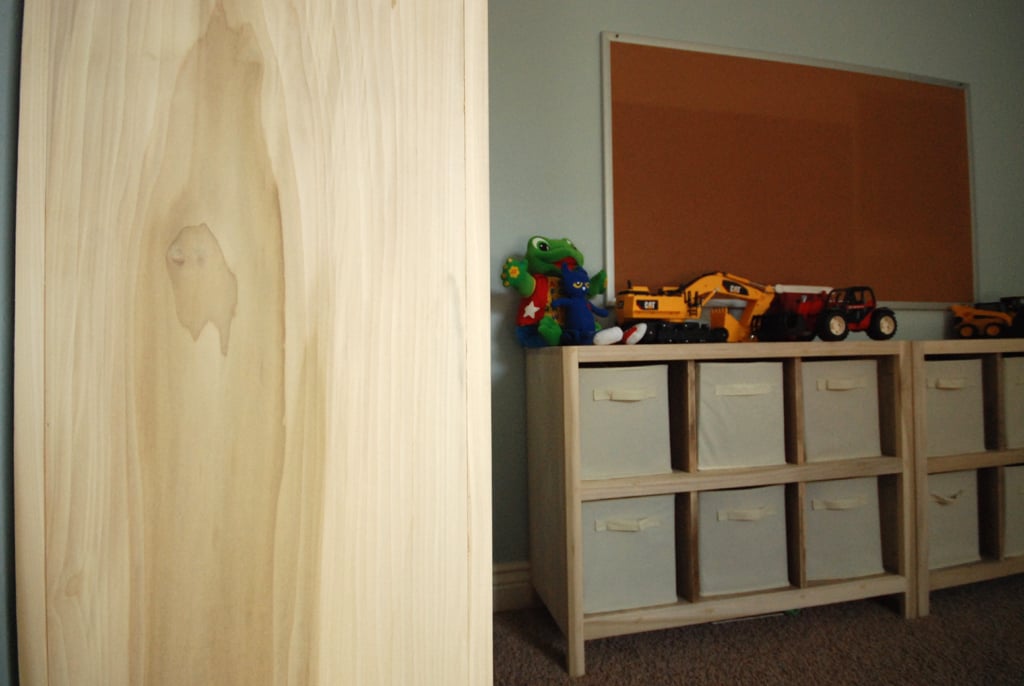
I built this set of cube shelves for my 3 yr old son's room. THANK YOU, ANA! I used poplar as I did not want to paint the wood and I love the irregular pattern of the wood grain. To save money, I used pine for the inner shelves and dividers. I stained it using the oxidized solution (http://www.friendly-home.net/2012/05/oxidized-x-console.html) that Ana recommended from the instructions of the Rustic Console. I added a cup of coffee to the solution to get a darker browner shade and unevenly sanded the wood for the distressed look. It matches the poplar wood more so than keeping the pine wood as is.
I also created a 5-tier version to match the 6 cube shelves but did not include the legs. I thought it would be more stable to keep the lower frame on the ground.
I purchased the storage boxes from Amazon It was around $20 for 6 boxes!
I am ready for the next project!
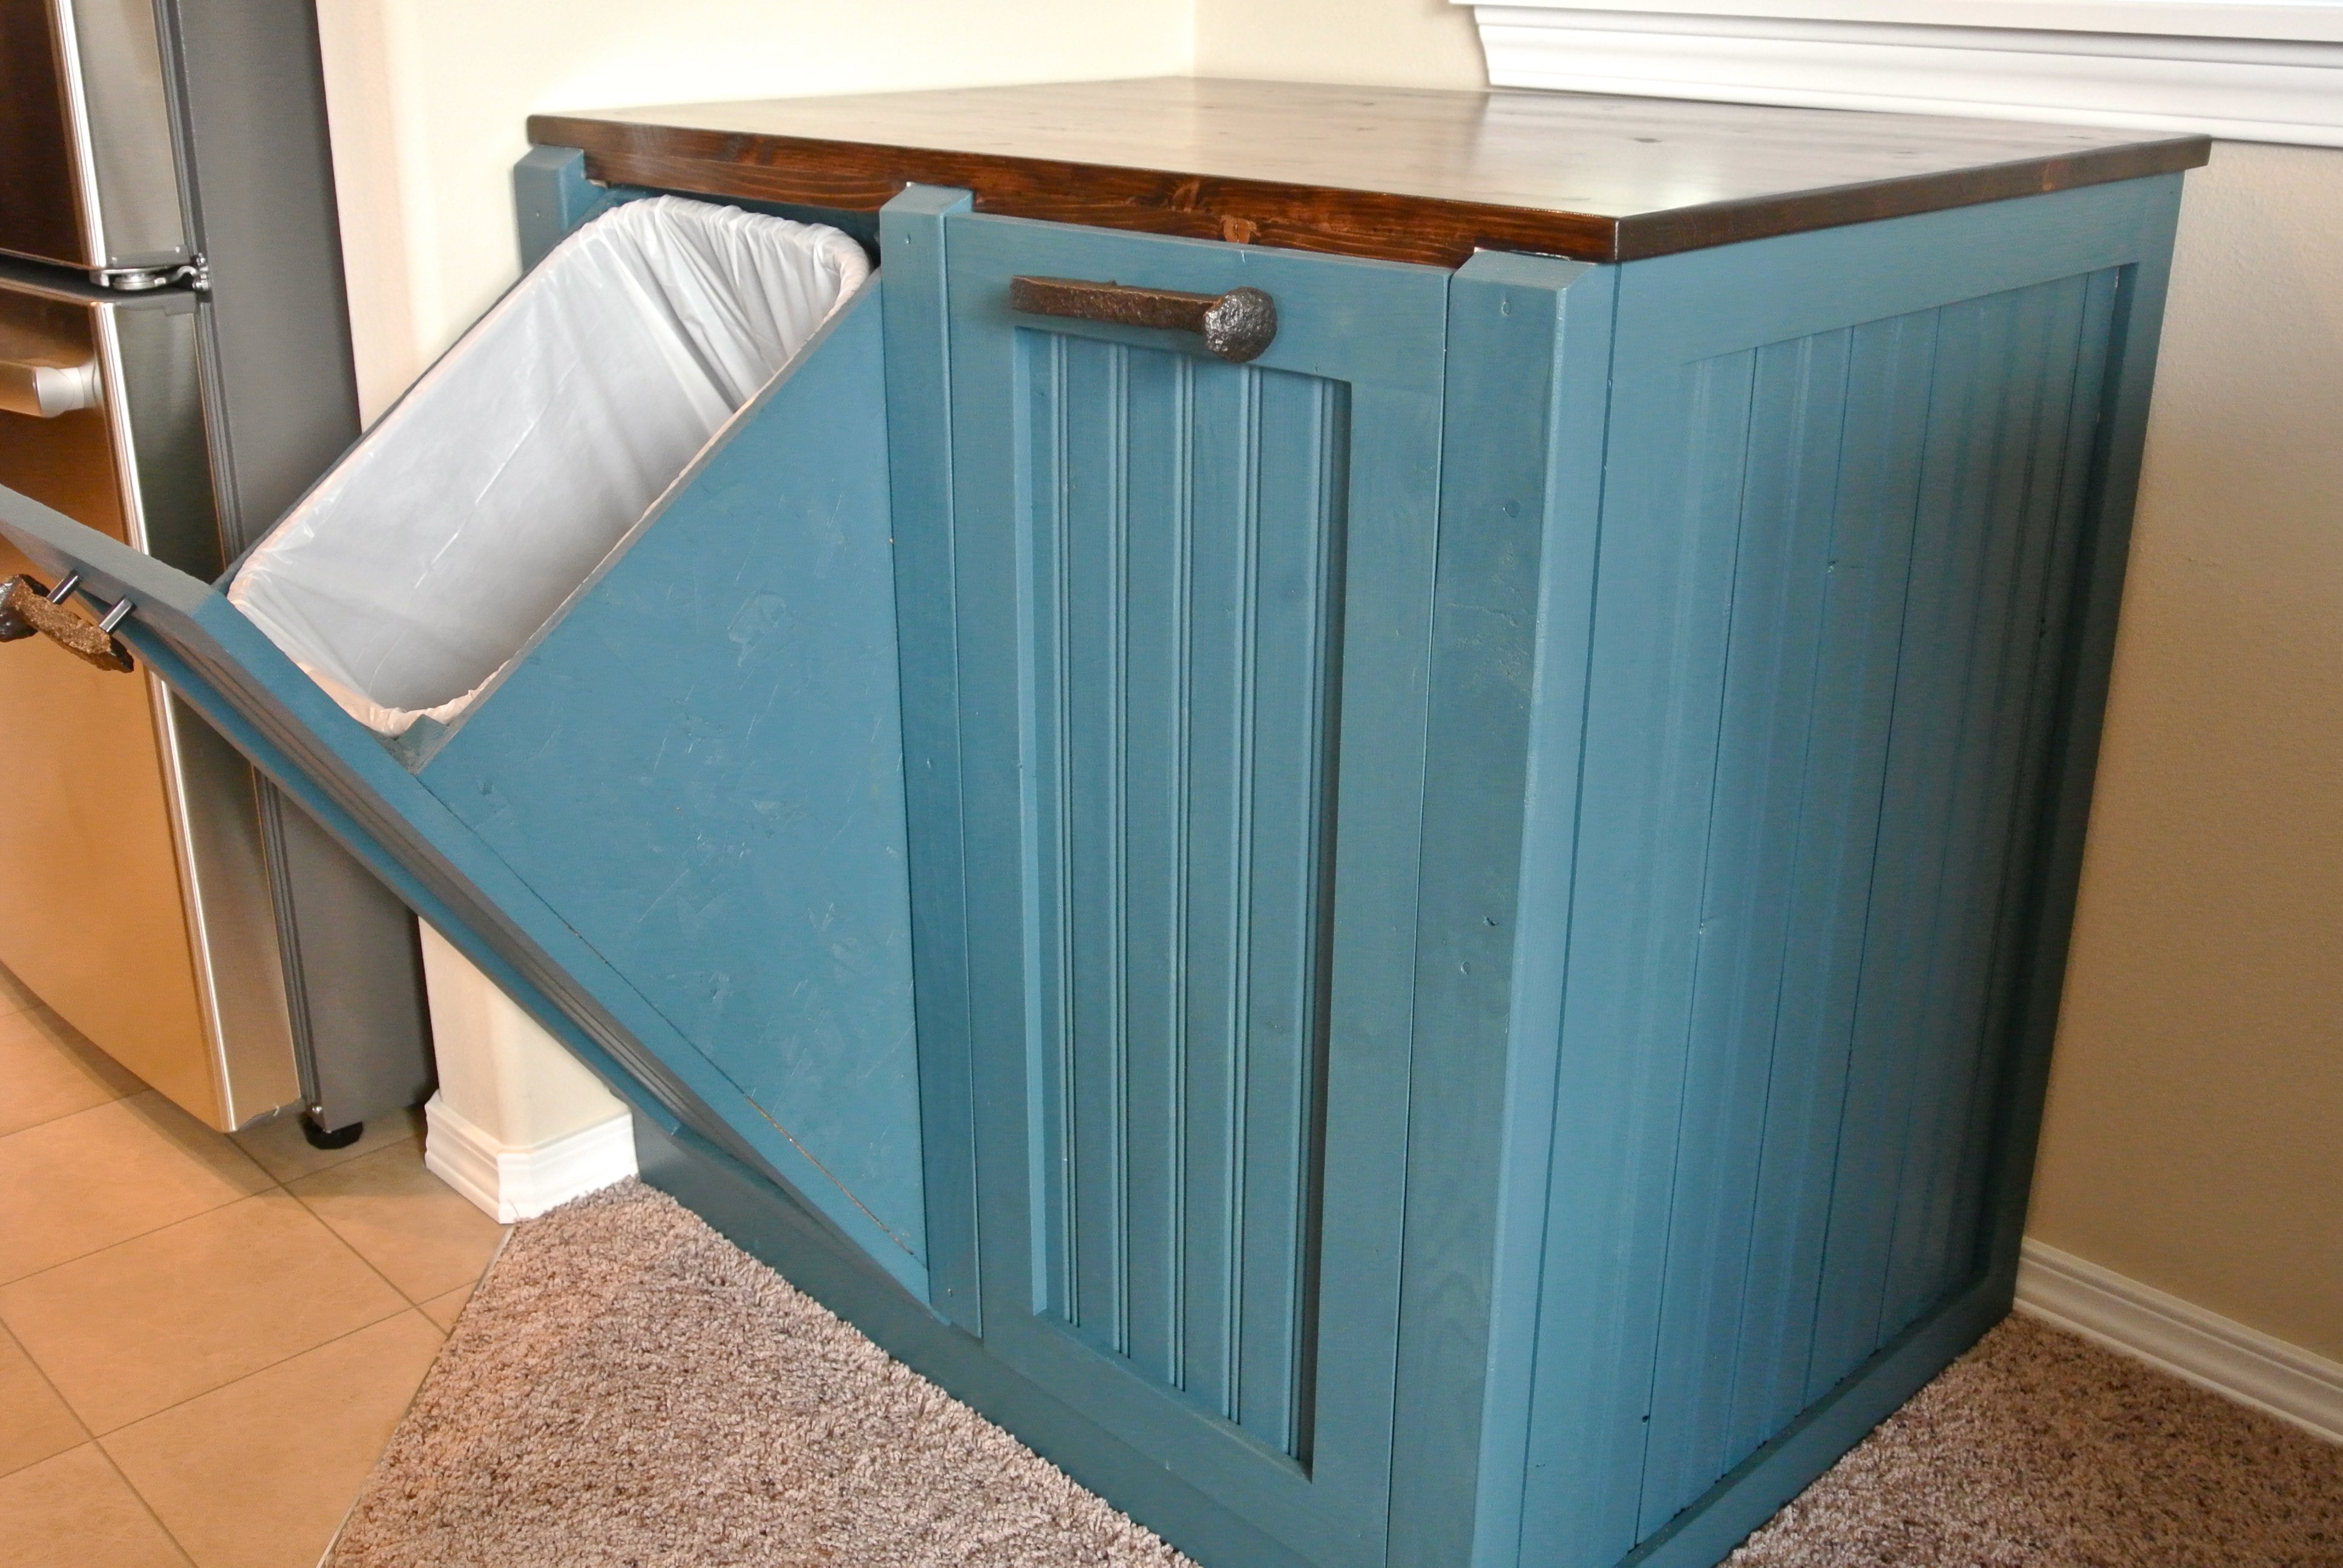
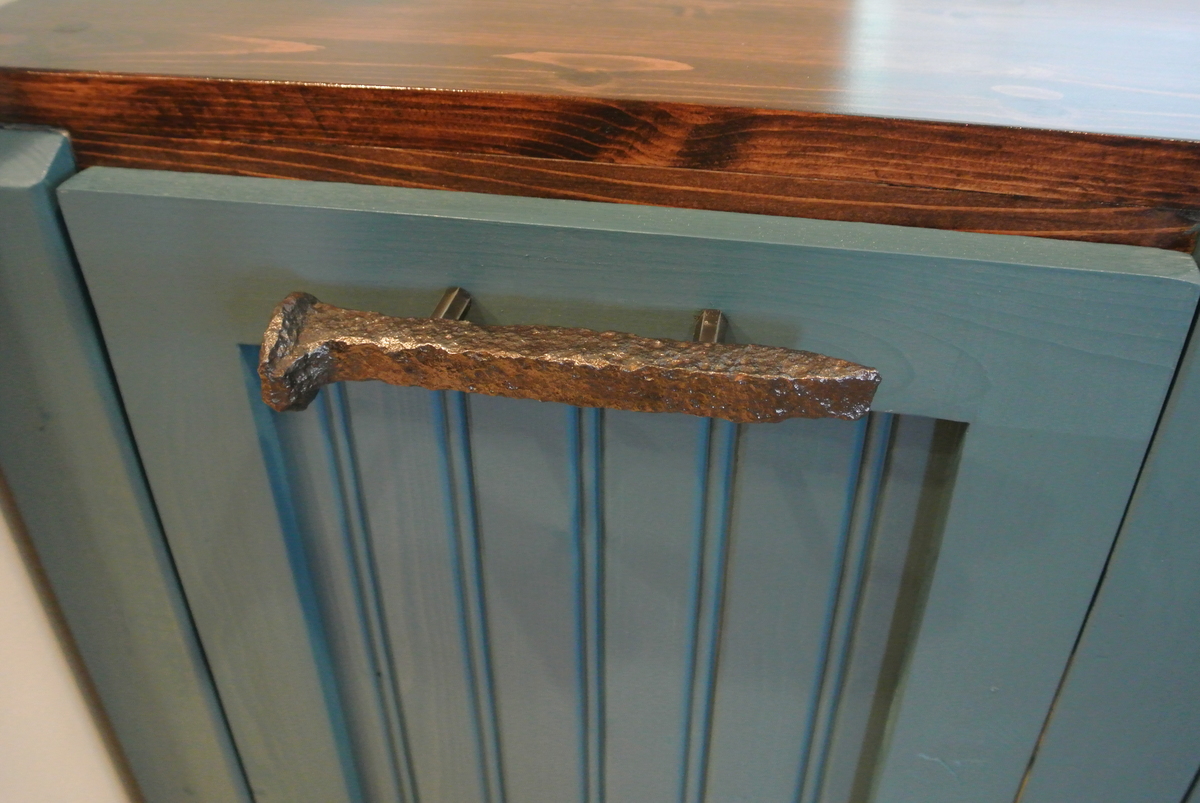
We just moved in to a newly built house, so it was important for everything to have a place. I don't like the garbage can to be under the sink, and my wife doesn't like the can just out on the floor...too many missed hook shots with the coffee filters I guess! This cabinet solves many kitchen problems all at once. An attractive cabinet that hides garbage and recycle, yet is easy to get in and out of. The railroad spike handles are something we sell on Etsy, as well as knobs and shelves. The shop name is YeenYus.

Wed, 07/24/2013 - 21:15
Yeah, I kind of built this on the run with nothing but the space it had to fit into. But it is 34" wide 32" deep and 24" high. I needed it to fit under the window and used the Home Depot garbage bins as the starting point.
I build a lot of stuff...and this was a tough one. The frame is 2x4's with pine facing and bead board. 4 hinges, stain and paint...less than $100.
I'd love to work with you on this if you want. The hard part was engineering the bins falling forward equally and not binding up. The back of the bin actually hits the counter top perfectly now. But you can see that I had to put an extra 1" under the top for it to hit something.
It' gonna take some work but this thing looks and works so smoothly. You can do it...I can help!
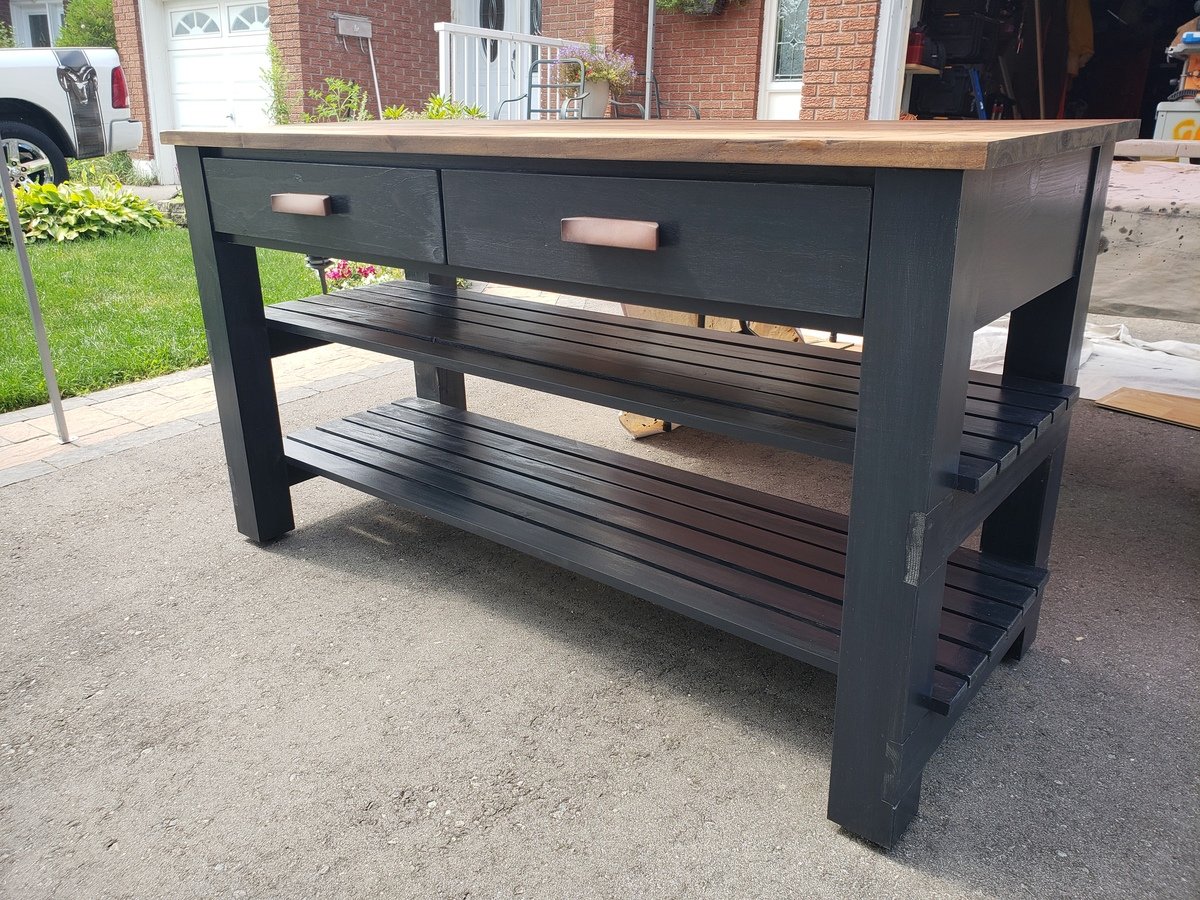
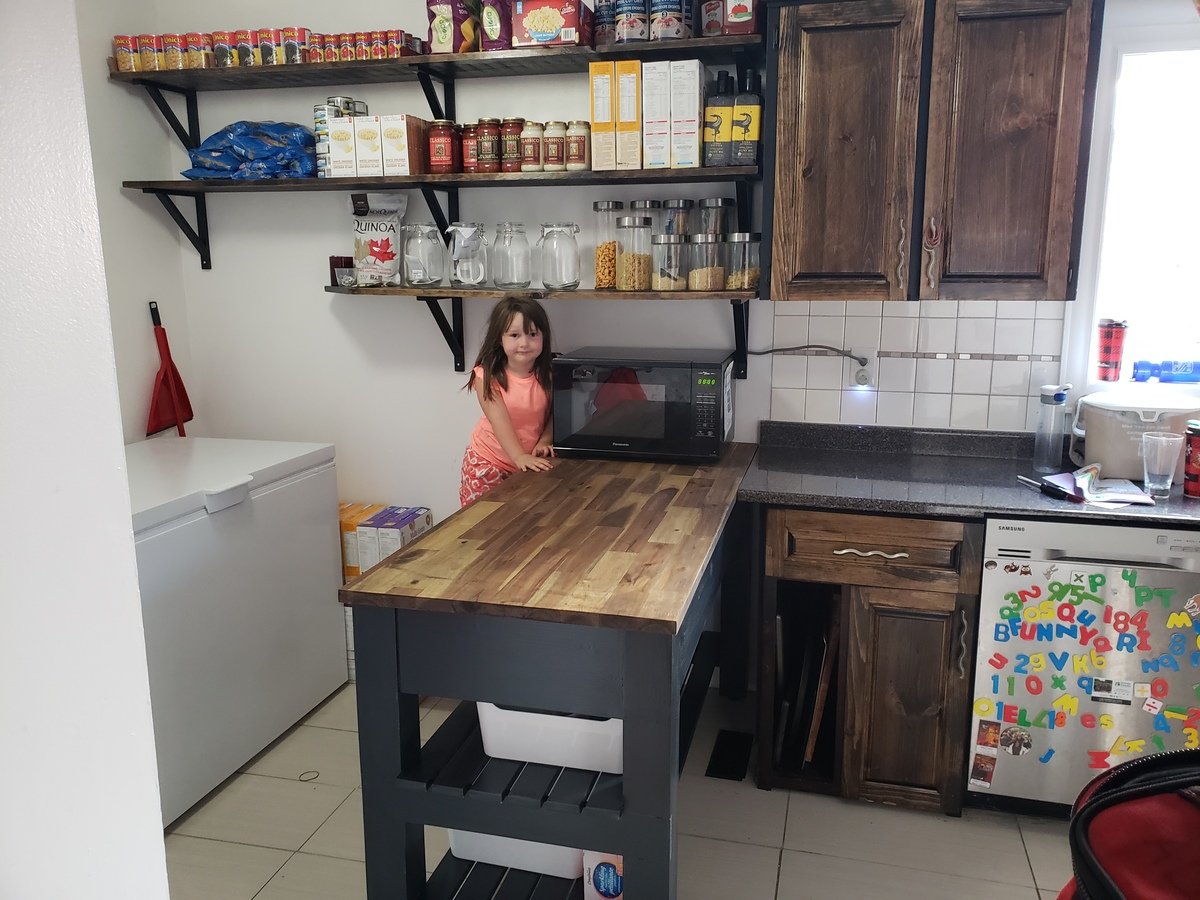
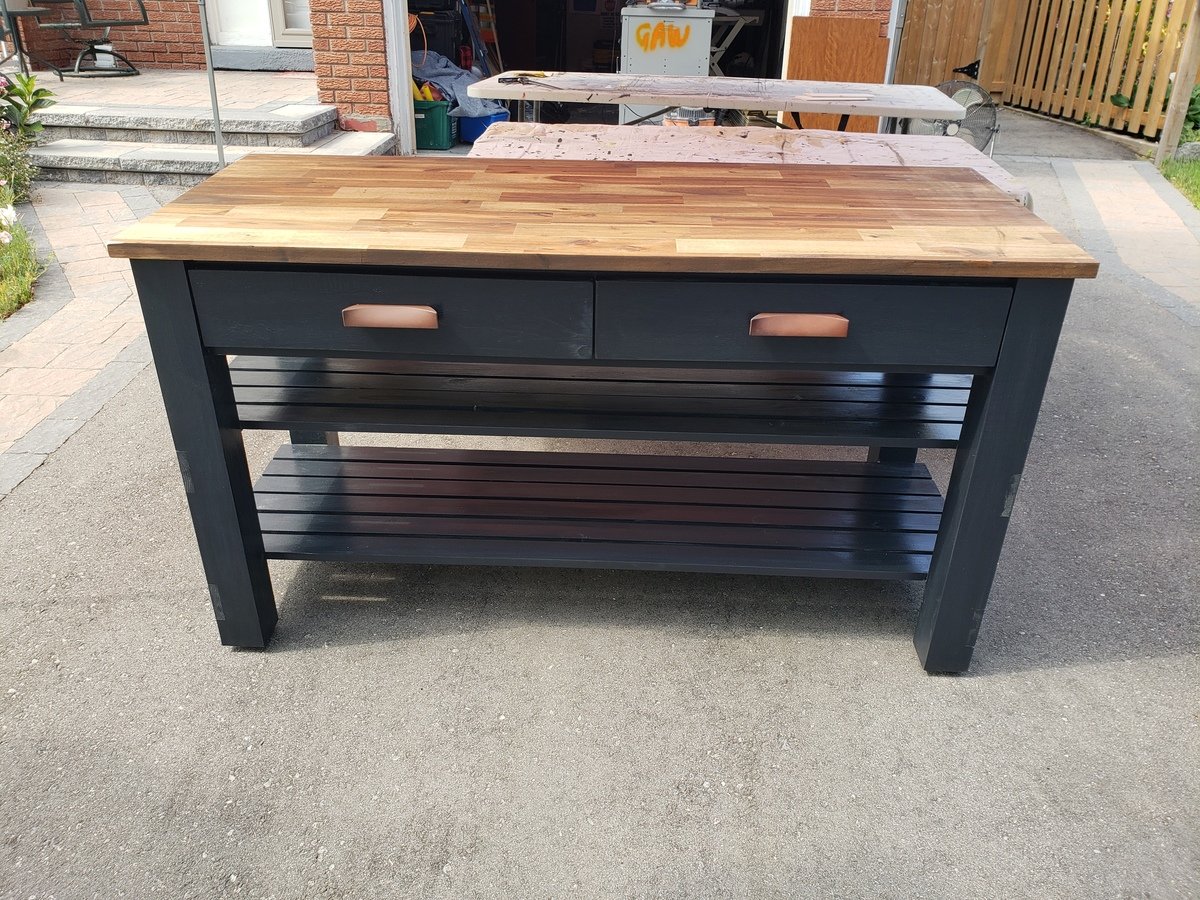
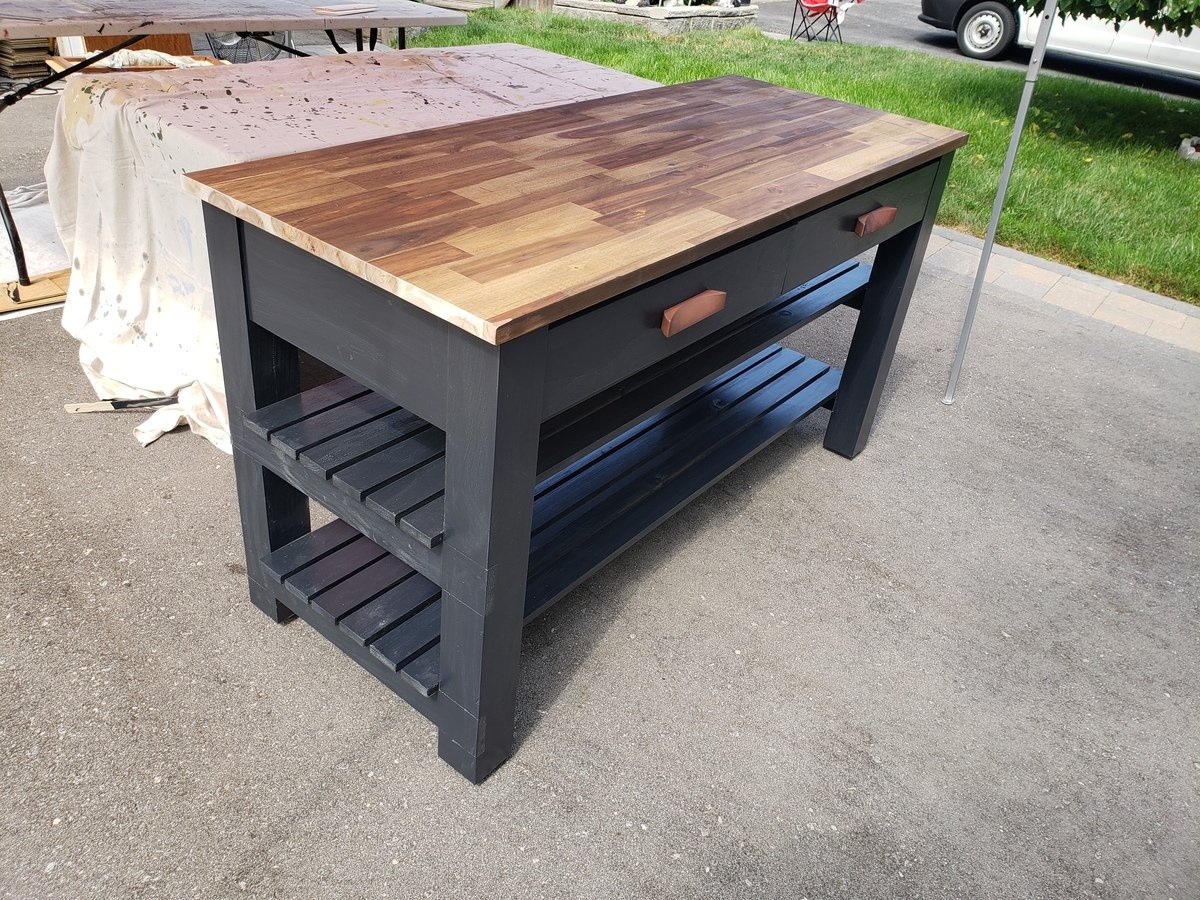
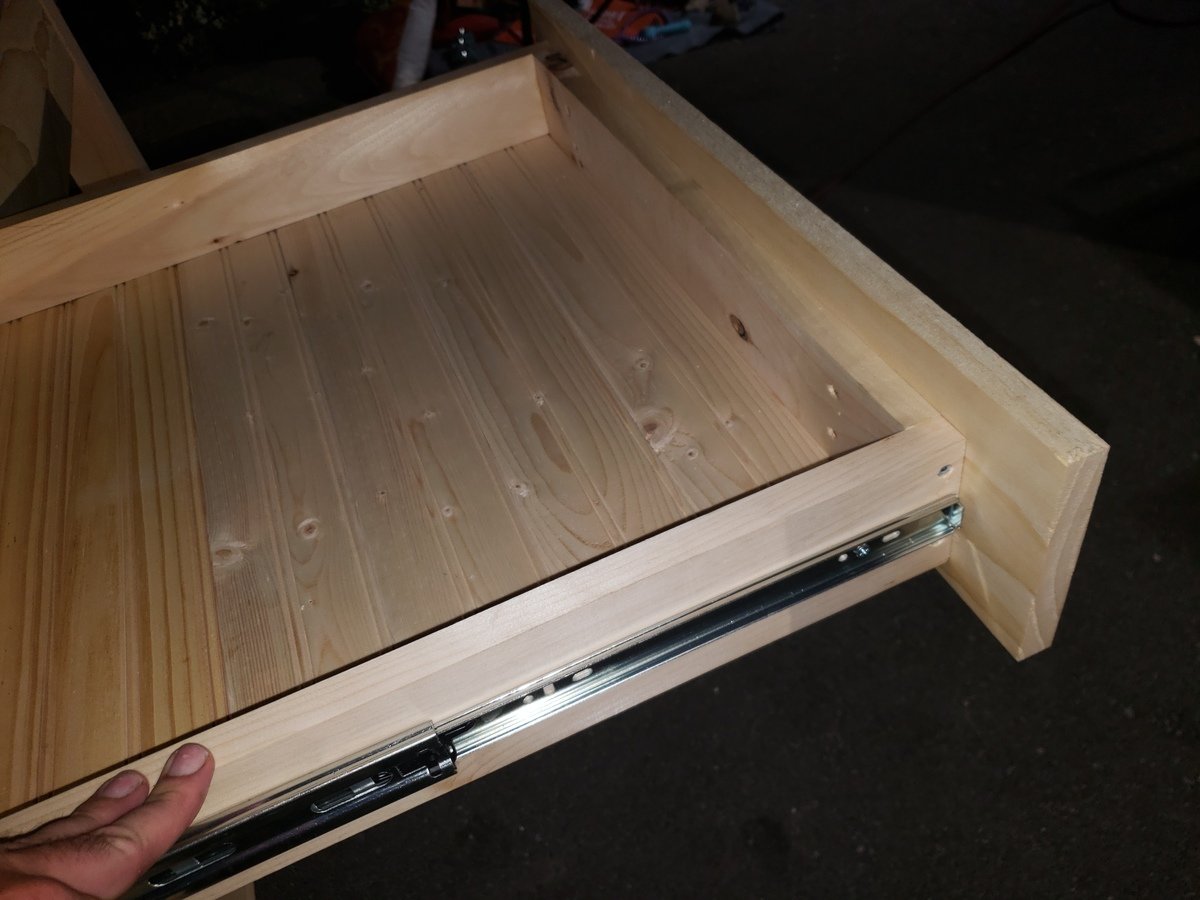
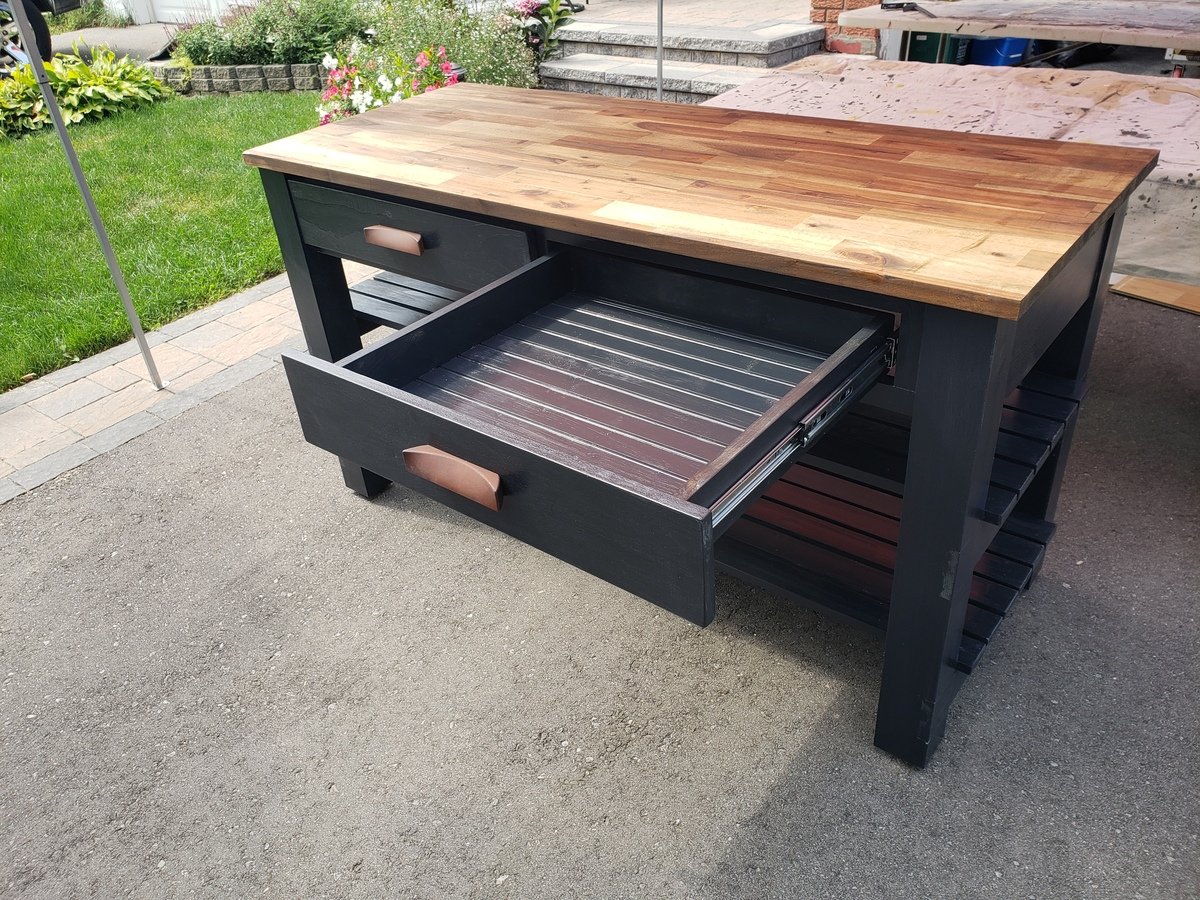
Took roughly 15hrs and $500... We bought the top at Lowes for $150 on sale (Acacia), because it turns out butcher block counter tops of this size (considered an "Island" top) are like $500 and I don't know who can afford those shenanigans but certainly not us. Interesting point: in as much as I totally appreciate the design (Thank You Ana!) the instructions are mostly beautiful but have a few key areas with room for improvement. If you are thinking of building this take some time to go over all the materials and really map out the project. I purchased everything in 8' lengths as per the shopping list, I realized afterwards that because my unit is only 5' long I now have many 3' cut-offs.... had I purhased 10' lengths, you see where I'm going with this yes? I would have paid more per board but had less leftovers. I think I also have a package of unopened screws and an extra board from the shopping list, no big deal, it's like the 10 hot dogs for an 8 pack of buns conundrum, I've now entered an infinite loop. I also realized too late that to use the pocket hole screws to secure the counter top I would need to drill the holes (using my handy dandy Kreg Jig) before putting the slats on the top shelf or else I couldn't get my drill in, rookie move I know...You may find, as I learned, Lowes/Home Depot do not carry such things as 4x4s that are not pressure treated and therefore not ideal to have in one's kitchen...I ended up purchasing all the lumber at an actual lumberyard (Peacock Lumber, Oshawa, Canada), which was cool, because now I know where that place is, and it smells nice. Have fun with your build. I tried to post some other pictures but they kept coming up sideways, story of my life. Take a look on Facebook if you want Adam Connor in Pickering, Canada, I'm not shy ;-)

Comments
Ana White Admin
Thu, 05/18/2023 - 07:33
Beautiful planter!
I bet she loves it, fantastic job! Thank you for sharing.