Outdoor Wooden Cooler
These outdoor wooden coolers are a real treat to have at any BBQ, tailgating event, or get together! Available for order contact for details on shipping and prices.
This was the second building project I've ever completed. I had to make a few adjustments to make it fit the size of ray's closet, but it was totally worth it. most of the work was in the measuring, sanding, and sealing of the wood. Ftting the frames can be a little tricky if your planks aren't perfectly straight. Otherwise, this project was pretty straight forward and can be done in just a few days depending on how much time you have to dedicate to it. Thanks Ana!
I built the octagon picnic table, and modified in a couple of ways.
1) Due to project deadline (Christmas) (and cost) I opted for composite decking for a finished top and bench, and pressure-treated 2x framing stock. Builder beware! Composite decking can be 5 1/4" wide, which impacts the spacing between the pieces, which means re-calculating most of the table-top pieces. Also, I added lateral structure underneath the benches (more weight!)
2) I really wanted that hole in the center, and hope that my solution (which slightly weakens the overall structural integrity) withstands the test of time.
I really liked the PB mega desk, but I didn't want to spend $1600 on it. After seeing someone's post here (a couple years ago...) asking for plans on that desk, I decided to do it myself. I took these two plans and made 4 base units. They are 18" square at the top and 34" tall. I used 2 IKEA table tops connected underneath for the top, to make a total height of 36" - counter stool height. I constructed them a little differently than the plans, but no matter how you make them, the idea is the same. The plan is to take them apart and make 2 desks once everyone is too old and cool to do homework/artwork together.
Mon, 03/16/2015 - 20:39
this is really awesome! What a cool work area :)
Sun, 08/02/2015 - 11:39
Where did you get the chairs to complete your project? And how much were they?
Sat, 08/15/2015 - 04:33
Just seeing your comment...sorry for the delay! I got the stools and the light fixture at a Ballard Backroom (outlet) store near me. 3 of the stools ended up being about $40 each with the sale they had at the time, and the 4th was $60? - bought at a later time than the first 3.
Sun, 08/30/2015 - 13:54
Could we get more detail on how this was built? The base units, for instance.
Thanks!
Wed, 11/04/2015 - 07:40
How did you connect the table tops from the bottom so that the tables were secure together? I'm curious what's the best way to do this. Since two of the four seats will be where the seam is, I want to make sure I secure it properly so it's not wobbly. Thanks so much.
Sat, 01/09/2016 - 05:06
I'm just seeing these latest comments for the first time, so you may have long finished this project already! The tops were surprisingly sturdy but I did reinforce them. I placed the tops on the floor upside down and screwed some metal brackets (about 12" long each) across the joint in four places. I just screwed them in through holes already in the brackets. This wasn't the most stable because those tops are particle board and don't hold screws very well... But since it was already pretty sturdy, I figured it would do. It has been fine, even with standing on the top (kids who get up there and me hanging the light fixture above).
Once the tops were joined, I placed the bases so there was about a 1" overhang on the top. To hold the top in place, I used small pieces of wood screwed to the underside of the top at the inside corner to act as a placement stop. The top is pretty big and heavy even though they are IKEA tops, so they don't have a tendency to move or slide at all anyway. I'm going to try to figure out how to post another picture of the braces and corner stops...we'll see if I can do it! Let me know if you have any more questions...again, sorry I didn't see this in a more timely manner!
Sat, 01/02/2016 - 05:55
Is the photo above the Pottery Barn version or your product result? I'm trying to figure out the dimensions for the drawer and shelf configurations. Thanks! BTW, I'm totally addicted to your style and personality...my husband loves the productivity inspiration I've received. :-)
Sat, 01/09/2016 - 10:17
Hi!
I'm glad you like the desk! The one in the picture is the one I built, not the pottery barn one! My dimensions were a good bit different than the PB desk - square bases instead of rectangular and counter stool height instead of desk/table height. So, I have no idea if I have my plans for this anymore, so I went and measured it again for you!
So each base is 18" x 18" square and 34" high so that with the 2" top the total height is 36".
Each base was made of oak plywood that made with 3 sides, a top and a bottom. All edges were rabbit joints (3/8" deep in thickness of boards and probably 3/8" wide - not 100% on width of rabbits). It's kind of a pain to do rabbit joints if you don't have a dado blade for your table saw, so you could use pocket hole screws instead. I glued and nailed these joints with a finish nailer, I believe.
I figured a diagram with measurements would be easier than trying to write descriptions...so I'm adding another pic with the dimensions outlined. Drawing is NOT to scale, so sorry about that! I really need to learn to use SketchUp. Let me know if you have any questions!
Sat, 01/09/2016 - 07:57
Hi!
I'm glad you like the desk! The one in the picture is the one I built, not the pottery barn one! My dimensions were a good bit different than the PB desk - square bases instead of rectangular and counter stool height instead of desk/table height. So, I have no idea if I have my plans for this anymore, so I went and measured it again for you!
So each base is 18" x 18" square and 34" high so that with the 2" top the total height is 36".
Each base was made of oak plywood that made with 3 sides, a top and a bottom. All edges were rabbit joints (3/8" deep in thickness of boards and probably 3/8" wide - not 100% on width of rabbits). It's kind of a pain to do rabbit joints if you don't have a dado blade for your table saw, so you could use pocket hole screws instead. I glued and nailed these joints with a finish nailer, I believe.
I figured a diagram with measurements would be easier than trying to write descriptions...so I'm adding another pic with the dimensions outlined. Drawing is NOT to scale, so sorry about that! I really need to learn to use SketchUp. Let me know if you have any questions!
Wed, 06/22/2016 - 15:26
Can you buy the bases from ikea? or did you build them from scratch?
Thu, 07/28/2016 - 14:13
No you can't buy them from Ikea. I bought the table tops from Ikea, but I built the bases. The dimensions for the bases are in one of the additional pictures with the post if you want to see them!
Mon, 10/10/2016 - 07:41
What are the total dimensions of the table top? Thinking of building something like this, but want to make sure it will fit in my space.
This was my seventh outdoor couch but my first sectional. My very first couches were all inspired by Ana White's plans and I have gotten so much better with my skills that I building other things as well. Thanks Ana for all your inspiration!
I found these plans online and was just waiting for the kids' grandpa to come out and build it. Could be built in one afternoon (depending on how many trips to your local Home Depot, and availability of the correct tools)
Modifications from original plan:
6x6 instead of 4x4
Brackets to hold patio umbrella for shade
Added seat gussets for additional support
Added "wooden flange" around bottom of box to run lawnmower on
One additional center back support on each bench
One centered handle (instead of a handle on each end)
Stapled landscape weed barrier fabric onto the bottom
Sanded all exposed edges
Materials:
4@2x10x8'
12@1x6x6'
2@2x6x12'
8 hinges
2 handles
3 1/2" decking screws (for attaching 2"x boards)
1 5/8" decking screws (for attaching 1"x boards)
2+ 1 1/4" 2-hole straps for metal conduit (for attaching patio umbrella*)
*Our patio umbrella pole was 1 1/2" diameter, but 1 1/2" straps had too much play, so we used 1 1/4" straps and misc flat washers to adjust the snugness to the pole
Cut lengths:
2@2x10 cut to 72" (long sides of the box)
2@2x10 cut to 69" (short sides of the box)
Cut one each of the following out of a 12 footer:
2@2x6 cut to 75" (long side "flange")
2@2x6 cut to 64" (short side "flange")
No cuts were made to the 12 1x6's
Used one leftover 2' from the 2x8x10's ripped in half cut to 11.5" for arm rests
Used two leftover 2' sections from the 2x8x10's ripped in half cut to 21" for back supports
Used the last 2' cutoff to make two seat gussets (cut about 9 1/2" off and then ripped it at 45 degrees)
Used the remaining piece (ripped in half length-ways) to attach to the center of the backrest for additional support and as the attachment point for our handles
We decided to do one handle in the center of the backrest so one reasonably strong adult could open the lid
The bottom "flange" was assembled with the box upside down. Basically a 2x6 screwed to the bottom edge of the box allowing 1 1/2" overhang all the way around
After making cuts, but before assembly, we recommend using a quarter-sheet pad sander (or similar) with 60 grit paper to break all of the edges and round over any ends or corners that will be in contact with sandbox users
Followed other general assembly instructions
Although I didn't build this from a plan I wanted to be sure and share it as it is because of my experience building from Ana's plans that I felt comfortable giving this a shot.
My in-laws were just updated their lake cabin and wanted a storage headboard as space is a premium and it will be the only furniture in the guest rooms. It is unique as it has shelves on either side which can pull out to function as a small night stand, perfect for cell phones, books etc. The back of the piece is tongue and groove knotty pine which for the more rustic look they wanted.
I will probably do things a little different when I build the next headboard but overall I am satisfied with the end result. I chose not to do a lower storage area, mainly to keep the cost down. It could be done very easily but this piece is already very heavy and that there is plenty of storage.
Sun, 01/17/2021 - 15:15
Is it possible to get the plans for this headboard. My teenage son really wants a head board with storage.
We needed a way to get all of the lawn & garden stuff out of our garage and organized. I found Ana's plans for the Small Cedar Shed & adjusted them to fit our space. We used 2x4s as our studs & added front walls on the sides. Our shed measures 9.5'x30". We had a concrete slab poured for our foundation. We are experienced DIYer's but had never taken on a project of this scale from scratch. This project was much easier than I was anticipating, and we were able to complete it in one weekend! Similar shed kits were way more expensive and not the size that we were looking for. Thank you so much for the inspiration!
Just wanted to do something a little more original.
Sat, 12/10/2016 - 17:57
Hi. Are there any plans for this piece using the lift top hardware?
Wed, 12/21/2016 - 20:46
Just curious about the hardware and design if there are any actual plans for this coffee table
Wed, 04/08/2020 - 05:01
Where can plans for this lift top version be found?
We loved the radiant air in our new early 20th century house, but as our daughter learned to crawl, we needed to prevent her little fingers from touching the two radiators that were still uncovered. After I finished my first few builds, I custom designed these radiator covers with 1x2s, 1x3s 2x2s and 1x12s. Needless to say, I got a ton of use out of my Kreg Jig. On the middle panel of the larger cover, I used a bit of decorative metal that they sell at the Big Box stores (of course, it would have been easier to use more of it, but I am a bit paranoid about little fingers touching a metal cover). For a final touch, I covered the top of the larger cover with decorative glass. For the smaller cover, I matched the distressed pink throughout the rest of my daughter's nursery.
I used the basic framing plan for the project, but extended roof overhangs, added engineered siding / trim and cedar shake roofing. I put 2x4 bracing on for the platform.
I followed Ana's Raised Planter Box plan exactly. We did purchase a Kreg Jig Jr. recently, which came in handy on this project for sure. It is a very sturdy piece and it only took a couple of hours to assemble.
Just finished up this unique TV console. Built from reclaimed pallet wood.
Mon, 12/02/2019 - 22:10
Hi there Im new to site and also have the issue of not seeing the plans for this Rustic Modern TV Console. Are they available and Im doing something wrong or??
Sat, 06/27/2020 - 05:03
I am logged in and I do not see the plans for the "Rustic Modern TV Console"
Planters build by Urban Wood Solutions
Fri, 03/31/2023 - 04:23
These are incredible. They look a little deeper, and would be good for vegetables. How deep are they?
This was my third project so far. I am having so much fun with your designs! I bought your book and also got a copy for my friend. Thank you so much for all of your free posts and for being such an inspiration!
We followed the outdoor sectional plan from Ana Whites blog to create this outdoor sectional. First we bought the cushions and custom built this sectional to fit the cushions. We used 2x4's and the kreg jig for pocket screws, then covered the base in beadboard and some pine trim, gave it a good sanding and a nice paint job.
Fri, 04/12/2013 - 05:46
Thanks! We built the frame according to Ana's design (customized dimensions for our cushions) and then covered the base in bead board and used pine trim around the edges. The cushions are from the Frontgate Outlet in Cincinnati.
Wed, 05/07/2014 - 15:34
Is there a link to the side/corner section of this so I do not have to guess. Thanks.
I wanted sturdy seating for my patio. Ana White had the perfect plans for my L shaped seating and coffee table. It was simple to put together and we love it!
A toy box, im not a profesional, but its a grate hobby. Regards from Hidalgo, México.
Herwin
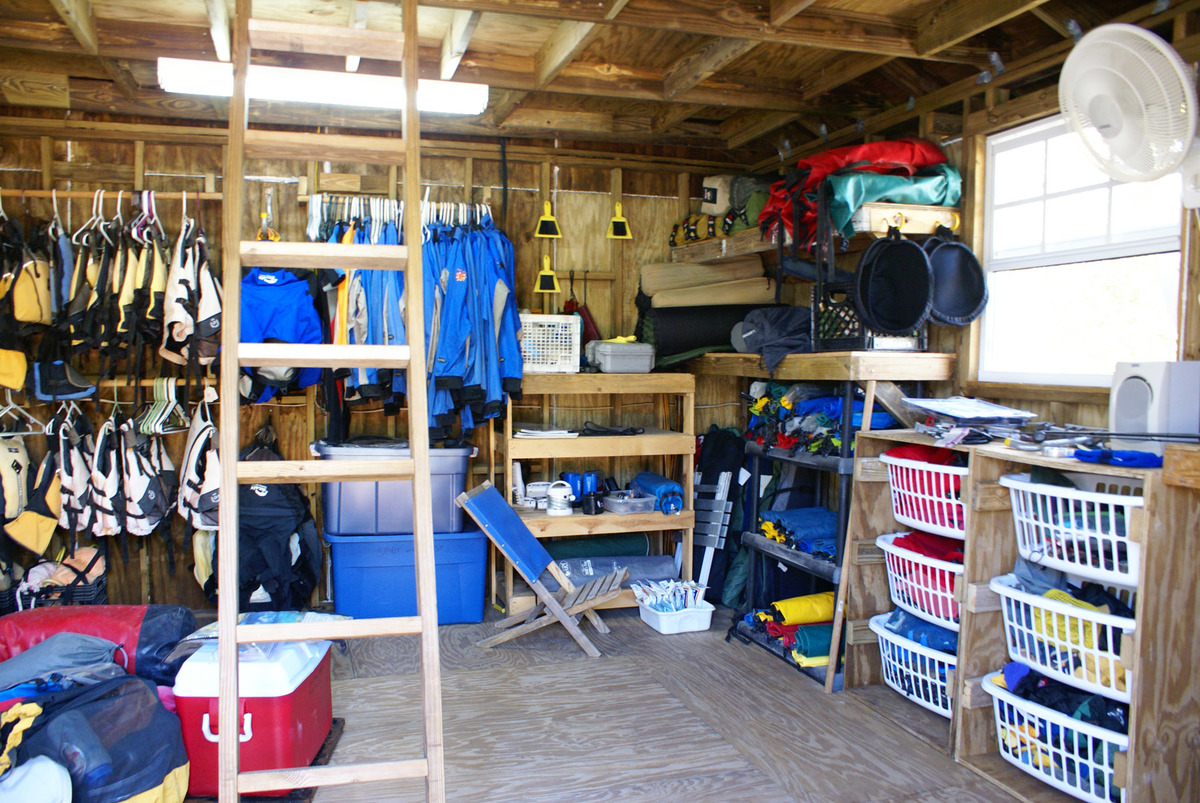
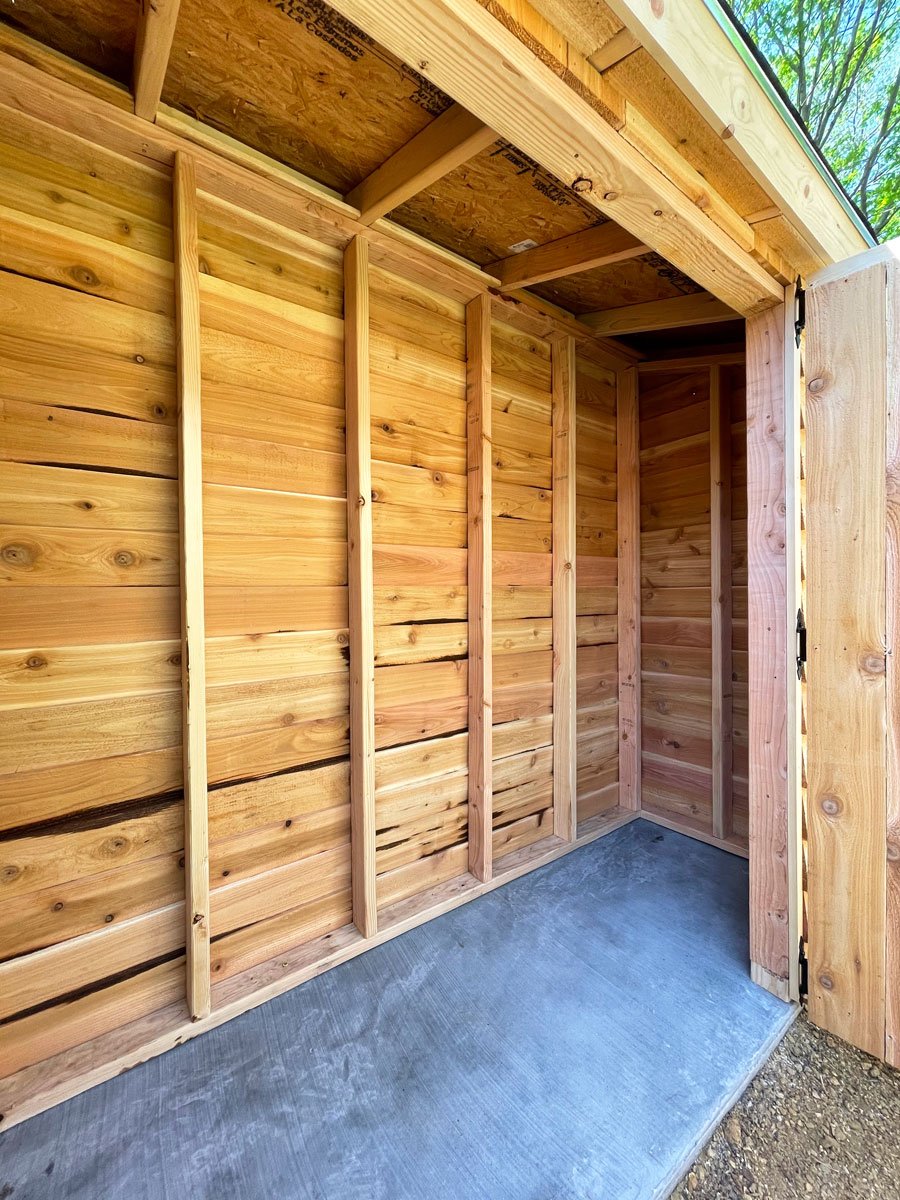
We loved this greenhouse plan from AnaWhite and wanted to be able to grow in 3 seasons so we modified the design to include humidity & temperature control & 18" deep elevated cedar beds inside with 4x4 posts for support and trellis option. We added electricity in order to have a lighted workspace and the ability to put in a circulating fan to control mold and fungus. We added 2 work tables (2x2') on the inside of the door left and right side door in order to do seed trays & store supplies. This was a wonderful project for my husband and my plants inside are doing incredibly well compared to my outside garden beds here in zone 5. Products used:
Foundation
We had a landscape company come and scape/dig a platform and then fill/compact with crushed rock
My husband then used rebar driven into a 4x4 frame in order to secure the frame to the ground and create a base upon which to build the greenhouse
Active ventilation
AC Infinity Cloudline T8 Inline duct fan
Air king range hood wall cap 8" on the bottom outside of the greenhouse wall for air intake + flex 8" duct to the fan itself
Shelter logic autovent automatic shelter vent kits (1 on each side of the front wall) in order to allow air intake from the bottom back of the greenhouse under the elevated beds to flow to the front of the greenhouse and out
Circulating fan- Hurricane wall mount fan 16" - this fan has 3 speeds with tilt function and small mounting bracket
Soil - sourced 3 yards of 50/50 loam/compost from local landscaping supply
60% loam
30% organic compost
10% organic topsoil + perlite
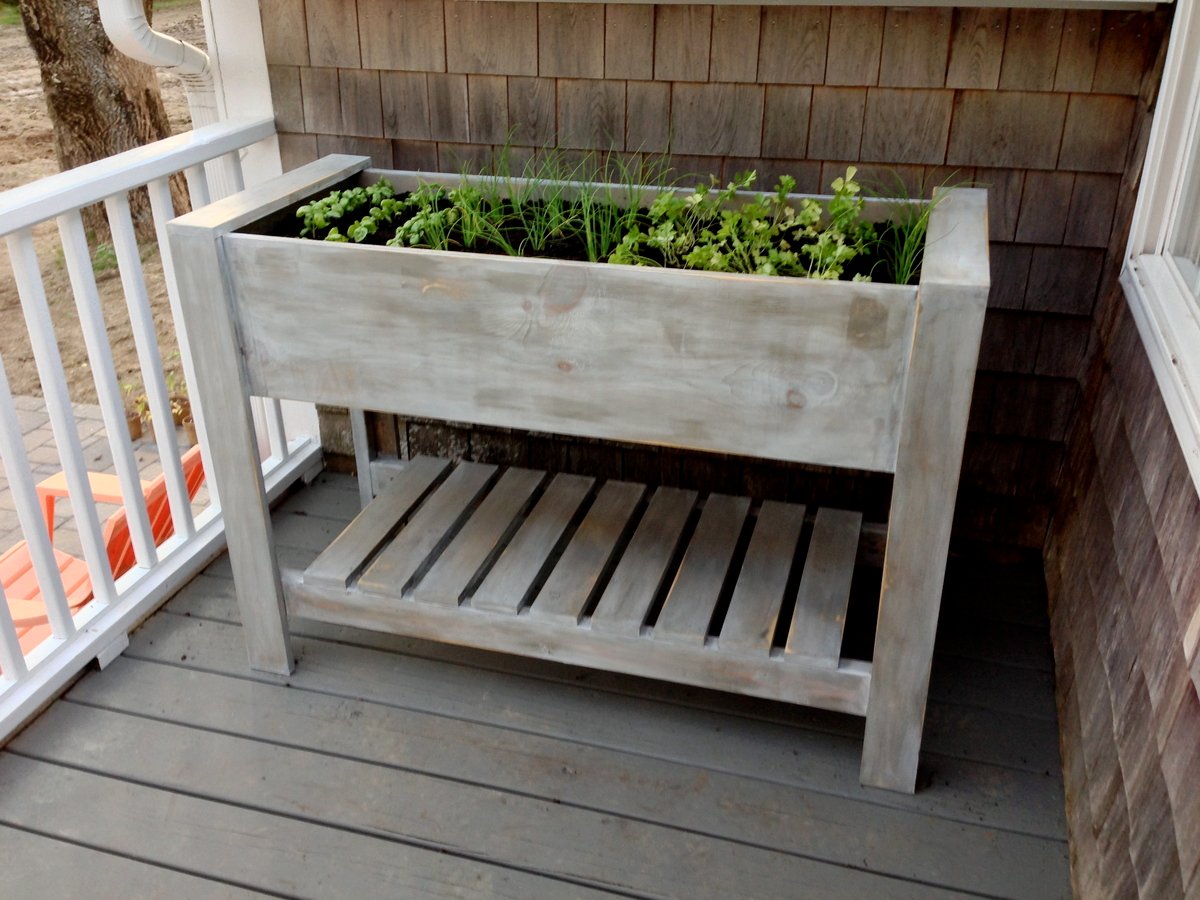
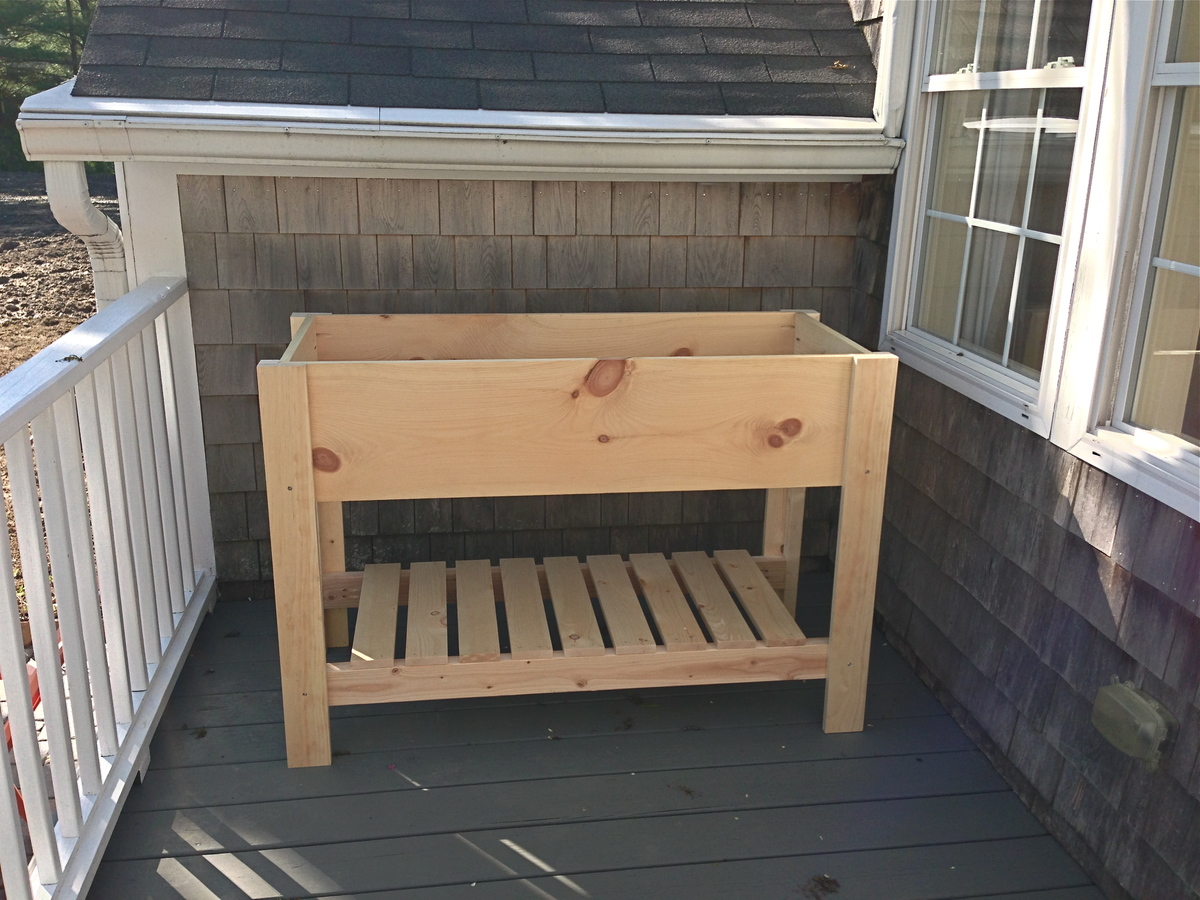
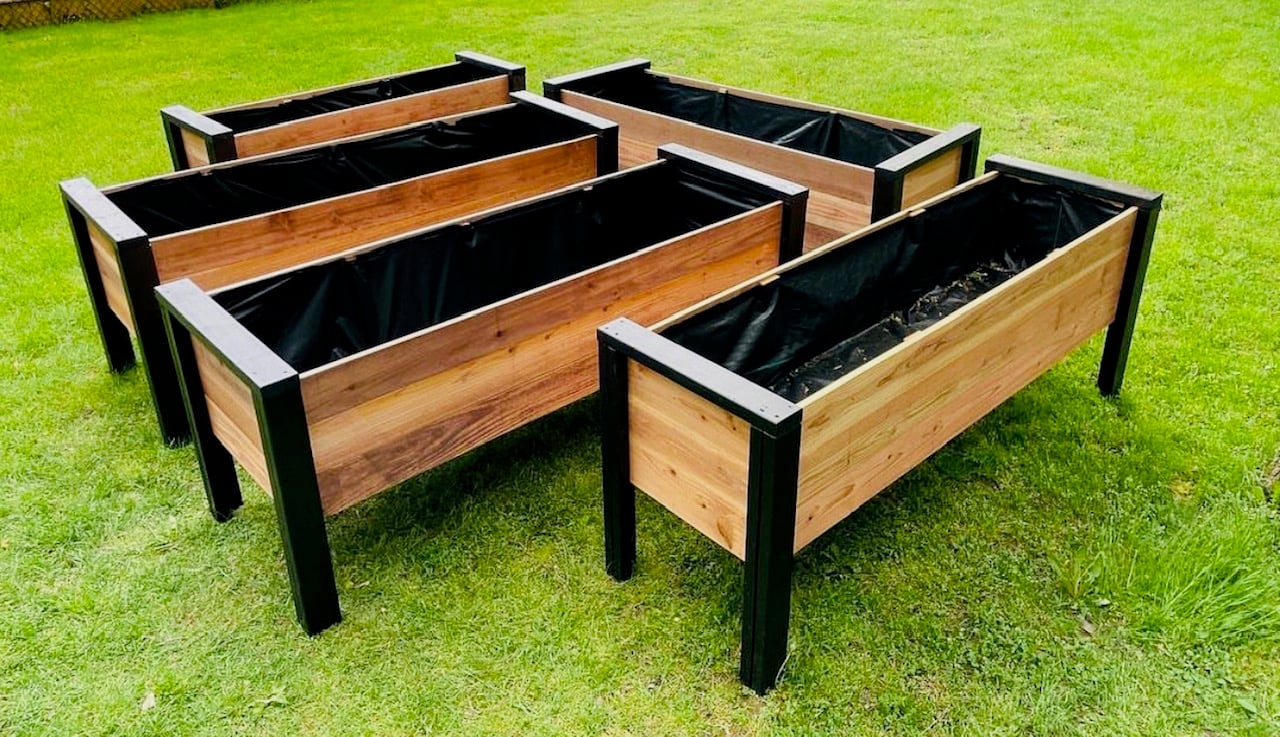
Soil beds
-cedar frame 2 feet wide along sides, 3 feet wide on the back wall
-galvanized metal roofing with holes drilled into it for drainage
-landscape cloth lined
Wed, 09/09/2020 - 13:09
Thanks for that update! I was wondering how to vent this project, as Green houses need the ventilation. Good to know dollar amount also. Great photos.
Wed, 09/09/2020 - 13:09
Thanks for that update! I was wondering how to vent this project, as Green houses need the ventilation. Good to know dollar amount also. Great photos.
Wed, 09/09/2020 - 13:09
Thanks for that update! I was wondering how to vent this project, as Green houses need the ventilation. Good to know dollar amount also. Great photos.
Ana, thanks for these plans! They inspired me to make my first bed build. I also want to thank all of you that added brag posts! They gave me ideas for some of the modifications that I made. I did this build by mixing your Queen Farmhouse and Queen Farmhouse Storage bed plans. I also added a number of modifications to suit my own preferences. The drawer boxes I changed by building a faceplate (I didn't want the plywood ends exposed), and by increasing in depth to maximize some additional storage. Since I increased the drawer sizes, I went with the euro roller bearing slides. I increased the foot-board height to be slightly higher than the mattress. I also designed the footboard to have a removable inner section with hidden latches on the inside. I did this because I wanted to make use of the "dead space" between the drawer boxes. I then used this space to house a hidden drawer, that is approx six feet deep (I couldn't help myself-I love hidden drawers 
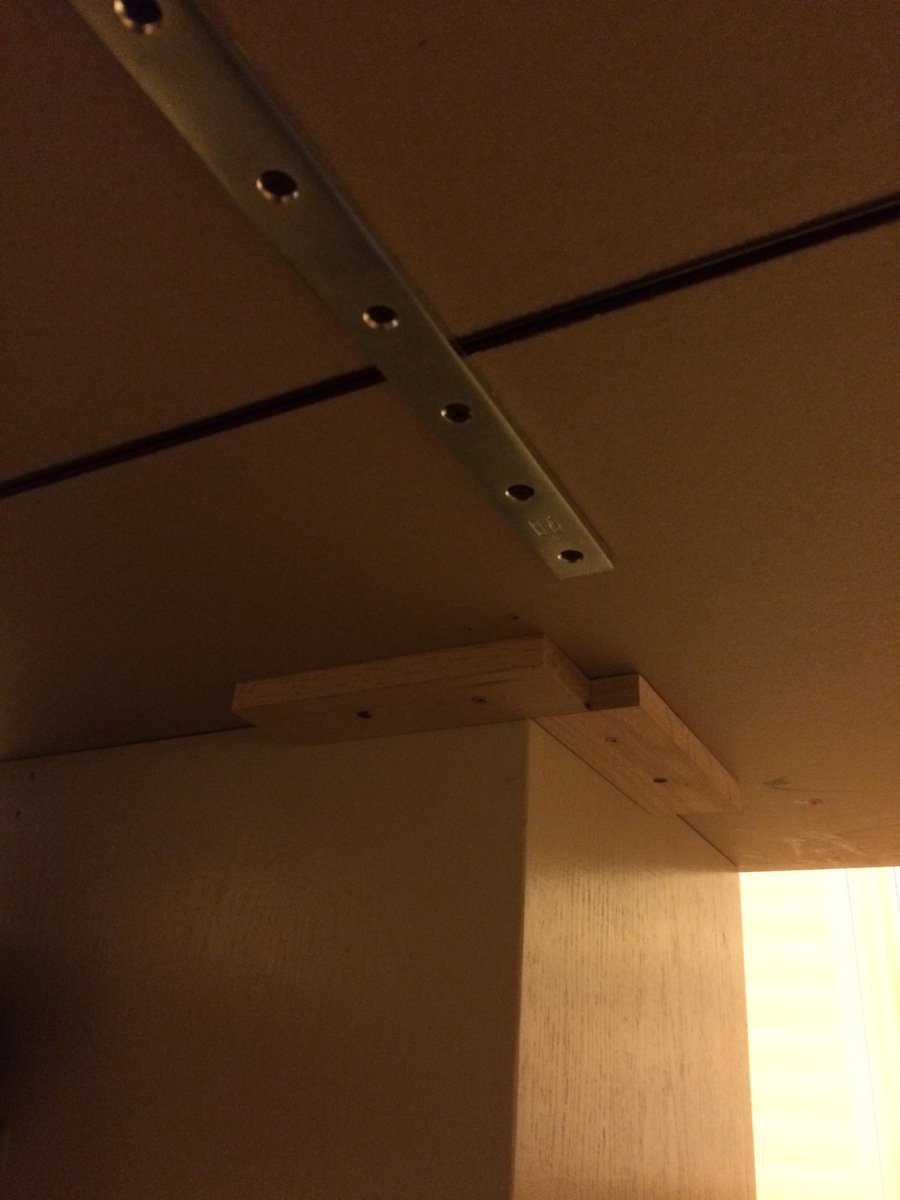
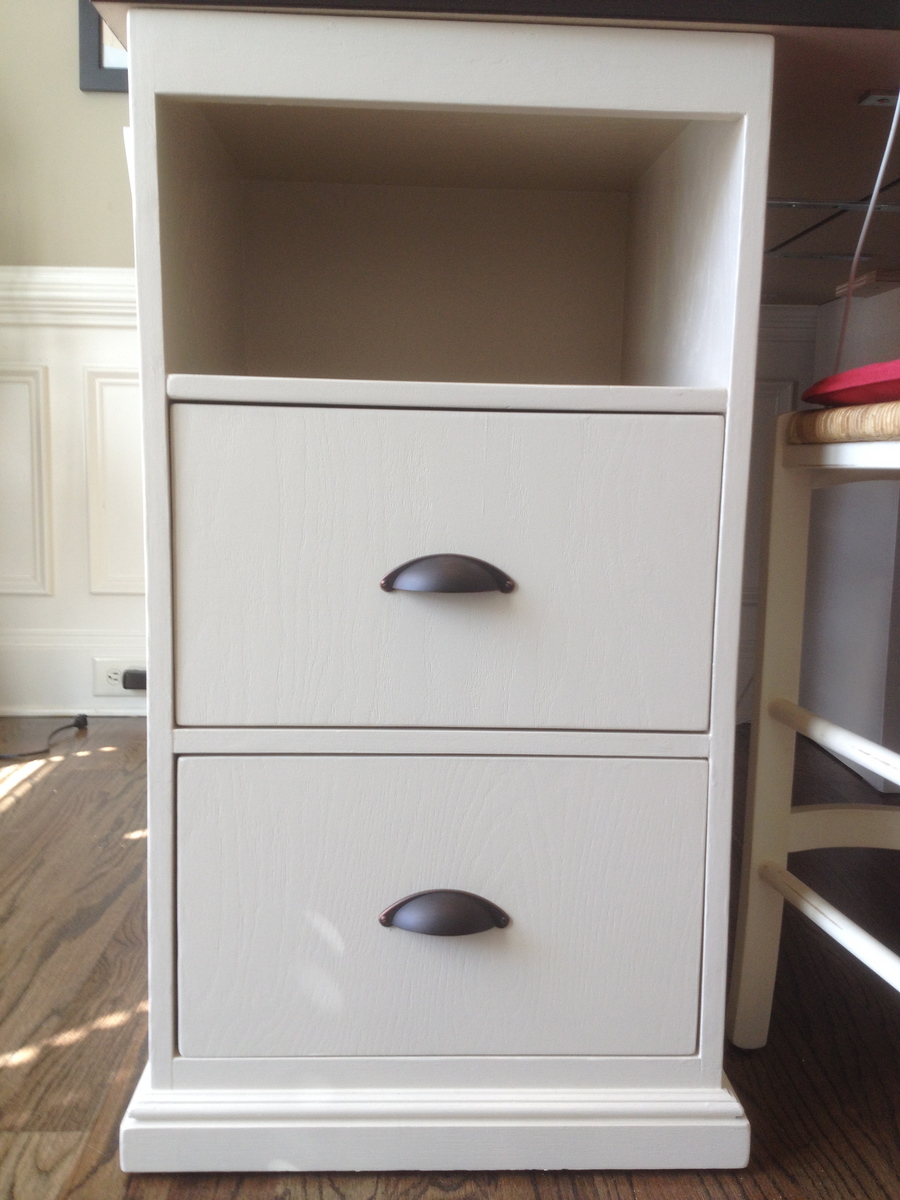
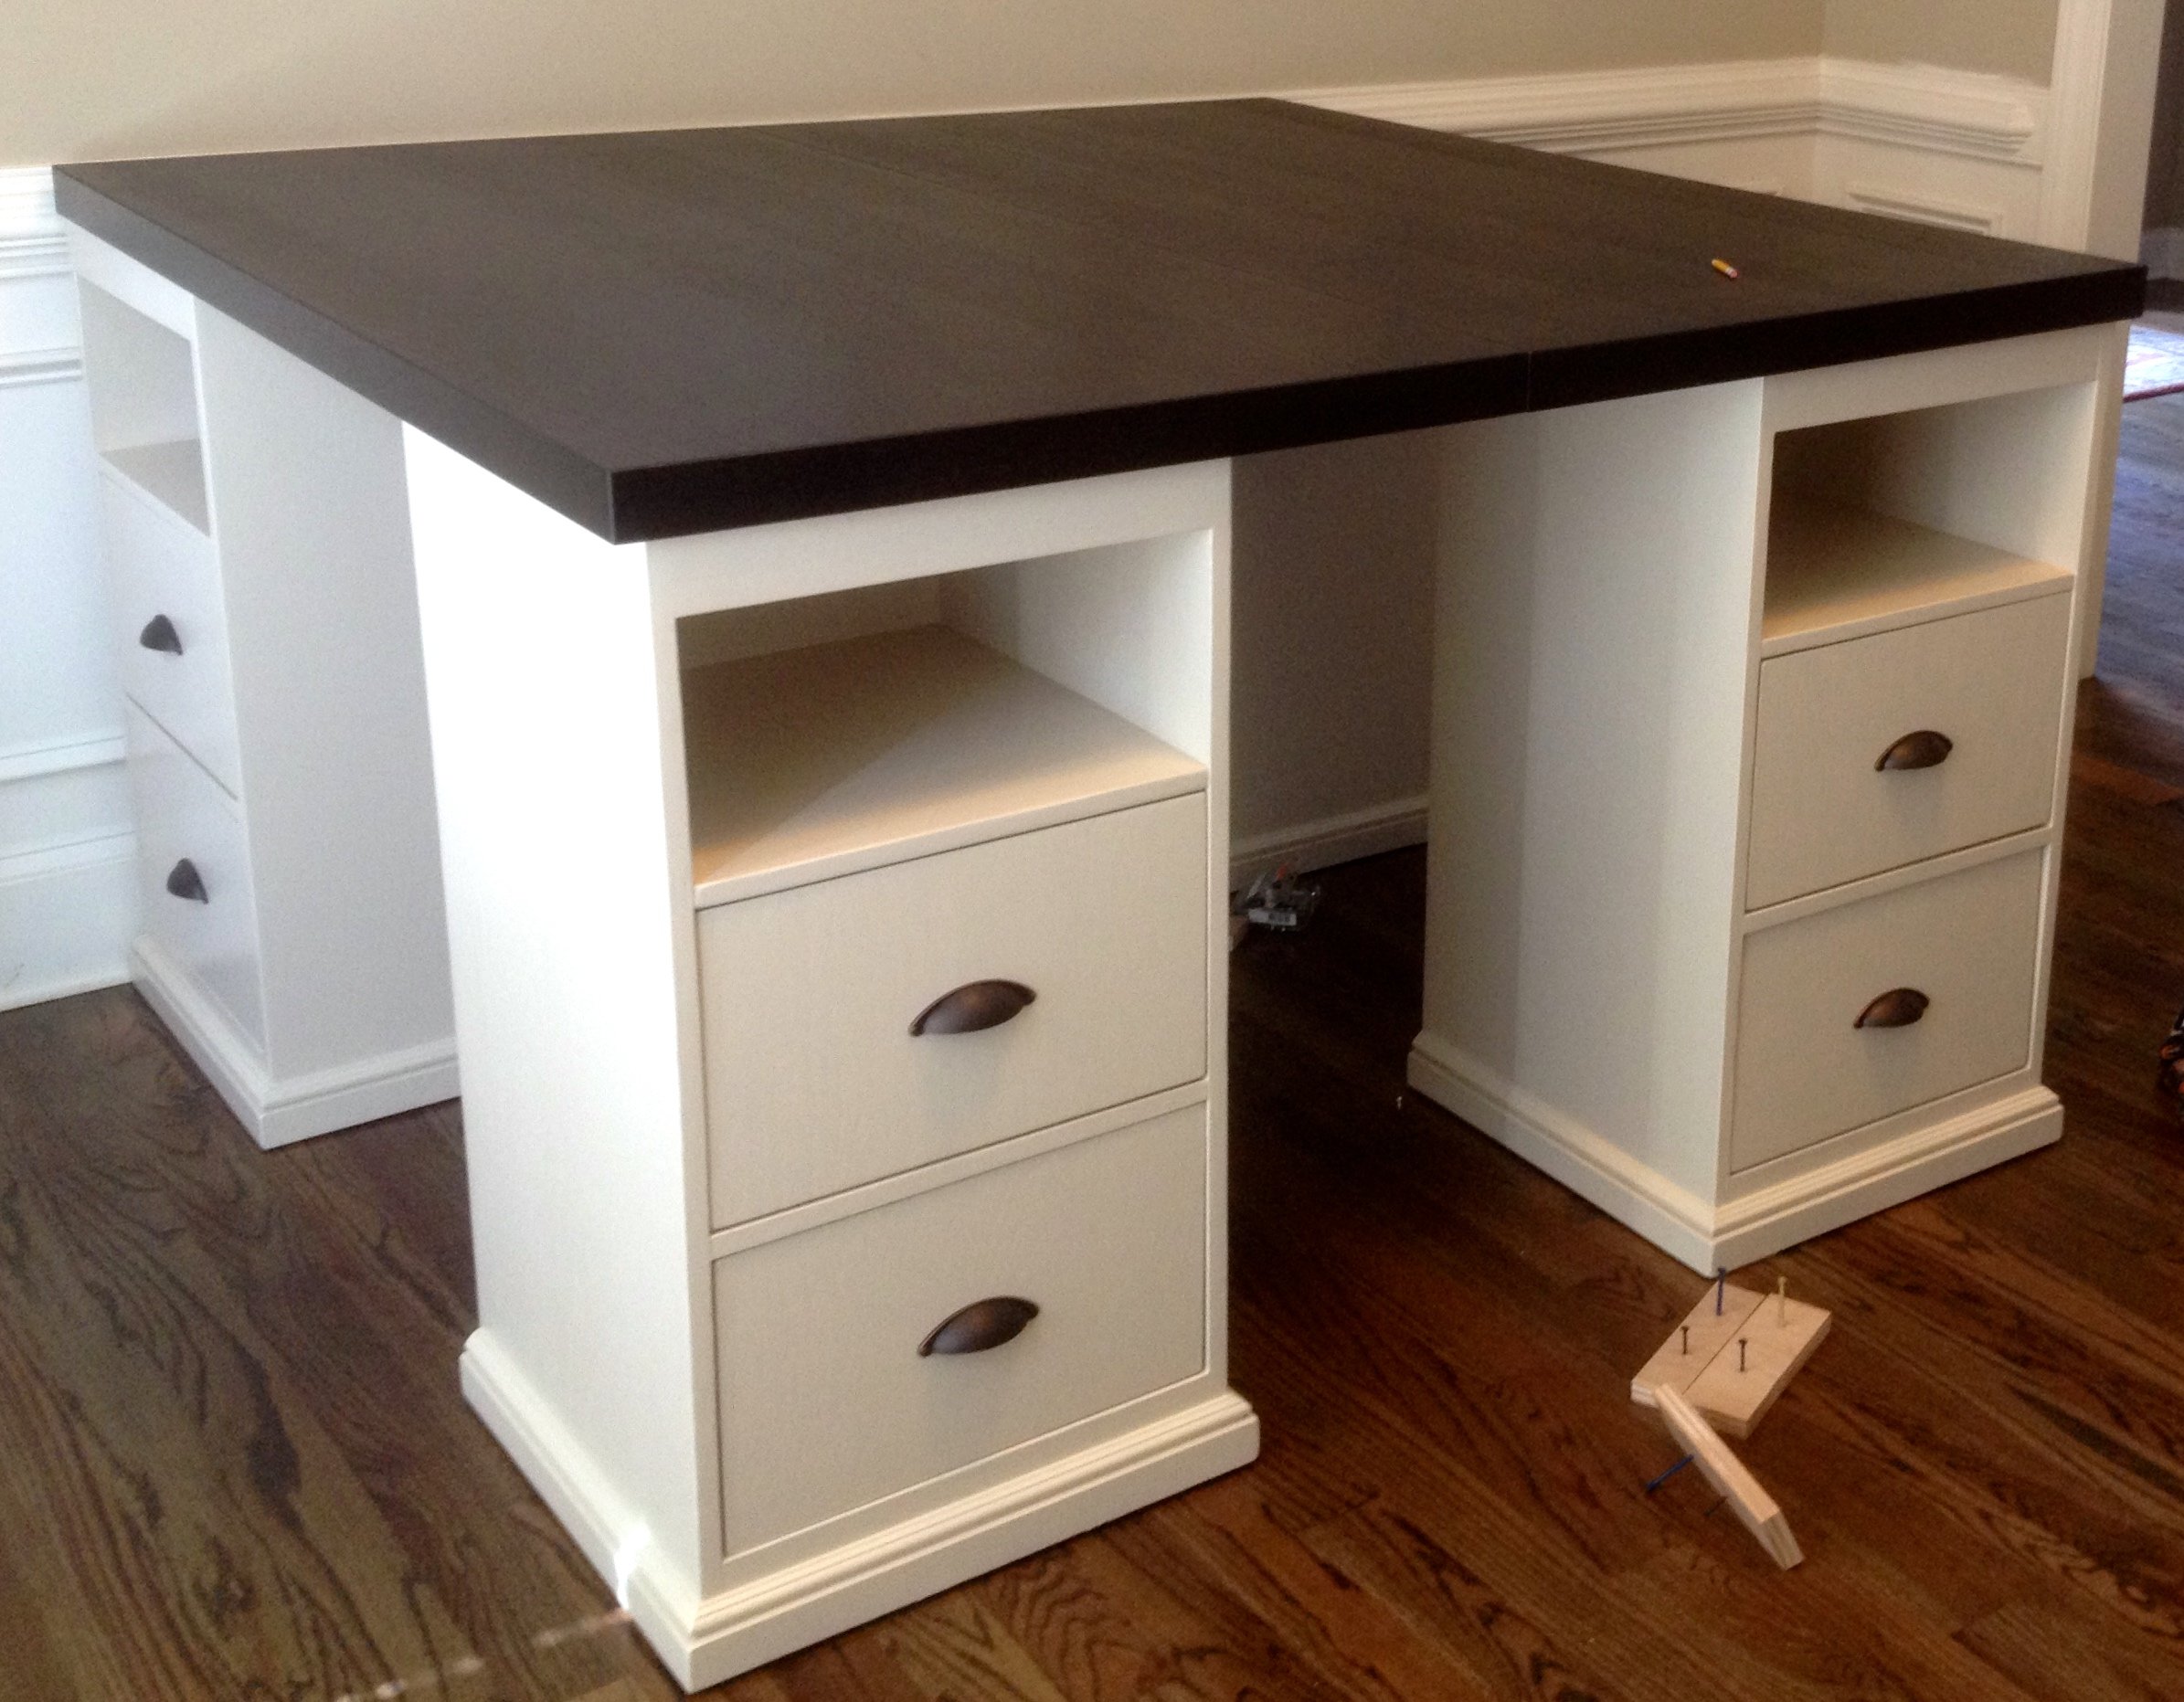
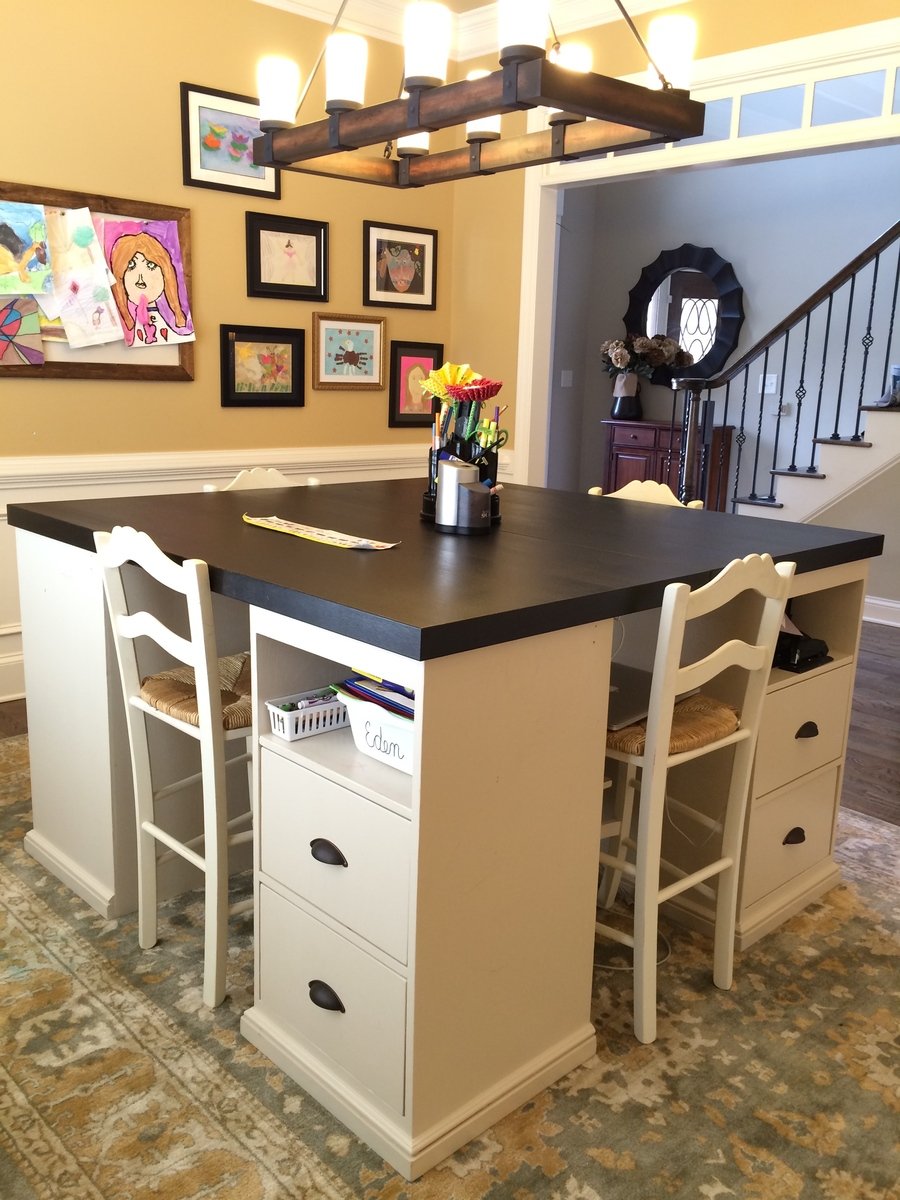
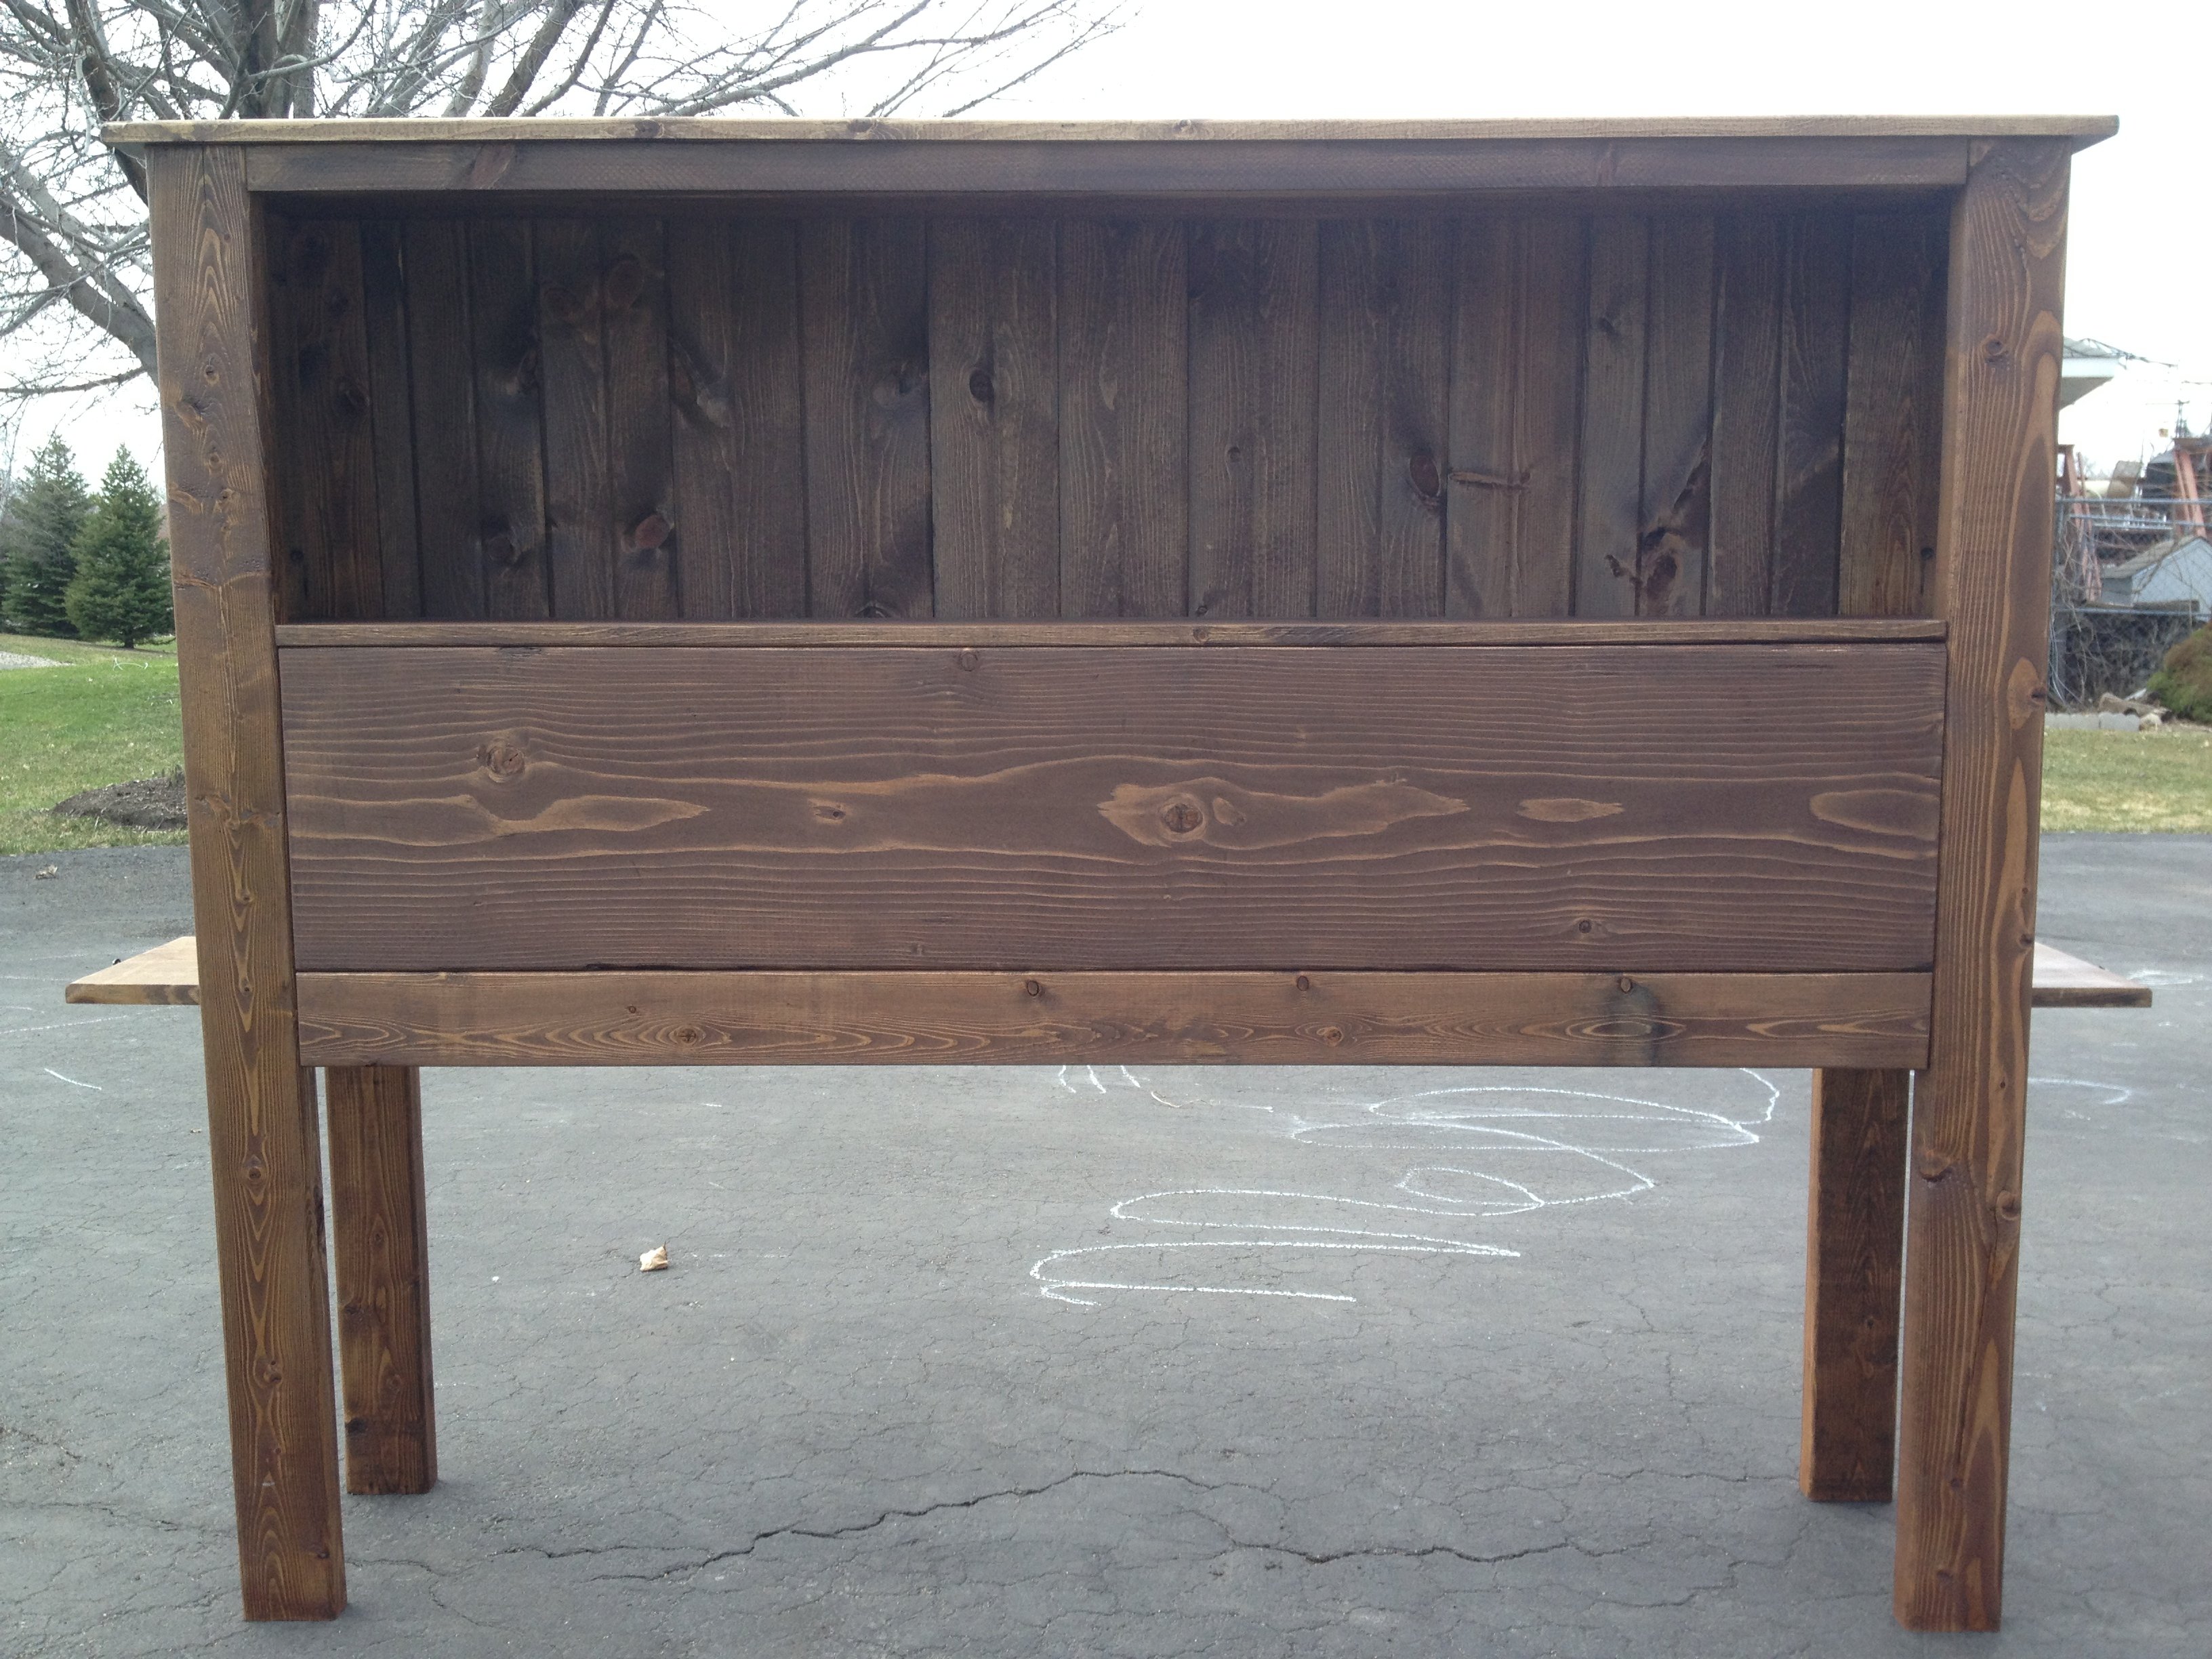
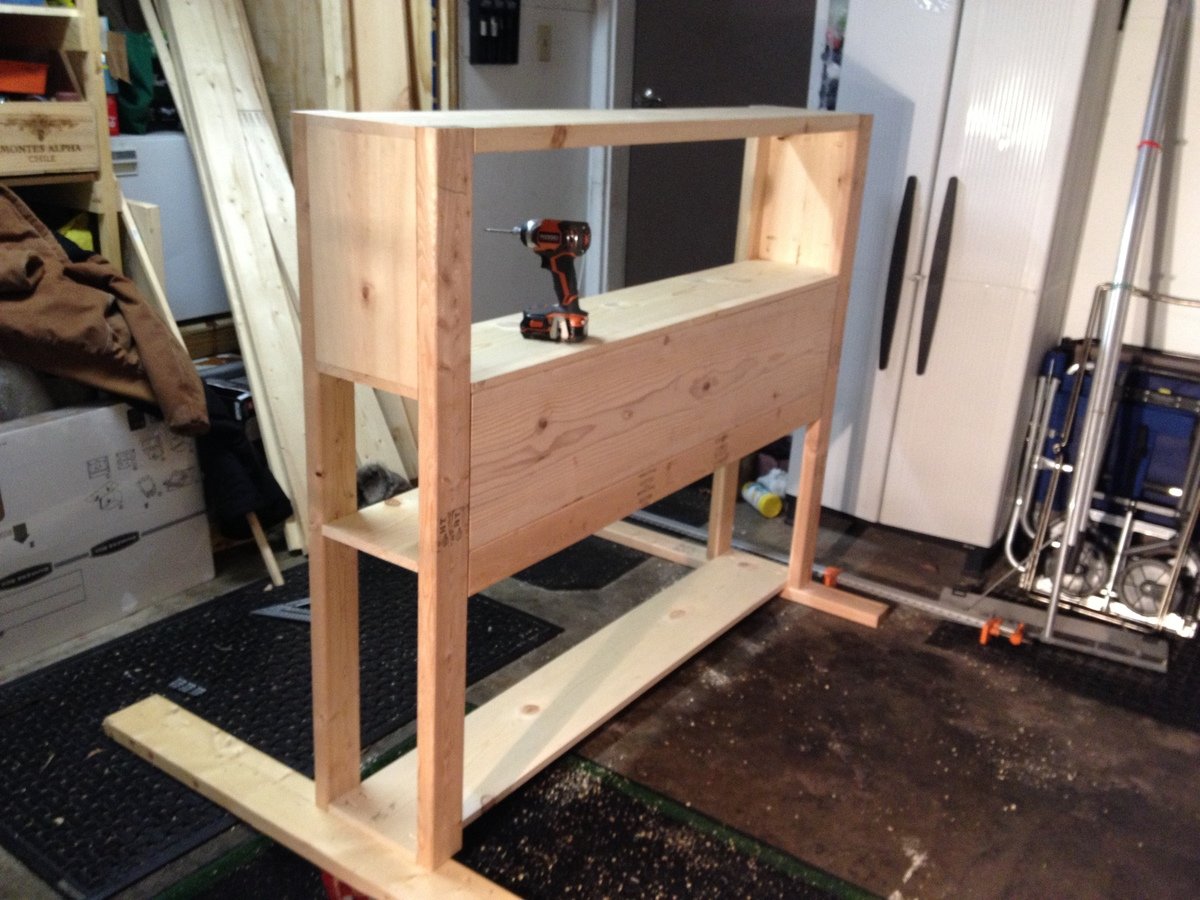
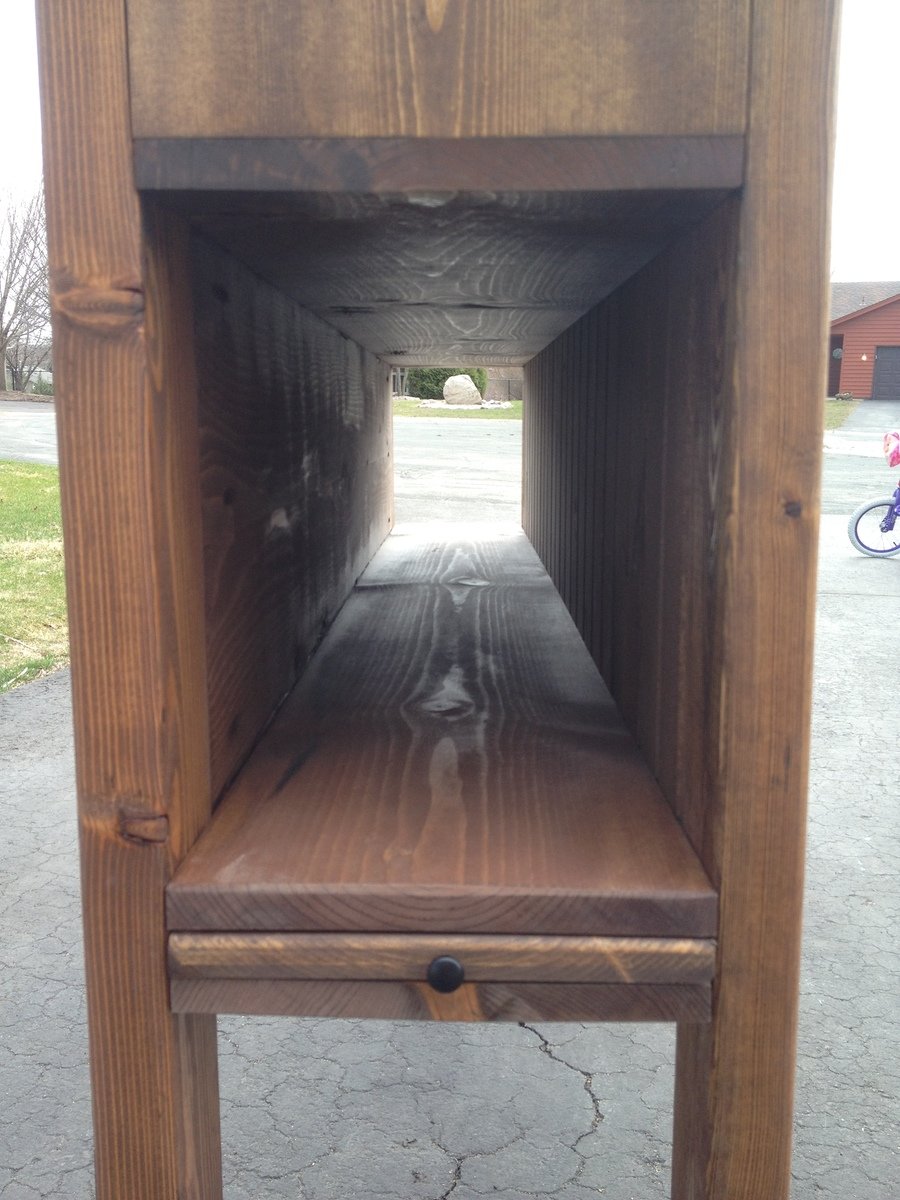
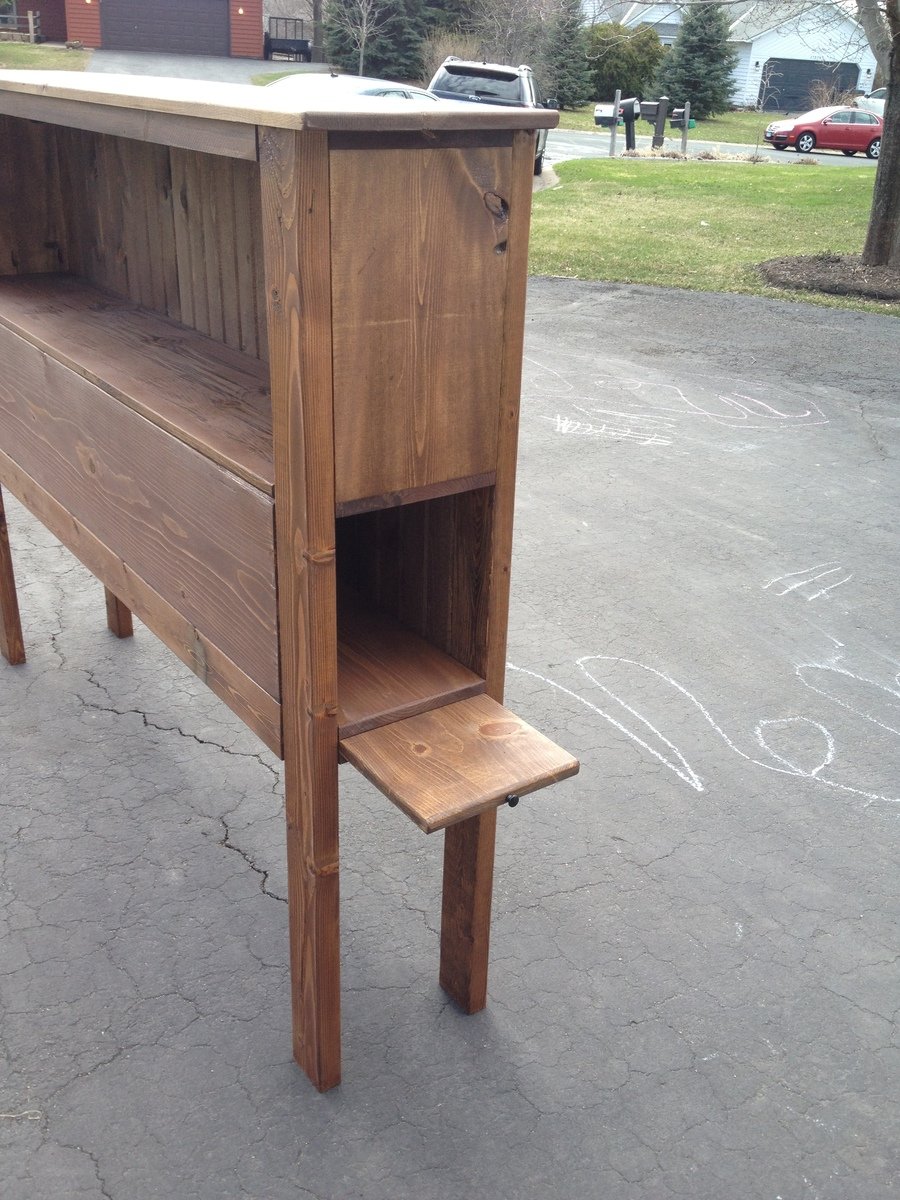
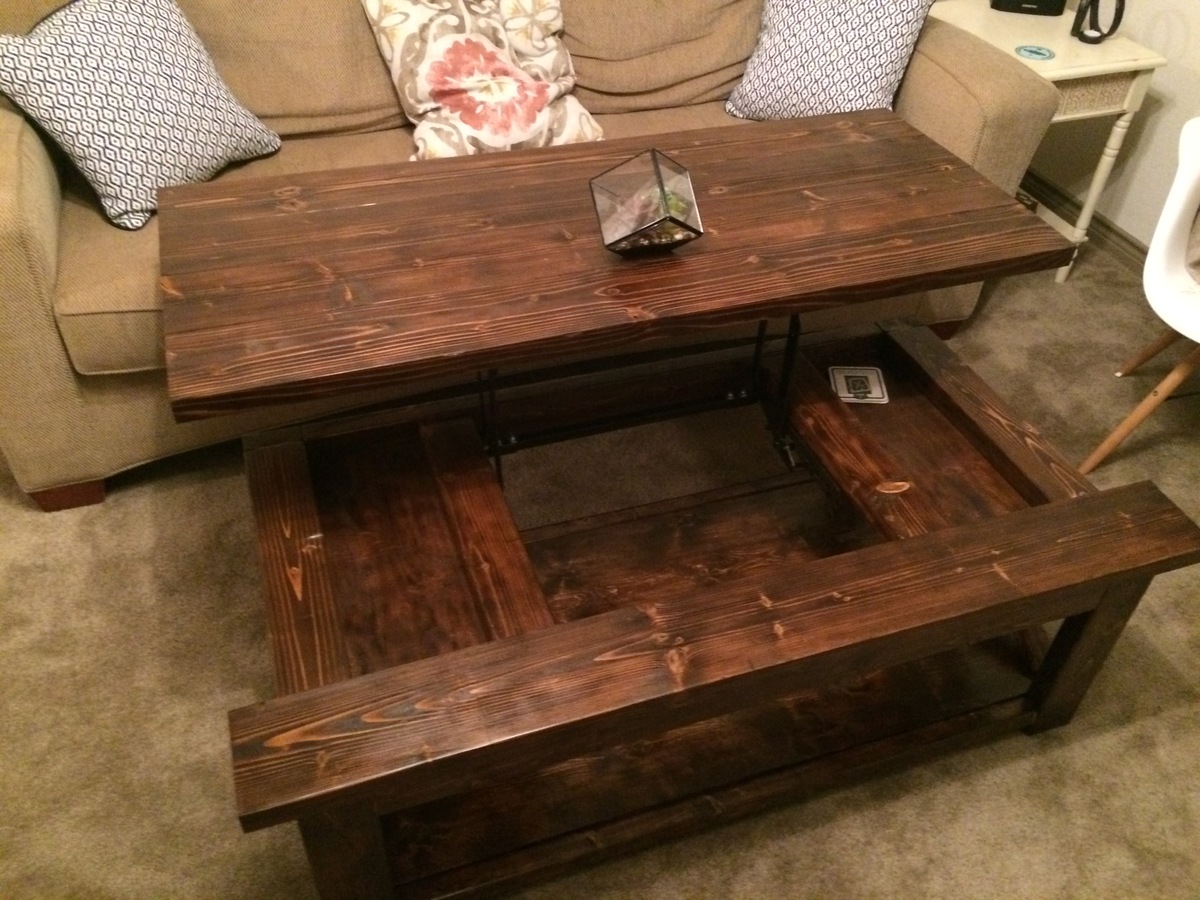
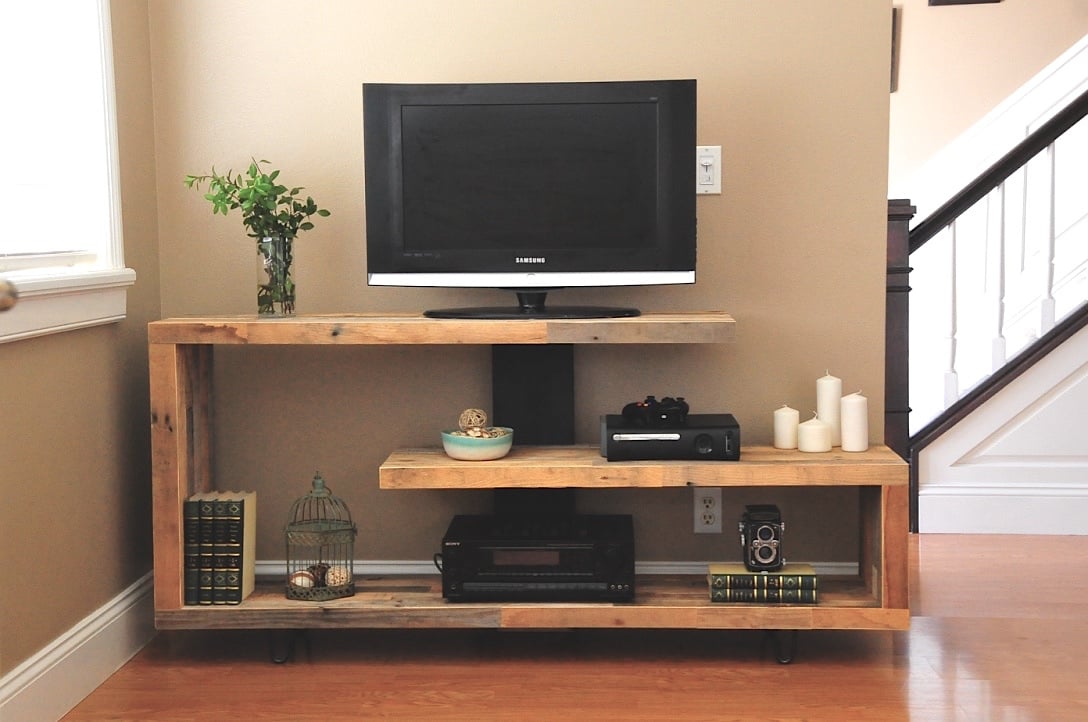
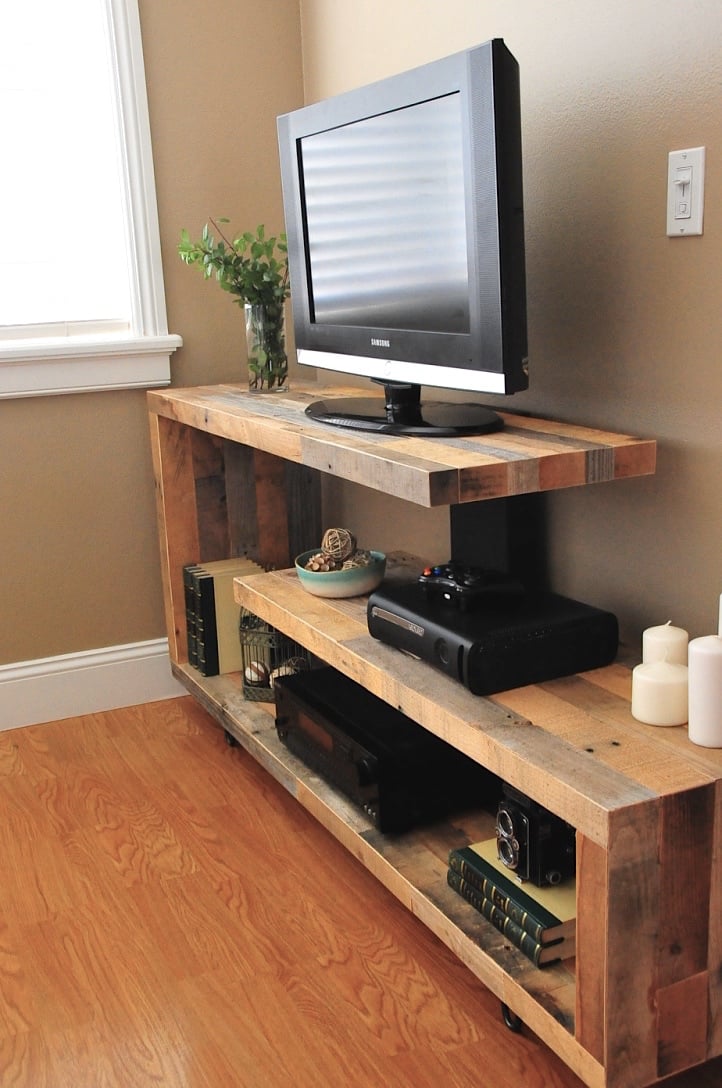
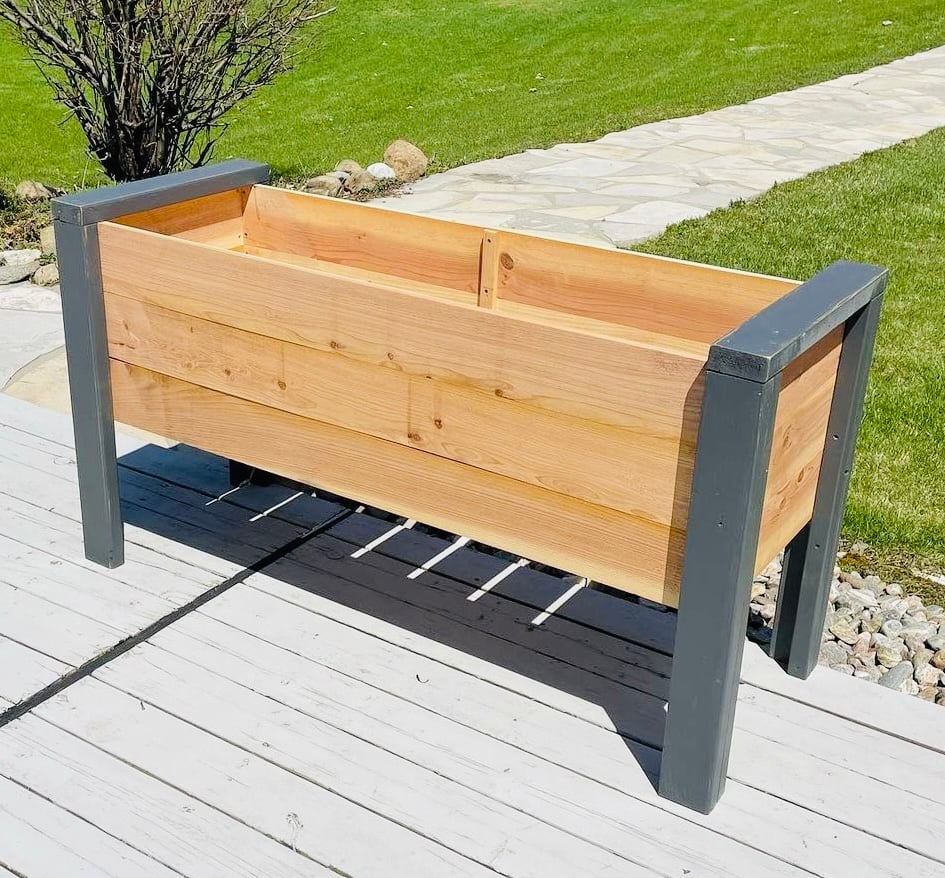
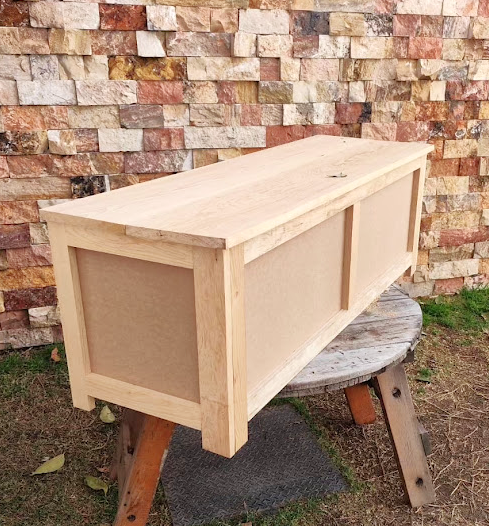
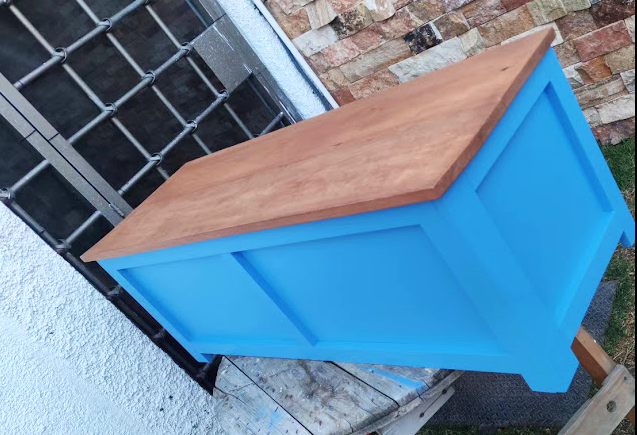
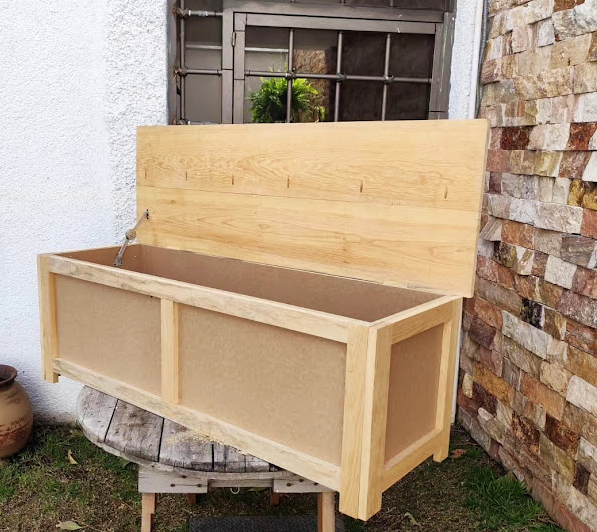
). Because I added the hidden drawer, I changed the opptional center support to 4X4 blockes that were pocket screwed under the center of the boxes. I ended up using birch plywood and fir for this build. For my first bed build I'm fairly happy with how it came out. Thanks again!
Thu, 12/11/2014 - 07:41
This is your first build and you did all of those awesome modifications?! Really impressive and it looks perfect! Congrats and welcome to the community!
In reply to Seriously?! by spiceylg
Sun, 12/14/2014 - 06:03
Thanks for the compliments! It was a fun learning experience. Making all the modifications definitely slowed down the build, but also made it more rewarding!
Fri, 12/12/2014 - 13:18
I just started my bed (mostly out of Baltic Birch) and am wondering where you were able to find such nice 4x4s. Your bed is gorgeous! No luck here. I bought redwood, but really wanted fir for the sharper edges. It's my first project, too. I also bought same drawer slides, but the soft close. Didn't want the slam. I figure building it will be the easy part compared to procuring nice 4x4s! Hope you can help!
Sun, 12/14/2014 - 06:01
Thanks! The 4x4s I found at a place called Better Living Building Supply. They had a pretty nice assortment of fir, including the 4x4s, so that is why I chose it for the build. Finding the 4x4s slowed down my start on the build. Our local Lowes only had them in treated pine.
Sat, 09/05/2015 - 20:47
Thank you for the pictures, the bed turned out Awesome. I was wondering about the latching system for the foot of the bed. Do you think a piano hinge on the lower would work too? Also on the center drawer did you use rollers or is it just friction? Can't wait to start the build.
Thanks
Mon, 02/15/2016 - 14:11
This is excellent!!! I really like this, so much in fact that the wife is going to have to get used to it too. lol But really, GREAT work! Any chance you could post a pic and or comment about how you attached that removeable end? i think this is the best part! Cheers!
Wed, 10/24/2018 - 23:21
How can I get / purchase the plans for the construction of the bed ?
Tue, 12/10/2019 - 08:42
Beekeeper, Awesome build!!! Have you posted your altered plans anywhere? I'm very interested in your build, I was wondering about some aspects of it and how you approached it. Plans would clear it up instead of bothering you with all my questions.
Mon, 11/16/2020 - 15:42
Bed turned out awesome. I was wondering if you have the plans for the bed with a list of supplies it took to make this bed. I so want this bed it's just what we are needing
Great job
Thanks to the tips and tricks we picked up from Ana here, we were able to build our very own storage shed. We use it for storing our kayaking, sailing and camping gear for our company down here in the Bahamas (which is still a bit unorganized in the photo). It works so much better than what we had before in multiple kit sheds. We even have a loft up top for extra storage, electricity in there with a fan, fridge and lights... MAJOR UPGRADE :) We still need to paint it and finish a few things, but we are very thankful to have it up and being used.
My favorite thing is the door handle (a boat cleat) sliding barn door and the herringbone design for 'eye candy' :)
Thanks go out to Ana and her wonderful site! I would have never attempted this without the foundation I built here!
Sun, 04/14/2013 - 20:37
What did you use to make the sliding door? Can you upload pics? I really want to make one for my bathroom but all the hardware I find is really expensive.
In reply to Sliding door by jbayer80
Mon, 04/15/2013 - 11:29
I've read on some blogs people have found theirs at Lowes or Tractor Supply.
Mon, 04/15/2013 - 06:05
We built the door out of some T1-11 Siding, 1x4's and various scrap pieces. The hardware we used is this Stanley set here: http://www.stanleyhardware.com/default.asp?CATEGORY=HDW+BARN+BOX+TRACK&… Then we bought the steel track separately. This door is super heavy, but it rolls like a charm on the track. Does this help any? Good luck!
Mon, 04/15/2013 - 11:42
And they work perfectly for our camping gear and kayaking gear too :)
Sun, 05/05/2013 - 13:58
Not really any plans that would help. We just drew some rough sketches up some paper and kind of went from there. Between Ana's site here and this book: http://www.amazon.co.uk/Building-Shed-Build-Like-Pro/dp/1561586196 we just pieced things together with the space and money we had. The book just helped me a lot to plan it out, and then all of the building techniques Ana has taught me on here came in handy. It's a group effort :) Hope this helps!