Community Brag Posts

2x4 Sectional & Handmade cushions - LOVE!

Submitted by Anonymous (not verified) on Thu, 05/26/2022 - 21:46

Building this project and sewing the cushions was like a love letter to my family. I made them a year ago while on a high dose of Prednisone for my asthma and chronic pain (so helpful!). I finally felt capable of doing something that would bring our family together outside. A year later it continues to serve us well.

The instructions for the sectional were very well done. Super friendly and made me want to keep going! I used black analin dye to stain the wood. Swoon!

For making the cushions:
- I relied heavily on Sailrite's resourceful web site & tutorials for their thorough and detailed instructions on making cushions, cutting foam and sewing piping.
- Home Depot has the best pricing on foam.
- Used the brand 'Cushion Qwik' Silk Film (Amazon) to wrap the foam so they can withstand PNW rain.

Comments

Planked Wood Sideboard - Rustic Yet Refined

Submitted by becada on Mon, 03/03/2014 - 08:06

This was my first finished project using plans from Ana's site, and I am very pleased with the finished product. Every aspect of the finished sideboard is based on something from the site. I started with the plans for the Planked Wood Sideboard, and made no modifications as the dimensions were perfect for our basement family room. I decided to inset the back (http://www.friendly-home.net/2012/02/gigantic-rustic-sideboard.html) as Ana explained that Hillary had done, and love the final result. This will allow us to use this to potentially divide a room in an open concept space at some point in the future.

For the finishing process, I decided to follow the "Rustic Yet Refined" finish tutorial highlighted on both the Ana-White site (http://ana-white.com/2013/08/rustic-yet-refined-wood-finish) and Jen Woodhouse House of Wood (http://jenwoodhouse.com/blog/2013/06/07/diy-dining-table/). I fully intended to complete the 9 step process, but found that after we applied the Minwax pre-stain wood conditioner, followed by Minwax special walnut stain and wiped it off within 15-30 seconds, the finish mirrored the restoration hardware finish that we were going for. We decided not to proceed with layering on the weathered oak or applying the whitewash, and went straight to the spar urethane satin coats.

Overall, the project was a success, but was difficult to finish during the Minnesota winter as it was unbelievably cold and was forced to complete the finishing process in our basement/laundry room, which extended the length of the project. I am very excited to begin building other pieces from Ana's plans.

Built from Plan(s)
Estimated Cost
$250-300
Estimated Time Investment
Week Long Project (20 Hours or More)
Finish Used
Minwax pre-stain wood conditioner; Minwax Special Walnut (natural bristled brush); Helmsman Spar Urethane in Clear Satin (natural bristled brush)
Recommended Skill Level
Intermediate

Comments

Coffee Table with Drawers

Submitted by Anonymous (not verified) on Sat, 11/18/2023 - 12:14

This was inspired by a Potter Barn table that looked similar. It was one of my first projects. I couldn’t afford the 2000 plus from there so built it. Sanded very fine and used Dark Walnut stain. Sealed four times with polyurethane sanding between each. Rubbed last coat of polyurethane on with cloth and used 0000 steel wool to give it a very soft and smooth finish.

Lynn

Children's chair

Submitted by Anonymous (not verified) on Sat, 09/10/2016 - 09:44

Our son is learning cello and we were told he needed a 14" chair for practice, so this plan looked perfect. 

Other than tweaking some of the dimensions as the plan didn't seem to quite work, the only other change I made was to use wooden dowels instead of screws to give it a cleaner finish. 

Seems stable enough for me to sit on.

Estimated Cost
£10
Estimated Time Investment
Afternoon Project (3-6 Hours)
Finish Used
None yet, but son wants it painted red
Recommended Skill Level
Beginner

Daughters blue Playhouse

Submitted by rysos81 on Thu, 07/23/2020 - 08:55

I used the basic framing plan for the project, but extended roof overhangs, added engineered siding / trim and cedar shake roofing. I put 2x4 bracing on for the platform.

Estimated Time Investment
Week Long Project (20 Hours or More)
Recommended Skill Level
Intermediate
Seasonal And Holiday

Big Kids Picnic Table

Built using Ana Whites plans for a Bigger Kids Picnic Table. Used pressure treated 2x4 for frame (legs and supports), 2x4 and 2x6 pine (fir) for table top and bench. Finished with Cabot's semi-transparent redwood stain and sealer.

Built from Plan(s)
Estimated Cost
$50.00 plus screws and finish
Estimated Time Investment
Afternoon Project (3-6 Hours)
Finish Used
Cabot's semi-transparent redwood stain and sealer
Recommended Skill Level
Beginner
Seasonal And Holiday

Master Bath Barn Door

Submitted by Anonymous (not verified) on Fri, 03/17/2017 - 16:34

Created this door with pine wood tongue and groove lumber and pine wood planks. Purchase barn door hardware / track from Jet.com and door handles from Hobby Lobby. 


This replaced my Master bath door and I think came out pretty good. Thank you for the ideas!!!  Jeff M.   Brownstown, Mi

Estimated Cost
Wood 55.00
Handles 2 for 8.00
Stain ( left overs)
Barn door track 54.00

Total $117.00 and 10 % Military discount at lowes
Estimated Time Investment
Weekend Project (10-20 Hours)
Finish Used
Minwax. Mix of Kona and Driftwood Grey
Recommended Skill Level
Intermediate

Redwood 2x4 outdoor sofa (Cushions on order, due Monday)

Submitted by Anonymous (not verified) on Wed, 04/21/2021 - 15:31

I love Ana White's 2x4 sofa project. I chose a couple of upgrades: bought redwood 2x4's and a pocket-hole jig to reduce visibility of screw holes and, of course, installed the additional side and back rails. I finished with Tung oil and then read the directions on the can afterwards: 'This product is intended for interior projects only!' Oh well.

We ordered these cushions: https://www.walmart.com/ip/Arden-Selections-Plush-BlowFill-Sapphire-Blu…
which were rather expensive but I read too many negative reviews from customers who bought and used cheap cushions.

This was the perfect project for a retiree with too much time on his hands and some basic building skills.

Thank you for this!

Michael Smith

Estimated Cost
$500 with cushions?
Estimated Time Investment
Weekend Project (10-20 Hours)
Finish Used
Tung oil...but I won't make that mistake again.
Recommended Skill Level
Beginner

Comments

Doggy loft bed!

Submitted by Anonymous (not verified) on Sat, 06/03/2017 - 17:31

My dog loves to people watch all day while I'm at work and she needed a new bed so I took the plans for the lower platform and modified them so it would stand alone. Took the platform and put it on the bottom so that her bed would sit inside instead of on top where she could more easily fall off.

I tried building without PH screws at first and all I ended up with was a lot of cracked and wasted lumber. Got the PH jig and finished the whole build myself in 2 hours. Sanding, staining, and sealing tomorrow but I'm just so excited about it I had to post now!

Estimated Cost
With the two sets of lumber, having to buy the jig, hardware, stain, and electric sander it cost me about $130
Estimated Time Investment
Afternoon Project (3-6 Hours)
Recommended Skill Level
Beginner

Comments

Great Patio Set

Submitted by Anonymous (not verified) on Mon, 10/04/2021 - 13:02

I wanted sturdy seating for my patio. Ana White had the perfect plans for my L shaped seating and coffee table. It was simple to put together and we love it!

Comments

Seasonal And Holiday

Custom Modern Chicken Coop

Submitted by Anonymous (not verified) on Wed, 08/30/2023 - 08:49

I made this coop twice as wide like Ana suggested since I have 4 chickens and wanted to make sure there was some extra wiggle room in case “chicken math” got the best of us. I made a nesting box to mount on the outside. I also used plywood for the sides like Ana did in the video. I installed a Run Chicken automatic door that opens at sunrise and closes at sunset. I added some hasps and clasps to make sure all my doors would close tightly. I put hardware cloth across the top before installing the roof panels. I stapled and buried hardware cloth around the perimeter for predator protection. I also spray painted the hardware cloth flat black so that it would be easier for us to see inside the coop. I stained the rest of the wood with Varathane Semi-Transparent stain, color “Carbon Gray.” I also added some roosts and cedar shingle siding for some extra protection during our New England winters at to match our house. Working 2-4 hours a day, off and on, with a bum shoulder and weak hands, this took me about a week! Thanks for the great plan, Ana!

Built from Plan(s)

Comments

Seasonal And Holiday

Bookcase with large drawer beneath for my son's nursery

I built a bookcase with a large drawer beneath for my son's nursery. This build was based on Ana's plans for the Cube Drawer Bench and Hutch, but I changed a few things to make it my own. This was my first real attempt at making any kind of furniture, or anything else, really, and I'm fairly happy with the way it turned out. More importantly, my wife loves it.

I learned a TON from all the resources on this website. Thanks Ana!

Estimated Cost
$200? Maybe a little more.
Estimated Time Investment
Week Long Project (20 Hours or More)
Finish Used
I originally tried staining using a deep mahogany color from Sherwin Williams, but I hated it. It looked nearly purple. I ended up sanding that off and refinishing using General Finishes "Georgian Cherry" Gel Stain - 2 coats. I then applied two coats of Minwax Satin Polyurethane. The gel stain was exactly what I hoped it would be.
Recommended Skill Level
Beginner

Comments

misterwilbur

Mon, 02/10/2014 - 16:54

Thank you!

I attached the hutch to the drawer by drilling 4 pocket holes on the inside of the bookcase where the bottom meets the top of the drawer. I also used wood glue. I was concerned about the hutch moving around, and the possibility of it tipping over, so I decided to go ahead and build the two components as one piece, essentially.

Also, in order to add some additional strength and stability, I combined the frames on both components so that I would have vertical 1x2's going down the entire length of the backside of the piece. I also added horizontal 1x2's on the backside of each shelf. All these things combined really gave it a lot of extra strength.

Workbench with Drawers and Carts on Casters

Submitted by vendo on Tue, 03/19/2024 - 07:38

Using Ana's Ultimate Workbench Plan and her easy drawer method I built this. I decided to do storage carts that roll in and out for small scrap lumber storage. The Kreg Foreman got it's own cart, I made it so the deck of the machine was at the same height as the work surface. I added a drawer so all of my kreg bits and screws can be in one place. I had batteries and chargers laying all over my small shop, so I incorporated a battery charging drawer. I'm excited for the projects to come using my new set up!

Walkin Closet for my Wife

Submitted by Indy69 on Mon, 10/24/2016 - 09:52

I built this closet system based on the plans here.  So easy and so basic, just putting them all together to make a very nice looking closet setup.  I used 12 sheets of birch plywood, and premium select 1x2 pine.  All stained in Minwax Jacobean and satin clear througout with semi-gloss clear on the drawer fronts.

For the rods, I used chainlink top bars, which cost $6 for a 10' piece, and used #0000 steel wool to buff them out and then polished them.  For the 45 degree corners, I used 1" electrical conduit, and placed two 45 degree bend in each piece, and again steel wool and polished them as well. 

For the drawers, I used soft-close slides.  When using these, I highly recommend installing the rear brackets as well, as they make installation so much easier.  16 pairs of soft-close drawer slides with brackets cost $120 for all of them on Amazon.


Estimated Cost
Under $1,000
Estimated Time Investment
Week Long Project (20 Hours or More)
Finish Used
Minwax Jacobean in satin and semi-gloss
Recommended Skill Level
Intermediate

Comments

Farmhouse Dining Room Table

Submitted by SaraLodise on Mon, 04/27/2015 - 06:18

Farmhouse dining room table built for my mom. Unstained.

Table top is 2" White Pine Boards, legs are cedar, and everything else is whitewood studs. Left the leg assemblies and stretcher board unattached for the two hour transport to Charlotte.  Attached them with screws and some glue upon arrival. Loved the plan and finished in two days!

Estimated Cost
White Pine 2x8s = $183
Cedar 4x4 = $48
Whitewood studs = $10
Screws/filler/plugs = $25
Estimated Time Investment
Weekend Project (10-20 Hours)
Finish Used
Unfinished
Recommended Skill Level
Intermediate

My version of "Outhouse Plan for Cabin"

Submitted by johnseigle on Mon, 06/06/2022 - 15:00

Hi Ana and Family,

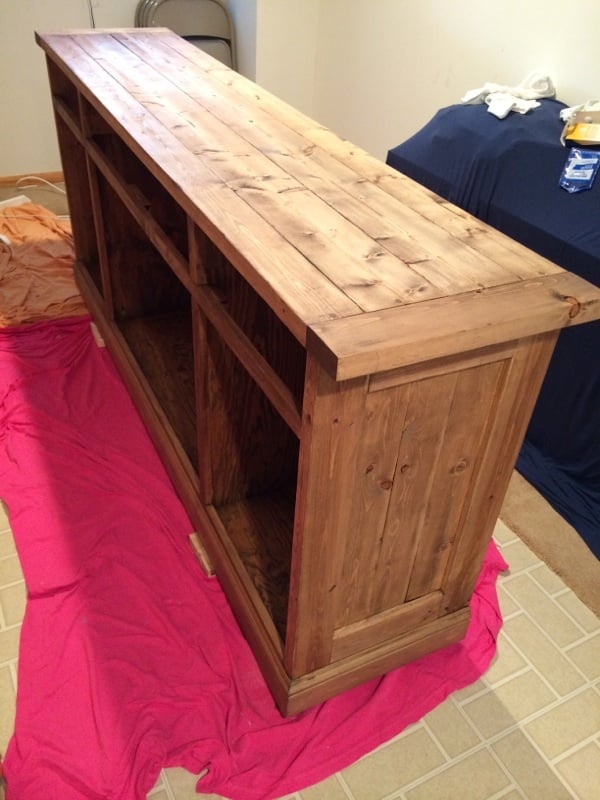
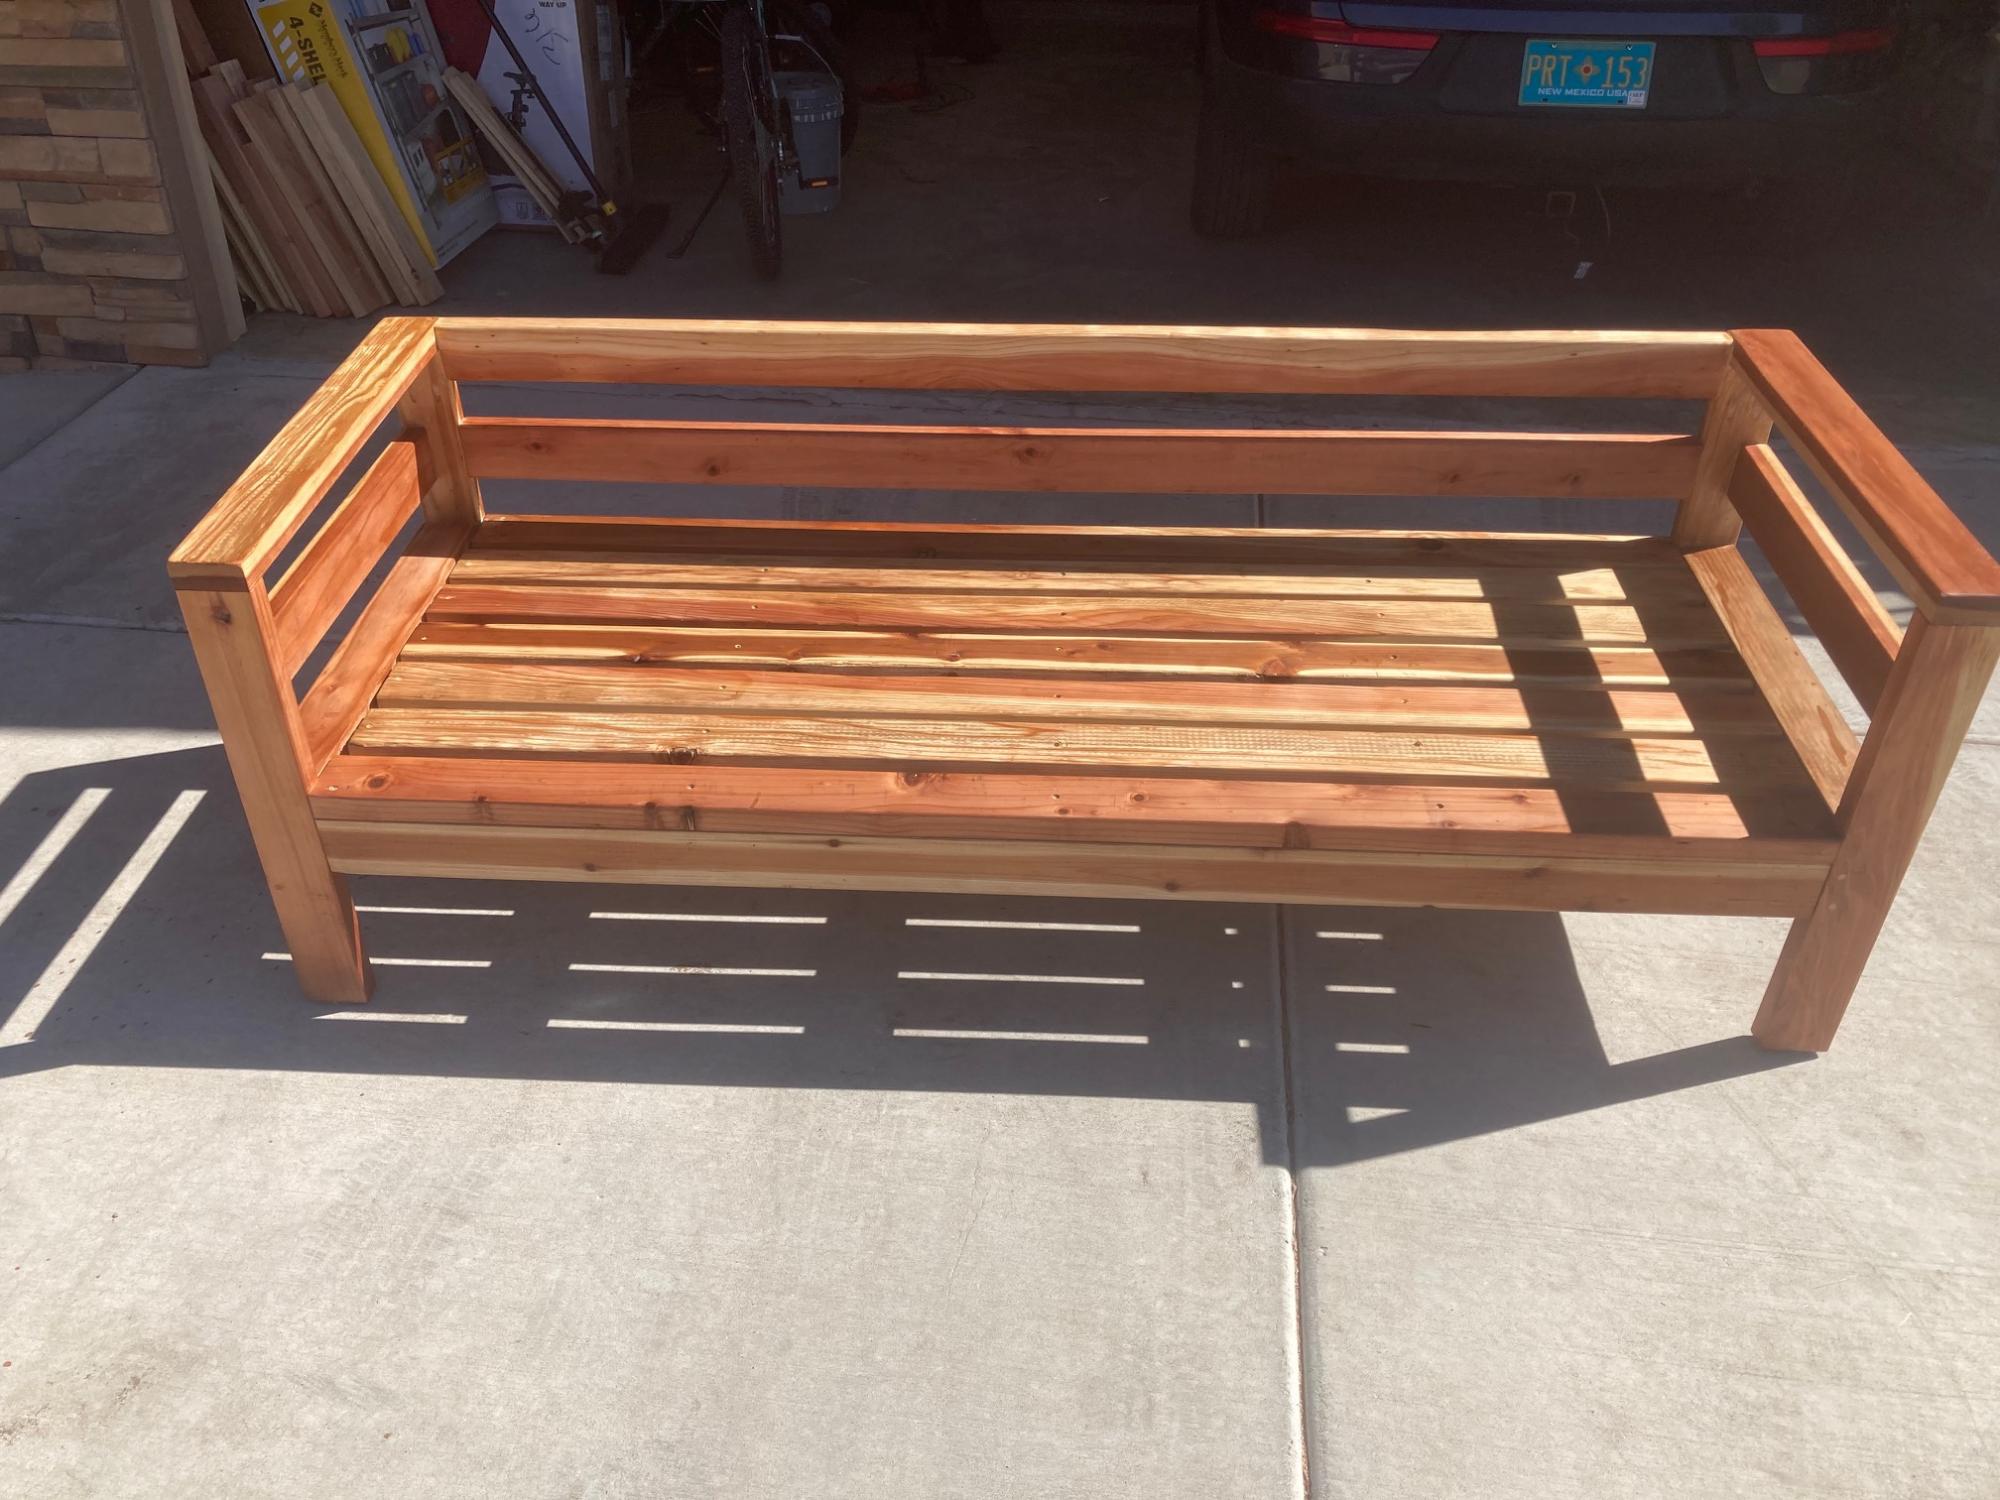
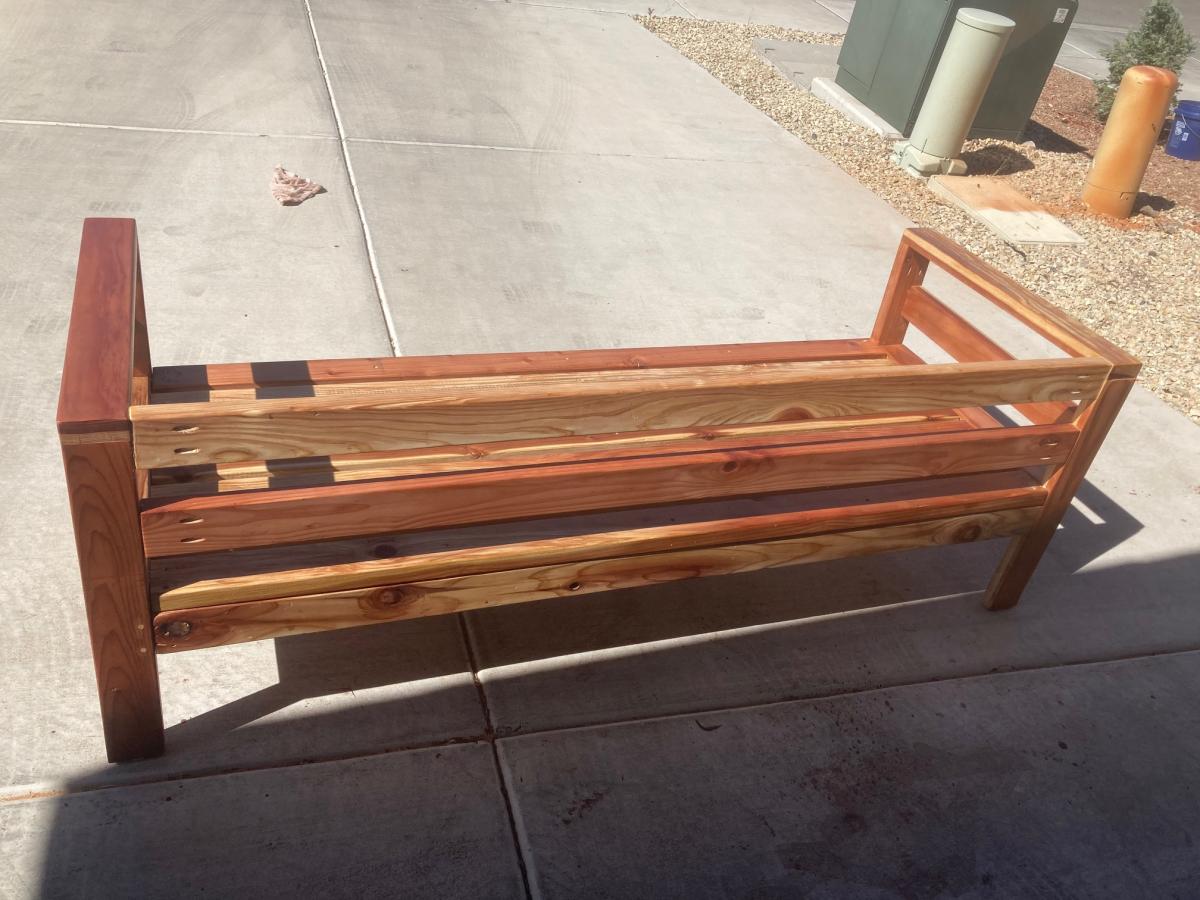
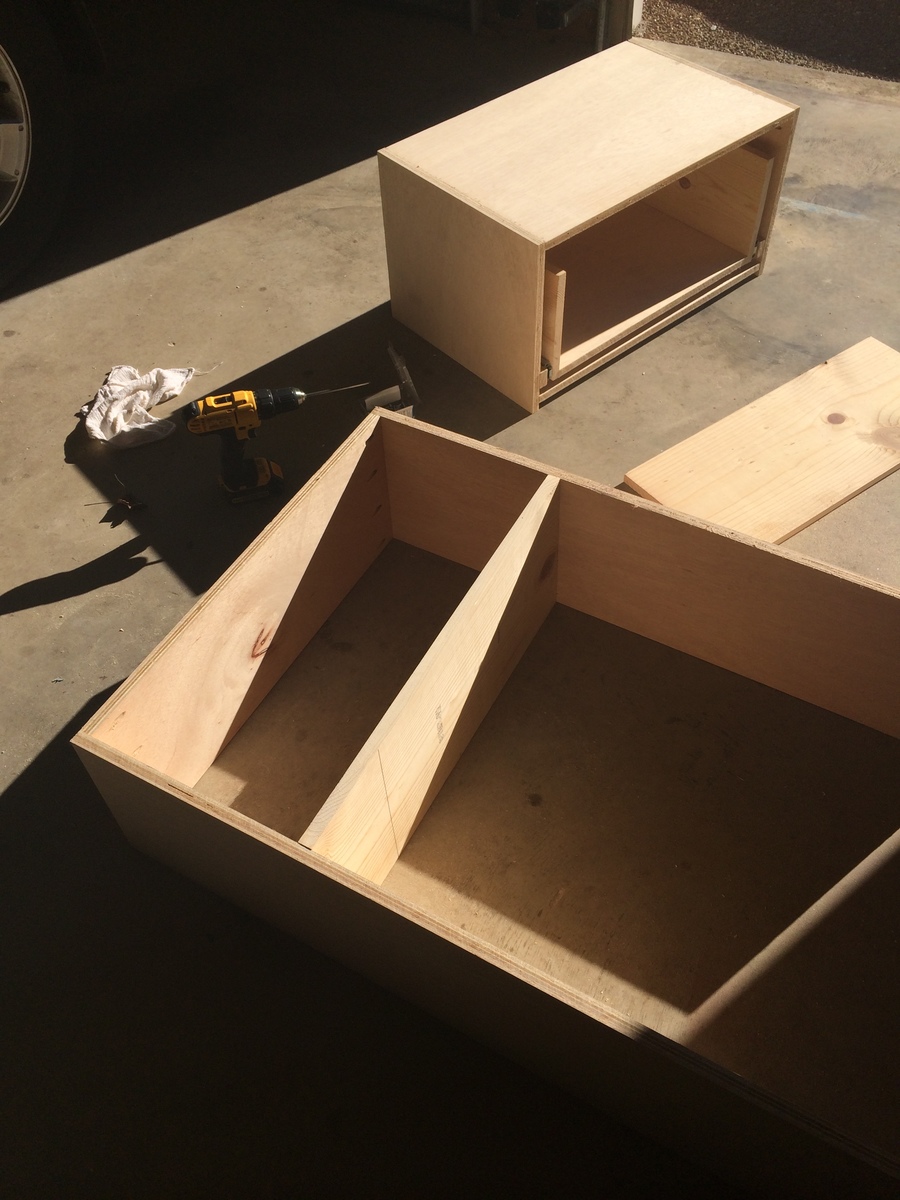
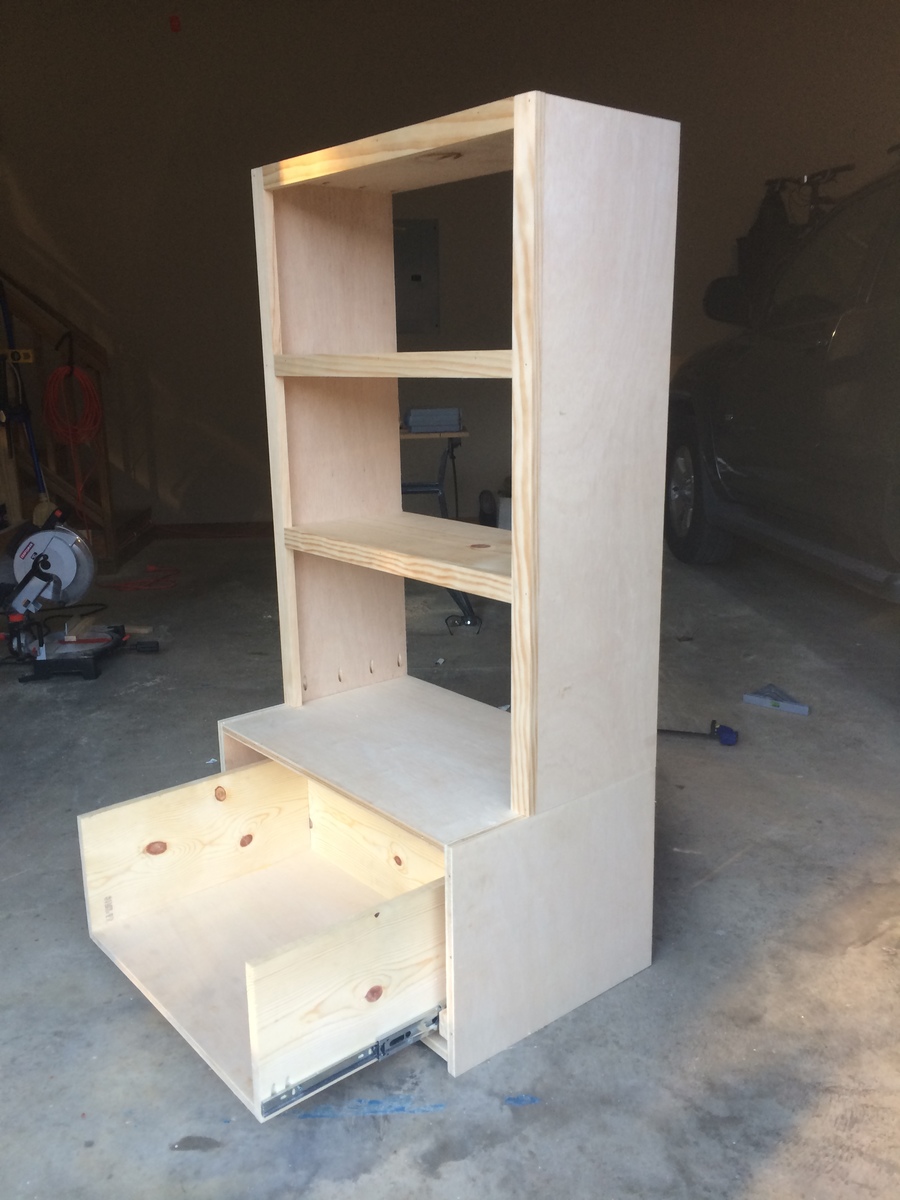
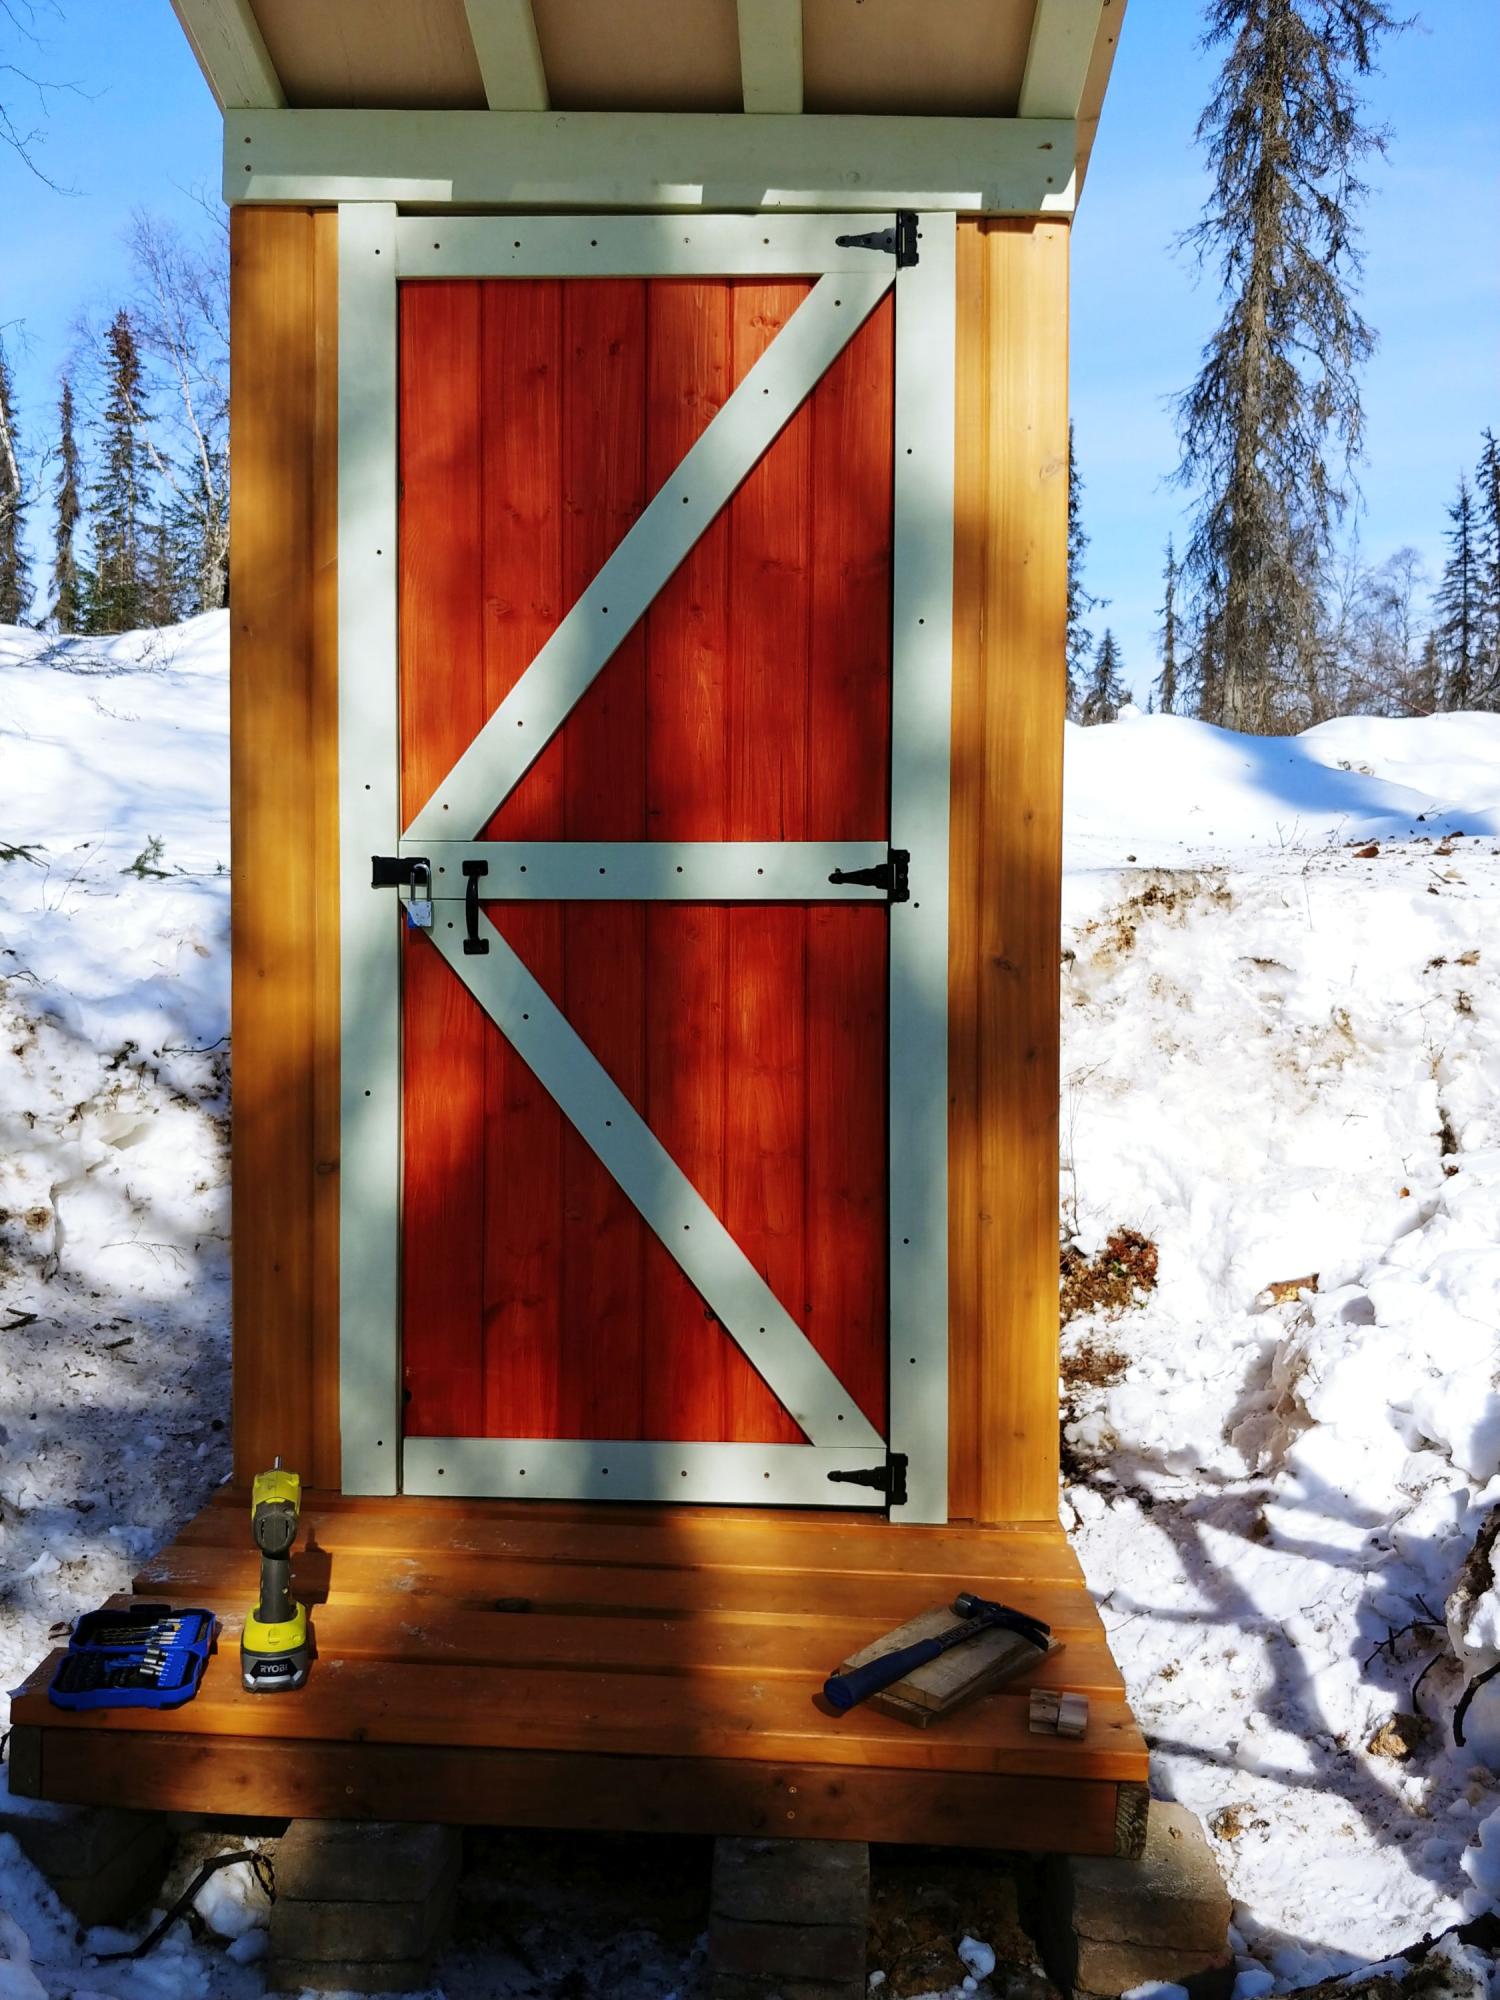
I mostly followed your plans for my remote Alaska property outhouse build, with slight modifications. Our property is 7 miles from any road (and 2.5 hr drive from Anchorage) and I typically go there in the winter via snowmobile (December-April). I built this on my back deck in Anchorage and then took it apart and transported it in sections (back wall, 2x sidewalls, floor parts, door, roof parts, seat parts). It took me 5 trips to get it all up to my property from the truck at the trailhead via snowmobile!

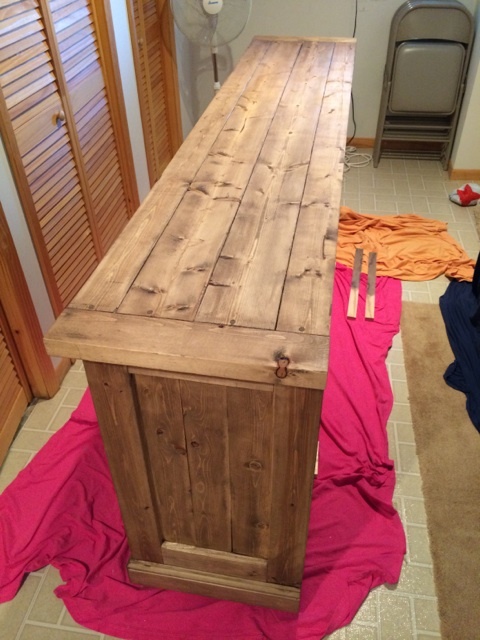
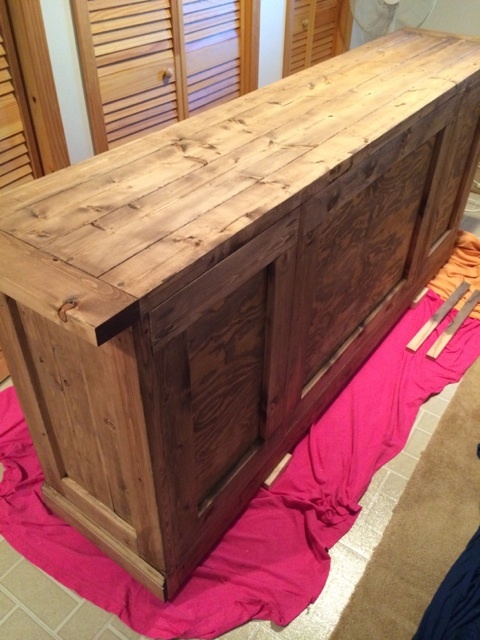
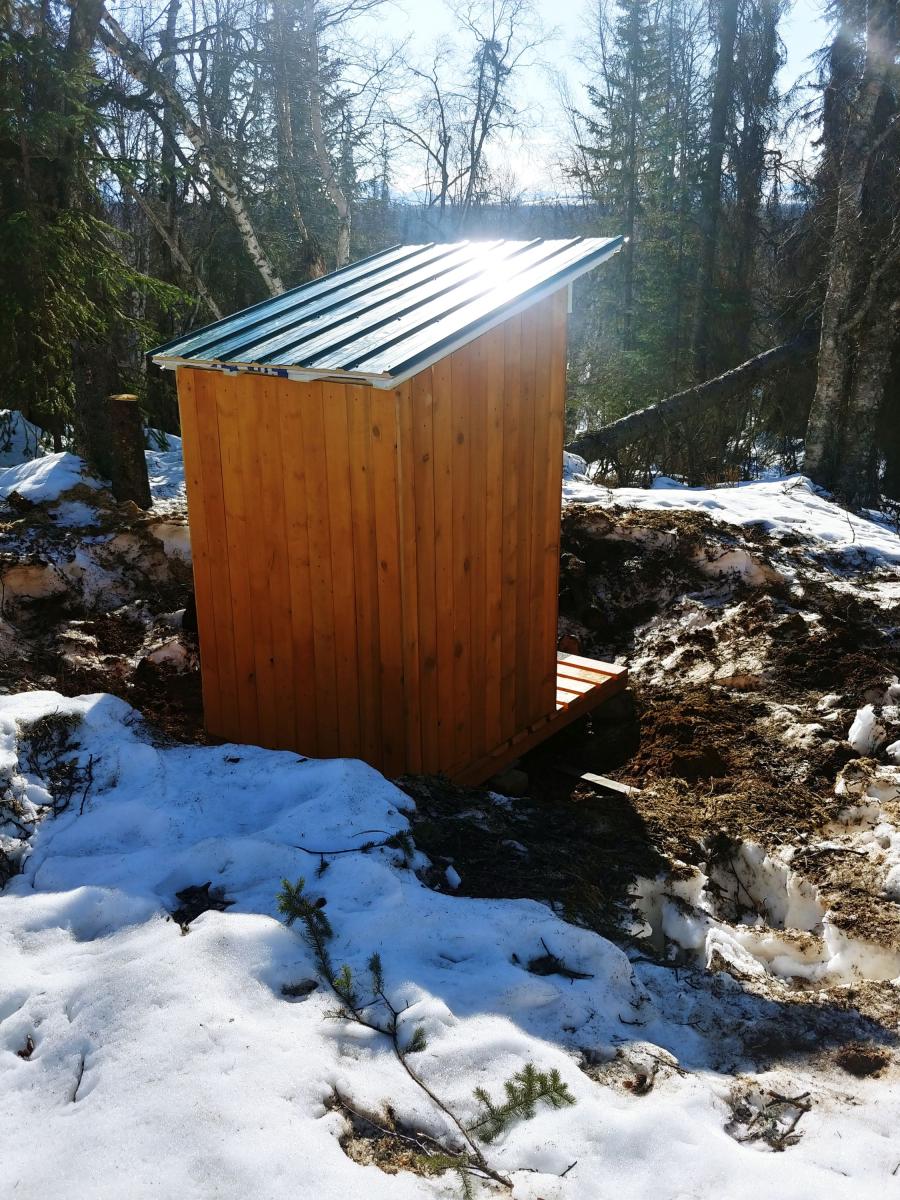
The hardest part was digging the hole under 5 ft of snow! I cut several dead spruce trees in the area I planned to situate the outhouse and started a big fire (really big). We kept that going until we had melted out about a 15ft wide area down to bare soil. The next morning, while the ground was still warm from the previous evening's fire, we dug the hole (only about 3.5x3.5ft). Then I cribbed in the hole with old cedar fence slats to help prevent the inevitable ground cave-in that we often see with soil melt and rains in Alaska. Then, I pieced the outhouse together, with the frame sitting on small pavers.

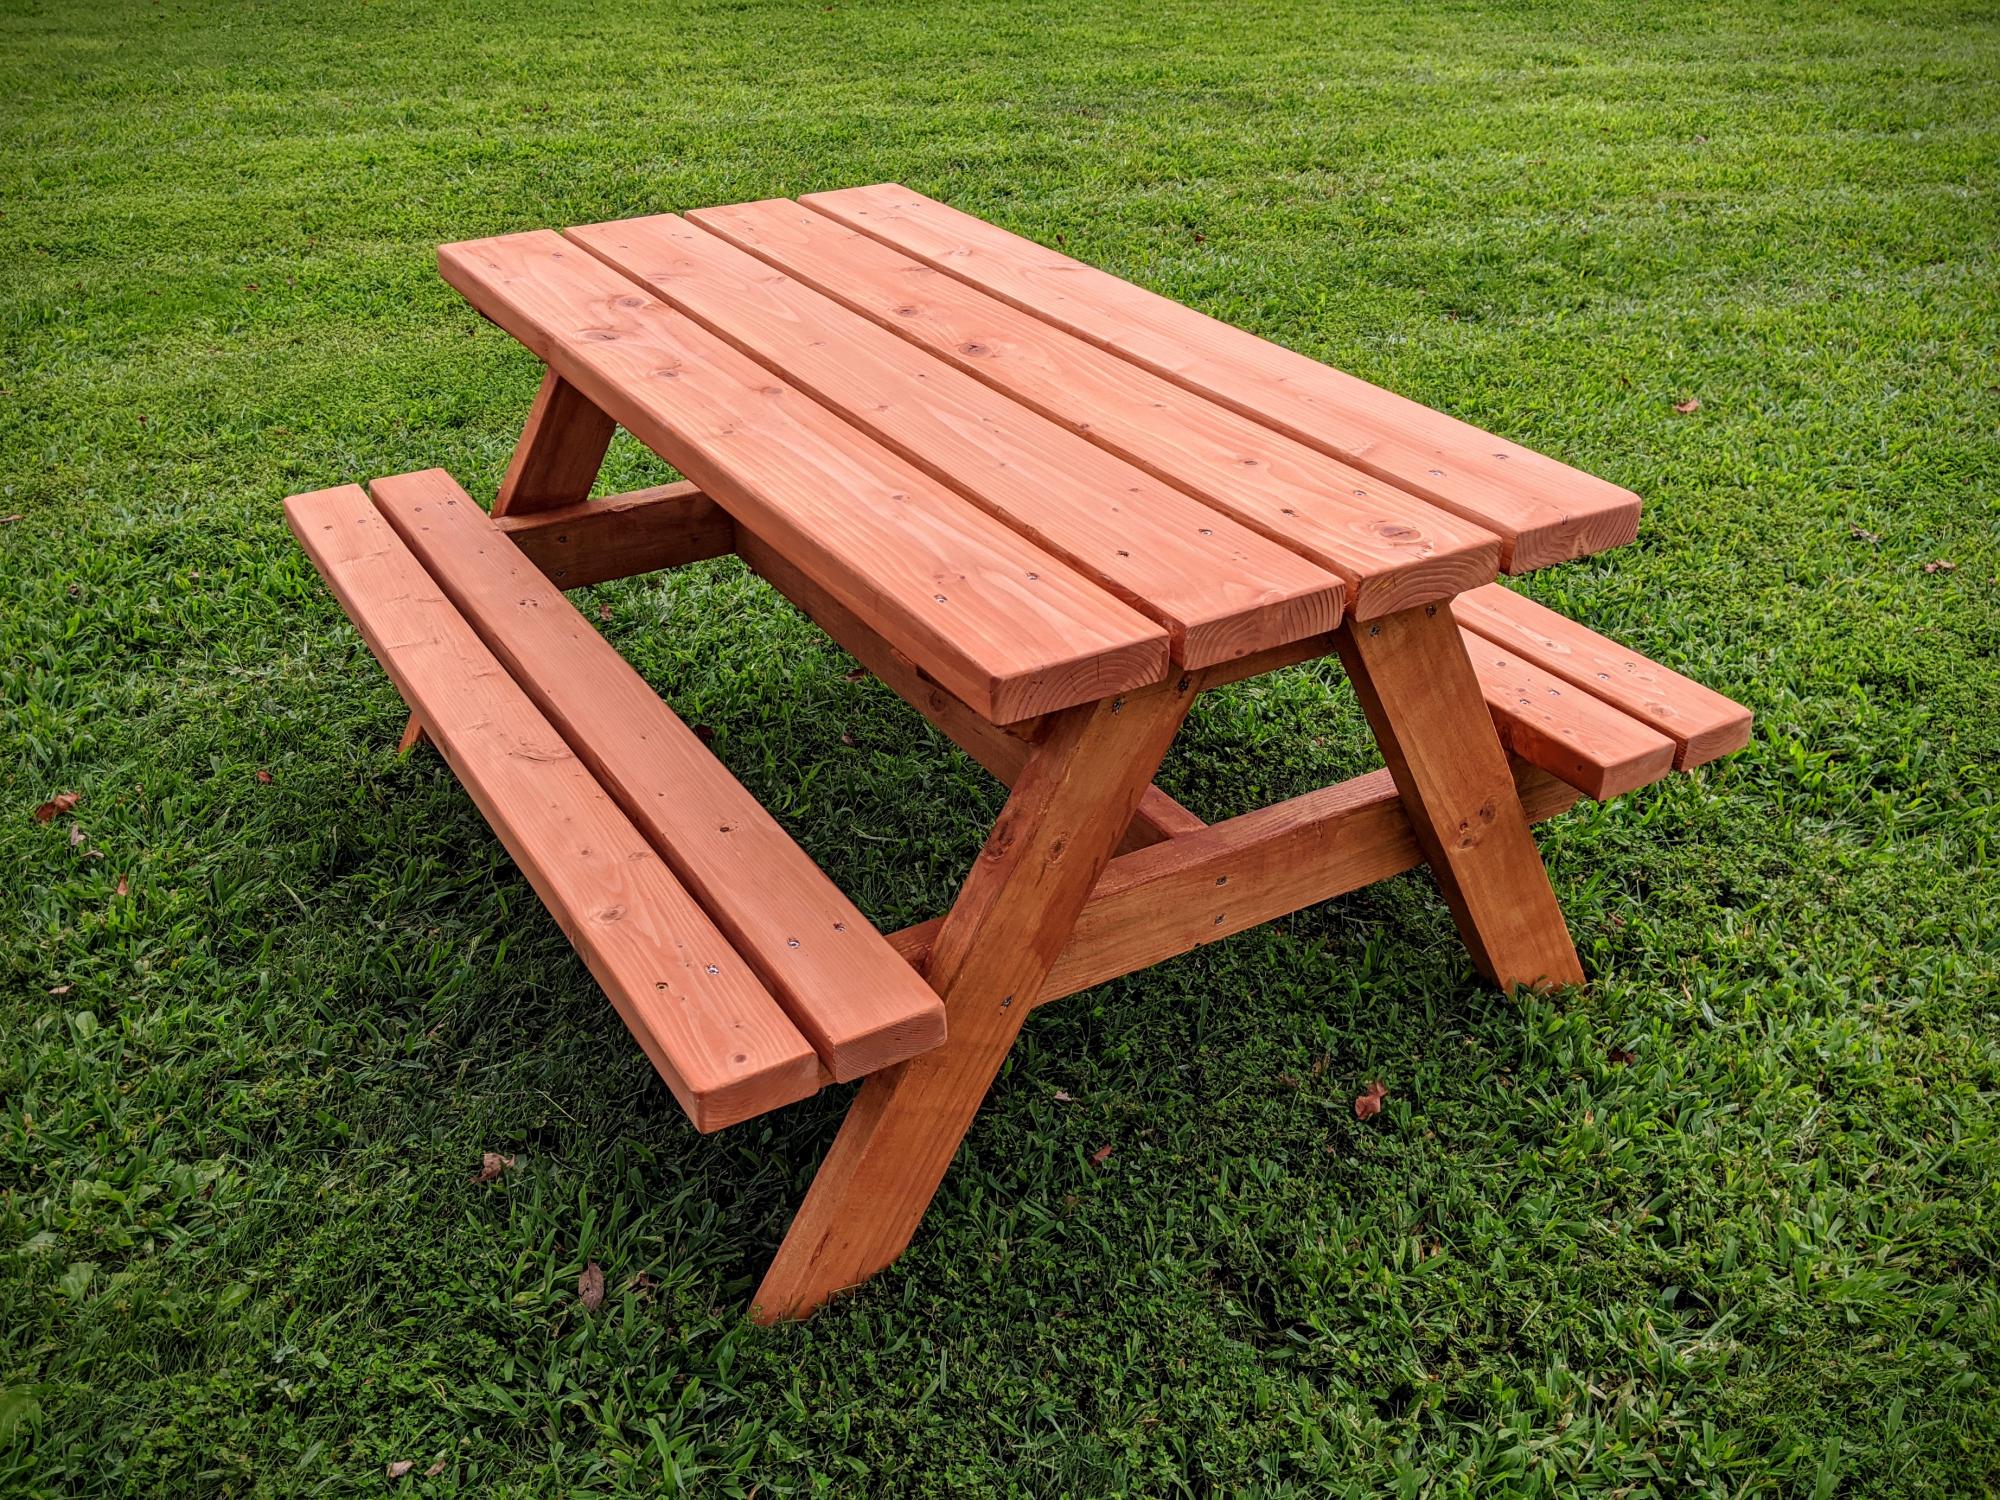
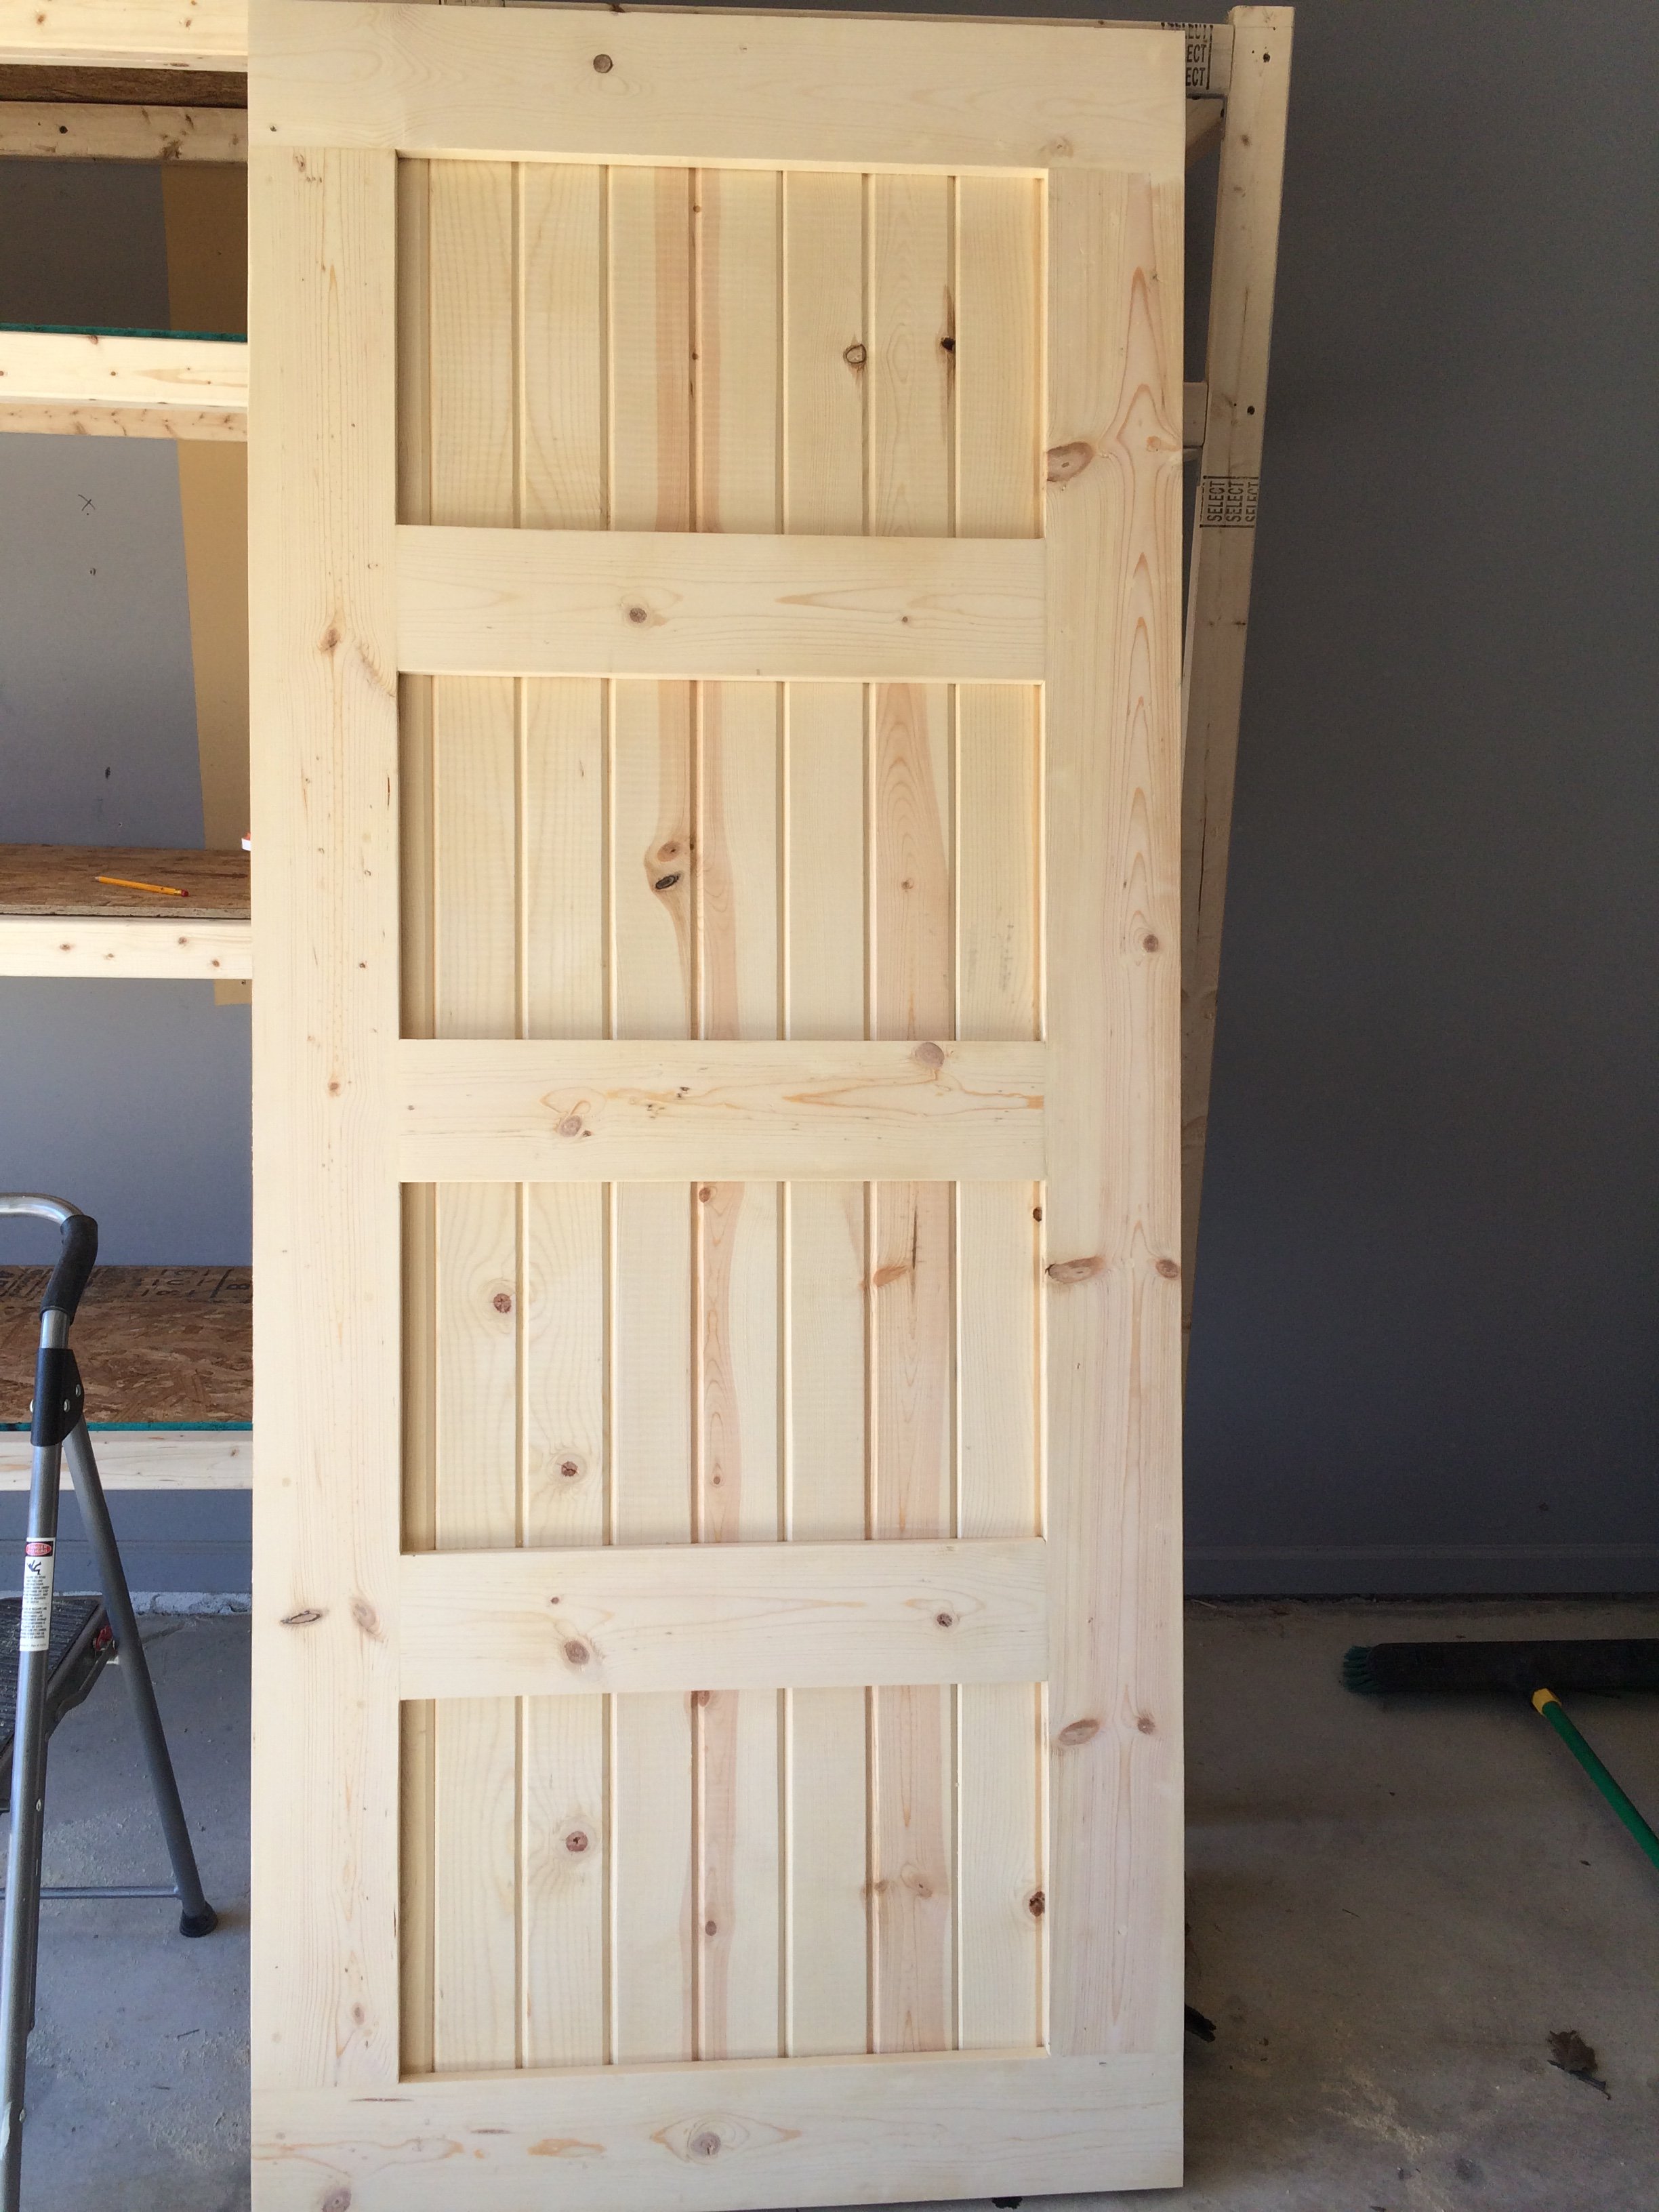
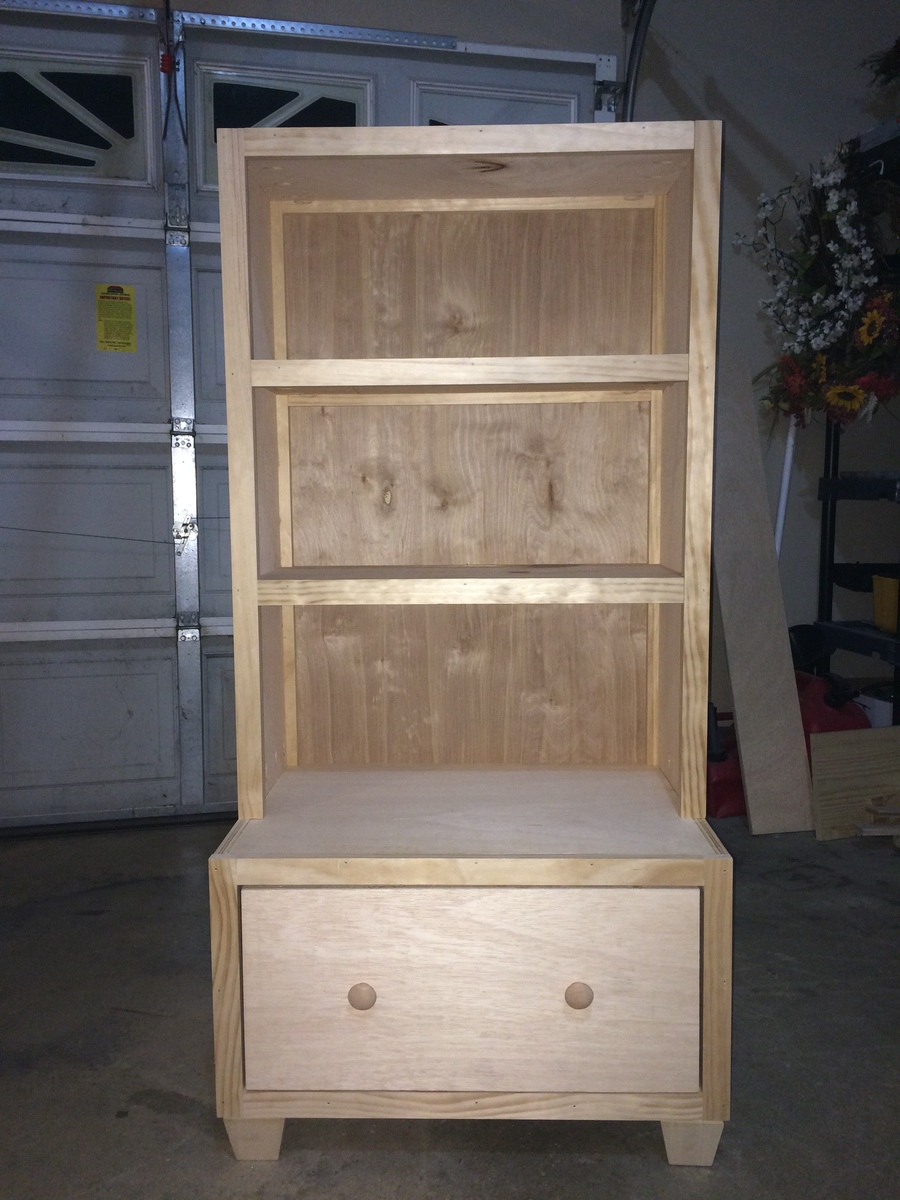
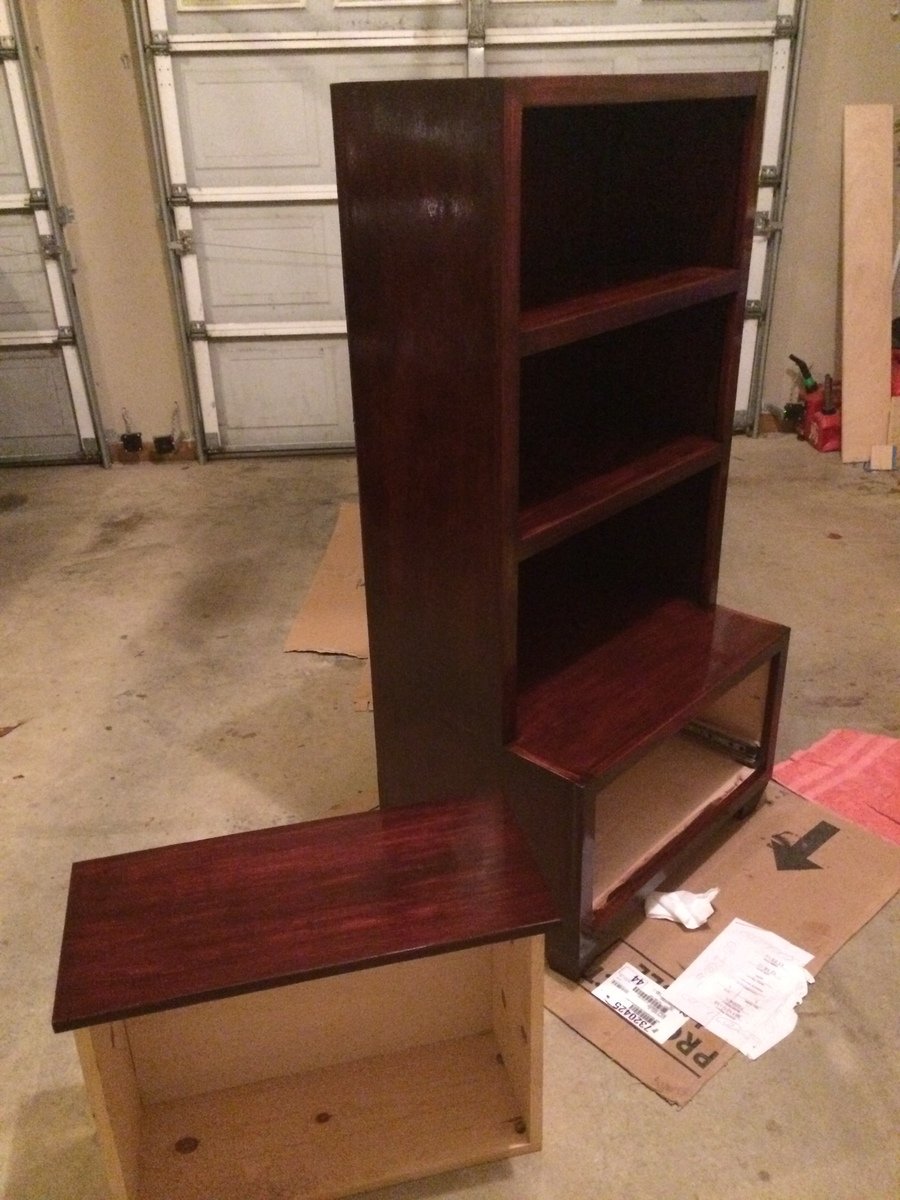
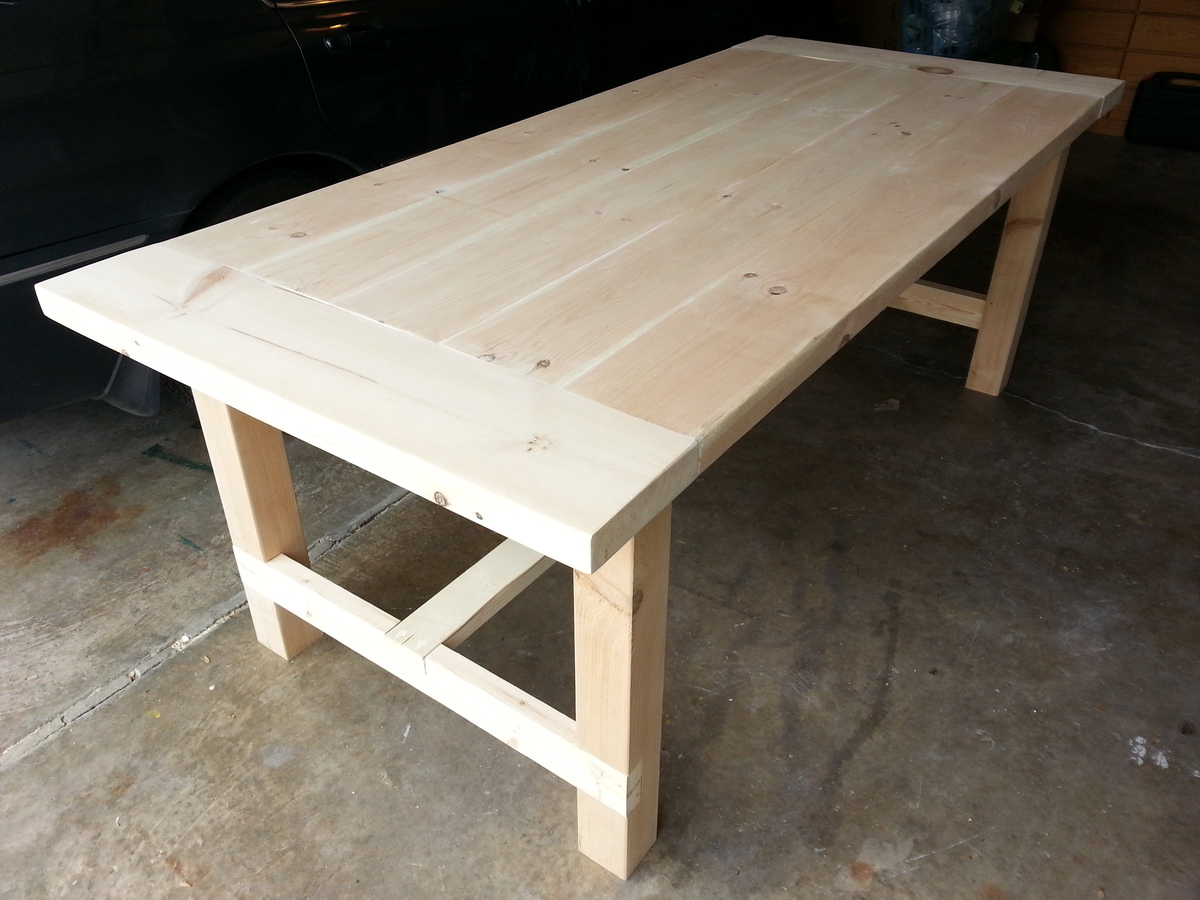
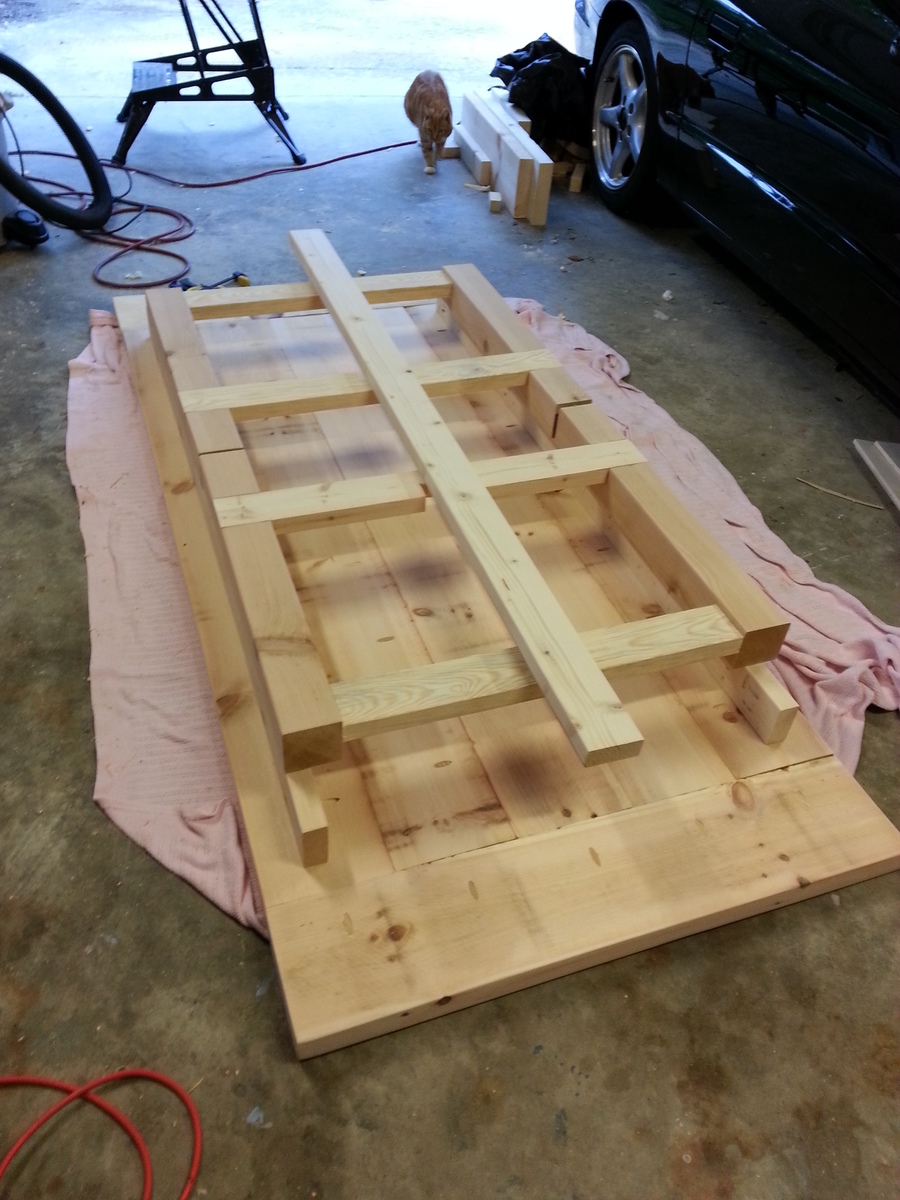
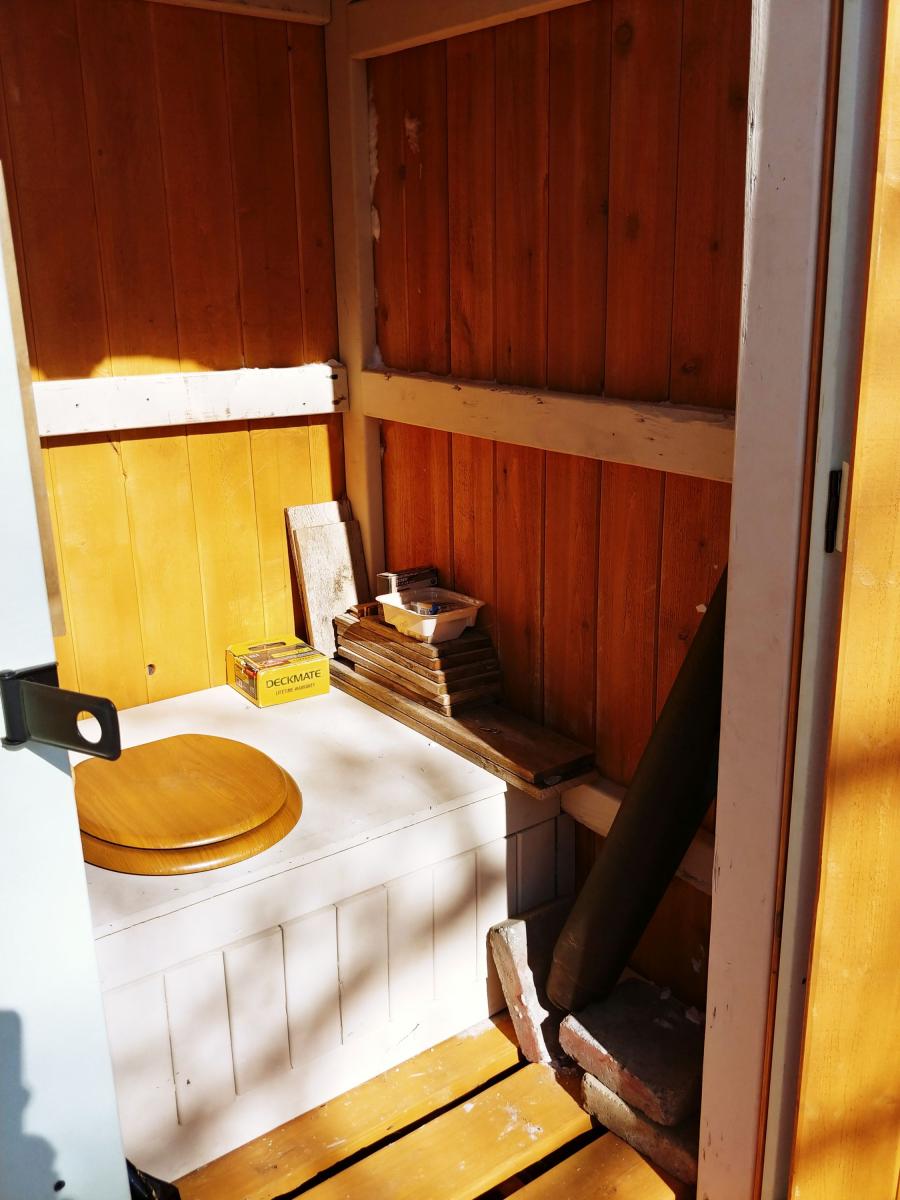
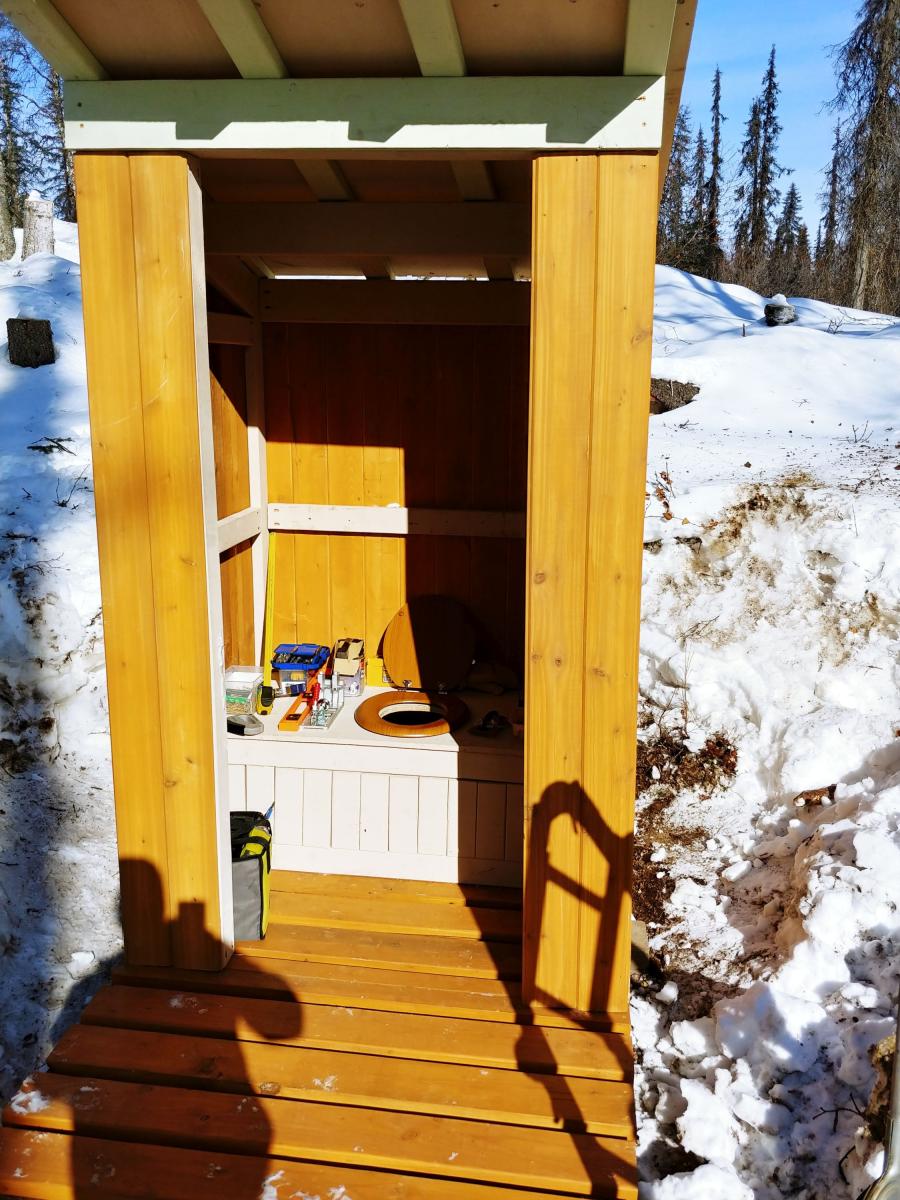
I used a combo of T&G pine and cedar for the walls. I used metal for the roof. As I built this in January and February over several weekends (in Alaska), it was very cold and I would take the pieces inside and paint/stain them. As such, this basically took me all winter from start to finish. It doesn't take that long if you build it on site in warm weather. Once transported to the cabin site, it took parts of 3 weekends to get it in place and useable, including site prep. I've still got a little touch-up work to do (e.g., window for light in winter and bird block to keep the spring and summer nesters out). I put some anti-slip tape on the frame so that I don't slip on the frame base.

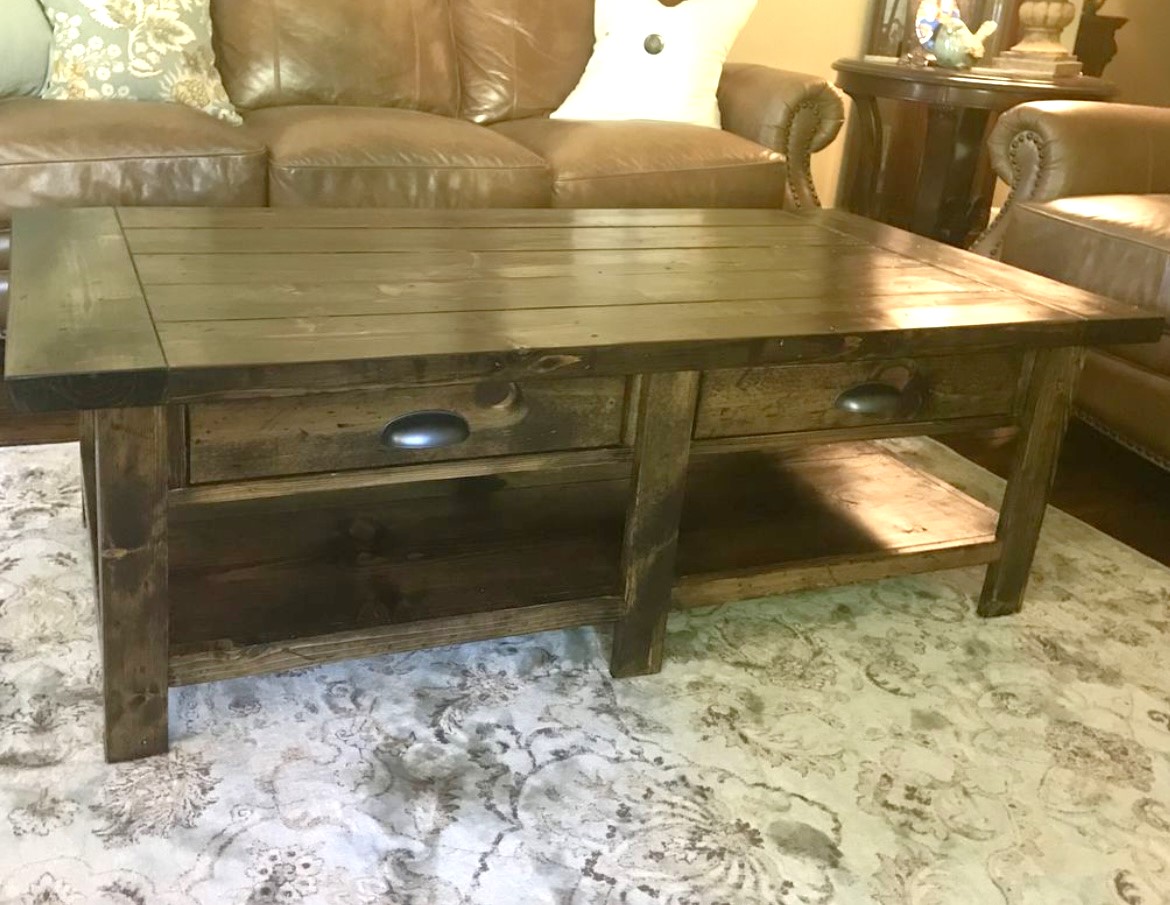
There is some waste wood if you follow the plans directly (especially 2x6), but I am using that to build a small firewood cover at home. This was not an inexpensive outhouse even without pandemic prices (I could have chosen a less expensive siding), but I wanted a nice outhouse and I'm very pleased with the outcome, so it was money well spent. Great plans! Thanks.

Built from Plan(s)

Comments

Modified Beginner Farm Table and Bench

Submitted by Anonymous (not verified) on Tue, 06/28/2022 - 12:09

Altered the Beginner Farm Table plans to use 2x8s for the top and 4x4s for the legs. I used pocket holes for the table. I followed the bench plans almost exactly, adjusting slightly for the 2x8 tops. I am a beginner and I did it myself! The table and bench are beautiful and sturdy! Thanks Ana!

Comments

Outdoor end tables

I made these two Ana White outdoor end tables for my patio. Next up will be the matching coffee table

Built from Plan(s)

Comments

Coffee Bar with Built-In Beer Fridge and Wine Storage

Submitted by Chuck1979 on Mon, 07/08/2019 - 10:39

We made a beverage station for the corner of the kitchen!

Estimated Cost
$250
Estimated Time Investment
Day Project (6-9 Hours)
Finish Used
Semi-gloss white paint and Dark Walnut stain
Recommended Skill Level
Intermediate

Comments

gunnare57

Fri, 07/31/2020 - 09:43

Hello! Was looking to see if this is something you would be interested in building for us? We are in love with this project but don't have the tools or means to do it ourself..

Can talk about pricing / size etc.
Thanks!

2 Person Picnic Table

Submitted by Anonymous (not verified) on Fri, 07/14/2023 - 12:45

Made 2 of these for my coffee shop in Puerto Rico. Easy instructions. Thank you!


Javiel Cardona

Comments

Seasonal And Holiday
Back