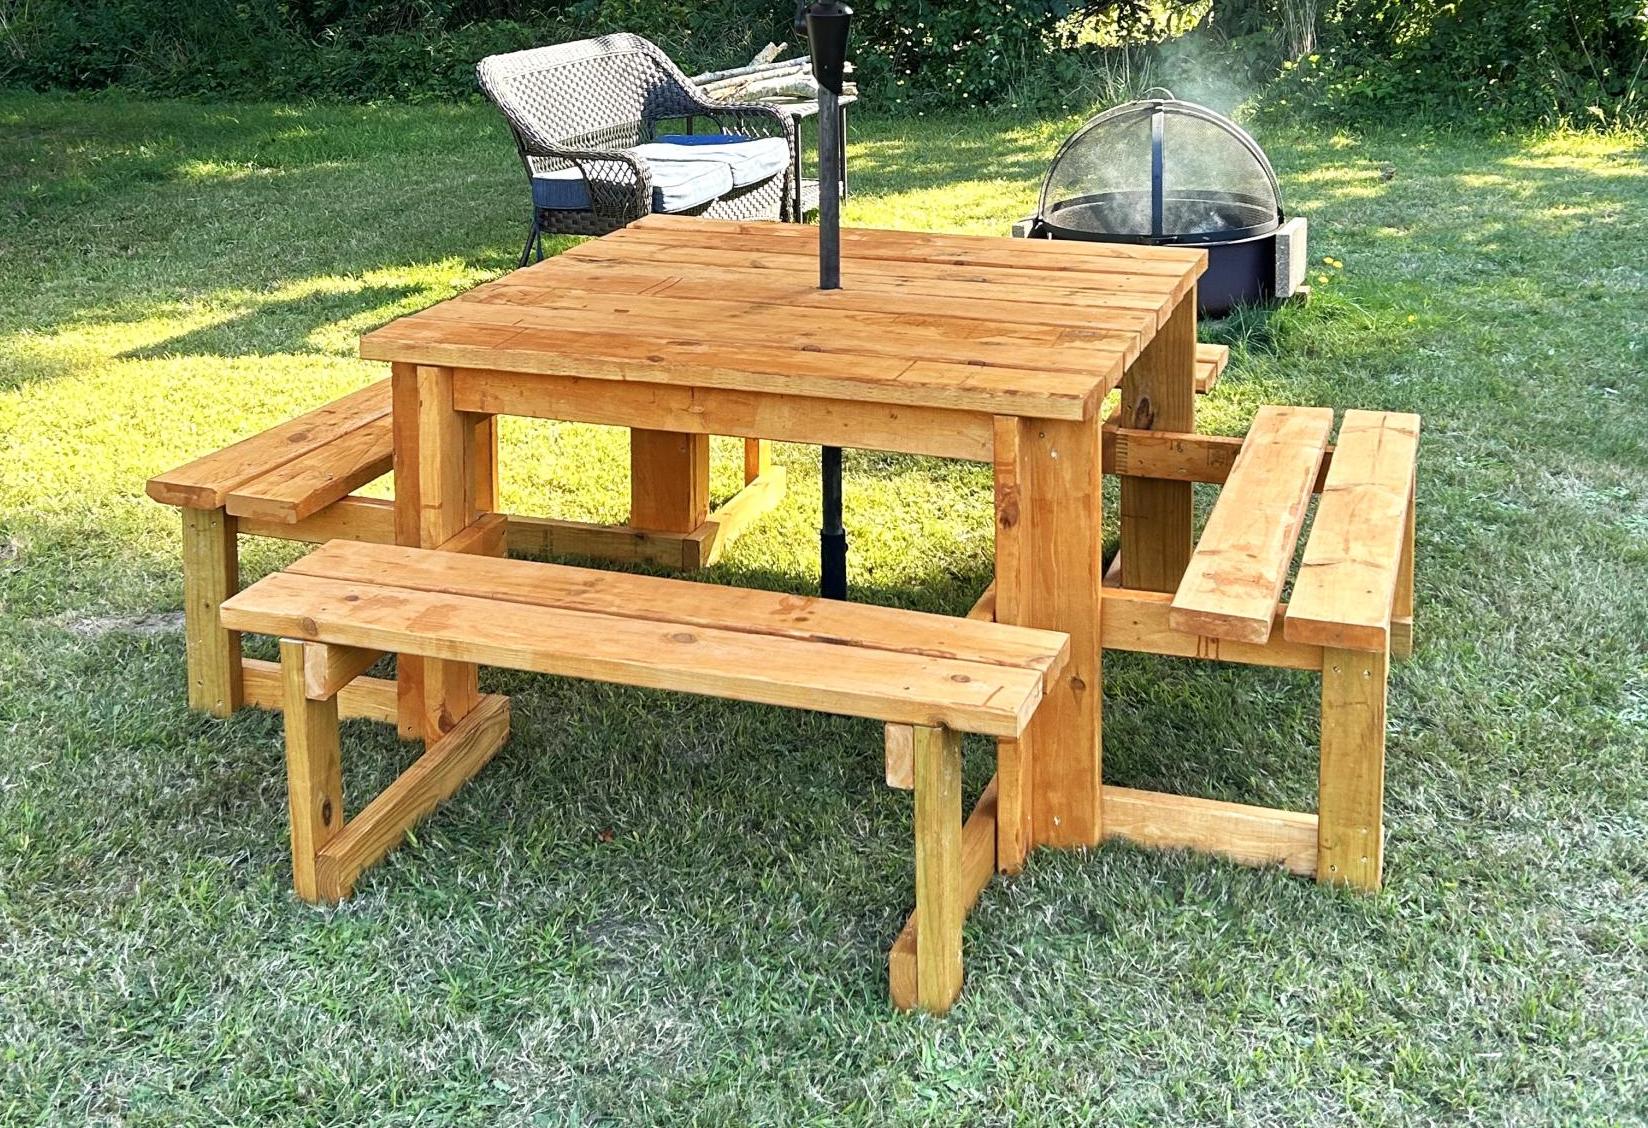
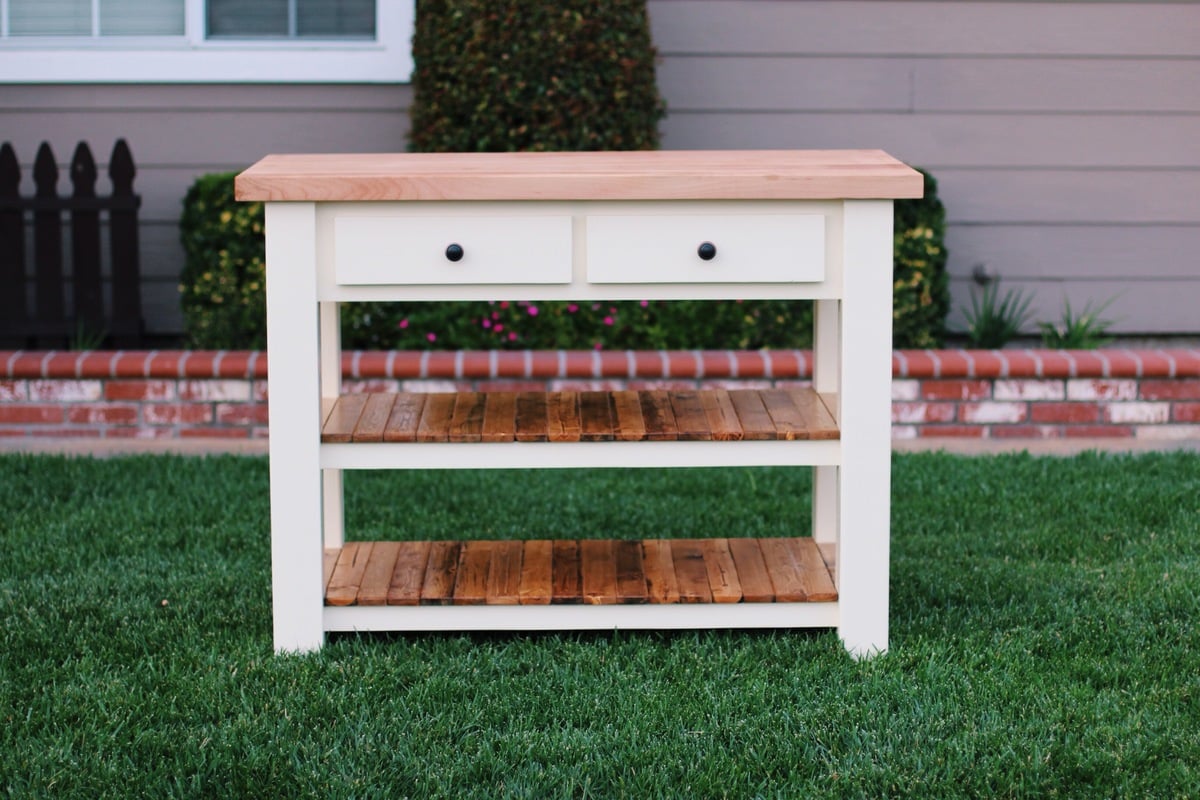
Community Brag Posts

Modern Farm Bench

Submitted by jackkatie on Mon, 11/28/2011 - 11:52

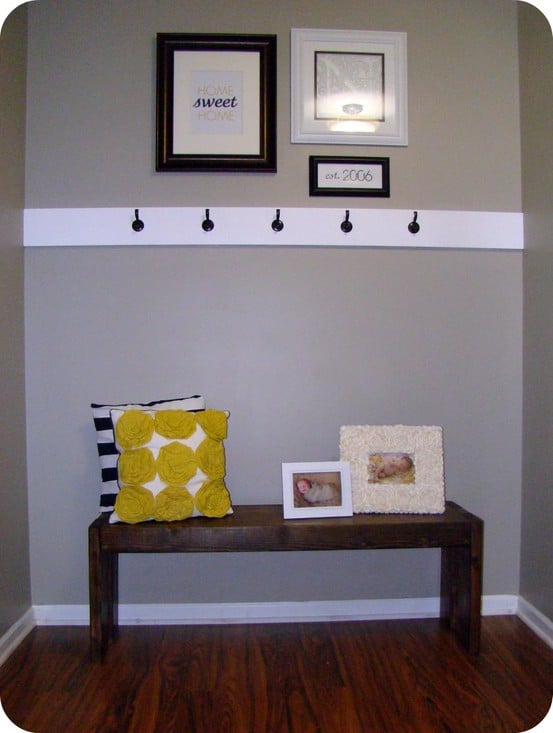
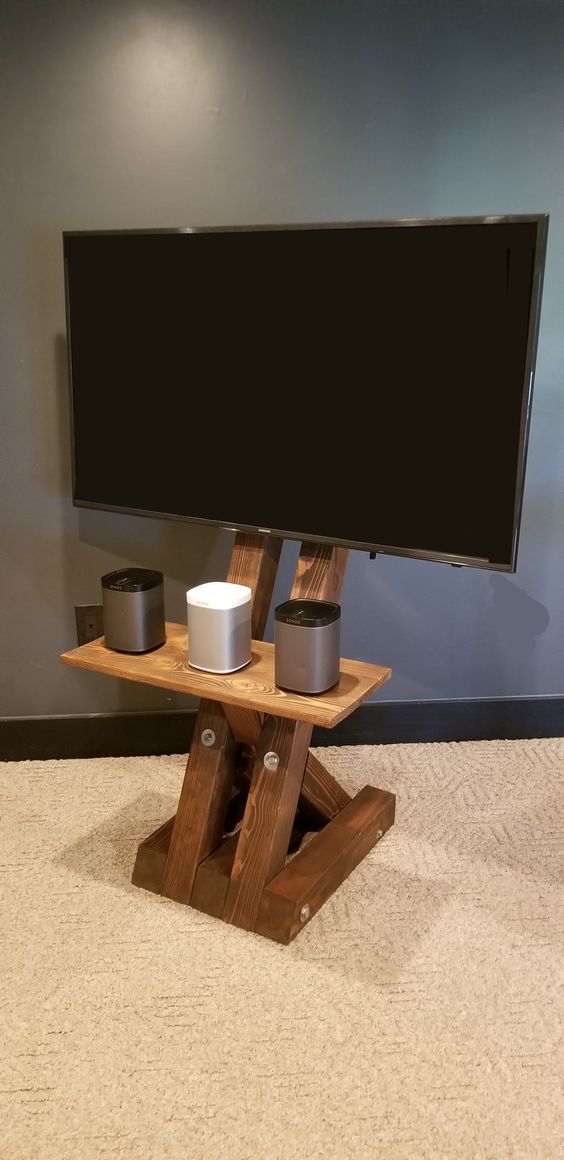
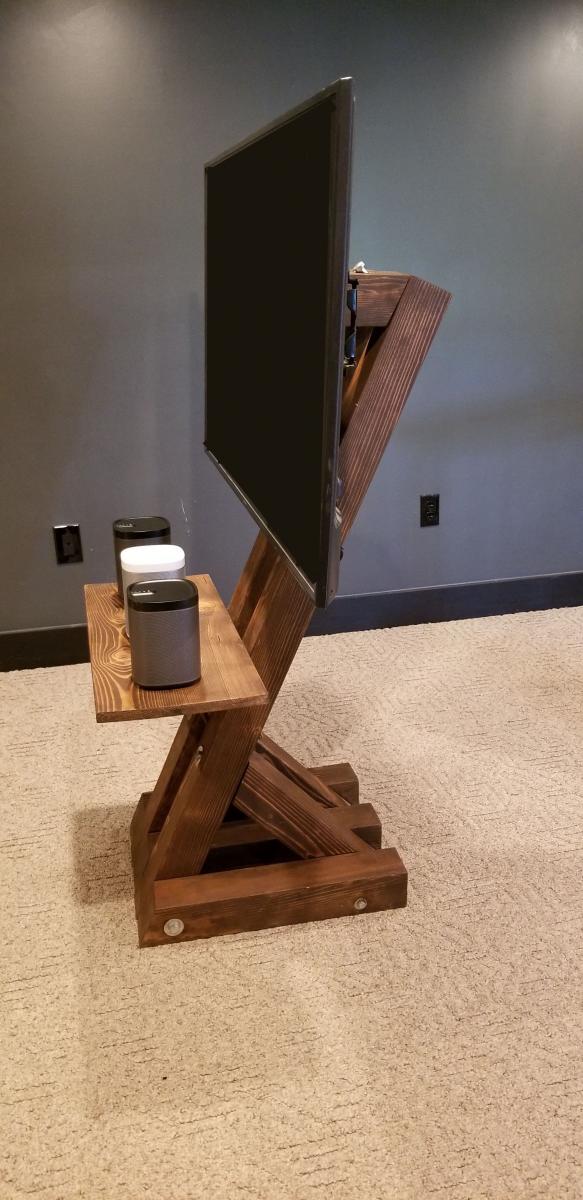
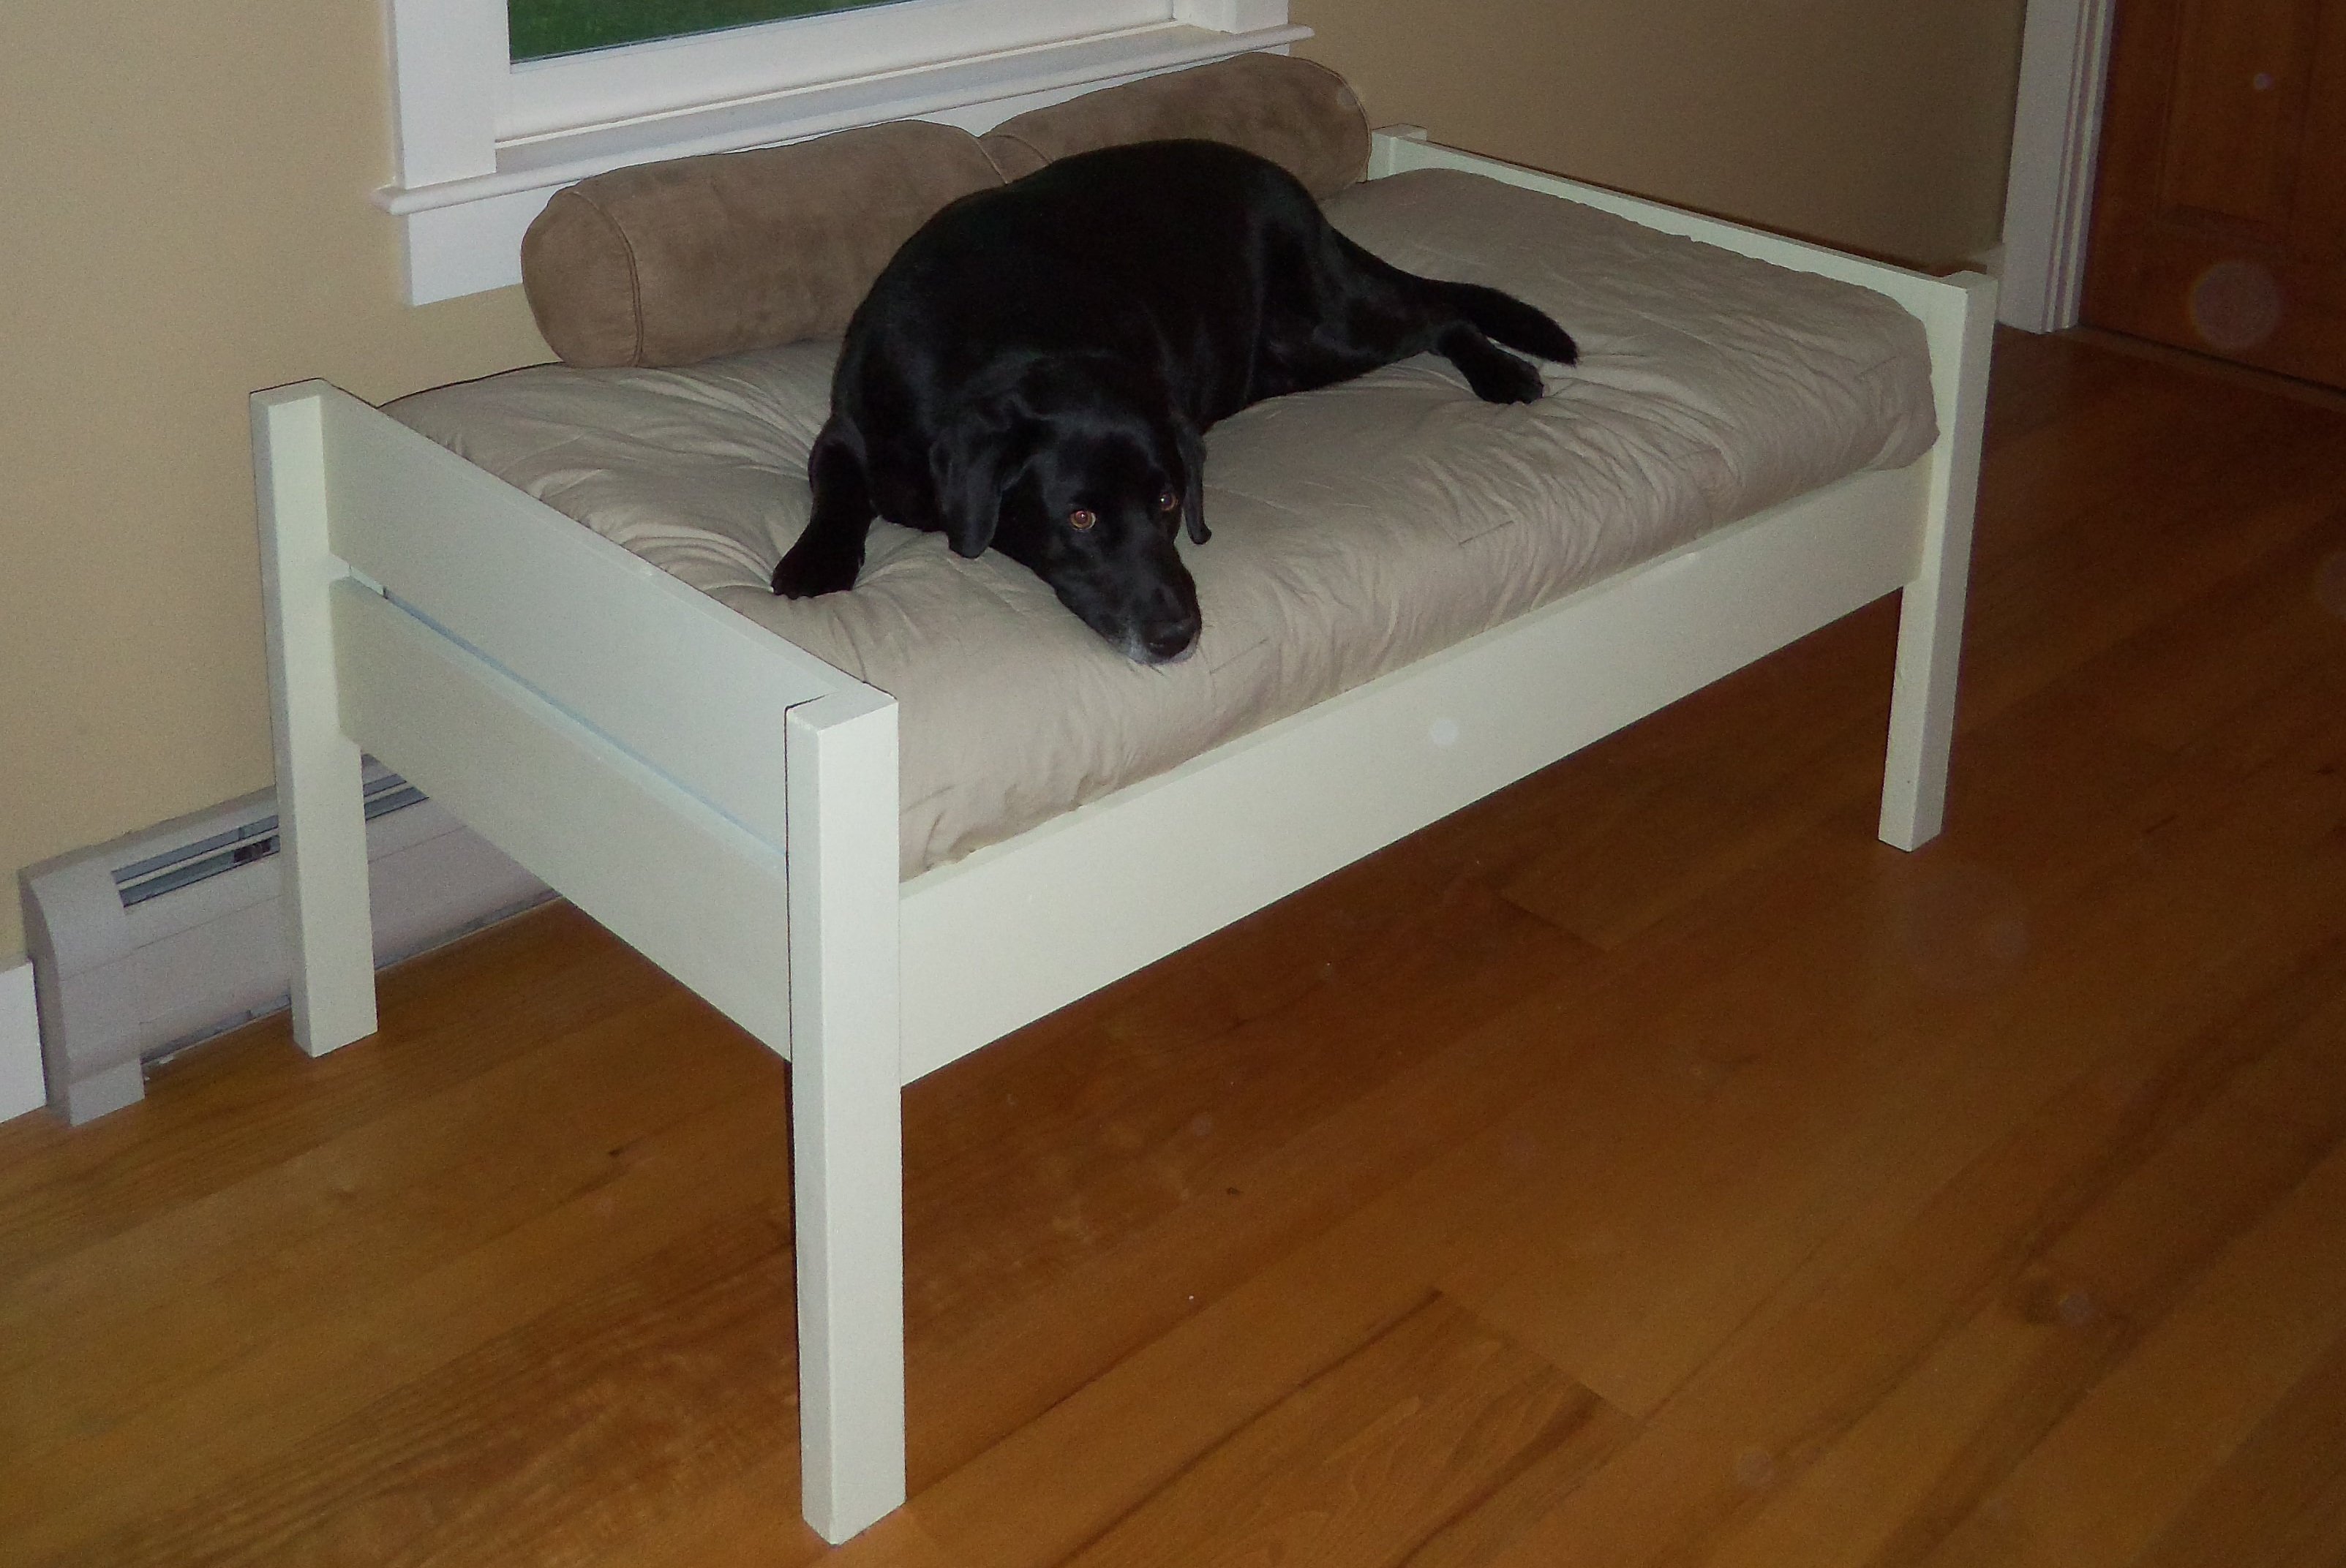
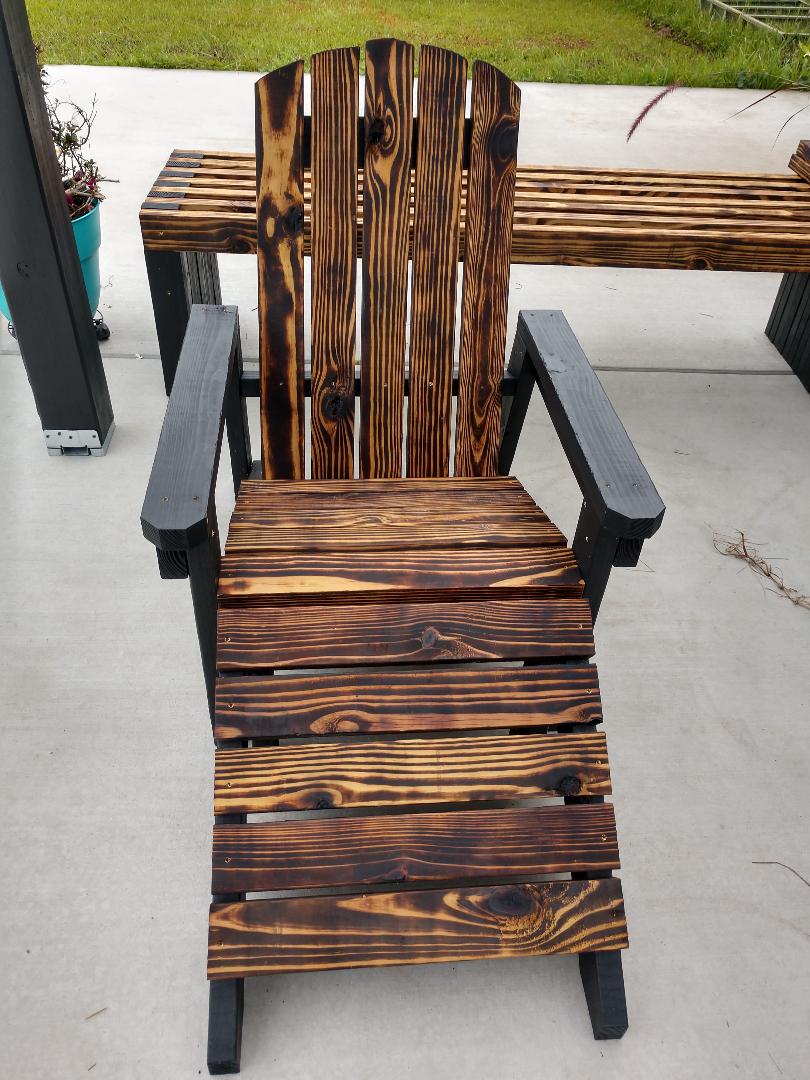
I was looking to make my foyer a bit more kid friendly while still being coze and practical. I came across the modern farm bench plans, and I knew it was the perfect fit!

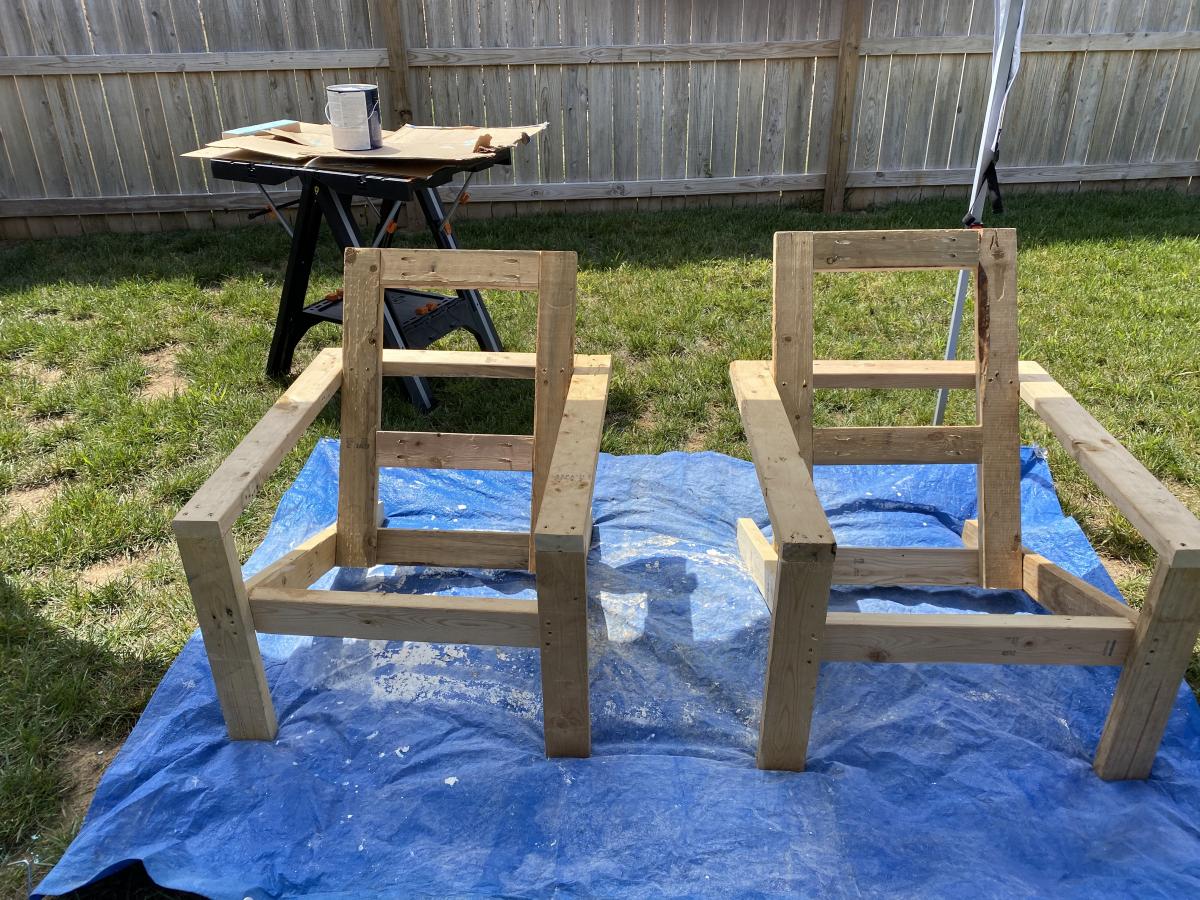
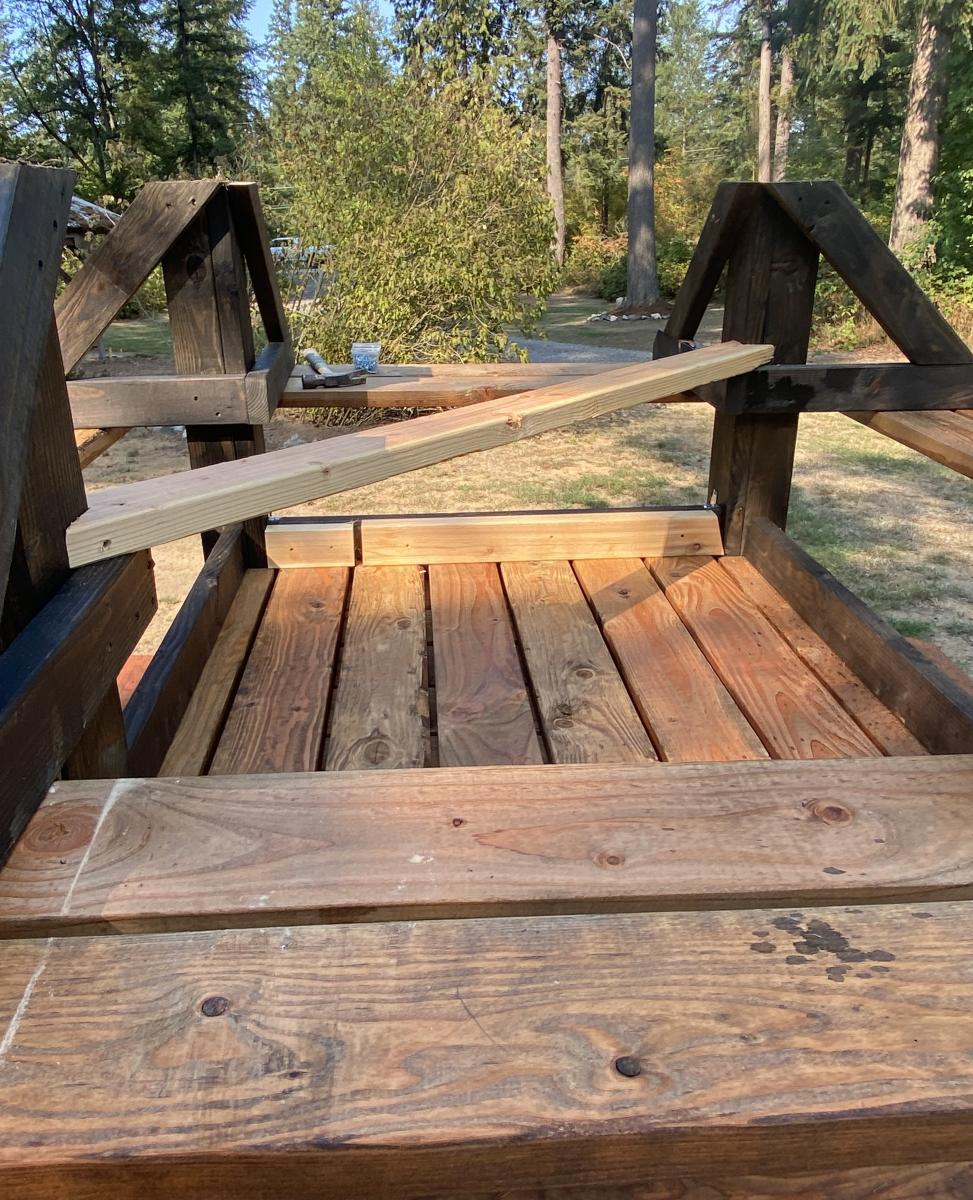
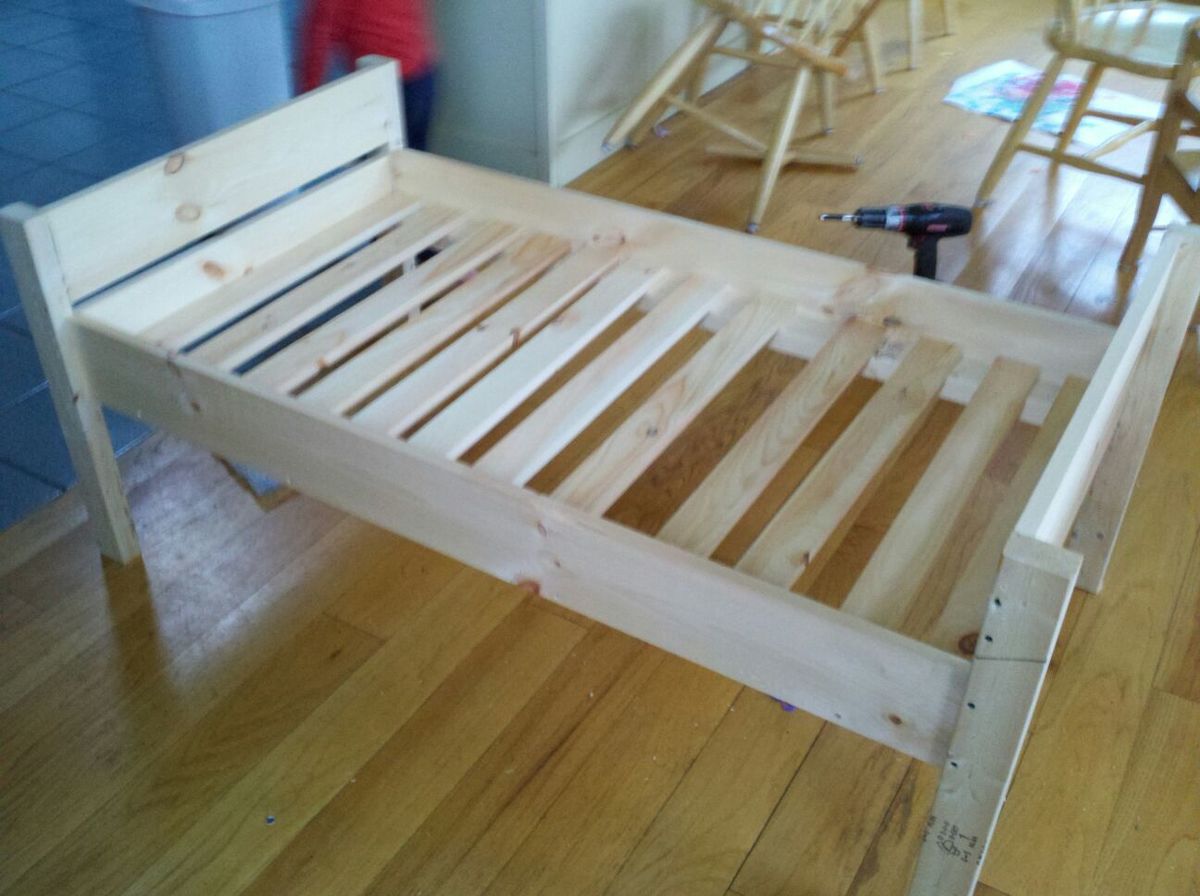
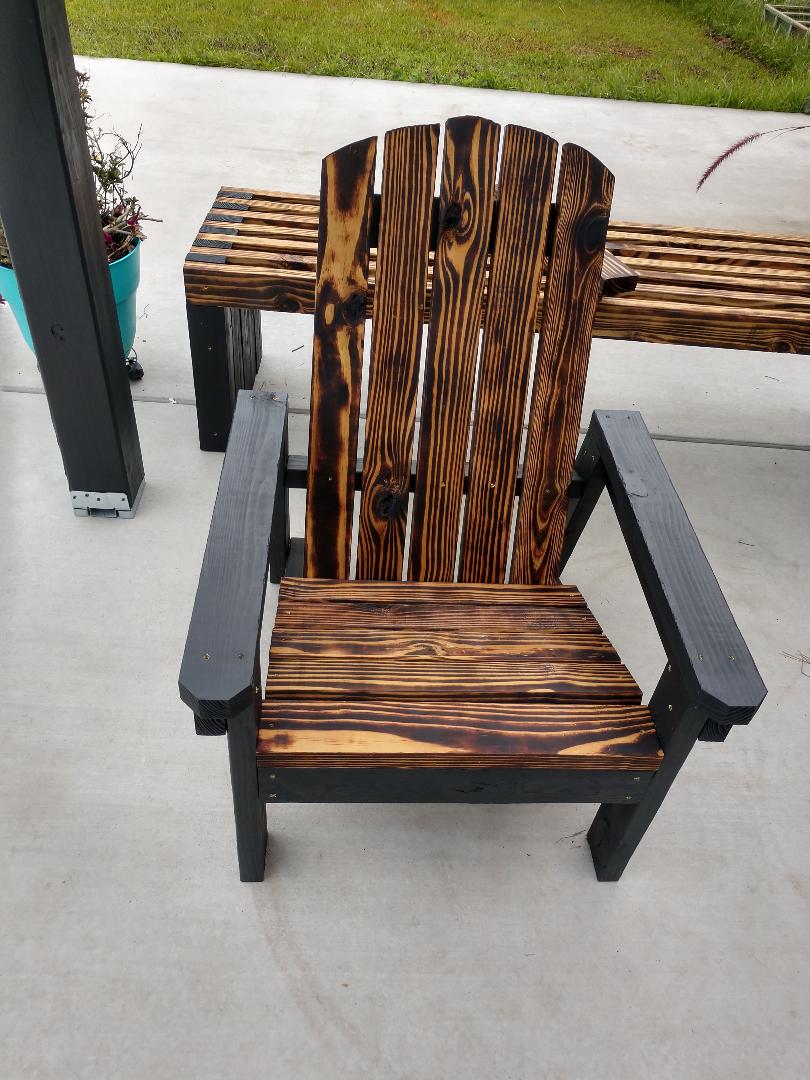
I have done a few other plans, but all with help. This project I started around 9 pm (after bedtime) one night, and by 11:30, it was completely built and stained. My son was climbing all over it by the next morning :)

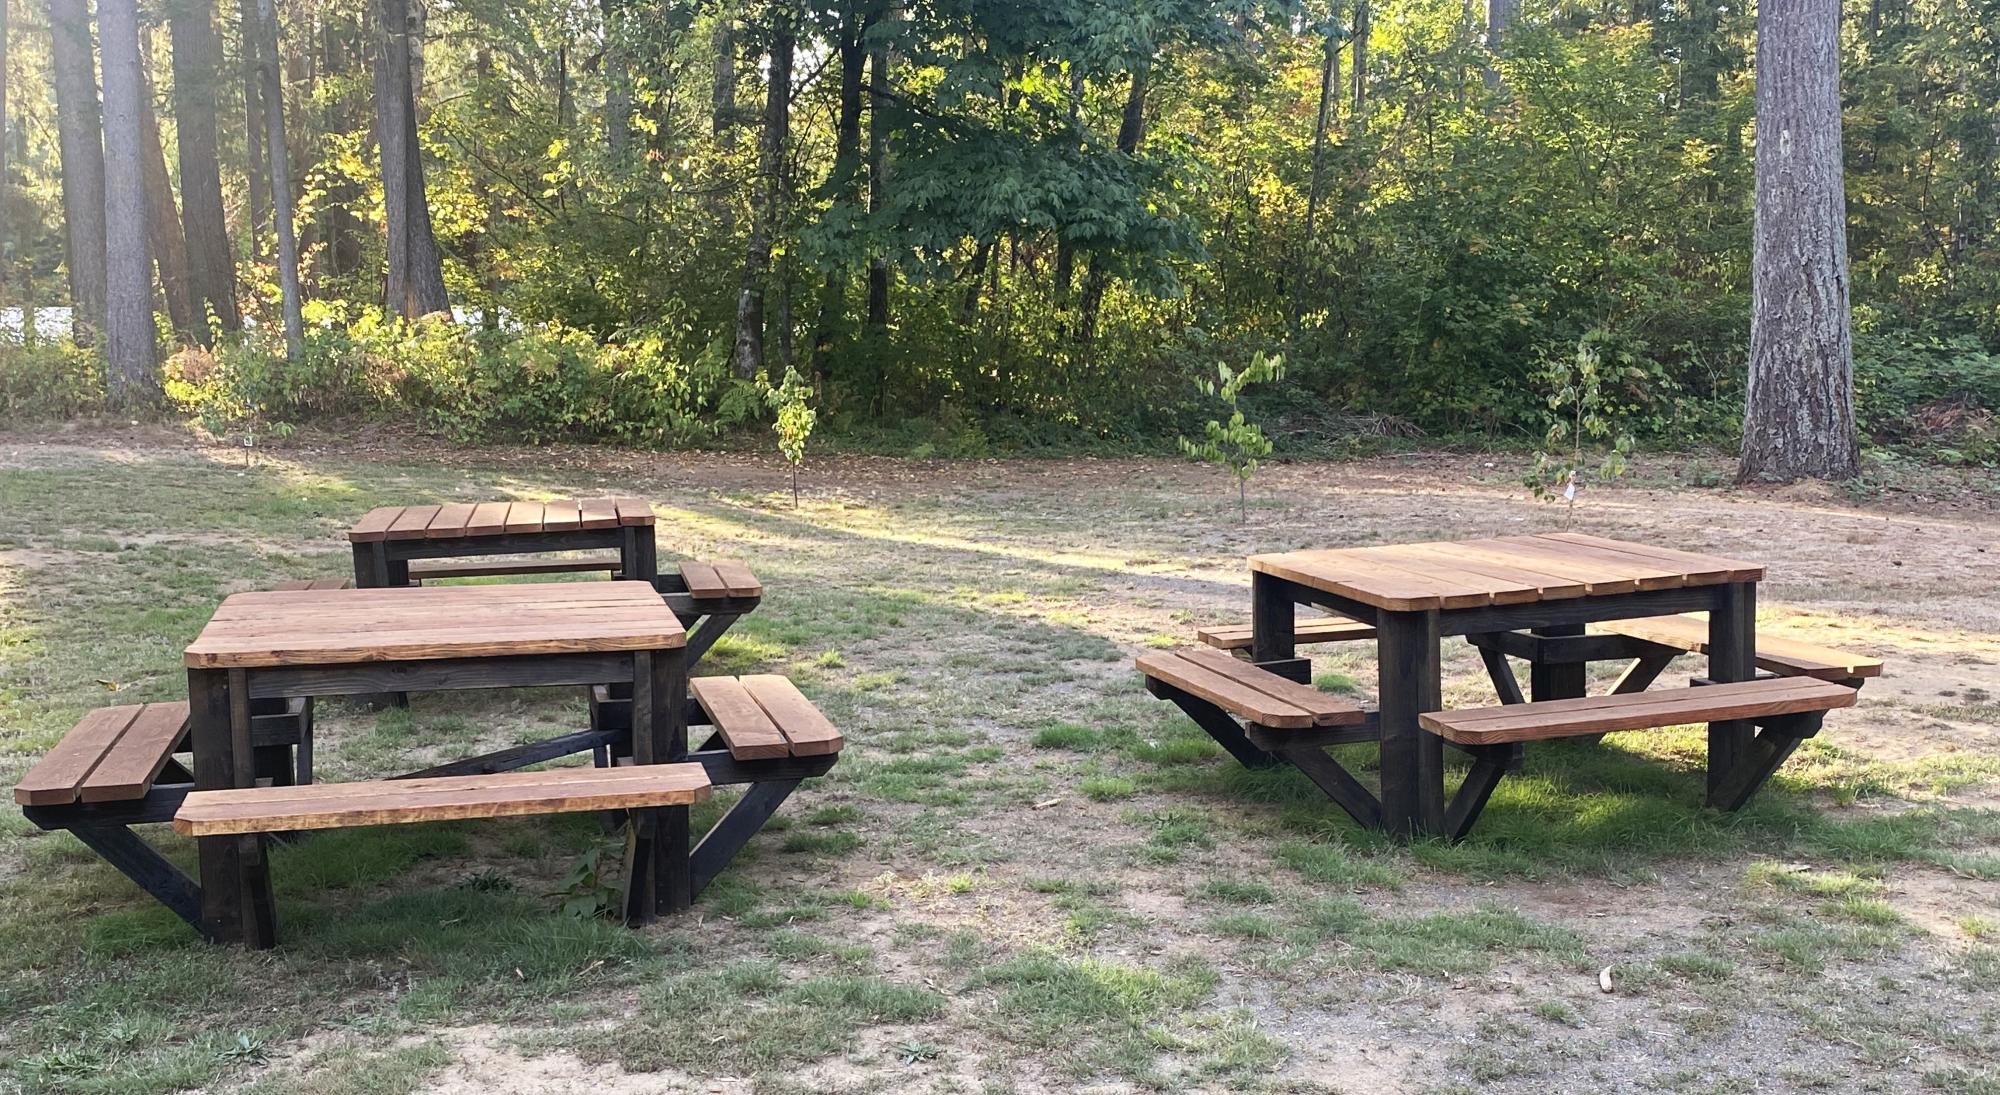
I love it - I think it adds the perfect bit of rustic charm to my foyer, while still giving my little guy a sturdy spot to get his shoes/coat on. I have since added baskets underneath for winter storage.

This will definitely not be my last build! Thanks Ana!

Built from Plan(s)
Estimated Time Investment
Afternoon Project (3-6 Hours)
Finish Used
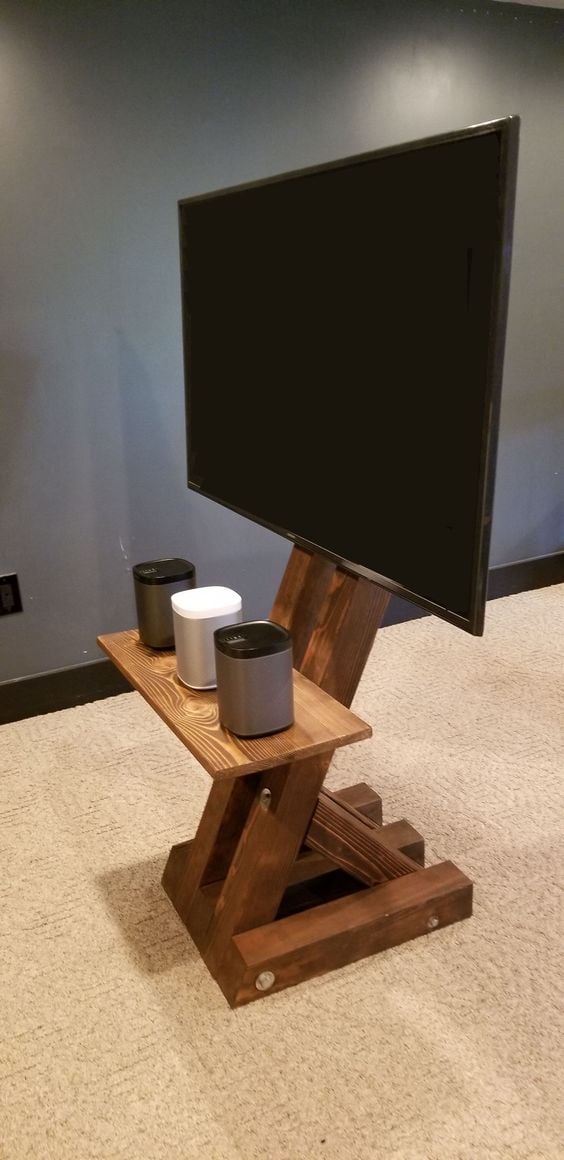
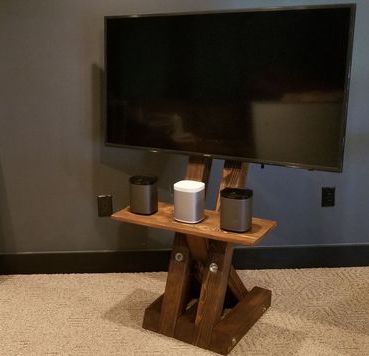
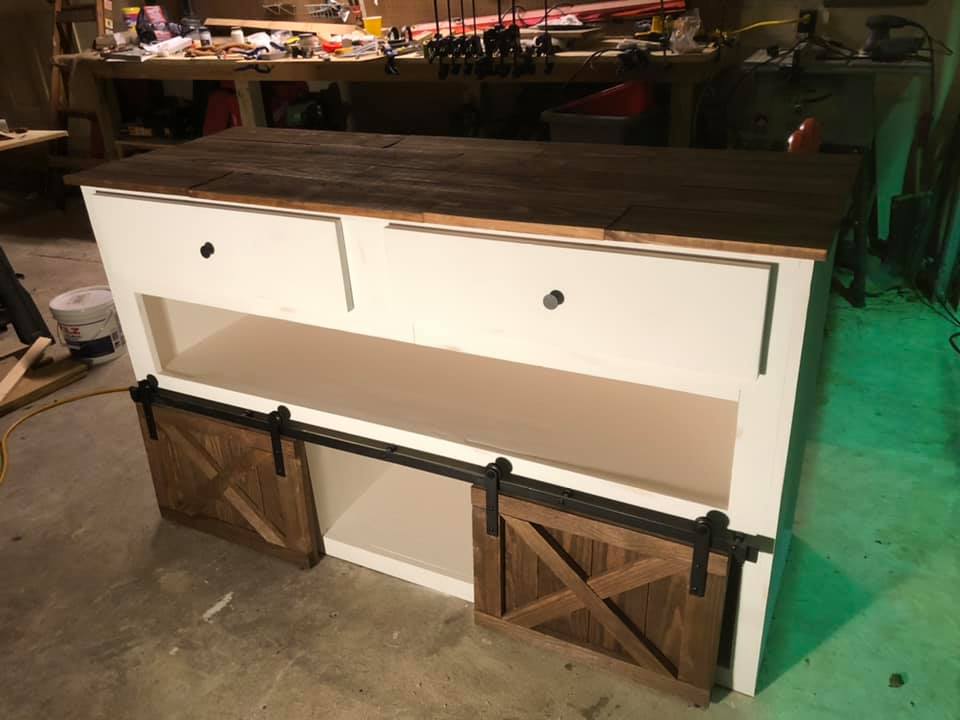
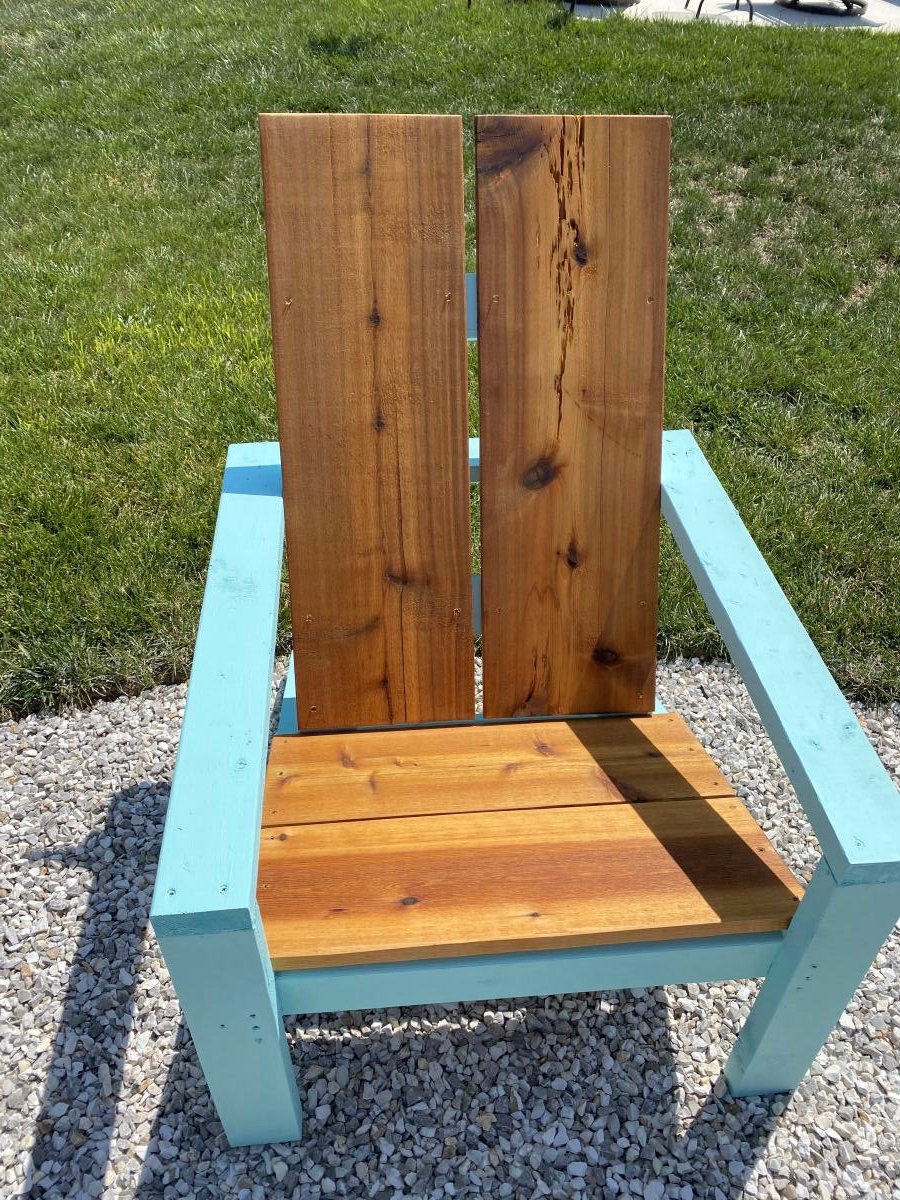
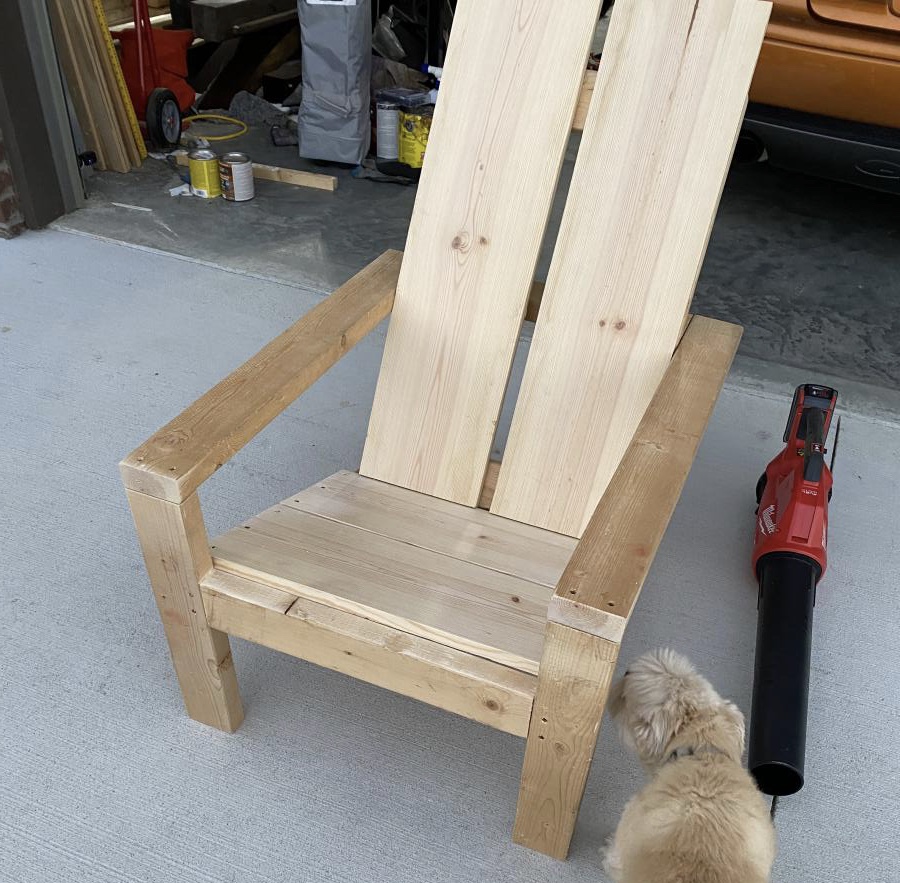
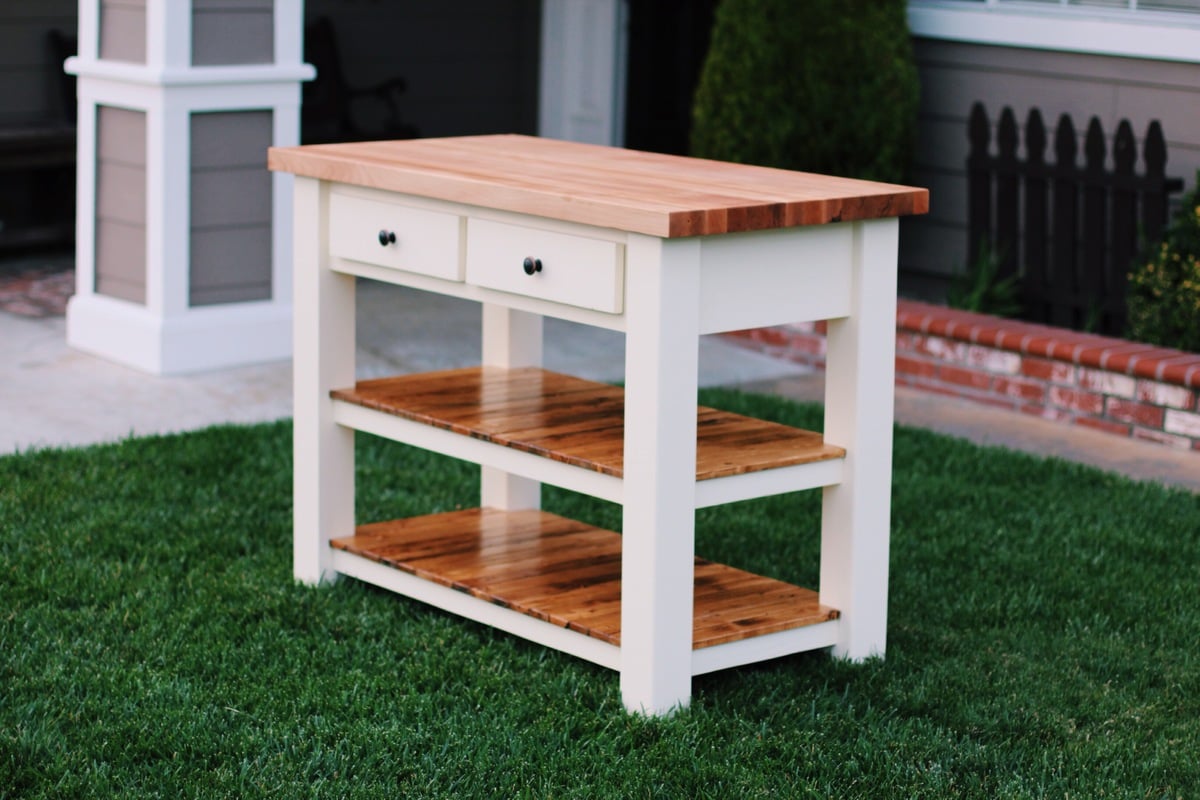
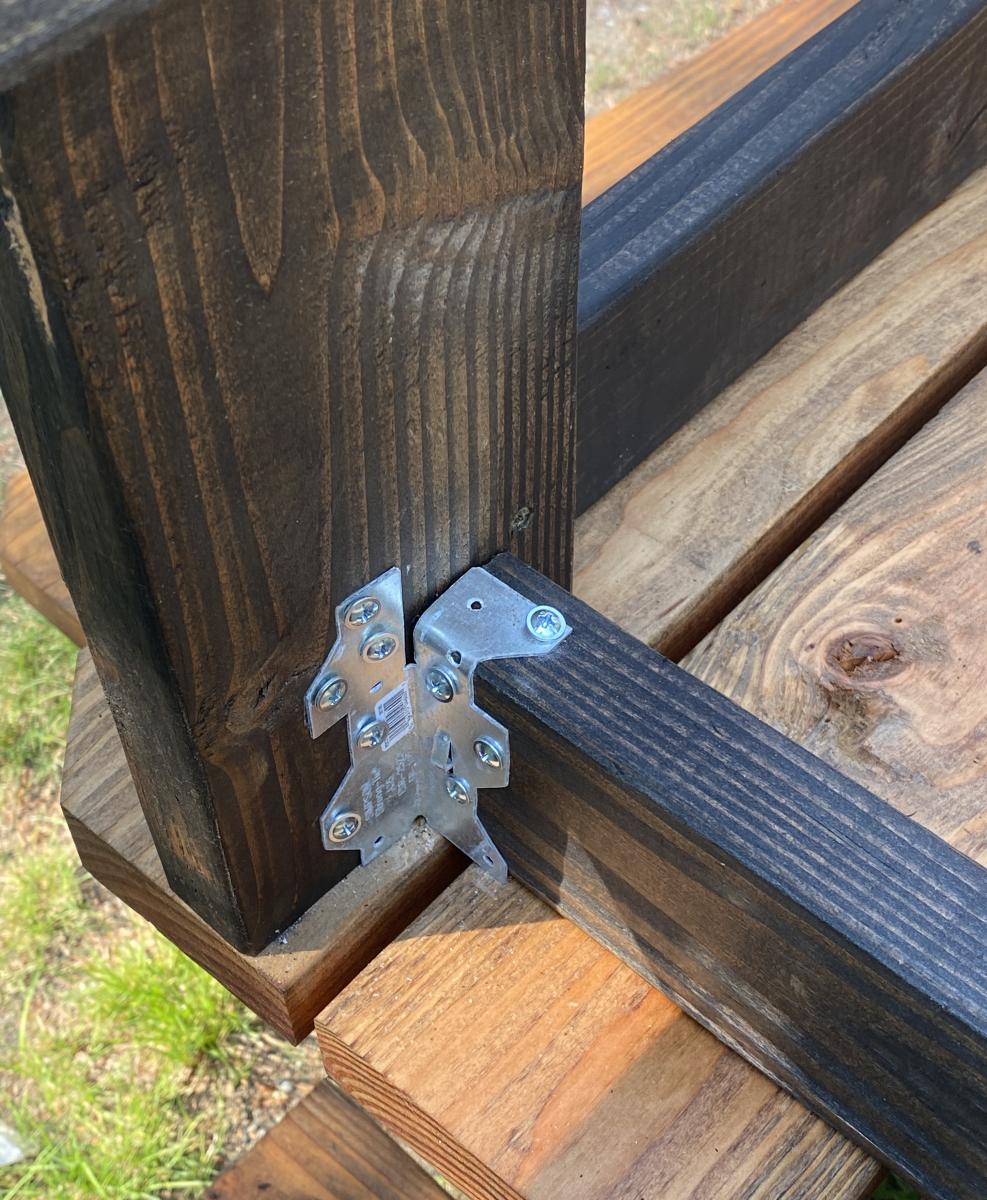
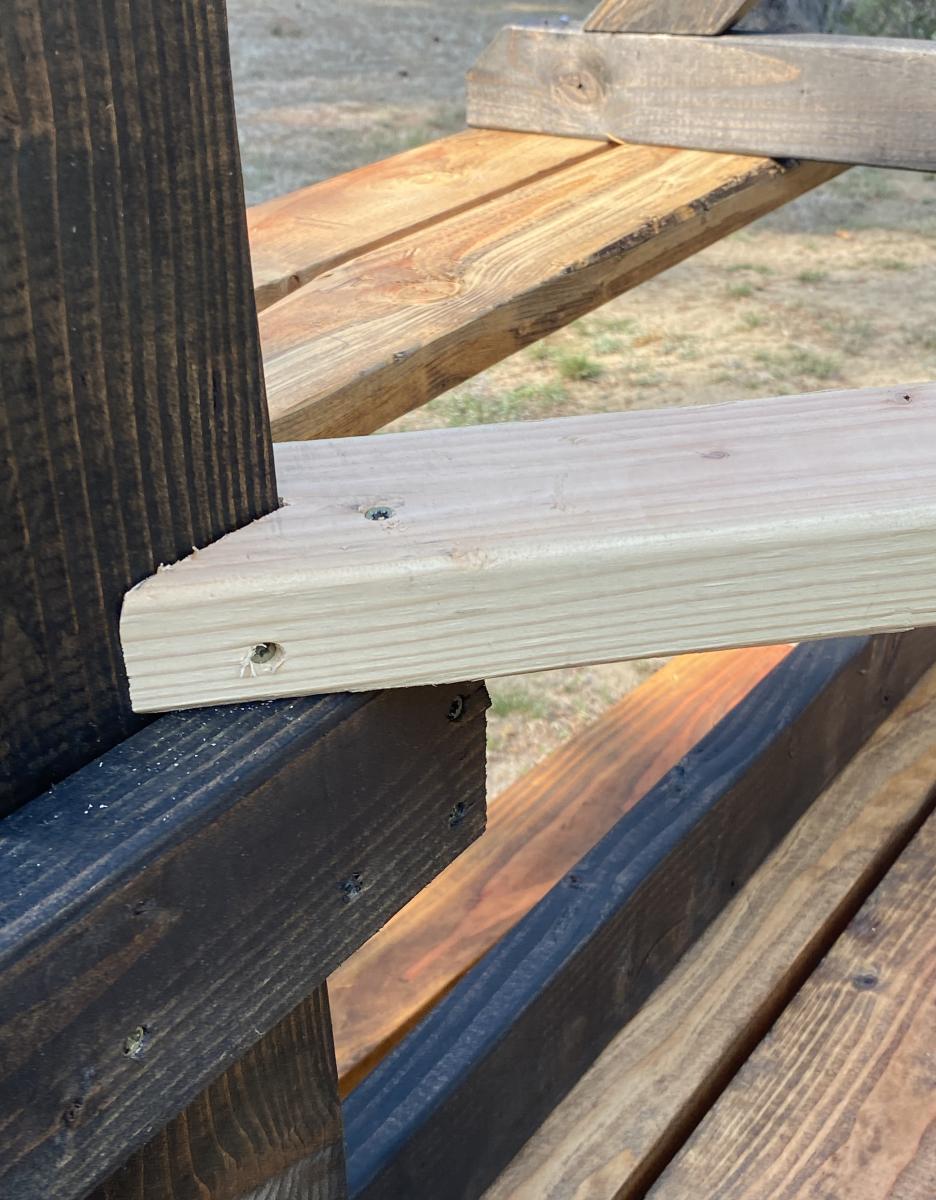
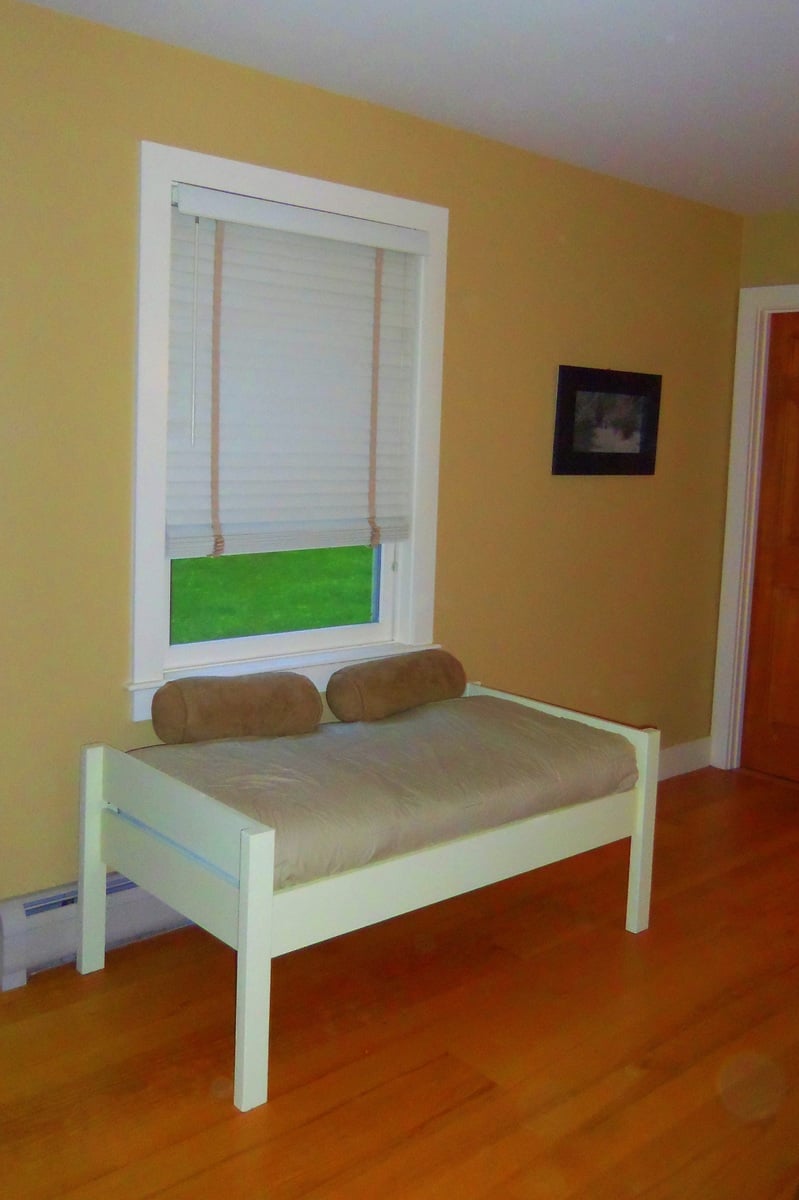
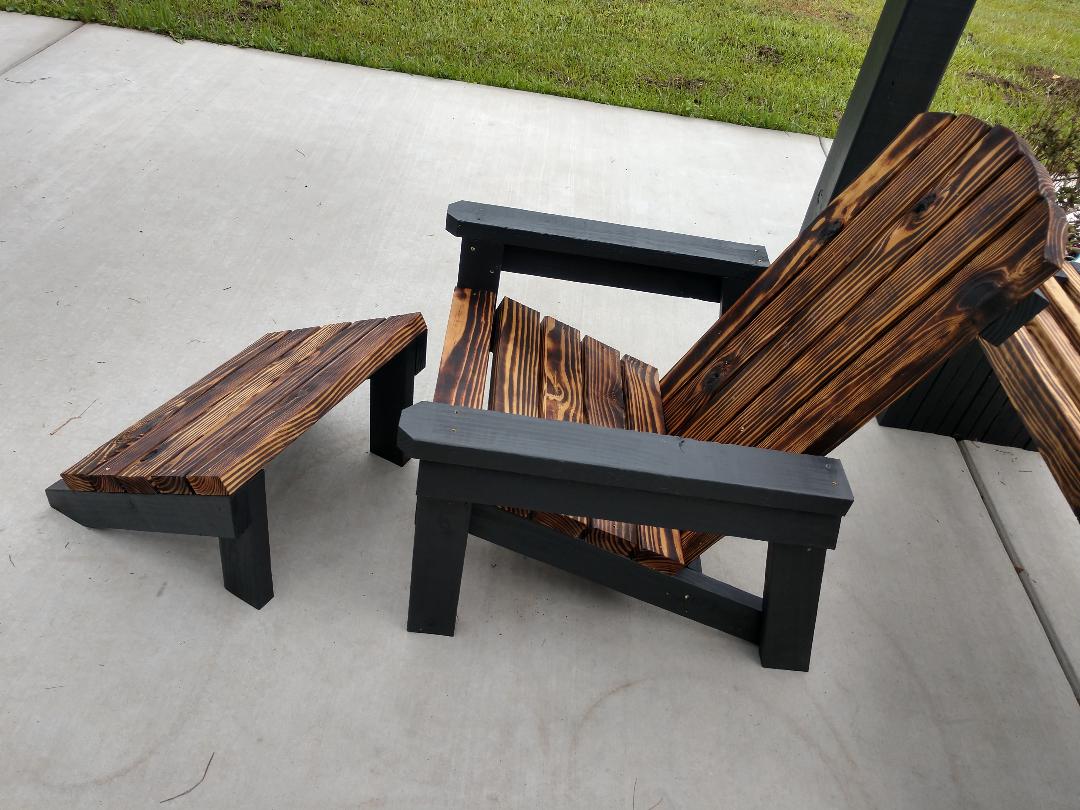
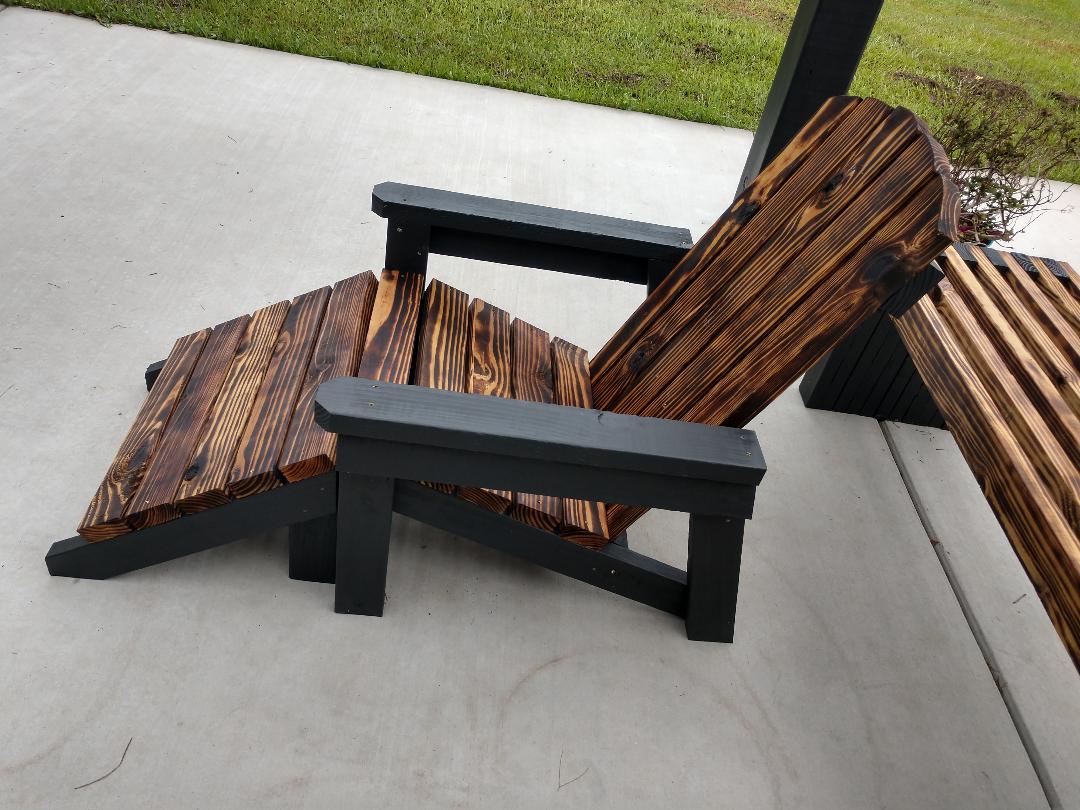
I stained using a mixture of both Kona and Dark Walnut stain from Rustoleum. It definitely wasn't a science - just slopped a little of each on, waited about 3 minutes, and wiped off.

I love the finish - rustic, but not too "country". The dark Kona stain definitely highlights the knots and grooves of the wood!
Recommended Skill Level
Beginner

Kitchen Cabinets

Submitted by Anonymous (not verified) on Wed, 10/02/2019 - 21:30

I followed the kitchen cabinet building plans to build all new upper cabinets up to my ceiling. I built all new drawers with soft close drawer slides also and built the refrigerator enclosure cabinet.I did the entire remodel myself including the new doors out of MdF.

Finish Used
Emerald urethane paint
BIN Shellac Primer

Comments

Ana White

Tue, 11/05/2019 - 10:41

We are so thrilled to let you know your entry WON the Best Brag contest!  There were many amazing entries, and it was tough to choose.

Look out for an email from us shortly!

The Gíaffe TV Stand

Submitted by Anonymous (not verified) on Thu, 02/06/2020 - 09:55

The Gíaffe Free Standing TV Mount. Handcrafted and engineered to use its center mass to deliver strength and balance for tv sizes 30-60". Display your television without detracting from your home's decor. The Gíaffe Free Standing TV Mount is the perfect solution and its rich finish will be perfect for any house/office room.

Estimated Cost
$109
Estimated Time Investment
Day Project (6-9 Hours)
Finish Used
Stain - Dark Walnut - Varathane - 2 Coats
Finish - Water Based Polyurethane - Varathane - 3 Coats
Recommended Skill Level
Intermediate

Comments

$1.18 Bird Feeder

Submitted by jaime19861 on Mon, 05/26/2014 - 11:11

I have been trying to attract more birds. I built and put up some more birdhouses, added a bird bath, and wanted to add some more feeders. I found this quick and easy plan and I had to build it.

This took me less than an hour to build. I bought my picket from Menards when it was on sale for $1.18. That's not a bad price for a bird feeder!

You can see the steps I took to build this on my blog.
http://jaimeofalltrades.blogspot.com/2014/05/make-bird-feeder-for-under…

Built from Plan(s)
Estimated Cost
2.00
Estimated Time Investment
An Hour or Two (0-2 Hours)
Recommended Skill Level
Starter Project

Comments

jessehawks

Sun, 03/01/2020 - 17:05

I can tell just from looking at this wood it was treated with a copper based chemical (note the green/blue blotches) while cedar is a good natural resistant wood these can sometimes be treated a well check for those greenish blotches around the Heartwood lines, chemical won't penetrate the tree sap in the wood and builds up along these lines. *I've worked in the pressure treated industry as a chemical tech for 3 years, and industry as a whole for more than 7.

Modern Adirondack Chair, Super Sized

Submitted by Anonymous (not verified) on Fri, 08/21/2020 - 10:39

Am a big fan of Ana's work, and have used several of her plans in prior builds including the more traditional Adirondack chairs. Those stayed with my old house, and I wanted something different for my new house. Really liked her Modern Adirondack design with the floating arm rest. However, plans are like recipes to me--a guideline. I wanted the back boards to run up and down, and I am a bit more robust than the lovely and petite Ms. White, so they would need to be wider after I built the first one at 19 1/2" wide per plan. The next three I made 22" wide and that worked well without throwing off the geometry and angles of the other parts. Since I ran the backboards up and down, I needed some cross beams for stability and to give an attachment point for the middle of the boards. Cut some 2x4s at 15" wide, drilled pocket holes in both ends, and attached in between the back supports with the pockets facing up to be hidden by the back boards. All of the 2x4s were leftover cut-offs from the houses being built in my neighborhood. Since the frames were free, I splurged and went with cedar boards for the backs and bottoms. With the wider frames, I had to use 1x12s ripped down to 10 3/4" to get the right look (about a board's width in between). Needed some color, so I painted the frames Teal Seaglass from Menards. Cedar was stained with a natural deck stain from Sherwin Williams. I experimented with salt paint (mixing unsanded grout with the paint) to give a heavily textured and weathered finish but this was unecessary--the wood was distressed enough and I am a terrible painter. It also toned down the color so I skipped that step and just went with 2 coats of plain paint. It looks like outdoor furniture should up close. As always, am pleased with Ana's plans. Thank you for doing all the hard work!

Estimated Cost
about $200 for all 4 chairs due to cedar and paint
Estimated Time Investment
Weekend Project (10-20 Hours)
Finish Used
Paint - Pittsburgh matte exterior with Dutch Boy coloring Teal Seaglass
Stain - Sherwin Williams Superdeck stain, Natural finish
Recommended Skill Level
Starter Project

Comments

Seasonal And Holiday

Camp Loft Bed with Stairs

Submitted by Vc1700 on Mon, 10/19/2015 - 12:02

I wanted to create a loft bed for my daughter so that she could have space underneath to play since her room is small. This was the perfect solution! I went ahead and added a stair rail so she could feel a little safer coming down the stairs (she is 4 yrs old). She loves her princess bed and what's best she wants to sleep in it instead of with mommy and daddy! This was my first wood working project. 

Estimated Time Investment
Weekend Project (10-20 Hours)
Recommended Skill Level
Beginner

Butcher Block Kitchen Island

I built this piece from ana white's plans. I modified the shelf design and also the dimensions to meet my needs. Instead of using 2x6 douglas fir for the top, I built the top out of hard maple. The top is built by ripping down several strips of hard maple 1.75 inches wide, turn the strips on there edge and gluing all the strip together. This is what is known as a edge grain cutting board. I finished the top with mineral oil and bees wax. The top is food safe and knife friendly. If you have any questions please don't hesitate to ask. - Brad

Built from Plan(s)
Estimated Time Investment
Week Long Project (20 Hours or More)
Finish Used
Cream brulee paint by behr
early american stain by minwax
mineral oil and bees wax
Recommended Skill Level
Advanced

Comments

romanweel

Tue, 01/28/2014 - 18:42

Did you use a planer to level your top and bottom surfaces here, or just lots of sanding? I've been told not to attempt butcher block construction without a planer...but I'm thinking of maybe going for it!

timberandsoul

Fri, 01/31/2014 - 23:01

I did use a planer for this top. But because my planer is only 12 inches wide I had to glue three individual boards together leaving two seams that I could not plane but instead had to sand out. Just sanding those two seams took a long time, I cannot imagine sanding 20 seams. I would not suggest attempting without a planer.

Calmly

Mon, 04/10/2017 - 18:45

is it possible for you to share your measurements.  I need a smaller island. Thank you.

Biff Loman

Wed, 02/05/2014 - 17:25

I'm curious how you joined the stretchers to the legs. The construction appears different from the plans. Did you use pocket screws or something more advanced like mortise and tenon?

timberandsoul

Fri, 02/07/2014 - 16:58

I am not sure exactly what you mean by stretchers. If you are referring to the shelf frame, yes it is different than the plans, I modified it. I felt the shelf design on the plans was not enough for the weigh that was going to be place on top. I used simple pocket holes to joint the frame to the legs. Hope this helps, have a great day.

voorheisb

Fri, 08/12/2016 - 10:41

Thank you Brad.  This is a really nice piece.  I recently picked up an old table from a college.  I discarded the base and plan to use the heavy butcher-block-style top to build something similar to this.  Do you have plans you could share?   Thanks again, Brian

3 Square Picnic Tables!

I built 3 of the square picnic tables, as we have a large extended family. I enjoyed the project and the results. I did end up adding a cross brace and some metal clips, they added a little more strength for the table when it was full of people.

Thank you for sharing your plans.

Rick

Built from Plan(s)

Doggie Daybed

Submitted by MurdaRae on Wed, 06/06/2012 - 10:16

I've thought for a while about building a bed for our dogs, but wasn't sure where to start. We had an extra crib mattress so I set out to find a toddler bed that would work. I decided the Lydia Toddler Bed plan would work best. It doesn't look anything like it, but it was a great starting point.

First, I got rid of the canopy and the decorative side pannels. I also raised the bed 12 inches. (The hope is to add a rug on the floor underneath as sort of a "bottom bunk") The lumber store didn't have 2x2s so I used 2x3s for the legs. I also only used two 1x6s at the head and foot of the bed. They are seperated by 1" because when I got home, I realized they were actually 1x5 (RUDE).

All in all, it turned out exactly as I had hoped and the dogs love it! GOODBYE stinky dogbeds!

**Photo 1: Just finished building--the slats weren't screwed down yet.
**Photo 2: Deacon is testing out his new digs! See the stinky dogbed underneath?YUK!
**Photo 3: Dog Bed Completed! Mac & Deacon love it!

Built from Plan(s)
Estimated Cost
$38
Estimated Time Investment
Day Project (6-9 Hours)
Recommended Skill Level
Beginner

Comments

Bookcase Dollhouse

We built this for our daughter's 6th birthday! Love how it turned out :D  As you can see we opted to leave the plywood backing off for the time being so she can use it as a doll house and play on both sides. When she grows out of the doll house phase we will either convert it to a book shelf, donate, or sell in a yard sale ... so many options!

Built from Plan(s)
Estimated Cost
$74 wood & white paint
Estimated Time Investment
Afternoon Project (3-6 Hours)
Finish Used
One quart semi-gloss white paint (2 coats) bought at Walmart. Pink and green colors were left over paints from when we painted the walls in our home.
Recommended Skill Level
Beginner

Comments

Mario Bunk bed Castle

Submitted by tdee on Wed, 05/28/2014 - 16:31

My son is a big Mario nut. And when it came down thinking about a new bed for him we sat down online and started searching for ideas. When we found this bed we both loved it right away. And when i found it was made from plans on Ana- white i was so excited as i have made a few projects already. My son was so happy the whole time this was being made. He was going to have his own castle. Once we finished the build he decided that he had to have a door so i made some curtains and embroidered Mario characters on each one. I let him decorate the inside with Mario stickers and he loves being able to have a Mario level right where he sleeps.

Built from Plan(s)
Estimated Cost
600
Estimated Time Investment
Week Long Project (20 Hours or More)
Finish Used
Paint in various colours to replicate a Mario castle.
Recommended Skill Level
Intermediate

Comments

Outdoor sectional and coffee table

Submitted by Rynhffr on Mon, 07/06/2020 - 21:06

Loved these plans! Was my first project I tackled trying my hand with a new hobby of wood working to stave off quarantine craziness :-) finished project looked awesome and got me started working on other plans on the site.

**note**
Side table was just sanded and refinished, wasn't built just tried to match.

Estimated Cost
400
Estimated Time Investment
Weekend Project (10-20 Hours)
Recommended Skill Level
Beginner

Christmas 3-tier cookie stand

Submitted by calcowoods on Thu, 12/31/2020 - 12:51

Inspired by Shara of Woodshop Diaries, created this 3 tier tray for displaying cookies for Santa. Added a 3 dimensional star as the topper and simply followed the excellent photos and schematics on Shara's website.

Estimated Cost
$5
Estimated Time Investment
Afternoon Project (3-6 Hours)
Finish Used
Minwax paste wax
Recommended Skill Level
Beginner

Comments

2x4 Adirondack Chair

Submitted by Anonymous (not verified) on Tue, 08/03/2021 - 06:27

Very easy instructions. I love the way they turned out. I used all 2x4's that I had left over from another project. I burned the top pieces and painted all other pieces. Love your easy instructions. My first time making furniture.
Thanks
Yvette

Recommended Skill Level
Beginner

Chicken Shed

I used the chicken shed plans to create the coop, with a modification to include two nesting boxes, one on each side.

I slightly modified the nesting boxes, using a U shaped frame and added hinges for the front to swing down and the pine shavings to be swept out.

For the siding, we found it easiest to do the tack and trace method. We tacked each full sheet of siding in place and traced the cuts for the window, roof line, doors, and nesting boxes. We then took them down, darkened the lines, cut 'em, and re-hung them. It made it a million times easier, IMHO.

For the inside, I designed several roosting bars with poop platforms. The water is a gravity fed chicken nipple/pvc setup, which I found online.

The food stations, also gravity fed, are (new) sewer pipes with wye connectors.

I used the roof and siding scraps to make shelves for storage inside.

By sourcing reclaimed materials, I built the coop, run, interior, feeding stations (5), and waterer for $550. I only bought 27 pieces of new lumber (15 2x4's and the 12 8 foot long 1x3's)

Even the paint was free! (We have a drop and swap at the haz mat recycling center run by the county. We have gotten 100's of dollars of free paint, stain, and varnish there. I even used a can of free spar varnish to seal the inside of the coop)

There are still a few pieces of trim to be cut and painted, but the girls are inside eating, drinking, and merry!

I did find that at the Home Depot, if you buy chicken wire, it costs way more then 150 feet x 36 inch "stucco netting". The stucco netting was $54 for 150 feet, and chicken wire is $76 for the same amount. It is the exact same wire.

I built the run out of resourced 1x2 furring strips. They were a pain to work with, very prone to breaking when not supported, but with the entire run costing $25 for wood and $54 (with half a roll left over) for chicken wire, I can handle some extra time and effort.

If anyone has any questions for me, feel free to contact me! I'd love to help!

Built from Plan(s)
Estimated Cost
550
Estimated Time Investment
Week Long Project (20 Hours or More)
Finish Used
Free paint !

I know several counties in CO have drop and swap places. Maybe your county does, too!

We got three cans of exterior rust colored paint and mixed them all together to make one color. This only works if the colors are pretty similar. It prevents one side from looking different then another.

The trim was a full gallon of blue-grey. Free and never even used.
Recommended Skill Level
Intermediate

Comments

xman1x

Mon, 02/06/2023 - 08:12

Hi! Do you still have this coop? It's been about a decade now and wondering how it has held up, if you have any suggestions, or additional pictures of the inside. Thank you!

Back