Home Closet Upgrade

DIY Home Closet Upgrade
Built from Plan(s)
DIY Home Closet Upgrade
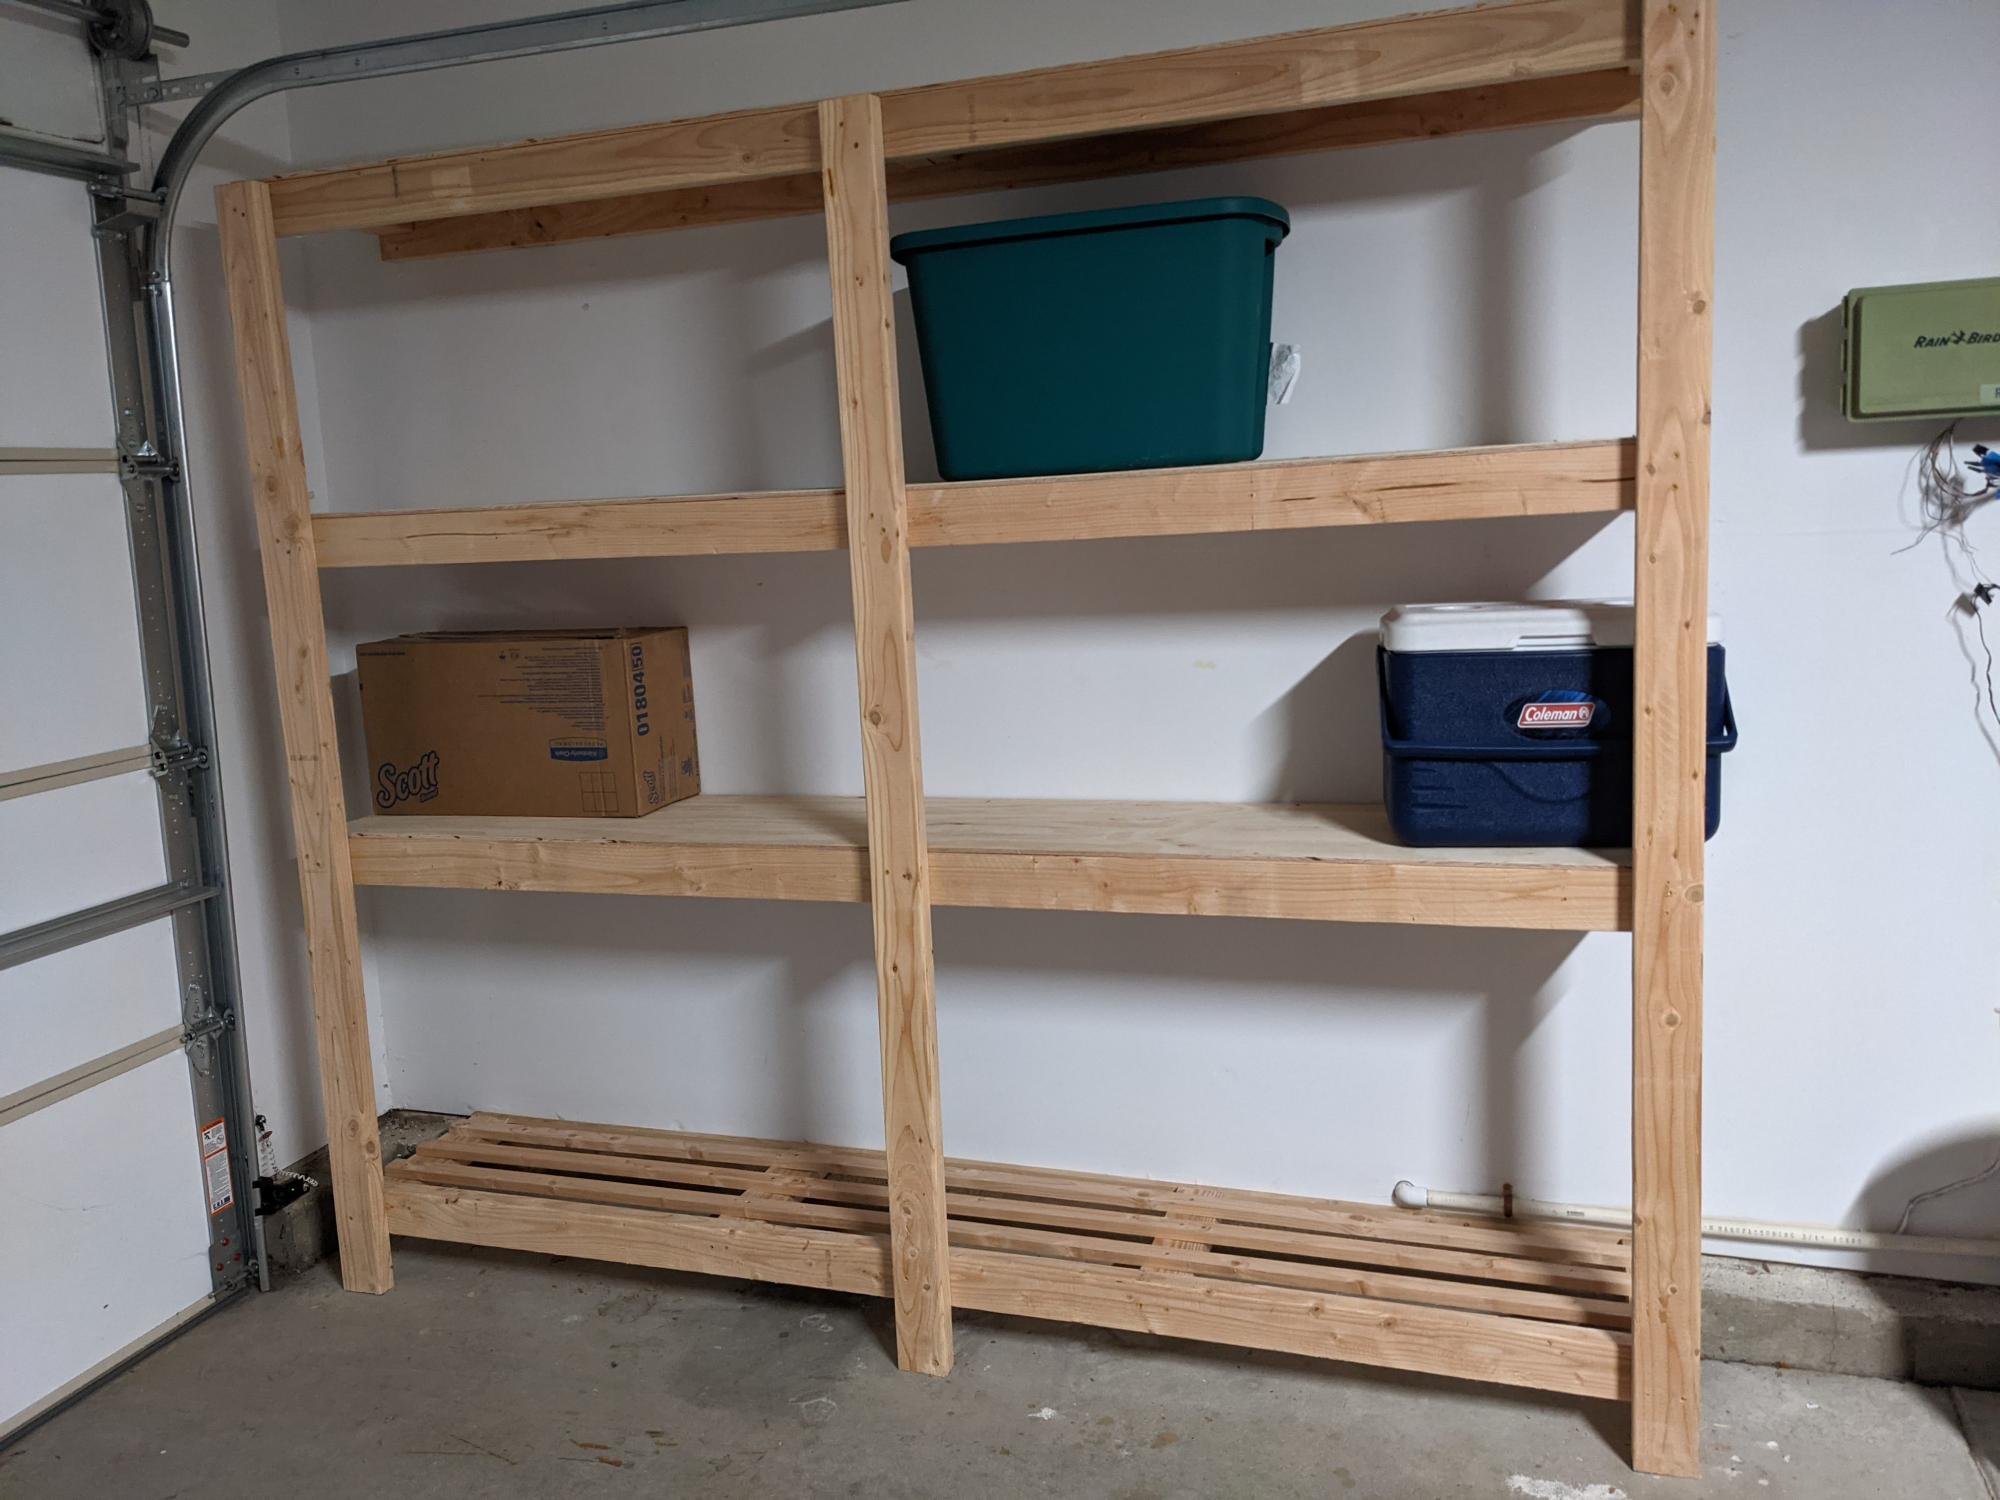
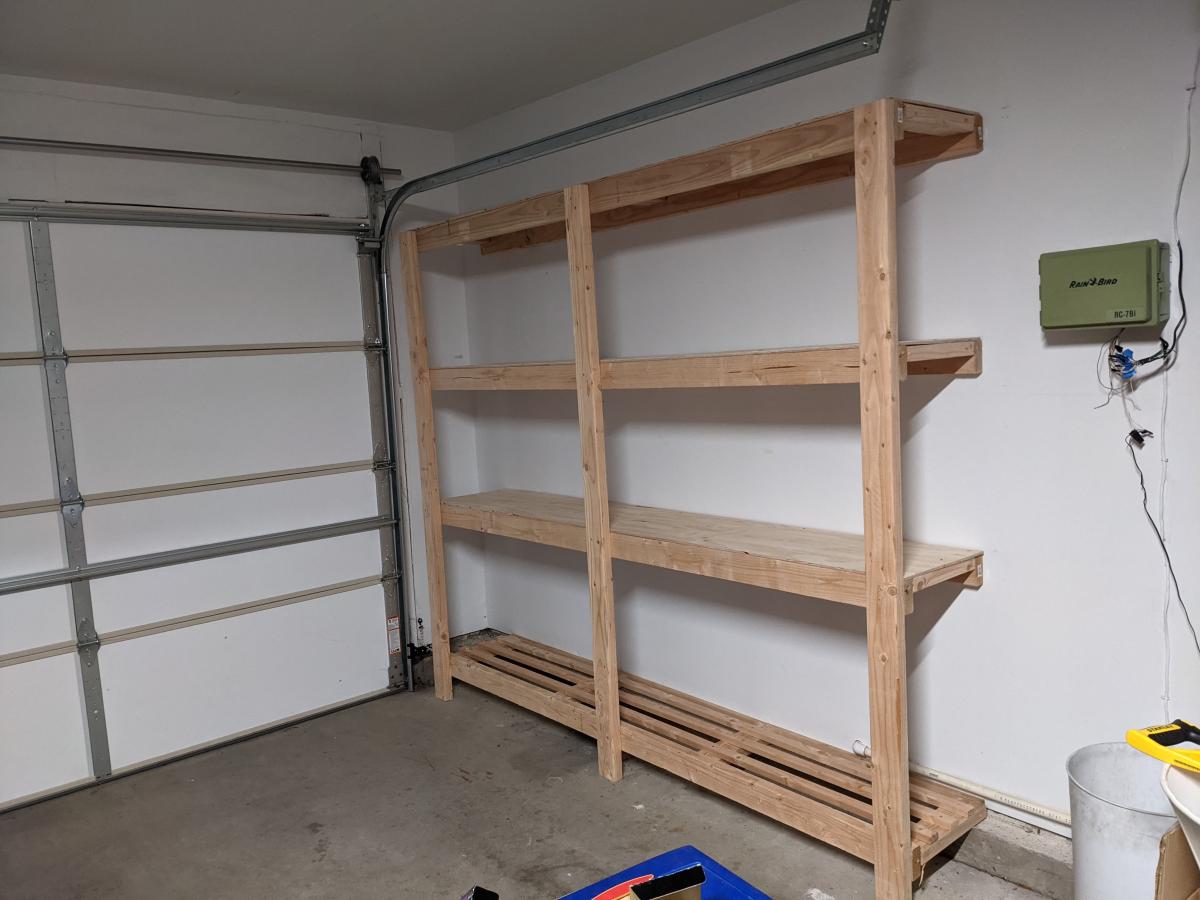
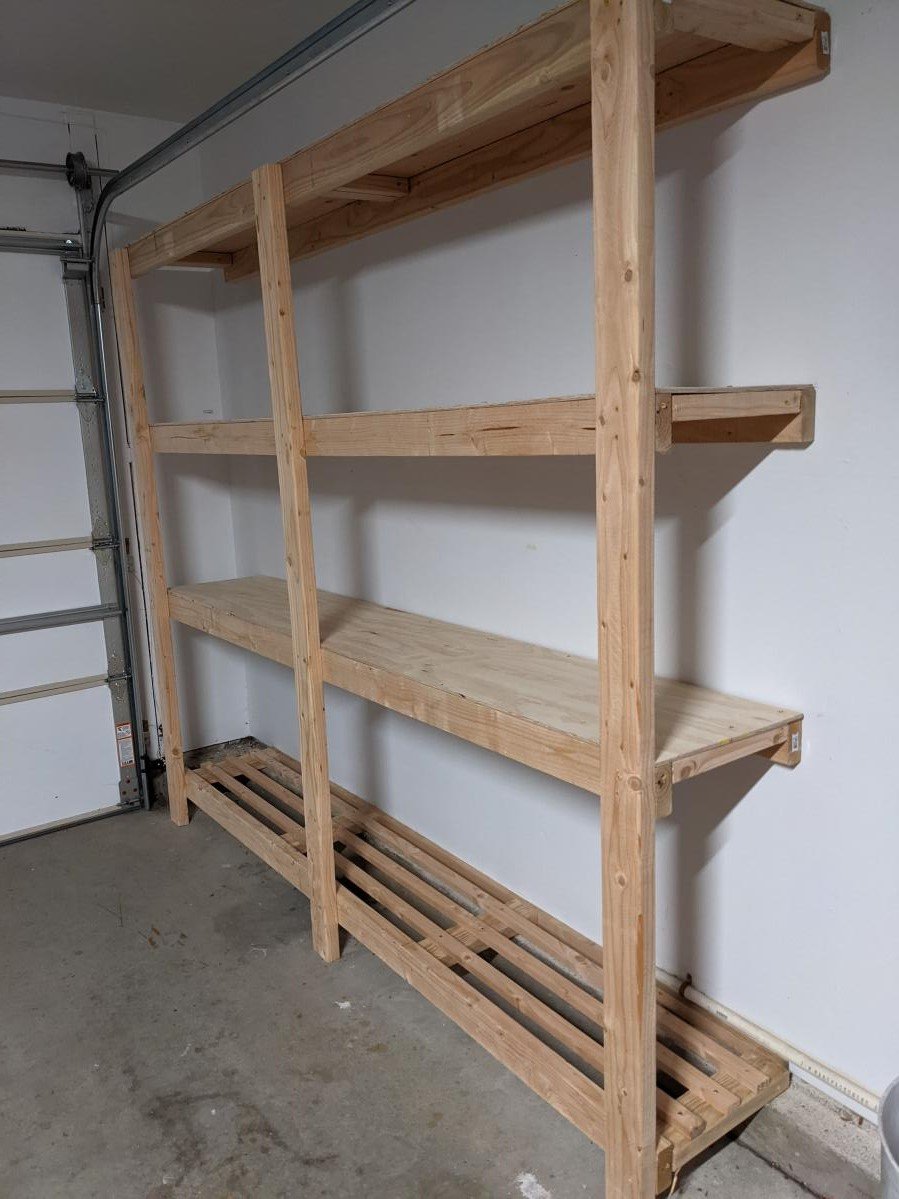
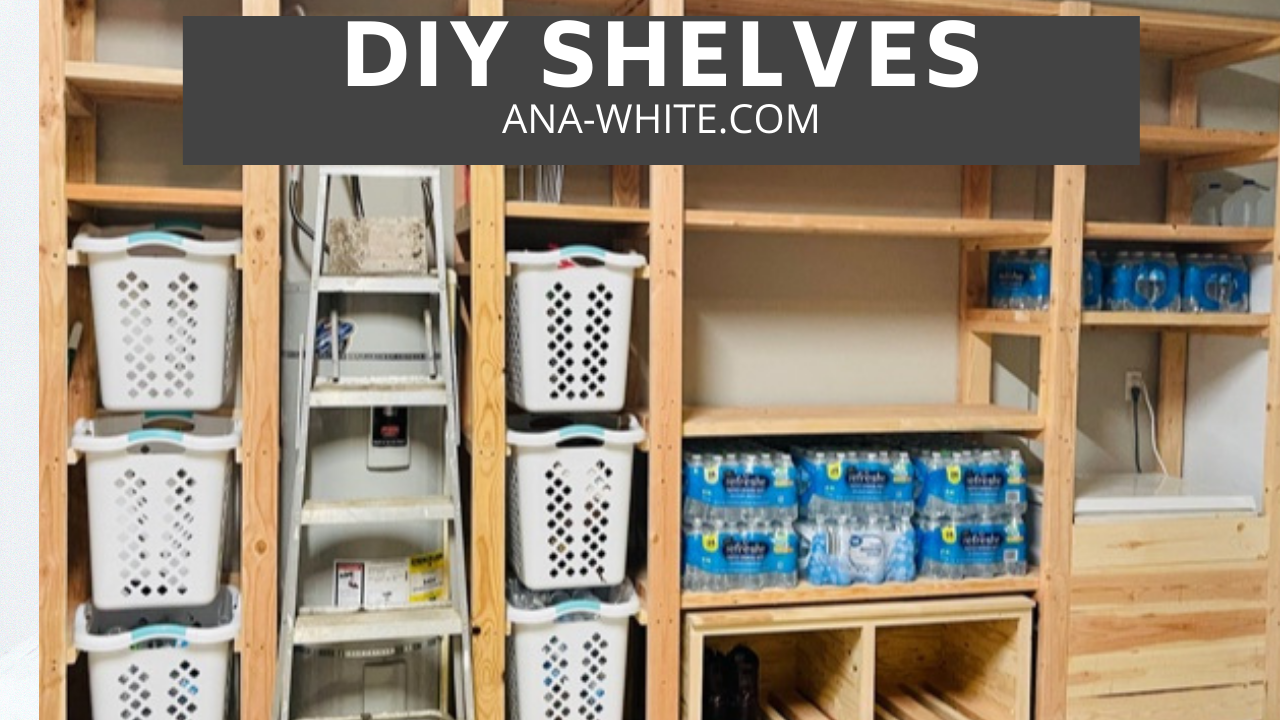
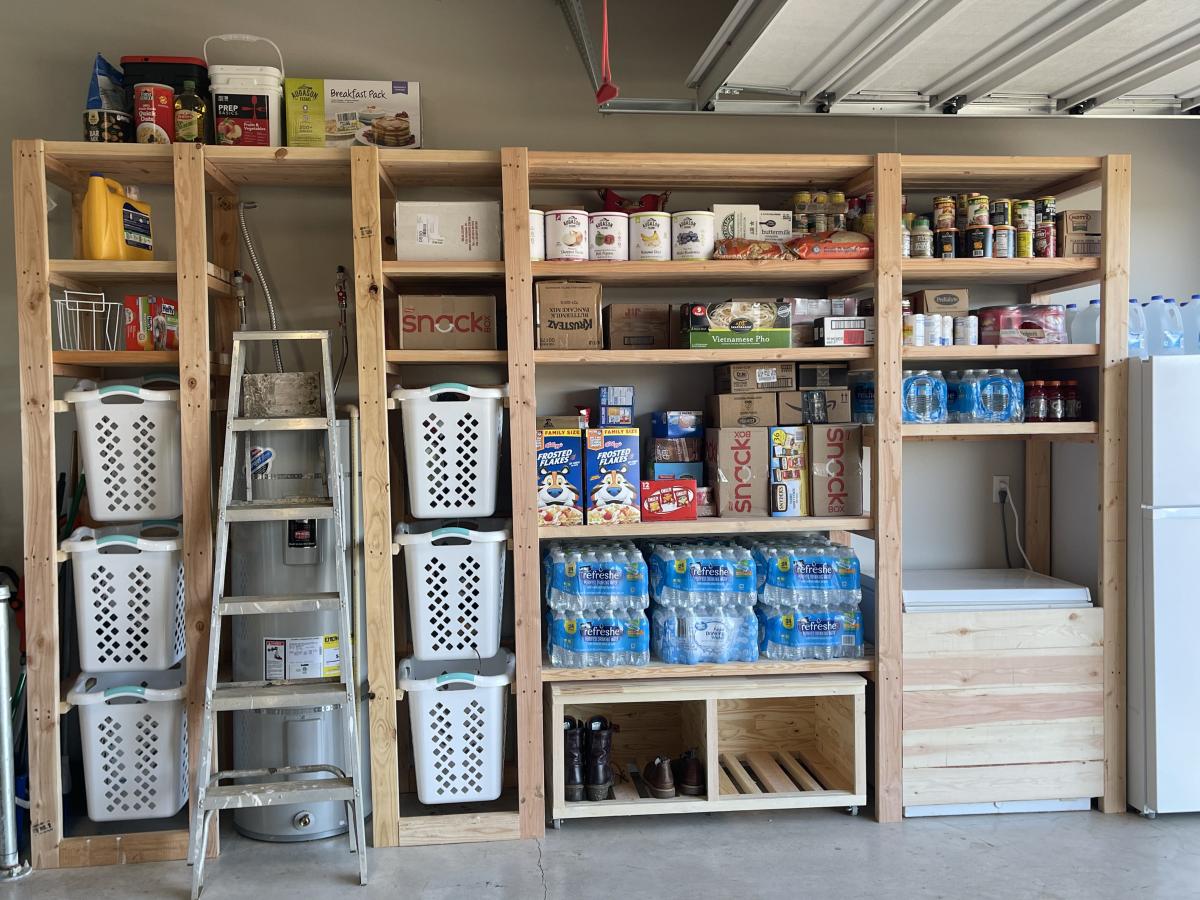
I just made this shelf using 2x4s 8 ft long wood. It is very strong and looks great. My garage size required the shelf to be max 16 in deep, so I used a 1 plywood sheet divided by 3 equal parts for the upper 3 shelfs. Since I made a 4th shelf, I used 3 1x2s for the 4th bottom shelf instead of a new plywood sheet and avoided having extra 2/3 of the sheet around and also saved like 30$ since the 2x1s were only 2$ea. That touch makes it look a bit stylish too so a win win. If you do that, here's a tip: use the outer 2x4s as rails - make sure that the cleats on the lower shelf are placed a bit lower ~ 1in. In such way, you can place the three 1x2 rails at the same level as the outer 2x4s and this you end up having 5 rails total in the shelf. Do use the wooden screws with star head if you can, they were muuuuuch easier to use compared with the regular ones. Note, this shelf is very strong, probably too strong for my needs. For a 8ft long, and my storage needs (camping, Christmas stuff, other lighter things), I'd probably use 2x2s instead of 2x4s. That would save costs, specially since wood isn't cheap these days( I spent ~$150 in materials Jan 2022).
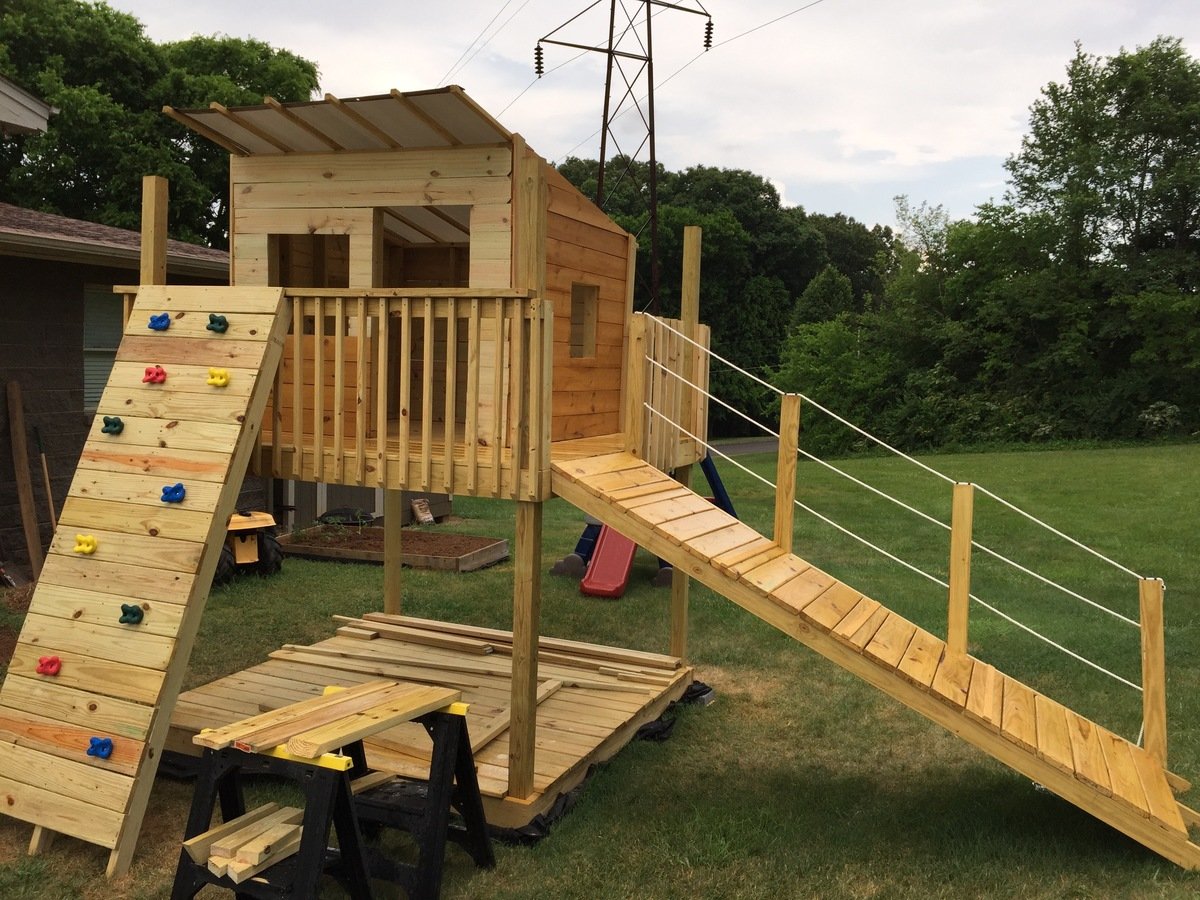
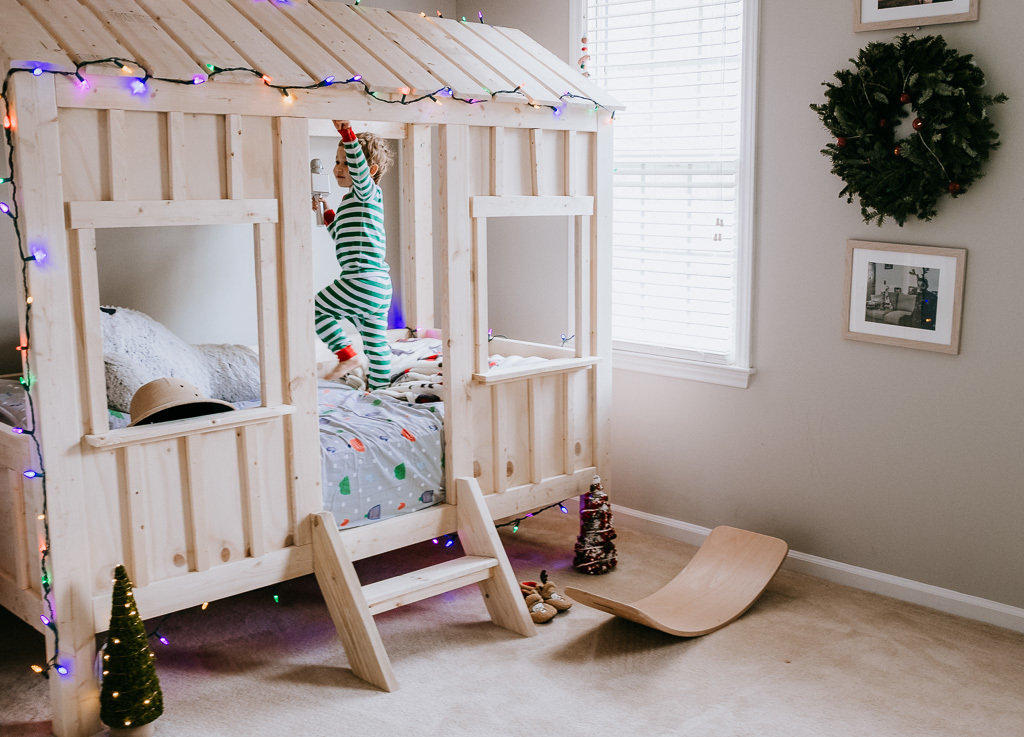
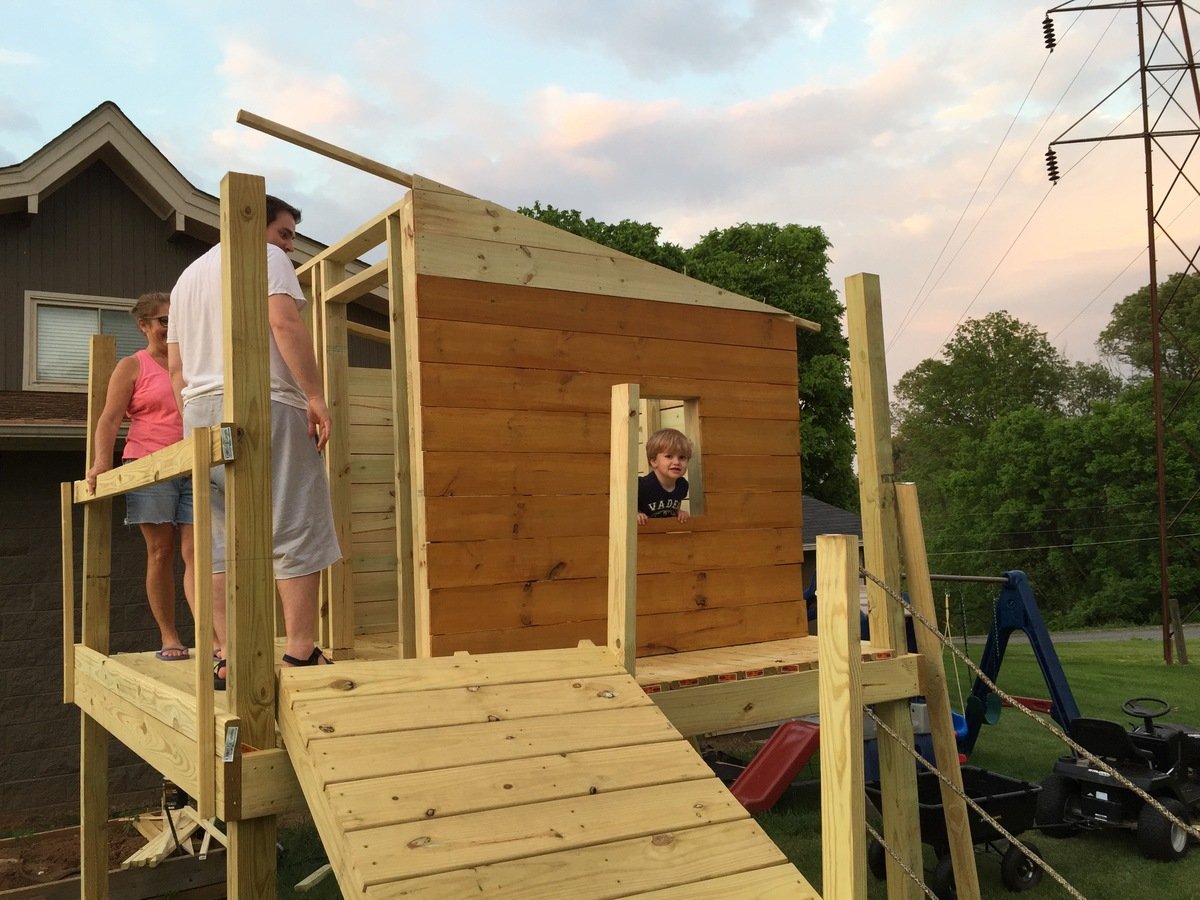
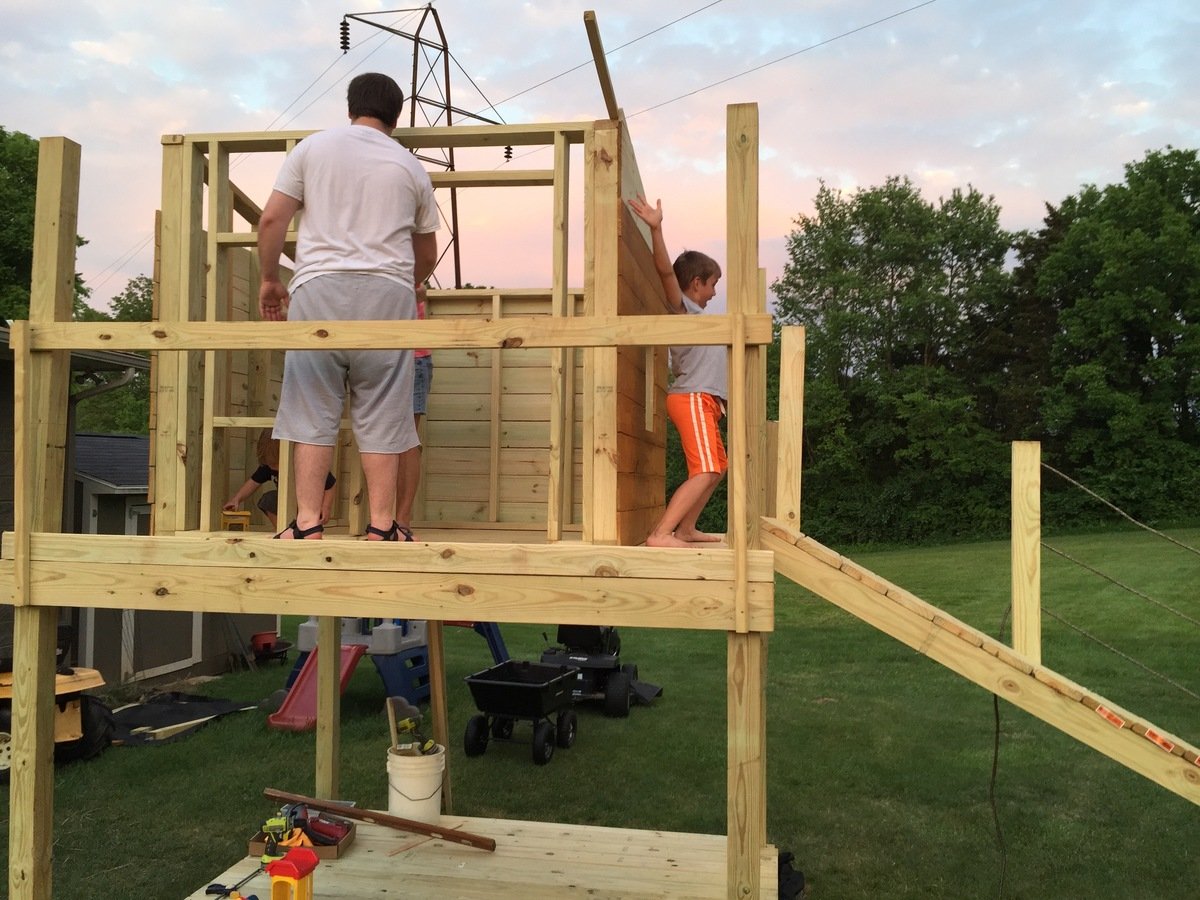
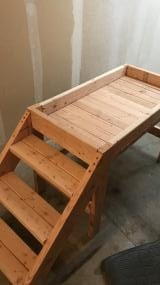
I wanted to build a structure for the kids to play in and on. I used the playhouse deck design and made it 8 feet by 8 feet. The "roof" is removable to provide shade when it's sunny. It's just 2x2 and a tarp - pretty simple, but it does the job. I used treated posts, dog eared fence boards andlots of screws. I stained and built the walls in my garage before assembling it. Once all of the wood at been stained, it came together pretty quickly with the grandkids help...Lol


Tue, 05/05/2020 - 06:43
What is the estimate cost of the entire playhouse with swing?
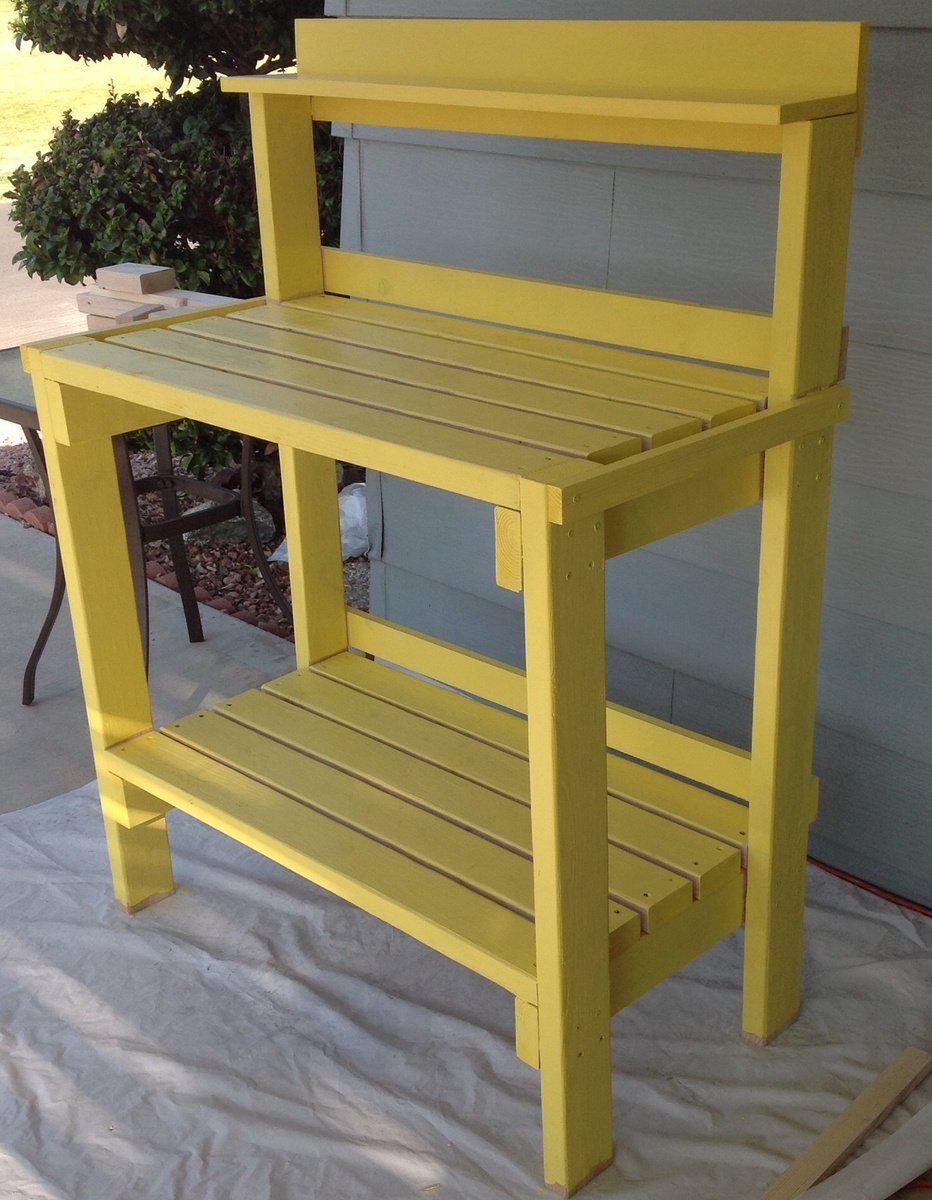
I'm so happy to have found your site! I've been wanting a potting bench for a while. Today the Hubs and I built this one in Daffodil Yellow! It is only partially painted, but I already love it! The hubs wants to build a modified one for his heavy electronics equipment. Thanks a Bunch!

I loved the plan for the cedar picket shed. It was tall enough to block my neighbor's view, so I shaved 20 inches off the height. It is the perfect size for a mower. We made a floor out of 12 inch blocks. The ground we have here packs very well, so I think it'll be good for a long time. We also have a lot of wind, but this thing isn't going anywhere!! It is solid. I also like the fact that it takes a stain right along with the fence and there is no painting involved! The hinges you recommended were great.

This was my very first wood working project since working around my grandfather's shop 20 years ago as a child. I had to buy a few tools to get it done (circular saw, Kreg Jig), but it was a great learning experience!
I made a rookie move of wiping up excess wood glue, which didn't take the stain at all. I had to remove that glue with a Dremel tool and spot restain. Since then, I've been told to let the glue drops dry next time and just chisel off after they are dry.
Since this was my first project, I had to buy EVERYTHING I needed, so my costs were a little higher. Now that I have some groundwork laid, the next projects will be a snap.
I also highly recommend the Rockwell Jawhorse product, it made working with the Kreg Jig super easy!
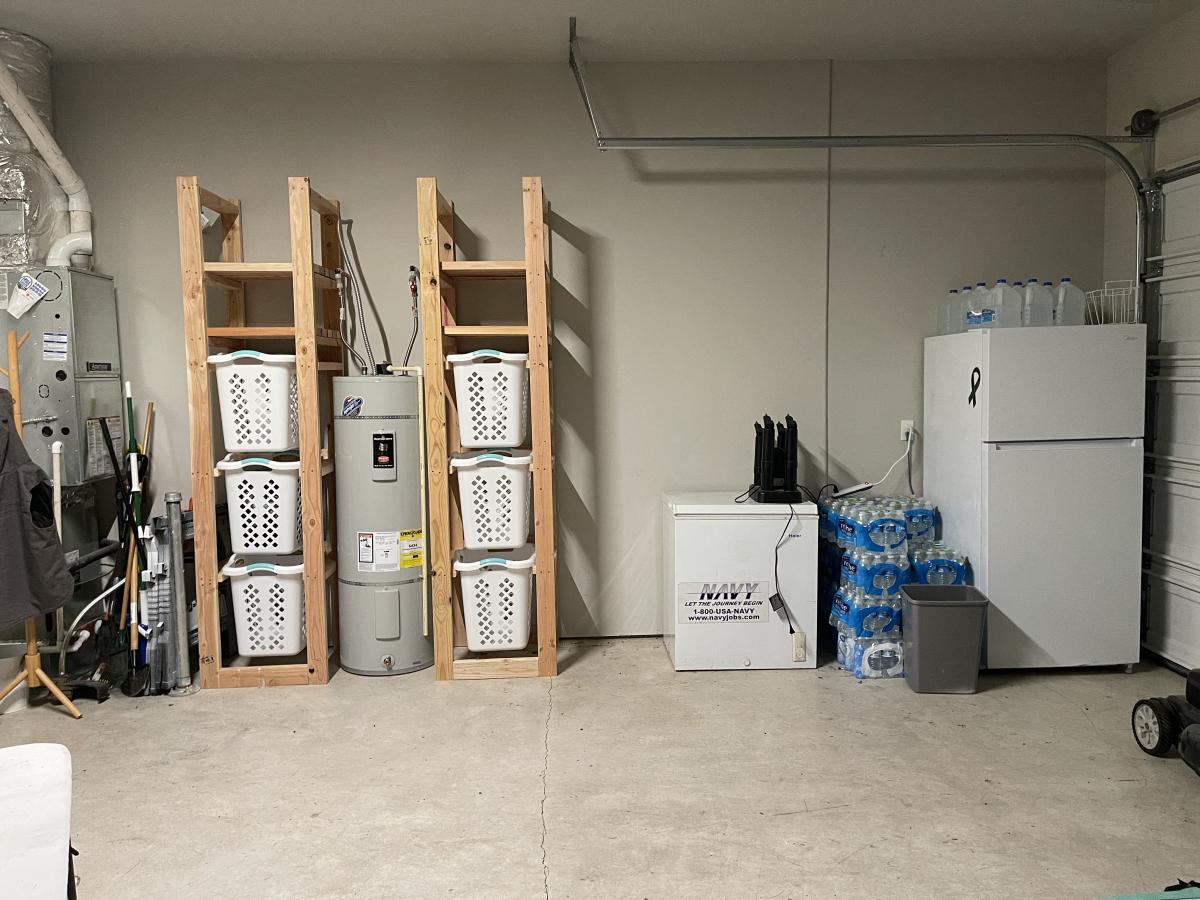
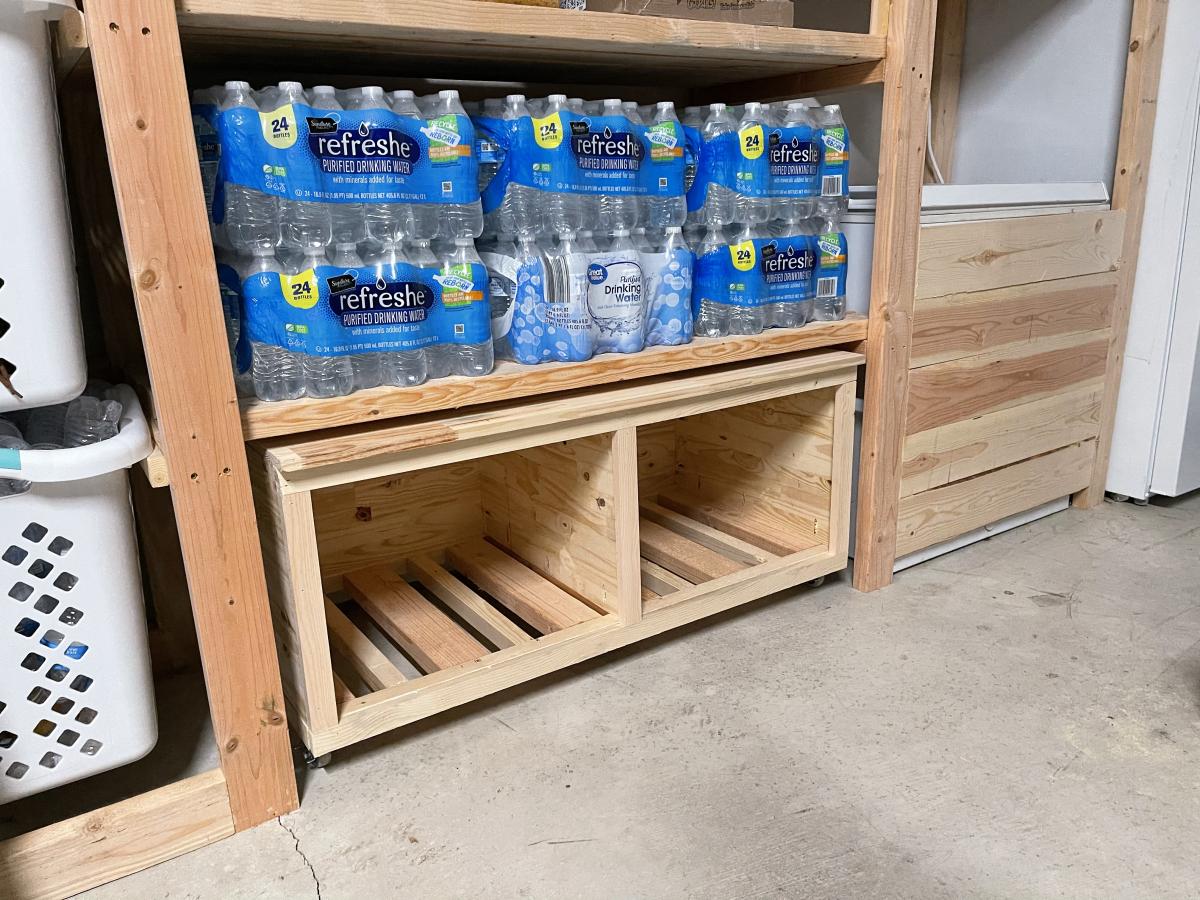
I used Ana's Freestanding Shelf plan and customized it to fit my needs. I incorporated laundry and recycle storage, a rolling bench and built in for our chest freezer. If you want to see it being built with some added tips, that video is available here https://www.youtube.com/watch?v=N8w7XGiVMbs&t=258s
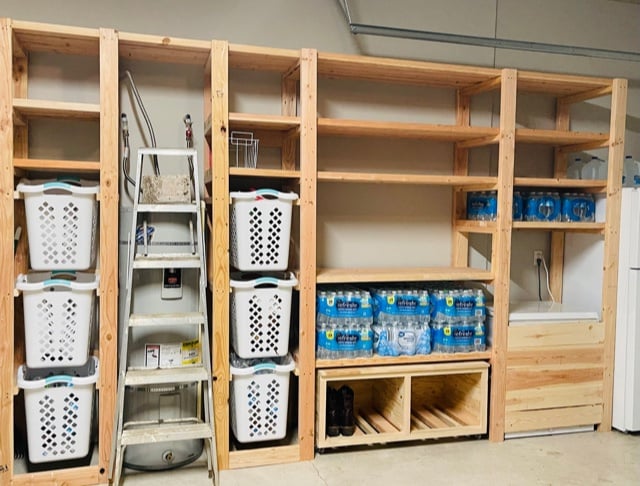
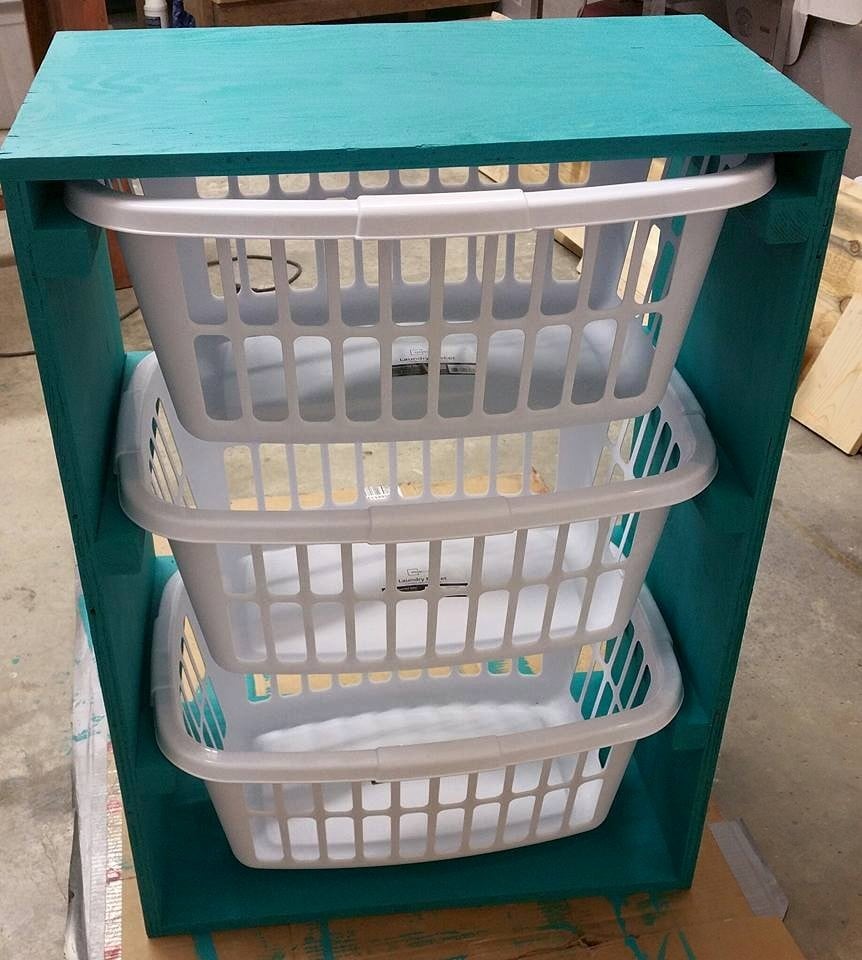
This took me about an hour to build. I used two coats of paint and bought the cheapest laundry baskets that Walmart sells here in Alaska ($3.77 each). I added some felt to the bottom corners as it'll be sitting on a hardwood floor. Very happy with the finished product!

I found out what the rack in the drive up area of my local Lowes was!
I often see piles of wood and sheets or plywood and such sitting there, but I never paid it much mind-turns out its a clearance rack of sorts they call it the "cull" rack, because they are culling the items from inventory that may be cut, chipped marked etc.
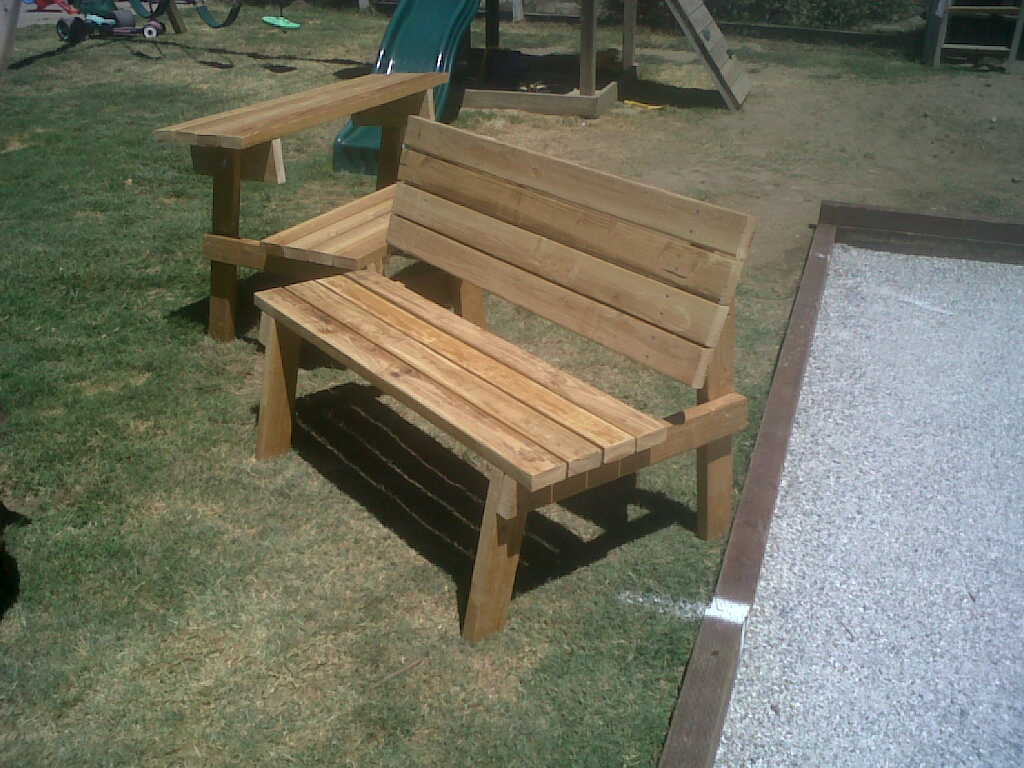
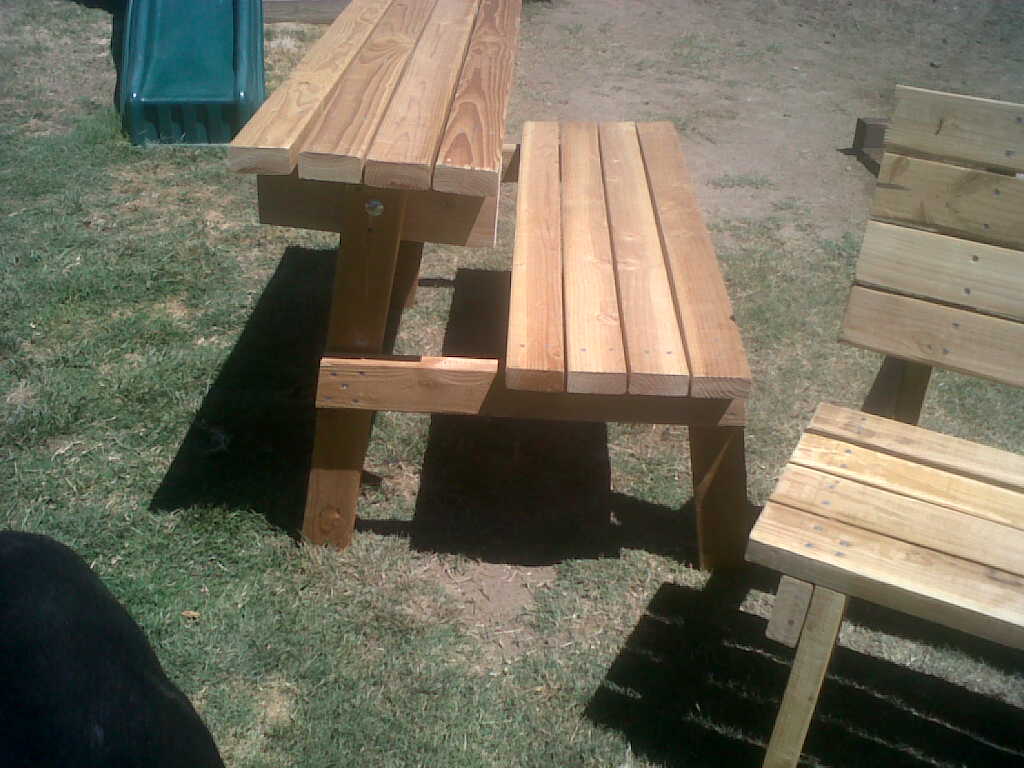
So I was at the store buying something for my Bocce Court and saw this pile of 16ft 2x4's and saw they were only $20 and there was 8 of them- so I picked em up for a "future project".
Needless to say they weren't the truest boards but they worked well enough for something like this. I had to buy a 2x6 to attach the top to because 2x4's aren't wide enough to give proper clearance as the plans showed(and I really didn't want to reinvent the wheel on this) so i bit the bullet and bought a $3 2"x6"x8'
Now if you notice I used all 2x4's for this instead of 2x6 so I adjusted the top to 14 1/8 to accommodate 4 2x4 pieces separated by spacers I use when installing wood floors. I made no change to the seat dimensions, but there is 4- 2x4's vice 3- 2x6's.
Great plan- perfect for more seating on my weekly bocce nights and they hold in excess of 600 lbs easily for those concerned about load limits.
(Note for those curious, that is my Bocce court in the background, it is 10'x60' and built with pressure treated 4x6's and 2x4's and a whole bunch of DG and crushed oyster shells.)
Thu, 02/23/2012 - 11:14
I plan to build several of these for my daughter's family. They stand around a fire most nights in the spring. Those nights often end up with roasted hot dog dinners with the friends who have dropped by. The dual purpose of these would be perfect!
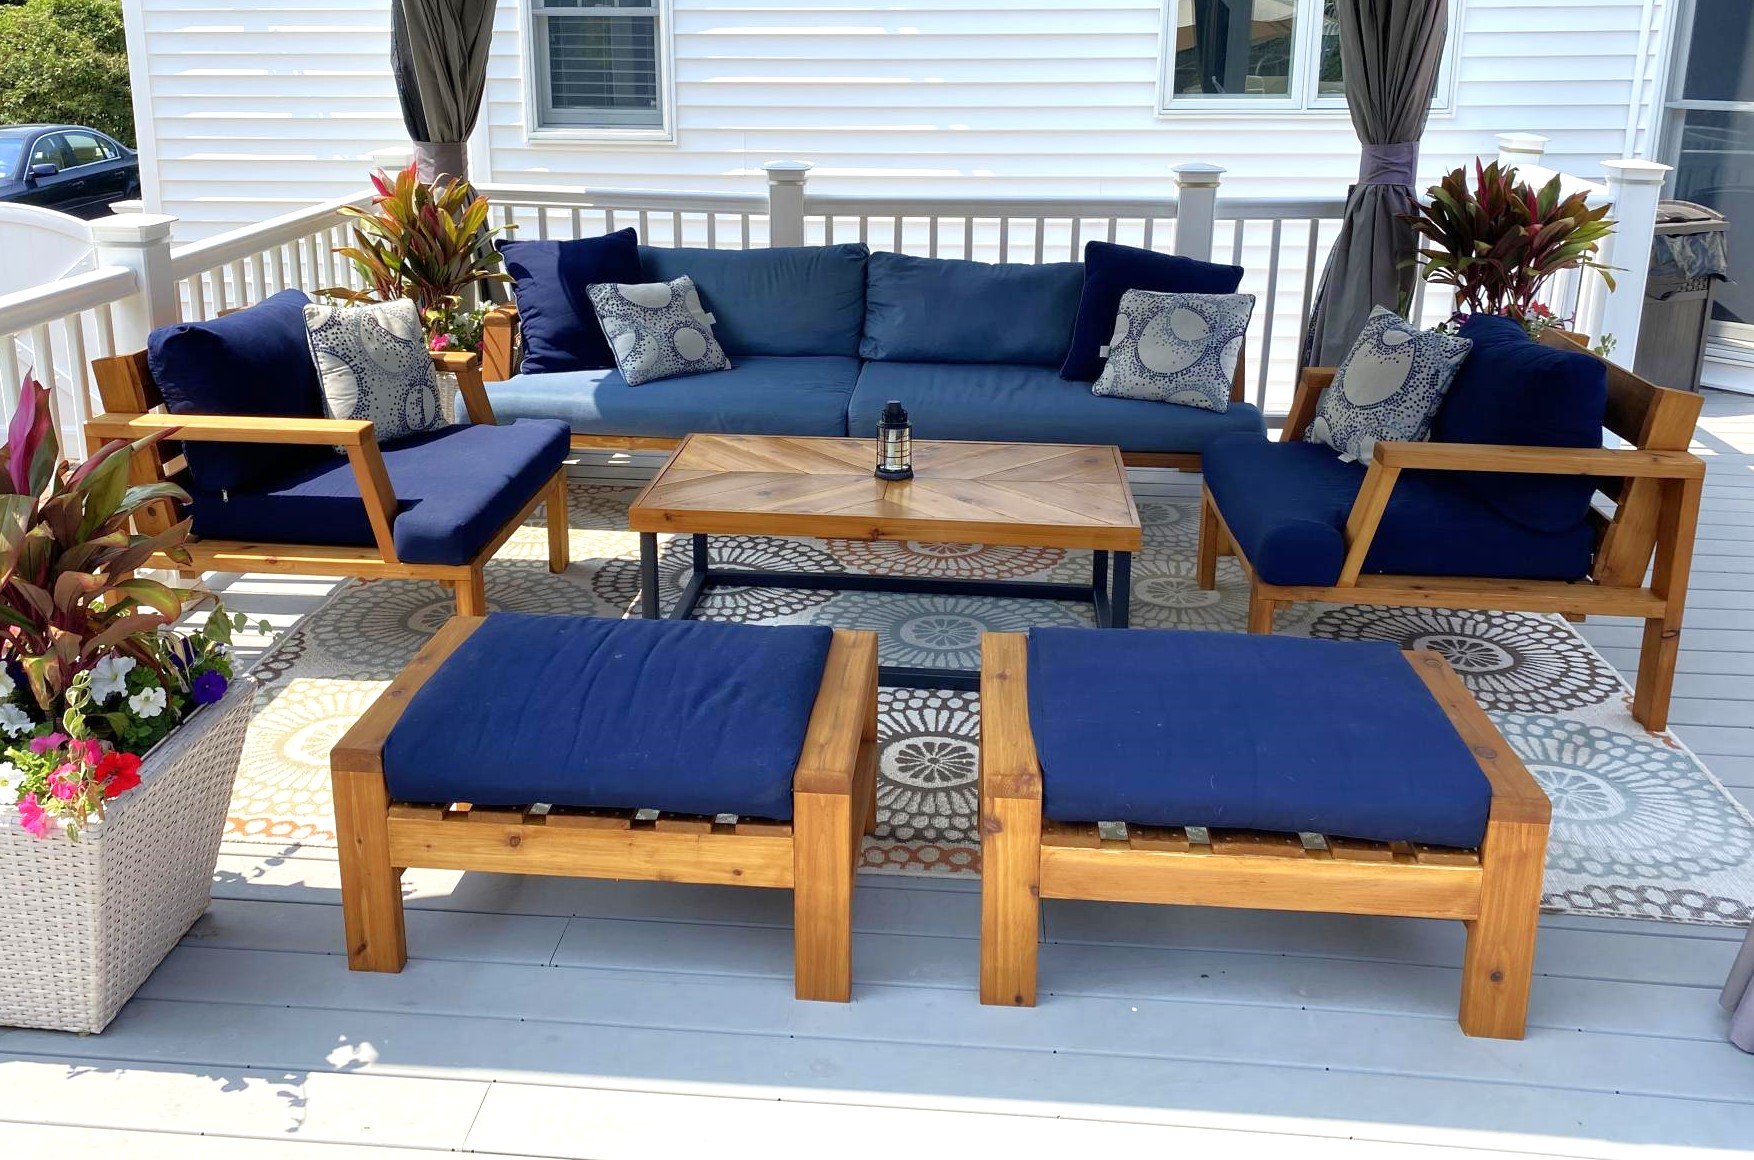
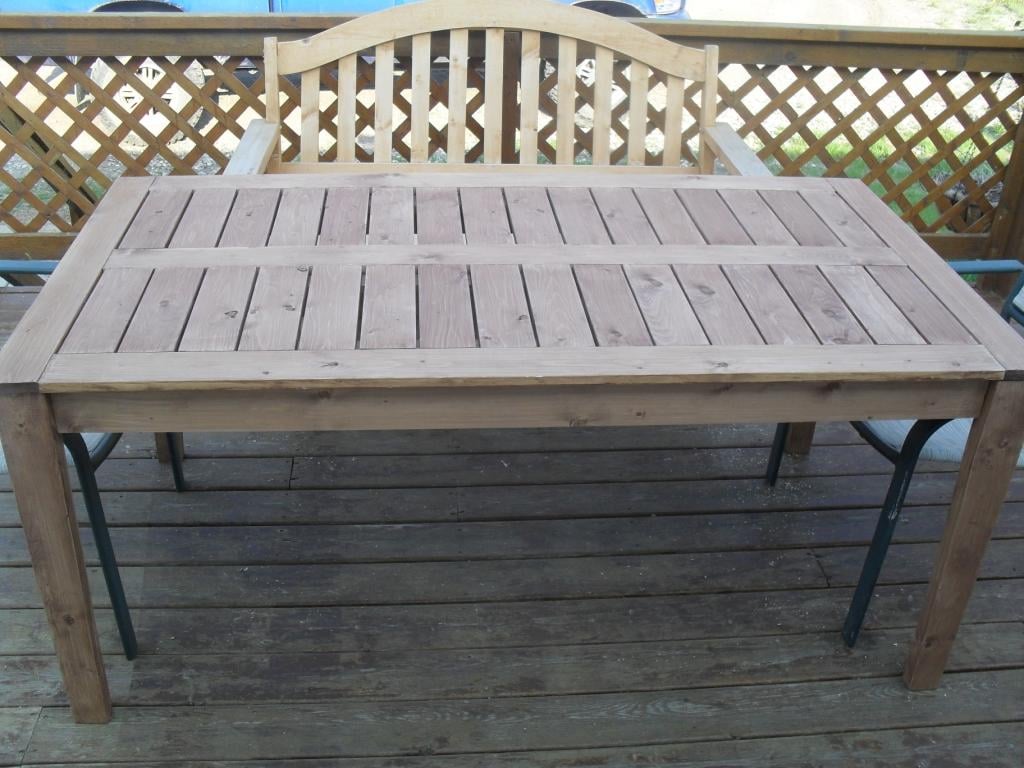
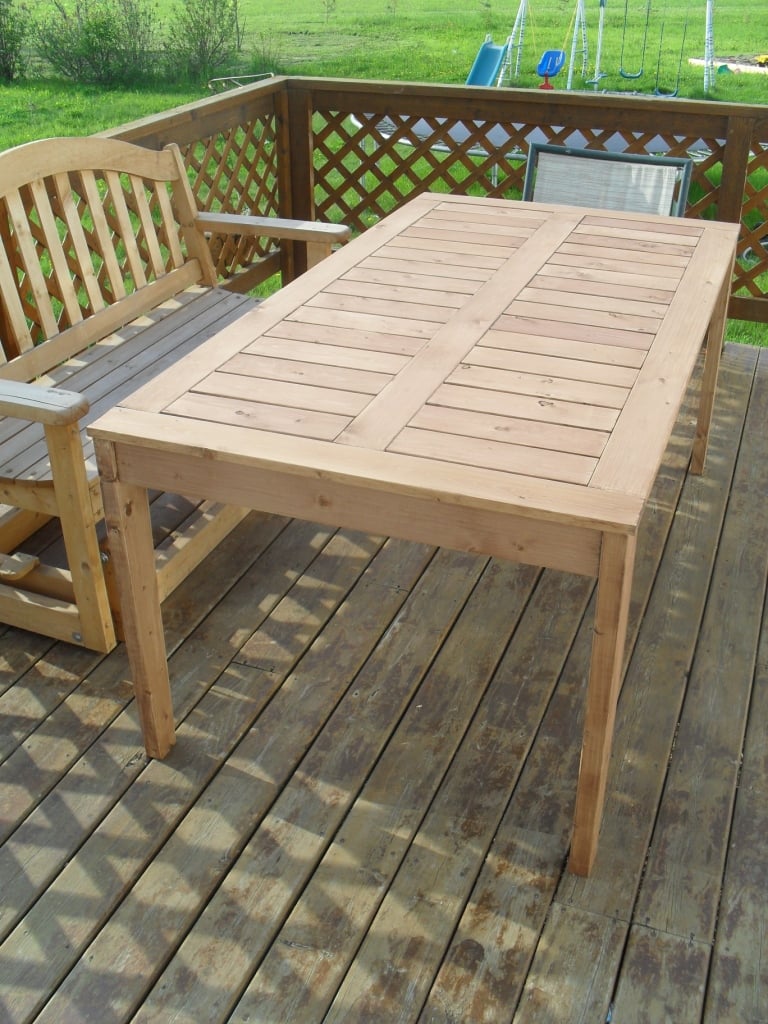
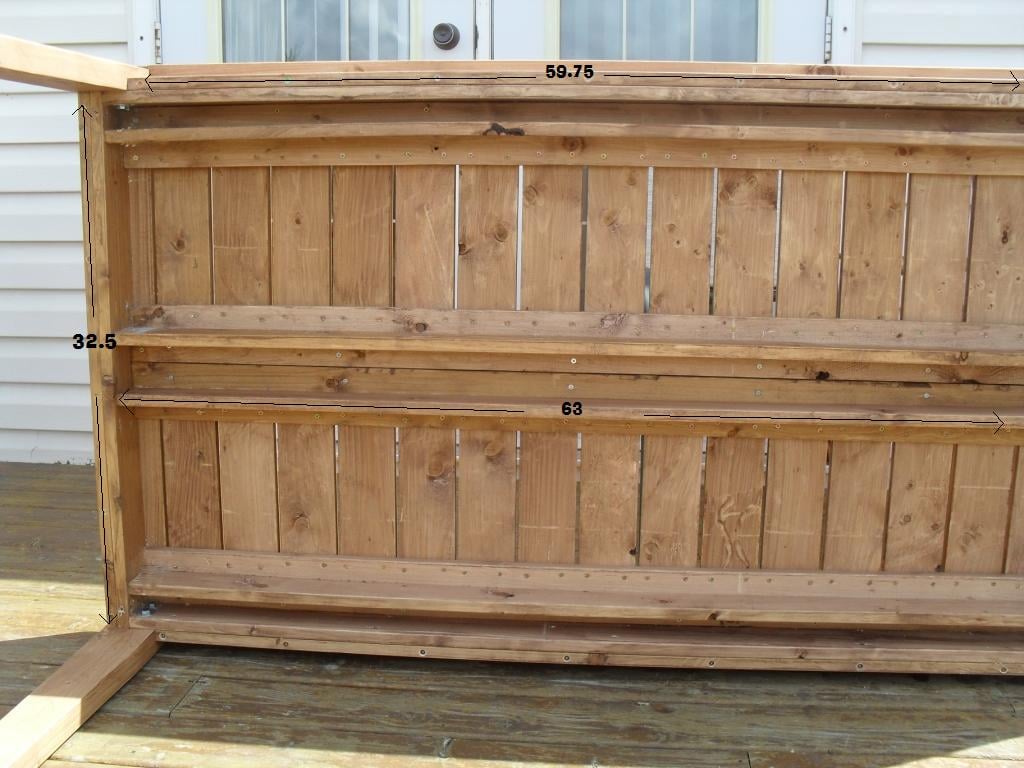
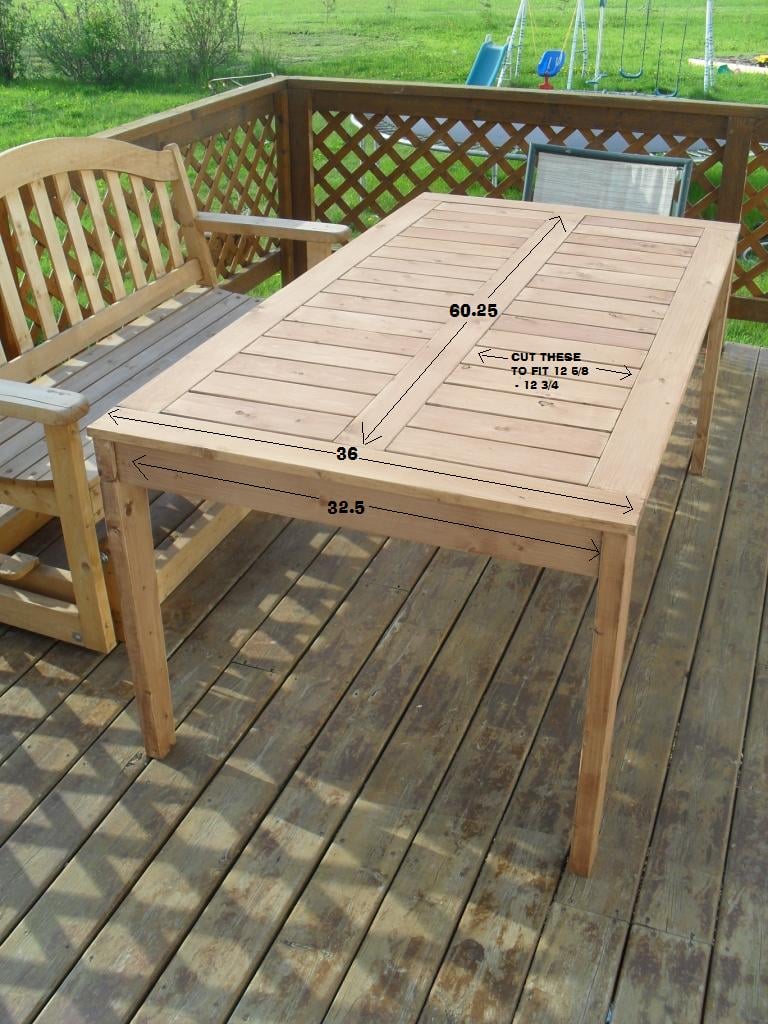
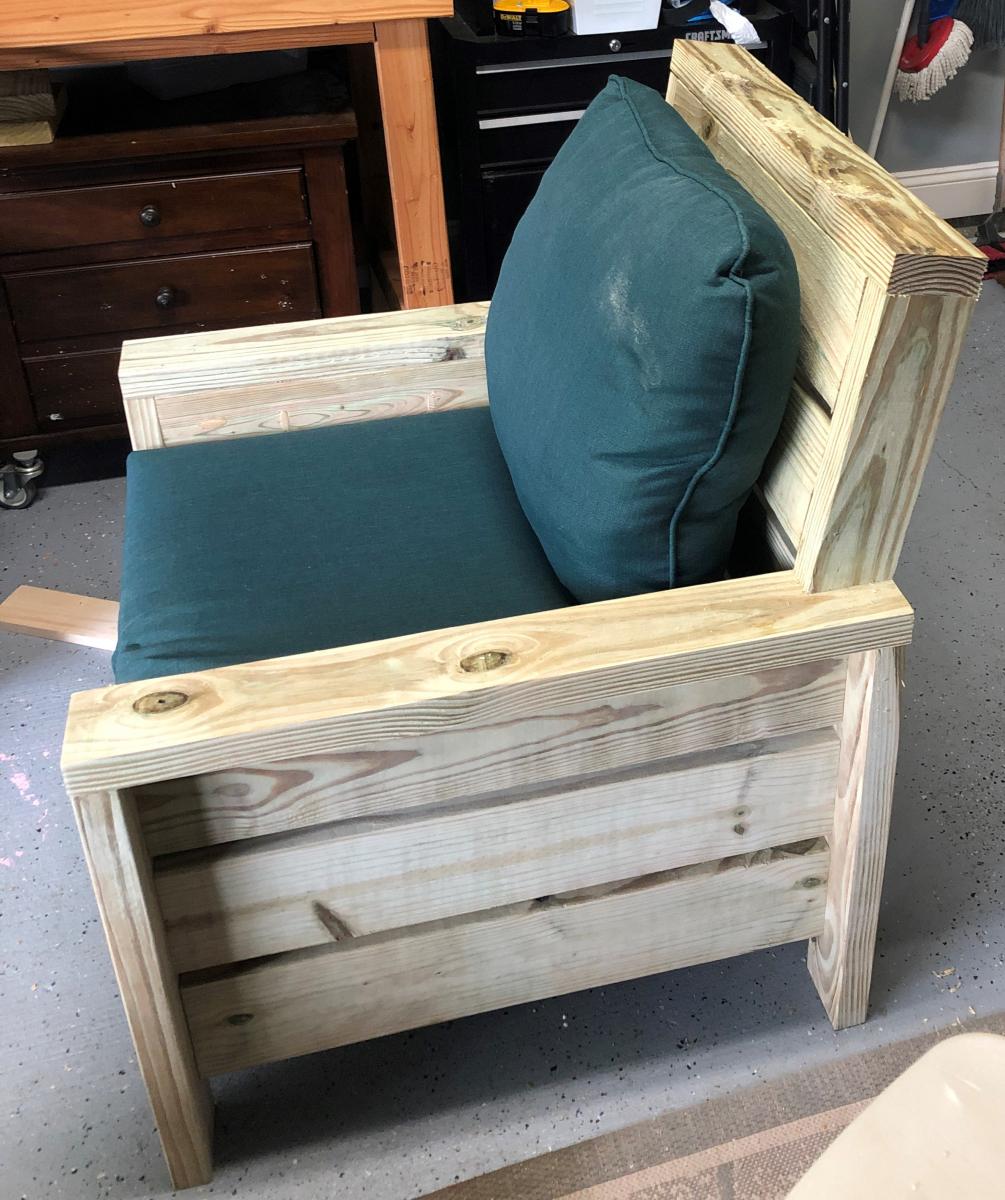
Our outdoor furniture from Costco was falling apart but the cushions were still in great shape so I decided to design the furniture around the existing cushion dimensions. I used all Cedar wood and stained it with Australian Timber Oil Honey Teak stain. The table design was from a picture I saw on another site.
Tue, 06/20/2023 - 12:56
Excellent idea to design the size around the cushions you had! Thanks for sharing ❤️

Cornhole boards for friends and family :) Used 1x4s for framing and legs, 1/2" ply for top.
"R" set: Birch plywood tops w/ (2) coats of Miniwax Weathered Oak oil stain. Red stripe is Behr 'Cherry Cola.' (3) coats of Polycrylic finish.
"AW" set: Regular plywood tops w/ (1) coat of Miniwax Special Walnut oil stain & Glidden 'Clemson Orange' stripe. (3) coats of Polycrylic finish.


Sat, 09/24/2016 - 10:16
Gorgeous! These would make such a fabulous wedding or house warming gift!
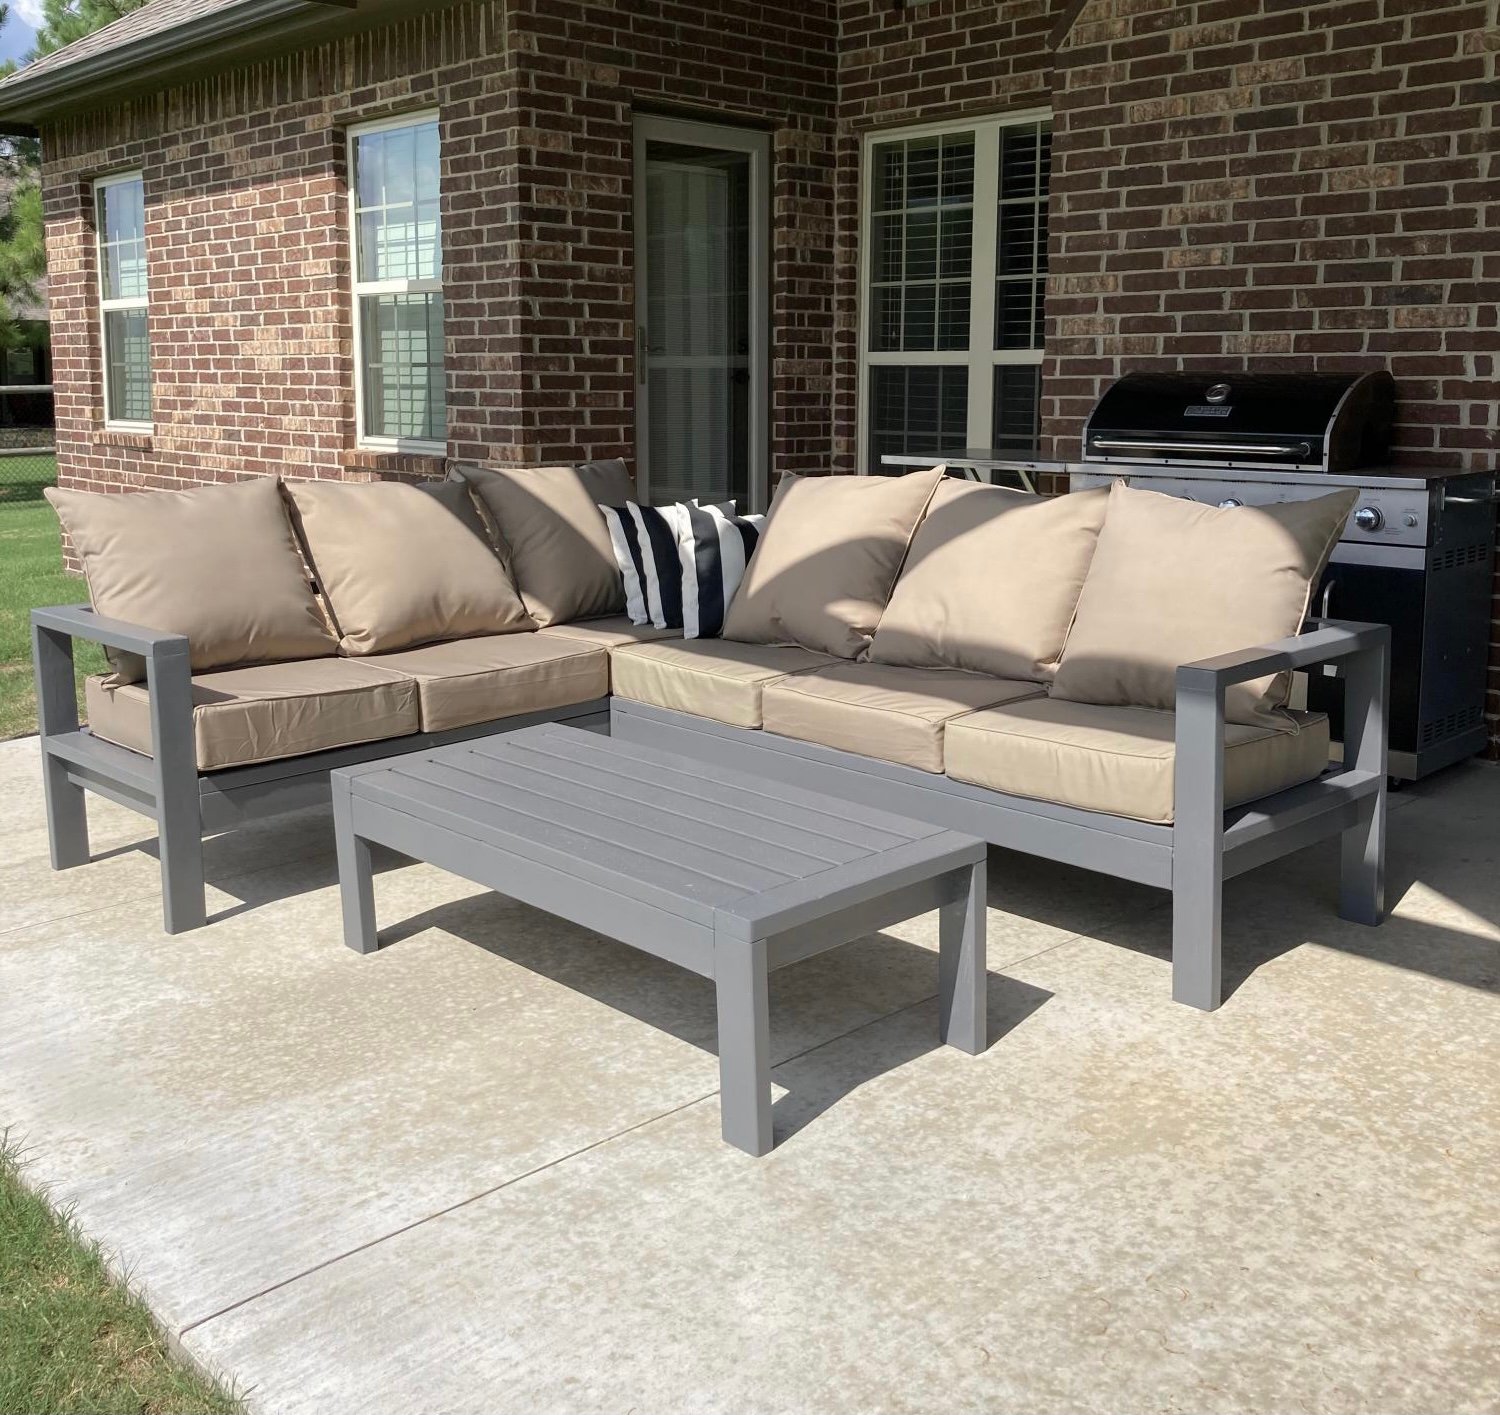
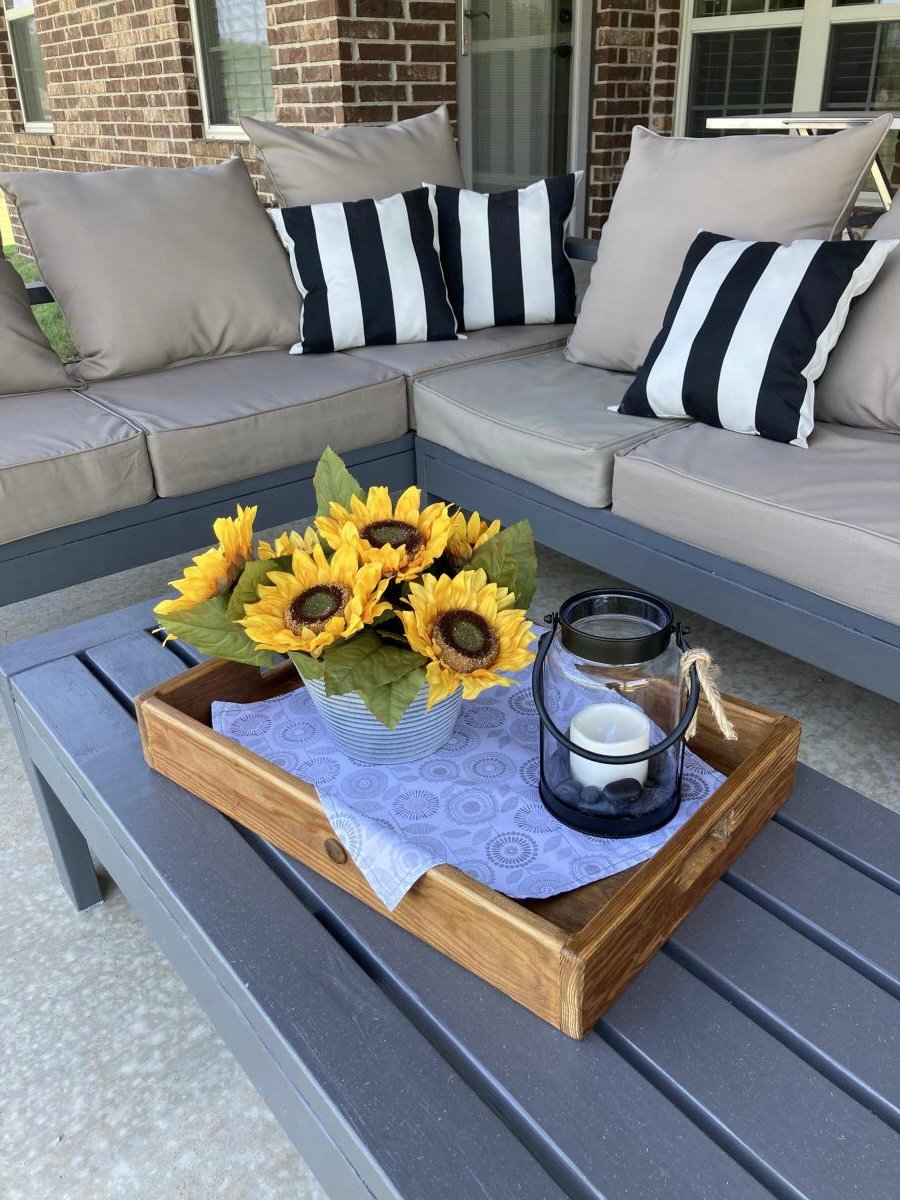
I wanted sturdy seating for my patio. Ana White had the perfect plans for my L shaped seating and coffee table. It was simple to put together and we love it!
Made this Loft bed for a full size mattress in 2019 and it is still strong. I added a stretcher on the bottom of bed across the length of the the bed added strength.
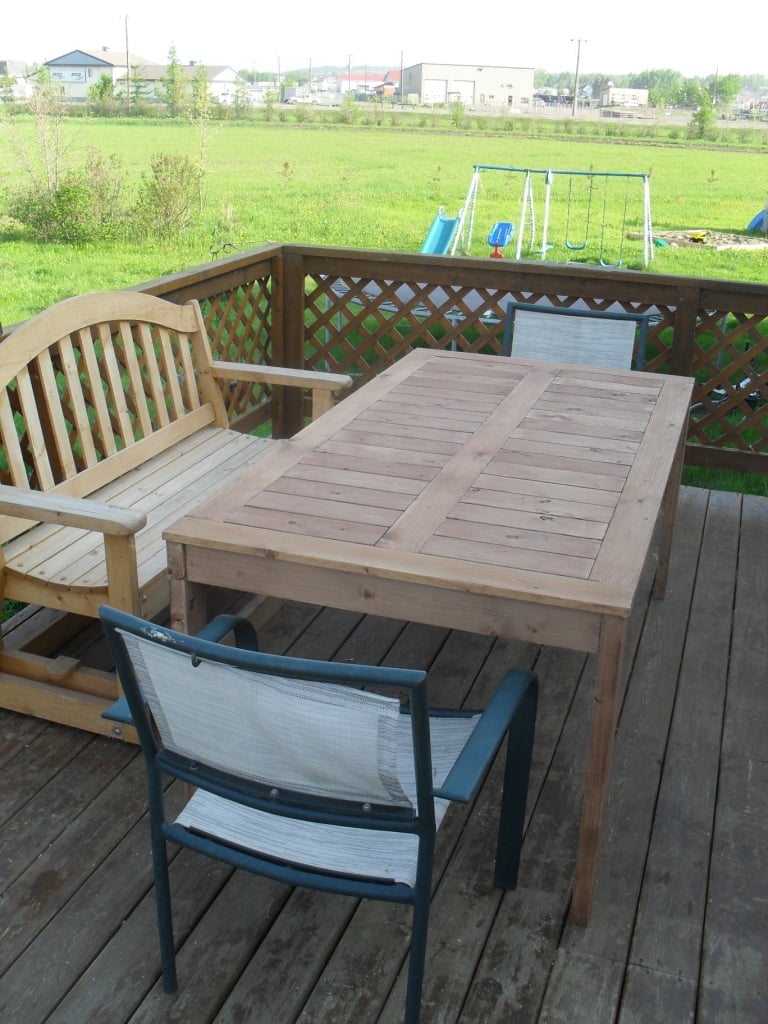
Wanted a Patio table and when I saw the plans on this site I really liked it; I just changed the plan a bit. Everything was screwed from the underside of the table, also I attached the legs with 2" lag screws.

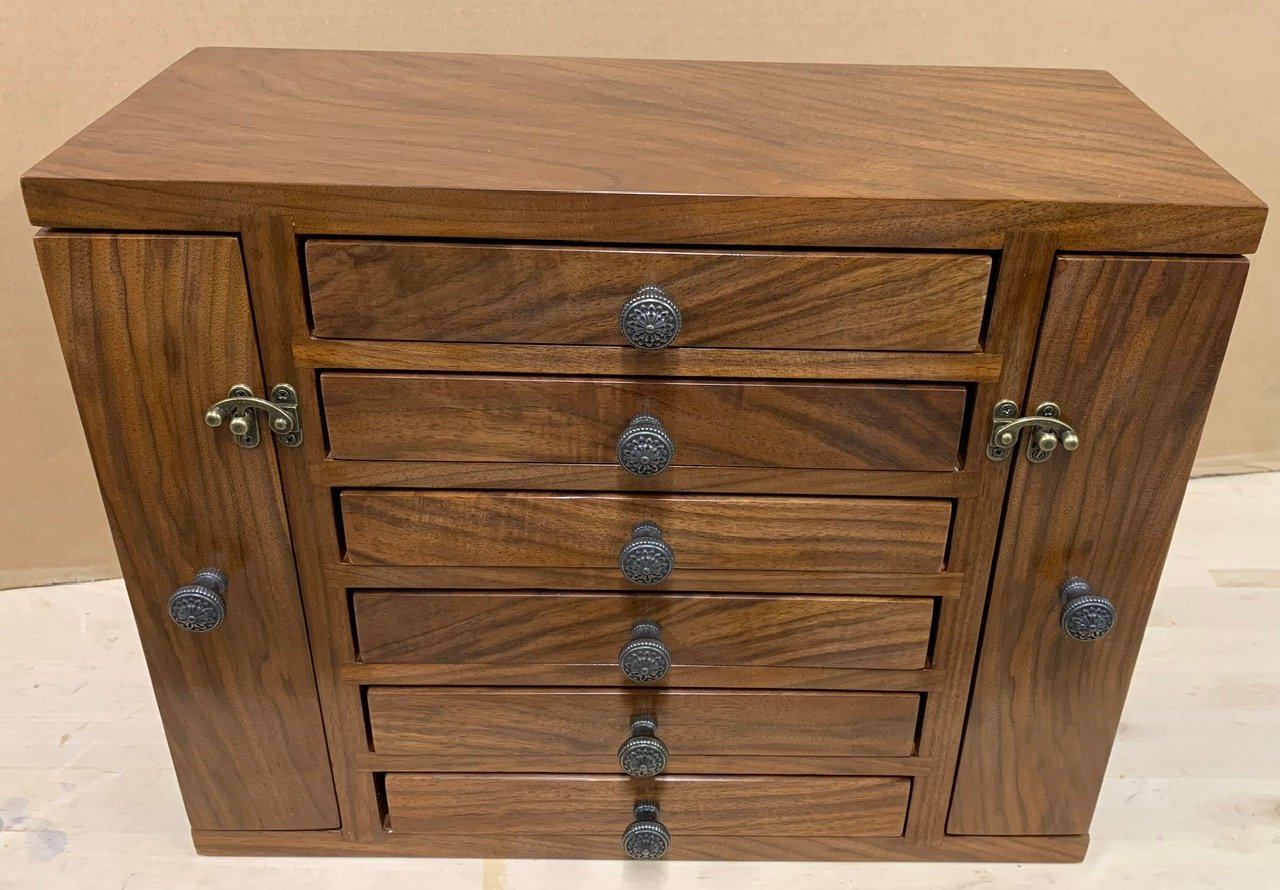
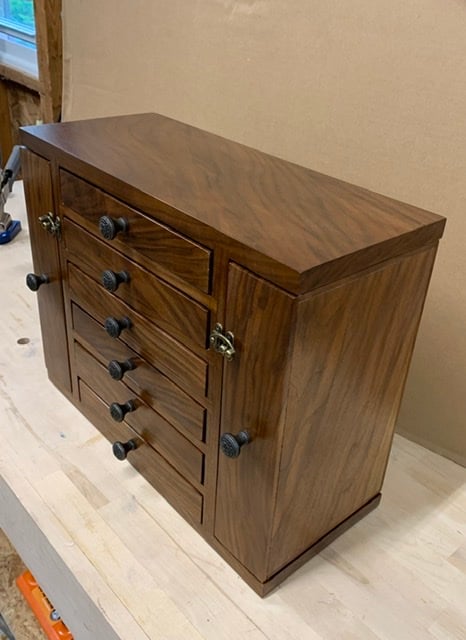
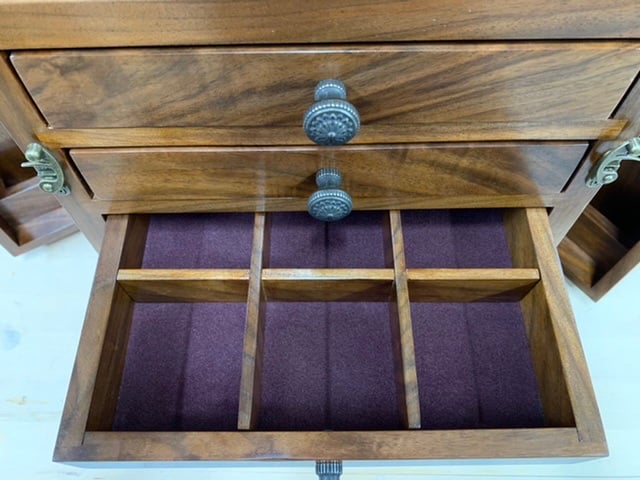
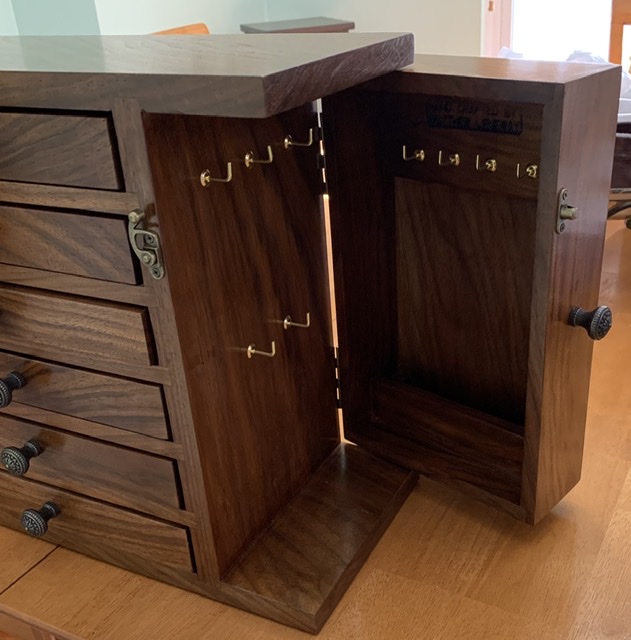
Great plans and a fun build. I made some modifications. My drawers are 1.5” high and 10” long. It allowed for 6 drawers. Overall height is 13.75” and length is 17.5”.
I used rabbits and dados rather than butt joints. There is flocking in the drawers.
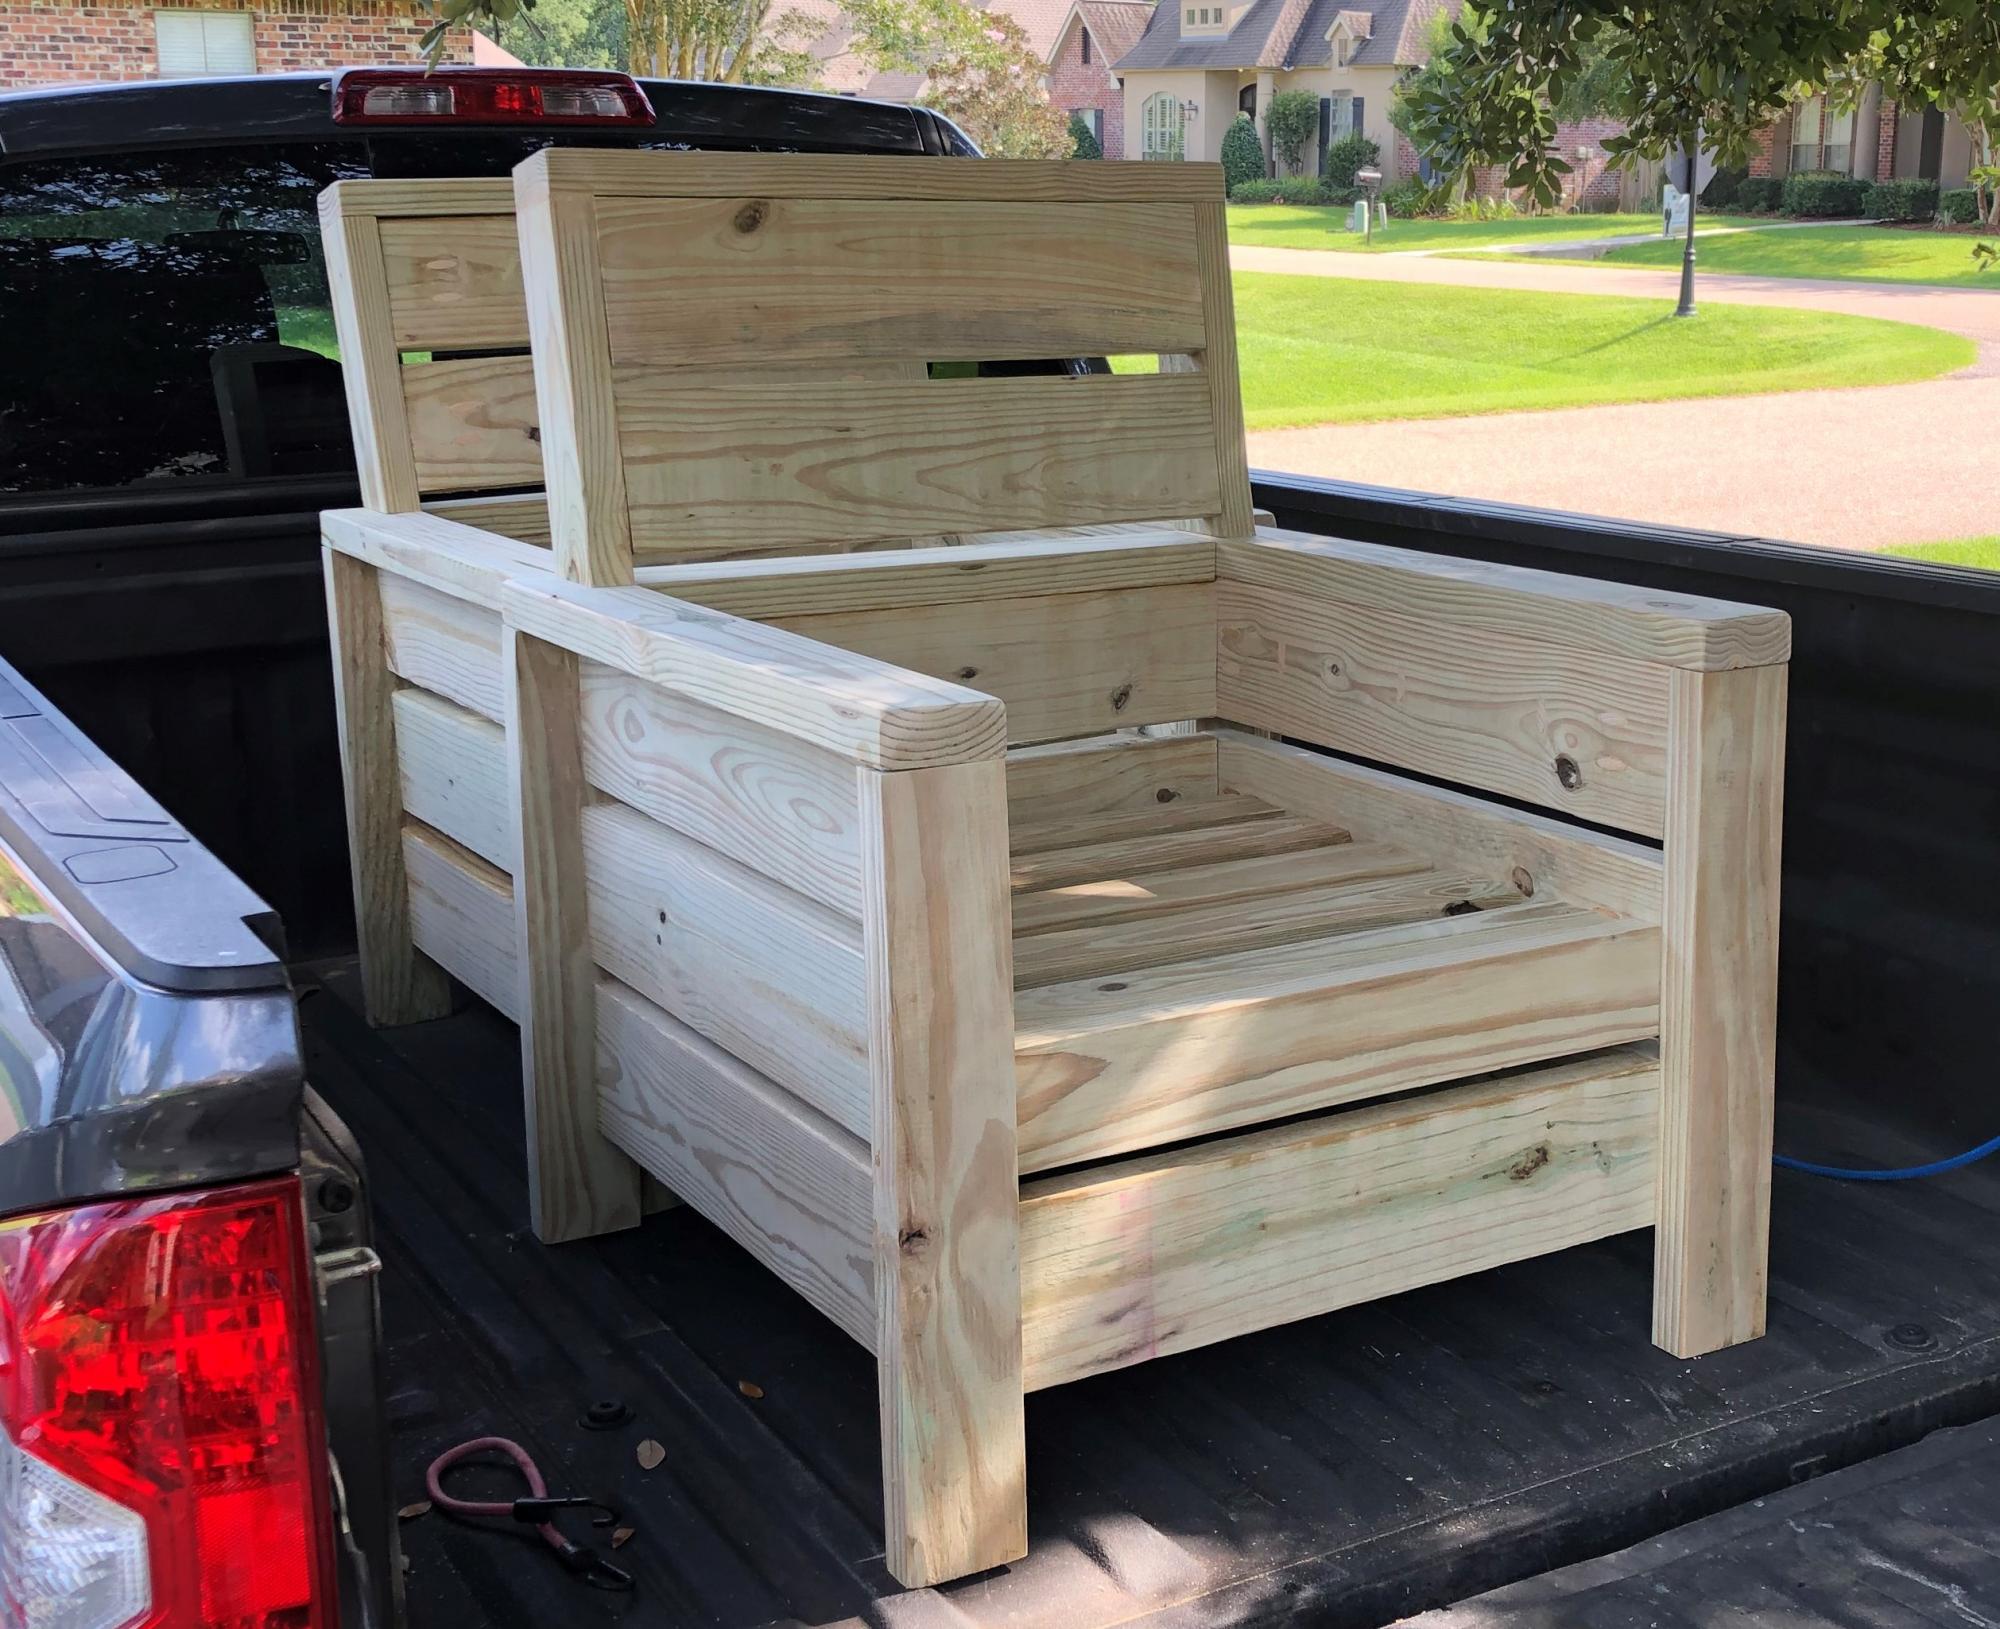
Per request of my wife, I opted to add a backrest to the chair. I feel as though my backrest design keeps with the style of the original build. I accomplished this by cutting the 2x4 vertical arms of the backrest at 13 inches with a 10 deg miter cut at the base. This allows you to keep with the 3/4" on the 2x6 backrest slats. I finished it off with a 2x4 top plate. I'd also note that I made slight modifications to the plans to accommodate 24" cushions.
My dog loves to people watch all day while I'm at work and she needed a new bed so I took the plans for the lower platform and modified them so it would stand alone. Took the platform and put it on the bottom so that her bed would sit inside instead of on top where she could more easily fall off.
I tried building without PH screws at first and all I ended up with was a lot of cracked and wasted lumber. Got the PH jig and finished the whole build myself in 2 hours. Sanding, staining, and sealing tomorrow but I'm just so excited about it I had to post now!
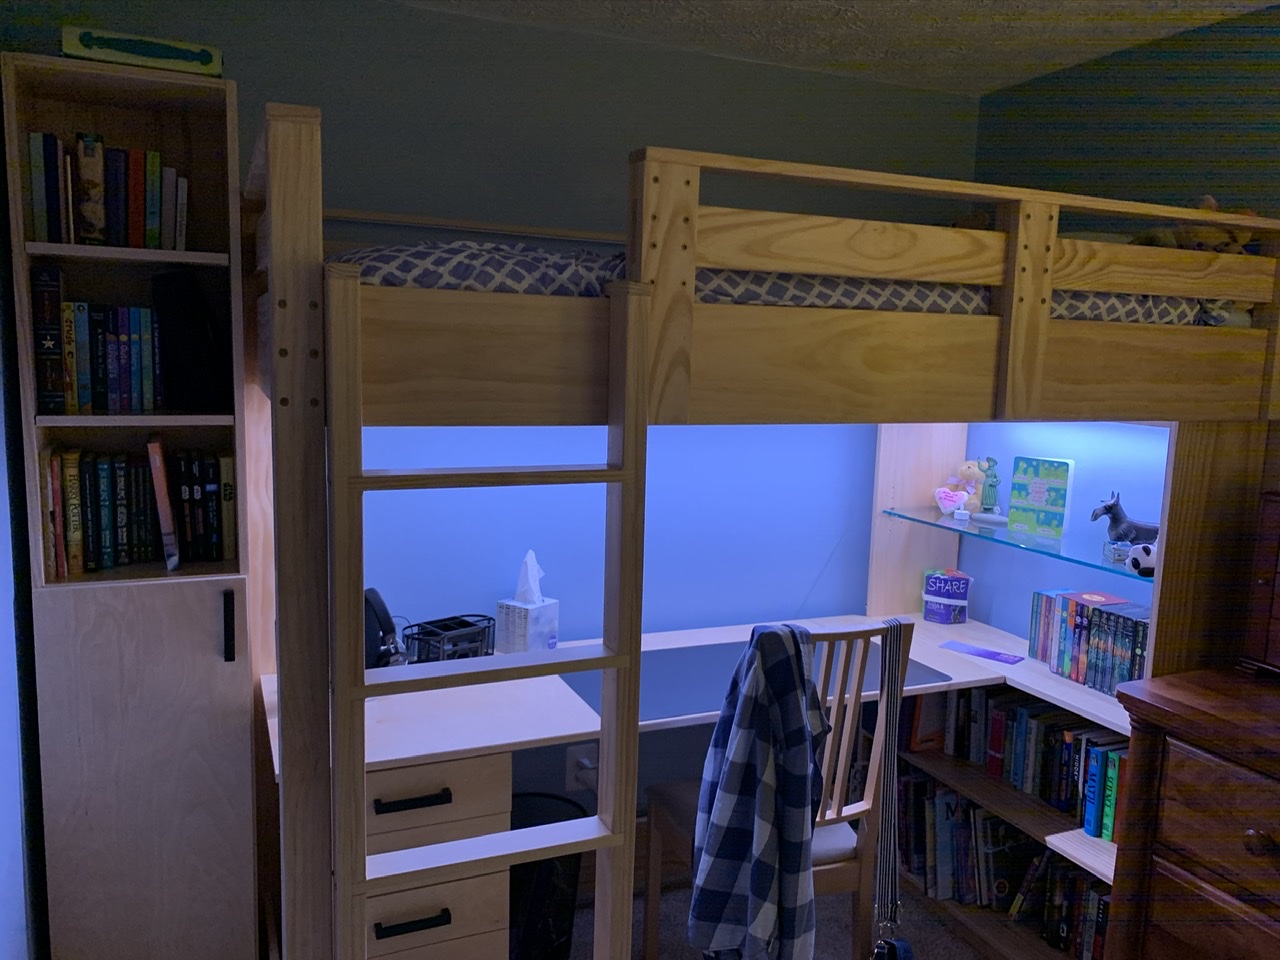
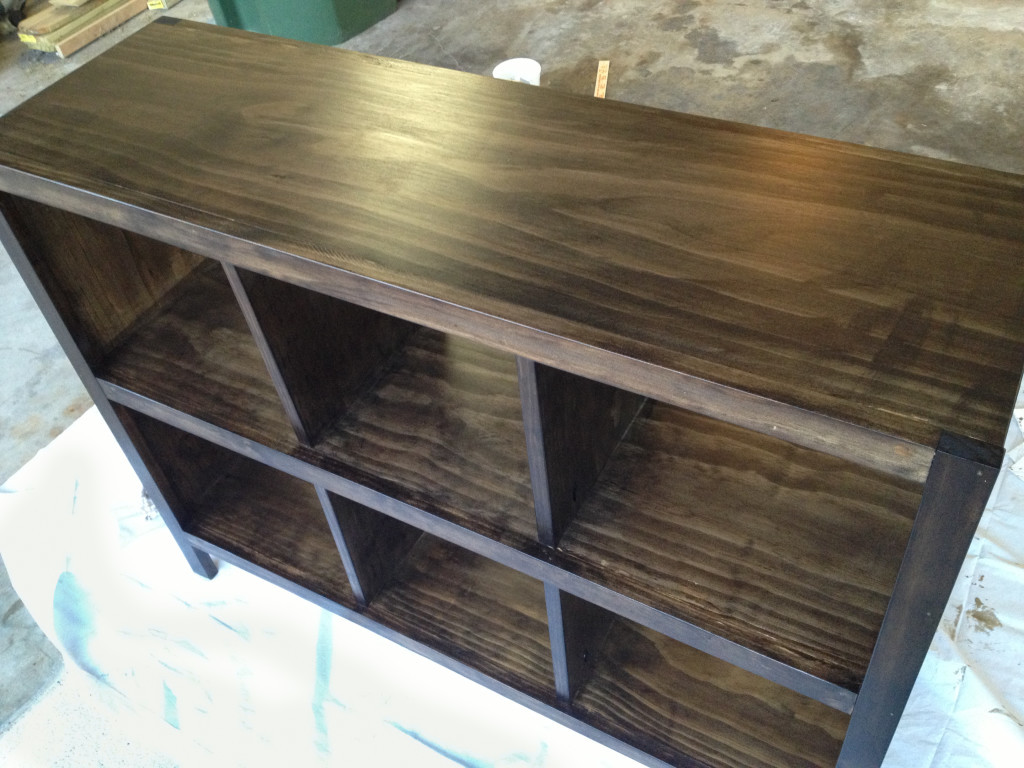
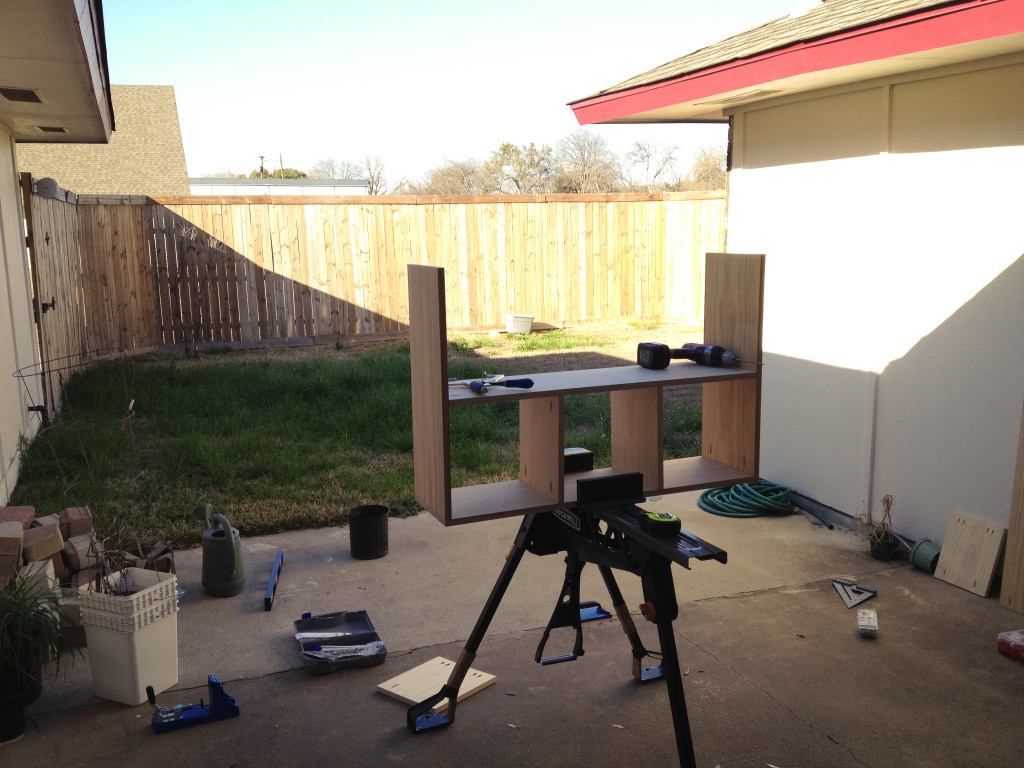
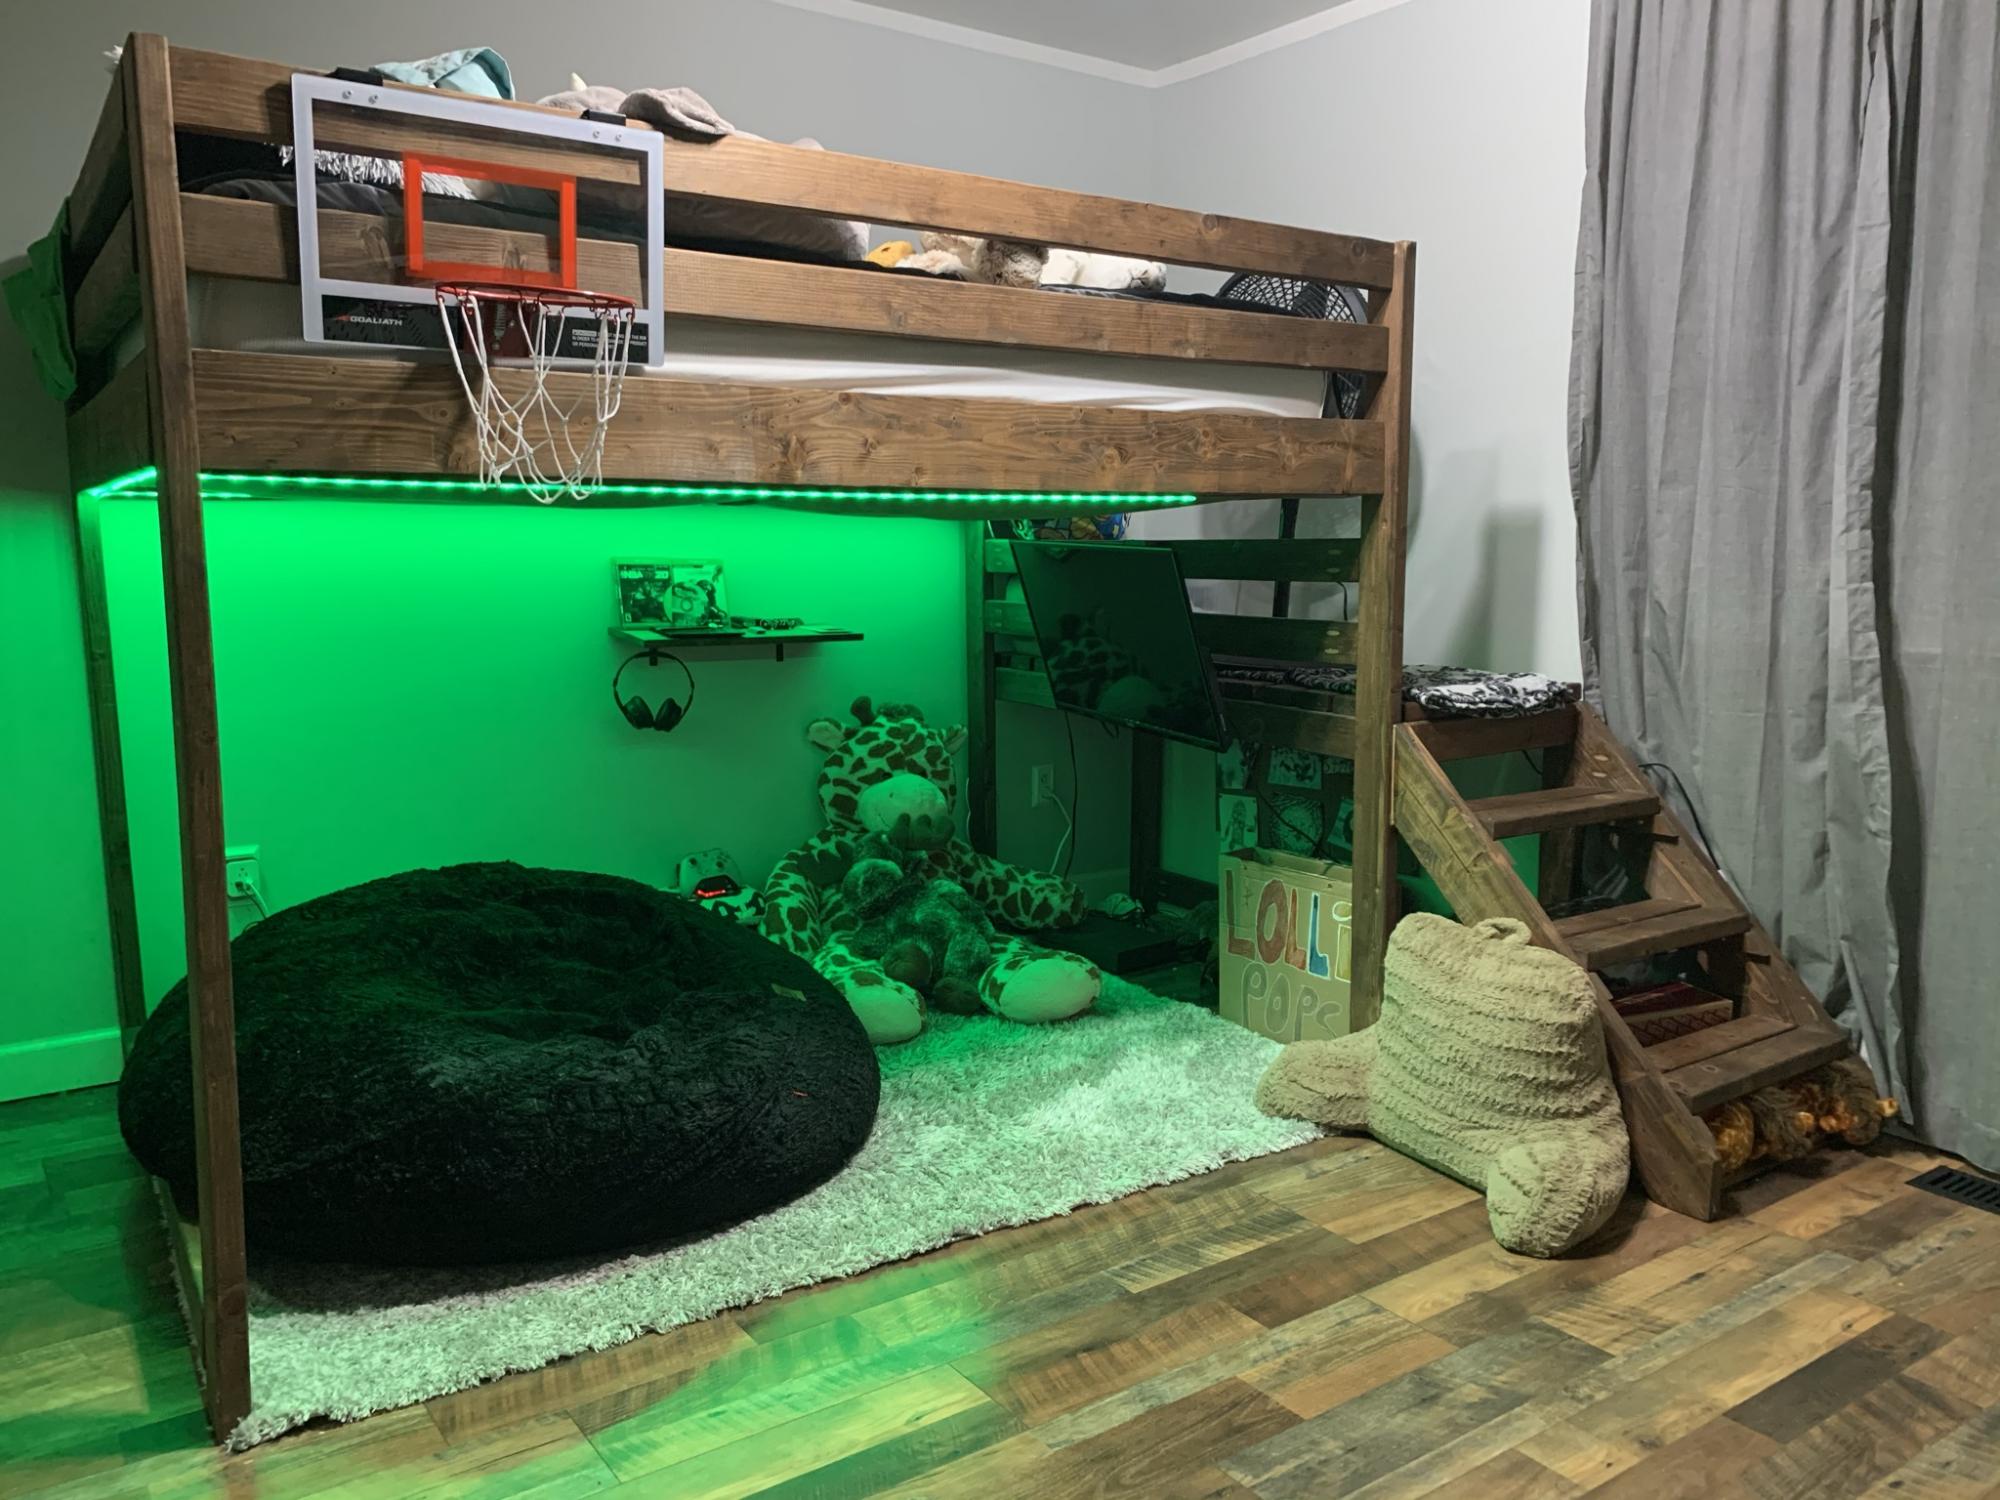
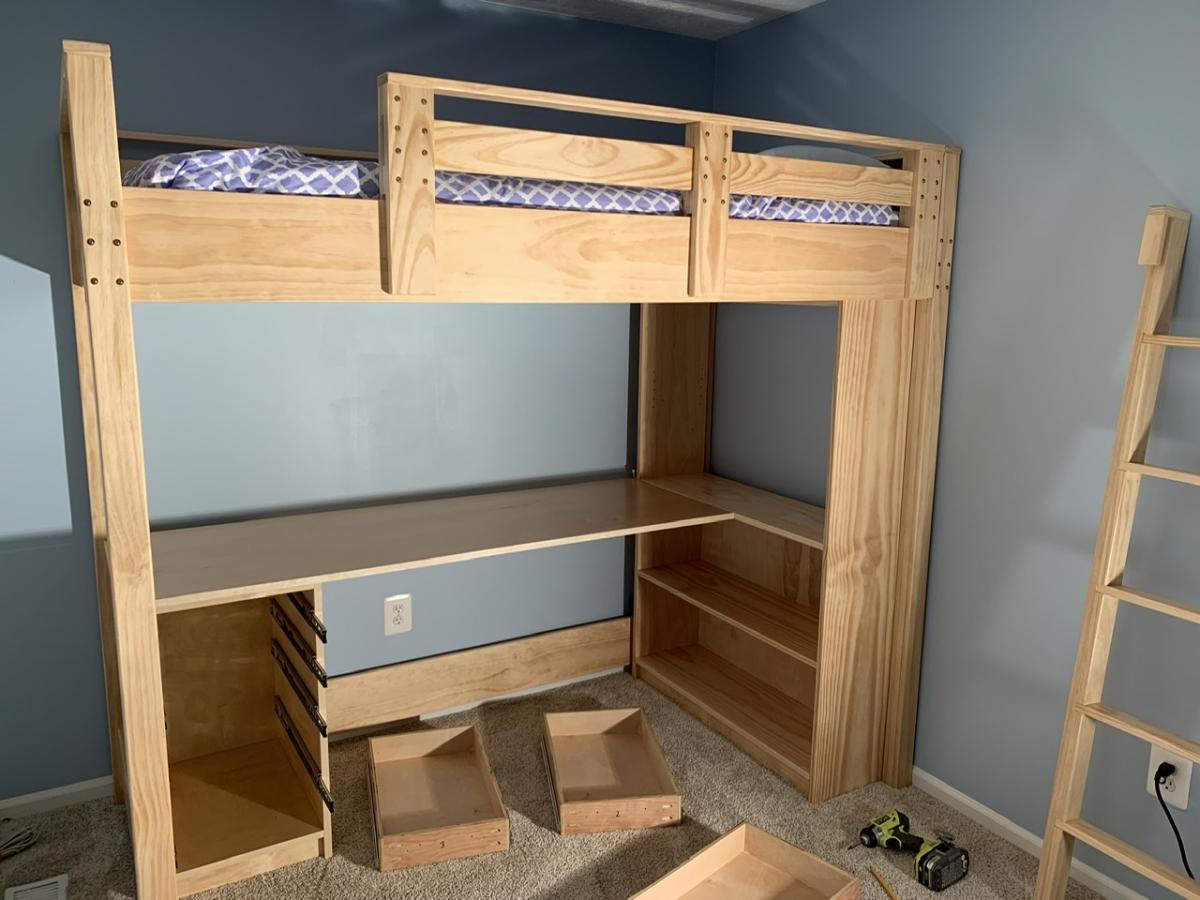
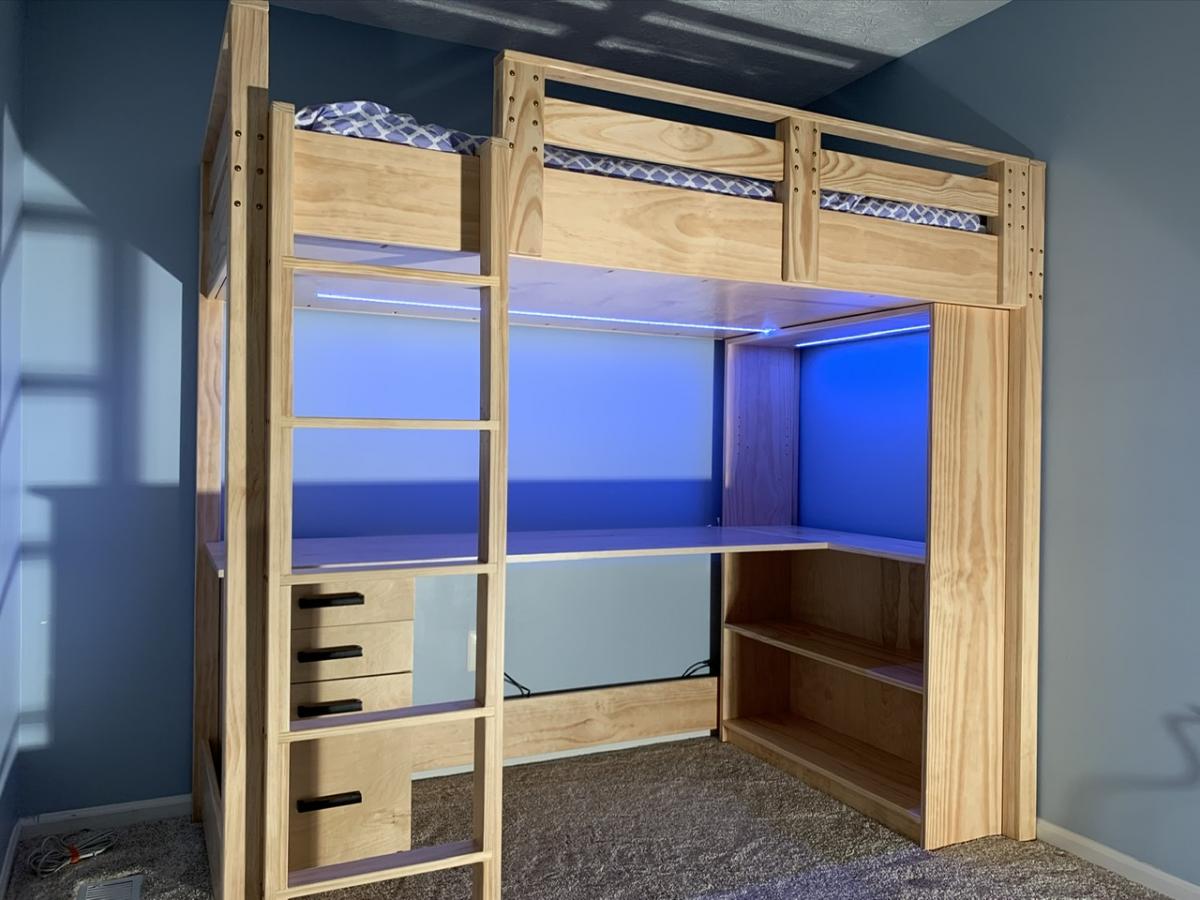
My daughter desperately needed a new loft bed for her small bedroom as she became a teenager. After looking a long time, I finally decided to take the plunge and make something custom after we couldn’t find a bed that met her needs (she’s VERY tall for her age). Thank you for posting the loft bed and bookshelf plans to this site, as they were great to work from and customize! This is my first woodworking project of any kind, and it came out great with these plans.
We followed the Loft Bed and Loft Bed Bookshelf plans pretty closely, but we did make some changes as we went...
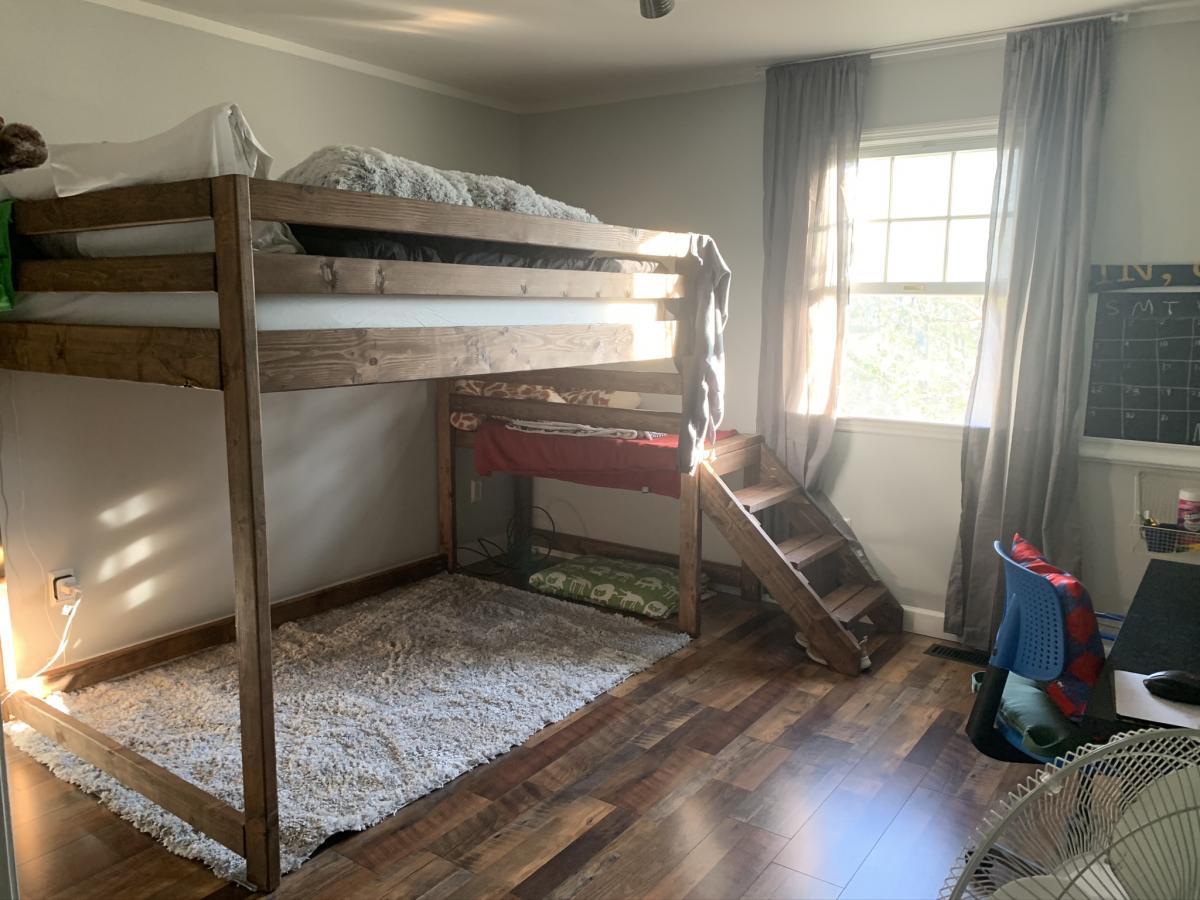
First, we tweaked the guard rail design to make it removable by adding back vertical posts. This way, the front and back posts slide over the front rail and it no longer needs to be screwed in place. This is a nice tight grip for safety, but it’s much easier to make the bed by removing the guard rail and dealing with the mattress. If you do this, just make sure the back vertical posts are shorter than the front ones to make room for the cleats and slats on the inside of the rail! This also means the top of the rail is made with a 1x3 instead of the 1x2 in the instructions.
We also decided to use a vertical ladder design rather than an angled ladder. We did this for space considerations in the room; it’s a bit harder to get up the ladder, but not that much. This also helped avoid any weird angle cuts with my basic tools. We also made the ladder about 3” wider than the one called for in the plans.
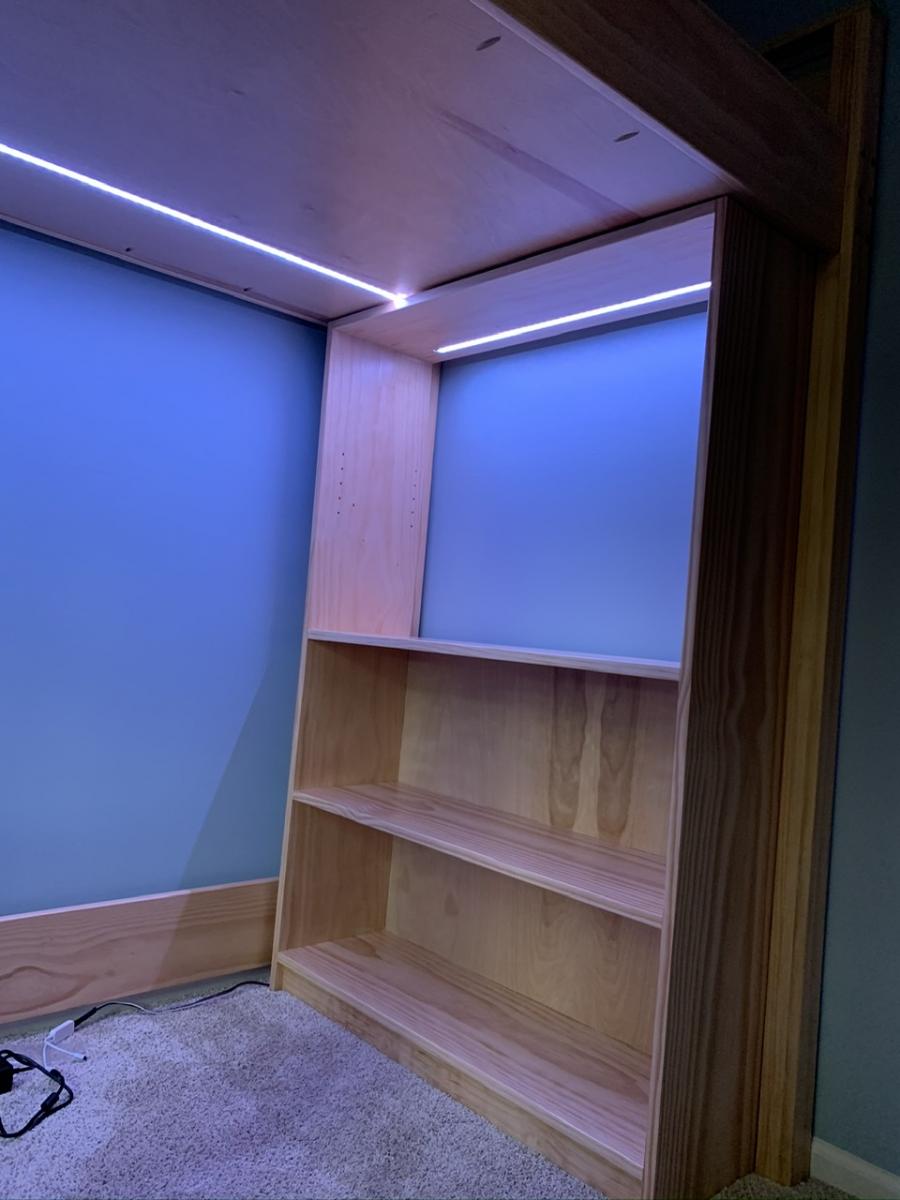
One of my favorite features was adding a 3/4” plywood “ceiling” above the desk. We did this by moving the long side cleats upward by 3/4” of an inch in the plans, and using pocket holes roughly every 10 inches around the perimeter of the plywood. We used this to hide the bottom of the mattress and all the bedding from view when sitting at the desk. It also provides for LED strip lighting above the desk, which is installed by routing out a pathway in the board and installing the lights within an aluminum channel for heat dissipation and to allow installation of a plastic diffuser over the lights. The wiring for the lights lives in the ~1.5” gap between the board and the slats thanks to the 1 x 2 cleats.
In the shelving, we made the upper shelf in the wide bookcase adjustable with the help of a Kreg shelf pin jig. We also ordered a 3/8” tempered glass shelf for this area to let more of the LED light strip we installed in the top of this shelf shine down as well. Again, this was installed in a routed-out pathway that holds an aluminum channel, and the wiring goes up through both the bookcase top and the plywood bed “ceiling” panel to join into the power. We got the strip lights, aluminum channel with diffusers, power supply, and controller from Amazon.
To get power to the LED lights, I routed out a channel for 5-conductor wire in the middle board of a rear leg assembly. Before gluing up the leg, I coated the wire with silicone spray to avoid the glue adhering to it so I could slide the wire around as needed. With a little bit of chiseling, this wire is able to come out of the slide-in joints for the upper and lower wide rails on the back of the bed. On the top, these wires go into a splitter and then to the two sets of LED light strips. On the bottom, the wires to into the LED controller which is mounted to a scrap board along with the power supply that stands on end in the 3/4” gap between the back side wall of the bookshelf and the bottom bed rail.
We created a custom-designed file drawer unit as the pedestal for the desk opposite the wide bookshelf. This was modeled roughly after Ikea Alex drawers with three narrow drawers and one file drawer. The carcass is about 14 1/2” wide by 21 3/4” deep by 29 1/4” tall and made of 3/4” plywood. The drawer boxes are approximately 12” wide by 20” long made of 1/2” plywood with 3/4” plywood fronts. We used full-extension soft-close drawer slides and positioned the cabinet so they have nearly full extension behind the ladder. Four wooden dowels are used on the top corners to align and secure this end of the desk surface.
Speaking of the desk, it is a piece of 3/4” plywood approximately 24” deep by 64” long. One end rests on the file drawer cabinet, and the other end is flush with the middle shelf of the bookcase and attached using two 6” by 5” 14-gauge galvanized T-straps usually used in framing applications. These are screwed upwards into the bottom of the desk and shelf from below, and are holding up quite well. This avoids the need for desk legs by the bookshelf.
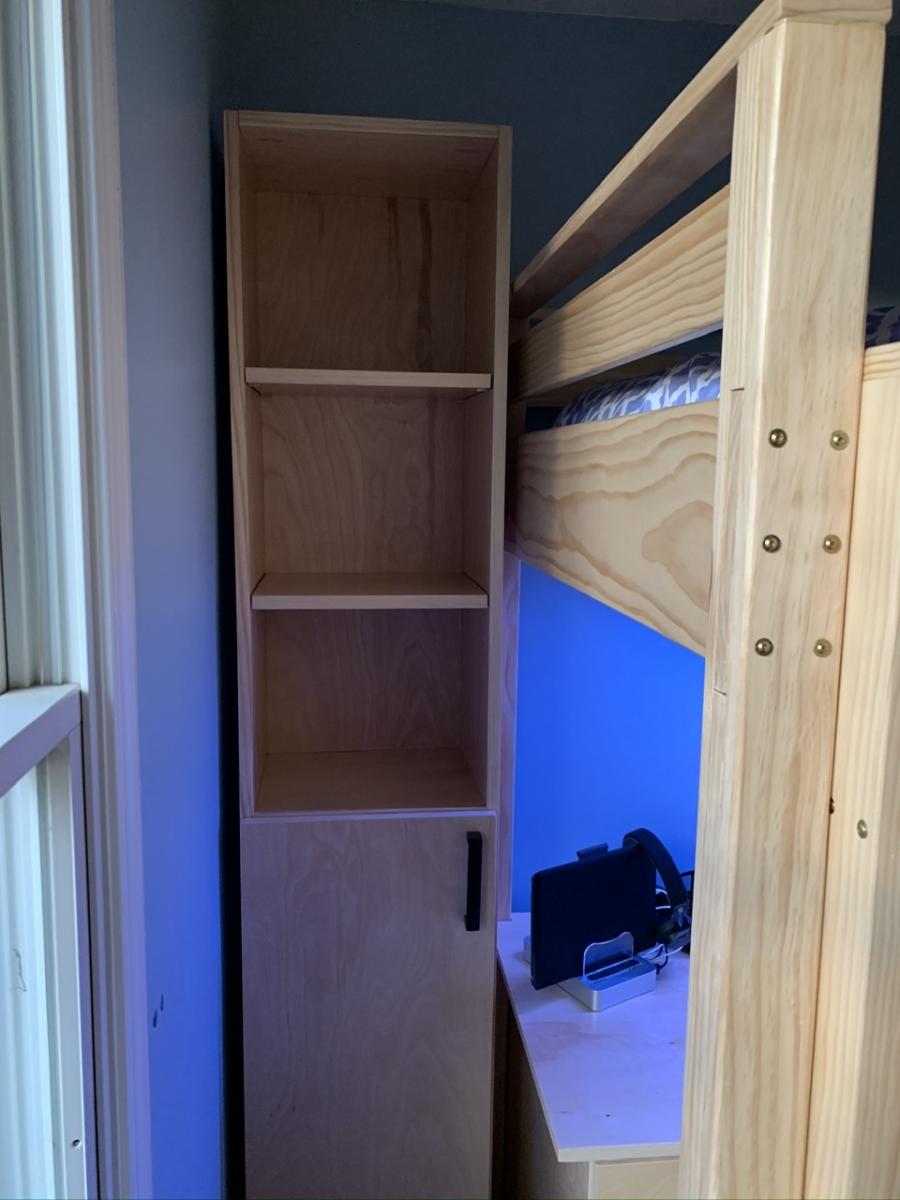
We then adapted the techniques used for the wide bookshelf to build a narrow bookcase (79” tall, 14 1/2” wide) out of two more 10-foot long 1x12 boards. This bookcase sits between the end of the bed and the corner of the room to finish out the look and provide more storage. The top, middle, and bottom shelves are fixed and there are a total of four adjustable shelves (two in the top half, two in the bottom half). We also cut a door and installed it using a pair of full-overlay euro hinges. With these dimensions, the tall bookcase is also capable of working with 11” x 11” x 11” storage cubes just like the wide bookshelf.
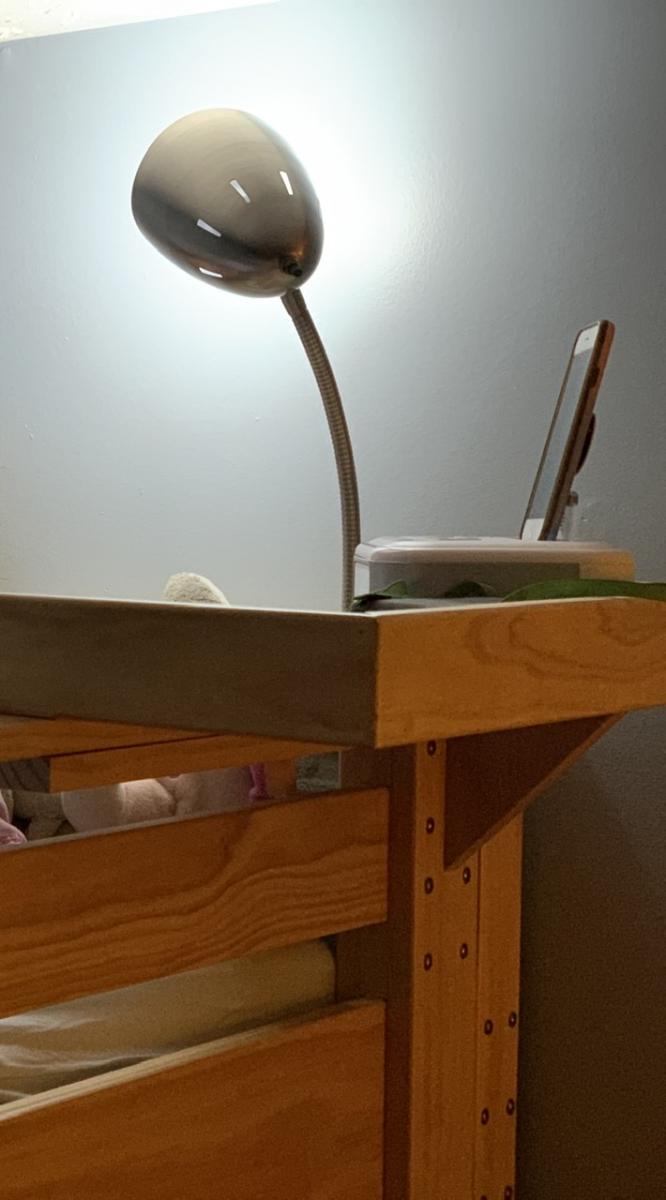
The finishing touch was to create a shelf that attaches to the guard rail and provides a place for my daughter’s alarm clock to sit and be within easy reach. This shelf is made around a piece of the scrap 3/4” plywood that is approximately 21” long and 9” deep. I used leftover 1x3 pine that I glued and nailed to the outside perimeter of the plywood flush with the bottom to hide the layers in the plywood while providing walls around the shelf. I also glued and screwed another 1x3 piece to the front of the plywood, this time flush with the top, as the first piece of a U-shaped grip to slide over the top of the guard rail. Another 1x3 scrap was then positioned, glued, and brad nailed to this front piece to finish the grip. I then cut a triangular piece of wood from a 1x6 to provide additional support under the shelf against one of the vertical pieces of the guard rail. This piece is held in place with counter-sunk screws that go through the top of the plywood shelf down into E-Z Lok threaded inserts in the top of the triangular wood support. The whole shelf assembly is only attached to the guard rail so that I can still easily remove the rail to change bedding on the mattress.
The whole project is constructed out of Home Depot select pine boards and birch plywood. Throughout construction, I used a 3/16” round-over bit in a router to eliminate sharp corners pretty much everywhere on the bed itself (legs, rails, ladder, etc.). I didn’t use this on the bookshelves, the file drawers, or the desk. Edge banding was used to hide any exposed plywood edges. I used 200-grit sanding discs and an orbital sander to sand the various pieces during construction and before finishing. The entire thing is finished with two or three coats of Minwax Polycrylic water-based polyurethane, sanding between coats, which gives this a nice smooth finish and lets the richness of the wood grain come through.
Hopefully the pictures I’ve posted can help understand the write-up on modifications to the project. I enjoyed building this a lot, and my daughter really loves what this did to her room to make it much more usable! That was worth all the effort and time right there.
Ana, thanks a million for the plans!!

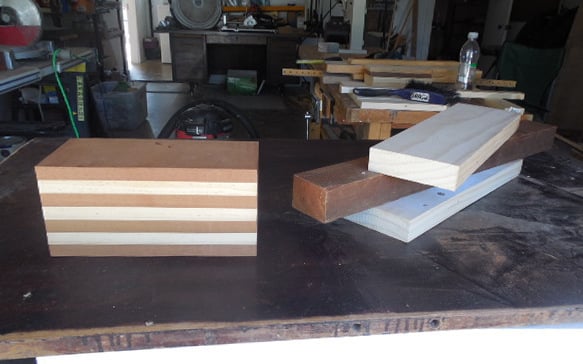
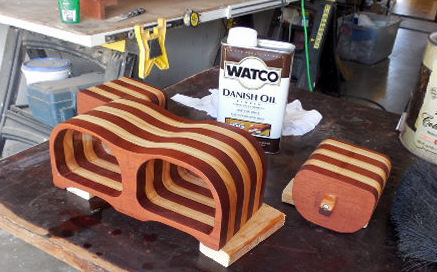
I just wish to point new bandsaw users toward trying to make bandsaw boxes as a way to really learn blade differences, tensioning, cutting curves, setting up the bandsaw and generally getting comfortable with your new tool.
The fun thing about bandsaw boxes is you can just almost cut free form and still have a great result. From start to finish it takes about two days some of which is just waiting and sanding.

Fri, 10/18/2013 - 16:31
I love the boxes, Jake. I did have an inexpensive band saw and I tried using it to make small boxes similar to yours. The saw scared me to death - when the blade came flying off I put everything back in the box and returned it! I'd like to, someday, try again.
Fri, 10/18/2013 - 18:14
I have only had my bandsaw about 6 months and in that time I have had two blades break and occasionally slip off the wheels. Bandsaws are considered to be one of the safest power saws you can use so don't be afraid but know where the off switch is if something happens. You just need to experiment with proper setup including the placement of guiding blocks or bearings, blade tension, and blade choice. Also a 3/16" blade can make a very tight turn where it would be foolish to try it with a 1/4" blade. I like a 3/16", 4 teeth per inch skip tooth. Youtube has many tutorials on how to make a bandsaw box.
Fri, 10/18/2013 - 16:31
I love the boxes, Jake. I did have an inexpensive band saw and I tried using it to make small boxes similar to yours. The saw scared me to death - when the blade came flying off I put everything back in the box and returned it! I'd like to, someday, try again.

Fri, 10/18/2013 - 17:04
These are awesome! My son was looking over my shoulder at these and said, "Mom, you have to comment and tell this guy your son says these things are awesome!" And I agree with him! How did you cut them to fit the drawers? These are so cool, do you have any in-work pictures?
In reply to Awesome project! by JoanneS
Fri, 10/18/2013 - 18:24
Many thanks to your son for recognizing genius. Ha Ha Sure!
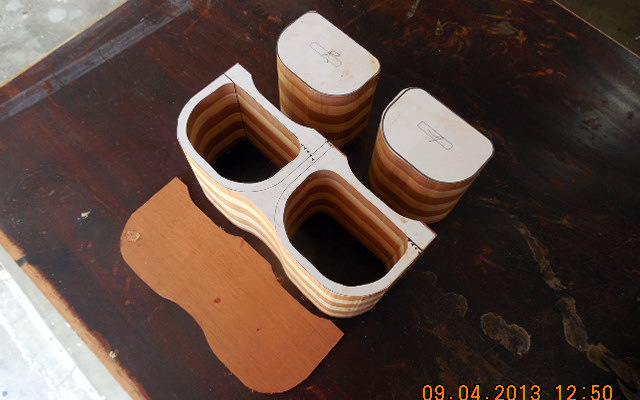
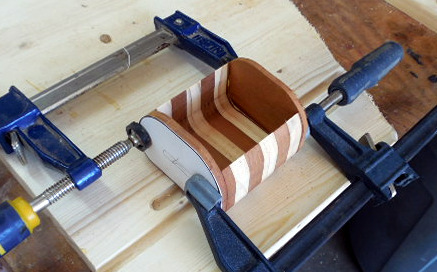
Everything fits because every piece is cut from the same block of wood. I want you to go to this link http://www.woodworkingformeremortals.com/2010/05/how-to-make-bandsaw-bo…
I was inspired to try it by Steve Ramsey of Woodworking for Mere Mortals and slowly progressed to what you see in my pics. Search Youtube and you will find a ton of bandsaw box videos.
I am limited to the size because of my small bandsaw but they are really fun to design and build, especially when you mix a variety of wood (including plywood) in your product. For your first box just take a 4x4 of any wood and cut into a 8 or 10 inch length and go from there. If you screw up it hasn't cost too much.
In reply to Awesome project! by JoanneS
Fri, 10/18/2013 - 18:28
Yes I did document the building process of one box and I will try to add the pics in the Brag post within a day. I may be limited on the number of pics however.

Fri, 10/18/2013 - 20:37
Thank you, Jake, for introducing us to bandsaw boxes! I've seen these for sale at craft shows and always wondered how they were made. They always look so complicatedly intricate. After watching that tutorial I now know that I CAN make them, too!!!! I've had a bandsaw sitting in my barn/workshop for several years and have only used it once. Now I think I'll be using it quite a bit more!
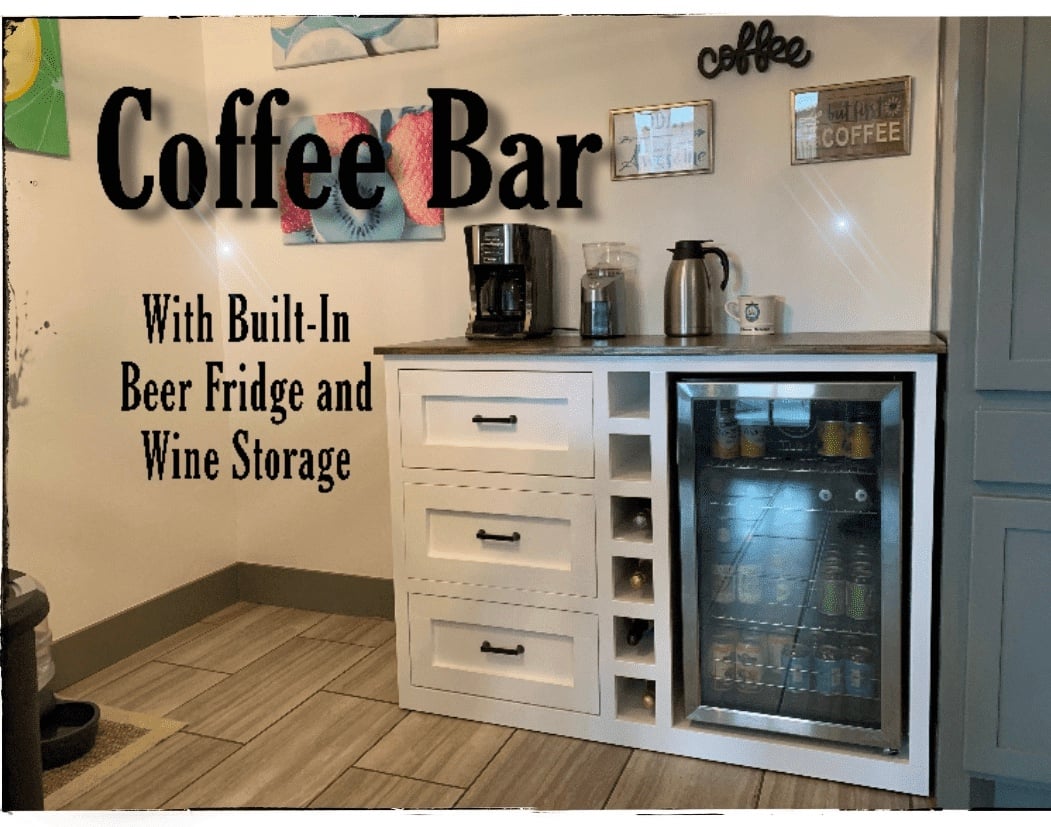
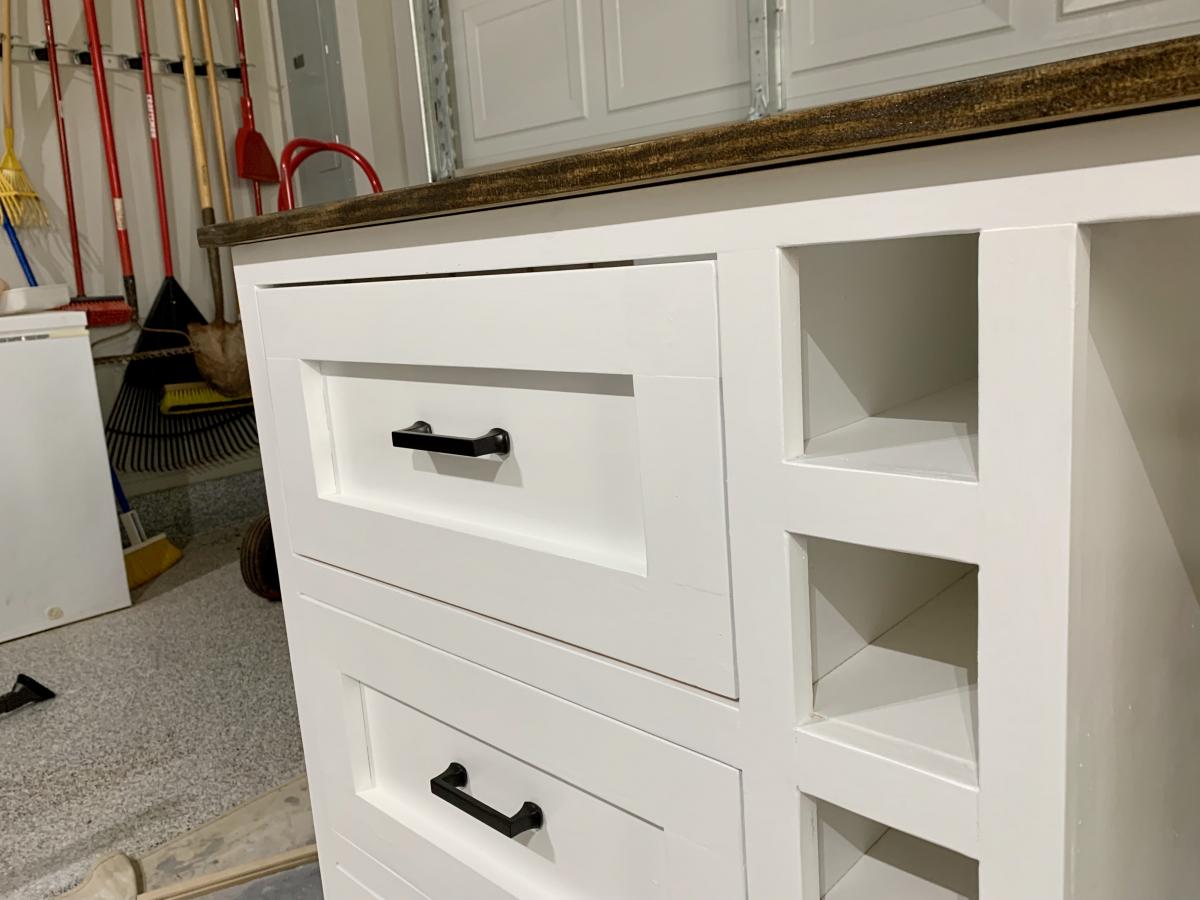
We made a beverage station for the corner of the kitchen!


Mon, 07/08/2019 - 10:46
We didn't use a plan for this but, if someone wants to build it, check out the linked YouTube video.
Tue, 07/09/2019 - 11:11
Amazing! Thanks so much for adding a brag post and linking to your video!
Fri, 07/31/2020 - 09:43
Hello! Was looking to see if this is something you would be interested in building for us? We are in love with this project but don't have the tools or means to do it ourself..
Can talk about pricing / size etc.
Thanks!