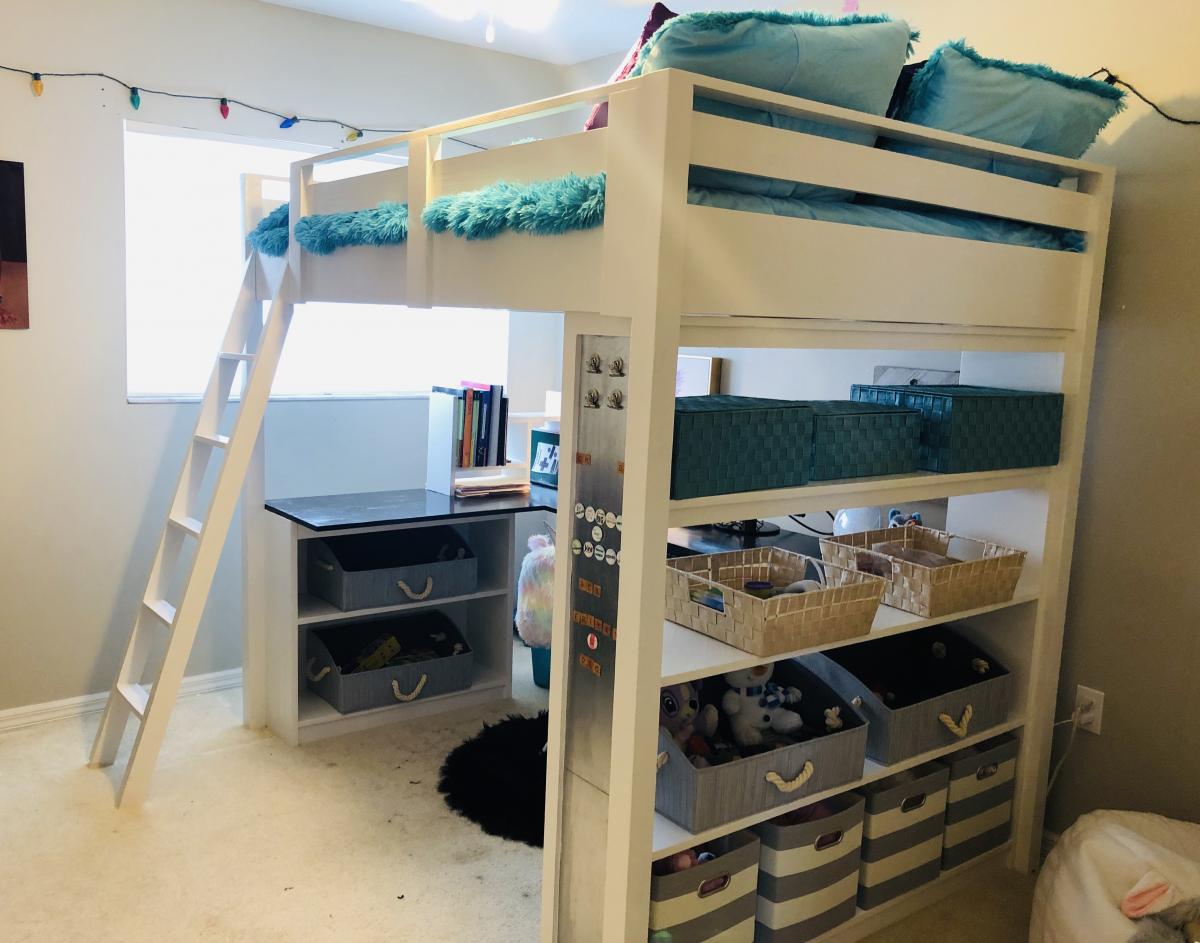
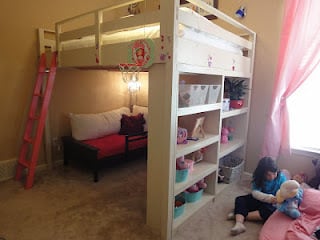
Community Brag Posts

Loft Bed w/desk

Submitted by Anonymous (not verified) on Sat, 08/29/2020 - 09:05

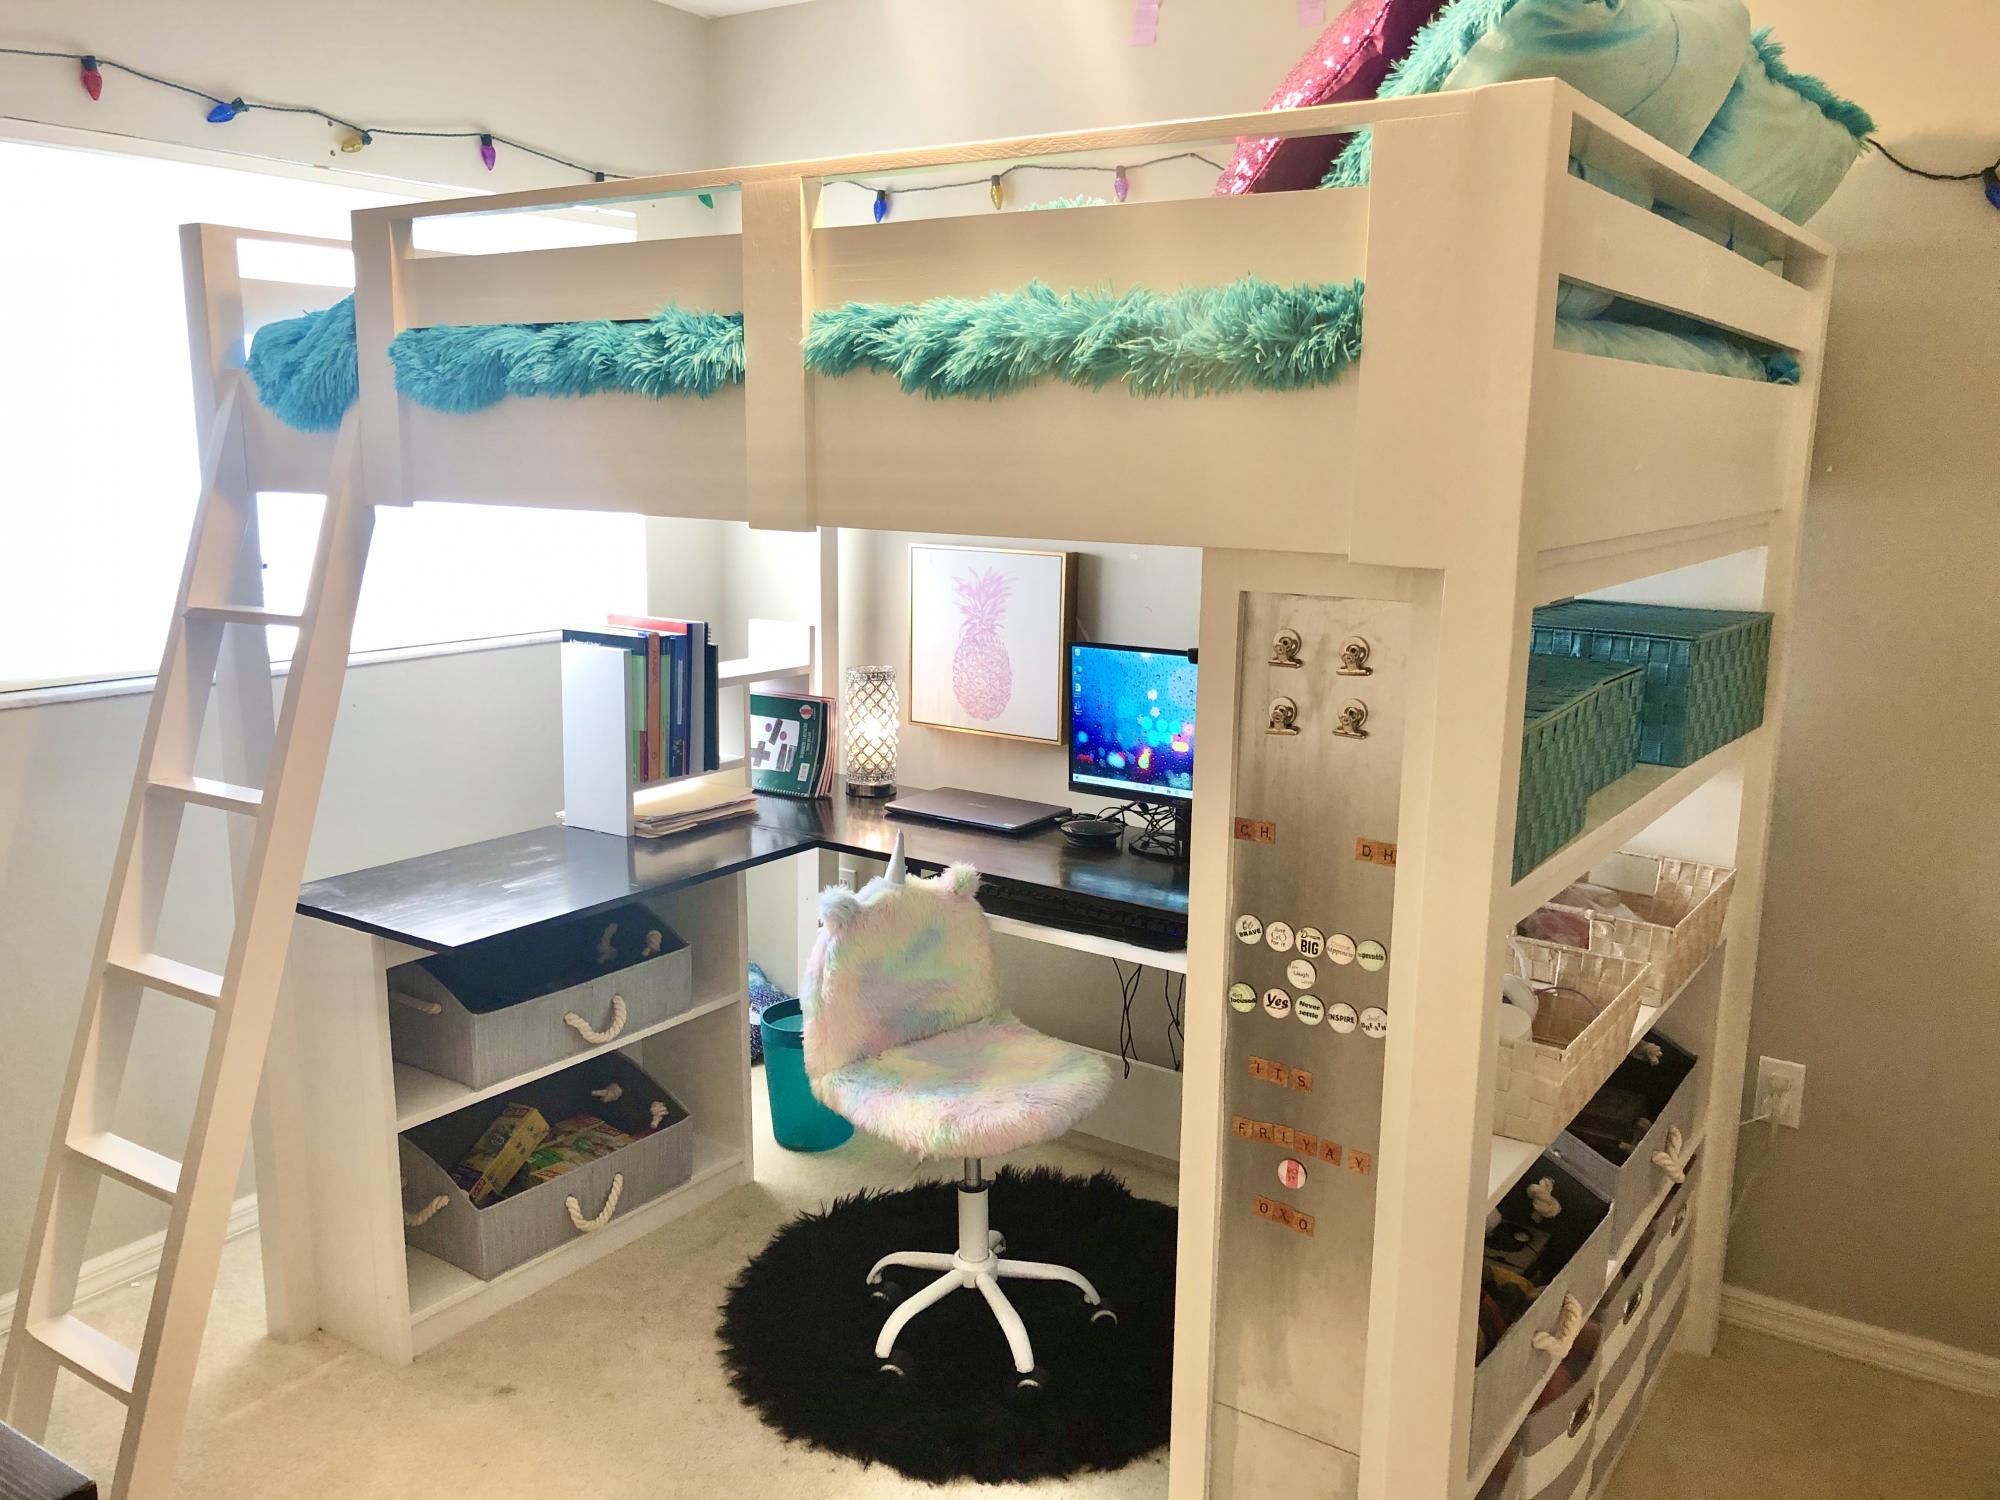
Our daughter has been asking us to build her a bed for months now. When eLearning became a reality for our household, we knew it was time to get to work. We usually do two to three big DIY projects a year, and have built from many of Ana White's plans. We often refer our the time together DIYing as "couples therapy".

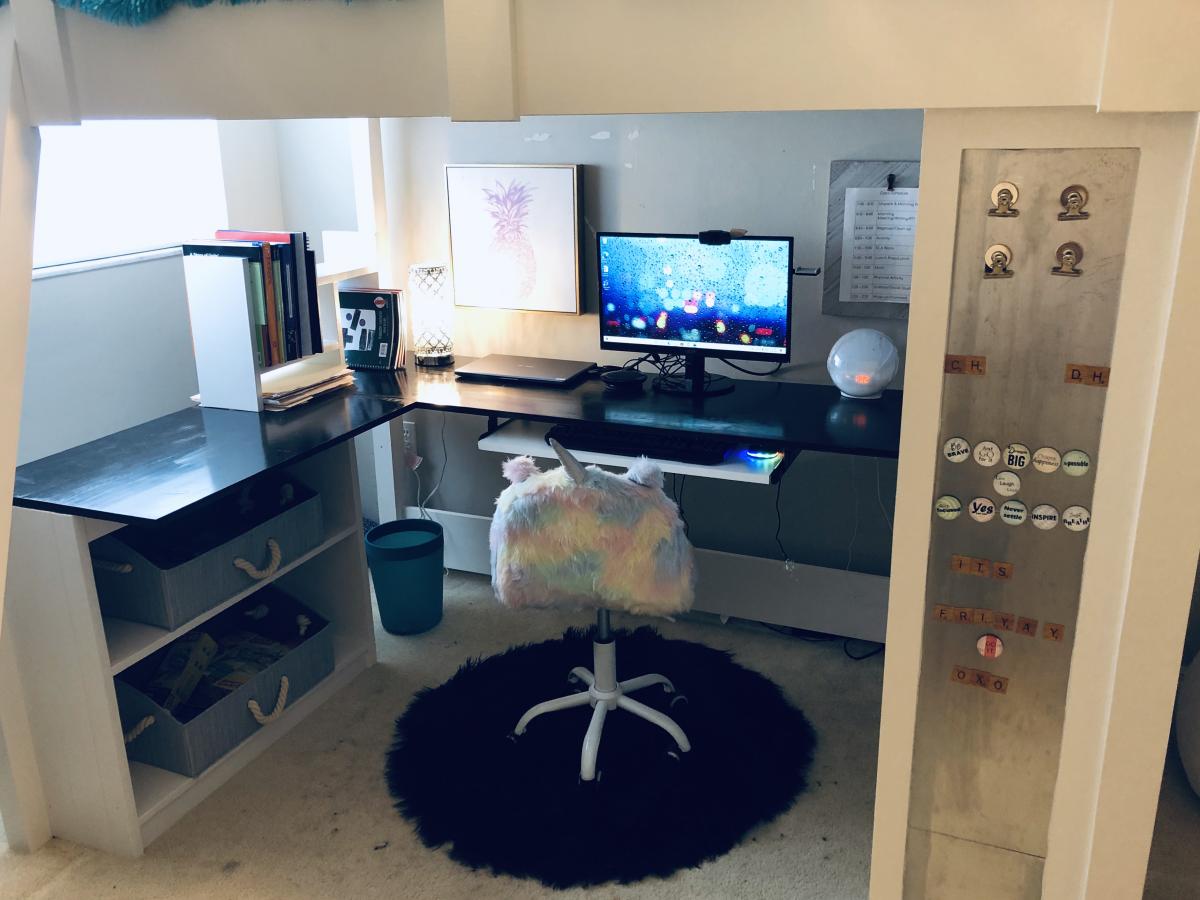
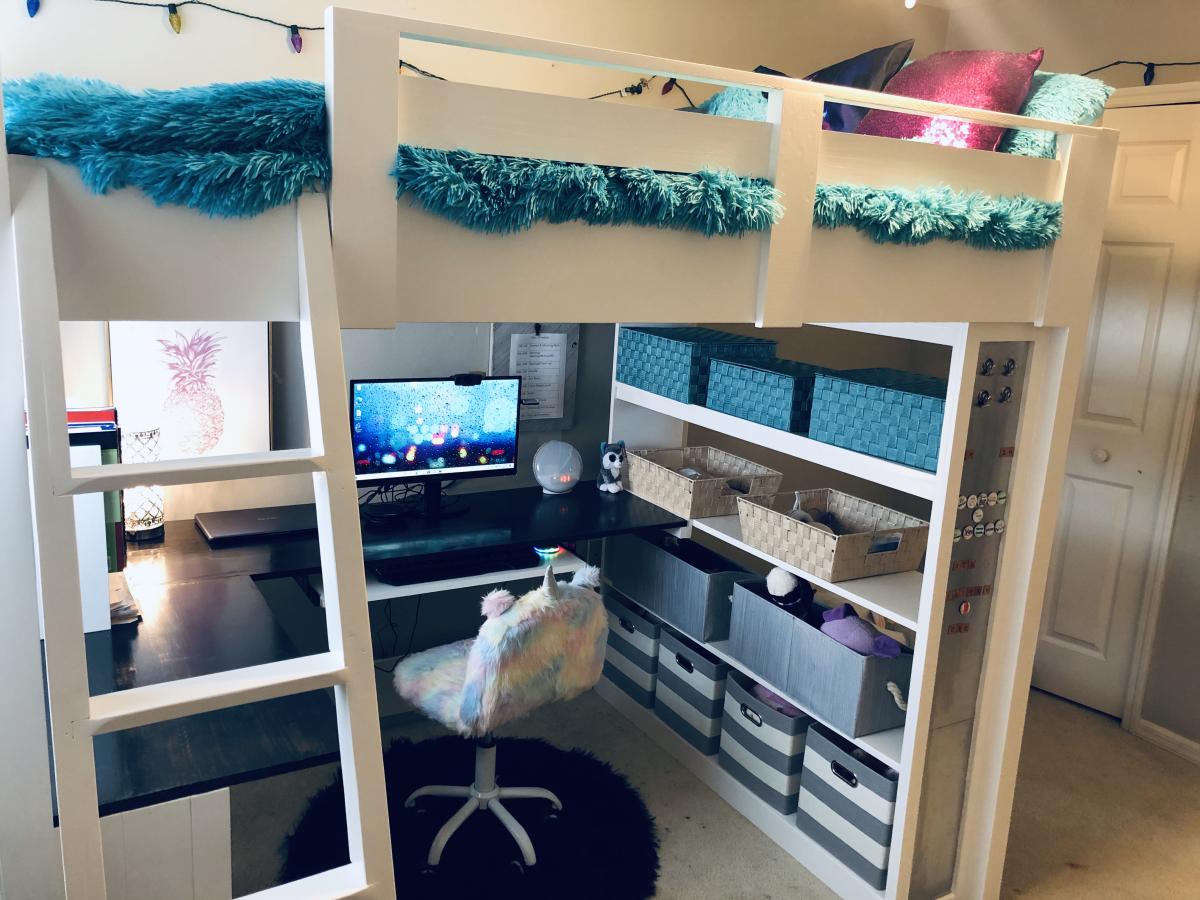
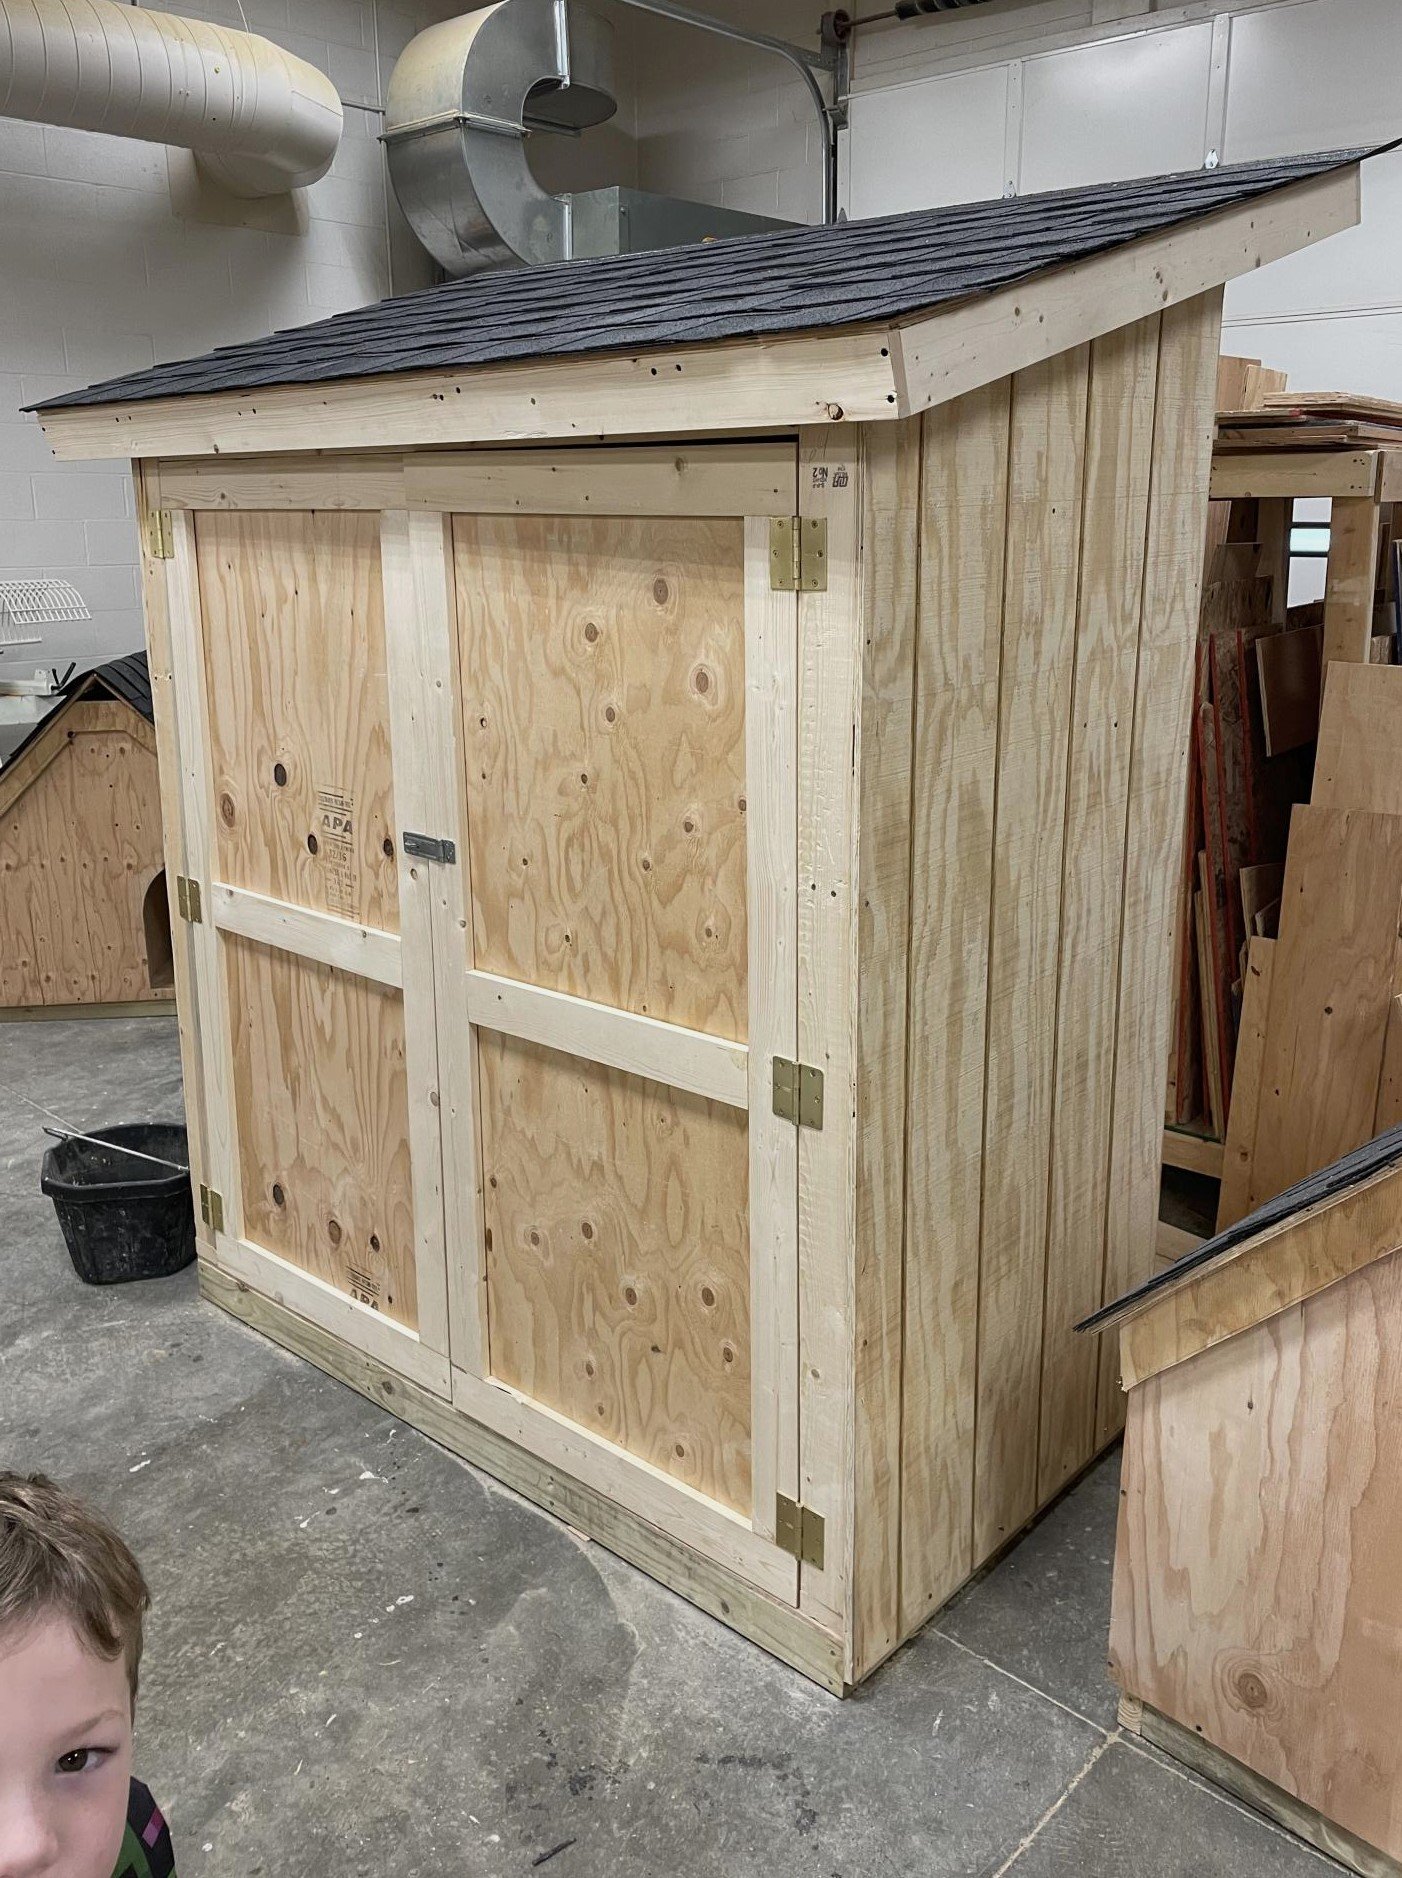
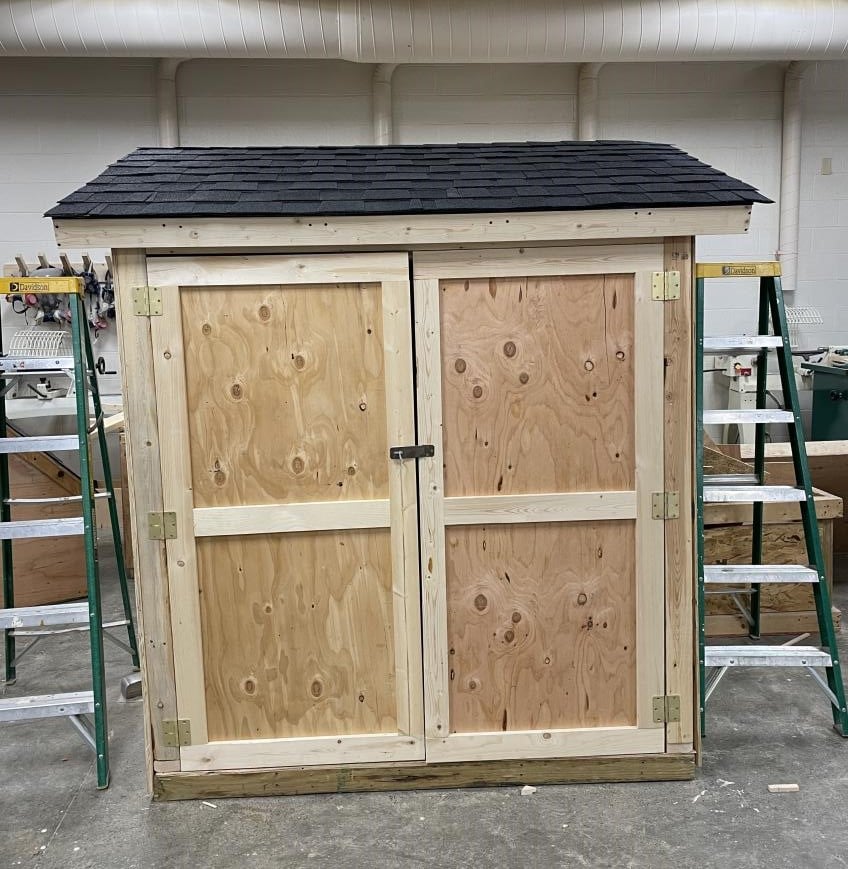
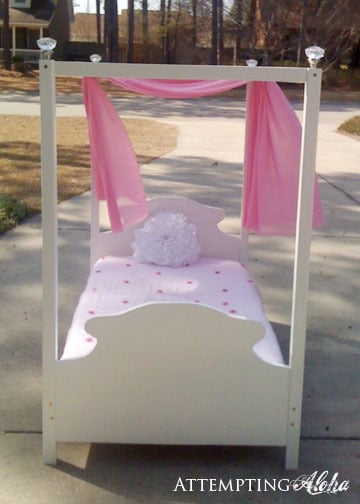
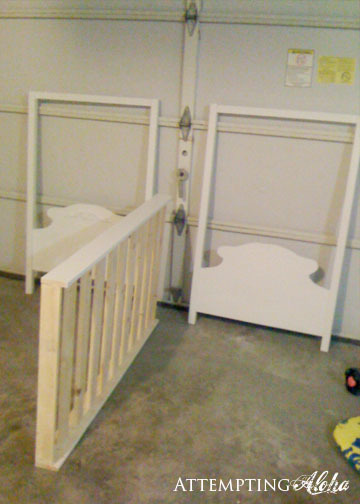
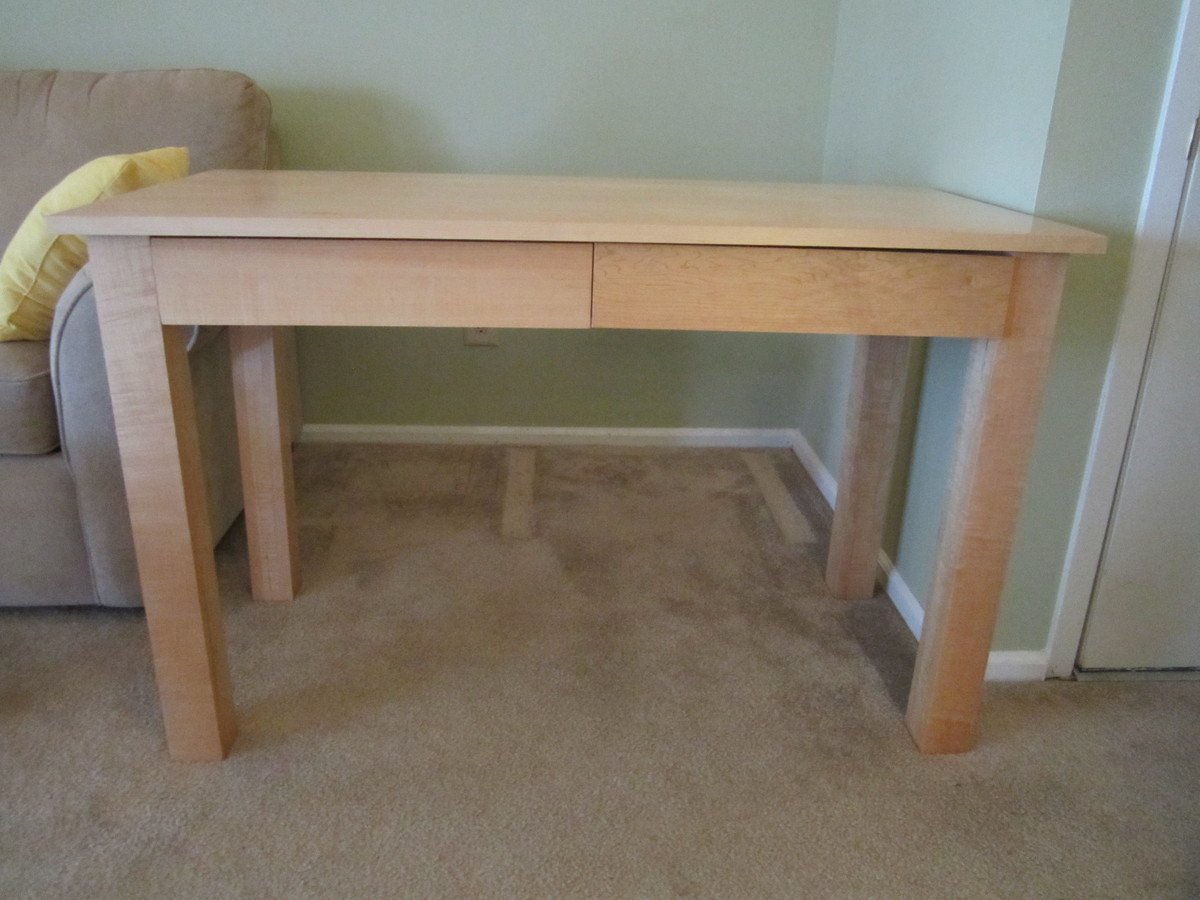
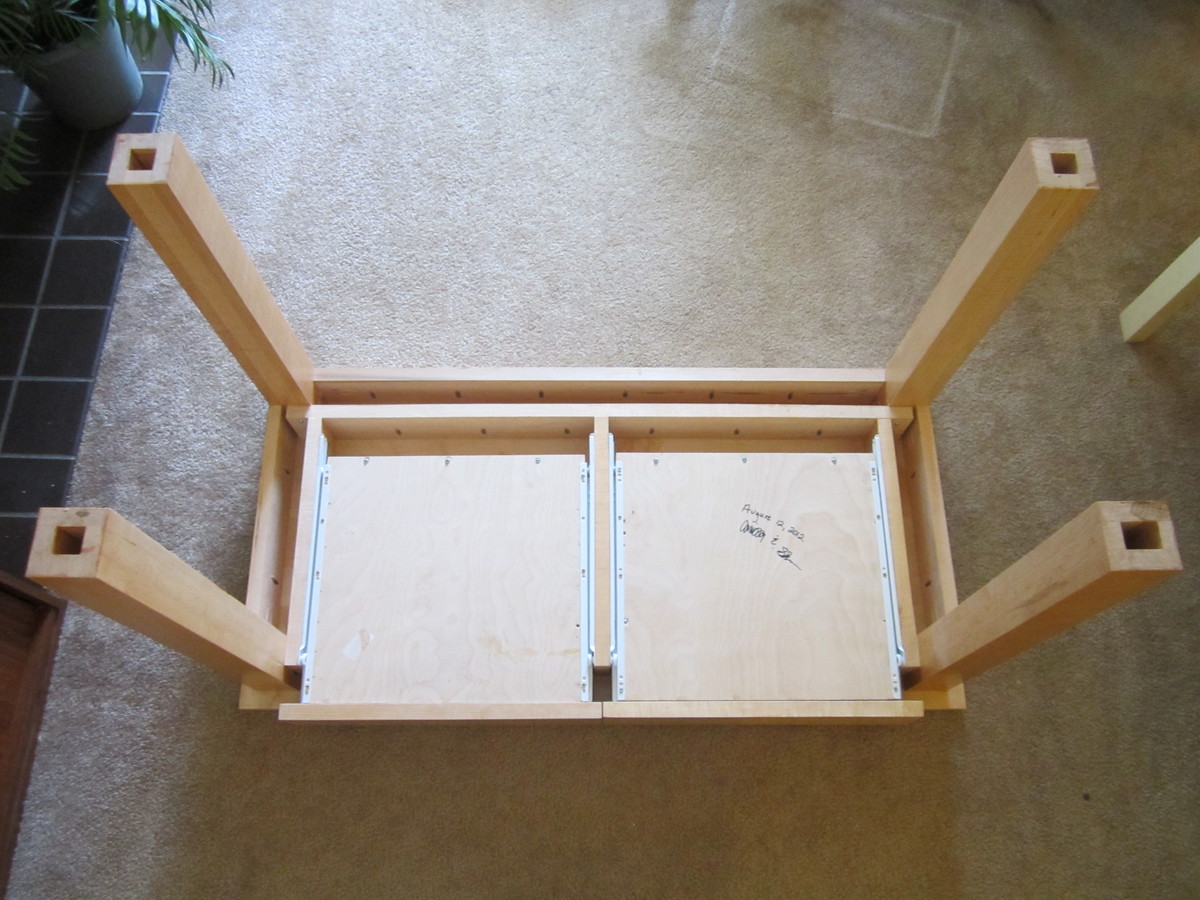
We used Ana's plans for the Loft Bed and included the tall bookcase and desk system, with a few of our own modifiations and personal touches, such as:
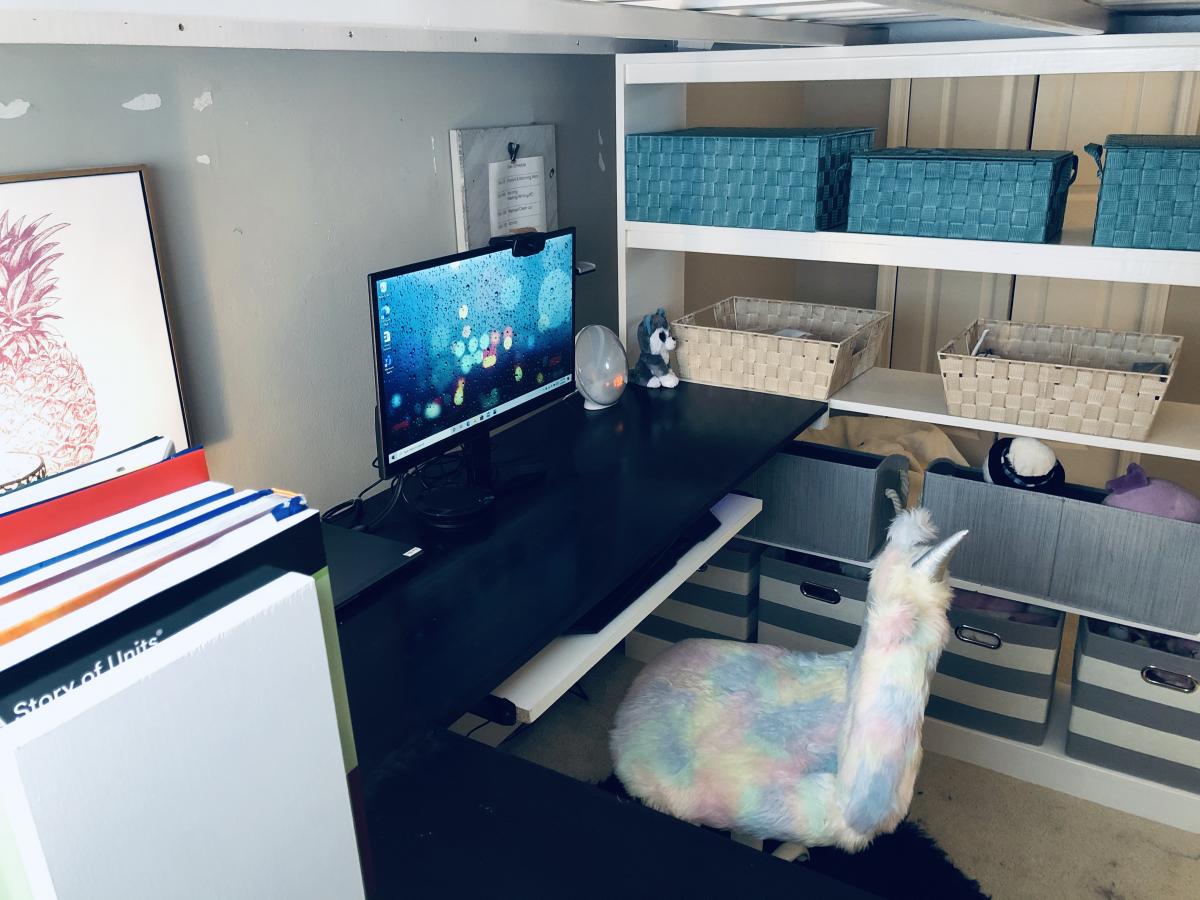
- elimated the plywood backing on the bottom shelves of the tall bookcase
- only used one (1) bookshelf for desk system
- used toungue and groove paneling for back of small bookshelf, adding it to the sides as well
- made the desktop 19" wide
- added a framed magnet board
- added a sliding keyboard tray

Estimated Cost
$600
Estimated Time Investment
Week Long Project (20 Hours or More)
Finish Used
Desktop: Minwax Ebony stain
Everything Else: Zinsser 123 primer & Valspar Cabinet & Furniture Enamel (Snowbound Semigloss)
Recommended Skill Level
Beginner

Comments

Ana White Admin

Mon, 09/07/2020 - 20:33

This is so cool, I'm sure it's a dream come true for your lucky girl!

Building is our couples therapy, sounds like a t-shirt in the making:)

Indoor Playground Set

Submitted by Anonymous (not verified) on Fri, 02/10/2017 - 11:56

This playroom set was inspired by the plans you posted.  I was forced to make some significant modifications due to the fact that our bonus/playroom has angled ceilings.  We have a rock climbing wall, ladder, crawl tunnel with windows, trapeze bar, monkey bars, miniature baskeball goal and a slide.  My boys are 6, 3 and 19 months and they love it!  Thanks for the inspiration.


Jim and Caroline Sparrow

Estimated Cost
$1250
Estimated Time Investment
Week Long Project (20 Hours or More)
Finish Used
Behr Paint on bottom and Minwax Stain on top
Recommended Skill Level
Advanced

Comments

Shoe Crates

I saw someone's brag where she used this plan for shoe storage. I thought it was a great idea. It sure lets me clean the floor better, just roll it out of the way, clean, roll back. It is so much better than the shoe rack that occupied the space before with such piles of shoes that it was arduous to clean the floor at all. Next month I will take care of the second shoe rack for my own shoes.

It was so simple, I loved making them. Grandpa and I had fun. The best part, you can make them quick because the don't have to be perfect. And Grandpa's nail gun made quick work of all the attached boards. All boards were also glued and sanded.

Ana your site gave me the confidence to solve my own furniture problems with custom solutions. Thanks, I can't wait for my next project.

Estimated Cost
$100 for 2.5 carts
Estimated Time Investment
Afternoon Project (3-6 Hours)
Finish Used
Polyurethane, 2 coats
Recommended Skill Level
Starter Project

Adirondack chairs

Submitted by Anonymous (not verified) on Mon, 10/04/2021 - 15:15

I made five of your 2 x 4 Adirondack chairs. Well I started with one and then my wife wanted four more after she saw how it turned out. We absolutely Iove them and they are easy to make! Thanks Ana!

David Knight

Comments

Allen/ Ana White Island

Submitted by tfj1283 on Sun, 07/07/2013 - 17:16

This was my husband and my first DIY project and we were thrilled at the outcome! It took us a day to build and then a couple days to stain and paint.

Built from Plan(s)
Estimated Time Investment
Weekend Project (10-20 Hours)
Finish Used
It is stained with min wax Jacobean and painted with Martha Stewart's Barn red. This was a super fun project; thanks Ana White!
Recommended Skill Level
Beginner

Modern Farmhouse Bed

Submitted by Anonymous (not verified) on Sun, 01/15/2023 - 13:37

My husband and I had worked on this bed together, and we are so happy with it! We went with taller side tables that we purchased, and just stained the wood instead of painting it.

Comments

Lean-To Shed

Submitted by Anonymous (not verified) on Fri, 03/24/2023 - 13:17

I’m a first year teacher of construction class at Waterloo High School in Illinois. We recently used your Small Cedar shed instructions with some modifications for a class project. It’s a bear getting cedar right now, so we used T1-11 for the outside and 2x4 for the frame.

Built from Plan(s)

Comments

2x4 Sectional , table, and chairs

Submitted by Anonymous (not verified) on Fri, 04/14/2023 - 04:57

Your easy to follow 2x4 proje ts turned out amazing. My outdoor set is complete. The chairs, also, came from your plans. I built all of it by myself in one weekend. Thank you

Comments

Toddler Canopy Bed

I designed and built this canopy bed without knowing Ana had already done a toddler canopy bed! Talk about reinventing the wheel. I should have known she already had plans up. ;)

Full plans are on my site, but I thought I'd add this as a brag post instead of a project plan since Ana's plans are already here. They're different, but the end result is very similar!

Built from Plan(s)
Estimated Cost
$20-50 depending on paint and finish supplies on hand
Estimated Time Investment
Afternoon Project (3-6 Hours)
Finish Used
Zinsser water-based primer, semi-gloss latex paint, and polycrilic topcoat.
Recommended Skill Level
Beginner

Queen Loft Bed

Submitted by christy on Tue, 05/22/2012 - 07:54

I made this bed for my 6 year old daughter. I loved Anna's Loft Bed plans, but she wanted a bigger play area underneath. So I modified the twin loft bed plans to fit a queen mattress. I also added extra supports for the mattress, and I used PureBond plywood on top of the supports for the mattress to sit on.
That's the Farmhouse Toddler Bed underneath. My younger daughter inherited her big sister's twin bed, so the toddler bed was put to use in the new "playhouse."

Estimated Time Investment
Week Long Project (20 Hours or More)
Finish Used
I sanded the wood and primed it. Then I sanded (lightly) again and painted it with Valspar latex enamel in Gloss Almond.
Recommended Skill Level
Intermediate

Comments

Neatha (not verified)

Mon, 08/20/2012 - 13:04

Do you have your modified plans still? I don't know where to begin with editing the originals. I am moving and we have limited space I need to place a desk under and queen sized bed but my ceilings are only 8ft.

Lindsay (not verified)

Sun, 09/02/2012 - 12:45

I think it's great that you modified it to a queen! I live a studio and NEED something like this. Could you share the modifications? It looks beautiful = )

christy

Sun, 09/02/2012 - 20:58

The changes I made were:
End planks cut to 63"
Top back guard and front and back rails cut to 87"
The top guard rails on ends cut to 66"
I measured for the mattress supports and the front guard rail after the rest was completed.
You should also measure for the bookcases after the rest is completed, but each of mine wound up being about 31" wide.

Everything else was pretty much the same.

Hope that helps.

dbai (not verified)

Thu, 11/01/2012 - 08:24

This is wonderful - I've been looking to make something like this for an urban efficiency (adult) apartment! Thanks so much for sharing your modifications!

gmur589

Mon, 07/29/2013 - 14:08

Will the height of the bed allow for adults to stand under it? If not what modifications should be made to make the height fit a standing adult? (the highest being 6'1" male) Thanks! =D

etb1999

Sun, 10/06/2013 - 08:23

Hello, about how much did it cost you to make this?
THANKS

NicoleLance0826

Fri, 09/19/2014 - 12:30

Hey Christy I was wondering if you could send the plans for upgrade to queen size. I cannot pull up the changes. Thank You. Im sure its not to many changes.

pretty-prima

Thu, 03/24/2016 - 16:52

Hello! I would like to build this queen sized bed, could you give me a cost estimate? I don't have any wooden planks sitting around so I would have to buy them all new.

Dog/Baby Gate

Submitted by advanlente on Sat, 03/28/2020 - 11:53

Inspired by Ana White's $25 Wood Baby Gate (https://www.youtube.com/watch?v=cPV6XfheqgA), I needed a gate for my miniature schnauzers. They loved going into the basement unattended ... and well ... potty accidents happen without me being the wiser. So, I modified the hardware used, and so far so good! The puppies and my little nieces and nephews are protected. 

Chestwick Queen Bed

Submitted by maw0130 on Tue, 06/05/2012 - 19:29

Built this as a platform bed for guest bedroom. Nice, sturdy bed.

Estimated Cost
150
Estimated Time Investment
Afternoon Project (3-6 Hours)
Finish Used
Stained
Recommended Skill Level
Beginner

Comments

Niki Maddux (not verified)

Sat, 09/29/2012 - 04:11

I Love this Bed. Would love king size dimensions. This is exactly what I have been looking for.

Dollhouse

Submitted by keribeth on Sat, 07/07/2012 - 05:46

I combined my favorite elements from three of Ana's dollhouse plans to make this dollhouse for my kids. My favorite part is the stairs, which I cut from a 2x4 with a miter saw. I made this project from start to finish in one day while the grandparents took the kids, and it was ready for Christmas morning! I made simple furniture for it, too, which you can see in the second picture.

Estimated Cost
~$20 (I used some scraps)
Estimated Time Investment
Day Project (6-9 Hours)
Finish Used
linseed oil
Recommended Skill Level
Intermediate

Comments

Jerika

Wed, 02/11/2015 - 06:35

Is there any way you could email me the plans you used for the furniture? or just individual pictures of the furniture? [email protected] (you may wanna copy and paste that people always get it wrong, haha).
I LOVE THIS

MissM

Wed, 07/10/2019 - 04:08

I know this is an oldie but if you have the finals plans I would love to see them!

What a great open dollhouse!

Simple Outdoor Table

Submitted by MrThompson on Sun, 08/14/2016 - 08:30

I was inspired by Handymommy's set, using the arm chairs instead of the standard ones, so thanks to you!

The wood I had was all rough cut 1 x 6's so I had to adjust the plans a bit.

Built from Plan(s)
Estimated Cost
$250
Estimated Time Investment
Week Long Project (20 Hours or More)
Finish Used
Helmsman clear gloss
Recommended Skill Level
Starter Project
Seasonal And Holiday

Garden bed with folding screens

Submitted by Kate_14 on Wed, 05/27/2020 - 09:39

I added folding screens to my garden bed to prevent my dog to go in it. It can also discourage hares, cats and other animals. The folding screens make it easy to work in your garden.

Estimated Time Investment
Day Project (6-9 Hours)
Finish Used
None
Recommended Skill Level
Beginner

Playset Addition

Submitted by Derek S on Wed, 06/10/2020 - 08:27

Decided our old play set needed an addition, landed on these plans of Ana's. Sat on them and mulled them over for months. Once the wife said something about adding on to it I made the purchases needed. Connected the two platforms with a bridge. I used 4"x4"x10' for the runners, same boards as the decking for the platform of the bridge(5/4"x6"), 2x4's and 1x4's for the railing. If you look at the 3rd photo, I had to chisel out the 4x4 post to get the 2"x6"x12" support to fit correctly. This should measure 2"x6"x13". Another change I made was to cut the bottom and top trim pieces longer on the front and back sections so that the trim would cover the framing of the gable end walls (see last photo). my son wanted windows so I faked in some windows with scrap 2x2's. I used 2x6's as supports from the 4x4's to the 2x6 framing (see photo 3) I added the monkey bars about a month before deciding to do the platform/deck and playhouse. The ladder is based loosely off of a couple of plans I found online. I was able to do all of this work myself except for the roof. Need my dads help to lift the plywood, he then helped me with the rest of the roof.

Estimated Cost
$1000
Estimated Time Investment
Week Long Project (20 Hours or More)
Finish Used
I used a dark wood stain fore the house, green exterior paint for the trim and white exterior paint for the interior of the house.
Recommended Skill Level
Intermediate
Seasonal And Holiday

Outdoor Daybed with Canopy

This was an awesome, quick, and easy project. The sanding, staining, and drying, took forever for me but the actual cutting and assembly was super quick. I have this on an uncovered patio and my local store didn't carry cedar in the sizes I needed so I went with the cheapest wood I could find and used a high quality oil based outdoor stain. I am hopeful it will hold up to our pacific NW winter because it won't be coming in. Considering I had never made anything before and had never used a miter saw, sander or quick square, I am happy with the time it took to finish this.
 

Built from Plan(s)
Estimated Cost
$150 for lumber, screws, stain, and glue
Estimated Time Investment
Weekend Project (10-20 Hours)
Recommended Skill Level
Starter Project

Solid Maple Desk

Submitted by ccbuilder on Sun, 08/12/2012 - 14:29

This is a solid maple desk with two drawers finished with shellac and paste wax. I altered the plan by giving the desk and overhang, as well as changing the way the legs were built.

Built from Plan(s)
Estimated Cost
$250
Estimated Time Investment
Week Long Project (20 Hours or More)
Finish Used
Shellac and paste wax. I sanded until the surface was incredibly smooth and then used a high quality brush to apply the shellac.
Recommended Skill Level
Intermediate

Truss Shelves: Cheap Garage Storage

Made of old fence rail (the dark pieces) and cheap 2x4s and 1x12s .

This is not as stable as I hoped, but for an afternoon's project that got all those tools off the workshop floor, it's not bad. I will add a diagonal brace at the back later. Much later.

NOTE: My engineer friend notes that 2 braces at the rear, below the bottom shelf and below the top shelf, would minimize side-to-side wobbling, and 2 braces front to back, both under the bottom shelf, would minimize the front-to-back wobbling, They could be a scrap of plywood, a 1x6 or wider scrap. Just nail them in two or more places on each of the ladders and they make the structure more rigid. Screw them in if you want a shelf unit you can disassemble.

TIPS:
If you are using pockethole screws, start the screws in all the holes before you put the crosspieces on. Stop when you see the tip of the screw come through the first piece.

Clamp scrap 2x4 to the uprights to hold the crosspieces in place as you drill.

To get the shelves in place, lean the ladders against each other and attach the bottom and top boards on one side. Than pull the other ladder out as far as it needs to go and screw that side of the shelves in place.

Don't try this without clamps.

It could have been cheaper if I had used all reclaimed fence 2x4s, and if my errand runner had bought cheaper 1x12s. He bought top-grade when #2 would have worked for half the price,

Estimated Cost
$ 30
Estimated Time Investment
Afternoon Project (3-6 Hours)
Finish Used
None
Recommended Skill Level
Intermediate

Rolling Bar Cart

Submitted by mary tuper on Mon, 05/06/2024 - 12:13

This was my second project using plans on this site and I loved it - I made this for a friend's daughter who was moving into her own apartment. She and her girlfriends loved it too! It was very easy and quick to build. Wheels took a bit of time and effort!

This was a real hit and I'd love to make more, if I had room at my house I'd make one for myself!