Community Brag Posts

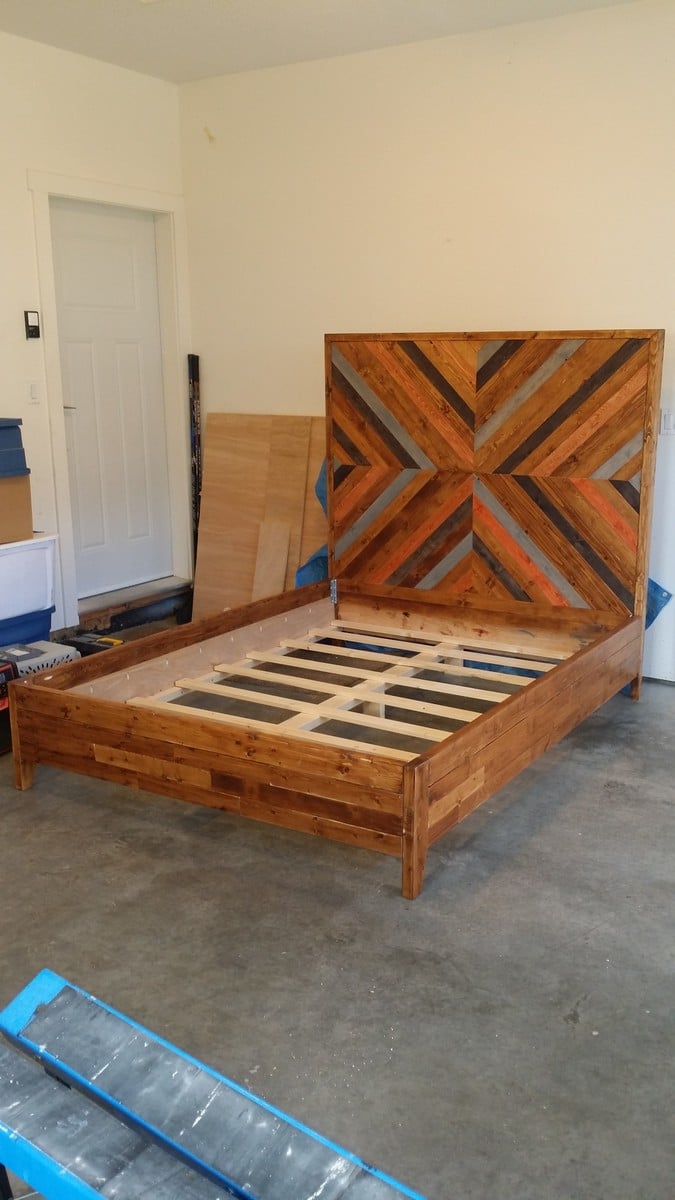
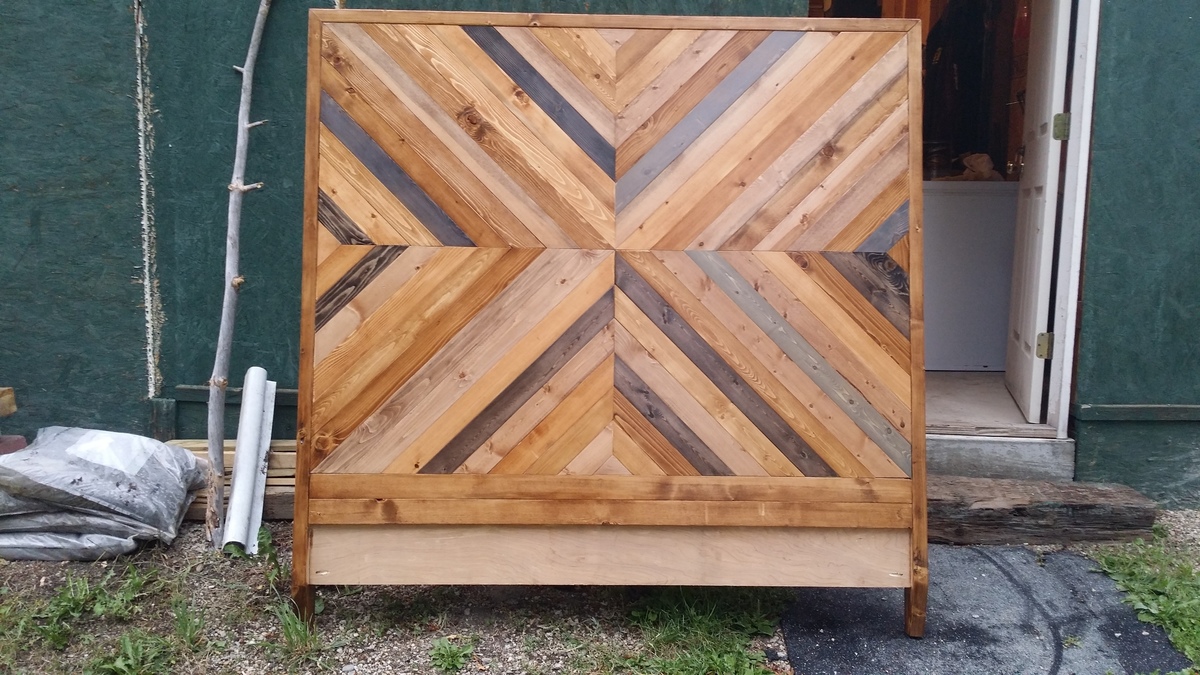
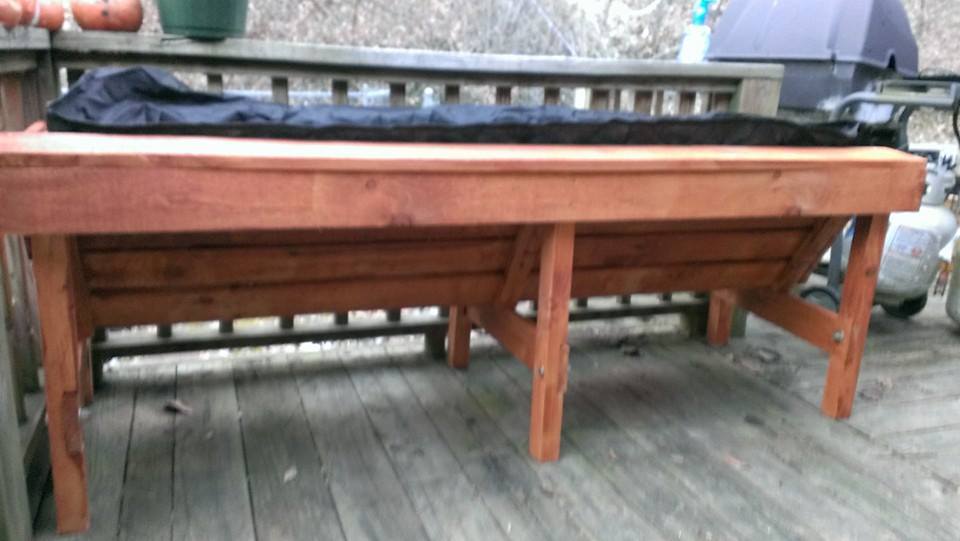
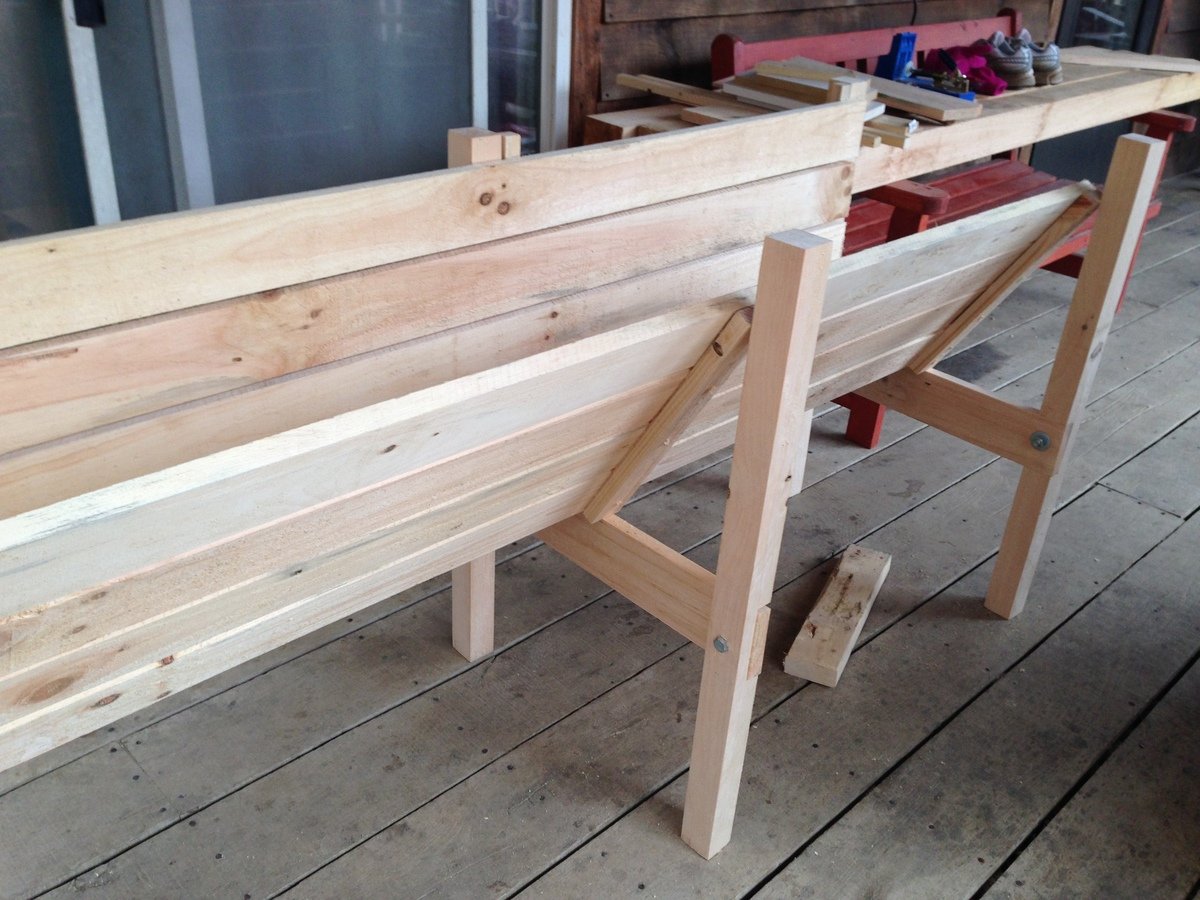
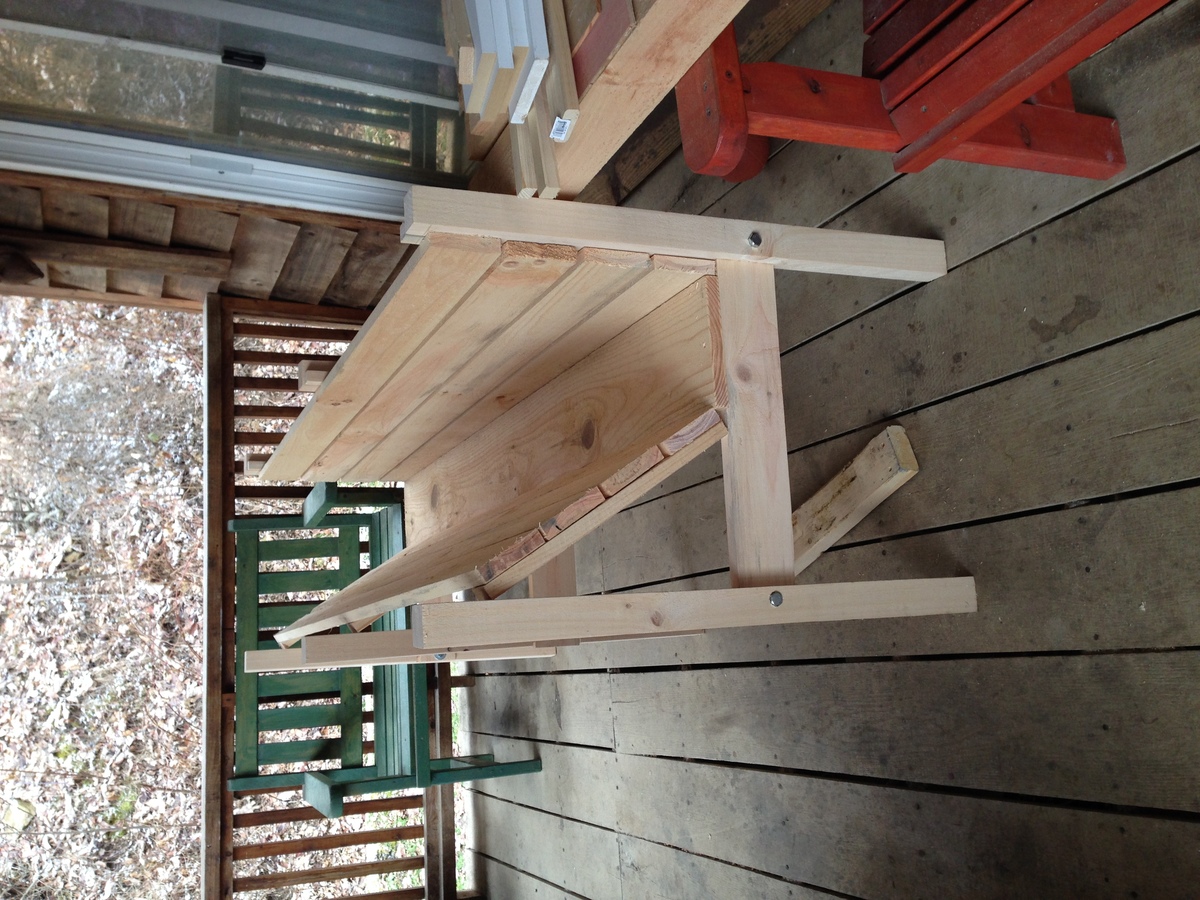
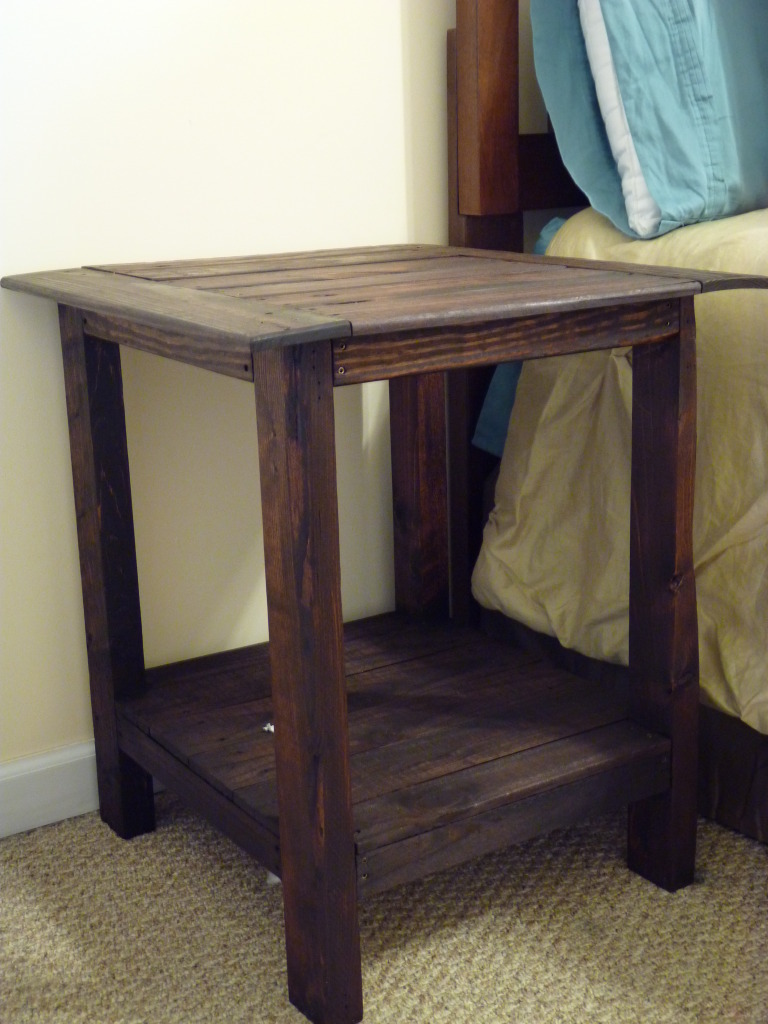
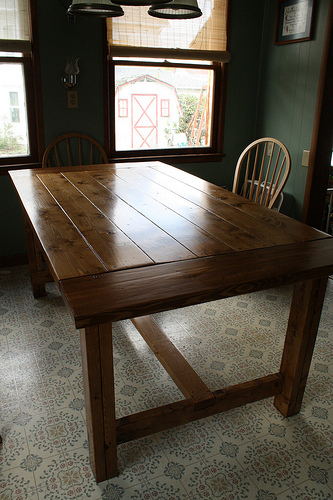
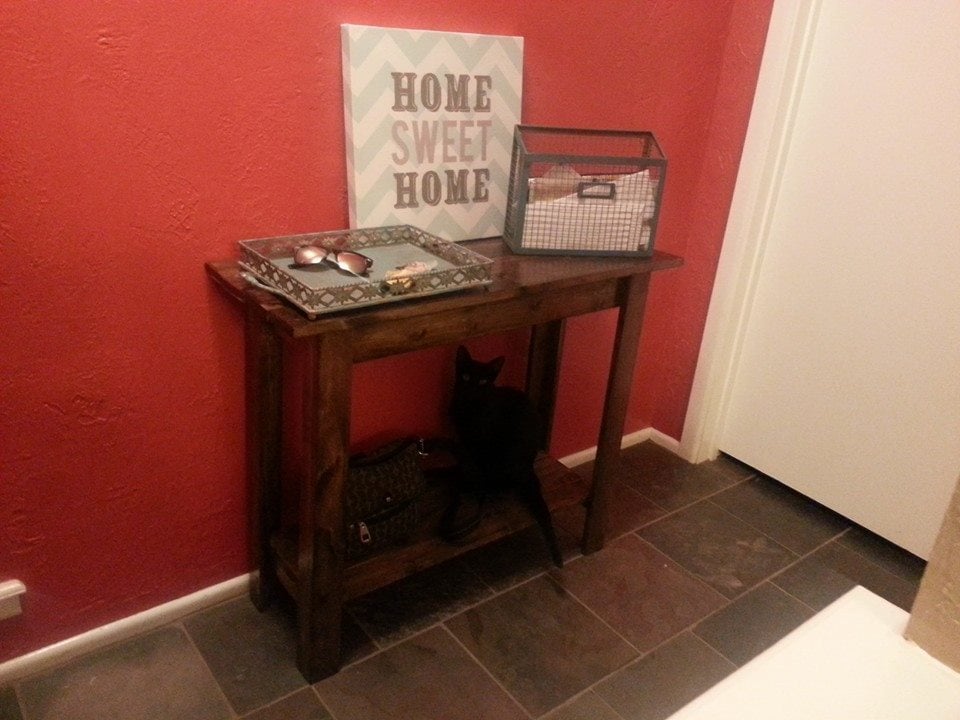
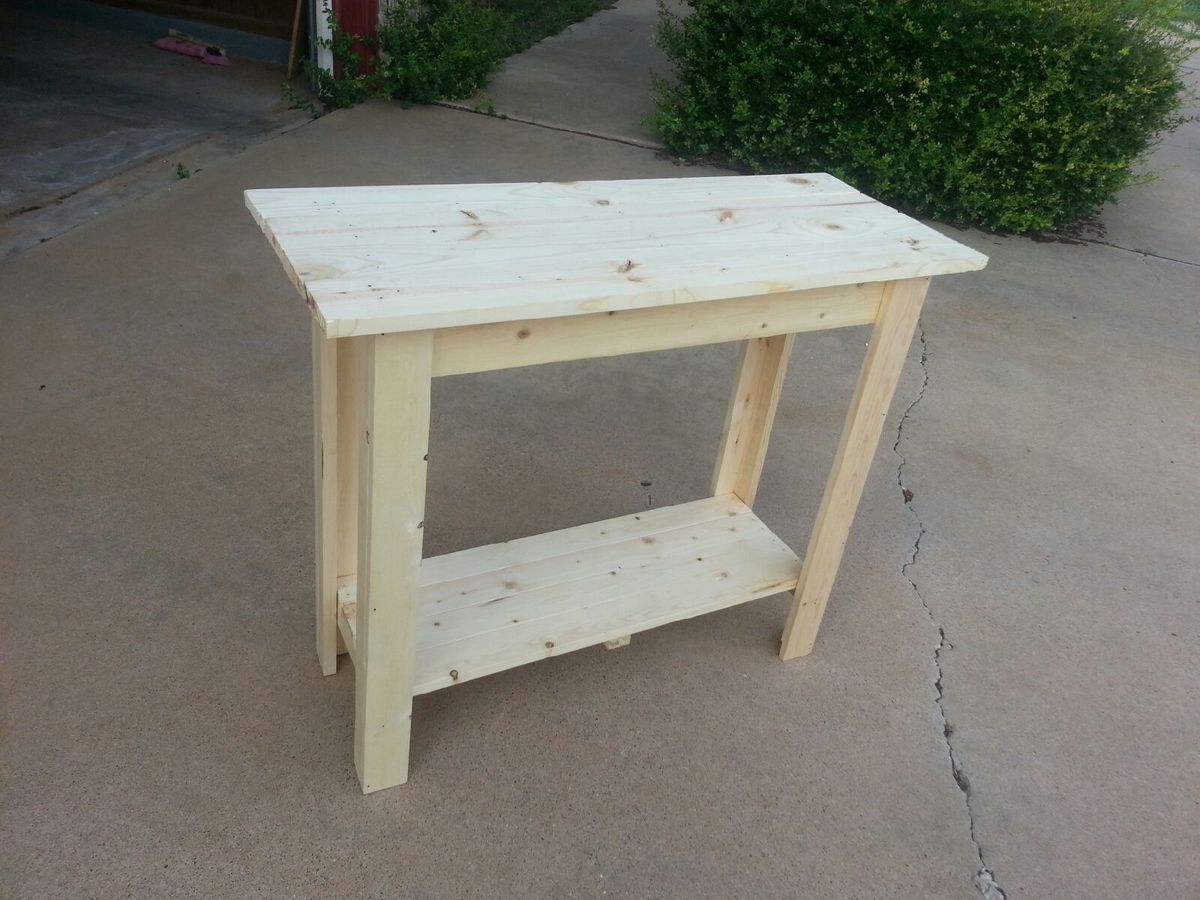
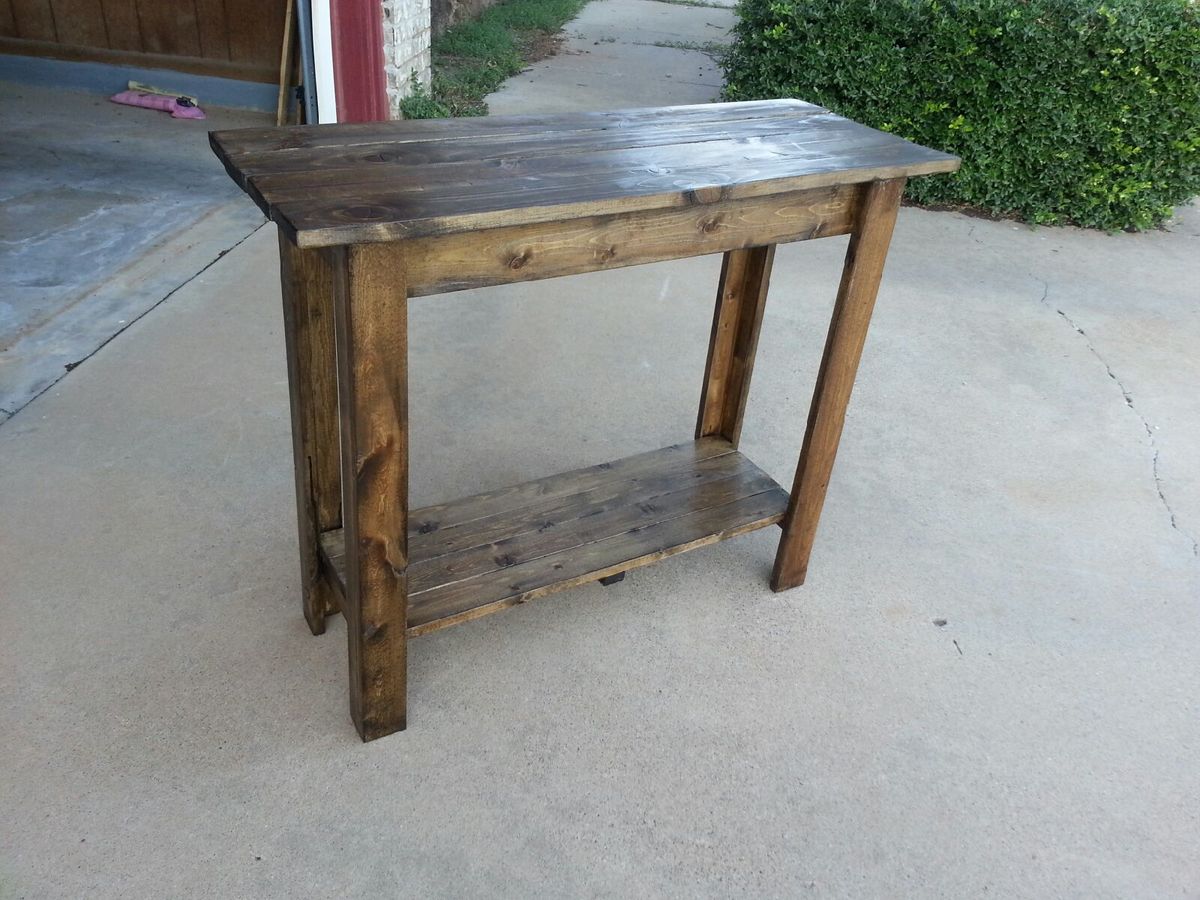
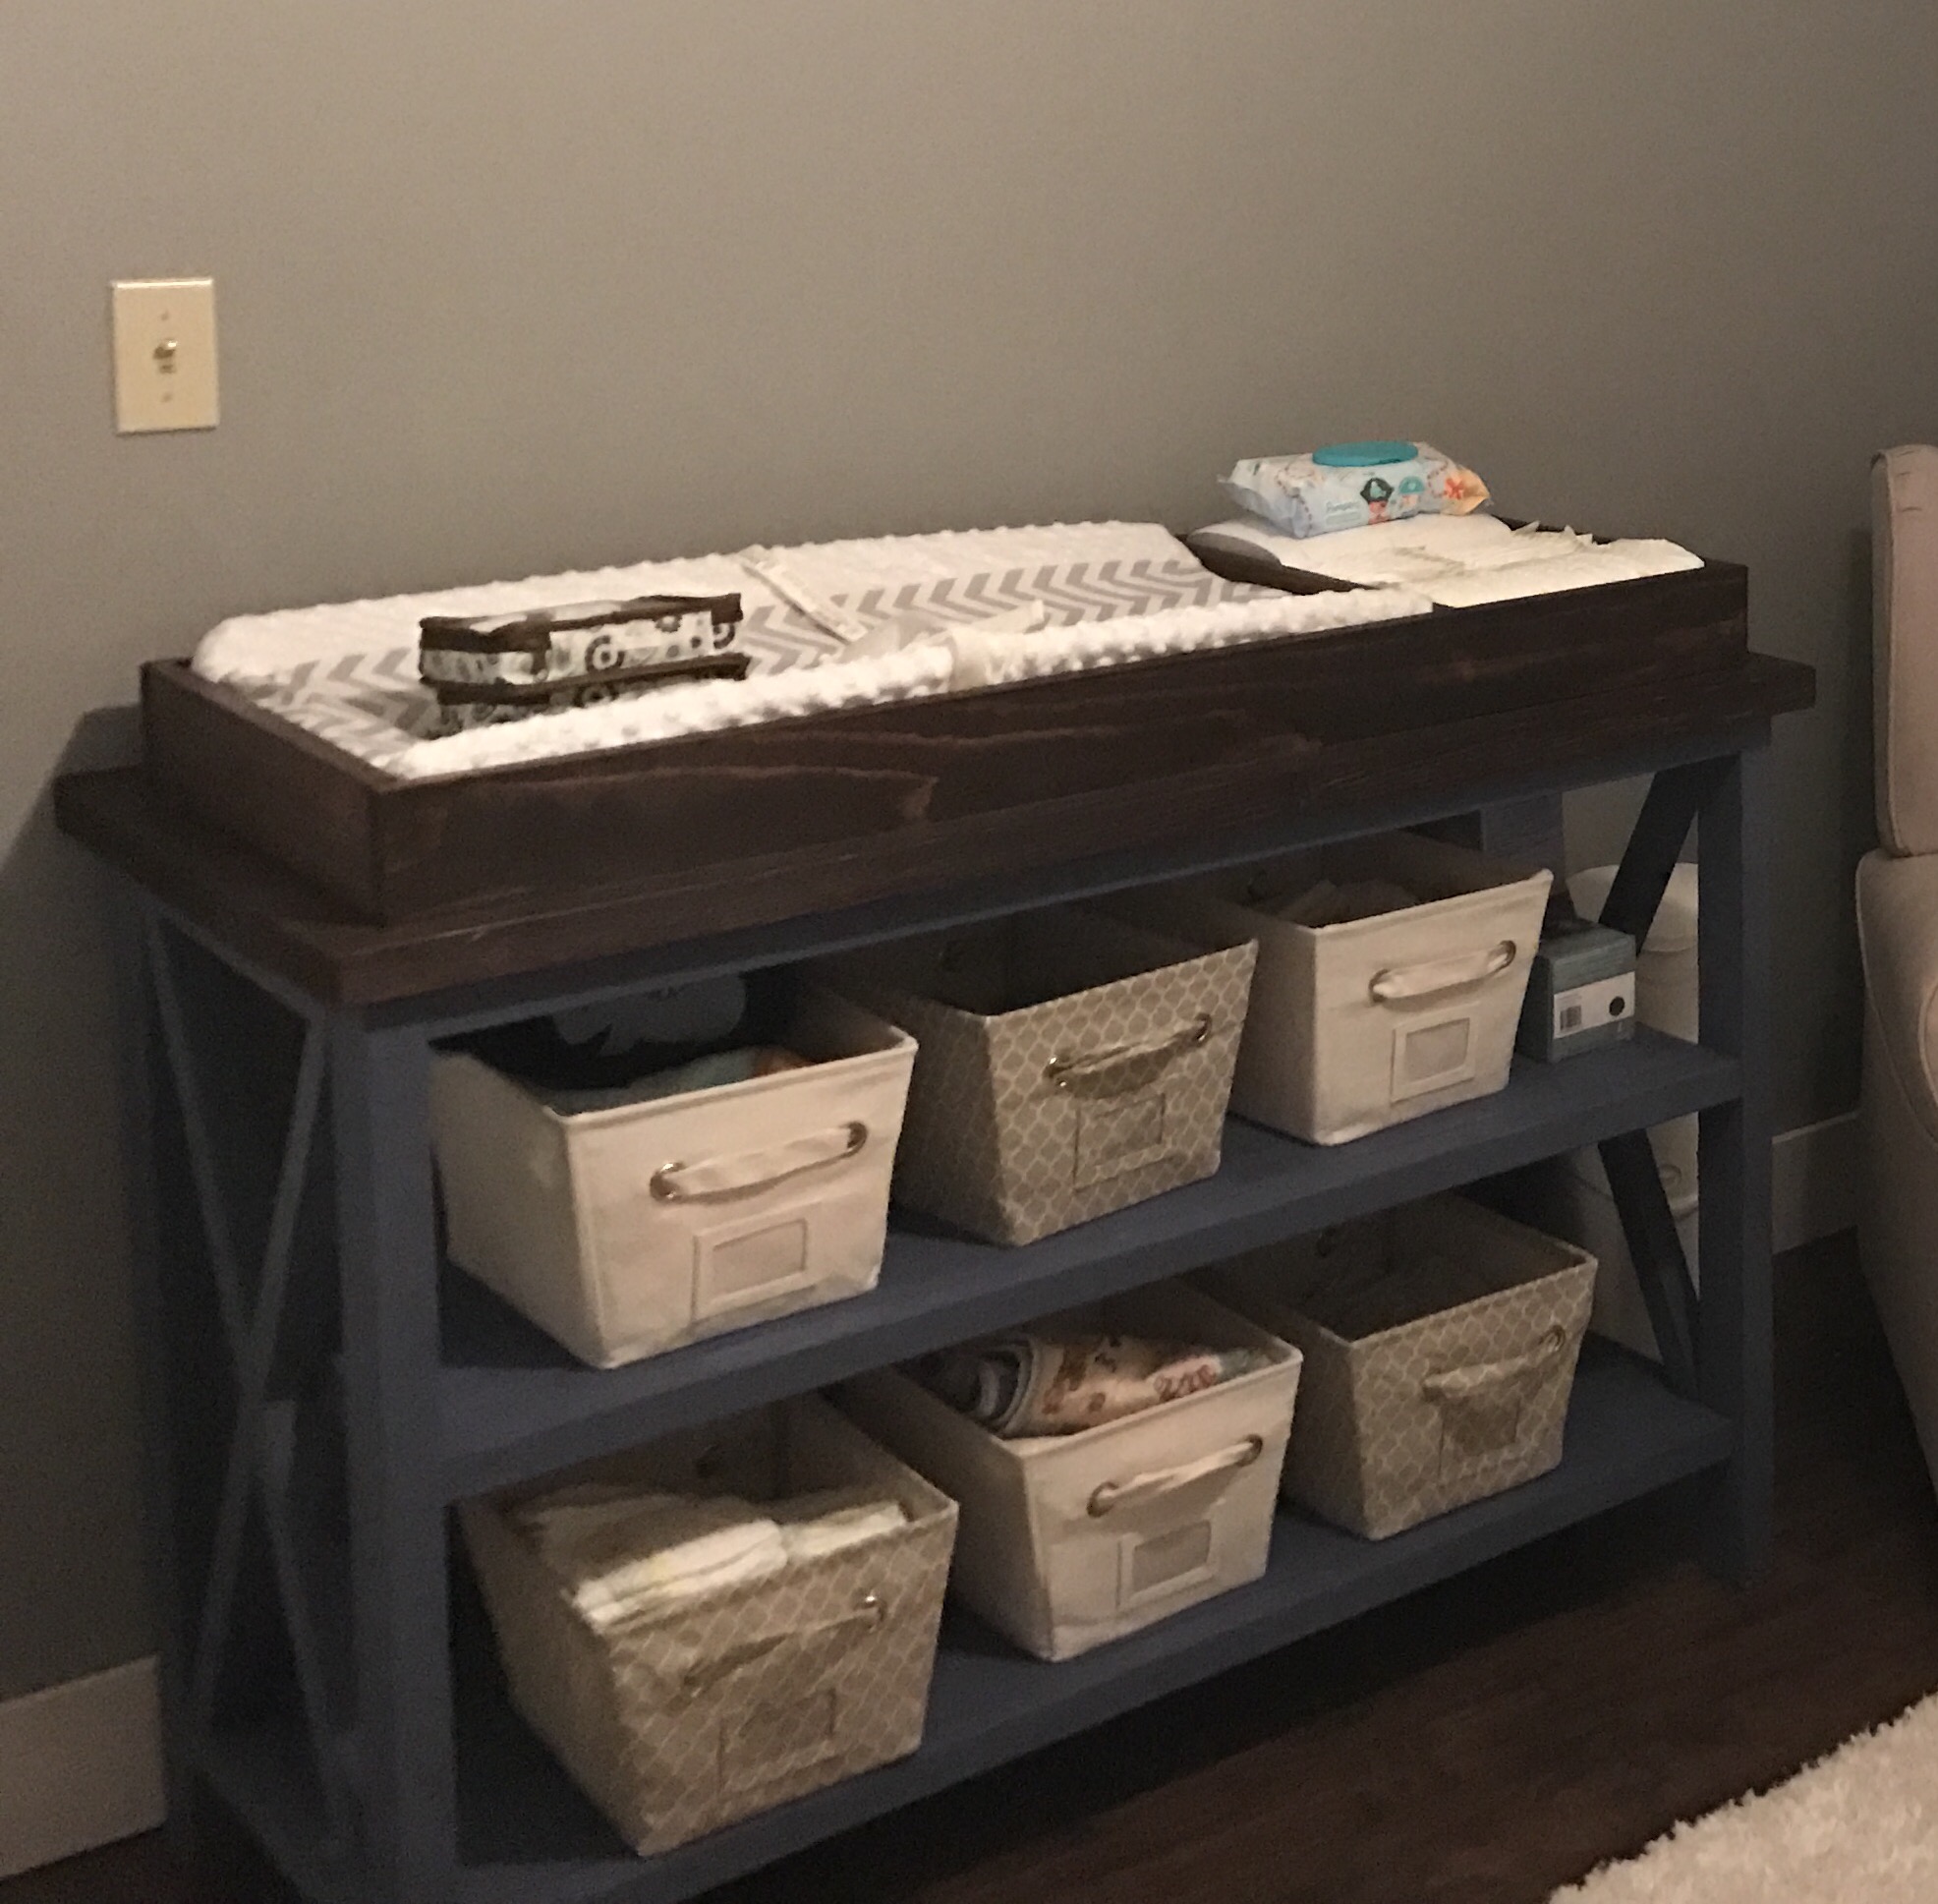
Breadboard Ended Fancy X Desk!

Submitted by pnytail01 on Wed, 09/06/2017 - 07:59

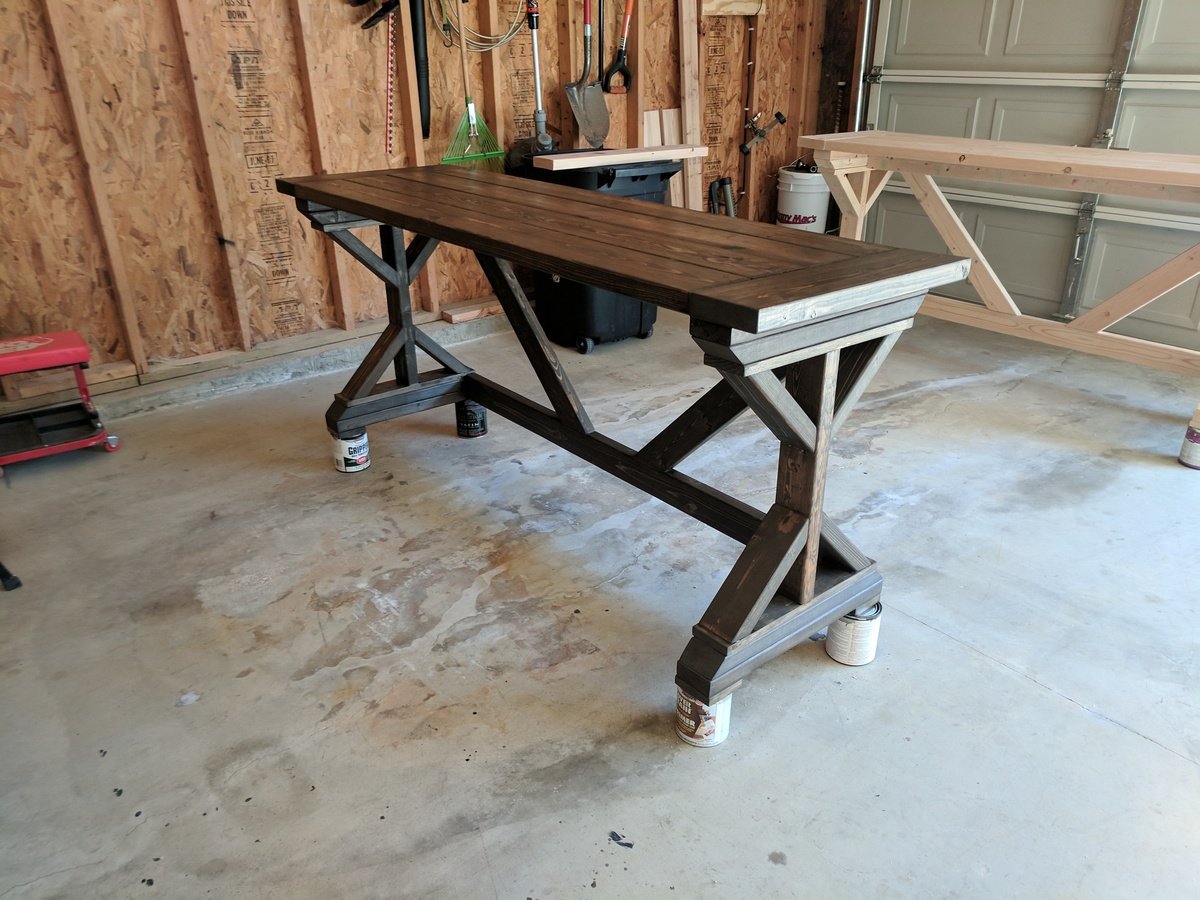
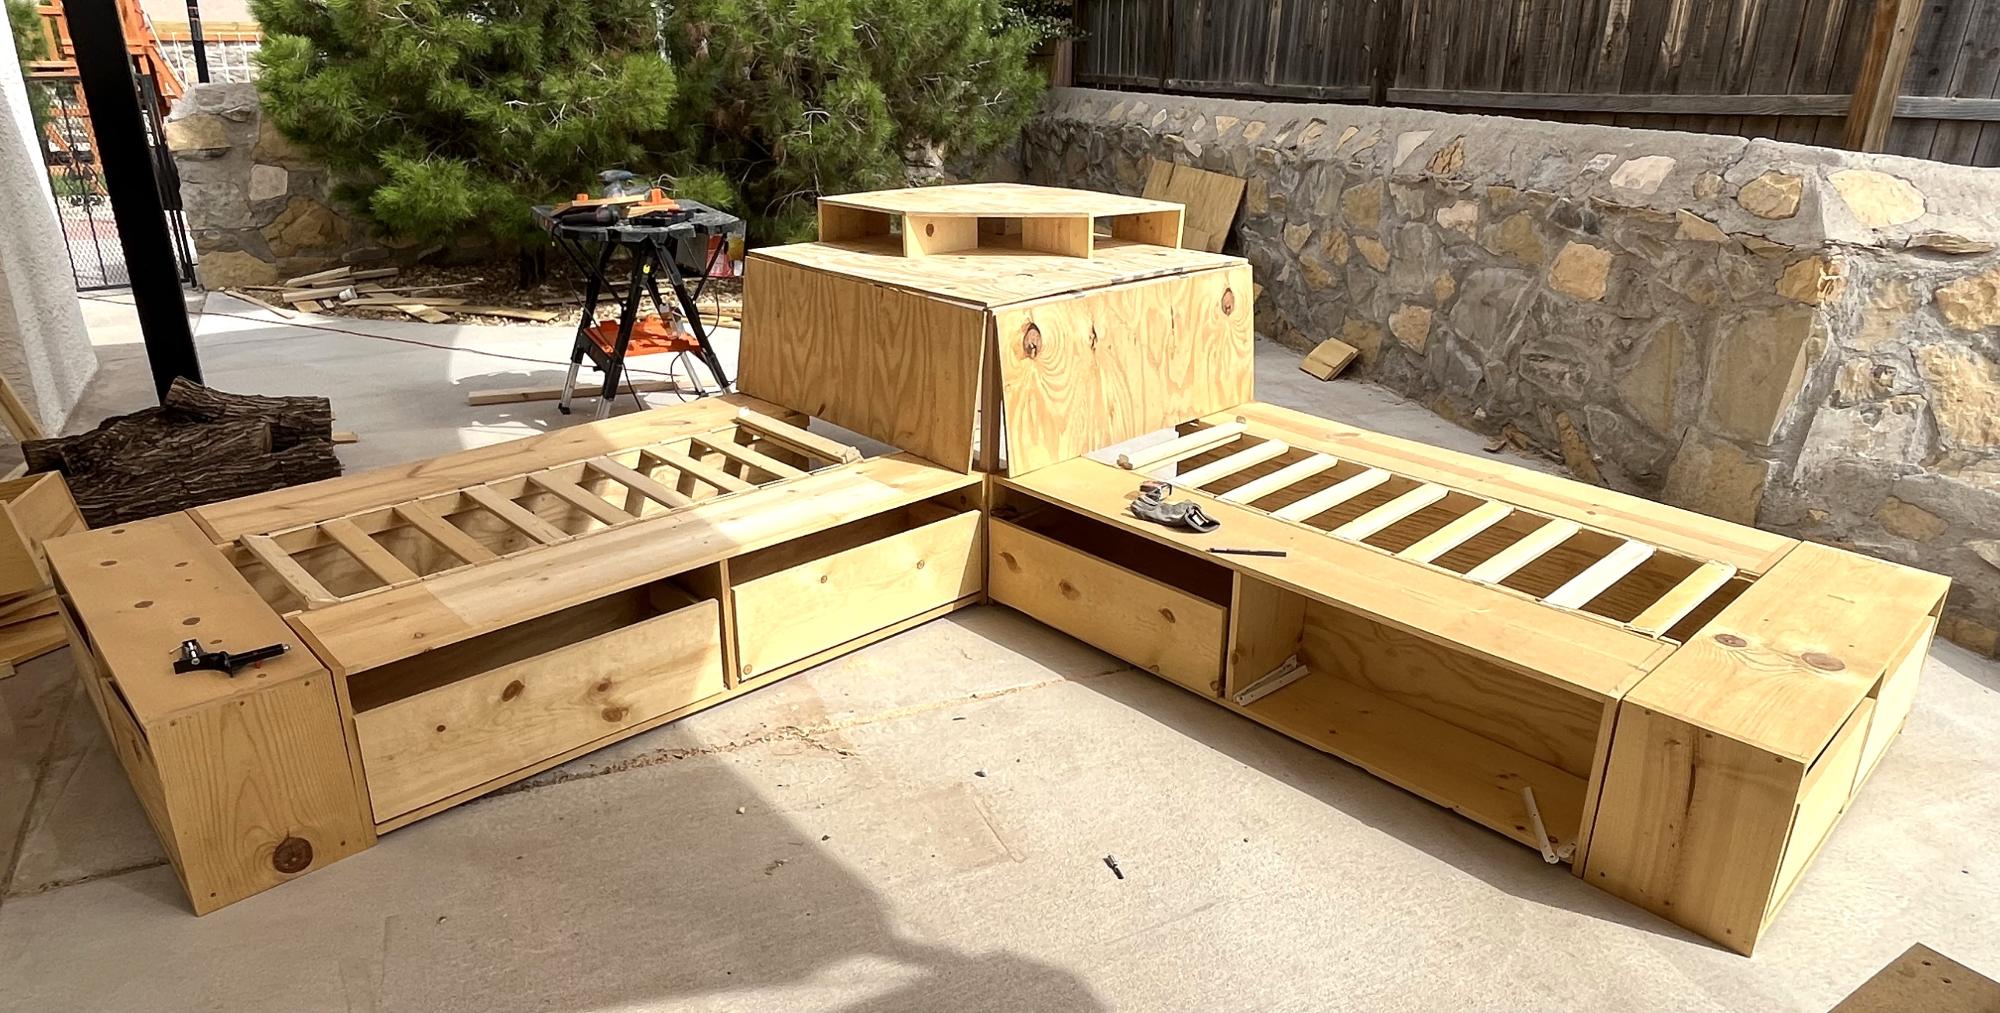
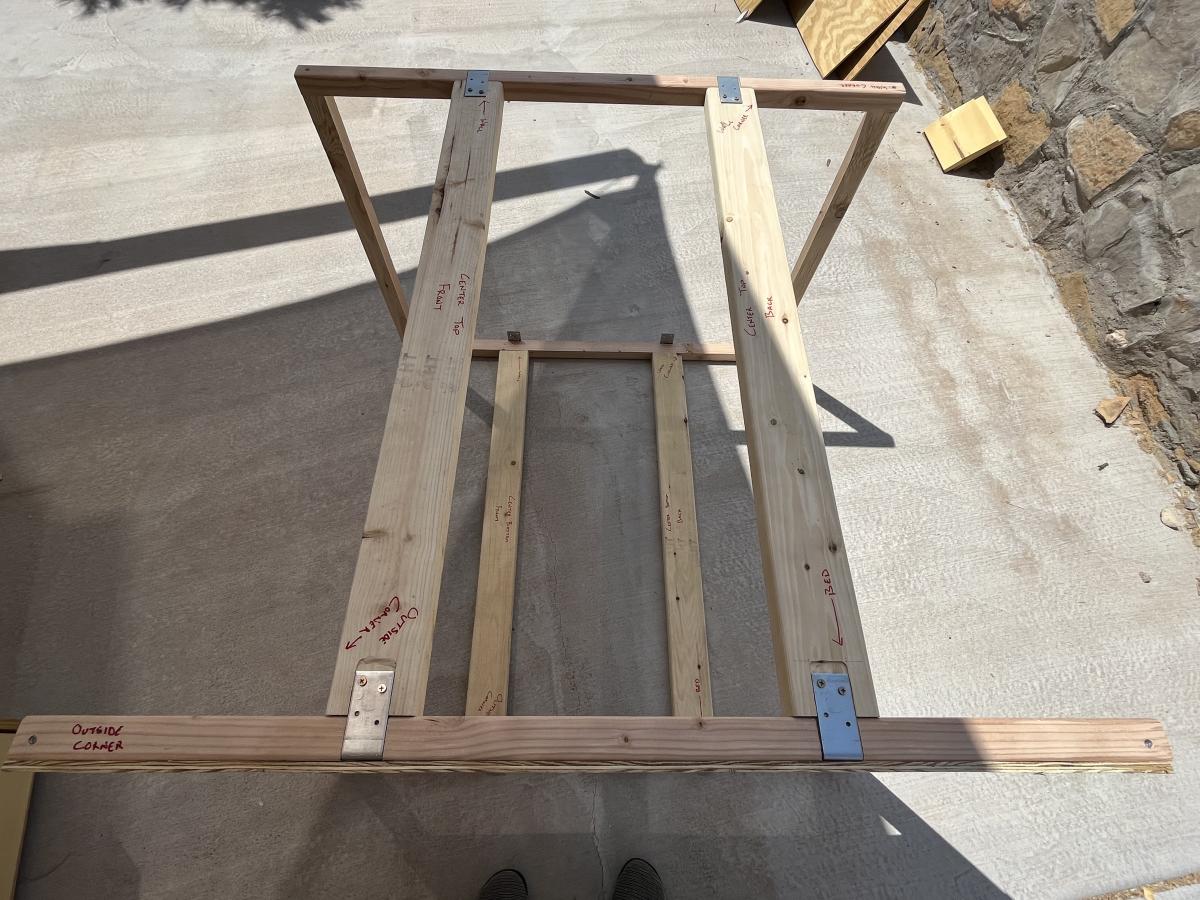
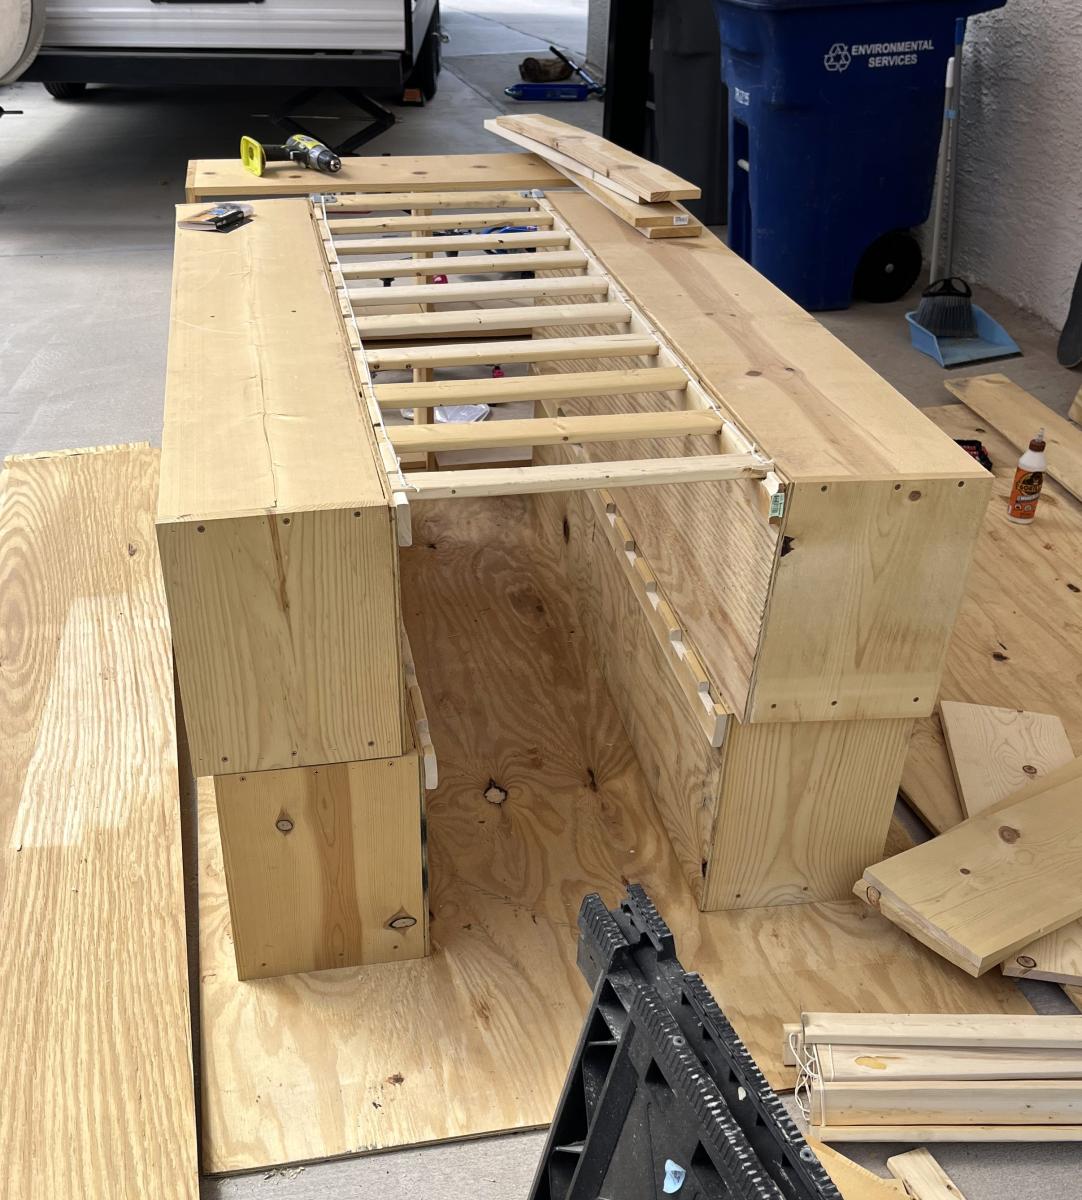
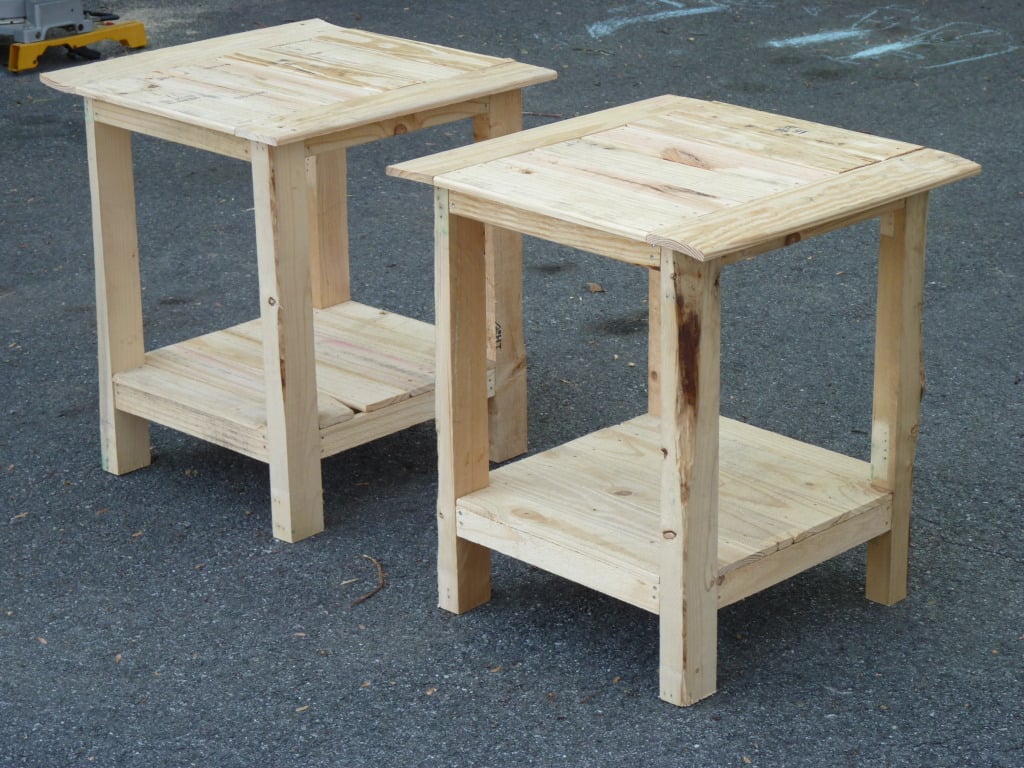
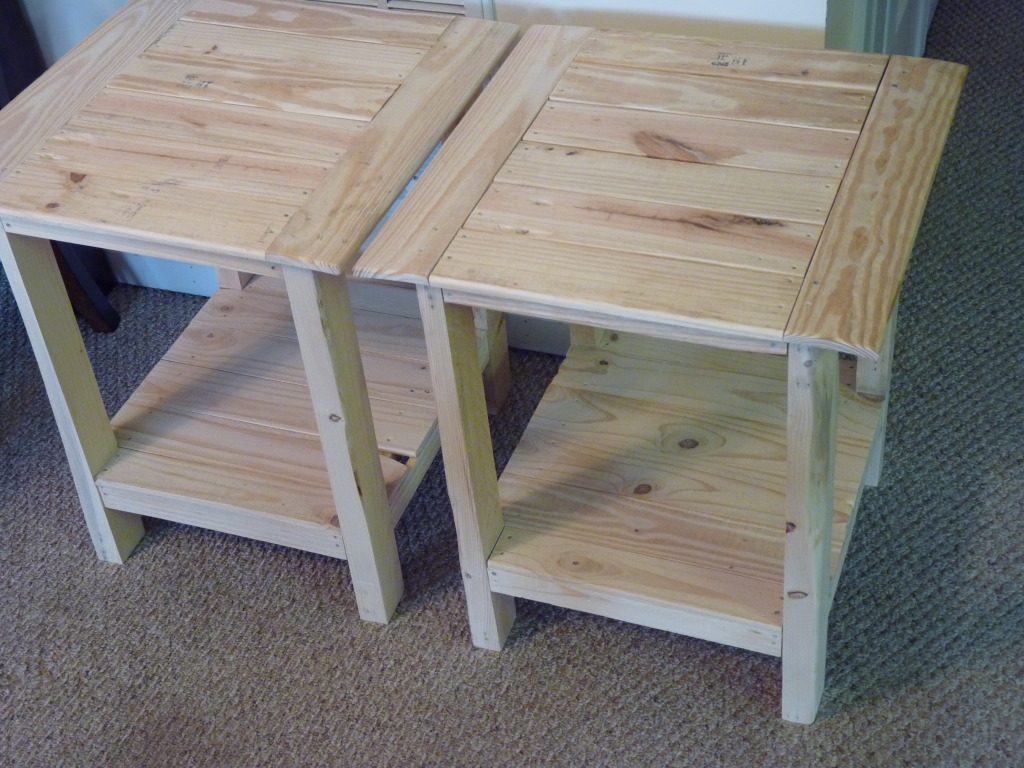
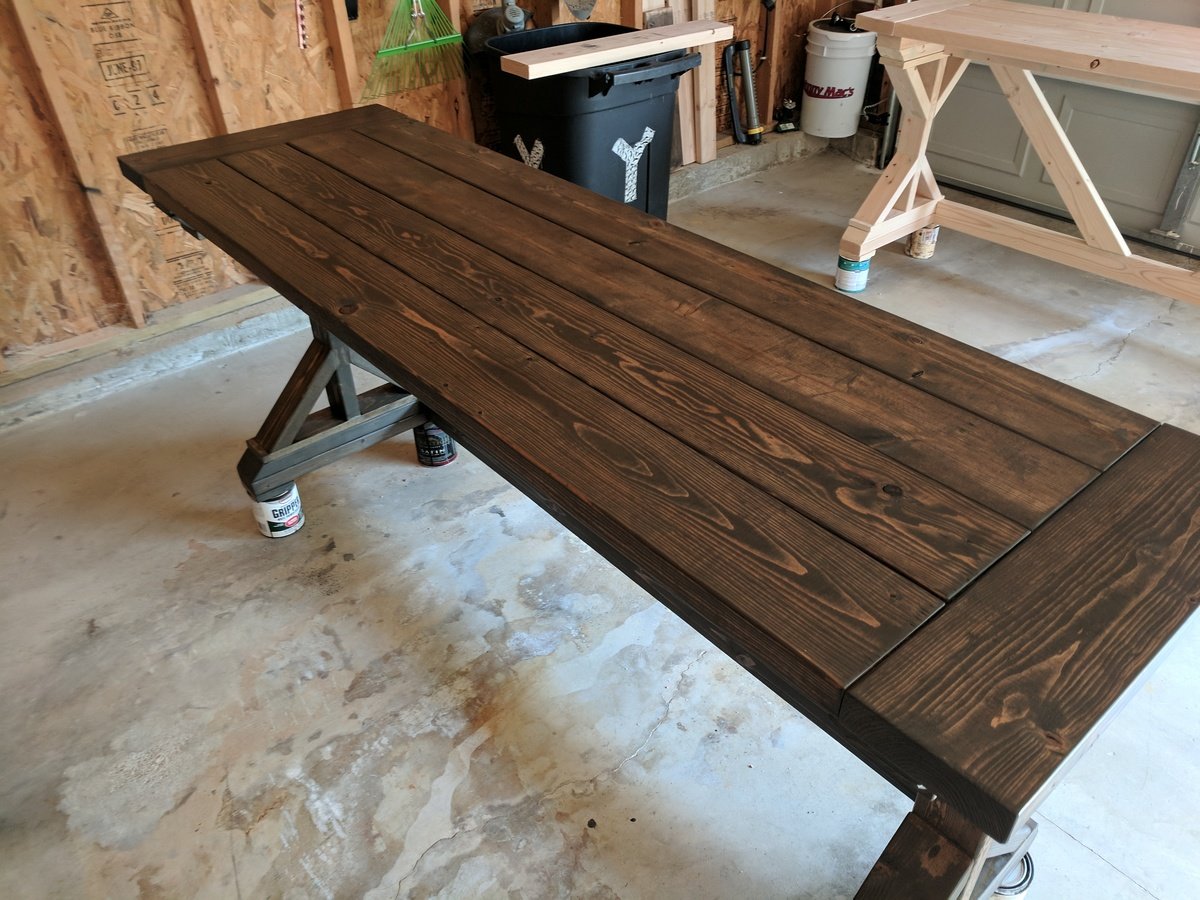
I felt a little bold deviating from the plans when this was my first project.  But I saw another version of this desk with the breadboard ends, and I really appreciated the added craftsmanship this gave off.  Other than the top, I followed the plans to a T.  For the top, I made this from 2x6's with the 4 lengthwise pieces cut to 61" and the ends to 22" (I think I ended up trimming the ends down to match better, but 22 was a good starting point).  As for the finish, I layered stains starting with Minwax's Classic Grey followed by Minwax's Jacobean.  I made two of these desks to put in our home office.  If I think of it once the office is complete and decorated, I'll add another pic!

Built from Plan(s)
Estimated Cost
After lumber, stain, and hardware, I figure I spent about $75 for each desk.
Estimated Time Investment
Weekend Project (10-20 Hours)
Finish Used
1st Layer - Minwax Classic Grey
2nd Layer - Minwax Jacobean
Recommended Skill Level
Beginner

Wood Toy Fishing Game

This was a very easy project from scrap wood I had leftover from previous projects. I modified the box a little. I cut slits in the box so the top slides on nicely. I also stained the box and sealed because I love the look of stained wood. I used early American wood stain.

Built from Plan(s)
Estimated Time Investment
Afternoon Project (3-6 Hours)
Finish Used
early american
Recommended Skill Level
Starter Project

Garage Storage

Submitted by wabilinski on Mon, 09/28/2015 - 10:48

My wife was needing some extra storage in the garage for seasonal decor totes.

So, of course, I first go to Ana White's website. Voila, I found the perfect plans for the space I had to work with.

- The final product ended up being 72"Hx54"Lx21"W

- I used a counter sink bit to pre-drill screw holes so the heads would be slightly below the surface of the boards. This way the totes would not get caught on or damaged by the screws.

Estimated Cost
$90 for wood and screws
Estimated Time Investment
Day Project (6-9 Hours)
Finish Used
N/A - left unfinished
Recommended Skill Level
Beginner

West Elm Knockof Chevron Queen Bed

Submitted by jpurp on Sat, 12/26/2015 - 21:33

I pretty much just followed the plans.  It turned out a bit more colourful that I expected but I've already sold it so I guess its okay.  I'm going to make another one with a bit more toned down colours.  I also created a matching night stand.  I didn't follow any plan.  Just used the ideas from the bed build.

Estimated Time Investment
Week Long Project (20 Hours or More)
Finish Used
Old Masters Wiping stain in Provincial, Cherry, Cedar, Weathered gray, Ebony
Recommended Skill Level
Intermediate

dresser turned bathroom vanity

Submitted by leahrush4 on Fri, 10/07/2011 - 08:23

We looked high and low for a sturdy dresser we could convert to a vanity for our kid's bathroom. We could find nothing for under $500 so we decided to make it. We used solid hickory for the top and bottom and hickory vaneer for the rest. Only the middle drawers are useable, the side ones have a faux front to leave room for the sink plumbing behind. My husband also reinforced the bottom compartments by making them three separate compartments instead of one solid one. We ordered the sinks from overstock.com and the faucets are from Lowes.

Estimated Cost
$350
Estimated Time Investment
Weekend Project (10-20 Hours)
Recommended Skill Level
Intermediate

Comments

catee (not verified)

Fri, 10/07/2011 - 16:39

My kids have been bugging for years for double sinks. I LOVE this. I was thinking along the same line but never got past the thinking part. This is GORGEOUS!

cathrobi (not verified)

Mon, 11/21/2011 - 10:52

Wow, this is stunning! You did an awesome job! The only thing I can't figure out is how you were able to attach the plumbing? Did your husband have to crawl underneath to reach the pipes?

Smaller Dog Crate with a drawer!

Submitted by imalearba4 on Wed, 01/06/2016 - 14:02

You may remember my green stratton day beds that I built a long time ago- finally I have another project to post- I am soo happy I found Ana White's website. We just got back from a 2.5 week vacation in Israel and my dogs were staying with my sister. She told me they had been sleeping in the same kennel together instead of separately. Their kennels are too small so I decided to build them one using wood I already had. But since they are small dogs, I decided to size it down- but I wanted it end table height- so I built a smaller kennel- 20"H x 19"W x 28"D. but... I added a drawer to the top to bring it to the right height. You can read all about it on my blog- link below.

Built from Plan(s)
Estimated Cost
$35 - for drawer pull, stain, drawer slides, and hinge hardware- I had the 2x2s and plywood in my stash
Estimated Time Investment
Weekend Project (10-20 Hours)
Finish Used
Provincial stain
Recommended Skill Level
Intermediate

Comments

KryssQuinn

Sat, 04/11/2020 - 15:17

I really like this idea. We have a repurposed dresser currently housing two crates, but this is cleaner.

Family Cabin with Flip up bed

Always wanted an Alpine lodge, we live in London so a Garden cabin for the kids (and Dad) will have to do! 

flip up bed and storage cabinet (for mattress)

sofa bed, foam cushions with leftover curtains  

mini storage boxes from wine boxes

inspired by tiny house (especially the sofa!)

Still more to do. Desk on its way and bulk head lights fitted soon. 
 

no real plans just rough sketches and trial and error

Estimated Cost
£300 for interior
Estimated Time Investment
Week Long Project (20 Hours or More)
Finish Used
Old white paint and fence paint

Barn for Tractor Supply animals

Submitted by jonbaty on Tue, 02/18/2014 - 11:13

I built this for a friend's daughter who collects the Tractor Supply farm animals. This is the first time I have cut on angles to make the roof. The directions say built it from bottom to top but I found it easier to start for the top and work down. Then attach the whole roof where it marched on the barn... Hope this helps. I did not finish it cause the friend wanted to stain it herself...

Built from Plan(s)
Estimated Cost
$40
Estimated Time Investment
Afternoon Project (3-6 Hours)
Finish Used
None
Recommended Skill Level
Beginner

VegTrug

Submitted by carongirls on Sat, 02/22/2014 - 18:52

A friend needed a raised garden bed for her husband who is in a wheel chair. I searched and found the VegTrug's. It took a lot of trial and error. I based it off Williams Sonoma's pictures. I wouldn't of attempted this with out a plan if it weren't for Ana's website.

Recommended Skill Level
Intermediate

Comments

steve badham

Wed, 09/09/2015 - 02:56

We have just set up a "Men'sShed" in our little village here in the UK, and think that these would make a great first project for novice handymen. Are there any plans available to help us?

Steve

Trickman2

Wed, 05/18/2016 - 21:45

Not sure what the story is here,  Maybe she got in trouble for saying Vegtrug?  I would like plans for a DIY Raised planter bed like the above. 

Tryed Side Table with Shelf

Submitted by papadaddy on Mon, 05/21/2012 - 18:59

All the wood is from pallets, which you can find for free at local big box stores.
I added the shelf with the same support system used for the table top.
Made with as little cost as possible so materials are not too much.

Material:
A few pallets
Wood screws

Tools:
Table Saw
Miter Saw
Drill
Sander
Measuring Tape
Square
Pencil and Paper
Stain
Brush
Shop Cloth

This is my first Project :)

Built from Plan(s)
Estimated Cost
$7
Estimated Time Investment
Afternoon Project (3-6 Hours)
Finish Used
1 coat of Red Mahogany 225, applied with a brush and rubbed with a shop cloth after 15 minutes.
Recommended Skill Level
Beginner

Comments

anderjes

Tue, 02/12/2013 - 07:55

Do you have blue prints or suggested measurements for this table?

House Number Planter from Cedar Fence Picket

Submitted by Juvlyne on Mon, 05/18/2020 - 07:30

Used Ana’s plans for this just made one modification, which was adding wire to the bottom so the plant can drain out. I also stained the fence picket before putting it together. The numbers were the most expensive part of this project they were ~$18. https://ana-white.com/woodworking-projects/house-numbers-vertical-plant…

Estimated Cost
$20
Estimated Time Investment
An Hour or Two (0-2 Hours)
Finish Used
Minwax Oil based wood stain grey & Krylon Matte clear coat spray
Recommended Skill Level
Beginner

Adirondack Chairs

Submitted by Beoncia on Mon, 05/05/2014 - 06:15

"Beginner" doesn't begin to describe me! I didn't know the difference between a skill saw & a miter saw before starting this project, but thankfully, my husband is a Mechanical Engineer & knows his way around a few tools. We're very happy with the end result, but they're not perfect. We learned a lot & I'm confident that the next project will be better. A couple of things I learned along the way--no need to buy exactly double the wood for two chairs. Probably obvious for those that are experienced, but I bought exactly double & could've saved a little $$ if I knew what I was doing. Not counting the investment of the saws & other equipment (that will now last my lifetime!), the chairs were less than $50 each for the wood, paint, screws, etc. We used the cheapest wood (whitewood, per the recommendation) available & now that I'm a bit more knowledgeable, I'll upgrade for my next project. The paint is regular Glidden Exterior, & the Home Depot reps were kind enough to mix samples of the two lighter colors so that I didn't have to buy a quart for such a small amount. Colors are Peach Crayon, True Peach, & Tropical Coral. It should be noted that samples aren't available in exterior, but the chairs will be used mostly on a screened porch--out of the direct sun and rain--so I didn't worry too much about it.

Built from Plan(s)
Estimated Cost
<$50 each
Estimated Time Investment
Weekend Project (10-20 Hours)
Finish Used
Glidden Exterior
Recommended Skill Level
Beginner

Comments

Seasonal And Holiday

First project--Updated Simplest Console

I'm pretty proud of my first project even though it does have some flaws. I learned a lot. I made every cut with a handsaw! Don't do this unless you want to have some seriously sore arms. I'm ready to graduate to a circular saw. I also used a hammer and nails instead of a nailer, so this project took me a little longer than it should have. Thanks so much, Ana, for the opportunities!

Built from Plan(s)
Estimated Time Investment
Day Project (6-9 Hours)
Finish Used
Minwax pre-stain conditioner, Minwax dark walnut oil stain, Minwax polycrylic clear satin
Recommended Skill Level
Starter Project

Comments

LannyBananny

Wed, 07/09/2014 - 21:15

From one newbie to another-- your table looks great. Talk about handmade, you went the extra mile by hand cutting and using the "arm and hammer" technique!

Jake

Tue, 08/12/2014 - 14:43

Using only hand tools? You did a great job. Ana offers great suggestions on what you need to start but here are my comments on some tools for Christmas or sooner:

Choose the miter saw over the circular saw. So much more useful and safer. For those times you need to cut sheet plywood invest in an inexpensive small circular saw. Lighter and easier to handle.

Orbital sander
Basic Kreg jig kit with drills , clamp etc.
Several lengths of pocket hole screws. You will use hundreds of them.
Square
Power drill
Clamps (Harbor Freight clamps are great and inexpensive) Get a lot of them and none less than 12" capacity. Miminum of six to start.
Eye and hearing protection
Titebond II or III glue

booksnotbombs

Tue, 08/12/2014 - 15:01

Thanks, Grandpa Jake. :) (I'm just going to call you that since so many of your projects are for your grandkids!) I was sorry to read about your problems today but glad you are so persistent. You weren't kidding when you said that checking for square is super important! I'm currently in the middle of my second project (the step up table, plans here on Ana White--actually done building but need to finish), and I took it apart/redid it twice to make sure it was square.

Thanks for building my Christmas list for me! I'm definitely itching for a fancy kreg jig, but I really need to get those clamps.

17” square, 2x4 side tables / stools

Submitted by Anonymous (not verified) on Mon, 10/04/2021 - 12:33

Well my wife bought 2 x 17” square seat cushions the problem was we didn’t have any stools to put them on so decided to enhance our front seating patio area with 2 solid 2x4 side tables that would double up as stools.
I based the design on Ana’s table design but decided to counter sink all the screws & cut plugs to suit so no screw heads could be seen, they turned out perfect & very robust, perfect for the U.K. weather, my wife finished them in grey outdoor paint to match the furniture, all in all they took only around 6hrs to make & paint.

Built from Plan(s)

Comments

Adirondack Chairs

Submitted by Anonymous (not verified) on Tue, 10/05/2021 - 08:19

This was a fun and simple project. One of my first attempts at making outside furniture and it was nearly perfect the first time....why?... the plans were so easy to follow, the techniques used were not demanding, and the tool selection was ideal for my workshop. I put them outside and I have had good reviews, and requests, for these chairs.

Comments

Seasonal And Holiday

Simple Stackable Outdoor Chairs for DIY Wedding

Submitted by OurWolfDen on Sun, 07/07/2013 - 14:43

For our wedding we wanted to make seating for our guests. We ended up making 16 chairs total over several weekends. We also made the pergola.

Built from Plan(s)
Estimated Cost
about $350
Estimated Time Investment
Week Long Project (20 Hours or More)
Finish Used
White paint
Recommended Skill Level
Intermediate

Comments

JoanneS

Sun, 07/07/2013 - 16:27

These are so lovely! Congrats on your DIY wedding, the setting is beautiful. Popped over to your blog, your new siding and floors look super too. :)

Reclaimed barn wood bed

This bed is built out of reclaimed barn wood. I added two full extension drawers on either side.  

Estimated Cost
$500.00
Estimated Time Investment
Week Long Project (20 Hours or More)
Finish Used
Matte varnish
Recommended Skill Level
Intermediate