Planter Porch Steps
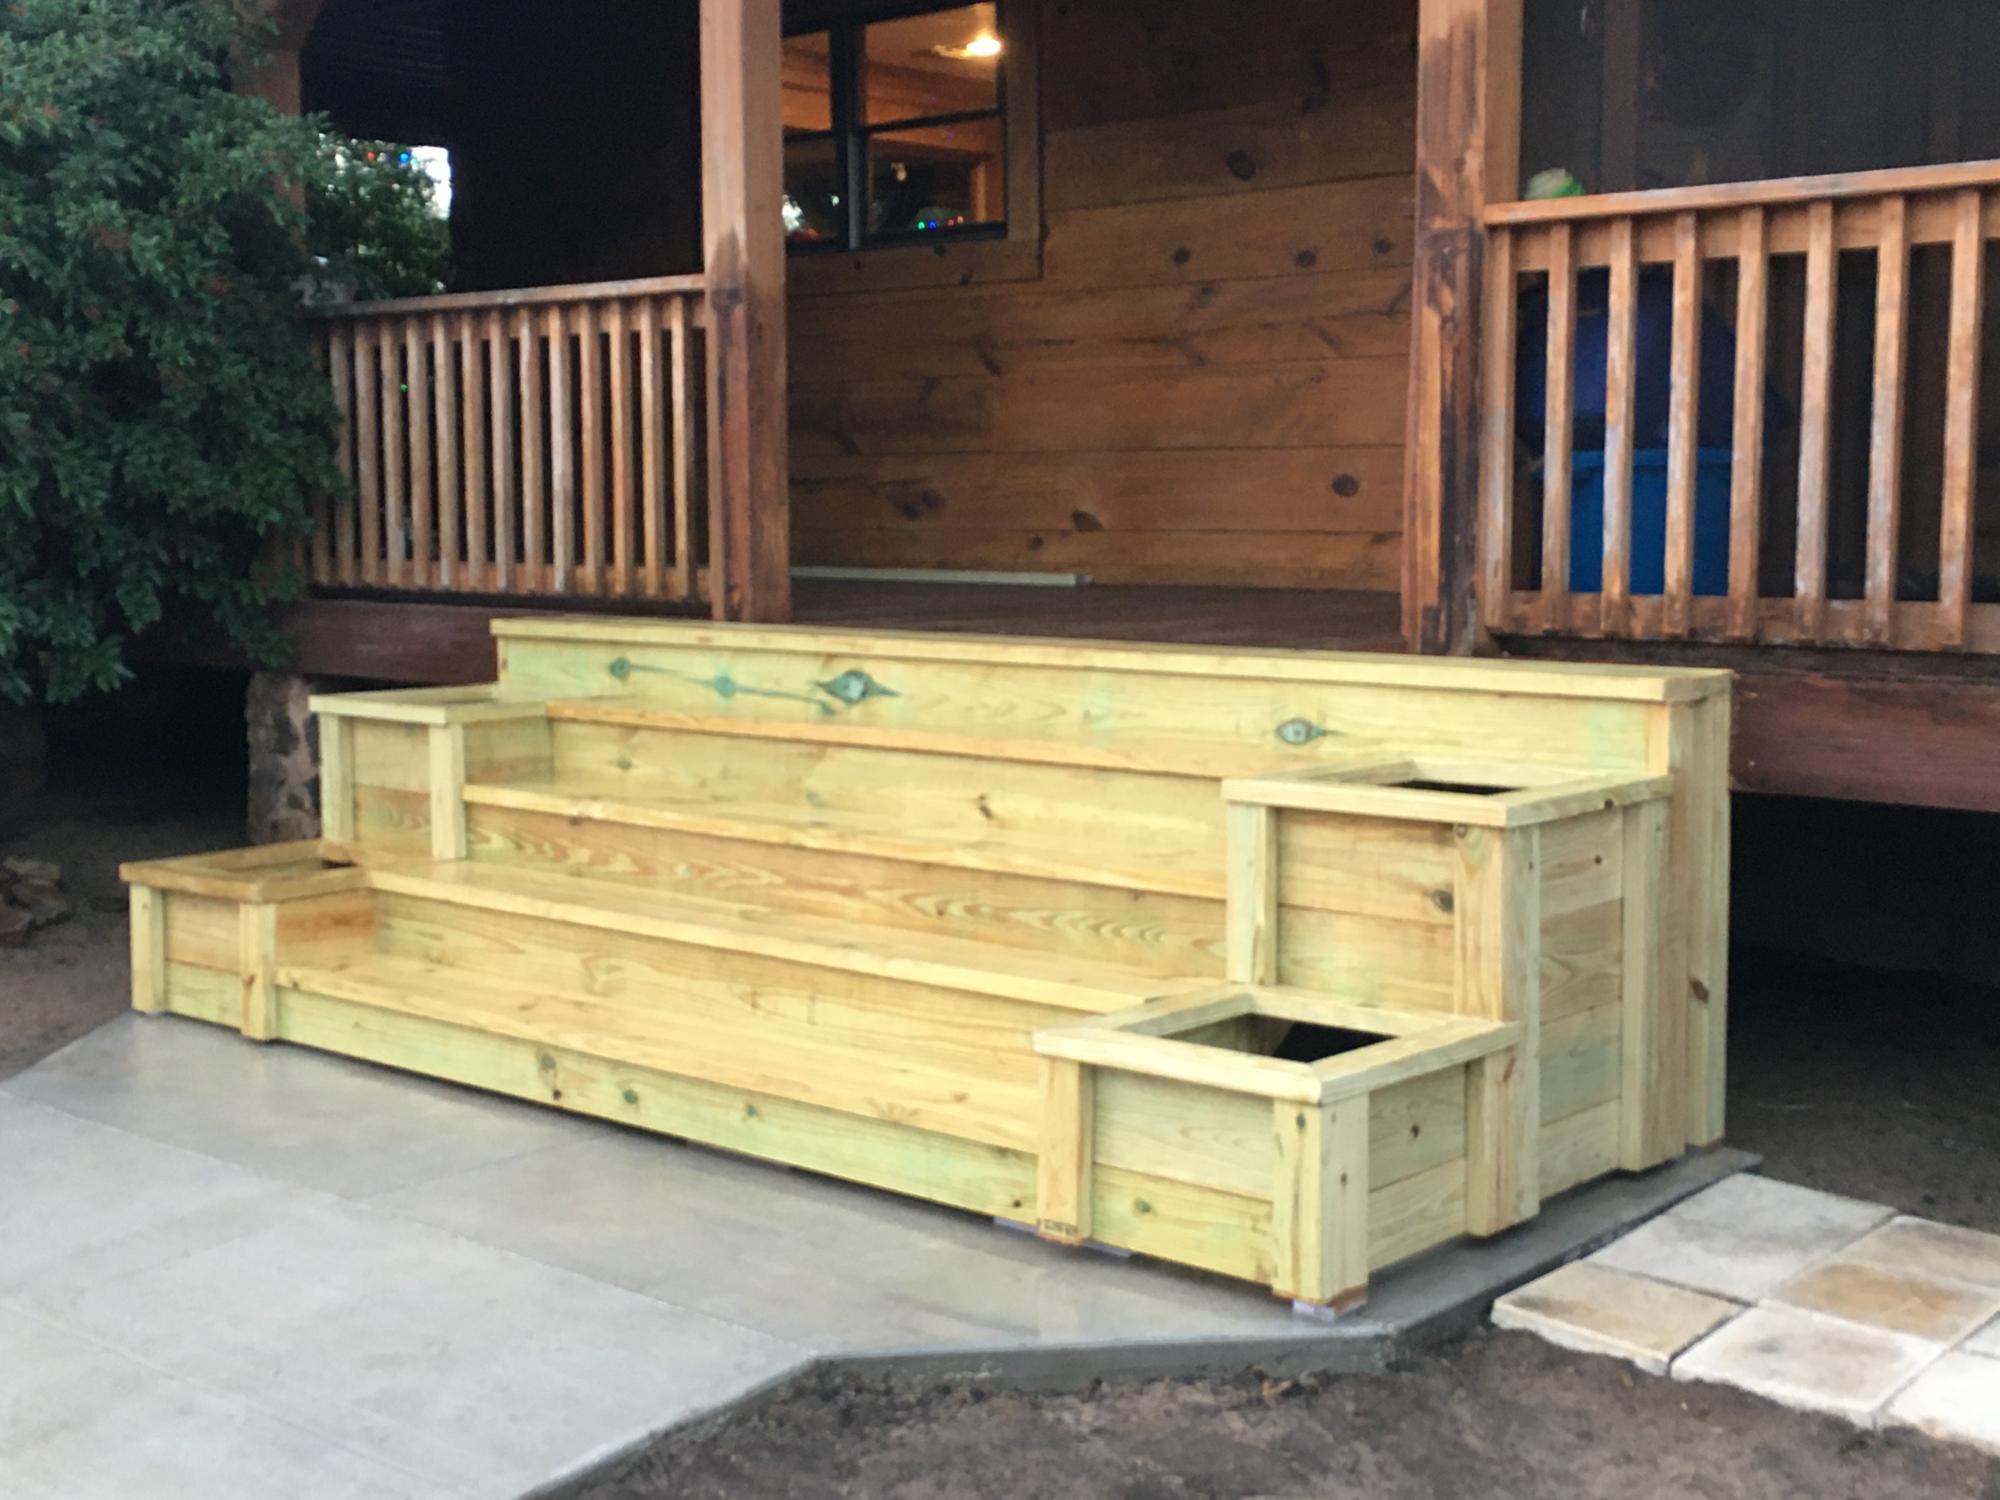
Plan modified to be built on stringers due to hight.
Built from Plan(s)
Finish Used
Pending
Plan modified to be built on stringers due to hight.
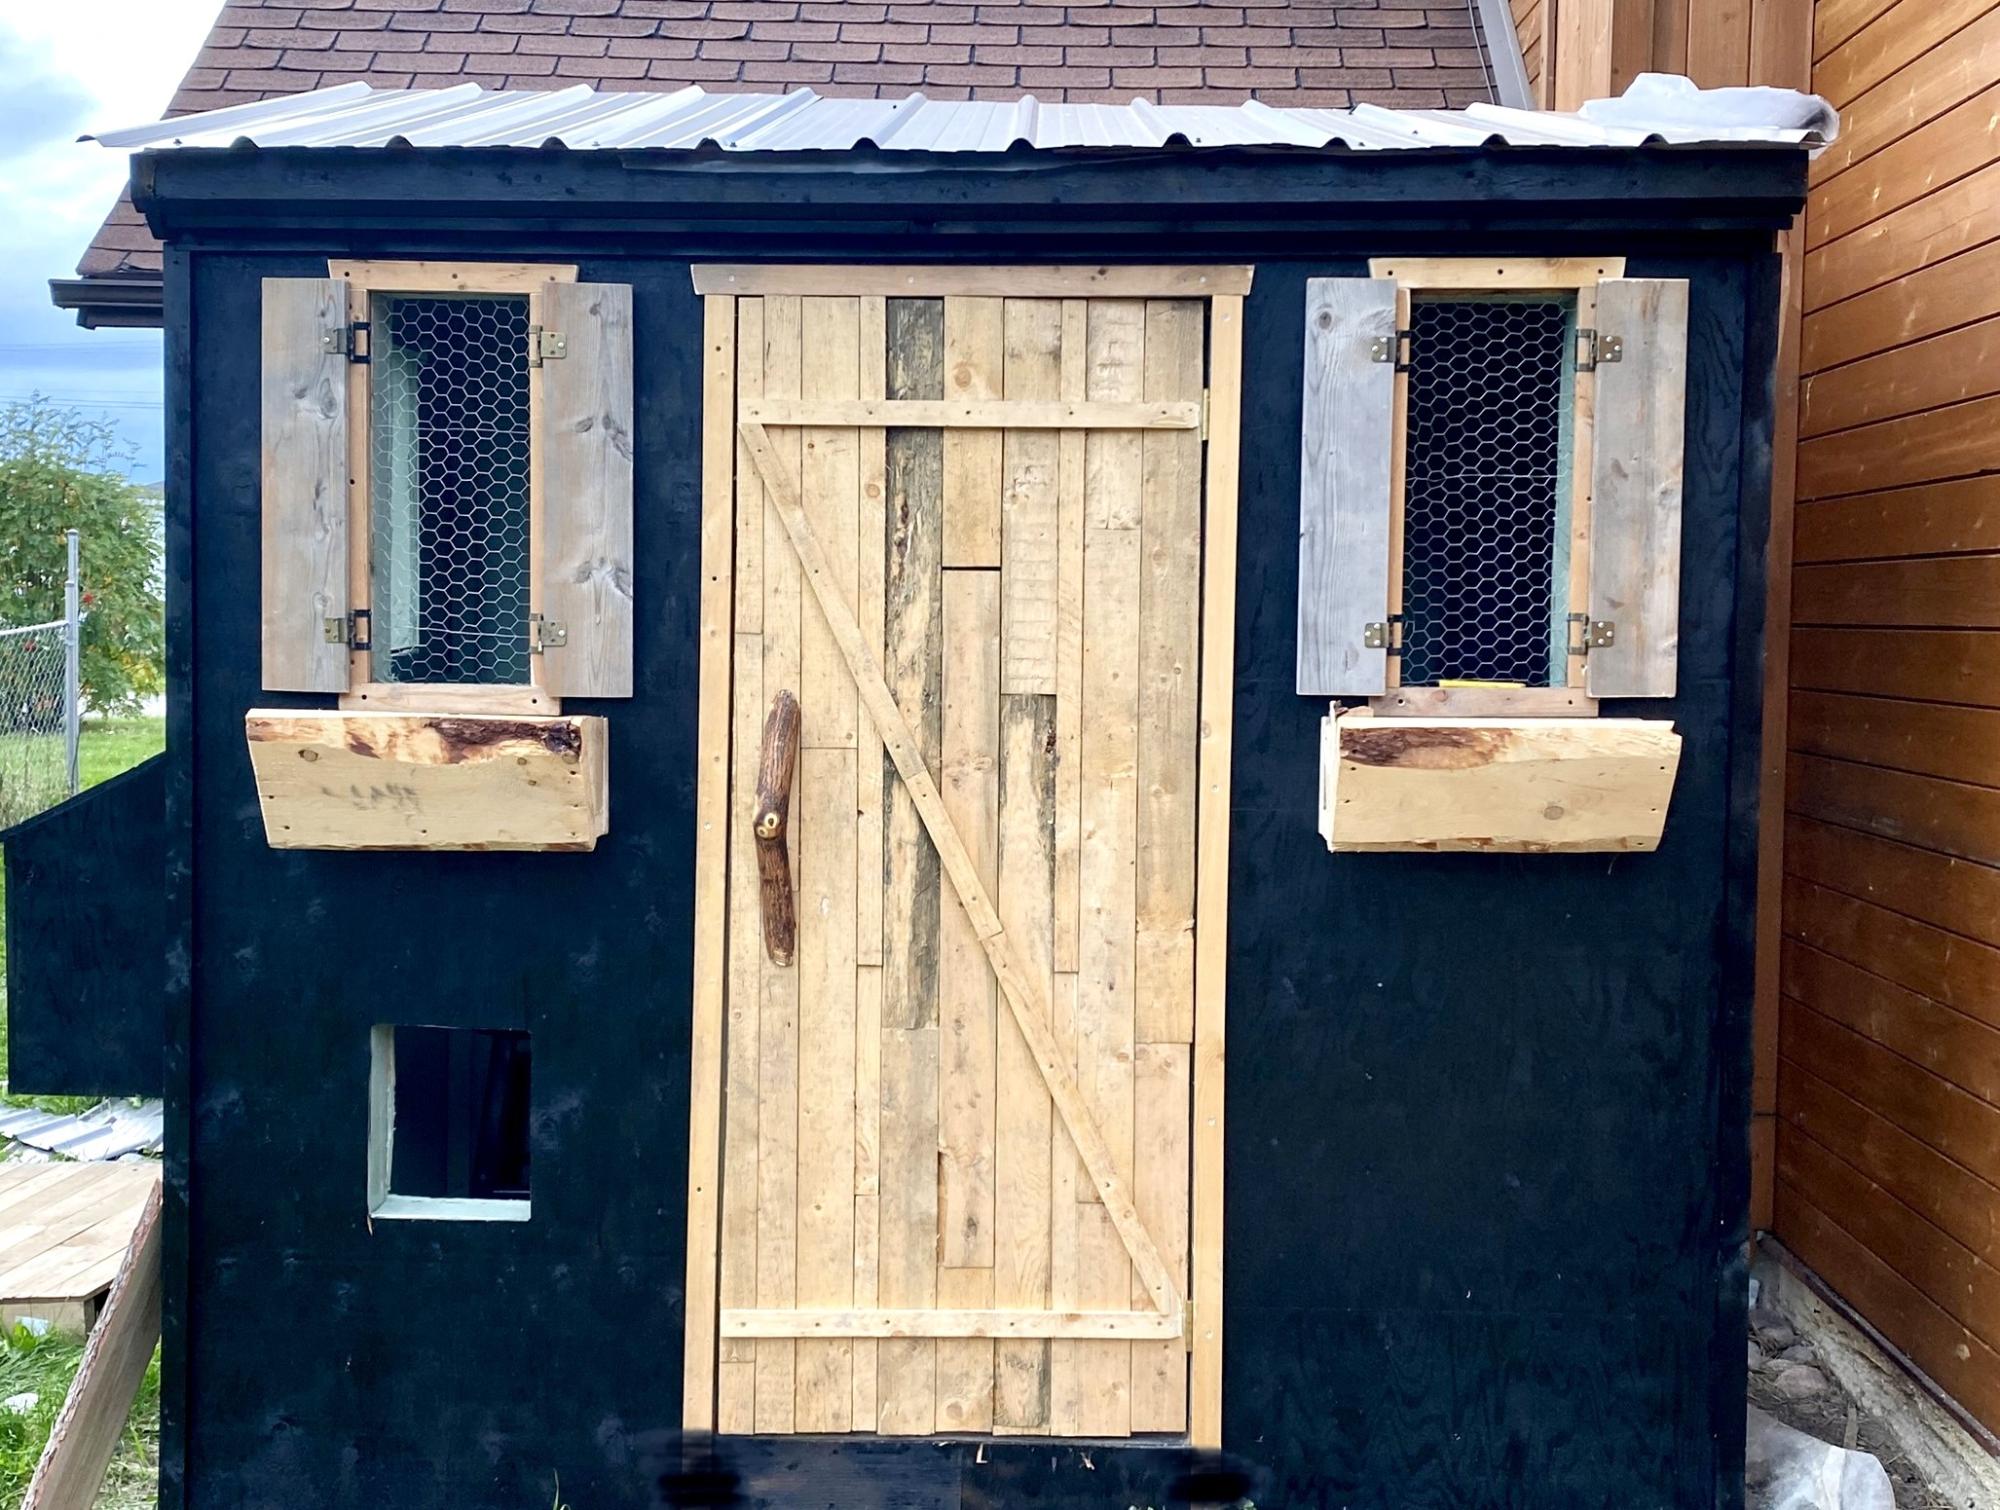
I’ve wanted a chicken coop for a while, and I wanted it cute. I love how it turned out!
Aj
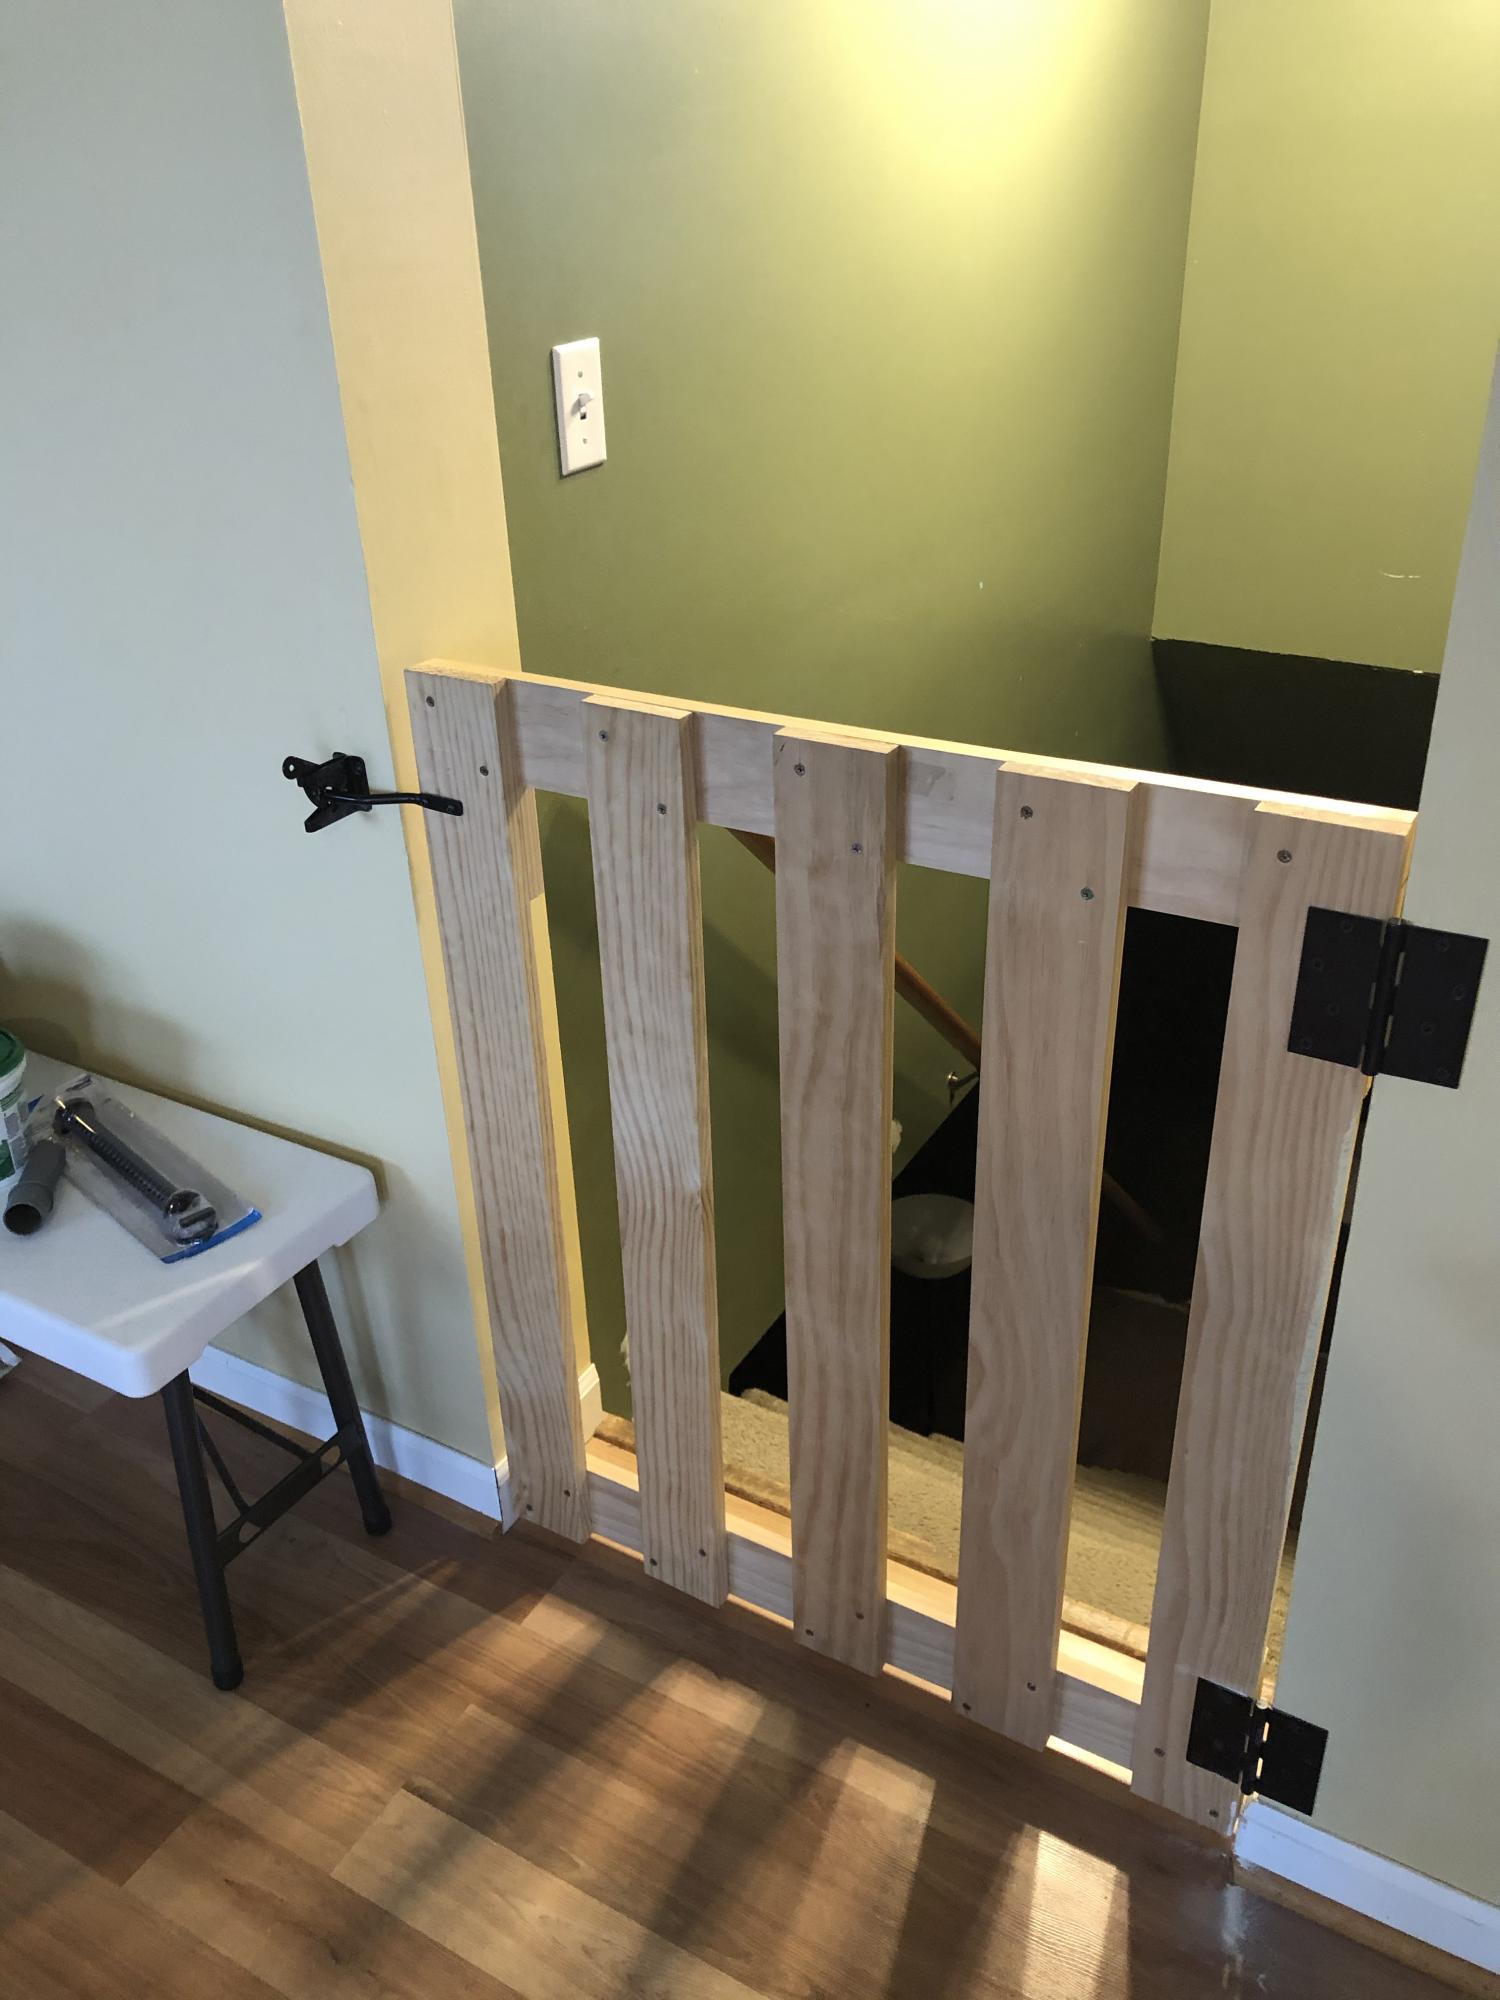
Inspired by Ana White's $25 Wood Baby Gate (https://www.youtube.com/watch?v=cPV6XfheqgA), I needed a gate for my miniature schnauzers. They loved going into the basement unattended ... and well ... potty accidents happen without me being the wiser. So, I modified the hardware used, and so far so good! The puppies and my little nieces and nephews are protected.
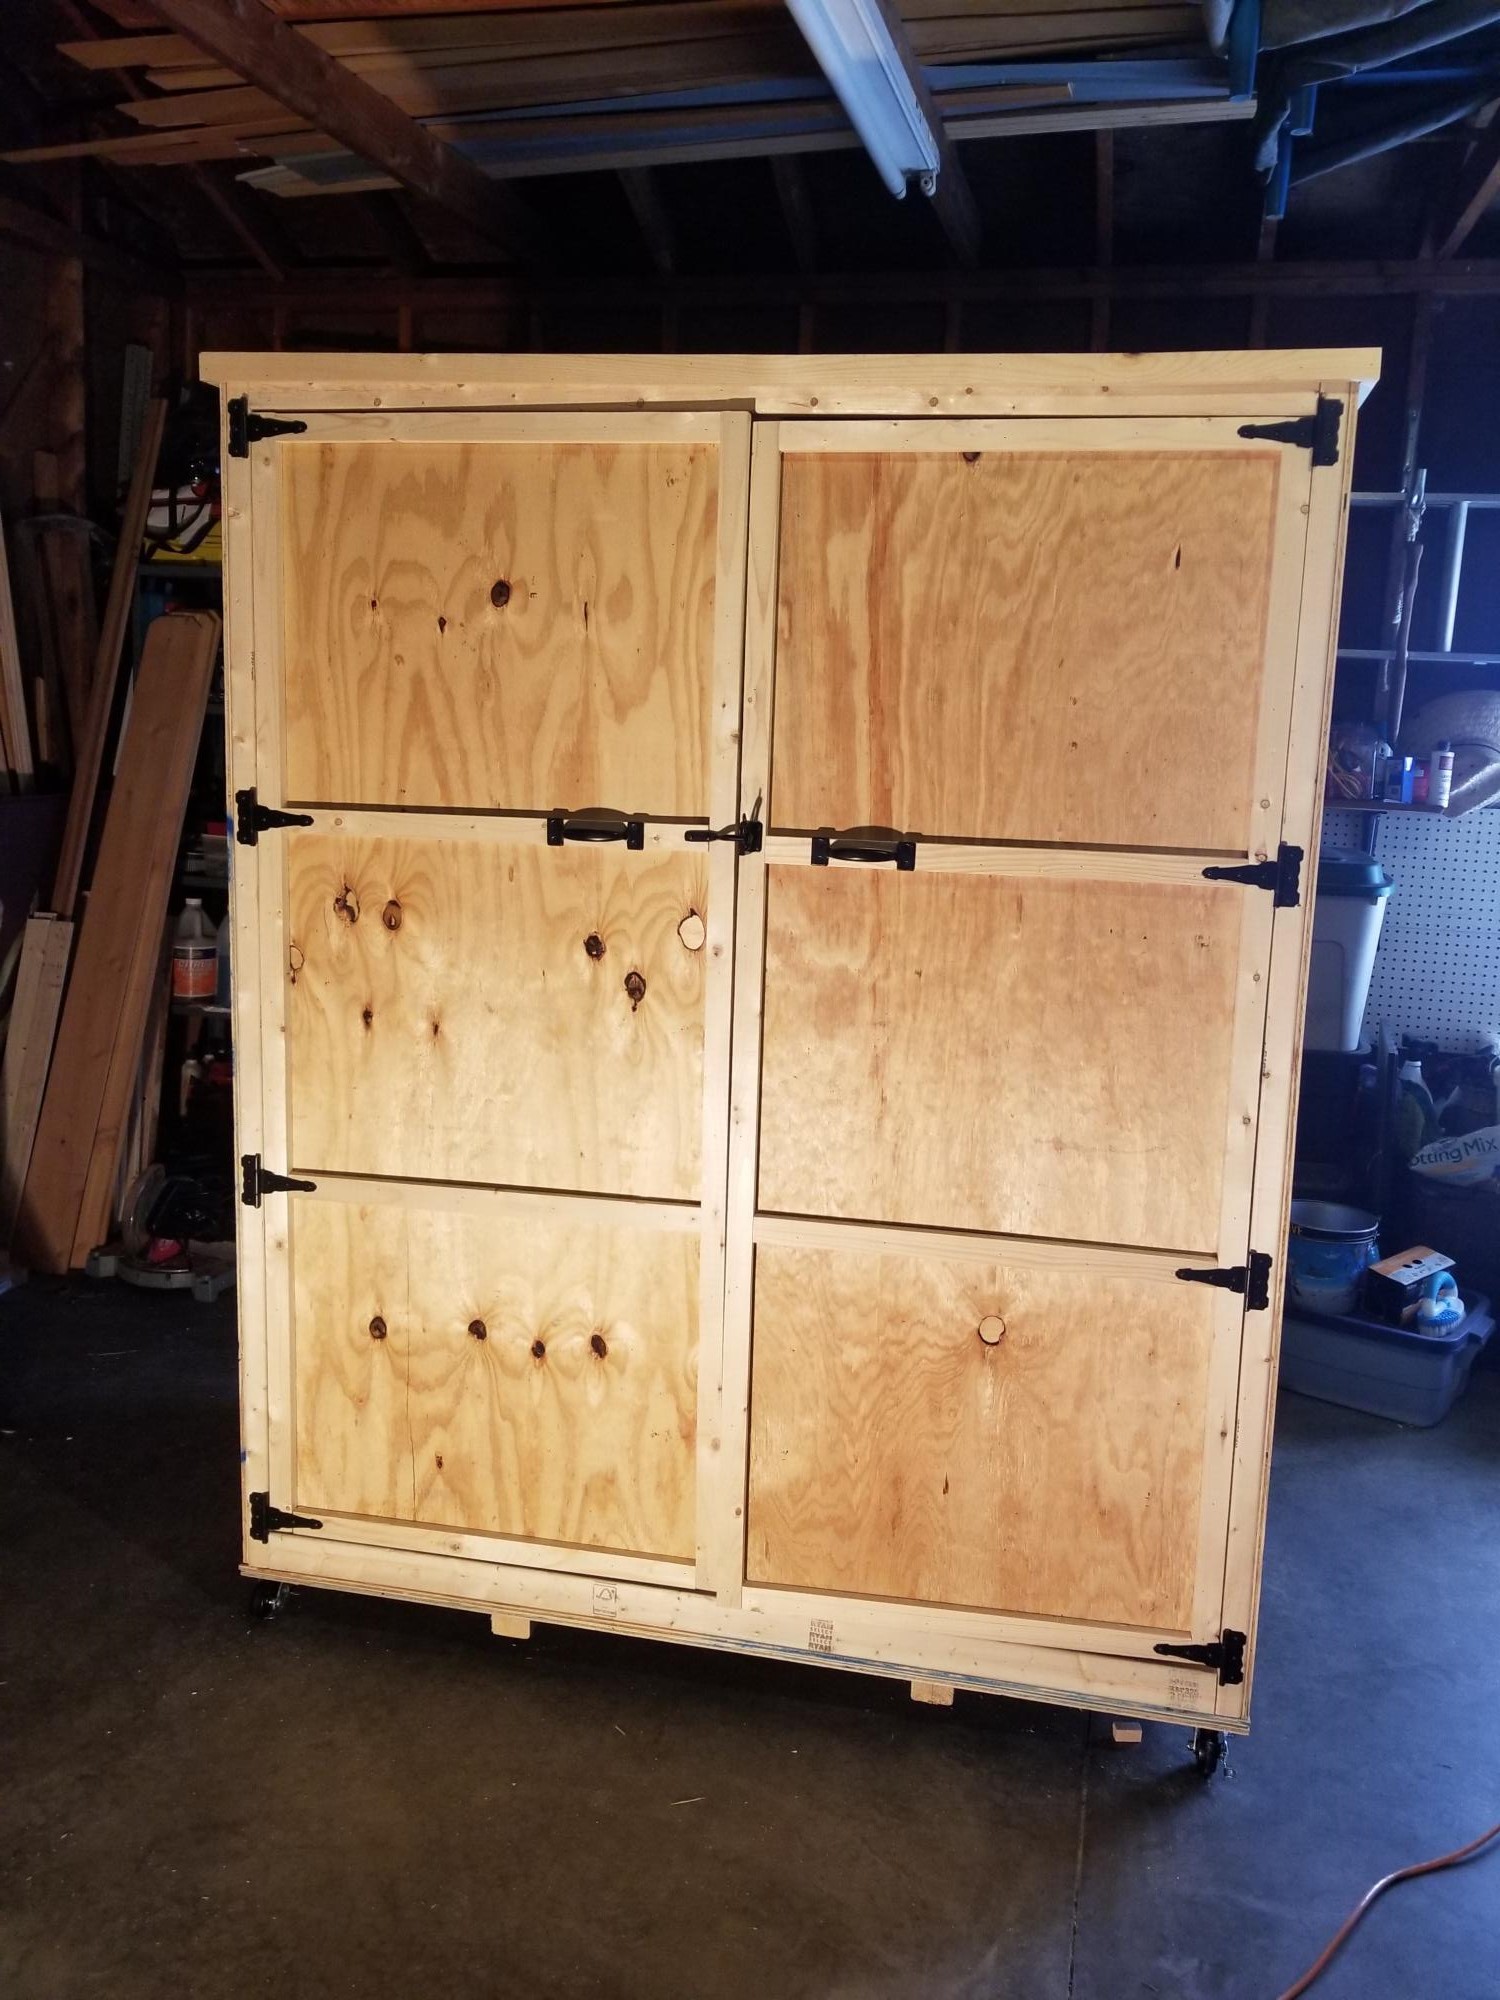
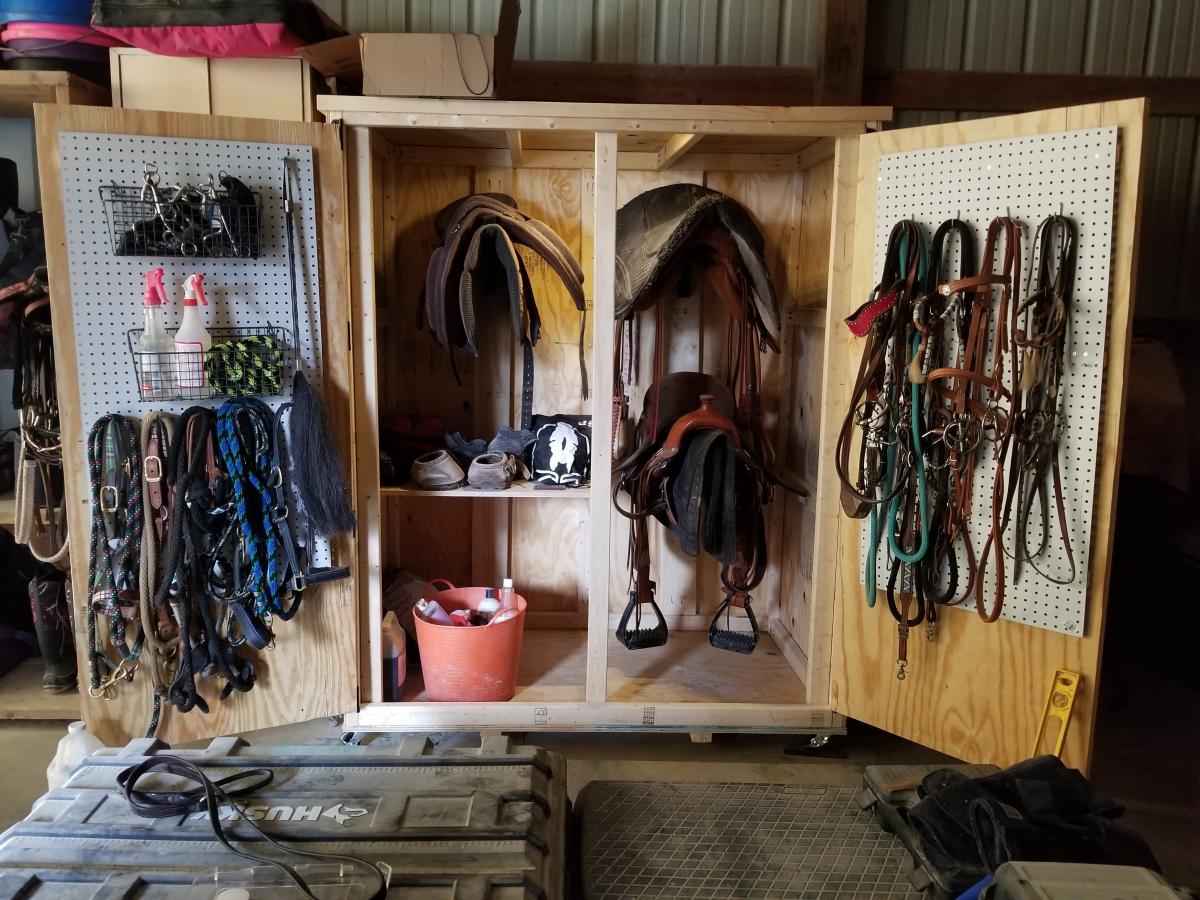
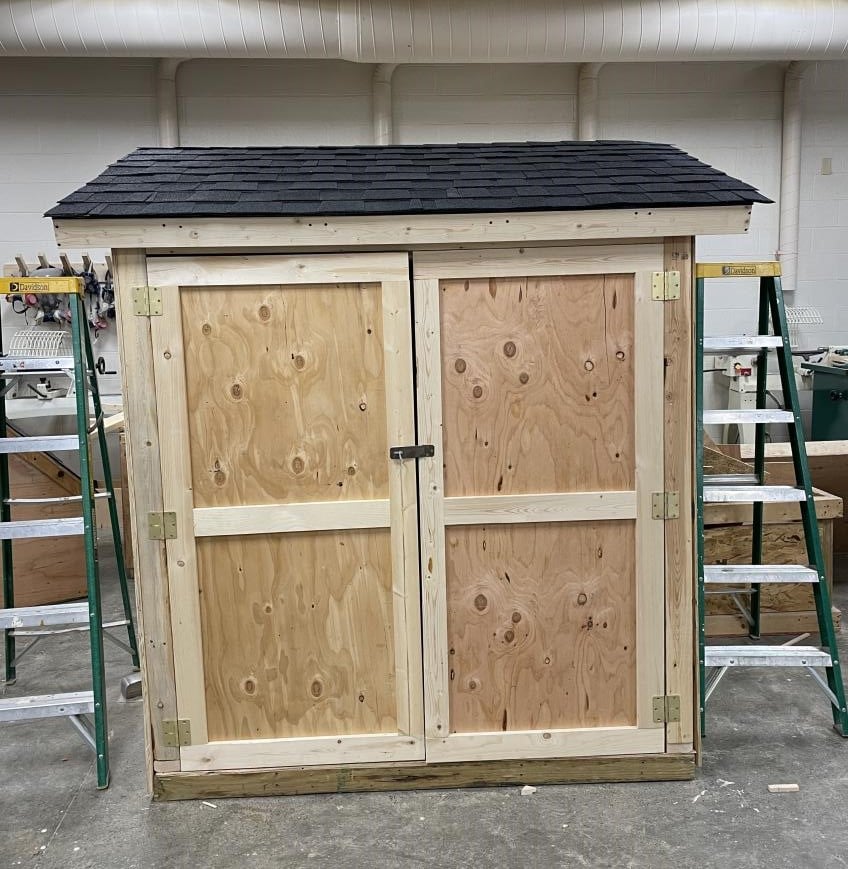
We did some conversions to the smokehouse plans to make a locker for all of my horse tack! :)
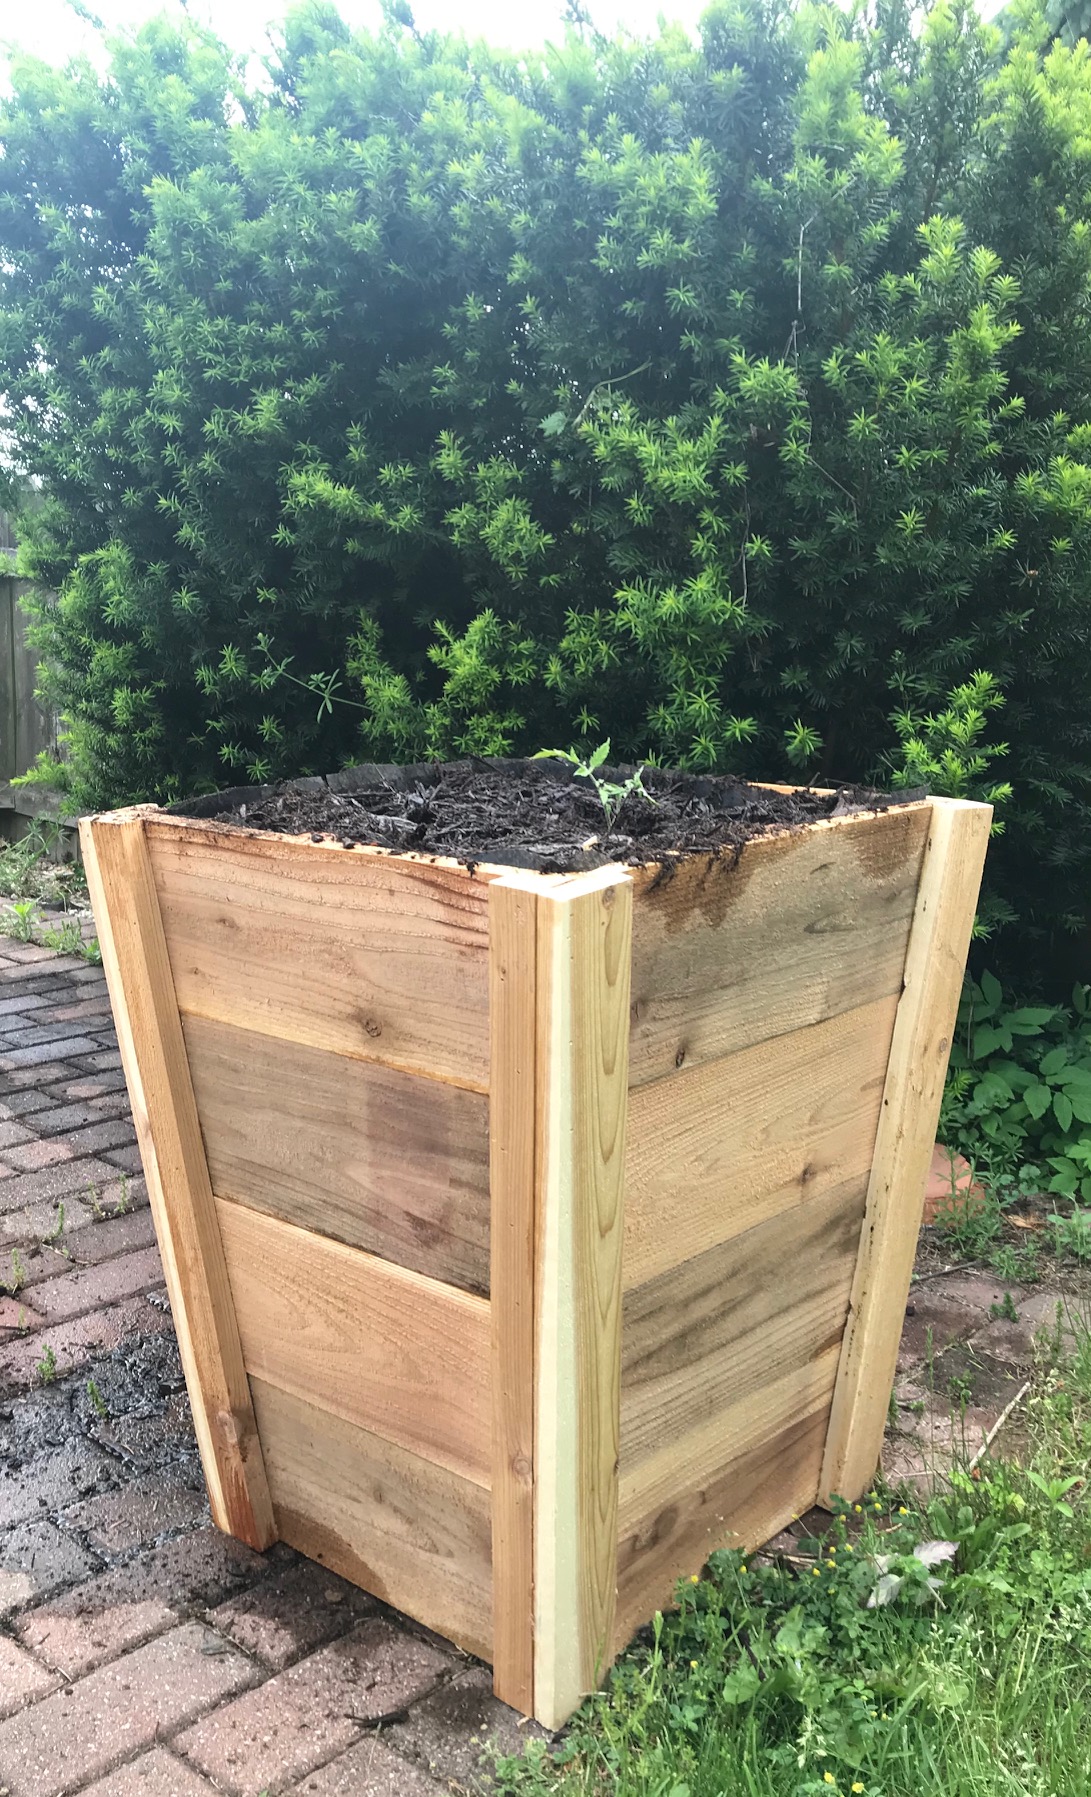
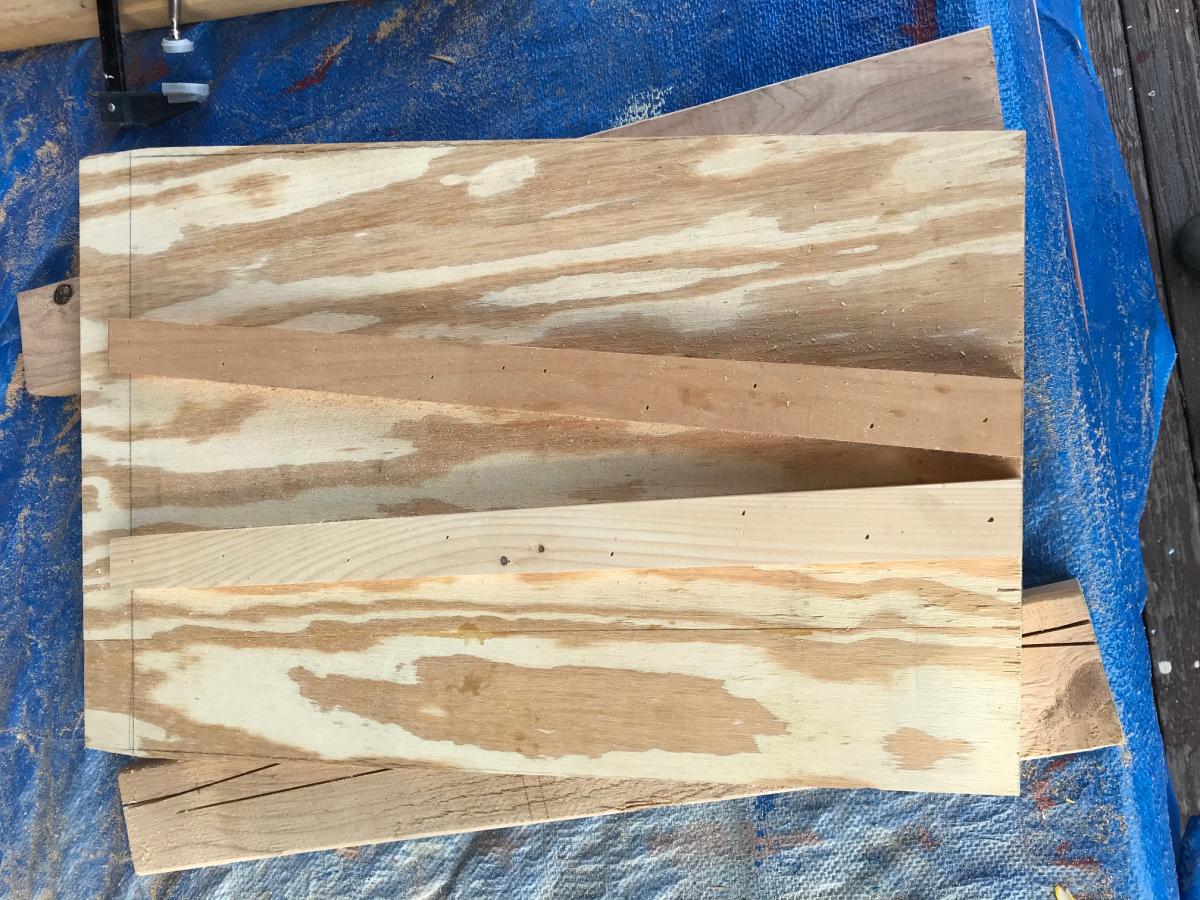
I love the way these planters look and knew I wanted to make them. My freehand circular skills aren't great, so I attached the pickets together with a furring strip and used a template (second picture) to make the cuts. I used screws to attach the furring strips so that once the trim pieces are attached, the furring strips can be removed - or not. This method takes a little longer but it allowed me to make uniform parts. It's also easier to align the sides of the planters since the pickets are already attached to one another - i.e. one unit. I've made two, have a third, shorter one in progress and plan to make more!
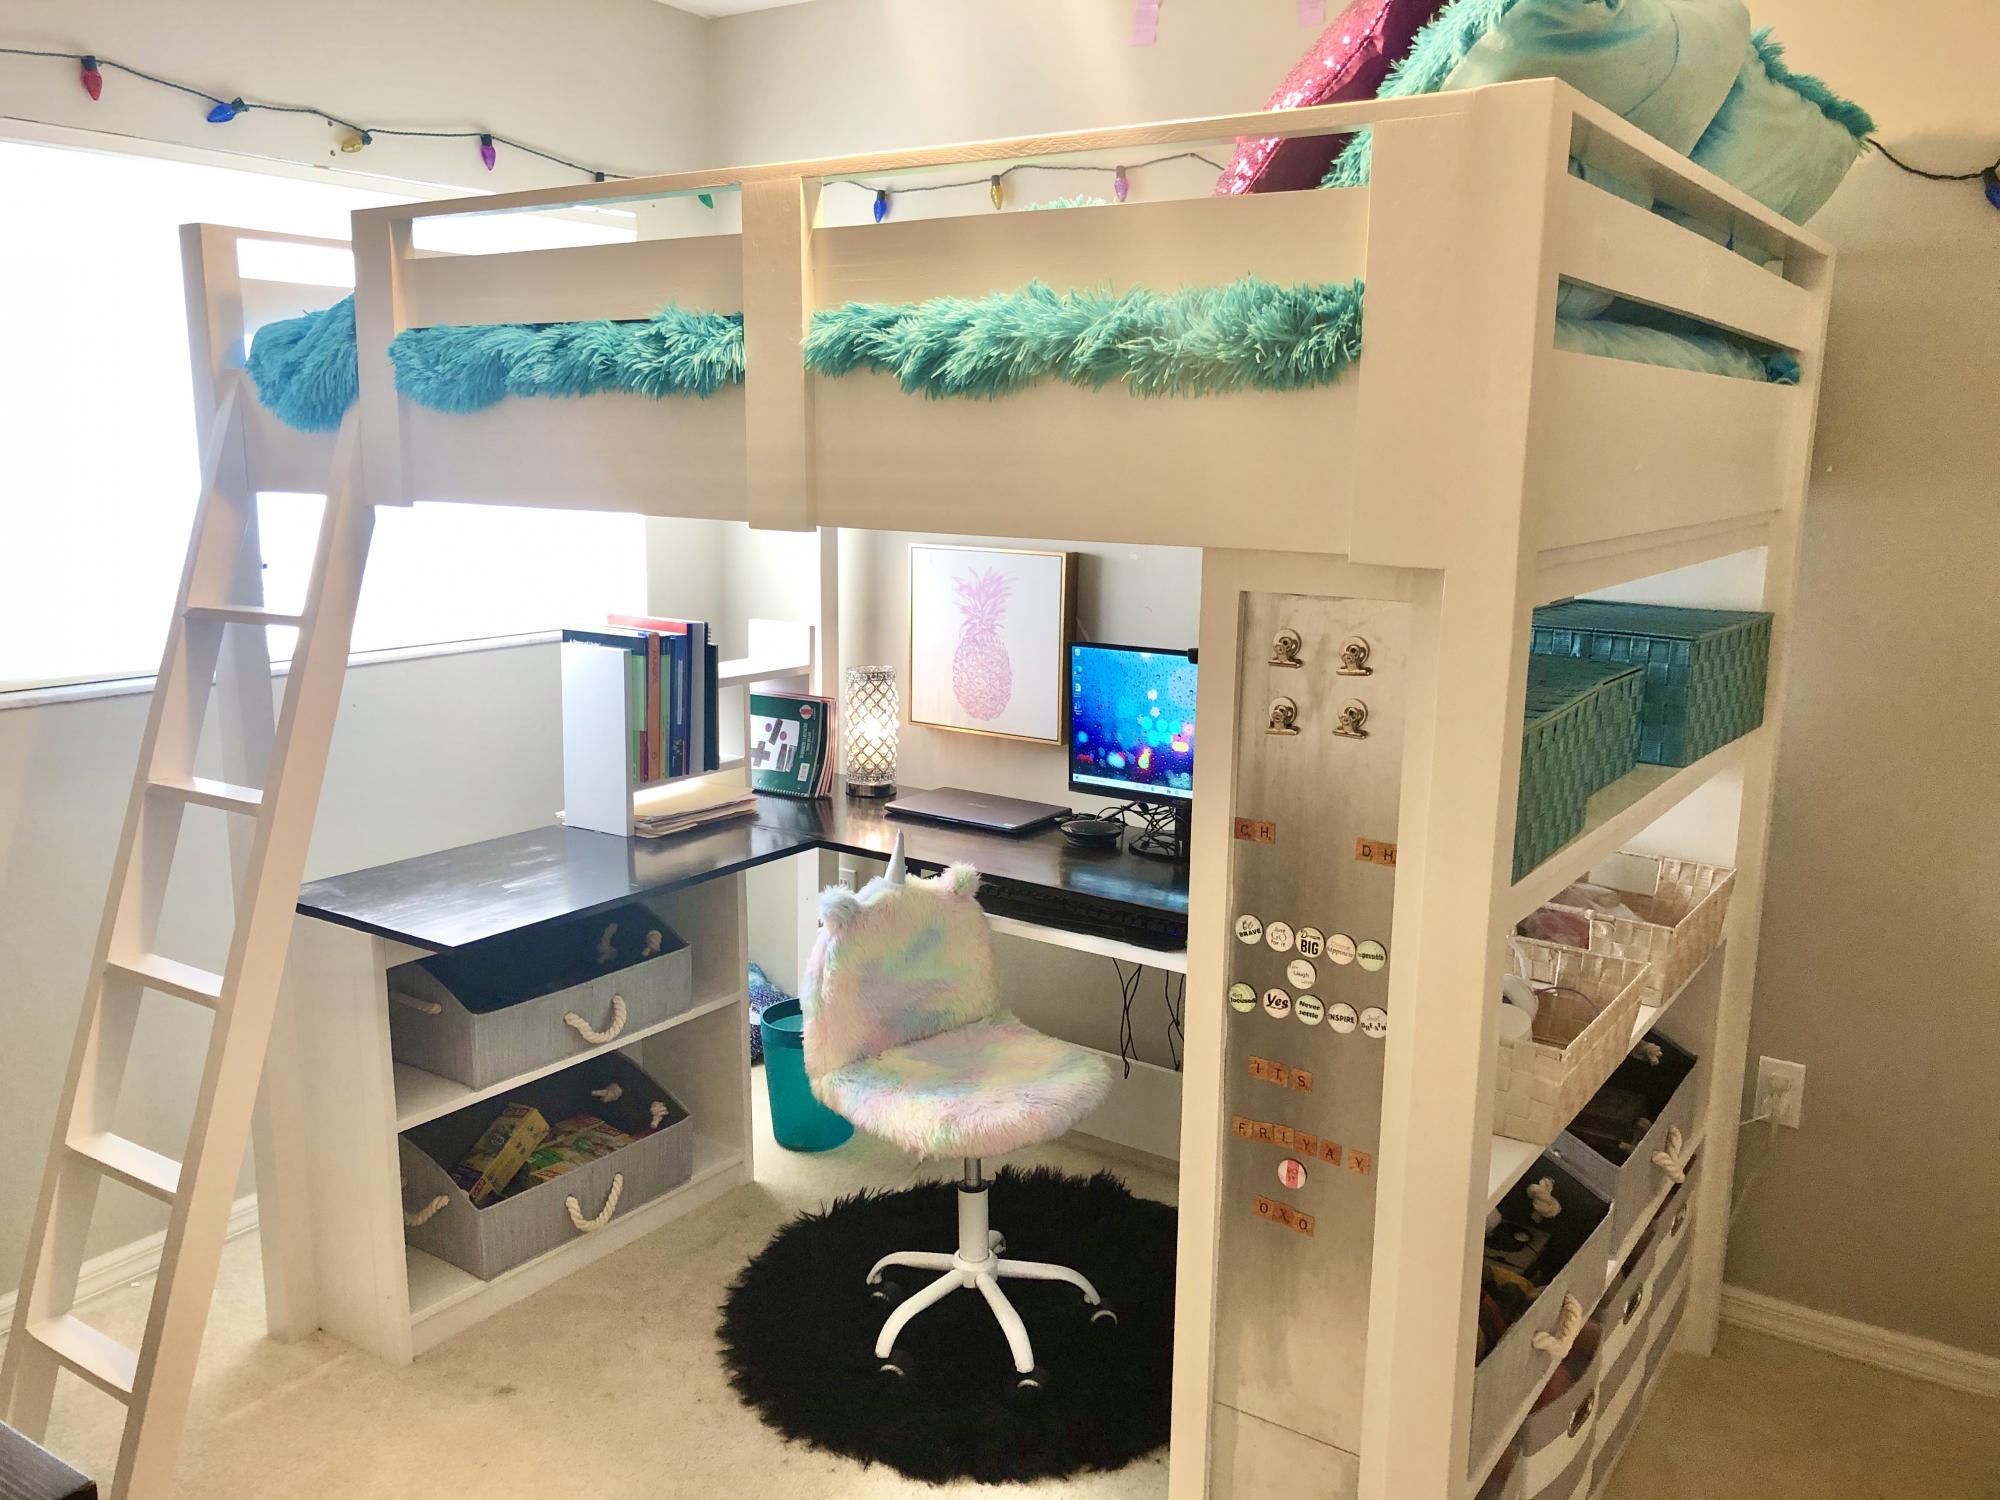
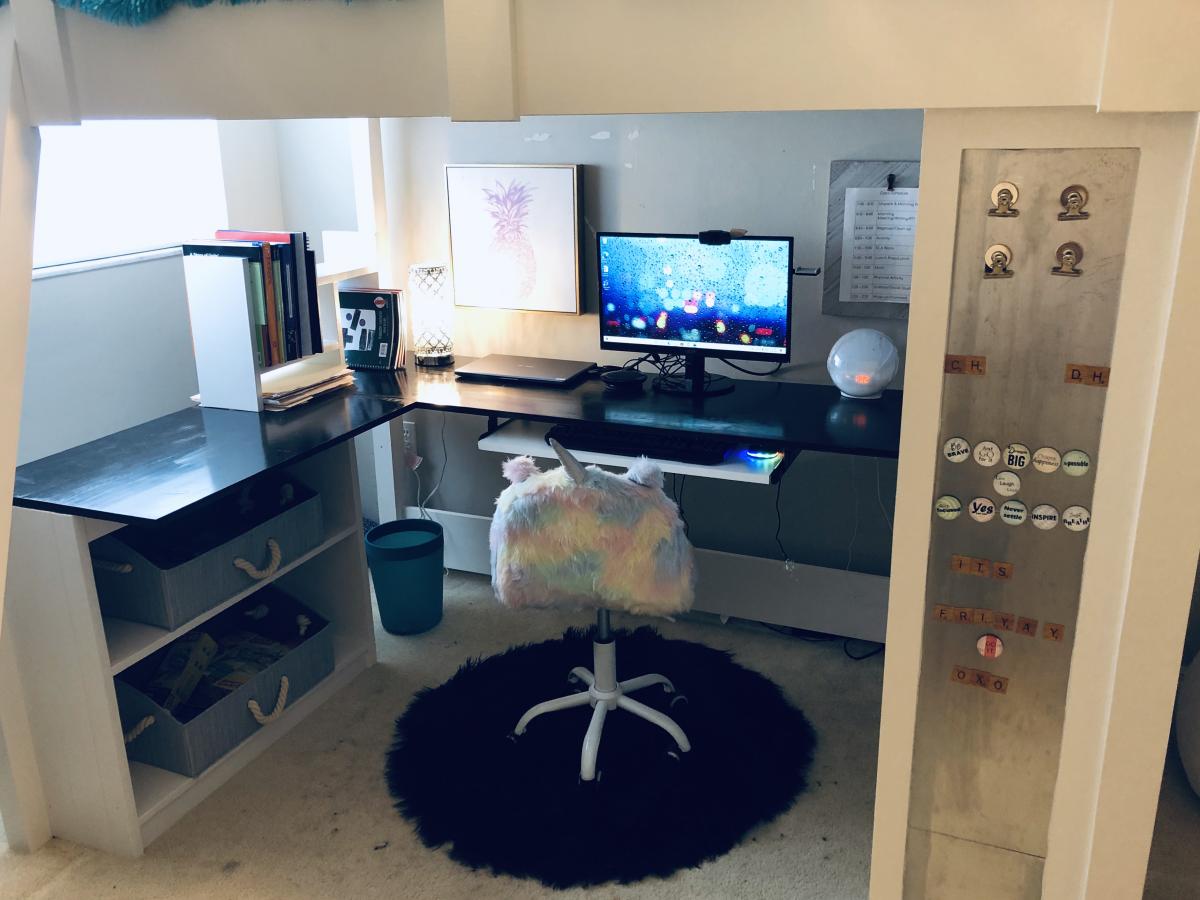
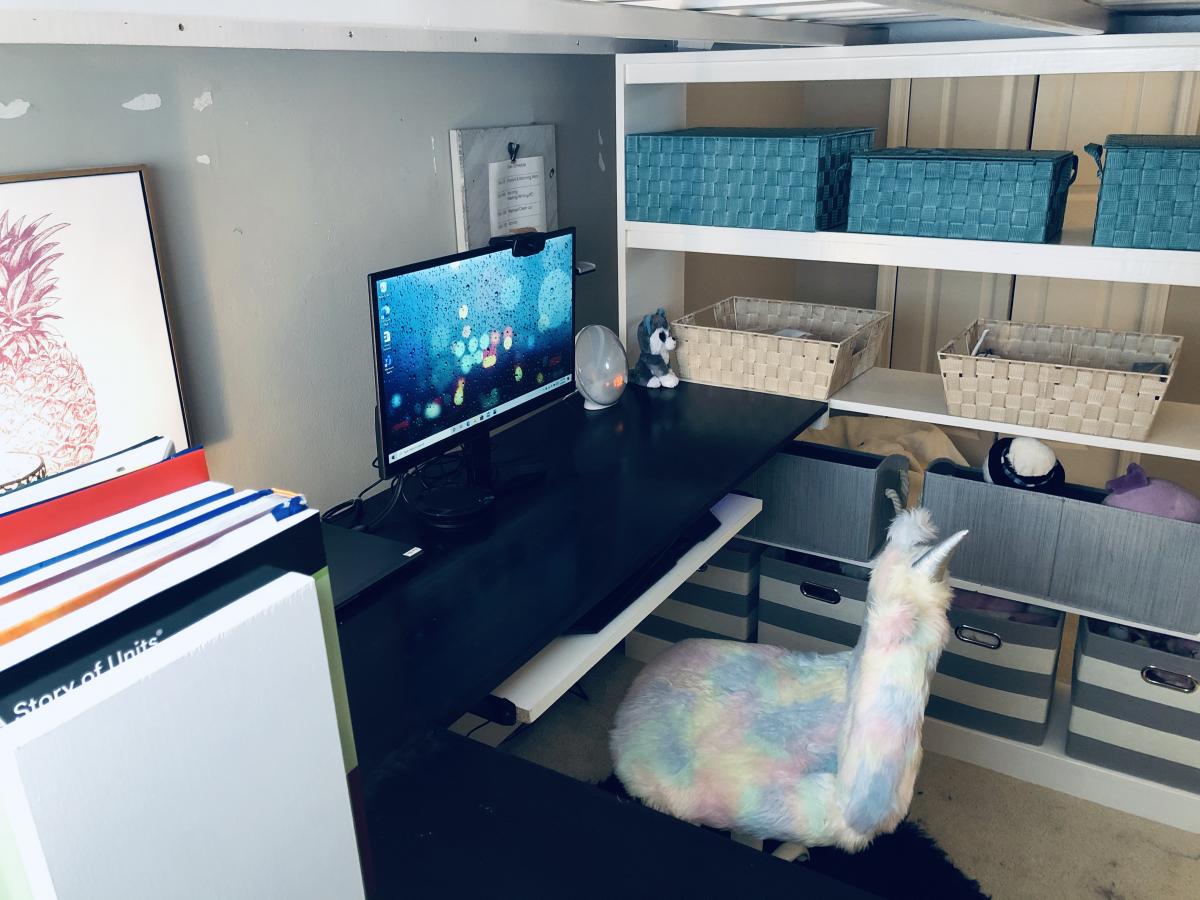
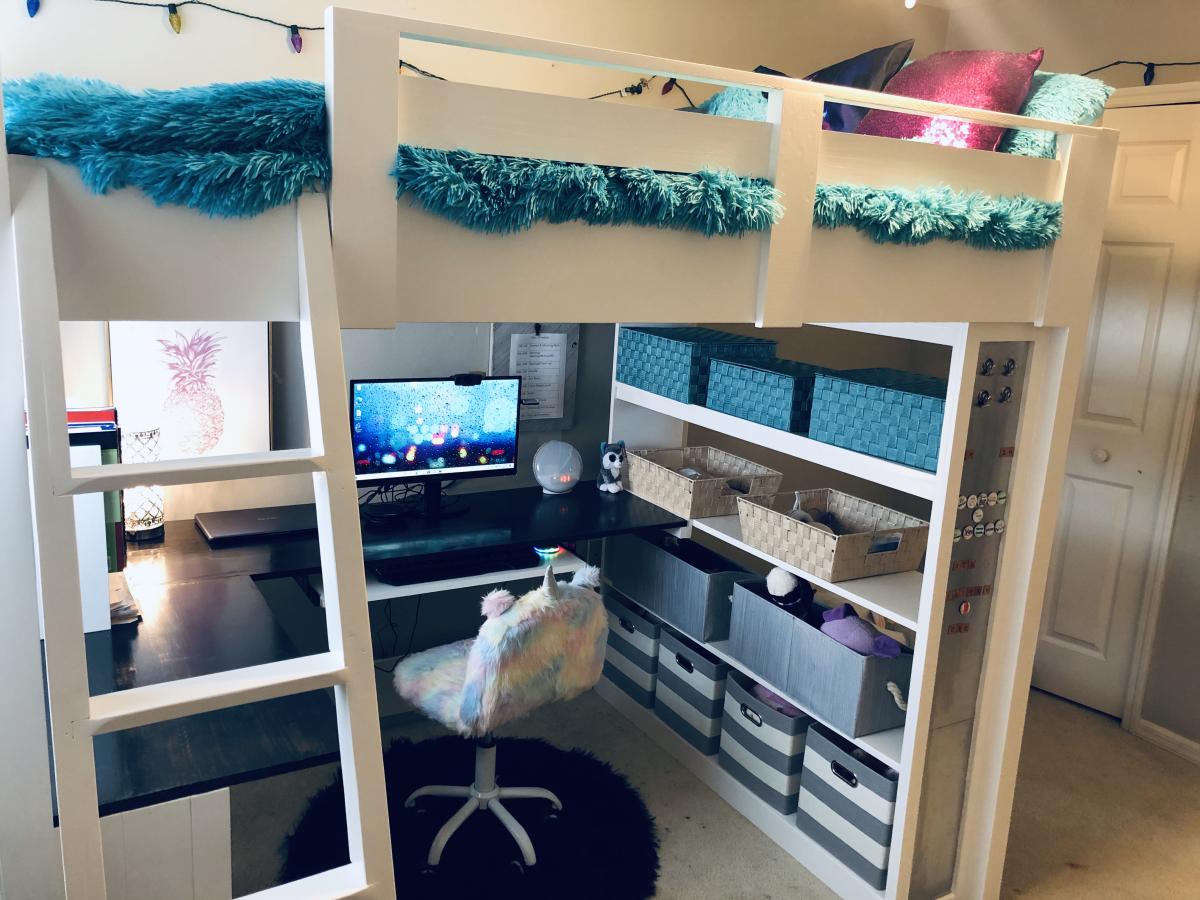
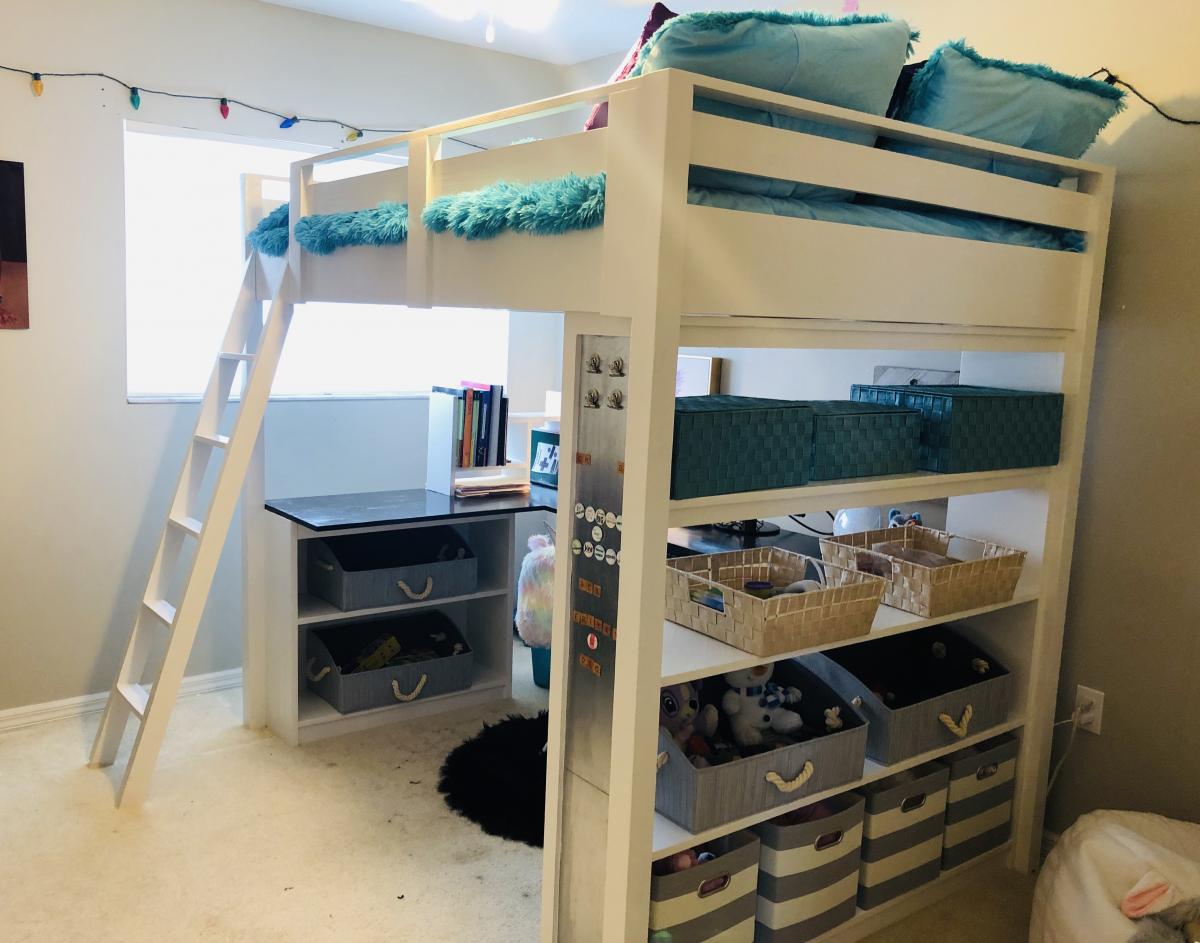
Our daughter has been asking us to build her a bed for months now. When eLearning became a reality for our household, we knew it was time to get to work. We usually do two to three big DIY projects a year, and have built from many of Ana White's plans. We often refer our the time together DIYing as "couples therapy".
We used Ana's plans for the Loft Bed and included the tall bookcase and desk system, with a few of our own modifiations and personal touches, such as:
- elimated the plywood backing on the bottom shelves of the tall bookcase
- only used one (1) bookshelf for desk system
- used toungue and groove paneling for back of small bookshelf, adding it to the sides as well
- made the desktop 19" wide
- added a framed magnet board
- added a sliding keyboard tray
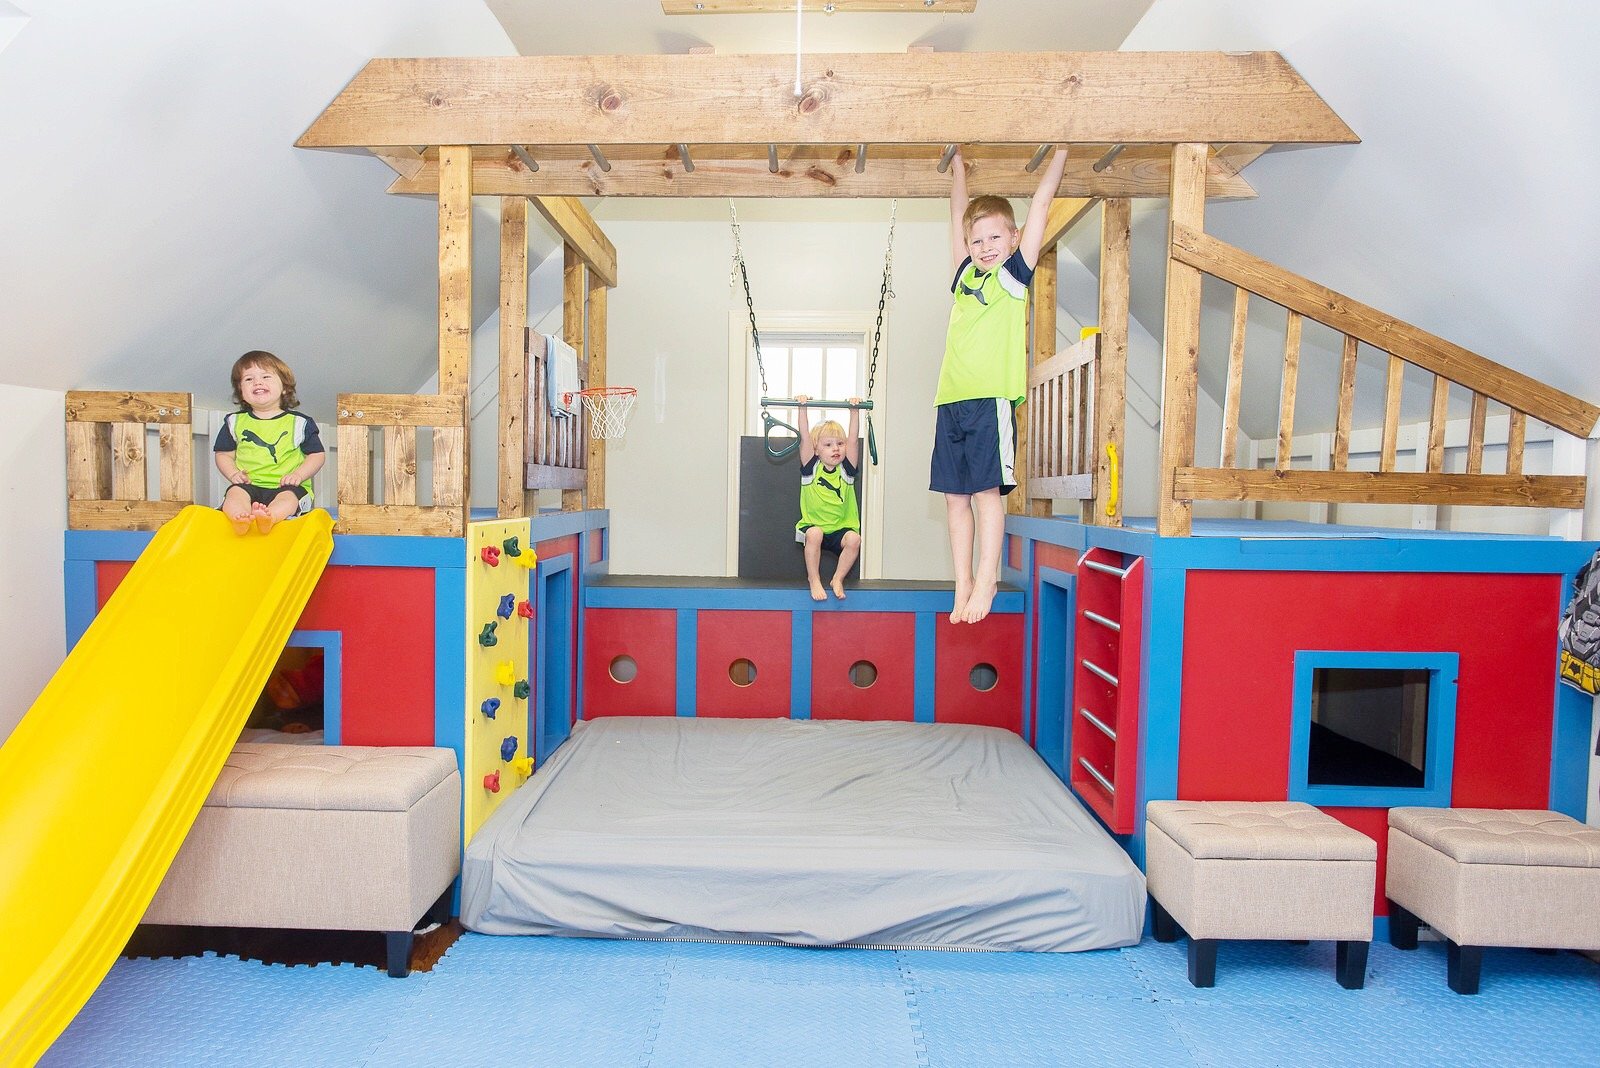
This playroom set was inspired by the plans you posted. I was forced to make some significant modifications due to the fact that our bonus/playroom has angled ceilings. We have a rock climbing wall, ladder, crawl tunnel with windows, trapeze bar, monkey bars, miniature baskeball goal and a slide. My boys are 6, 3 and 19 months and they love it! Thanks for the inspiration.
Jim and Caroline Sparrow
Sun, 01/05/2020 - 10:03
Hi -
Would you be able to share your modified plans with me , please ?
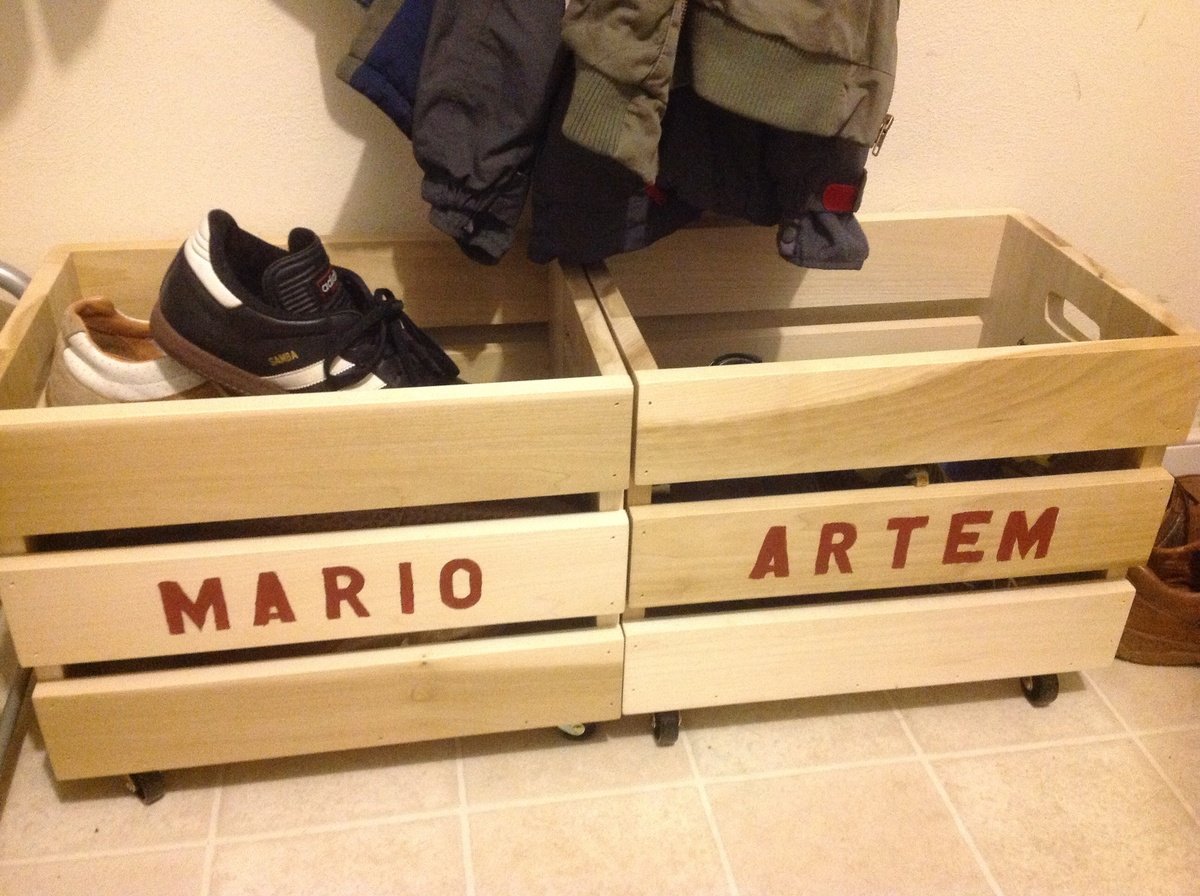
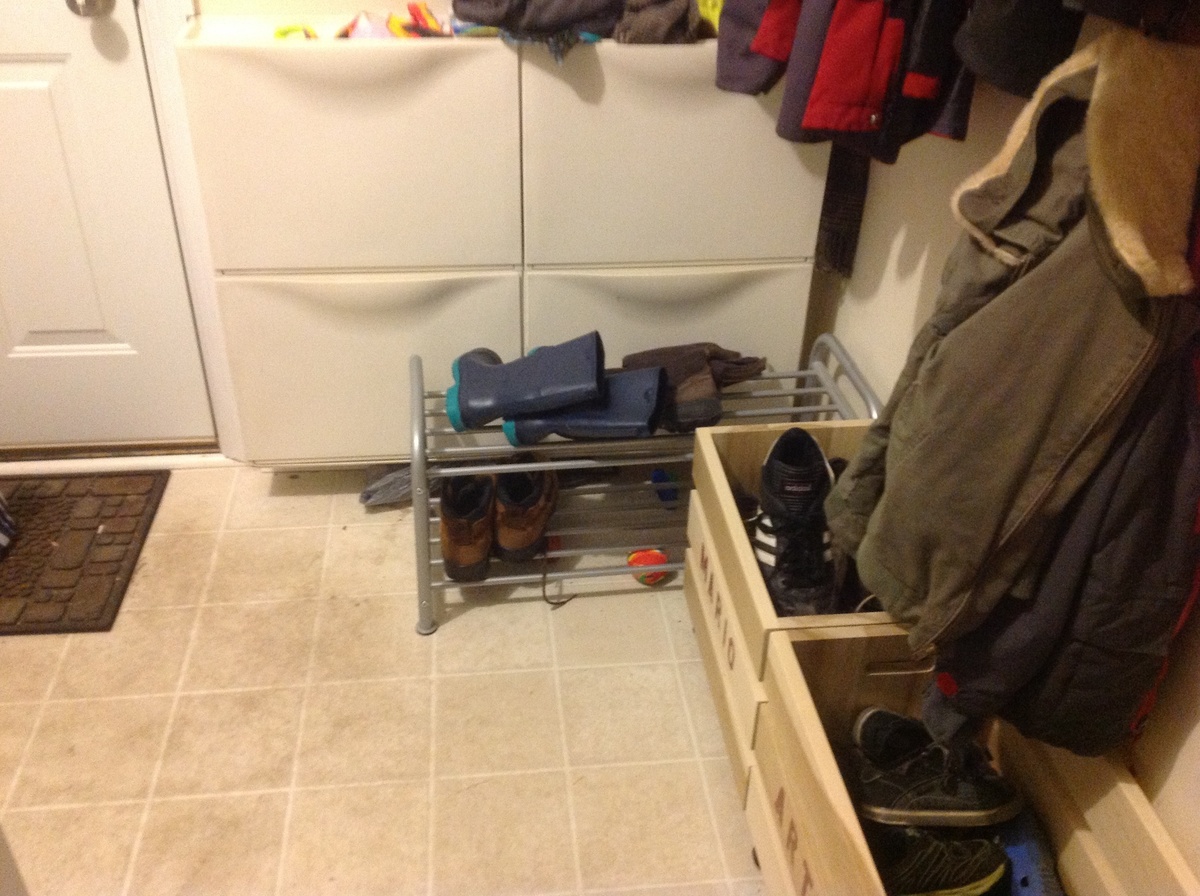
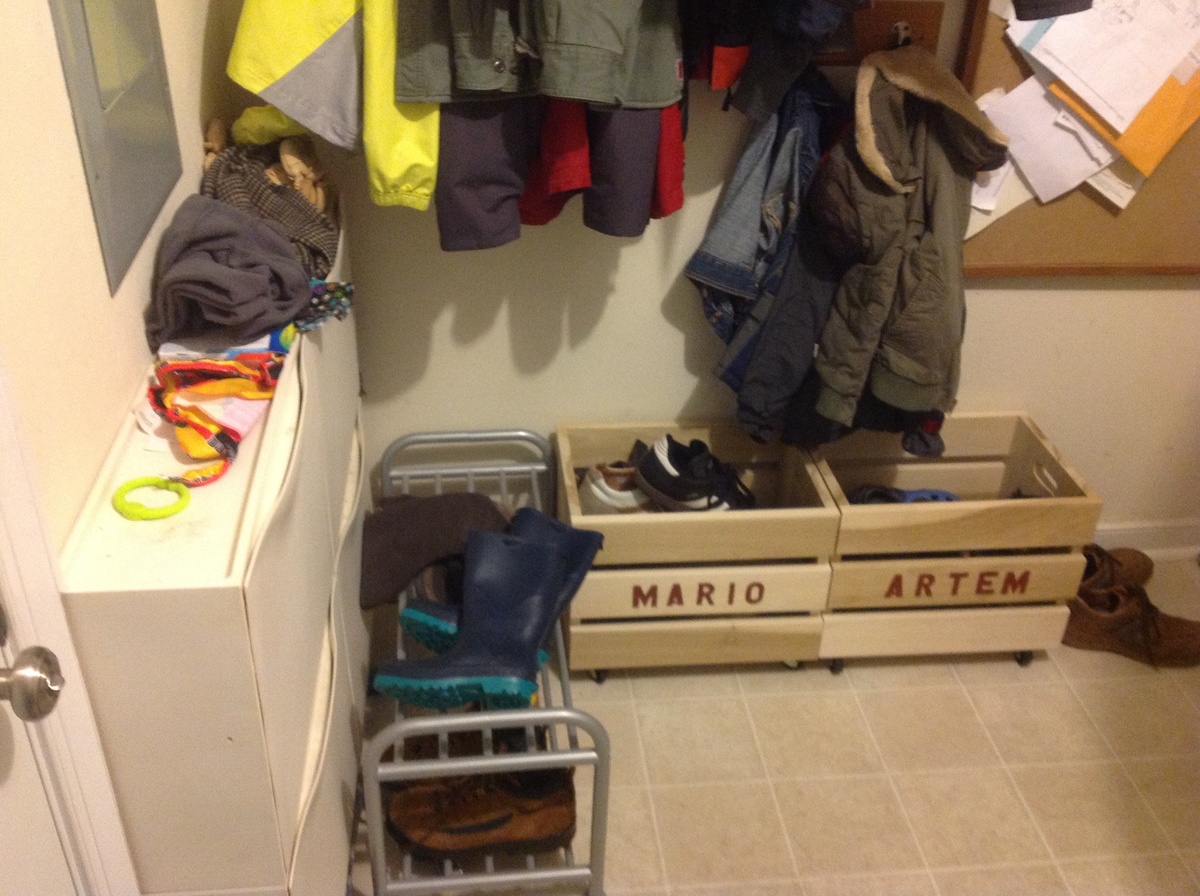
I saw someone's brag where she used this plan for shoe storage. I thought it was a great idea. It sure lets me clean the floor better, just roll it out of the way, clean, roll back. It is so much better than the shoe rack that occupied the space before with such piles of shoes that it was arduous to clean the floor at all. Next month I will take care of the second shoe rack for my own shoes.
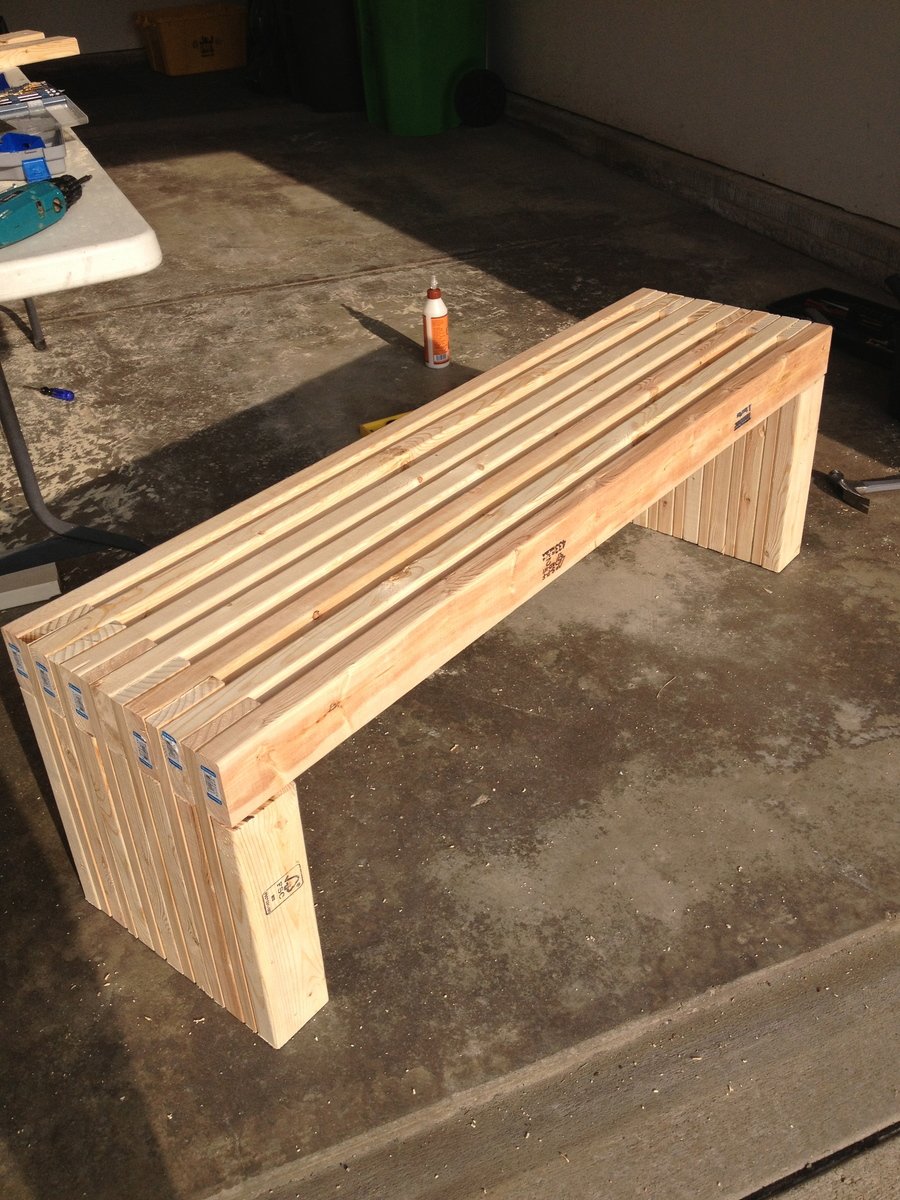
It was so simple, I loved making them. Grandpa and I had fun. The best part, you can make them quick because the don't have to be perfect. And Grandpa's nail gun made quick work of all the attached boards. All boards were also glued and sanded.
Ana your site gave me the confidence to solve my own furniture problems with custom solutions. Thanks, I can't wait for my next project.
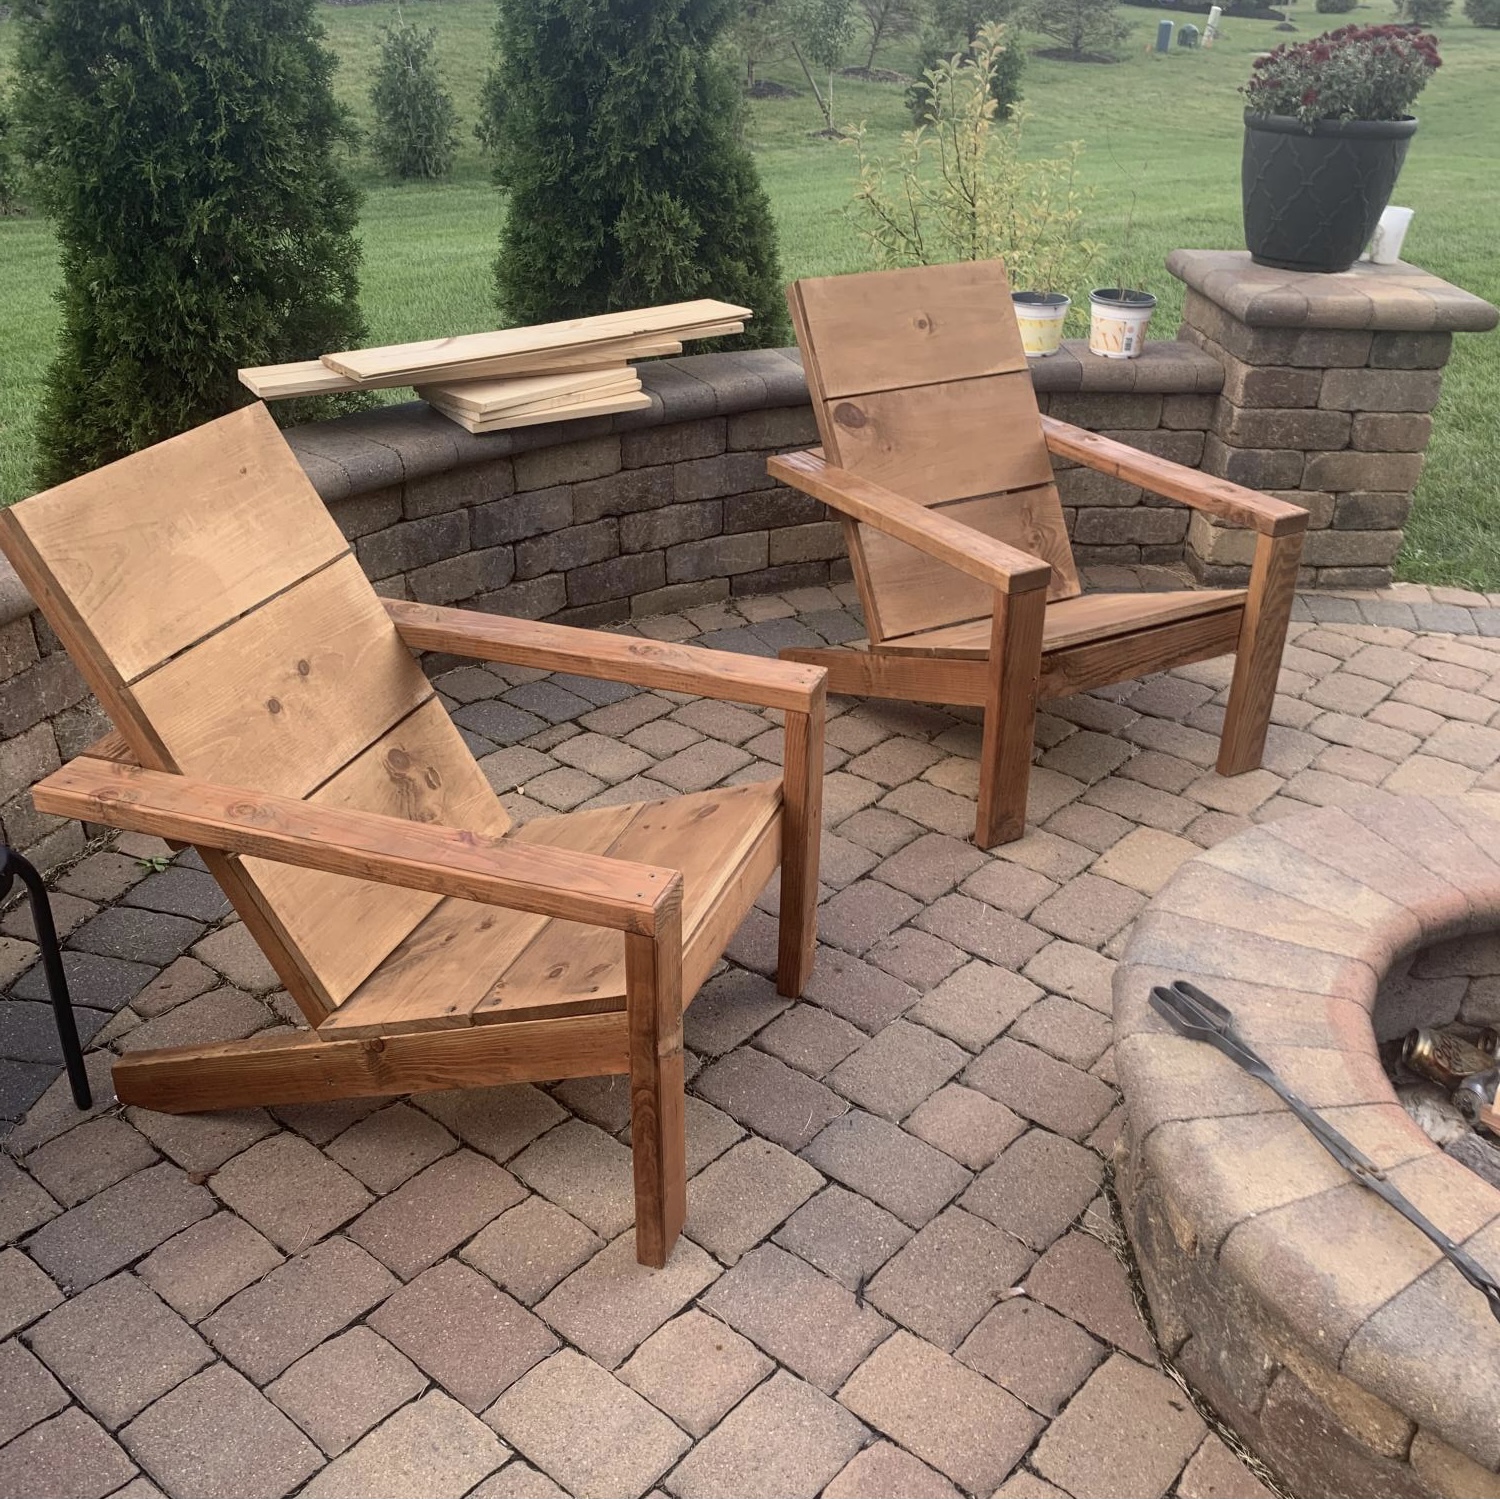
I made five of your 2 x 4 Adirondack chairs. Well I started with one and then my wife wanted four more after she saw how it turned out. We absolutely Iove them and they are easy to make! Thanks Ana!
David Knight
Tue, 10/05/2021 - 09:30
Those looks great, so happy to hear you're enjoying them!
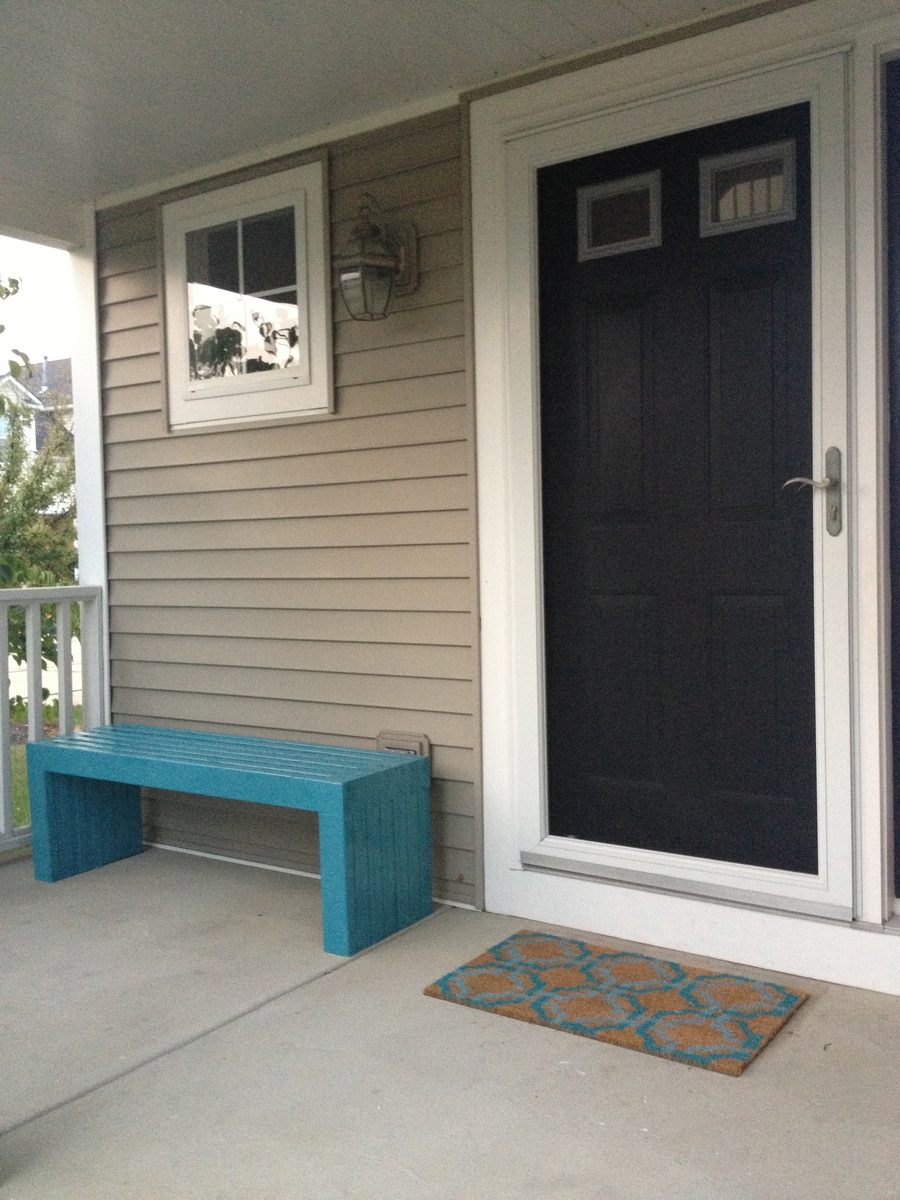
This was my husband and my first DIY project and we were thrilled at the outcome! It took us a day to build and then a couple days to stain and paint.

This was my first project. I am pretty excited how it turned out. If I did it again, I would recommend sanding and painting prior to building.
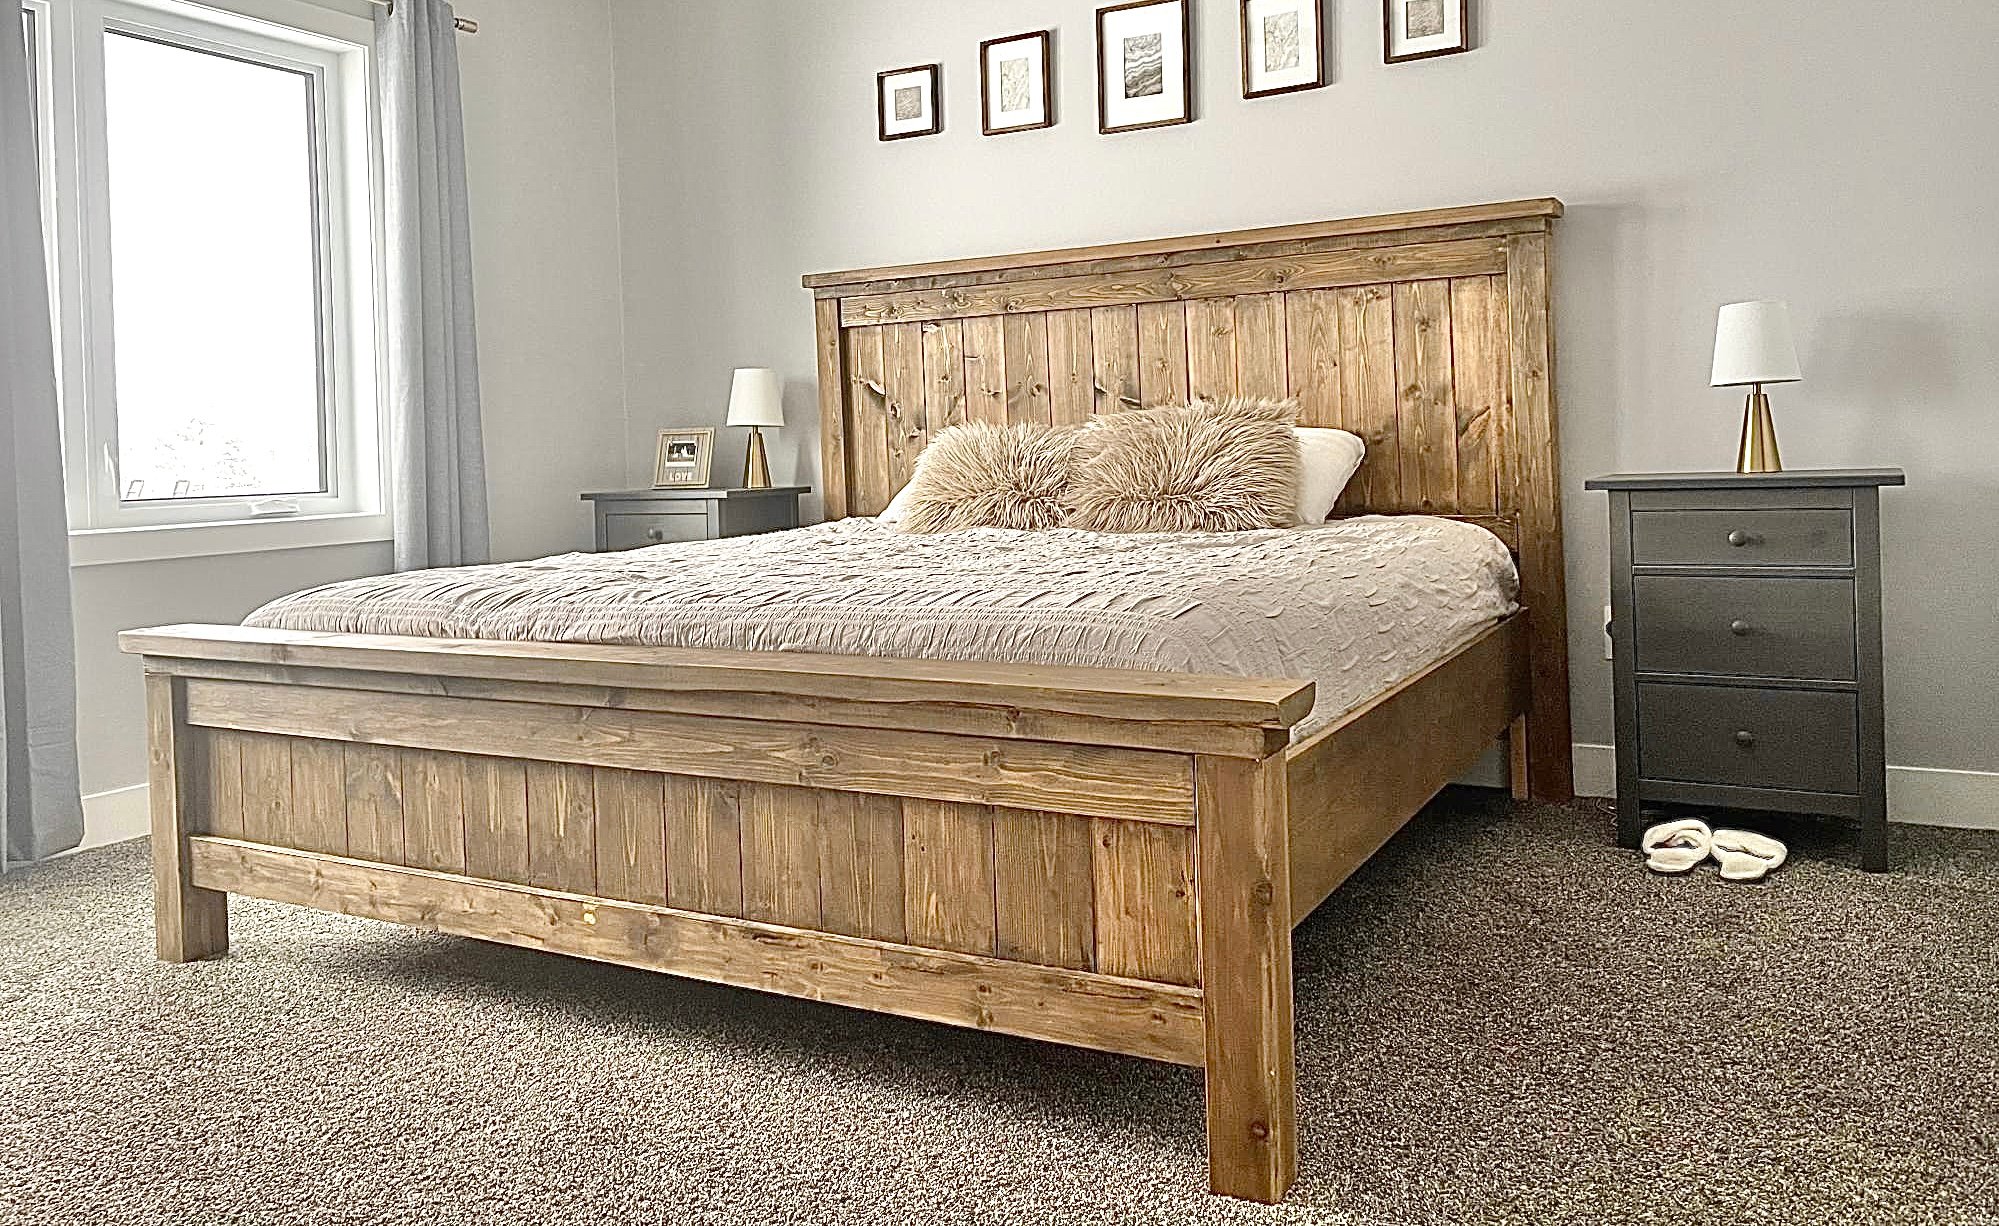
My husband and I had worked on this bed together, and we are so happy with it! We went with taller side tables that we purchased, and just stained the wood instead of painting it.
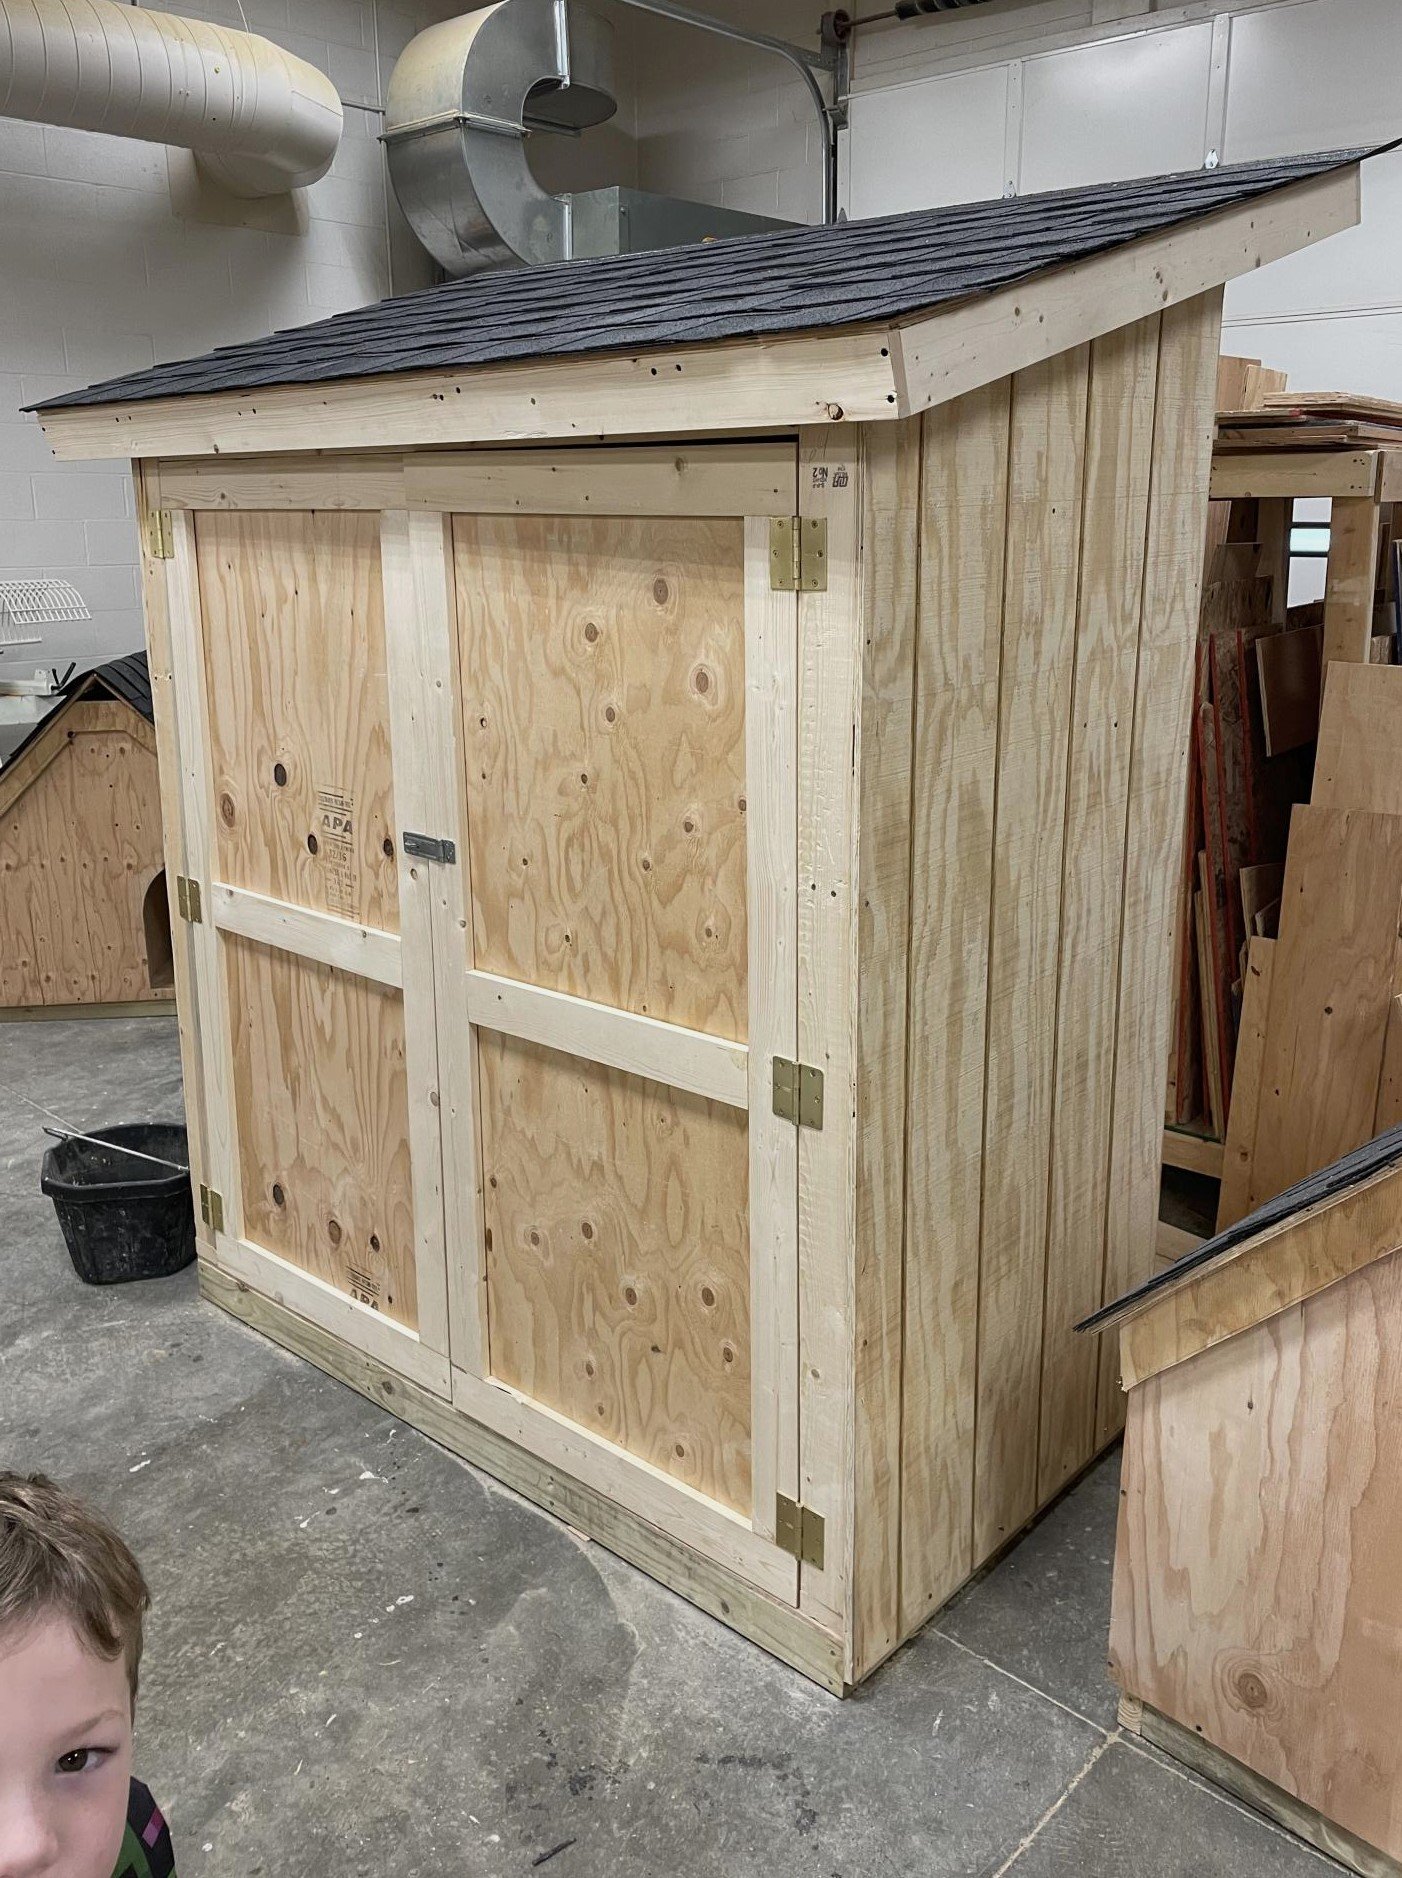
I’m a first year teacher of construction class at Waterloo High School in Illinois. We recently used your Small Cedar shed instructions with some modifications for a class project. It’s a bear getting cedar right now, so we used T1-11 for the outside and 2x4 for the frame.


Sat, 03/25/2023 - 09:14
Very fun and job well done! Thank you for sharing.
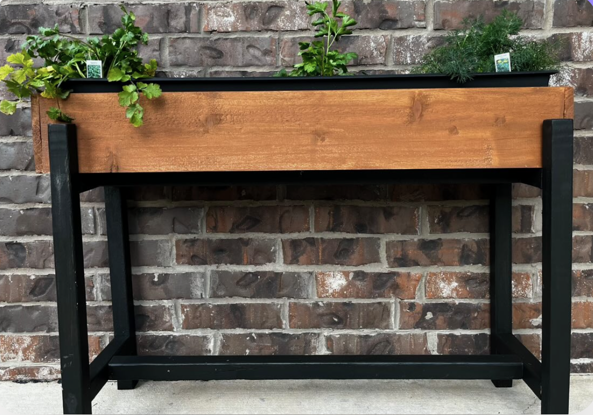
"Here's a pic of the planter I made! I modified it to fit a 36" planter. I LOVE it. Thanks!!"
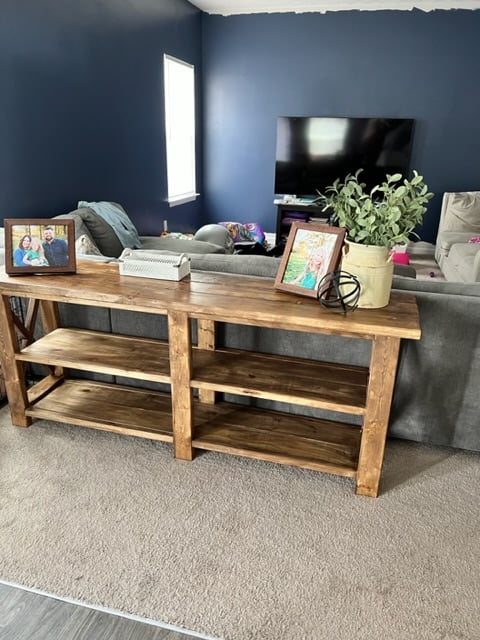
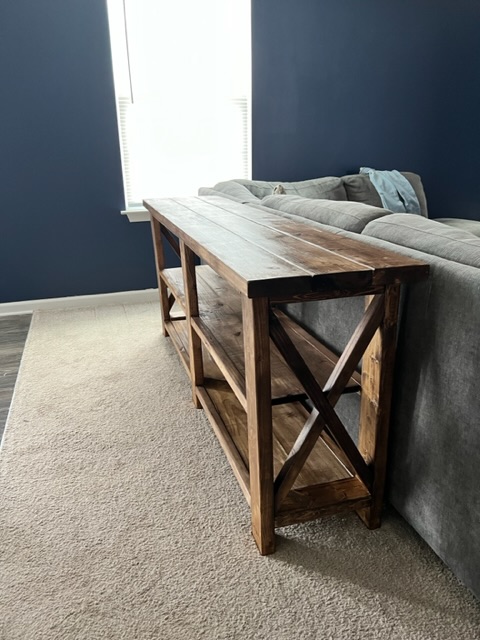
This was a big undertaking for indoor furniture and I learned so much! I slightly adjusted the size to what I had available with some scrap wood from my old stairs so saved a little on costs with lumber!

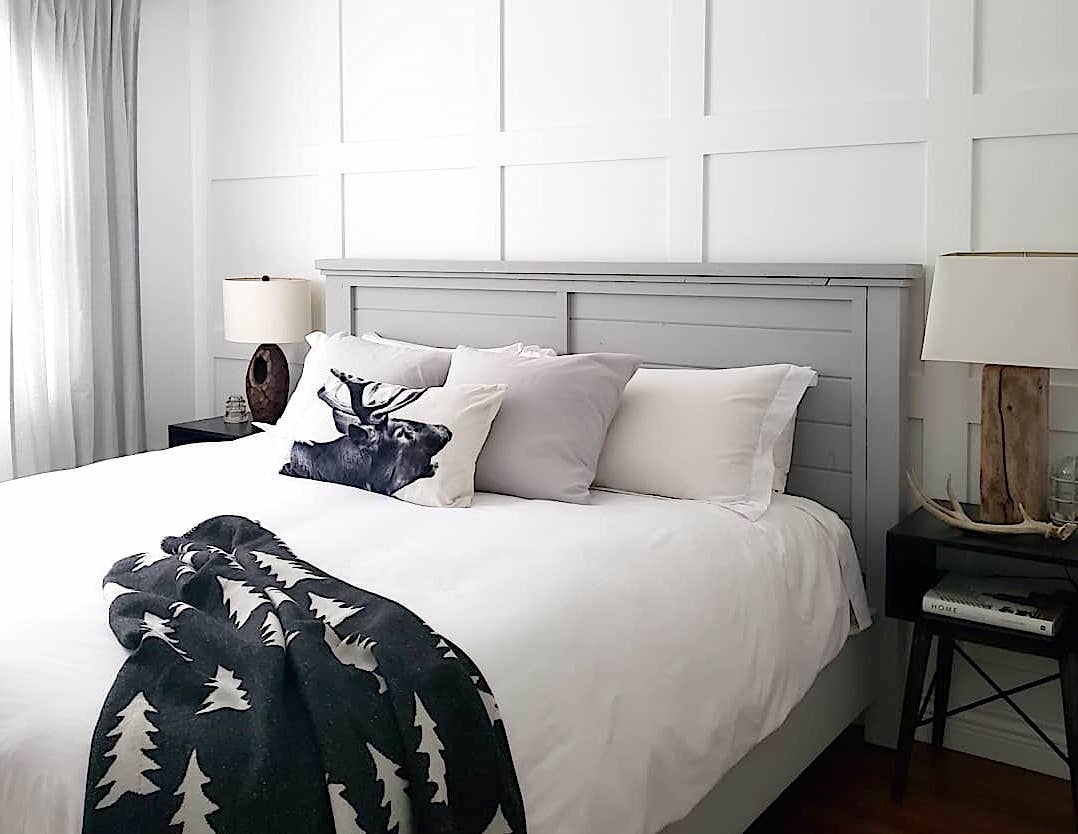
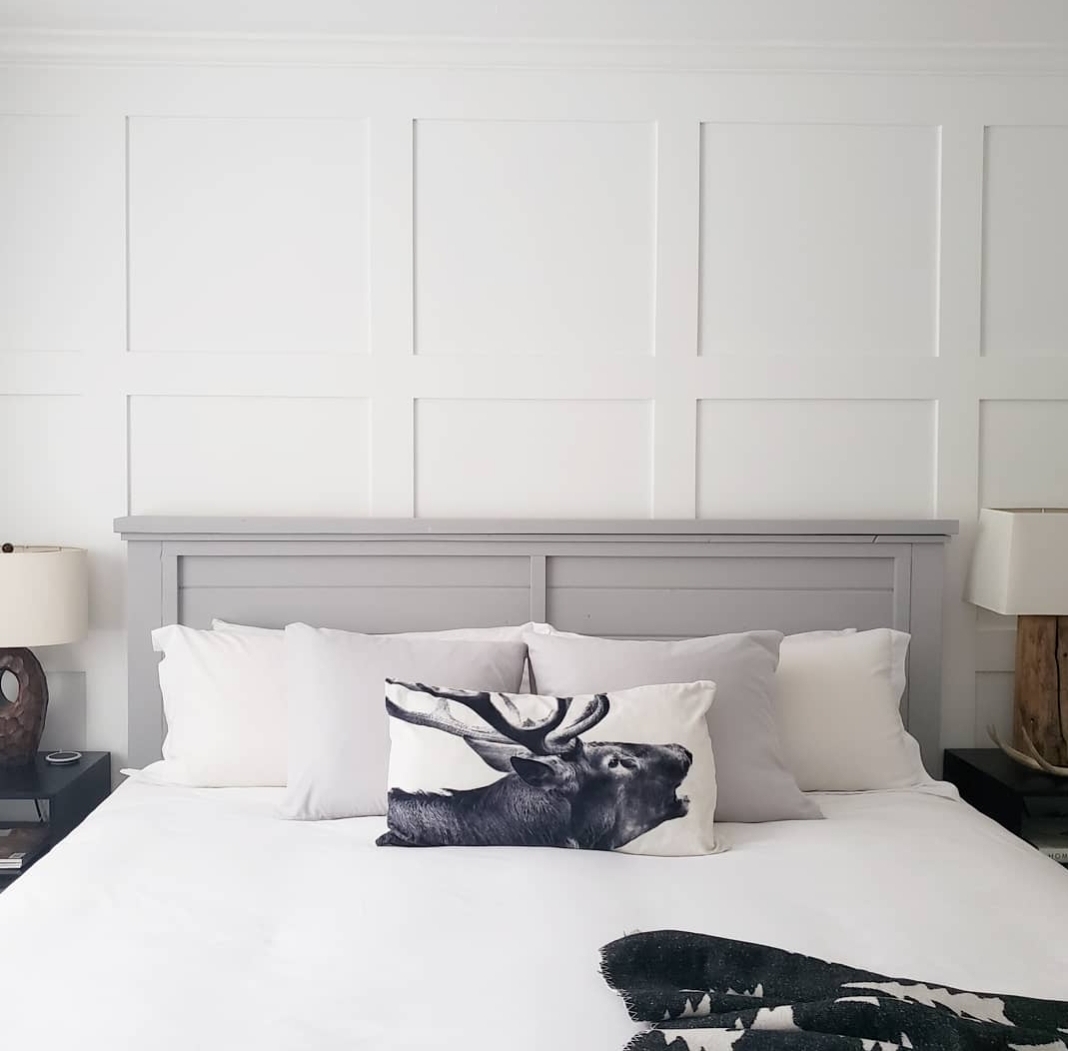
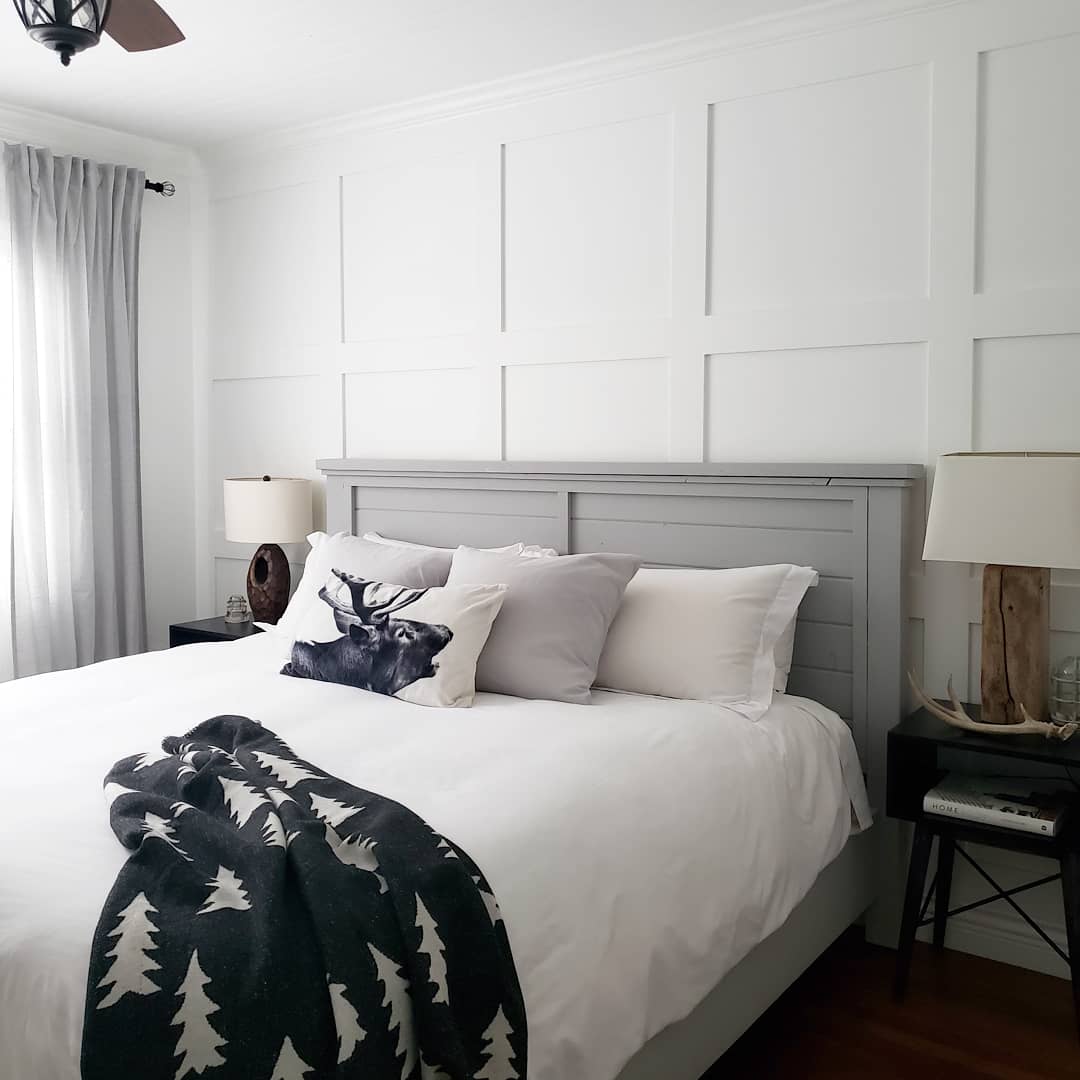
This farmhouse bed is a combination of Ana White's Farmhouse Bed/Modern Farmhouse Bed plans as well as some slight modifications. I modified the bed using materials already on hand and leftover from past jobs. The 4x4 posts are 2 - 2×4s glued and filled together. The headboard was made using 2x2's and tongue and groove boards. The side rails, foot board and matress supports are 2x10's since this was old material from a job site my husband was on. I opted for no footboard to make the bed feel less bulky. The finish was done using chalk paint in a light gray, giving it a more modern look.
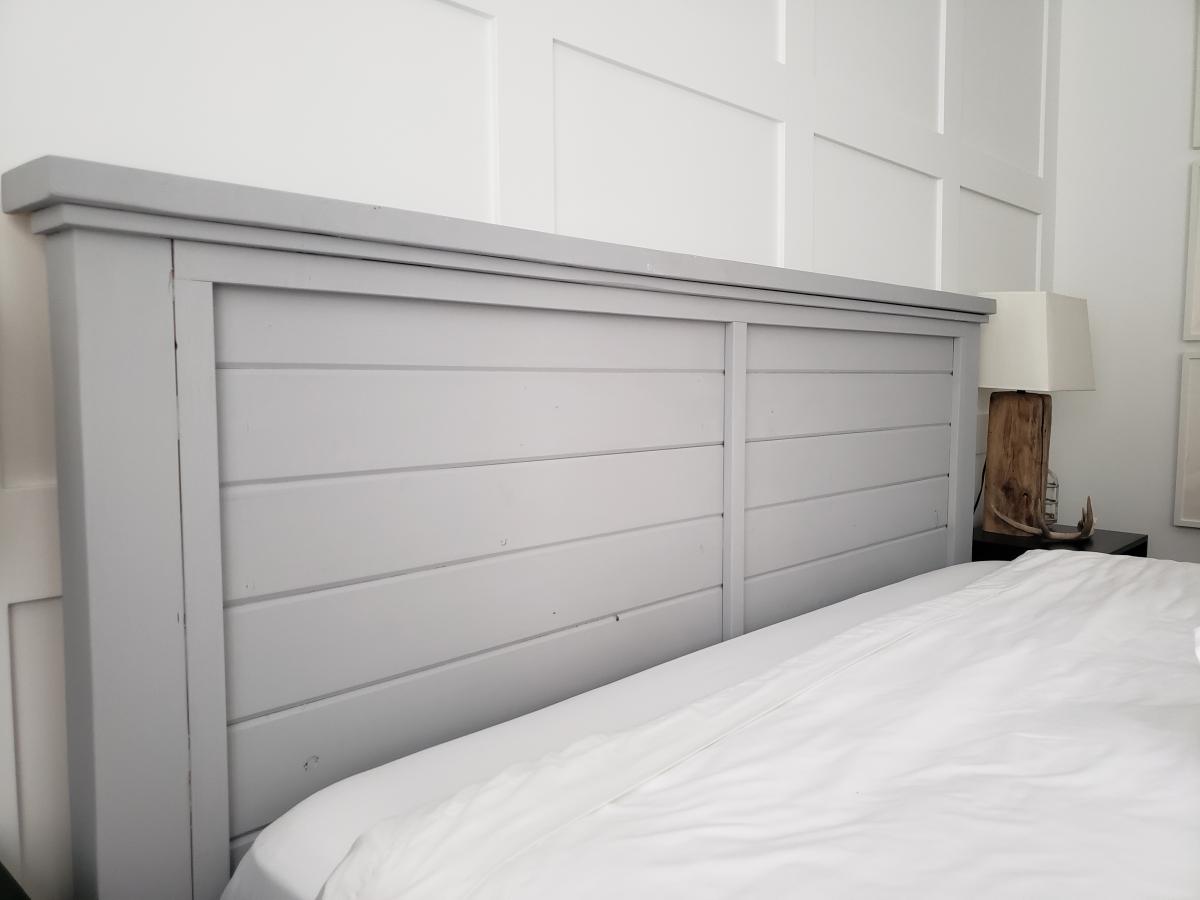

Thu, 10/03/2019 - 13:09
This is so beautiful! Thank you so much for sharing photos!
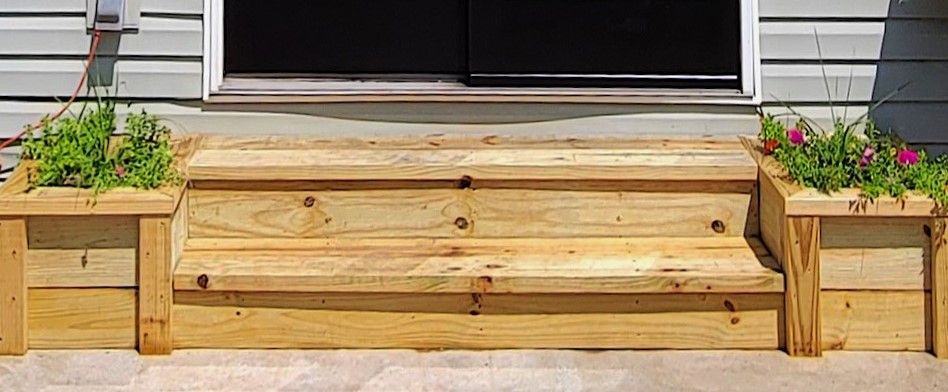
I had to modify the plans a little to make the steps 9ft long. I also used 2x6 on the bottom step, so the rise was the same.
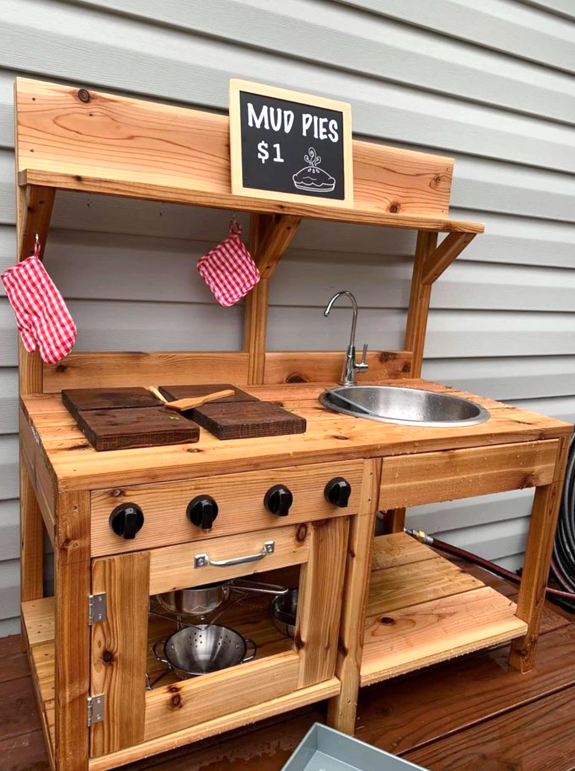
Thank you! My favorite & first is from your mud kitchen! I put in running water!😂 For the GrandLuvs!”
@penny.vanderlugt
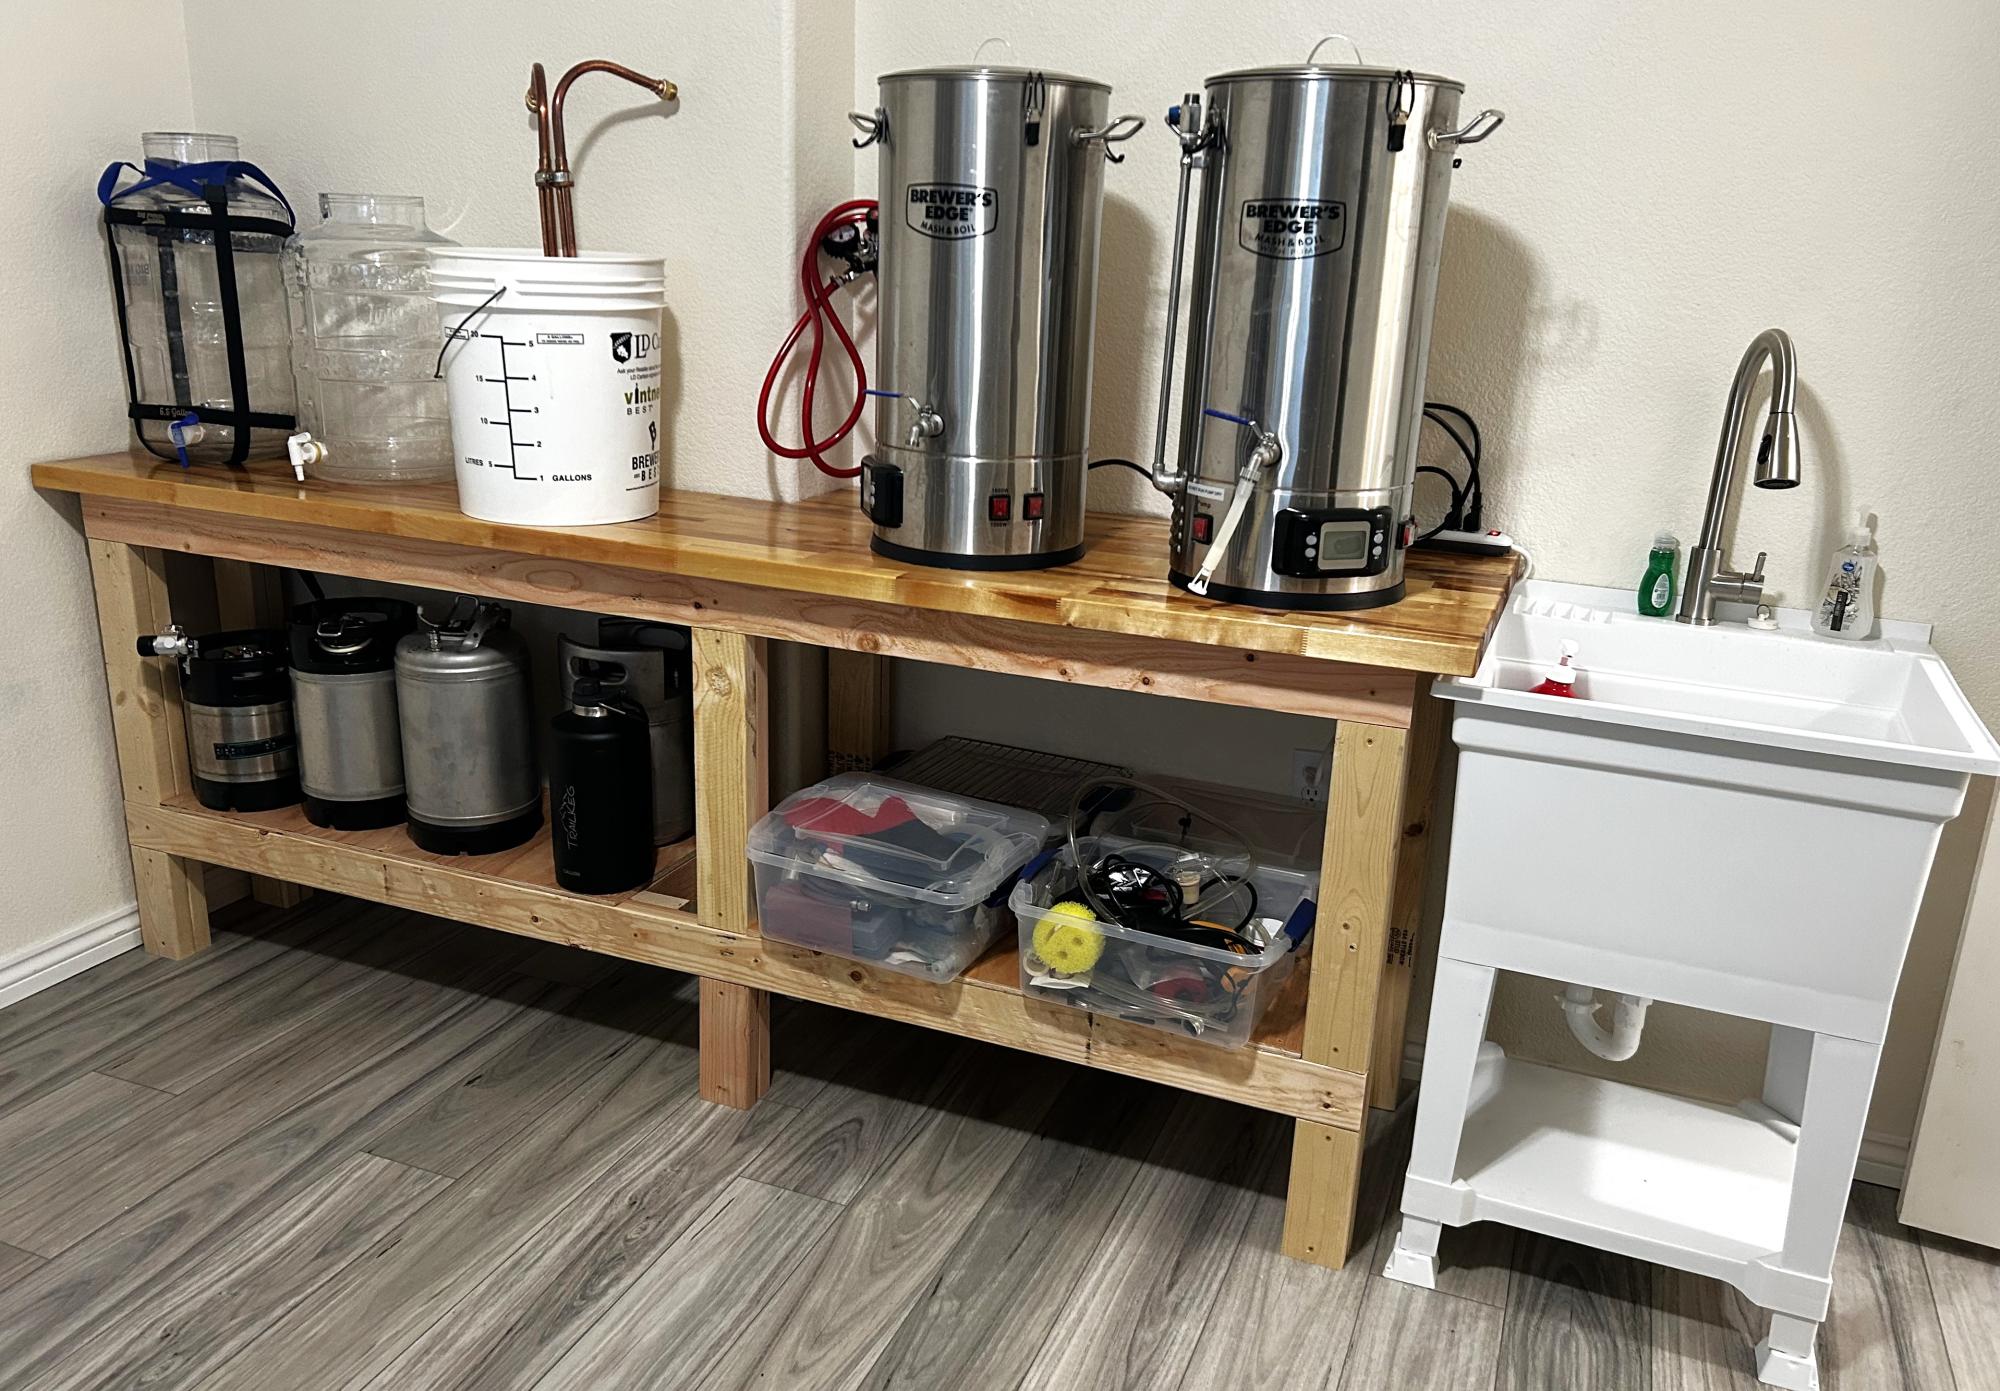
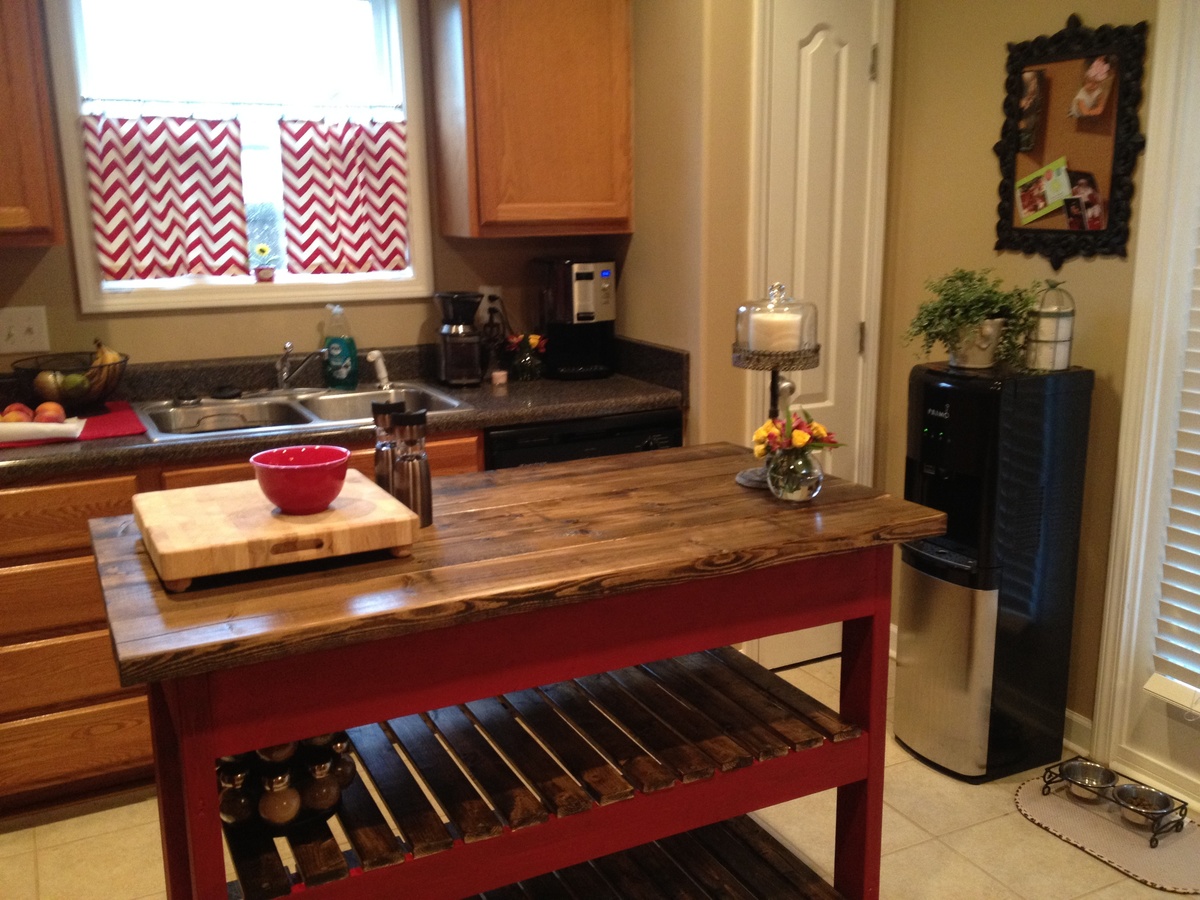
I used your workbench plan to build my Brew Bench. I changed the measurements to fit my space and used a butcher block for the countertop. Very sturdy and pretty easy project. Took one day to build.
Scott R

Had a blast building this for my mother. Only problem now is everyone in my family wants one!
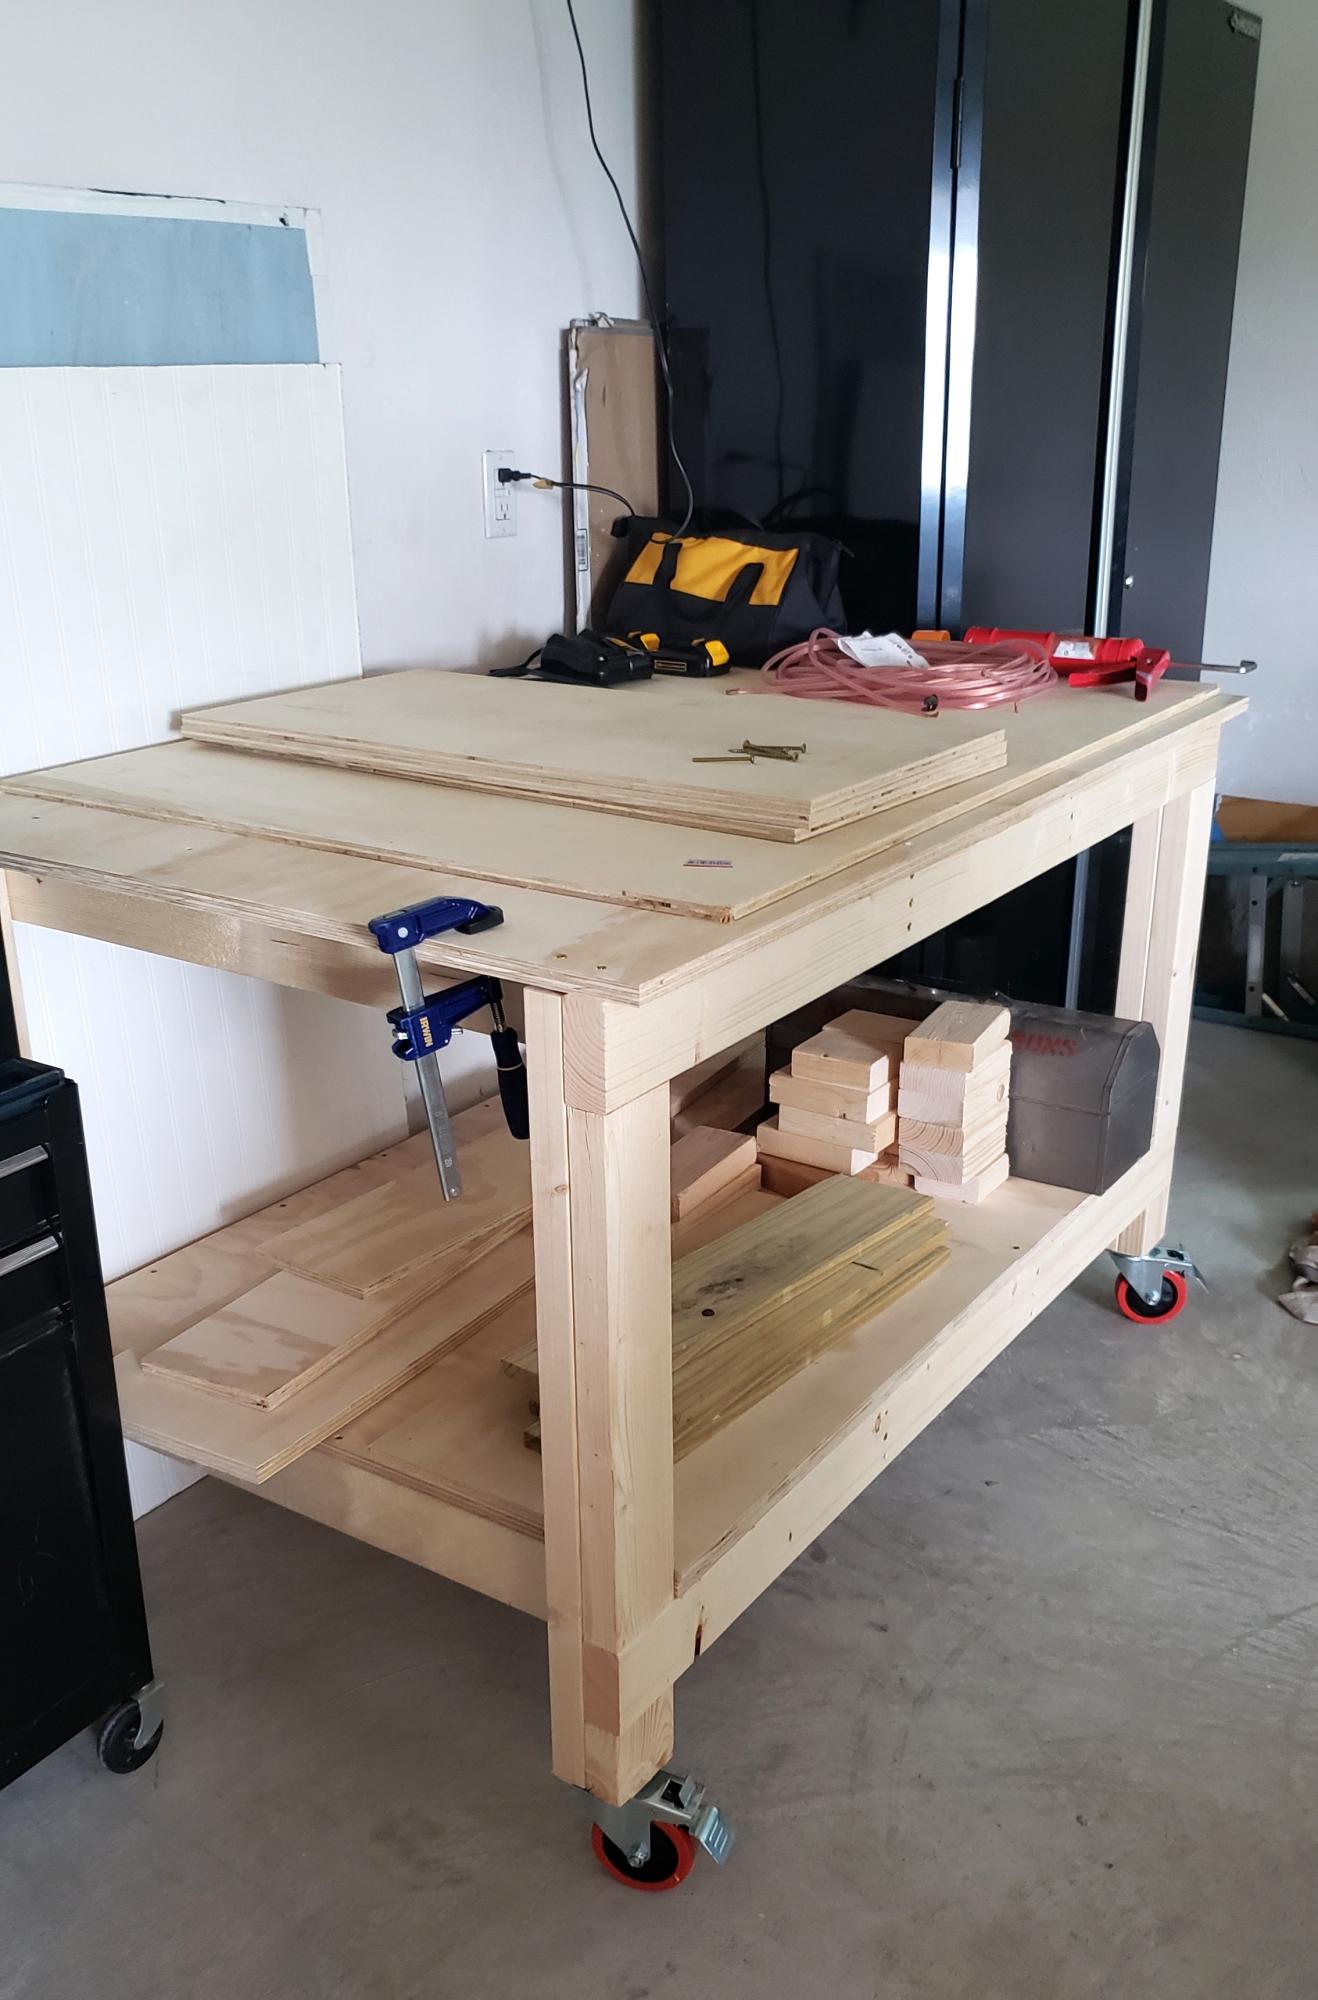
Easy to build workbench. I added an extra 2 1/2 inches (width) to the top plywood cut. This gave me a 1 1/4" lip to the front and back sides. I wanted to be able to clamp on all sides of the bench. Also added casters since I wanted to use this as an outdoor table for entertaining if needed and to simply have mobility with the bench. So far I love it!
Comments
Ana White Admin
Wed, 09/09/2020 - 11:42
Great application of this plan!
This worked out great! Thanks for sharing:)
VGuz
Fri, 07/07/2023 - 15:22
Do you have an illustration…
Do you have an illustration or instructions on the exact modifications you used for this project?