Community Brag Posts

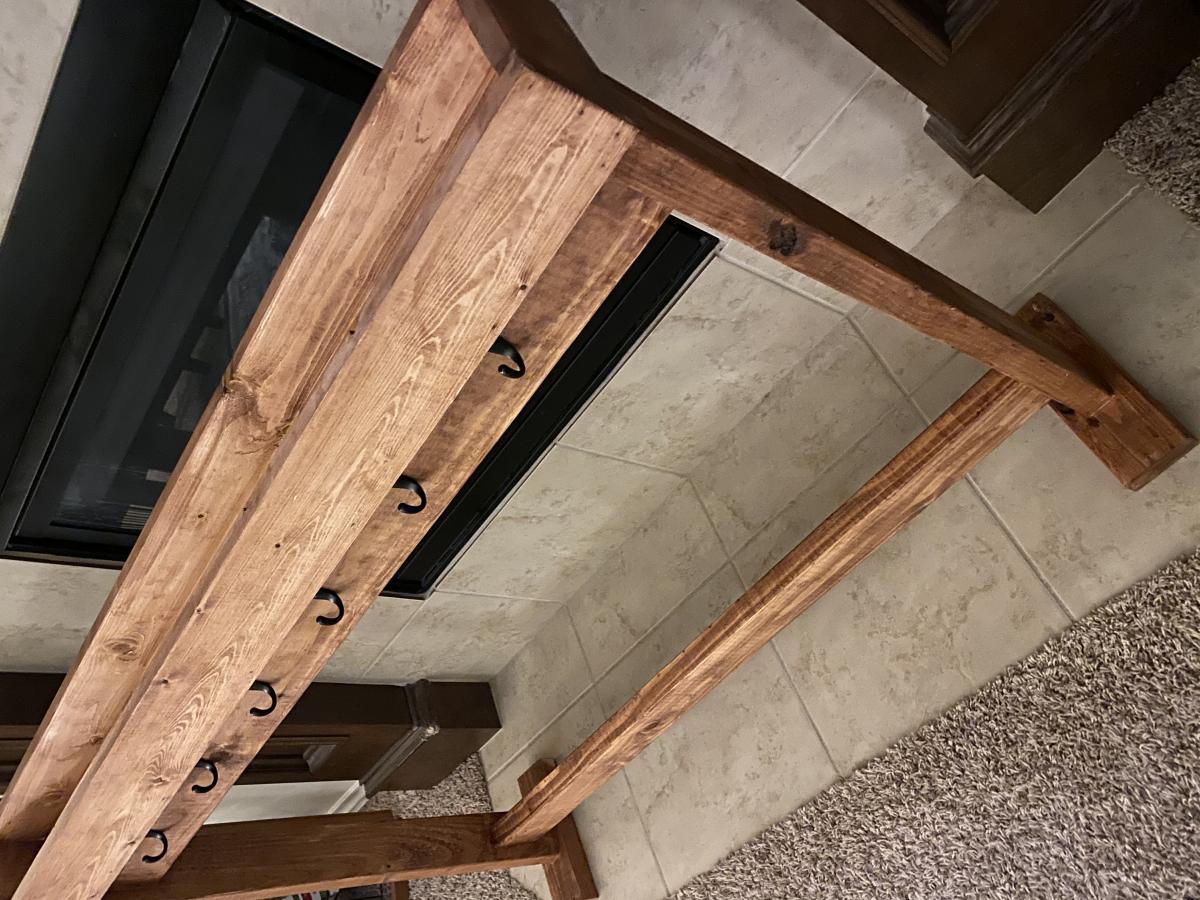
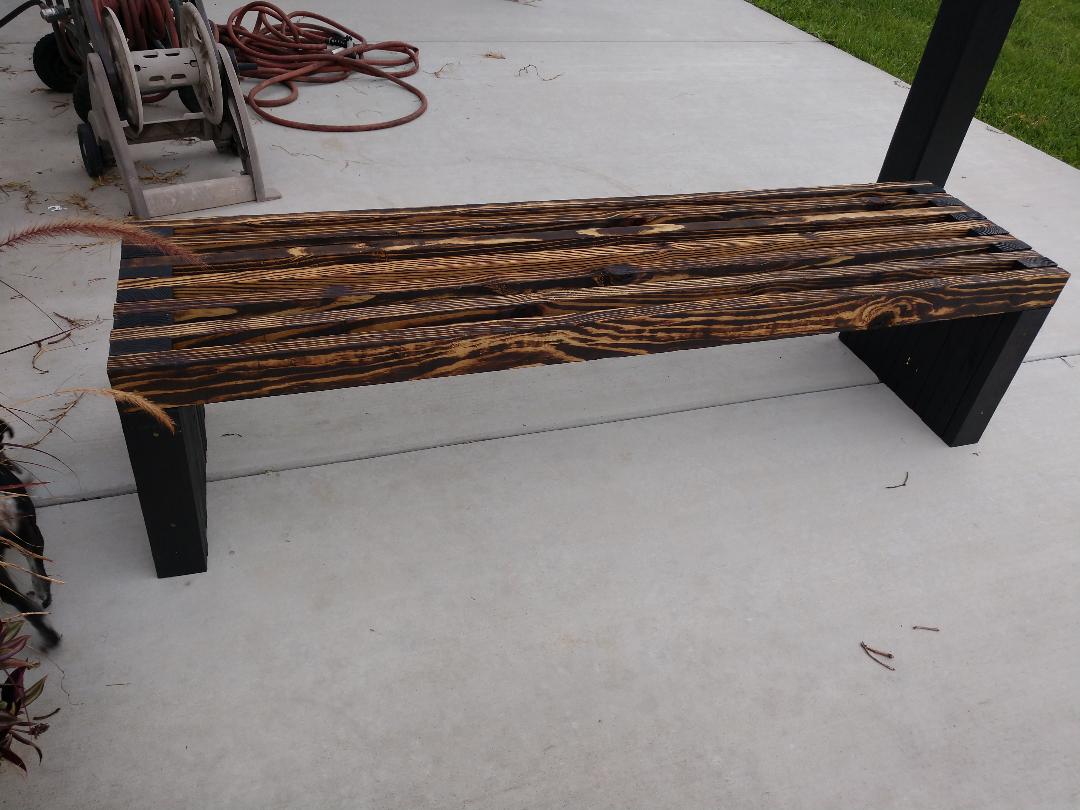
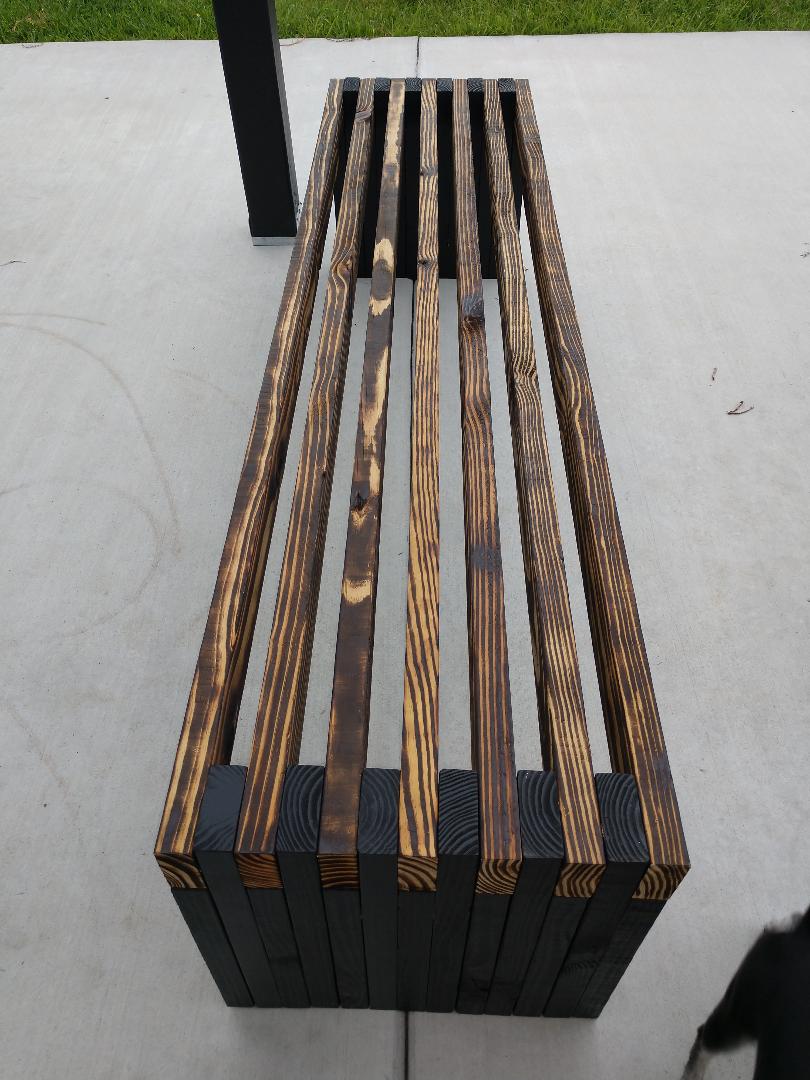
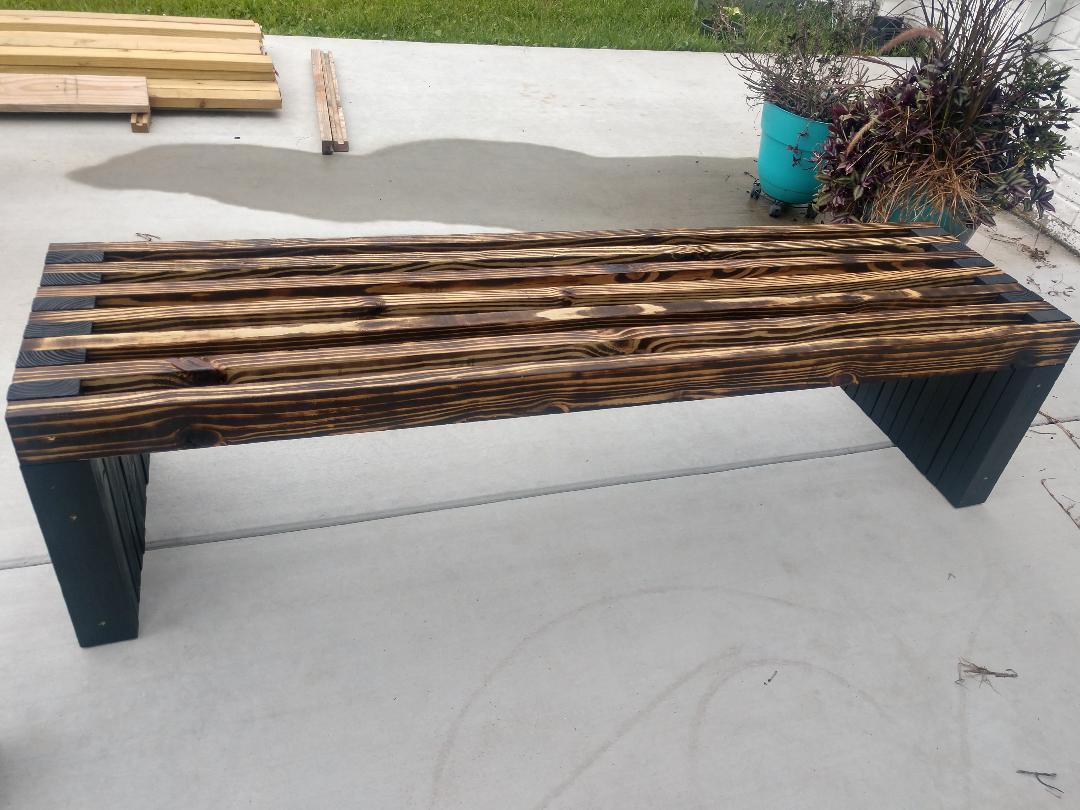
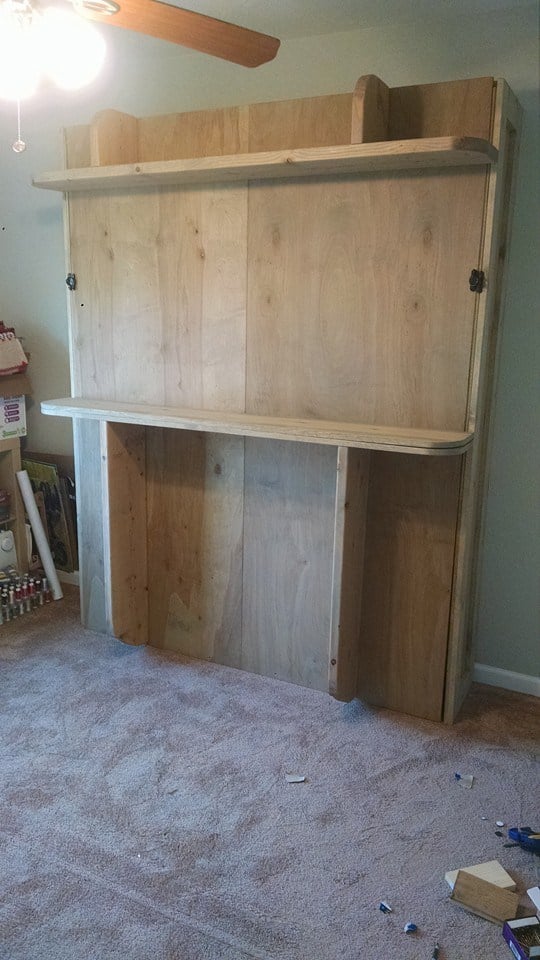
Ana White Stocking Stand & Shanty2Chic Stocking Box

Submitted by vprice on Thu, 12/24/2020 - 19:14

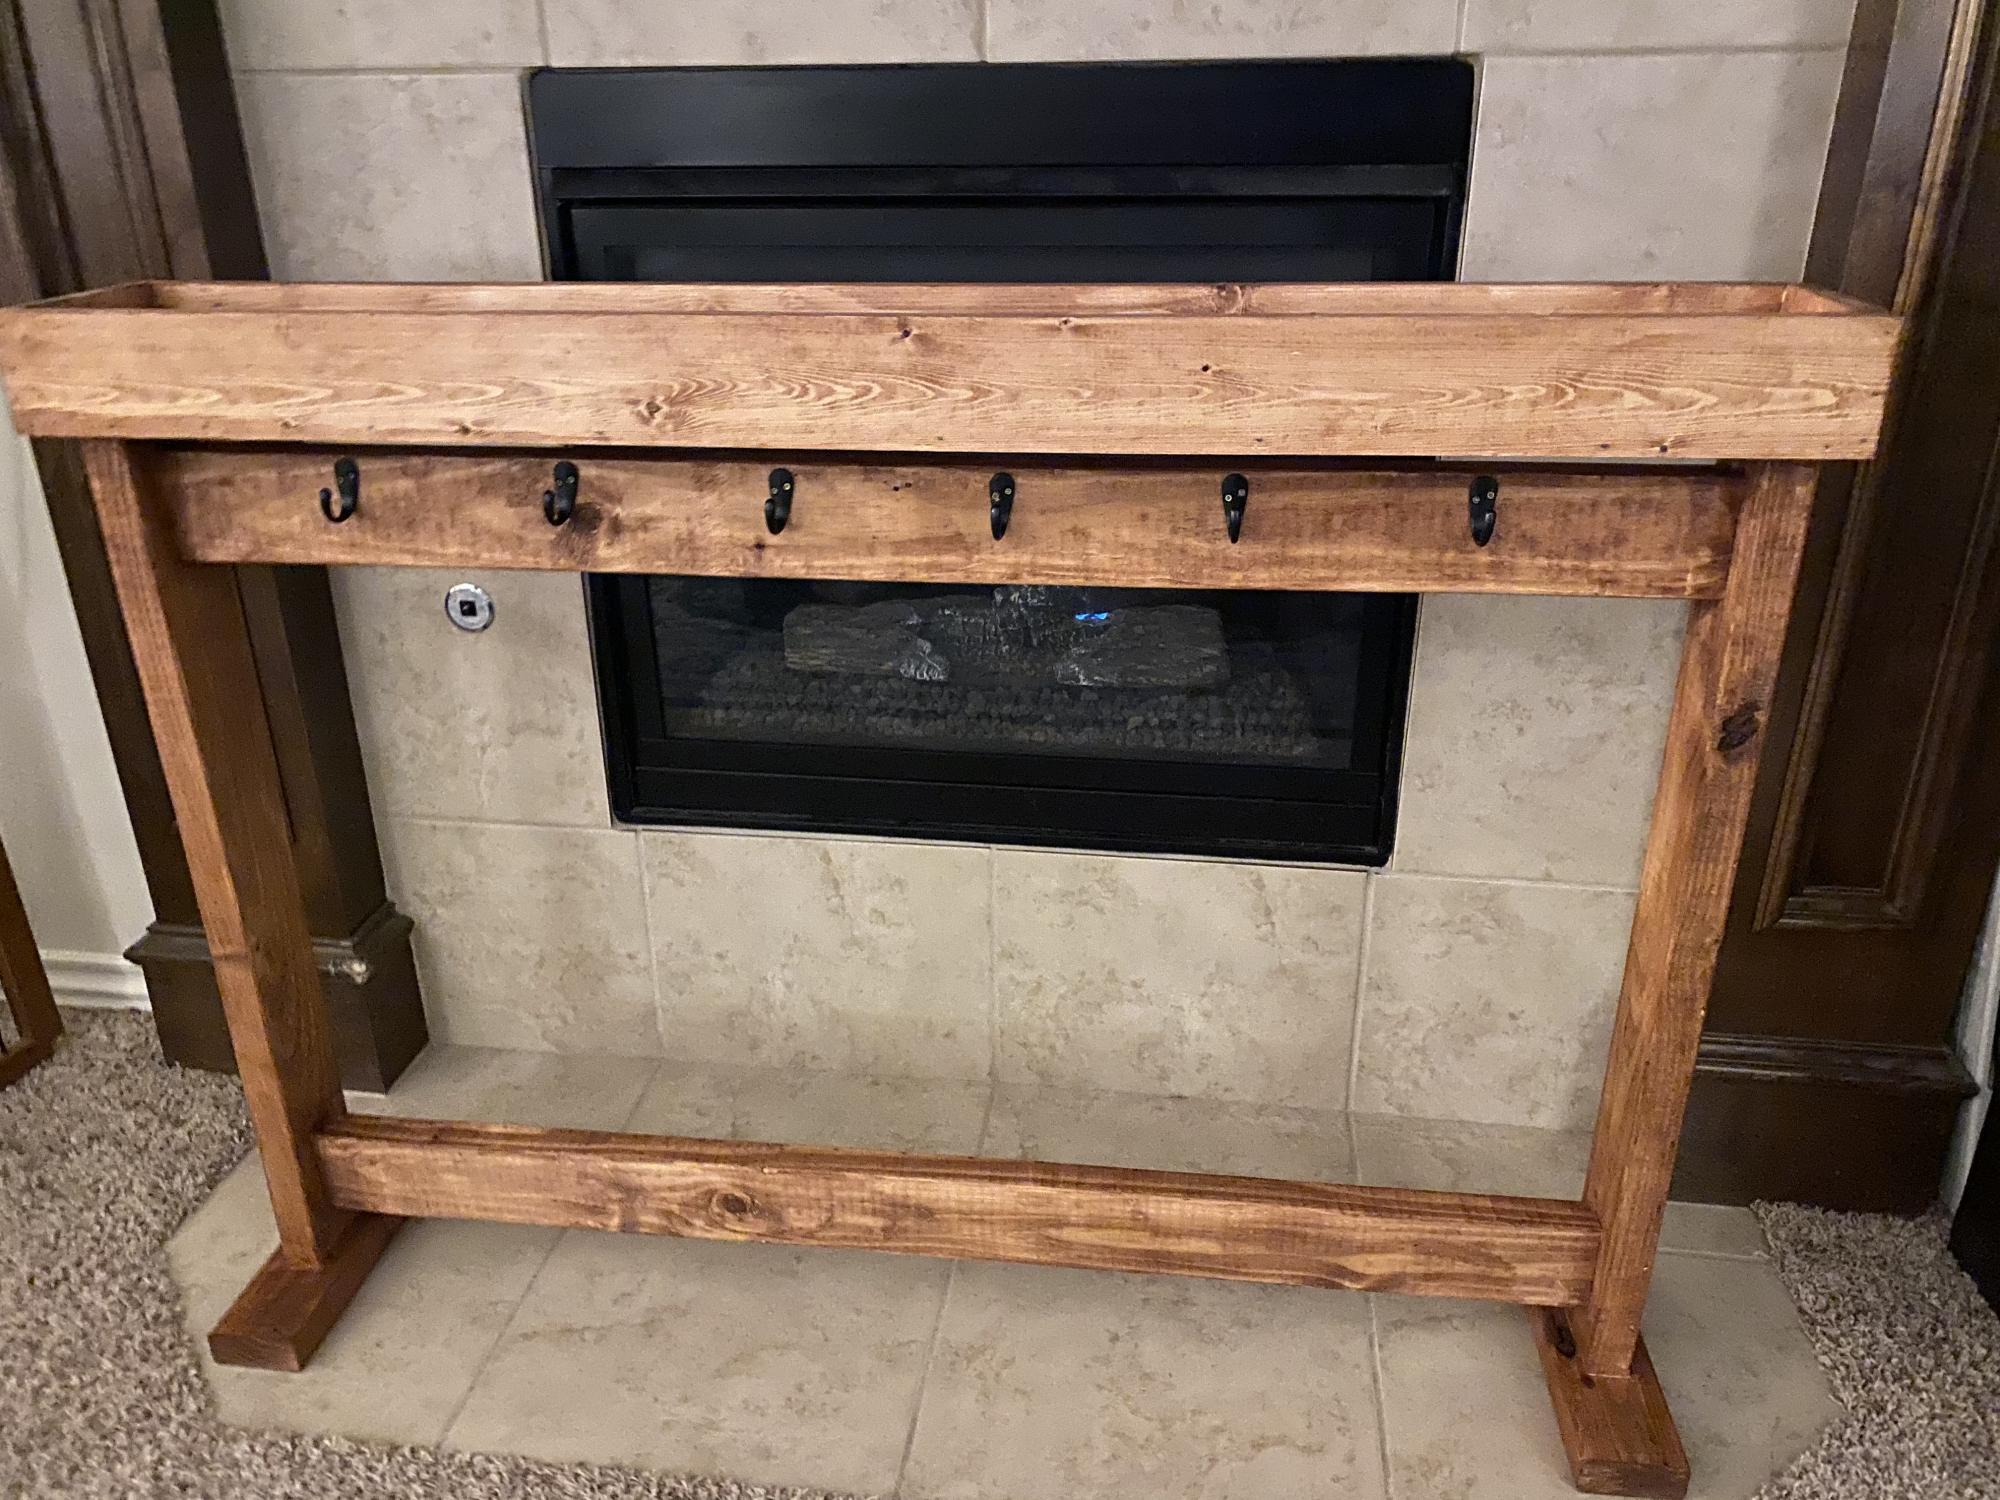
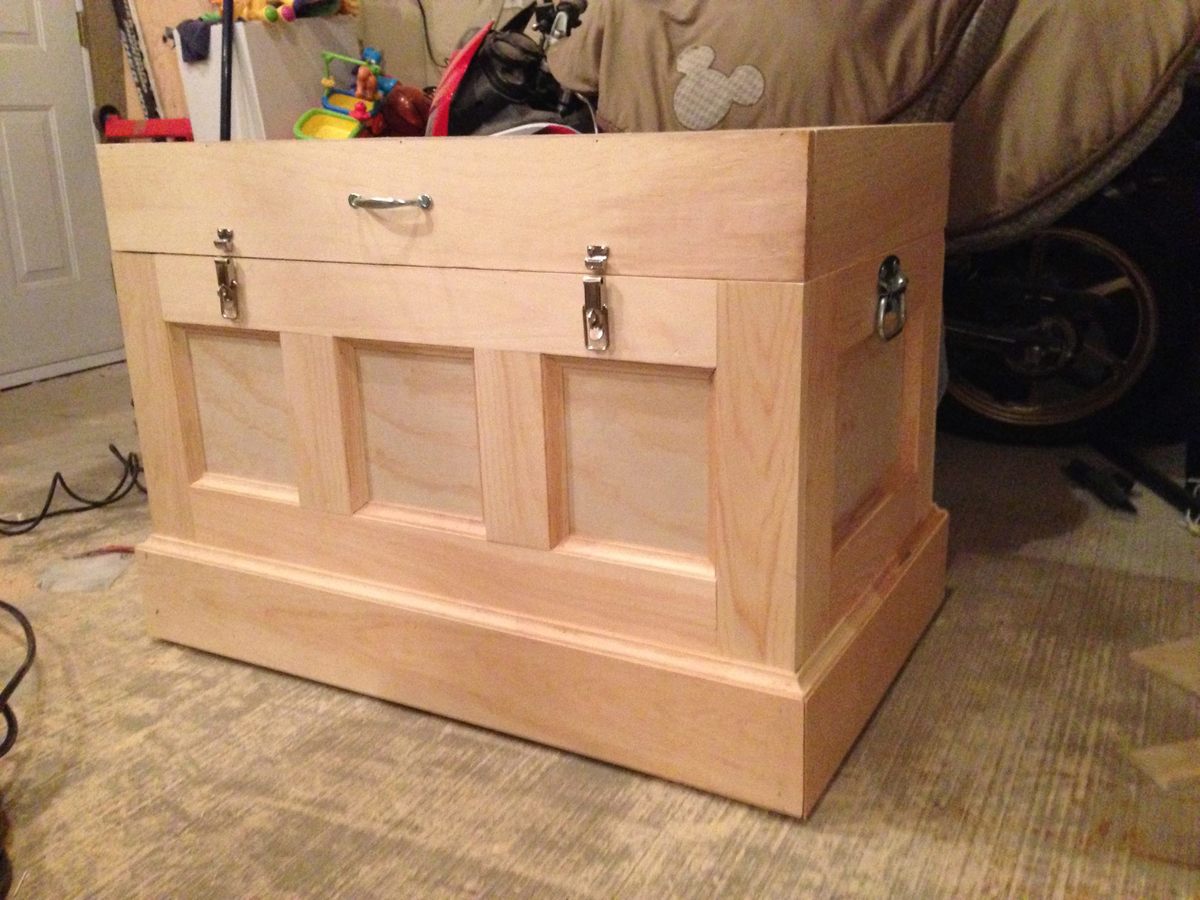
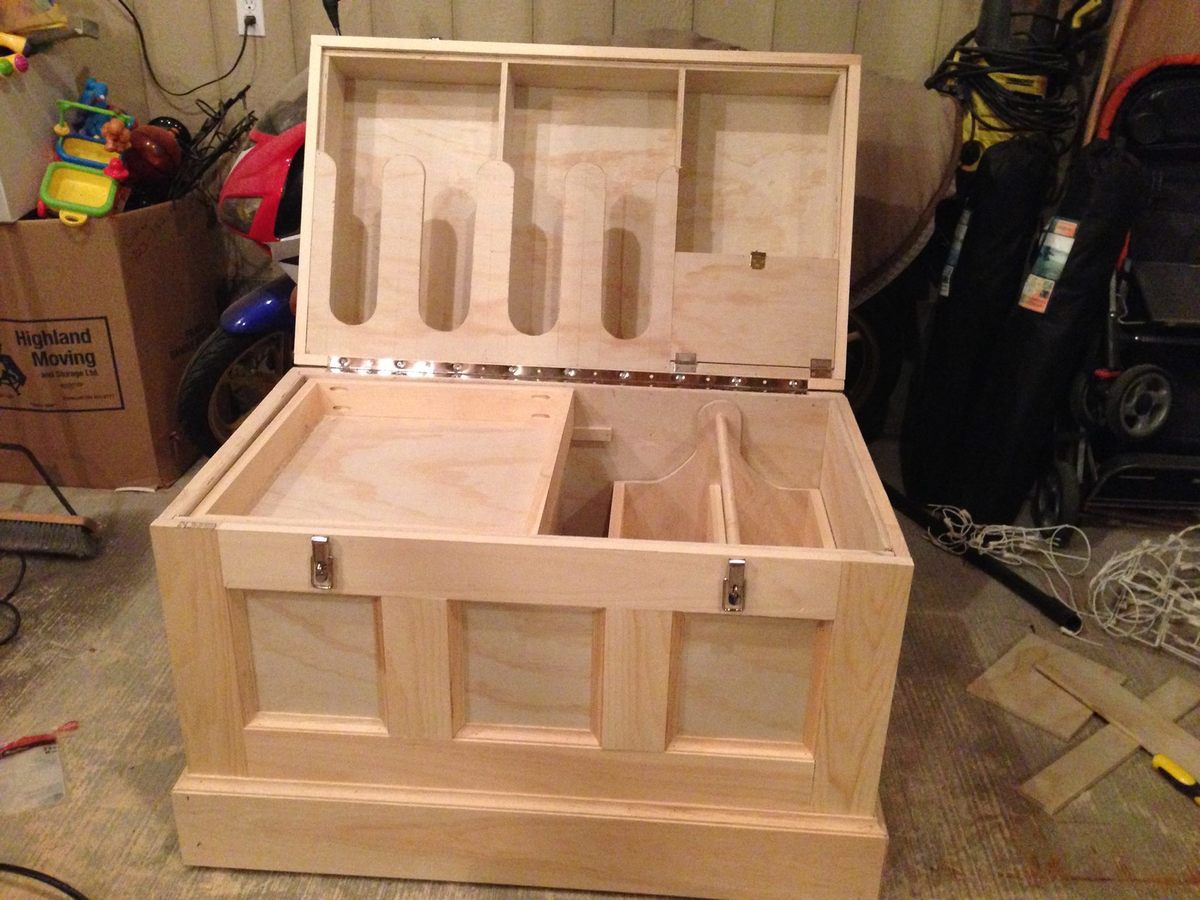
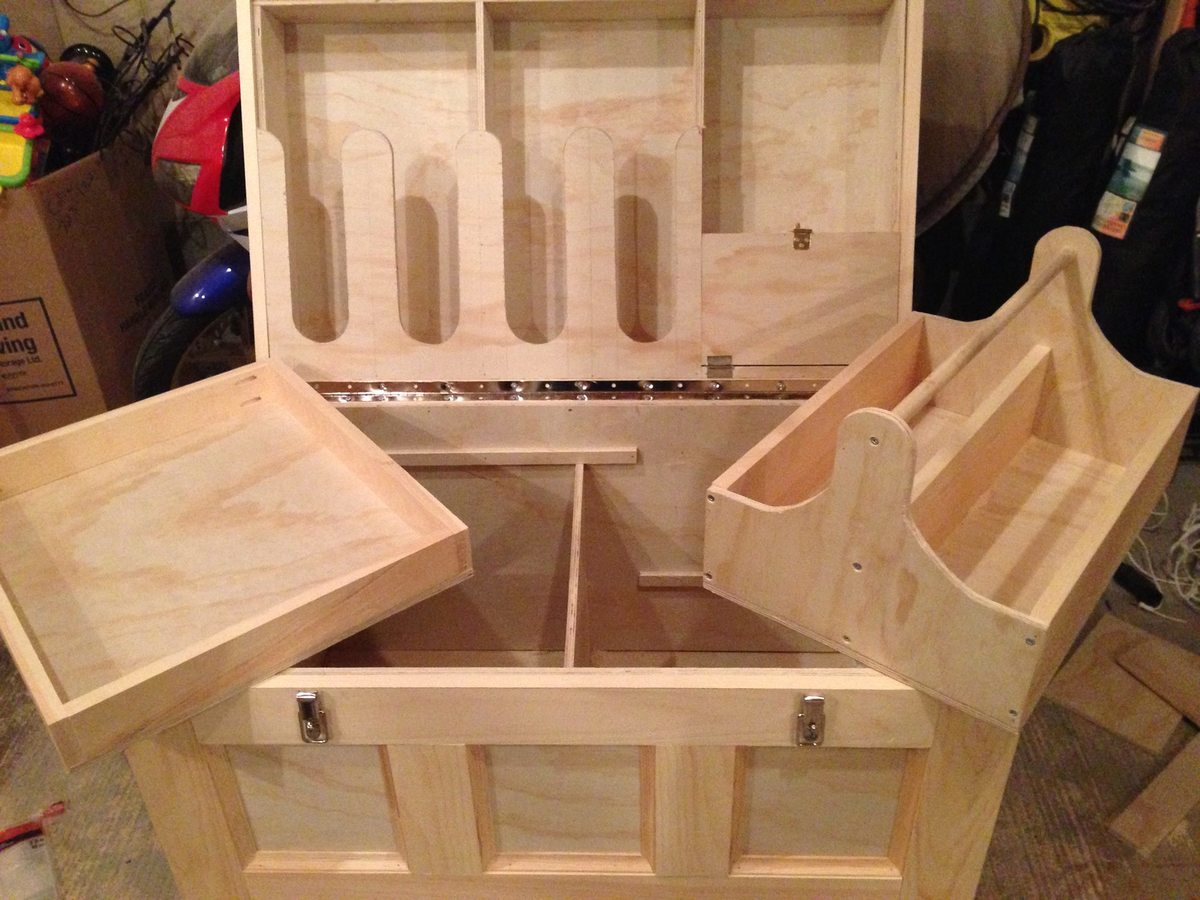
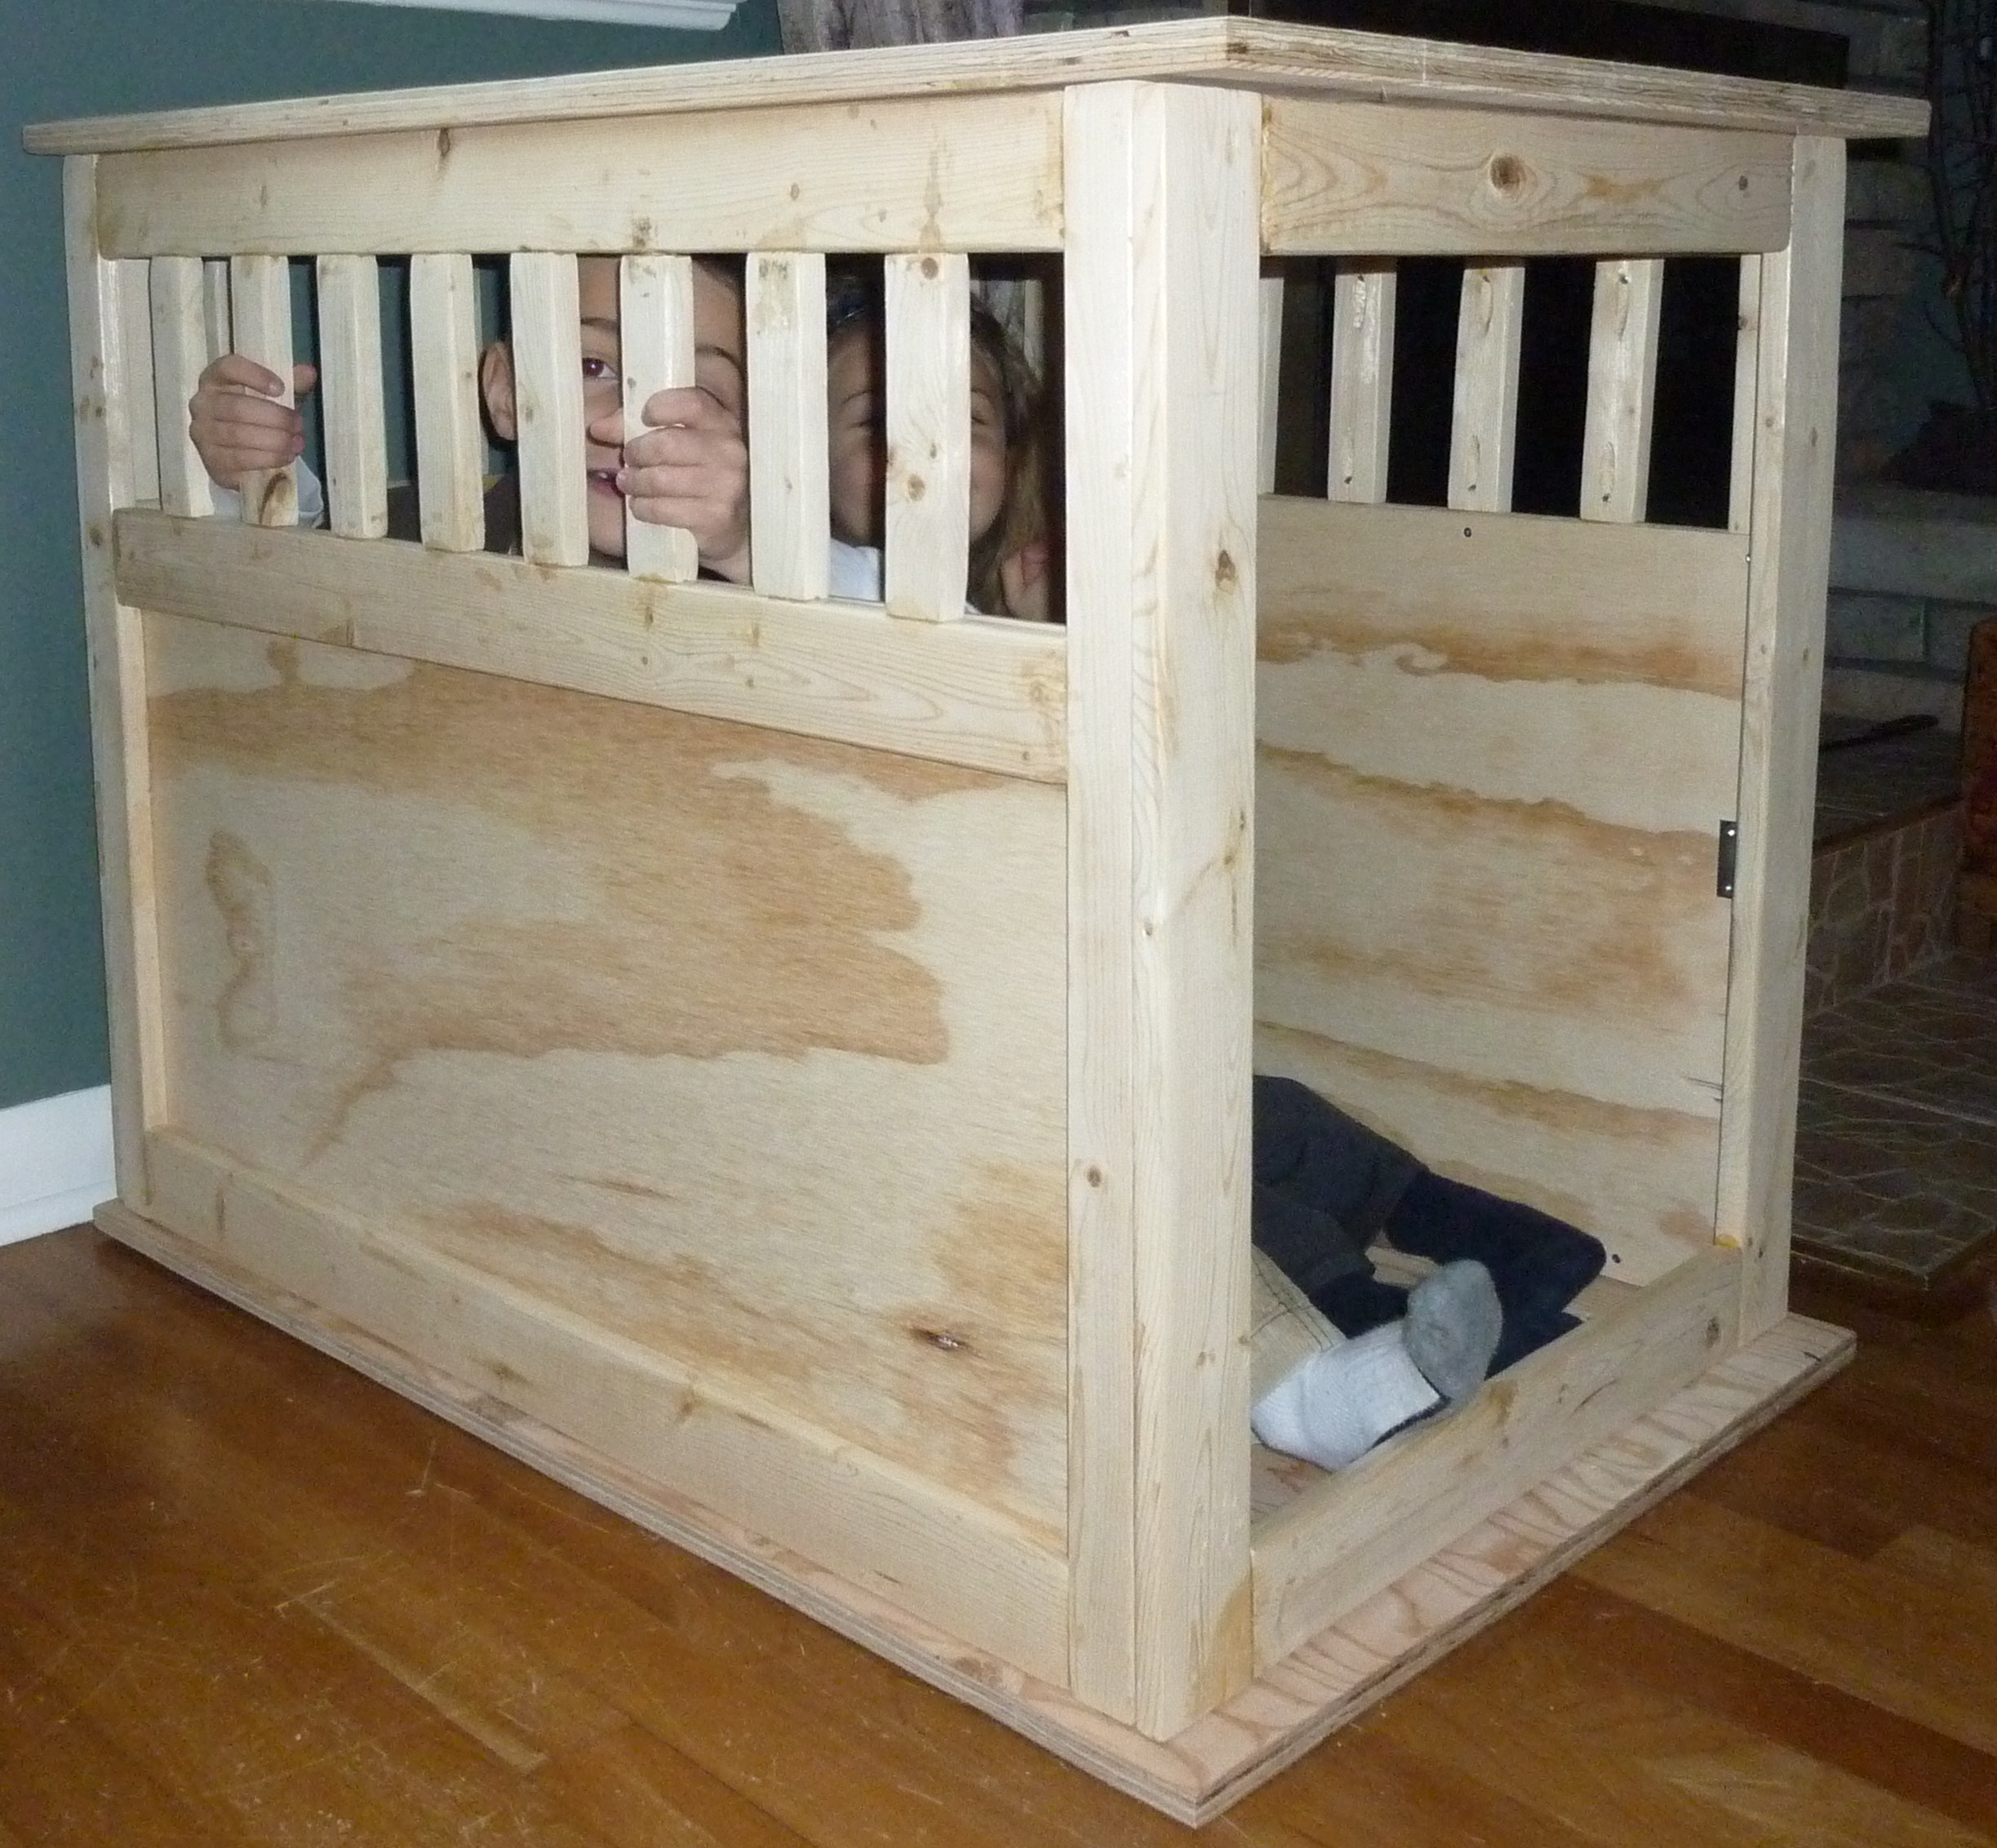
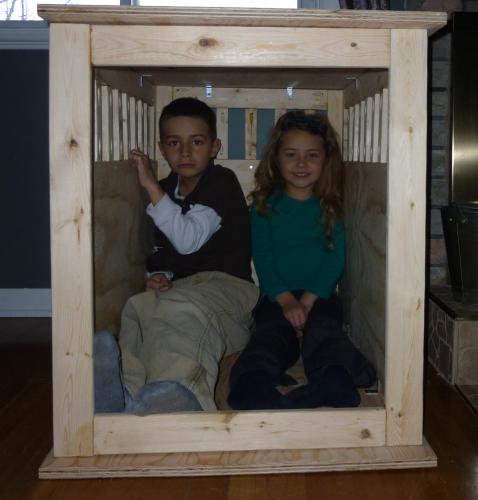
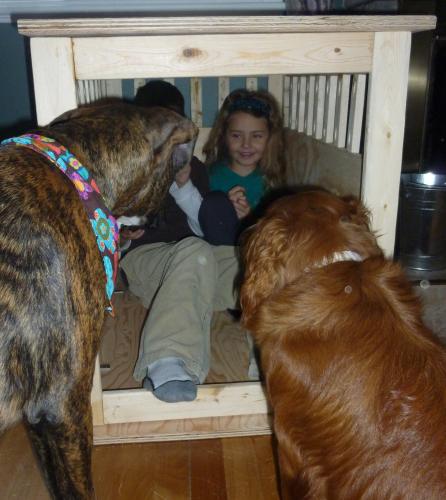
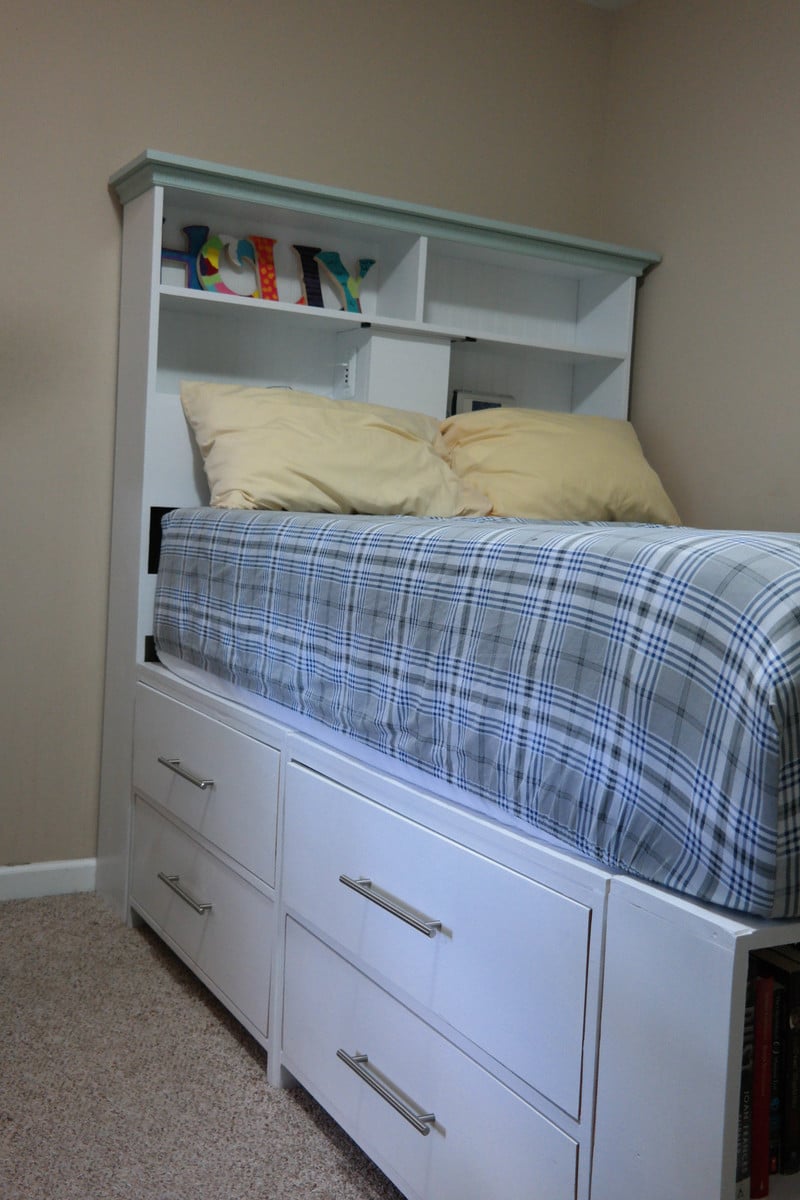
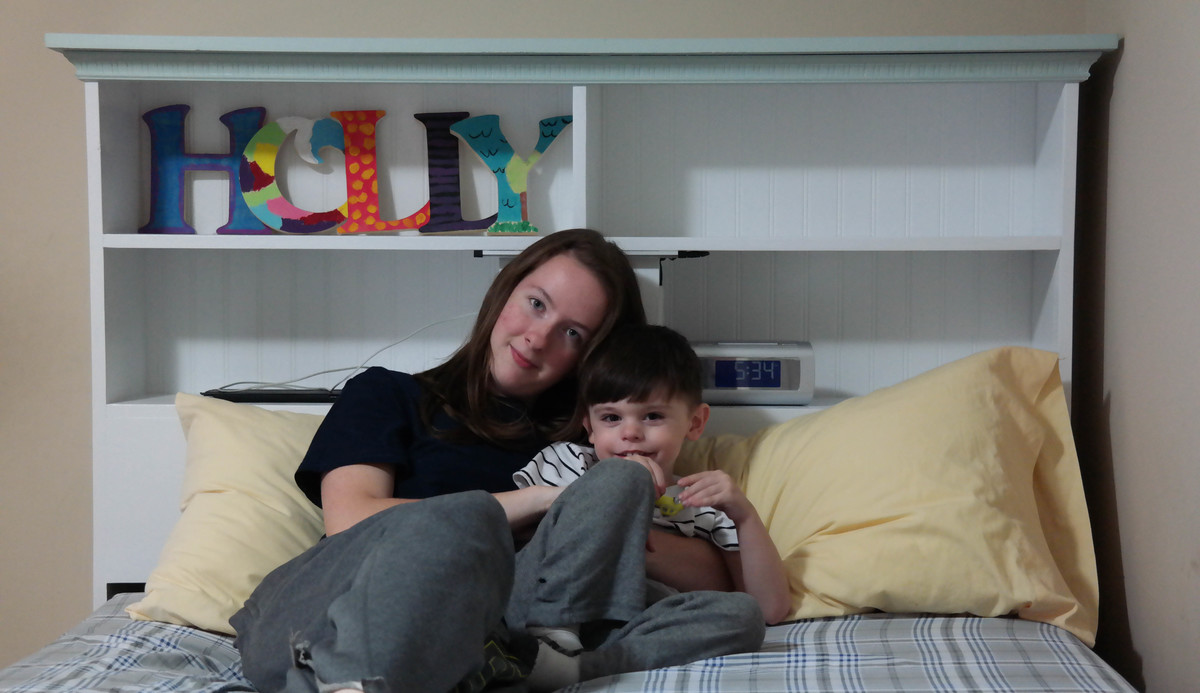
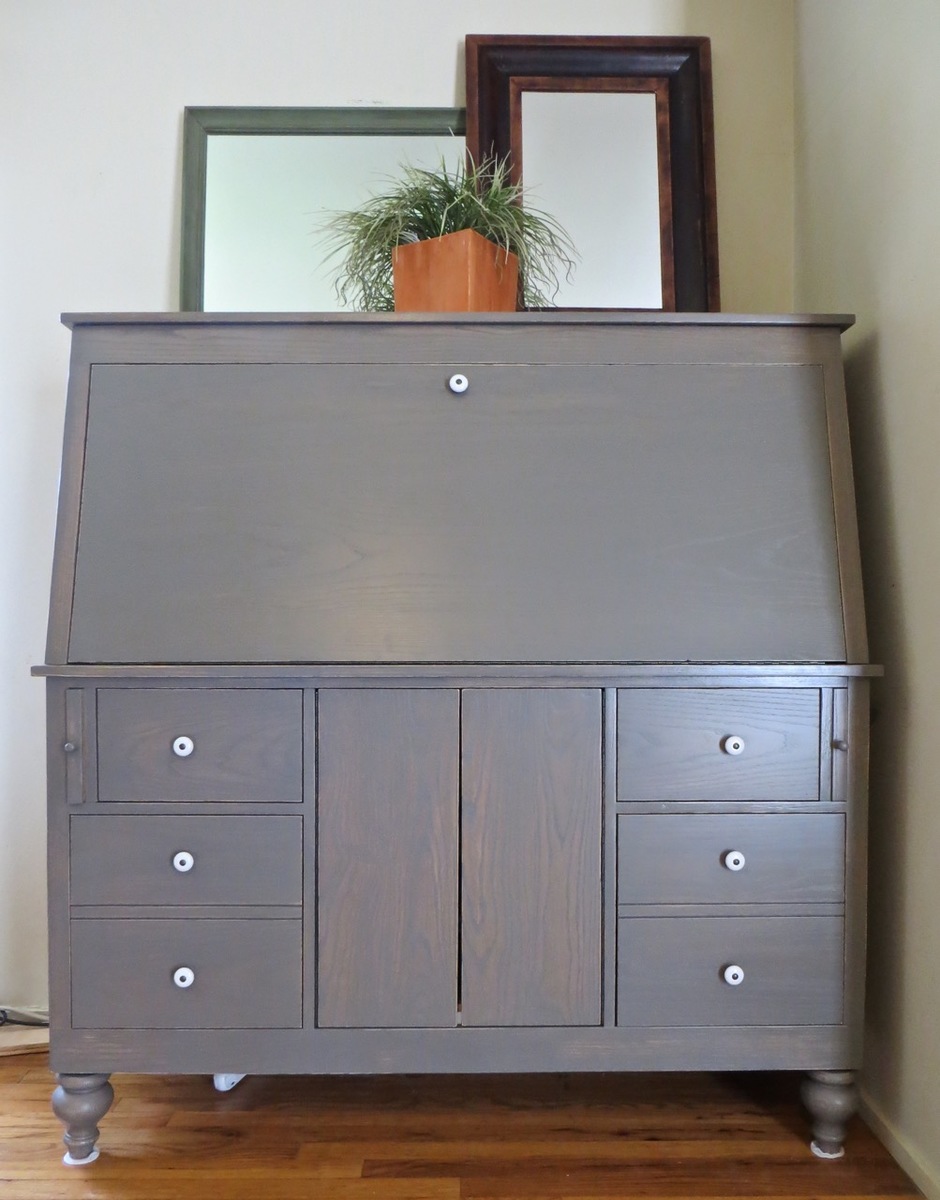
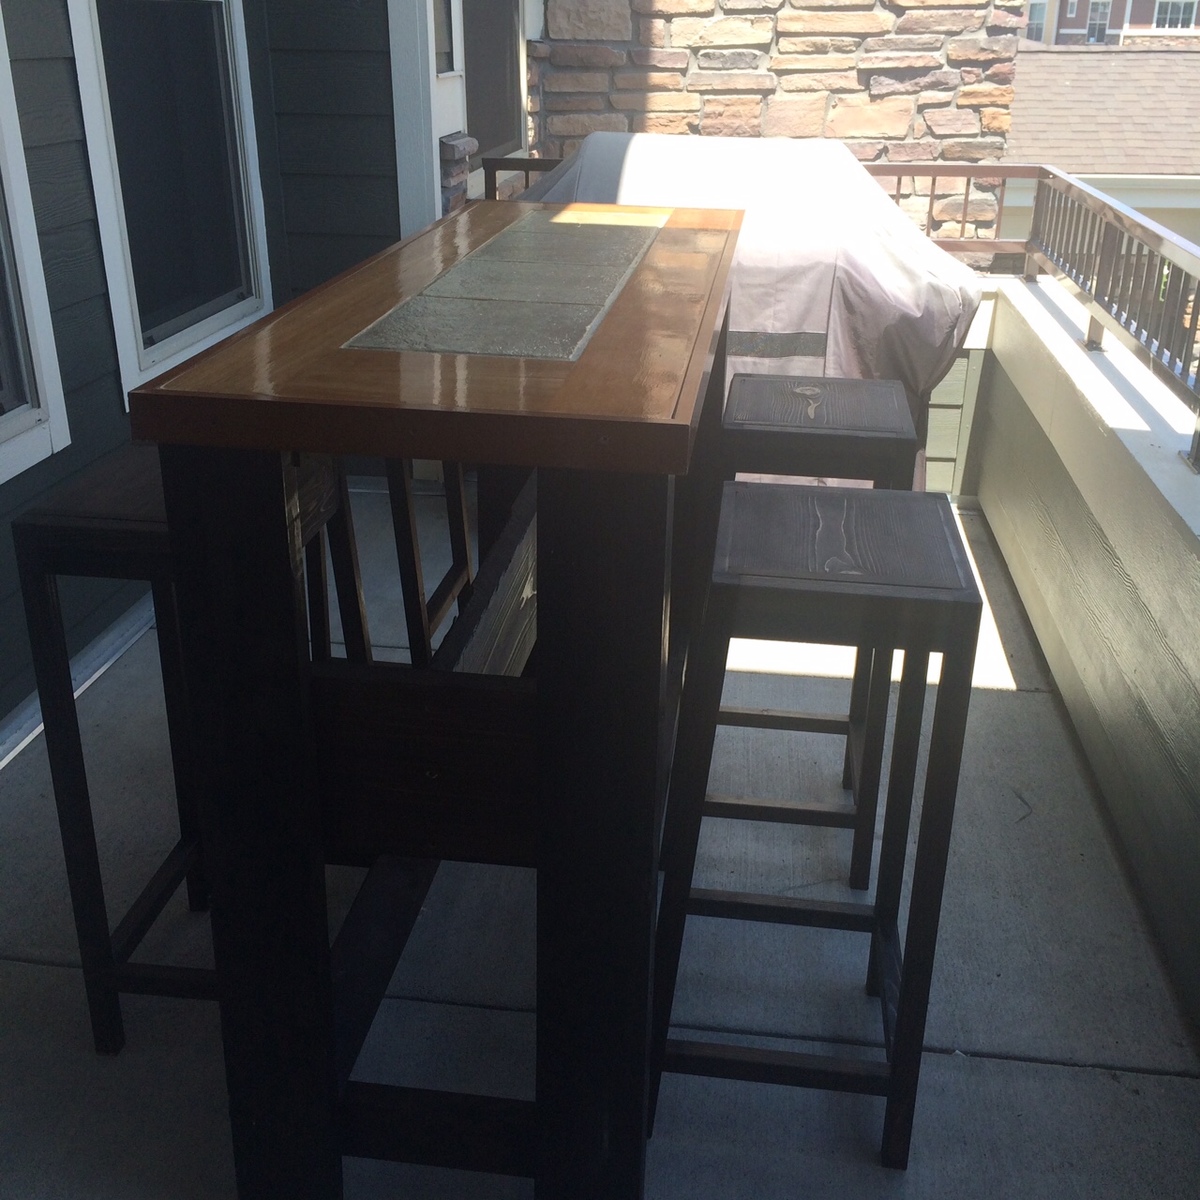
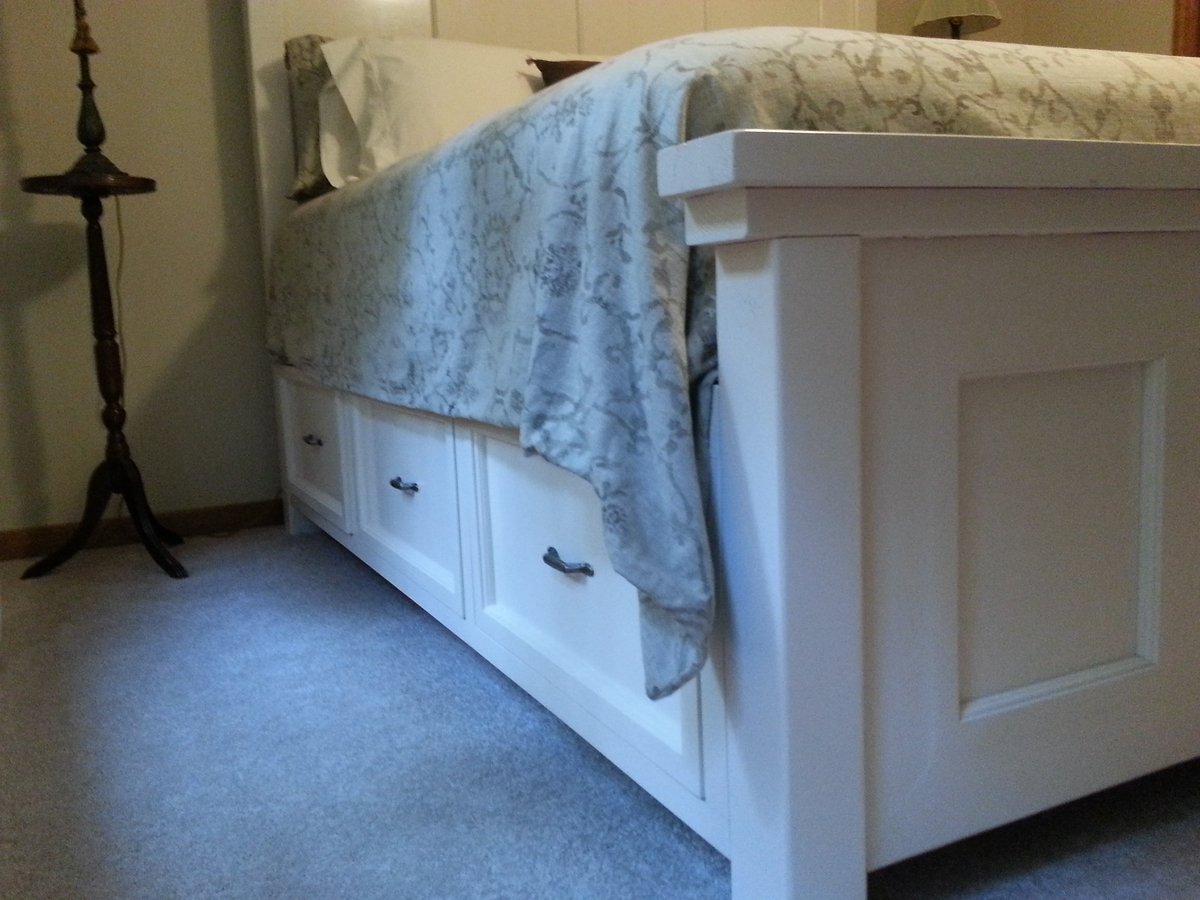
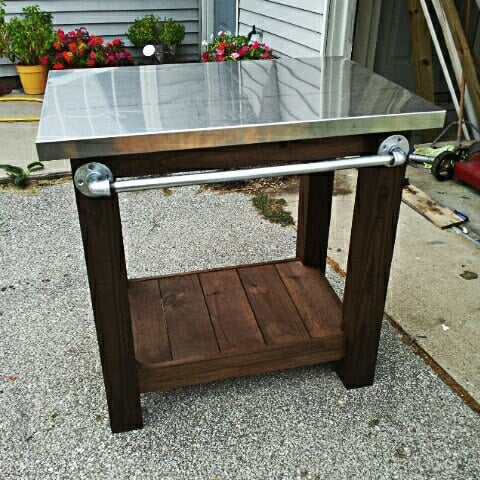
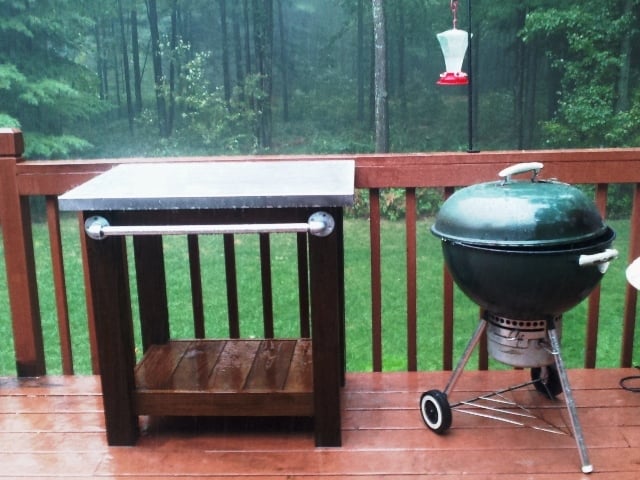
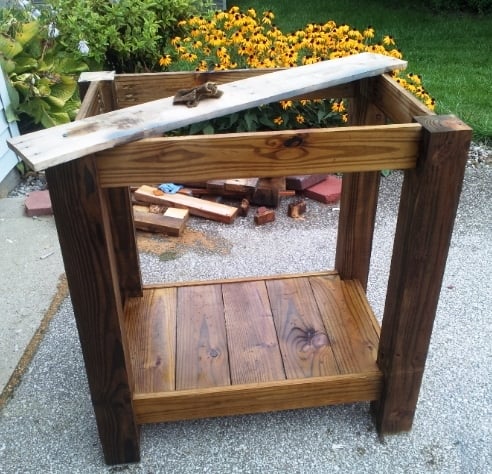
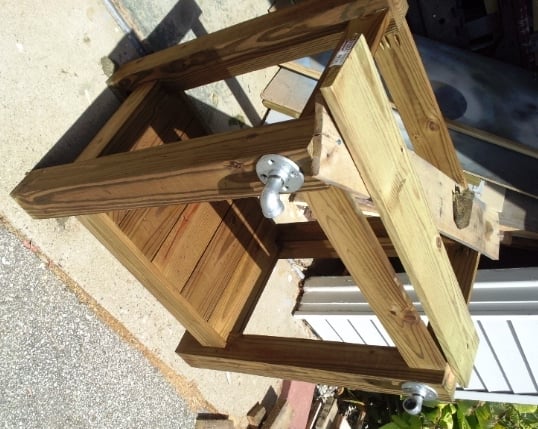
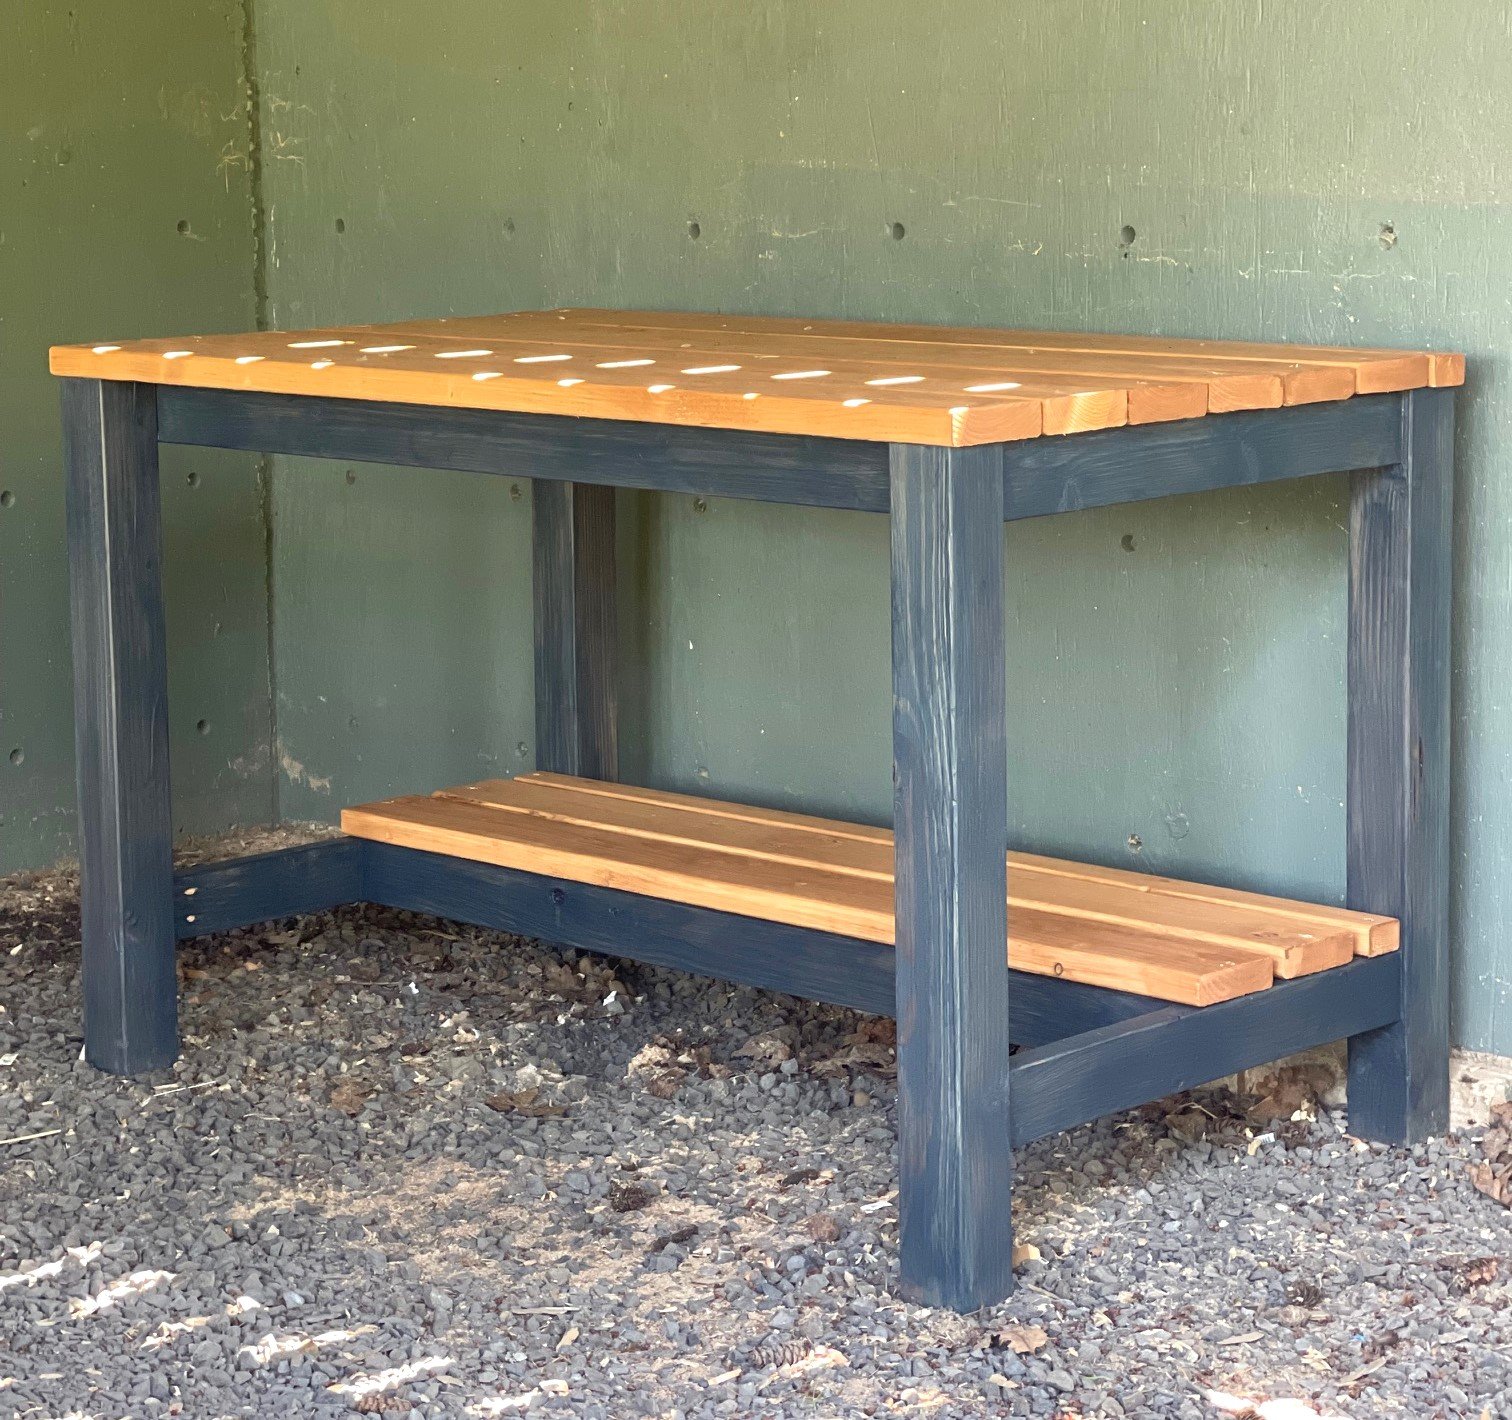
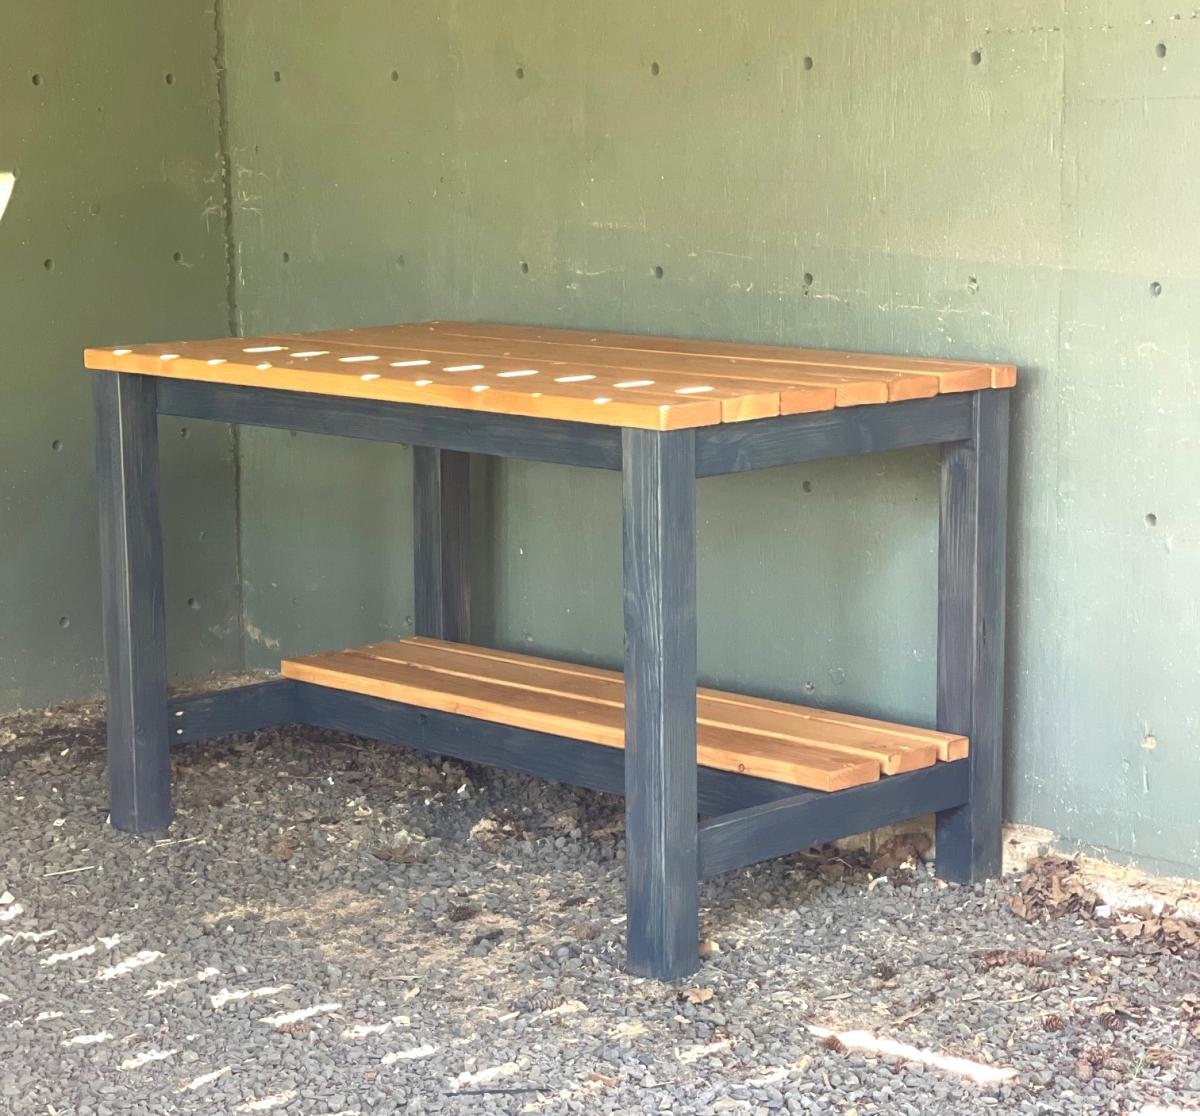
Built this today per request of my daughter because she wanted our stockings hung! I loved the stand Ana made but wanted to be able to use it after Christmas. I saw Shant2Chic built a stocking box and decided to combine my two favorite inspirational builders and came up with this! I hope you like it!

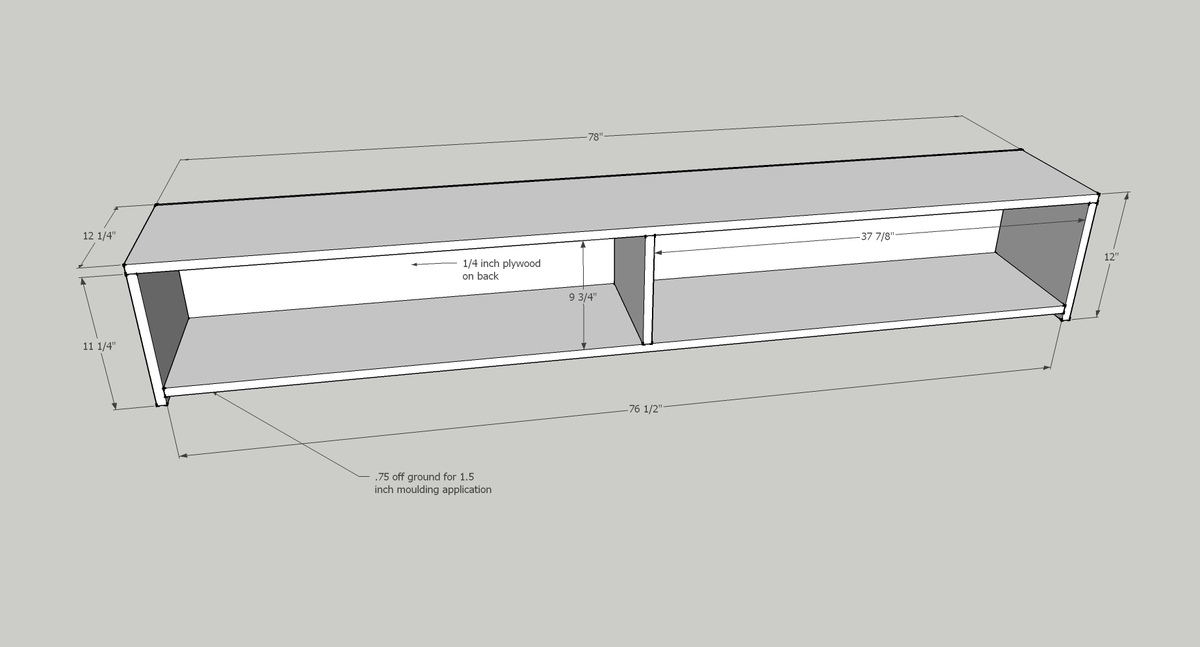
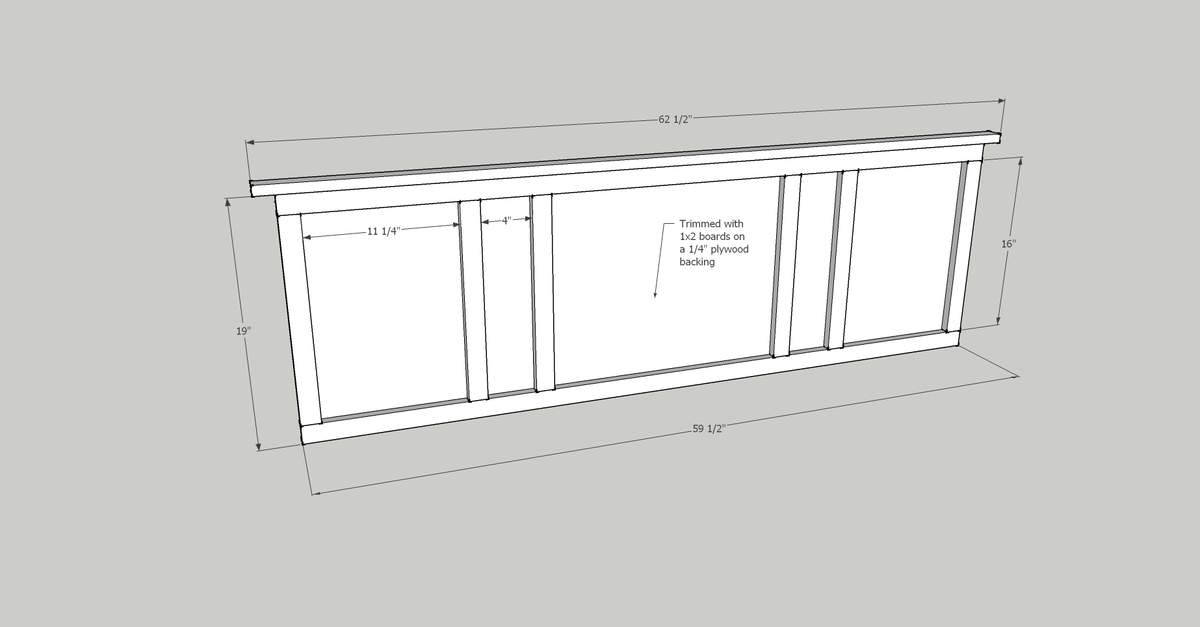
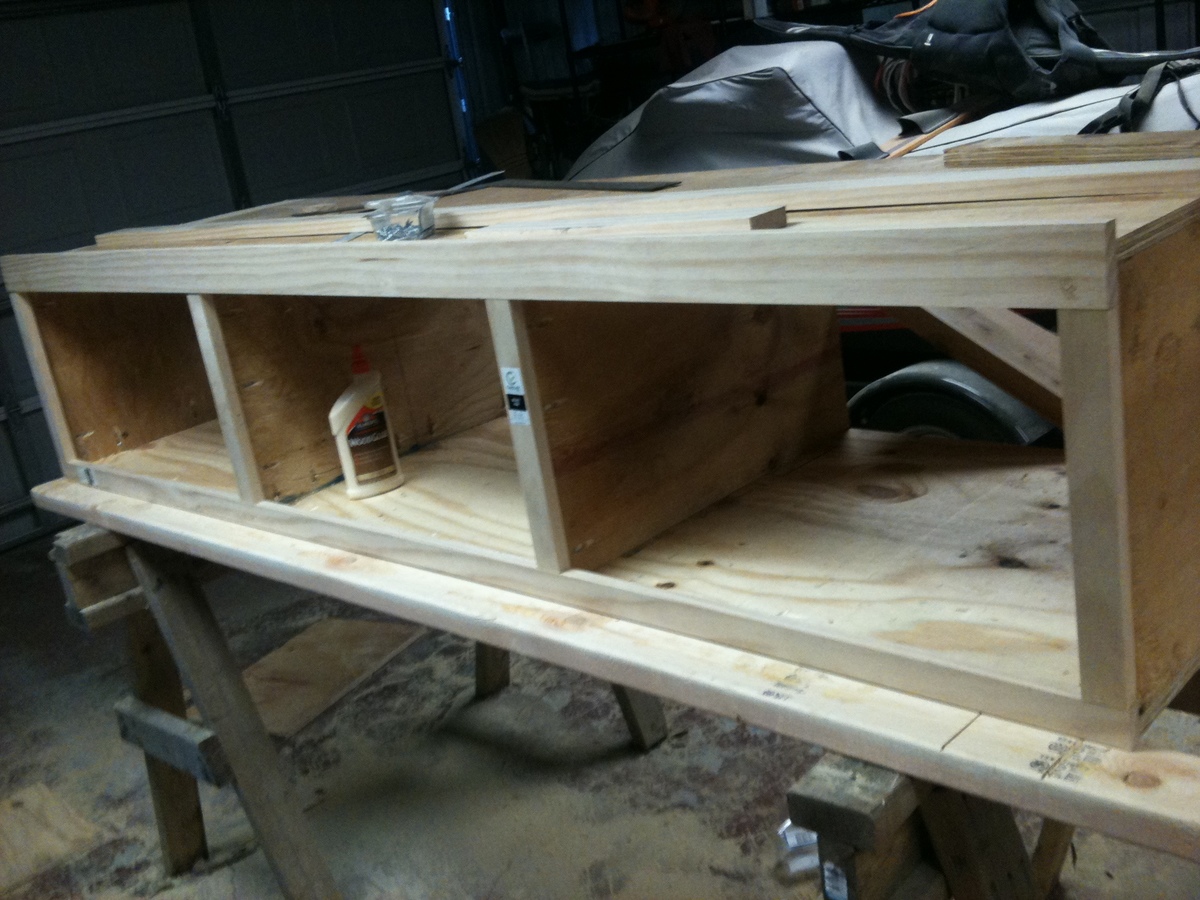
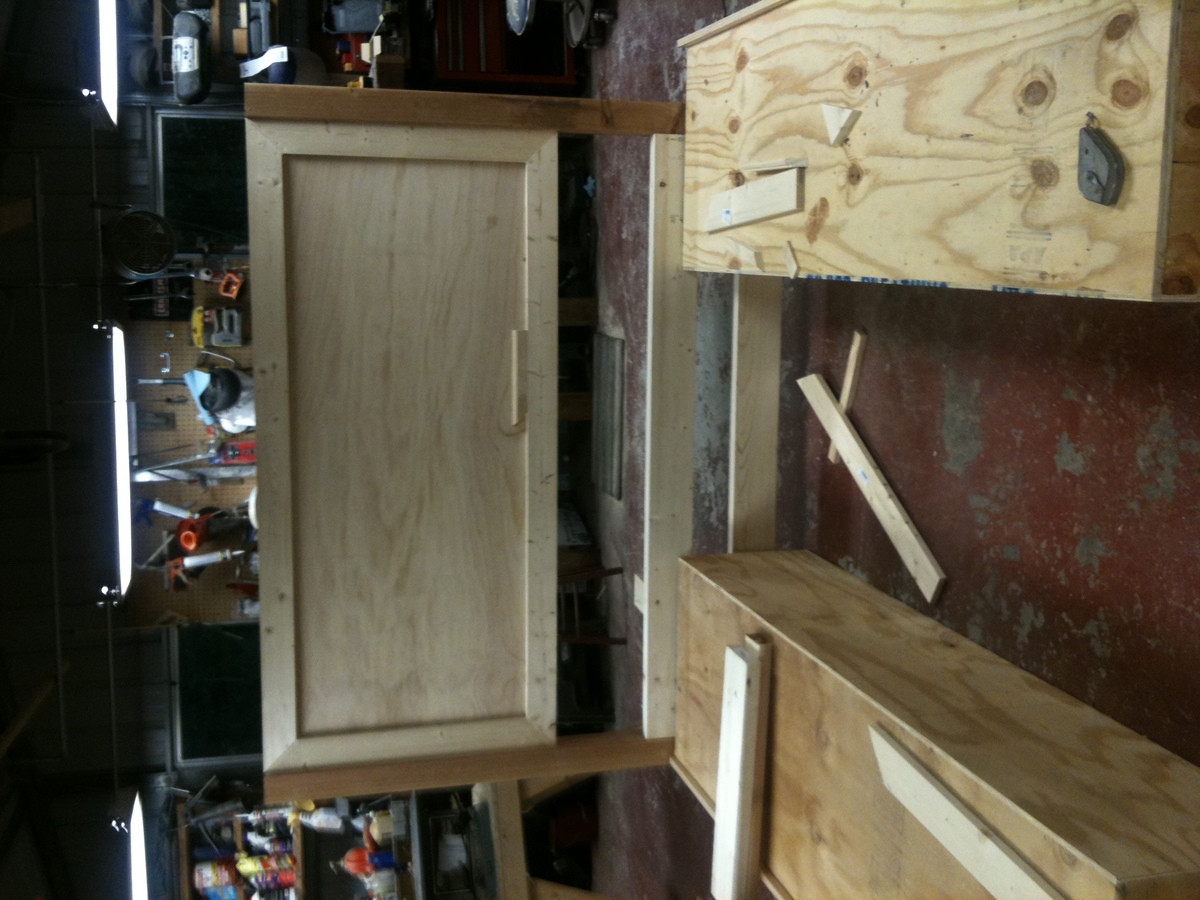
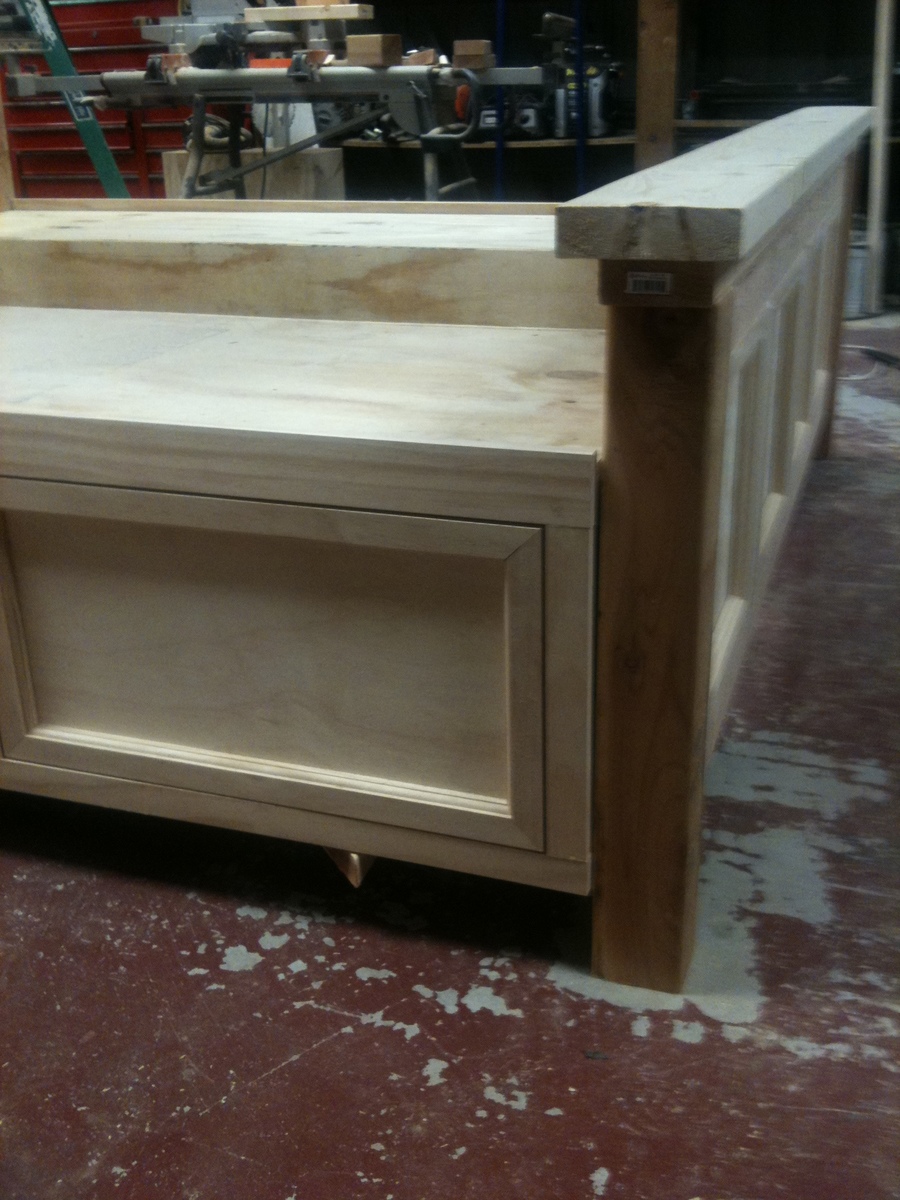
I added a 50” box (monitors Shanty2Chic’s measurements) and screwed it to the top of Ana’s Stocking stand!

Built from Plan(s)
Estimated Cost
$15
Estimated Time Investment
An Hour or Two (0-2 Hours)
Recommended Skill Level
Beginner

Comments

Greenhouse

Submitted by Anonymous (not verified) on Tue, 01/05/2021 - 08:08

We made some modifications to the greenhouse to include a bench with three levels, a working bench and a square foot garden. We also put it on concrete to keep all the weeds out from the bottom as well.

Built from Plan(s)
Estimated Cost
2500.00
Finish Used
We start our own seeds and plan to grow 15 different varieties of vegetables inside this greenhouse all year long.
Recommended Skill Level
Intermediate

Comments

Platform bed with 11in 2x6 legs added

Submitted by Anonymous (not verified) on Fri, 03/17/2017 - 09:32

We based this bed on plans we found on the Ana White website, but after final assembly we decided it was just a tad too low. Eventually we got around to adding the legs, which were made with left over pieces (from the bed project) of 2x6, cut to 11in.  We've been very pleased with the appearance, stability, and height of the bed this way. Now to wait for some nice weather to take out to the garage and stain/finish! If we would build it again, we would increase the width by an inch or two because the plans we followed "as-is" ended up being the exact dimensions of our mattress. Thankfully a foam mattress will squish into it and we won't have to rebuild for the extra inch. Overall pleased with our new bed. 


Estimated Cost
150
Estimated Time Investment
Weekend Project (10-20 Hours)
Finish Used
Unfinished. Sanded to 120 grit
Recommended Skill Level
Beginner

Comments

Tack Box

Submitted by Evandgc on Tue, 12/30/2014 - 16:21

I made this box for my wifes christmas present. She has been riding horses for sometime and is planning on doing some shows. I built this box from Mimi's storage bench design, made it bigger, added a deeper box top and created the rest from looking at pictures online. Its all made of pine plywood and pine boards to keep it light. I added 4 castors to the bottom to make it easily moveable and hid them with the moulding around the bottom. Still has to be sanded and stained before it hits the barn. Its 39W X 24D X 29H. I used a piano hinge and routered the back to set the hing in. Added cove moulding around the bottom and to all the boxes around the front and side. Used a lot of pocket holes and finsh nails. Took me longer than it could have, because I planned everything as I went.  I will add more pictures when its finsihed. I would rate it intermediate to advanced depending on your skills with certain tools. 

Built from Plan(s)
Estimated Cost
Will all the hardware, wood materials, screws etc, I think it cost me around $250-$300
Estimated Time Investment
Week Long Project (20 Hours or More)
Finish Used
not finished yet
Recommended Skill Level
Intermediate

Comments

Modern Slat Top Outdoor Wood Bench

Submitted by Anonymous (not verified) on Tue, 08/03/2021 - 06:31

Love your easy instructions! I used all 2x4's because it was made with left over wood from another project. I burned the top pieces to get the grain to stand out and painted the legs. I think they turned out beautiful. I also used your 2x4 Adirondack Chair Plan to match the bench.
Thanks,
Yvette

Recommended Skill Level
Beginner

Comments

DIY Murphy Wall Bed

Submitted by Dstor22 on Sun, 03/15/2015 - 07:05

Just finished up my Murphy Bed project. Hope you like.

Estimated Cost
280.00
Estimated Time Investment
Weekend Project (10-20 Hours)
Finish Used
Weathered Oak Stain
Recommended Skill Level
Intermediate

Comments

Hayden and Tanner's Play Fort / Swing Set

I built this play fort and swing set based on Ana's Playhouse design. Today is my daughter's 3rd birthday and it is a present to her.
She has helped me the whole way through the project. It was a lot of fun building it with her.

For more pictures on my project see
http://flic.kr/ps/2spv6t

The deck is 12' x 8' and it is 5' off the ground to the top of the deck. The tube slide comes off of a platform that is 3' x 4' and 7' high off the ground to the top of the platform. I got the slides, swing arm and swing legs off a set from someone selling and old set through craig's list. Everything else i built myself.

Estimated Time Investment
Week Long Project (20 Hours or More)
Finish Used
paint playhouse, pressure treated will be stained probably next year after drying out
Recommended Skill Level
Beginner

Comments

Farmhouse table modified

Submitted by Podgirl on Thu, 05/30/2013 - 21:11

I used the basic plan by Ana, but modified it for the size I needed. Its 2x12 pine with english chestnut stain and tung oil (formby's) finish. I did use 4x4 posts for the legs instead of 2- 2x4's. notching out was the most difficult part. (Should have watched the video by Ana 1st. Lol). I did want some over hang so I cut the leg notches 1/4 shallow so there would be detail. I regret not using the kreg jig on the top, as I have much bigger gaps than I like! But I started buying better tools during this build when I realized mine were not getting the job done. And it definitely makes a huge difference!!! I still have to finish the benches. Just trying to find the time. I can't wait to start the next project!

Estimated Cost
$200
Estimated Time Investment
Week Long Project (20 Hours or More)
Finish Used
English Chestnut with some walnut added. 10 coats of formby's tung oil first in high then low gloss.
Recommended Skill Level
Intermediate

Dog Kennel

Submitted by Tamila on Wed, 03/16/2011 - 22:57

I am so excited to post these pictures of the dog crate I built for my boxer. I was a little nervous about beginning this project. It was my first project - aside from the garden boxes. I bit the bullet and bought the Kreg Jig, and I'm glad I did! It is so easy to use. The project was easy enough, I did make a few mistakes along the way, but I was able to fix them easily enough. The pictures show the dog crate without the door, (we were getting our puppy used to the crate before putting the door on). As you can see, the kennel is big enough for a big dog, my niece and my nephew had fun playing in the kennel.

Estimated Cost
$80
Estimated Time Investment
Weekend Project (10-20 Hours)
Finish Used
none yet ;)
Recommended Skill Level
Starter Project

Drop-Down Door Hutch Desk

Submitted by danicarby on Thu, 05/14/2015 - 13:47

I designed this desk from another desk I built. With this one, I wanted the overall foot-print smaller but still something that was able to organize all our office stuff and be able to close everything to keep it clutter-free. We have a small apartment, and although this desk is about the size of an up-right piano, it works perfectly into our living space!

I made it out of raw hardwood (Ash) and because I knew just the wood alone would make this desk heavy/bulky to move I made the top hutch removable. It's held in place by wood pegs (dominos). All the shelves are adjustable and the drawers are full-extension (something I've never had - wahoo)! The drop-down door is help up by 2 pull-out boards on each side (my first desk had chains). I spend a lot of money on this desk because I knew it was a chance in a lifetime to make and wanted it to be perfect and something that would last generations.

I built the main carcass off of plans/measurements I designed, but then all the insides, drawers, shelves, doors, etc where made as I built (because just a millimeter difference in building changes everything)!

If you want more pictures/descriptions of the building process I wrote about it in a 4-part series on my blog.

Estimated Cost
$1,000 for all wood & supplies
Estimated Time Investment
Week Long Project (20 Hours or More)
Finish Used
To achieve the ash gray color I used "General Finishes" brand water-based stains (equal mixtures of Walnut, Antique Oak & Whitewash) with 1/2 ratio of Pre-Stain Conditioner (bought from Woodcraft). I did 2-3 coats stain, lightly sanded and sprayed 2 coats of Ceramithane clearcoat using HVLP sprayer (sanding with 550 grit paper in between).
Recommended Skill Level
Intermediate

Comments

Patio Stools 35 inches

Submitted by Kcirone on Sun, 08/09/2015 - 17:10

I adjusted from the plan to build the stools to 35 inches and found they remianed very stable! Used Cedar for the seat and aprons, and redwood for the legs and supports. 

Built from Plan(s)
Estimated Cost
25 per stool
Estimated Time Investment
Day Project (6-9 Hours)
Finish Used
Jacobean stain
Recommended Skill Level
Beginner

Finally a bed for my little girl

Submitted by redhead_61 on Sat, 06/18/2011 - 11:33

We are poorer than poor which I am sure some of you can relate to. This means I have been looking longingly at Ana's site for more than a year now with no hopes of ever getting anything of my own started. But, I borrowed my brother in laws tools. I started small and sold some stuff and now I am building (still slowly) with 100% money earned by my new craft, talent, and sweat! This means I only get to build something for me every two projects or so, but feels AWESOME not to be taking from a very tight monthly budget.

I sold everything in my daughters room that counted as storage to help along the process. So she has needed this for a while now. I am so excited that it turned out looking so well. It was a pretty easy build and I am so happy. She loves it too. THANKS ANA!

I extended the sides from the original plan so that it was all open and then designed a footboard. I'll post the plans for that extension.

Built from Plan(s)
Estimated Cost
$70 but I bought the cheapo plywood to save about $30
Estimated Time Investment
Day Project (6-9 Hours)
Finish Used
One coat primer, Two coats semi gloss
Recommended Skill Level
Starter Project

Comments

brookifer86

Sat, 06/18/2011 - 12:55

So exciting that you paid for this bed from profits from other builds! I'd love to do that myself, and seeing this post is such an inspiration!

jeannemomof5 (not verified)

Sat, 06/18/2011 - 13:29

I do relate to this post, but just the first part. Poorer than poor and looking at the sight longingly. In fact, I haven't been on here for awhile because it just makes me antsy and frustrated.
I would love to get some tools. I told my sister in law that my brother should just gift me some of the old ones he wants to sell, in repayment for all of the back scratches and sunburn peelings I did for him. Haven't heard back about that yet :) But he lives a long way away so I could buy some cheaper than the gas prices to go get them :)

merideth

Sat, 06/18/2011 - 13:57

now THAT is what i call being a good steward(ess) of your money; and your daughter must be ecstatic to have her own beautiful bed!

jennyda

Sun, 06/19/2011 - 02:53

Love your take on a storage bed. I'd been thinking about making a few adjustments to take the storage off the end of the beds. Looking forward to them.

Guest (not verified)

Sun, 06/19/2011 - 18:47

YOU should be very proud!.. This is very ecclectic, chic, elegant.. multipurpose grow with you bed.. AND YOU did it.. Awesome... !!! I bet your daughter is very happy with her bed....
I love the headboard.. Ingenious.. i've been thinking on how to integrate the tufted look with Ana's plans.. And now i have you to thank for the Inspiration....

judym

Mon, 06/20/2011 - 10:36

Your candor and honesty about your situation really hit home with me .. though I suspect there are more than just a few of us struggling along. Thank you for sharing and proving again that it IS possible. Your daughter is fortunate to have such a great role model (and such an awesome bed and room!). Thanks for sharing - truly inspiring! And thanks again to Ana for helping us all to expand our roles as home-MAKERS!

redhead_61

Mon, 06/20/2011 - 12:51

I am so touched that everyone took time to look at my little project, and obviously read my story. Thank you all for such encouraging words. I LOVE that Ana has enabled us all to be a little "family" in our venture out of our comfort zones.

Will (not verified)

Tue, 12/04/2012 - 15:41

Hi redhead_61,
I love the projects you have posted on here and think it is amazing that you now build custom projects. I have just done a couple projects and want to do more because of the thrill of seeing something and making your own creation from it. If you don't mind me asking how did you start selling your projects? Do you have a website?

Will (not verified)

Tue, 12/04/2012 - 15:42

Hi redhead_61,
I love the projects you have posted on here and think it is amazing that you now build custom projects. I have just done a couple projects and want to do more because of the thrill of seeing something and making your own creation from it. If you don't mind me asking how did you start selling your projects? Do you have a website?

Will (not verified)

Wed, 12/05/2012 - 08:00

Hi redhead_61,
I love the projects you have posted on here and think it is amazing that you now build custom projects. I have just done a couple projects and want to do more because of the thrill of seeing something and making your own creation from it. If you don't mind me asking how did you start selling your projects? Do you have a website?

brguad

Thu, 06/23/2011 - 17:58

You really did a great job with this. I am really impressed that you built it and did the plans! Unbelievable!! I can't wait to see your next project.

Sandi (not verified)

Fri, 06/24/2011 - 05:37

I have been searching for plans to make a bed for my daughter for over a month now. I found a few that would serve the purpose but were not quite what I wanted. This bed, however, is perfect! I love the storage and it seems easy enough for us girls to handle. I plan to pick up the wood tonight and make it over the weekend. Thank you for the great project.

lmh1632

Wed, 07/06/2011 - 18:55

I have been longingly looking at several plans from this site for awhile myself, but we too are poorer than poor! I mean like struggling to keep toilet paper in the house not sure where the groceries will come from next week poor! BUT your post inspired me:) I'm soo glad for you that you are able to build things for yourself from the profits of other builds. Your daughter is very lucky:)

redhead_61

Sun, 08/07/2011 - 21:22

I just used a sheet of plywood (you could also use OSB which is cheaper) figured out my measurements and shape and then cut it out with a jigsaw. The good thing about this type is that it doesn't have to be a beautiful cut because it will be covered up. You will then need to pre drill your holes figuring out what type of design and where your buttons will be.

I used two layers of batting as my foam layer. Professionals use a thick layer of foam and spray adhesive it to the board. This could be VERY expensive depending on density and size. I had a friend tell me she used a couple of those waffle bed pads back to back (so the flat side is out) That would be cheaper and still give you some good tufted look. My buttons didn't end up indenting very much because I only used batting.

Then you cover foam with batting and then fabric and staple it all to the back of the board. Make sure to pull tight as you go and keep checking that your fabric looks good. Then you use thick thread or string or twine to thread through the back, through all the layers, through the button holes and then back through. You will need an anchor of some sort on the back to keep the thread pulled tight against the back of the board. You could use a nail, a dowel, or I just used another button because I had a bunch. You then pull as tight as you can and knot.

And then do it LOTS more times! Fairly easy but a little time consuming, but SO worth it. I used regular buttons and then hot glued big rhinestones onto them for a sophisticated bling!

Ayana (not verified)

Sun, 08/14/2011 - 19:10

I have been working on bunk beds for my girls for over a year now. I should be done soon. I can totally relate to the money being tight. :) Beautiful bed

Jamype (not verified)

Tue, 04/17/2012 - 07:48

If nothing else, you are certainly RICH in talent:) You did a wonderful, inspiring job, and you are teaching your daughter to be independent and resourceful. I am giving you a virtual pat on the back!

shwalton (not verified)

Sun, 01/06/2013 - 06:12

Hi! I'm so happy I found this because I'm in live with your design! I loved Ana's too but I didnt likehow the three benches came together and there was the block of wood on the side. Anyways, could you tell me what sized bed these dimensions are for!? It looks like a queen to me but I'd hate to second guess myself.

In reply to by shwalton (not verified)

redhead_61

Sun, 01/06/2013 - 13:21

The bed pictured on here is a full size mattress. However, I have since put a queen size mattress on this same frame. It still fits pretty well. I did have to pull the mattress away from the headboard, but I had never attached mine, and since I have the little curtains hanging on the sides it hides the difference well. A queen is 6 inches wider and 5 inches longer if you want to add in the difference when you build.

Krit_krat

Wed, 09/18/2013 - 21:07

Hi! I just went and bought all of the lumber and had the cuts made at Home Depot but when I got home to assemble I had some areas of confusion...

1. I thought I might be short one 1/2 plywood cut to 12" x 78" as the list only called for one but I thought these were being used as the back to the two side cabinets

2. Do two of the four 3/4 plywood boards cut to 11.5" x 78" need to be cut to 76.5" to be used as the bottom shelf of the cabinet?

Thanks!

In reply to by Krit_krat

redhead_61

Fri, 09/20/2013 - 13:49

Yes two of the plywood cuts are to 76.5". They actually sit inside the side legs of the cabinet space. Look again at the cut list pictures on here and it will show better. THANKS. good luck

King Farm House Bed

My husband designed this after the farm house bed. I wanted panels on the head board and foot board to "dress it up a bit" and storage drawers. He did a wonderful job. I don't think I have ever had a more prized piece of furniture. Now to find some tall night stands.

Estimated Time Investment
Week Long Project (20 Hours or More)
Finish Used
Off white oil based semi gloss paint
Recommended Skill Level
Intermediate

Comments

vanash2012

Wed, 09/23/2015 - 11:54

Any chance you or your husband would share the adjusted plans to include the storage under mattress?

Thank you so much! love your site and your work!

vanessalust

Thu, 01/21/2016 - 21:52

Hi Ana! 

I was wondering if you had the plans available for this bed with the drawers underneath and the head and foot board ? 


:) thank you!

vanessa

nateleejohnson

Fri, 02/10/2017 - 05:27

What a beautiful bed.  Like others I was looking for the plans for the headboard and drawers.  Are they available?

Thanks,


Nate

danthony313

Sun, 12/17/2017 - 16:03

the wife loves this design but are there plans for the whole thing yet?

Tacoma9596

Wed, 09/25/2019 - 10:40

Ana,

   Can you provide plans with pics for this bed?   My wife wants it and I got tasked with doing it.

Grill table with stainless steel top

Submitted by krochelle on Tue, 08/20/2013 - 08:00

I made this table to go next to an outdoor grill to be used as a food prep area or just a surface for holding ingredients (instead of using the deck railing!). The top is stainless steel which fits tightly over 2 3/4" pieces of plywood laminated together. The bar/handle in front is made out of galvanized pipe. All wood was treated.

Legs - 4x4 posts
Bottom shelf - 1x6's
Sides - 1x4's
Top - 2 pieces of 3/4" plywood laminated together with a stainless steel top (custom fit) over top
Towel bar - galvanized pipe (cut and threaded to size at Lowe's), floor flanges and 90 degree elbows

Estimated Cost
$120
Estimated Time Investment
Day Project (6-9 Hours)
Finish Used
I used Kona stain but since it was over treated wood the stain did not take as dark as it should have. I will have to restain this piece after it has completely dried out.
Recommended Skill Level
Intermediate

Comments

spiceylg

Tue, 08/20/2013 - 09:07

Love this. Where did you get the stainless steel top? Did you have to special order to fit?

In reply to by spiceylg

krochelle

Thu, 05/15/2014 - 10:33

Sorry about the late reply! Yes, I just gave my dimensions to a local steel supplier and they made the top. I think I have about $40 into the stainless. They didn't weld the corners but I've never had an issue with them.

krochelle

Thu, 05/15/2014 - 10:46

No...I didn't have any plans when I built it but it's a very simple concept. I chose to use all treated wood since I knew it would be sitting outside unprotected. However, my 4x4 posts weren't square so this caused a lot of problems and everything was built to fit. I believe I just used 4x4's, 1X6s (for the bottom shelf) and 1x4s for the sides (top and bottom). For the top, I just laminated 2 pieces of 3/4" plywood together to bulk it up and then had the stainless top built to fit. It fit perfectly so I didn't glue it to the plywood. This makes it easy to remove and clean, if necessary. For the galvanized pipe (towel bar), I bought it at Lowe's and had them cut/thread it to fit my dimensions.

Mailbox Base

Submitted by TxDork76 on Wed, 11/14/2018 - 20:27

my mailbox was hit by a vehicle so I decided I wanted to do something creative/different but also didn't want to spend much money as it may just get taken out again in the future :)

this is a good project to get kids to help you with

instead of cutting into the concrete easement, I installed 2 post bases & locked them with sleeve anchors.  They're sturdy enough but will give if hit again.  drilling the holes for the sleeve anchors was the hardest part of the project.

I used a left over 4x4x8 for the posts, scrap 1x4s, 1x2s up the sides (1/2" gap between boards), and a 2x4 scrap to attach the mailbox.  I eyeballed the width between posts using the mailbox itself. I left over stain from another project (almost bought a quart of oops paint at HD)

I figure the total cost would have been about $100

It's a super easy project that took about 4hrs. I've already had a couple of neighbors come by to take measurements to try something similar.

FYI: USPS guildlines for installing a curbside mailbox: https://www.usps.com/manage/mailboxes.htm

Estimated Cost
$75-$100 depending on materials/tools on hand.
Estimated Time Investment
Afternoon Project (3-6 Hours)
Finish Used
valspar semi-transparent stain & sealer in "Pinebark"
Recommended Skill Level
Beginner

I used the corrugated polycarbonate to cover the greenhouse I made from a chalet style Sun Country Greenhouse Plans. Thanks for the idea.

Submitted by Anonymous (not verified) on Sat, 03/09/2019 - 06:34

I saw the barn shaped greenhouse plan but preferred a regular roof pitch. I did however incorporate the corrugated polycarbionate as a covering. I find it odd that you guys installed the polycarbonate horizonitally instead of vertically.

Anyway thanks for the info on polycarbonate.

Built from Plan(s)
Estimated Cost
Using cedar framing... 9 x 16' @ $3000 +/-
Estimated Time Investment
Week Long Project (20 Hours or More)
Finish Used
Behr
Recommended Skill Level
Intermediate

Comments

hauxy

Tue, 09/01/2020 - 17:47

Love this! I really prefer the roofline on your greenhouse. Did you modify Ana's design, or did you get plans from another site? Would love to replicate your design if possible-very elegant.

Seasonal And Holiday

Rustic Hall Tree

Submitted by Anonymous (not verified) on Mon, 02/27/2023 - 14:31

I had a lot of fun making this. Thank Ana, I enjoy looking at your work and doing new projects.

Built from Plan(s)

Comments

Kitchen island

Submitted by Anonymous (not verified) on Fri, 04/21/2023 - 11:56

my first project!

Built from Plan(s)

Comments

Double Bin Trash and Recycling Bin

Submitted by Anonymous (not verified) on Tue, 02/02/2016 - 12:54

Modified the design a bit to be lift up lids instead of tilt out.

Estimated Cost
125
Estimated Time Investment
Weekend Project (10-20 Hours)
Finish Used
White Painted Base, Dark Walnut stained top
Recommended Skill Level
Intermediate

Comments

Matt712

Sat, 03/07/2020 - 02:29

I’d be grateful for details, plans, measurements for this project. This is an amazing build, nicely done.With green top looks fantastic and complements the white very well.

smbanks75

Thu, 01/11/2024 - 20:31

To everyone asking for the plans, it's a modified tilt out. It states right there under the pics that it was modified and the original plans are there in red, under "Built from plans"