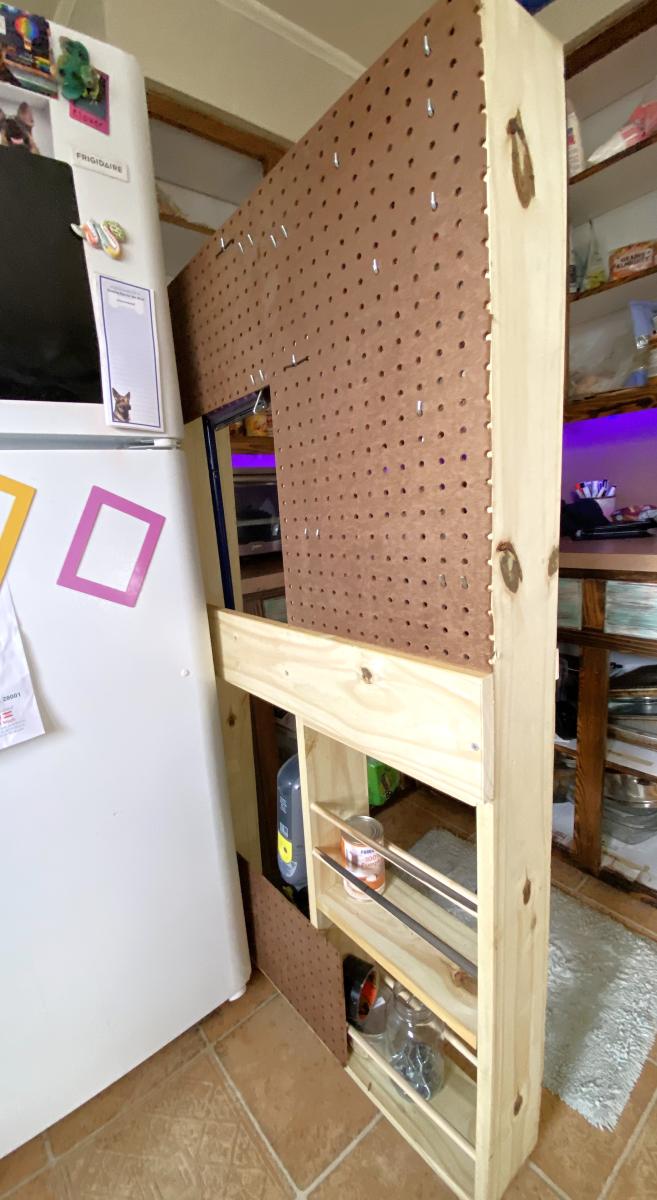
Rolling Kitchen Organiizer
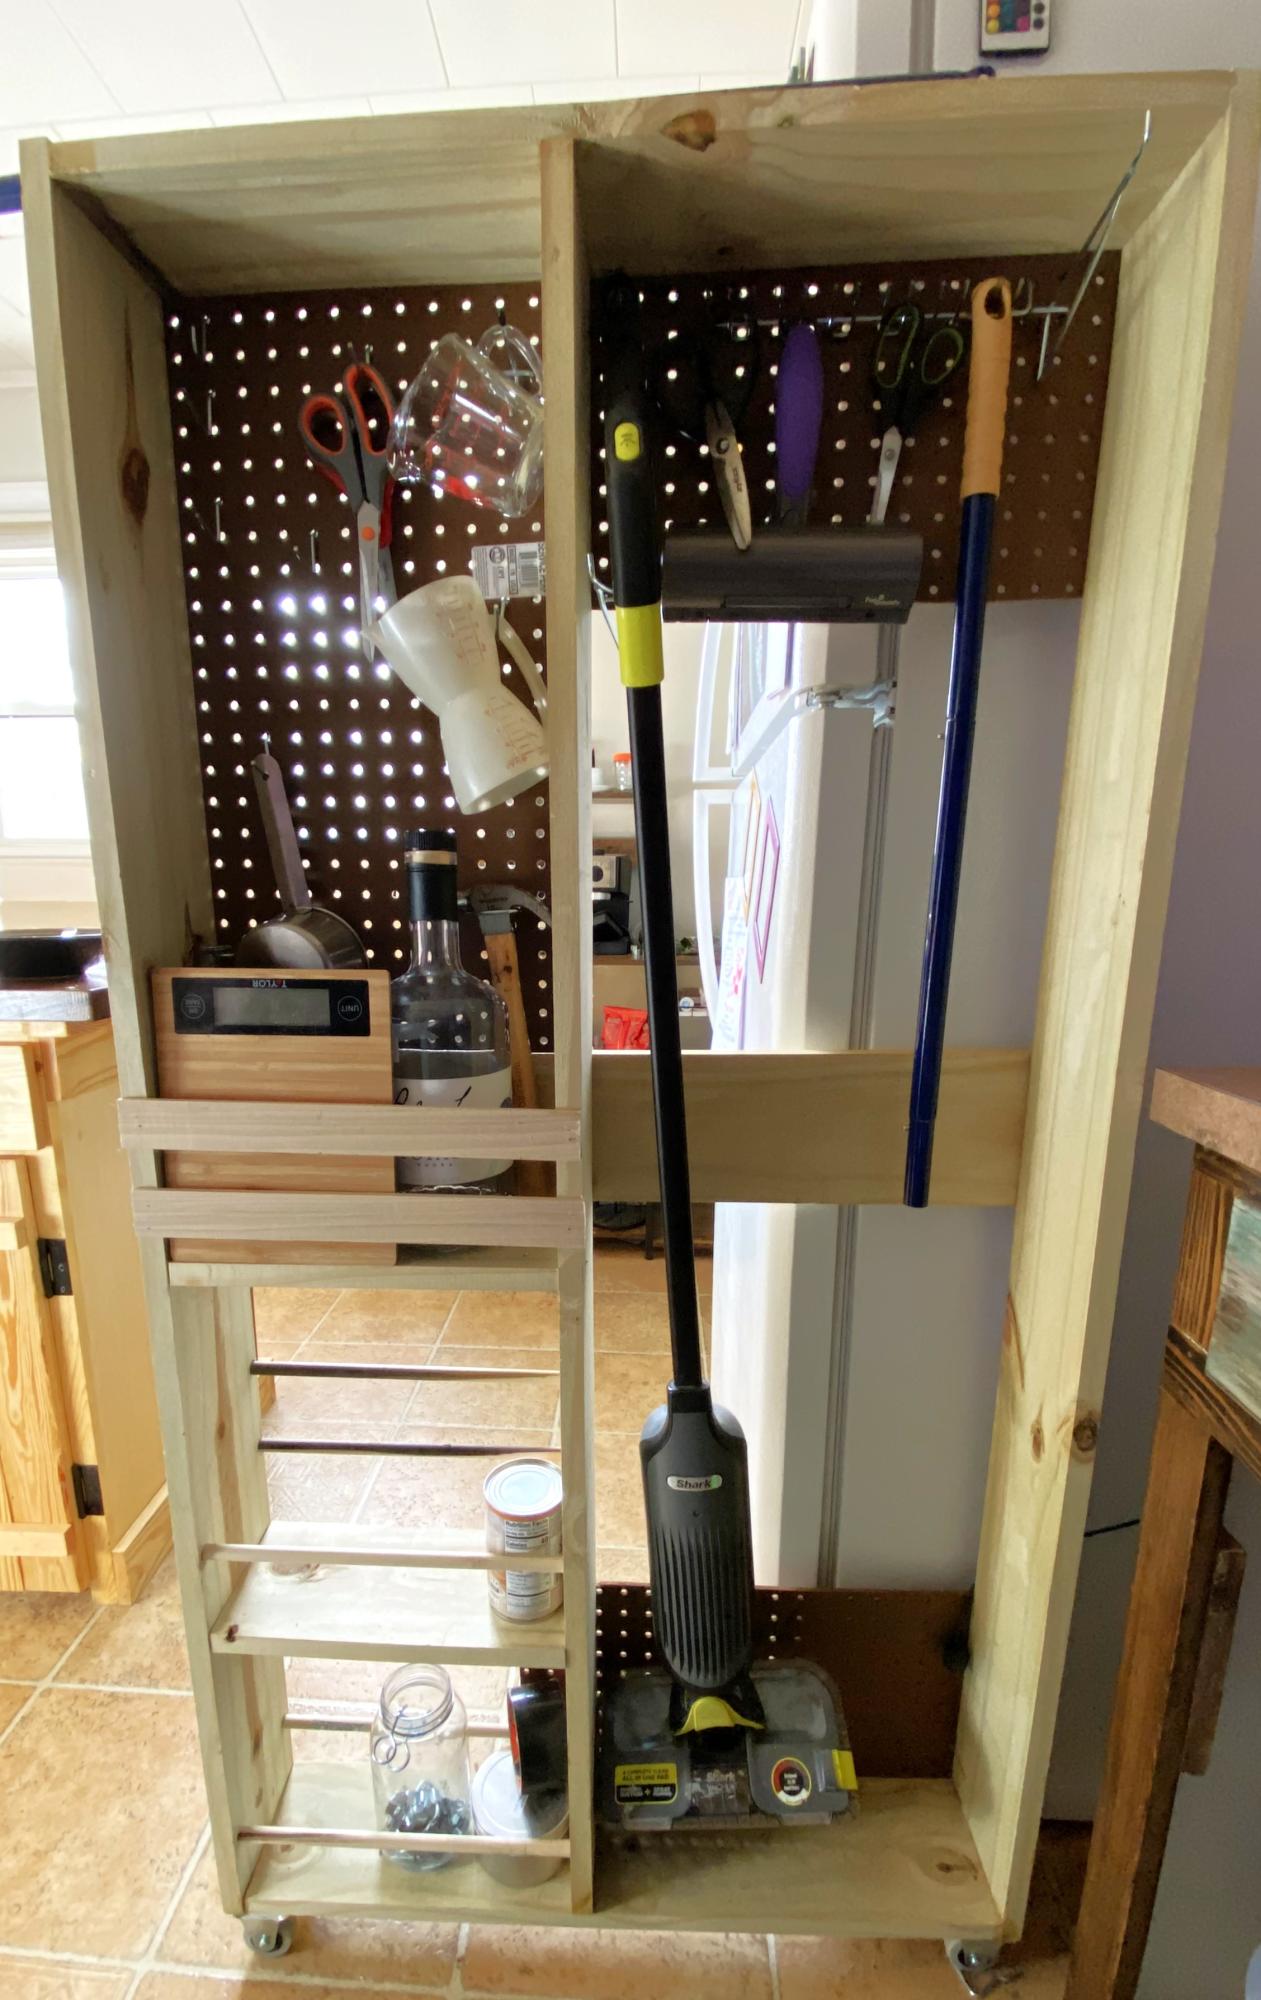
Not the prettiest but extremely effective. I think my entire kitchen will be all Ana White by the time I finish….what an inspiration she is! Thank you!
Built from Plan(s)
Not the prettiest but extremely effective. I think my entire kitchen will be all Ana White by the time I finish….what an inspiration she is! Thank you!

I finished my first project. Although there are some cosmetic errors, I think overall it’s amazing. We had a lot of wood left behind by the builder of our log home. So, I was able to use a lot of that. I made some adjustments to the height of the boxes to help the back!
Michelle M - Jefferson, NC

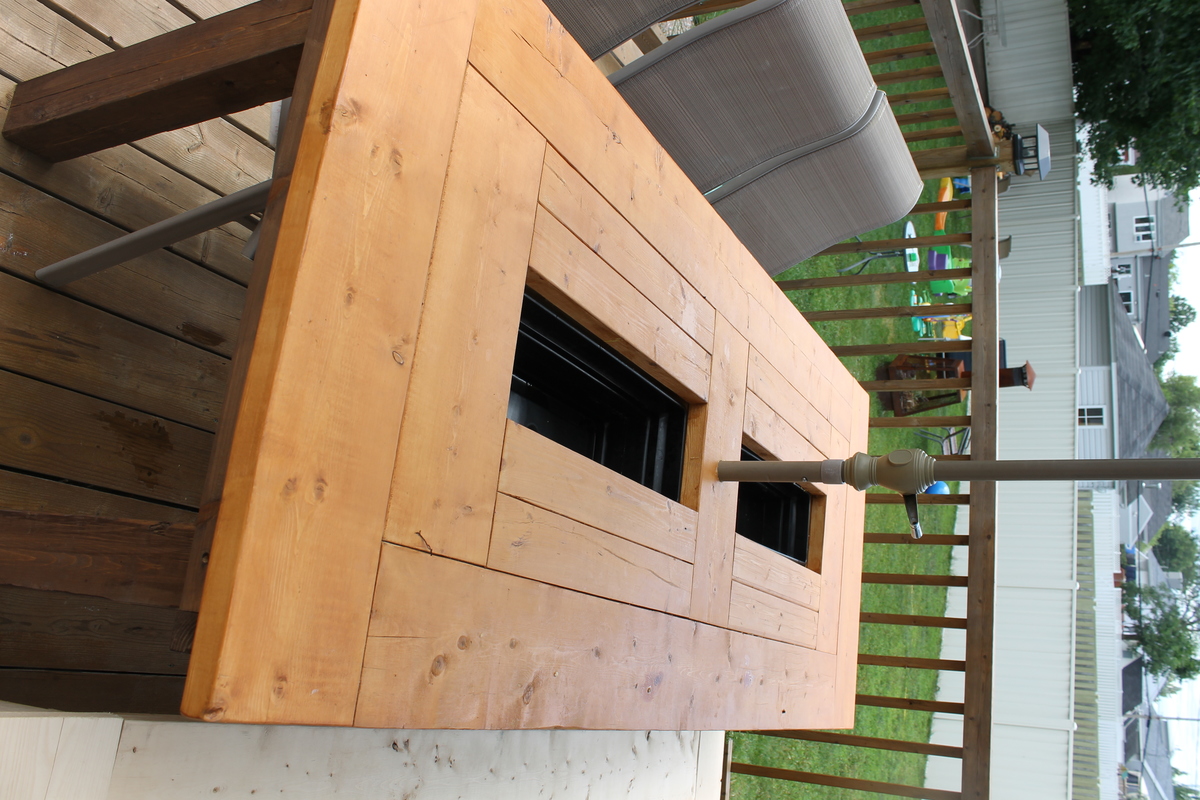
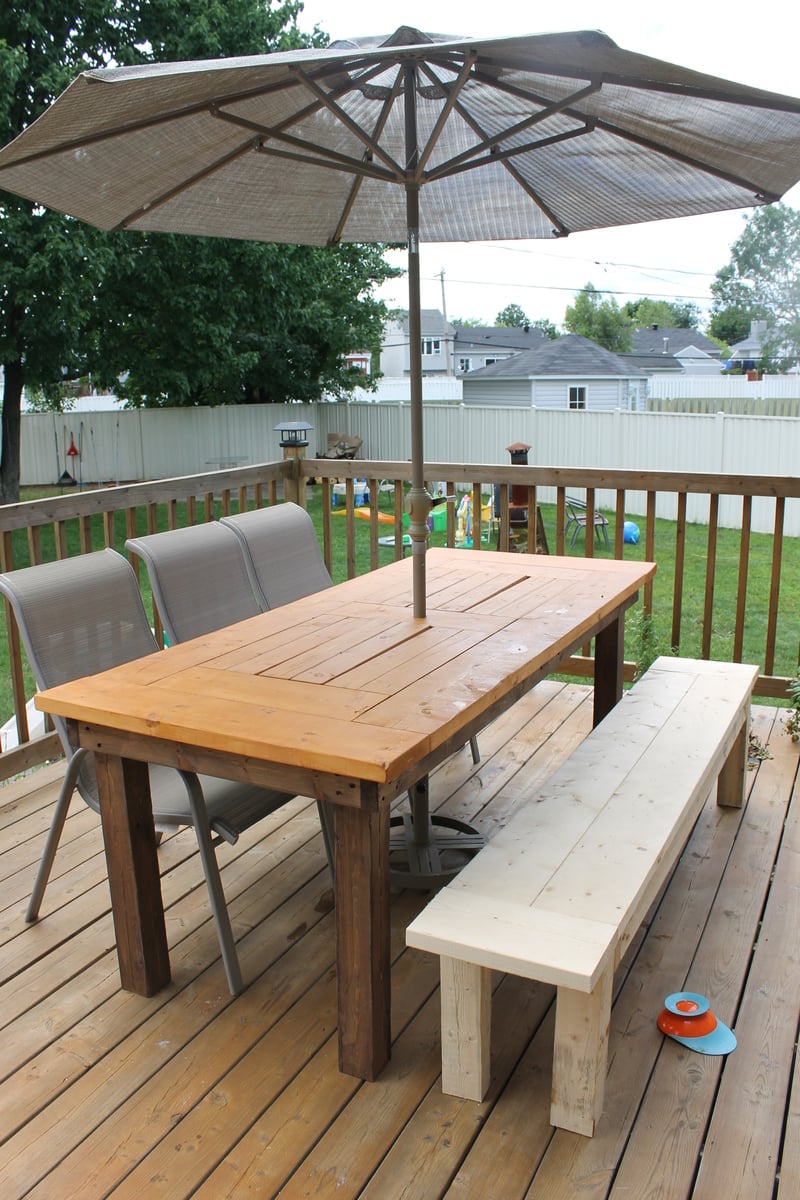
My sister was in love with my 4x4 truss table i made and needed a patio table so we decided to take one day to make 2 tables, one for each. We convinced both daddys to take care of the kids while we made the table by telling them the tables were gonna have beer coolers inside! Attaching the to of the table was a lot a job. If you plan of doing this you really want to have a kreg jig. It works well, we love it. I made a bench to go with it. I made my how plan for it.
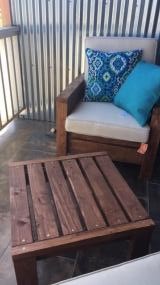
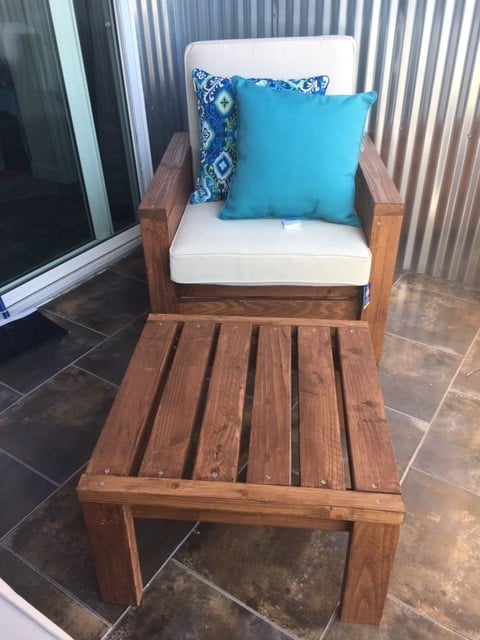
The chairs were my first project ever and they came out great! I even made the ottoman/side table because the chairs looked so good. Ana, your plans were fantastic and easy for a beginner. I learned so much from this first project and I'm already working on another project from your site! The cushions were definitely the most expensive part of the chair.

I had a big empty wall in my den/man cave, so I decided to build a dartboard cabinet instead of just hanging a dartboard on the wall. No plans for this, I just made it up as I went. Measured twice, sketched it out and cut as I went.
I use pine 1x4's for the frame and back. 1x3's for the accessory box, 1x2's for the door frame, and poplar strips for the doors and door braces. The darts are held by 6" long 2x2's with holes drilled.
Wood screws, finish nails, and small brads were used to hold everything together.
The chalkboards are simple MDF's cut and sprayed with chalkboard paint. Overlay hinges are used for the doors, and the dartbord is held on with screws from the back so it can be replaced when needed.
The Alabama A is hand-painted.

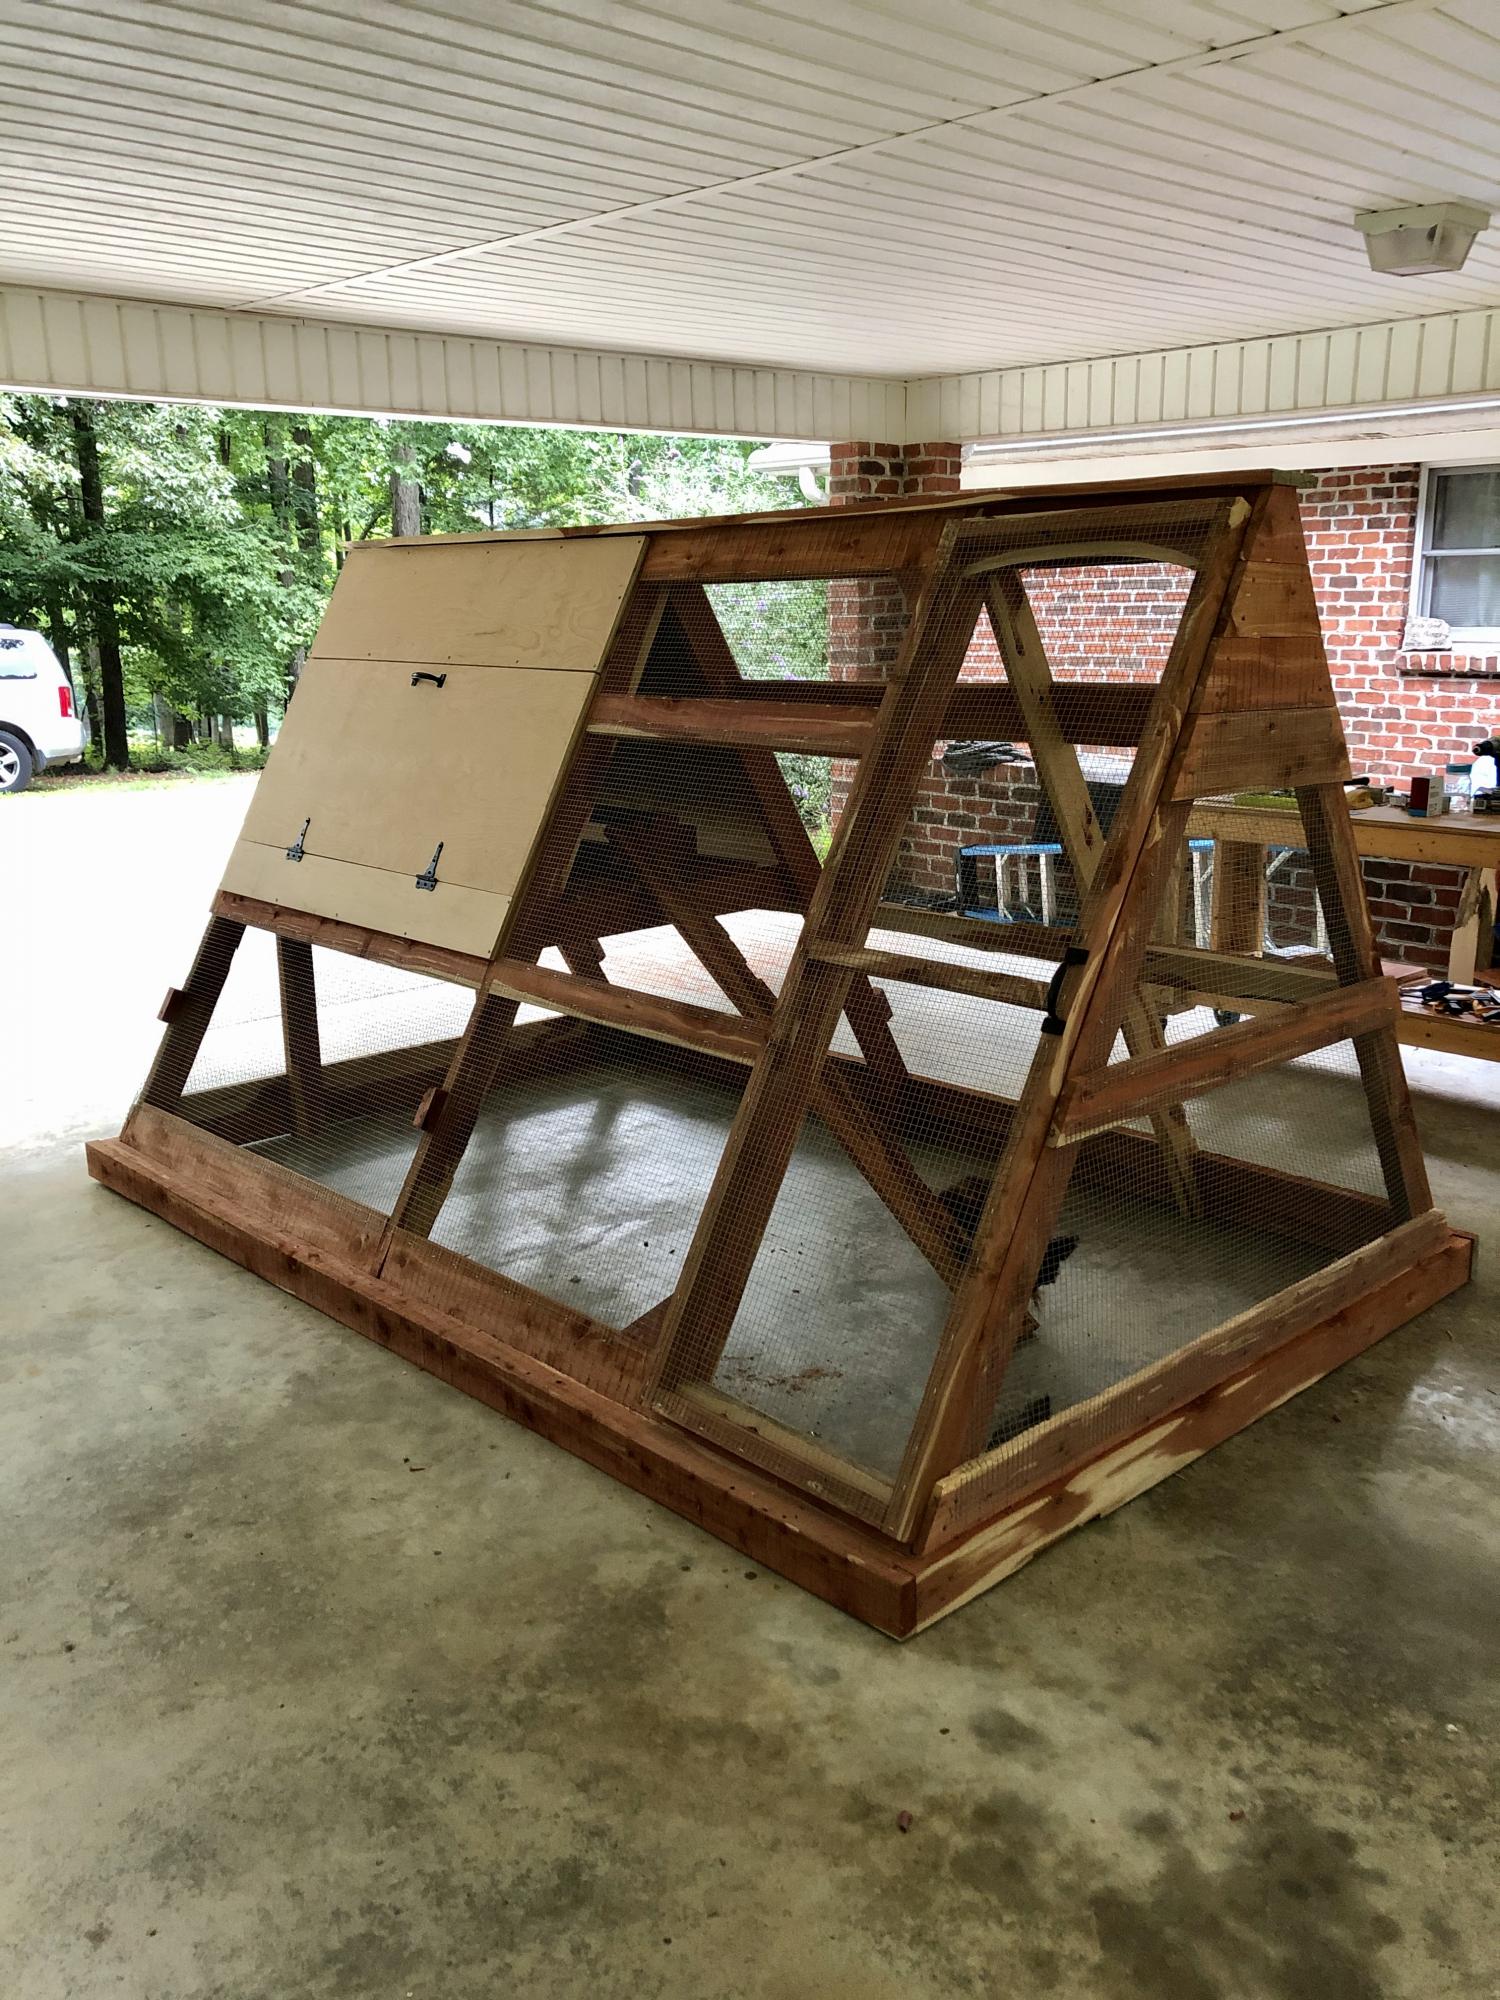
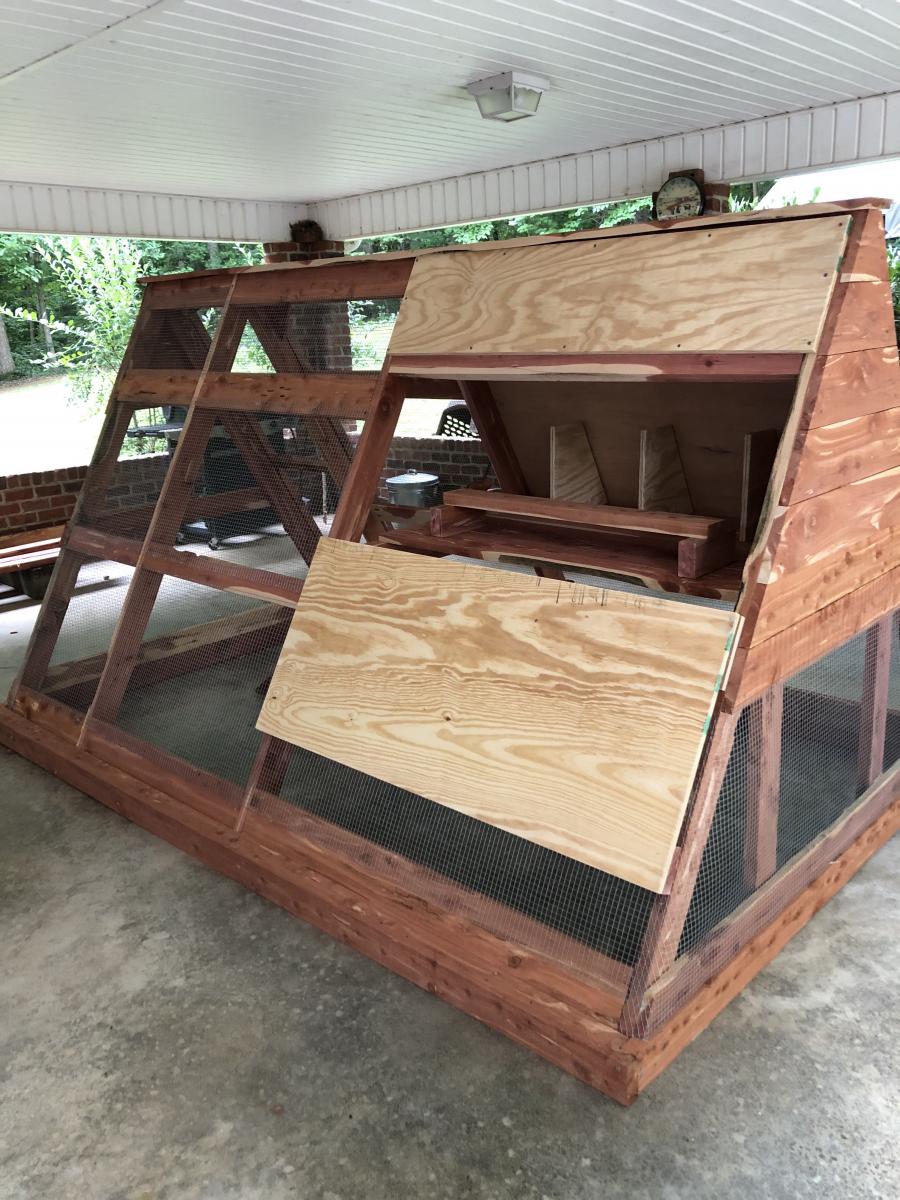
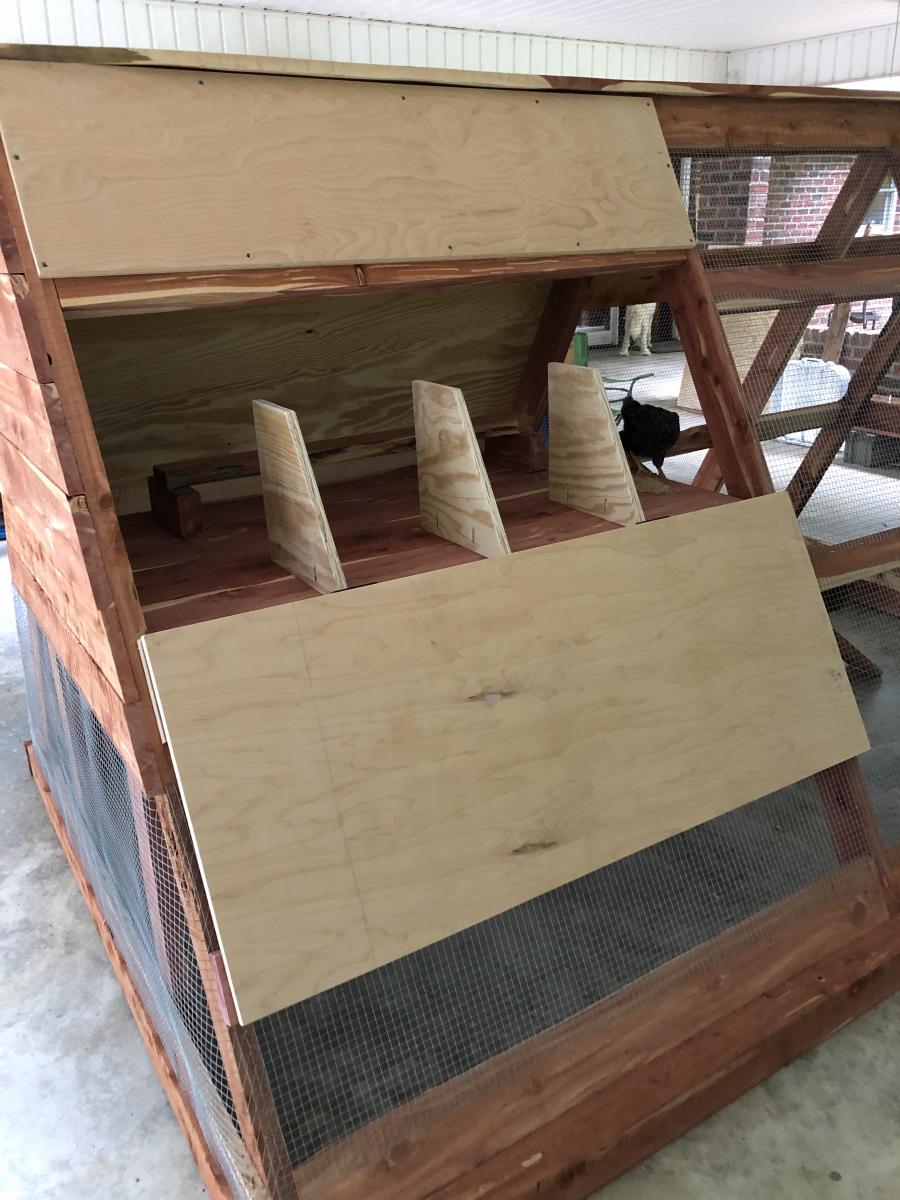
This was my biggest build yet and these plans along with being able to see a few brag posts with modicifactions made this project less intimidating. I extended the coop in order to add a walk in door. The drop down doors on both sides will give plenty of access and help with cleaning. I've added door latches to all the doors since putting it in place. My dad provided the cedar so that greatly reduced my costs. This project took about six days to complete. The fun part was getting it out of my carport : ) This was built for my daughter's chickens and she is thrilled with it. So am I! Thanks for the plans Ana!

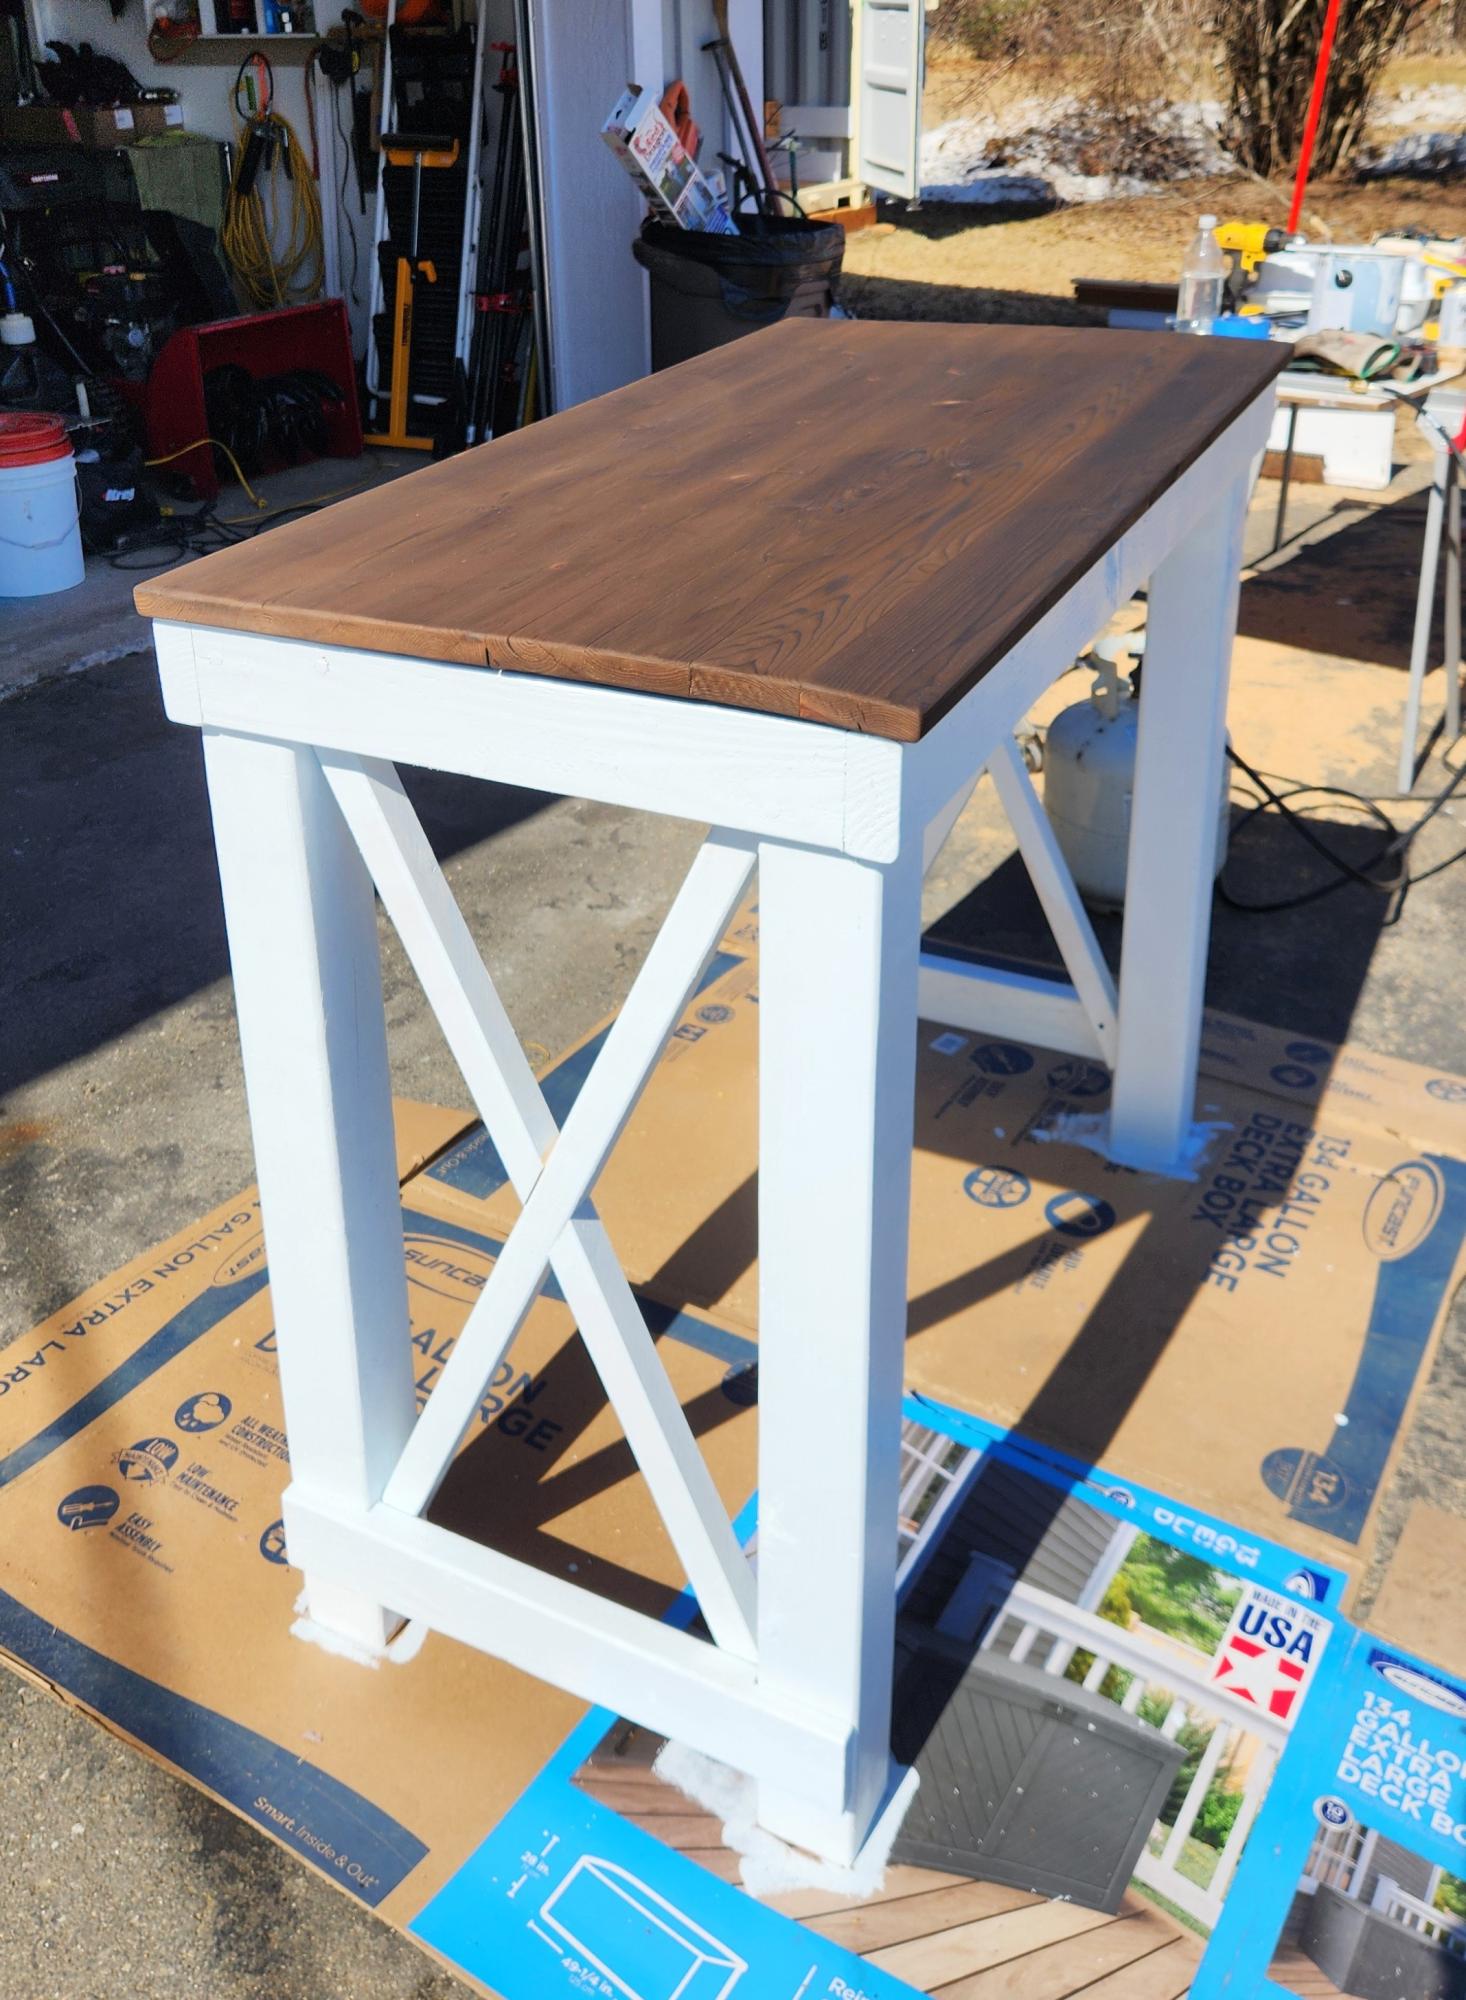
I build the bar table with an x-base and created some stools using part of the plan. We really wanted backs on the stools so I made them up!
Wed, 11/14/2012 - 18:16
Hard to believe that you are a beginner. Fantastic work. Keep it up and the whole home will be furnished.
Sat, 04/13/2013 - 13:47
I'd love some information on the backs. My husband has a bad back and it's a necessity, but I'm a beginner and not sure how you did it/
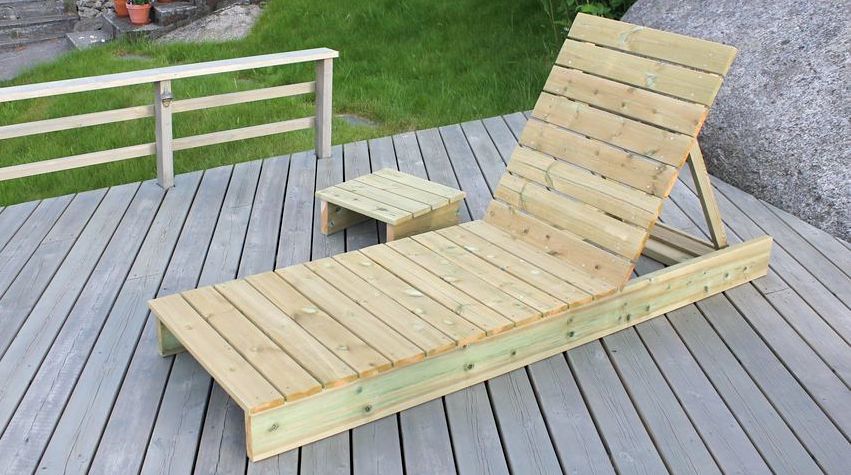
Solid garden lounger and side table to match our garden chairs and table.
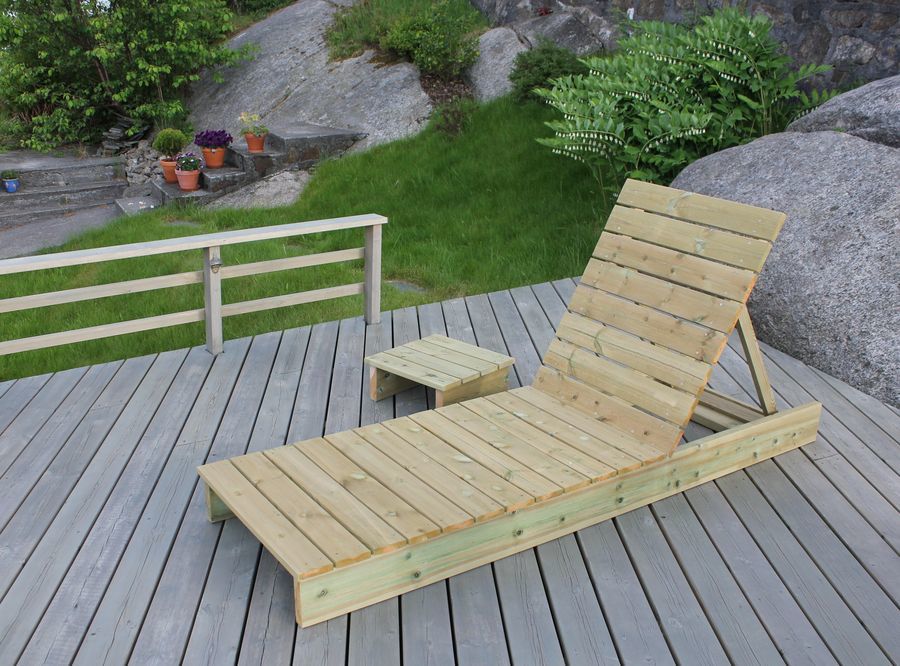
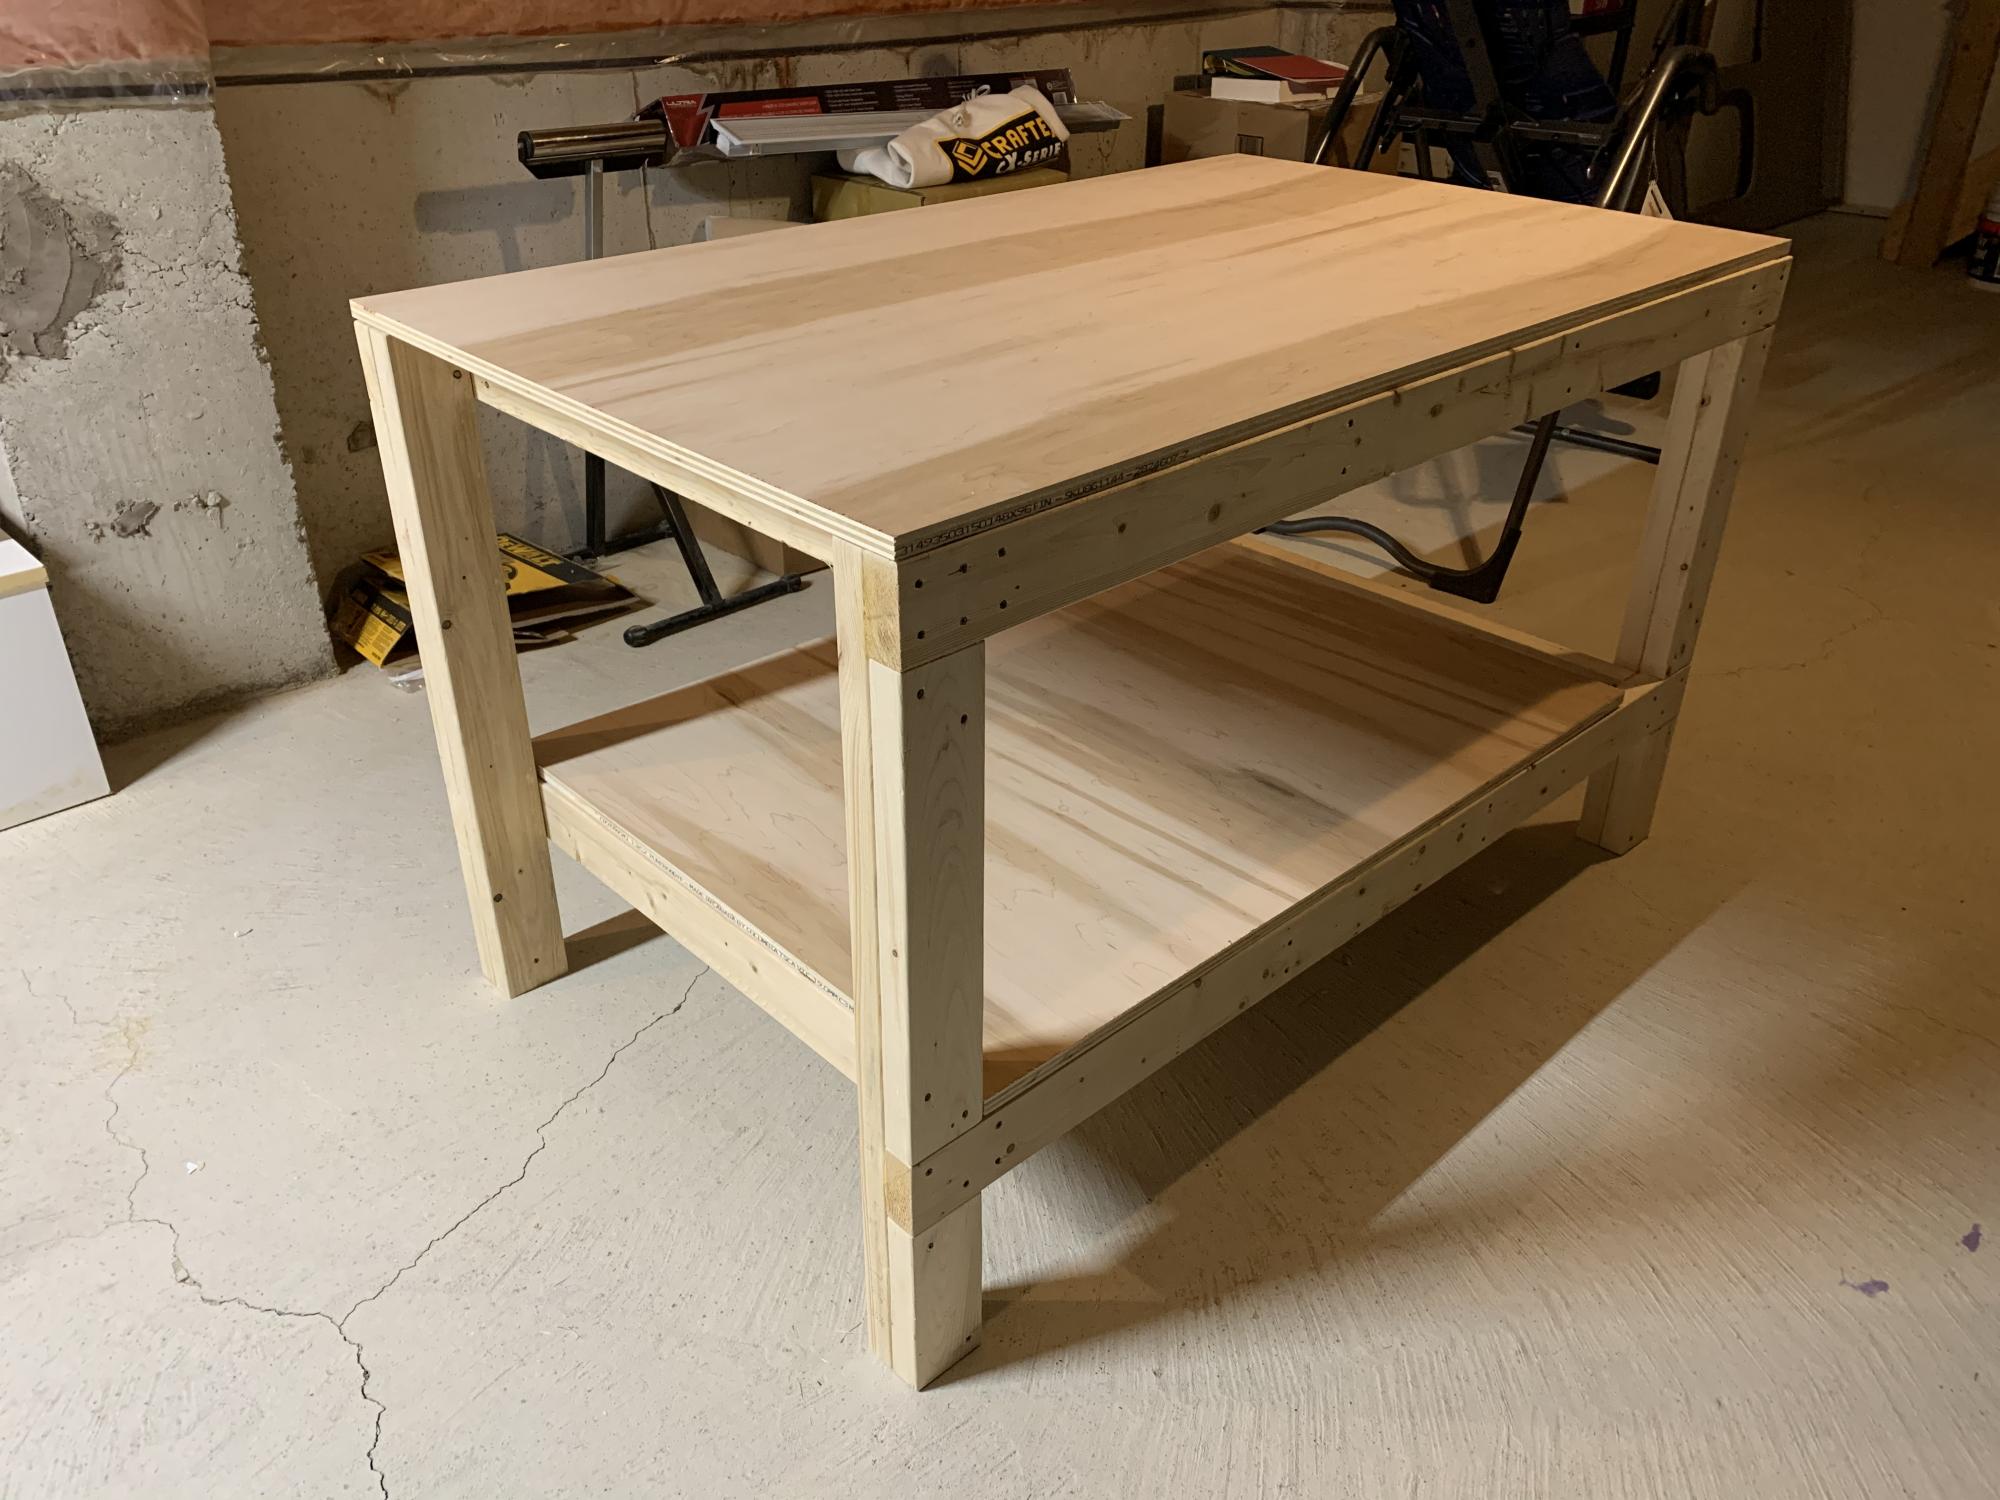
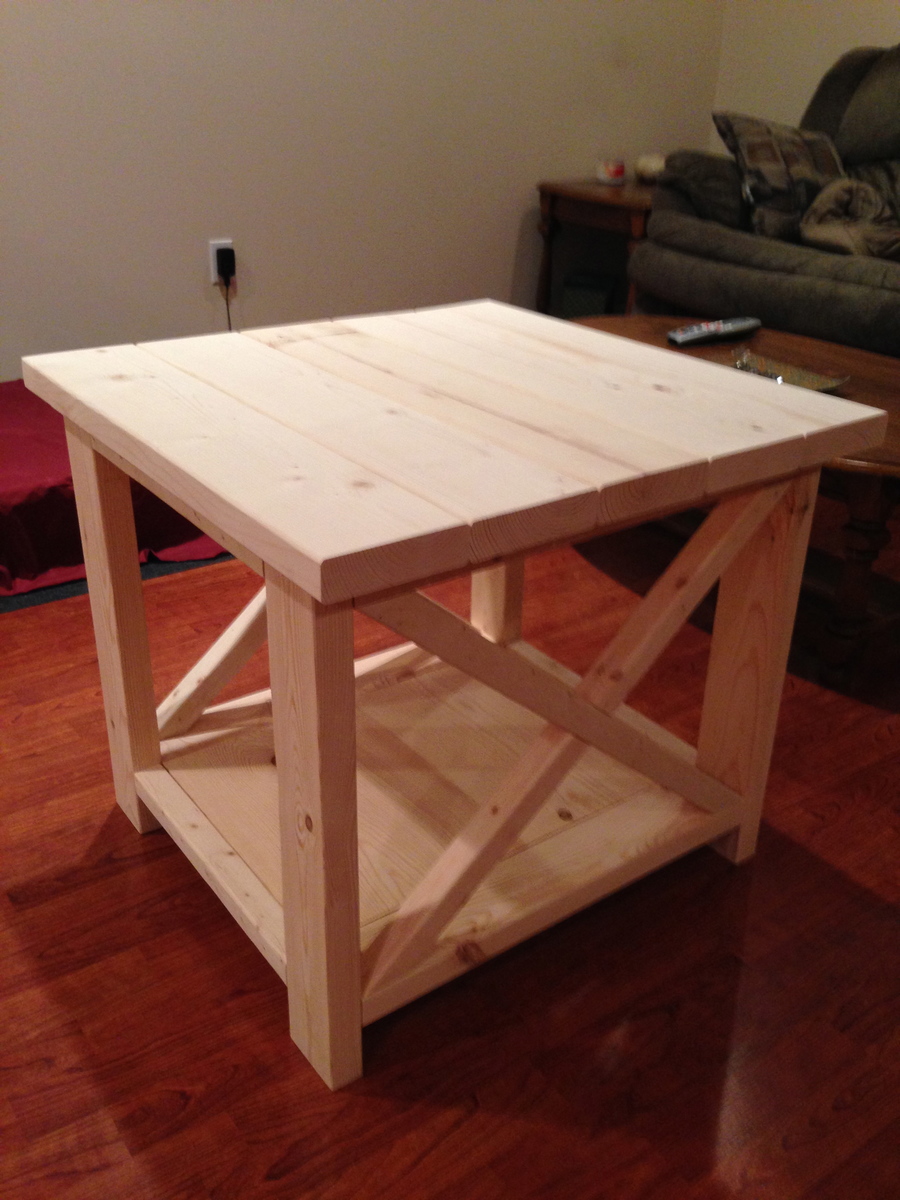
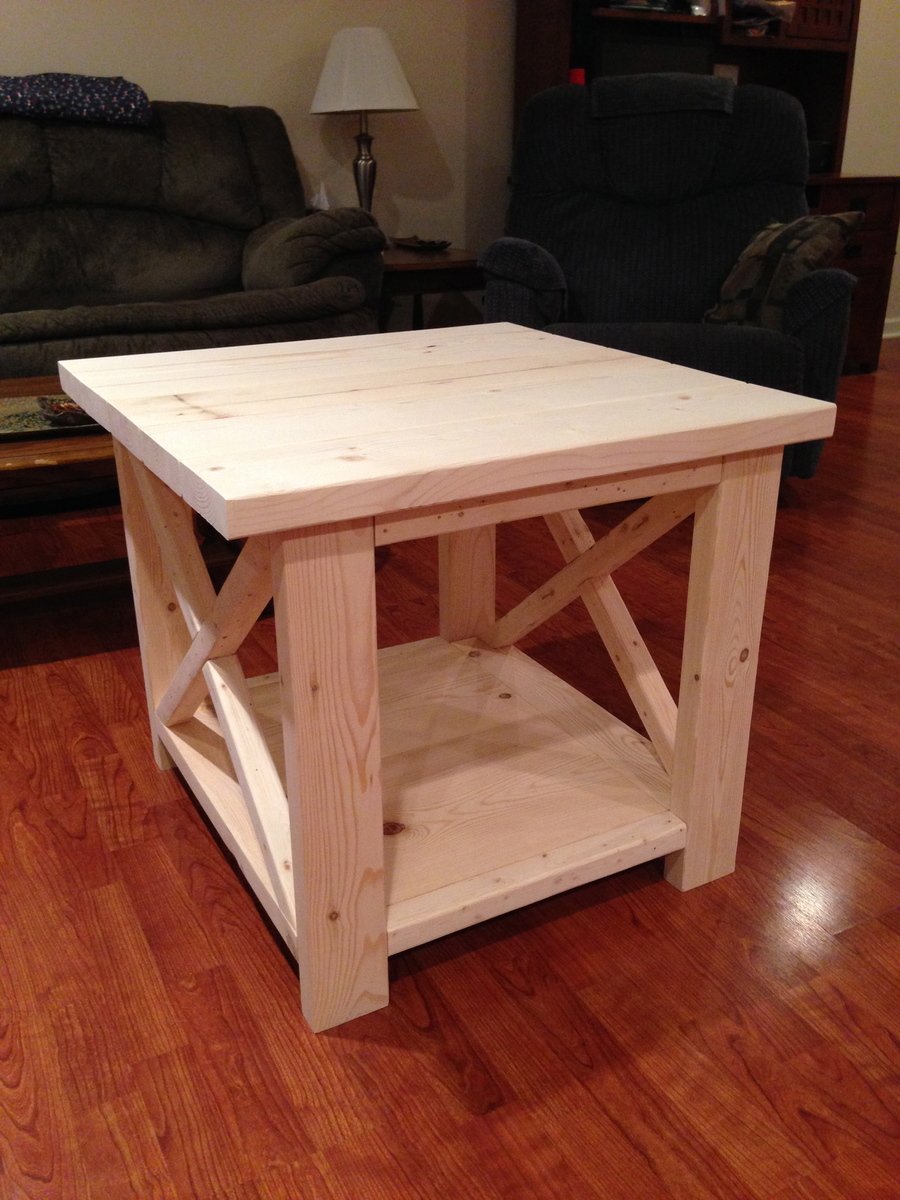
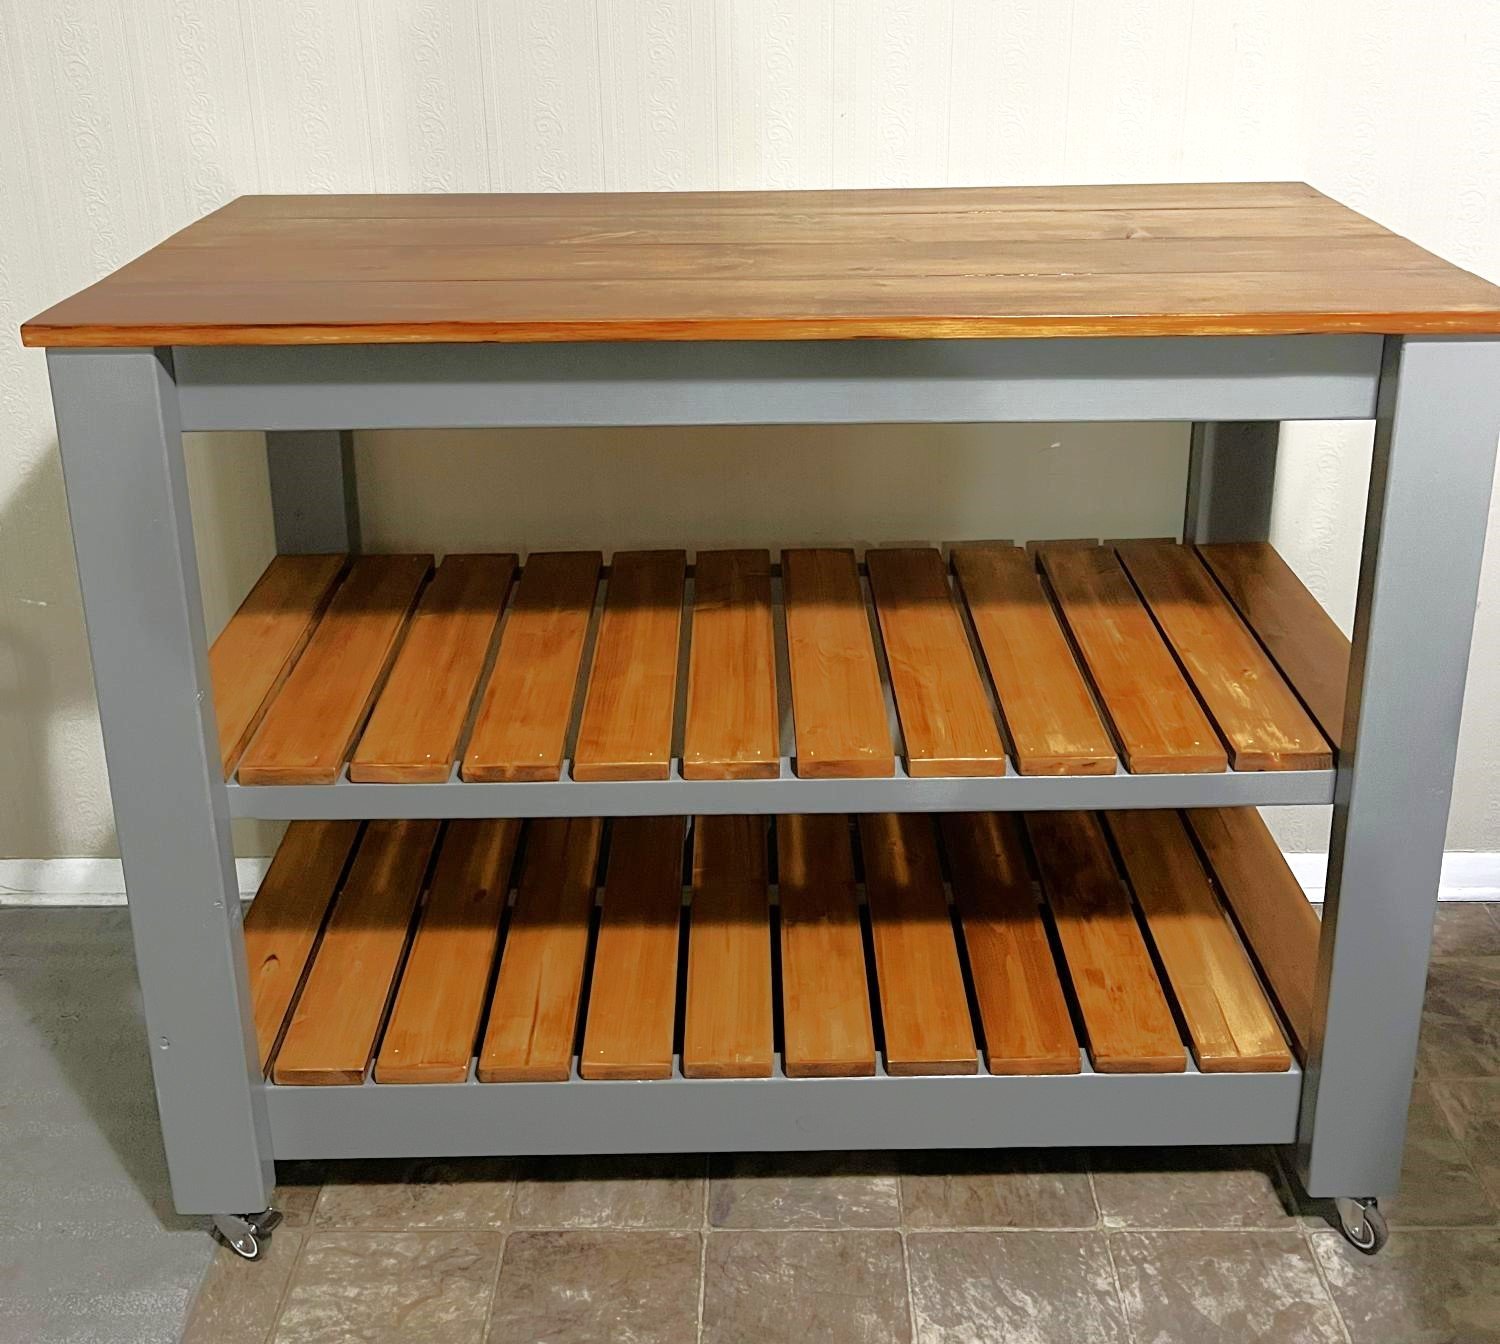
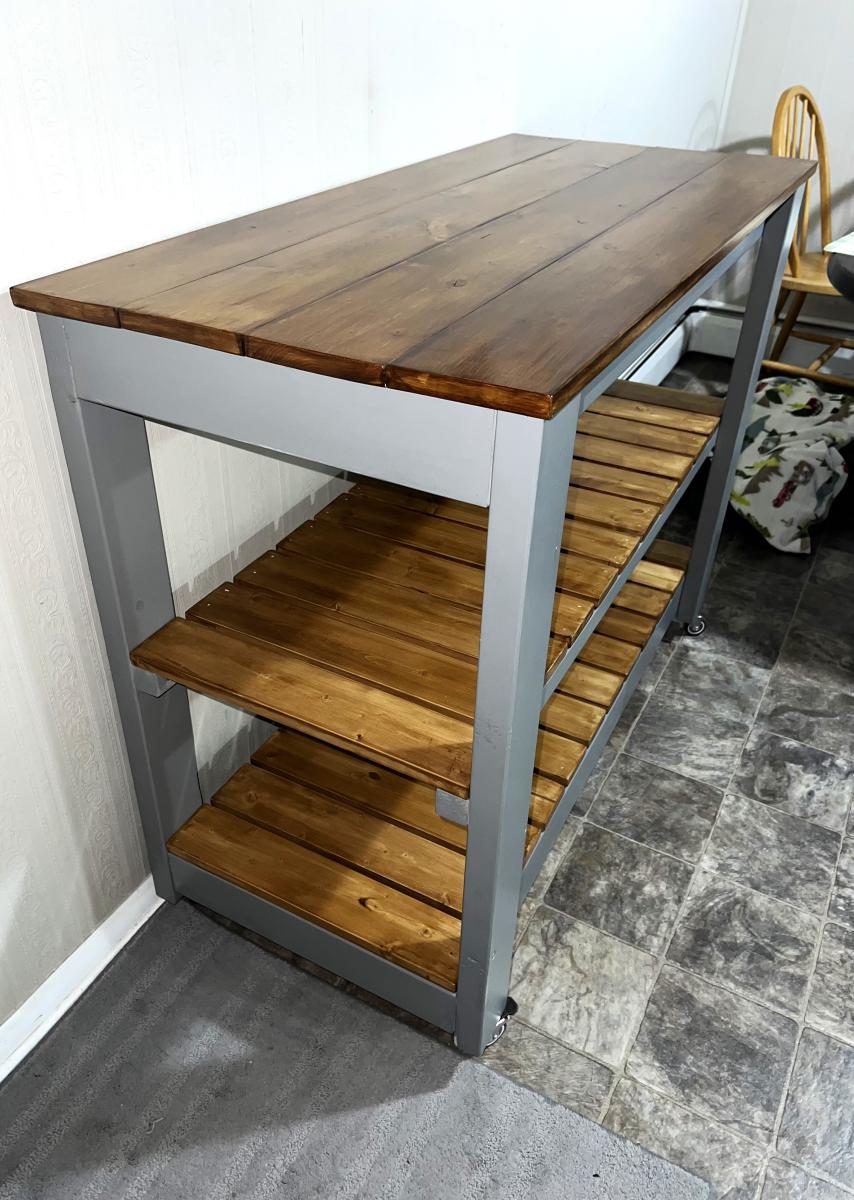
Thanks for the simple plans Anna, they worked out great!. I resized the table to make maximum use of the material, still within the same quantity you specified in your plans. I glued the legs along the lengths of the table, and kept the table top and shelf screwed in, for easy dismantling, if necessary.
Finally I added pop down heavy duty wheels allowing me to move the table (not shown in this pic) easily. When the wheels are not being used they pop up, making the table very stable. The height of the table is about 1/2” lower than the table saw, making it an ideal outfeed table as well.
Great design, and fun build.

I used 8 ft precut boards for shelves and modified the design so there was enough room for two racks on each side. In addition I screwed 1x4 to the studs to secure the shelving to the wall. I have a 5 year old climber so it was best to be proactive and secure it. It was easy project took about 4 hours to complete. I plan to paint the vertical boards a medium gray and stain the shelves a dark coffee color.

Modified the design to allow me to roll lawnmower directly in the end. Fun project.
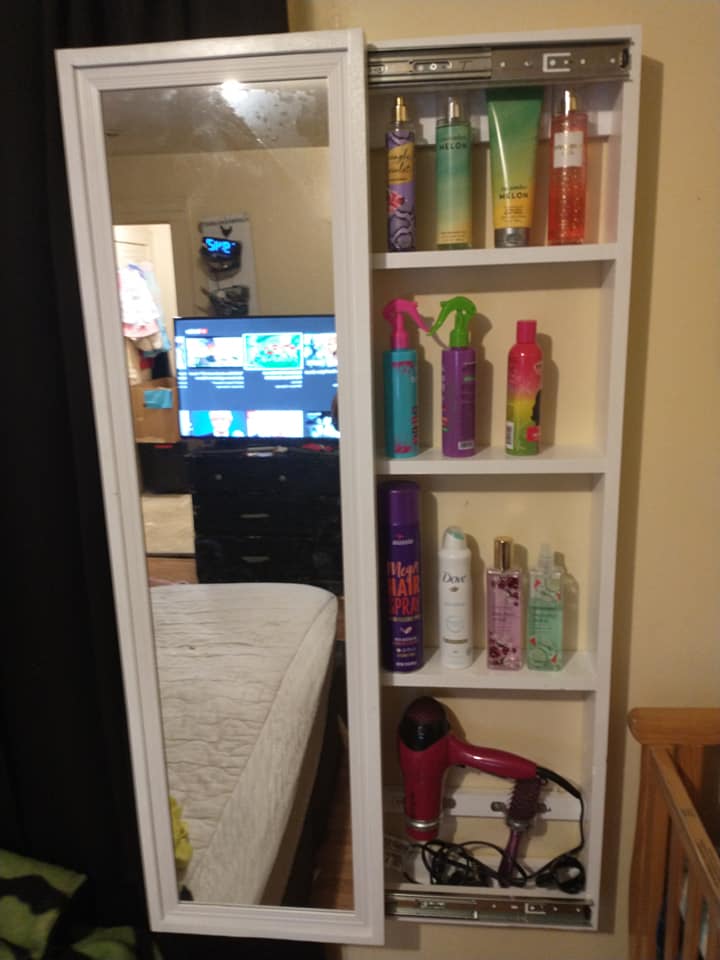
Great idea being my wife is not a hair person she really loves it.

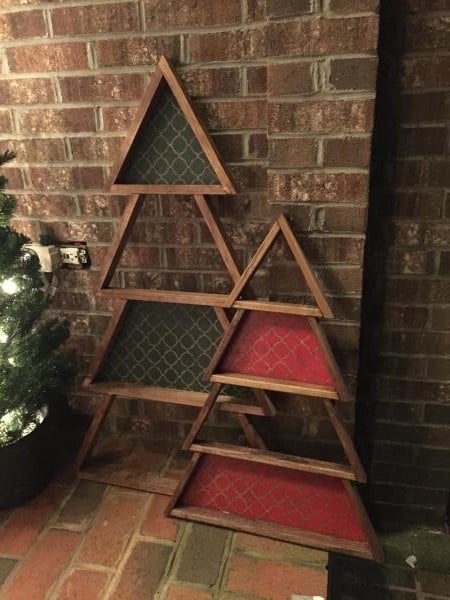
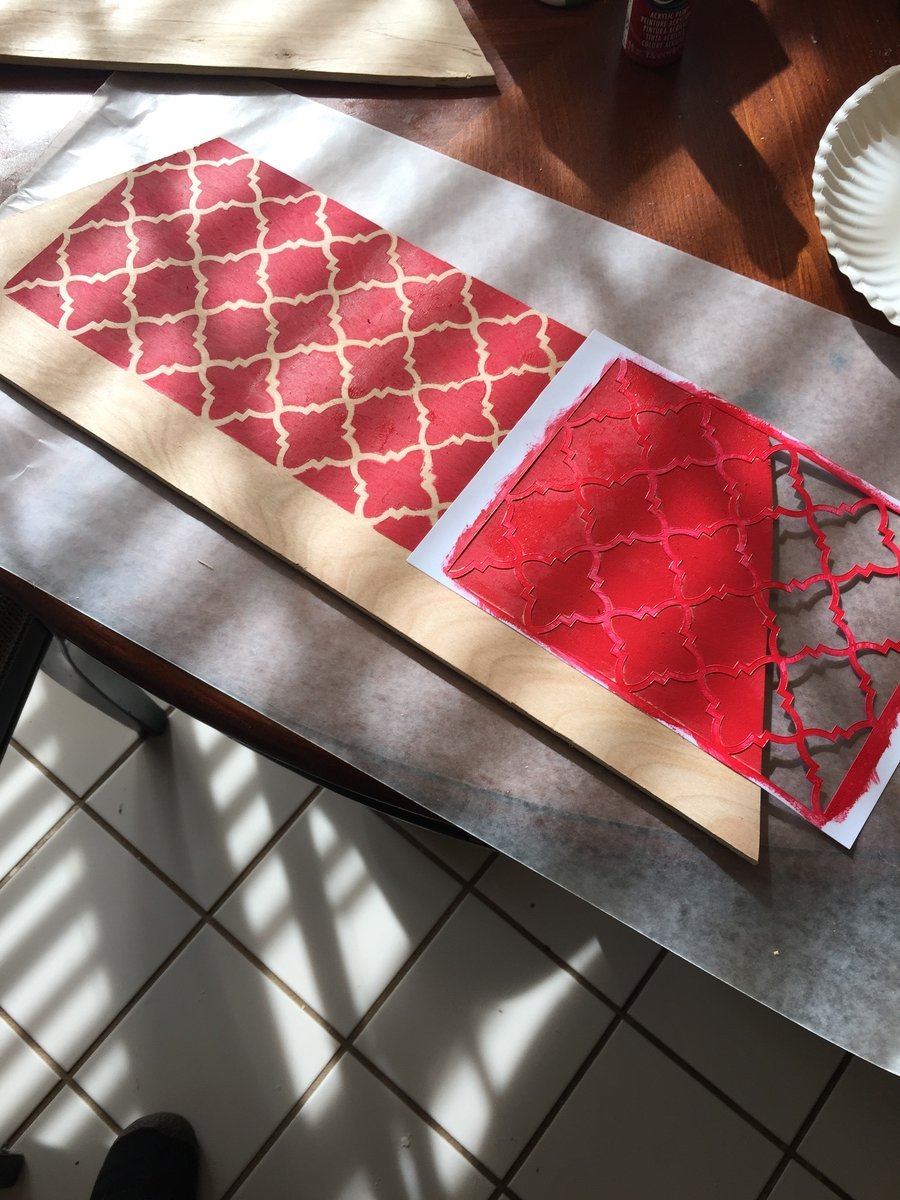
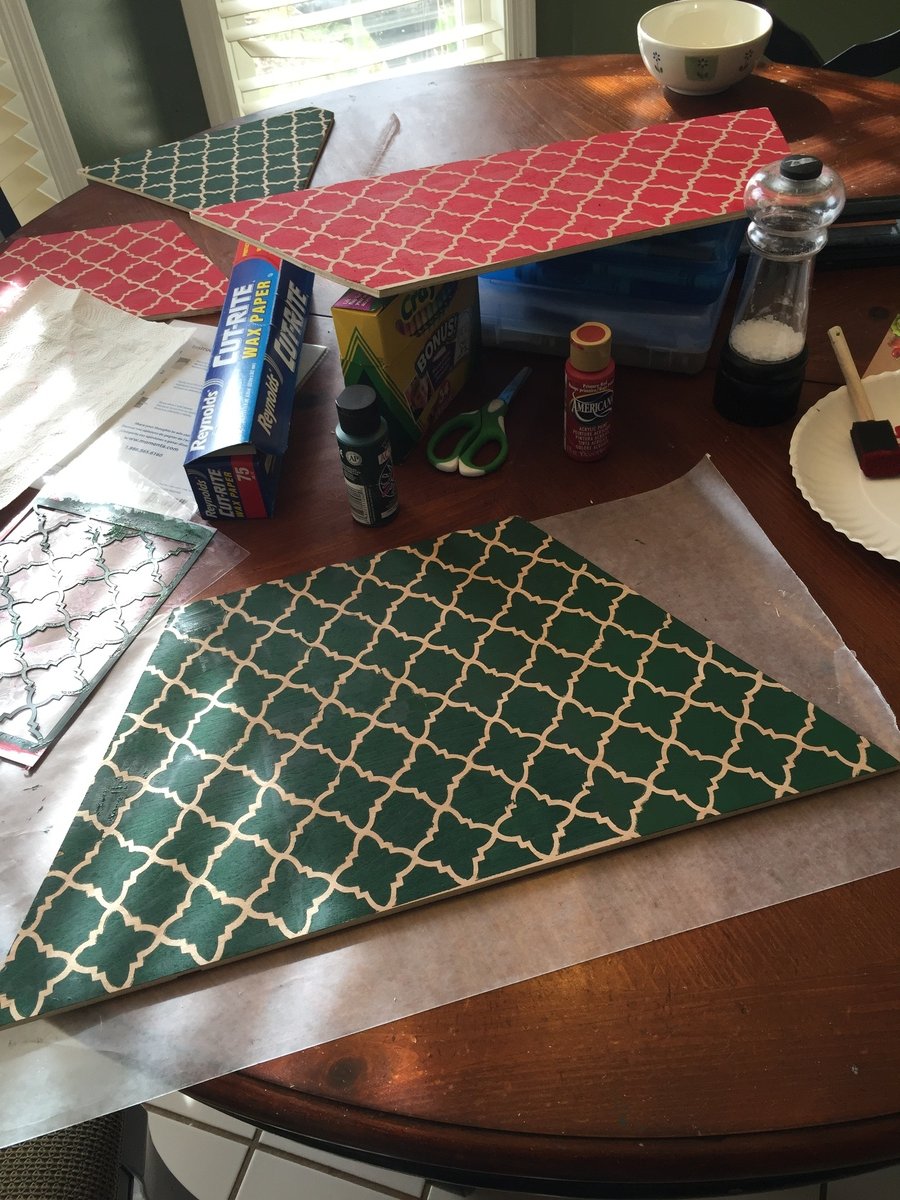
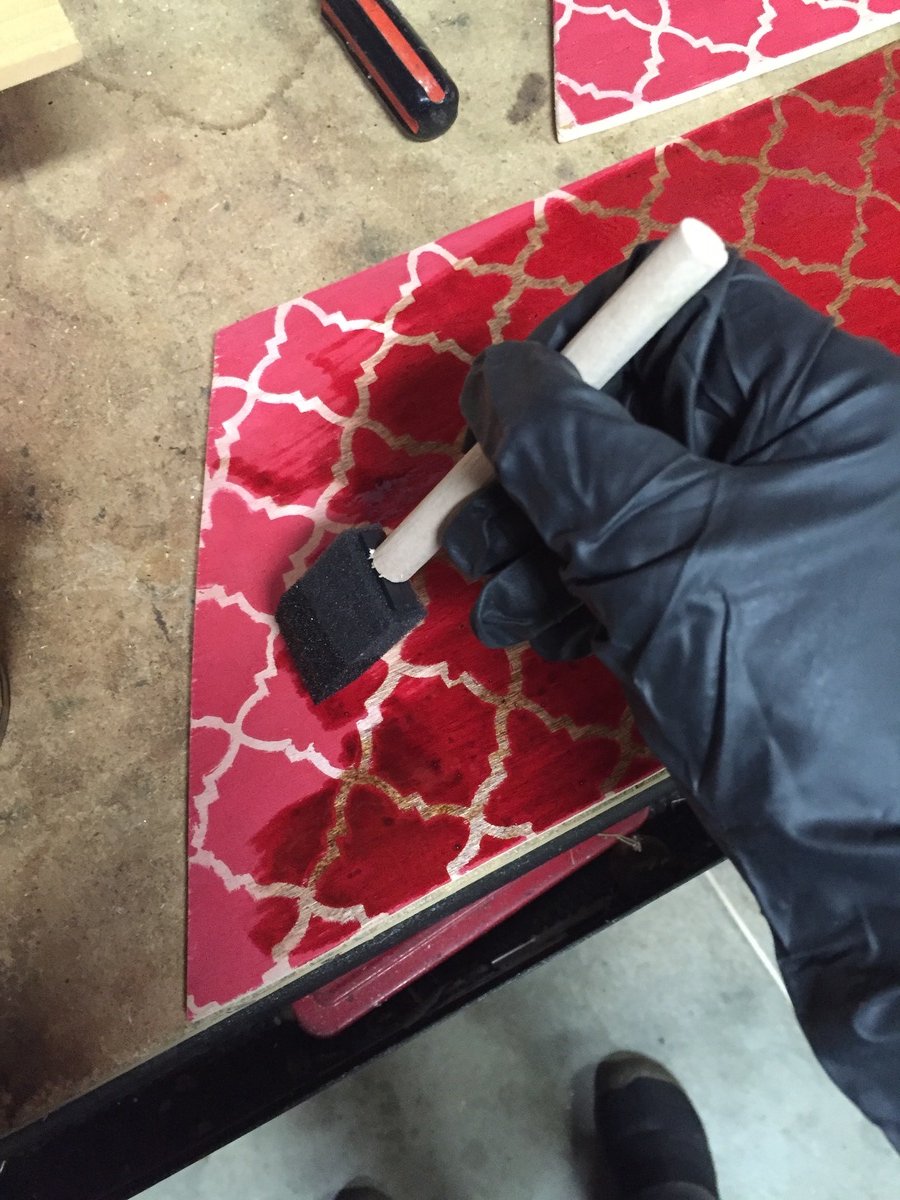
I used 1x2 boards for this project. The smaller tree is the size according to plans (minus the coat rack). For the larger tree, I added 3.5 inches to each piece. 1/4 plywood on the back and used a stencil for the design. I love the way it turned out.
have not put a stain on this yet, waiting to make a pair before doing that
Thanks to Ana White we learned how to make these cubbies. The wood for the stained bench is from trees milled from my husband’s family farm.
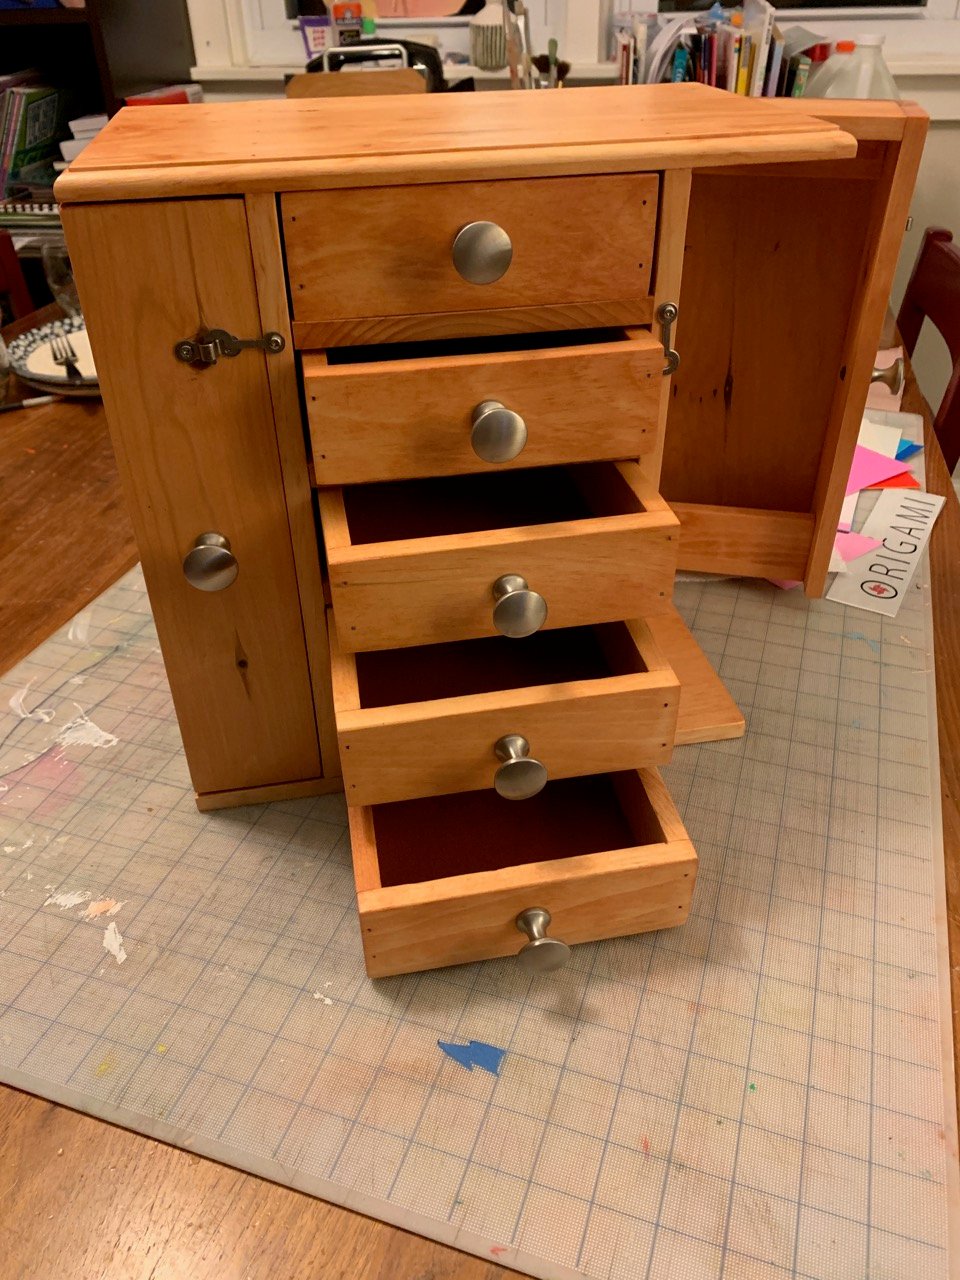
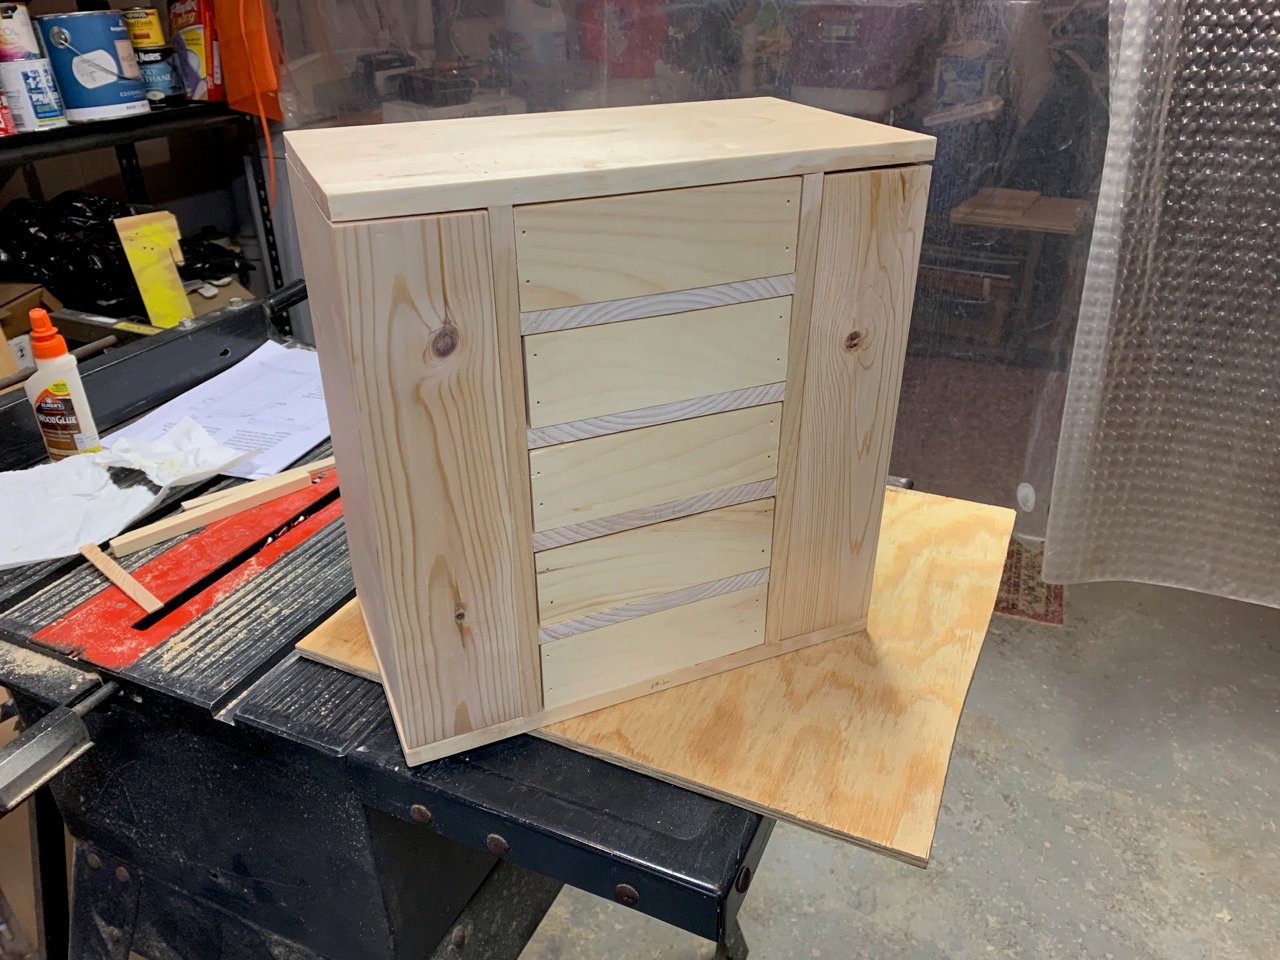
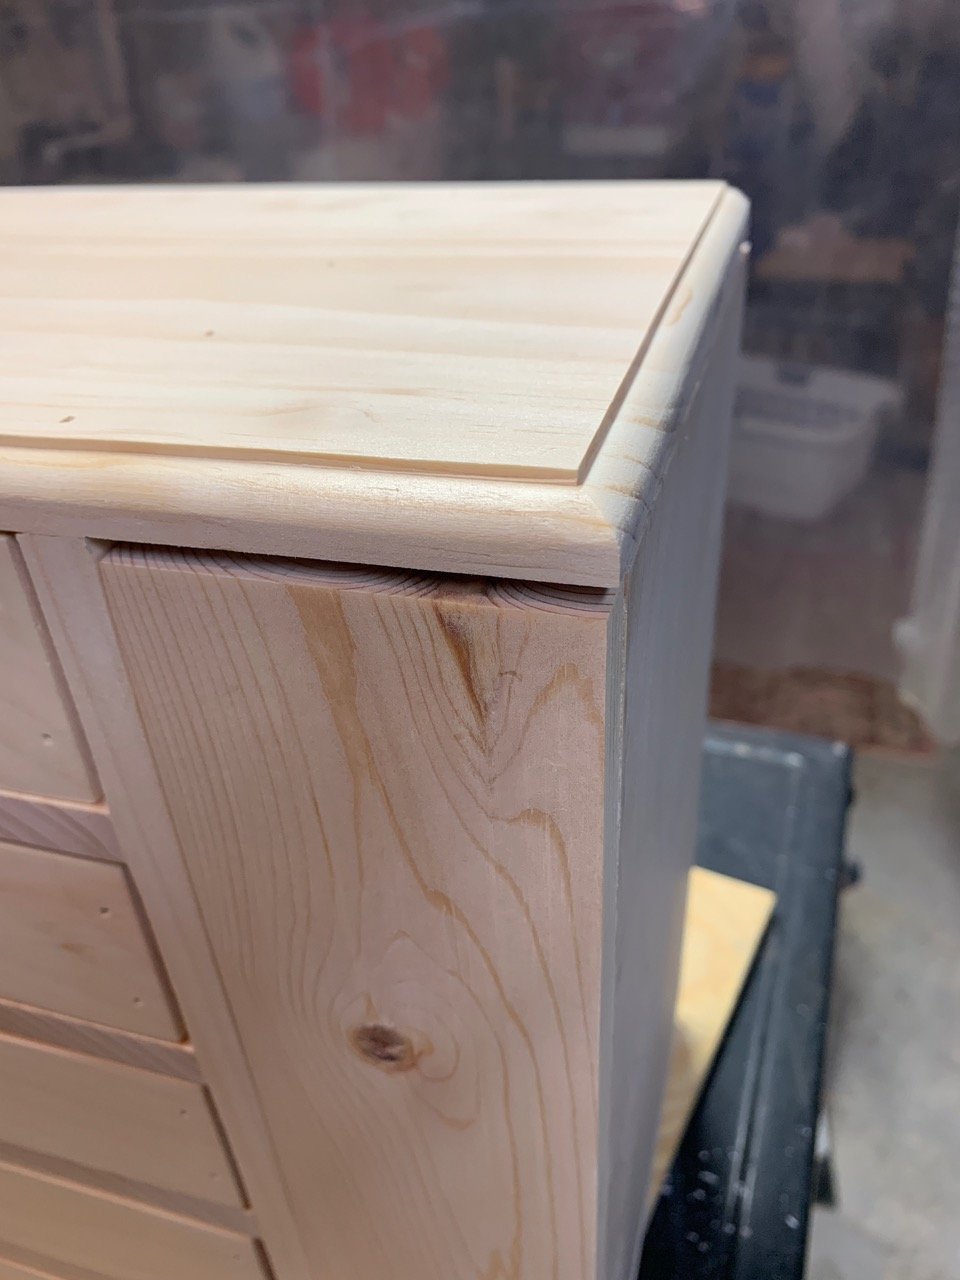
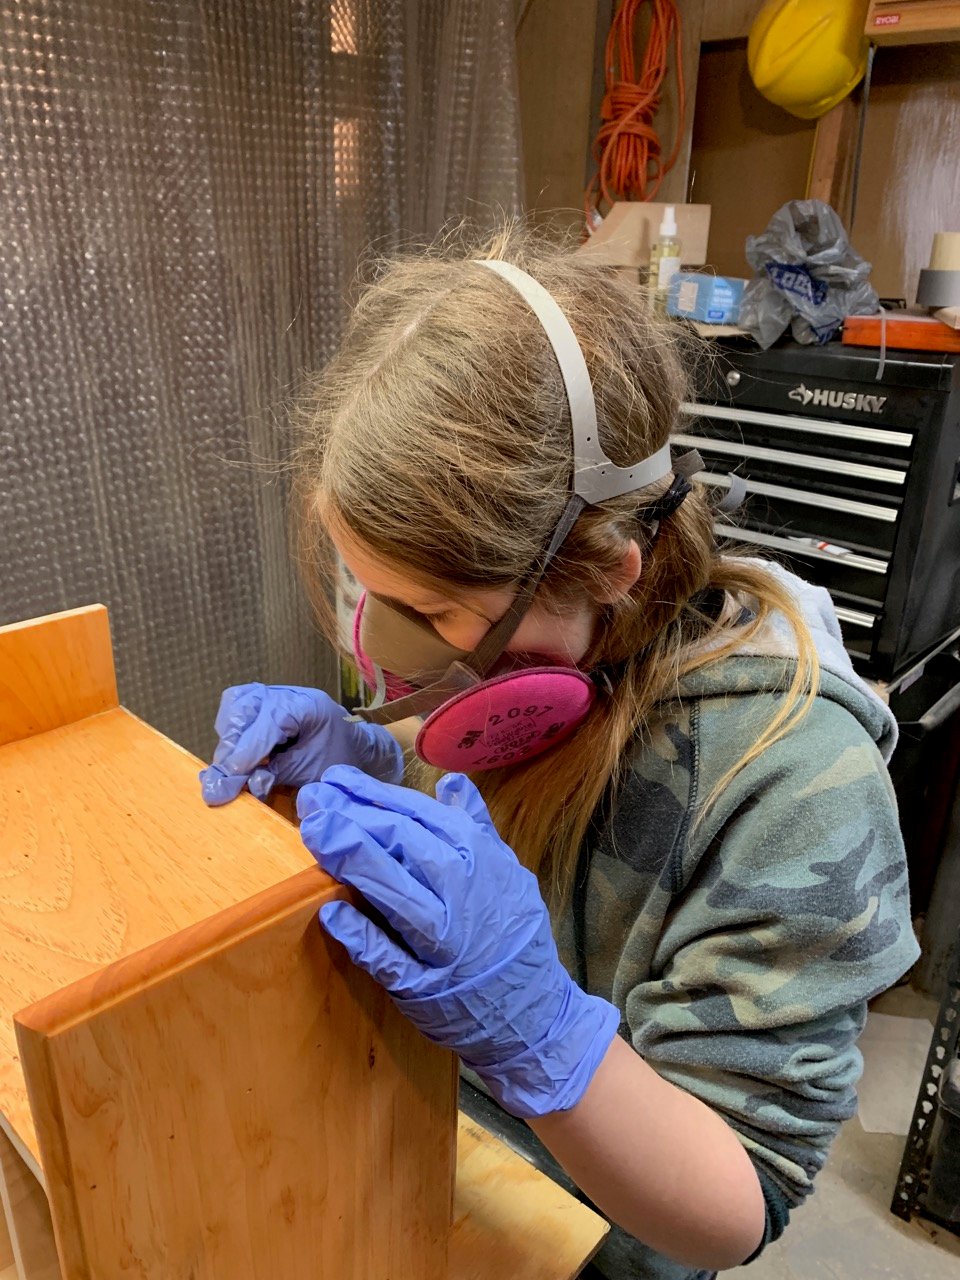
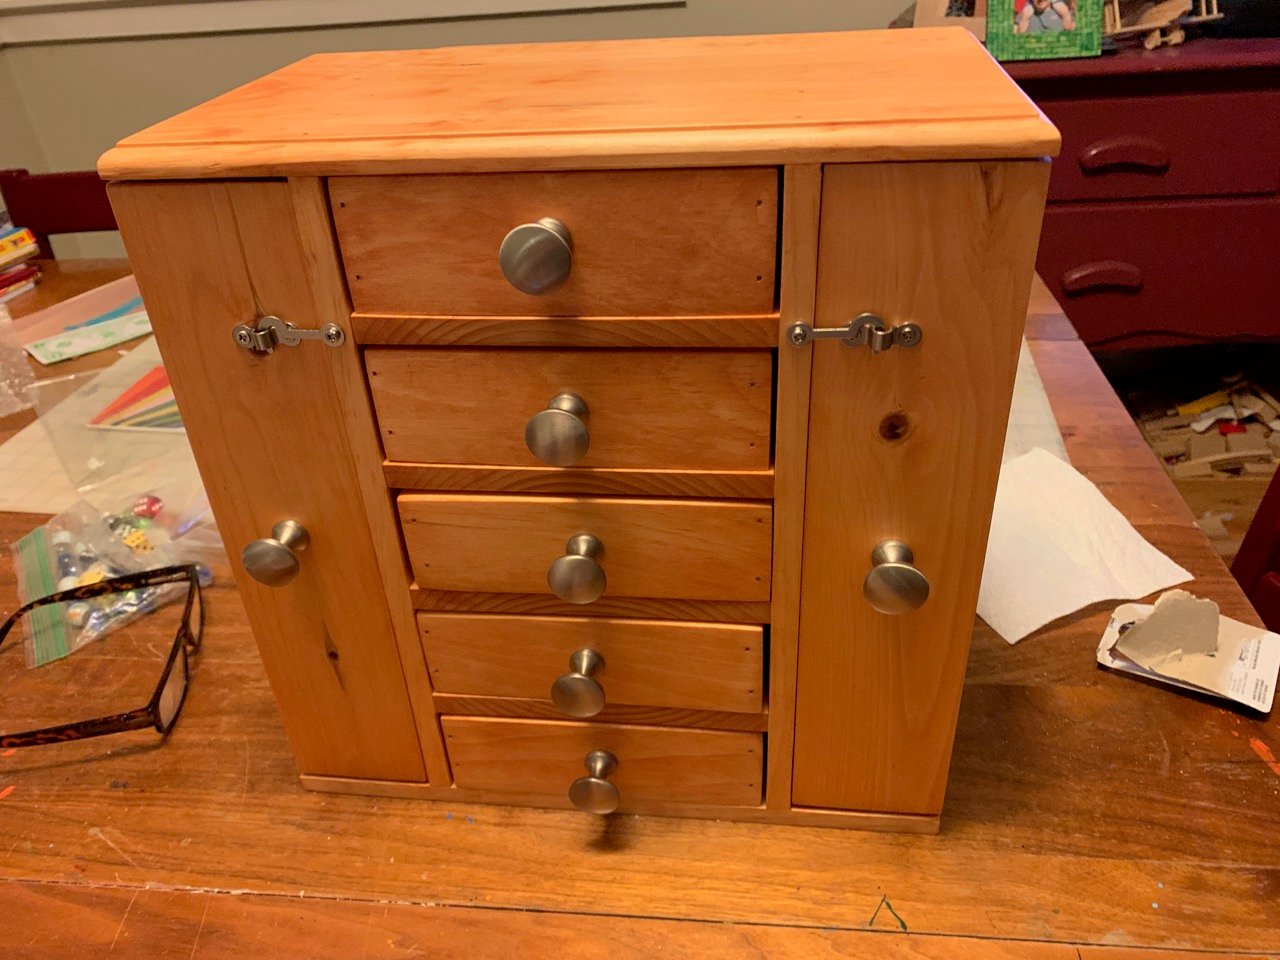
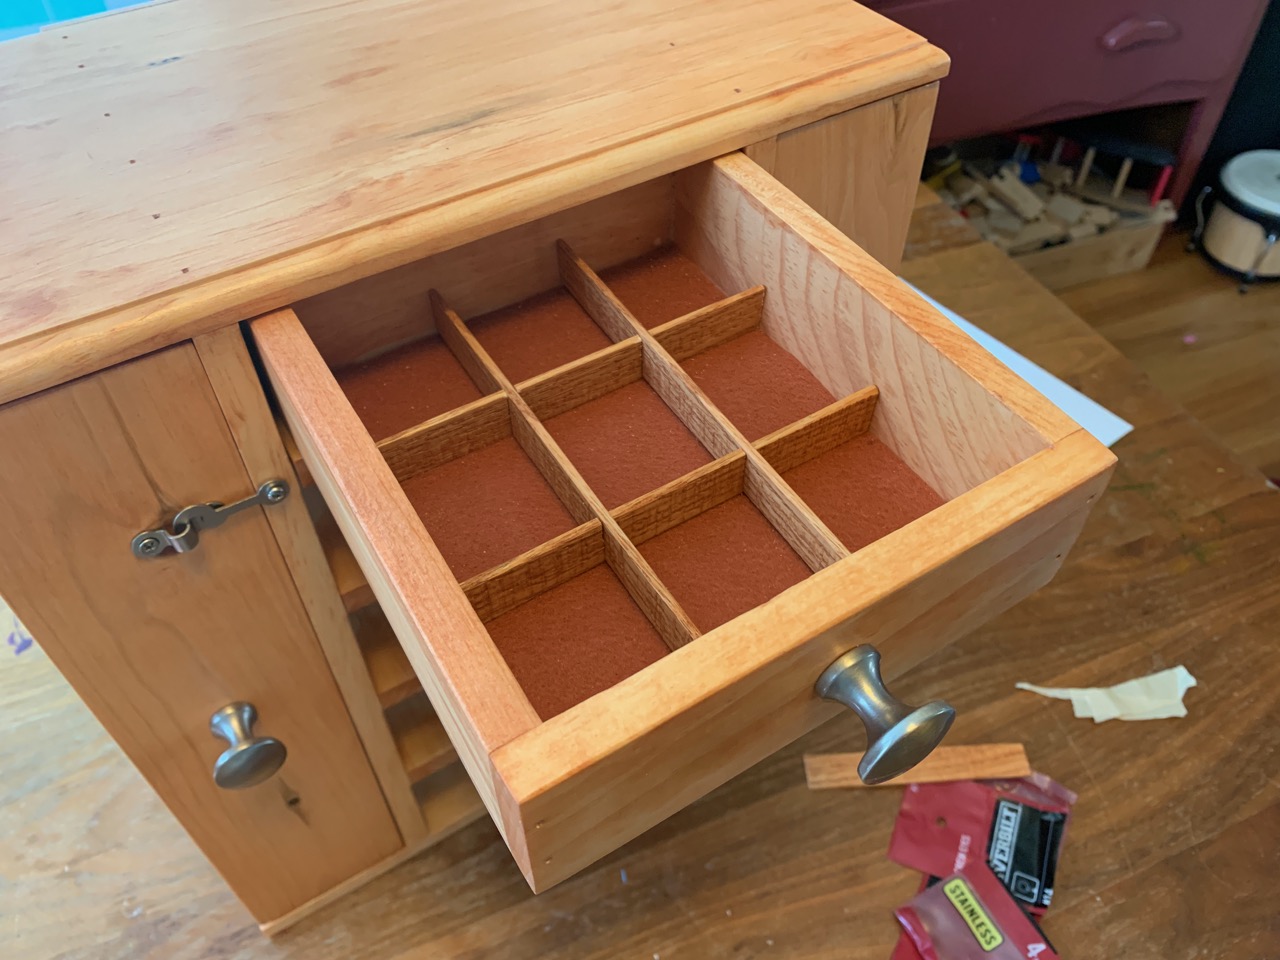
My 10 year old daughter is always creating. She recently decided that she wanted to do a woodworking project with me. We started by searching online for a design that looked doable and came up with the Fancy Jewelry Box from the Ana White website.
We decided that using the full thickness of 1x stock gave the piece a bit more of a clunky look than we were after. And since I have a thickness plainer, we milled our stock down to just under 1/2”. But that meant that we had to rework many of the measurements on the plan. This also made the drawers deeper and wider. Which is nice. A happy mistake happened when, while rough cutting the individual pieces before milling them down, I inadvertently cut the pieces between the drawers too narrow. We ended up turning them 90 degrees which allowed them to fit. This is why you see the end grain on those pieces. But we like it.
We also altered the plan a bit so that the edges of the plywood on the faces of the drawers and doors do not show. We added a nice border to the top of the box with a curved router bit. We lined the drawers with felt and then added some dividers here and there using some scraps of oak which we sawed thin with a bandsaw.
The original plan was to paint the box, as opposed to staining it. It wasn't until after I had nailed on the top and the drawer fronts that my daughter decided she wanted to stain it. That's why you can see those nail holes!
We had such fun making this Jewelry box.

Sat, 09/07/2019 - 13:43
You did a fantastic job on the jewelry box! It's absolutely gorgeous!
I did your same couch but made the back lean in the middle parts 15 degrees. Love your website. I'm 3 years sober and to try to sell this on facebook marketplace.
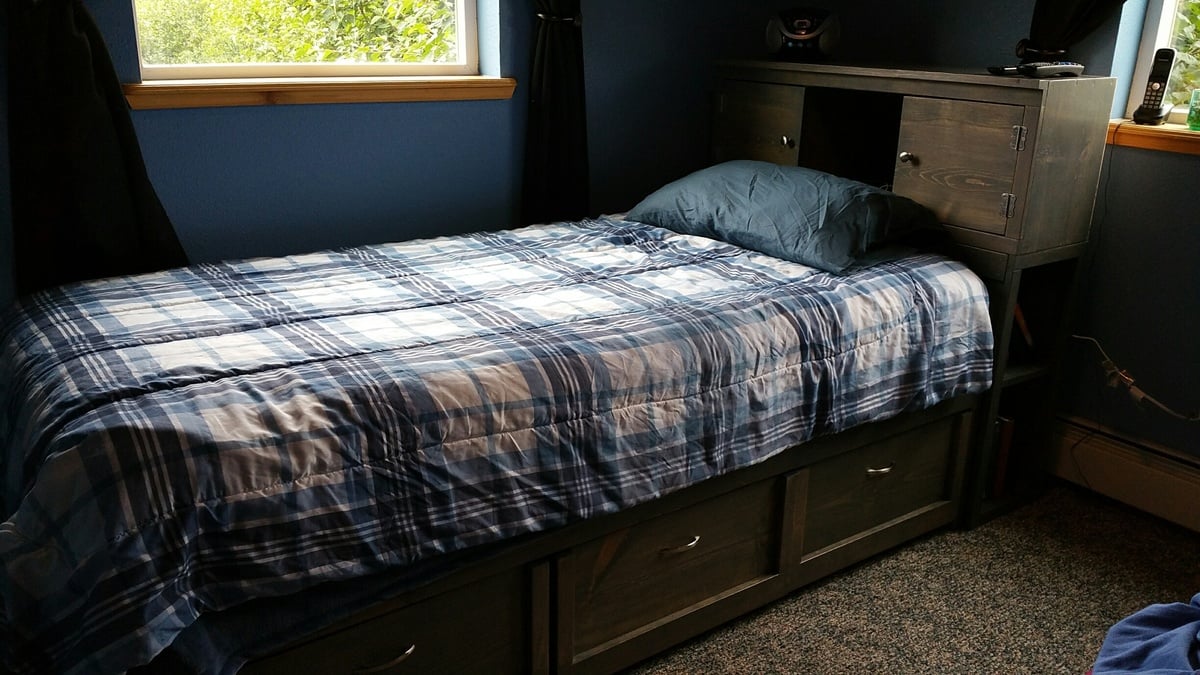
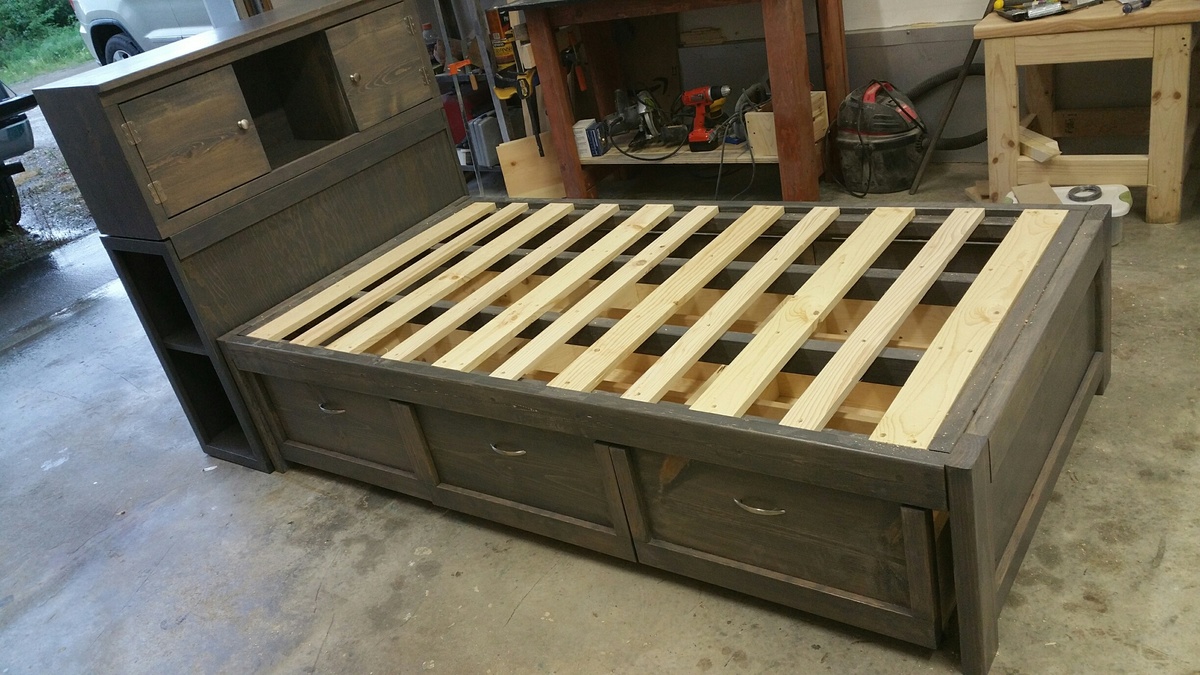
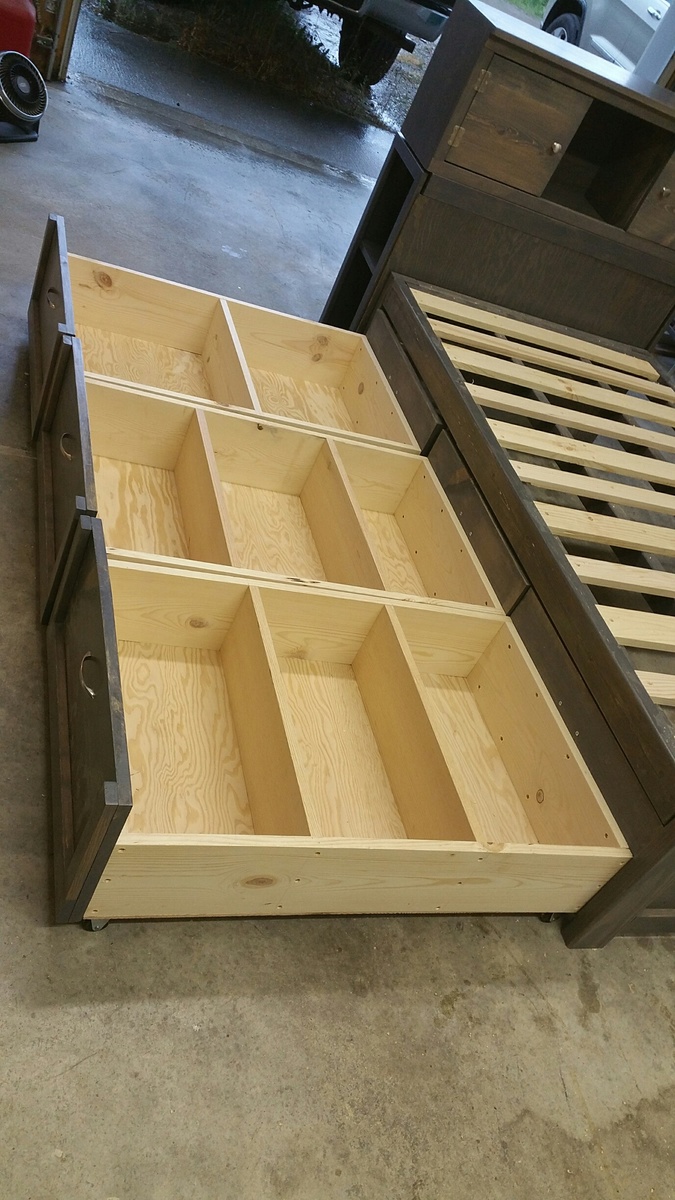
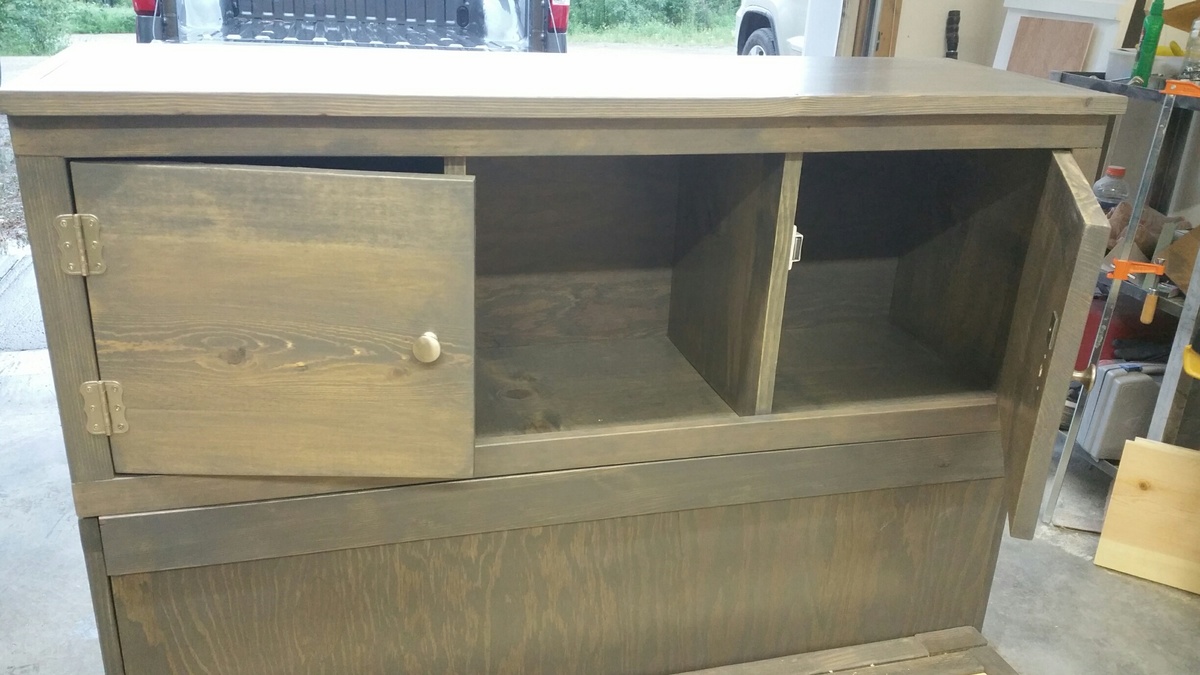
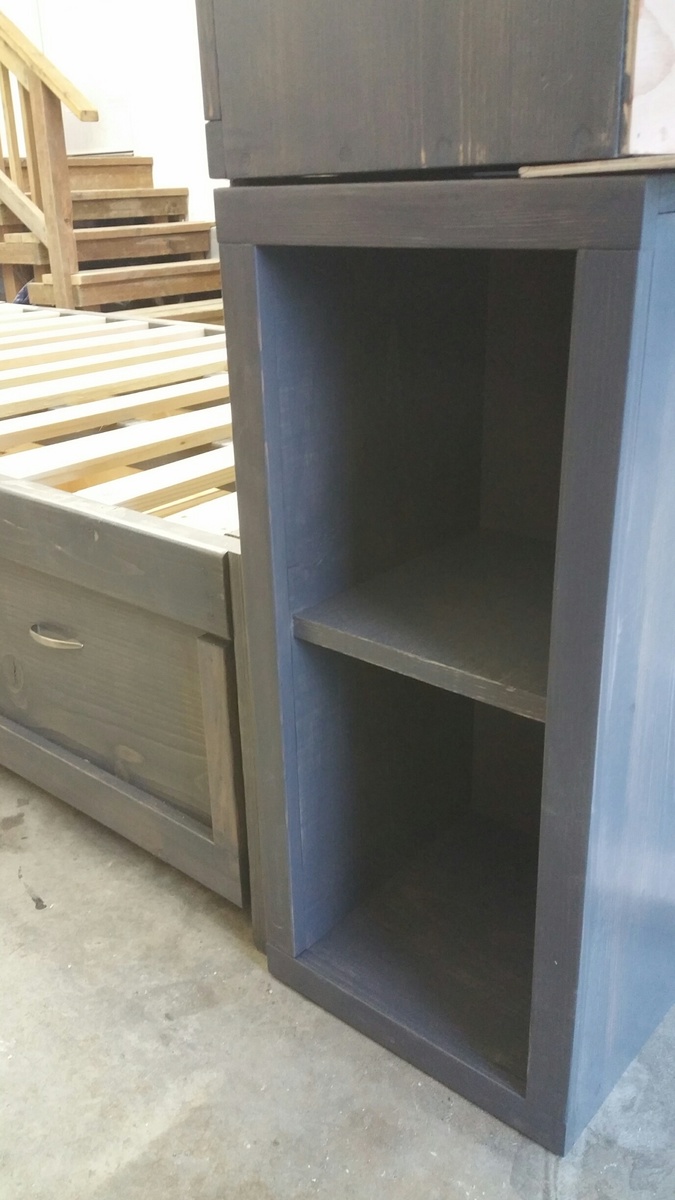
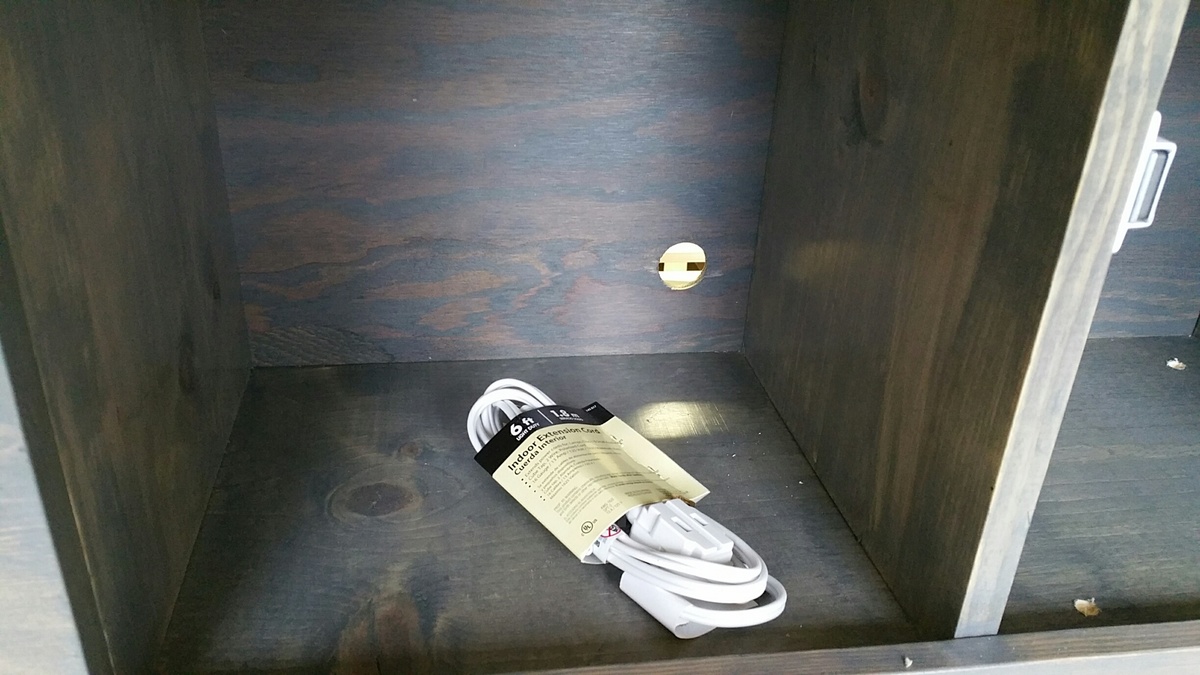
I combined Ana's plans for Daybed with Storage Trundle Drawers and a Storage Headboard with a Small Hutch.
This is my 3rd daybed with storage drawers. It's such an easy build and gives so much extra space. The entire project took about 40 hours. I used Minwax stain in Classic Grey and three coats of polyurethane. For the drawers, I used 1.5" casters. I drilled a hole through the back of the headboard to feed cords through. Then I put the whole thing in the back of my truck and drove 500 miles for the final assembly. :) In the provided photos, some of the pieces are flush because I hadn't permanently attached them.
Thank you for the plans! Super easy. Built for my son and his girlfriend. They needed more storage in their kitchen.
Misti B
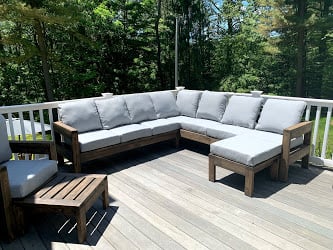
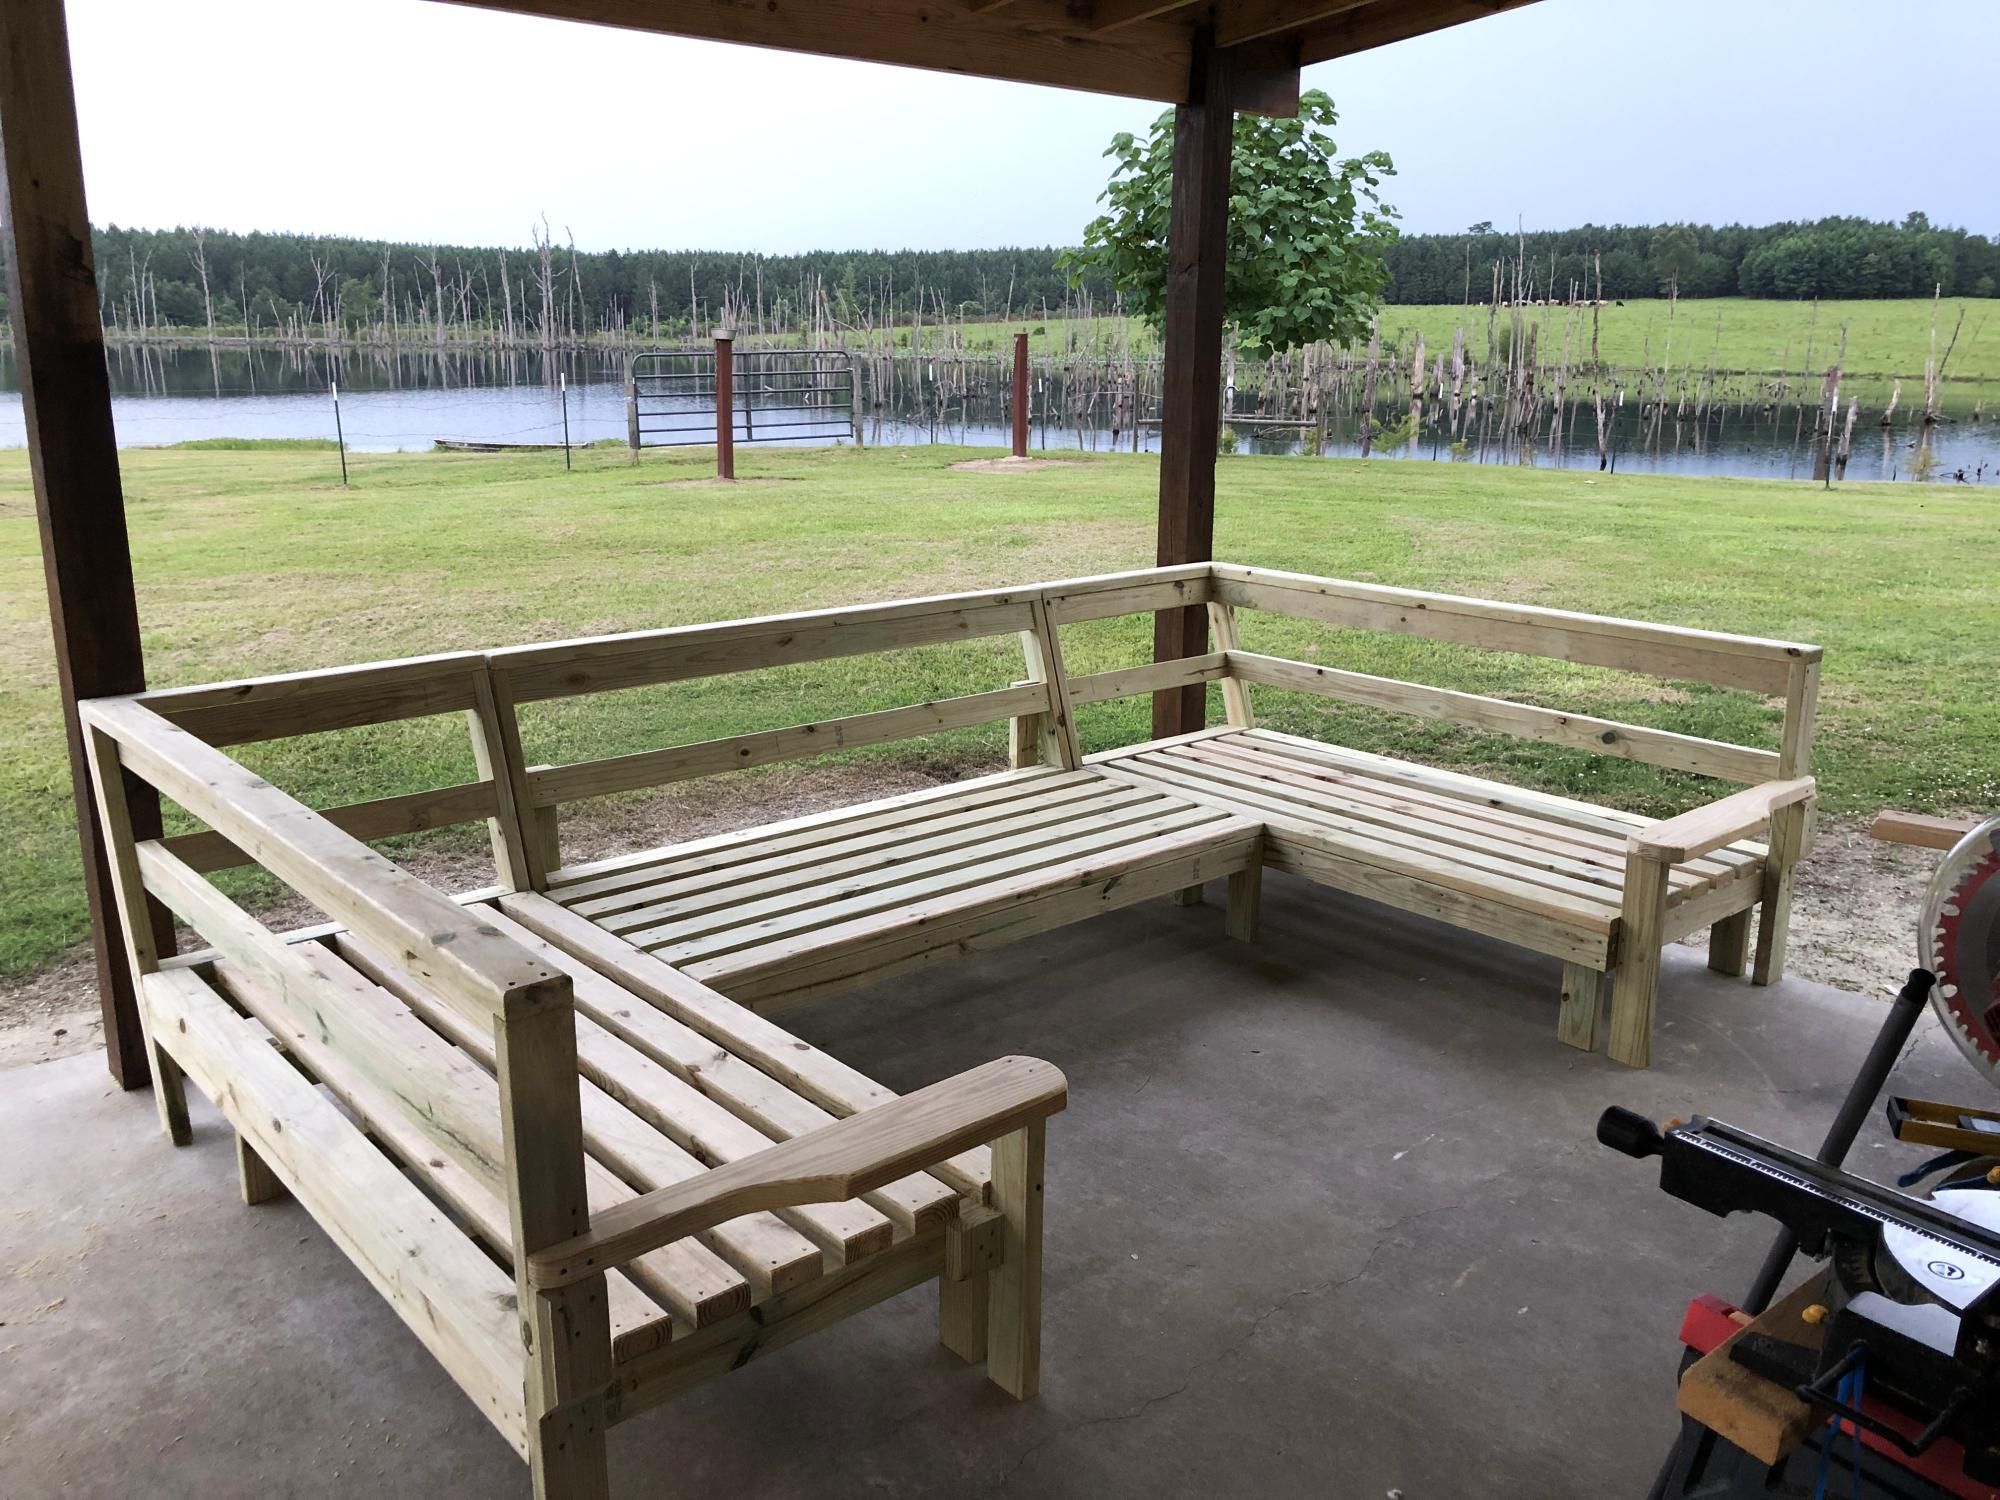
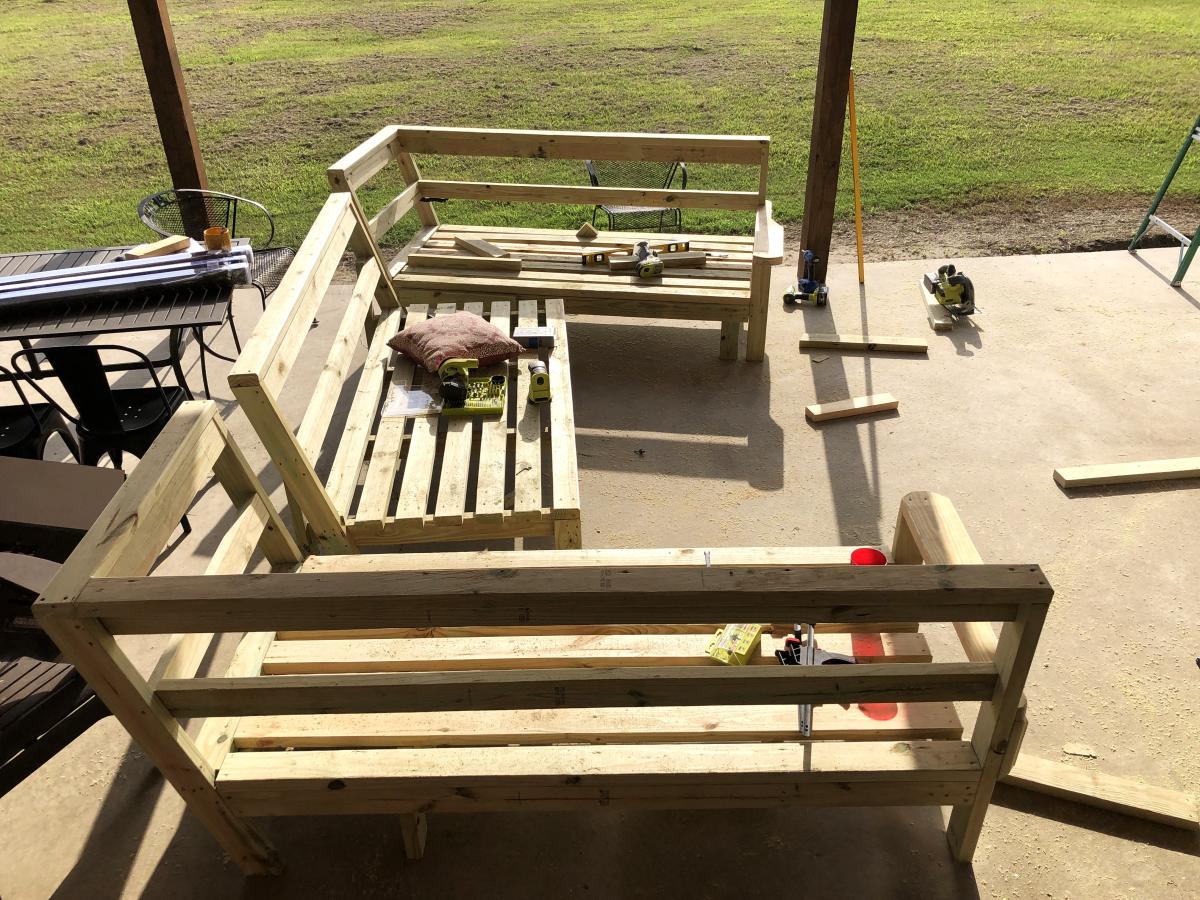
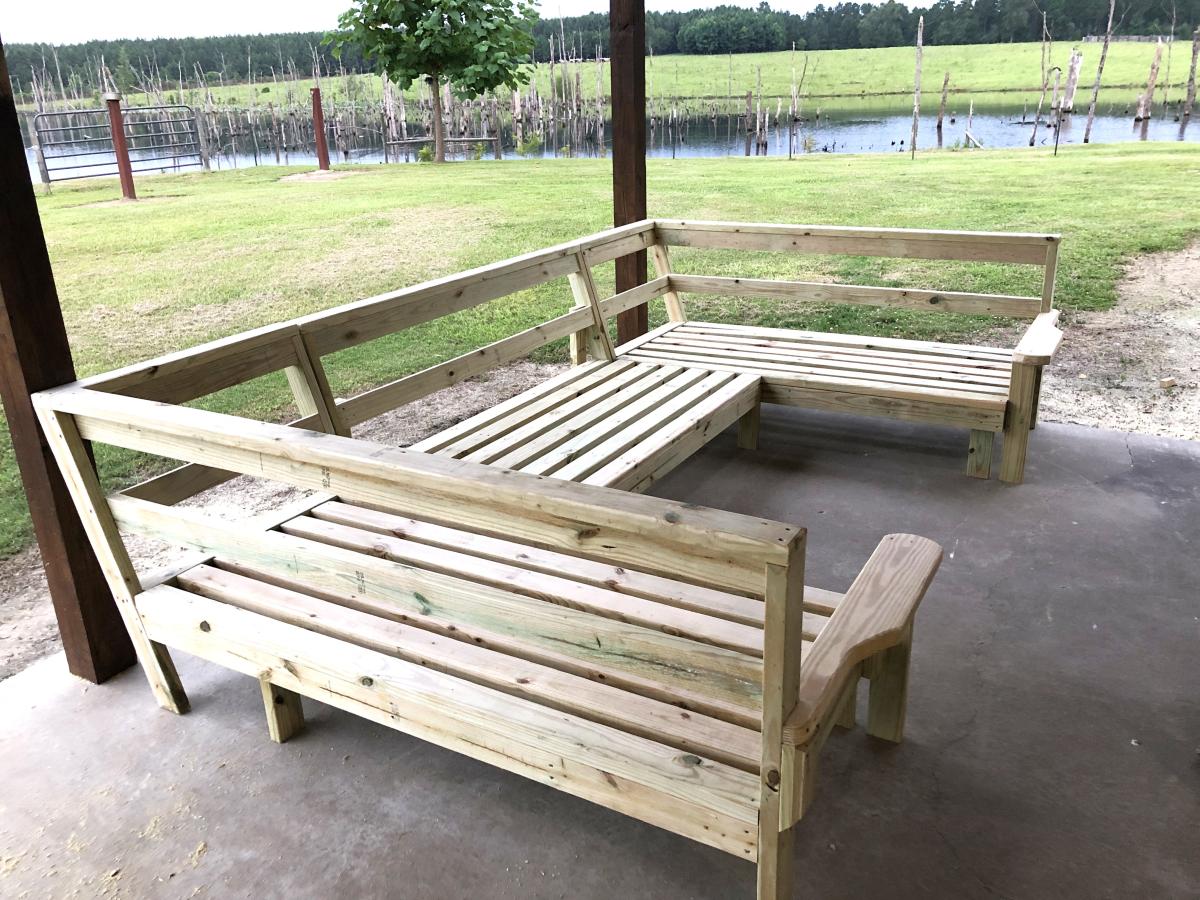
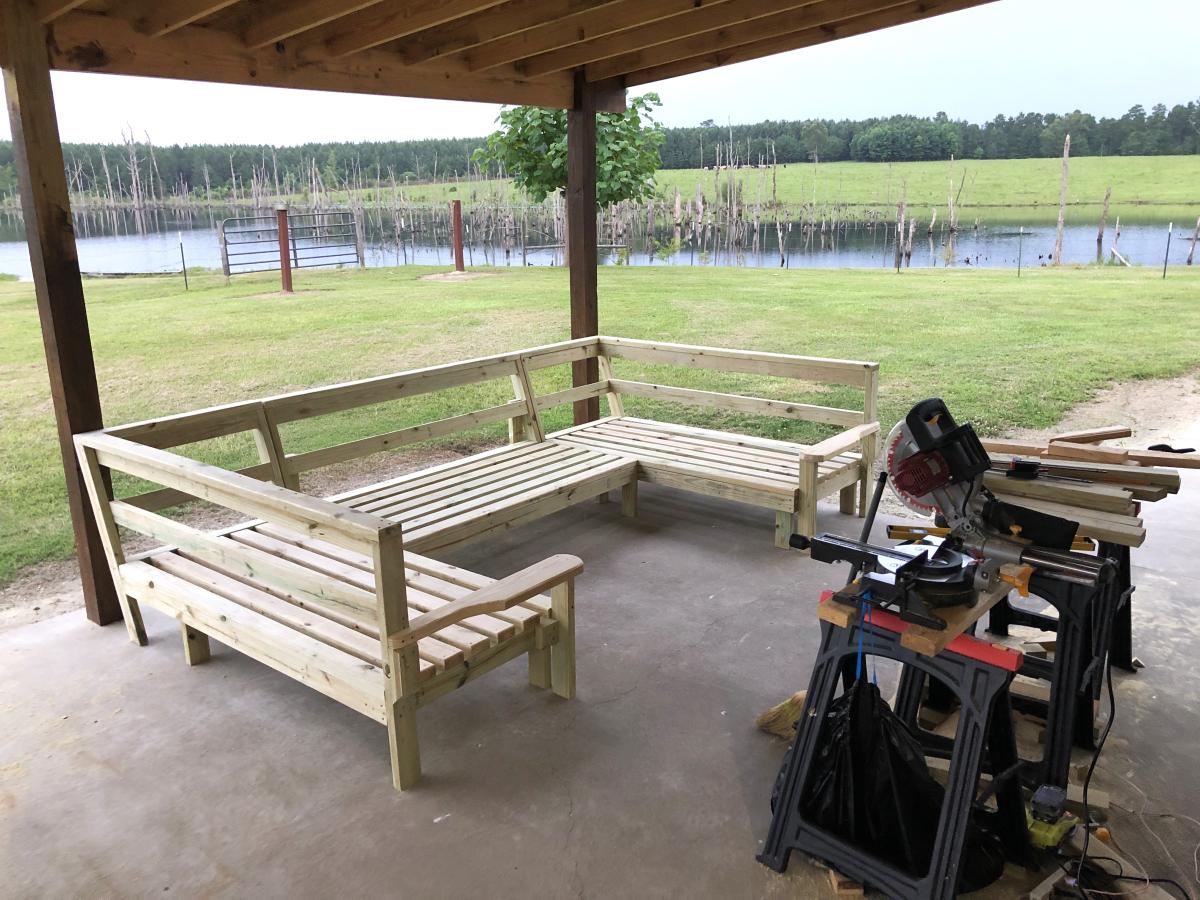
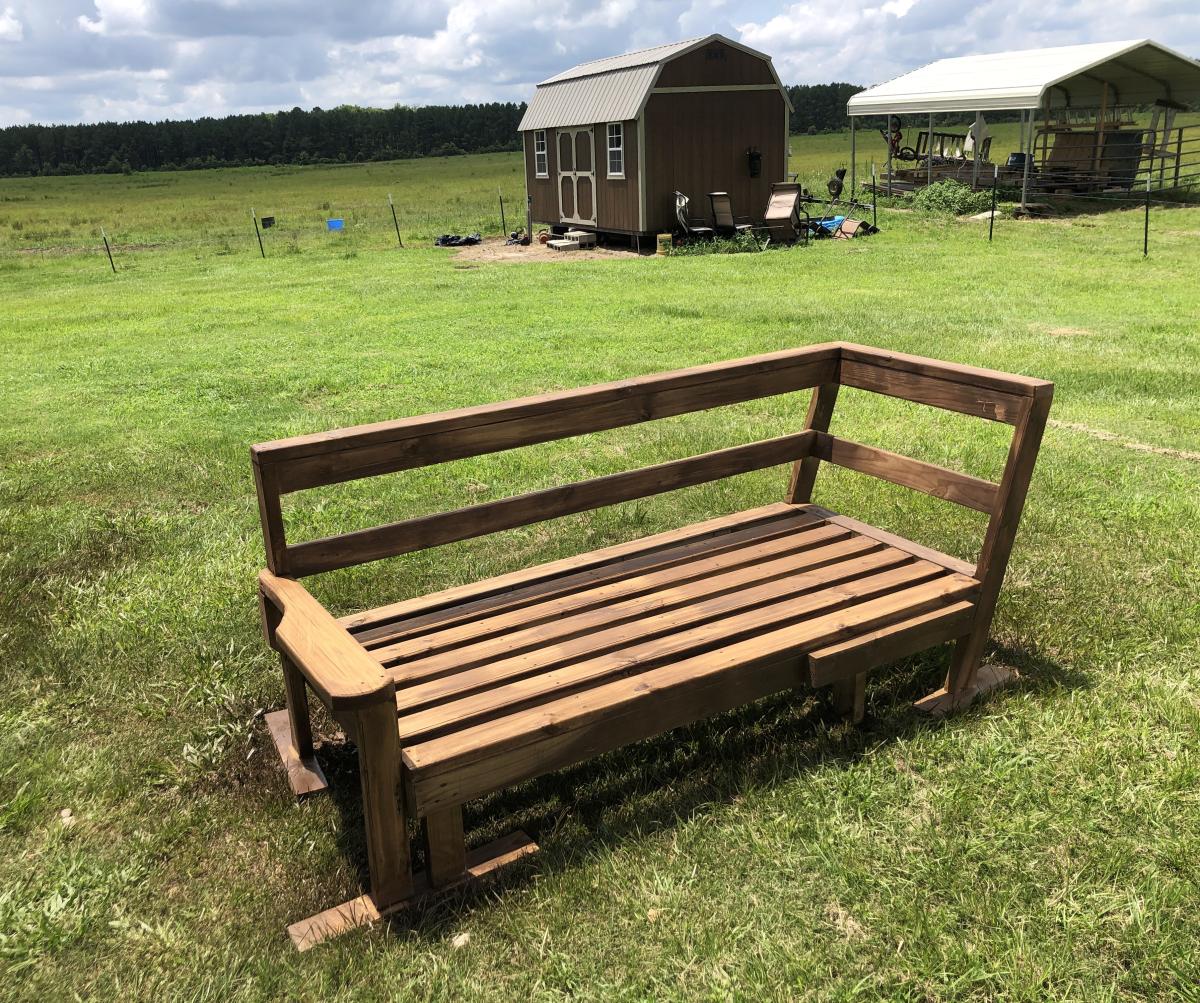
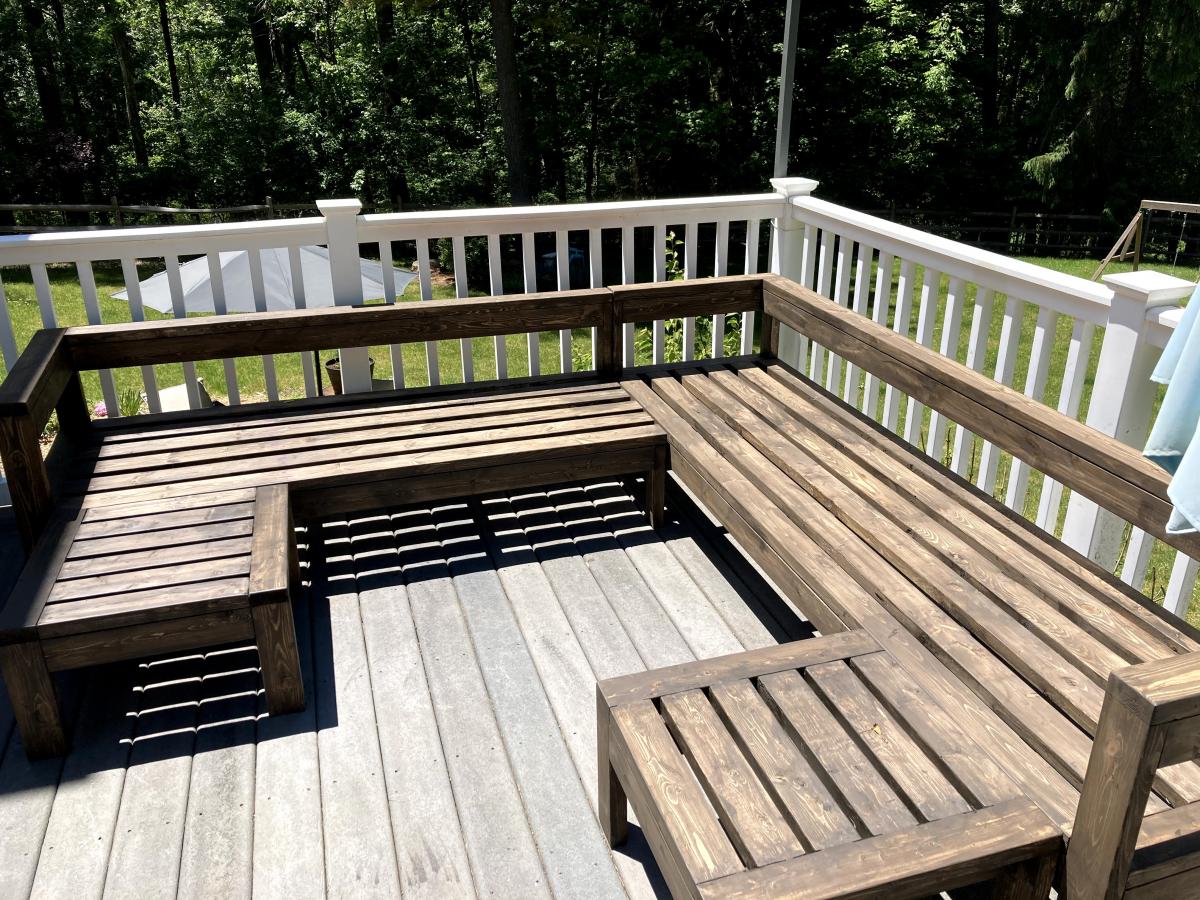
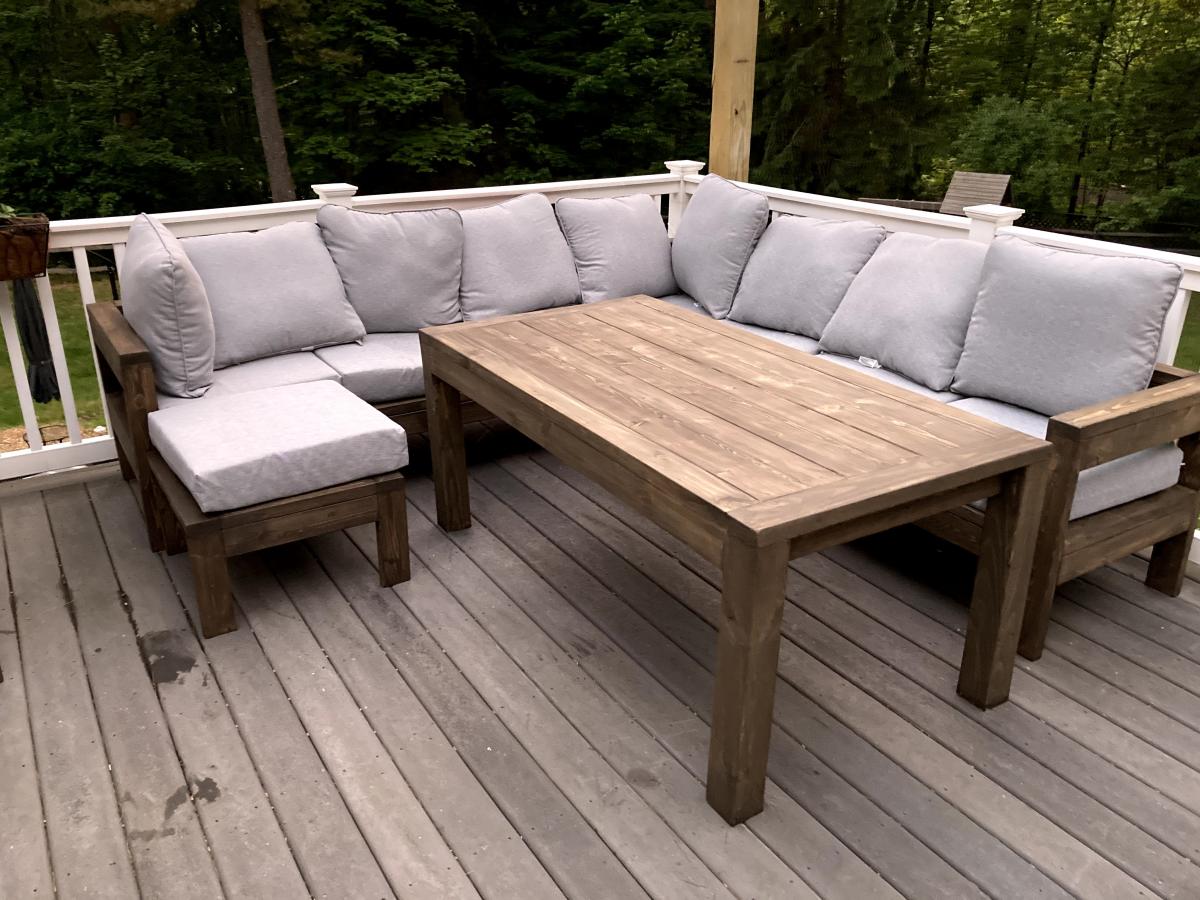
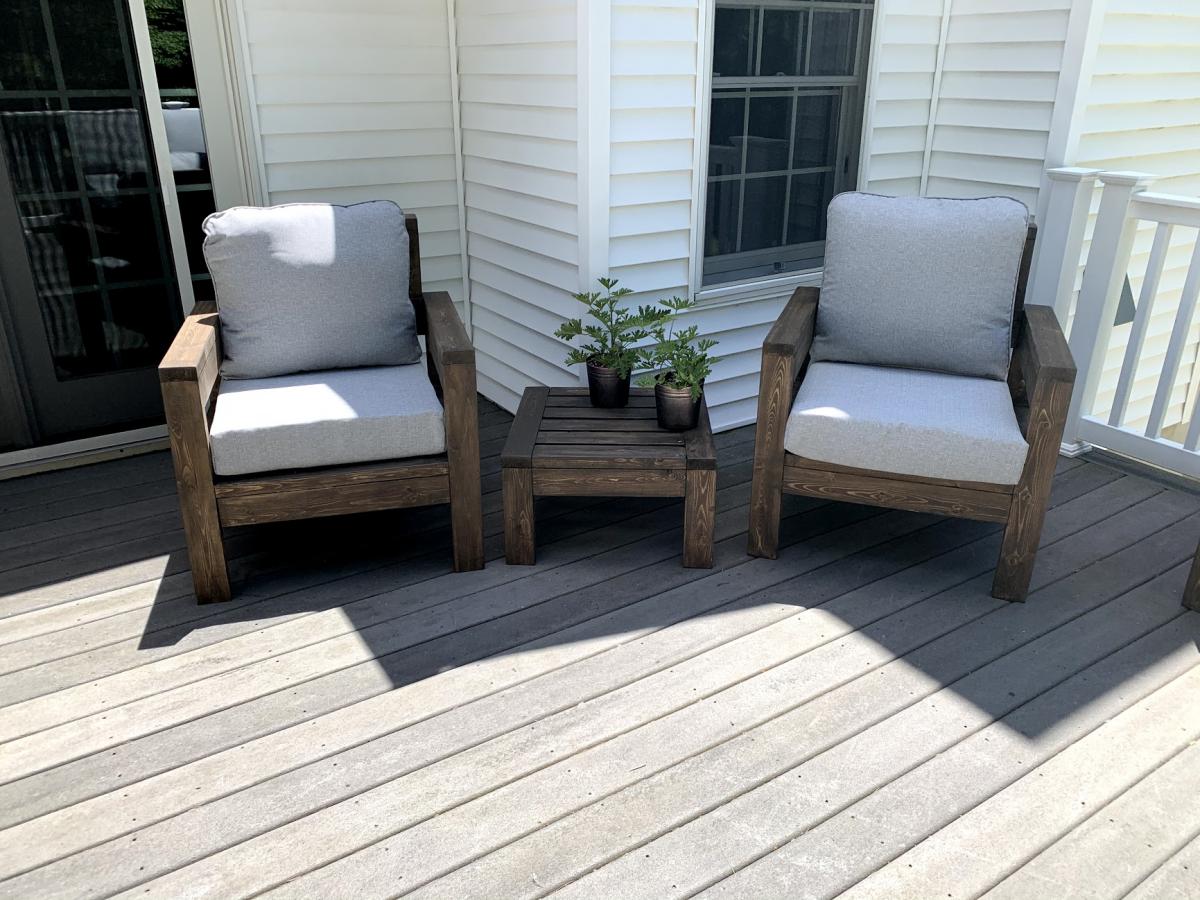
We were looking for outdoor furniture for our deck, and for the size and amount we needed it would have cost us at least $2000. We really like the idea of having an outdoor sectional that we can also use for dining, and we had trouble finding a set we liked. We found Ana's plans for the 2x4 Outdoor Sectional, and i loved the look. After seeing what others have done with the plans, I thought I would be able to modify it to get everything we needed for much less cost than buying a set.
We ended up extending the size of the 2x4 outdoor sofa by one 24" section, for a total length of 96". I then used the same design to make two outdoor chairs, just reduced the length to 24". I modified the 2x4 outdoor coffee table plans to create two ottoman's that can be moved around to make the seating more lounge style Finally, I modified the coffee table plans to make a 5 foot outdoor dining table. All in all, it took about a week and I couldn't be happier with how it turned out!
I saw this table and nesting grill station on your FB page. I changes it up a little bit, but the concept is perfect for my back yard deck.
Dharris