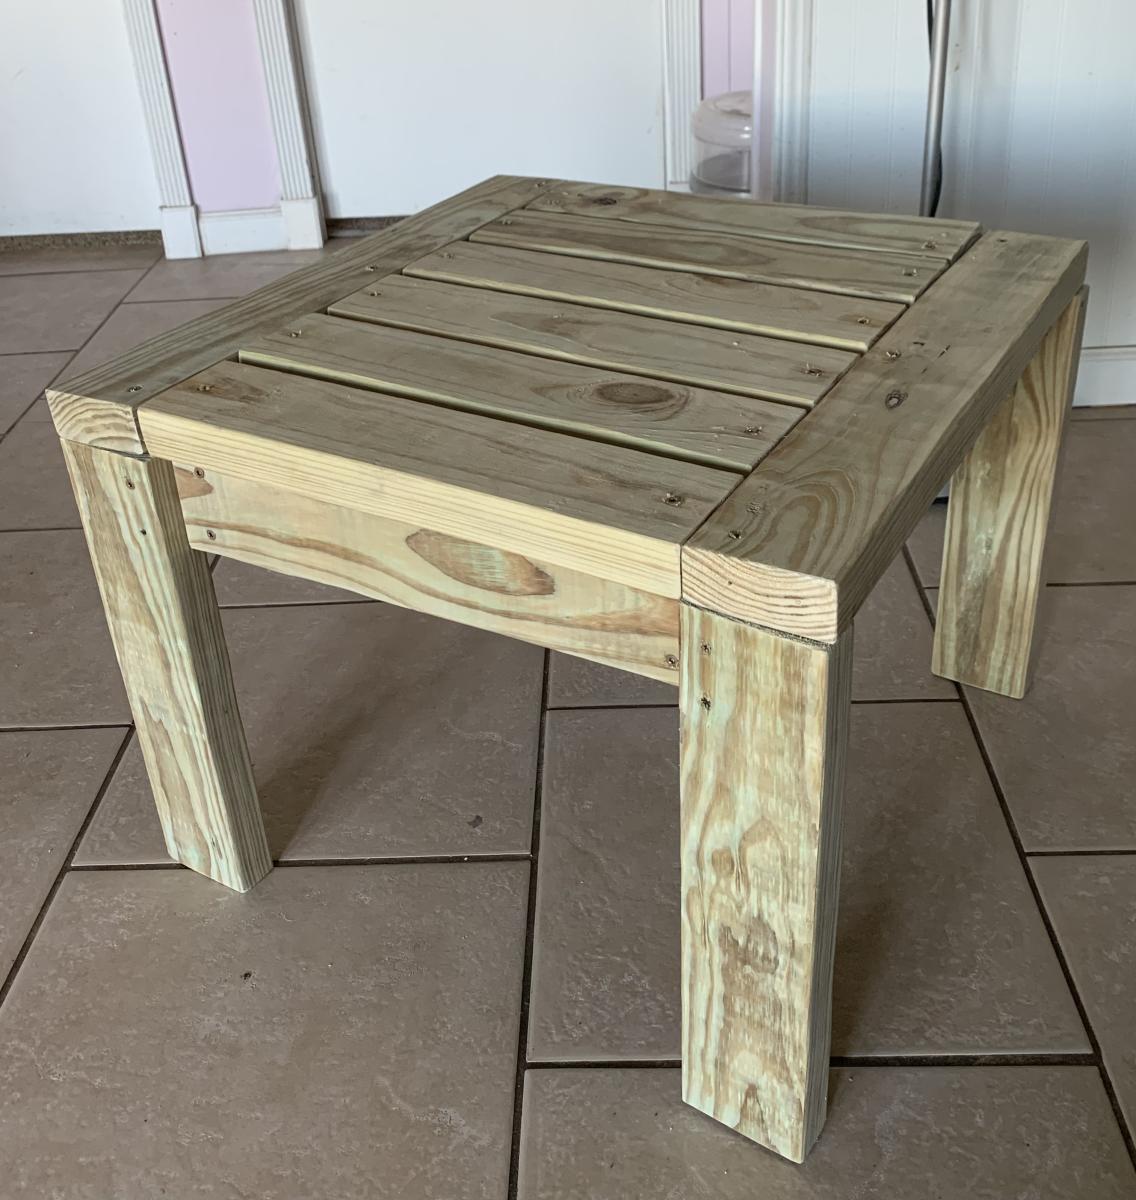
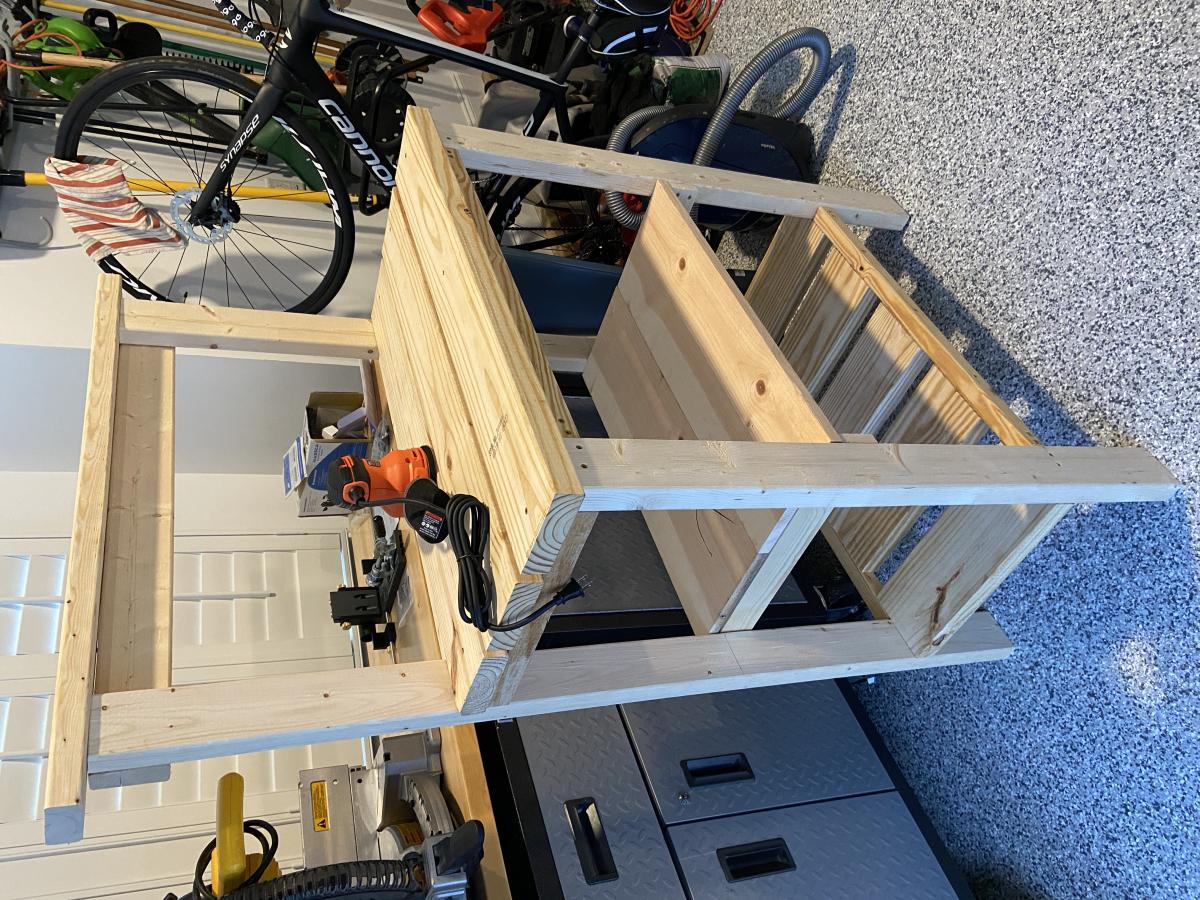
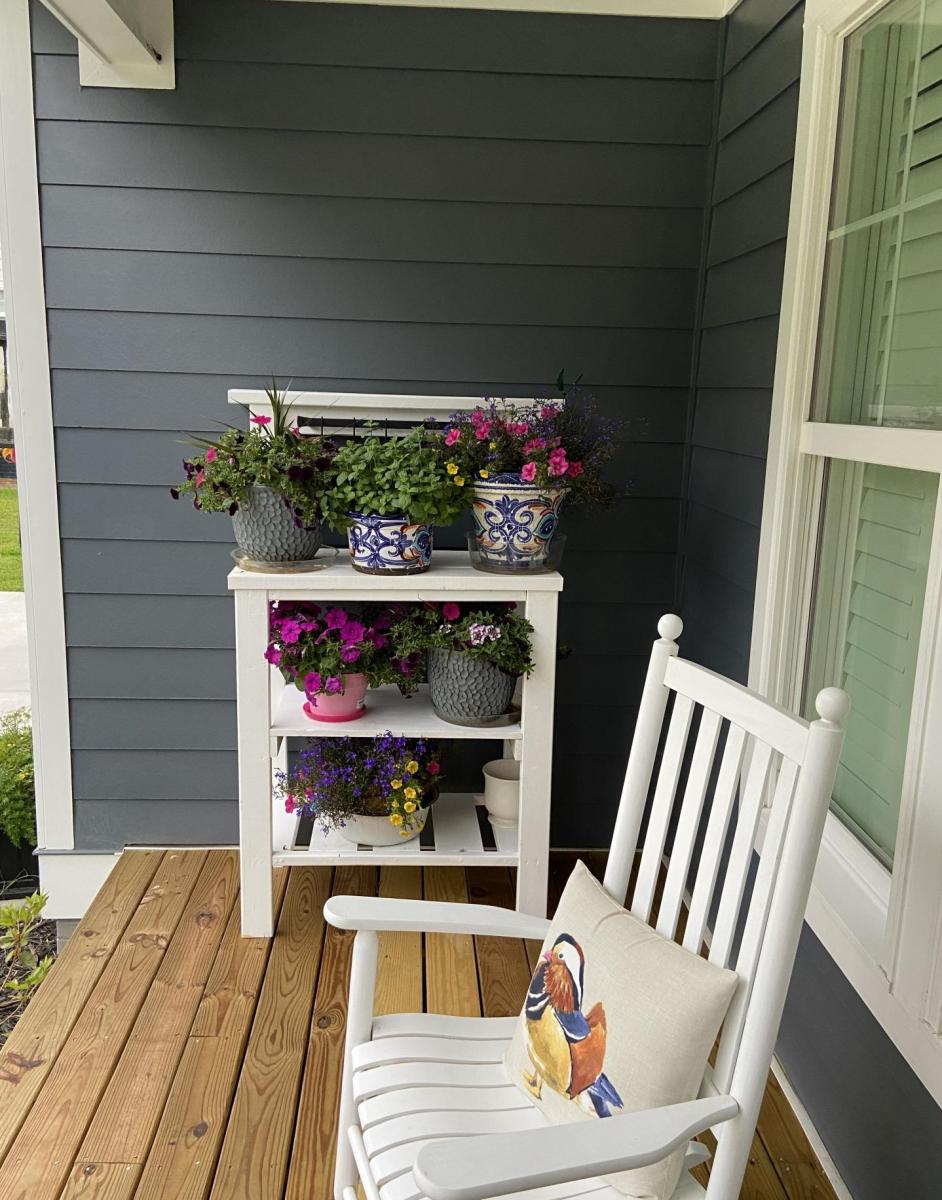
Outdoor end tables
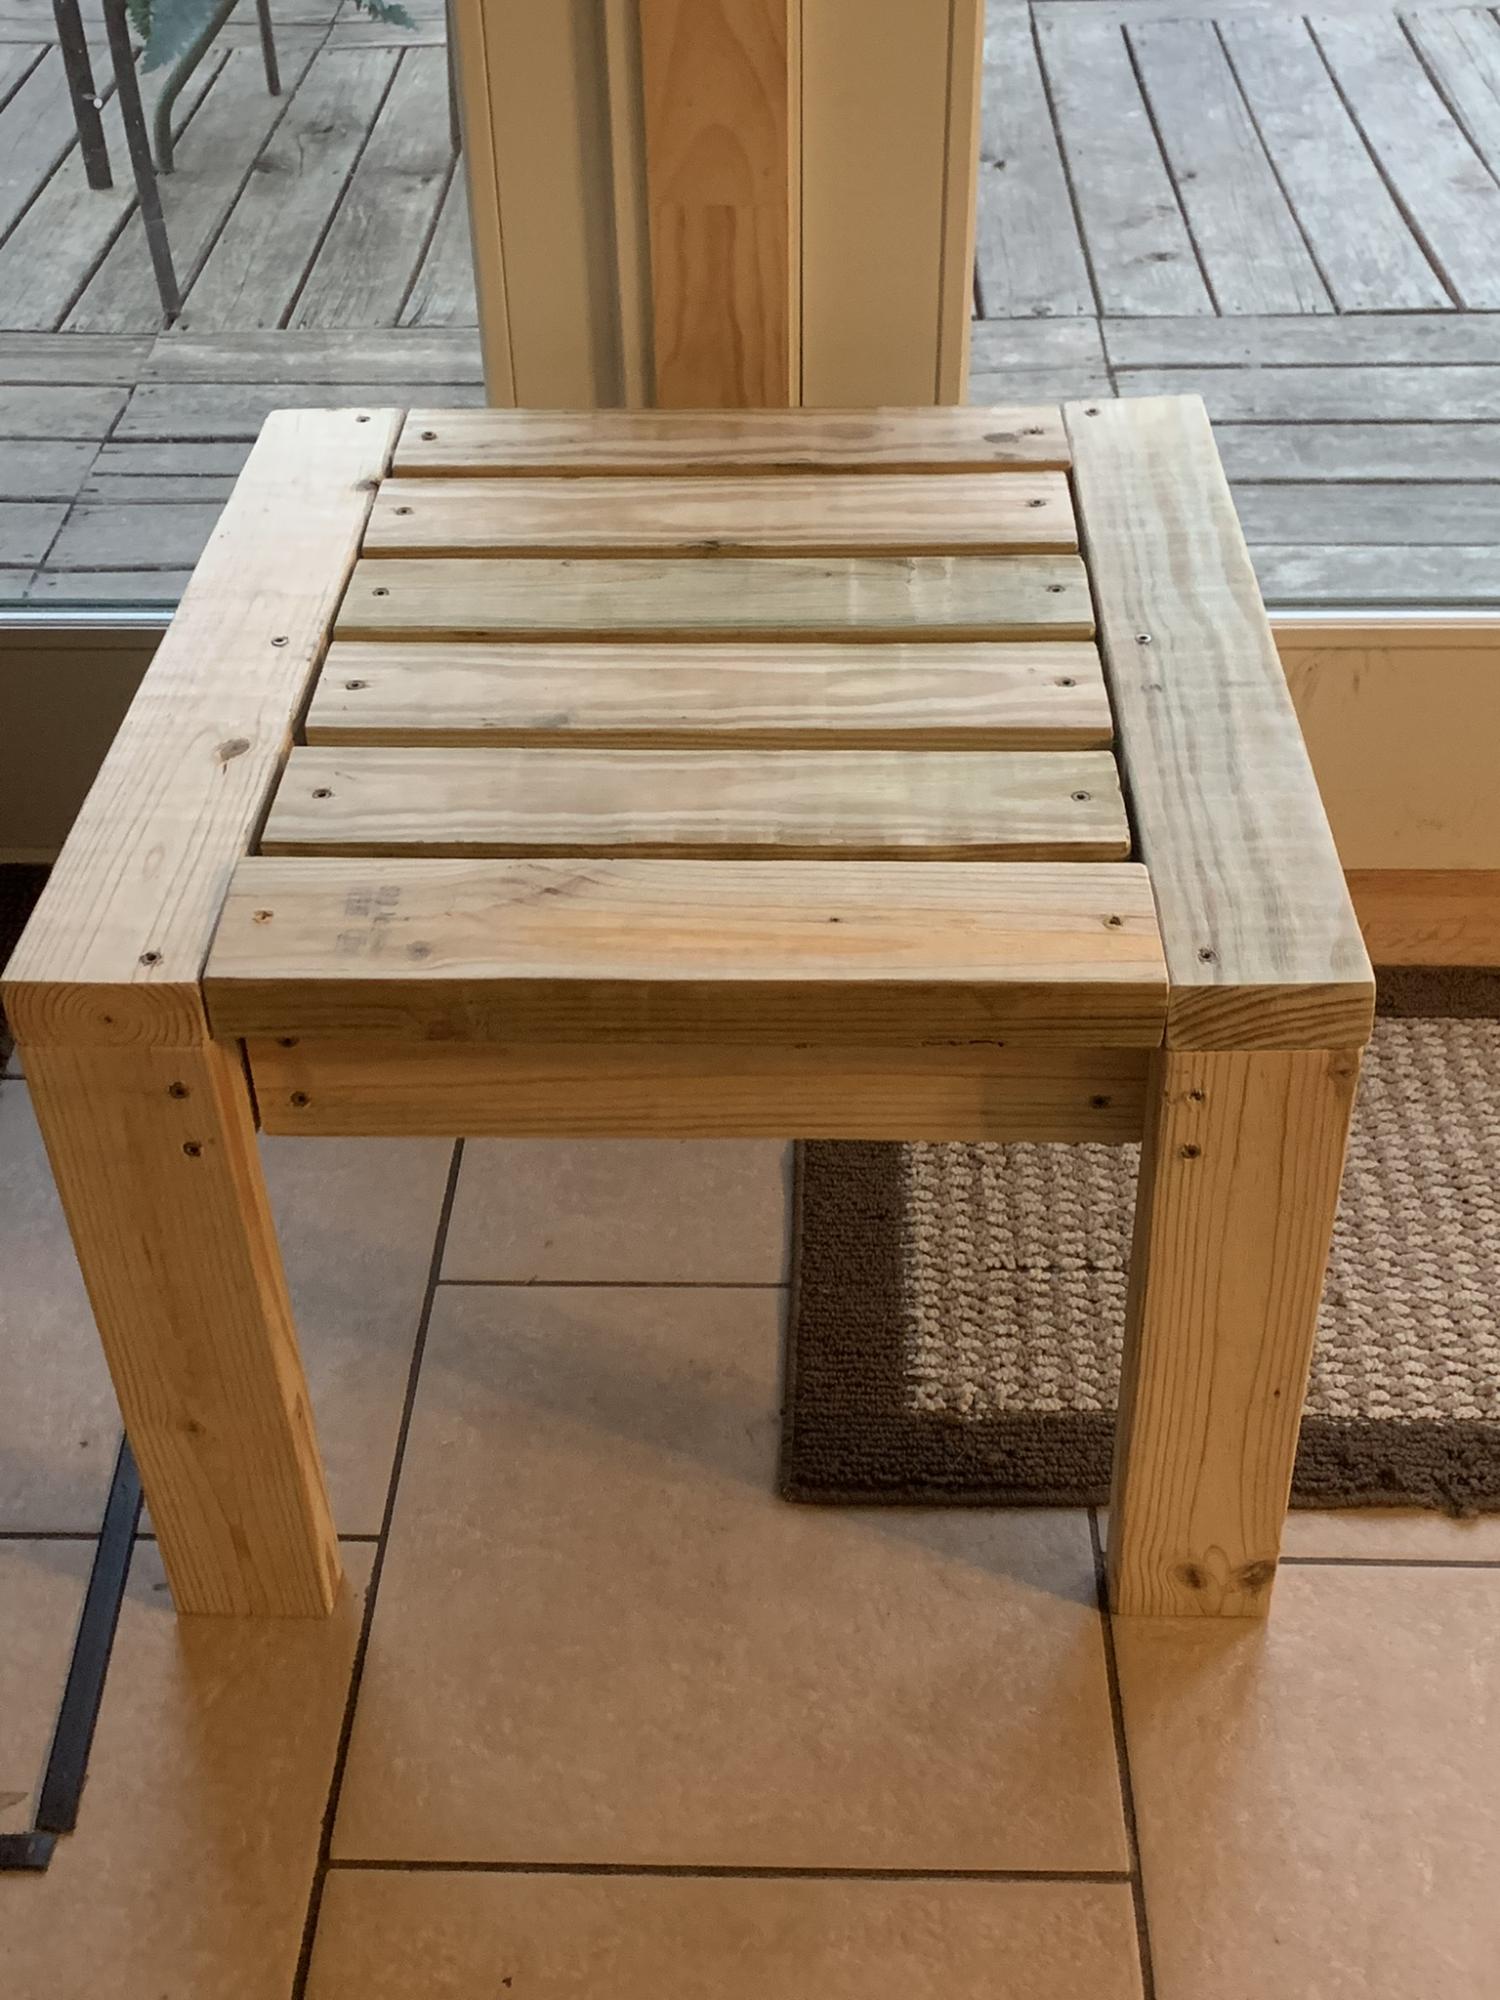
I made these two Ana White outdoor end tables for my patio. Next up will be the matching coffee table
Built from Plan(s)
I made these two Ana White outdoor end tables for my patio. Next up will be the matching coffee table
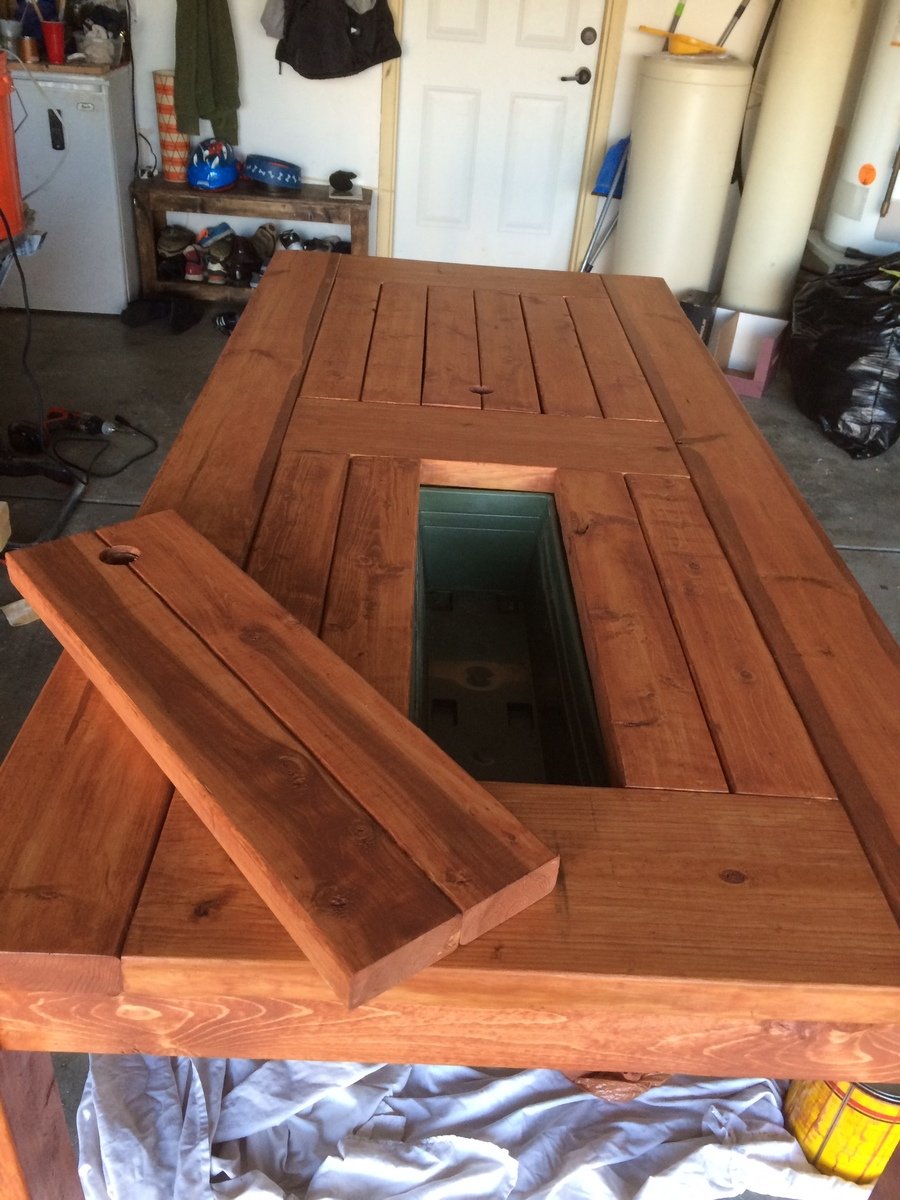
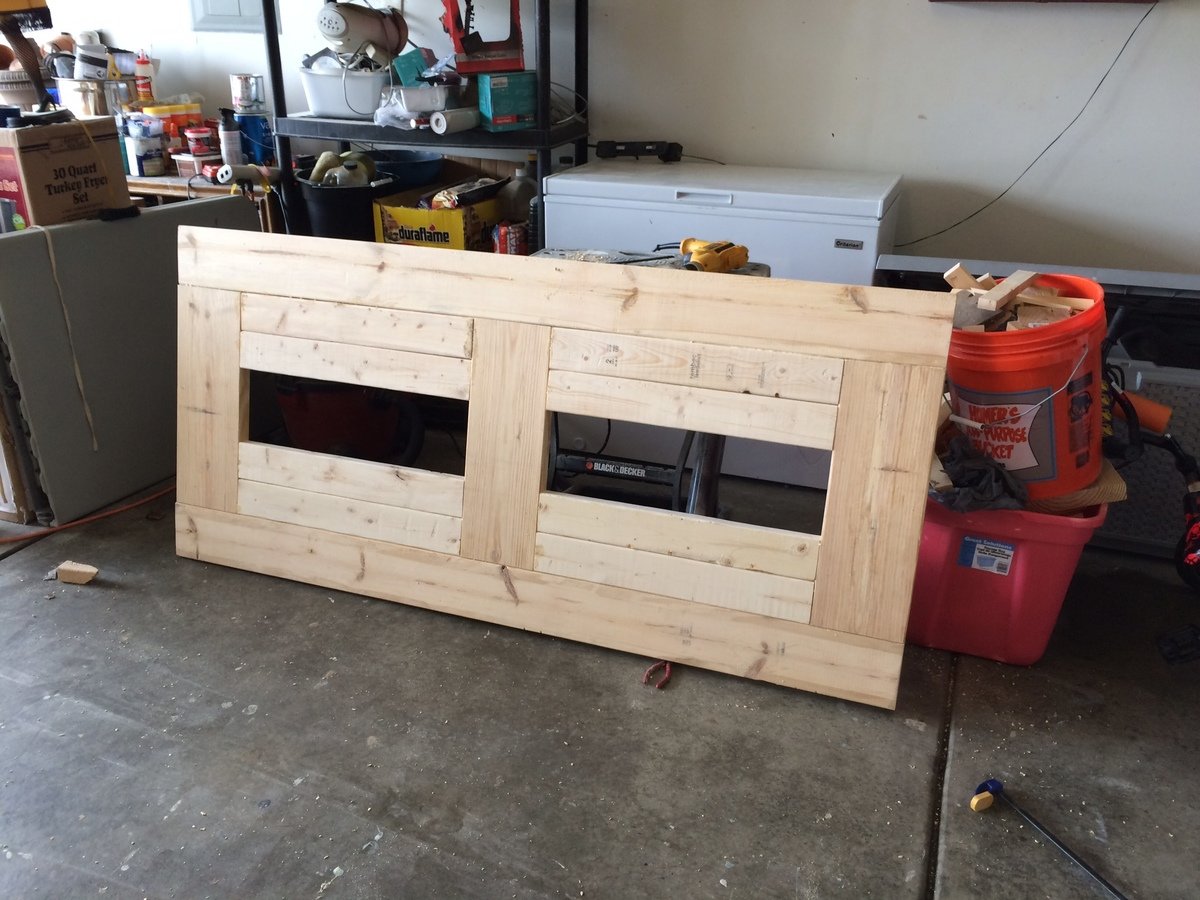
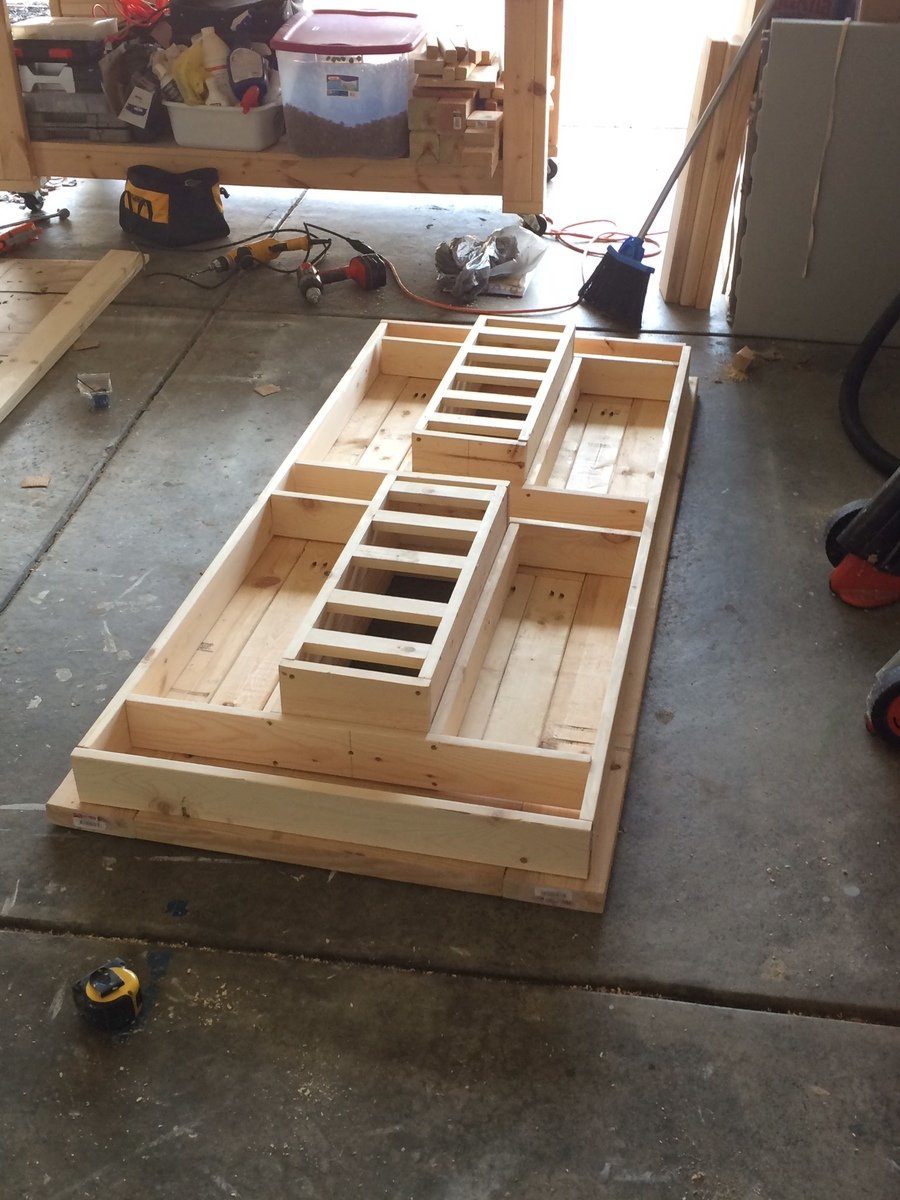
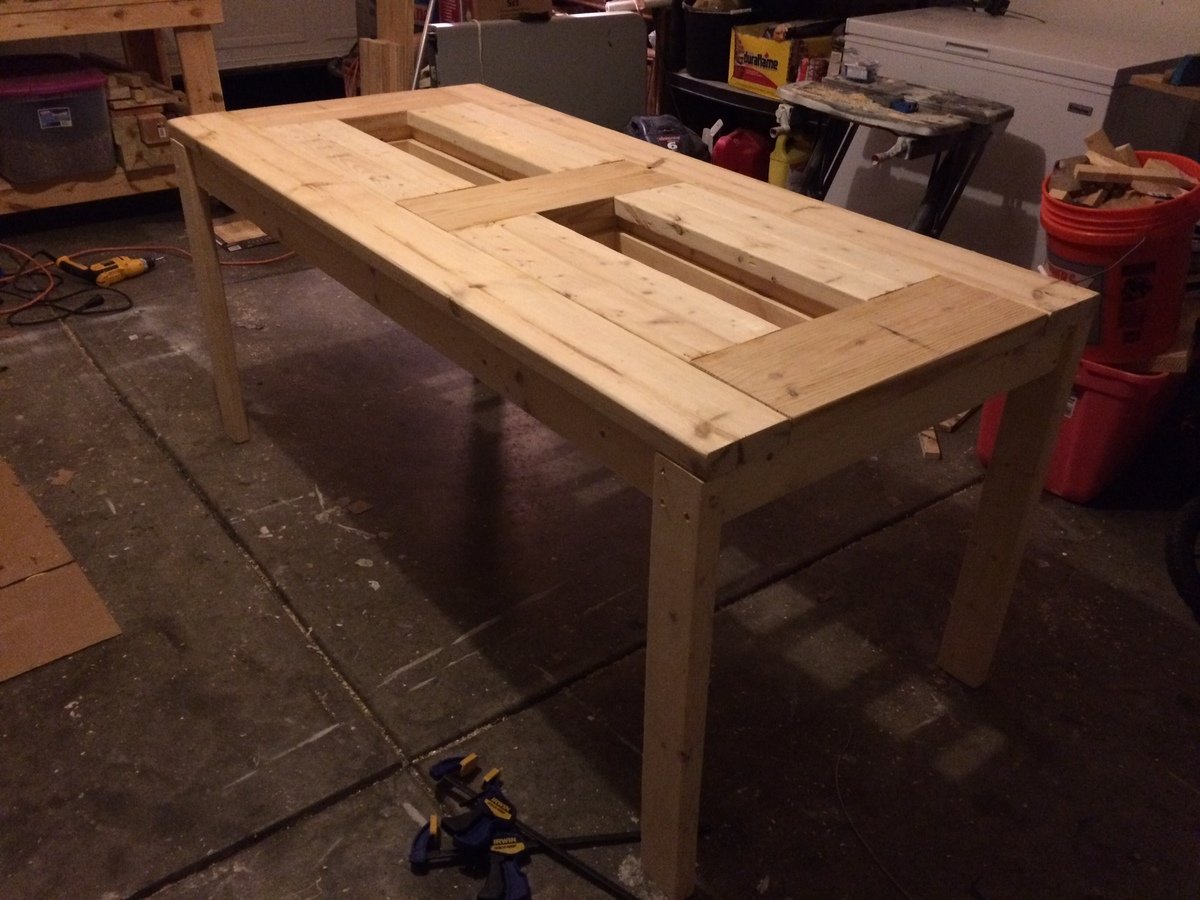
I made this table for a friend of mine. I'm a Realtor and he used me to help purchase his home. Instead of a boring house warming gift, I made him this table instead!
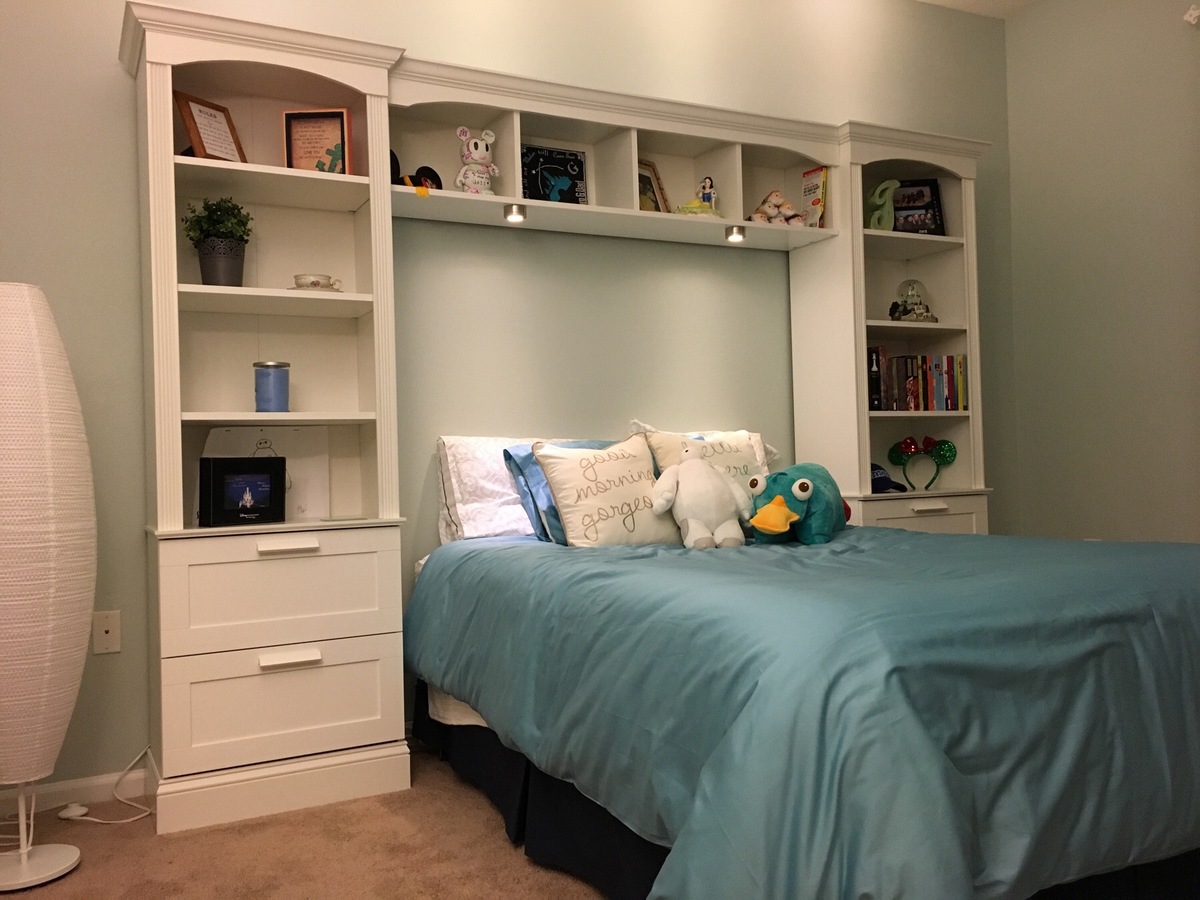
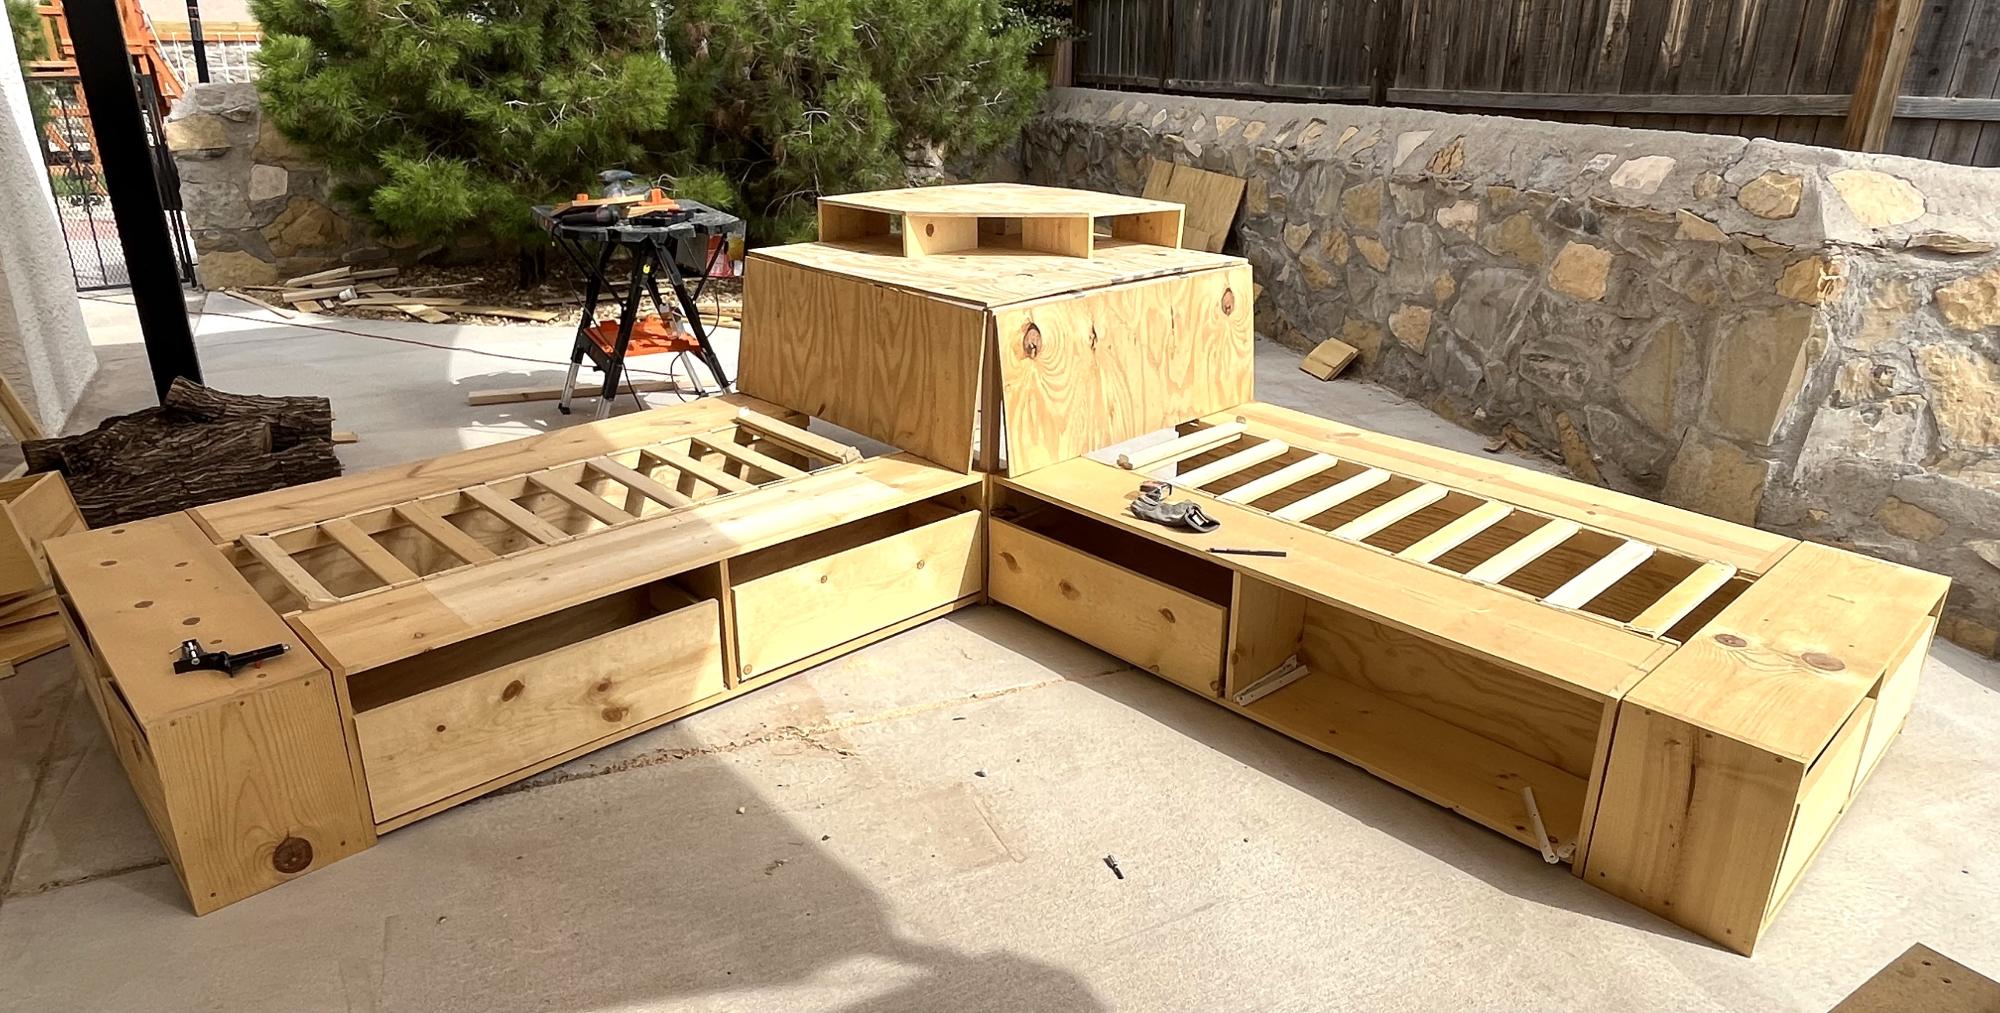
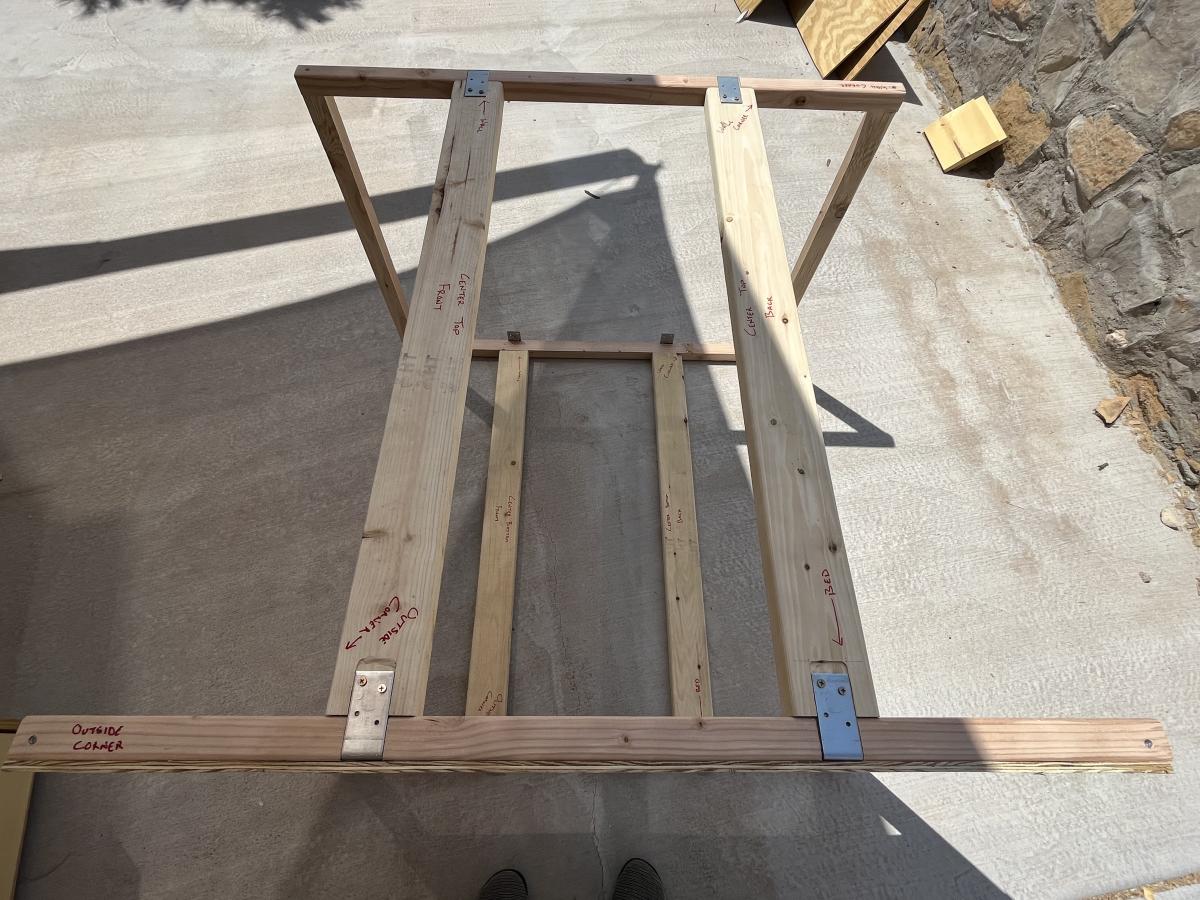
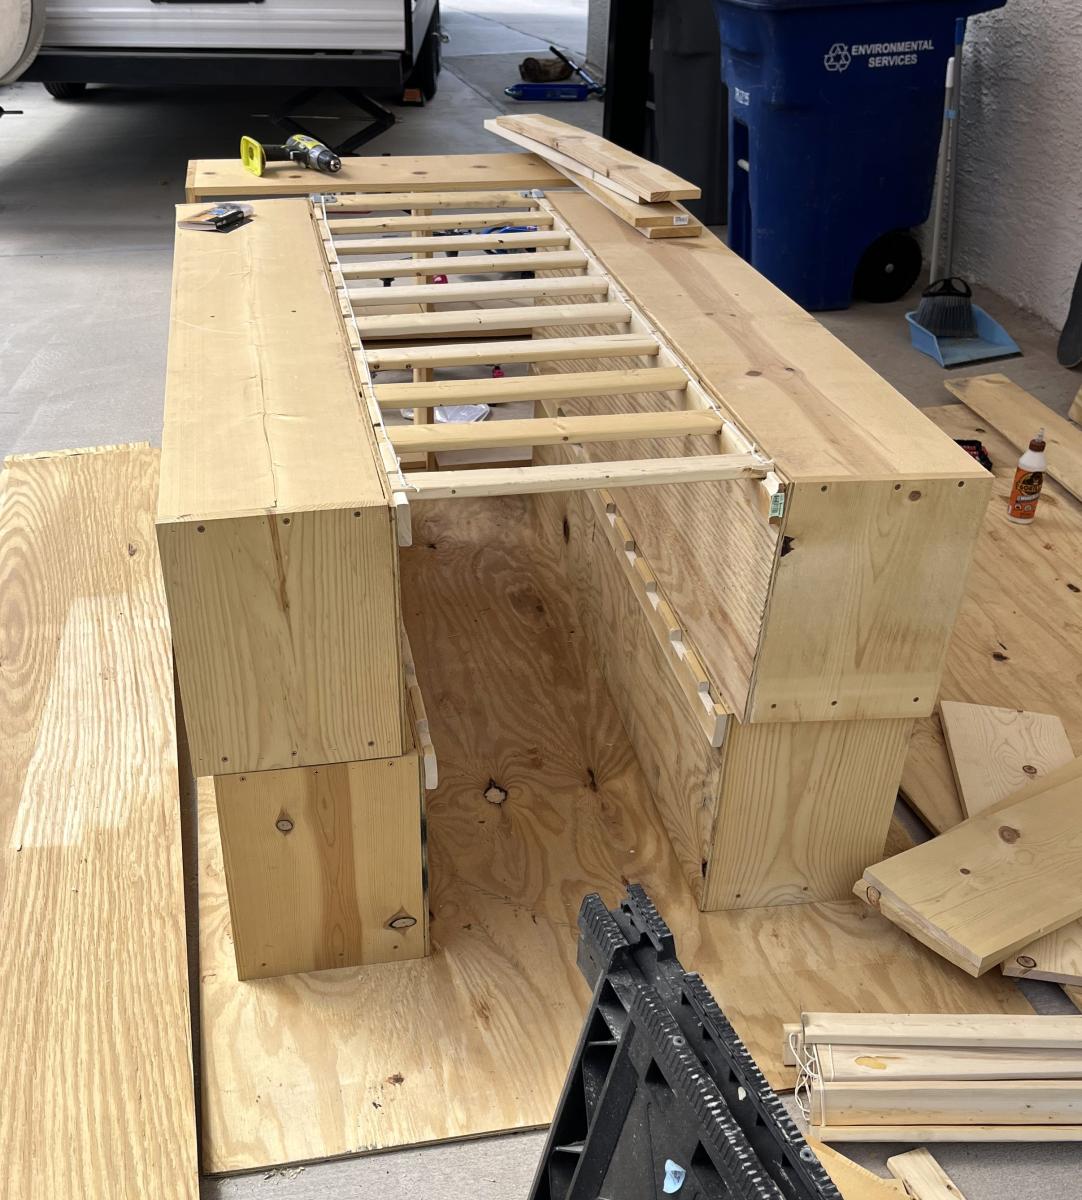
I hacked three IKEA bookcases into this beautiful bed for my princess of a daughter who was getting her first apartment in Orlando, FL, because she got a full-time dream job with Disney. Full details at http://handydad.tv/ikea-hack-bed-bridge-bookcase/.

We loved this greenhouse plan from AnaWhite and wanted to be able to grow in 3 seasons so we modified the design to include humidity & temperature control & 18" deep elevated cedar beds inside with 4x4 posts for support and trellis option. We added electricity in order to have a lighted workspace and the ability to put in a circulating fan to control mold and fungus. We added 2 work tables (2x2') on the inside of the door left and right side door in order to do seed trays & store supplies. This was a wonderful project for my husband and my plants inside are doing incredibly well compared to my outside garden beds here in zone 5. Products used:
Foundation
We had a landscape company come and scape/dig a platform and then fill/compact with crushed rock
My husband then used rebar driven into a 4x4 frame in order to secure the frame to the ground and create a base upon which to build the greenhouse
Active ventilation
AC Infinity Cloudline T8 Inline duct fan
Air king range hood wall cap 8" on the bottom outside of the greenhouse wall for air intake + flex 8" duct to the fan itself
Shelter logic autovent automatic shelter vent kits (1 on each side of the front wall) in order to allow air intake from the bottom back of the greenhouse under the elevated beds to flow to the front of the greenhouse and out
Circulating fan- Hurricane wall mount fan 16" - this fan has 3 speeds with tilt function and small mounting bracket
Soil - sourced 3 yards of 50/50 loam/compost from local landscaping supply
60% loam
30% organic compost
10% organic topsoil + perlite
Soil beds
-cedar frame 2 feet wide along sides, 3 feet wide on the back wall
-galvanized metal roofing with holes drilled into it for drainage
-landscape cloth lined


Wed, 09/09/2020 - 13:09
Thanks for that update! I was wondering how to vent this project, as Green houses need the ventilation. Good to know dollar amount also. Great photos.
Wed, 09/09/2020 - 13:09
Thanks for that update! I was wondering how to vent this project, as Green houses need the ventilation. Good to know dollar amount also. Great photos.
Wed, 09/09/2020 - 13:09
Thanks for that update! I was wondering how to vent this project, as Green houses need the ventilation. Good to know dollar amount also. Great photos.

I followed Ana's plans as written. However, I couldn't find a locking hinge the comments suggested. I will keep on the look-out for this though. I used 3/4" hardwood and had Blue do all the cuts for me. Easy-peasy. I painted the whole thing with left-over paint and then randomly taped off stripes using more leftovers and then protected everything with a coat of poly. Finally, I used a double layer of quilt batting and 100% cotton fabric to upholster one of the leaves for use as an ironing board. Literally finished this today, so I haven't had a chance to use it, but I'm so excited with how it turned out!
Thu, 04/25/2013 - 10:57
I found locking hinges for a table here: http://www.hardwaresource.com/hinges/FURNITURE+HINGES/Table+Hinges+-+Sh… and here: http://woodworking.rockler.com/c/table-leaf-locks
I hope that helps you finish the project!
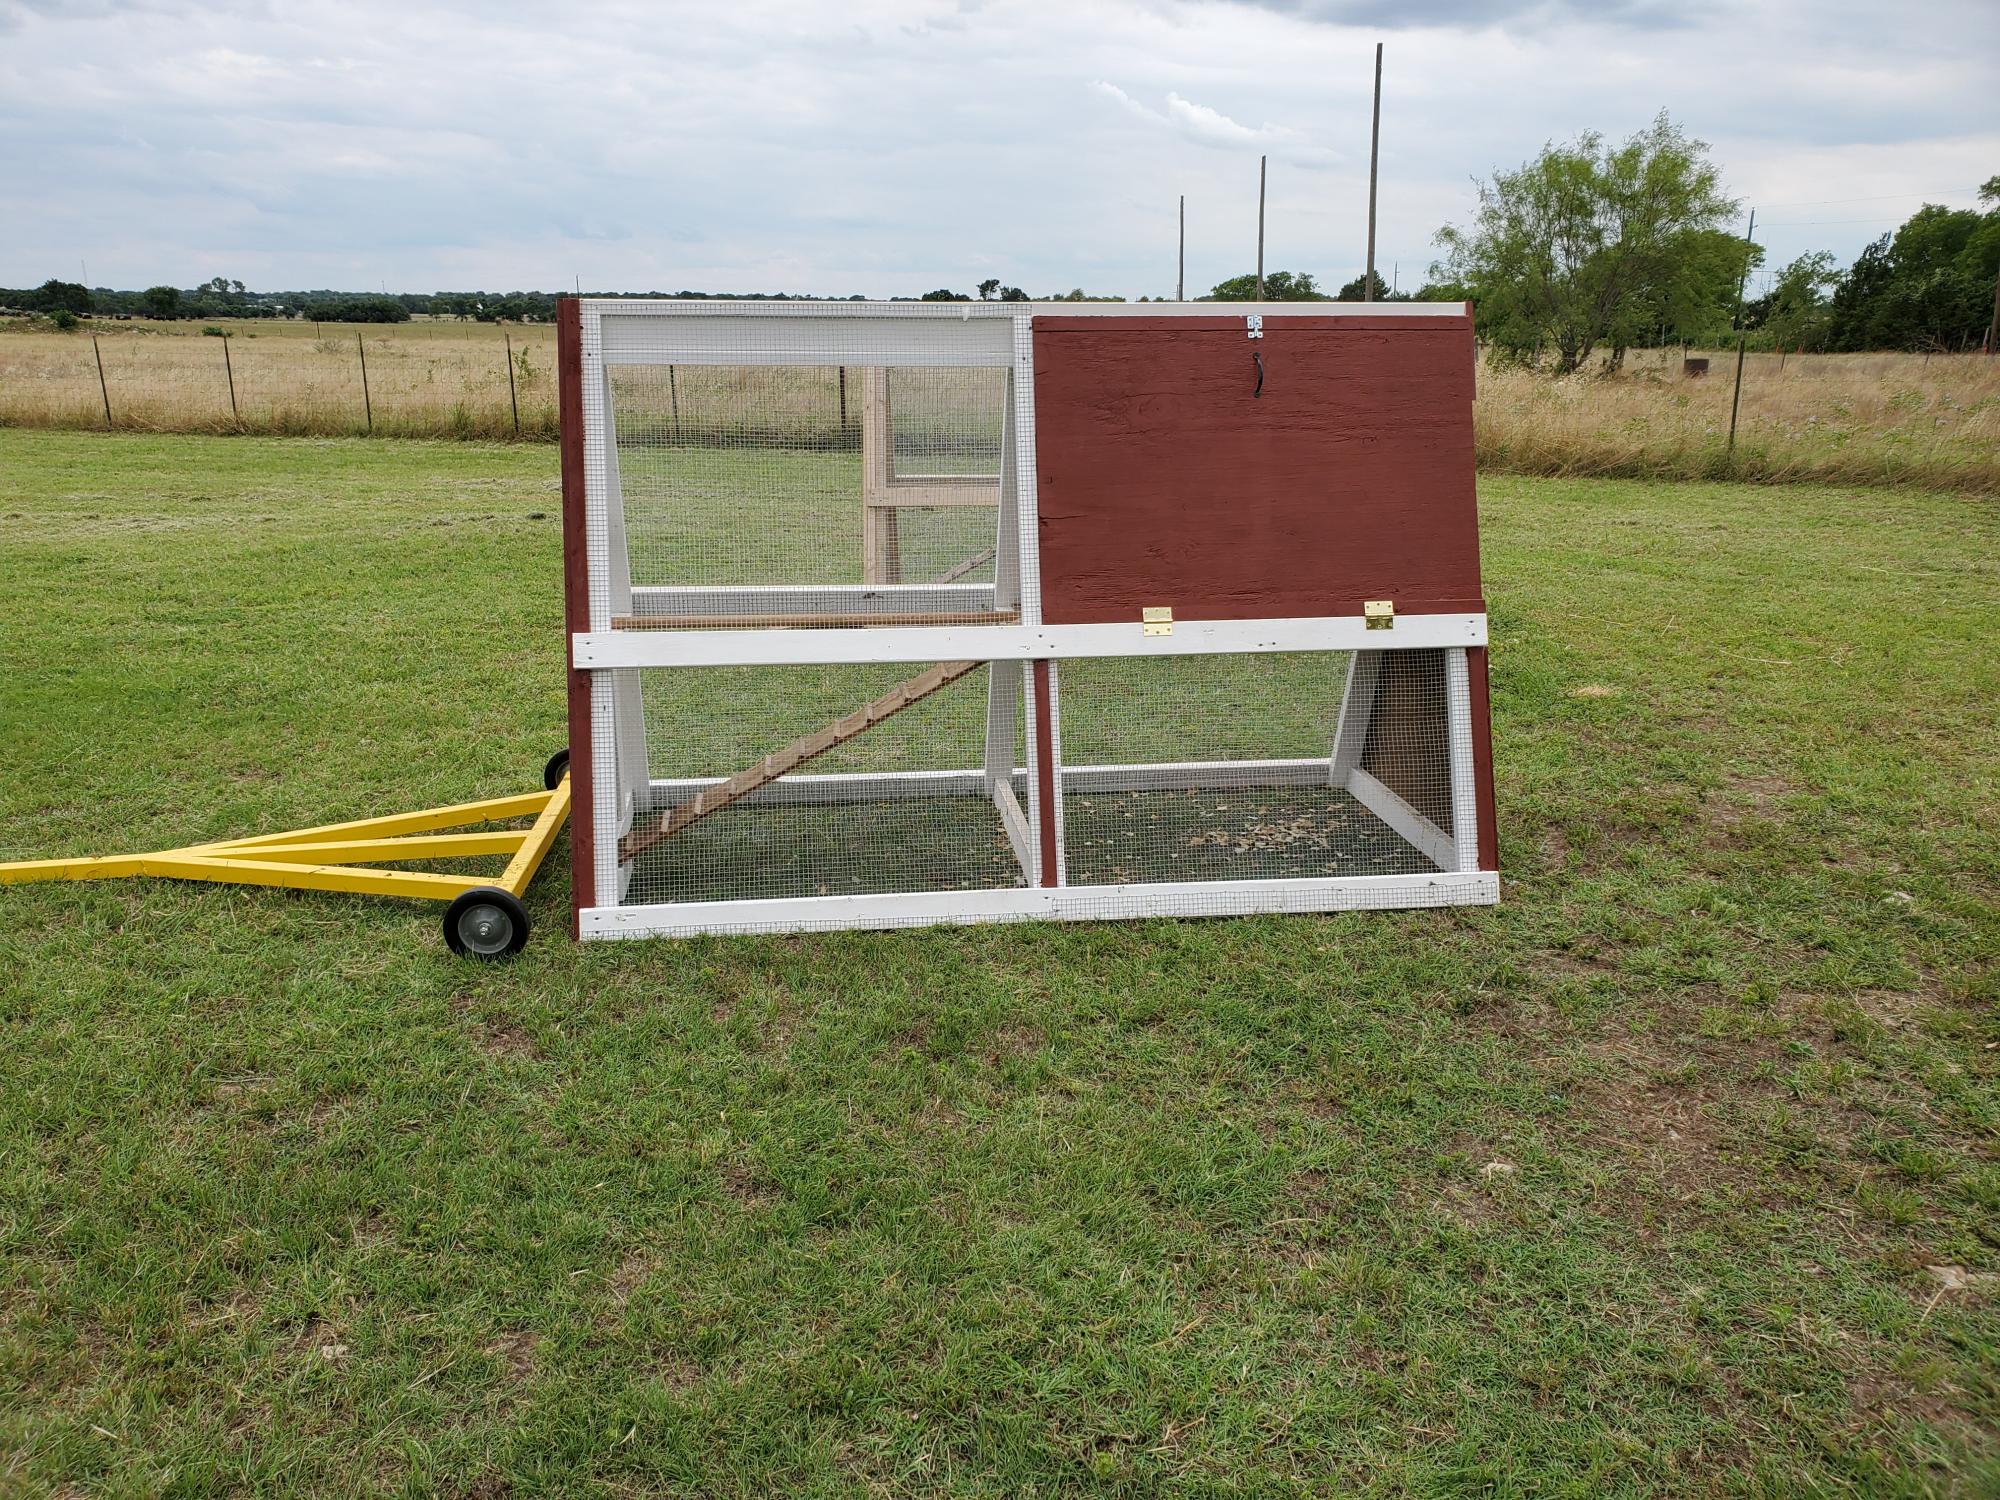
Quick a-frame coop for 4 chickens.
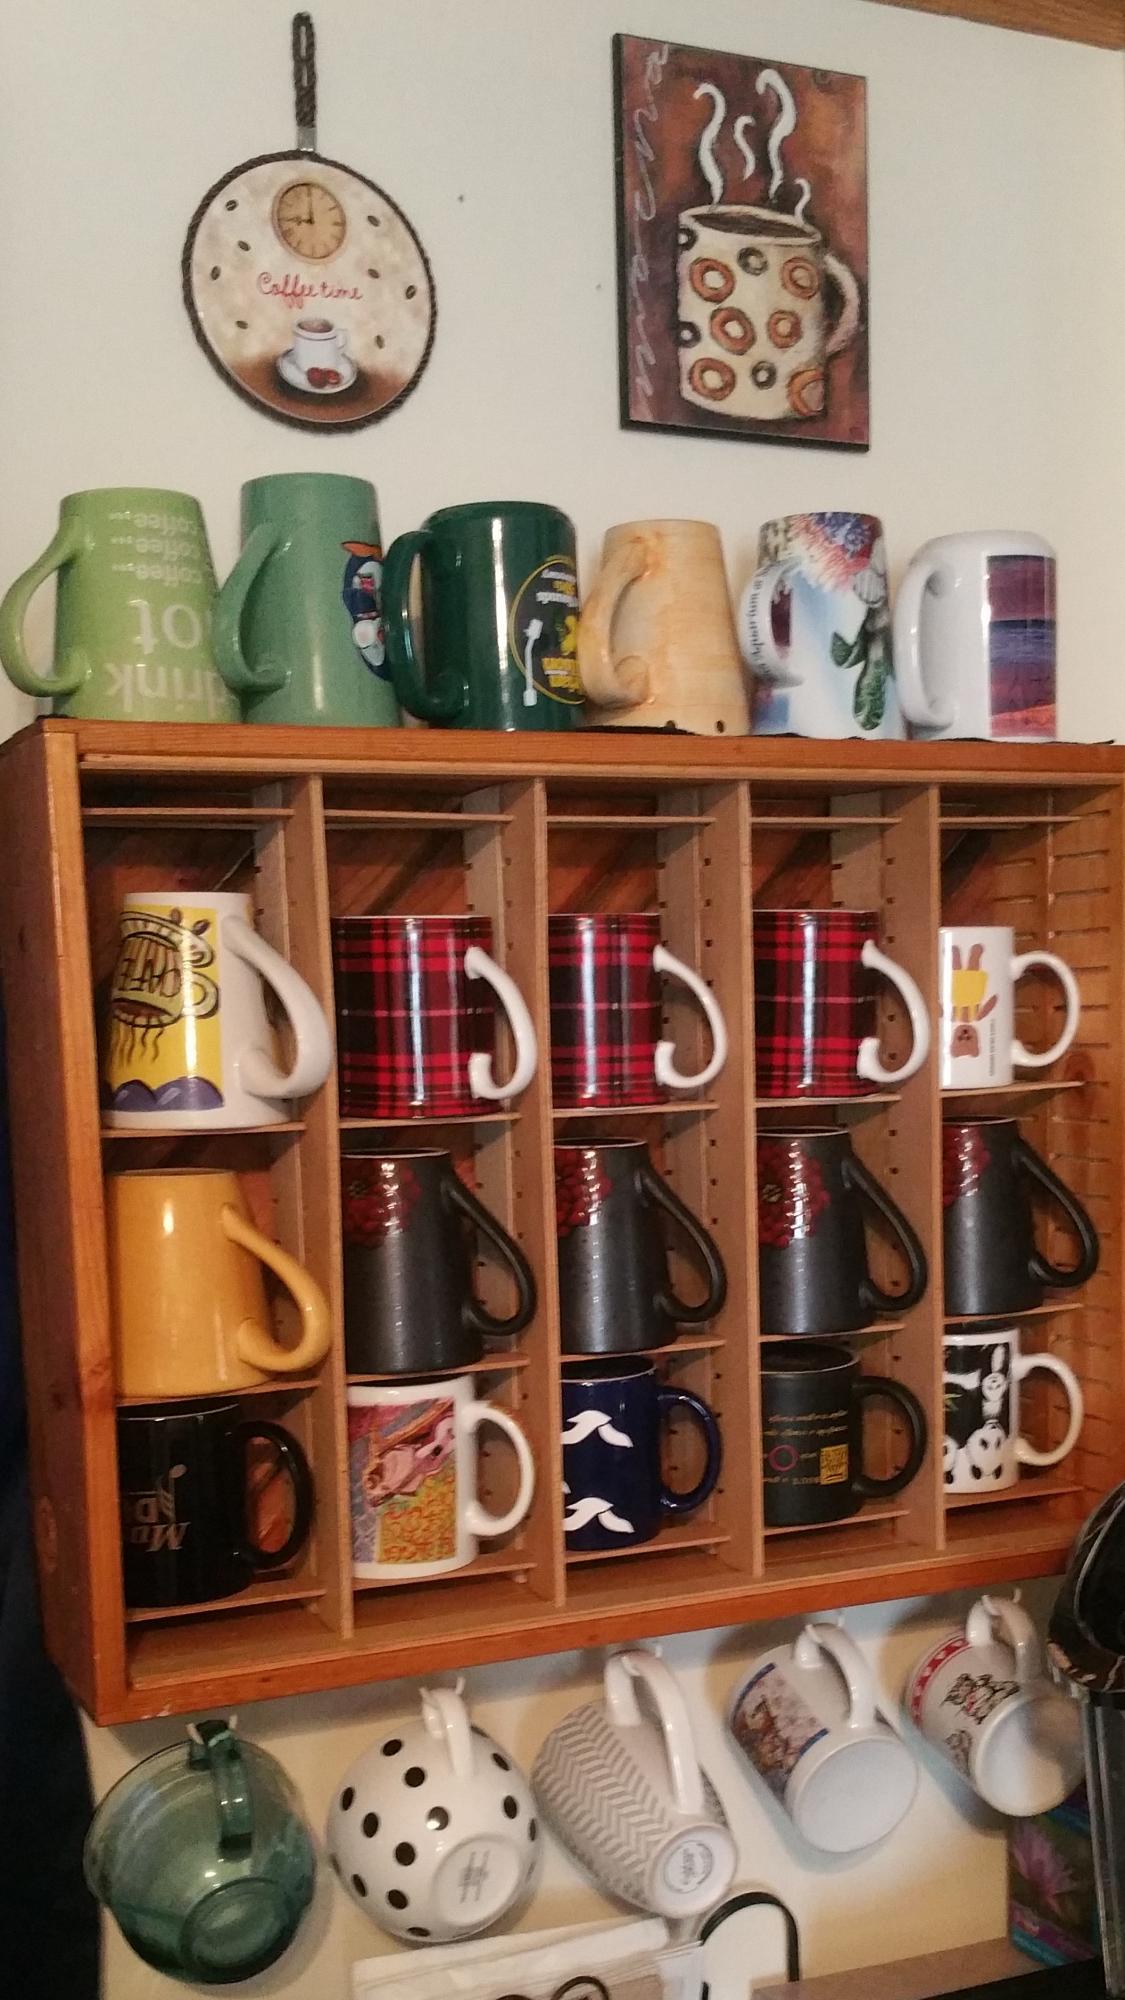
We had too many disorganized coffee mugs and needed a better storage solution. I took a couple of old cassette (remember those?) storage crates, did a chevron style back from old pallet wood, added shelves from the former dividers, and added a lot of clear coat. It functions well for us and was completely upcycled materials.
by Kevin
Proud of this, my very first build. Thanks to Ana White for the detailed, easy to follow plan. Can hardly wait to start the next project!
Fri, 06/16/2023 - 22:02
Absoutely love this, way to go! Can't wait to see your next project.

This build was also a lot of fun! I made an extra brace to hold the wait of two sitting on the bench. Thanks again Ana for your plans!
David Marks
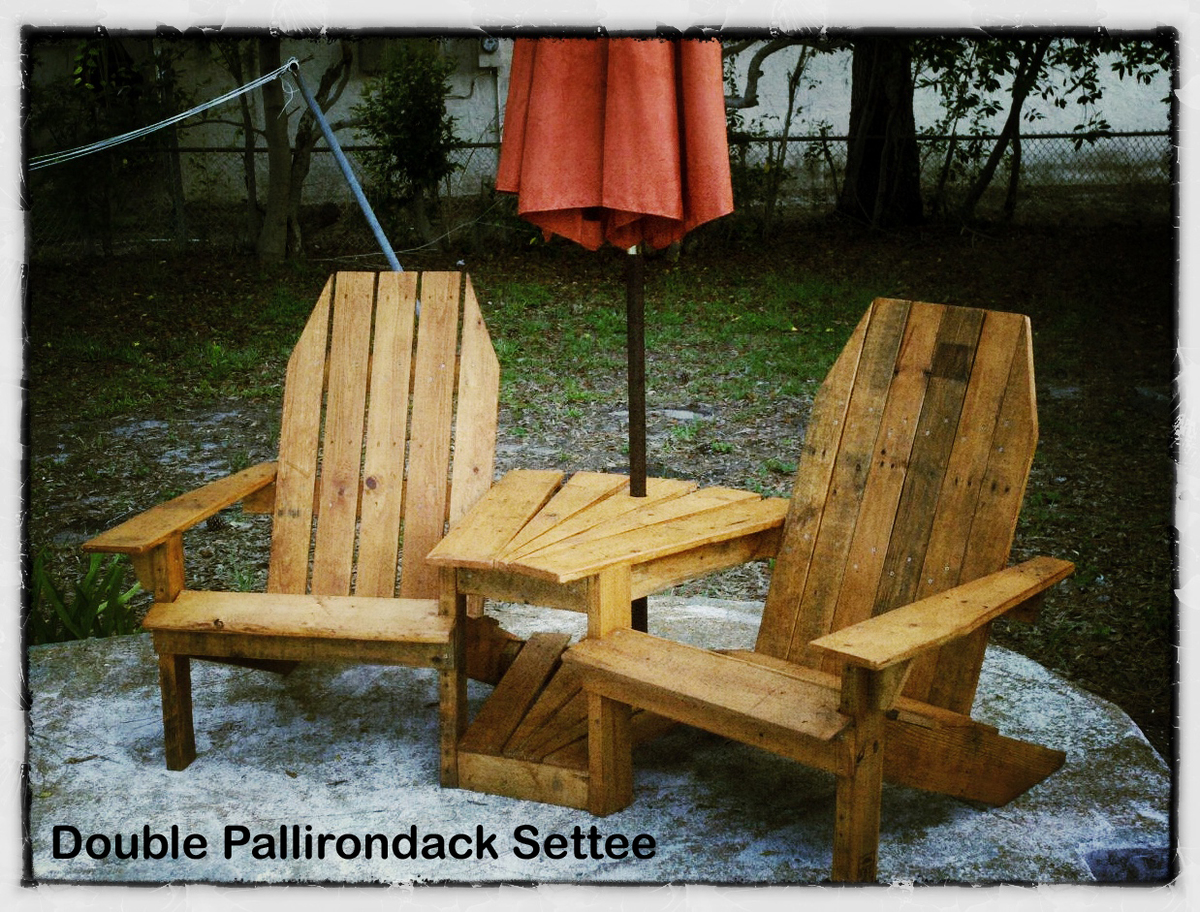
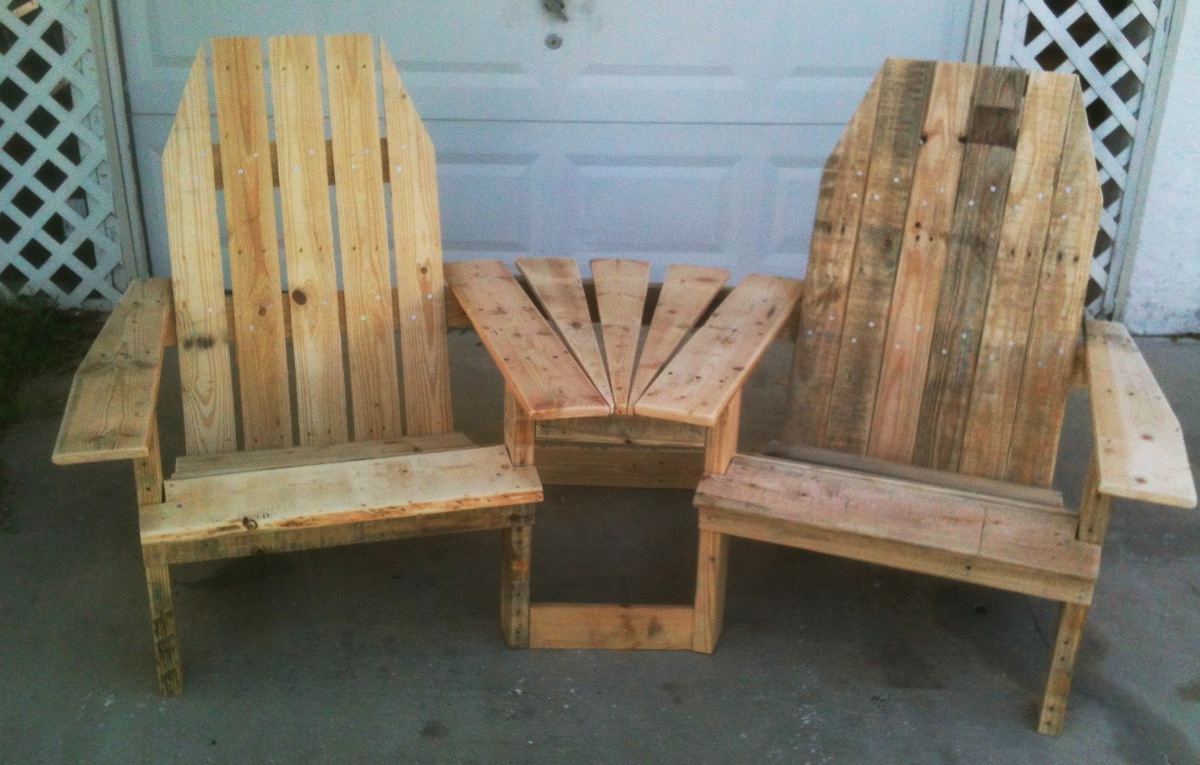
This is a Double Pallirondack Settee, an Adirondack-styled set of chairs connected by a two-shelf table that is also an umbrella holder. It is made 100% from recycled wooden pallets (thus the name). It took approximately four full pallets to make the settee. The finished picture was taken by its new owners after they stained it with a cedar-colored sealer and added an umbrella.
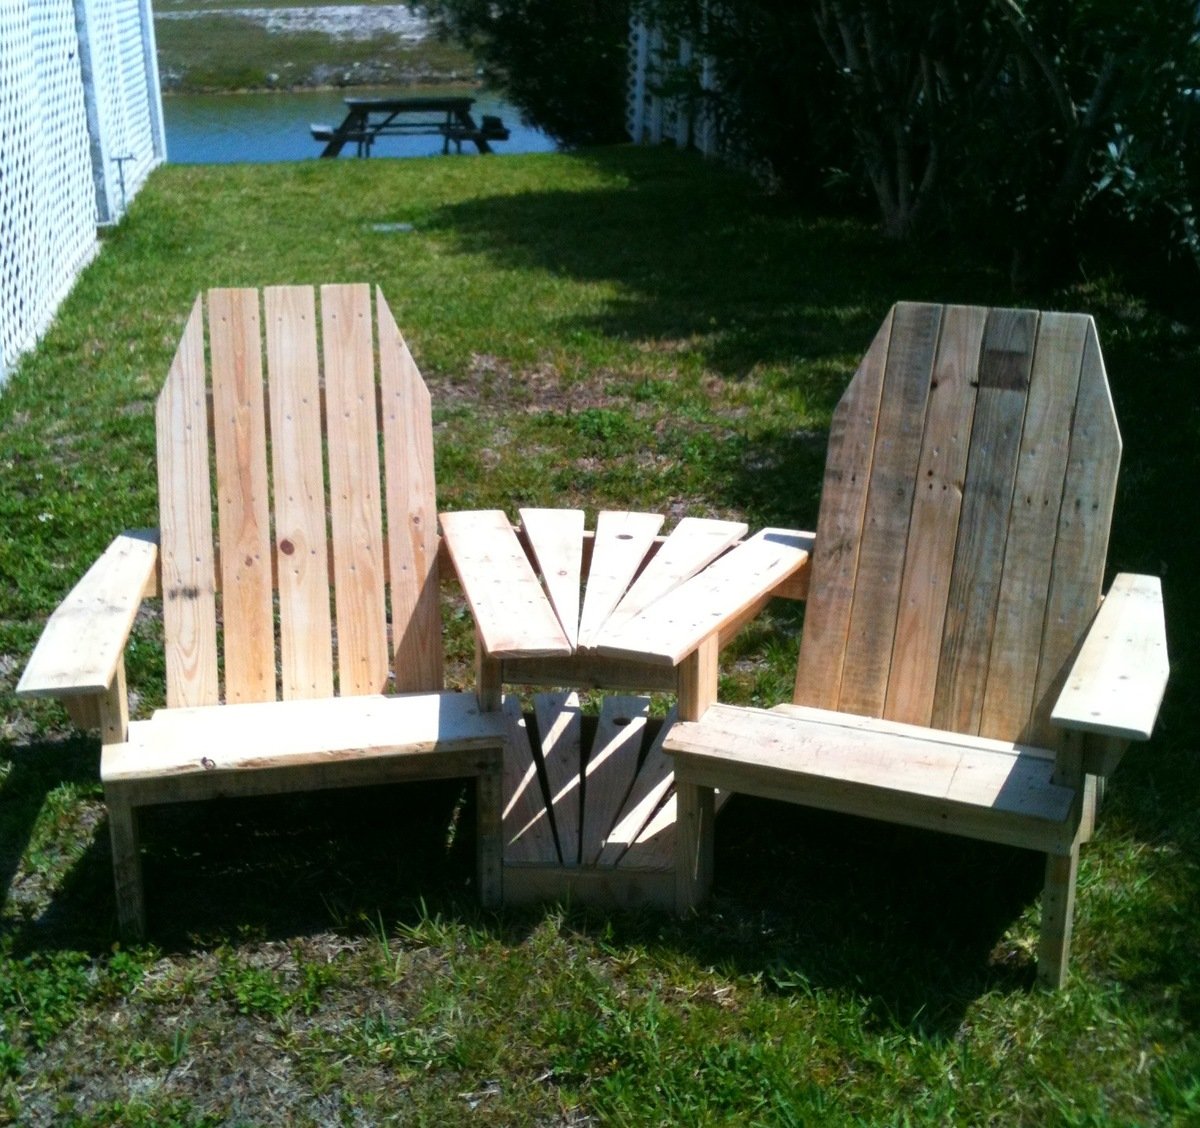
The other two images show it before I had added the bottom shelf of the table and it finished before staining. I just finished a second settee and will be selling that to someone who saw the original one at a party.
The design is based on a couple different plans -- one for the chairs and one for the table/umbrella holder. I modified both plans to make them work together. Great fun. If I could have worked on it straight through, it probably would have taken 2 full days, starting with pallet deconstruction, then cutting pieces, sanding, assembly of chairs and, finally, assembly of the connecting table.
Thu, 07/12/2012 - 10:16
Is it possible to get plans for these??? This would be awesome to build..
Thu, 07/12/2012 - 10:17
Do you happen to make plans for these?
I would love to build this!!
Thu, 07/12/2012 - 13:51
Unfortunately, no. I actually took the plans for a chair and mixed it with the plans of another settee. Essentially, the "inside" arms of the chairs do not get shaped at all. The front of the chairs are 12" apart (15 degree miter) and the backs are 27" apart if I remember correctly. I added 4" 2x4 blocks to the outside of the bottom back legs and that is what the bottom back table support is attached to on the settee. The the three center boards are cut to fit (1/2" in the front, 5.5" in the back and spaced equally. 1.5" hole for the umbrella holder in the center board, top and bottom.
Wishing well back yard art.
Jwrobel904
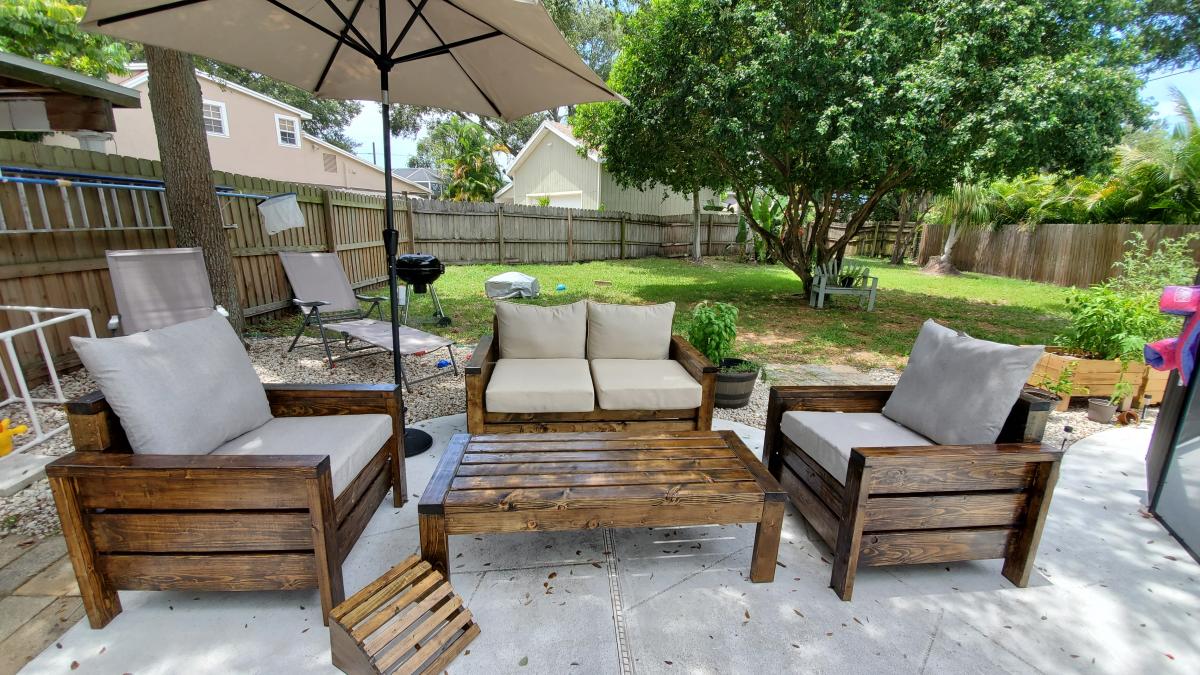
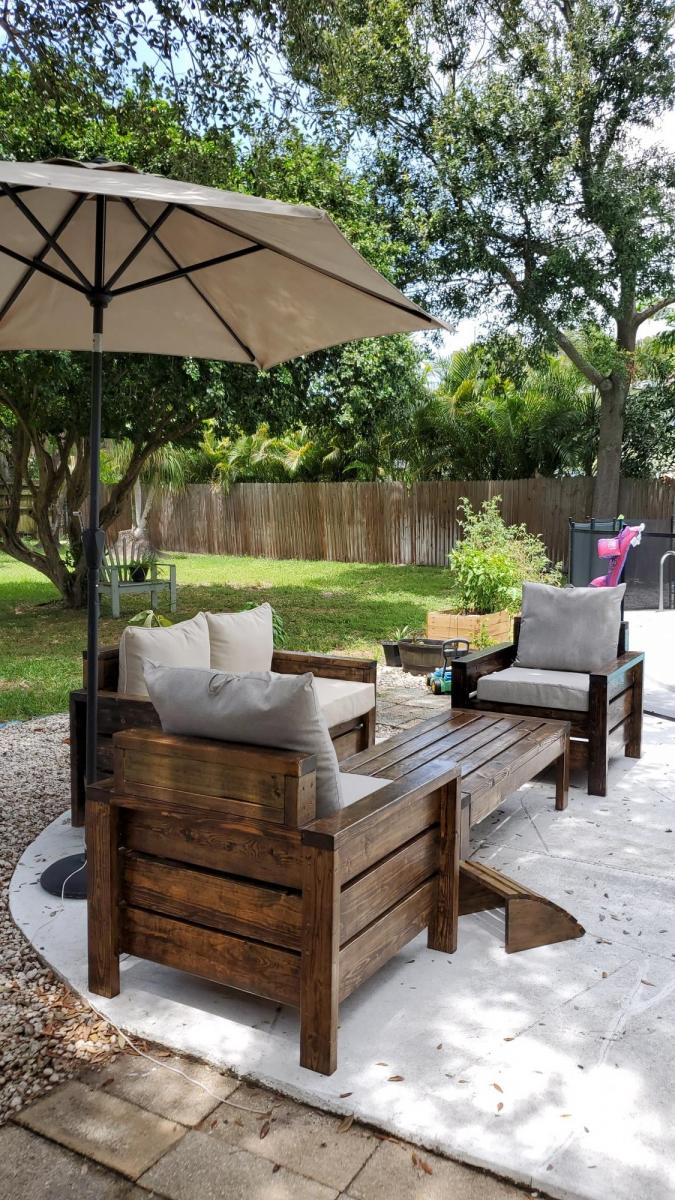
Well, I started with one chair and finished with a full set. Not bad for a first timer. Definitely room to improve. Little tip if you're going to make this amazing set... raise the backs as they are too low with thicker cushions. I built a casing to go on top after the fact. Pretty happy with how it all turned out. Thanks Ana for the plans... now onto the next project!


Fri, 04/28/2023 - 08:41
Very nice workmanship. I'm curious as to how comfortable they are with the straight 90* backs? Let me know please at [email protected]. Again nice workmanship.
Fri, 04/28/2023 - 08:41
Very nice workmanship. I'm curious as to how comfortable they are with the straight 90* backs? Let me know please at [email protected]. Again nice workmanship.

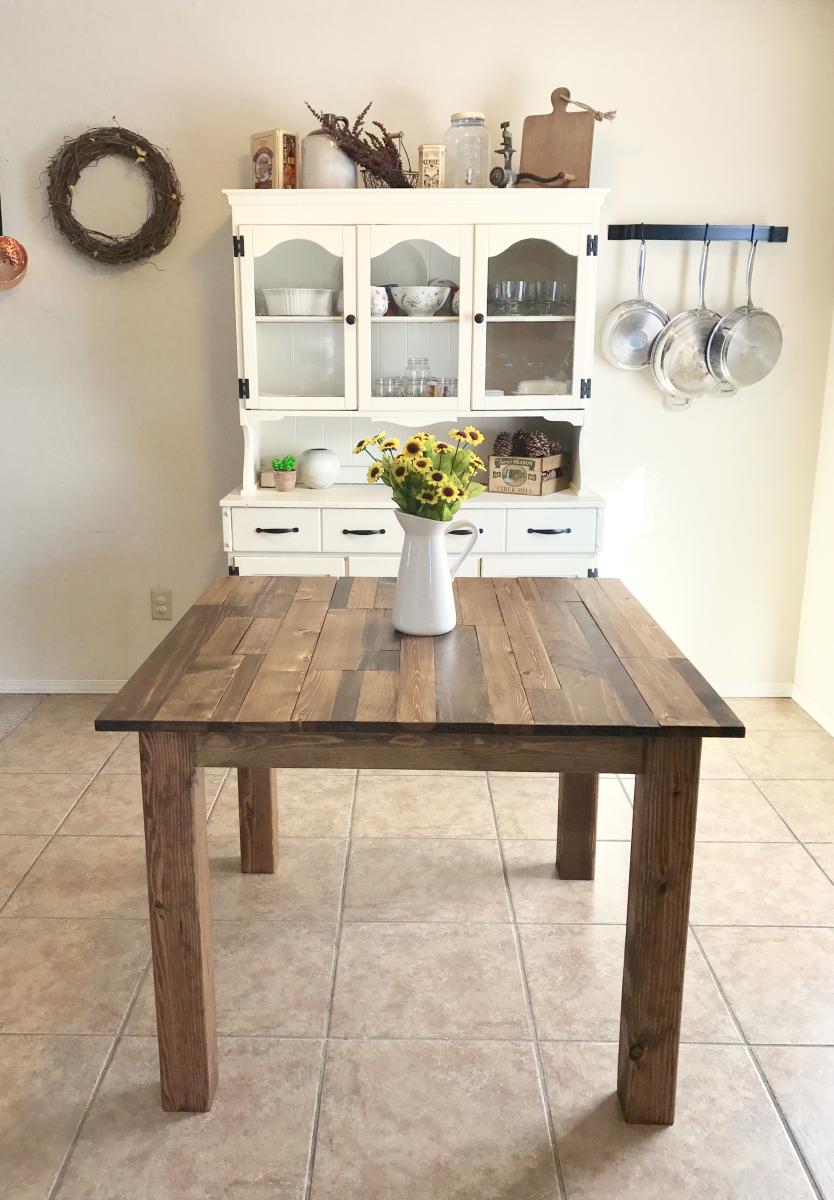
I built this table for a friend who wanted a rustic, plank-top kitchen table. She wanted a square table with 4x4 legs. Since I don't have clamps, I used pocket holes and wood glue for the table top. Also, I only have a 7&1/4" miter saw, which means the 4x4s were too thick to cut. So I made one cut in the legs, then flipped them and made another. It worked! :) I sanded down the sides of the table top with 80 grit. They needed to be evened up since some of the planks were a little longer than others. I back braced underneathe the top with (3) 1x3s. Then, I sanded all over with 120, vacuumed, then wiped it down with a damp towel. Fun build!!


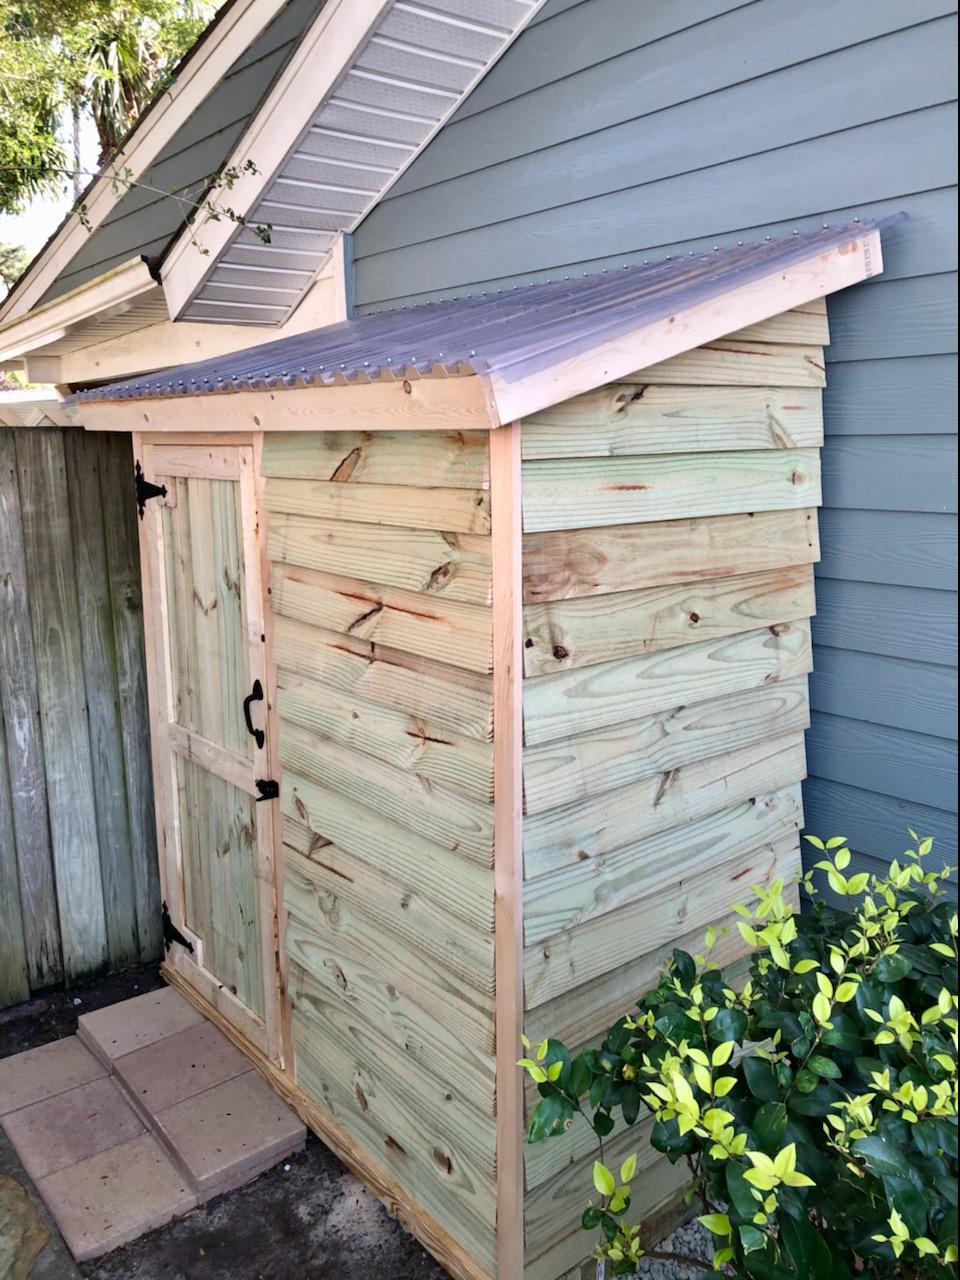
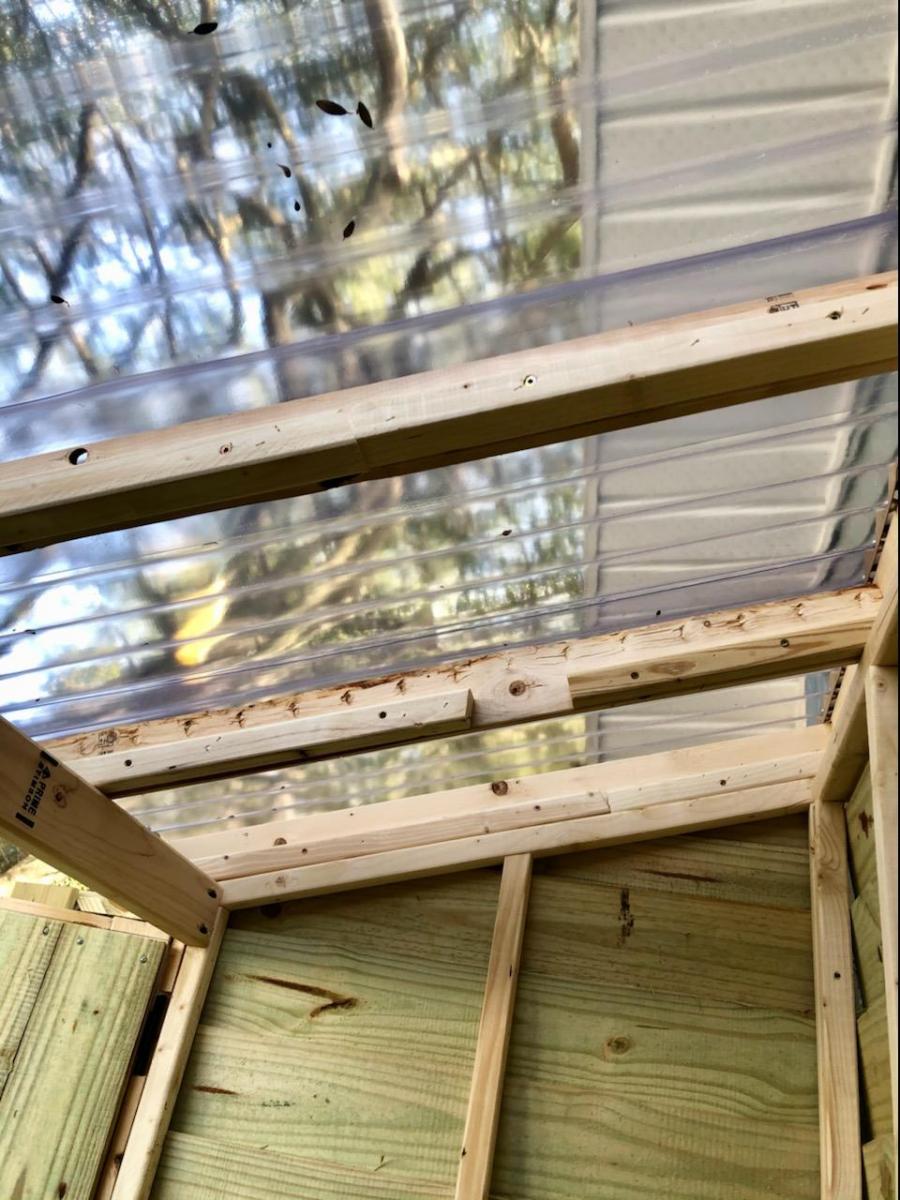
I absolutely loved these plans for this shed. I'm new to the site but I've been using your plans for things here at home... love it. I went with just one door to give me more places for shelves and I also went with a clear corrugated roof since it's shaded on that side of our house.
Mon, 03/15/2021 - 11:47
It's always nice to have additional storage options, thanks for sharing!
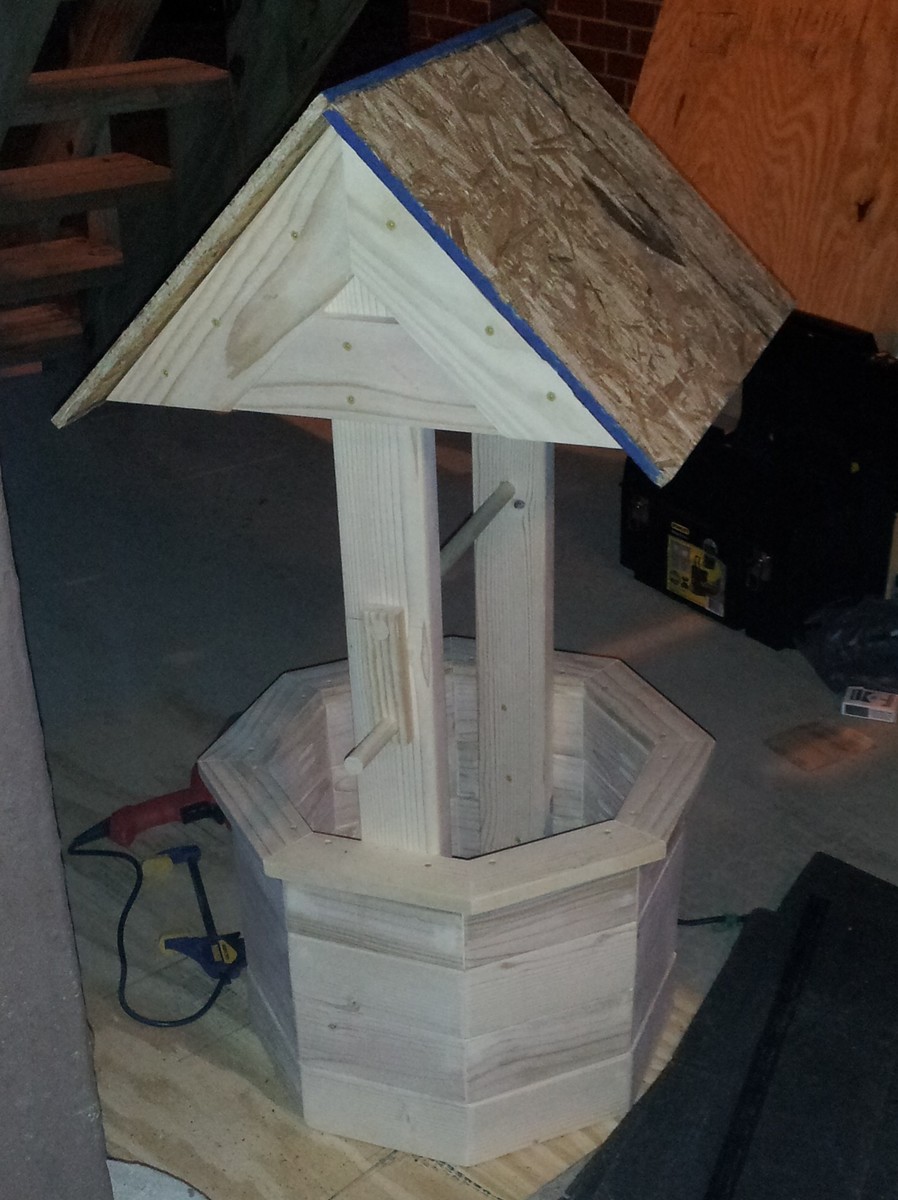
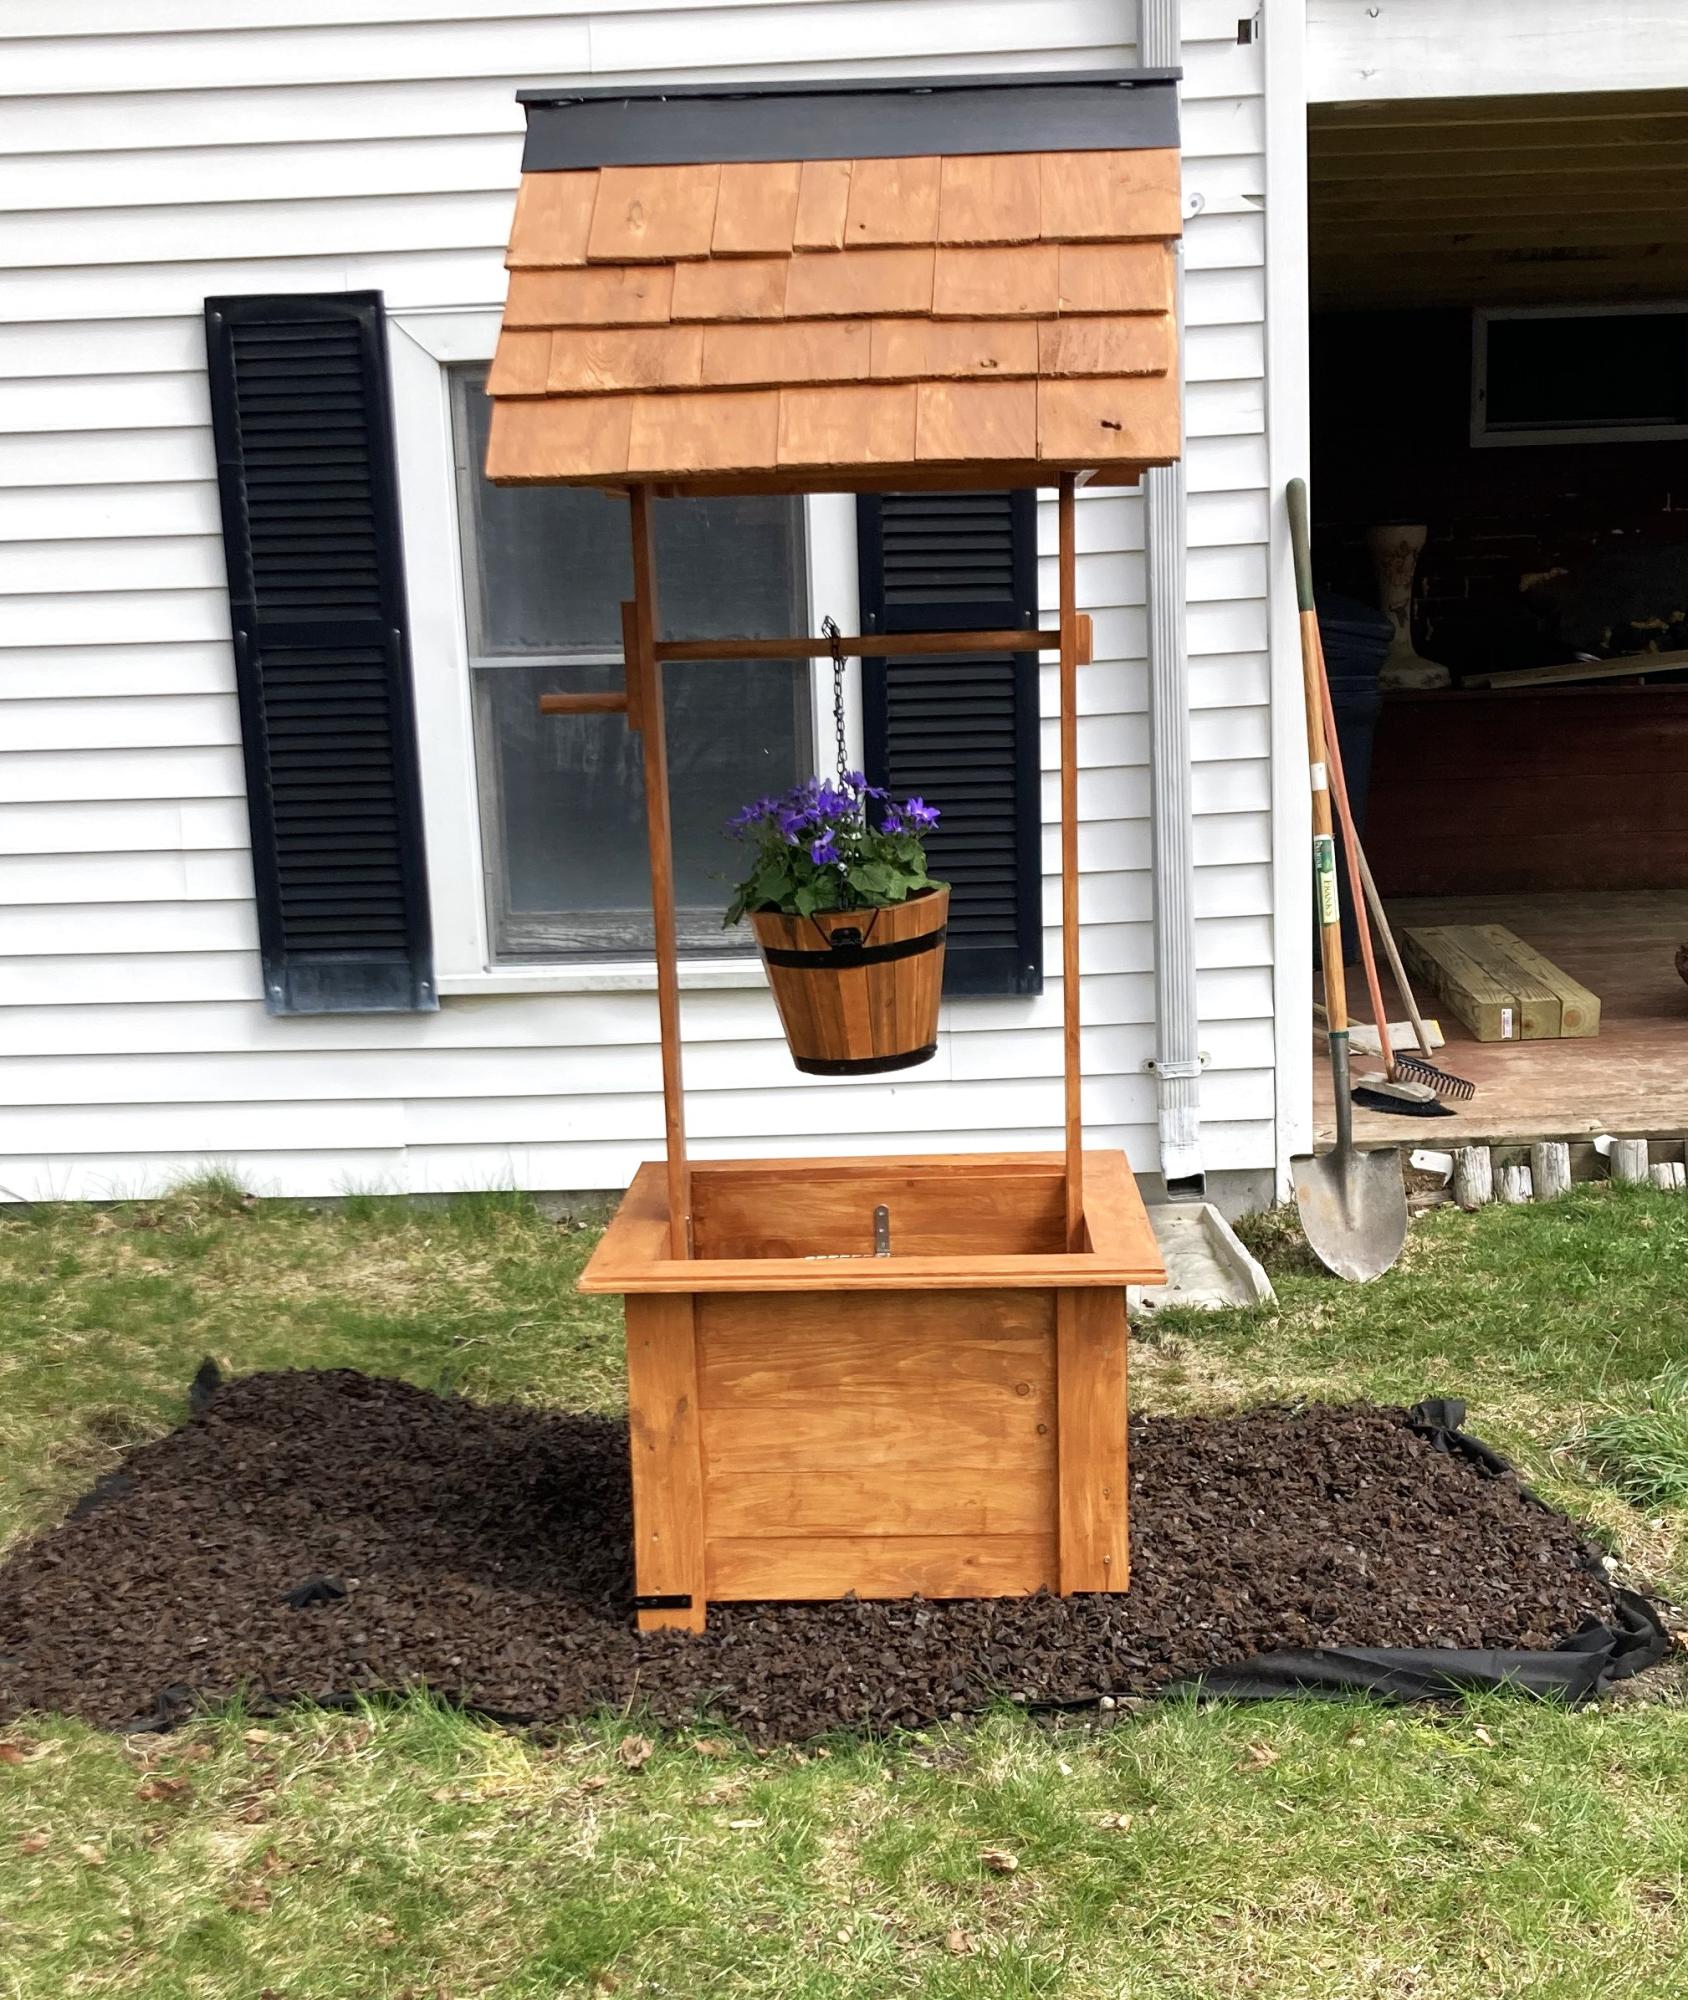
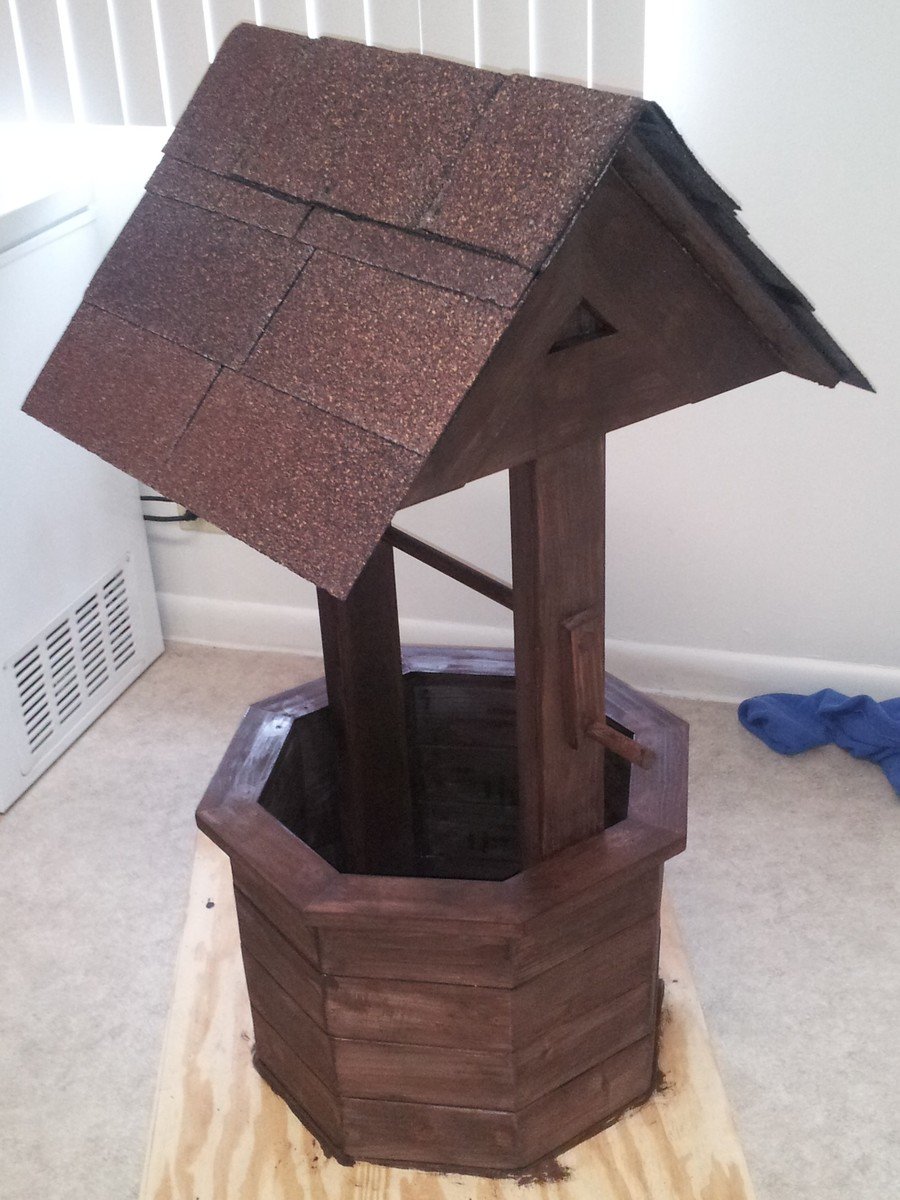
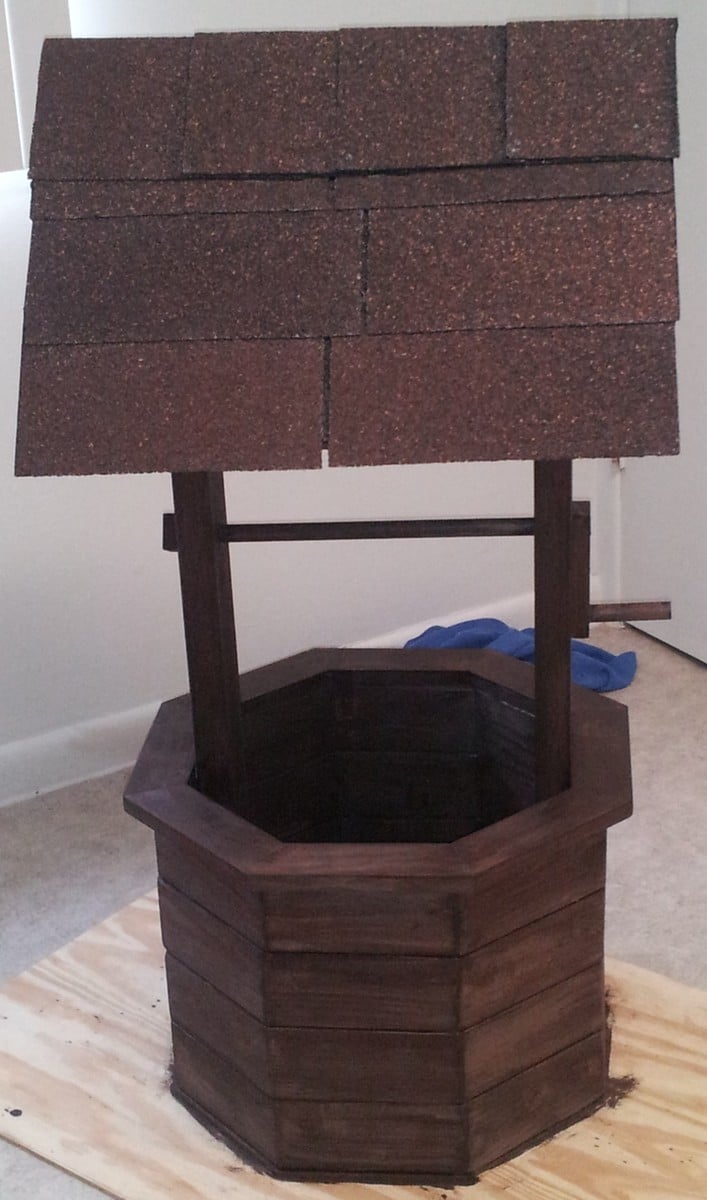
This is a wishing well I made for my sister for her wedding. It will be used during the wedding for people to drop "wish you well" cards into and afterward she can use it as a planter in her yard.
I followed ideas from multiple plans here on Ana-White.com, but I didn't follow any specific plan. Mostly I followed tips and instructions for cutting angles, drilling pocket holes and some finishing tips. This is the first "big" project I've done and I"m quite proud of it.
With everything, it measures 44.5 inches high. The well measures 21 inches across and 15 inches high. The roof measures 22.75 inches by 23.75 inches.
I hope y'all like it. I worked hard on this! :)
Thank you, Ana and everyone who contributes to this site. It's been so much fun and I've got lots of ideas for more stuff. If I was any good at all at Google Sketchup I'd put up the plans but I'm not. If anyone could help me with that, that would great. :)
Have a great day!
Mon, 07/21/2014 - 20:04
Anyway you can please tell me the angle for the boards ont the walls. I reallly like your well, and would like to build this for my wife but im not sure on what angles to use thank you

In reply to wishing well by bellows86
Sun, 07/10/2016 - 17:10
The 8 sided wishing well is going to be 22.5 degrees all the way around. hopes this helps
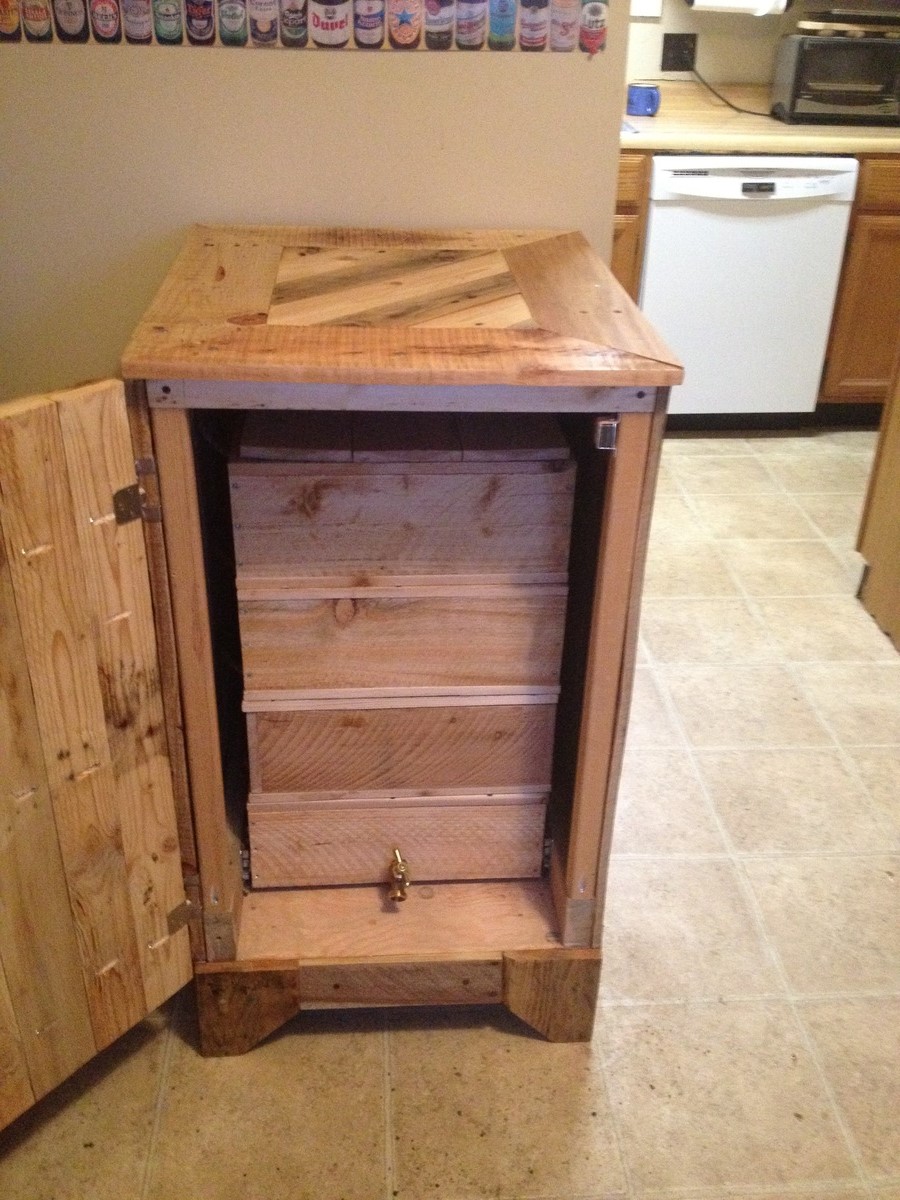
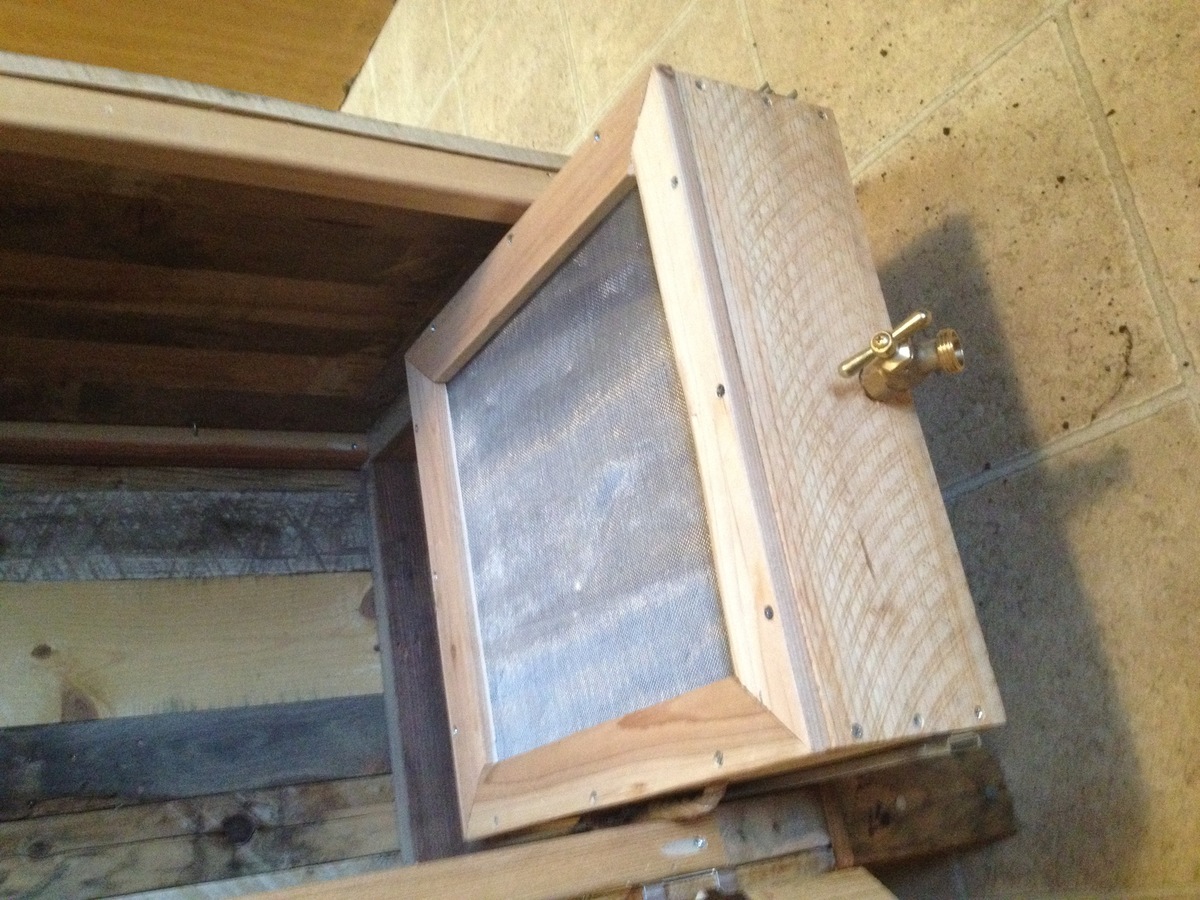
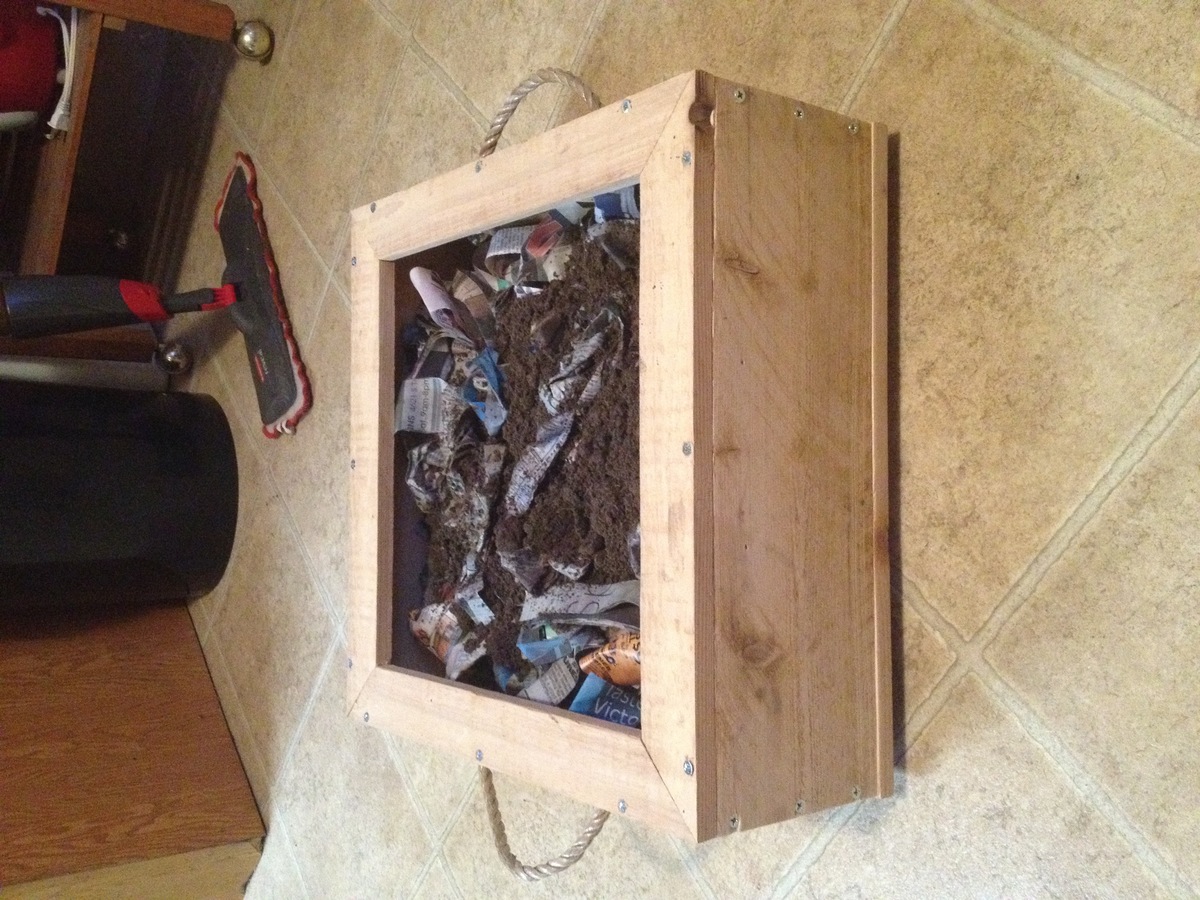
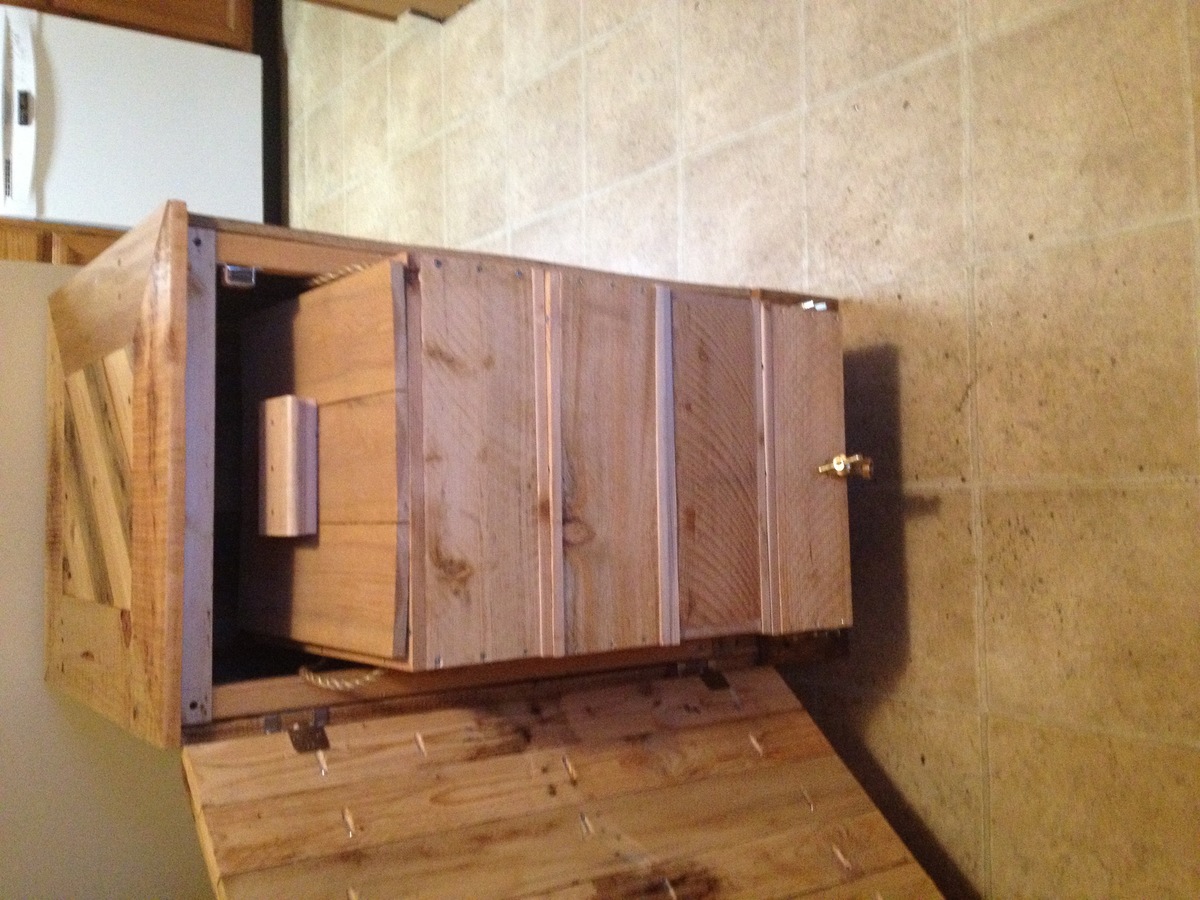
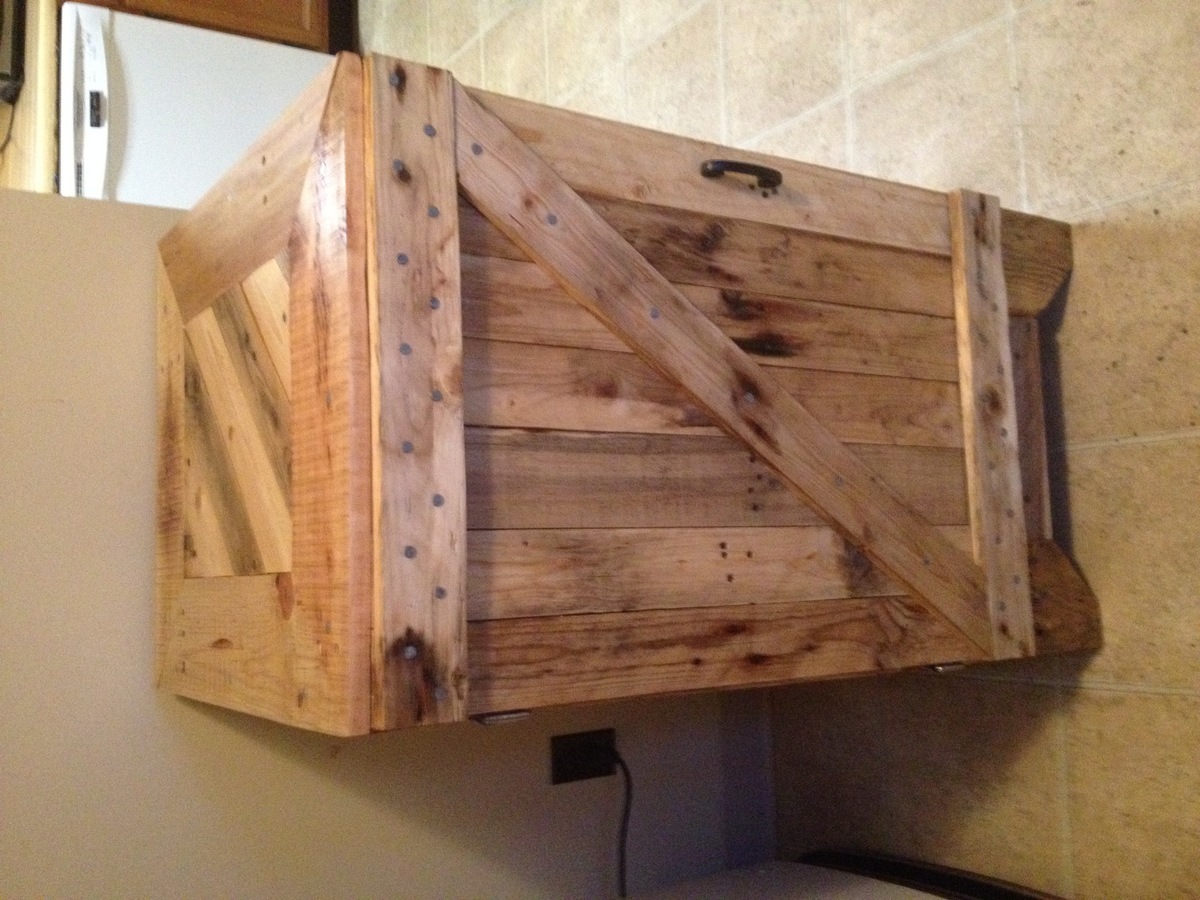
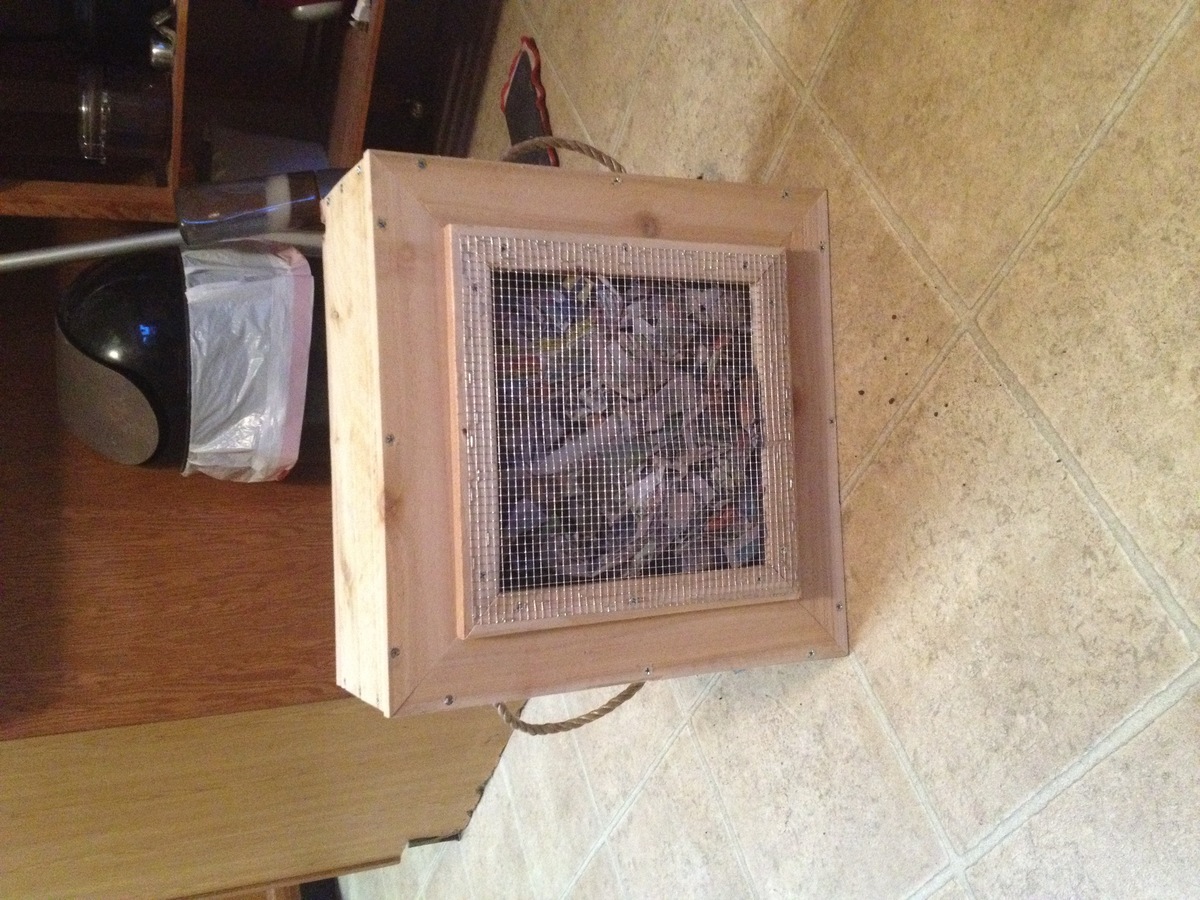
I made the worm composter from Ana's plan and built a cabinet out of old pallets. The stack of worm composters drawers slide in and out of the cabinet on a heavy duty drawer glide set. I used cedar fence board. For 3 bucks a board, it was worth the work to rip them down and sand them. The bottom drawer has a tray built out of old flashing and slopes towards a hose bib in order to collect the worm tea. I designed the drawer insert out of cardboard and cut it out of flashing, using a pop rivet gun to put it together, sealing the seams with flashing caulking. The drawer has a sheet of aluminum window screen under the top square of cedar.
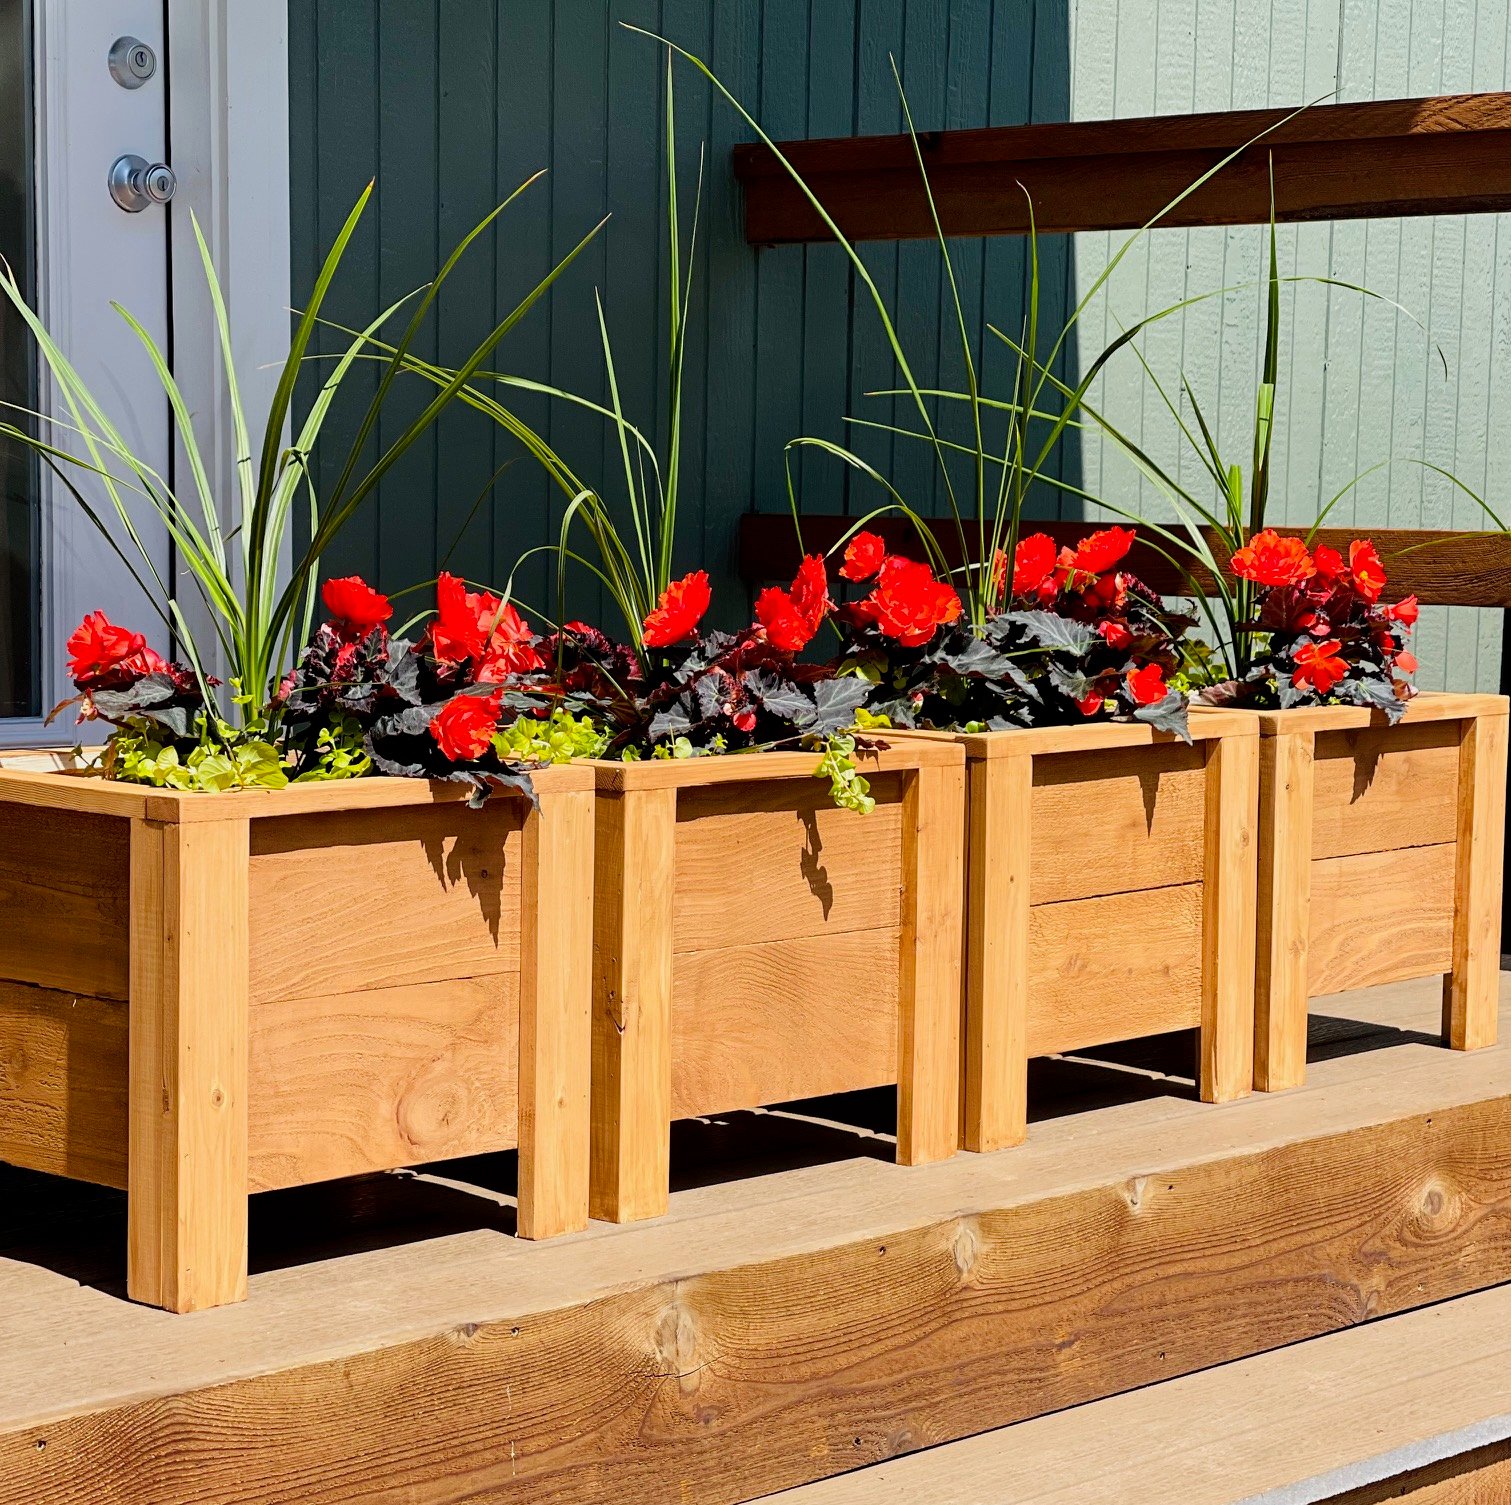
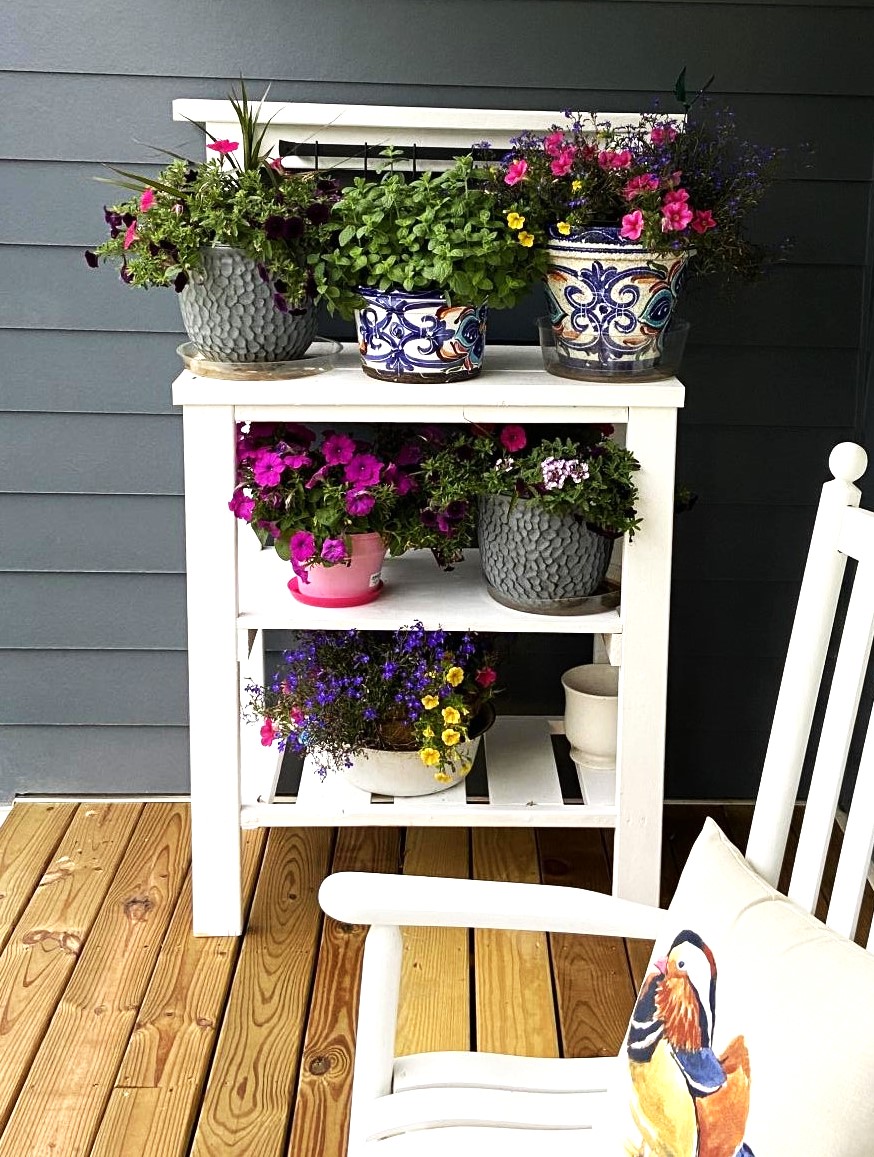
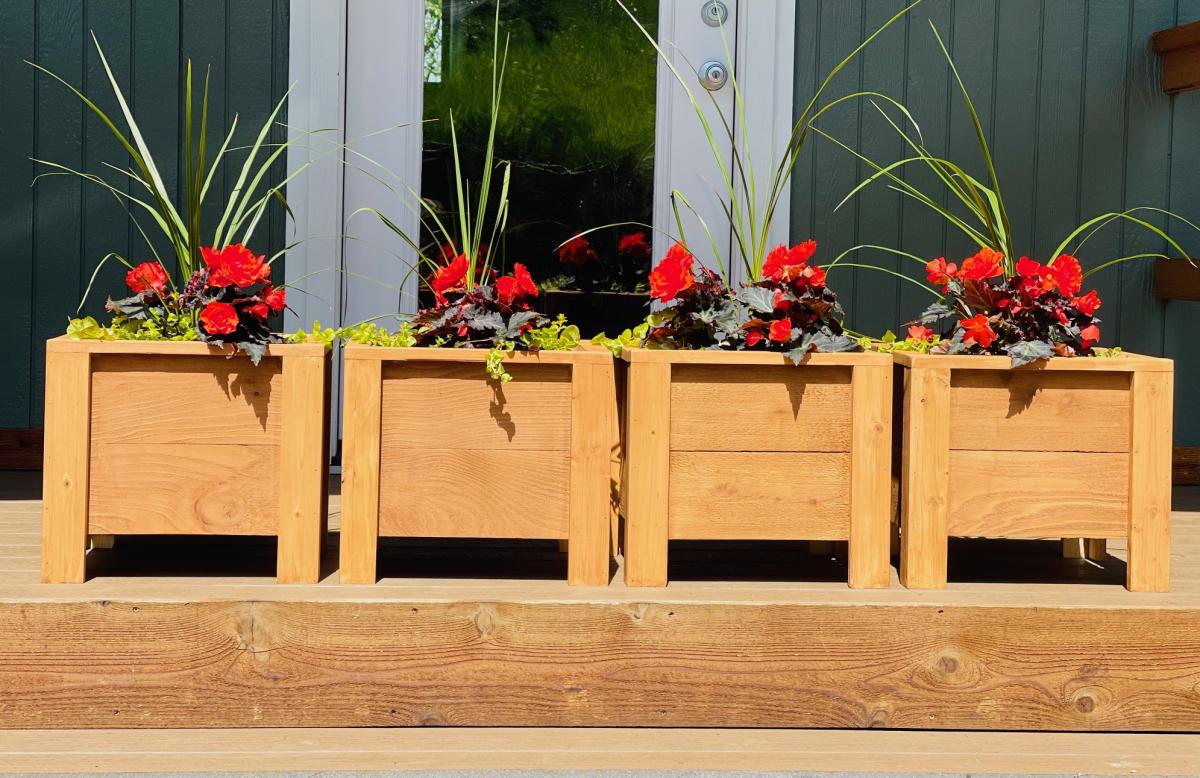
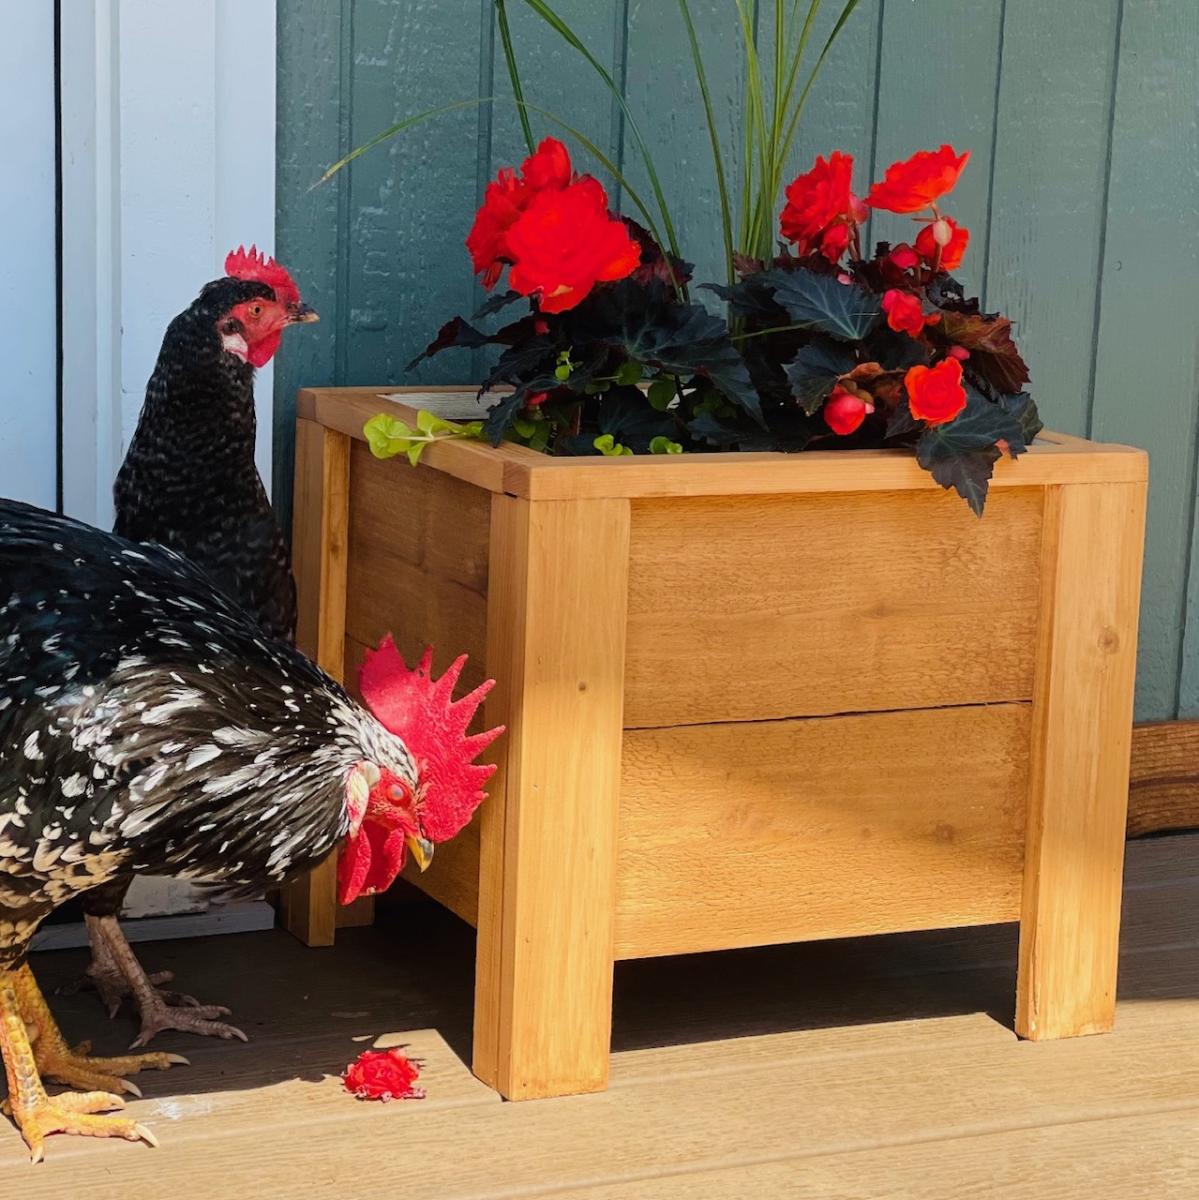
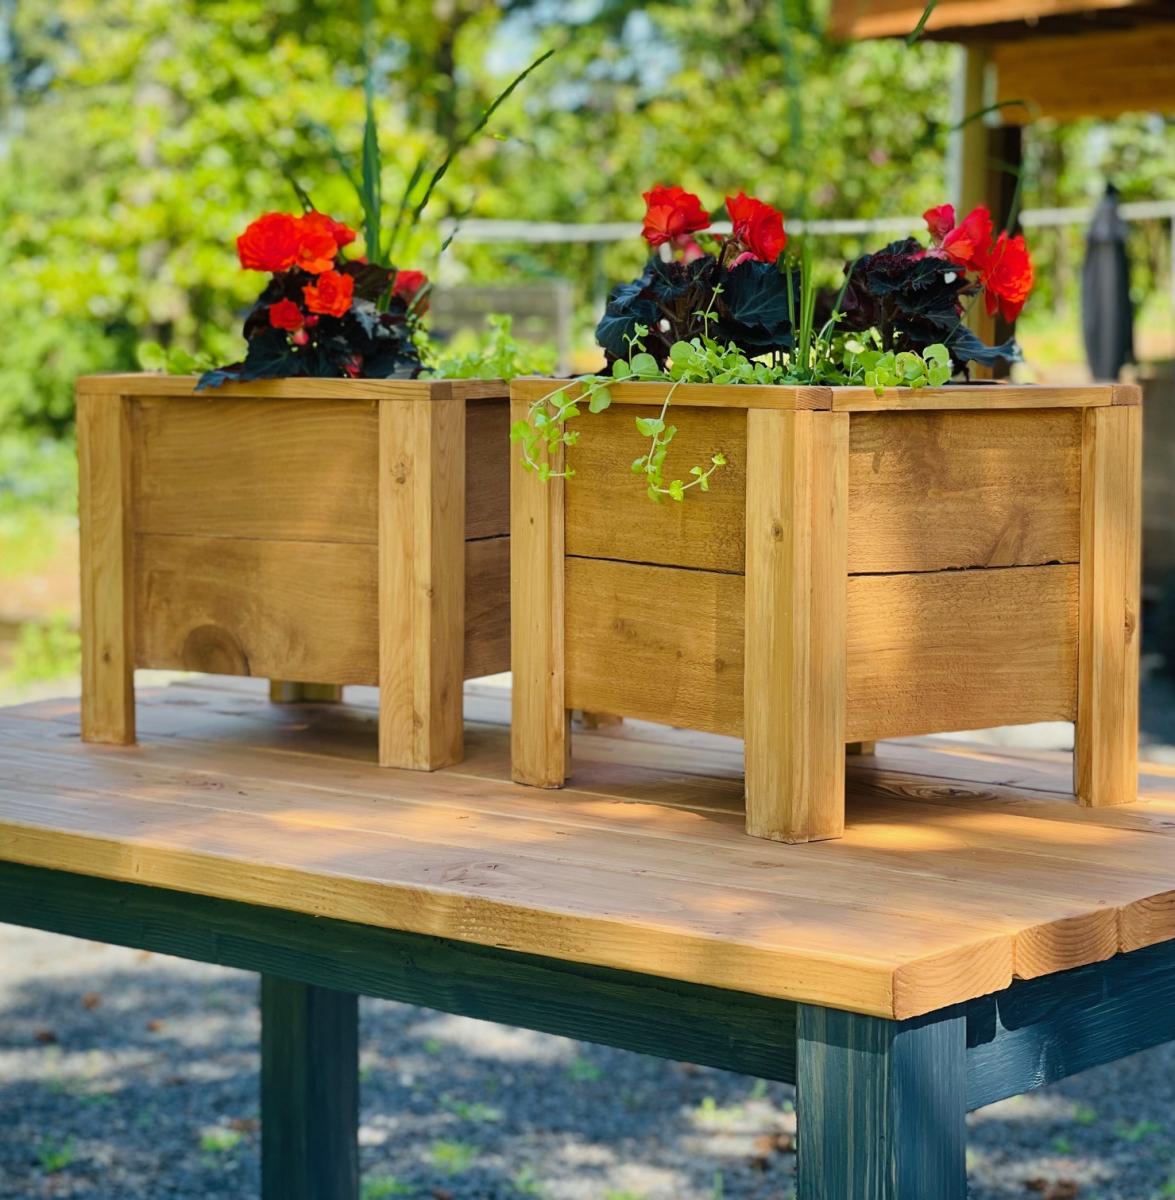
I've been wanting to build this plan for quite some time! Took me about 2 hours to build and 1 hour to finish. Giving these as gifts for Mother's Day! Total cost was about $15 per planter. I scaled down the design after I found the plants I wanted to put in them. Ana has the best and easiest plans!

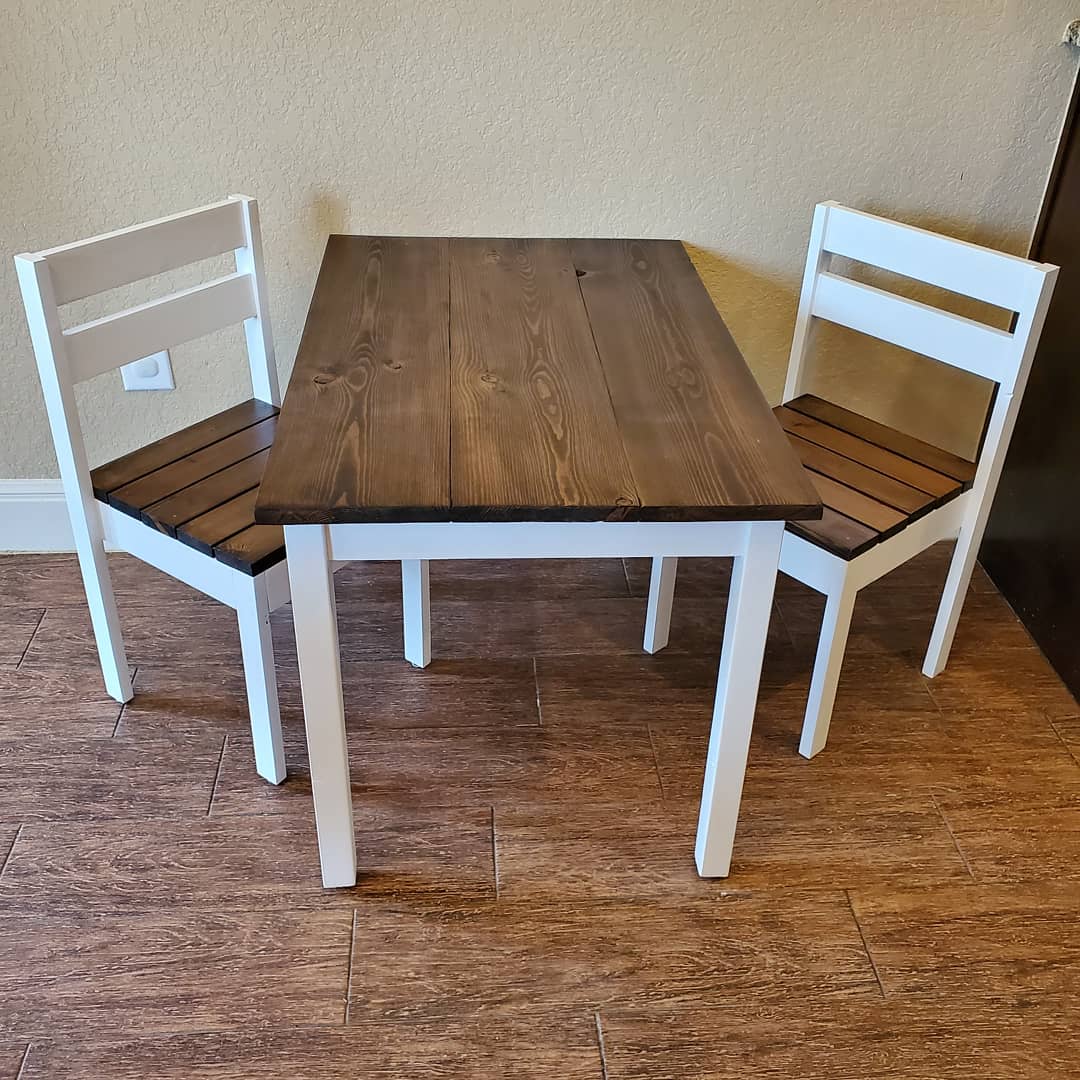
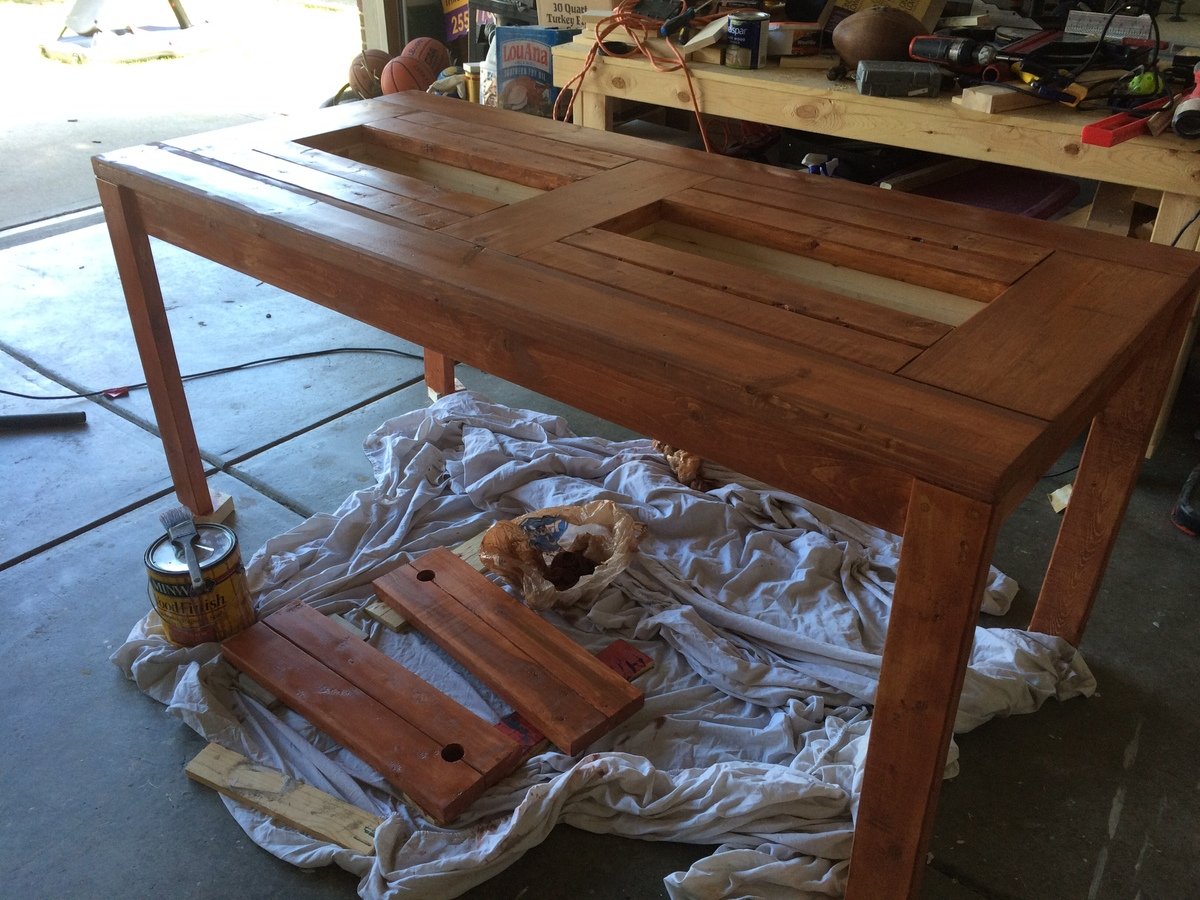
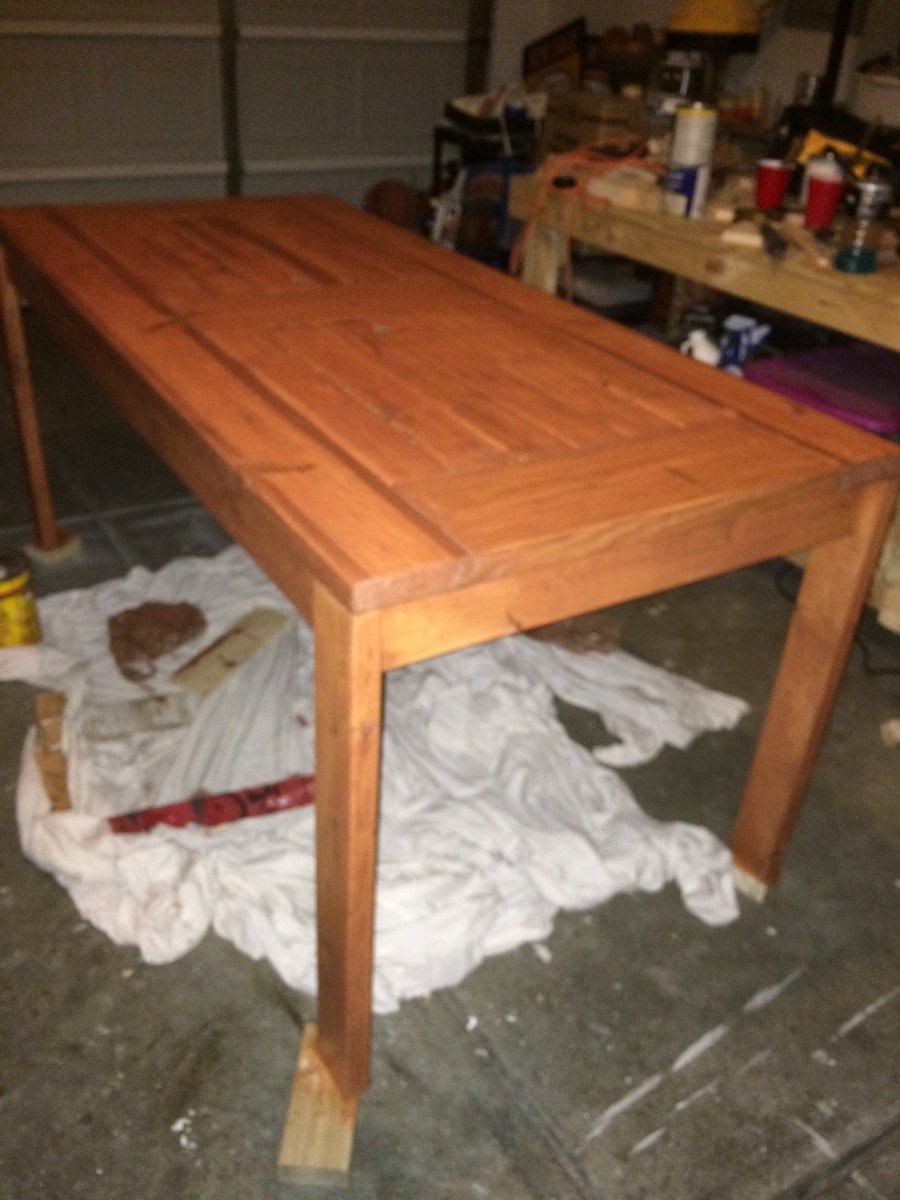
I stained the top with Dark Walnut stain and used perfect white paint.

Fri, 10/11/2019 - 09:38
What a beautiful set!
Thank you for uploading so many brags - love it!
Built this plan, added bolt hangars and flat face mounts, and corner braces to make it easily assemble or disassemble for moving


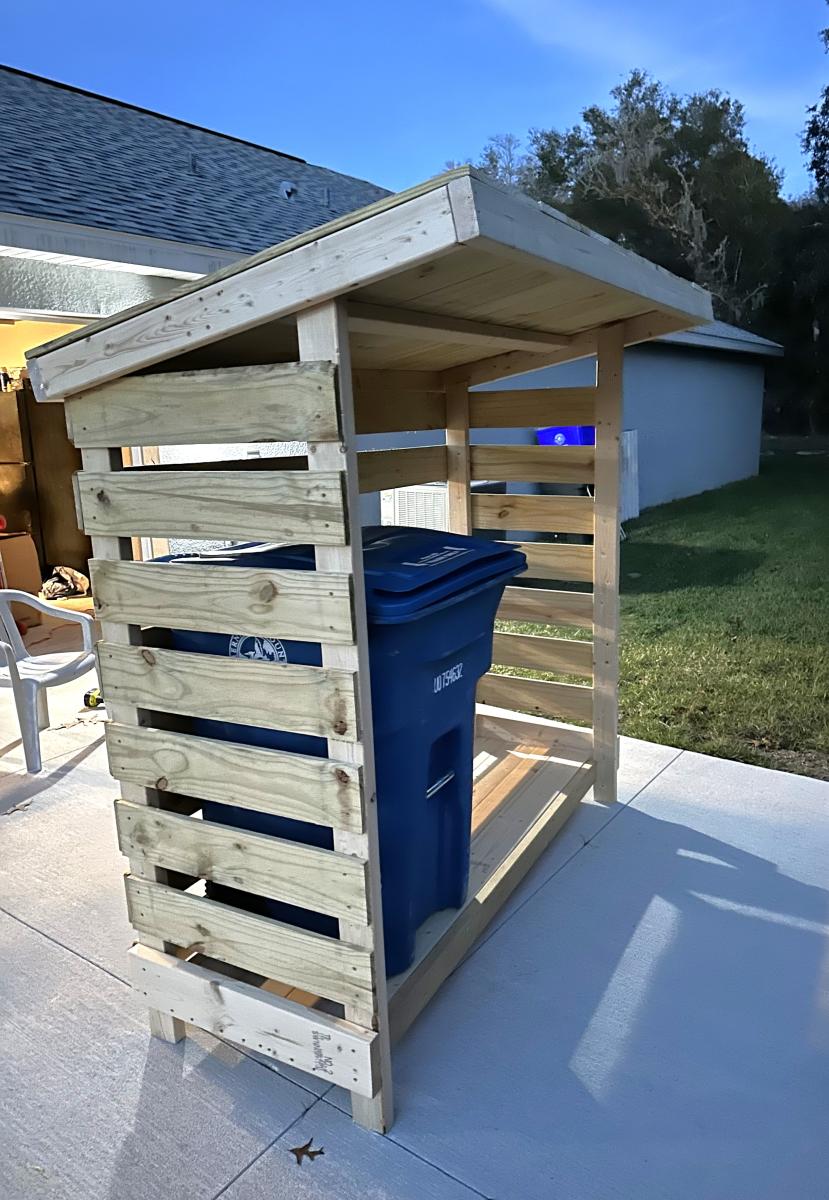
Chose the small firewood shed project as a "template" if you will .. built this to house our garbage cans and eventually put a gate on it to "help deter" the Florida black bears (we do multiple things to keep them at bay) but this will also just be a nicer looking way to keep the cans outside.
I modified the floor since the firewood shed had a floor that was suitable for, well, firewood but not so much for rolling garbage cans. Had to leave the one slat off the back for the depth of the can which I didn't completely account for in the beginning. Overall, still need to paint it and water seal it but happy with how it turned out.
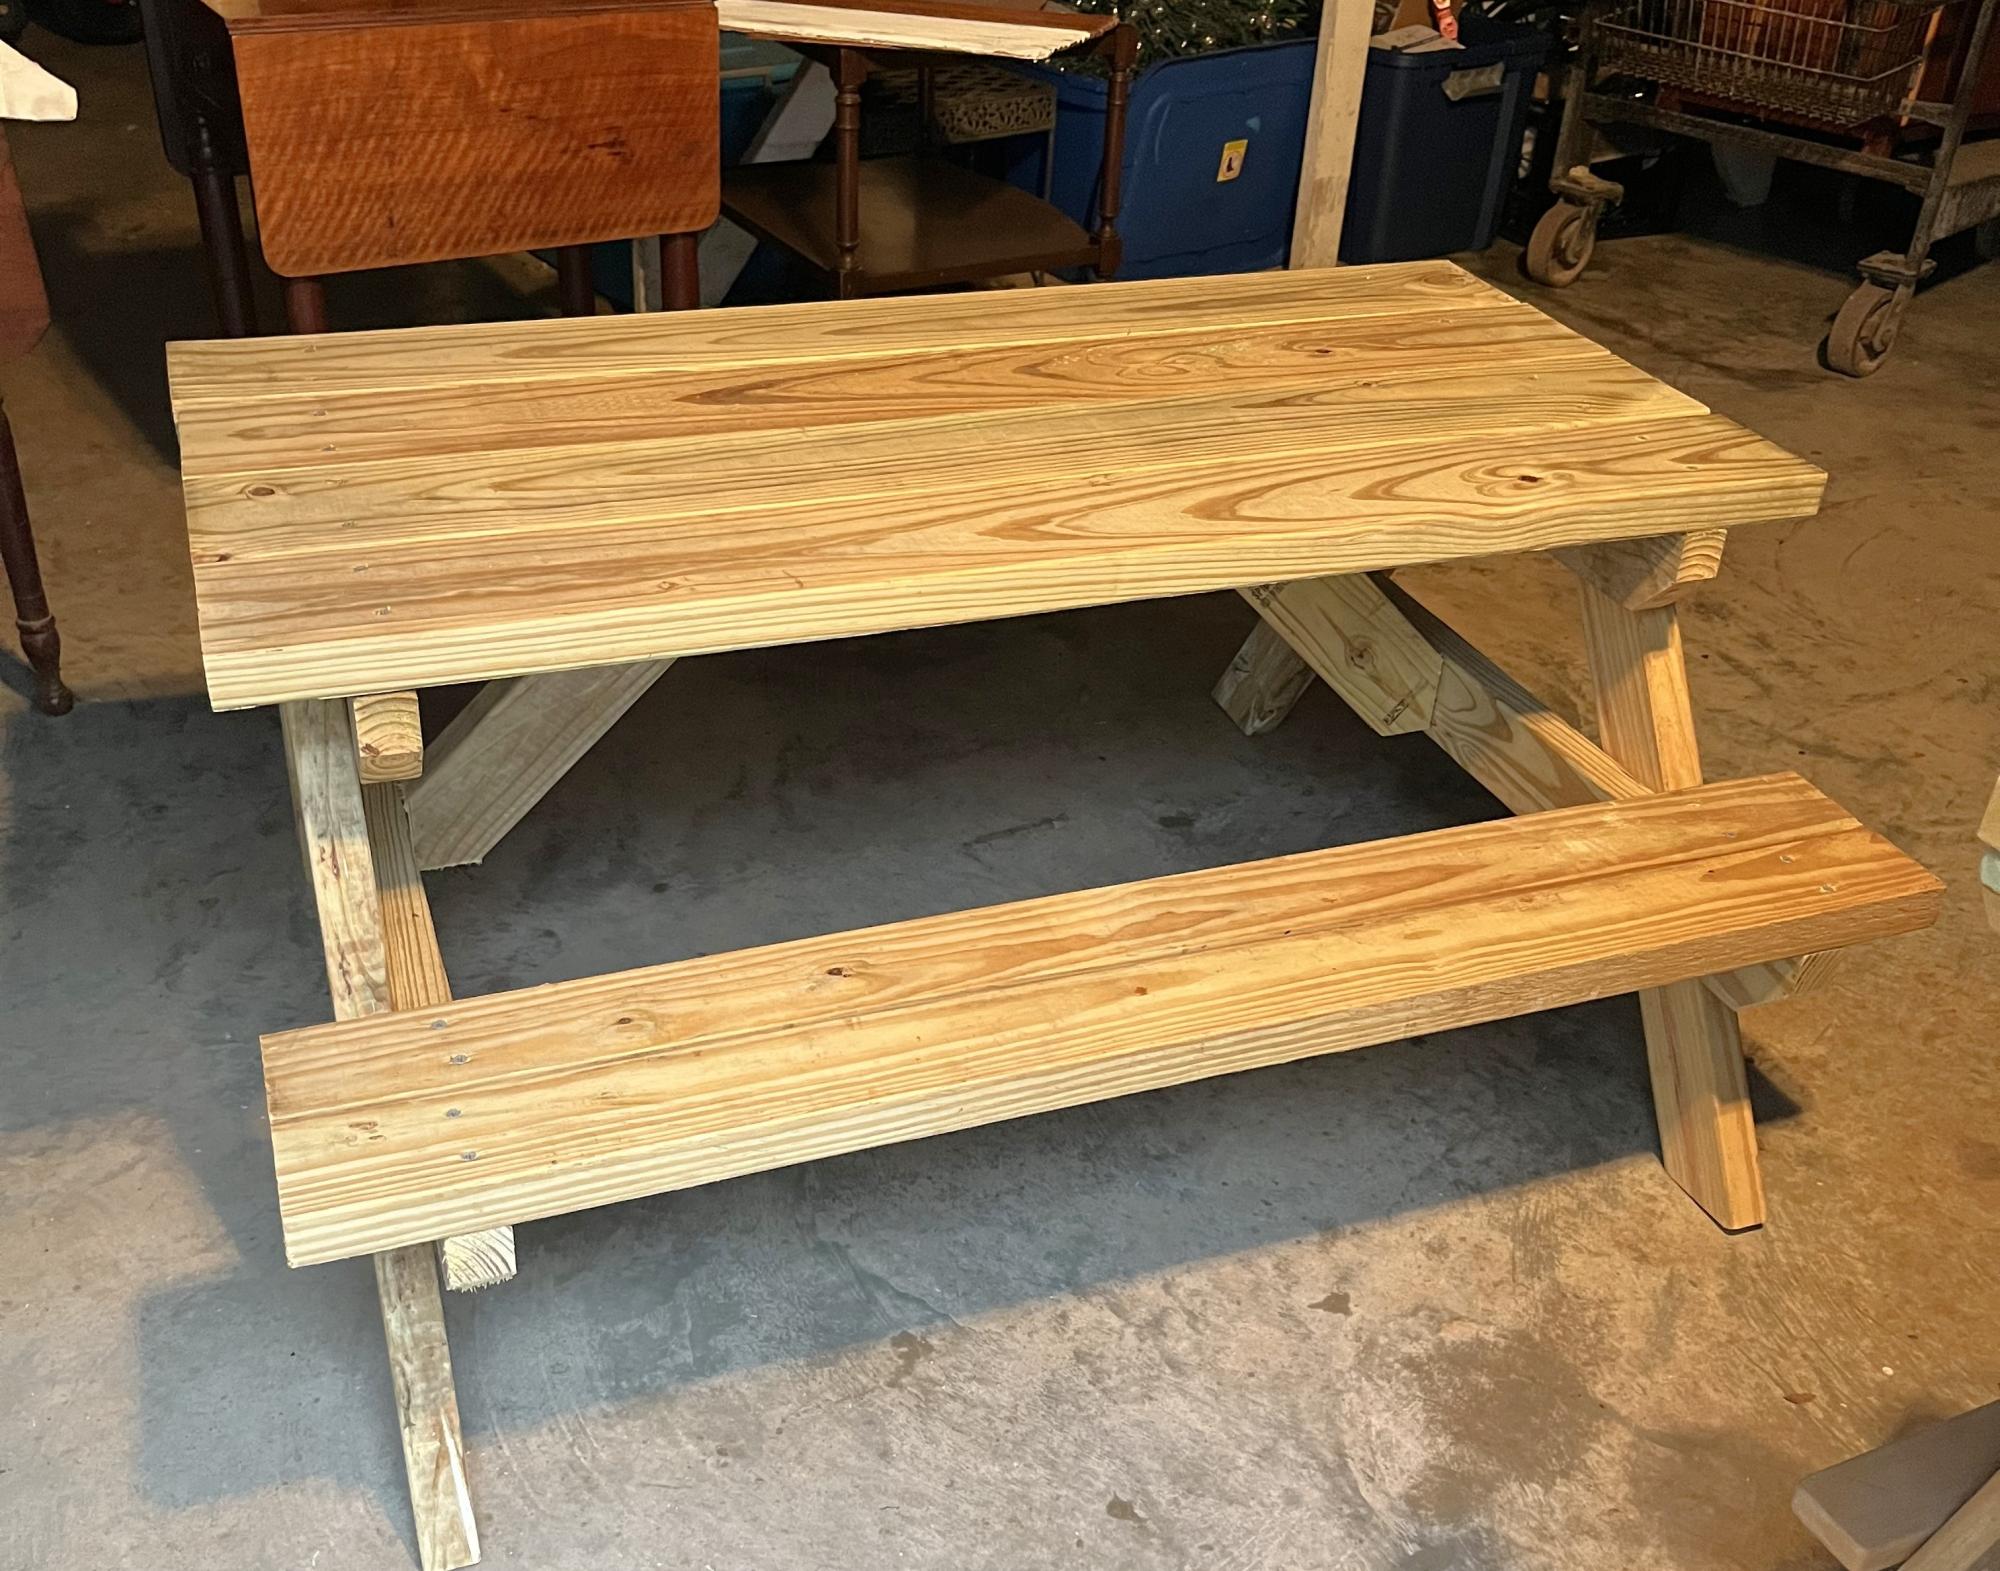
Built this to replace a cheap picnic table that I had bought. The table is solid and a great first project for me Pops. The grandkids will enjoy this one and Gammy has me already building #2 table. Thank you for the plans and your expertise.
Mark E aka Pops
Comments
Ana White Admin
Sun, 01/29/2023 - 16:04
Great little side tables!
Thanks for sharing, they will be a nice outdoor additon!