Community Brag Posts
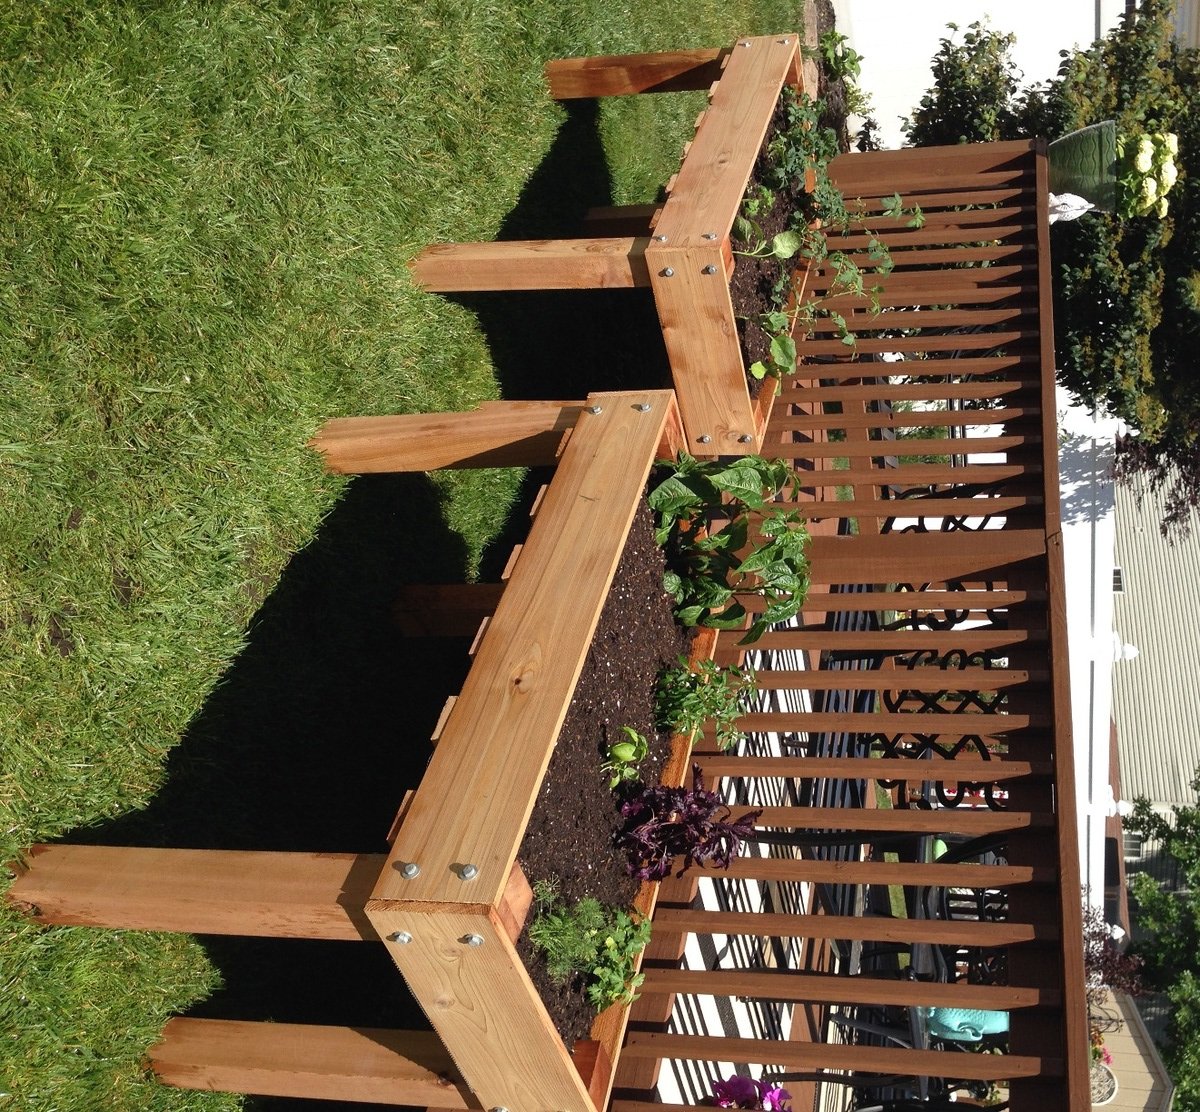
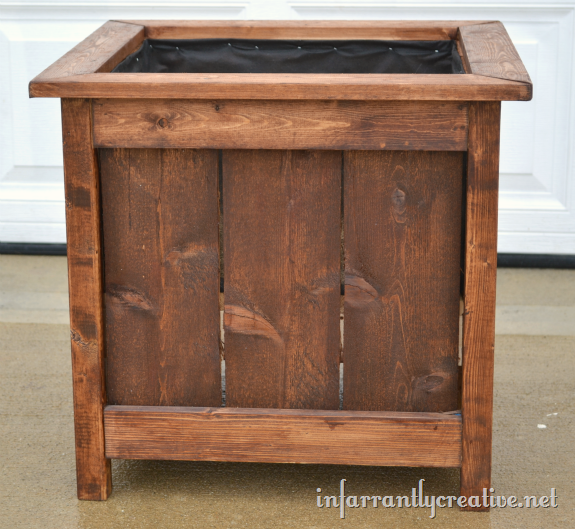
Cedar Planter with Mitered Top
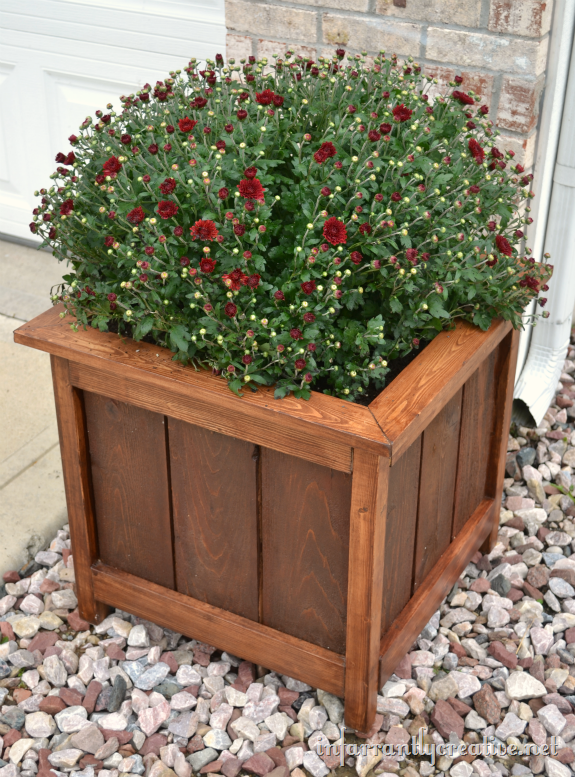
This was by far the easiest project. This planter is HUGE as well and makes a great focal point for your curb appeal. I didn't extend the sides but rather created a mitered edge for the top creating a nice clean finish.
Built from Plan(s)
Estimated Cost
$20
Estimated Time Investment
An Hour or Two (0-2 Hours)
Finish Used
Minwax English Chestnut with a Spar Varathane protective coat
Recommended Skill Level
Beginner
Comments
Mon, 10/29/2012 - 23:02
This looks beautiful! I just
This looks beautiful! I just made one too, I will have to do the top like yours it's pretty that way. I love how the stain too!
:) Valerie
Sun, 09/22/2013 - 20:25
about the top....
how exactly did you attach the mitered top?? Finish nails or is there a way to use the kreg jig to hide joinery? These are beautiful, BTW. Thanks :)
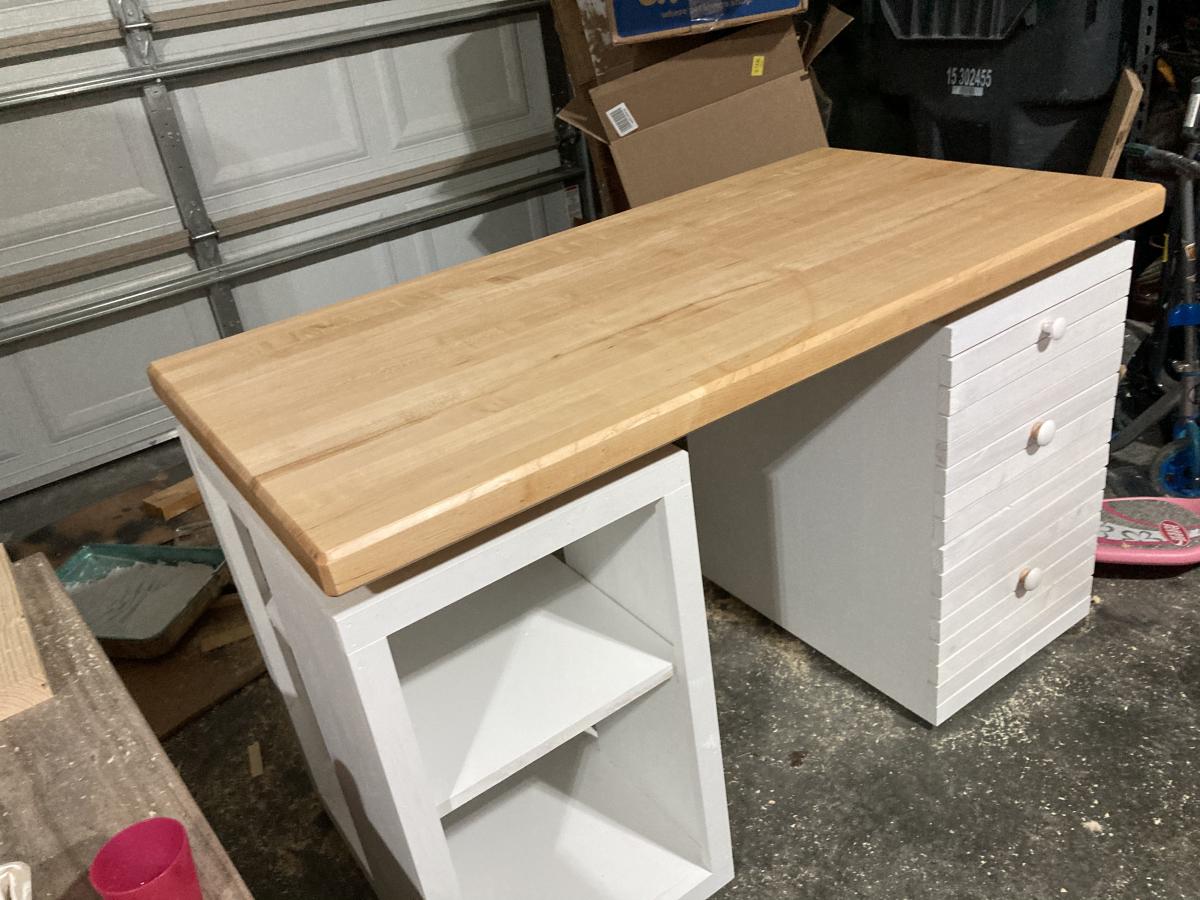
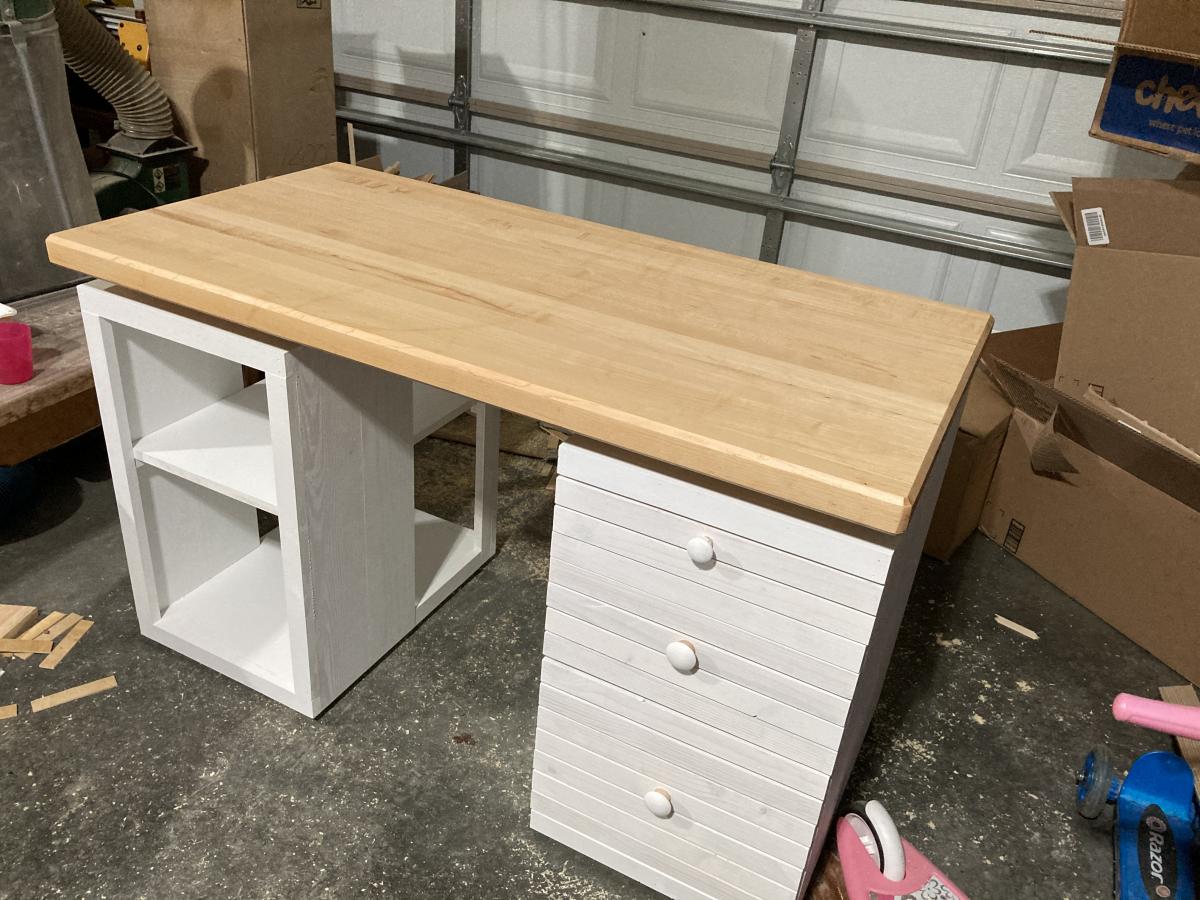
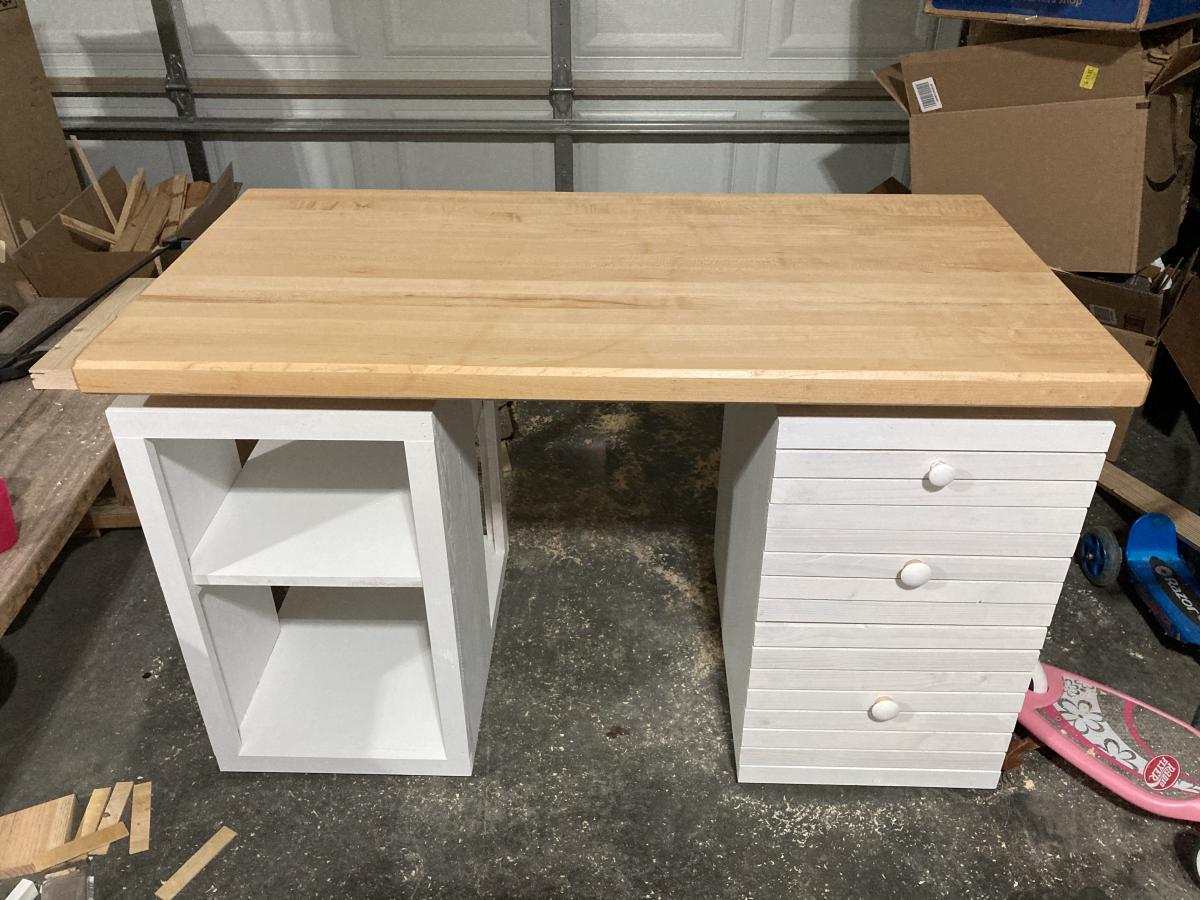
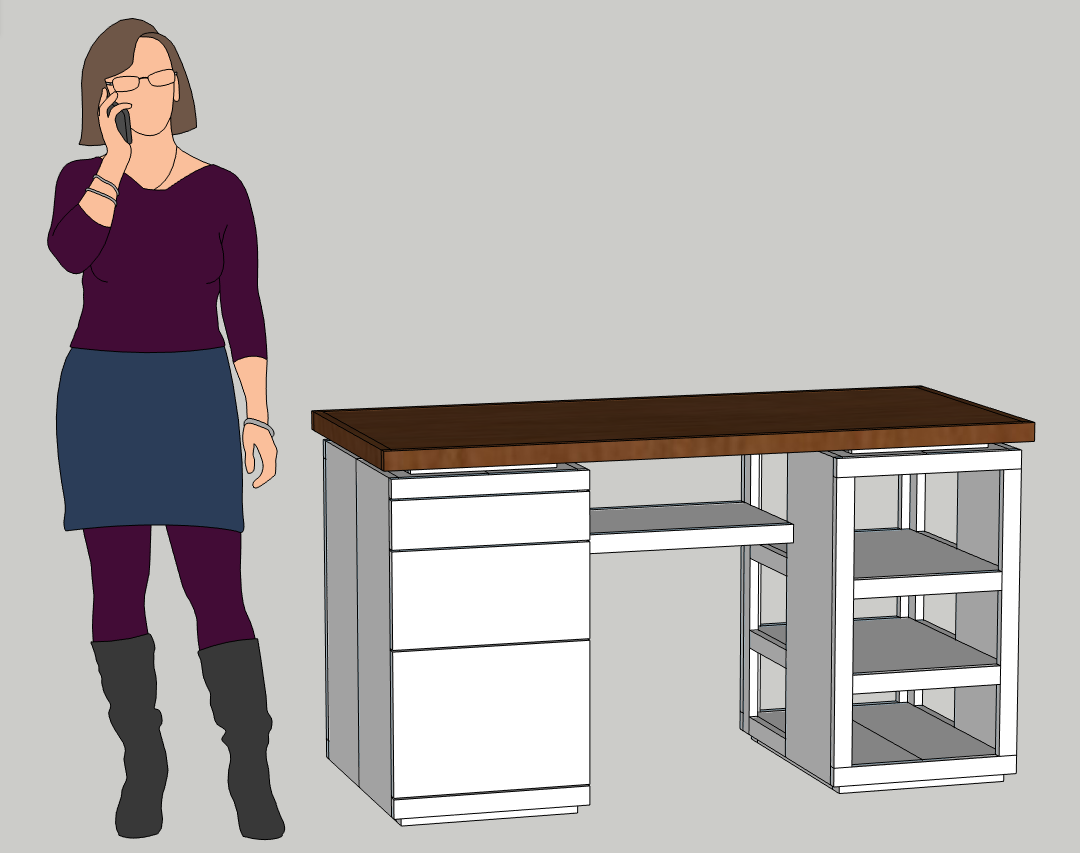
Modern craft table inspired desk
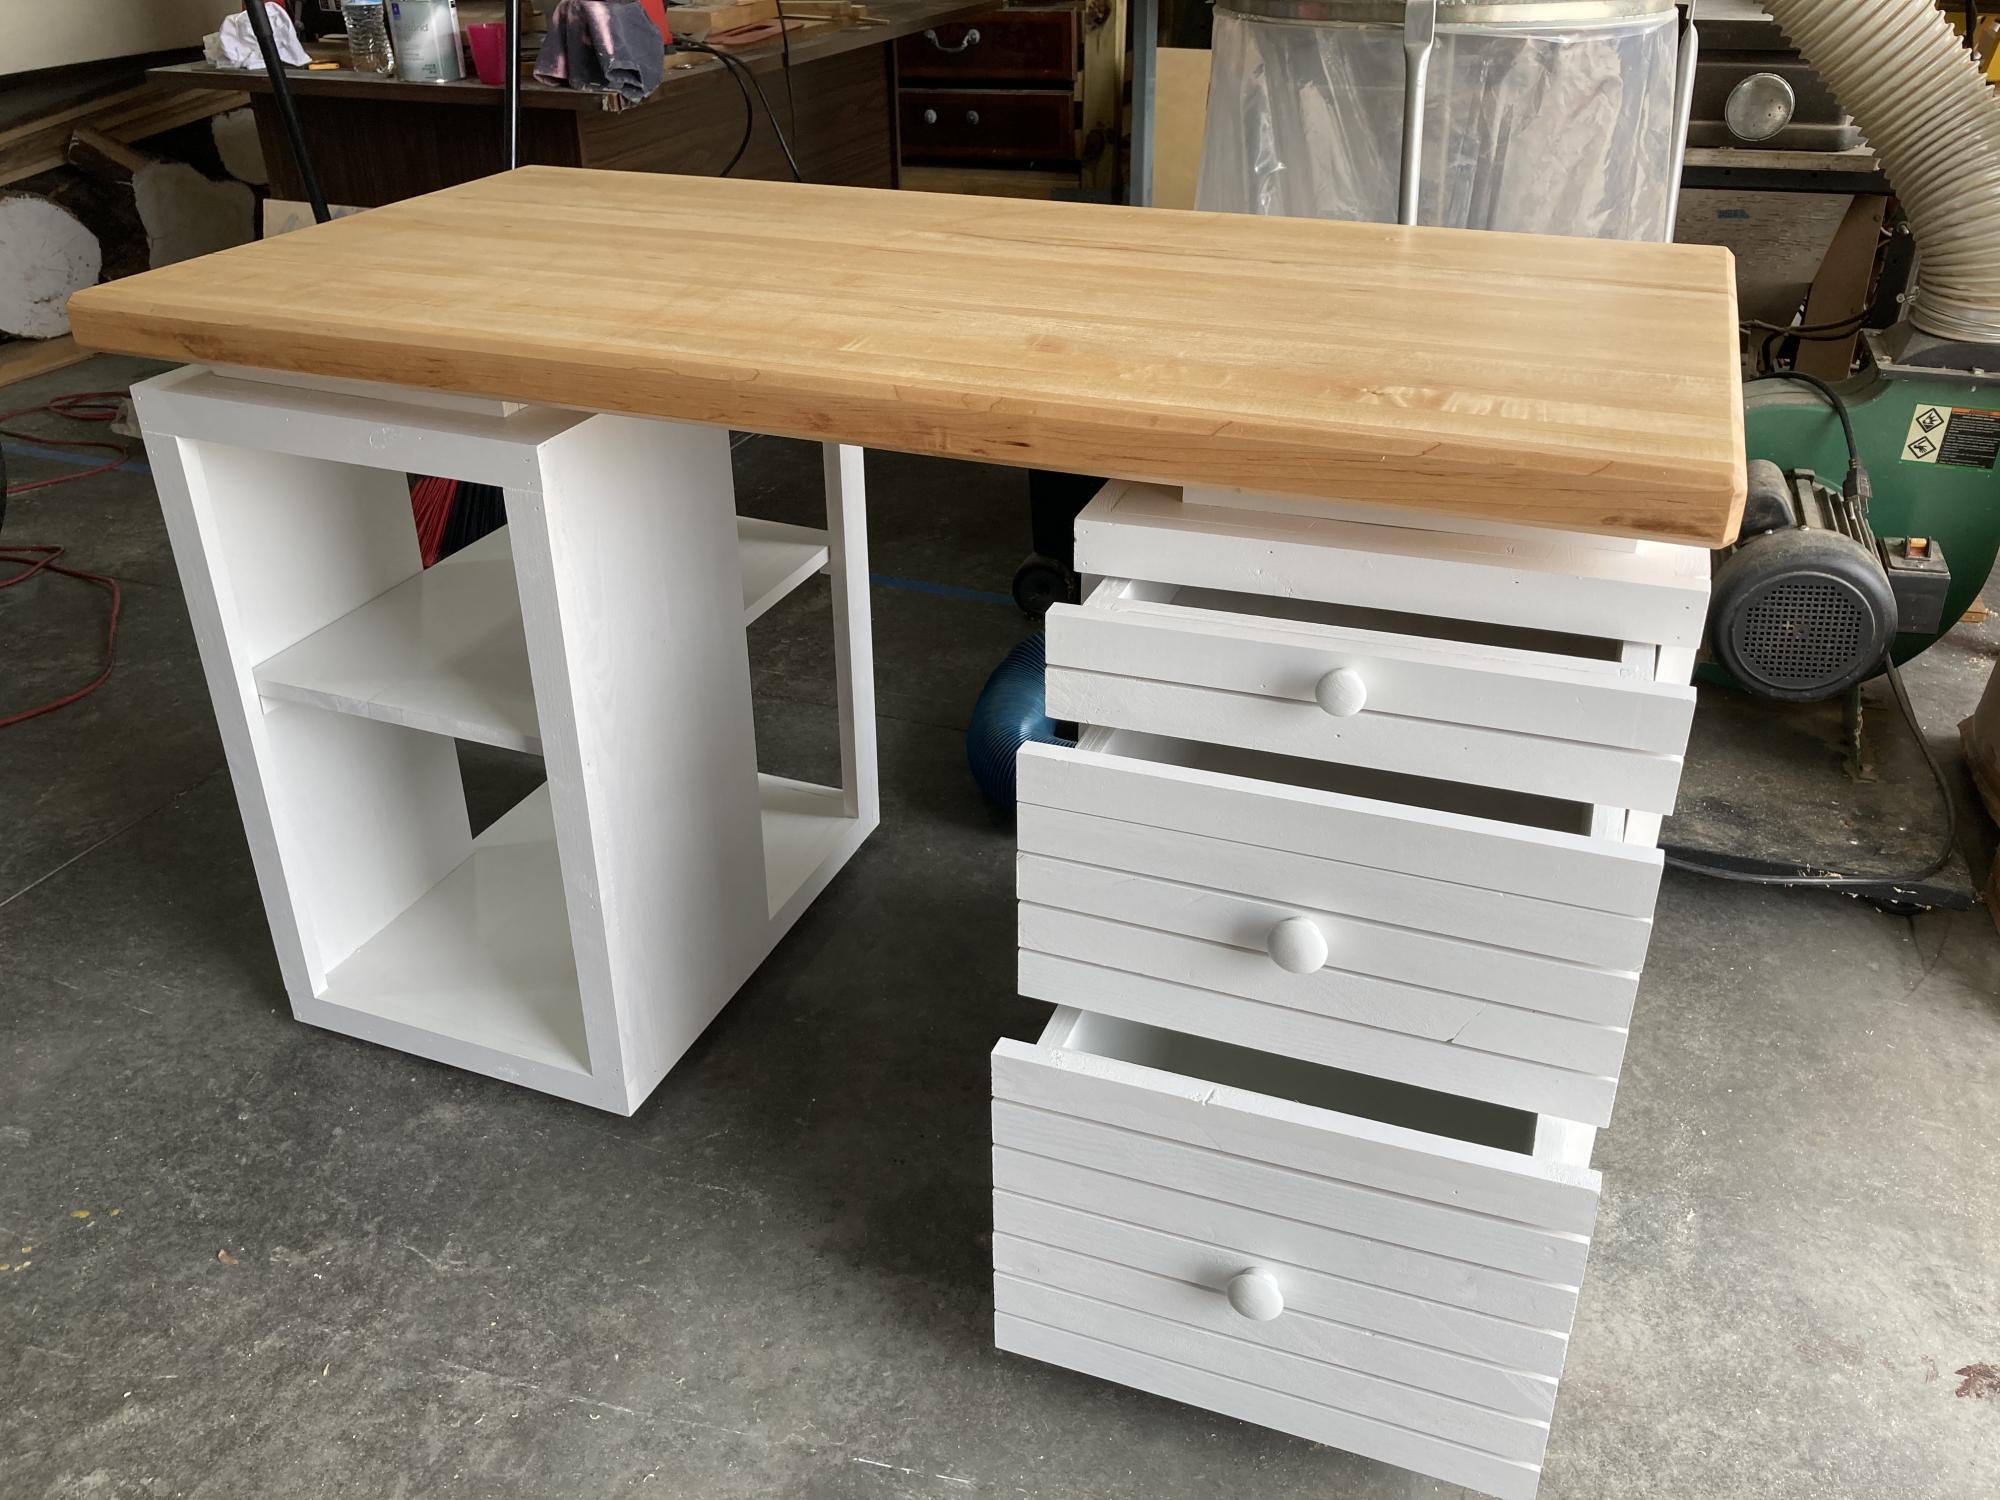
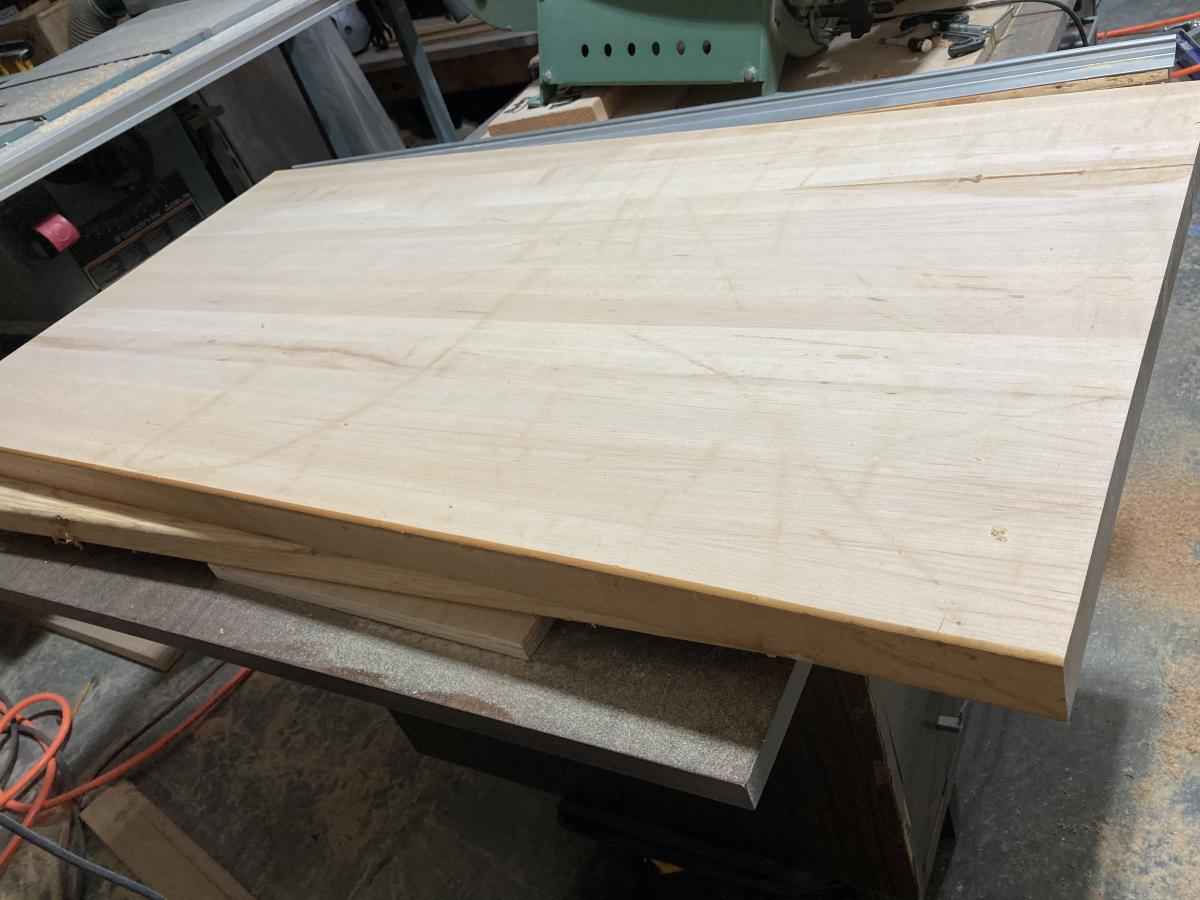
Your craft table was the kicking off point for this desk. Pine cabinets, plywood drawers, maple top.
Built from Plan(s)
Estimated Cost
I already had the materials, the paint was about $50
Estimated Time Investment
Week Long Project (20 Hours or More)
Finish Used
Sherwin Williams Pro Classic White paint & Minwax wipe on poly for the maple top.
Recommended Skill Level
Intermediate
Comments
Entryway Bench

My wife wanted an entry way bench that would fit the baskets for a cube storage shelf units. Each box is 11 1/2 square and accomidates a 10 in basket. The bench is 50 inches long and and just shy of 19 inches tall. The depth of the bench is approximately 12 1/2 inches. My wife made the cushion for the top and we purchased the baskets from Lowes.


Built from Plan(s)
Estimated Cost
Bench cost - $50-70
Estimated Time Investment
Weekend Project (10-20 Hours)
Finish Used
I only used white paint to match the trim in our house where the bench is placed.
Recommended Skill Level
Beginner
Double Twin Camp Loft Bed

Camp Loft Bed modified to fit two twin loft beds in the bedroom with a shared platform step.
Age of boys in bed: 6 and 4
The boys have yet to agree on a stain color...awaiting their decision.
Built from Plan(s)
Estimated Cost
$100
Estimated Time Investment
Day Project (6-9 Hours)
Recommended Skill Level
Beginner
Comments
Twin Storage Beds with corner unit

When we moved into our new house, I figured it was time to replace my girls's mattresses on the floor with actual beds. so I set about making the twin storage beds with corner unit. I primed all the wood prior to cutting and assembling, and that made things go much faster. Assembling the corner unit was tricky, since i really didn't want to have sanding and much paint in their bedroom. (i loaded in the beds first and the corner unit a week later). I added trim that wasn't on the plan, and also used the magnetic paint on the center area, although it makes a weak magnetic surface. All in all, I LOVE the way it turns out and no one can believe that I built it and didn't buy it... (although it seems obvious to me when you look closely LOL)
Built from Plan(s)
Estimated Cost
~$500?
Estimated Time Investment
Week Long Project (20 Hours or More)
Finish Used
paint
Recommended Skill Level
Intermediate
Comments
Fri, 11/04/2011 - 11:42
Love the walls!
It looks great, and I love what you did with the walls! Free hand with paint, or decals? Either way, its darling and clearly gives each girl her own space.
We have the same lamps - quite popular :)
I am trying to figure out a clever way to put three girls in a (huge) room and I think something like this or a bunkbed combo would make it fun and new for them..
Sun, 01/08/2012 - 18:36
Twin storage bed with corner unit
Where can I find the plans for the top half of the corner unit.? Your beds are exactly what I want for my girls. Thanks for sharing.
Mon, 10/08/2012 - 17:25
I must be missing something.
I see the plans for the beds and for the top part of the corner unit but what about the bottom part. please HELP I'm I totally missing it?
Mon, 10/08/2012 - 17:25
I must be missing something.
I see the plans for the beds and for the top part of the corner unit but what about the bottom part. please HELP I'm I totally missing it?
Mon, 10/08/2012 - 17:25
I must be missing something.
I see the plans for the beds and for the top part of the corner unit but what about the bottom part. please HELP am I totally missing it?
Mon, 01/18/2016 - 06:30
The links to the top and
The links to the top and bottom of the corner unit seem broken; is there still access to these plans? Thanks for your help!
Fri, 11/18/2016 - 17:24
OMG where are the plans for the hutch
I have been round and round where are the plans for the Hutch?
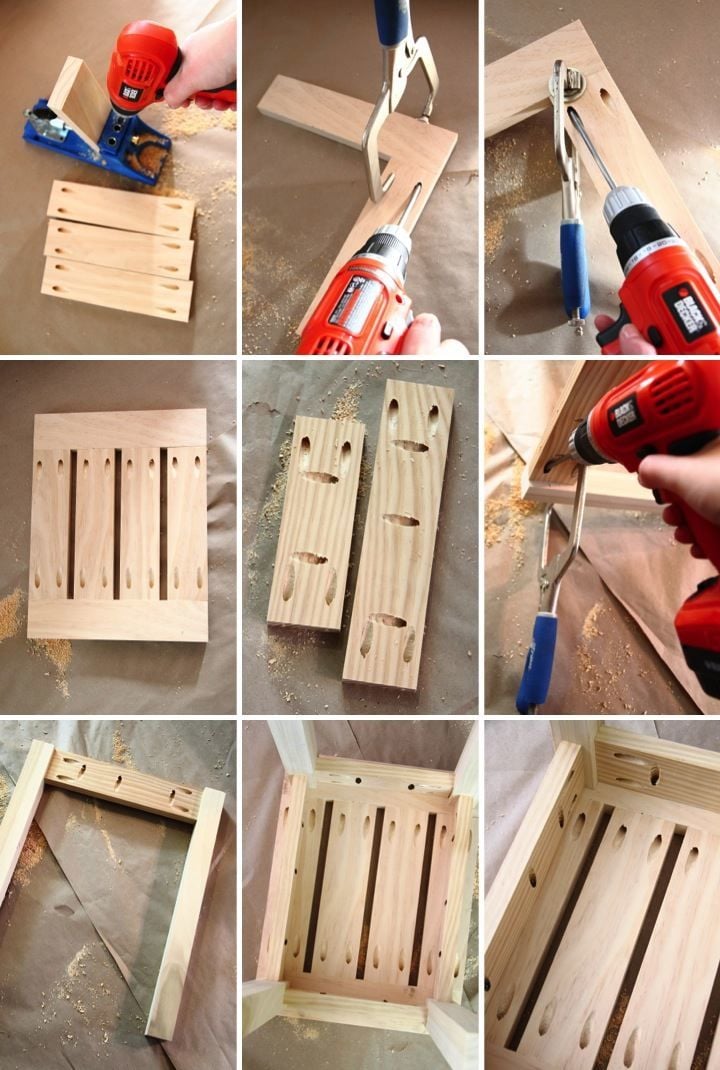
Simple Shower Stool
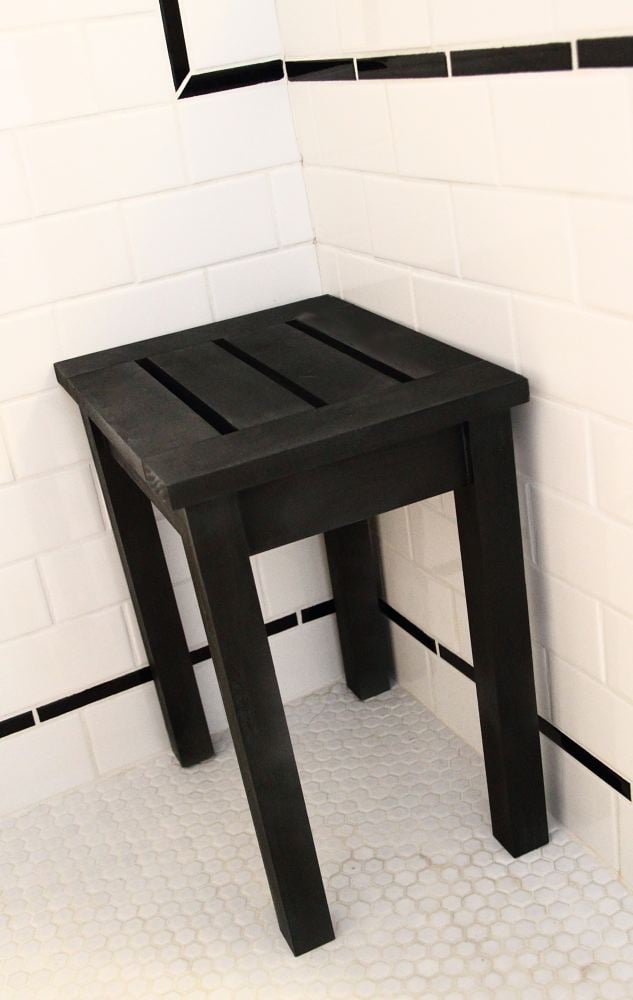
I love my 3' x 5' shower and with all that space I thought that having a little spot to sit down would be really nice. After looking around online and at some stores I couldn't find anything that I liked that was also reasonably priced so in the end I decided to make my own.
For details about how I built it check out my blog: http://www.homeandawaywithlisa.com/blog/2012/2/18/simple-diy-shower-sto…
Estimated Cost
Under $20
Estimated Time Investment
An Hour or Two (0-2 Hours)
Finish Used
I used a dark grey spray paint primer on the stool first before applying two light coats of black spray paint.
Recommended Skill Level
Starter Project
Comments

Mon, 02/20/2012 - 07:03
Did you do any waterproofing?
Did you do any waterproofing? This would probably work well in cedar, too.
Wed, 02/22/2012 - 17:17
Waterproofing
Cedar would definitely be a great option. For the finish I used Rustoleum outdoor spray paint which is supposed to stand up to the elements. I figured that would help it stand up to the water in the shower.
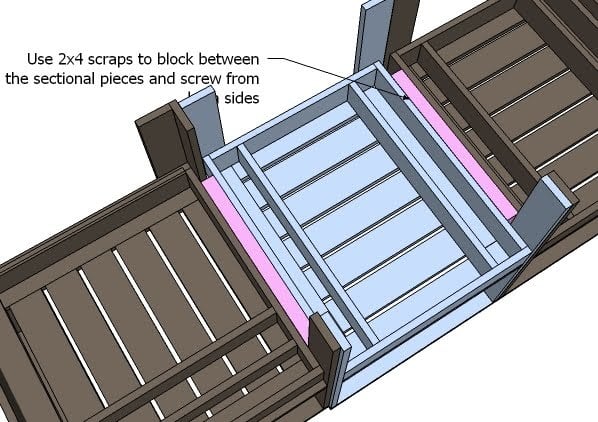
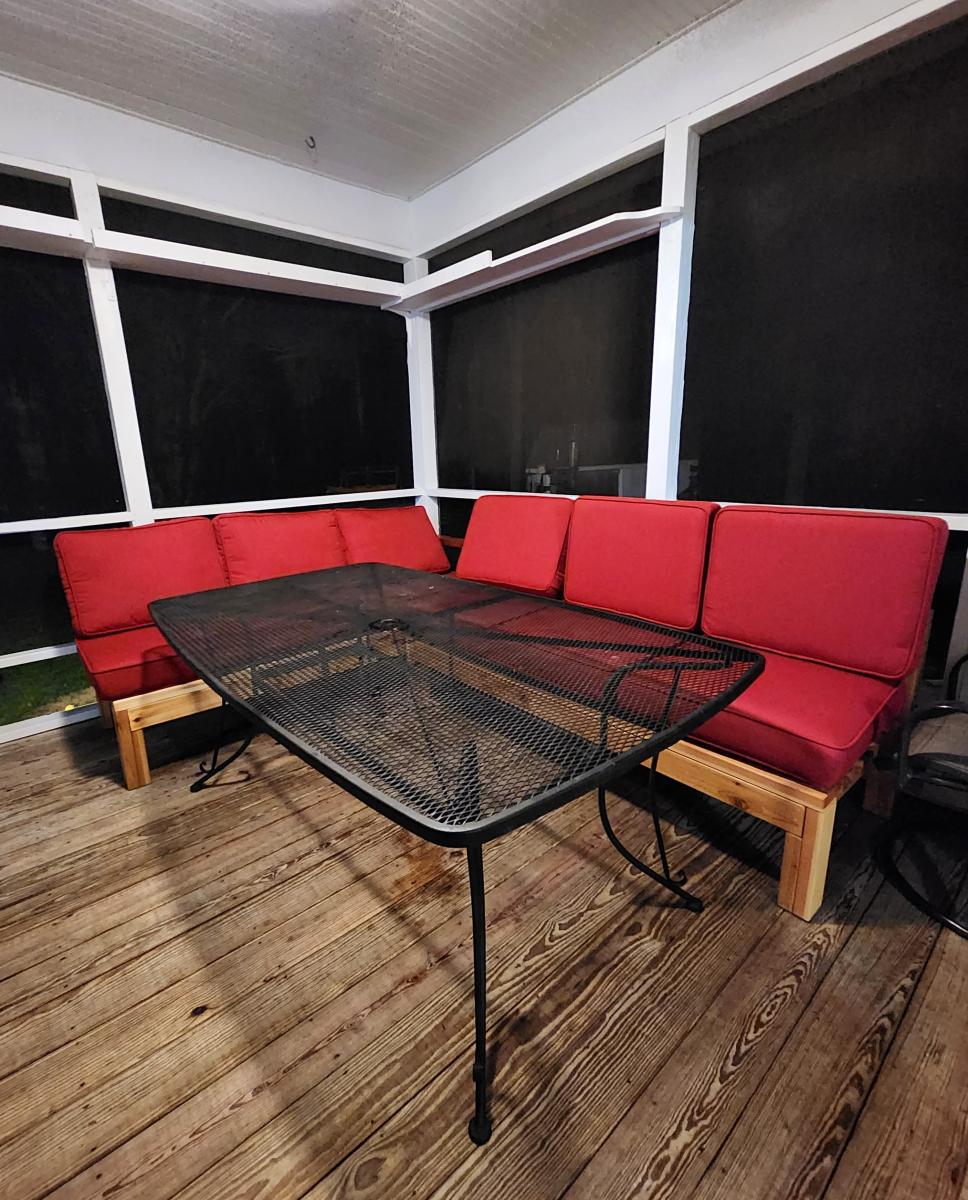
Armless Sectional

A 6' armless sofa & a 6' one arm sofa made of decking cedar and finished with outdoor urethane. Perfect seating for large group for dinner in a screened in porch! This is my first project using Ana White plans and it came out perfectly!! Thank you.
Michele V.
DIY Greenhouse
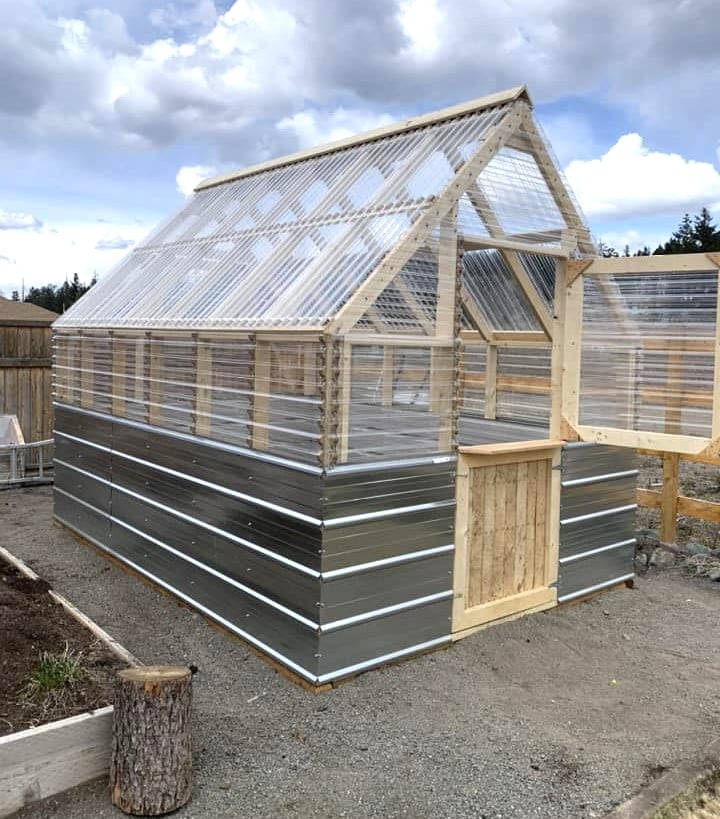
DIY Greenhouse by Trenton Kirby on Facebook!
Built from Plan(s)
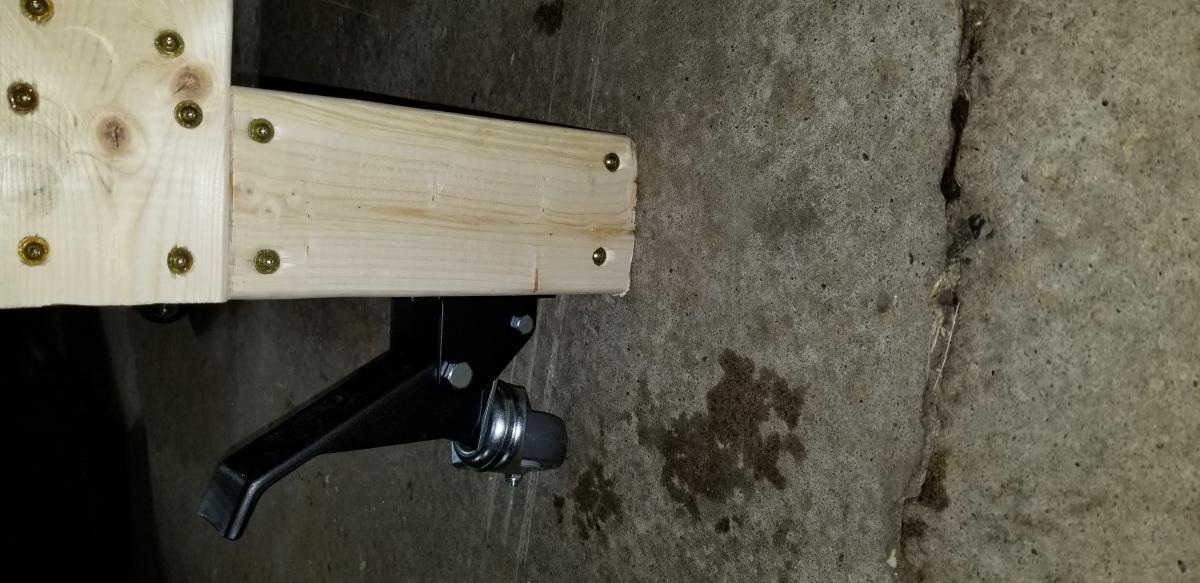
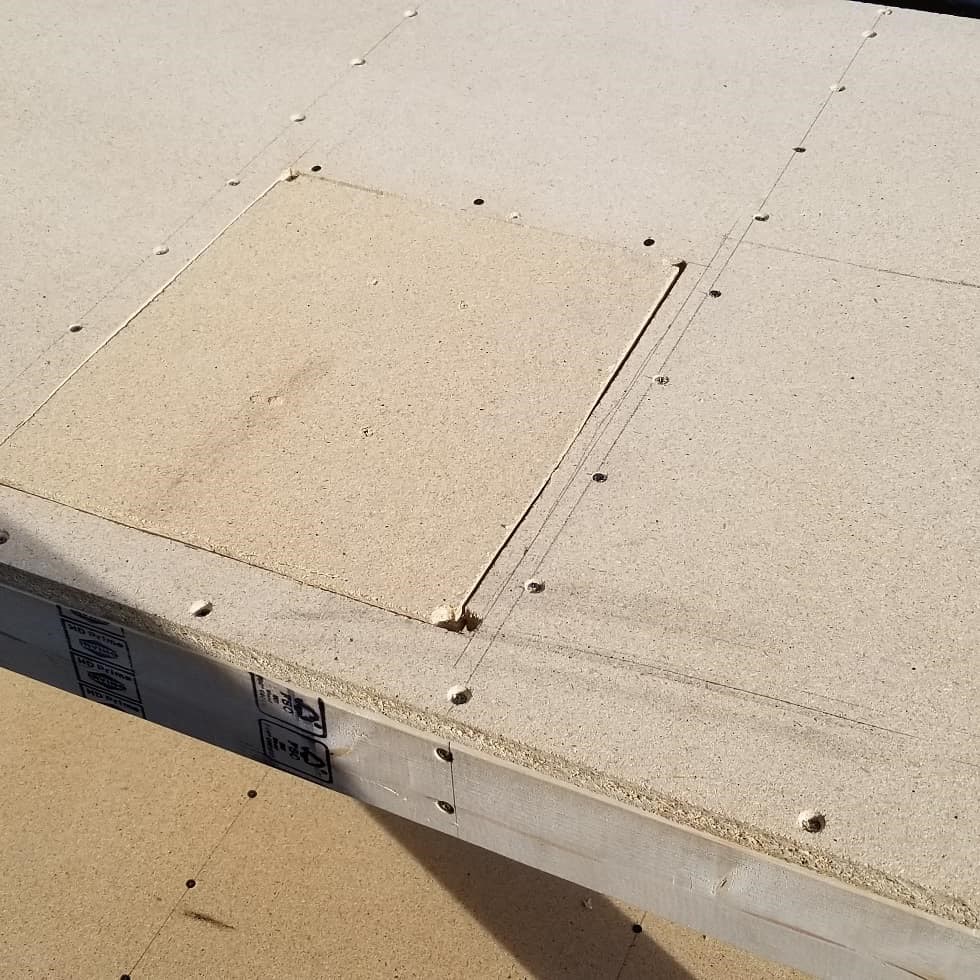
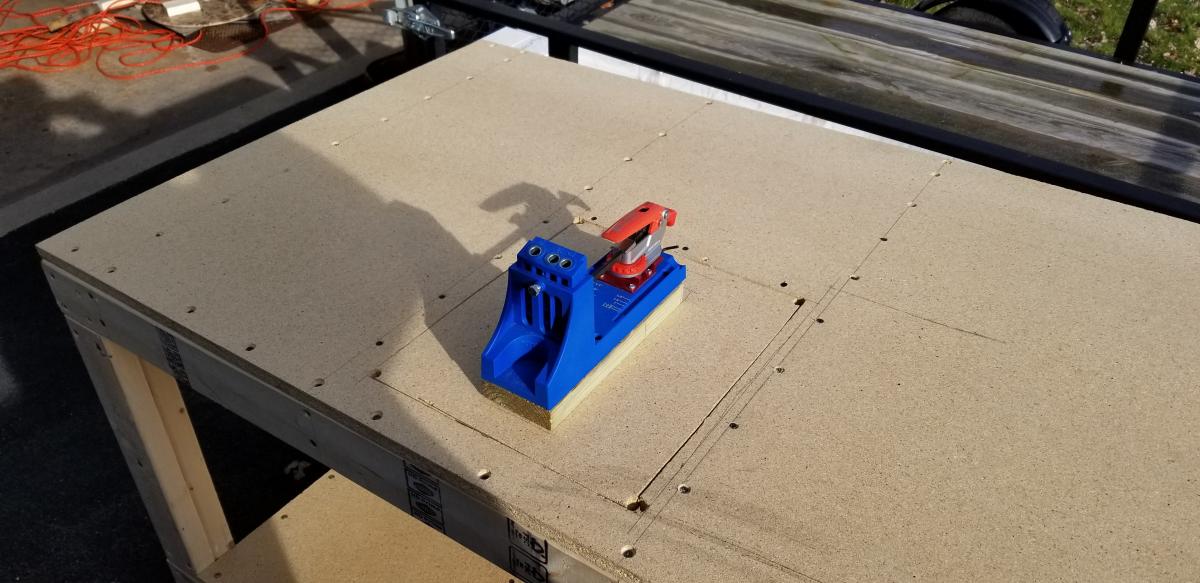
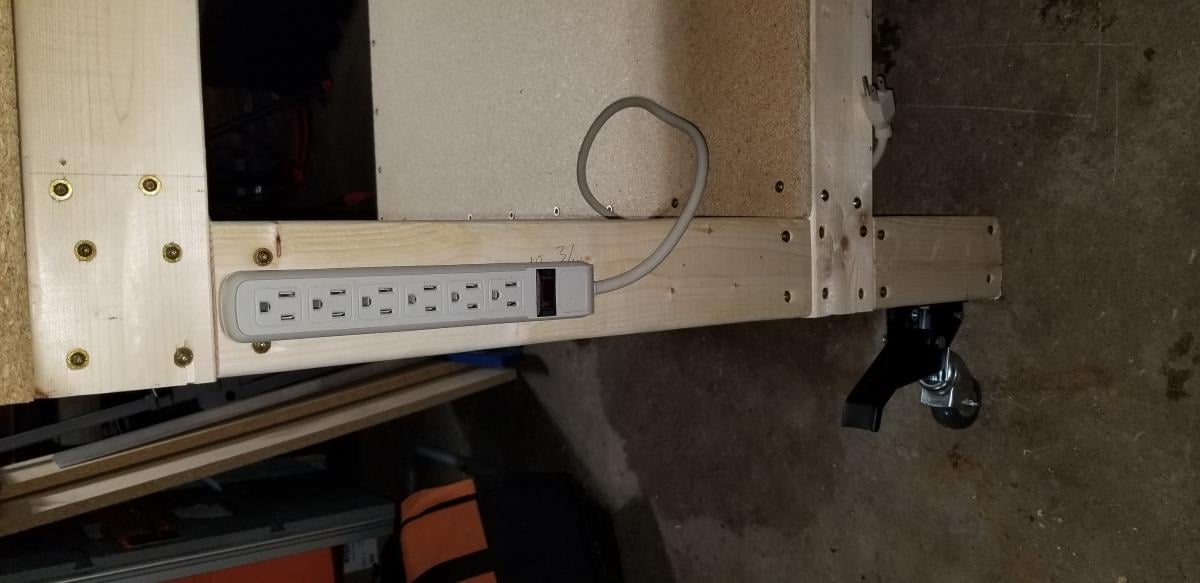
Simple, Strong Workbench
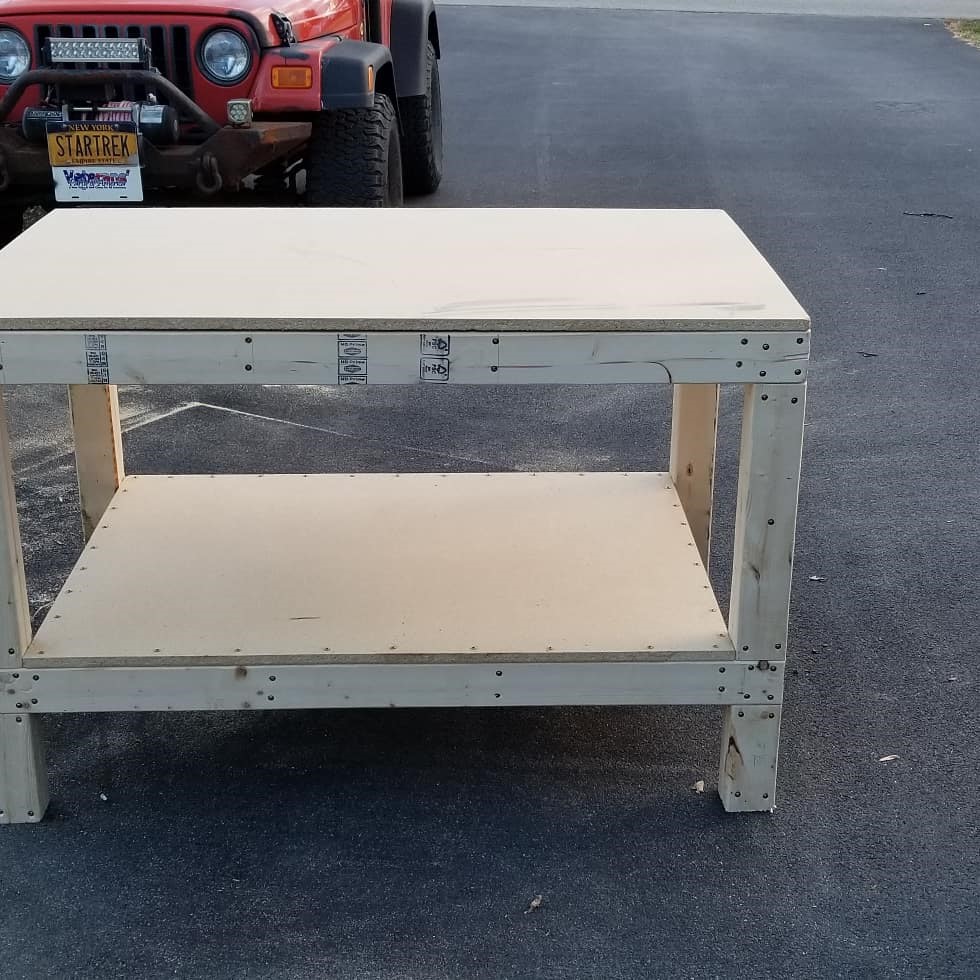
Built this for my garage shop in a day. Added a cutout for my Kreg Pocket Hole Jig, a power strip and casters for ease of movement.
Built from Plan(s)
Estimated Cost
$100
Estimated Time Investment
Weekend Project (10-20 Hours)
Recommended Skill Level
Beginner
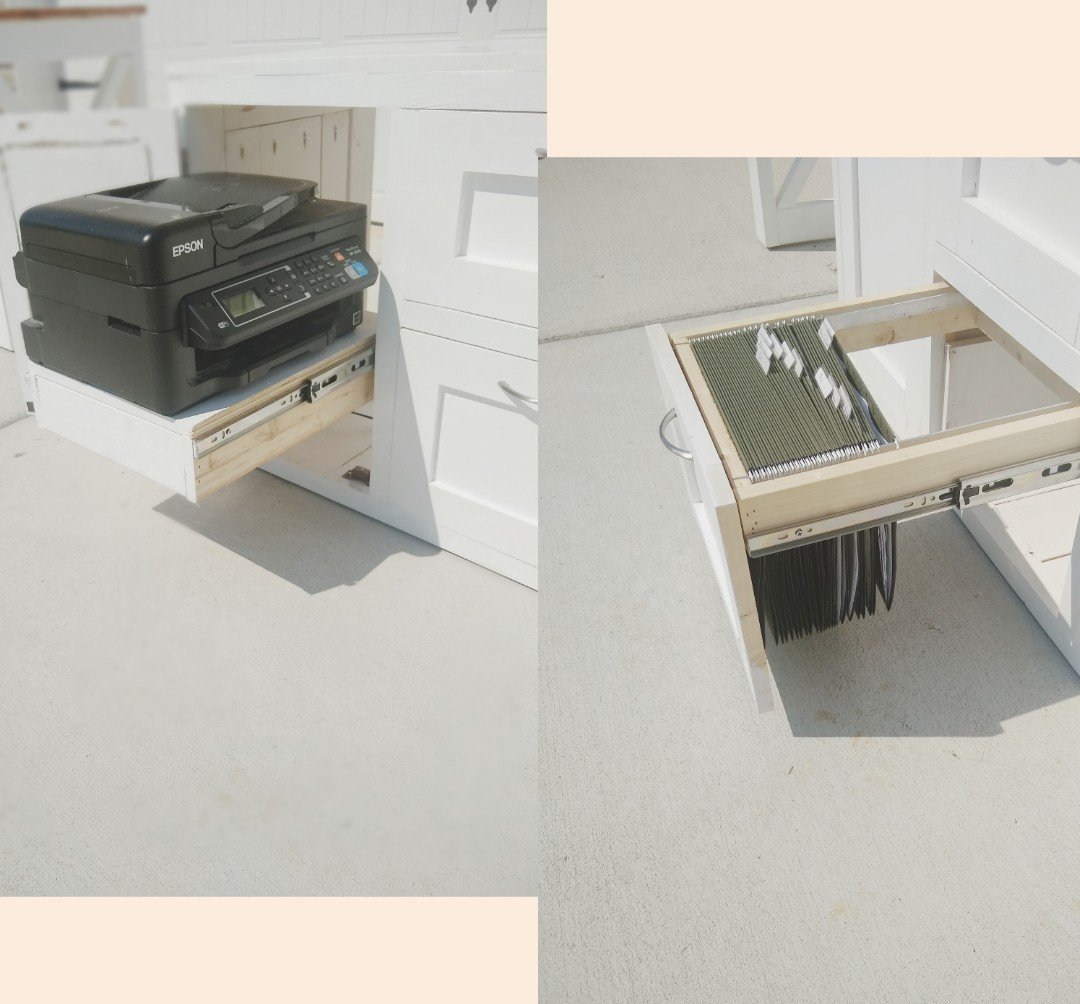
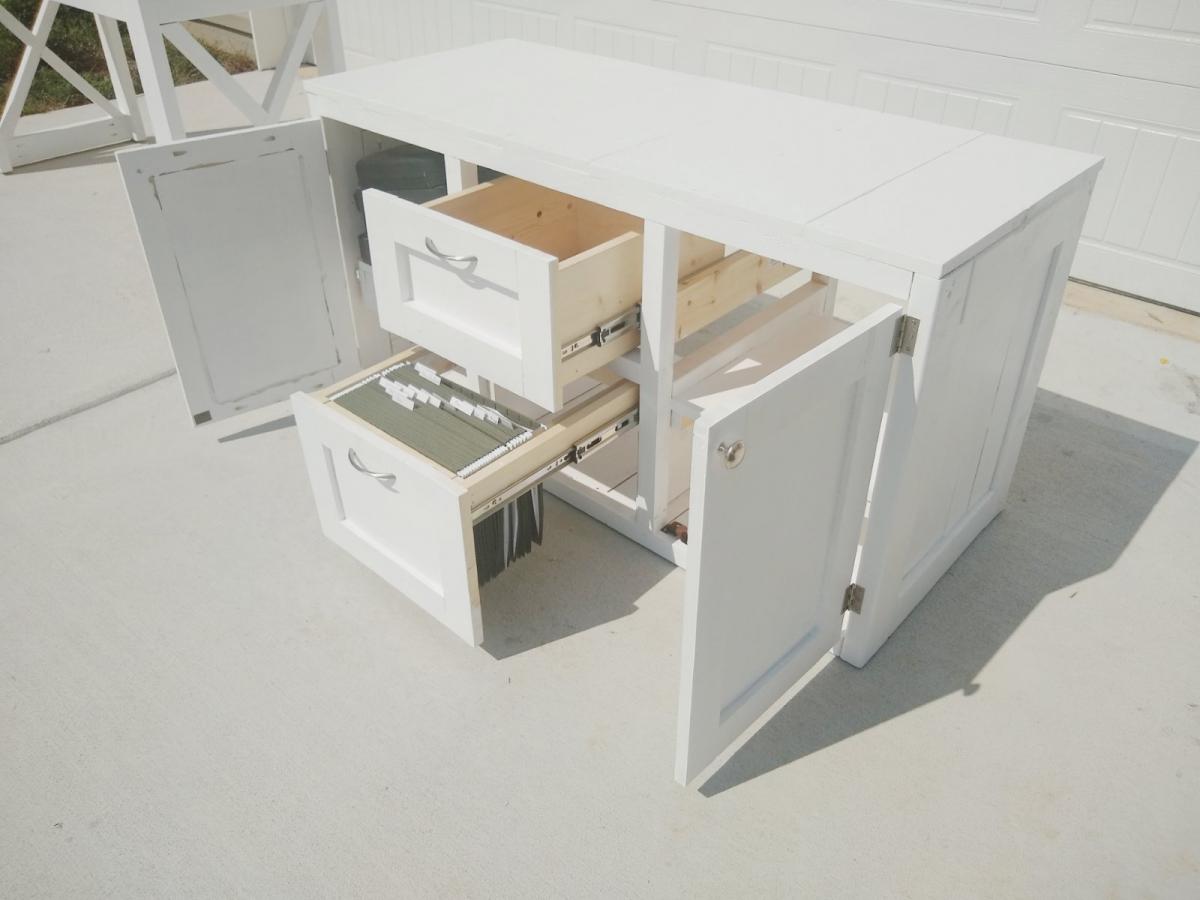
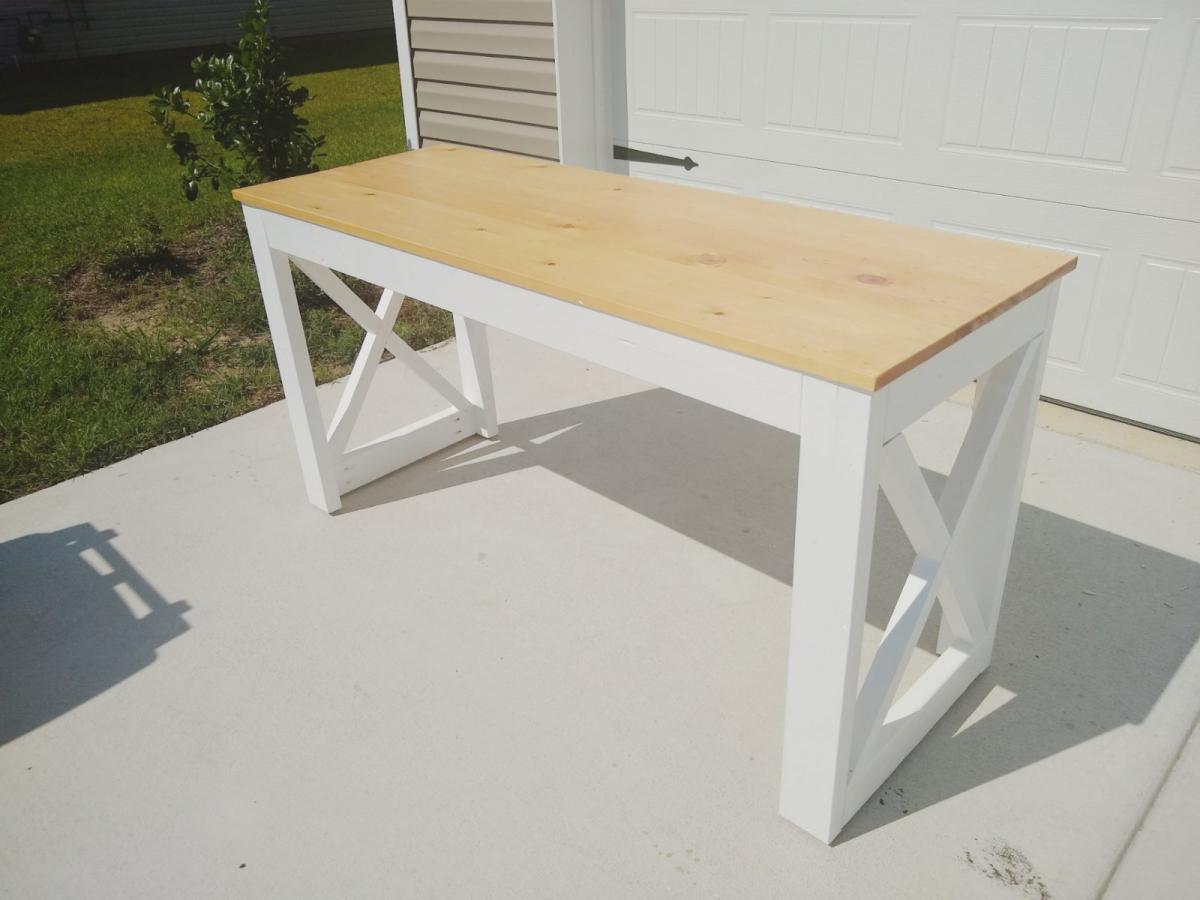
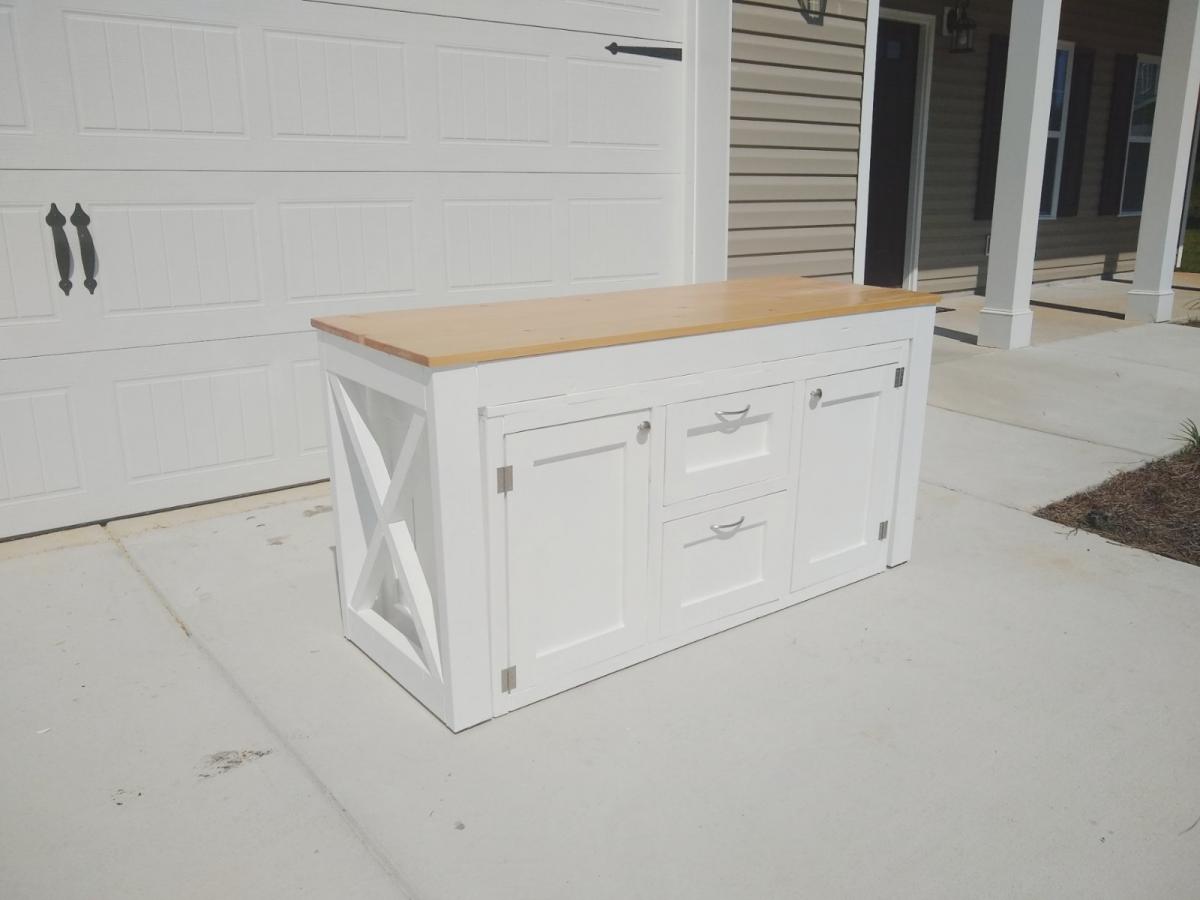
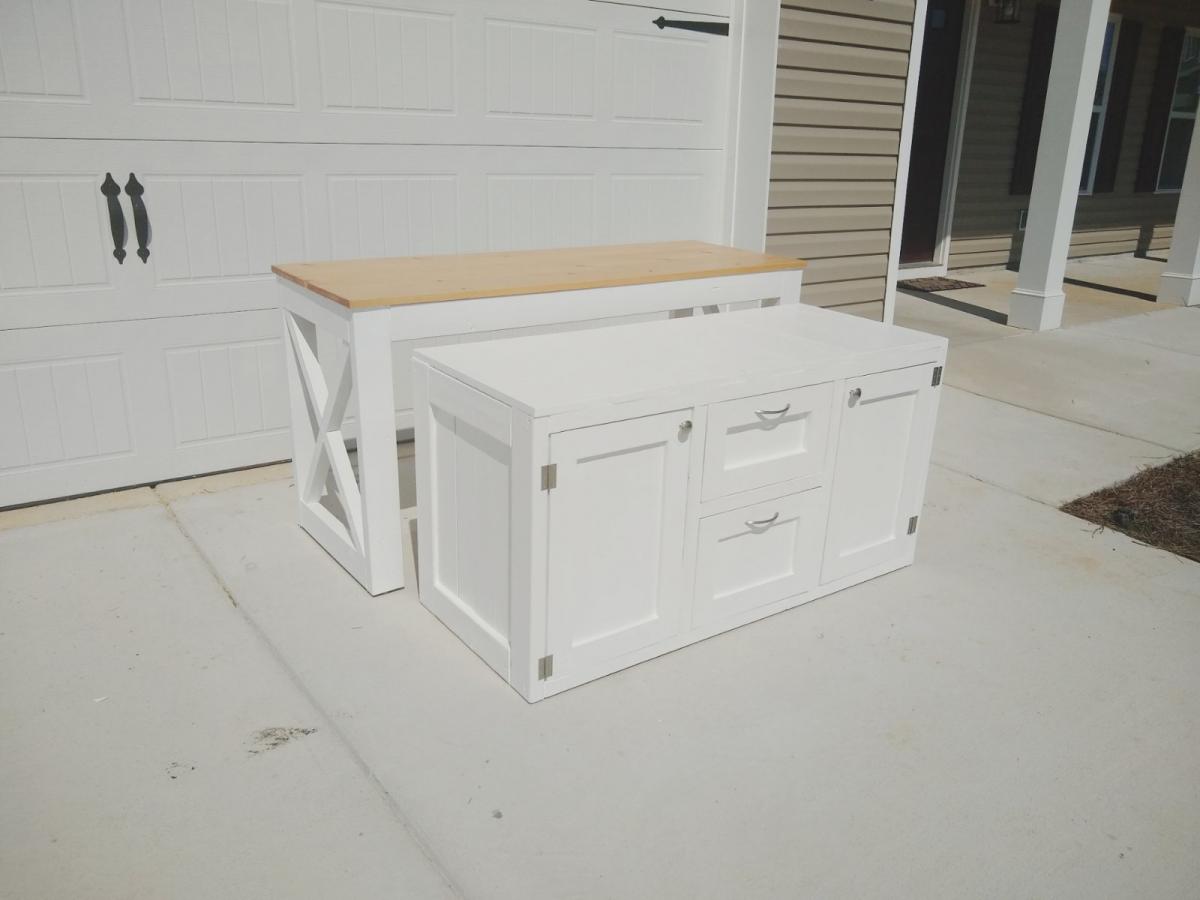
Nesting Office Station

So loving this nesting office station❤️! We will have a sofa sleeper in the office as well. So we needed a desk that could be moved to the wall when the sofa sleeper is being used by guest. I saw a post from Ana for her Nesting Grill Station and I came up with the idea to make this nesting office station. The cabinet includes a file folder drawer (which is from Ana's mail boss plans), a regular drawer, cabinet doors with shelves. One of the shelves is a pull out shelf for the printer. I think it came together great! Design for nesting desk inspired by these plans: https://www.ana-white.com/woodworking-projects/nesting-grill-station https://www.ana-white.com/woodworking-projects/mail-boss
Built from Plan(s)
Estimated Time Investment
Weekend Project (10-20 Hours)
Finish Used
Minwax Golden Pecan
Valspar Signature Ultra White in satin
Valspar Signature Ultra White in satin
Recommended Skill Level
Intermediate
Comments
Wed, 07/15/2020 - 04:40
Great work!
I love this! Very creative and practical design and oh so pretty. Nice job!
Mon, 08/31/2020 - 09:47
This looks so good. Great…
This looks so good. Great work. Do you mind sharing how you concealed the wheels? Do you have wheels on both pieces?
Sat, 10/03/2020 - 08:35
Hi, Thank you! Actually I…
Hi, Thank you! Actually I didn't add wheels to the design since this will be in an office with thick carpeting. I added adjustable metal foot pads to the bottom of the desk.
Mudroom Bench
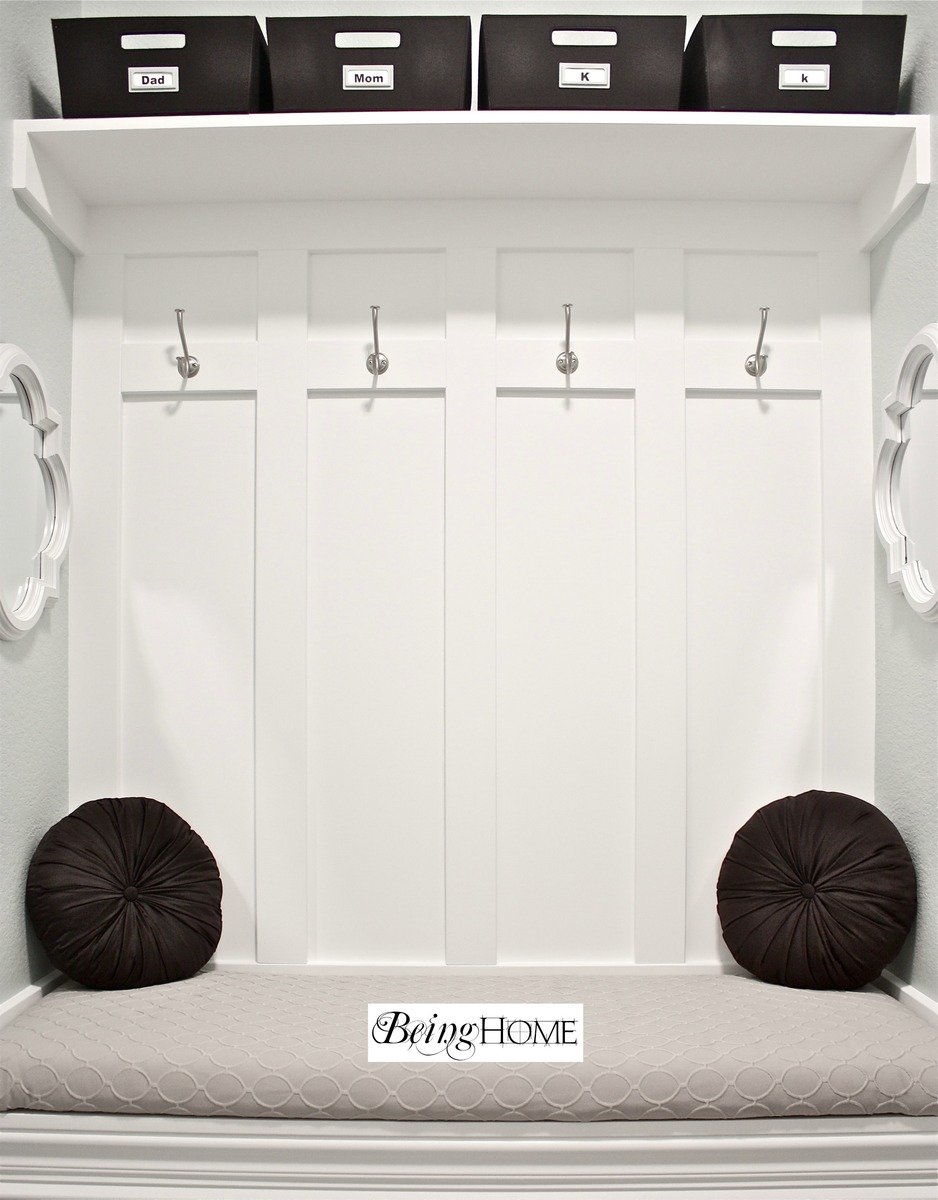
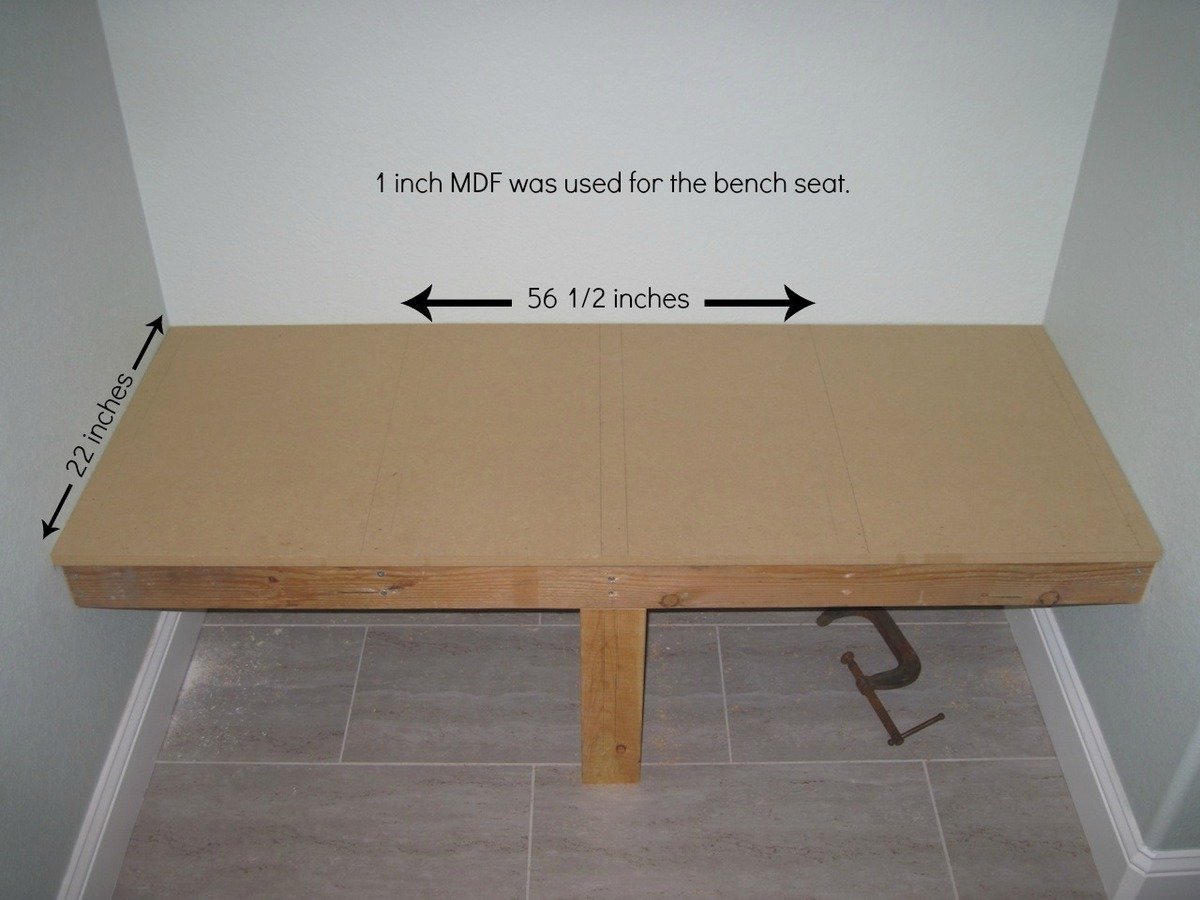
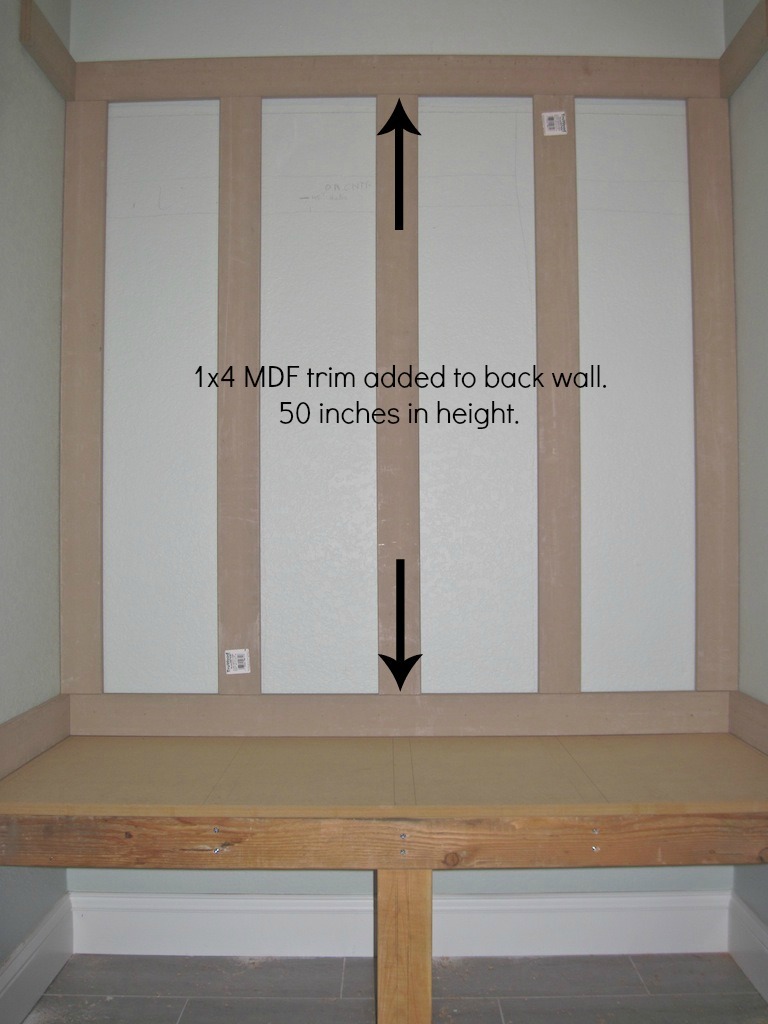
With much needed seating in the mudroom, an unused space (nook) was used to build a mudroom bench and shelf. No plans were used. I basically looked on-line and mentally drew up an idea of how I wanted the final product to look.
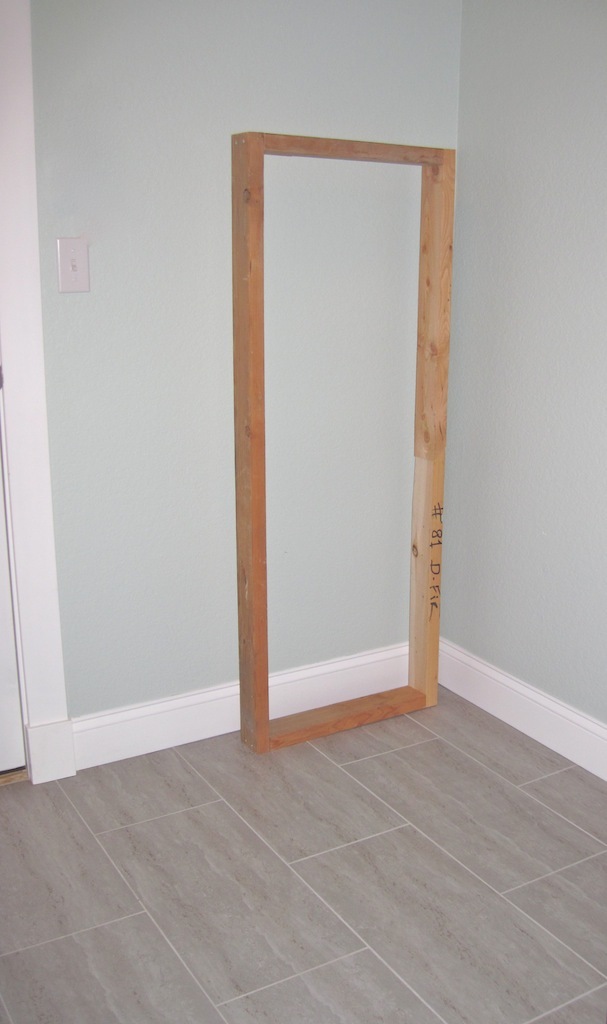
There were some setbacks such as not like the knock down textured walls (after partially painting the bench). I ended up covering the textured walls with hardboard and repainted.
A bench cushion was made for added comfort and style.
Complete tutorial for the bench is here and the bench cushion tutorial is here.
Thank you.
Julie

Built from Plan(s)
Estimated Time Investment
Weekend Project (10-20 Hours)
Finish Used
Behr Ultra (paint and primer in one) in ultra white finish.
Recommended Skill Level
Beginner
Comments
Thu, 05/16/2013 - 13:48
Mudroom Bench
Thank you so much for the idea and plan. I used it to turn an extra laundry room that we have off of our garage into a much needed mudroom. The most challenging project I have ever done before is hanging blinds. But with your help and some from the Home Depot employees, I did it! Our family is more than happy with it. Thanks!!!
Backyard Patio Set
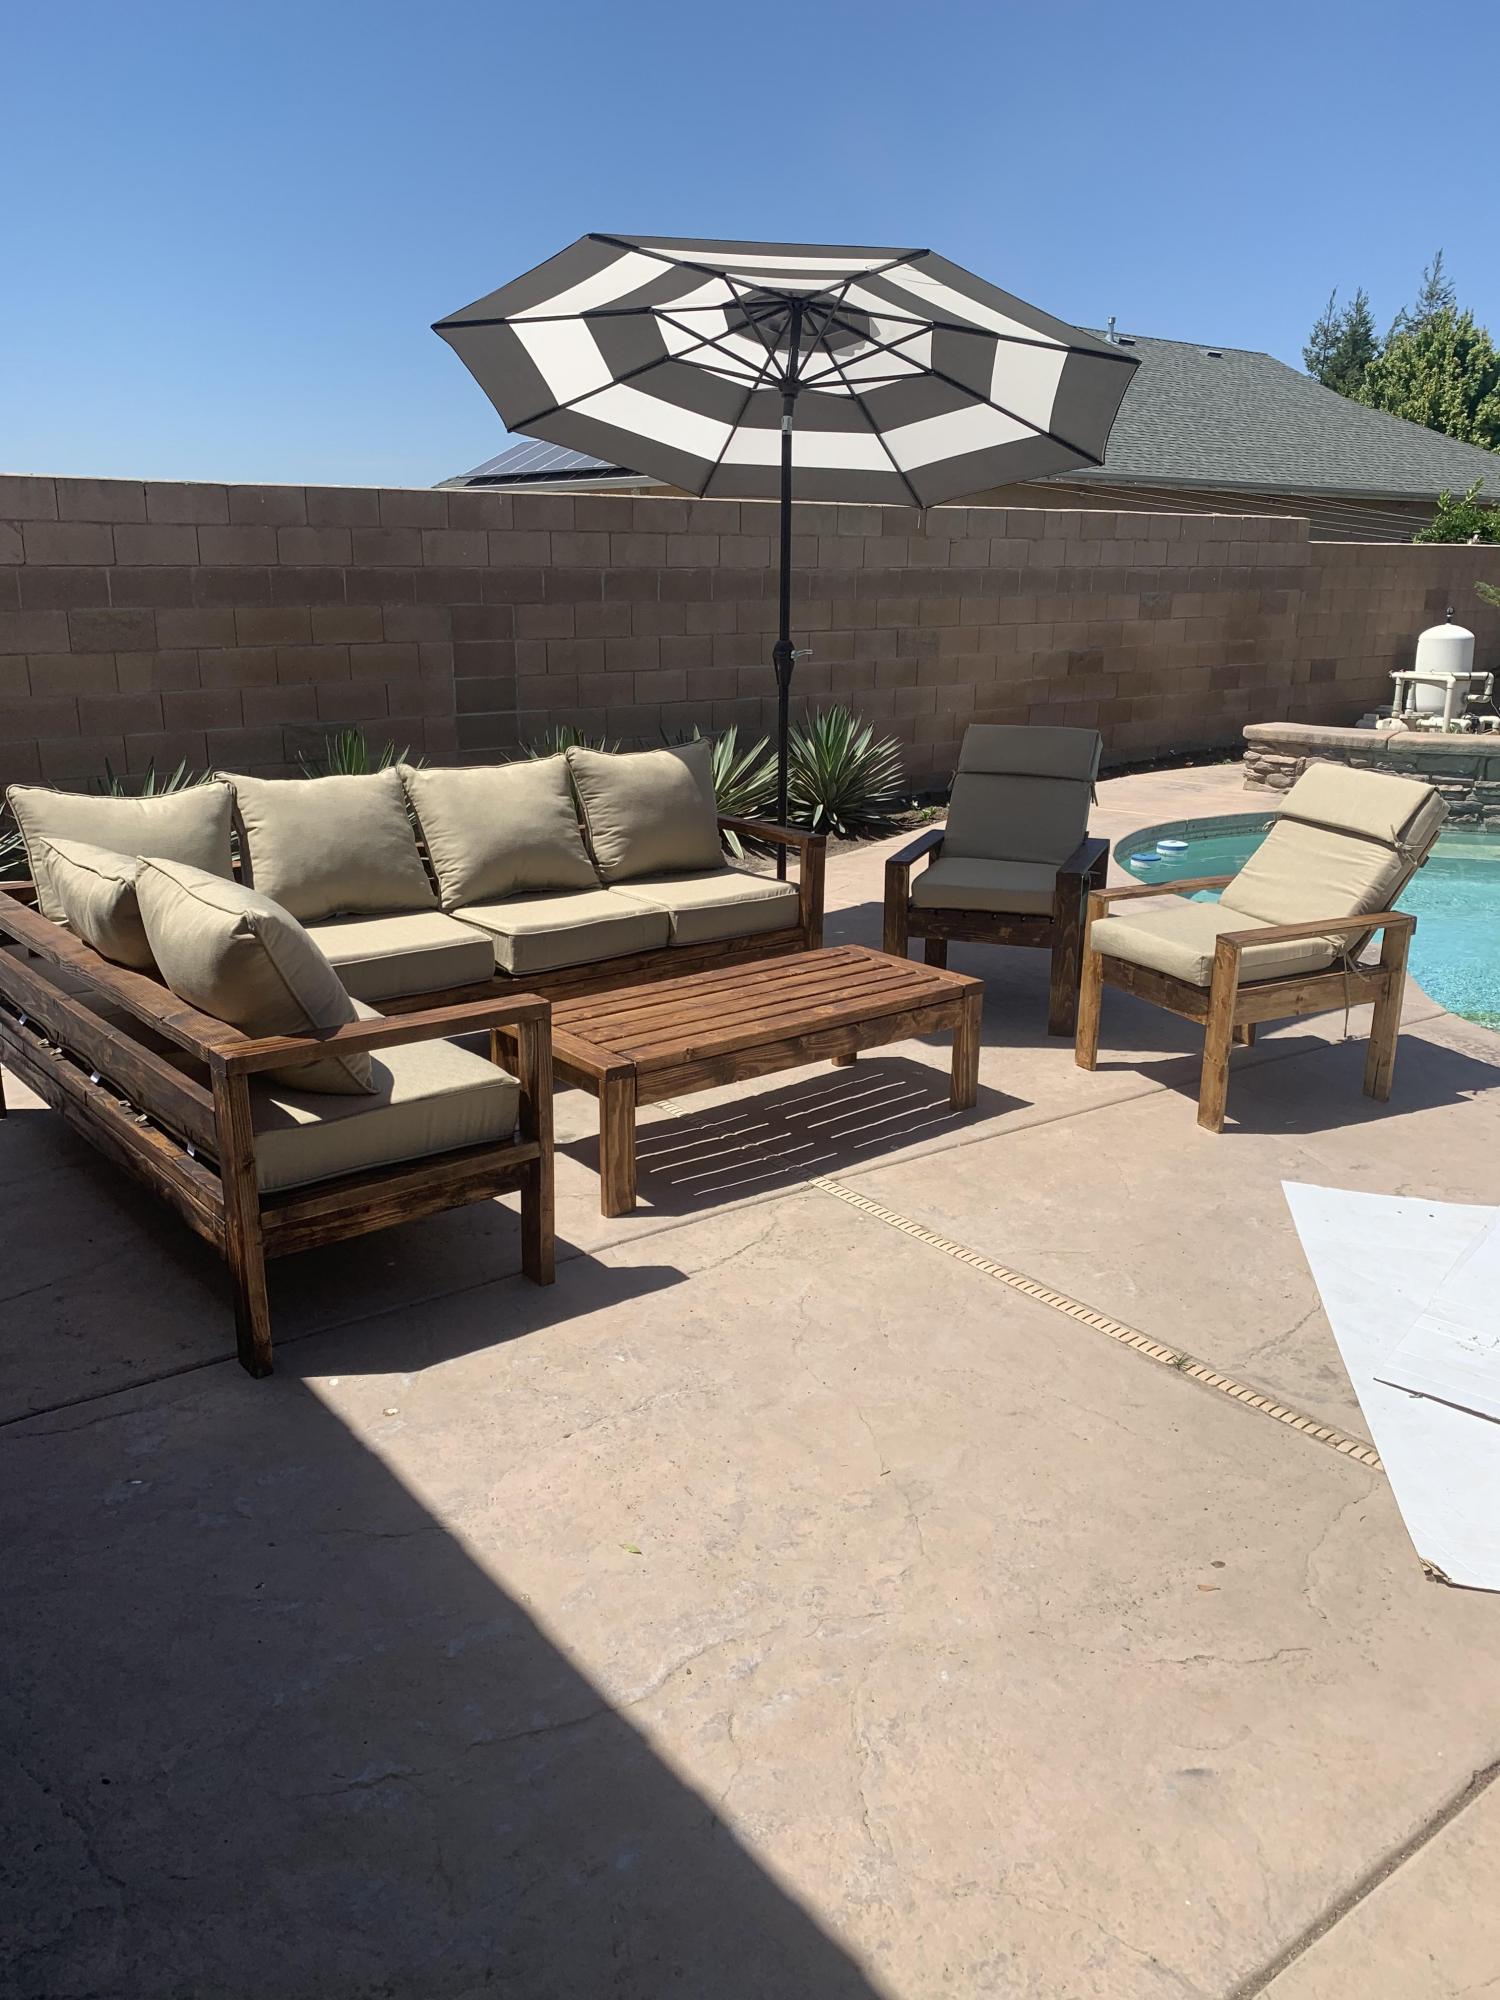
Used Ana's plan for chairs, coffee table, sofa and lounger. Stained and clear coated. Wife is happy. What can be better!
Built from Plan(s)
Estimated Time Investment
Week Long Project (20 Hours or More)
Finish Used
SPAR Urethane
Recommended Skill Level
Intermediate
Comments
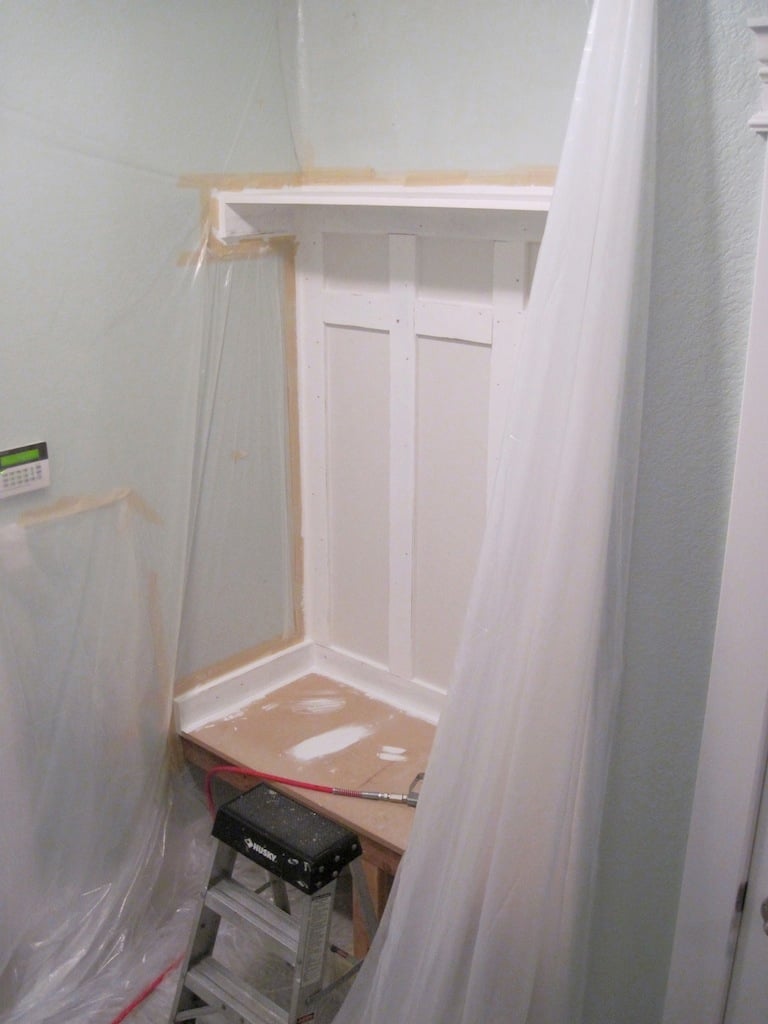
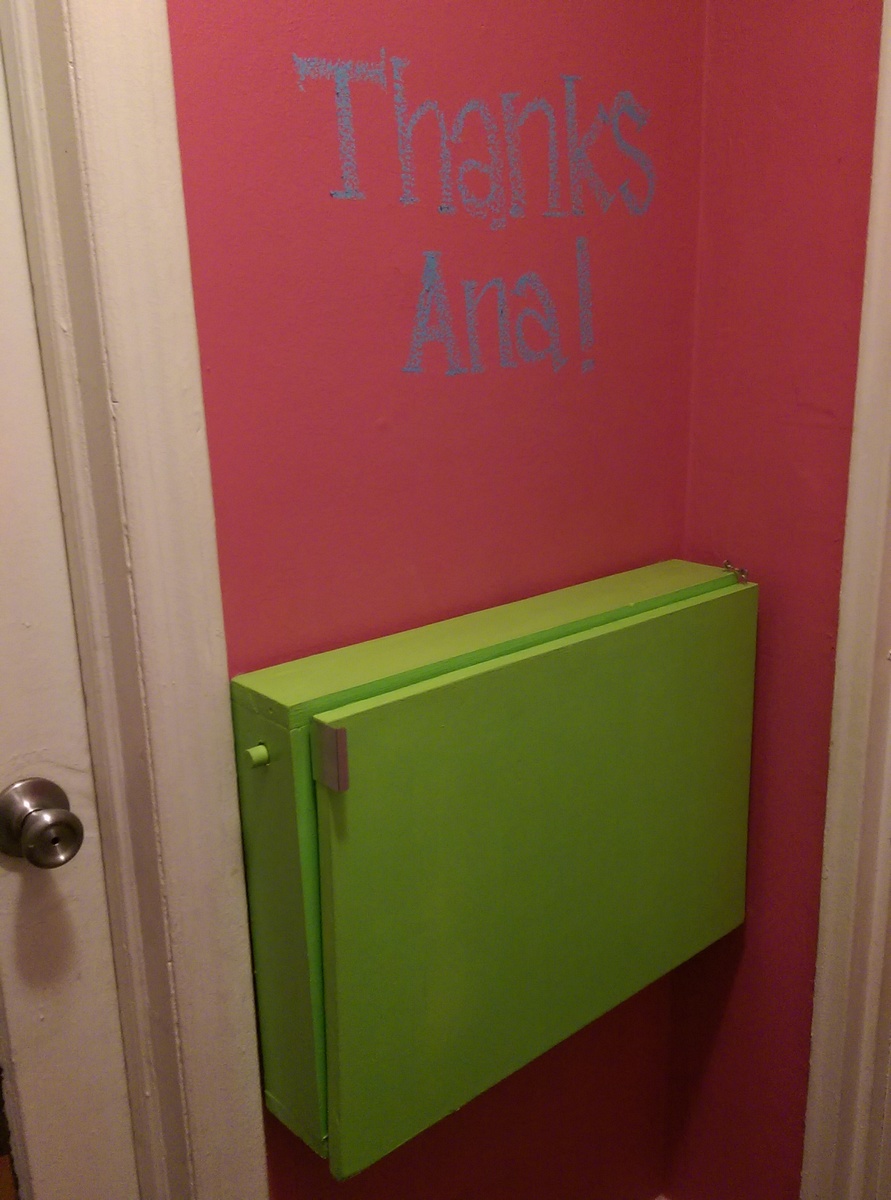
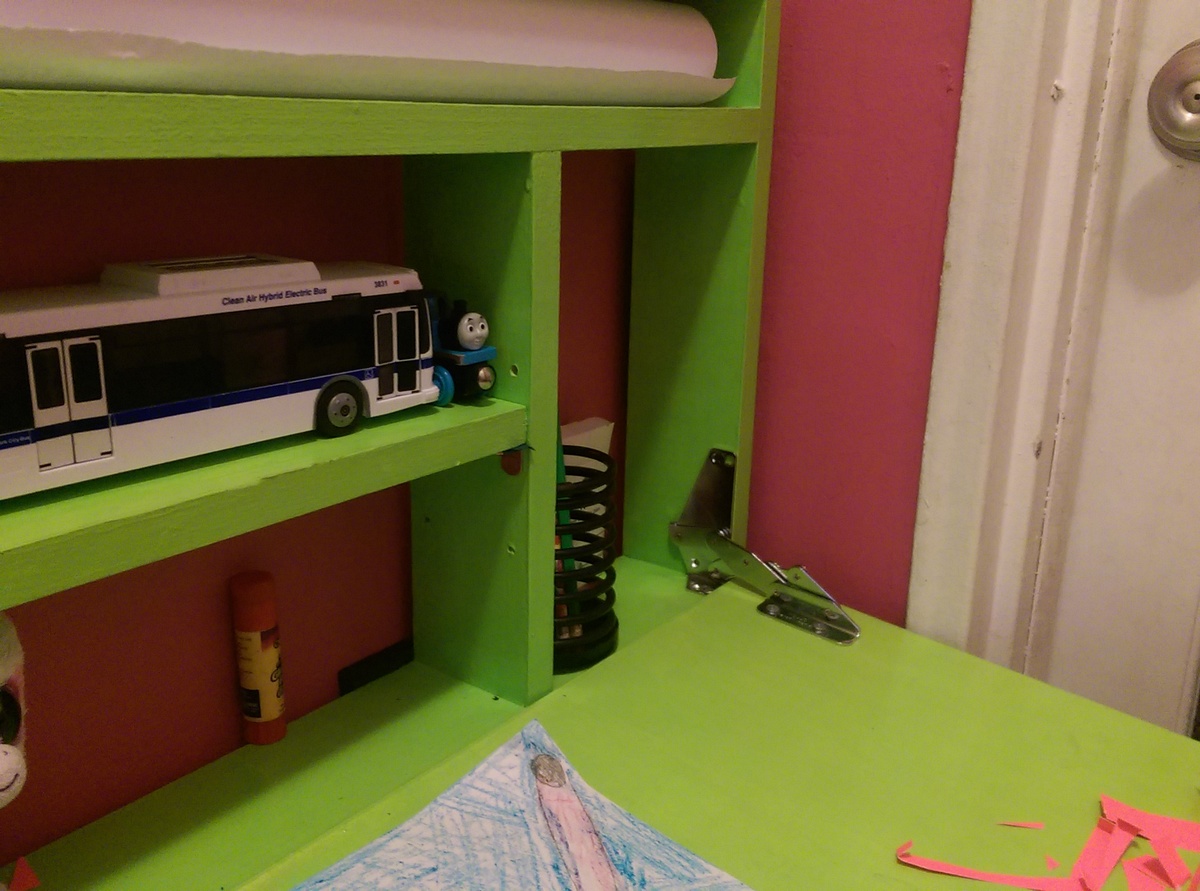
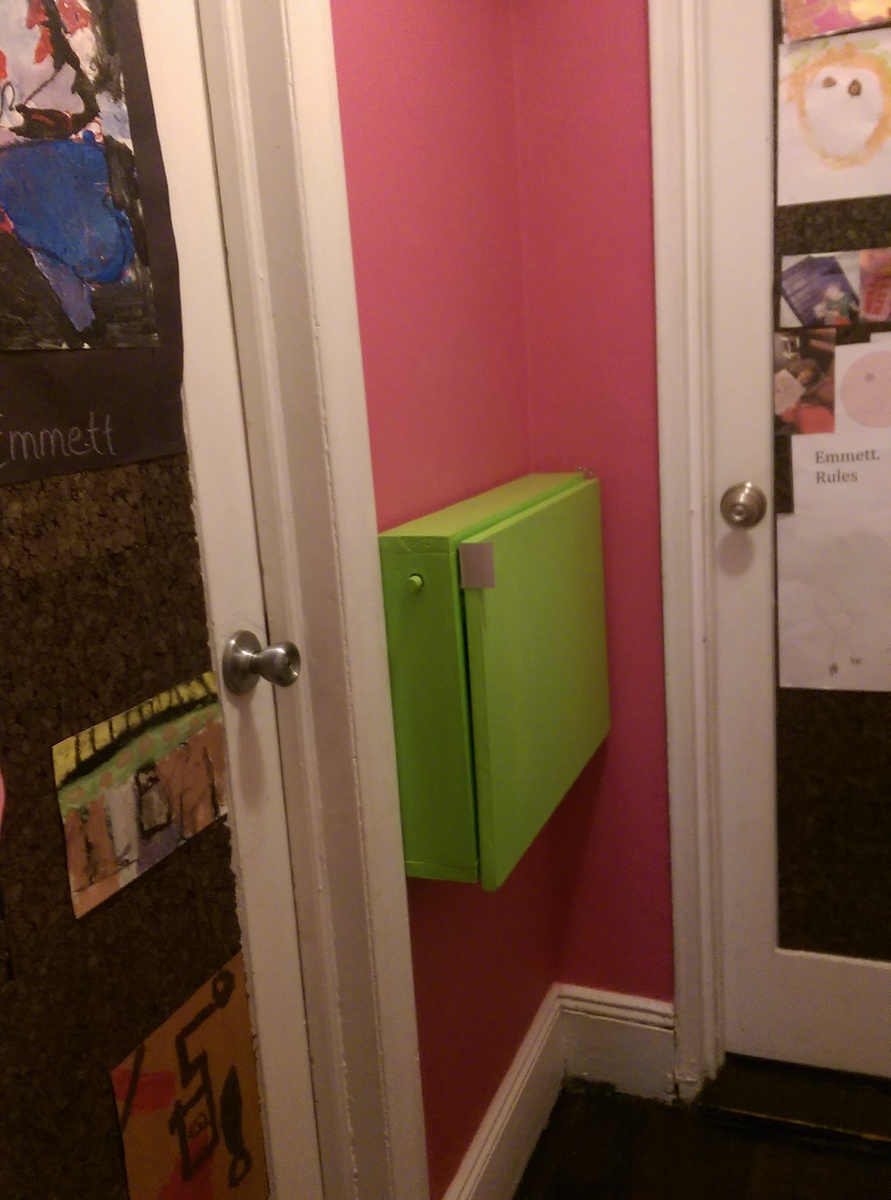
Emmett & Luka's Hallway Murphy Desk
My wife and I live in a 575 sq ft Manhattan apartment with two young boys so space is extremely limited! Last year when our older son was 6 he had the idea to turn our tiny bathroom hallway area into a work space for his growing homework assignments. It took me a year, but it all fell into place when I found this design. Luckily we live in a quirky old 1844 brick row house and I've been lucky enough to craft a small space in the basement where I can keep my tools and work on projects. Even a small desk like this takes more space than you think!
I had to make it a bit smaller to fit the wall space we have. Then I realized the exterior hinges wouldn't have enough clearance because of the door frame. I found a neat set of interior hinges made by Pojjo but they attached to the sides as well as the bottom so the craft paper section was in the way. Then my wife said, "Can you flip it upside-down?" Absolutely. The only other hack I added was adjustable peg slots for the shelf on the left.
I did a twist on the chalkboard theme by painting the desk in a semi-gloss but the entire hallway in hot pink chalkboard paint--pink is my son's fave color =:-) Hudson Paints has an amazing range of chalkboard paint colors.
We love, love, love this design--thanks, Ana!
Estimated Cost
$50
Estimated Time Investment
Weekend Project (10-20 Hours)
Finish Used
Benjamin Moore Natura "Margarita Green" in semi-gloss; walls Hudson Paints "Sweet 13" pink chalkboard paint.
Recommended Skill Level
Beginner
Comments

Wed, 03/11/2015 - 16:03
This is soooooo cute! I just
This is soooooo cute! I just love the vibrant colors! And thank you for building and sharing!
Modern outdoor chairs
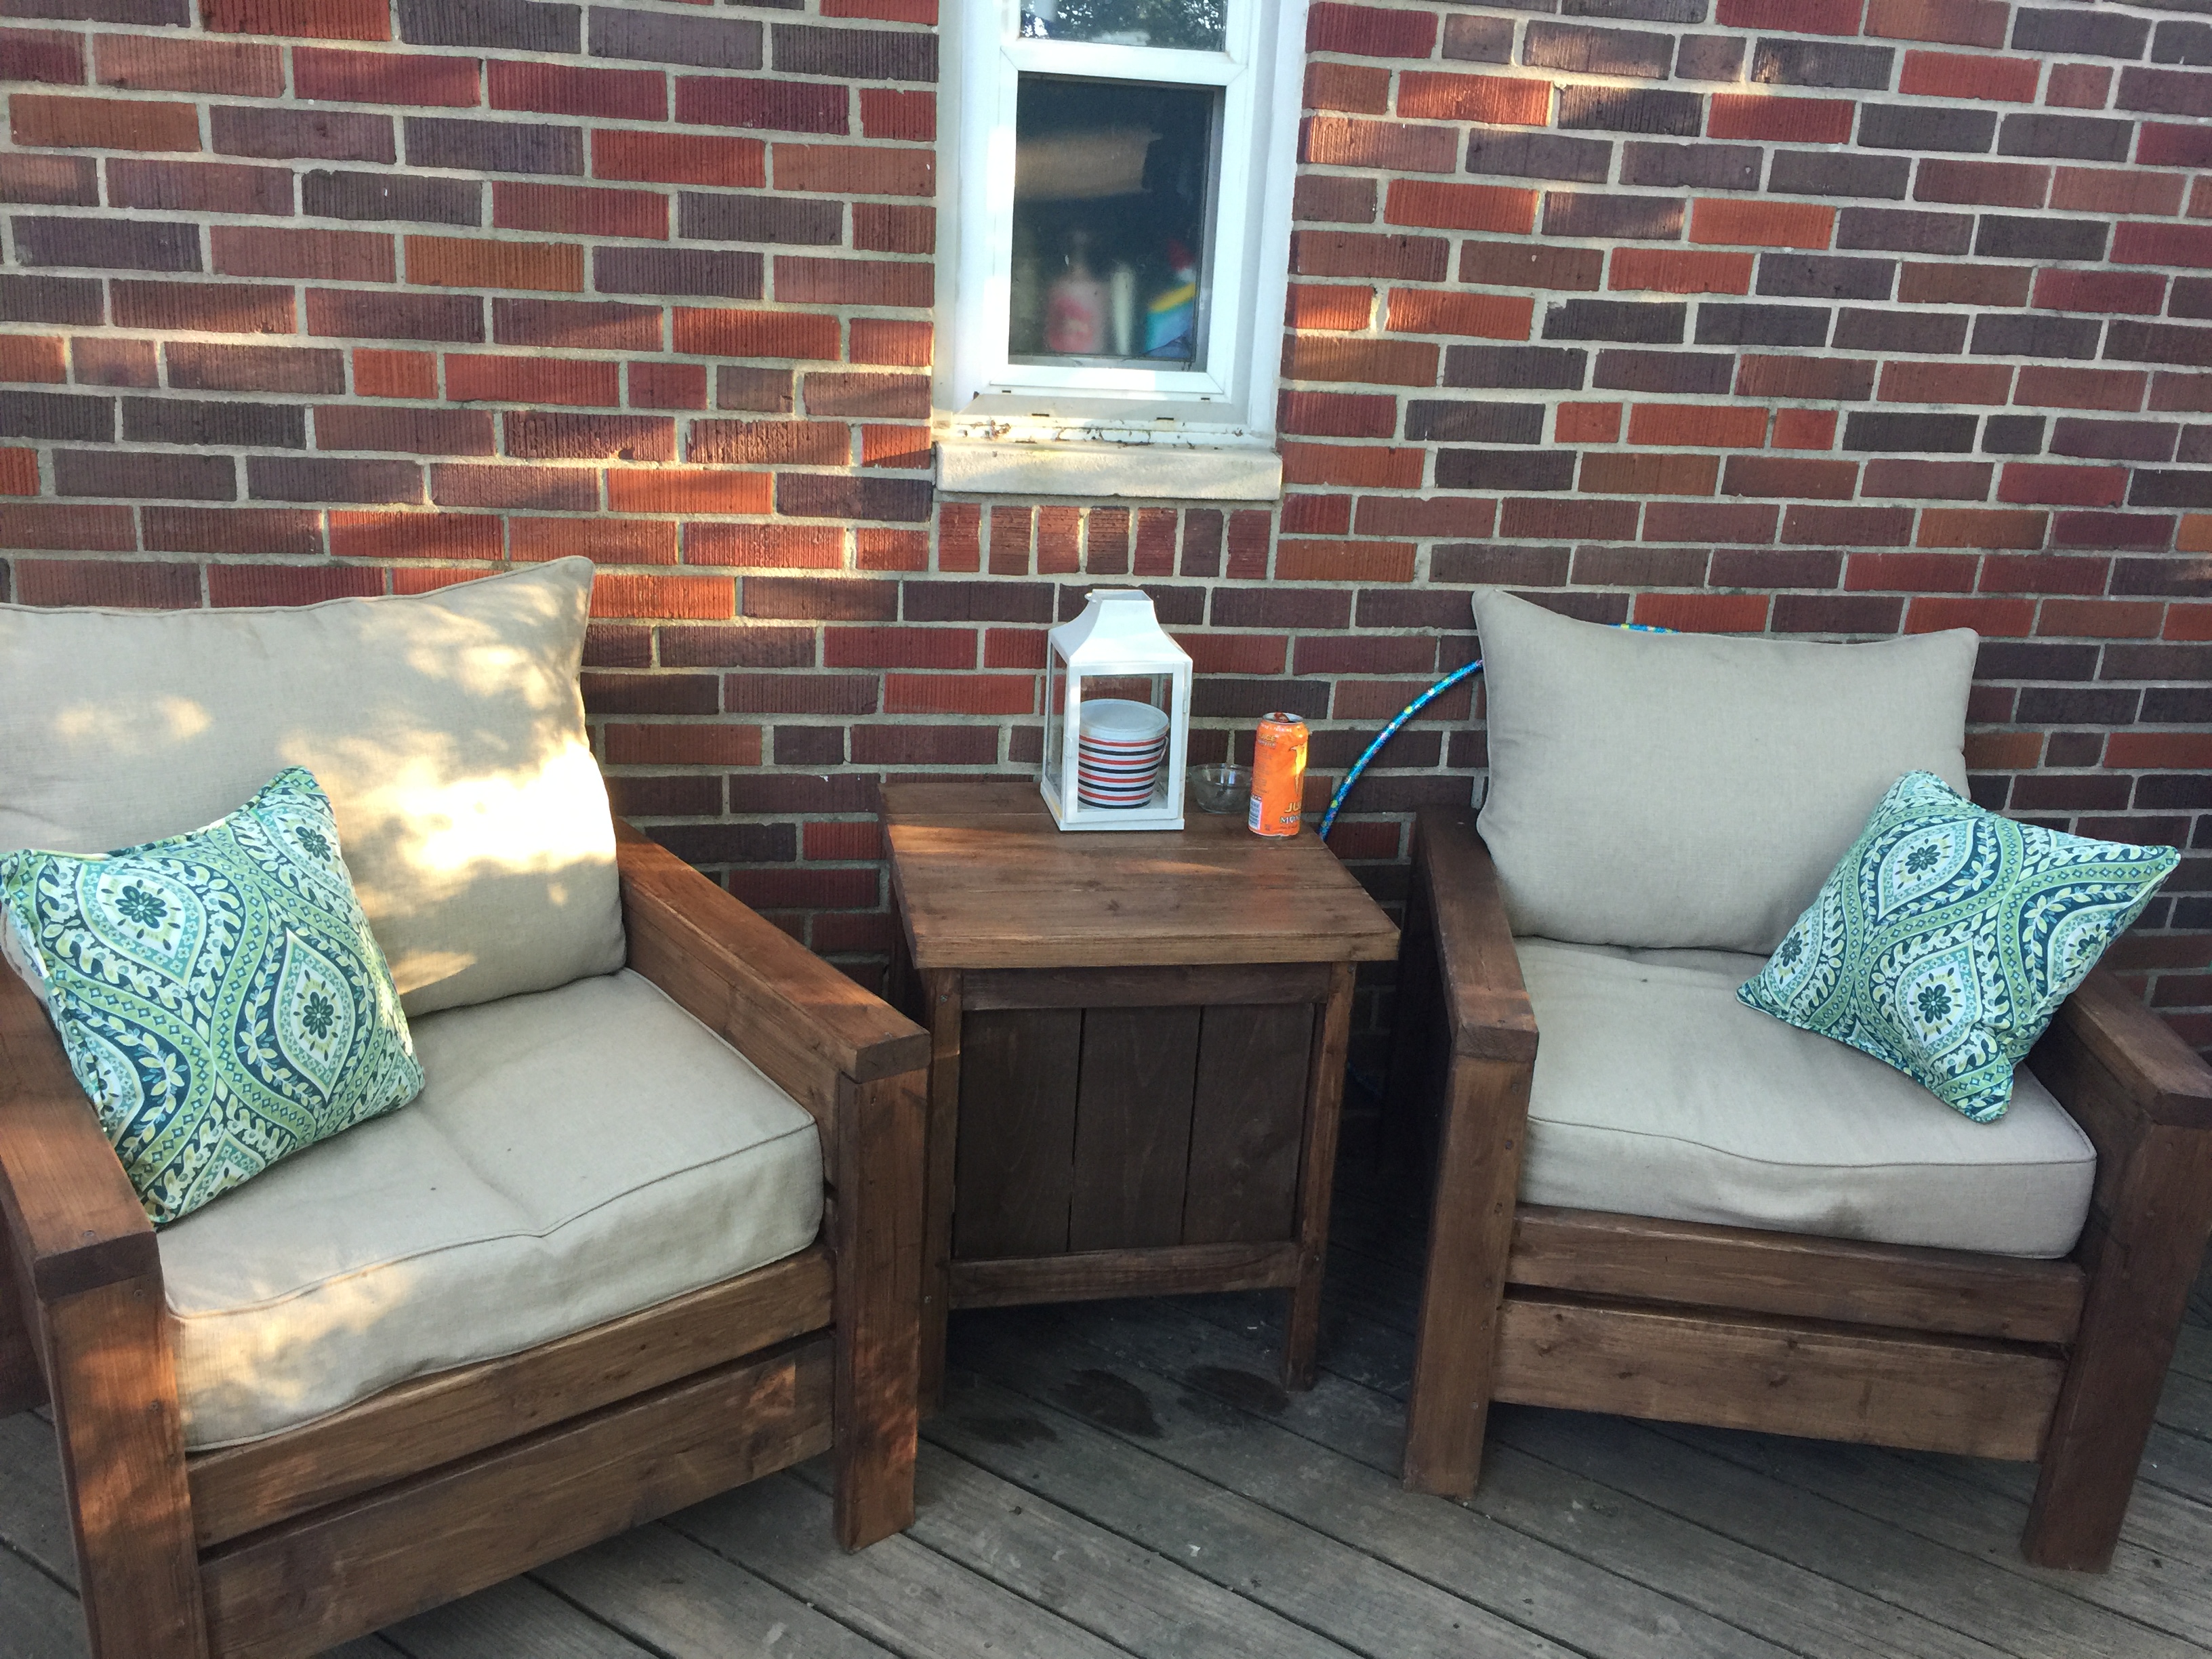
Amazingly easy to build!❤️❤️❤️ My new chairs. The table is made from the Ana White planter. We just used left over 2x6's and 2x4's to create a removable top. It makes a great table with Kentucky of storage.
Estimated Time Investment
Day Project (6-9 Hours)
Finish Used
Behr deck plus Padre Brown
Recommended Skill Level
Beginner
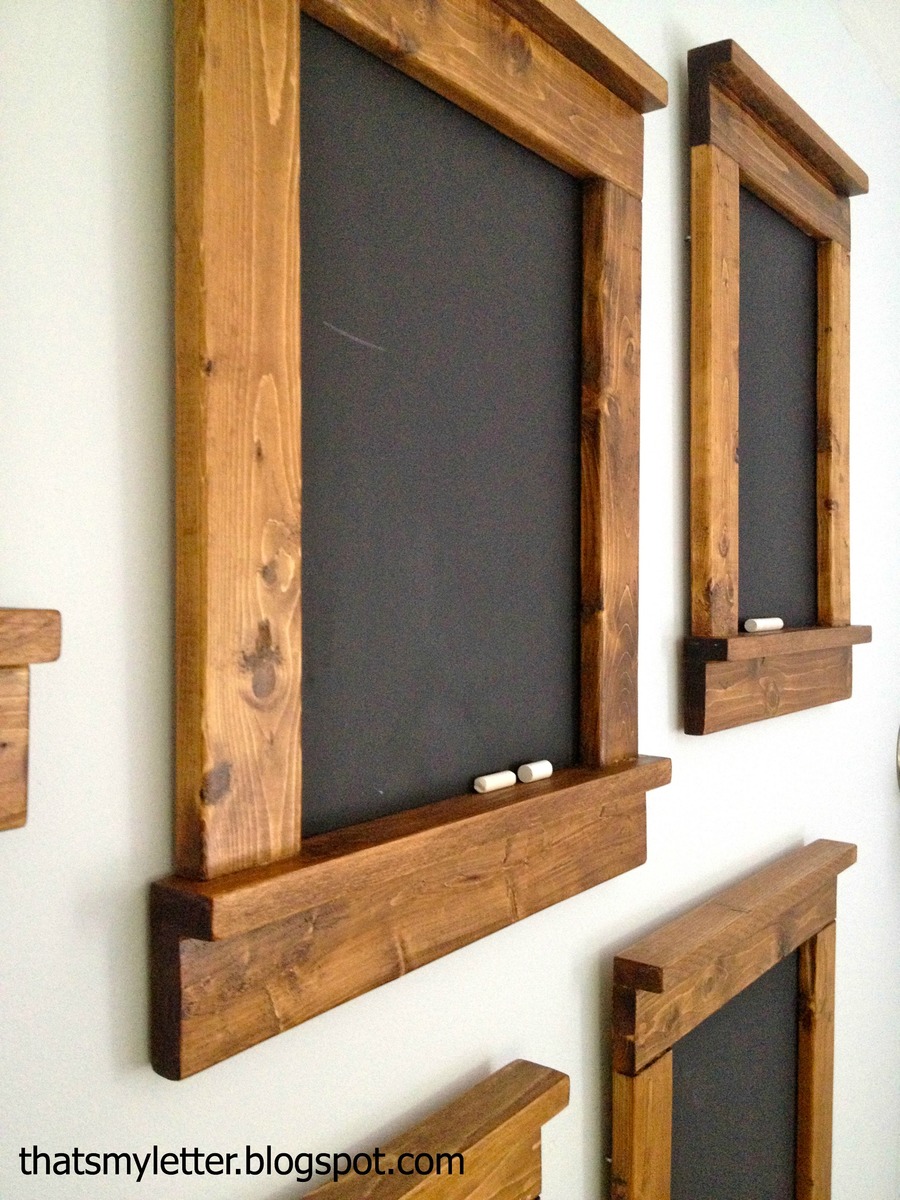
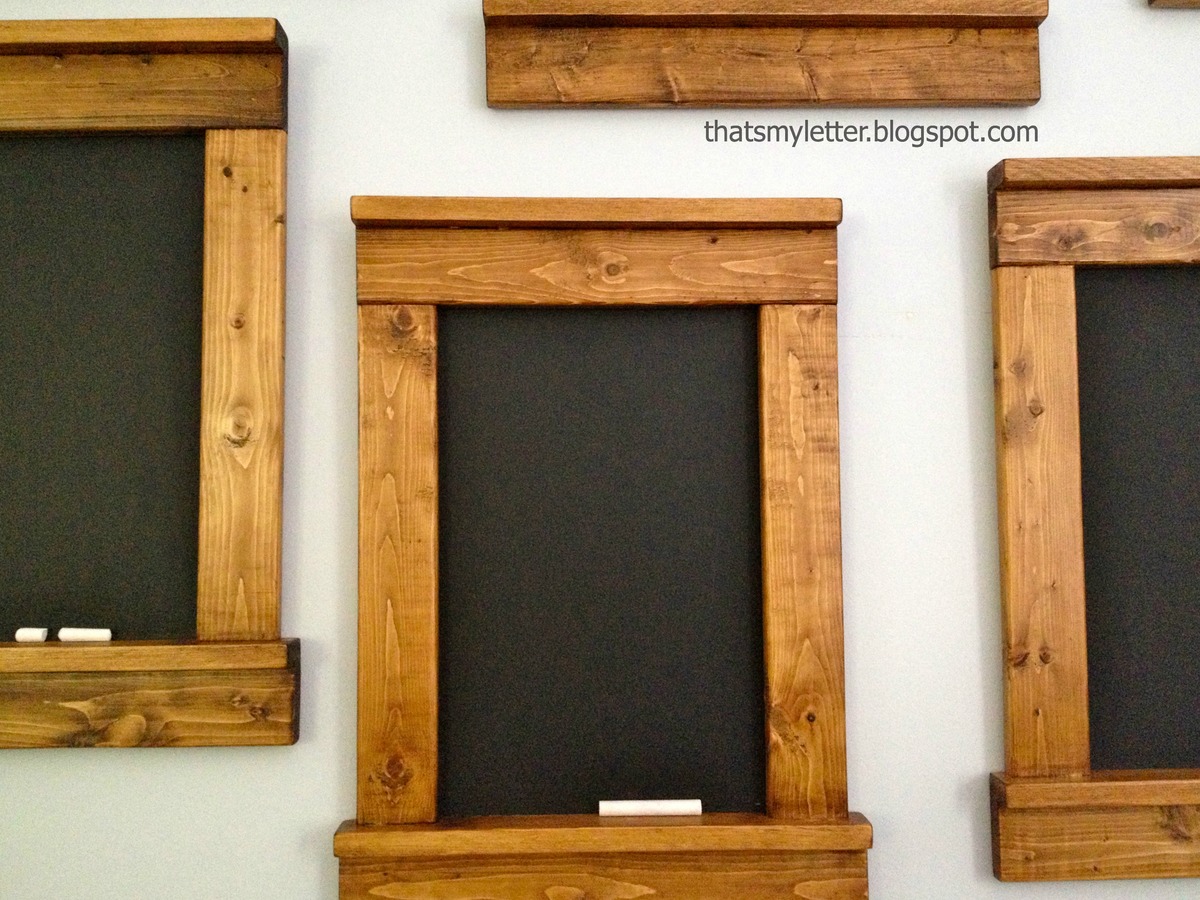
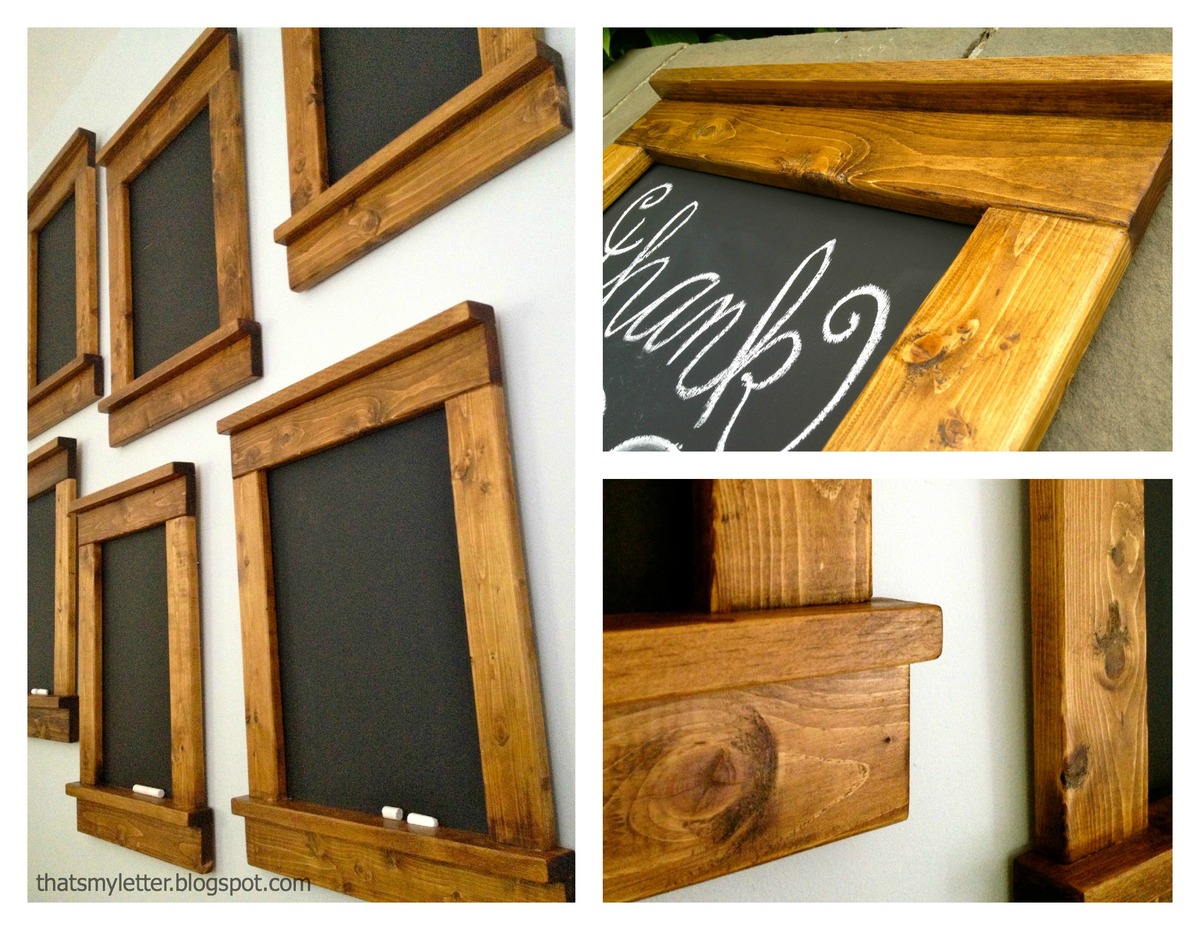
teacher chalkboards

An easy end of the year teacher gift - framed chalkboards. I made these using furring strips and 1/4" plywood for about $5 each.


Built from Plan(s)
Estimated Cost
$5
Estimated Time Investment
An Hour or Two (0-2 Hours)
Finish Used
1. Minwax provincial stain
2. two coats Minwax oil based poly semi-gloss
3. two coats black chalkboard paint
2. two coats Minwax oil based poly semi-gloss
3. two coats black chalkboard paint
Recommended Skill Level
Starter Project
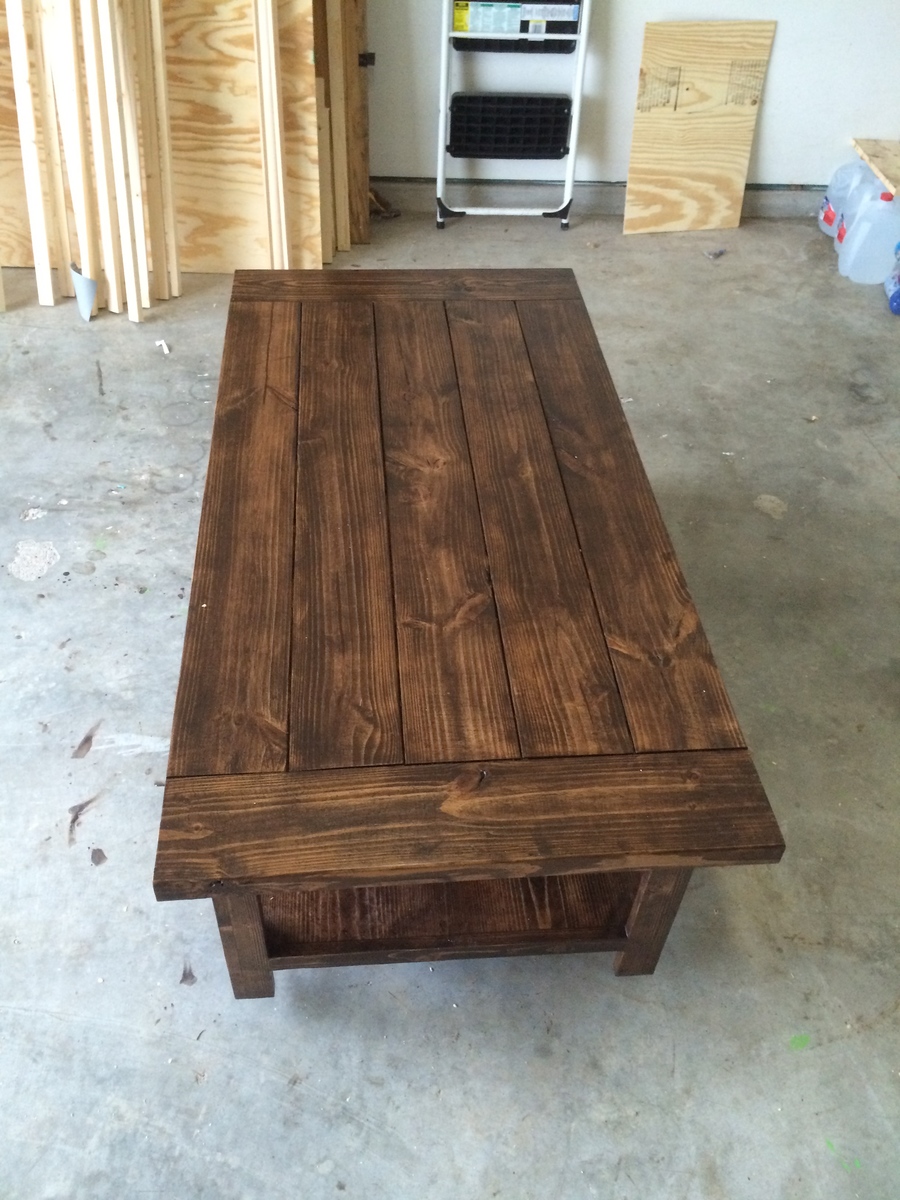
Benchright coffee table
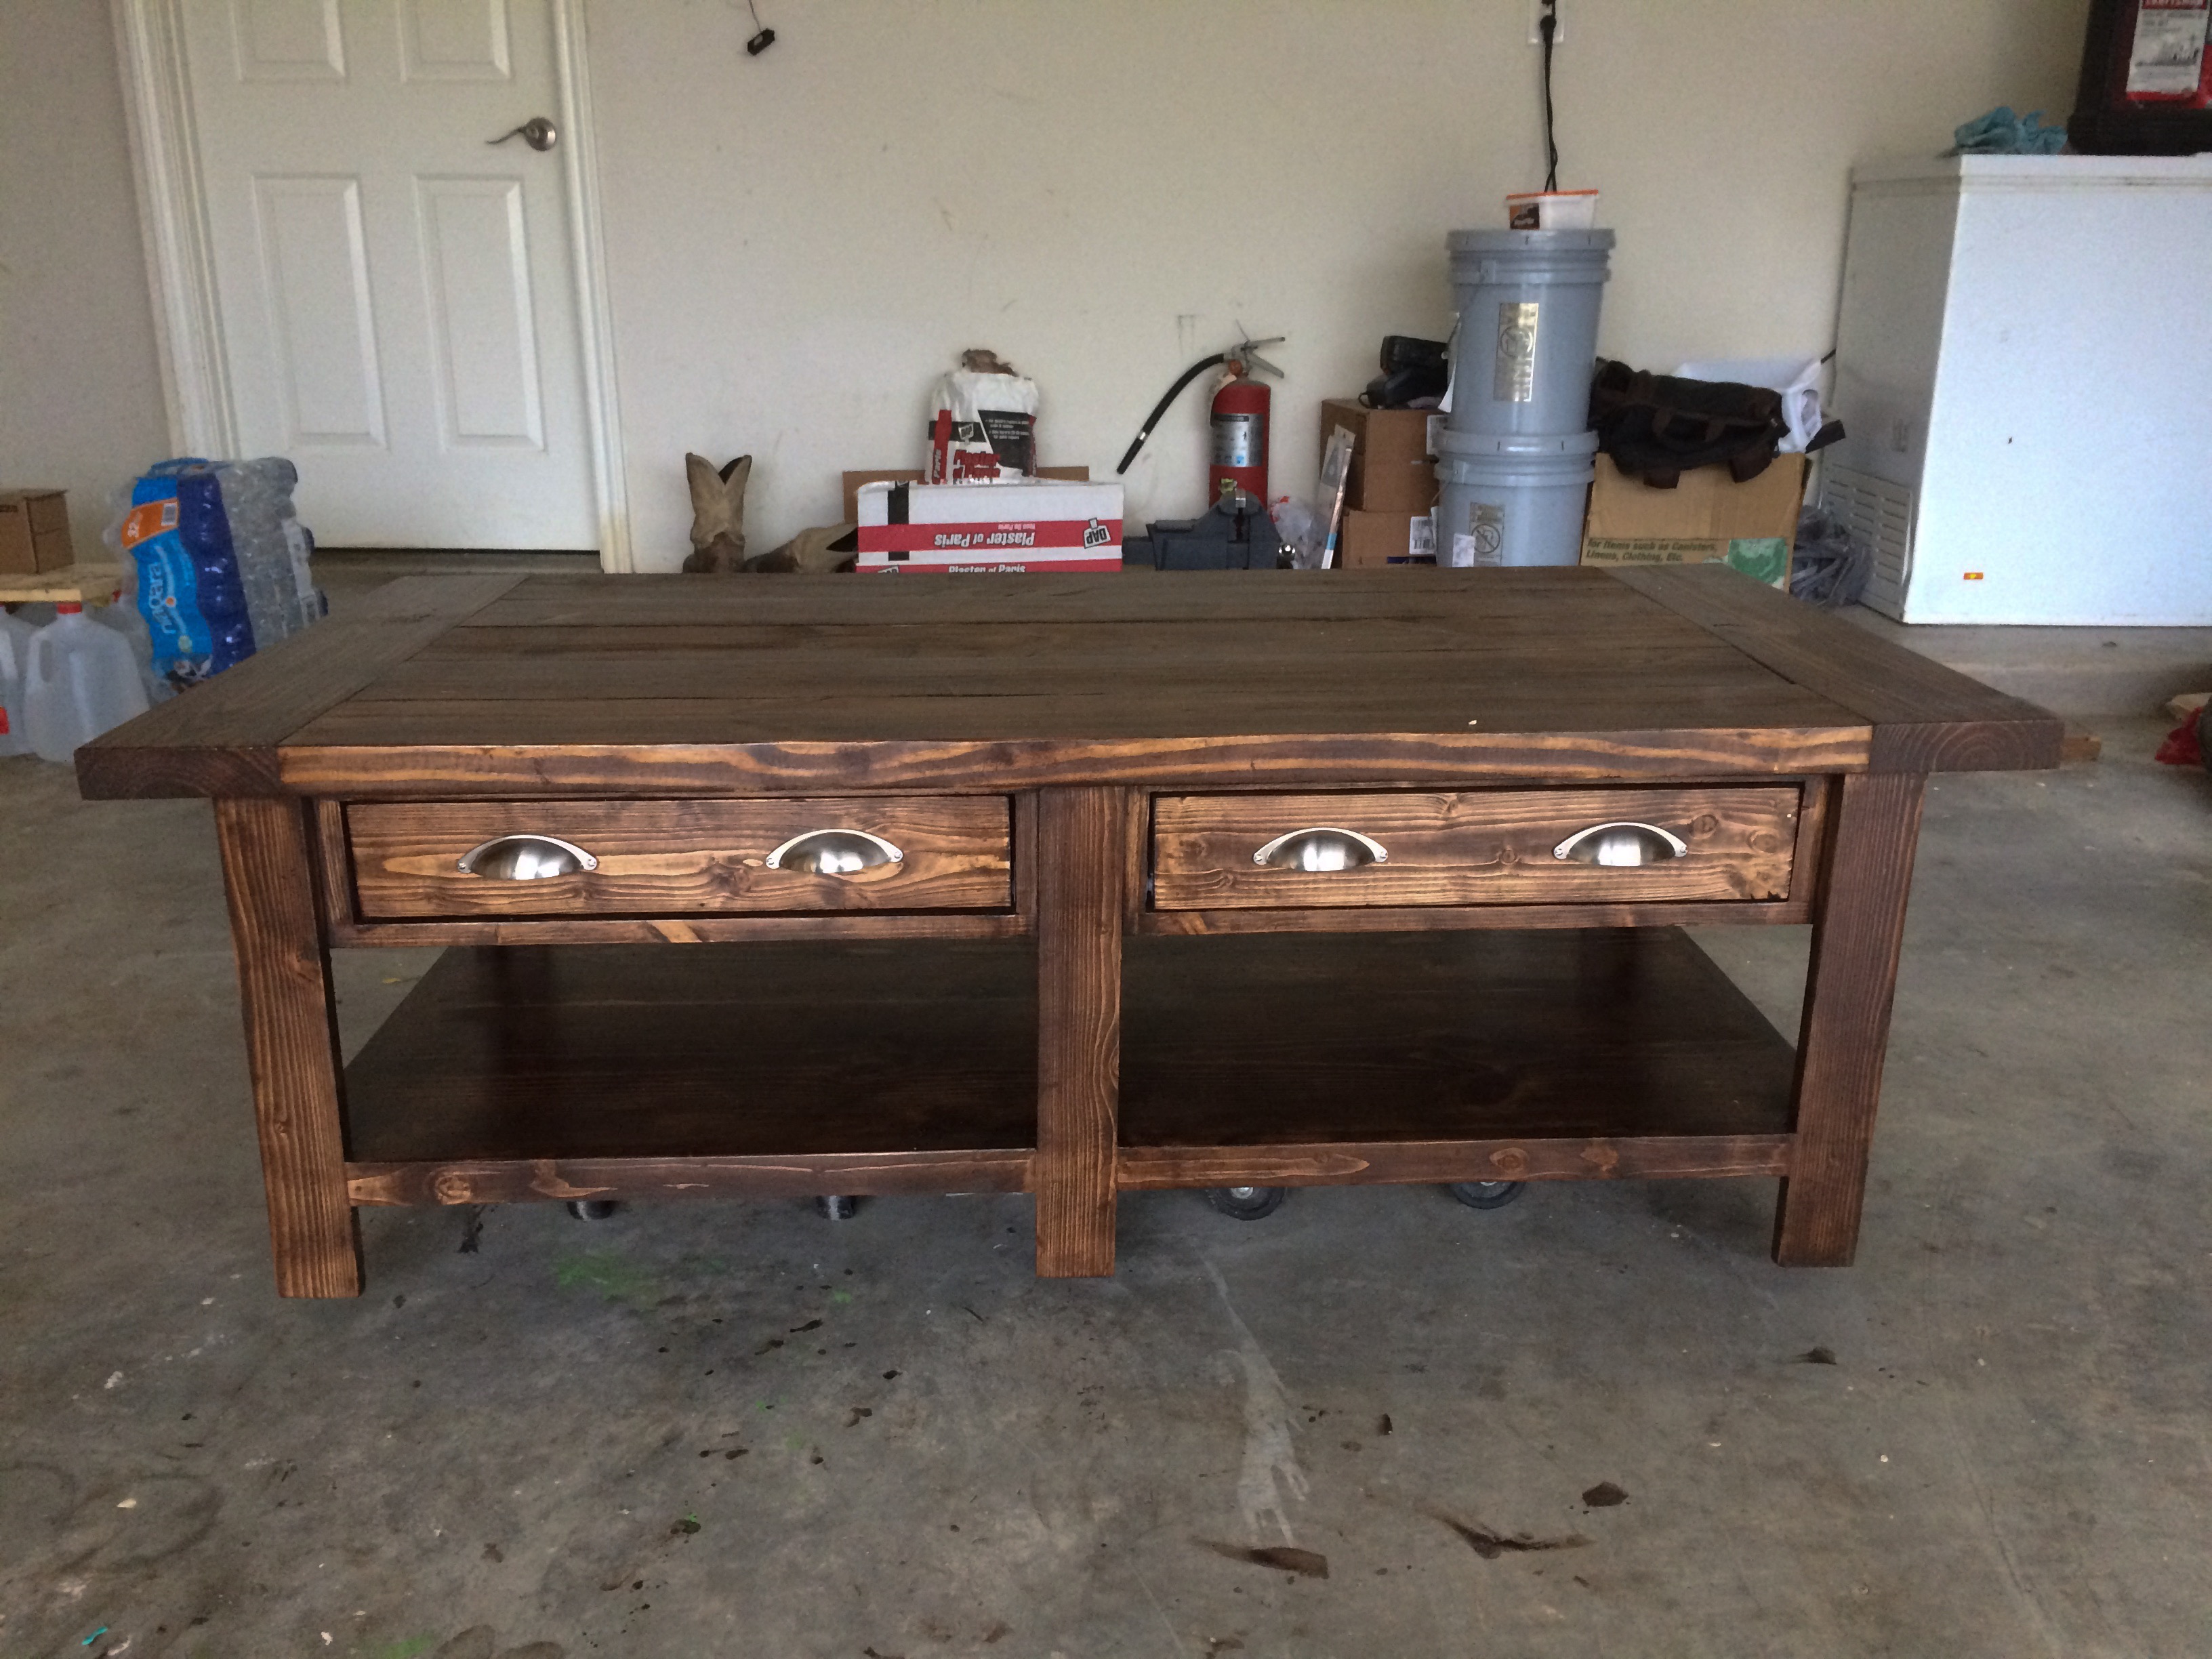
Love building a beautiful table for a fraction of the cost!
Built from Plan(s)
Estimated Cost
$120
Estimated Time Investment
Week Long Project (20 Hours or More)
Finish Used
rustoleum-dark walnut
poly
poly
Recommended Skill Level
Intermediate
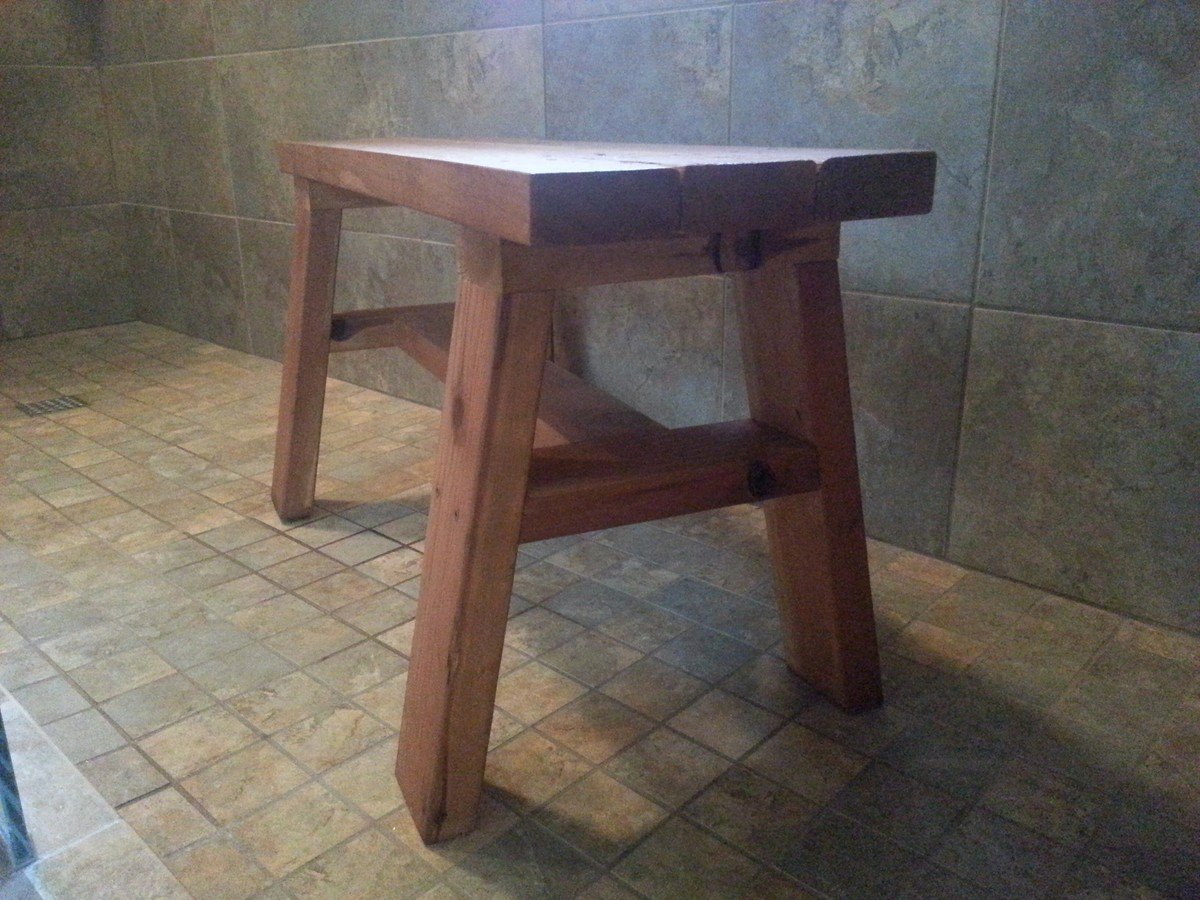
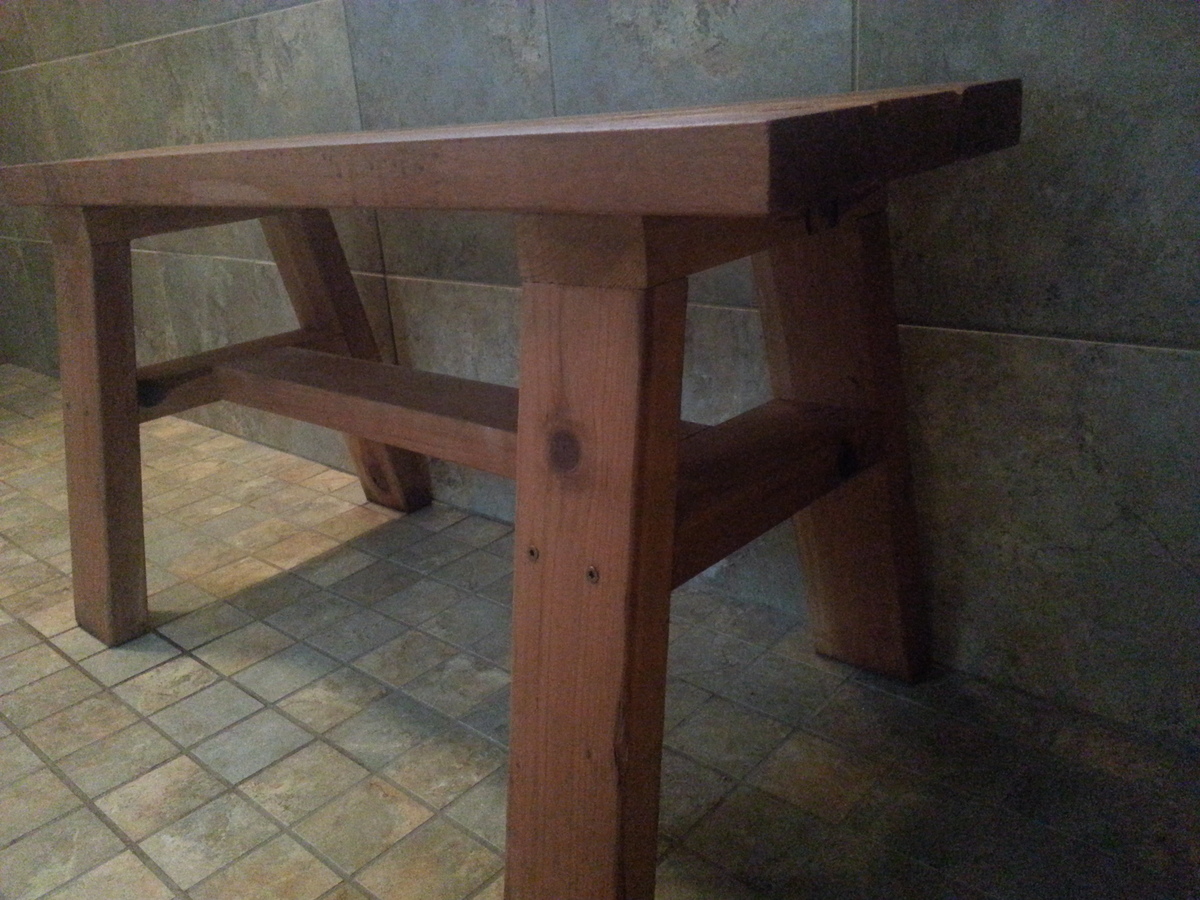
Redwood Shower Bench

I wanted to build a small shower bench. I used the Providence Bench Plans and just made it a bit smaller with a few adjustments. This bench is 35" long and 18" tall. I did not use the cross supports on the bottom because it was so short. Also, you will see that I turned the bottom stretcher and side supports flat/horizontal. I put the screws for the seat boards through the top down just because this was the easiest way for me to do it. The plans did not show in detail how to attach the seat boards from the underside. It just said "finally, the seat boards." I guess they probably used a pocket jig. I bought a pocket jig and used it in the couple of places, but this was my first time using it. I used brown, coated decking screws in the places I did not use the pocket screws. This was my first attempt at building anything and my first time to use a pocket jig. I used a natural wood stain and Behr Weather-Proofing since it will be in a wet area.

Built from Plan(s)
Estimated Cost
$20
Estimated Time Investment
An Hour or Two (0-2 Hours)
Finish Used
Behr All-in-One Stain and Weatherproofing in Cedar Naturaltone (No. 5533). Because this is going to be in a wet area, I put 2 coats on and let each one dry 12-24 hours in between and before getting wet.
Recommended Skill Level
Beginner
Rustic Computer desk with Shou Sugi Ban and Epoxy Top
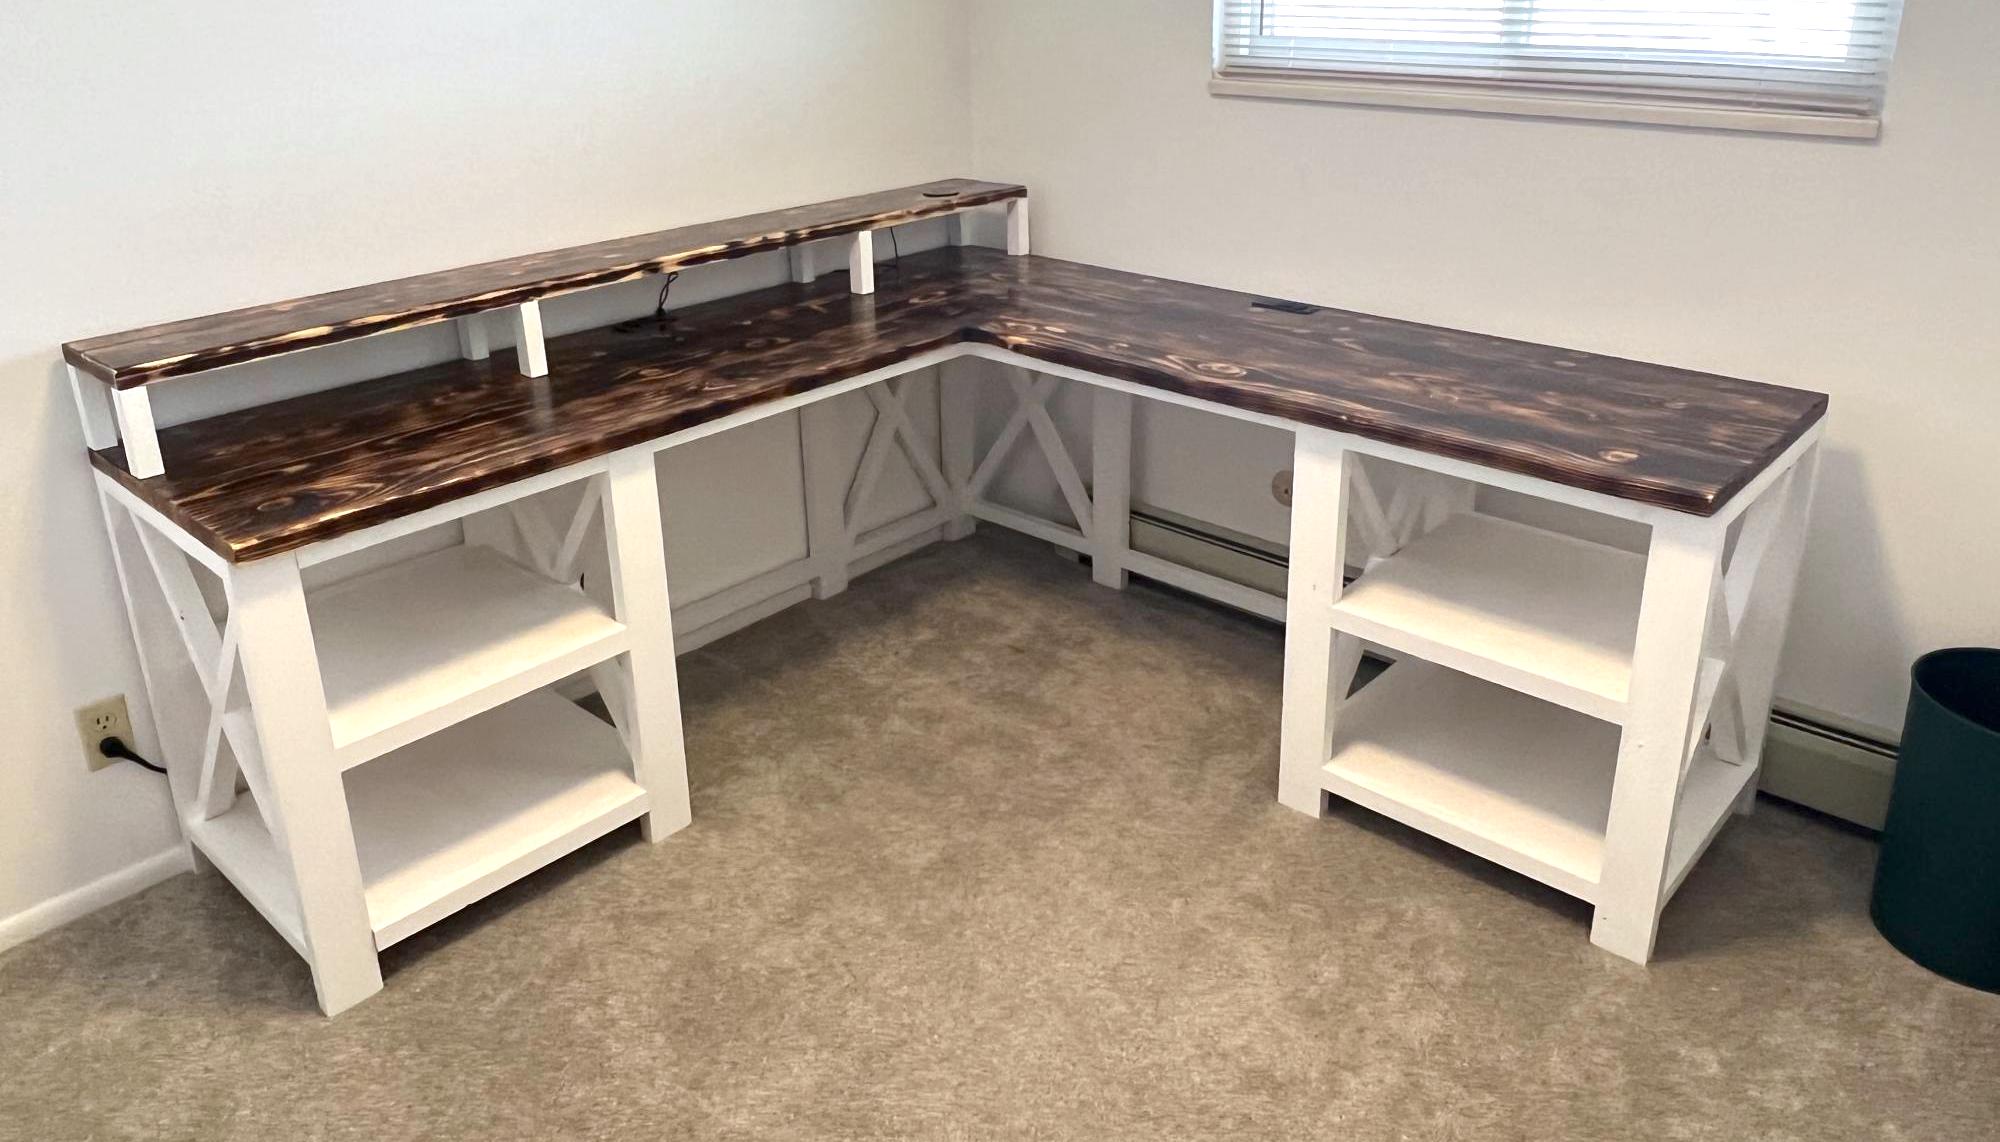
I slightly modified the Rustic X Desk plan to make my L shaped computer desk with a monitor platform! The desk surface is Shou Sugi Ban with an epoxy finish. All made from stock lumber and a lot of pocket hole screws. Thanks for posting your plan Ana to give me the idea! Construct for around $200.
Built from Plan(s)
Comments
Tue, 03/14/2023 - 18:34
Superb desk!!!
Love your modifications, additions and finish! Thank you for sharing.
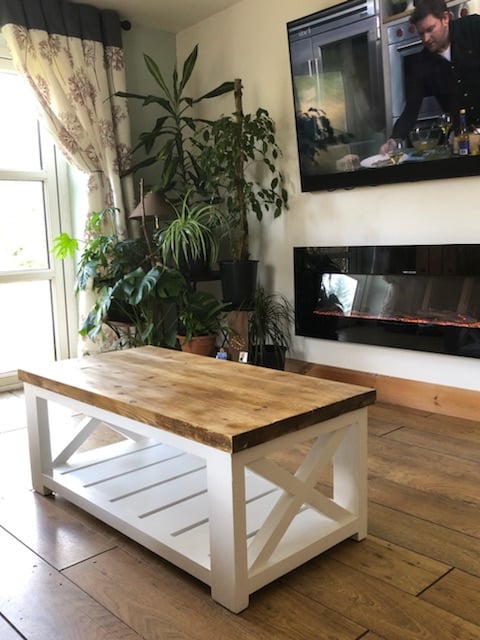
Farmhouse Coffee Table [Beginner/Under $40]
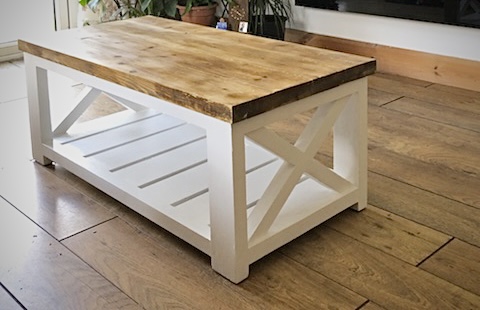
Than you Ana, My first time ever that I have made anything - my coffee table taking pride of place. Looking forward to making my next project from your plans.
Built from Plan(s)
Comments
Sat, 03/25/2023 - 09:24
Love your first project!
WOW! This is beautiful, can't wait to see your next project. Thanks for sharing:)
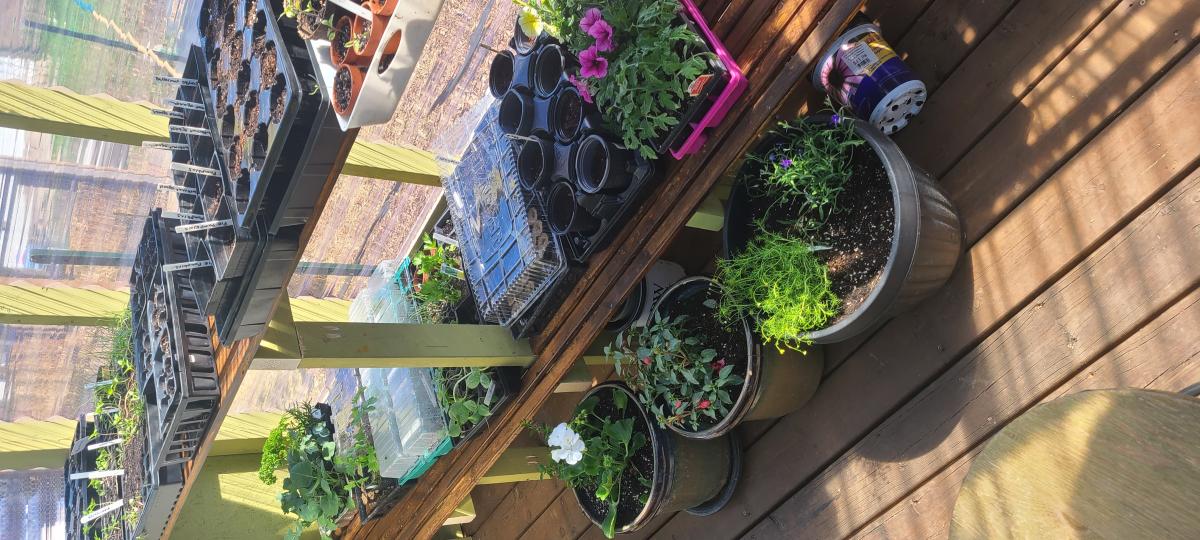
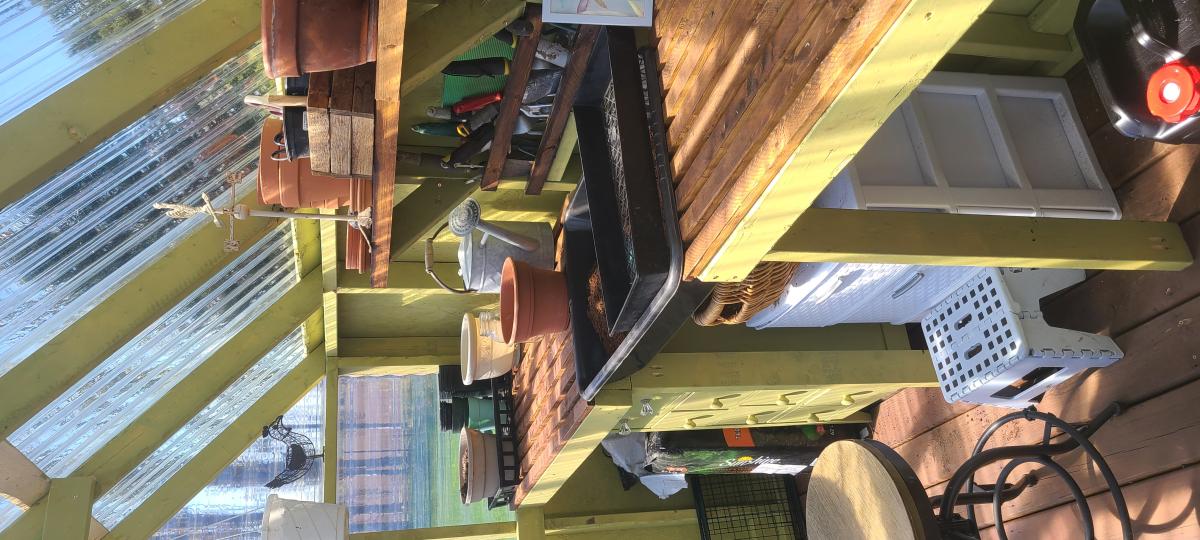
Greenhouse
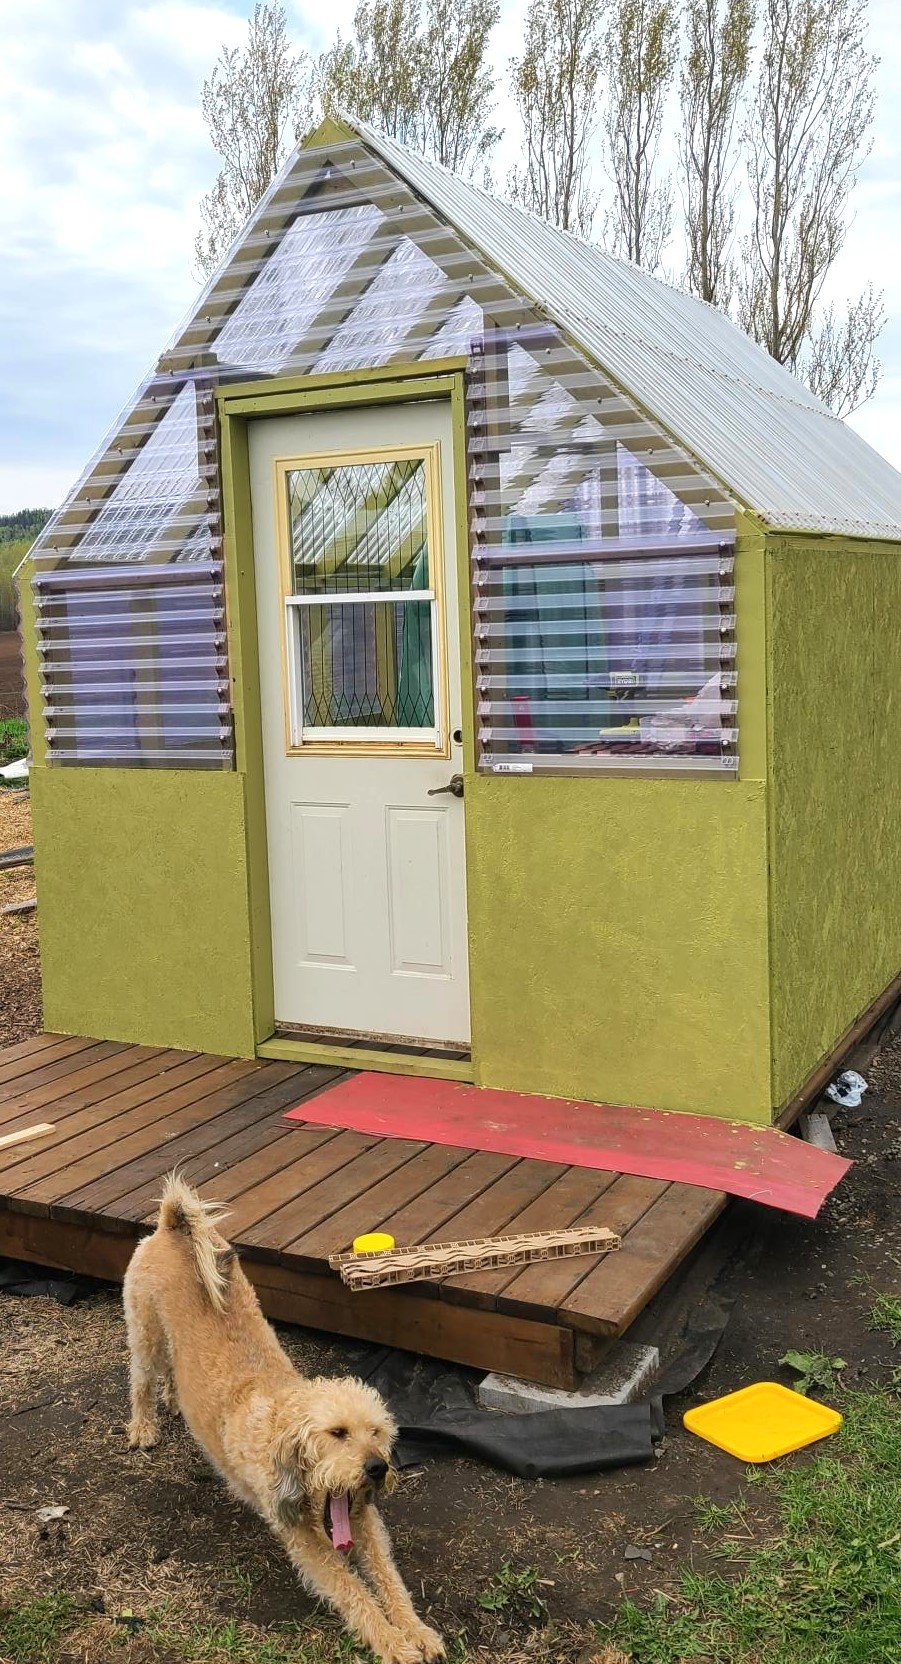
We followed Ana's plans but went 1 ft taller on the pony walls to increase the height. We are so impressed with how it turned out. I'm excited to grow plants in Northwestern Ontario.
Built from Plan(s)
Comments
Fri, 05/26/2023 - 19:43
Superb Greenhouse!
It looks awesome and love your pup! Thank you so much for sharing.
Comments
Janettx
Mon, 09/20/2021 - 13:24
Nice job!!! I'm still using…
Nice job!!! I'm still using mine. I ended up putting 12"x12" pavers under each leg to extend their life. After the 2nd year now we get bumper crop out of ours each season.