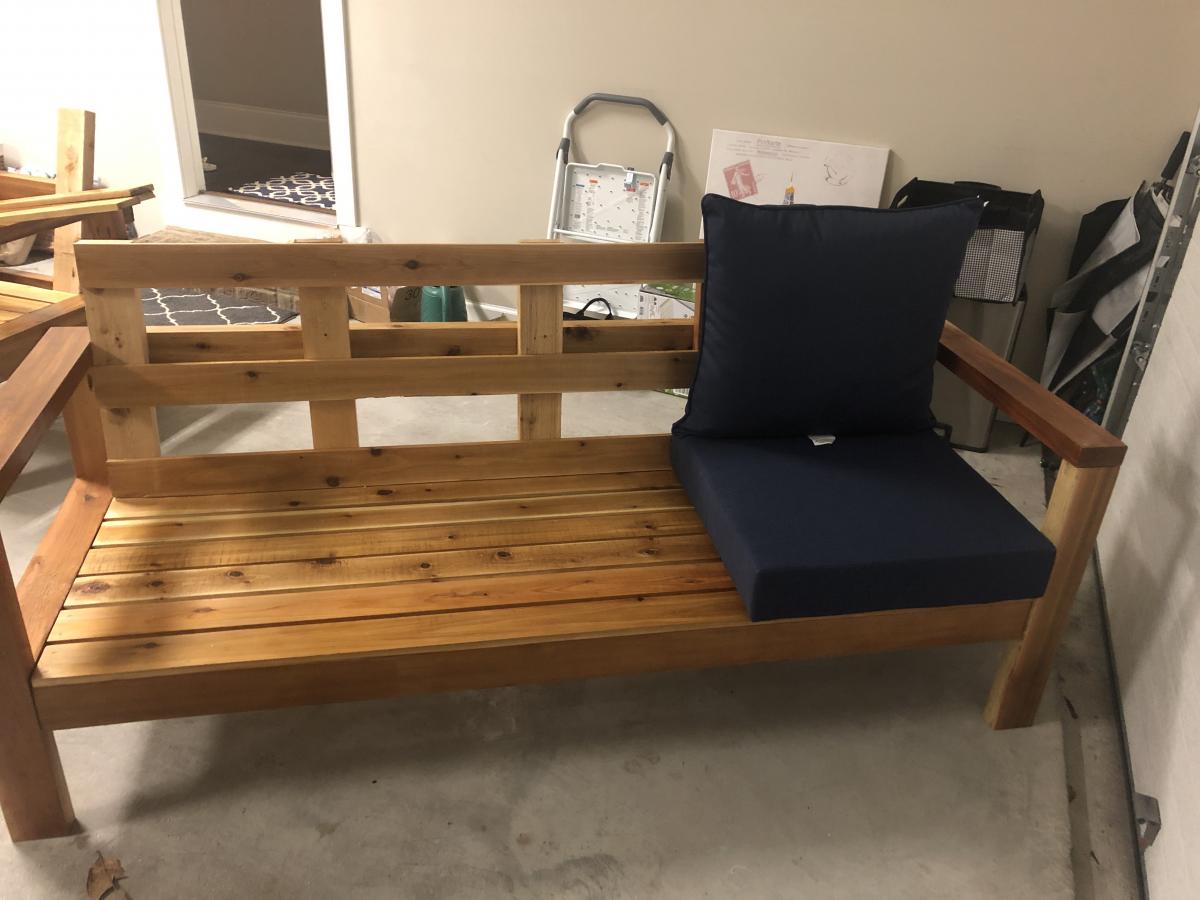
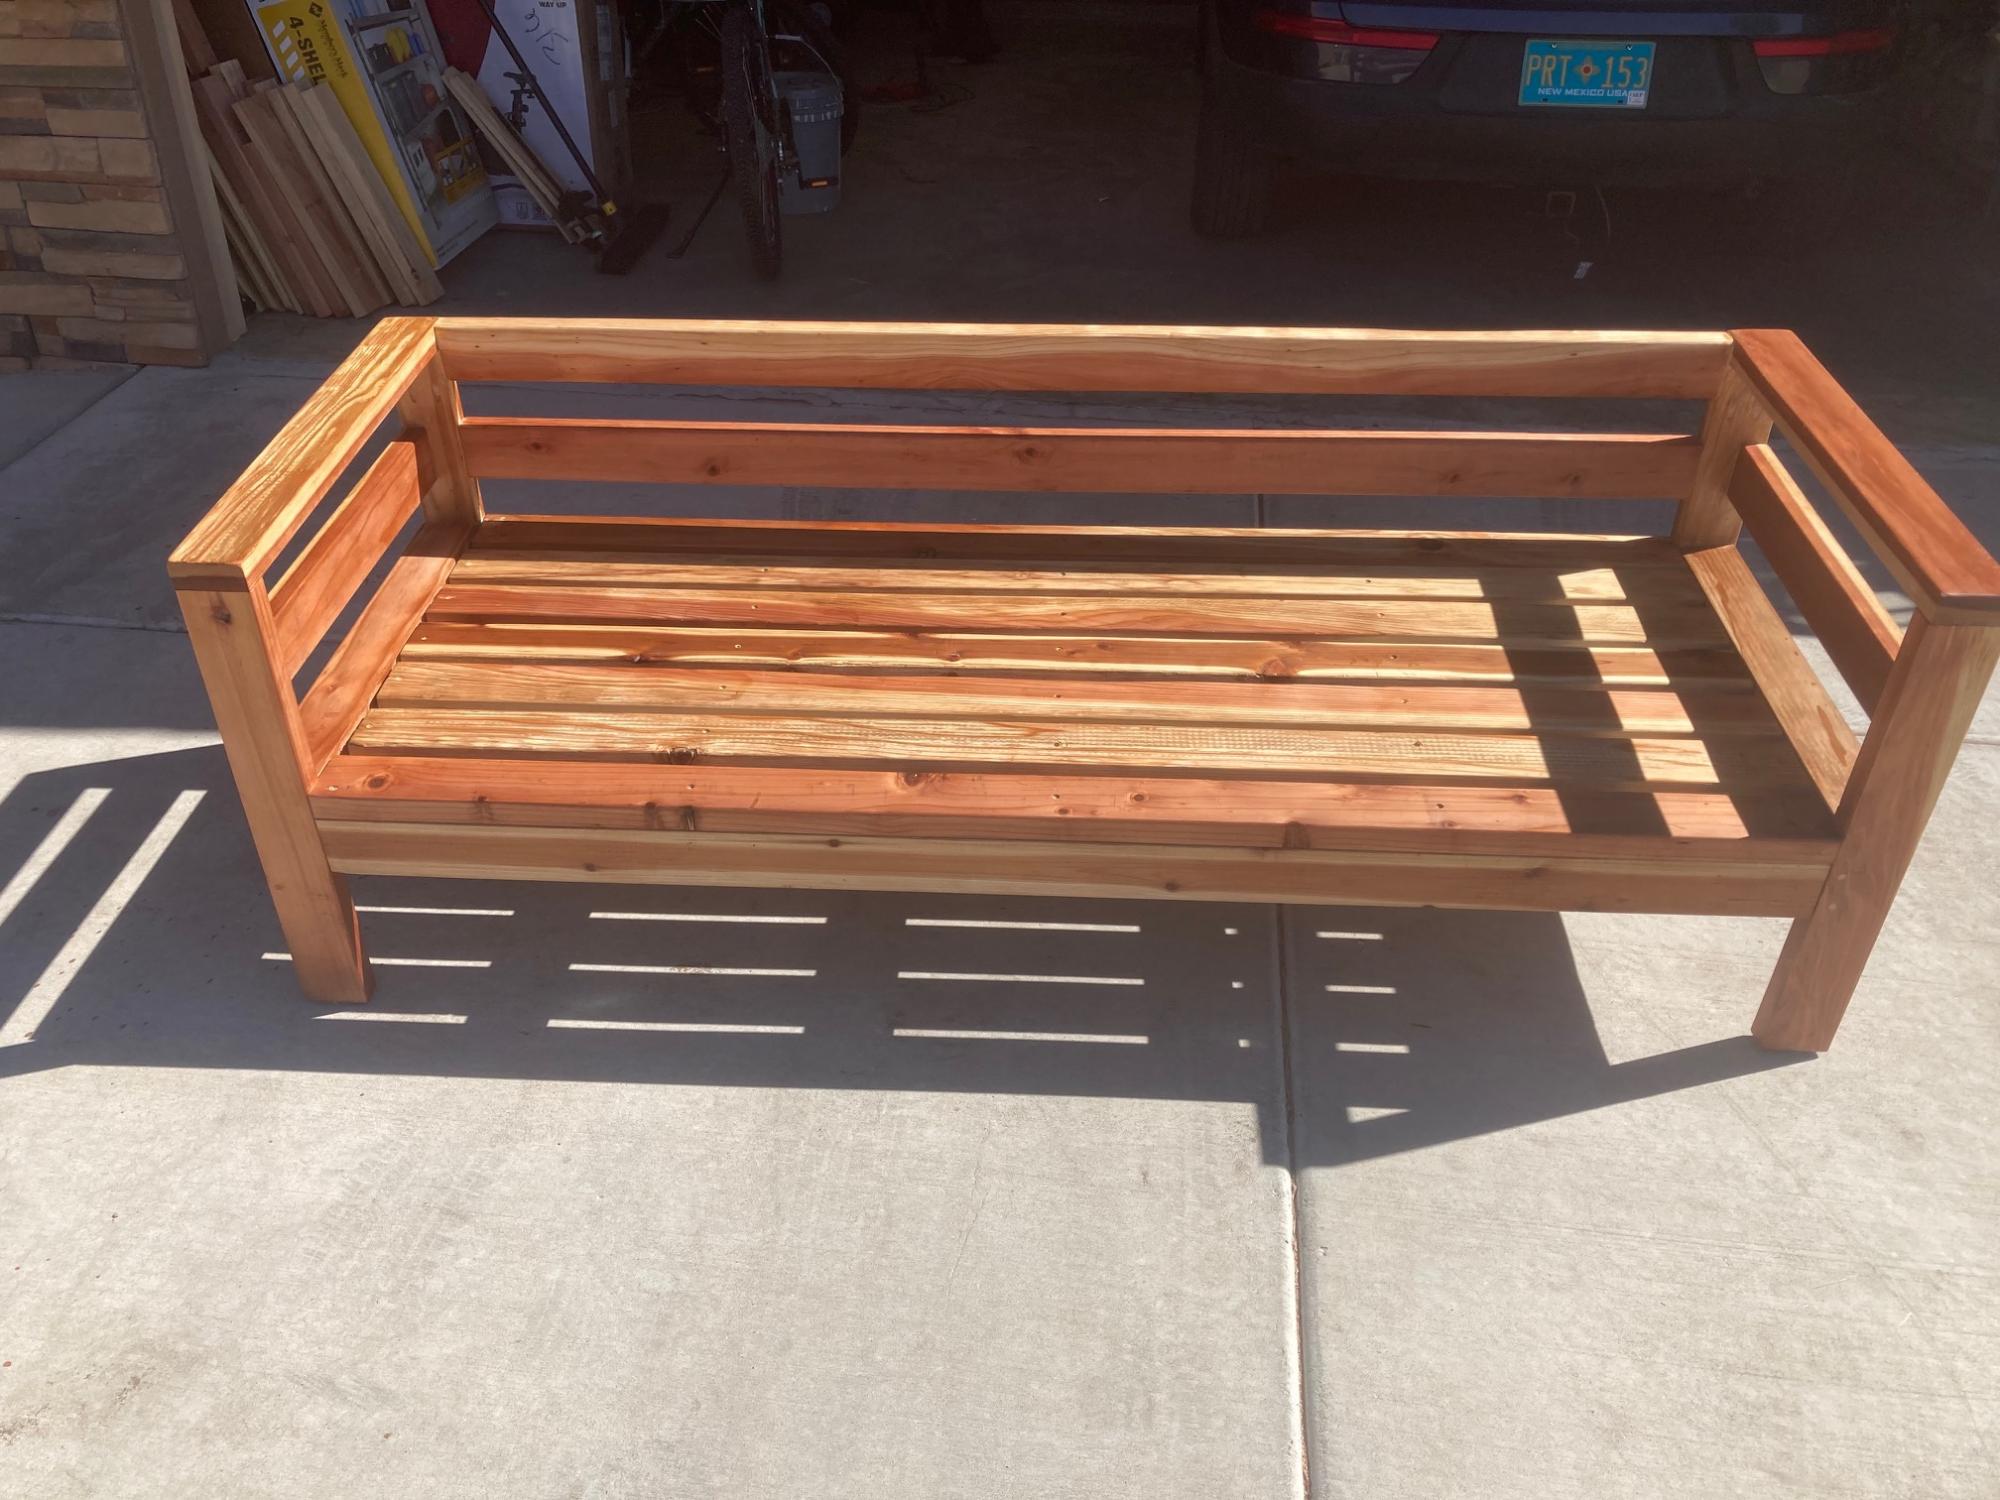
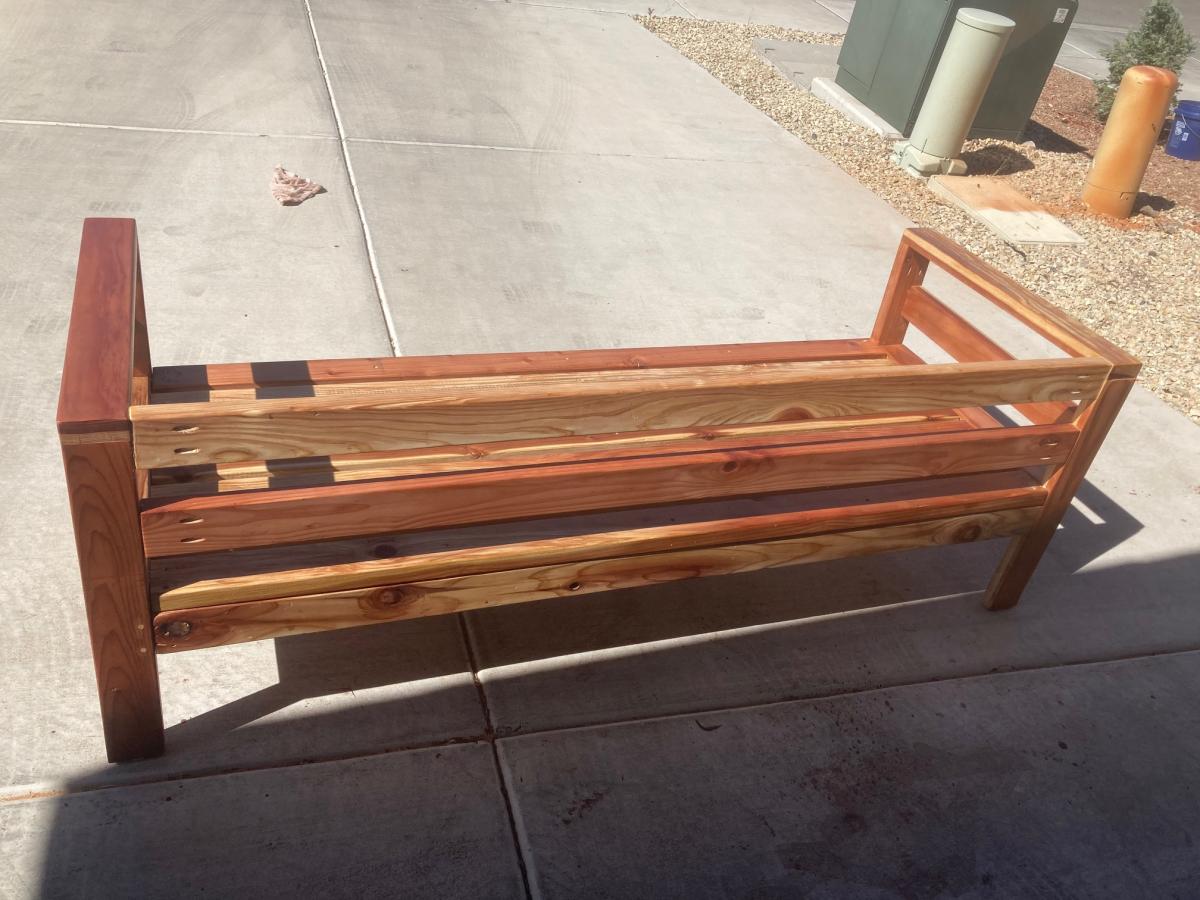
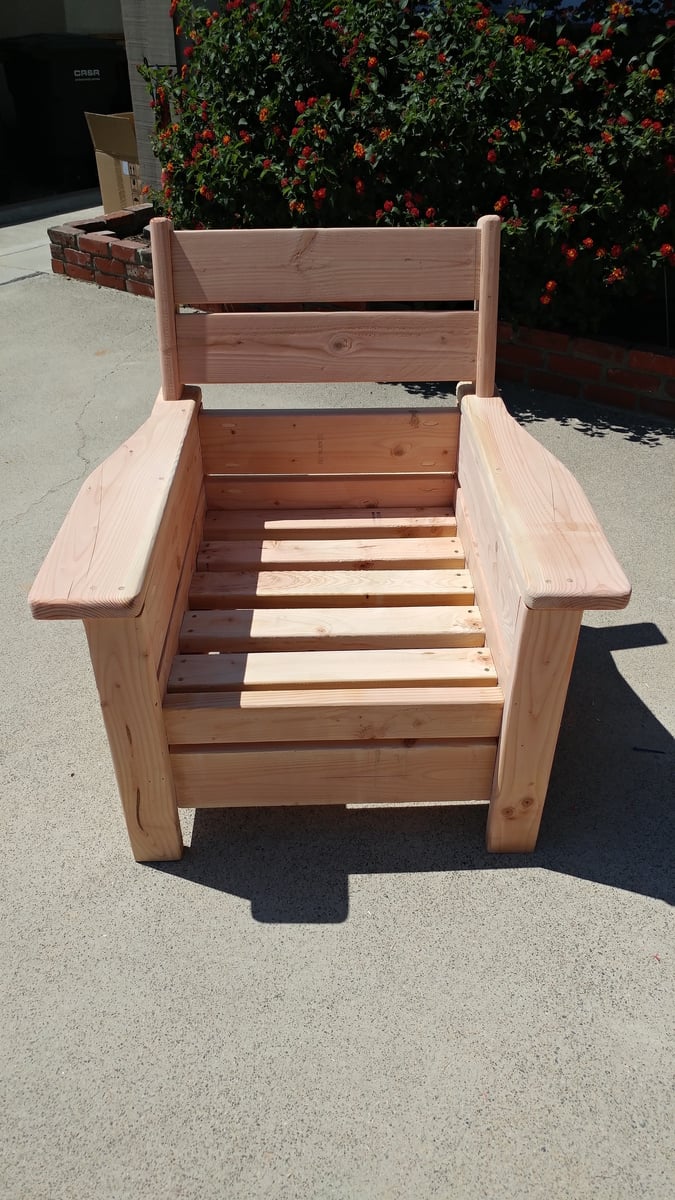
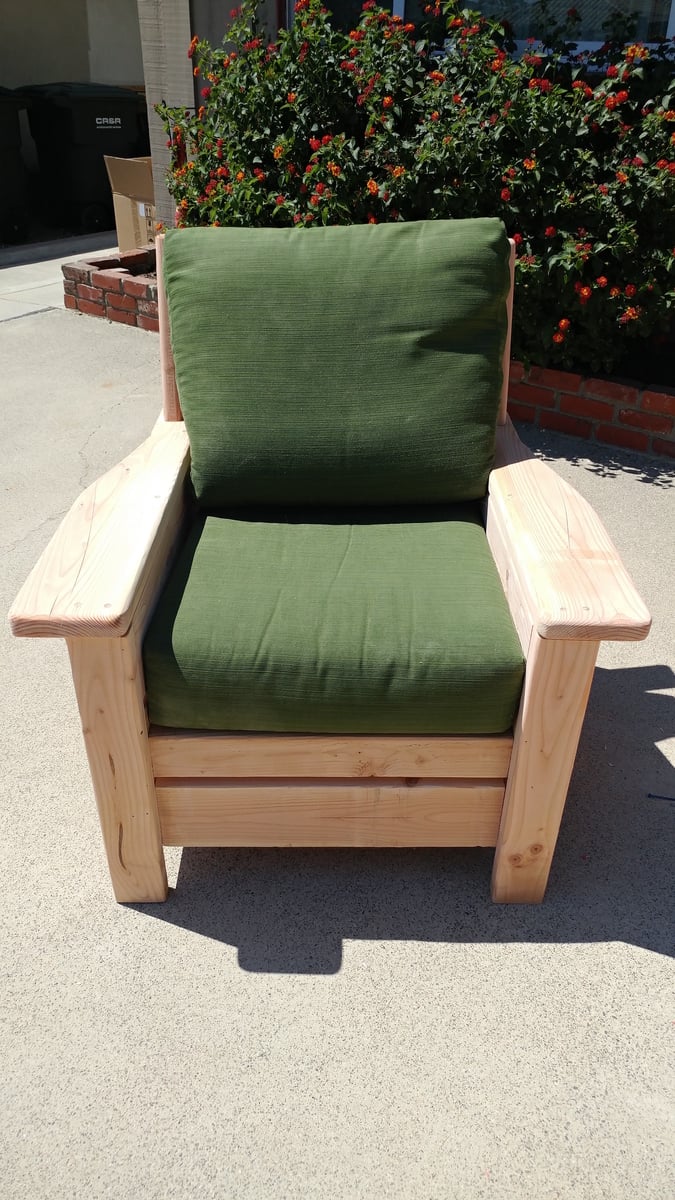
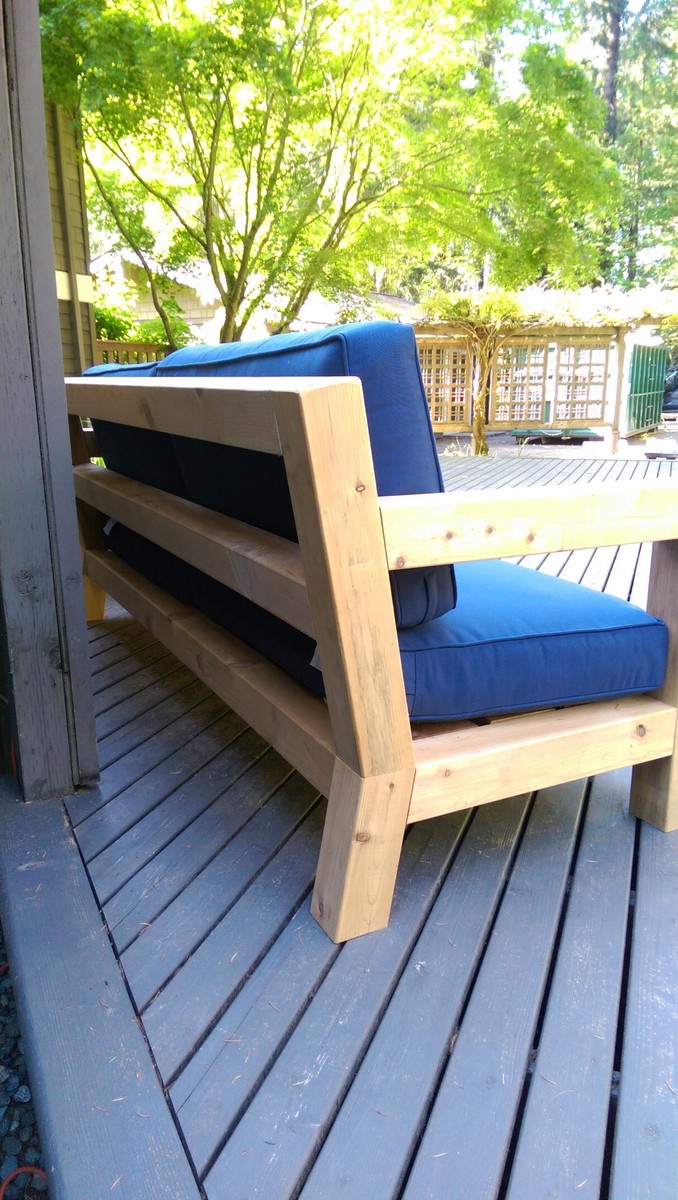
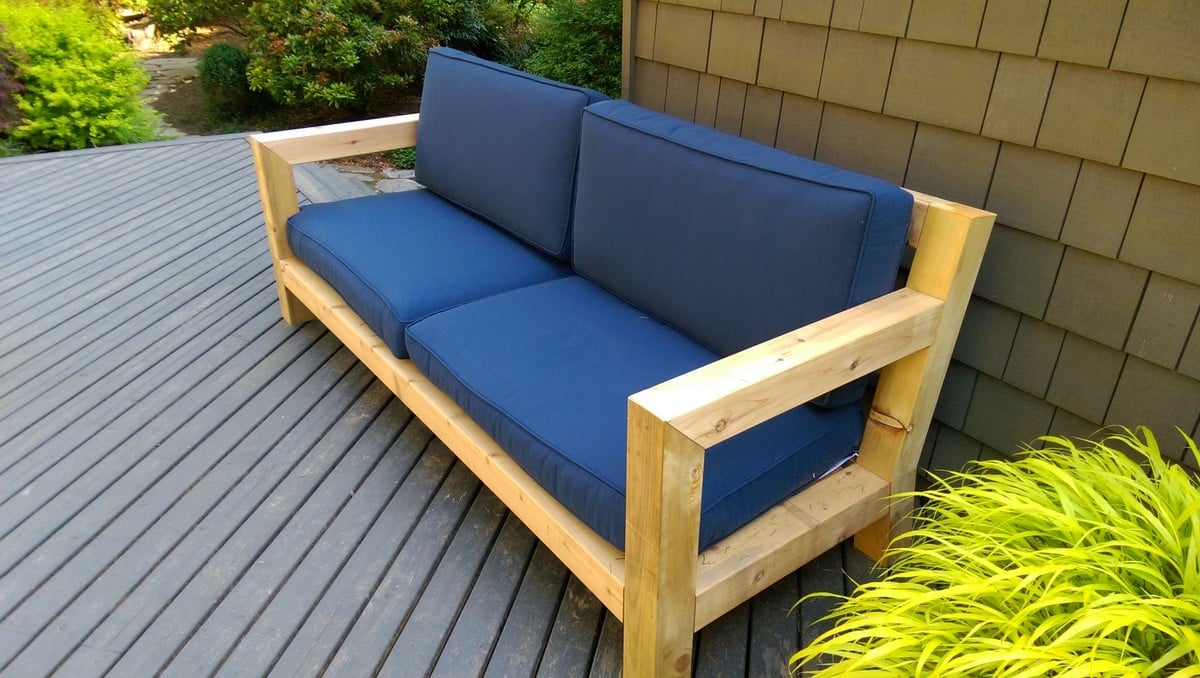
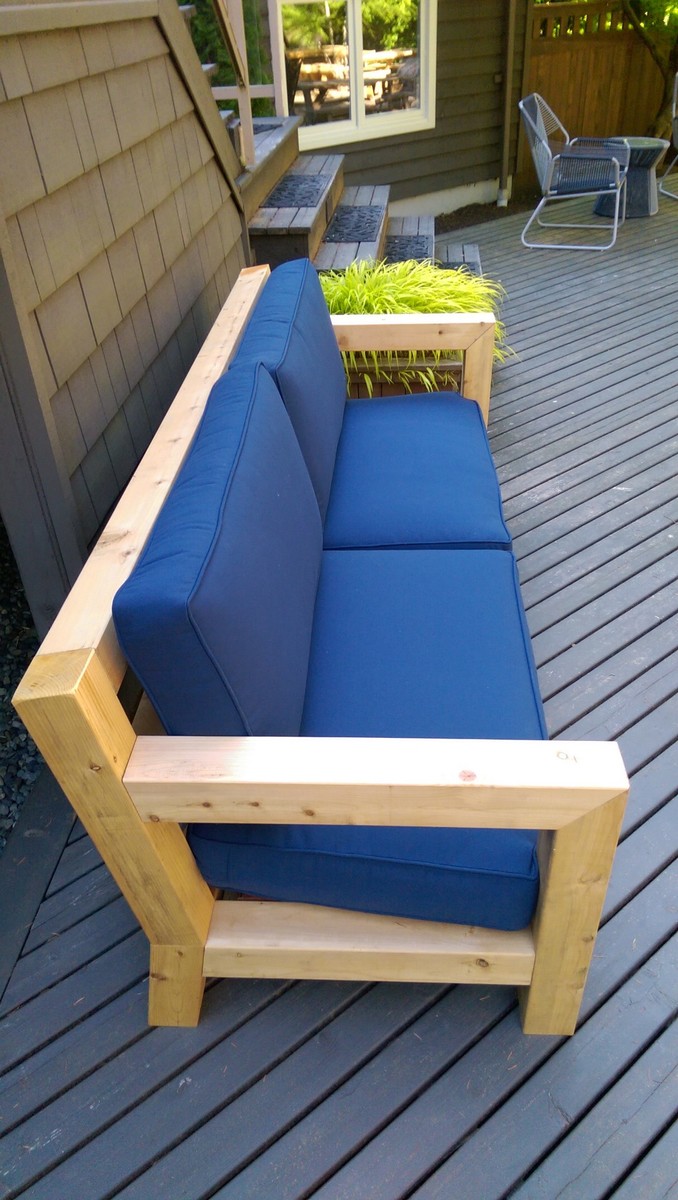
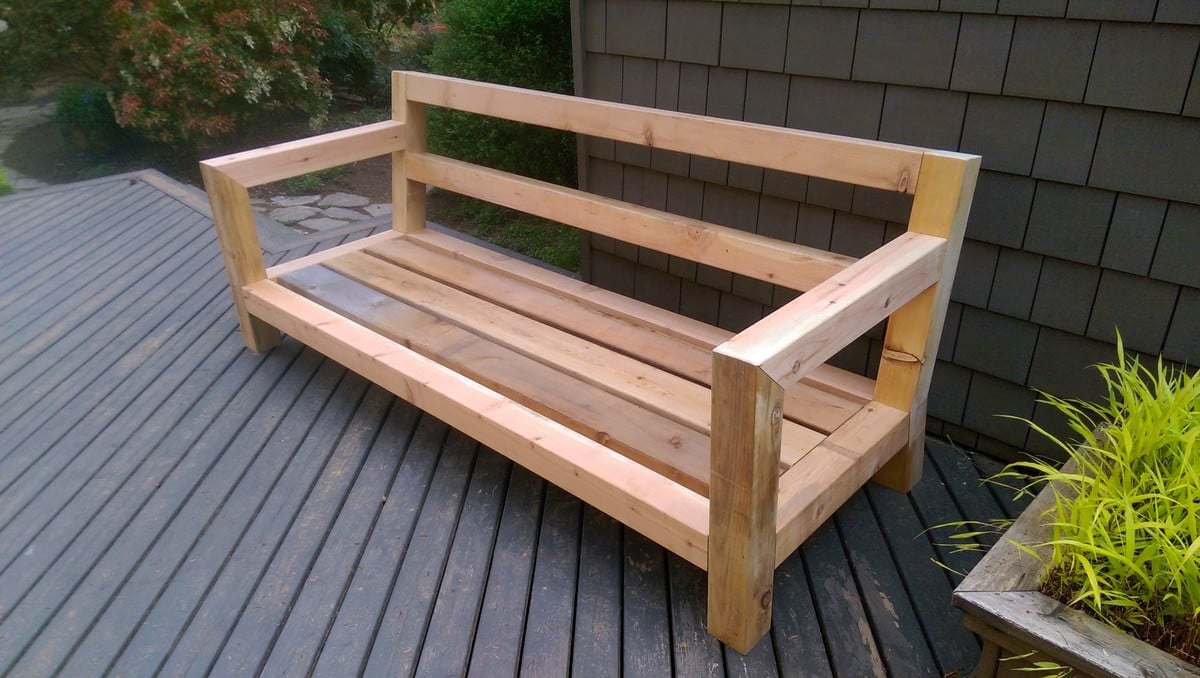
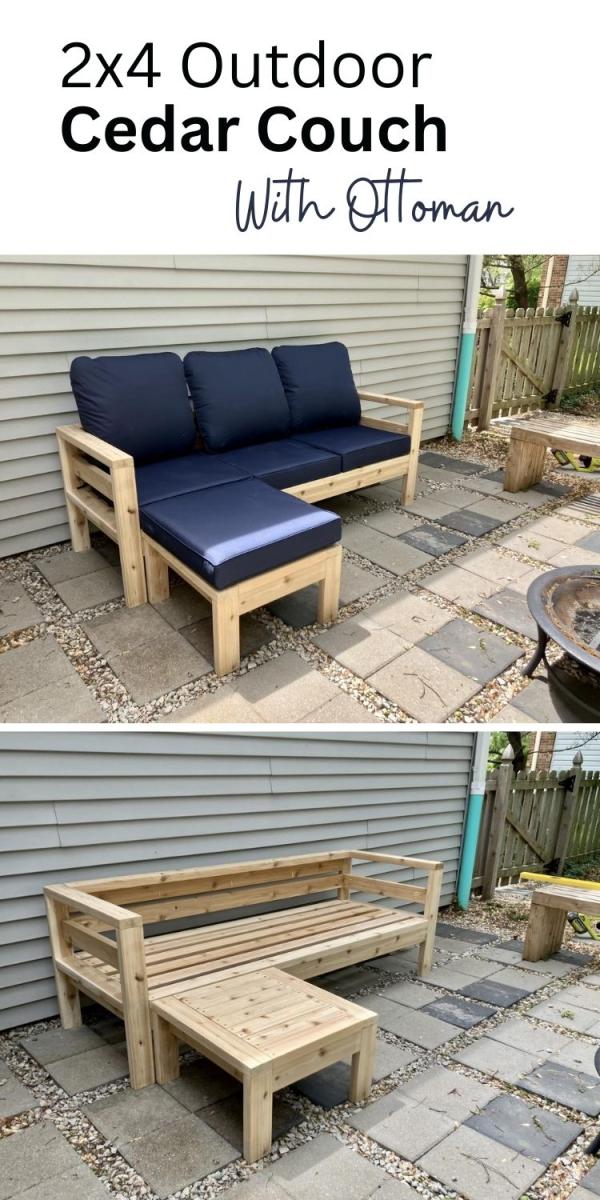
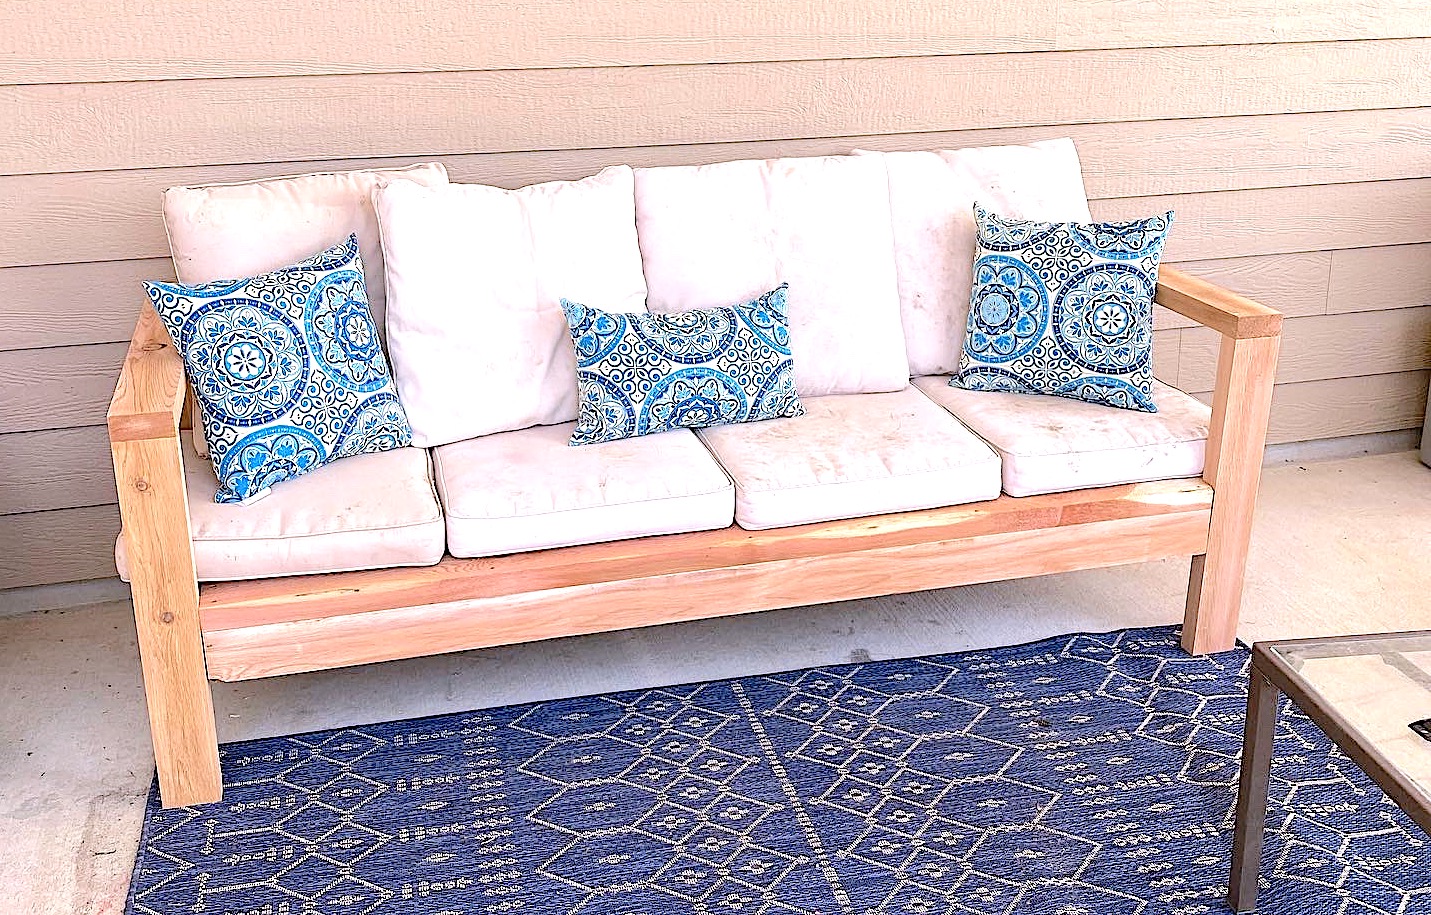
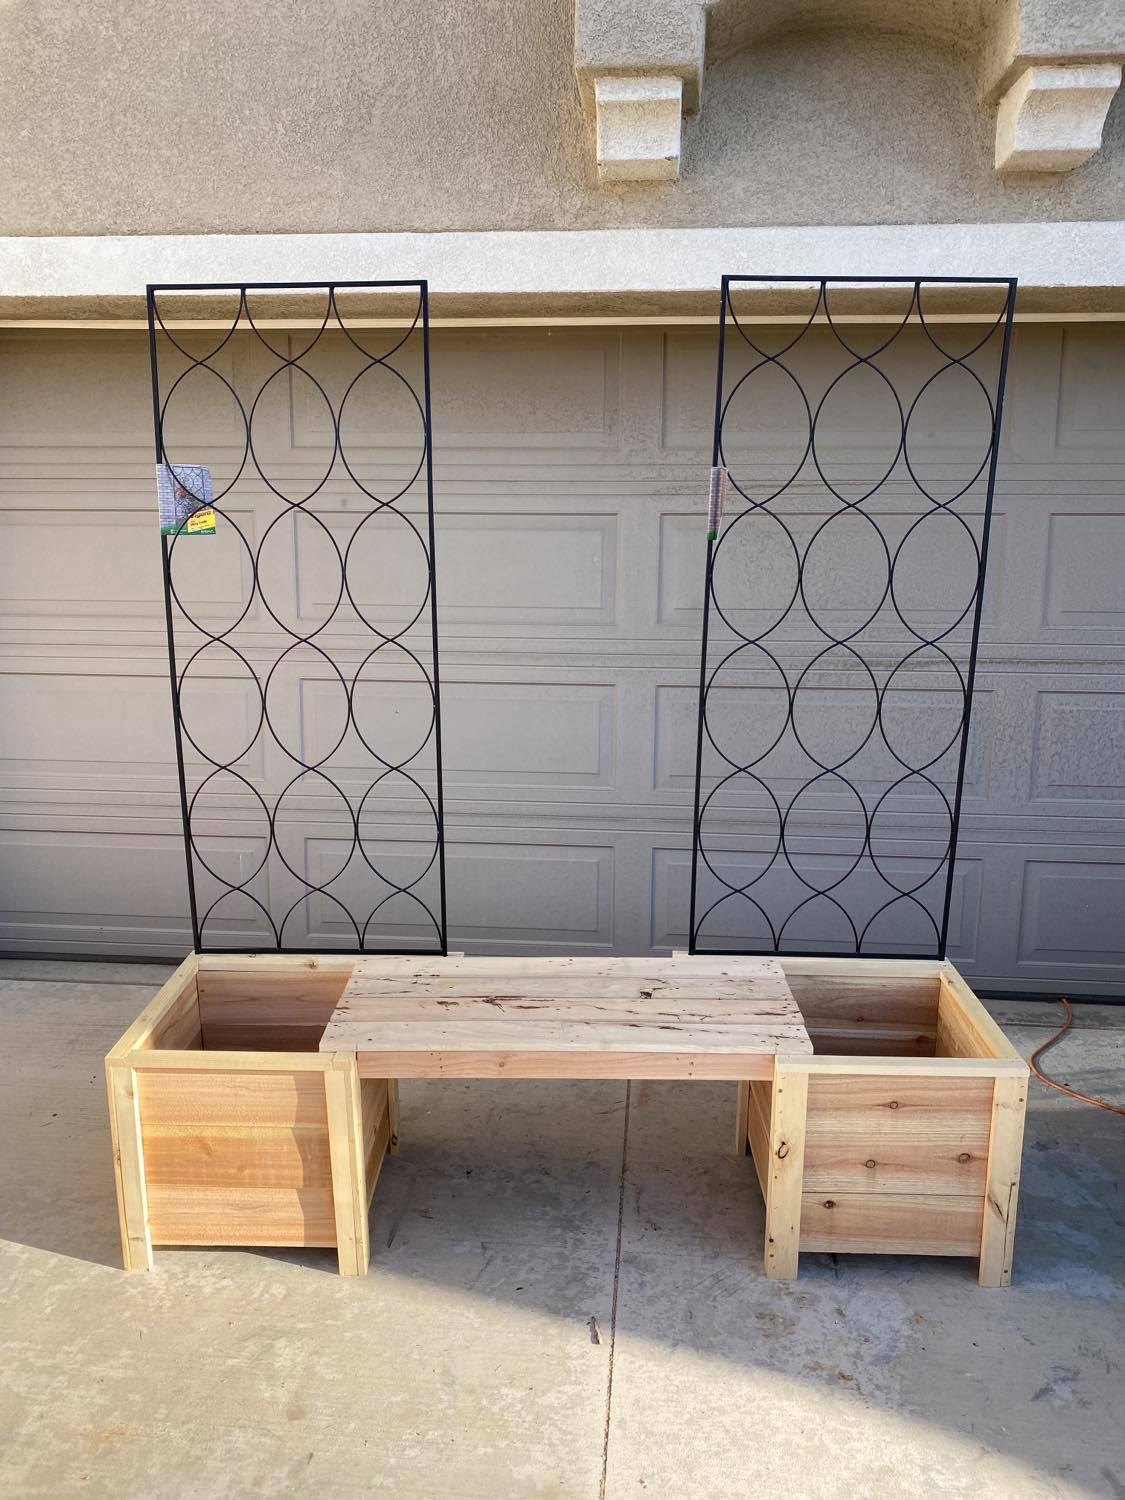
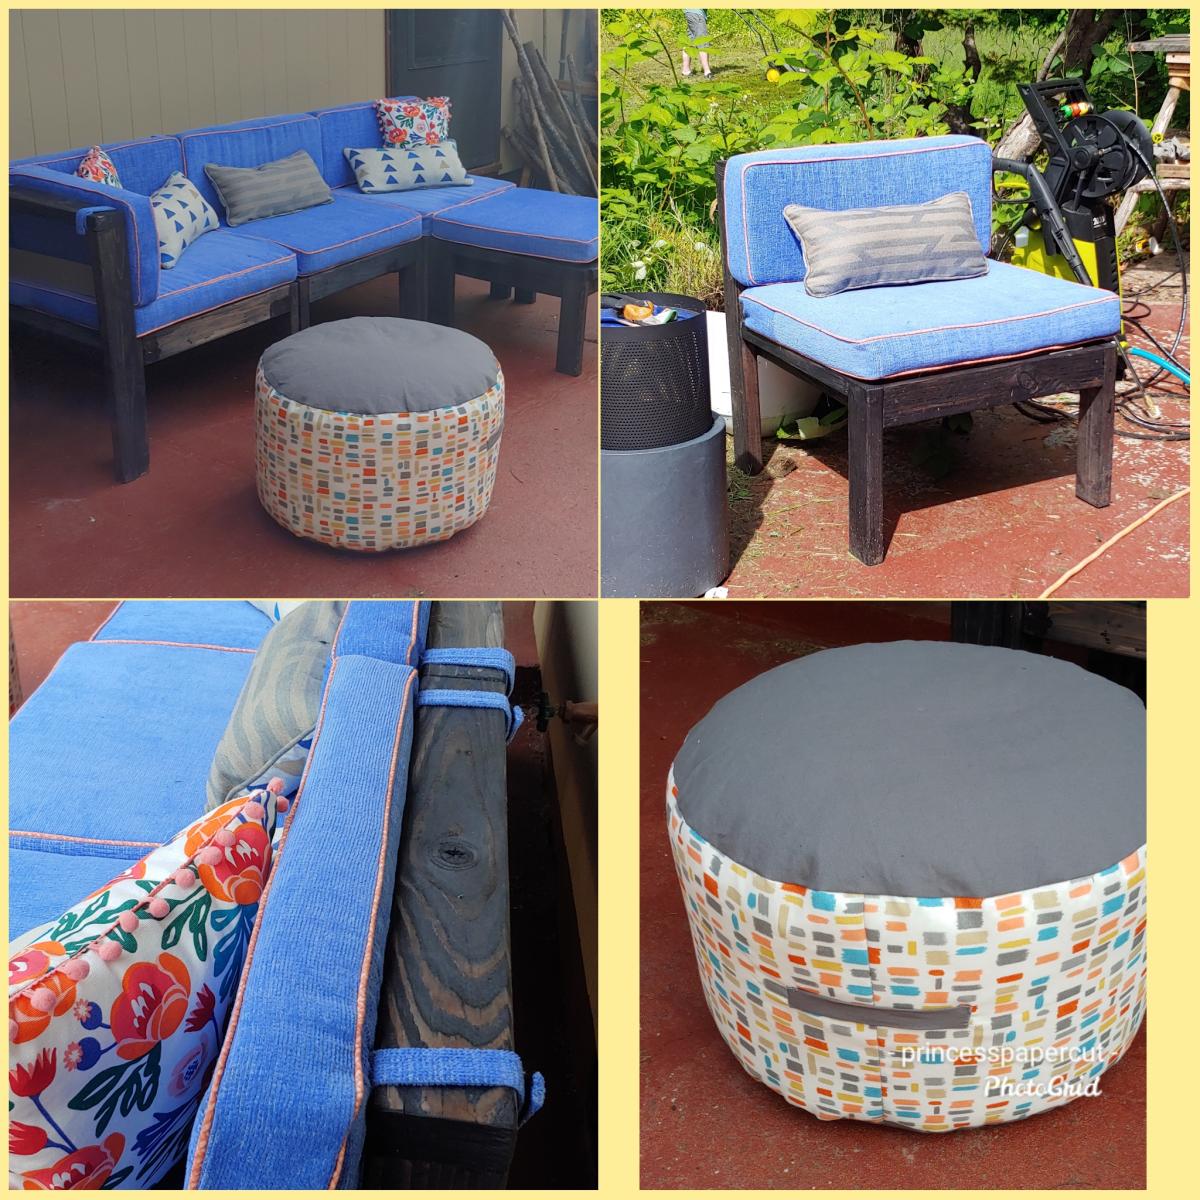
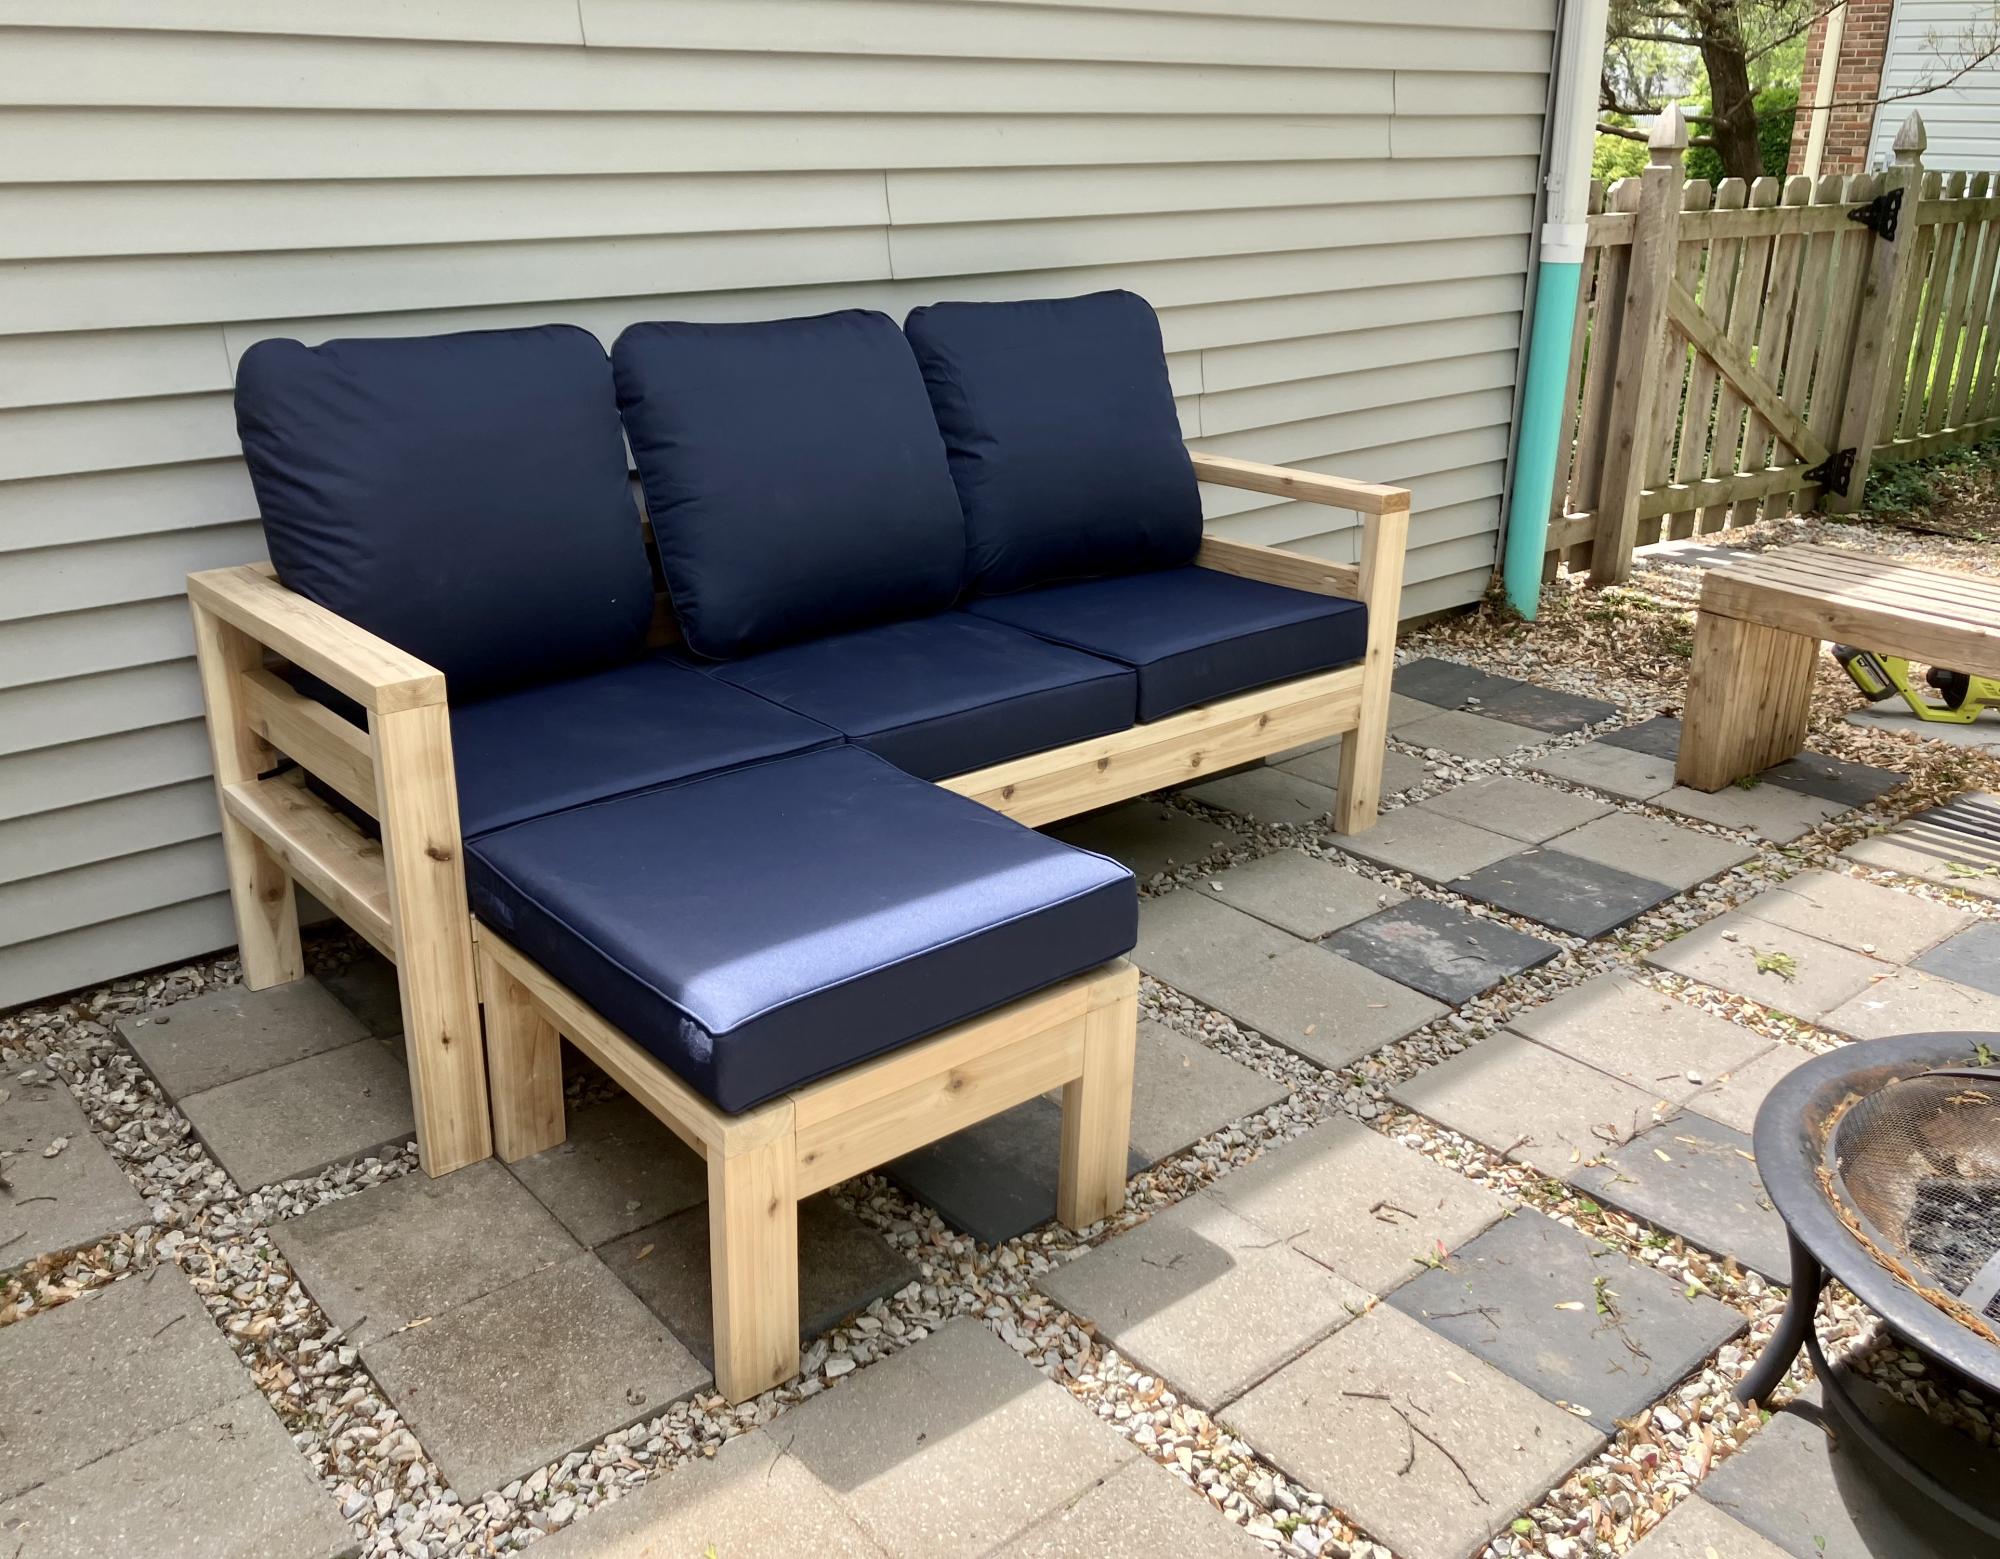
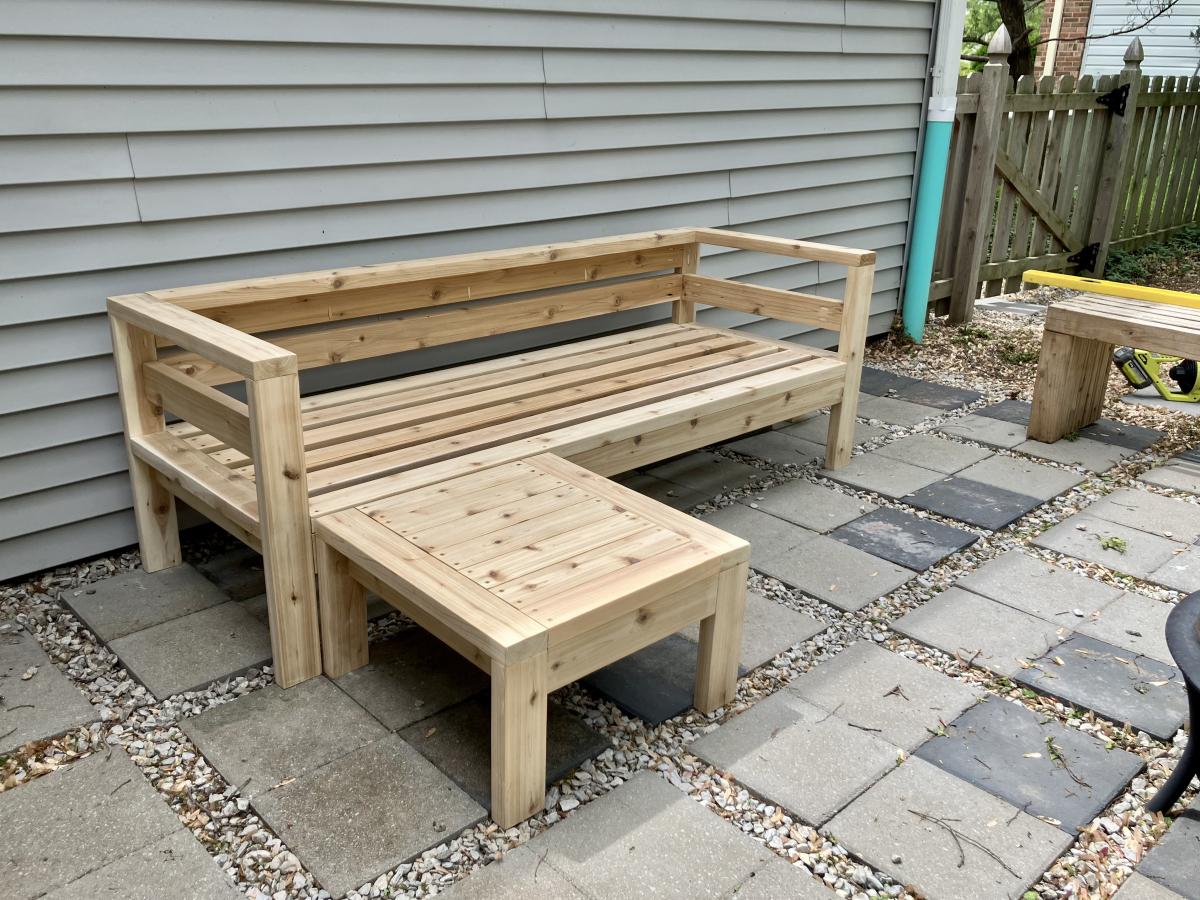
Community Brag Posts

Farmhouse desk

Submitted by Reader Submission (not verified) on Fri, 11/05/2021 - 16:02

My first “big” piece of furniture! I have over the last year realized I had a little sawdust in my blood! My dad is a 3rd generation carpenter, he is the youngest of 5 boys and he is now 79. I started with a couple of quilt/blanket ladders for my daughters, then graduated to a headboard. Then last Christmas I surprised my dad with an oak bookshelf (because oak is the best 😉) I knew that’s what my dad loved. It brought him to tears! So, then my daughters began showing me pictures of desks, tv chests, etc and I gained a little confidence with each piece.

Built from Plan(s)

Comments

Garden/Storage Shed

Submitted by Smokeydog on Mon, 08/03/2015 - 06:48

Building a storage shed was quite a jump for me but because of the confidence and experience I gained from Ana's  site I decided to give it a shot.  I acquired the plans online. It has 8 foot high walls and 3 feet of "attic space".  The shed is 8'x12'.  I used cement board lap siding.  It took about seven weeks to finish working a few hours here and there.  I really like it.  Even has a little window flower box.

Estimated Cost
2100.00
Estimated Time Investment
Week Long Project (20 Hours or More)
Finish Used
Benjamin Moore Paint
Recommended Skill Level
Intermediate

Comments

Laundry Basket Dresser & Board and Batten Wall

Submitted by canesa on Thu, 07/14/2011 - 21:44

If you'd like to find out how I modified the laundry dresser to hold four baskets and how I hung the board and batten wall, check out the details on my blog. http://isteppedoutofmycomfortzone.blogspot.com/2011/02/and-did-spontane…
After I hung the boards with Liquid Nails I found out that if I ever want to take them down, the sheet rock is coming down with them! So I would probably skip that step...just incase!

Built from Plan(s)
Estimated Cost
Under $50
Estimated Time Investment
Weekend Project (10-20 Hours)
Finish Used
I painted everything in Dark Kettle Black by Valspar.
Recommended Skill Level
Beginner

Comments

aw02bzhmz (not verified)

Sun, 01/08/2012 - 15:34

Des [url=http://www.longchampbagsfr.com]Sacs Longchamp[/url] sont des sacs qui sont faites dans l’usine de masse, juste comme le genre plus mature que vous pourriez probablement découvrir dans les grands magasins, sauf qu’ils sont créés rendant l’utilisation du bien, dessins à couper le souffle. En fait, ils ont des styles, couleurs et matériaux qui sont comme des sacs de créateurs, mais sont ensuite utilisées dans l’itinéraire des sacs fabriqués en usine. De cette fa?on, vous obtenez le très plus efficace de chaque monde. Vous serez en mesure d’obtenir une belle revanche, un sac dynamique, mais payer alternativement bien moindre que vous n’aurez probablement besoin pour vous d’obtenir une marque de fabricant qui est en développement à être utilisé. Vous serez en mesure d’obtenir ces généralement en ligne, aussi que dans plusieurs magasins. Des sacs Longchamp, par exemple, sont généralement créés beauté. Ils fournissent des designs tout en utilisant favorisées régulière et les schémas, les figures de dragon animé individus, aux conceptions fourre-tout, après quoi il a offert à tous qu’ils obtiennent à travers le monde, à cause de cette réalité, ils pourraient générer suffisamment pour tout le monde. Vous ne devez posséder plus longue dans les sections et de payer pour à peu près n’importe quel élément limité, tout simplement parce que des dirigeants avides de style dans l’industrie.

Sacs à main sont vraiment un énorme business, et des ressources énergétiques et du marché de milliers de dollars. Sacs à main Longchamp pliage, en particulier, sont offerts comme objets de grande classe ce marché étoile et montrent loin de d’, portant le co?t et alléchantes chaque femme à vouloir un équivalent particulière à cela. Elle a utilisé étant de savoir comment la série vous vécu était d’acquérir une normale, sac inintéressante brun, [url=http://www.longchampbagsfr.com]Sacs Longchamp[/url] ou avoir à payer pour le meilleur co?t de posséder un concepteur de sac extrêmement. Mais heureusement, qui pourrait effectivement très probablement pas être plus longs vrai, parce que la mode des sacs sont en train de révolutionner l’industrie.

Avant, [url=http://www.longchampbagsfr.com]Sacs Longchamp[/url] sont réellement développés au sein d’une manière assez normale. Vous avez vécu des usines qui a élaboré des normes, brun ou des sacs, offerts à des milliers pour pas cher, alors vous incontestablement connu les sacs de créateurs. Les individus sont réellement développés par des designers bien rémunérés qui ont travaillé dans l’industrie de style, et montrerait loin de leur nouveaux sacs à chaque douze mois sur le tapis de couleur rouge. Là, ils obtiendraient des célébrités, acteurs et artistes en général, à mettre sur leurs nouveaux modèles, et leur montrer lointaines à partir de la route du monde. Mais quand il est arrivé le temps de les générer, ils ne font de petites quantités, tout comme le choix de maintenir le co?t varie de haut. Voilà comment ils seraient artificiellement fournir les gens de la demande et la pression ces temps qui désiraient acheter ces articles à dépenser des prix exorbitants. Mais dans les décennies précédentes, cela a commencé à changer avec Longchamp bon marché, ainsi que la révolution qui est-il passé au sein de l’industrie de style.http://www.longchampbagsfr.com

Farmhouse Writing Desk with Turned Legs

Submitted by kwildman on Mon, 01/07/2019 - 08:53

I modified the Small Old English Style Farmhouse Dining Table plan to build a writing desk.   I used five 1x6 boards for the top for a width of 27.5 inches.   I made my desk 56 inches in length.  I put the drawer on the long side like a pencil drawer.   I did use the legs that Ana recommended in the plan.   I love how it turned out.  I used dark walnut danish oil and dark wax for the finish.  

Estimated Cost
225
Estimated Time Investment
Day Project (6-9 Hours)
Finish Used
I used Watco dark walnut danish oil and Minwax dark paste wax.
Recommended Skill Level
Intermediate

Comments

kwildman

Fri, 10/04/2019 - 21:46

Thank you!  I used Watco Danish oil and I used Minwax dark wax.  I've tried alot of different wax brands and I always come back to Minwax.  It dries the hardest in my opinion.

Our Farmhouse Table....my first build!

Submitted by jchorton on Sun, 11/27/2011 - 19:55

Due to limited space and inclement weather, this table took us a bit longer than a weekend....in a perfect world, we would have been done a lot sooner...however, it was completed just in time for Thanksgiving dinner...hence the mis-matched chairs. I LOVE my new table. It turned out even better than I had hoped. Thanks Ana!

Estimated Cost
$125.00
Estimated Time Investment
Week Long Project (20 Hours or More)
Finish Used
I used two coats of Minwax Dark Walnut and then three coats of poly.
Recommended Skill Level
Beginner

Comments

sgilly

Wed, 10/02/2013 - 13:11

I don't know how I missed seeing your beautiful table! What a nice finish. I'm planning to build one for my son and his wife and would love to know how's it holding up. Would you do anything differently?

Bread Box

I started baking my own bread a few months ago, and storage was an issue. My husband decided to build me an old fashioned bread box and set out designing one on his own to fit in our small galley kitchen. I love it. It is a double decker, so I can fit two loaves in it just fine. The inside is coated with a food-grade sealer.

Estimated Cost
$20: $16 for the food-grade sealer and $4 for the handle, scrap wood used from other projects.
Estimated Time Investment
Afternoon Project (3-6 Hours)
Finish Used
White spray paint, food-grade sealer inside.
Recommended Skill Level
Beginner

Comments

JoanneS

Wed, 12/07/2011 - 03:49

This is an awesome idea, can't wait to make one for my kitchen. Beautiful job! Thanks for sharing this!

Farmhouse Chairs

I found a picture of this style of chairs, and I really wanted to make them for my table. I created my own plans and adjusted them until they were perfect. I’ve since made several sets of chairs for other people including this set of 6. 

Built from Plan(s)
Estimated Cost
$25
Estimated Time Investment
Afternoon Project (3-6 Hours)
Finish Used
After sanding down the chairs, I apply a coat of Preston by minwax. To get the color I wipe on the stain gunstock by winwax. After letting it dry for about an hour, I then wipe on a coat of espresso stain. For the finish, I apply coats of a gloss polyurethane by Minwax.
Recommended Skill Level
Intermediate

Comments

Ana's Slipper Chair

Submitted by moosmani on Wed, 04/09/2014 - 12:40

I mostly followed the plans except for a few modifications in order to use the wood I got for free. I did use 4x4s instead of 2x2s for the legs because I wanted the chunkier look. I might chop them off and put on some fancy feet, but for now I think they look fine. The most expensive part was the foam cushions. I got the good stuff because I wanted the chairs to be comfortable, and they are!

Built from Plan(s)
Estimated Cost
Around $155 for the foam and fabric for both chairs. The wood was free.
Recommended Skill Level
Intermediate

Comments

A's Full Size Loft Bed

Submitted by Hulsberg on Sun, 08/12/2012 - 14:58

My son needed more room in his bedroom...and to be rid of the very girly furniture he inherited when he moved into his "big boy-ish" bedroom. At 10 yrs old, it was high time he got a bed that wasn't pink-tinged, white washed pine with 4 posters and enough curlicues to choke a forest. He also needed a desk which I couldn't really fit in his room with the armoire and chest of drawers that came with the Queen sized bed.

So off to Ikea we went and I saw a black loft bed for $300, but it was really, really high which meant I would have to cut it down and it was not sturdy at all. I looked at PB and saw the $1800 bed. Um, no - that wasn't happening. So, off to Ana-White I went and I'm so happy I did!

I built the full sized version of these plans and, to keep costs down, used wood I had on hand. This meant I had to work a bit at the cuts, but it all worked out.

Mods:
1) I modified the railings to have the ladder at the end of the bed to keep away from the ceiling fan.

2) Because I put the ladder at the end of the bed, I got very nervous about having a soon-to-be teen climbing on to a ladder secured to a 1x10 that was only connected to the side railings with glue and screws. So I sandwiched extra 1x3s over the bottom rails and attached them to the top railing.

3) I was very nervous about making sure that the bed was adequately supported so I put a 2x4 down the center instead of the 1x2.

4) I went a wee-bit overboard screwing things together to the point where it's a bit embarrassing and now I have to paint over the screw heads.

5) I made the ladder treads with 2x4's, modifying the inside spacer board cut lengths.

Because I had quite a bit of lumber on hand, the bed only ended up costing me about $90.

For the bookcase, I did end up buying the 1x12s and the adjustable shelf railings. I made the book shelf the entire width of of the bed and split the two sections based on width of the 1x24 board I bought for the desk. I only put the backer board up half way so that the daylight could get underneath the bed and make it not so cave-like.

The book case cost me about $70.

The desk was the easiest...but most costly item. A 1x6x24, 4 table legs and the table leg mounts ran me about $80. The plexiglass top that I had cut for the top cost me about $80.

Time wise, this would have taken me a lot less time than the 4 months it took - but I worked on it as I could and when I could, by myself. I got some friends to help me bring it upstairs and put it back together, but it was mostly done when I could fit in some time.

My son LOVES this and it really does give him so much room!!! Thanks Ana - I really appreciate it!

Built from Plan(s)
Estimated Cost
with paint, screws and bookcase hardware, about $450
Estimated Time Investment
Week Long Project (20 Hours or More)
Finish Used
gloss spray paint / primer in one.
Recommended Skill Level
Beginner

Comments

Jennifer P (not verified)

Fri, 01/18/2013 - 07:38

Hi!

To modify this to be full sized, I just added 15" to the width of the bed. Ana said this in the plans:

Cutting Instructions:

Converting to Full Size This bed can easily be converted to full size. You will simply need to add 15″ to all boards that run parallel to the ends. This includes the planks, end top pieces and the slats. Shopping list will need to be adjusted as well.

So I modified the cuts to the head and foot board parts and the full size mattress fits perfectly.

For the shelving underneath, I just looked at some of Ana's other plans for shelves and winged it.

Schoolwork organizer

Submitted by Deborah on Thu, 08/23/2012 - 15:45

I'm trying to revamp our family "launch pad" in time for the start of school and was hoping to have a box for each kid to drop off their school forms and stuff. The "numbered cubbies on the wall" plan is just not practical for us -- I don't need a lot of little cubbies, just a few big ones! So I modified it to work for us. The letters are each of my boys' initials.

Also, I used scrap wood and leftover paint. So basically the cost was almost nothing, just a few nails and some wood glue.

Built from Plan(s)
Estimated Cost
0
Estimated Time Investment
An Hour or Two (0-2 Hours)
Finish Used
First I painted the piece black, and then covered it with some light gray house paint I had leftover. I used a sharpie pen for the letters and distressed everything.
Recommended Skill Level
Beginner

DIY Outdoor Sectional

Submitted by Reader Submission (not verified) on Mon, 05/06/2024 - 13:25

I used the armless chair plan, and altered the one armed plans to make two chaises. Then I increased the size slightly to accommodate the 25x25 pillows I bought. This took about 12 hours with one person working. I am super proud of it! Finished today, and will eventually stain after the wood has dried out a little. Thank you, Ana, for making straightforward plans that gave me the confidence to do my first woodworking project!

Andrea in Michigan

Chairs for Around the Firepit

Submitted by Reader Submission (not verified) on Thu, 09/05/2024 - 07:34

Used 2x6s for the arms. if I were to make them again I would make the arms 1” longer so they overhang a little over the front legs. Tapered the back to “wing” the arms in a little. Arms and seat slats were rounded over with router for a more finished look. Also made chairs just 1” wider all around and love how comfortable they are. Black semi-transparent stain and black deck screws. - Jake

Seasonal And Holiday

Simple Outdoor Bar Height Table

Submitted by vendo on Tue, 11/05/2024 - 08:16

We needed to add a table to our outdoor living space. This was a super easy build, I opted for a 2x4 top and I built it to match the height of my deck railing so it could be moved around and slid into a corner and used where needed. It also provides a nice tabletop space while we use our blackstone or grill to set food items on as we cook. Overall we are very happy with this sturdy outdoor table that only took about 1 hour to build! This plan was very easy to modify for the exact size that we wanted. 

Built from Plan(s)
Seasonal And Holiday

Adirondack chair from Pallets

Submitted by Reader Submission (not verified) on Fri, 03/24/2017 - 19:42

I decided to try and use the plans on Ana's site but with a twist. I wanted to limit myself to using only pallets. I think it turned out great! I can't upload all the photos because they exceed the maximum size limit. If I was able to you could see how each chair is slightly different and has a lot of character. I finished them with a waterproofing oil which I highly recommend over other finishes. 

Estimated Cost
$10 for screws.
Estimated Time Investment
Afternoon Project (3-6 Hours)
Finish Used
Cabot oil
Recommended Skill Level
Beginner

Comments

DIY Small Chicken Coop

Submitted by Reader Submission (not verified) on Wed, 07/02/2025 - 10:06

Thank you so much for your plans, Ana! I made some modifications, but all of your measurements, instructions and the material list were spot-on. Chicks move into their abode next week! Thank you, thank you!

Phil Birnie
Worthington, Ohio

Built from Plan(s)

Bench

Submitted by Reader Submission (not verified) on Mon, 06/05/2017 - 13:31

Great bench

Estimated Cost
$100
Estimated Time Investment
Day Project (6-9 Hours)
Recommended Skill Level
Beginner

Bike Storage

Submitted by vendo on Wed, 10/13/2021 - 10:10

I live in a smaller rental with limited garage space, so I needed a place for my kids bikes. This is what I came up with. It required minimal screw holes in the treated fence posts and I attached a rail system(rubbermaid fasttrak) for the bikes to hang from. I used Ana's easy shelves plan for the upright supports and then just added some corrugated roofing and cedar fence pickets (which I had on hand) to finish off the top.

Rustic end table pet kennel

I was able to take the end table plan and modify it slightly to accommodate the kennal. I added the detail to the sides using a couple 2x2. The for door and rear I made a frame and then cut down some wire shelving. I think it turned out quite nice. Now the dog has a good place to sleep and I don’t have to have an ugly kennal in my great room. 

Built from Plan(s)
Estimated Cost
75
Estimated Time Investment
Day Project (6-9 Hours)
Finish Used
Antique white chalk paint and a mix of about 4 stains for the top.
Recommended Skill Level
Beginner

Comments