Community Brag Posts
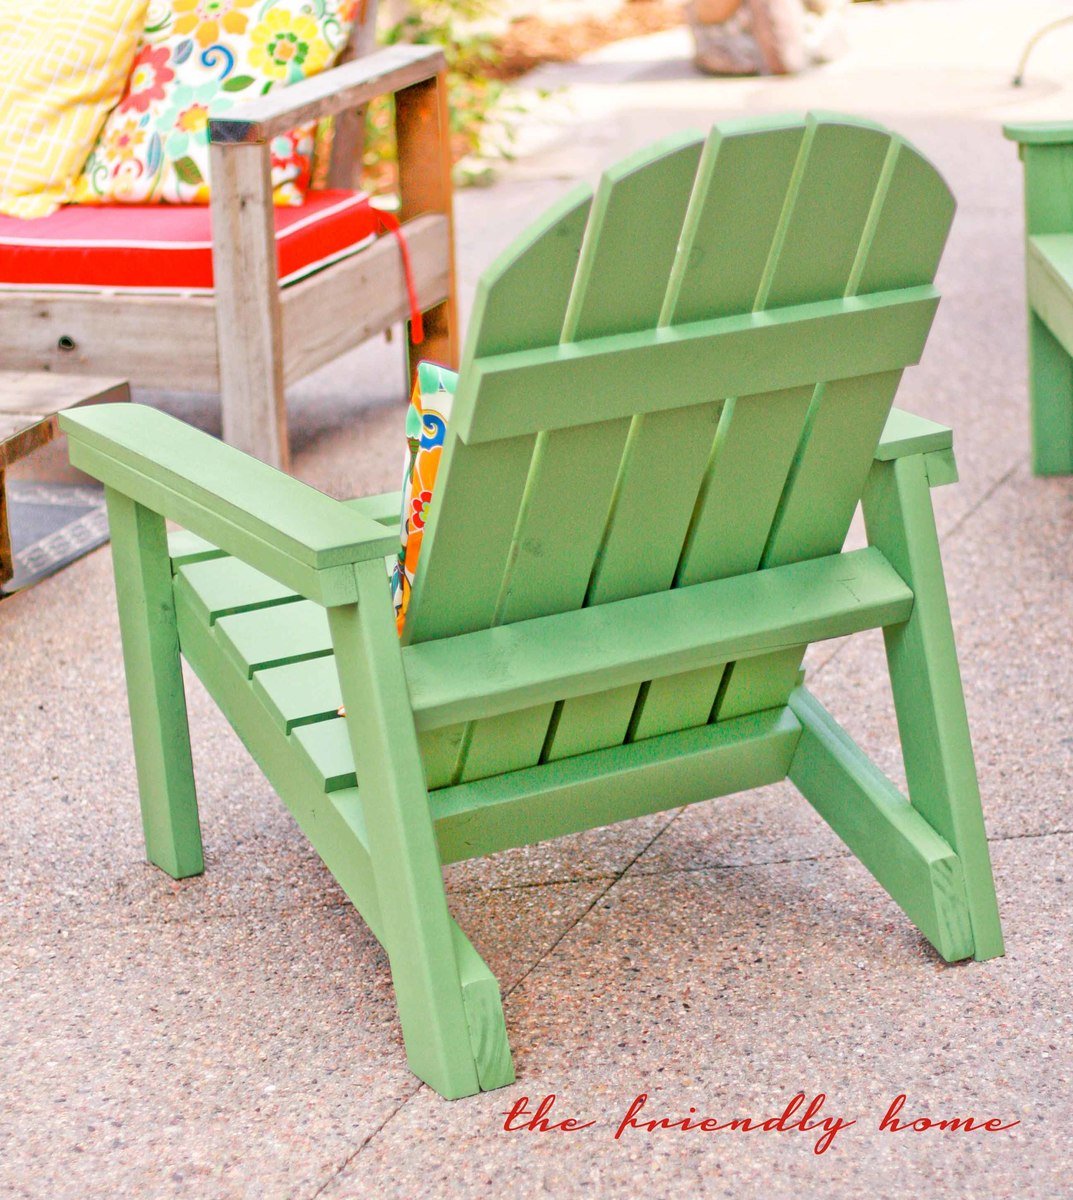
Green Adirondack Chairs
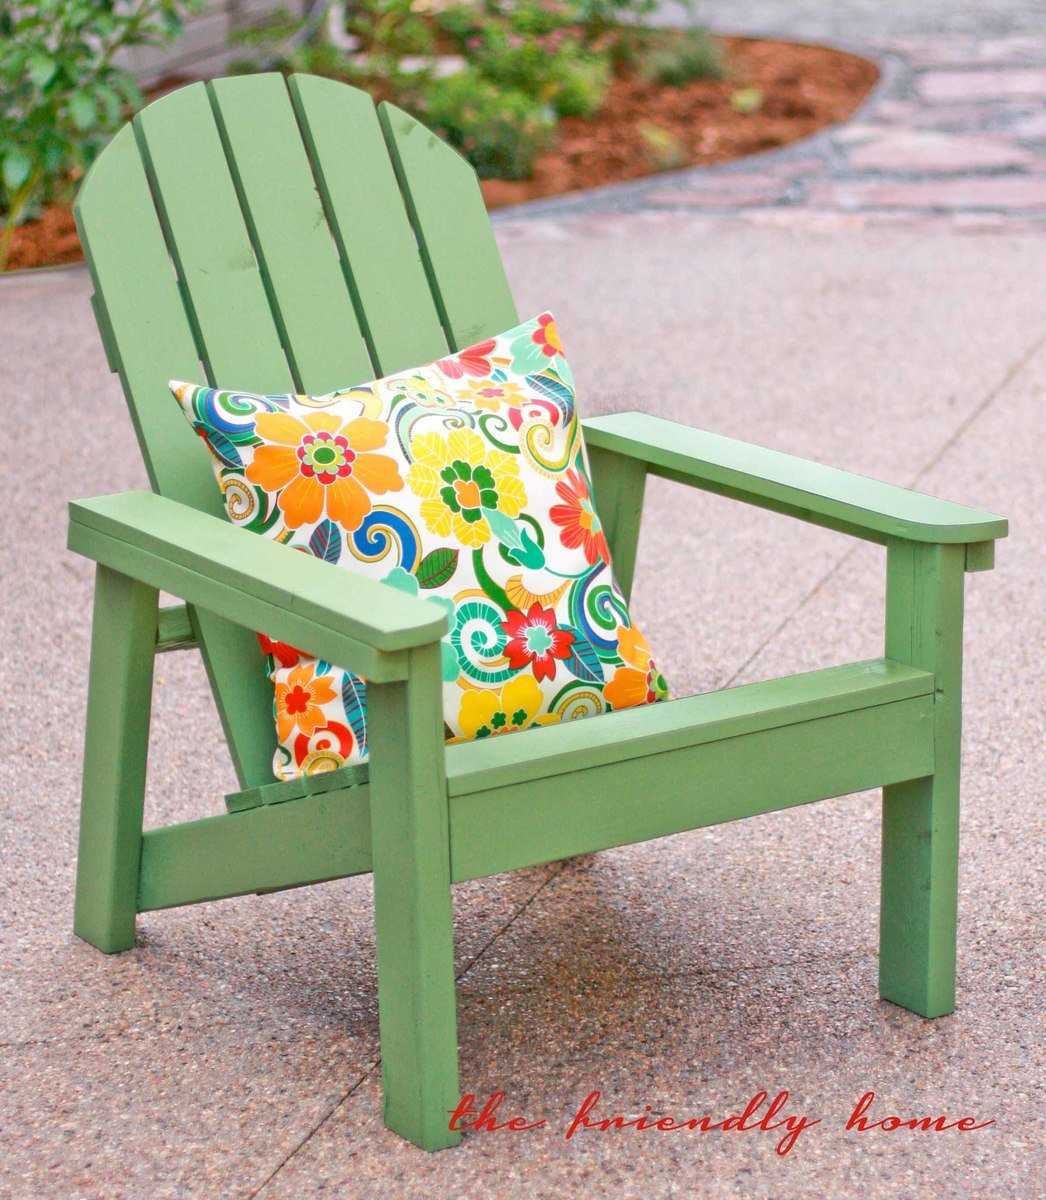
These are great chairs! Easy to build, comfy to sit in. Check out my blog post for more info.
Built from Plan(s)
Estimated Cost
$32 per chair for lumber, plus finishing and hardware
Estimated Time Investment
Day Project (6-9 Hours)
Finish Used
Exterior latex paint + primer in one, color matched to Sherwin Williams Dill
Recommended Skill Level
Beginner
Comments

Mon, 06/24/2013 - 10:59
Beautiful chairs Hillary!!!!
Beautiful chairs Hillary!!!! I love the green!!!
Thanks so much for building and bragging!
Ana
Fri, 06/28/2013 - 15:58
Beautiful!
I'll be making four of these this week in turquoise to match the little ones I made for the kids. Yours is an inspiration!
Sun, 05/10/2015 - 05:17
Very nice..
Are these kid size or adult, and where are the plans for them....
thanks bunches,
Debbie.
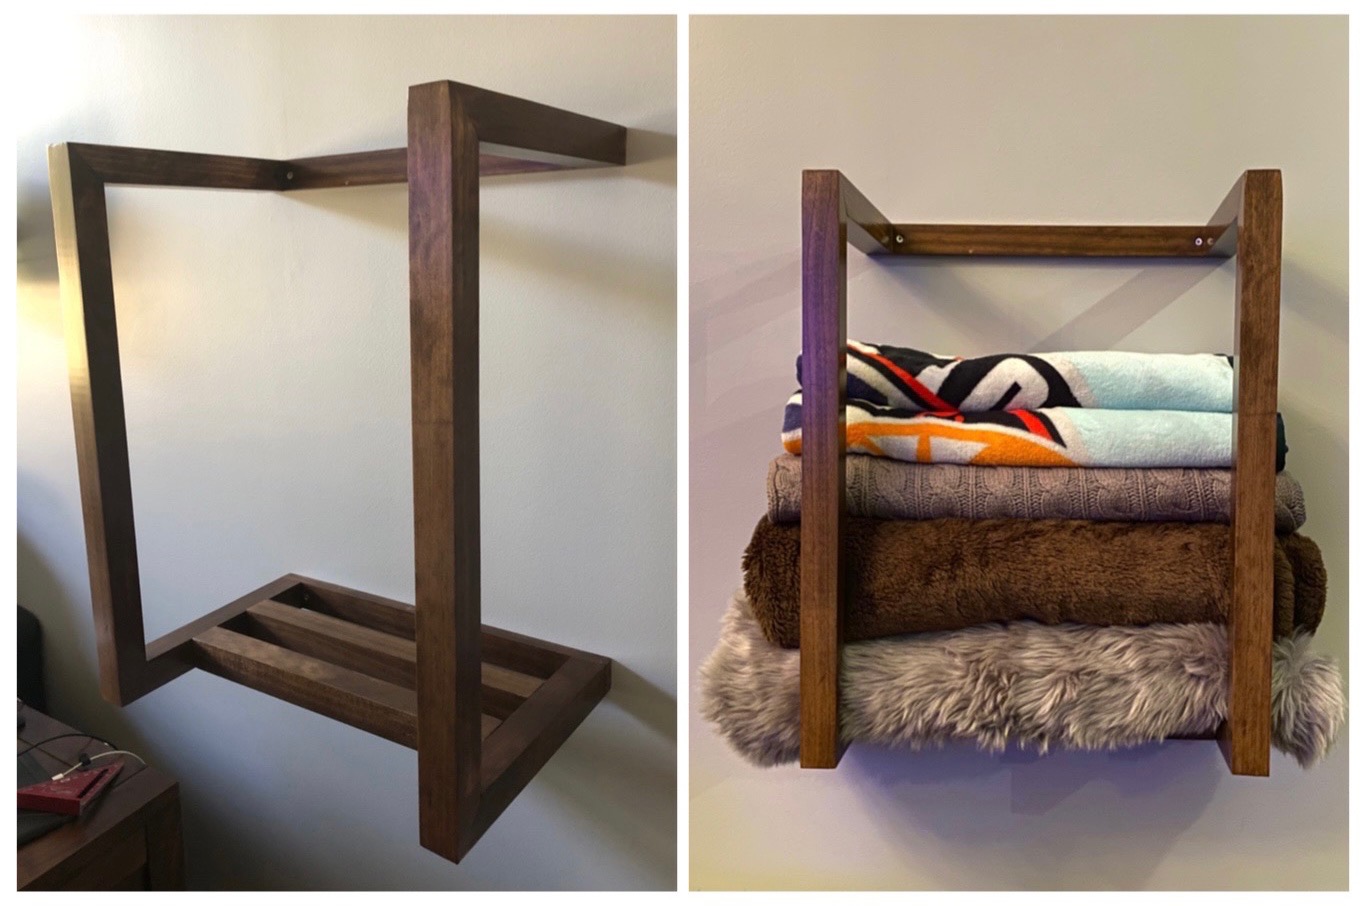
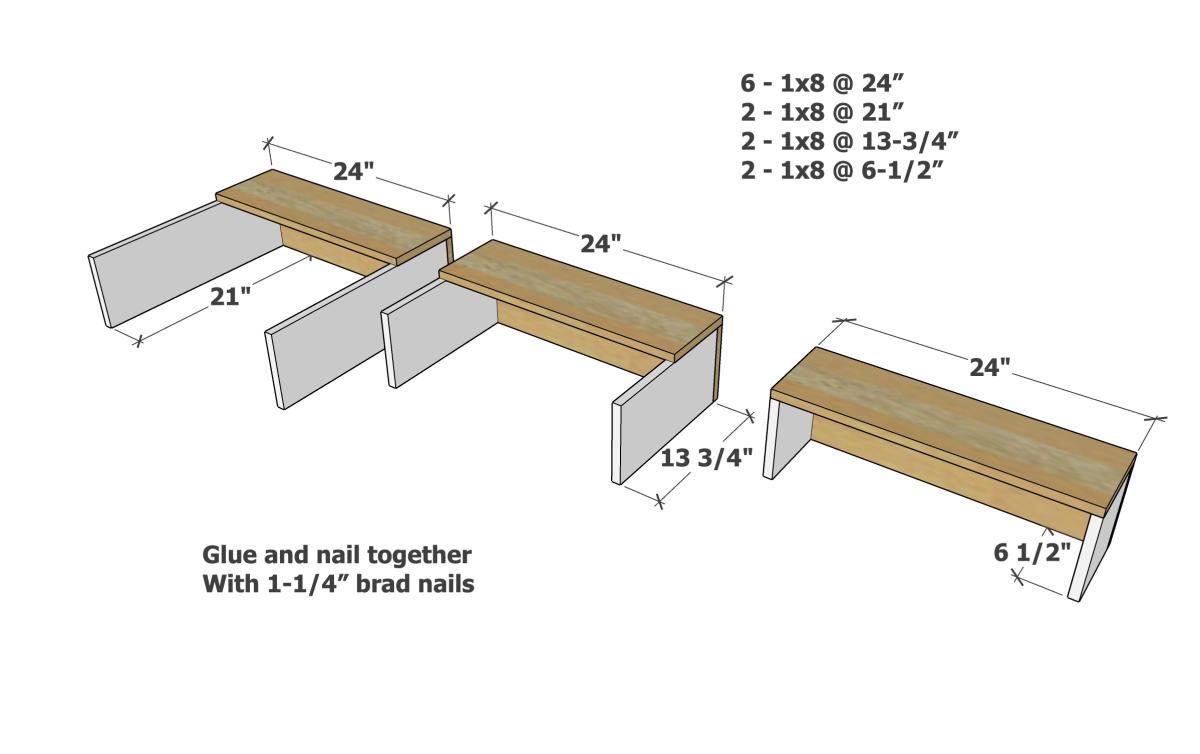
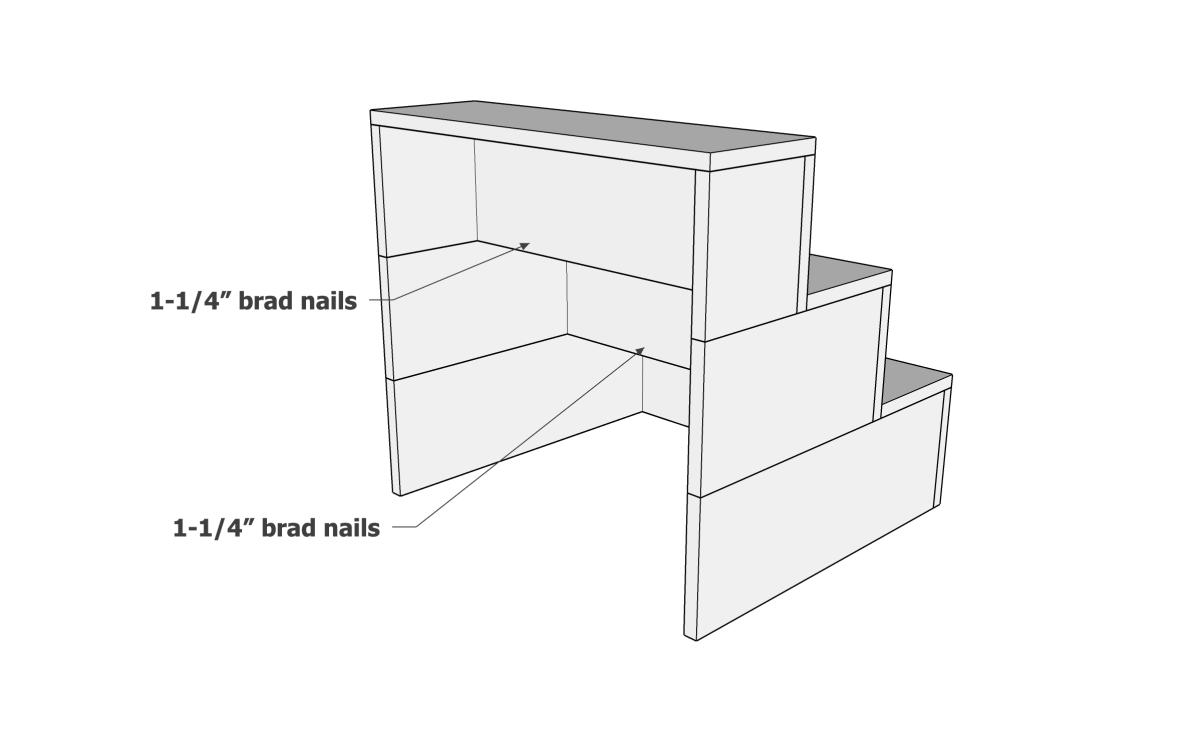
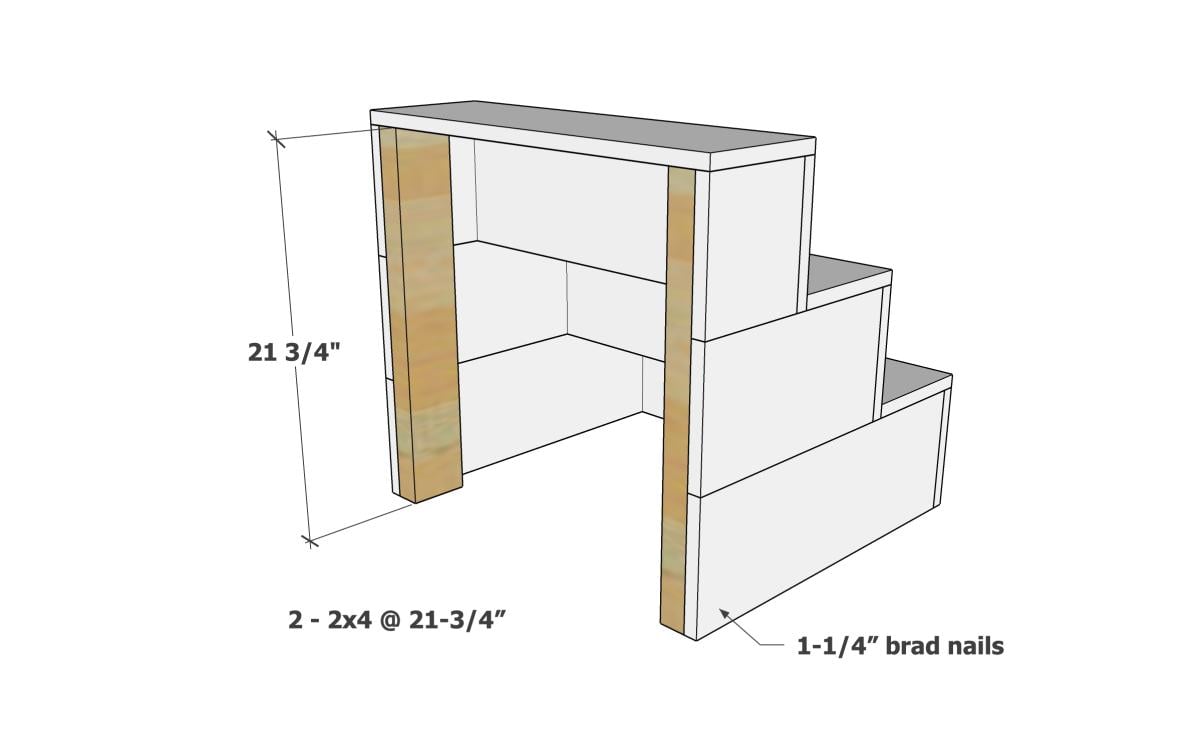
Pet Stairs
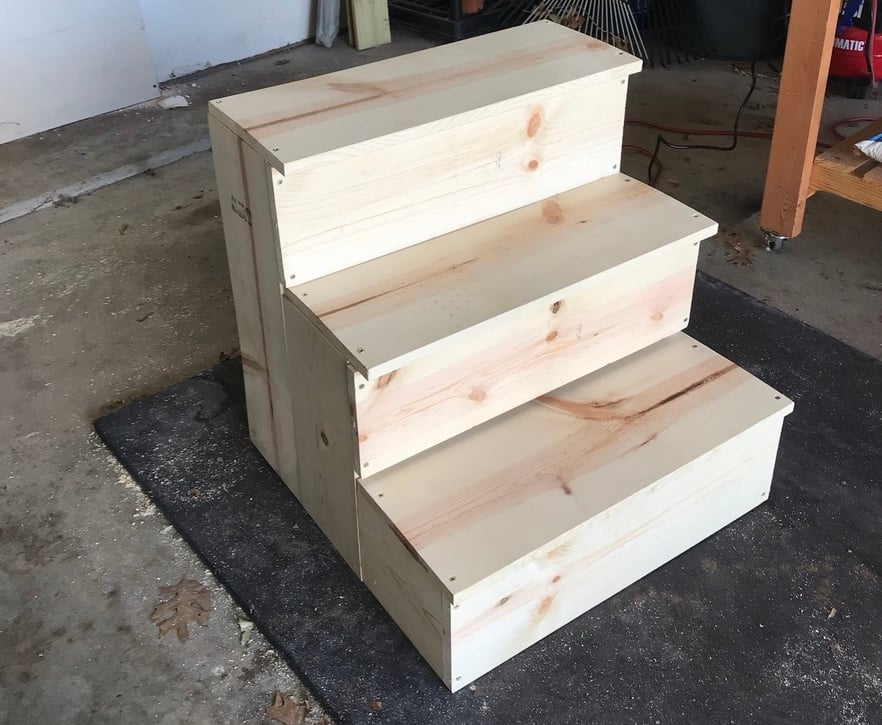
I needed sturdy stairs for my 2 60lb dogs. My bed is 33 inches from floor to top of mattress. So, this is my very first project completed by myself! Custom size pet stairs 24inx24inx24
Estimated Cost
$40-50
Estimated Time Investment
Afternoon Project (3-6 Hours)
Finish Used
Minwax polyshades Espresso gloss (3 coats)
Recommended Skill Level
Starter Project
Comments
Dry Bar
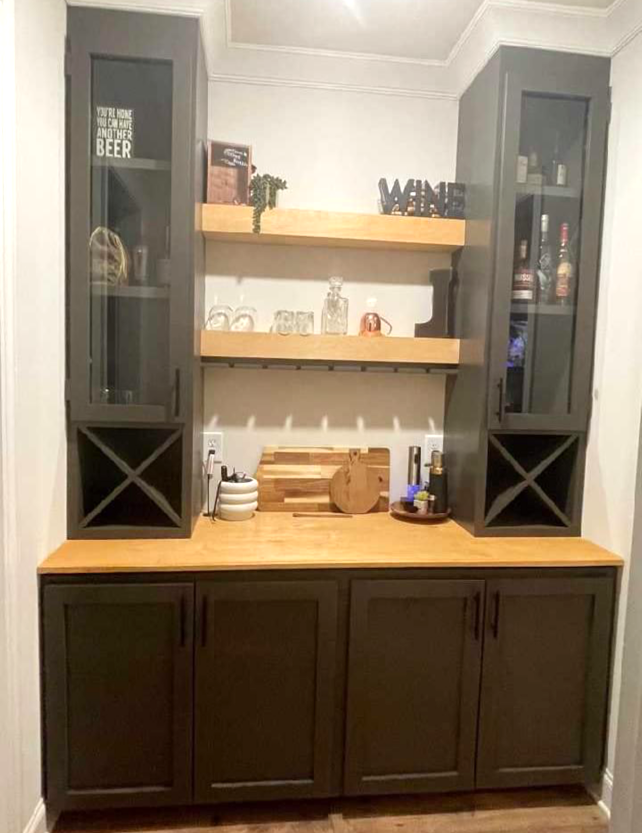
DIY Dry Bar by Brian Pettibone
Plans linked to help others achieve a similar build
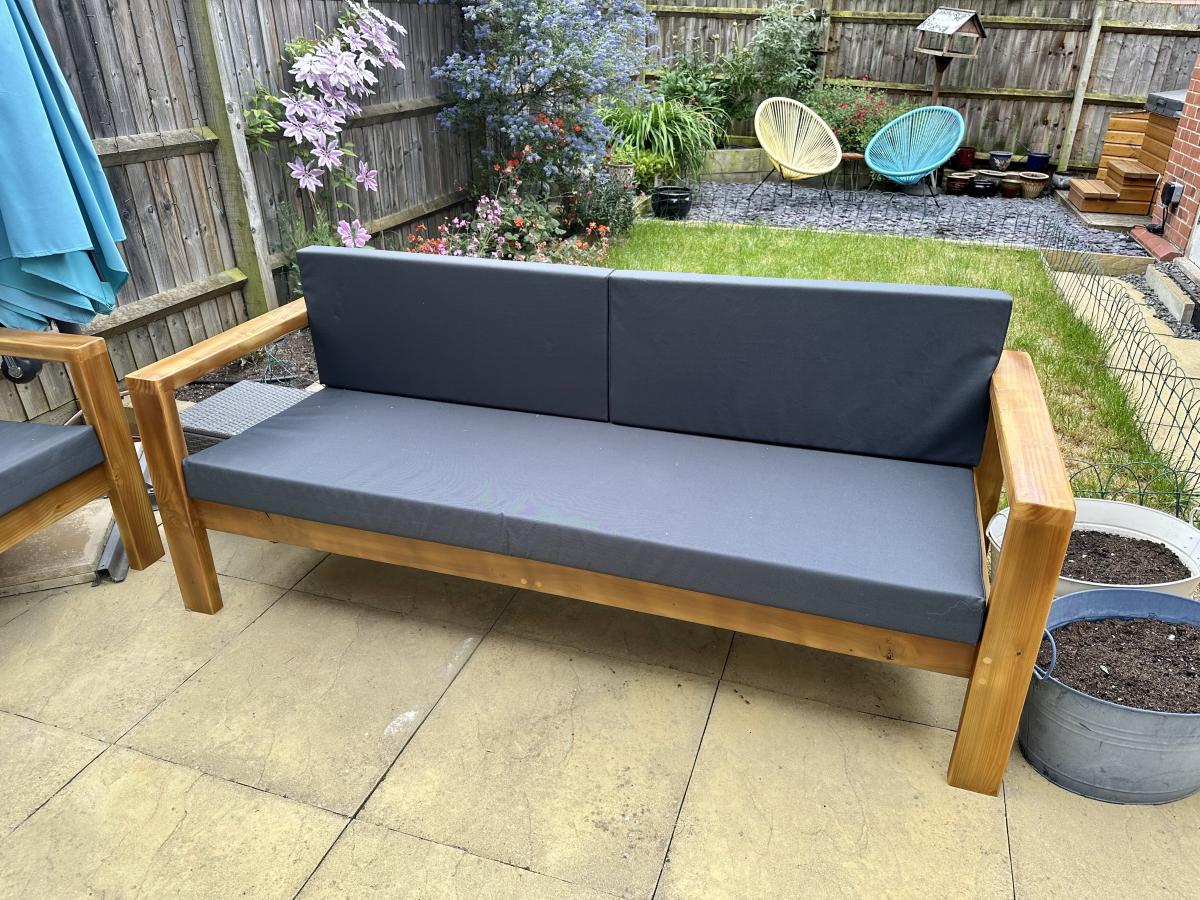
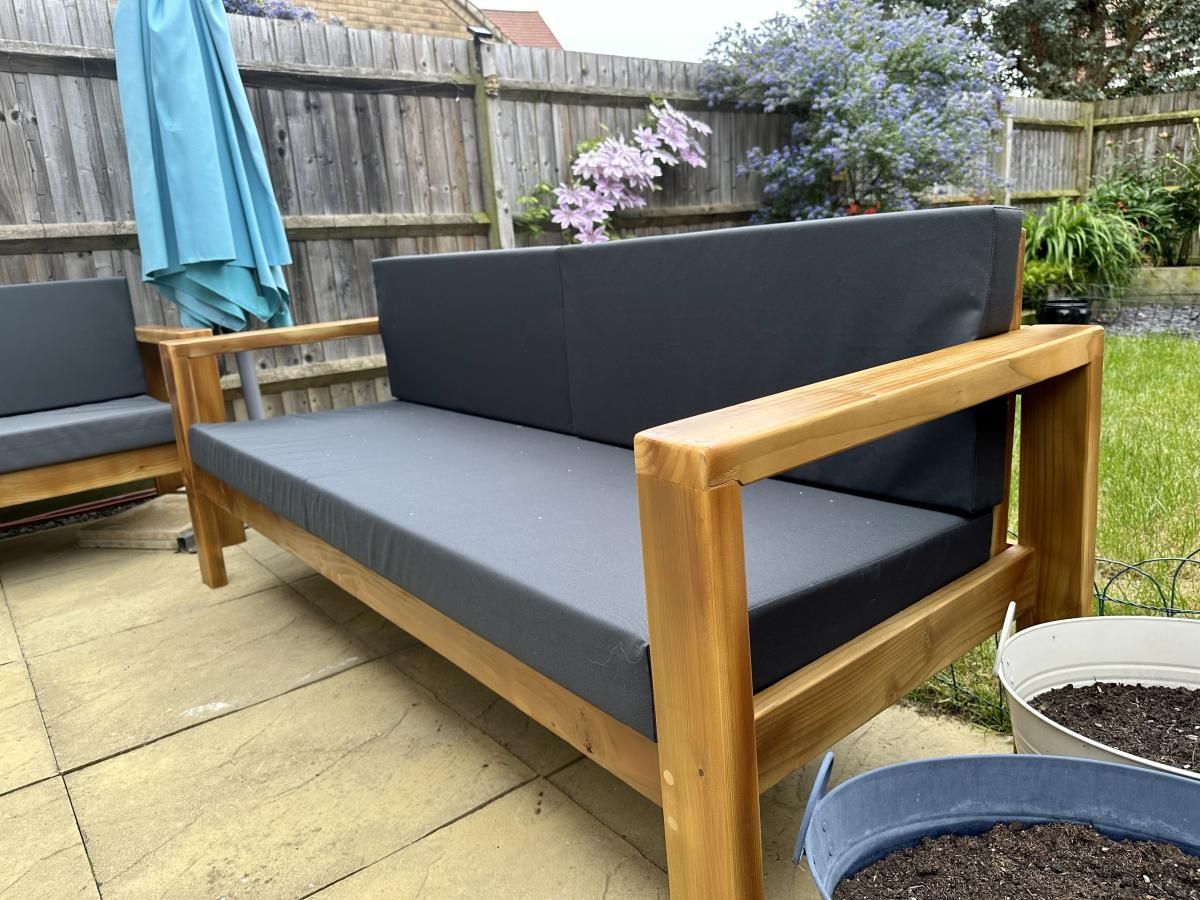
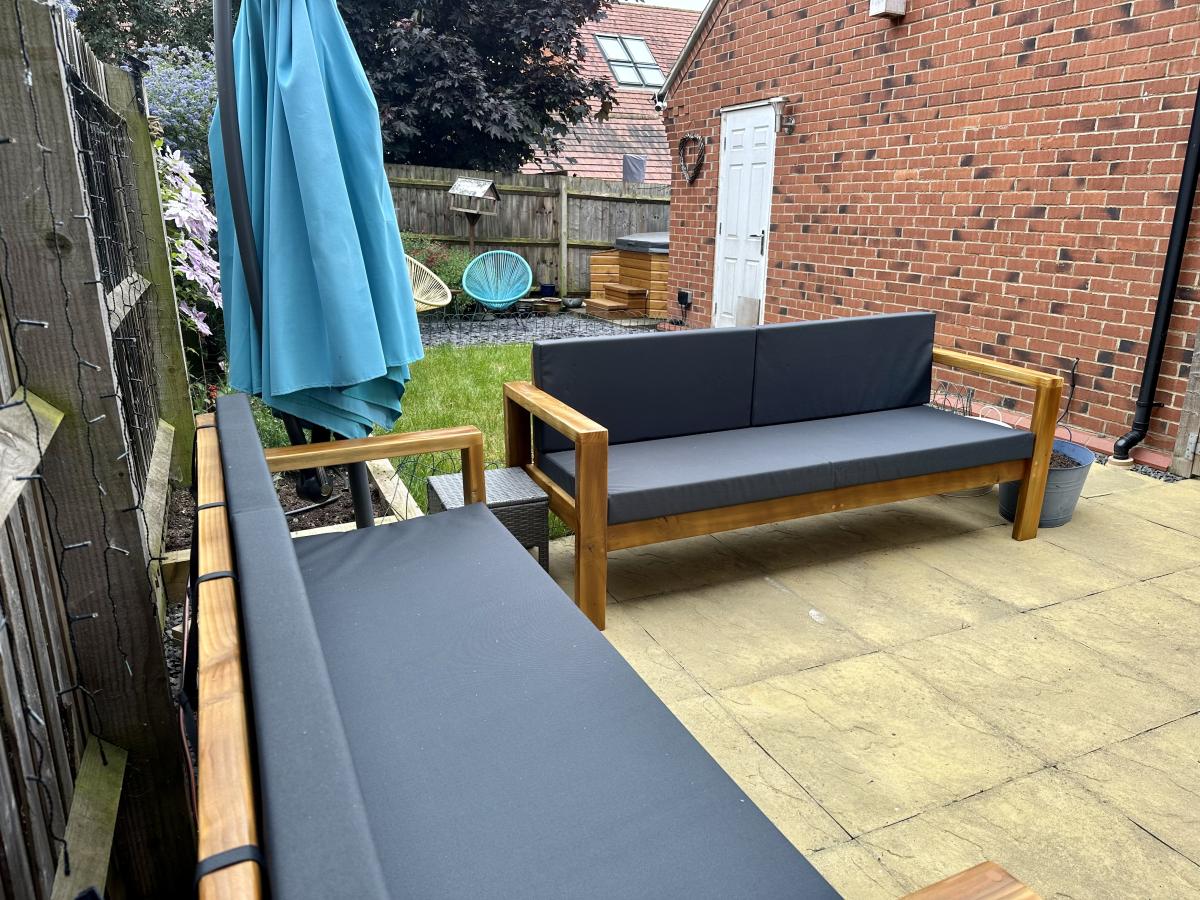
Outdoor sofas
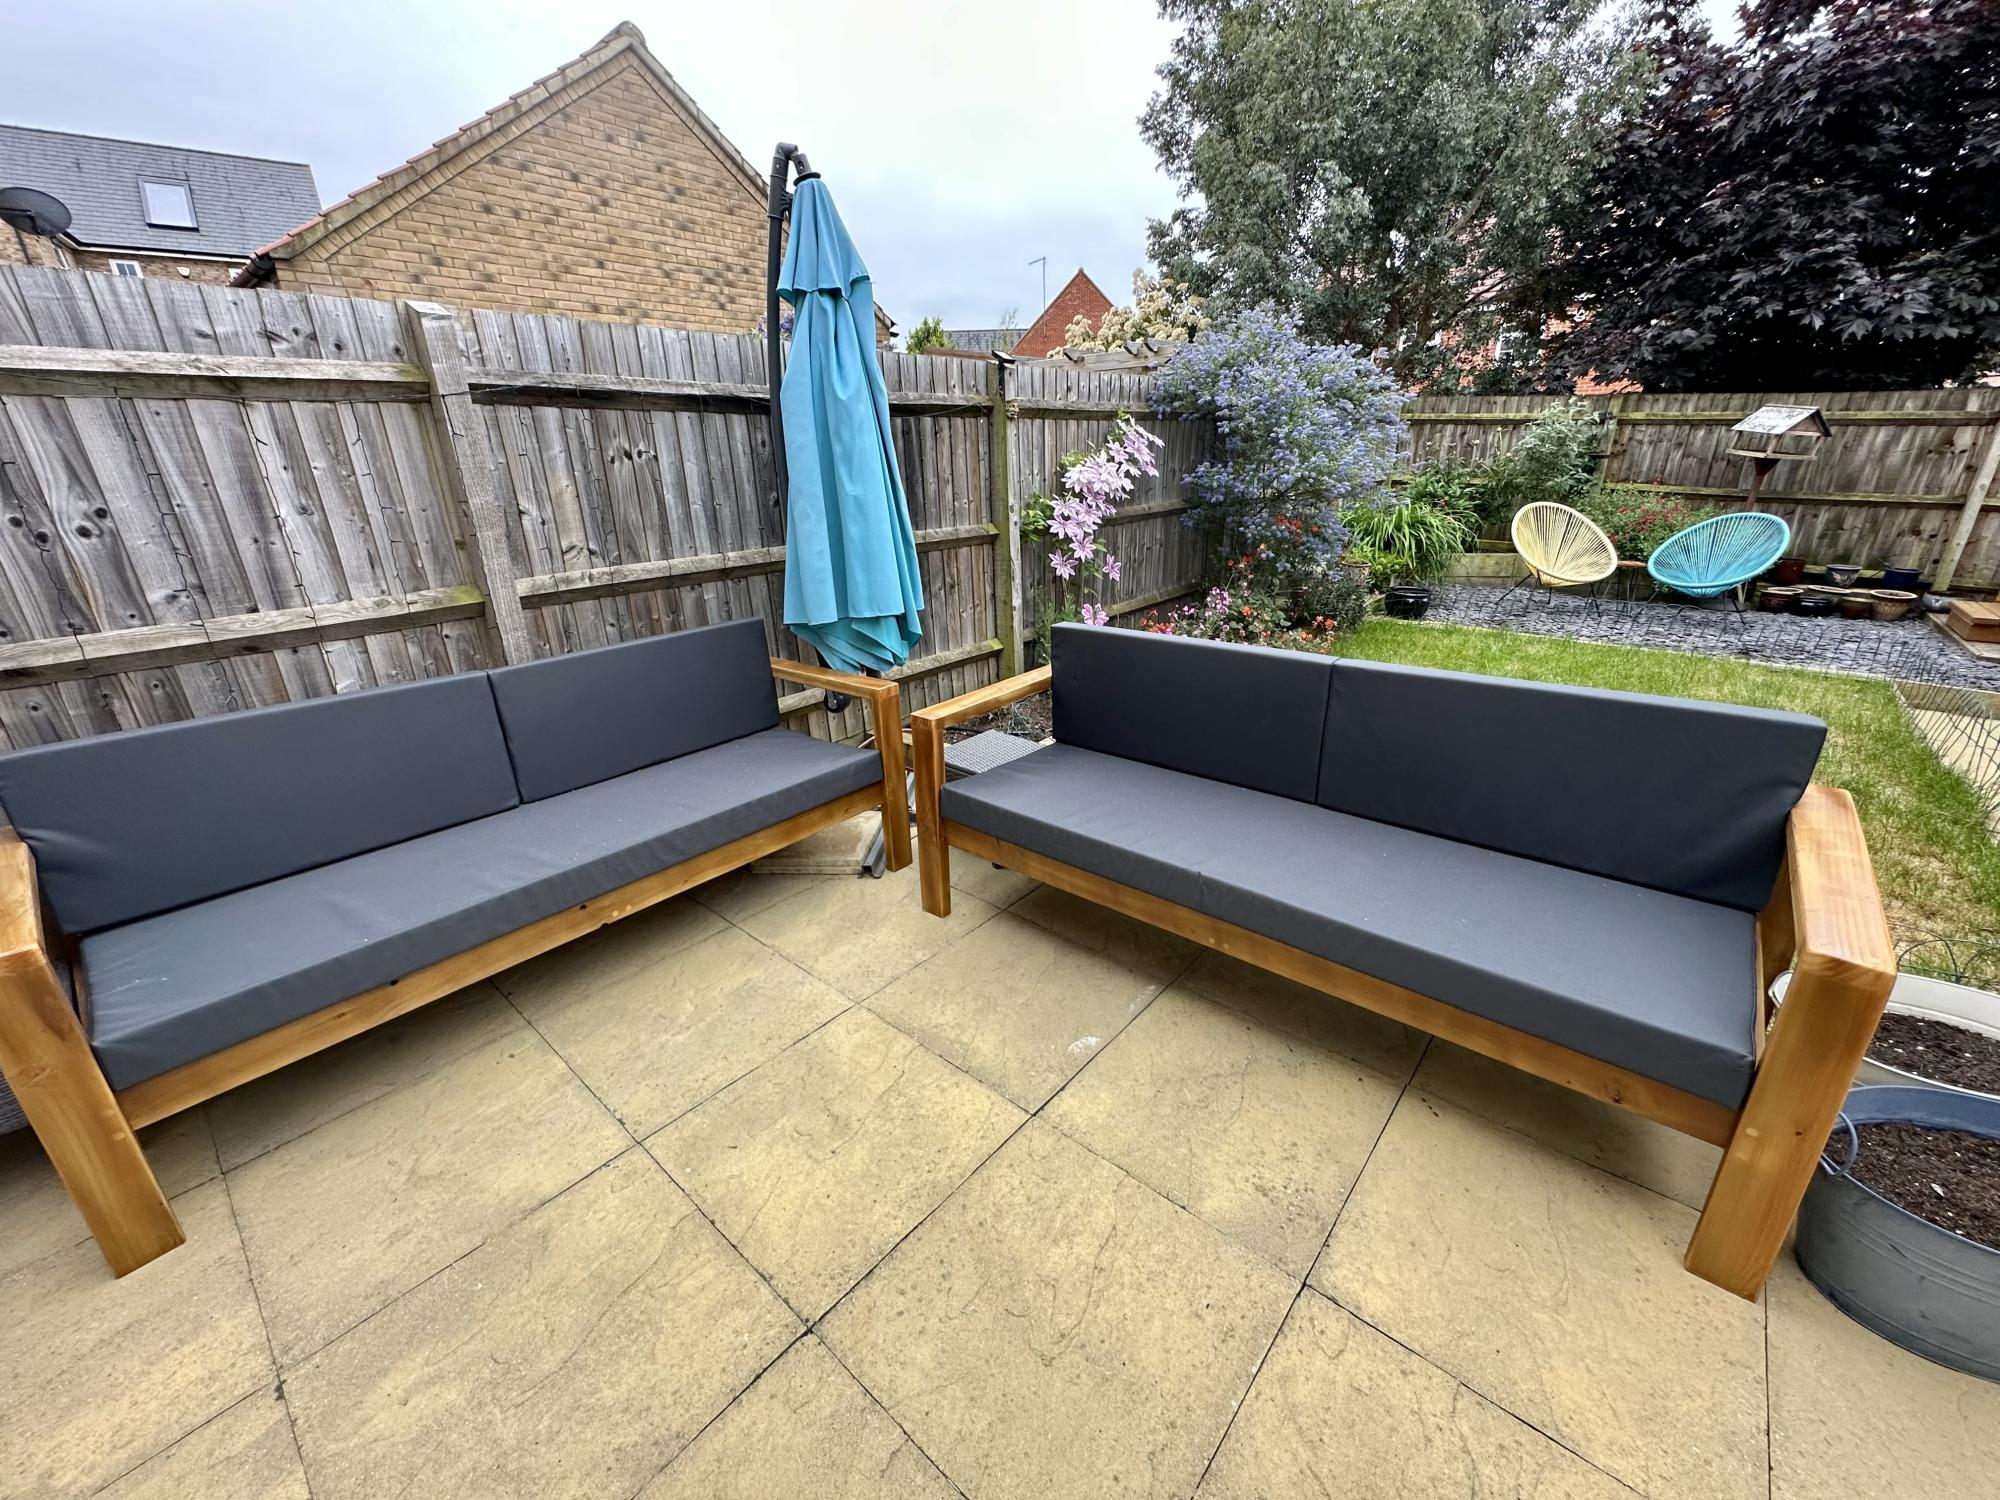
These were inspired from a few different projects of Ana’s, great fun to build and have transformed our patio area
Comments
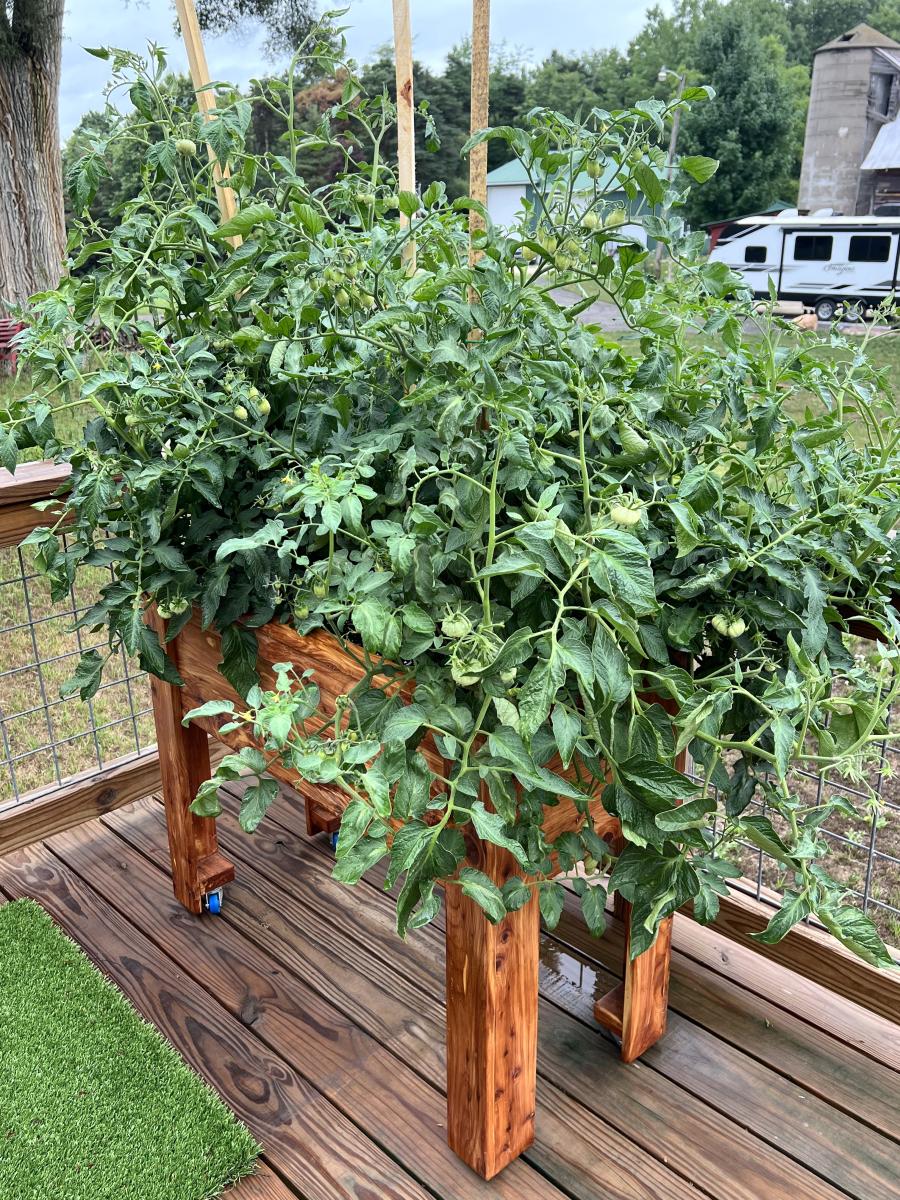
DIY Raised Garden Planter on Casters
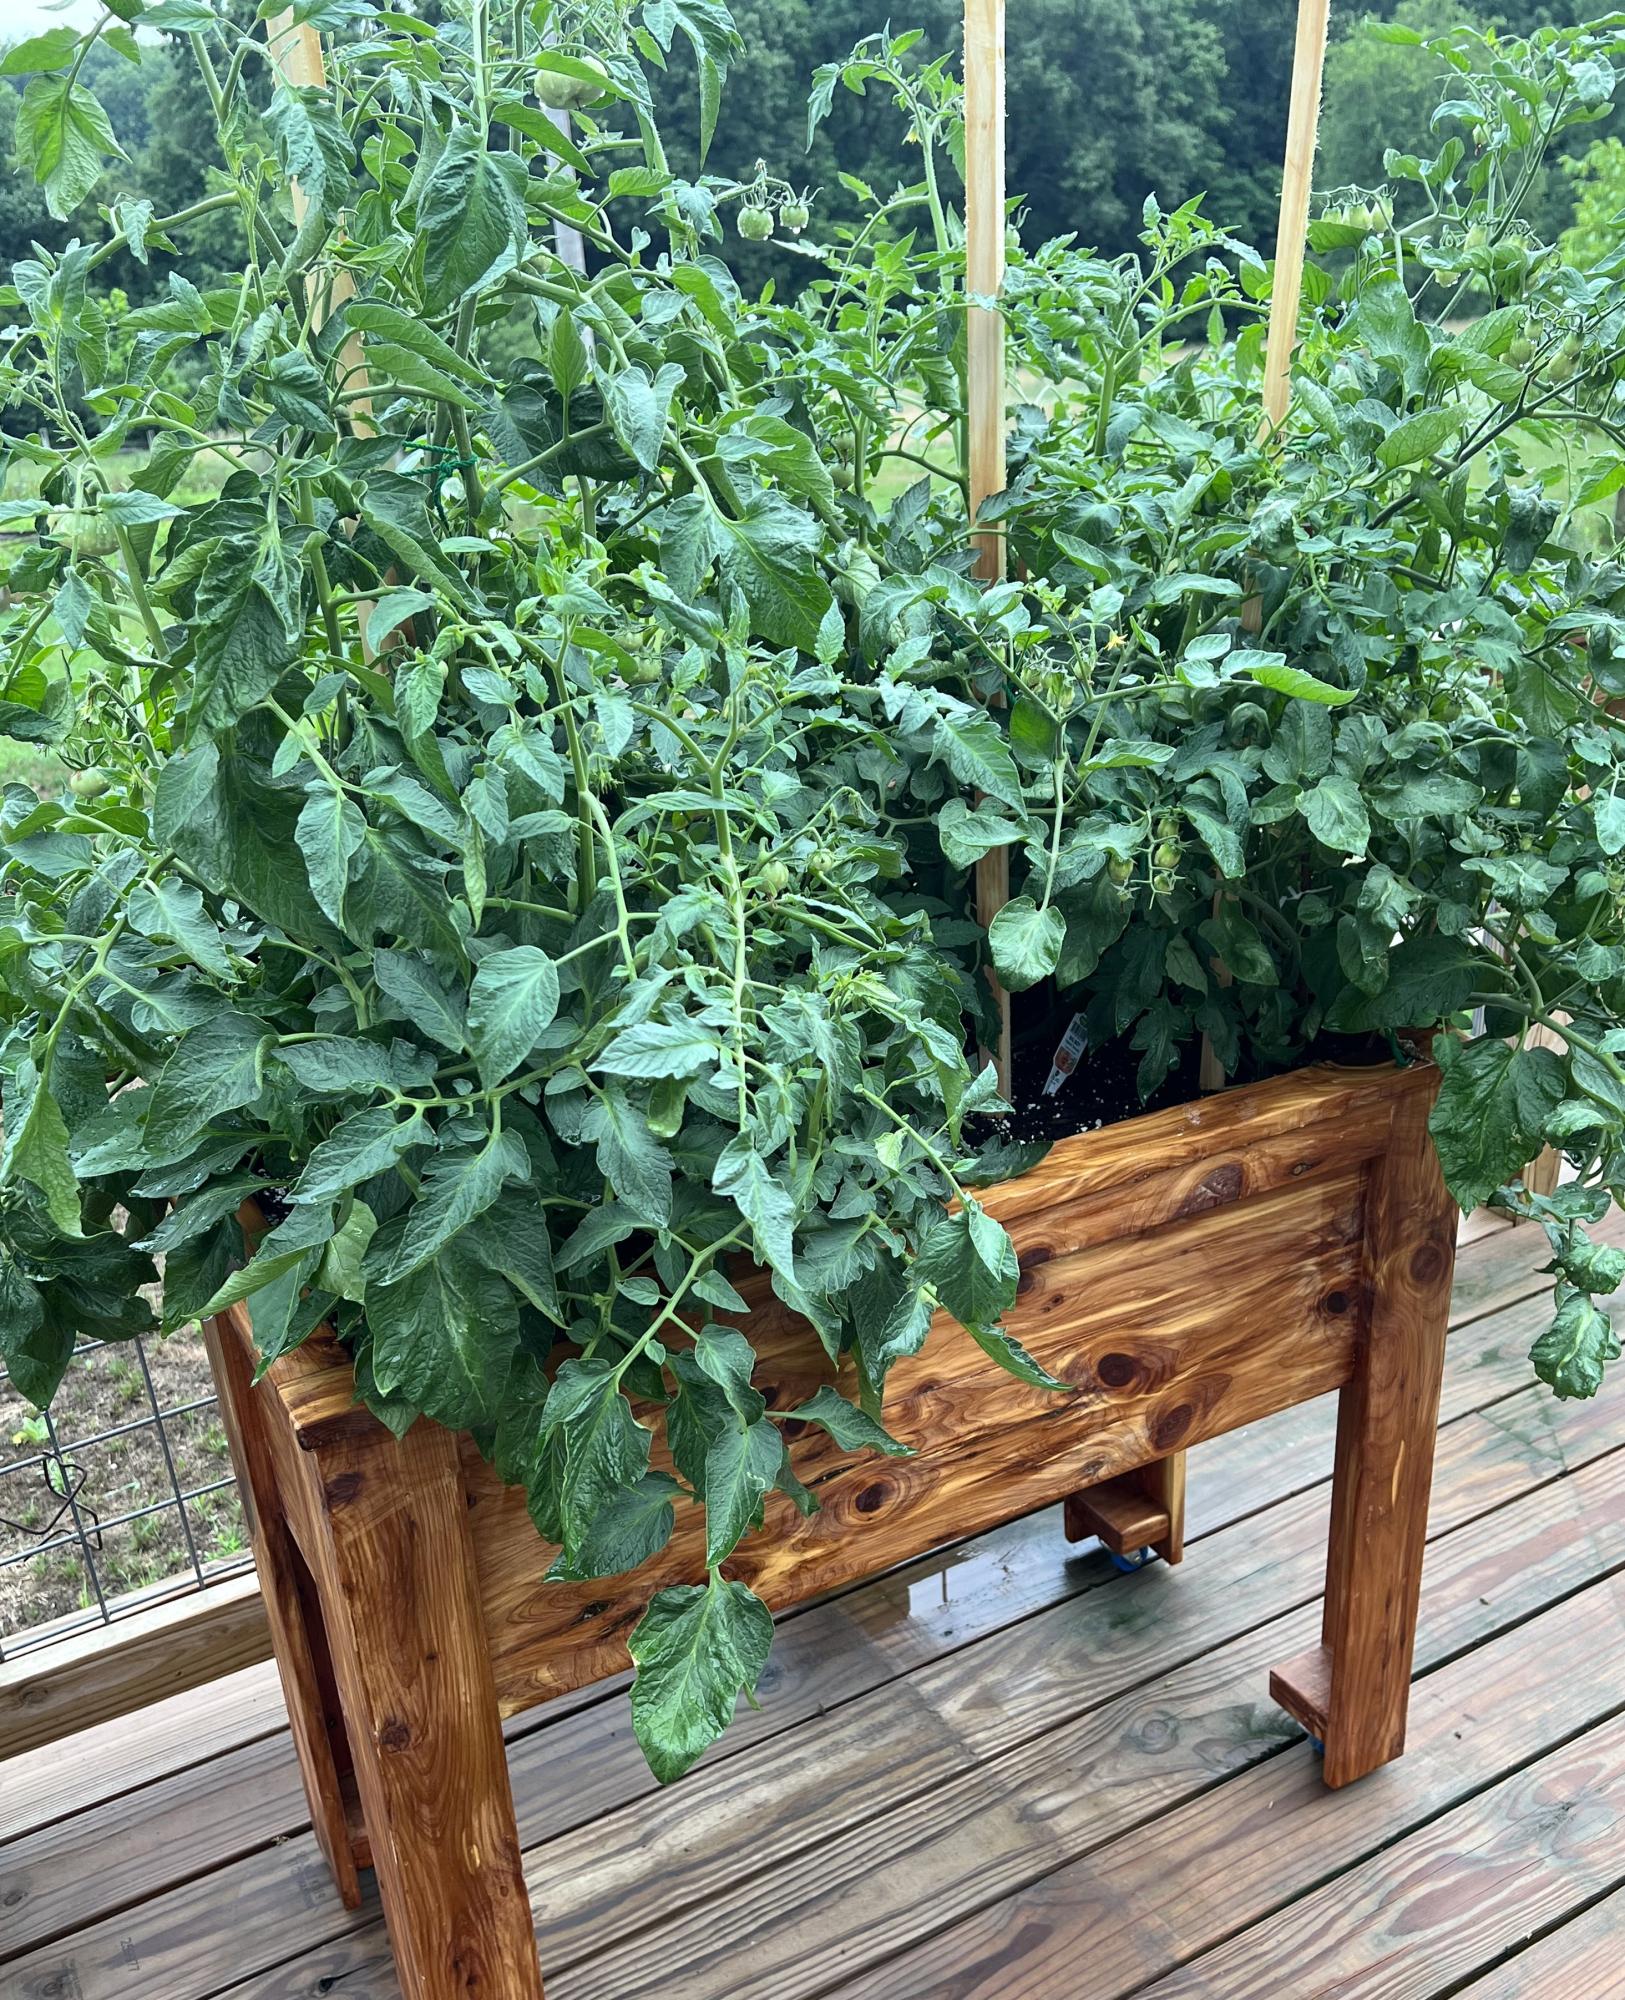
I saw your raised garden box and decided to make it for my wife so she could garden on our deck due to medical problems. She absolutely loved it.
The only thing I did different was I added casters to the legs so it can be moved easily on the deck.
Thank you very much for the idea and plans. We really enjoy them.
John Sterzick
Built from Plan(s)
DIY Wood Stool
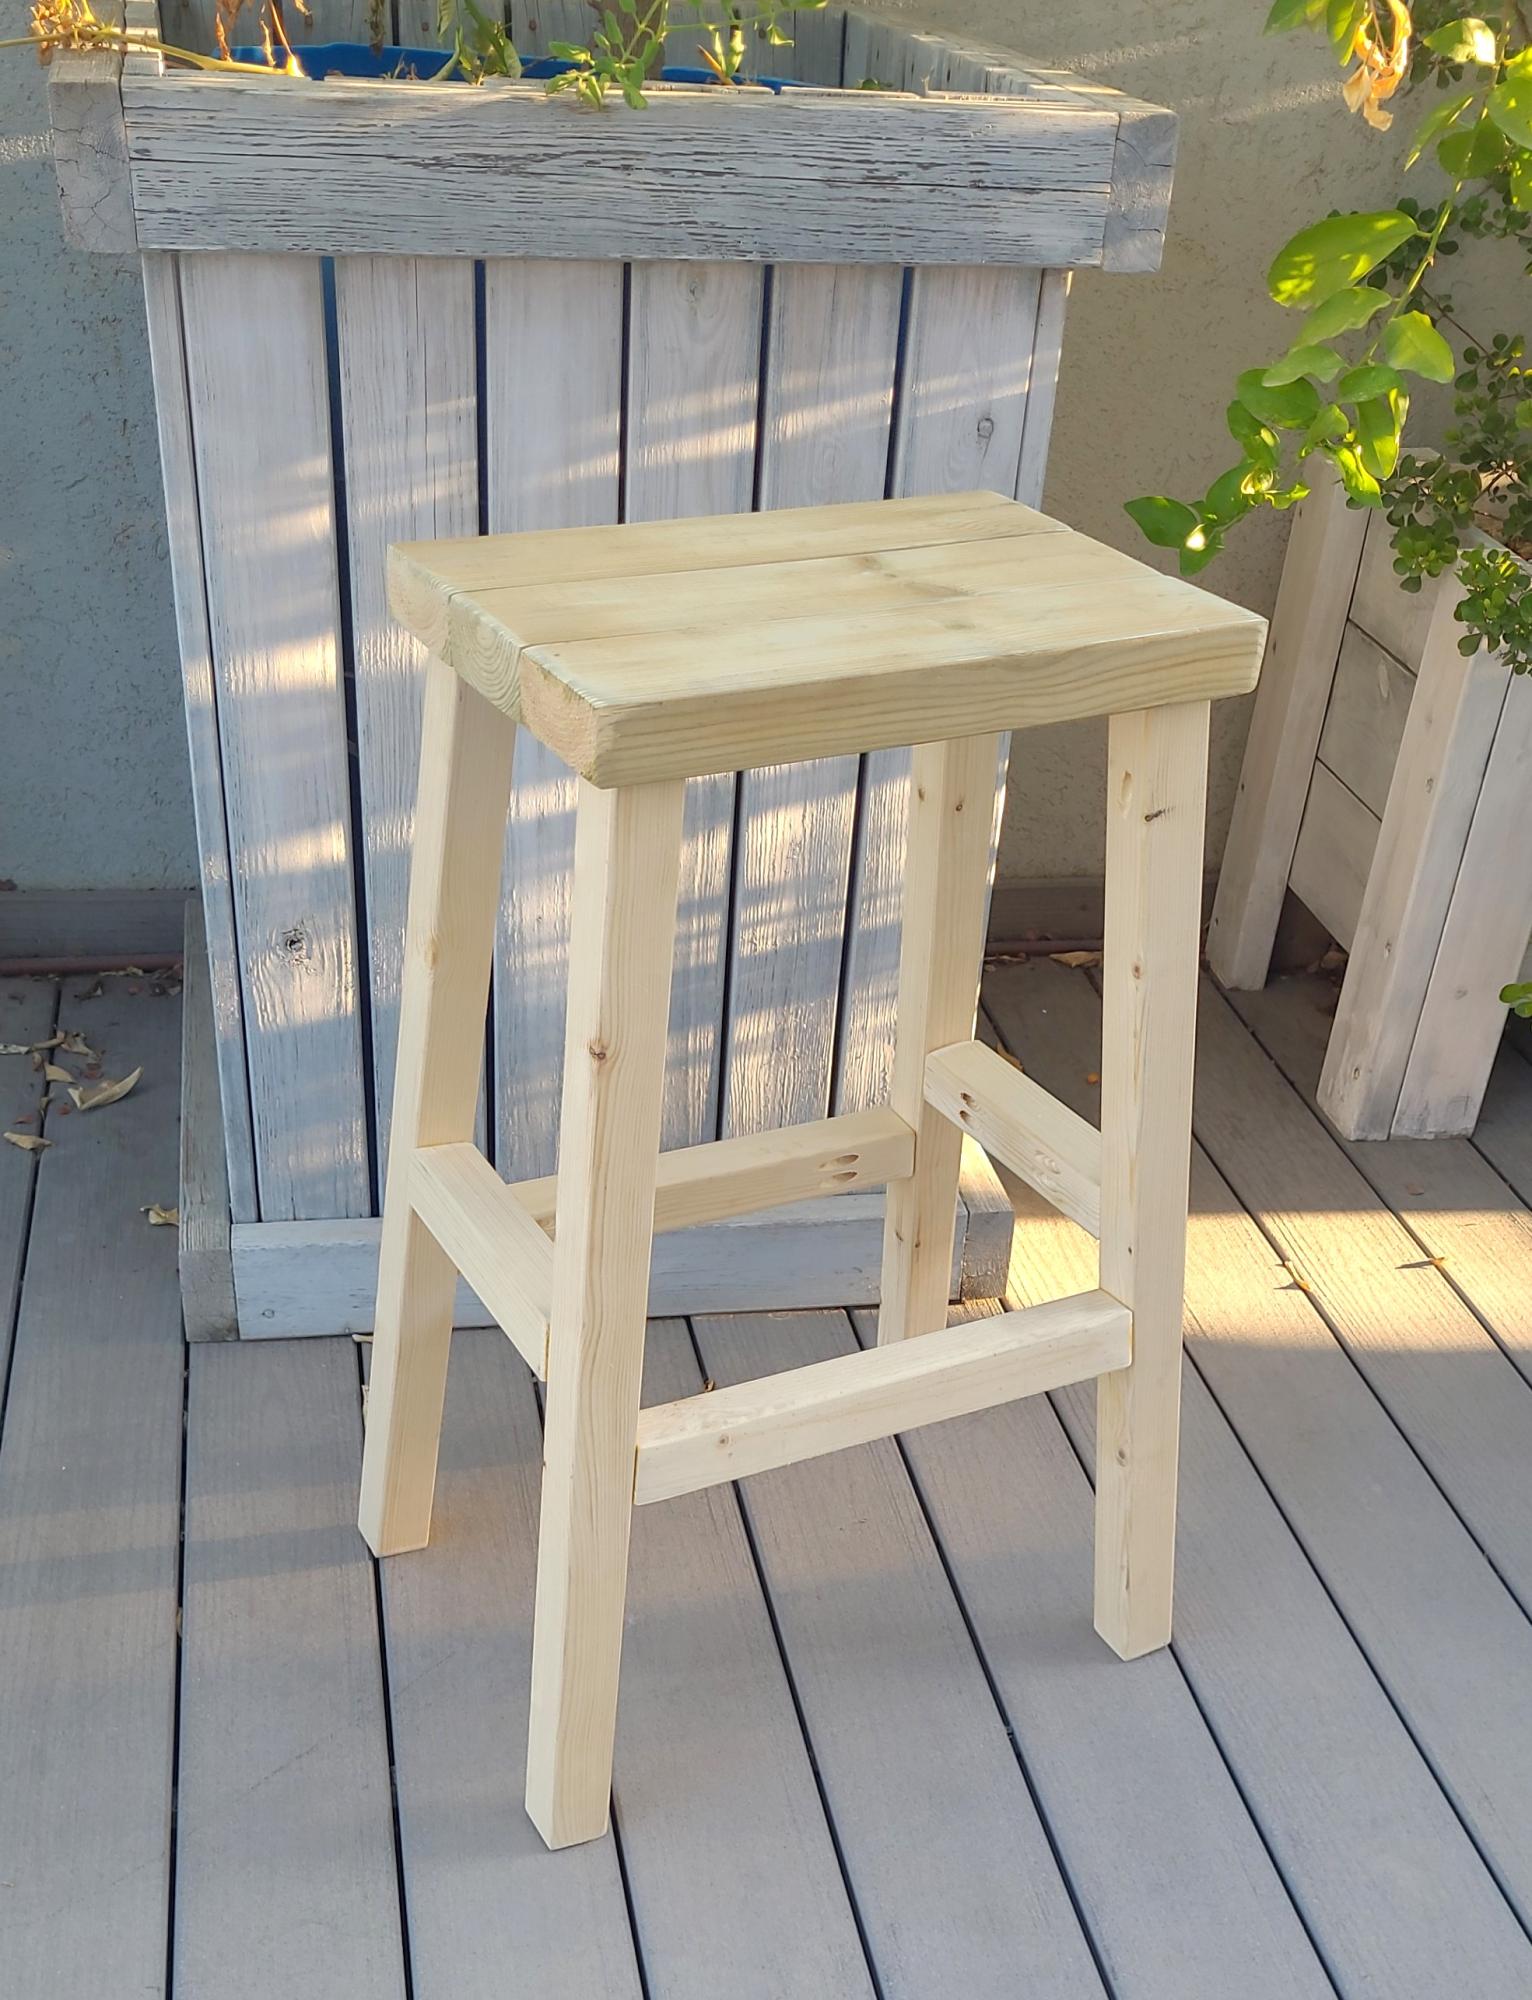
For my son's wedding!
Built from Plan(s)
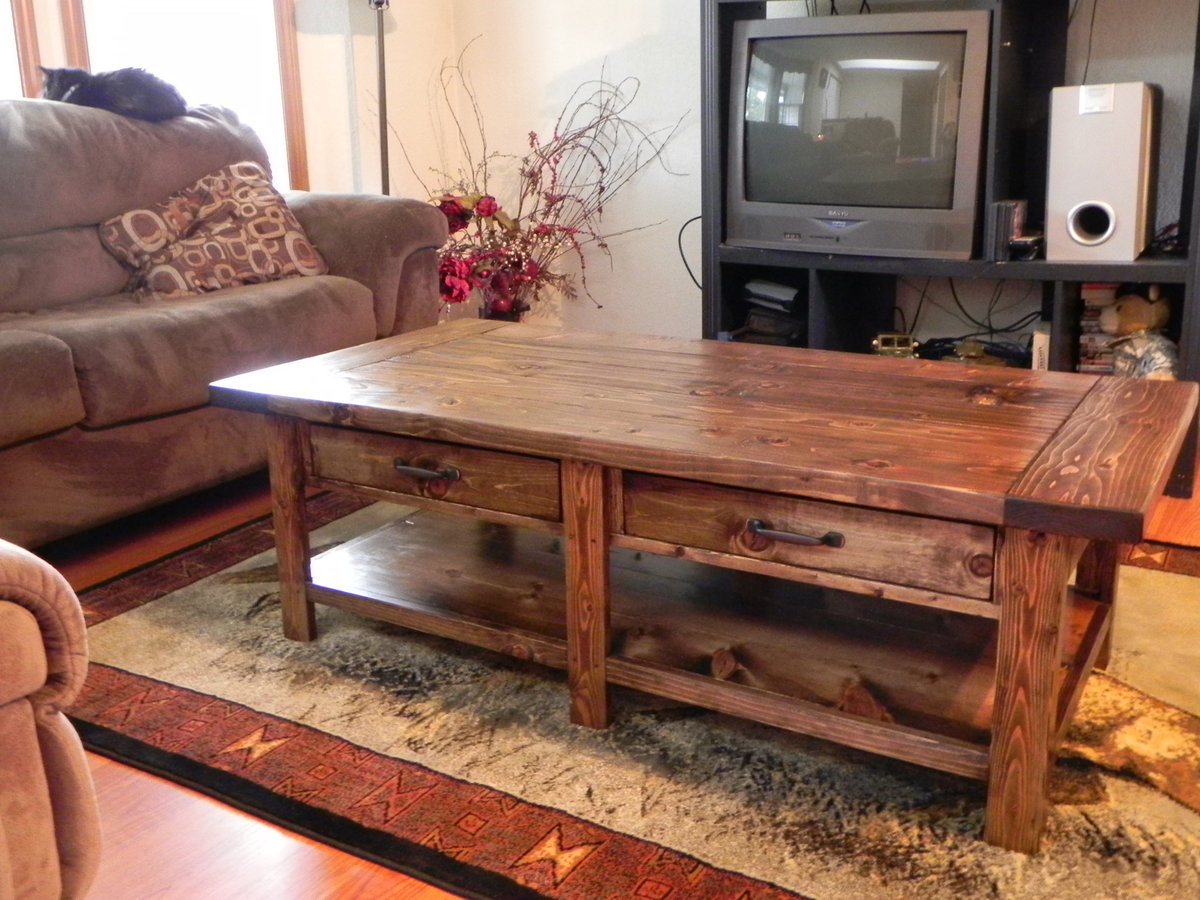
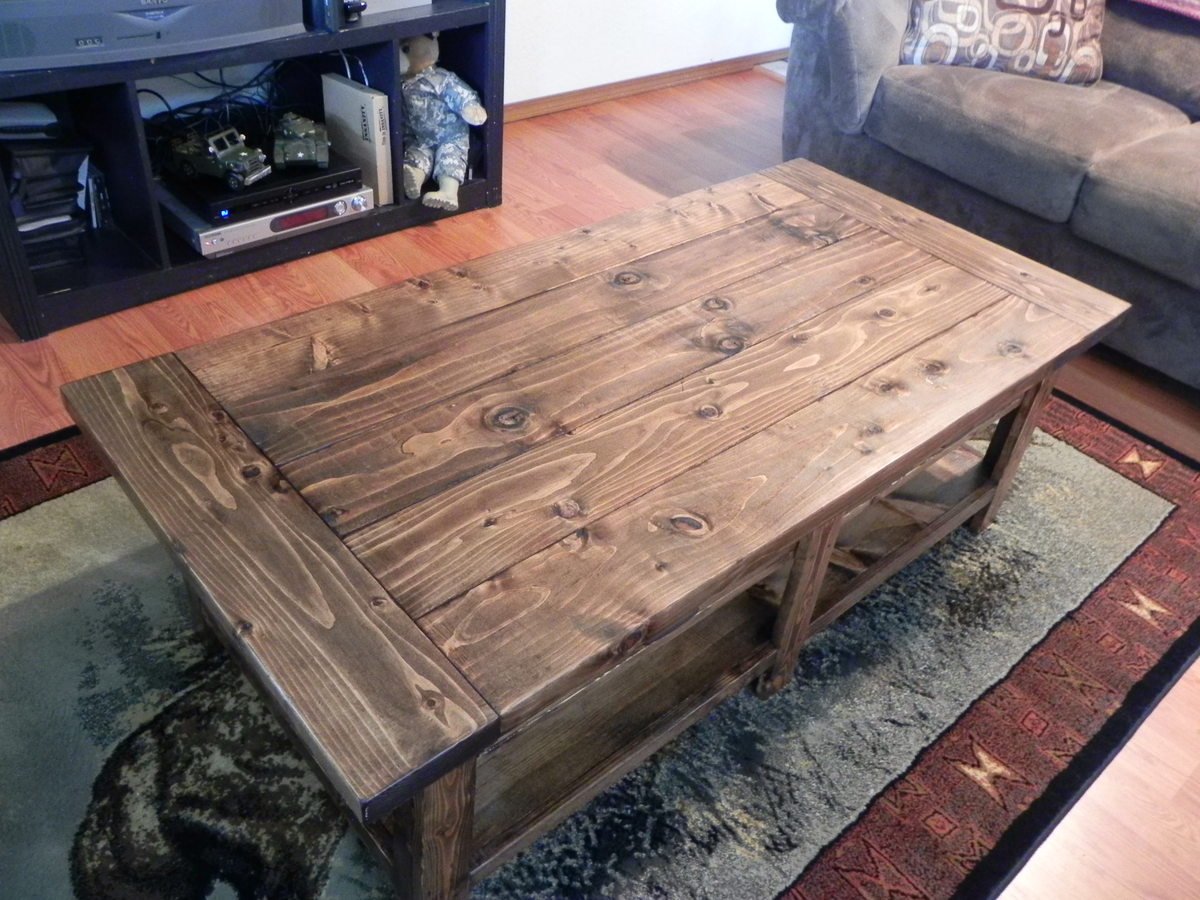
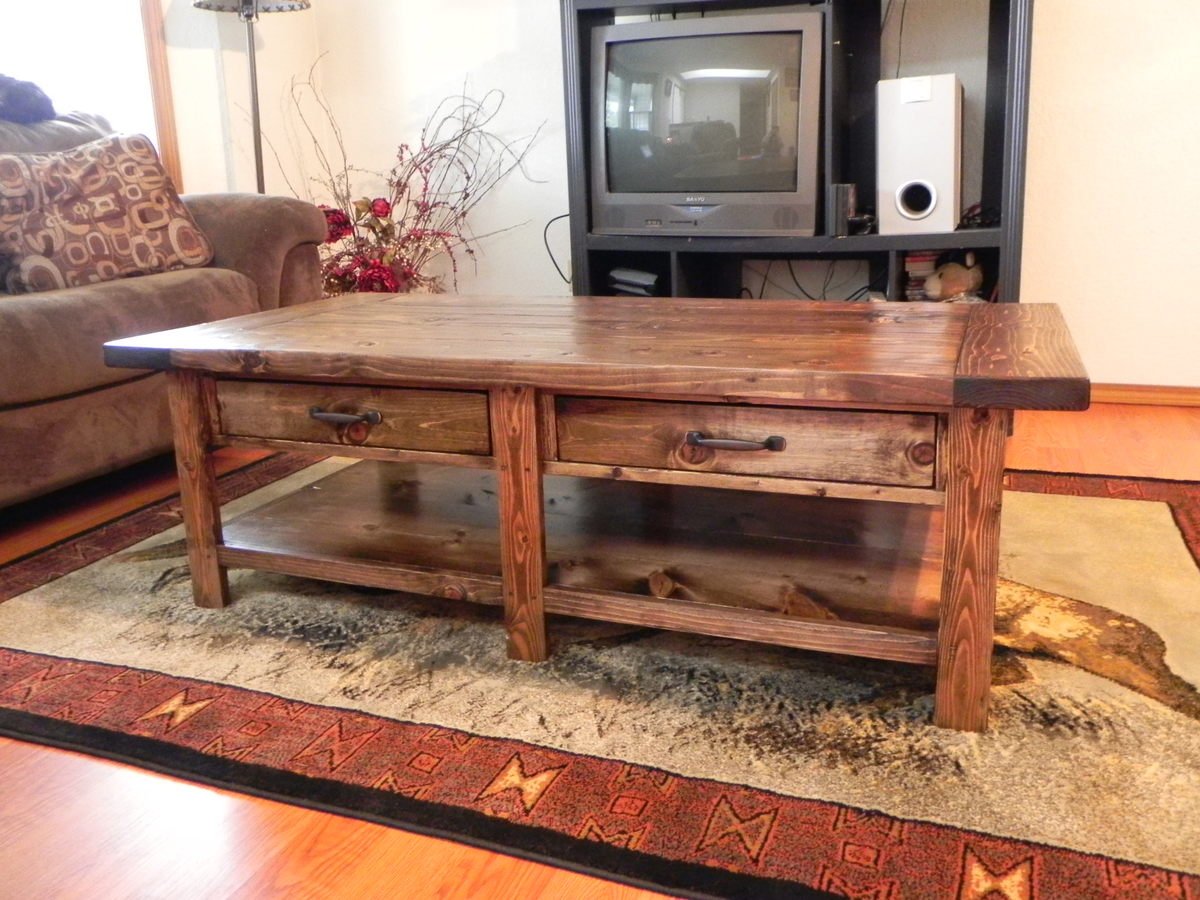
Benchright Coffee Table
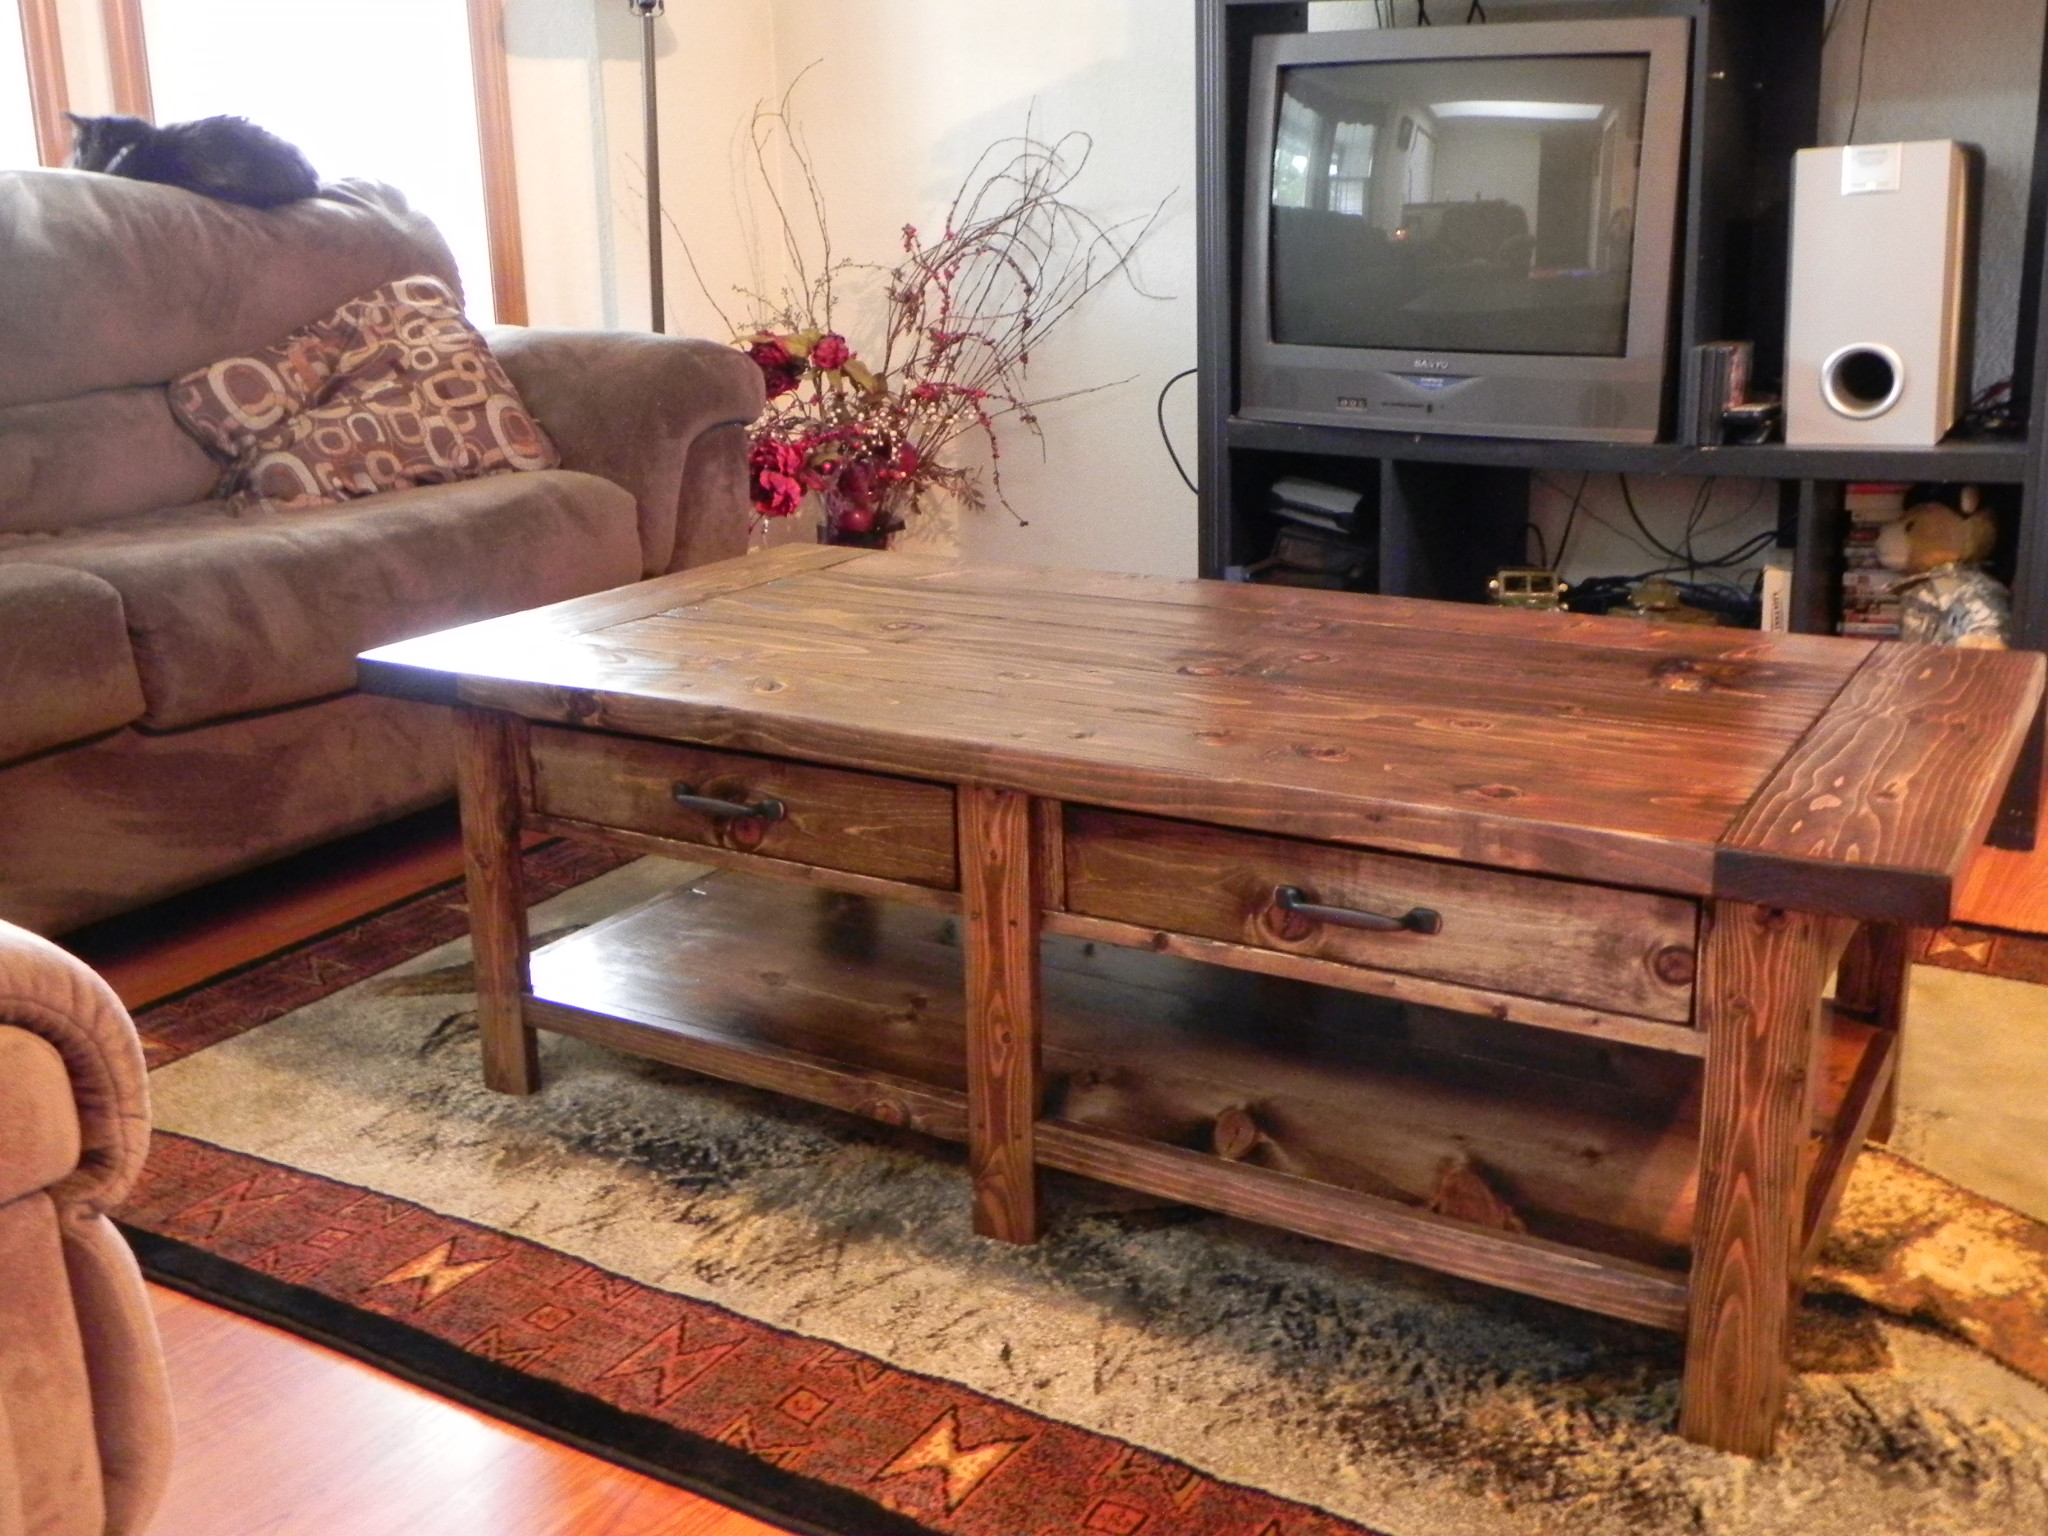
Great fun Easy Project! I am in absolute love with this table and give it the rustic feel and look that we were going for. We tried to get the knottiest pine that we could find with also the different colors. We love that look of pine!
Built from Plan(s)
Estimated Cost
$65
Estimated Time Investment
Weekend Project (10-20 Hours)
Finish Used
Min-wax Dark Walnut, Min-wax wood conditioner, Min-wax Semi Gloss Polyurethane. We also wet/dry sandpapered the top of the table to give it the extra smooth feel without letting go of the rustic look.
Recommended Skill Level
Intermediate
Comments

Wed, 04/18/2012 - 13:26
It's good to know I'm not the
It's good to know I'm not the only one who likes the knots and swirls and different shades in the pine boards! The last time I was at the lumberyard, when I told the lumberyard-guy that I was building furniture he tried to direct me to the clear pine. I had to explain to him that I like the character that the knots and such give to a piece. He thought I was nuts, but he still helped me find the straightest boards in the rack.
Tue, 07/30/2013 - 08:17
building material questions
Hi I love your piece and think it came out great. I noticed on the original plans that 2 x6 pieces were listed. Did you use them in your project?
Thanks
Sat, 08/17/2013 - 10:42
Sorry it took me so long to
Sorry it took me so long to reply and thanks for the compliment. But, yes we did use 2x6's on this table.
DIY Nursery Closet
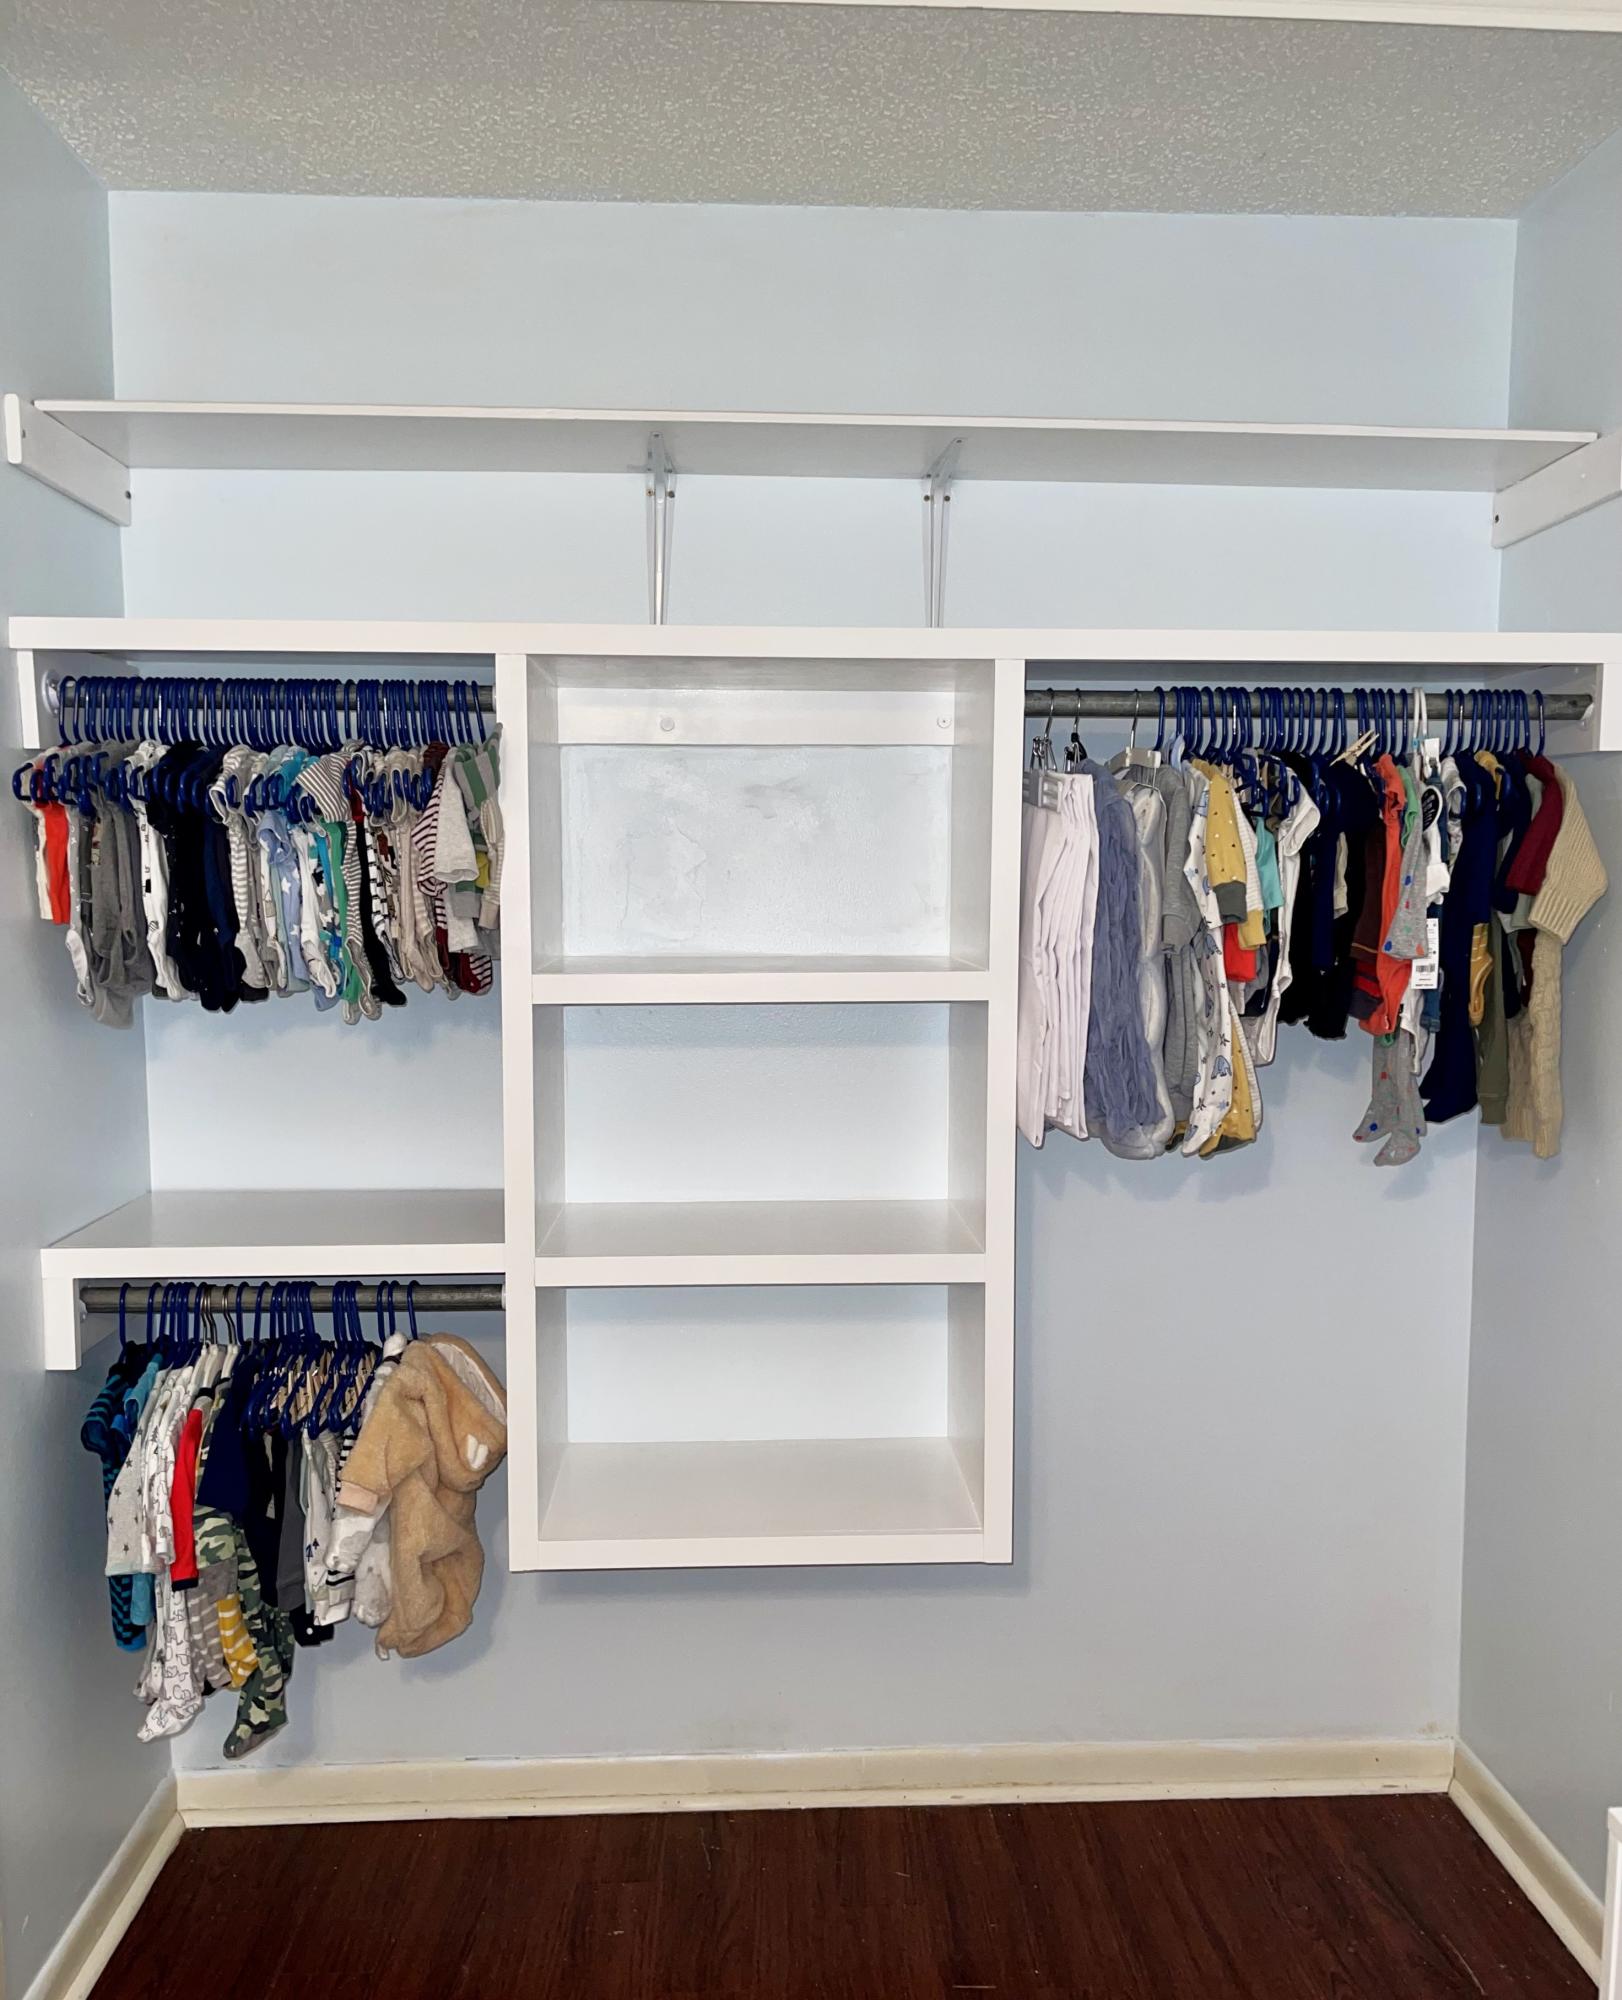
This project is based on the floating closet tower build. This is the first time I’ve attempted a renovation project of this size, and I feel satisfied with the results. I did not purchase my boards from shelf help, I cut mine from a sheet and a half of plywood. Thank you for providing your plans for free. They are very helpful for beginners like me!!
Charity P
Built from Plan(s)
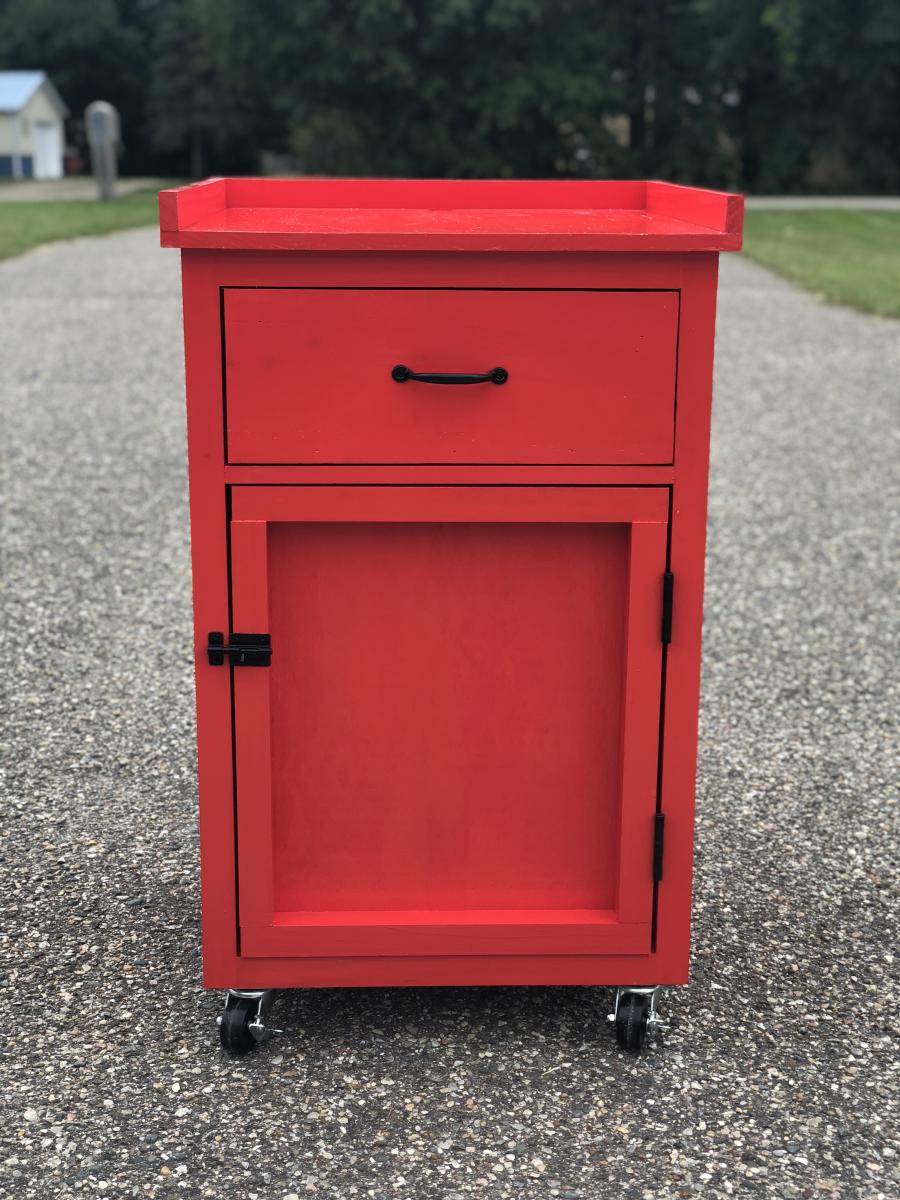
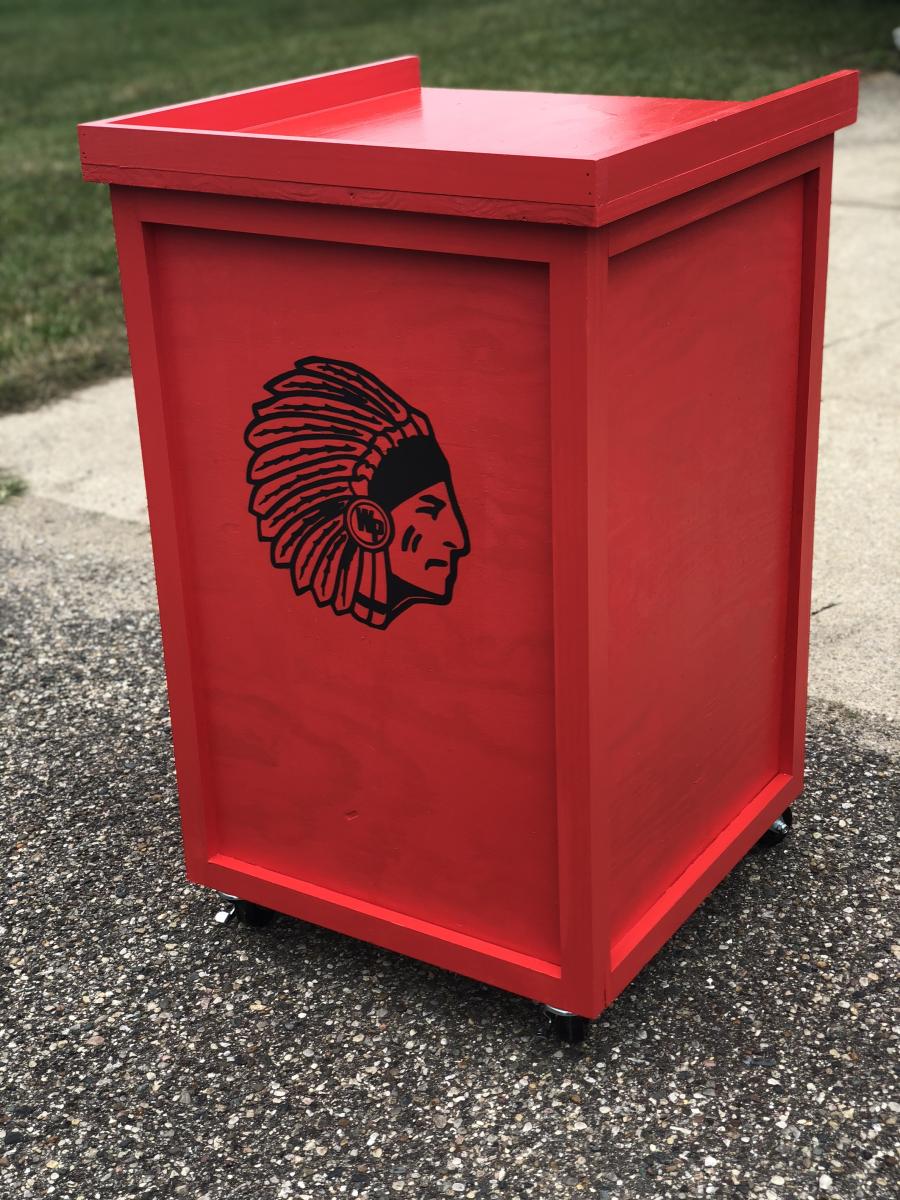
Popcorn Machine Stand and Storage on Wheels
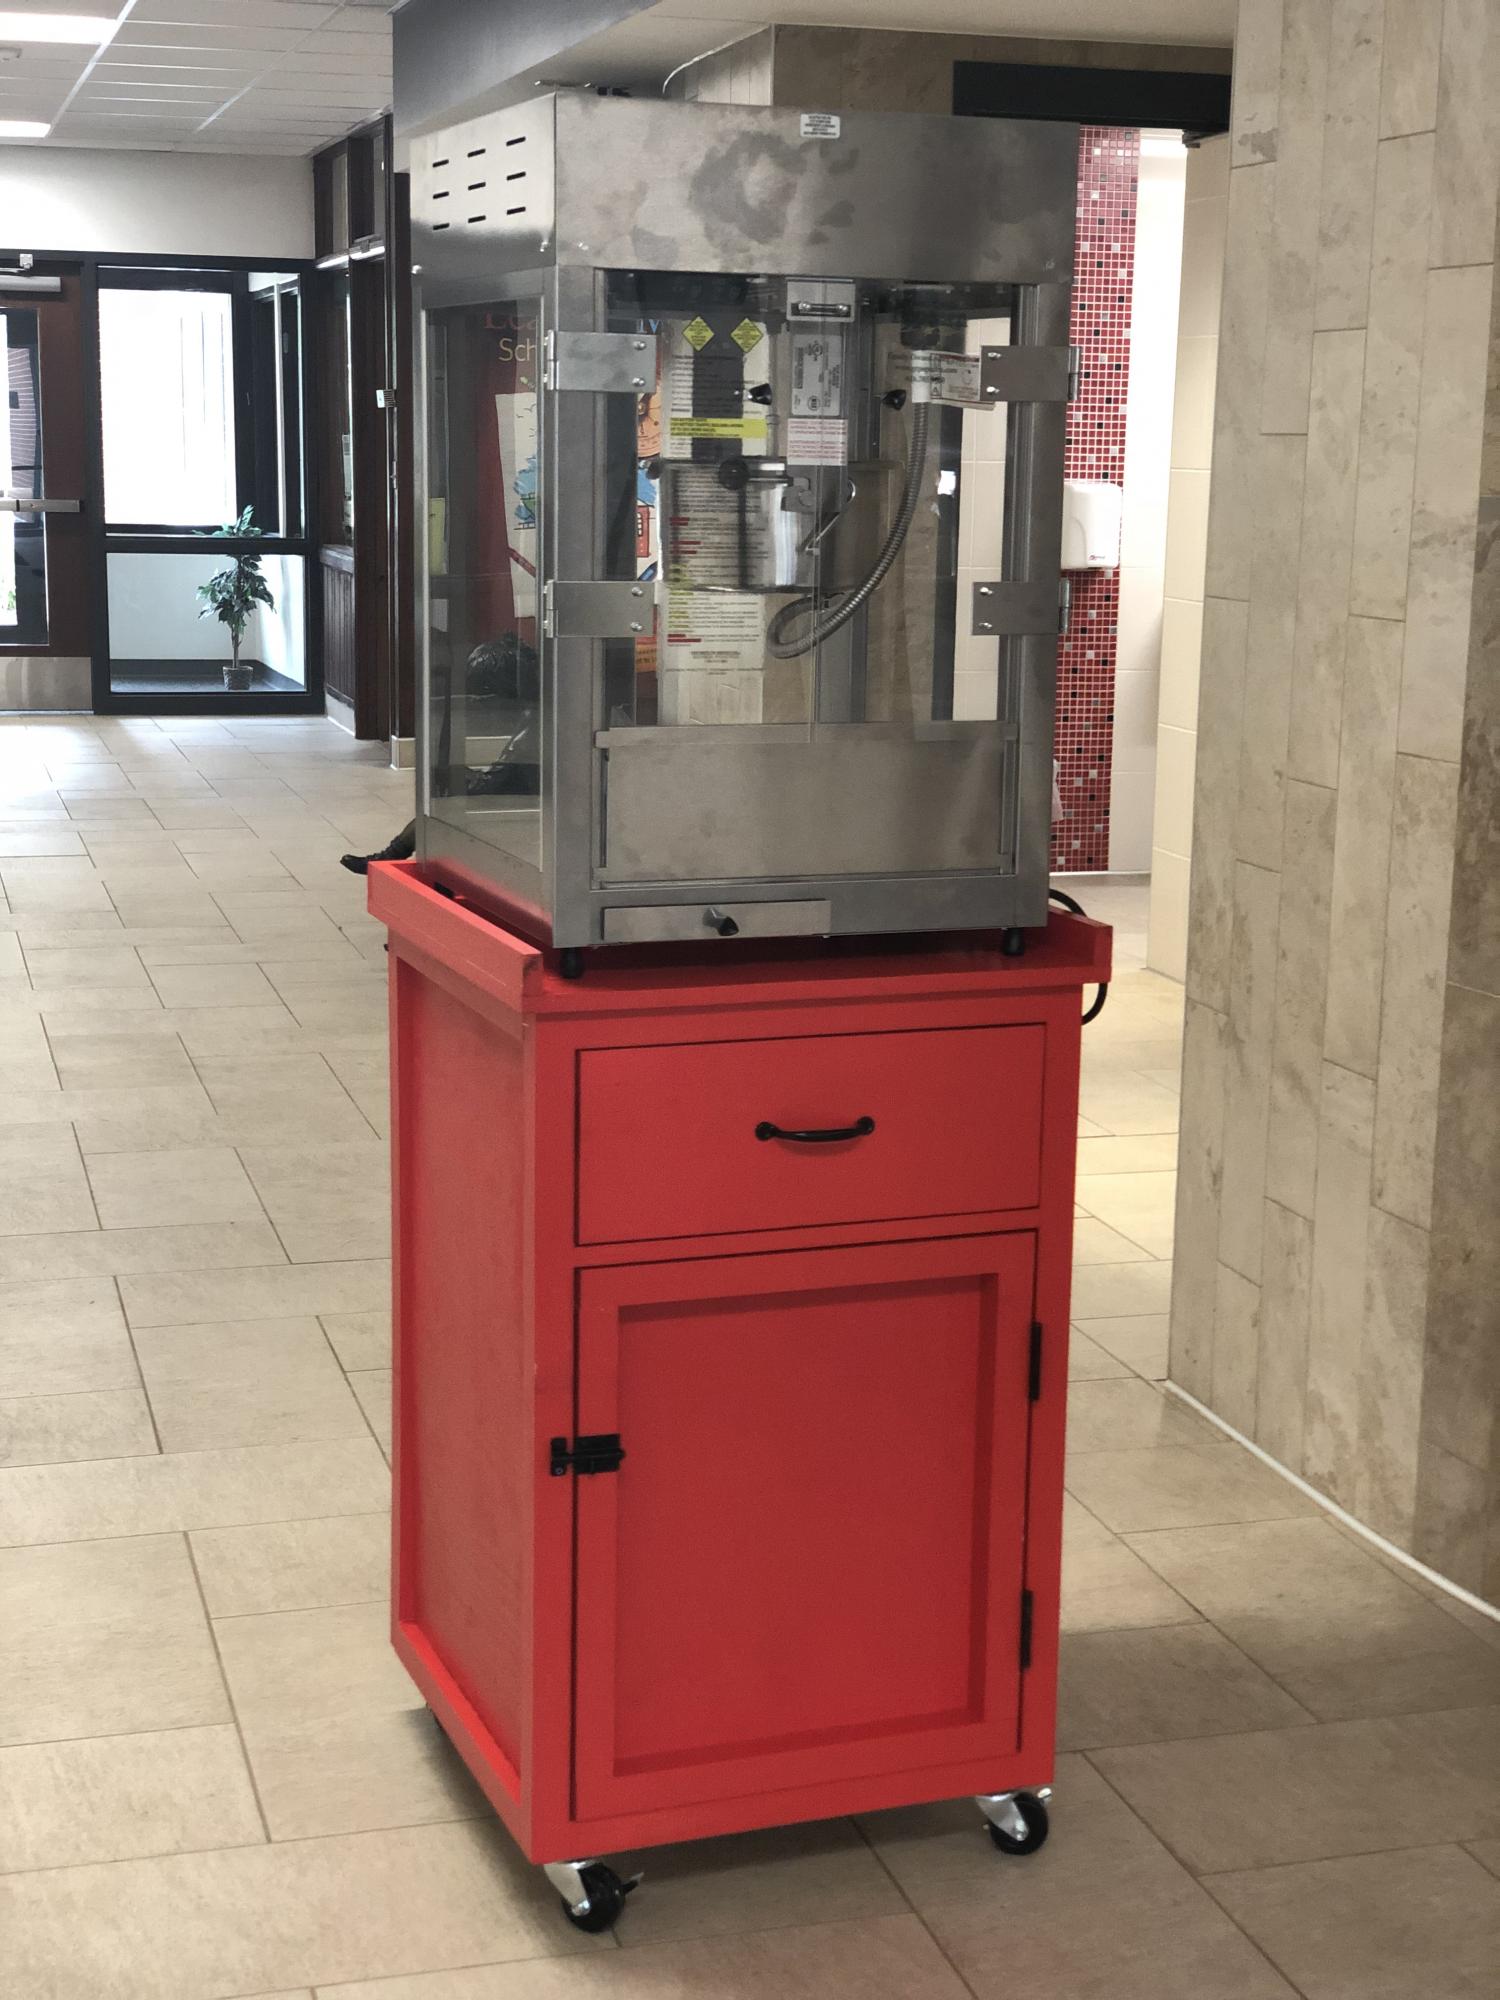
My parent organization at the elementary school had just bought a brand new popcorn machine but had nowhere to store it. So, I offered to try my hand at building a stand with storage. I knew that we needed the stand to be mobile as the idea was to pop the popcorn in different classrooms for incentives, etc. I modified the kitchen prep cart to have a large cabinet underneath to store the popcorn, bags, etc. The pullout drawer was home to the measuring cups, directions, etc. I used my Cricut and cut out our school logo, placed on the popcorn machine and then polyurethaned it to the side. It turned out great!!! I could not be happier :)

Built from Plan(s)
Estimated Cost
$120
Estimated Time Investment
Weekend Project (10-20 Hours)
Finish Used
Red paint and polyurethane
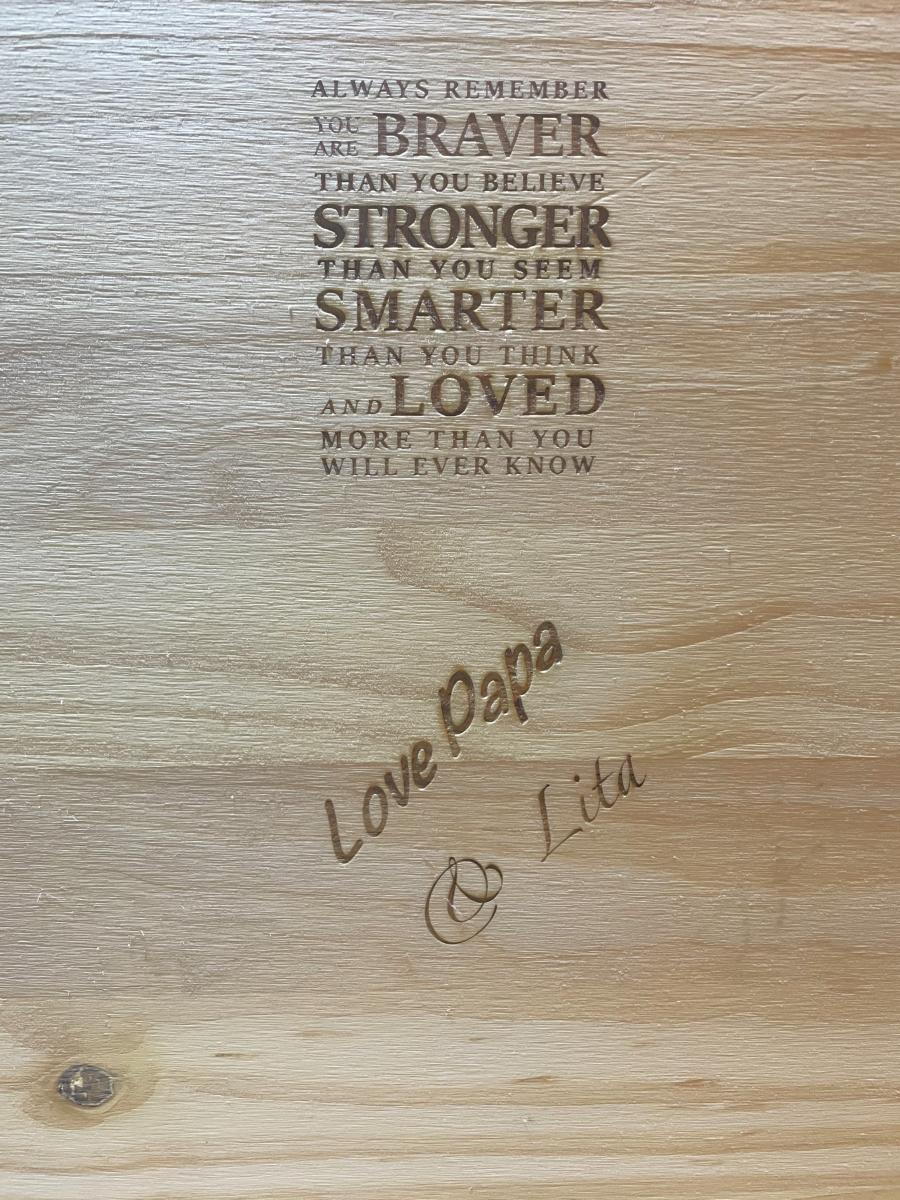
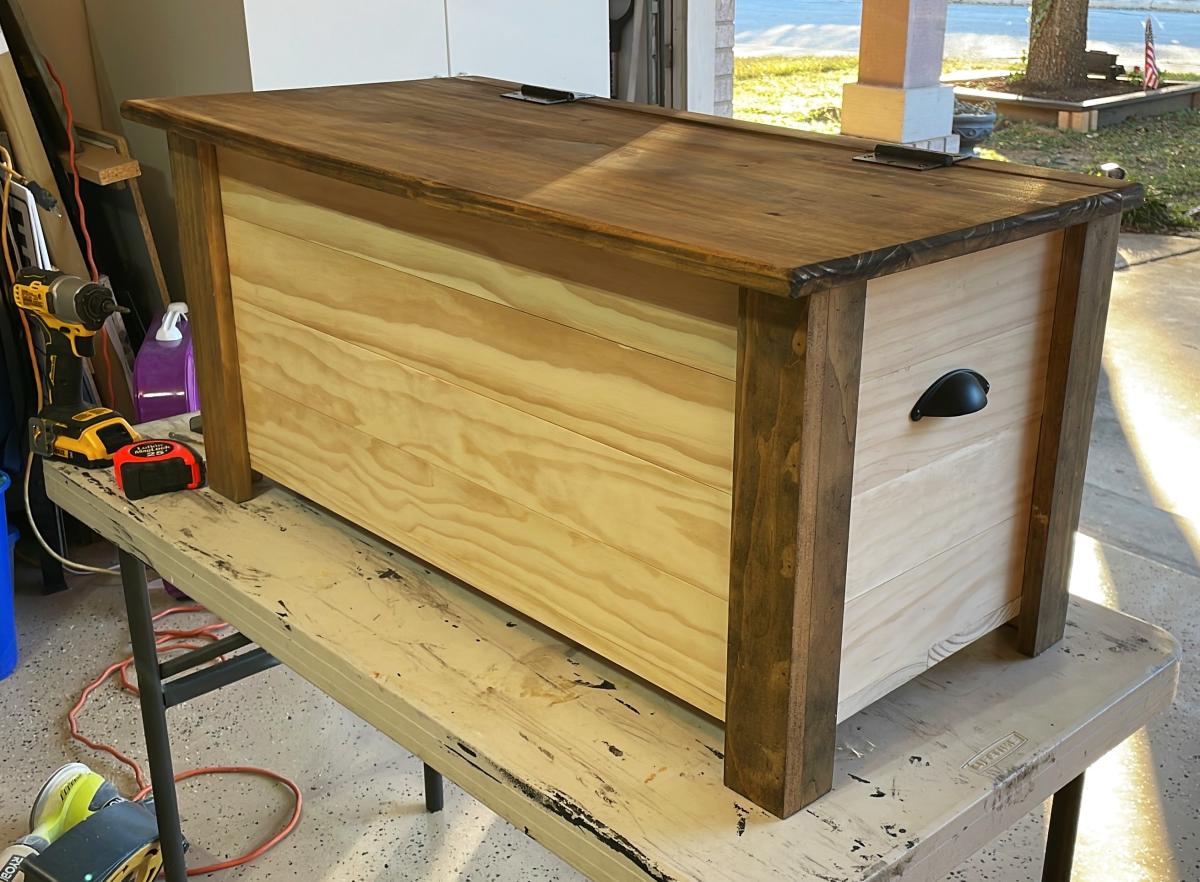
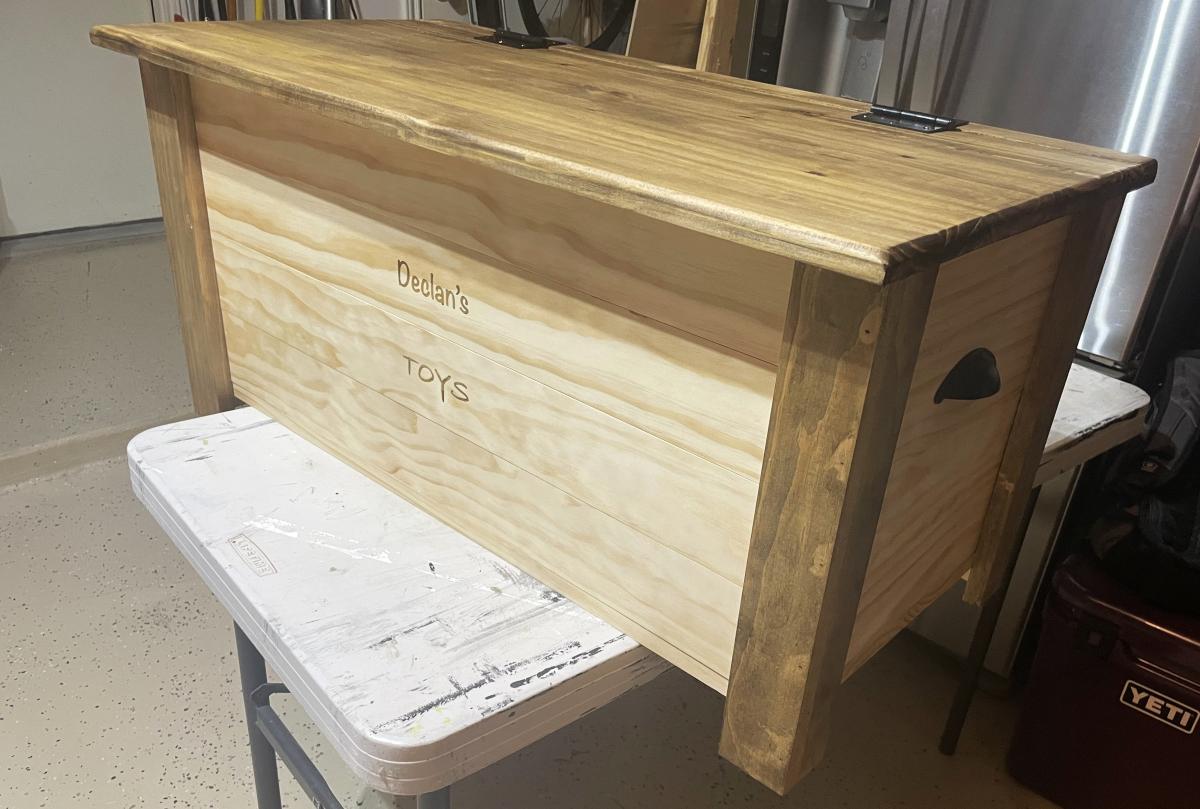
Custom Toy Boxes
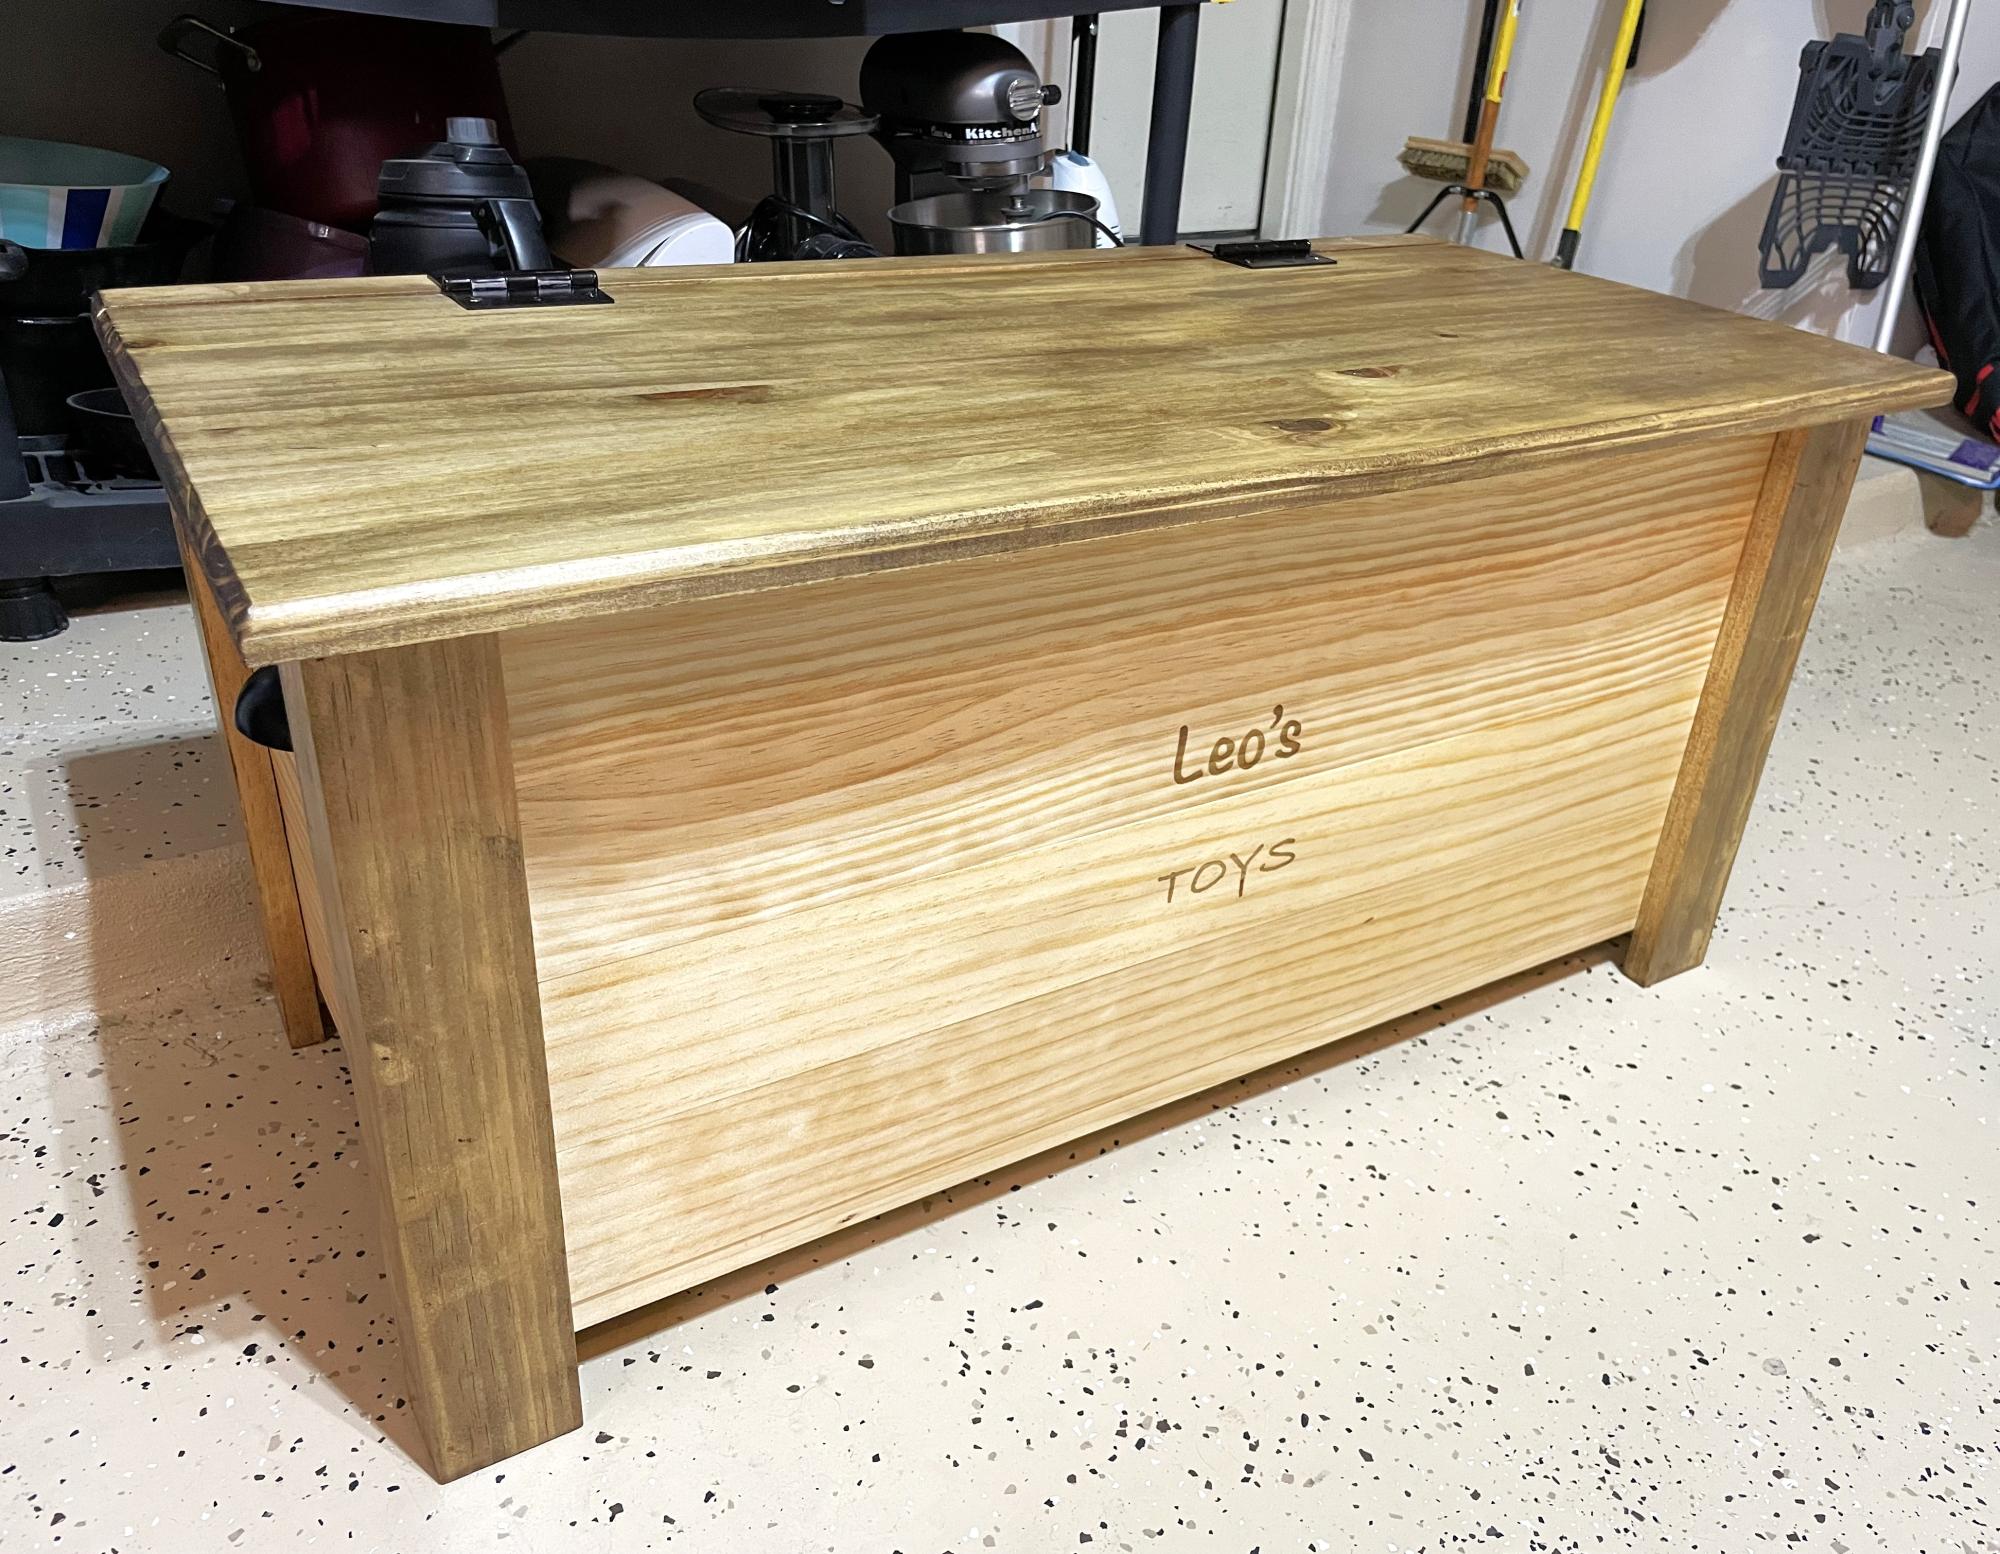
I made these toy boxes for my two grandsons for Christmas. They have been laser etched with their names and a special note on the inside of the top lid. "Always remember you are braver than you believe, Stronger than you seem, Smarter than you think and Loved more than you will ever know. Love Papa and Lita.
Jim Greaves https://www.facebook.com/jim.greaves.180
Built from Plan(s)
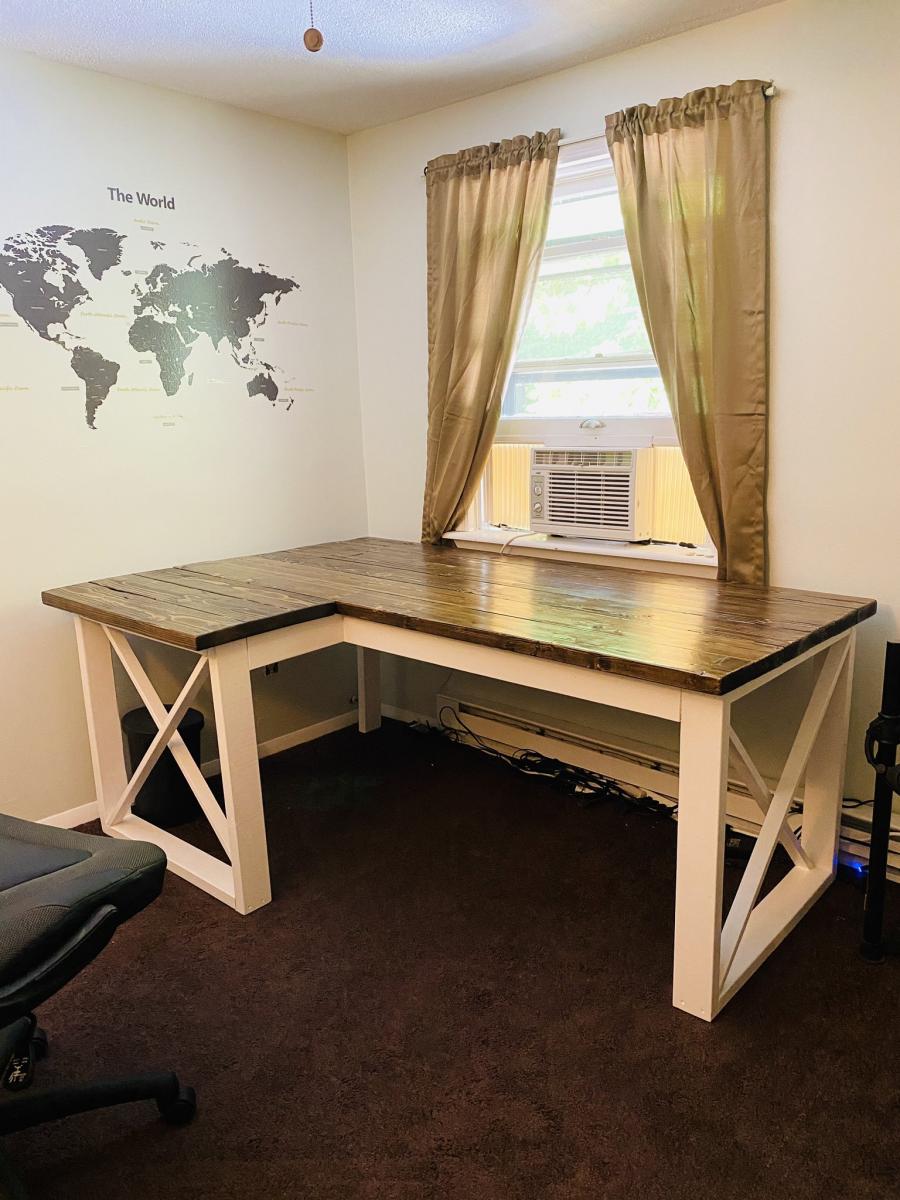
L Shaped Double X Desk
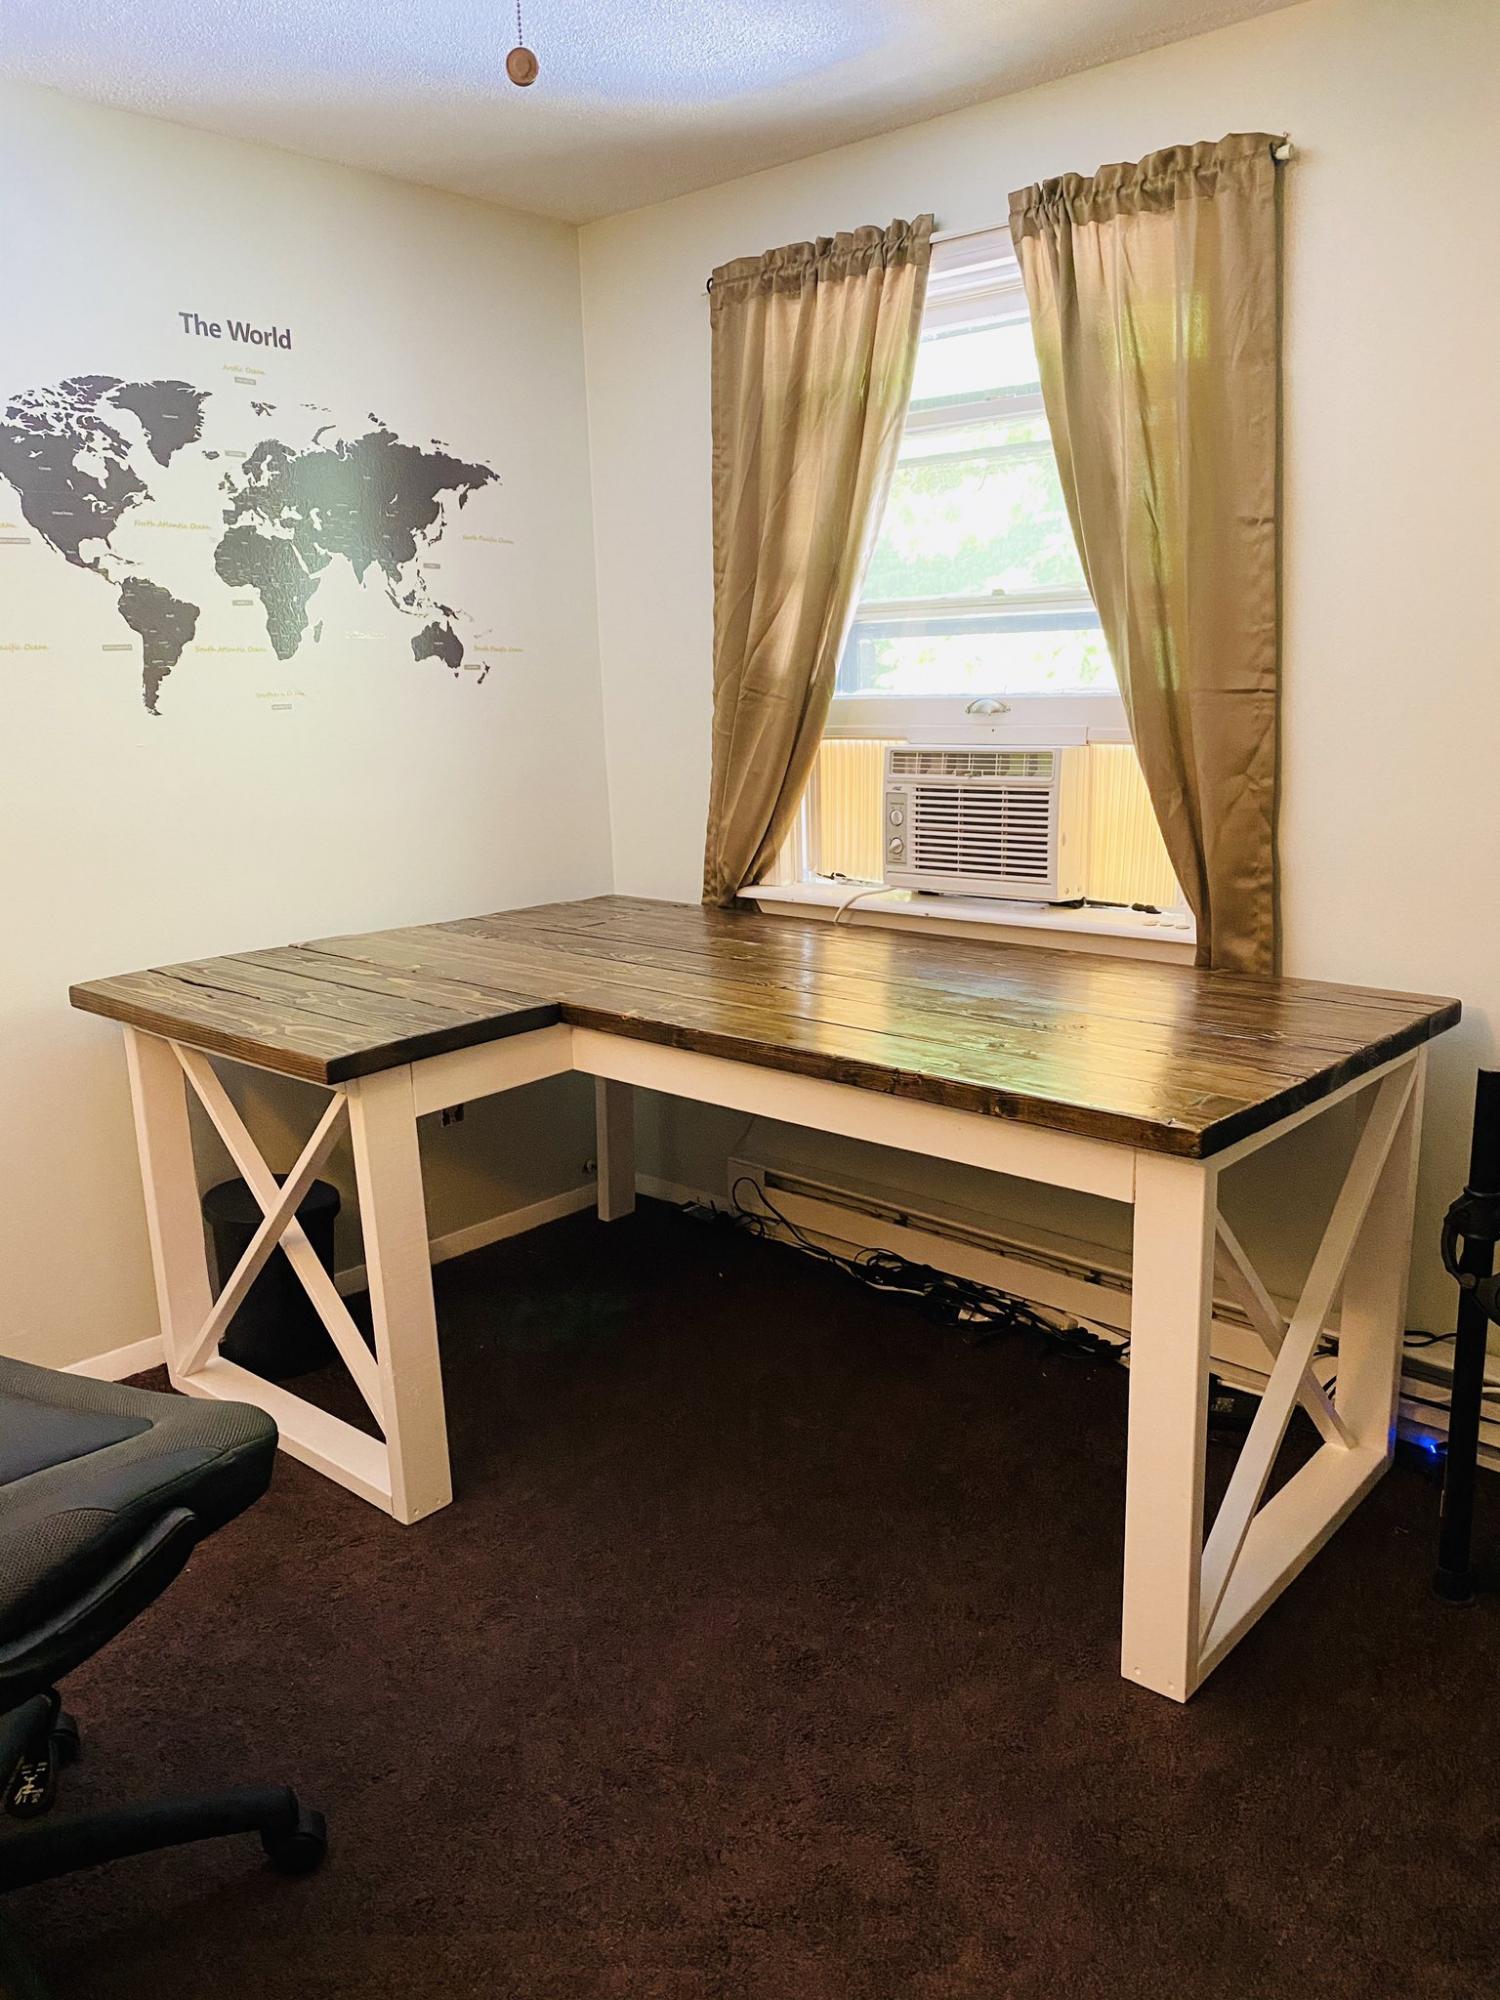
Made the move to working from home because of the pandemic. After 2 months and no end in sight, I decided I needed a better workstation. Built this in about 5 days. Really nice sturdy desk but make sure you measure how big it is first, I think I could have shrank this down by one less 2x6 on the top. It's a very large desk from the plans.
Built from Plan(s)
Estimated Cost
$40
Estimated Time Investment
Weekend Project (10-20 Hours)
Finish Used
Jacobean stain
Recommended Skill Level
Beginner
Podium for My Wife's Classroom
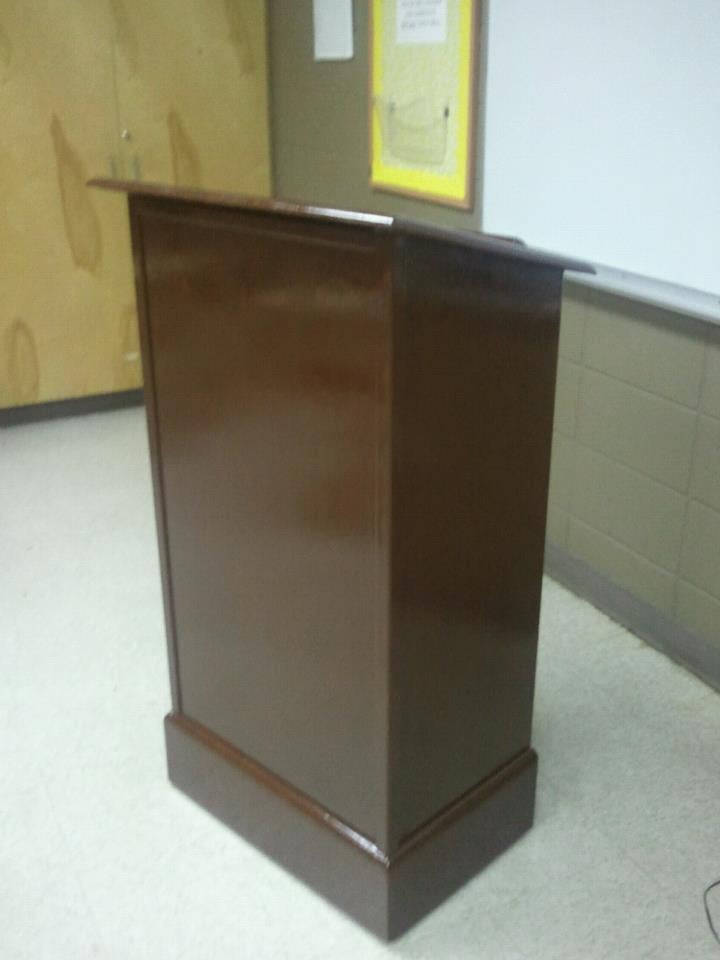
This is my first try at building furniture. I've built larger things in the past like decks and a fort for my nephews, but never furniture. Even though I used the plans to build the main box, I did change up the bottom and added some new stuff. I added wheels to the bottom my wife could easily move it around her classroom. I didn't want to put a square base on it because I thought it might hit her ankles when she was standing close to it. So I sort-of notched it out to give an opening for her feet and I used some scraps to create a short shelf at the bottom. I also added more trim that the plans call for. I cut strips of the pine plywood for the base molding and topped it with quarter round. I used corner trim for the front corners, the self inside and the bottom notched shelf. I also used screen trim for the back of it. I think it came out nice and I've very pleased with it. I used 2 coats of Minwax PolyShades American Chestnut on it.

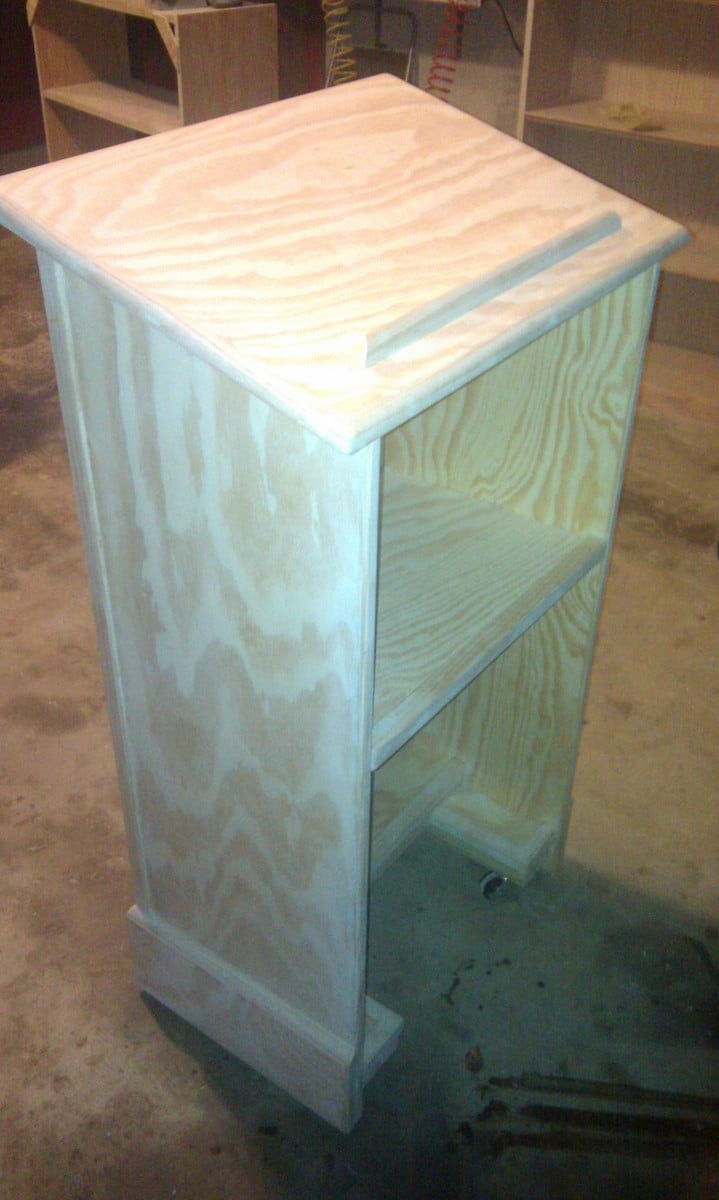

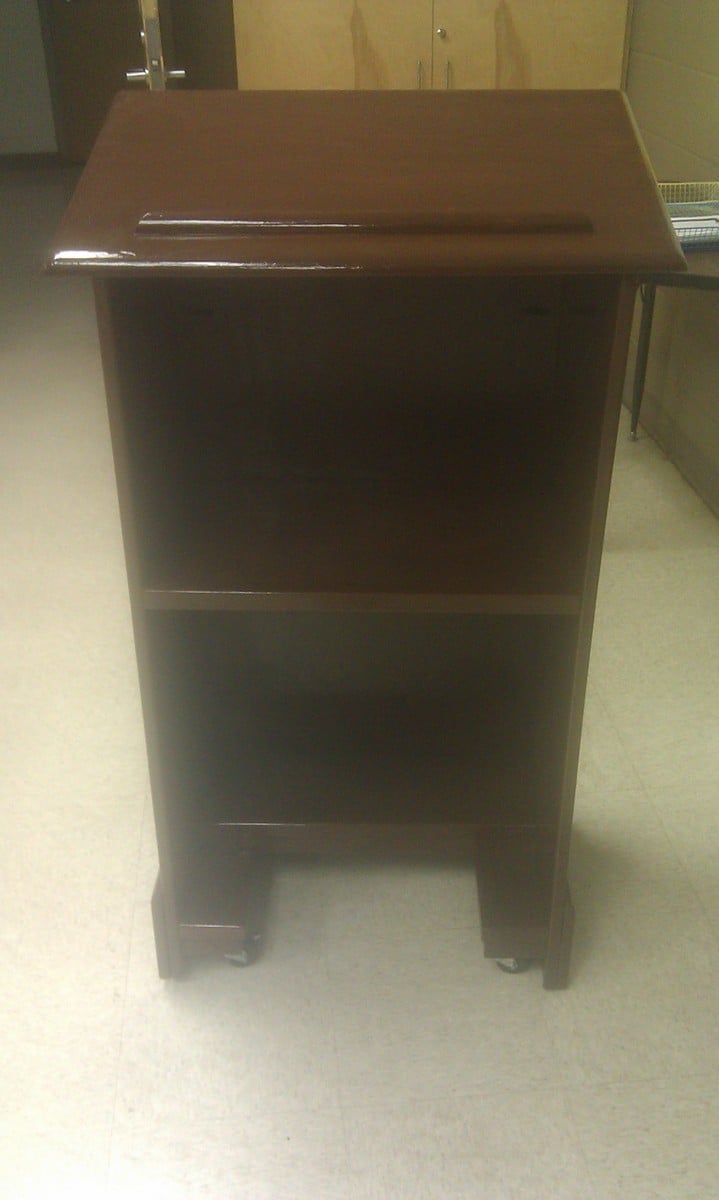
Built from Plan(s)
Estimated Time Investment
Weekend Project (10-20 Hours)
Finish Used
Minwax PolyShades American Chestnut
Recommended Skill Level
Beginner
Pirate Sandbox
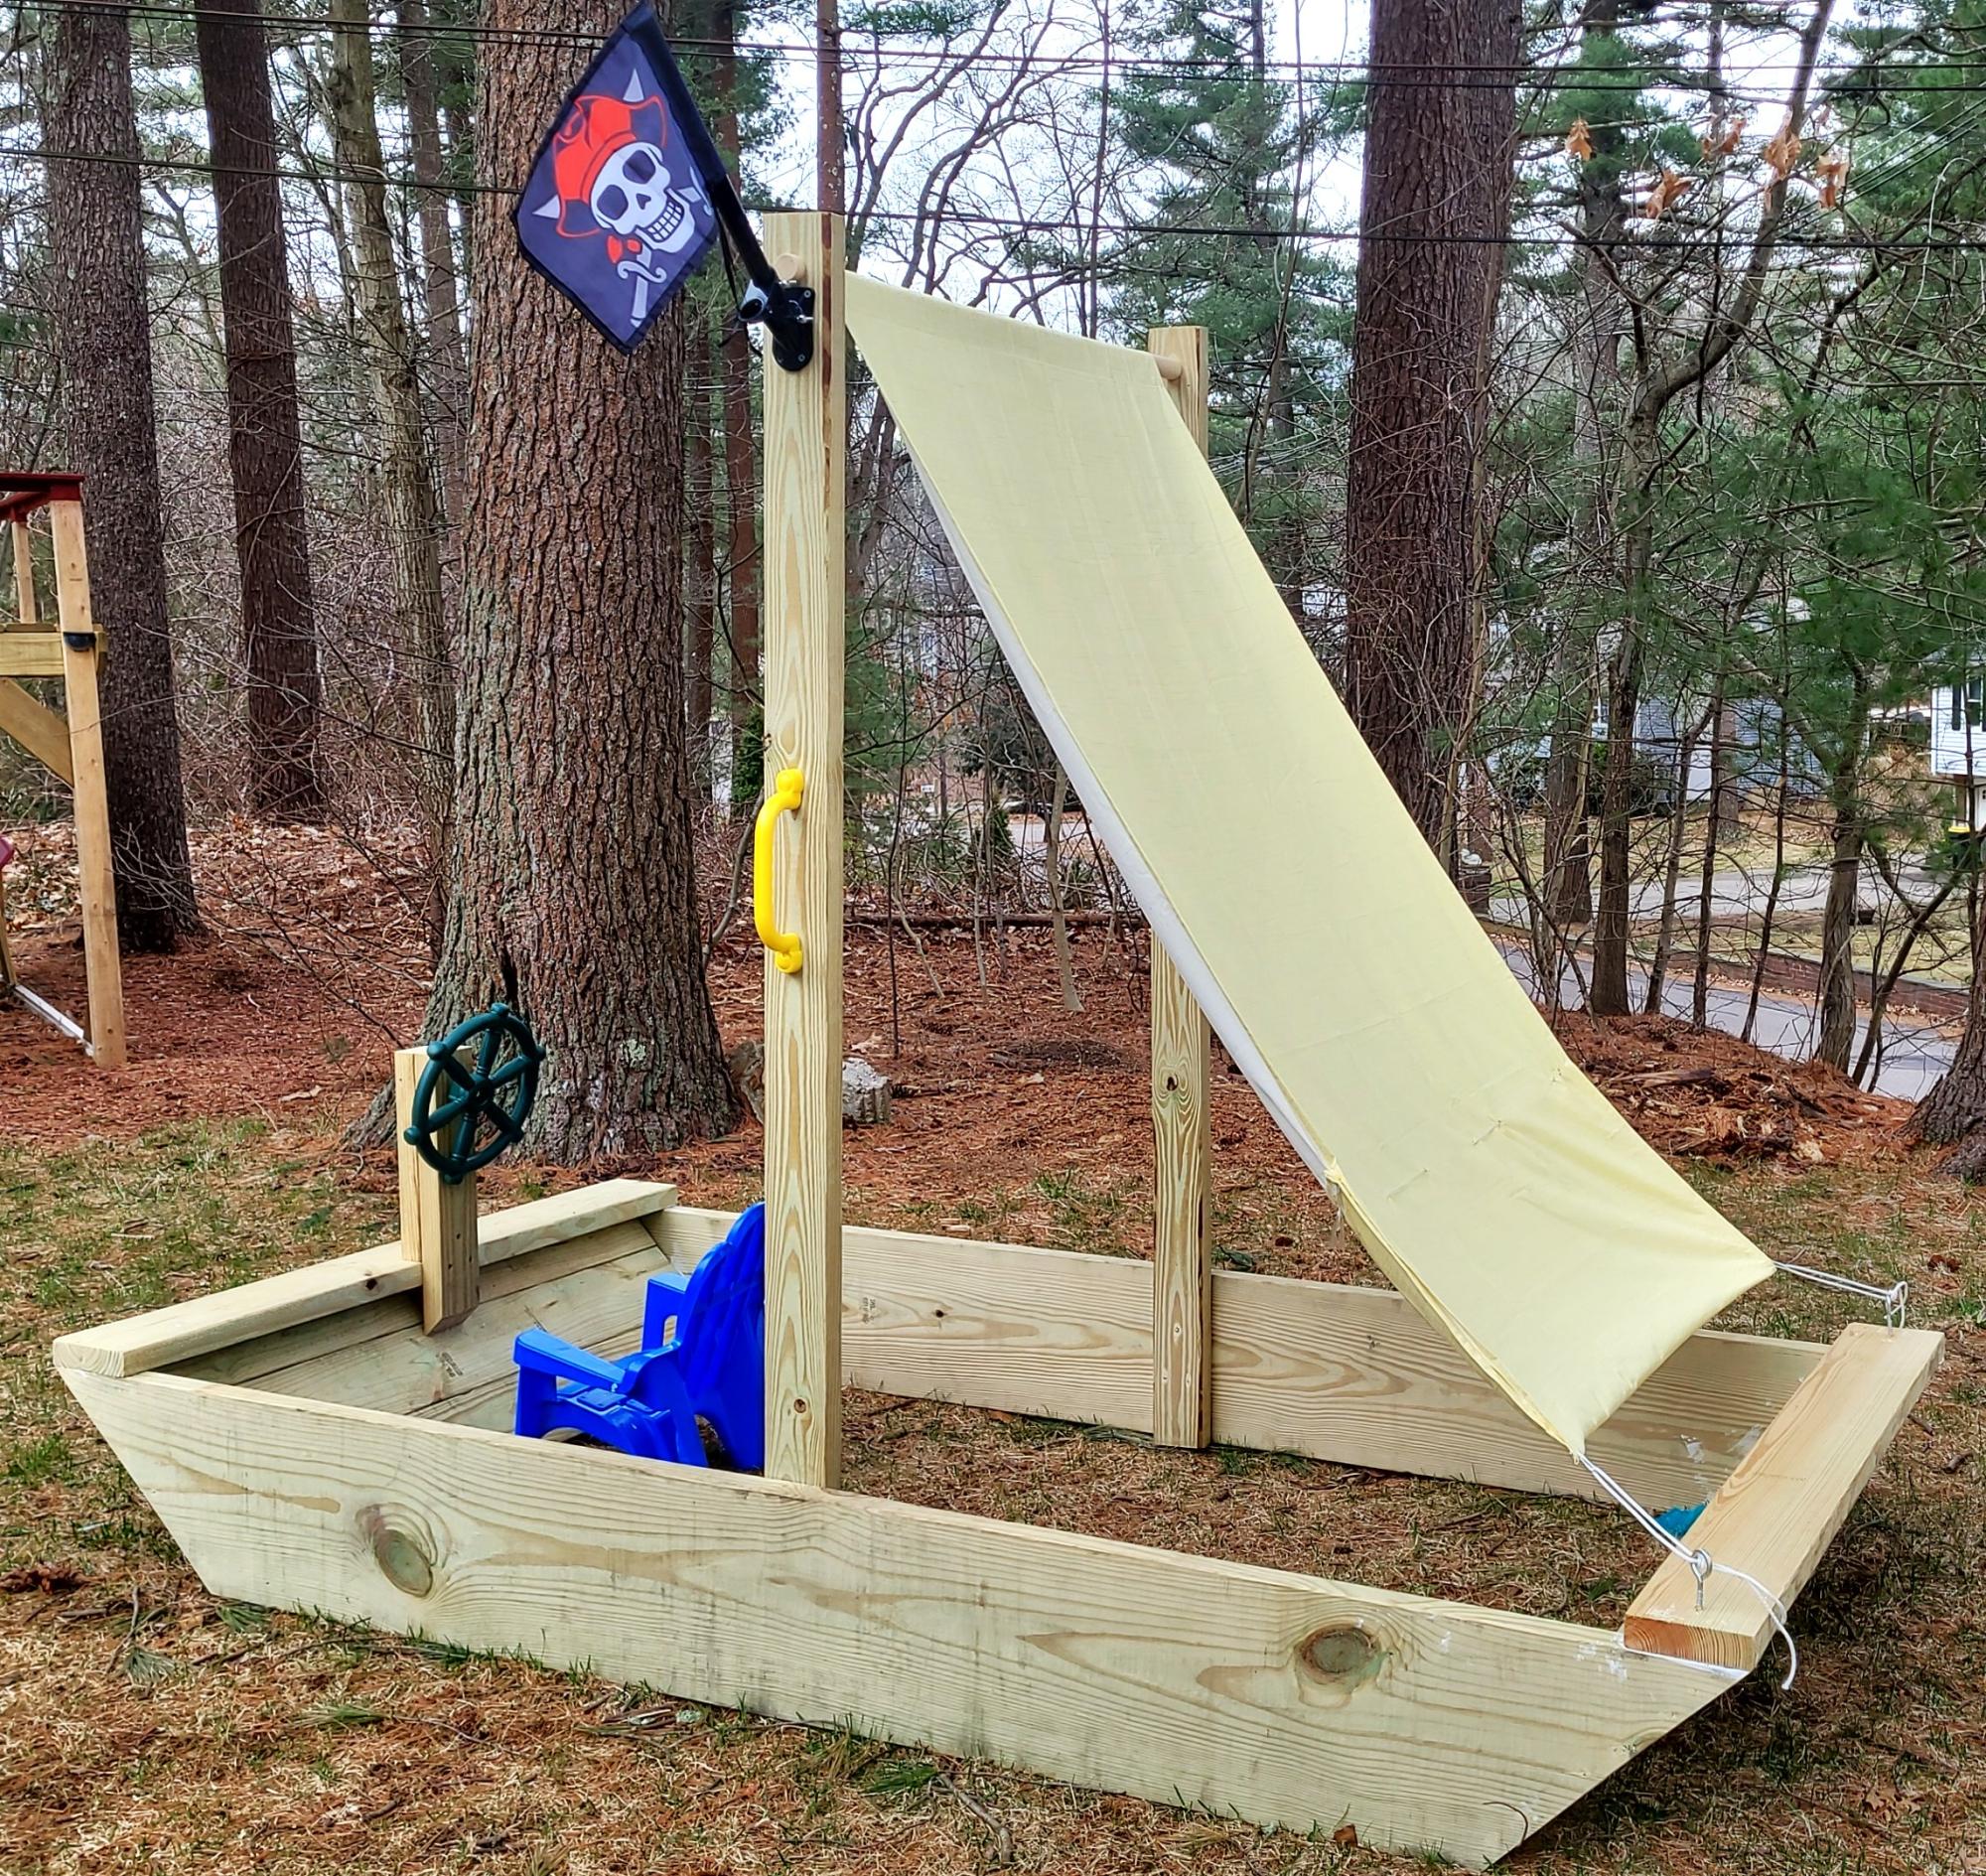
Turned the sandbox into a pirate ship. The kids love it!
Lea B.
Built from Plan(s)
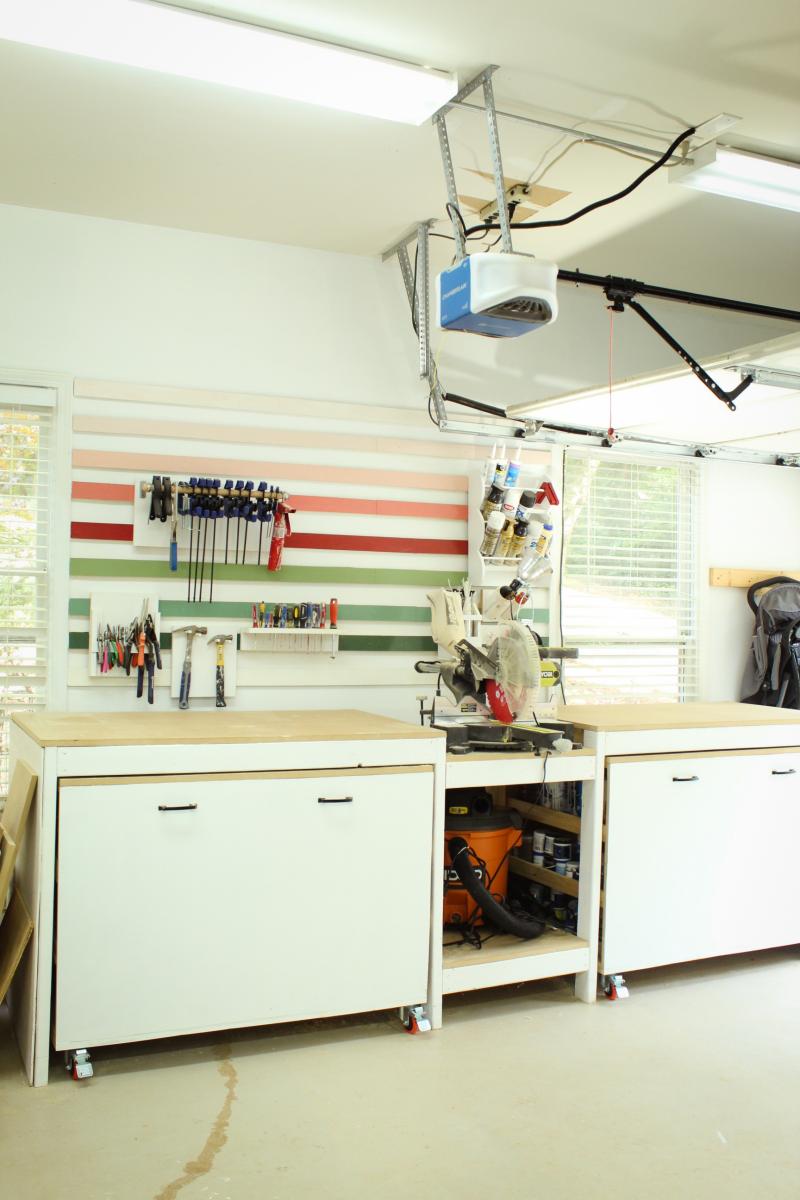
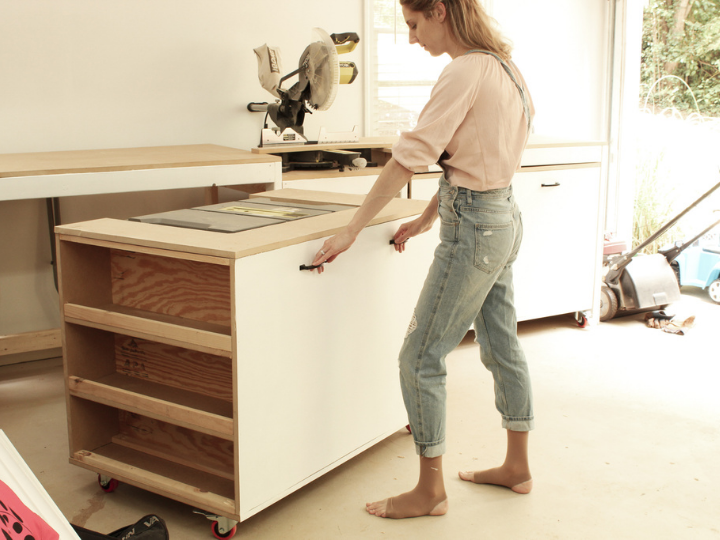
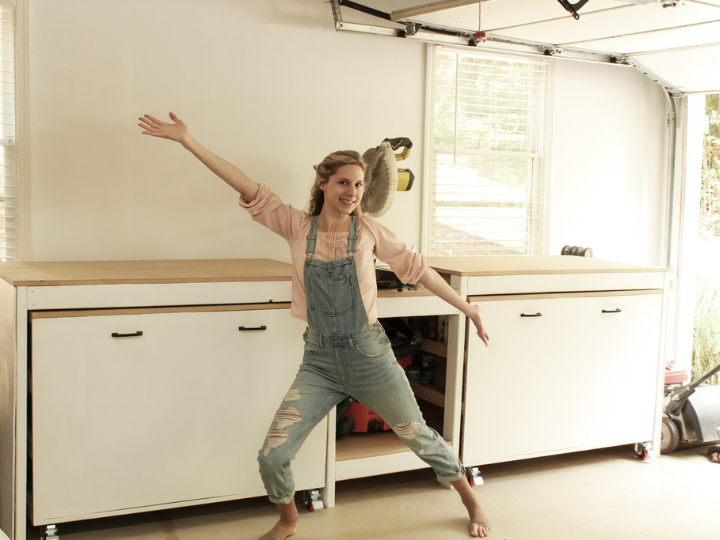
Painted Ultimate Miter Saw Workbench
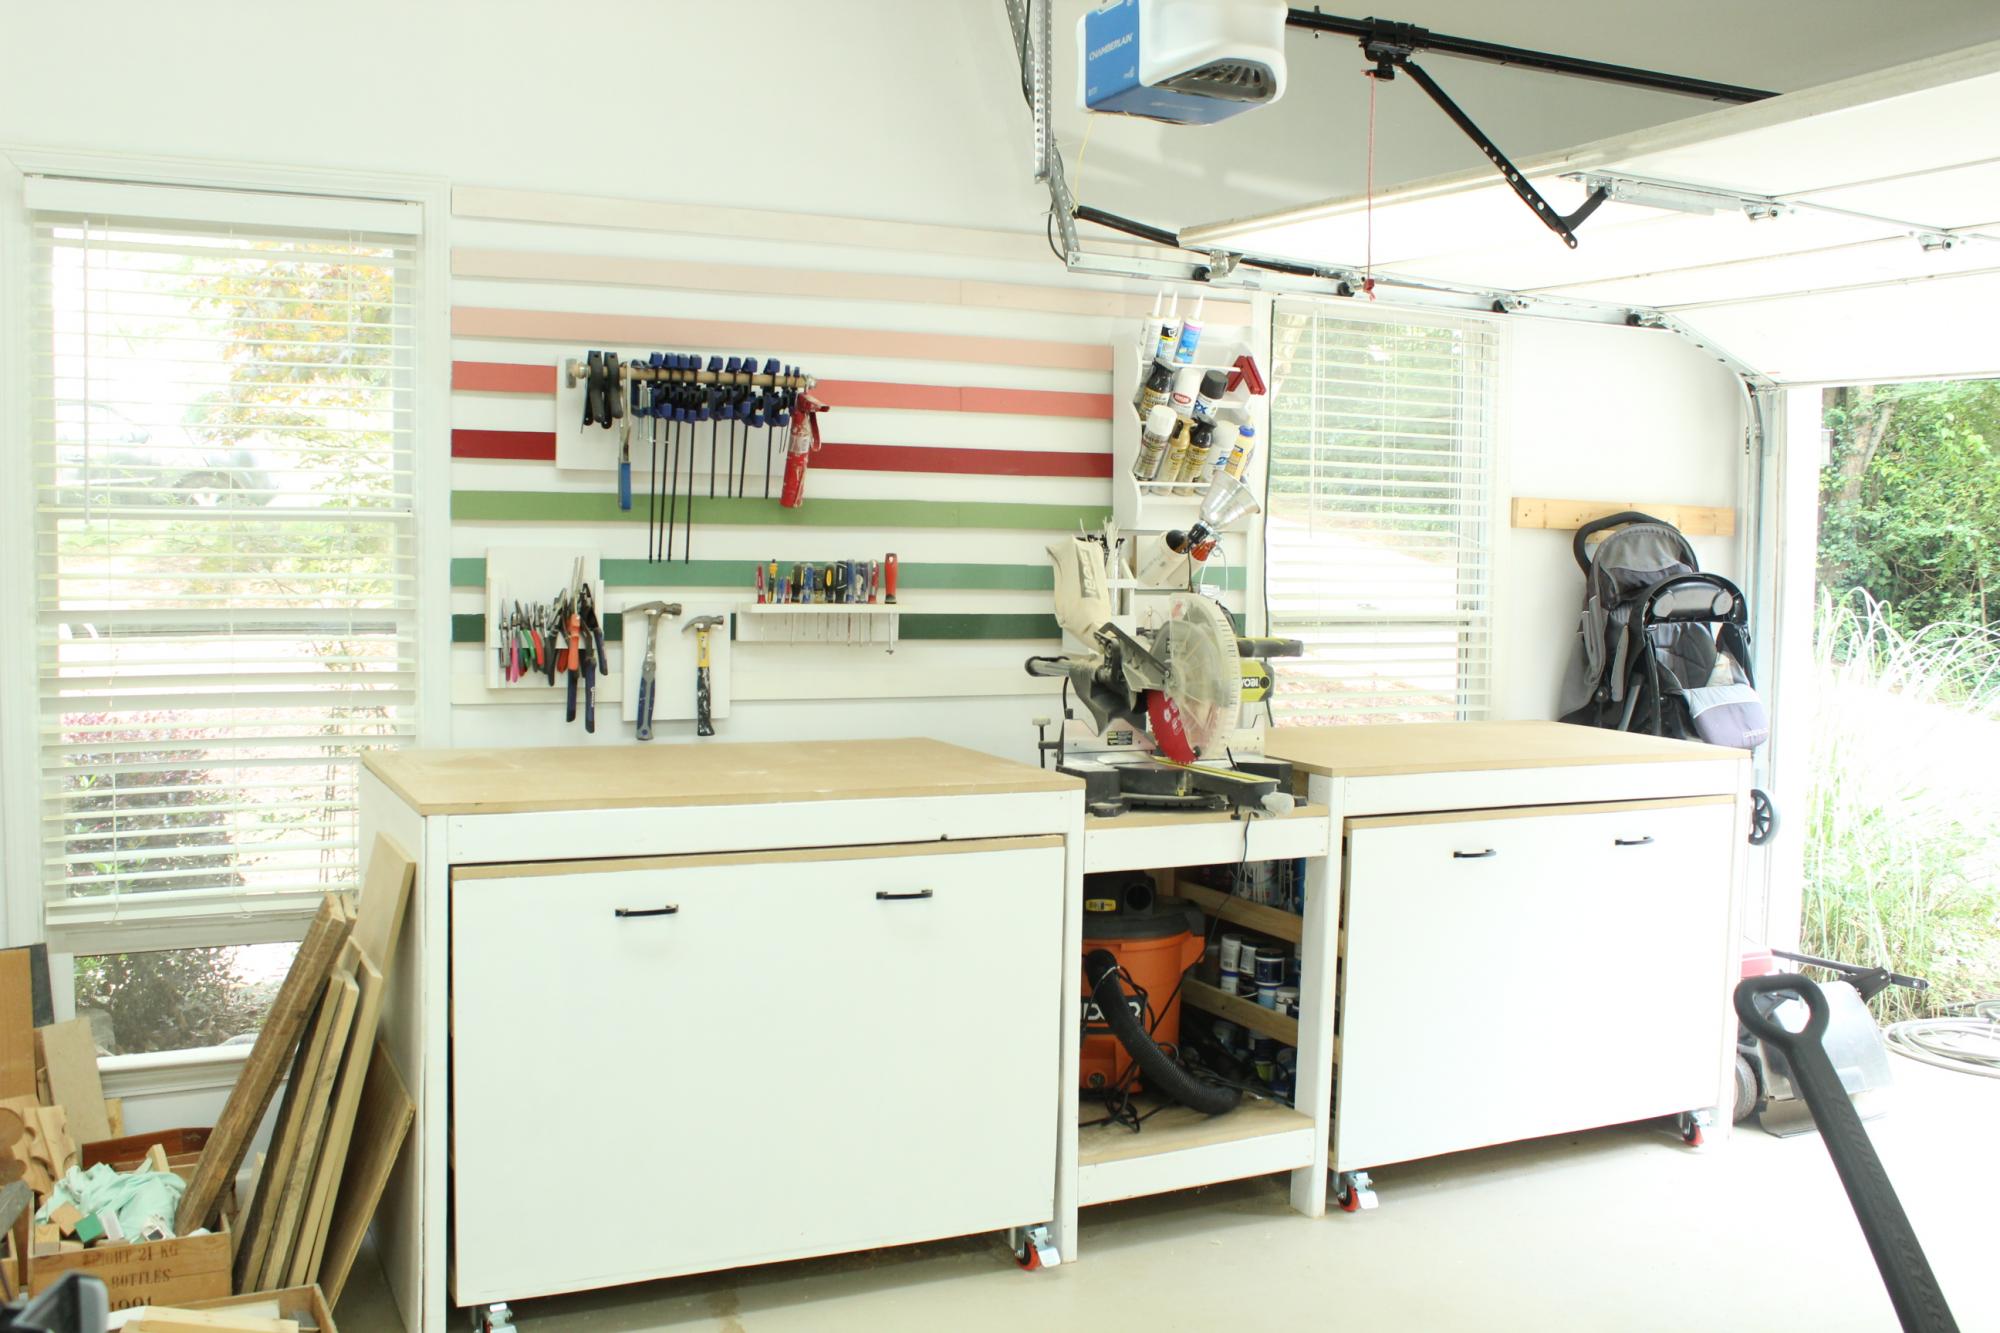
I love, LOVE my built-in miter saw stand! No more using my saw on the cold cement floor. I took others' advice and used pocket hole joinery to connect the bases. It was a lot more solid with this modification. I also secured the top and bottom of each cart with additional screws around the perimeter to prevent separation. I used MDF instead of plywood because plywood is crazy expensive right now! In retrospect, it would have been better to splurge on plywood since MDF splits easily and is more sensitive to temperature changes. I painted the front of the carts Chantilly Lace by Benjamin Moore and attached the hardware using an old cabinet jig leftover from a previous project.
Built from Plan(s)
Estimated Cost
600
Estimated Time Investment
Week Long Project (20 Hours or More)
Finish Used
Latex paint for the cart fronts in an eggshell finish.
Recommended Skill Level
Intermediate
Comments
Tue, 07/27/2021 - 11:47
Pretty workshop!
WOW, wonderful job! Can't wait to see all the projects that come from your awesome space, thank you for sharing.
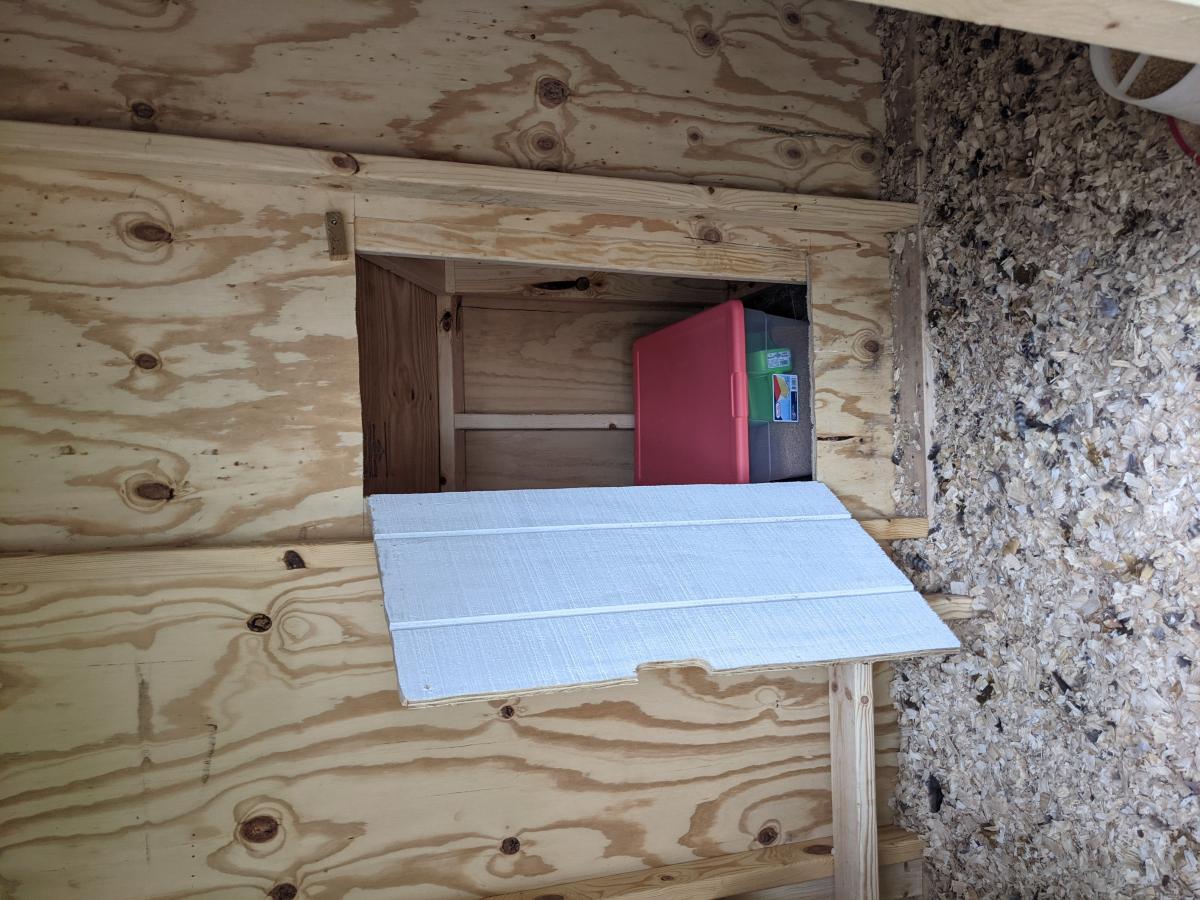
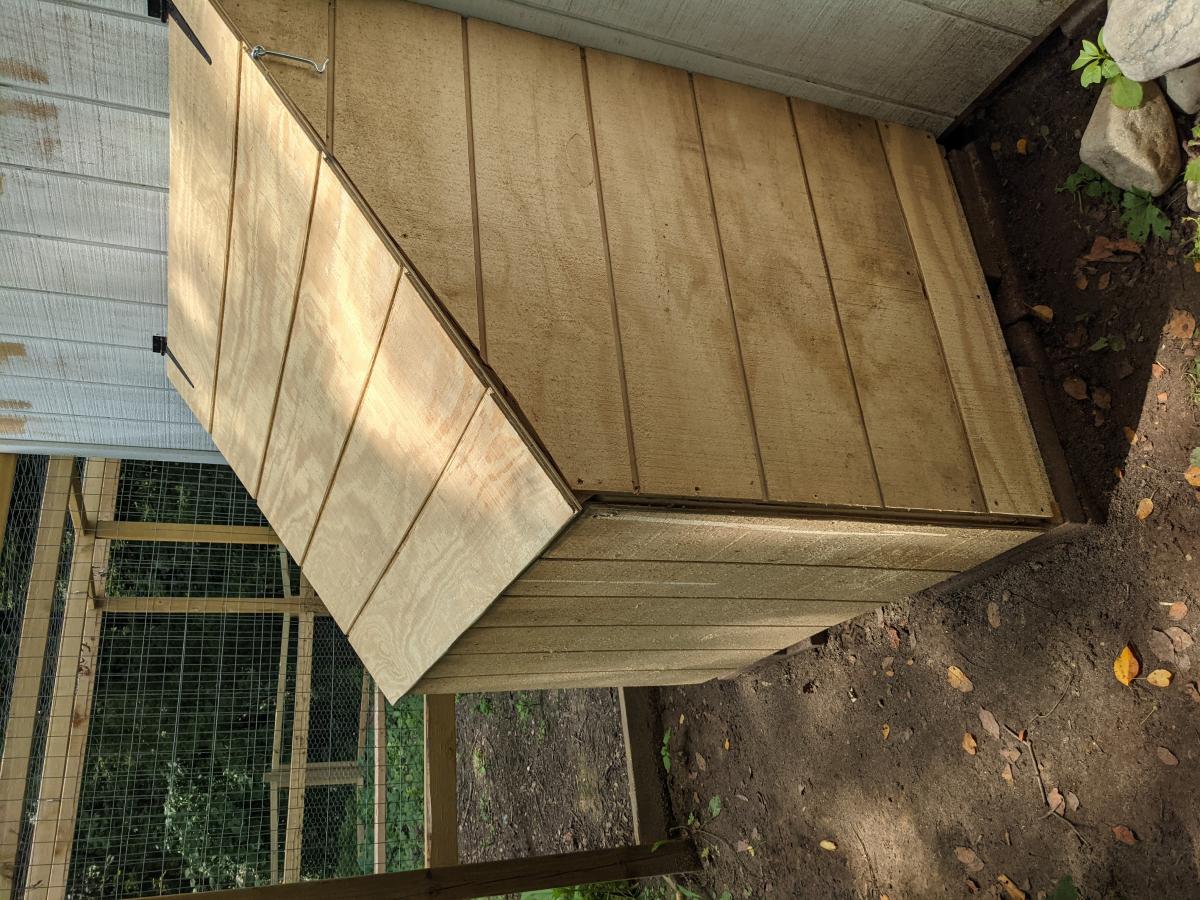
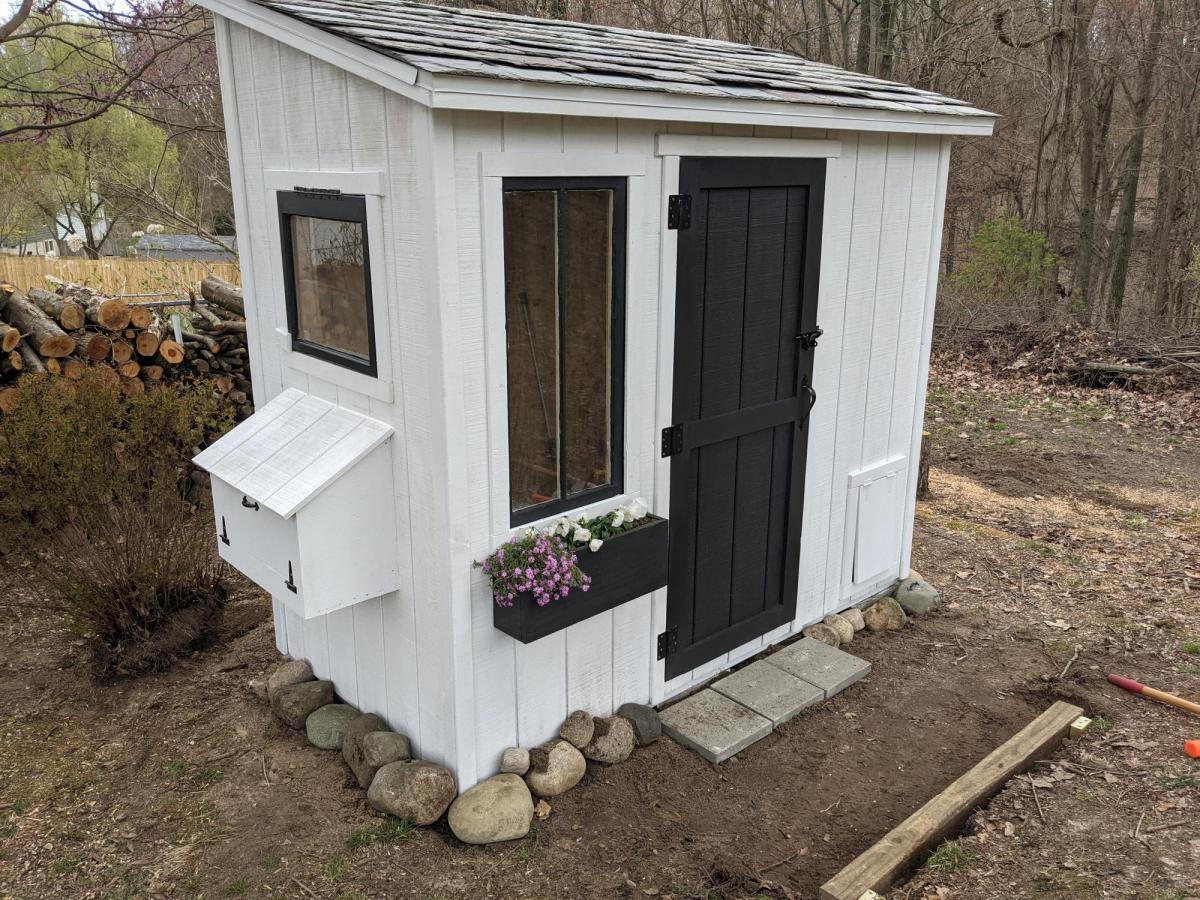
Chicken coop and run
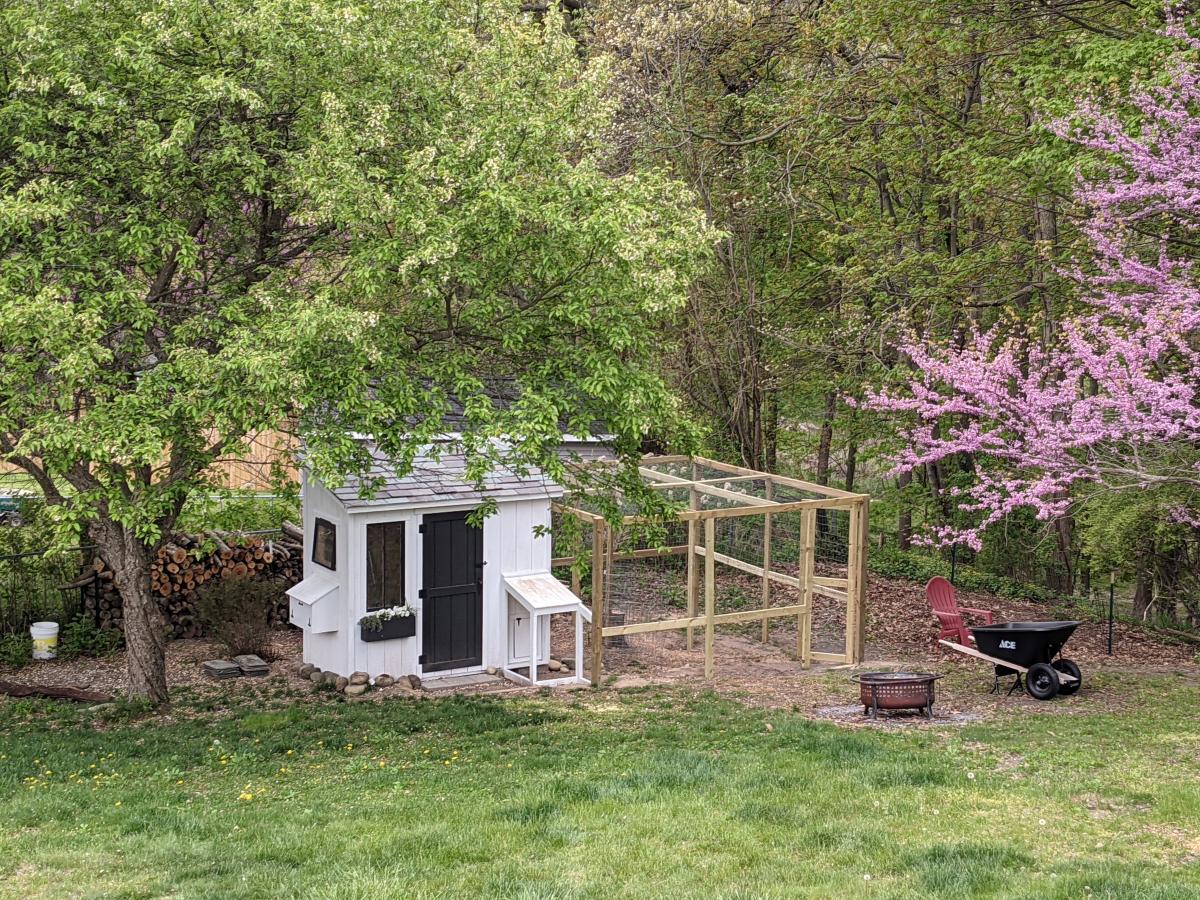
I followed the Shed Coop Plans to make this chicken coop and designed my own run. Because I wanted to view the chickens coming in and out of the coop, I moved the chicken door to the front and built a little covered area to shelter the coop door so I did not have to have the entire run extend over the front. I also made the access to the layer boxes be accessible from the front rather than the top so that my kids could more easily access the egg boxes. I thought these were great plans to follow and easy to adapt to fit what I wanted in a coop. I also ended up adding a lean-to storage on the back with an inside access so I could easily refill their feed.
Built from Plan(s)
Comments
Lego display shelf
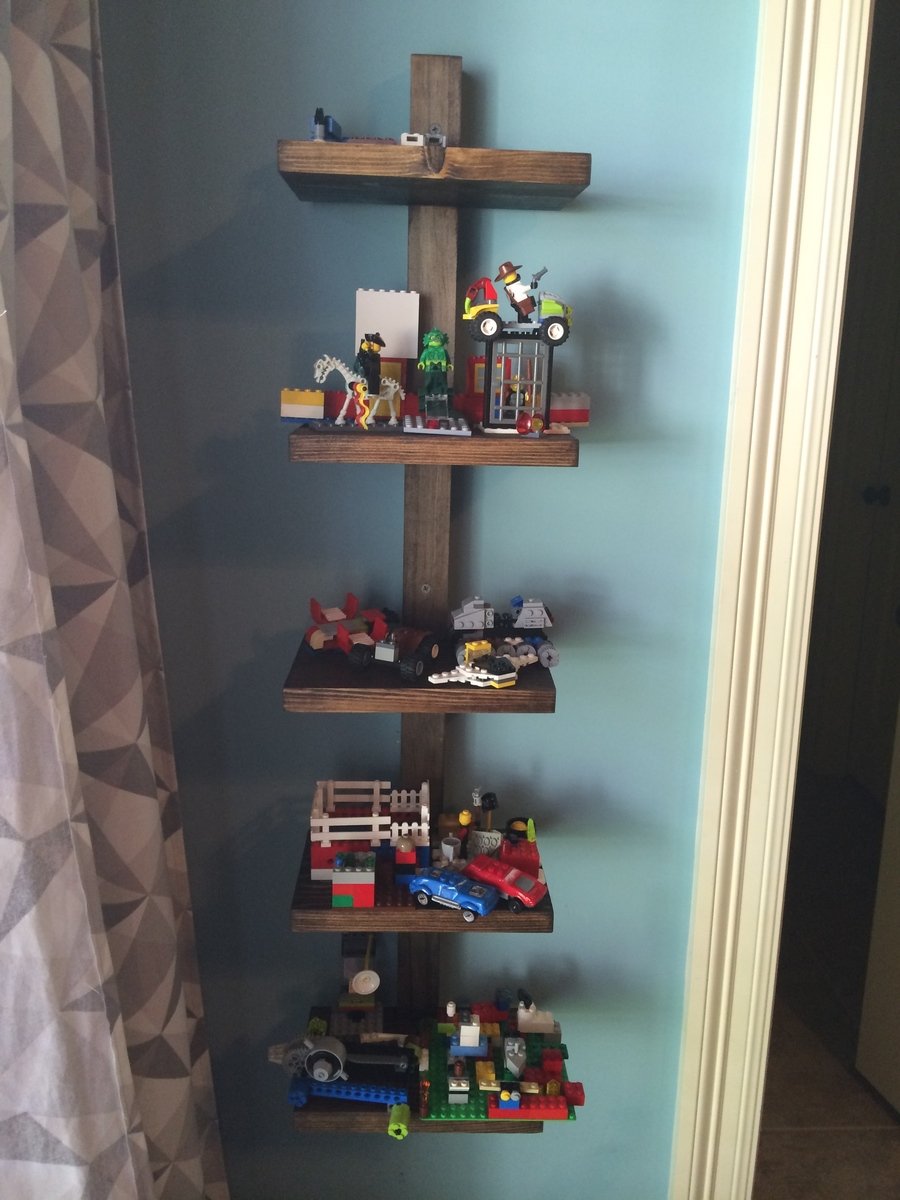
This was my first project that I built completely alone! My sweet husband has built a couple things from the site but I didn't have any help with this one. Nice to have a cleanish room and carpet now that all my son's legos are up on display. He loves it!

Built from Plan(s)
Estimated Cost
$5, used mostly wood we had laying around
Estimated Time Investment
An Hour or Two (0-2 Hours)
Finish Used
Miniwax Dark Walnut stain
Recommended Skill Level
Starter Project
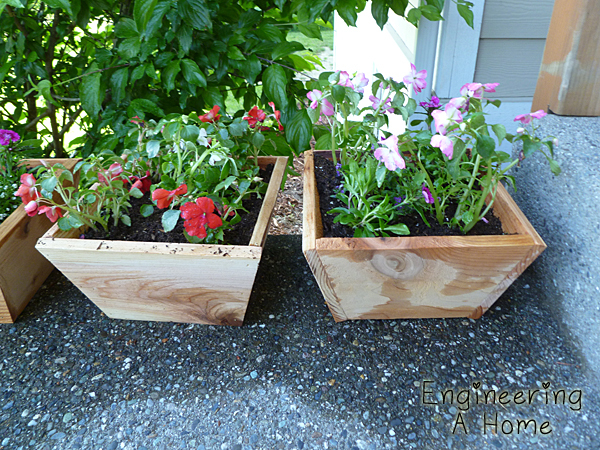
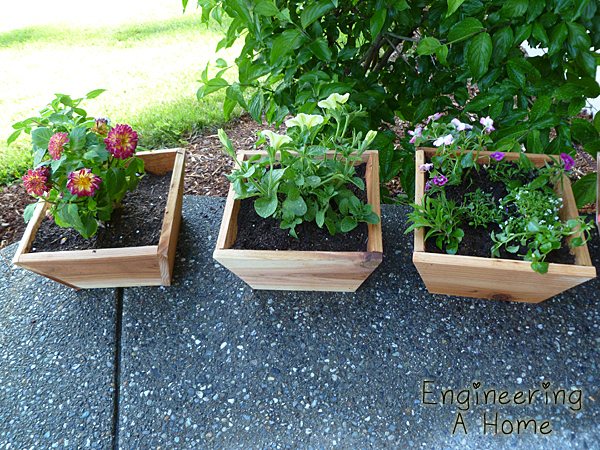
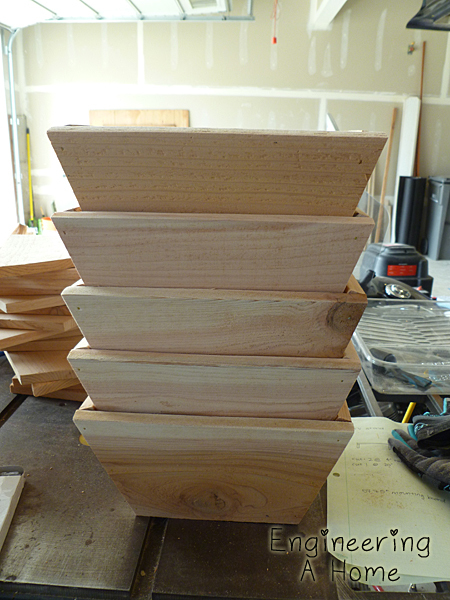
Mother's Day Cedar Planter Boxes
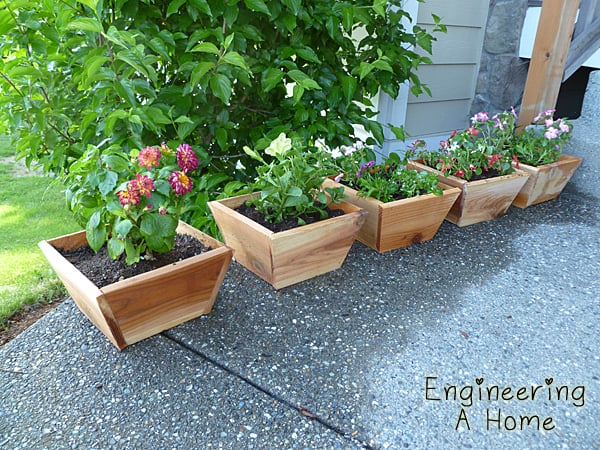
I made some of the cute little cedar boxes to use as planters. I love the size and they were super simple to make.
Built from Plan(s)
Estimated Cost
10
Estimated Time Investment
Afternoon Project (3-6 Hours)
Finish Used
None. Just sanded smooth.
Recommended Skill Level
Starter Project
Our Playroom Shelves!
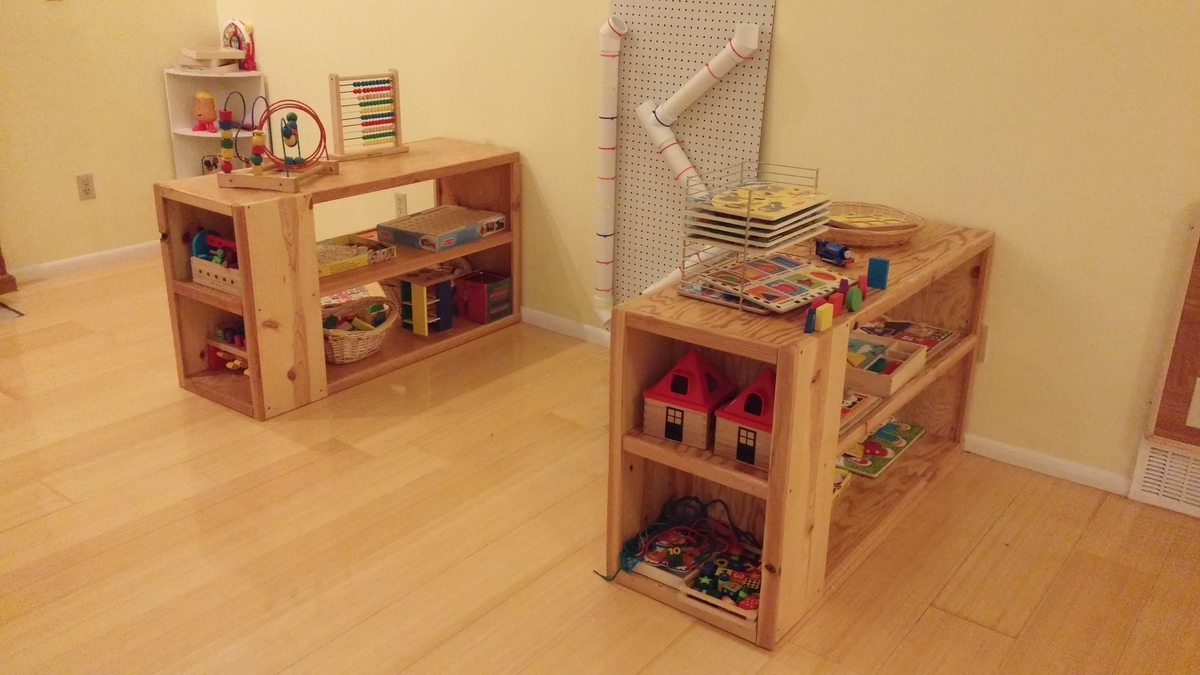
This was my first project ever and I absolutely love these shelves! I was looking everywhere for a simple shelf system that was wide enough to stand alone in the middle of the floor. I didn't use the kreg jig at all as I was too intimidated and impatient for my first project. I also didn't add the 2X2 floating bottom. Also, I decided I wanted the whole thing trimmed and went ahead and got some extra 1X2 to trim the middle shelves.
Built from Plan(s)
Estimated Cost
$70 per shelf
Estimated Time Investment
Weekend Project (10-20 Hours)
Finish Used
Natural Wood Stain and Satin Finish Polyurethane
Recommended Skill Level
Beginner
Comments
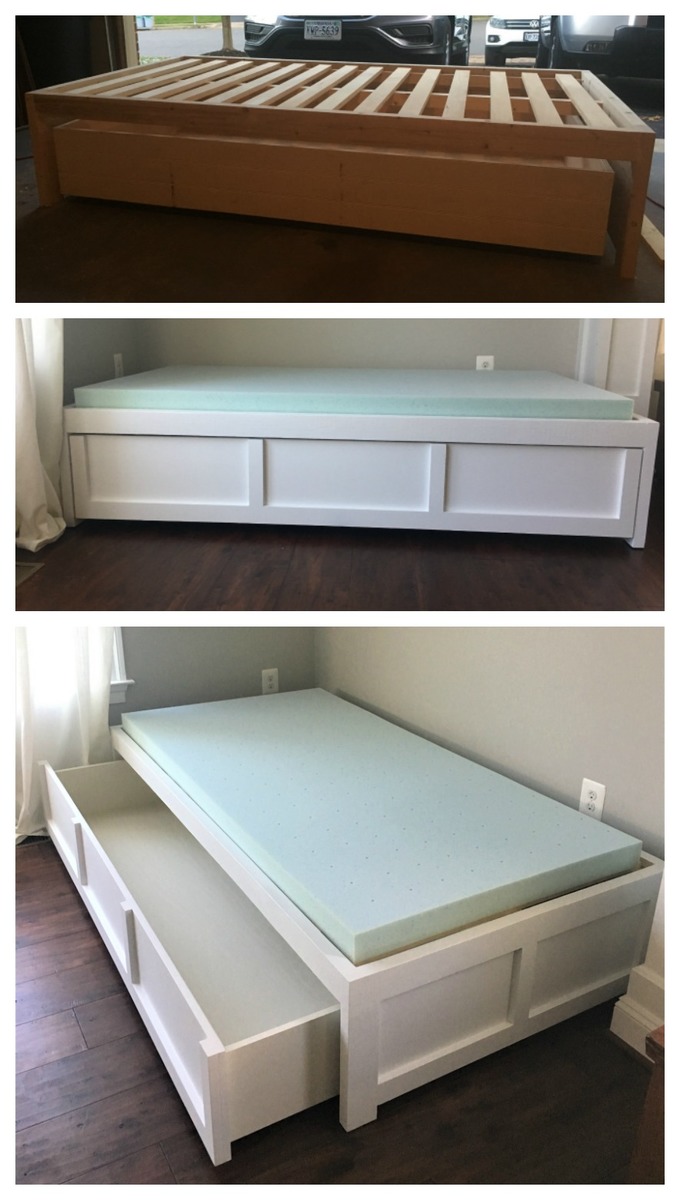
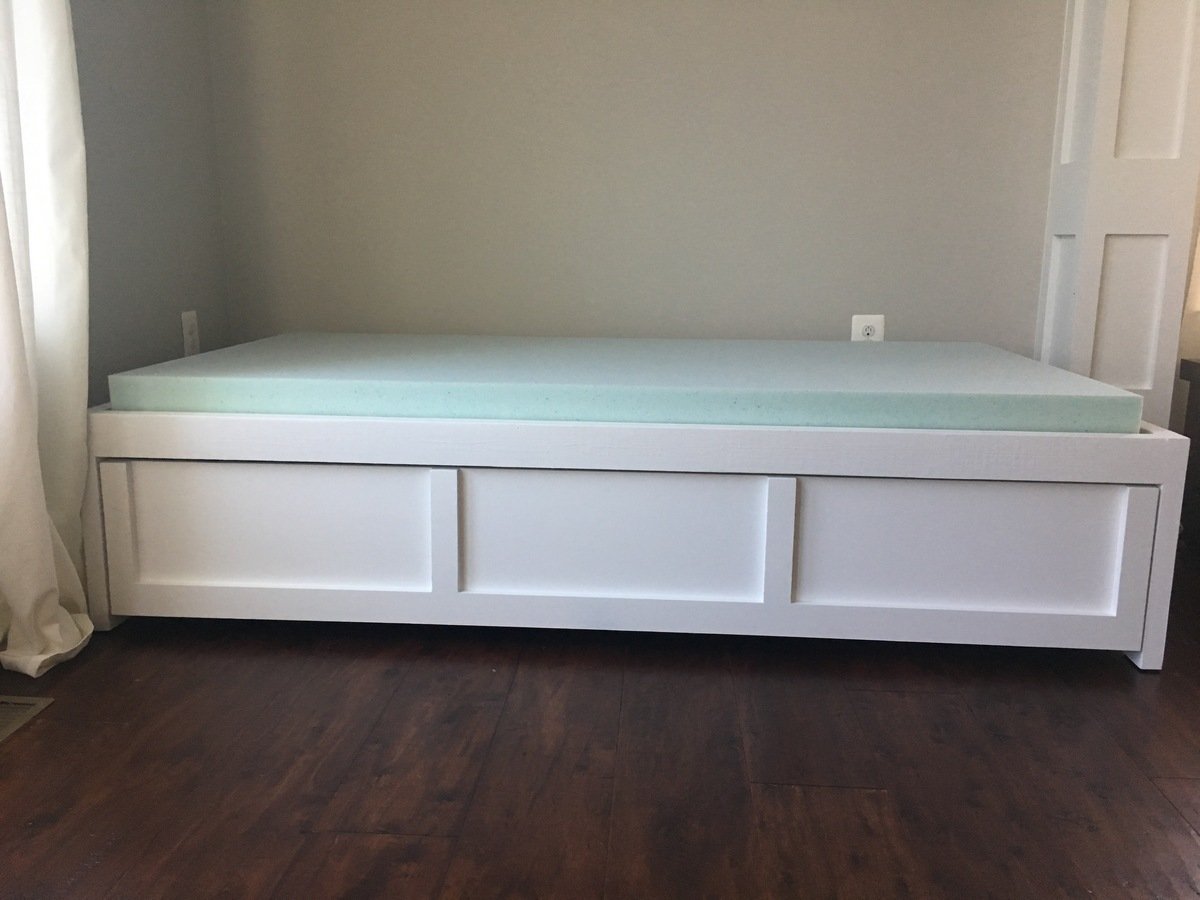
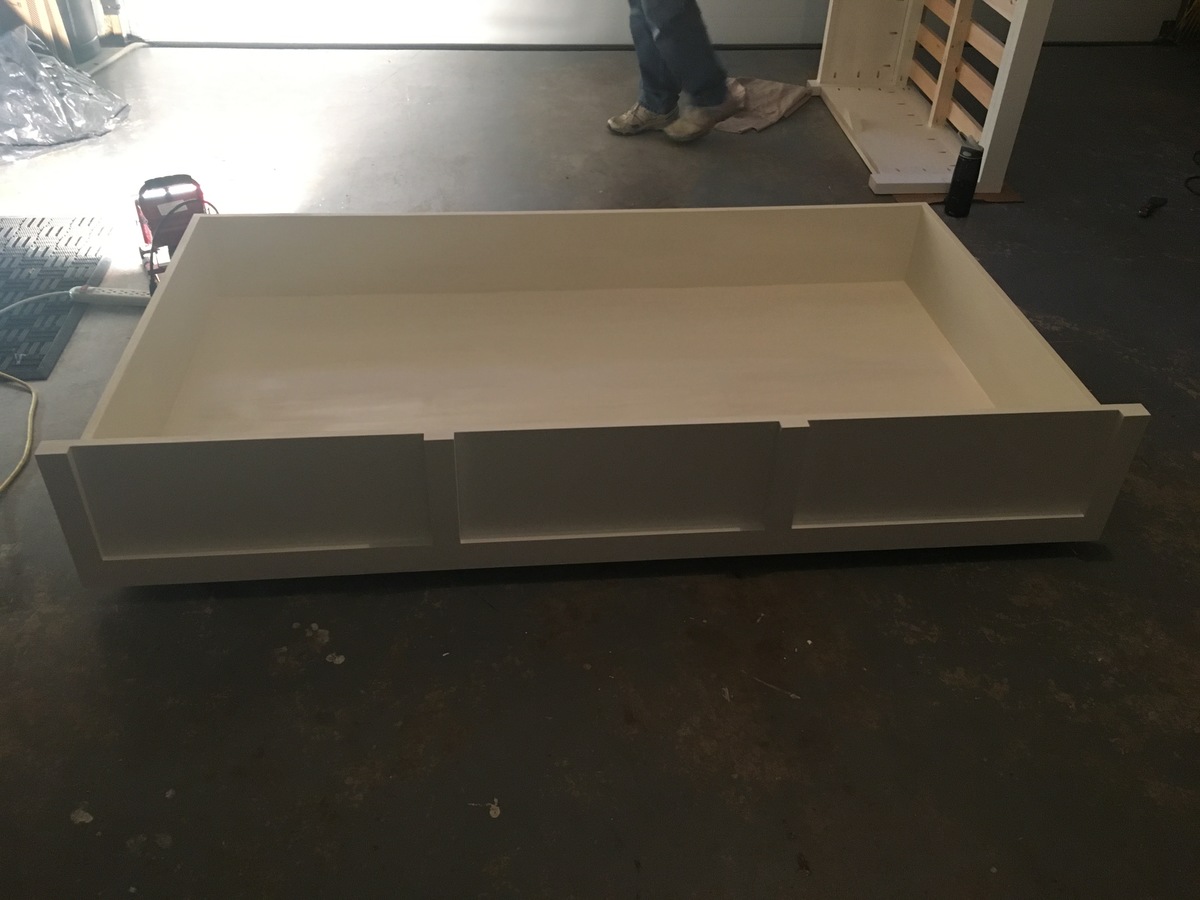
Daybed with Storage Trundle
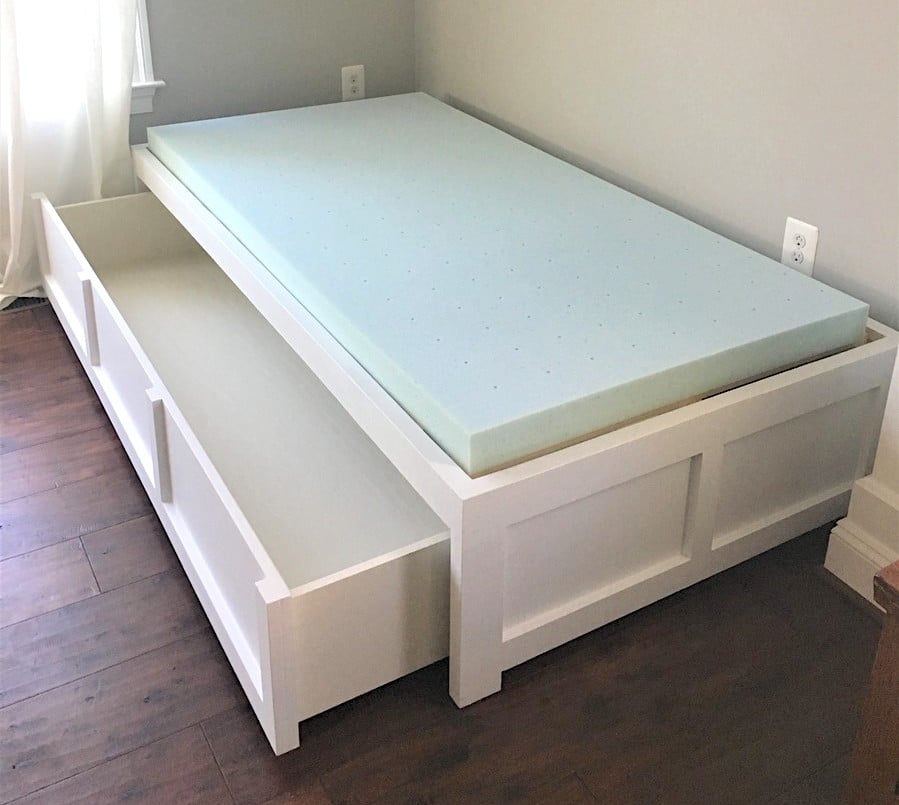
This was my first project from Ana's website and I'm hooked! I'm a beginner, but thank goodness for my Dad's help because I have a lot of learning to do!
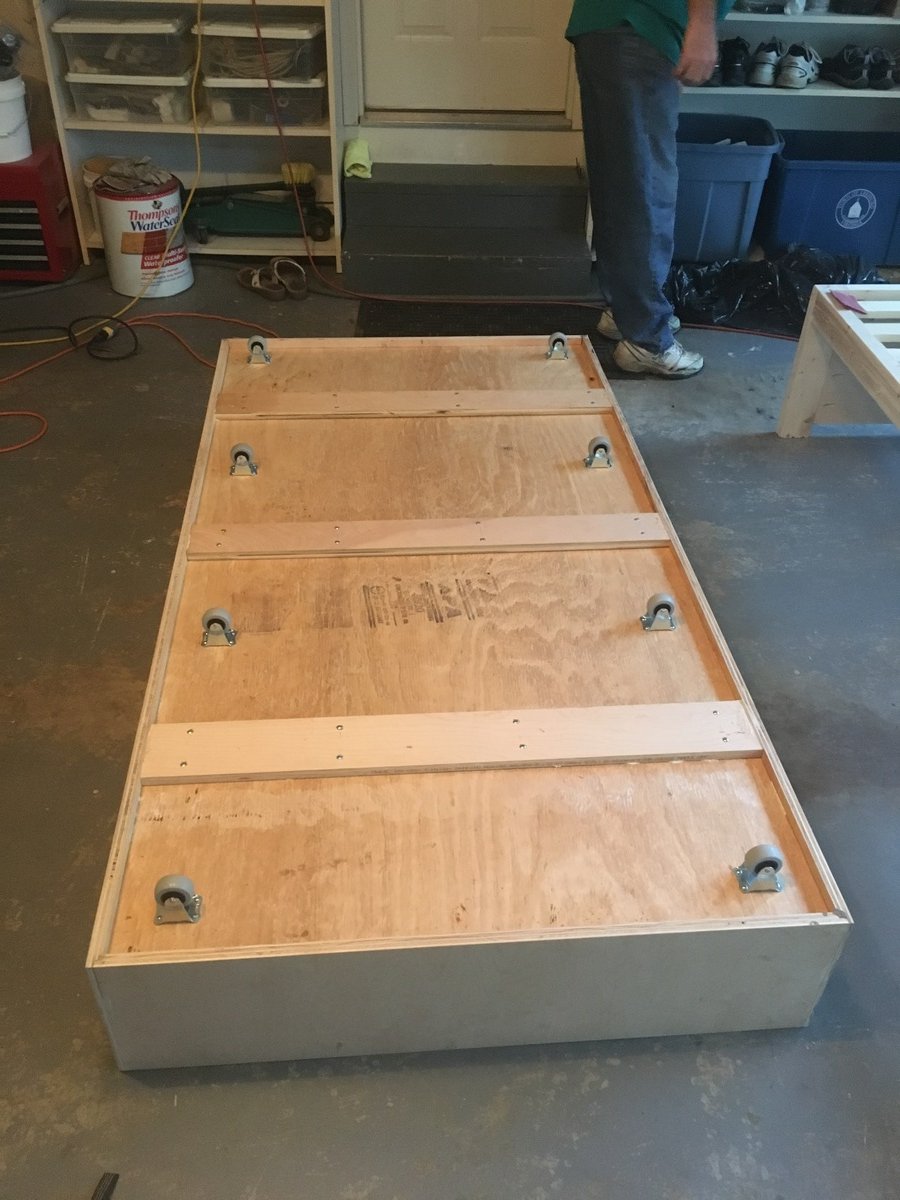
I wanted the drawer to be 1 drawer instead of 3. I feel like it looks cleaner (without having to adjust 3 drawers constantly to make it look good when you push them in). I was thinking the bed could actually be used as a trundle bed in the future too! I use this to store toys right now and it is Awesome!
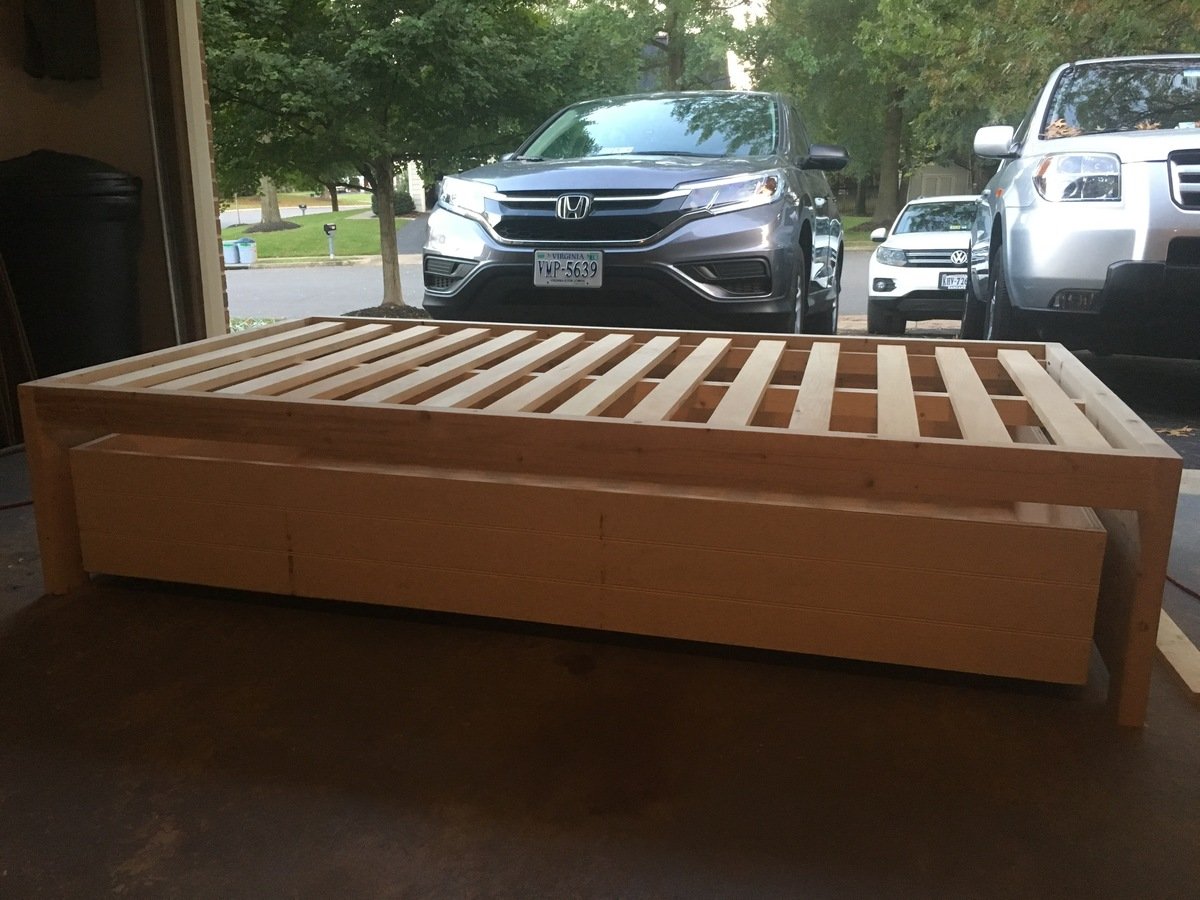
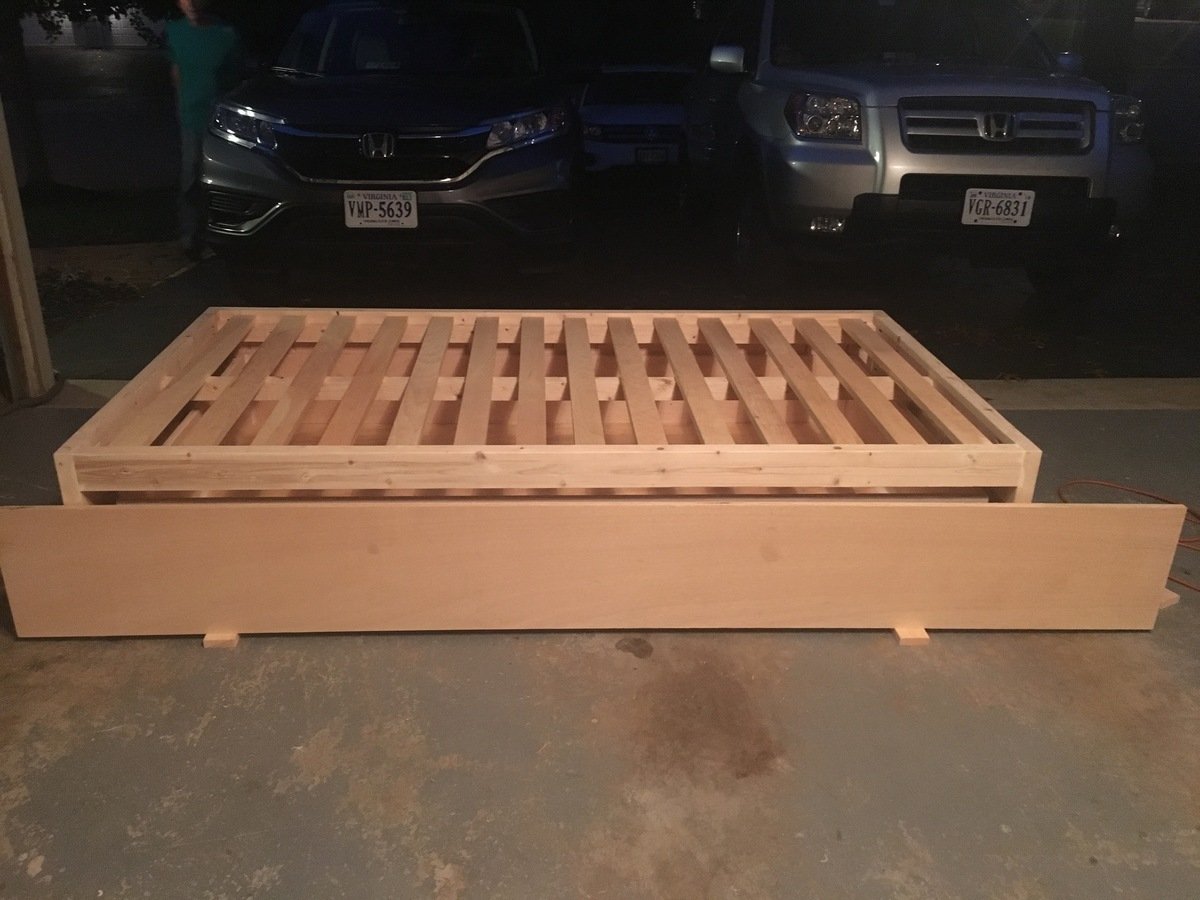
I increased the bed size to fit a twin mattress and increased the height of the bed slightly so that the drawer would be a little bit deeper. We also added a back to the bed and carried around the trim to make all sides look the same. We added a bumper to the back and sides of the inside of the bed so the drawer is easy to push in and fits in snug. Finally we reinforced the bottom of the drawer with more 1x4 boards so that if a child does sleep in it, it would be more sturdy. I now have kids come over and jump into the drawer (literally) and I'm glad we reinforced it.
The changes we made did add to the cost and our time (as well as being newbies), but I think it's worth it and the bed turned out beautiful!
Built from Plan(s)
Estimated Cost
$180
Estimated Time Investment
Weekend Project (10-20 Hours)
Finish Used
Behr Marquee (I'll have to find the name of the white color we used). We almost went with chalk paint, but after talking to the HD guy, he talked me into this paint and I'm glad we used it! So much cheaper and turned out beautiful.
Recommended Skill Level
Beginner
Comments
Sat, 01/15/2022 - 08:02
Any chance you have your cut…
Any chance you have your cut list for this? Will the trundle storage drawer fit a twin mattress in it? Also, you say you increased the bed size to a twin, was the original not a twin too?
Comments
Ana White Admin
Tue, 10/05/2021 - 09:47
Perfect solution!
Great job, love the look! Thank you so much for sharing:)