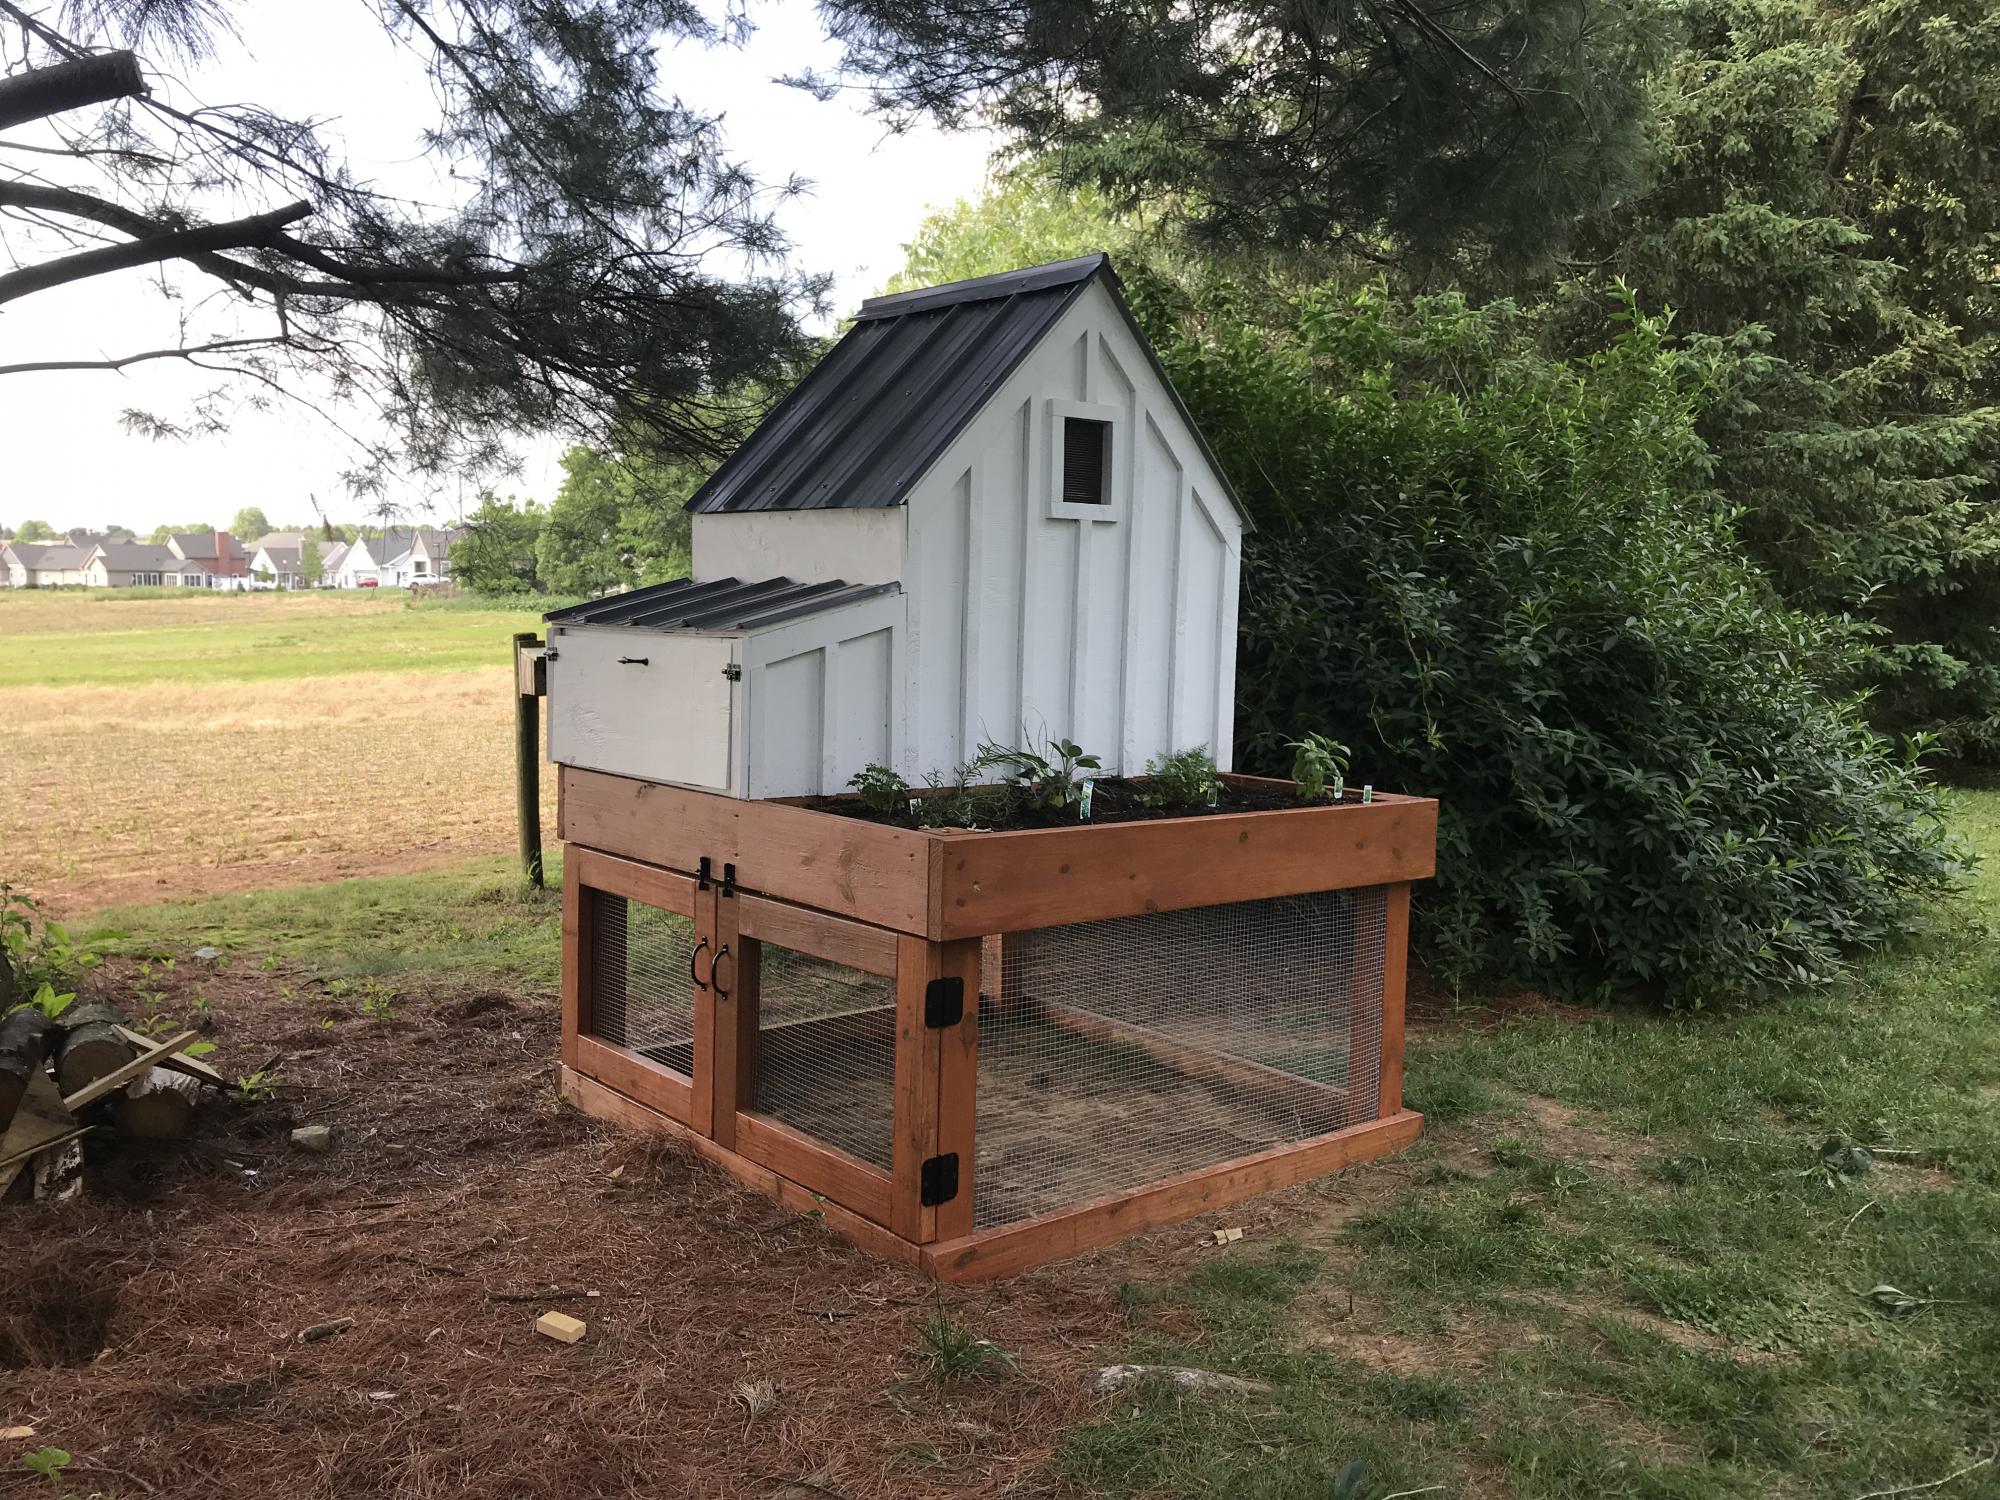
DIY Barn Style Greenhouse
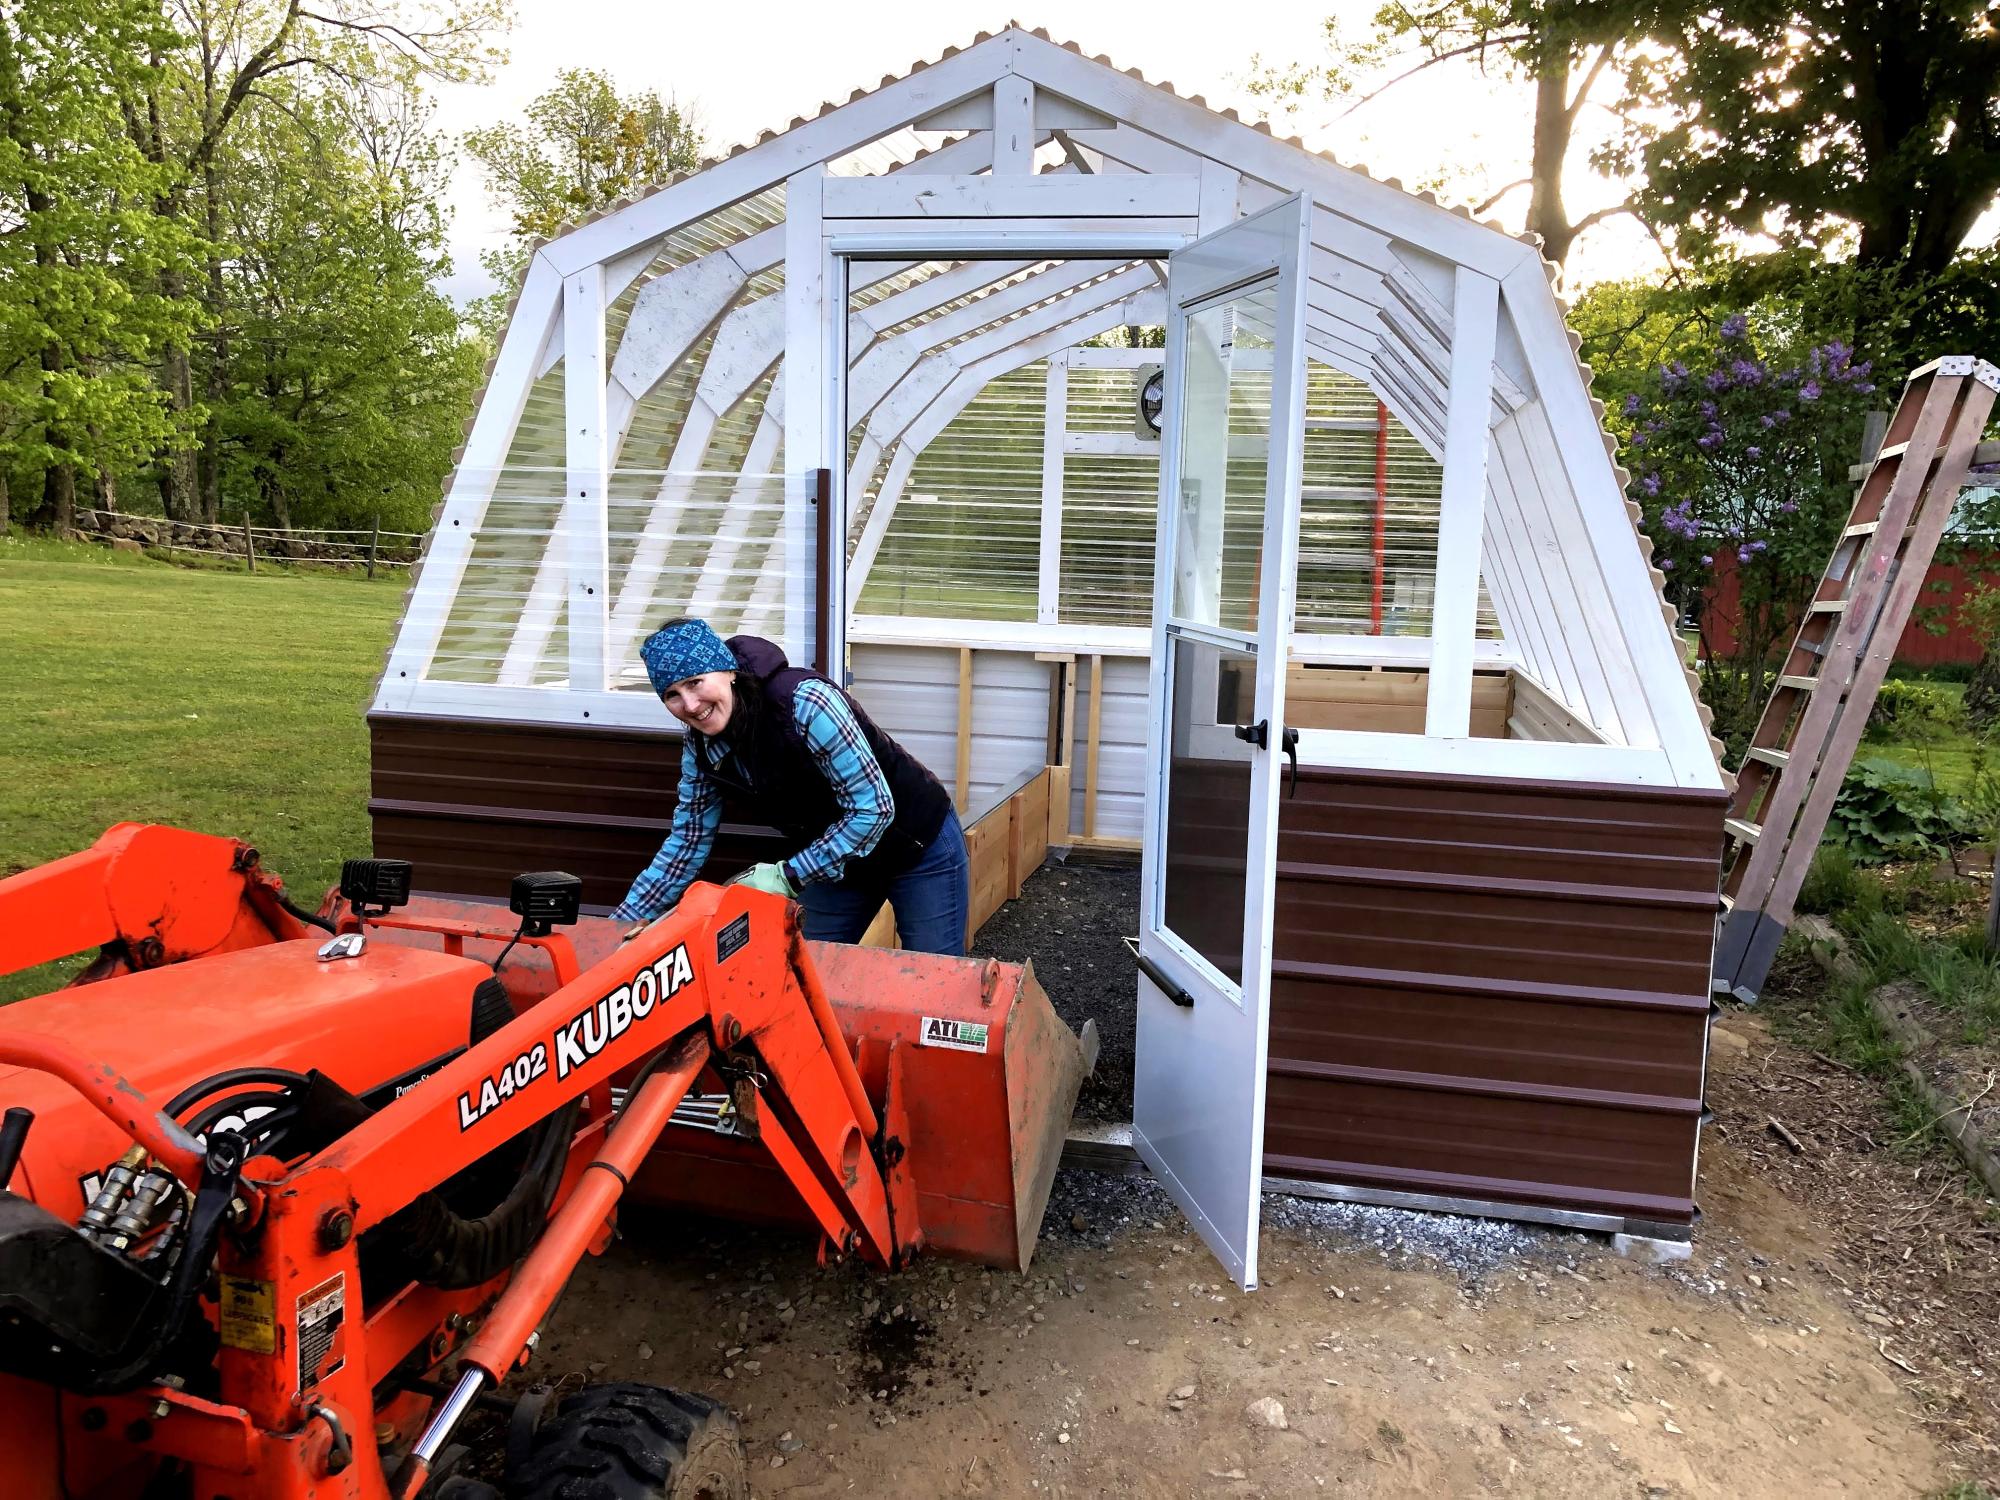
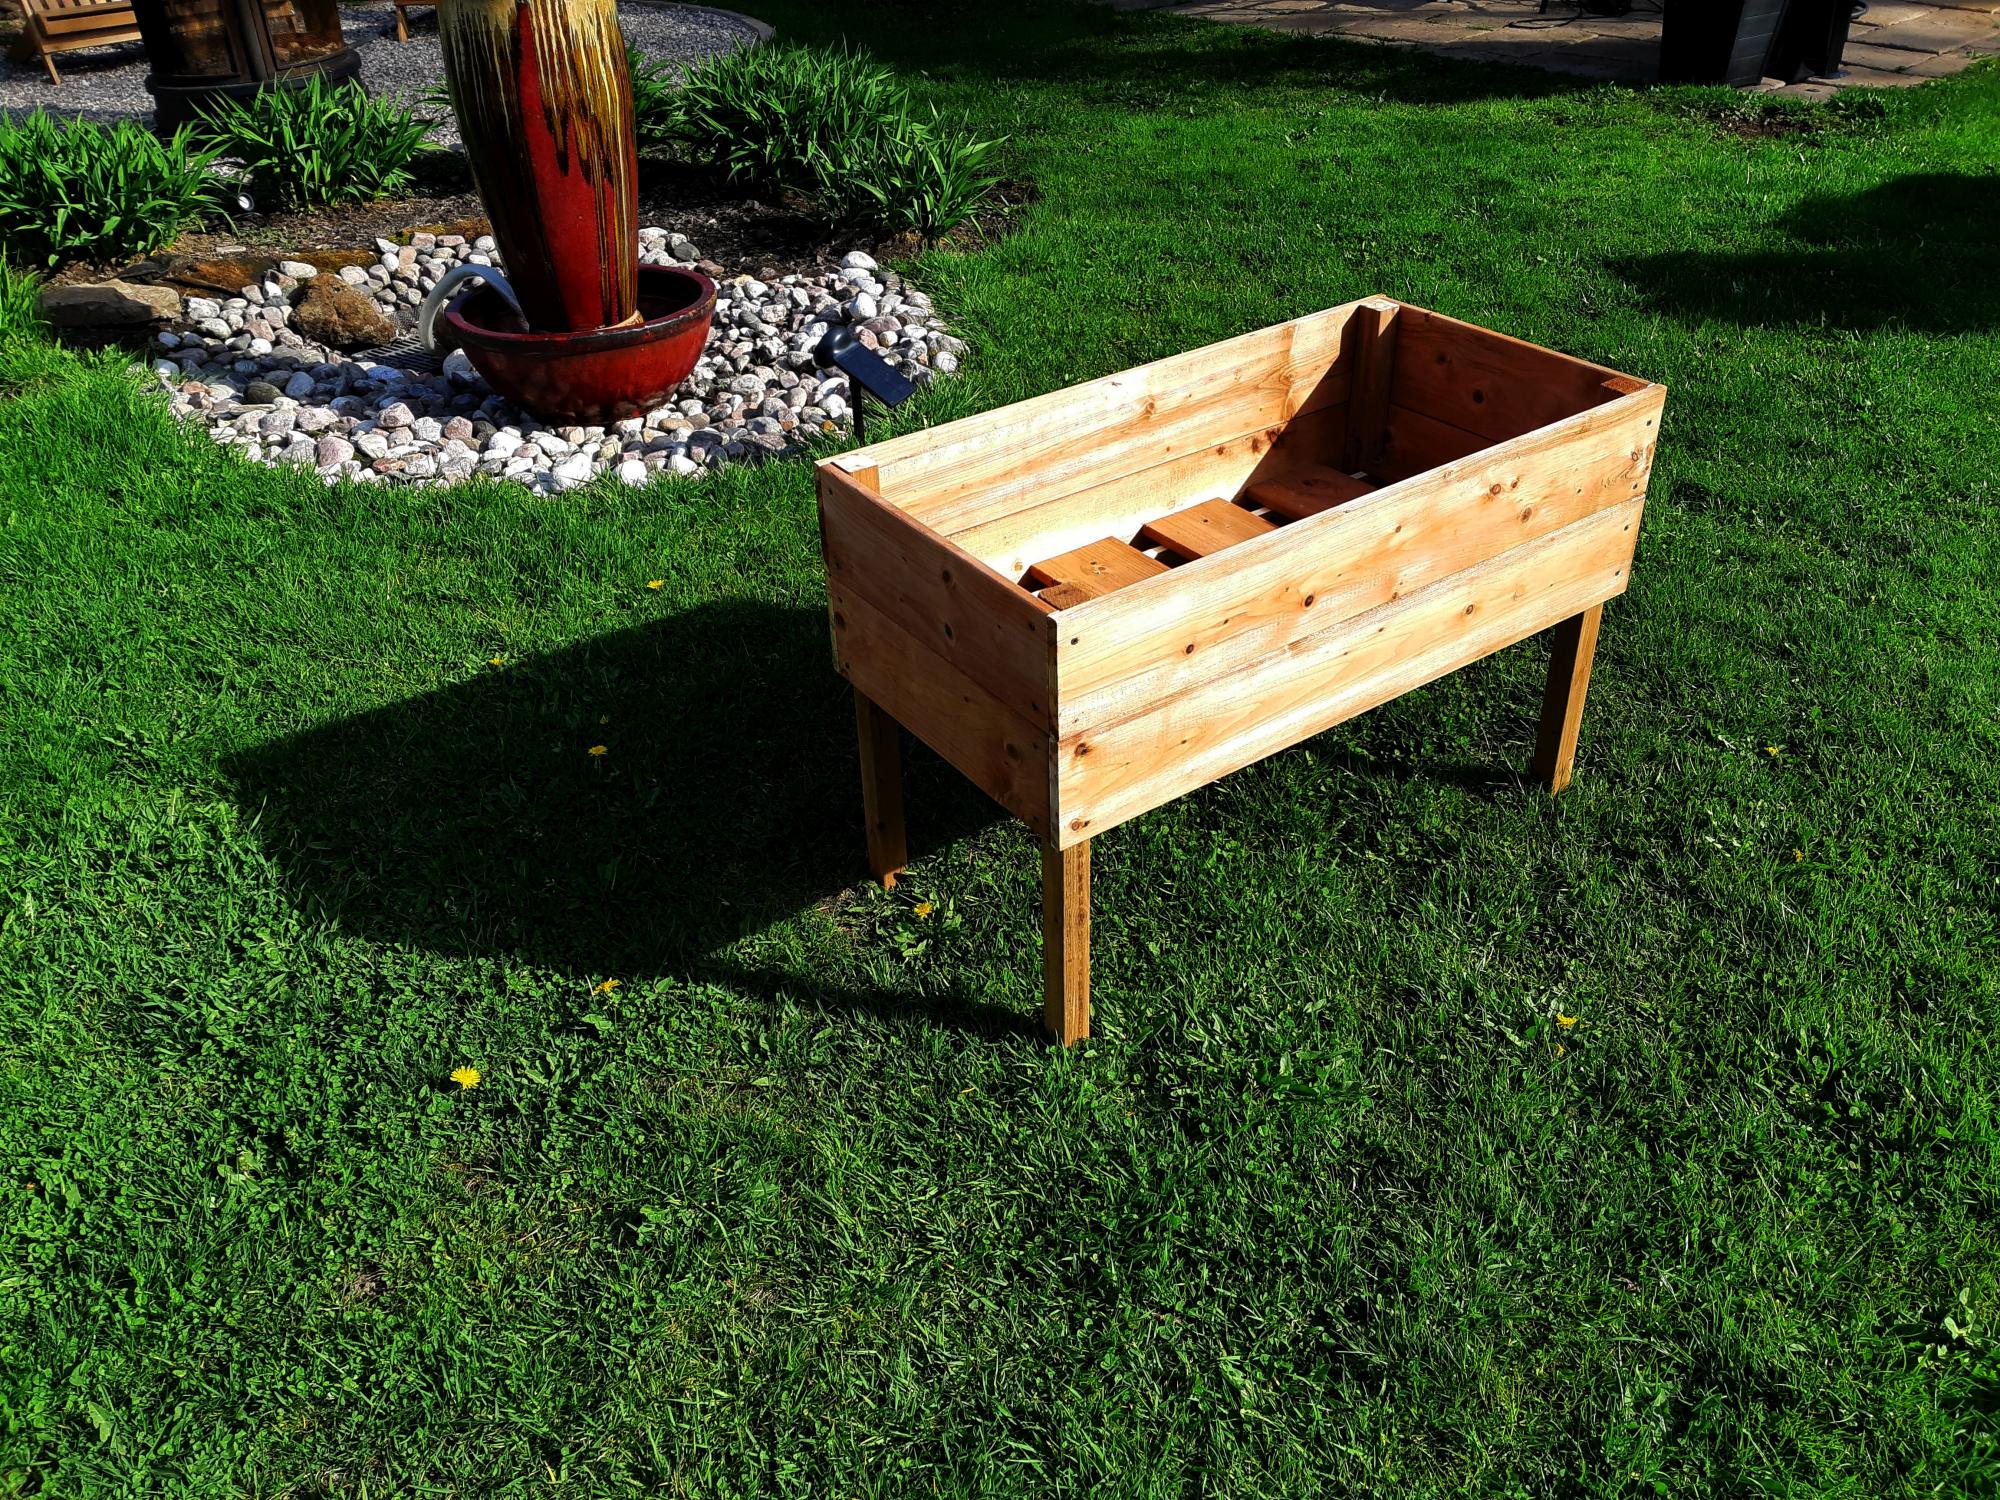
Built in May of 2020, made some modifications to install a fan unit. Has raised beds left and right.
Moltzvt
Built from Plan(s)
Built in May of 2020, made some modifications to install a fan unit. Has raised beds left and right.
Moltzvt

Hello Everyone! This is my FIRST brag post here on Ana-White.com - but not the first project that we've built from her awesome plans. :)
We have an unfinished basement that desperately needed some shelving because 1. It's our workshop in the Winter and 2. We don't have an official 'storage' room in the basement of our split level home. When I saw these plans I immediately thought they could be modified to fit our space and get my stuff off the floor!
I modified the plans just enough to fit our space. After reading through them completely, I realized for an 8 ft wide space (beside the stairs) I only needed three supports for the shelves. Easy! The only trick was fitting the shelf into the space AFTER installing the shelves. Because I had walls on two sides (unlike the tutorial) I couldn't do the shelves as the last step.
I LOVE how these turned out! They are a strong as a ladder (we tested them... :)) and they hold everything I need them to, and a little bit more. It's a definite improvement on my previously messy, cluttered, saw-dust covered space ... :)
2nd project, but learning quickly! :)
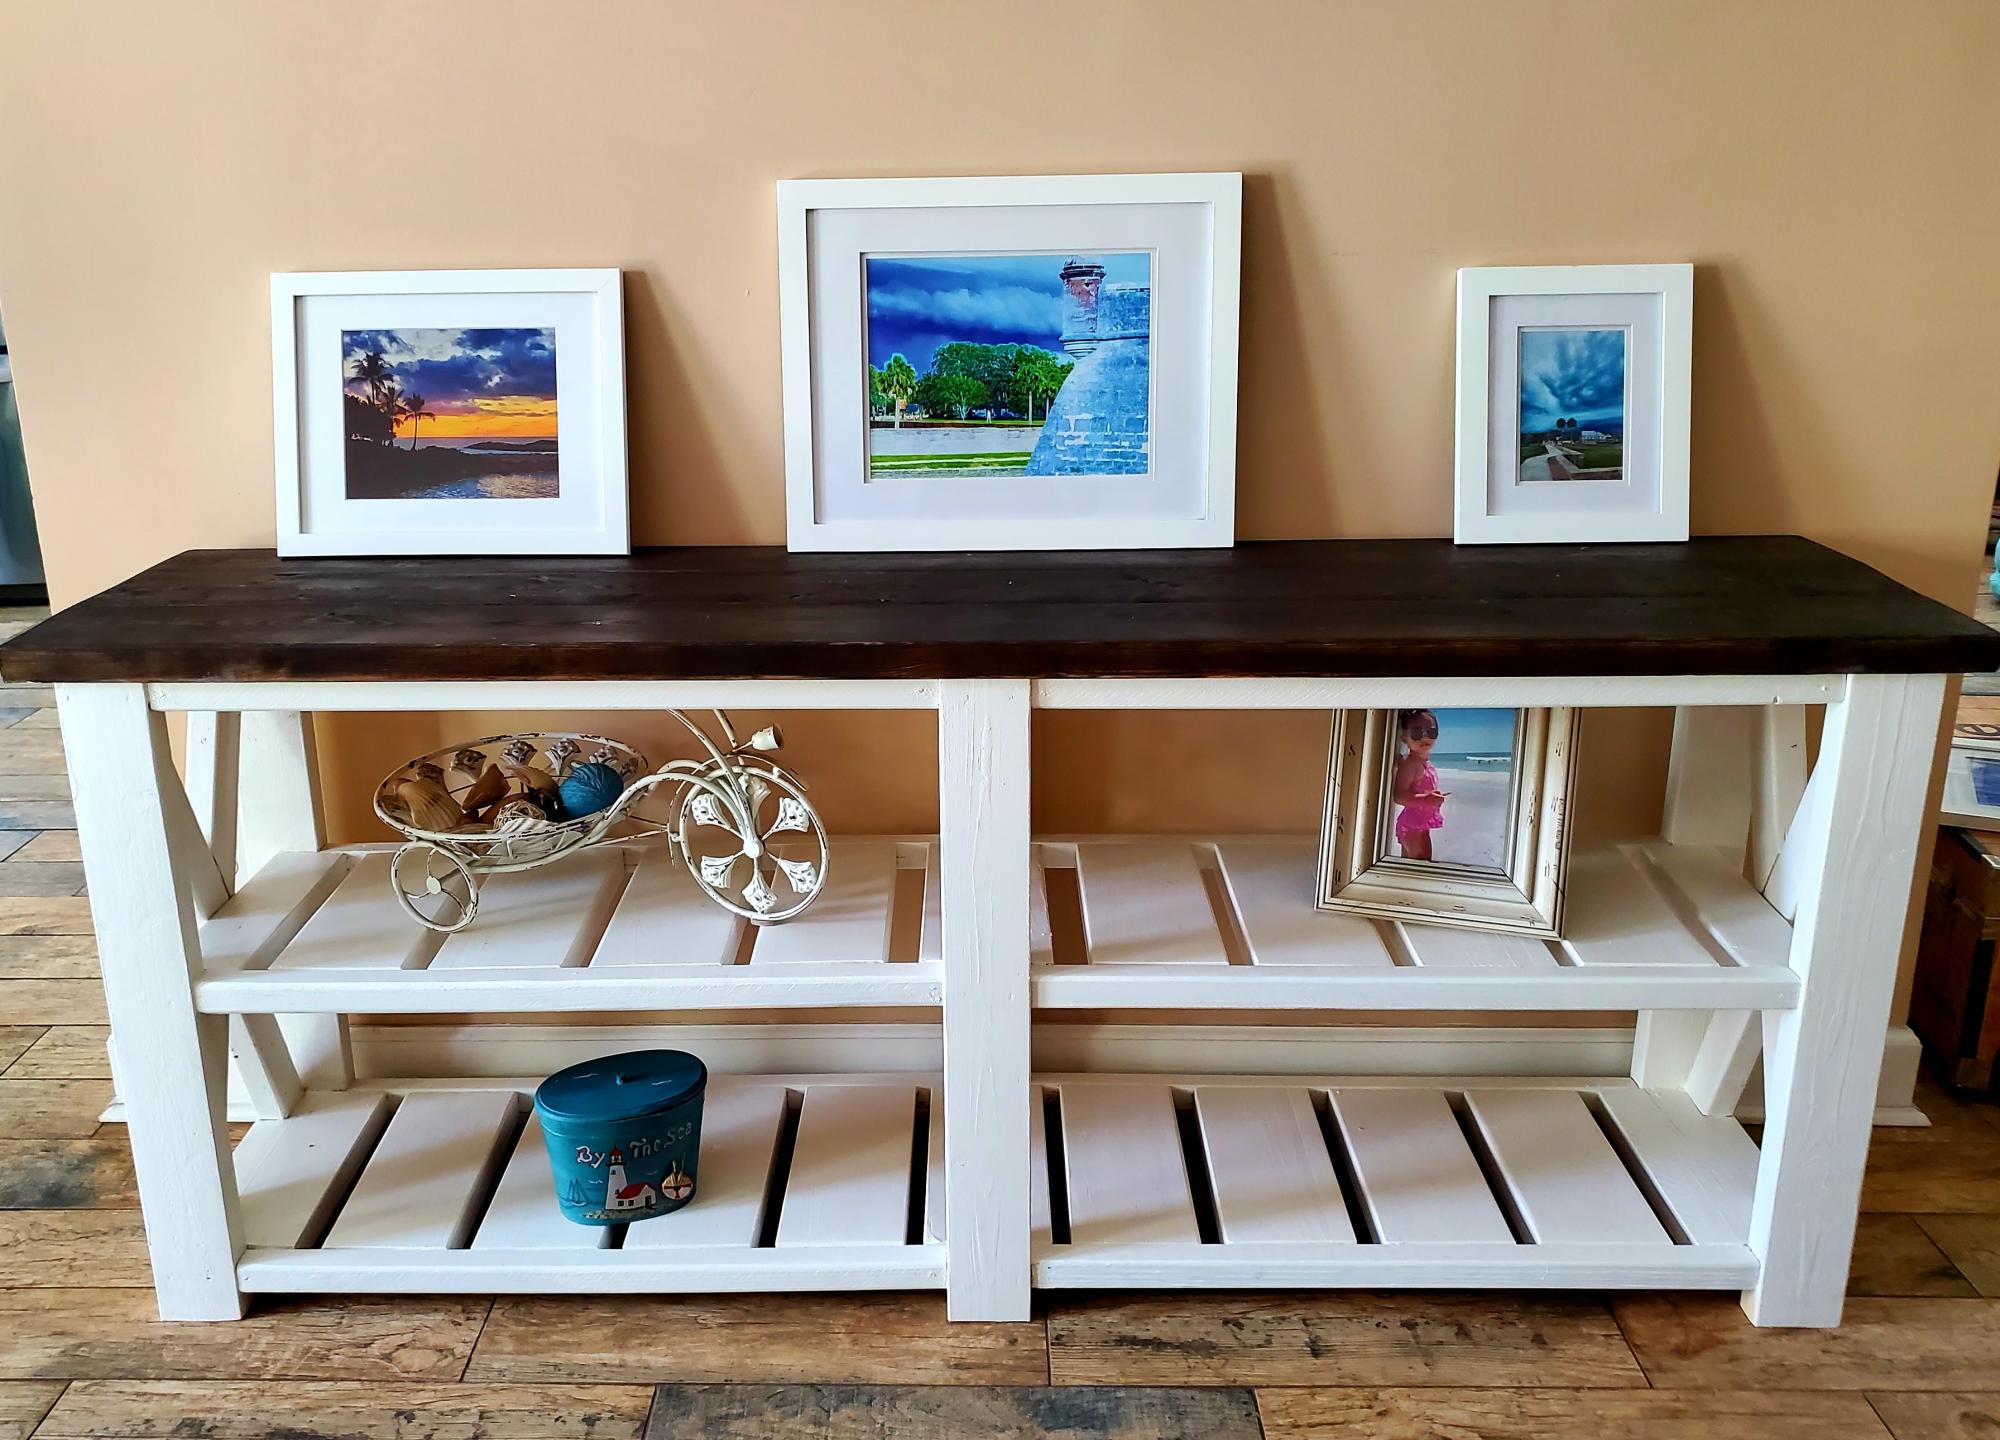
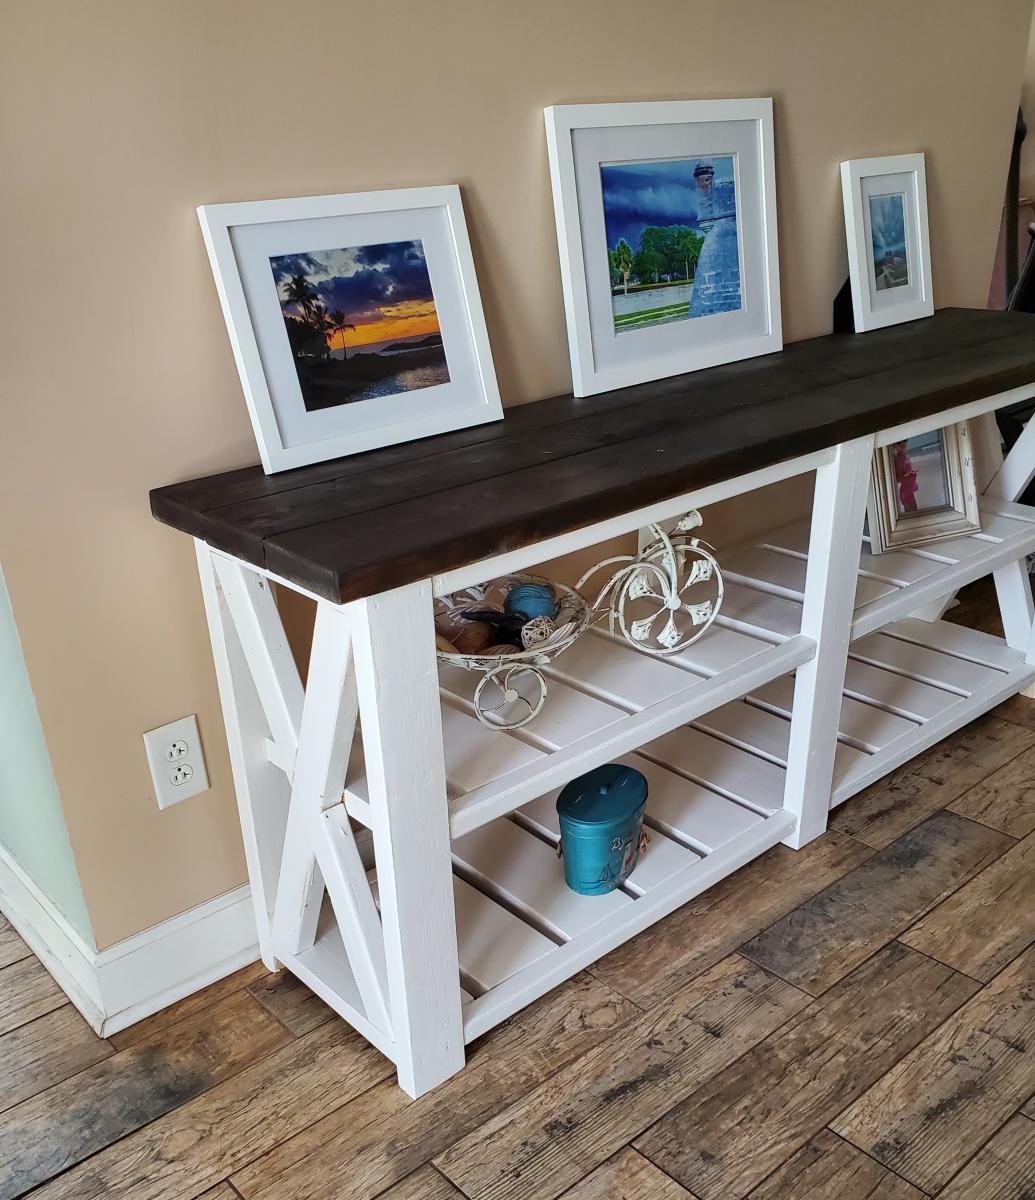
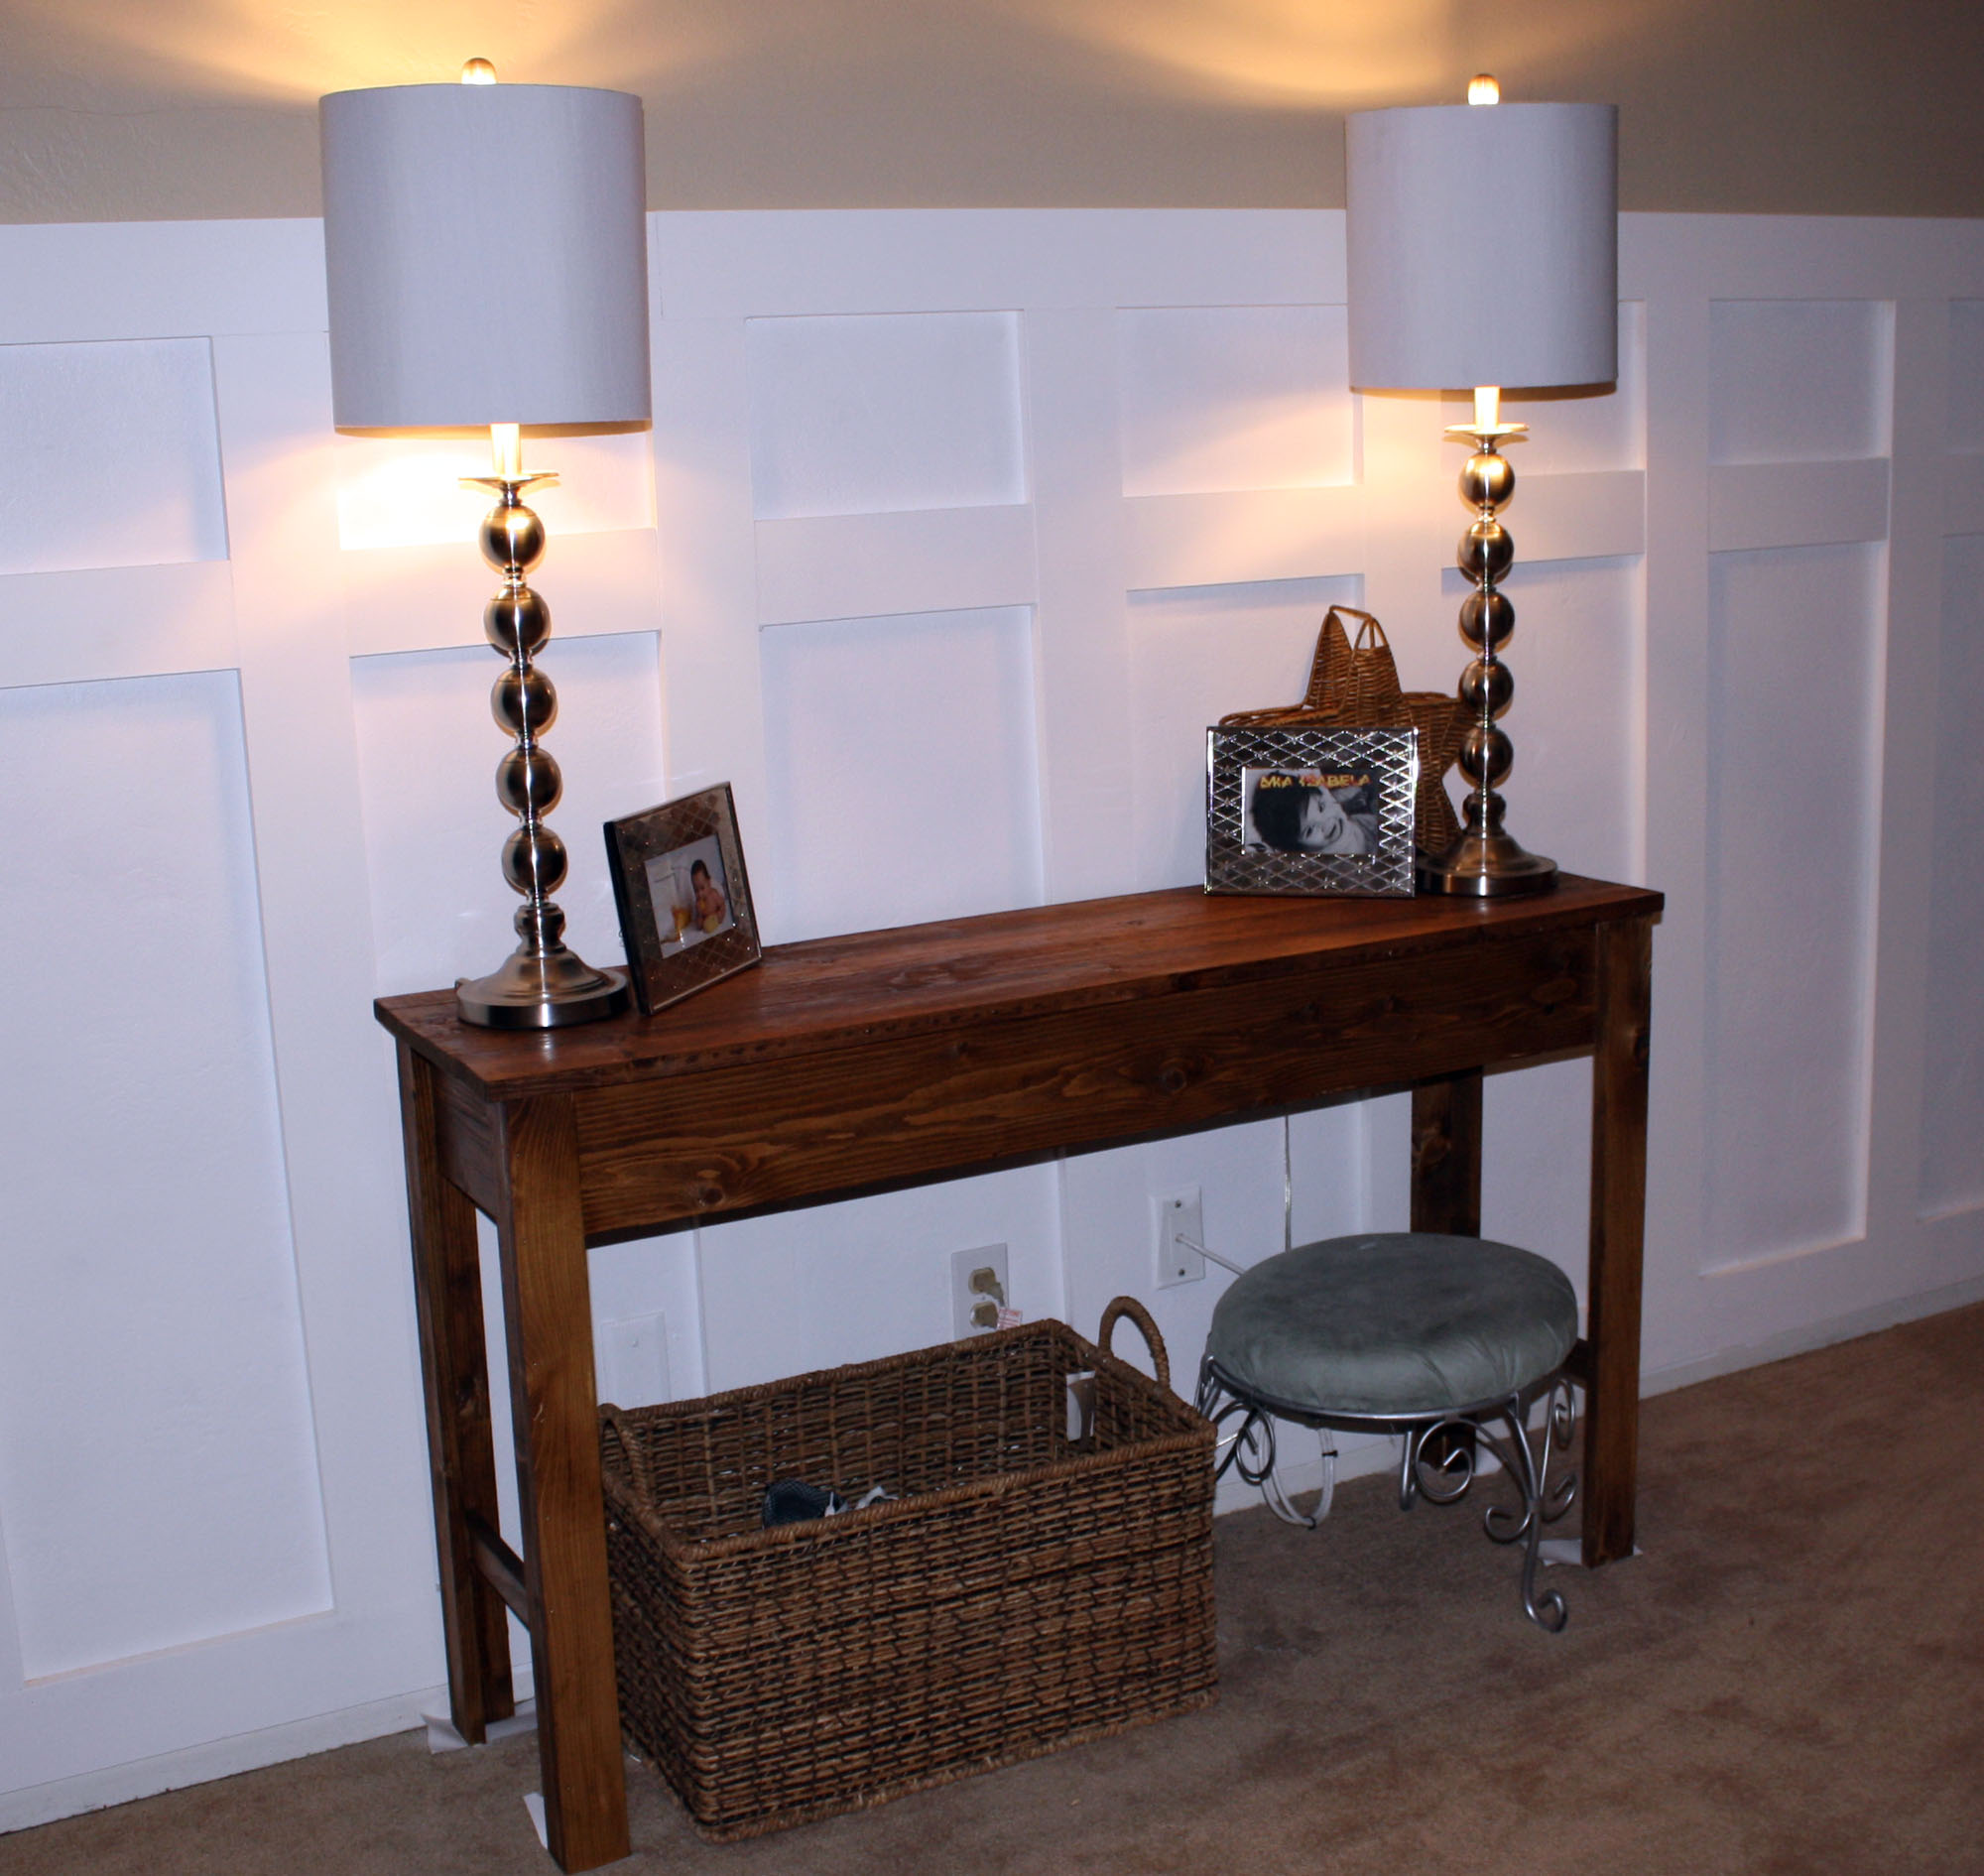
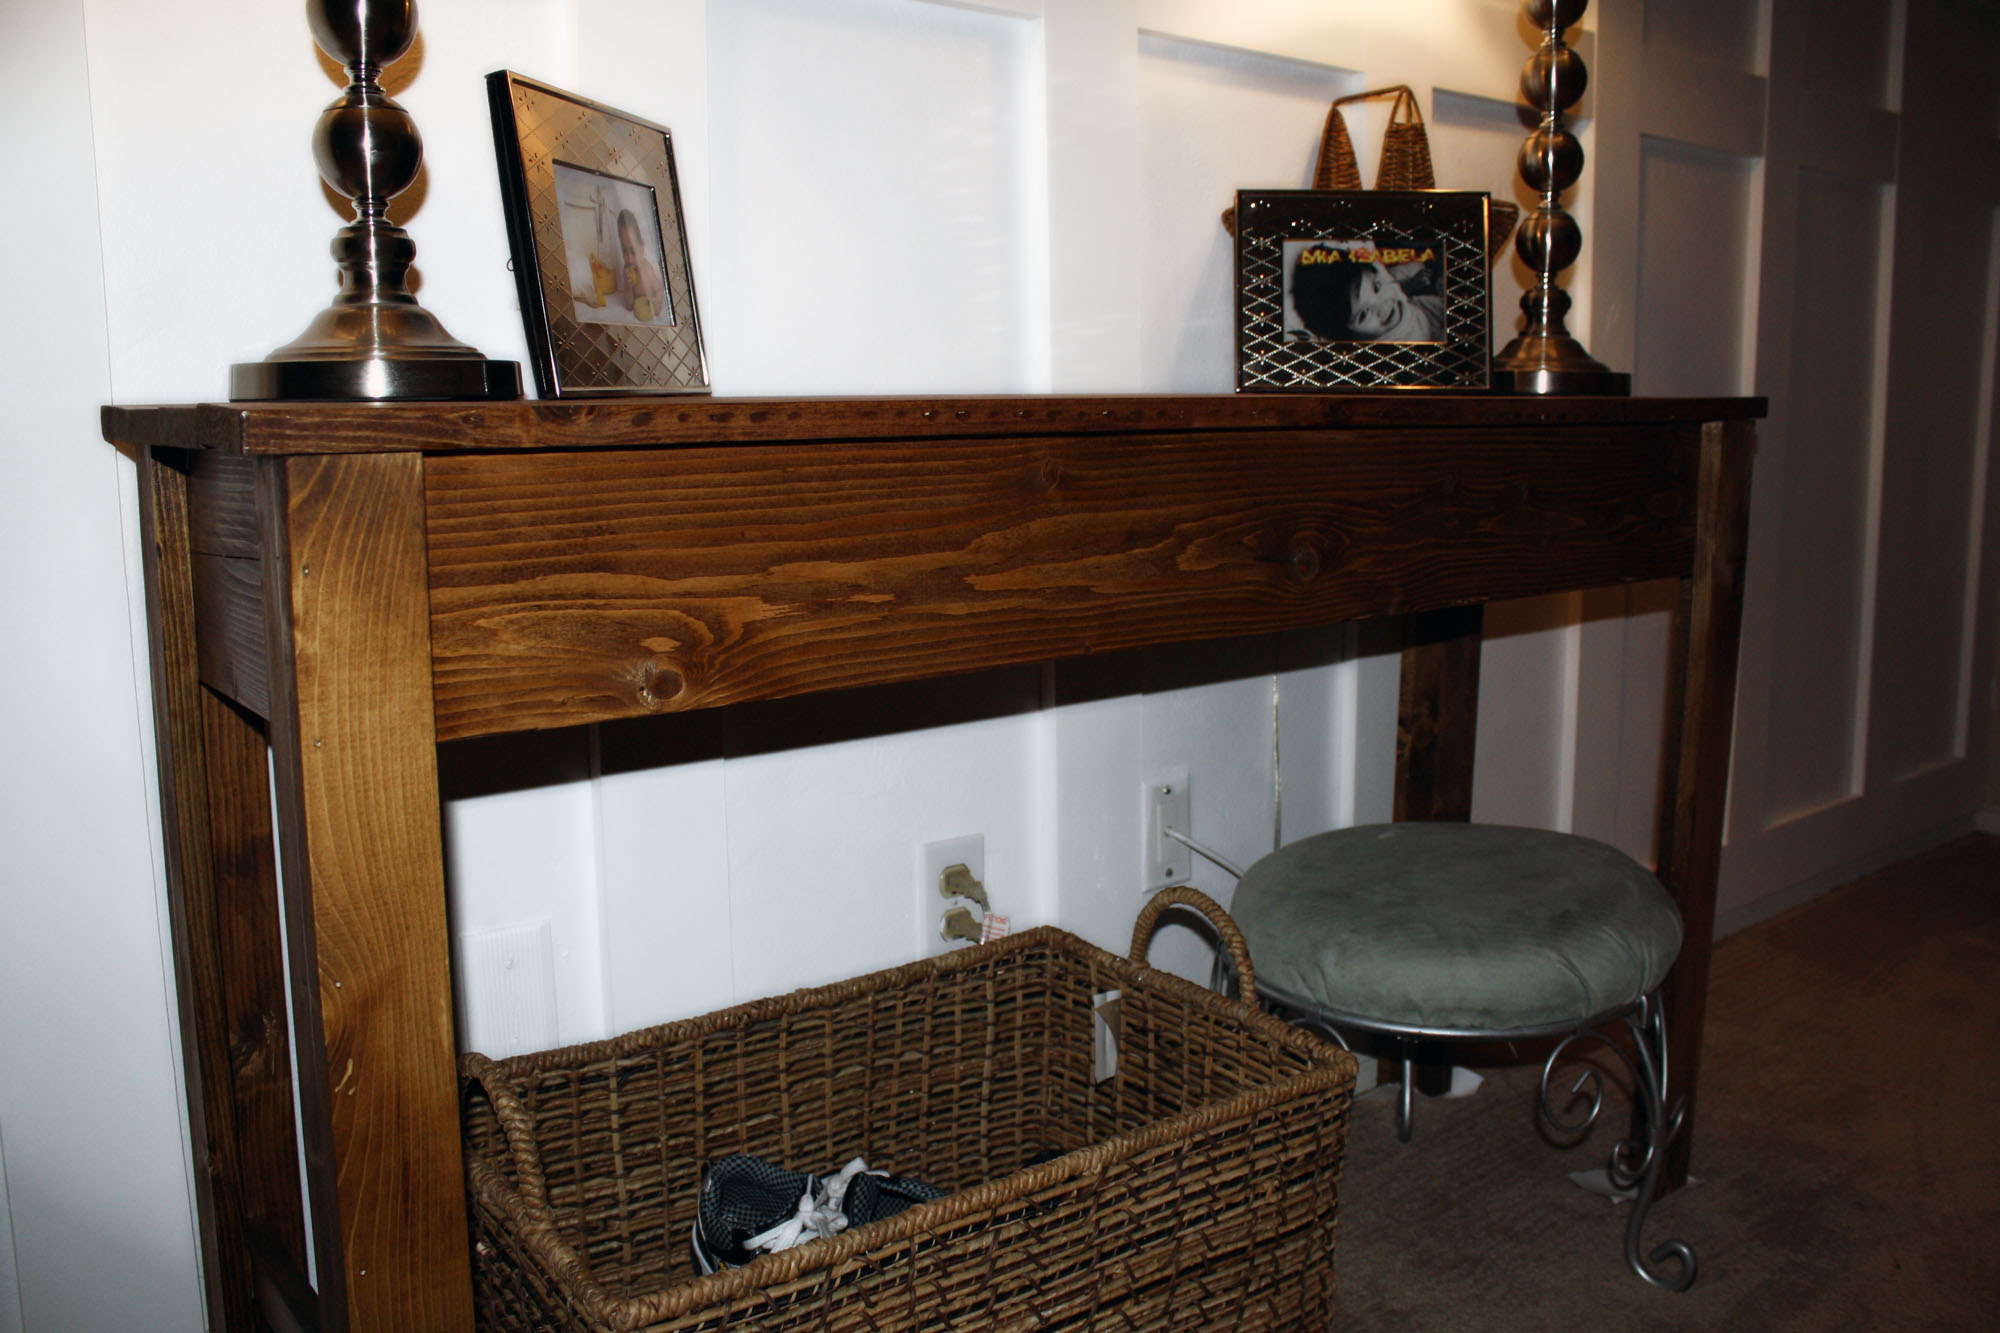
I first started with the wall treatment, love board and batten walls, they add such a crisp look and tons of character, but then the entry way was a little bare. So I needed a table for our keys and some lighting...so this table was perfect, narrow and Pottery Barn looking...
It took about 1 hour to build, including cuts and everything....the staining was the task...my God was I impatient!
I started with the wood conditioner, which only gives you a 2 hour window to add the stain, but do need to wait 15 minutes to start...then I did 2 coats of dark walnut stain and after 8 hours of drying time came in the top coat...which takes 4 hours to dry and then a 2nd coat needed to be added (which I skipped) but I love the color, love the turn out.
So light, I carried it ALL by myself. :)
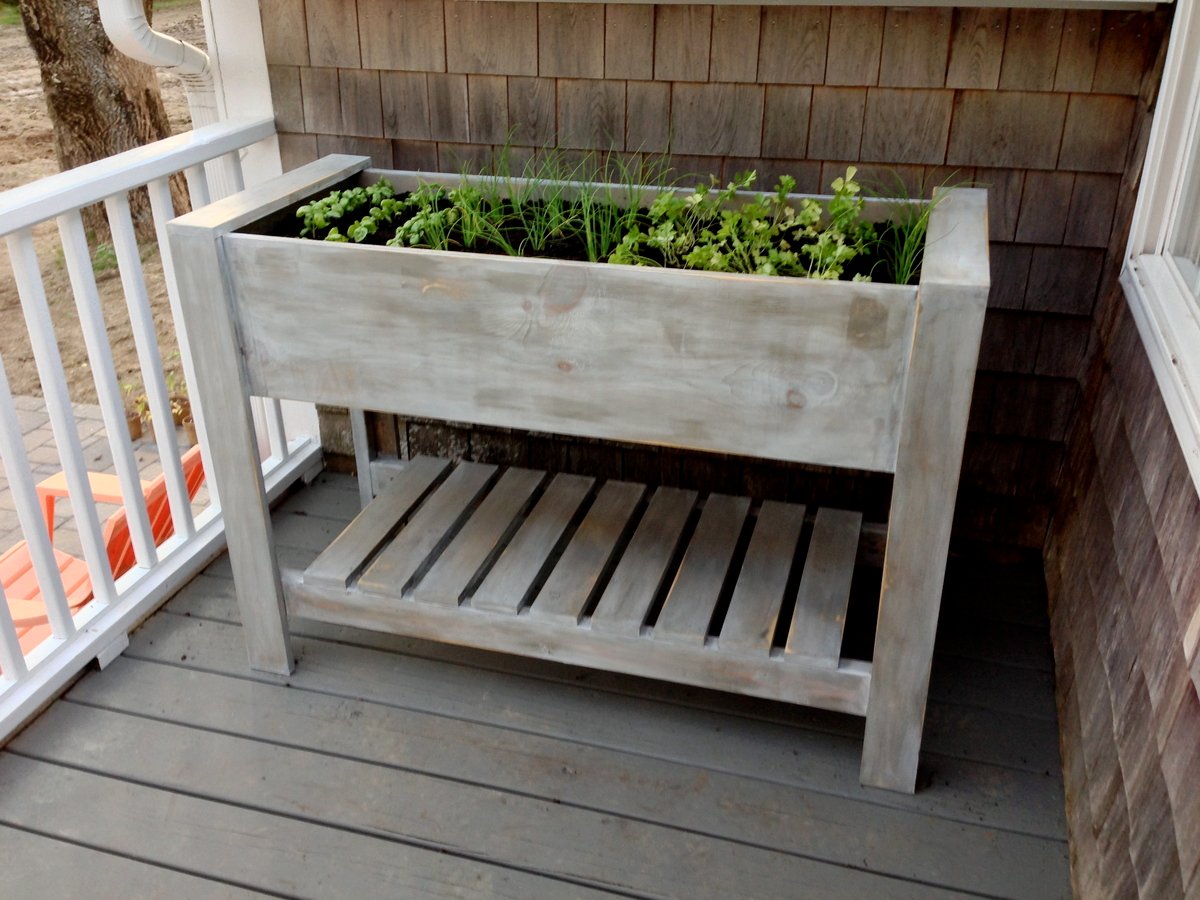
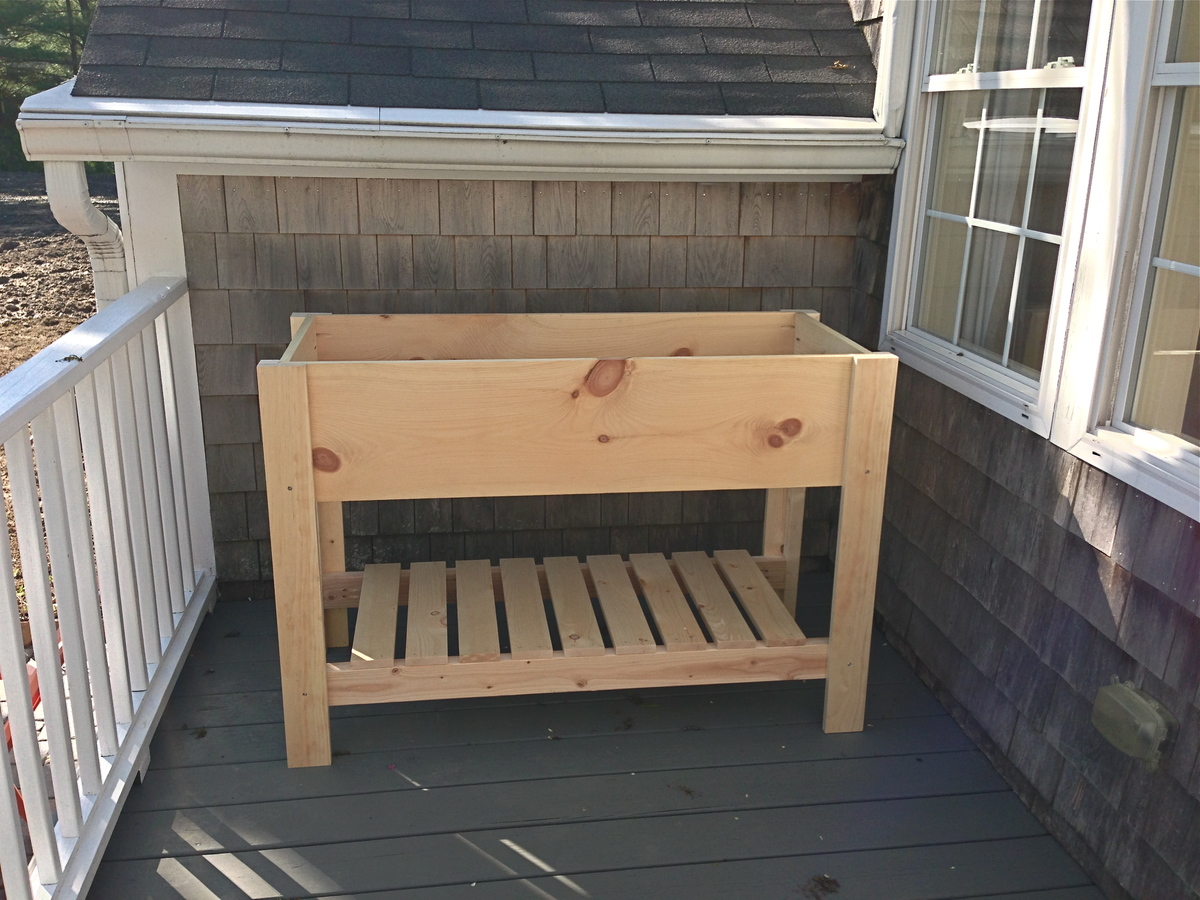
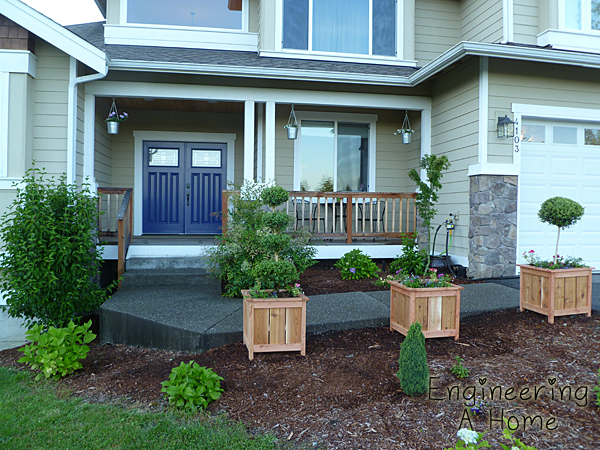
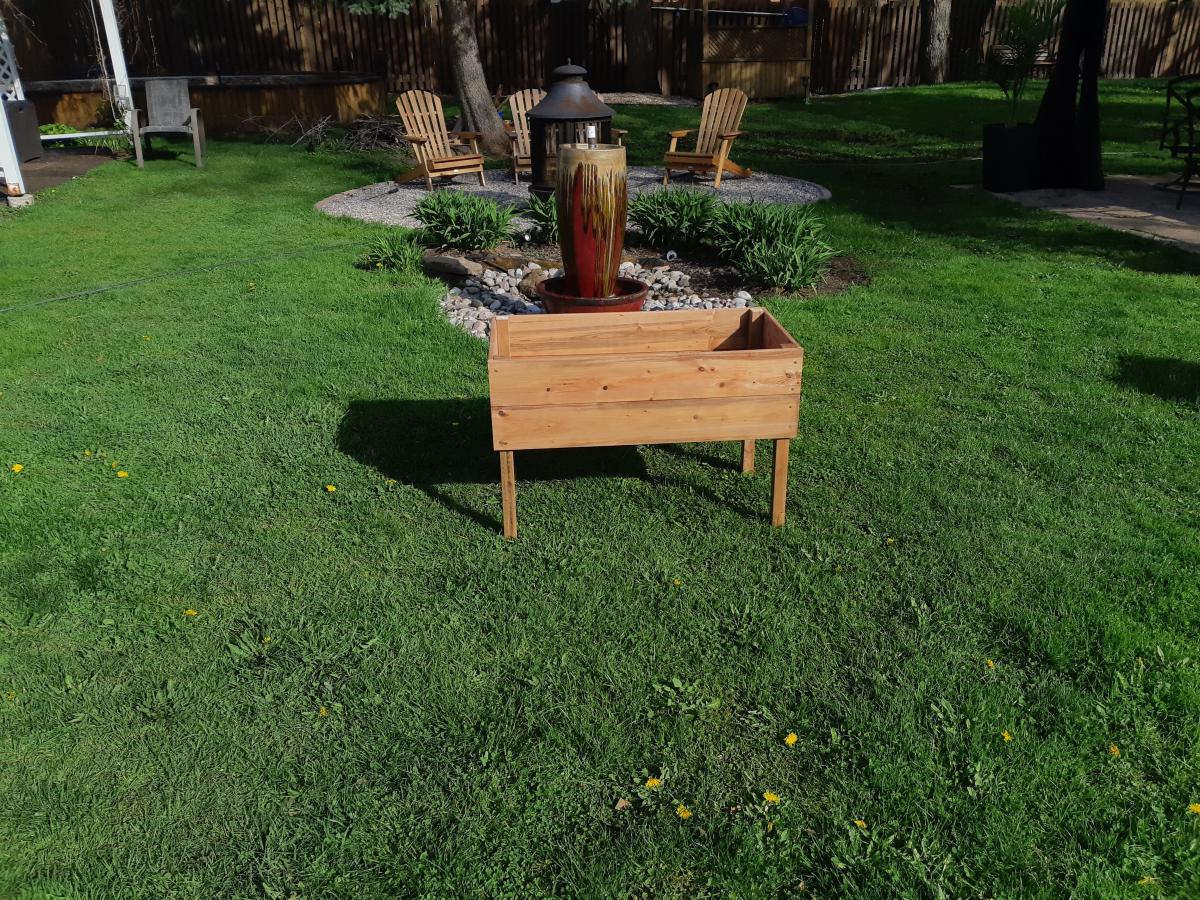
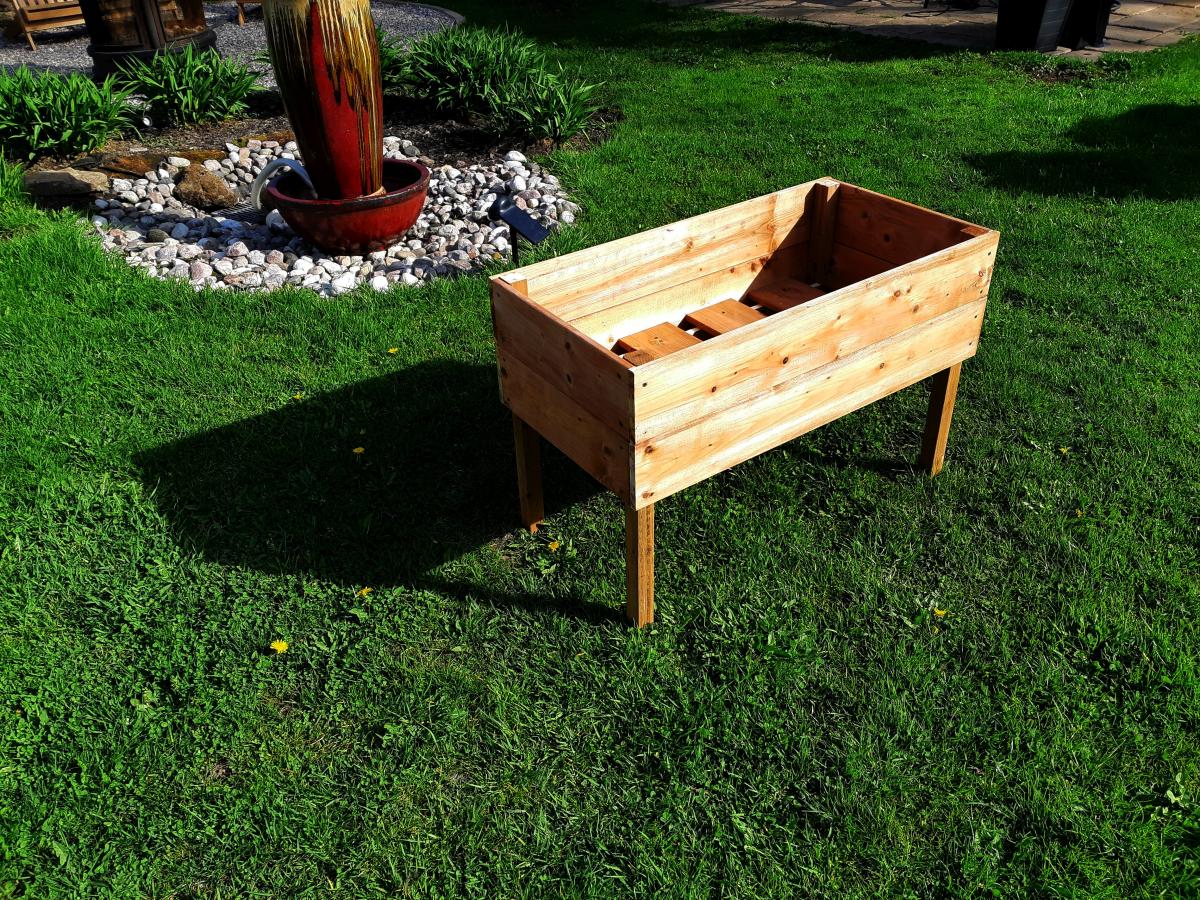
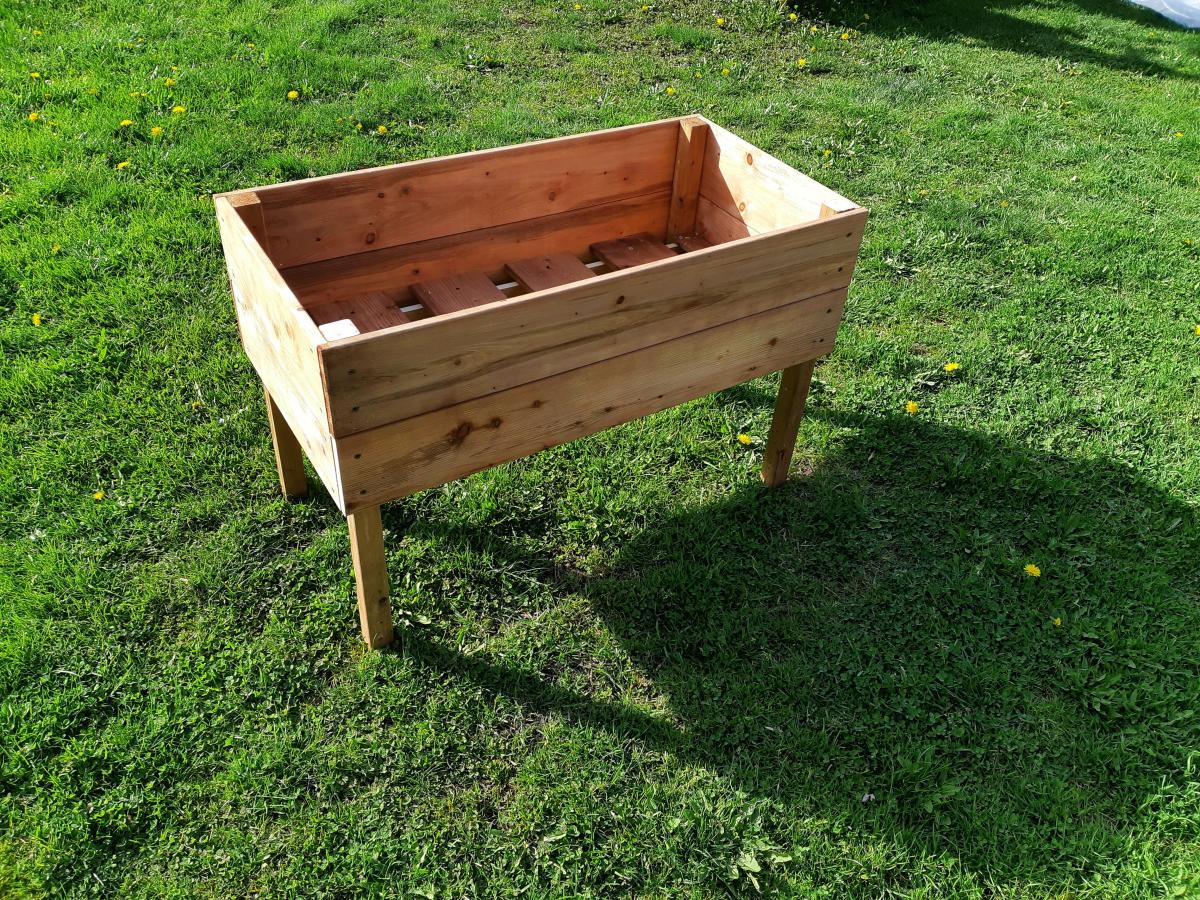
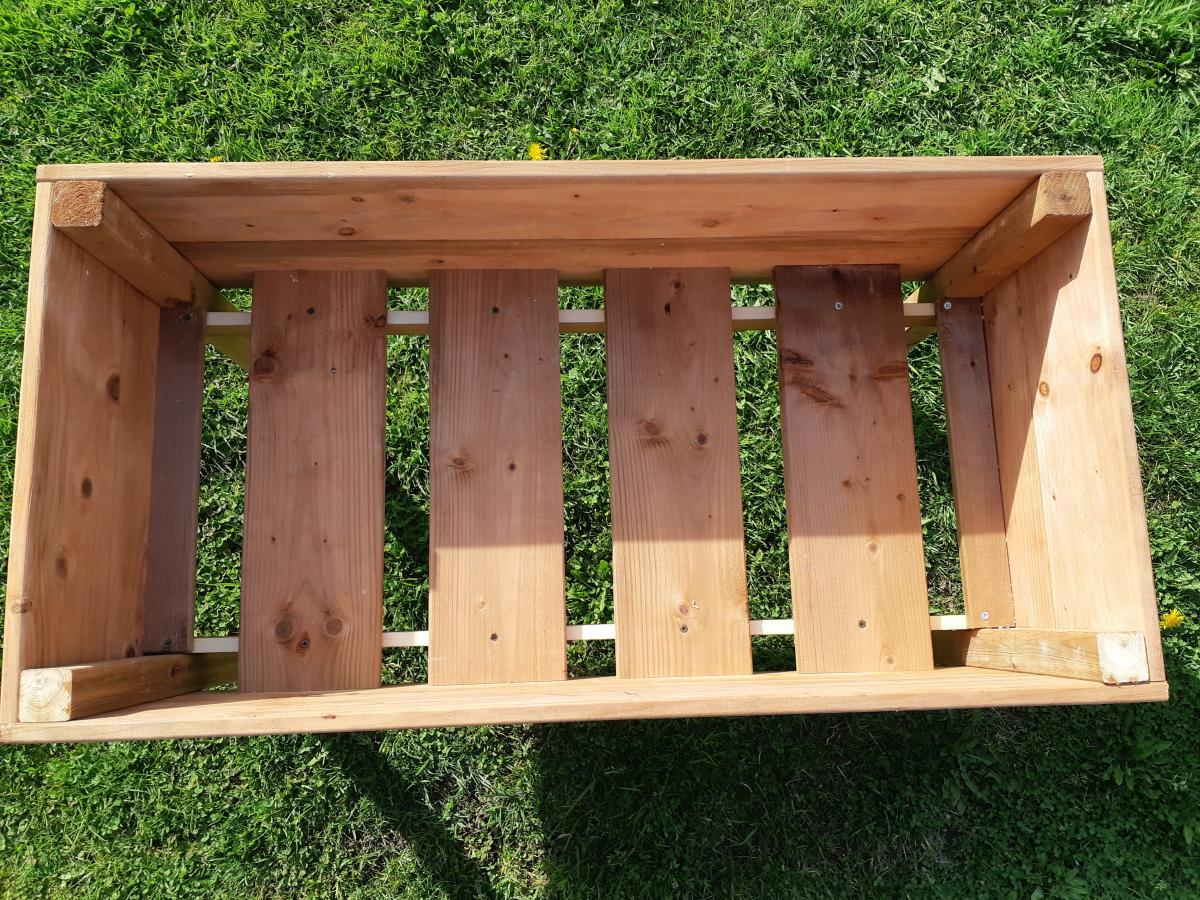
I followed Ana's Raised Planter Box plan exactly. We did purchase a Kreg Jig Jr. recently, which came in handy on this project for sure. It is a very sturdy piece and it only took a couple of hours to assemble.
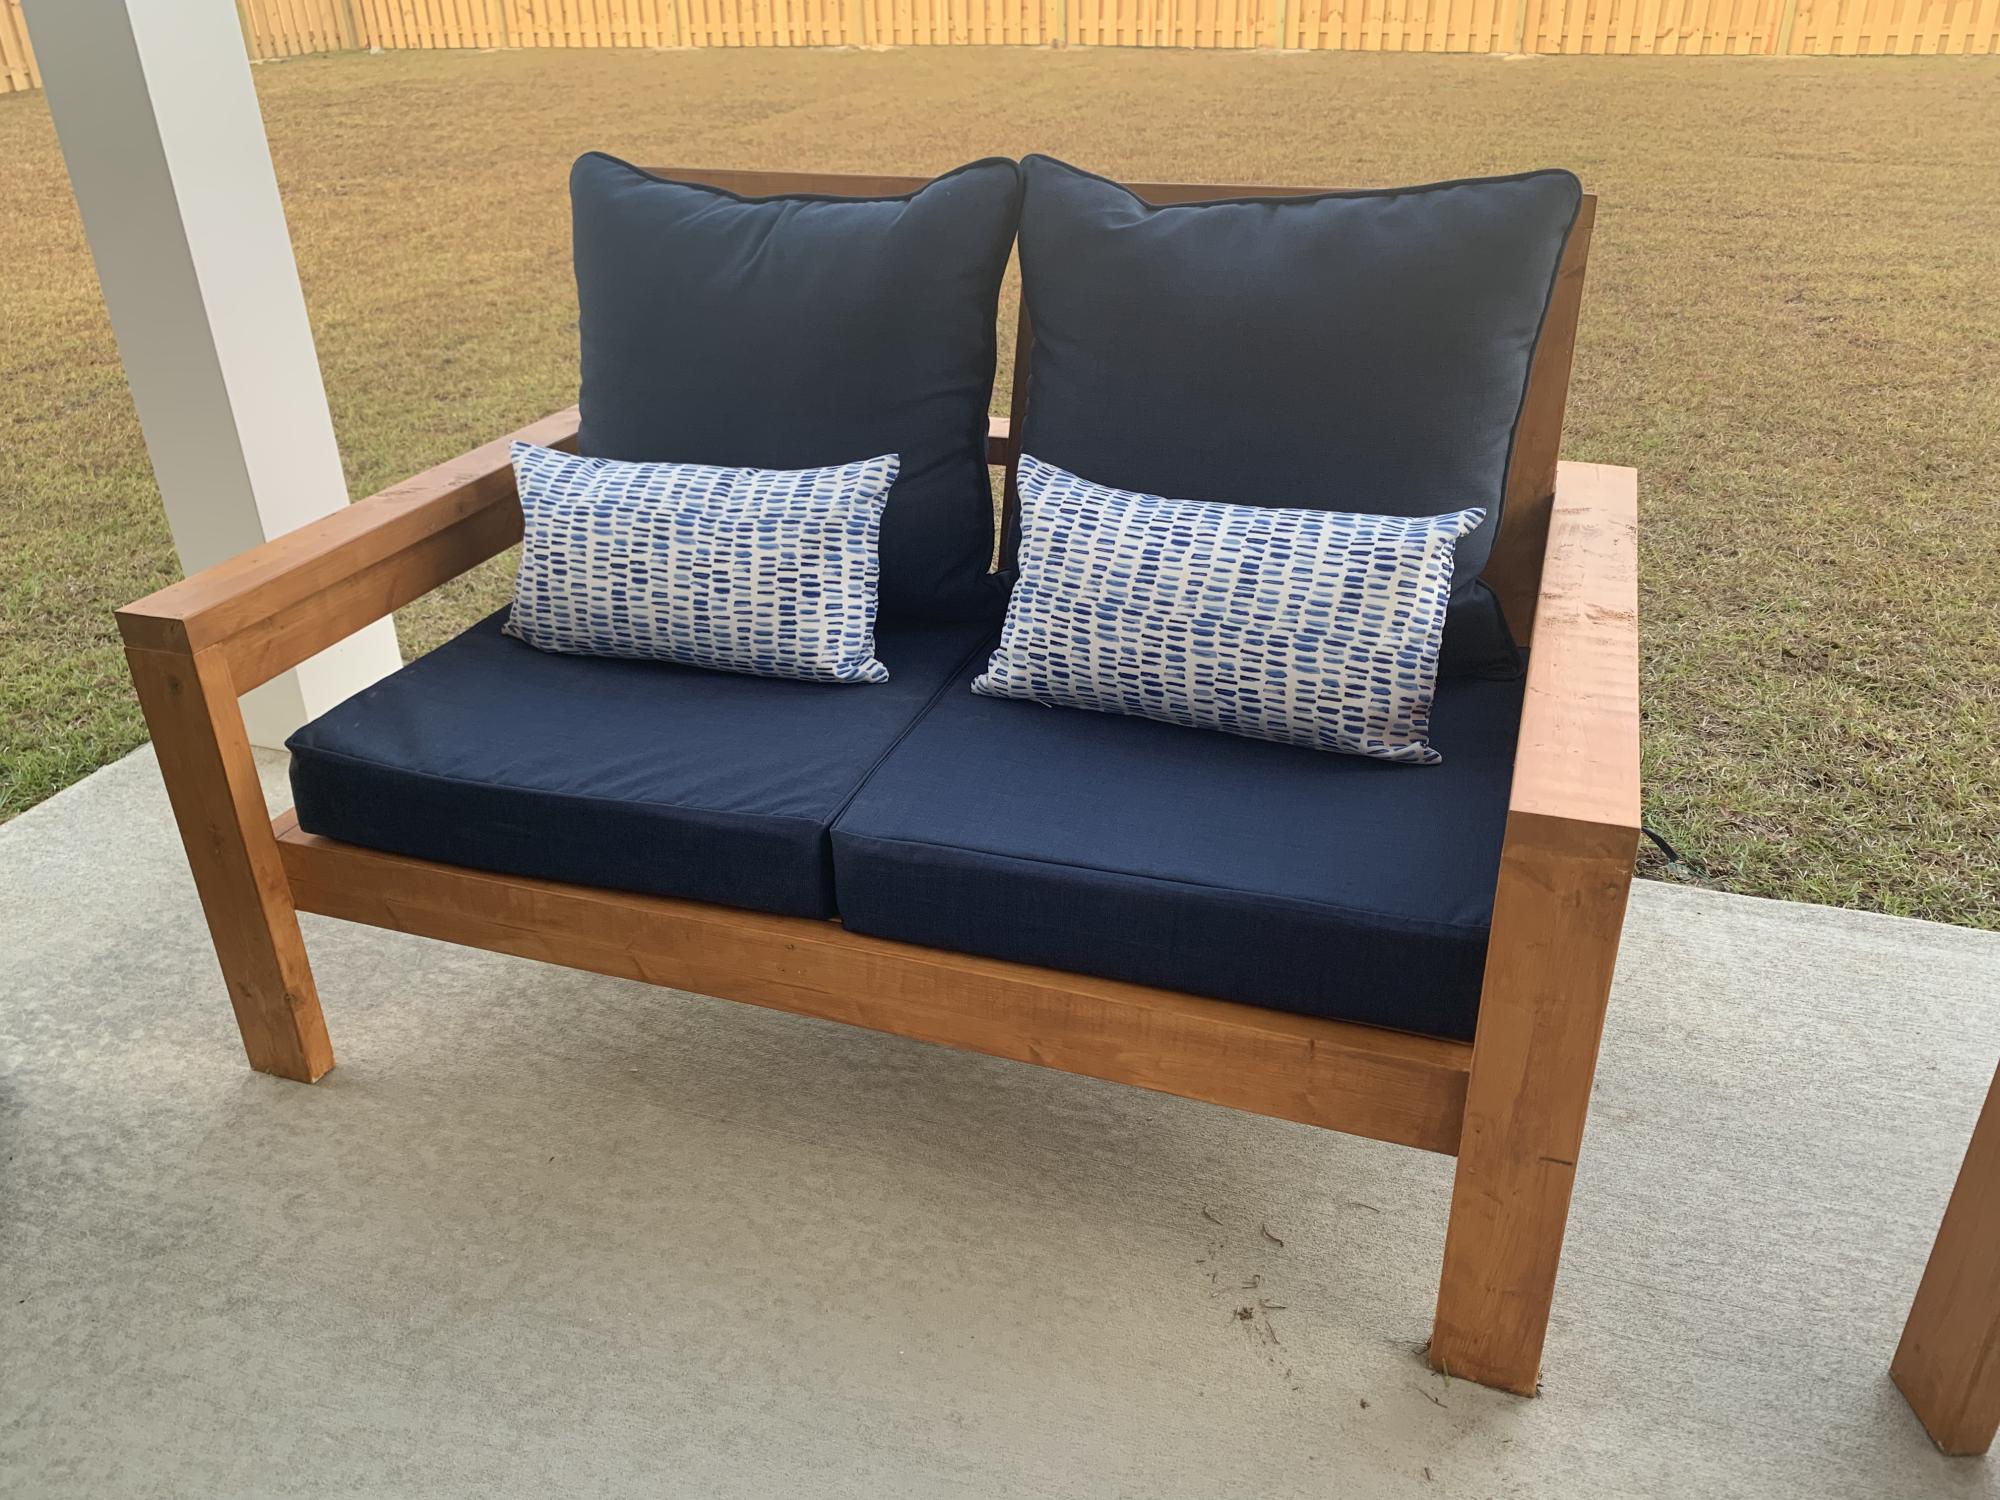
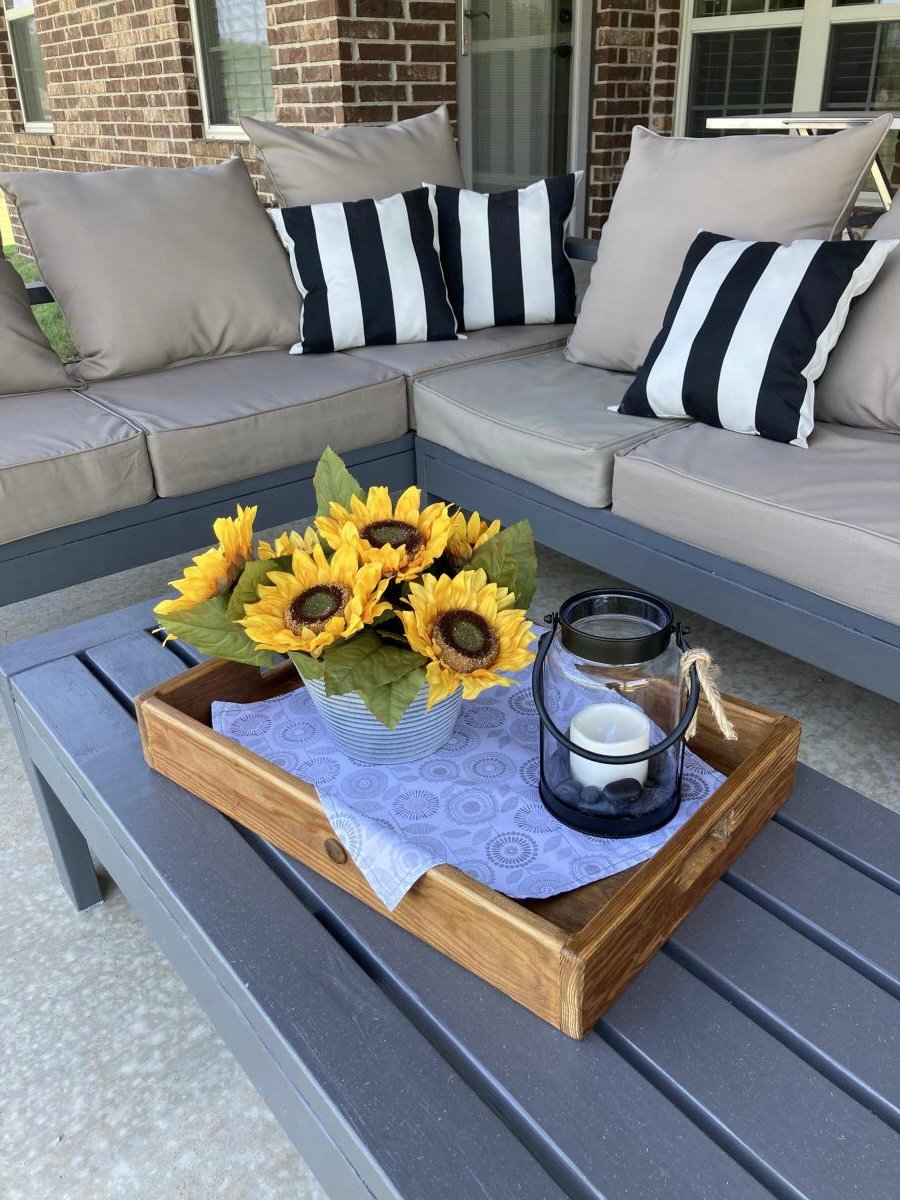
Super easy and fun project! We altered the original plans to build a loveseat and had zero issues. We did add some extra support below.
I did not find 25”x25” cushions within our price range so I settled for 25”x22.5” and they work but ultimately 25x25 works best.

I made this coop twice as wide like Ana suggested since I have 4 chickens and wanted to make sure there was some extra wiggle room in case “chicken math” got the best of us. I made a nesting box to mount on the outside. I also used plywood for the sides like Ana did in the video. I installed a Run Chicken automatic door that opens at sunrise and closes at sunset. I added some hasps and clasps to make sure all my doors would close tightly. I put hardware cloth across the top before installing the roof panels. I stapled and buried hardware cloth around the perimeter for predator protection. I also spray painted the hardware cloth flat black so that it would be easier for us to see inside the coop. I stained the rest of the wood with Varathane Semi-Transparent stain, color “Carbon Gray.” I also added some roosts and cedar shingle siding for some extra protection during our New England winters at to match our house. Working 2-4 hours a day, off and on, with a bum shoulder and weak hands, this took me about a week! Thanks for the great plan, Ana!


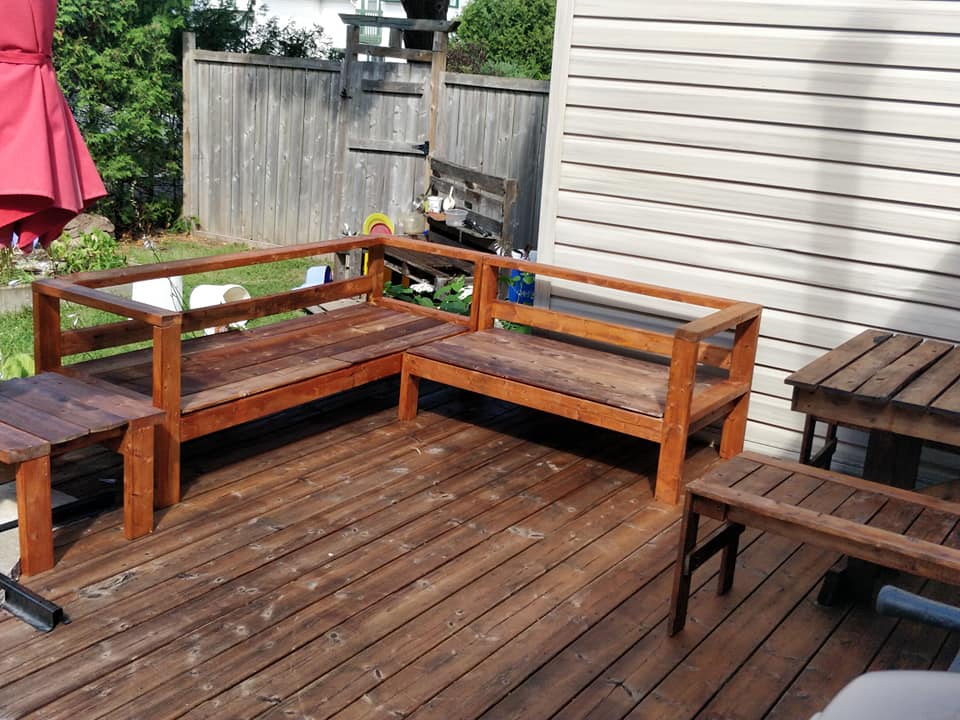
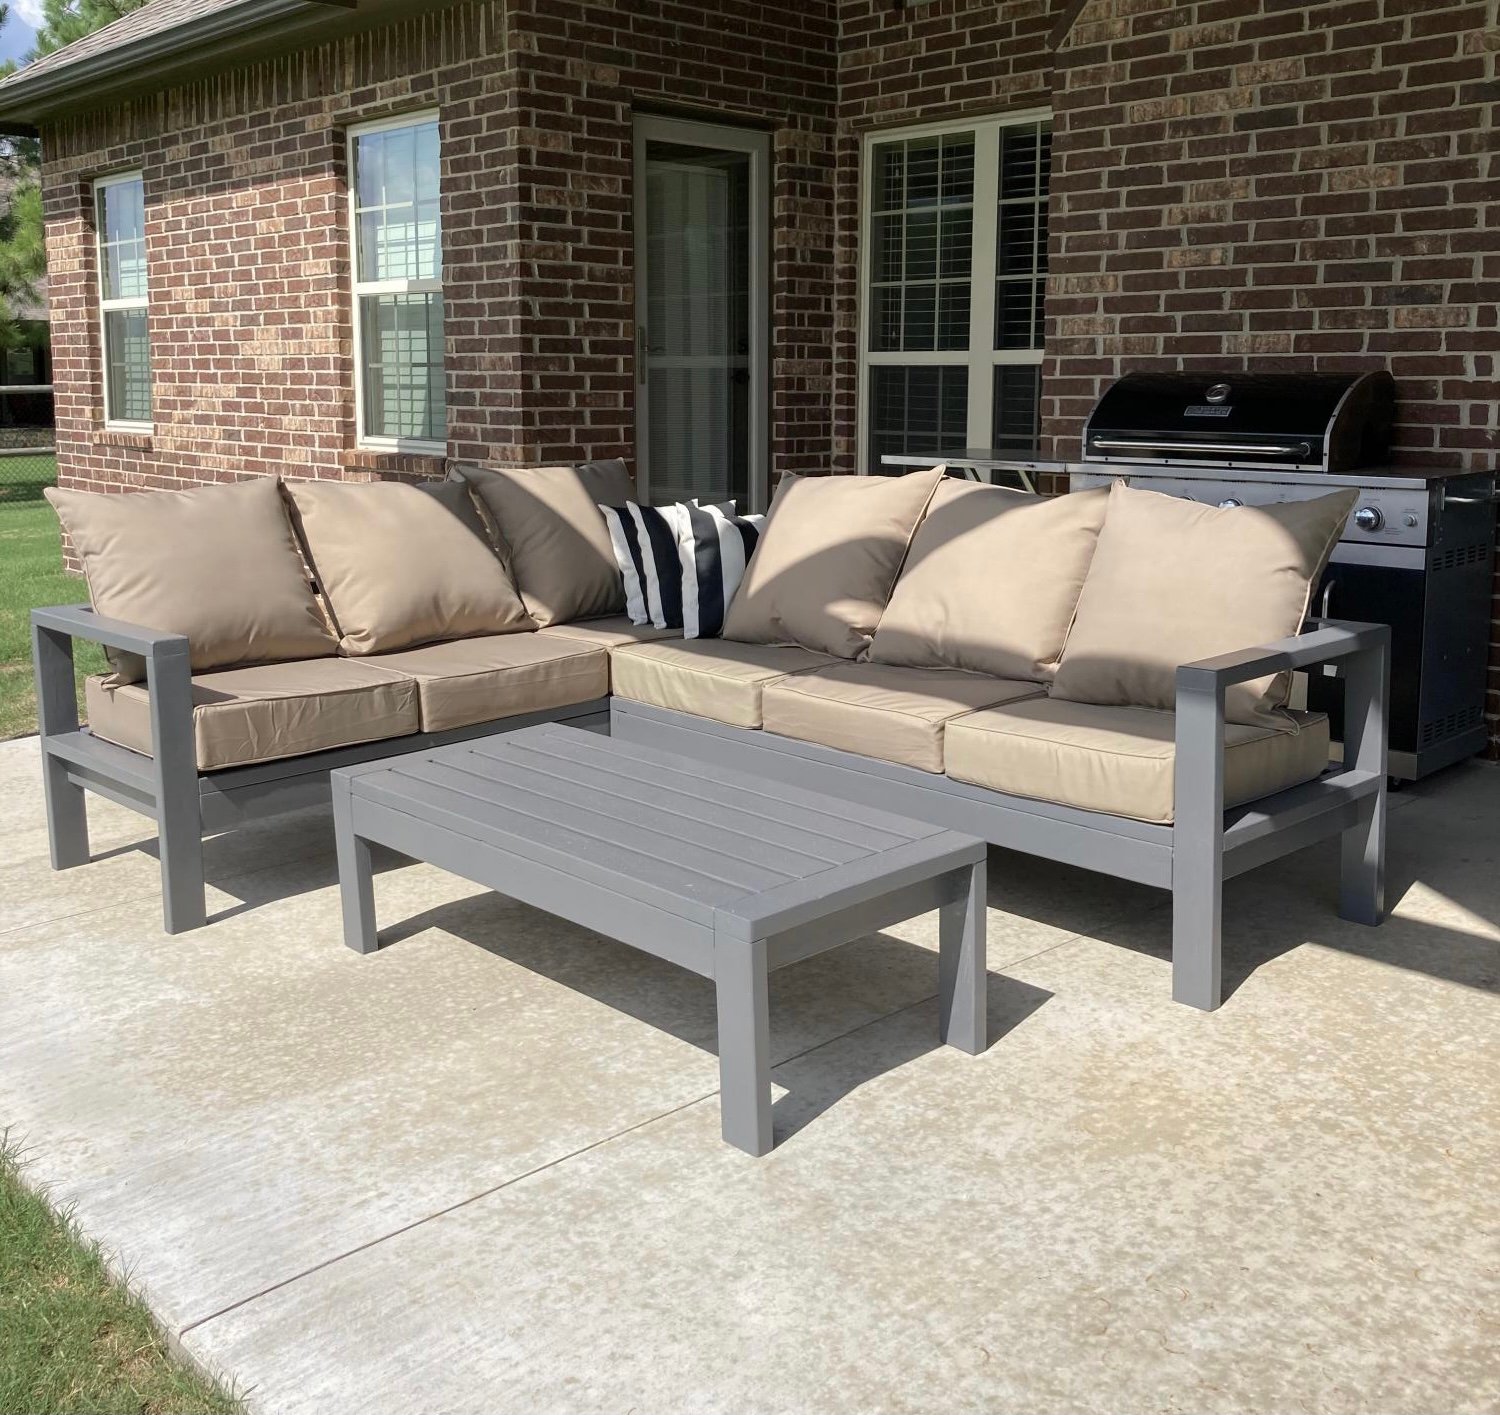
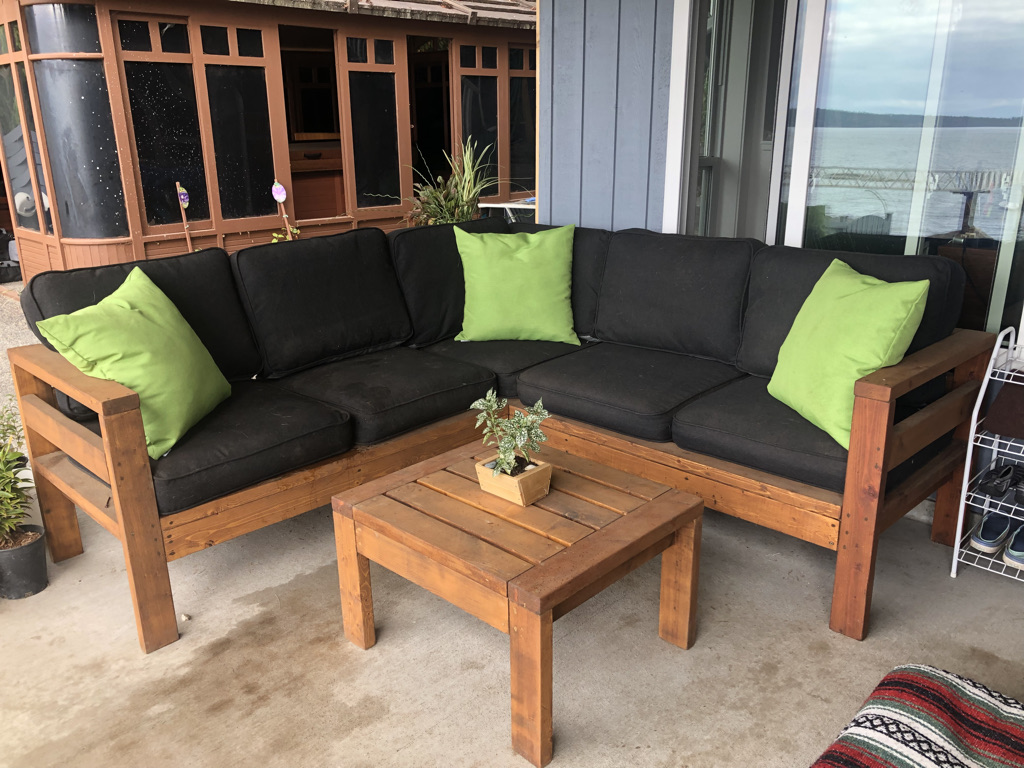
My first Ana White project. My friend Shelley and I are RN's, and she got me hooked on woodworking. I started with cushions from Lowes ( in the sizes that you recommended)to see if I loved the sectional for a few years. I loved it so much I decided to have custom Sunbrella fabric ones made. Even though the custom ones were more expensive, it has been worth it. They go perfect with my California Mission style home. Now I want to add the armless one and make it a U-shape. I did add a piece at the bottom back of each sofa to hold the cushions in. The seat cushions would slide out the back when sitting on the sofa. I made the coffee table to match. Our family loves it!
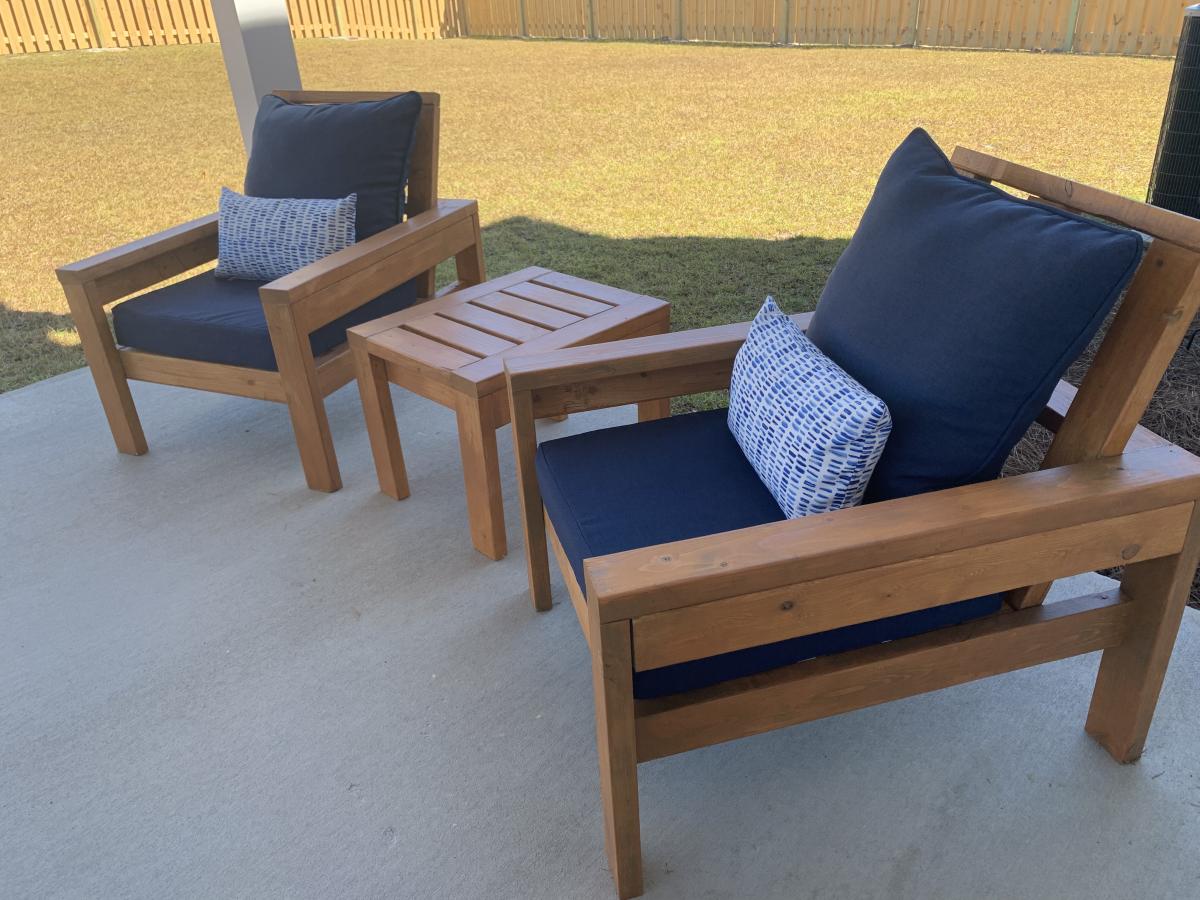
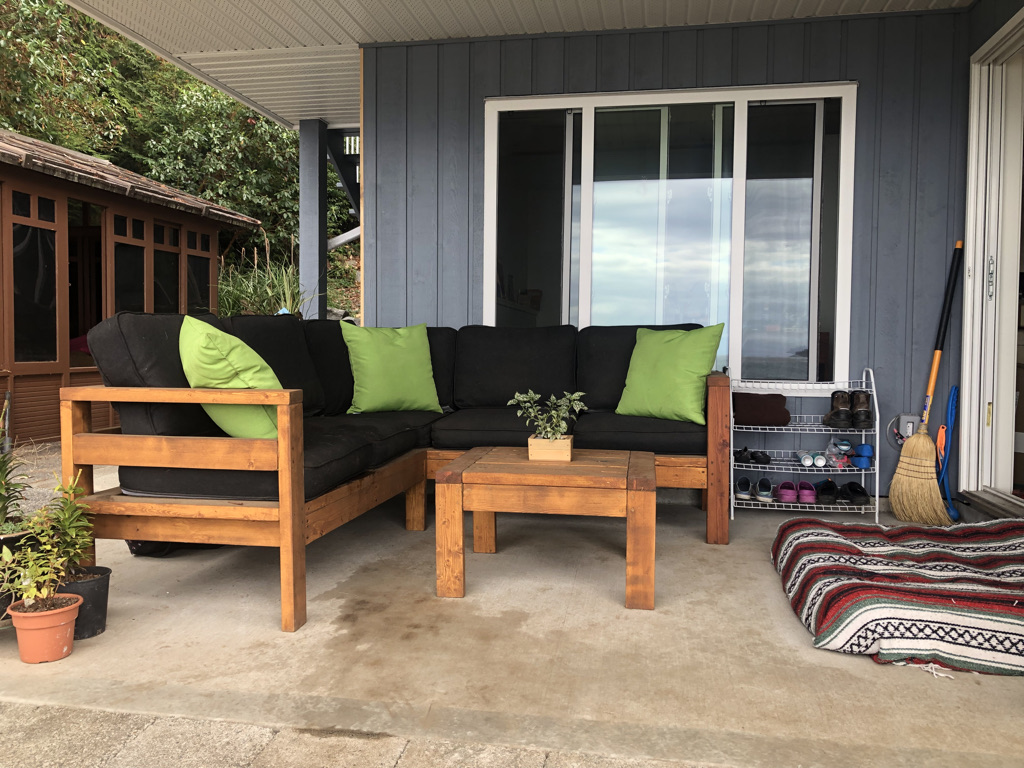
I wanted sturdy seating for my patio. Ana White had the perfect plans for my L shaped seating and coffee table. It was simple to put together and we love it!
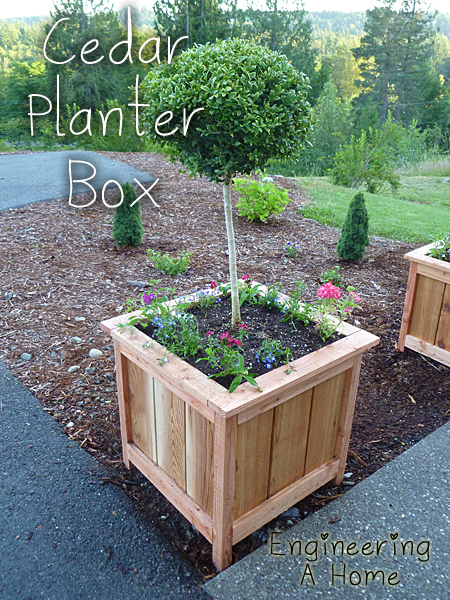
They were simple to make and the plan was easy to follow. The only modification I made was adding the 1x3 topper in place of the longer legs sticking out of the top.


Fri, 07/19/2013 - 06:36
Adding these to my to-do list for spring (yes, I plan ahead). I'm thinking of elevating and elongating them to fit around a bay window.
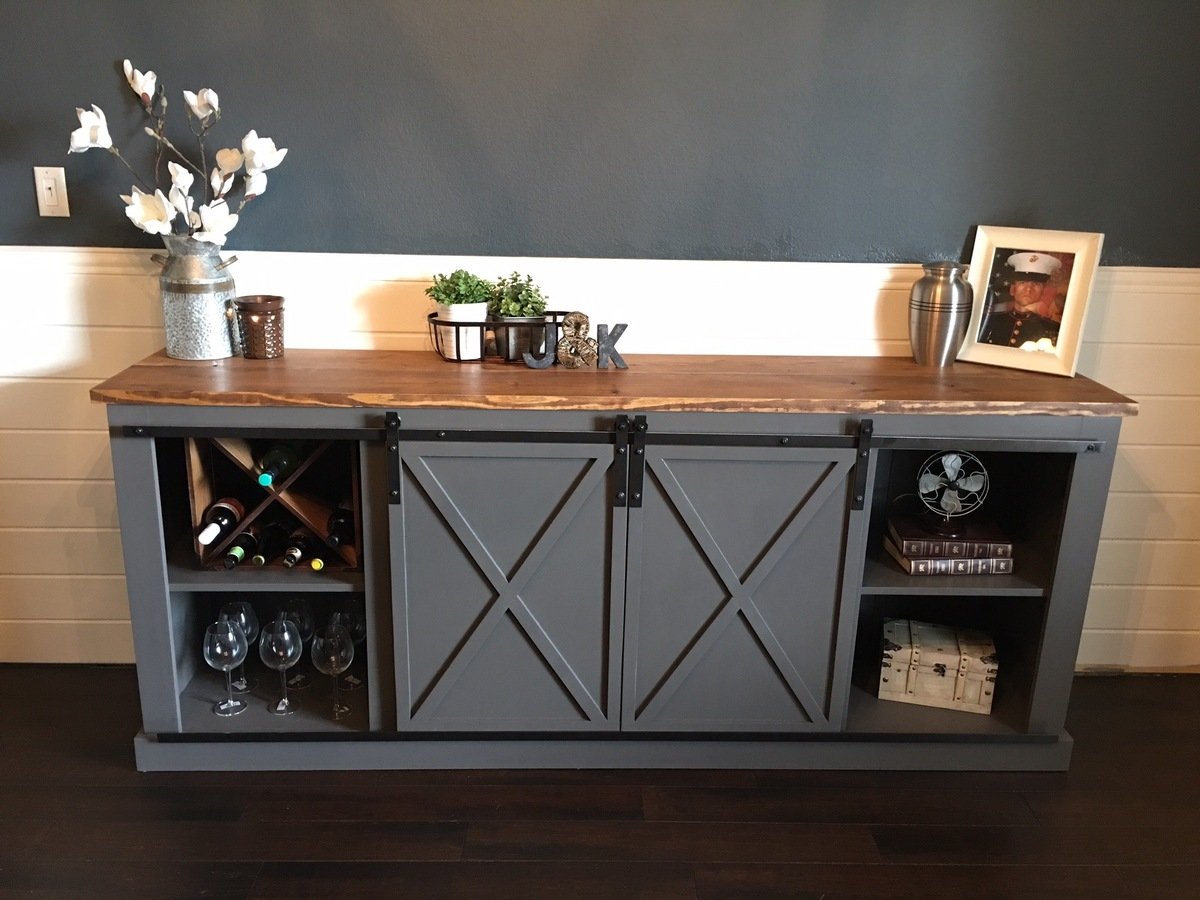
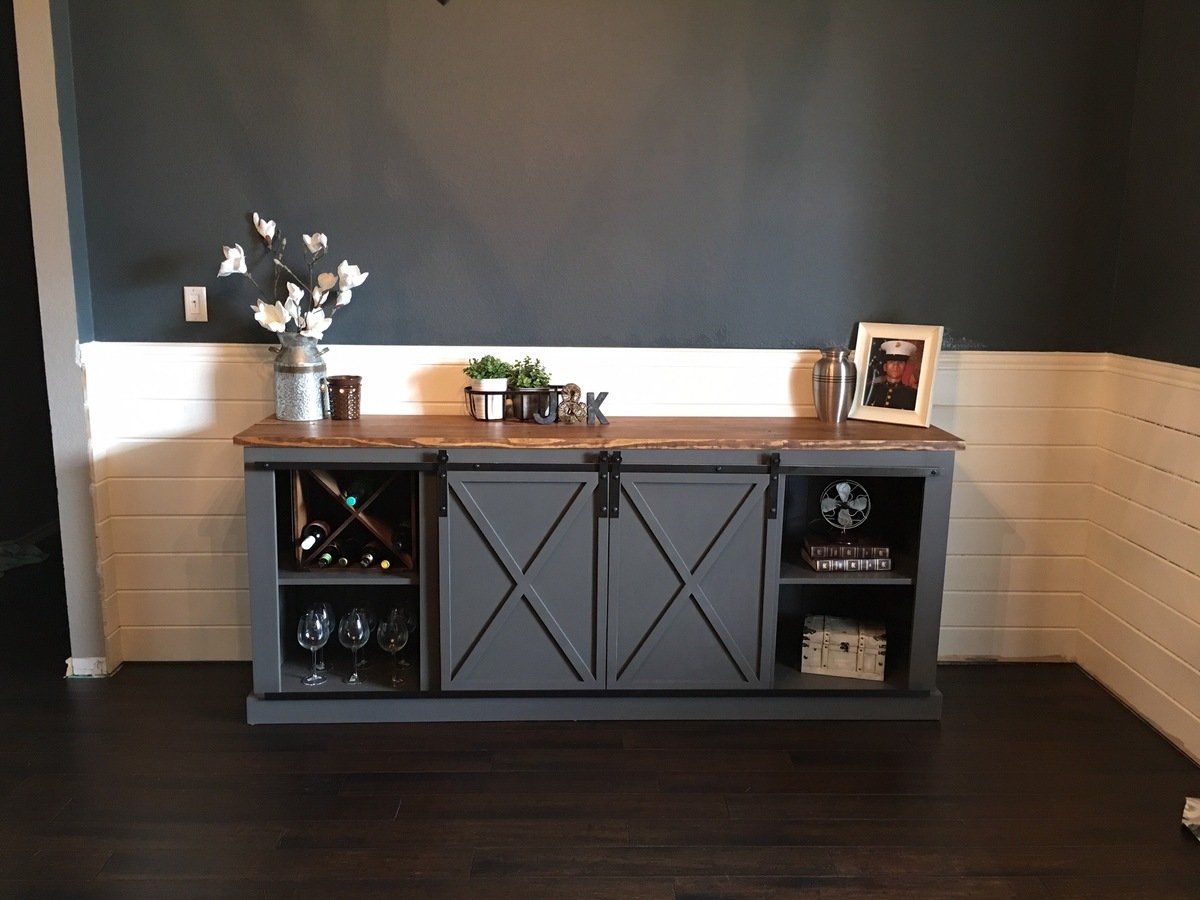
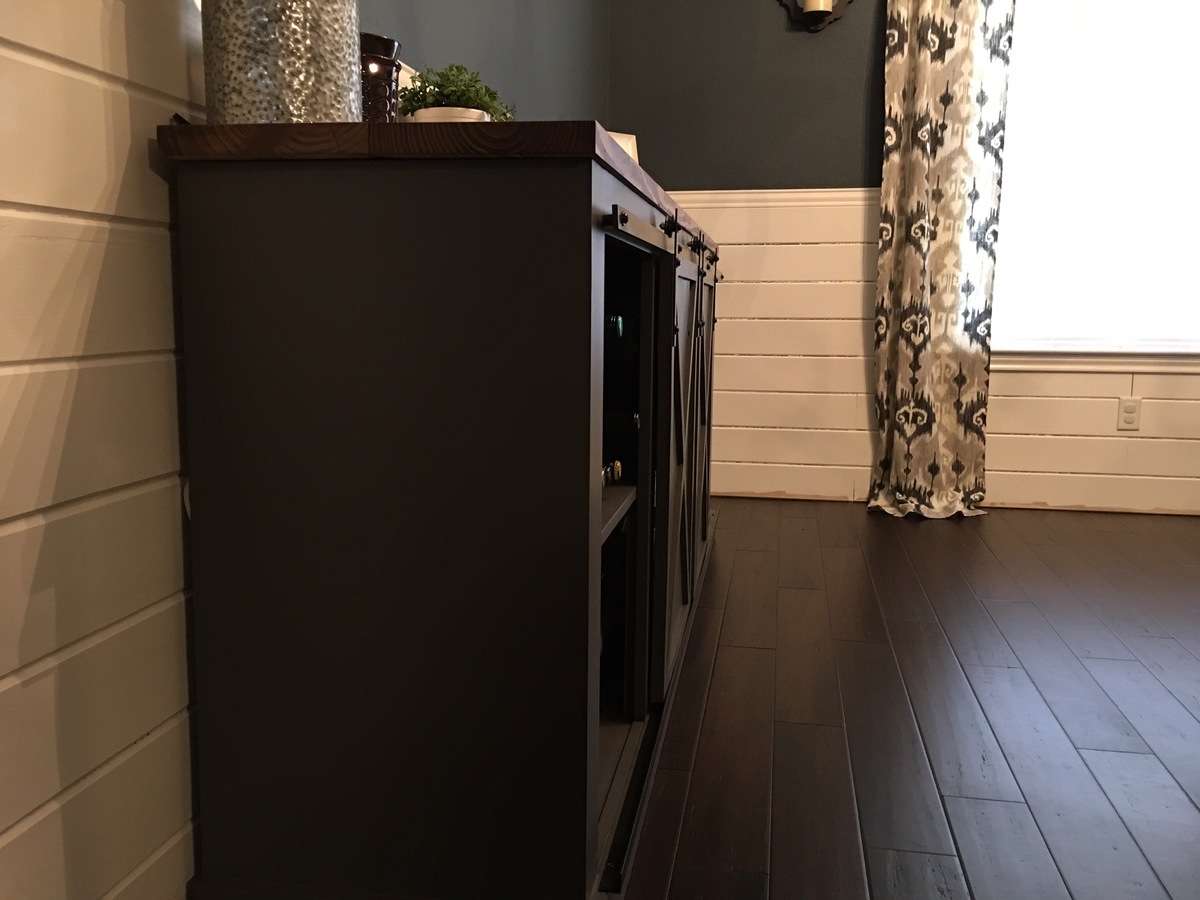
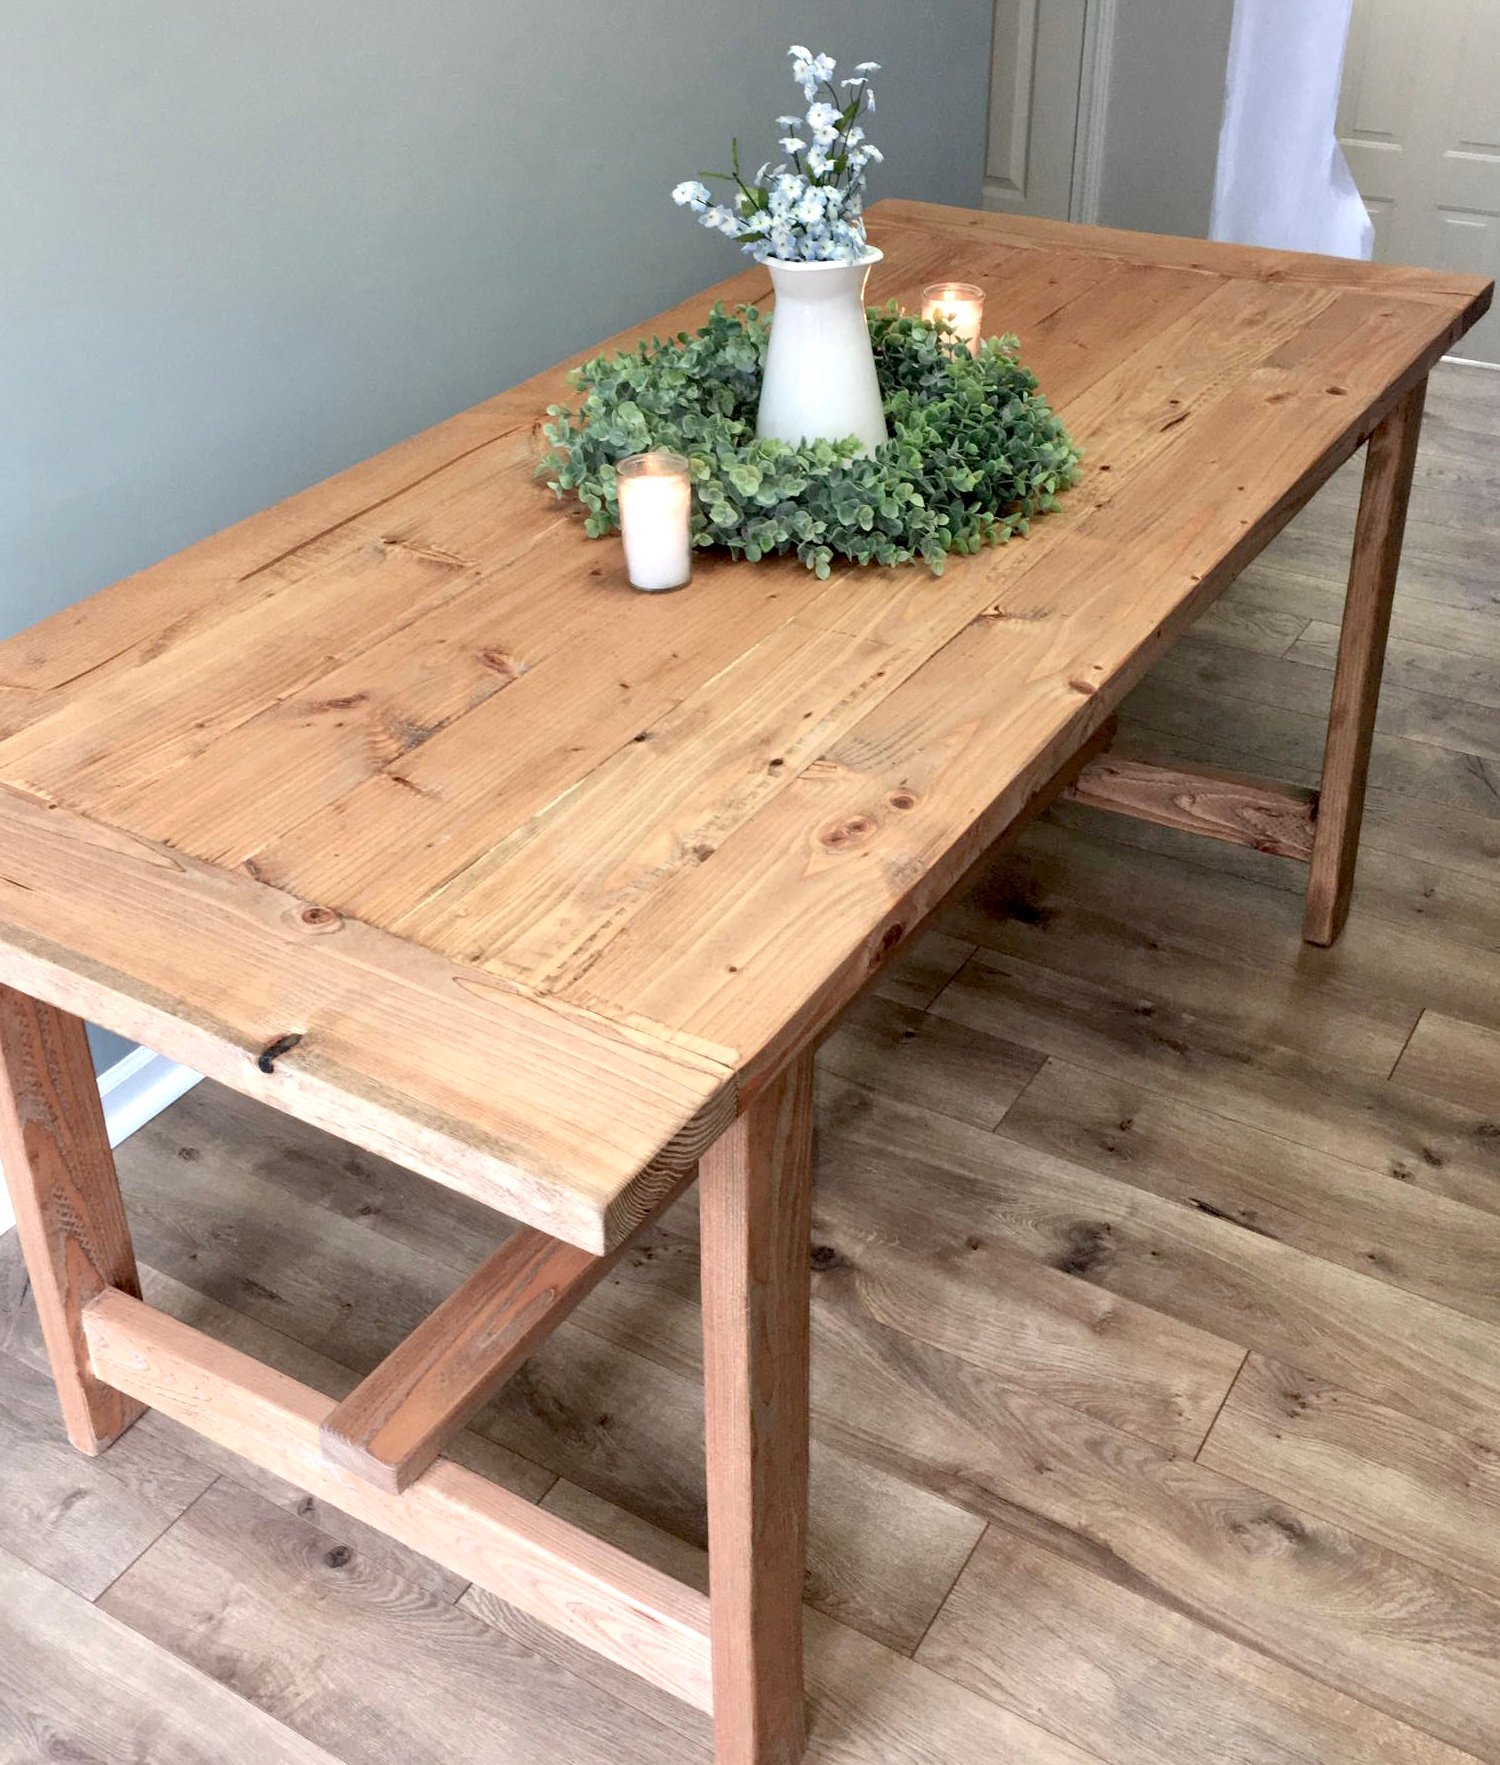
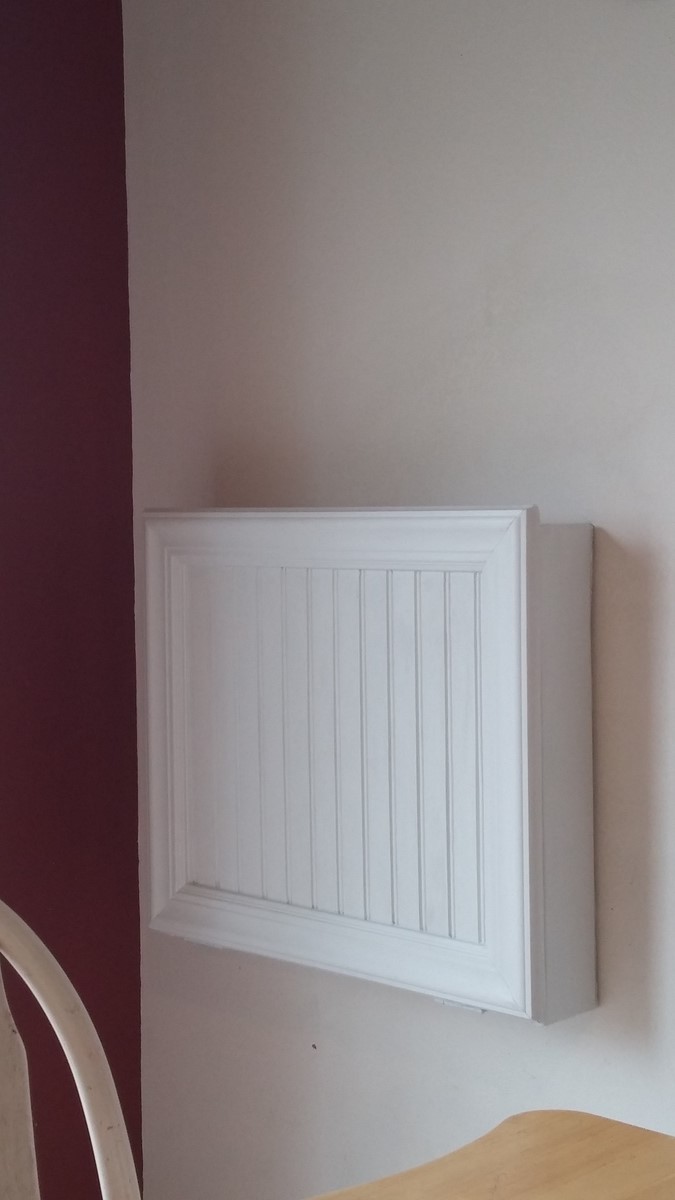
This is my build of the sliding door console. I built this for my wife after she insisted we needed this for our dining room. The build overall was pretty easy, after my wife decided to change the paint color 3 times (yes, after we had bought the gallons, and I had it completely painted every time). I will say though that if you plan on painting this then you should use plywood for the front facing boards of the frame. I built mine over the course of about a month and after I had painted it I noticed significant wood shrinkage on the areas where boards came together. Plywood shrinks minimally if any at all so it should take care of that issue.
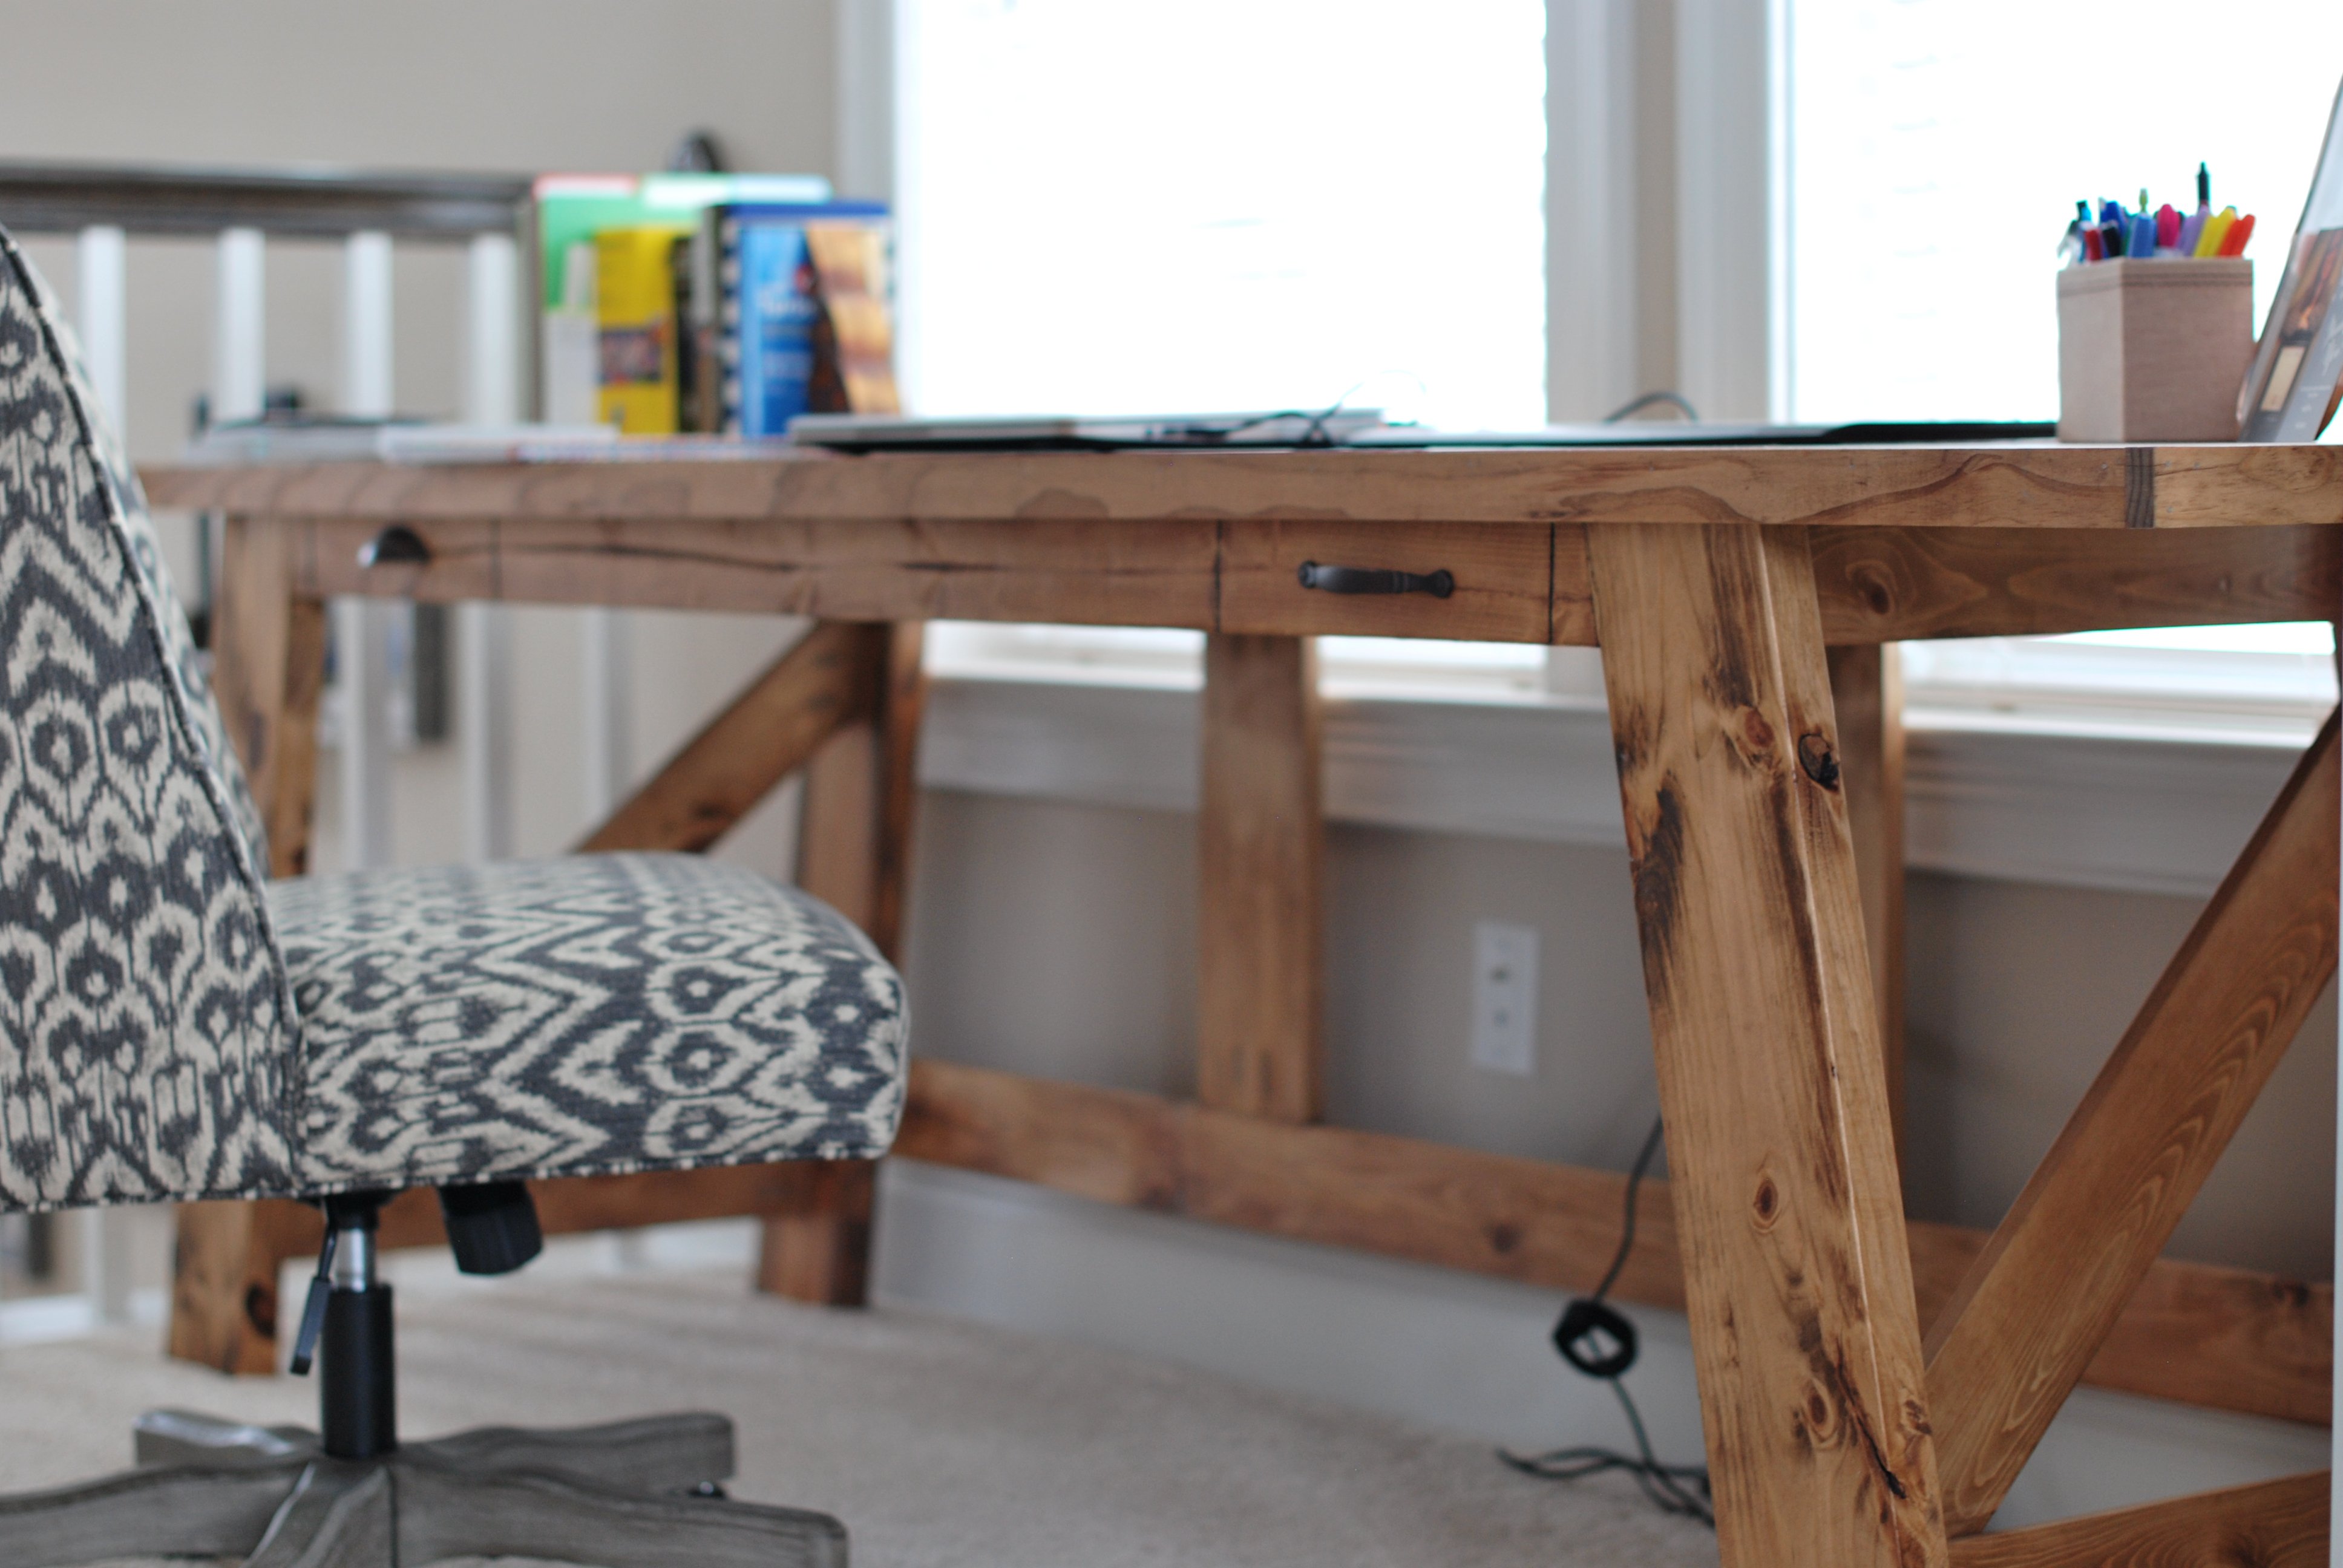
P.S. Don’t mind the unfinished construction in the background, we are in the process of installing bigger baseboards, and the planked walls are still unfinished.

Fri, 12/11/2015 - 19:53
Looks awesome! We have ours built (except the doors and hardware). Any tips? Thanks!
Wed, 12/23/2015 - 15:00
Hey, Im so sorry for the late reply. I hope you were able to get that doors/hardware done without problems! The doors werent bad at all, I added right angle bar below the door into my plan to keep them gliding smoothly and in line. Also we have a 1 and a half year old that would most definitely figure out a way to get the doors off without it. As far as the rest of the hardware, I used the link that Ana posted on her original post for building it, it wasnt too bad at all. I had to improvise on a few things, other than that I just followed the instructions. Let me know how yours turned out!
Sat, 03/26/2016 - 08:44
Looks fantastic! Where did you purchase the barn door hardware from? Finding it difficult to find some that won't break the bank!
Fri, 07/22/2016 - 23:56
I recently completed this project with a few changes. I used 1/4th inch aluminum flat bar for the track and the hinges . For the wheels I used metal screen door replacement wheels. I originally had the pully wheels, but when they are on flat bar it's very difficult to move and has a rough time sliding across the flat bar. The screen door wheels were about $6 and gives you a nice smooth glide for your door, because the wheels have ball bearings.
Sat, 01/09/2016 - 17:53
Hello. I have one built, about 90% done just need some staining and paint. My wife and I went to home depot today to look at paint and looked are your intellectual because we really like how yours turned out. Intellectual looks to be a dark gray? In your pictures it looks like there is a possible tint of a blue? What finish did you get? We bought a sample and painted a piece of the wood to see how it would turn out in our room. Doesn't seem to match your color.
I made some dimension alterations to our, will post picture when its complete.
Tue, 02/16/2016 - 20:14
The color is intellectual, but the light coming in might make it look a little blueish. Also the color we have our walls painted behind it is "steel blue," so it may be making the buffet look more blue than gray. The finish we used was satin. Sorry this is a late reply but I hope you got yours all finished and love it!
Fri, 01/08/2016 - 20:24
Can anyone recommend where to find 2x3 pieces of lumber like she calls for in this plan? We can find 1x3 and 2x4 but no 2x3s anywhere!
Fri, 01/15/2016 - 14:43
Is that a 1x10 or 2x10 on the top. All 2x10 I find are rounded on the edges and yours look squared. Ran threw the table saw but now I am short and to big of a gap.
Tue, 02/16/2016 - 20:18
I used 2 2x10s for the top but I jointed them first so that may be why it looks squared. I ended up rounding it over a little bit anyway to soften the edges. I ended up cutting off more than I wanted also and while I didnt have a gap on mine - the edge doesn't hang over on the front as much as I would like.
Fri, 01/15/2016 - 18:31
Did you use a 2x10 on the top? I can't tell. If so where did you find one with squared edges??
Fri, 02/05/2016 - 10:29
what color stain did you use? and when you painted it, did you spray it or roll it on? I'm struggling with the quality of paint job I can do once I finish a project
Tue, 02/16/2016 - 20:22
The stain I used was Miniwax "Special Walnut." I actually used our paint sprayer that we got for a christmas present for the first time! It took a lot of practice and I ended up having to sand off a bunch before I got the technique down, but in the end it was worth it. The sprayer makes it look much more professional and finished. Just be sure if you use a polyeurathane for a sealer, that you get a water based and not an oil based.
Thu, 10/27/2016 - 11:08
Do your doors stop when sliding open or can they slide off? Great Work!
Sun, 01/15/2017 - 07:07
Sorry for late reply, I never get notified when there has been a comment. At the moment they slide all the way off, but there is a simple pin system you can use that stops them from sliding off. Thank you!
Mon, 12/12/2016 - 08:53
So in the materials it lists
2 - project panel pieces 17-1/4" x 36" (may be advertised as 18" wide project panel - measure in store)
What is the thickness of these supposed to be? I cannot find this at any hardware store and was going to ise 1x4 strips instead. My question is, if this is going to have heavy use, do I need to use thicker boards to ensure it can hold the full weight of the top?
This is for my art studio and will hold tools, printer, laptop ect.
thanks!
B
Mon, 12/12/2016 - 12:03
So in the materials it lists
2 - project panel pieces 17-1/4" x 36" (may be advertised as 18" wide project panel - measure in store)
What is the thickness of these supposed to be? I cannot find this at any hardware store and was going to ise 1x4 strips instead. My question is, if this is going to have heavy use, do I need to use thicker boards to ensure it can hold the full weight of the top?
This is for my art studio and will hold tools, printer, laptop ect.
thanks!
B
Sun, 01/15/2017 - 07:11
I believe the thicknesses are the same of 1x material that you find at a big box store. If you are going to lowes or home depot it would be in the back of the section where the nice 1x boards are (pine ranging from 1x2-1x12). They will be wrapped completely in plastic shrink wrap. Hope this helps, sorry for late reply!
Great plans! Fun project

Sat, 05/25/2019 - 19:34
Your chicken coop is beautiful! I love the farmhouse feel of it! Thank you so much for sharing a picture! Ana
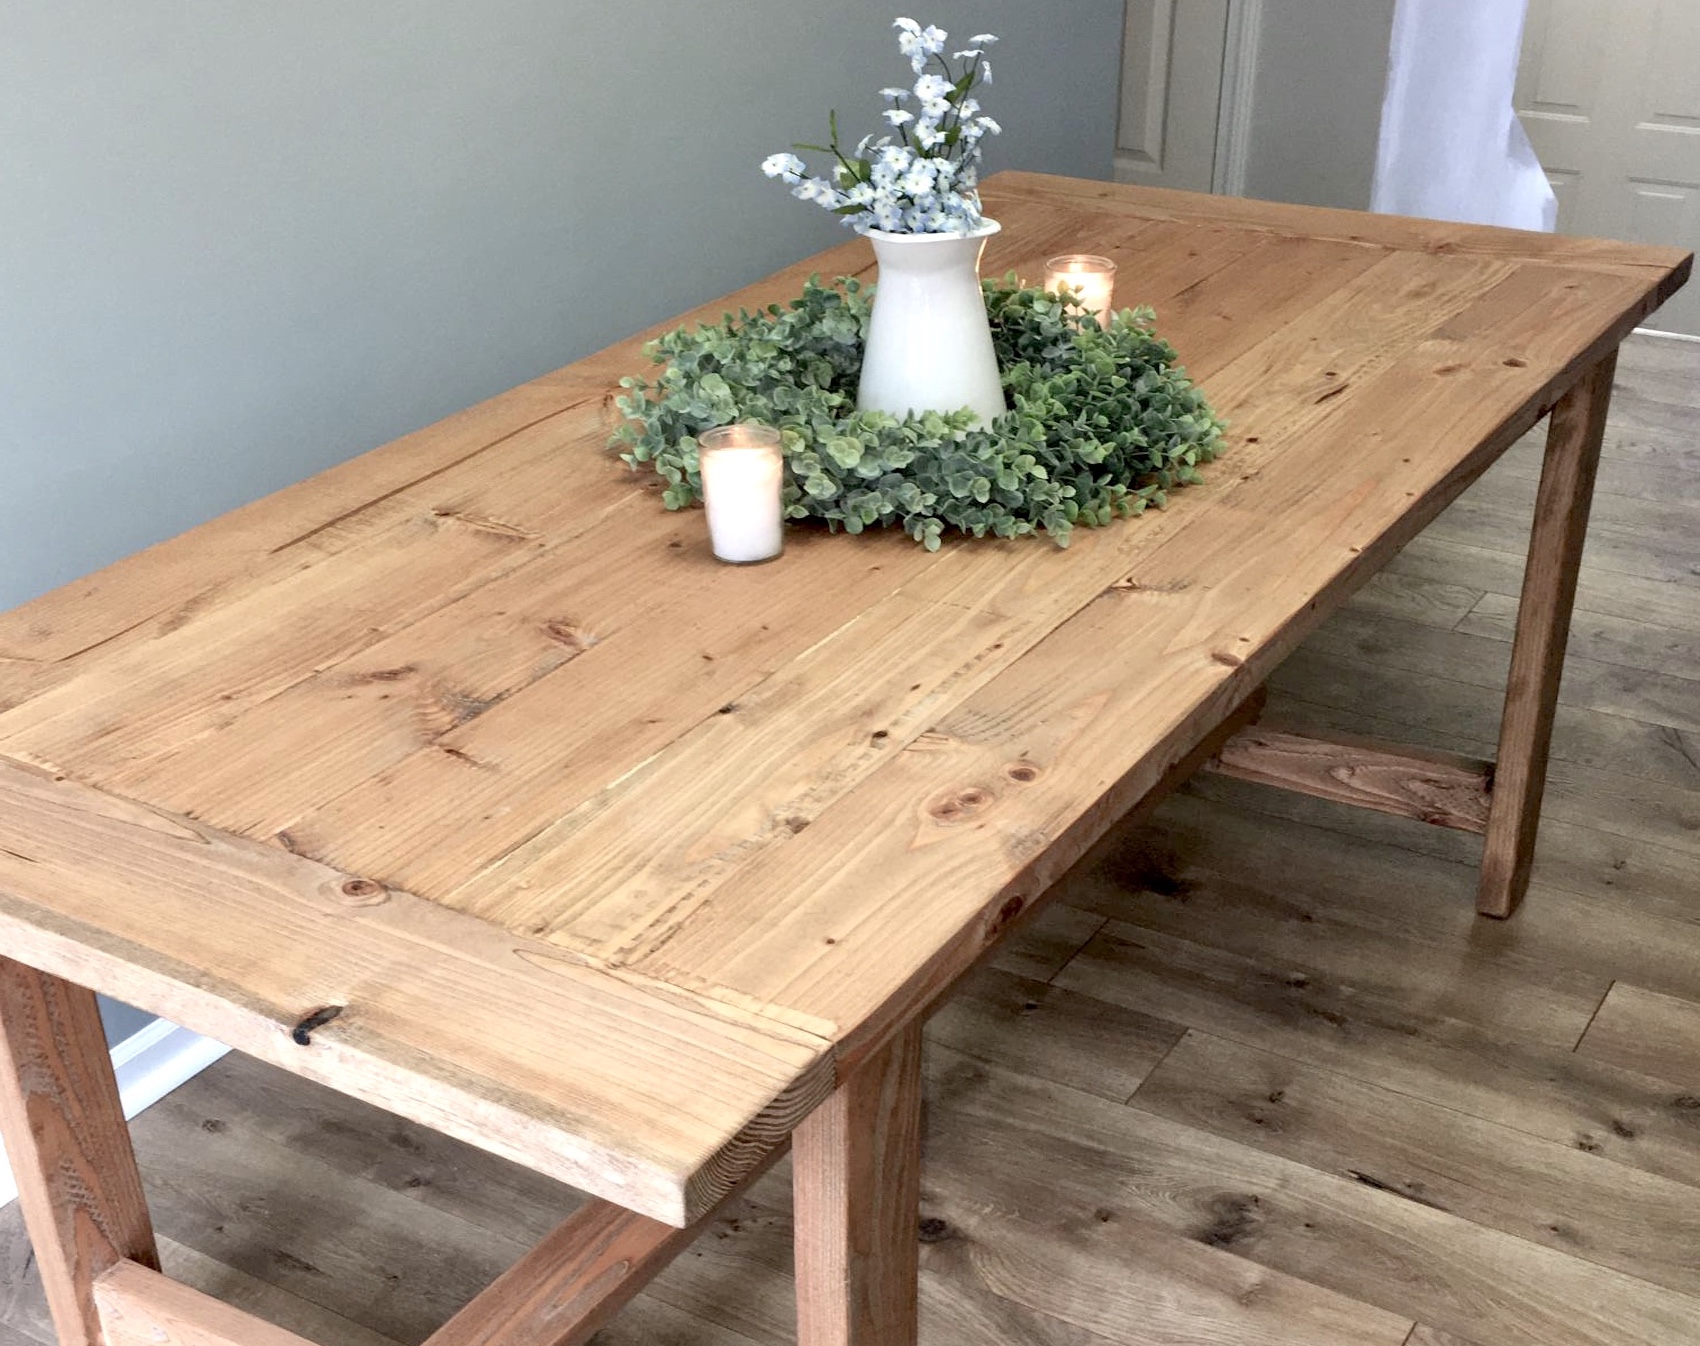
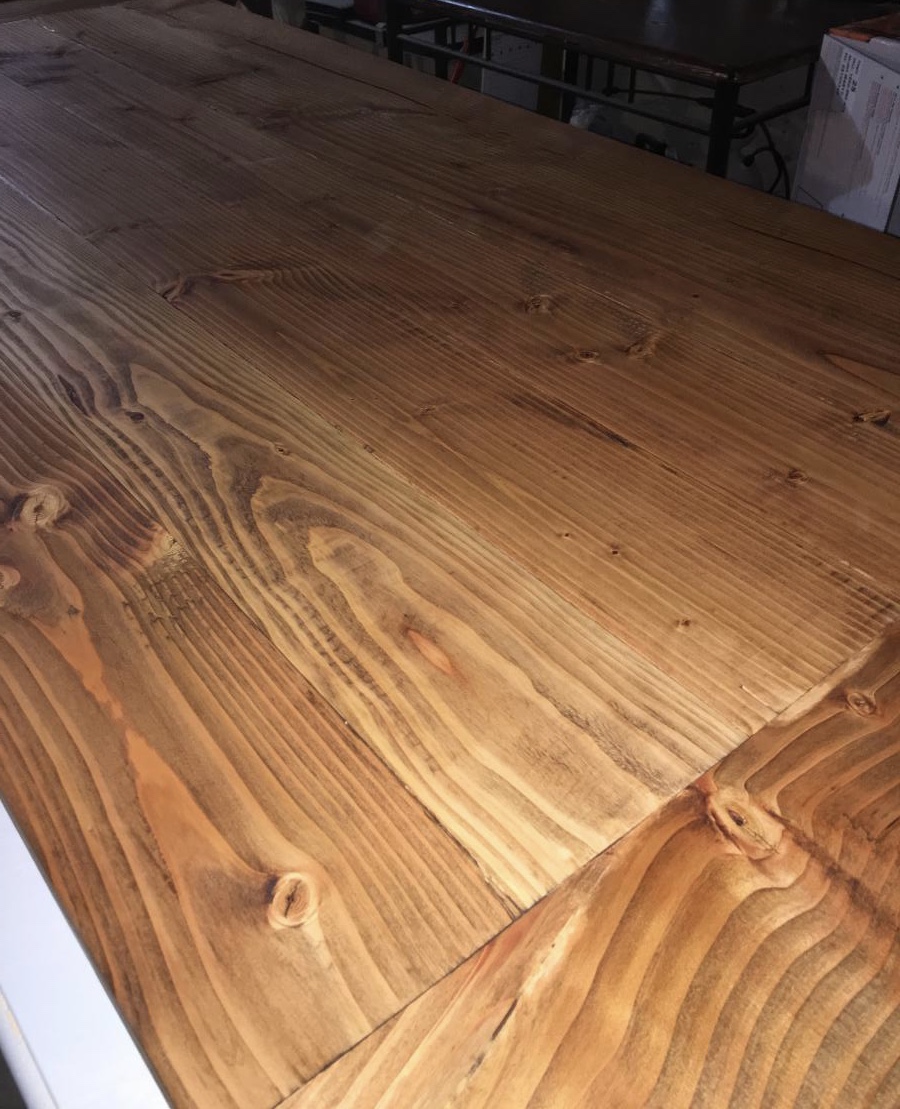
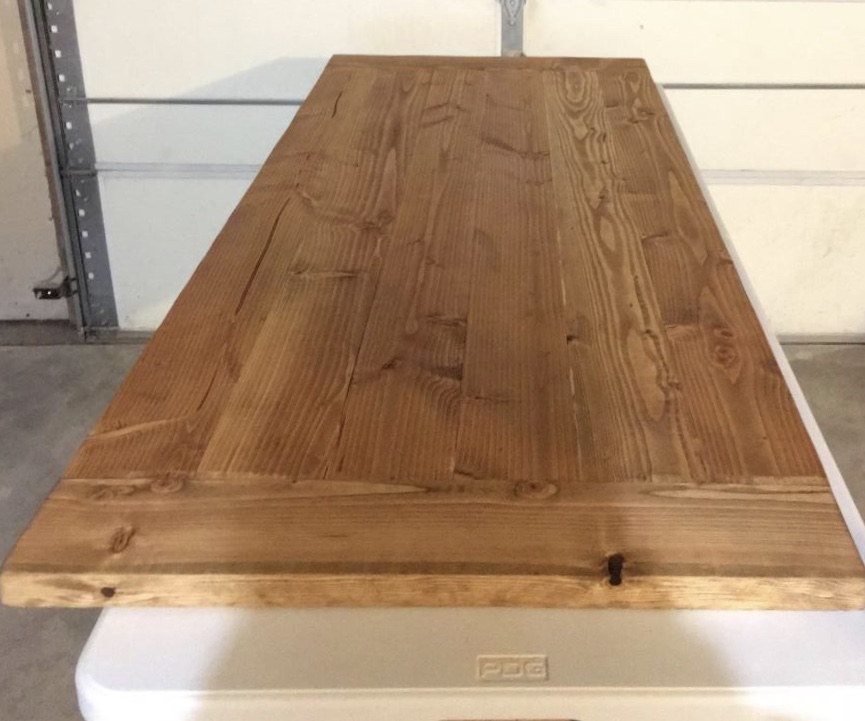
This project was actually my first build (besides a small blanket ladder). I used the Ana White plans every step of the way! Since this build I have created coffee tables, side tables, console tables, head boards and a bed frame. This table gave me the confidence to try an original project of my own. Although this table was fairly simple, it was the project that started it all. That is why I chose for this piece to be my brag post.
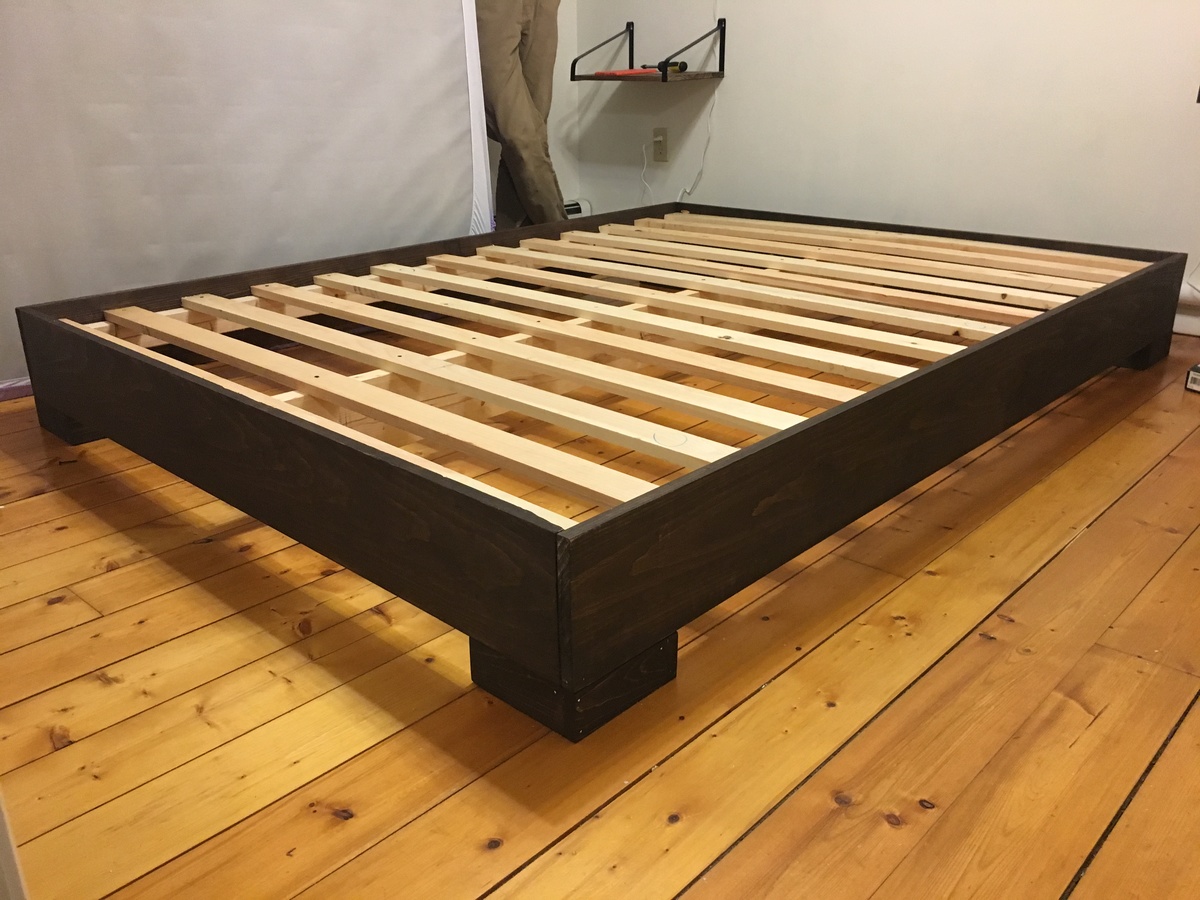
I got tired of sleeping on the floor like college kids, but I didn’t want to buy a junky particle board bedframe. My husband and I are novice woodworkers. Even still, we bought the lumber around noon and managed to finish the whole project in about 5-6 hours! We used a Kreg jig for the first time and it was pretty simple. I am really pleased with how this turned out, and I can’t wait to try more of Ana’s plans in the future.
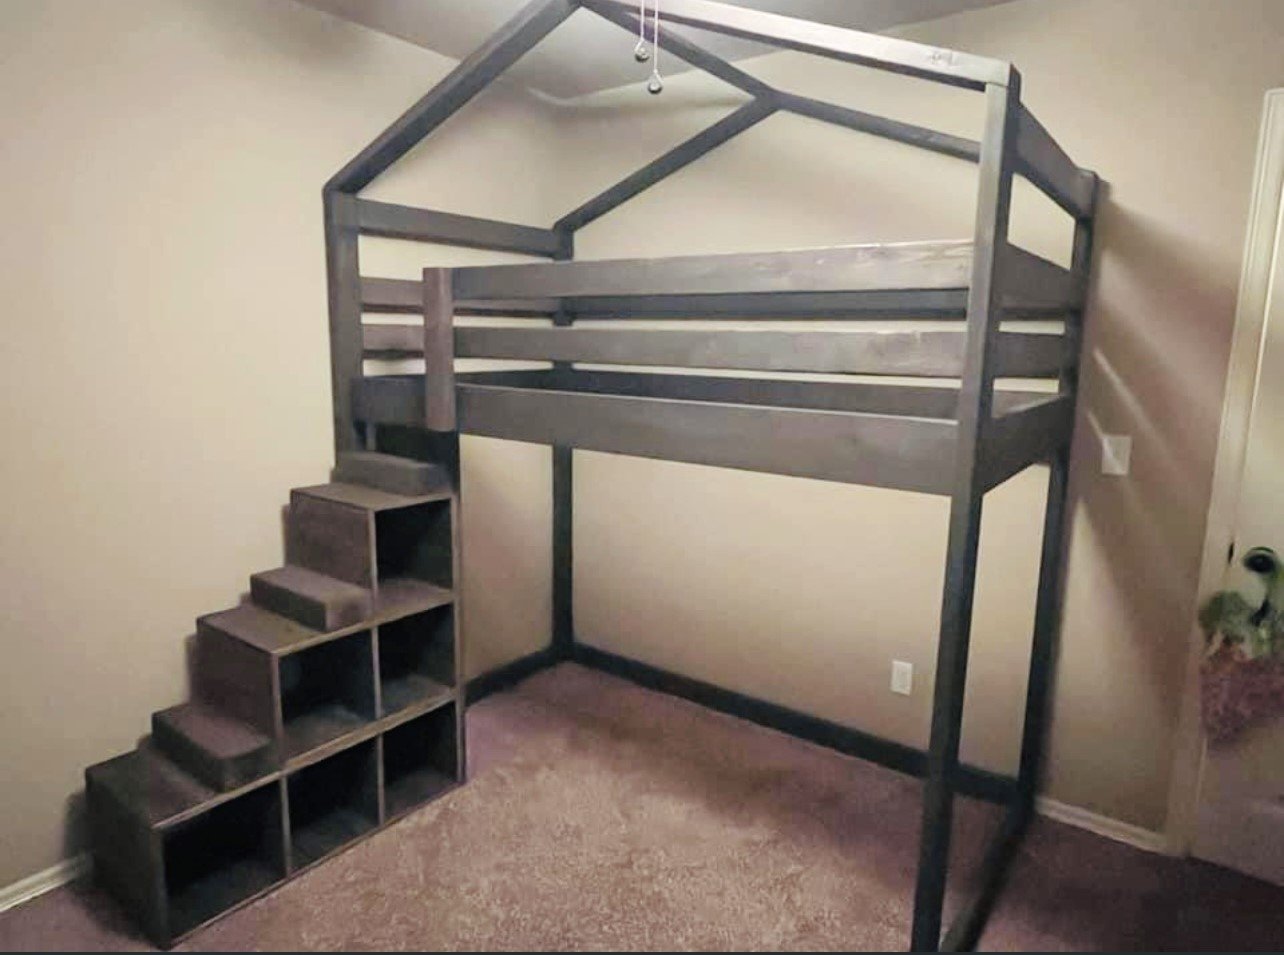
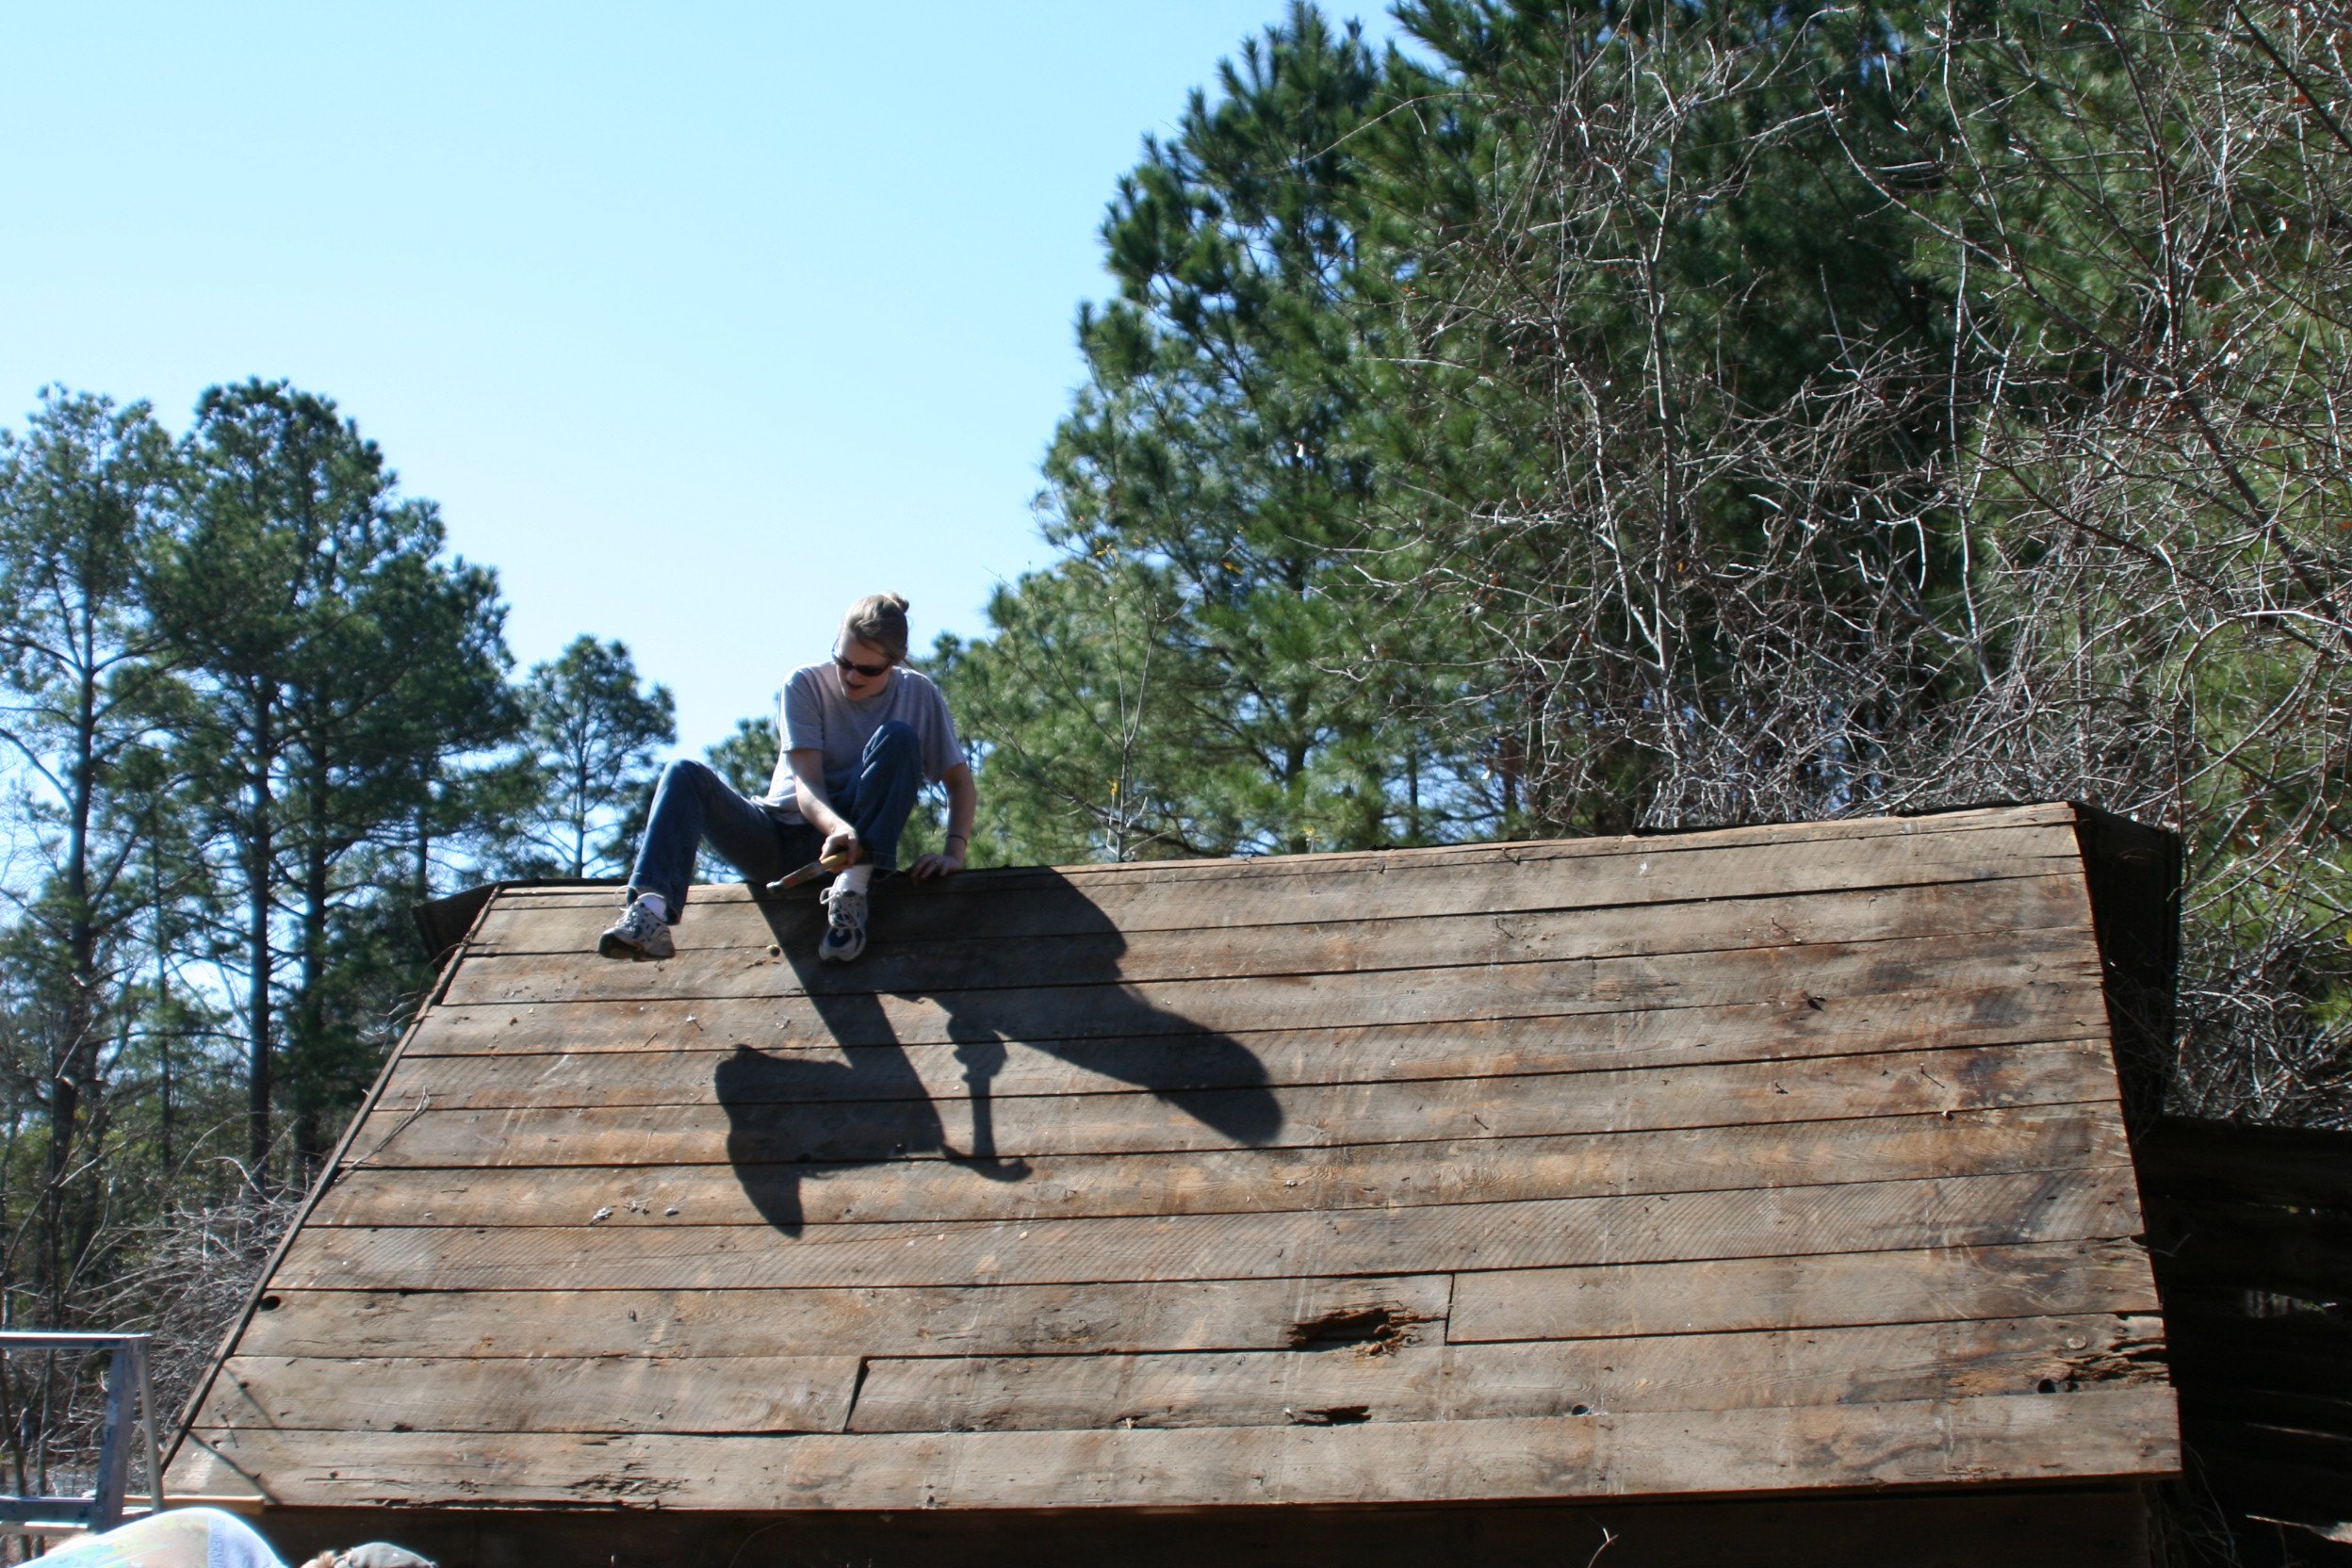
Modified the junior loft plan to add a house design element and storage stairs, by Amy Mott
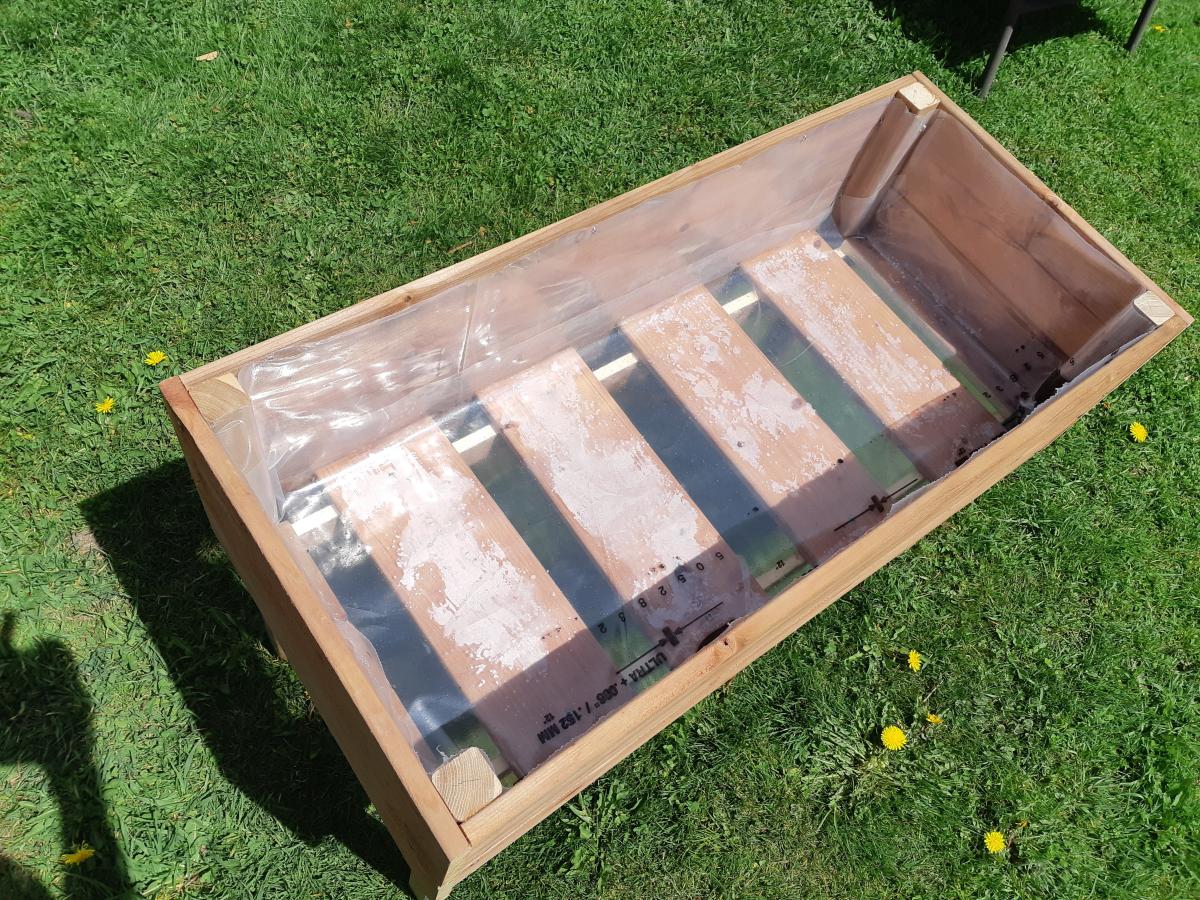
Not much to say apart that some internal measures were different (!?) and that I used treated wood and covered everything with recyclable plastic.
Oh yeah, of course.... Thank you Ana!!
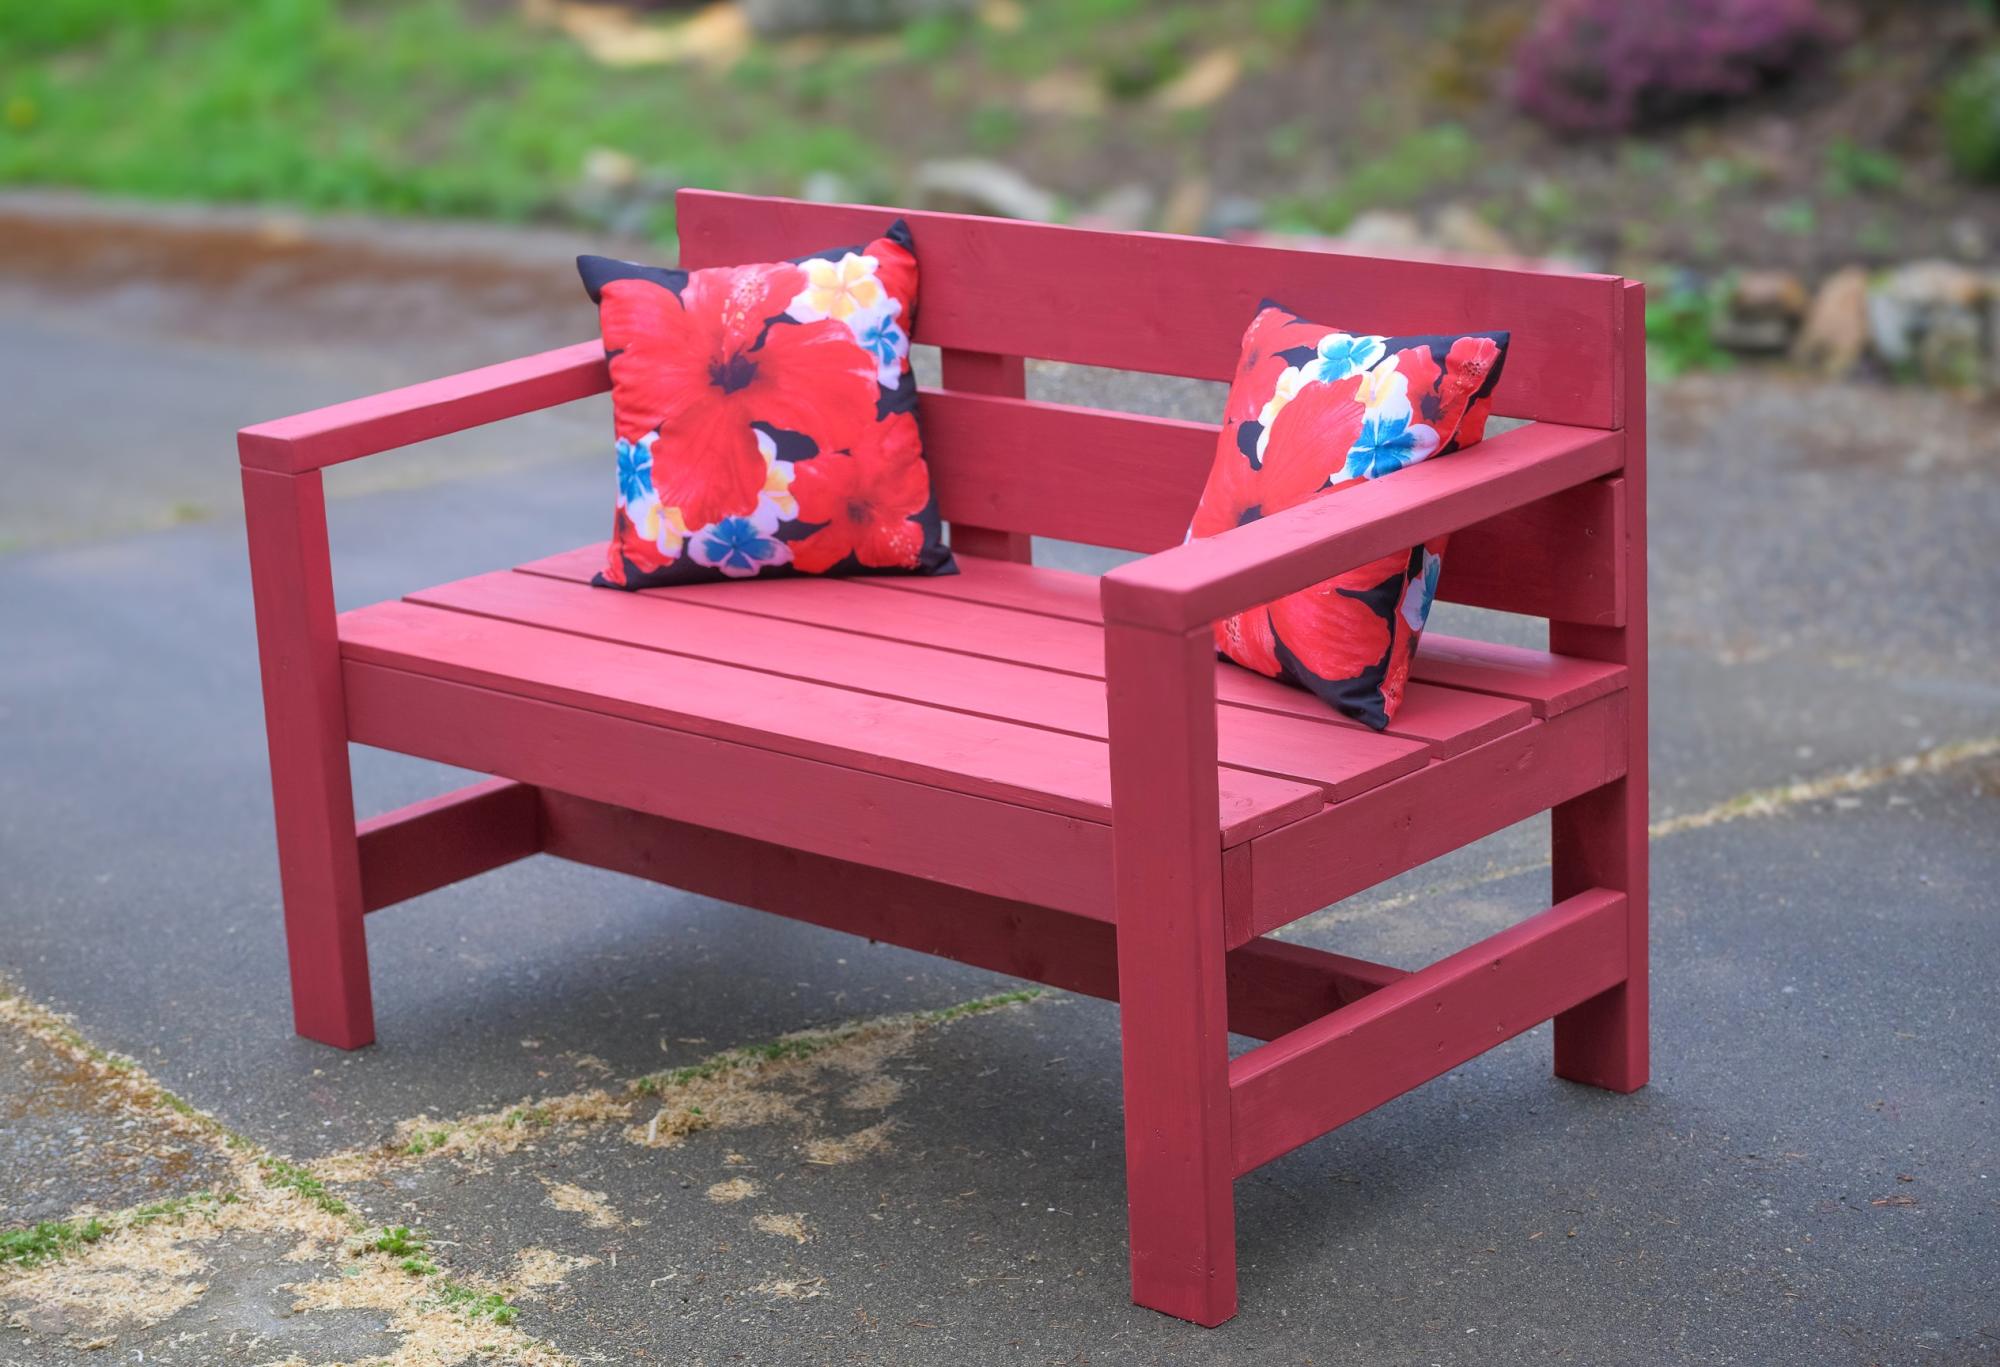
I am new to this. I used your plan but reduced the lenght by 24 to make a 2 seat Garden Bench. I used softwood and painted with this outdoor paint. Thanks for inspiration and plans. I am located in Victoria, British Columbia, Canada.
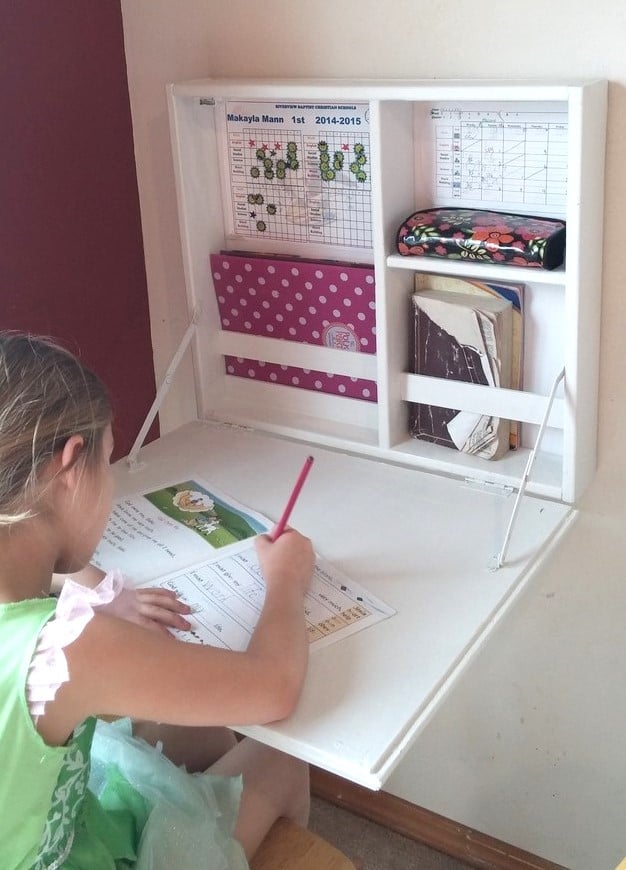
This was just what I needed! My daughter started homeschooling and we needed a place to neatlly contain her school stuff. I had her working at the kitchen table next to me, but it still felt like it lacked the school atomosphere. I removed the area for the paper holder and instead added a few support scraps to hold her folders and books upright.
It did take me awhile to get the support hinges placed correctly (I almost gave up and went with a rope or chain) but I finally got them placed correctly after placing a pencil mark on where they could lie correctly open and closed - seriously this took me awhile because just when I thought I had it, the brackets when closed would be to deep for the desk or when I placed it it correctly inside when open it wasn't 90 degrees.
The only thing I wish was that I had made it slightly shorter, because when it is open it is a little hard for her to reach the top shelf, but its not to bad and that is the height my scrap bead board was and I was to lazy to cut it =)
I had a magnetic clasp left over from another project and that has worked well to keep it closed nice and tight, I also used some foam board I had lying around for the back so that her things were not tapped/pinned on my wall. I choose the bead board on the front because A: it is what I had lying around and B: it is in my dining room so I wanted it looking a little nicer.
I had everything on hand excpet for the support brackets which cost me 2 something each at Lowes. YAY for projects under $10 bucks! Thank you so much Ana!
Thu, 08/15/2019 - 12:45
What a beautiful desk! I'm so glad you got the brackets to work, they look awesome!
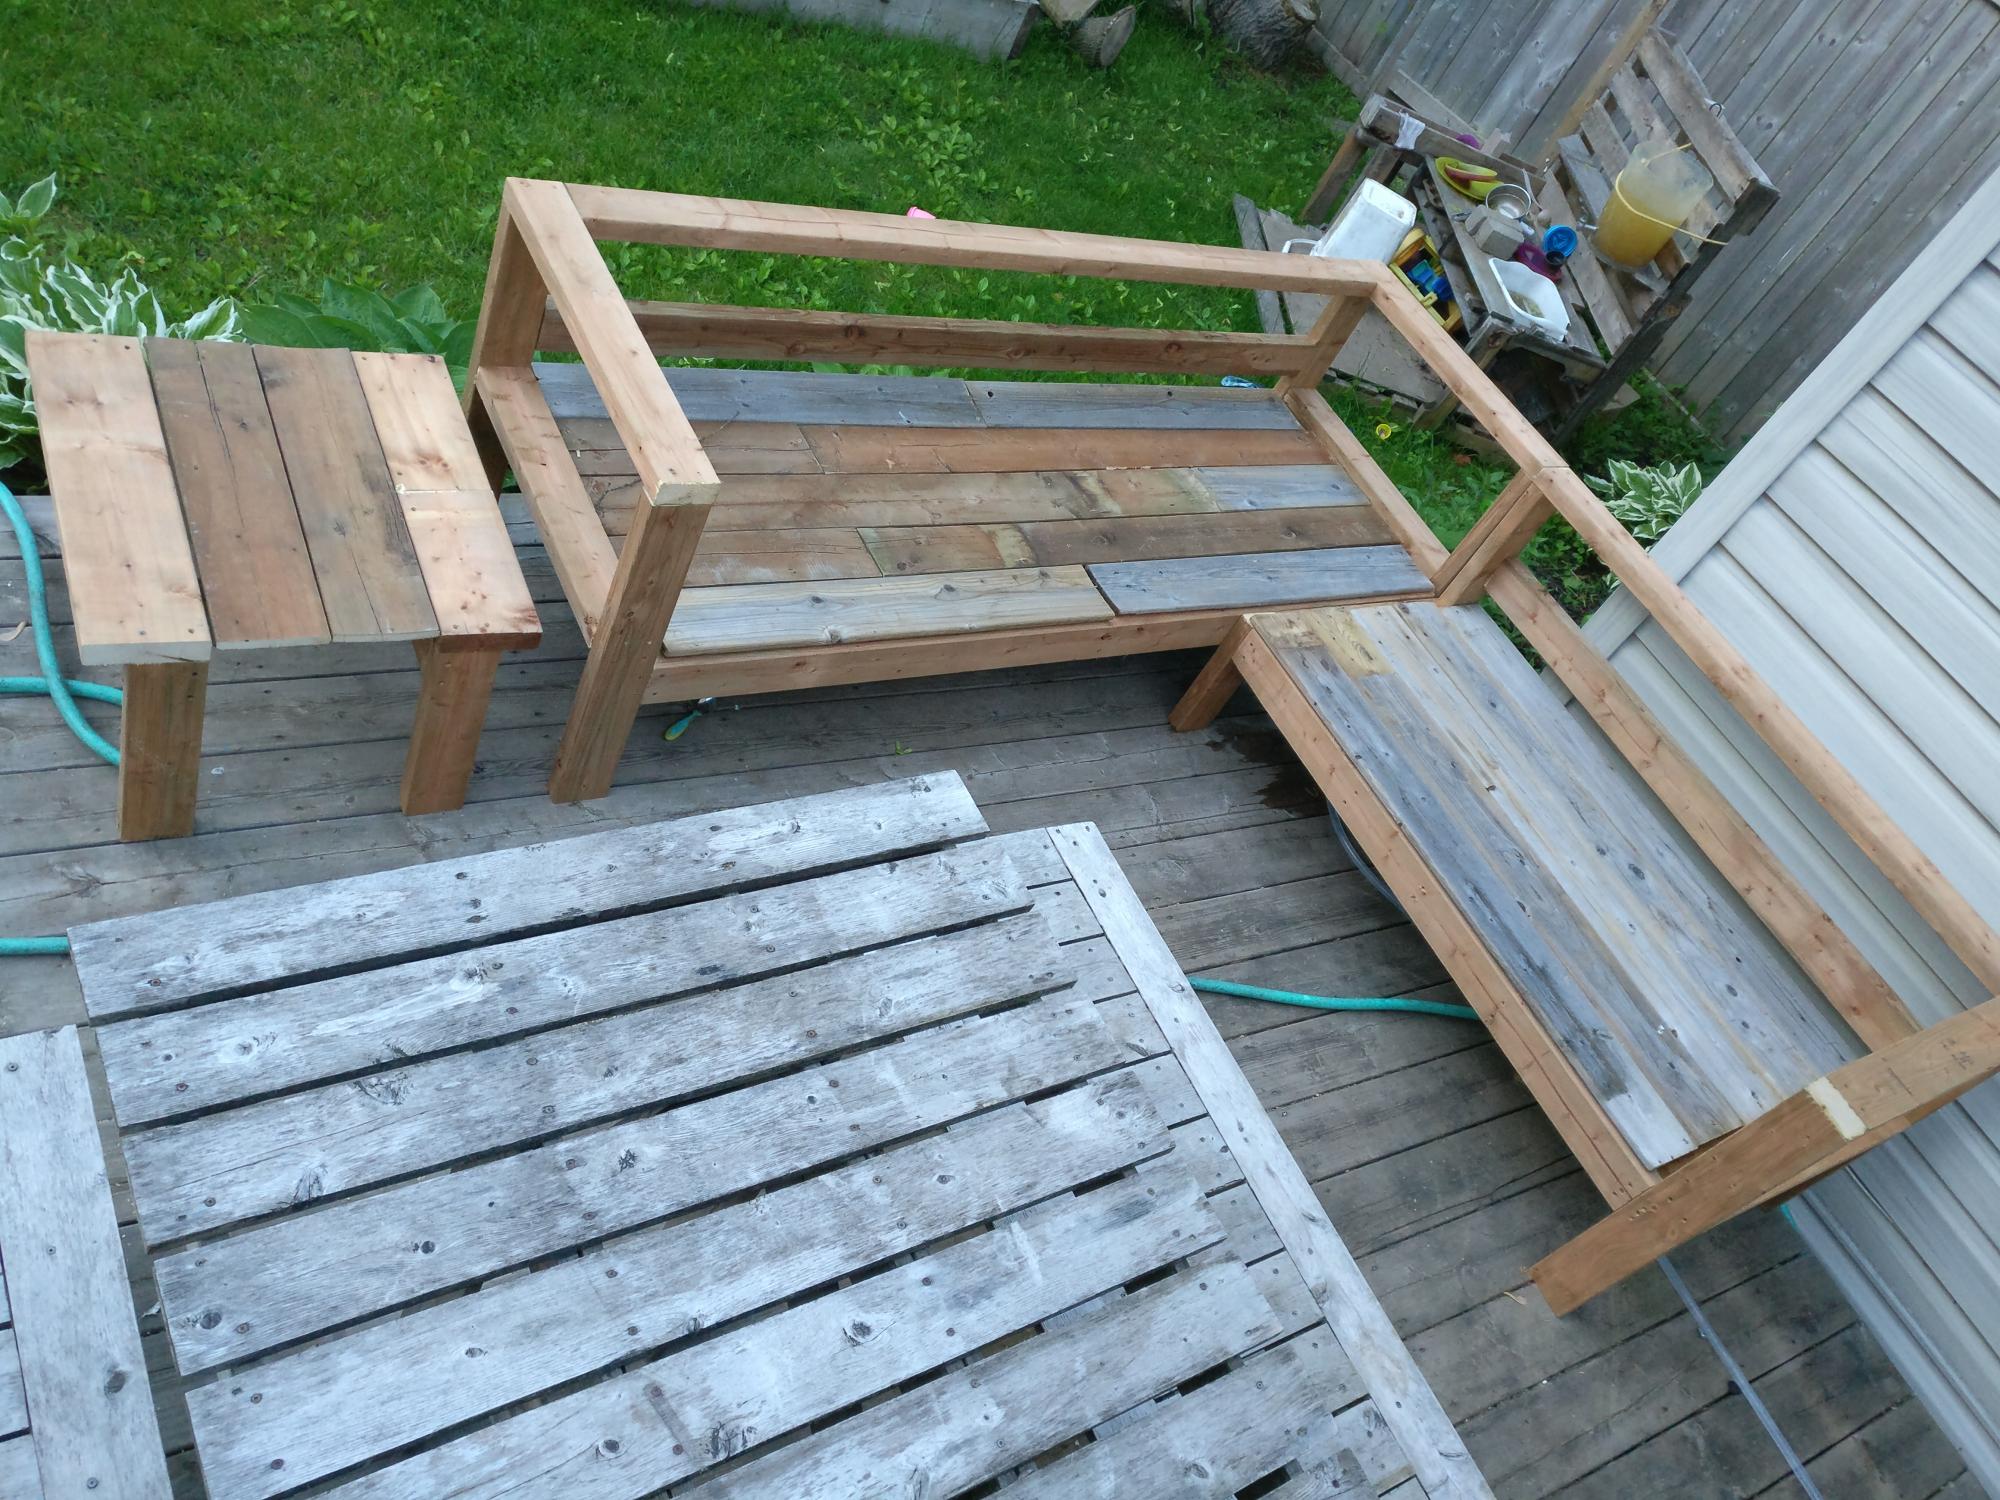
My daughter and I built this out of the old framing that was pulled out of the house (fir) and some leftover wood from a friend's house build a few years back. If the cushions are lifted up you will see the old electrical wire holes! I shortened the set by one seat so it would fit the patio space. The cushions are from Ikea and fit perfectly. I also modified the coffee table so it was the similar proportion to the full sized set. Thanks for the very approachable plans Ana! Excuse the water all over the area in the pics. We have water dogs and they seem to like the sectional too!
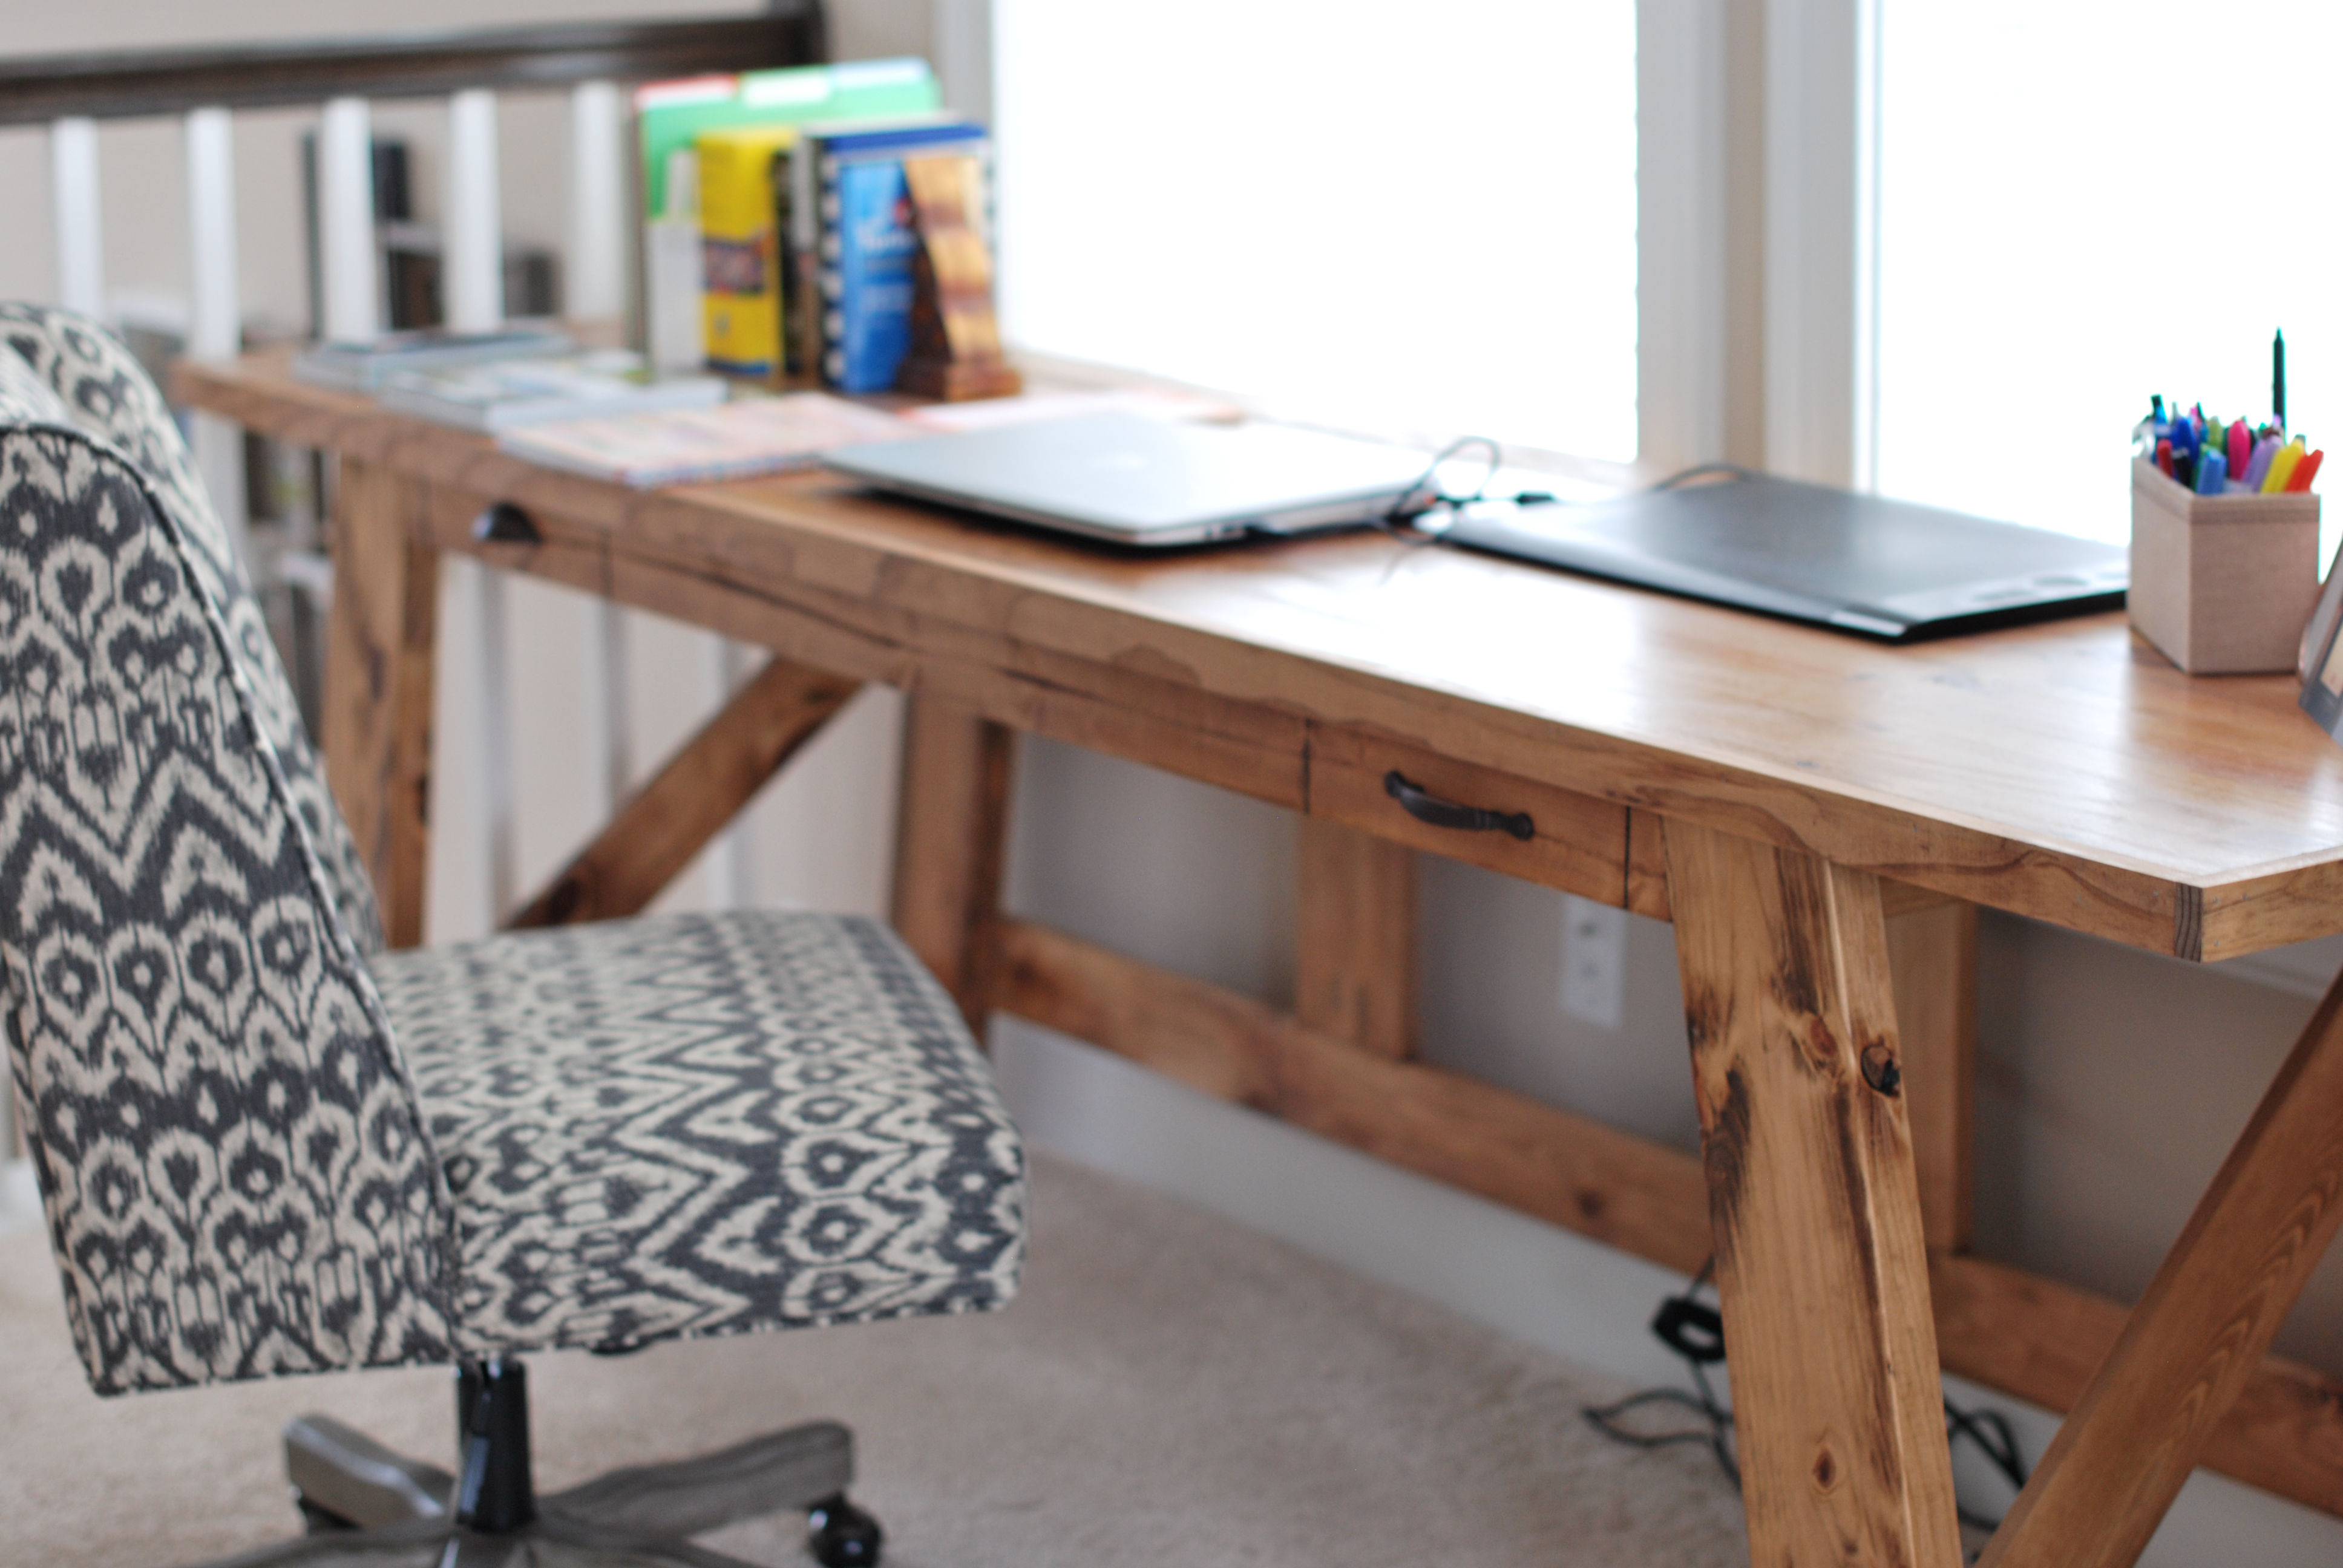
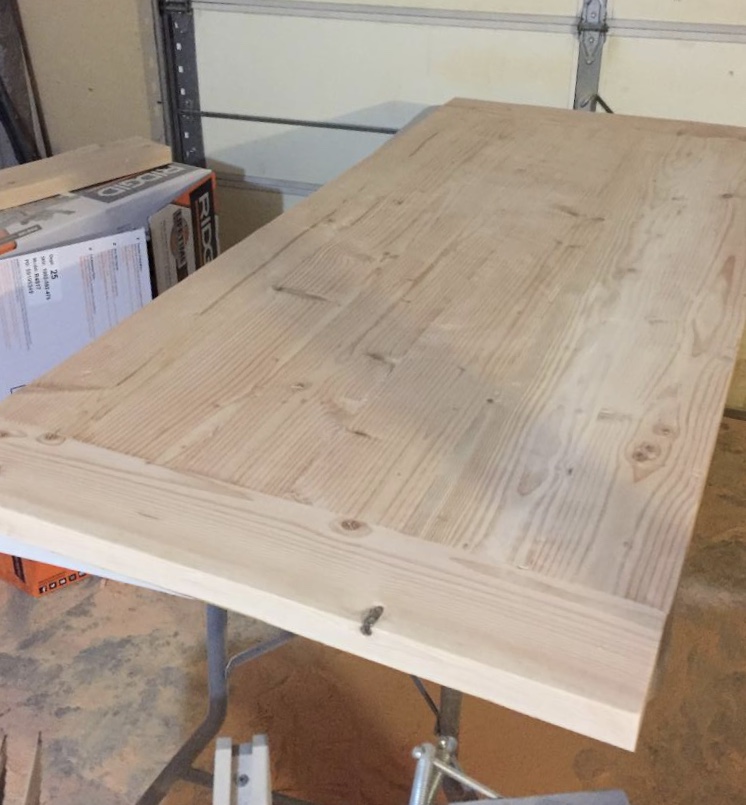
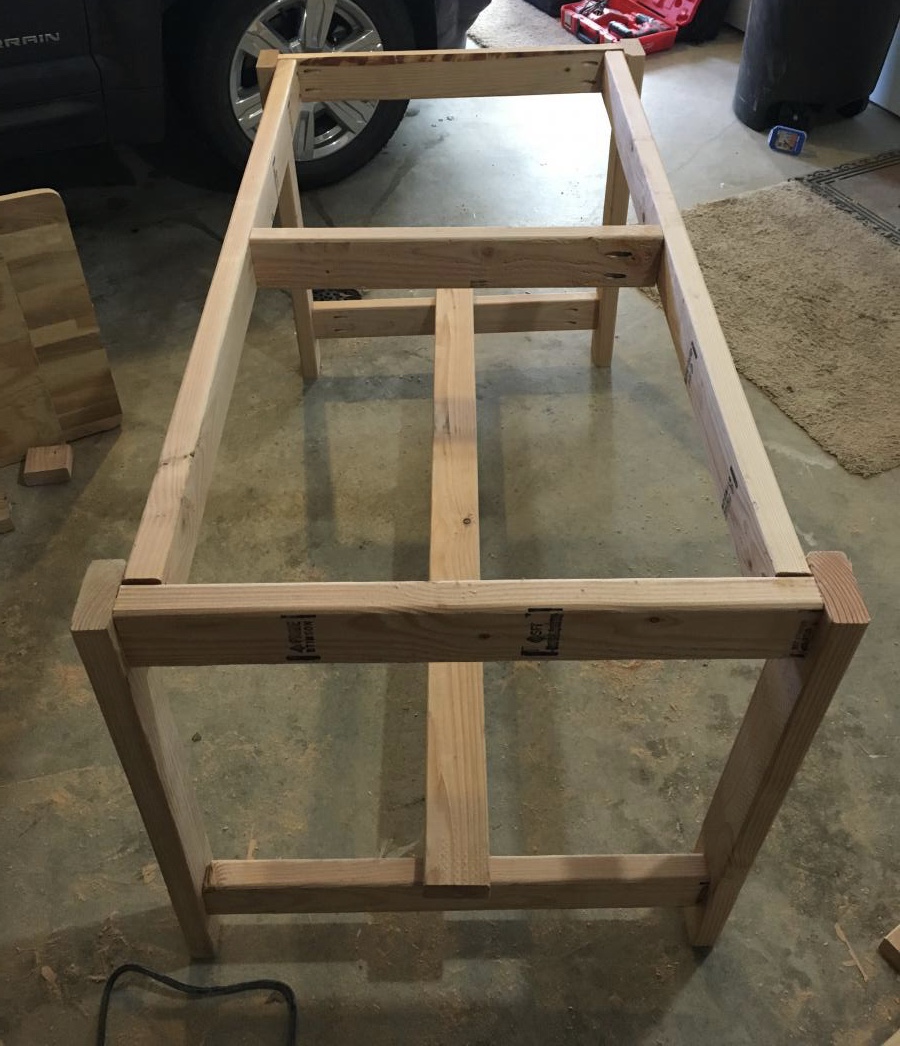
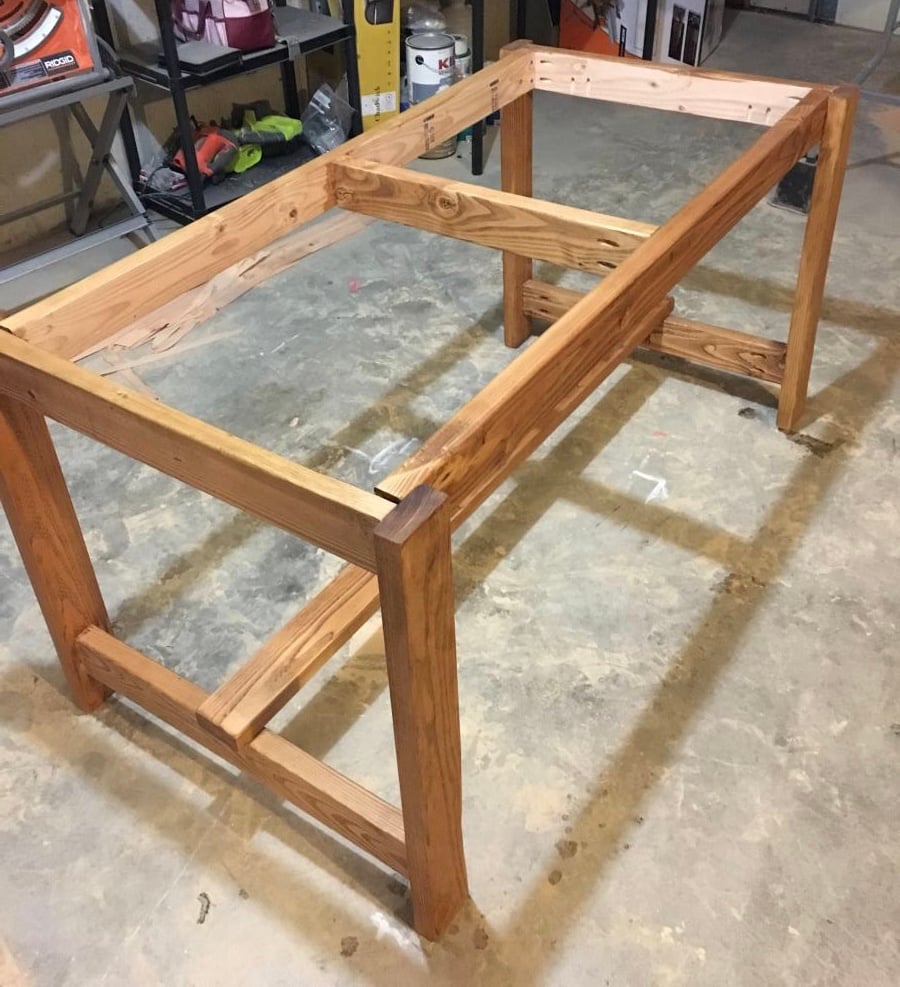
I build this desk from Ana White's Pottery Barn inspired Henry desk plan. I modified it a little in that I made the top almost 8 feet long to fit my space.

Mon, 11/23/2015 - 19:09
The finish looks gorgeous. I love the look, and beautiful photography!

In reply to The finish looks gorgeous. I by handmadewithash
Wed, 11/25/2015 - 16:25
Thank you, Ashley! ![]()
Bought enough lumber for one sofa but ended up using old fence boards for the decking so had enough lumber to make the sectional and a shortened coffee table.
Great way to save some cash even if u have to buy the fence posts.
Added a reinforcing piece to the one armed sofa between the legs using a kreg jig to stabilize the legs a bit more.
Waiting on my foam from Amazon to finish off this project!
Used inspiration from the beer/wine cooler patio table and made the middle of the table removable to add a buck underneath later.
Note the 5 year old patio set, also an ana white project from back in the day!
Super quick build!
I did find that the measurements for customizing it for your cushion size seemed about 1.5 inches too big for all the depth pieces so I sized down but I haven't received my foam yet so maybe I'm wrong but Smth to think about. I didn't want my cushions to slide around so I took that into consideration when building.