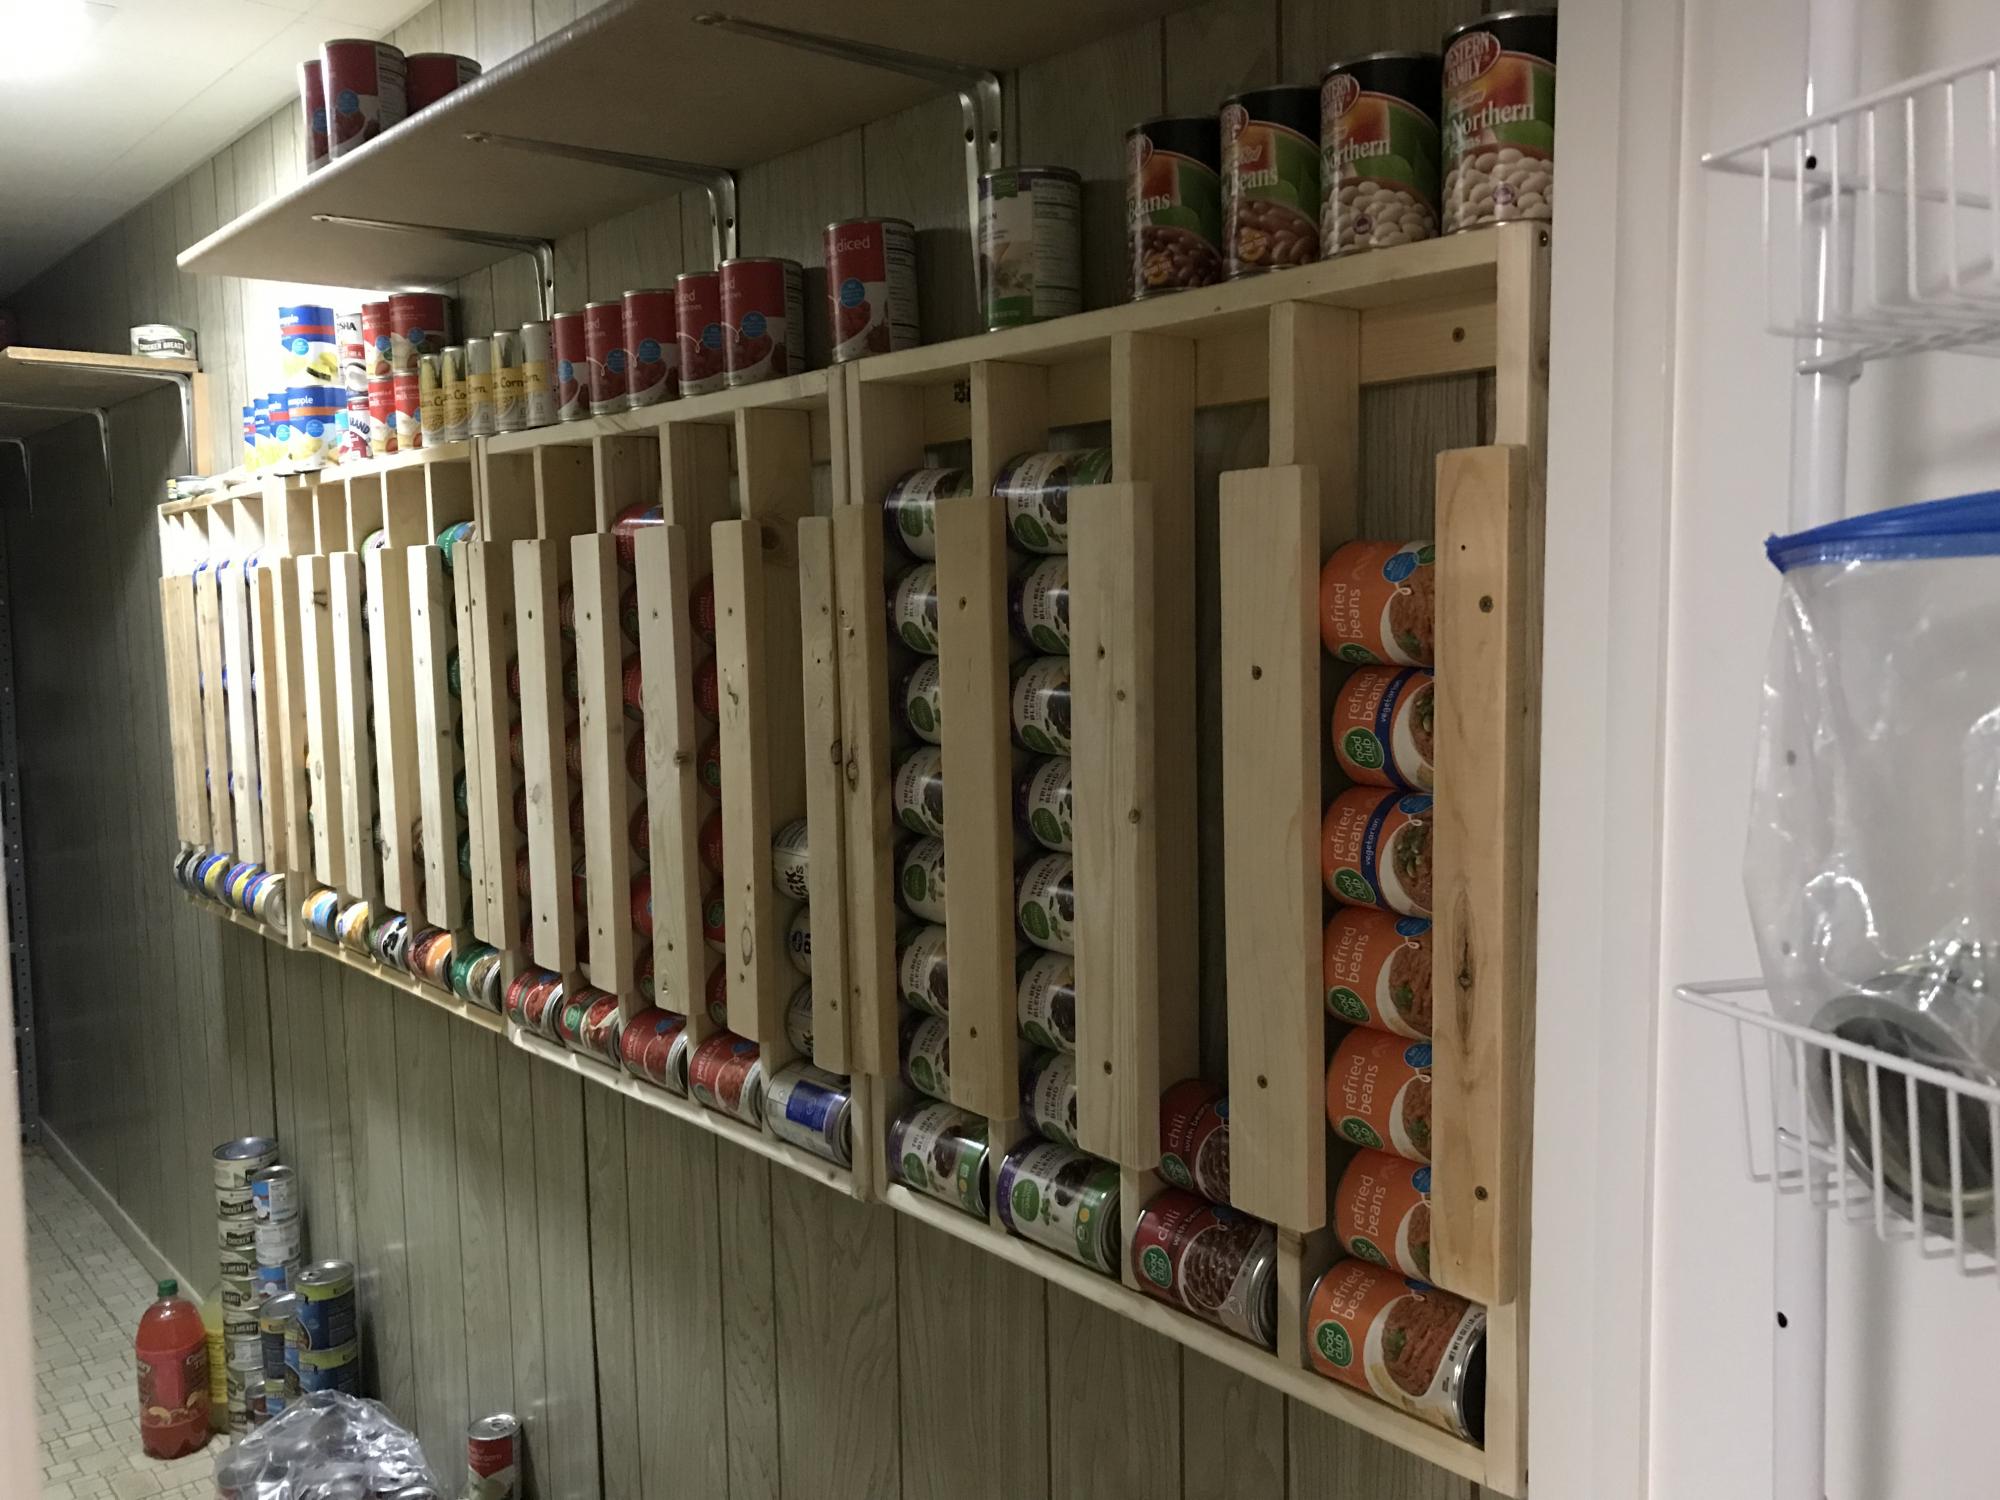
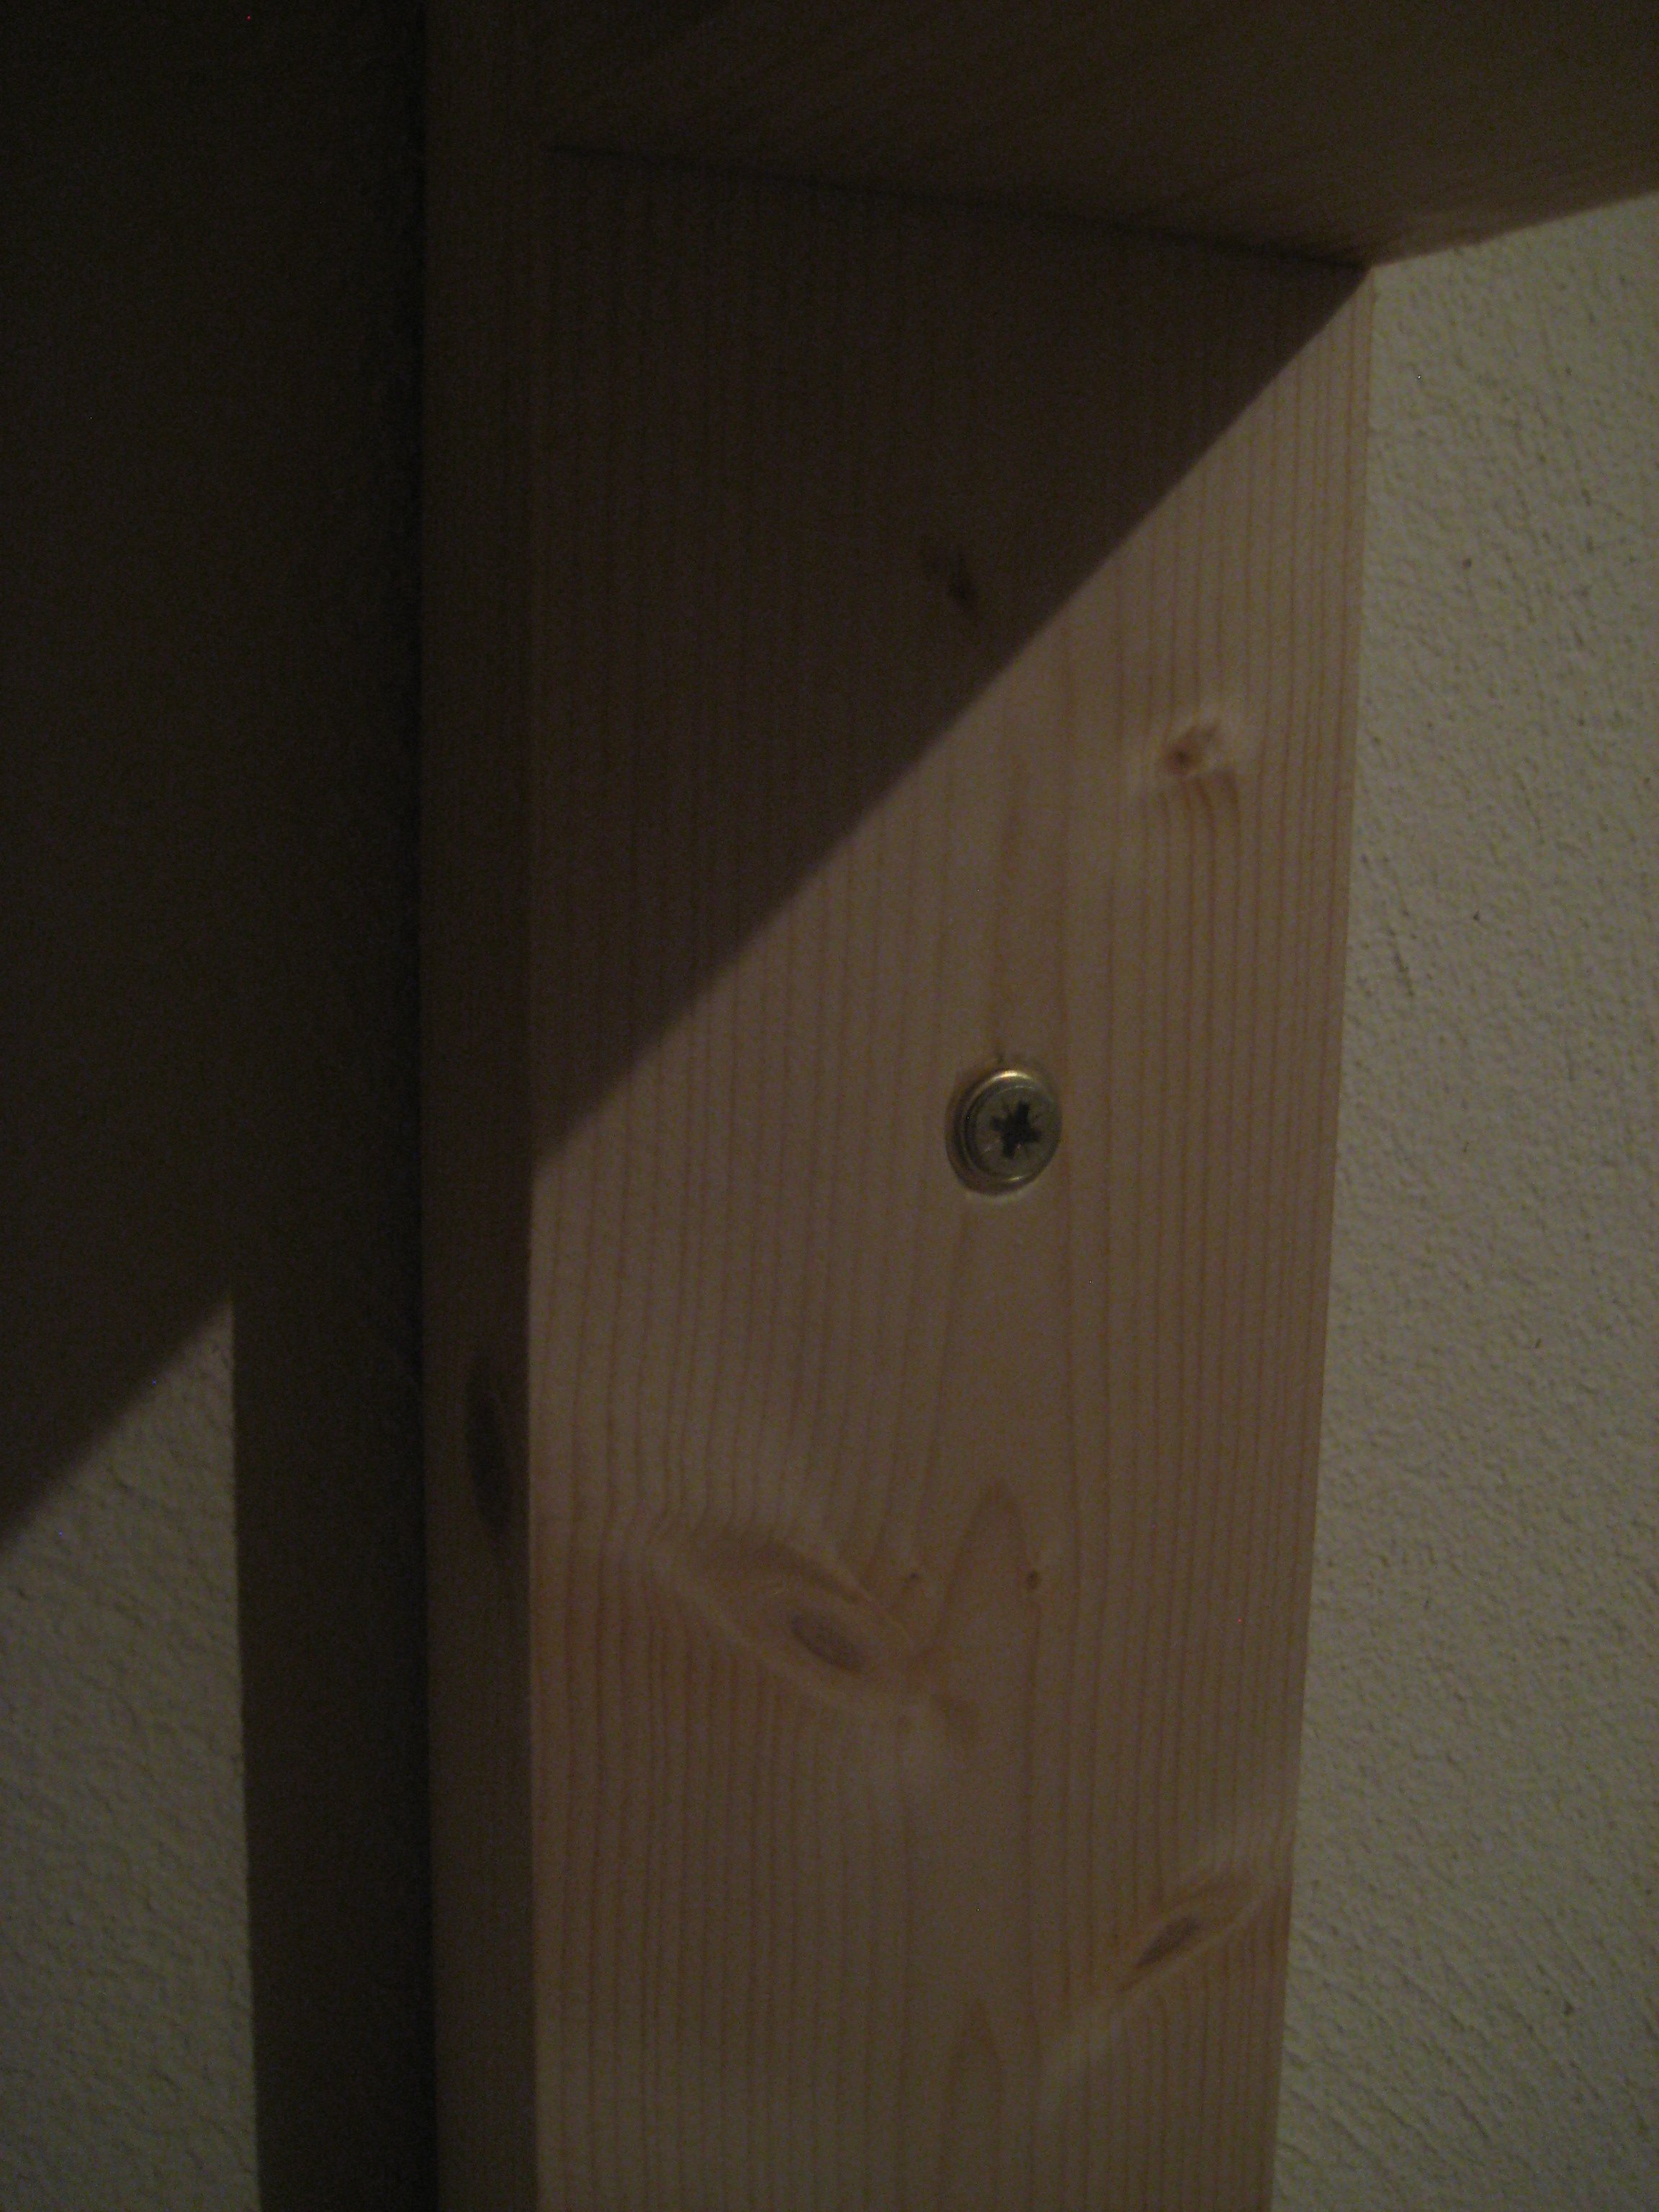
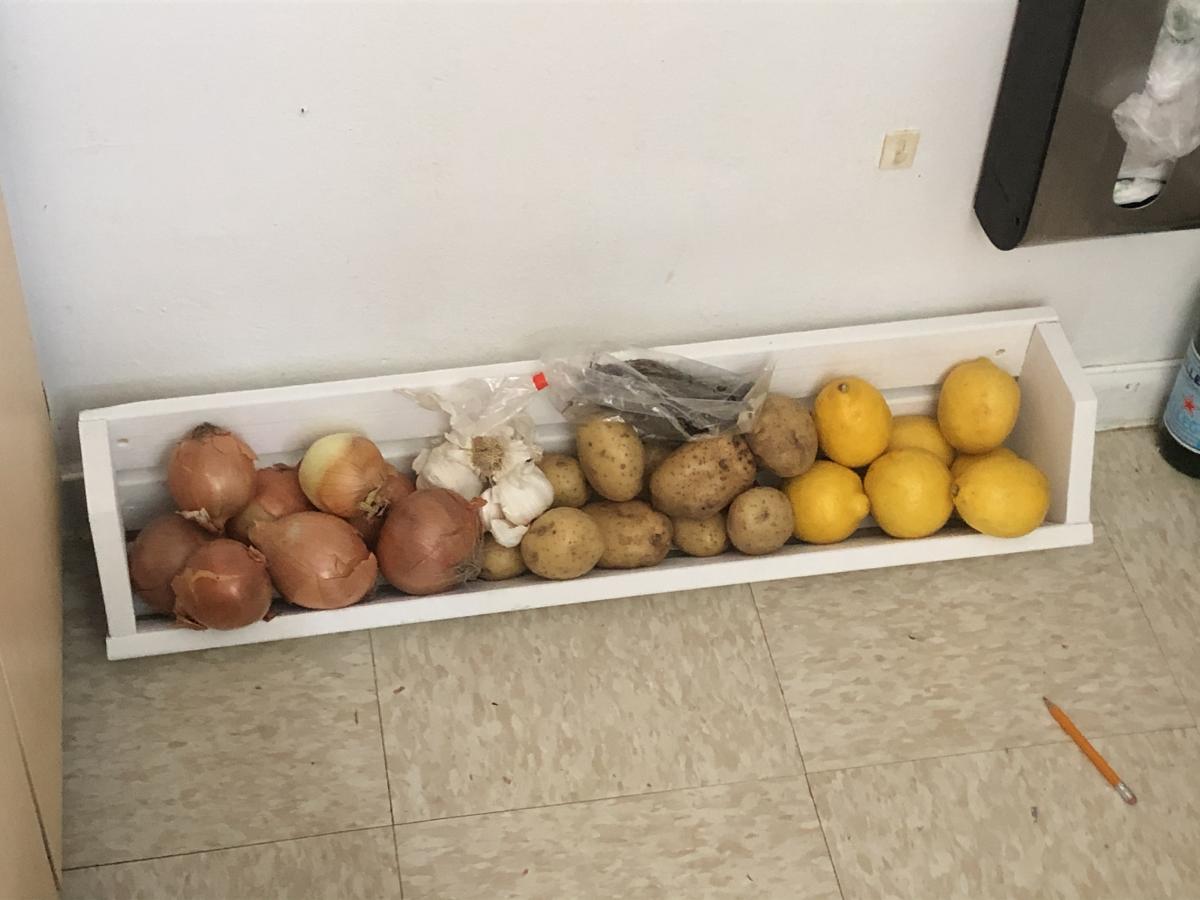
Walk mounted can organizer
Love this! My husband used this project to help boys learn to use power tools and work with wood. They made one and he did the others. THANK YOU!
Built from Plan(s)
Love this! My husband used this project to help boys learn to use power tools and work with wood. They made one and he did the others. THANK YOU!
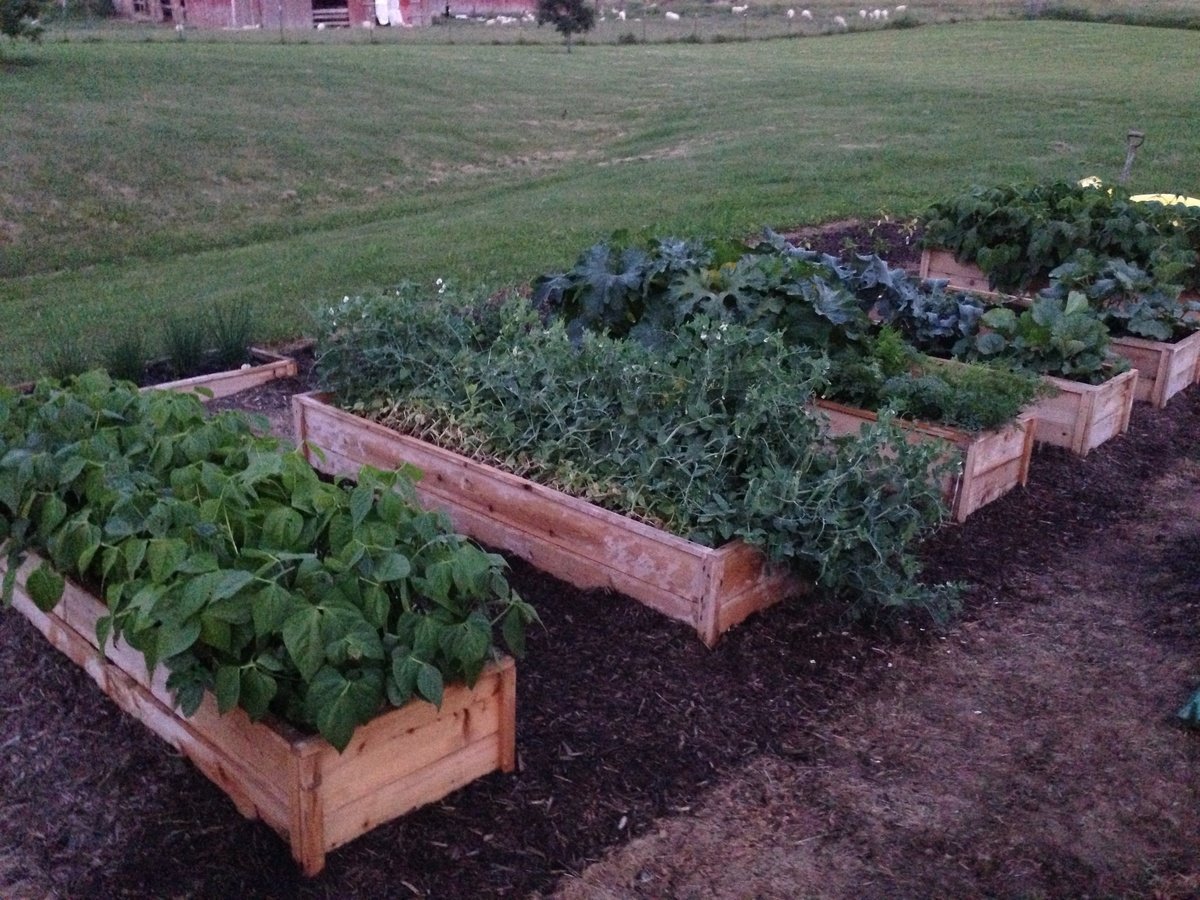
These garden beds are fantastic! They were so easy to build and look great in our backyard. We have always found ourselves with a garden covered in weeds or plants out of control. Our garden this year looks wonderful and we have hardly any weeds in the beds. Thanks for the great plans!

Fri, 05/24/2019 - 10:05
I'm so glad the plans worked for you! Your garden looks fantastic!

The plans on this were so easy to follow. Thanks so much for posting!
I ended up using screws instead of nails just because I am more comfortable with a drill than a nail gun. Seems like it is holding up fine :)
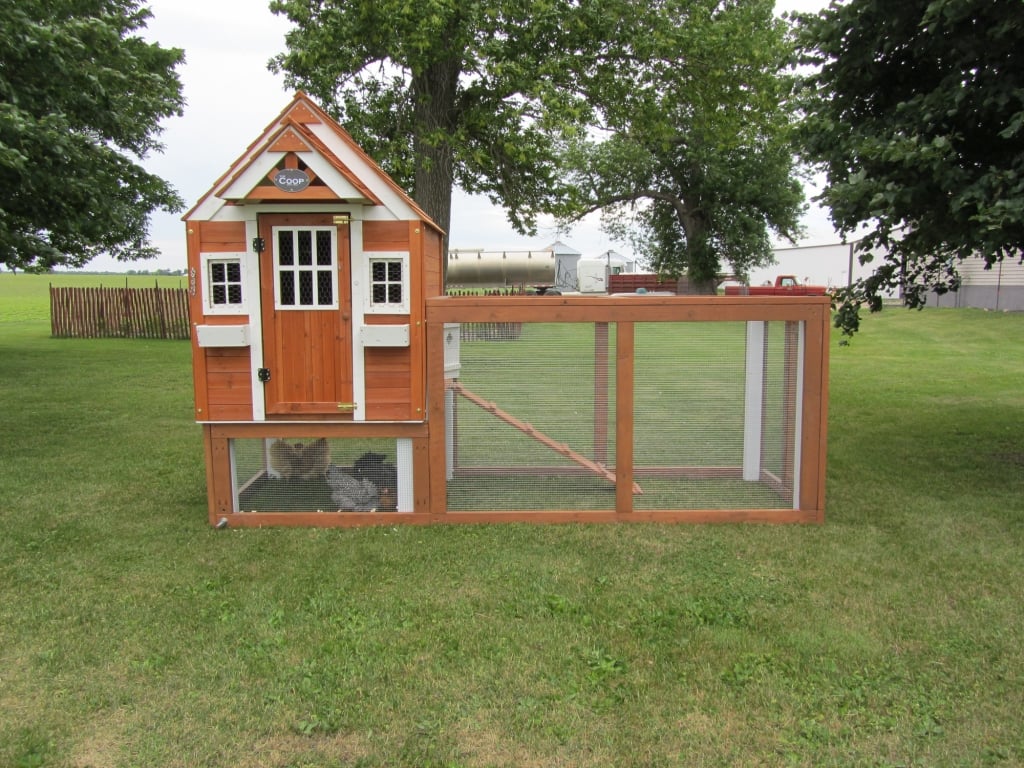
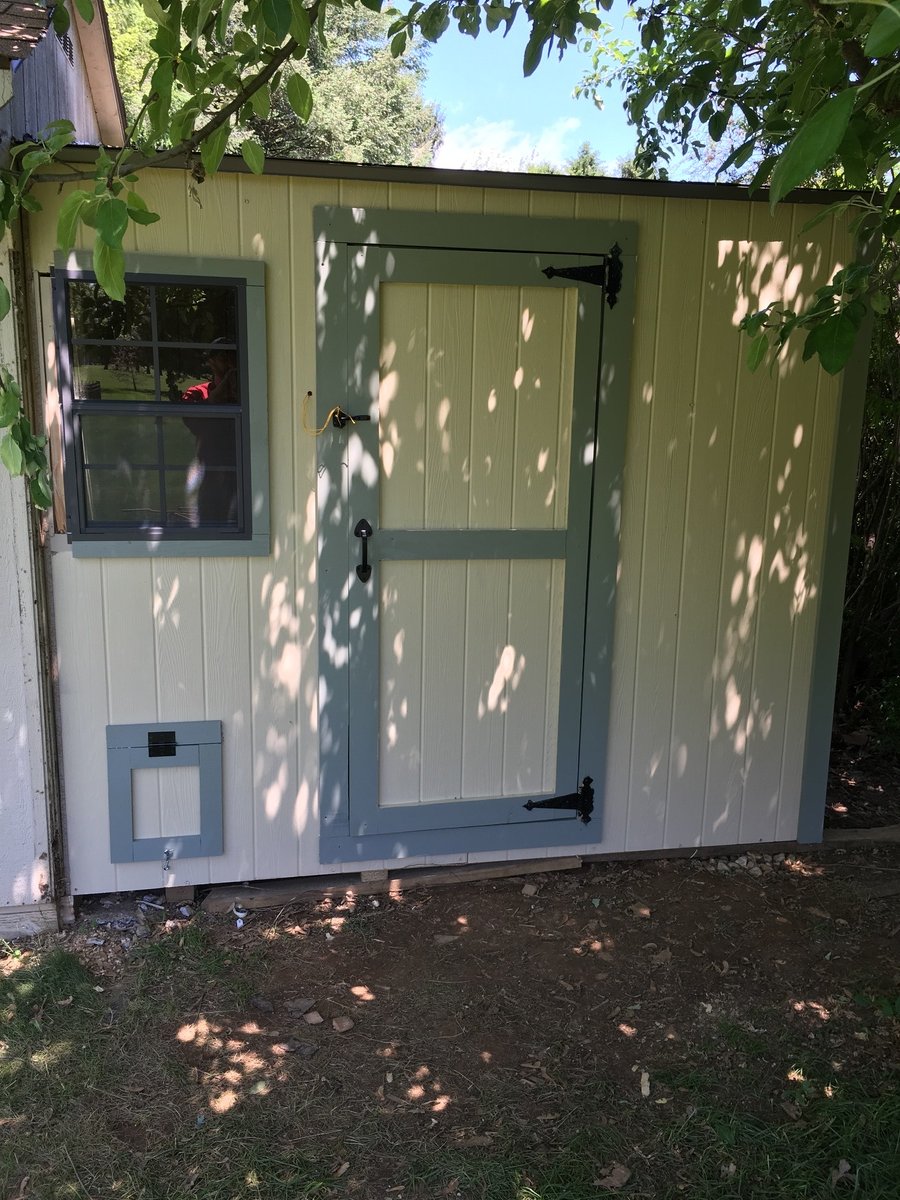
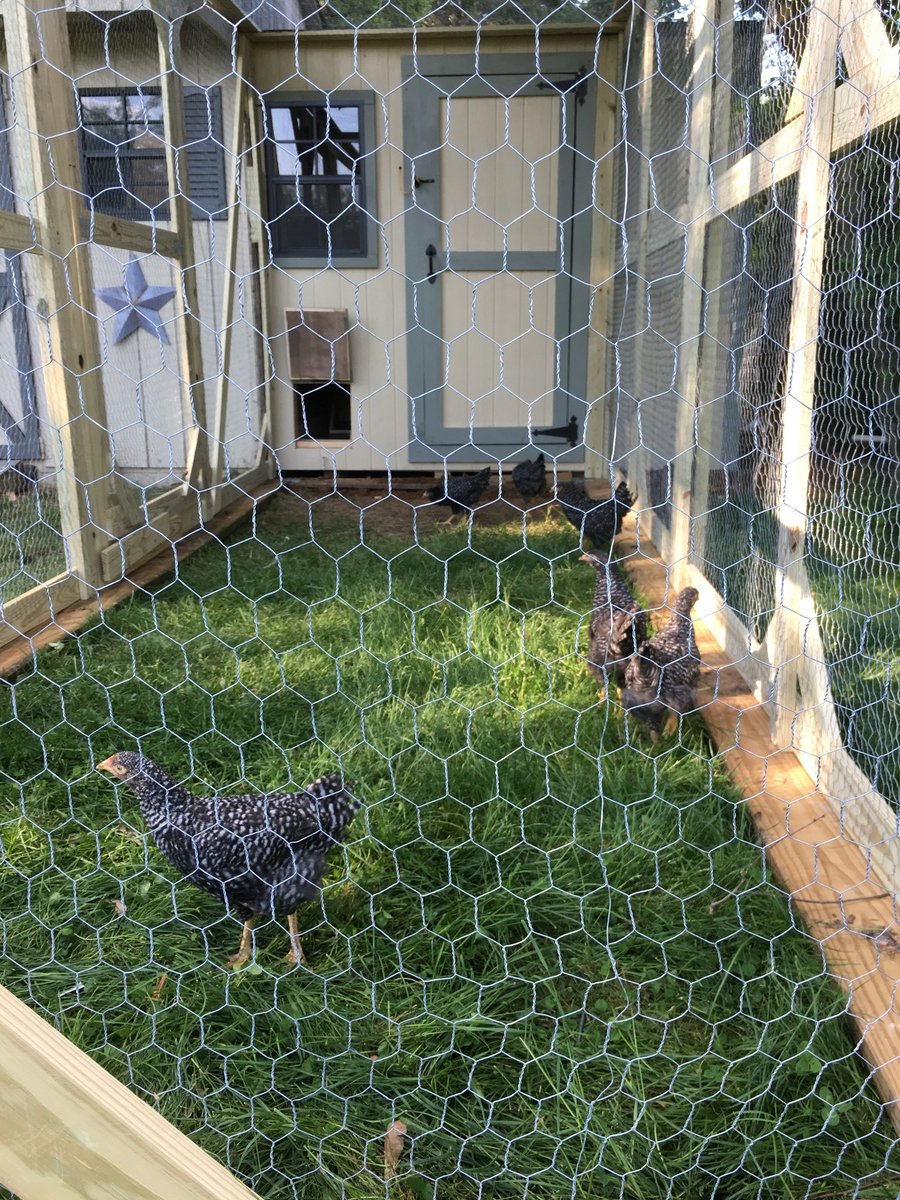
My husband and I live on a small hobby farm and are growing/raising a lot of our own food. We decided to venture into working with chickens. We wanted to start out small so we got 6 chickens and needed a home for them. We found a kids play house one day while shopping and got the idea of modifying it into a chicken coop with a run. We took off with this idea and with quite a bit of modification and some extra building materials we were able to raise it up in the air and attach a run so our chickens would have a nice home to protect them from preditors and the emements and not to mention one that looks good in our yard!

In reply to OMG! by benfoldsfivealive
Wed, 05/27/2015 - 18:42
Building chicken coop doesn't have to be expensive. Just get the easy-to-follow plan from this:
http://bit.ly/how-to-build-cheap-chicken-coop
Fri, 06/17/2011 - 21:26
Looks awesome! I just spent the evening building a coop for 4 hens of my own!
Tue, 02/21/2012 - 19:08
Are the plans available? I have Black Copper Marans and Lavender Ameraucanas and I really need to separate the LAs from the BCMs and this would be perfect!
Sun, 02/26/2012 - 18:00
When I click the link to get the plans for the standard coop, they are not there. Do you know where I can find the original plans? Thanks.
Tue, 02/28/2012 - 10:20
Yes - would love the plans please!!!
It's gorgeous - great job!
Sat, 06/02/2012 - 15:22
Sorry guys there are no plans for this coop. My husband and i just "winged it" and built it without any plans.
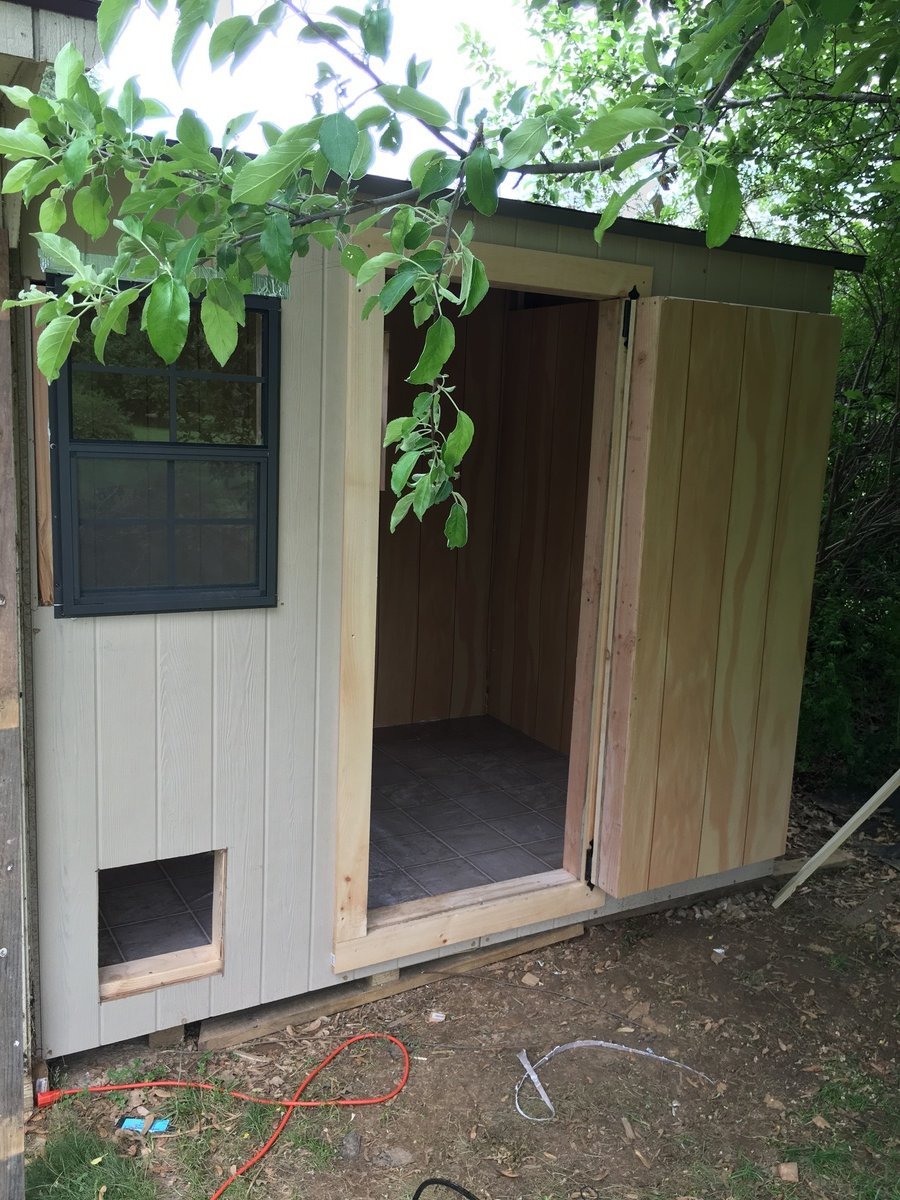
It is a play house that we found at Mills Fleet Farm and we modified it to make it a chicken coop. We put together the play house based on instructions from the box (with a few of our own modifications to make the window on the ground etc.) added some chicken wire to the doors and bay window, added some 4x4 "stilts" and a floor to get the house in the air, and constructed a frame around it with 2x4's and wire fencing to make the run
Sorry I dont have any plans to give you guys!
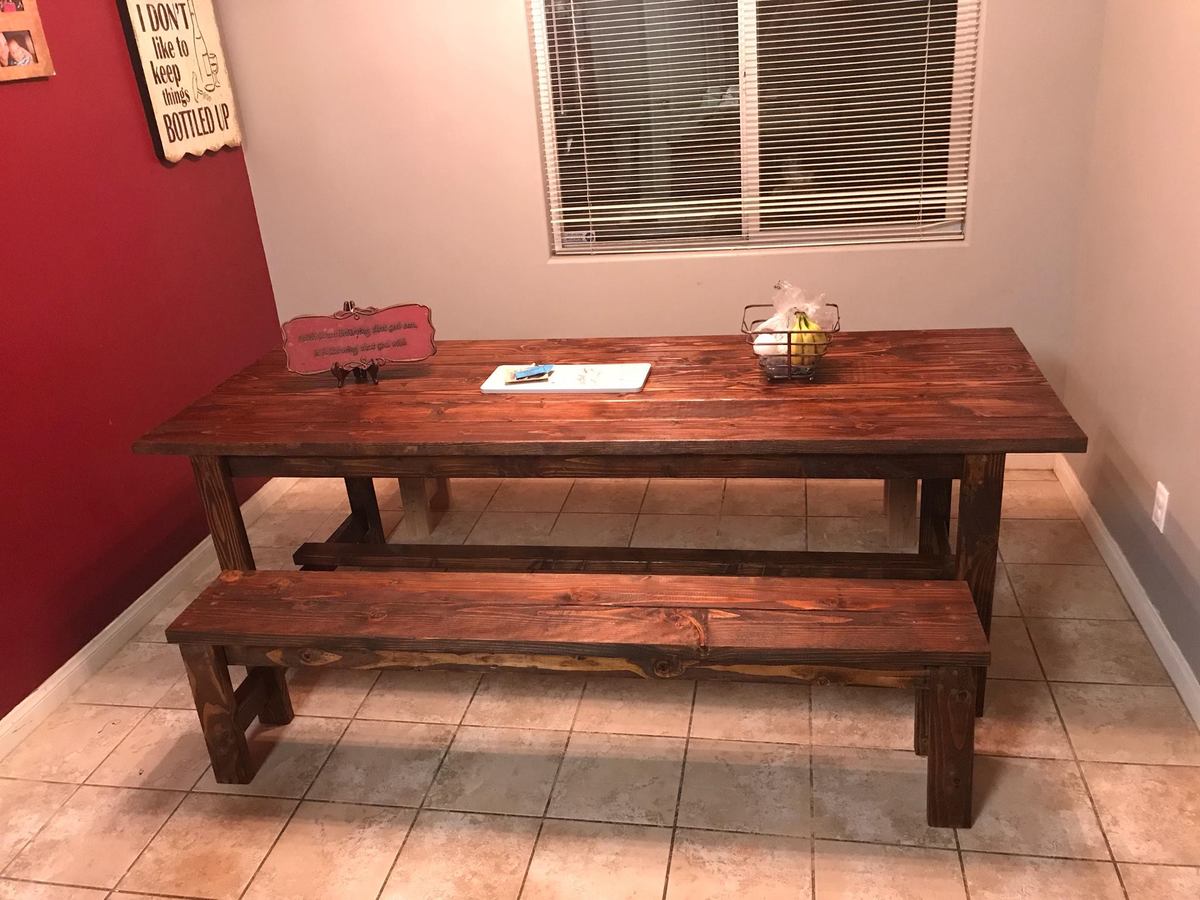
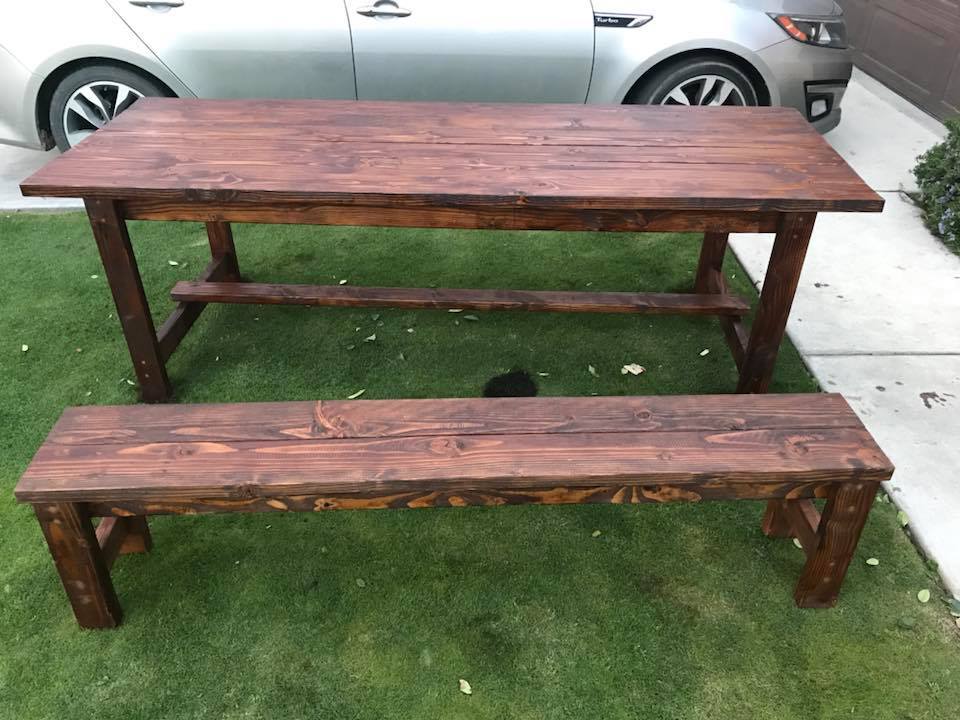
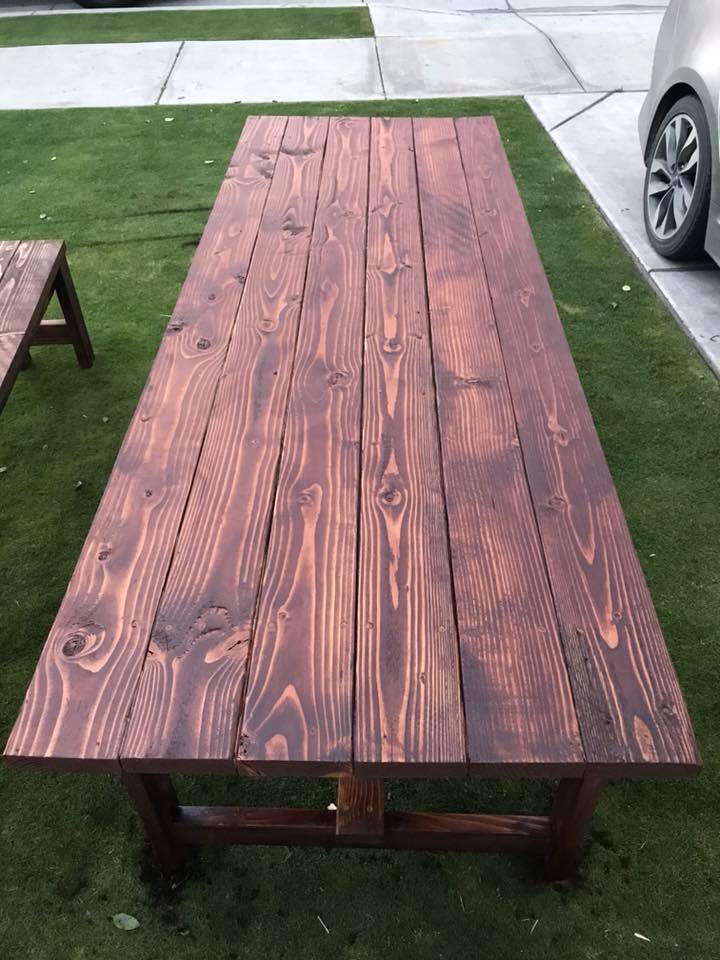
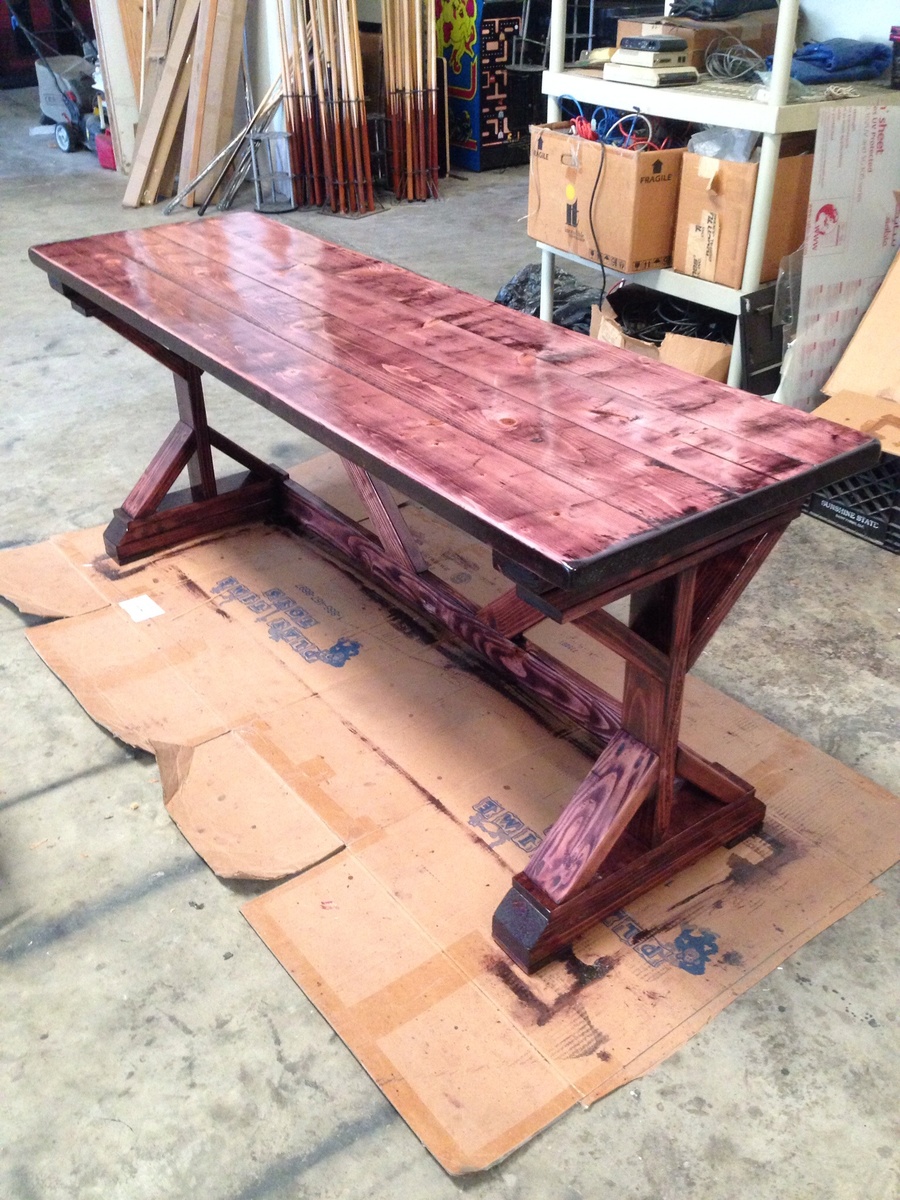
I love this table and bench set! Very easy to build and didn't take too much time. We made it a family build. My kids helped put together the benches and table. My wife and kids did all the staining.

Thanks for the plans Ana!
I stuck to the design but changed the dimensions to suit the space and the boxes we intend to store. This made the shelves 7.5 feet high by 8.5 feet wide. The timber was supplied in 17’ lengths so this also meant very little wastage. The frame is composed of 2x4’s, the shelves are 4.5 x 1.5’s - as I wanted the shelves slightly shallower this meant I could get away with three boards for each shelf instead of 4 as on the plans.
For the short cross pieces I used woodglue and screws – to attach the long shelf pieces I just used screws. I predrilled holes in the first piece for each of the screws, but I didn’t drill a pilot hole in the next piece, the screws were self-tapping and didn’t need one.
The back wall is concrete block and I screwed each upright to the wall using wall plugs and screws. I’ve 2 young children and as the shelves are quite high I was afraid they might climb on them and tip them over otherwise. The attachment to the wall definitely makes the whole thing feel much sturdier – the structure is completely rigid.
The only real issue I encountered was that some of the boards were slightly twisted or warped – and I had to apply some force to keep everything square when I was gluing up. Overall I’m very happy with the end product, and found it reasonably easy to put together. Now its time to put the shelves to good use and start tidying up the garage!


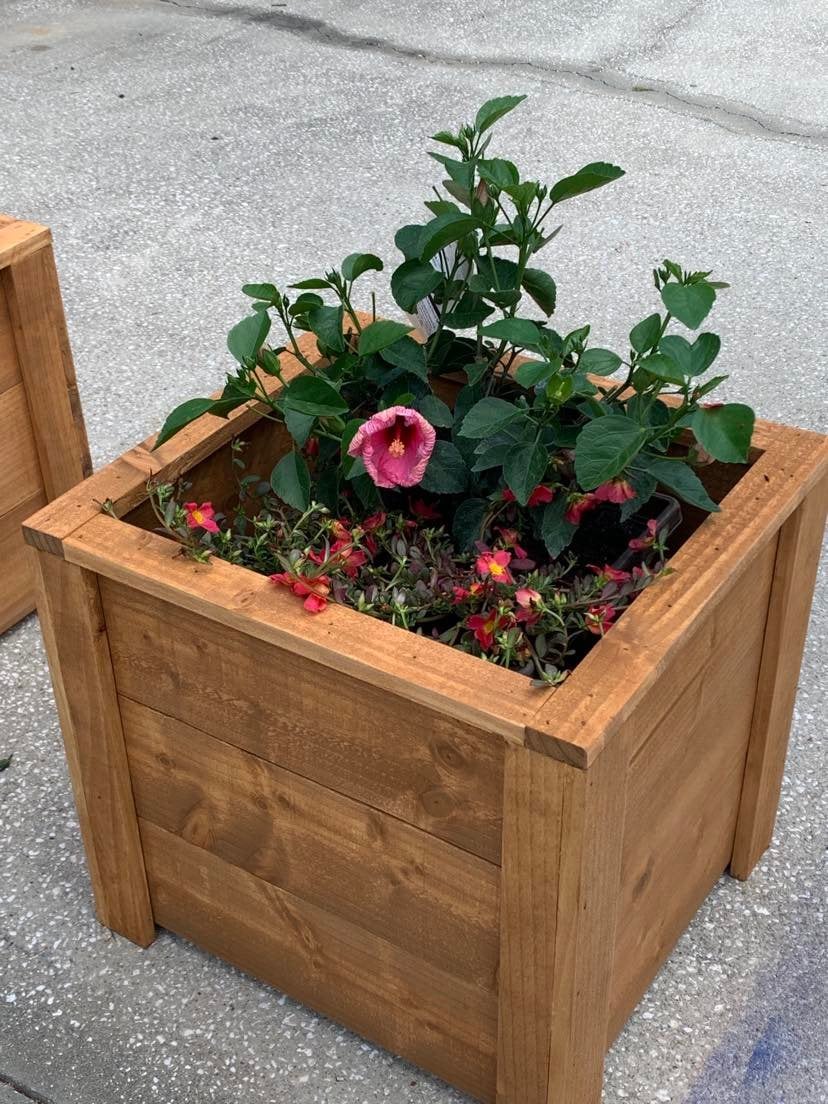
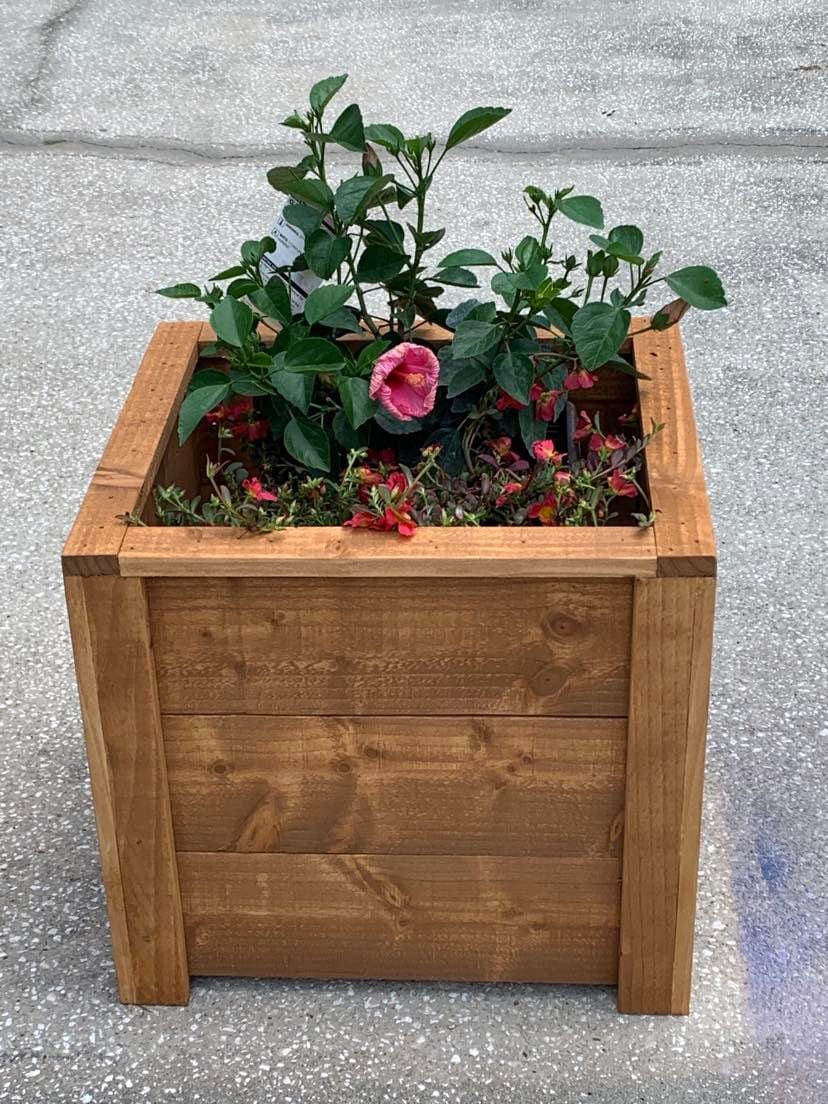
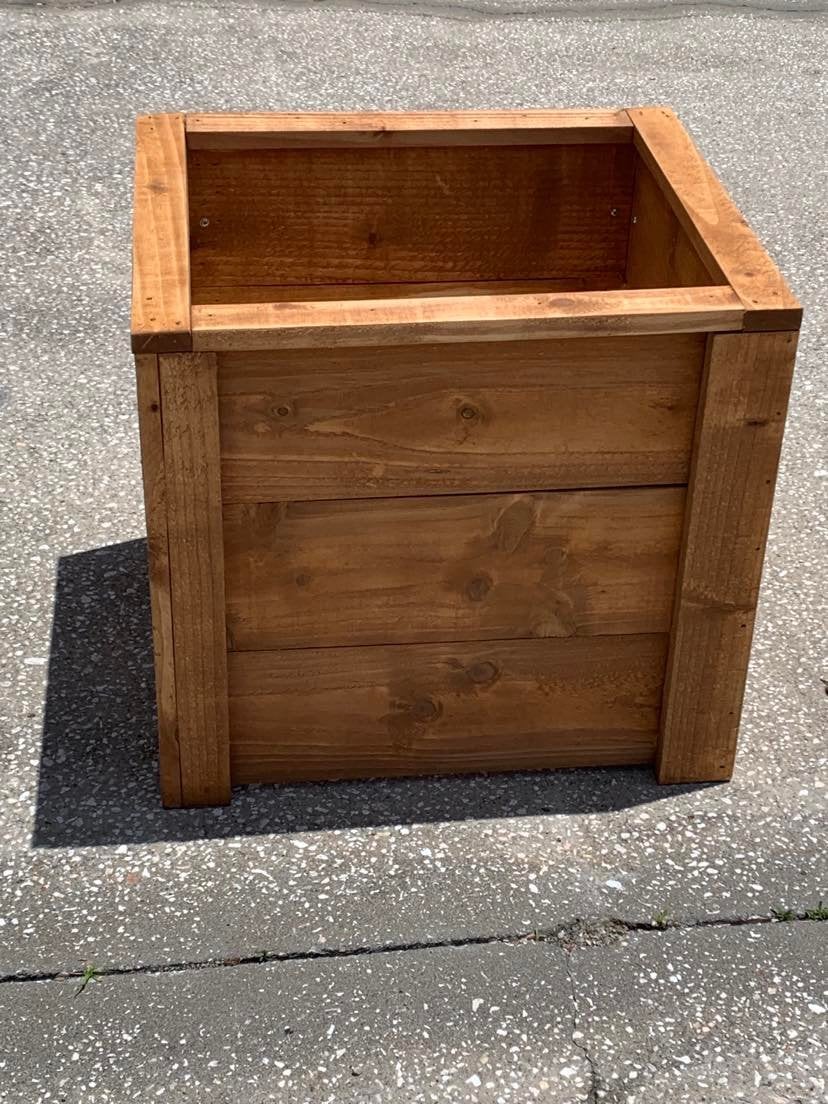
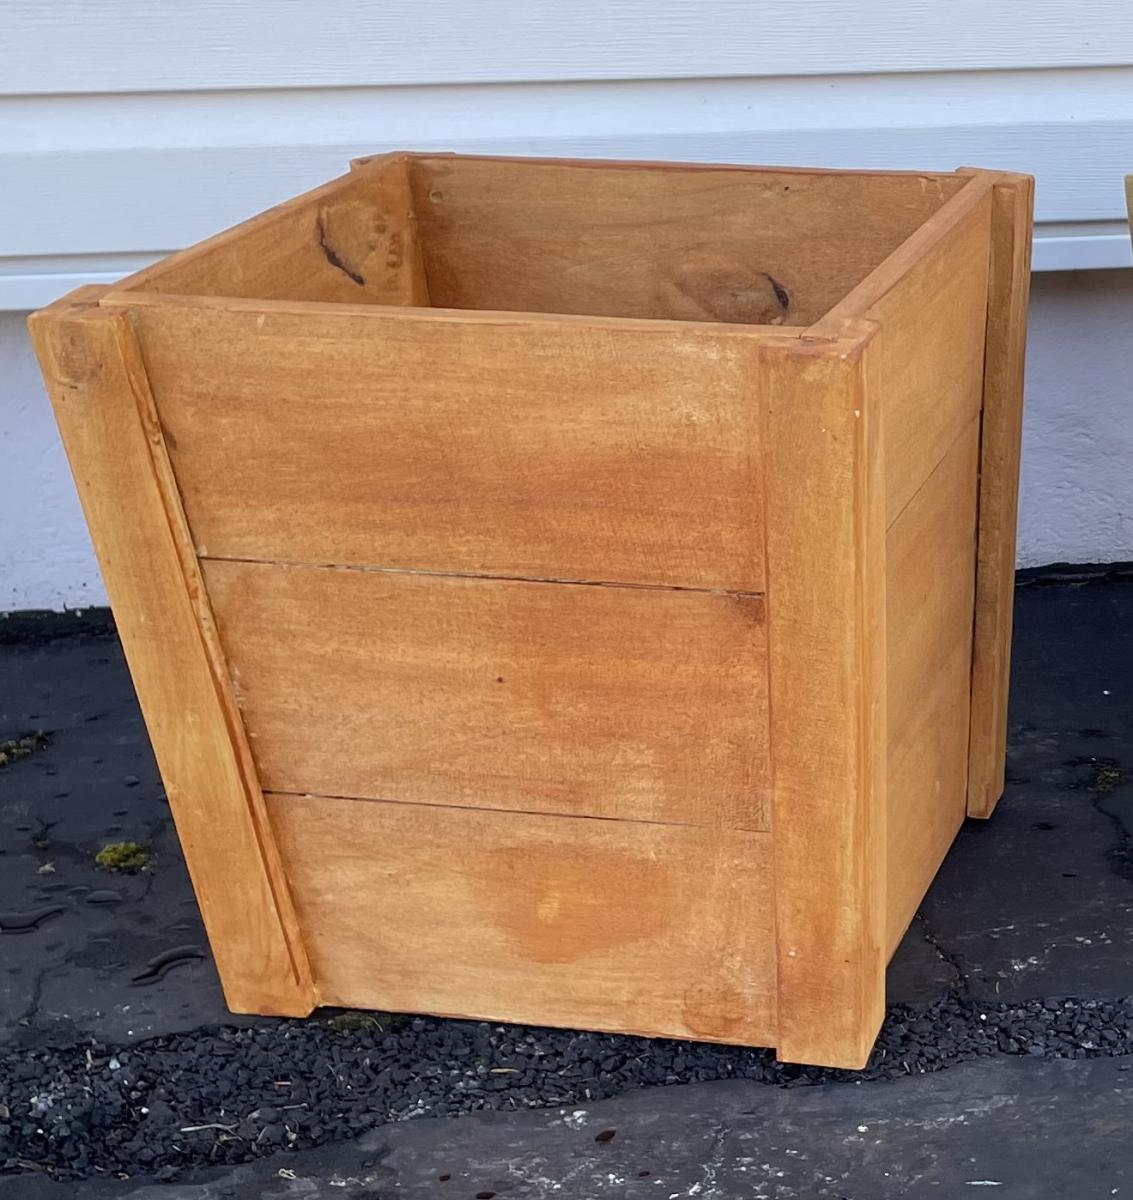
Thanks Ana, I built your planter box, actually built 2 of them, one for each mom. The were a huge hit and I already have people asking me to build them one.
So loved building this planter box. Thanks for all you do for your fellow woodworkers!
Dale G
Callahan, FL
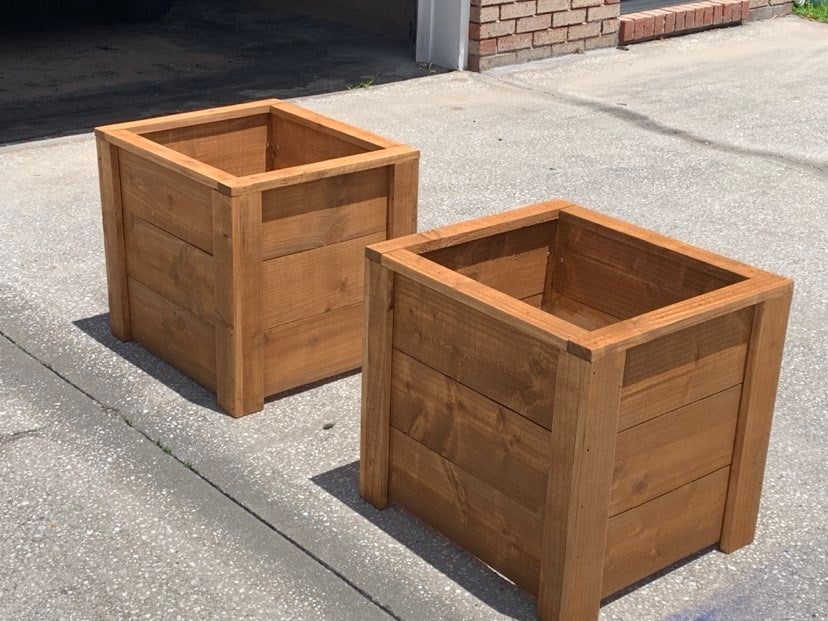
Tue, 05/10/2022 - 07:05
Love these, wonderful idea for a mother's day gift, thank you for sharing!
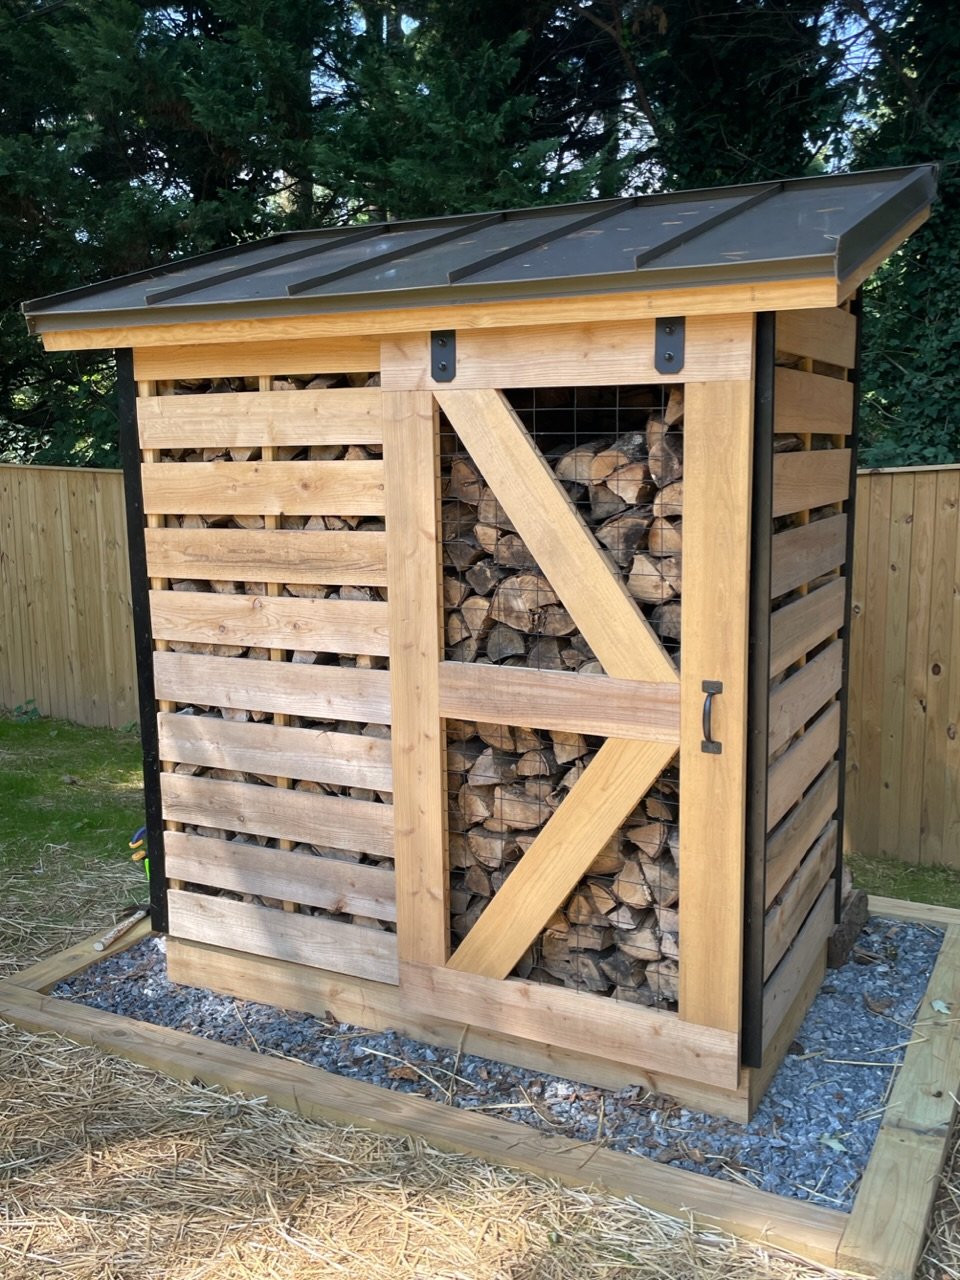
Spaced out the boards to allow airflow; did a sliding barn door and metal roof. Thanks for the plans!
Wed, 10/19/2022 - 08:23
This is totally awesome, way to think outside the box! Thanks for sharing.
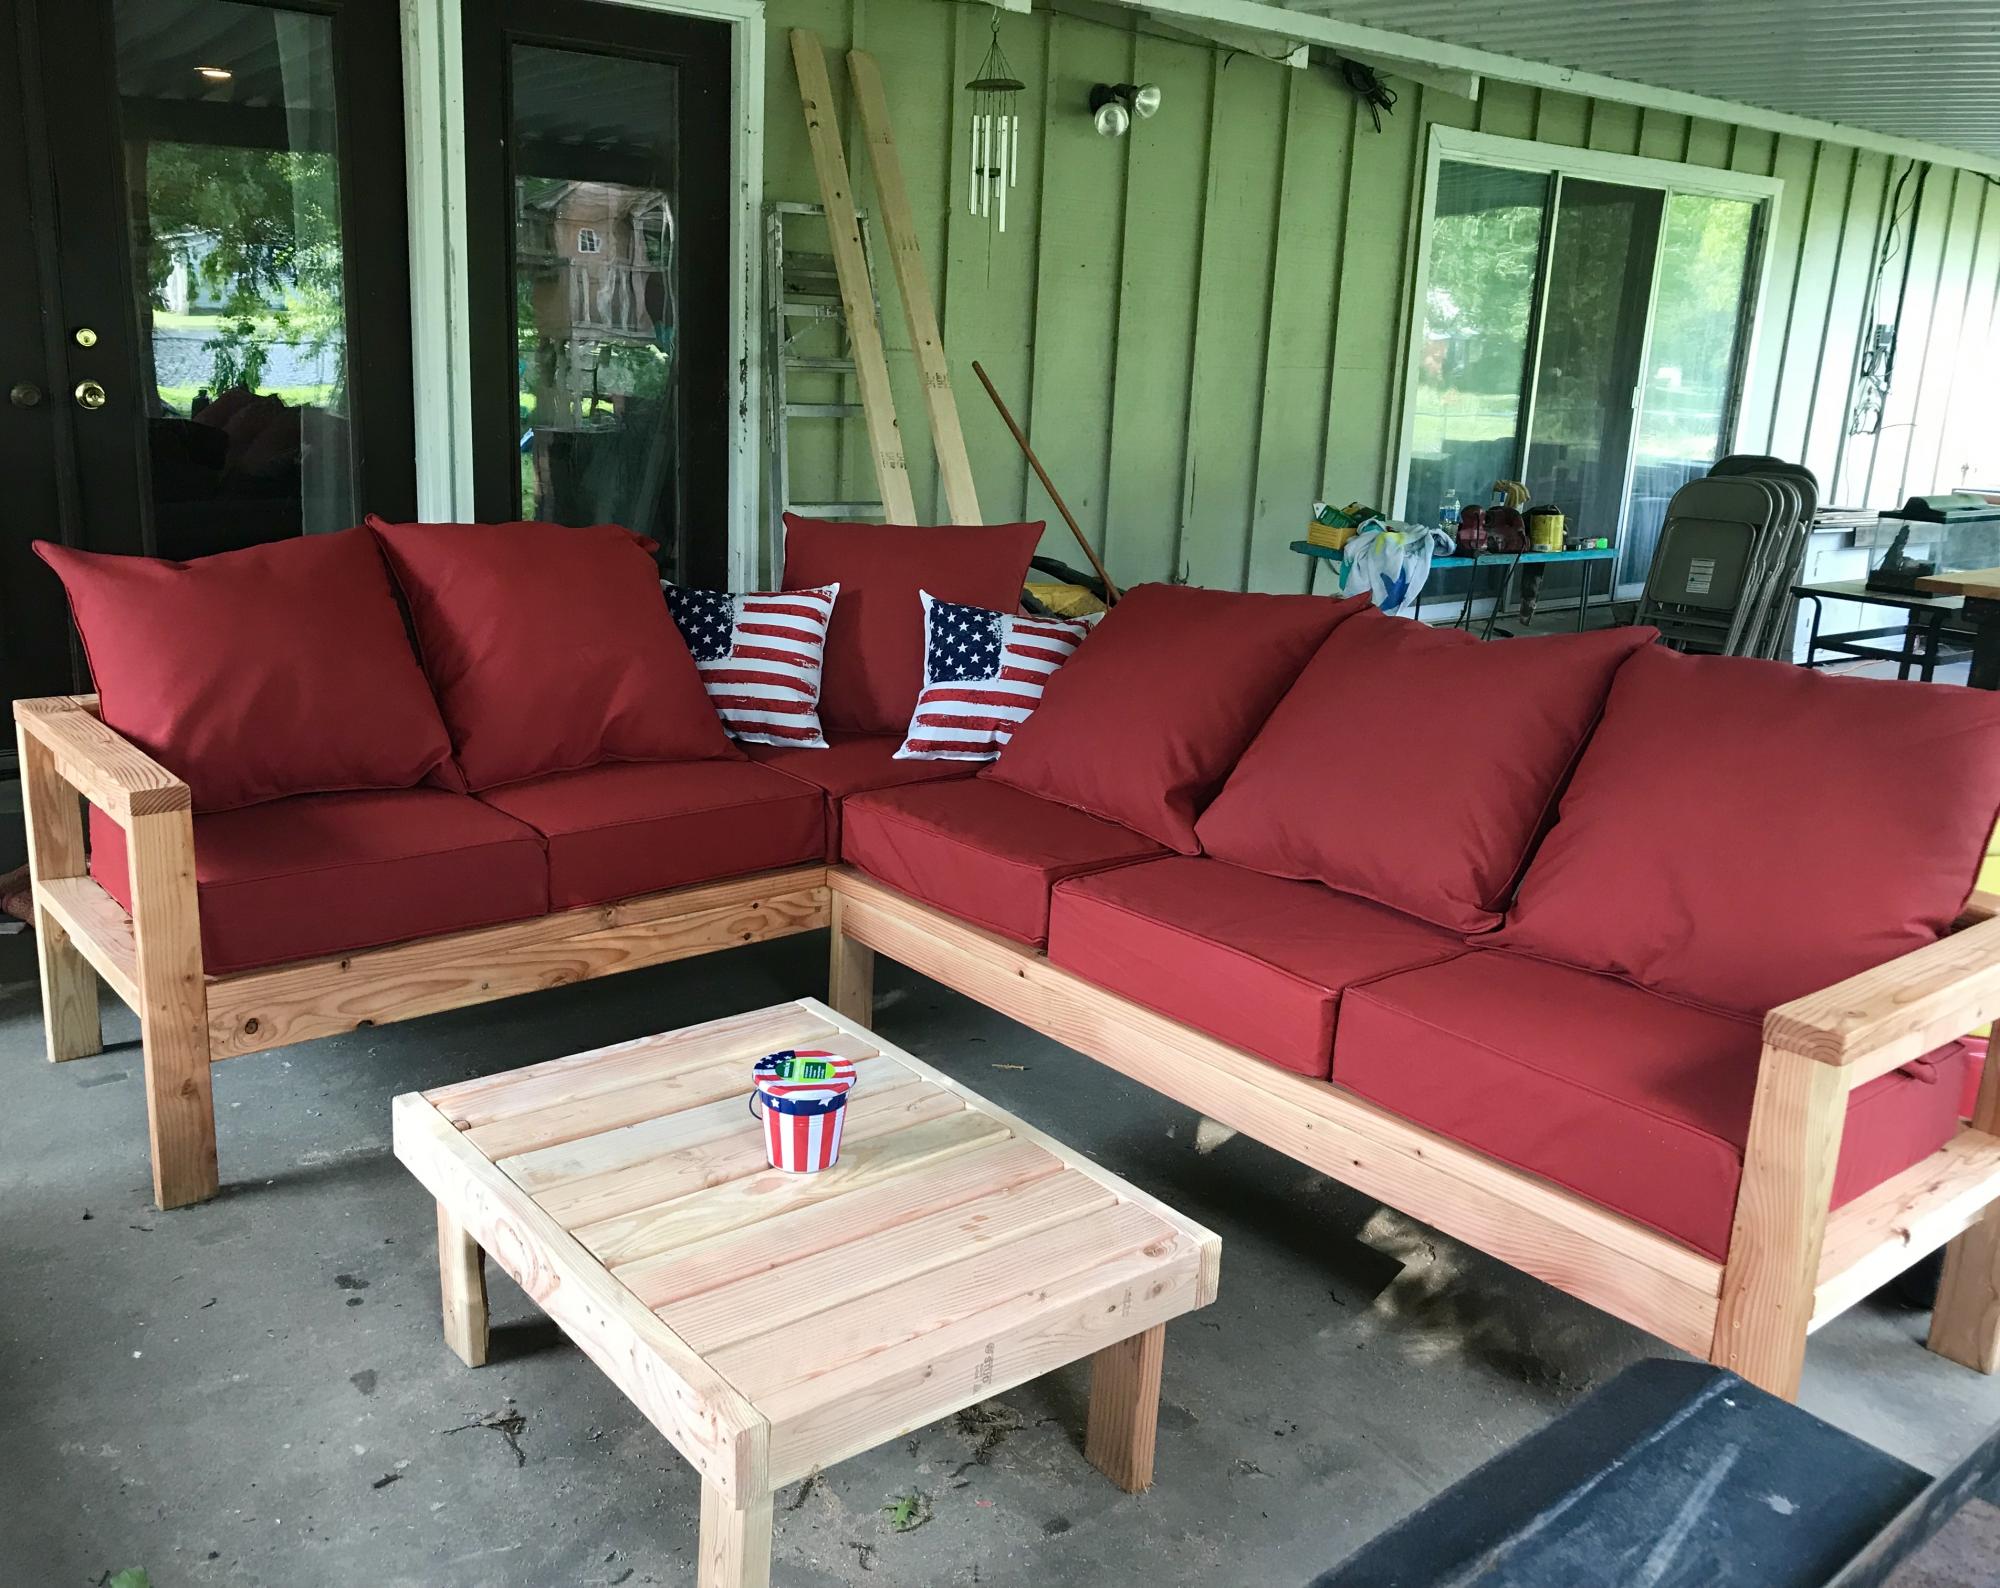
I followed the plans as written, It took me about 6 hours and that includes sanding and staining. Very simple yet offers a very wow finish. I think in total we spent about $300 for all supplies including cushions which was the most expensive part. I just finished it off with Teak Oil and an Americana theme for our covered patio. We love it.
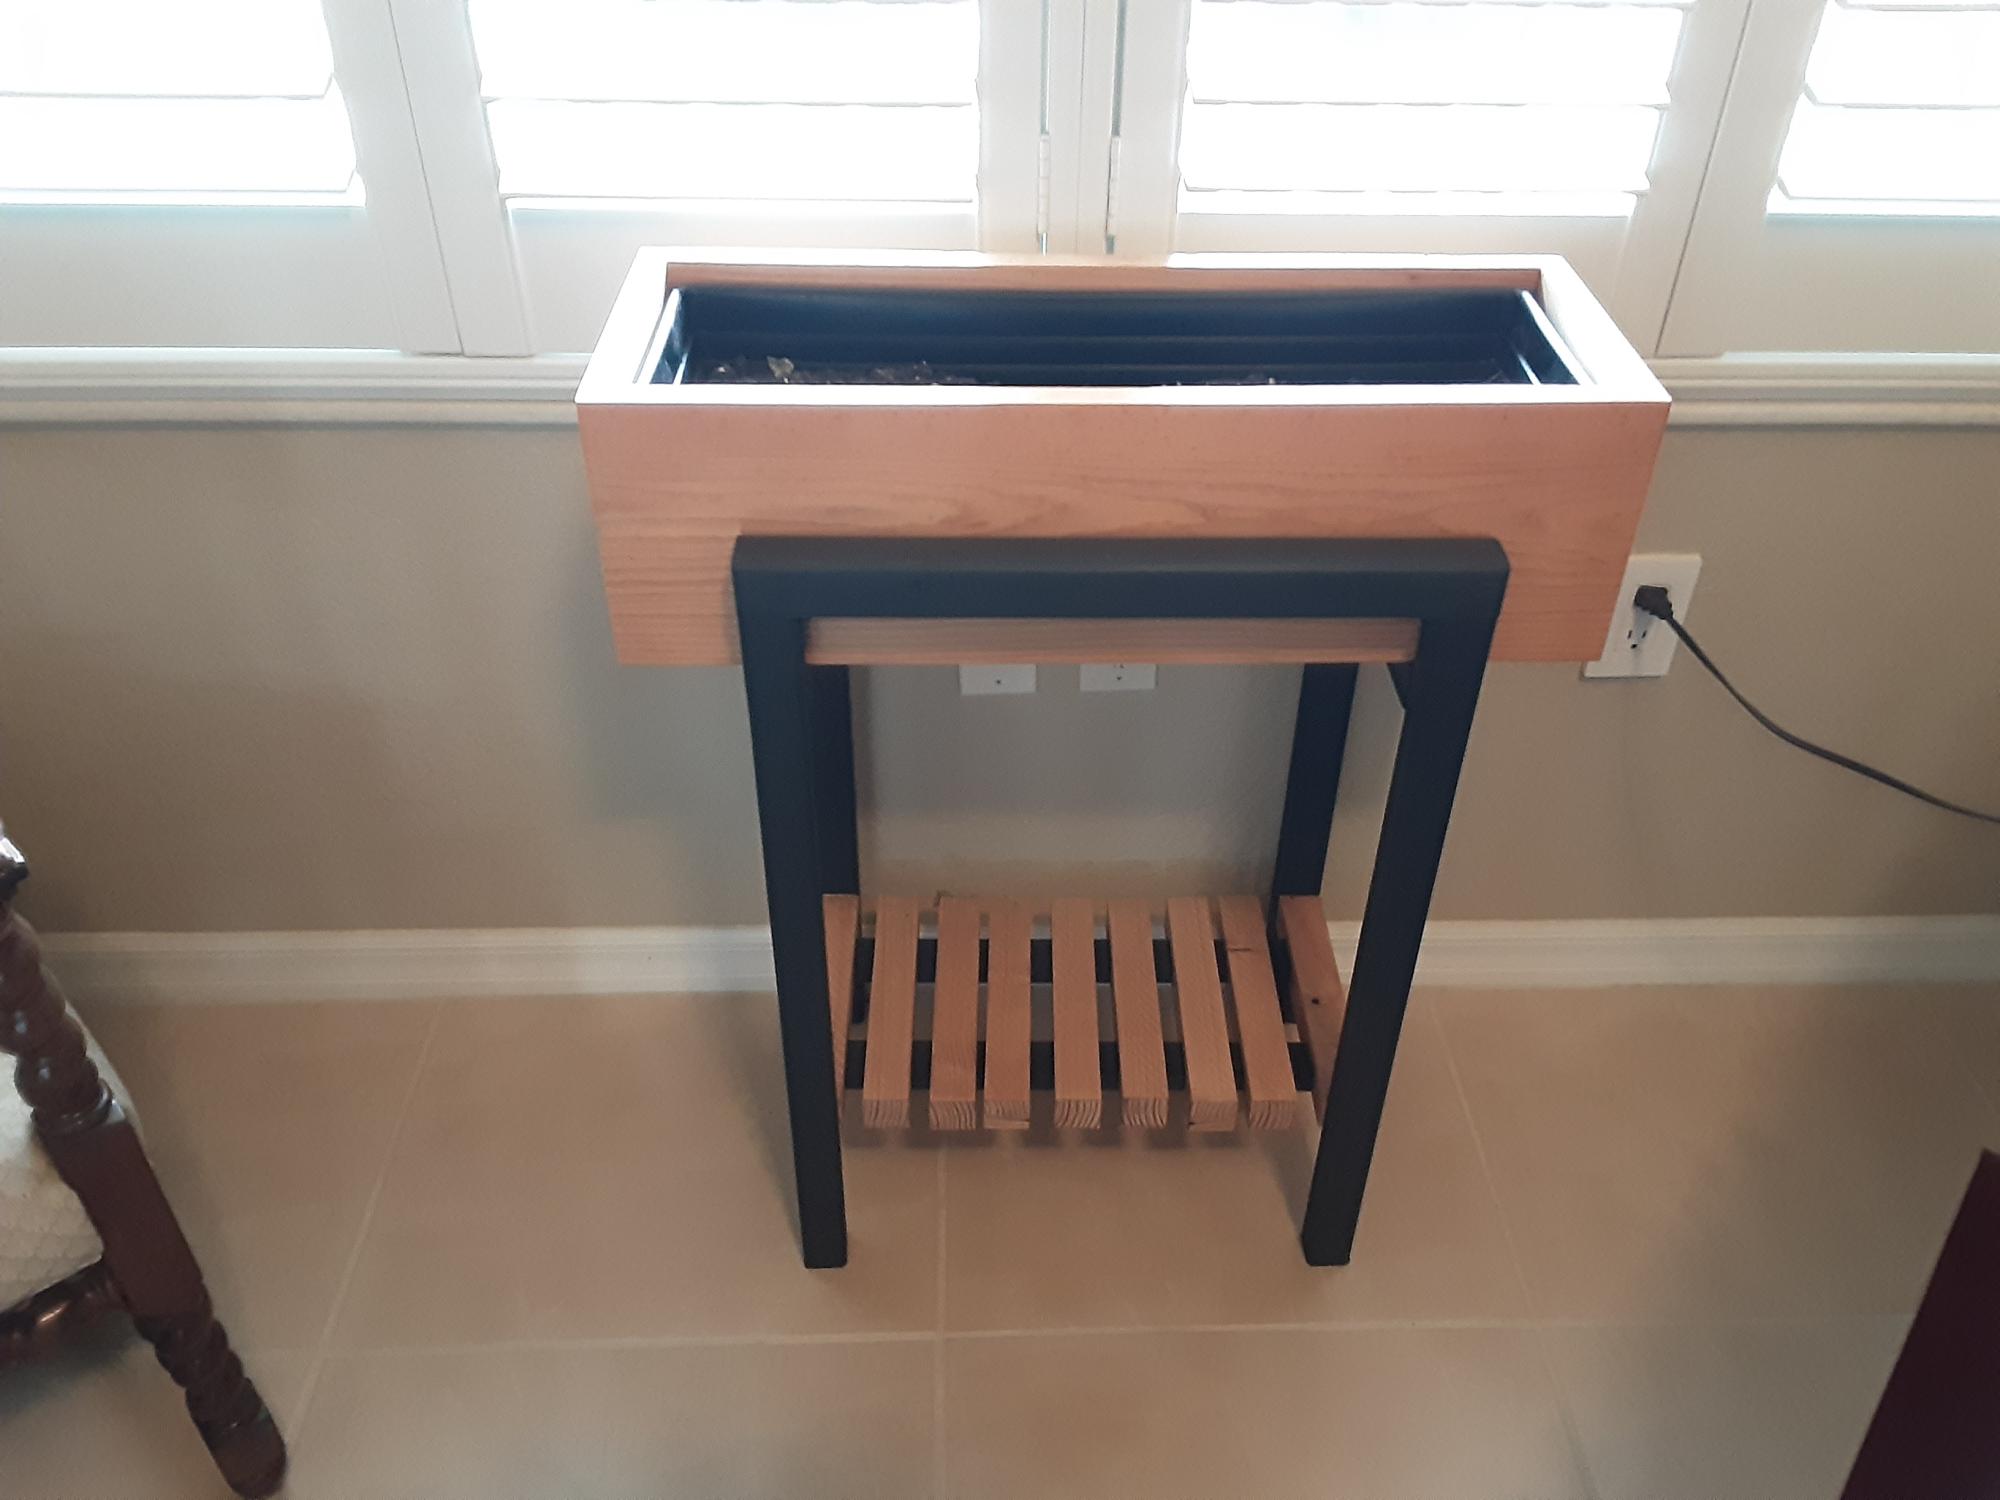
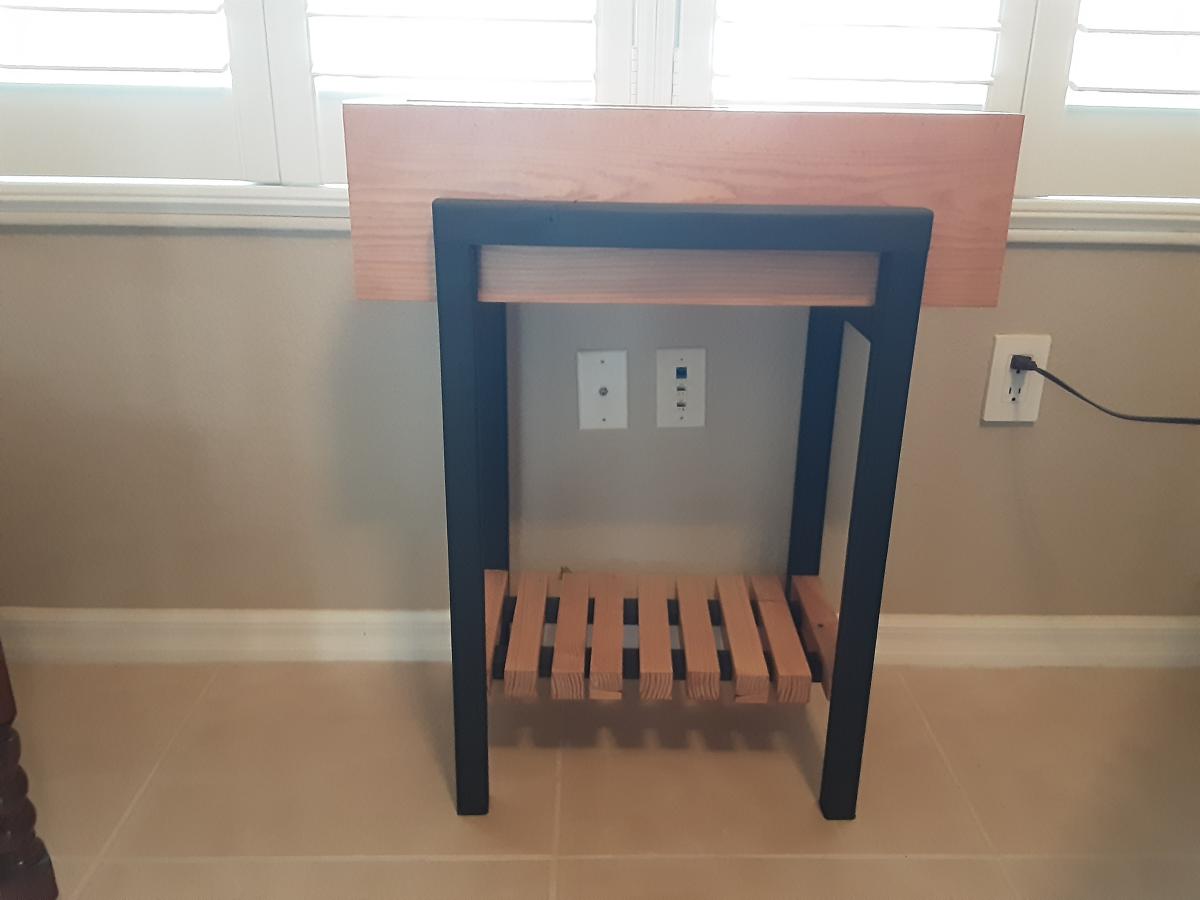
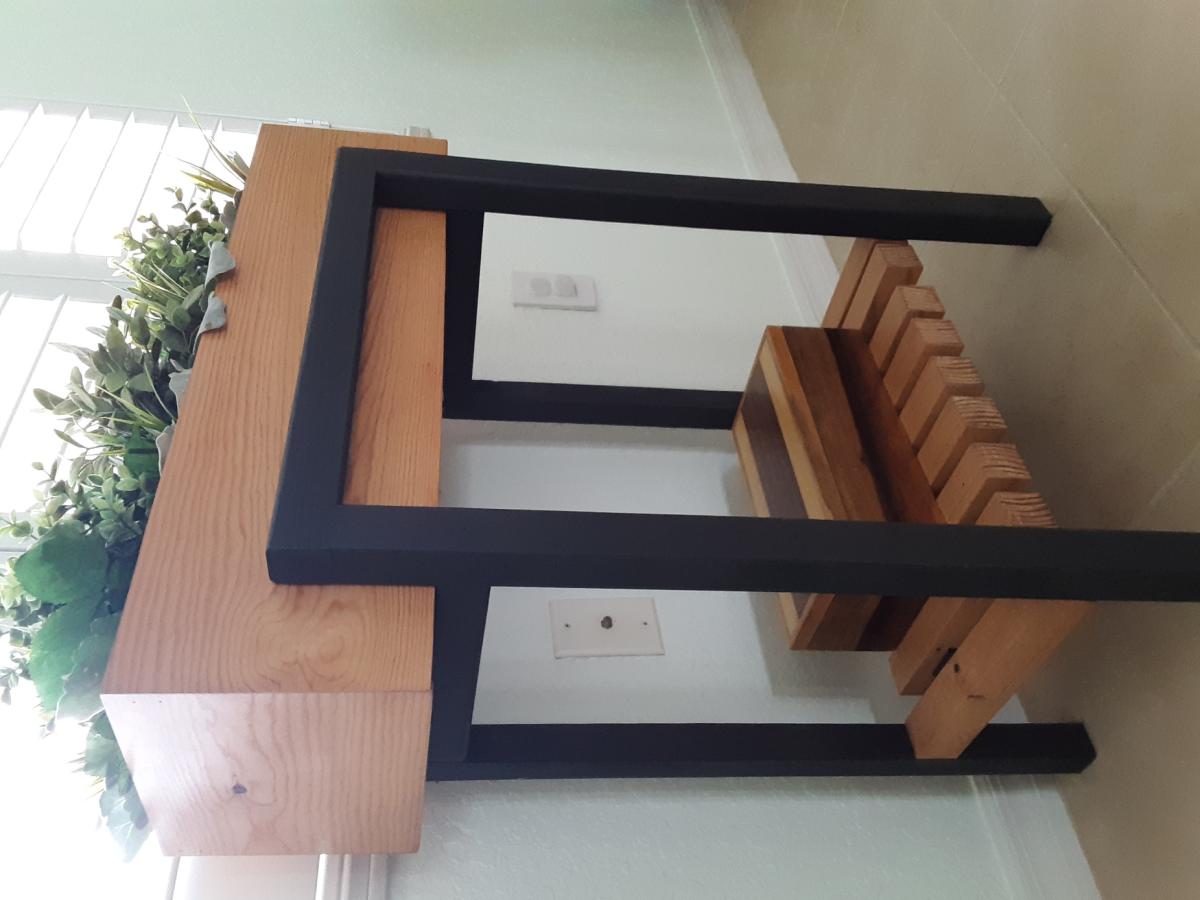
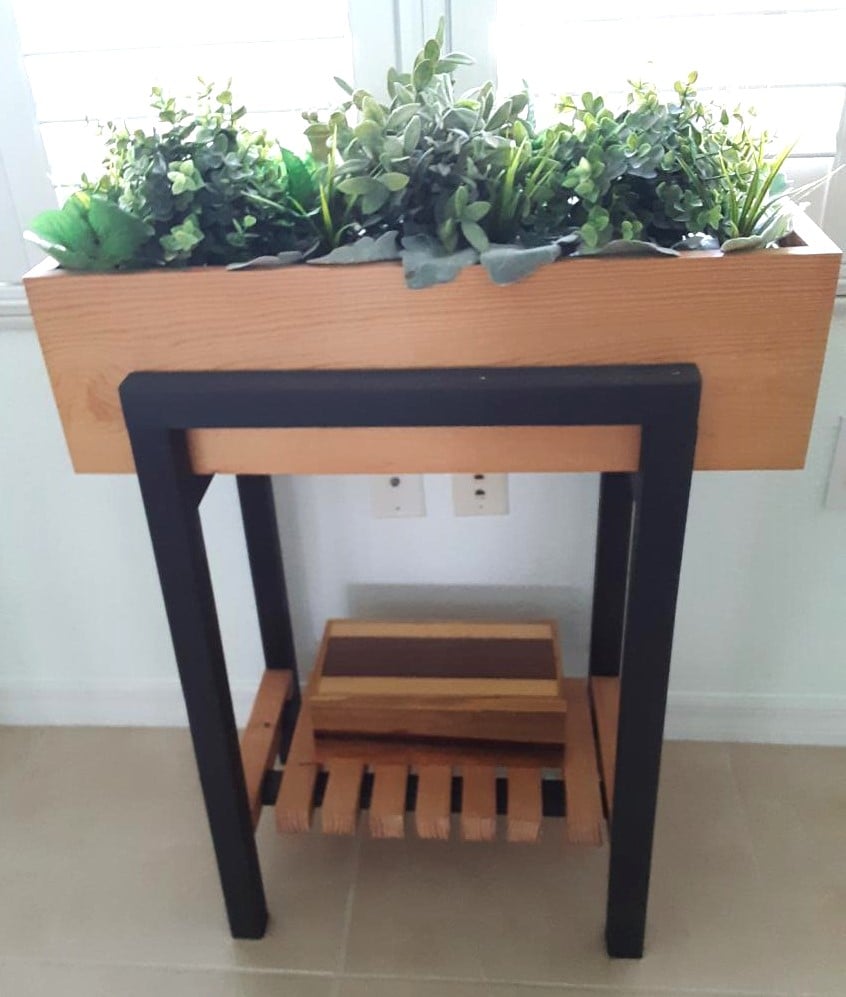
Created the stand for the raised planter using 2X2 assembled using dowels. Painted the stand mixing black with a bit of white to simulate metal. The actually plastic window box fits within a wood open box with mitered corners fir clean log. Bottom of the stand provides a shelf using (9) 2X2s with a dado placed on either end to fit on the runners of the stand.
Mon, 05/01/2023 - 08:24
It looks super high quality, love your take! Thanks for sharing.
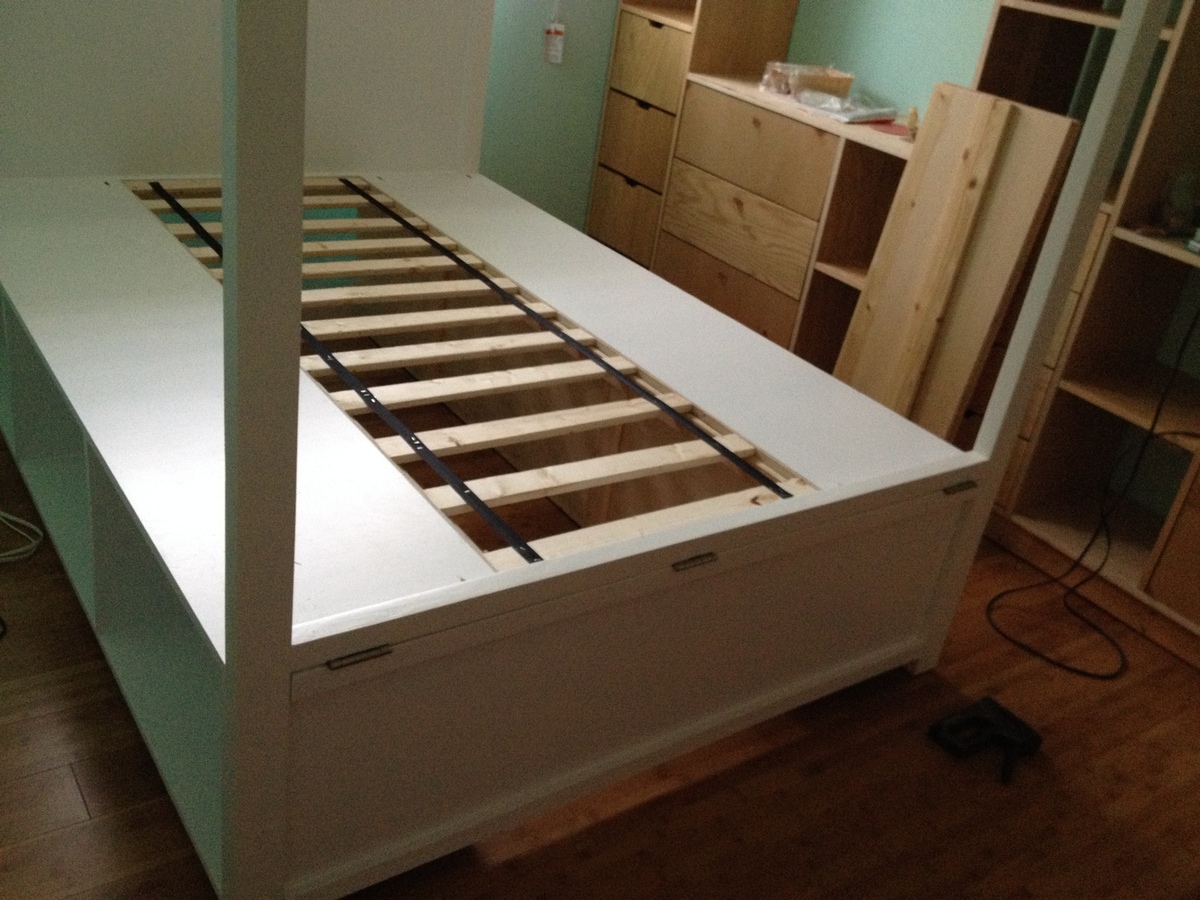
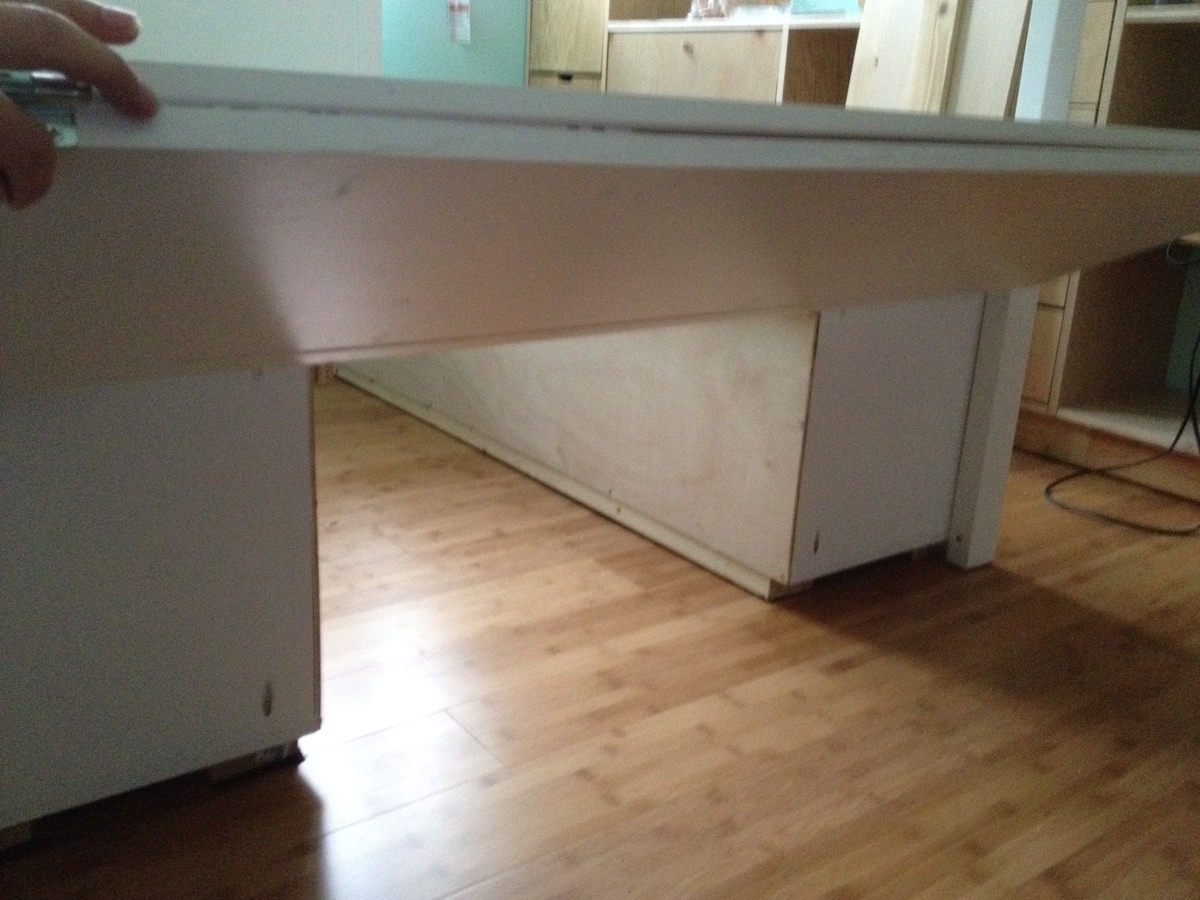
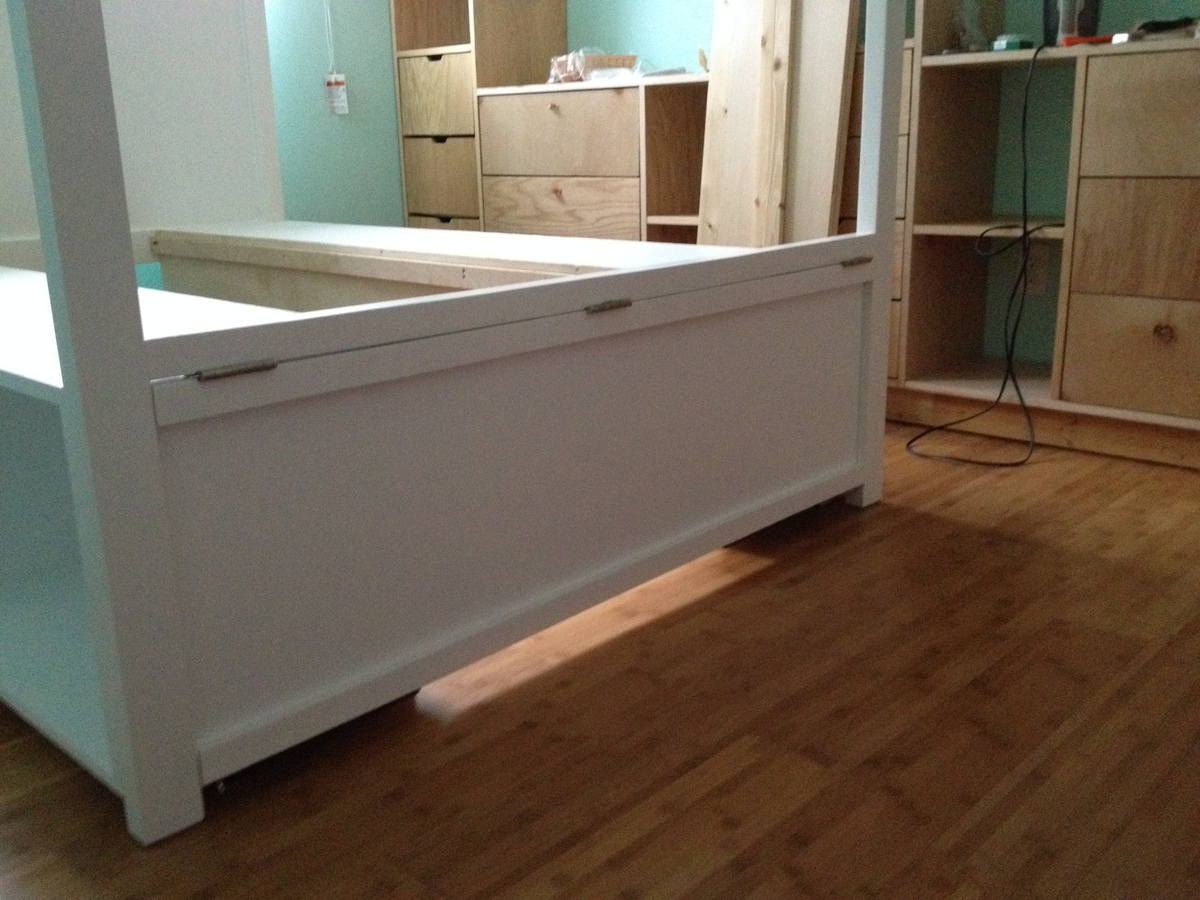
I combined the full-sized Hannah canopy bed plans with the Farmhouse Storage Bed with hinged footboard by birdandsoap here: http://ana-white.com/2011/07/farmhouse-storage-bed-hinged-footboard . Decided not to taper the ends of the 2x3s. There's so much storage underneath!


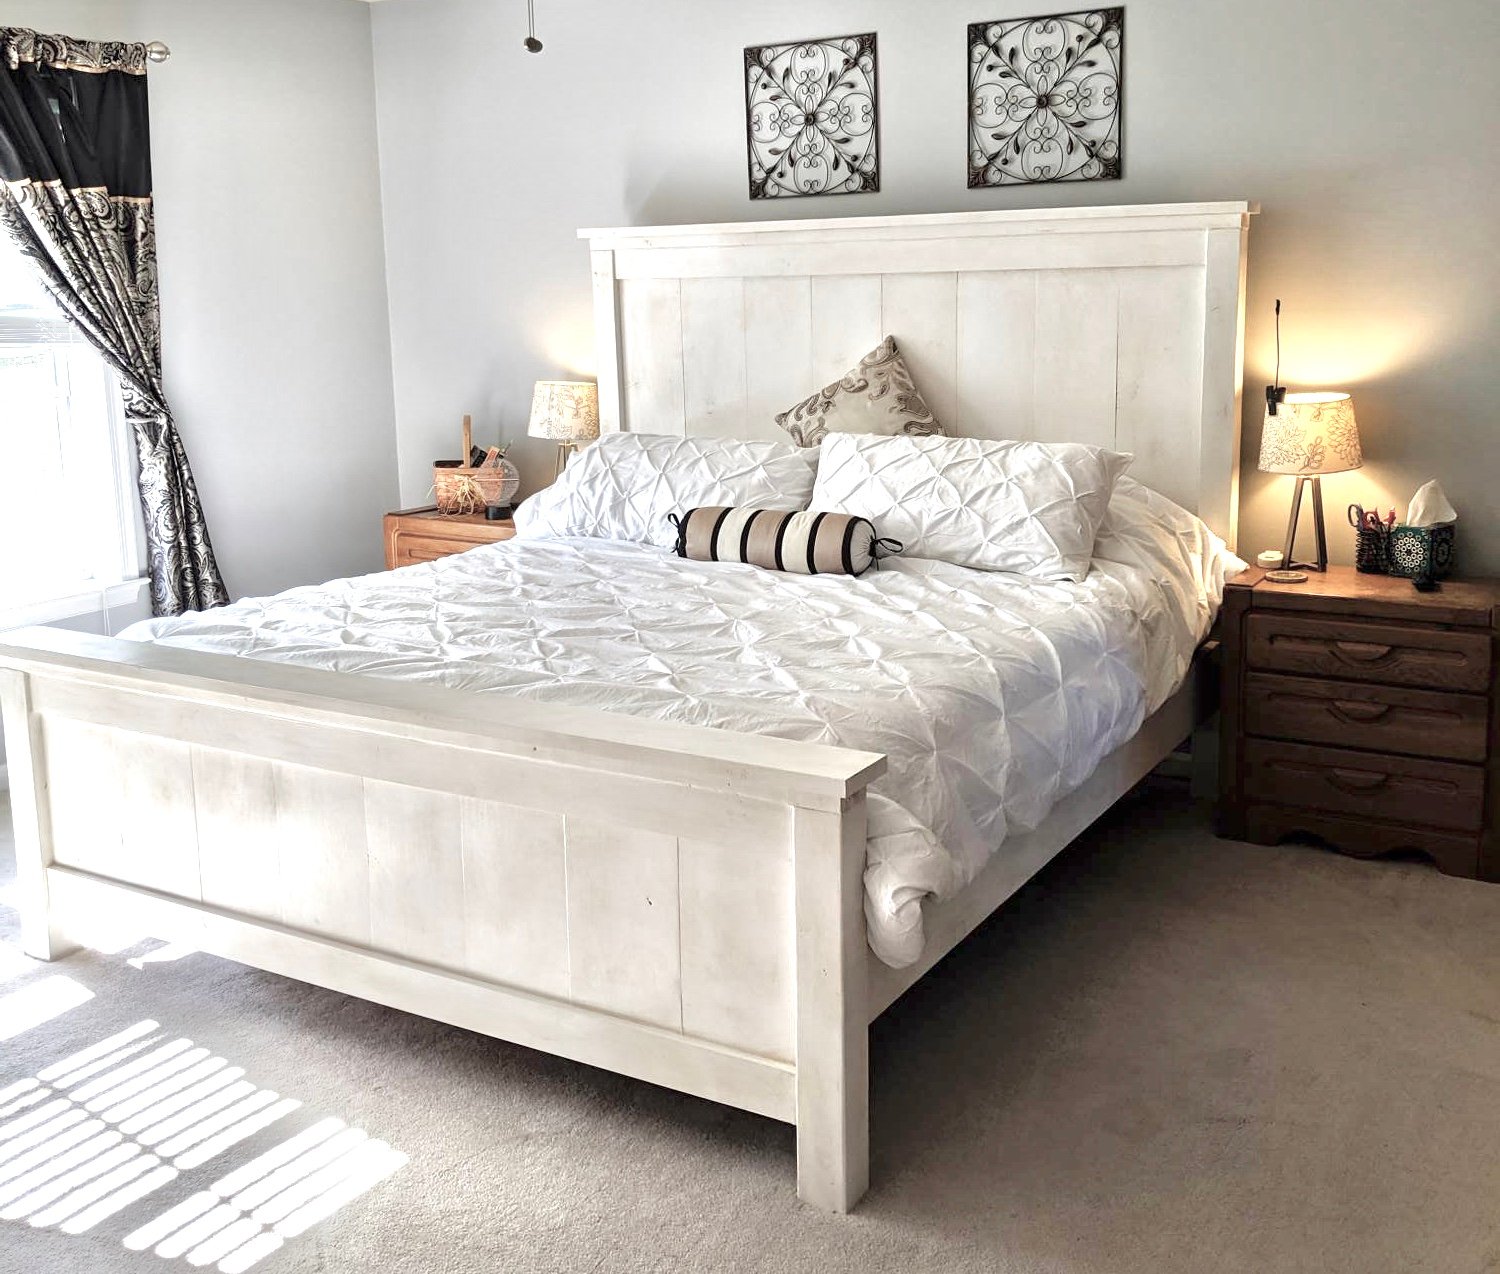
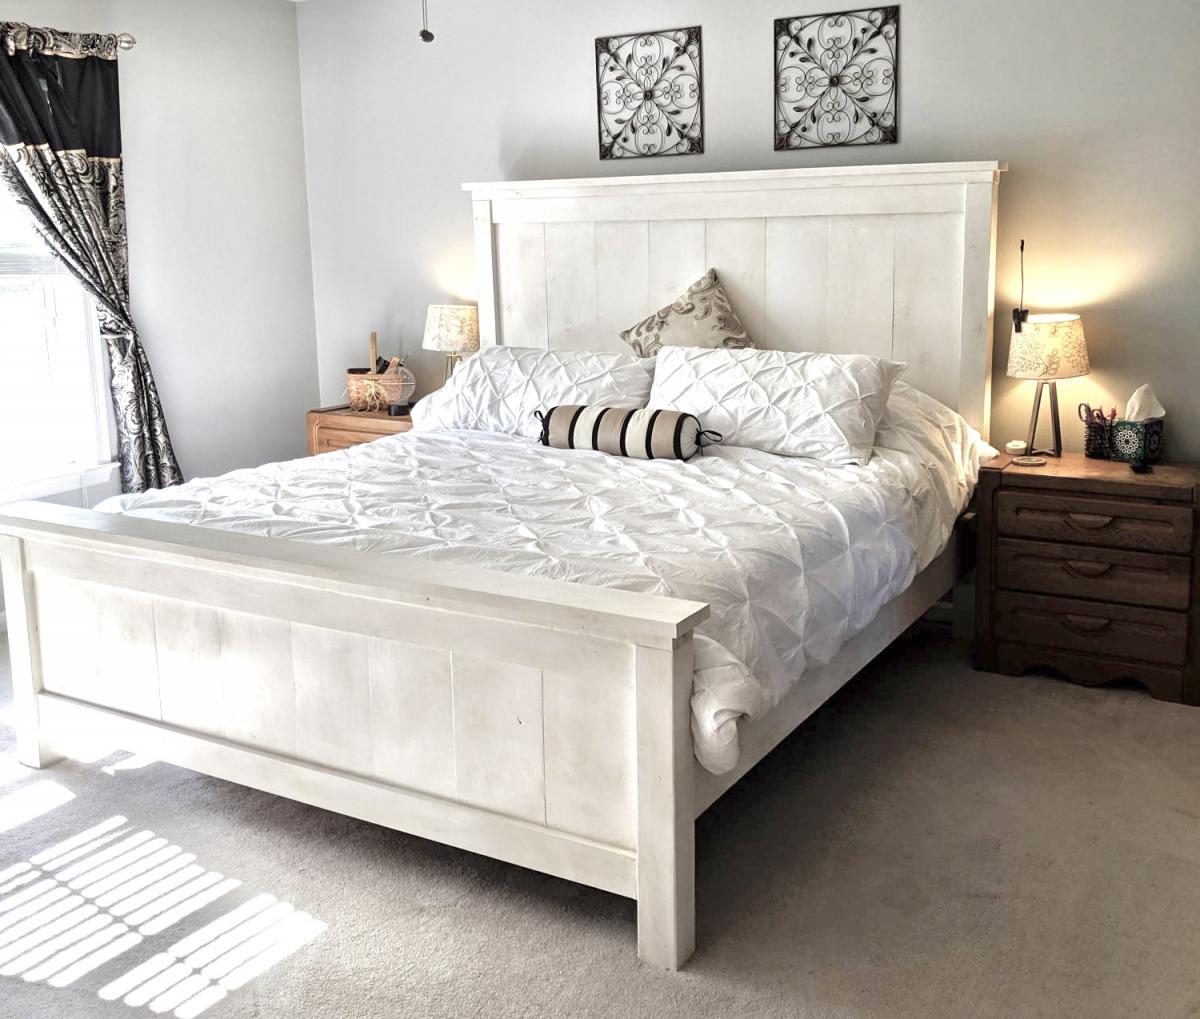
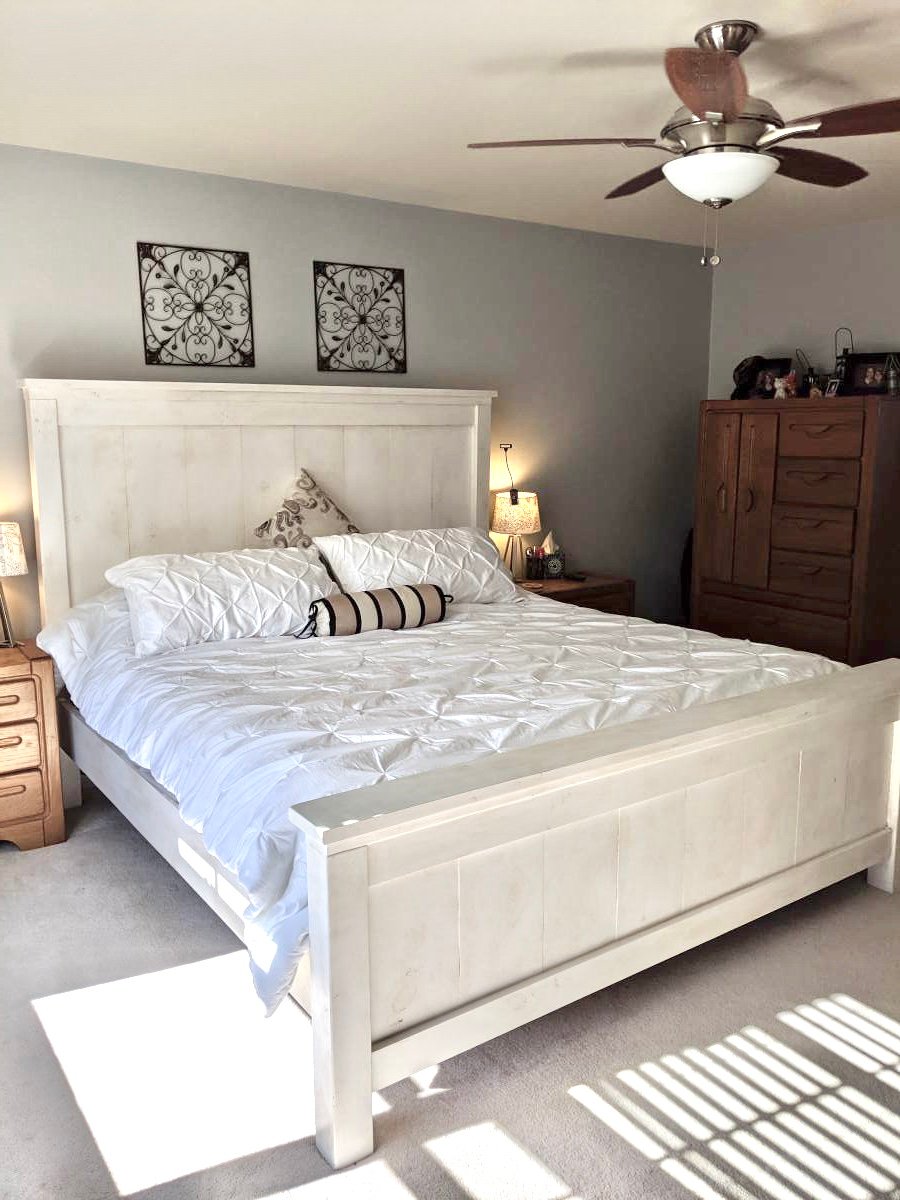
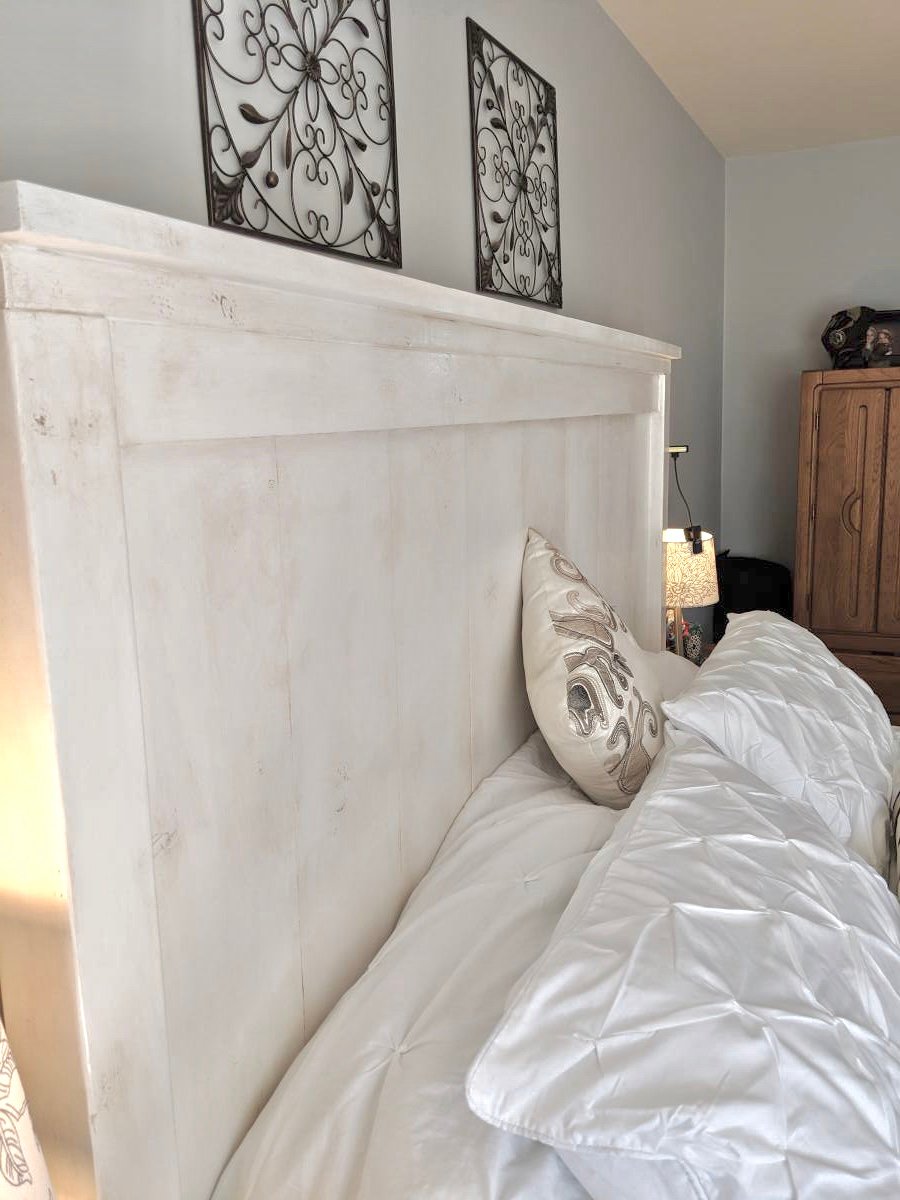
I could not find a frame which would accommodate my new adjustable king base. Modified Anna's plans by increasing the height of the headboard and footboard. Finished with chalk paint and antique finish for a rustic look. Side rails attached with mortises to allow for moving bed in 4 pieces if needed. Love my new bed
Sat, 11/30/2019 - 03:31
Hi! We are making this headboard this weekend. We want to increase the headboard height and footboard as well. Do you happen to know the cut measurements or how you adjusted the height of the 1x6 (or 1x8 as others used) to make it work? Yours looks perfect! Thank you in advance for any feedback!
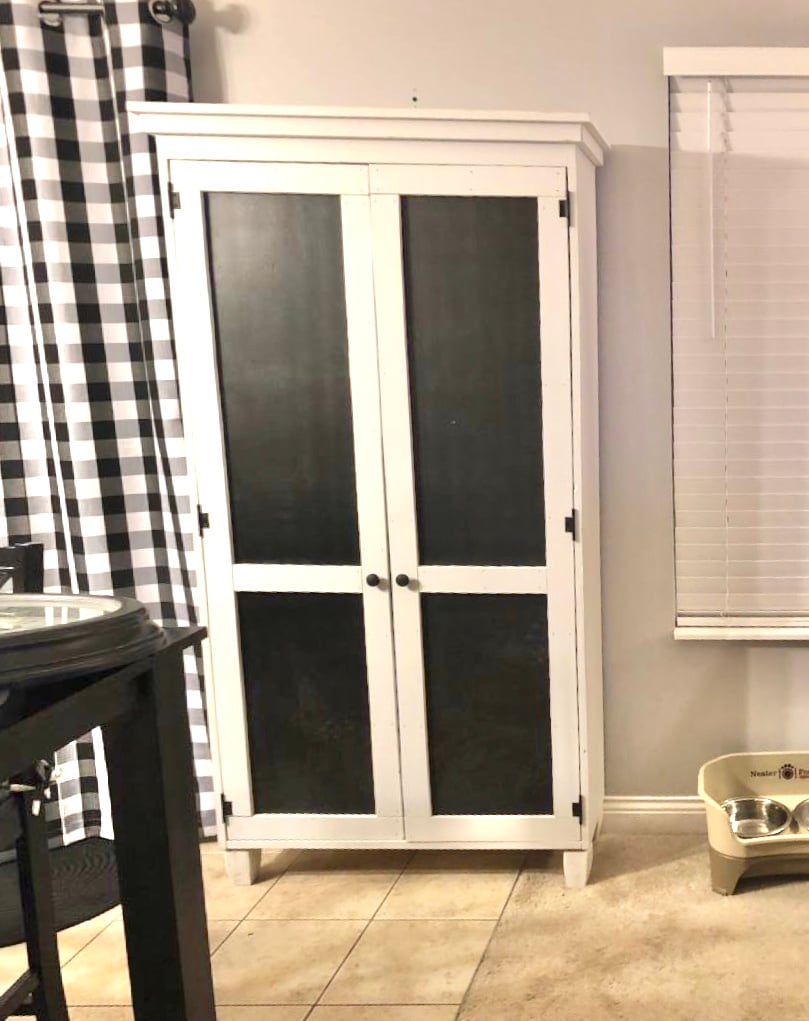
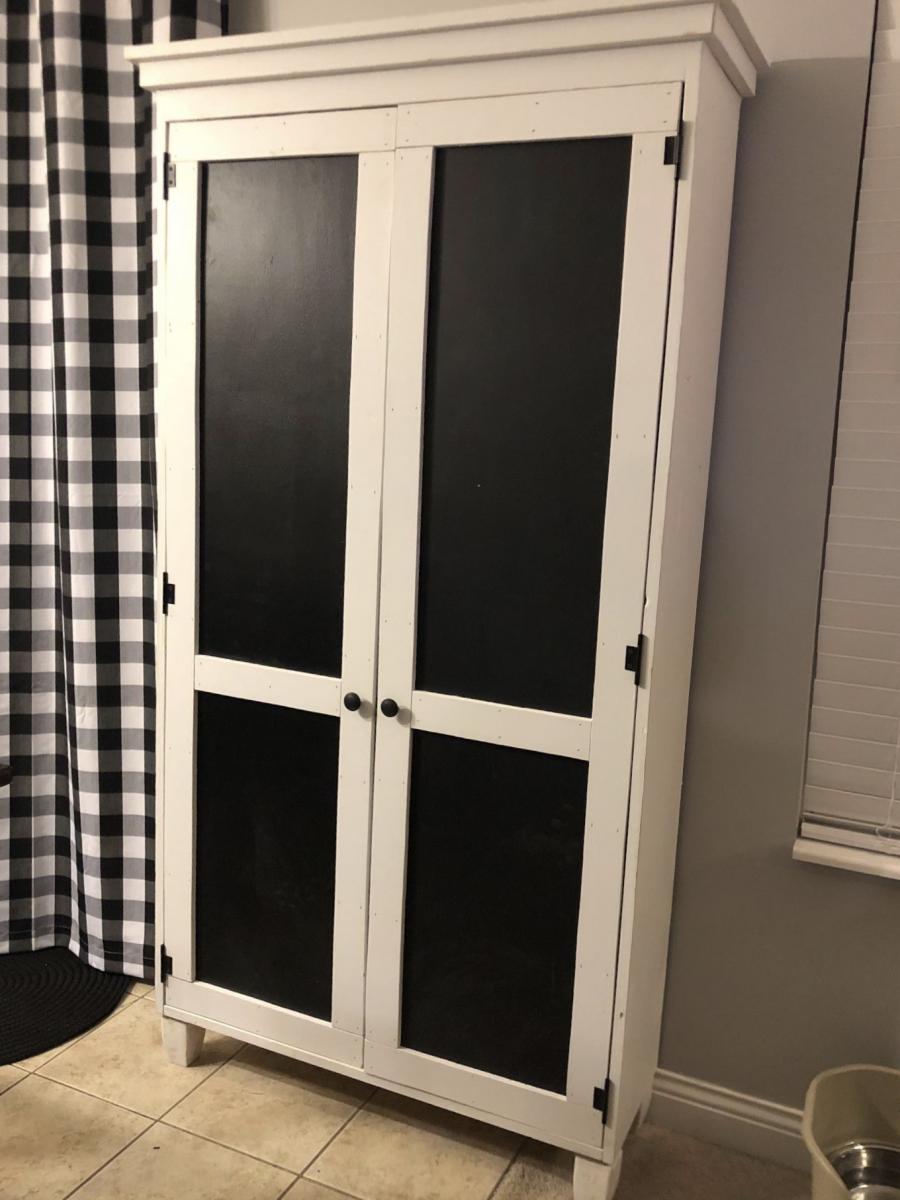
Used Chalkboard paint for the doors.
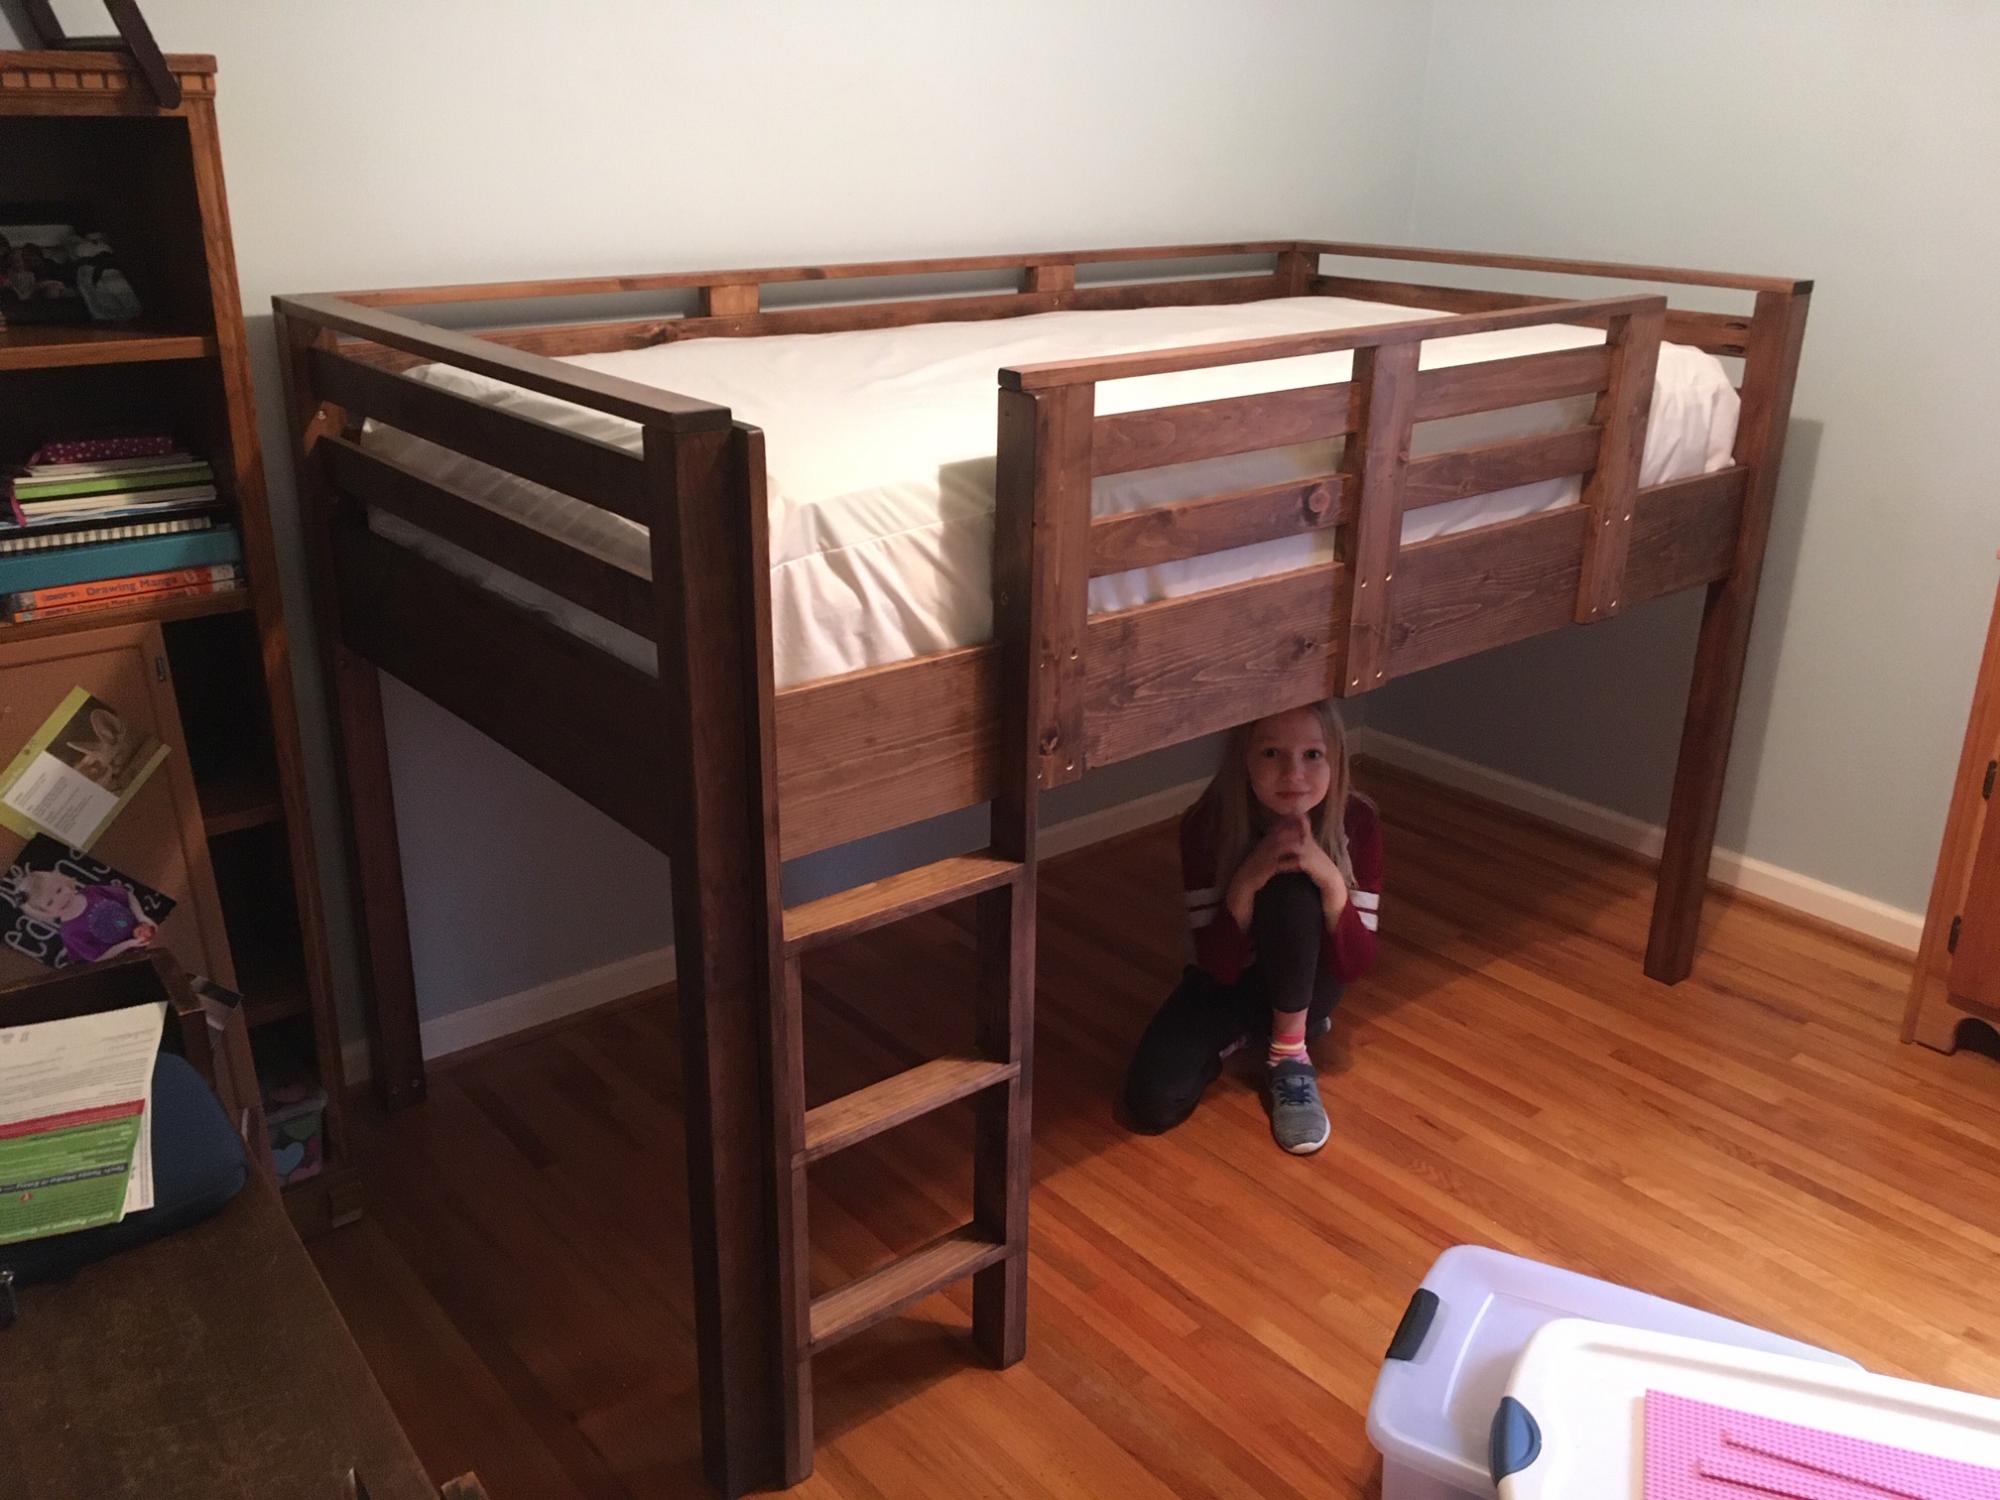
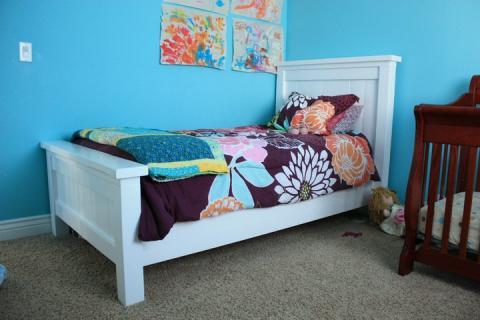
Made several modifications to this plan. Wanted the bed to be easy to change sheet, reduced overall height to 48in. The mattress is fairly thick so I increased the rail height to 18in by adding another row on the side rail. The ladder can be located on either end. My munchkin now has a new bed and with some curtains, a new hideout.
The project was used using the same plans but I extended the floor to be 6 feet wide vice 4 feet the additional 2 feet provided the perfect amount space I wanted. I also added an extra windows to get cross ventilation. I also insulated the coop and put paneling on the walls and lenolium on the floors. I dropped the back wall sheeting 1.5 inches for additional airflow since the shed doesn't have a ridge vent. The plans are easy to follow and easily adaptable.

Thu, 07/02/2020 - 11:29
Great job! We are getting ready to build a coop for our chickens which arrive in 3 weeks!
I loved this project. Took me a couple hours. Since I didn’t want to go out and buy material I used what I had which was 1x3s. I altered a little but still has the same look. Love it.
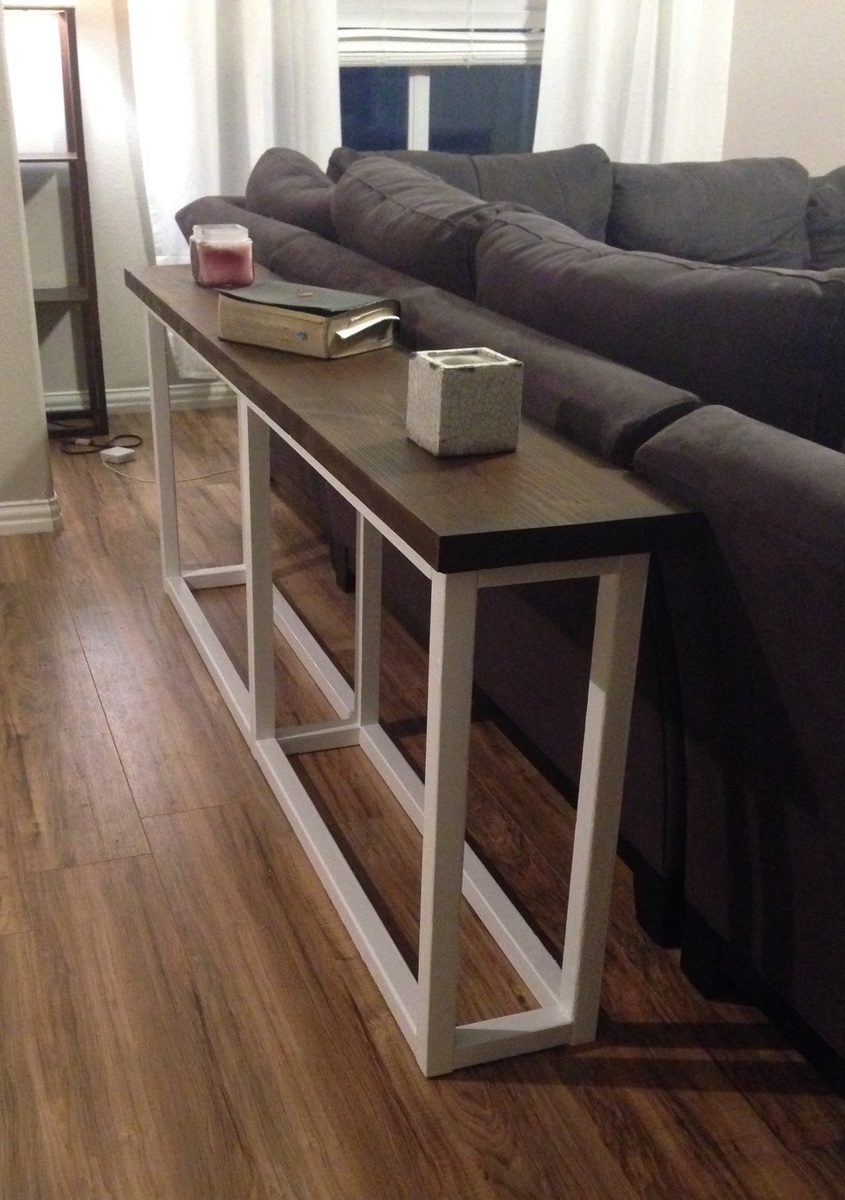
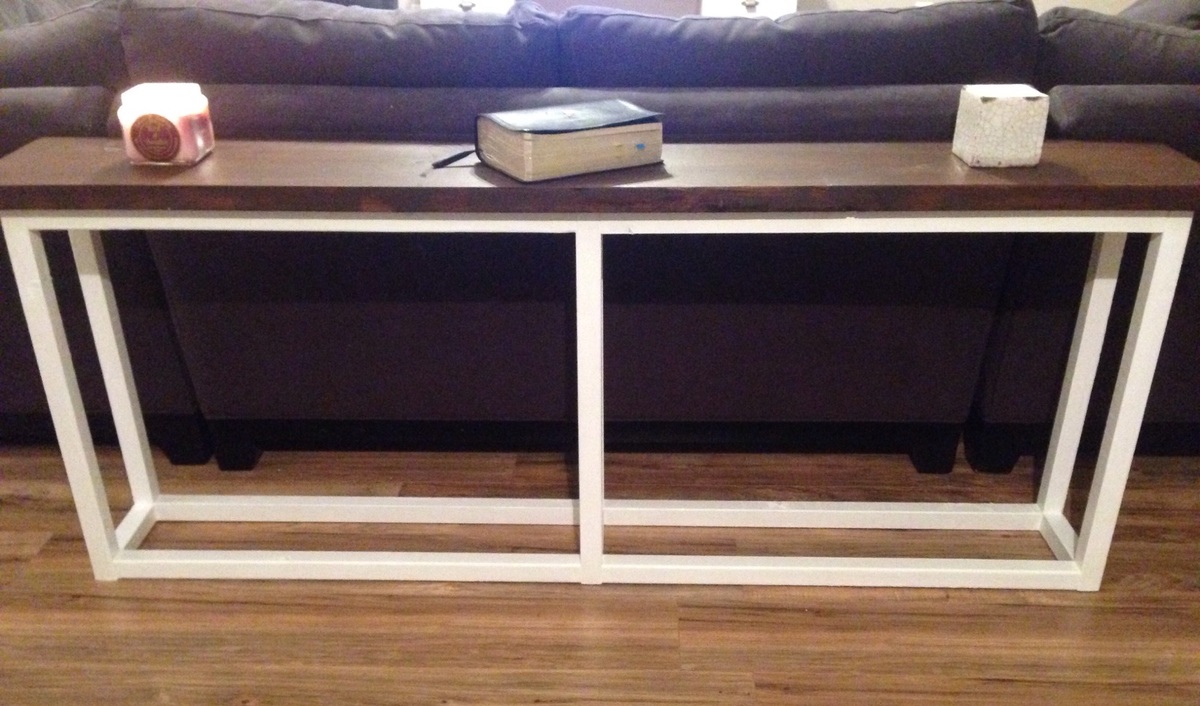
Sofa table
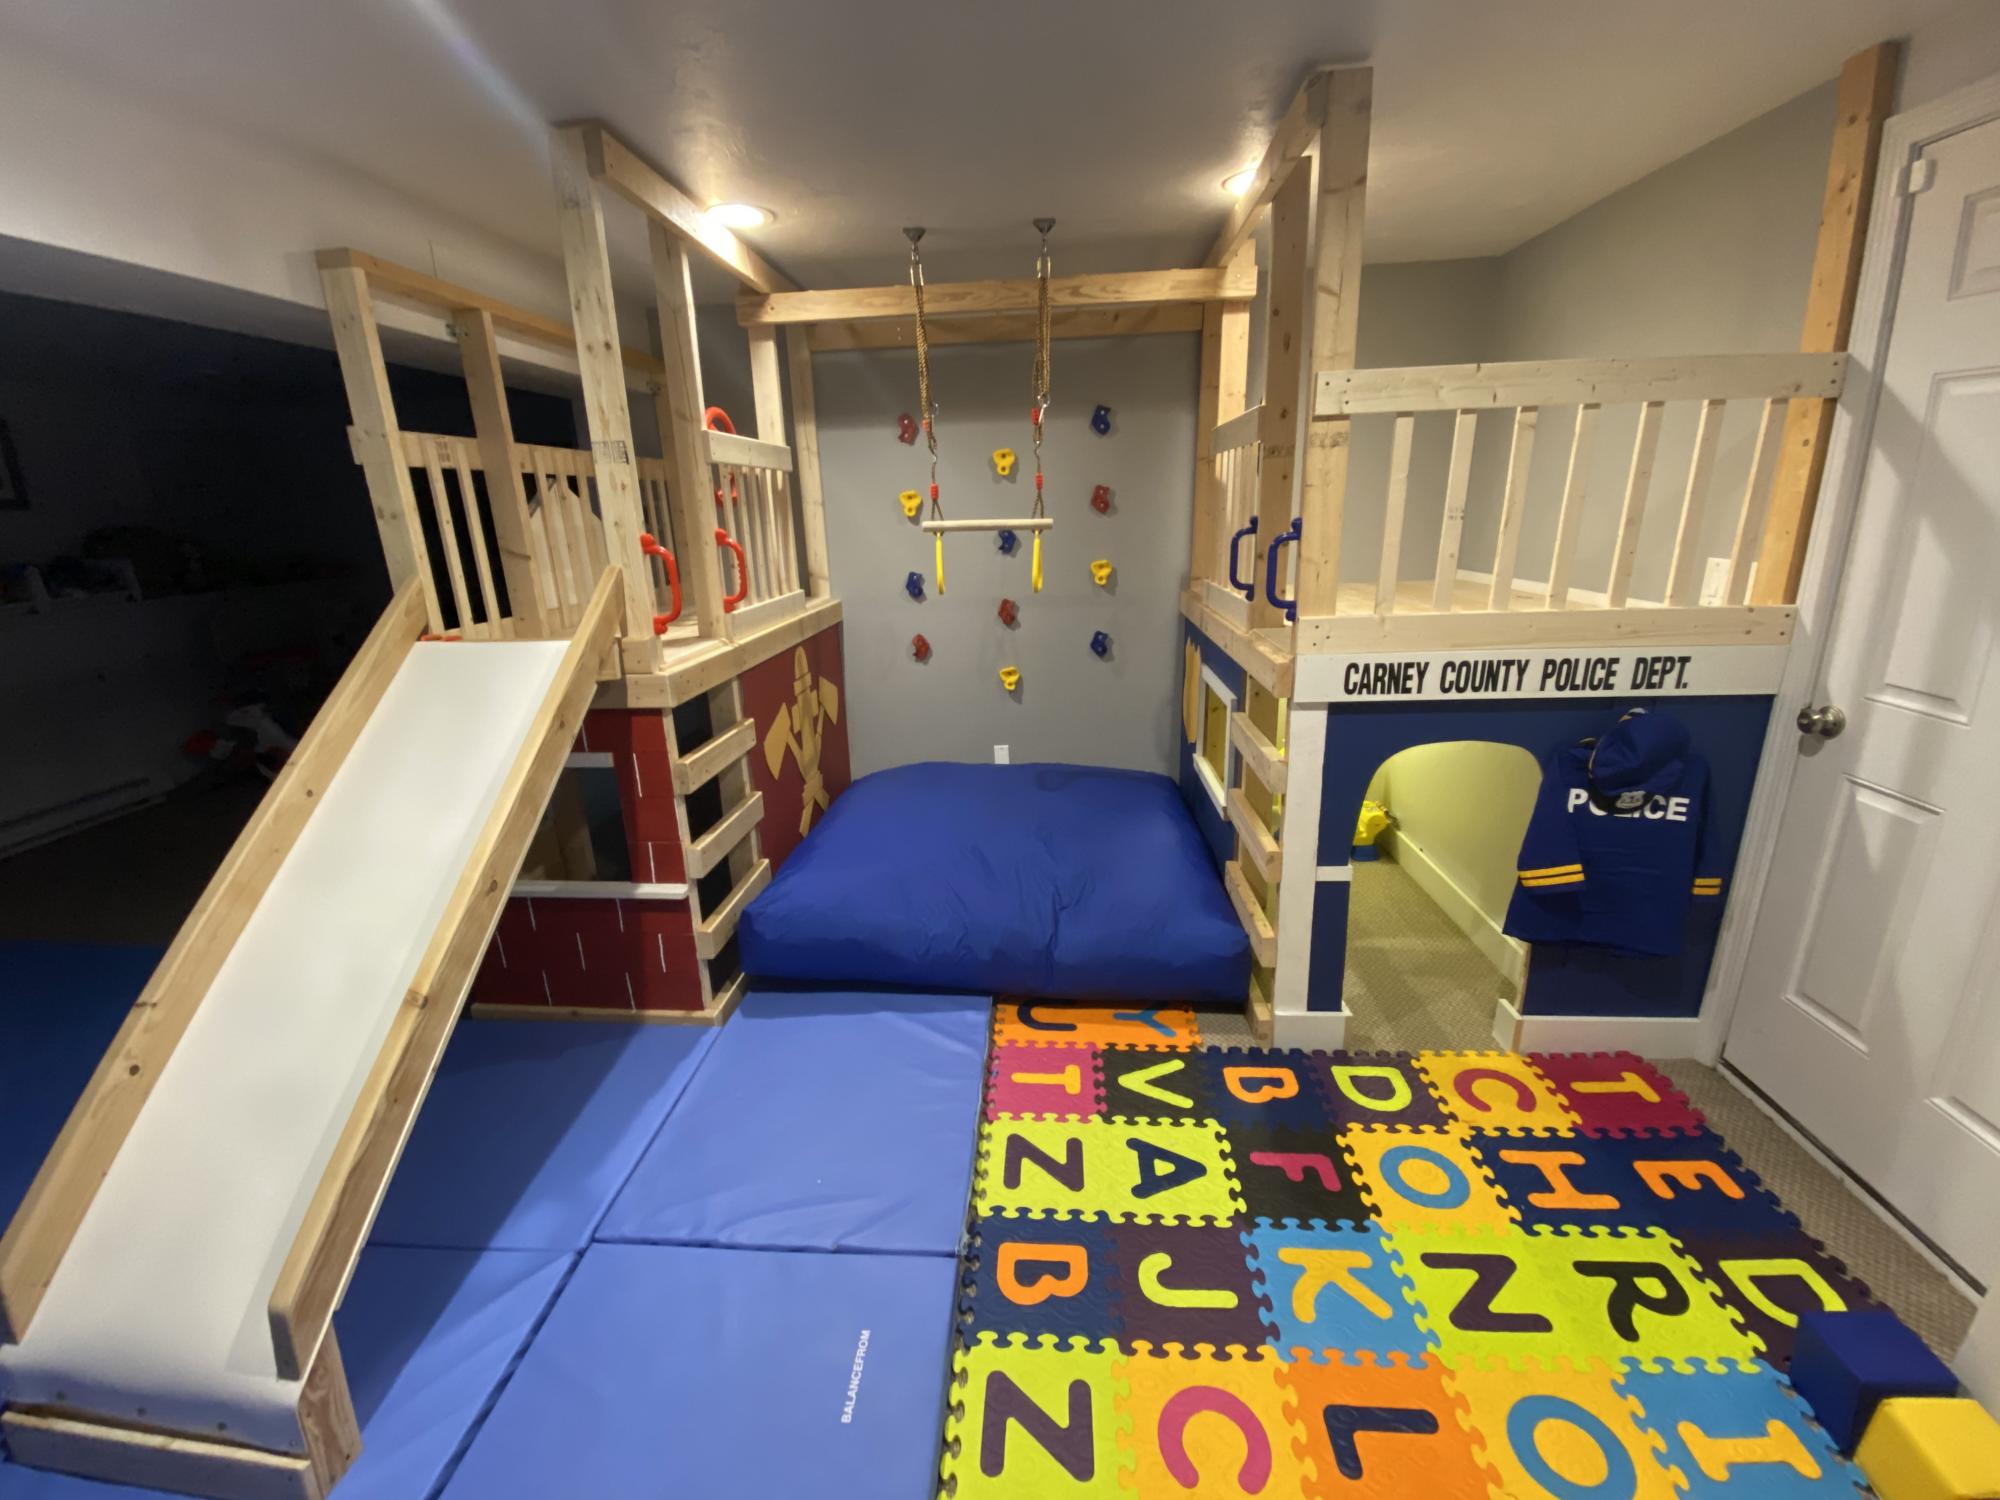
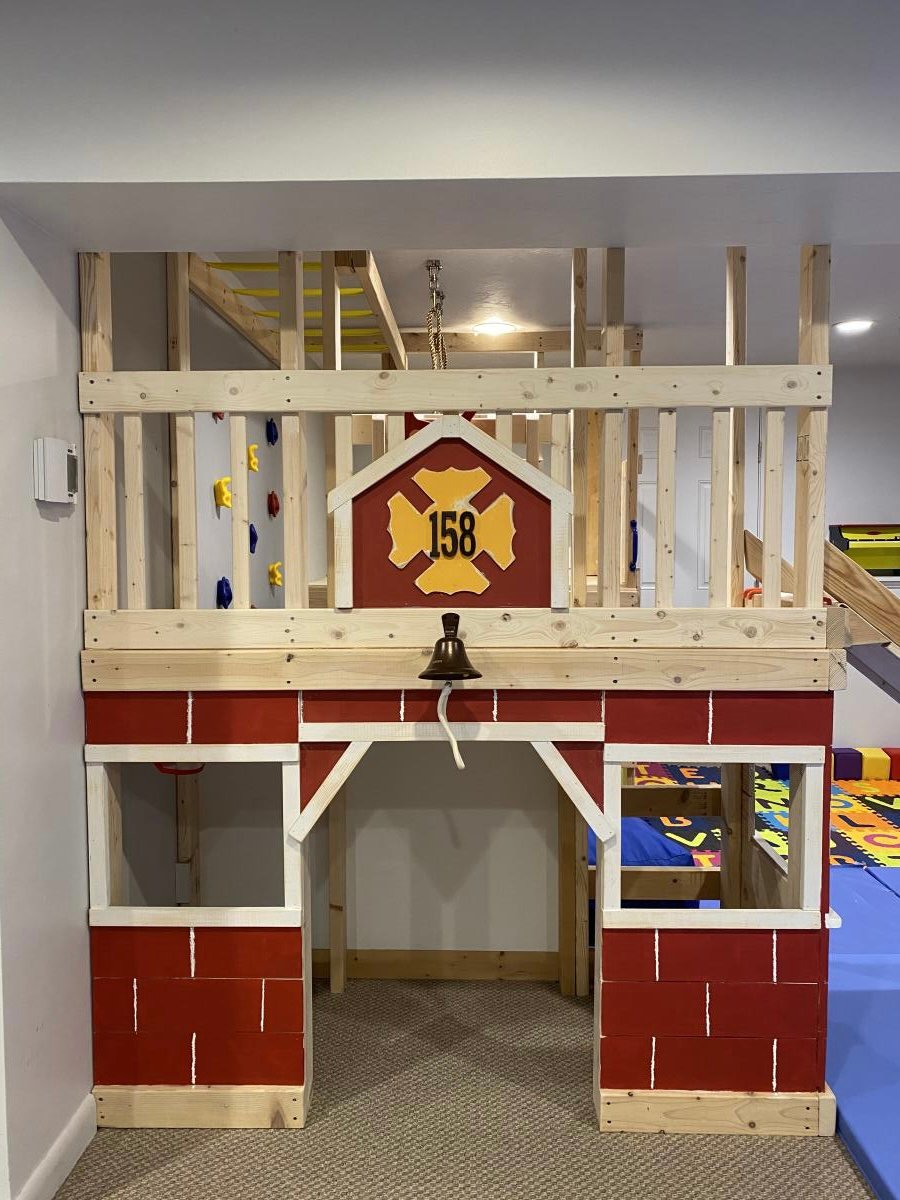
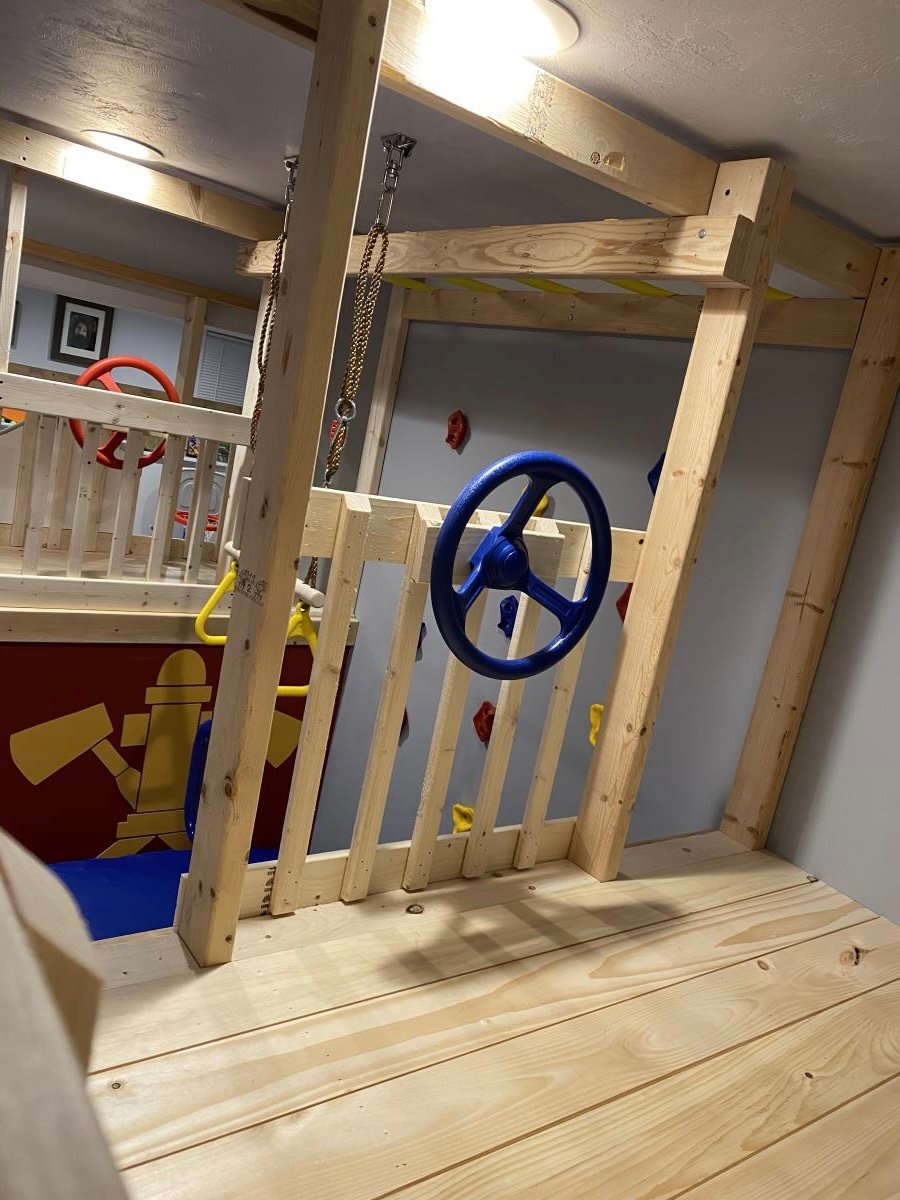
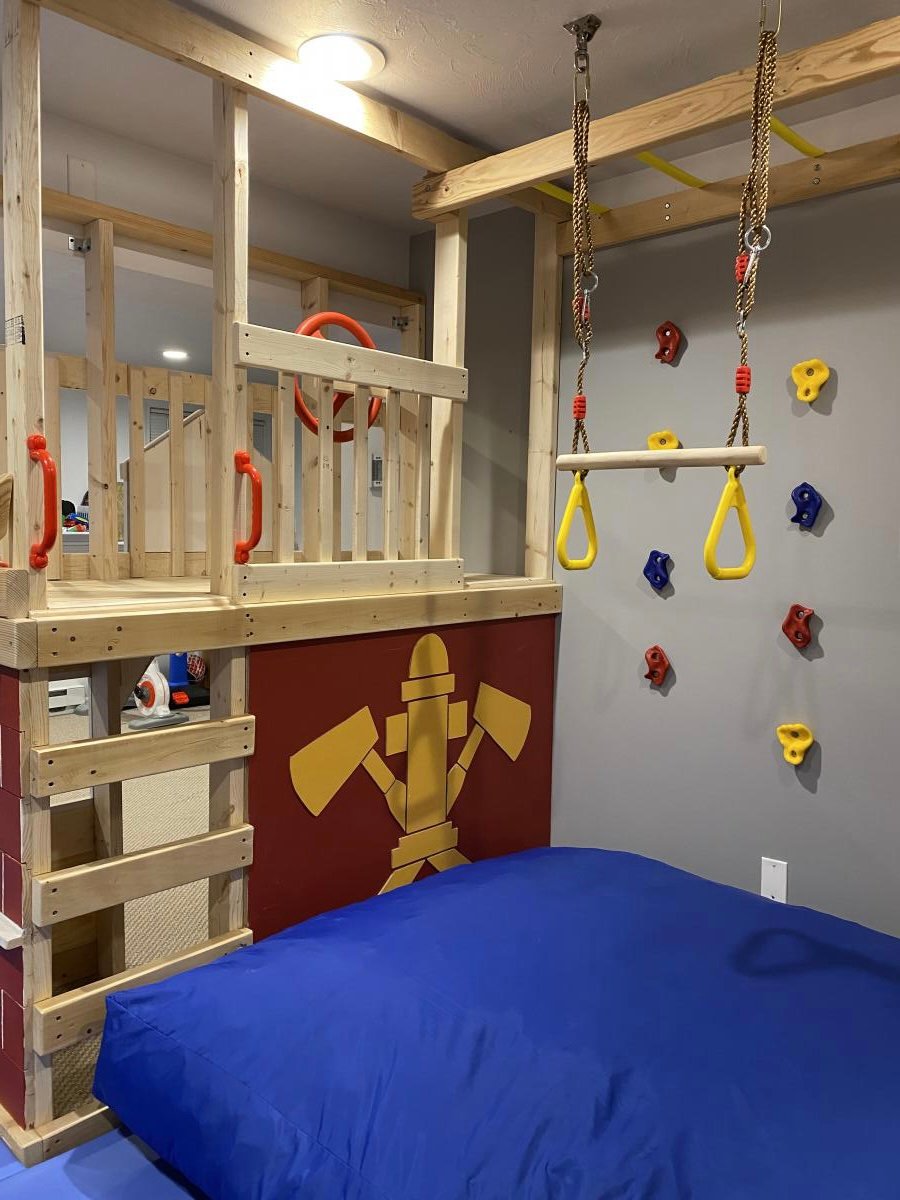
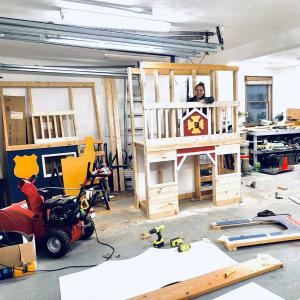
With Christmas approaching and the realization that my three young boys had way too much “stuff”, I enrolled the help of my dad to build this amazing basement play area. When I found Ana’s plans for the play gym with monkey bars, I knew we were in business. I modified the design to fit our space and we were off. Such a fun build and my boys absolutely love spending time down there. Thanks so much for your continued inspiration and the confidence you give us mamas to build with the big boys, Ana!!

In reply to Fabulous! by Ana White Admin
Fri, 01/08/2021 - 16:23
Thank you so much!! 🙏
I created these 16" cedar patio planters using Ana's plans. I bought four 6' cedar pickets from Lowe's for $1.98 each or under $8 for the lot. I used the extra picket to cut our my 1x2s and 1x3s so the whole construction is made of cedar including the pieces to hold a potted plant. I used Behr's clear and cedar finish to complete the job in under 1 hour. Thanks Ana for the motivation.
Fri, 03/05/2021 - 11:10
Looks great and doesn't break the bank! Thanks for sharing:)
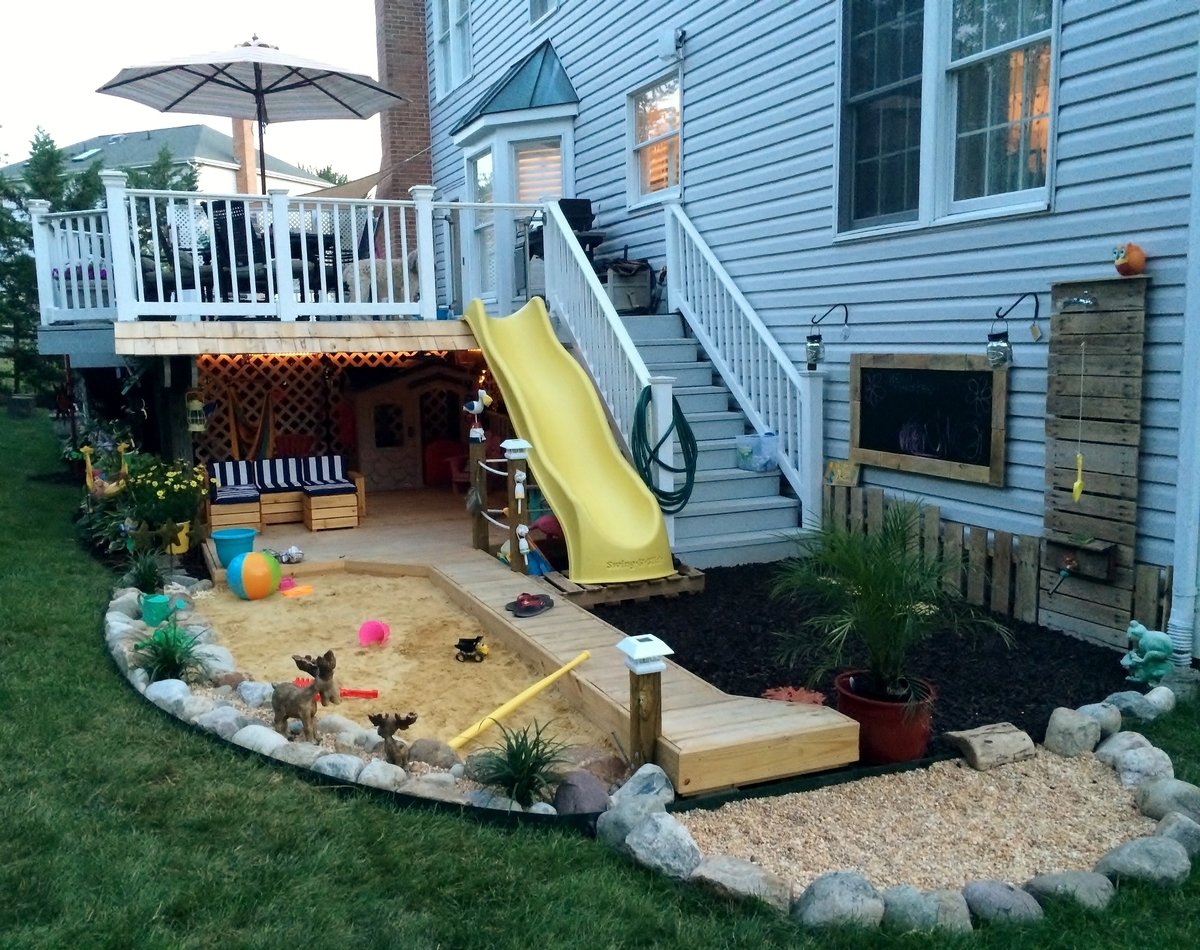
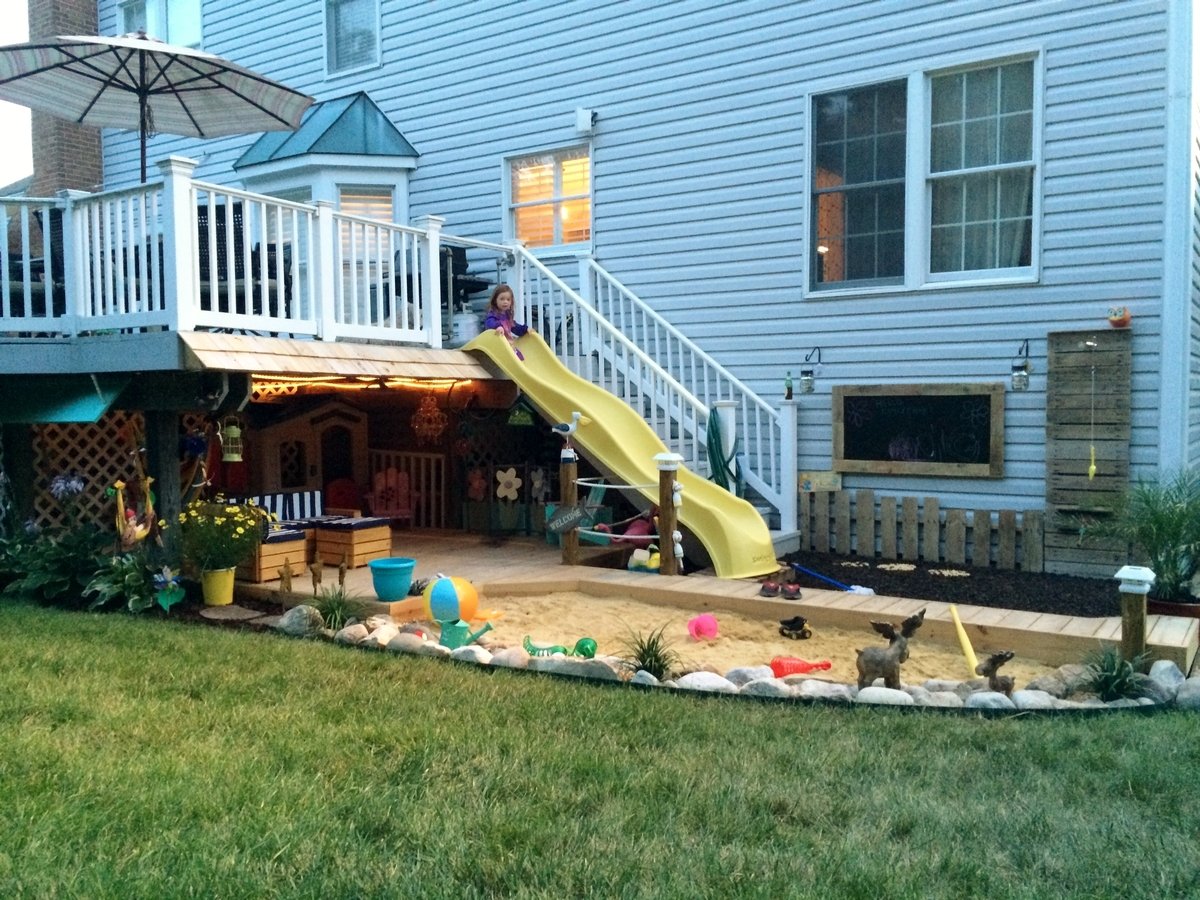
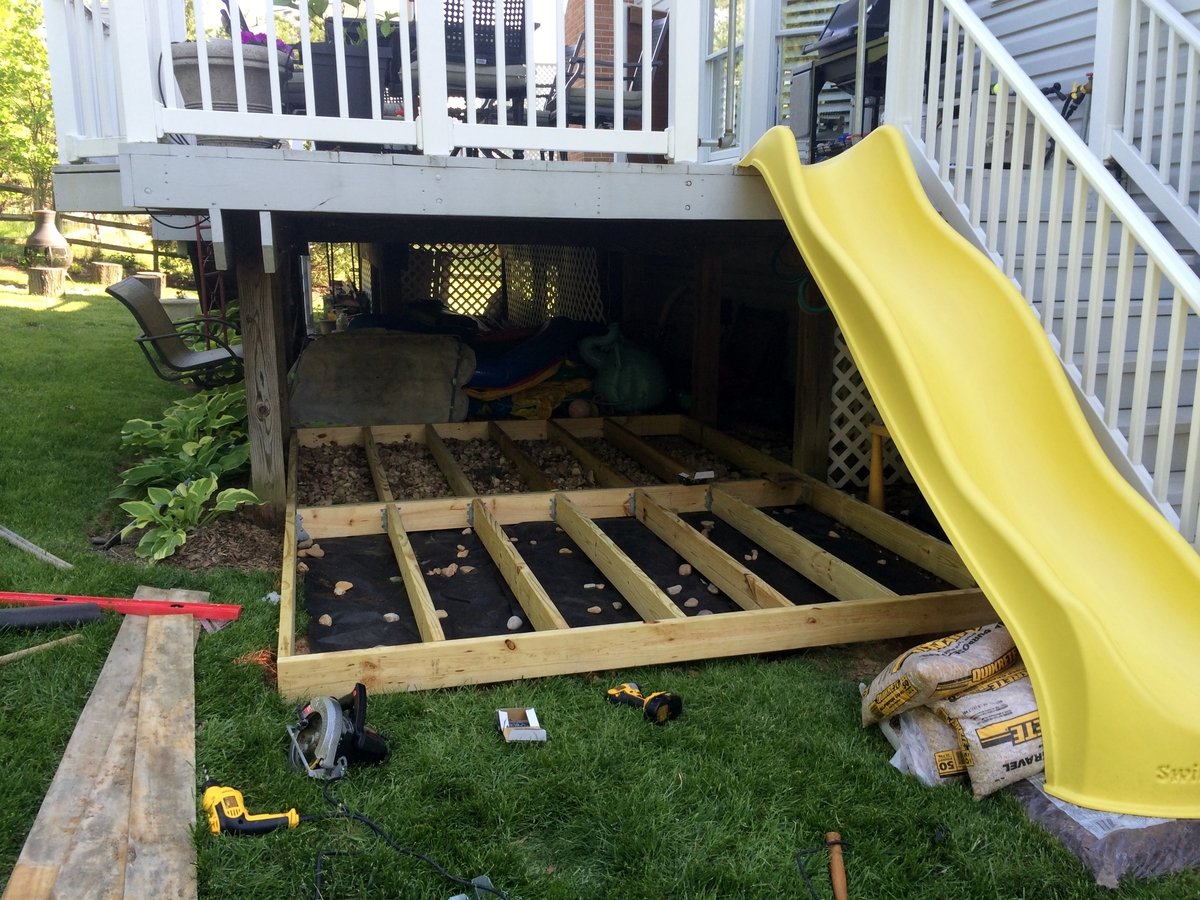
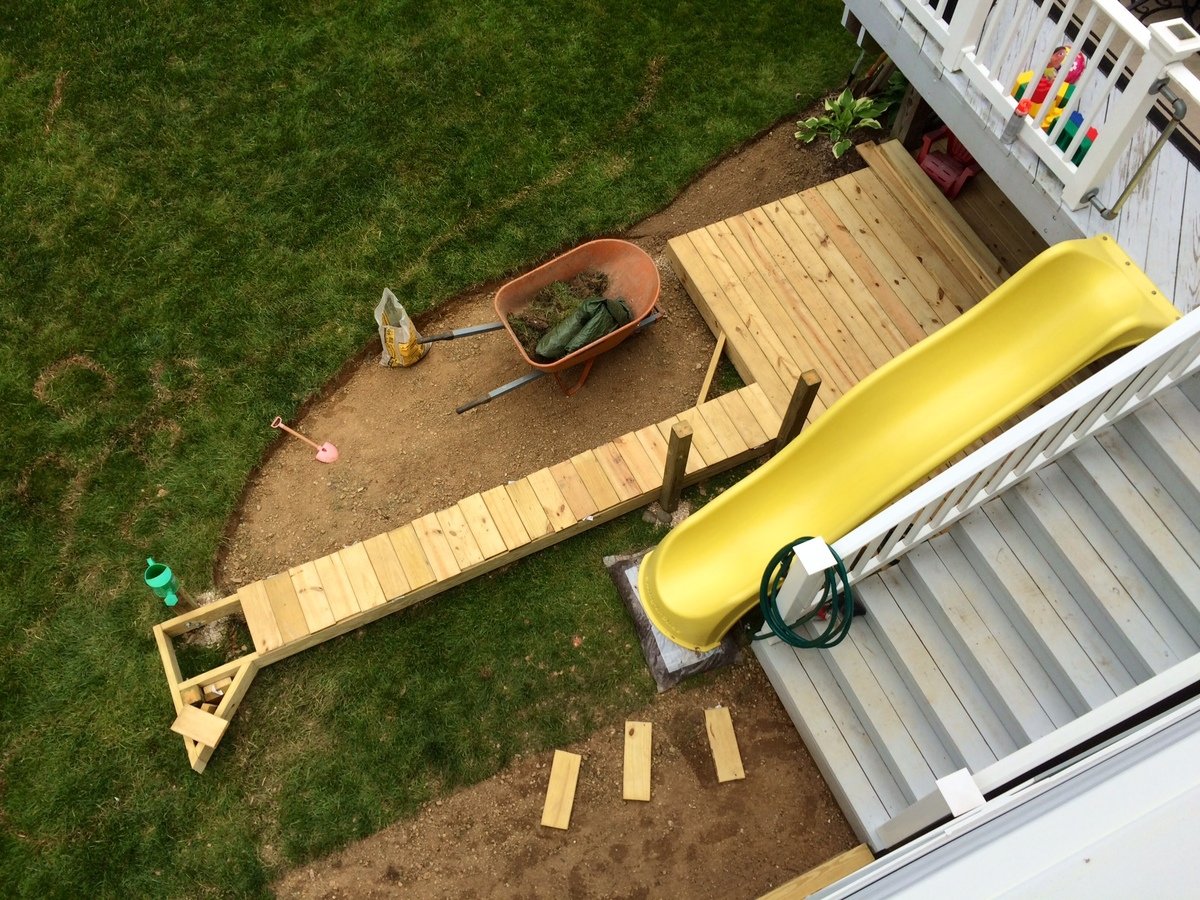
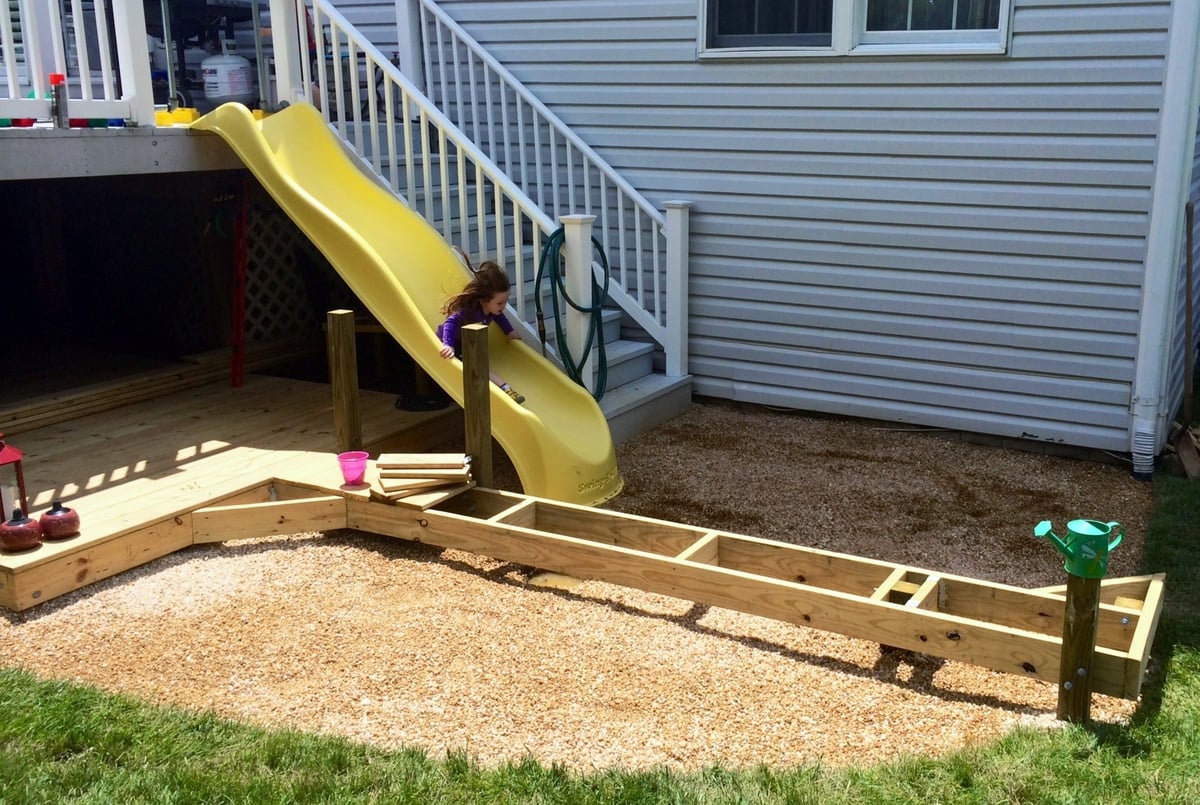
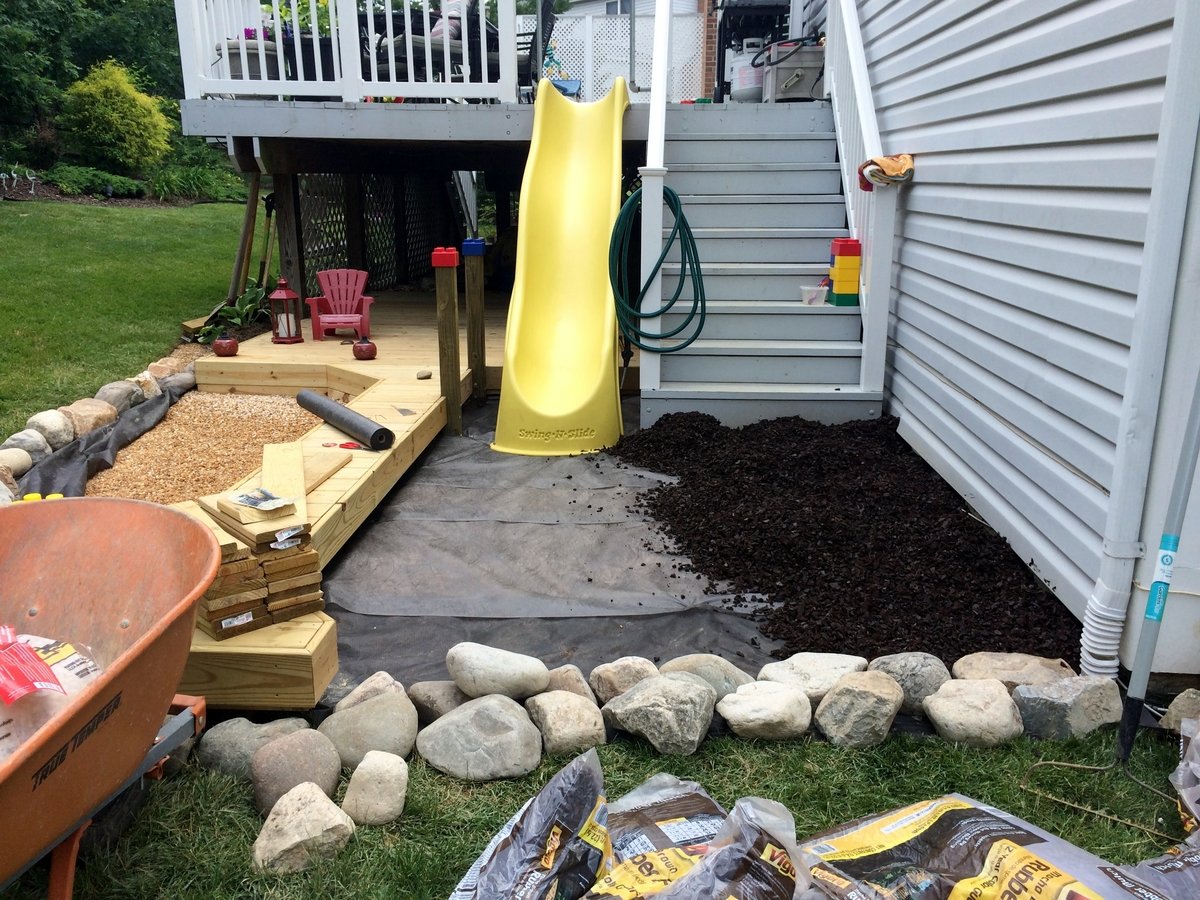
I built this outdoor play area for my kids this past summer. The area under that portion of the deck was always messy and muddy and so I wanted to make use of it. I built the deck and anchored it with lag bolts to the deck supports. On the one side I used rubber mulch and on the other there is play sand. I dug holes in various locations and filled with gravel to allow for drainage under the sand and mulch. For the awning I used plain cedar shingles. I added a shower that is just regular 1/2" metal pipe with a hose adaptor. The shower wall and fence are just old pallets that I had for a while, cut to size, which was pretty much random but they came out great. I added a misting system under the awning that works great, the kids love the cool mist on the hot days. Overall, a heavy job ripping up the grass, moving the wood, gravel, stones, sand and mulch, but a fun deck build and even better experience doing this with my kids by my side!
Tue, 01/13/2015 - 09:37
What an amazing use for a weird outdoor space ! You are genius !
Wed, 01/14/2015 - 06:21
I love it! I'm now trying to convince my husband to let me add a slide to the deck. Who wouldn't love that?!
My first big project. It turned out great! There are a couple of issues with the plans but nothing a little common sense couldn't resolve. Also, for any beginners out there, make sure when you're going through your cut list, start with the larger pieces first then work your way down to the smaller cuts. You'll end up having to take another trip to the hardware store if you cut the smaller pieces first. Great plans Ana White! I built this as a Christmas gift for my girlfriend. She was blown away! She absolutely loves it!
~Justin~

Comments
Ana White Admin
Wed, 10/06/2021 - 10:15
So much storage!
Great way to get the kids involved, it looks very nice, organized and functional! Thank you for sharing~