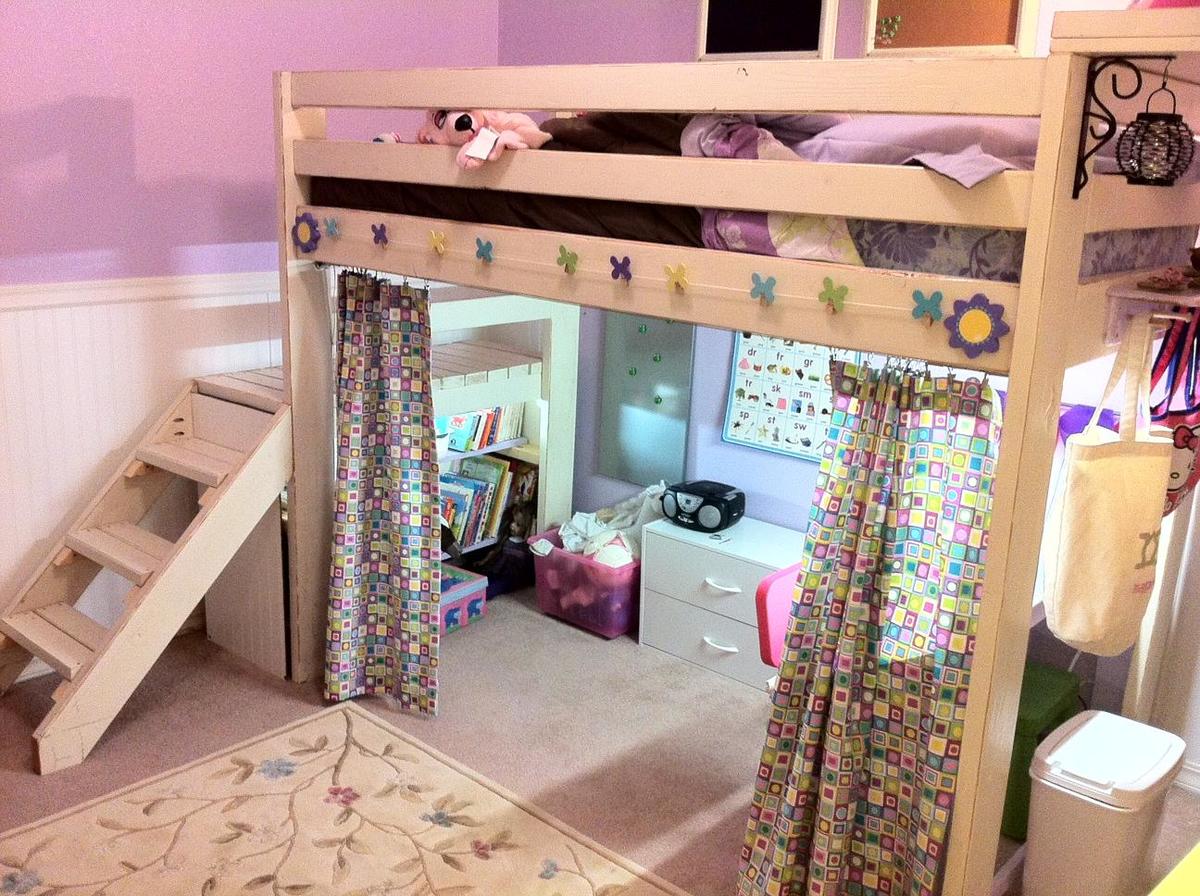
Art Studio Loft Bed

After I built my nephew's AT & T Park bedroom, I had to figure out what to create for my 5 year old niece, Maggie. She loves drawing, so I settled on an "art studio," where she can work and display her art.
The bed was created using Ana's Camp Loft Bed Plans. I narrowed the stairs by 4 inches as one of the other posts had done. I also put shelves under the stairs like another post I read on this site.
I built a small drafting-type desk for underneath using my new Kreg Jig (Man, I love that thing!). I also made some curtains to pull shut in case Maggie wanted to escape from the world. Chairs, storage containers, flower light, and leaf above bed are from Ikea.
I bought some cheap picture frames, and put a bulletin board in one and a chalkboark in the other for above the bed, and the string hanging across the front of the bed is from Target. It actually has clips to hang artwork.
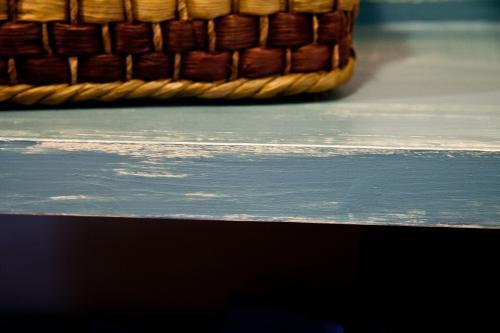
I painted the bed using Ana's antique finish with the Minwax pen. It came out fantastic.


Comments
spiceylg
Tue, 02/26/2013 - 10:00
Wow
Your niece and nephew must be over the moon! Another awesome build!
bhoppy
Tue, 02/26/2013 - 16:10
I love all the personal
I love all the personal touches. You are so getting Aunt of the year:-)