Dollhouse Bookcase from Santa's Workshop
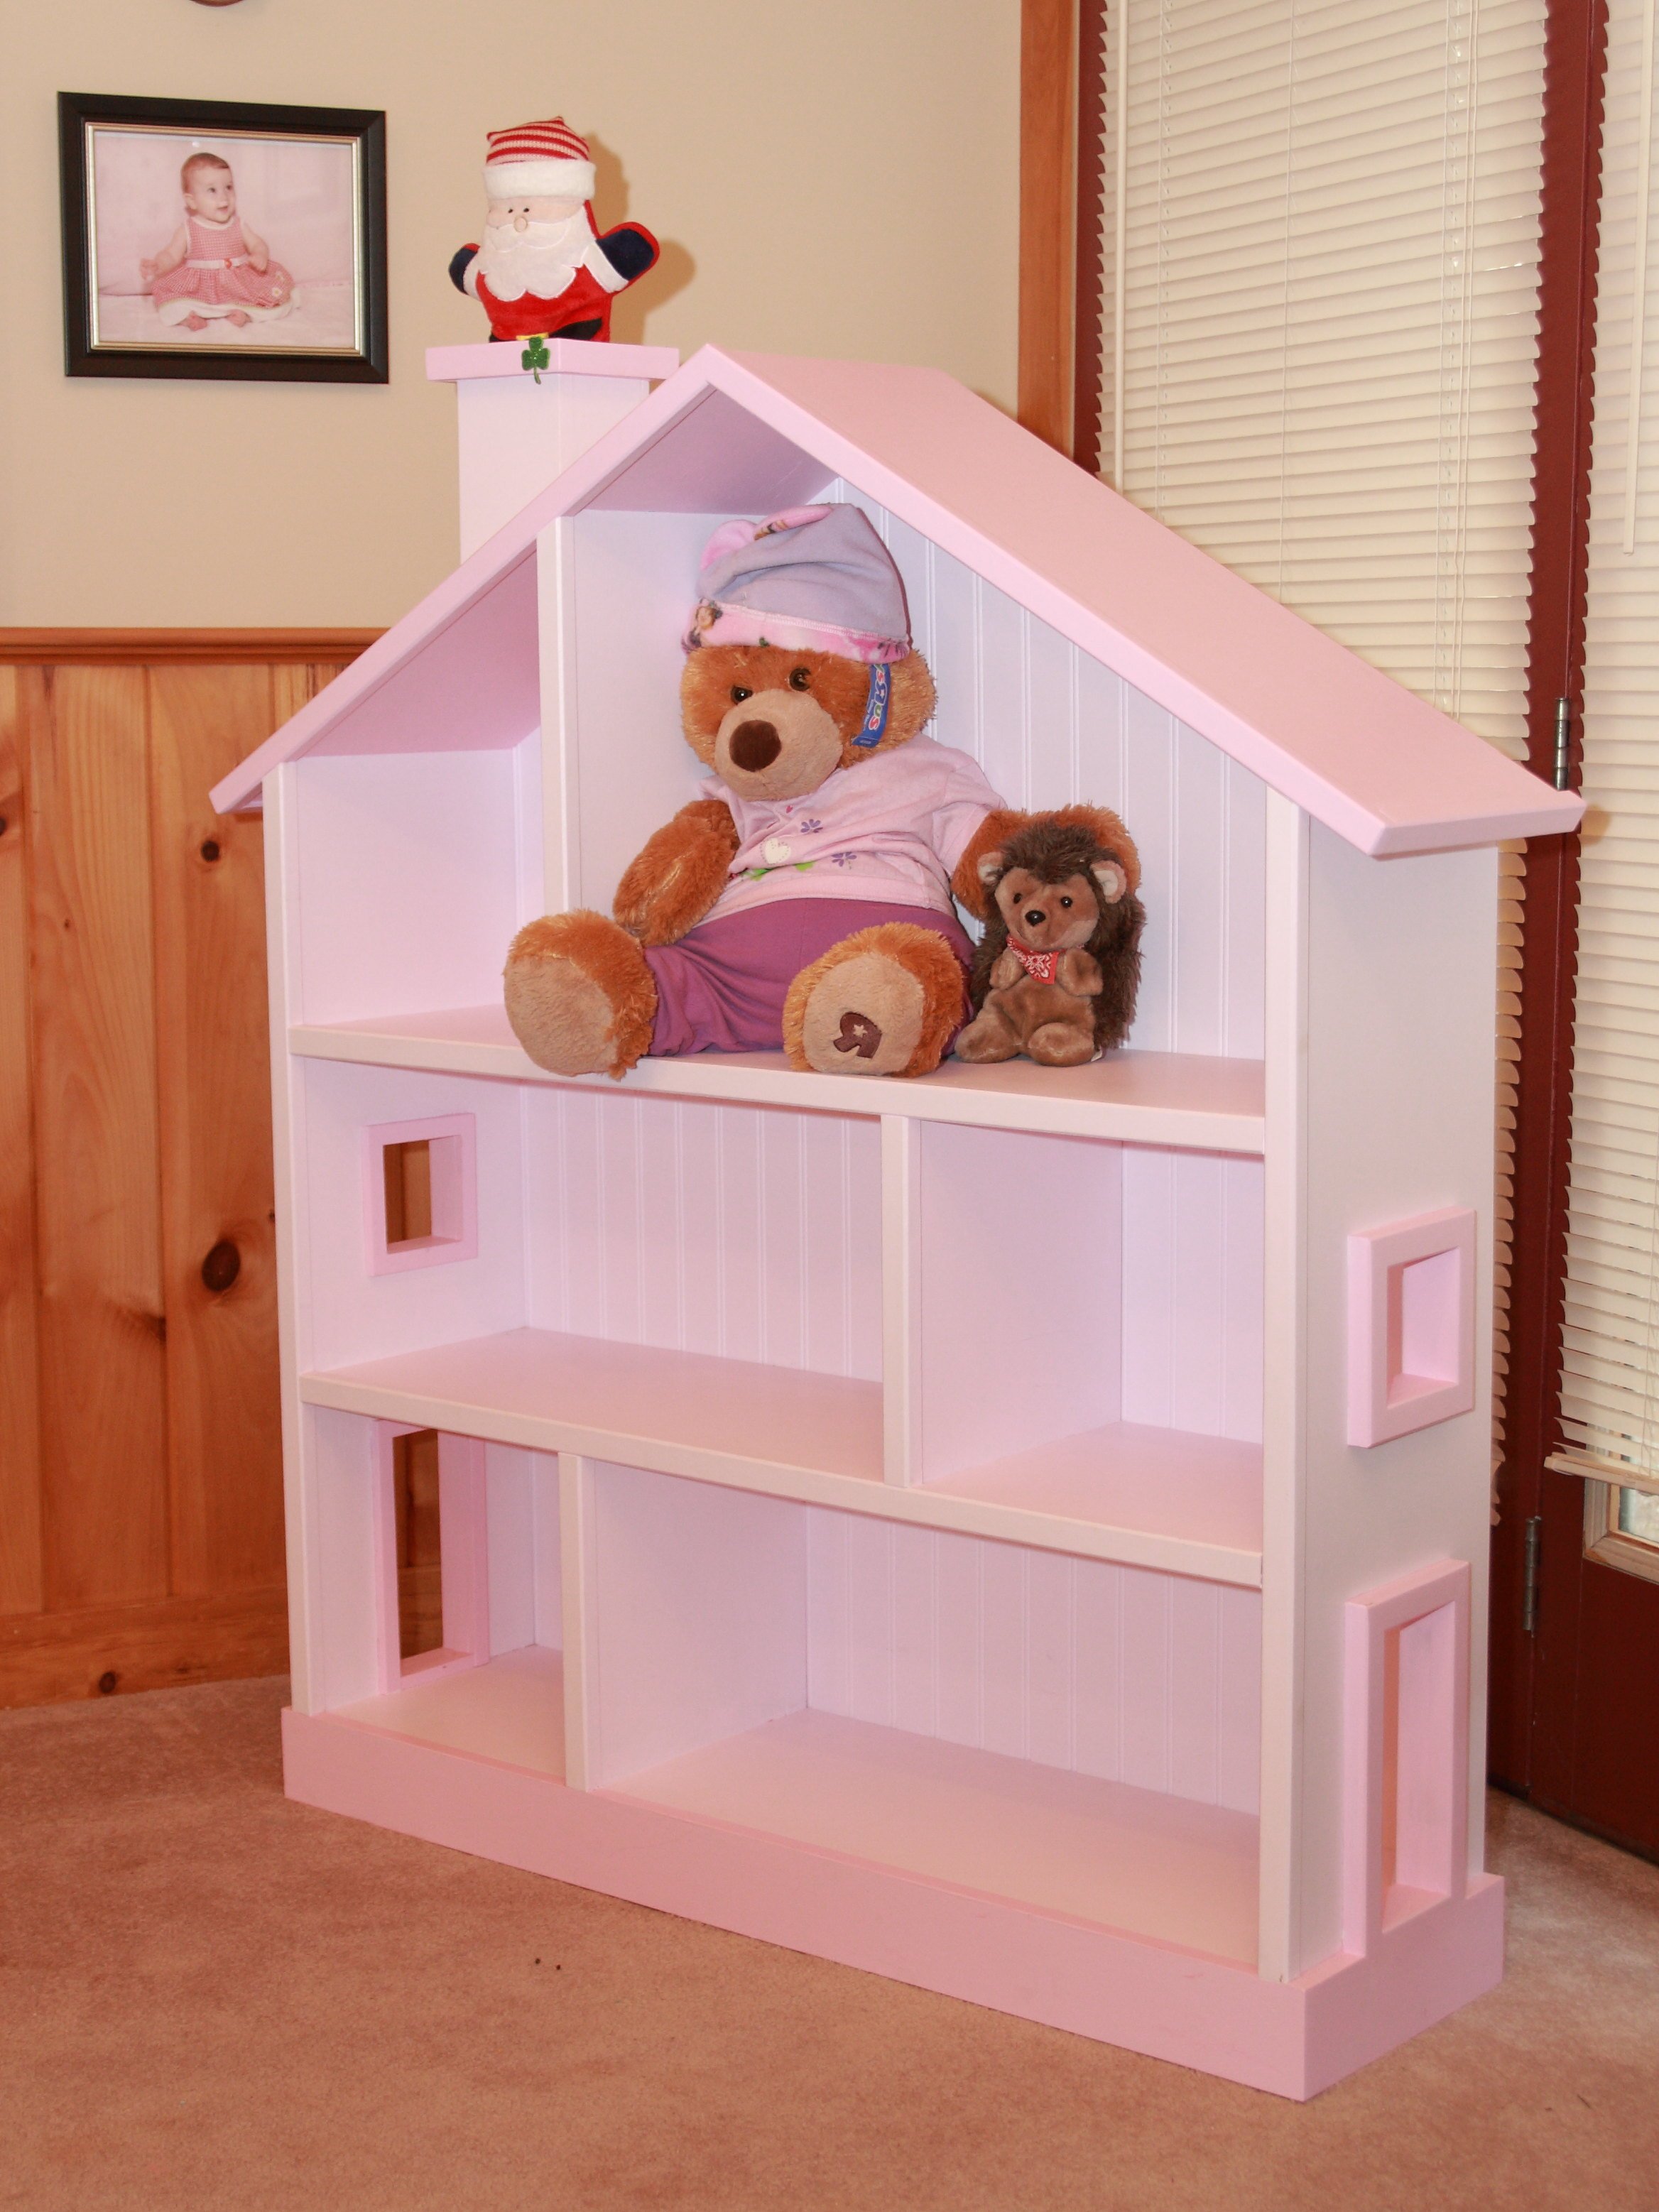
This past Christmas I built the dollhouse bookcase for my 3 year old daughter. I built mine out of plywood and made a few modifications. I routed dados for the shelves. I also added a pine face frame to cover the plywood edges. The back is beaded paneling. I painted it in the same princess pink colors that are in her bedroom. The final touch was adding a chimney and stuffing a Santa into it. She loved it! You can check out the full story on my blog http://www.homefront-dsr.blogspot.com/
Thank-you Ana!
Built from Plan(s)
Estimated Cost
$45.00
Estimated Time Investment
Weekend Project (10-20 Hours)
Finish Used
One coat of white latex primer and one coat of pink latex paint applied with a brush.
Recommended Skill Level
Intermediate