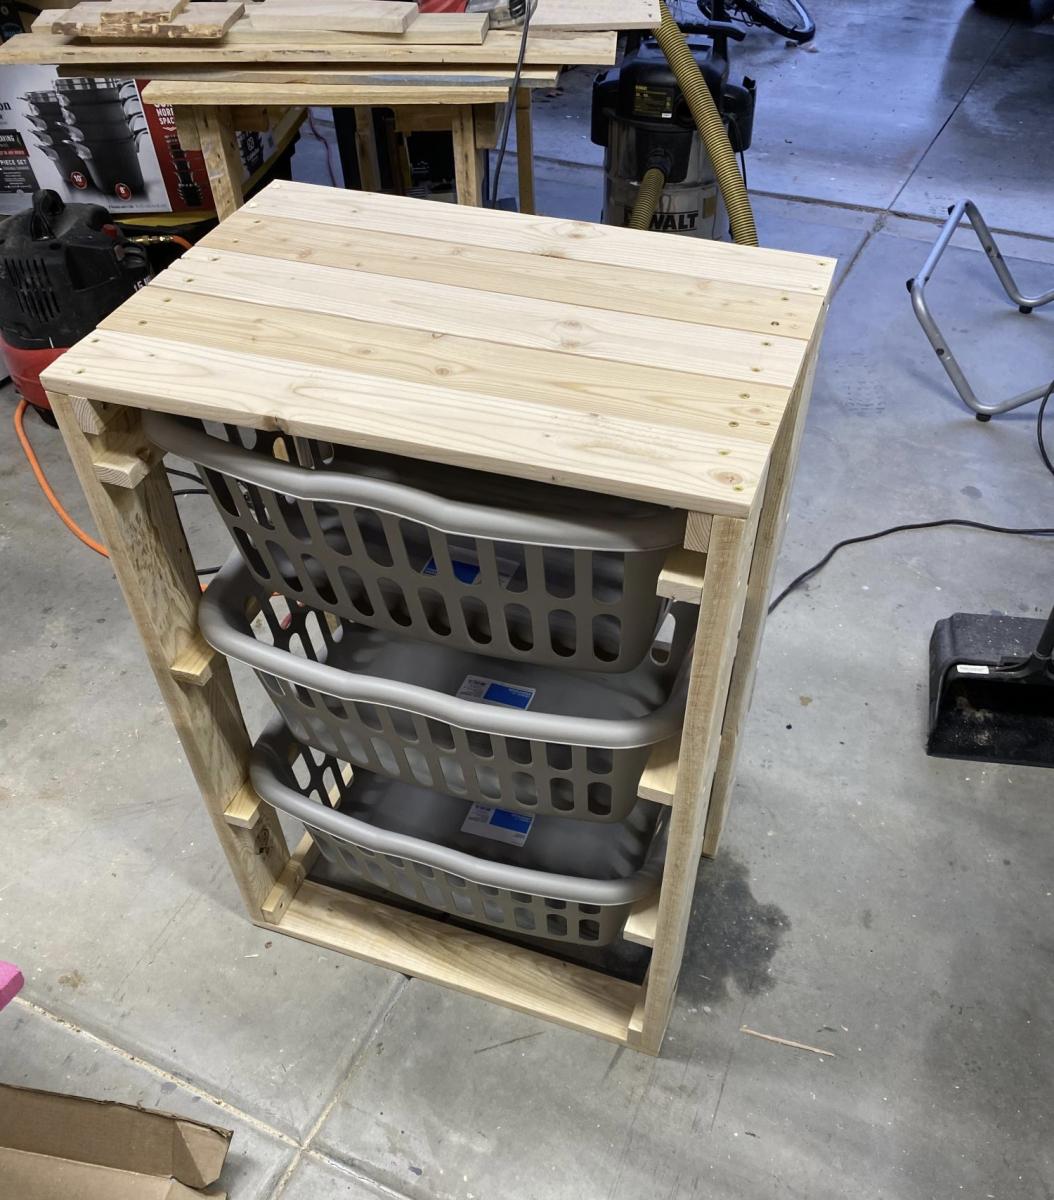
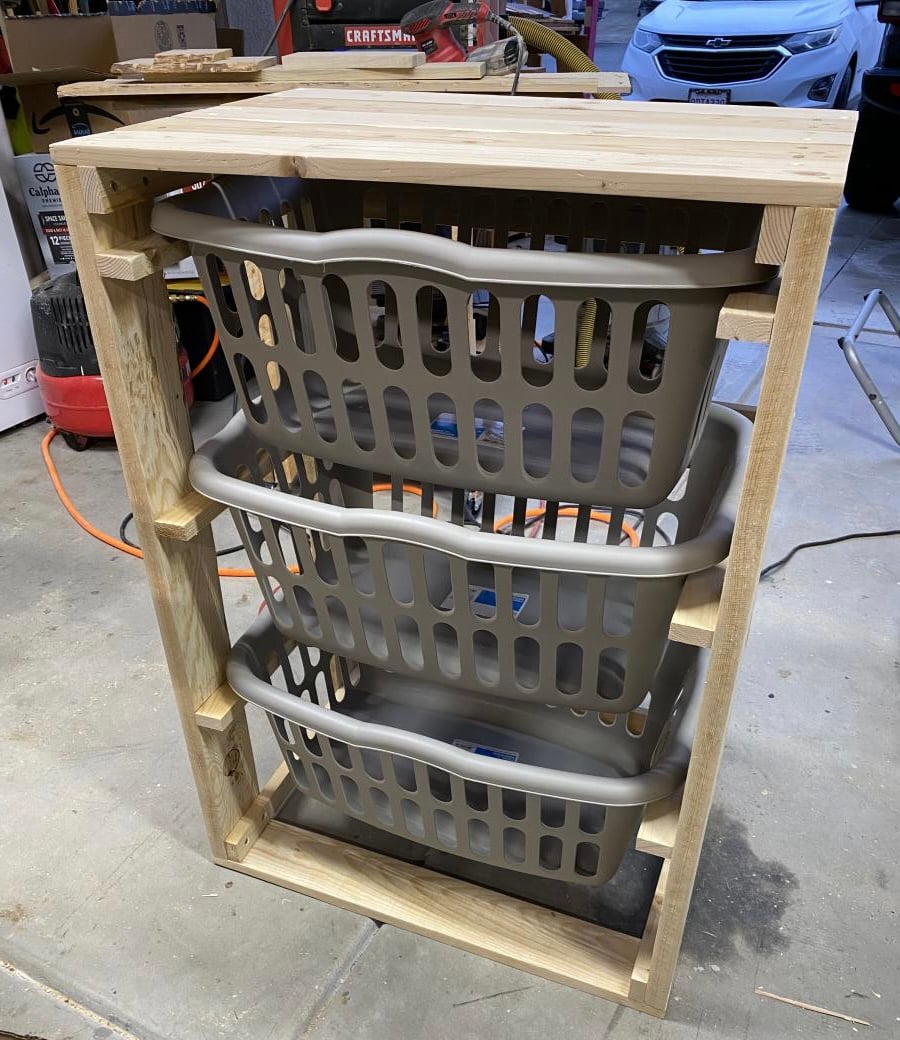
Farmhouse Bed with Antique window headboard
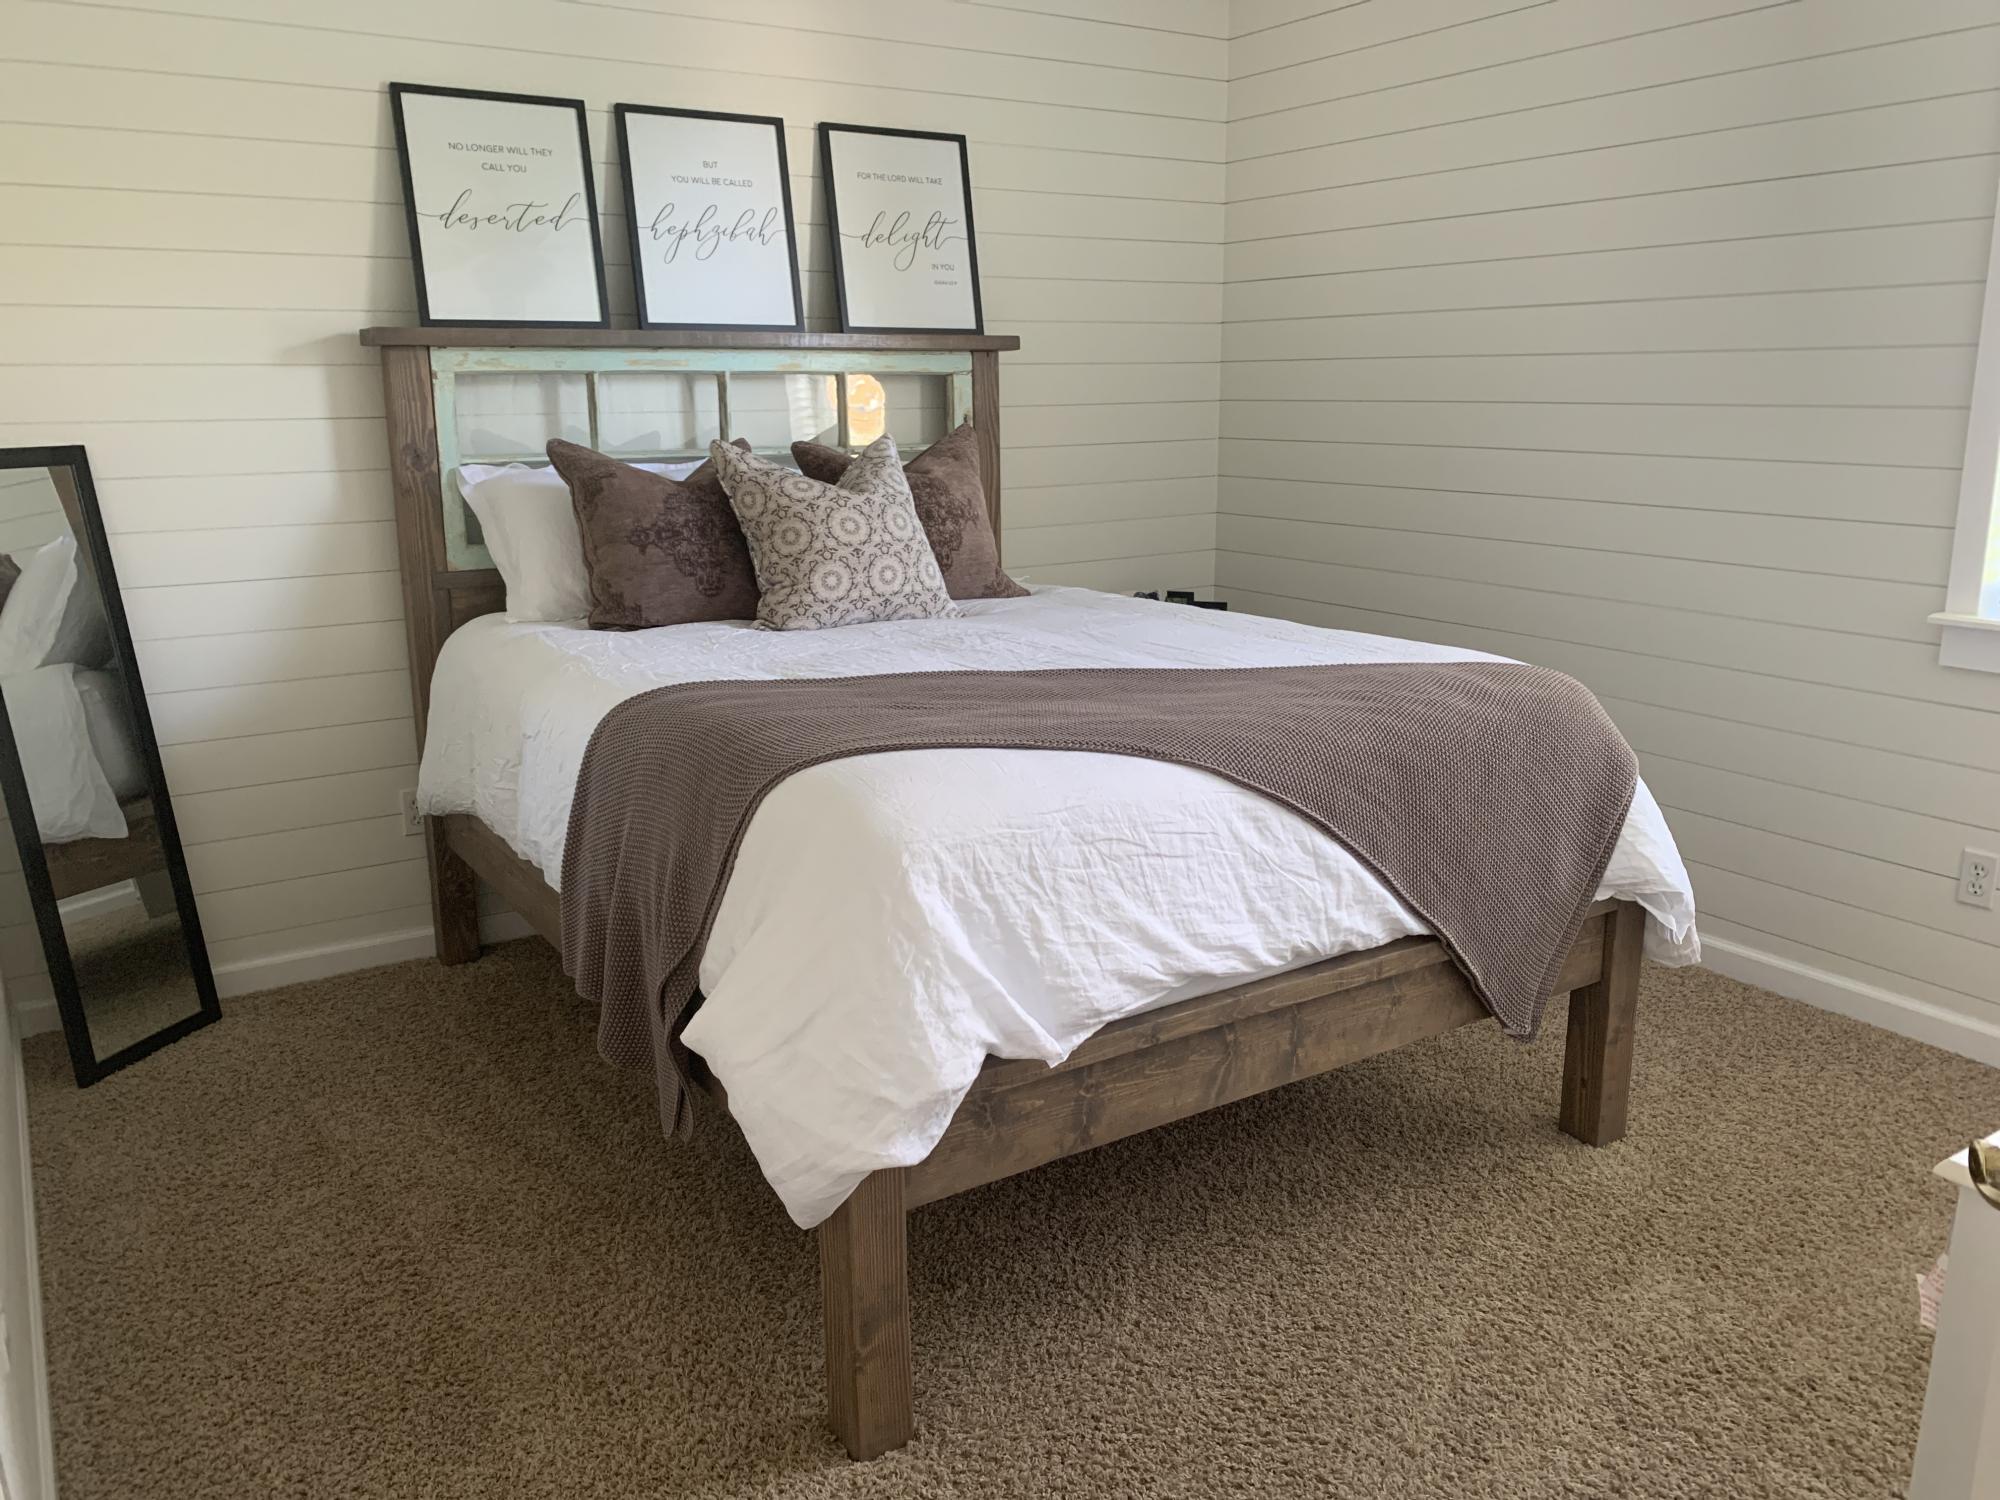
I had been searching the internet looking for plans to make a headboard out of an old window I found. I came across these plans and they worked perfectly. Thank you for the great plans and tutorial!

Built from Plan(s)
Estimated Cost
$200.00
Estimated Time Investment
Week Long Project (20 Hours or More)
Finish Used
Varathane
Pre-stain wood conditioner
Special Walnut penetrating stain
Weathered Oak penetrating stain
Polyurethan
Pre-stain wood conditioner
Special Walnut penetrating stain
Weathered Oak penetrating stain
Polyurethan
Recommended Skill Level
Intermediate


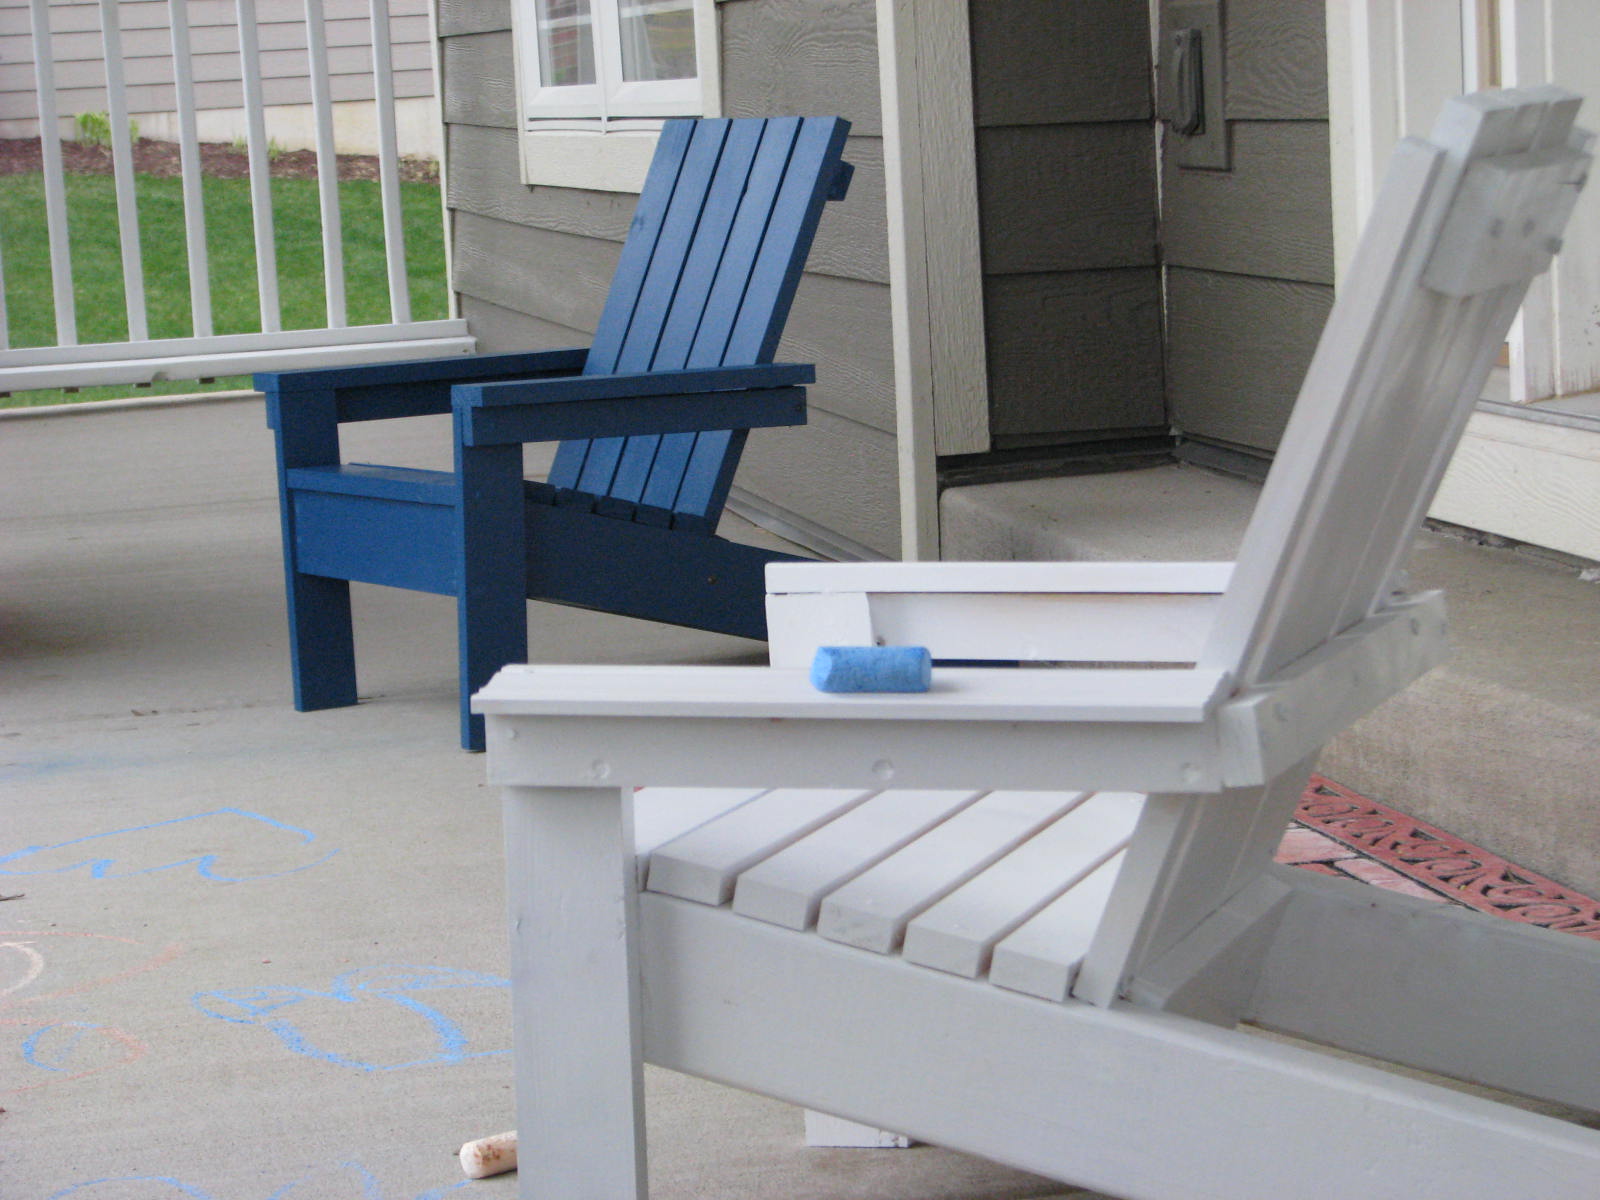
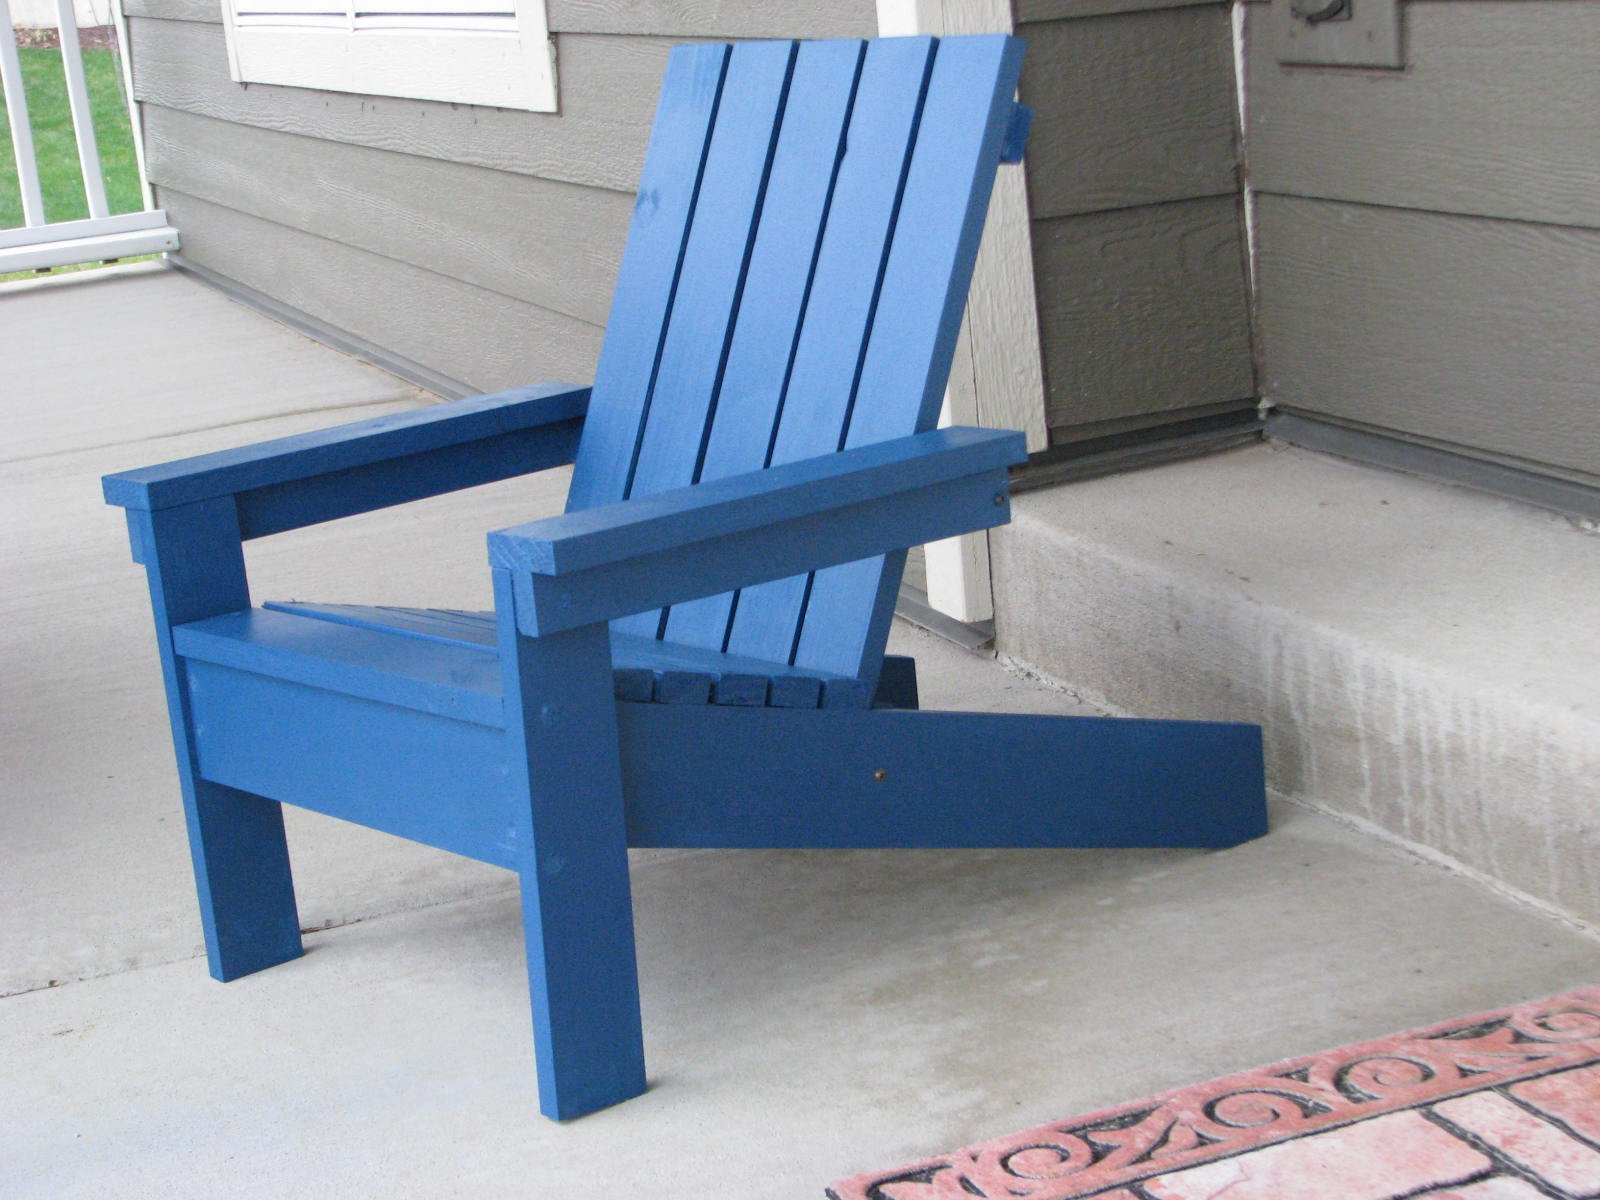


Comments
Ana White
Thu, 10/03/2019 - 14:01
What a neat idea! Turned…
What a neat idea! Turned out awesome!