Community Brag Posts

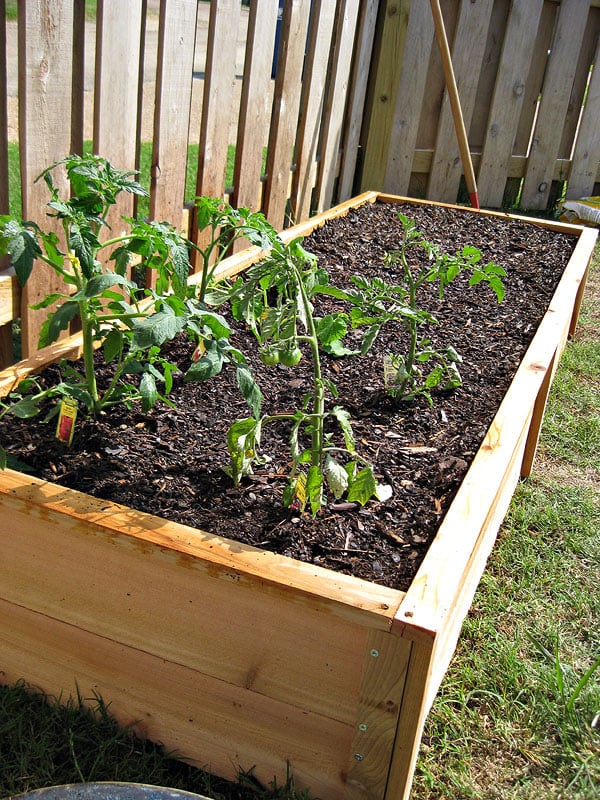
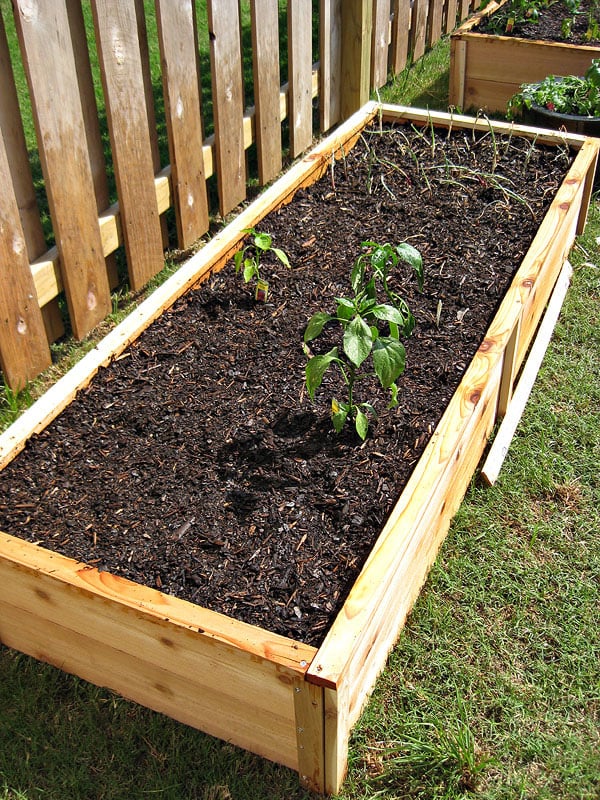
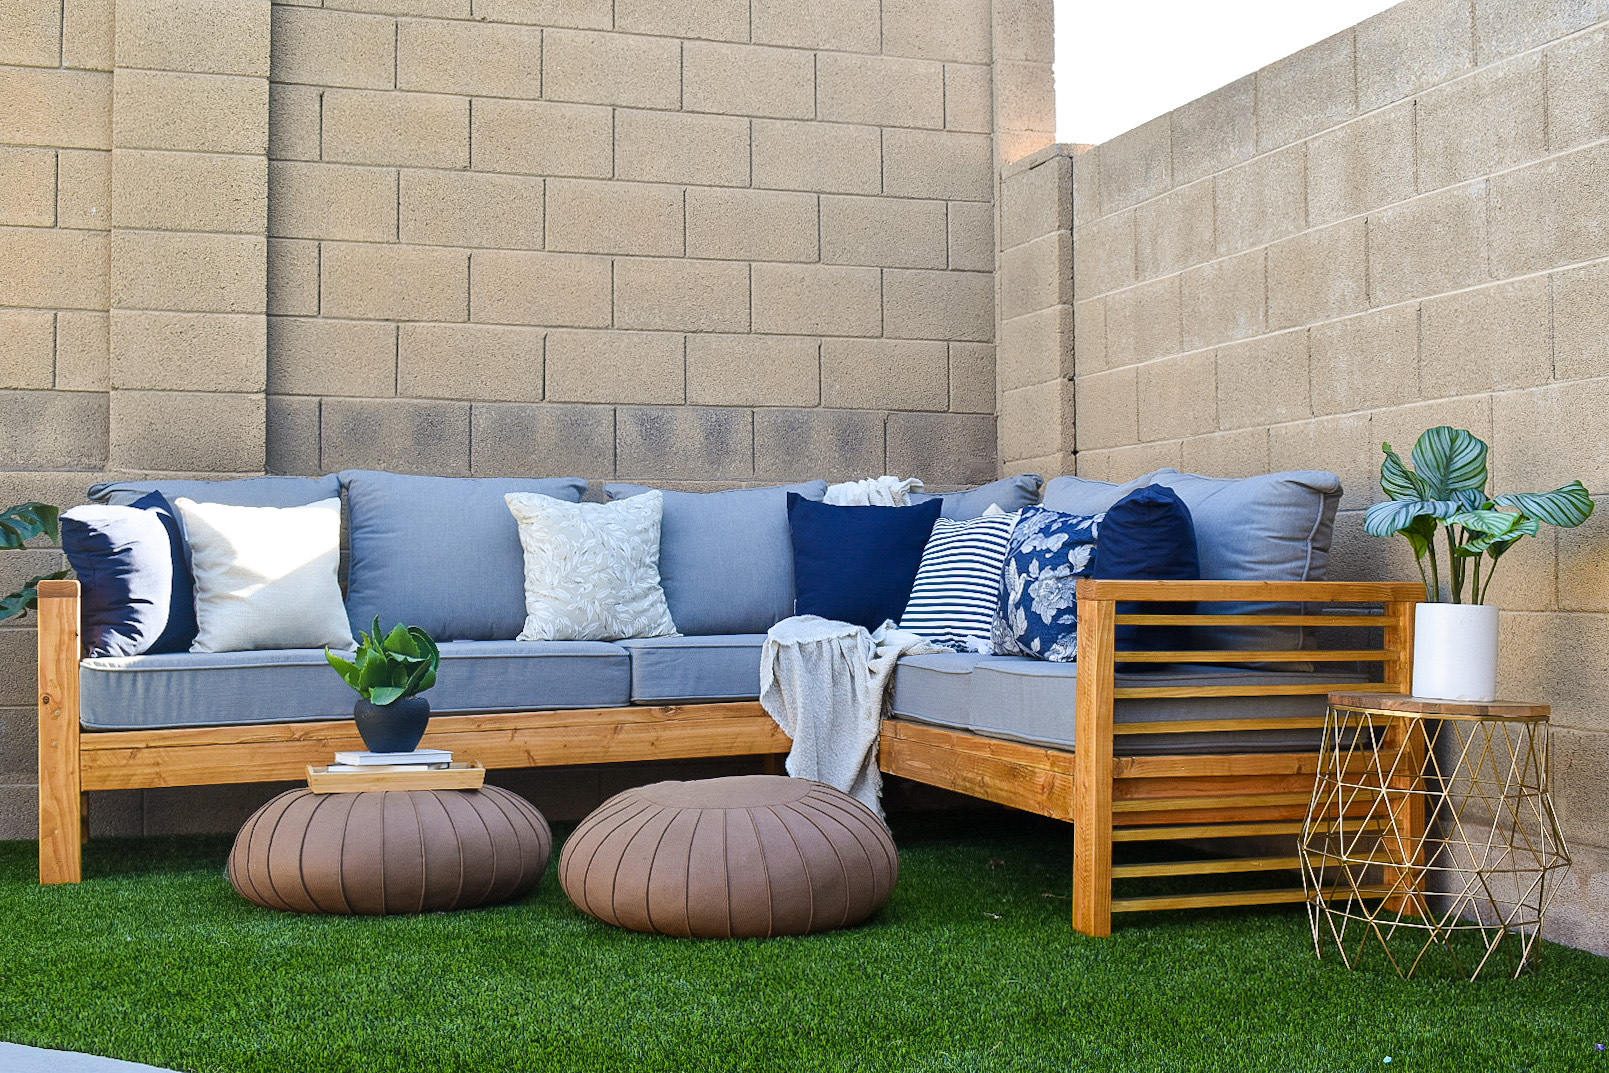
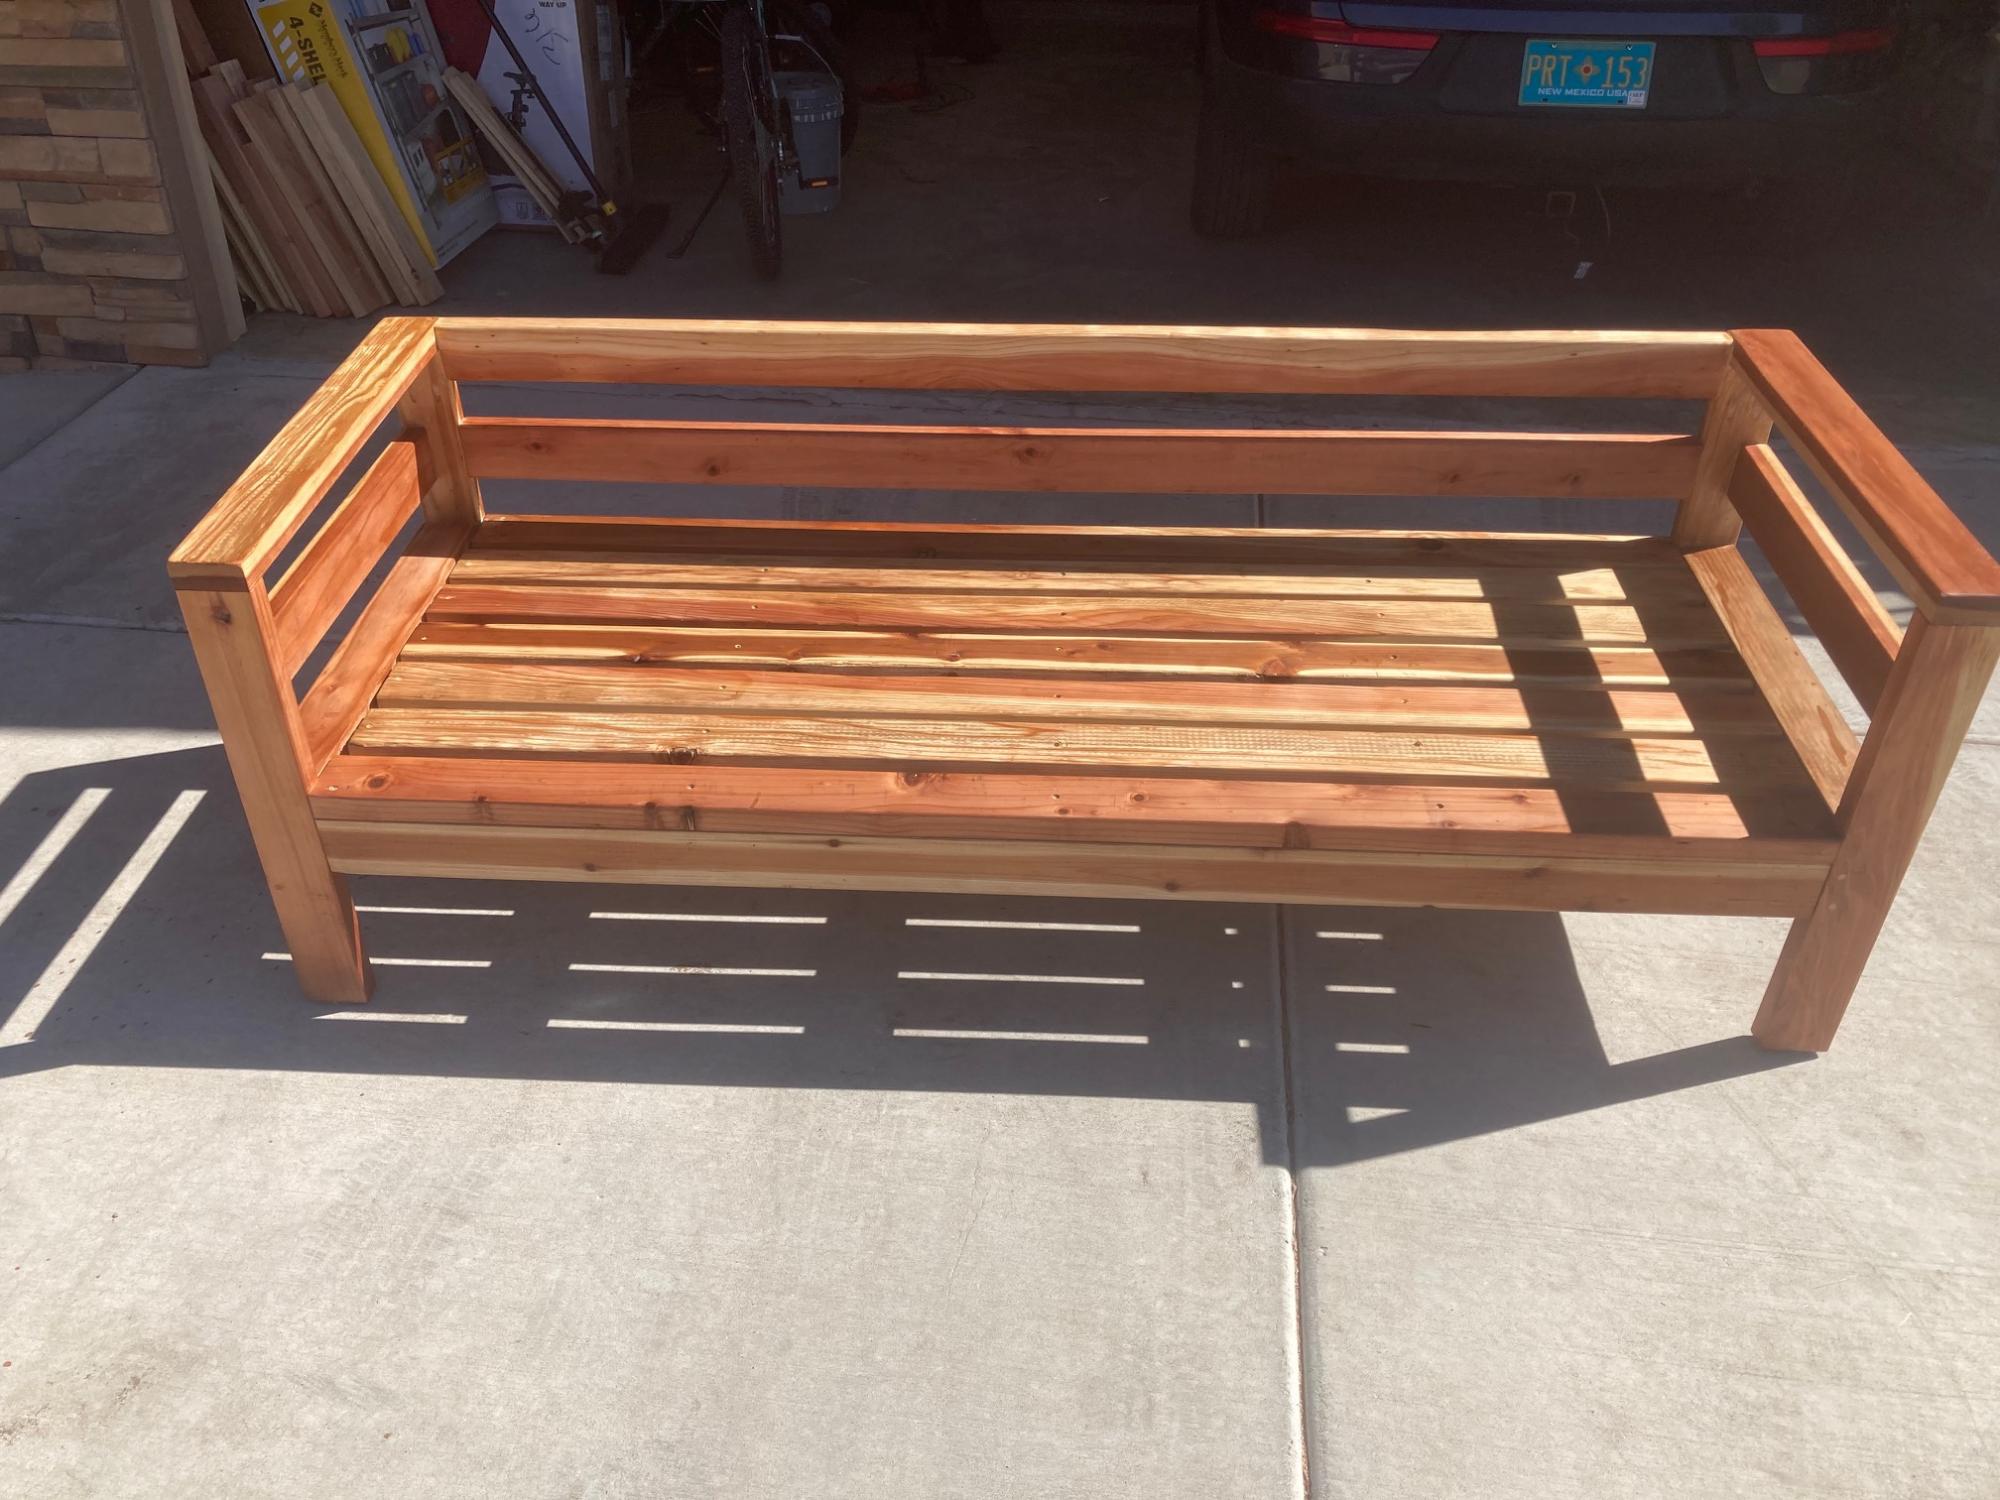
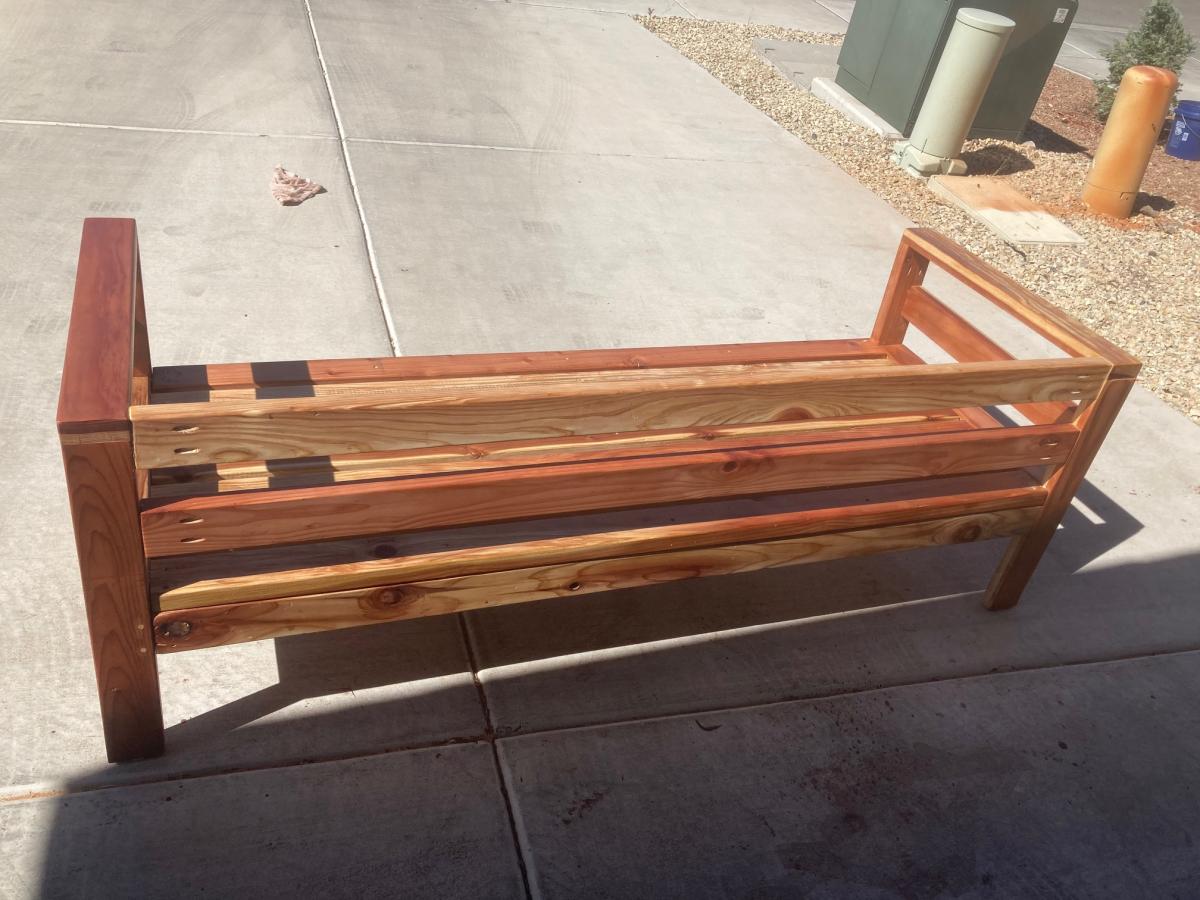
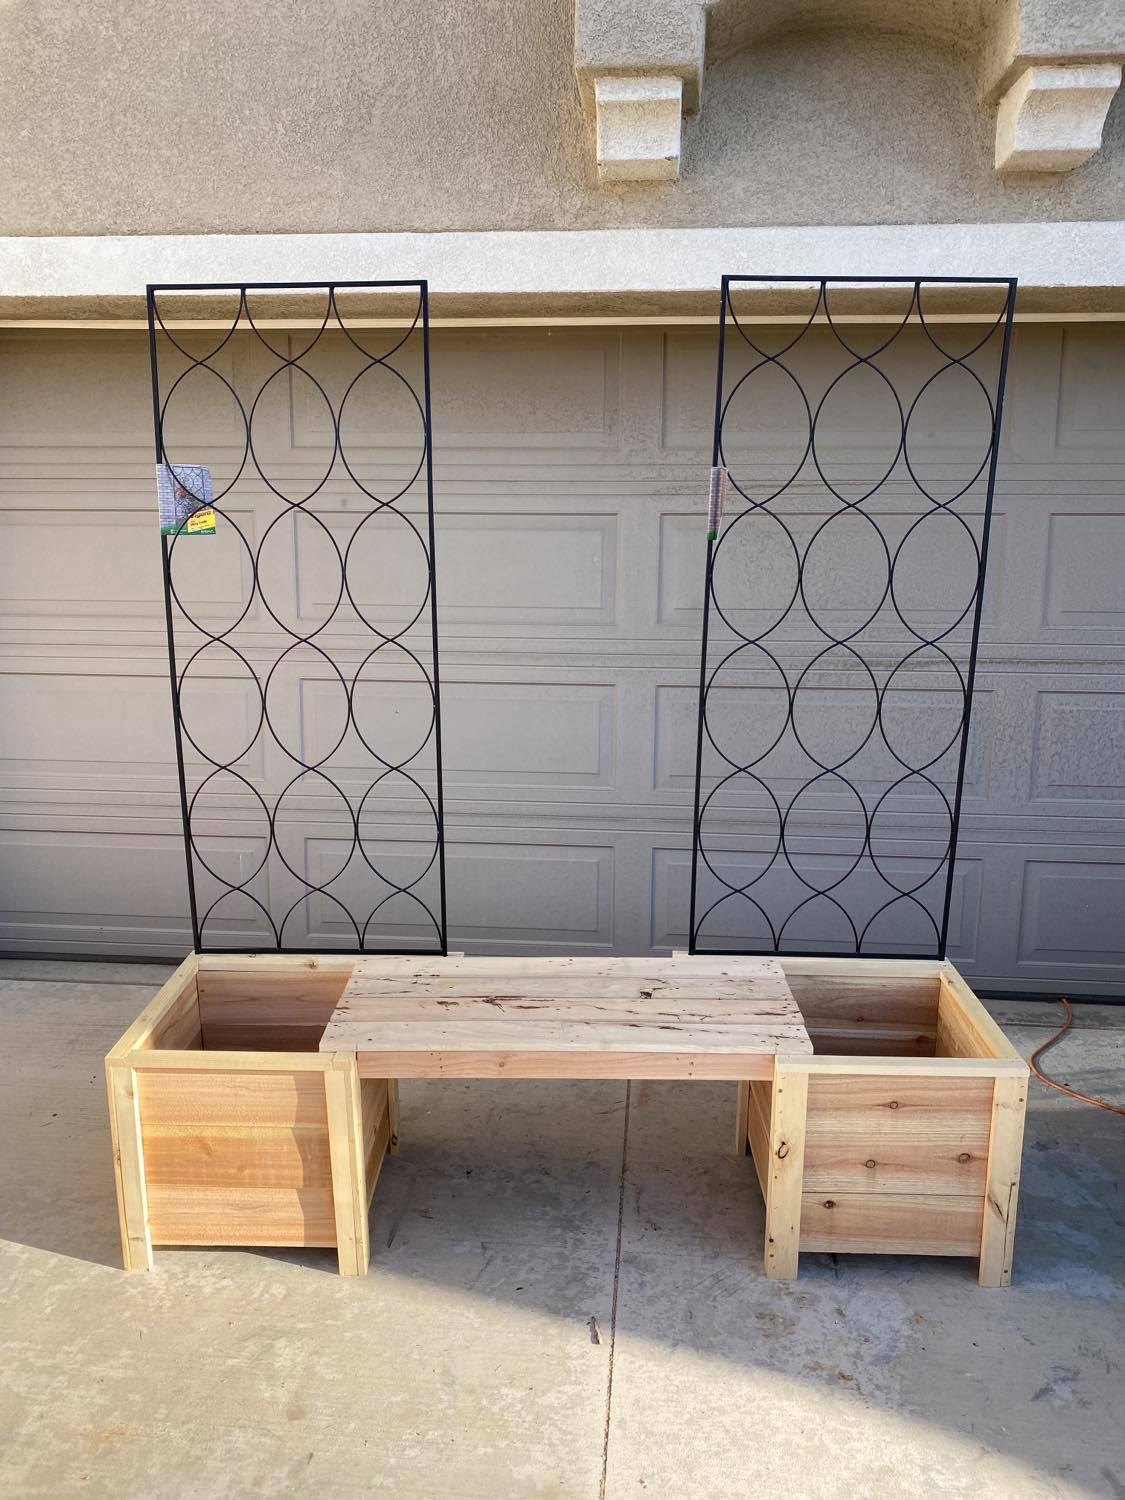
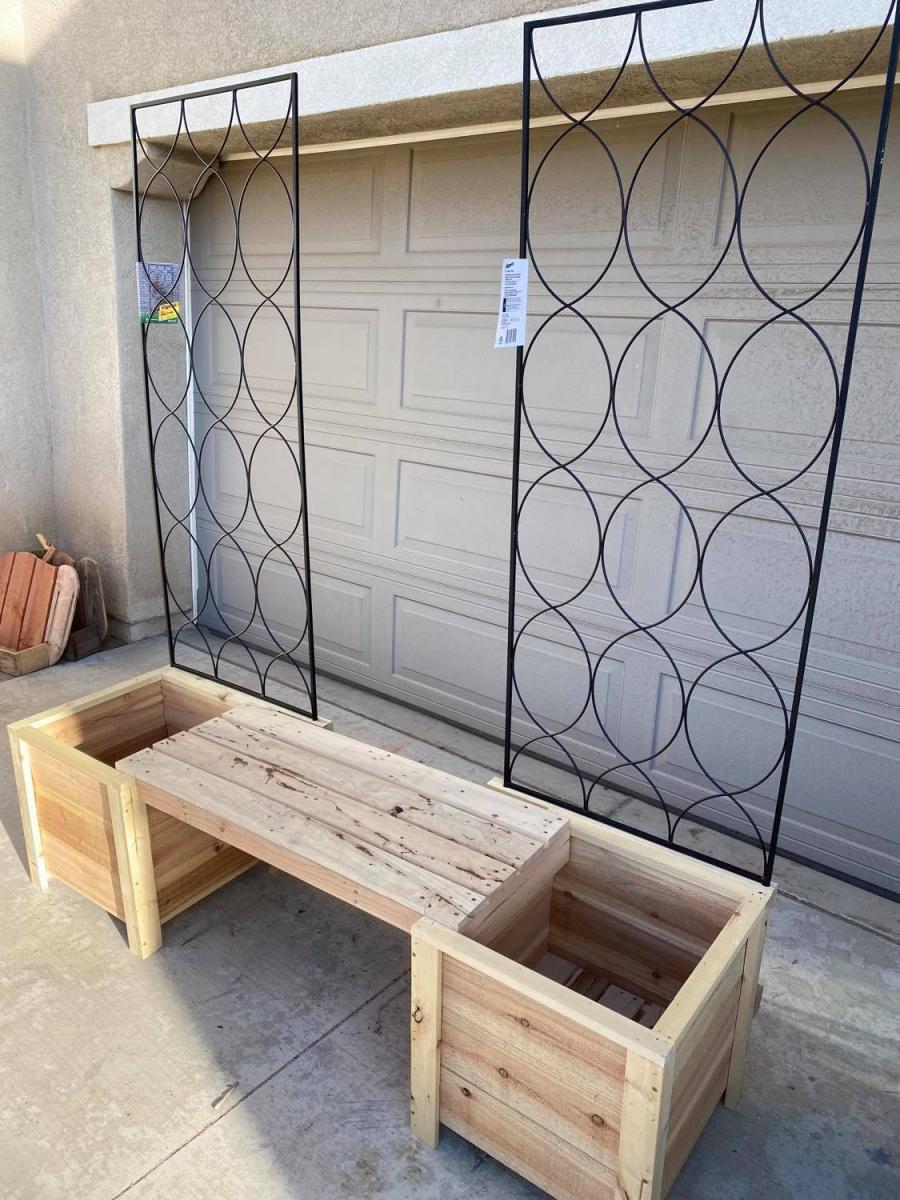
Ten Dollar Cedar Raised Garden Beds

Submitted by kelli224 on Wed, 06/29/2011 - 19:19

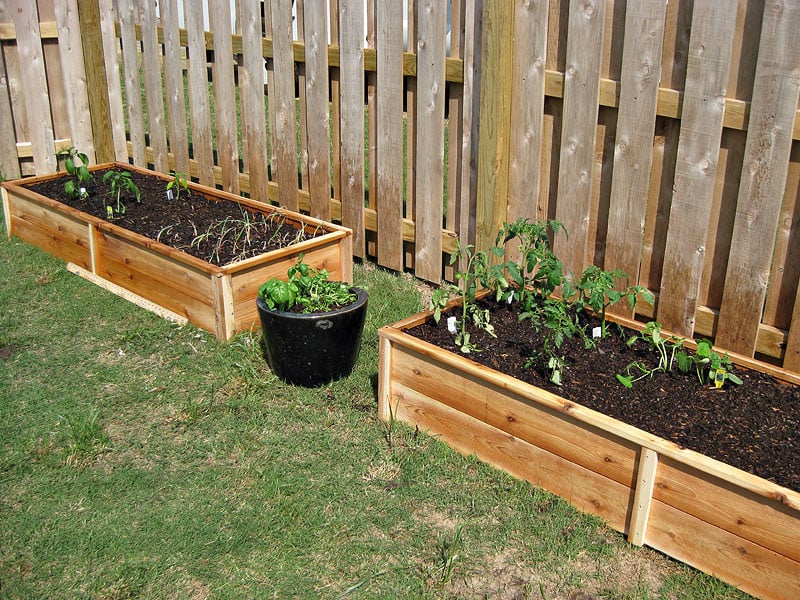
Since moving and finding Knock Off Wood, we decided now would be a good idea to try some gardening (again...after failed attempts!) These beds are so simple but beautiful out in the yard and for the first time I actually have vegetables growing. We used the cedar fence posts just as Ana suggested.

Estimated Cost
$40
Estimated Time Investment
An Hour or Two (0-2 Hours)
Finish Used
None
Recommended Skill Level
Beginner

Comments

Seasonal And Holiday

Cedar deck box

Submitted by JMG on Wed, 07/06/2022 - 19:47

I had to modify these plans to use what I had on hand. I used left over cedar fence pickets (planed down and sealed) and adjusted the size to fit all my outdoor cushions. Overall dimensions are 49" wide x 28" deep x 26" high. I also used 2x4's instead of 2x2's because that is what I had in my shop. I added 1x3's around the top to fit snugly instead of using hinges (again trying to use what I had on hand). We get A LOT of rain in the summer so hopefully the cushions will stay dry. I also added some screen left over from the screened in porch to the bottom before adding the "floor" to keep bugs out. I just stapled it to the frame before adding the floor boards. I did add a piece of treated 1/4" plywood under the top in hopes of keeping the rain out.

Built from Plan(s)

Comments

Panel Bed for Ray

I made this bed over a weekend while I “room crashed” my oldest’s bedroom. 
I’m so happy with the result. I experimented with stains mixing two, well layering colors. 
That was a lot of fun! 
I hope to write a blog post about it one day. I will add it to my ever-growing To Do List. 
Let me know if you have questions. I love talking about building and all things DIY! 

Estimated Cost
100
Estimated Time Investment
Weekend Project (10-20 Hours)
Finish Used
Layered Simply White and Early American from Minwax.
I applied the Simply White (didn’t remove excess) and then I added the Early American on top. Let it all sit a bit and wiped off the stain.
This left a beautiful color.
Recommended Skill Level
Beginner

Comments

Essential Adirondack chair

Submitted by str1523 on Mon, 05/25/2020 - 10:23

Like this chair! Changed the 3 1x10's on the back to 4 1x8's ripped down to 6 ¹⁵/¹⁶

Estimated Cost
40
Estimated Time Investment
An Hour or Two (0-2 Hours)

Comments

8 Foot Picnic Table

Submitted by hummbaby on Mon, 07/27/2020 - 17:11

I built the 8 Foot Picnic table off of Ana's plans but didn't do the greatest job following the full directions. I was going a little too fast. The area I most regret moving too quickly on was the legs. I neglected to look at the sketch of the table legs with dimensions close enough to see that the spread for the bottom of the legs should be 47-1/4" and that the top 2x4 should extend beyond the top of the leg by 3". I only looked at the note "meets at corner" and built the legs off that. The legs were thus, not uniform. The next error I made was not measuring my 2x6 boards to make sure they were equal. All were longer than 8' and none were the same length. When I started attaching the unmeasured, uncut boards to the table legs, I attempted to attach them per plan but ended up with a table slightly out of square. Overall though, I am generally happy with the table and will be donating it to my church. If I build more in the future, I will make sure to space my legs correctly.

Built from Plan(s)
Estimated Cost
$150
Estimated Time Investment
Day Project (6-9 Hours)
Finish Used
Behr Redwood deck stain, distressed by sanding, Thompson's water seal
I began by brushing on the deck stain. The next day I sanded the top of the table and seats with 60 grit sandpaper and then smoothed it with 120 grit. This evened out the stain and hid any brush strokes. I then wiped it down to remove the dust and coated it with Thompson's clear water seal.
Recommended Skill Level
Beginner

Chicken shed

Submitted by diegaeb on Wed, 10/07/2020 - 08:32

I had started this project last year in September and finished it finally 2020 in March because I get my chicken then.
I did modify the chicken coop a little bit due to the material I got.
The instructions and most of all the cutting list I like best!

Antje

Built from Plan(s)
Estimated Time Investment
Week Long Project (20 Hours or More)

Comments

First nightstand

Submitted by juliec on Sat, 04/02/2011 - 13:24

We used ana's plan but modified the top

Built from Plan(s)
Estimated Cost
$35
Estimated Time Investment
Weekend Project (10-20 Hours)
Finish Used
We will use espresso general finishes and several top coats of poly.
Recommended Skill Level
Intermediate

Comments

bridgetschaefer

Thu, 05/30/2019 - 13:00

This is EXACTLY what I'm looking for but I can't find the plans that were used to build it. Do you happen to still have the link for them?

DIY Bar Cabinet

Submitted by Anonymous (not verified) on Mon, 02/24/2020 - 16:27

I bought this tv corner cabinet for $40. I spent many hours turning into my perfect bar cabinet. I built a custom lighted liquor display. I have posted photos of the transformation.

Estimated Cost
$1000
Estimated Time Investment
Week Long Project (20 Hours or More)
Finish Used
Benjamin Moore- hale navy
Recommended Skill Level
Intermediate

Comments

frendlygrl

Tue, 07/06/2021 - 19:04

So this is not your project? Because there isn't much information or a before and after picture. This gave me an idea for our home.

Daughters blue Playhouse

Submitted by rysos81 on Thu, 07/23/2020 - 08:55

I used the basic framing plan for the project, but extended roof overhangs, added engineered siding / trim and cedar shake roofing. I put 2x4 bracing on for the platform.

Estimated Time Investment
Week Long Project (20 Hours or More)
Recommended Skill Level
Intermediate
Seasonal And Holiday

Drop Leaf Mobile Kitchen Island

Submitted by jkjackson on Sun, 03/14/2021 - 11:19

This was born out of the need for more counter space in our galley kitchen. We don't have the space to add an island. Especially around the holidays, it would be great to have extra space for making cookies, serving big meals, etc. I used Ana's Small Kitchen Island Prep Cart plans for inspiration. I adapted the dimensions to fit at the end of our counters when not in use and added a drop leaf to give us almost 4 additional feet of butcher block counter top when we need it. I used scrap lumber that I had for the cabinet and had an extra drawer handle that matches our kitchen cabinets but bought the butcher block, locking casters, drawer slide and hardware for the legs. Also, the weight of the butcher block makes it want to tip when it's away from the cabinet with the drop leaf down so I added a lead counter weight inside the drawer.

Estimated Cost
$150-200
Estimated Time Investment
Weekend Project (10-20 Hours)
Finish Used
Behr paint for the cabinet, food grade mineral oil and cutting board wax for the butcher block
Recommended Skill Level
Advanced

Comments

jkjackson

Sat, 07/24/2021 - 16:59

Sure! I used a 4 foot butcher block and cut it down. The horizontal part is 13 1/2" and the drop leaf part is 32 1/8" attached with a piano hinge. The legs need to be cut and hinged to fit when folded up. This one is made so that the drop leaf fits right under the overhang of the kitchen countertop that it is next to so it's snug against the cabinet and not an issue but, if you want it to be freestanding, the weight of the butcher block will pull it over if you don't weight the cabinet down with something as well. I got a 5 pound lead bar from Amazon in case we need to use it somewhere else. I hope that helps! Let me know if you have any other questions.

Custom Rustic King Bed

Submitted by jhavinga on Wed, 01/14/2015 - 14:55

My wife is always annoyed with me. I make something for our home, and a few months later I decide I dont like it and want something better! I sold our 5th bed set months ago (Farmhouse Bed made through Ana White) and have been sleeping on the floor for the last few months.. Figured it was time to create something I wouldnt sell! Took some plan ideas from the Farmhouse King Bed Plans and came up with something a little more extravagent.

Hopefully I dont sell this one.

Estimated Cost
$350 With Reclaimed Wood, Im sure much cheaper with HD Wood.
Estimated Time Investment
Weekend Project (10-20 Hours)
Finish Used
For the Pine. used my favourite combo; Weathered Oak and Special Walnut.
For the Fir and Cedar I just sanded.
Recommended Skill Level
Beginner

Comments

jhavinga

Thu, 01/15/2015 - 05:06

Thanks thewoodbuilder, its super easy and you could probably figure it out just by looking at it. =)
I extended the legs 2" past top of footboard, and 4" past top of headboard with caps on top. And layed 1x4 vertically over top of the 1x6 planks, and horizontally across the top of both foot and head board.

Cheers!
Justin

tracygator

Wed, 01/21/2015 - 20:47

This bed is gorgeous!!!! If you don't mind I have a couple of questions... For your stain combo of Weathered Oak and Special Walnut do you layer the weathered oak, wipe it off then apply special walnut? Or do you mix the two stains? Your footboard looks taller than the plan calls for , did you make it higher , if so by how much? And what dimensions are your footboard posts? This seriously is an amazing build. Great job!

In reply to by tracygator

jhavinga

Fri, 01/23/2015 - 14:04

Thank you! I don't mind at all. =)
The stains I do seperataely. I start with weathered oak and let sit for 15min, wipe off. Than do special walnut right after for 15min than wipe off. I repeat this until I like my color. From the farmhouse plans I really only took the planking idea and how to attach planking section to legs. The foot board is higher by 11" while the headboard posts are higher by 10".

The posts are reclaimed fir 6x6's. Thank again very much tracygator! Its a super easy design! if you have any other questions just let me know. =)

Cheers,
Justin

awheat1

Sat, 05/23/2015 - 20:13

Do you have any other pictures of the side rails? I'm curious how you did them? Specifically, how did you mount them to the head and footboard?

Redwood 2x4 outdoor sofa (Cushions on order, due Monday)

Submitted by Anonymous (not verified) on Wed, 04/21/2021 - 15:31

I love Ana White's 2x4 sofa project. I chose a couple of upgrades: bought redwood 2x4's and a pocket-hole jig to reduce visibility of screw holes and, of course, installed the additional side and back rails. I finished with Tung oil and then read the directions on the can afterwards: 'This product is intended for interior projects only!' Oh well.

We ordered these cushions: https://www.walmart.com/ip/Arden-Selections-Plush-BlowFill-Sapphire-Blu…
which were rather expensive but I read too many negative reviews from customers who bought and used cheap cushions.

This was the perfect project for a retiree with too much time on his hands and some basic building skills.

Thank you for this!

Michael Smith

Estimated Cost
$500 with cushions?
Estimated Time Investment
Weekend Project (10-20 Hours)
Finish Used
Tung oil...but I won't make that mistake again.
Recommended Skill Level
Beginner

Comments

Planter Box/Bench with trellis

I used Ana's planter box plans and I designed and built the bench out of pallet wood, and purchased the power coated trellis's and custom fit then to the planters.

Estimated Cost
$110.00
Estimated Time Investment
Day Project (6-9 Hours)
Finish Used
unfinished
Recommended Skill Level
Intermediate

Comments

Grillin' and Chillin' - Outdoor Grill Food Prep Station

Needed a table for food prep with my grill and found your plans! I used treated lumber for the base and nice cedar planks for the top. The treated lumber had a whiter than usual color which made the base really pop out. I put a nice pecan stain on top and a few coats of poly so the BBQ sauce wouldn't stain it! This was so easy, literally took 2-3 hours to build, stain and poly was done over the next few days. Ready for my next ana-white project. Thanks for posting these plans.

Built from Plan(s)
Estimated Time Investment
Afternoon Project (3-6 Hours)
Finish Used
Simple pecan stain and minwax poly. Brushed on the stain and kept brushing until I got the darkness I wanted
Recommended Skill Level
Starter Project

Comments

tr7dul

Wed, 07/09/2014 - 16:24

I was looking on Pinterest and found this table. It was exactly what I was looking for. You inspired me to go out and buy a miter saw and some wood and make the table. It turned out wonderful. It now has a permanent place on my patio and gets used when I grill mostly. I was hoping to be able to upload a photo but don't see the option to do so. Anyway, I want to say thanks for the great plans/instructions.

Twin Farmhouse Bed with Trundle

Took the farmhouse plan and added a Trundle.   Was initially going to build two farmhouse beds for my two girls, but thought adding the Trundle would free up some much needed floor space.  The girls love it!

Estimated Cost
$150
Estimated Time Investment
Day Project (6-9 Hours)
Finish Used
Latex paint
Recommended Skill Level
Intermediate

2x4 Sectional & Handmade cushions - LOVE!

Submitted by Anonymous (not verified) on Thu, 05/26/2022 - 21:46

Building this project and sewing the cushions was like a love letter to my family. I made them a year ago while on a high dose of Prednisone for my asthma and chronic pain (so helpful!). I finally felt capable of doing something that would bring our family together outside. A year later it continues to serve us well.

The instructions for the sectional were very well done. Super friendly and made me want to keep going! I used black analin dye to stain the wood. Swoon!

For making the cushions:
- I relied heavily on Sailrite's resourceful web site & tutorials for their thorough and detailed instructions on making cushions, cutting foam and sewing piping.
- Home Depot has the best pricing on foam.
- Used the brand 'Cushion Qwik' Silk Film (Amazon) to wrap the foam so they can withstand PNW rain.

Comments

Small Cedar Shed

Here is our version of the small cedar shed. Had to raise the door up a bit to clear the rocks. All built from cedar fence boards and a few 2x4's

Built from Plan(s)
Estimated Time Investment
Afternoon Project (3-6 Hours)
Finish Used
None - age naturally
Recommended Skill Level
Intermediate

Comments

Ana White Admin

Fri, 11/06/2020 - 08:18

Love that you used all cedar fence boards, do you have an estimated cost for this project? Thanks for sharing!

"Cube" storage unit

Submitted by kds199 on Fri, 10/14/2022 - 09:49

My wife and I wanted a nice way to hide more of our son's toys in the living room that didn't look tacky. We actually bought the cubby bins before even deciding what to make. (From target of course.) I made the bookcase out of wood shelving that already looked kind of beat up when I bought it knowing that the wood stain wood bring some character to it.

I only changed the plans slightly by making the legs flush with the inside so I could trim the ends and customizing the size of the cubby openings to fit the bins. (Mine aren't actually cubes.)

Built from Plan(s)
Estimated Cost
$60
Estimated Time Investment
Afternoon Project (3-6 Hours)
Finish Used
2 coats of stain...minimal sanding to keep the surface looking rough
Recommended Skill Level
Beginner

Great Patio Set

Submitted by Anonymous (not verified) on Mon, 10/04/2021 - 13:02

I wanted sturdy seating for my patio. Ana White had the perfect plans for my L shaped seating and coffee table. It was simple to put together and we love it!

Comments

Seasonal And Holiday