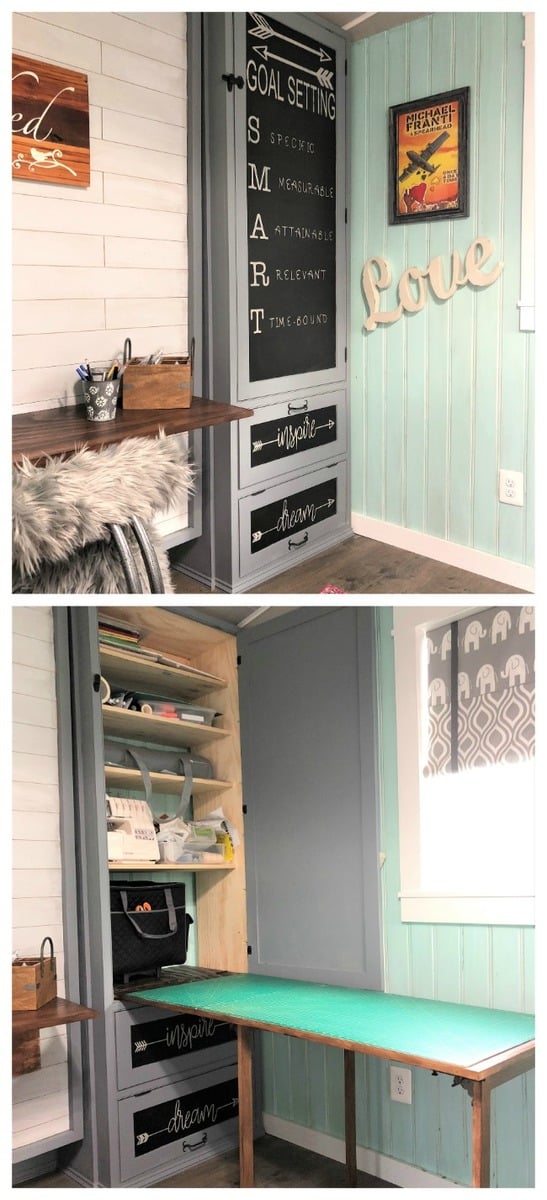
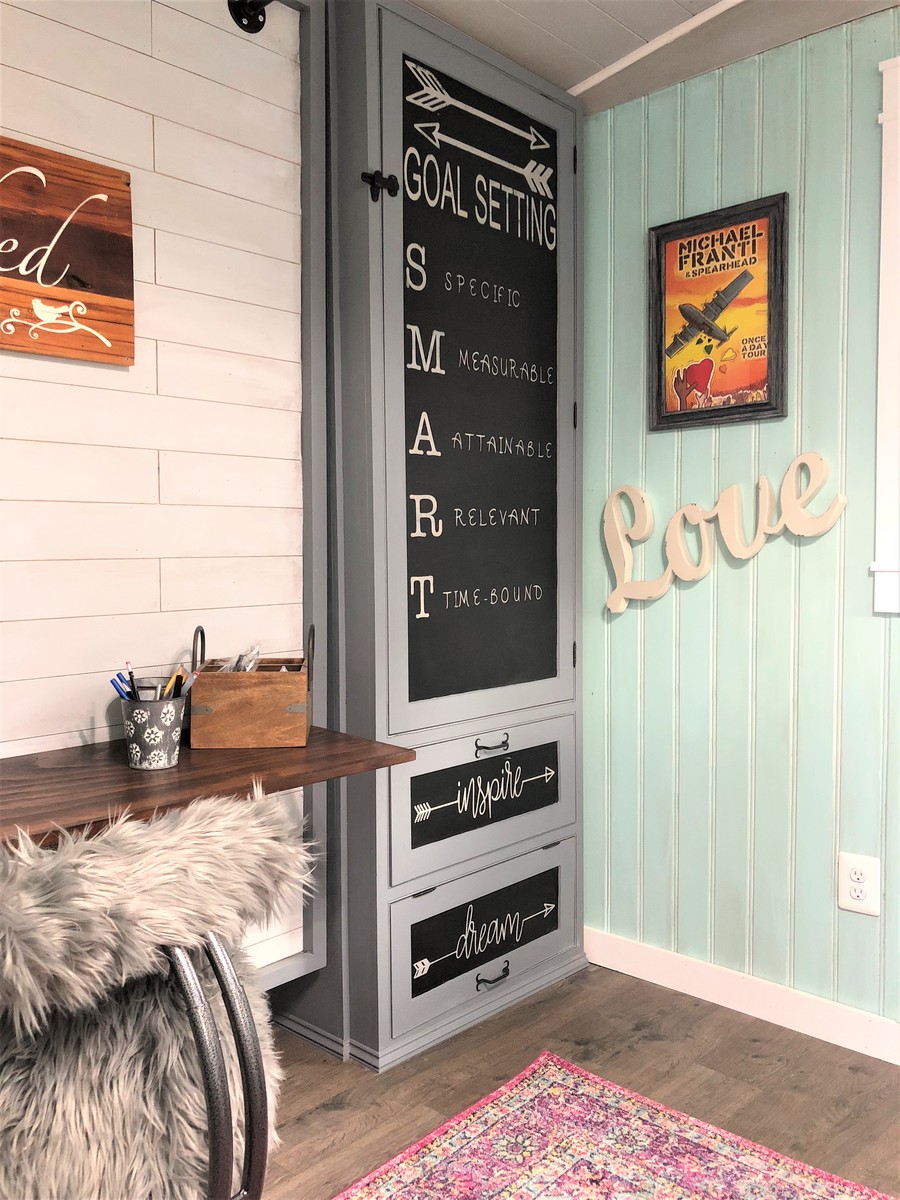
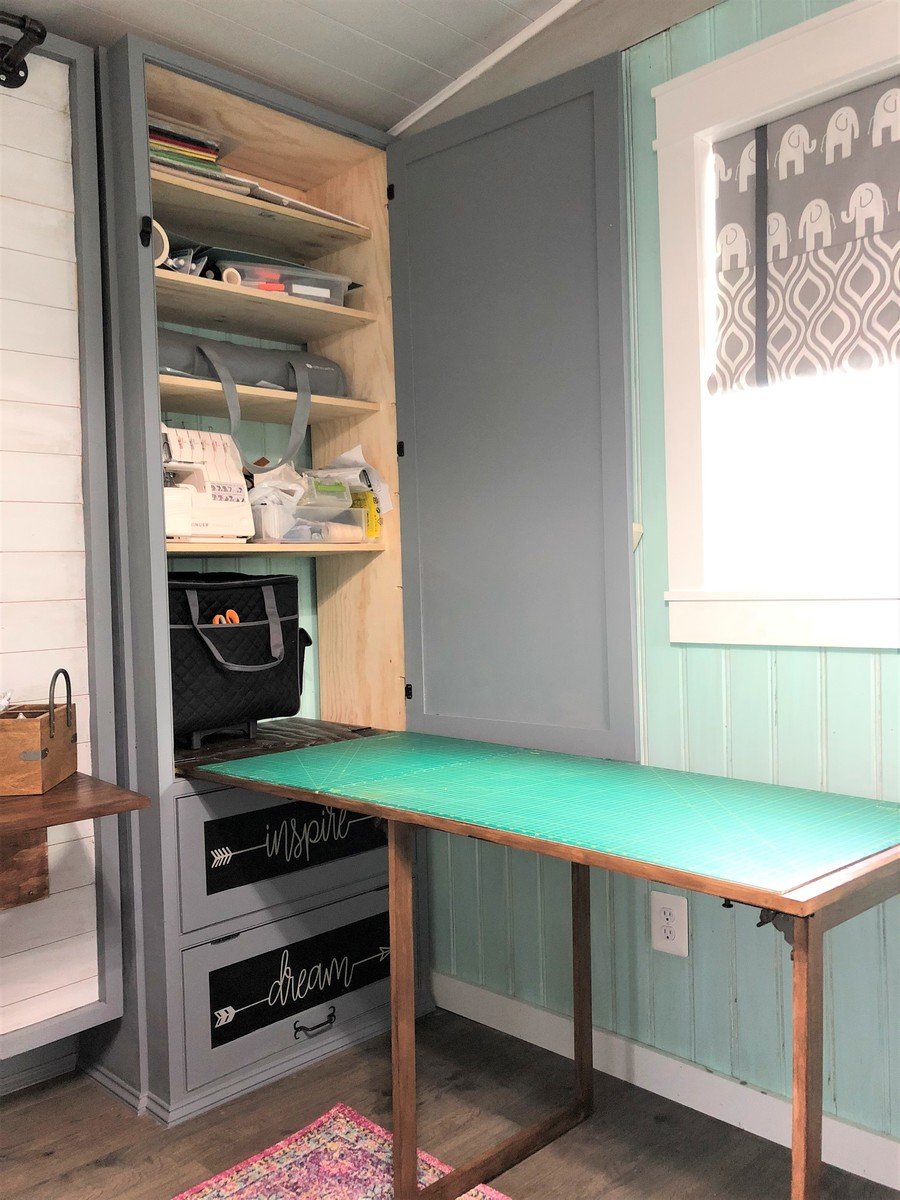
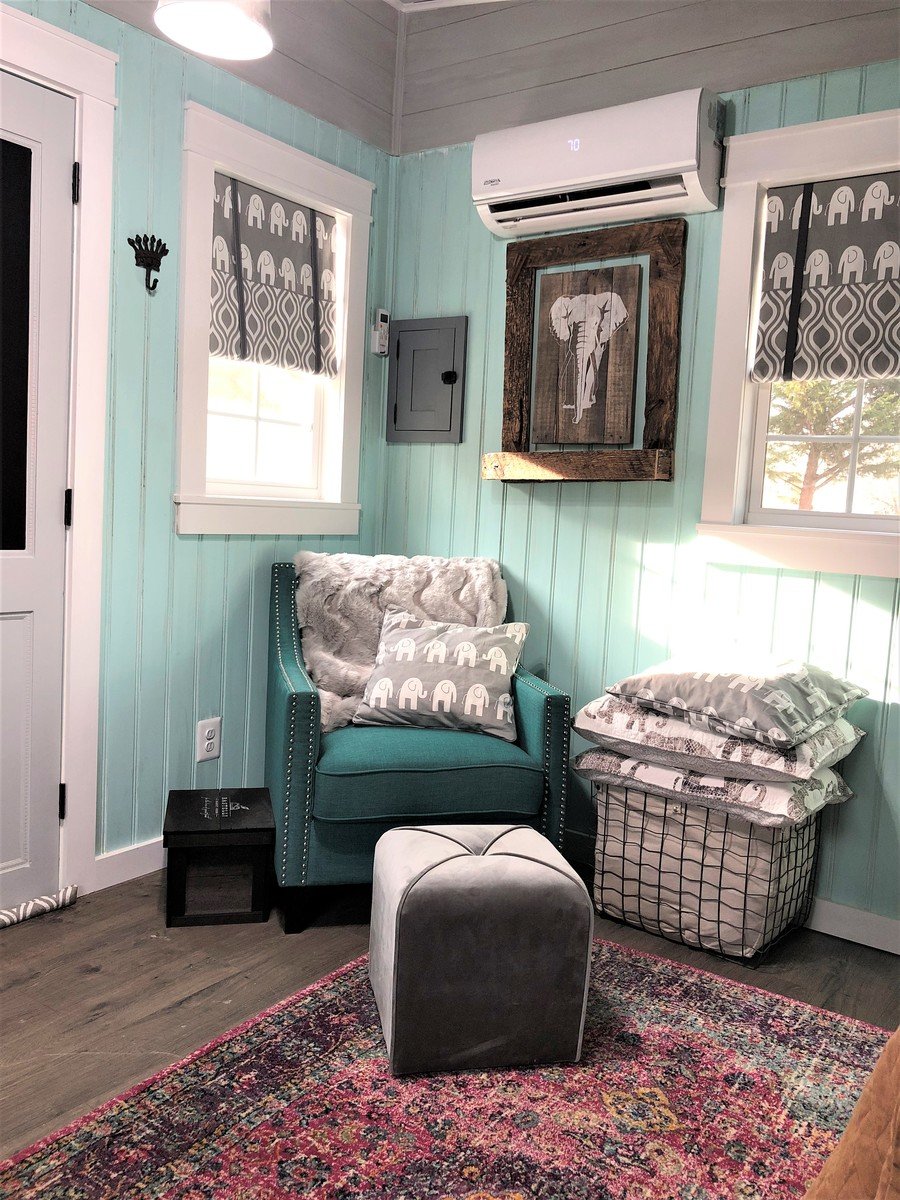
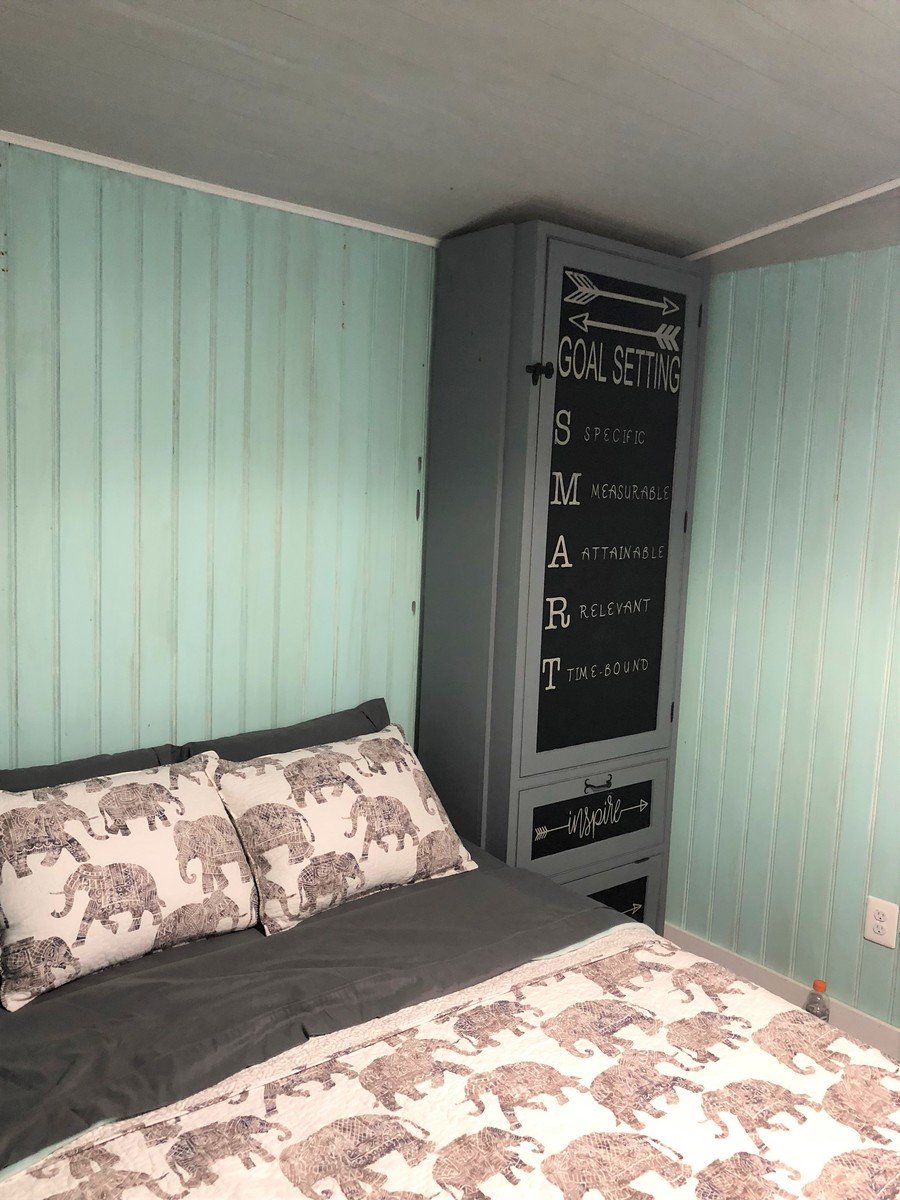
She Shed - Guest Room, Craft Room, Office
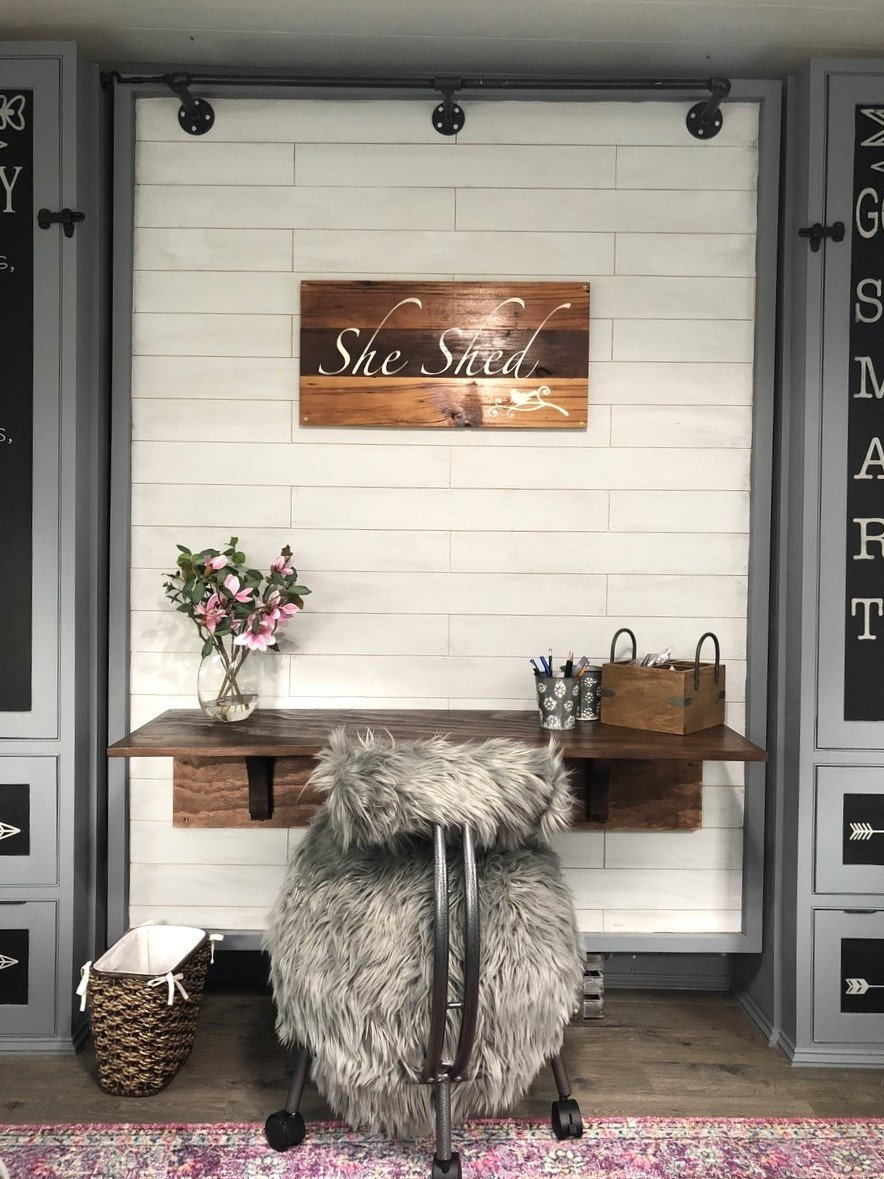
I needed an office and also a guest room so i built a she shed and all the furniture.

Built from Plan(s)
Recommended Skill Level
Advanced
I needed an office and also a guest room so i built a she shed and all the furniture.
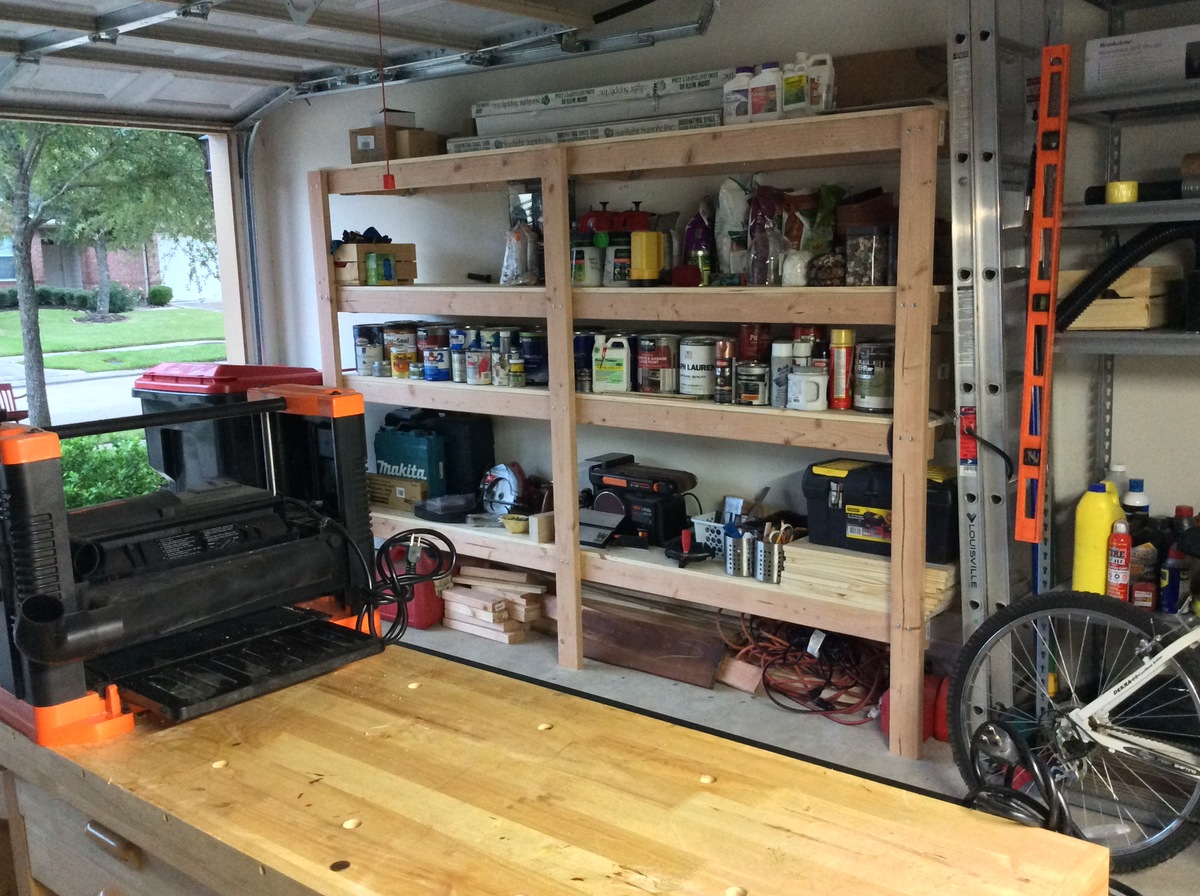
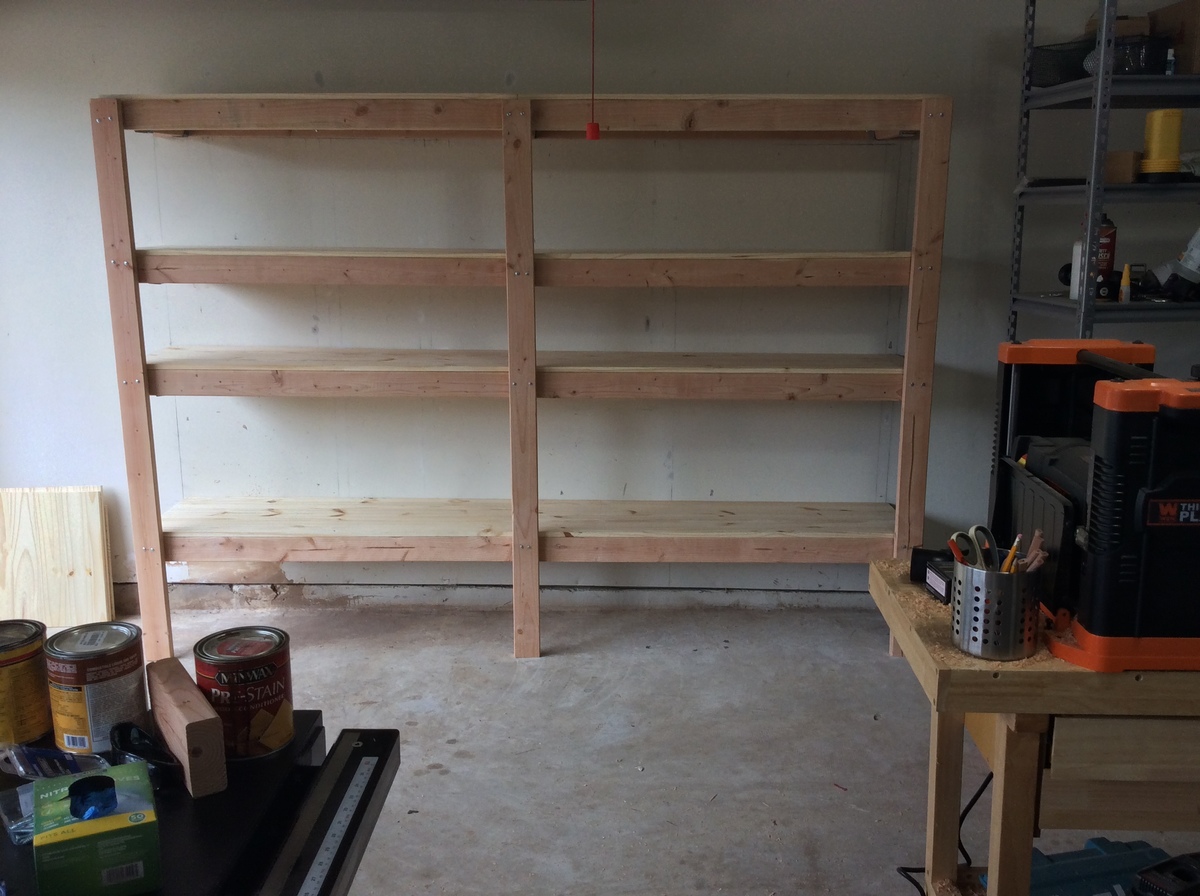
This was a pretty easy project, but I had to adjust the vertical legs to accommodate the sloping garage floor. I drew a horizontal line for the top edge then measured to the floor at the spacing I wanted the vertical legs. I used these measurements to cut the three vertical legs. It’s level and straight, even though my garage is sloped.

Not too bad of a project but had to a good bit of guess work so I could changed the plans for a queen size bed and flip in on its side.


Sun, 05/29/2016 - 18:50
Good evening!
I am new at wood working, and would be very interrested in knowing the different measurements you changed to get from a twin to queen murphy bed. If it is posted on this page, I tried but couldn't find it. Thank you for your help. Have a good day.
Marie-Julie
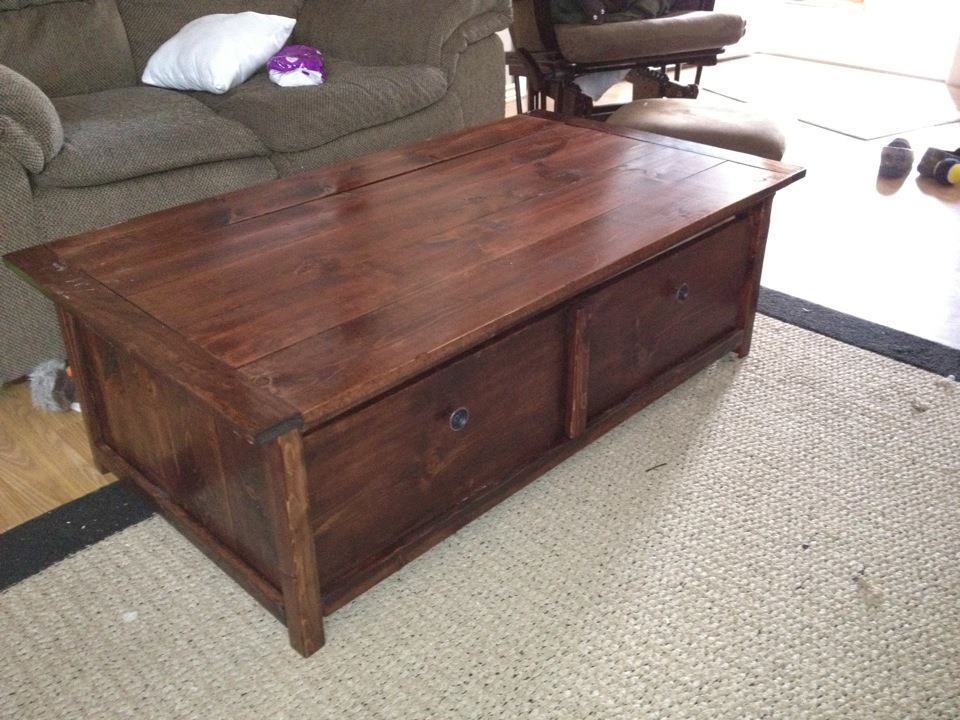
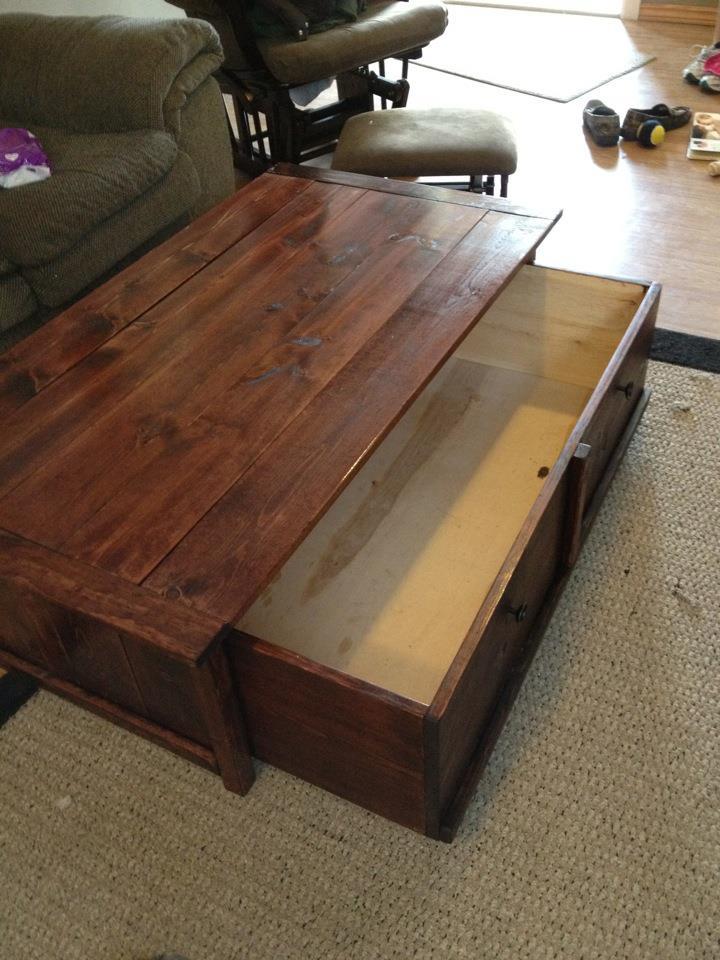
This is a project we built this weekend. My husband and I desperately needed some sophisticated storage space in the living room that is kid friendly, so we accepted the challenge. We together built a coffee table with trundle storage inspired by a plan on ana-white. We are truly inspired by her designs and plans help a LOT! Check out our work!
Tue, 03/13/2012 - 07:11
That looks very nice. This is the next project on my list I think.
It's really great to see the project with a different kind of finish also. How do feel about the functionality of it now that you have it "up and running" in your living room?
And... how do your kids feel about it?
Any drawbacks to this design for your needs, or tips that you can give me for building it over the next couple weeks?
In reply to Nice by Bunnie1978
Tue, 03/13/2012 - 07:53
Thank you for the compliments! So far we absolutely LOVE the functionality! It really is made for easy clean up, slides back and forth nicely (we used wheels that only go one way, not swivels.) and our one year old seems to enjoy it. The table and storage compartment are just short and sturdy enough that she can pull herself up on them and because the storage compartment is not on swivels it doesn't move when she does. She is the first grand-baby on both sides of the family so she has approximately 175 toys that we have to find a place for and they all fit very nicely. With the large storage we have noticed that she is pulling out and playing with different toys that she could never get to or find before. As far as design is concerned we did have to modify it a little bit to work with the tools that were available to us. We wish the side legs were sturdier, even with 6 screws in each side they are still a bit wobbly. With the storage box underneath it helps to support it from swaying but we are still talking about ways to make it better. A possible support beam on the bottom of the back side? All in all we love the piece it fits perfectly into our space and offers a LOT of storage that we didn't have before. My husband and I had tossed around the idea, before we started, of making the piece smaller but we are glad that we didn't.
Suggestions: if you are going to buy based off of the shopping list provided make sure you also buy 2" screws. They forget to include that in the shopping list but include that in the directions. If you have any other questions feel free to ask. It was a really really fun project for us.

Tue, 03/13/2012 - 09:10
I just finished my Tidy Up Table too (brag post coming!) and I decided to add one L-bracket to each corner because of the wobble. I've also got a baby (7 months) and it's nice to have that added stability just in case. Now the sides are solid as a rock!
Tue, 03/13/2012 - 13:08
A little bit of medal support would probably be really good... I was actually thinking of modifying the design a little bit already, which will probably serve the end result to provide better stability. I think I'm going to make the storage trundle a little shallower, and put a row of small square drawers above it on each side. That is of course, much more complex, and then detail the trundle with the small squares so it looks like a cabinet of drawers all the way down...
What do you think of that idea? I mentioned that on the plan post too... still kicking it around a bit.
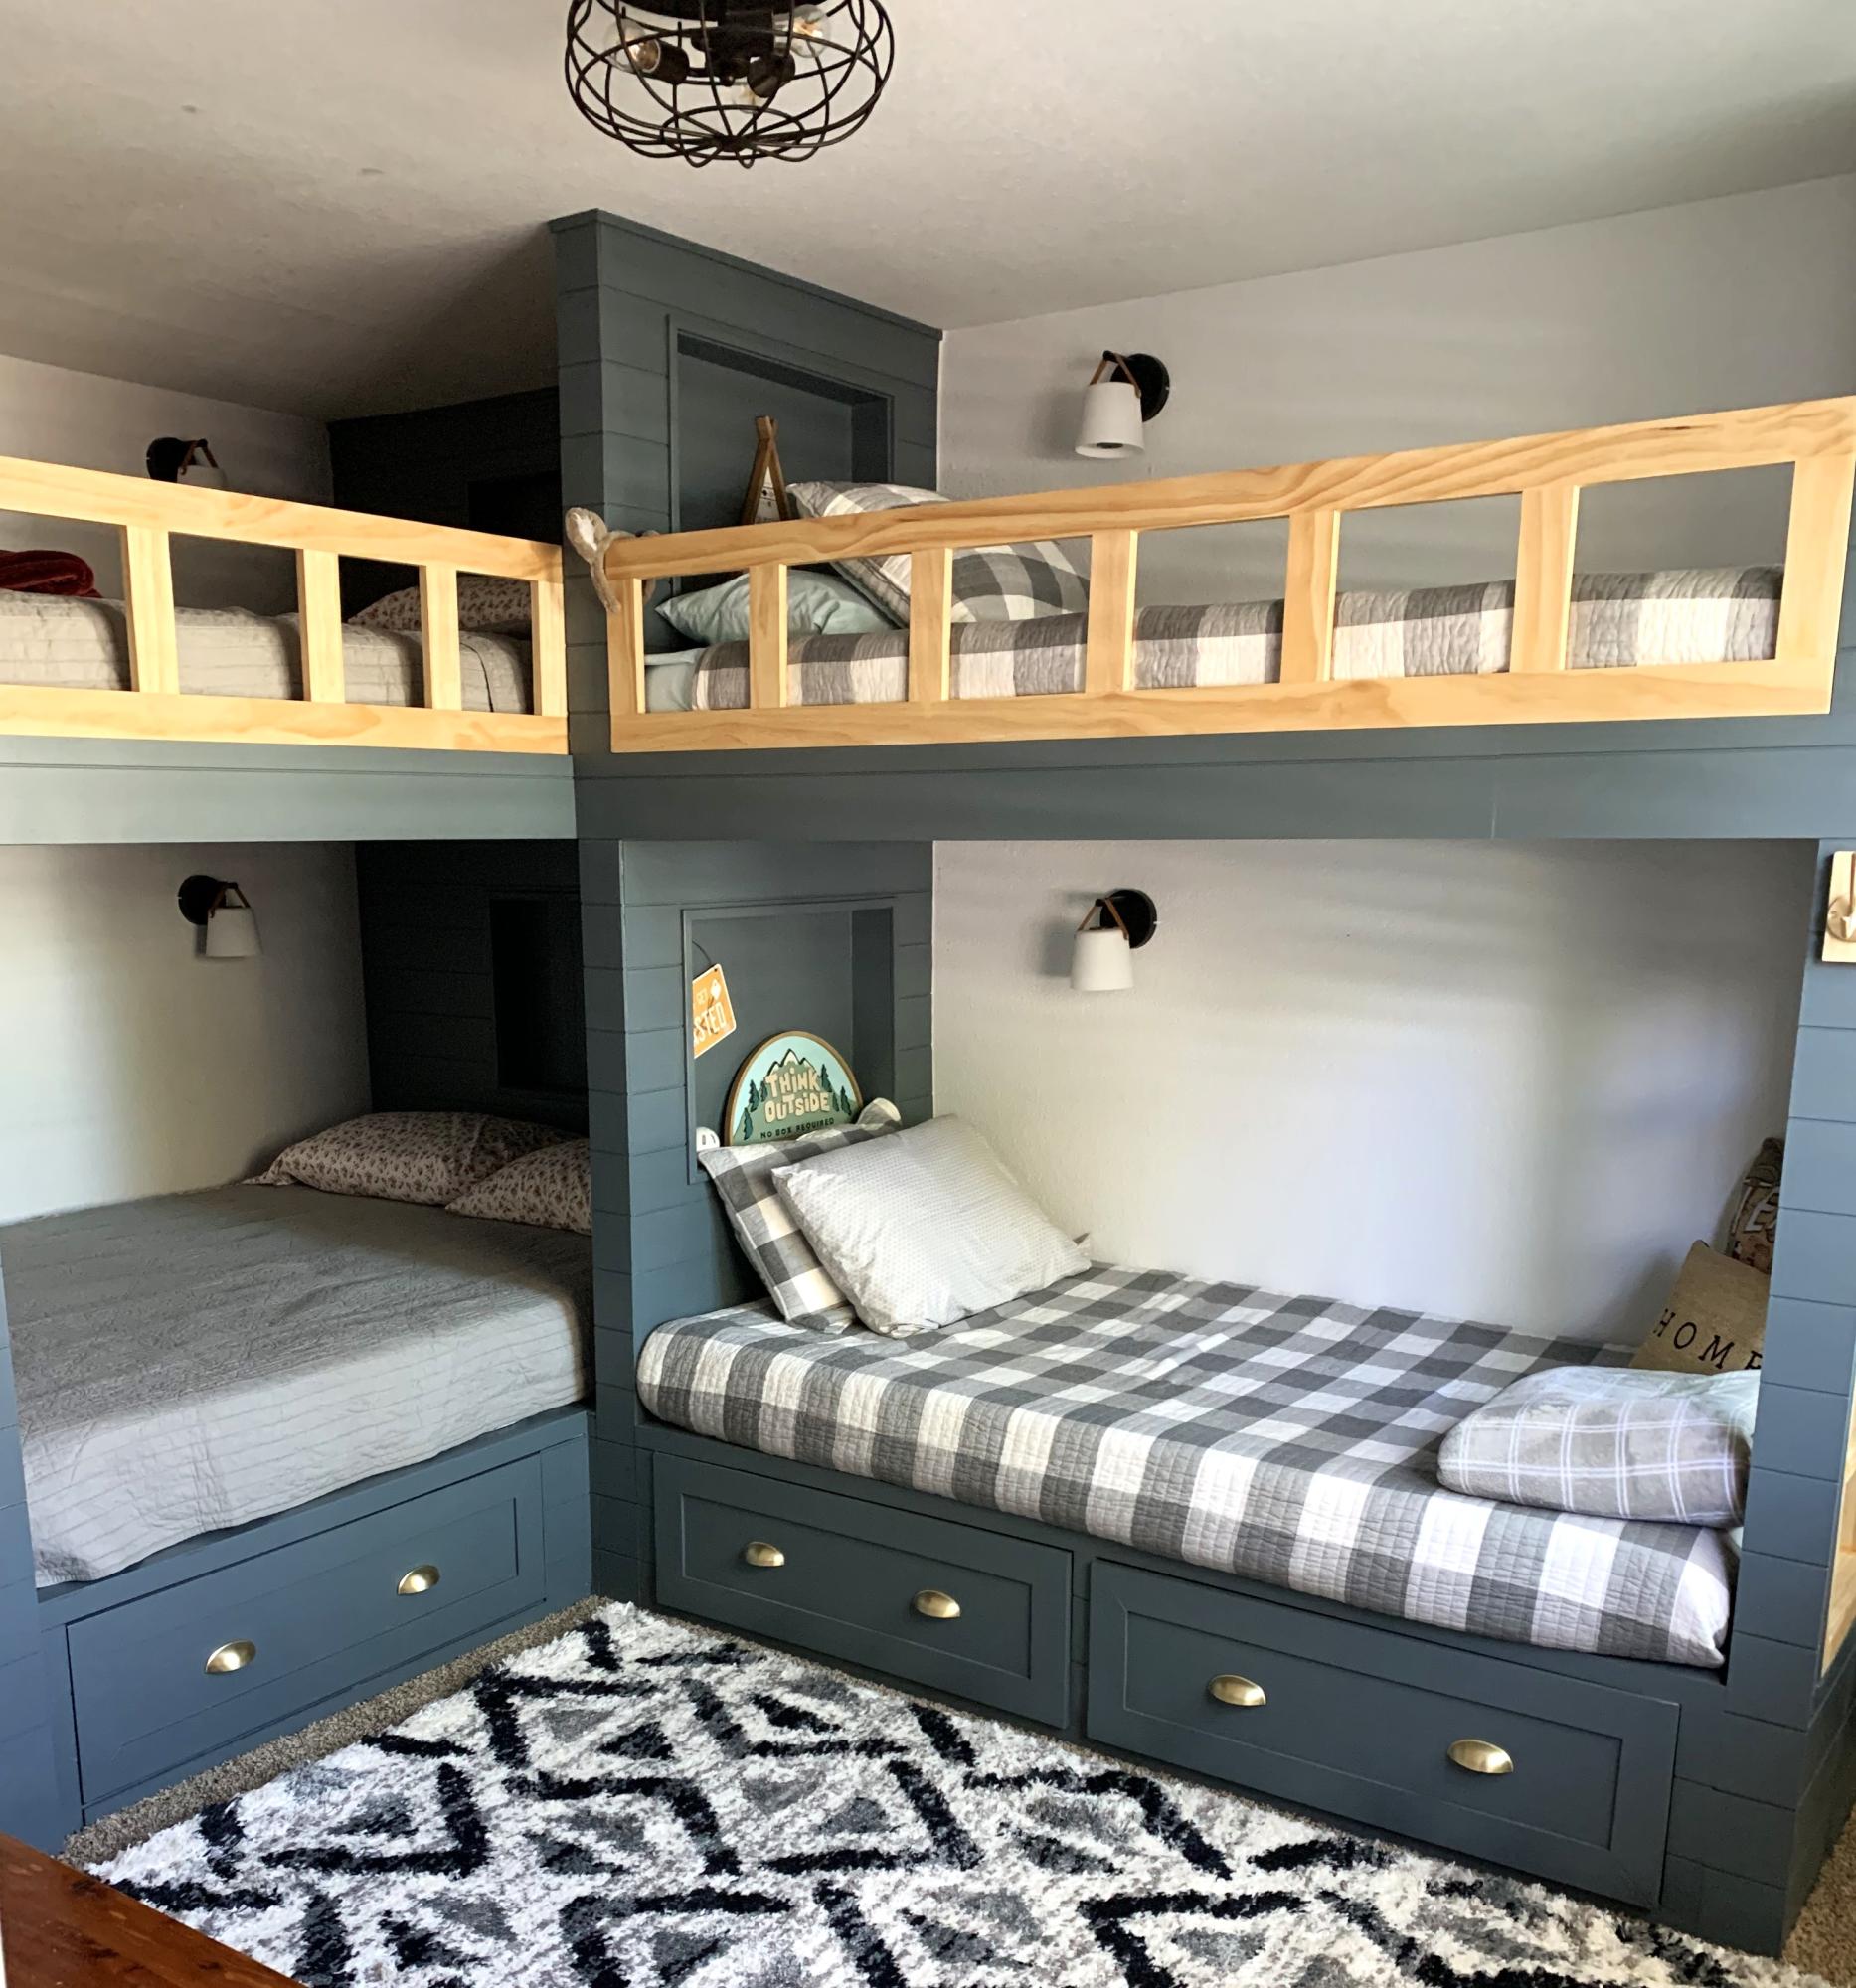
The queen and twin bases were base on your twin bed with storage. Pretty easy to do. This is my first time doing anything this big. I live in a four season resort town and needed beds for heads for ski season.
Debbi H - IG - callintn

My first Ana White project. My friend Shelley and I are RN's, and she got me hooked on woodworking. I started with cushions from Lowes ( in the sizes that you recommended)to see if I loved the sectional for a few years. I loved it so much I decided to have custom Sunbrella fabric ones made. Even though the custom ones were more expensive, it has been worth it. They go perfect with my California Mission style home. Now I want to add the armless one and make it a U-shape. I did add a piece at the bottom back of each sofa to hold the cushions in. The seat cushions would slide out the back when sitting on the sofa. I made the coffee table to match. Our family loves it!

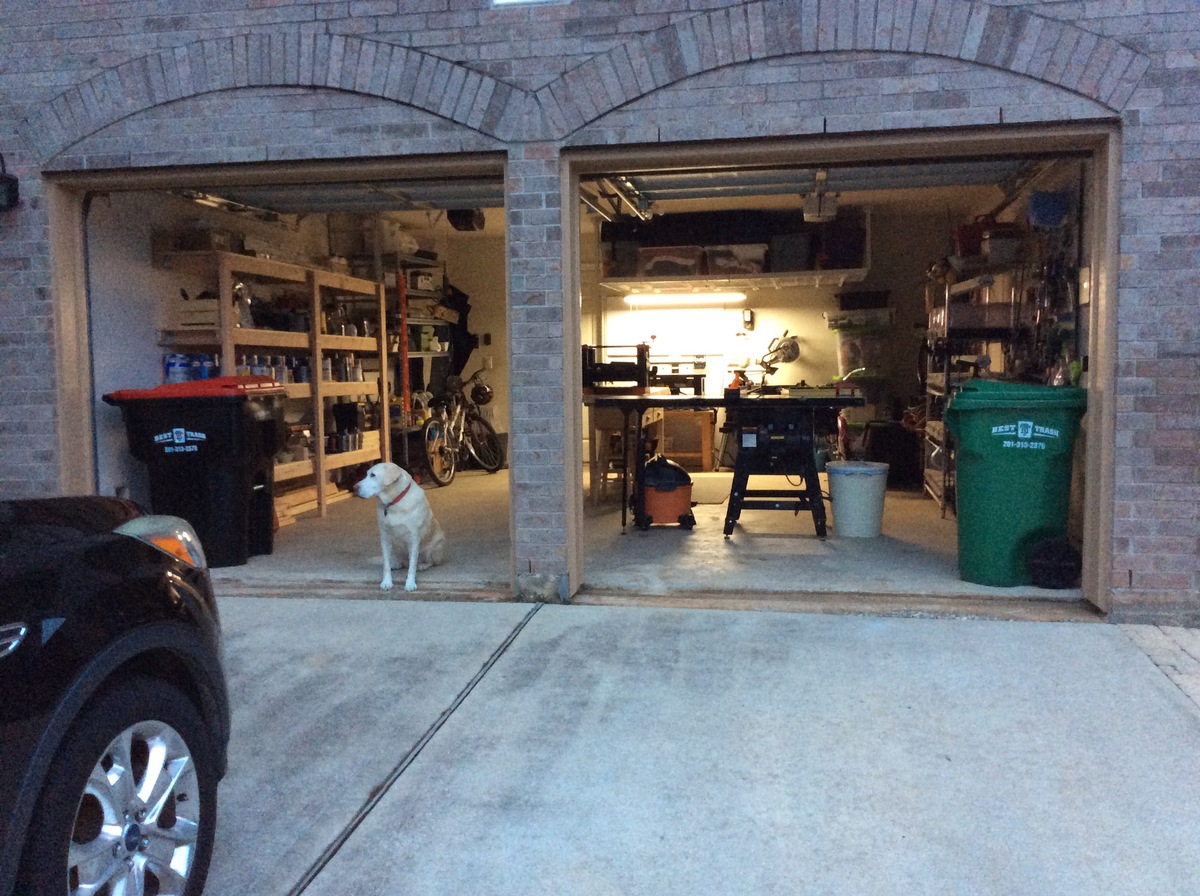
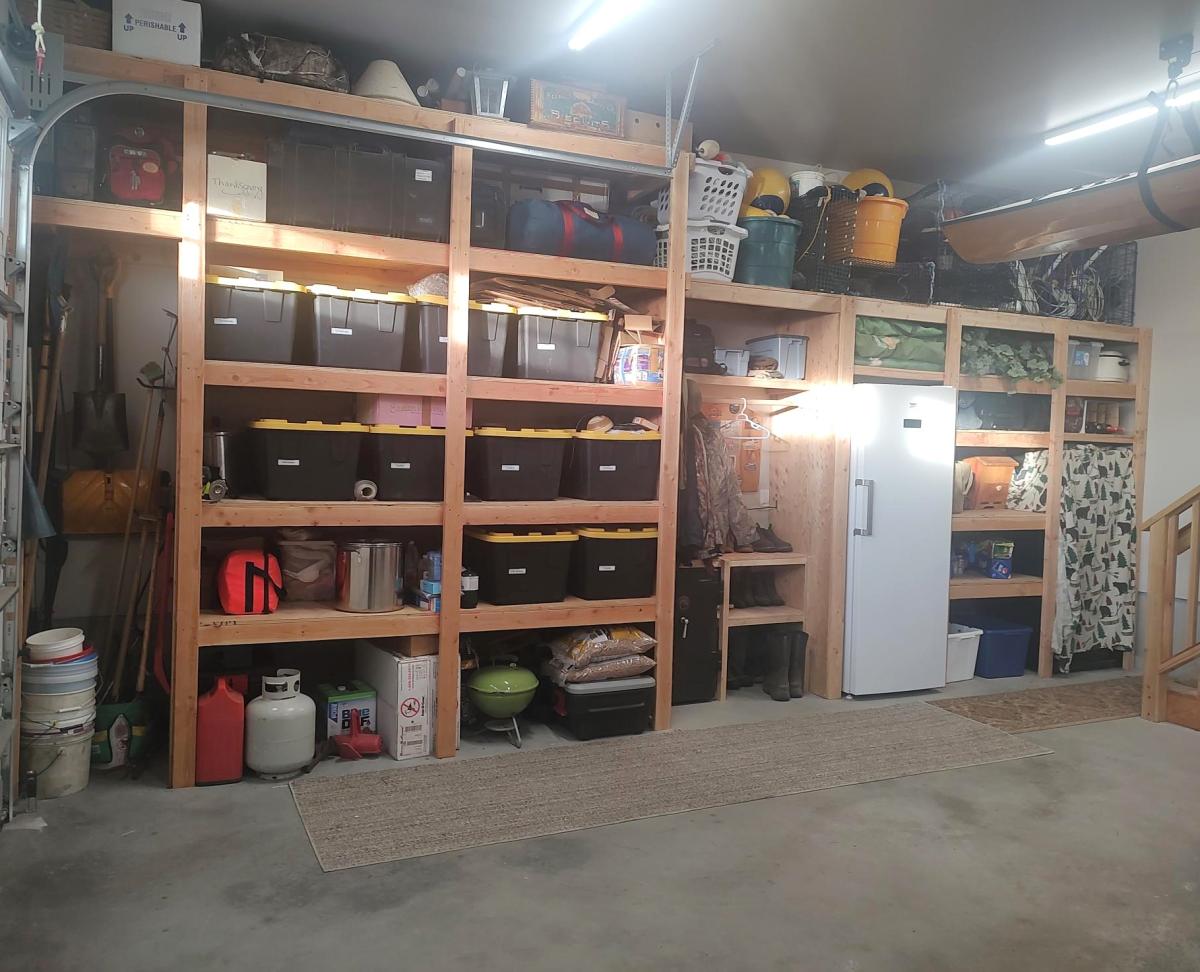
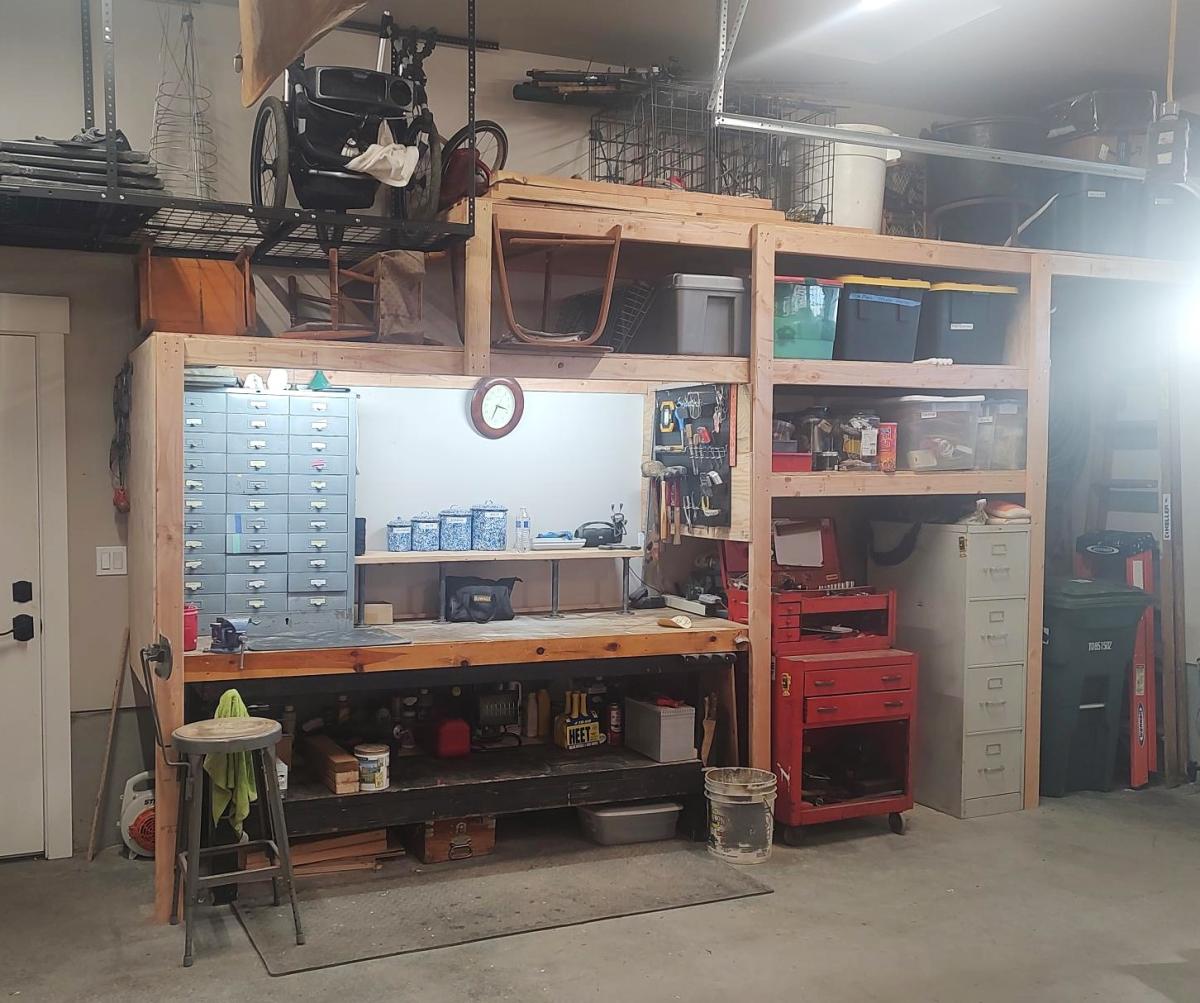
I just finished shelves on both sides of my garage using your video. I built a coat rack and boot rack. I also made space for tall items like tools and ladders near the garage door. I had to also build in a gun safe, freezer and my work bench. Everything came together and now I have everything in bins on shelves.
Gary Hoffman

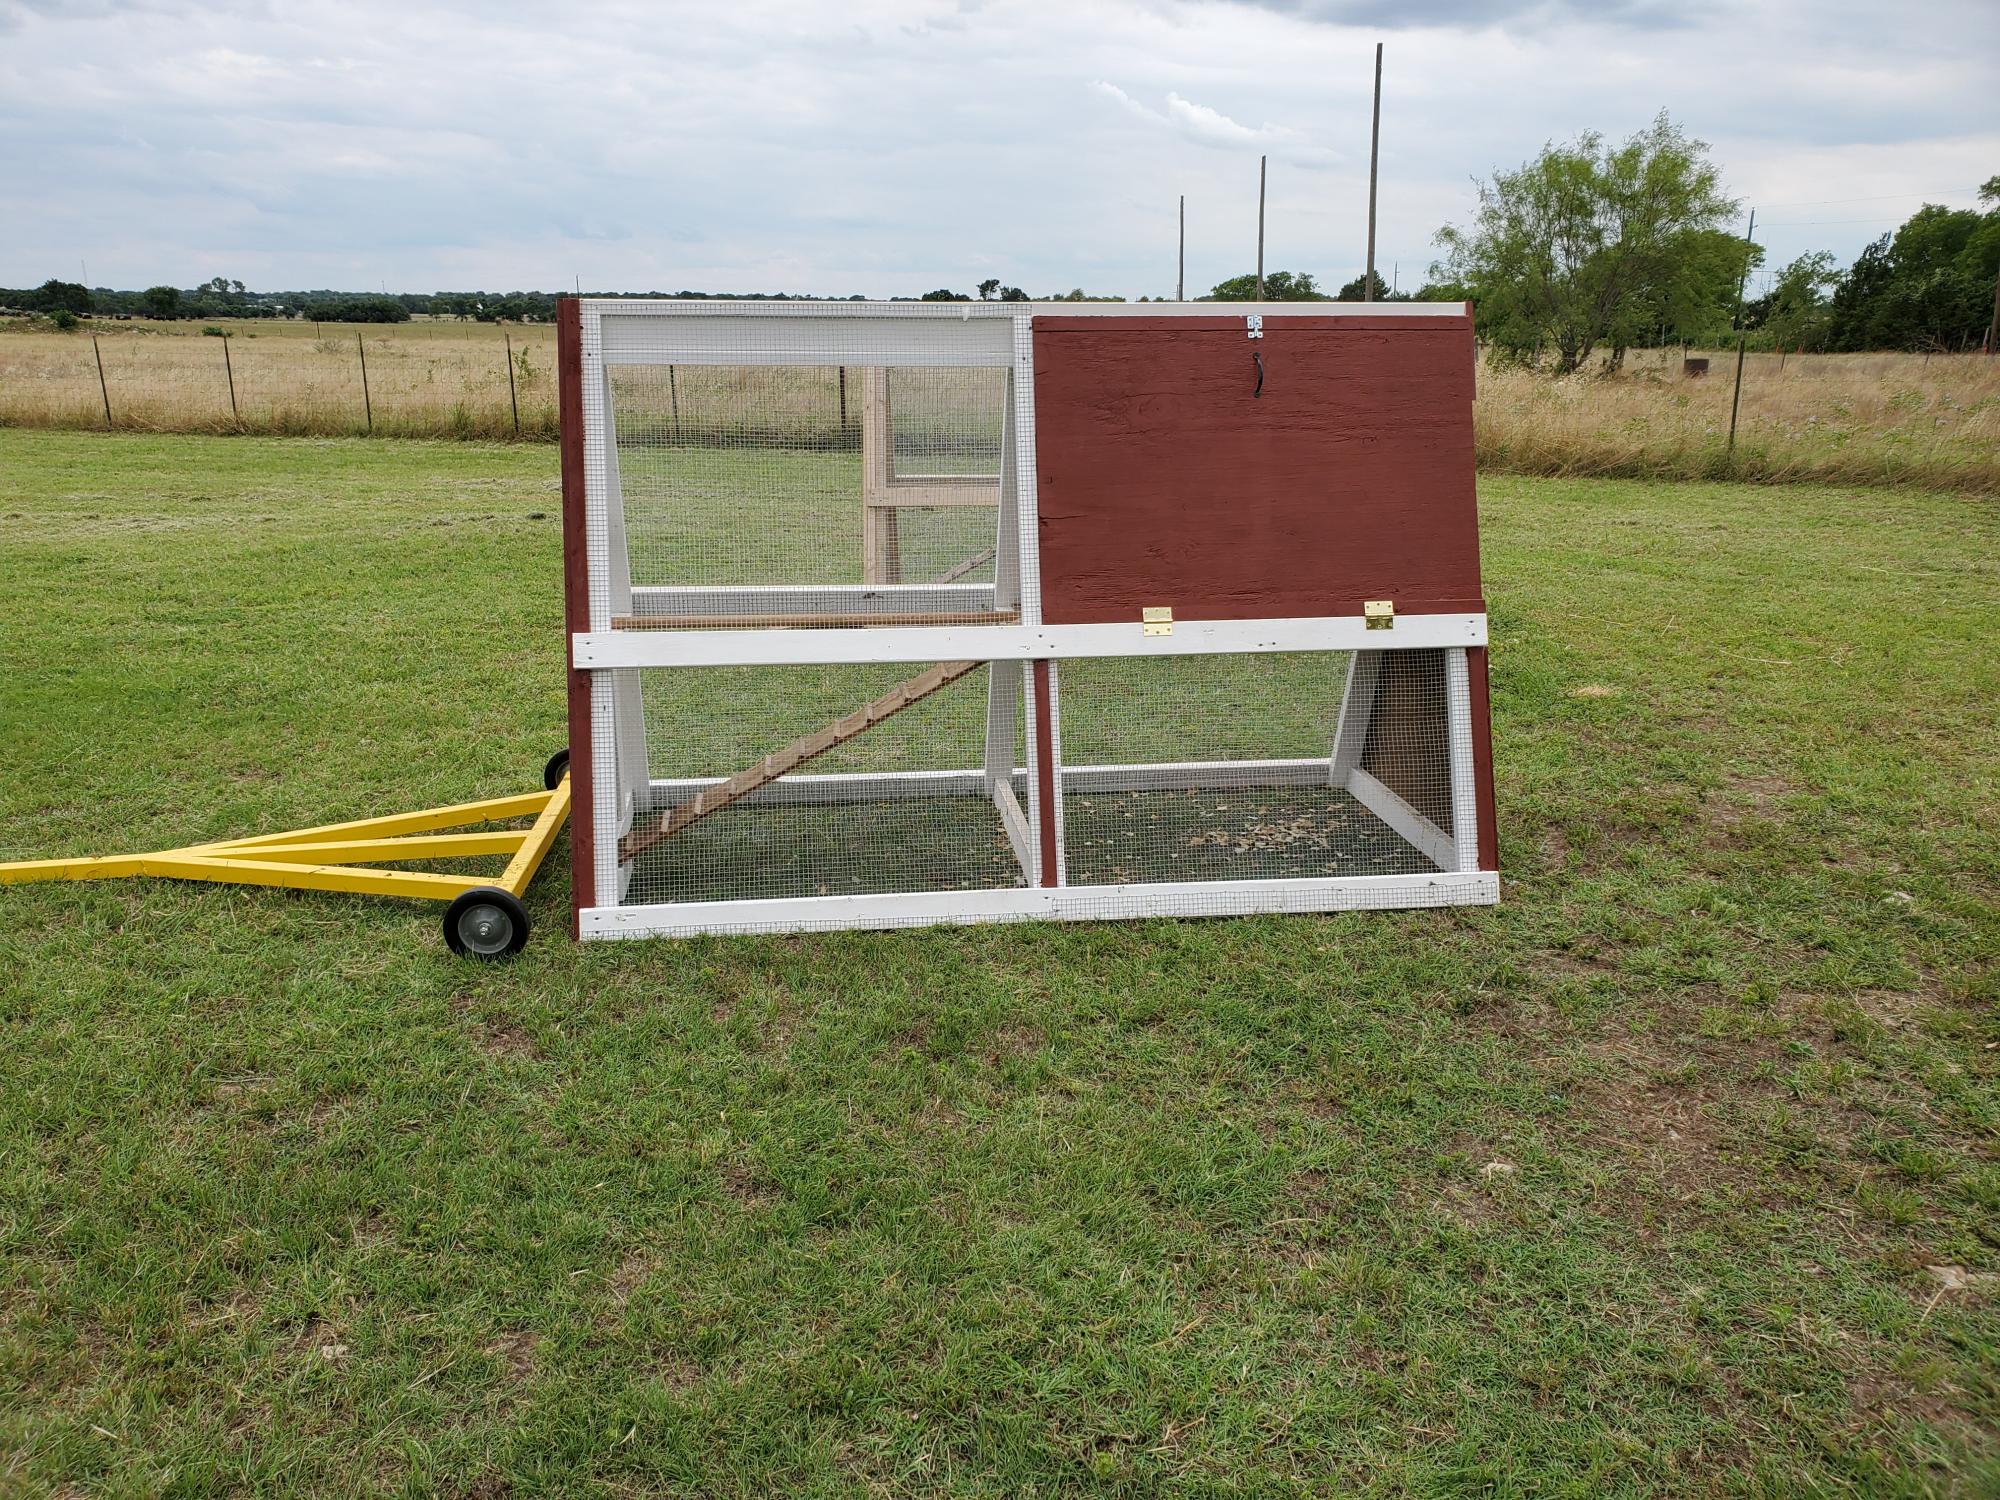
Quick a-frame coop for 4 chickens.
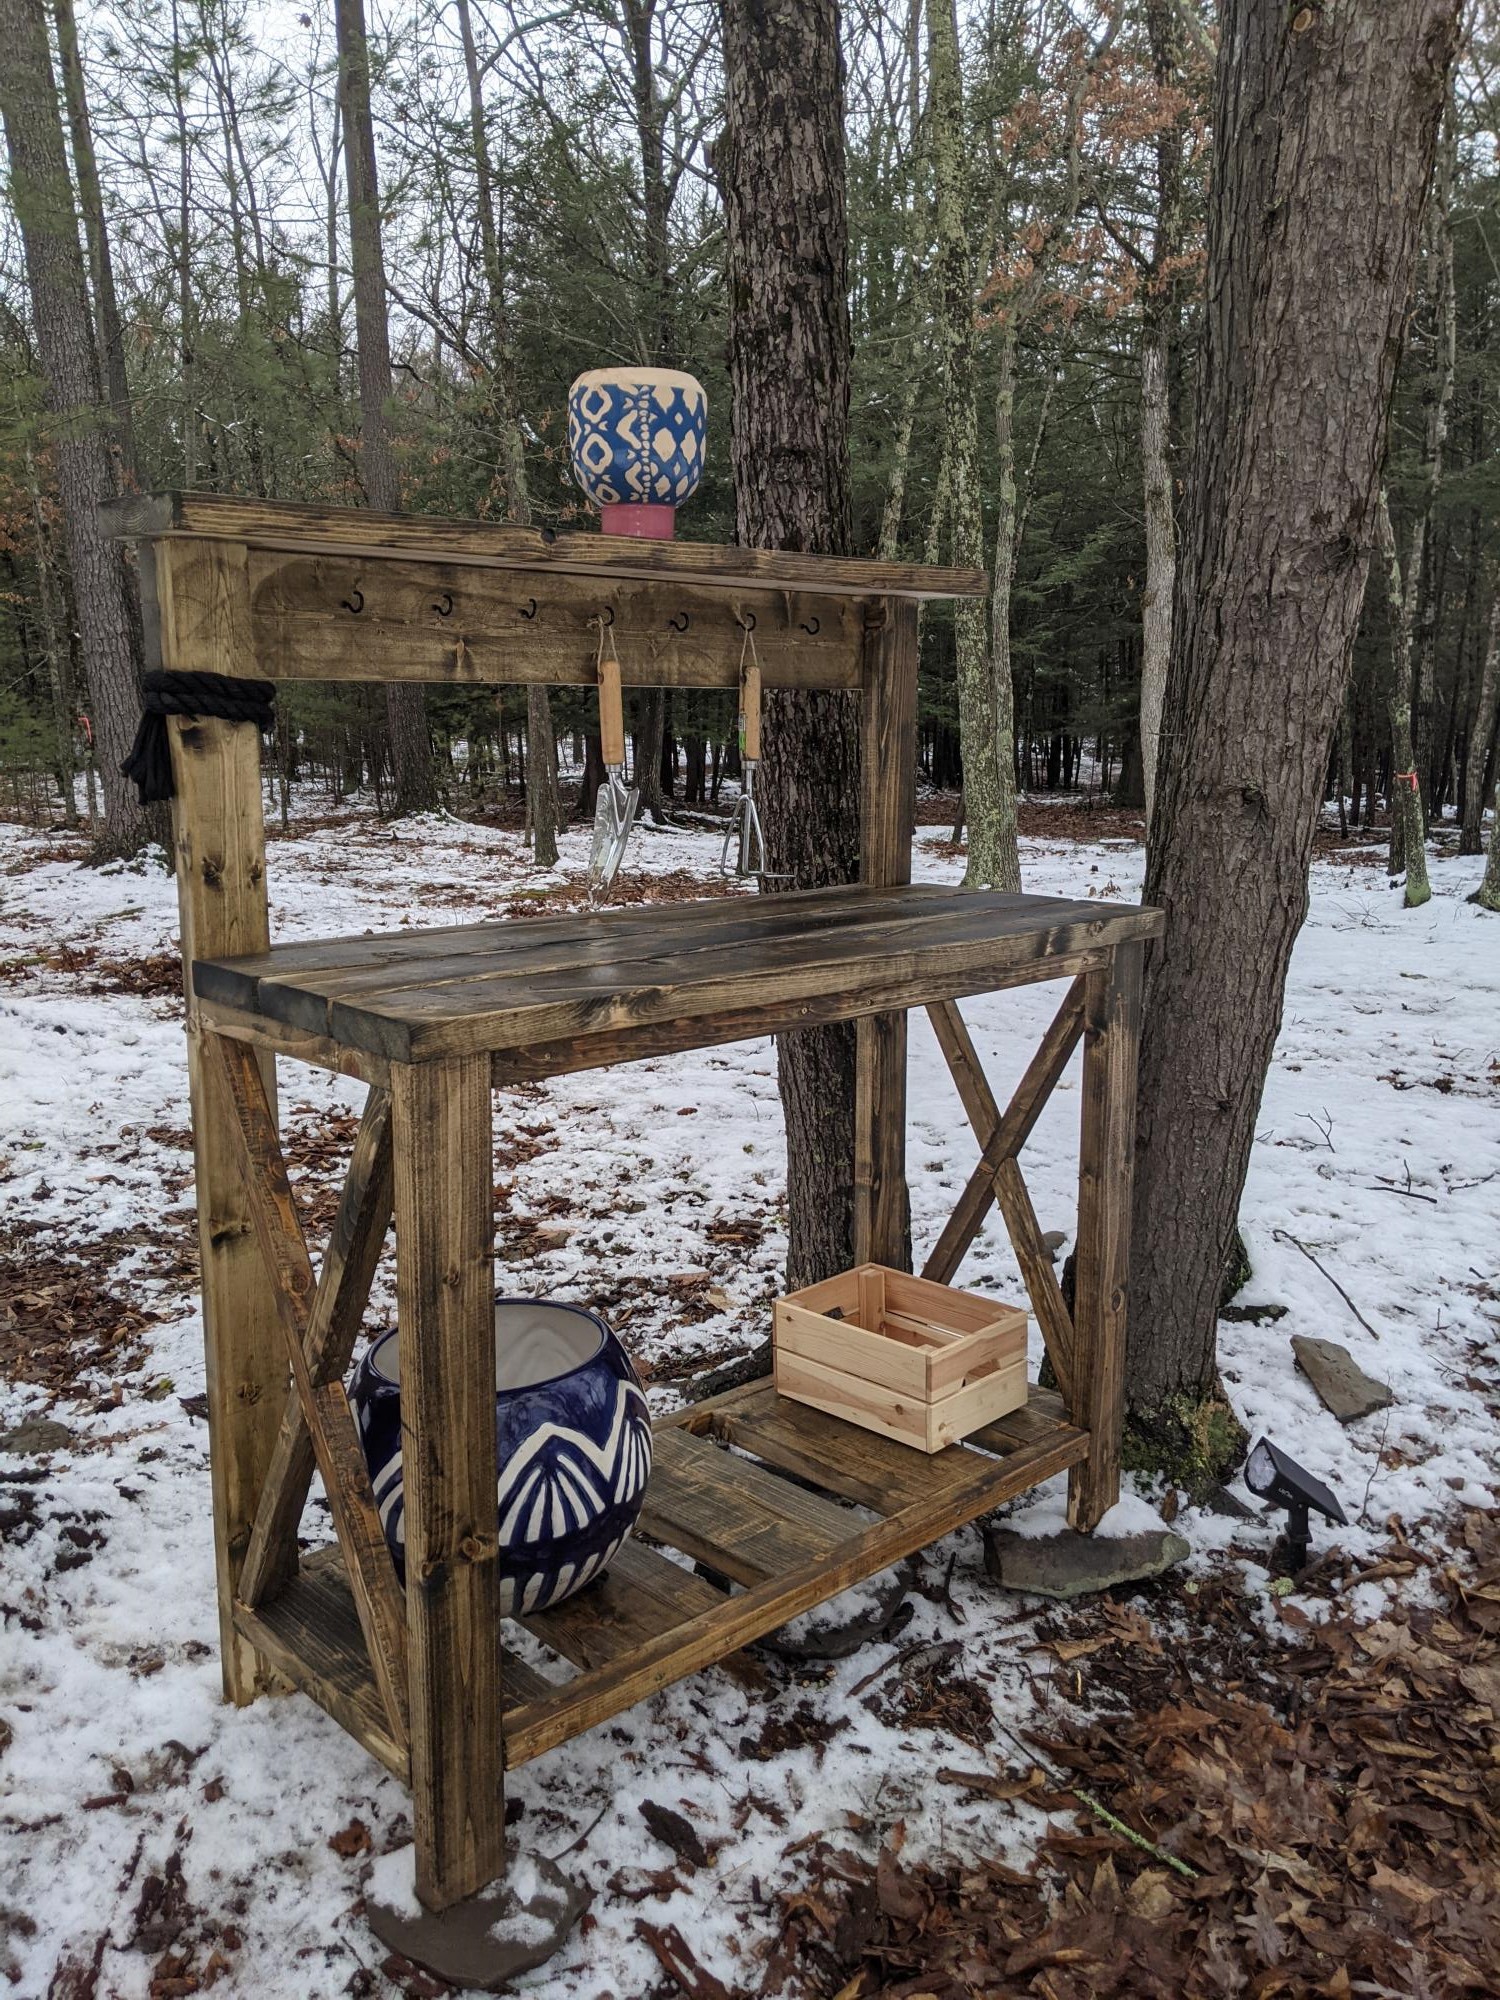
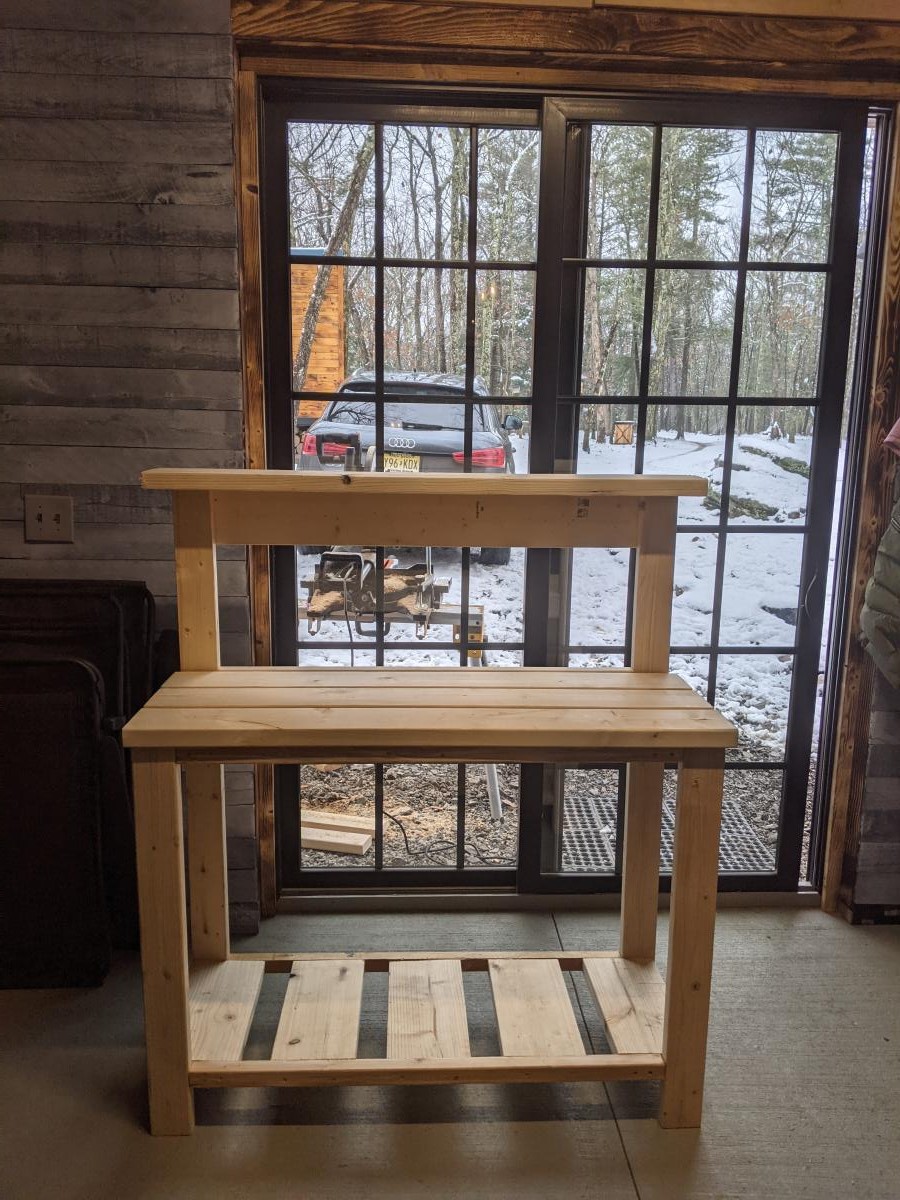
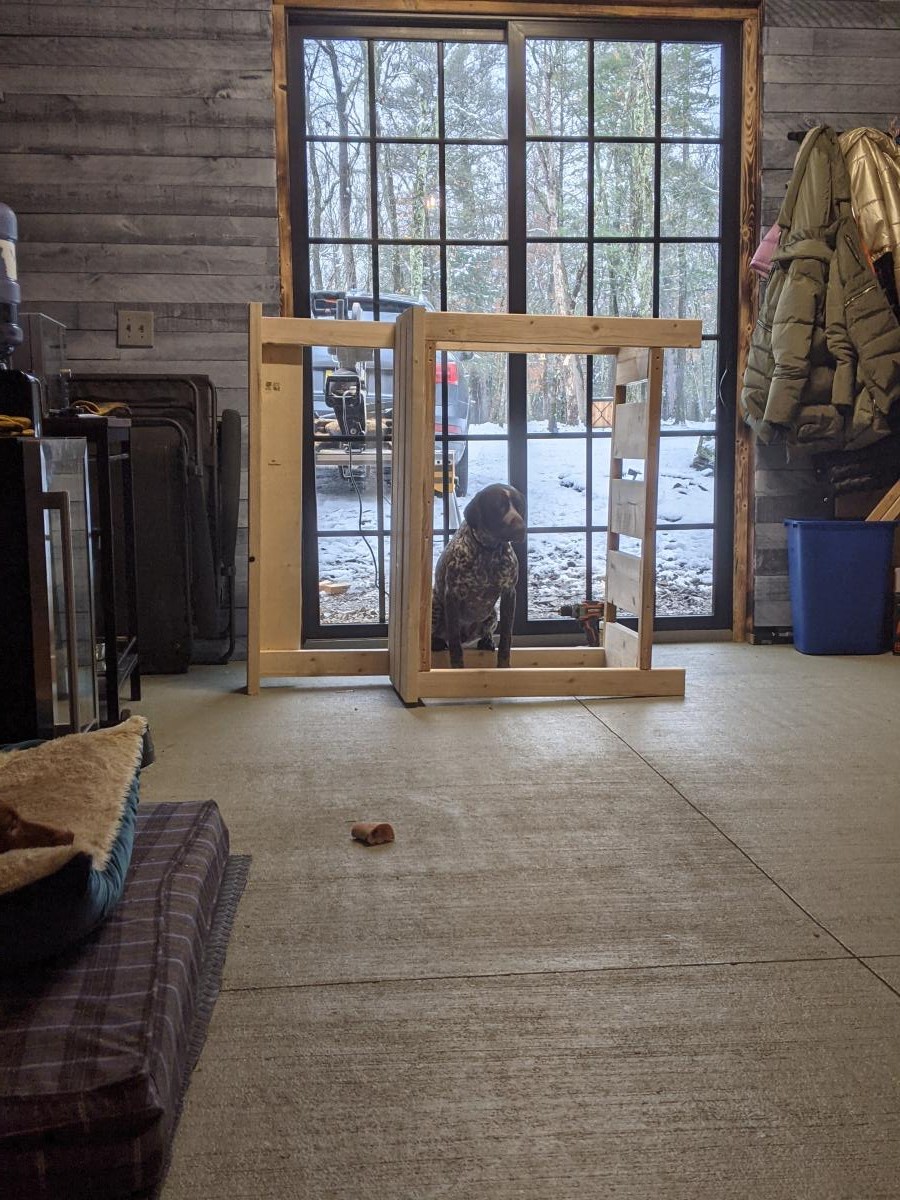
Potting table, was easy to build, very strong and stable because of the size of the wood used. It's a big table -- an entire dog fits inside :)
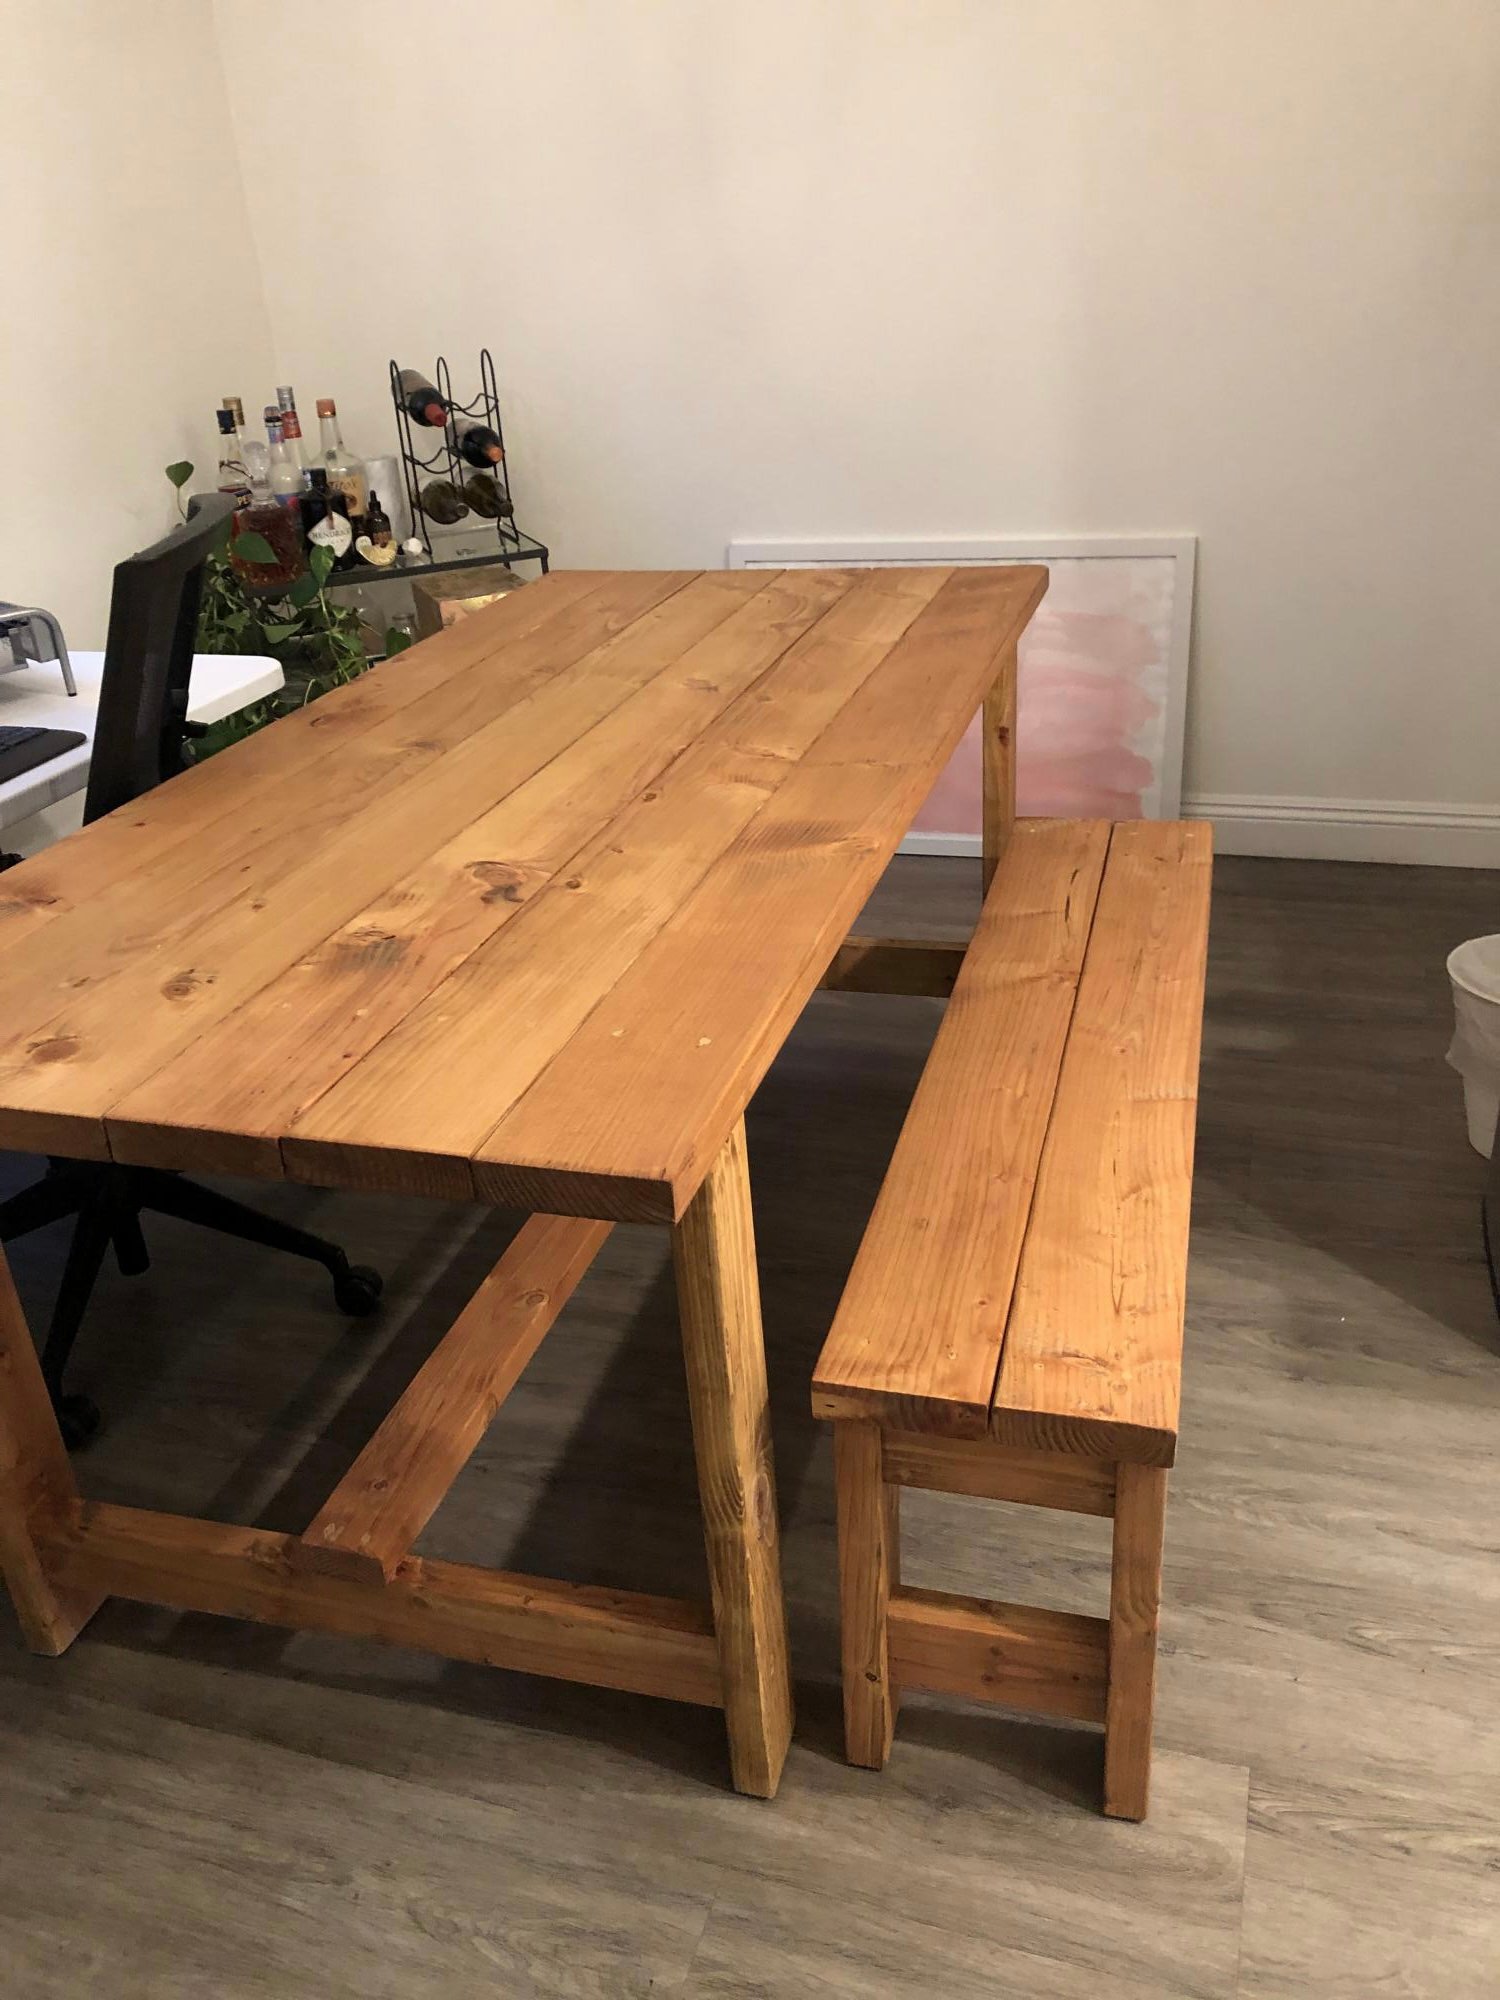
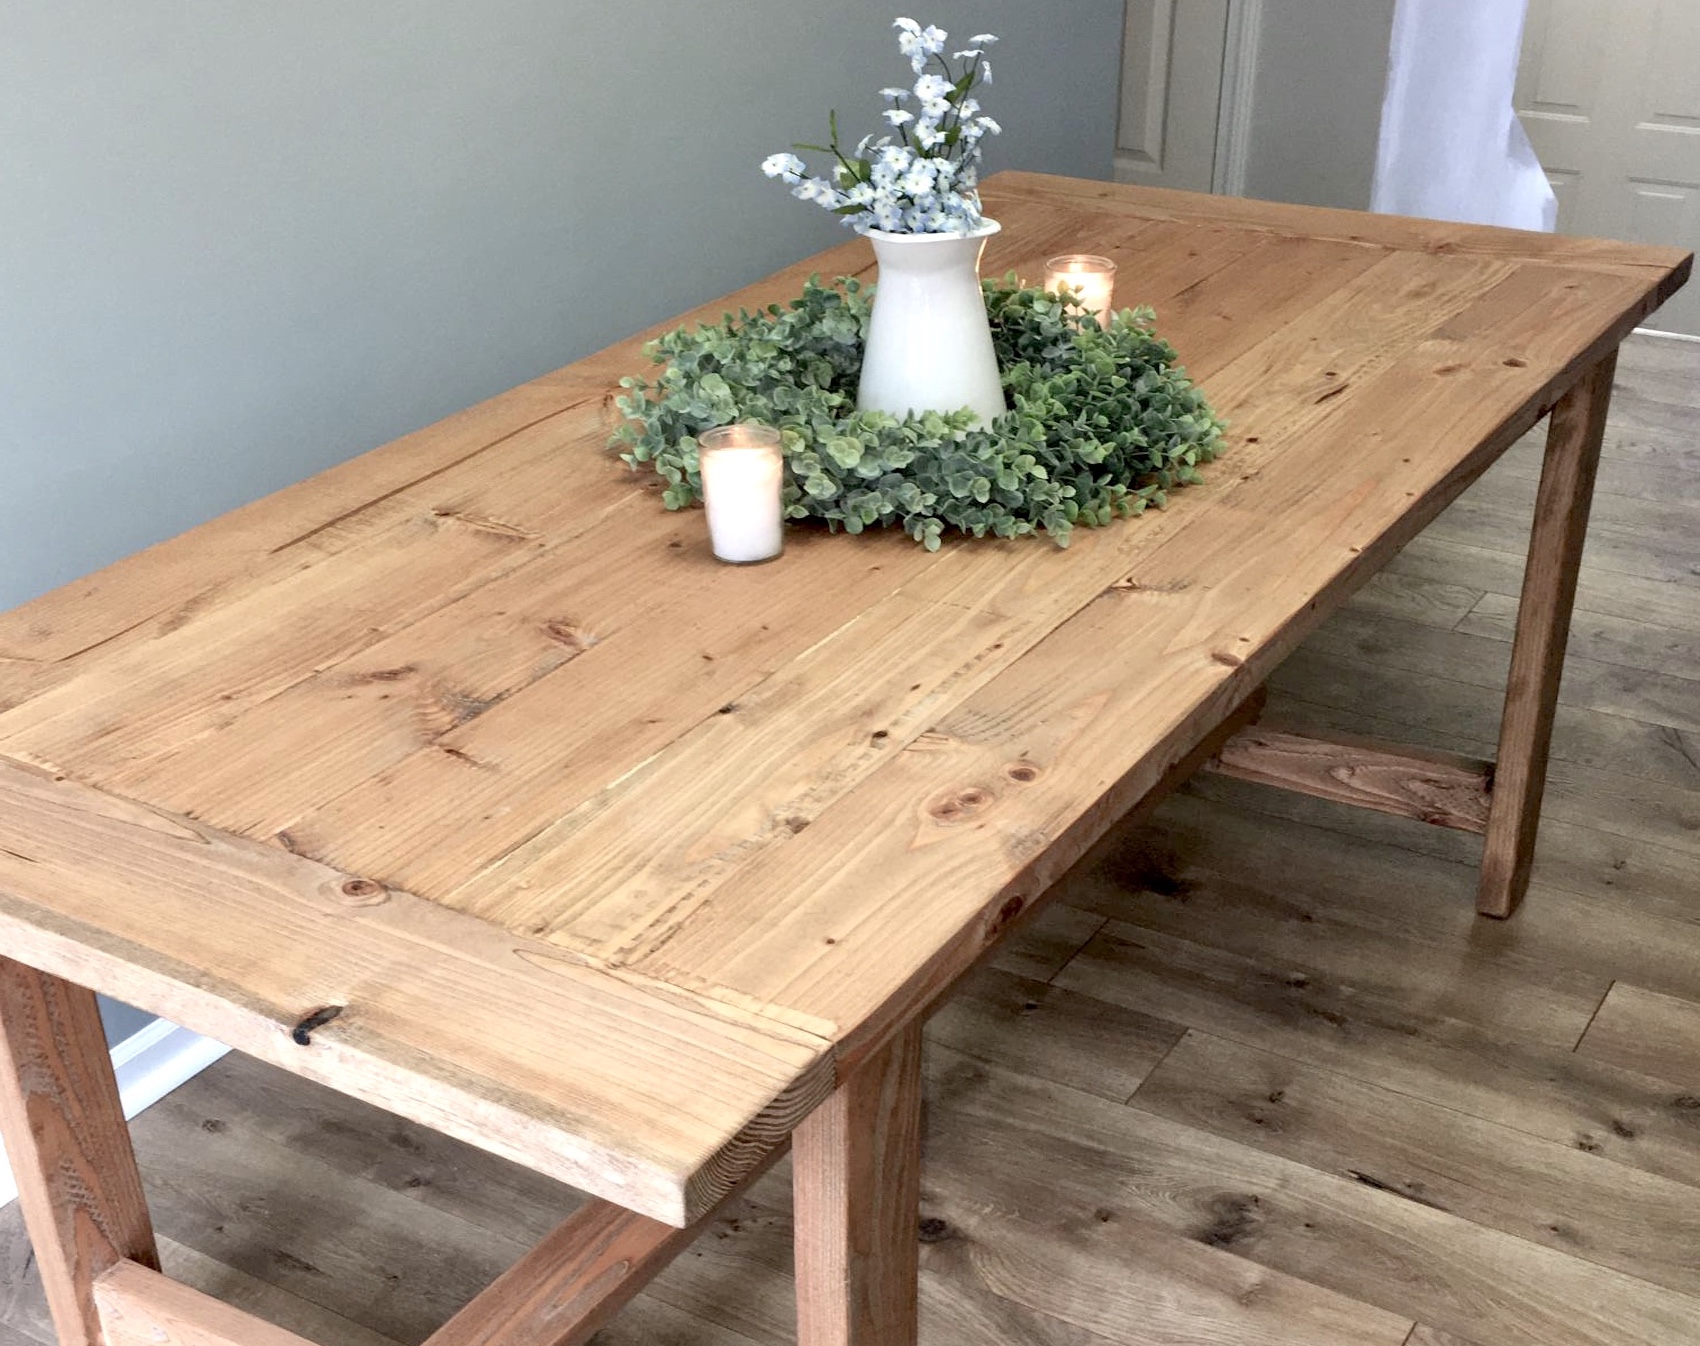
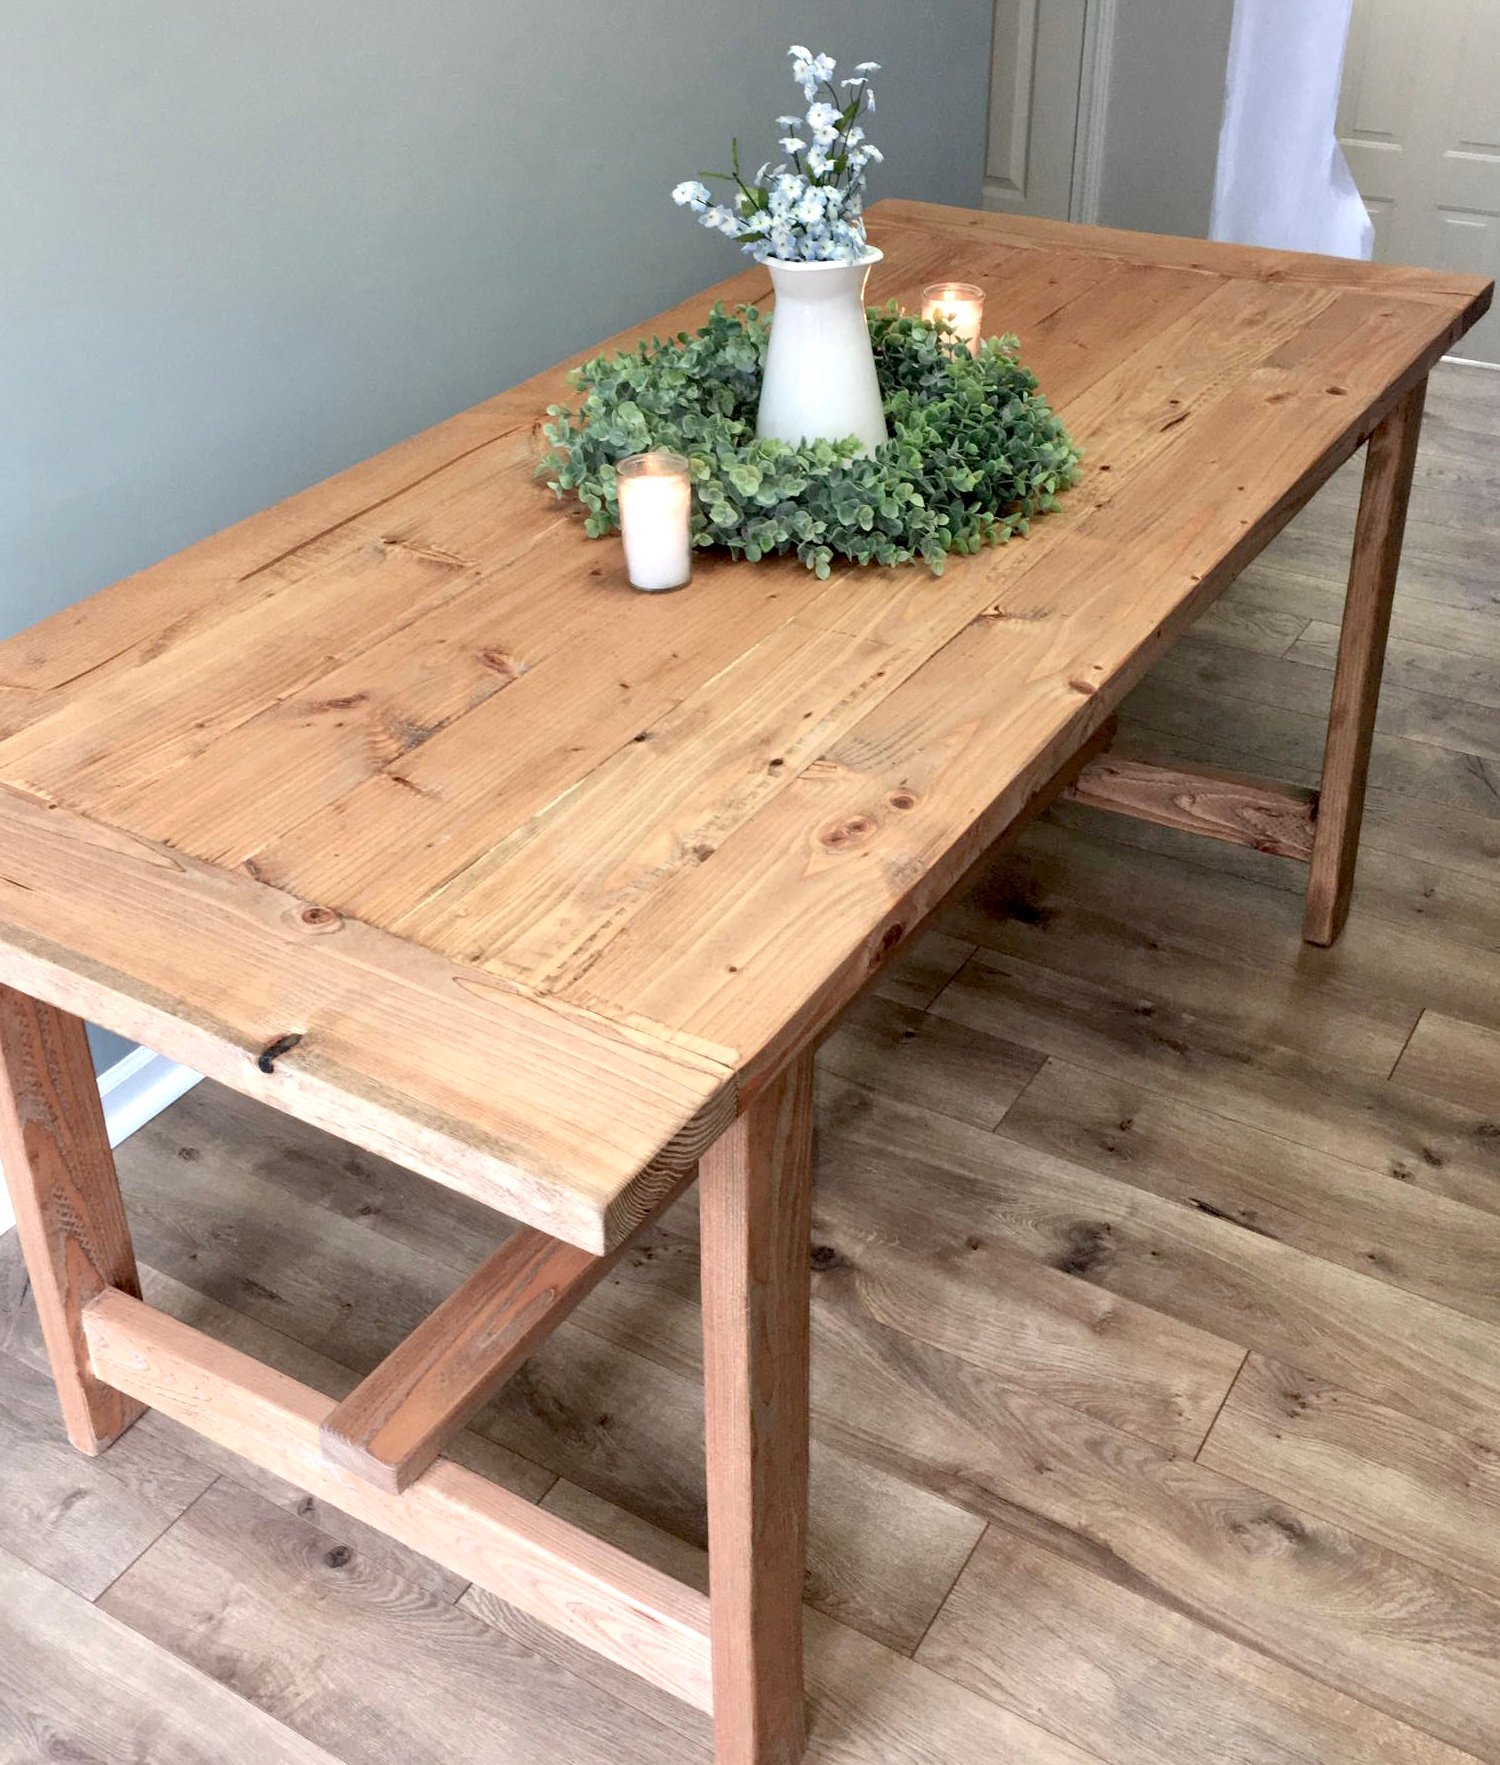
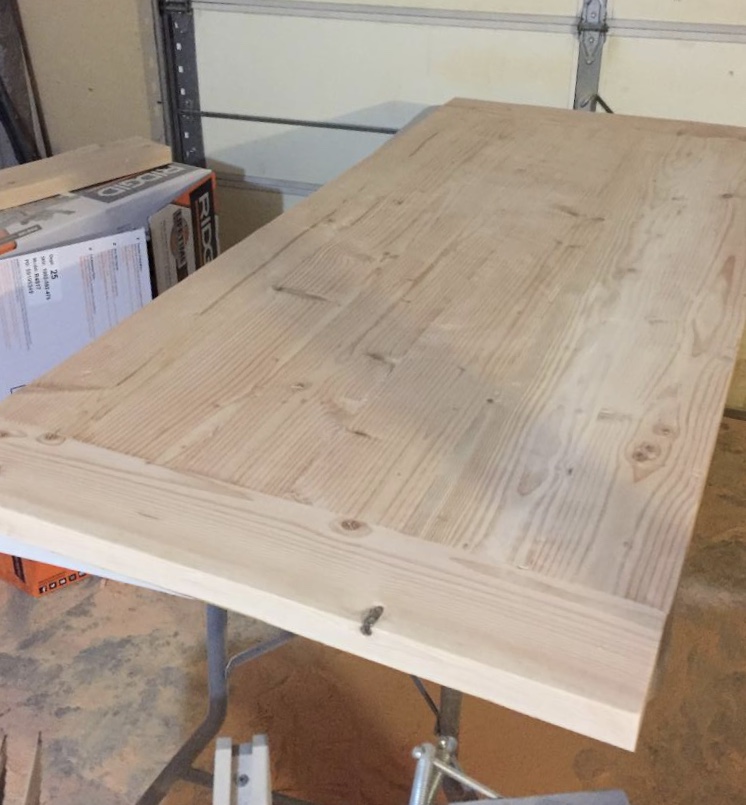
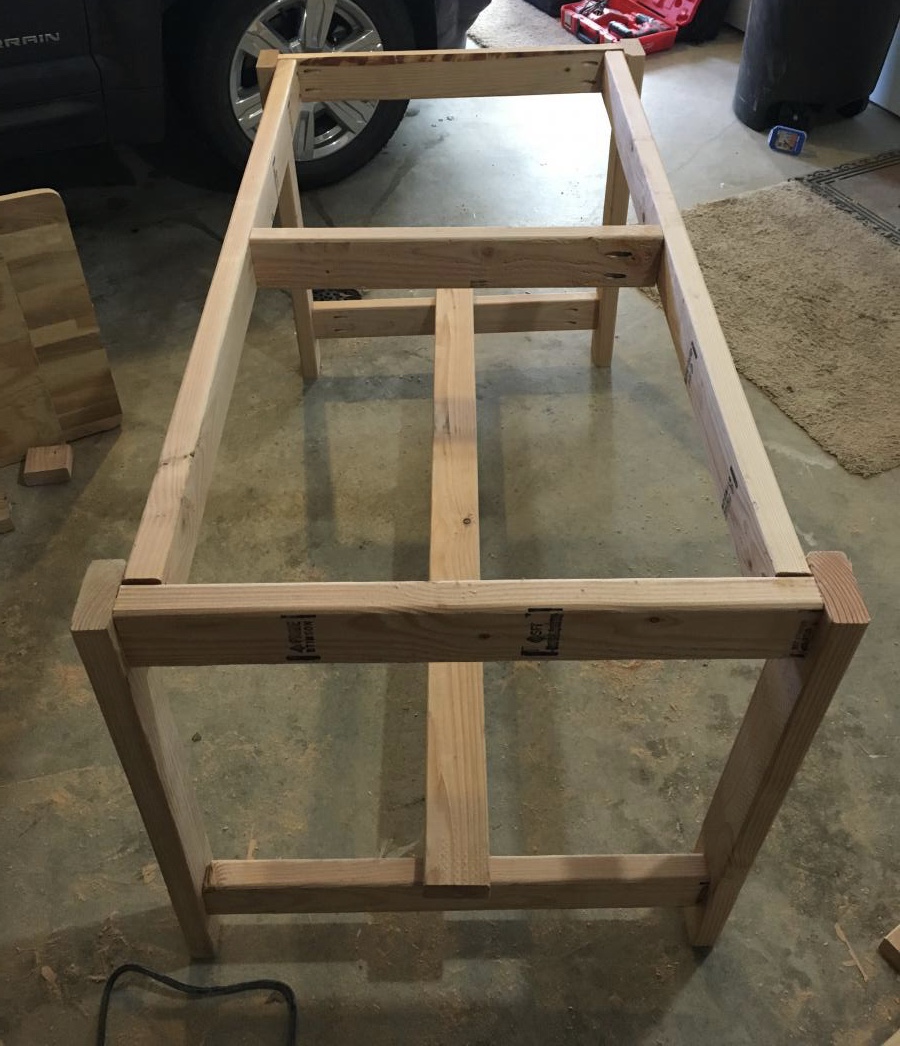
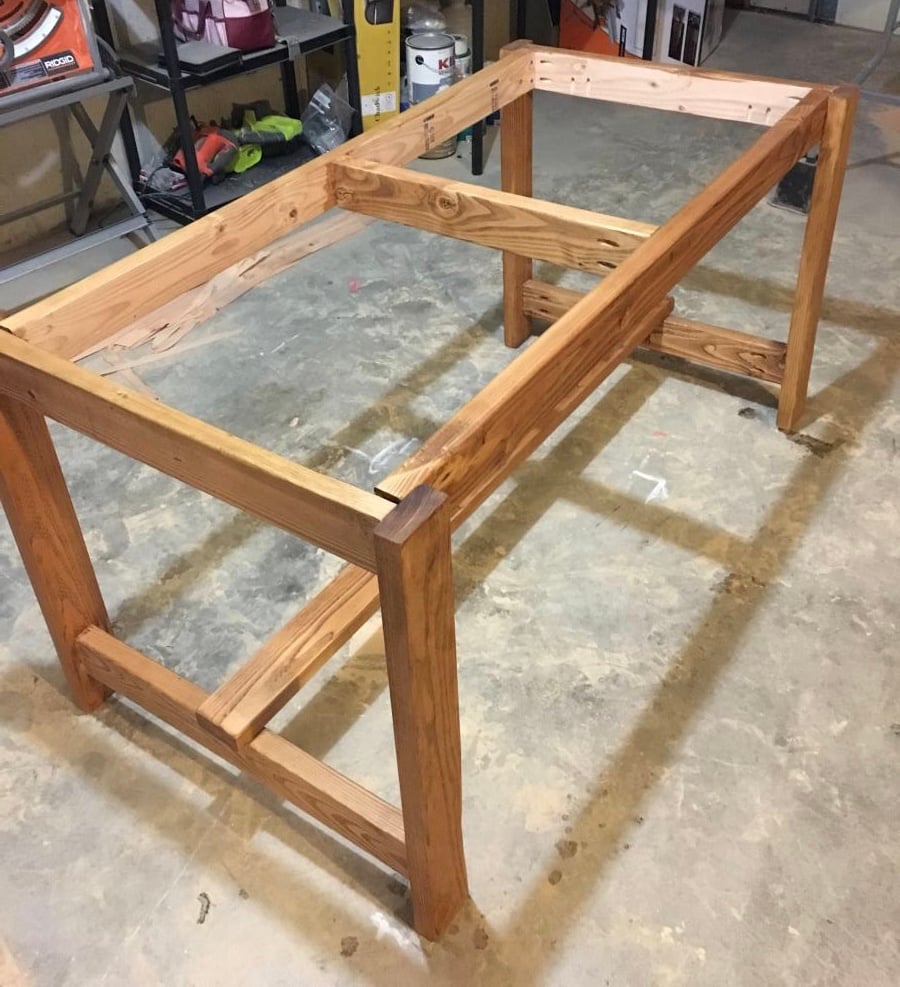
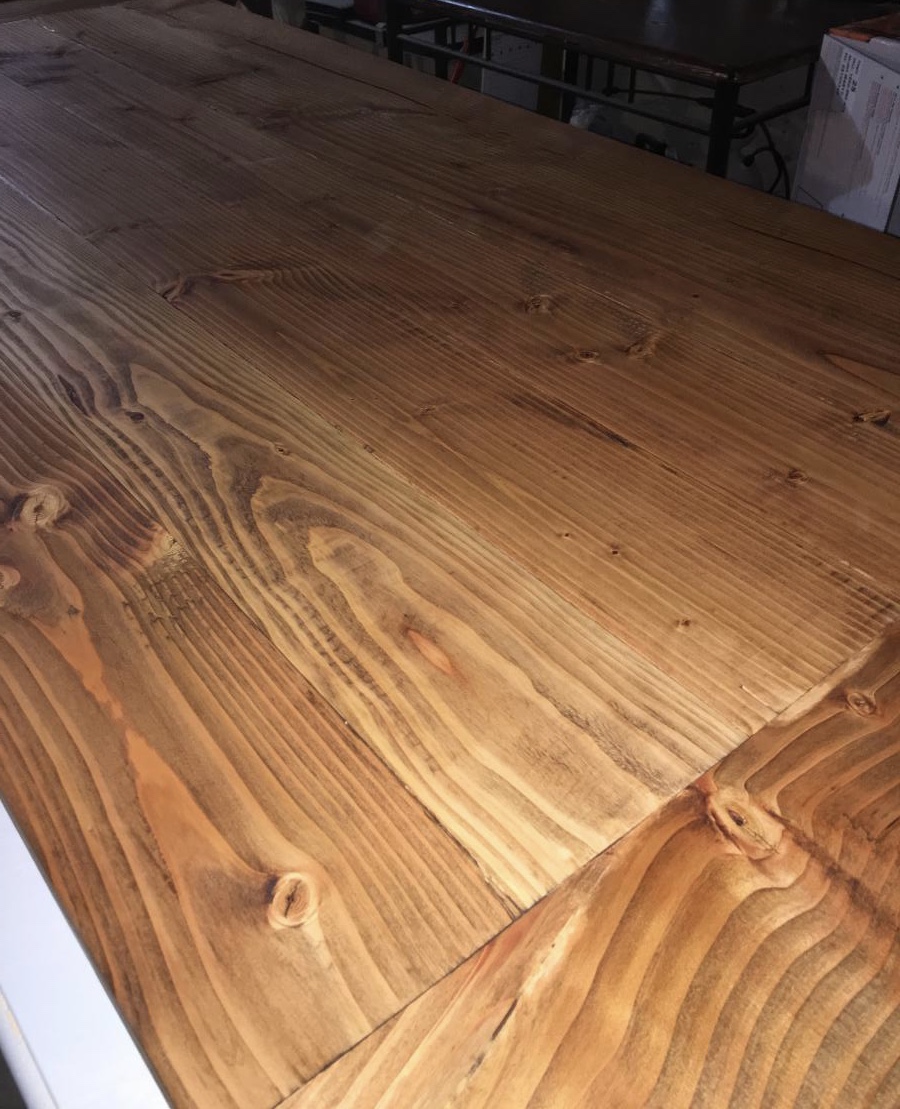
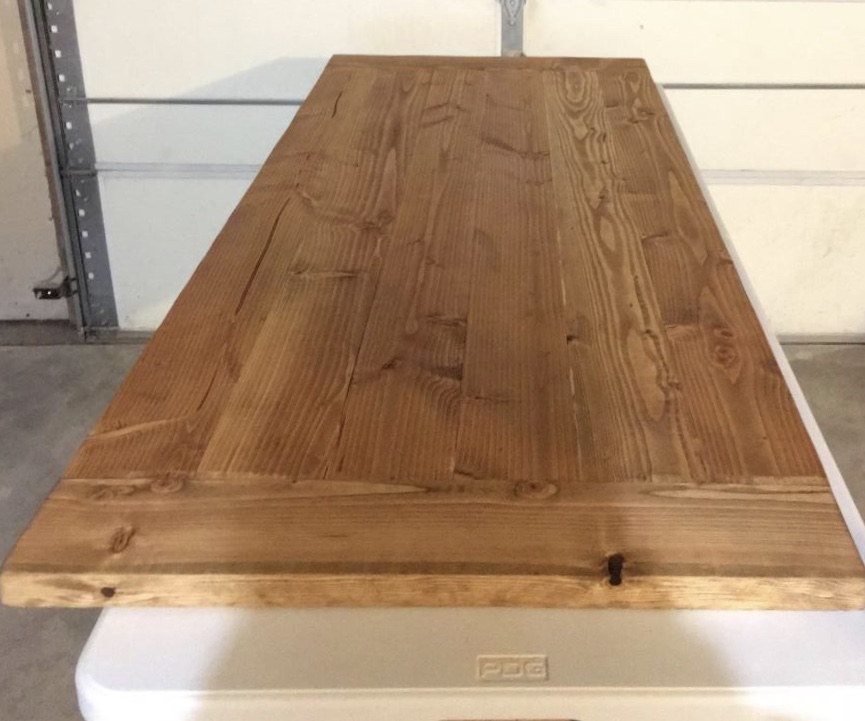
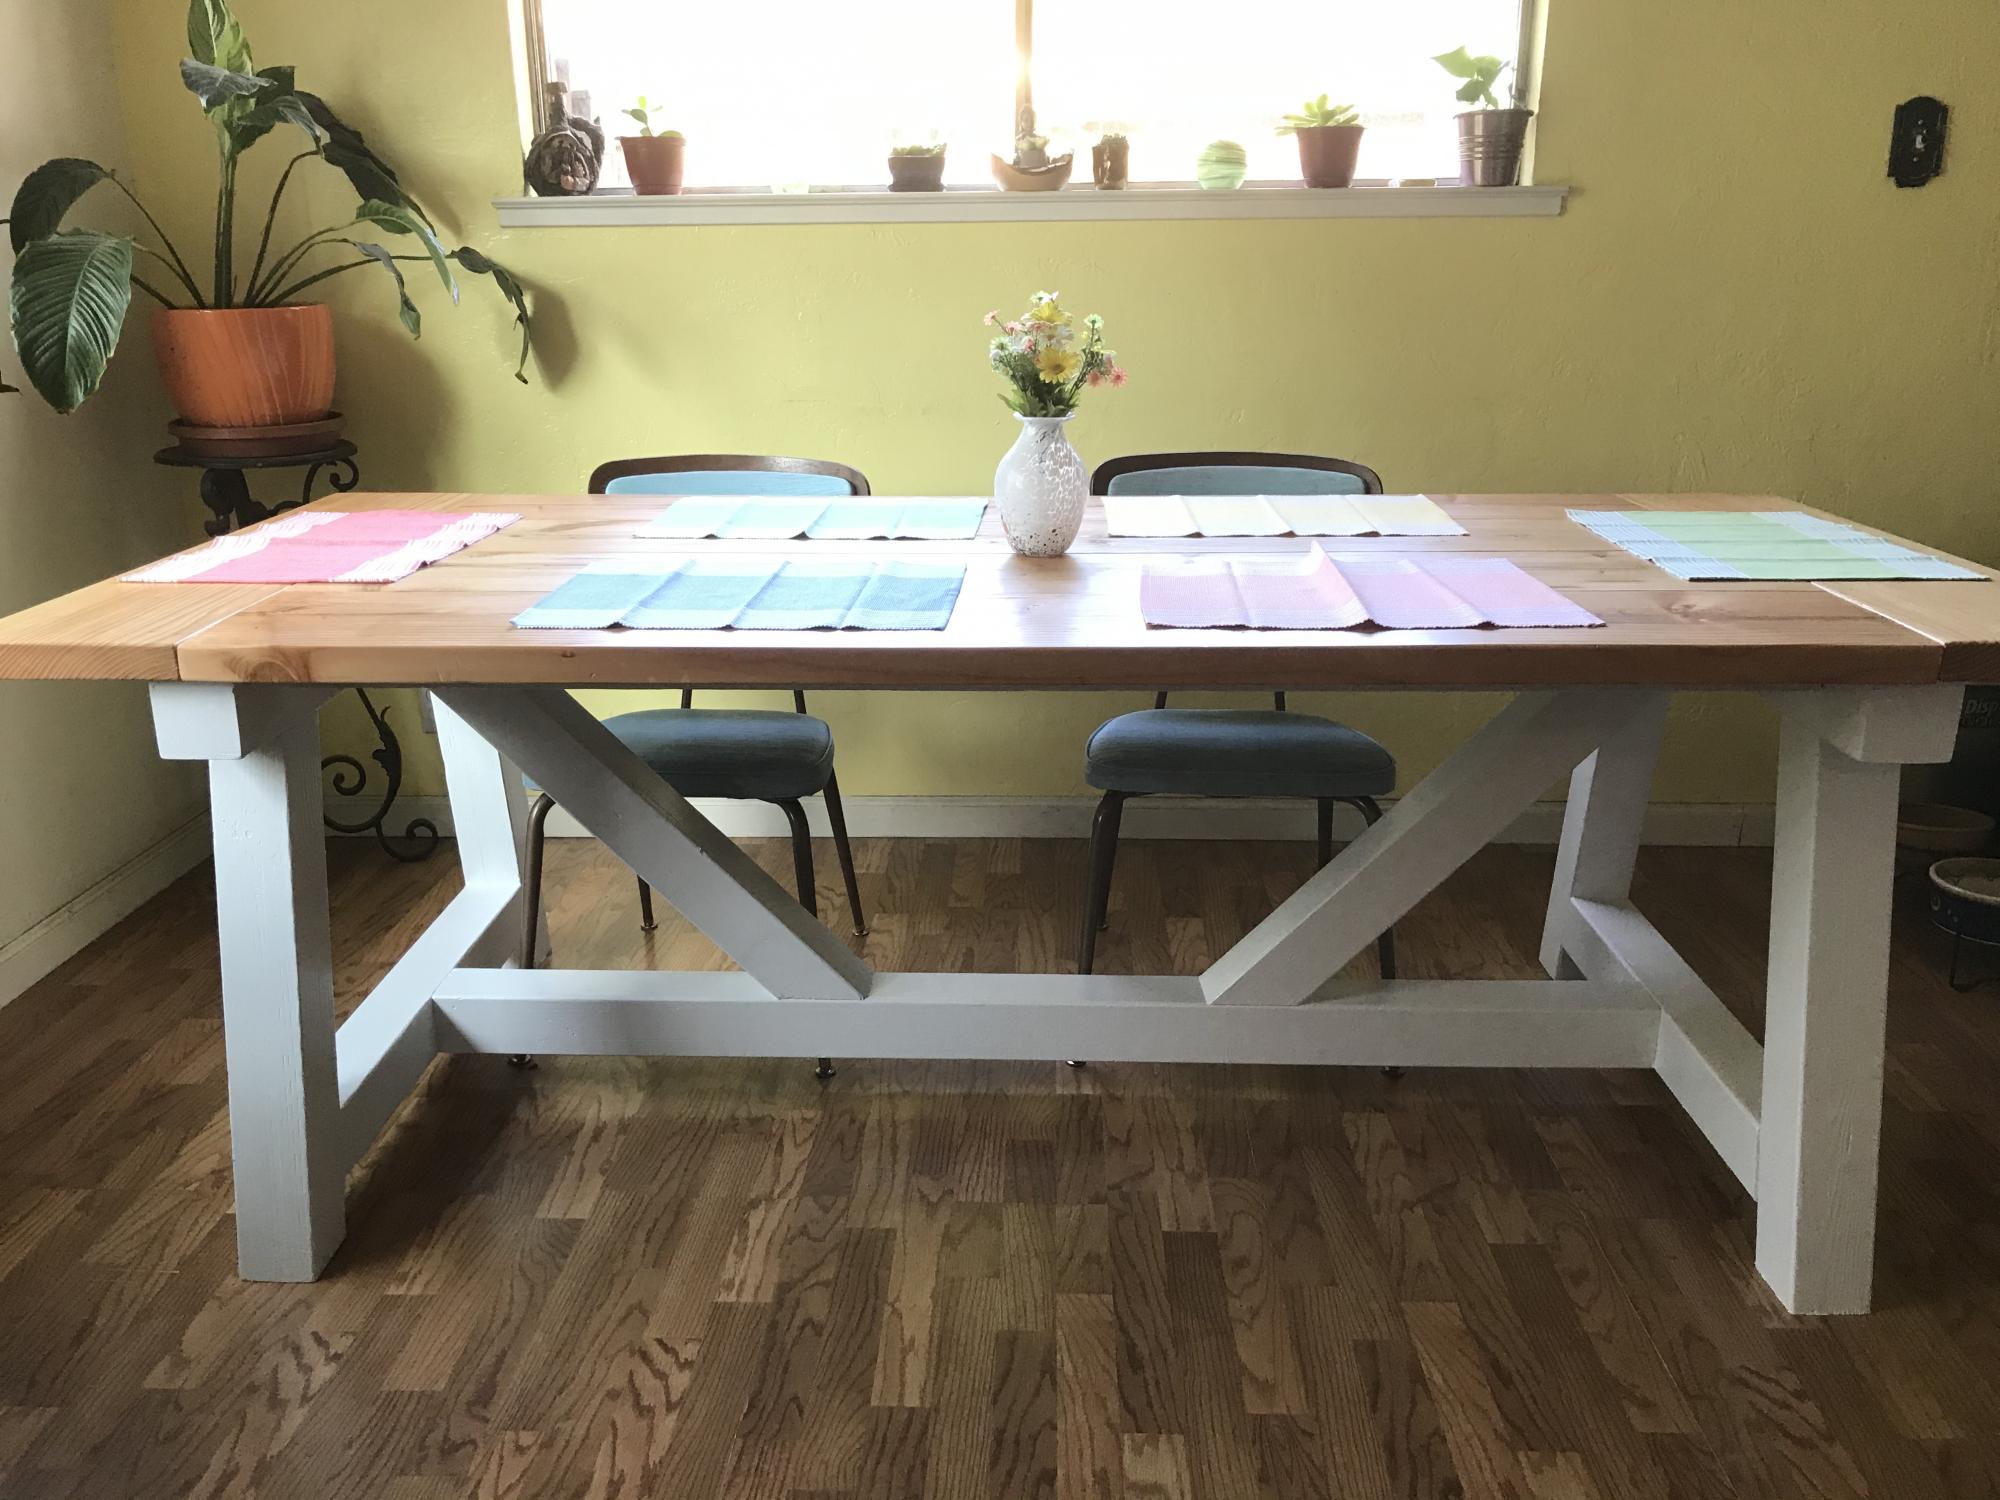
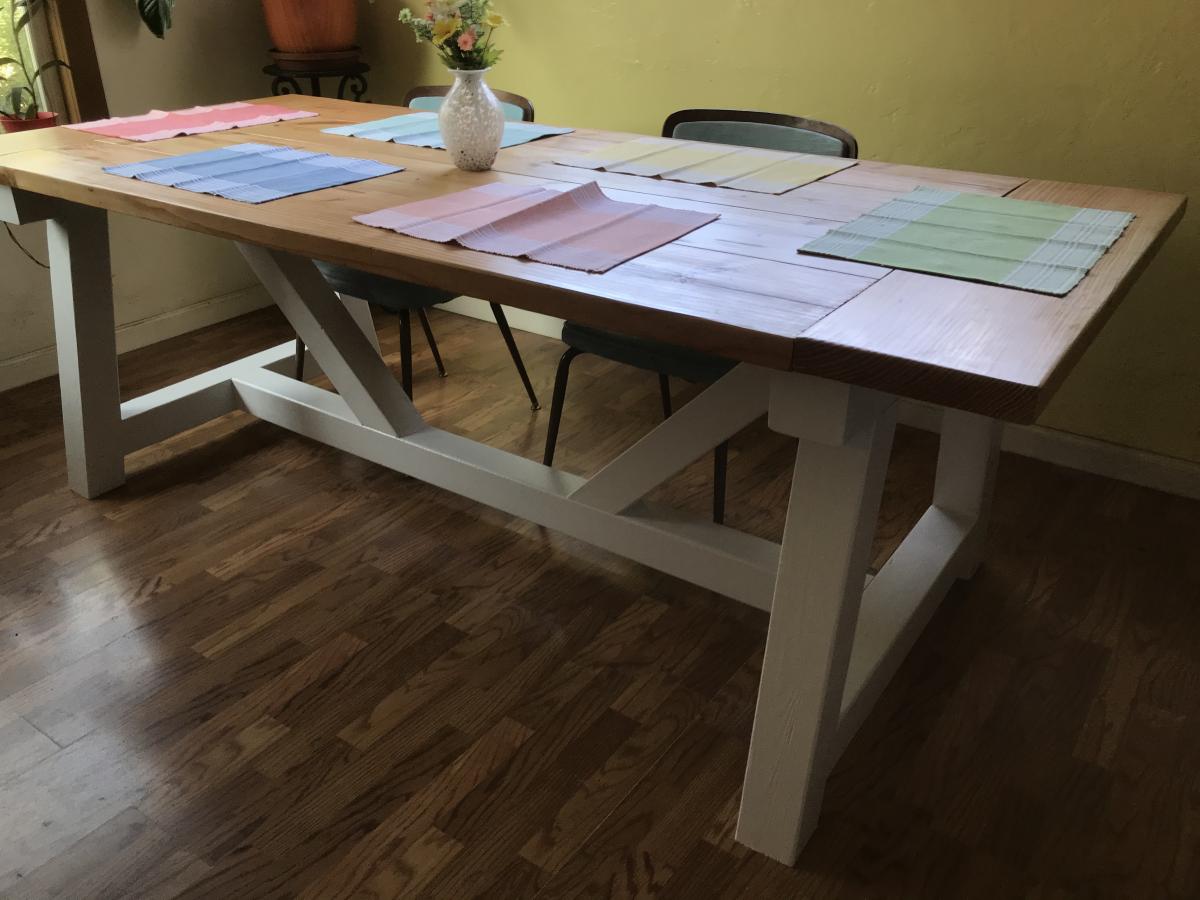
So my sister moved back to Southern California from New York. She found a great place but needed a table. I made one table and one bench. My sister then found two chairs for the other side. This is the second or third thing I have made/built from Ana’s site. Thank you for making me feel more manly with great instruction. I also built this pre Covid-19 when lumber was not so expensive.
Tue, 10/05/2021 - 09:55
Great housewarming gift, and very pretty too! Thanks for sharing!
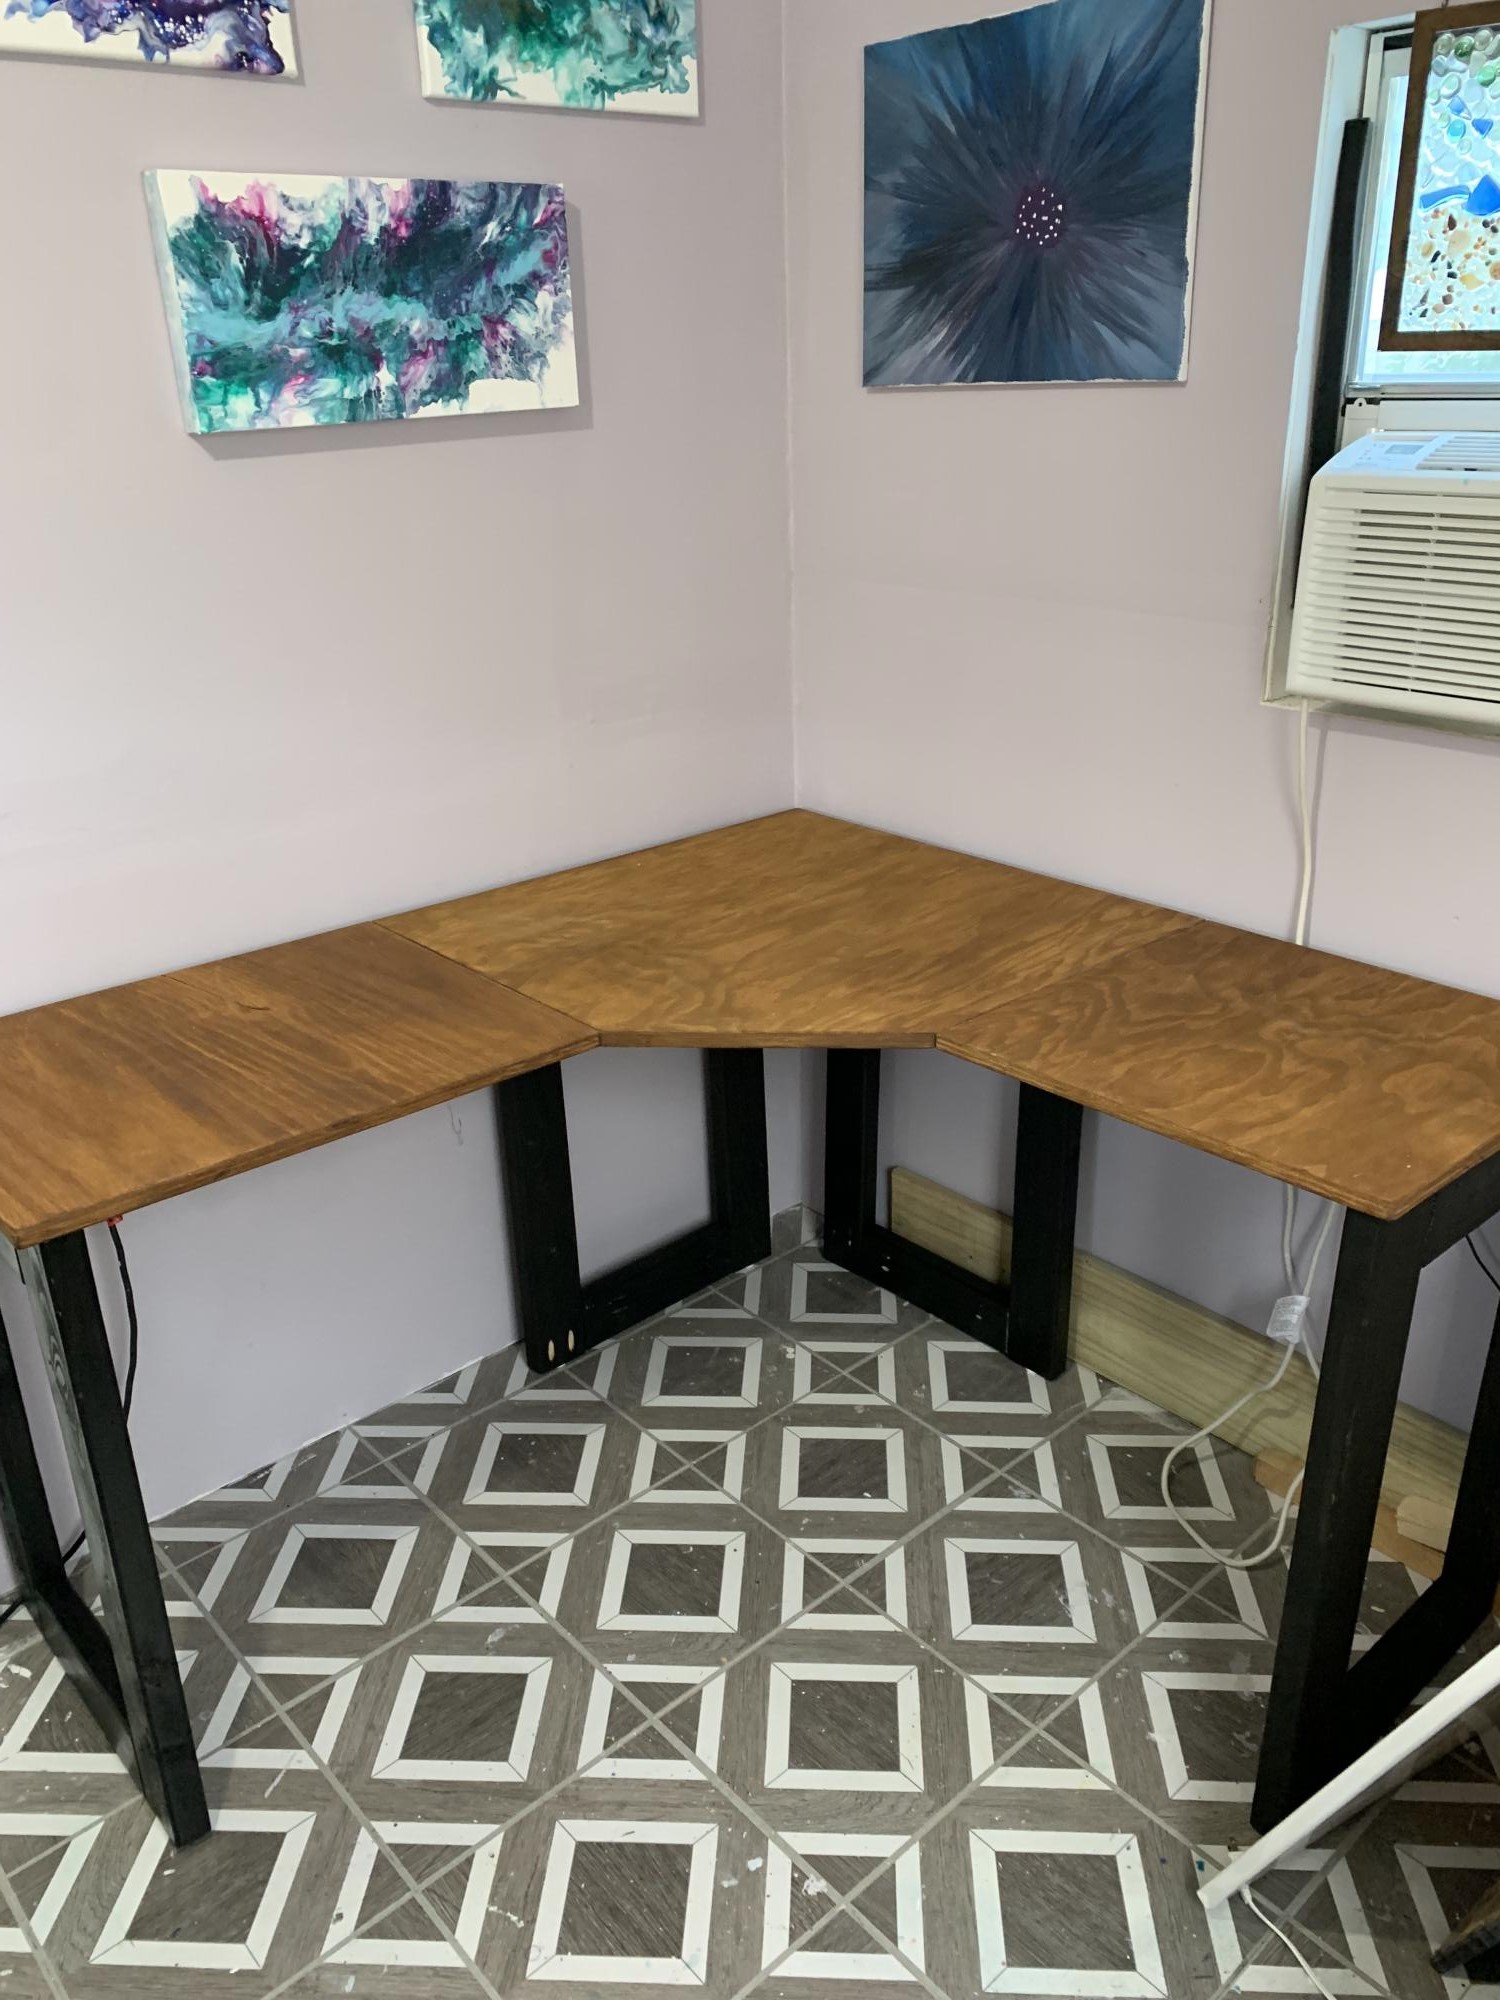
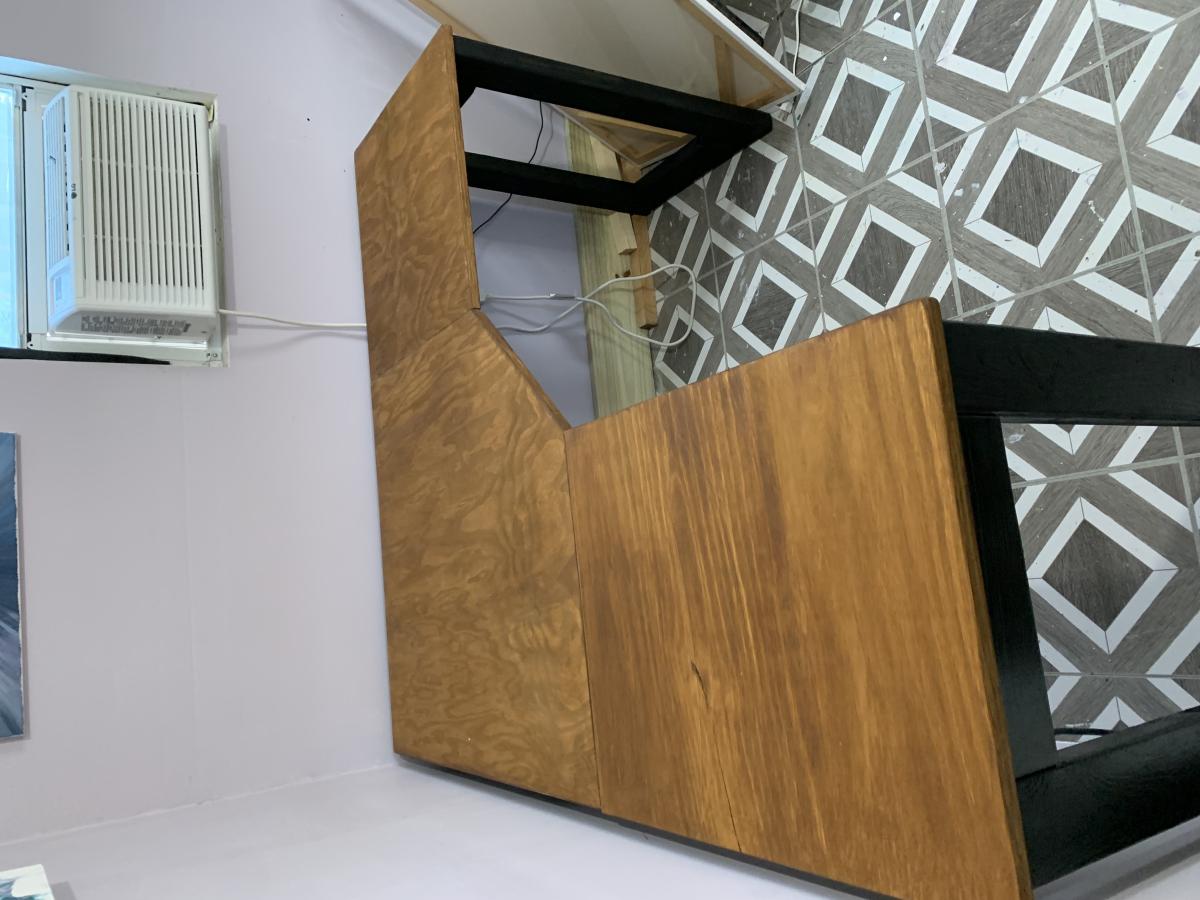
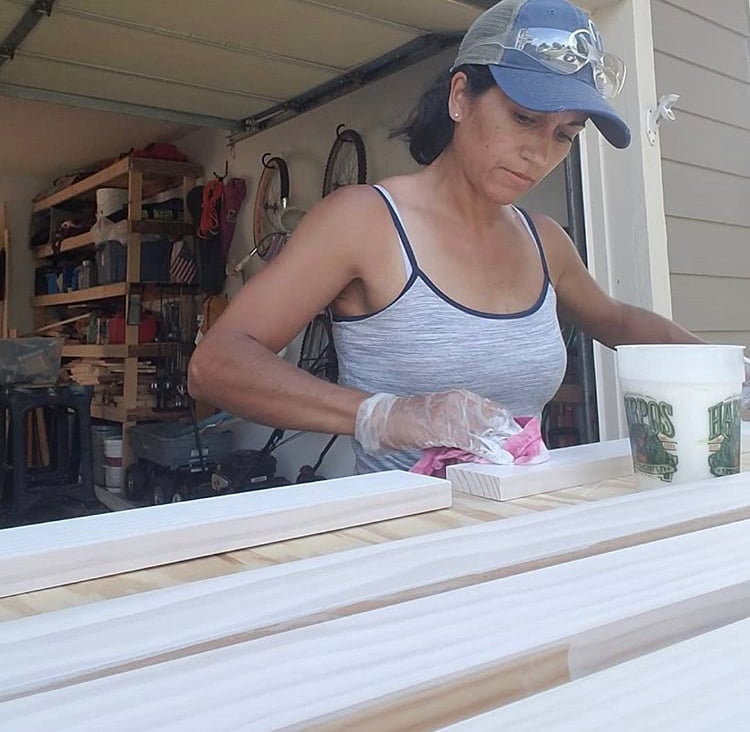
I wanted to convert my craft shed to my office after I accepted a new job and would be working from home full time. My shed is only 10x8, so I needed something smallish and functional. I modified the plans slightly and I did make a few mistakes. In the end, I think it turned out great for a 50 something grandma who likes to work with her hands!
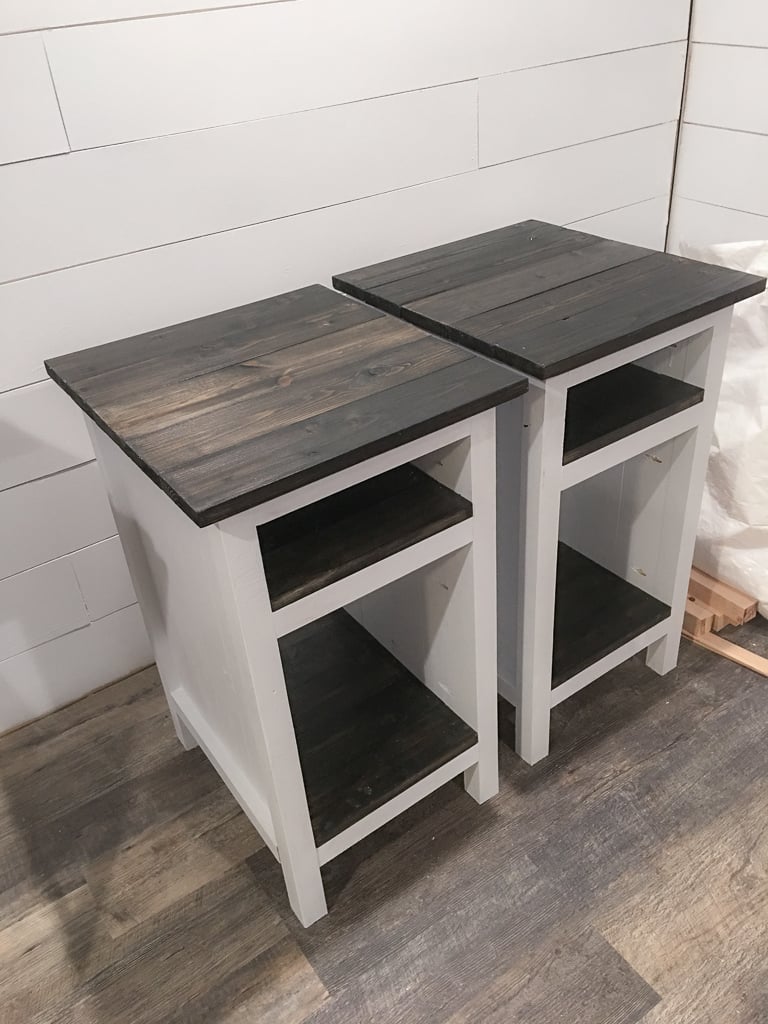
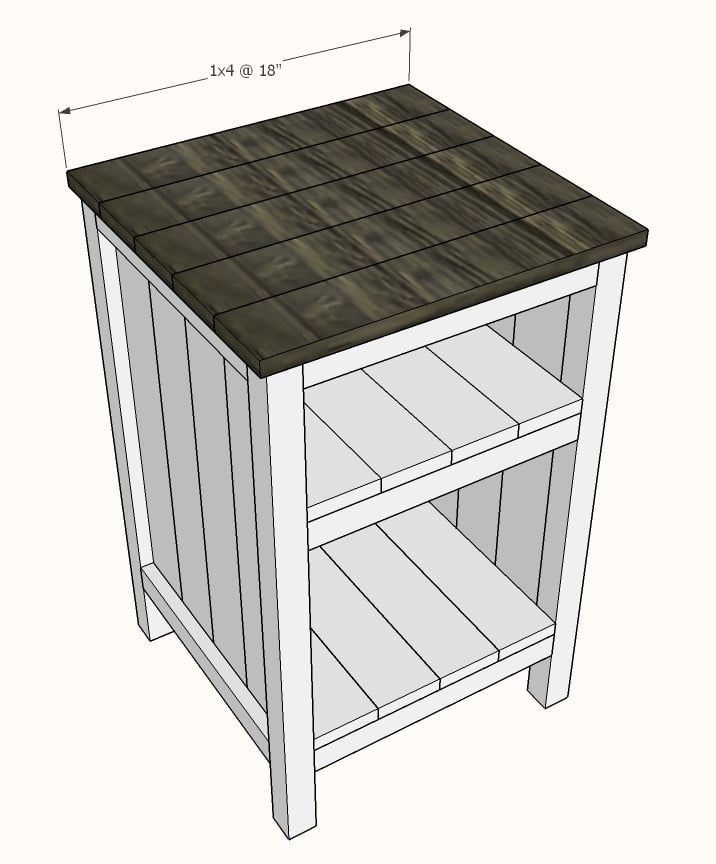
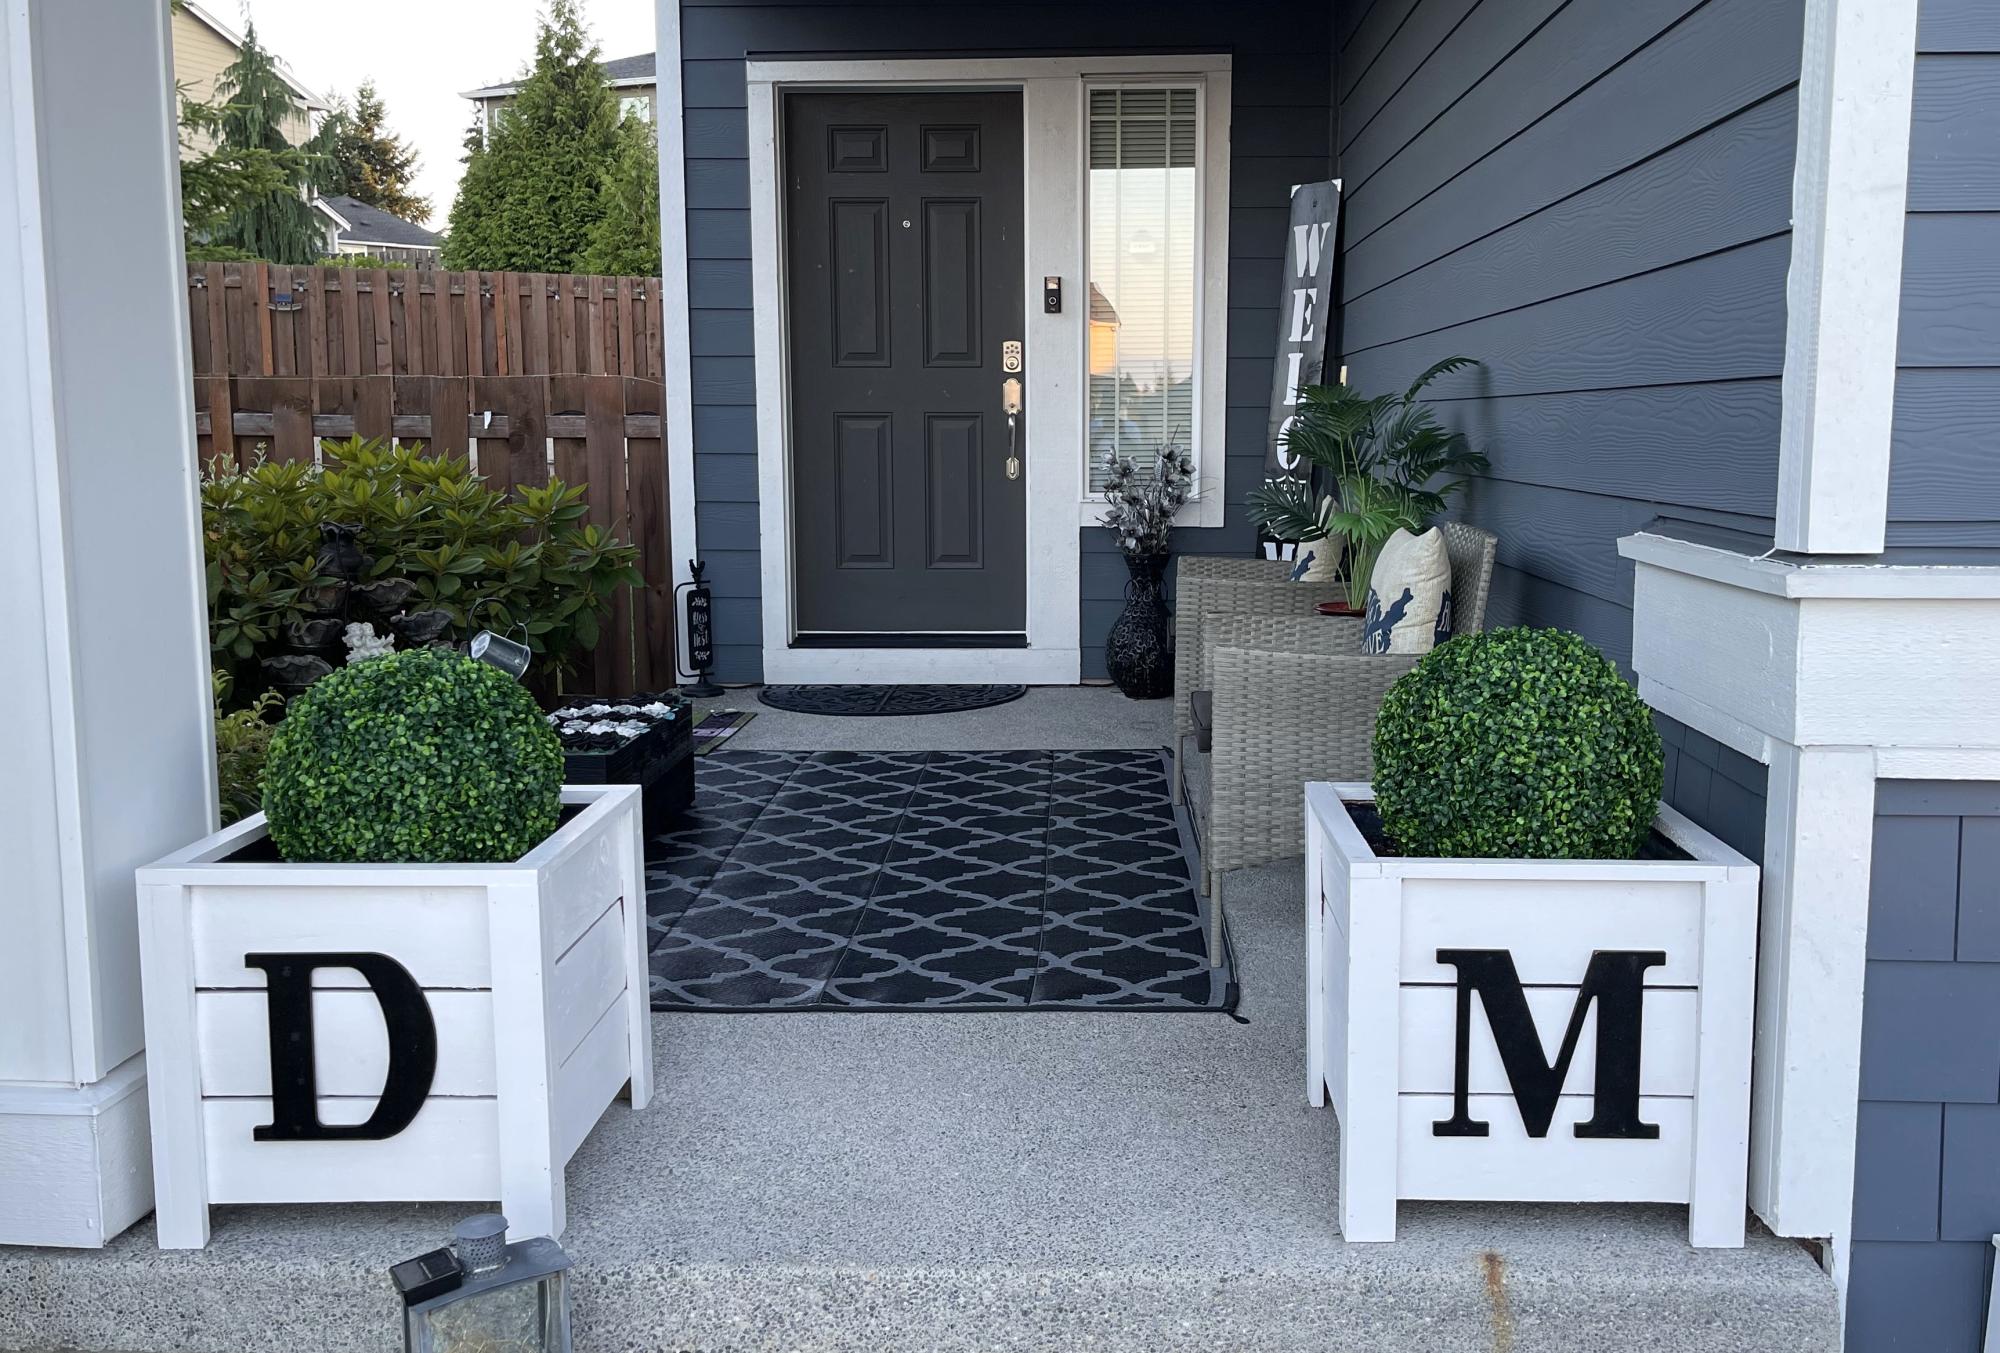
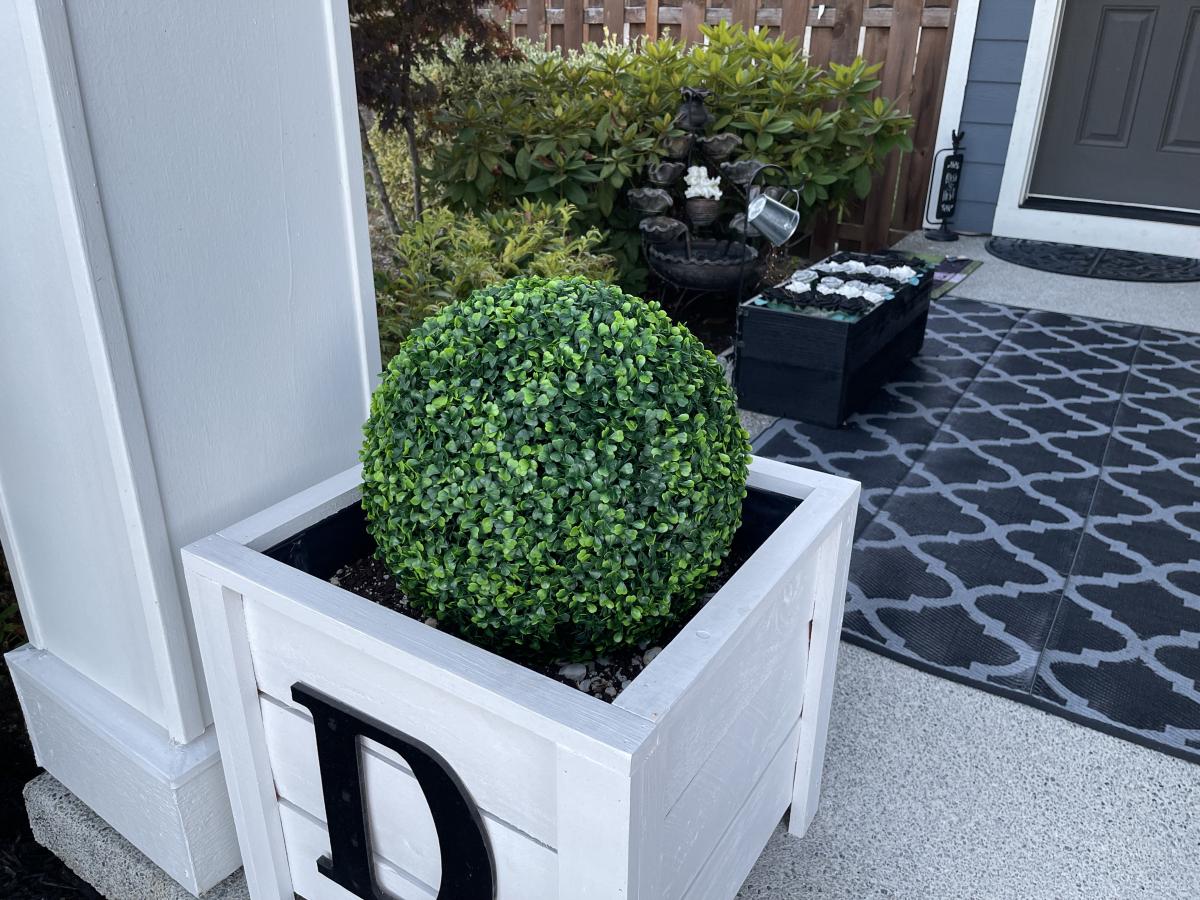
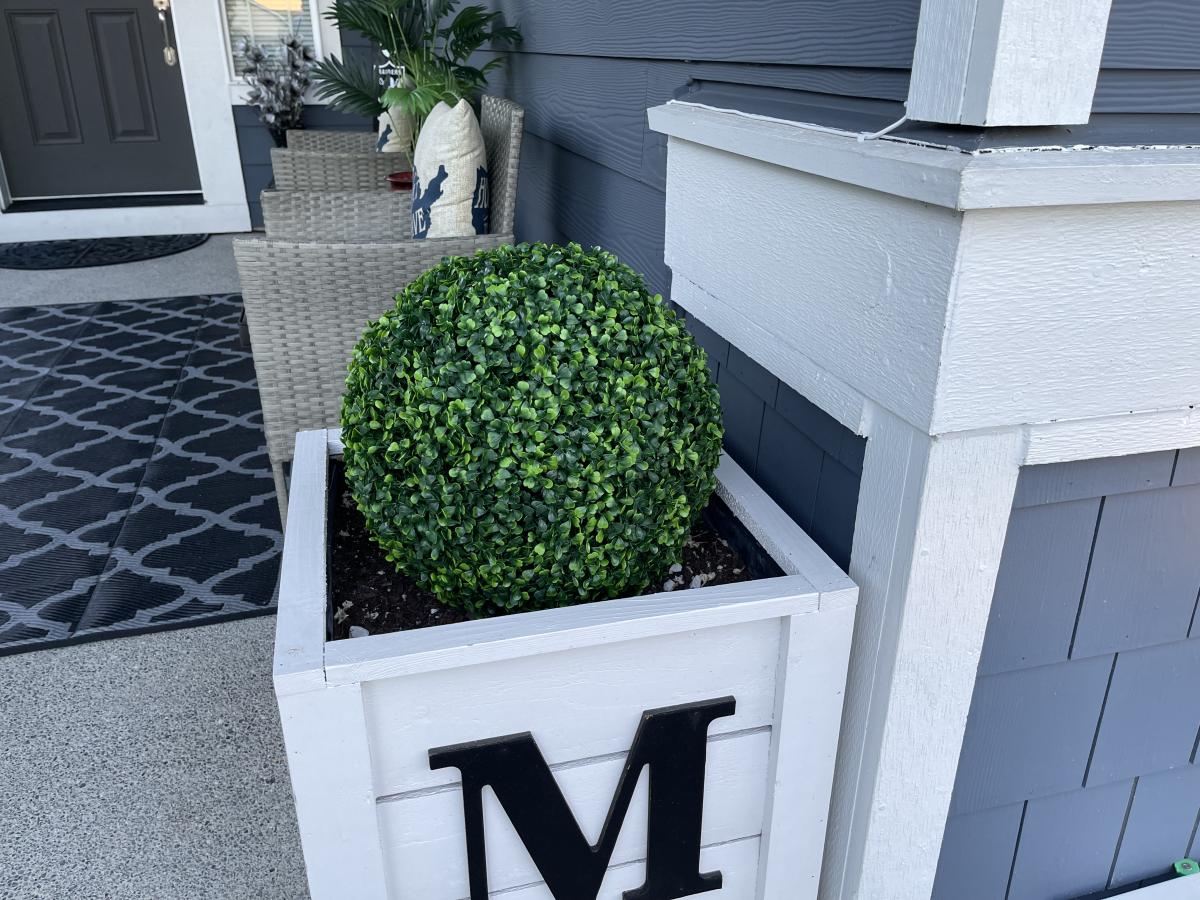
These are made from the three drawer plans but modified the size to meet our needs and used planks for shelves instead of drawers. Painted white and black gel stain.
UPDATE FROM ANA - We have received MANY requests for this plan and have created a plan inspired by this post here.
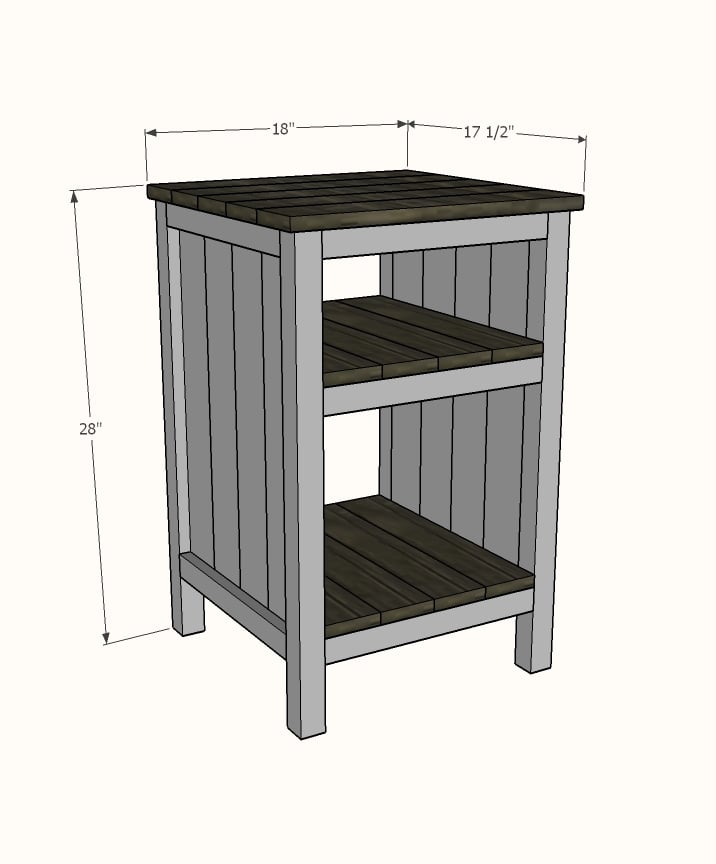
Shopping List (for ONE bedside table) + Tools
Cut List (for ONE bedside table)
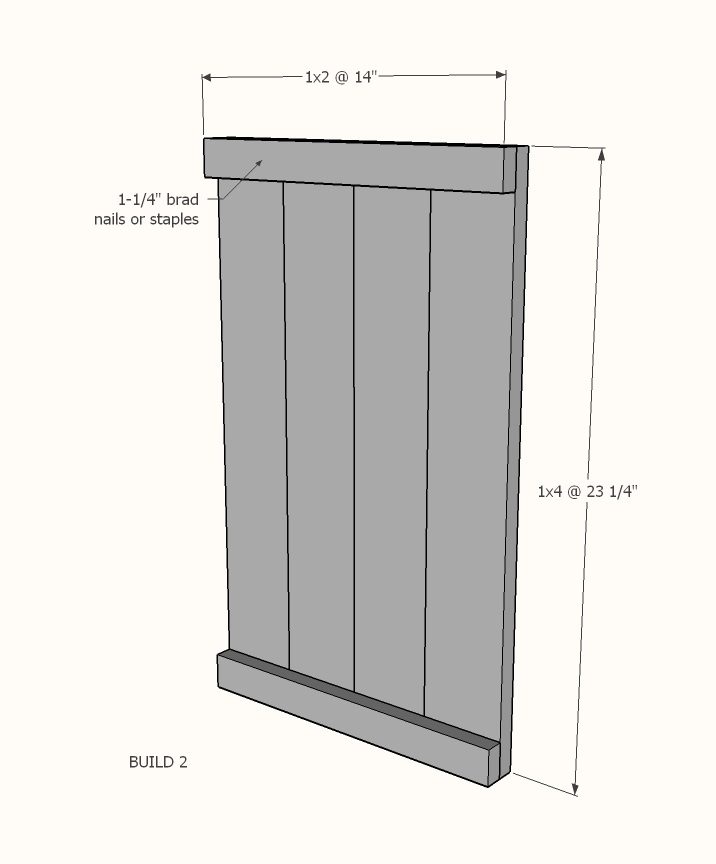
Cut 1x4s and 1x2s with miter saw. Layout side panel 1x4s as shown above. Measure and cut 1x2 to length. Nail the 1x2 to the 1x4s, two nails per overlap with glue. Make sure your side panels are square. Build two.
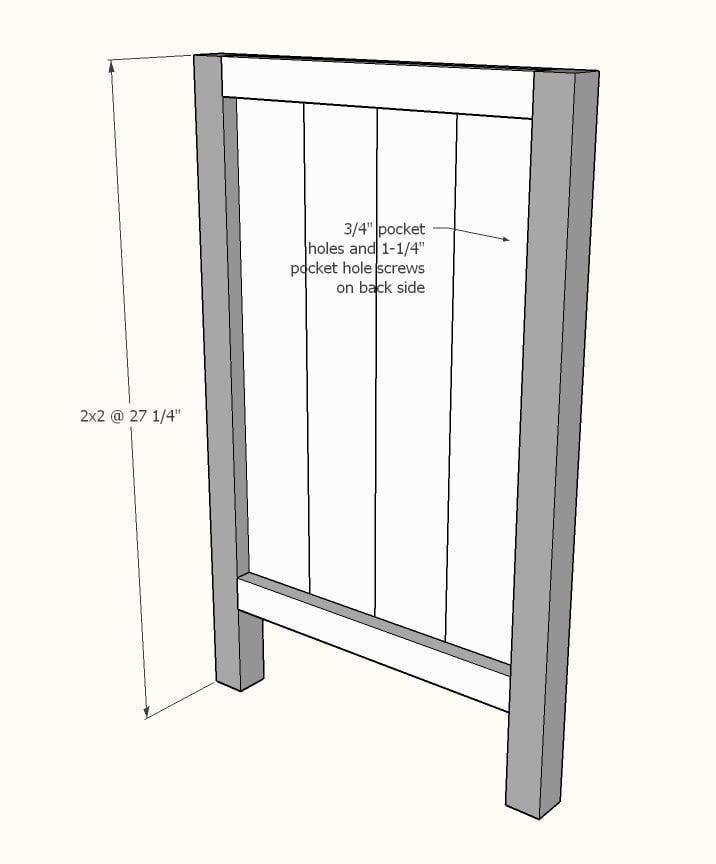
Drill 3/4" pocket holes on inside edge of 1x4 ends as shown above. Cut 2x2s with compound miter saw. Attach to the 2x2 legs with 1-1/4" pocket hole screws.

Set Kreg Jig to 1-1/2" setting. Drill 1-1/2" pocket holes on end of each 2x2, one per end. Attach to 2x2s with wood glue as shown above.
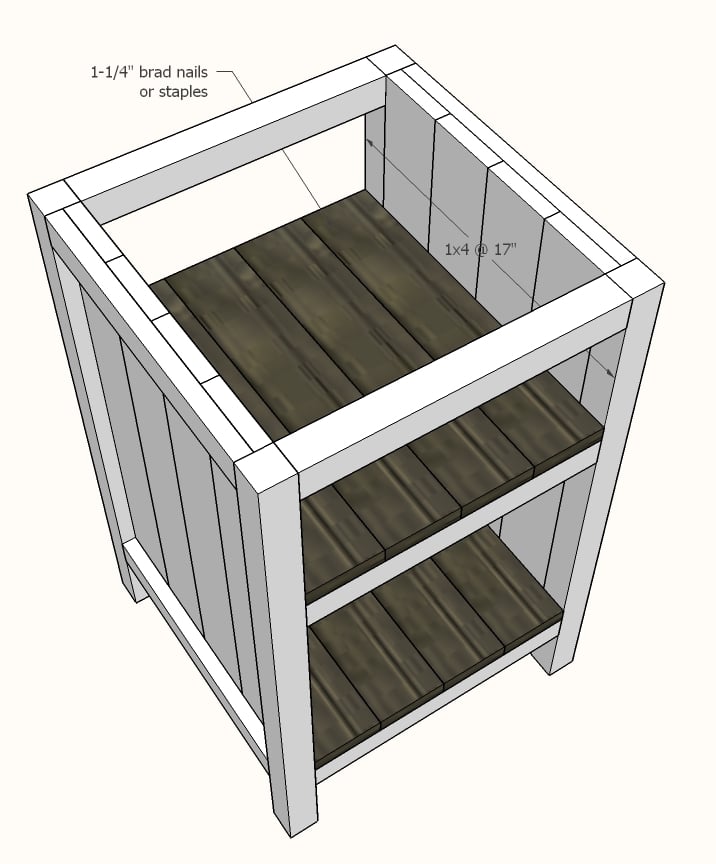
Cut 1x4 shelf boards with compound miter saw. Nail and glue to the inside of the project as shown above.
Cut 1x4 top boards with compound miter saw. Nail and glue to top with 1-1/4" nails and wood glue.
If you wish to add a back, measure and cut from 1/4" plywood and attach with 3/4" brad nails.
Mon, 02/12/2018 - 16:24
Is there plans for this one? Its gorgeous and I'd love to build it!

In reply to Is there plans for this one? by laurahamer07
Thu, 06/07/2018 - 15:37
Hello, this nightstand was built using these plans http://www.ana-white.com/2011/06/reclaimed-wood-look-bedside-table instead of adding drawers the builder added shelves. The shelves can be 3/4" plywood or 1x boards.
In reply to bedside end tables by karenlouder
Thu, 06/07/2018 - 15:40
Hello, this nightstand was built using this plan, but instead of drawers, simply measure and cut shelves to fit from 3/4" plywood. http://www.ana-white.com/2011/06/reclaimed-wood-look-bedside-table

Wed, 07/24/2019 - 09:24
It's taken us a couple of weekends, but we finished our bedside table. We made two, but one still needs painting.
Thank you for the plans. We had a great deal of fun and learning experience making these.
Want to see it? https://www.facebook.com/photo.php?fbid=2830583376957272&set=pcb.283058…
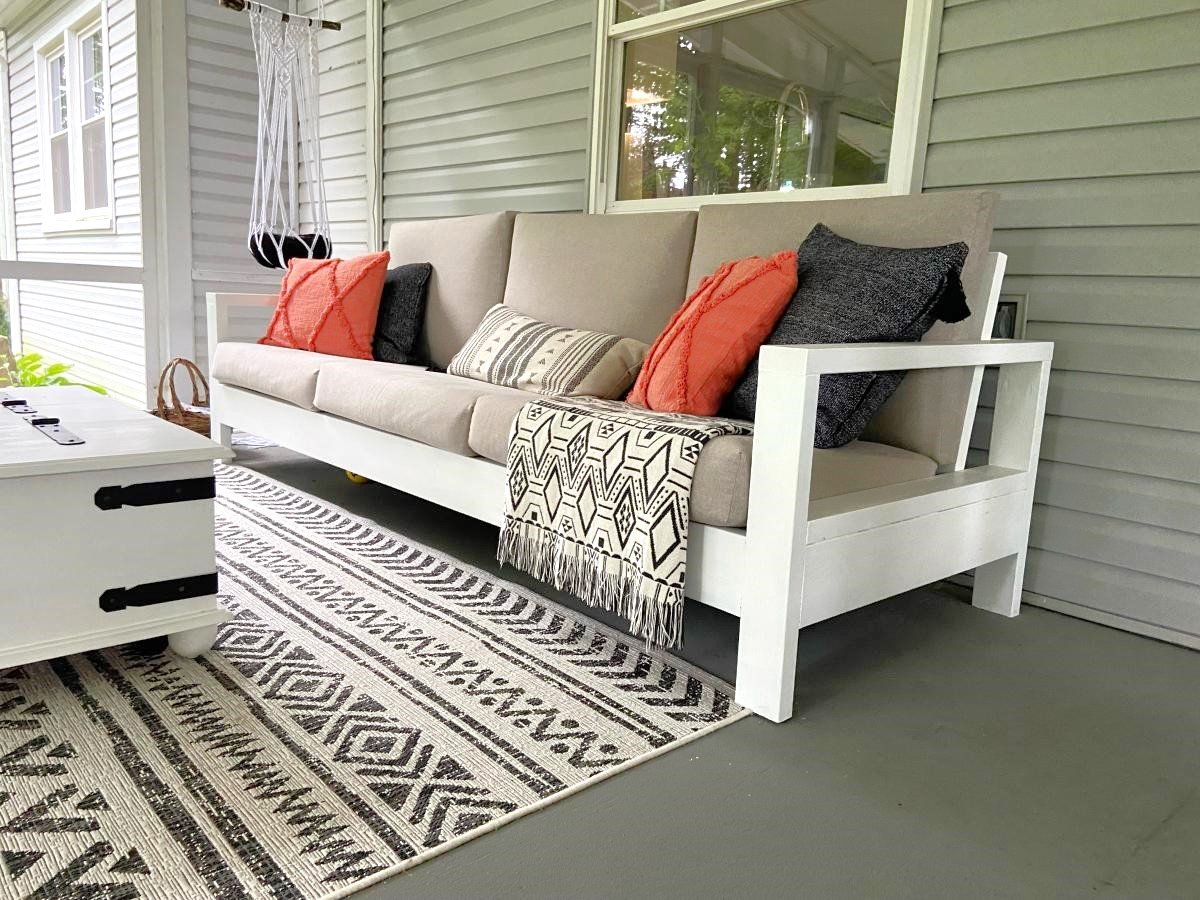
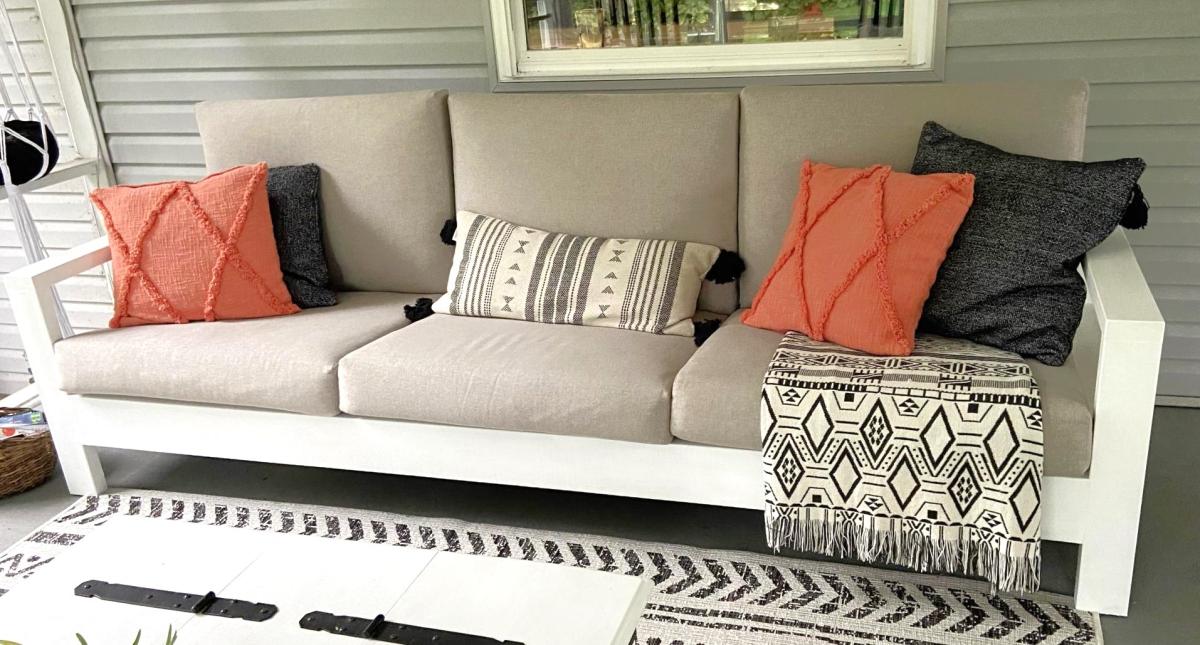
This was our first big project with our Kreg Jig. We adapted the plans to make the sofa 8' long. On Friday night, my husband did all the cuts and I pre-painted everything. With the help of our son, we had the whole sofa built in a few hours on Saturday morning. I puttied the visible holes, did a second coat of paint, and made custom cushions. The plans were very easy to follow. I followed the others' advice about pre-painting and assembling the back on a perfectly level surface. It came out better than I expected and it's super comfortable!
Sun, 04/10/2022 - 10:33
Thank you for sharing, it looks amazing! Would love to hear how you made the cushions.:)
Mon, 04/11/2022 - 07:44
I want the plans for this one! I like this style a lot better. I really like how the bottom cushions are at a slant. I suck at modifying plans.
photos sent in via email from Leanne
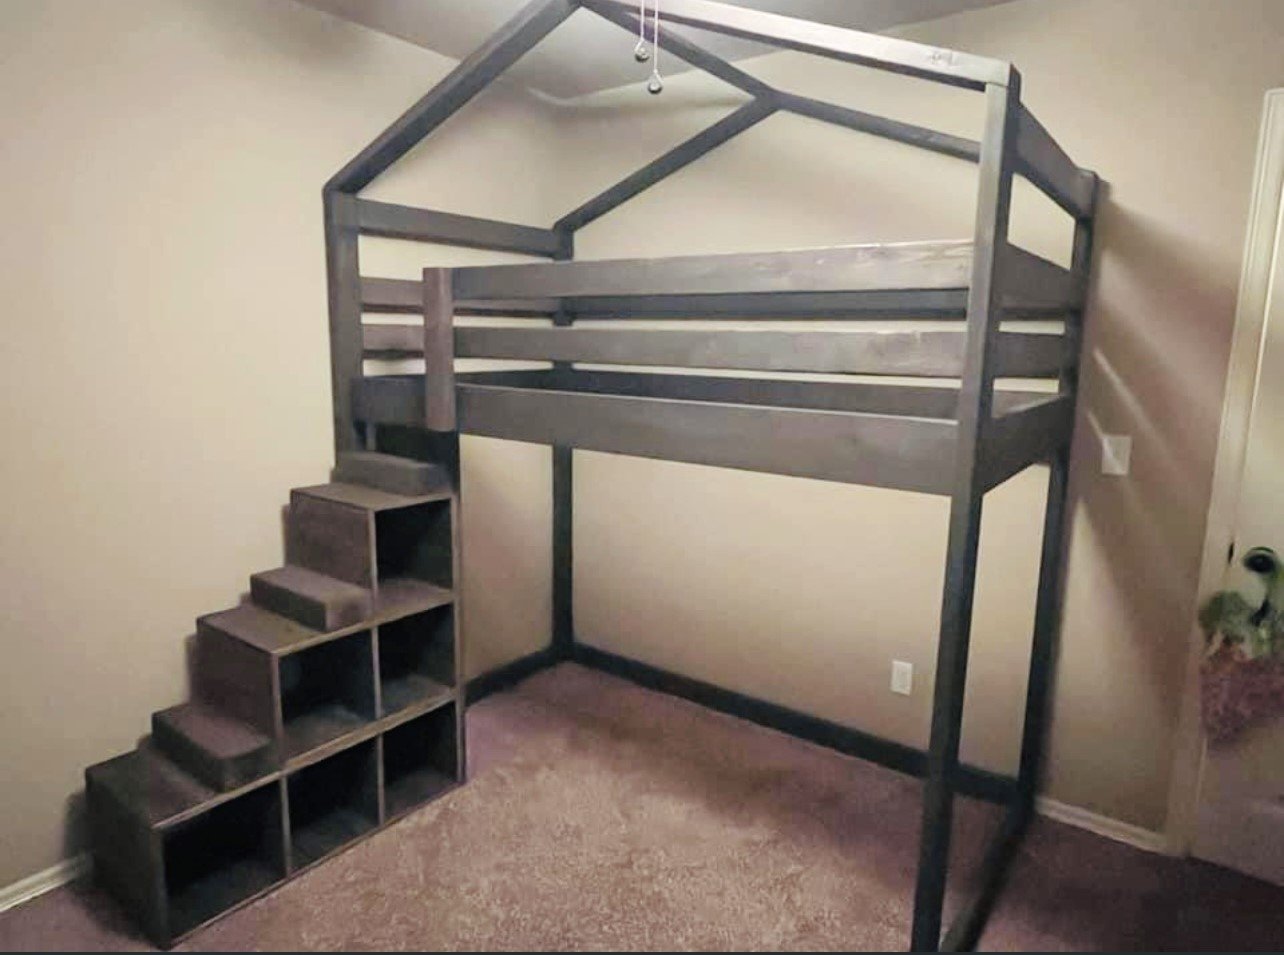
Modified the junior loft plan to add a house design element and storage stairs, by Amy Mott
This was my first attempt at making anything out of wood. I was thankful for guidance from my husband but I did it myself!!!
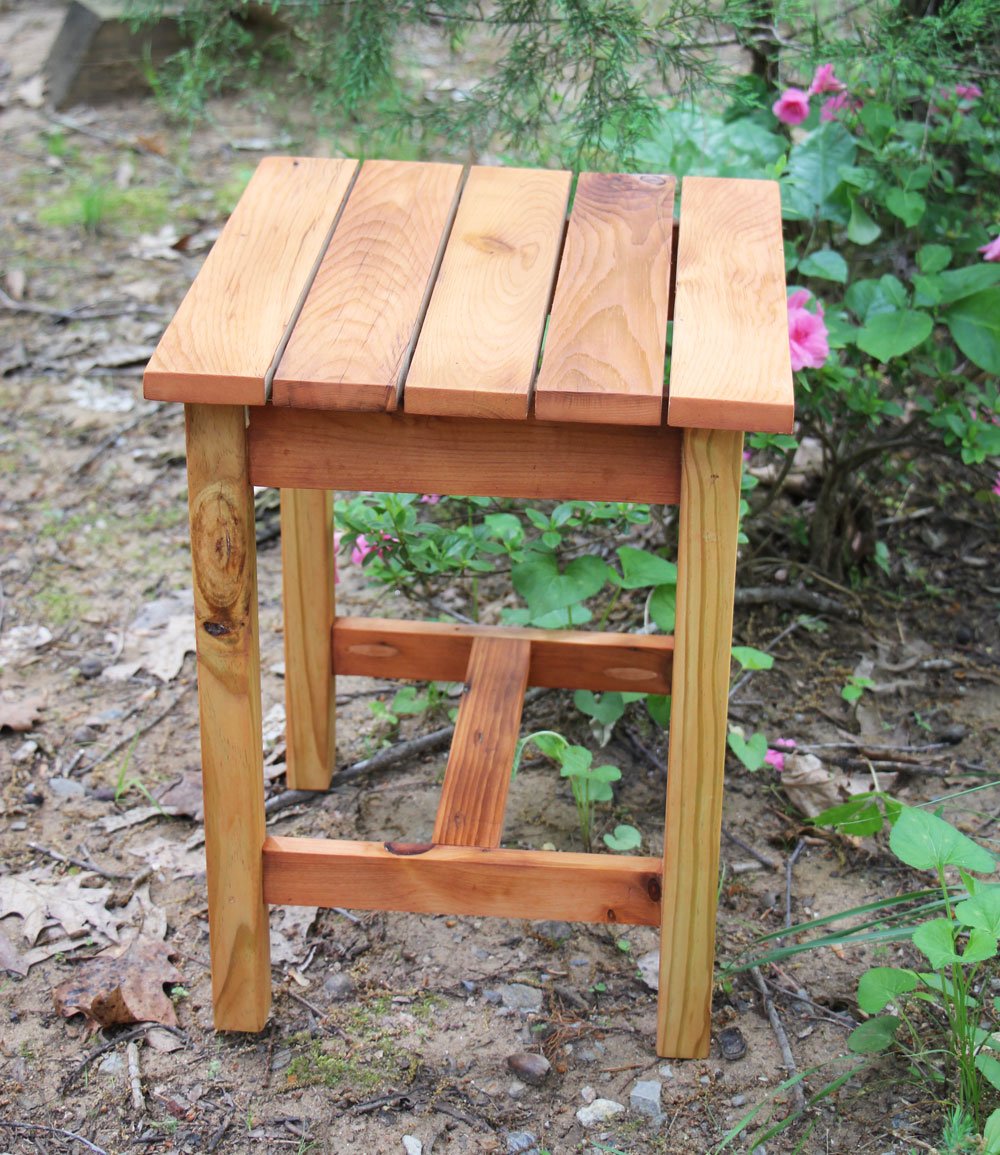
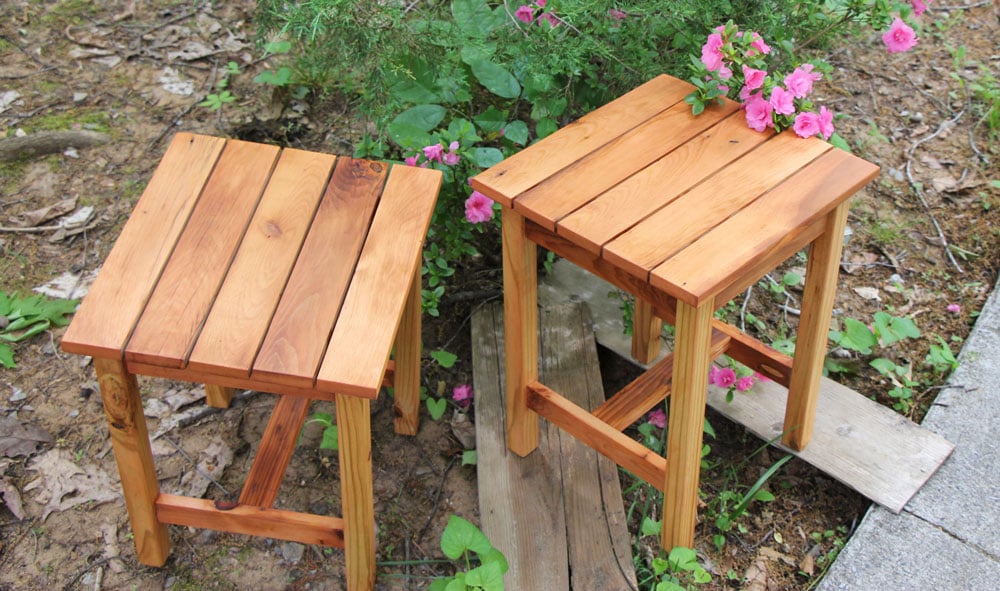
Sat, 05/04/2019 - 13:30
Great job! These little side tables are perfect! LOVE!
Thank you so much for sharing a brag post!
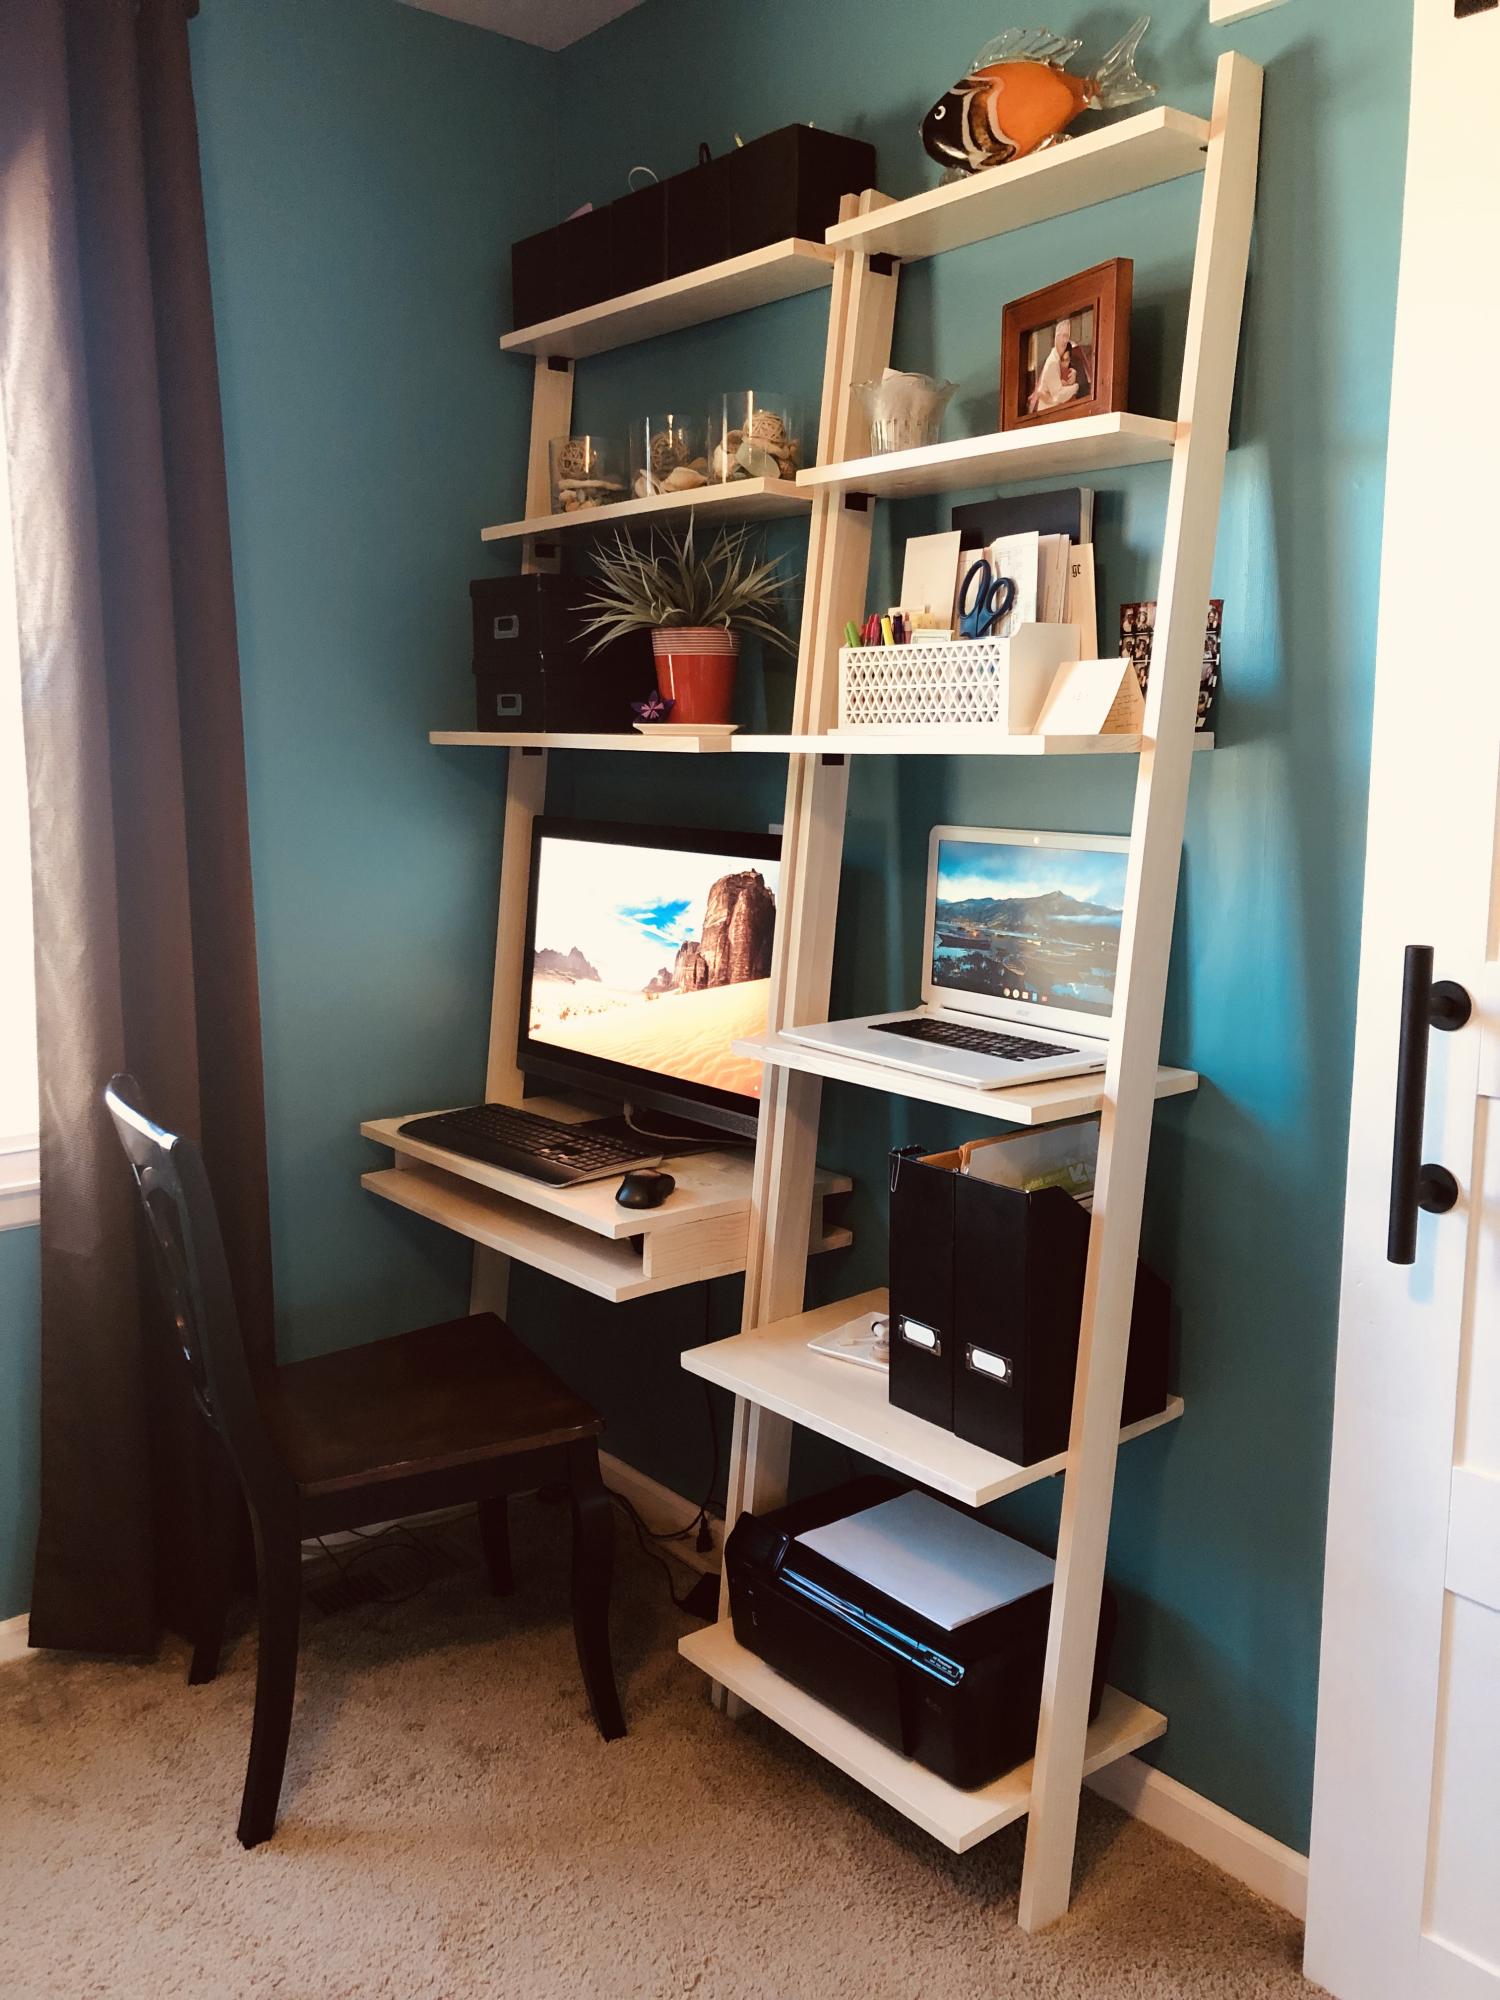
I needed a desk to get my computer off the kitchen table. After remodeling my bedroom and sealing a doorway to make the wall space, I needed something that would take up a little amount of floor space. Of course I couldn't find exactly what I wanted so I decided to build it. Found this little gem of a plan and modified it to my liking and needs. I’ve had it up for about a year and I love it.
This project was actually my first build (besides a small blanket ladder). I used the Ana White plans every step of the way! Since this build I have created coffee tables, side tables, console tables, head boards and a bed frame. This table gave me the confidence to try an original project of my own. Although this table was fairly simple, it was the project that started it all. That is why I chose for this piece to be my brag post.
I followed the basic plans but added a couple 12x2” metal supports for each breadboard. This was a must. I used Douglas fir for the entire project from Home Depot.
My 2 kids helped me put a few screws in, otherwise I did this myself. The wife really loved it and was a bit surprised coming back from her facial spot on Valentines Day. It turned out better than I could have hoped, especially considering this was my first real woodworking build.
Great plans and nuggets of advice from everyone else made this really fun and not so scary!
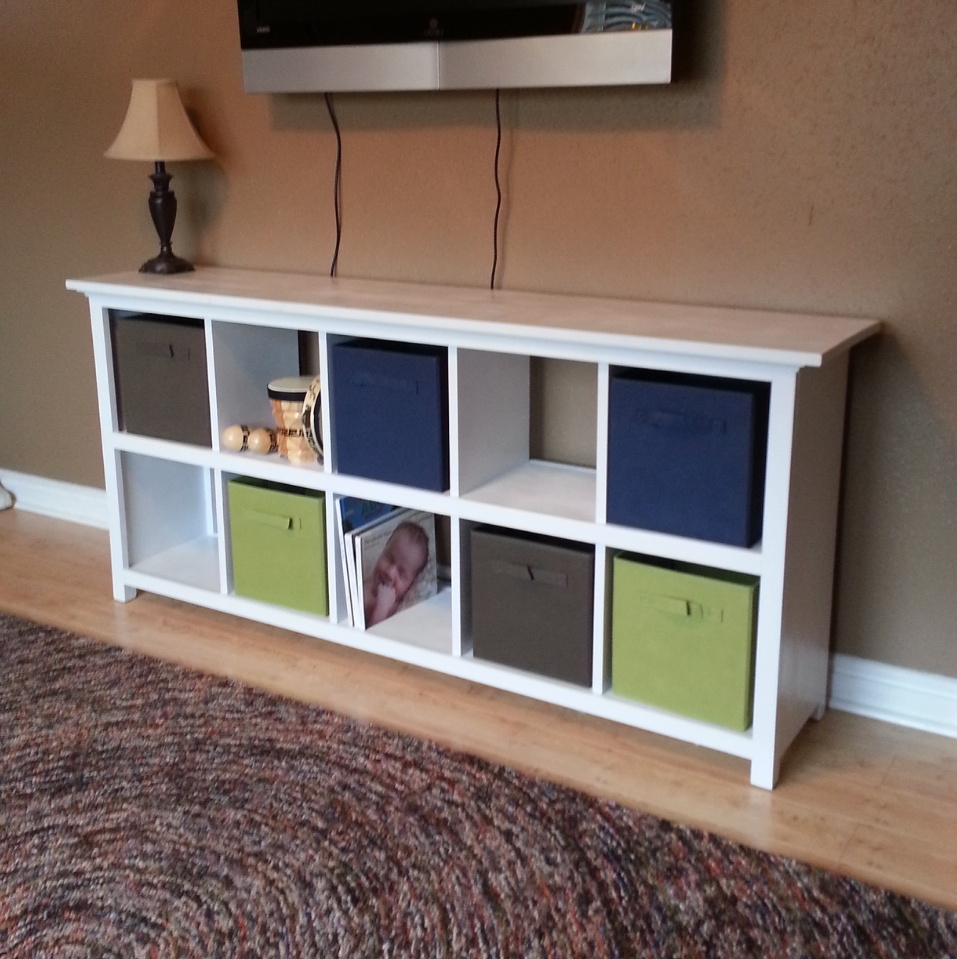
Expanded the 6 cube shelf to 10 cubes, beefed up the feet a little and fancied up the top to more closely match the picture in the plan page. Just joined a couple 1x8's and cut to length for the top.
Used the Kreg Jig to make the shelf box and face frames - biscuit joiner for top.
Wed, 11/26/2014 - 05:32
Hi John- this is exactly what I'm looking for- did you by any chance save your modification measurements and cut list? Also- I'm considering putting a 50 inch tv on the unit- would you recommend additional support? Thanks for any help.
Comments
junesummer21
Thu, 01/25/2018 - 06:27
murphy bed
I love your murphy bed idea and would love to have plans for it. I too am looking for a guest bedroom and craft area and I know this would work in my space.
Chriss45
Mon, 02/05/2018 - 16:20
Murphy bed
I didnt really have a plan when I was building my Murphy bed, I can do a sketchup plan for you if you would like. I used boat chair swivels instead of hinges and there is a YouTube video on how to do this.
Chris
Nurserene62
Thu, 06/24/2021 - 23:11
Sketch up request
Hi Chris! I would love to have a copy of the sketch up of this. I have a small she shed/guest cottage I would live to duplicate this in. Thanks in advance.
cgself12
Mon, 11/08/2021 - 14:18
Lovely Space
Hi Chris!
I know I'm coming late to this party but I just found your shed and I adore it. You did an amazing job and I cannot express how impressed I am! I would also like a sketchup plan of both the murphy bed and the adjoining side cabinets. Great job!
Kim Daigle
Thu, 06/06/2019 - 10:59
Plans or Sketch up
I absolutely love everything about this she shed!! I would be interested in a sketch up of the murphy bed as well as the cabinets next to it. I would at least like to know what the dimensions of it all is. You did an amazing job! It's so beautiful!
mcocooper11
Tue, 06/25/2019 - 15:14
Me too!! I built a…
Me too!! I built a horizontal Murphy bed so I have that part done but I would like to see the plans for the cabinets on either side with the pull out desk!
so very cute!
BrooksCreations
Fri, 11/22/2019 - 08:03
Absolutely stunning
I love this. I would love to have the plans as well.
Jenn13Soccer
Thu, 05/14/2020 - 05:53
Perfect idea!
I would love the plans for all of this please! This is exactly what I have been looking for! Thank you!
gotthisgurl
Sun, 09/20/2020 - 00:13
Hi Chris Can you advise how…
Hi Chris
Can you advise how I can receive a copy of the sketchup? I love the entire setup from the bed to the additional shelving.
jklmnhurst
Fri, 04/02/2021 - 19:53
Sketchup
Can you advise how to get a sketch up of your design. I love it !
wr3nch85
Thu, 01/13/2022 - 08:09
Plans
I would love a copy of these plans if you still have them