Community Brag Posts

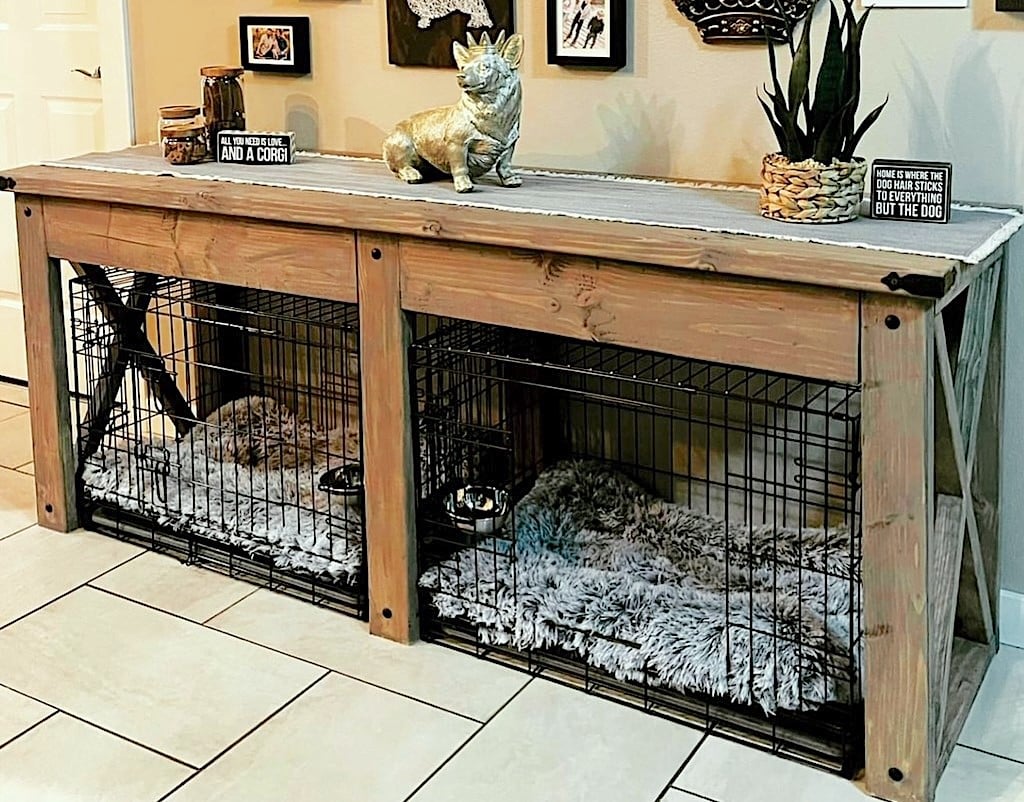
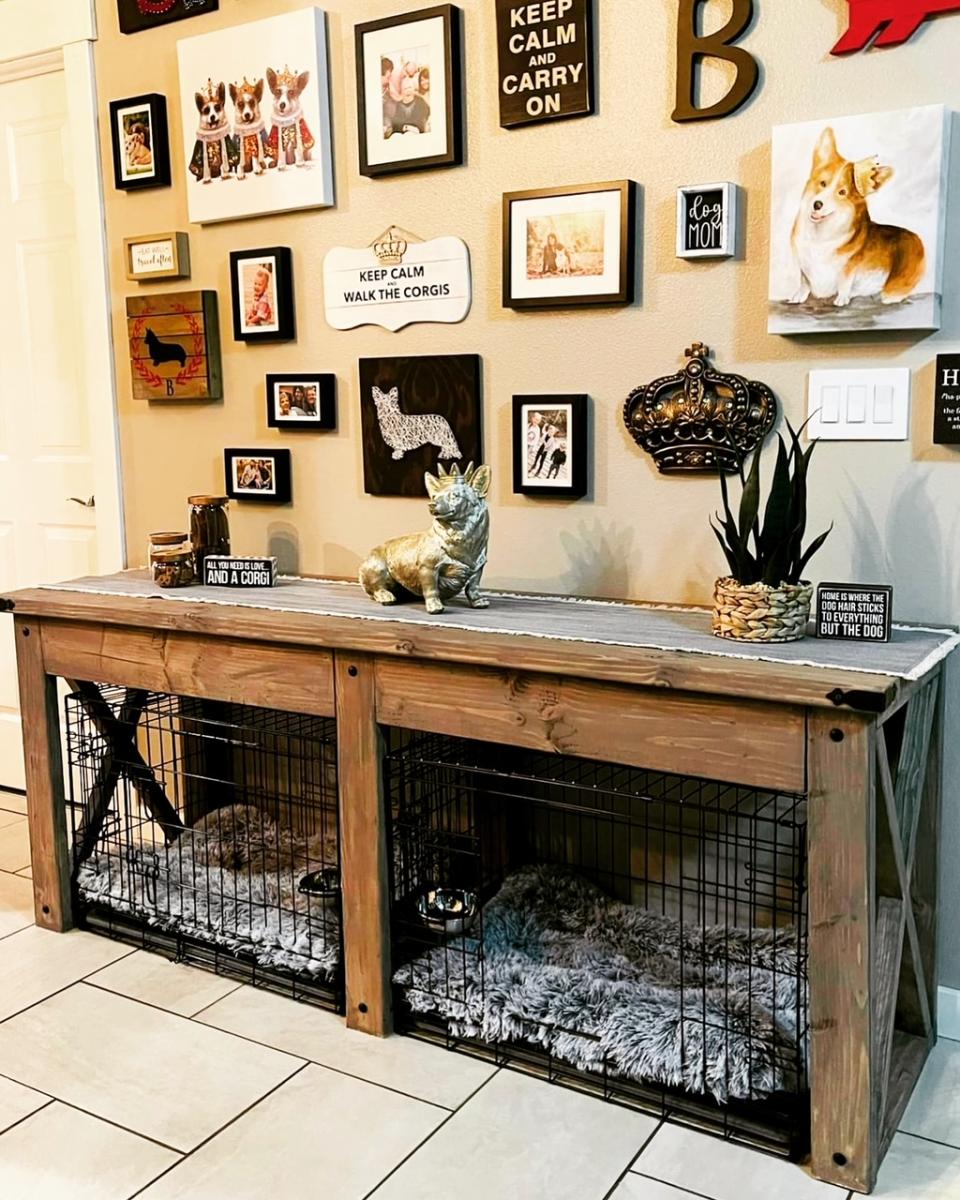
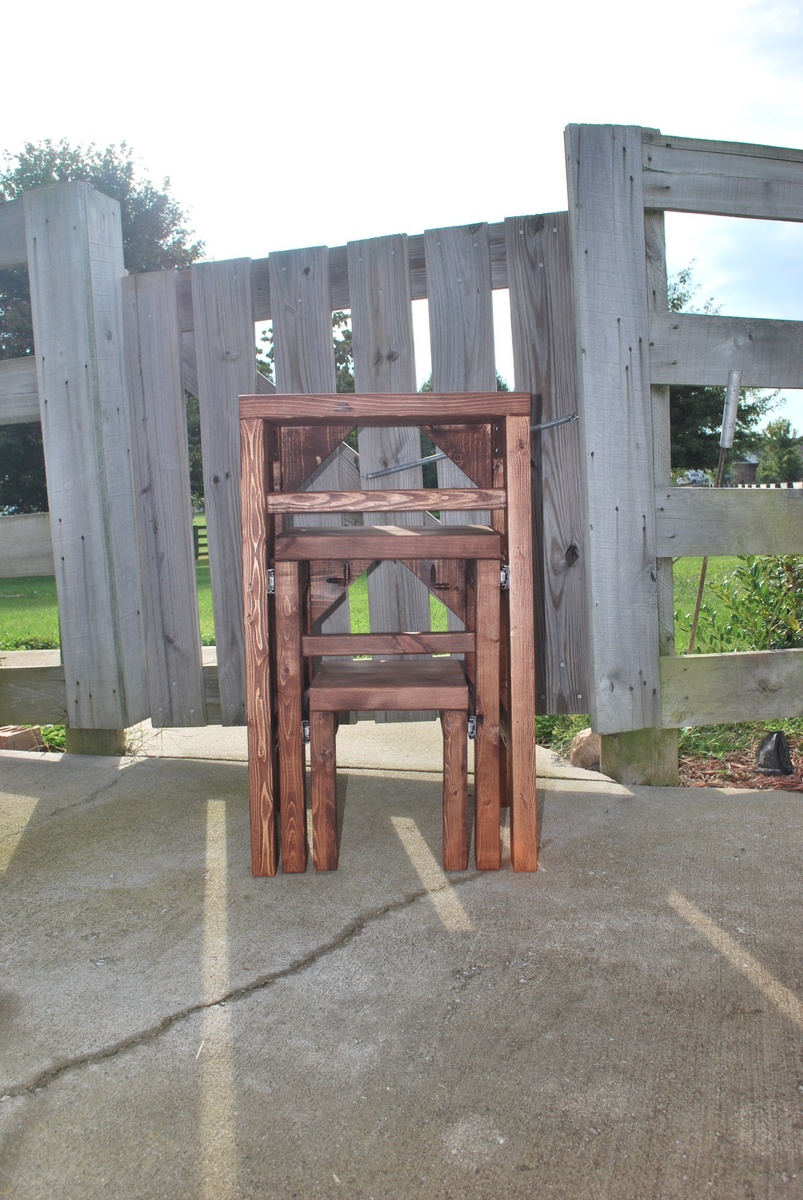
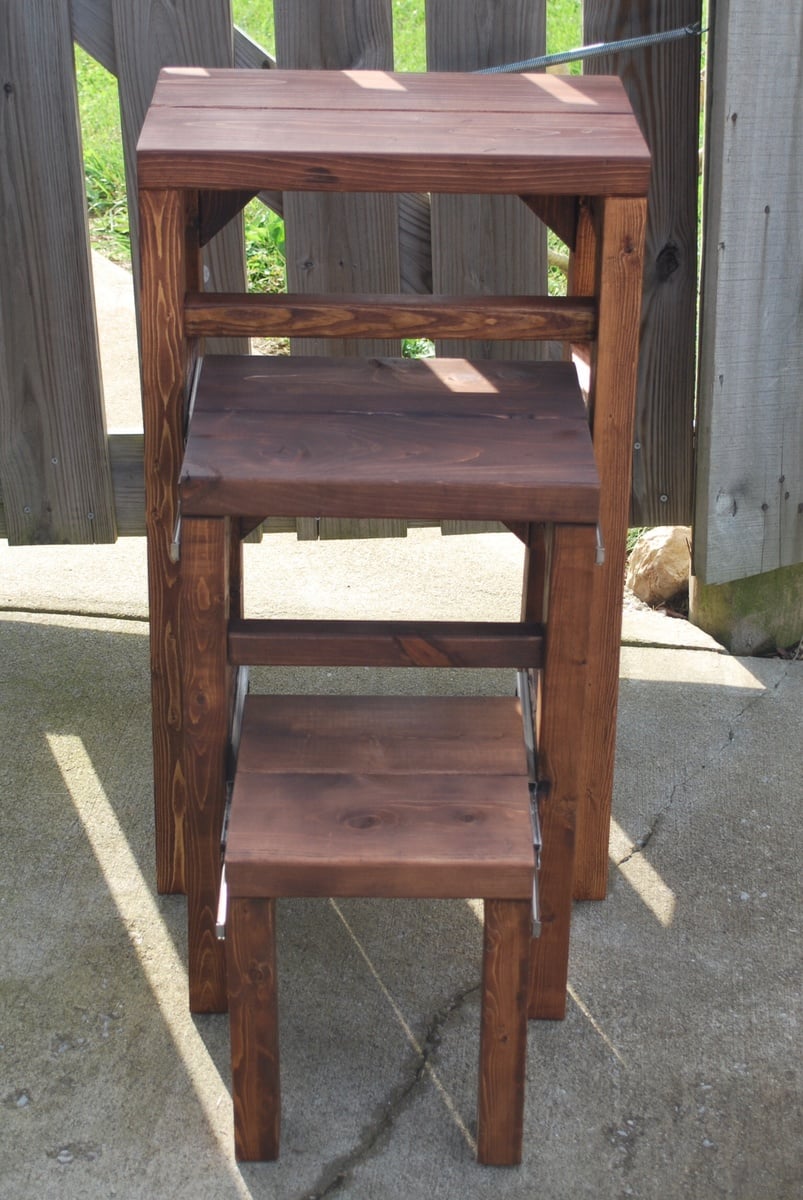
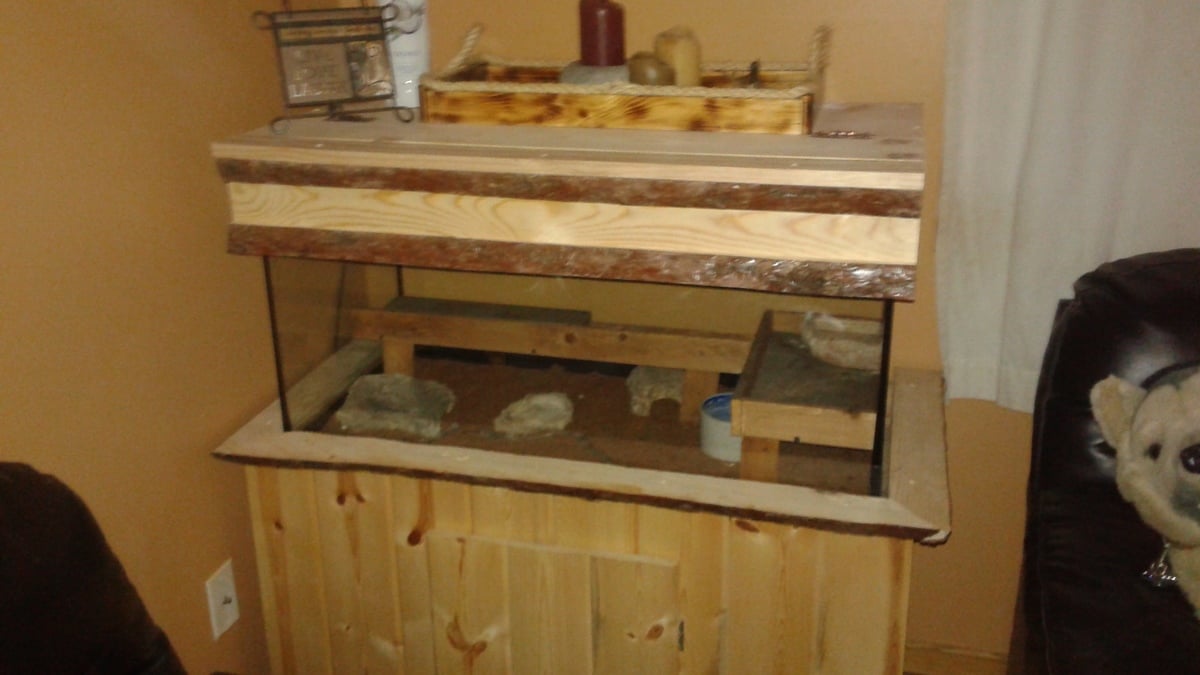
Aquarium stand for the snake cage

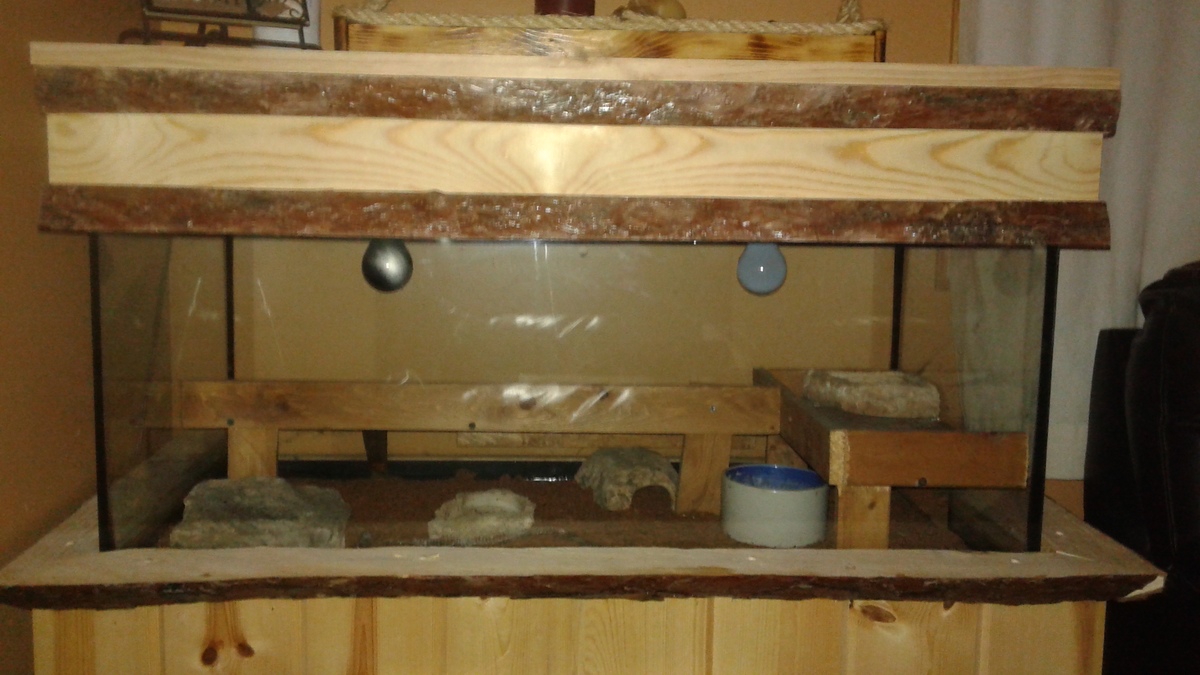
My husband and I bought a milk snake a few years ago. We had the cage sitting on our kitchen table. My husband was up north visiting his family and it irritated me. So I went out to the garage to see what we had. We had some tongue and groove and some misc. Pcs of scrap pallet wood. I slapped the stand itself together in a day. 3 years later, I completed it with the live edge shelf trim and the canapy, again using live edge. The pine log Pcs are left over from our basement knee wall ledge. 

Estimated Cost
$30
Finish Used
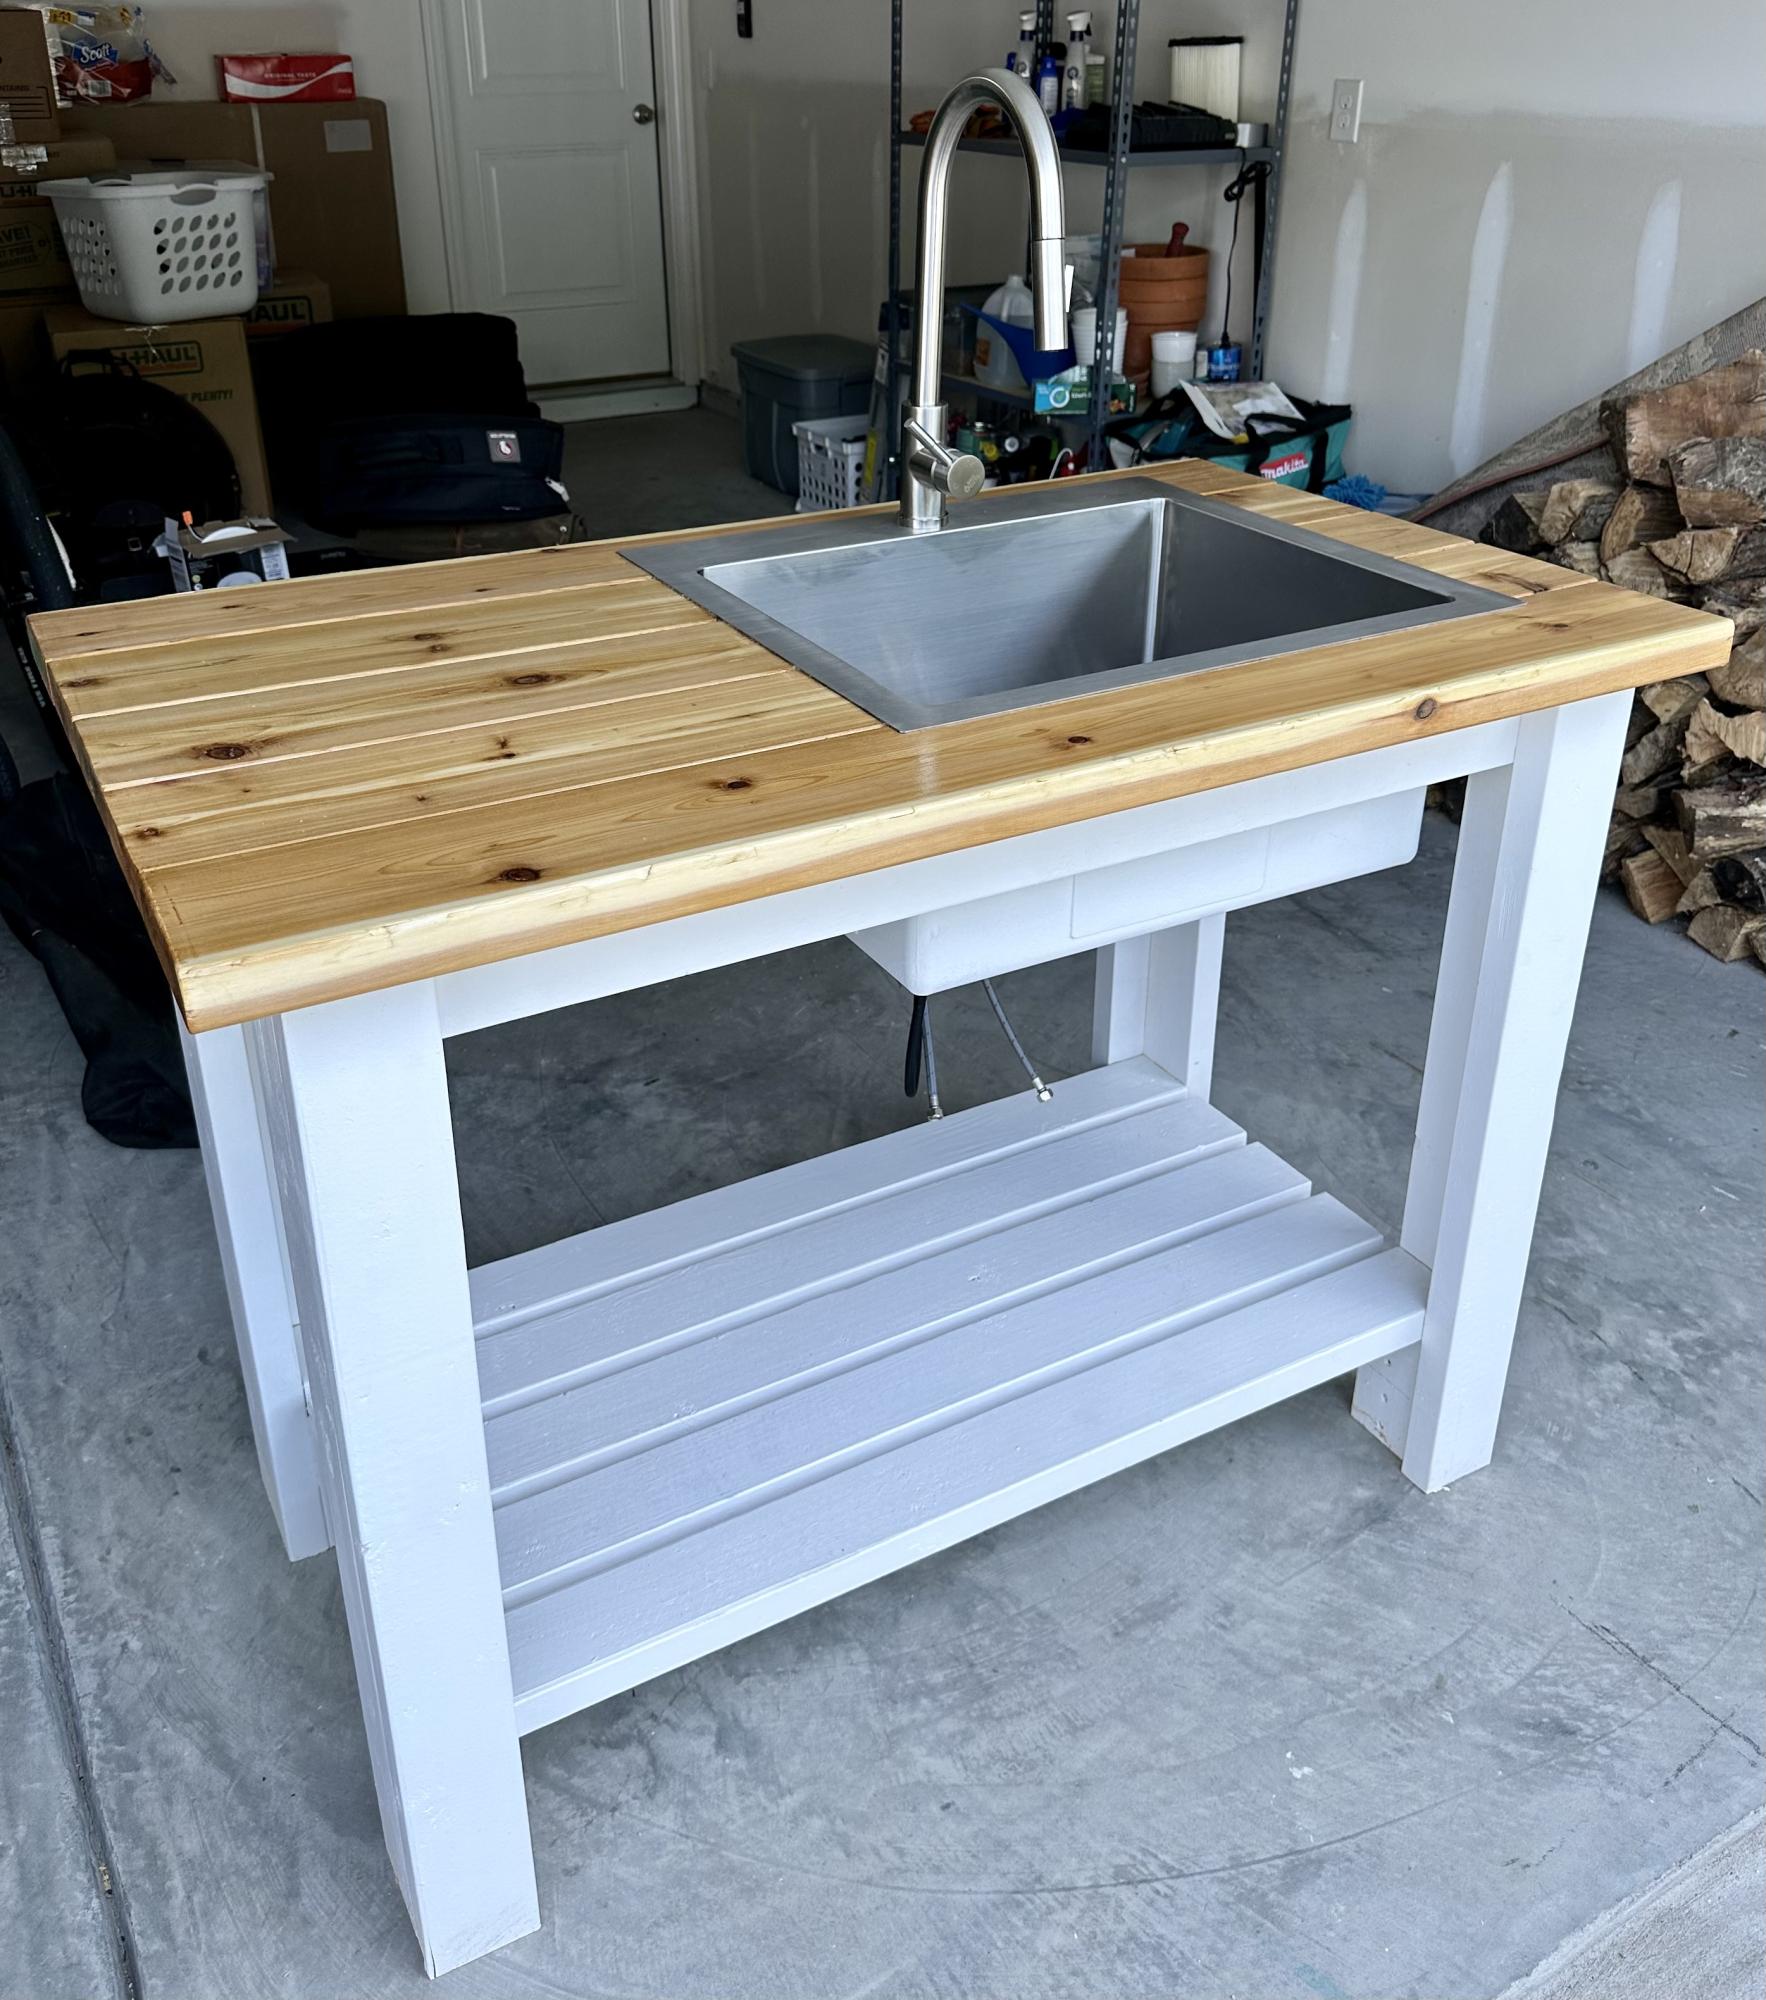
Left raw. The live edge is coated in thick polyurethane to keep the bark solid and complete.
Recommended Skill Level
Beginner

Sturdy Workbench Sink

Submitted by Anonymous (not verified) on Mon, 05/01/2023 - 09:57

Used sturdy workbench plans with 2x6 cedar top for outdoor sink. Turned out much better than I expected!!

Built from Plan(s)

Comments

Kitchen Cabinets

Submitted by Anonymous (not verified) on Wed, 10/02/2019 - 21:30

I followed the kitchen cabinet building plans to build all new upper cabinets up to my ceiling. I built all new drawers with soft close drawer slides also and built the refrigerator enclosure cabinet.I did the entire remodel myself including the new doors out of MdF.

Finish Used
Emerald urethane paint
BIN Shellac Primer

Comments

Ana White

Tue, 11/05/2019 - 10:41

We are so thrilled to let you know your entry WON the Best Brag contest!  There were many amazing entries, and it was tough to choose.

Look out for an email from us shortly!

modern outdoor lounge chair

Just finished this beauty, entirely made with 2x4, plans were modify to match our outdoor sofa and coffee table. I think our best looking project so far ;) Thank you for inspiring me to build !!!

Estimated Time Investment
Week Long Project (20 Hours or More)
Recommended Skill Level
Beginner

Comments

Seasonal And Holiday

Couch mods

Submitted by Anonymous (not verified) on Thu, 03/10/2016 - 00:09

My SketchUp of the Sofa I am going to build, modified from this plan. New features include wider arm rests, and a taller back that is at a 12 degree slant. I will post additional pictures after the build.

Recommended Skill Level
Beginner

My Simple Outdoor Lounge Chair with 2x4 modification

I modified this chair with 2x4's as the base and 2x2 for decoration on arms, this is prior to sanding and finishing

Built from Plan(s)
Estimated Cost
$15-$20 dollars, depending on local lumber prices and finishing options.
Estimated Time Investment
An Hour or Two (0-2 Hours)
Finish Used
Unfinished
Recommended Skill Level
Beginner

Comments

RandyW

Sat, 06/13/2020 - 16:33

I always take my sander to the sharp edges and round them off

Furniture for the Deck

Submitted by Adevney on Mon, 07/25/2016 - 10:05

 I followed the plans to build the counch.  My wife liked it so much she requested the love seat and chairs.  The chair plans were not up on the site yet.  That said, the plans were so easy to follow, I was able to adjust the loveseat plans to make the chairs with ease. Thank you very much!  

Estimated Cost
Couch, Loveseat, and 2 Chairs - Wood, Screws, Stain - $500.00 - Cushions were another $420.00

Each piece took about two to three hours to cut and assemble. The sanding and staining took another two hours per peice
Estimated Time Investment
Weekend Project (10-20 Hours)
Finish Used
Minwax Mission Oak
Recommended Skill Level
Beginner
Seasonal And Holiday

Garden Enclosure

Submitted by Anonymous (not verified) on Thu, 06/04/2020 - 17:29

My chickens took over my garden area and being the voracious raptors they are, I needed to build a garden enclosure to keep my veggies safe. I modified a little, making my beds deeper. I also had to stretch chicken wire over the top to keep the great flyers out. I also used it as a way to organize my garden tools (which is possible because I live in Southern California with moderate temperatures and little rain. Thanks for the plans! Yvonne

Built from Plan(s)
Estimated Cost
500
Estimated Time Investment
Weekend Project (10-20 Hours)
Finish Used
Deck on the outside. Clear coat on the inside. I also added chalkboard paint on the inside so I could fill in what I’m growing and erase it after.
Recommended Skill Level
Beginner

Junior loft bed

Submitted by Anonymous (not verified) on Thu, 06/29/2017 - 09:55

My very first furniture build! Took me about 5 days, but as a beginner I found it very easy to follow the plans. I did buy a Kreg jog for this project, highly recommend it! Other tools used were a miter saw, circular saw, and drill.

Estimated Cost
$80
Estimated Time Investment
Week Long Project (20 Hours or More)
Finish Used
Ebony stain
Recommended Skill Level
Beginner

Farmhouse bed

Submitted by Anonymous (not verified) on Sun, 01/15/2023 - 18:51

Needed a bed. After looking in town for premade beds, I wasn’t satisfied with the workmanship or price. I thought I could build one much nicer than what I was seeing. With these plans, I was able to make it happen. It turned out way better than expected. After a couple of strikes with paint, I watched a couple of YouTube videos on painting furniture black and that’s all it took to get exactly what I was looking for. Thanks so much for the plans. I also made the mini farmhouse bedside tables. I’ll put pics of it under the tables category

Comments

Pull-out step stool

I needed a step-stool in my kitchen to reach in my top cabinets. I'm rather short so I was constantly dragging a chair from my dining table over to find things. I did a google search for a step stool and looked at images. As soon as I saw the picture I knew I had to build it, the retailer selling the original one I saw has a starting price of $270 and goes all the way up to $680! It took me 2 weeks off and on and several times of putting together and taking apart to get Ito the size specifications on the retail website.

Estimated Cost
Around $50
Estimated Time Investment
Weekend Project (10-20 Hours)
Finish Used
Stain and satin finish poly
Recommended Skill Level
Beginner

Comments

Bunnie1978

Wed, 10/09/2013 - 04:13

That's a cool idea... mix between nesting tables and stools! Great job!

Mrswhetstone

Sun, 05/31/2015 - 18:27

I just used the picture i found online as reference and built it through trial and error. Unfortunately I don't know how to create plans either.I can tell you the legs are 2x3's cut at a 5° angle and the tops are 2x6's. I ordered the drawer slides from amazon for approximately $12 a piece.

robear529

Fri, 08/21/2015 - 06:34

Hi, I've been looking for the original image that you used as your model in an attempt to find dimensions to start with, but haven't been able to find it. Could you perhaps remember what brand it was or what site you found it on? If you still have the stool, could you maybe tell me the width of your top step and I could maybe go from there? 

Thanks for the picture. This is a brillant idea and exactly what I'd like to create for my kitchen. I'm hoping to be able to use it as a counter height seat as well when I'm working in the kitchen.

Simple Outdoor Conversation Set

Submitted by cspires64 on Sun, 03/18/2012 - 13:13

Spring is around the corner and I had no outdoor furniture. My boyfriend had just talked me into a new weber grill, which did not leave much budget for new outdoor furniture. That's when I came across this web site and thought 'I can do that'. So I talked me boyfriend into helping build this Simple Outdoor Conversation Set. We used plans for the Simple Outdoor Lounge Chair and Simple Outdoor Ottoman and then followed the alterations by post for 'My Modern Outdoor Patio Collection' to make the loveseat.

The whole project came together over 5 days.
Day 1: Cut all boards (5 hrs)
Day 2: Sand all boards (5 hrs)
Day 3: Stain all boards (6 hrs)
Day 4 & 5: Assemble furniture (9 - 10 hrs)

The total project took about 25 hrs and cost about $350. Here's the breakdown wood and supplies $204 from Lowe's for pretreated wood. $145 on cushions (NOT ON SALE); $60 for the seat cushions from Home Depot and $80 for the back cushions from Wal-Mart. We were originally planning on only having the seat cushions, but the seats were long when you set in them with your back against the bear wood (I was setting so far back, my feet couldn't reach the floor) so we opted for thick back cushions to make it more comfortable. The project finished up just in time for our first BBQ party! (March 2012)

Estimated Cost
$204
Estimated Time Investment
Week Long Project (20 Hours or More)
Finish Used
Redwood toner and sealant
Recommended Skill Level
Starter Project

Comments

Painted Tryde End Table with Shelf

Submitted by Anonymous (not verified) on Mon, 06/27/2016 - 01:00

A white spruce base painted with hessian chalk paint and waxed with furniture wax over the top. Topped off with a section of oak block kitchen counter waxed with dark oak wax

Estimated Time Investment
Weekend Project (10-20 Hours)
Finish Used
Rust Oleum Hessian chalk paint with furniture wax over the top
Old Oak Kitchen counter top with Briwax dark oak wax
Recommended Skill Level
Starter Project

Comments

Board & Batten Inspired Headboard

Our guest room finally has a headboard! I put together this queen size headboard using what I had learned building my daughter's headboard (and consulting the plans for the Reclaimed Wood Headboard) using the remainder of the plywood sheet from her headboard project, 2x3s for the legs, a 2x4 to join the legs (and connect to the metal bed frame), furring strips, and a 1x3 to top it off.

Our plywood had been cut to fit our car, so the first vertical furring strip was placed to hide the seam where I joined the two pieces back together. Then we evenly placed them from center as just looked right to us.

We had a great time seeing this come together as we didn't follow a specific plan, but were able to be a bit more creative inspired by various plans.

Estimated Cost
$45 including hardware & paint
Estimated Time Investment
Afternoon Project (3-6 Hours)
Finish Used
We painted with Martha Stewart's Stratosphere in a flat finish, distressed and rubbed on Minwax Provencial stain. Unfortunately, the stain gave the headboard a very green tint, so after a lot more sanding, we were able to finish the project with two quick coats of Minwax water based Poly.
Recommended Skill Level
Beginner

Comments

New counter height planters in use

Submitted by jrbdmb on Fri, 06/20/2014 - 05:05

Using the counter height planter plans from Janettx. Thanks!

Estimated Time Investment
An Hour or Two (0-2 Hours)
Recommended Skill Level
Beginner

Comments

Janettx

Mon, 09/20/2021 - 13:24

Nice job!!! I'm still using mine. I ended up putting 12"x12" pavers under each leg to extend their life. After the 2nd year now we get bumper crop out of ours each season.

Eric's Cedar Shed!!

Submitted by Anonymous (not verified) on Mon, 07/06/2020 - 21:35

Thank you for the plans, shed turned out great! My association required me to match the siding color, roof color, and anchor to a concrete slab. So I poured 25 bags of 80lbs concrete to make a 9x5 slab. Redid the plans for an 8x4 shed, built the frame with 2x4s and not 2x2's, installed flashing, ice/water shield + felt + matching shingles since I'm near Chicago, and used a flexio finishing sprayer to paint the shed. Saved some $ by using 2 Redwood Grain Fiber siding panels for $22 each at HD.

All in all very happy with my shed and all my dangerous yard tools and woodworking tools can be put away from my toddler.

Built from Plan(s)
Estimated Cost
400
Estimated Time Investment
Weekend Project (10-20 Hours)
Finish Used
Behr Premium Plus exterior paint
Recommended Skill Level
Intermediate

Guitar Stand

Submitted by Eddie K on Thu, 03/02/2017 - 13:49

Built this guitar stand basically by using on-hand materials left over from another project.  Used 1x12's; 18" tall fir for sides and back braces (cut at 5 degrees on each side).  Added felt strips to protect the instrument.

Estimated Cost
Probably around $20-25. Need about 4' of 1x12 fir and Minwax Polyshades in Classic Oak. All materials were on hand except the roll felt, so hard to pinpoint.
Estimated Time Investment
Afternoon Project (3-6 Hours)
Finish Used
Minwax Polyshades in Classic Oak.
Recommended Skill Level
Beginner

Comments

Back