Community Brag Posts

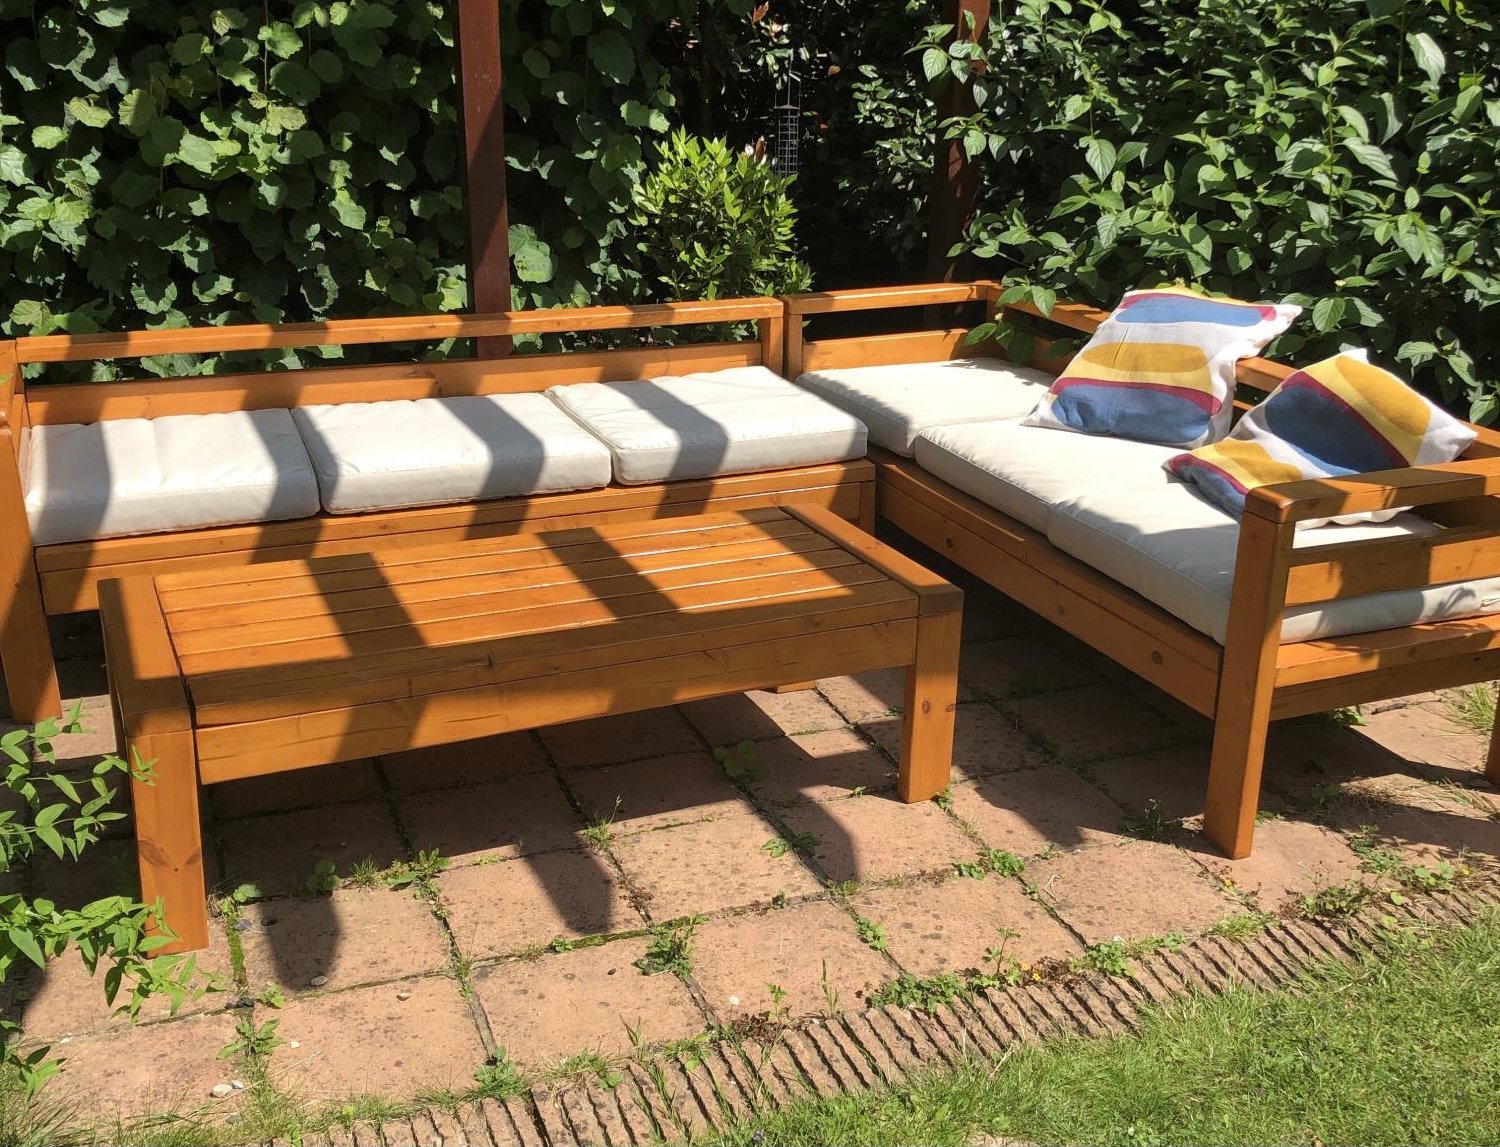
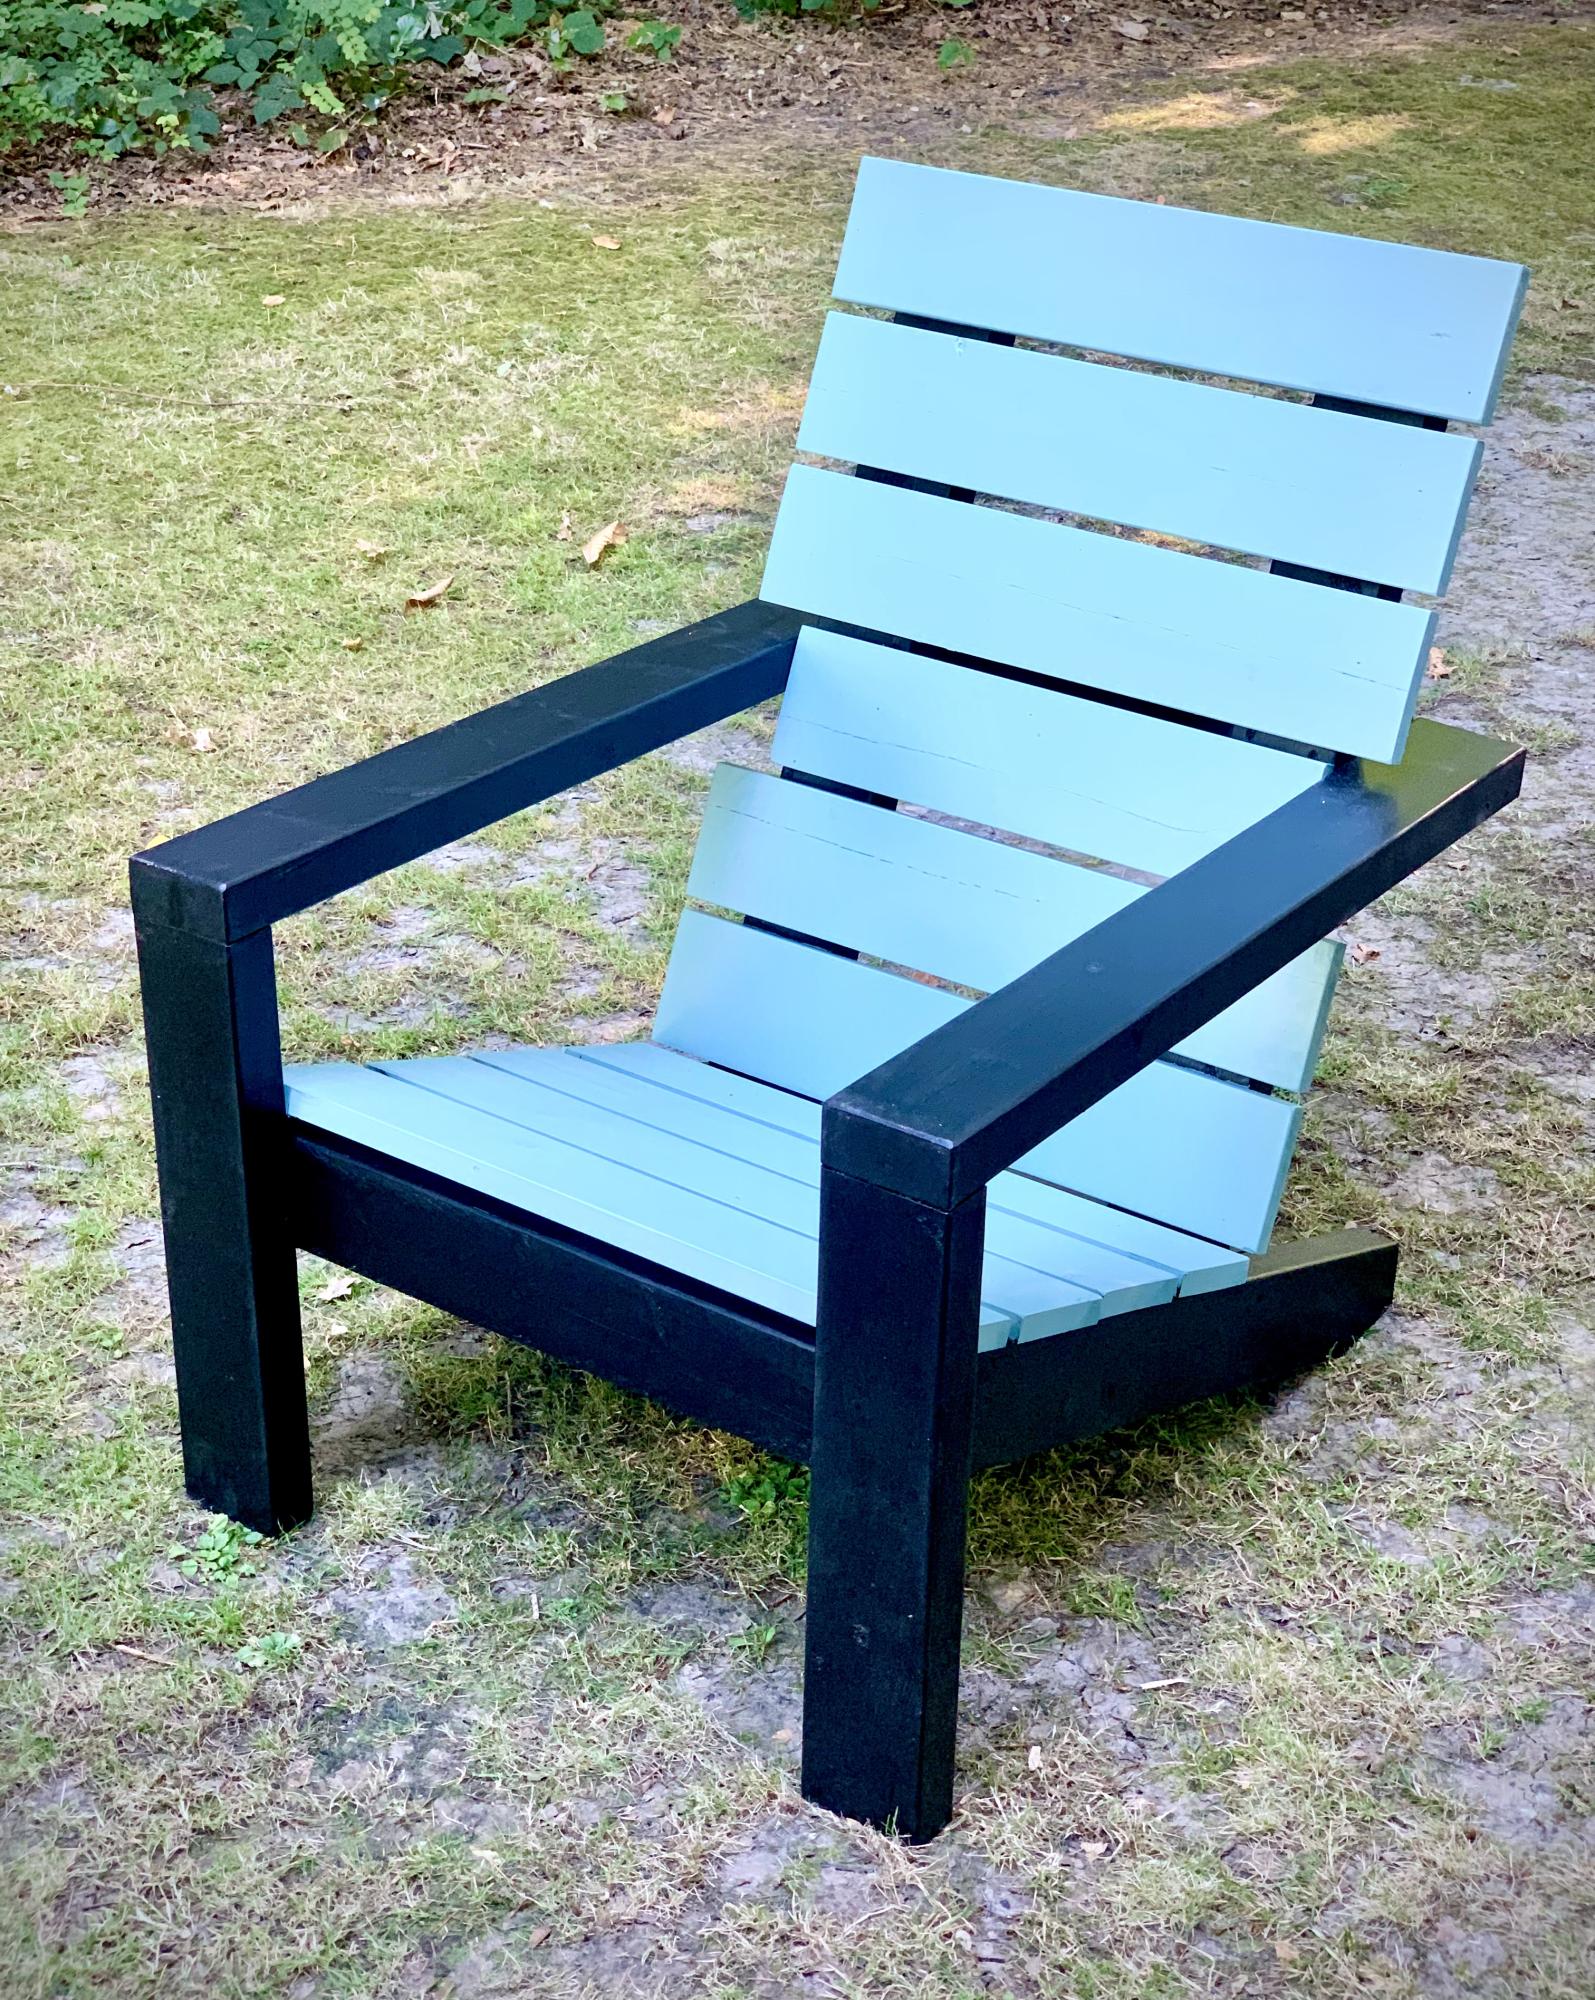
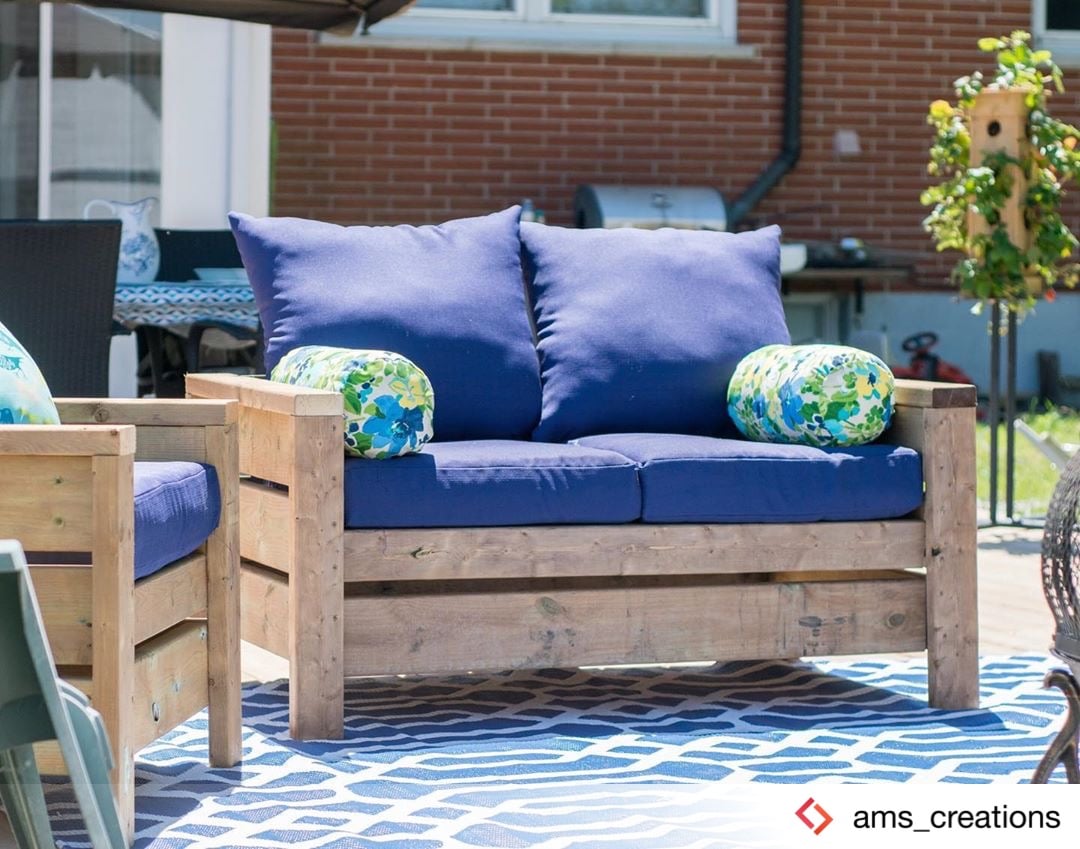
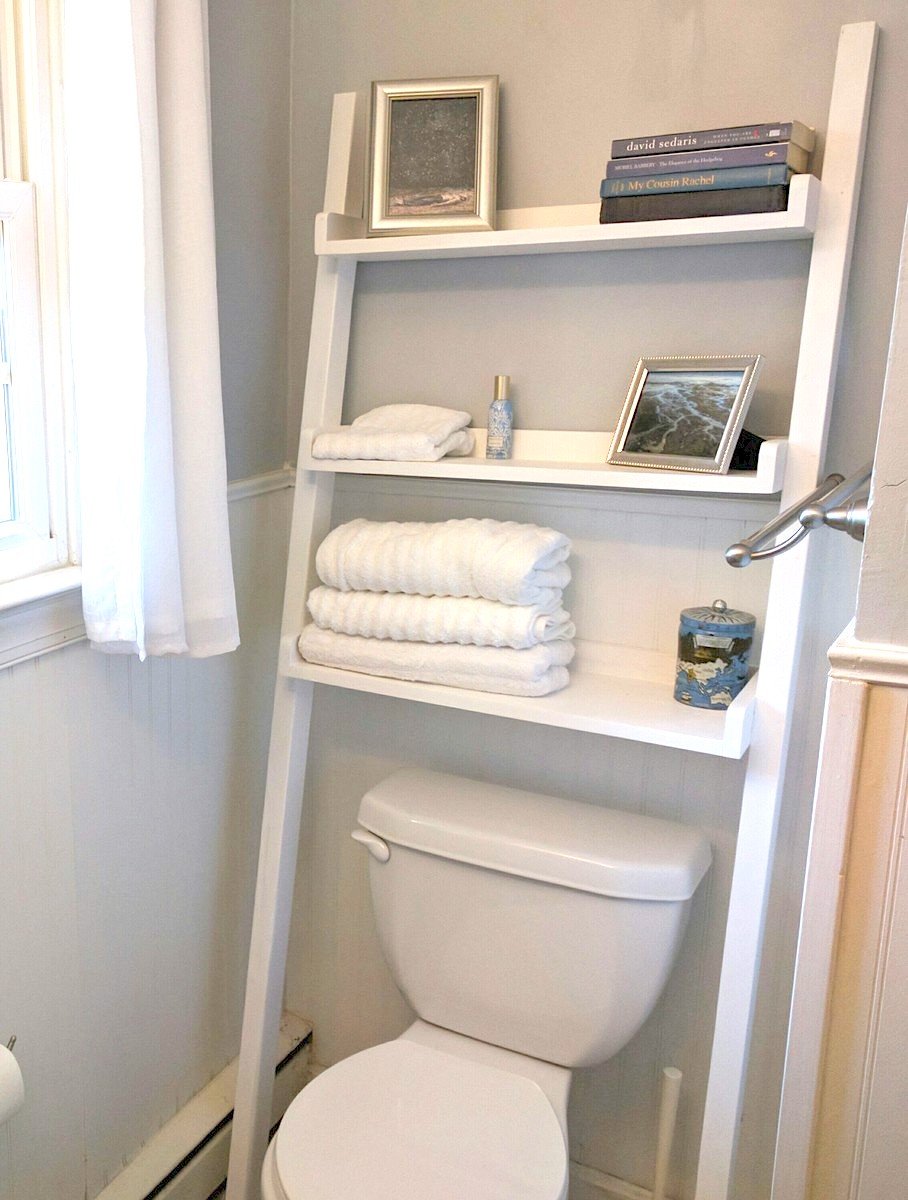
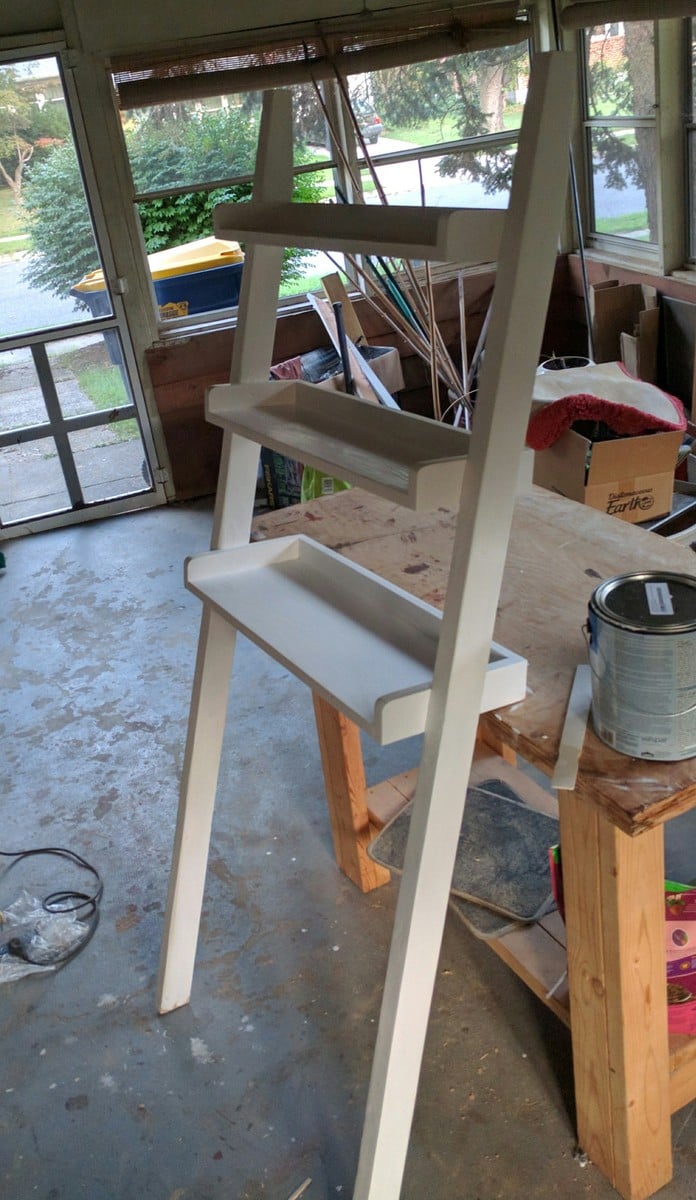
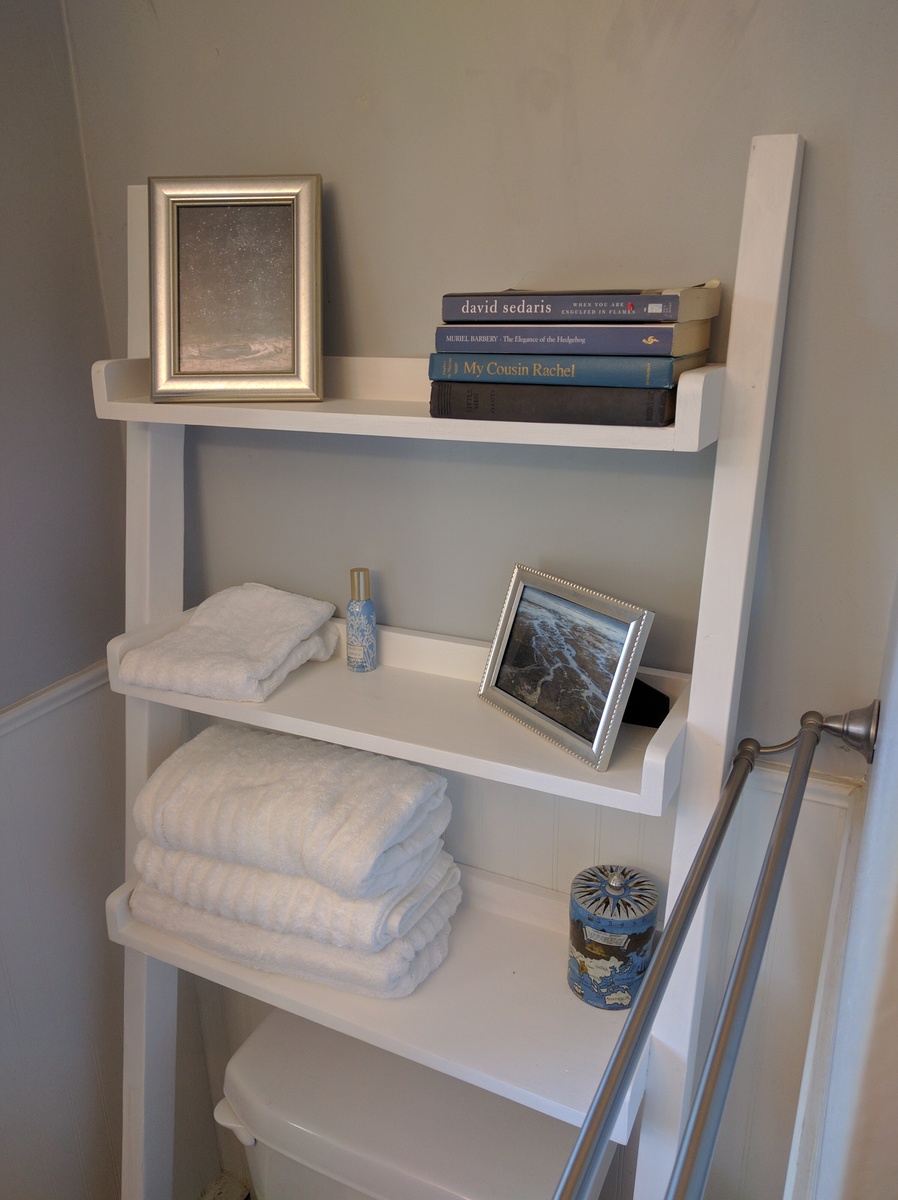
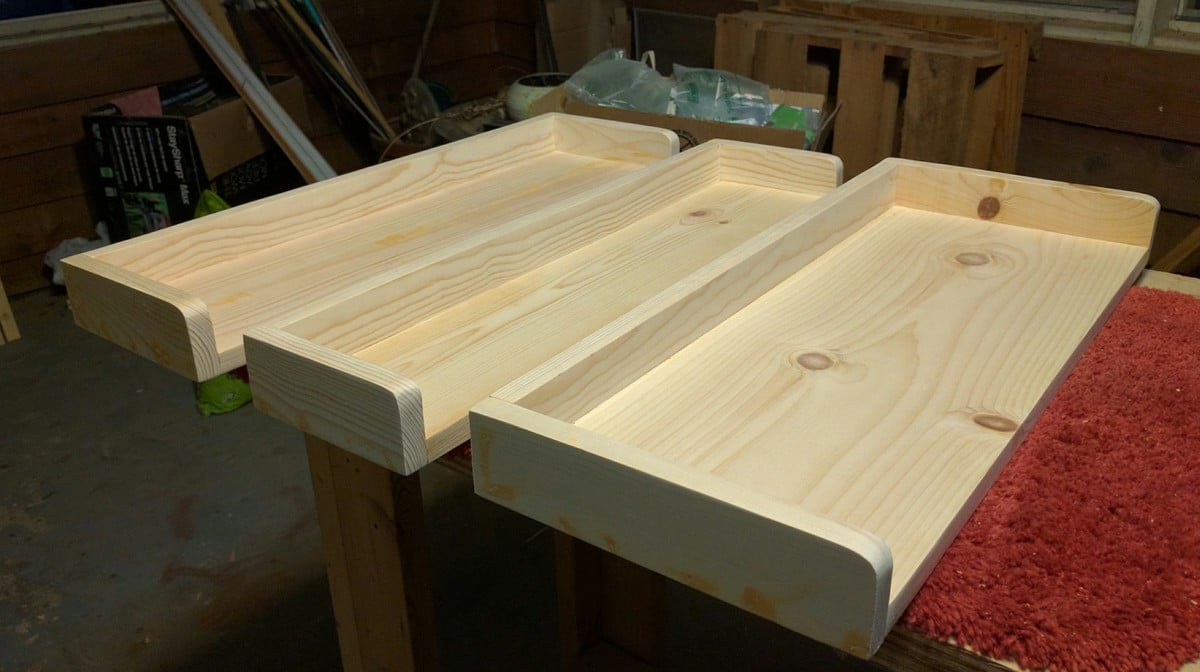
Chairs and Round Side Table for the yard!

Submitted by tbman7 on Fri, 05/03/2013 - 15:38

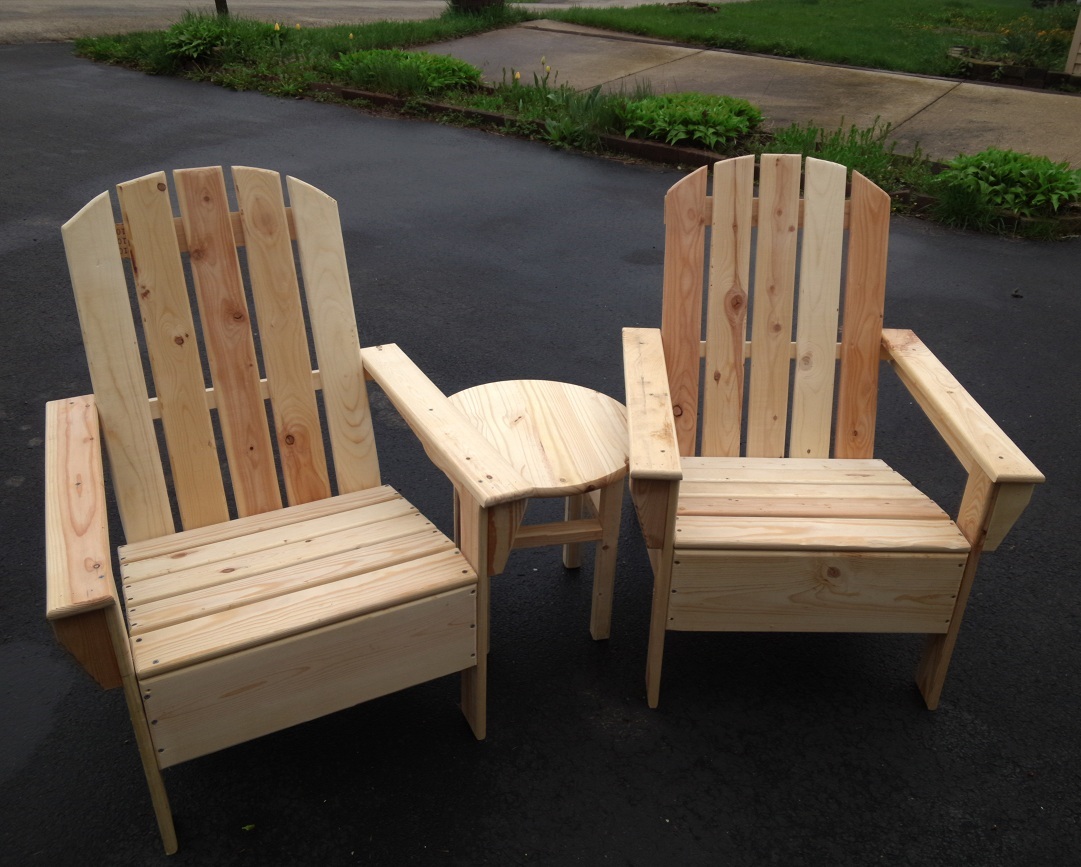
My dad and I built these chairs by following Ana's Adirondack plan, and then adding our own curved back. We also routed all the edges to give the entire chair a rounded feel. We also built the simple little round side table to use with the chairs.

Built from Plan(s)
Estimated Cost
$25 per chair
Estimated Time Investment
Day Project (6-9 Hours)
Finish Used
unfinished, but plan on using an outdoor finish
Recommended Skill Level
Beginner

Garden sectional and table

Submitted by Anonymous (not verified) on Mon, 10/04/2021 - 13:00

Easy to do though some thought required for conversion into centimetres .

Comments

Farmhouse Doll Bed

Submitted by jkjackson on Thu, 12/23/2021 - 19:39

Created from scraps using Ana’s plans for the bed and the mattress.

Comments

jkjackson

Fri, 12/24/2021 - 14:33

Thanks for the great plans and making the mattress so simple (for those of us who feel like just threading a sewing machine is like playing the game Mouse Trap while under the influence! 😄)

Outhouse

Submitted by taimysha on Thu, 01/20/2022 - 18:13

This is the 1st Ana White project I ever built. I now have several items of hers under my belt. I built this the summer of 2017 for the solar eclipse. We live directly in the path with longest viewing times. I placed an ad and got responses from all over the country of people wanting to stay on our property. This outhouse like all of Ana's other plans were easy to adapt to fit my needs. I extended the roof to include the covered porch and only used tin. I also added a couple of shelves a 2 mirrors. Almost everything I used to build this were things we already had. It's mainly built used our old swimming pool deck that we had torn down. The versatility and the clarity of Ana's project plans make this my go to building site!!

Comments

Modern Dining Room Table

Submitted by Highway6 on Thu, 07/16/2015 - 11:22

Plans developed myself after sneaking photos from the underside of the table at West Elm. 

Pine 2x4s make up backbone of the 2 legs and the horizontal piece underneath.

Used the figure 8 fasteners for members going across the table top to allow for any slight seasonal movement of the table top.

Not shown, but each leg is secured to the table top with (4) 2.5" bolts and a countersunk t-nut

Because I'm a beginner, this has taken up 75% of my weekends since mid-March.  Would not recommend this as a 1st major project.  3 way bevels are a pain in the arse. Thank God for the Timbermate filler.. that stuff worked great to give me crisp corners.

modern dining table

Estimated Cost
$450 in Ash.
Couple hundred more in finishing materials, screws, pine 2x4s, miscellaneous odds and ends
Estimated Time Investment
Week Long Project (20 Hours or More)
Finish Used
50-50 Rustoleum Kona and Weathered Gray.

Polycrylic Clear Satin - 3 coats (5 on table top) with brown paper bag sanding between coats.
Recommended Skill Level
Intermediate

Comments

Highway6

Wed, 01/13/2016 - 13:54

I don't have plans, sorry.

I'm a heavy sketchup user... had a detailed sketchup model that I put some key dimensions on (what you see above), and an exploded table view that color coded my pieces by wdith and gave the lengths of each board.. Lot of it was measuring as I went along.

jwells1

Thu, 03/03/2016 - 16:41

This is the table i want to build. It is the only my wife and i both agree on. Is there any way you could go through the steps? the sizes of wood you used and how you kept them together. Please responf back here or Message me!!! The way you did the legs is what really has me.

Miter Saw Cart

Submitted by Anonymous (not verified) on Tue, 02/22/2022 - 08:51

Followed the plans and it came out great. I am still thinking about the extension on the right side since the hinges are so expensive.

Built from Plan(s)

Comments

Dog kennel

This was my first project with the kreg jig and I love it. Pretty easy once I got the hang of it. I used beadboard in place of 1/4 ply to dress it up a little but more. The hardest part was attaching the sides to eachother, I used 'L' brackets so it could be taken apart.
My dogs love this kennel! It is large enough for my weimaraner and my lab/pitbull mix to stay in it together. Most mornings they are laying in there waiting on us to lock the door.
I purchased a vinyl covered stress mat from 'Blue', it fits really well inside and just pulls out to be wiped down. I haven't needed to but it can be hosed down also.

Built from Plan(s)
Estimated Time Investment
Day Project (6-9 Hours)
Finish Used
Walnut stain then lacquered.
Recommended Skill Level
Intermediate

Comments

scribble

Wed, 05/02/2012 - 06:57

I am wondering what type of latch's those are and were you got them. I am also wondering were you purchased this mat from. I tried searching blue but could not find anything?

My Garden Shed

Submitted by jimavera on Tue, 03/13/2018 - 09:07

I used these plans of this project. Only differences are I used 2X3 studs. I also made the shed longer,, its 3ft X 8ft.. Also on the back I used two siding sheets since it wouldnt be seen. Did it over the weekend. Just needs shingles and stain. Anyway I love it. Had a spot behind the house where it fits perfectly. Thanks

Built from Plan(s)
Estimated Time Investment
Weekend Project (10-20 Hours)
Recommended Skill Level
Intermediate
Seasonal And Holiday

Modern Adirondack chair with a couple of variations!

Submitted by Anonymous (not verified) on Sat, 07/09/2022 - 10:40

Needed a chair to sit and drink a beer in, this was a quick and easy build, and does the job of being sat in whilst drinking beer admirably well. Good work all round.

Comments

Storage sofa / single bed- made with 8" memory foam twin mattress

Built this while 8 months preggo with help from my husband and best friend (sewing). I wanted to make it big enough to be an extra bed and I wanted it to be comfortable so I invested in an 8"memory foam mattress. Here is the pic before the leg base went on.
We made the back 3" higher since the mattress is so thick. I have kids so I made the cushion cover around the whole mattress so we could take it off and wash it. I staple gunned plain grey fabric to hide the plywood of the lid (since I was limited to fabric I had found).

It is a little too deep to sit on for two people but it is great in a corner where you can lounge on it with a book or snuggle for a movie with your partner or kids! :)

Wood /glue/adhesive spray - about $120
Fabric - bargain bin upholstory fabric/thread - $67
Cushion covers (filled with old pillows,leftover uphostry foam and two KING pillows) - cream, from IKEA bargain bin 4@ $5 each= $20+tx
Mattress- Twin memory foam (Classic 8")- $199+tx @ Jysk on sale (they go on sale every two months).

So the whole thing was about $450 and we love it. The only thing I saw that came close was $3000 in a store downtown.

Thank you so much for the plans Ana!!

Samantha A.
Halifax, NS

Built from Plan(s)
Estimated Cost
$450 or less (depending on mattress)
Estimated Time Investment
Weekend Project (10-20 Hours)
Recommended Skill Level
Beginner

Double Tilt-out trash bin

Submitted by lindy19 on Wed, 10/23/2013 - 17:47

Really wanted one of these but everything I found was way too expensive so I found these plans, tweaked em a bit to fit the space I had and voila, double tilt-out trash bin. Thanks for the wonderful plans!

Estimated Cost
$50-75
Estimated Time Investment
Day Project (6-9 Hours)
Recommended Skill Level
Beginner

Comments

ADeboer

Sat, 05/02/2020 - 14:36

This is the exact Style I've been looking for!! I see that you made this ages ago - any chance you still have the dimension modifications you made somewhere?

L shaped loft beds

Submitted by AbiCurrie on Wed, 01/13/2016 - 00:49

We have 12 foot studs in our house so I wanted to make use of the height of our ceiling to provide more space on the floor for the boys to play! With two boys sharing a room, the beds were going to take up a lot of valuable floor space. I found the bunk bed plans in Ana's book and decided to modify them to make loft beds. We had to do two so decided on an L shape so we could fit them into the room! Once we made the first bed we decided we should put only one set of stairs in to save space. The safest way we could think to do this was to place the stairs against the wall so the boys were less likely to fall. The stairs double as book shelves. The coloured rope was an added safety feature we thought up and gives me peace of mind! This was a fun, relatively easy build for two non-builders making their first big project. I bought a Kreg pocket hole jig for this project and it was a life saver. I can't imagine doing this build with out it!!! We completed it in about two to three days while my brother was down on holiday. It was fun and good brother sister bonding time! I am about to embark on phase two of the boys room, this time by myself , adding a storage dresser under one bed. I will modify Ana's laundry dresser plans to fit some plastic storage boxes. Then a day bed/sofa under the other bed using Ana's Alaska cabins day beds plan and finally (if I'm still standing) a shorter version of the craft table for the middle of the room! That's my year planned! Hope you enjoy the pictures, the beds are so big and high it's very hard to get a good photo. 

Estimated Cost
$300-400 NZD
Estimated Time Investment
Weekend Project (10-20 Hours)
Finish Used
Dulux - White paint matte finish. I painted all the wood before assembly, I highly recommend this. It needs another coat post build but I can confess I haven't gotten around to it yet!!!
Recommended Skill Level
Beginner

Full Size Simple Bed with Arch

Submitted by jalfieri on Mon, 12/05/2011 - 17:14

I'm building new beds for my daughters for Christmas. My oldest wants a bigger bed, so she's getting the full size simple bed. My baby bear needs a little more space in her room, so she gets the loft bed. The loft bed is finished but no pic's yet, as I can't assemble it till Christmas. For the full bed, I combined the Simple Full Bed with the Simple Bed with Arch. It's not quite finished yet, but here is a picture of the headboard. I'll add more pics when I'm done. I want to thank Ana for the hard work she puts into this website. To go out and buy similar beds to the ones I'm building would have probably cost me a couple thousand dollars, and would have been made of flake board. Because of Ana's plans, both my children will sleep on good quality, solid wood furniture for under five hundred dollars. Thanx Ana!

Estimated Cost
$200
Estimated Time Investment
Week Long Project (20 Hours or More)
Finish Used
Behr Premium Plus Ultra
Recommended Skill Level
Intermediate

Comments

Shoe storage bench and coat rack

Submitted by SeanLC on Mon, 02/22/2016 - 10:07

Very easy project, just have to put stain and coat hangers on and all done. 

Estimated Cost
150.00
Estimated Time Investment
Afternoon Project (3-6 Hours)
Finish Used
Min wax
Recommended Skill Level
Beginner

Farm Table and Benches

Submitted by Handy Dad on Thu, 12/19/2019 - 14:28

I used rough cedar instead of pine. And a hand held planer to knock off the rough.  The faux finish started with various blunt and sharp object beating in random patterns.  Then a blow torch, white spray paint wiped off after a few seconds. Then a natural stain with polyurethane. 

Estimated Cost
$300
Estimated Time Investment
Week Long Project (20 Hours or More)
Finish Used
Mimwax spar urethane. Clear gloss.
Recommended Skill Level
Beginner

Farmhouse Bed with Storage and Bookshelf footboard

Submitted by rbgreene04 on Sat, 05/21/2016 - 15:50

I altered the plans just a bit so that I could make use of the drawer closest to the headboard, while using bedside tables as well (not the ugly ones in the pictures, but some that only exist in my mind as of now). With the plan as is, I didn't think that first drawer would be able to open if you have a nightstand. So I left about a 17" gap that can be used as an open shelf for storage, and still had room for 3 drawers. I also wanted to include a bookshelf as the footboard to make it multifunctional. We have a ton of books and no place to store them (fear not, a large bookshelf/media center is coming soon!) I also altered the top of the headboard just a bit to give it more texture and visual appeal (hopefully, but beauty is in the eye of the beholder so I've been told). Lastly, I did not put the 1/4" plywood backing on the drawer carcasses. They were pretty sturdy as is, and only got more sturdy as they were attached to the headboard and footboard; I'm not worried about racking at all. Leaving the back off also allows me to pull the drawers out and access some hidden storage in between the two drawer carcasses. 

I wanted a simple finish, so I rubbed it with dark walnut Danish oil. Super simple finish and I think it'll hold up as the bed is not like a desk that needs poly or something. 

Estimated Cost
Cost? Great question! I build things, but don't keep track of receipts. Whoops! It's a major flaw of mine, and I'm working on it. I'd estimate just shy of $300.
Estimated Time Investment
Week Long Project (20 Hours or More)
Finish Used
I sanded to 120 and then lathered on Dark walnut Danish oil. I let it soak into the wood, and boy was the wood thirsty. Then reapplied after about 30 minutes and wiped off the excess, which there wasn't much excess--did I mention the wood was thirsty?
Recommended Skill Level
Intermediate

Comments

ciara5545

Sun, 08/28/2016 - 19:50

This bed turned out amazing.  I love the modifications and agree the first drawer will be more usable.

Dumpster Dresser

Love Ana's Dumpster Dresser. It is the perfect addition to our guest bedroom!

Built from Plan(s)

Comments

nekeroom58

Thu, 08/20/2020 - 07:39

Your dumpster dresser looks great I hope that mine looks as good as yours. I'm making the Dumpster dresser and it's turning out pretty good would I be able to post my picture of the dresser here?

Poplar Truss Table

Submitted by Anonymous (not verified) on Sun, 07/10/2016 - 18:50

Was planning to build the table from smooth cedar... But at the lumberyard I happened across this beautiful batch of 5/4 poplar and adjusted on the fly. The tabletop is actually a crazy assortment of widths... 6, 8, 4, 12, 4, 8, 6 (respectively). Kregged, sanding like the dickens, two coats of light stain (cause I love all the ribbons/grain in this top) and fought with the poly for a few days to get it smooth. Decided to paint the base cause the broad grain of the pine base wouldn't match the top. My wife picked the little accent color for the stretchers on the base and that added some nice contrast. I didn't intend to build a bench at the start, but I had enough wood and the remaining 5/4x12 poplar top was too pretty not to use!


snagged the 4 chairs on Craigslist too. Really rounded out the set.

Estimated Cost
$300
Estimated Time Investment
Week Long Project (20 Hours or More)
Finish Used
A custom blend of stains, Helmsman Spar
Recommended Skill Level
Intermediate

Leaning Bathroom Shelf

This was a perfect Labor Day weekend project and solved a storage problem in my cramped bathroom. I plan on getting some wicker baskets or bins to store toiletries on the shelves. It's also a great spot to store fresh towels so guests have easy access. The shelf feels very stable when leaning against the wall. I curved/rounded the front,  top corners of the shells using 40 grit sandpaper. 

Estimated Cost
I had a lot of the lumber on hand from other projects but I would guess about $20-25
Estimated Time Investment
Day Project (6-9 Hours)
Finish Used
Paint & wipe on poly
Recommended Skill Level
Beginner
Back