Custom Shiplap Fireplace
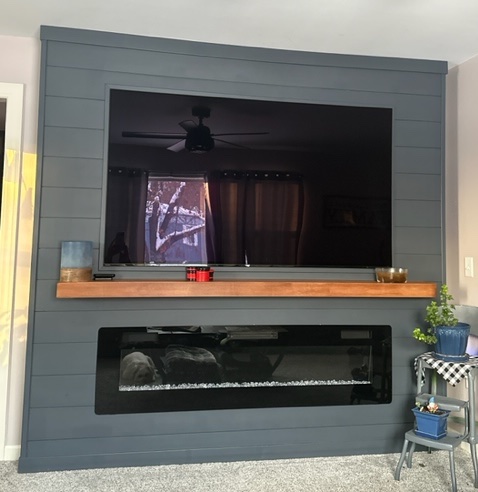
photos sent in via email from Leanne
Built from Plan(s)
photos sent in via email from Leanne
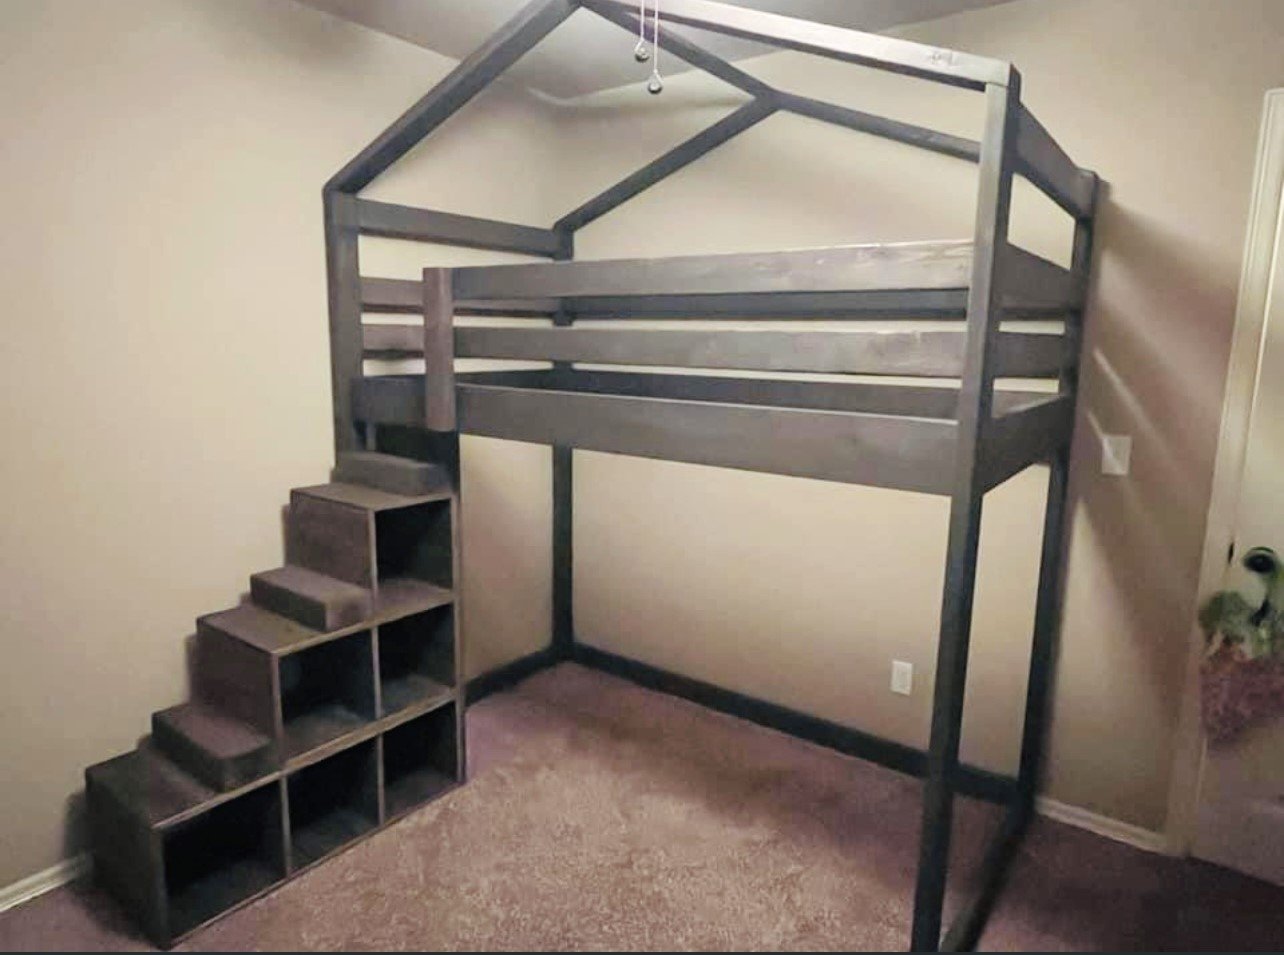
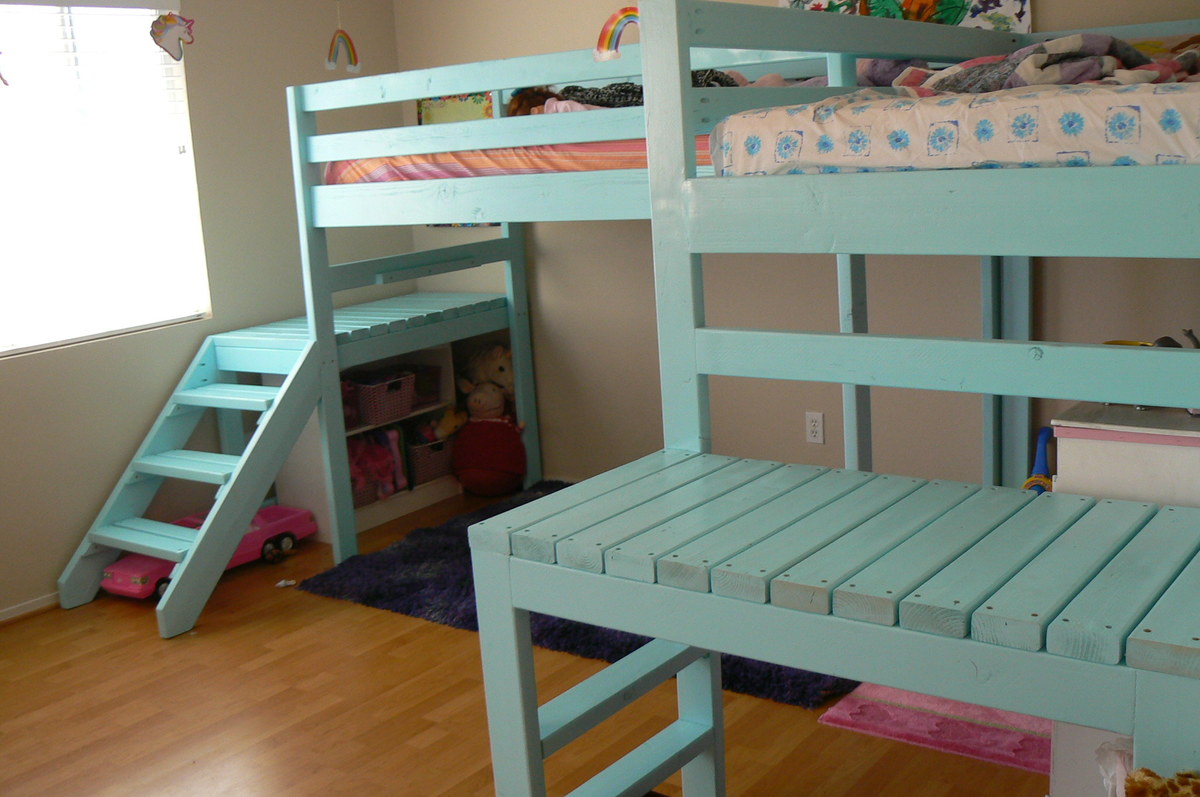
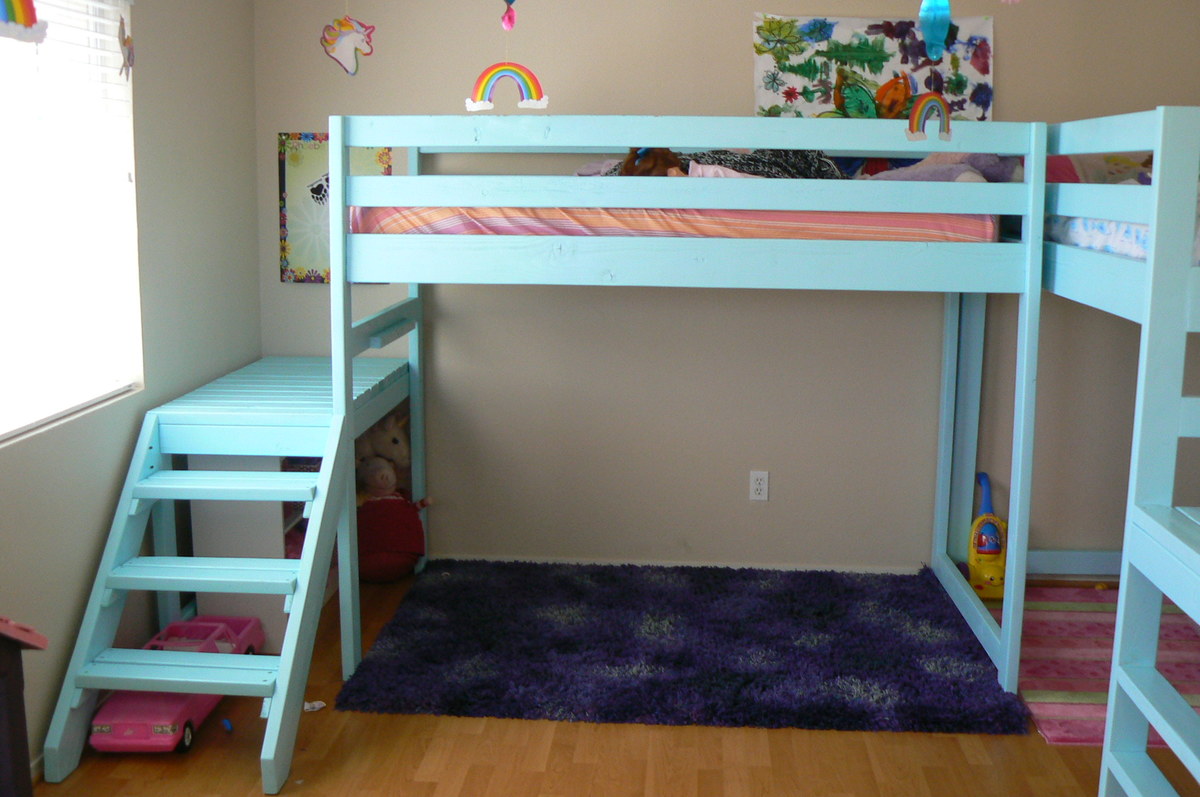
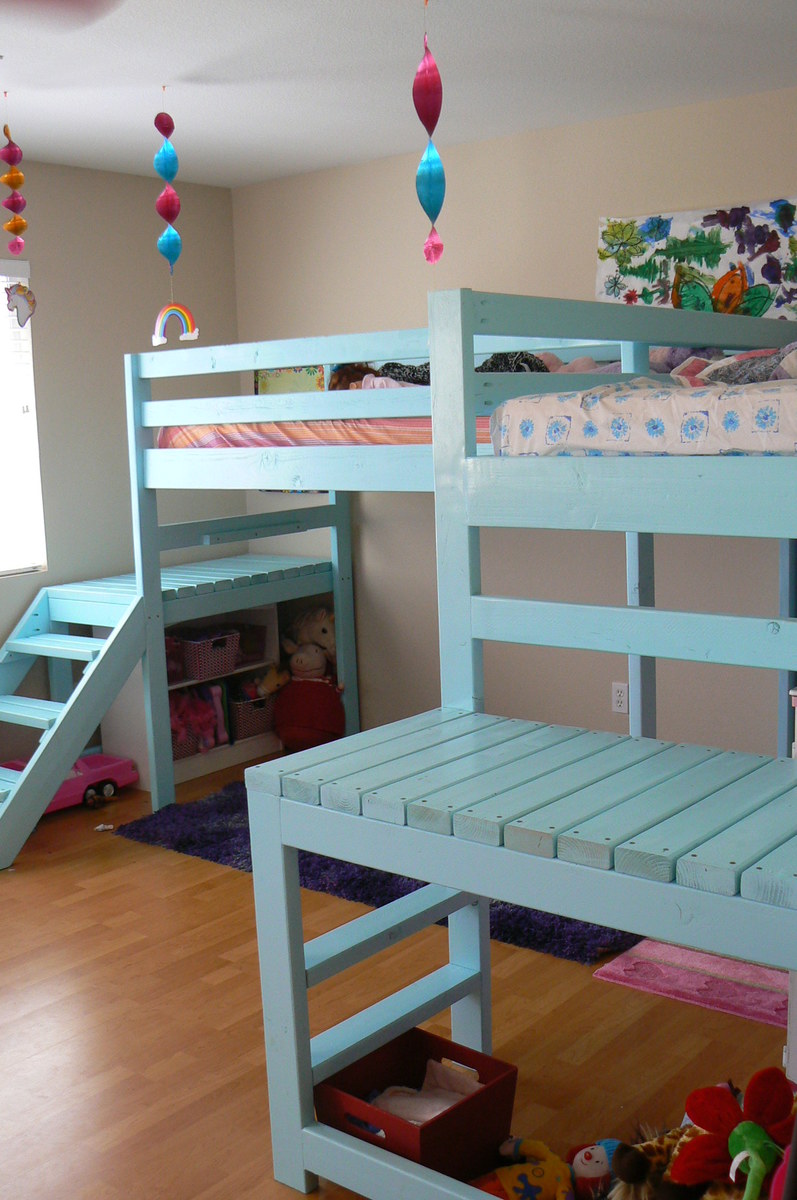
Modified the junior loft plan to add a house design element and storage stairs, by Amy Mott
This was my first attempt at making anything out of wood. I was thankful for guidance from my husband but I did it myself!!!

Sat, 05/04/2019 - 13:30
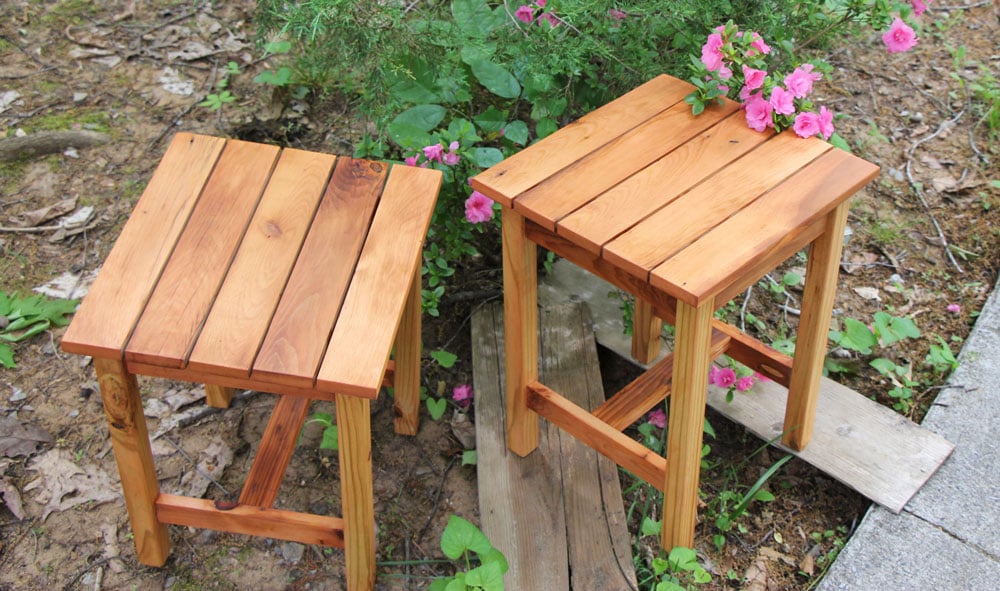
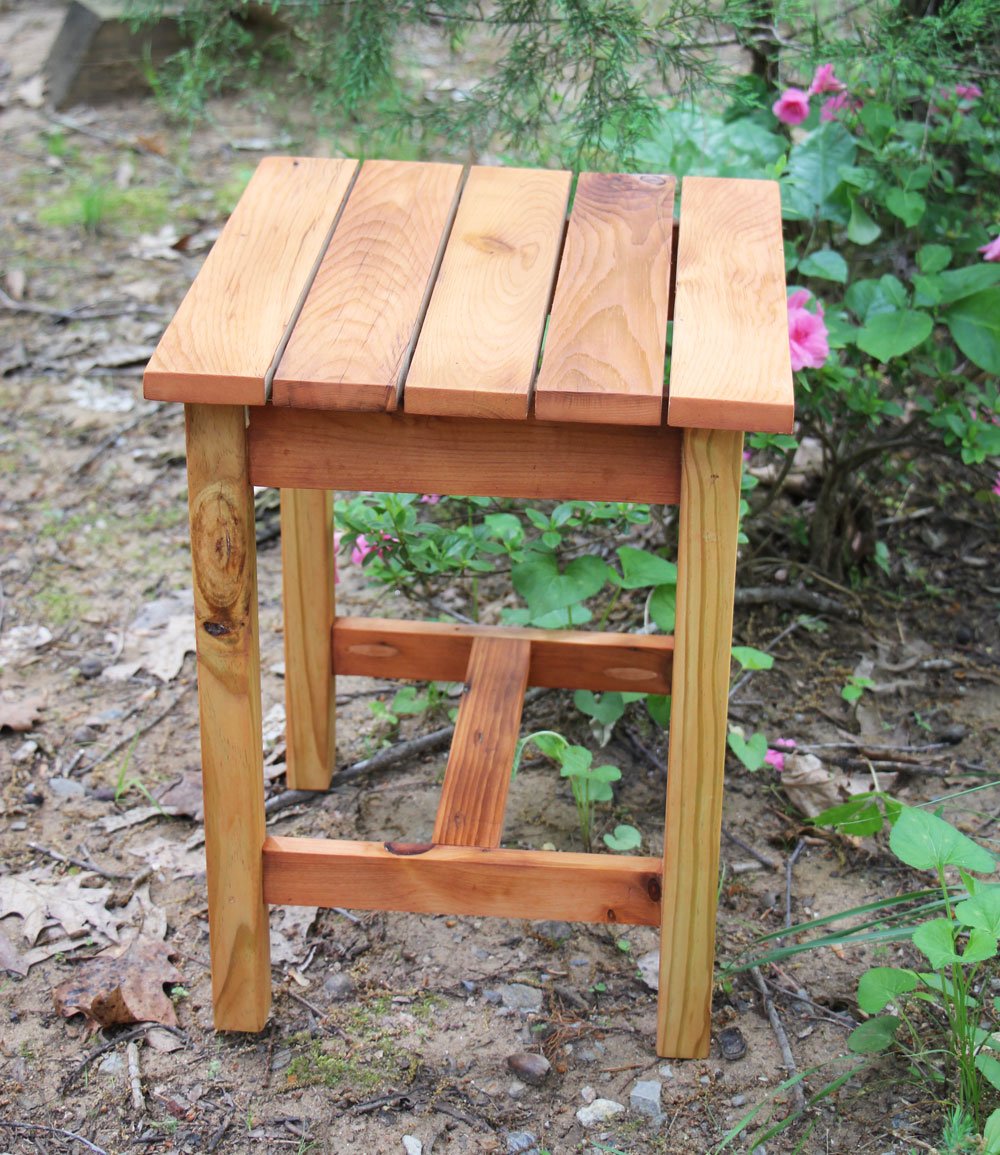
Great job! These little side tables are perfect! LOVE!
Thank you so much for sharing a brag post!
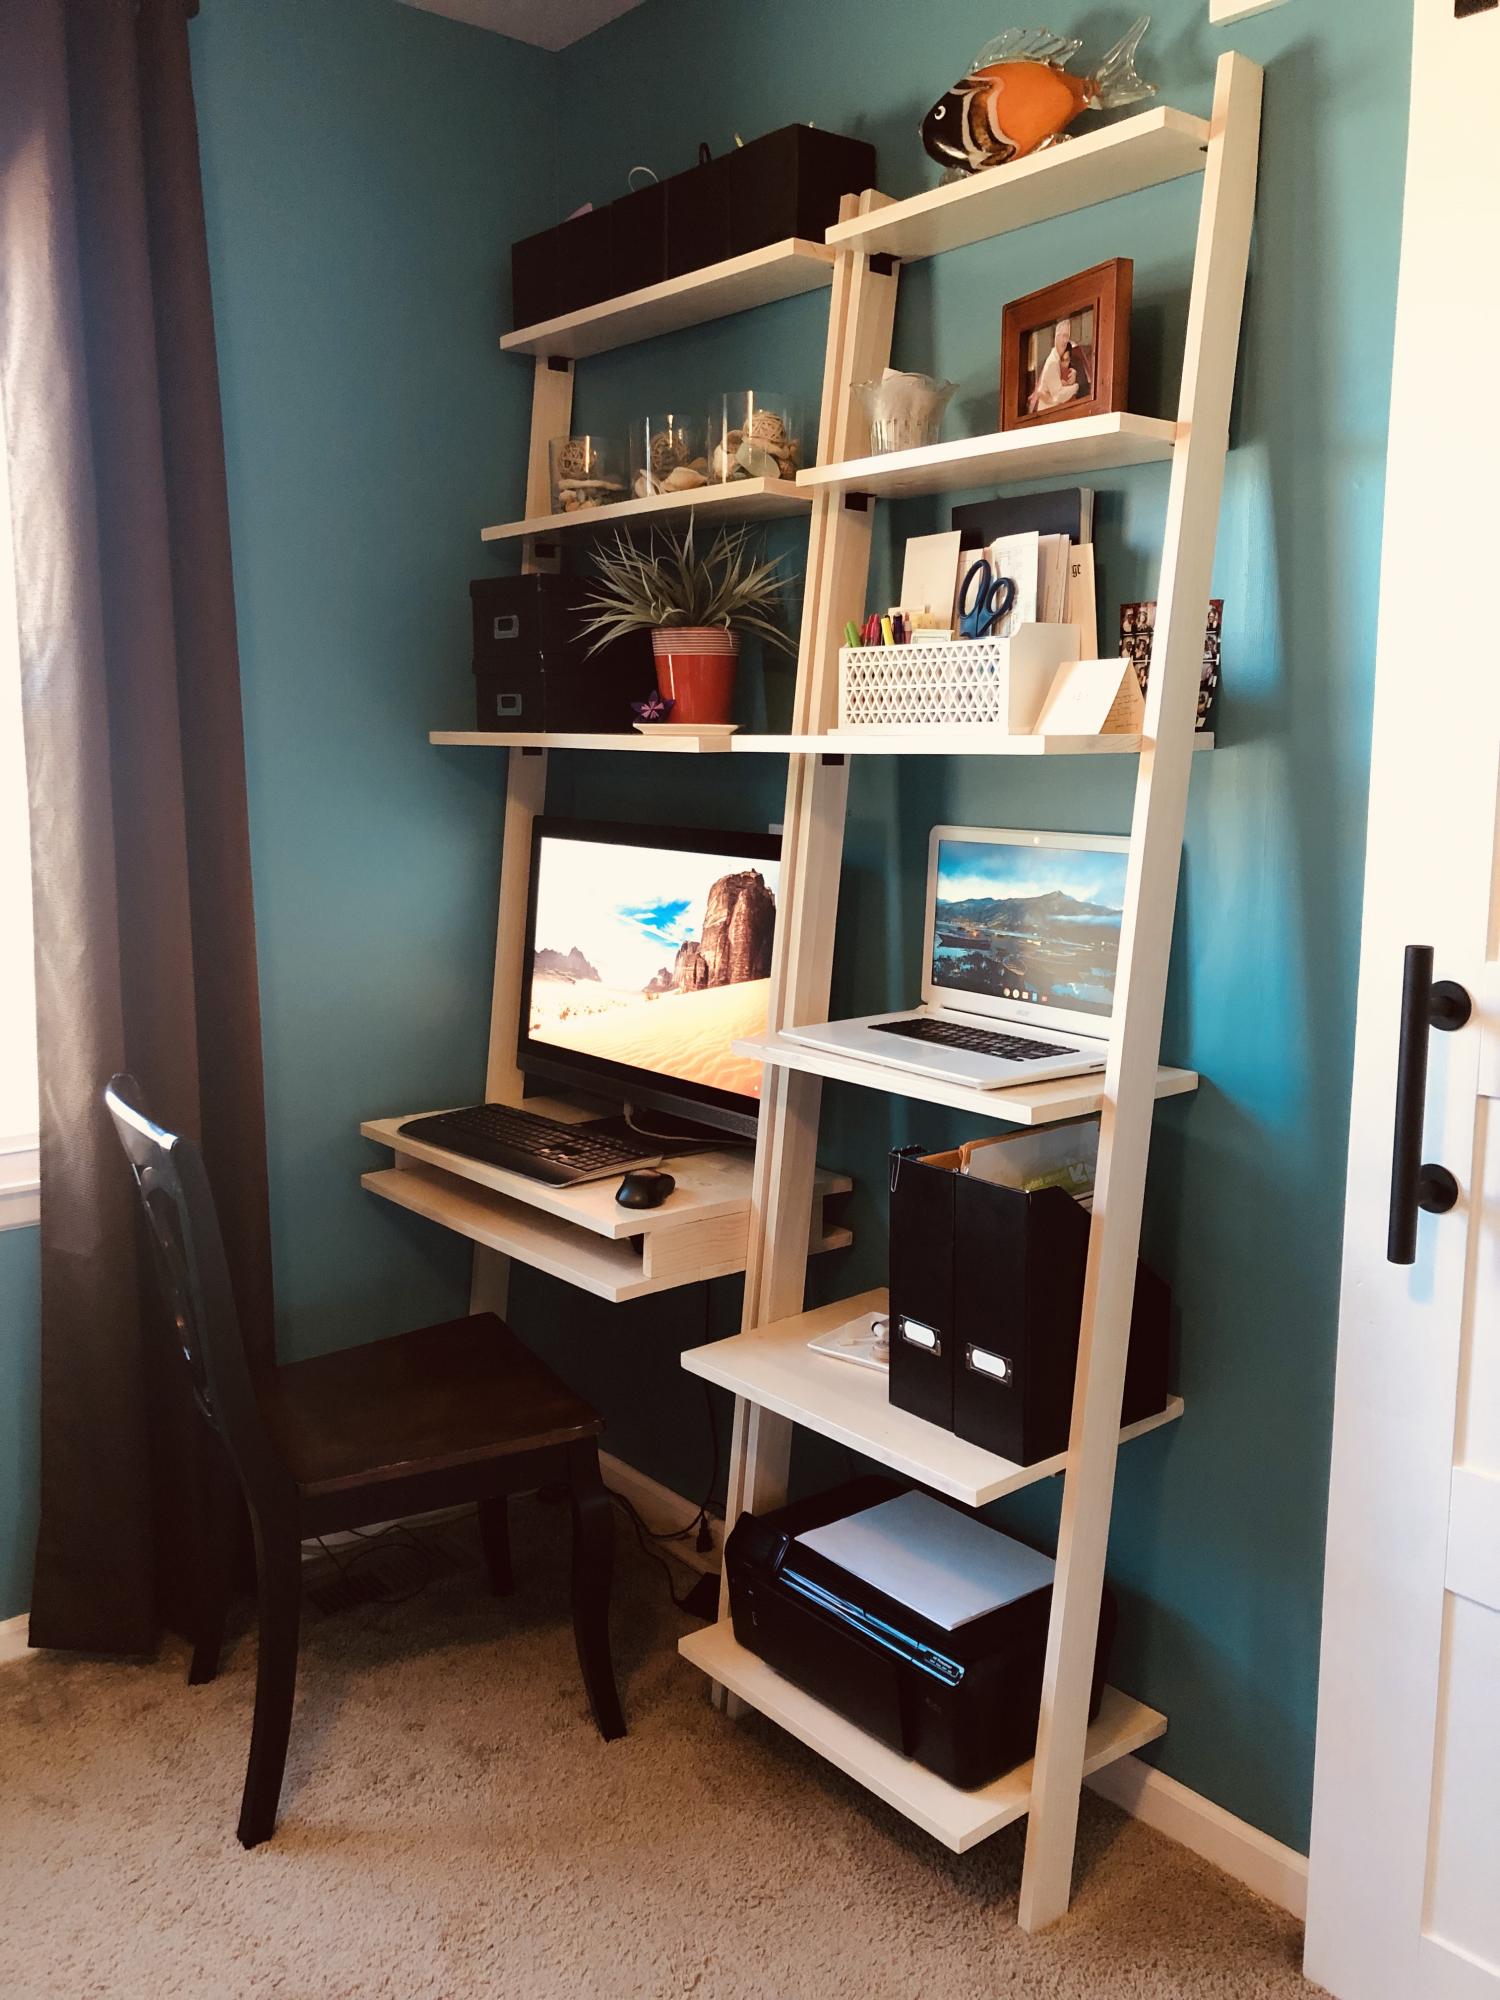
I needed a desk to get my computer off the kitchen table. After remodeling my bedroom and sealing a doorway to make the wall space, I needed something that would take up a little amount of floor space. Of course I couldn't find exactly what I wanted so I decided to build it. Found this little gem of a plan and modified it to my liking and needs. I’ve had it up for about a year and I love it.
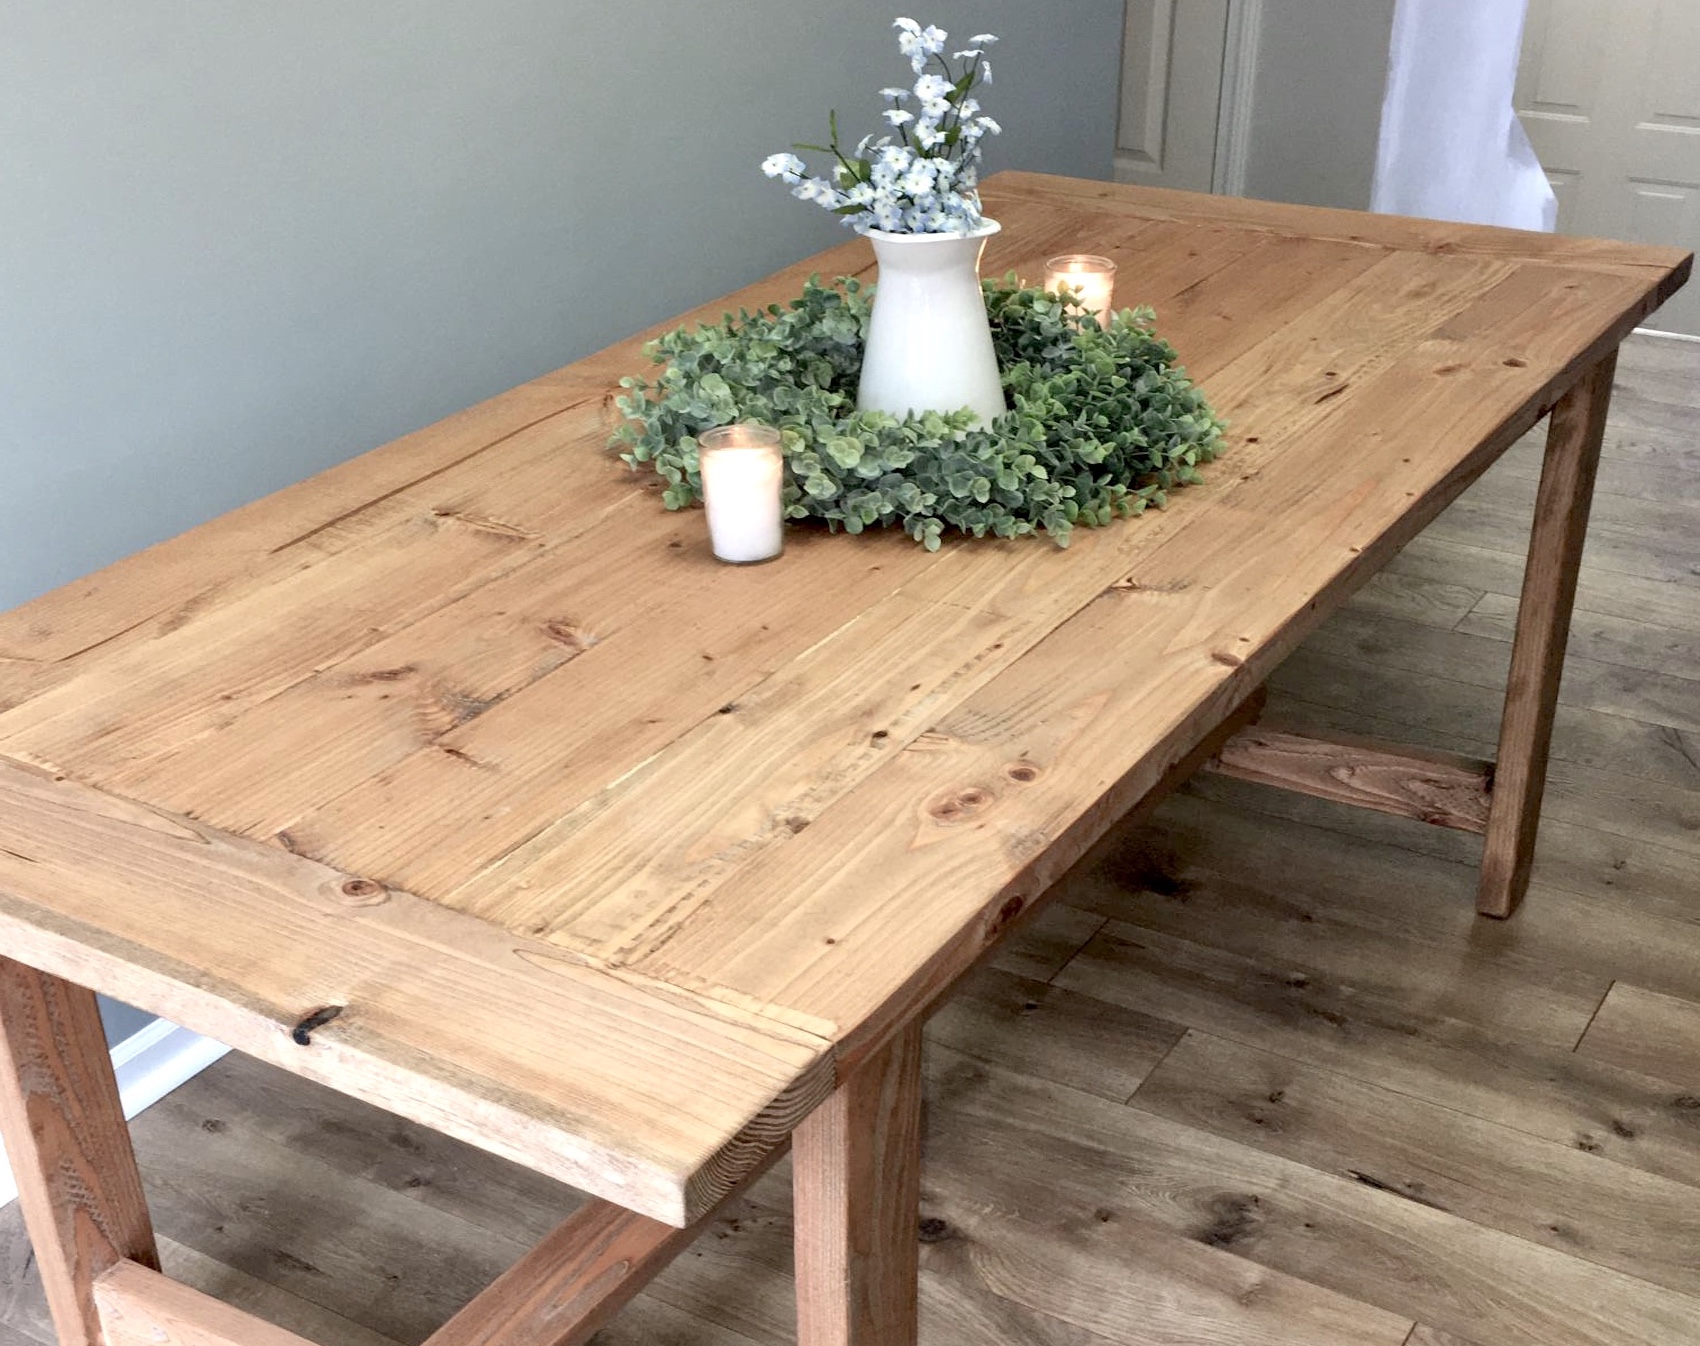
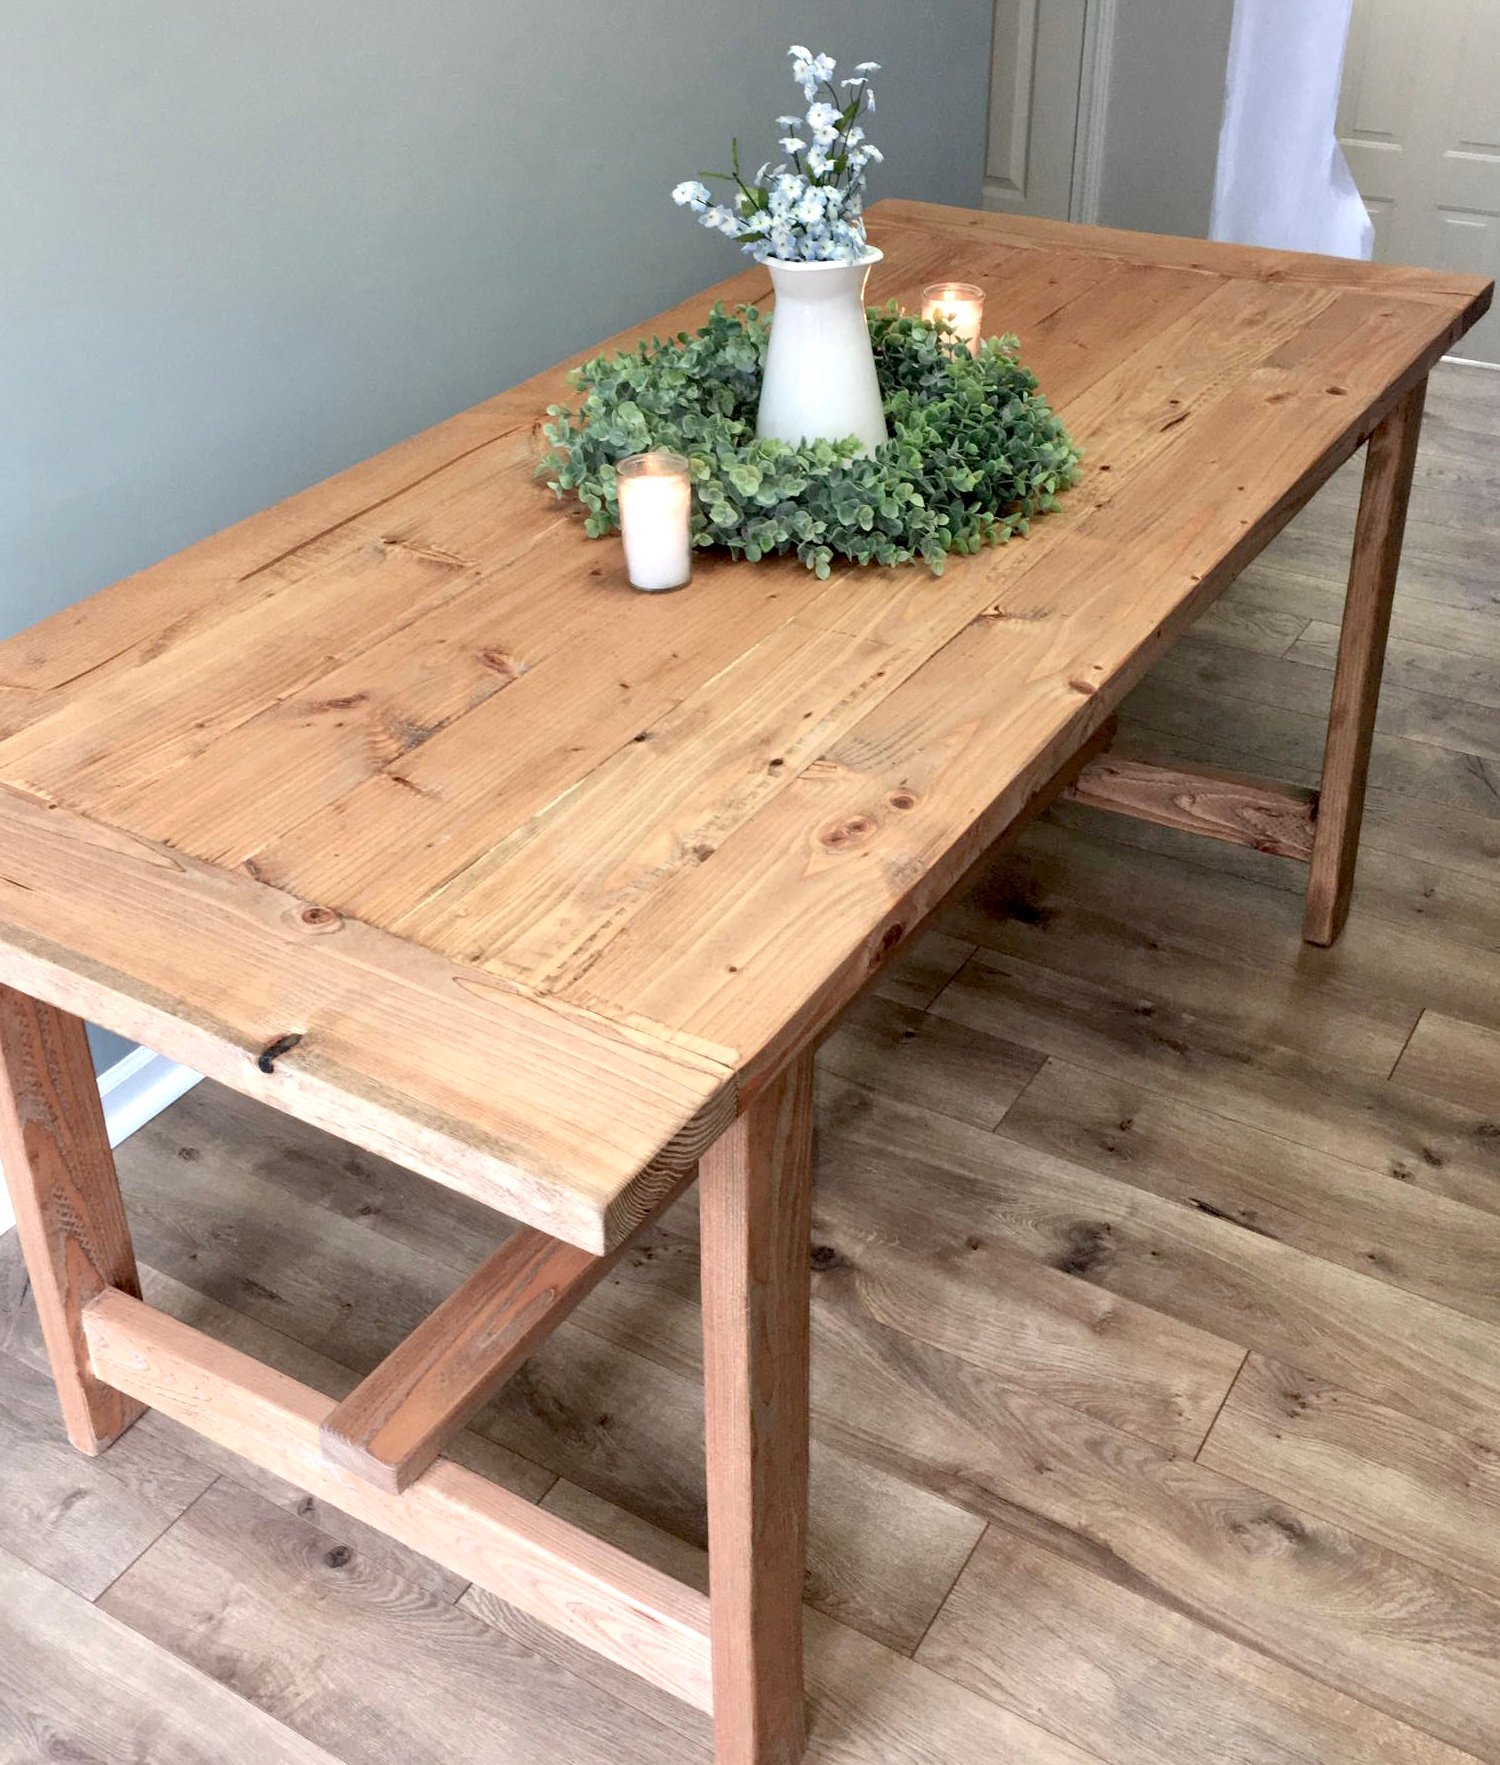
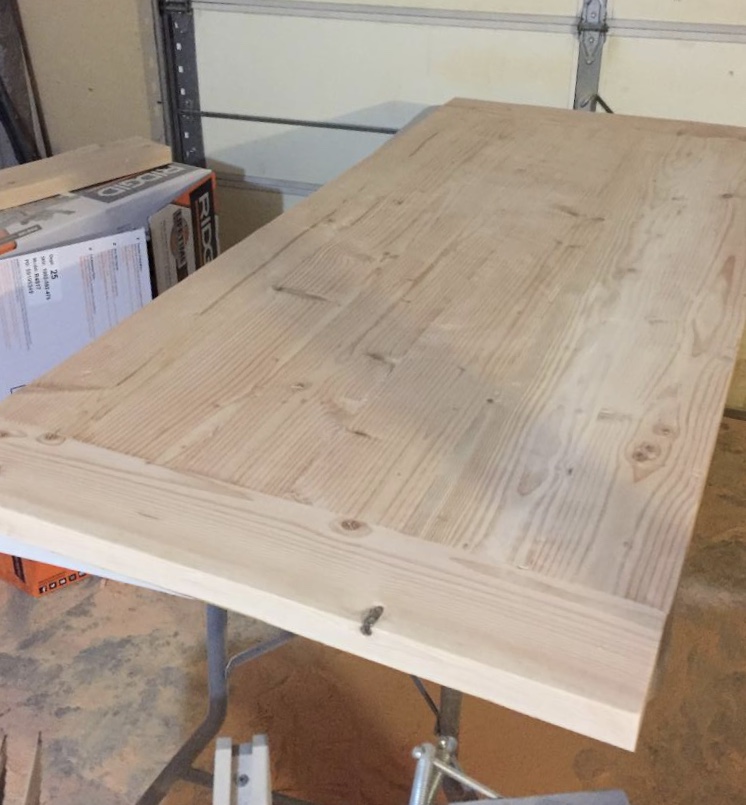
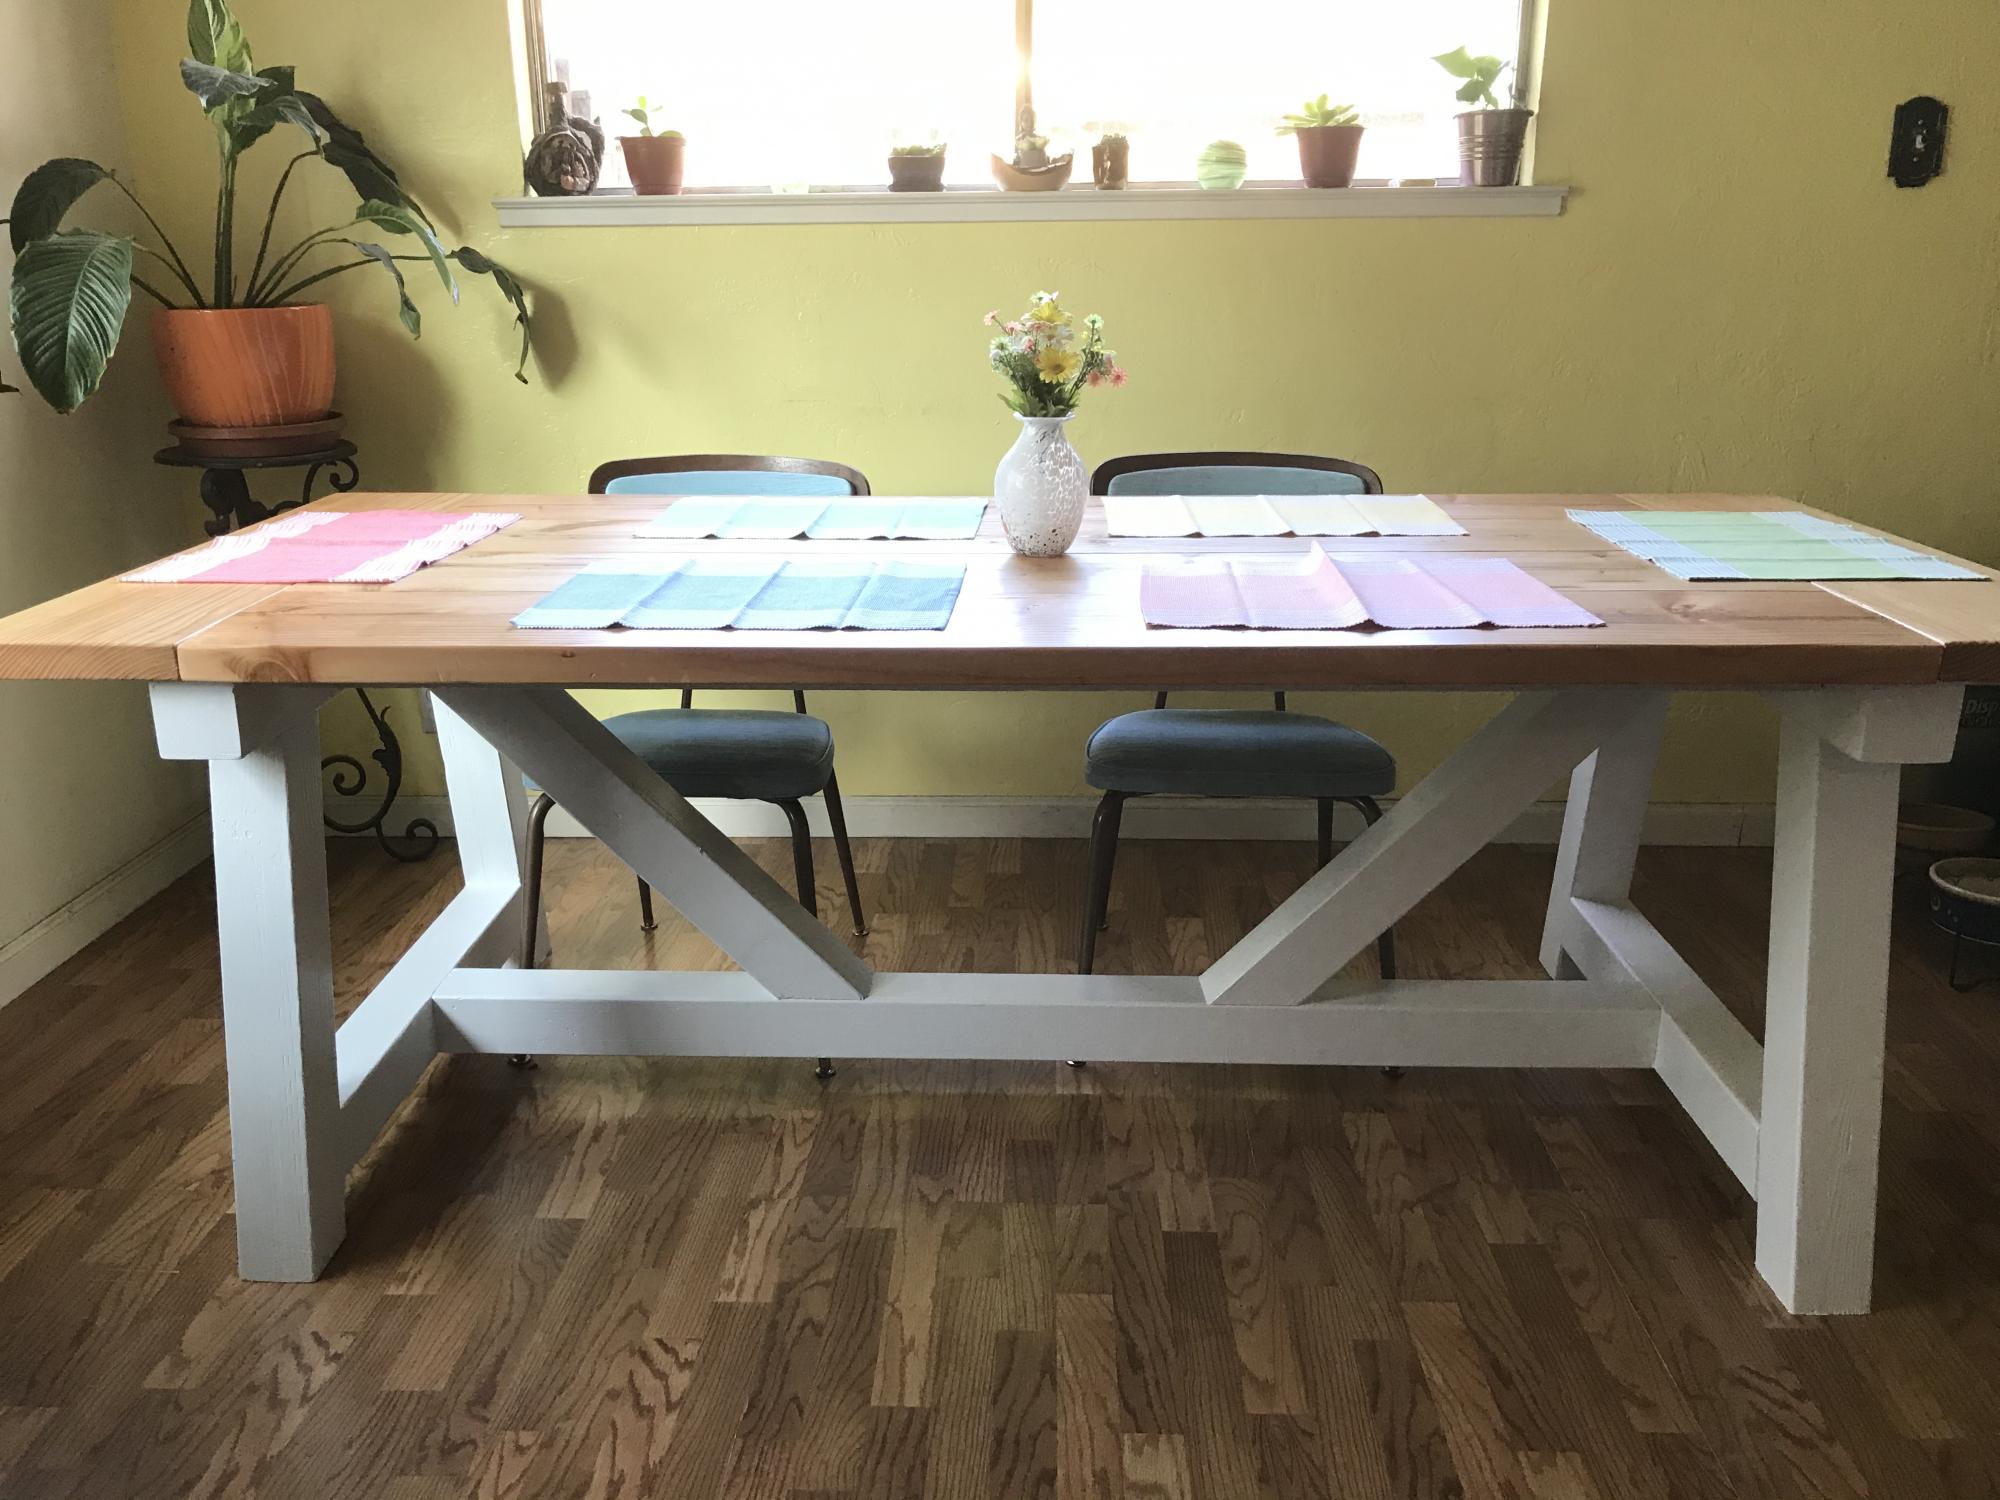
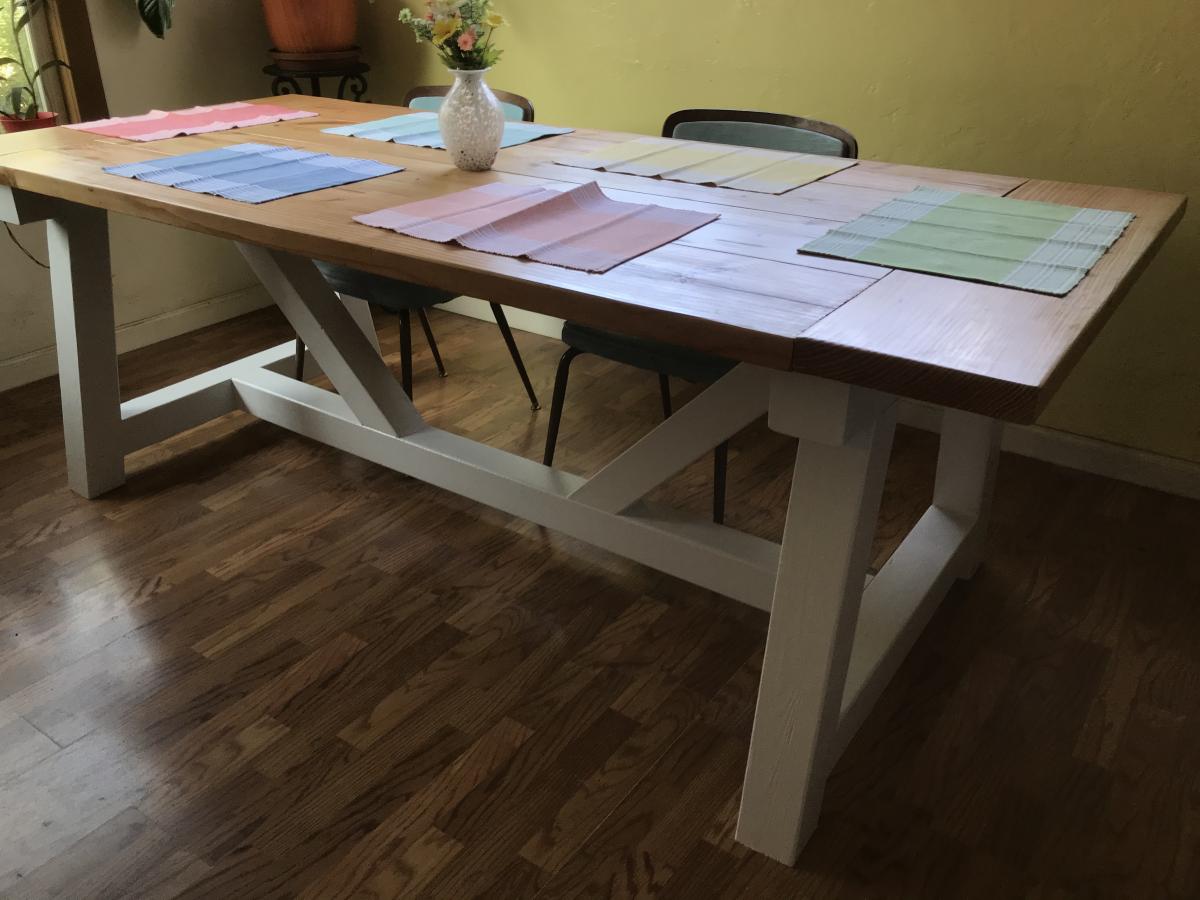
This project was actually my first build (besides a small blanket ladder). I used the Ana White plans every step of the way! Since this build I have created coffee tables, side tables, console tables, head boards and a bed frame. This table gave me the confidence to try an original project of my own. Although this table was fairly simple, it was the project that started it all. That is why I chose for this piece to be my brag post.
I followed the basic plans but added a couple 12x2” metal supports for each breadboard. This was a must. I used Douglas fir for the entire project from Home Depot.
My 2 kids helped me put a few screws in, otherwise I did this myself. The wife really loved it and was a bit surprised coming back from her facial spot on Valentines Day. It turned out better than I could have hoped, especially considering this was my first real woodworking build.
Great plans and nuggets of advice from everyone else made this really fun and not so scary!
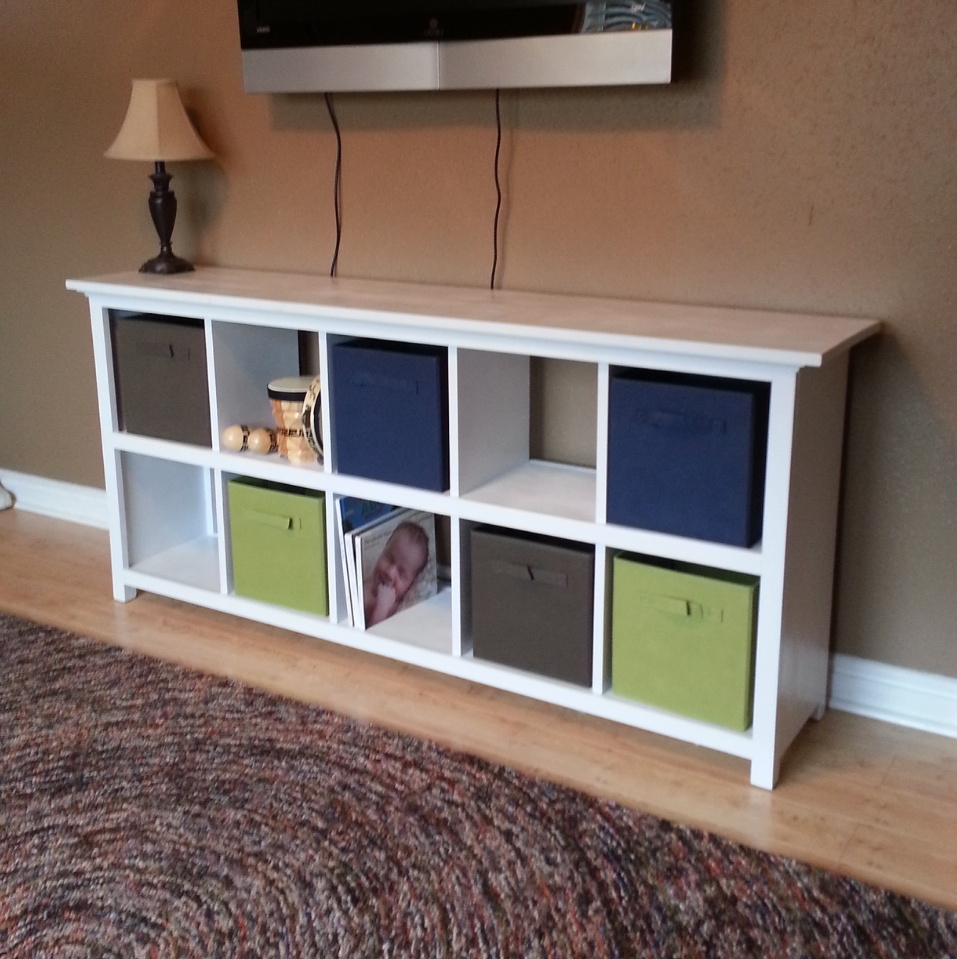
Expanded the 6 cube shelf to 10 cubes, beefed up the feet a little and fancied up the top to more closely match the picture in the plan page. Just joined a couple 1x8's and cut to length for the top.
Used the Kreg Jig to make the shelf box and face frames - biscuit joiner for top.
Wed, 11/26/2014 - 05:32
Hi John- this is exactly what I'm looking for- did you by any chance save your modification measurements and cut list? Also- I'm considering putting a 50 inch tv on the unit- would you recommend additional support? Thanks for any help.
Added some extra trim pieces to finish it out. turned out really nice!!
Mon, 05/18/2020 - 17:25
These look great! Did you use the cedar tone water proofing?
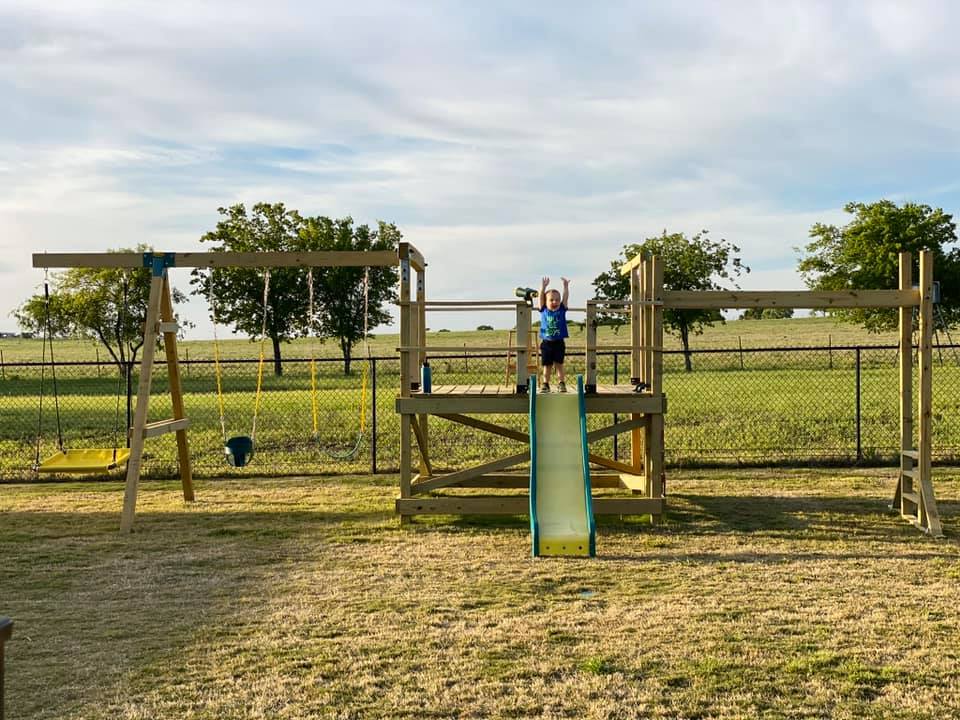
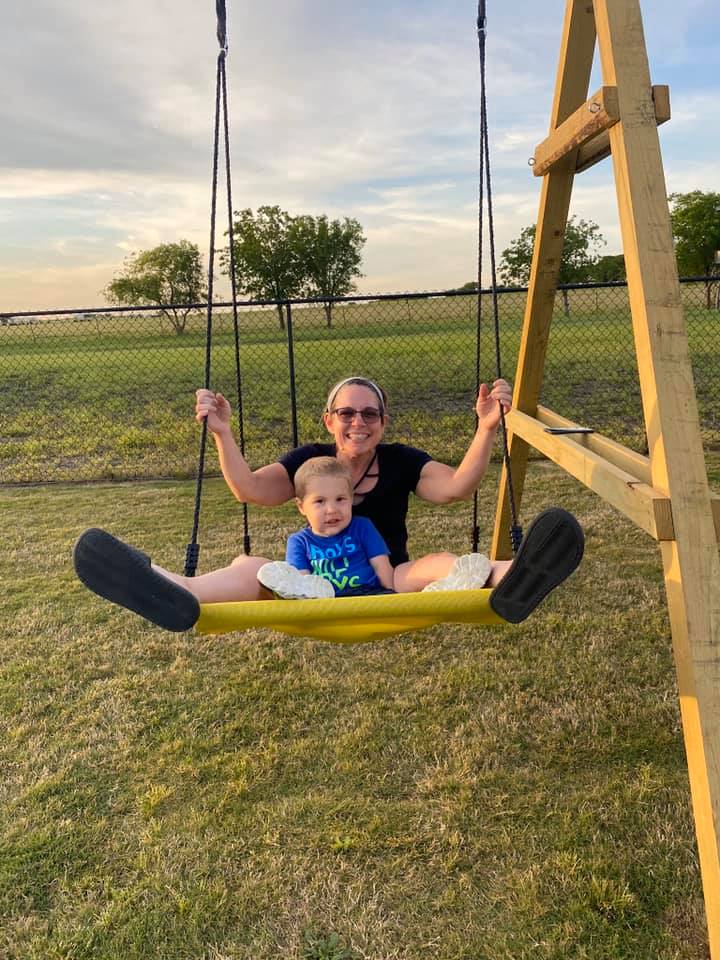
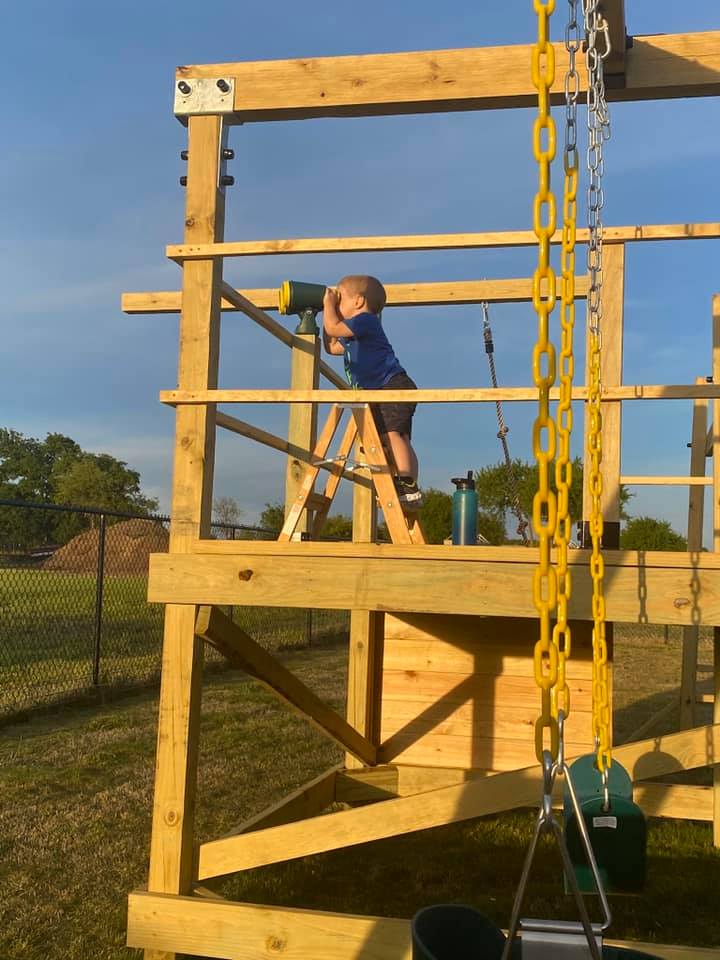
We are used to seeing our grandson every weekend but during the 2020 COVID quarantine we were unable to do so. Instead, we filled our time building him a swing set for our backyard. He loved it!! We are going to add more to the swing side but the hardware I want isn't available right now (apparently there is a lot of swing set building going on during this time). I look forward to many years of playing on this with our grandson and hopefully additional grandkids in the future... Our cost was pretty high mainly because our first round of lumber came from a local lumberyard that was willing to deliver within a few days (big box was going to take several weeks) and they had what is supposed to be higher end lumber (not sure I am convinced of that)....also, i chose some pretty expensive hardware (brackets) just for the added security.....
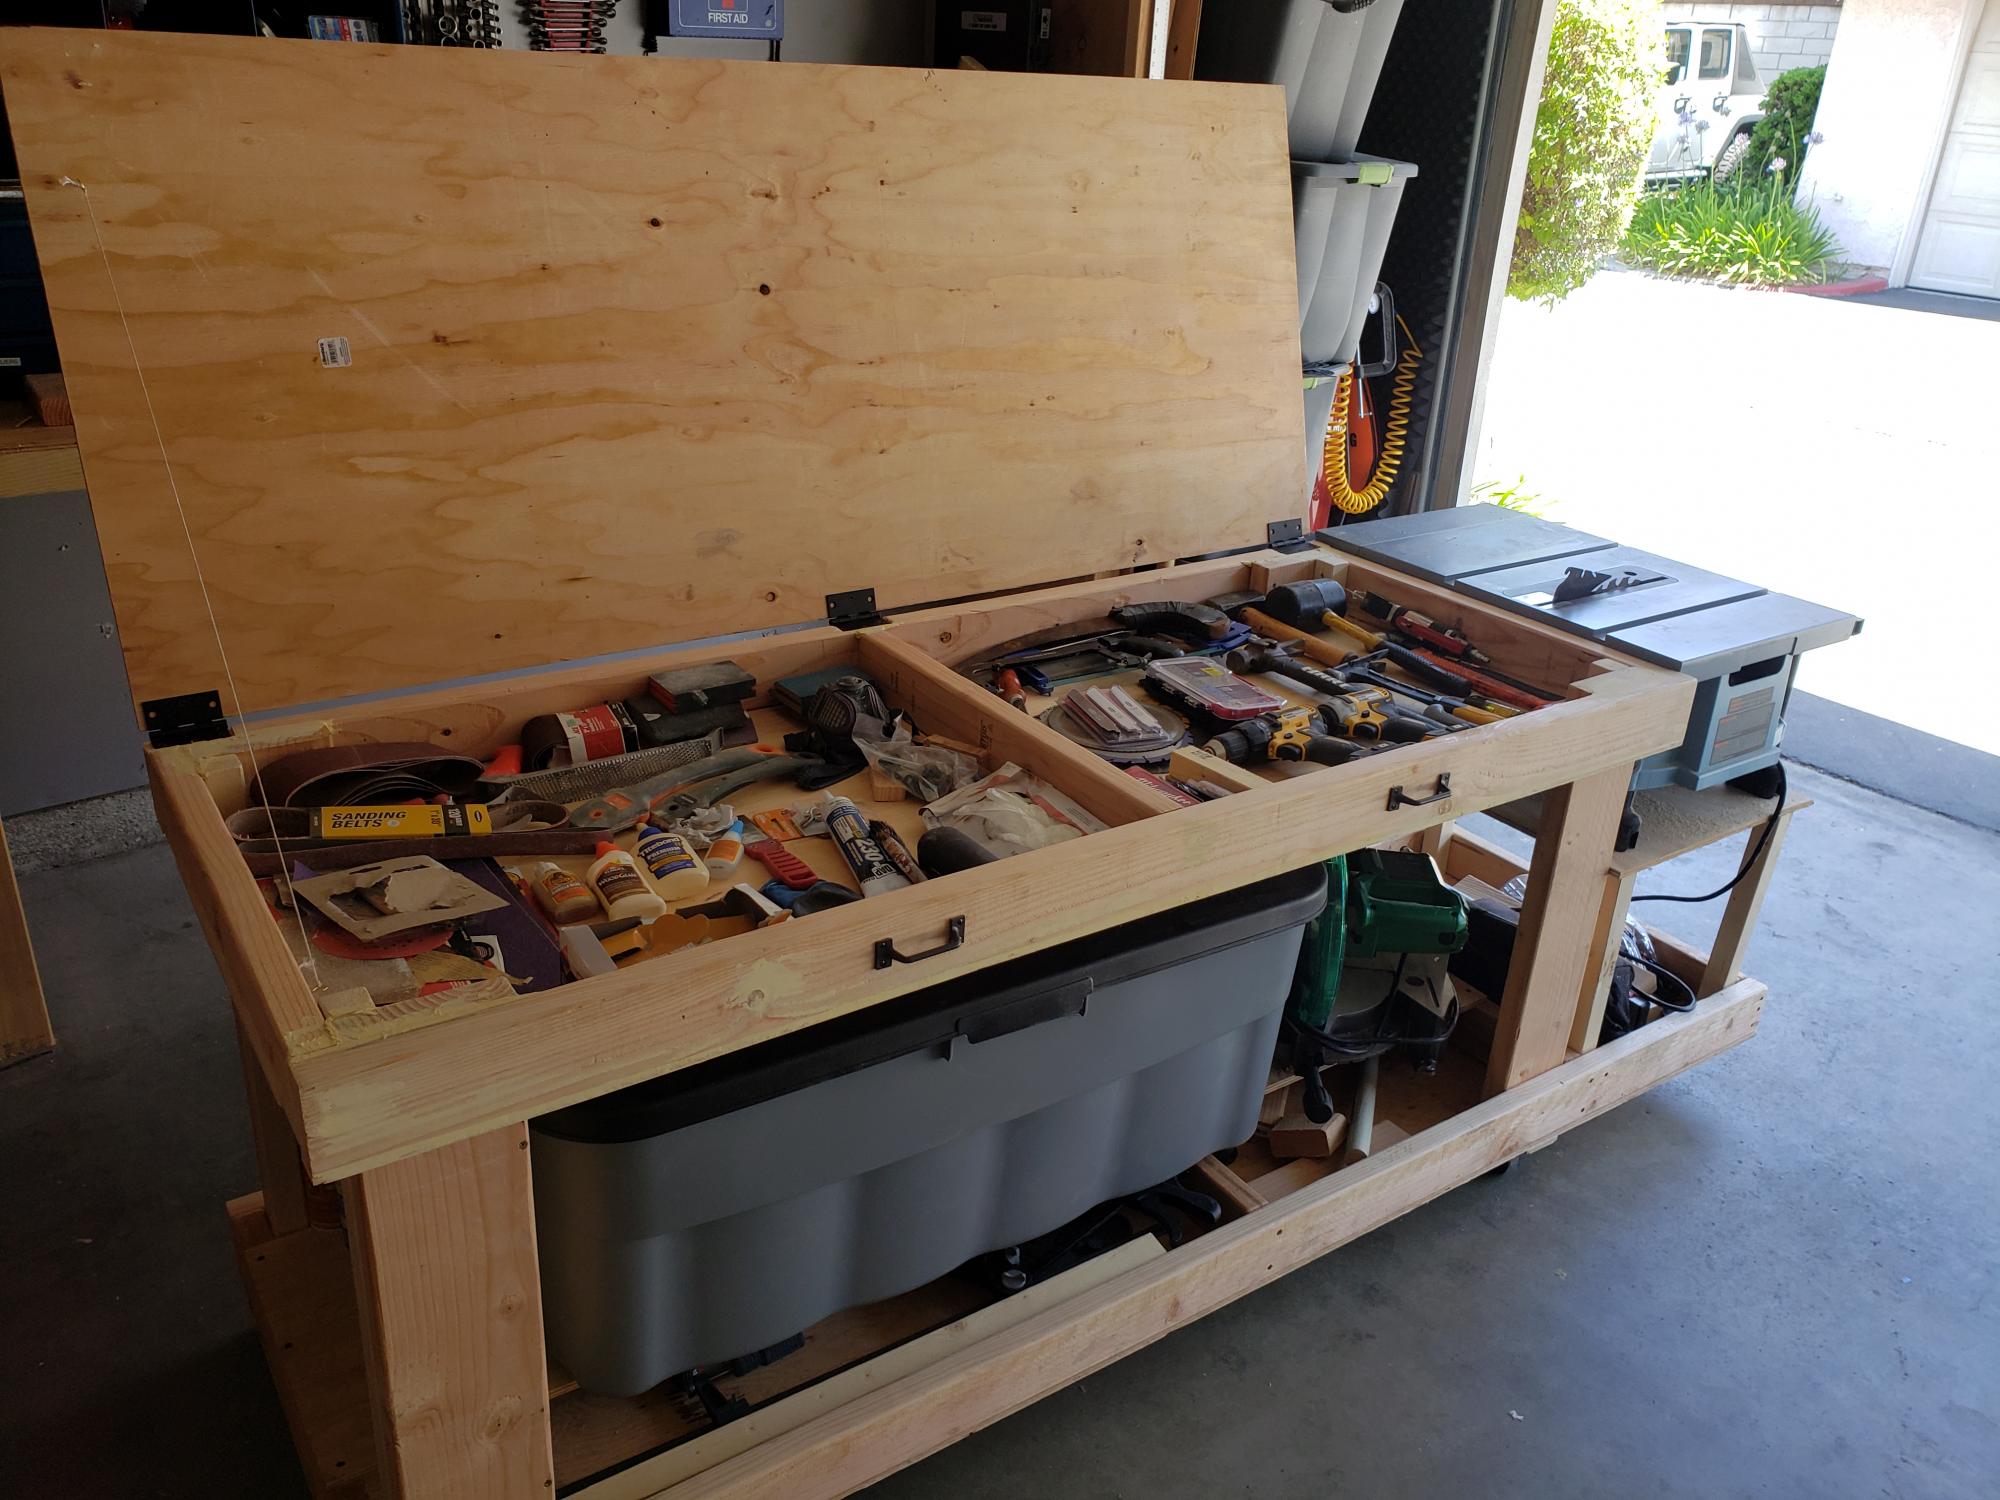
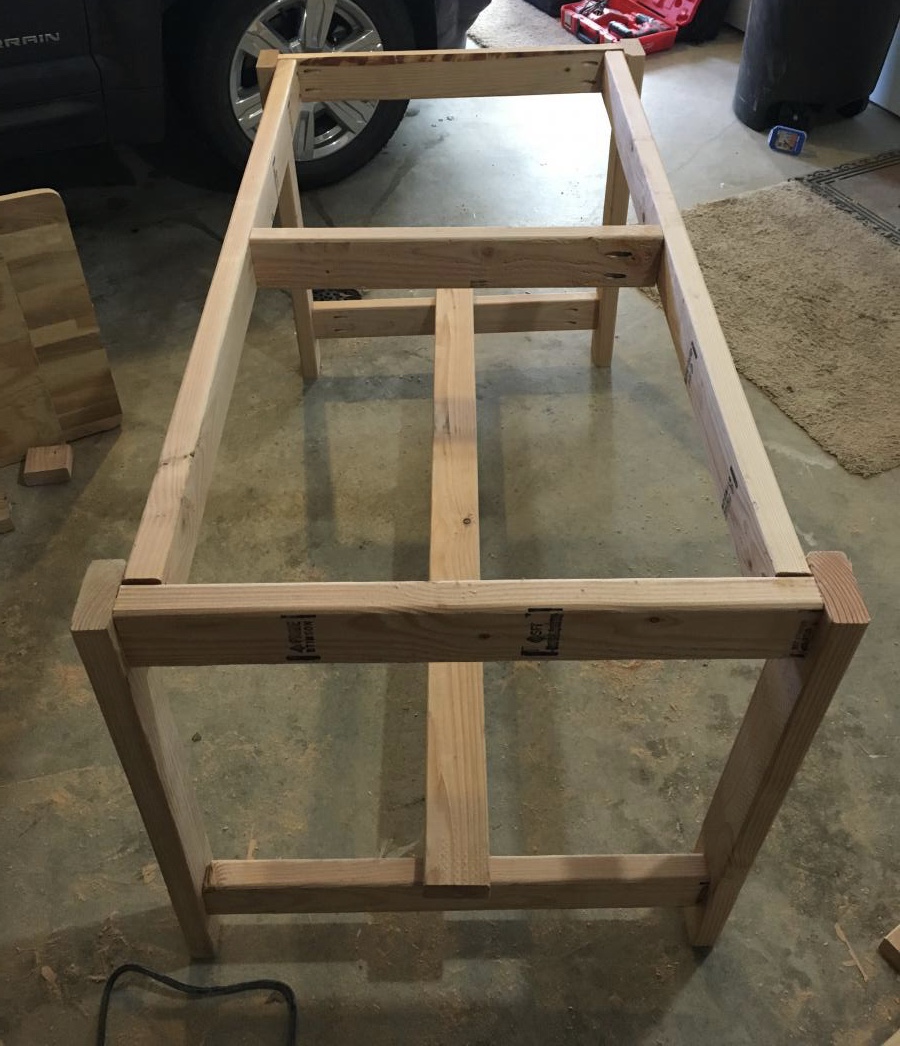
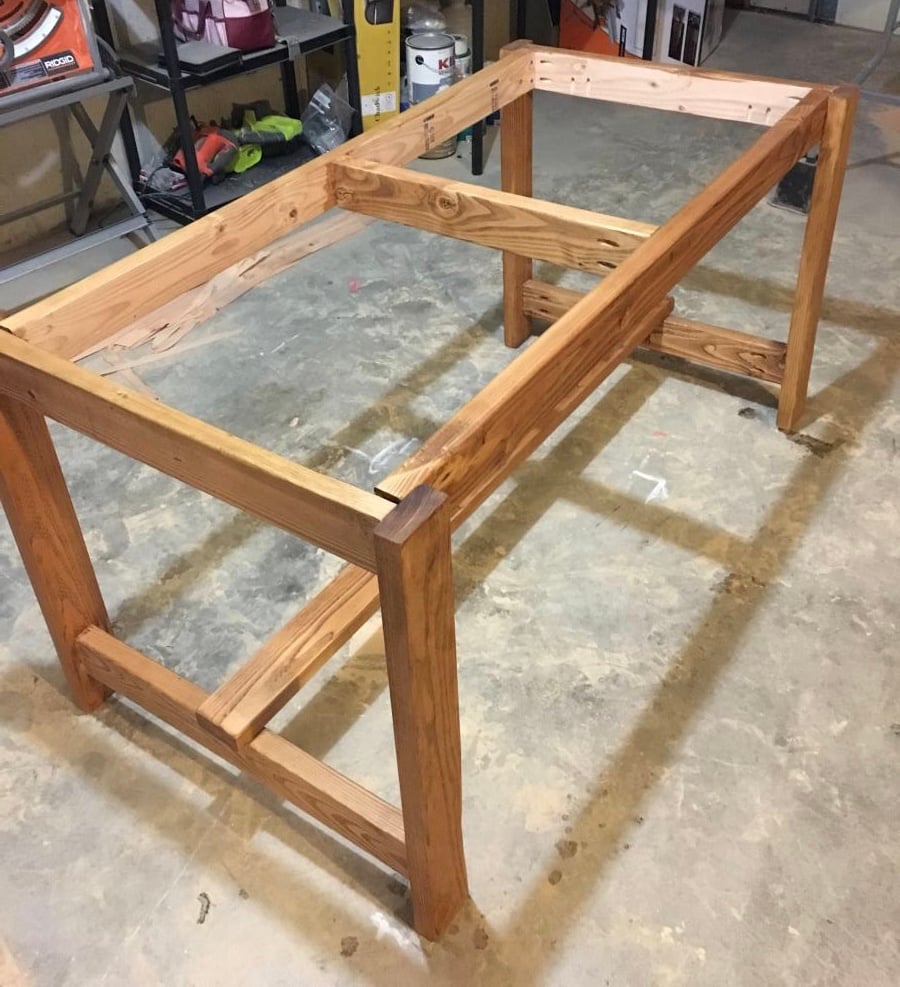
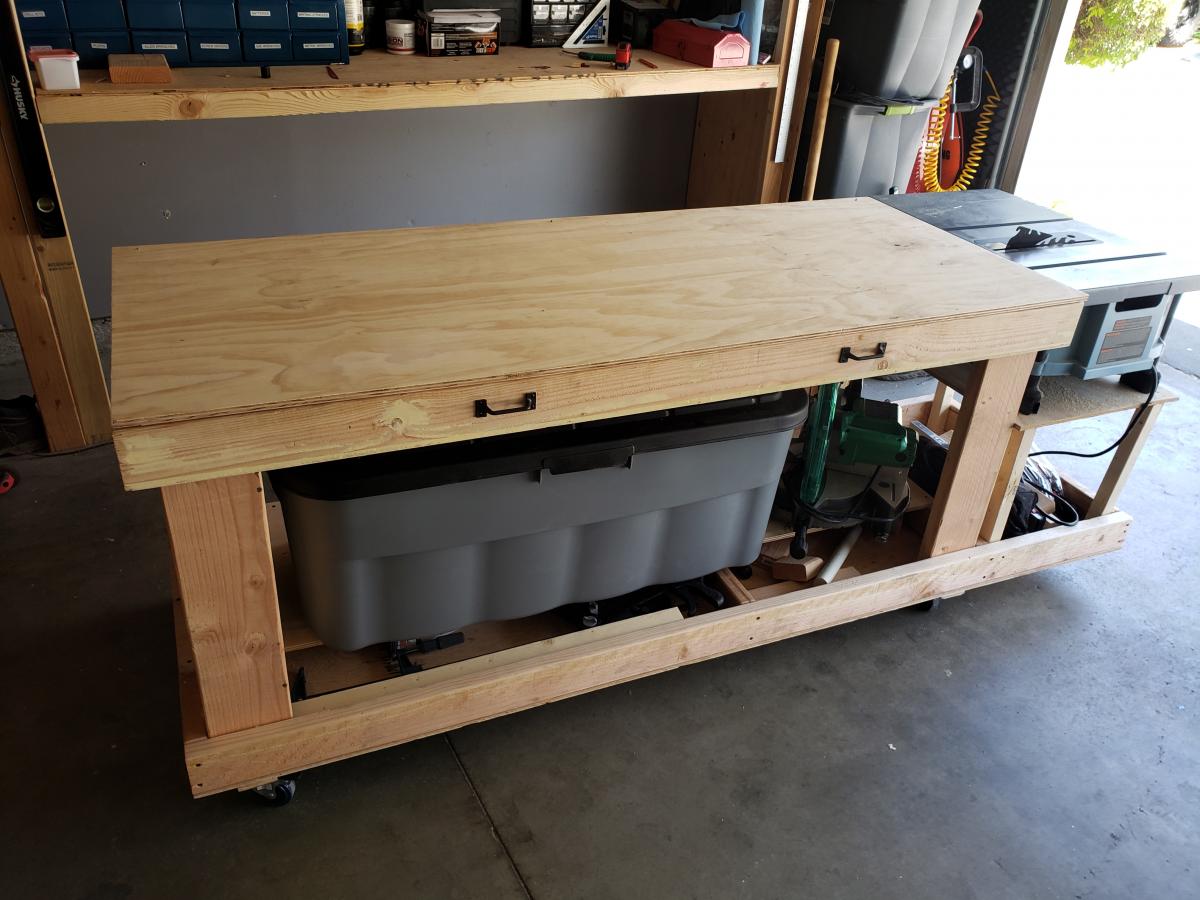
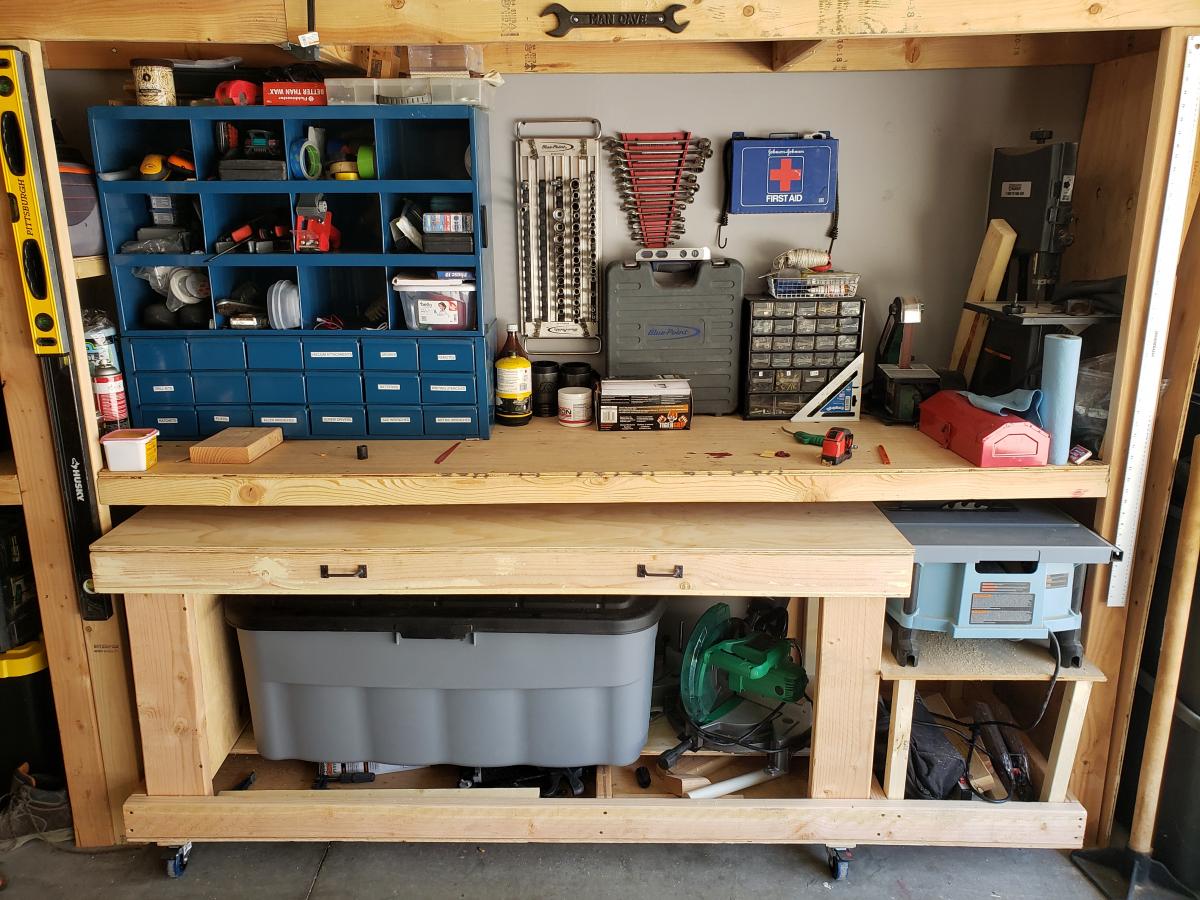
A modification of the traditional work bench. Great for storage. Bench area of 70 inches with 18 additional inches for the table saw.

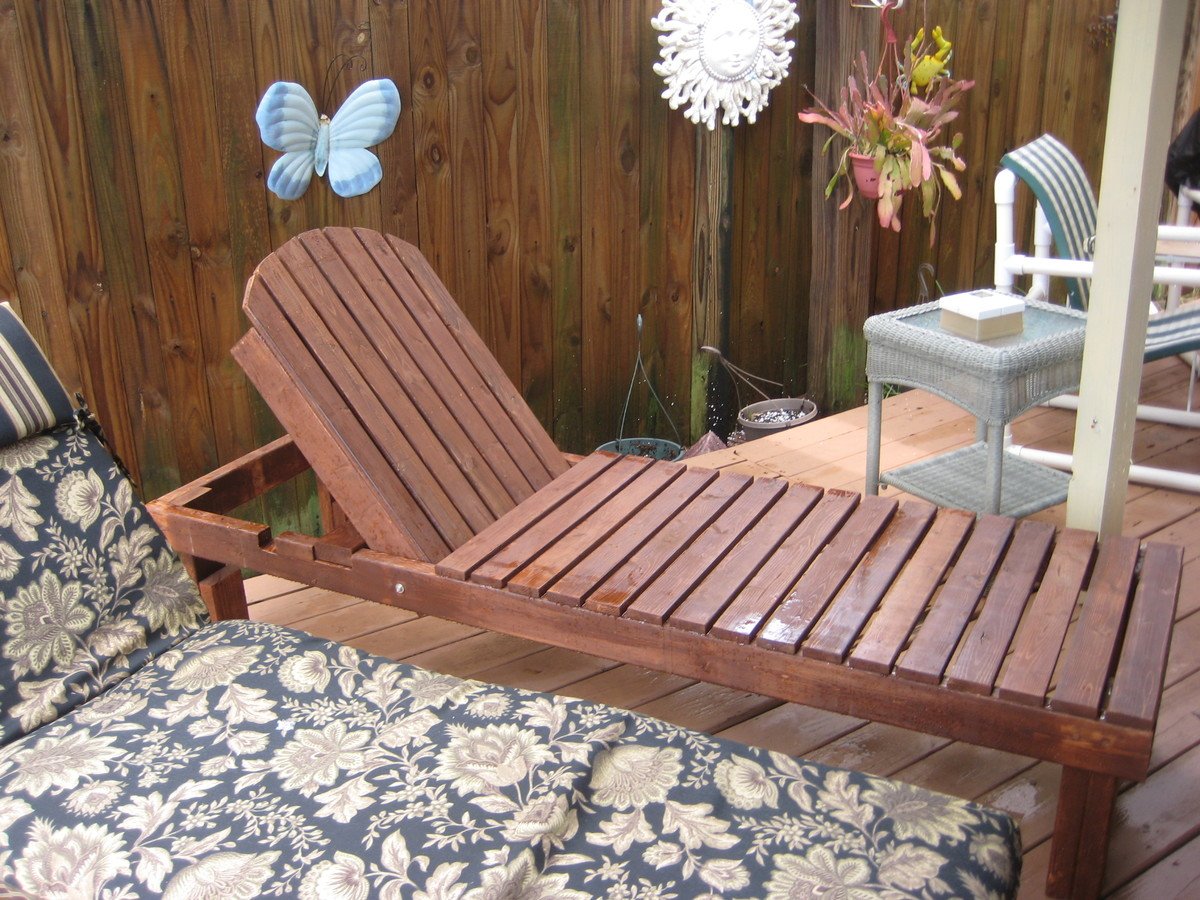
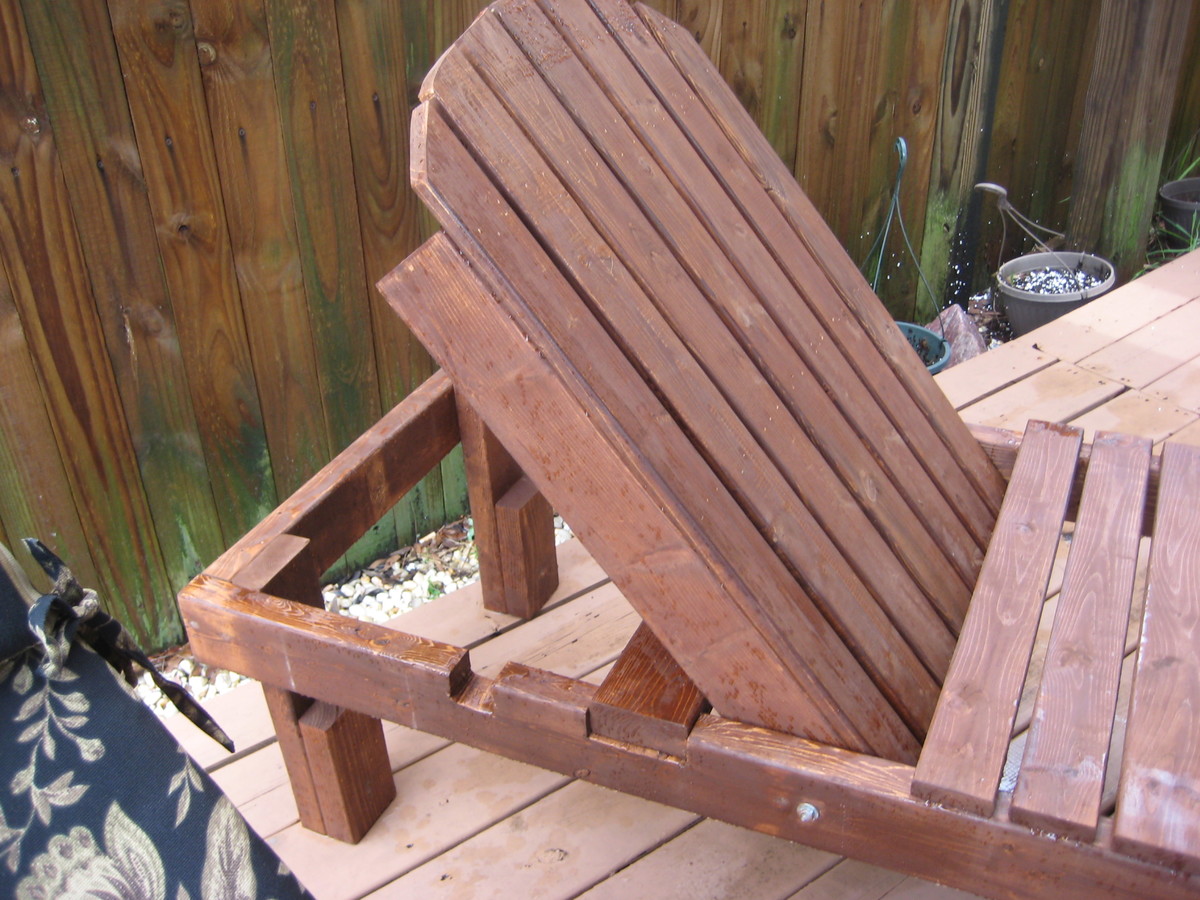
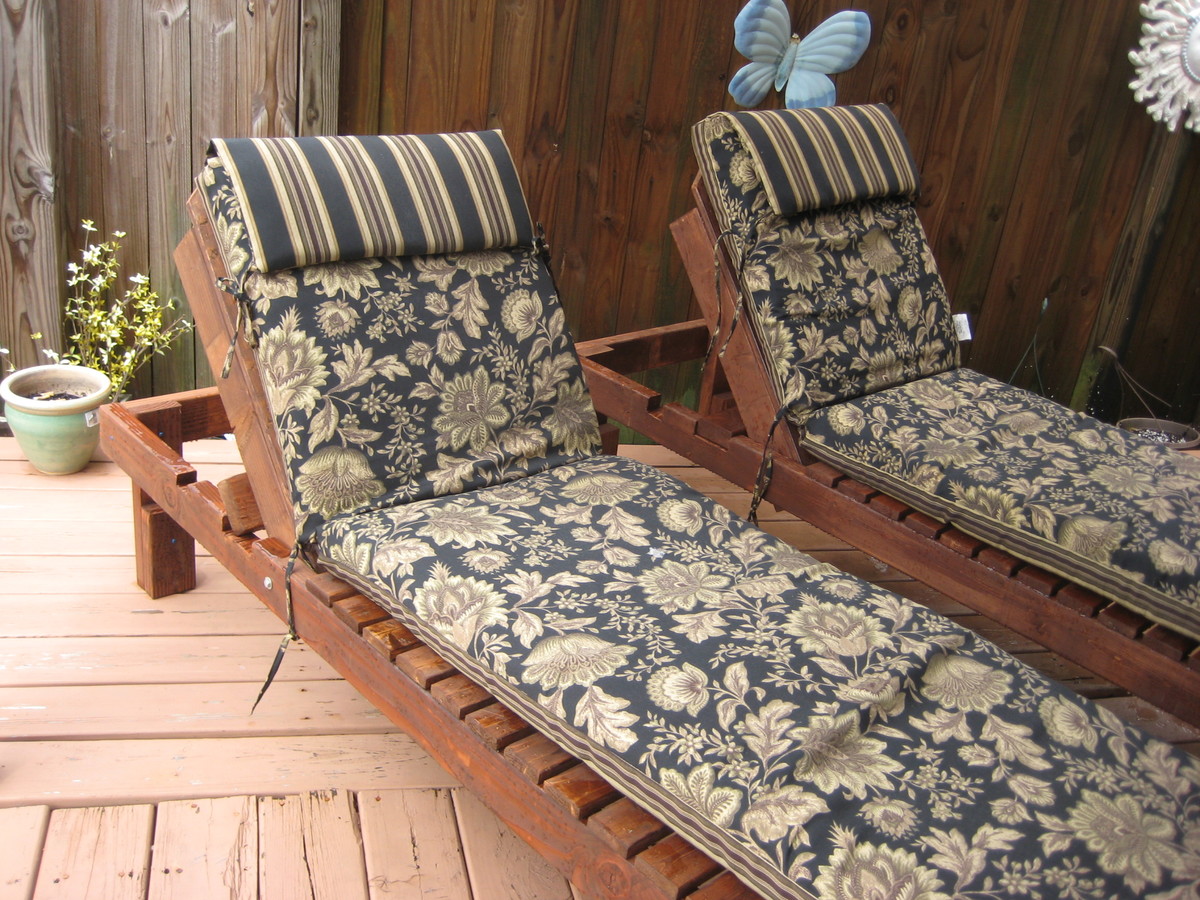
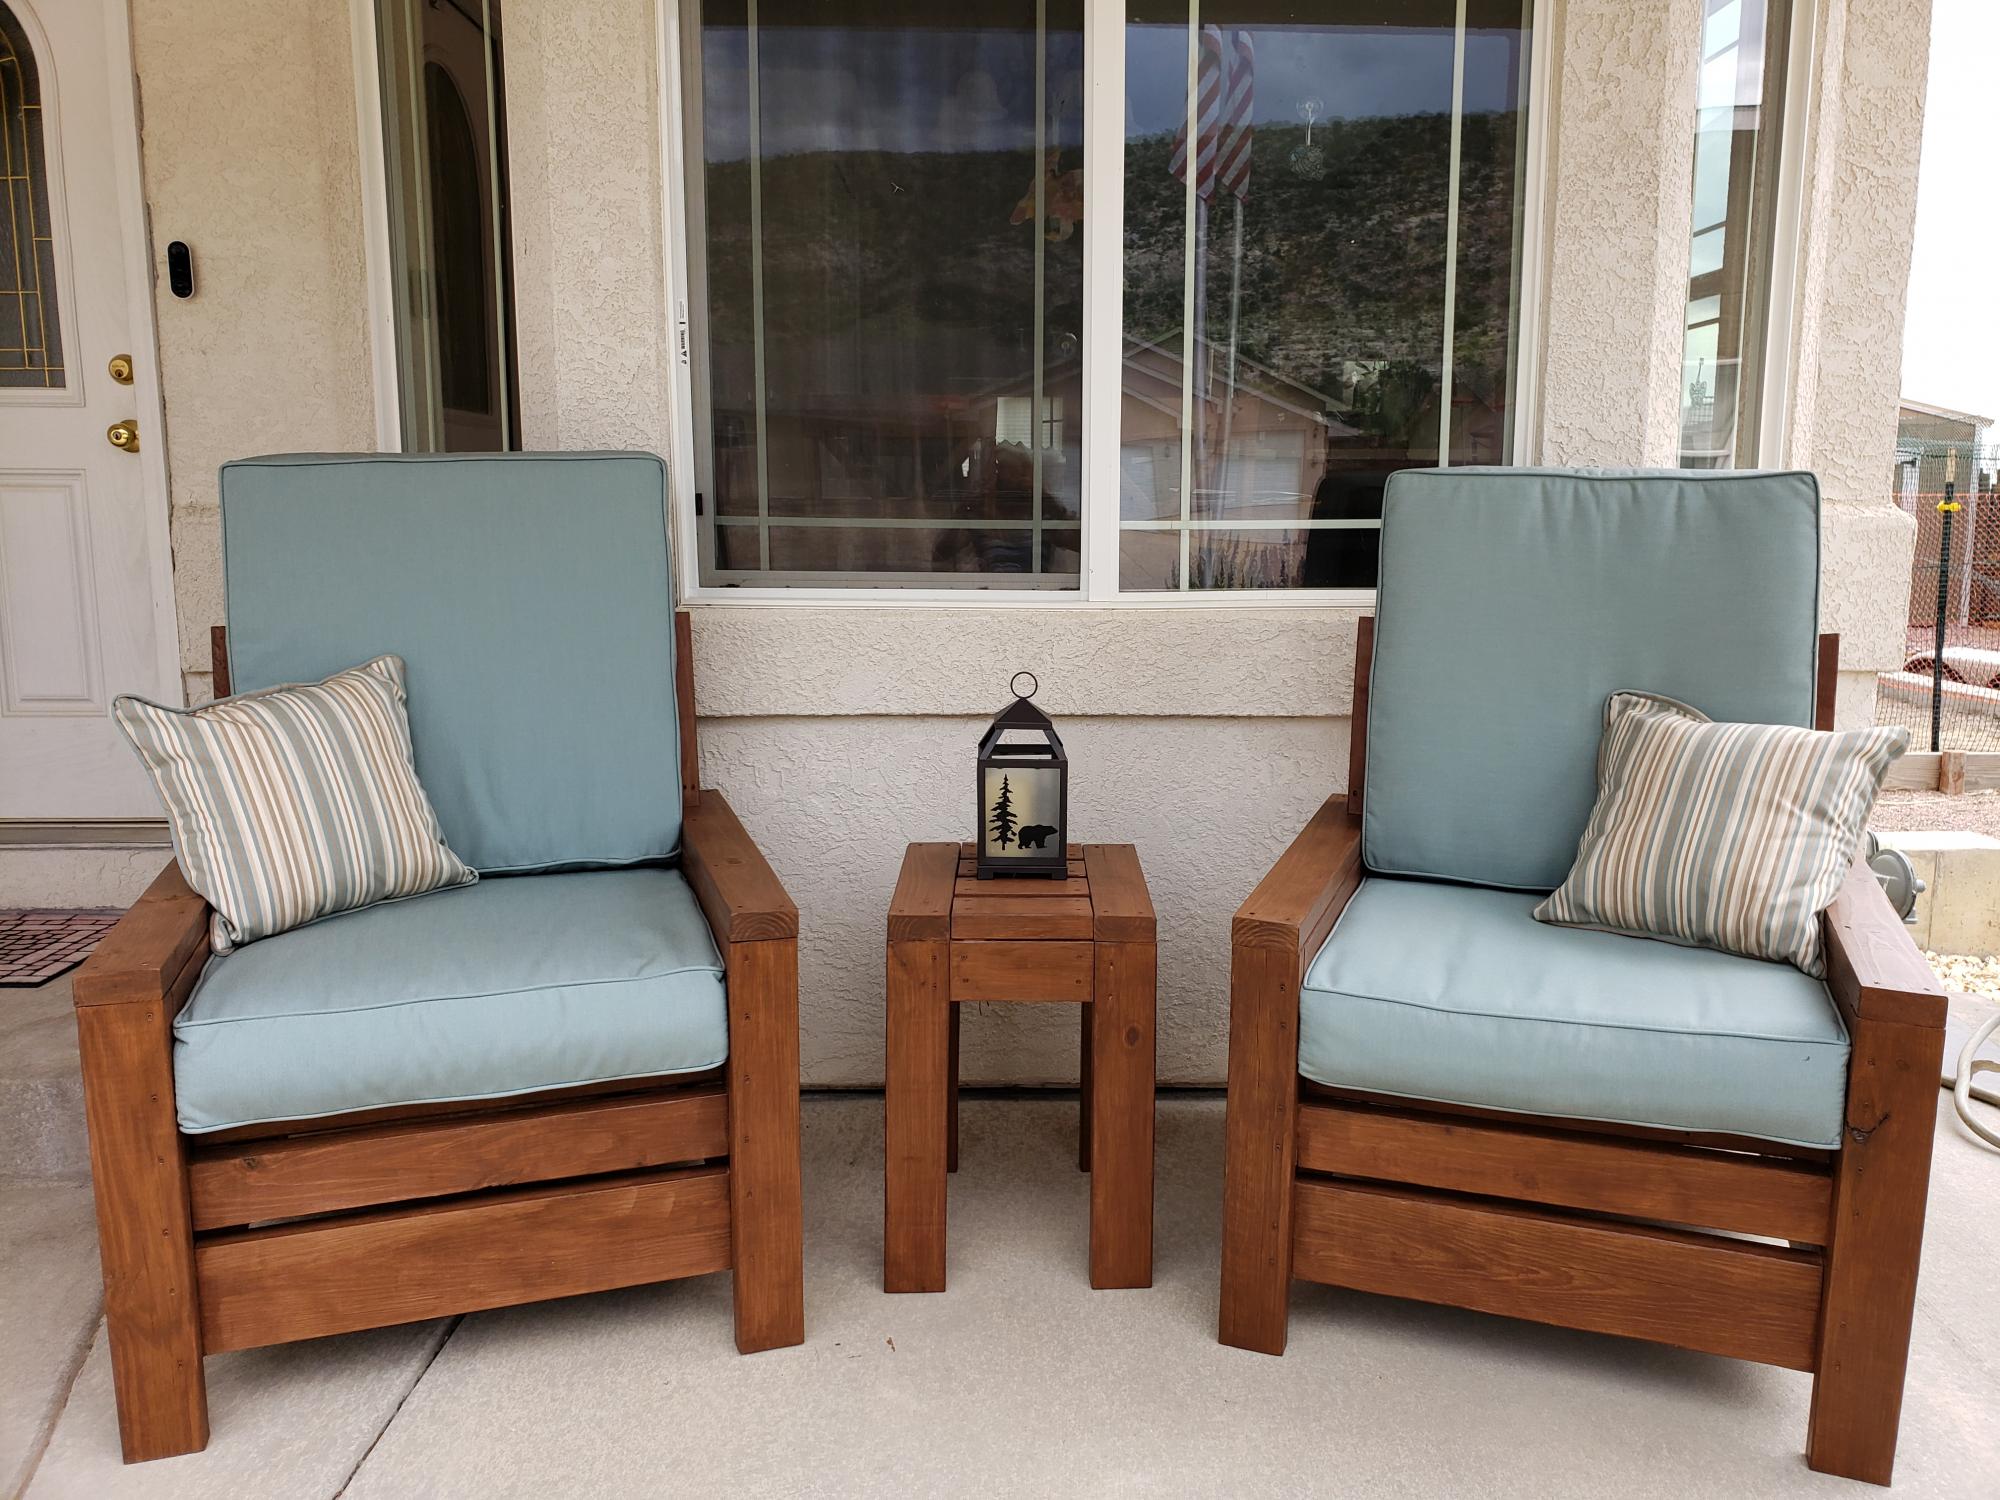
Love these outdoor Chaise Lounges. They are very sturdy and comfortable. I am hoping to make a loveseat and tables to match. Makes a perfect patio sent for my back porch and pool!

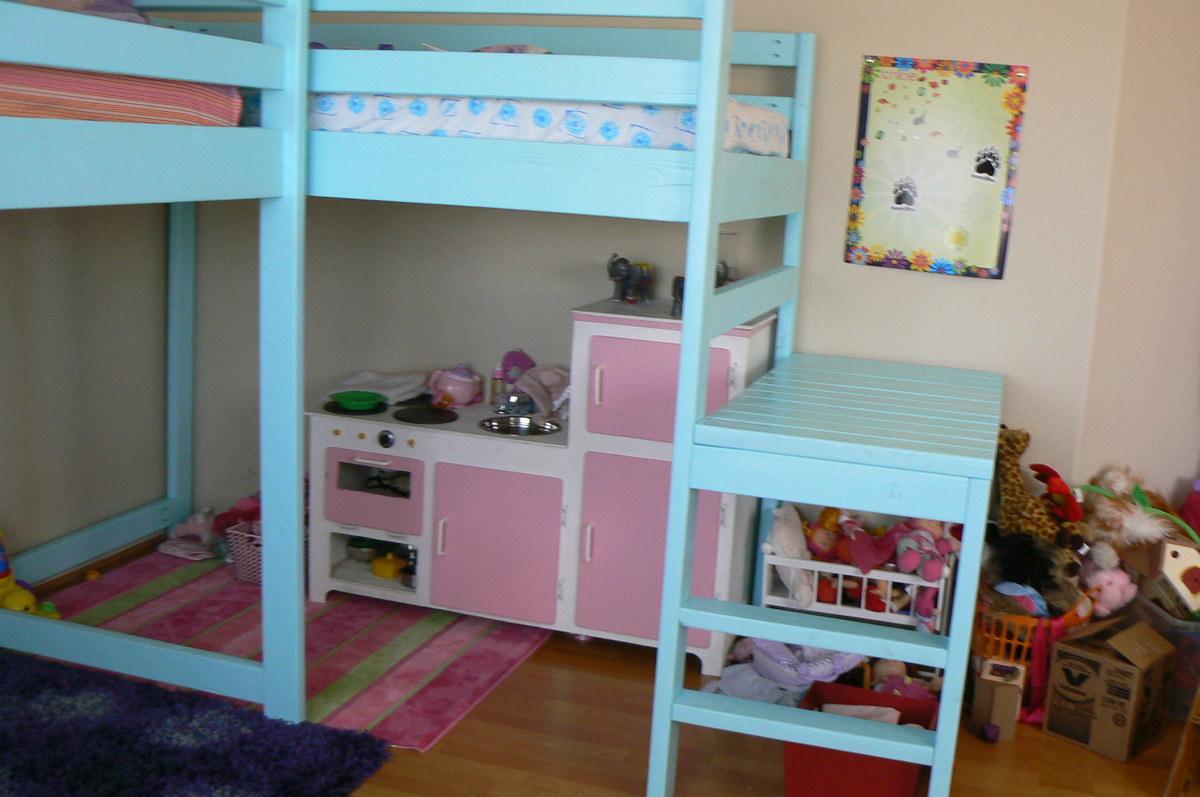
Ana read my mind! I was telling my husband that I wanted "L" shaped loft beds for our girls abouttwo weeks before she posted these plans! As soon as I saw them we went and got our lumber. So excited to have these done and the girls love them!

Thu, 09/13/2012 - 13:05
I saw another post where they did horizontal 2x4s instead of stairs. I see that you did one of each. Could you tell me what your thoughts are on how the kids like them....if the 2x4 steps are easy to get up and down on....
We are adopting and we're not sure what age children we will get....so, I want to make sure they are easy to navigate. Any thoughts???
Thank you!

Tue, 09/03/2013 - 09:30
we id the stairs for our 3 year old and the ladder for our 5 year old. She has no problem getting up and downthem but our 3 year old doesn't like to come down the ladder ones. The stairs are really nice and make the bed easily accesable even for me. =)
Wed, 02/04/2015 - 18:48
What are the overall dimensions with the two landing areas and stairs? I really like this idea, but the bedroom is not super big. Thanks!
Very clear plans and directions. My husband and I built these and the table in a weekend. We added a back and made a table from the scraps. First time of not chasing furniture that has blown away! We love them!
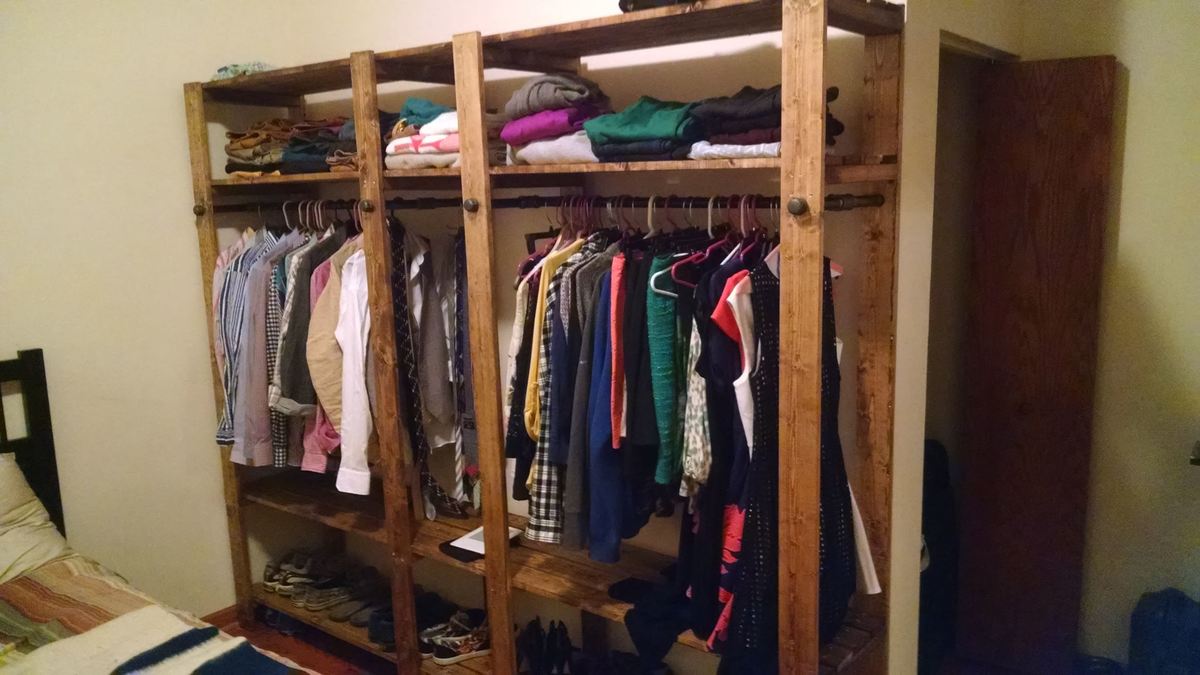
My girlfriend and I just moved into our new apartment. It has hardly any storage space at all and very little closet space. So we built our own! It was a long day's work, but the reward of a beautiful Chifforobe is well worth it.
This was my first carpentry project, and I couldn't be happier with the way it turned out.
Tue, 03/10/2015 - 18:42
This is sooo awesome! You look like a professional!
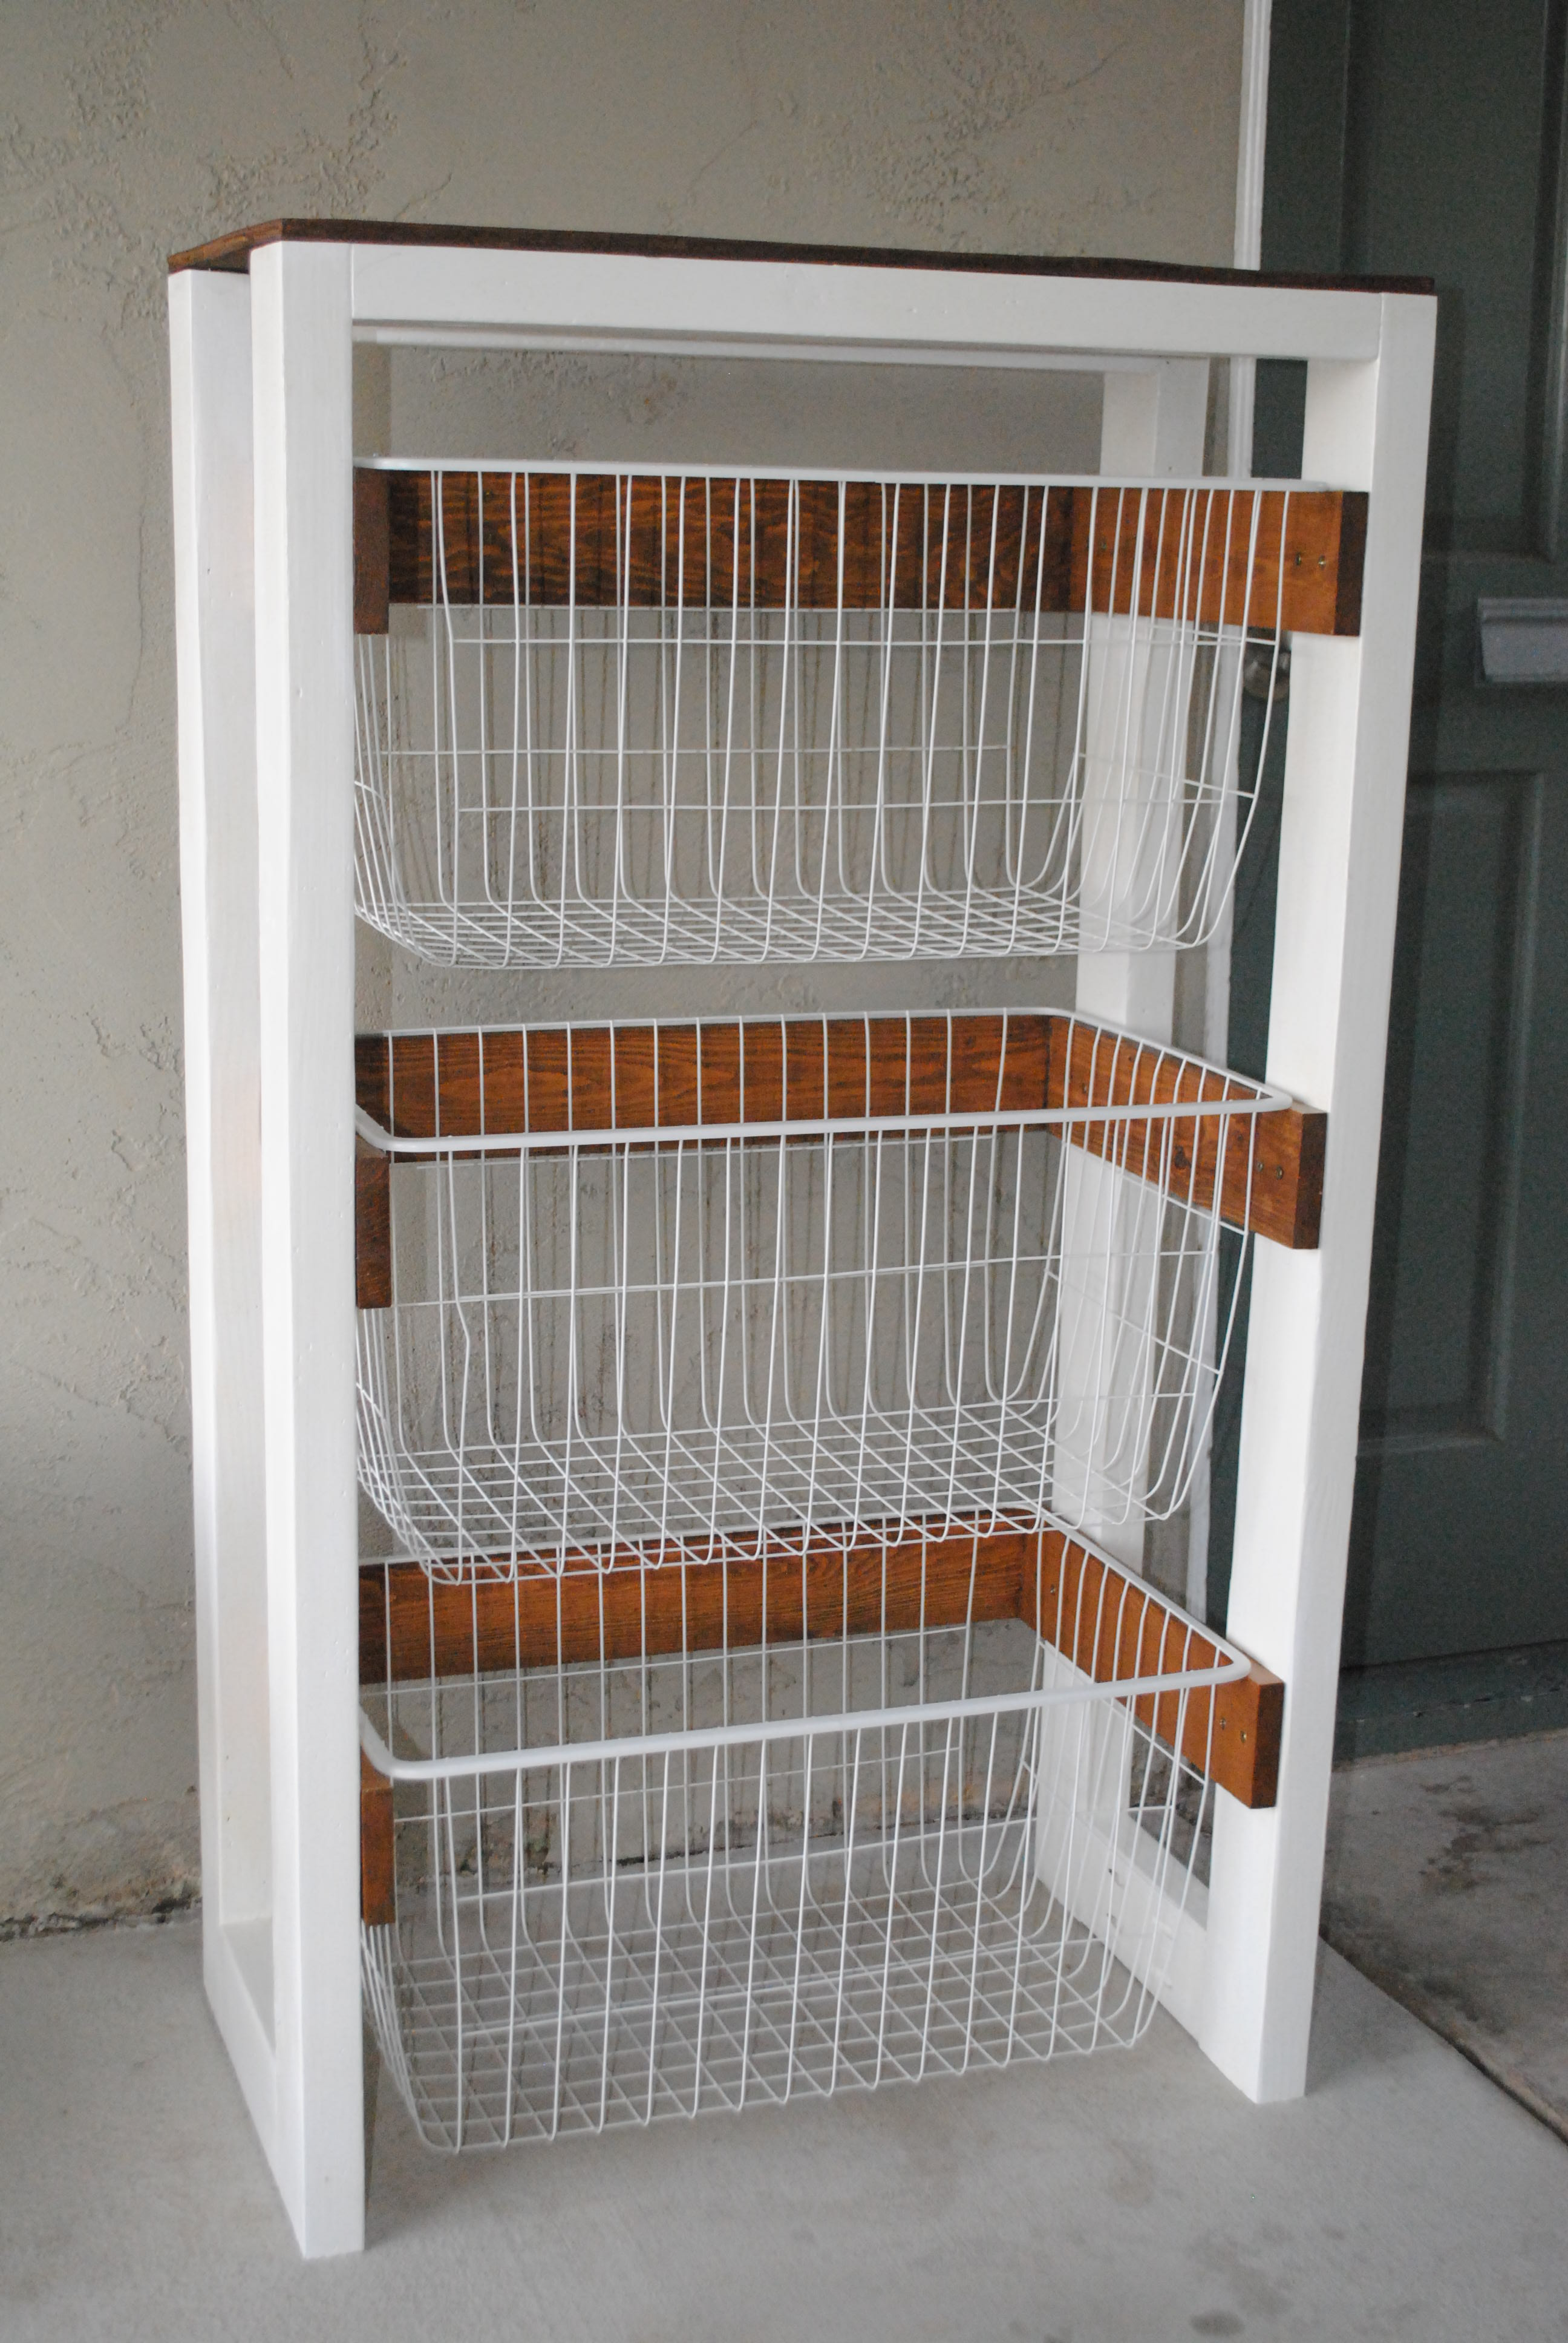
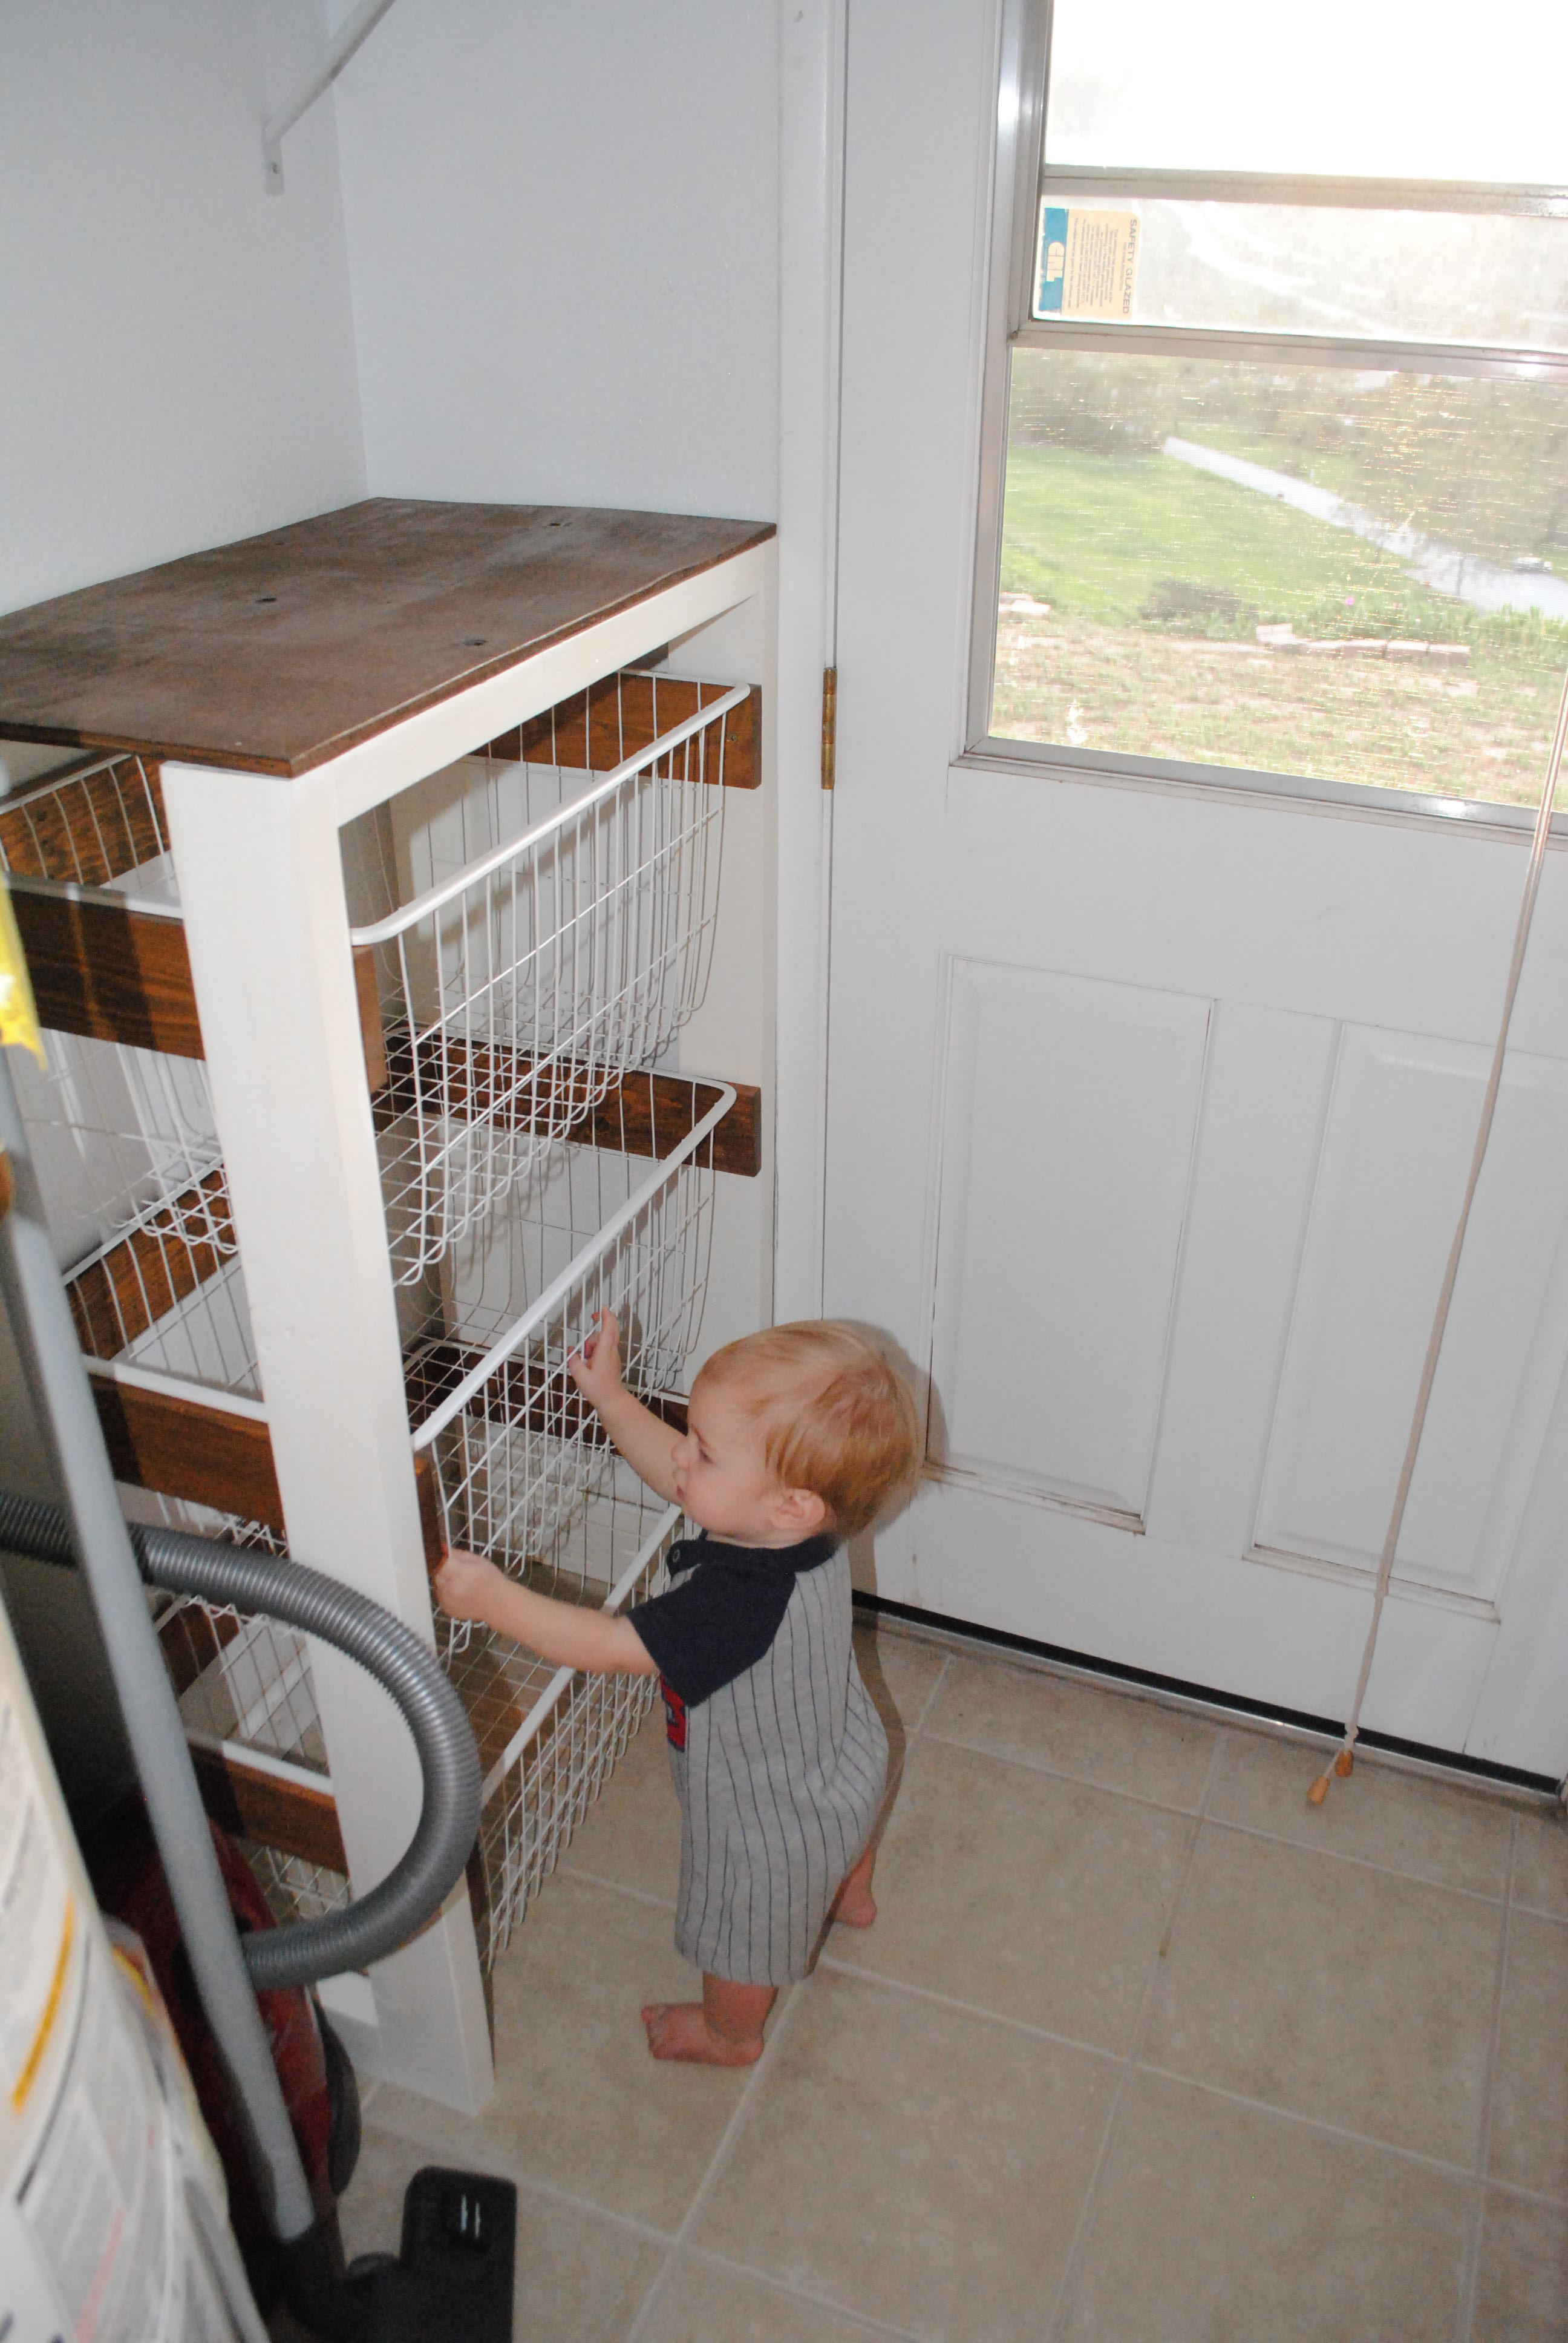
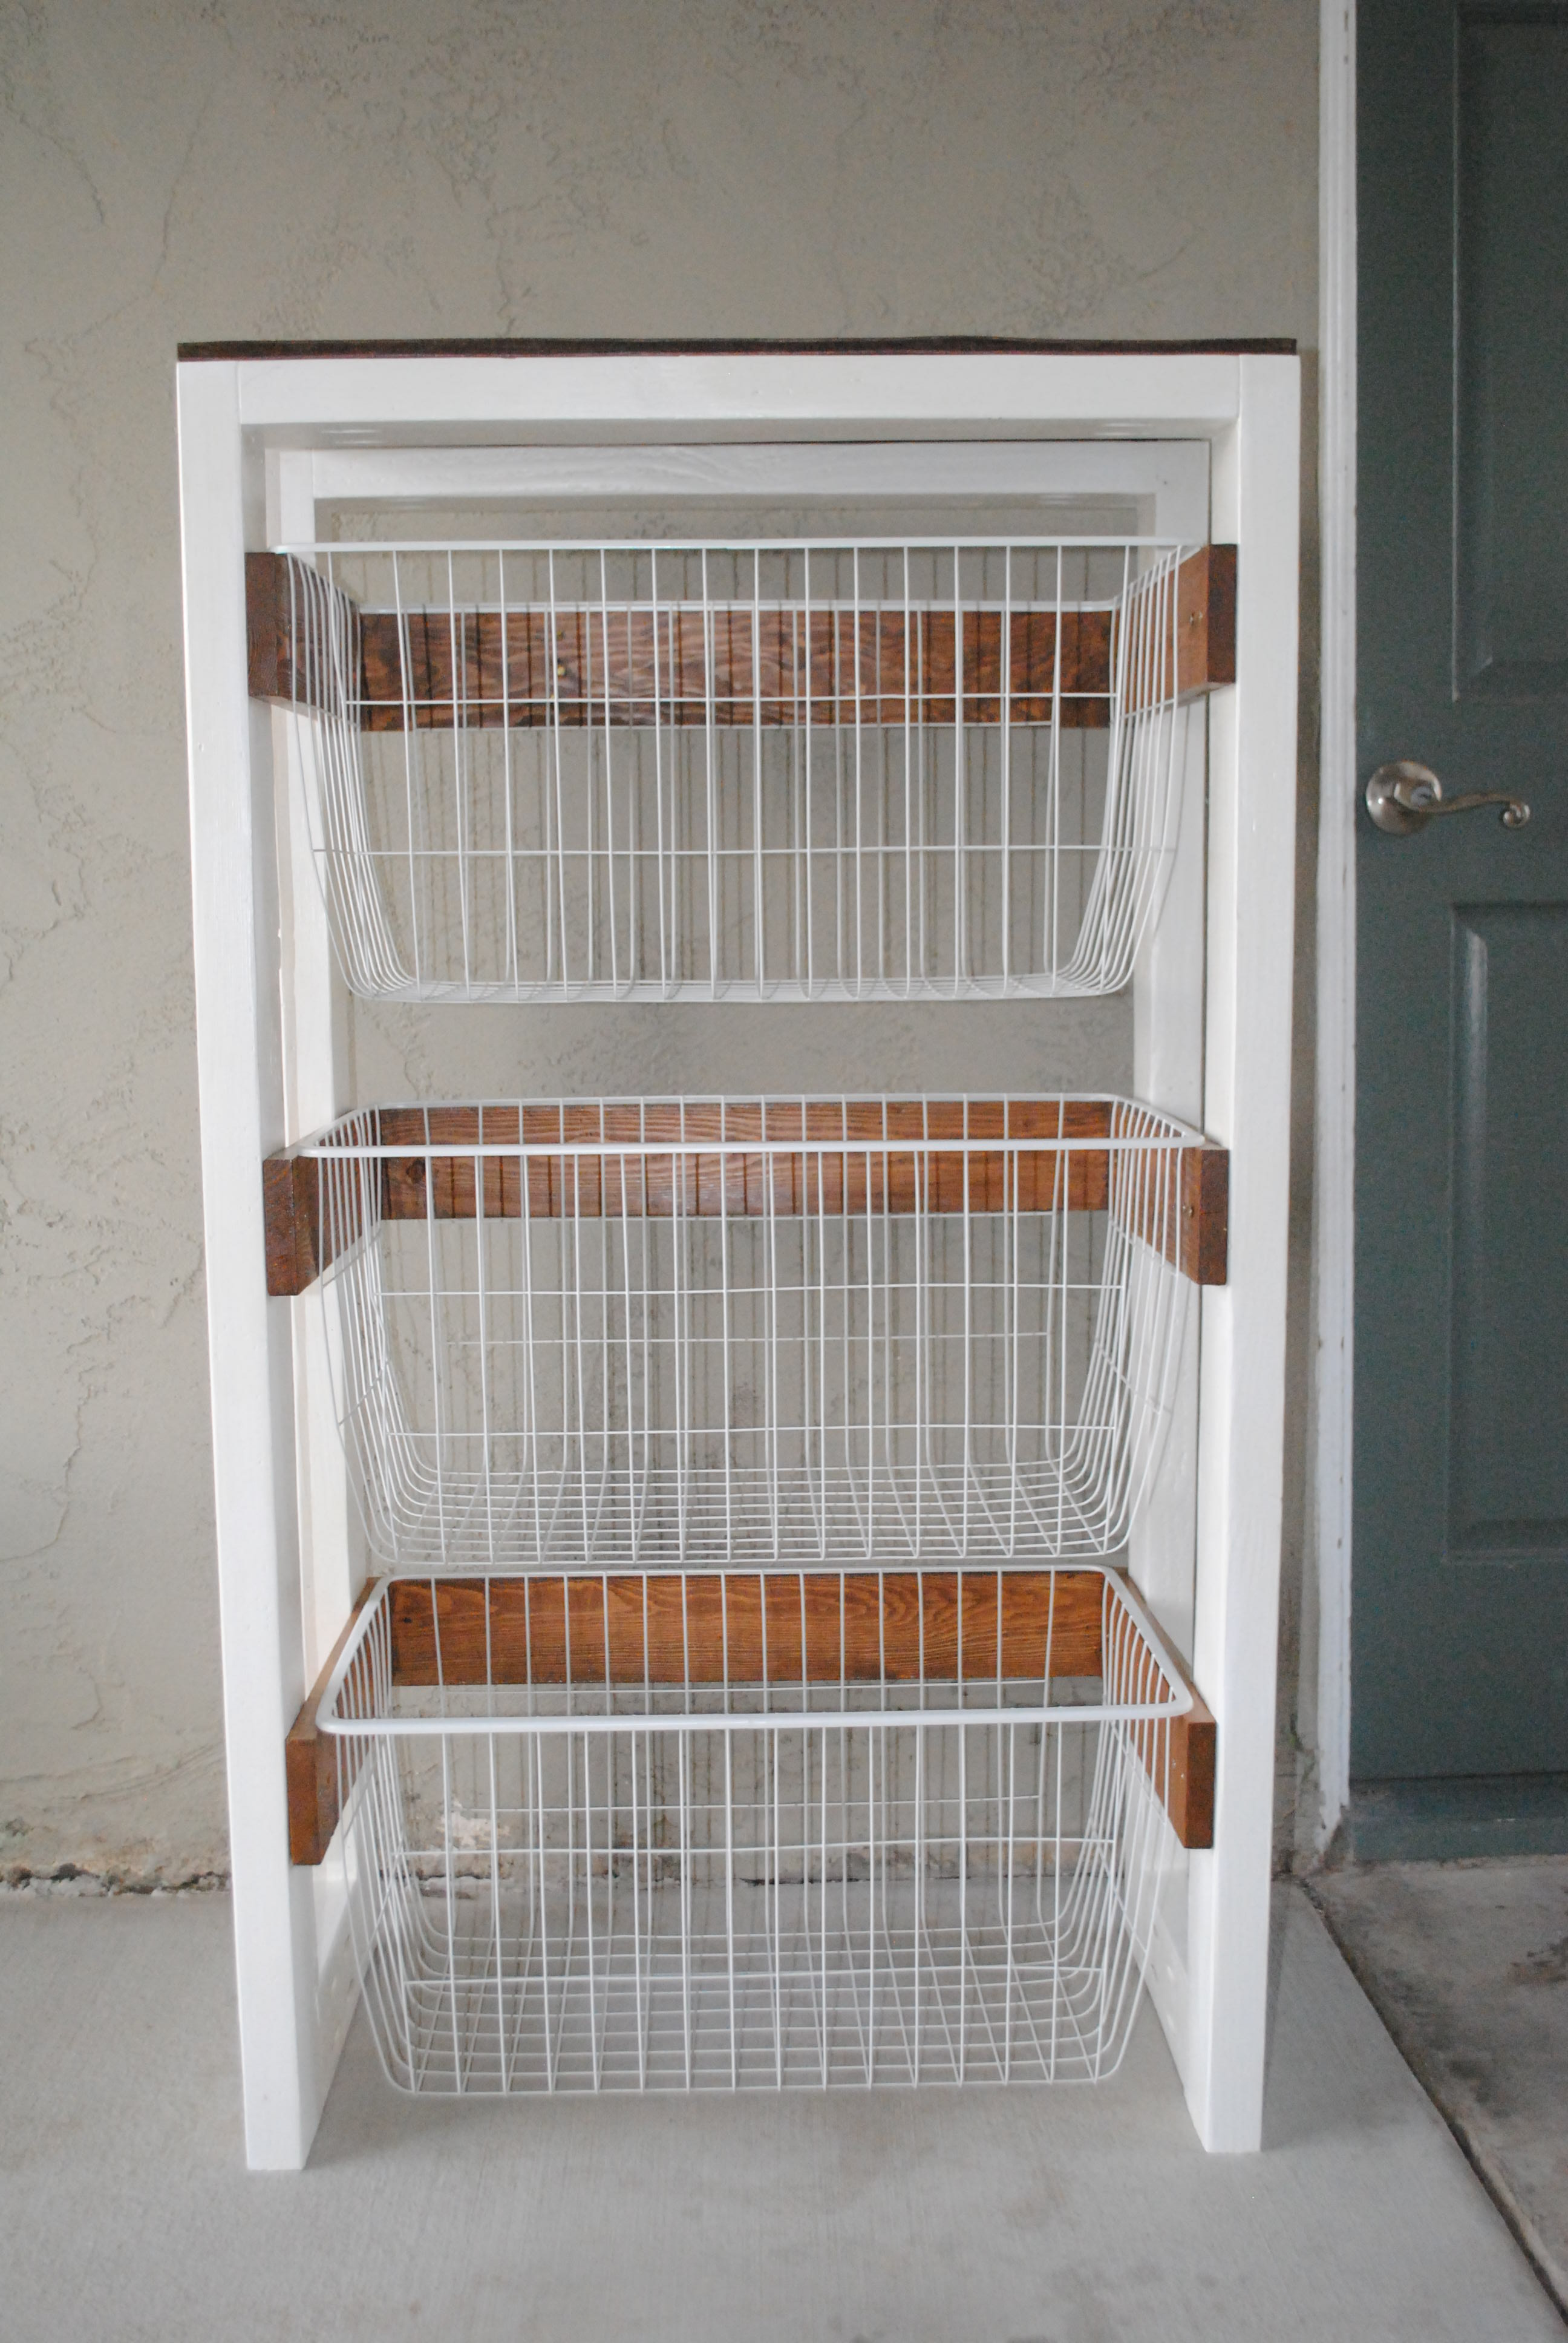
I built this project totally from pallet wood and leftover 2x4's. I already had the paint and stain from other projects, so the only cost was for the baskets, which were $6 a piece at Ikea. This project turned out even better than I expected and I couldn't be happier.

The plans were easy to follow. I modified my island to fit my space and cut it down to 44 inches in length.

Fri, 07/22/2011 - 14:13
i was looking for THE PERFECT ISLAND.. thank you so much for posting this. love it and can't wait to start building it. where did you find the shelves?
Mon, 10/31/2011 - 15:33
Your island is gorgeous, and I love the modification you made to the original plans on the shelving support! I would like to know what size the boards are that you used so that I can duplicate. Thank you!
Tue, 02/07/2012 - 19:43
I would think it would be basically the same build, just add brackets to support the extra wood.
Mon, 03/05/2012 - 15:20
I want to make this Kitchen Island but if can't find the Supply List. Would you mind posting it or emailing me please! This will work perfect in my Kitchen
Mon, 03/05/2012 - 17:46
Wow! Just a wonderfully simple project! I can figure it out by looking at it. I have a piece of Rock Maple Counter Top 24"x6'that needs legs. I'll probably use 4x4' for legs, six of them. But the shelves will be just like this. Thank you!
Mon, 03/05/2012 - 17:50
Wow! Just a wonderfully simple project! I can figure it out by looking at it. I have a piece of Rock Maple Counter Top, 24in.x6ft., that needs legs. I'll probably use 4x4s for legs, six of them. But the shelves will be just like this. Thank you!
Mon, 03/05/2012 - 18:59
I have enjoyed what I have seen so far. You are an awesome designer.
Mon, 03/19/2012 - 11:57
Do you have instructions on how to build this? It's awesome!
Wed, 04/04/2012 - 11:58
Just click on the link for the instructions. It's under the heading 'About This Project' titled as 'From Plan: Easy Kitchen Island Plans'.
Click where it says 'Easy Kitchen Island Plans'. When you hover your cursor over the words, you will see that is a hyperlink.
Sun, 05/20/2012 - 06:48
I love your island and I also have a small kitchen...would you happen to know the sizes of the boards you used? Thanks
Wed, 07/25/2012 - 14:31
Yours looks so different and so much better then the one that show how to make it, how did you do it? I really would love to build it but have no idea how...
Thanks so much!
Wed, 08/15/2012 - 13:08
This island is perfect. I love the shelves and the size. Any chance you could send me the dimensions of this island and details on how you did the shelves? Great job!
Wed, 12/31/2014 - 07:37
Hi, this is my first time building anything. I really like the modification made to the original plans. I like the legs facing the other way. I can't figure out how to modify the cuts on the sides and front and back supports for the top to adjust for turning the legs the other way. Are there modified plans. LOL I need instructions, I’m not quite there yet on doing it myself. Thank you
Sat, 06/06/2015 - 18:33
Hello, i love this island but maybe i missed it. What kind of wood is everyone using? Frosting said $47 but that could only be for pine right? Are people using pine to build this? I would like it to look just like the picture. Any help would be appreciated! thanks!
Fri, 08/14/2015 - 14:34
I wnat to kow how much wood and what size I need ans the saws i need to build this project
Fri, 08/14/2015 - 14:35
I need to know how much wood and what size wood and also what kind of saws do I need for this job
Fri, 08/14/2015 - 14:35
I need to know how much wood and what size wood and also what kind of saws do I need for this job
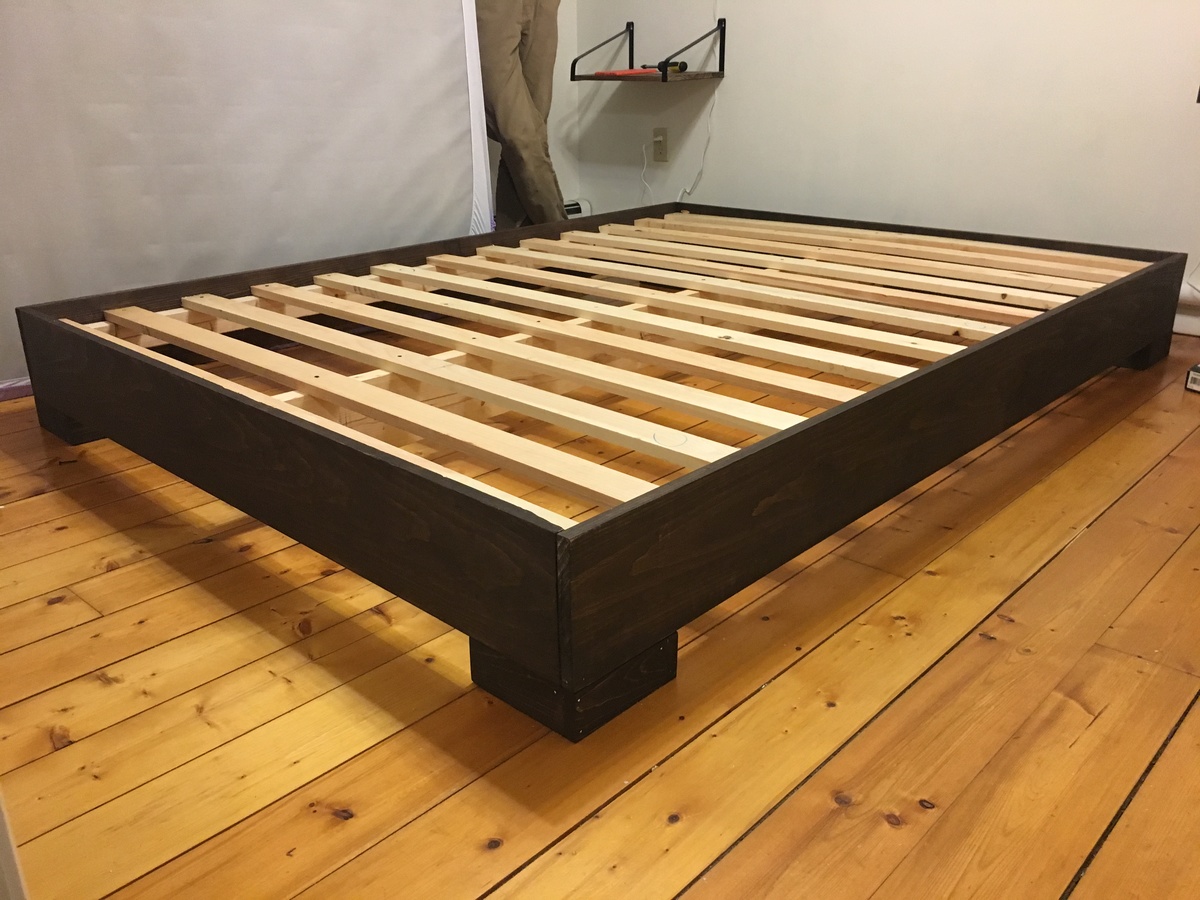
I got tired of sleeping on the floor like college kids, but I didn’t want to buy a junky particle board bedframe. My husband and I are novice woodworkers. Even still, we bought the lumber around noon and managed to finish the whole project in about 5-6 hours! We used a Kreg jig for the first time and it was pretty simple. I am really pleased with how this turned out, and I can’t wait to try more of Ana’s plans in the future.
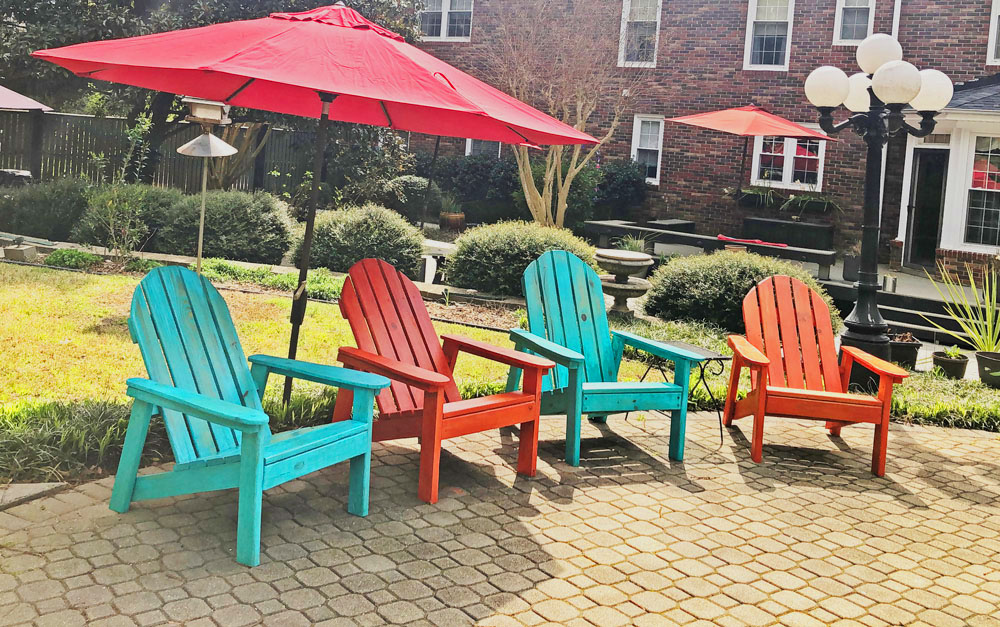
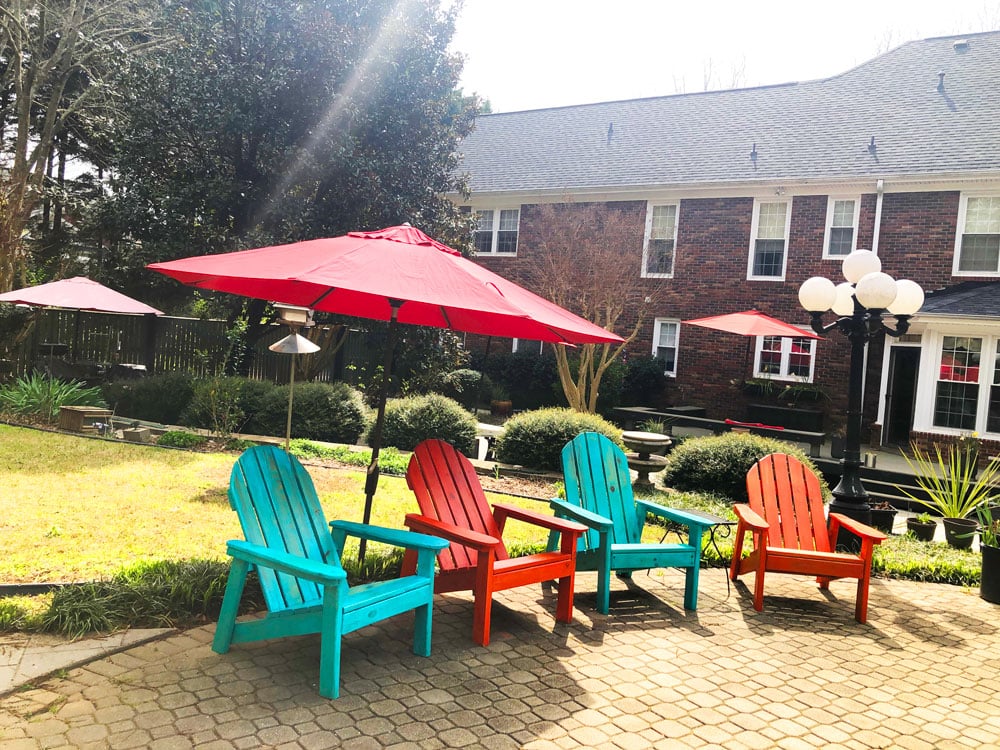
Adirondack chairs from your plans. My husband added some rounding on the arms and back. We wanted them to look like well weathered beach chairs. To get that effect we used milk paint which lets the grain show through.
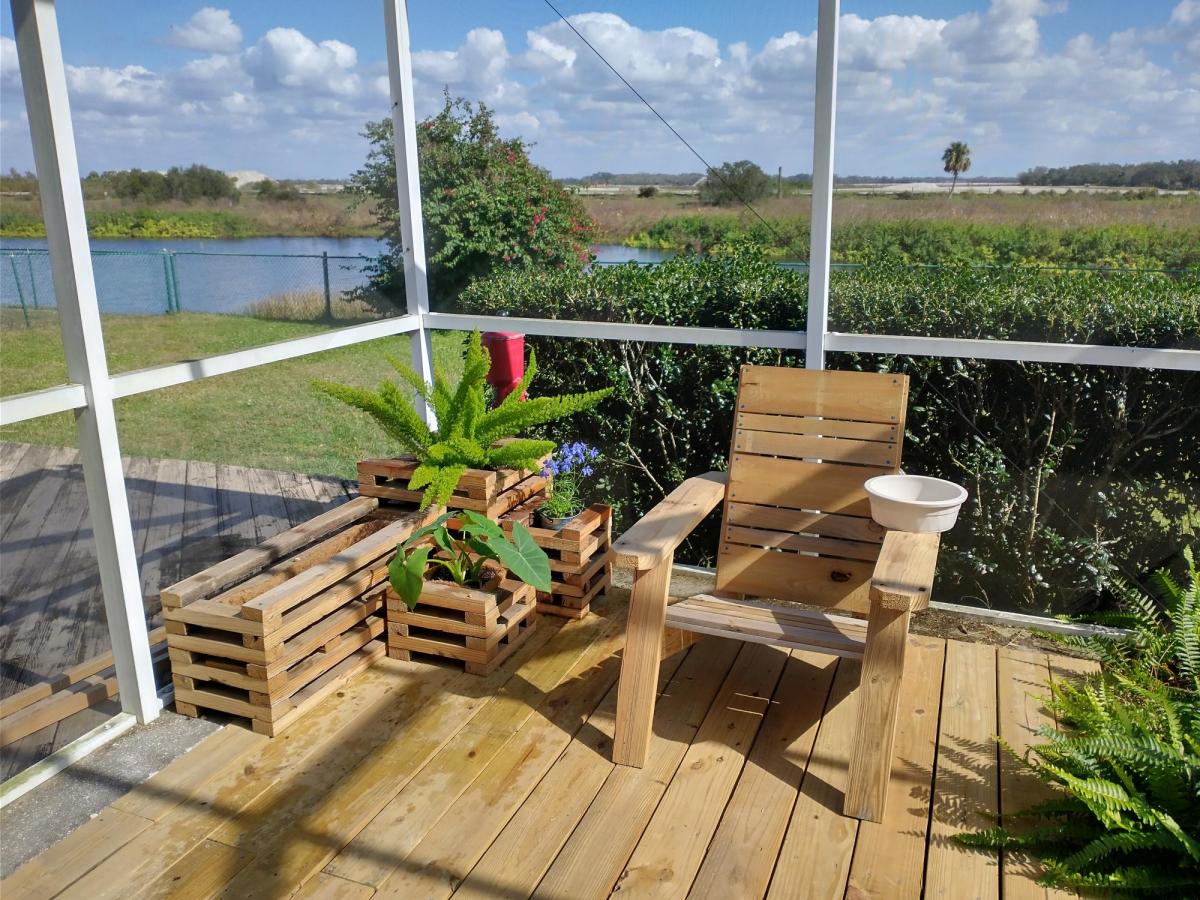
The best addition are the two wooden wheels on the back leg of the chairs, I can now easily move them around my patio.


Mon, 05/06/2019 - 11:10
What a gorgeous seating area and what a seal! Love the wheels too!
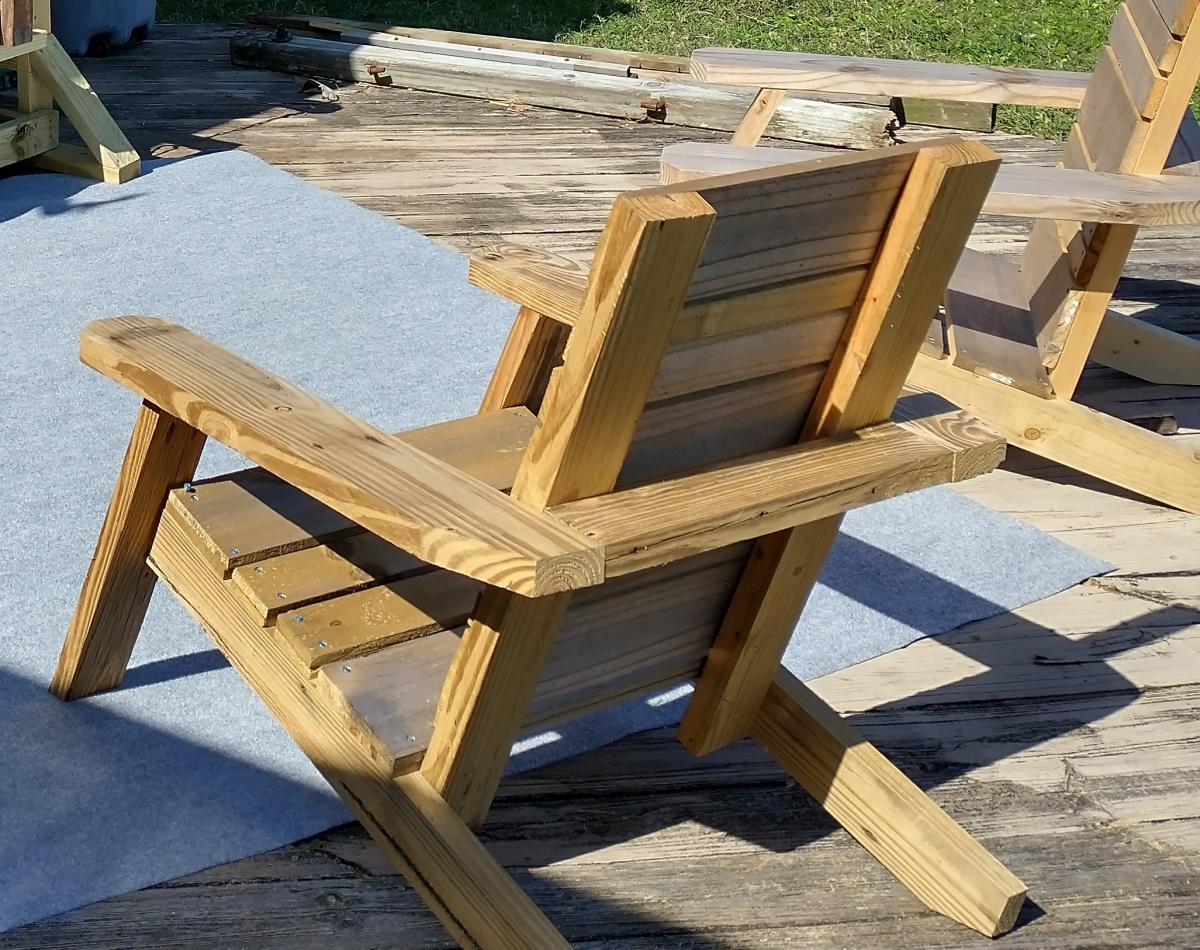
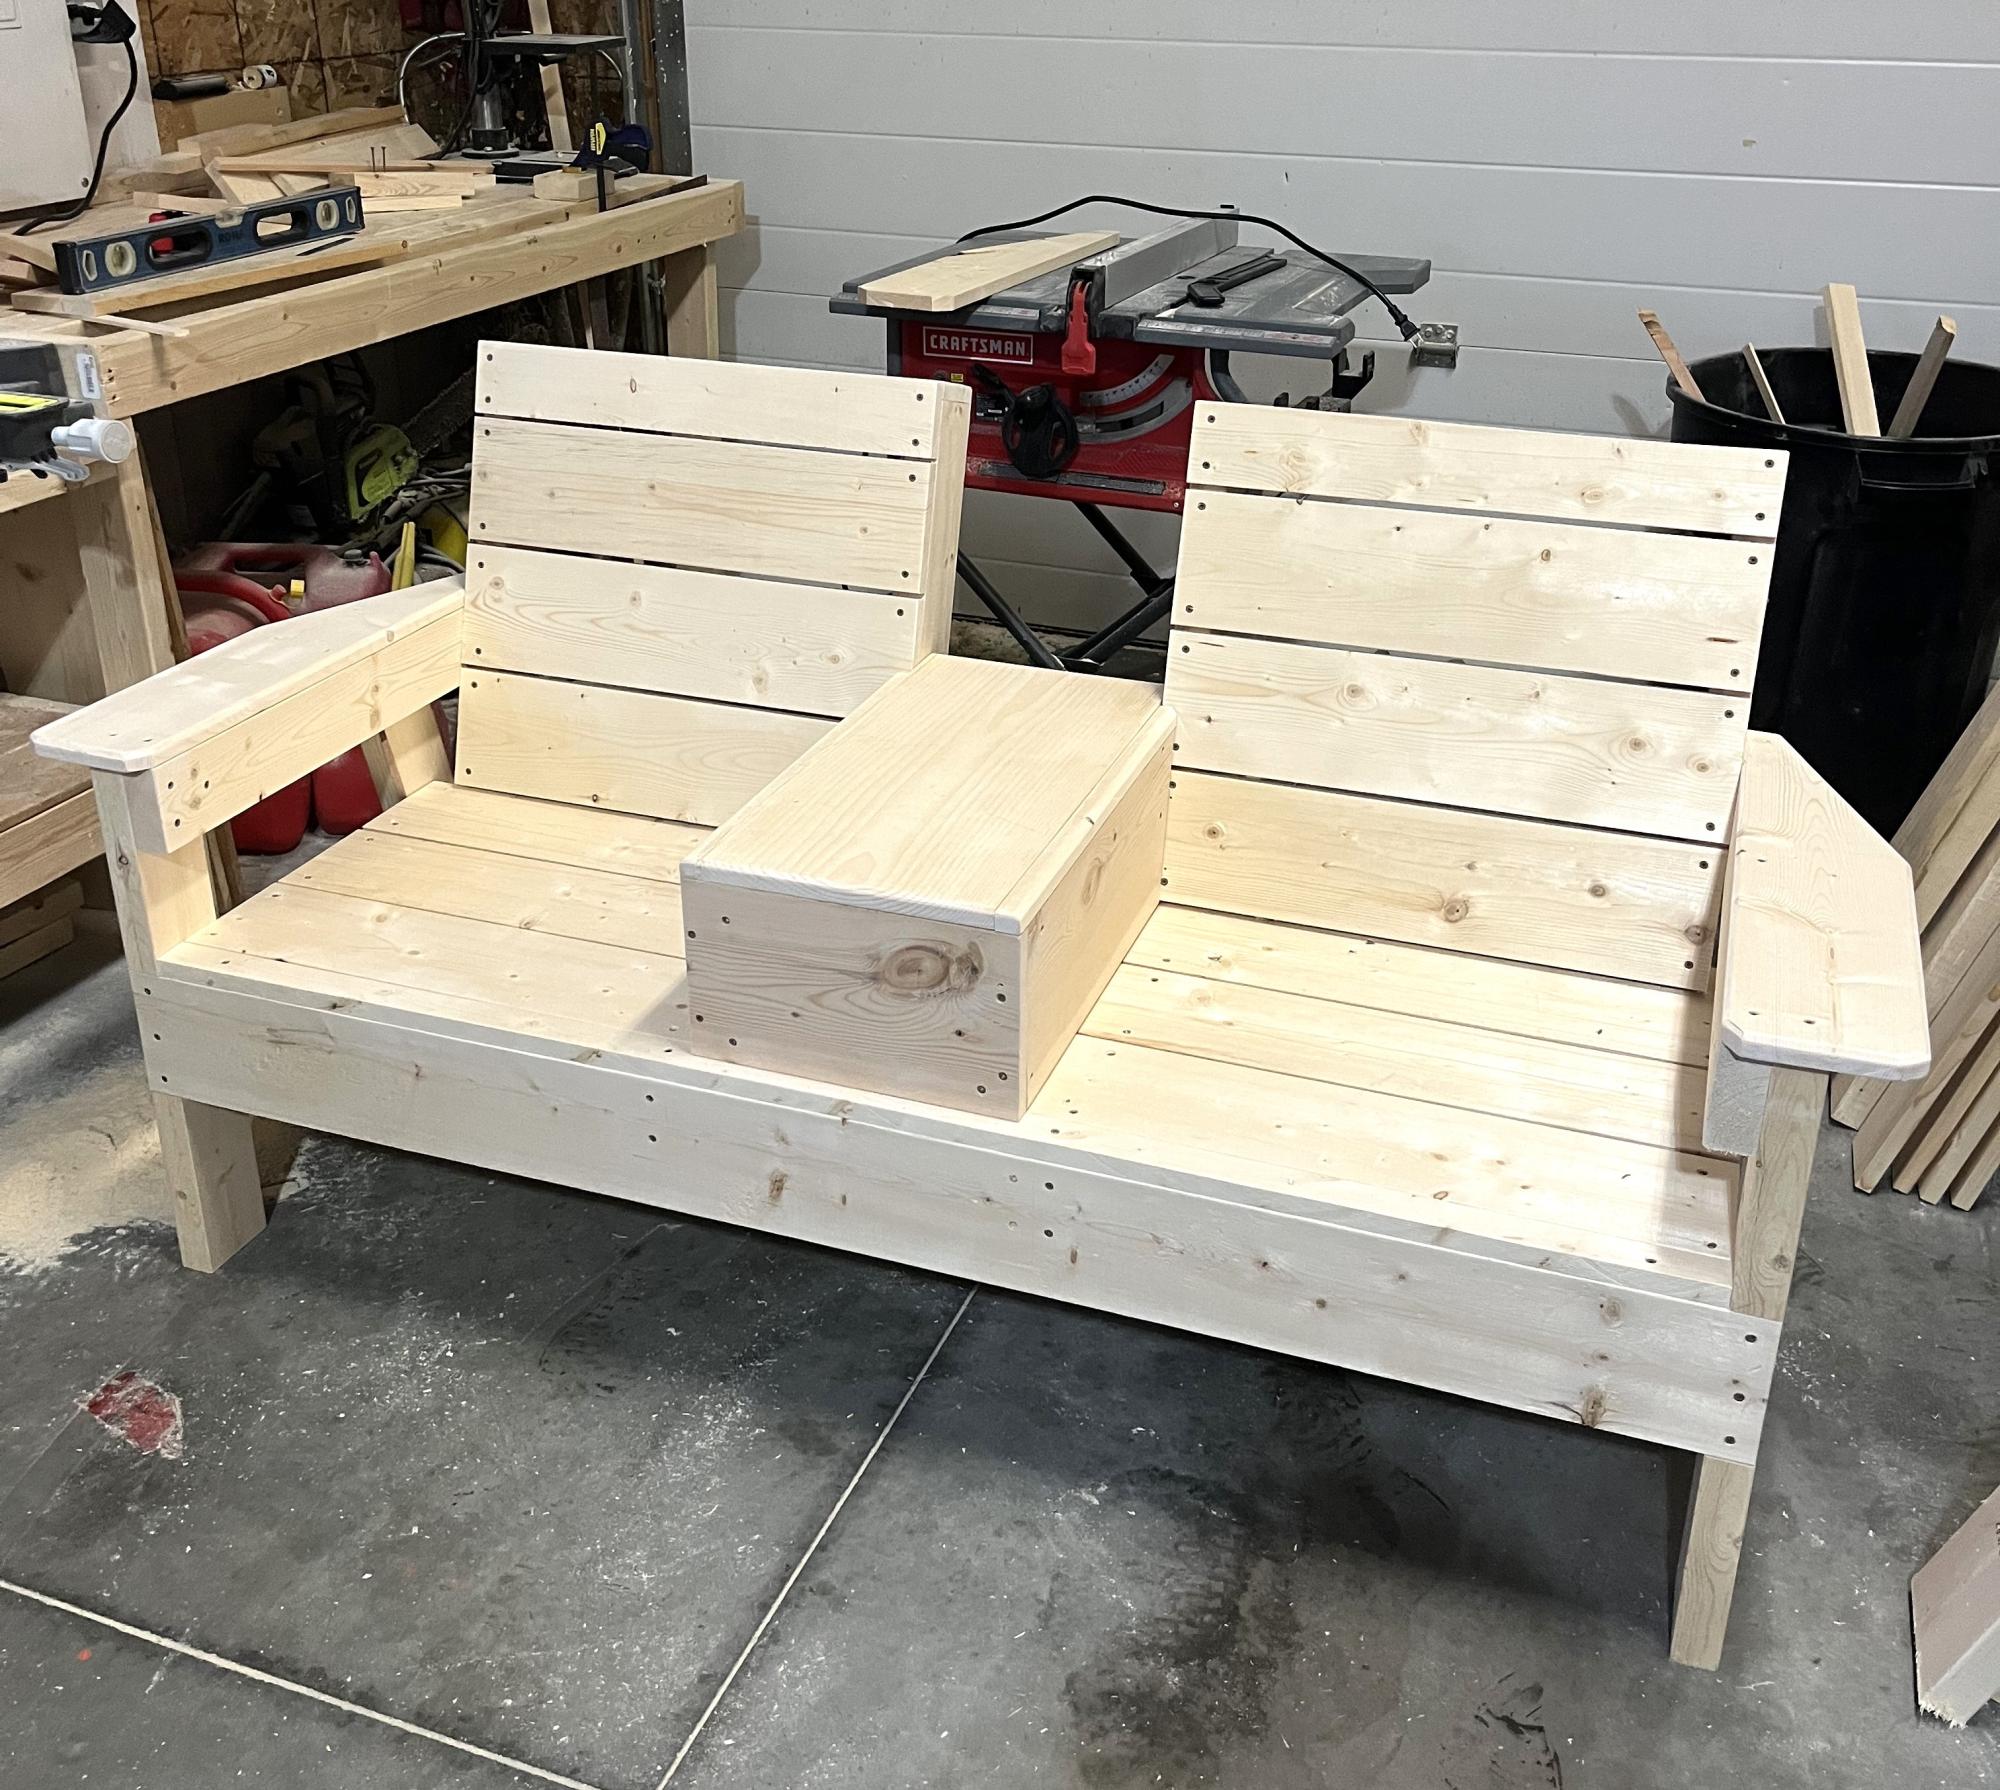
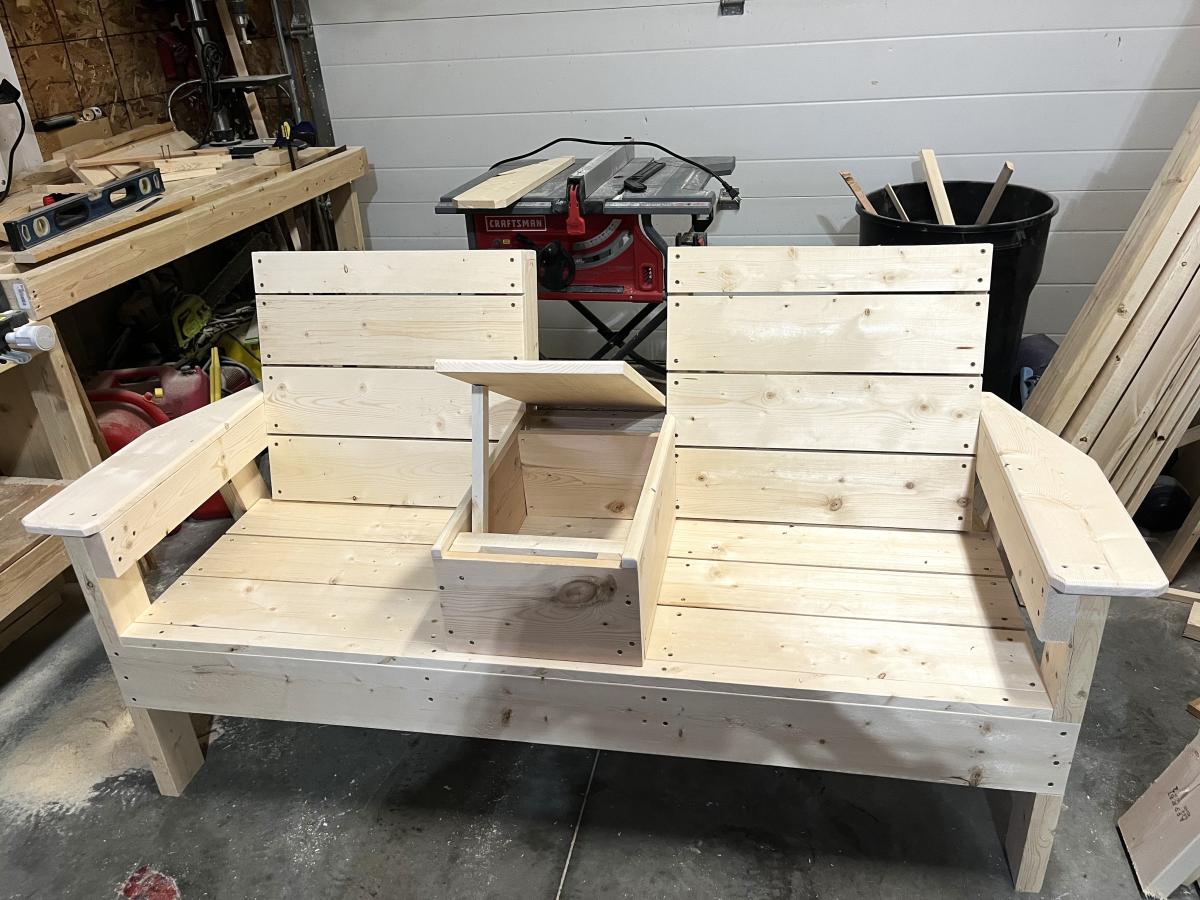
had some fun with the back and seat slat design and did an angle rather than a 90 degree where the arms meet the front support. also used a 2x6 for a larger arm rest. i think it turned out well. thanks Ana

Thu, 03/30/2023 - 10:13
Thanks for sharing, it looks awesome and I love the wider arm!
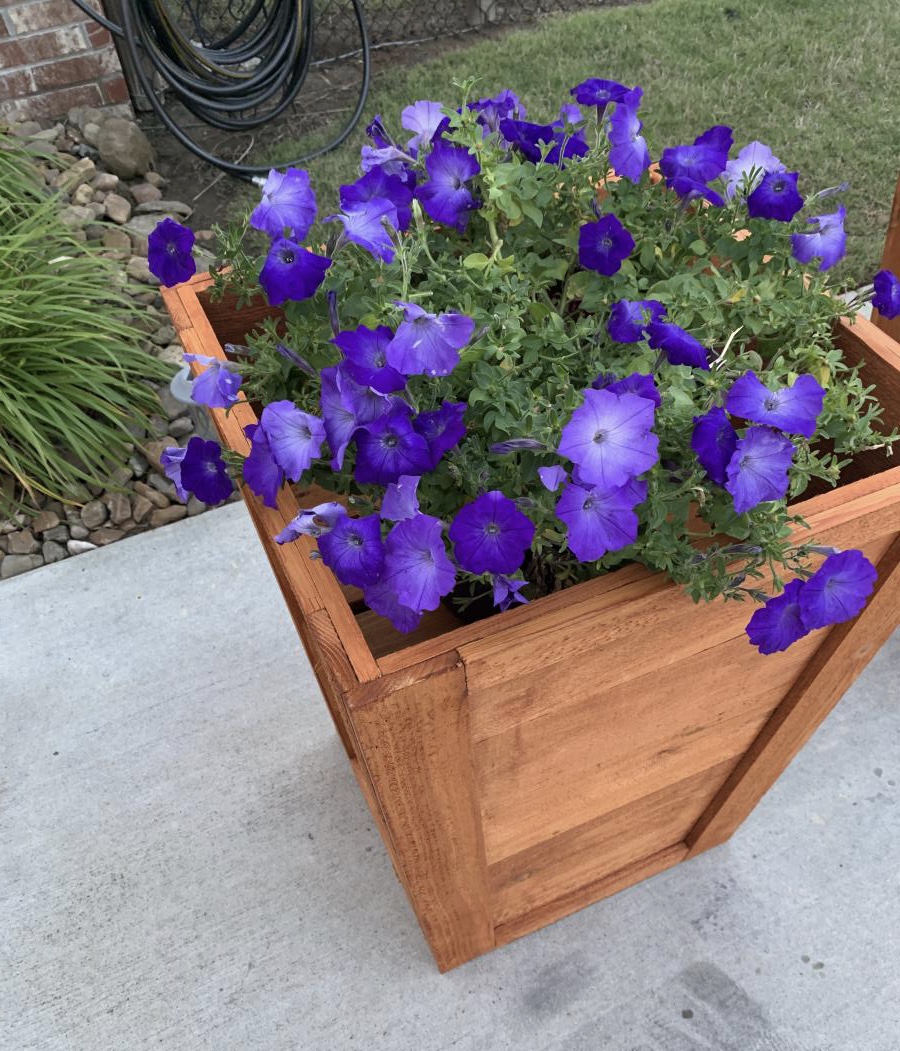
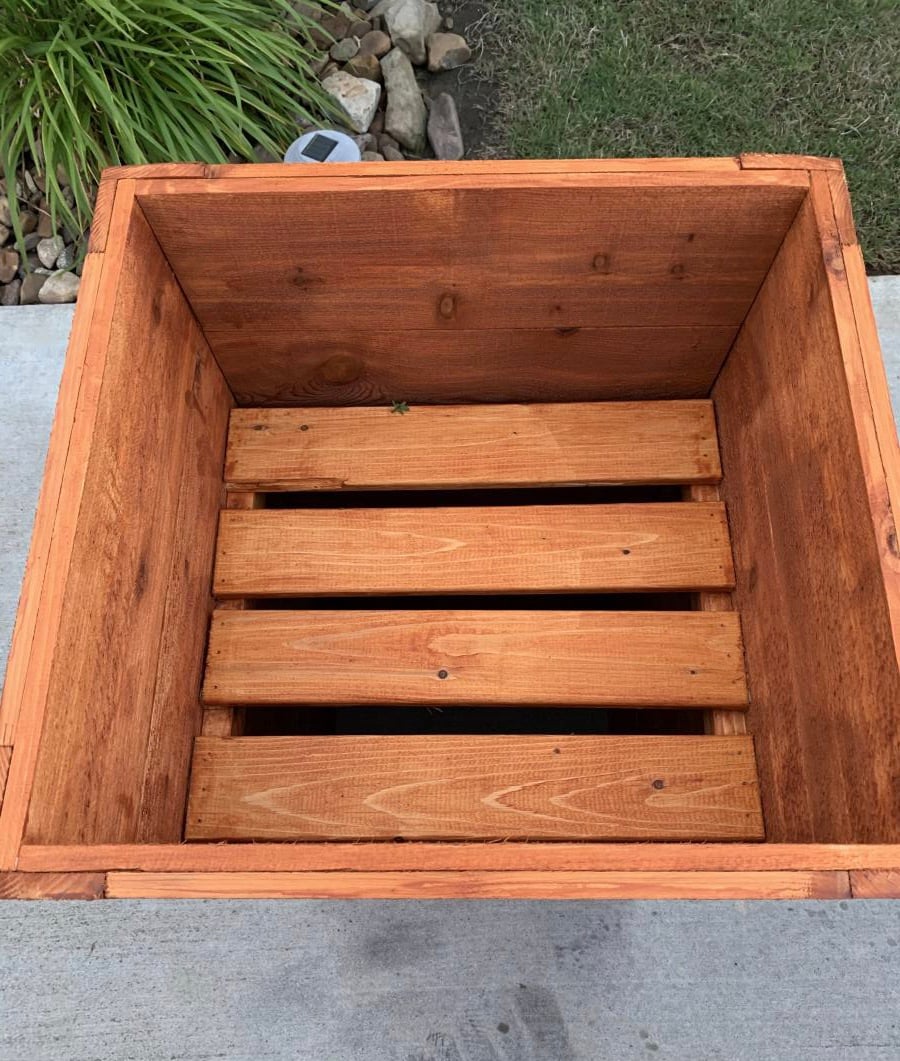
I made the boxes a little wider than the plans called for but still came out great. I'm very happy. Thanks Ana for the inspiration.