Community Brag Posts

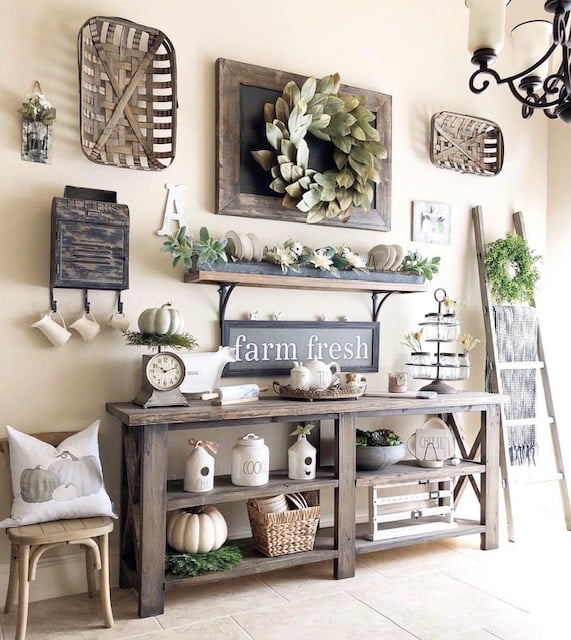
Foldable Farmhouse Table 2

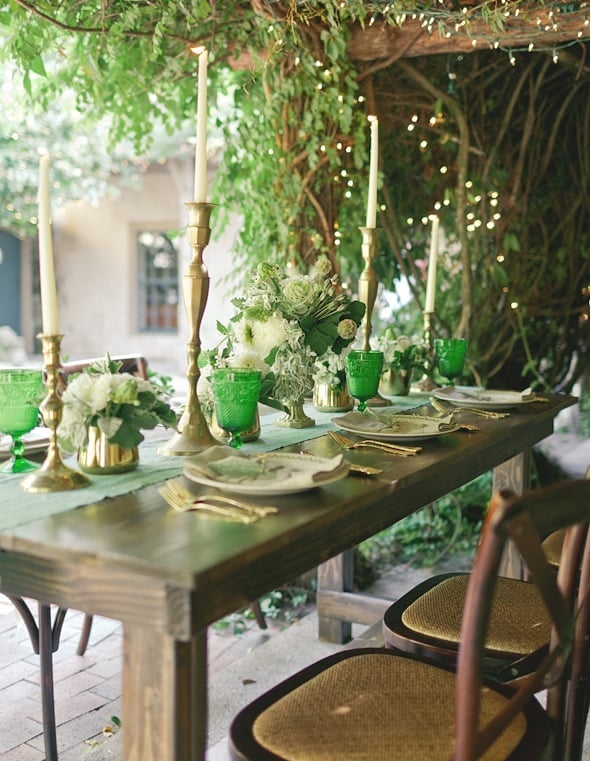
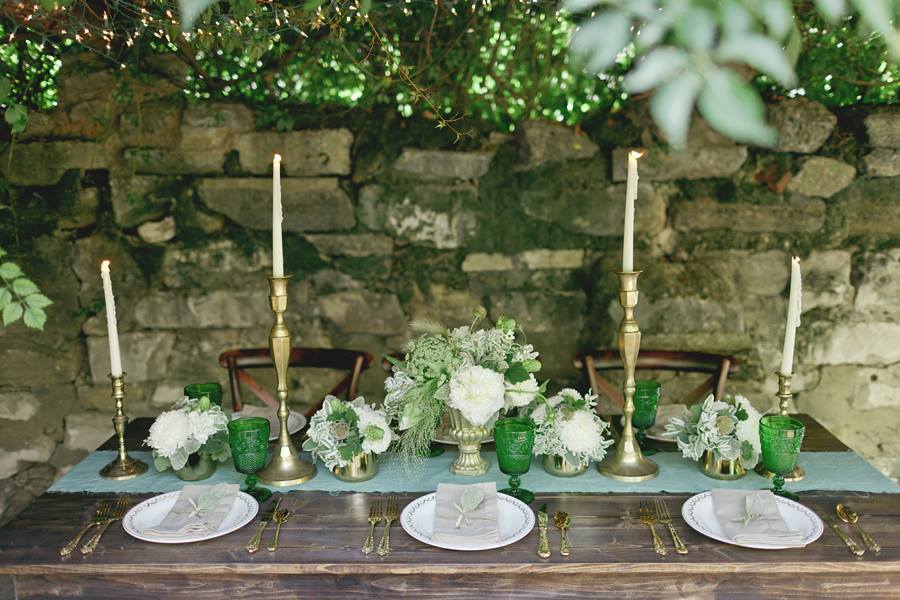
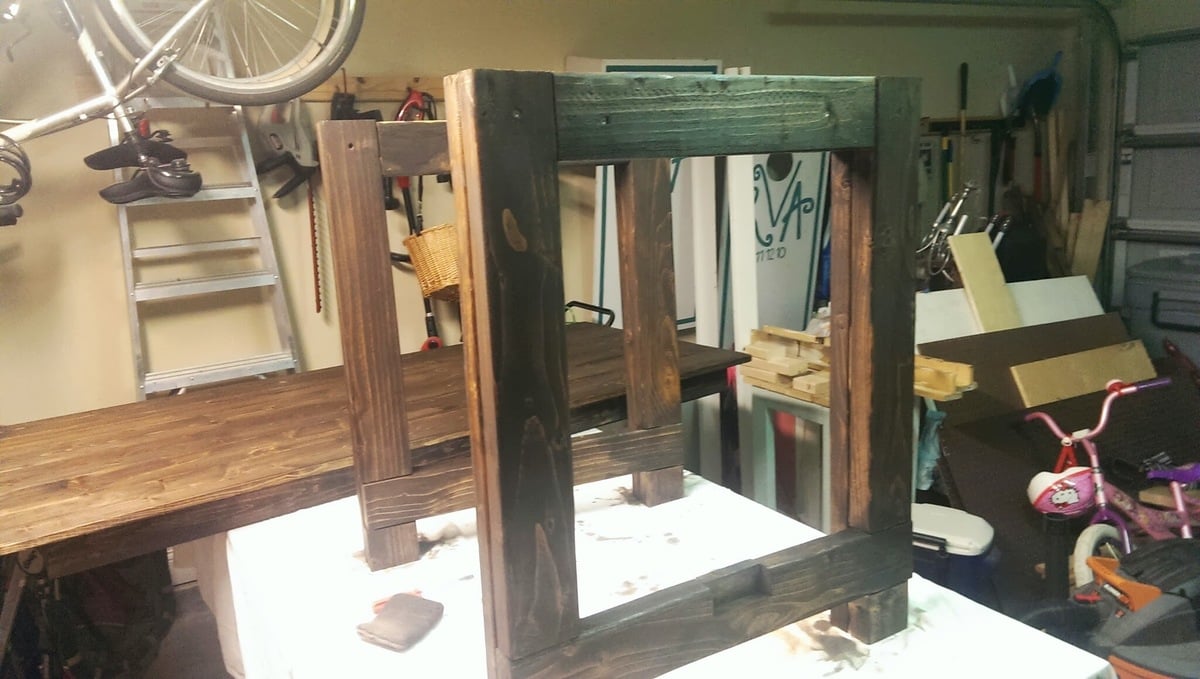
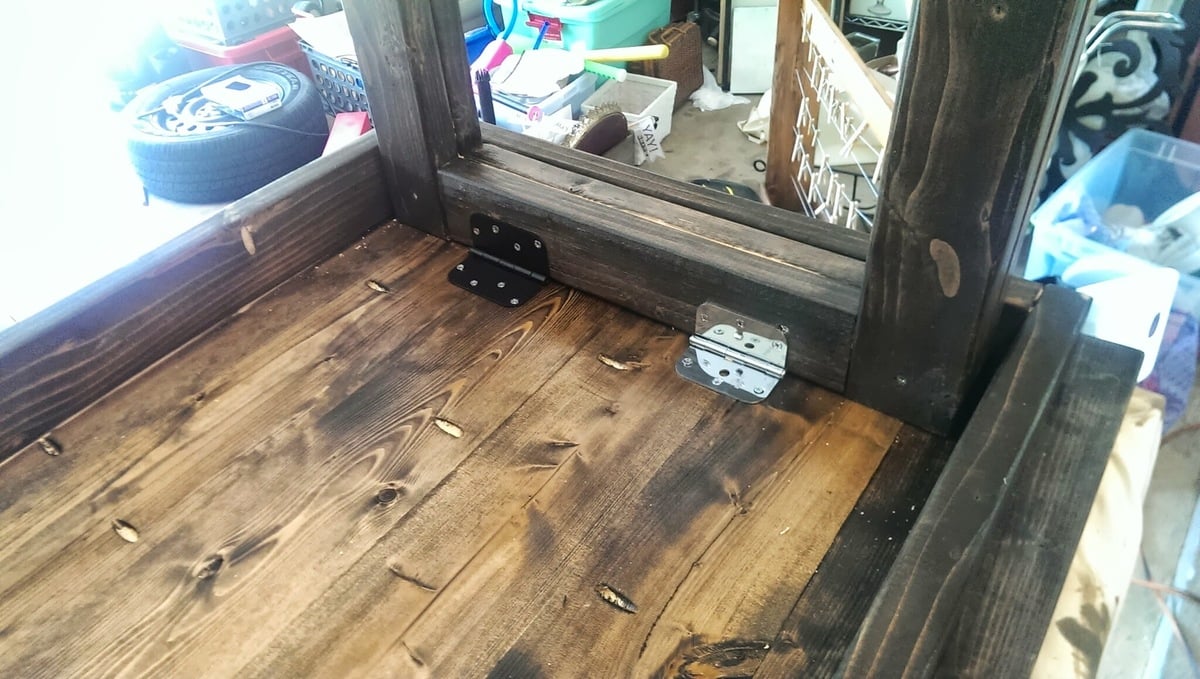
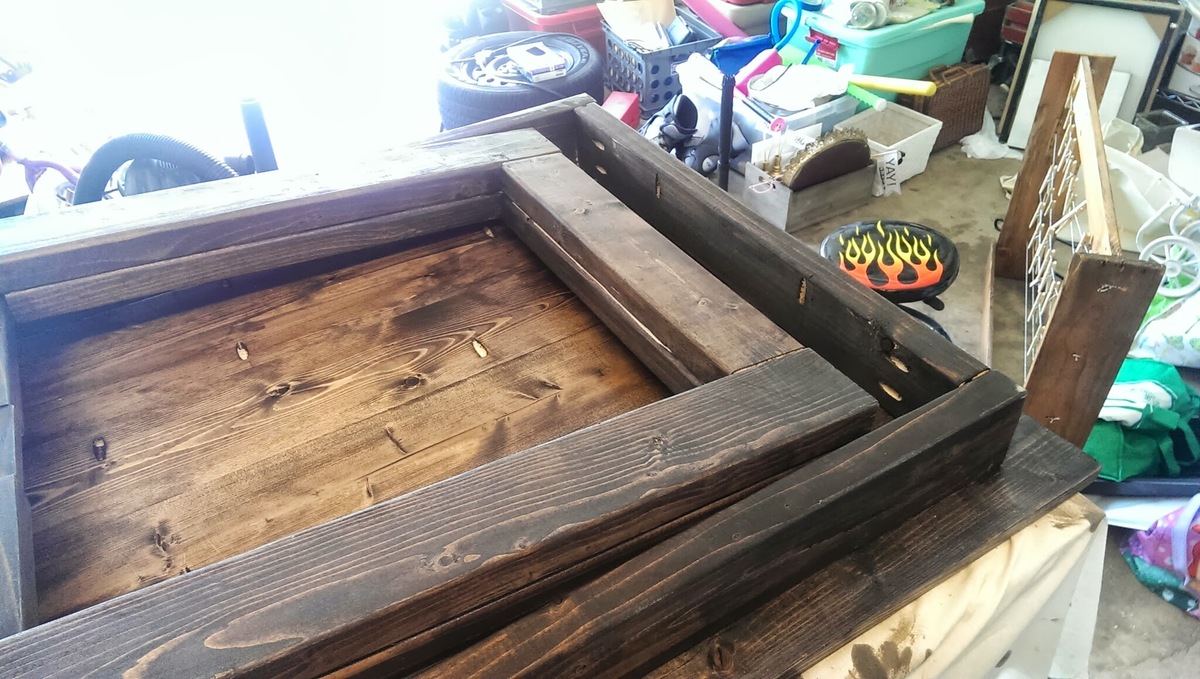
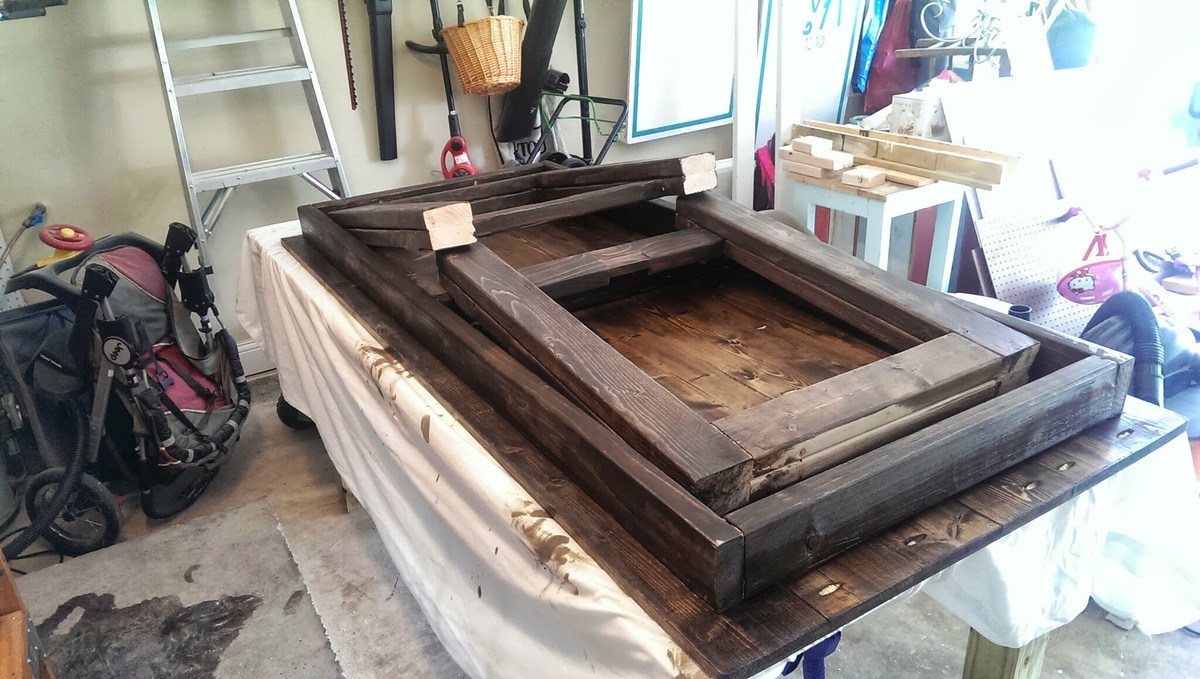
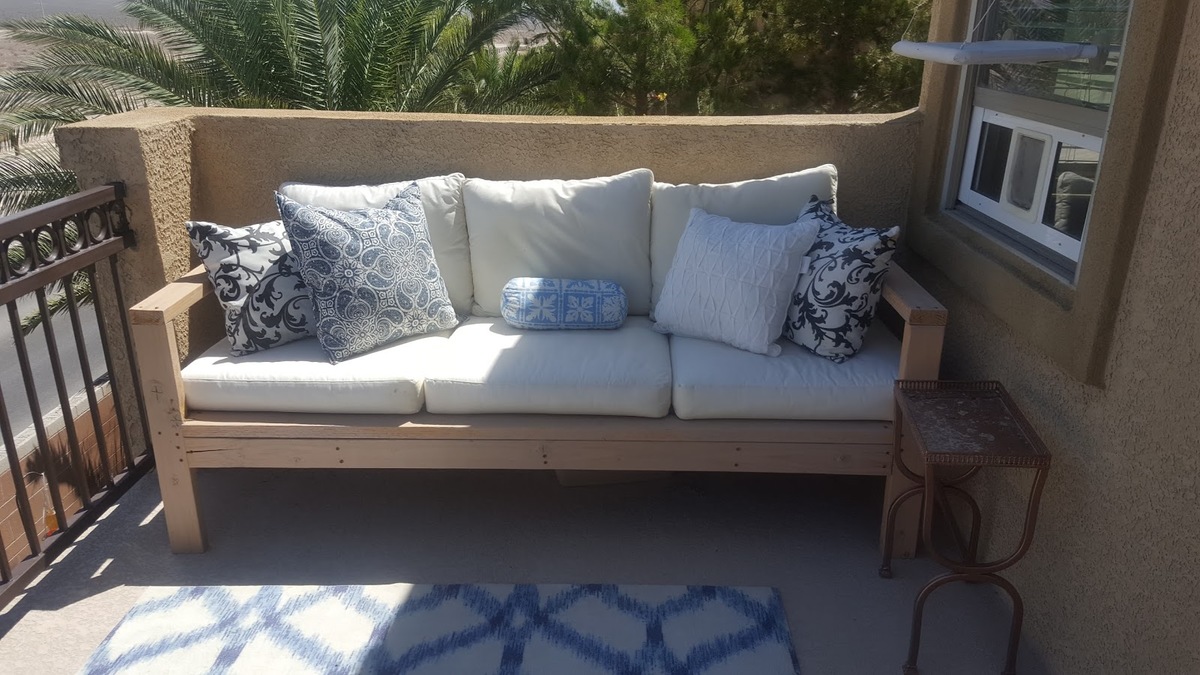
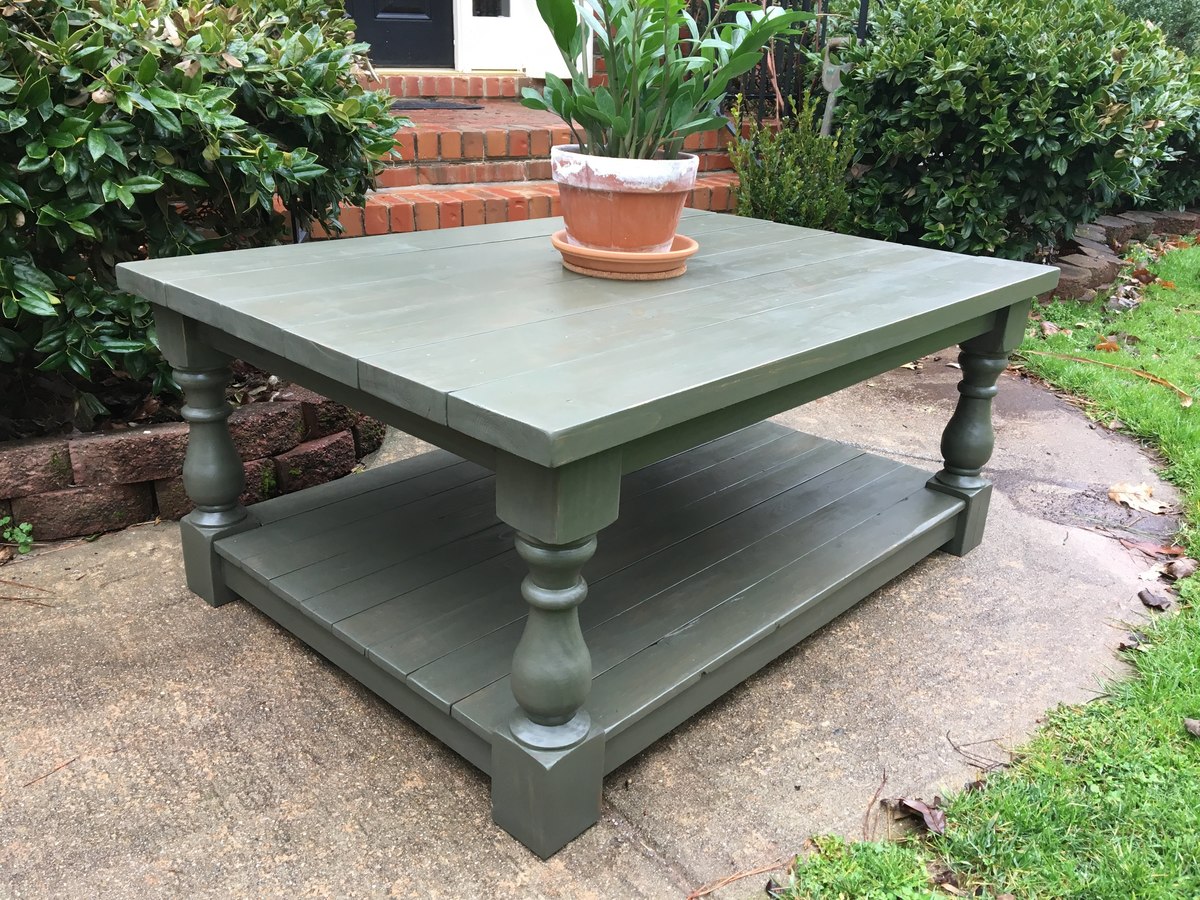
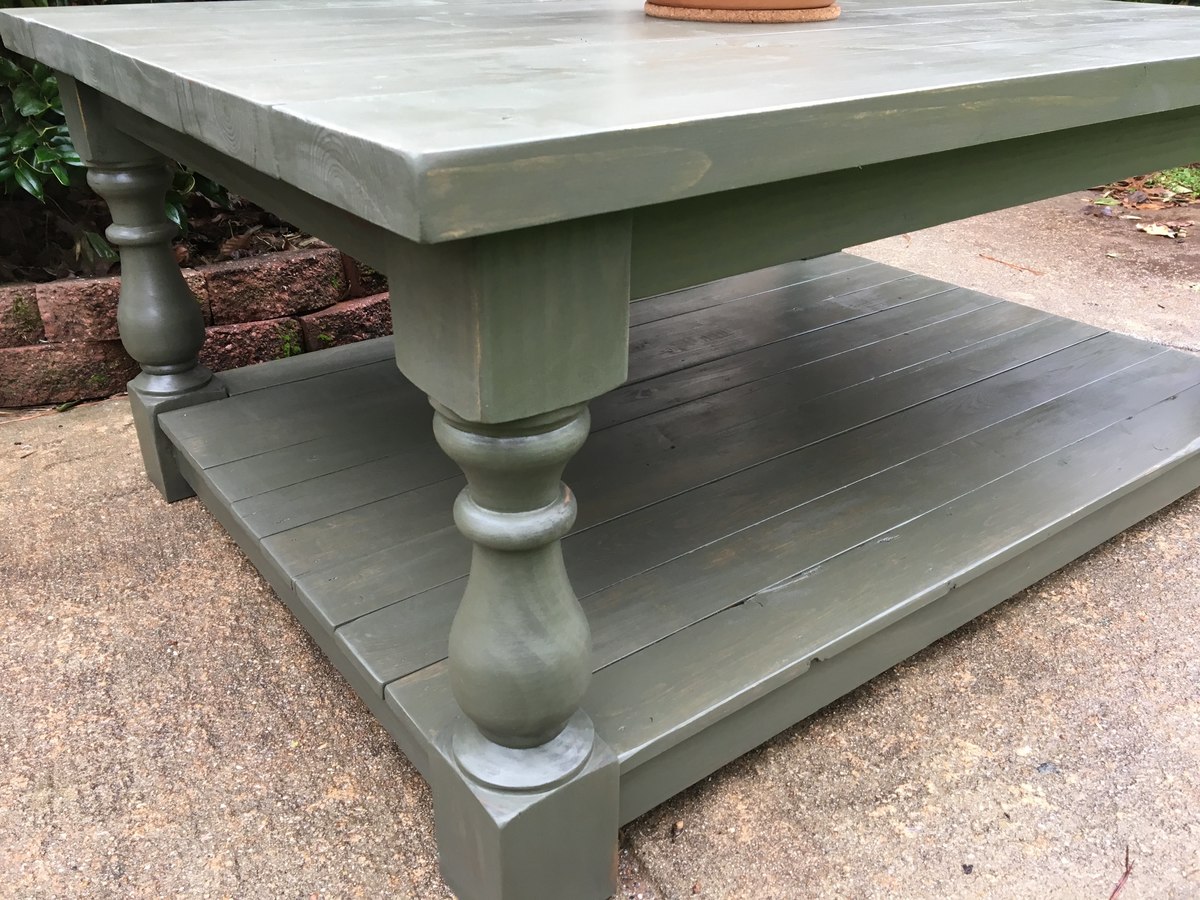
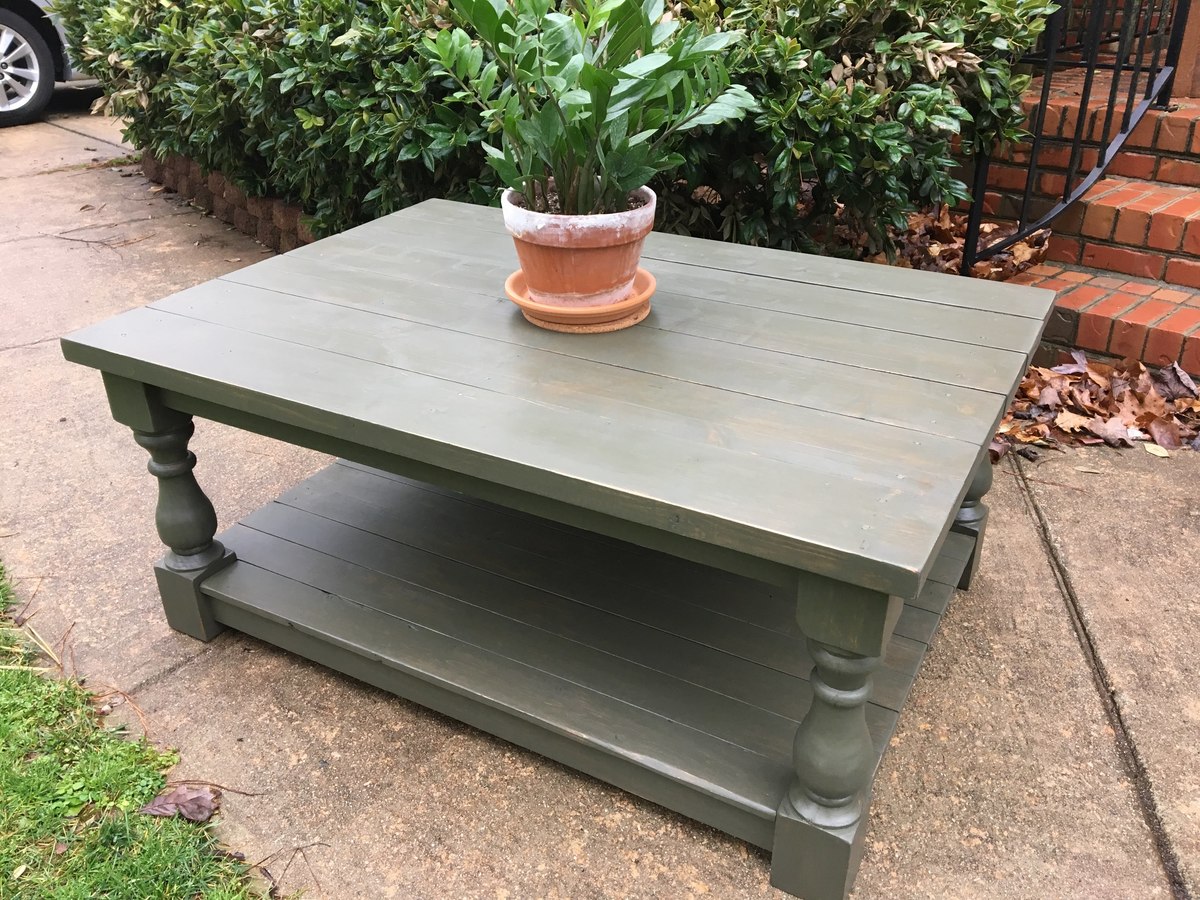
I recently published my first foldable farmhouse table last week here: http://ana-white.com/2013/06/foldable-farmhouse-table The first one I made was very heavy because I used 2x6 tops and 4x4 legs. I decided to make another one that would be lighter and easier to transport. The plans are basically the same just instead I used 1x6 for the top and put 2x4s together for the legs. I also shorted the length by about a foot. The only issue with making the table shorter length is that the legs don't fold completely flush. You could easily make the legs short enough to fold flush, but then the table was a little too short from the ground up for us. The same as before I simply used kreg joints to join the top boards together. I then made a 2x4 frame and attached it to the bottom. I made each of the legs separately by joining 2x4s together and sanding everything down. Everything was stained before putting the legs on using Miniwax Dark walnut stain. I used 2 coats of Miniwax water based clear coat to seal it. A notch was cut out on each of the bottom 2x4 supports on the legs and I glued in a small piece of wood cut to size. These are so I can put in a 2x4 support board under the table so that the legs do not fold in on themselves when it is standing up. The legs are just attached using door hinges you can buy in packs in the hardware section. Be careful when screwing into the 1x6 top not to use too long of screws or else you will over screw and have them come through into your table top. Table design was by Amber Veatch Designs and photographed by Andi Mans Photography

Estimated Cost
120.00
Estimated Time Investment
Day Project (6-9 Hours)
Finish Used
Sand to finish and then used Miniax dark walnut stain followed by Miniwax water based clear coat.
Recommended Skill Level
Beginner

Comments

Freddyflis

Tue, 07/07/2015 - 06:41

We have built something very similar and we have a good bit of wobble at the top, even though the stretcher down the center of the table is holding solid in there and secred with clasps. Were thinking of some sort of sliding pin into the top of the leg to the apron. Anyone run into this before?

Seasonal And Holiday

OUTDOOR SOFA

Decided to build Ana's outdoor sofa for our Master Balcony and love the results. I was a bit impatient to finish the build and therefore did not take the time to use pocket screws for a more finished result, (which I will do next time). Regardless, I love how the sofa turned out and would reccomend for anybody to build. The cheapest outdoor cushions I could find were from Ikea and we spent around $160.

Built from Plan(s)
Estimated Cost
$100 BUILD, $160 CUSHIONS
Estimated Time Investment
Afternoon Project (3-6 Hours)
Finish Used
OUTDOOR STAIN
Recommended Skill Level
Beginner

Modified Miter Saw Cart

Submitted by DavidH on Fri, 01/19/2018 - 20:56

I started with the basic plans and dimensions, then made it my own from there. I added a center shelf, used regular (cheap) hinges and a removable brace instead of the shelf brackets, with stop blocks on the brace cleats to help easily center them. Added 2x4s on the sides to mount the hinges and let the wings fall flush, 2x4s on the bottom to mount 4” casters, 1/4” plywood backing, and 1x3 trim on the front for aesthetics and as a lip to hold items in place. The backing completely covers the lower shelf, and I left a gap to run cables through in the upper shelf backing. Velcro strips on the back hold the wing braces when they’re not in use.  Even though it’s plywood, I sanded everything thoroughly to reduce splinters and snags. 


Built from Plan(s)
Estimated Cost
$100-$125
Estimated Time Investment
Weekend Project (10-20 Hours)
Finish Used
Unfinished
Recommended Skill Level
Beginner

Comments

nzmitchell11

Sat, 02/03/2018 - 08:22

Hi there. I’m planning to use Ana White’s plan to build this miter saw cart but I like some of your alterations like with adding the 2x4s to allow the leaves to fall flush and the 2x4s at the bottom to attach the casters. How did you attach the casters? I have ones similar to yours- plate casters with 4 holes. Did you use bolts or screws? 

Chunky Coffee Table with Turned Legs

Submitted by danicarby on Sun, 02/18/2018 - 06:53

I turned my legs (woot woot!) but you could buy legs that are 3x3" @ 18".  This was a simple build using pocketholes + glue joinery and using glue + nails for the shelf and tops.  To allow for seasonal expansion of wood I spaced the wood on shelf and top slightly because I built it in the dry winter.


I used a Dark Walnut stain first and went back over with a light coat ("dry brushing") of a sage green paint.  Lightly distressed edges.


I have more pictures and details on my website: http://www.theprojectlady.com/2018/02/diy-tutorial-chunky-coffee-table-…


Happy building everyone!  It's so rewarding, right!??

Estimated Cost
$50 for wood
$20 for finish
$5 for screws/nails
Estimated Time Investment
Day Project (6-9 Hours)
Finish Used
Dark Walnut Stain
Behr Premium Plus Indoor Paint
Recommended Skill Level
Beginner

Art Table!

Submitted by Jess1221 on Sat, 06/04/2011 - 09:50

I used the plans for the craft desk and modified it a little. I made the top like a lid that just sits on top so I can take it apart easier. I also put on full extension drawer glides and made the drawer larger. This took me quite a long time because I was working on it and studying for finals! Well worth it though!

Estimated Time Investment
Week Long Project (20 Hours or More)
Finish Used
High Gloss black paint with Jamaican Aqua accent color
Recommended Skill Level
Beginner

Tall Bedroom Dresser

Had a blast with this project and am getting more confident with drawer slides. I built a matching dresser that is much shorter and wider. It can be found here: http://www.ana-white.com/2018/08/DIY_furniture/bedroom-dresser

Estimated Cost
$150-$200
Estimated Time Investment
Weekend Project (10-20 Hours)
Finish Used
Varathane Weathered Wood Accelerator, Varathane Poly
Recommended Skill Level
Advanced

Comments

hutchingslv

Thu, 08/12/2021 - 15:35

Any way to get a copy of these plans? I really like the look and want to give it a shot. Have to make a few of these if all goes well for all my boys.
Thanks

Essential Wood Outdoor Chair Frame for Standard Chair Cushion

Submitted by Anonymous (not verified) on Sat, 11/05/2022 - 14:11

Beginner here and I enjoyed this one quite a bit. I played with the angle of the back and finally perfected it on chair three and four. I put the last bottom slat a little closer to the front to create more of a back angle. I also added a third back support position of the bottom slats are essential for comfort so you’re not sitting on a slat. My cushions need to be a bit thicker because you can definitely feel it. Overall, I enjoyed this project. Longest part was making all the cuts, and then painting because I use the sprayer and had to clean it. Thanks Anna!

Comments

Fireplace with hidden Mantle storage and side bookshelves

Submitted by ibseenu on Thu, 12/01/2022 - 14:30

Thank you Ana for you Fireplace design as it was exactly what I needed! We’ve lived in our house for 3 years now and I’ve wanted a fireplace ever since. Your plan was perfect and with a few modifications I made it come to life. My 9yr daughter as I was almost done building thought there should be a shelf for books and movies below the fire place. It gave me the idea of adding storage on the sides. I had already had the idea of the mantle storage and just used a floating shelf idea and made that. This was a lot of fun!! It took me a little over a week to build. But can’t wait to build something else for our house… like the mudroom!

Amy

Comments

jtemperley

Sun, 01/08/2023 - 19:02

That looks awesome! My husband and I are planning on doing this as well. I do have a question, as I see you have carpet just like us. Did you cut out the carpet where you built out, and if so how did you go about that, or did you just build on top of it?

Window seat built in

Submitted by daliae on Sat, 09/17/2011 - 20:19

I made this two years ago in my daughter's room, before I got to know Ana's site. This was my ever first carpentry project. It took me 4 whole days to finish. The whole wall is like a bay wall so I had to custom make the built in. Also – I did that when my husband was out of town so in order for me to be able to lift all the pieces from the basement to the second floor, I made it of 4 pieces. When my husband came back home he thought I paid someone to built it.

I made it out of 2x4’s and plywood. I trimmed the bottom with a trim.

One day I will add drawers and the cushions are in the making.

Estimated Cost
100 $
Estimated Time Investment
Week Long Project (20 Hours or More)
Finish Used
Primer and two coats of Valspar high gloos White Dove from Lowe's.
Recommended Skill Level
Beginner

Comments

nhoffer

Thu, 06/11/2015 - 20:20

Do you have more pics of the finished product...especially where it meets the angled wall? I don't have a table saw (yet) so I'm trying to figure out if I can handle this without one. :(

Entry Mirror (from The Handbuilt Home)

Submitted by Linda7 on Tue, 10/01/2013 - 14:48

My sister and brother-in-law recently moved to Albuquerque and purchased a home with a wonderful view of the Sandia Mountains. I built them the mirror from The Handbuilt Home (p. 36), and they hung it in the entry hall. The reflection in the mirror is a gorgeous view of the mountain range out of their large living room windows. Because this was not a rustic build, I used better pine boards, sanded very smooth.
Thank you to ANA for the great plan (and book!). Also a great big hug to JOANNE and TRACY for responding so quickly to my query regarding attaching the mirror to the frame. I ended up having the mirror company attach the mirror with silicone because I was afraid mirror clips would mar the smooth, shiny surface of the wall. We also covered the back of the mirror with craft paper, contact cemented to the frame to protect the mirror silvering.
This was a fun build, and my sister and b-in-law are very pleased with it.

Built from Plan(s)
Estimated Cost
Around $75.00
Estimated Time Investment
Weekend Project (10-20 Hours)
Finish Used
Minwax Express Color "Crimson", two coats, followed by four thin coats of gloss poly, sanding between coats with fine grit.
Recommended Skill Level
Beginner

Comments

JoanneS

Tue, 10/01/2013 - 18:11

Linda, your mirror looks fabulous! The finish is just gorgeous, and I love the hardware you used. Beautiful build! :)

Linda7

Tue, 10/01/2013 - 18:20

Thanks for the nice complement, Joanne. I really do appreciate your help!

Garage shelving unit

We made this peace 12 feet long, the hardest part was to find straight boards at home depot and adjust the feet because of an uneven garage floor. It was my first big project and hubby helped so I can't take all the credits :)

Estimated Cost
$126
Estimated Time Investment
Afternoon Project (3-6 Hours)
Finish Used
Unfinished
Recommended Skill Level
Beginner

2x4 sectional

Submitted by Anonymous (not verified) on Sun, 02/26/2023 - 05:49

After building my workbench and some shelves to organize my makeshift wood shop, I went online to find practical first projects. Stumbled upon the Ana White site and really liked the simplicity of the pieces and the thoroughness of the plans (cut list, pictures, etc). Had the wood dimensioned at a local lumber yard and started building. Upon completing the first bench - sealed with a tinted Thompson’s water seal - found a local upholster to make the cushions. Now to find a place to put them that the wife approves. Build already approved by the pup (see last photo).

Comments

Seasonal And Holiday

sectional and chairs!

Submitted by Anonymous (not verified) on Mon, 04/03/2023 - 13:57

my husband and I used your plans for the sectional, end tables and chairs I made the pillows thanks so much for the designs we love them

Comments

Back Yard

Submitted by Anonymous (not verified) on Mon, 05/15/2023 - 08:32

This is my homemade backyard inspired by plans from Ana. Used Ana's previous post to build all pieces. Stained in Mission Oak and bought pillows from Lowe's. Succulents from a local nursery.

Coffee Table
2 piece lounge
2 chairs
Ice chest
Planter Box

Comments

Planters

Submitted by Anonymous (not verified) on Fri, 05/26/2023 - 07:47

Hi Ana. Been a fan of yours. My name is Ed. Wood working is my hobby. And its always nice to look at your plans, and put my own spin on it. My wife wanted a planter for our deck. So I tweaked your plans and made them a little bigger. I Also built her a herb garden too. With these new planters; it should put a stop to the rabbits eating everything.

Thanks for your inspiration.

Comments

Complete Full Sized Hailey Bed and Storage System

This project was our largest build to date, but the outcome was definitely worth the sweat! The build went relatively fast between my mom and I. I had a little problem assembling the tower bases, but we'll blame the 108 degree heat on my inability to figure out where to place my Kreg holes! I included a picture of how I did the tower base, in case anyone else runs into the same issue.

To accommodate for our base boards we added furring strips to the wall to bring all of the pieces flush. The hutch is secured into the studs with multiple L-brackets and so are the towers.

Finishing was very time consuming, but we'll worth the end result and look on my daughter's face! This system provides an incredible amount of storage. Thank you so much for the plans Ana!

Estimated Cost
$350
Estimated Time Investment
Week Long Project (20 Hours or More)
Finish Used
*All visible edges of the MDF were sealed with a mixture of white school glue & water, sanded and repeated until they were smooth.
*3 very light coats of Zinsser oil based primer with a foam roller, sanding between each coat
*2 coats of Behr Hi-Gloss lacquer in off the shelf white. Finishing was definitely the most time consuming part of the project.
Recommended Skill Level
Intermediate

Barn Door Garage Storage

Submitted by MommaBlue on Wed, 10/09/2019 - 07:13

I adapted this build from the Barn Door Entertainment Center plan.  Like most families, our storage space needed some major help!  We had minimal space to work with and all sorts of awkward things to store (rollerblades, helmets, etc).  I measured how deep I needed the shelves to be to fit our helmets and pretty much built around that!

The open shelves are great as they allow easy storage spots for the kids to reach - the doors are great because they allow me to hide the stuff that just never seems to get organized!  And the best part?  The sliding barn doors!  I park next to this thing so not having a swing out door was a major win for me!

I left the center of this piece open so I could fit a stand I already had in our garage, which allowed for a “charging station” for the cars!  Our garage is rustic theme so on this piece I went with standard common board for the walls and shelves and built the trim and doors from cedar.  The entire piece is stained with Minwax Provincial.  

Built from Plan(s)
Estimated Cost
300
Estimated Time Investment
Weekend Project (10-20 Hours)
Finish Used
Minwax Provincial
Recommended Skill Level
Intermediate

Comments

Faux Fireplace with Storage

Submitted by Anonymous (not verified) on Mon, 10/28/2019 - 16:33

Went with a black, high gloss finish which I sanded down with 220 grit sandpaper to soften the look. Cut up a birch tree from the backyard, back-lit the logs with two strands of orange Halloween lights from the dollar store (we drilled a hole in the bottom back for the plug for the lights).
Added a remote extender so we don't have to open the front middle door in order to operate our streaming devices.
Love to be able to decorate this for the holidays--can hardly wait for Christmas!

Estimated Cost
$250
Estimated Time Investment
Weekend Project (10-20 Hours)
Finish Used
Black high gloss
Recommended Skill Level
Intermediate