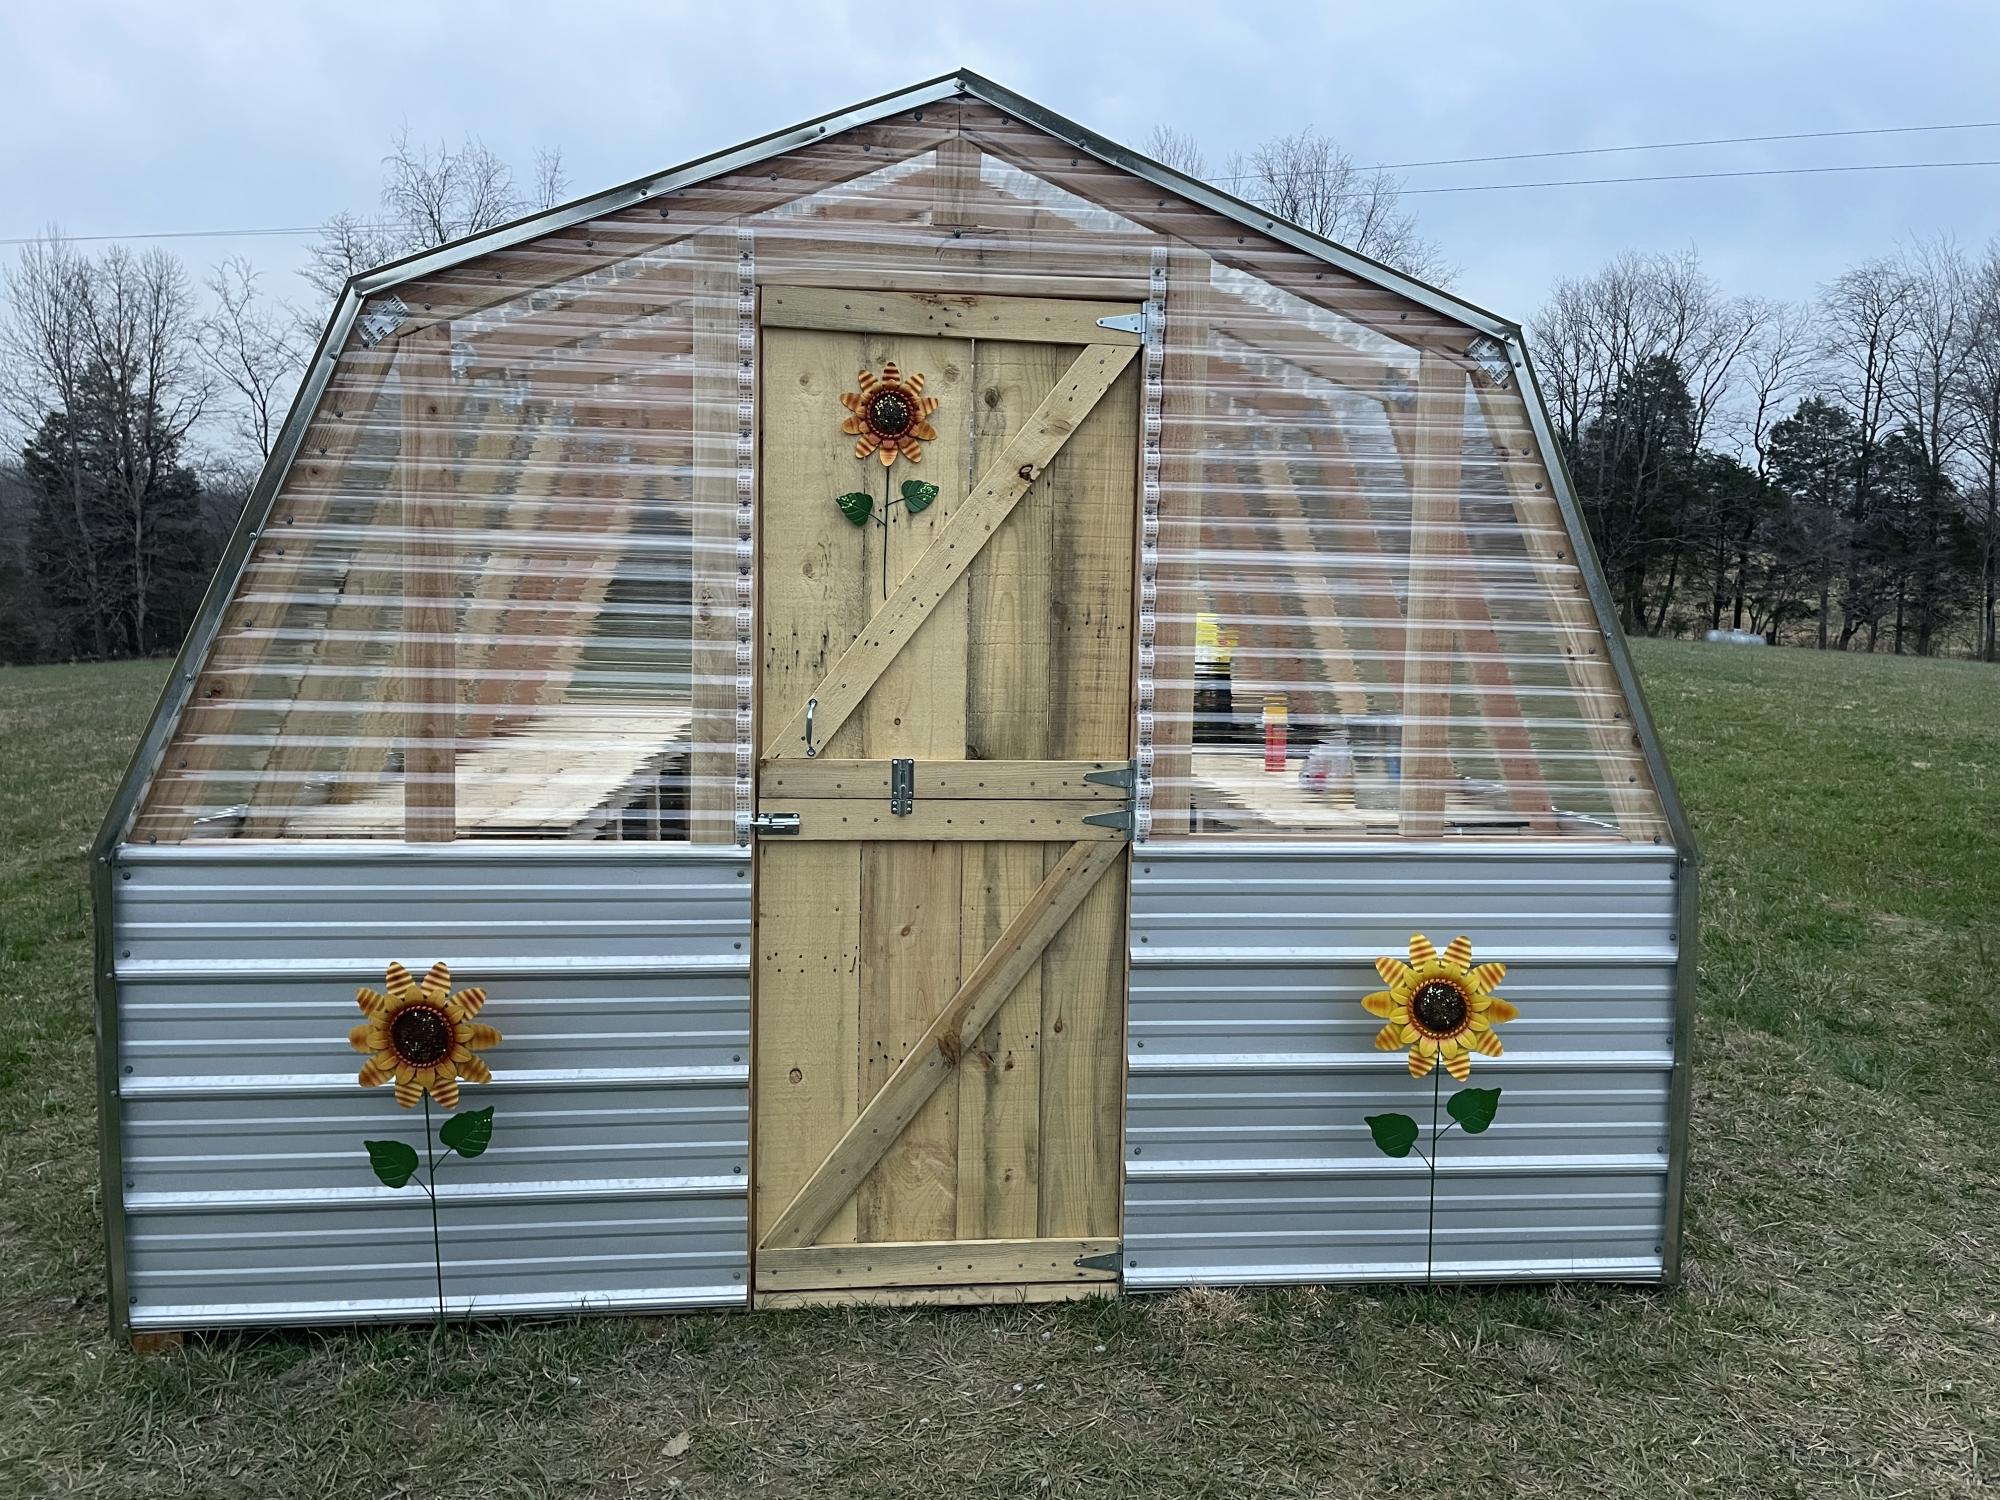
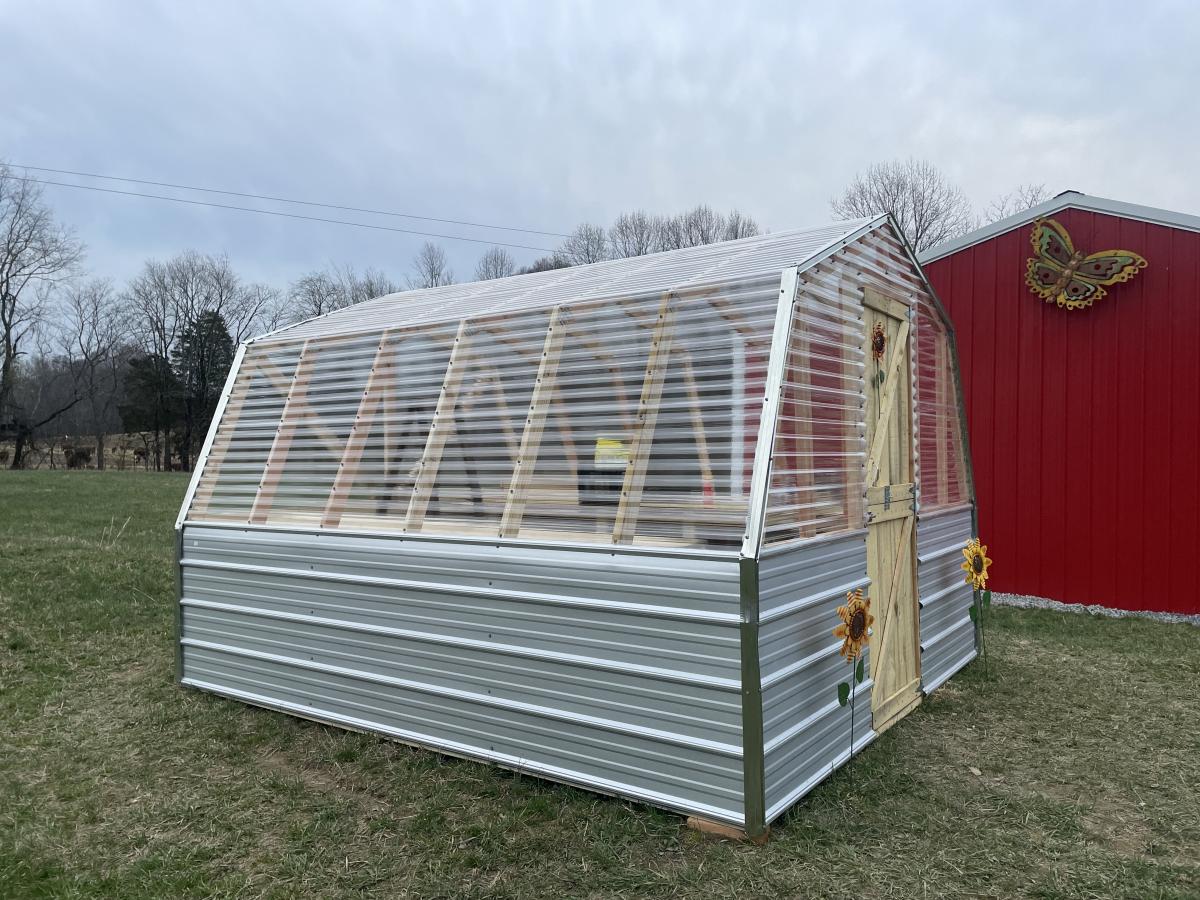
8x10 Shed - Built by Julia Eliopoulos
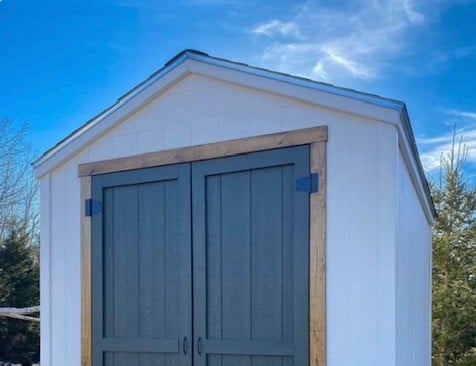
I made your 8x10 shed! Turned out so well, thank you for the amazing plans.
Julia Eliopoulos

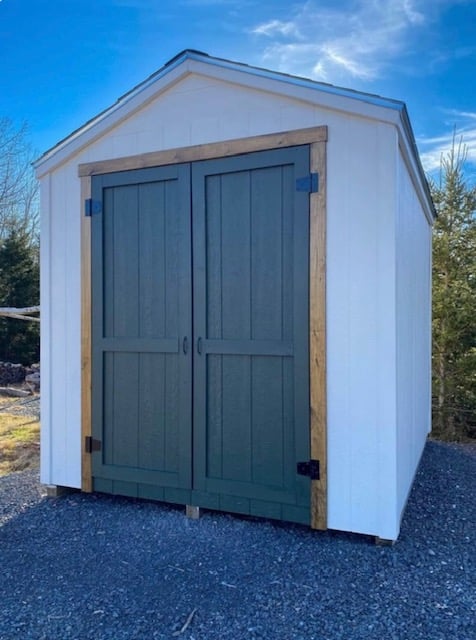
Built from Plan(s)
I made your 8x10 shed! Turned out so well, thank you for the amazing plans.
Julia Eliopoulos
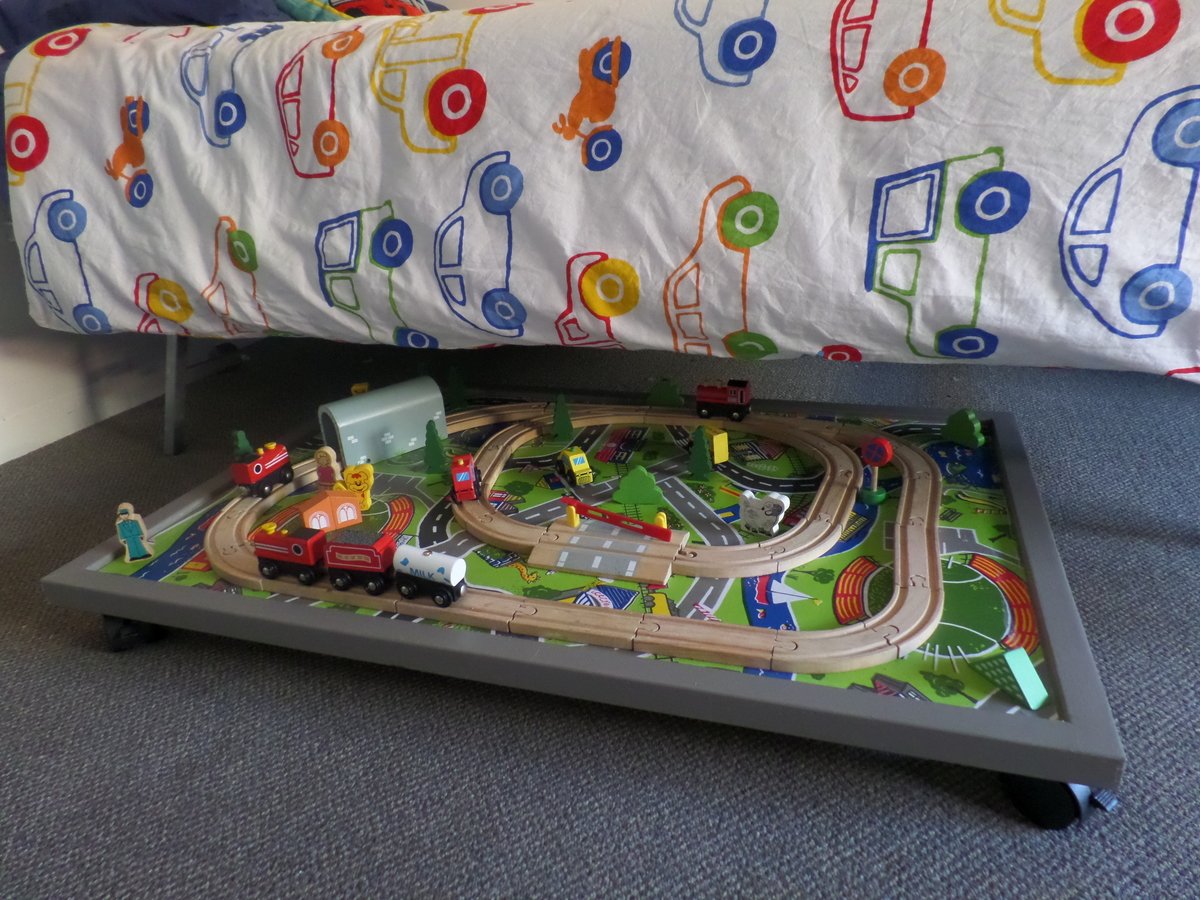
I actually made this before I came across your plans! My son loves it and i love that he can 'play and roll away!'

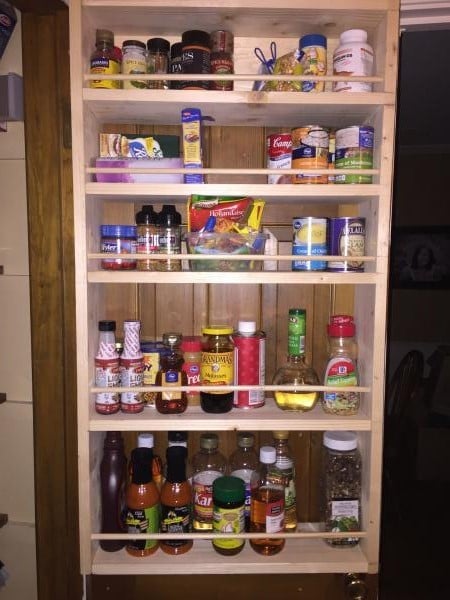
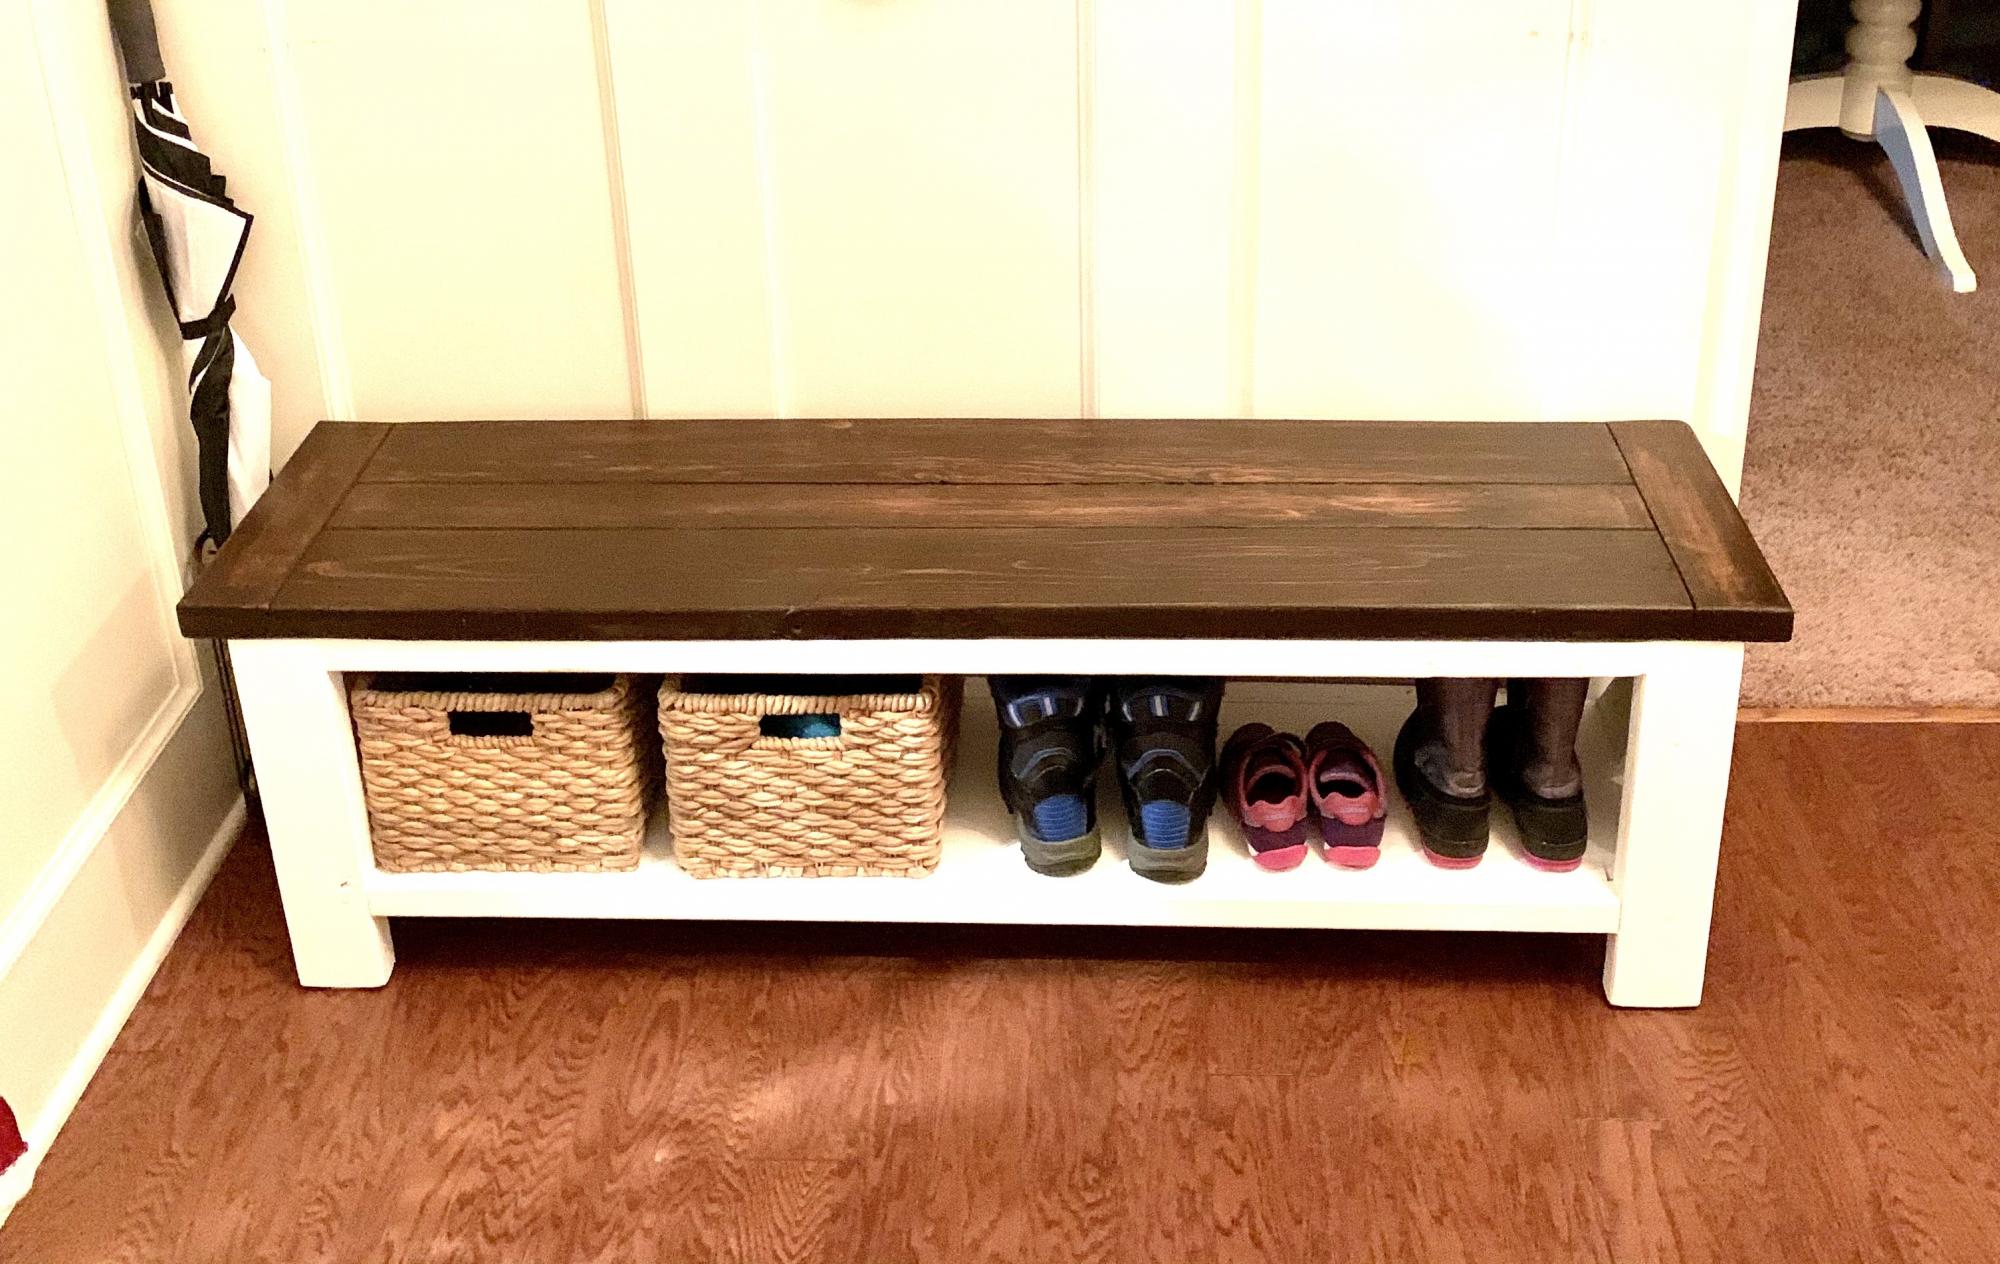
I changed the original plan a little so it would hold bigger items in the bottom shelves
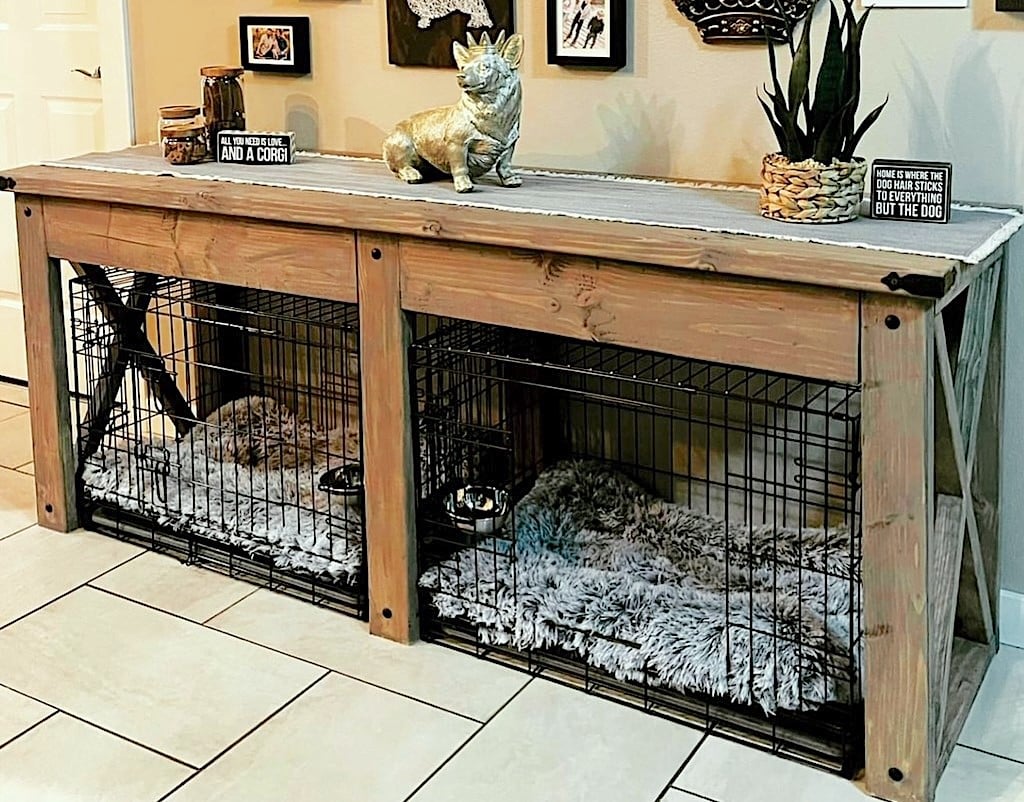
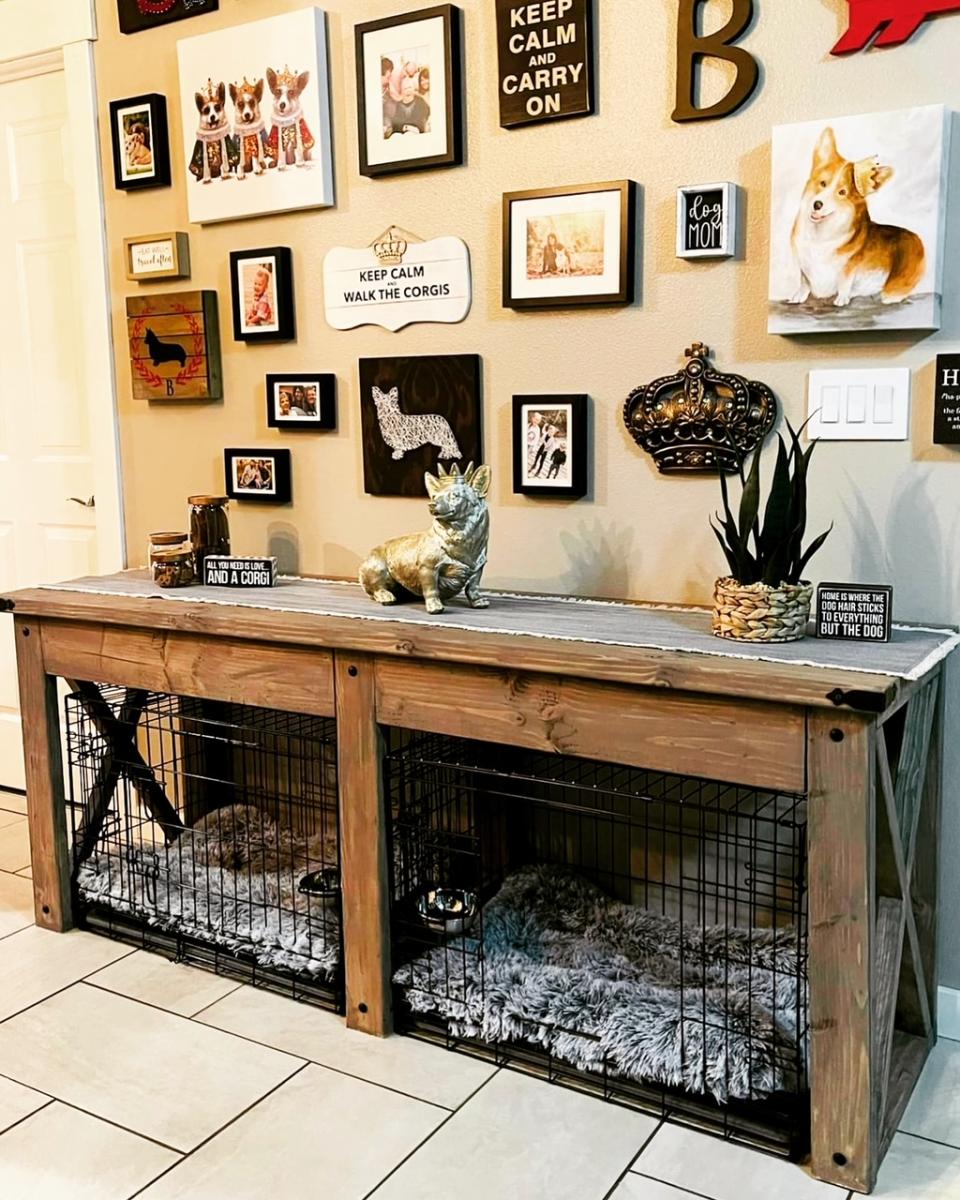
"I modified the Farmhouse X Console to become a surround for my dog crates. Thanks for the project plan!"
Sheena
Thank you so much for the plans. We enjoyed building it. We love it!!!
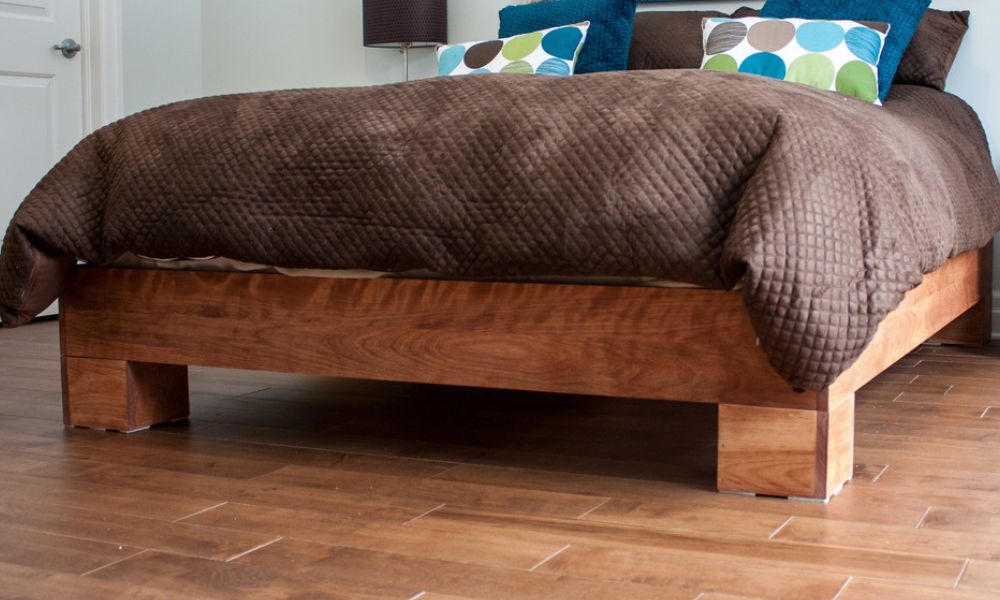
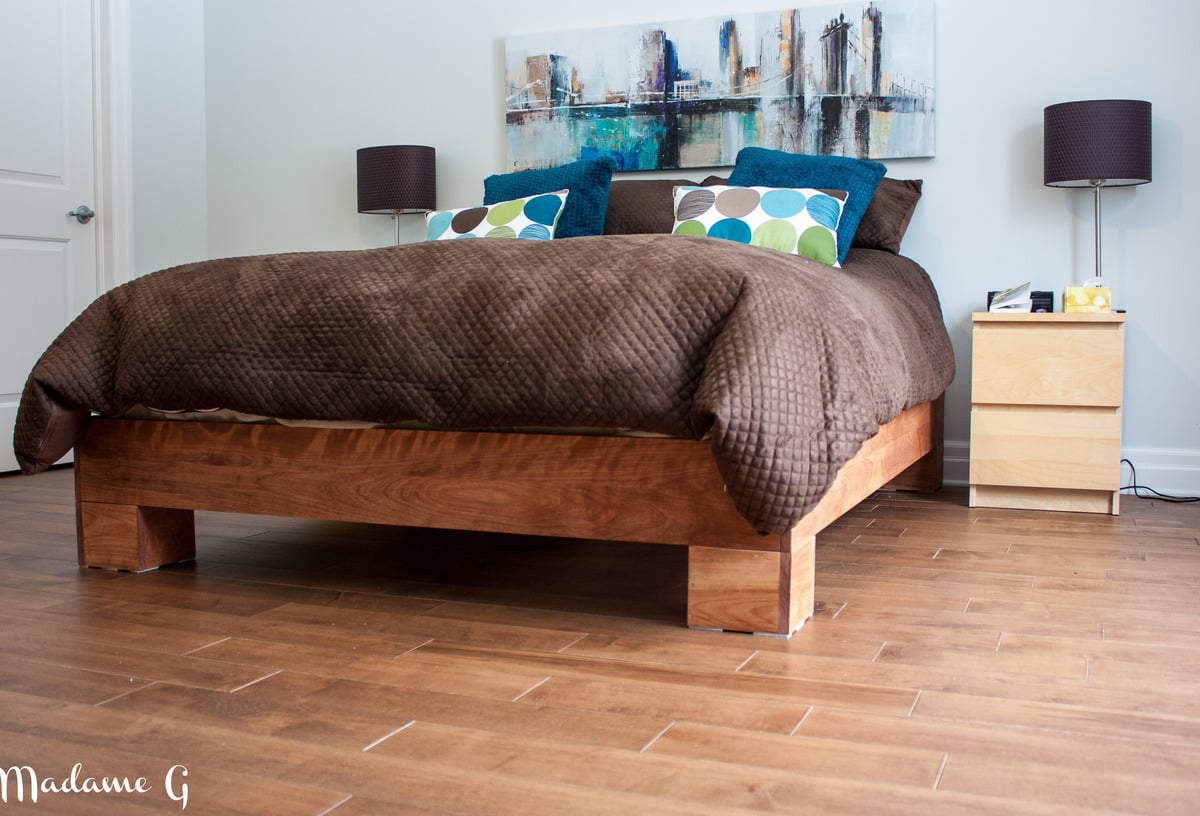
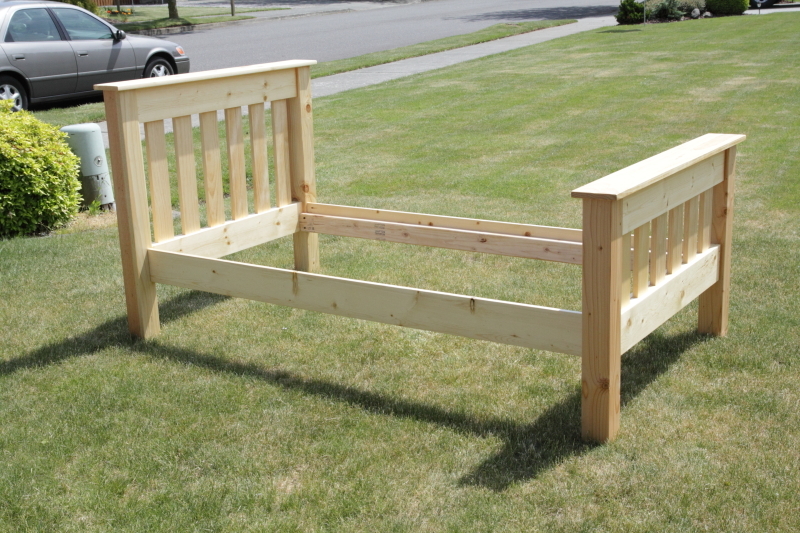
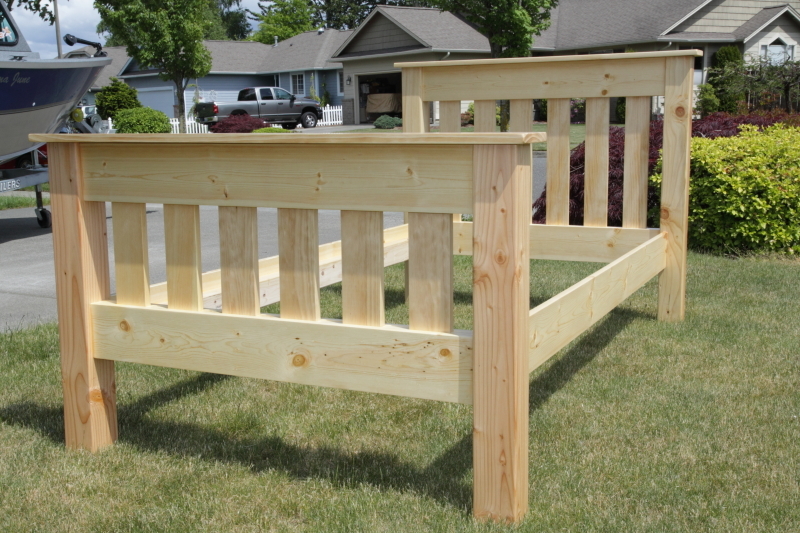
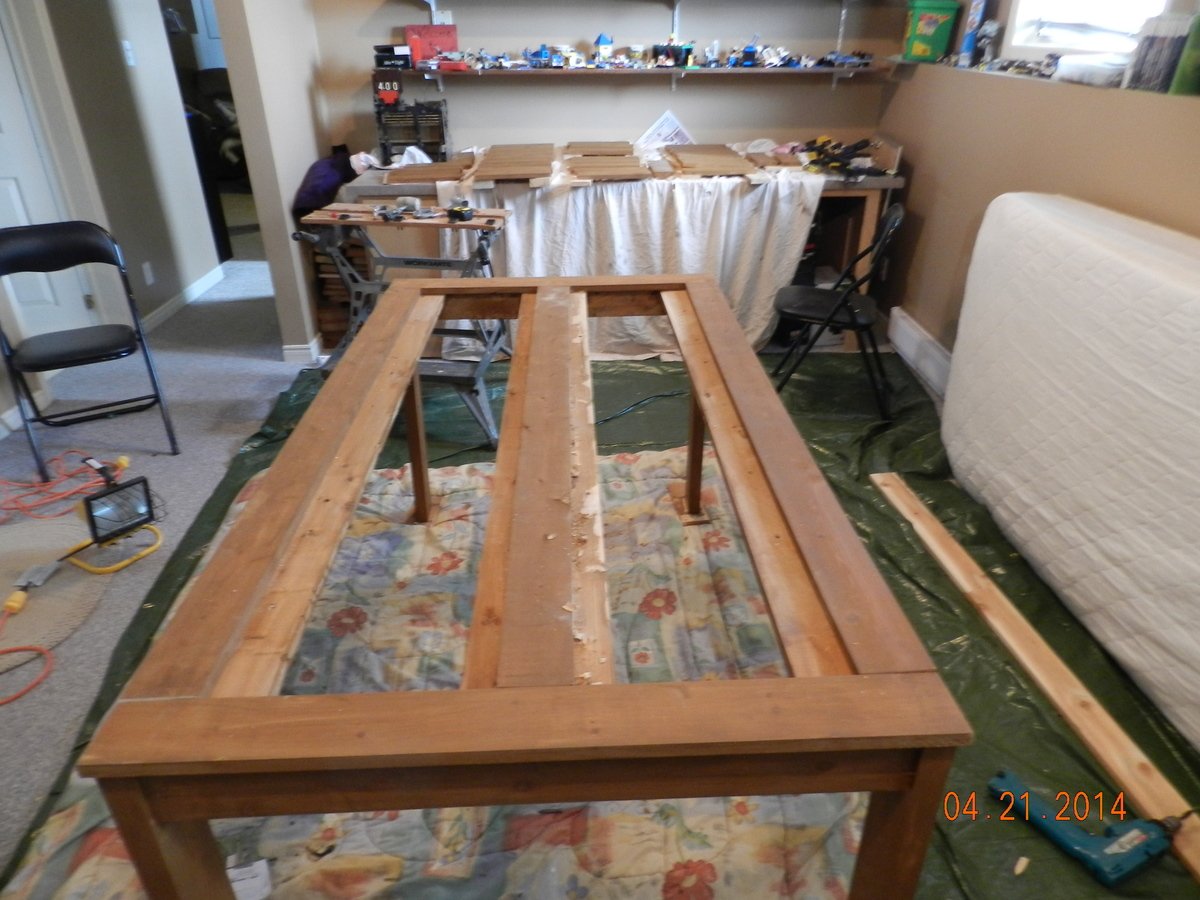
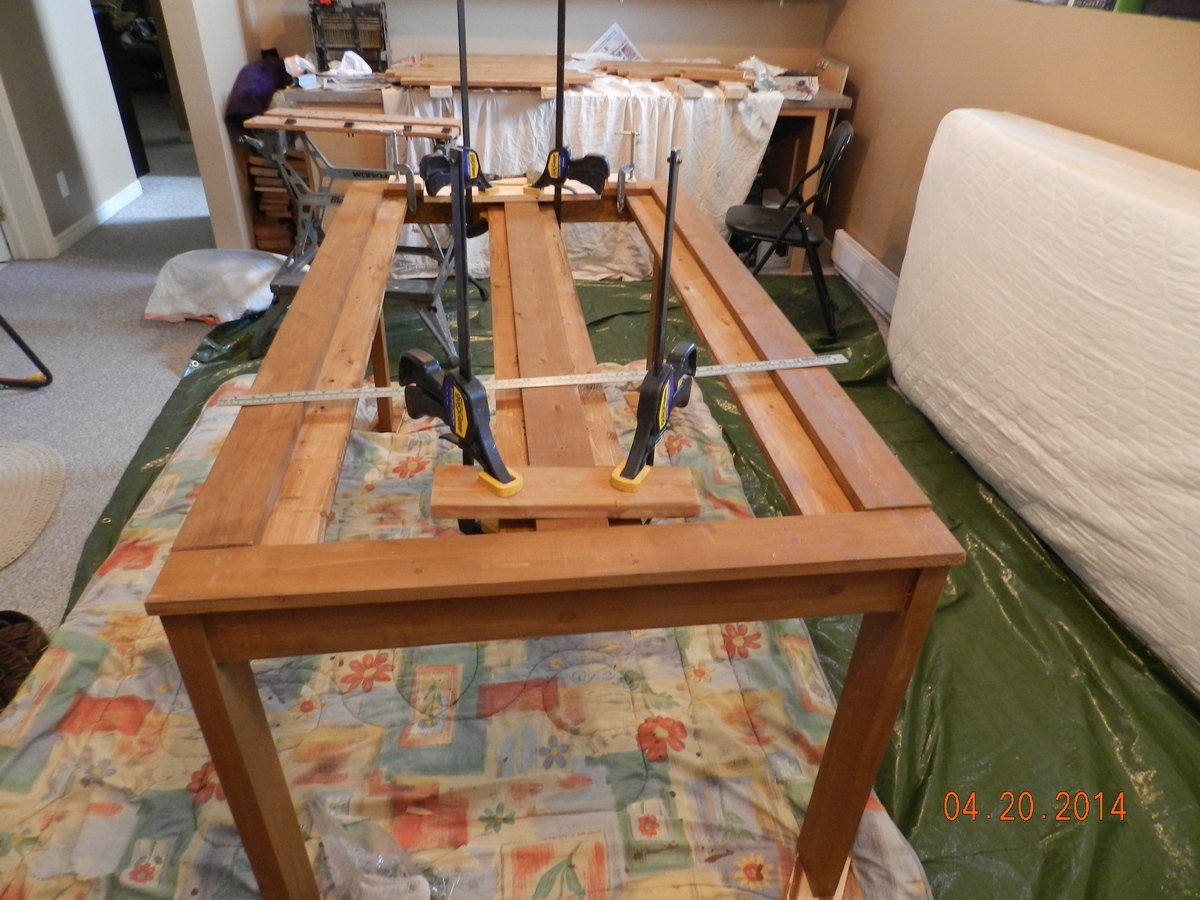
This is my first build and im really proud of it. We needed a new platform bed to fit our new matress! Yeah! a queen size bed! I discovered ana's blog and i got really inspired by all the projects in the blog! For the construction, i used birch for the showing parts, pine for side rails and center support and spruce for the slats. Actually, i haved cut de sides and builded the legs then i oiled evething before assembling. I used my Kreg Jig r3 to join the sides and i used a corner metal bracket to join the legs to the sides! Everything is attached from the inside, so no filler needed! I also decided to use 1x6 for the legs to get a taller bed. If you want your matress lower in the frame use 2x4 instead of 2x6 for the center support. Adjust de side rails to fit with the 2x4. Can't wait to build something new! FYI: I know my english is bad but its not my first language!Im french canadian!


Sat, 02/18/2012 - 08:17
Your bed looks good! It makes a nice focal piece for the room.
Your English is fun to read!
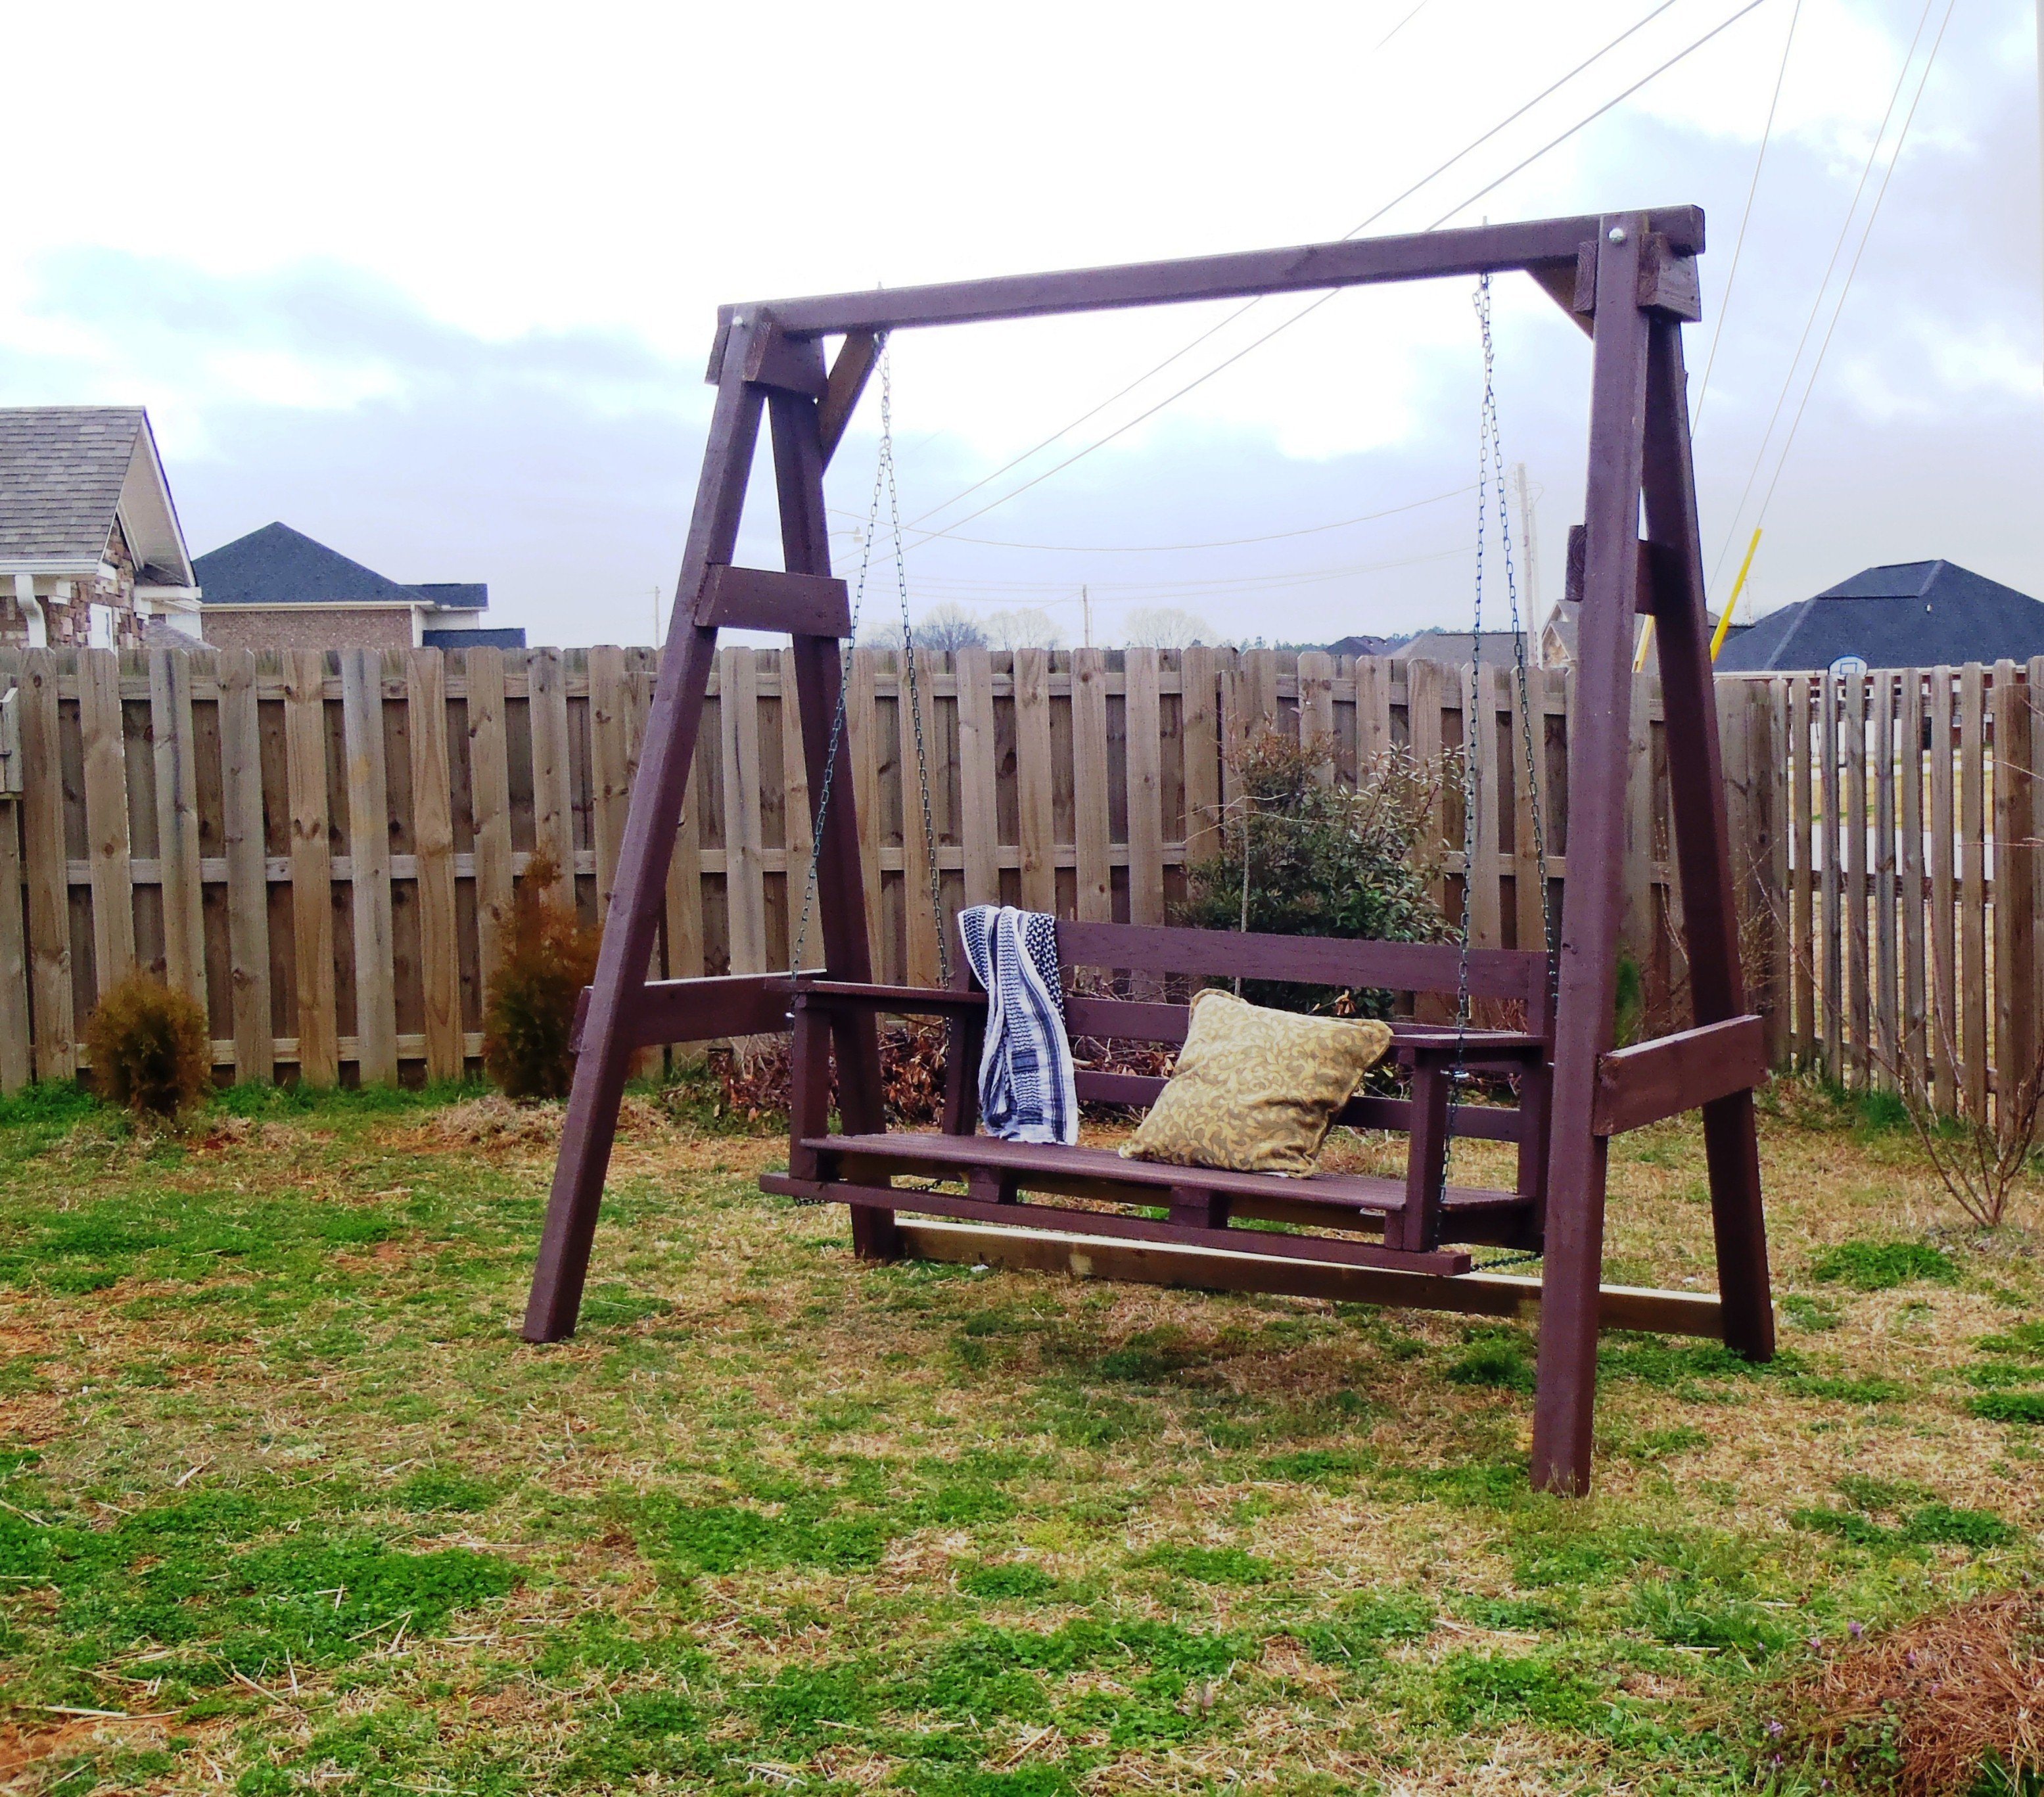
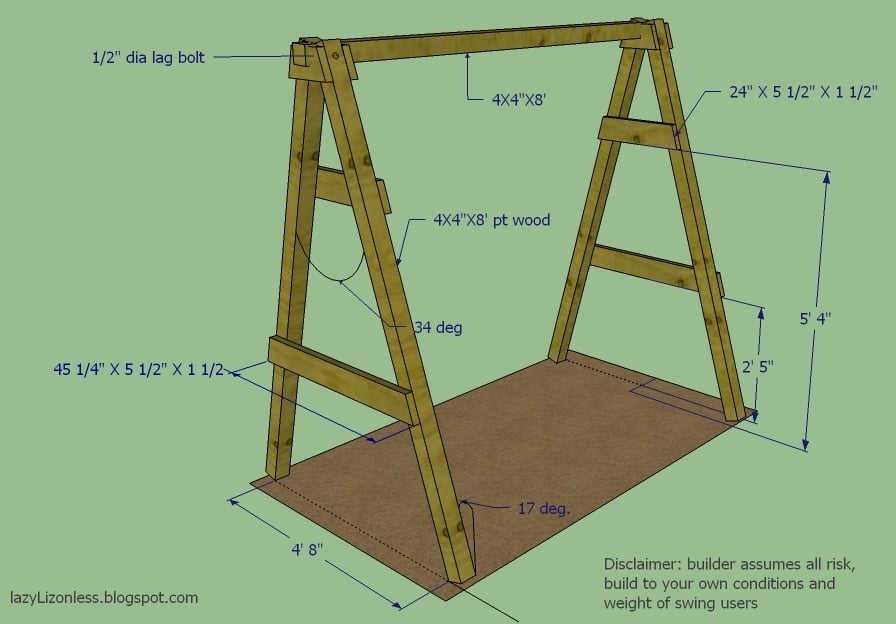
I've finished my swing but my porch don't have enough clearance so I built A frame stand for it.
Fri, 03/02/2012 - 07:09
You did such a great job on your swing! I hope I can build up to making one someday.

In reply to I love this swing! by beachmama79
Thu, 05/10/2012 - 14:02
Thanks and you will. I just added the dimensions in case
Fri, 04/19/2013 - 15:37
I love the idea of adding the A-frame considering that where i live there are no real trees to hang it on and building a porch where one doesn't already exist is a pain in the butt! Lol. How wide do you think we could go before it starts compromising the frames integrity? And how much weight can it hold?
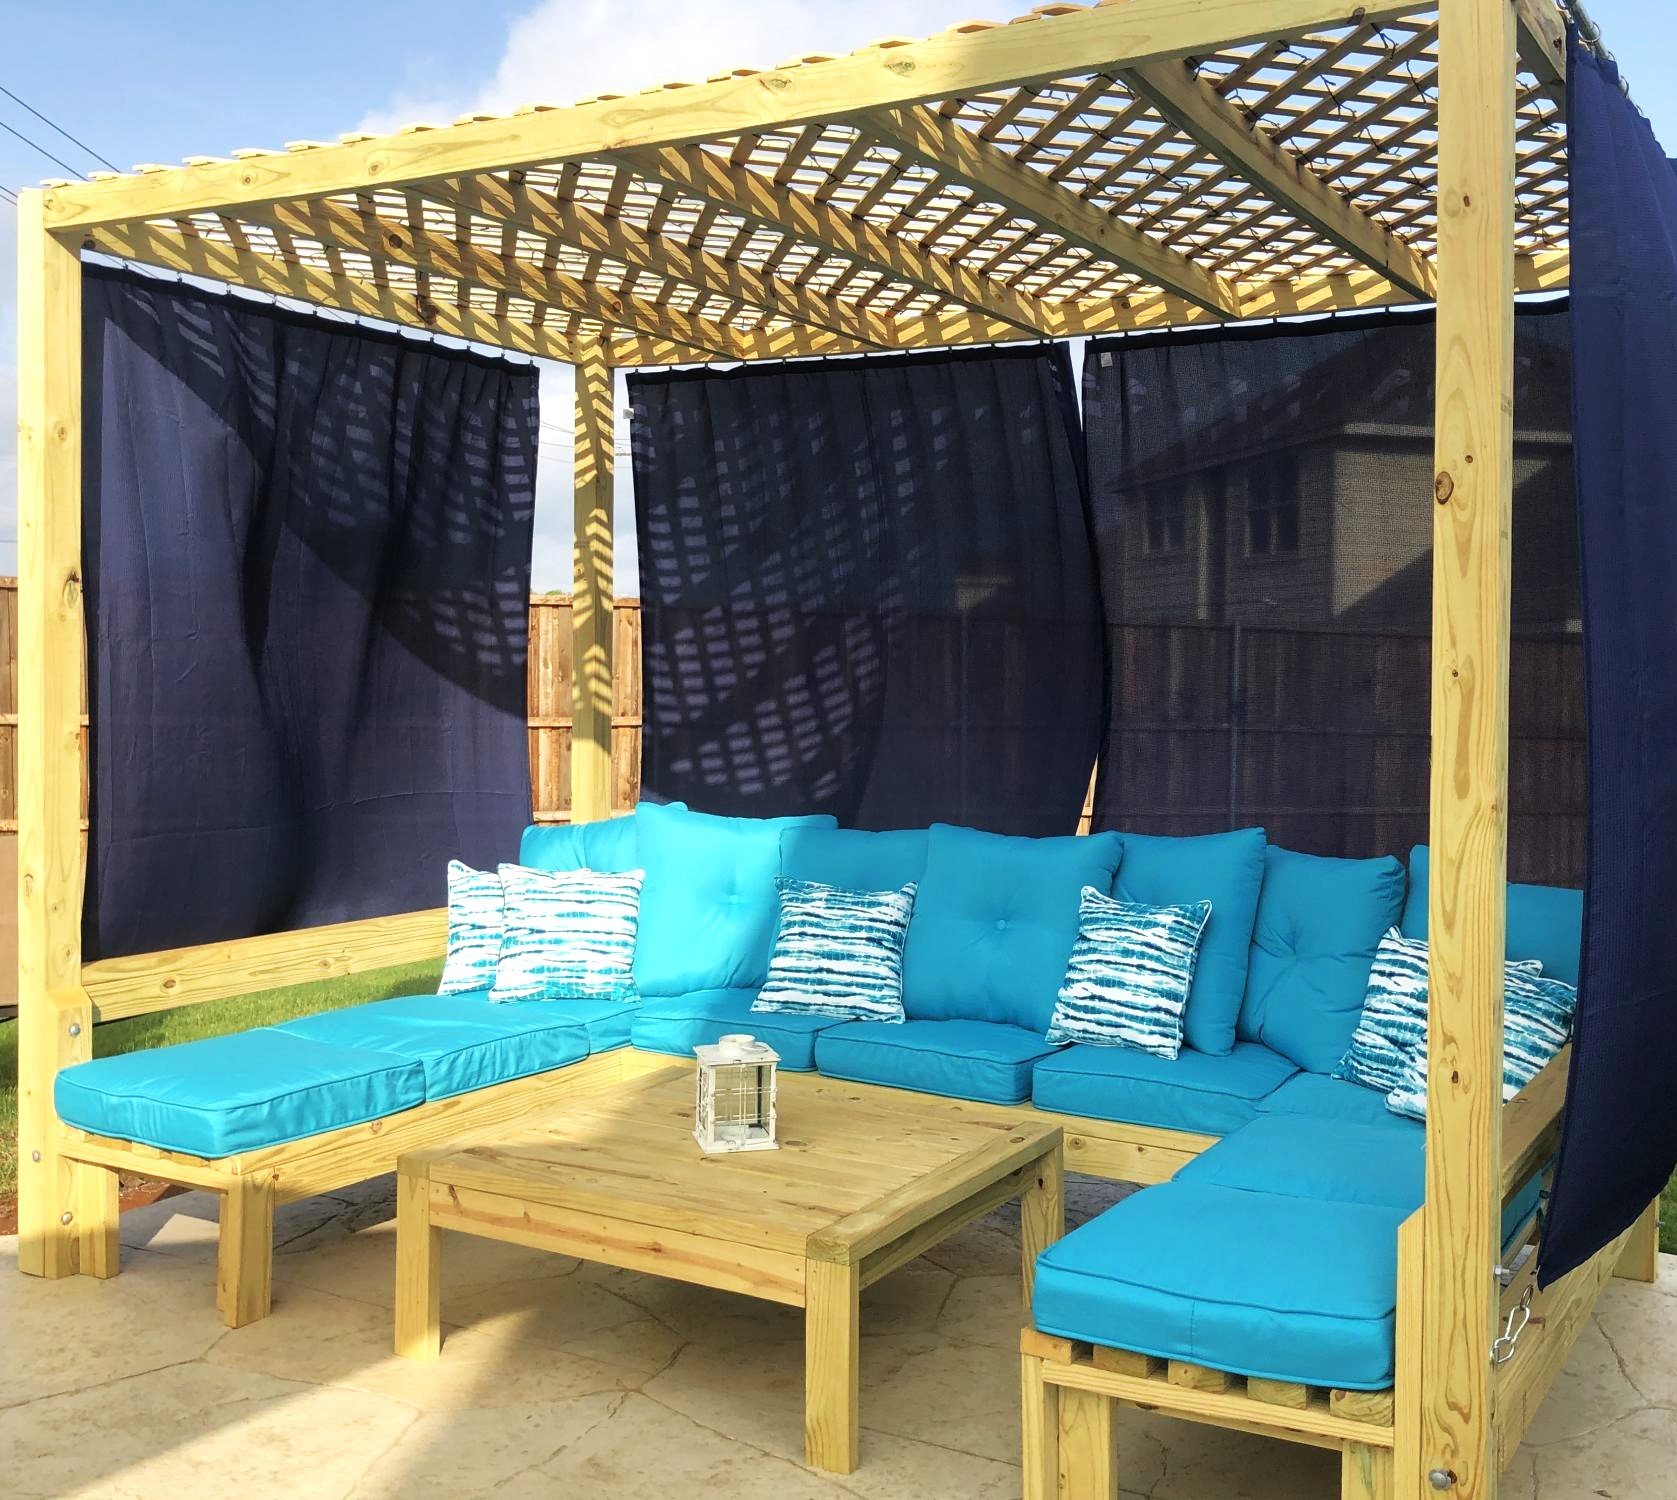
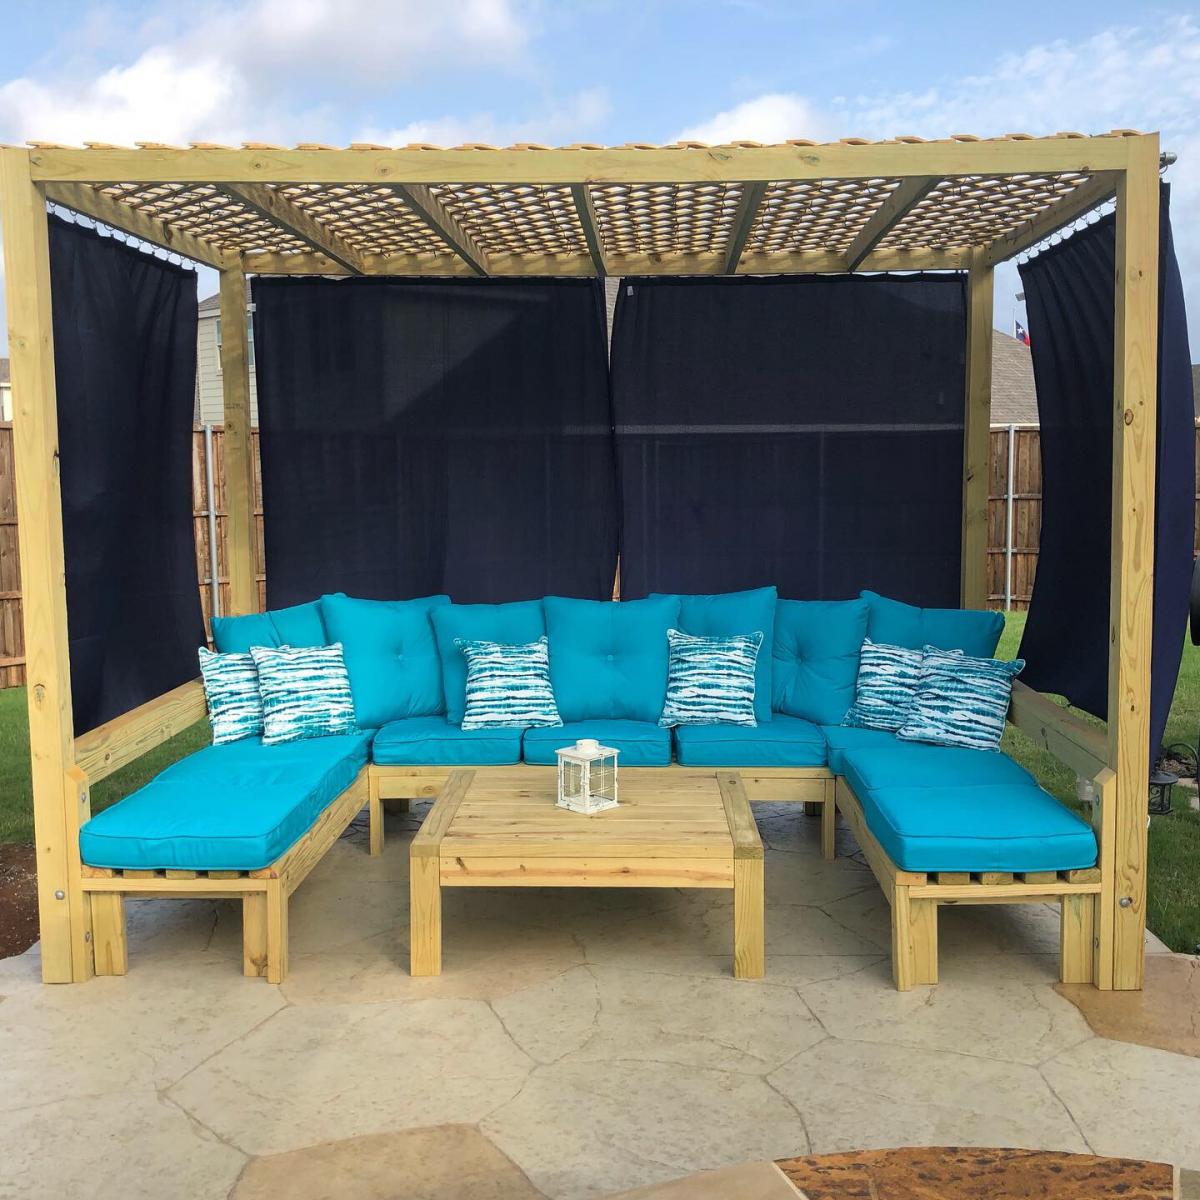
I wanted a huge cabana for my outdoor pool area to have a place guests could kick back and relax if they weren’t swimming. I took the plans from the one arm and armless outdoor sofas and modified the plan to include posts and a lattice top for shade. This inspired plan was finished off with cushions from at home and features seating comfortably for 9. Everyone loves this area in the backyard to kick back! At night we have solar lights twinkle at the top and they complete the project perfectly with a soft twinkle.

Fri, 06/02/2023 - 11:21
This is amazing! Great work on this project, thank you so much for sharing photos!
Made 2 changes to the plans which was using a 2 x 4 as a center top board to add some variety to the board width and also decided to go with breadboard ends which also used 2x4
Thanks for the plans!

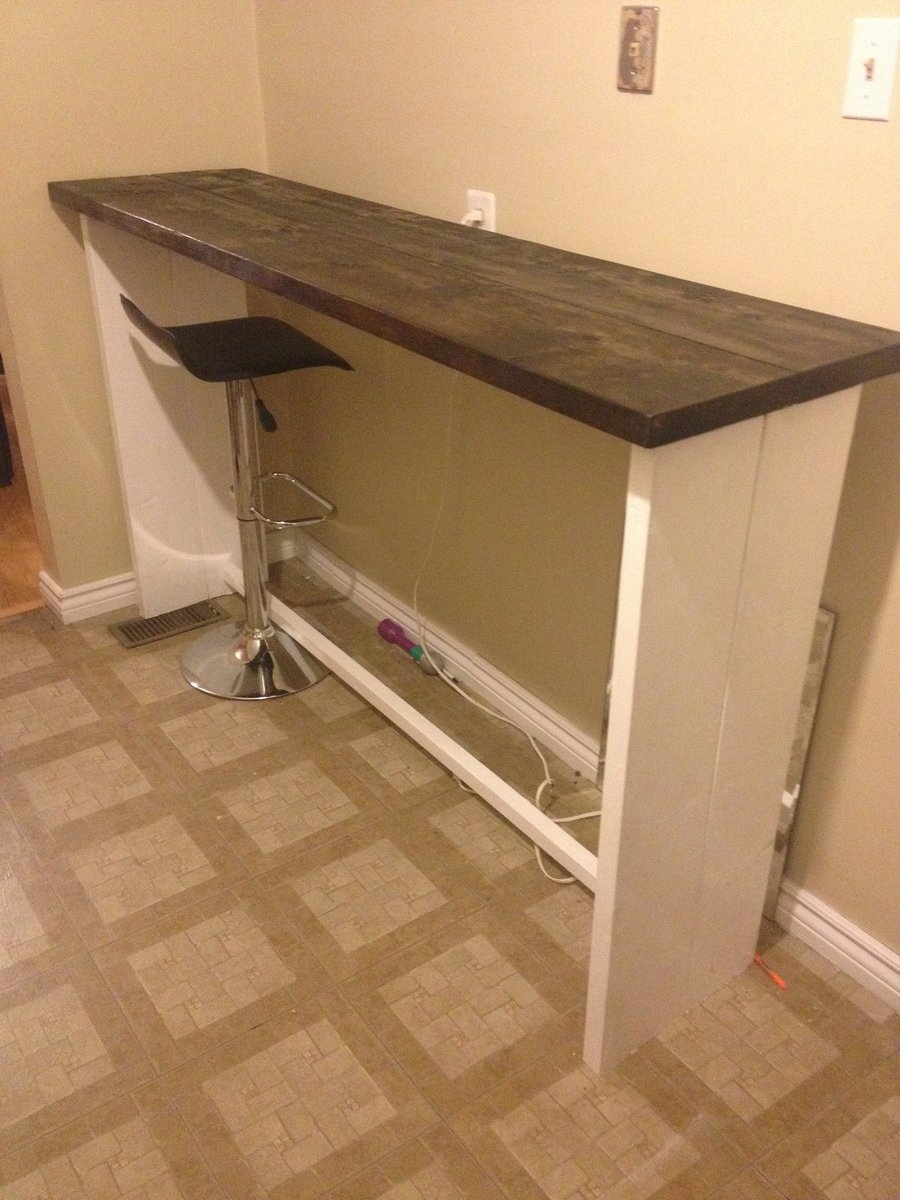
I got so inspired by Ana White I just assumed I can make anything just like her :D
But deep inside I knew, I wasn't nearly as good as her :(
So when we needed a bar table of definite length and height and type and color and way out of our budget, I thought to myself "hey girl! you can do this ;)"
So I came up with this super easy plan.
You can read all about it from the link below

Sat, 02/13/2021 - 06:51
Hi Anna I have enjoyed coming to your page and have made many things from your plans but your page is so over run with pop up adds that it is jumping all over the place and give me a headace from all the movement sorry to say I must leave
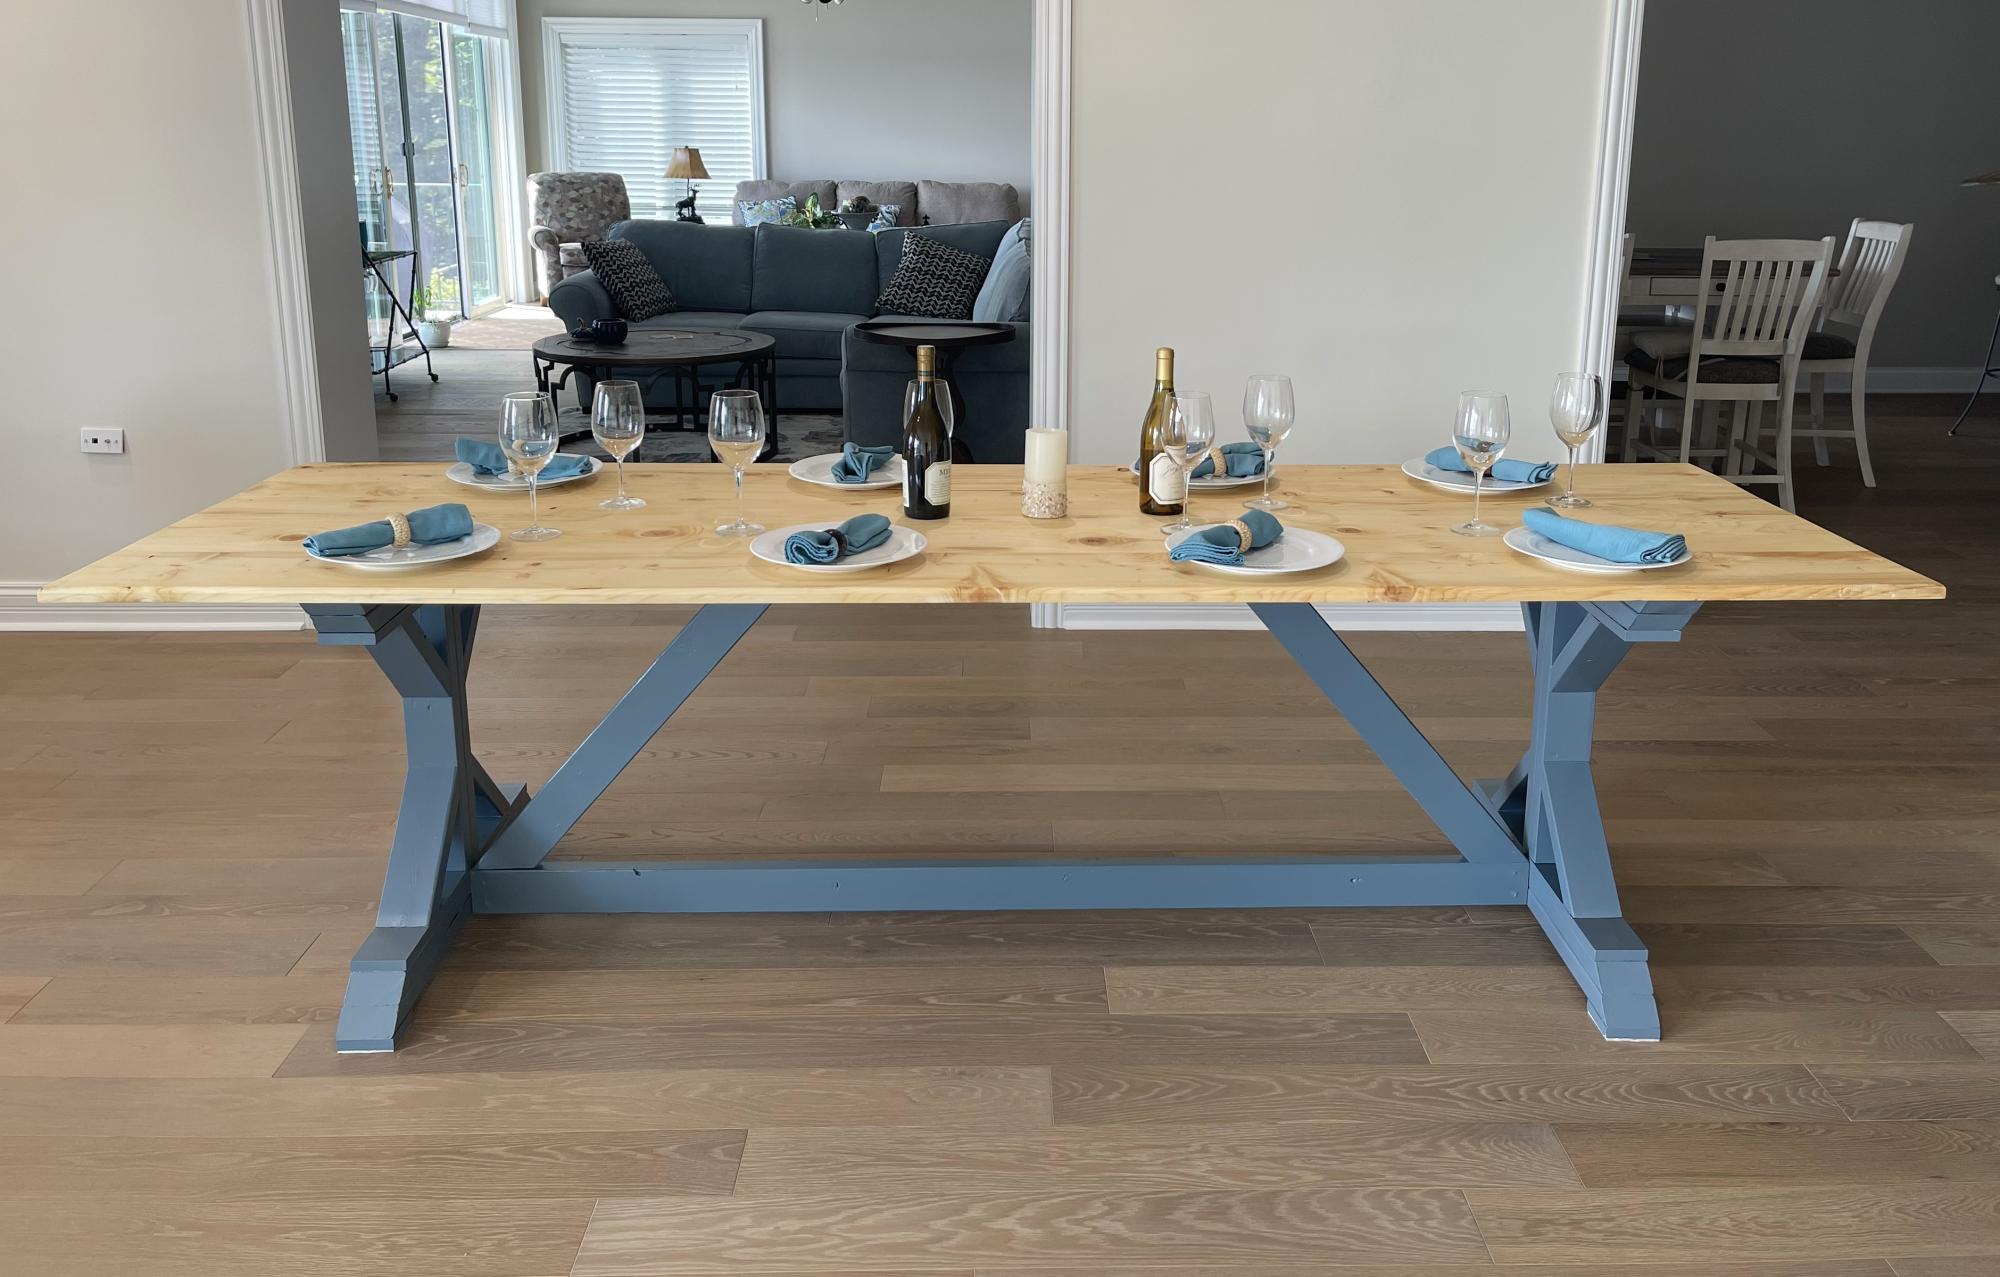
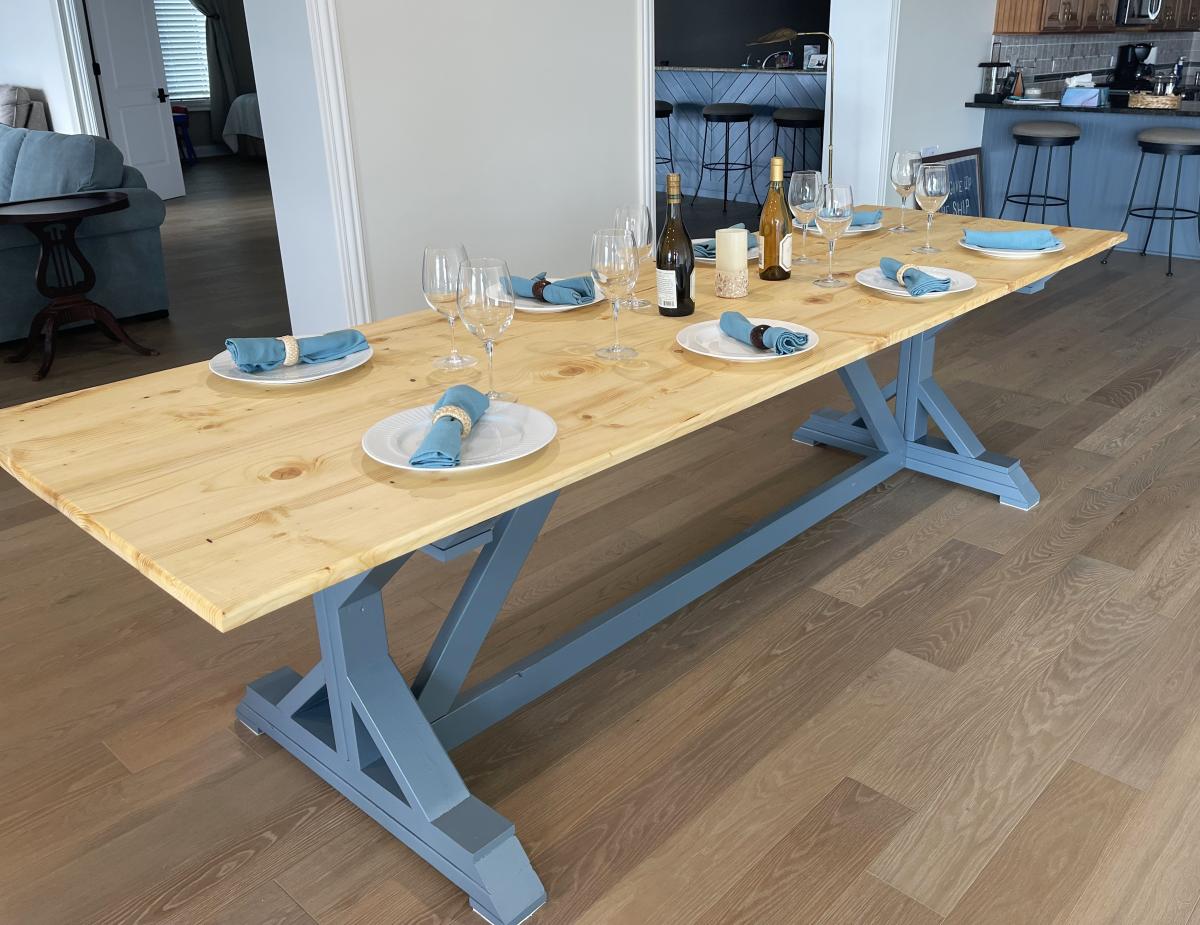
This was really fun! Actually used Spruce from a tree on my property that I had cut down and taken to a Saw Mill 6 Years ago. Been in the barn drying. The rough sawn boards were only 1.25 thick after the planer I could only maintain 1.00”. Extended the length of the table to 10’. Decided to reverse the underneath support angled boards to add support to the center of the table due to the added length and only 1” thick boards. Used biscuit joints to add strength and alignment. We love it at the lake home!
Matt Menges
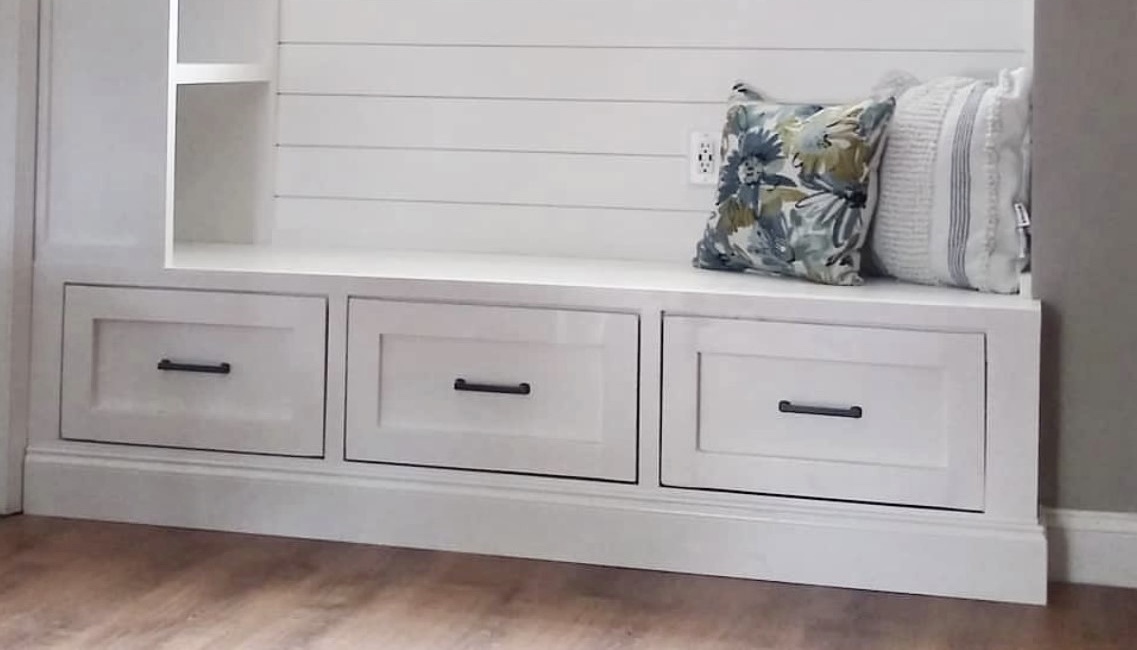
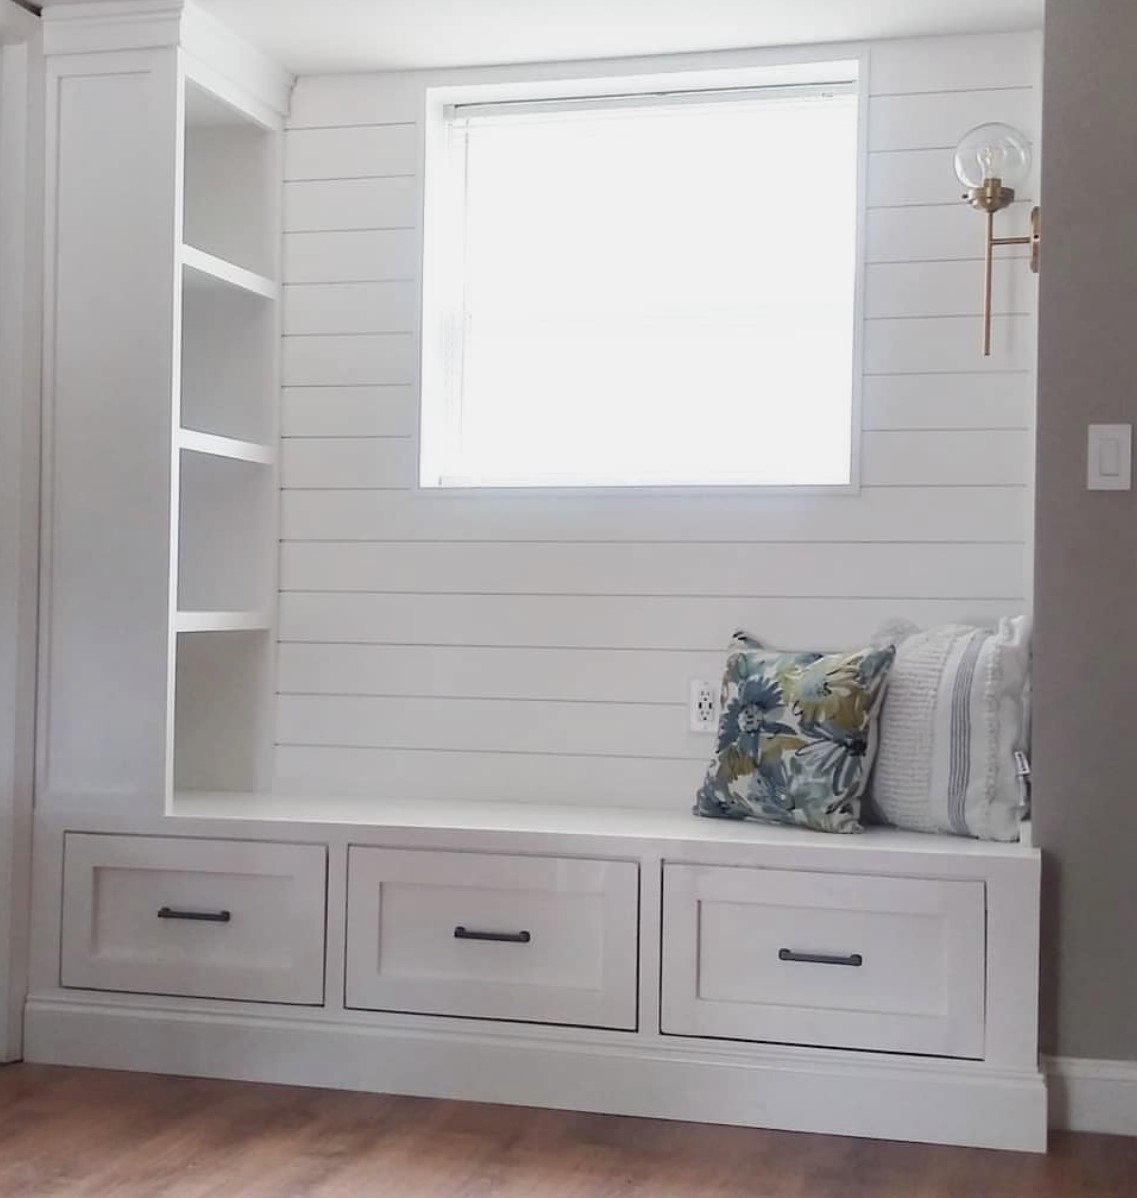
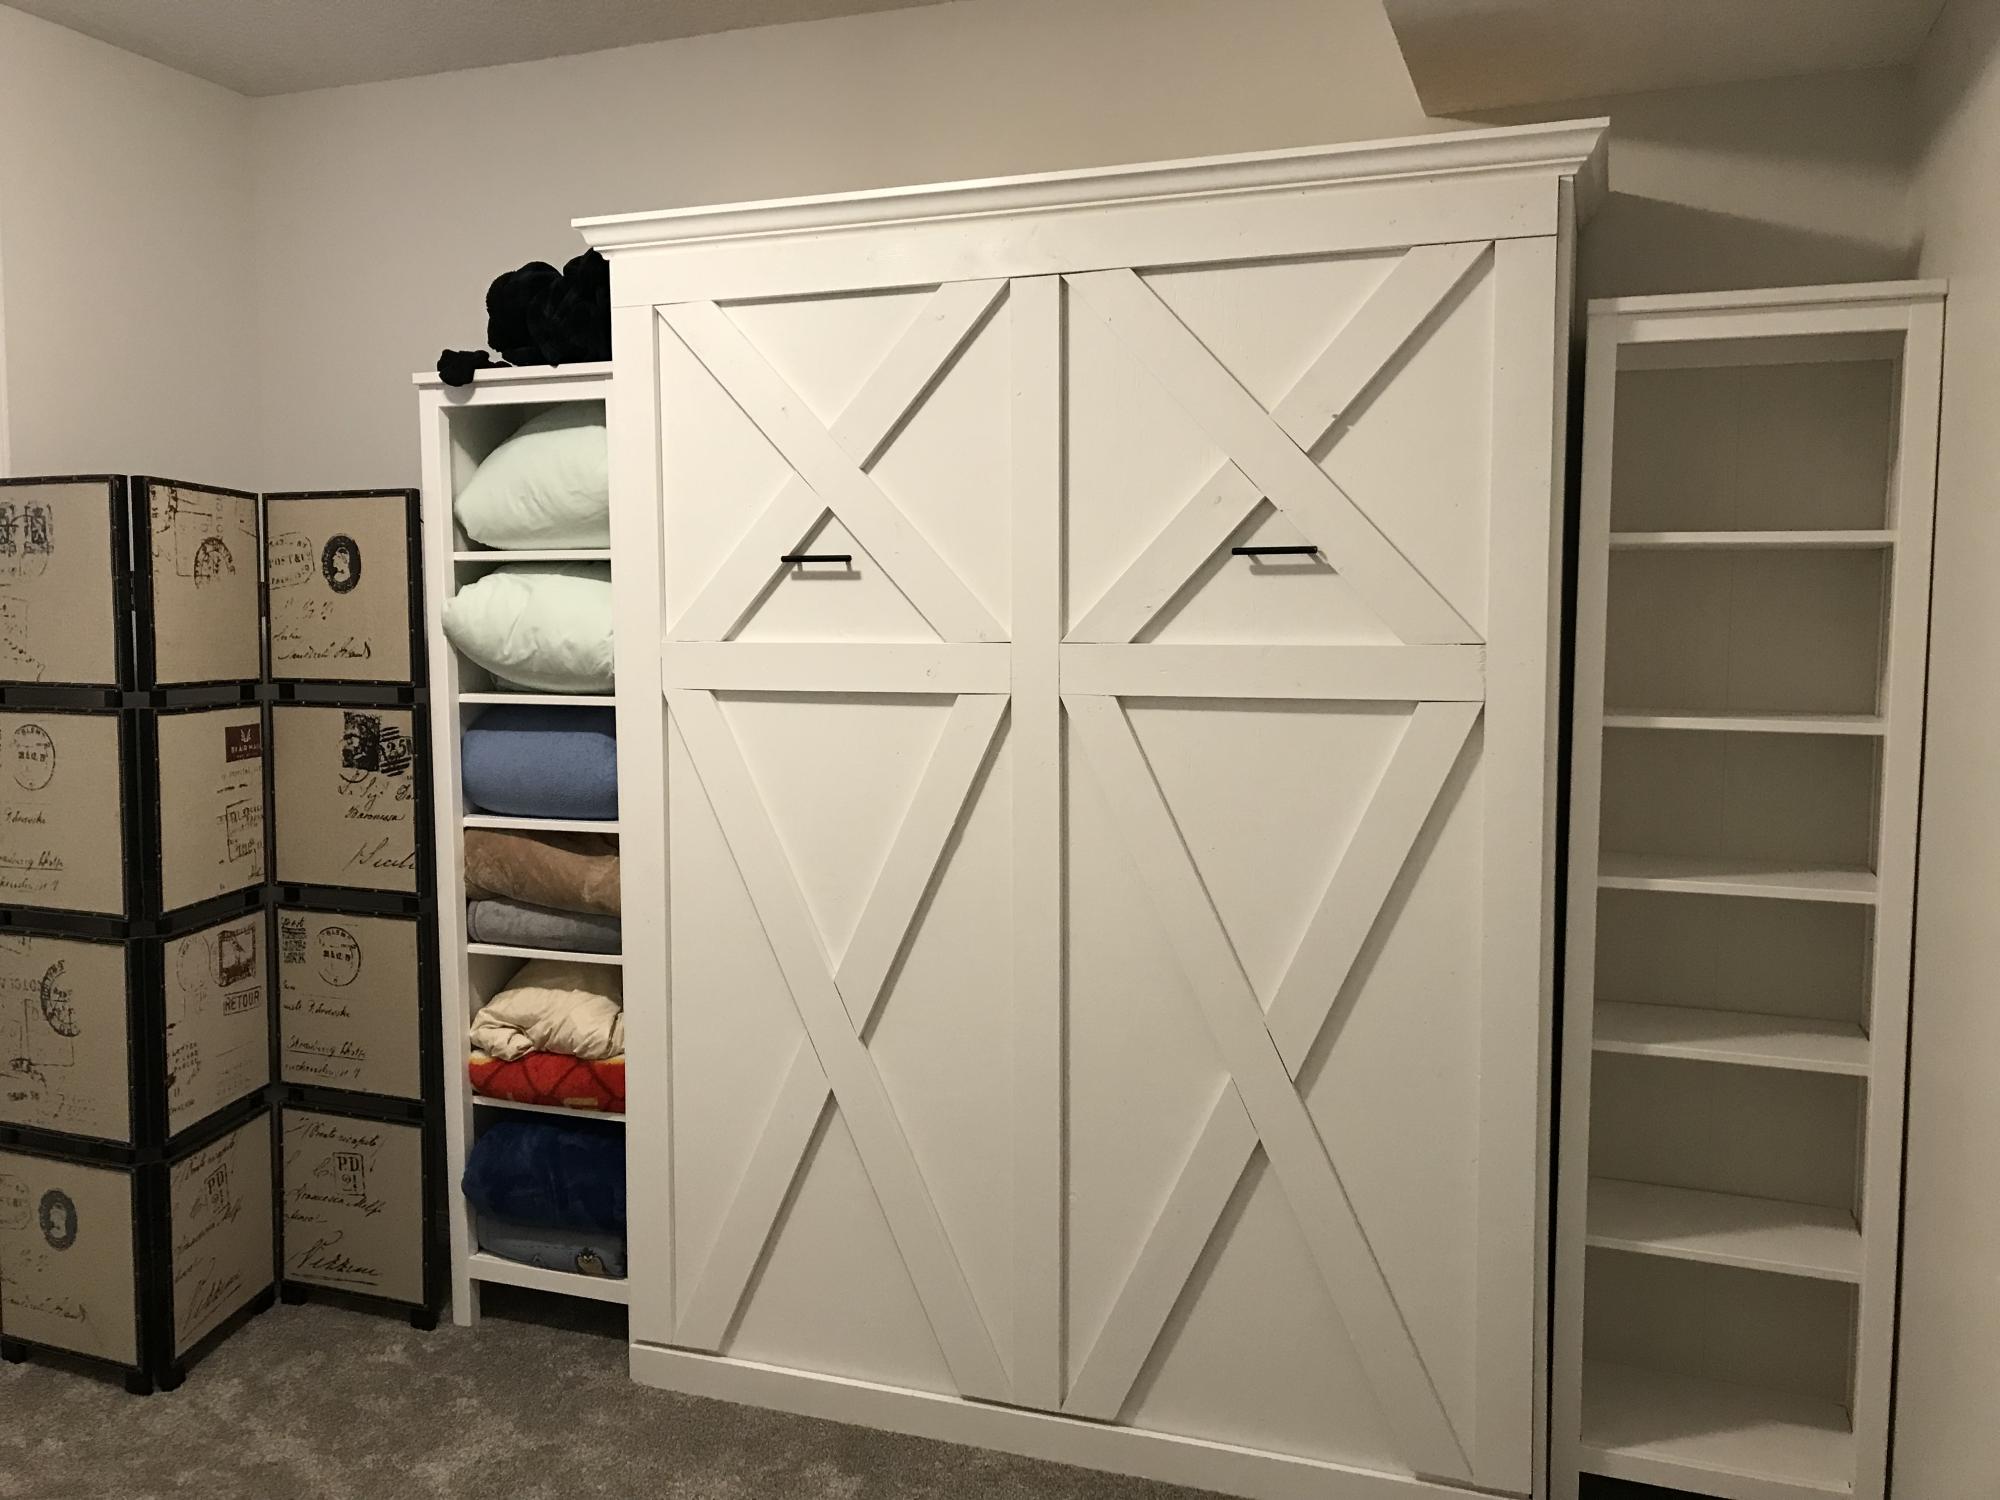
love Ana! We moved from the city to a late 1800's Victorian farm house with no closets, no basement, no storage! This was a great Woodshop 101 project for my husband and me, and gave us extra space in the kitchen. Can't wait to do another Ana project.
Wed, 08/28/2019 - 11:03
This is awesome!!! Thanks so much for sending in a brag post!
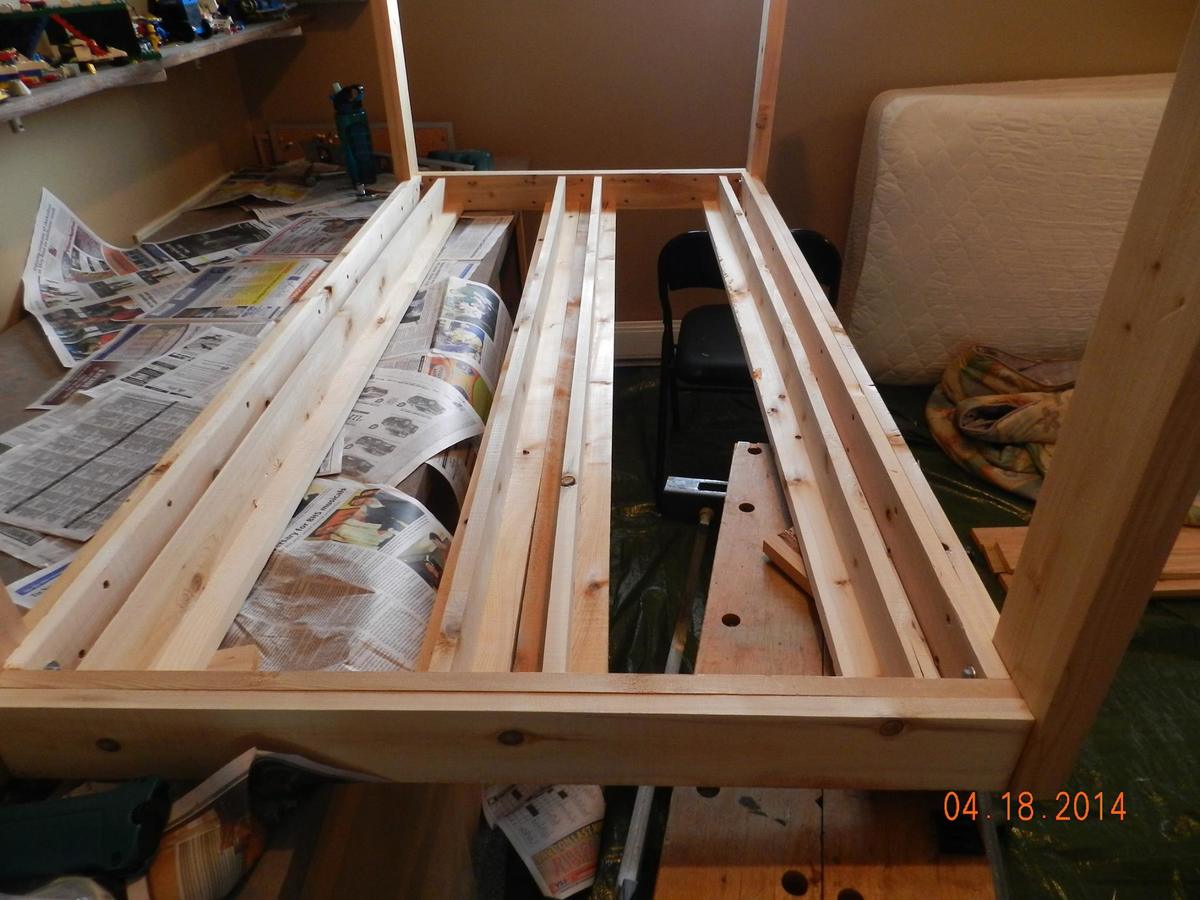
Total cost was under $200. The wood was a combination of select pine, Douglas fir. I used Minwax clear finish. Instead of slats I used plywood. This is going into the spare bedroom. We are quite pleased.


Mon, 05/28/2012 - 19:51
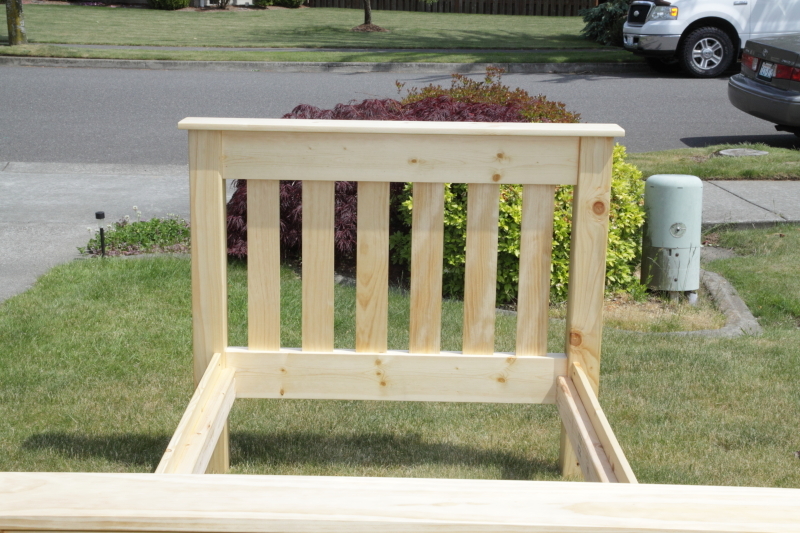
We chose to go with a 1 x 6 instead of a 2 x 4 for the top of the head and foot boards.
Tue, 05/29/2012 - 16:29
Can you take the bed apart in case you move? You did a great job.
Fri, 06/01/2012 - 20:45
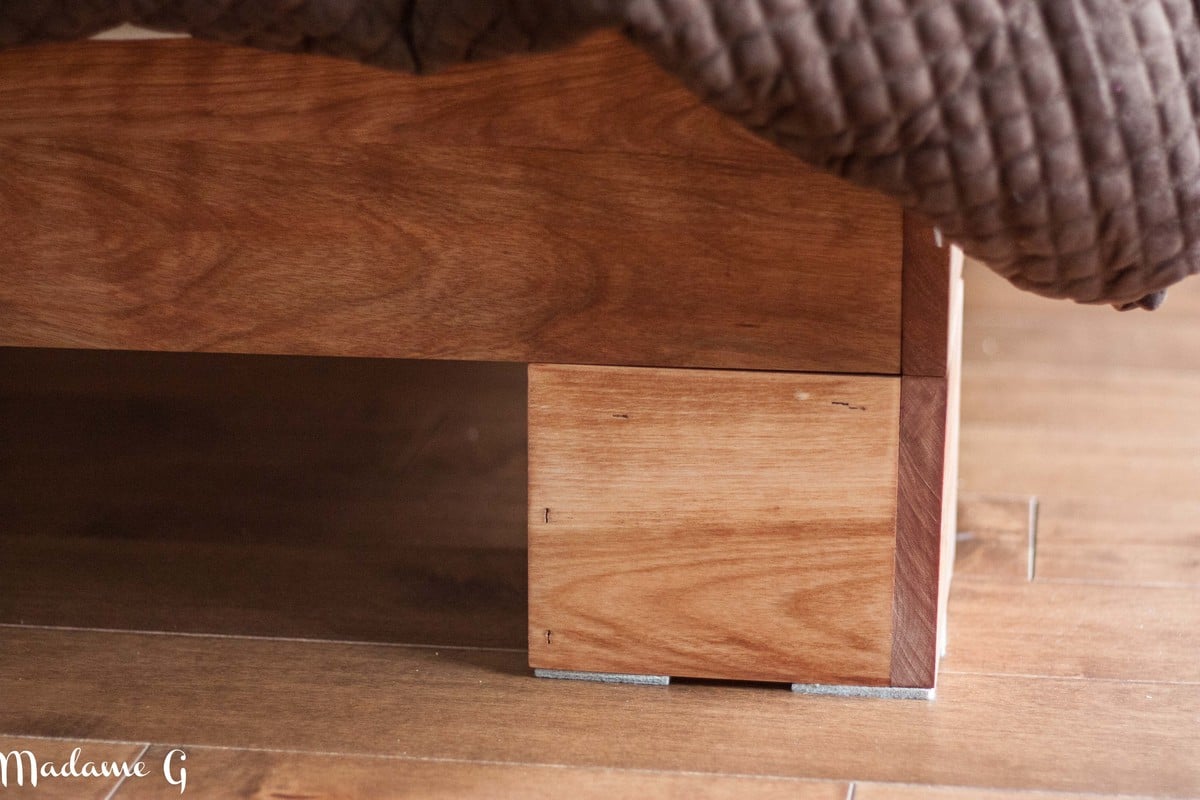
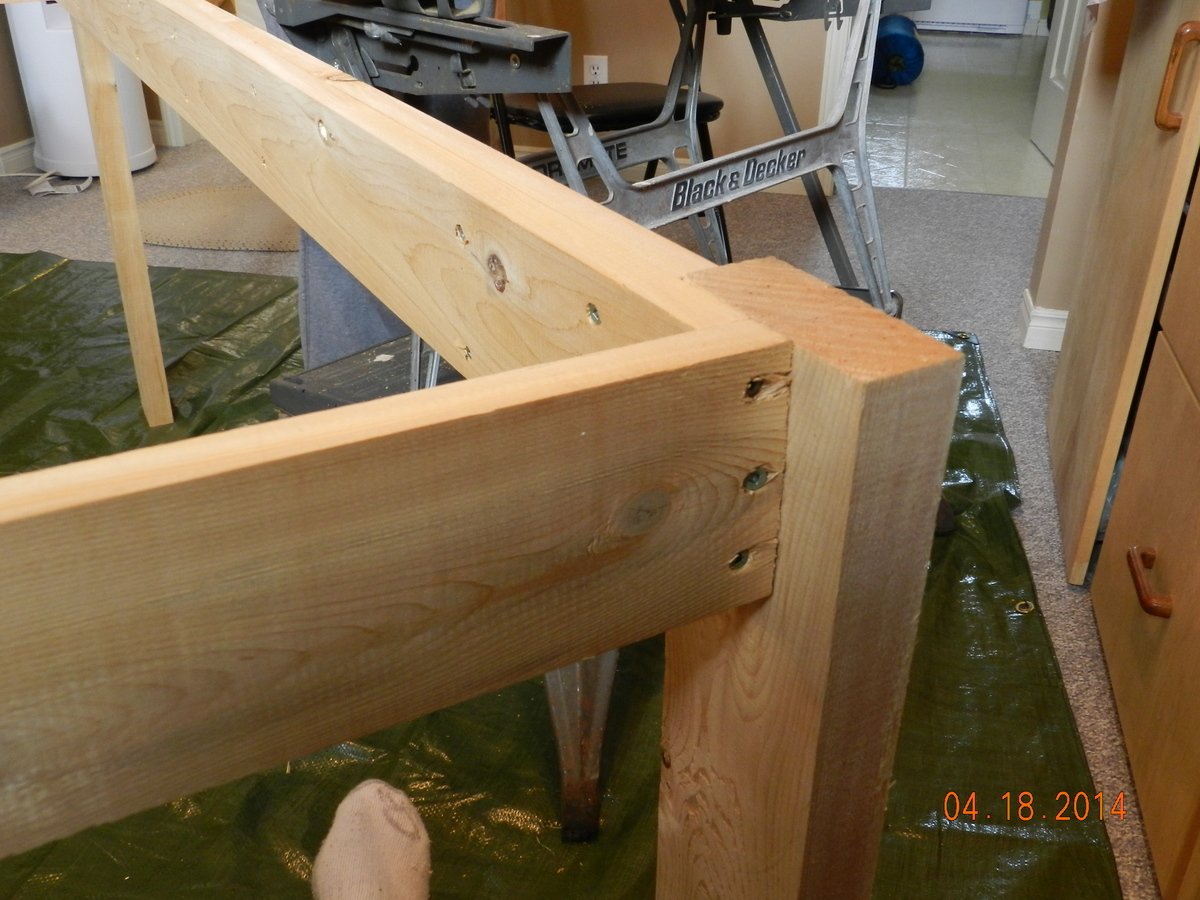
Yes it comes apart. A total of four pieces. Headboard, footboard, and the two sides. Also a fith piece if you count the plywood base for the mattress. The sides are screwed in at each of the corners of the head and footboards.
Mon, 05/12/2014 - 19:01
Thinking of building this for my son as we move from crib to bed. Just curious how sturdy and strong the bed is? From the pictures it doesn't look like there's much wood where the rails attach to the head and footboard. Did you use pocket holes and screws? Any comments on how it's held up, what you might do differently? Also any idea if it'll hold a kid and parent for nightly story time?
Thanks...nice work!
Wed, 05/14/2014 - 15:22
It is in our guest room and does not get much use. However, it is screwed in at the corners not with pocket screws because the rails were too close to the edges. I chose to screw them in starting farther back and at a 45 degree angle to send the screw deeper towards the center of the four posts. It is very strong. Another suggestion would to purchase bed hardware. Hardware can be found online or in a hardware stores for attaching rails to bed posts. I've used such hardware for fixing commercial beds I've purchased.
Hope this helps.
Tue, 01/20/2015 - 15:25
Sorry it took so long to answer. Where I put the screws depended on how the bed was going to be placed in the room. In our case, the headboard was going to up against a wall. Therefore the screws were on the wall side of the headboard. The footboard of the bed had the screws on the mattress side. Kreg sells pocket hole plugs that work very well. Glue them in after you screw the head and foot boards together and sand them before finishing.
The sides of the bed that are attached to the head and foot boards and screwed in too. I had to screw them in at a sharper angle to get enough sideboard material but deep enough into the head and foot boards in. Use the longest screws possible for strength without going all the way through the four corner posts.
Tue, 01/20/2015 - 15:50
Either way described above will work. See added photos of plugged finished pocket holes and underside attachment to foot-board.

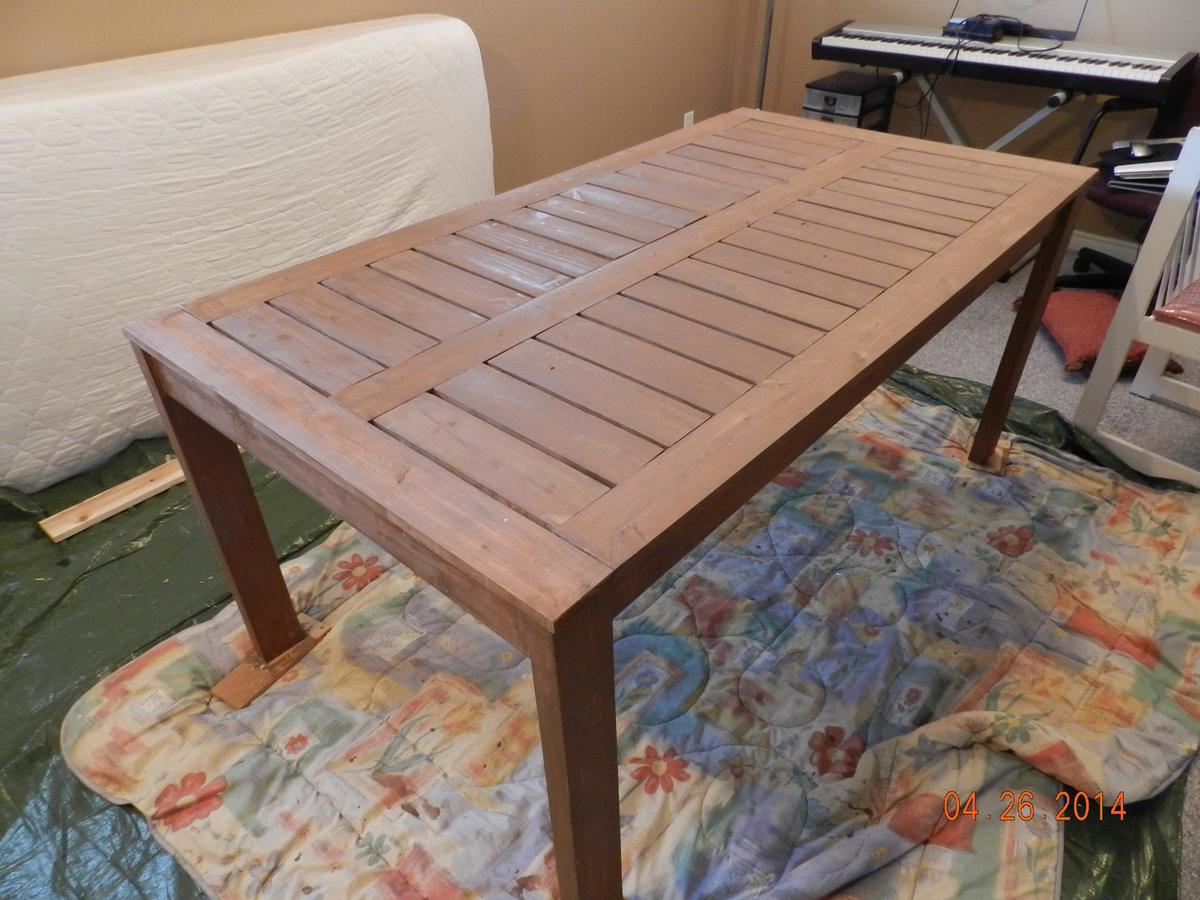
I didn't make any changes , his orginal design was great. Hope these pictures help others. I tried to link to the modified-simple-outdoor-dining-table but wasn't able too.
Sun, 04/27/2014 - 14:06
Found the plans "modified-simple-outdoor-dining-table" and I built it. Very nice table, I posted more pcitures to help others
Sun, 04/27/2014 - 14:06
Found the plans "modified-simple-outdoor-dining-table" and I built it. Very nice table, I posted more pcitures to help others
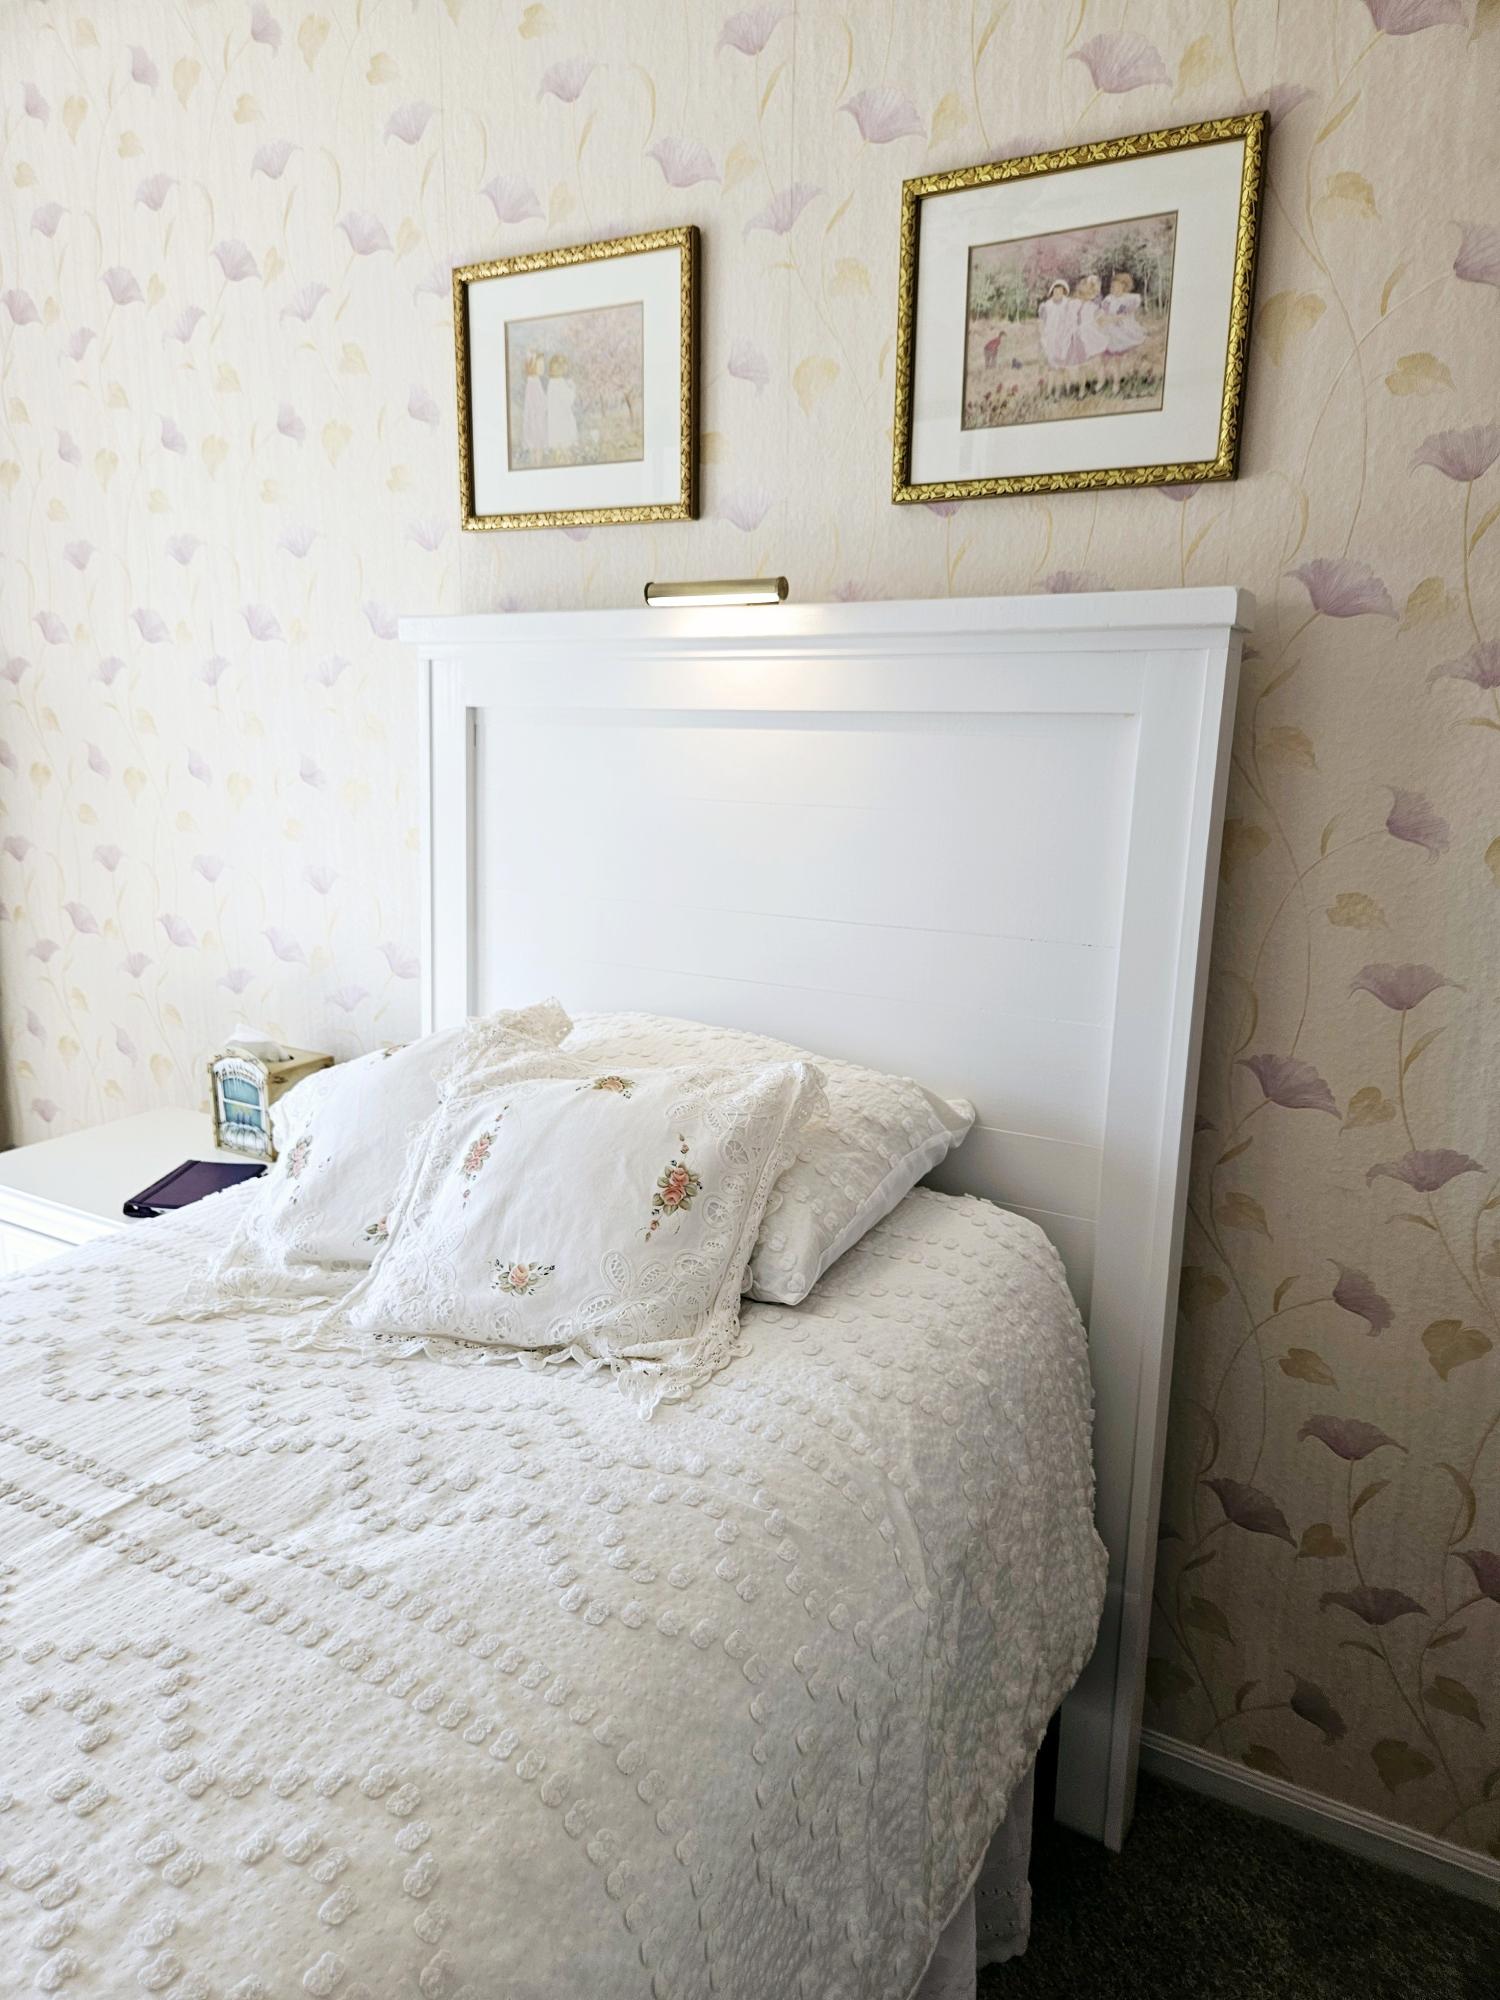
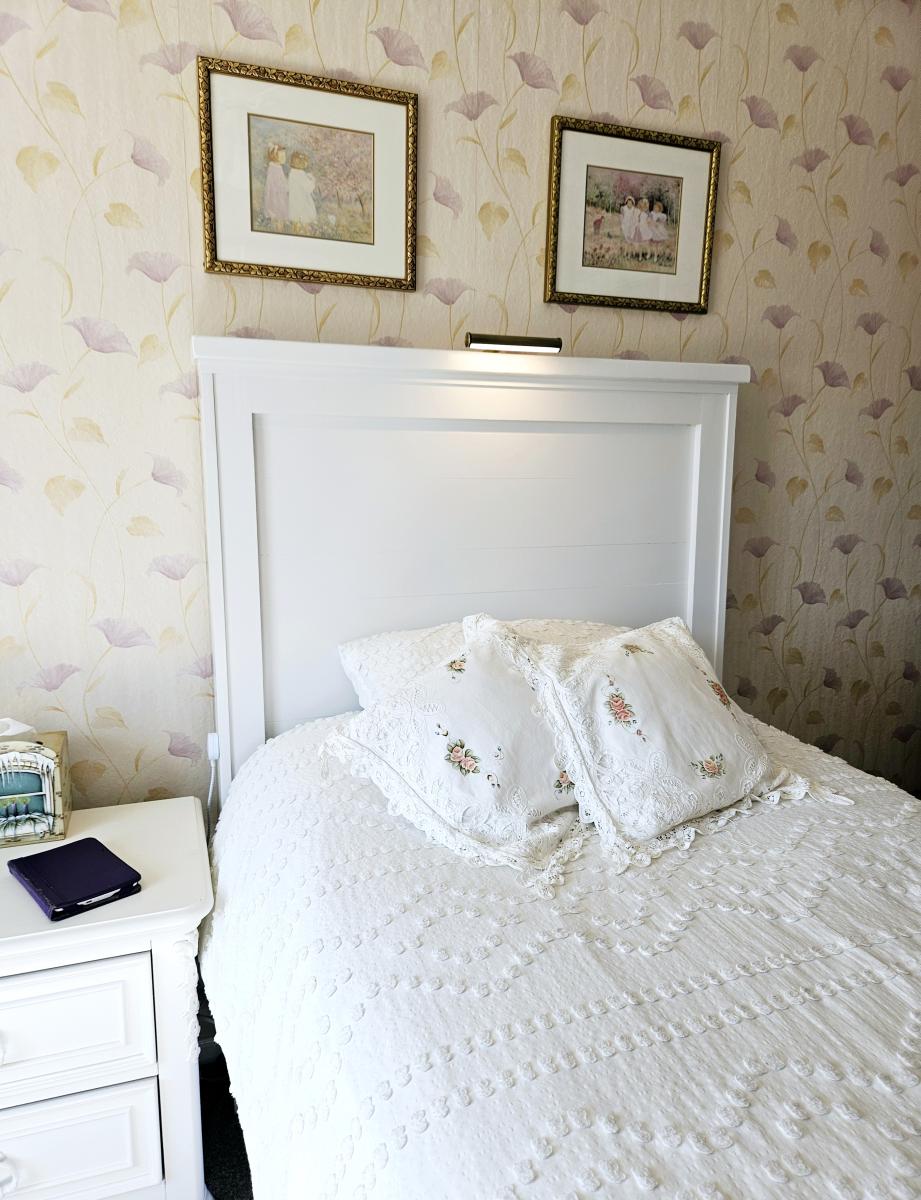
am thrilled with my new headboard. The plans made every thing about this project FUN and DOABLE. I'm a 70 year old Granma who loves to DIY. SO fun to show my photos of what I did ALL BY MYSELF! THANK YOU FOR YOUR WONDERFUL PLANS! With out them my pretty new headboard would never have happened. WHAT FUN. I mounted an LED picture light fixture on the top for reading in bed and mounted the corded on off extension cord switch to the side of the leg for easy on off ! Again, THANK YOU!
Cheryl King

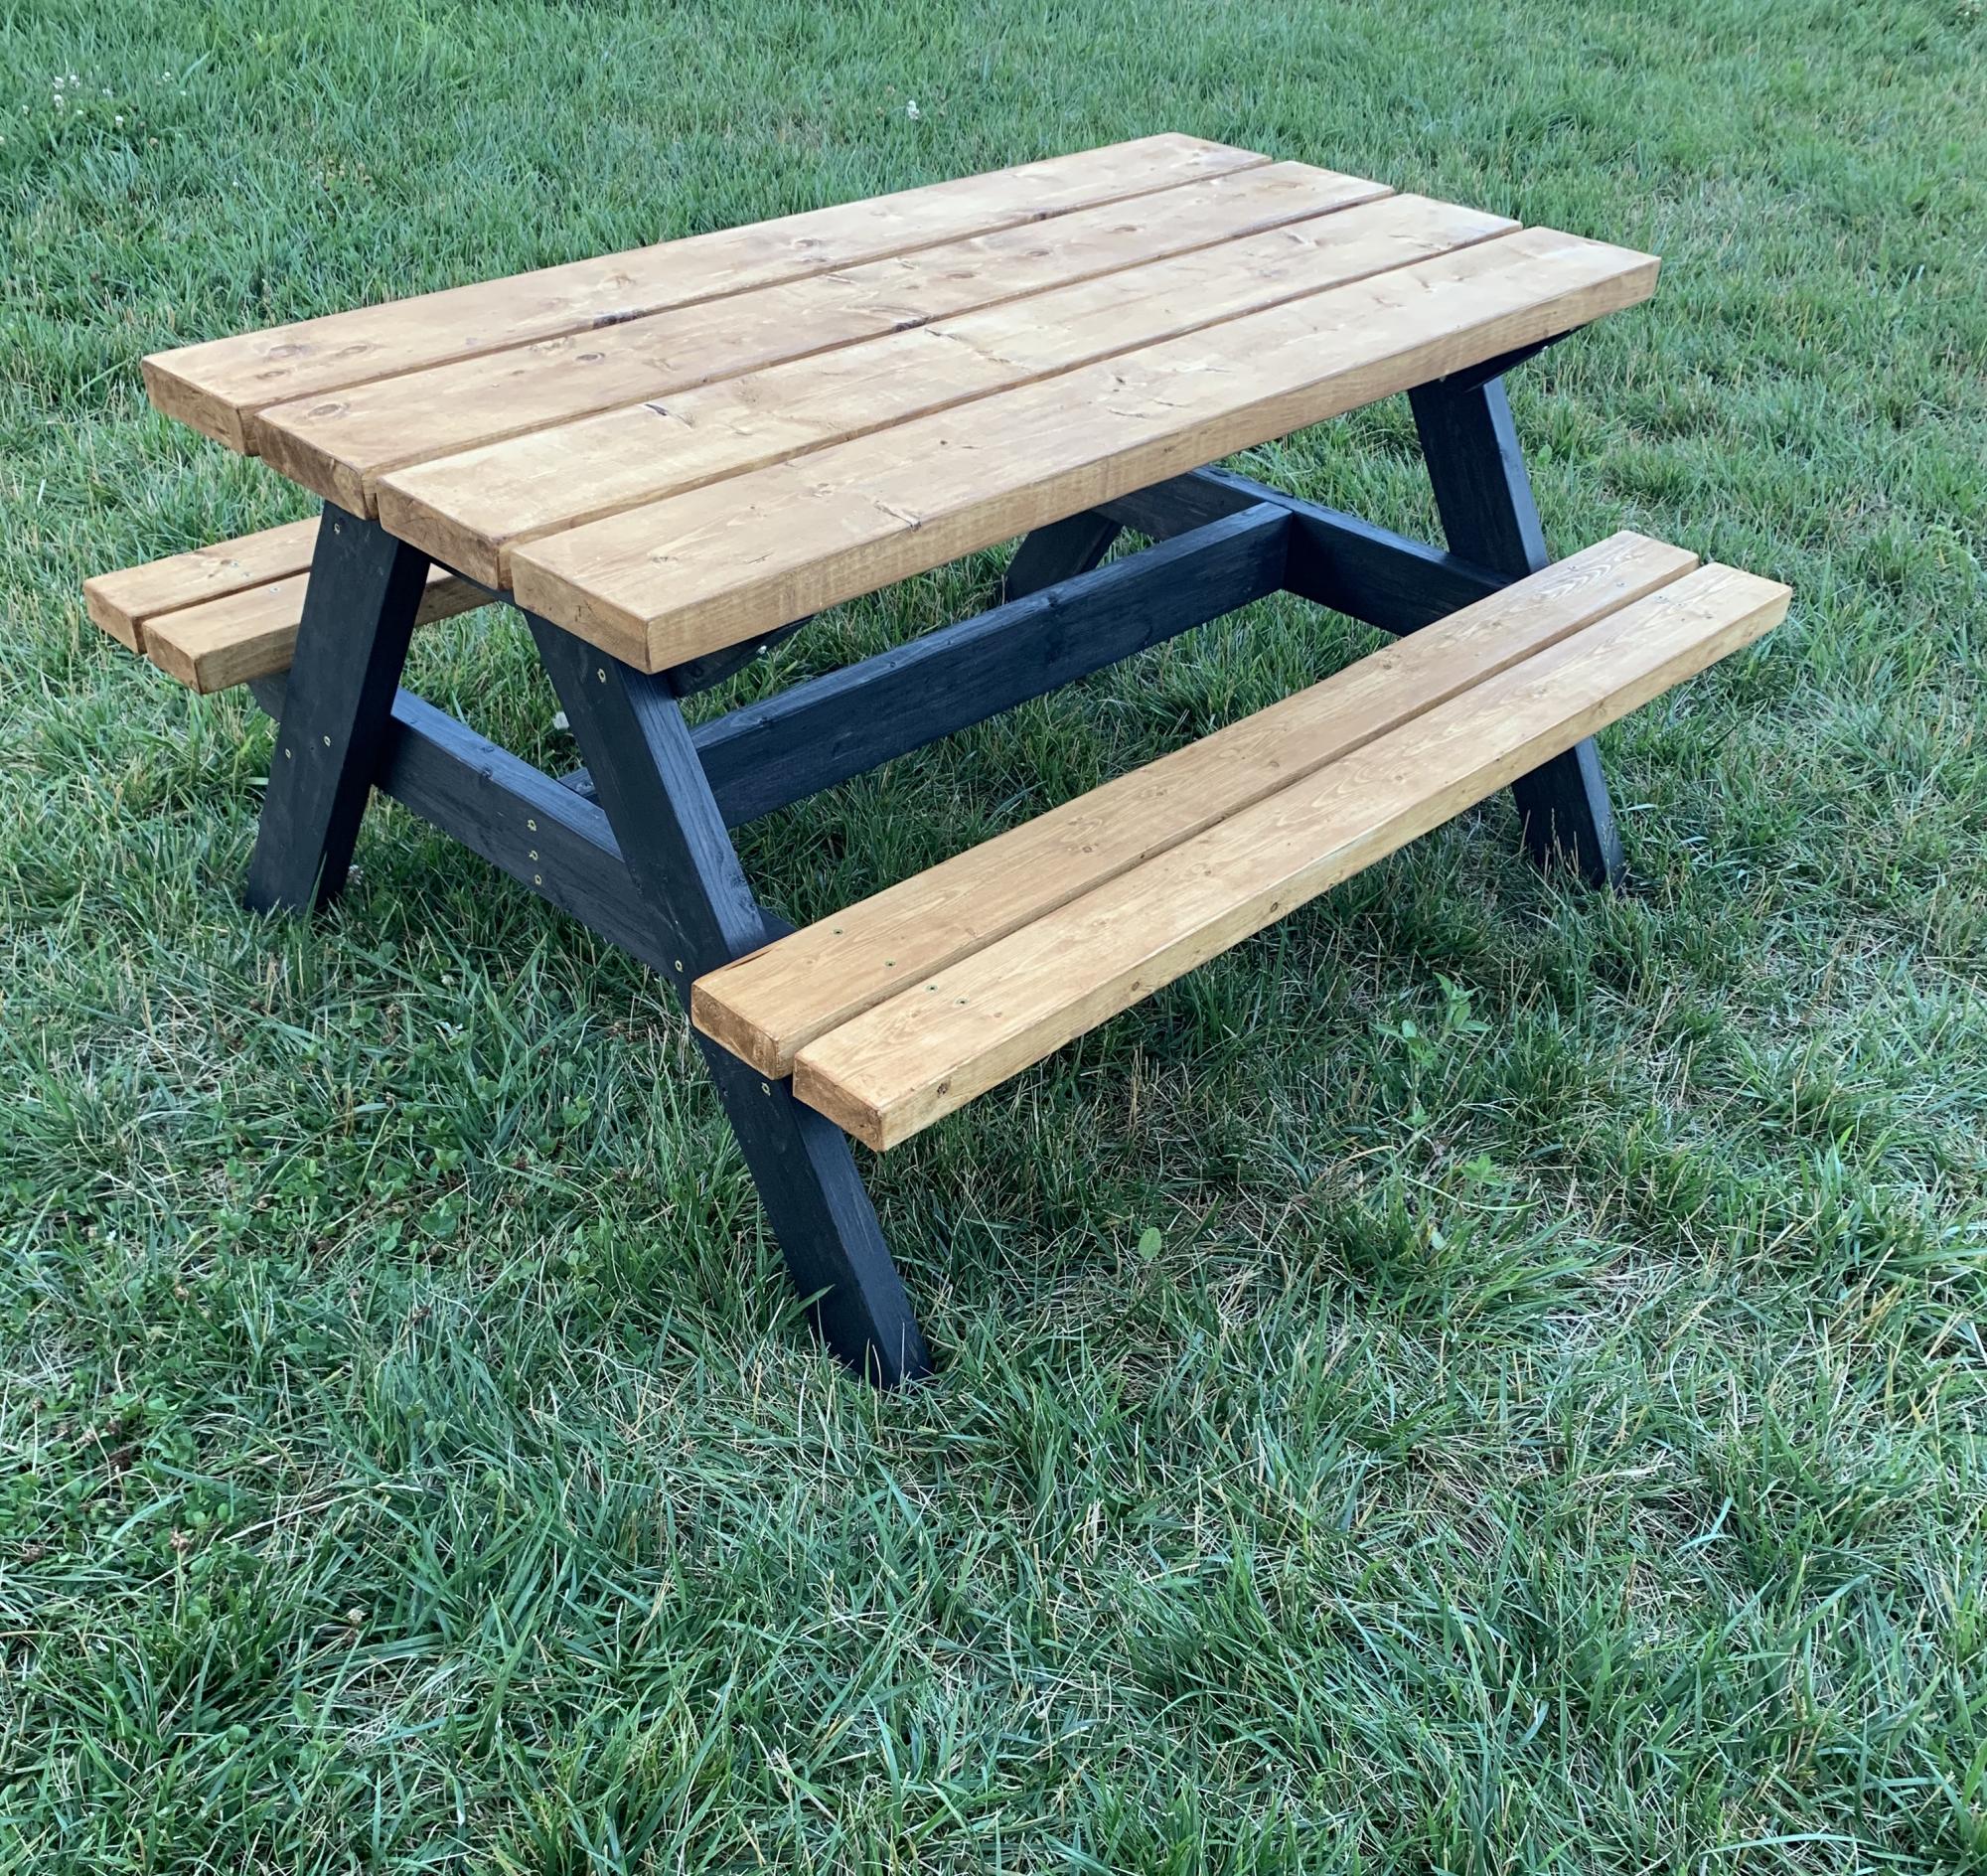
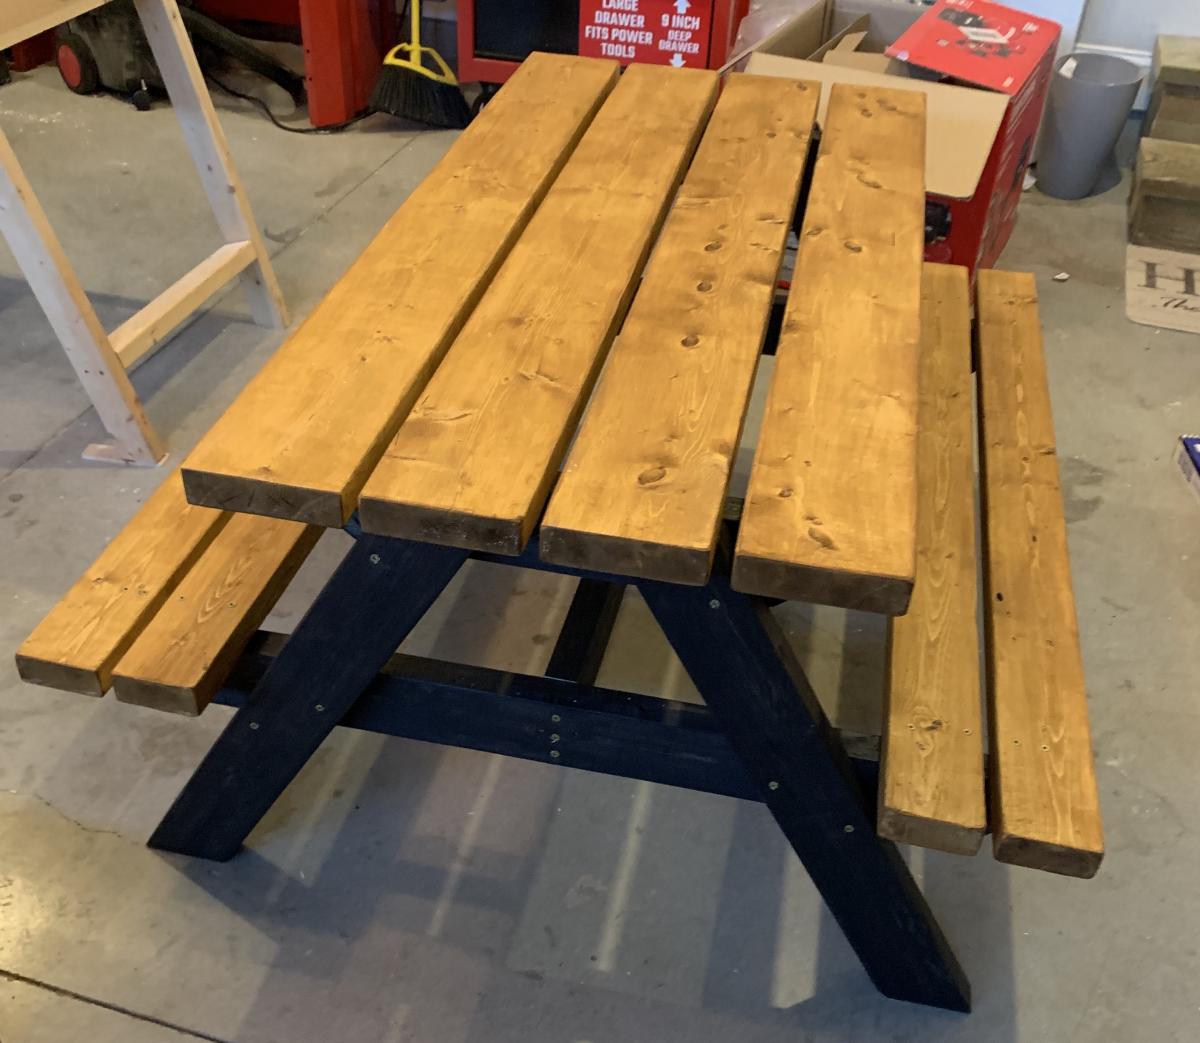
This was a easy build and is super strong . ITs built for a kid sized picnic table but I tested It with my weight to see how it holds up and (200 lbs) didn’t hurt it or even make the seat budge.

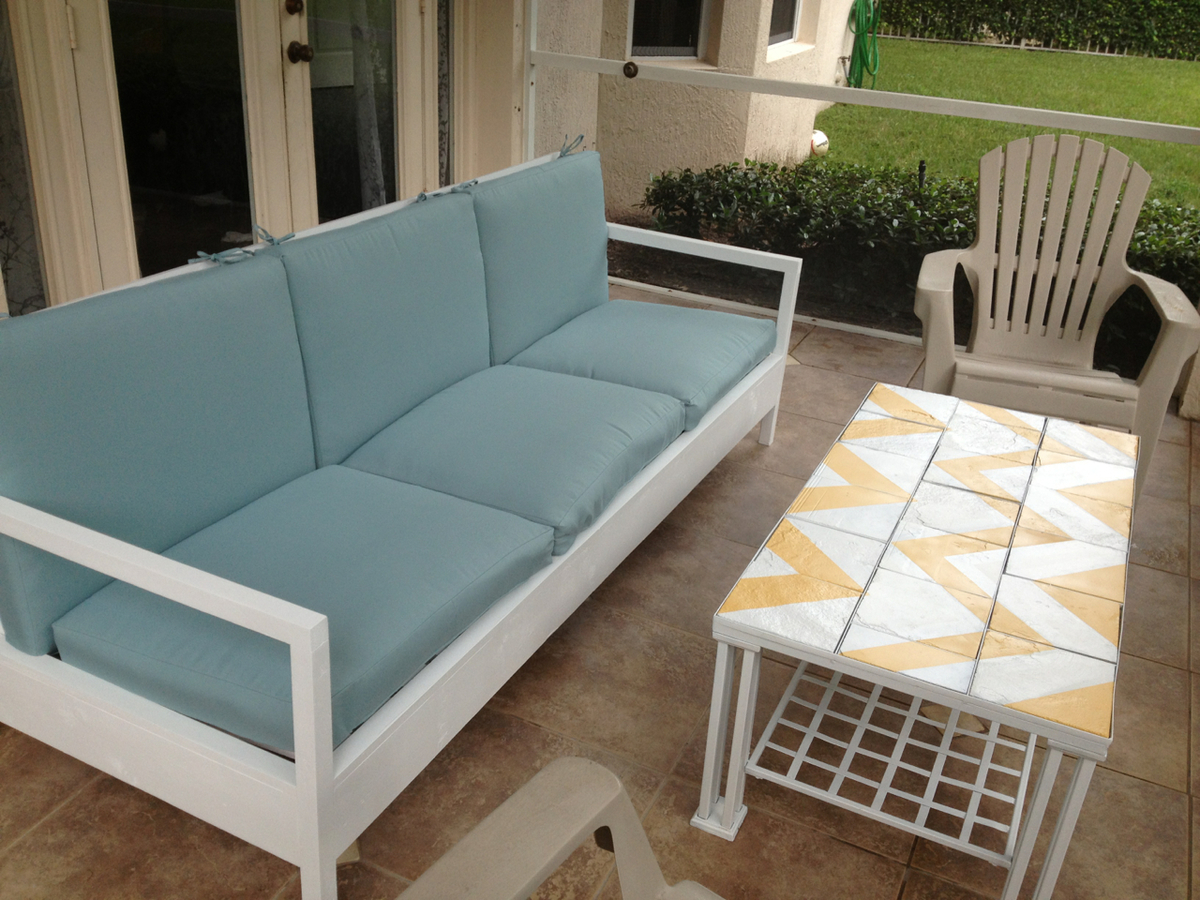
This was one of my favorite DIY projects. It's so much more affordable than buying patio furniture, and the building instructions make it sturdy as ever.
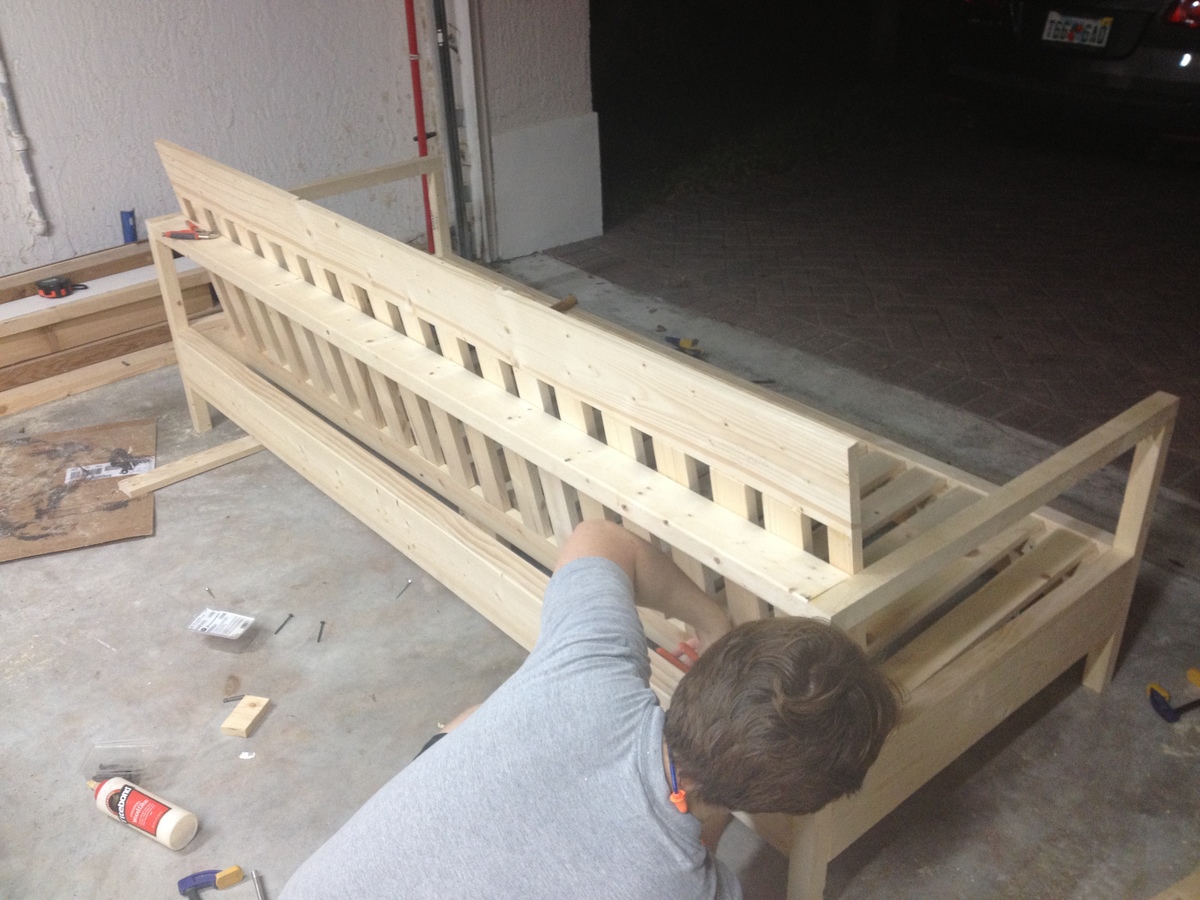
I built this with my fiance, who you'll see in the image of the in-progress bench. It was a snap for us, since we have a fair amount of experience building our own furniture. With the right tools, this project can take only two days, including wait time in between coats of paint and varnish.
We made our sofa to fit the cushions we found, and thus, the sofa is actually 84" wide, instead of 72" wide. By doing this, we also eliminated the need for a love seat, and instead are in the process of making two chairs to match this sofa. All in all, our patio will seat 6, which is what we were aiming for.
TOOLS
The most important part of making this an easy, fun project is having the right tools. I highly recommend you purchase or borrow:
- Compound miter saw
- Kreg jig
- Square head screws (stripping these is nearly impossible)
Mon, 04/12/2021 - 09:52
where are the plans for this? the link goers to the new plans which are different
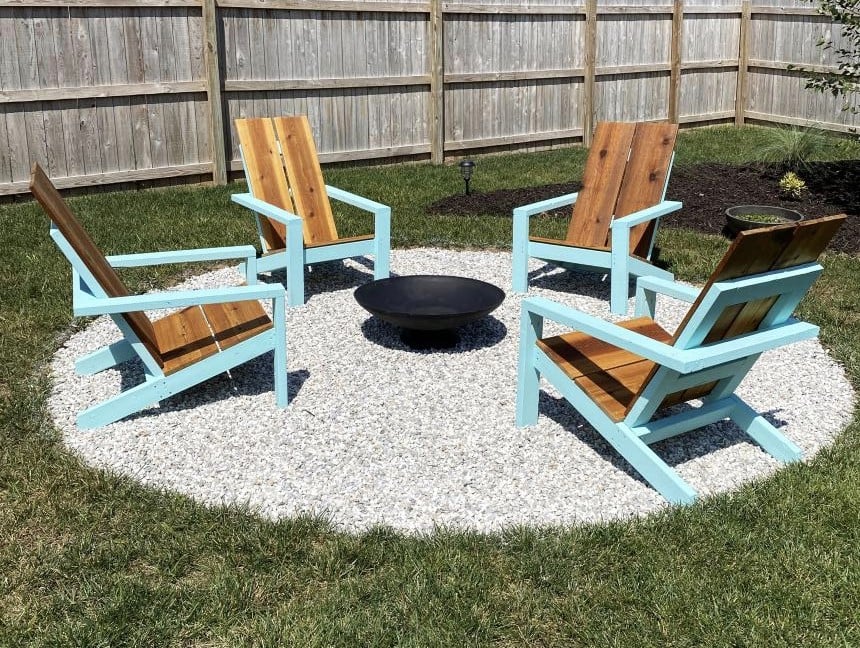
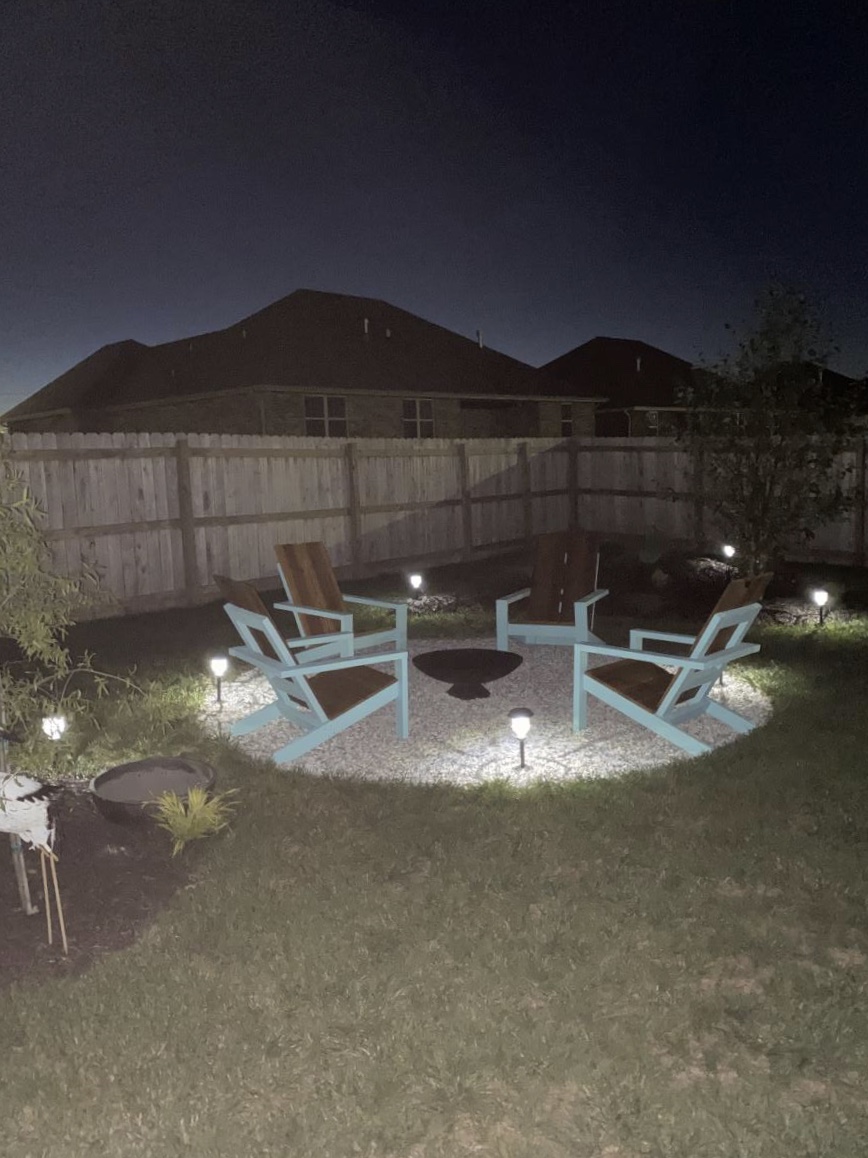
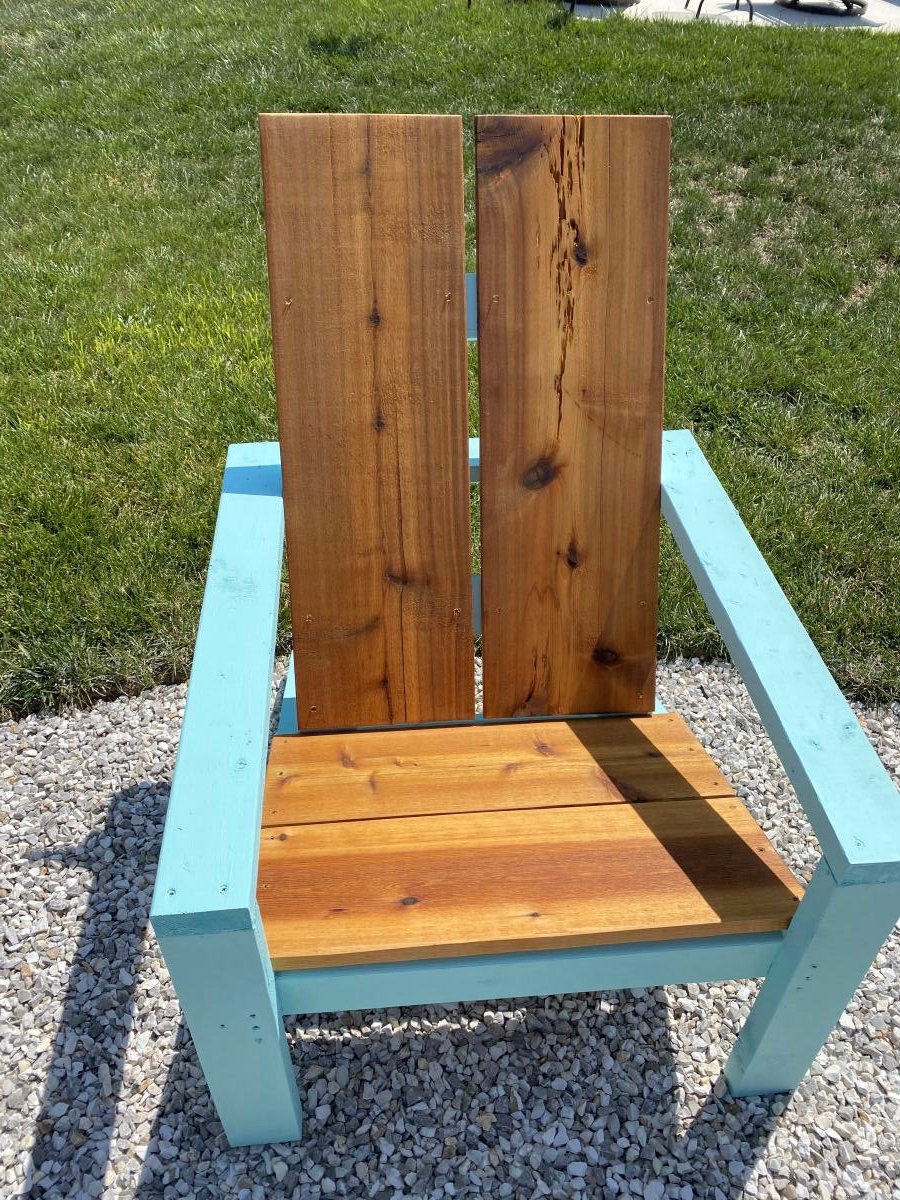
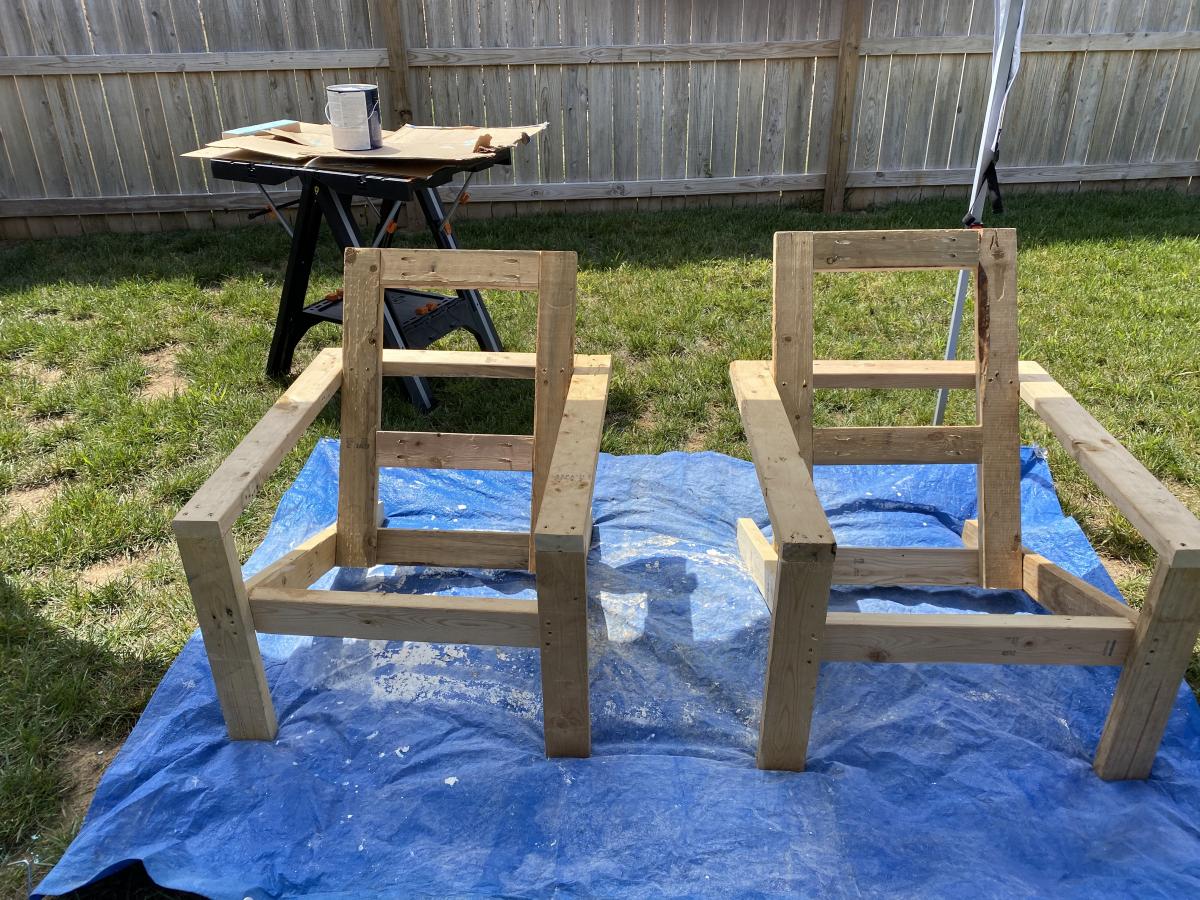
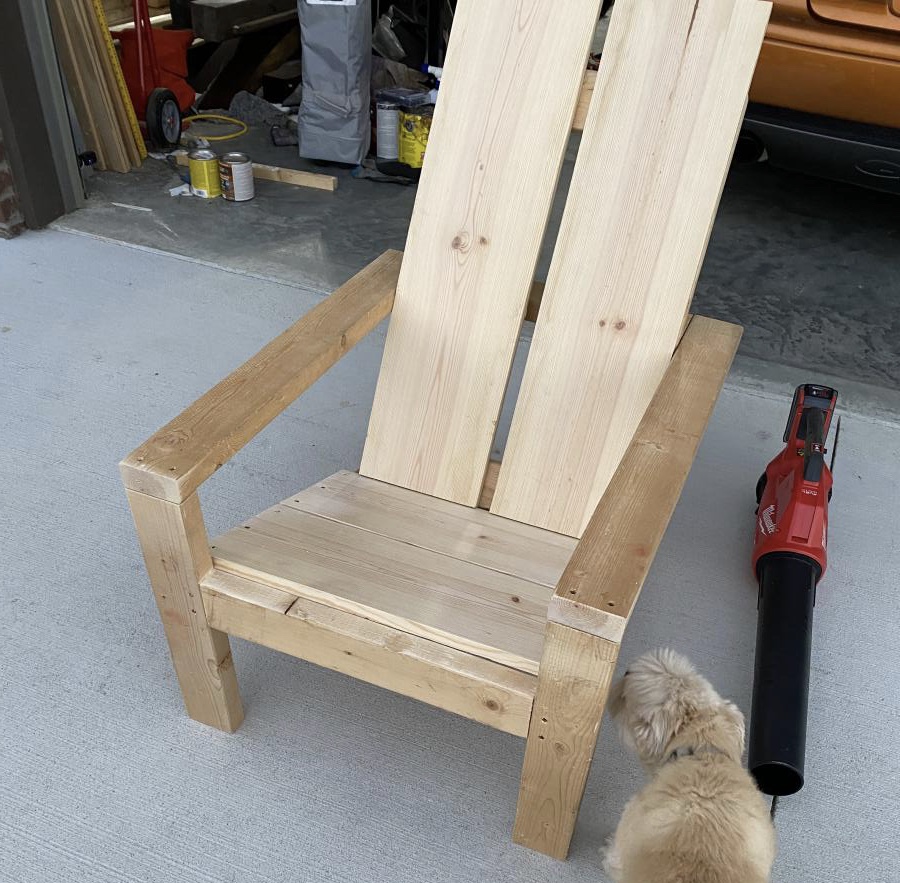
Am a big fan of Ana's work, and have used several of her plans in prior builds including the more traditional Adirondack chairs. Those stayed with my old house, and I wanted something different for my new house. Really liked her Modern Adirondack design with the floating arm rest. However, plans are like recipes to me--a guideline. I wanted the back boards to run up and down, and I am a bit more robust than the lovely and petite Ms. White, so they would need to be wider after I built the first one at 19 1/2" wide per plan. The next three I made 22" wide and that worked well without throwing off the geometry and angles of the other parts. Since I ran the backboards up and down, I needed some cross beams for stability and to give an attachment point for the middle of the boards. Cut some 2x4s at 15" wide, drilled pocket holes in both ends, and attached in between the back supports with the pockets facing up to be hidden by the back boards. All of the 2x4s were leftover cut-offs from the houses being built in my neighborhood. Since the frames were free, I splurged and went with cedar boards for the backs and bottoms. With the wider frames, I had to use 1x12s ripped down to 10 3/4" to get the right look (about a board's width in between). Needed some color, so I painted the frames Teal Seaglass from Menards. Cedar was stained with a natural deck stain from Sherwin Williams. I experimented with salt paint (mixing unsanded grout with the paint) to give a heavily textured and weathered finish but this was unecessary--the wood was distressed enough and I am a terrible painter. It also toned down the color so I skipped that step and just went with 2 coats of plain paint. It looks like outdoor furniture should up close. As always, am pleased with Ana's plans. Thank you for doing all the hard work!

Fri, 08/21/2020 - 16:59
I absolutely love how the back was done!! Thank you so much for sharing!
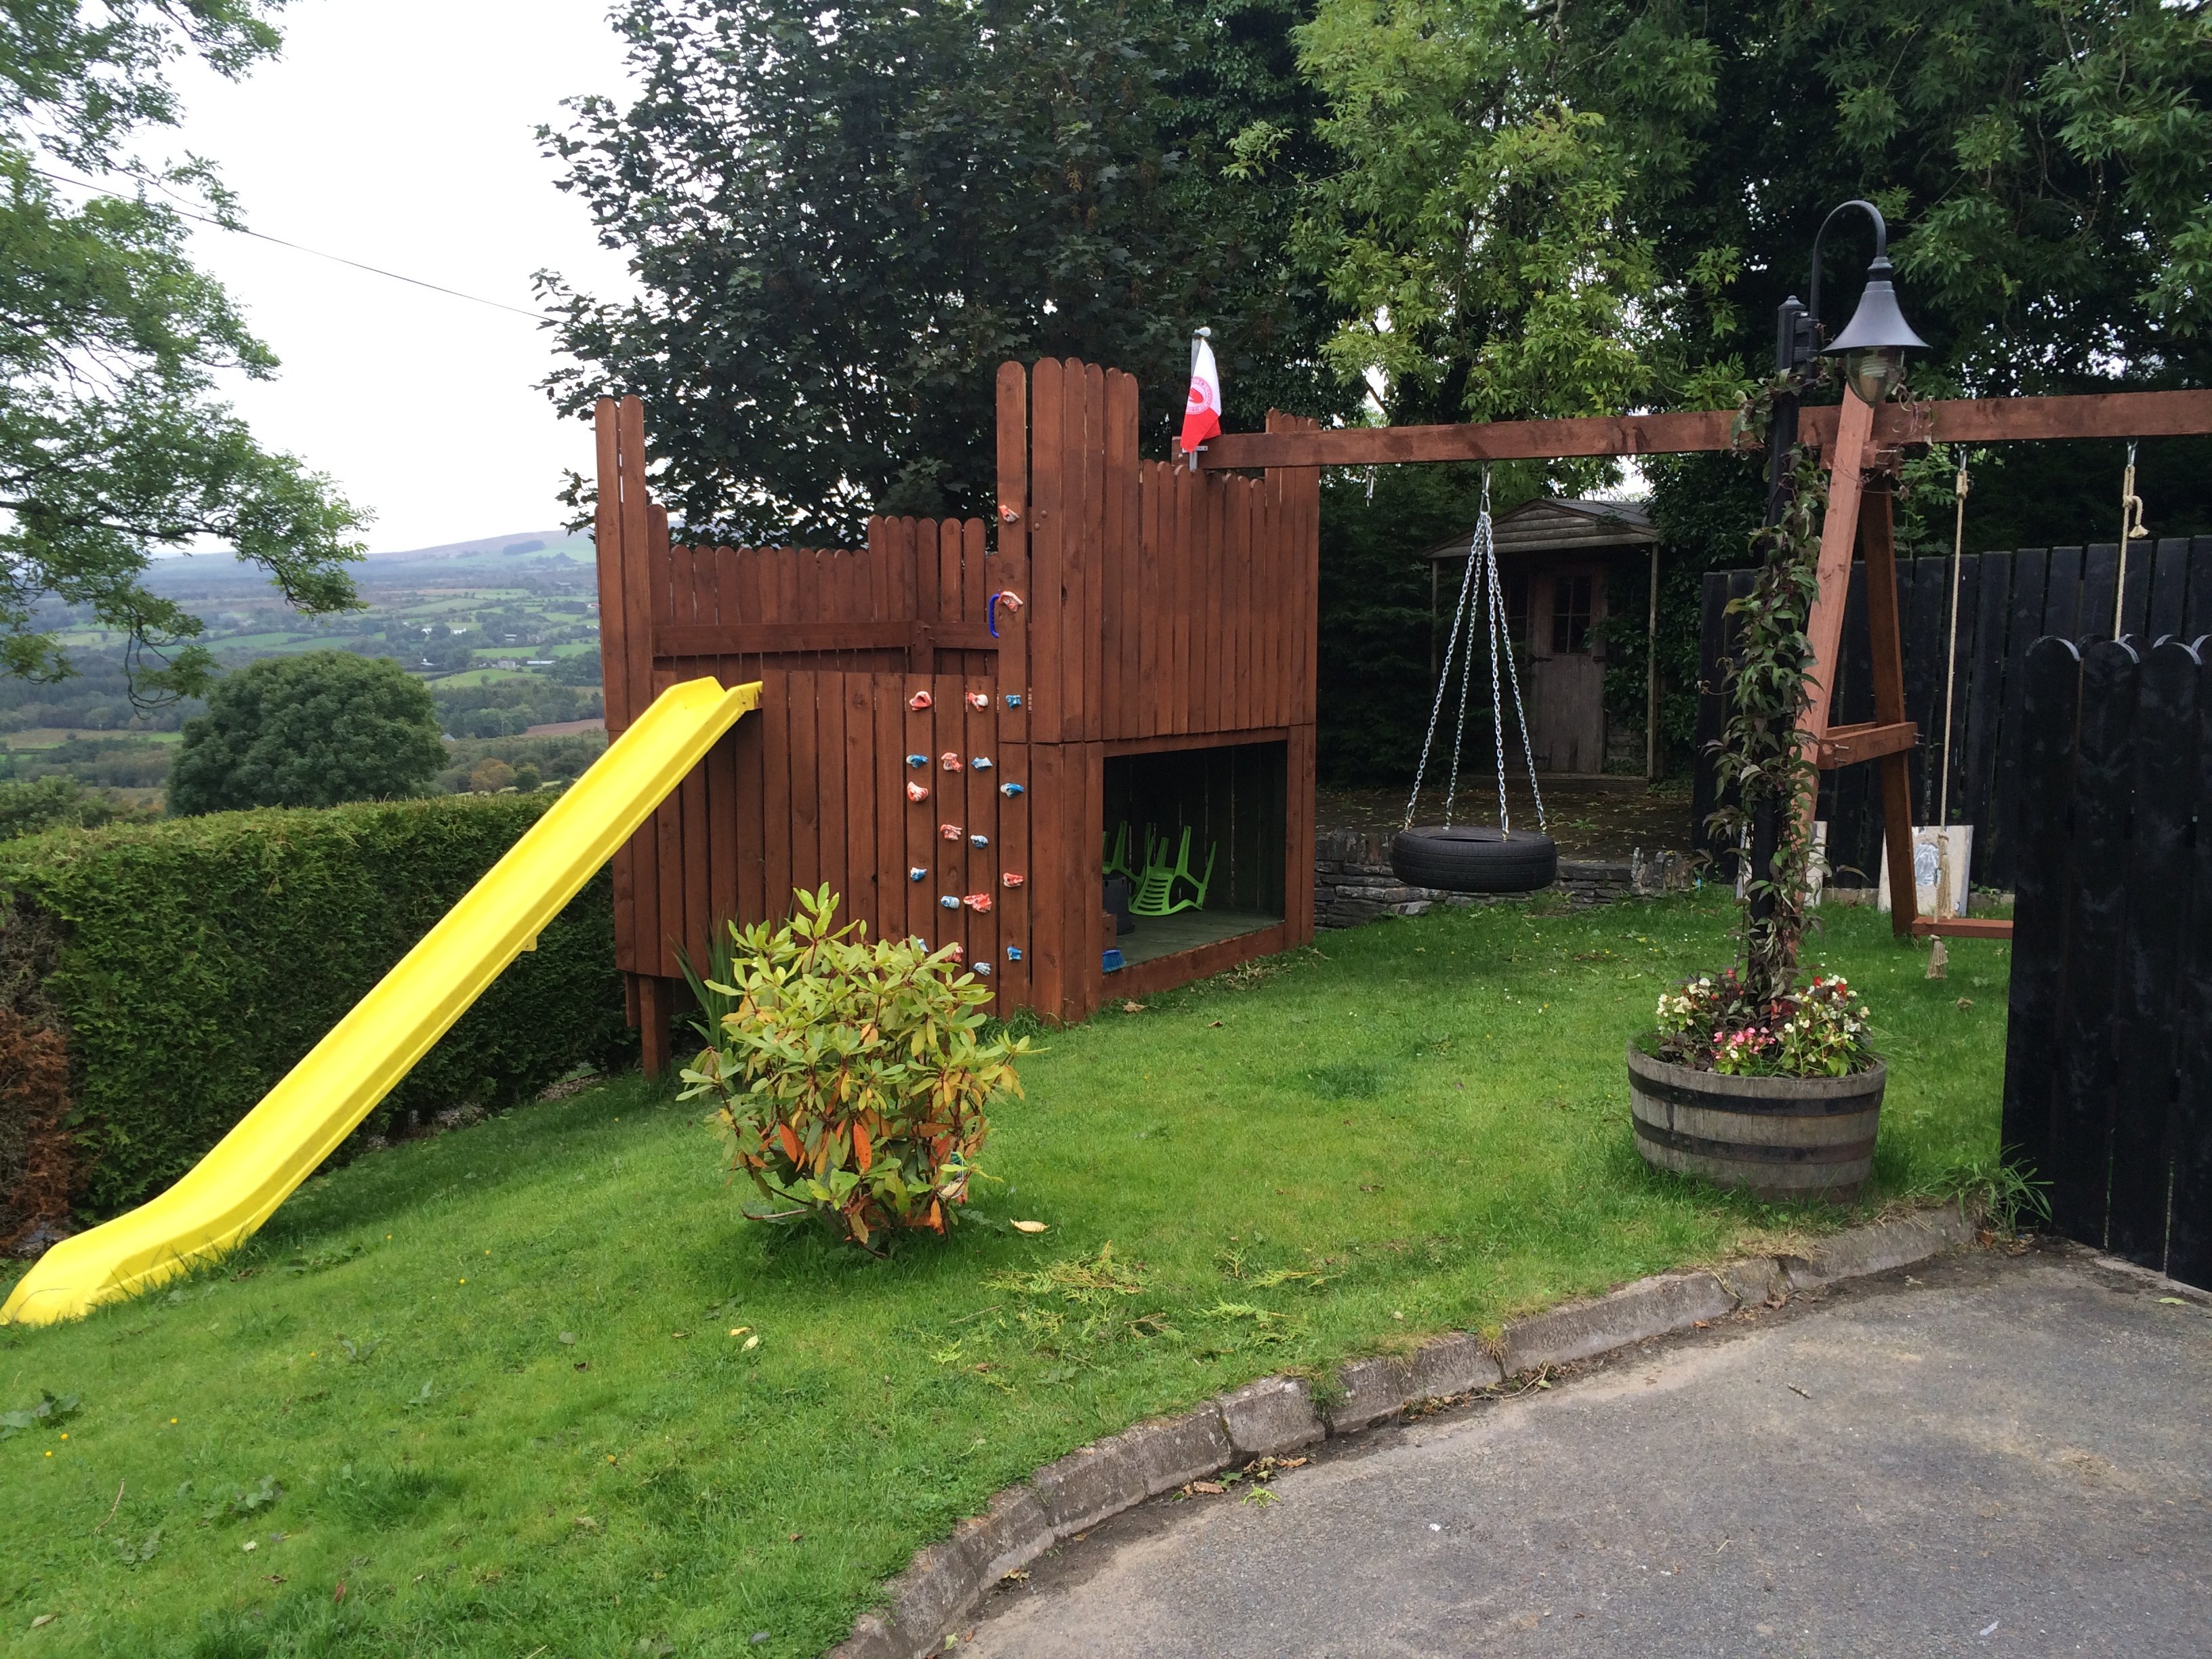
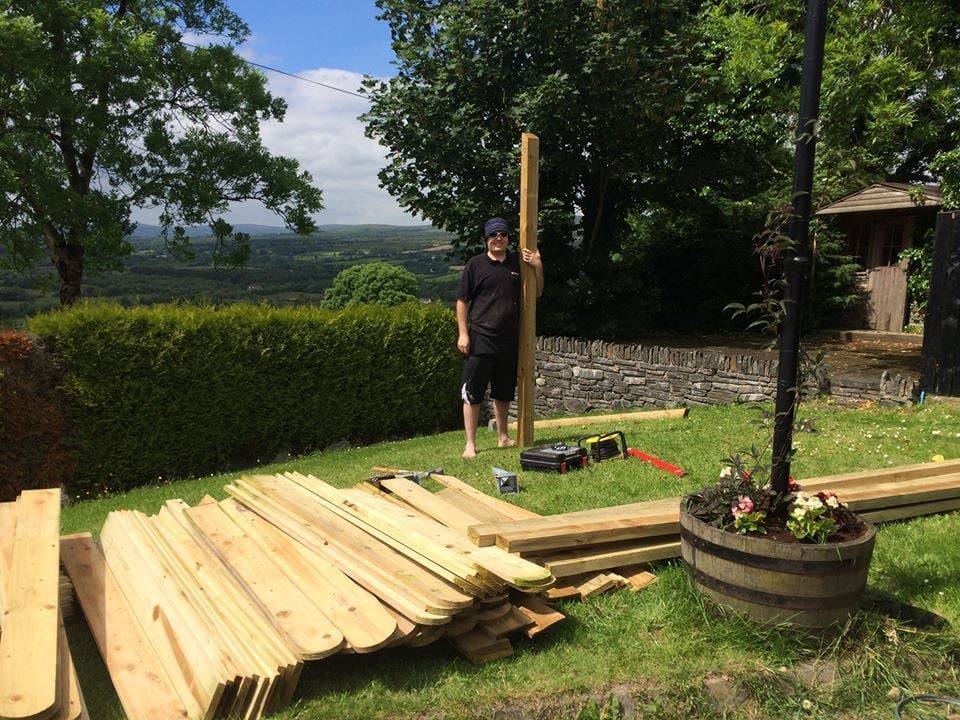
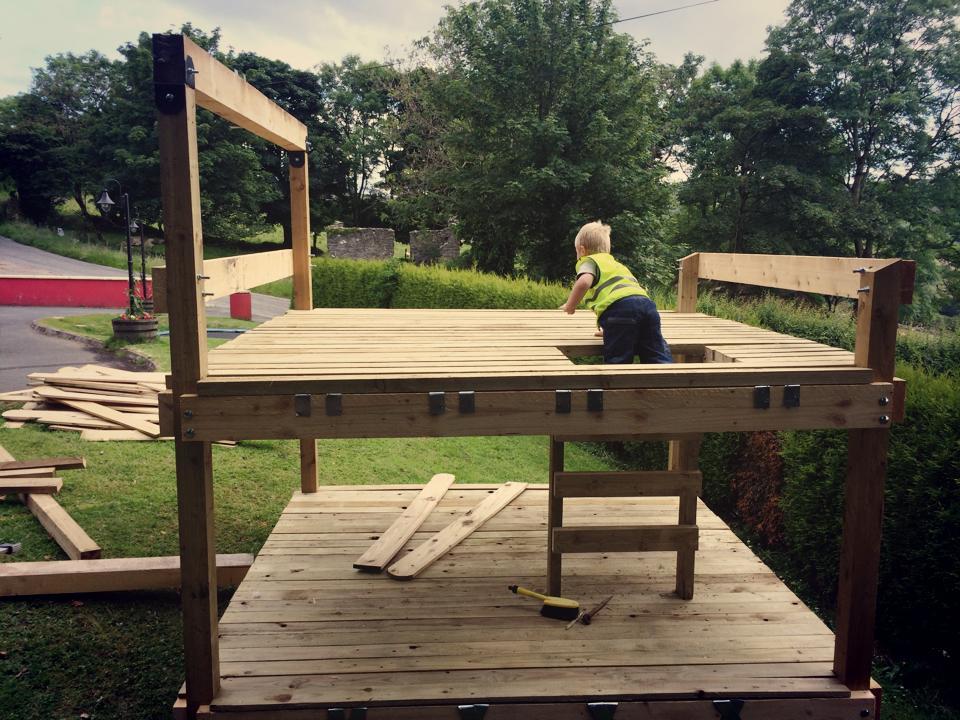
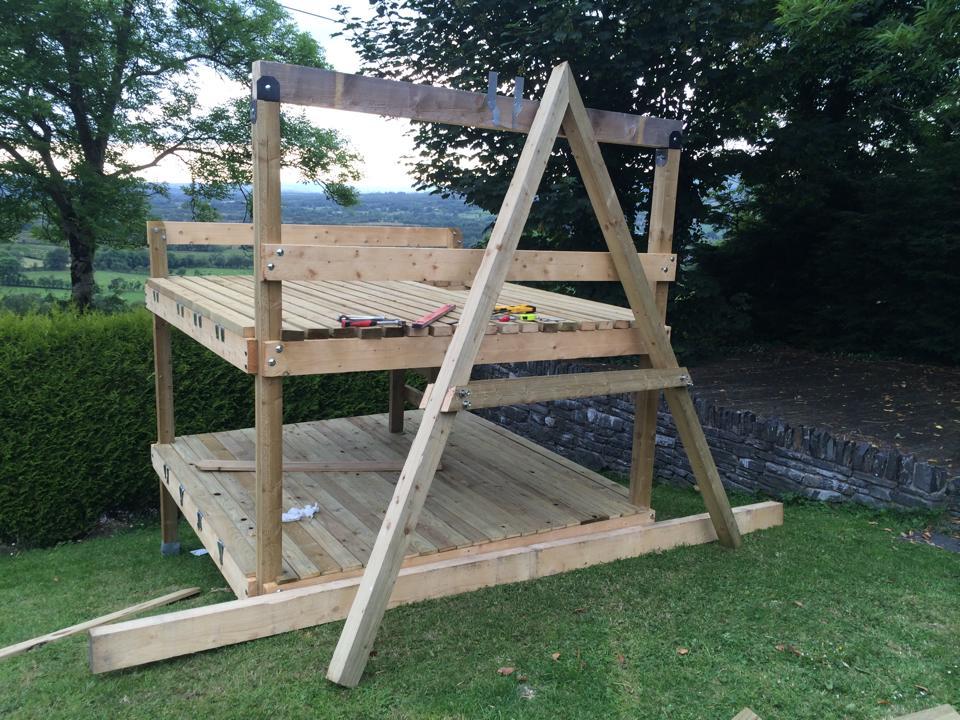
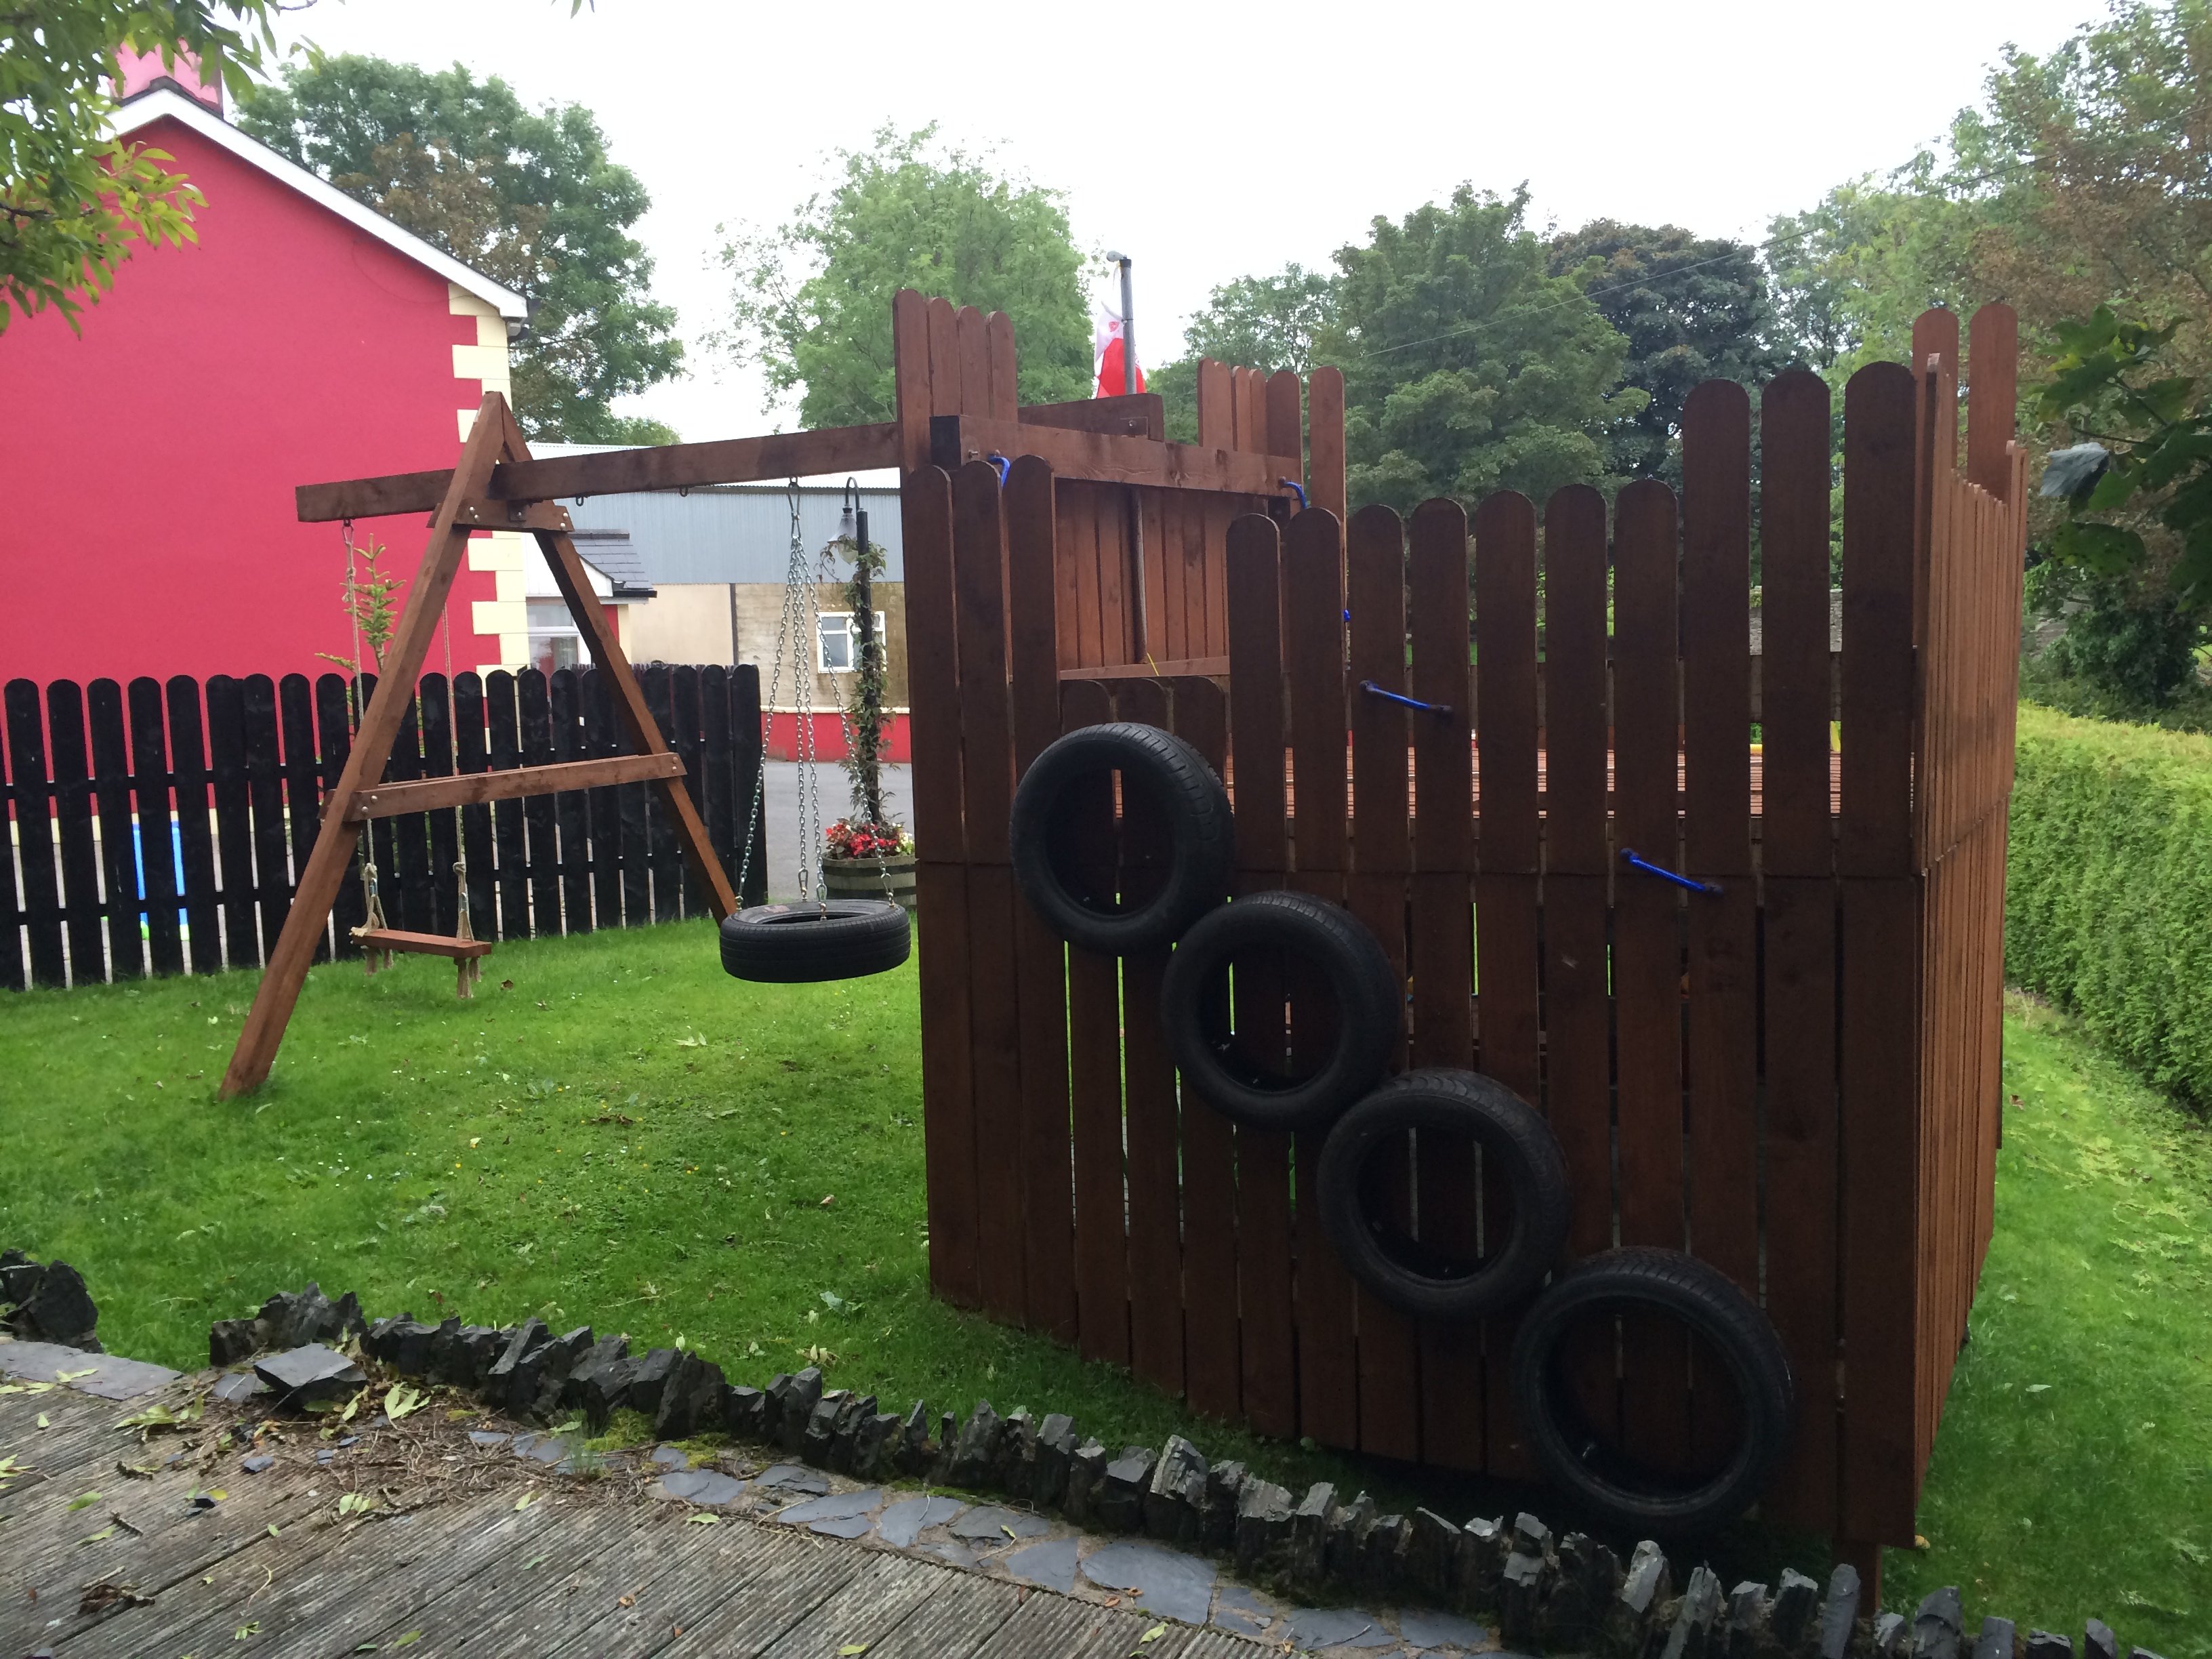
Play Deck and Swing

Wed, 09/03/2014 - 07:35
You have a BEAUTIFUL view from your yard! Just curious, where do you live? I assumed somewhere in Europe due to the currency. The play area looks fantastic. What lucky kiddos!
Wed, 09/03/2014 - 08:21
Thanks. Lovely part of the country outside Omagh, Northern Ireland


Comments
lmmblog
Mon, 01/09/2023 - 07:55
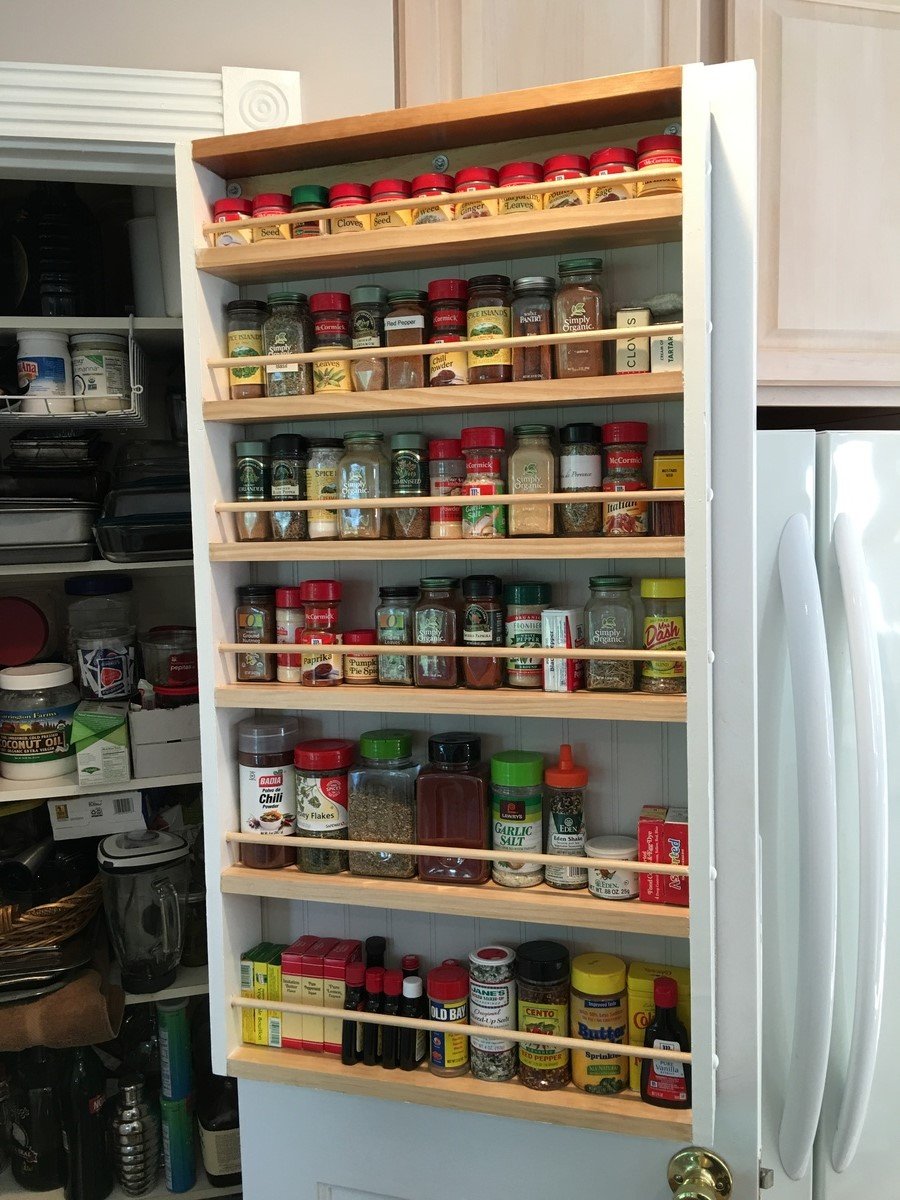
can you share the stain on…
can you share the stain on the doors?