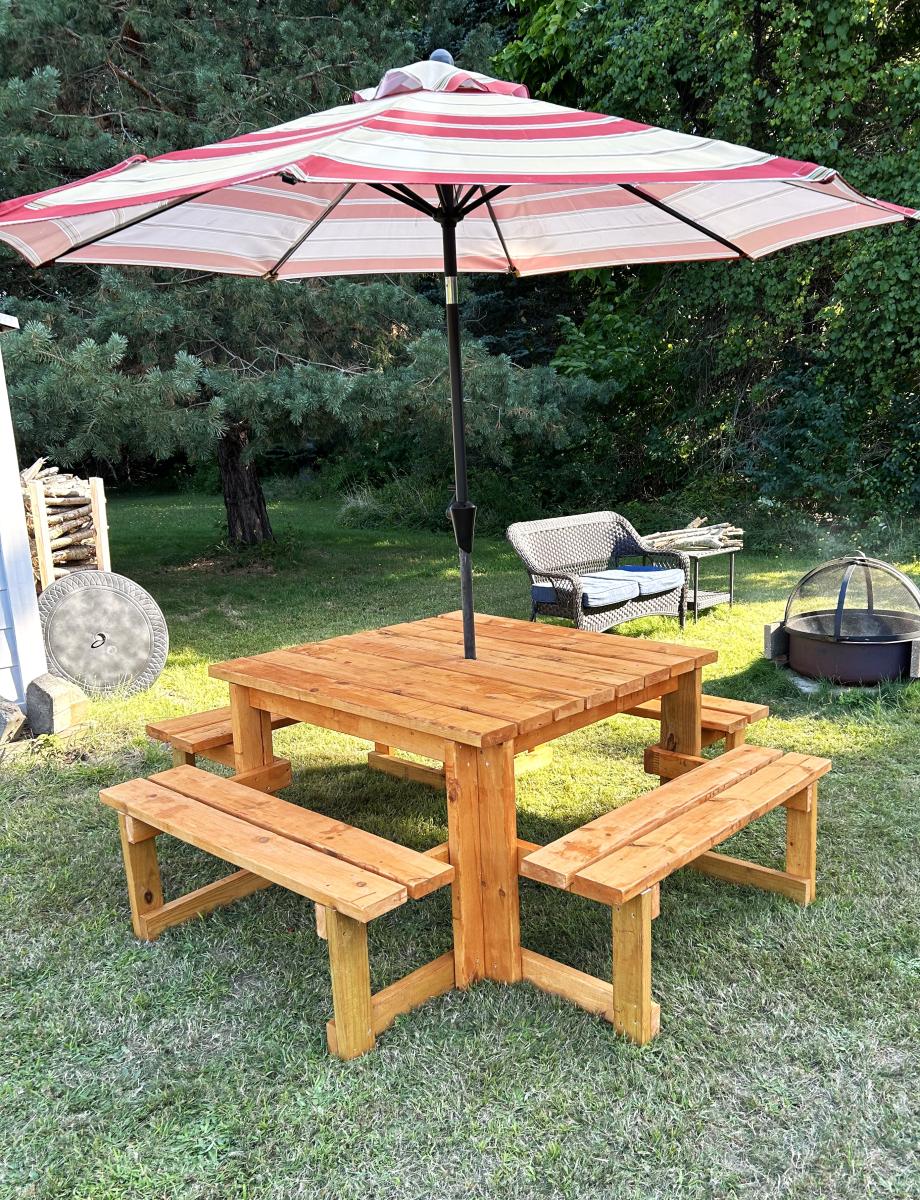
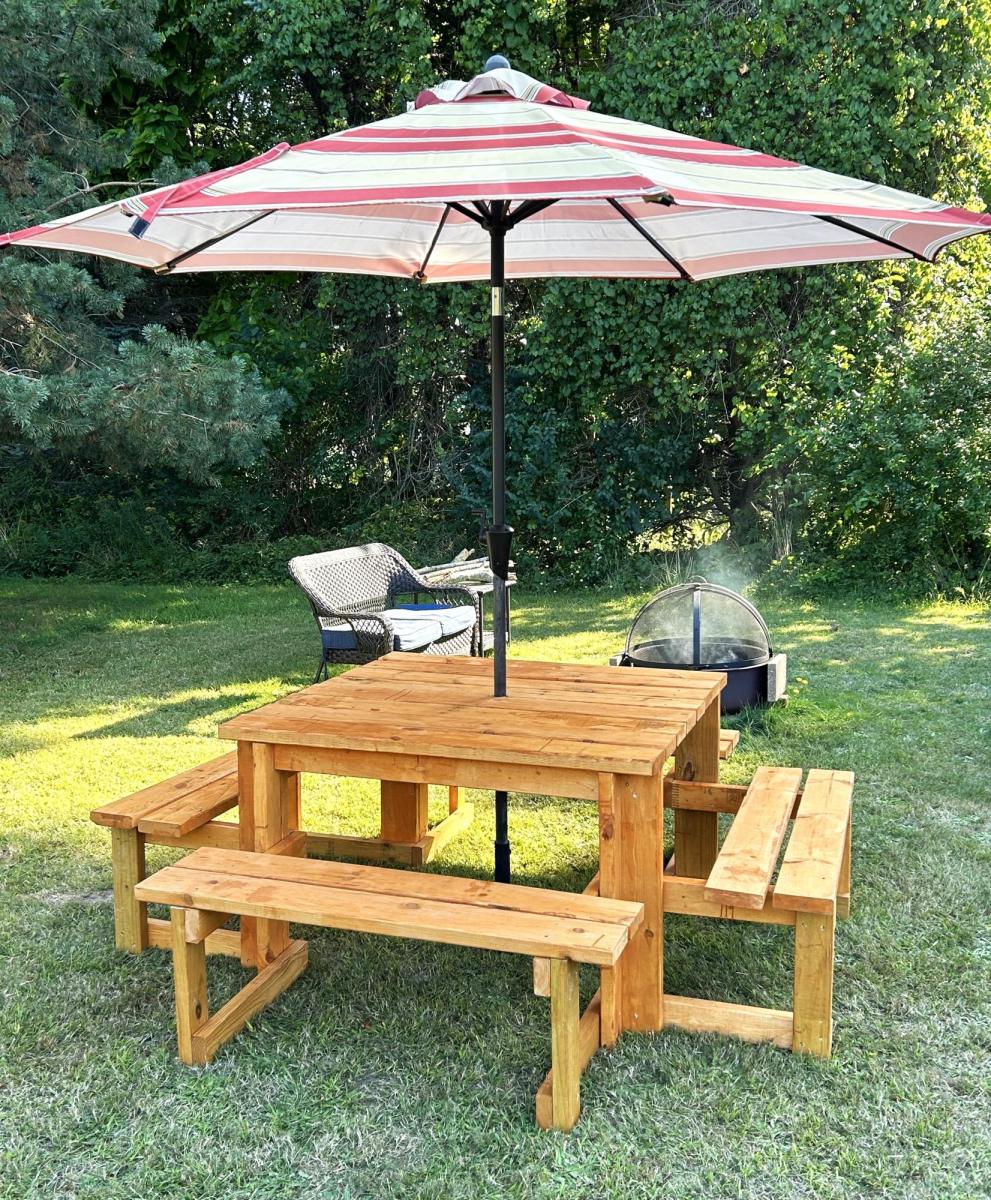
Outdoor Umbrella Picnic Table
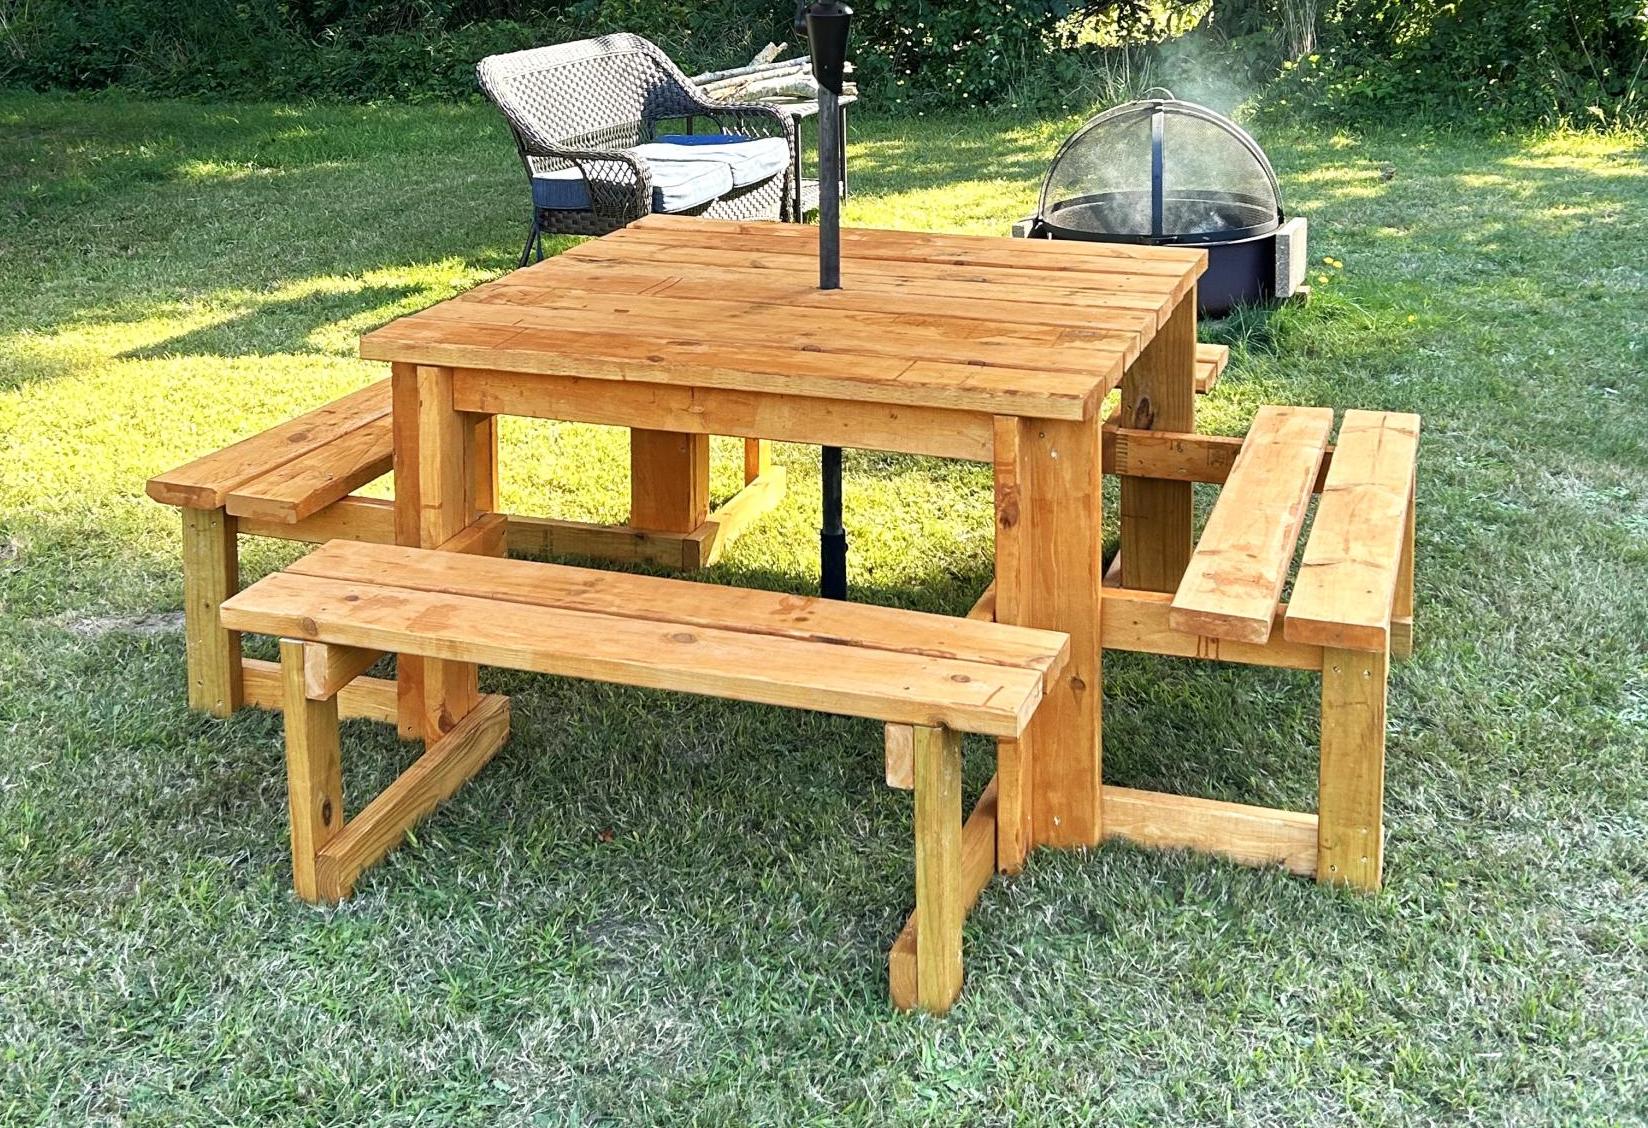
Picnic table with slight modifications. Assembled with the help of our five grandsons. A day to remember.
Kerry Still
Built from Plan(s)
Picnic table with slight modifications. Assembled with the help of our five grandsons. A day to remember.
Kerry Still

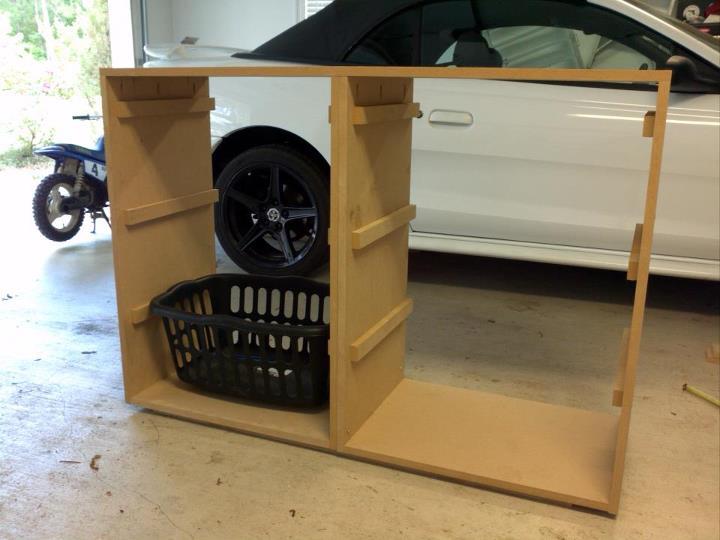
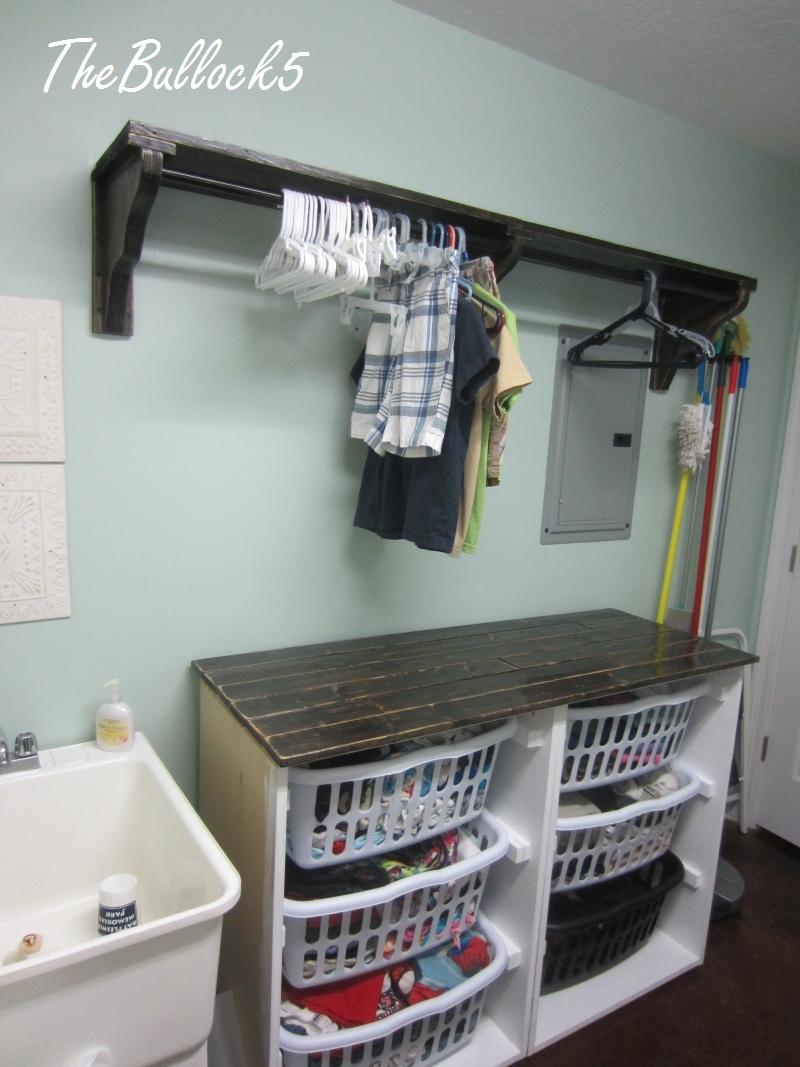
more details on my blog. I built 2 of the laundry dressers. adjusted the placement of my baskets due to restrictions in the overall height of my unit (I have a ironing board cabinet built into 1 wall that I still wanted to be able to open and use :) I used MDF, but it was a bear to work with and next time I would spend the extra $$ on birch. i painte the bottom in a semi gloss. and plan to add the doors (which will have a beadboard backing) they will be painted white with a dark walnut glaze. The top and shelf /brackets are all done in a distressed finish with ebony and mahogany stain mixed then 2 coats of poly very sturdy even filled!


Fri, 06/26/2015 - 00:00
I have been wanting to make the laundry basket dresser but am holding off because we are moving. What color did you us on the walls, I love it.
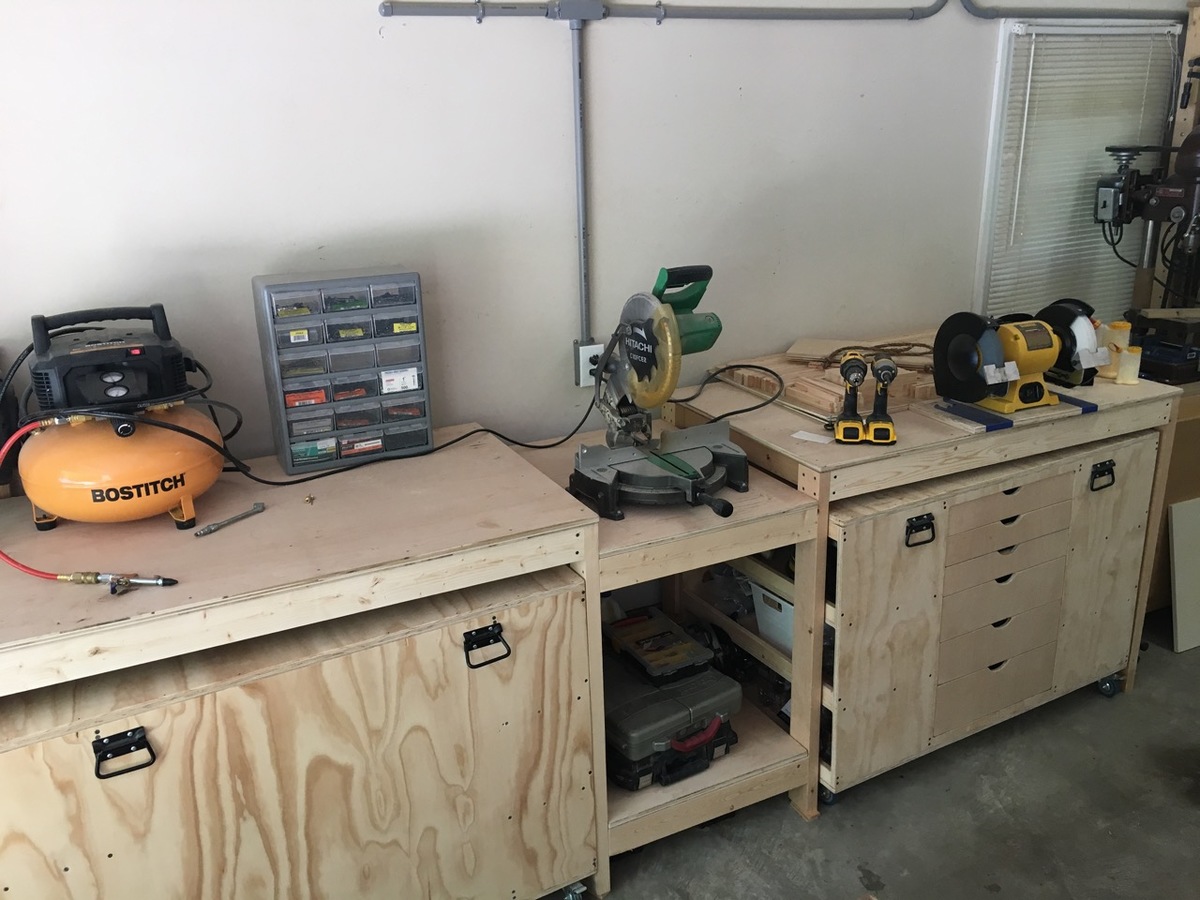
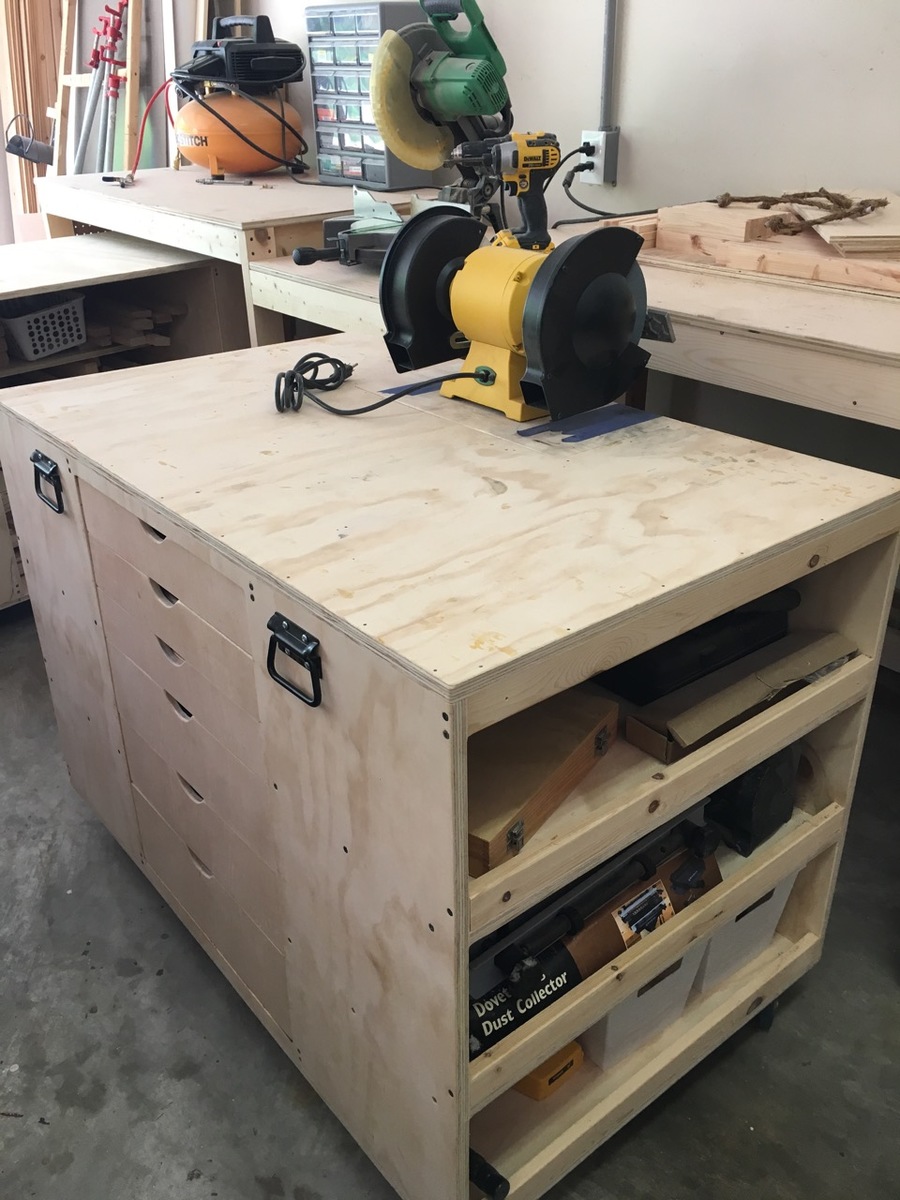
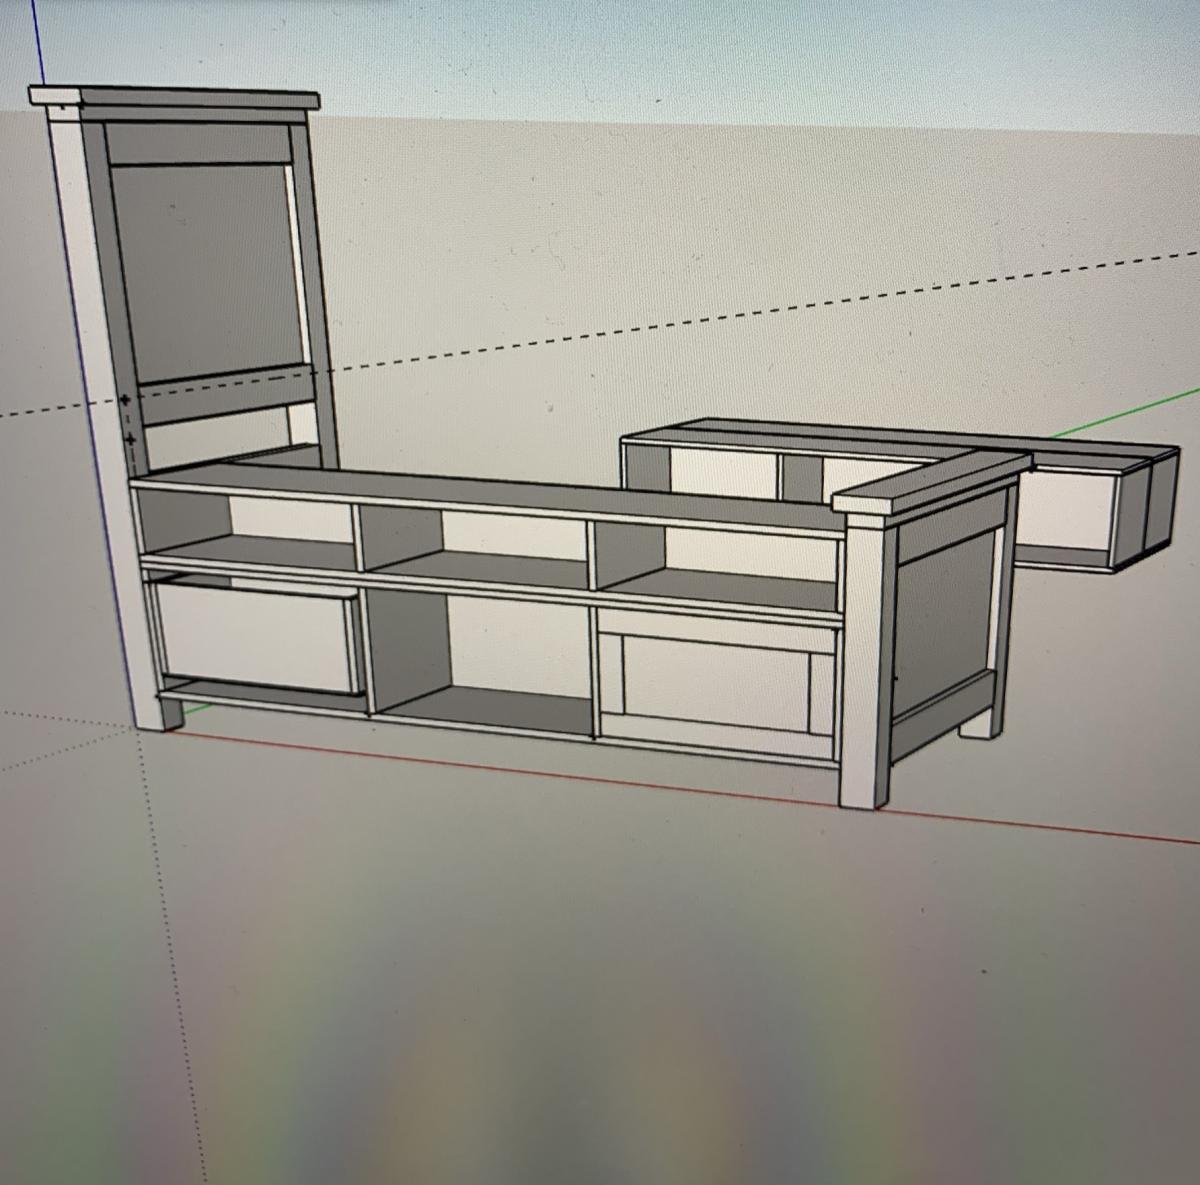
I'm so happy that I found the plans for Ana's miter stand and rolling carts! It was just what I needed for my garage shop... so everything can be organized and stored compactly but things can pull open and expand when I have a project (which is all the time, actually).
The actual miter stand was super easy to build - the carts took a few days working non-stop (when the kids permitted).
I made a few obvious changes from the plans:
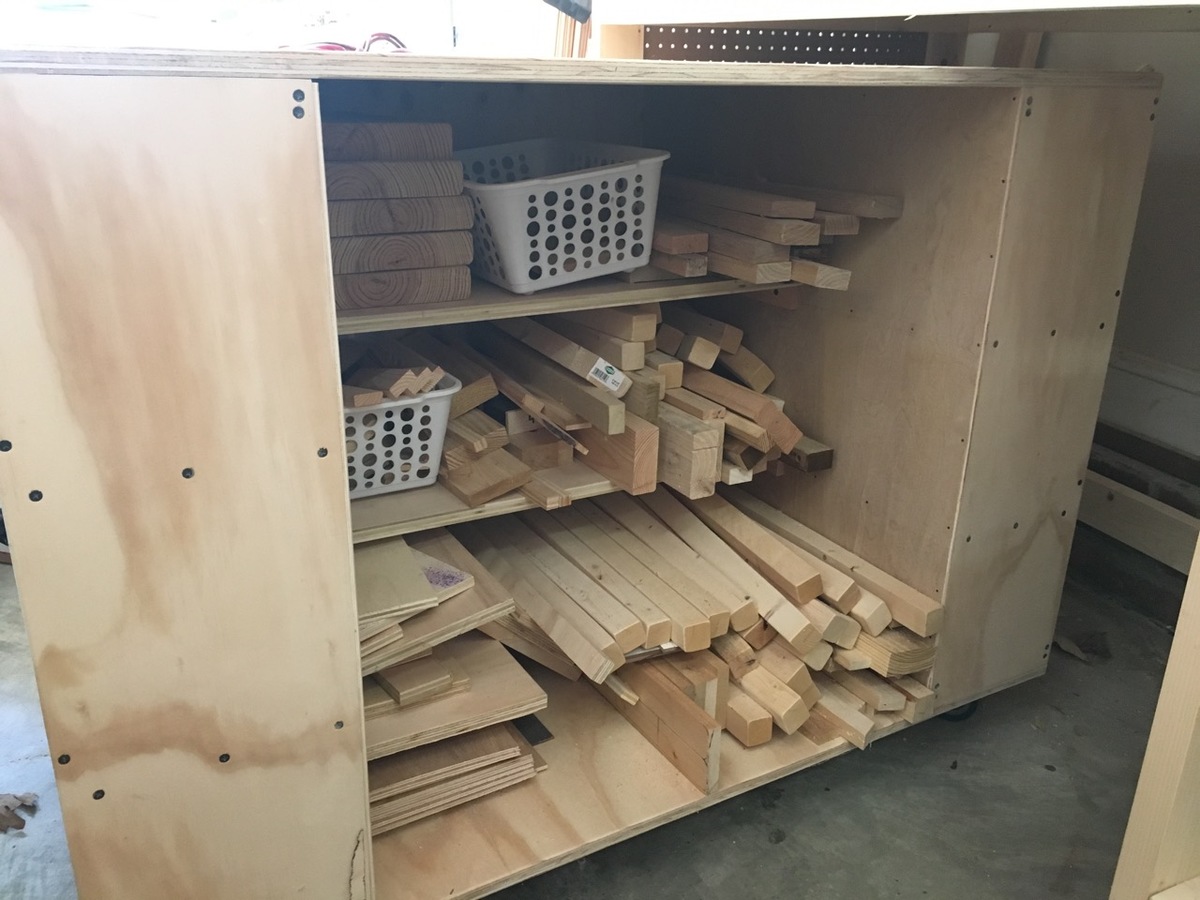
-made deeper shelves on one of the carts
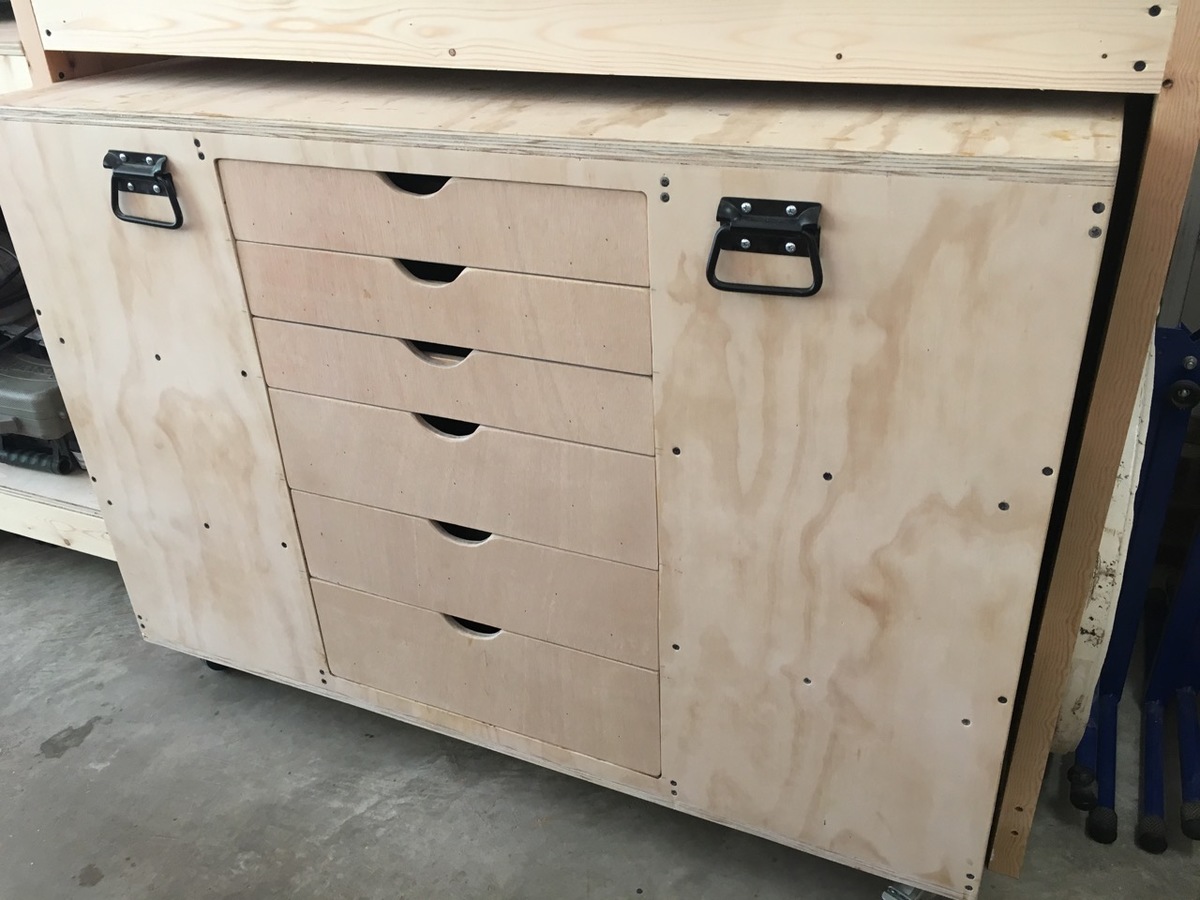
-added drawers on one of the carts
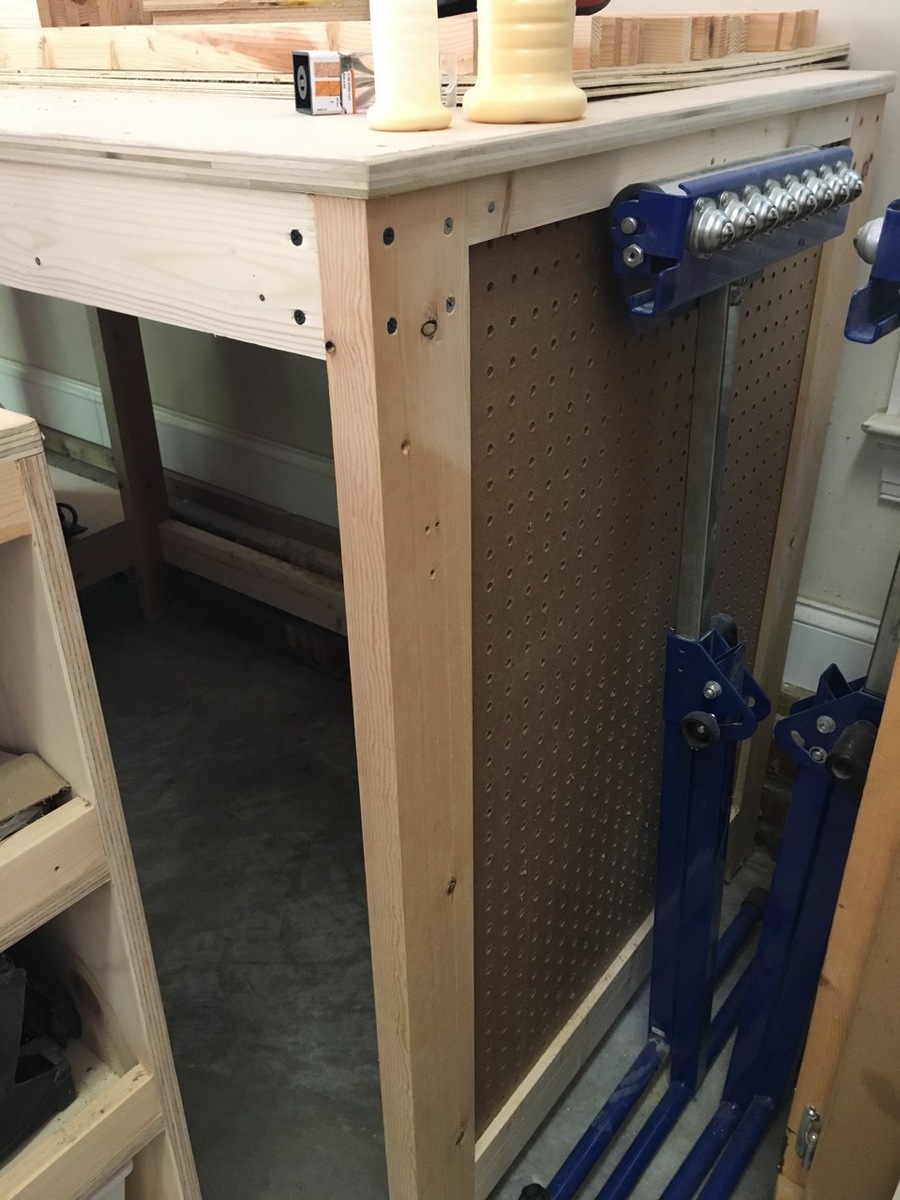
-added ped board on the end caps of miter stand
Something I didn't consider before building this was the slope of our garage floor. There's a 3" difference from one end of the legs to the other so I had to use riser blocks to get everything perfectly level. Unfortunately there's no way to level the carts as they aren't stationary but they slide in/out just fine.
I'd recommend this build to everyone! Check Home Depot clearance often for deals on plywood!

Wed, 02/07/2018 - 11:35
Would you be able to share the original plans? It seems that once the contest ended, the links to the plans stopped working.
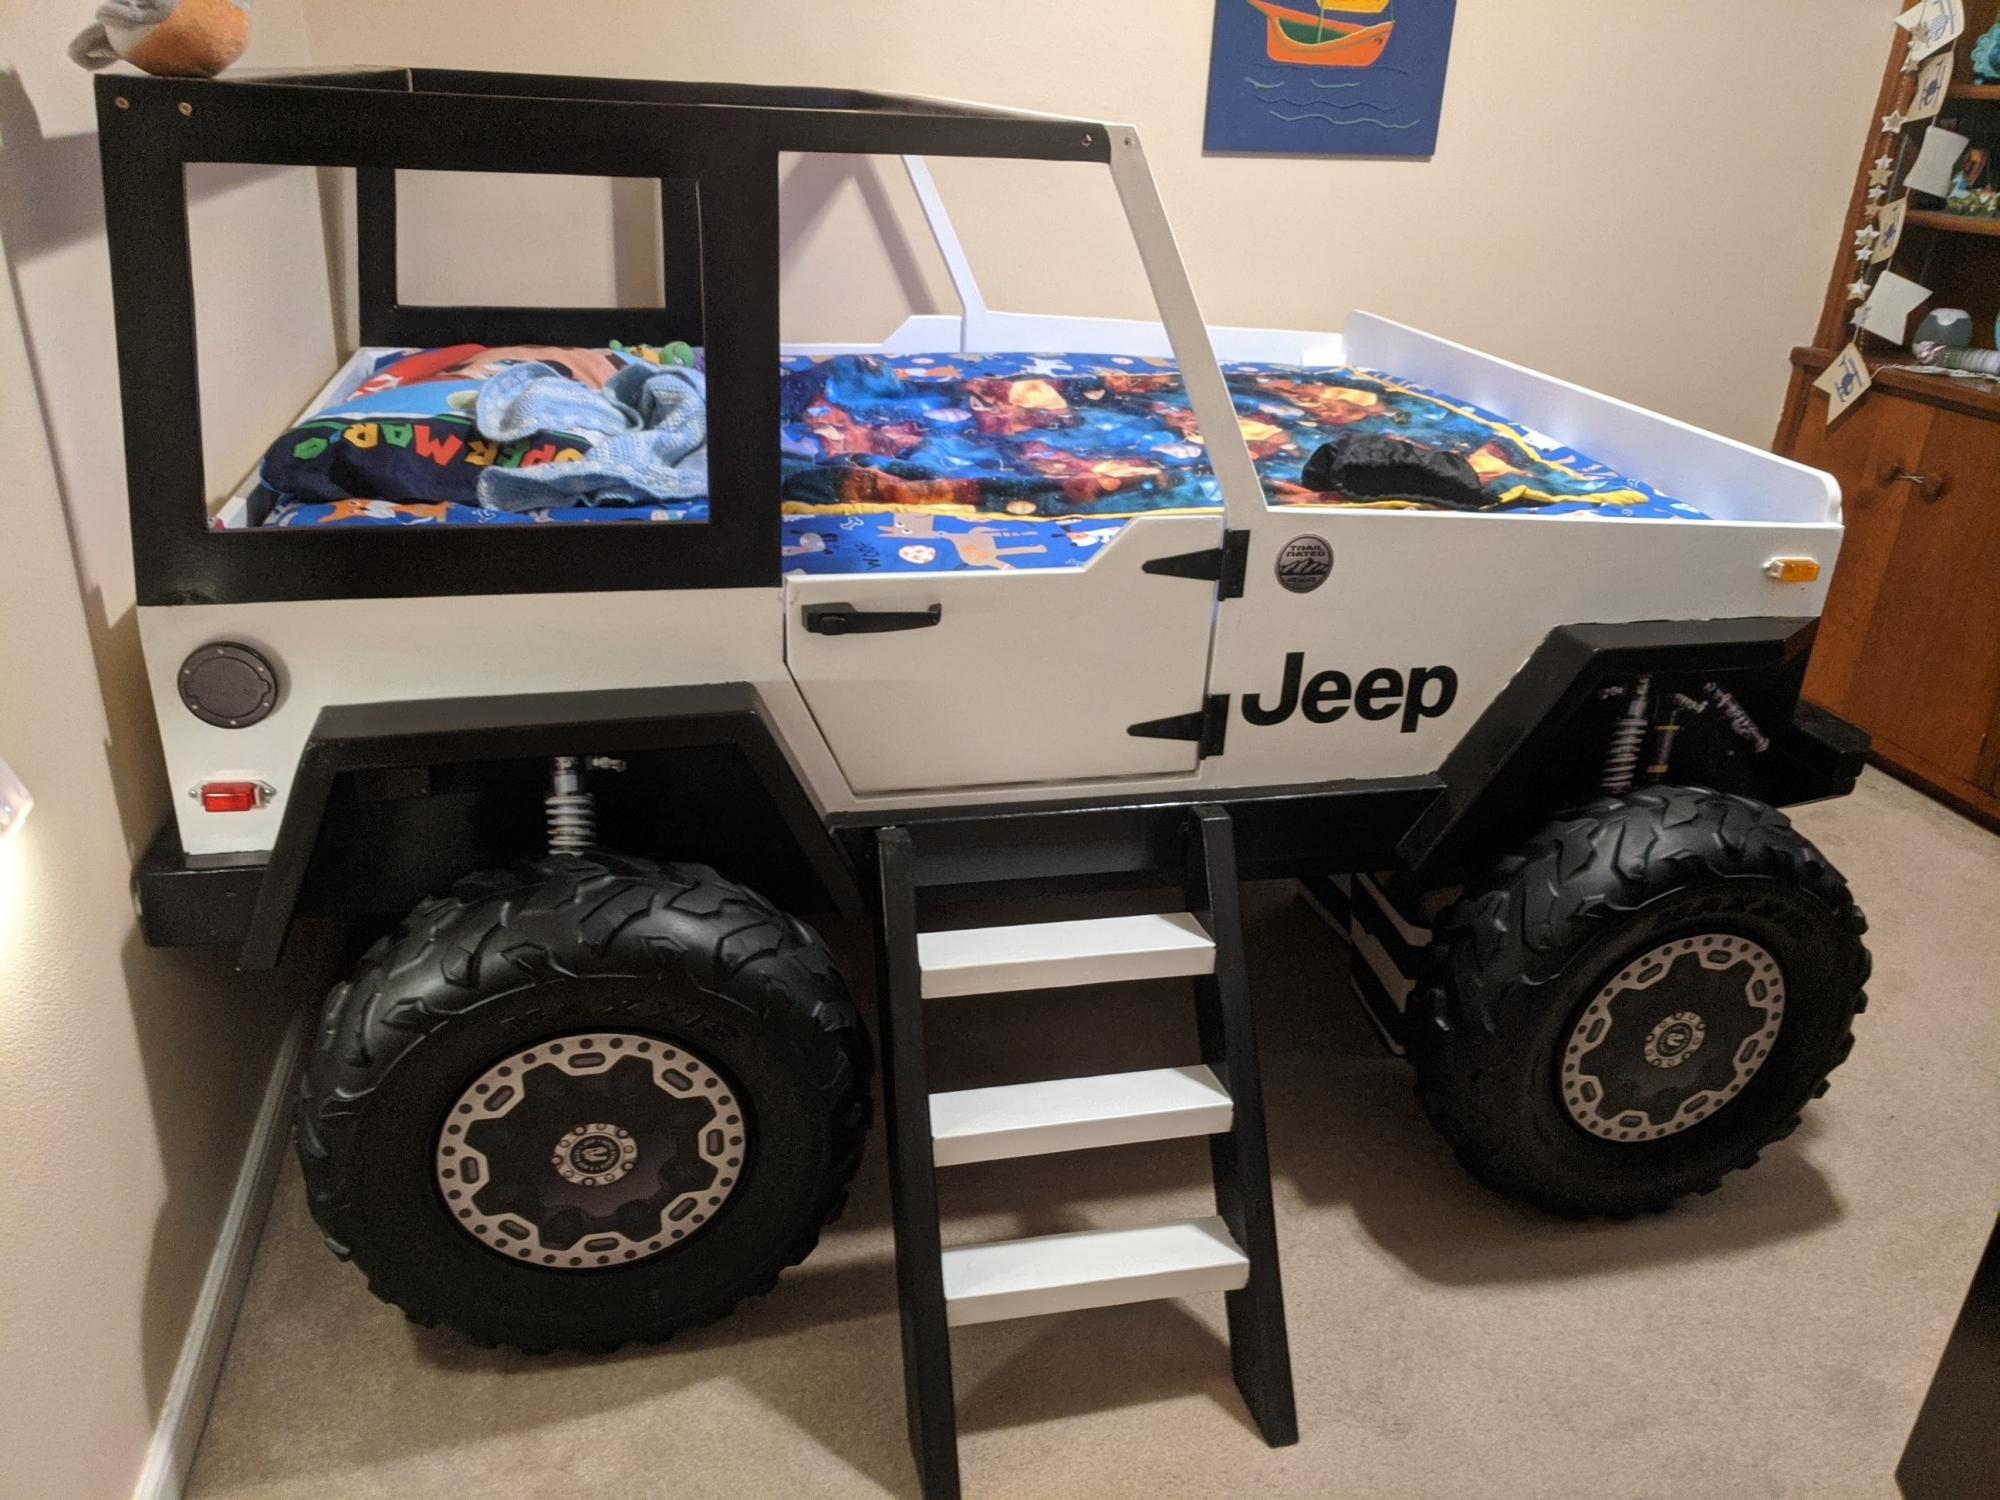
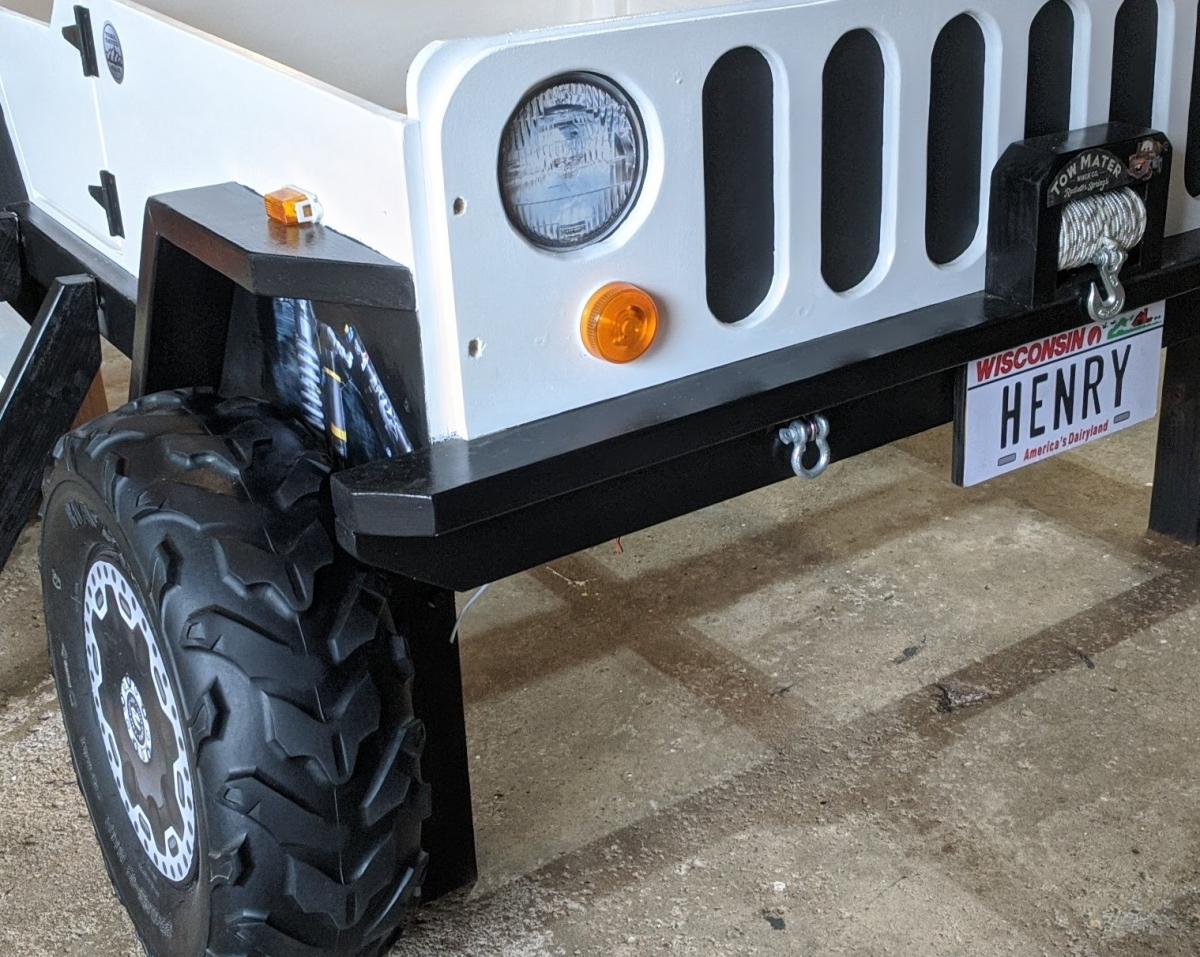
I hope this is OK to add here. It's not an Ana White plan, so moderator please delete if it is not allowed. I made this bed for my grandson. I bought a plan online and modified it from a twin to a full size bed. The dome light and running lights work as night lights. A motion sensor light activates if he crosses the door to illuminate the ladder. Front tire is made as a step so his parents can climb in and read to him. The whole thing is on EZ Sliders so they can move it away from the wall to make the bed.
Mon, 07/05/2021 - 21:59
Wonderful job, thank you for sharing! The details are spot on:)
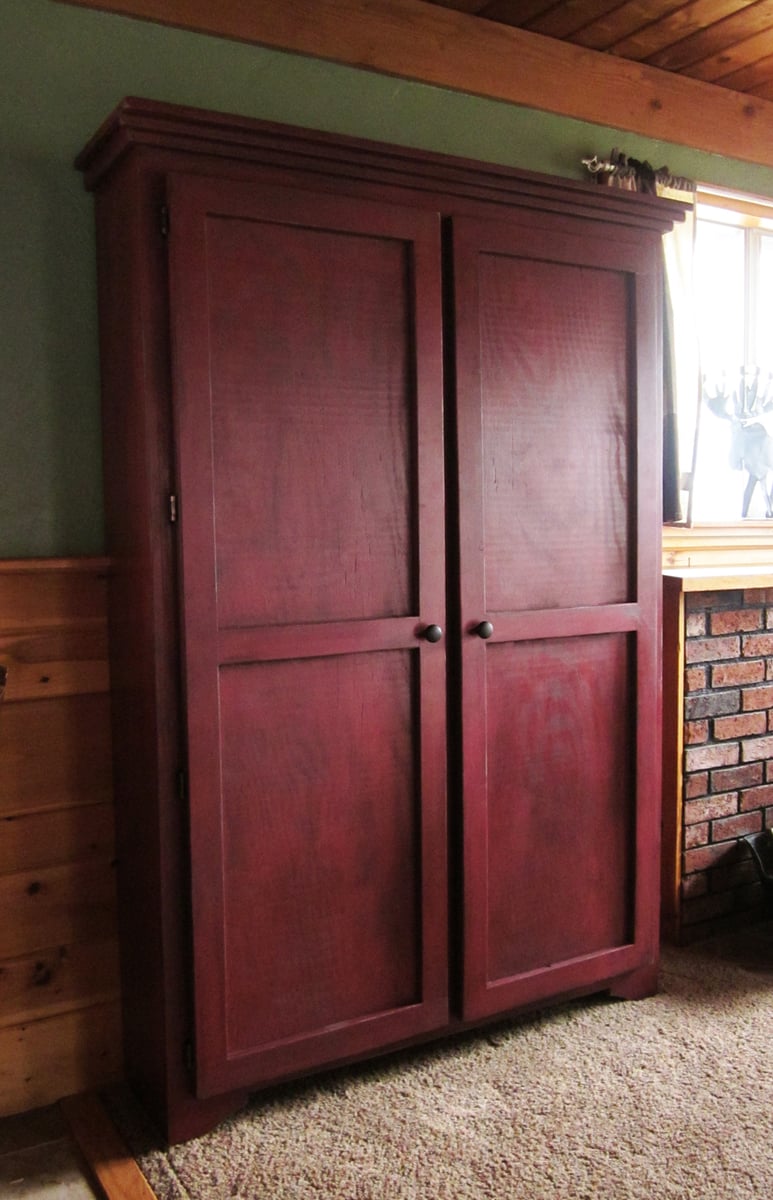
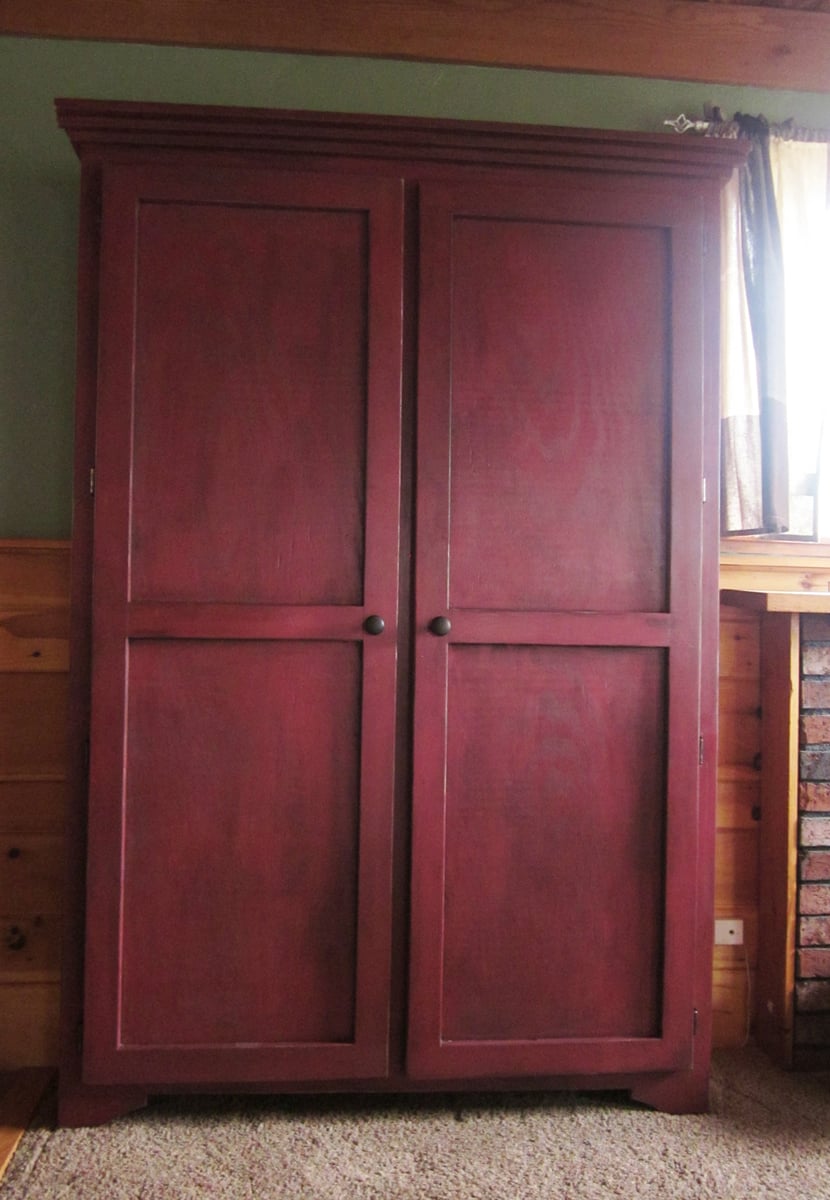
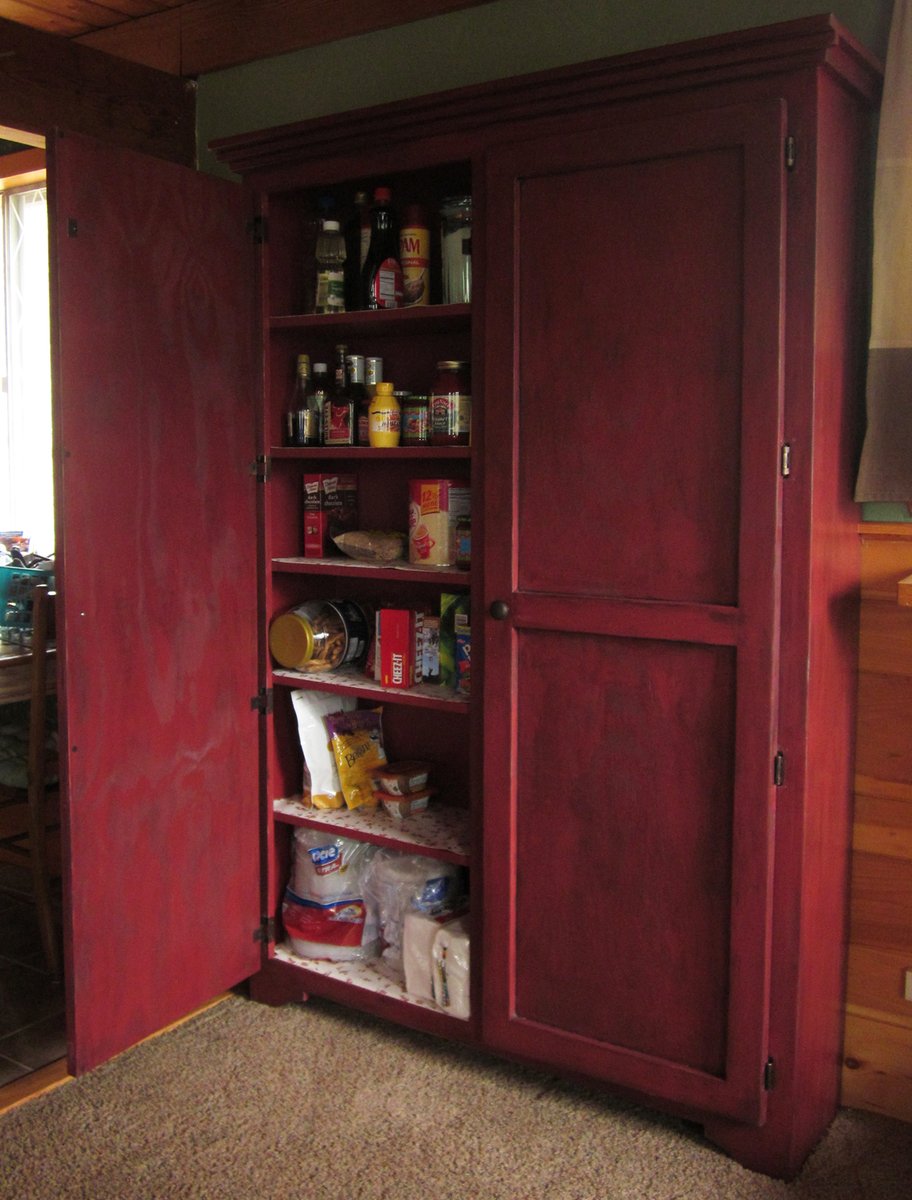
We bought a vacation home that has such a small kitchen. I knew we needed more storage. So I checked out Ana's plans and made this bad boy based on the Simplest Armoire plans.
The home is in the mountain/lakes area of northern New Hampshire, so I wanted to bring the outside colors in. I used Valspar Cabin Red paint and the Valspar Antiquing glaze over the top after distressing it a bit.
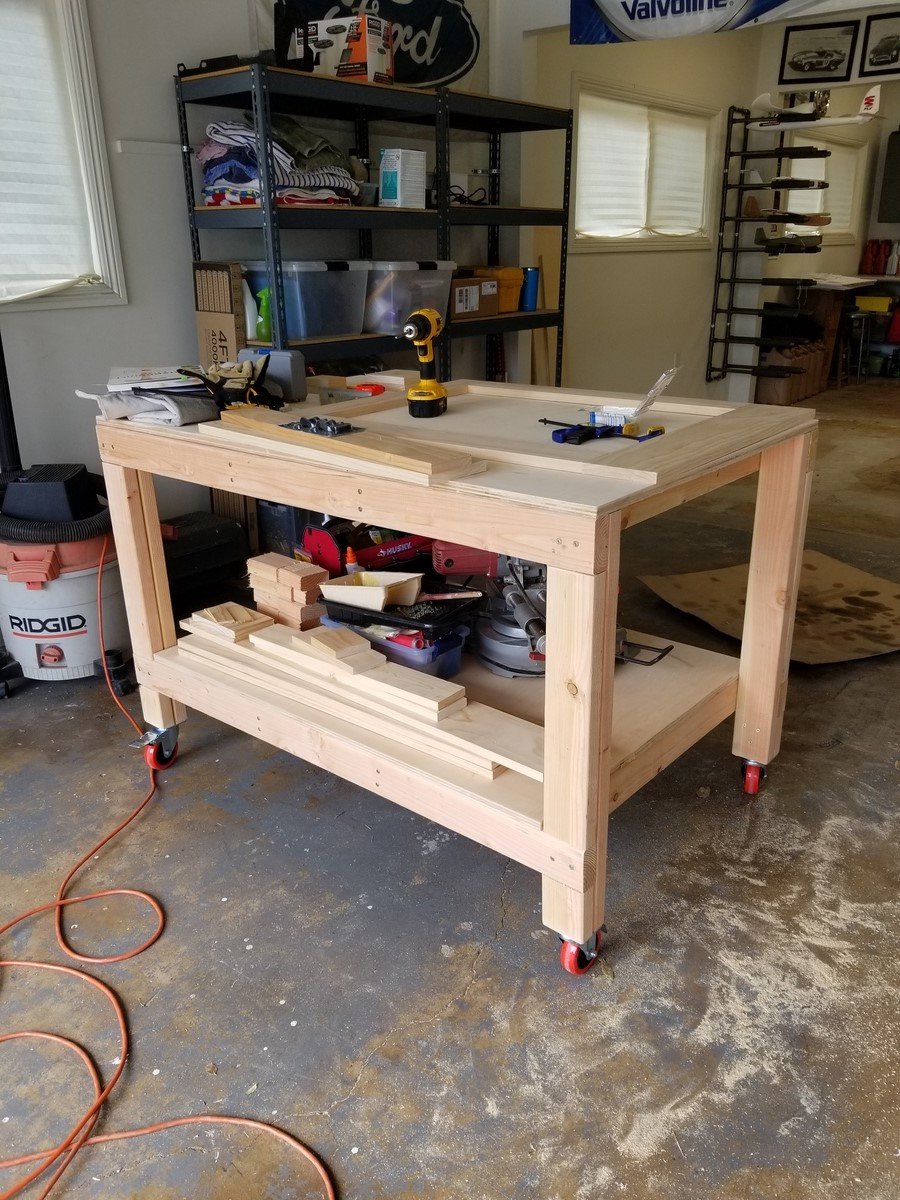
I love this workbench! I added casters so I can move it around the garage, outside, wherever it's needed. I just took 4 inches off the bottom of the legs. My hubby is admiring my handy work and planning on making one for himself.
Wed, 01/25/2023 - 14:31
Love this with the casters! So beautiful. I'm new here and wondering at what point you took 4 inches off the legs. Did you build the table and then just cut off the legs? Or did you adjust the measurements of the cuts? Thanks in advance! :)
Mon, 01/30/2023 - 02:32
The overall height of a 4-inch caster wheel is a little over 5 inches with the mounting bracket, so that also needs to be taken in to consideration. 2nd photo shows the overall dimensions, but to me the bracket and brake area appear to be a bit more than 1.03 inches. https://amzn.to/3DkMKzB
I think the best bet would be to have and measure the overall wheel height, prior to measuring and cutting the lumber.

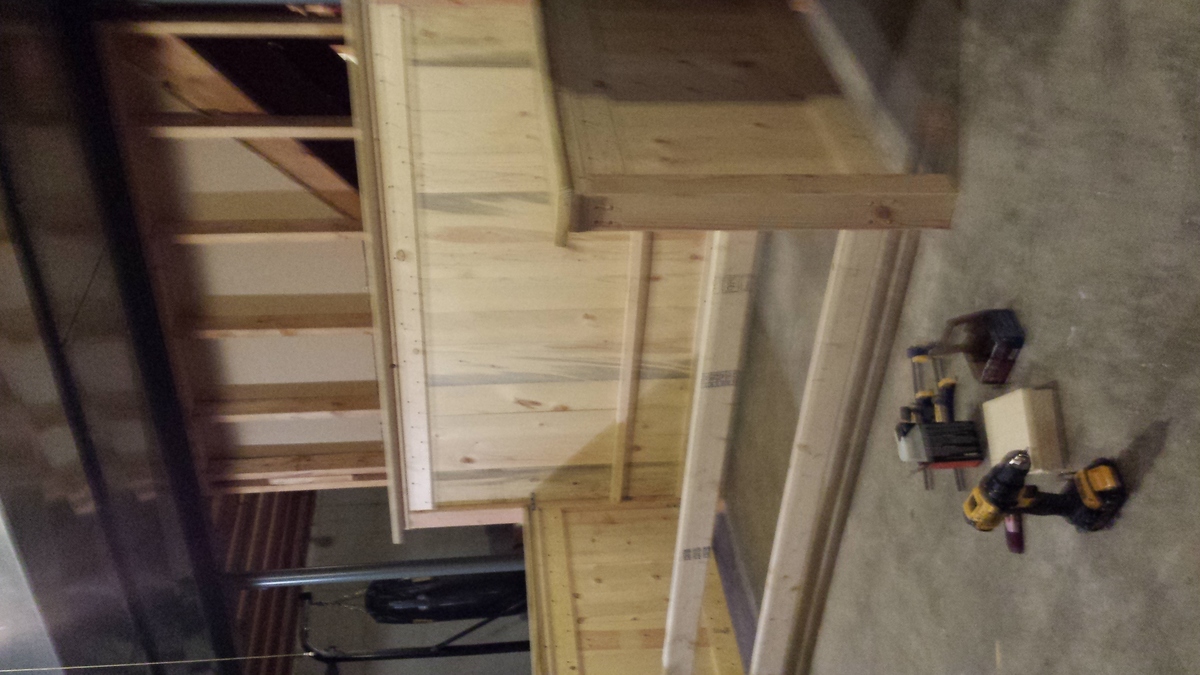
This daybed was modified from the Farmhouse bed plans. I am still finishing the drawers, sanding, putty and paint.
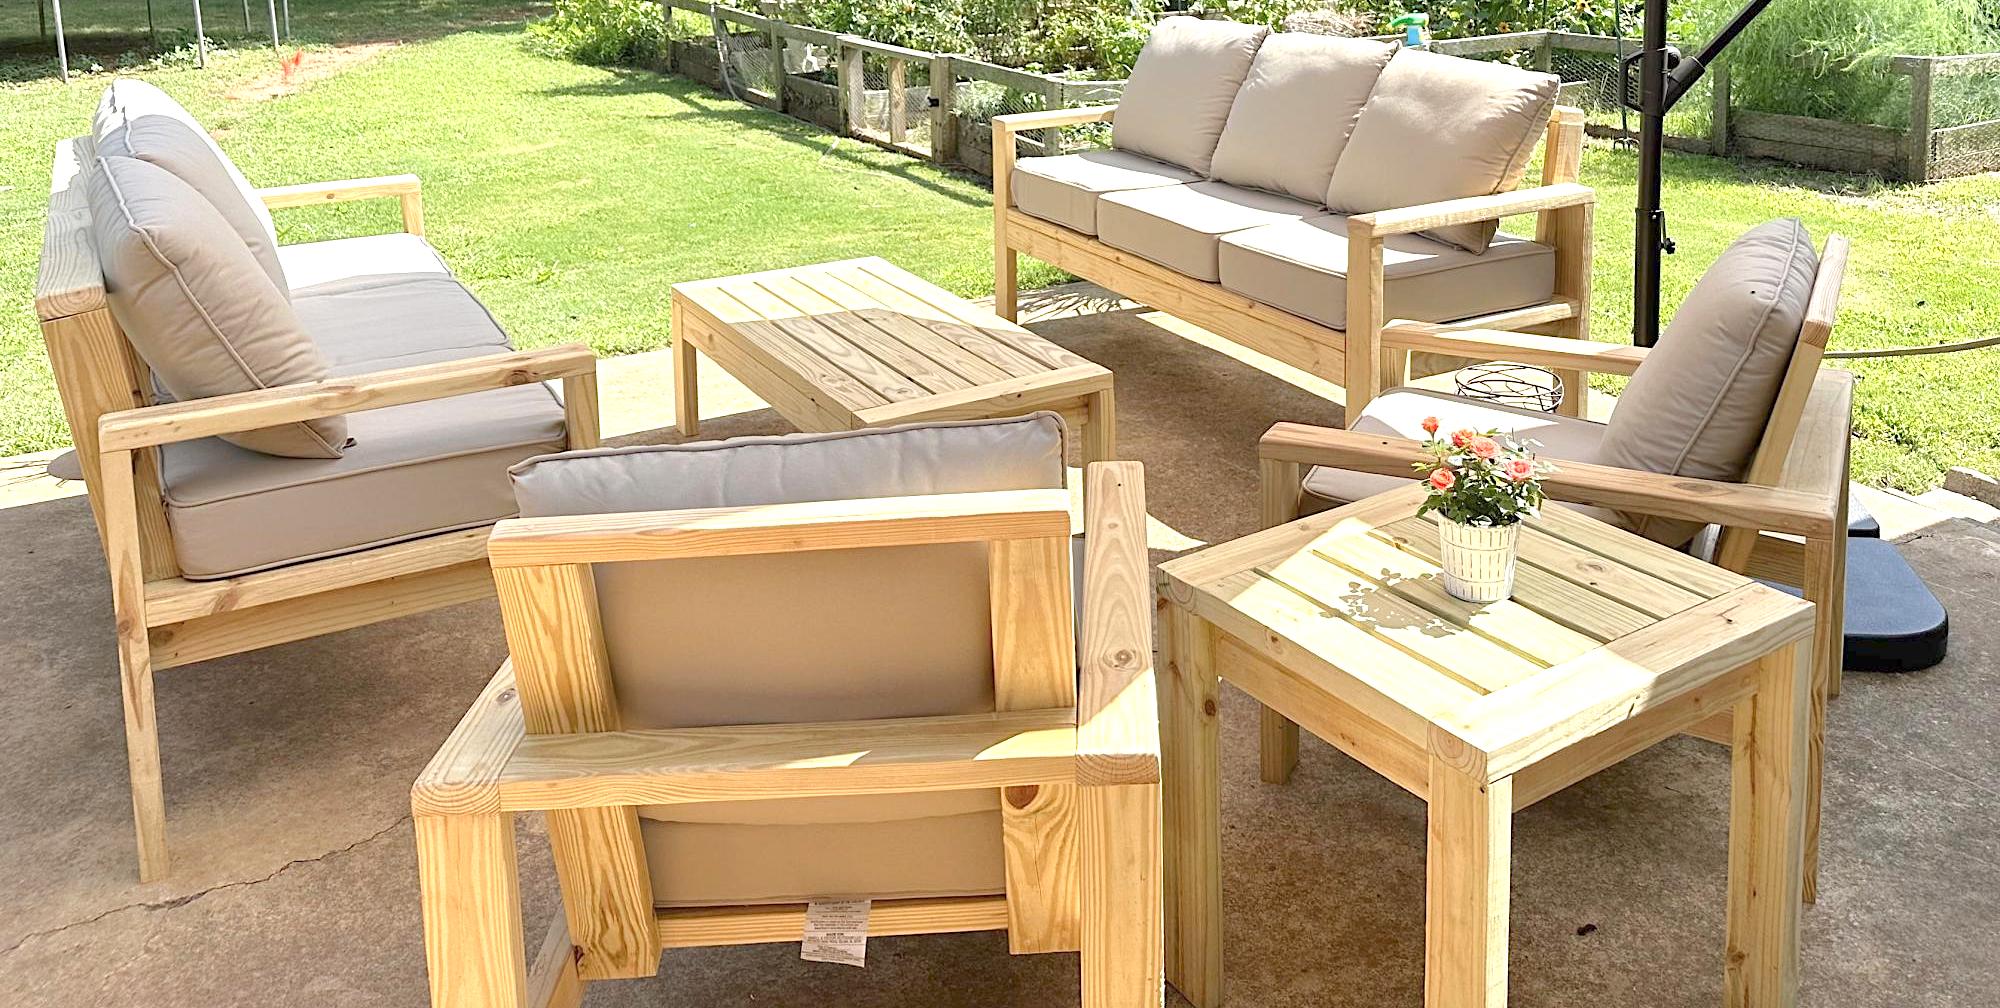
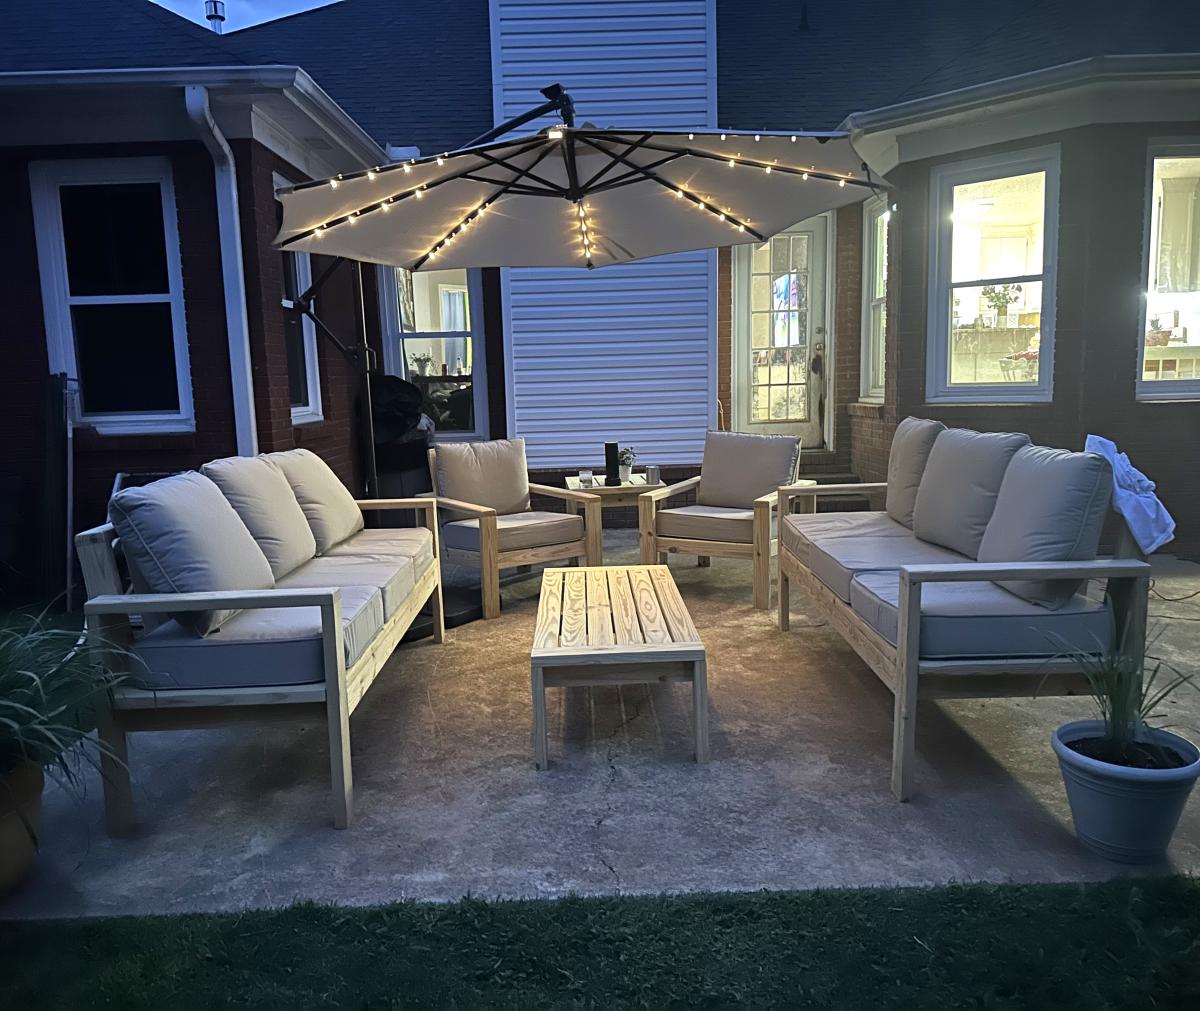
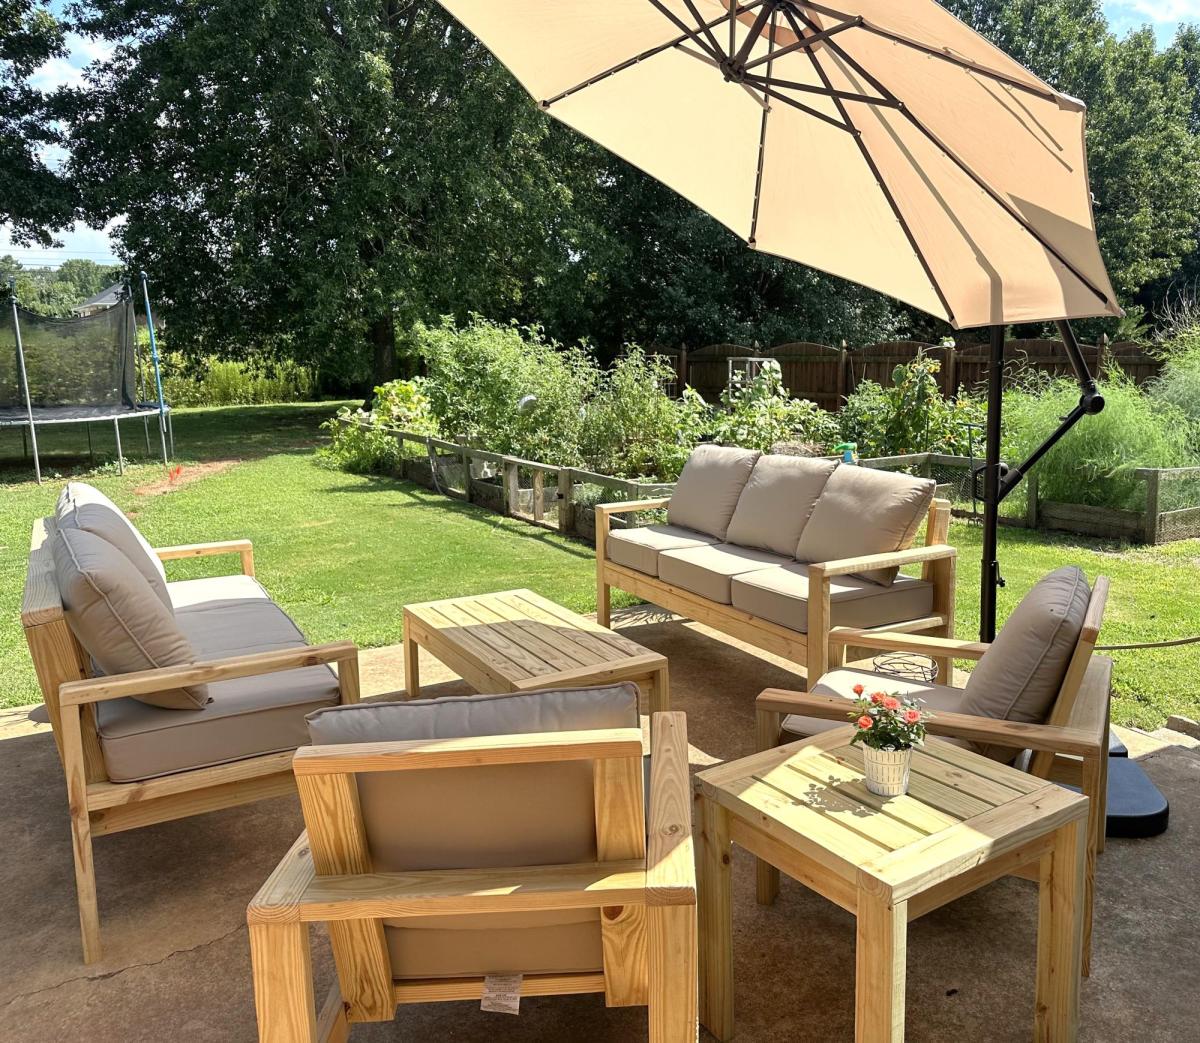
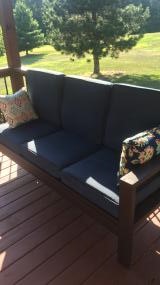
Loving this furniture! We modified it slightly by raising the height of the couches. Added some height and a slight tilt in the back. The chairs are super comfortable as the plans are done. We used 6” 25x25 cushions. We plan on staining soon.
Jaime Sallis
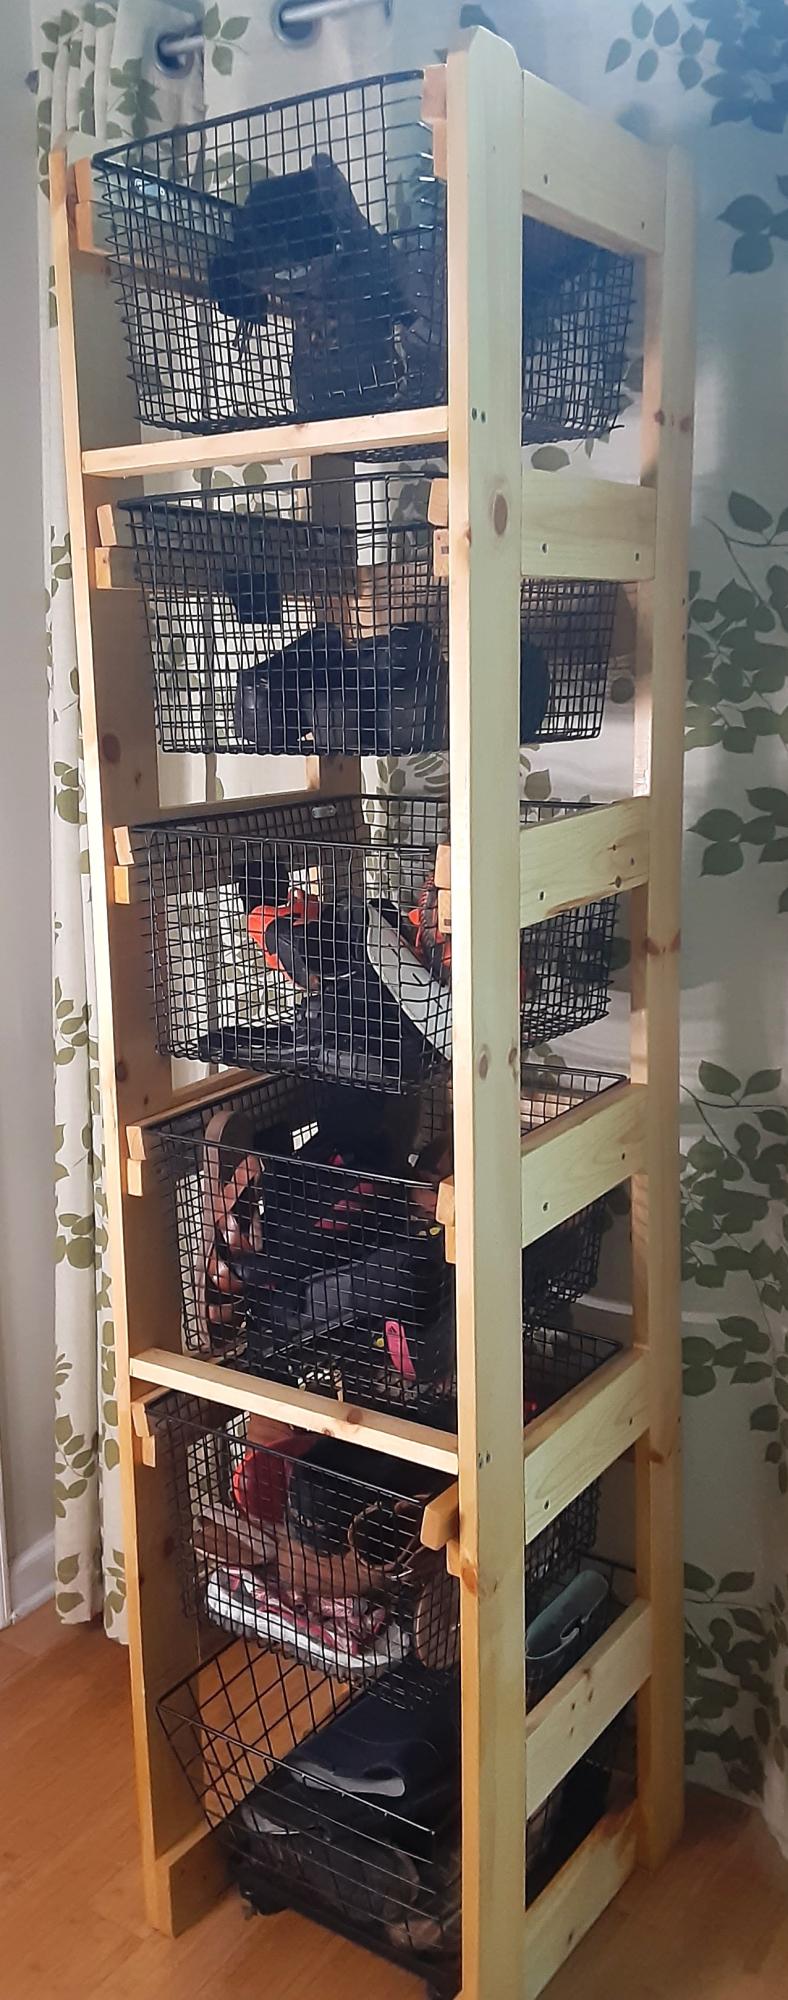
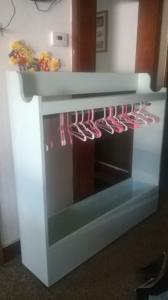
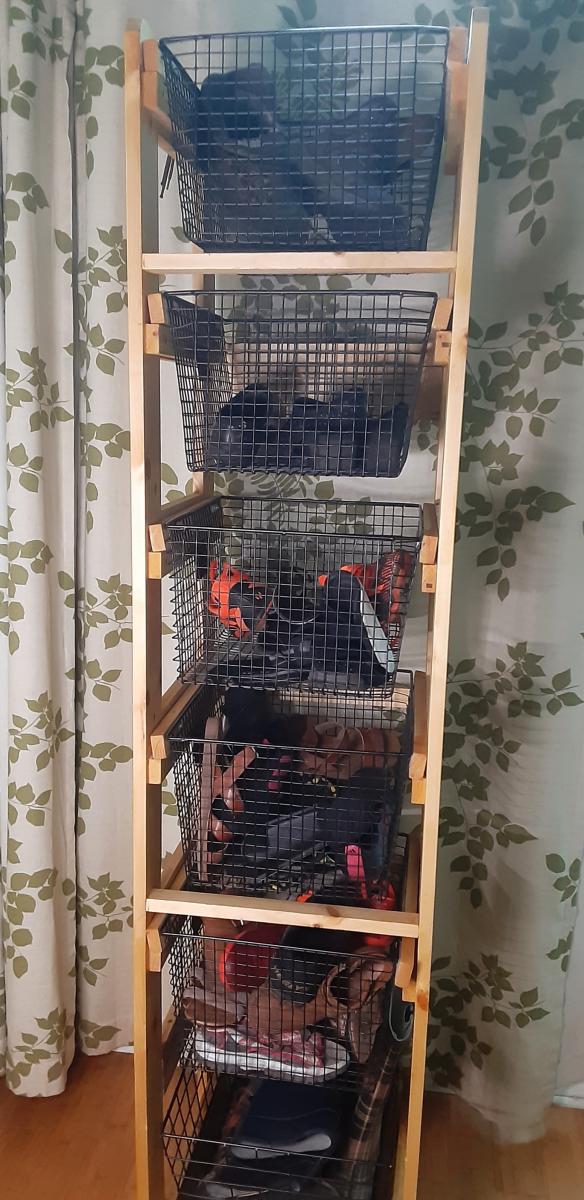
Our shoes have always been a very messy area that we couldn't keep clean with not much of an entry area. I saw your laundry basket tower and thought it might work for our shoes. We're very happy with how it's helping to keep us organized!
Crystal
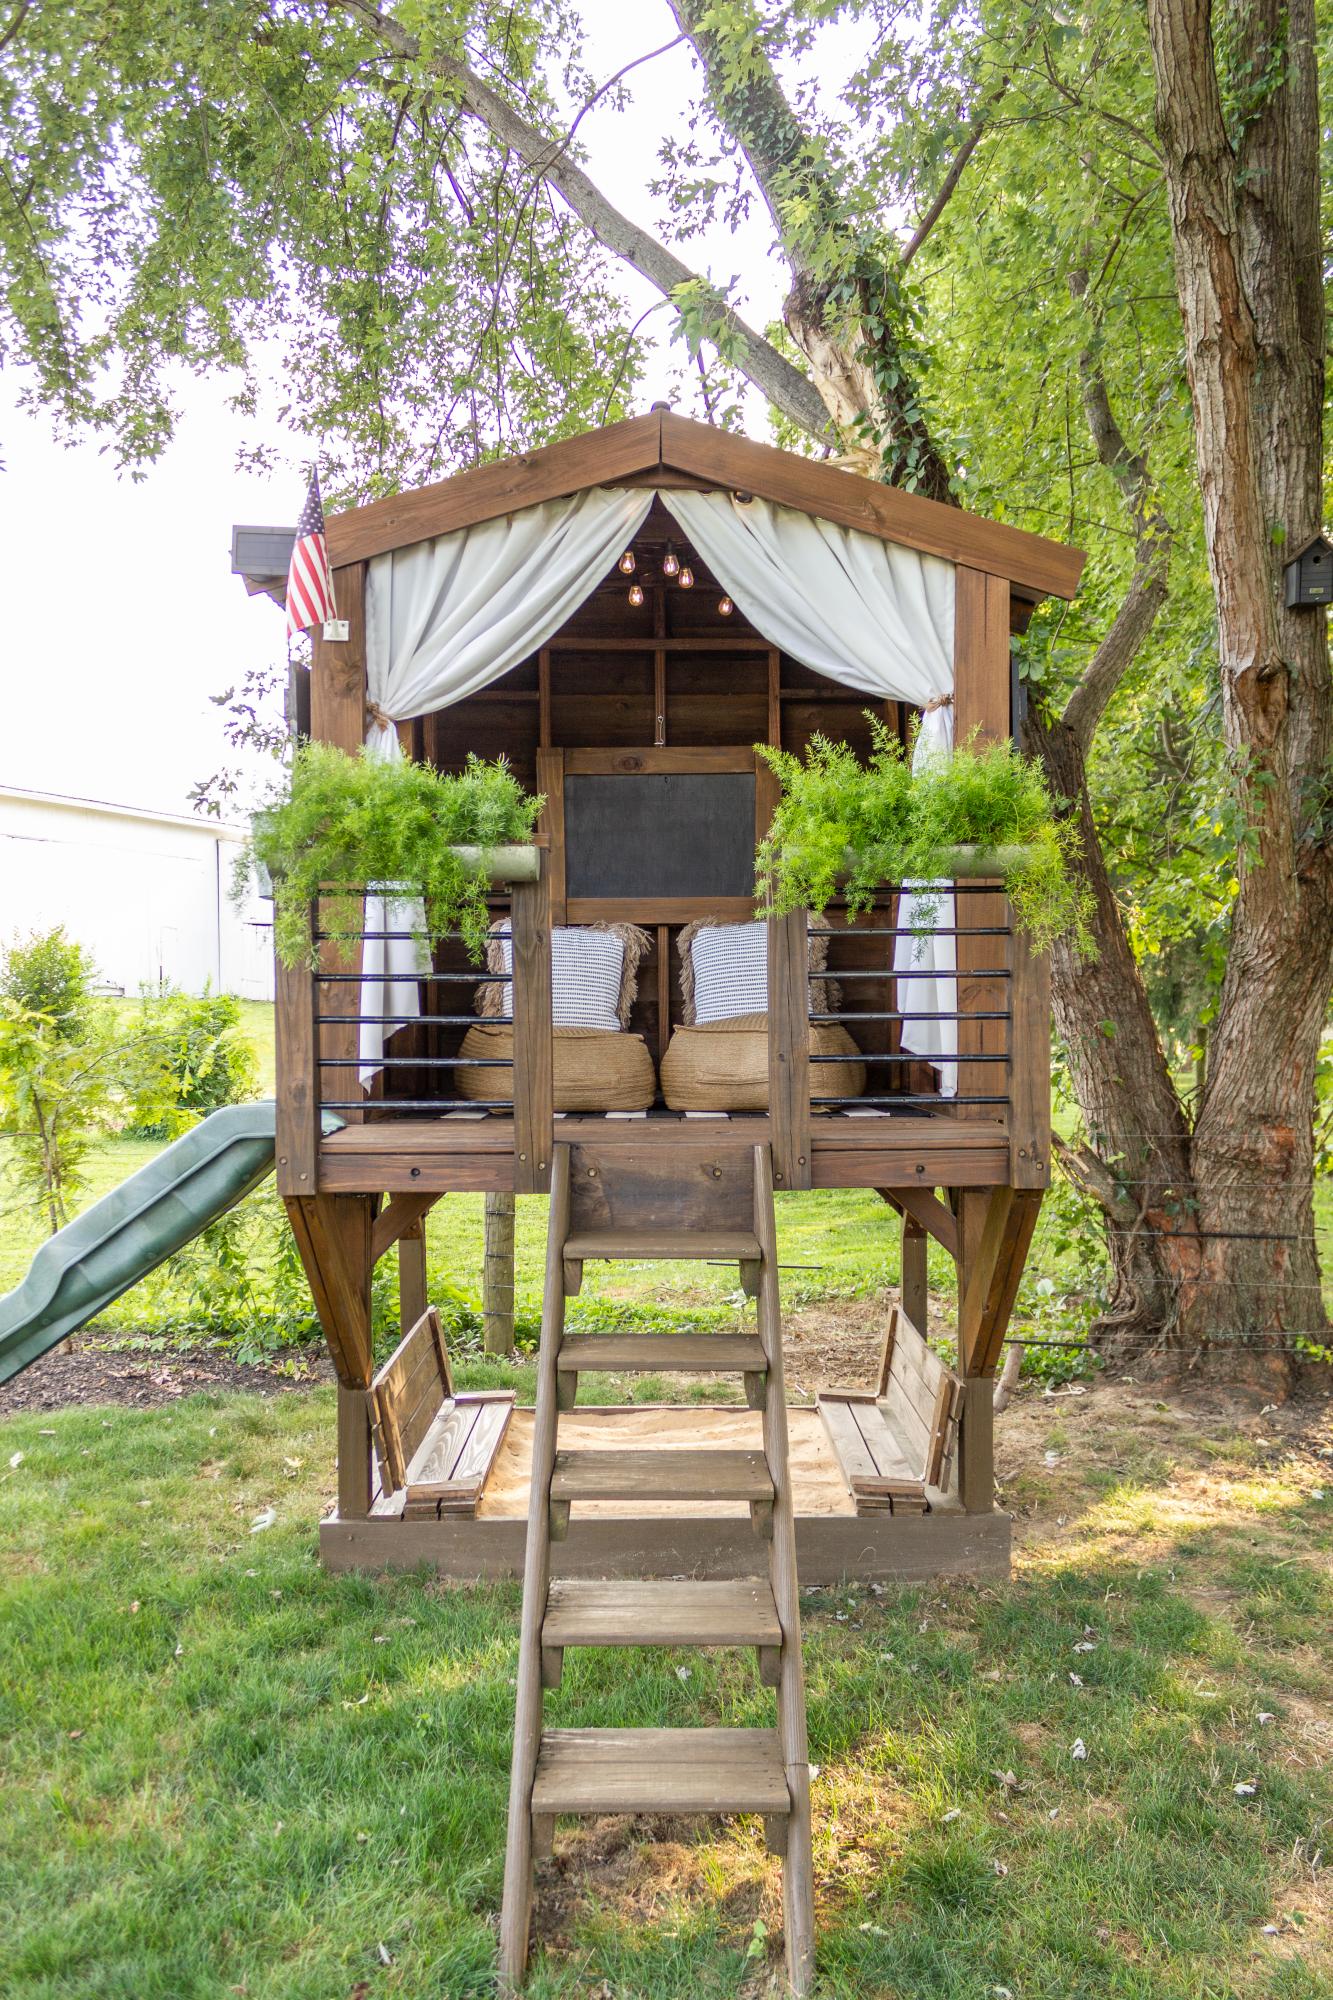
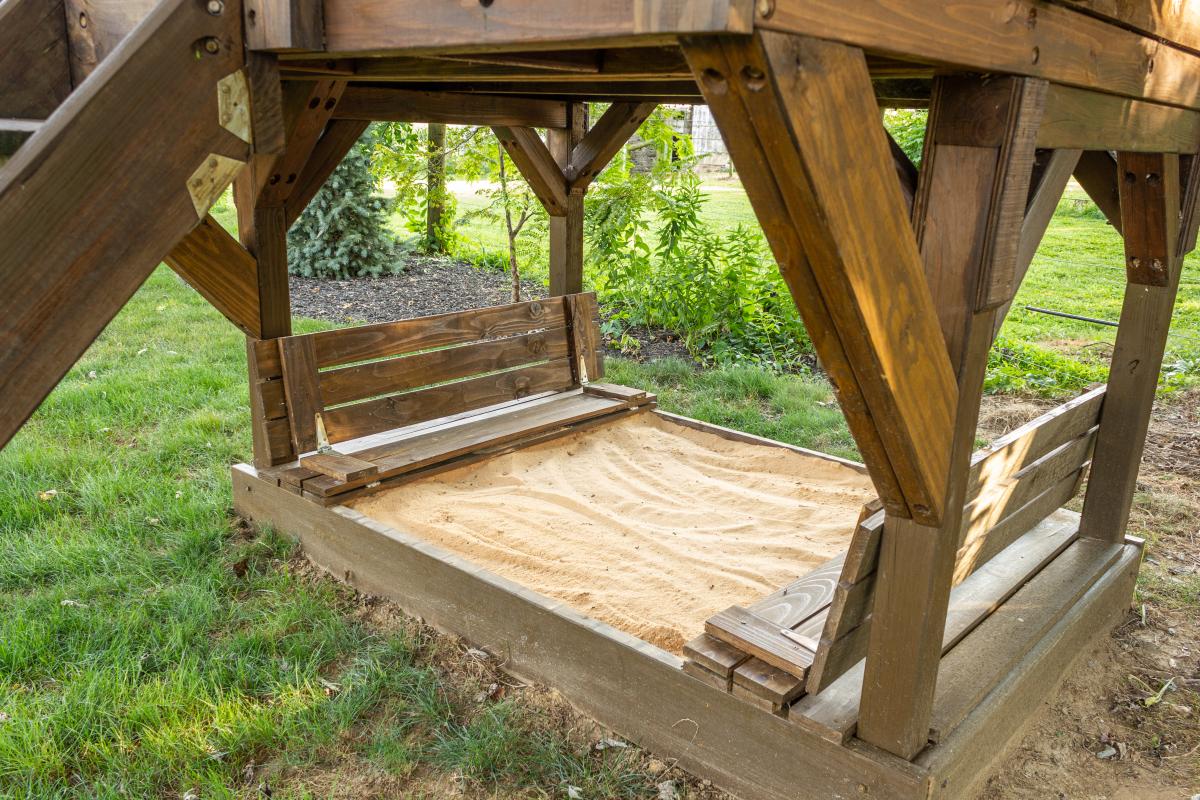
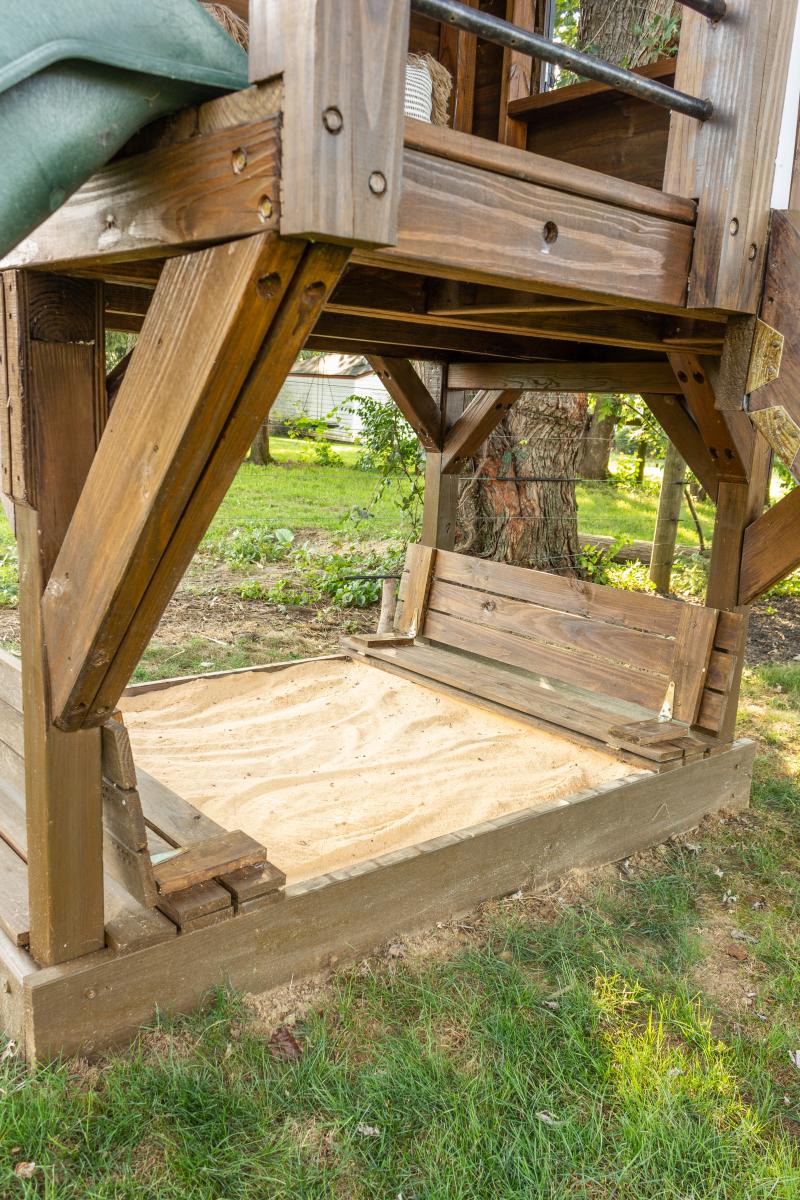
The base of our playhouse felt like the perfect spot to use the sandbox plan with built-in seats. The bench seats actually fold flat to create a lid for the sandbox when it’s not in use. I followed Ana’s plans exactly and used the list of materials she provided. The only modification I made was eliminating the back supports. It was not necessary for me to add the back supports since we have the playhouse posts to support the back of the bench.
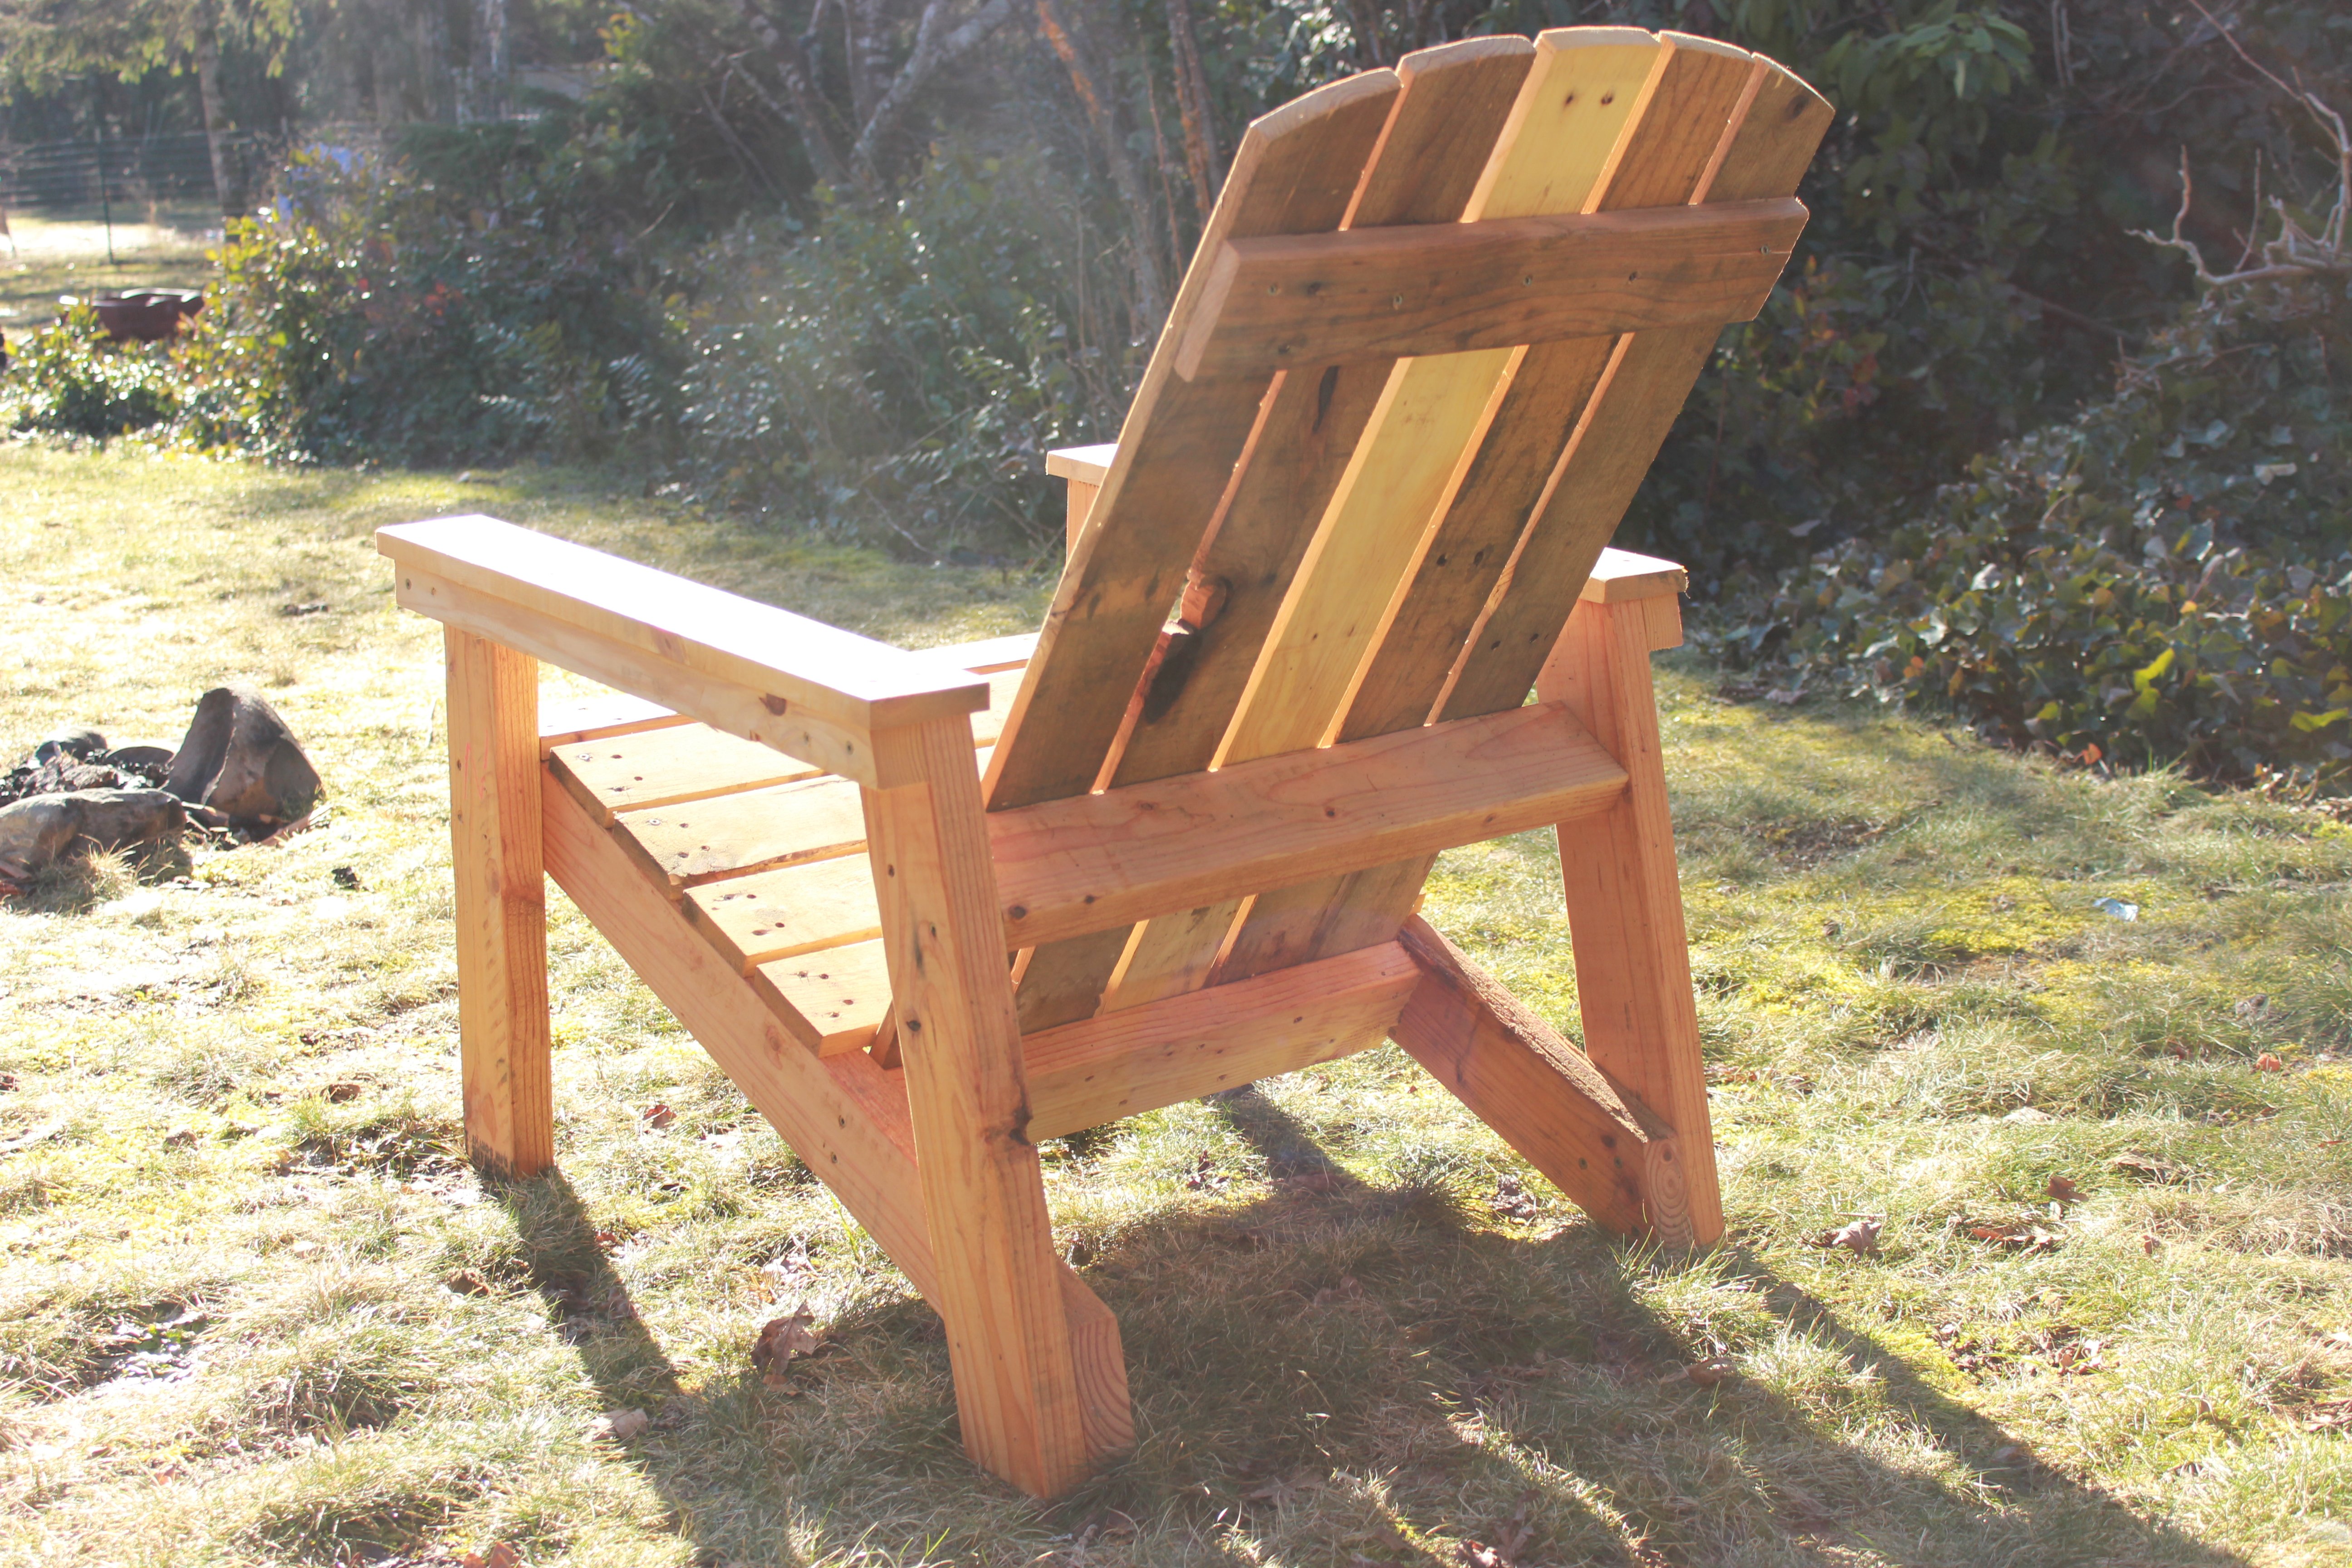
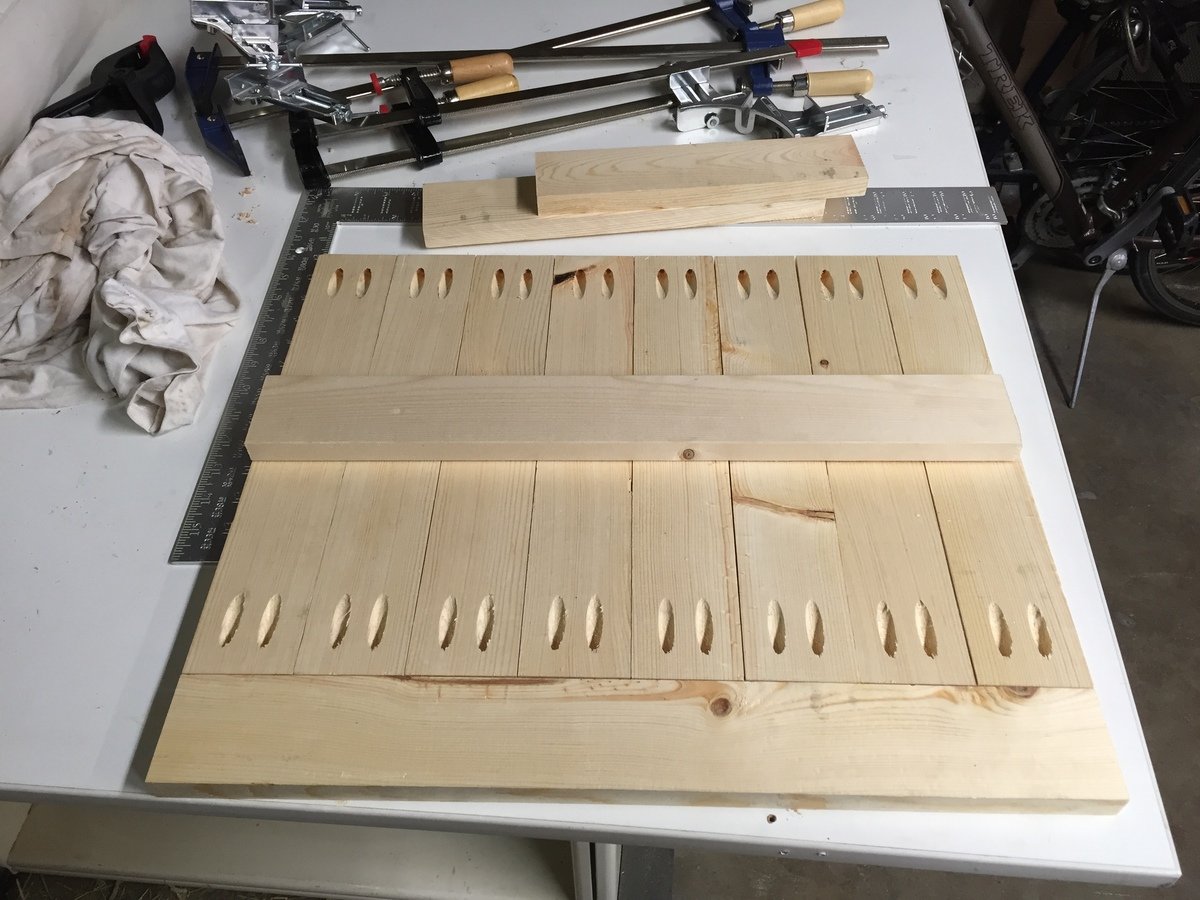
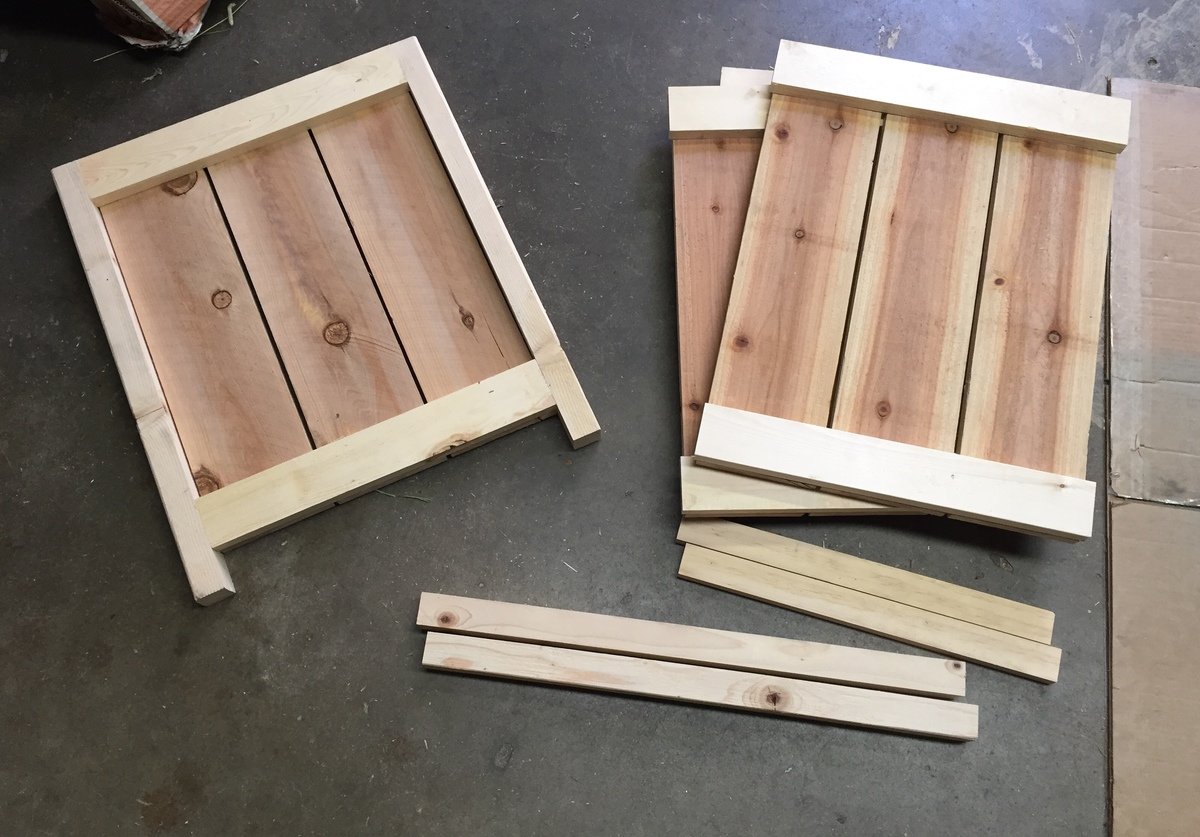
I decided to try and use the plans on Ana's site but with a twist. I wanted to limit myself to using only pallets. I think it turned out great! I can't upload all the photos because they exceed the maximum size limit. If I was able to you could see how each chair is slightly different and has a lot of character. I finished them with a waterproofing oil which I highly recommend over other finishes.

Mon, 04/10/2017 - 08:51
This is exactly what I'm looking for !! Fantastic build and re-purposing is always better.
THE MOTIVATION
After a recent washer outage (that I was ultimately able to repair myself), my wife and I talked about eventually replacing our front-loading washer/dryer set. One of the bullets I hate biting is paying the exhorbitant prices for the matching pedestals for new washer/dryer sets.
Having just bought a good set of cordless powertools, and having watched my father when I was a kid build countless household fixtures, window dressings, furniture pieces, etc., I decided to try my hand and construct a permanent platform for our current washer/dryer set, thereby eliminating the need to ever buy manufacturer pedestals again.
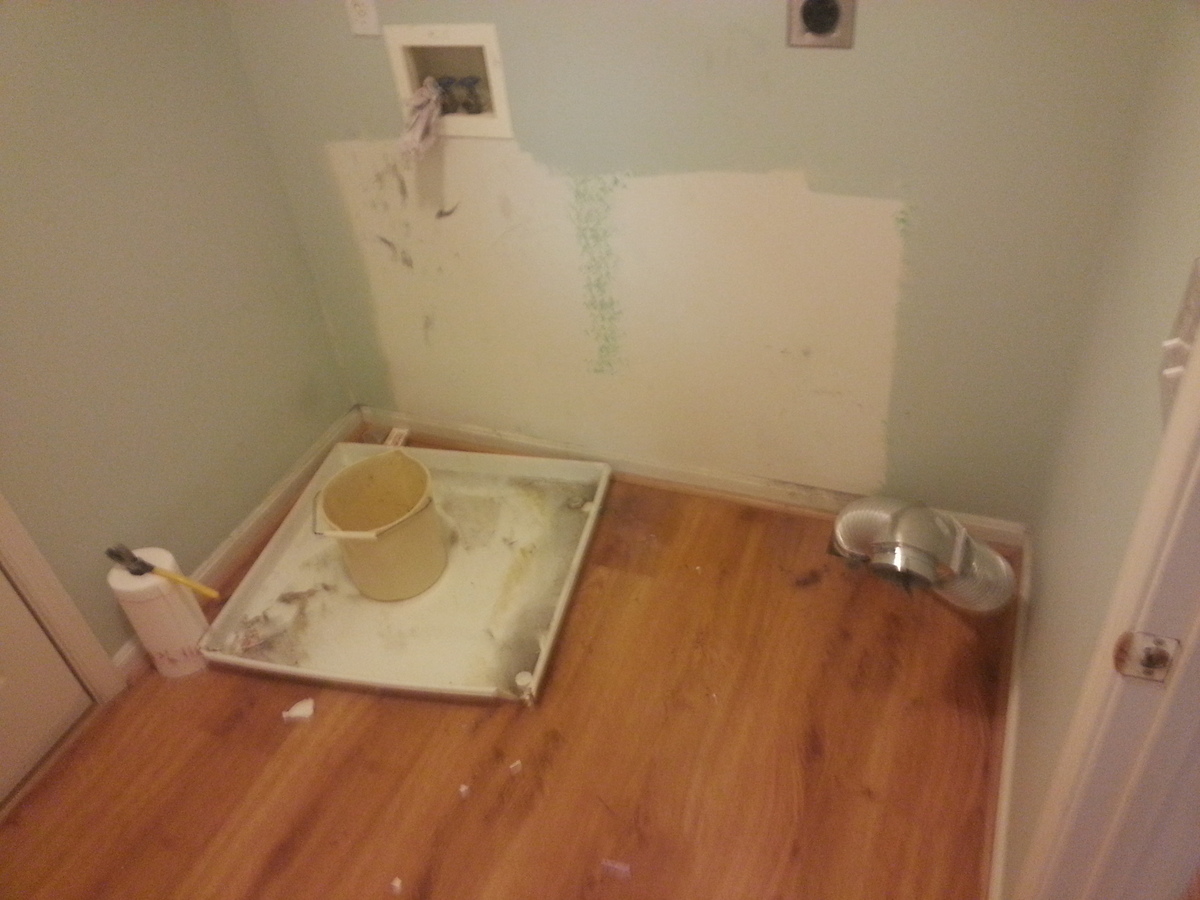
The existing pedestals were a standard 15" high, with a storage drawer, which we felt was still not high enough for comfort. And, the washer pedestal drawer was entirely inaccessibl due to the 2" walls on the washer drain pan, so its drawer was totally useless, wasted space.
And, lastly, we really wanted more space for clothes baskets full of laundry, which we generally stacked (full and haphazardly) on top of the machines.
THE CHALLENGES
The largest challenges were mainly logistics, and gravity. The washer/dryer would have to be unavailable for at least 2-3 days while they sat disconnected in the next room waiting for their new home. So I coordinated with the family so they'd know when they needed to have their laundry done, or tough it out until I was done.
There was no way to know for sure what the drain connection for the washer pan looked like until I got the washer out. So it was a small gamble that I'd be able to get the parts needed to extend the drain pipe up to the new platform right when I was ready for them. Fortunately, this was no issue at all.
The biggest challenge turned out to be toward the end when it came time to lift our 230-lb. washer onto the new platform. I seriously considered disassembling the washer to the point that I could remove its molded concrete counter-weights, but instead (and arguably stupidly) elected to use a large hydraulic car jack to raise the washer. This ultimately worked, but I have to STRONGLY ADVISE AGAINST trying this.
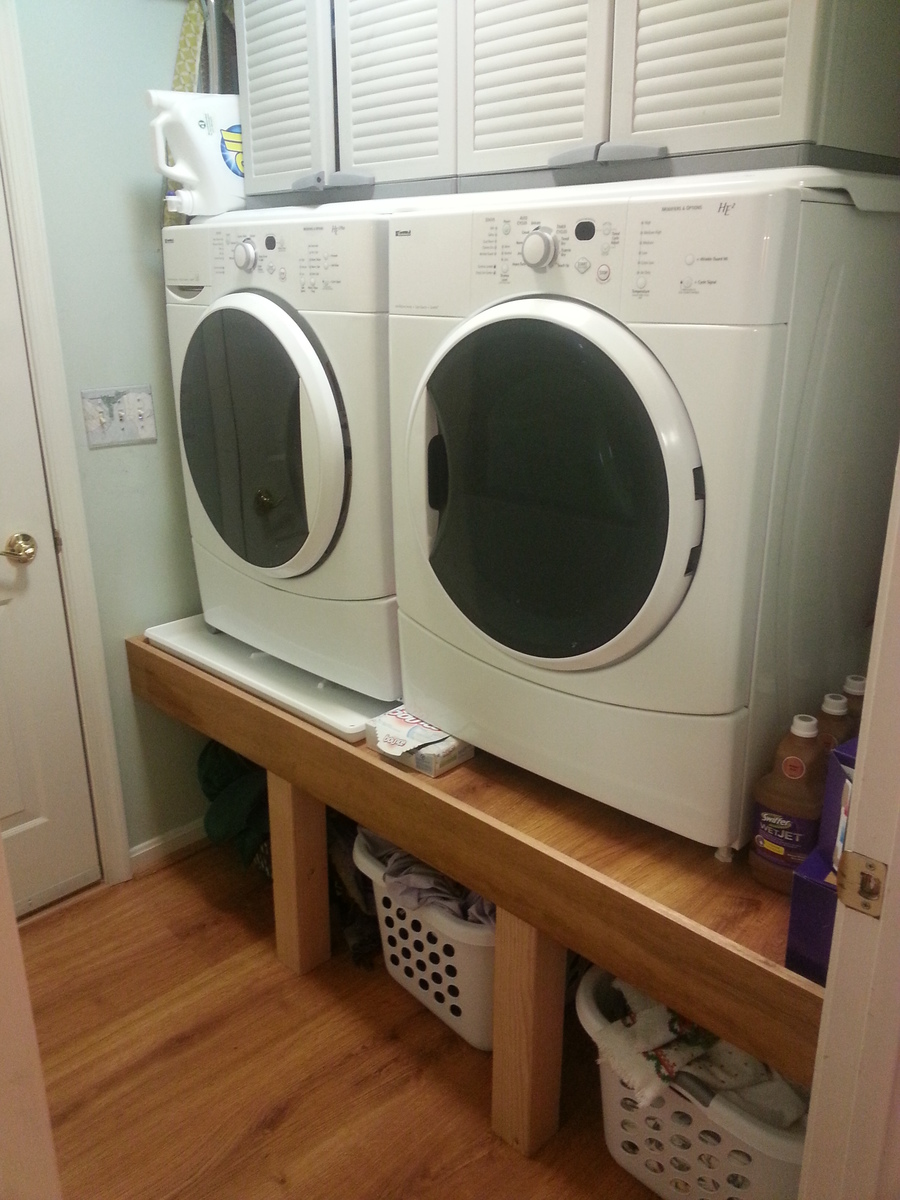
THE SPACE
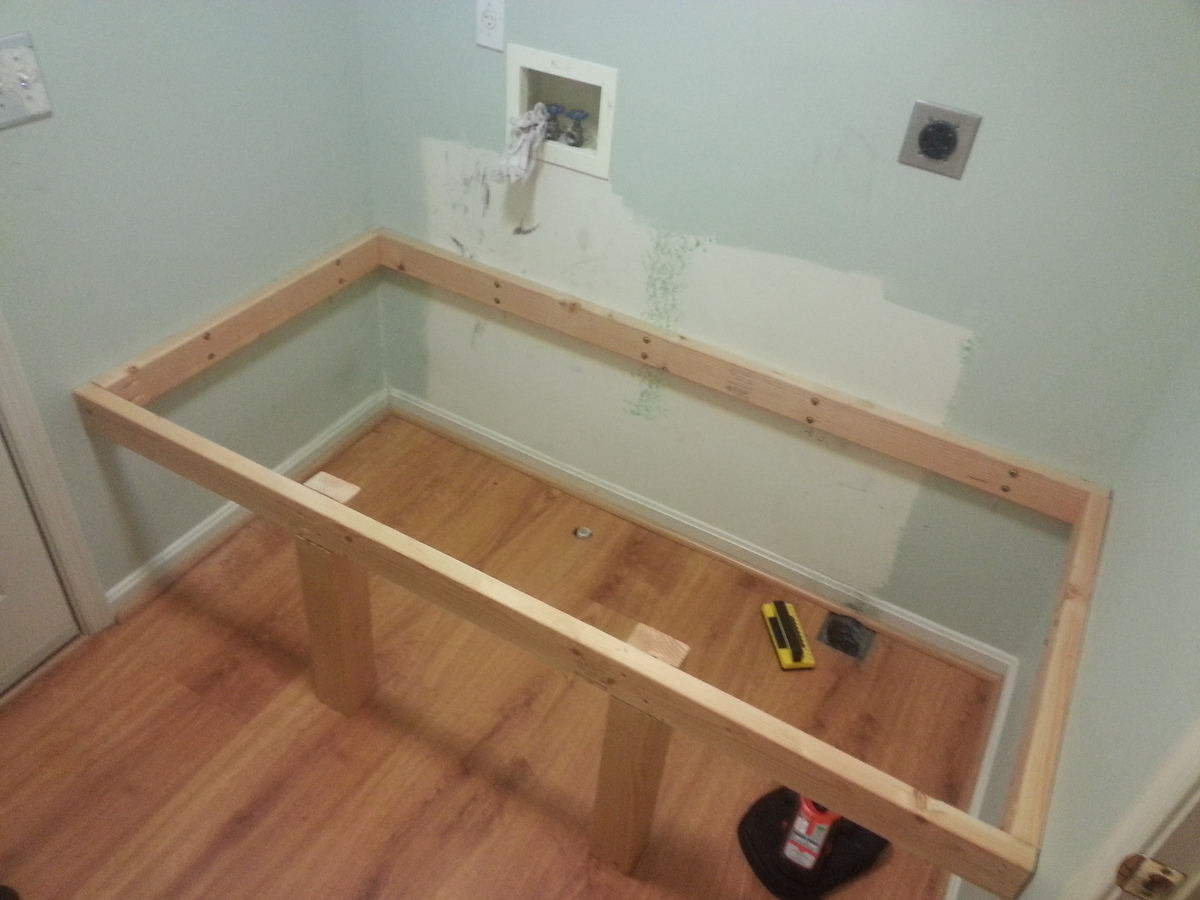
Our laundry room is also the "mud room" between our kitchen and the garage. It is only large enough for the two machines, and the walk way between the two doors--in total, about 70.5" square. Building the platform from wall-to-wall made the most sense, and minimized framing by fastening edge framing directly to the wall studs.
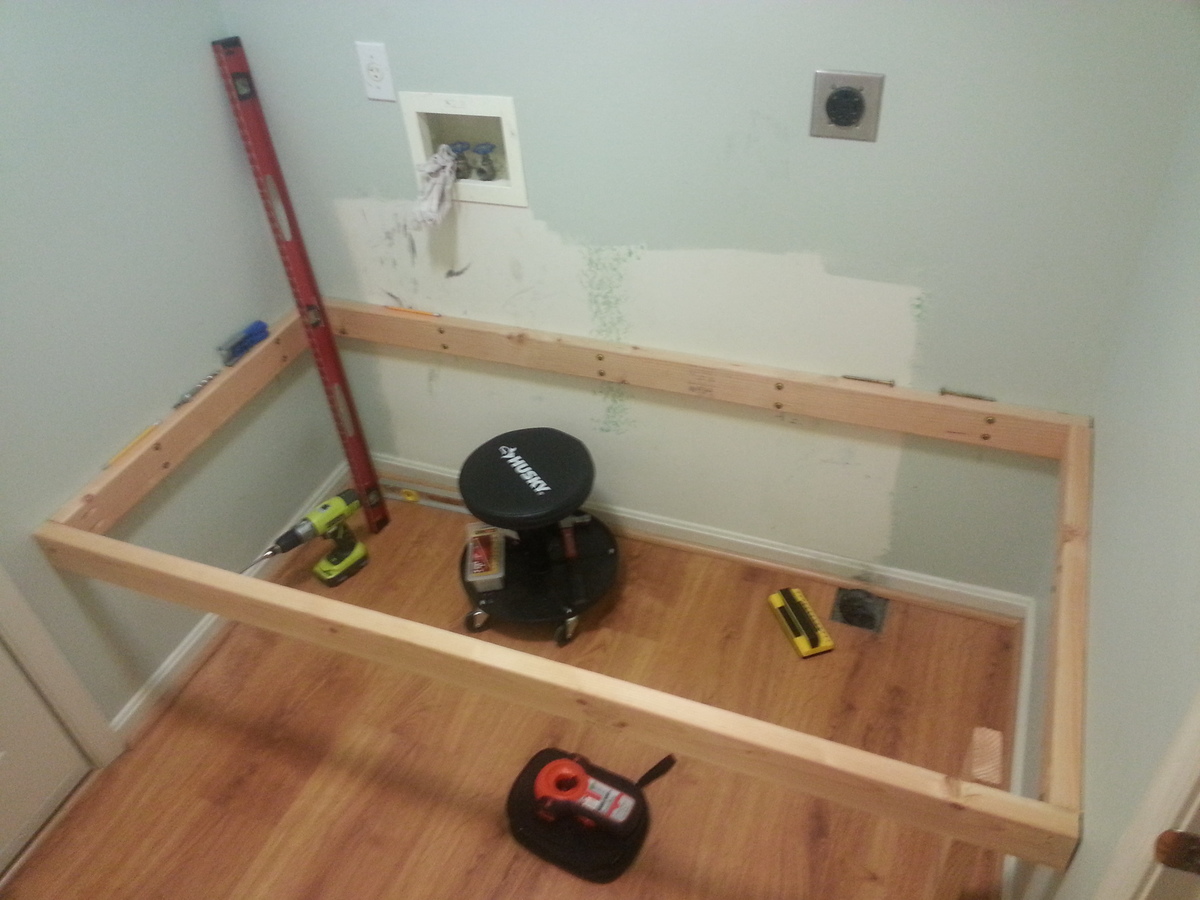
THE PLAN
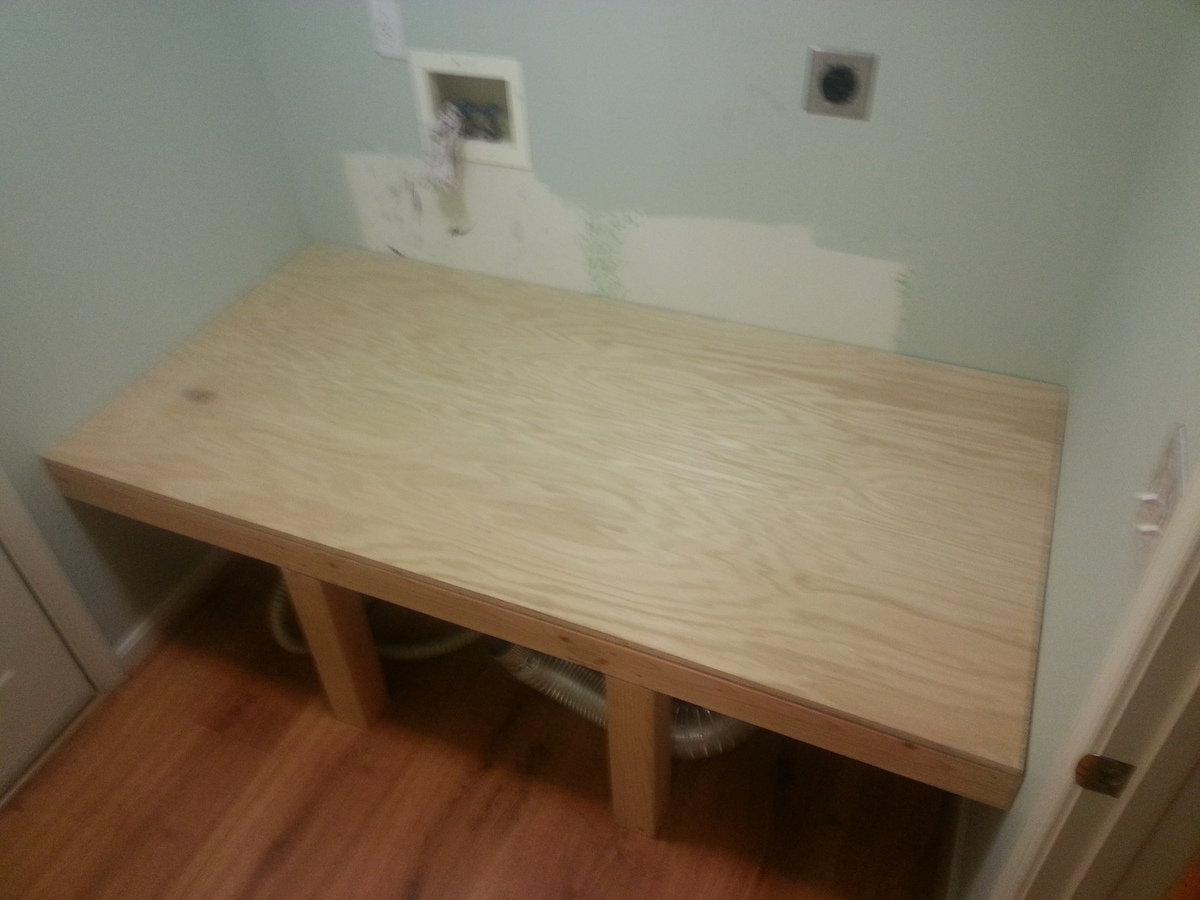
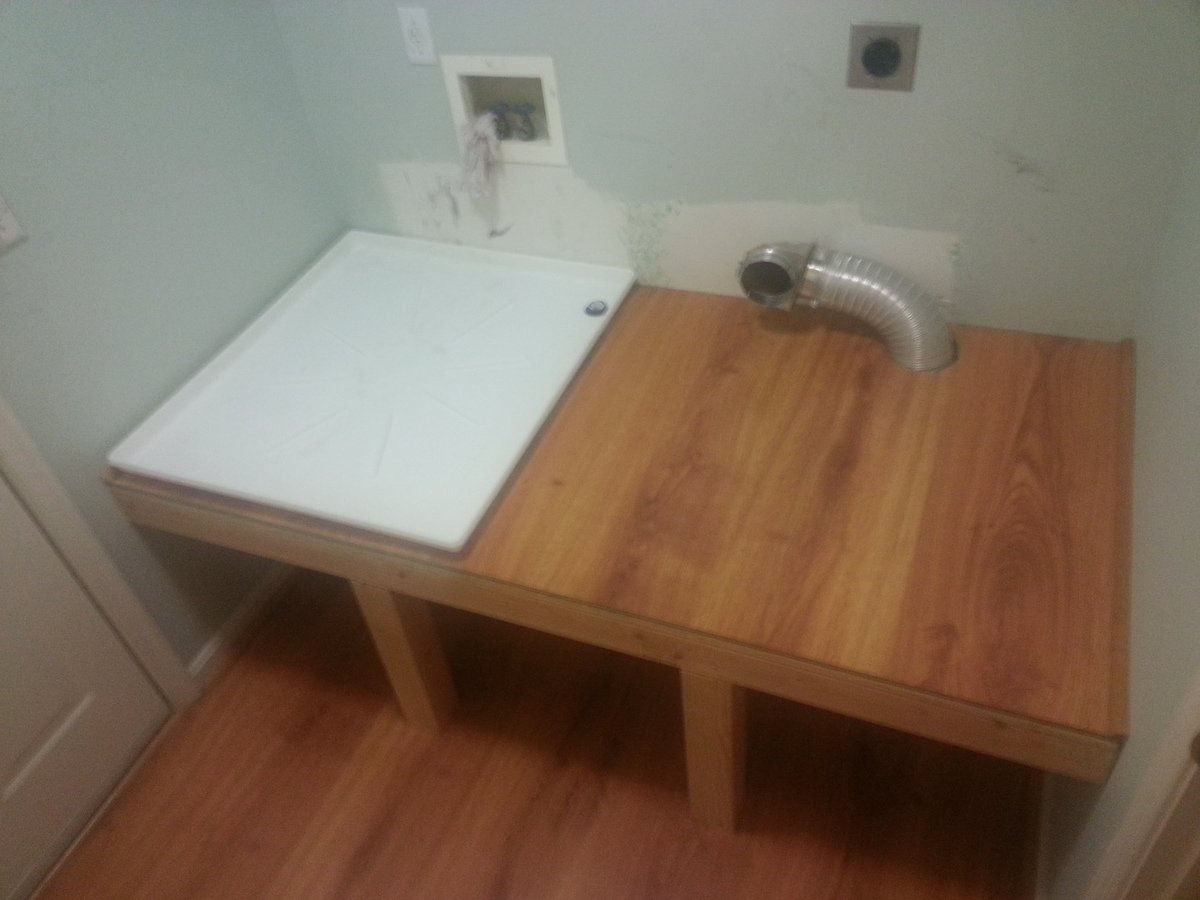
Pretty basic: 2x4's all around for the edge framing--back and sides fastened directly to the wall studs, and front 2x4 supported by two, notched 4x4 legs. 3/4" plywood for the subsurface, and 1/4" laminate faux-wood flooring on top (left over from reflooring, so it matches the floor below). Bore holes for the washer pan drain and the dryer vent. 1" quarter-round molding on the sides, and 5.5" face piece flush with the top of the molding across the front (spare lauan I had looks perfect). I also made a point of putting the machines on the platform before the face piece since it might have been in the way or damaged.
Anyone will tell you that it's best to at least sketch out what you want to do so you can minimize surprises, forgotten parts, etc. I, of course, did virtually none of that, and made several course changes and corrections along the way. For this project, I was lucky that I didn't need to backtrack at any point, and probably won't learn this lesson any time soon anyway. However, you SHOULD.
TAKE-AWAYS
The main mistake I made was while gathering the platform dimensions for cutting the plywood. It was only blind luck that kept me from having to do it more than once (and having to buy more than one 4x8 sheet). I know that it's actually very unlikely that two adjacent walls are perfectly square, so I made a point to measure the width between the walls at the back and at the front--and, sure enough, found a 1/8" difference--wider at the front. But when I measured and marked the plywood for cutting, I measured both distances from the precut edge, and then cut. By doing this, I inadvertently assumed that one of the back corners was perfectly square.
What I should have done was used a carpenter's square in each back corner to extend a square line from the back edge to the front, and then measured from the square lines to their respective side wall. This would have accounted for neither back corner being square.
Fortunately, my mistake wasn't big enough to keep the plywood from fitting, but it was very, VERY close.
GIDDY
I honestly couldn't be happier with the finished project (or more smug). We've raised the washer/dryer 9" higher than they were (24" off the floor), and we now have basket storage underneath all the way across. I placed two 24" plastic cabinets on top, which still leaves room for the detergent right over the soap inlet on the washer.
And, most importantly, I got to use every powertool I own. Kinda beats "the quick brown fox jumped over the lazy dog" thing, huh?
Fri, 04/17/2015 - 19:54
Thanks for sharing the ins and outs of your project! Looks great!
I modified the plans slightly to go taller so it could fit a standard propane tank. I also added a hinged lid based on an image I found on Pinterest that did something very similar. I still need to sand and stain it next weekend.
Like others, I had a little trouble keeping the fence planks from splitting when screwing them to the 2x2 legs, since there was about an 1/8” gap between. I tried to find some scrap to fill in the gap and didn’t overtighten the screws. The lid was made entirely of 1x3”.
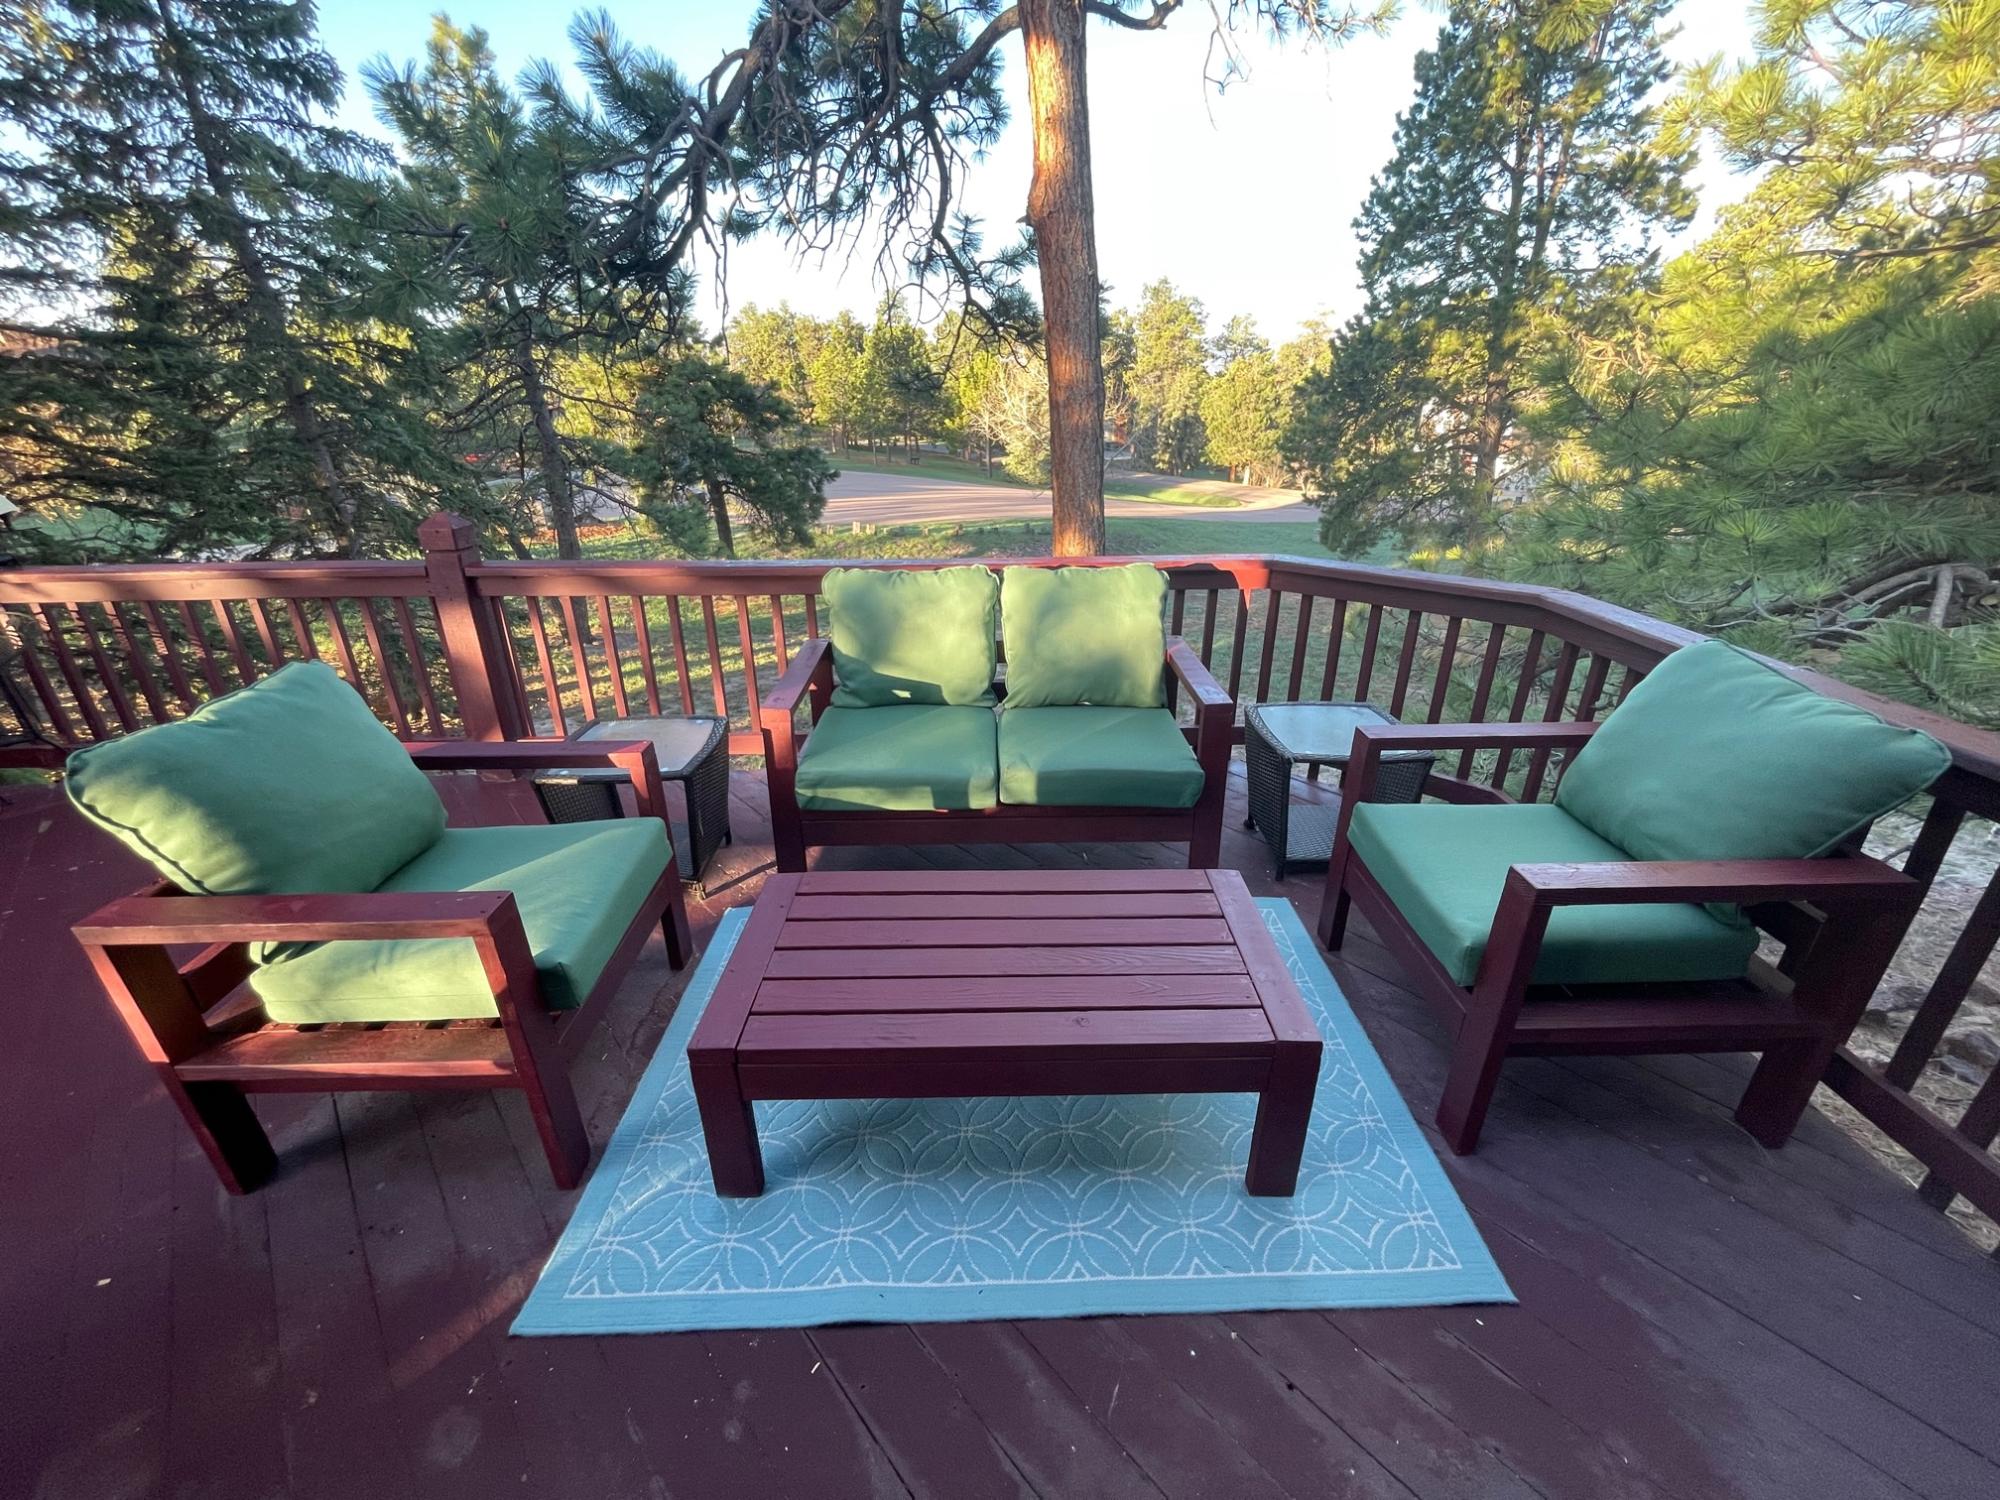
We have gone through several sets of deck furniture at our home in Monument, Colorado. We like wicker, but so do the squirrels! Inspired by an article in the Wall Street Journal where the author used his wood shop experience to make outdoor furniture and avoid "astronomical prices," I found this site. I thought, "Even I can build something out of 2x4s." I borrowed my neighbor's high-end chop saw and made two chairs, a love seat (by cutting the dimensions of the 79" sofa - three cushions - down to 55" - two cushions, and the coffee table, cut down from 55" to 47". Construction took less than two weeks from purchasing the wood to finishing. Everyone who has seen the finished set loves it.
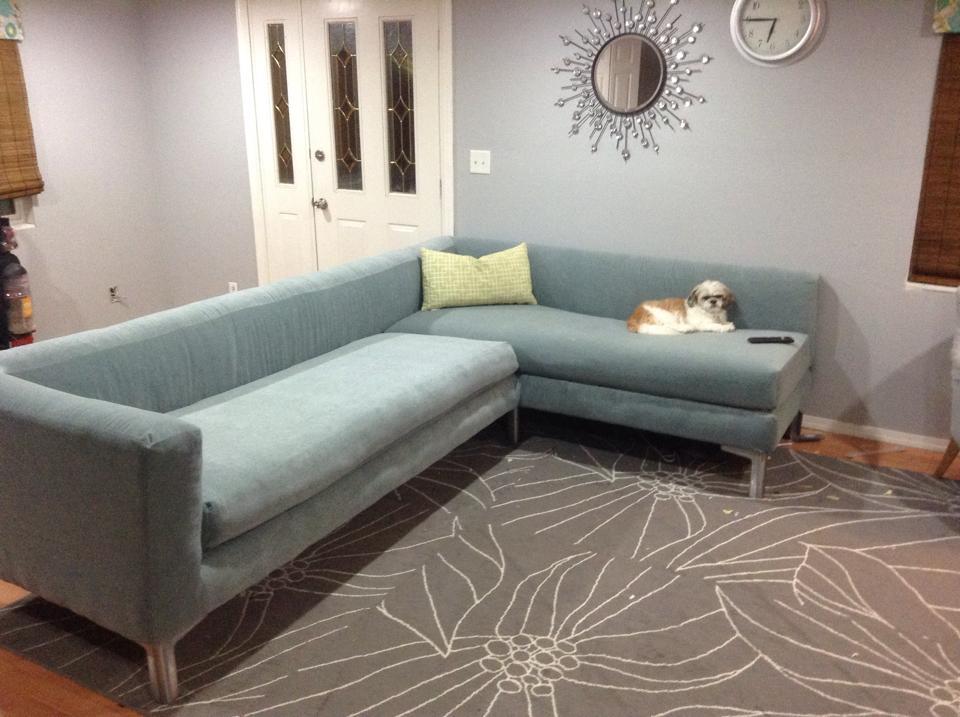
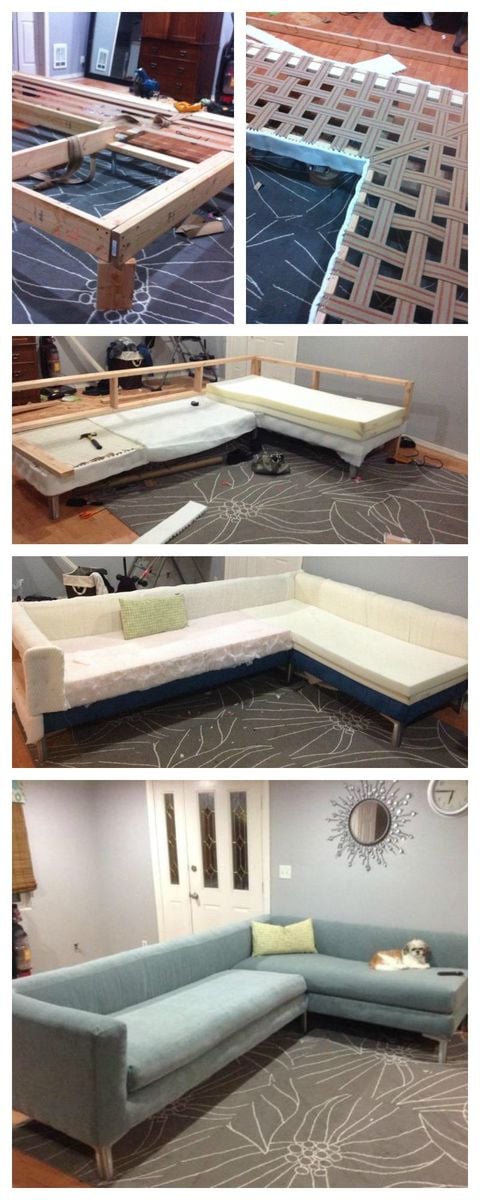
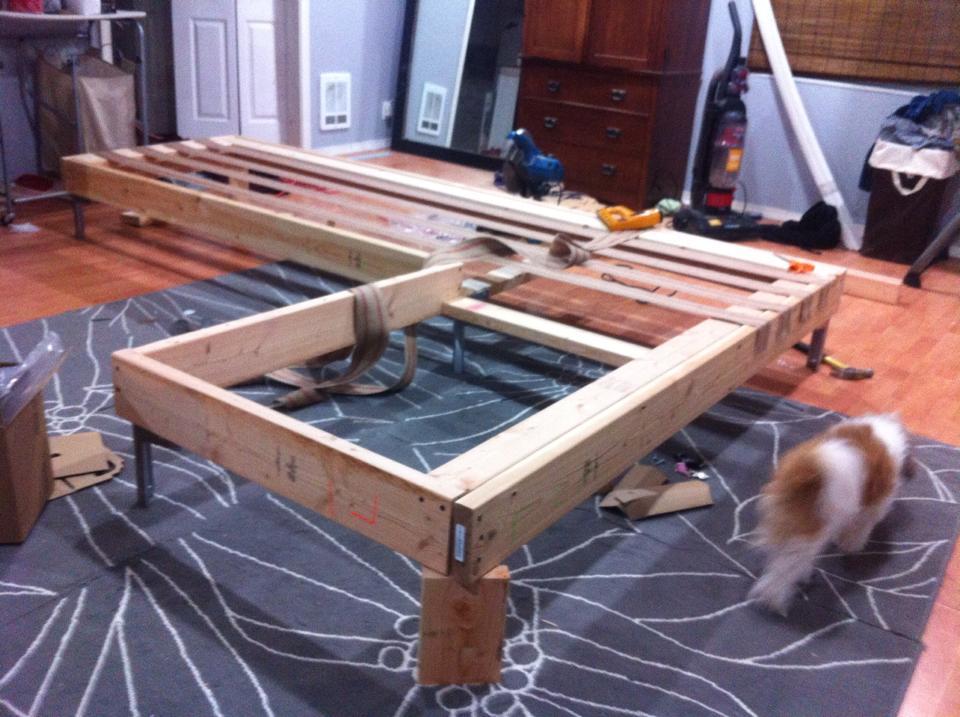
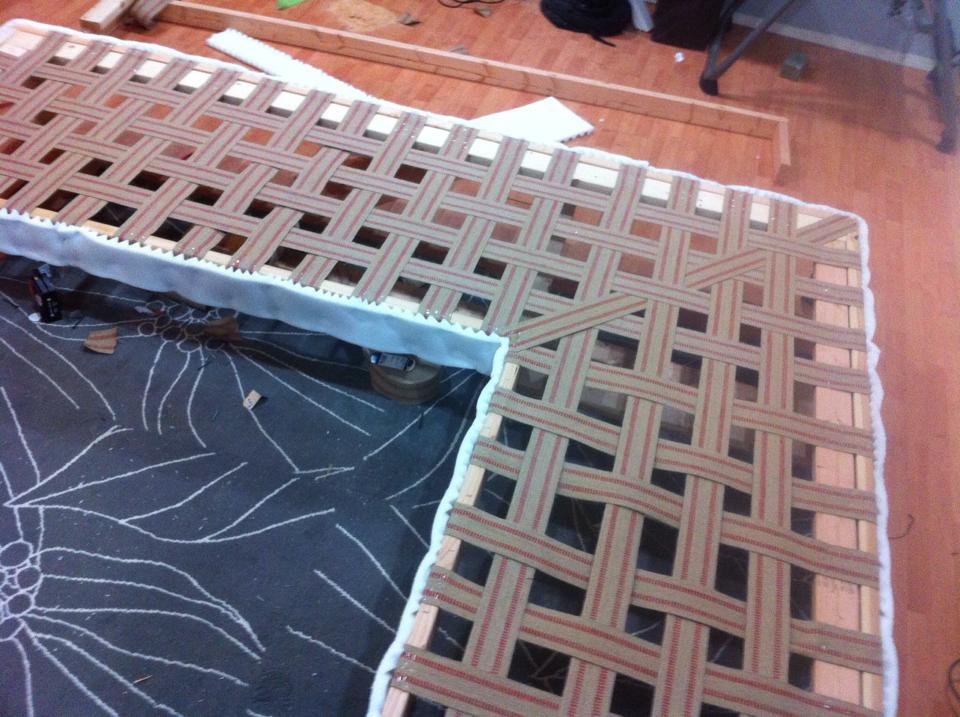
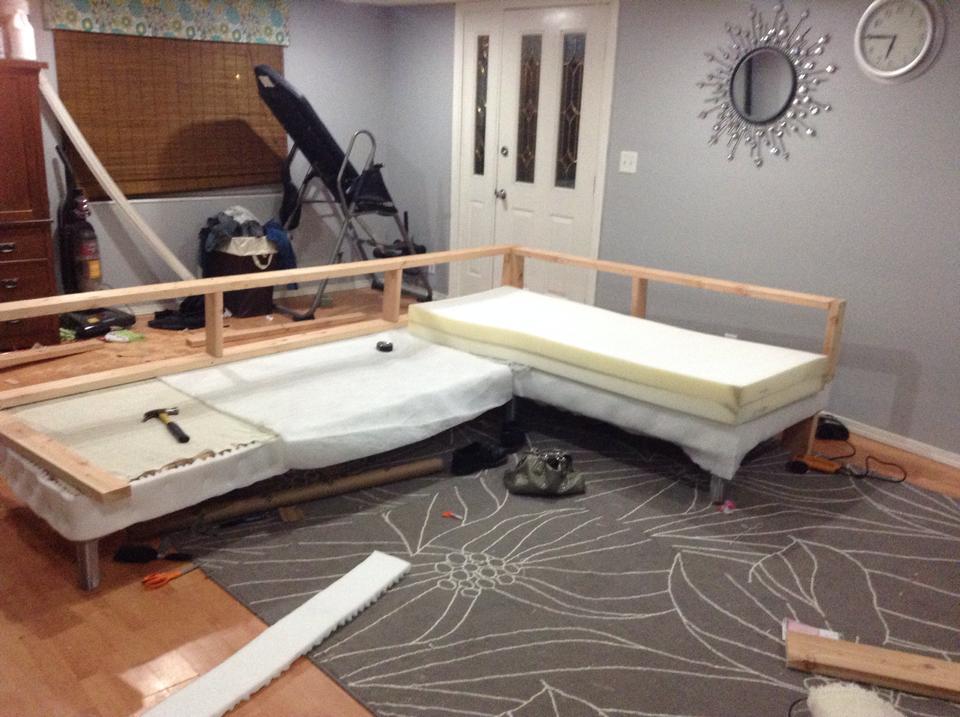
I looked all around my town for a sofa that meet my needs. I wanted something with tall legs, modern lines and fit my living room. I did not have $3,000 to buy one online so I said to myself why not???


Sat, 07/25/2015 - 12:28
You are my hero ! Your modern diy sectional is amazing, love the blue fabric! Thank you so much for sharing! Ana
Mon, 08/03/2015 - 14:52
I've been looking for plans for a big sectional this would be perfect!

Did them for a friend that owns a bakery.
I don't have access to new lumber unfortunately.
The bulk of what I make is pallet. That's why there are four instead of 3 slats.
Same plan though. Pretty easy to follow.
I did add some handles to make it easier to move
since they will be brought in and out daily.
Yun
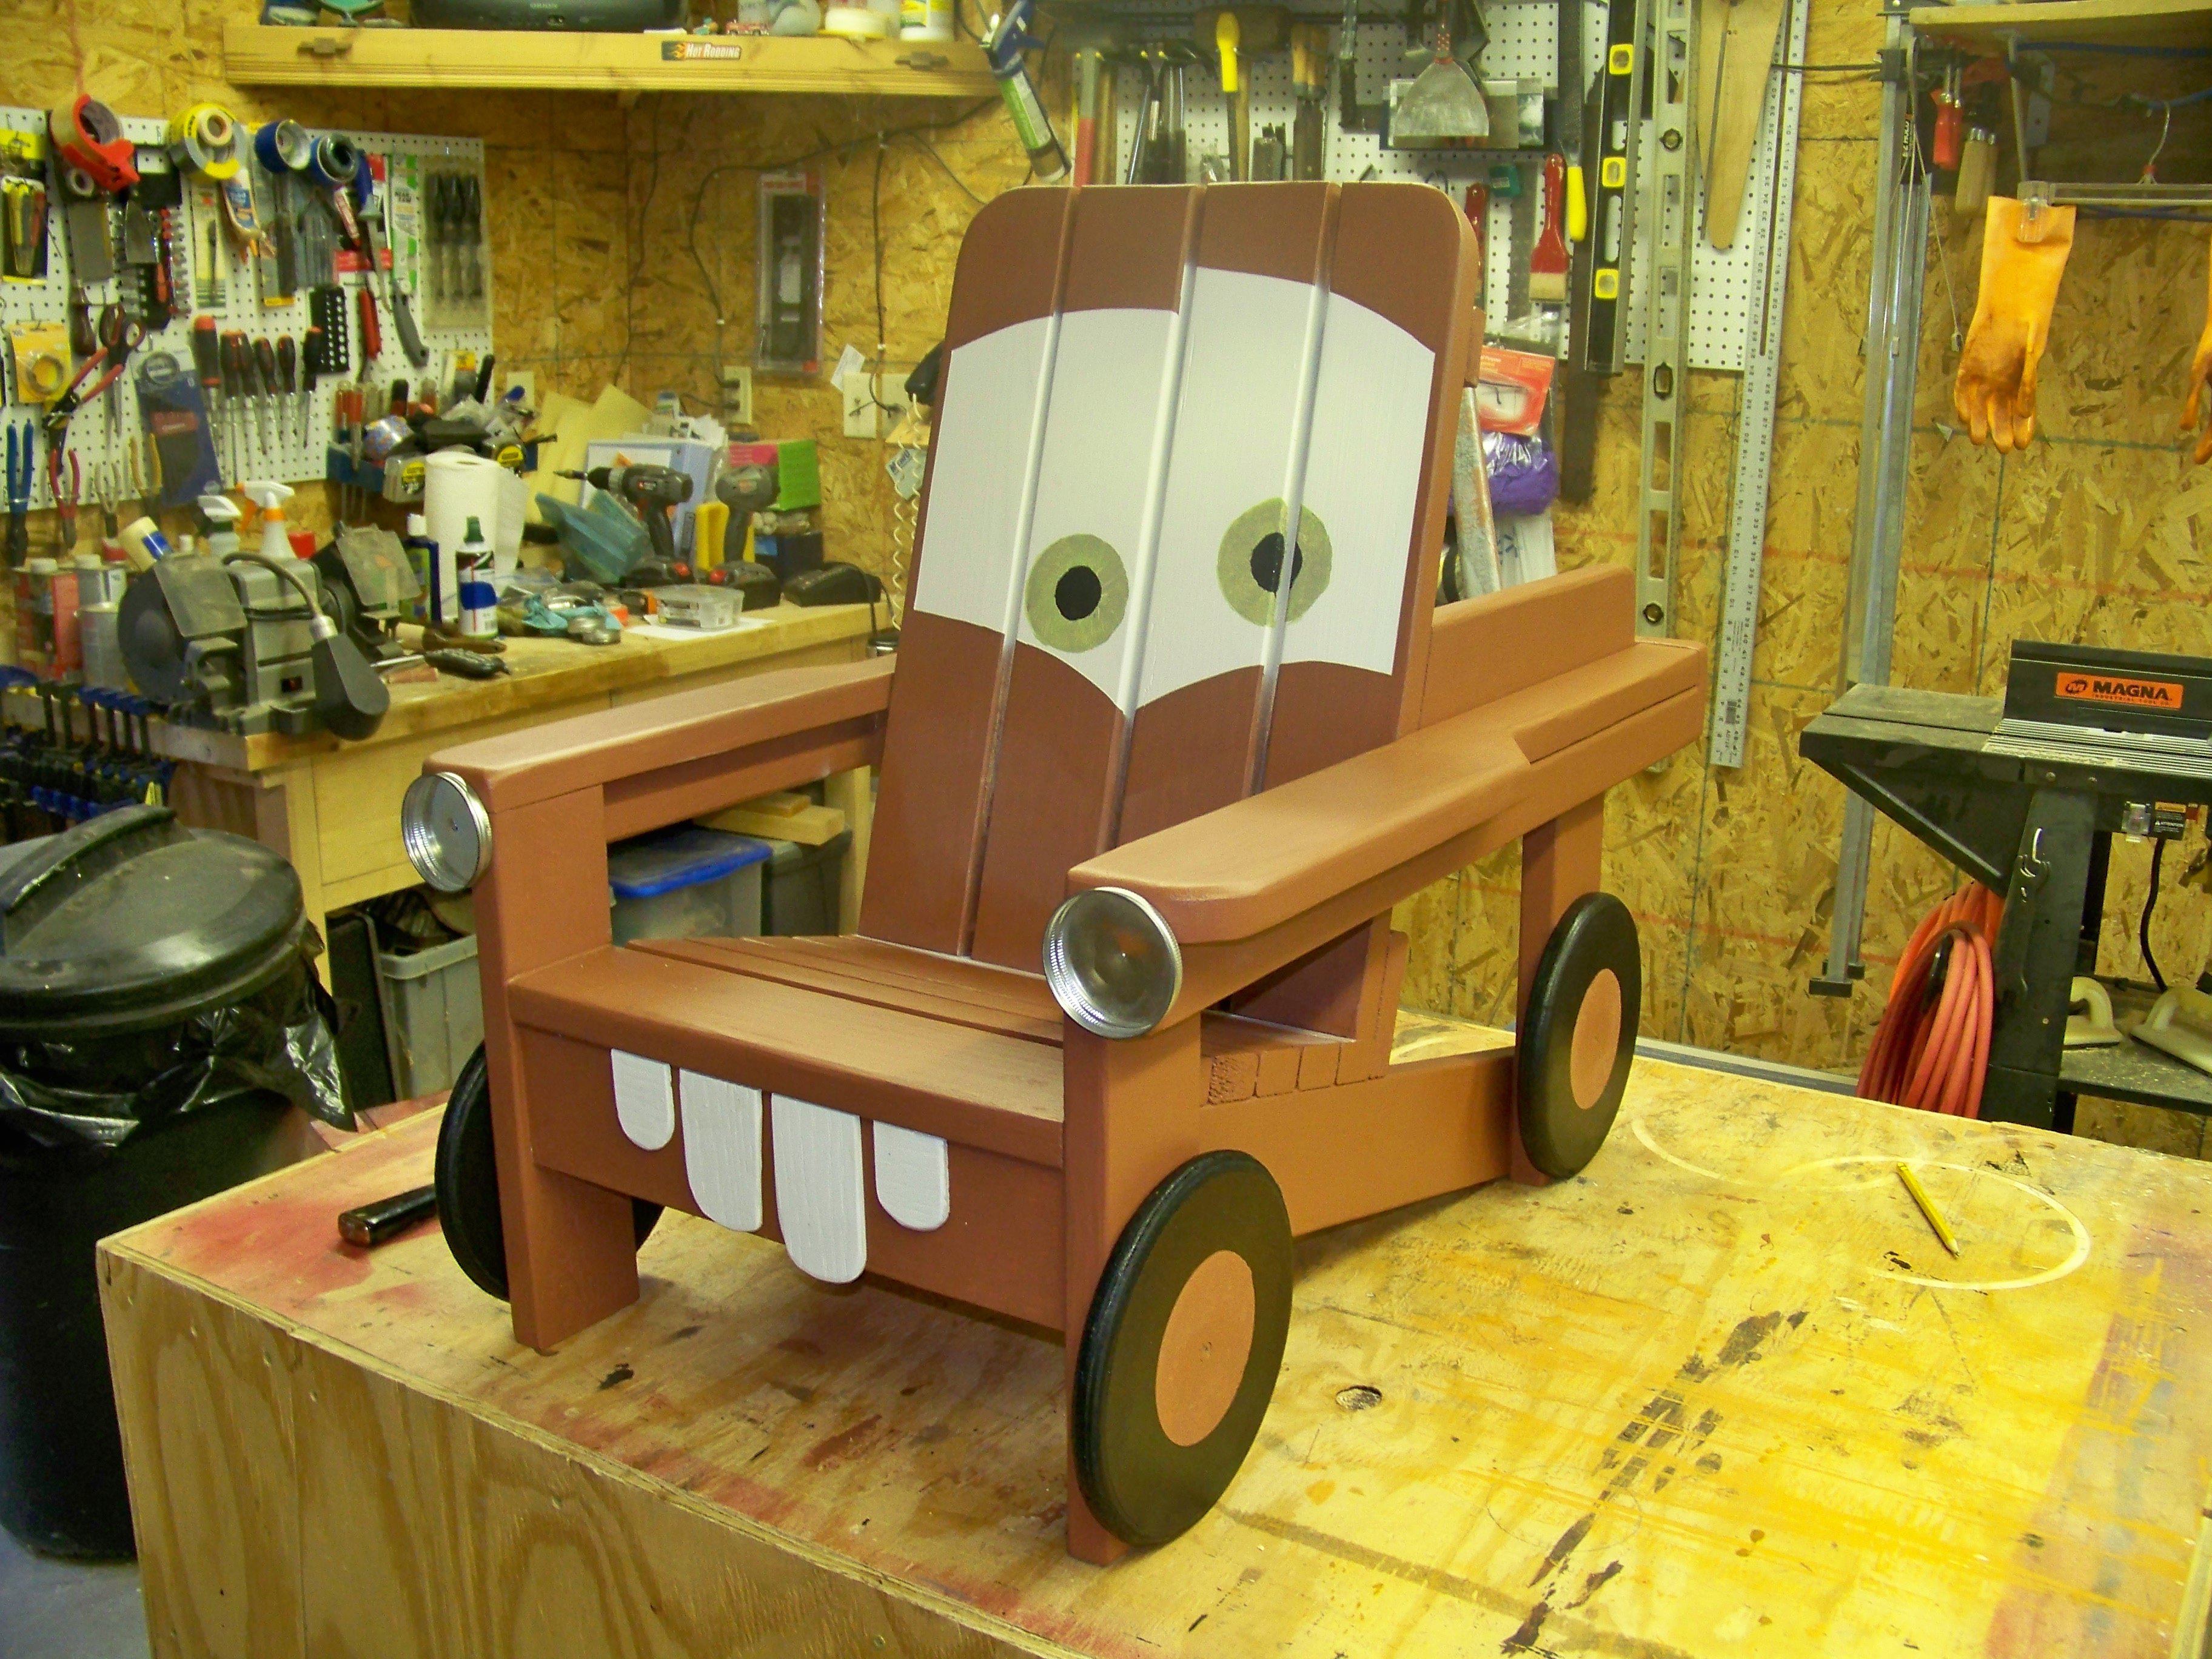
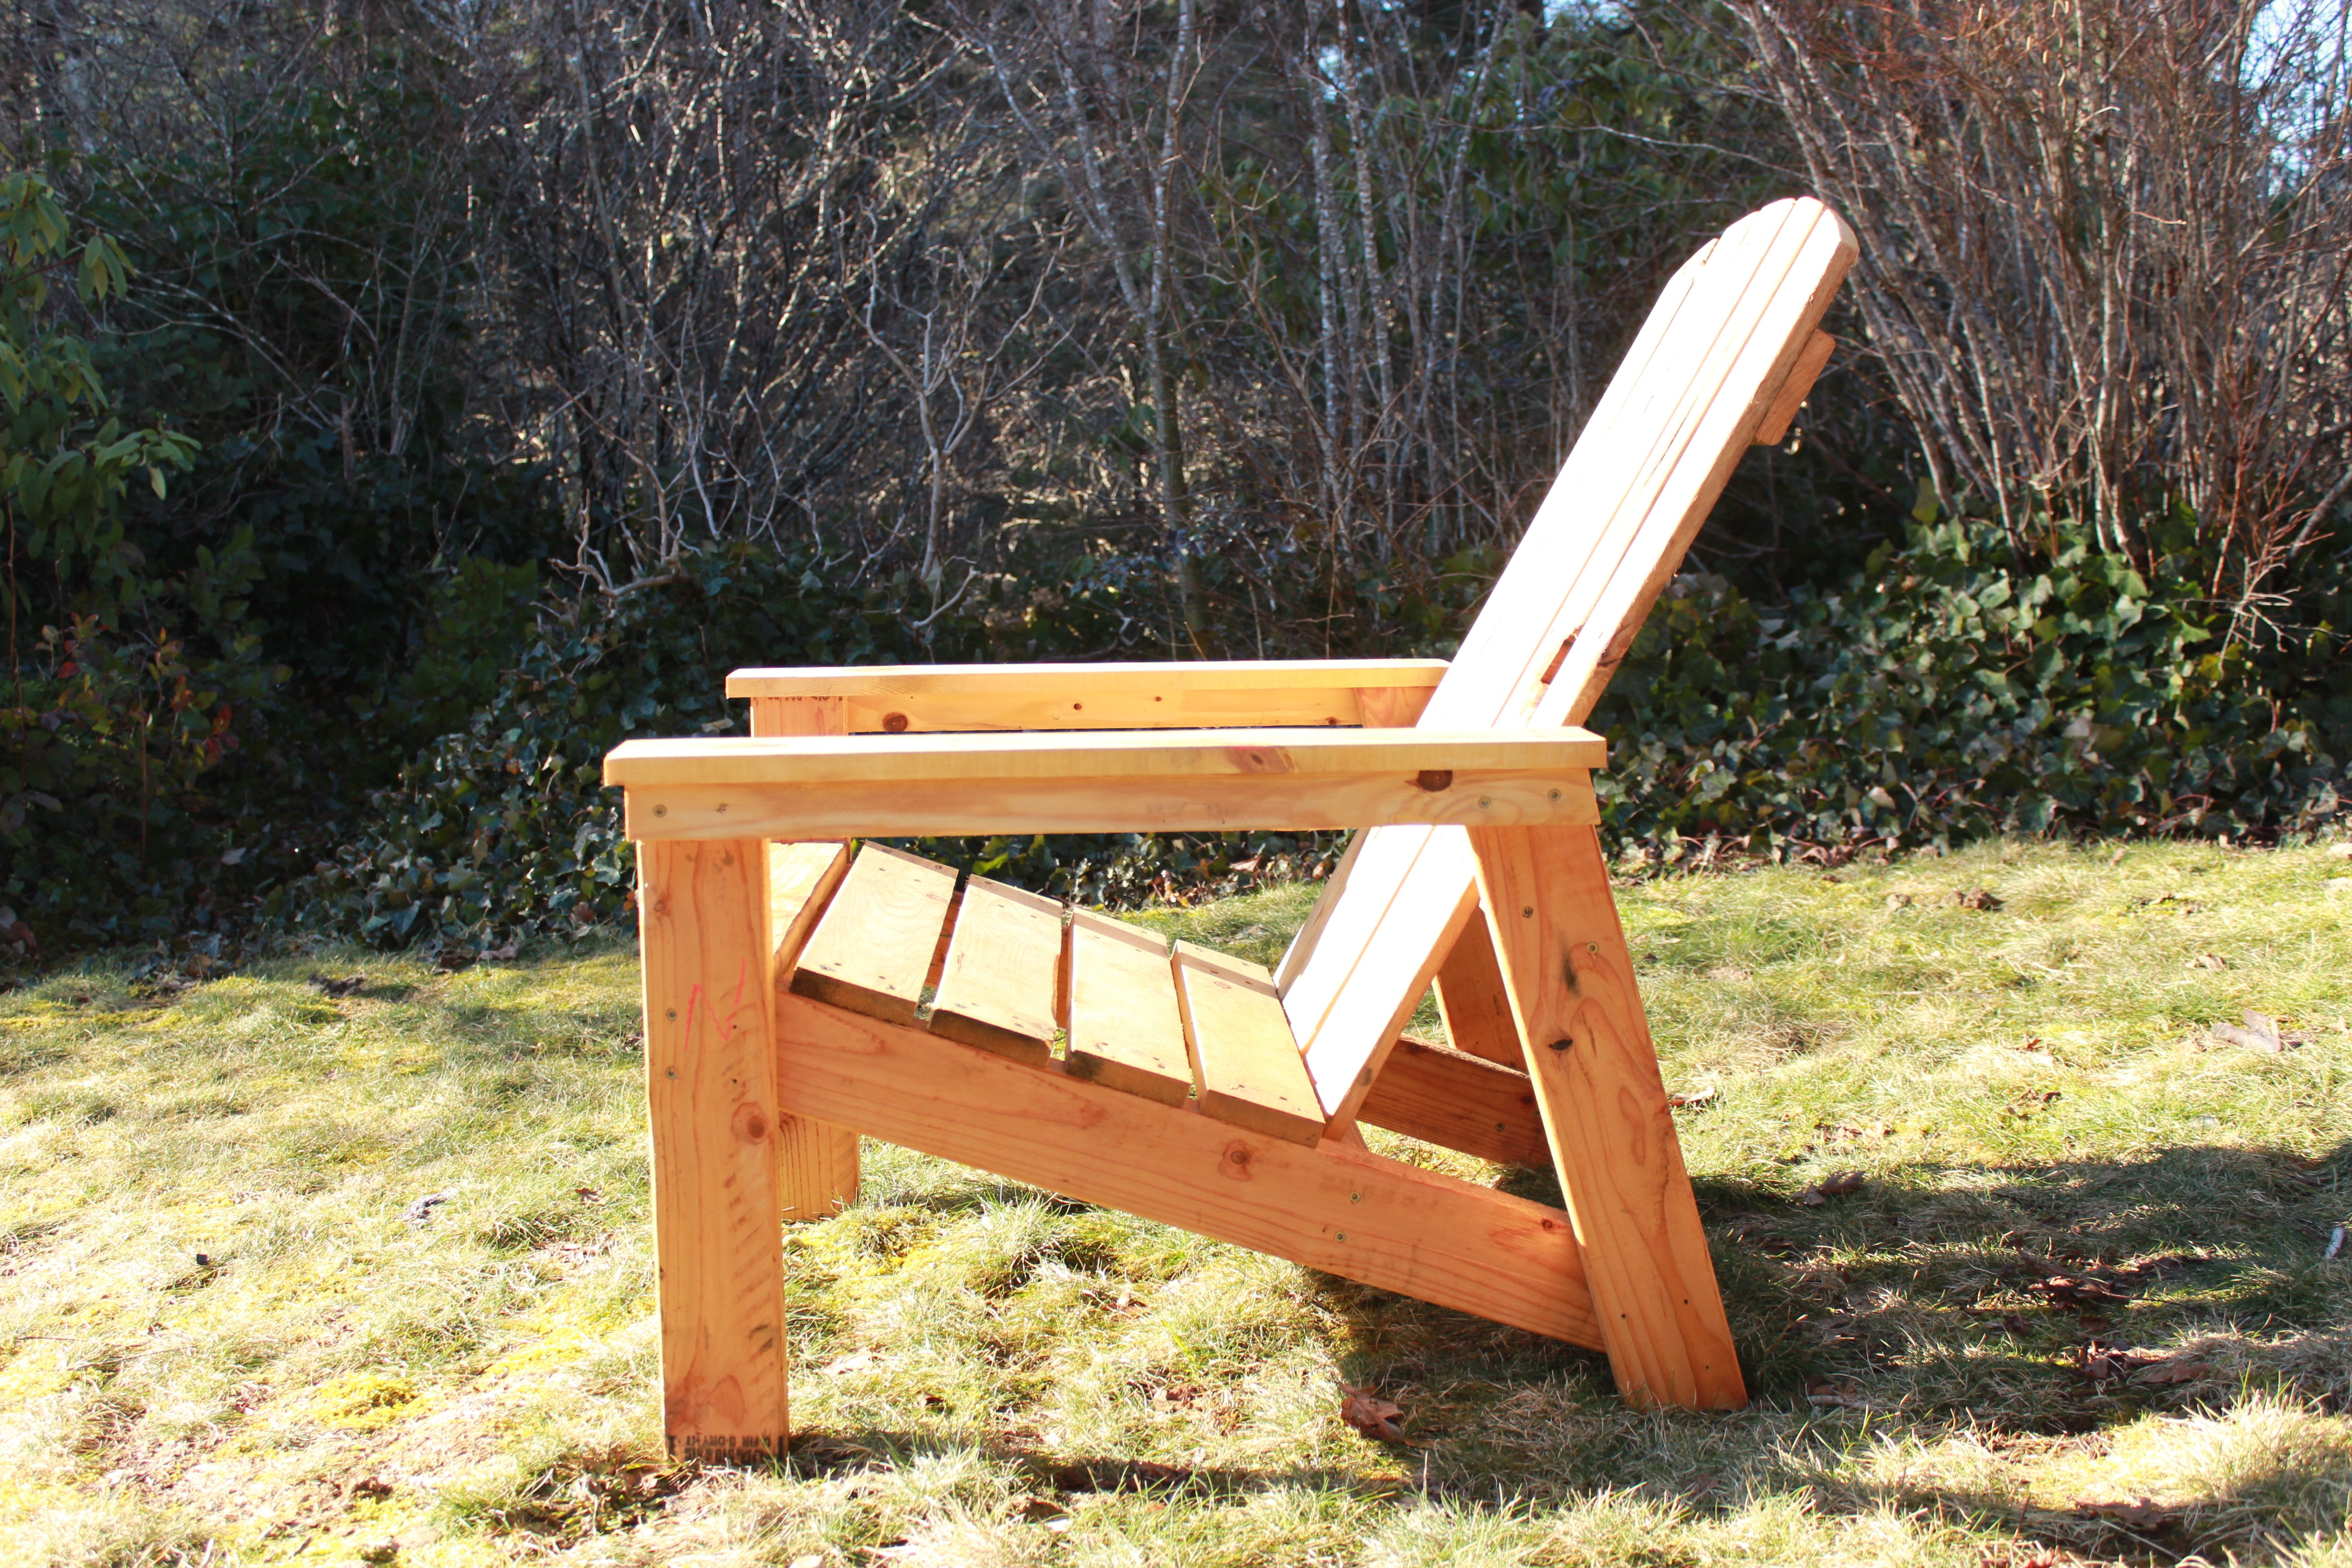
This is a chair I made from the Super Easy Adirondack Chair plan from your website.
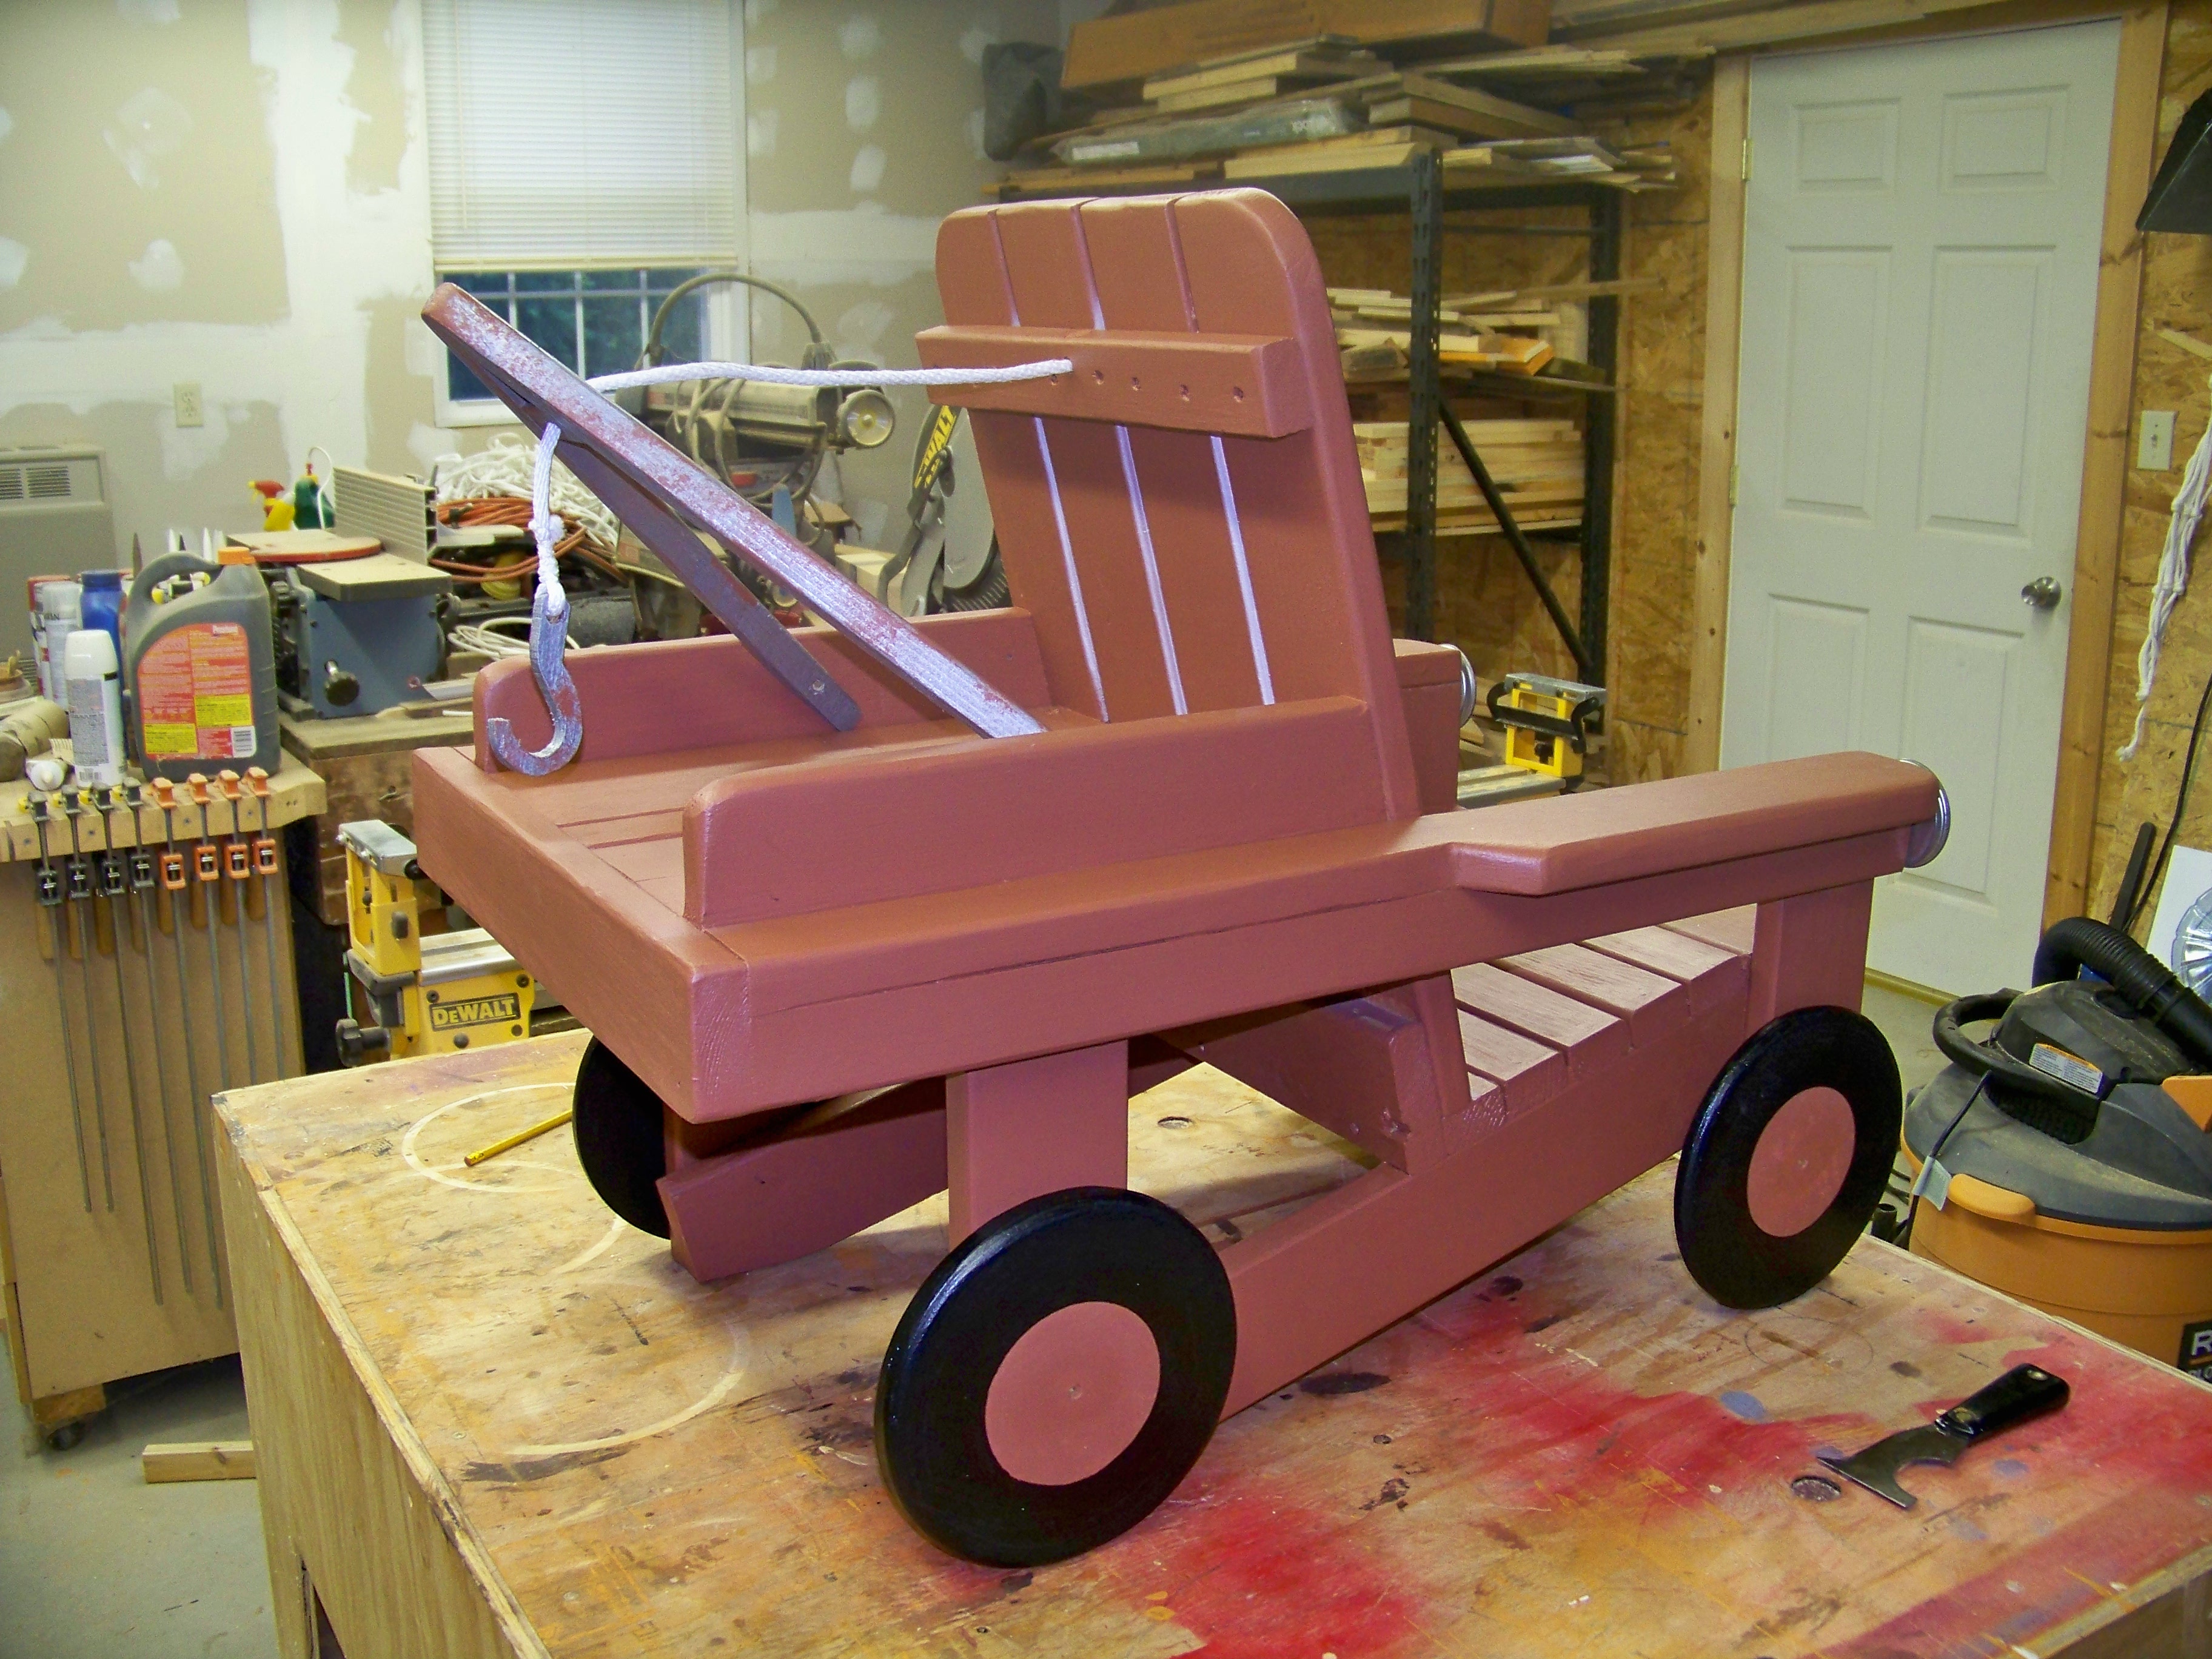
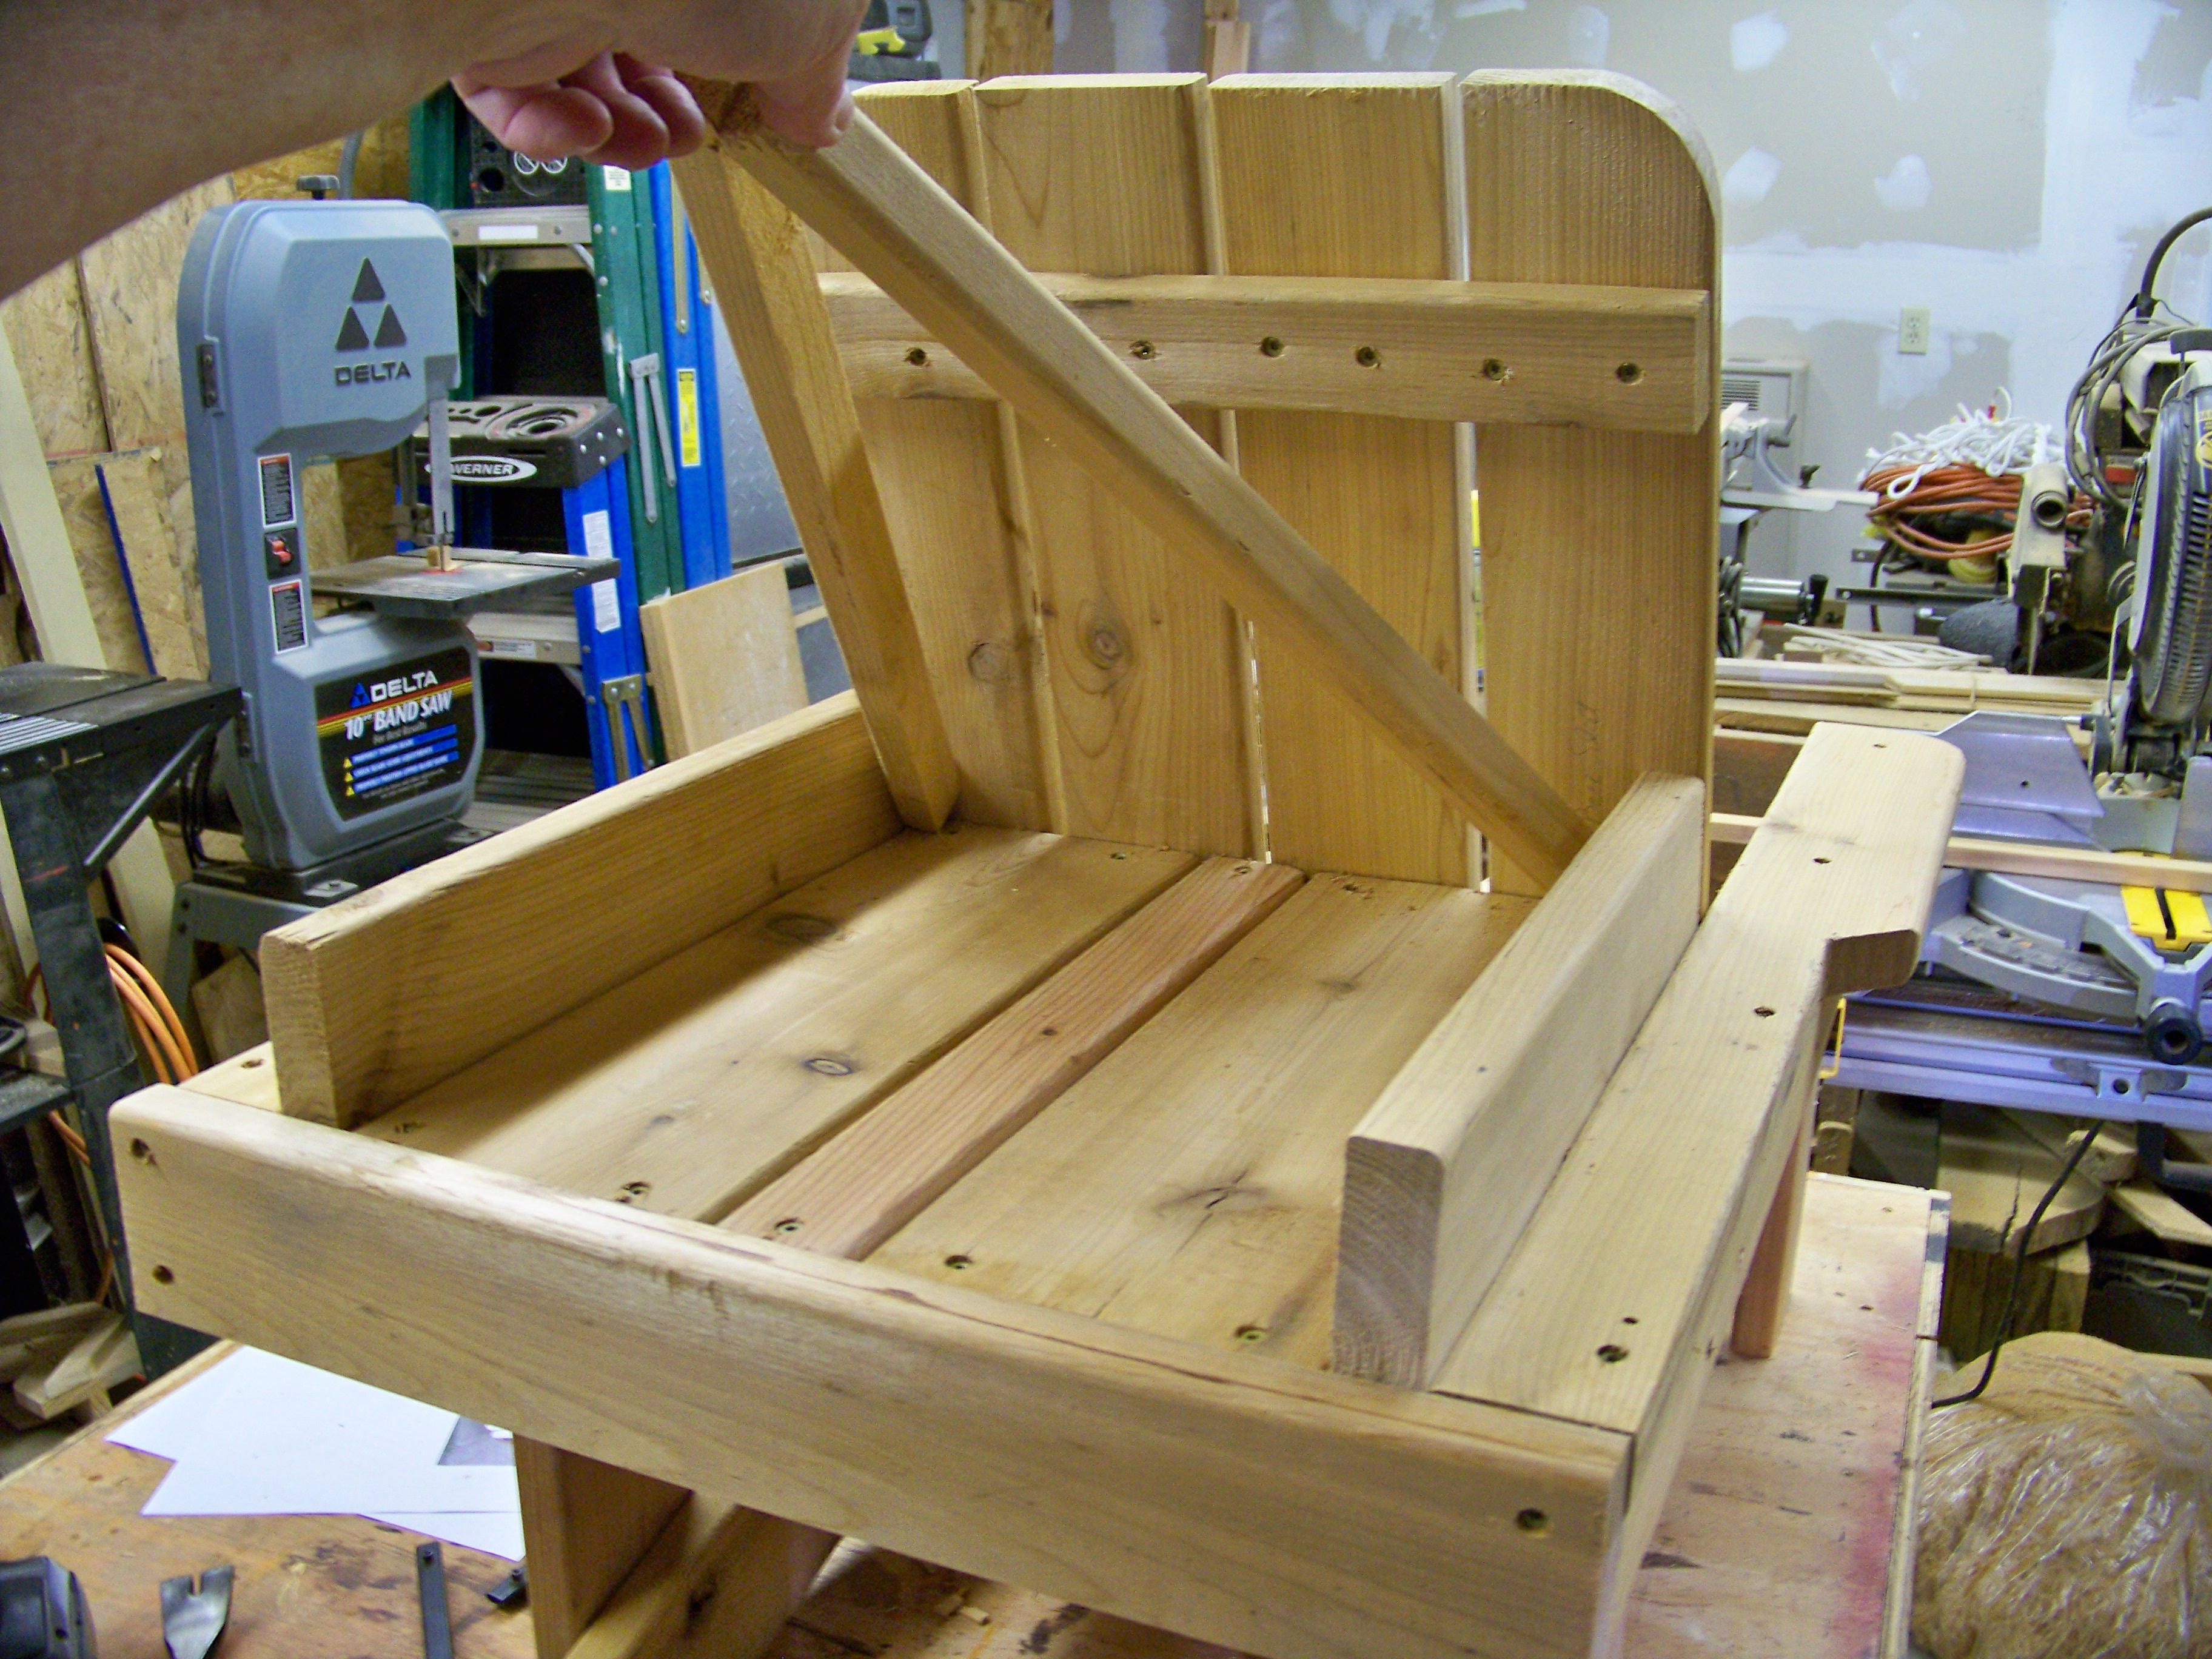
Fri, 12/05/2014 - 18:01
This has to be T H E cutest chair I've ever seen! Keep up the great work.
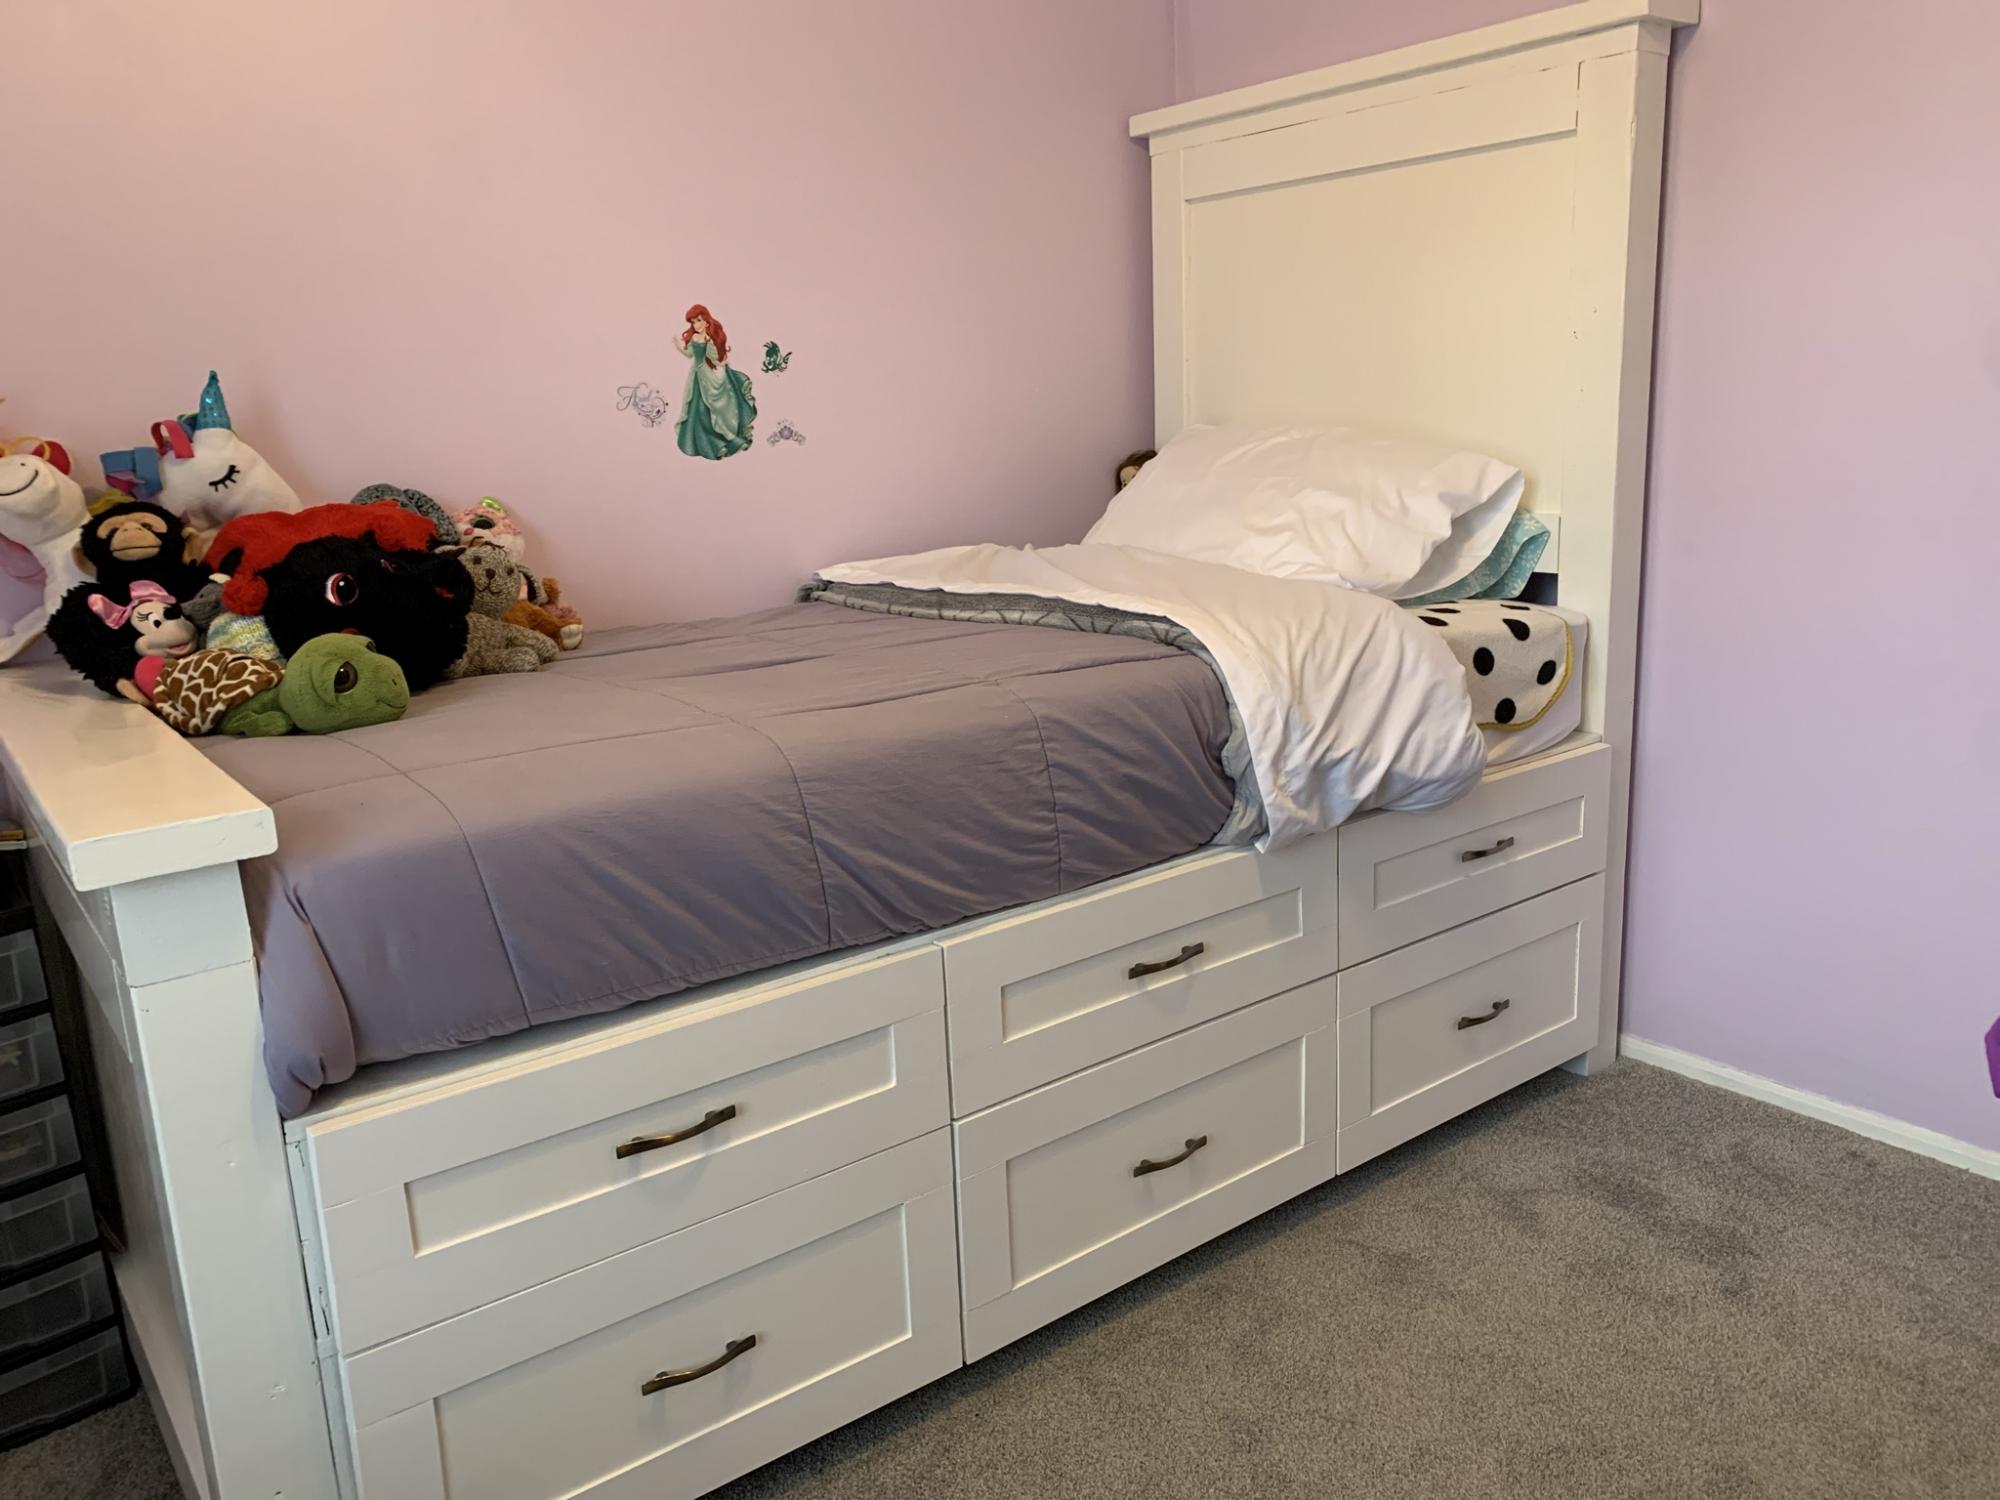
I just finished this bed and wanted to thank Ana White for the plans and directions. I didn’t understand the purpose of the gap between the storage cabinets so I extended the drawers making them deeper. This makes more sense to me rather than having dead space under the mattress. Who couldn’t use more storage?!? I also decided to make a second layer of drawers, so the bed is raised much higher. It was a bit of a challenge, but using the plans from Ana and SketchUp helped me plan. The bed looks amazing and my 6 year old loves the space she has not without a dresser in the room. Thanks, again!

Thu, 04/08/2021 - 08:36
Love this build and the finish is beautiful too, thanks for sharing!
We've been wanting to tackle some outdoor furniture for a while and finally took advantage of a coupon to get a bunch of outdoor cushions. With a big mound of cushions taking up space, we had to force ourselves to get to it. We spent more time talking about cushion and stain colors then it actually took to cut and screw it together. This is a great solid project to start with. Don't be intimidated by it. We can't wait to start on some chairs to go with it.
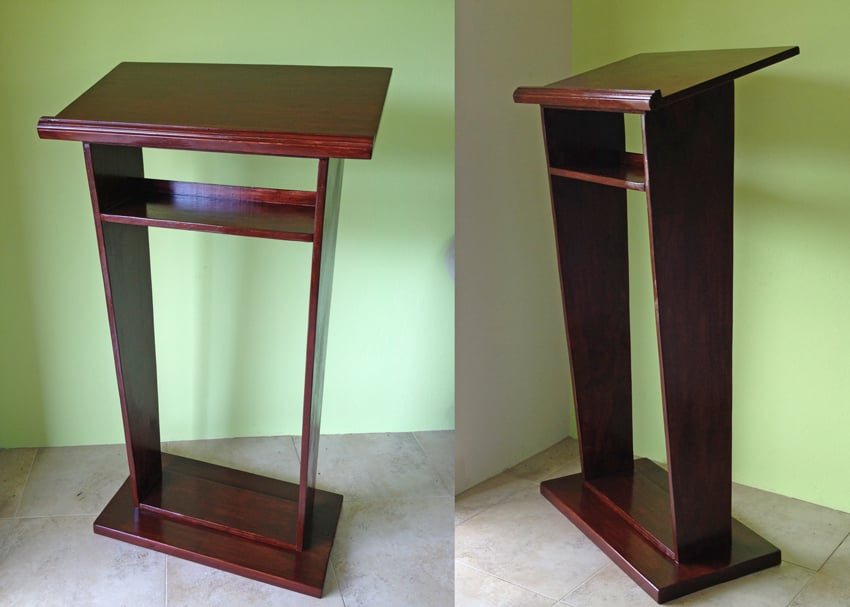
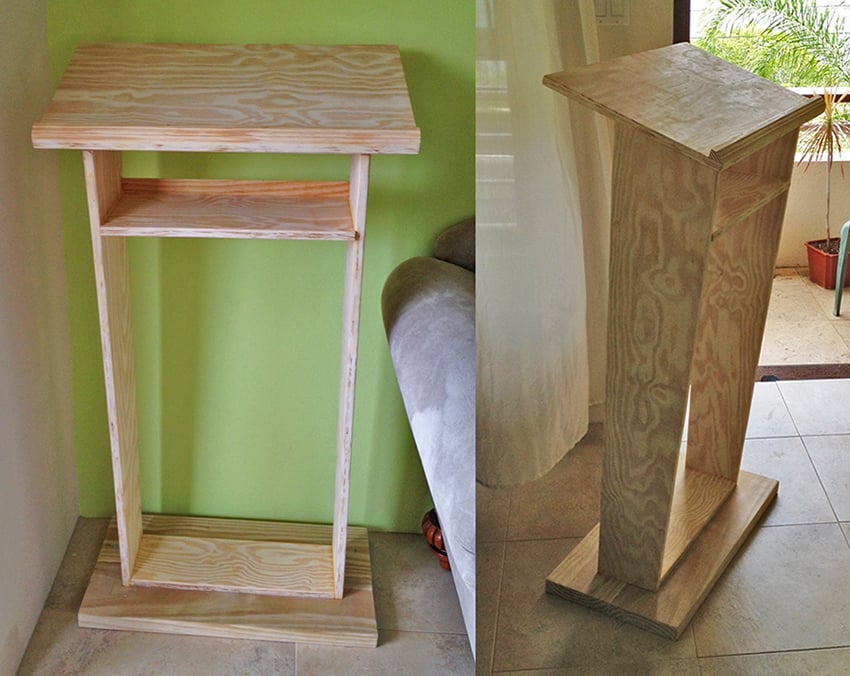
A good friend of mine, a pastor of a local church, asked me to build a pulpit for their recently finished church up in the countryside of Grenada. She showed me a picture of what she had in mind and based on that, I drew my own plan in SketchUp, and then built it out of Yellow Pine boards and Plywood.
Note to the dimensions:
After I drew the plan, and just when I was at the lumberyard to have the plywood and boards cut, I thought I might have had it estimated not wide enough, so I decided on the spot to make it 2" wider and the top panel 2" wider and deeper too. So if you'd like to build based on my plans, please consider if it's wide enough for your purposes.
This is what I used (corrected measurements here):
2x 2x8 26" long YP Boards (Base)
1x 18 1/2" x 6 1/2" Plywood (Base Support Panel)
1x 26" x 16" Plywood (Top)
1x 18 1/2" x 9" Plywood (Shelf Panel)
2x 45" x 9 1/2" Plywood (Side Panels ) - these are cut angled, see plans
1x 44 1/2" Wood Moulding (for the "stopper" on the top panel, and the "back" of the top shelf.


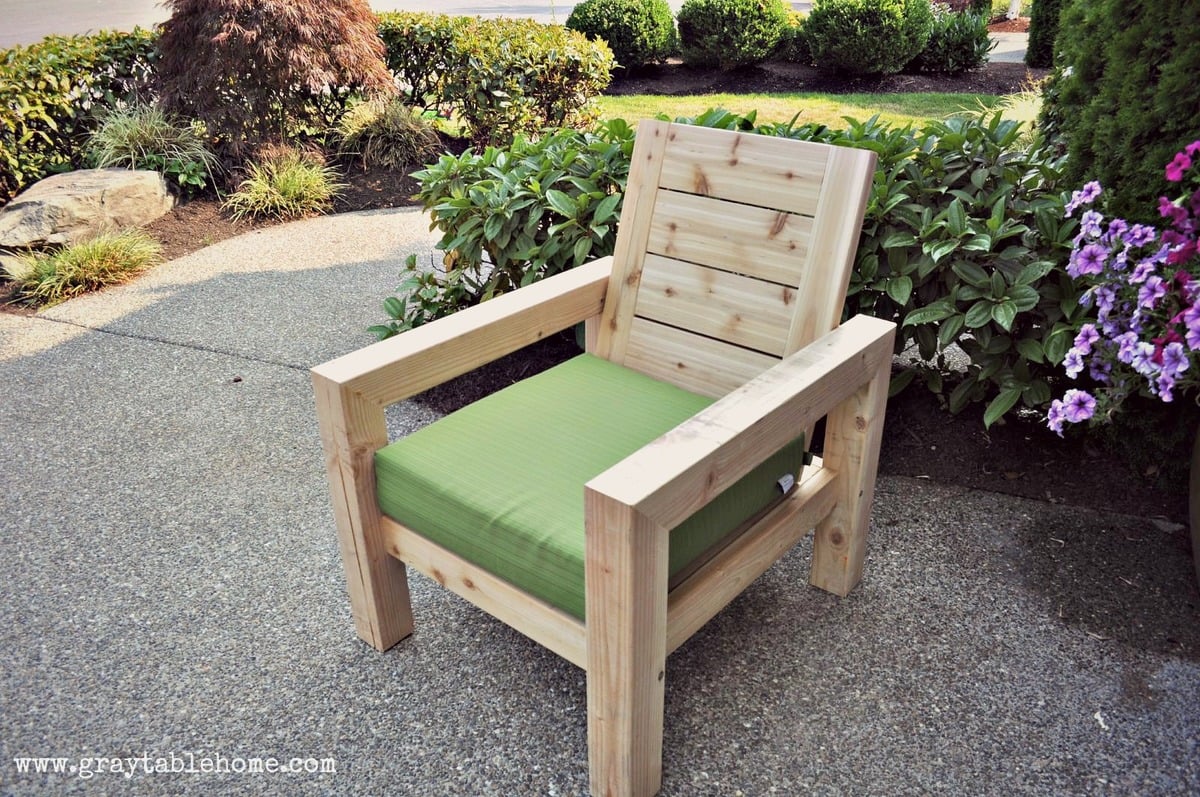
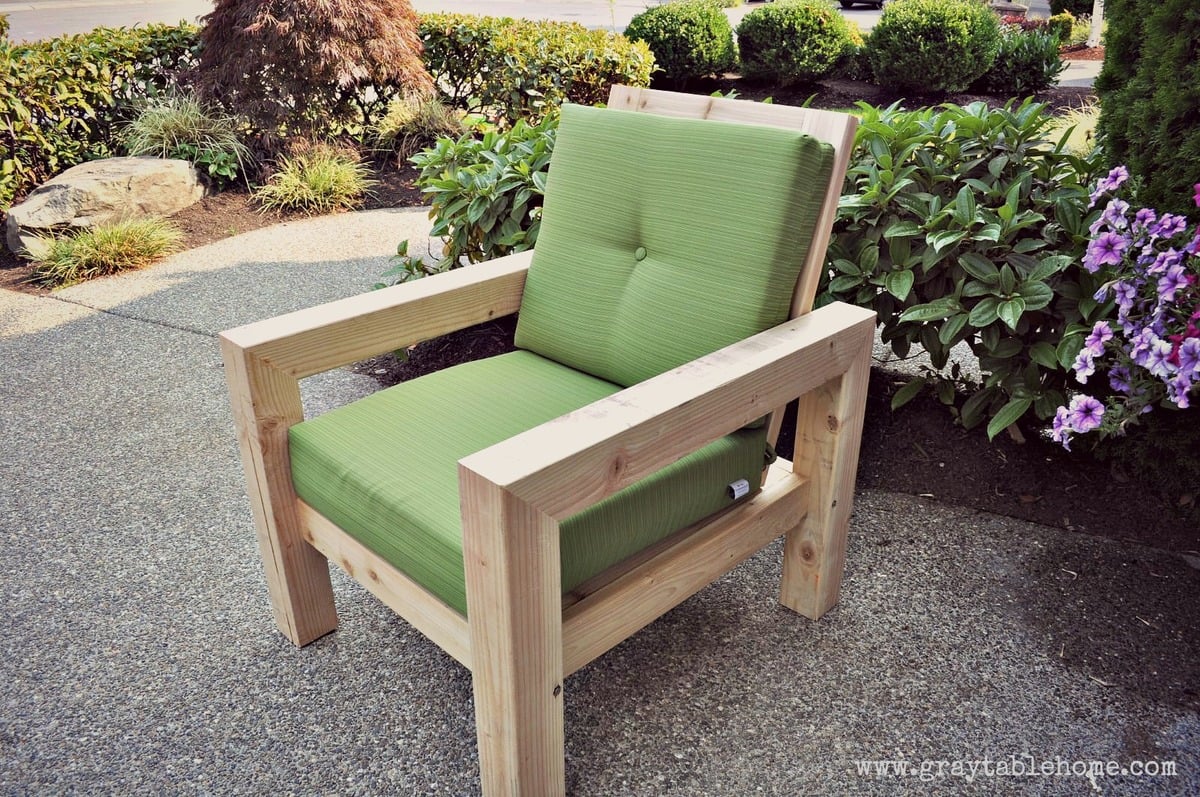
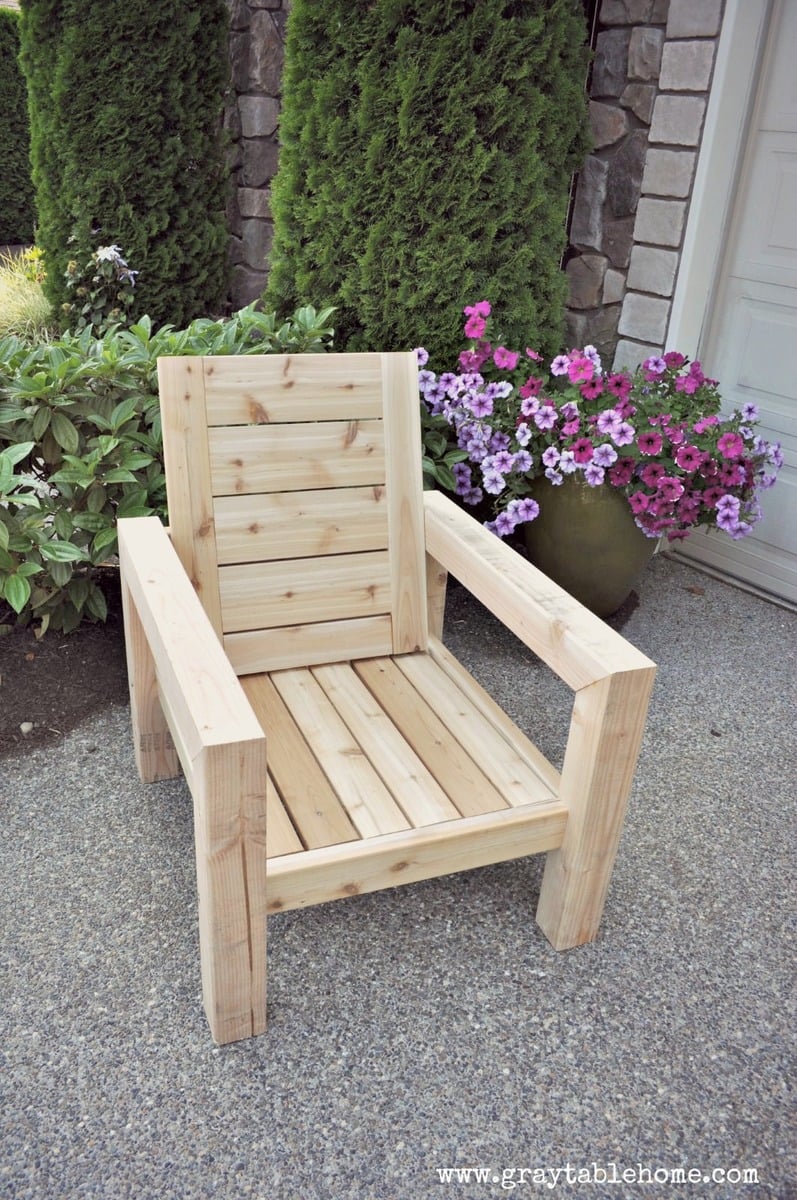
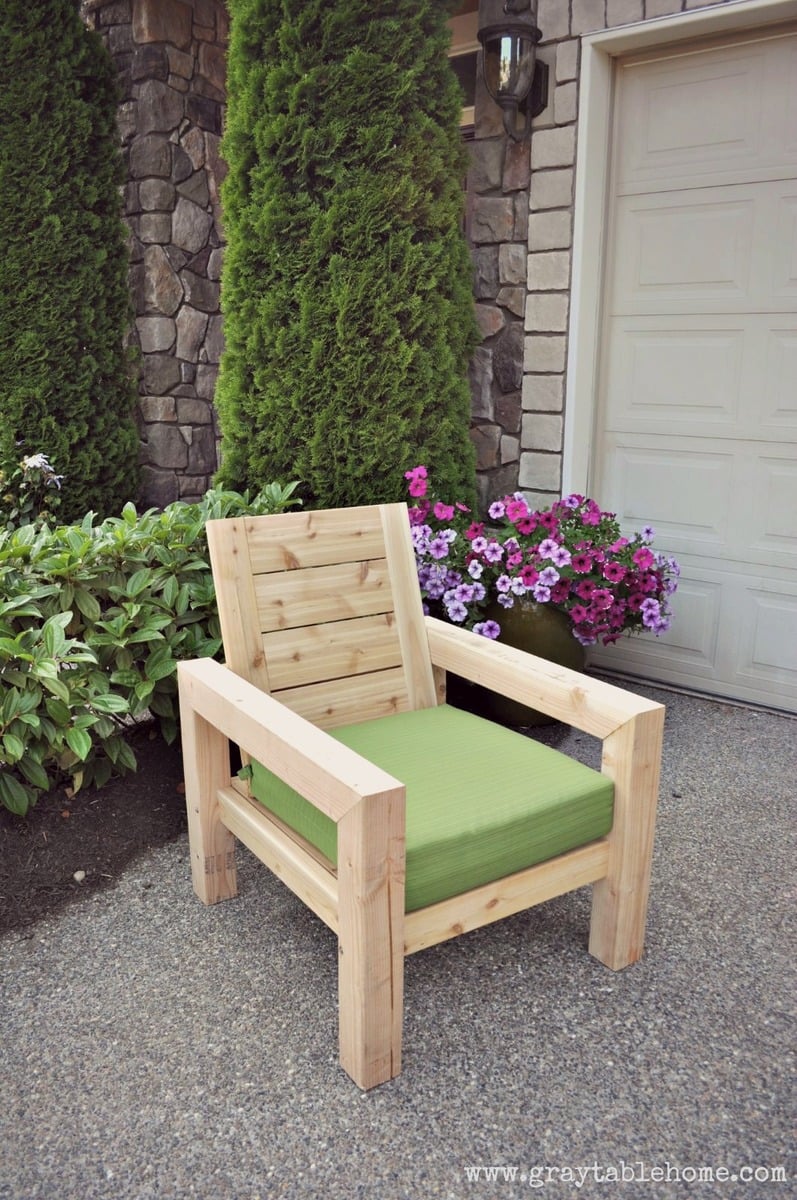
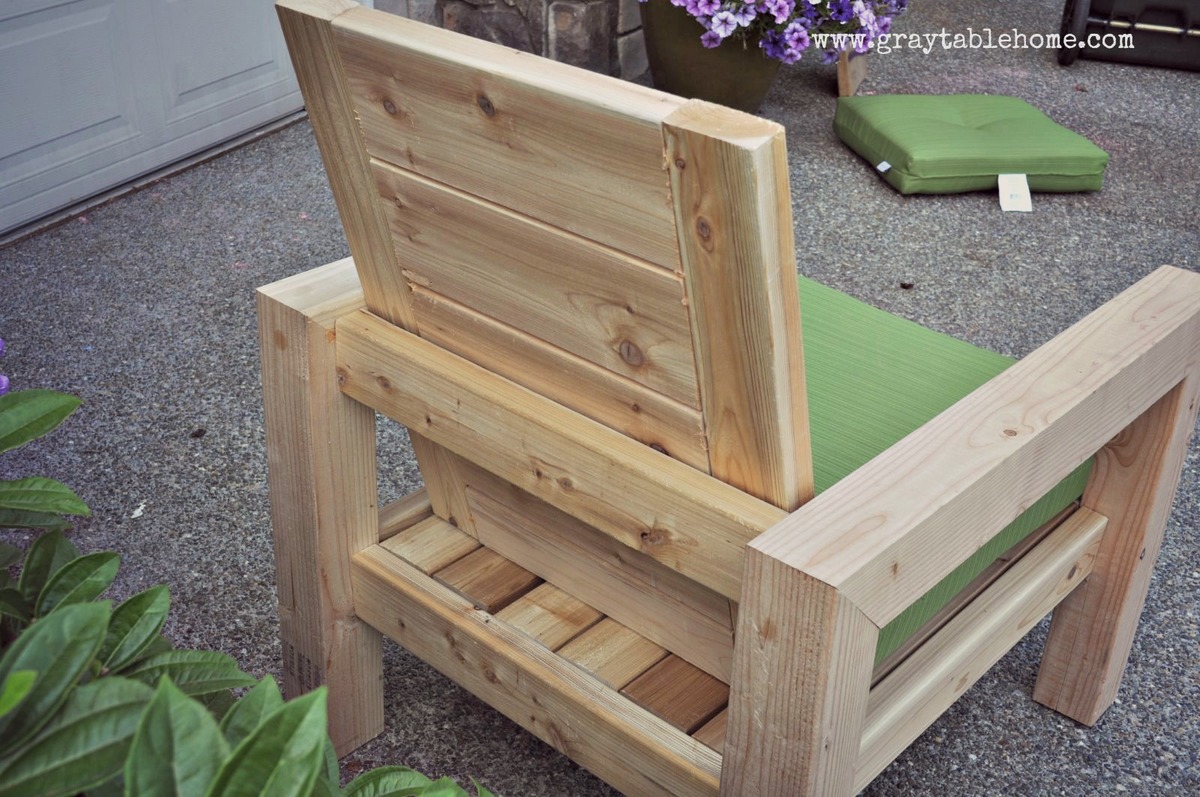
I made this outdoor chair by looking at a variety of plans and designs from Restoration Hardware and other stores. Check out more info on the project on my blog link. Thanks for looking!