Community Brag Posts

Aged turquoise

Submitted by Anonymous (not verified) on Sat, 01/19/2019 - 09:09

Aged rustic turquoise 

Built from Plan(s)
Estimated Time Investment
Day Project (6-9 Hours)
Finish Used
To be auctioned
Recommended Skill Level
Beginner

Sandbox with built-in seats

I modified this a tad from the original plans to suit my needs. I will eventually be adding a platform with attached slide and swing set.

Plans were easy to follow. My store didn't have 1x8's so I stacked 1x4's and used my Kreg jig to join them together and then I added extra bracing.

I had seen this on Pinterest a couple years ago and thought it was the coolest thing! Io excited I was able to build it myself!

Built from Plan(s)
Estimated Cost
About $40
Estimated Time Investment
Day Project (6-9 Hours)
Finish Used
None yet. I will stain and seal everything when I get the entire play set finished.
Recommended Skill Level
Beginner

Tryde Console Table

Submitted by Lee8717 on Mon, 01/09/2012 - 17:54

Tryde Console Table. First project undertaken. Decided to make a bottom shelf. Used 4 1x4s and notched the middle two to fit around legs. Being that is was out first project, we had a few problems with keeping everything square and level but with a few minor tweeks it ended up looking really good.

Built from Plan(s)
Estimated Cost
$70
Estimated Time Investment
Weekend Project (10-20 Hours)
Finish Used
Semi gloss black. Before painting took sander and sanded the sharp corners off all boards making them rounded and distressed looking. After painting two coats, took 220 grit sandpaper to the edges to take off some paint to expose the wood underneath.
Recommended Skill Level
Beginner

Comments

Kitchen Cabinets

Submitted by Anonymous (not verified) on Wed, 10/02/2019 - 21:30

I followed the kitchen cabinet building plans to build all new upper cabinets up to my ceiling. I built all new drawers with soft close drawer slides also and built the refrigerator enclosure cabinet.I did the entire remodel myself including the new doors out of MdF.

Finish Used
Emerald urethane paint
BIN Shellac Primer

Comments

Ana White

Tue, 11/05/2019 - 10:41

We are so thrilled to let you know your entry WON the Best Brag contest!  There were many amazing entries, and it was tough to choose.

Look out for an email from us shortly!

Swing set

Submitted by lazyLiz on Wed, 02/29/2012 - 10:21

I've finished my swing but my porch don't have enough clearance so I built A frame stand for it.

Built from Plan(s)
Estimated Time Investment
Day Project (6-9 Hours)
Finish Used
mahogany latex based exterior primer and paint in one
Recommended Skill Level
Intermediate

Comments

Ashley Doucakis

Fri, 04/19/2013 - 15:37

I love the idea of adding the A-frame considering that where i live there are no real trees to hang it on and building a porch where one doesn't already exist is a pain in the butt! Lol. How wide do you think we could go before it starts compromising the frames integrity? And how much weight can it hold?

Rustic X Bench for Entry

Made 2 changes to the plans which was using a 2 x 4 as a center top board to add some variety to the board width and also decided to go with breadboard ends which also used 2x4

Thanks for the plans!

Built from Plan(s)
Estimated Cost
$50
Estimated Time Investment
Afternoon Project (3-6 Hours)

DIY Farmhouse Cabinet

Submitted by Anonymous (not verified) on Thu, 08/10/2023 - 15:53

The inspiration for this piece came from an Instagram post. We decided on our overall dimensions (36" tall, 18" deep and 60" long), then more or less guessed what the size of the pieces for the face frame would be. We recreated it as best we could and I think it came out incredible. It has soft close drawers on top and the hand-made sliding shelves are also soft close. The raised panels for the doors were made on a table saw. The doors have soft close hinges. The cabinet is made from maple plywood, oak plywood, yellow pine and poplar. The top is made of cypress and stained with Minwax "fruitwood" color and semi-gloss urethane. Next step is to make the shelves which will be 48" tall overall.

Dave Patterson

Great weekend project...the "love swing"

Submitted by Don Ellery on Mon, 05/19/2014 - 15:49

A great weekend project...the "love swing"! I used the plan from Ana for the swing seat and added two arm rests from left over 1x6, rounded them off and sanded.

I cobbled together an A-frame to hang everything, made from five 8 foot 4x4s and two 8 foot 2x6s laminated together for the stretcher. Assembled with 1/2" galvanized carriage bolts and hung with 1/4" chain.

Definitely going to want a good miter saw for the A-Frame angles (the top ones are a bit tricky to get everything lined up)

Love it! Thanks for another great plan Ana..and of course..Shanty2Chic!

Built from Plan(s)
Estimated Cost
$200 ish..including the A-Frame... the hardware and chain can be pricey!
Estimated Time Investment
Day Project (6-9 Hours)
Finish Used
Behr exterior weatherproofing stain - Chocolate.

Just 2 thin coats, dries fast...second coat can be applied later the same day.
Recommended Skill Level
Beginner

Comments

Carpenters Daughter

Mon, 12/12/2016 - 17:09

Could you please post the plans to build the a frame as well? I really love what you did and would like to copy it! Great Job!

Don Ellery

Wed, 07/19/2017 - 11:31

Hi! I wish I could, but I didn't take any notes on the angles or lengths when I made this and I left it with the house when we moved. 

Mario Bunk bed Castle

Submitted by tdee on Wed, 05/28/2014 - 16:31

My son is a big Mario nut. And when it came down thinking about a new bed for him we sat down online and started searching for ideas. When we found this bed we both loved it right away. And when i found it was made from plans on Ana- white i was so excited as i have made a few projects already. My son was so happy the whole time this was being made. He was going to have his own castle. Once we finished the build he decided that he had to have a door so i made some curtains and embroidered Mario characters on each one. I let him decorate the inside with Mario stickers and he loves being able to have a Mario level right where he sleeps.

Built from Plan(s)
Estimated Cost
600
Estimated Time Investment
Week Long Project (20 Hours or More)
Finish Used
Paint in various colours to replicate a Mario castle.
Recommended Skill Level
Intermediate

Comments

Modern Sectional Sofa

Submitted by reinkense on Fri, 05/30/2014 - 17:22

I looked all around my town for a sofa that meet my needs. I wanted something with tall legs, modern lines and fit my living room. I did not have $3,000 to buy one online so I said to myself why not???


Estimated Cost
$400
Estimated Time Investment
Week Long Project (20 Hours or More)
Recommended Skill Level
Intermediate

Comments

reinkense

Sat, 05/31/2014 - 15:58

Thank you! I am really proud of it. I was thinking of putting together some plans.

Samigdal

Fri, 12/25/2015 - 17:48

Are there step-by-step instructions for building this posted anywhere?

walthoca

Fri, 01/06/2017 - 11:06

I am so impressed. We recently spent a small fortune on a sectional, but yours looks equally beautiful. You are incredibly talented! 

Modern Outdoor Chairs

These were so easy to build and look amazing! The only challenge was finding cushions. Finally found the 25x25 cushions at Lowe’s.

Estimated Cost
$60 each
Estimated Time Investment
Weekend Project (10-20 Hours)
Finish Used
First coat SW New Ebony Stain
second coat Varathane Briarsmoke
Recommended Skill Level
Beginner

Pallet Shelf Spice Rack

Submitted by rjh2006 on Thu, 11/01/2012 - 17:33

My mother lives with me and we loved the Pallet Shelf Project and made a back door shelf/coat rack. Then, task maker that she is, she decided we need a spice rack in the kitchen, and viola. Still needs another coat of minwax, but should be ready to hang tomorrow! Thanks Ana!

Finish Used
Minwax
Recommended Skill Level
Beginner

Adirondack Chair Project WNY Sept 2020

Submitted by Anonymous (not verified) on Mon, 09/07/2020 - 19:06

My daughter and I completed 4 chairs per Ana's design over Labor day w/e 2020. It took a little longer because we did a Shou Sugi Ban burn/brush finish with 2 coats of clear Urethane, including cleaning/drying time. We may add another after light sanding. Love the modern look - super easy plans to follow with video. Thanks Ana for making this available - a great way to spend the holiday weekend during Covid!

Estimated Cost
$60 per chair
Estimated Time Investment
Weekend Project (10-20 Hours)
Finish Used
Shou Sugi Ban deep burn and brush on all pieces
2 Coats of clear urethane .... possibly another still to come
Recommended Skill Level
Intermediate

Twin storage beds

Submitted by DIY JEFF on Sat, 10/25/2014 - 12:11

Second build for oldest son's room. 

Estimated Cost
250.00
Estimated Time Investment
Weekend Project (10-20 Hours)
Finish Used
Sherwin Williams all purpose enamel.
Recommended Skill Level
Beginner

Comments

VickeyB

Mon, 05/18/2015 - 08:04

Is your $250 estimated cost for the corner unit only, or for the corner unit and the beds? You did a fabulous job!

Potting Bench

I am a complete newbie to anything woodworking. I just turned 60 and used a drill for the first time about 9 months ago. Thanks to Anna and her plans and videos, I have developed some some self confidence in this art and absolutely loving it.

Farmhouse coffee table and king size bed is next.

Thank YOU Anna!!! You totally rock!!!!!!!!

Estimated Time Investment
Day Project (6-9 Hours)
Recommended Skill Level
Beginner

Comments

Rolling Kitchen Island with tilt trashcan and Holy cutting board

Submitted by MBlack on Thu, 02/21/2013 - 16:27

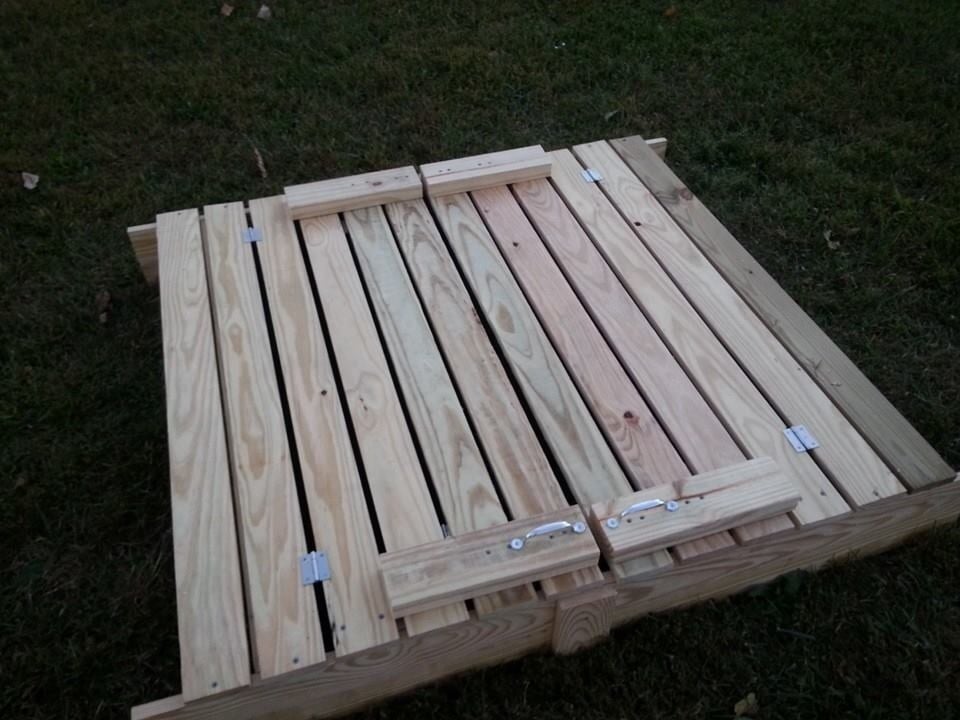
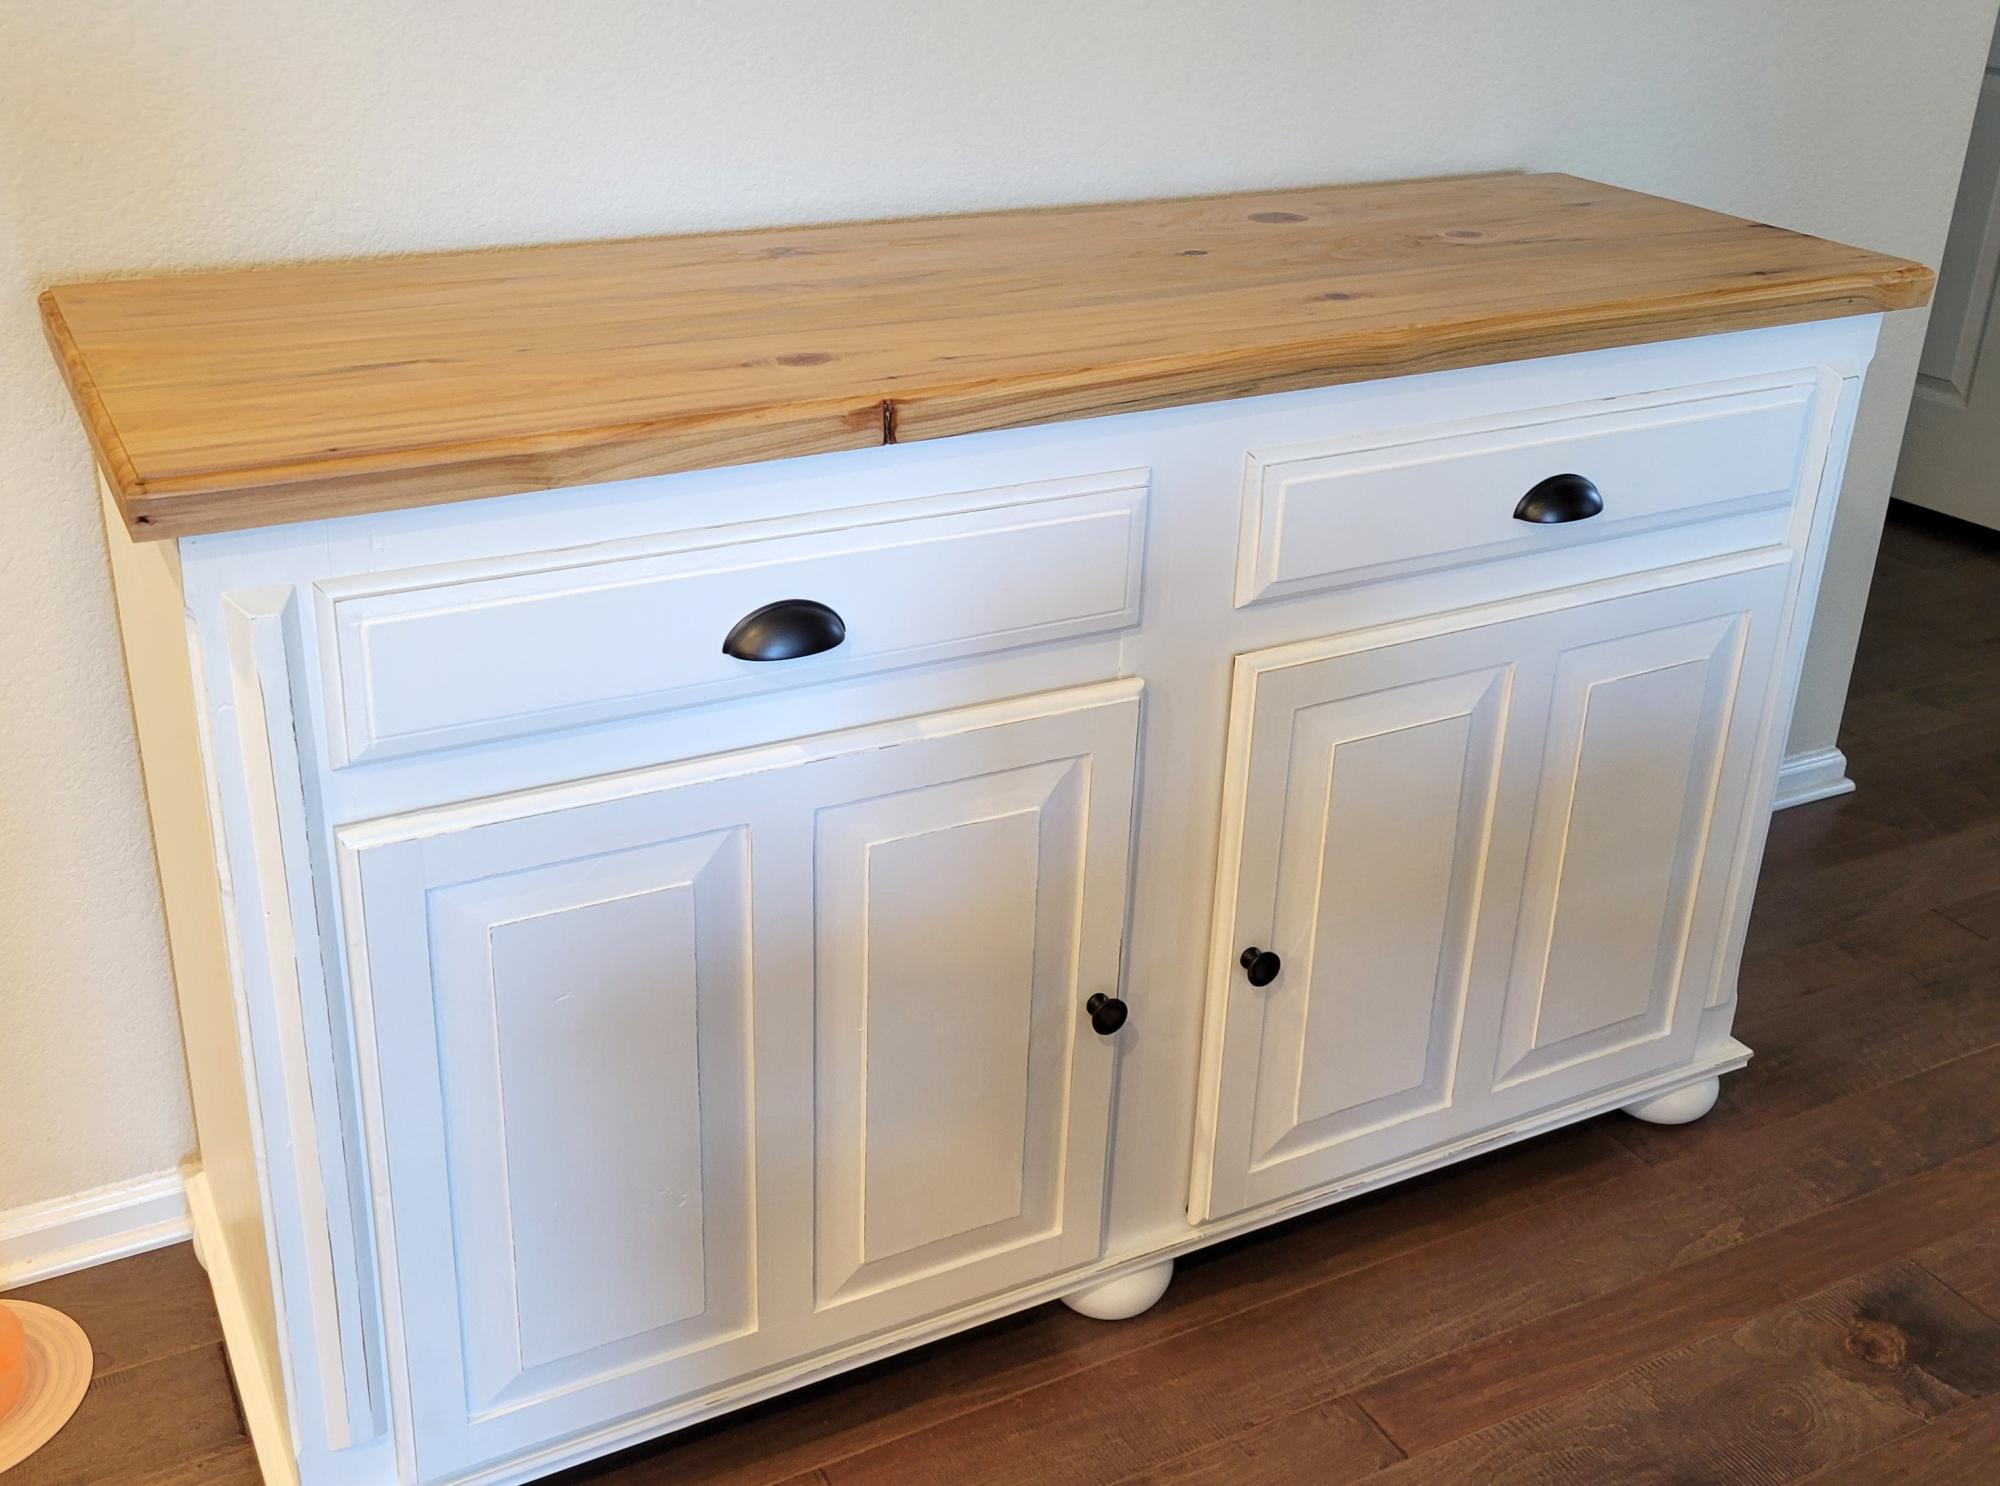
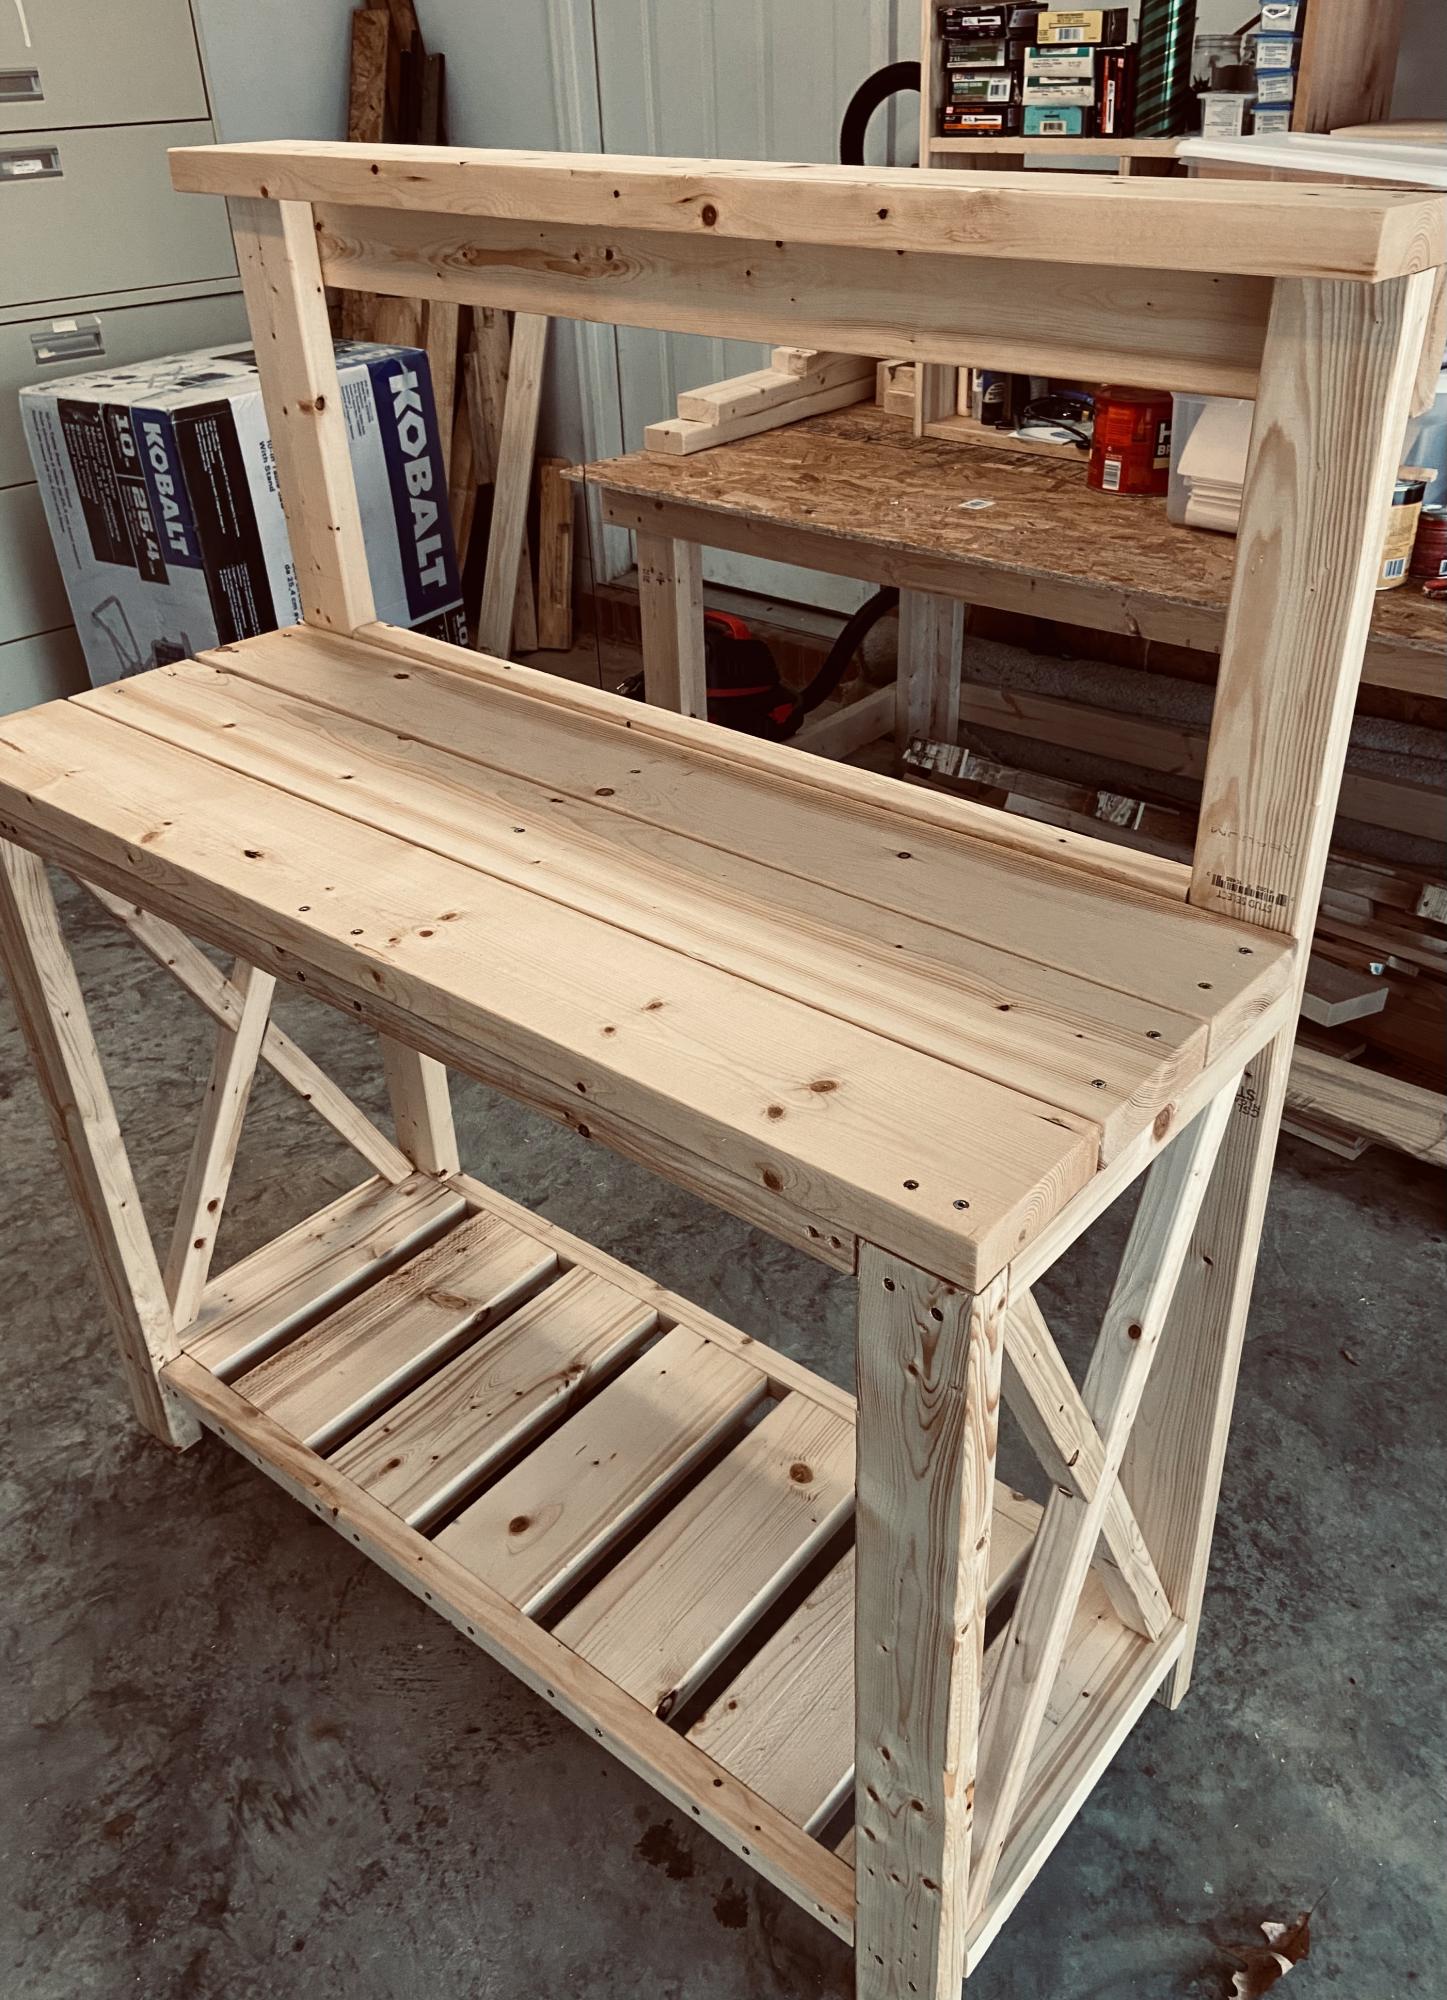
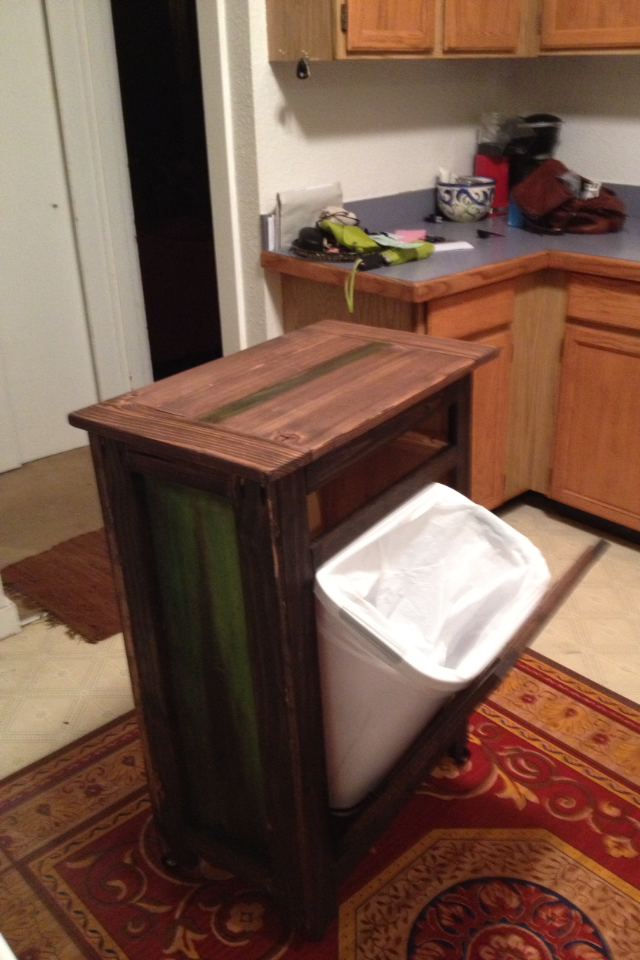
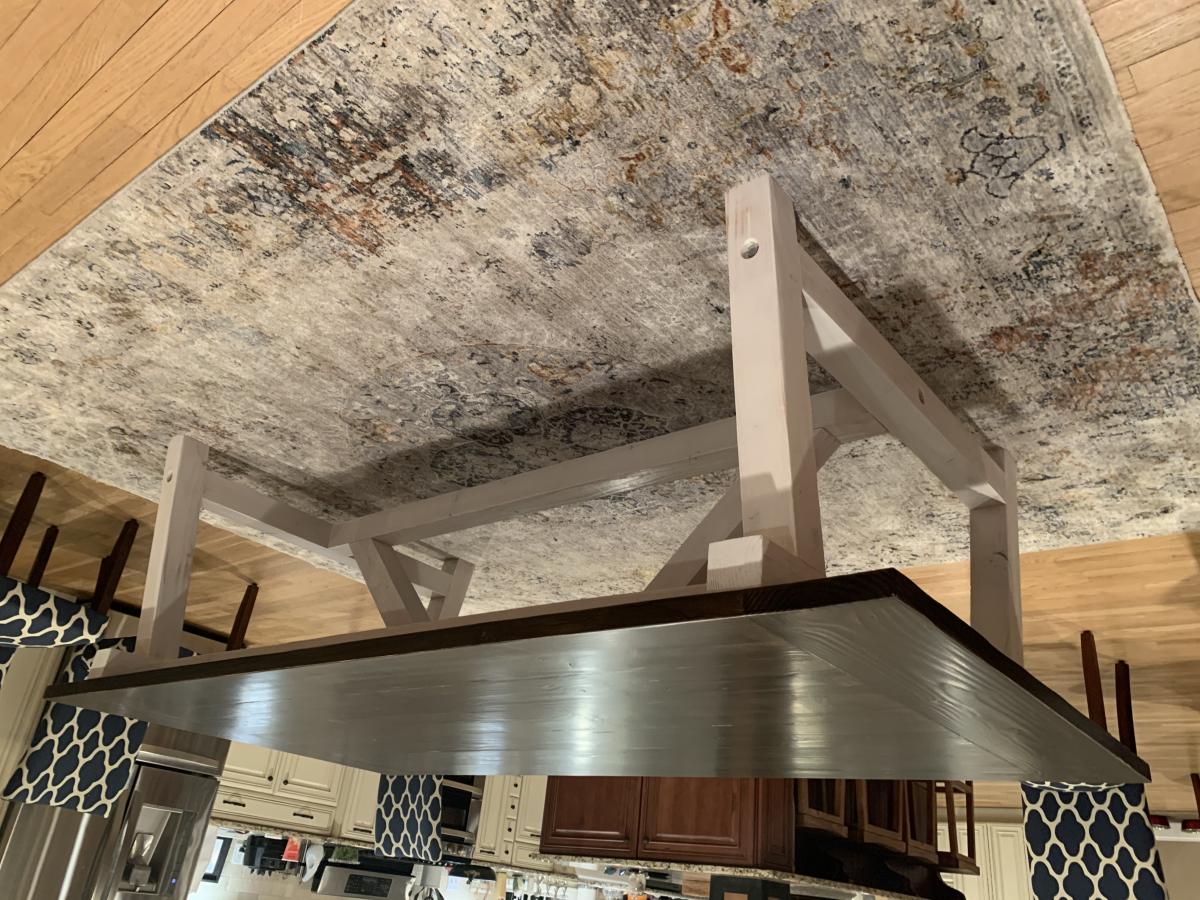
I saw Ana's tilt trashcan plan and I knew that I had to tackle this bad boy. I didn't want anything stationary because my 1910 kitchen is big but also pushed against the walls. My stove is 7 steps from a counter top so prep is kind of a pain.

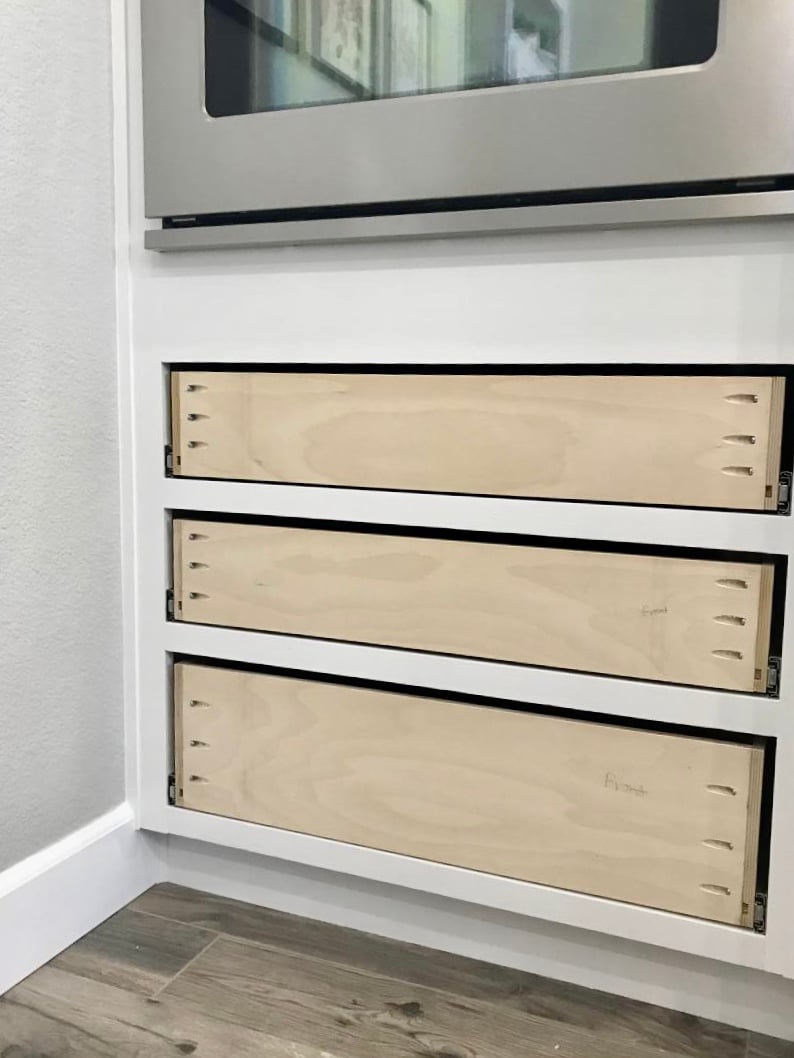
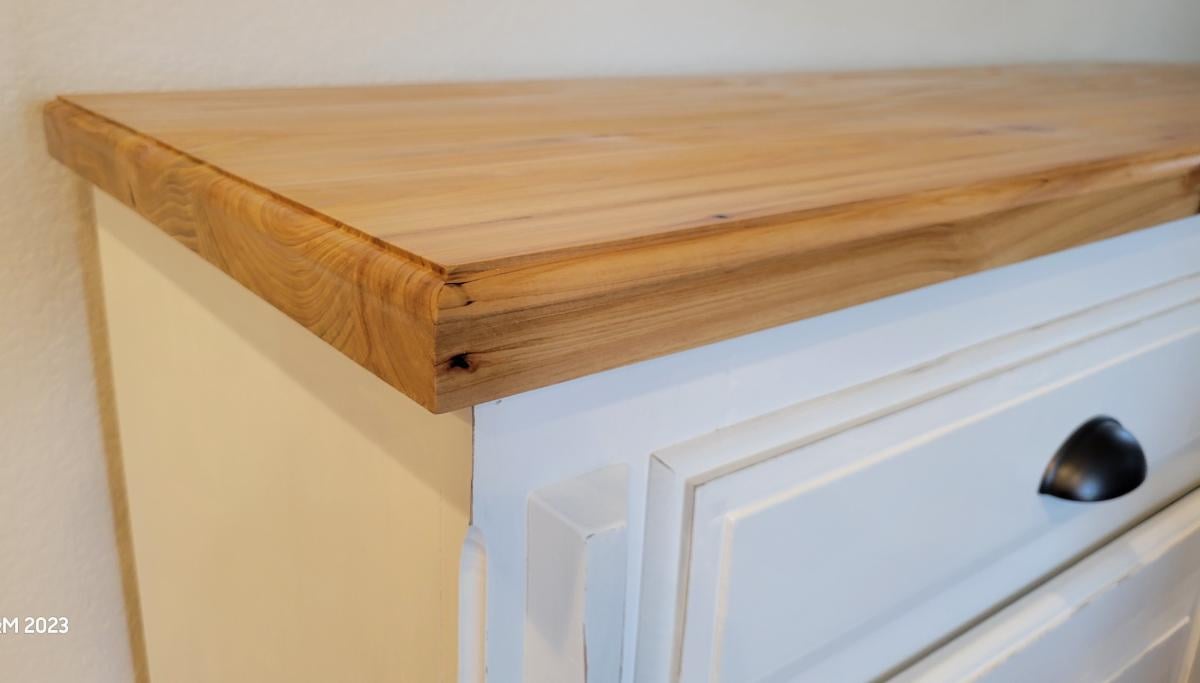
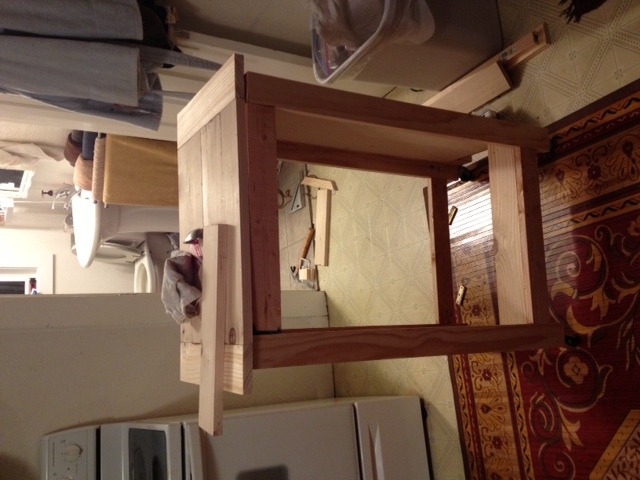
I modified Ana's original plan to be taller and even (well, close) with the stove's height for extra counter space. I also wanted a slide out cutting board with a hole so that while I'm chopping my ingredients, I can scoop it into the hole that drops directly into the trash.

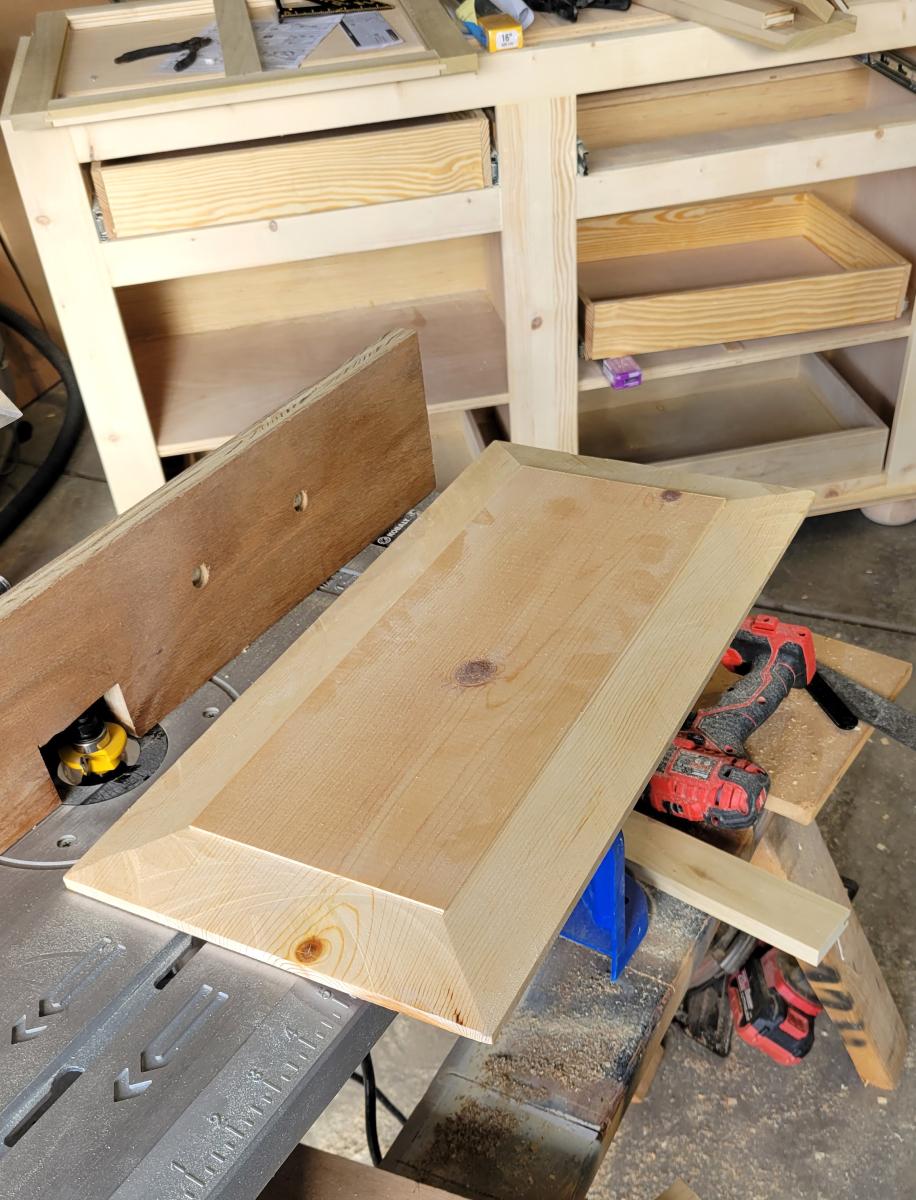
I'm a very ambitious girl who doesn't like to be told that I can't do something. This is also my second built....my first is a huge craft supply cabinet made from old barn wood that is lovingly referred to as 'The Outhouse'. My tools are limited to a 7in circular saw, drill, and Kreg Gig. I knew this would be tough but after a few head scratches, I have a pretty cool island.

If you have questions about what I asked, please ask. There are all types of wicked little tricks/fixes in this beast.

Estimated Time Investment
Weekend Project (10-20 Hours)
Finish Used
Rust-oleum Kona Stain for the frame and an acrylic wash for the sides. You can use those little cheap bottles of acrylic paint. Dip your brush in water then a small dip in paint. Brush it on then treat it like stain. Depending on how much paint is on your brush and the longer you leave the wash on the wood, the more darker and opaque the color becomes. Definetly test before applying to a completed project. The whole thing is coated with 6 coates of matte poly since it's a piece of kitchen furniture.
Recommended Skill Level
Intermediate

Comments

nicolepitts

Sun, 09/21/2014 - 08:11

we are about to start building and island based off this plan as well and i love the holy cutting board idea. do you have pictures of that or advice on how to accomplish it? we plan to make it twice the width with two trash cans. ( we have 5 kids= lots of trash!) 

Truss Beam Dining Table

Modified plan dimensions to accommodate 8' long by 4' wide top. Also, added 4" lag screws (just for appearance) to secure beams at base of the legs and center support

Built from Plan(s)
Estimated Cost
$550
Estimated Time Investment
Week Long Project (20 Hours or More)
Finish Used
Top:
Varathane Jacobean Stain + Poly
Polyurethane\Mineral Spirit 50/50 mix (see PMK Woodworking)

Base:
Varathane Antique White Stain + Poly
Recommended Skill Level
Intermediate

Comments

"Old Wood" Adirondack Chairs

Submitted by Anonymous (not verified) on Mon, 06/14/2021 - 06:16

Given the crazy price of wood (2021), I'm glad I saved some old deck boards and fence panels we replaced last year, so I could build these! Love the design.

Comments

Back