Community Brag Posts
Firepit Swings
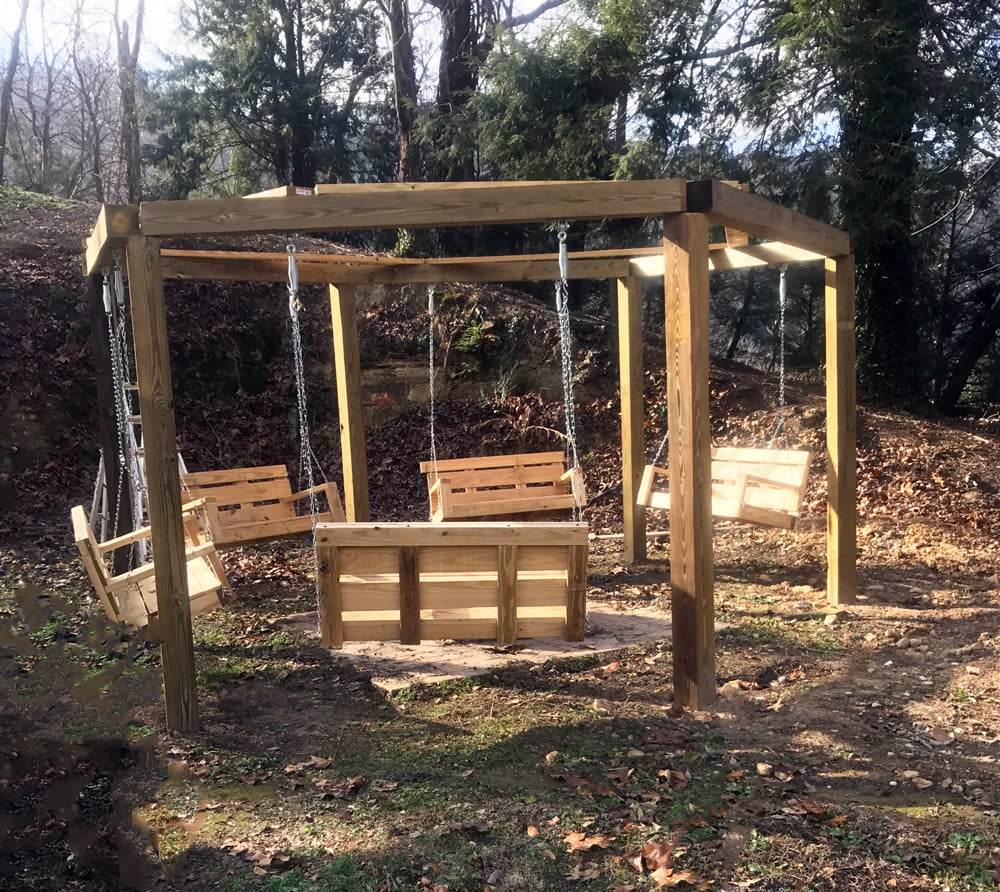
This was a real challenge as I did the whole project alone. 6x6 pressure treated lumber was used as posts and support beams. 120 lbs of quickcrete was used for each post and the support beams are bolted onto the posts. The swings were all made with pressure treated
lumber and I bought heavy duty mounting hardware for the chains. I bought the firepit kit at Lowe's and did the 4 block high enclosure. I had a lot of fun with this!
Built from Plan(s)
Estimated Time Investment
Week Long Project (20 Hours or More)
Finish Used
None
Recommended Skill Level
Intermediate
Comments
Tue, 03/07/2017 - 10:28
That is AWESOME! Job well
That is AWESOME! Job well done :) I need one of those in my back yard!
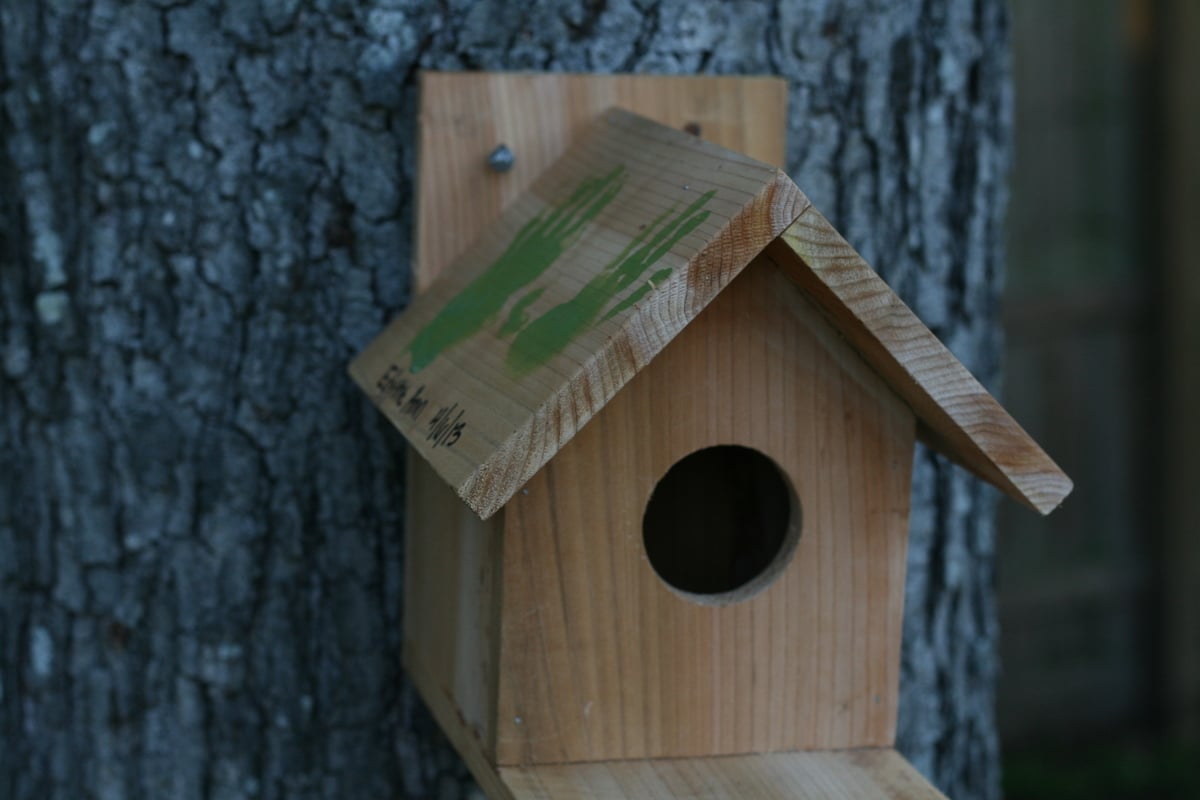
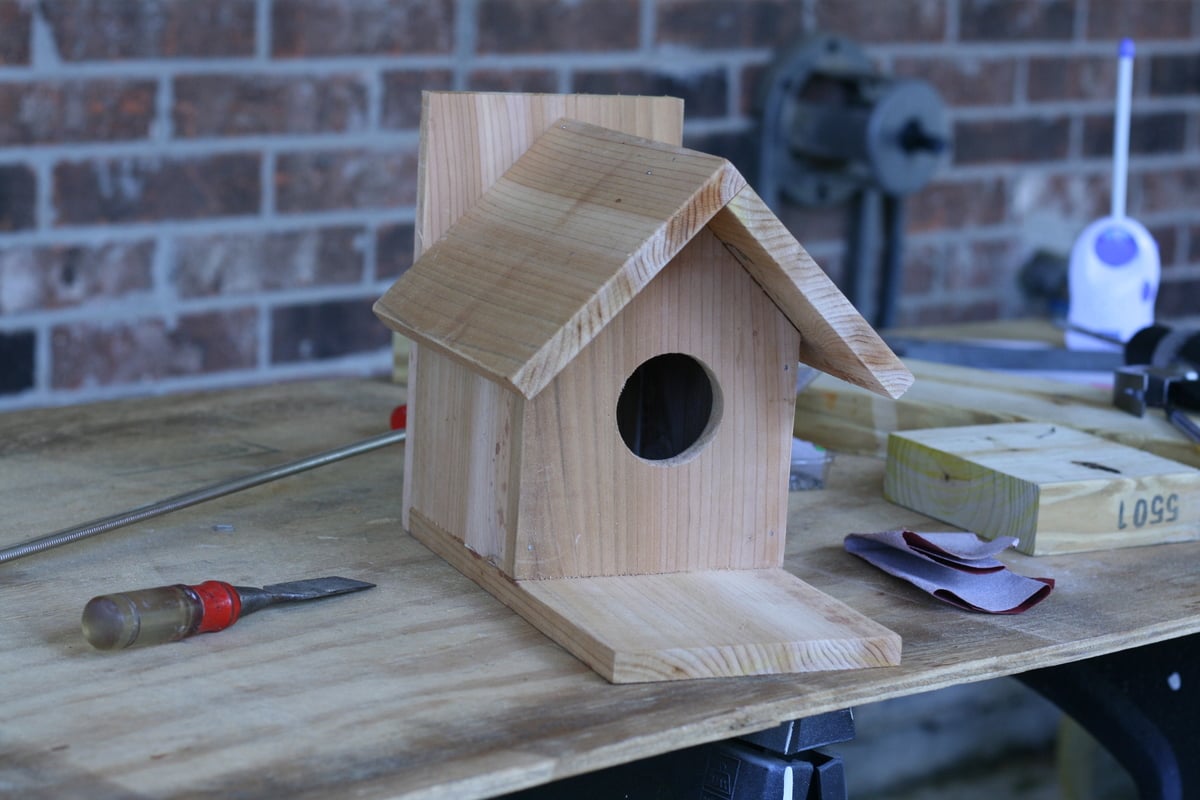
Traditional Bird House Brag Post

My very first project using the Compound Miter Saw. Easy Cuts. Easy assembly. Cost was about $1.50. I think I am going to make kits (as suggested in the sister plan) for a couple of birthdays coming up!
Built from Plan(s)
Estimated Cost
$1.50
Estimated Time Investment
An Hour or Two (0-2 Hours)
Finish Used
No finish. Used spray paint to put Little One's hands on the roof.
Recommended Skill Level
Starter Project
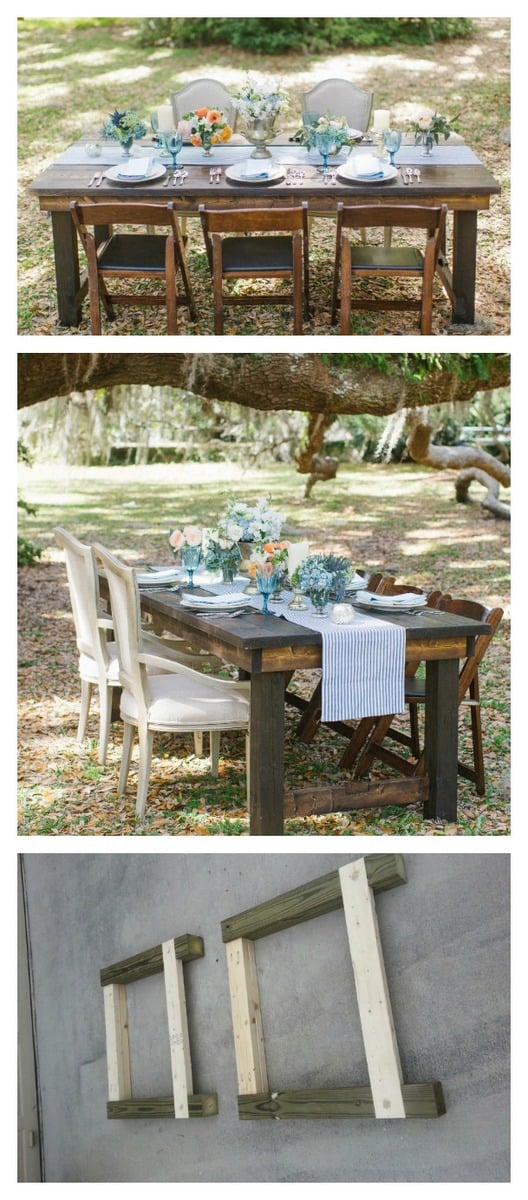
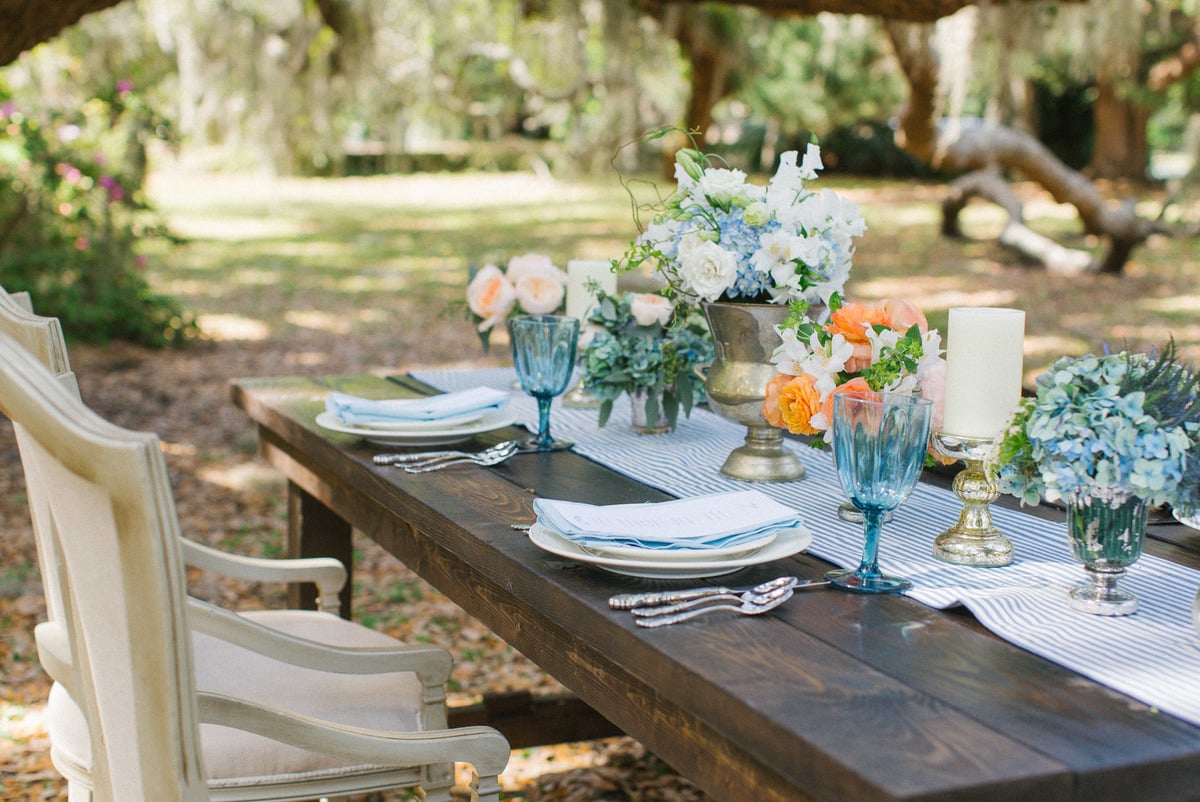
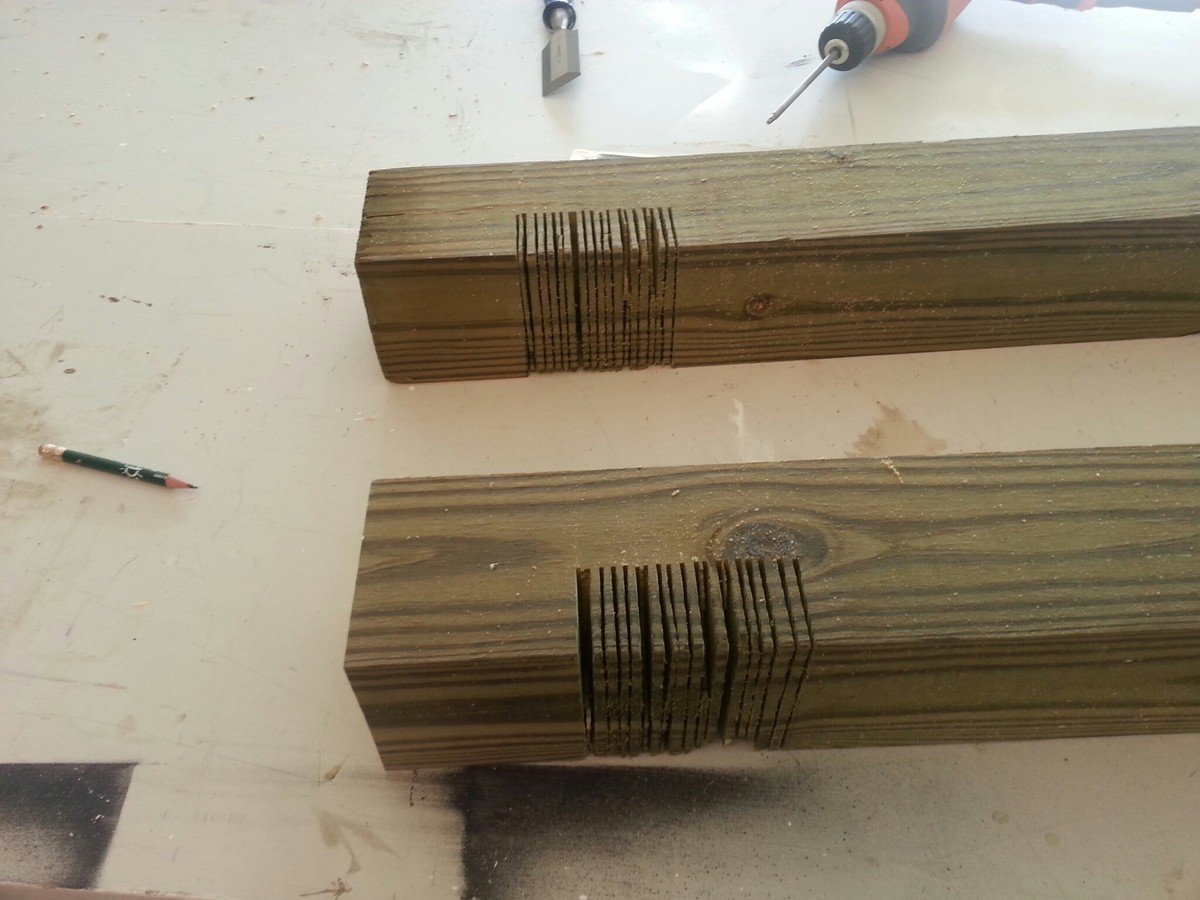
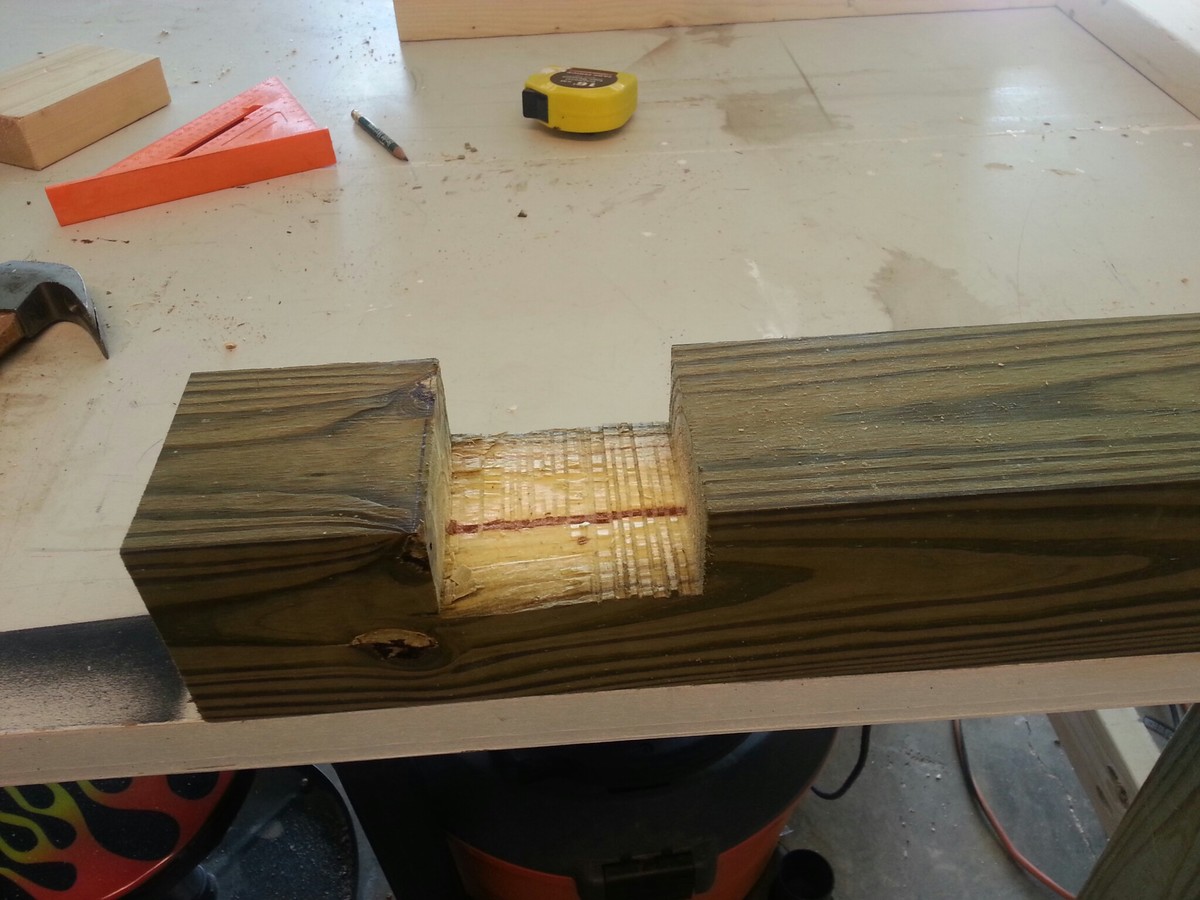
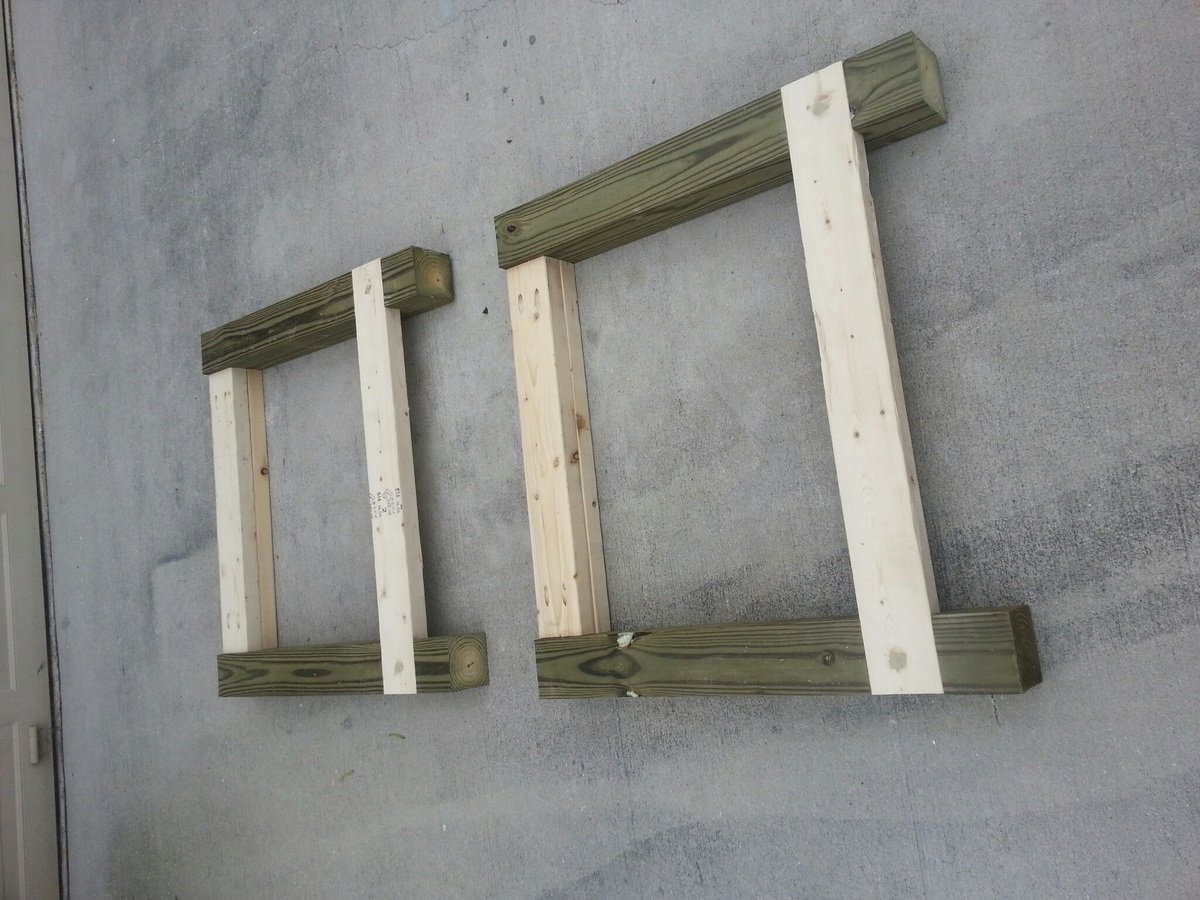
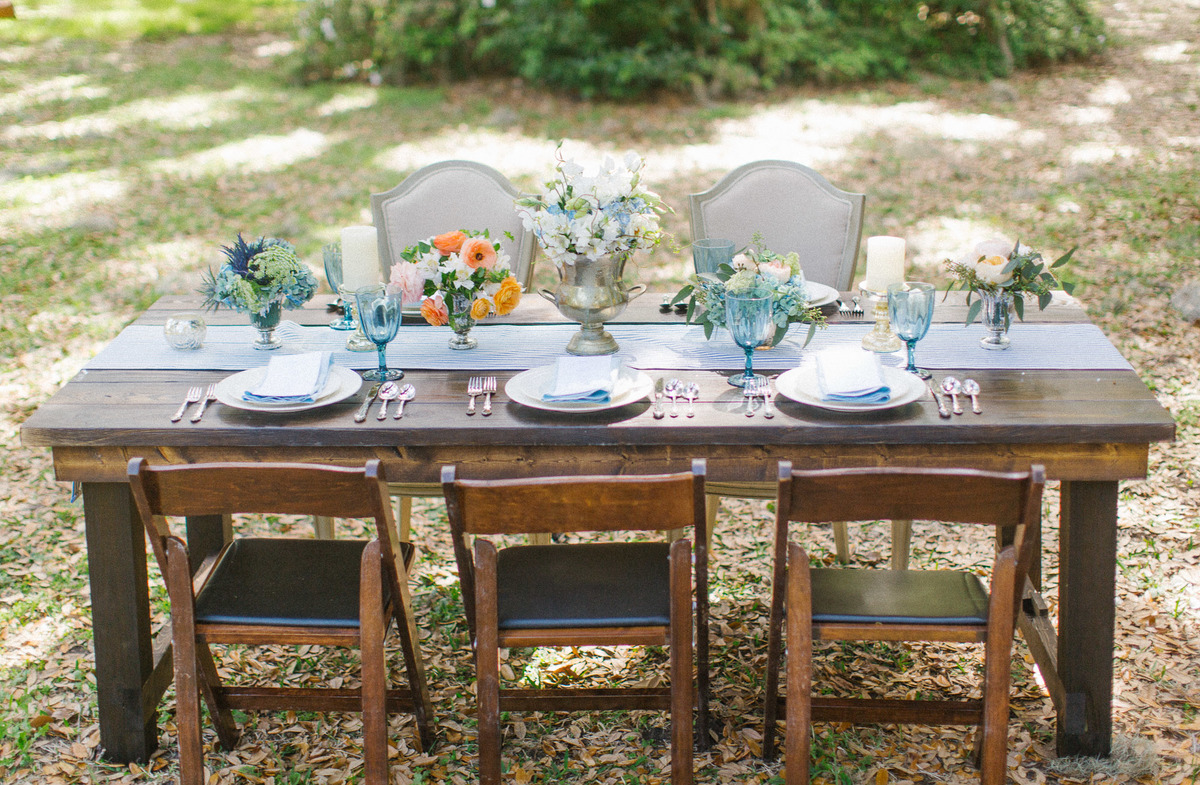
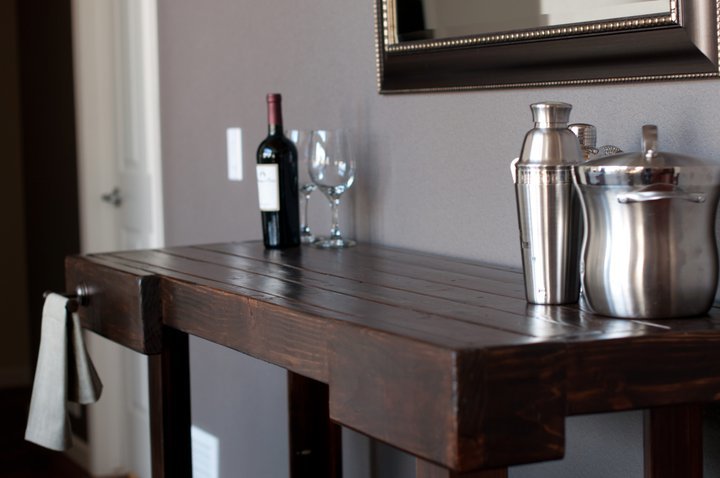
Foldable Farmhouse Rustic Dining Table
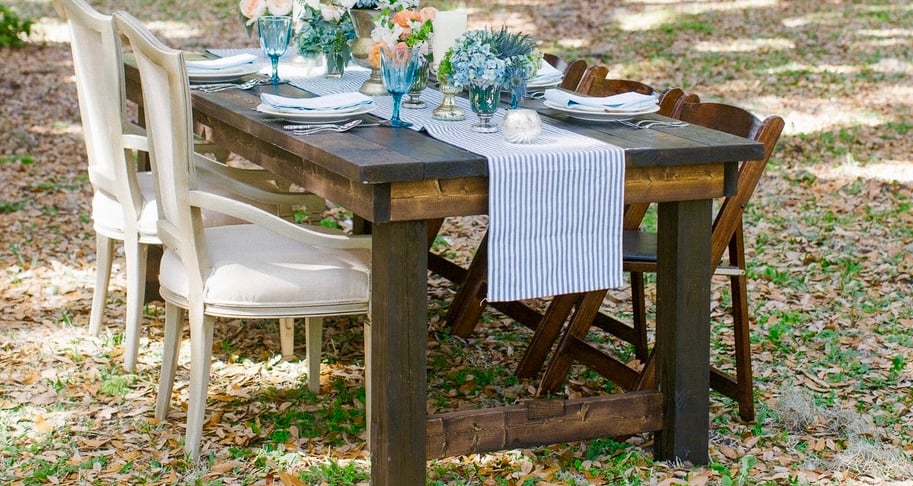
My wife wanted a portable farmhouse style rustic dining table that she could take to photoshoots and other events. I started with a top made with 2x6s and make the legs with 4x4s and the rest with 2x4s. Stain is dark walnut with a clear coat on top.
The legs are attached with door hinges and can fold into the top for more portable use. There is also a board that can be inserted in the bottom slots so that when in use the legs can not fold in.
So far the rustic dining table is working out great, although this table is VERY HEAVY and needs 2-3 strong people to carry it around. I have also made a lighter version using 1x6 tops and all 2x4 frame and legs.
Photos courtesy of Jennifer Blair Photography Designed by Amber Veatch Designs
Built from Plan(s)
Estimated Cost
150.00
Estimated Time Investment
Weekend Project (10-20 Hours)
Finish Used
Miniwax Dark Walnut
Recommended Skill Level
Intermediate
Comments
Wed, 06/12/2013 - 04:15
oh plans pleeease
Oh I really hope that you are able to put these modified plans up!!! A foldable farmhouse table.... what will they think of next!

Sat, 10/22/2016 - 12:25
Stunningly beautiful! Thank
Stunningly beautiful! Thank you for sharing and inspiring!
Sat, 10/22/2016 - 17:21
Toe kick drawers
I cannot find the plans for the tiny house drawers any where. Can someone please point me in the right direction. Thank you!
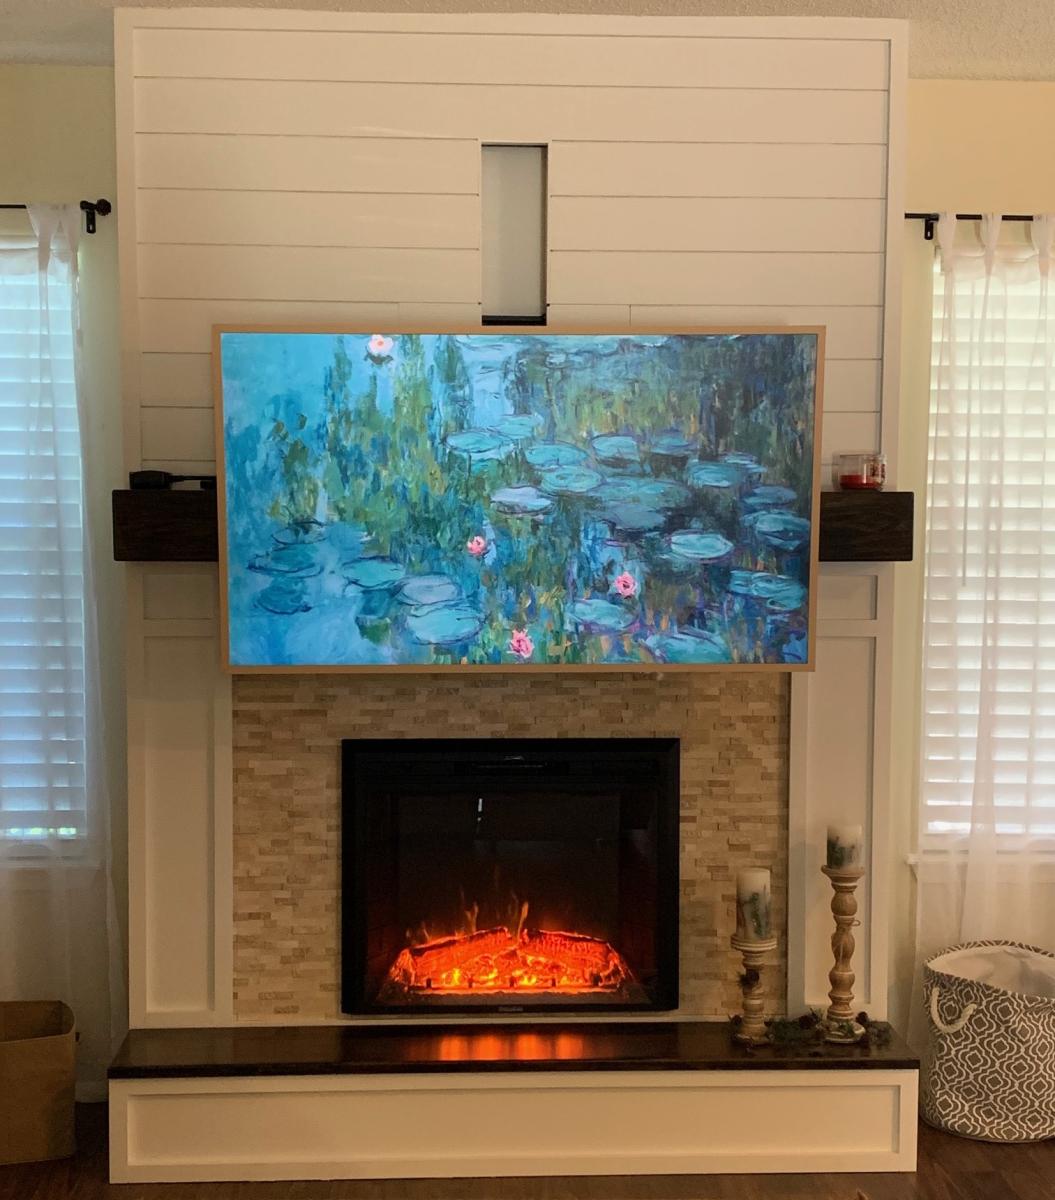
Fireplace with recessed TV mount

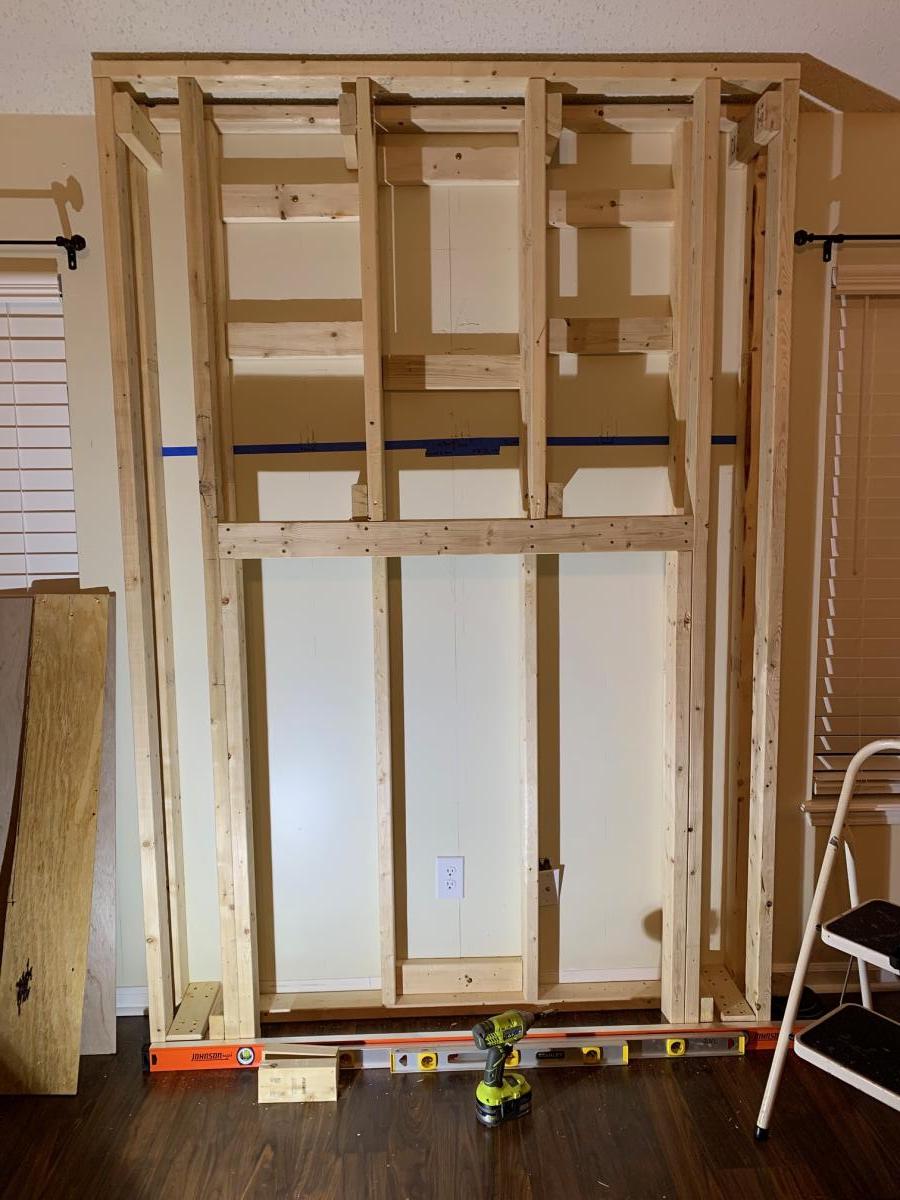
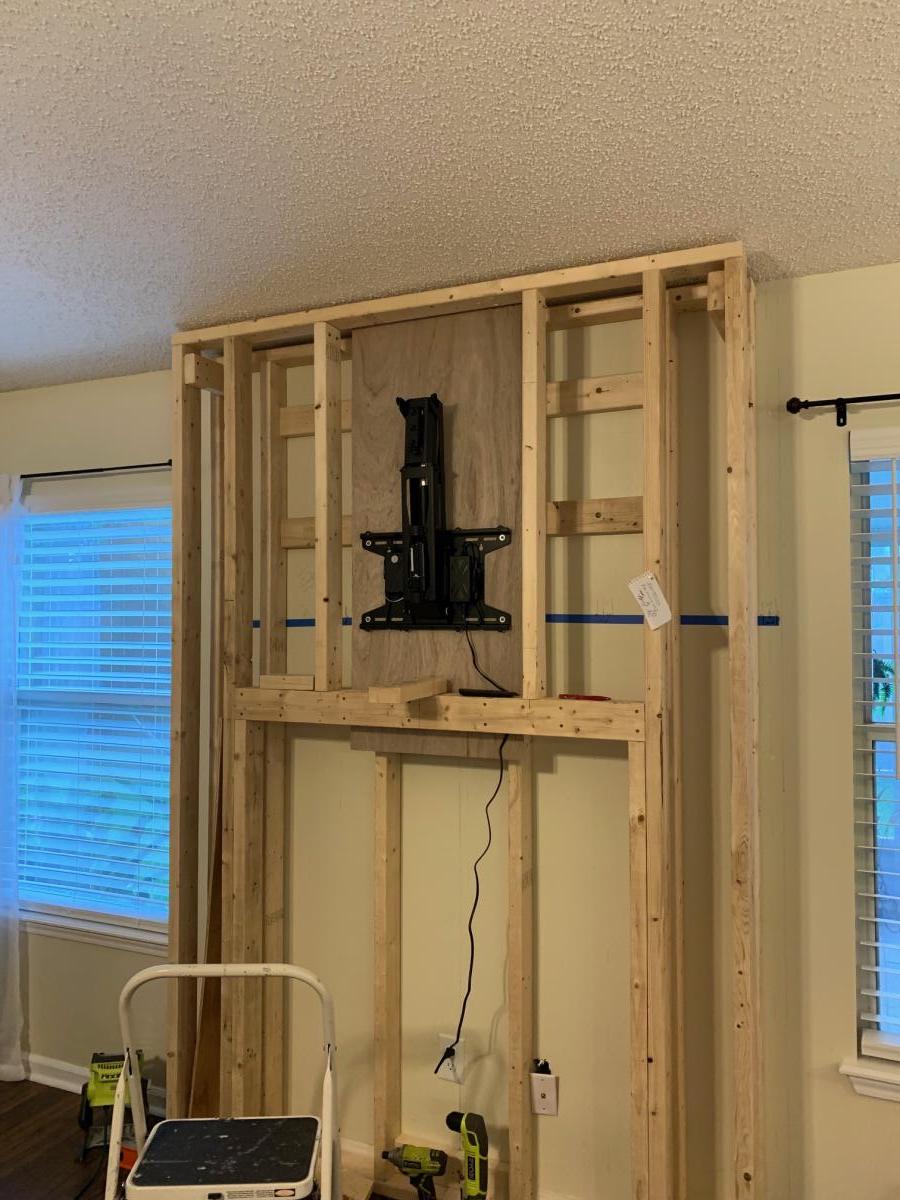
This is a very custom fireplace that I built for my wife as a 40th wedding anniversary gift. It is built around a Samsung 55” Frame TV and a Vivo motorized mount. The motorized mount allows the TV to be lowered to a better viewing height than the standard above mantle position which is usually too high for comfortable viewing.
In order to maintain the flush mount effect with the TV in art mode, I recessed the mount into the fireplace. That required building a “back” frame for the TV mount then the outer frame for the surround. I covered the outer frame with ½” OSB then ship lap. The mantle and hearth is made from Poplar with walnut stain and Polyurethane satin top coat. The hearth opens for storage.
This was sourced from several different plan sets with a lot of customization and input from the Technical Support Staff at Vizo-US.
Built from Plan(s)
Comments
Thu, 02/16/2023 - 09:46
Happy Anniversary! This is a…
Happy Anniversary!
This is a beautiful, well thought out project.
I was hoping someone would do the recessed mount, and you nailed it! It's so much better with the tv flush like yours.
Also love the motorized mount.
Thank you very much for sharing photos.
Ana
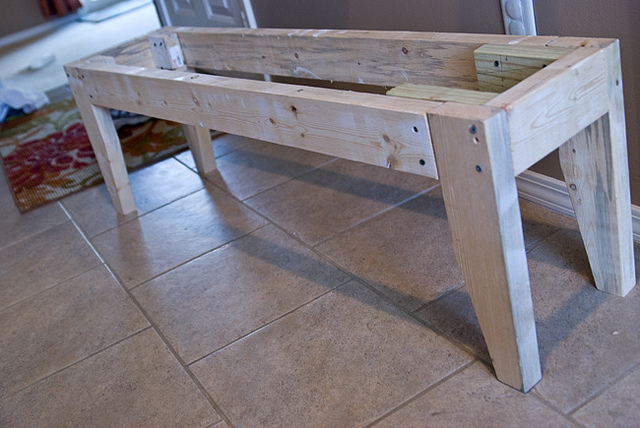
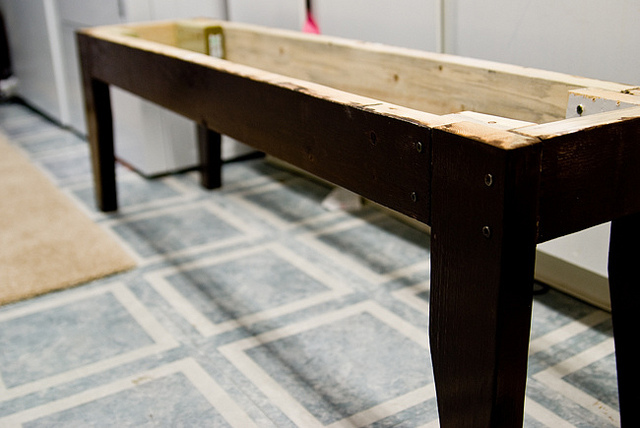
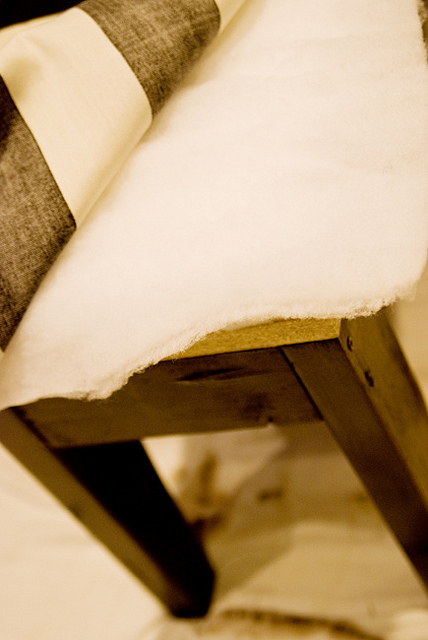
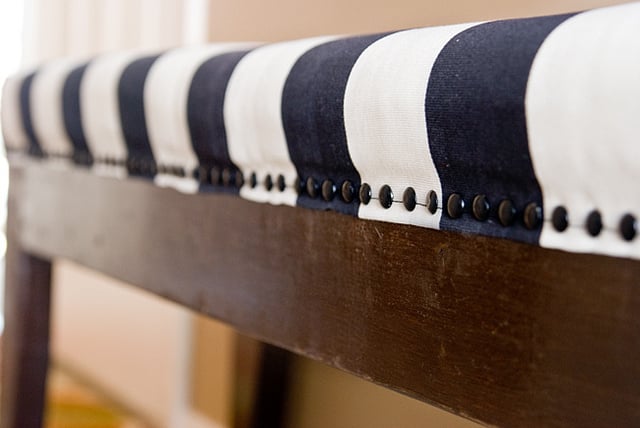
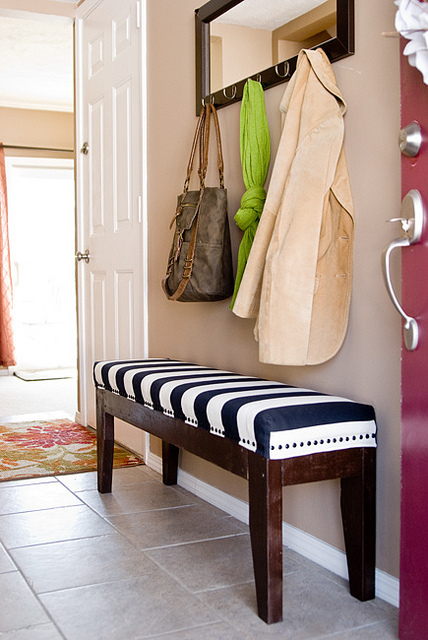
Easy Upholstered bench
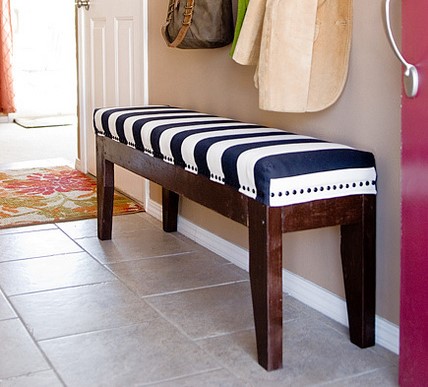
Wonderful project! Very fun. Built a bench from scrap 2x4s (left in the garage by our home's previous owner, so they were free!) and a piece of MDF shelving. Perfect for our entryway. The bench itself was incredibly easy to build. The hard part, in my opinion, was finishing it. So many pretty things to choose from! I used a piece of 2-inch foam plus a double layer of batting for the top, some striped upholstery fabric, and 160 nailheads to finish it off. Love it.
Built from Plan(s)
Estimated Time Investment
Day Project (6-9 Hours)
Finish Used
Minwax stain in cognac, and then two coats of minwax poly.
Recommended Skill Level
Beginner
Comments
Tue, 02/14/2012 - 12:45
This really came out nice,
This really came out nice, and lovely selection of fabric.
Sun, 02/19/2012 - 12:54
Love it! Wondering if I could
Love it! Wondering if I could build it and have some type of slipcover on it. (house with three kids under 5 years old does not go well with permanent upholstery! haha)
Fri, 03/09/2012 - 09:06
slipcover for bench
If you check out Ana's original plans for the Easiest Upholstered Bench, you'll see that she DID use slipcovers! You could make different ones for each season, or for holidays like Christmas or birthdays...
Wed, 10/30/2013 - 08:36
fabric question
Hi Katie, I am having a difficult time finding fabric (hard to believe)! did you get yours online? How wide are the stripes? most fabric I am finding is not wide enough to cover the top and sides. Thanks for the help! Great build!
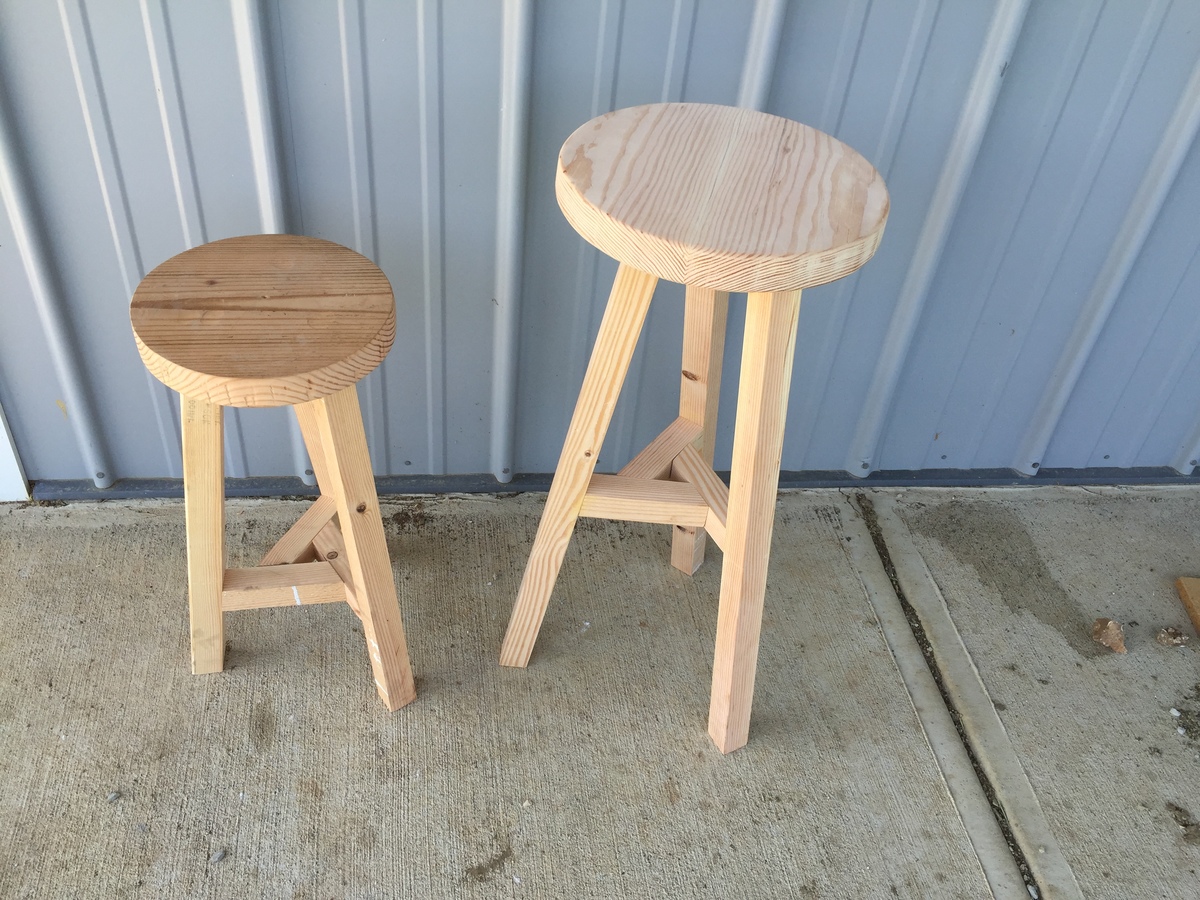
Three-Legged Stool
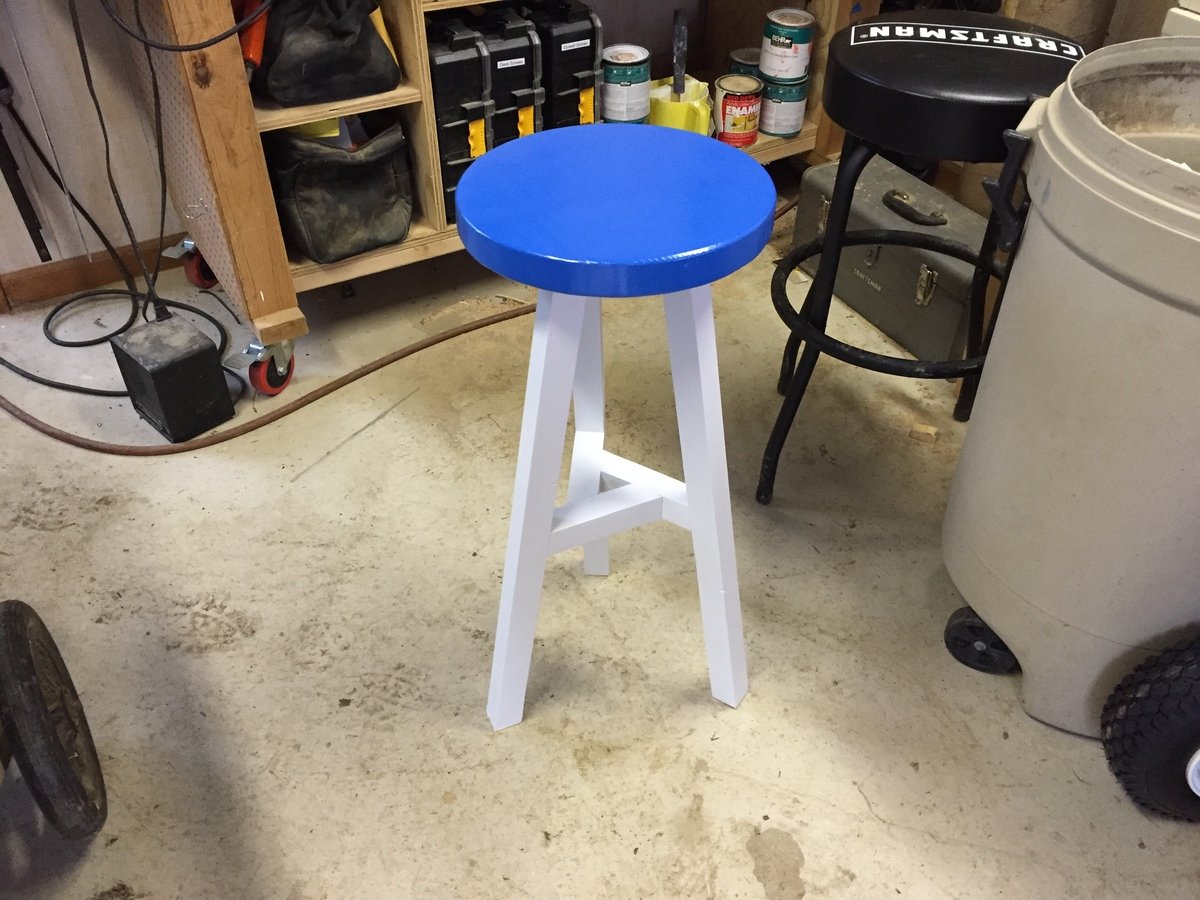
My 13-year-old daughter asked me about making a stool, with the main requirement being it had to have a round seat. So I turned to this ana-white.com to see if I could find something that we could do and found the plans for the three-legged stool. The first one we made with the dimensions specified in the plans but she thought it was too short. So we made another one with longer legs and a larger diameter seat.
Built from Plan(s)
Estimated Cost
$4. The lumber was scrap and the white paint was leftover. We only bought the blue paint.
Estimated Time Investment
Afternoon Project (3-6 Hours)
Finish Used
Rustoleum Painter's Touch
Recommended Skill Level
Beginner
Bench with soft-close drawers for Front Entry

We needed a bench to fill the space in our front entry and provide some storage for seasonal gear. We couldn't find anything to buy that would work for us, so when my wife found these plans, I had to try it! Couldn't be happier with the results. We widened the bench by a foot to 84" to fill the space. Basically, it just made each drawer 4" wider. Everything else was built to plan. The most expensive thing was the soft-close 24" drawer slides (~$100). As soon as you go above that 24" depth, they get pricier! It was also tricky to get the drawers to catch properly on the soft-close mechanisms, but I made sure to take the time to get it right before closing it all in. Now I just open and close the drawers for the pure satisfaction of it! I used premium pine plywood for the top and I find it still doesn't give that smooth finish I like, even after sanding. I think I'll create a new top out of joined knotty pine planks later and just attach it to the top.


Built from Plan(s)
Estimated Cost
$300 CAD
Estimated Time Investment
Week Long Project (20 Hours or More)
Finish Used
Primer and pearl finish paint.
Recommended Skill Level
Intermediate
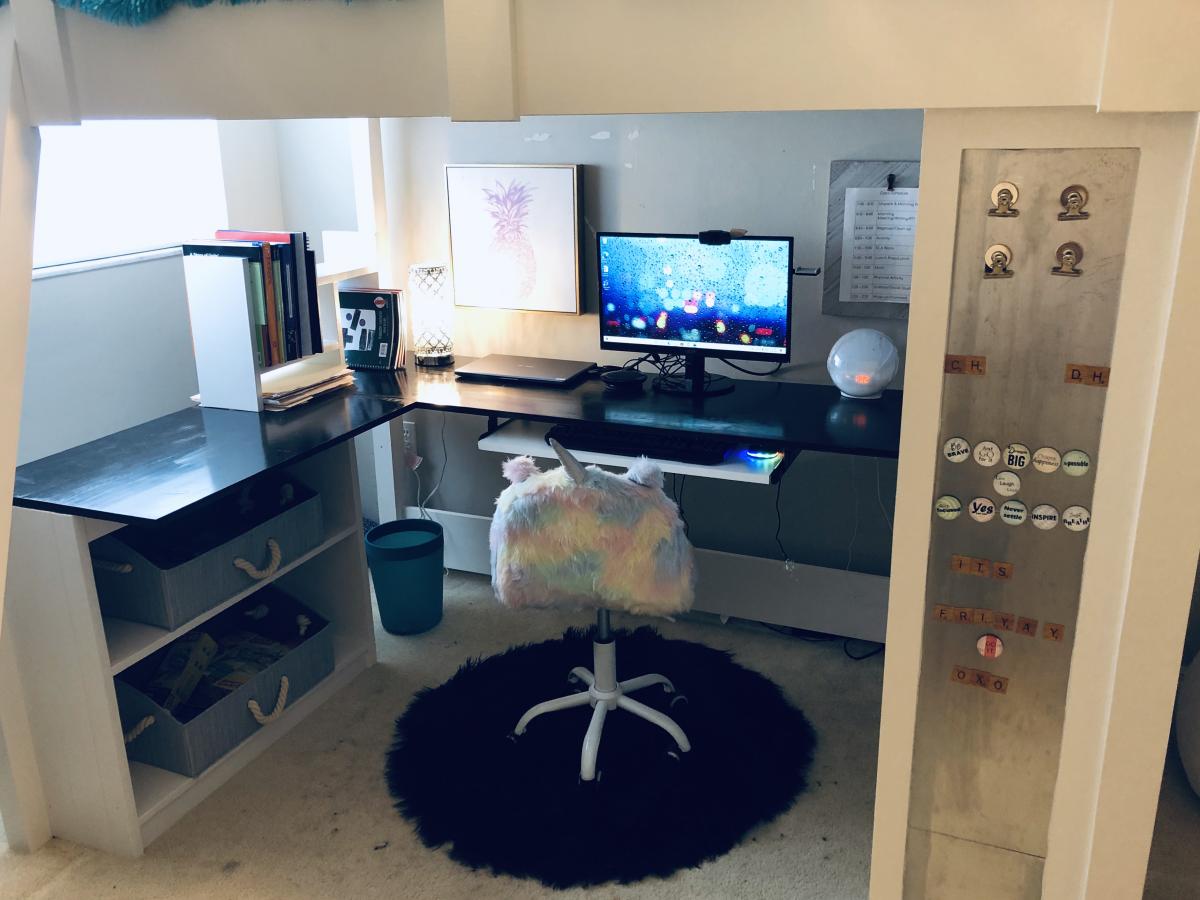
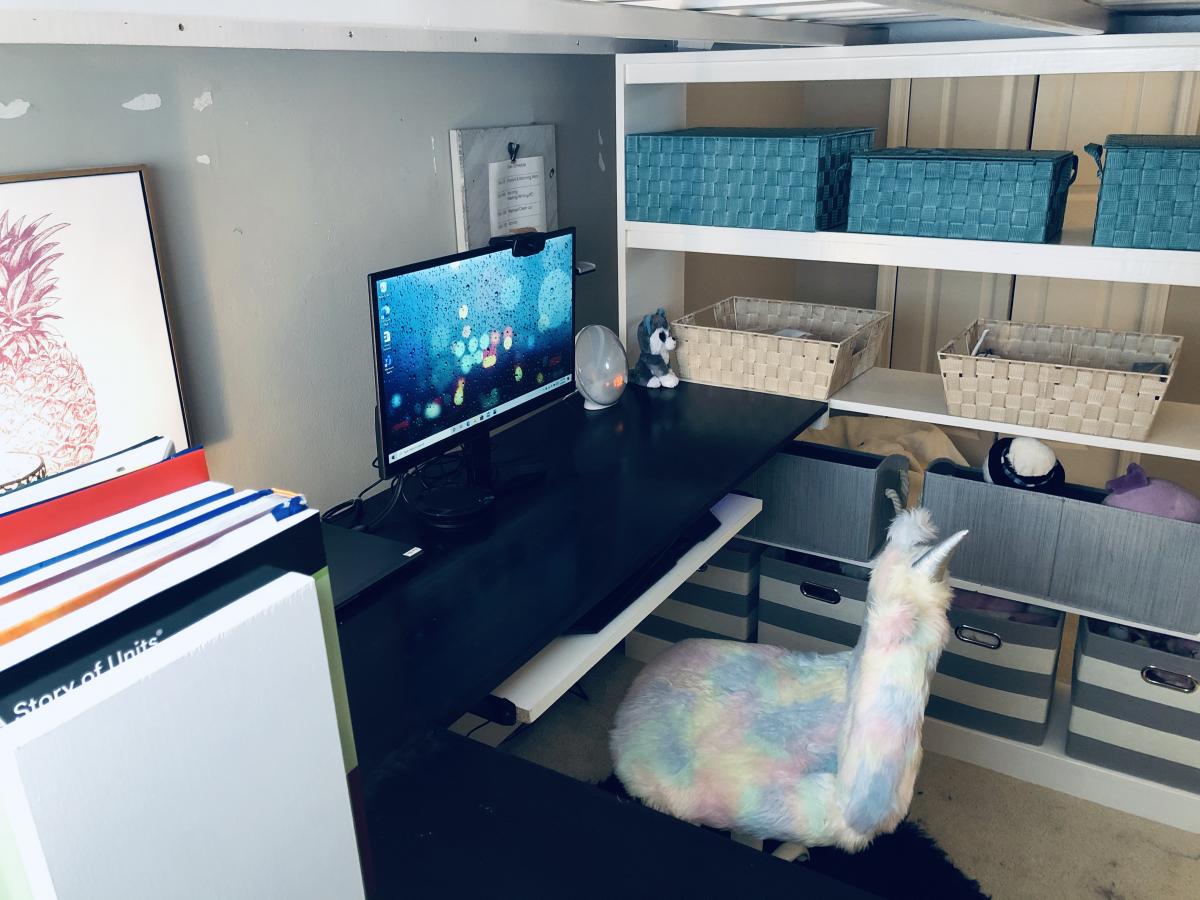
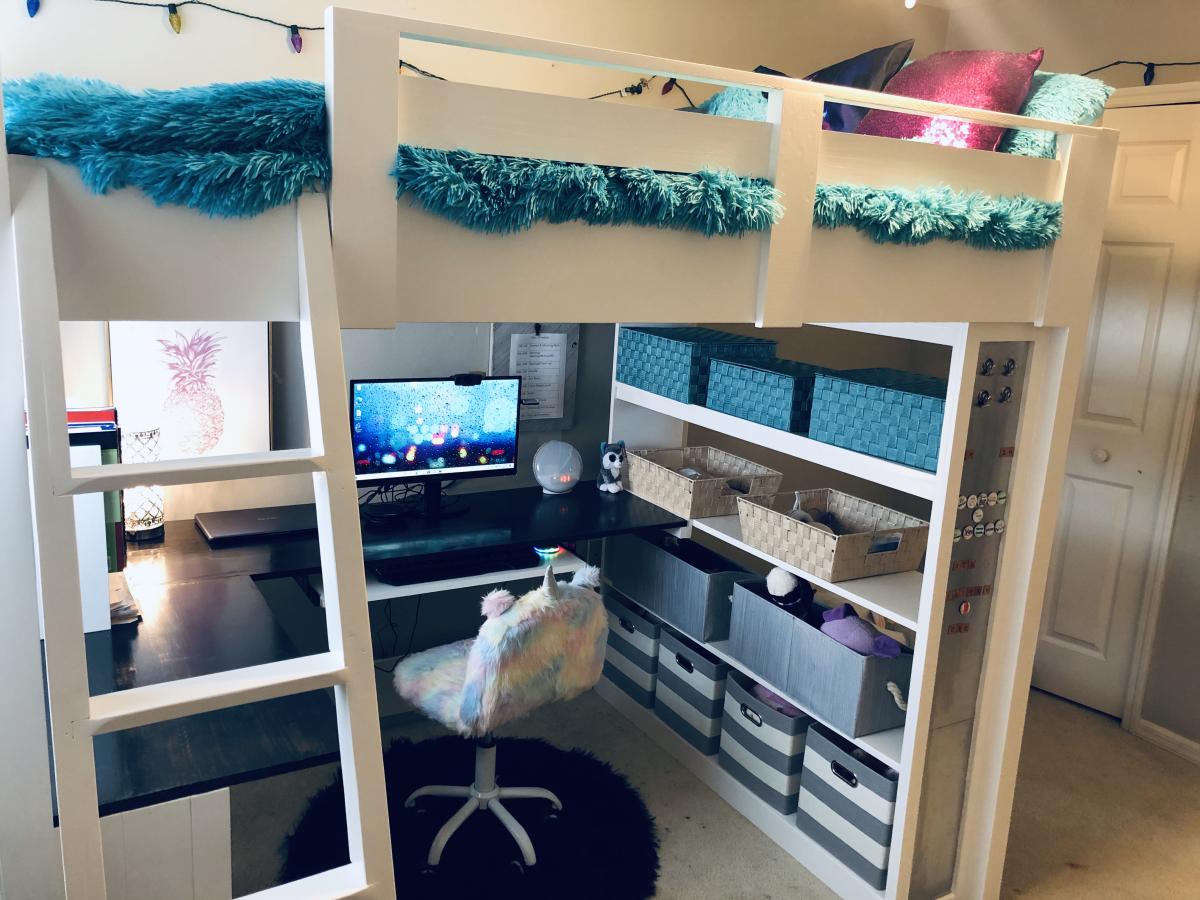
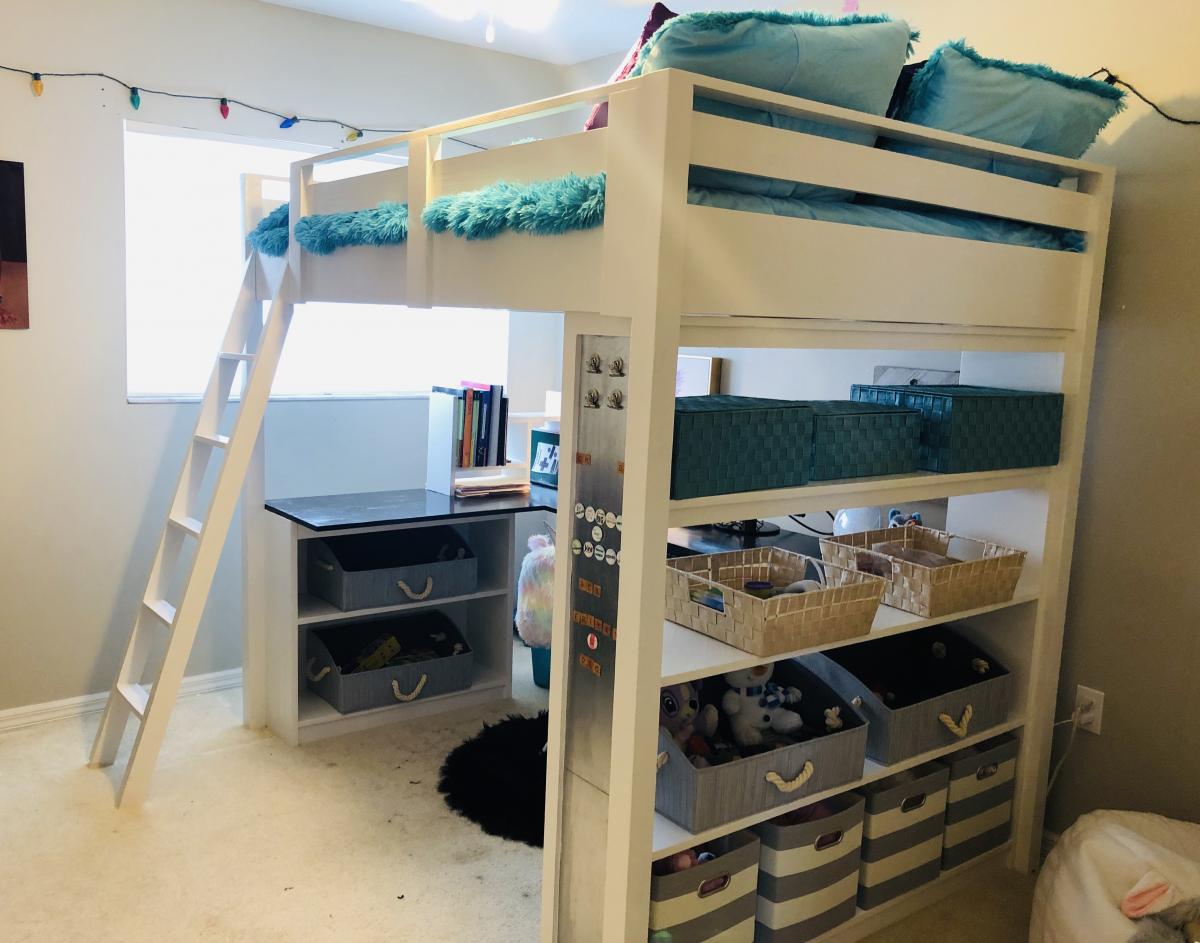
Loft Bed w/desk
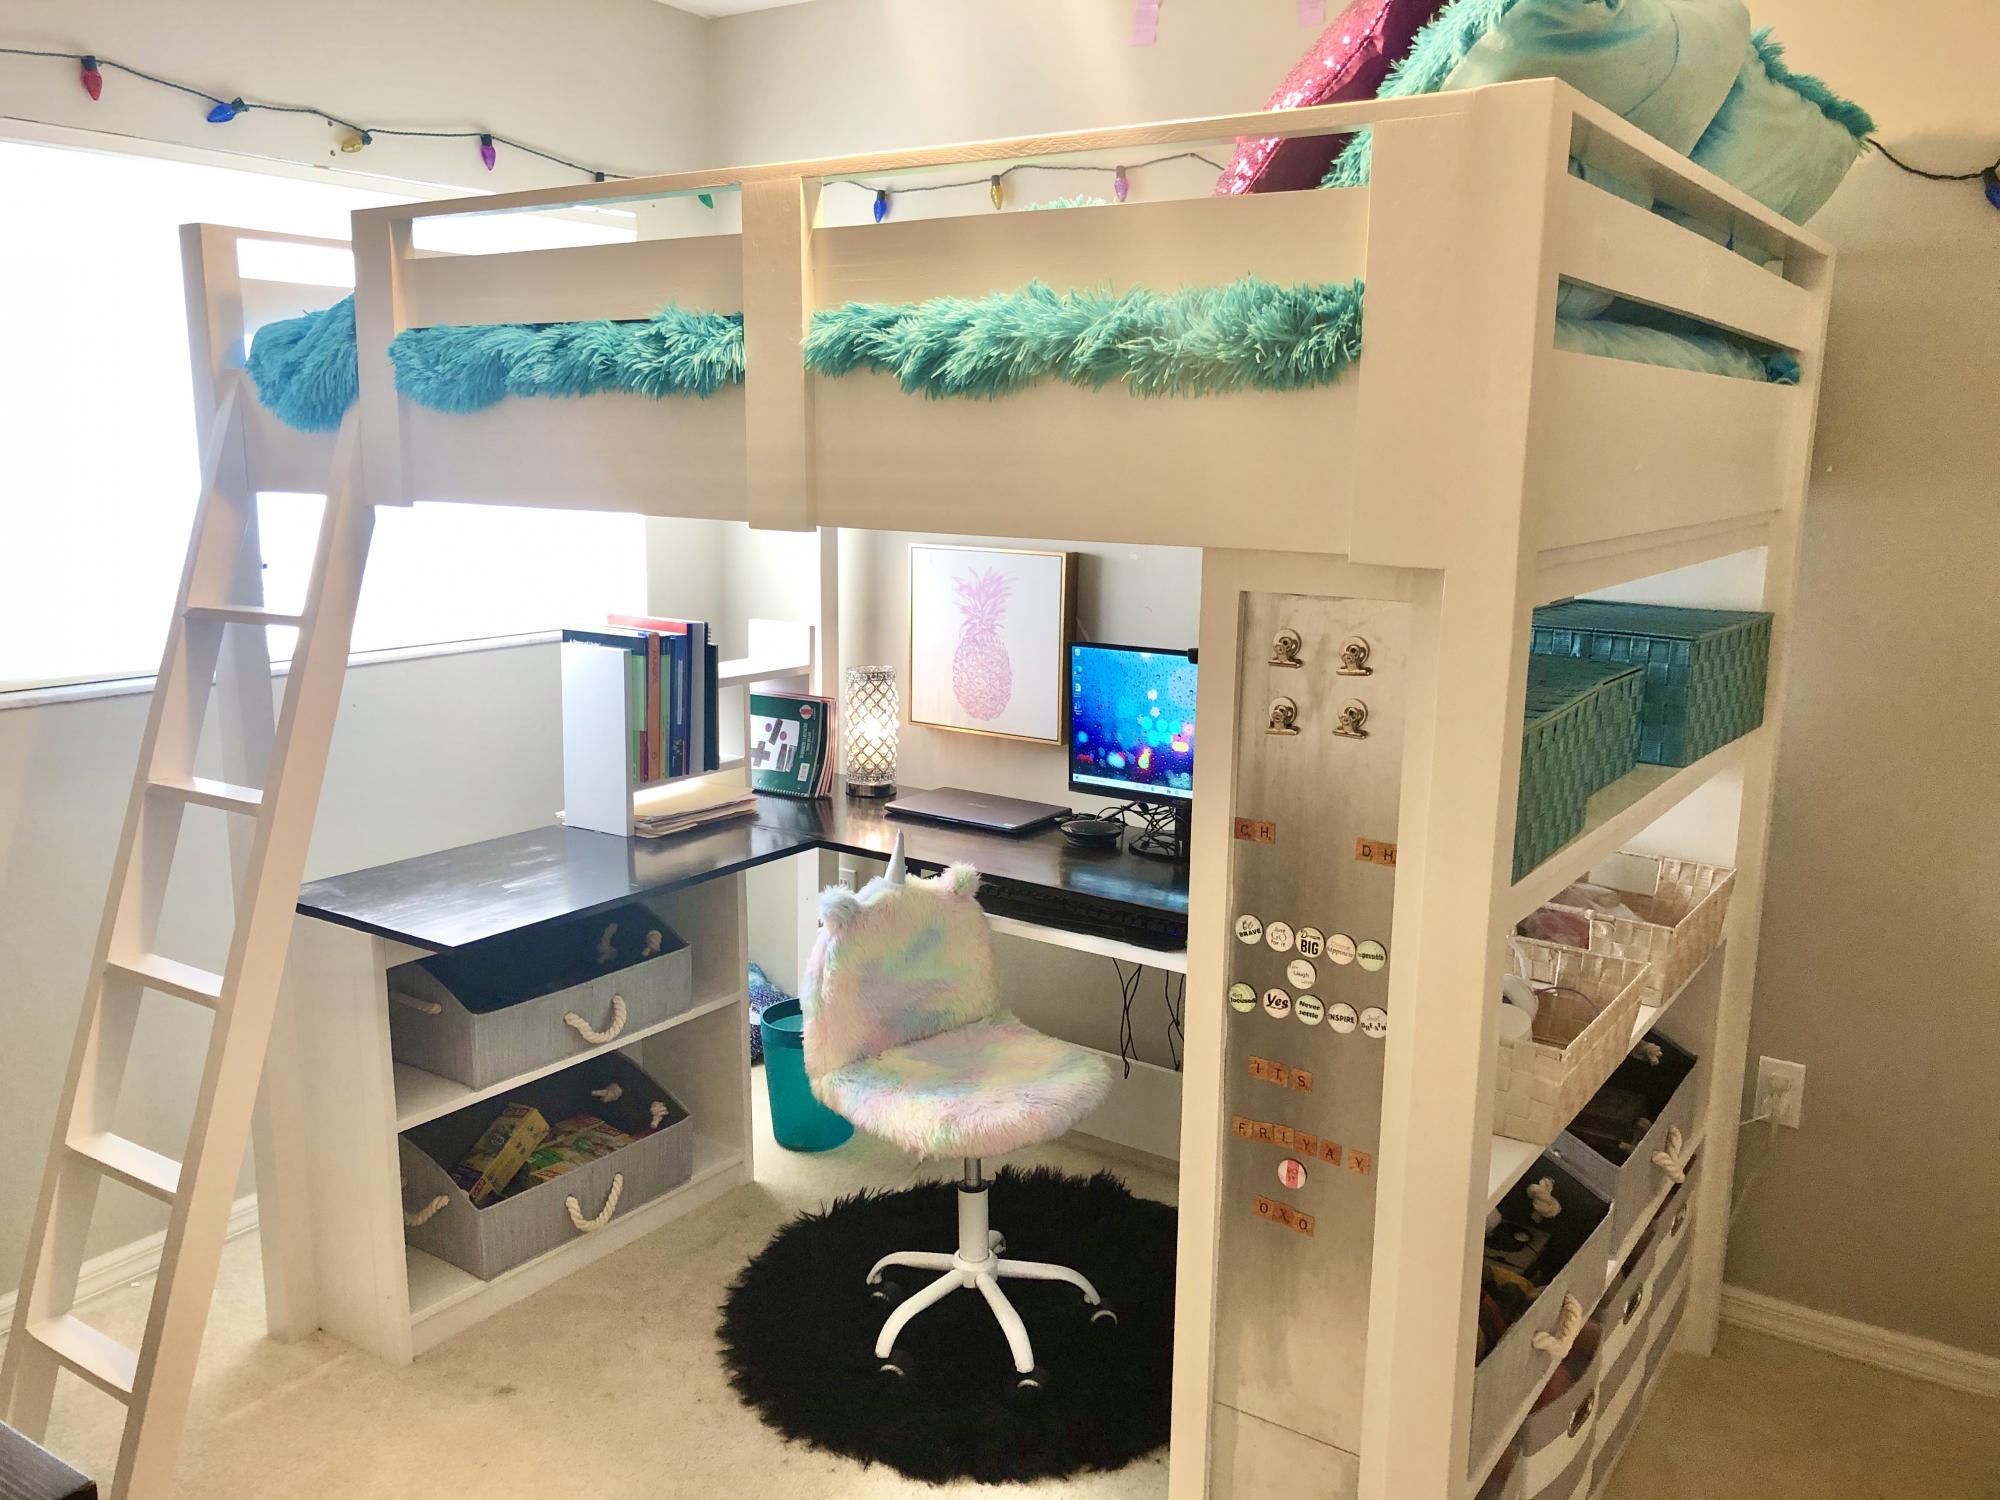
Our daughter has been asking us to build her a bed for months now. When eLearning became a reality for our household, we knew it was time to get to work. We usually do two to three big DIY projects a year, and have built from many of Ana White's plans. We often refer our the time together DIYing as "couples therapy".
We used Ana's plans for the Loft Bed and included the tall bookcase and desk system, with a few of our own modifiations and personal touches, such as:
- elimated the plywood backing on the bottom shelves of the tall bookcase
- only used one (1) bookshelf for desk system
- used toungue and groove paneling for back of small bookshelf, adding it to the sides as well
- made the desktop 19" wide
- added a framed magnet board
- added a sliding keyboard tray
Built from Plan(s)
Estimated Cost
$600
Estimated Time Investment
Week Long Project (20 Hours or More)
Finish Used
Desktop: Minwax Ebony stain
Everything Else: Zinsser 123 primer & Valspar Cabinet & Furniture Enamel (Snowbound Semigloss)
Everything Else: Zinsser 123 primer & Valspar Cabinet & Furniture Enamel (Snowbound Semigloss)
Recommended Skill Level
Beginner
Comments
Indoor Playground Set
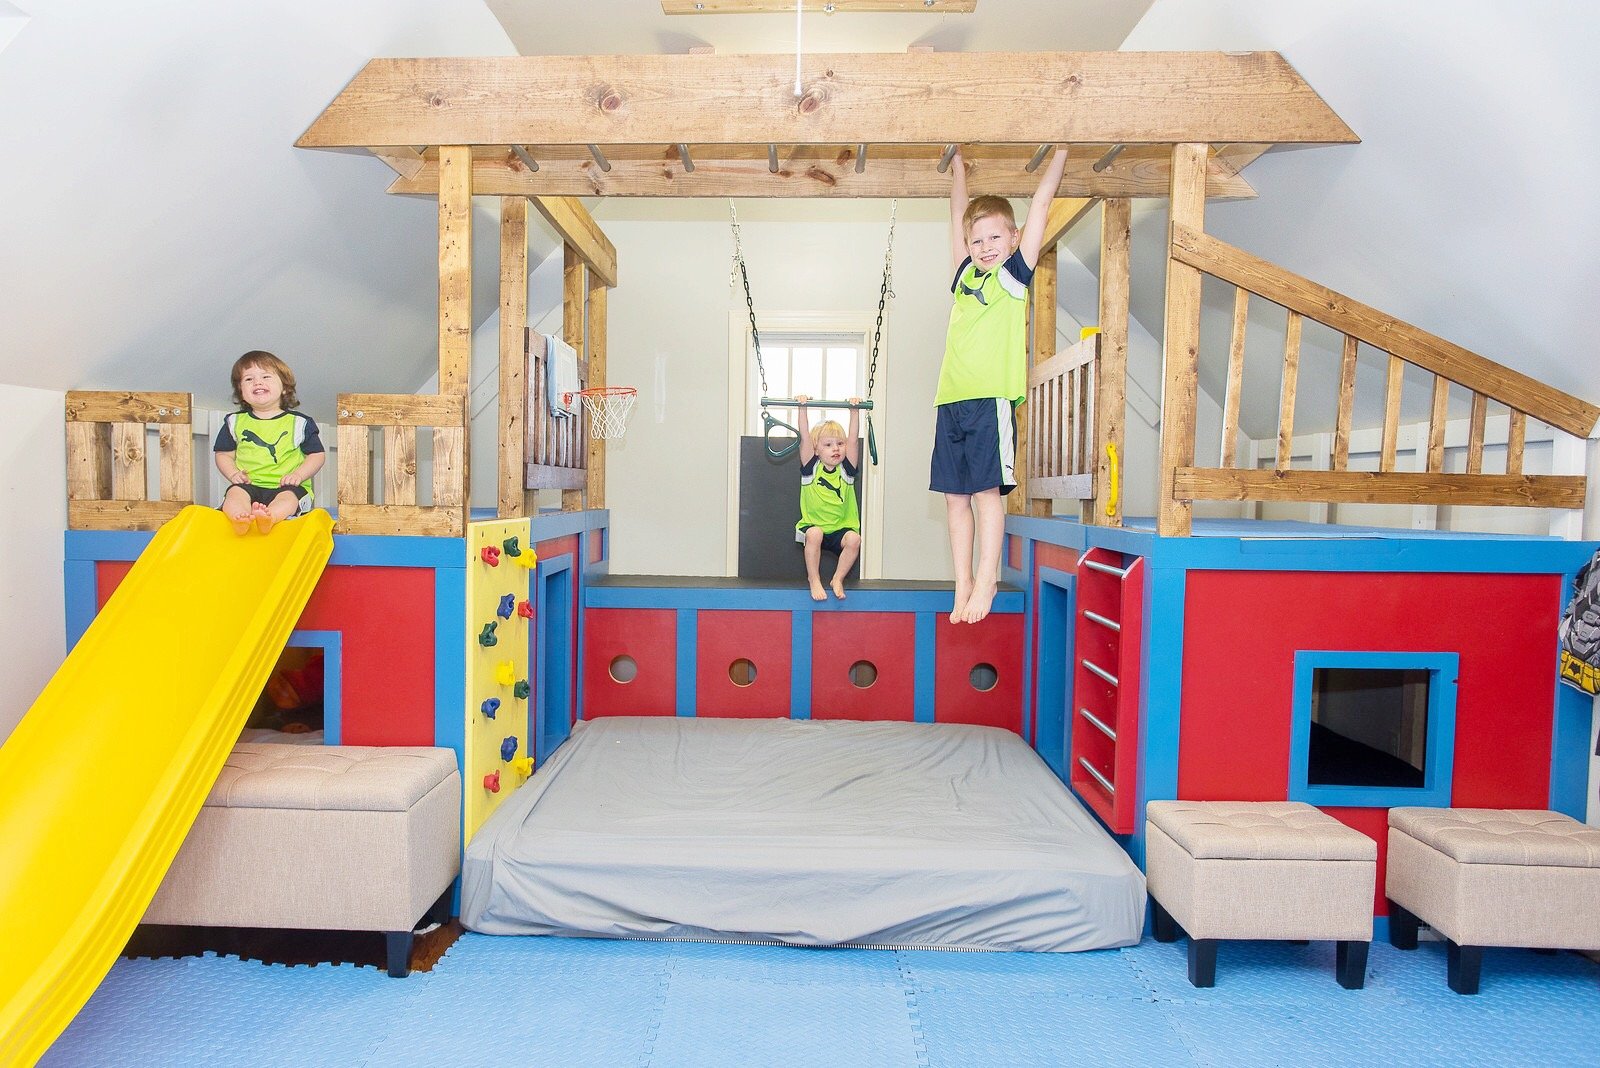
This playroom set was inspired by the plans you posted. I was forced to make some significant modifications due to the fact that our bonus/playroom has angled ceilings. We have a rock climbing wall, ladder, crawl tunnel with windows, trapeze bar, monkey bars, miniature baskeball goal and a slide. My boys are 6, 3 and 19 months and they love it! Thanks for the inspiration.
Jim and Caroline Sparrow
Built from Plan(s)
Estimated Cost
$1250
Estimated Time Investment
Week Long Project (20 Hours or More)
Finish Used
Behr Paint on bottom and Minwax Stain on top
Recommended Skill Level
Advanced
Comments
Sun, 01/05/2020 - 10:03
Hi - Would you be able to…
Hi -
Would you be able to share your modified plans with me , please ?
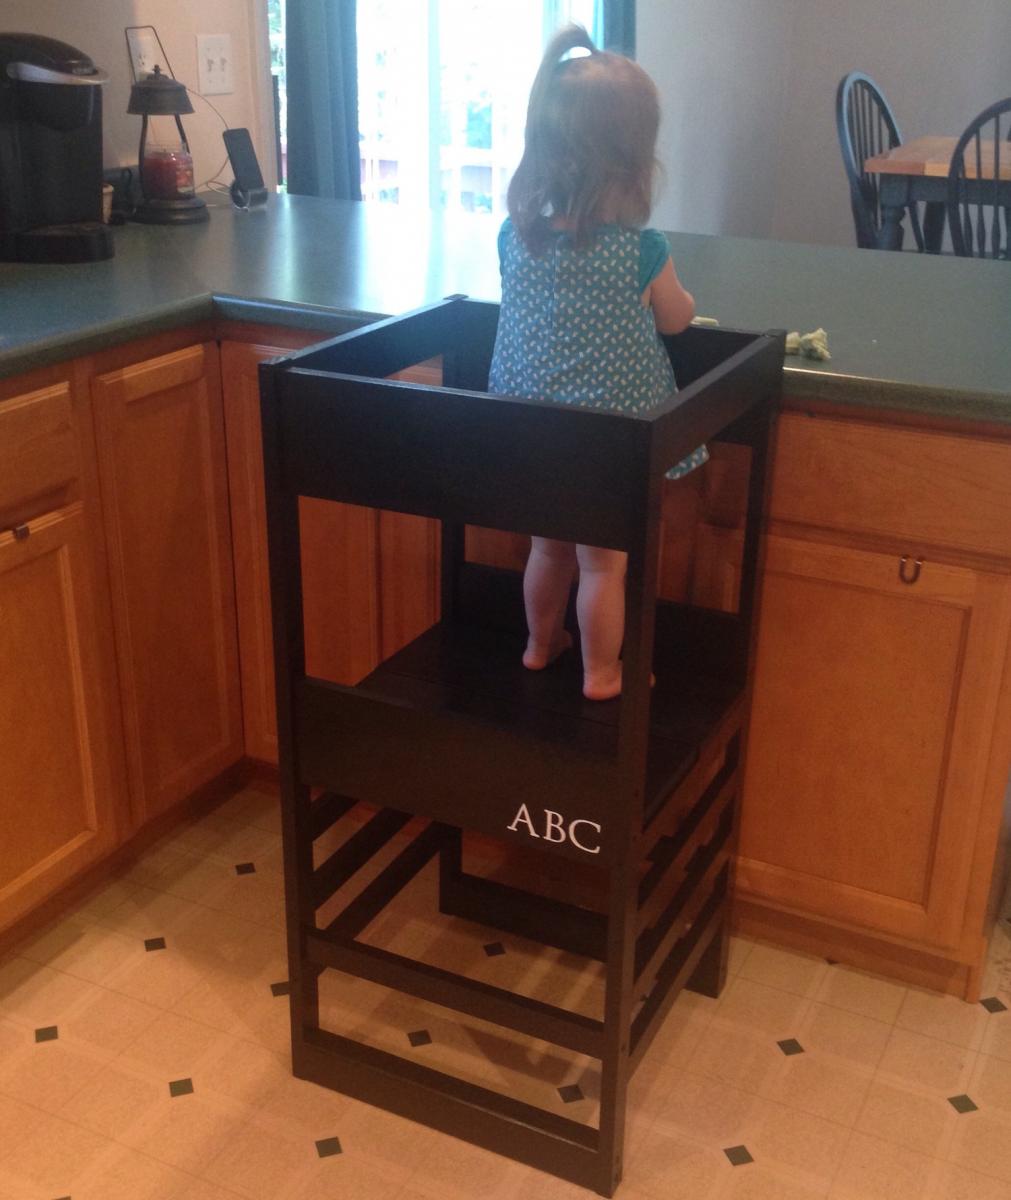
DIY Learning Tower / Kitchen Helper

Our little one may be happily playing independently but the second I go to make dinner she demands to be held and refuses to be put down, making cooking impossible. To help keep her occupied but still involved I've been eyeing a learning tower / kitchen helper on Amazon for months now, but at $200 it just wasn't in our budget. My sister-in-law had made a learning tower from a plan by Ana White and suggested I try to make one too. I was unsure at first, I've never made anything more complicated than a birdhouse, but I decided to give it a go!
Please see my blog post for additional photos and lessons learned during this project.
Built from Plan(s)
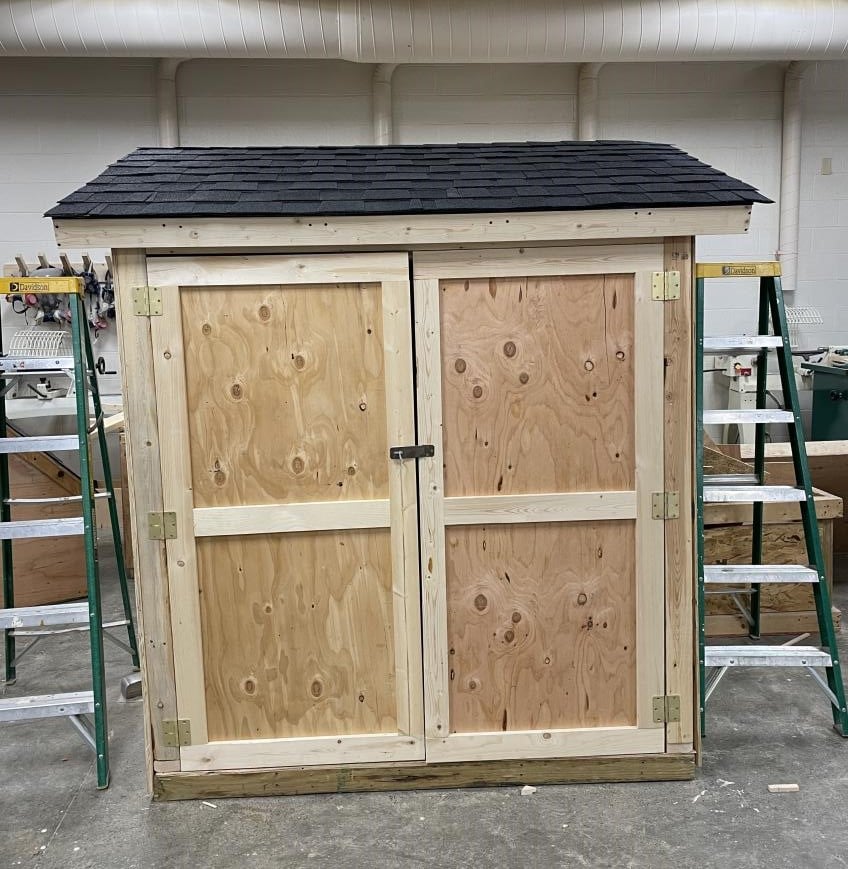
Lean-To Shed
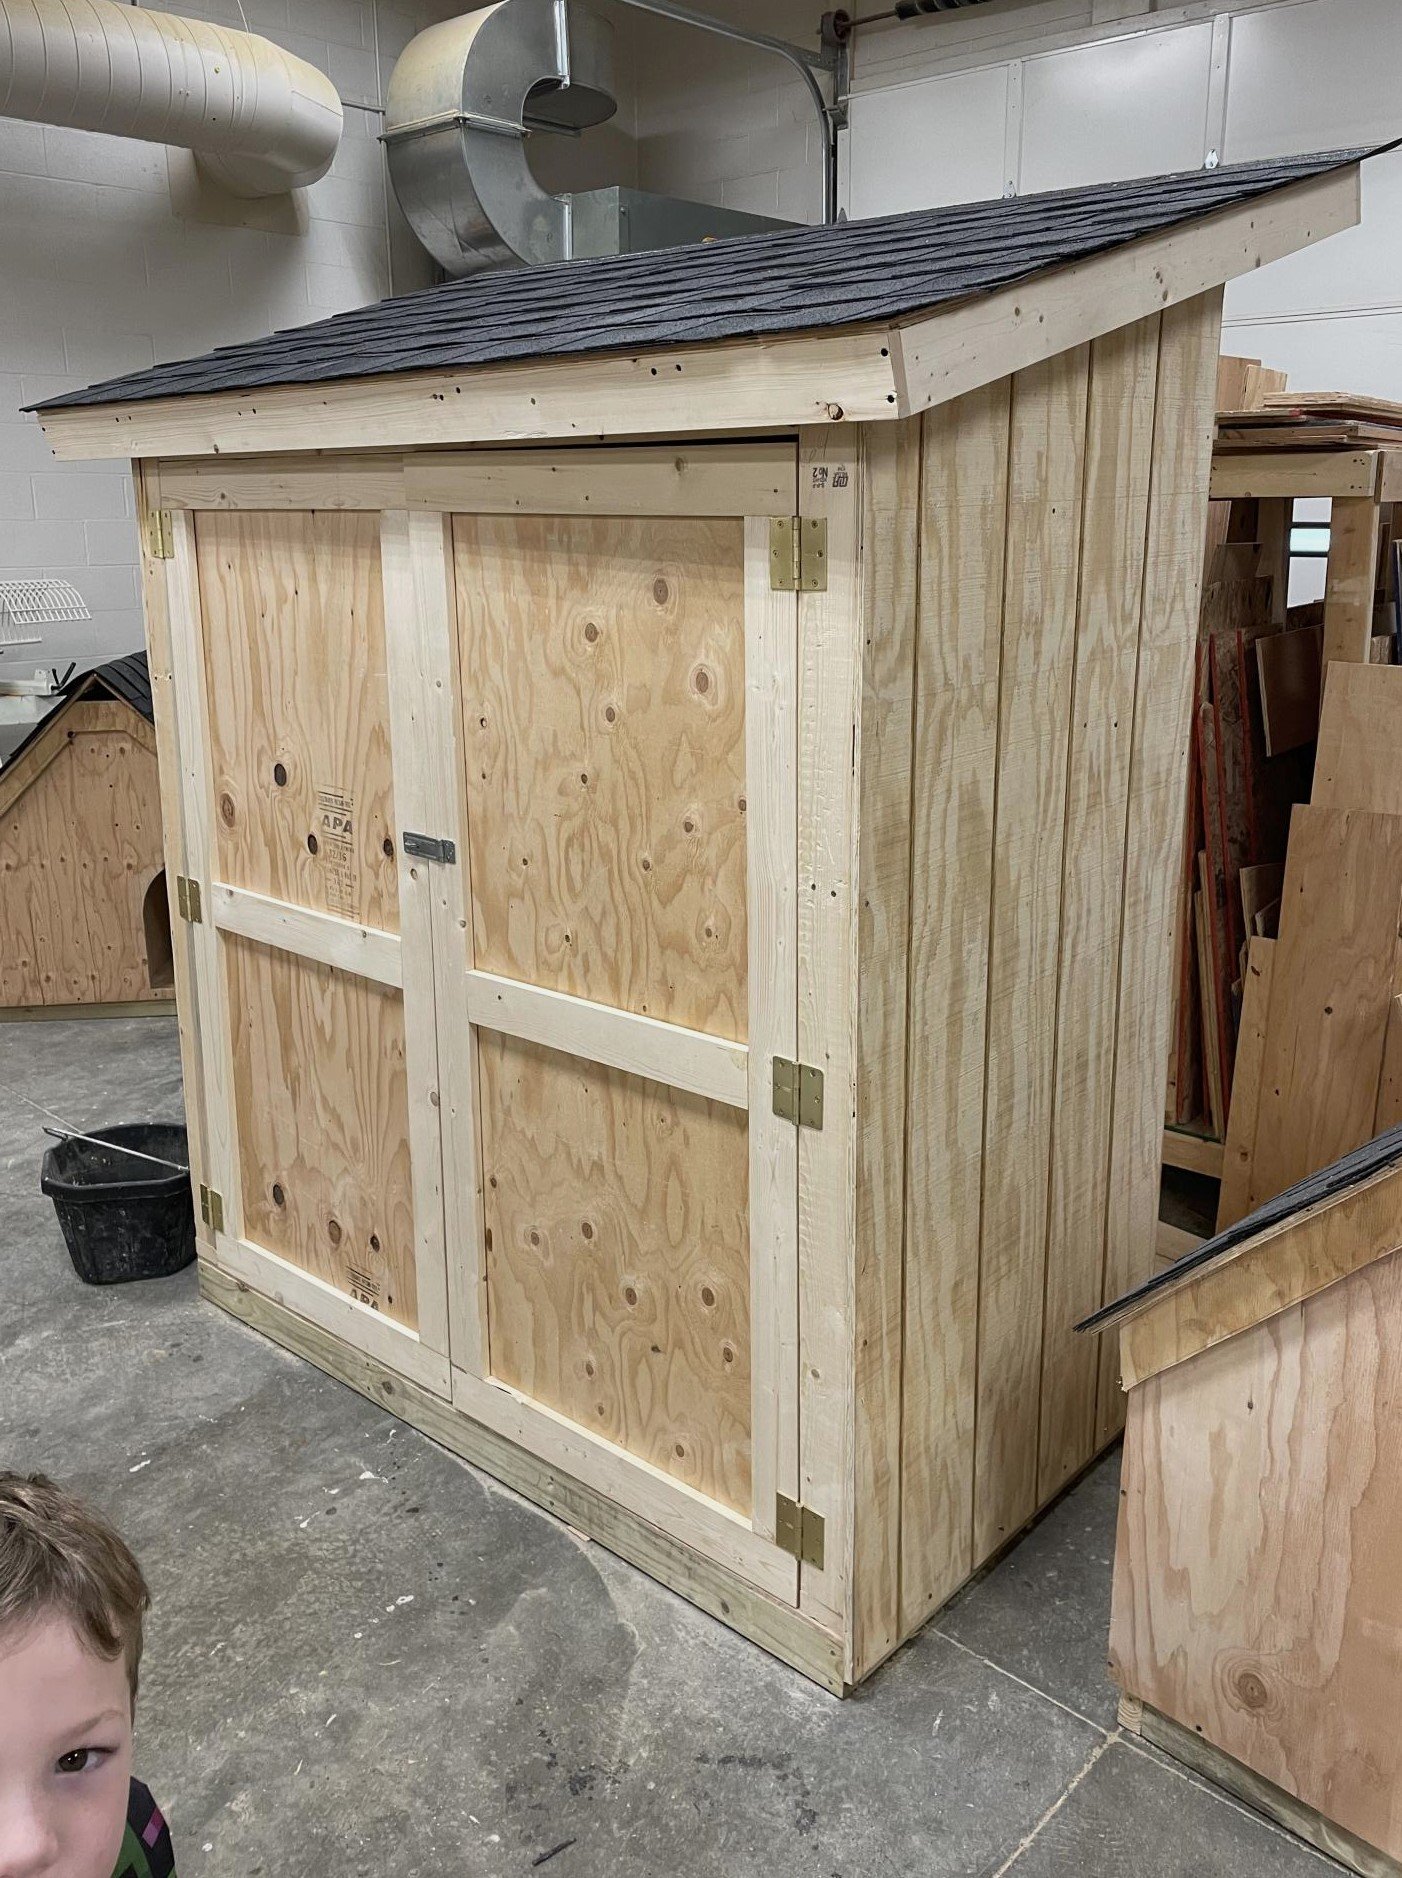
I’m a first year teacher of construction class at Waterloo High School in Illinois. We recently used your Small Cedar shed instructions with some modifications for a class project. It’s a bear getting cedar right now, so we used T1-11 for the outside and 2x4 for the frame.


Built from Plan(s)
Comments
Sat, 03/25/2023 - 09:14
Great project for your class!
Very fun and job well done! Thank you for sharing.
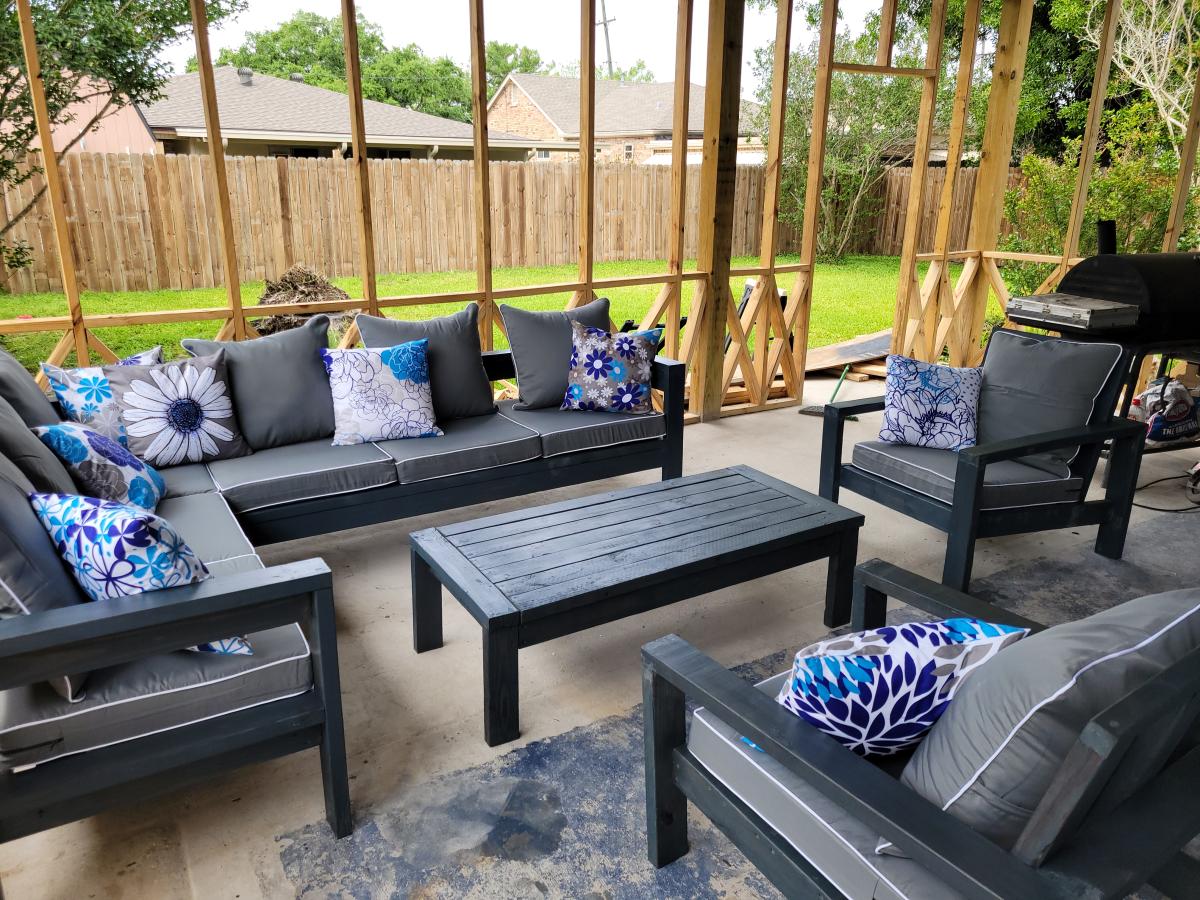
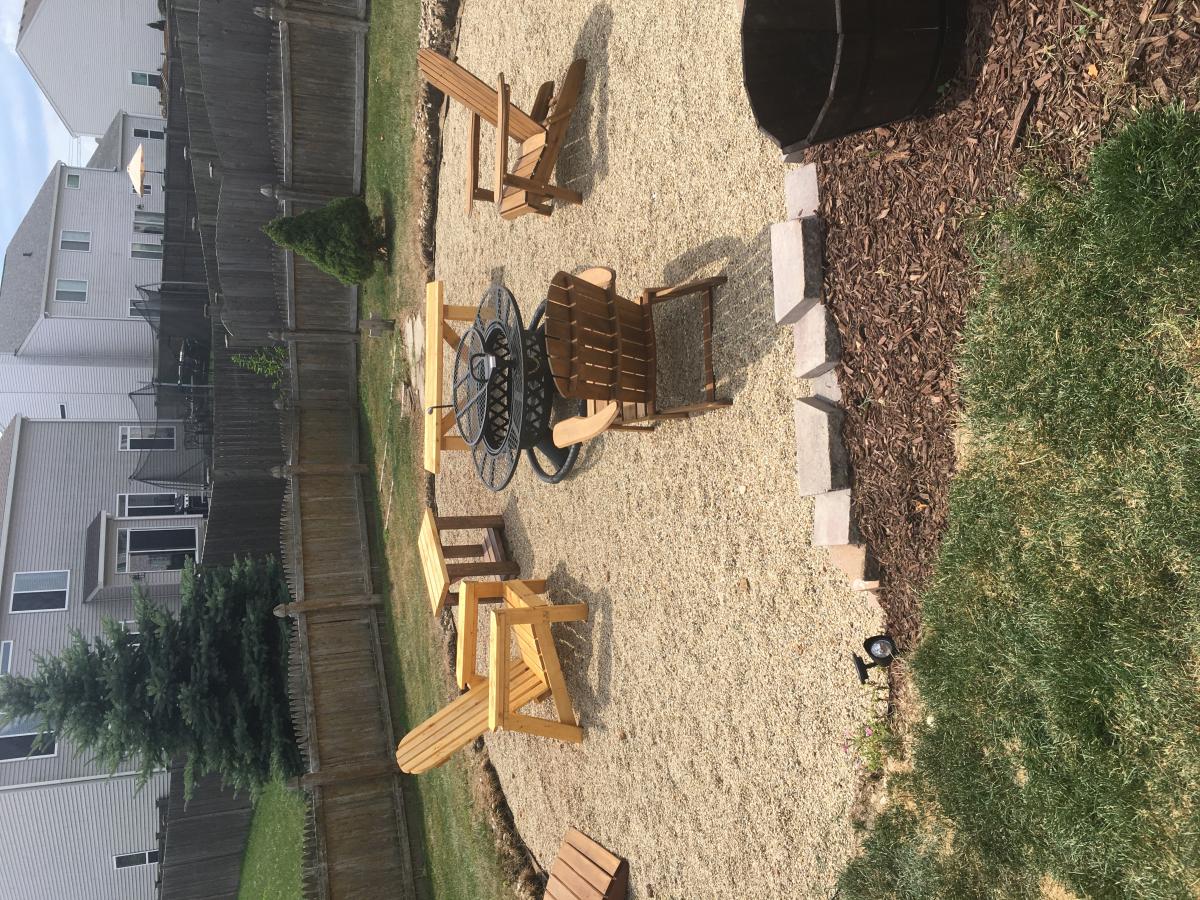
2x4 Sectional , table, and chairs
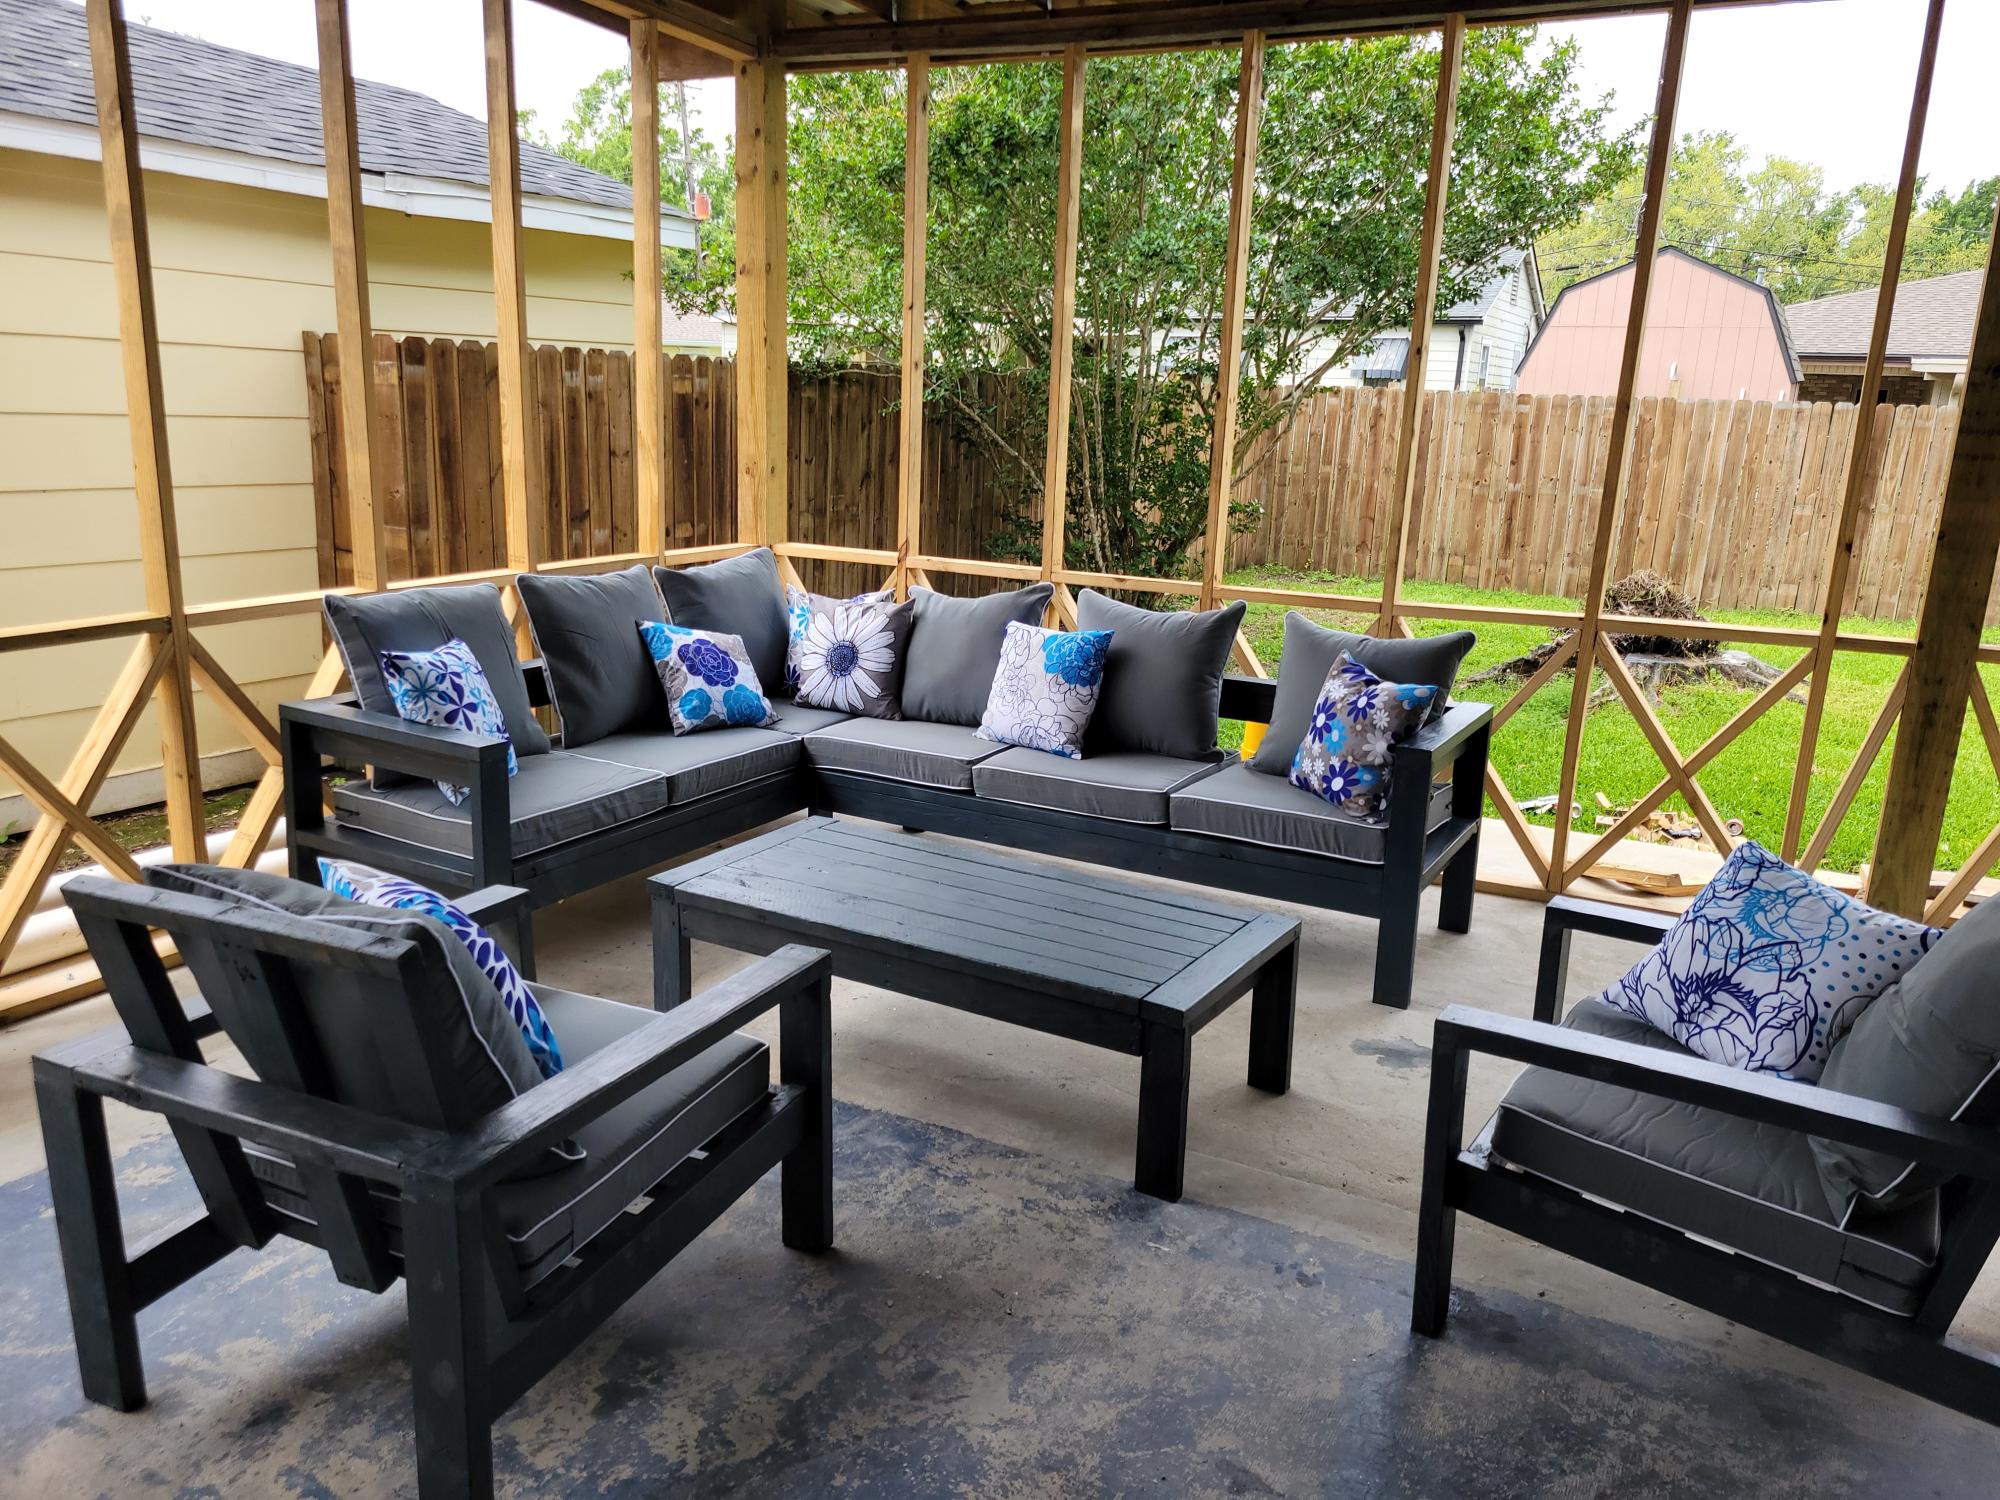
Your easy to follow 2x4 proje ts turned out amazing. My outdoor set is complete. The chairs, also, came from your plans. I built all of it by myself in one weekend. Thank you
Comments
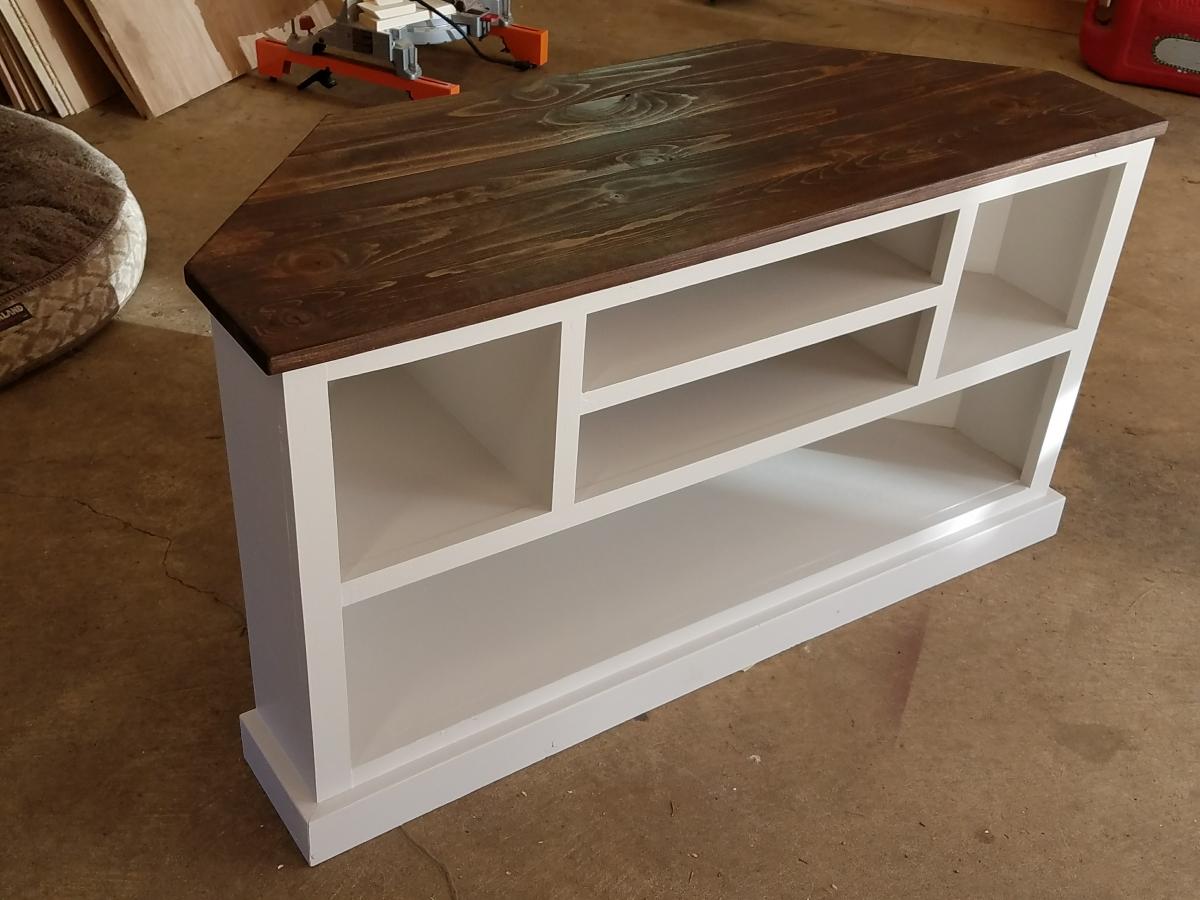
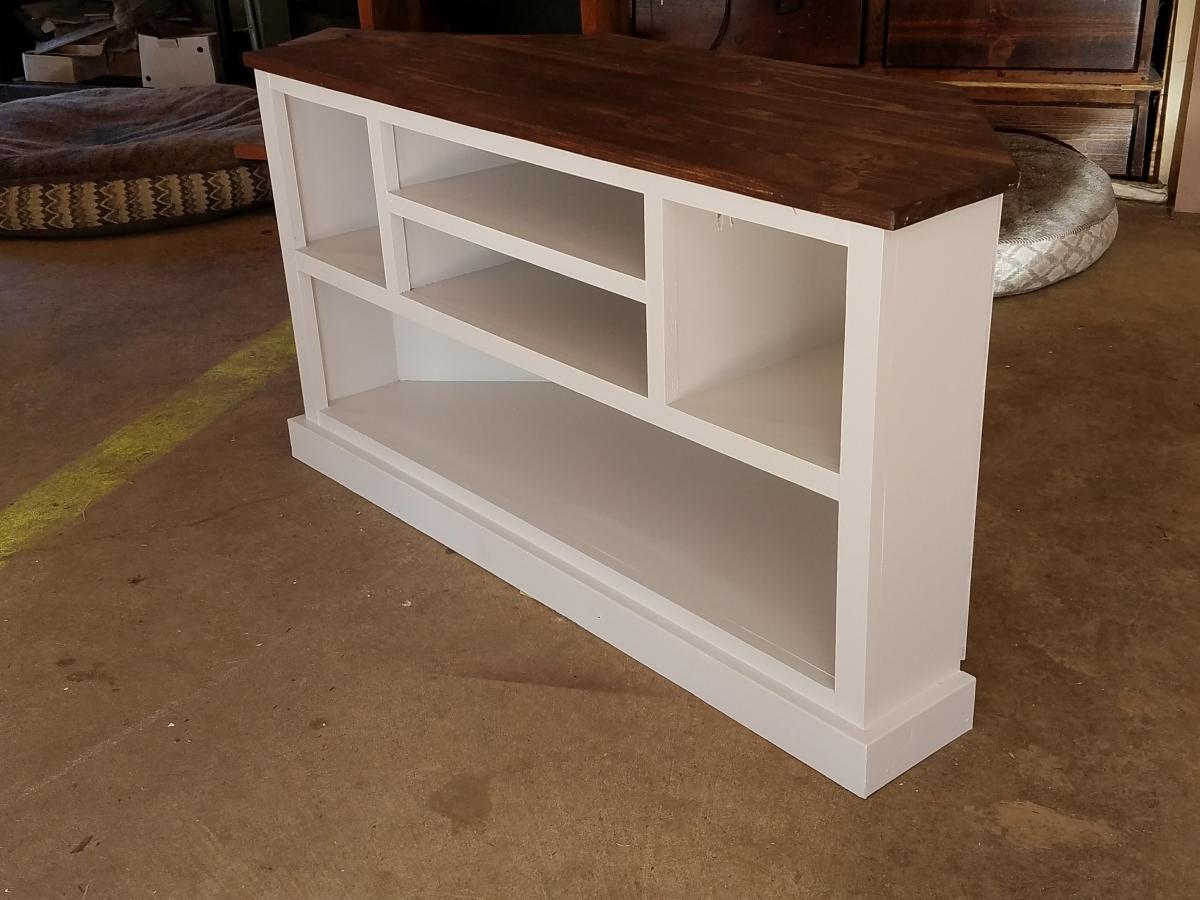
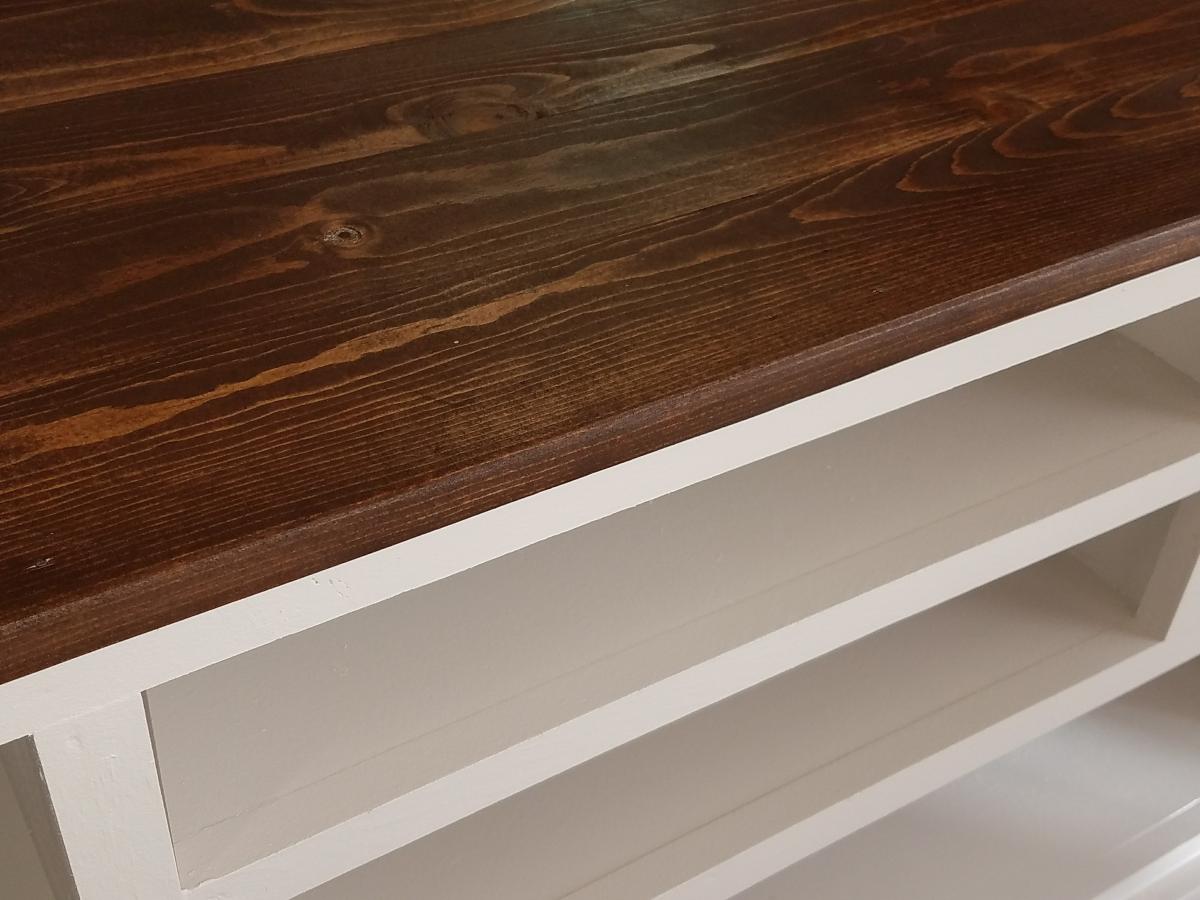
Corner Media Console
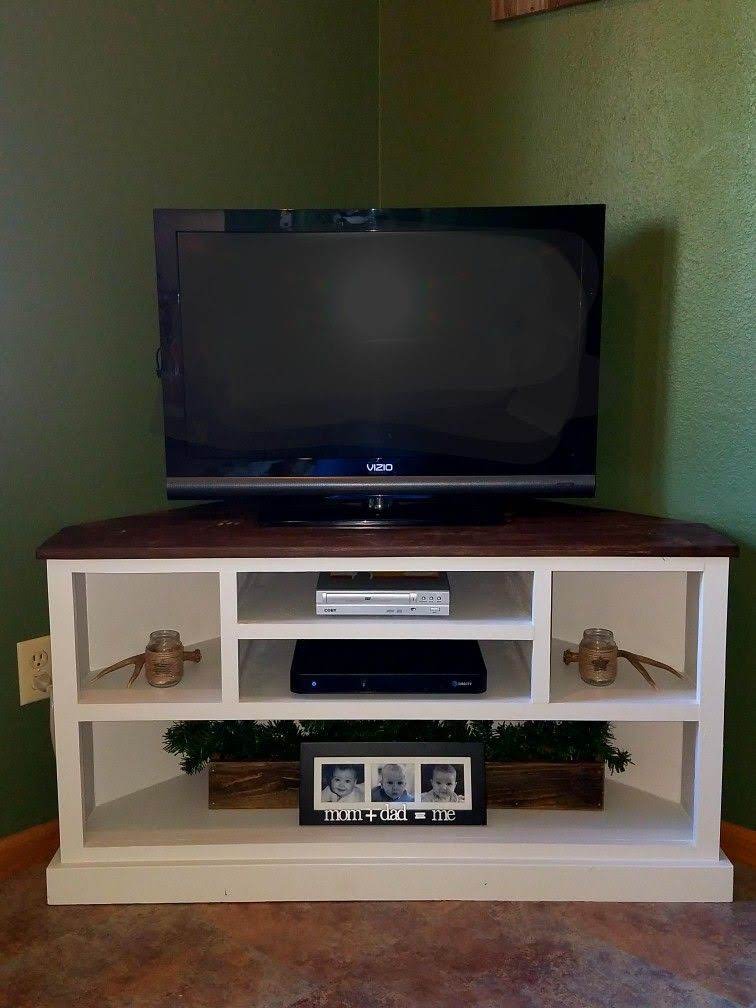
We had just moved into our new house and were using an end table for our TV stand I just didn't like it. I found this and modified it so it's shorter and fits in our room better. I also opted to not put doors on it and use it to display items instead. This was a relatively easy build and I'm learning new things with every build I make. It took about 2 days to complete not including filling holes/paint/stain. I love it, it looks so great in our room and I am planning on building end tables to match as well as replacing our buffet with movies in it to match also. Thanks for the easy-to-follow plans!
Built from Plan(s)
Estimated Cost
$45
Estimated Time Investment
Weekend Project (10-20 Hours)
Finish Used
Whatever white paint I had on hand (haha) and Varathane Kona with a satin poly for the top.
Recommended Skill Level
Beginner
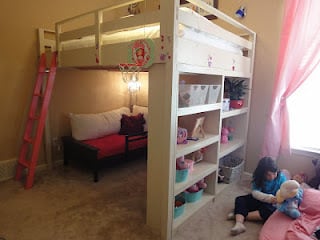
Queen Loft Bed

I made this bed for my 6 year old daughter. I loved Anna's Loft Bed plans, but she wanted a bigger play area underneath. So I modified the twin loft bed plans to fit a queen mattress. I also added extra supports for the mattress, and I used PureBond plywood on top of the supports for the mattress to sit on.
That's the Farmhouse Toddler Bed underneath. My younger daughter inherited her big sister's twin bed, so the toddler bed was put to use in the new "playhouse."
Built from Plan(s)
Estimated Time Investment
Week Long Project (20 Hours or More)
Finish Used
I sanded the wood and primed it. Then I sanded (lightly) again and painted it with Valspar latex enamel in Gloss Almond.
Recommended Skill Level
Intermediate
Comments
Wed, 02/09/2022 - 15:31
We’ve been looking for…
We’ve been looking for exactly this!! Can you share your modified plans and the list of lumber and supplies needed?
Sun, 09/02/2012 - 12:45
Modified Queen Size
I think it's great that you modified it to a queen! I live a studio and NEED something like this. Could you share the modifications? It looks beautiful = )
Sun, 09/02/2012 - 20:58
The changes I made were: End
The changes I made were:
End planks cut to 63"
Top back guard and front and back rails cut to 87"
The top guard rails on ends cut to 66"
I measured for the mattress supports and the front guard rail after the rest was completed.
You should also measure for the bookcases after the rest is completed, but each of mine wound up being about 31" wide.
Everything else was pretty much the same.
Hope that helps.
Thu, 11/01/2012 - 08:24
Thank you!
This is wonderful - I've been looking to make something like this for an urban efficiency (adult) apartment! Thanks so much for sharing your modifications!
Mon, 07/29/2013 - 14:08
queen loft for adults
Will the height of the bed allow for adults to stand under it? If not what modifications should be made to make the height fit a standing adult? (the highest being 6'1" male) Thanks! =D

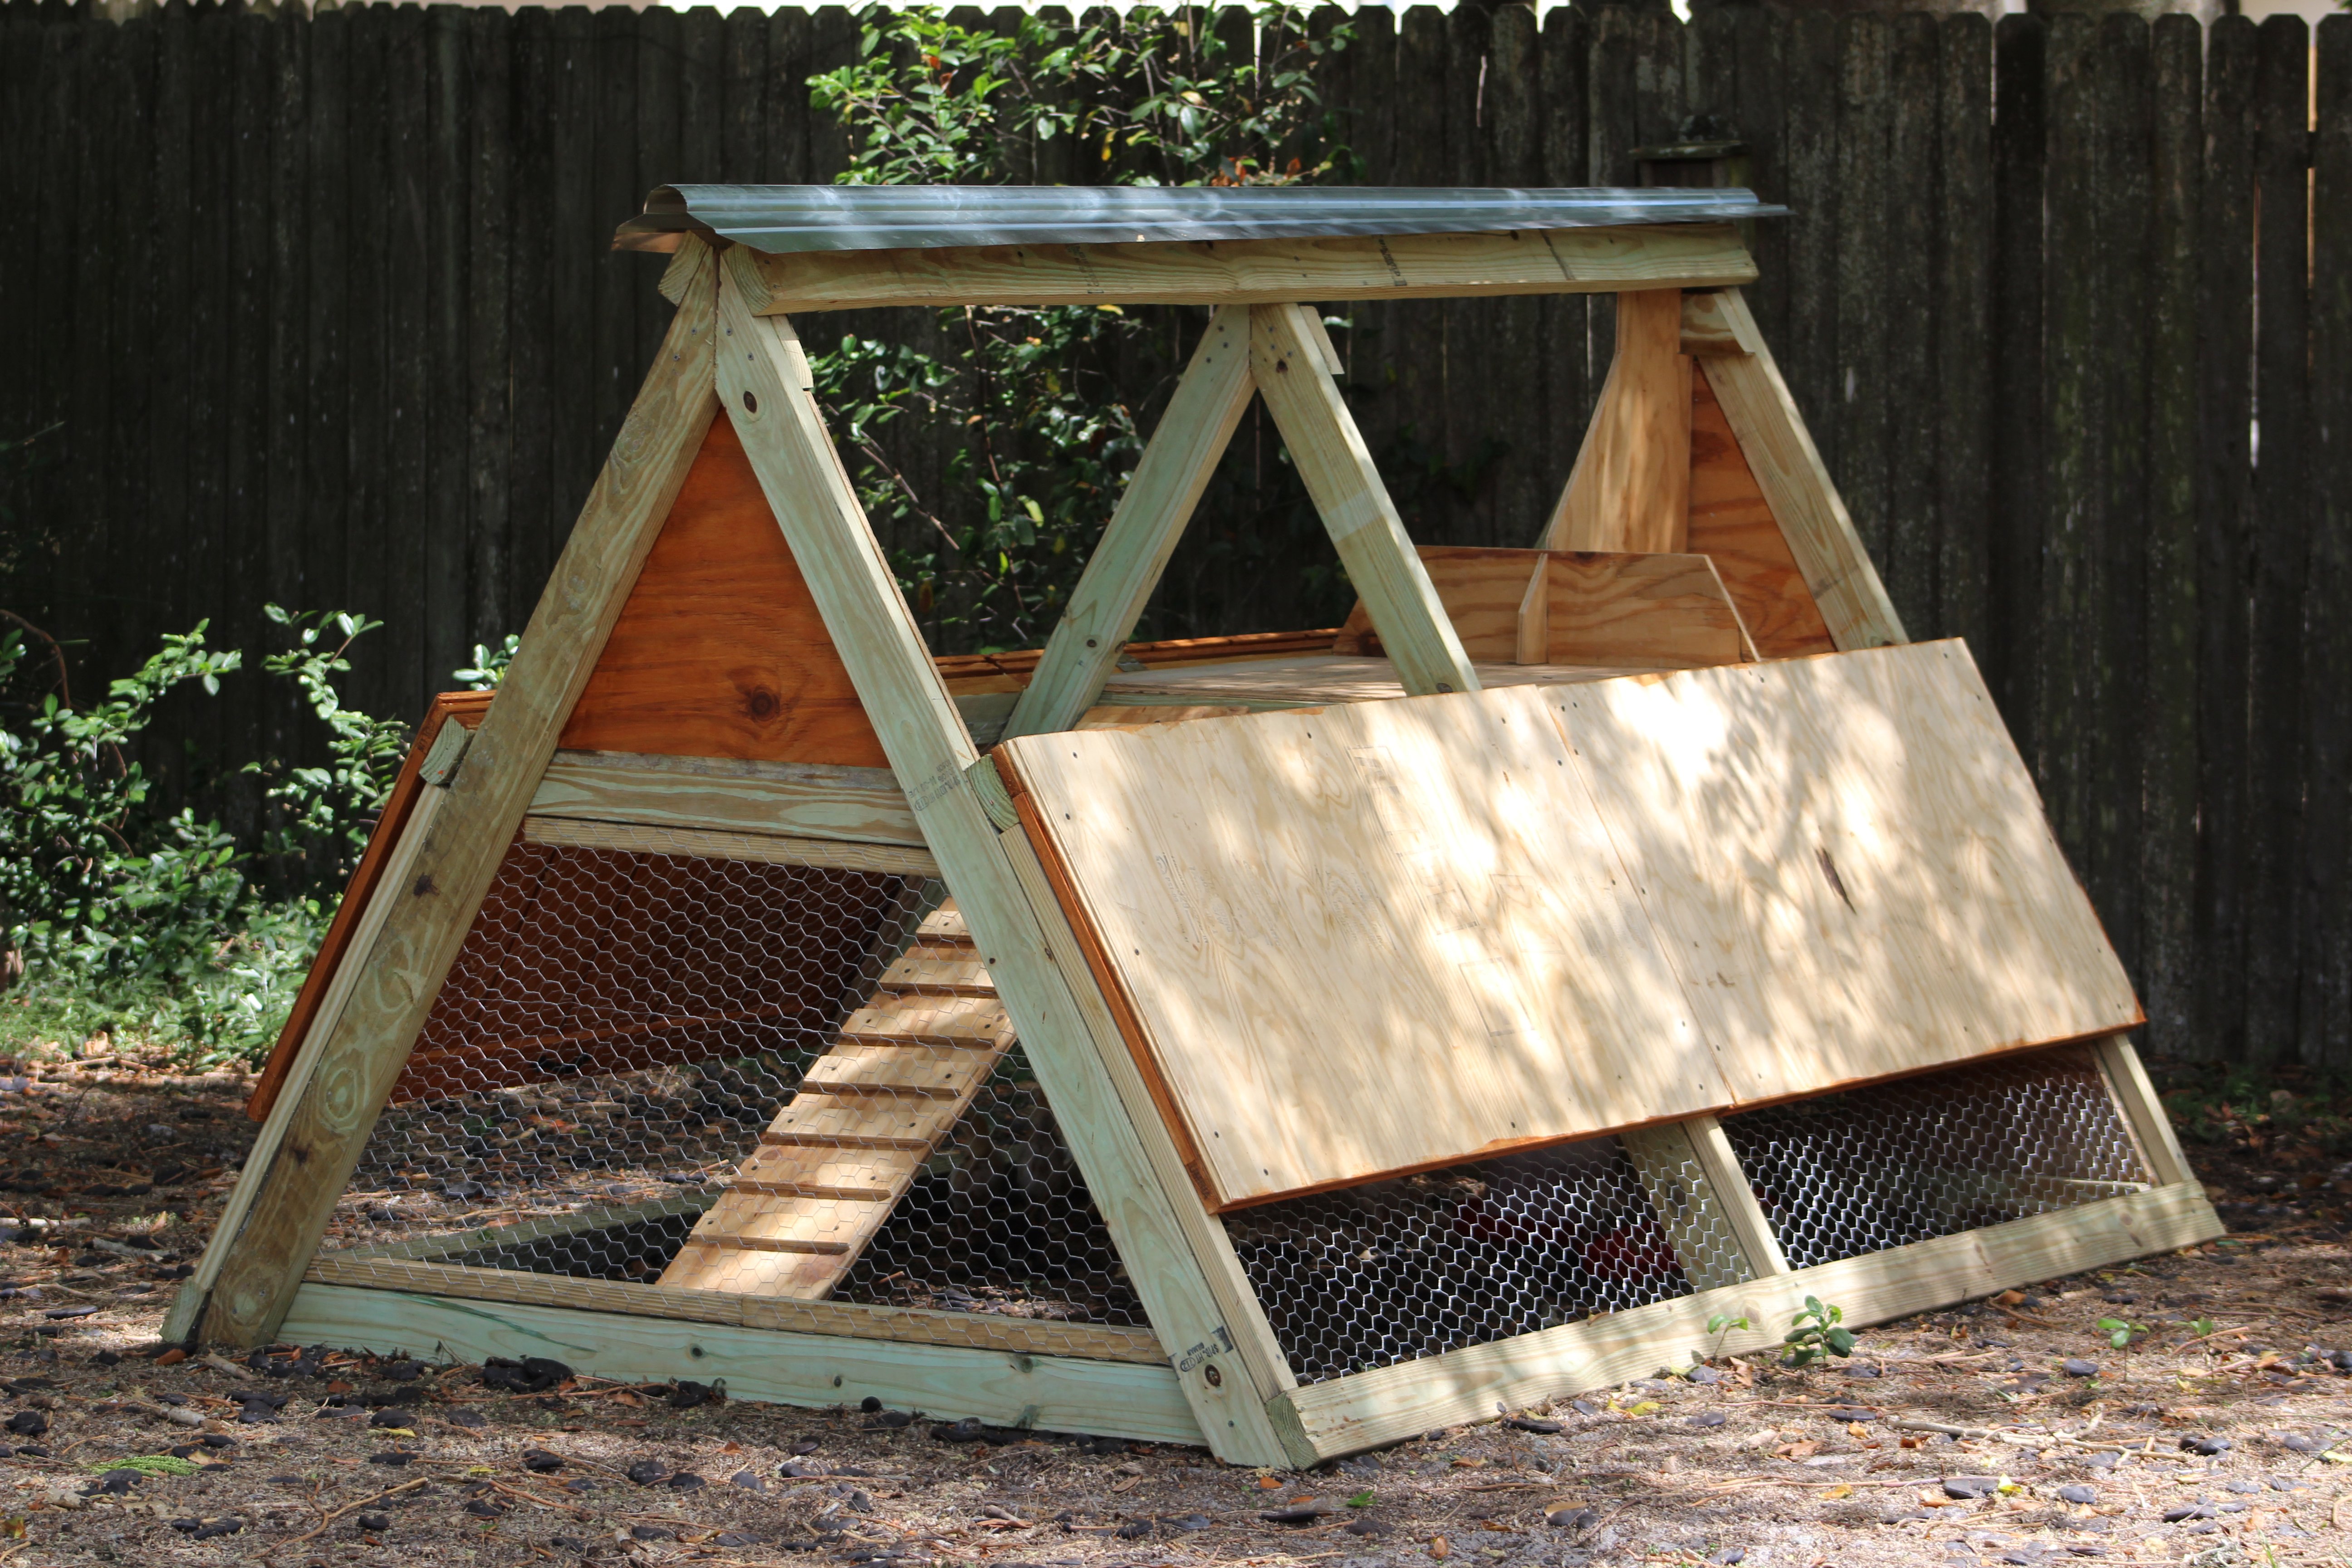
Chicken Coop
This was my biggest build yet and these plans along with being able to see a few brag posts with modicifactions made this project less intimidating. I extended the coop in order to add a walk in door. The drop down doors on both sides will give plenty of access and help with cleaning. I've added door latches to all the doors since putting it in place. My dad provided the cedar so that greatly reduced my costs. This project took about six days to complete. The fun part was getting it out of my carport : ) This was built for my daughter's chickens and she is thrilled with it. So am I! Thanks for the plans Ana!
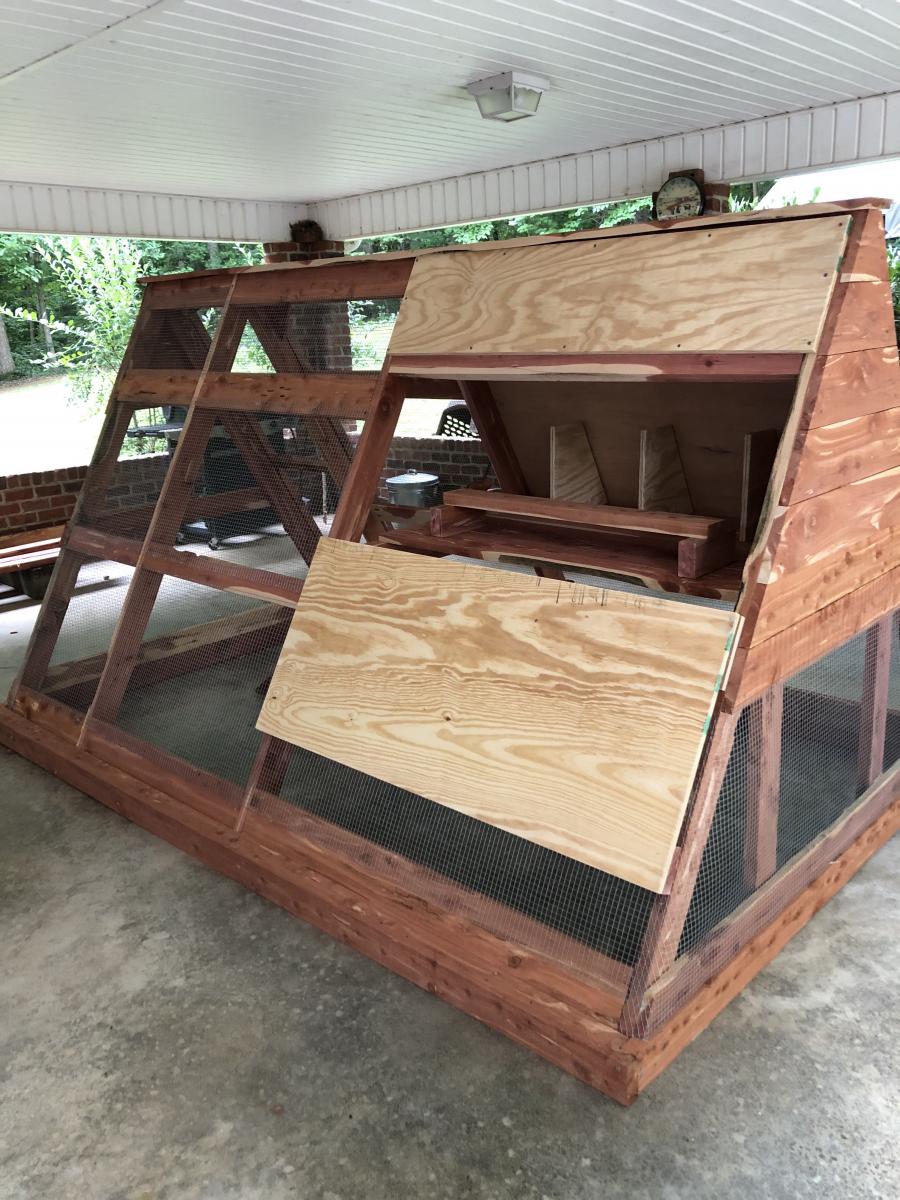
Built from Plan(s)
Estimated Cost
Hardware, screws, hardware cloth and plywood - around $150
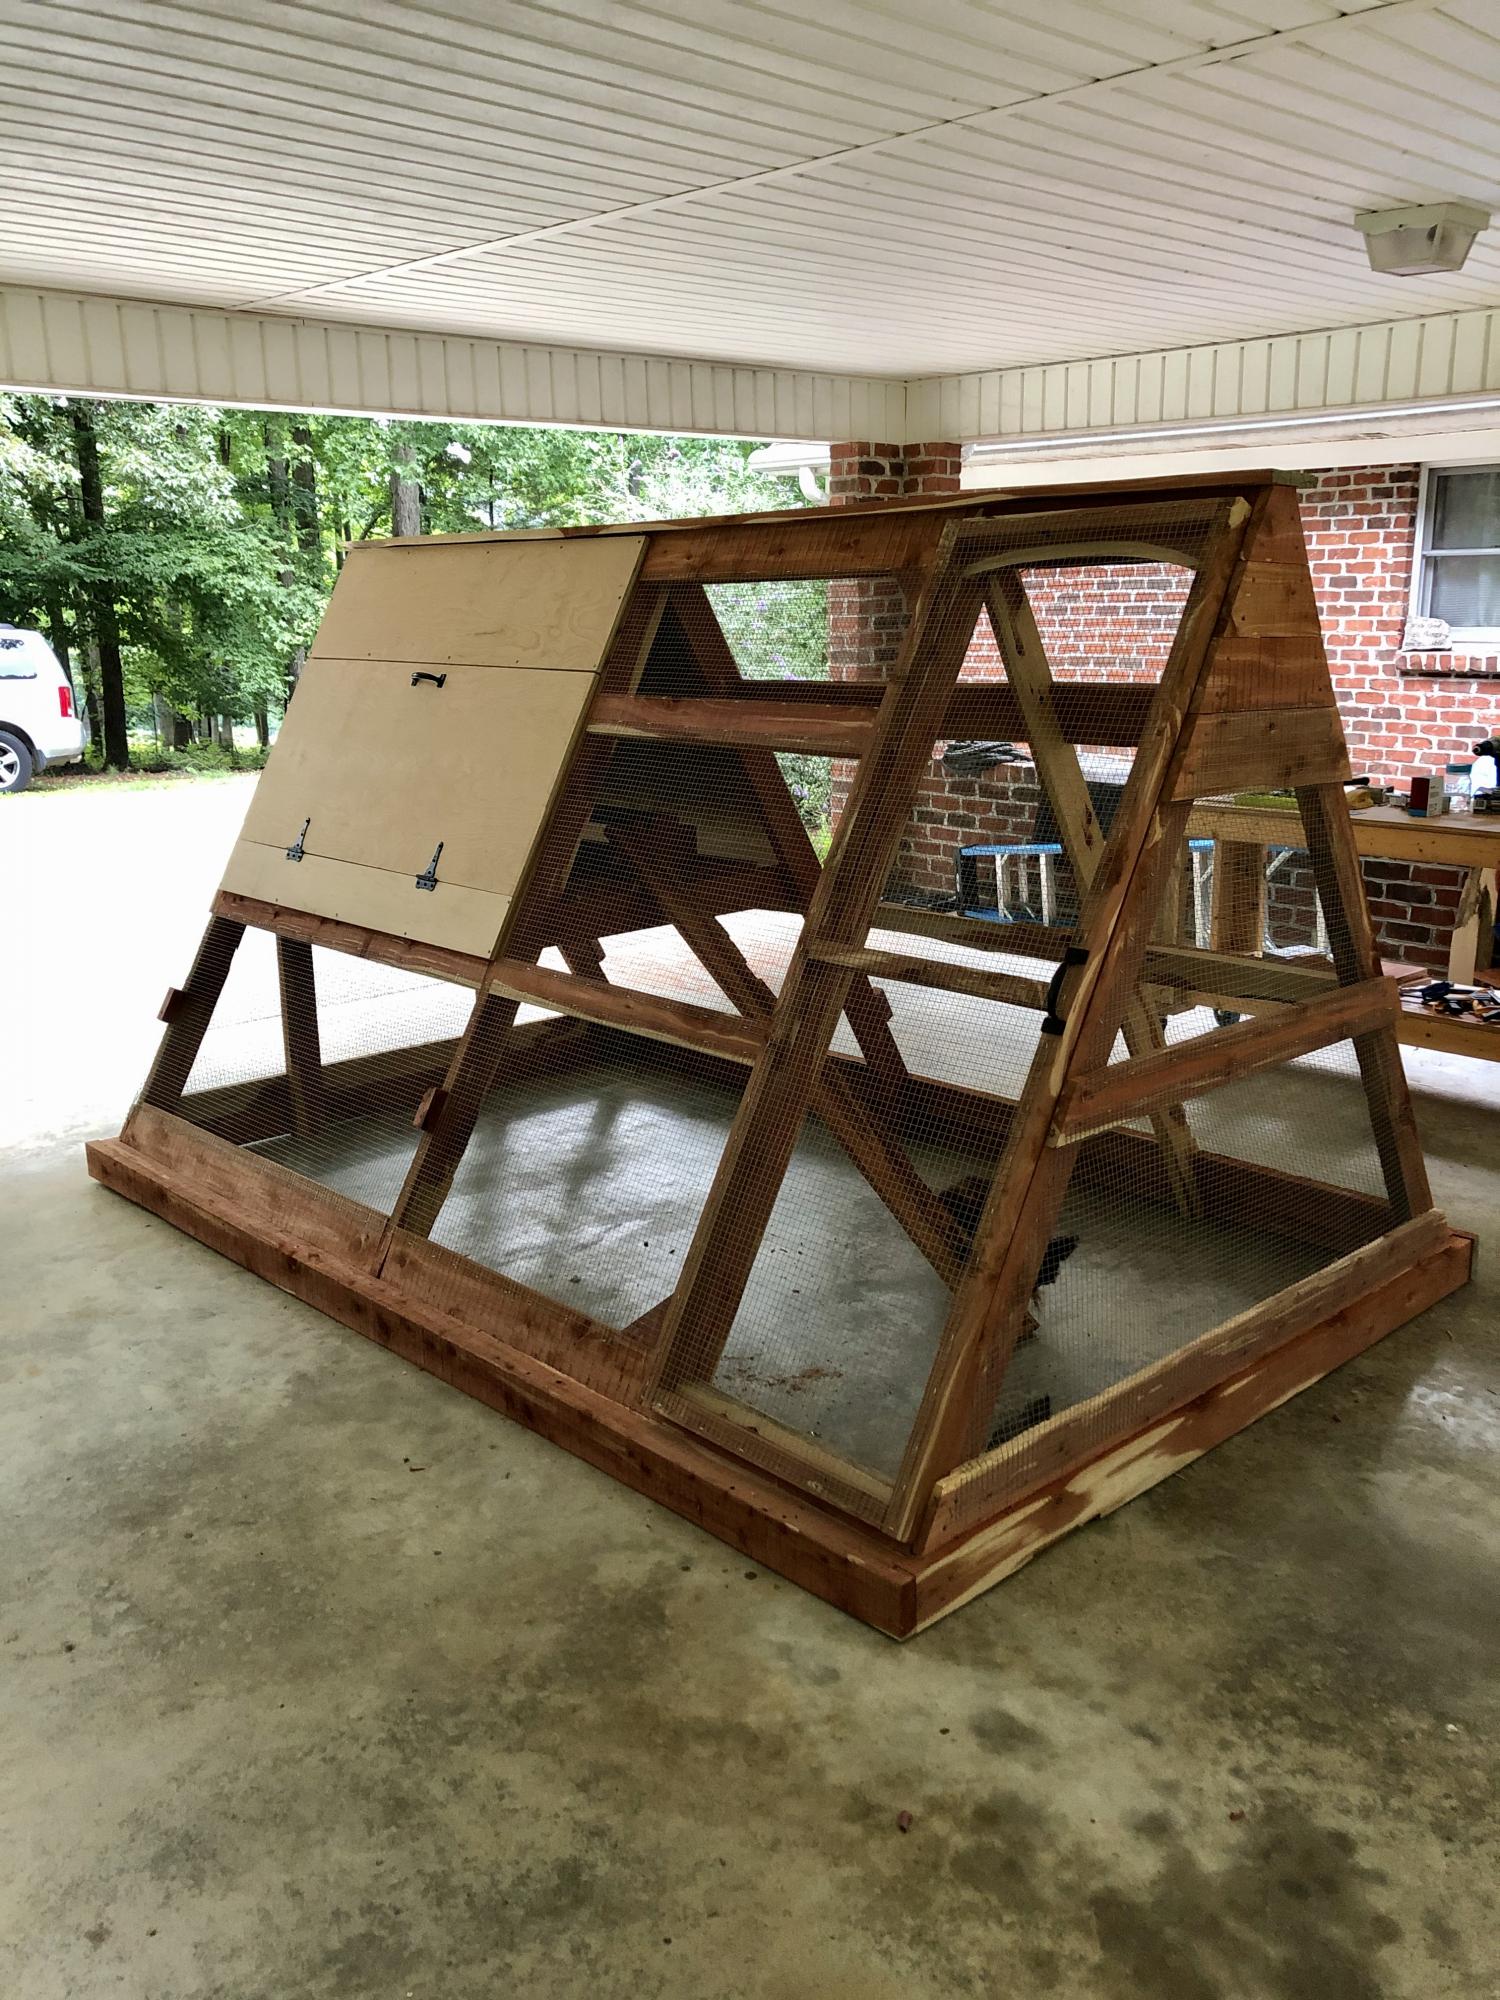
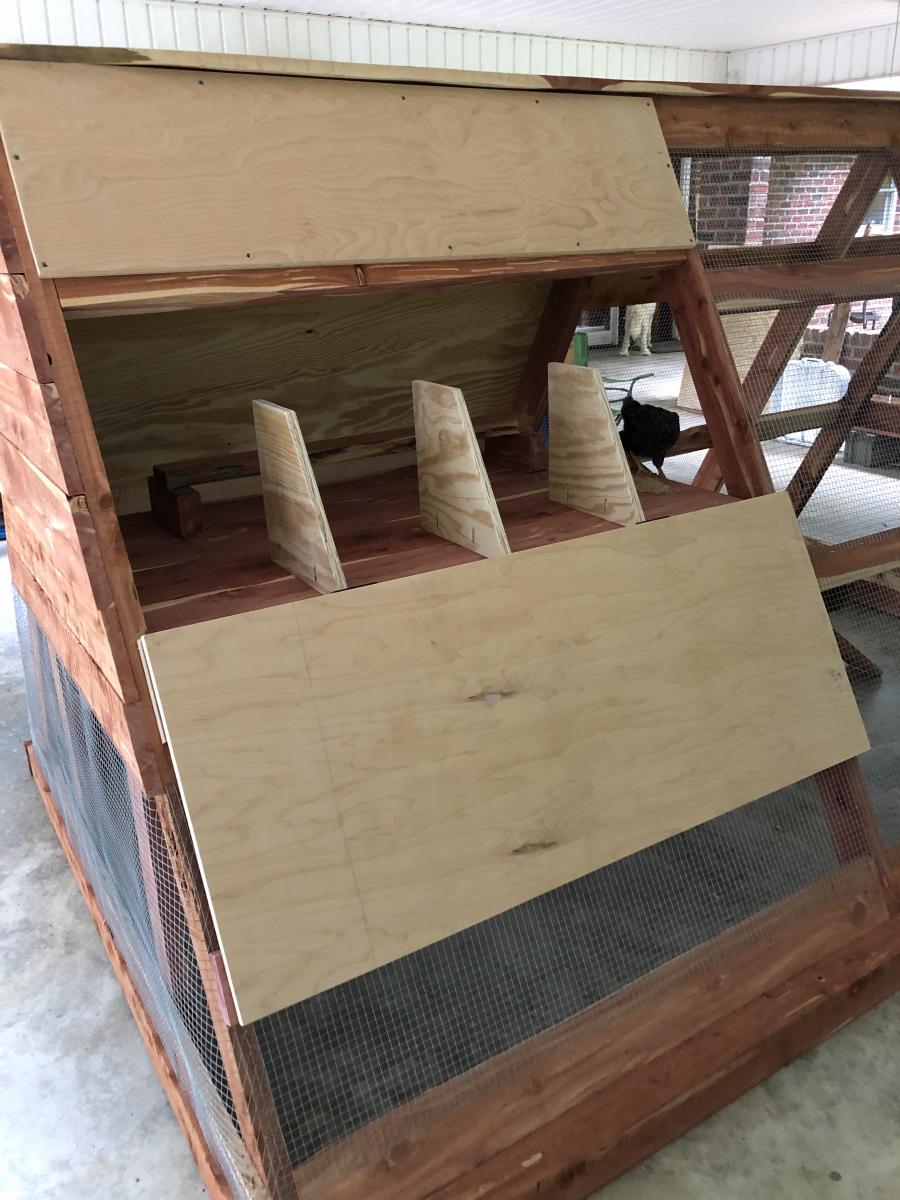
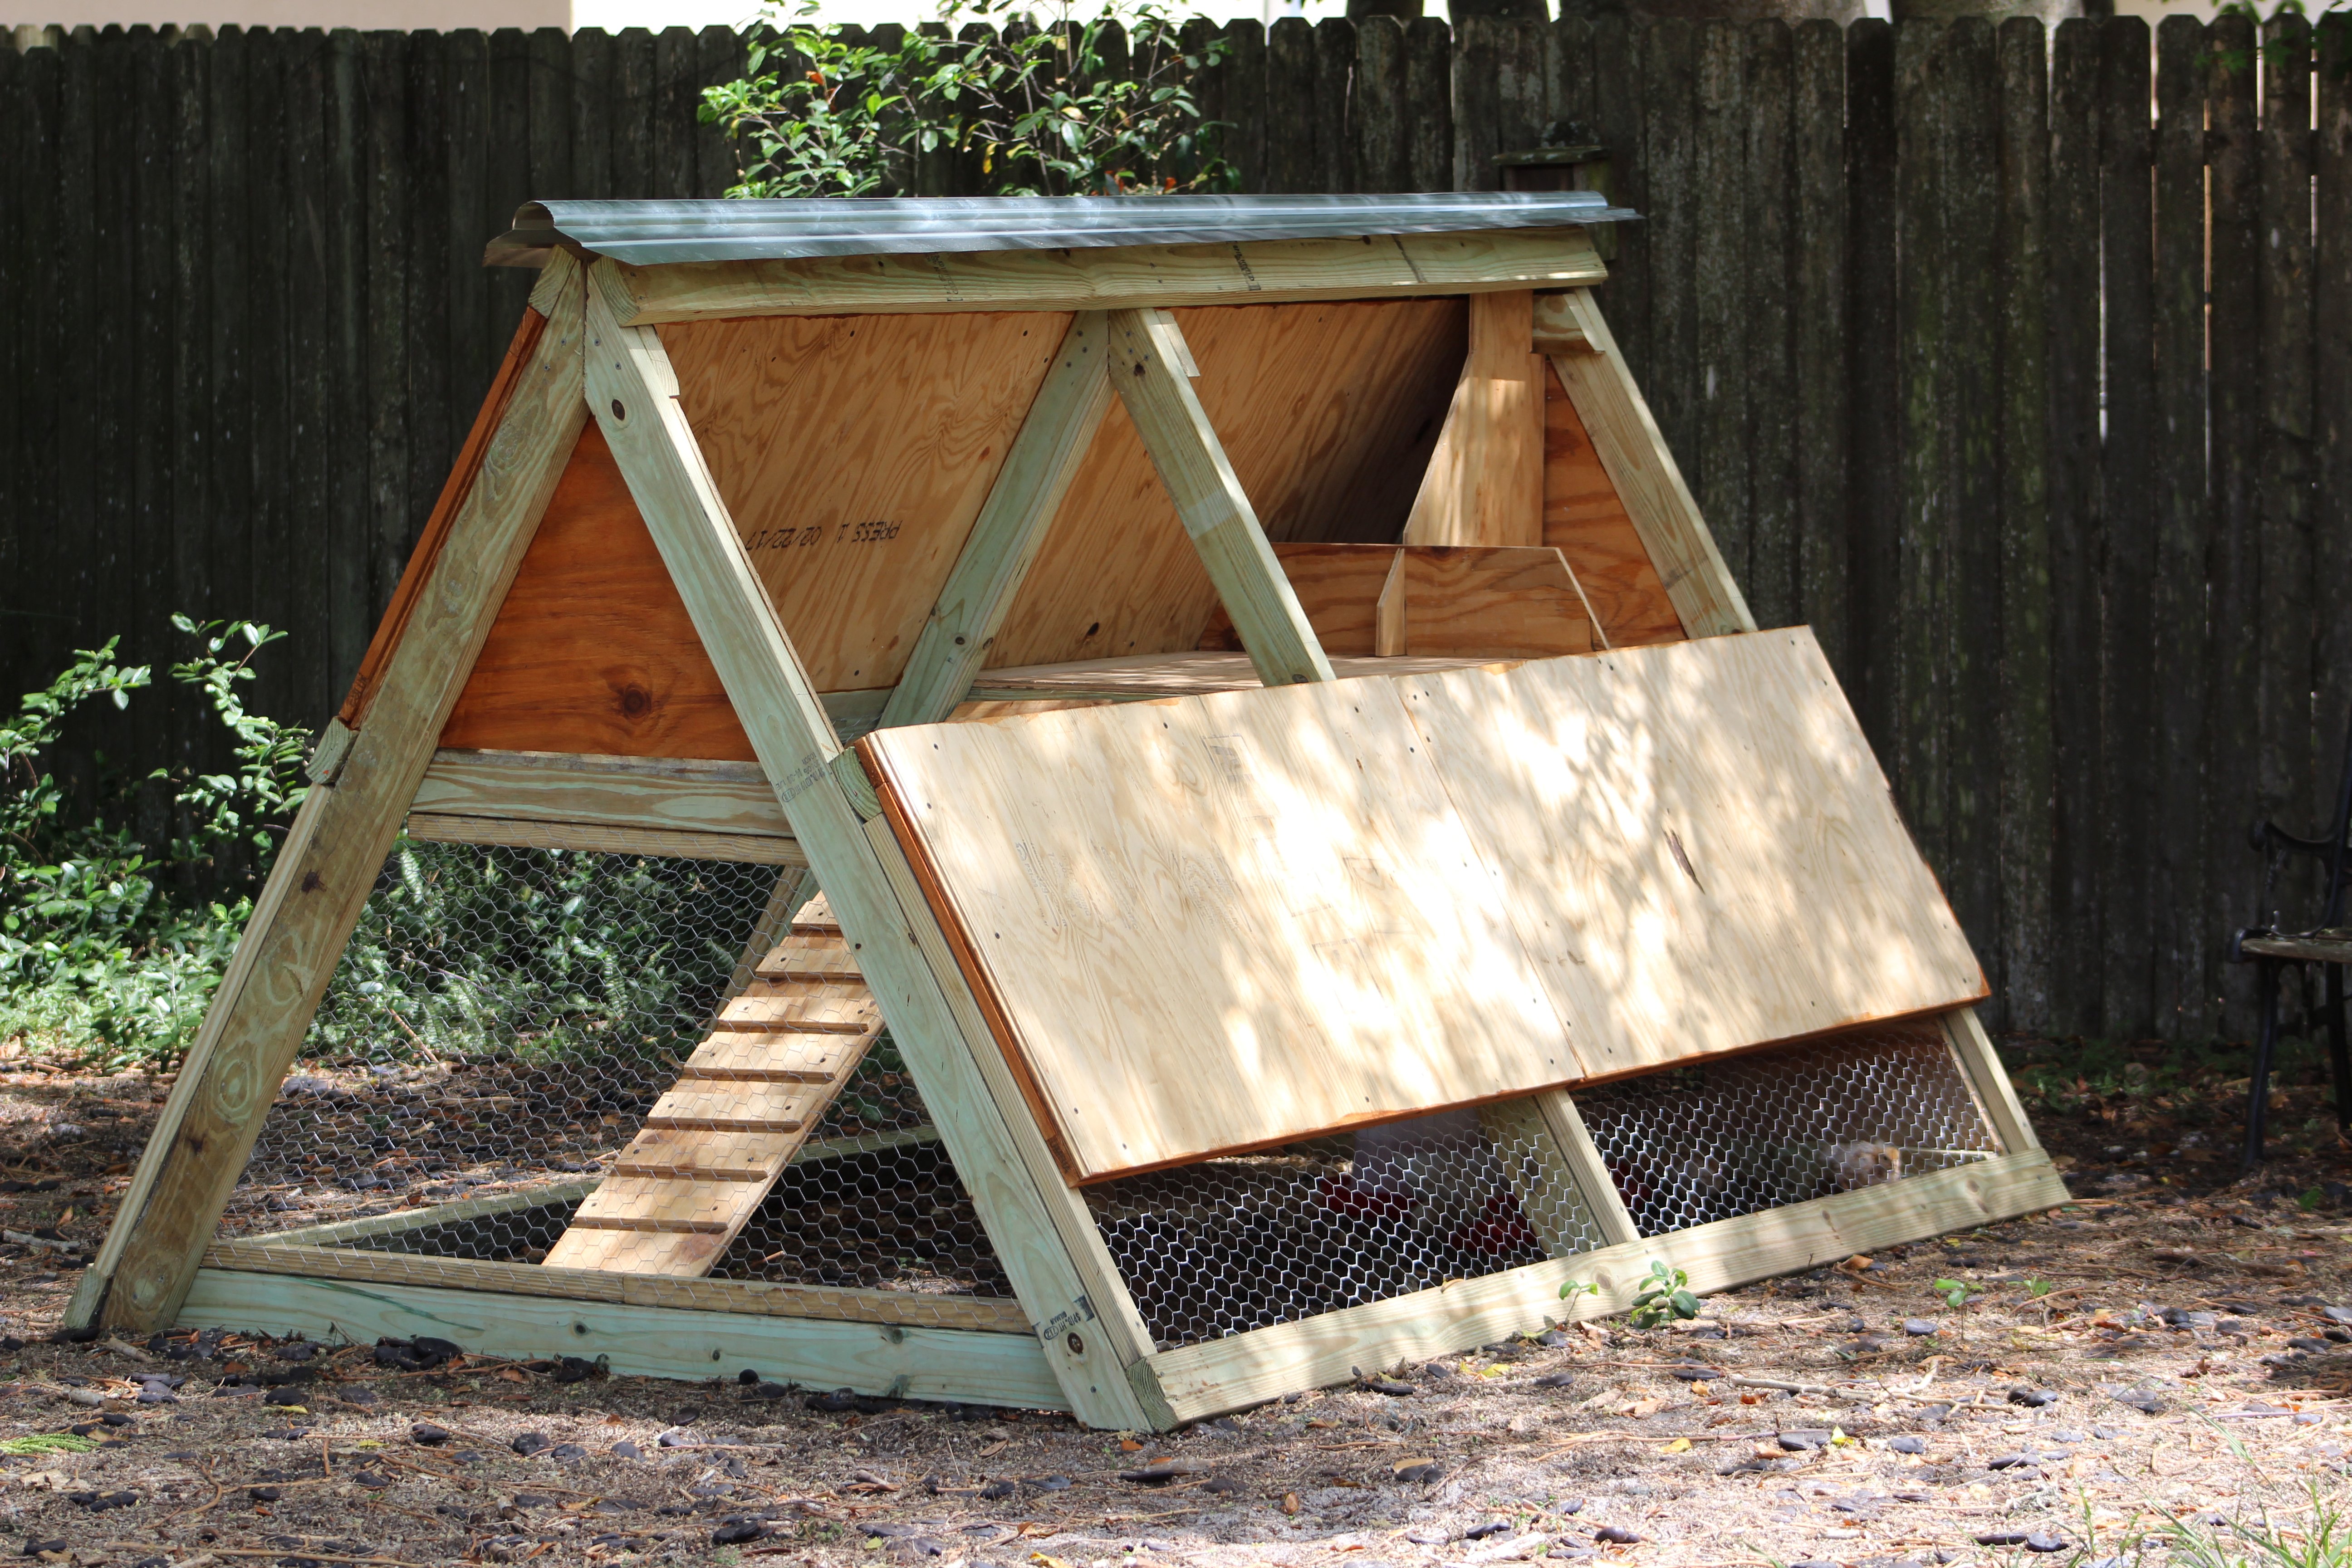
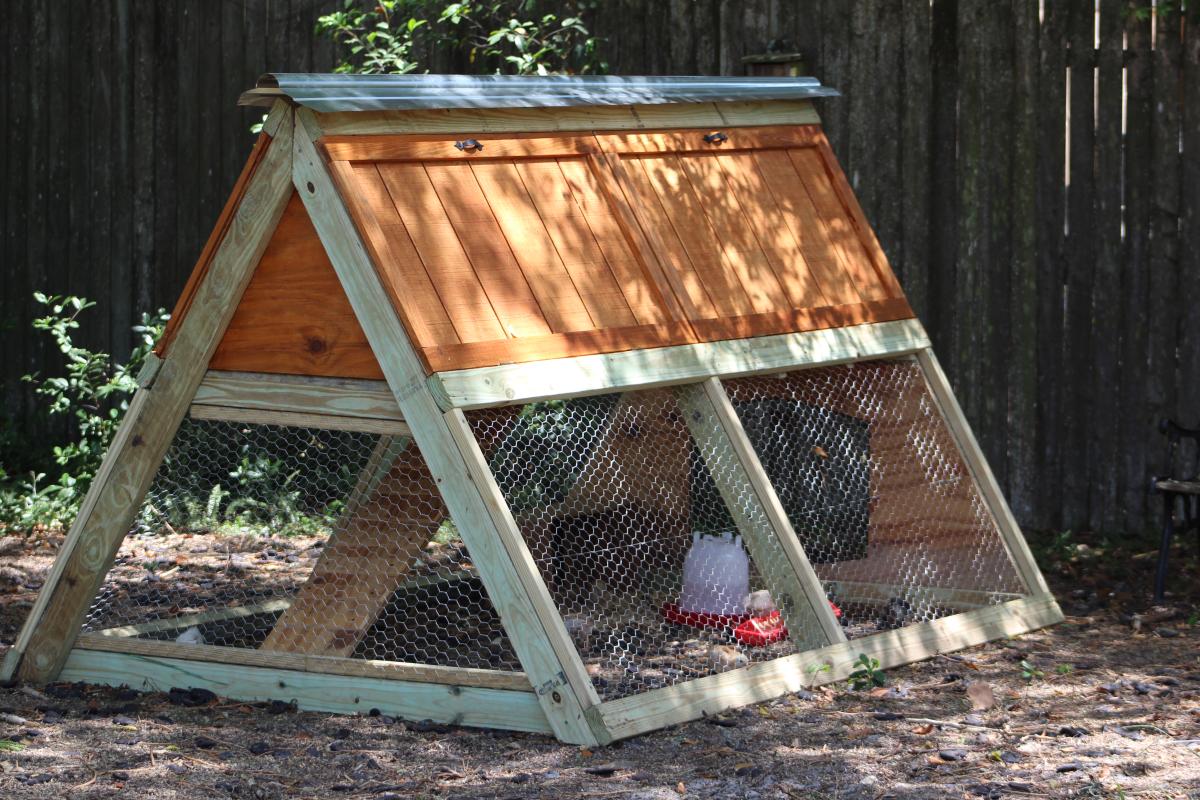
A-Frame Chicken Coop - Easy to Clean

Thanks for the free plans. I did have to make modifications for the doors. i hid the hinges to give it a clean look. i used cedar for the trim and Plywood Siding Panel T1-11 4 IN OC (Common: 19/32 in. x 4 ft. x 8 ft.; Actual: 0.563 in. x 48 in. x 96 in.) for the doors. i used a metal flashing for the roof so it will vent.
Built from Plan(s)
Estimated Cost
$250
Estimated Time Investment
Week Long Project (20 Hours or More)
Finish Used
BEHR Transparent waterproofing finish (Cedar Natural Tone) NO 501
Recommended Skill Level
Intermediate
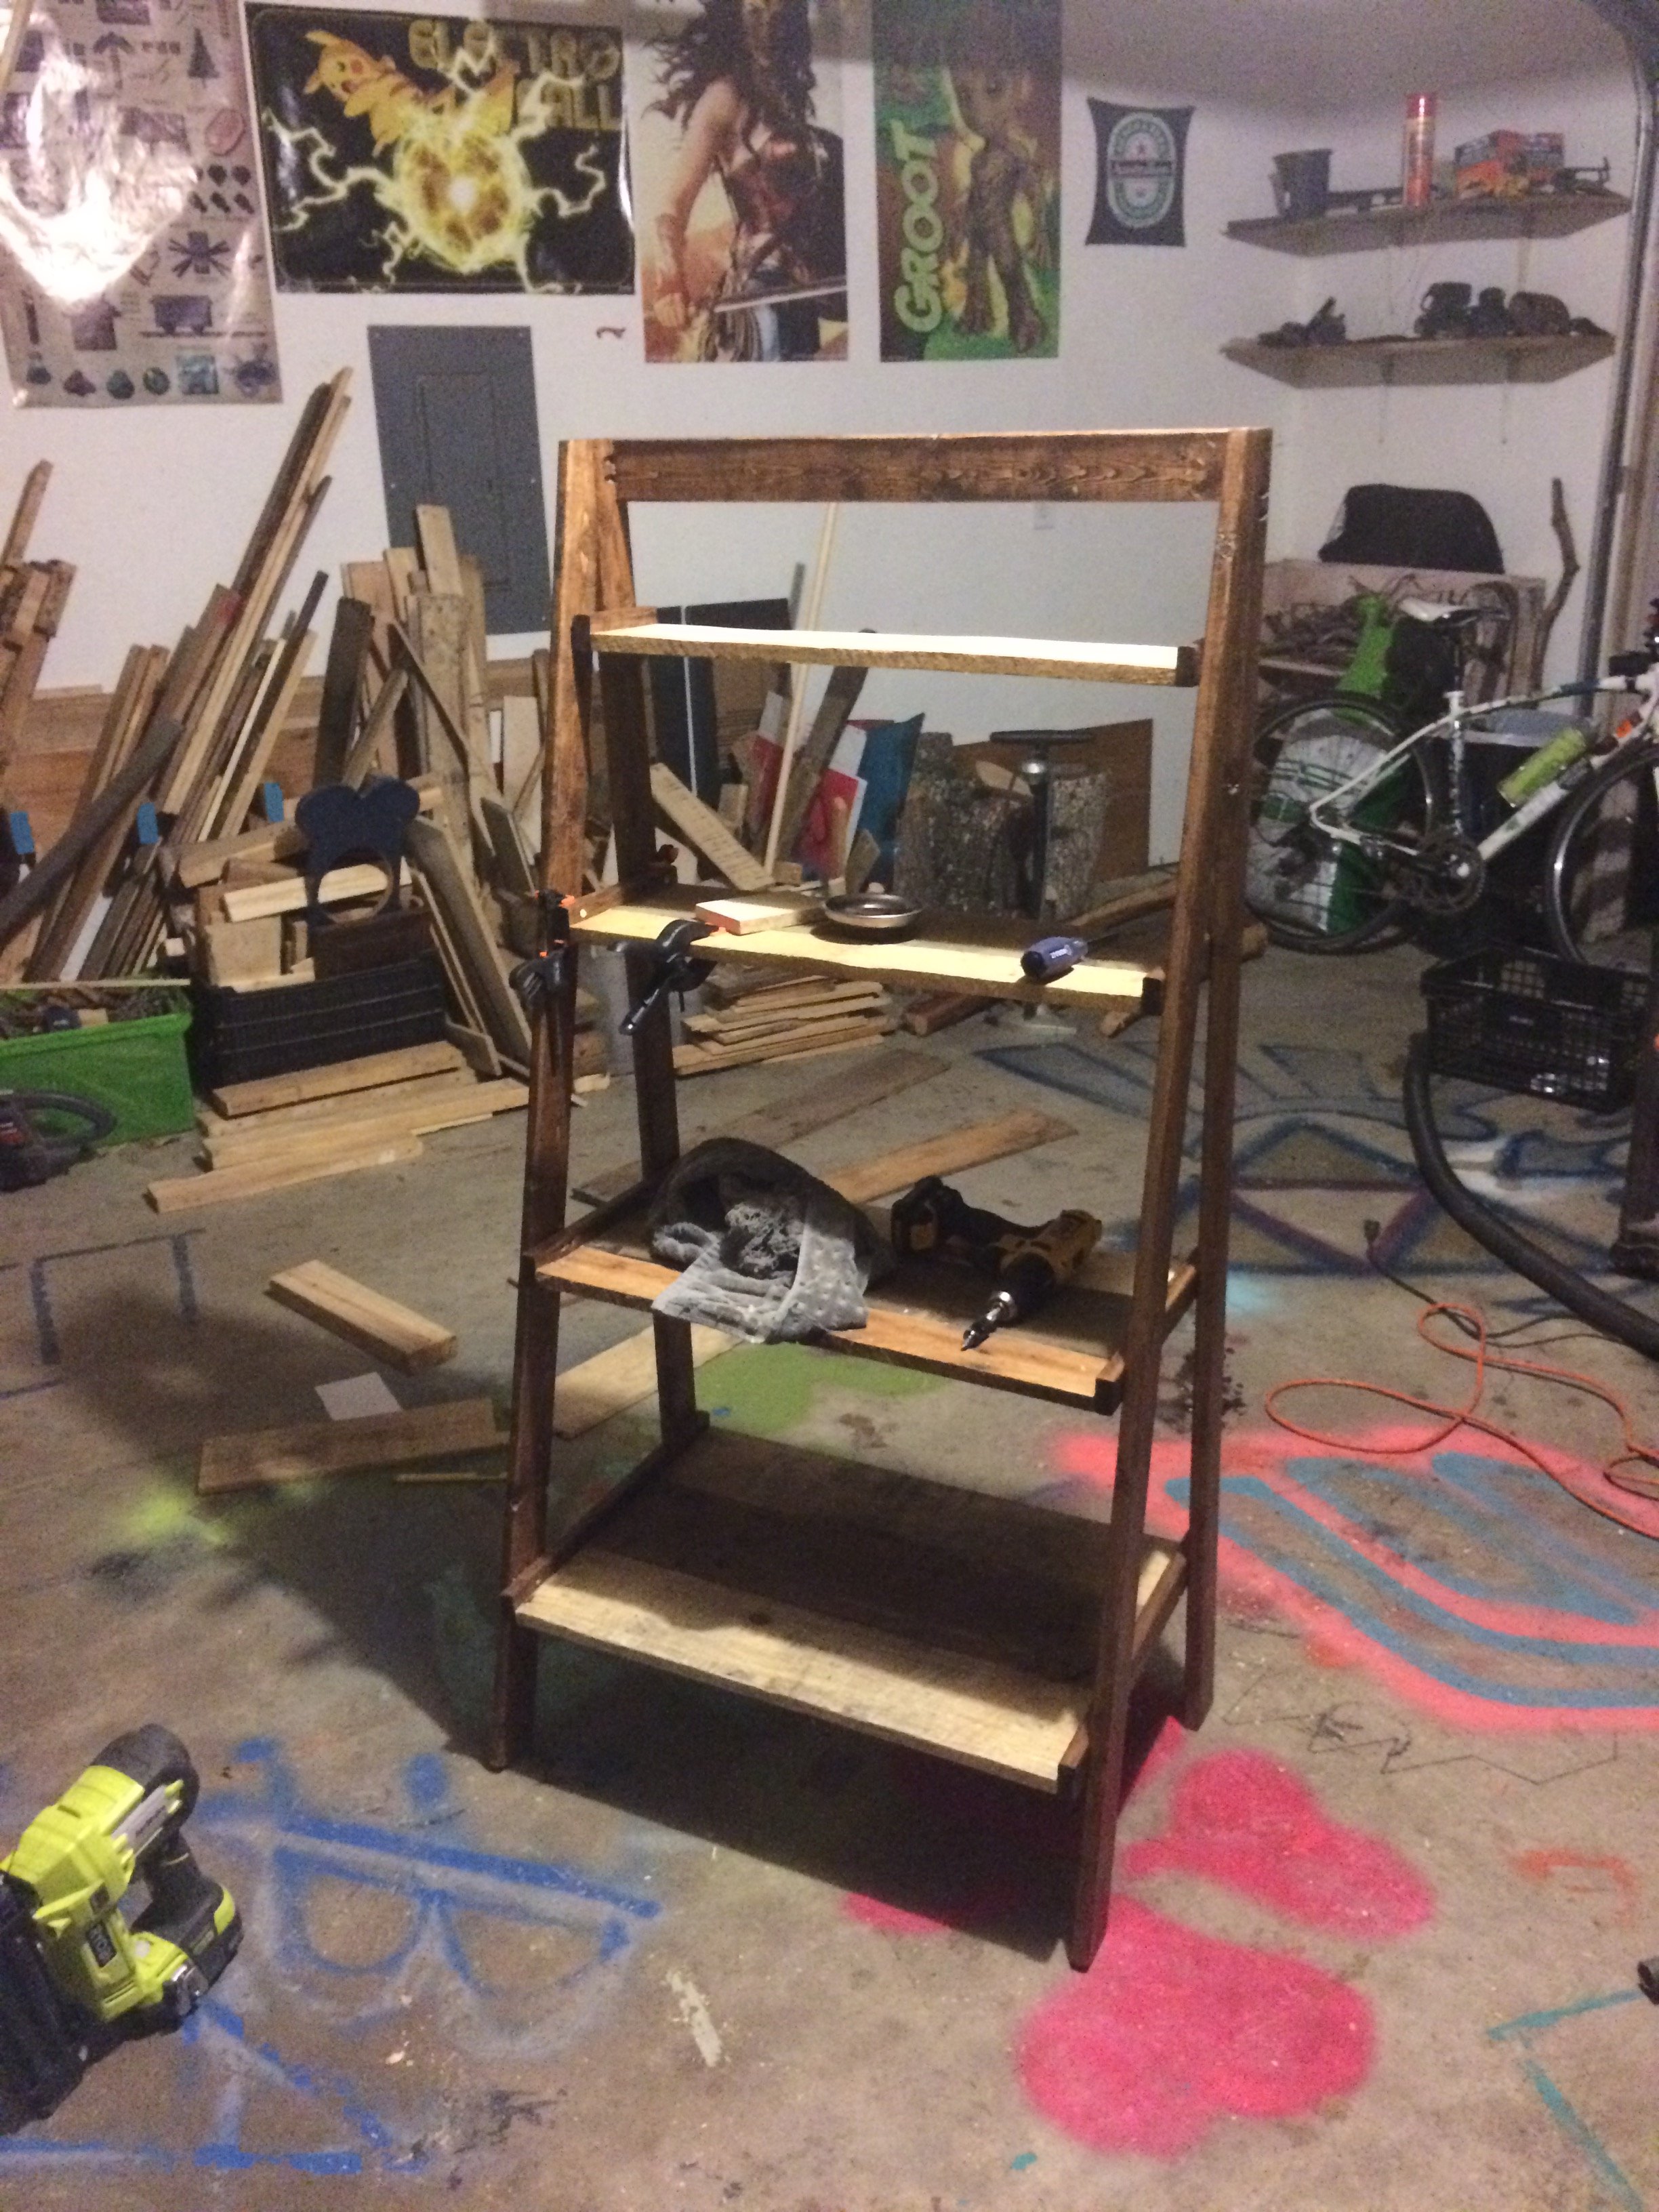
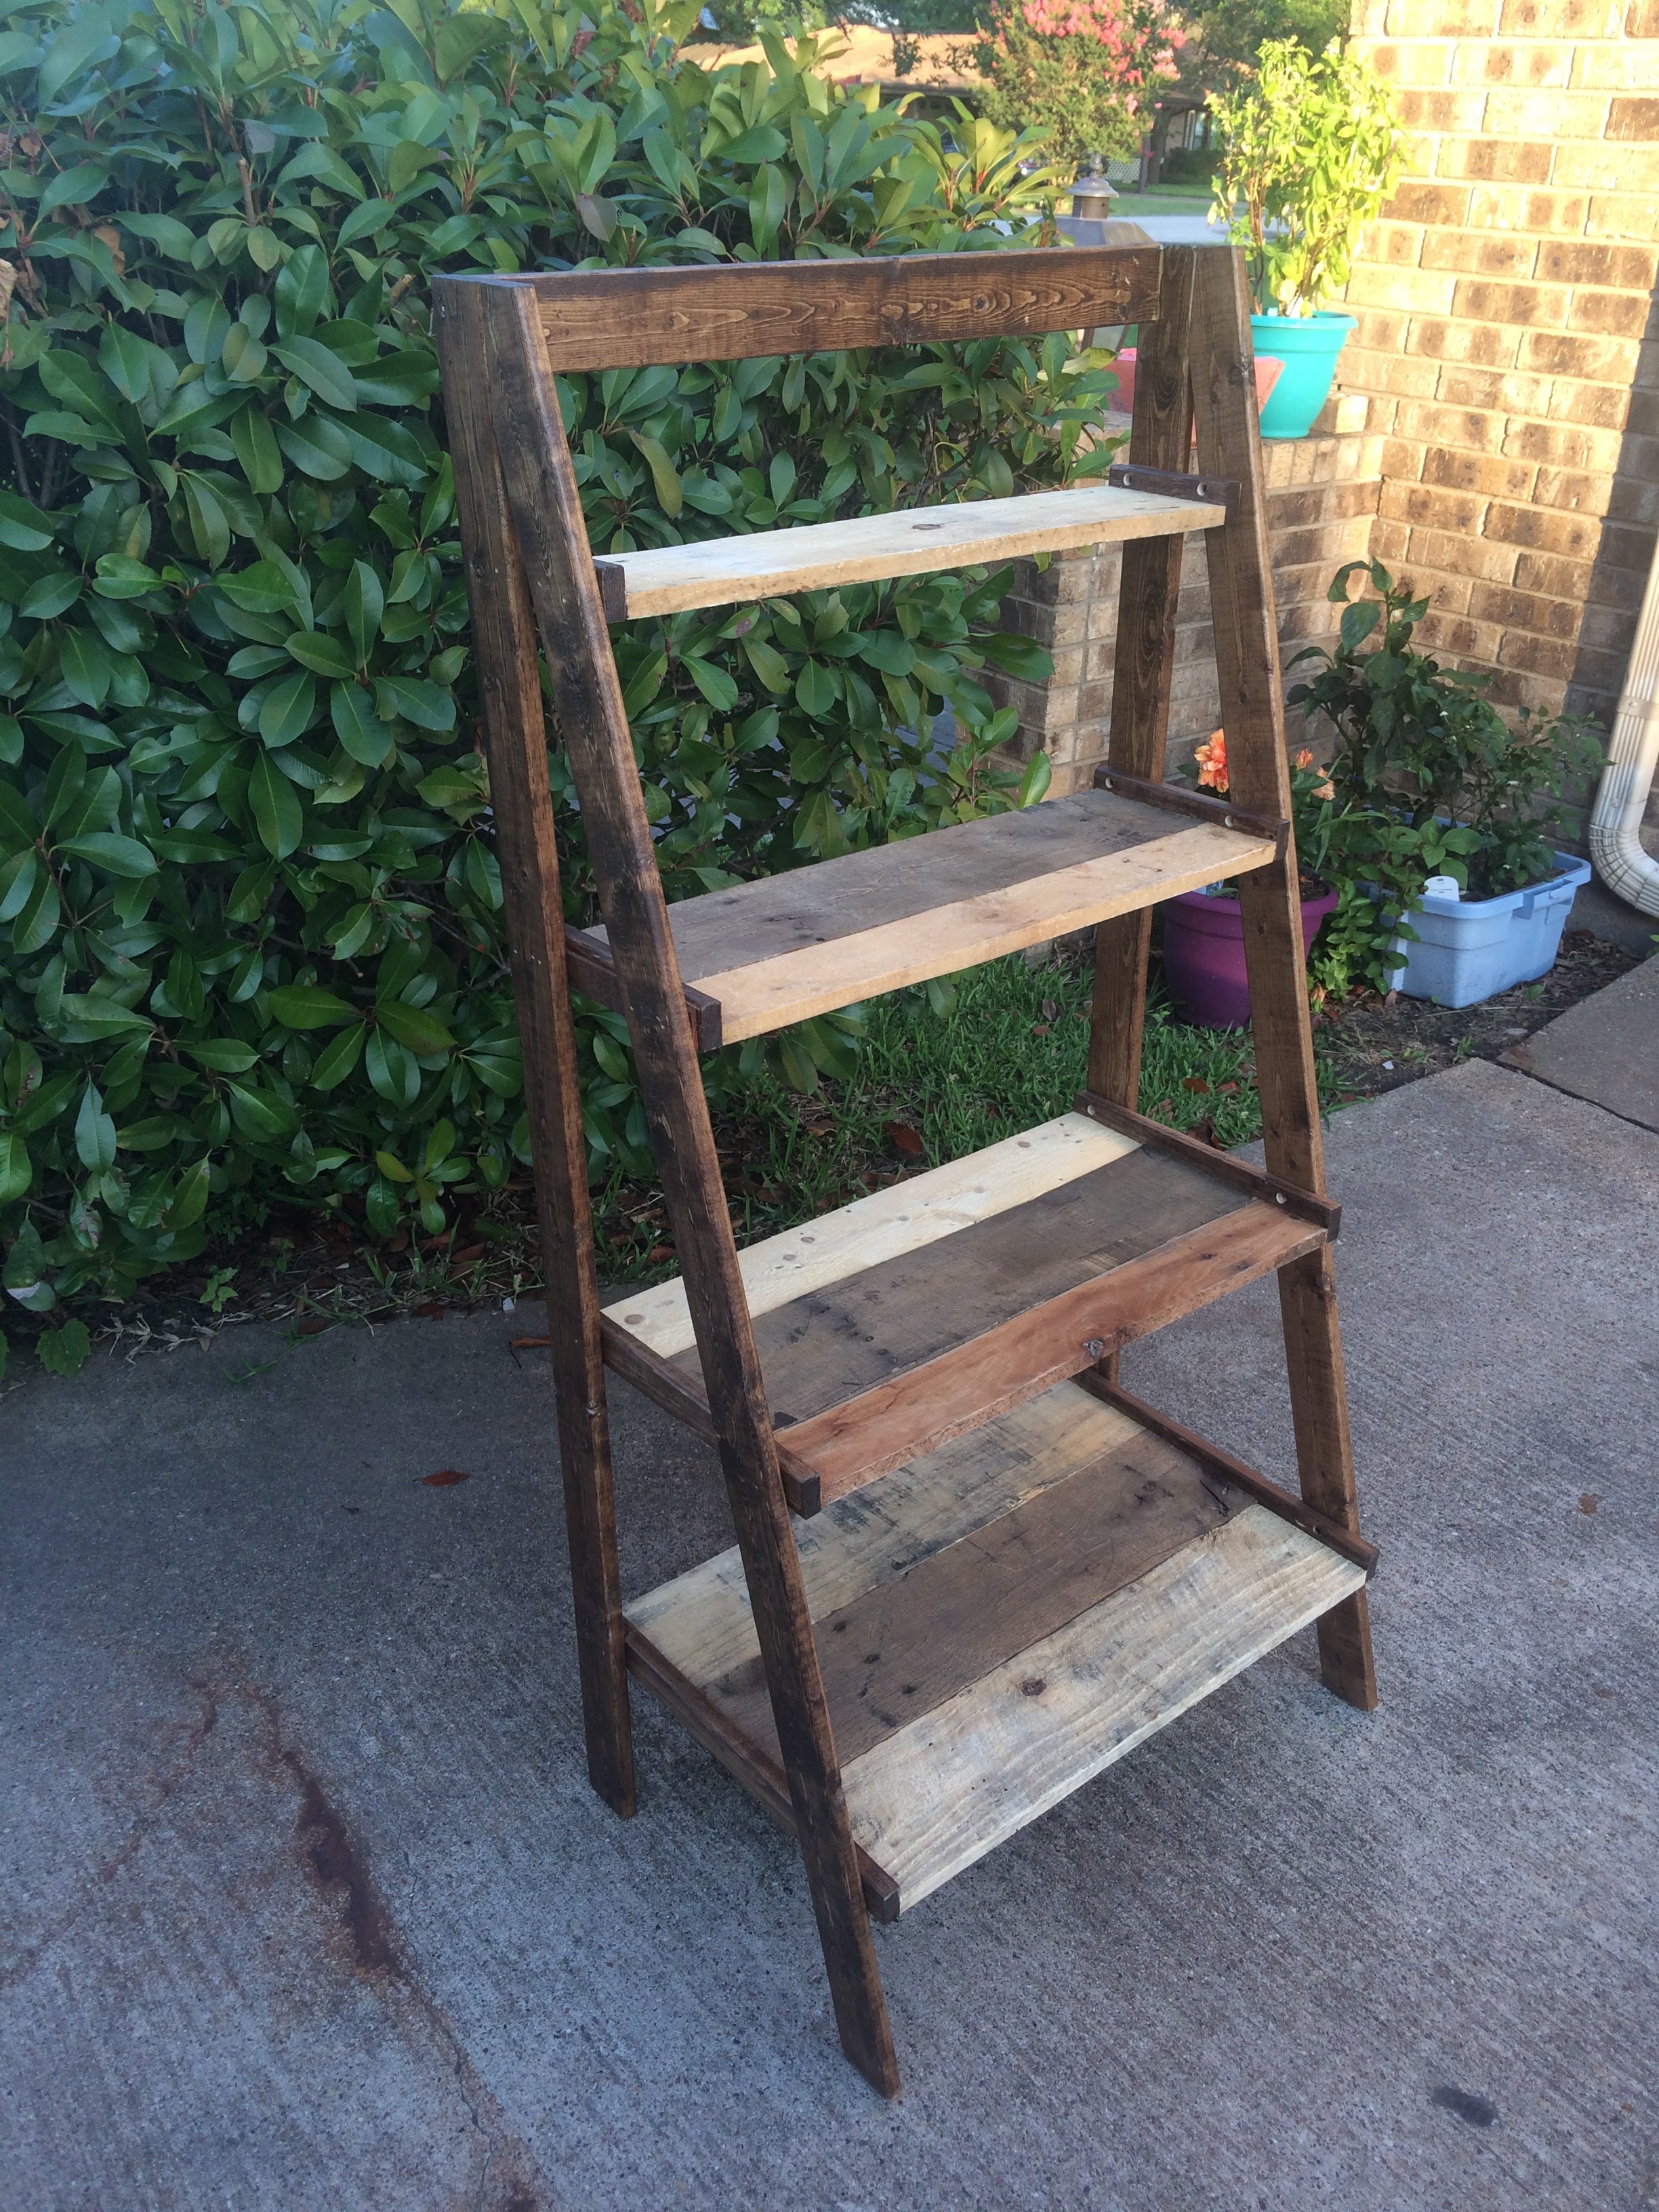
Pallet wood painter's ladder shelf
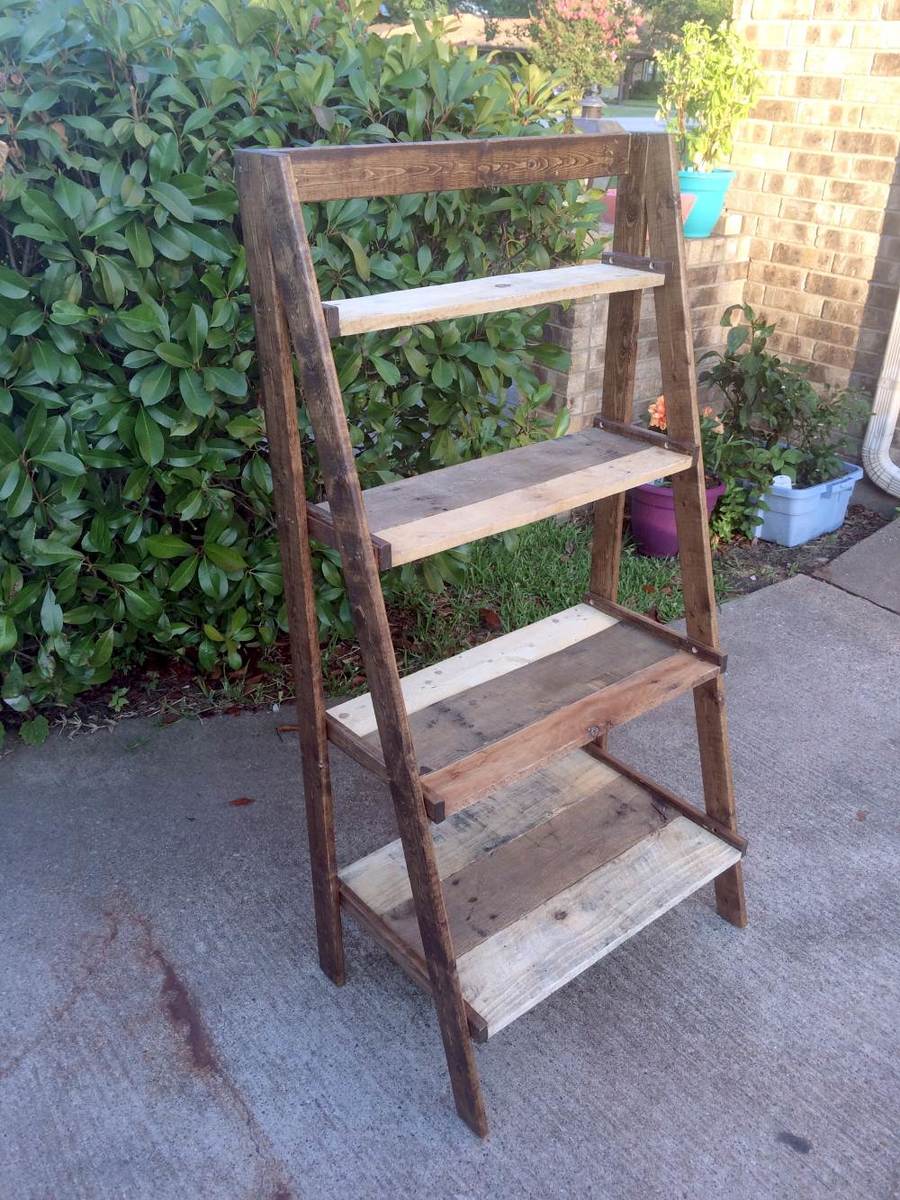
Made this one with shelf edges/trim just on the sides. Somehow my top shelf didn't span the width so had to add a little shim on each side but it all worked out! We had all the pallets and used 1x3s for the frame because some of my pallet wood was heavy hardwood. It was not without frustration because I was working with uneven/warped pallet wood but it hits the rustic look. I am happy with how it turned out.
Built from Plan(s)
Estimated Time Investment
Day Project (6-9 Hours)
Finish Used
English chestnut minwax stain and matte interior sealant
Recommended Skill Level
Beginner
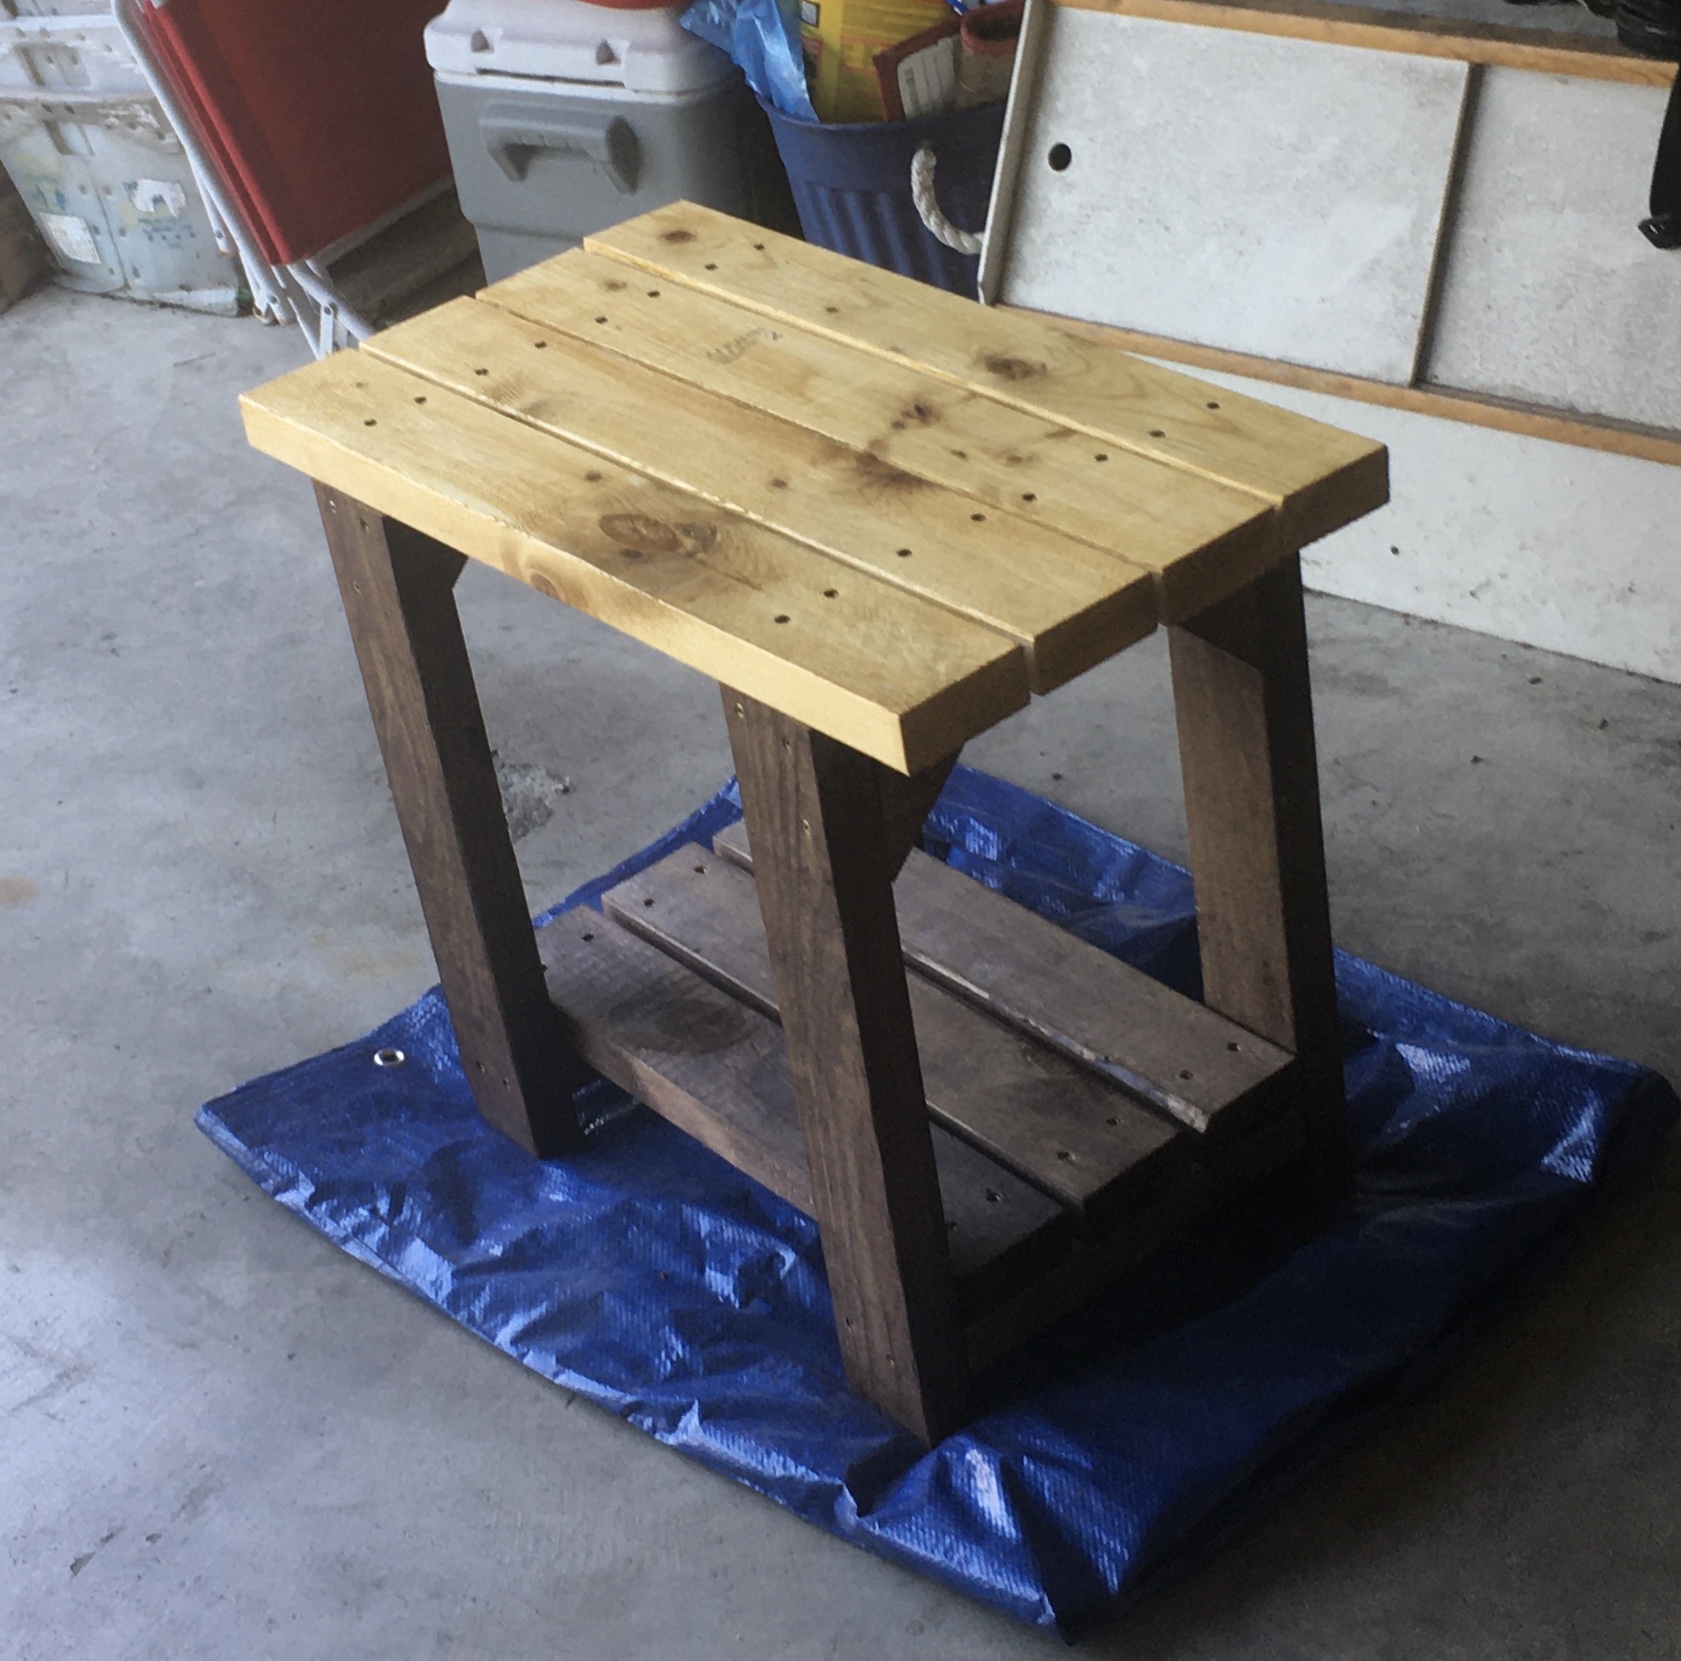
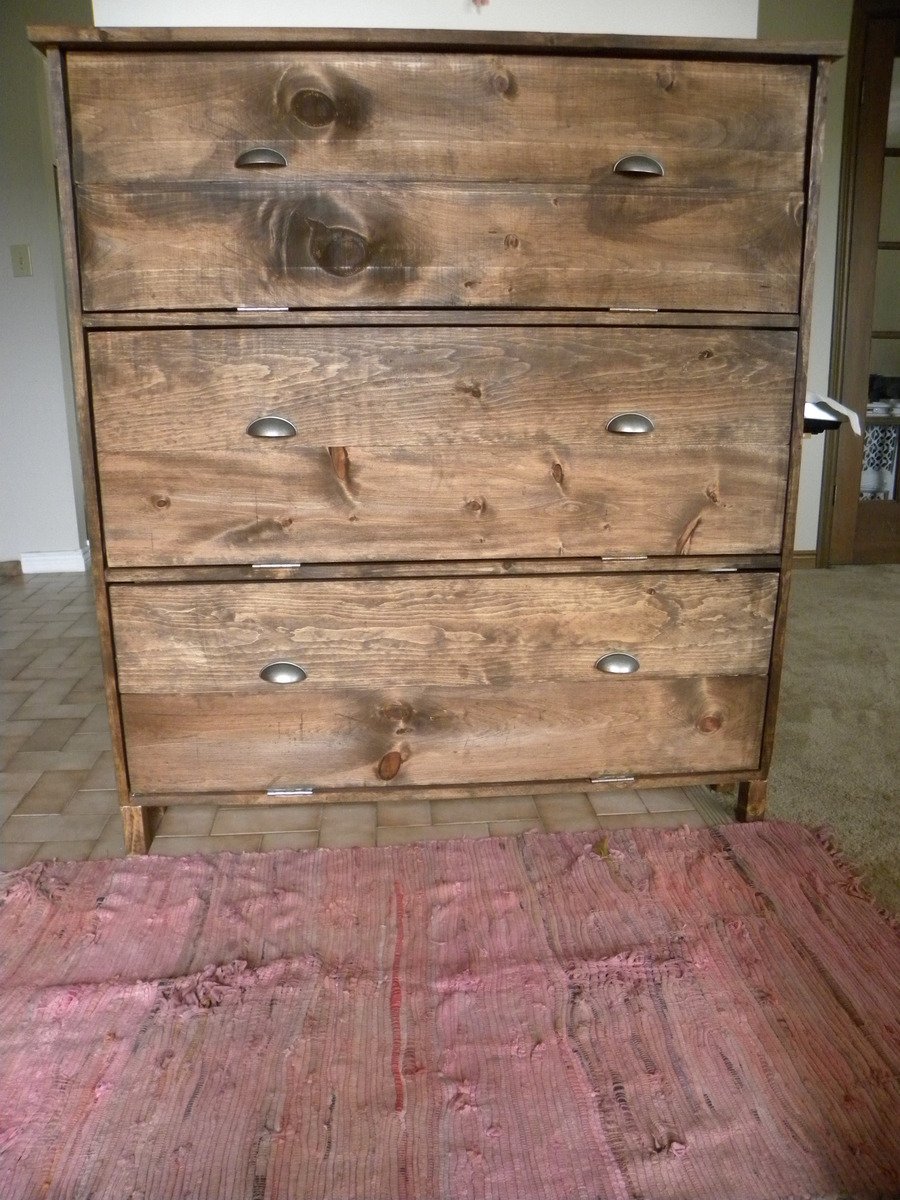
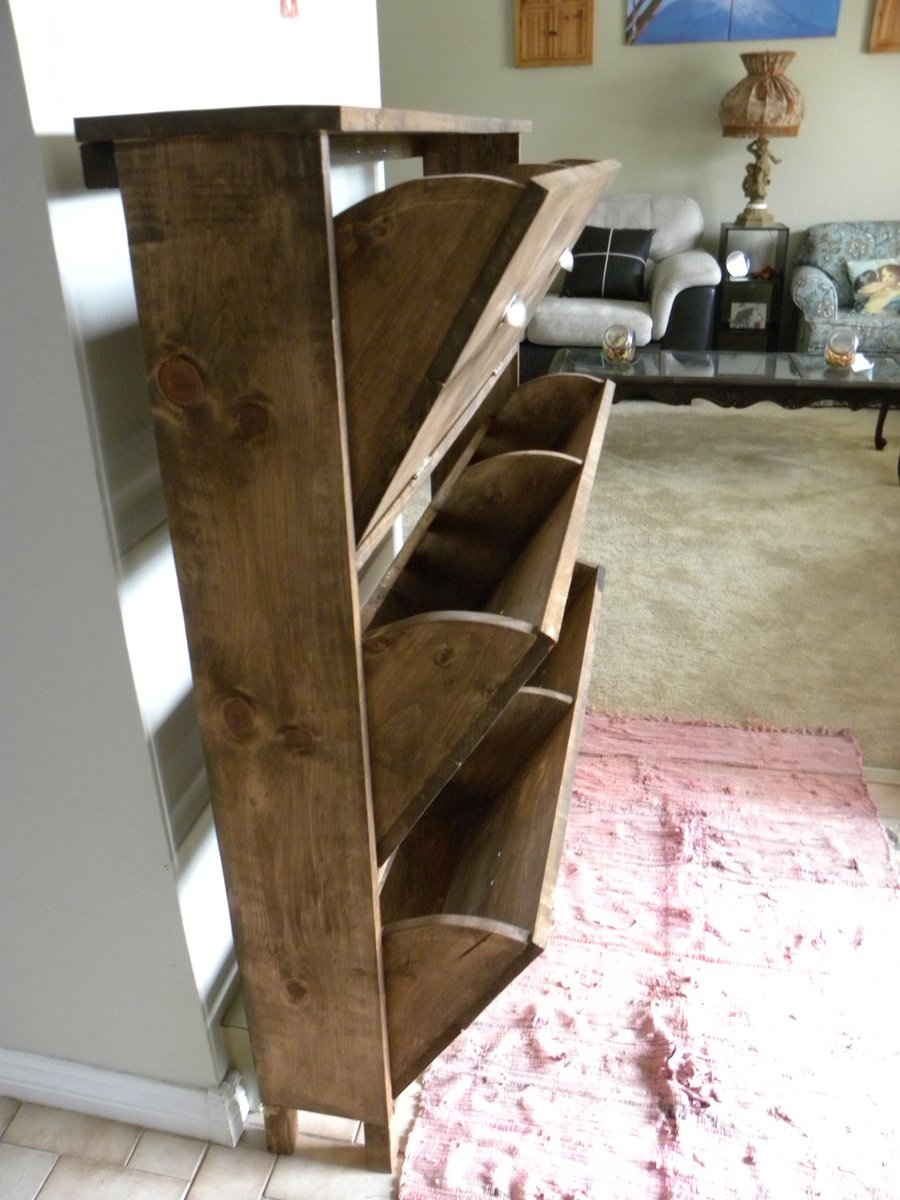
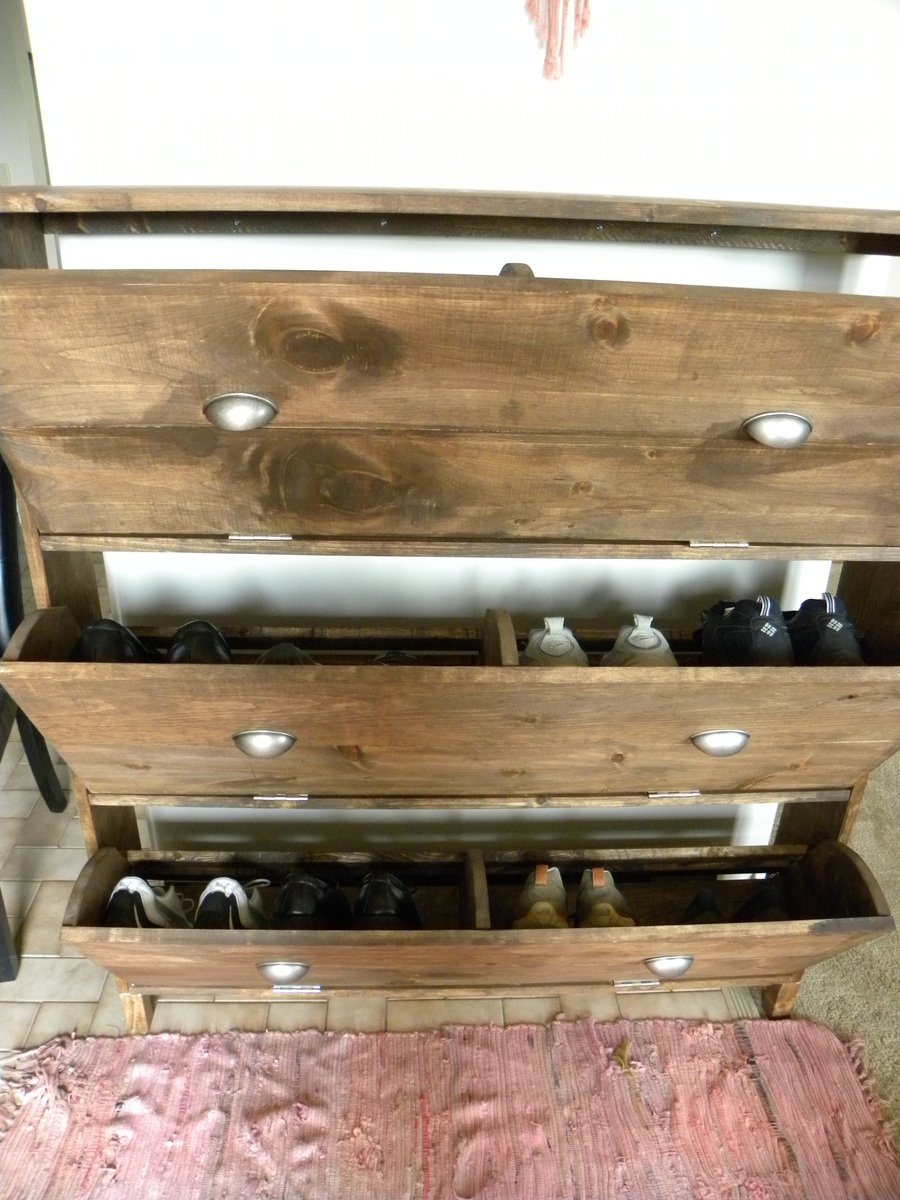
Shoe dresser

I didn't build this shoe dresser because I particularly needed one, but it looked so lovely that I couldn't resist.
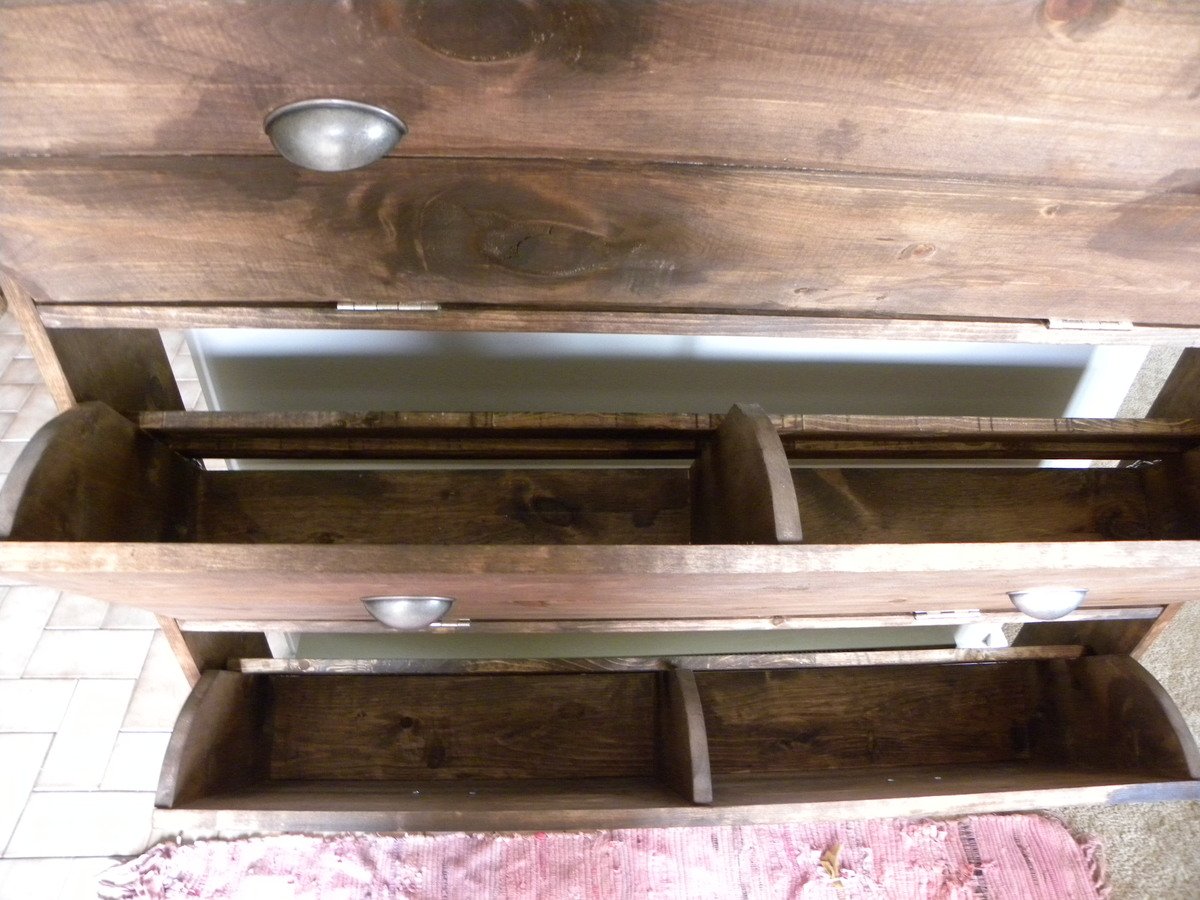
- I modified the plans by building 3 bins instead of 2 so it could hold more shoes.
- I decided against the dowel stick and opted for hinges instead, which were surprisingly not too difficult to assemble. I found that I didn't even need the magnets after installing the hinges as the doors stay closed.
- I used 7" chains on both sides of each bin instead of a belt to make it extra sturdy.
- I added two back legs.
Et voila! This is the end result. I'm very pleased.
PS. Those flopping bins are a pain when you're trying to build!! An extra pair of hands is definitely recommended.
Built from Plan(s)
Estimated Cost
$150 (with extra bin)
Estimated Time Investment
Weekend Project (10-20 Hours)
Finish Used
Walnut (can't remember the exact name of the stain, but it's the one Shanty 2 Chic always uses!)
Recommended Skill Level
Intermediate
Comments
Fri, 07/05/2013 - 22:49
Nice Job
Pretty :) Good Job. Now if I only had the space for one thats 10 rows high :P I like the stain color too. Shanty 2 Chic always uses Rust-o-leum. I think its called dark walnut. Dont quote me though. I love the stain and spray paint combo colors they use.
~Melody
In reply to Nice Job by SoCaliforniaMel
Sat, 07/06/2013 - 20:00
Thanks!
Rust-o-leum, that's the one!
Yes, if only every woman could own a 10-row cabinet for all her shoes! :)
Golf Club Locker

Utilized the plan for the Locker Book Shelf-Full Size and modified it a bit to convert to a golf club locker. Definitely keeps all the clubs, shoes, and accessories organized and eliminates the clutter. My wife loves it, course she added the baskets, which makes it look awesome! Actually this is how I stumbled upon Ana White's website. I was looking high and low for a plan for golf club lockers, and found Ana's website as part of the process. Best google search I've ever done!
Built from Plan(s)
Comments
Mon, 04/11/2022 - 14:51
Perfect for the golfer!
WOW, that looks awesome and is the perfect storage solutions for all the golf gear! Thank you for sharing.:)
Comments
David King
Thu, 03/18/2021 - 01:27
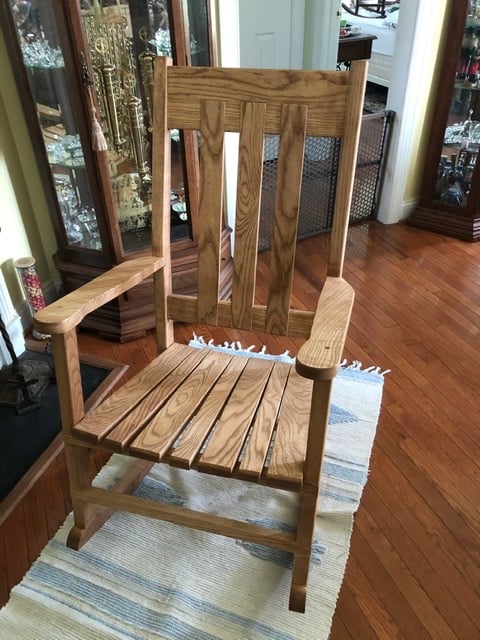
Rocking chair.
Lovely chair. Nice proportions. Would like to copy it. Have you got any plans, sketches, or dimensions to share?
jlxvnwk
Fri, 02/10/2023 - 13:10
Rocking chair
Love this rocking chair! Do you have any dimensions or plans. I would live to take this project on. Thank you.