Cedar Planters
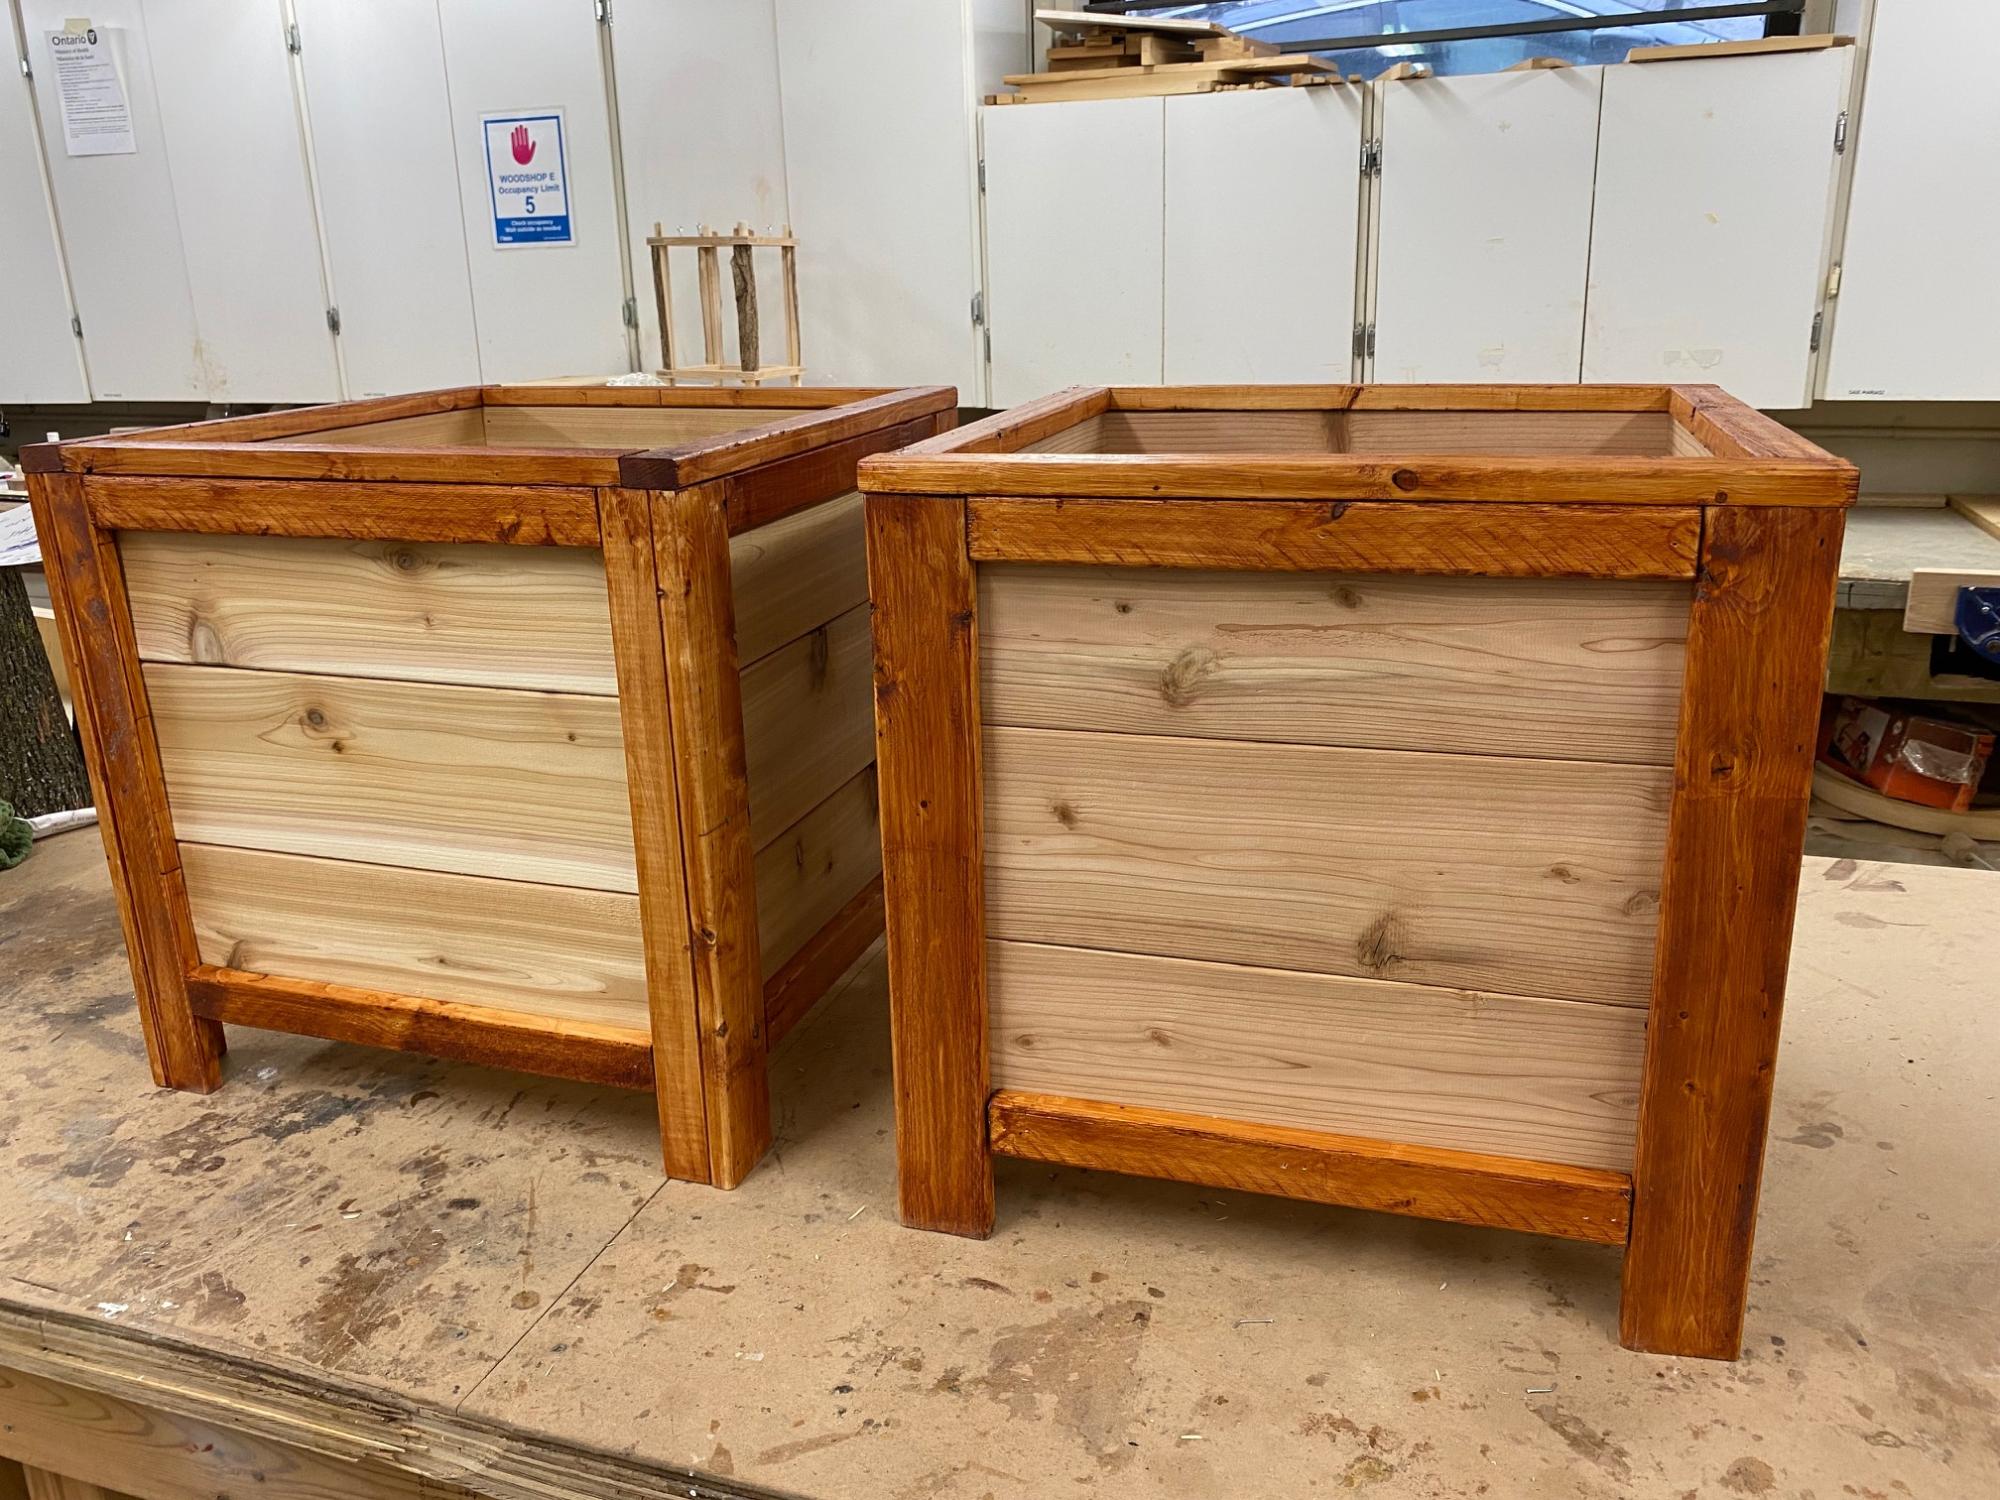
Cedar Planters!
Built from Plan(s)
Cedar Planters!
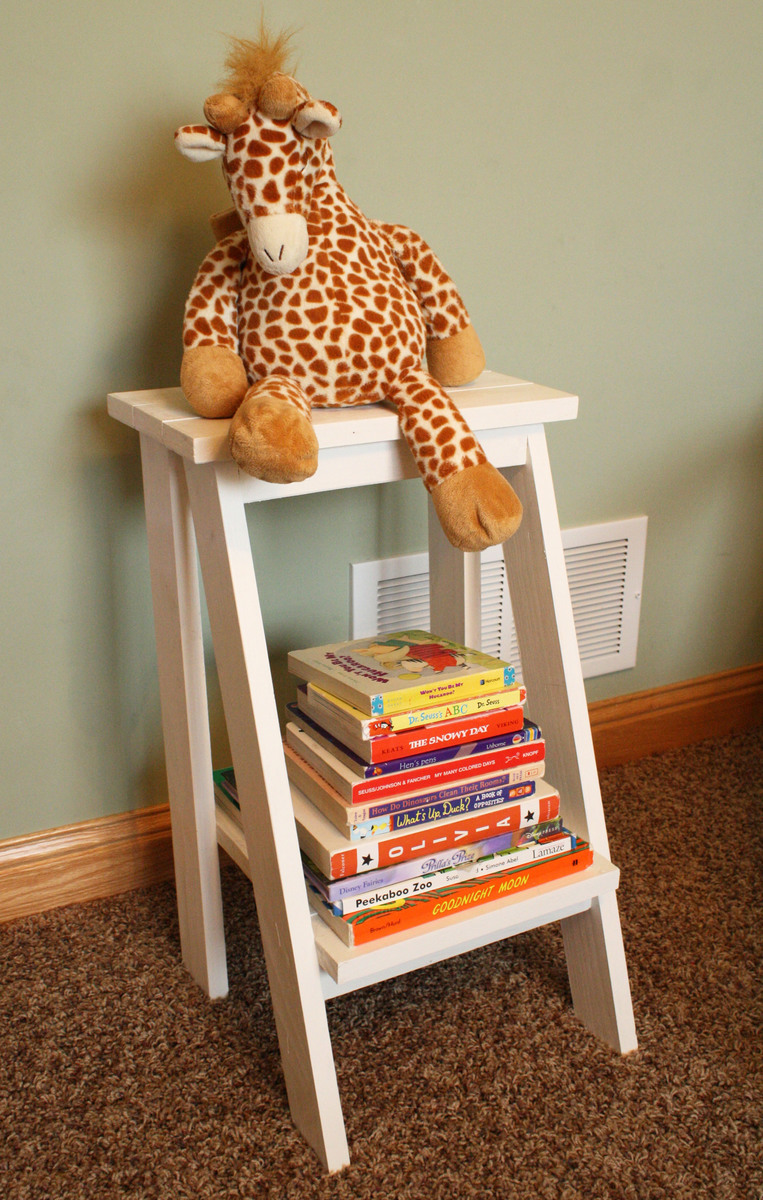
I made this ladder table, I just love it to hold books in my daughters room, I think I got the legs on backwards but you can't tell, and it sits flush. First project done!!
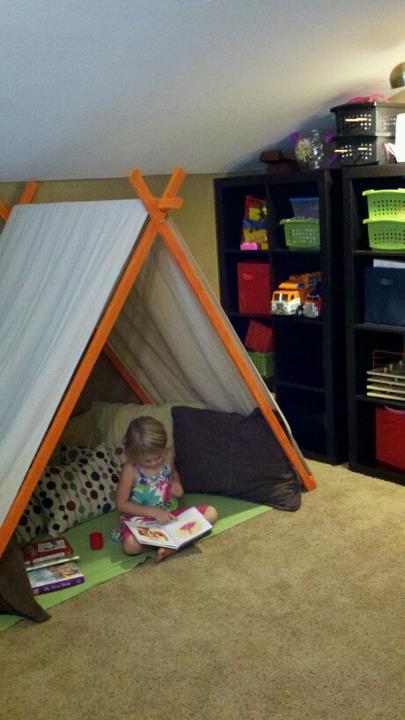
I loved this plan as soon as I saw it. The only modification I made was I used a 4x16 8oz drop cloth up on over the center instead of curtains or fabric and painted the wood with orange gloss spray paint. The kids love it. I think we may make come doors and ties to make it cozier but they love it!
Wed, 09/28/2011 - 13:44
I love your tent! I am thinking of making one but want to get an idea of the area it will take up. Can you tell me how much space (l, w, h) it takes when assembled? Thanks!

Reader submitted photo
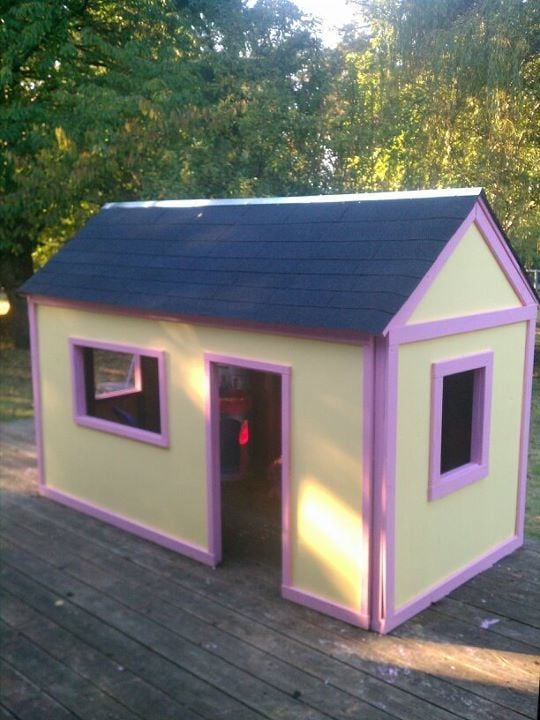
My 2 year old daughter played in a playhouse at a farm and was just amazed by the "little house" every time we would see them at the store or driving down the road she would just scream "mom, its a little house, little house!" I knew I wanted to get her one and started to search. Couldn't believe the price of playhouse kits so I figured I could build it. This playhouse took about 2 weeks to finish but I only worked on it a couple of hours at a time just a couple times a week. Total cost for me for just the playhouse not including paint was $343.90. Thanks Ana for posting the plans and showing everyone that anyone can build!
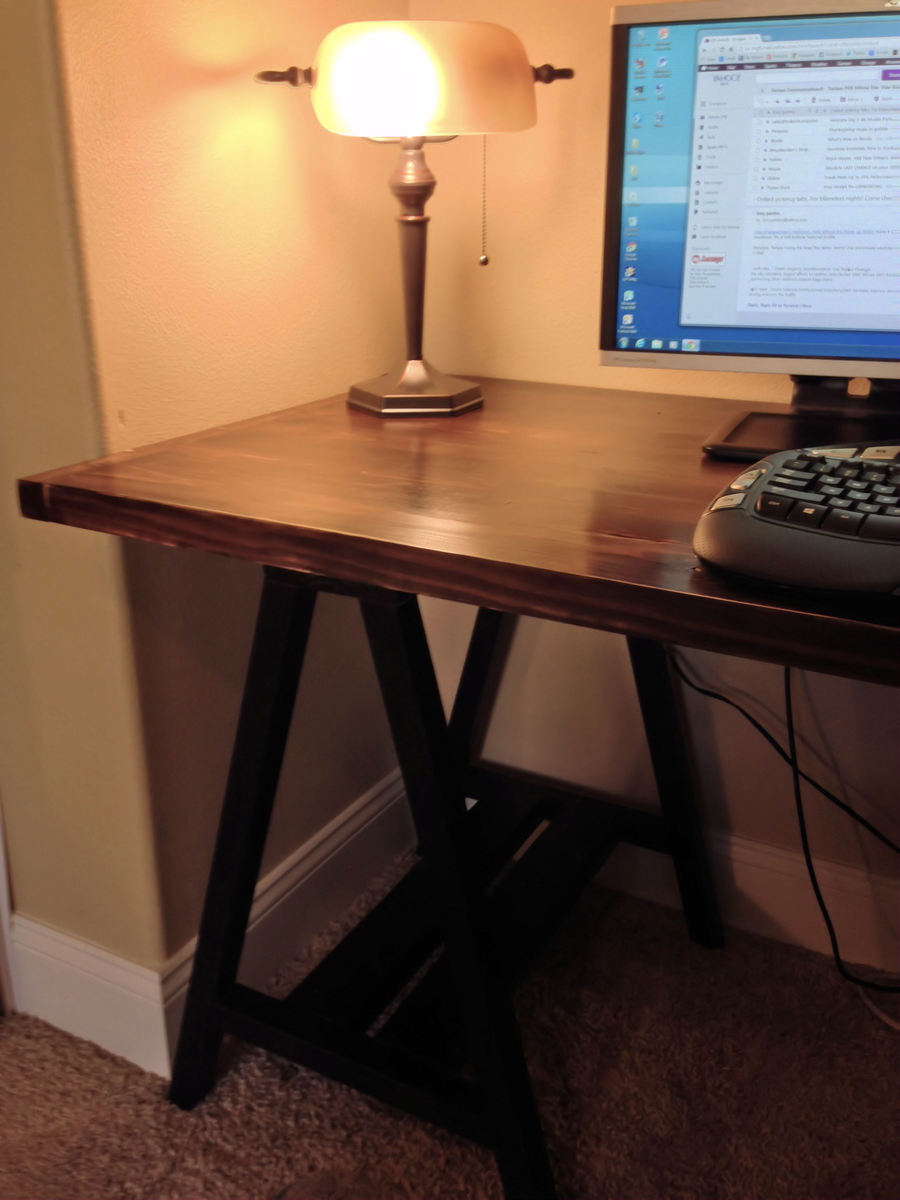
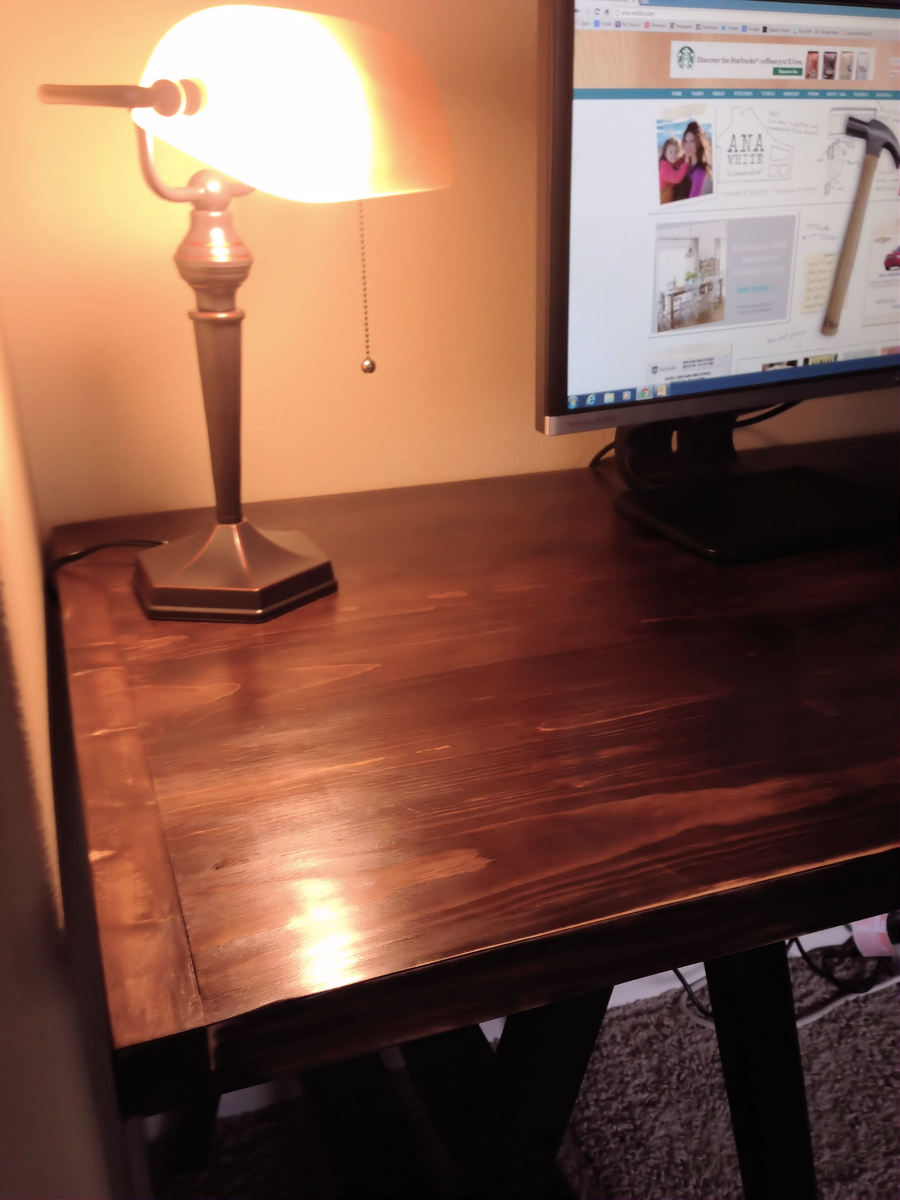
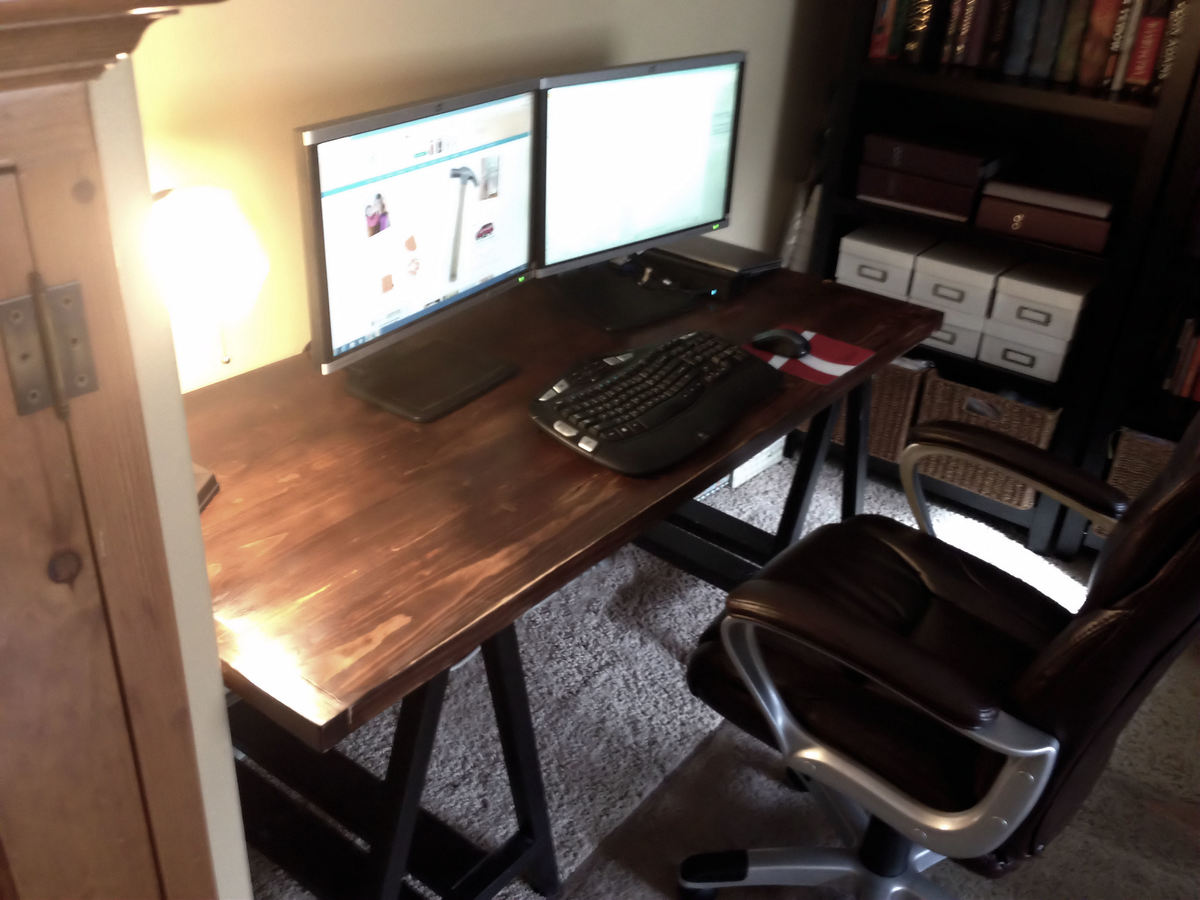
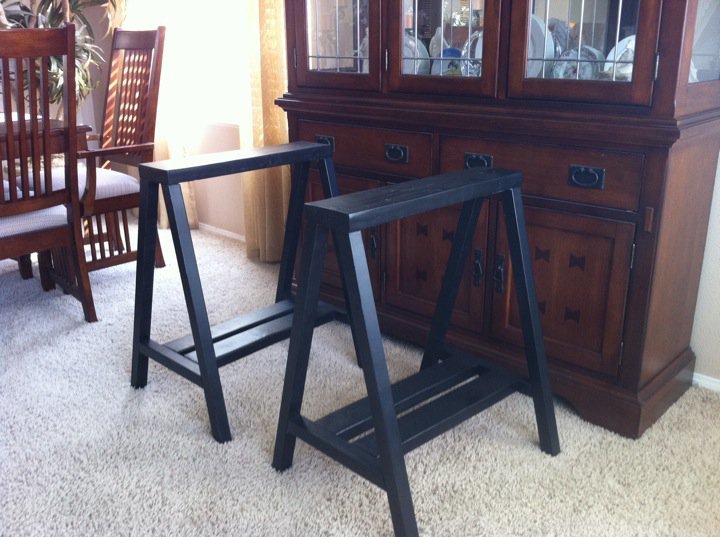
I used Ana's sawhorse plans and painted the sawhorses black. I made up a plan for the desk top inspired by some of the farmhouse table plans. The top looks very thick and chunky, but is mostly made from cheap 1x6 boards put together with glue and pocket holes. The ends of the top are made from 2x2 boards attached with pocket holes. The sides are from 1x2 boards - all attached with glue and pocket holes.
For the finish I used a water based stain from General Finishes - Black Cherry. I started with one coat of poly-acrylic and did not like the look. I sanded it back and bit (distressing the edges a bit) and put on two coats of wax.
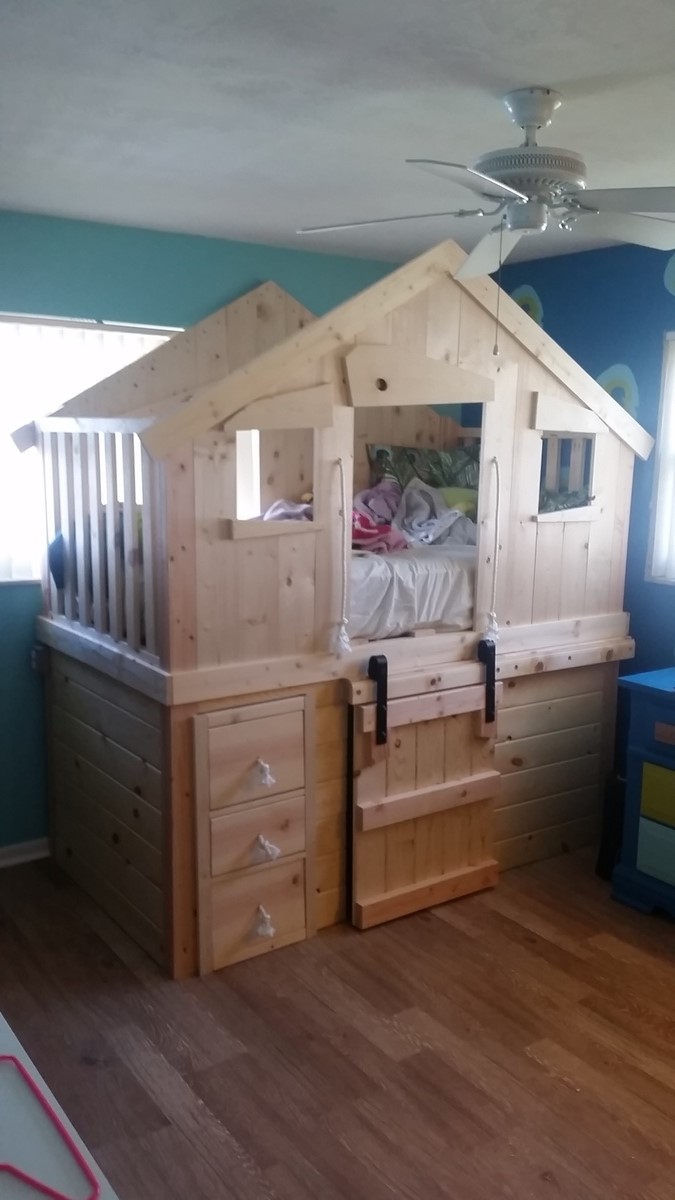
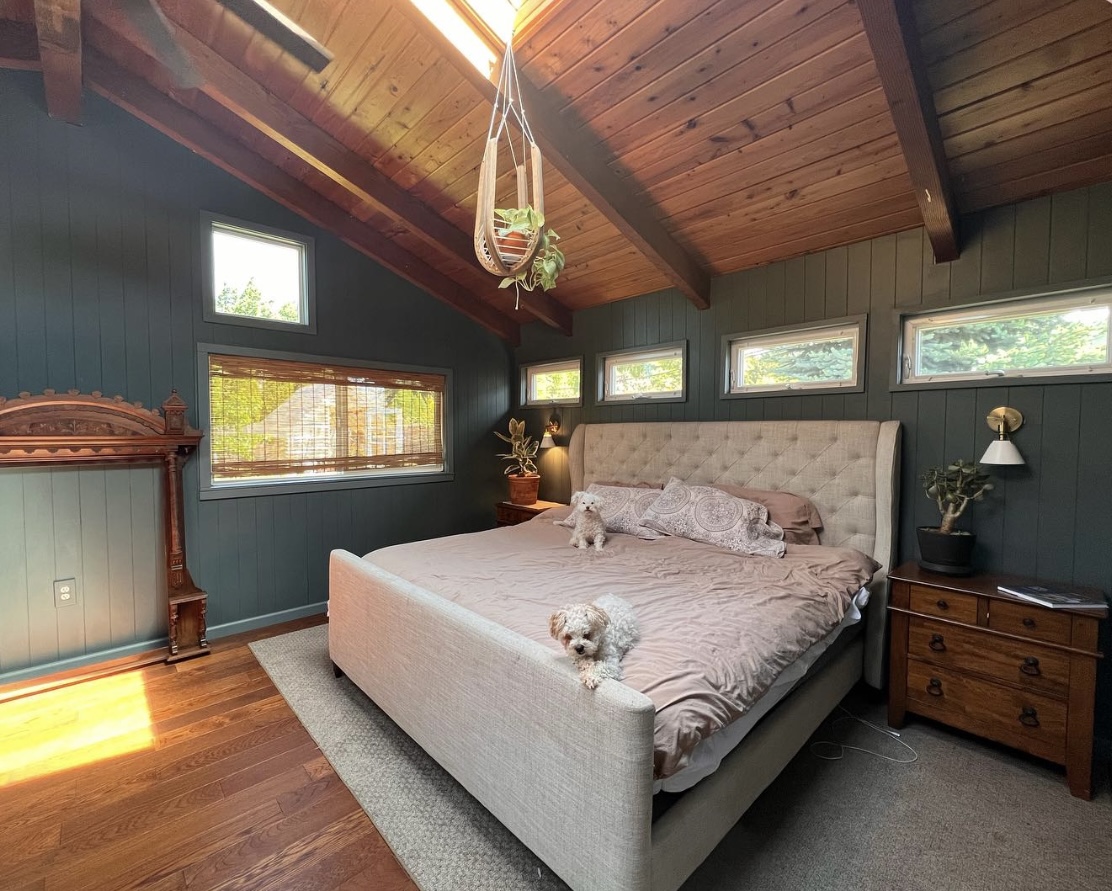
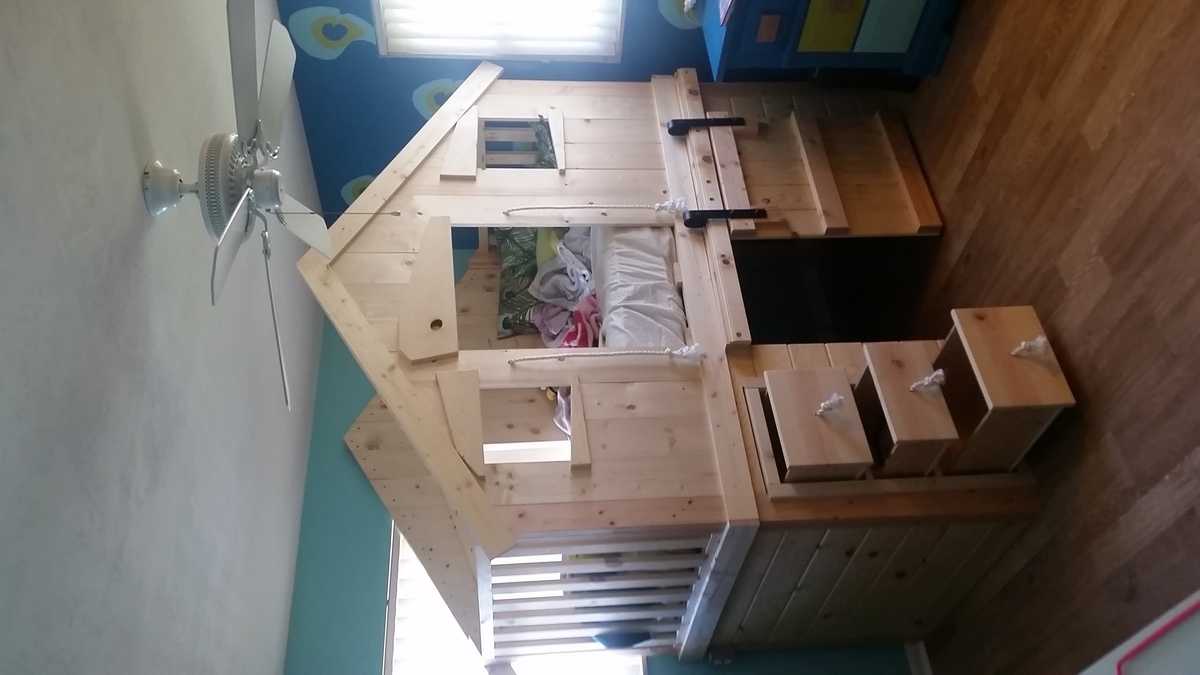
My daughter wanted to remodel her room with a peacock farm theme. These plans worked perfectly. I decided to just enclose the bottom, add 3 drawers and a barn door to give it functionality and add to the "farm" theme. Enclosing the bottom mad for way more storage in her room. I'm going to add a cubby on the head board side. It's going to mimic a "lean to" shead to further add to the rustic farm look.
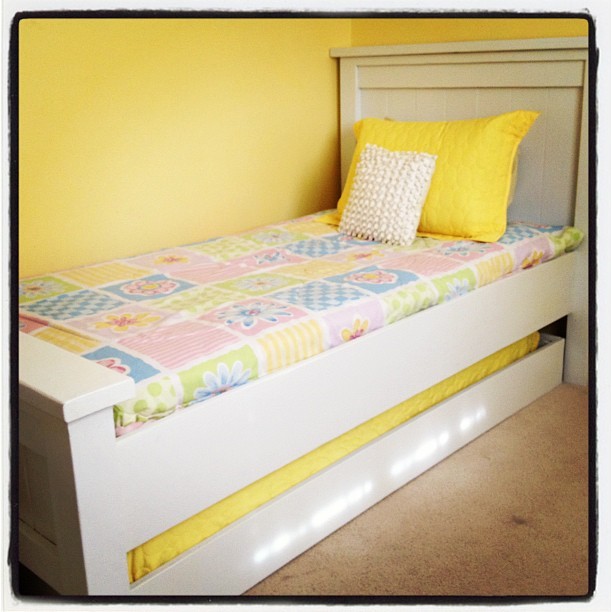
This is the twin farmhouse bed and the matching trundle. We chopped about 8 inches off the headboard since we were not using a boxspring for our mattress. Other than that it's as written. I'm so thrilled to free up space in our girls' room!
Fri, 08/22/2014 - 16:27
This is exactly what I'm looking for!
My husband and I would like to begin building this ASAP. Could you please clarify for me that the original measurements for the Twin Farmhouse bed and the trundle bed will certainly be able to accommodate one another? I just want to make sure it'll fit! I think I saw someone else comment that they changed some of the measurements to make a trundle bed fit underneath, but they didn't go into detail.
We also won't be using a box spring.
Thank you for your help!
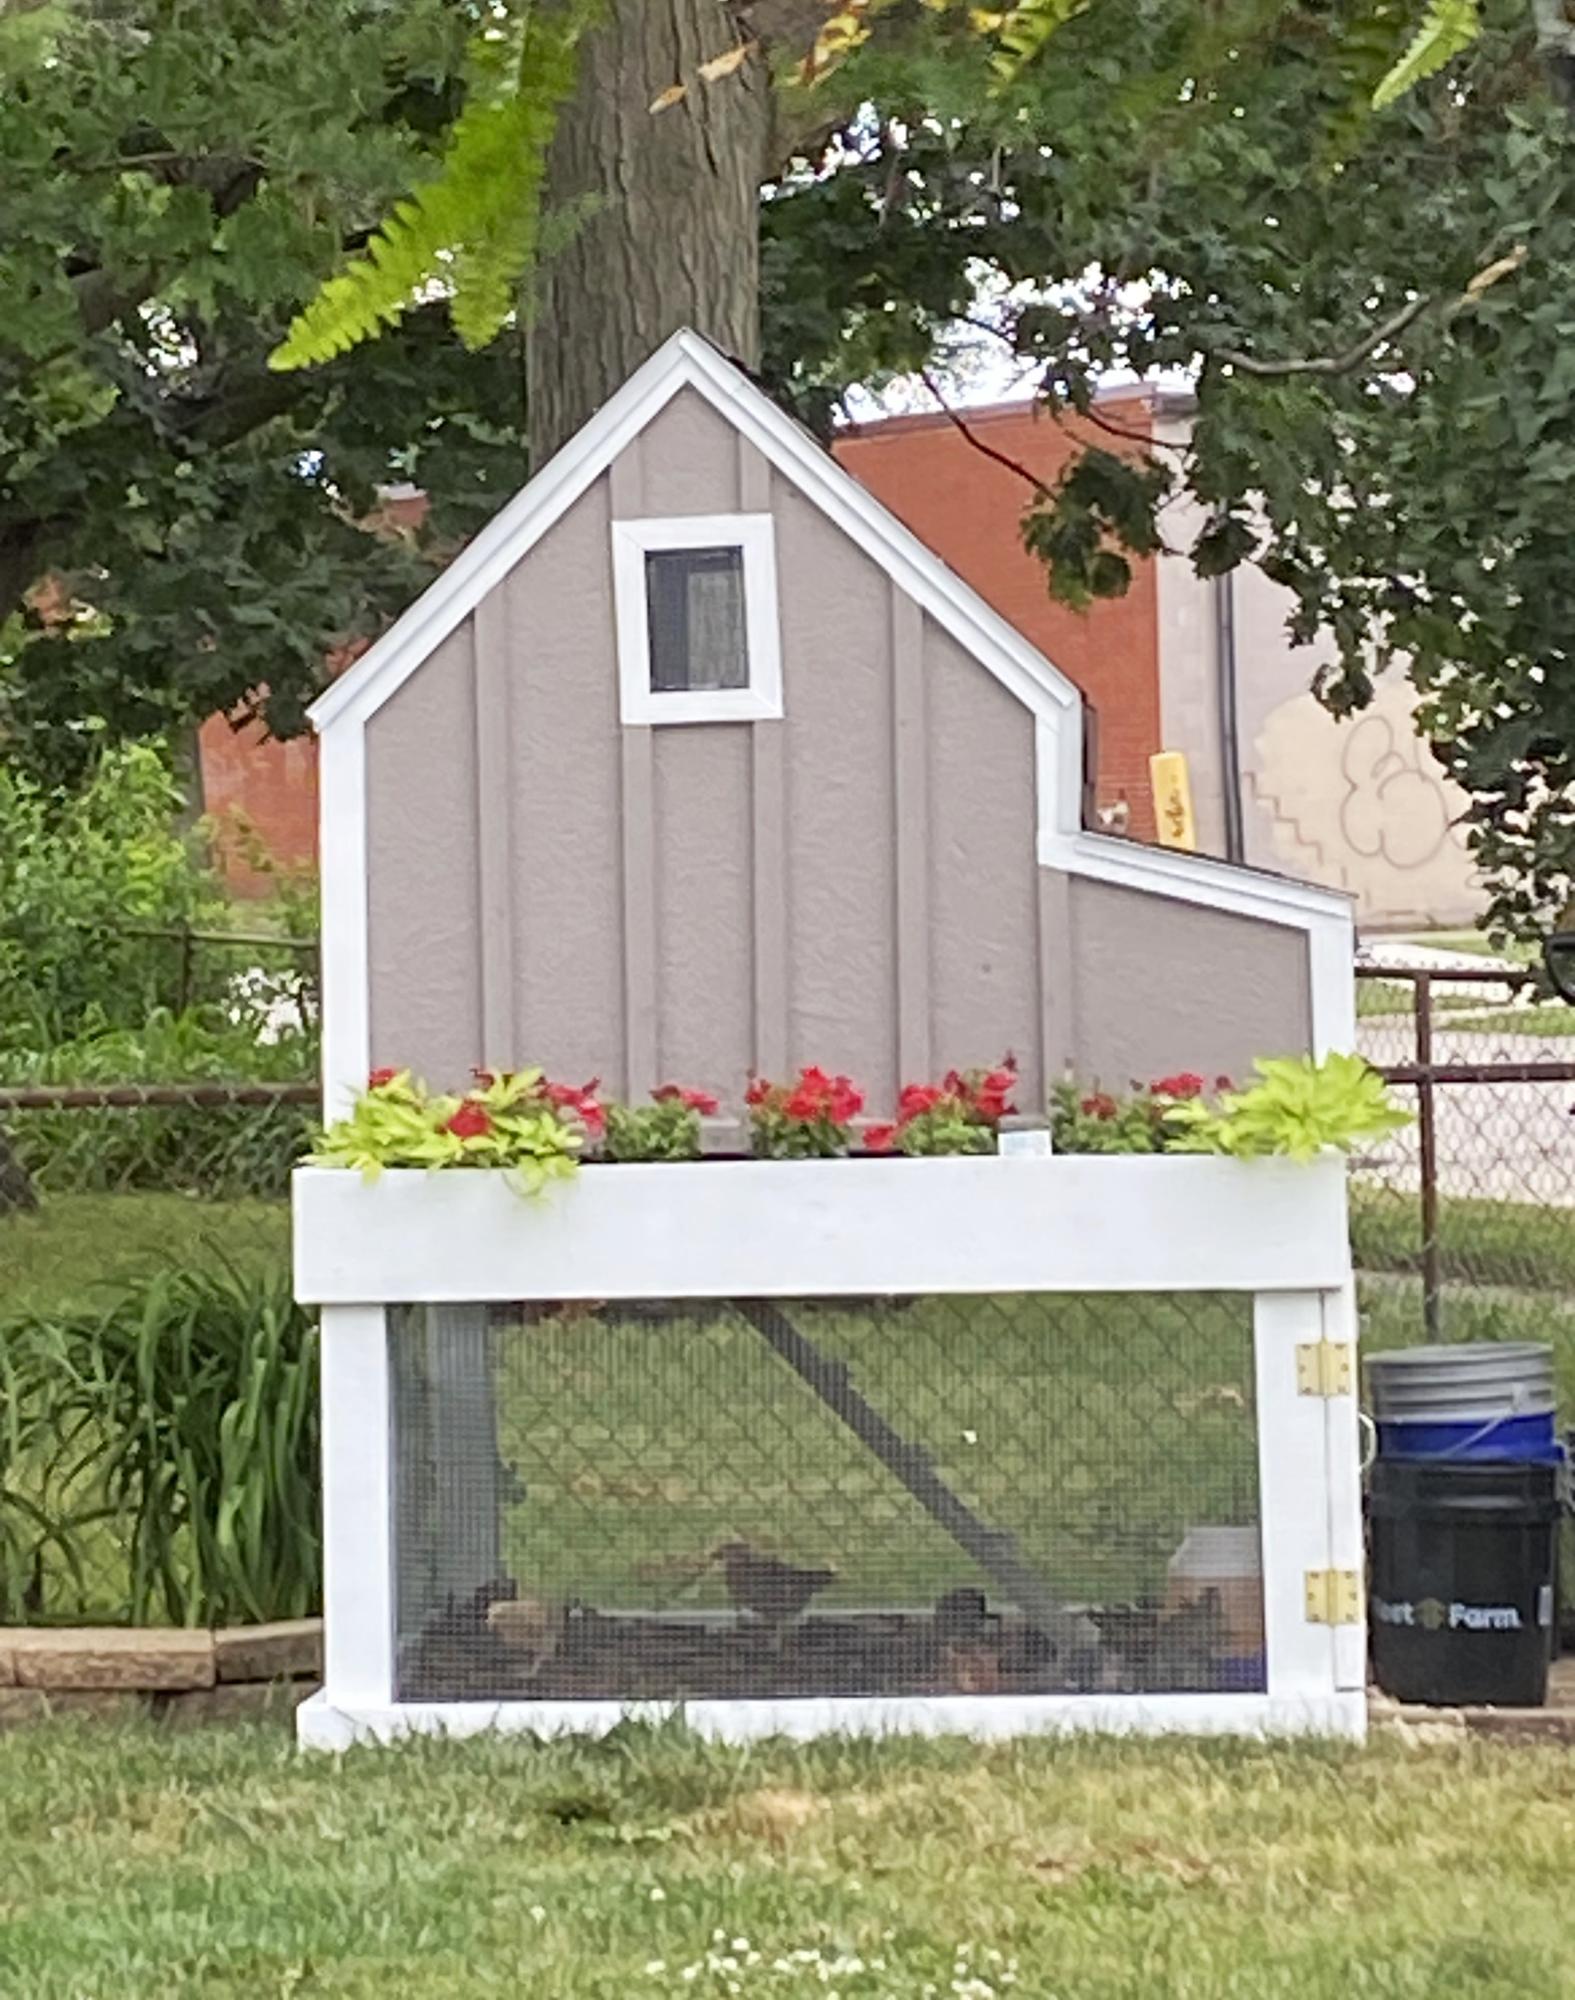
As a first time chicken farmer, I have four chickens now fully grown. It was 29 degrees in Iowa this morning, wondering if I should wrap the lower portion of the coop on three sides with visqueen, and should the roost windows be covered? I have straw bales to roost on and add where needed . I don’t plan to heat the coop . Any help will be appreciated.

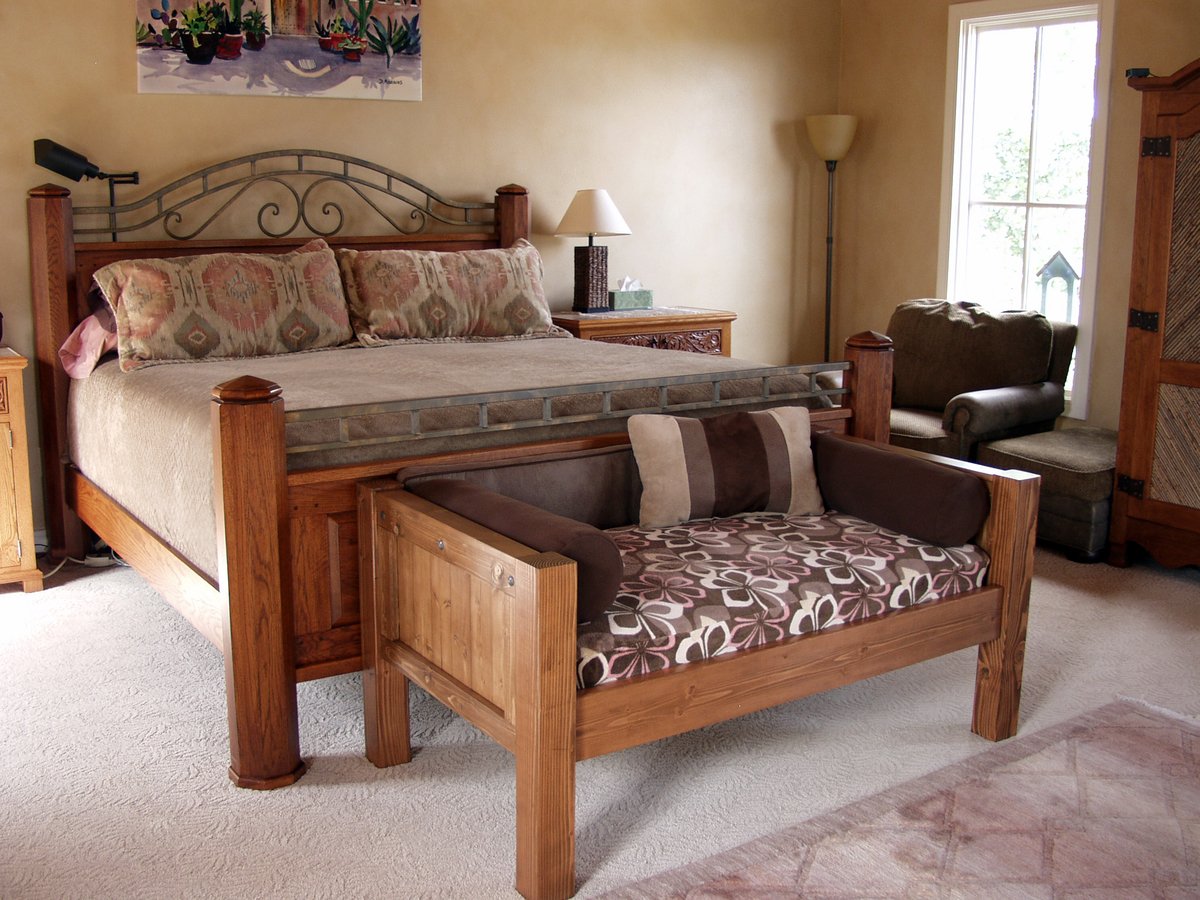
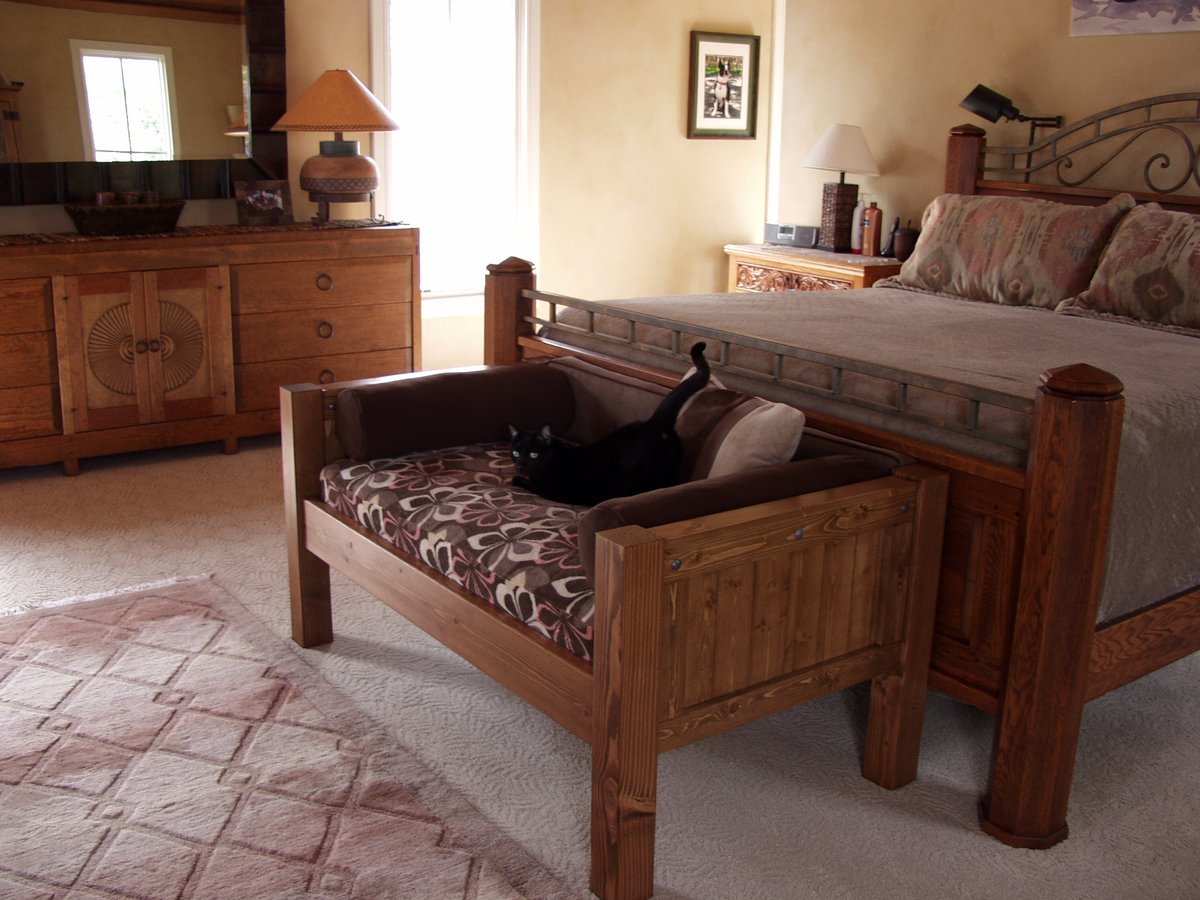
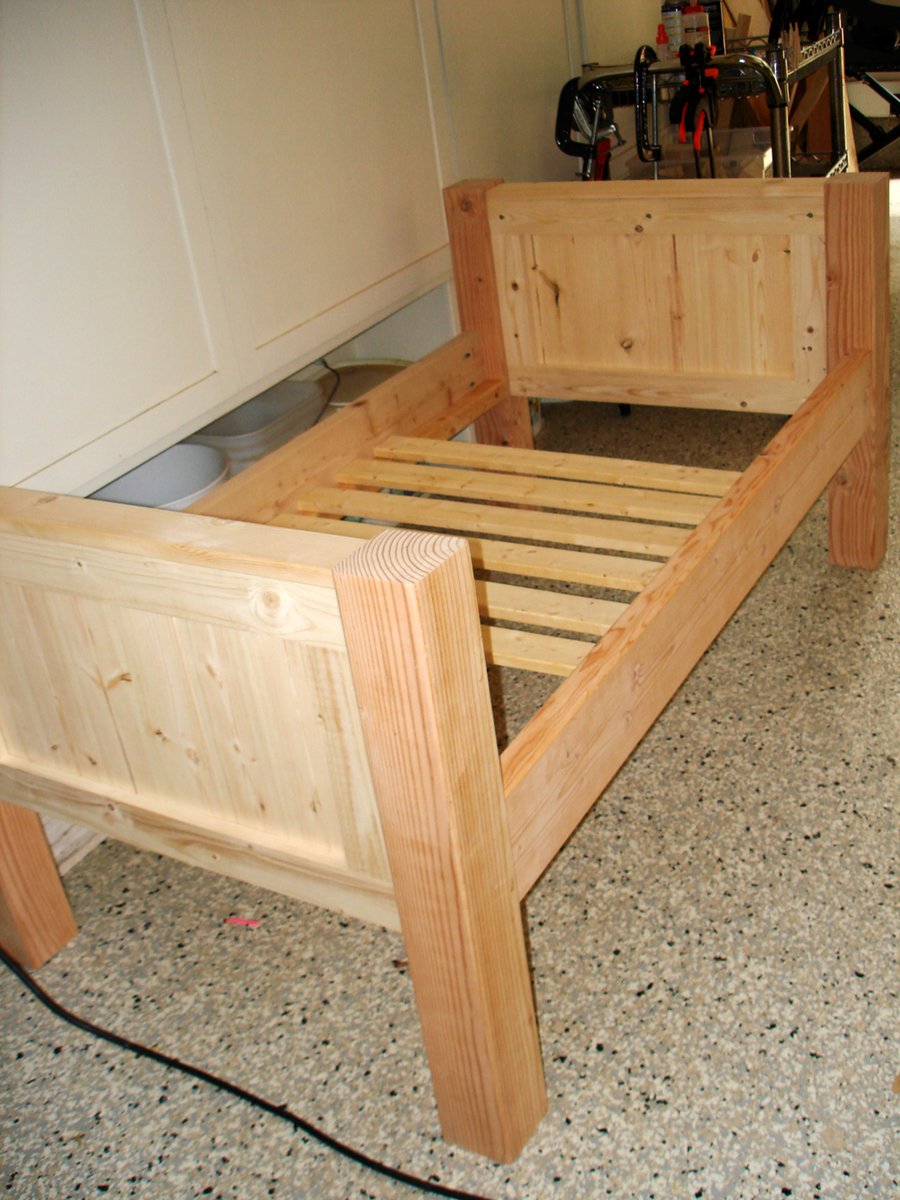
Yes, my husband and I share our bedroom with 6 dogs and an occasional cat (or 4). Our older dog (Petra) has slept on our bed for over 10 years, and she's getting too old to jump anymore. We didn't want her to feel like she was getting kicked off the bed, so I made Petra her very own bed at the end of ours so that she wouldn't feel left out. I was inspired by MurdaRae's dog bed (http://ana-white.com/2012/06/doggie-daybed), and thought it was genius to use a toddler/crib bed. So I went looking for plans on Ana-White, and came up with a mixture between a couple of twin bed plans. I love that the plans are easy enough to modify my sizes, and come up with exactly the custom solution that I need. This was my first big project using Bri-Wax. The last one was kind of a disaster when the wax changed the stain color to something not-so-great. With this project, I learned to wait at least 2 weeks before attempting to wax it. I was blown away with the results. It is a beautiful subtle satin finish that feels great to the touch. Plus, I can easily touch up all the dog fingernail scratches that will inevitably occur. When I re-assembled the bed in my bedroom, I actually nicked it in a few places. No problem -- slap on some more Bri-Wax! My Bri-Wax was 11 years old, and pure liquid. I tossed it in the fridge (per Bri-Wax's recommendation), and it was as good as new. The only real problem I had with this project was leaking sap from one of the 4x4s. I'm still fighting this today. In talking with Rustoleum/Zinsser reps, they said that no sap could penetrate their "Seal Coat" shellac product. After 5 coats, the sap is still penetrating, but only if I turn it on it's side or upside down. I'm still baffled. I made the mattress cover out of a dog blanket, and made the cushions from some remnant fabric (suitable for dogs and weekly washing), so this was a fairly inexpensive project. It was a success because Petra slept in her bed from the fist night and loved that she had all the room to herself, and no boston terrorists (I mean terriers) attempted to bother her.


Sun, 08/26/2012 - 10:24
It matches the woods in your bedroom so well and looks great! Also, I love the bolster pillows around the edges. That is something I need to make for our dog bed. Thanks for sharing.

Thanks for fantastic plans Ana!! My 12yr old son and I knocked these out in an afternoon.
He learned new skills and we got a key project done. The best thing was his statement of "these are awesome!!"
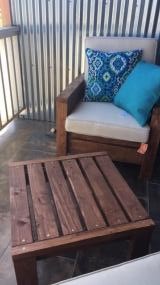
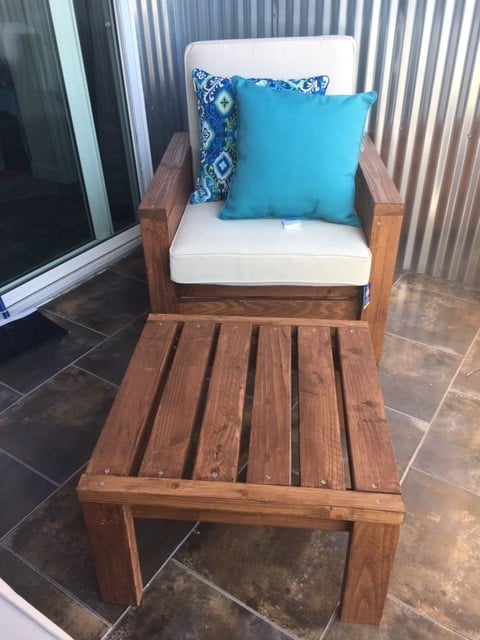
The chairs were my first project ever and they came out great! I even made the ottoman/side table because the chairs looked so good. Ana, your plans were fantastic and easy for a beginner. I learned so much from this first project and I'm already working on another project from your site! The cushions were definitely the most expensive part of the chair.
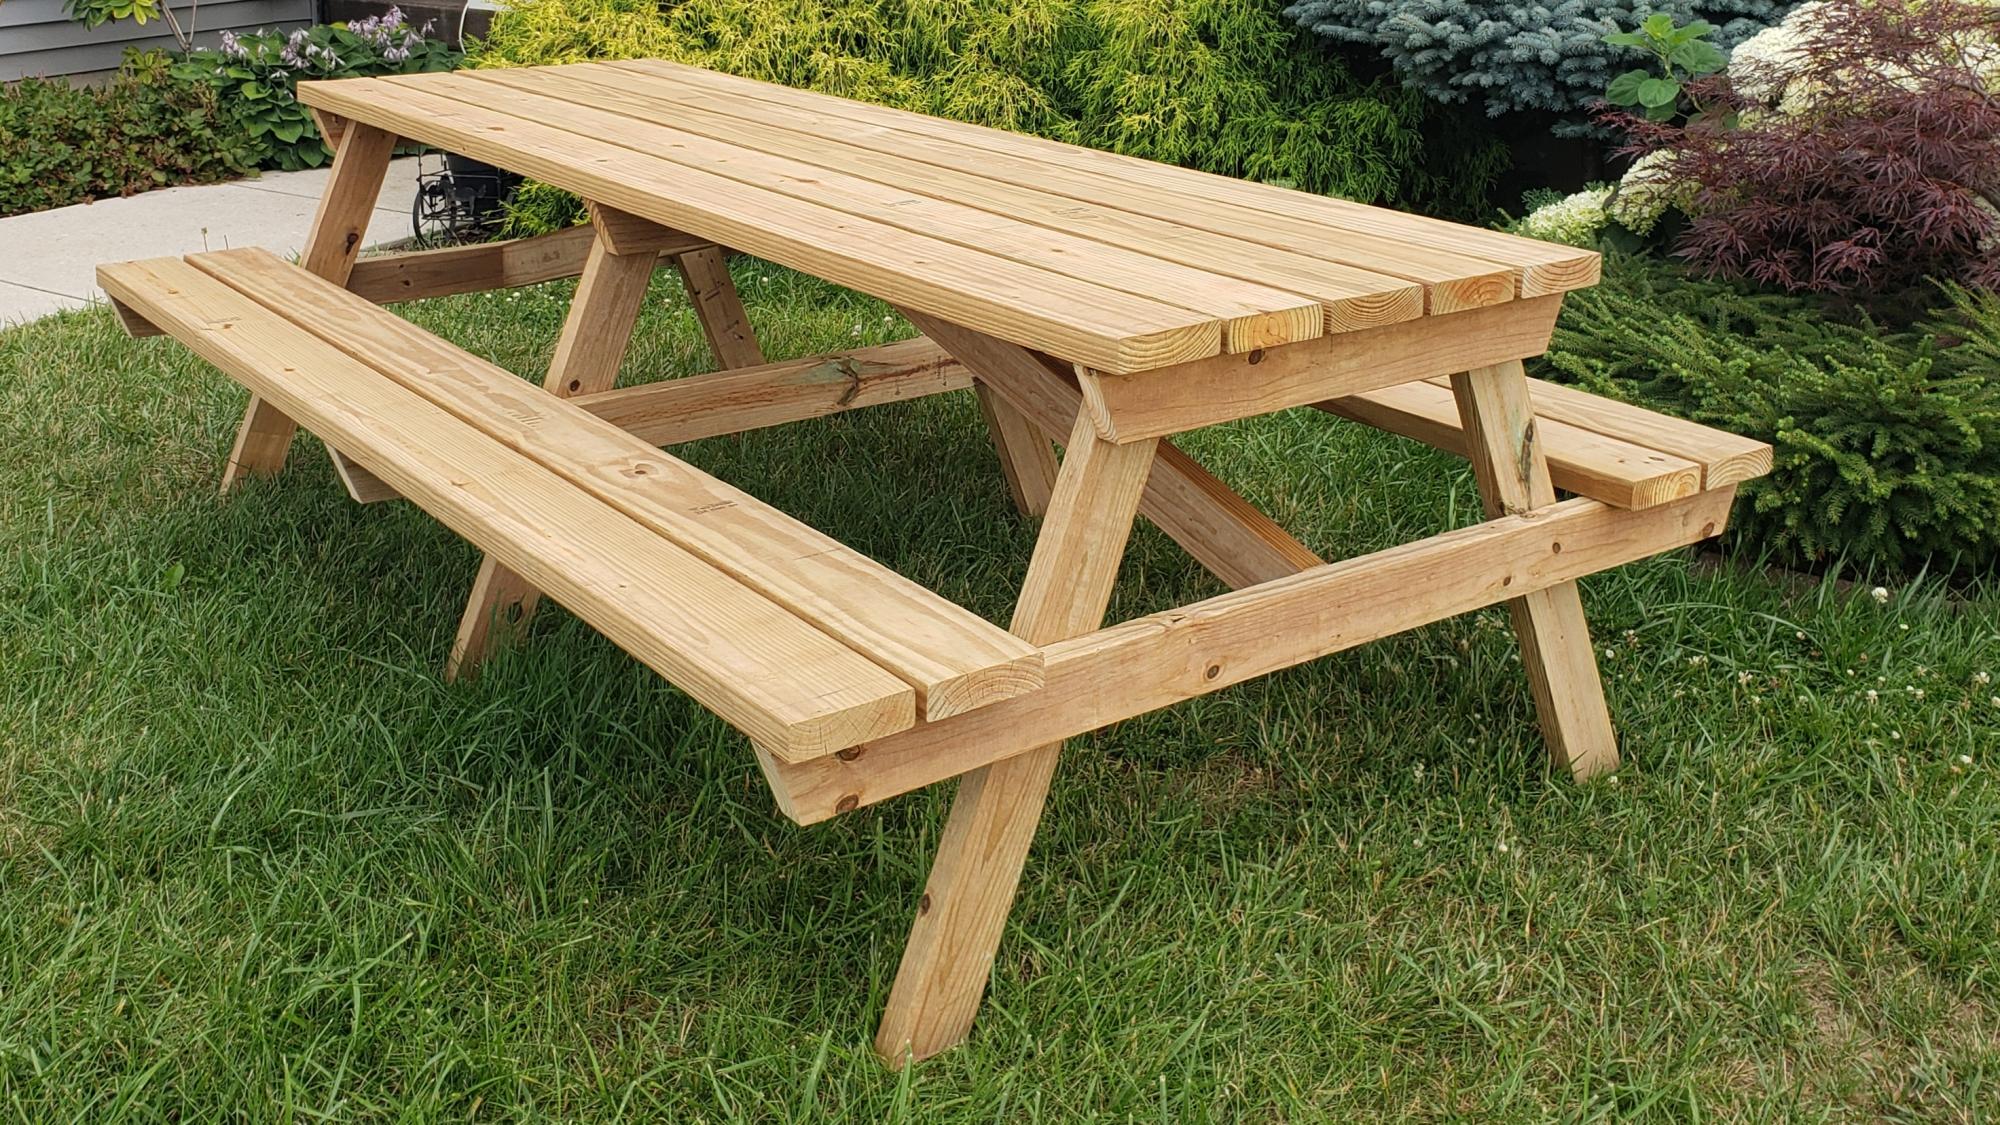
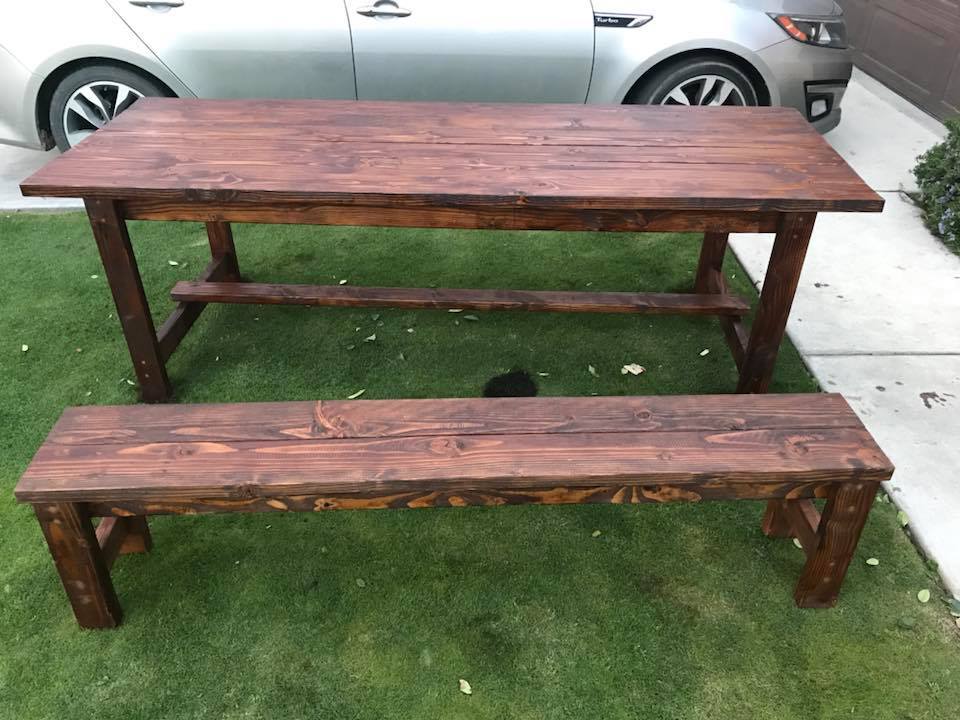
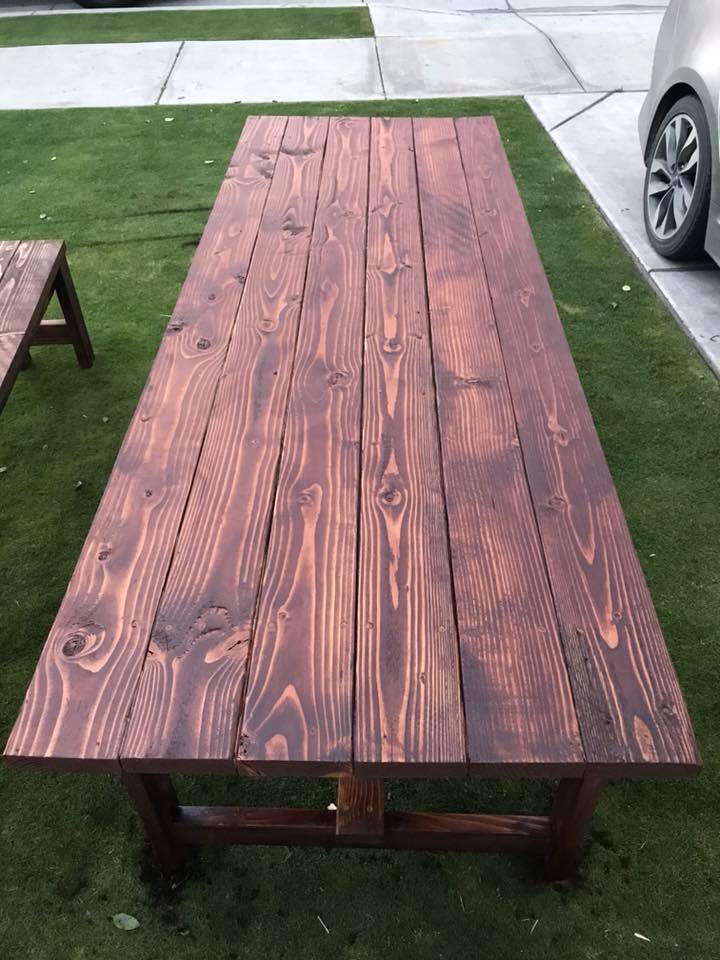
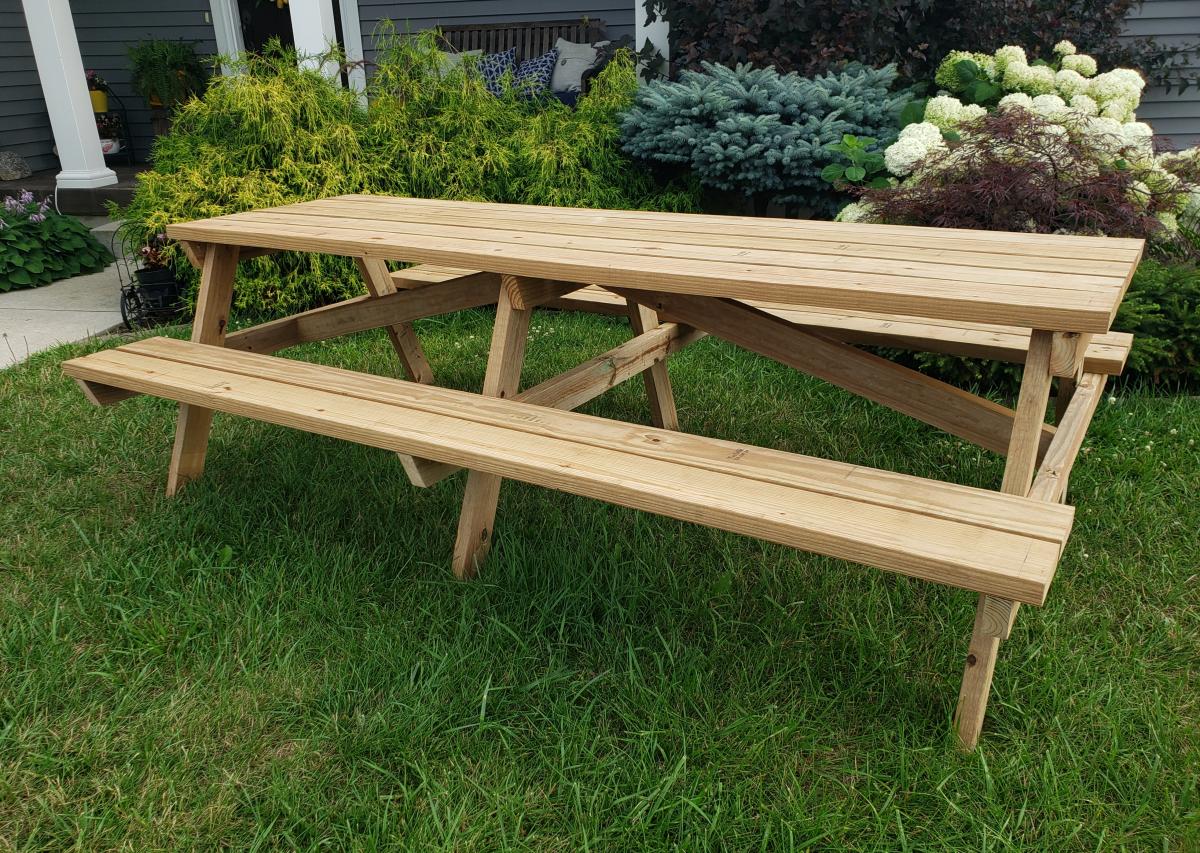
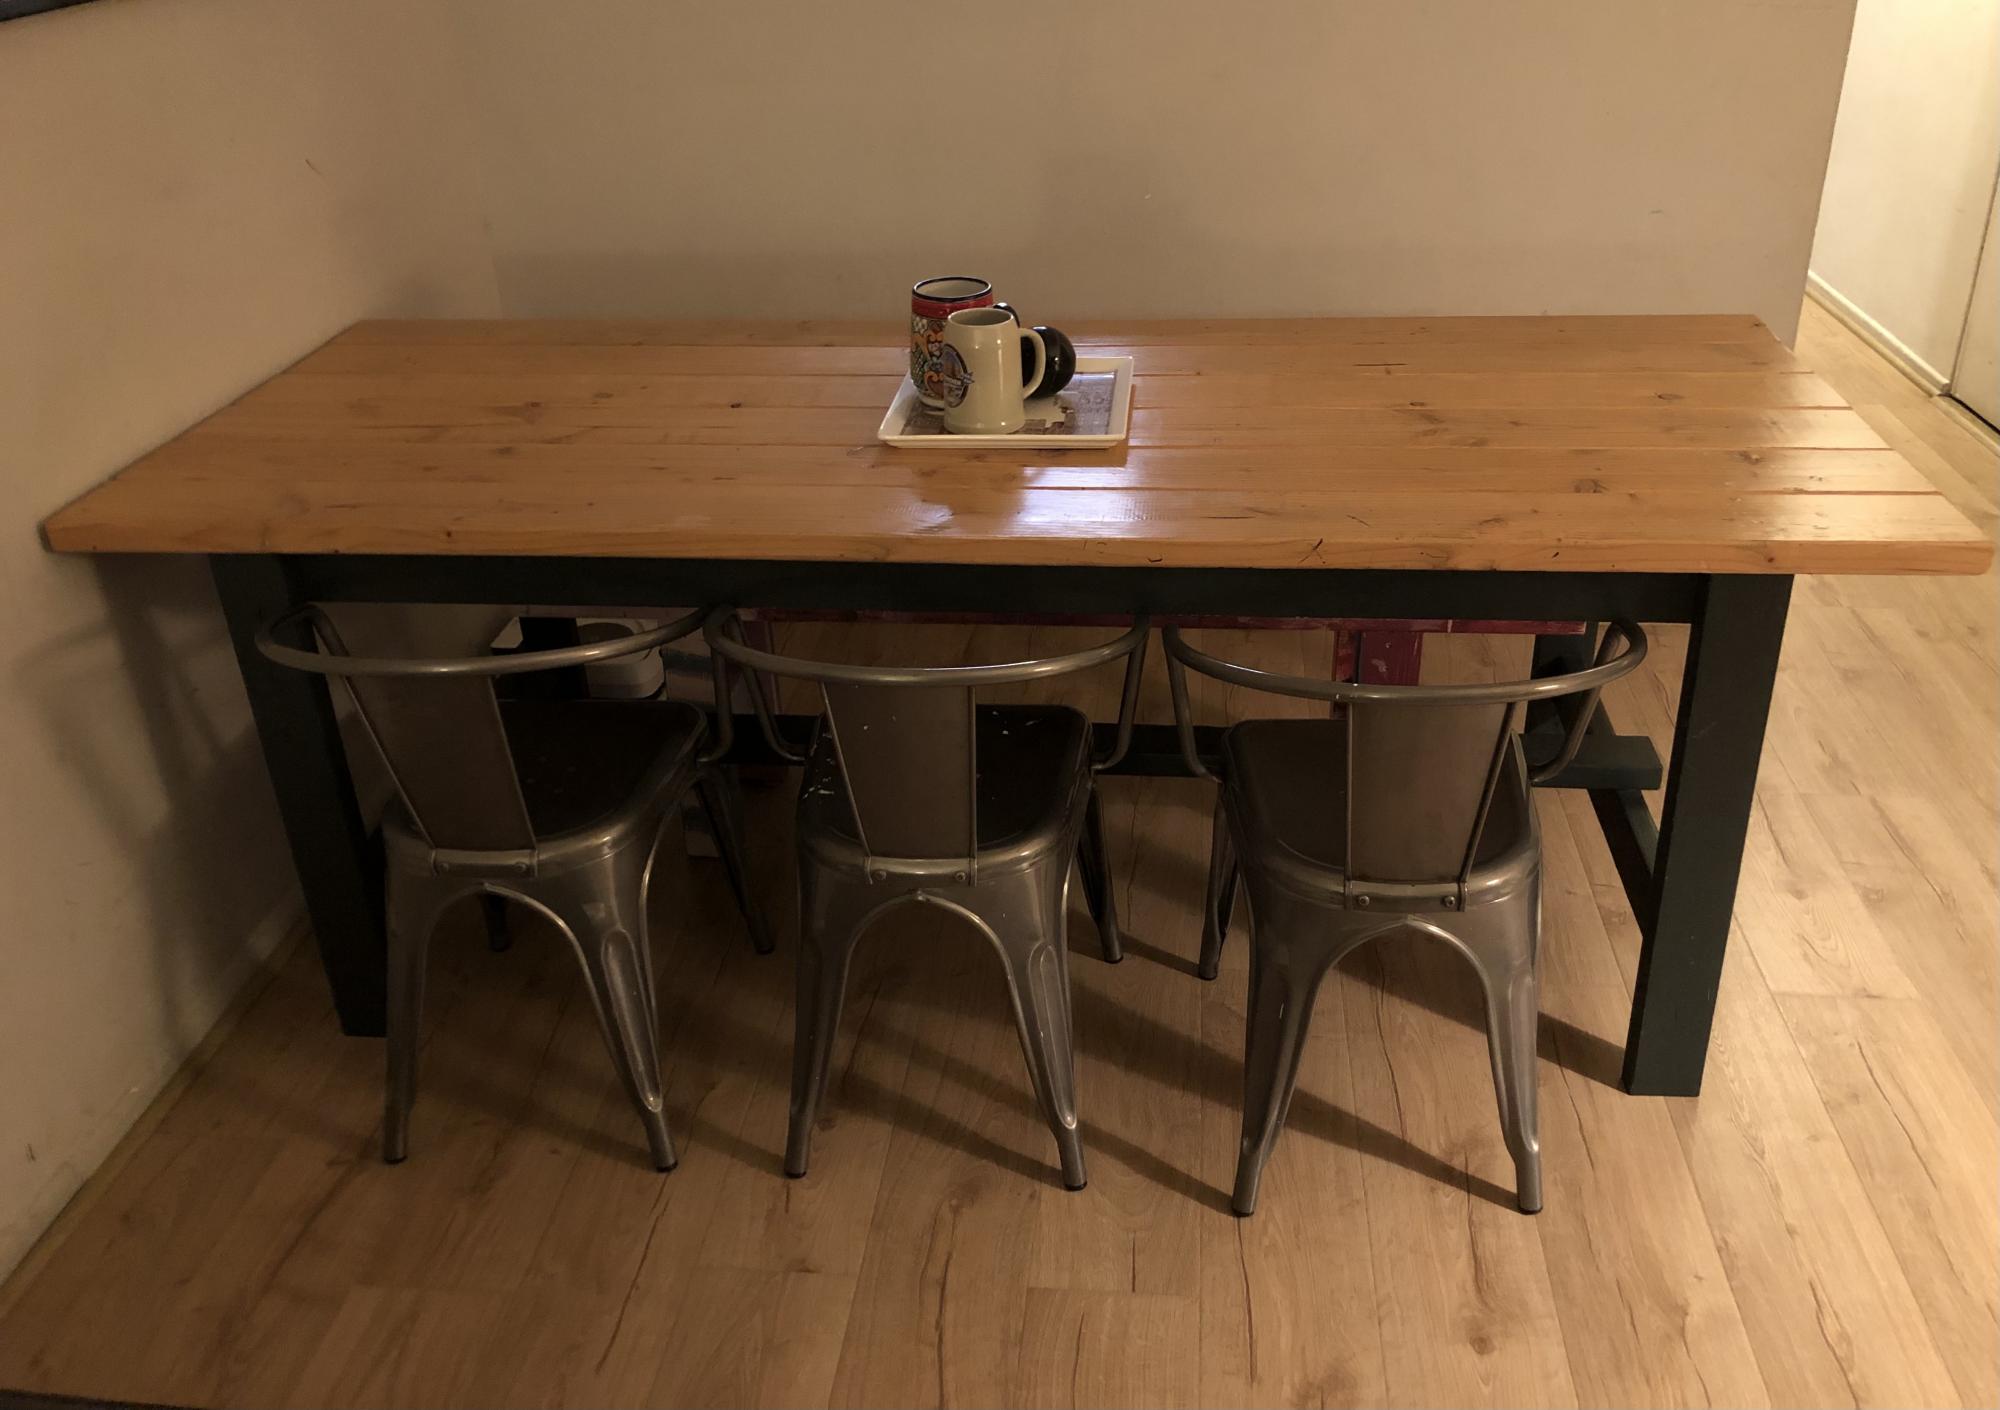
My teenage son and his father took over the bulk of the building duties this time. We chose to use treated lumber as untreated lumber with finish applied doesn't do well in Michigan weather in my experience. We made it more beautiful by using the treated lumber in cedartone. We used pocket holes to attach the top and seats to the supports to make for a smooth appearance. This is one large and heavy table! The plans were accurate and the build was fairly simple, but having many hands made working with the large piece easier.

Wed, 07/22/2020 - 12:10
This is BEAUTIFUL!!! Thank you so much for building this table and sharing photos!
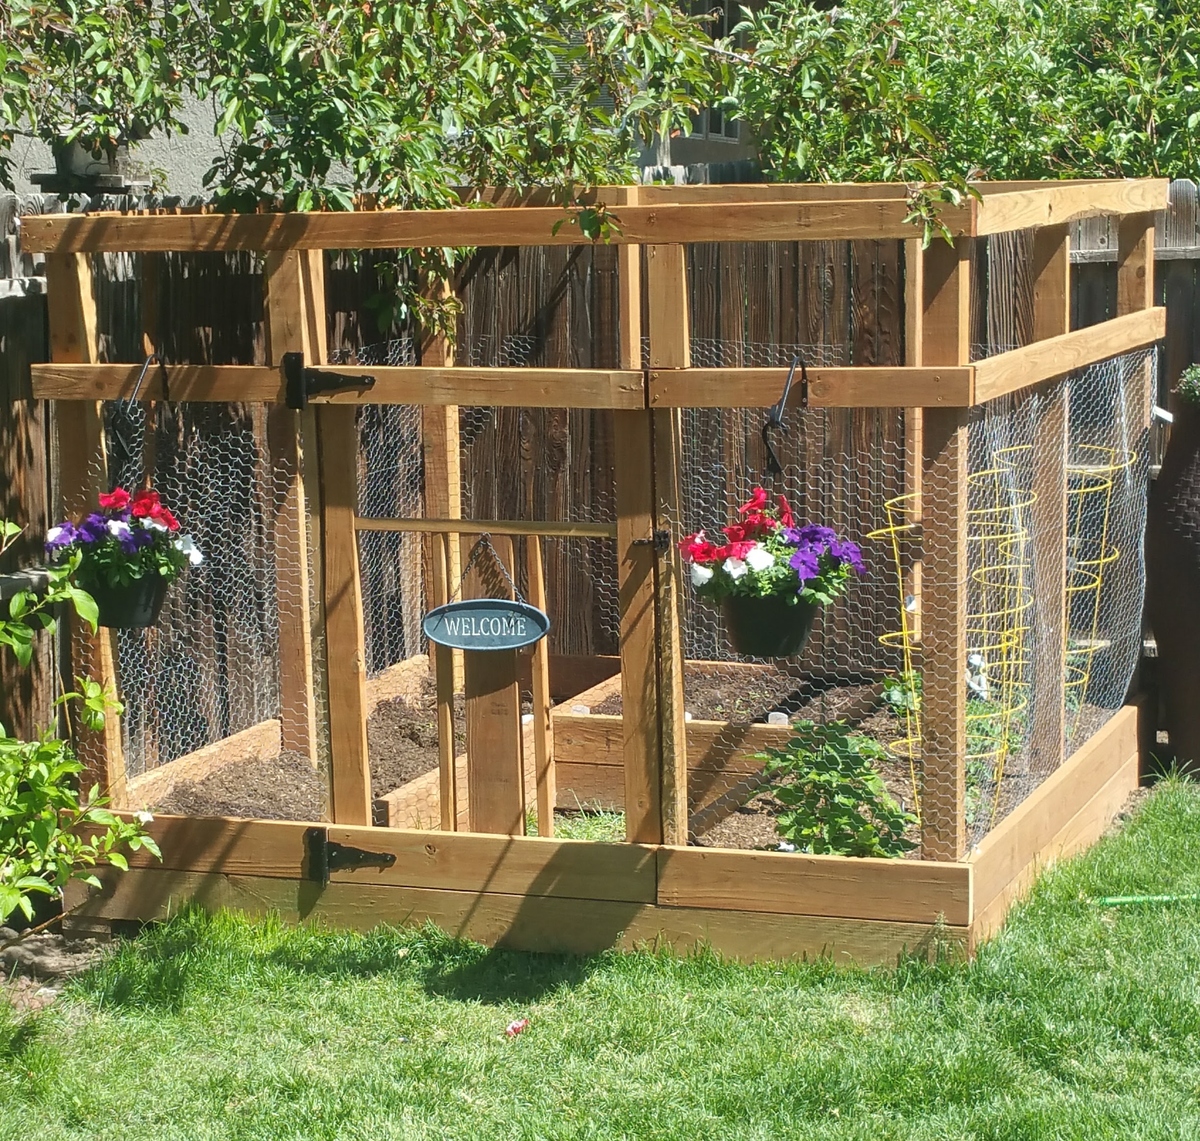
I found the plans on the website last year but we never got around to building it. So this year it was first on the list!! I wanted a large enclosed garden because we had a hard time keeping our dogs out of our last boxed garden. I followed the plans pretty closely, making minor changes to give us more room for planting.
I did not use the corner wood pieces for bracing because I did not like how they looked. Instead I used brackets made for decks that I can't see from the outside of the garden. I also made a custom gate to mimic the custom railings I had made for our deck. Added brackets to the outside for hanging baskets. Still needs to be stained and sealed. Hoping to get that done next week.
Note: I bought 22 2cubic feet bags of Miracle Grow Flower and Vegetable soil to fill the garden boxes.
Approximate costs were around $180.00 for wood/stain/gate hardware, netting and deck screws.
Approximate costs for the soil was $140.00.
I hope
Absolutely love how this table turned out! I slightly modified the length to accommodate our space. Definitely a beginner friendly project. I used farrow and ball studio green for the base and just poly on the top.

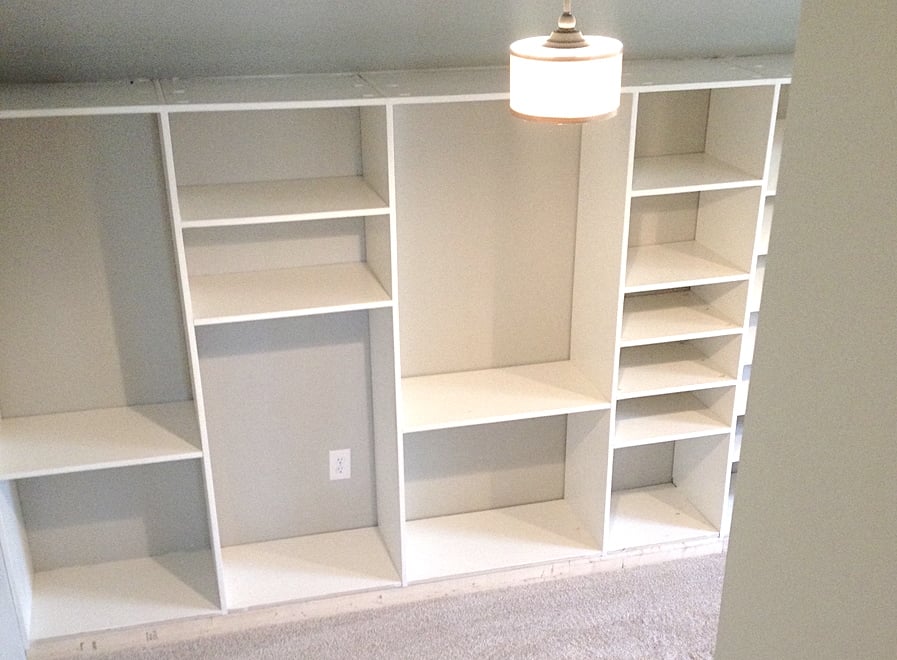
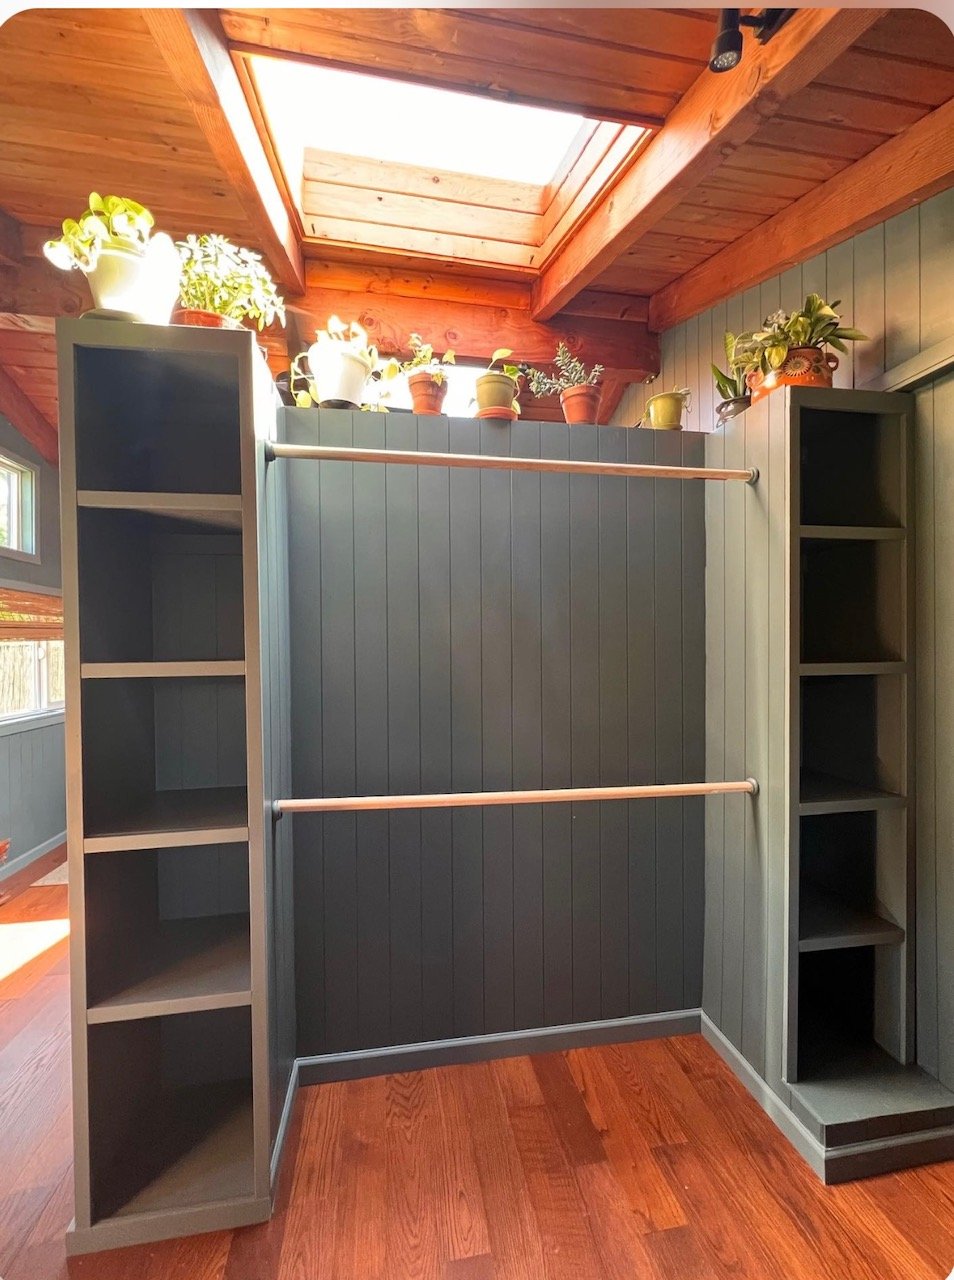
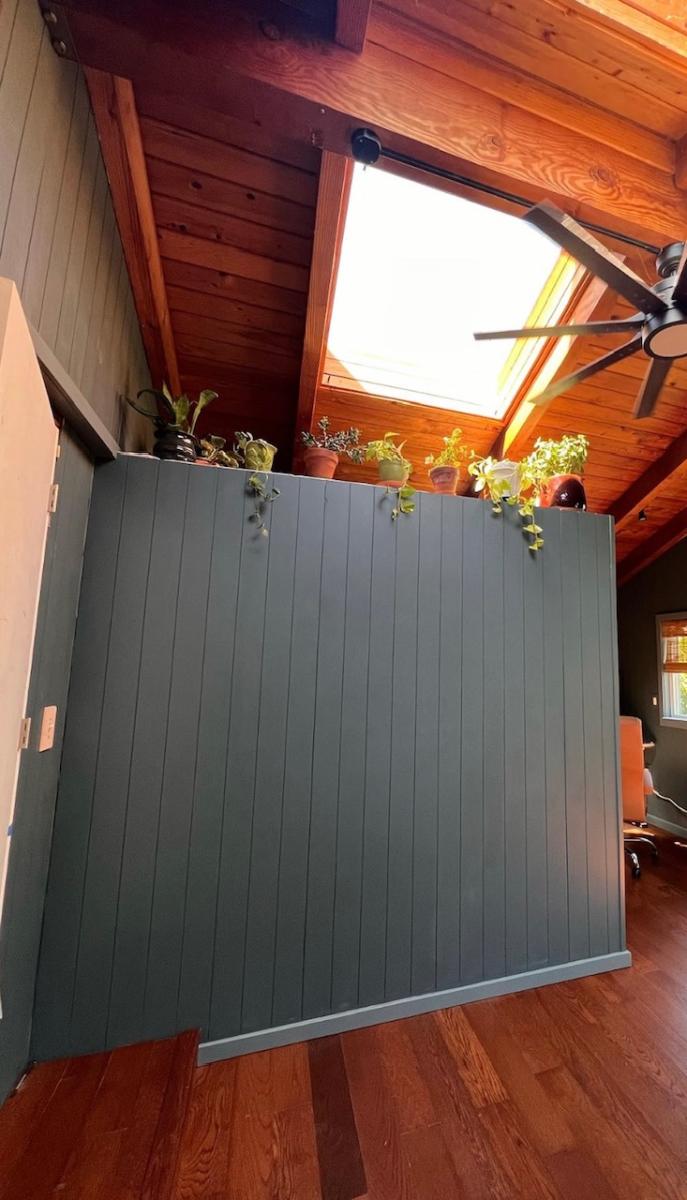
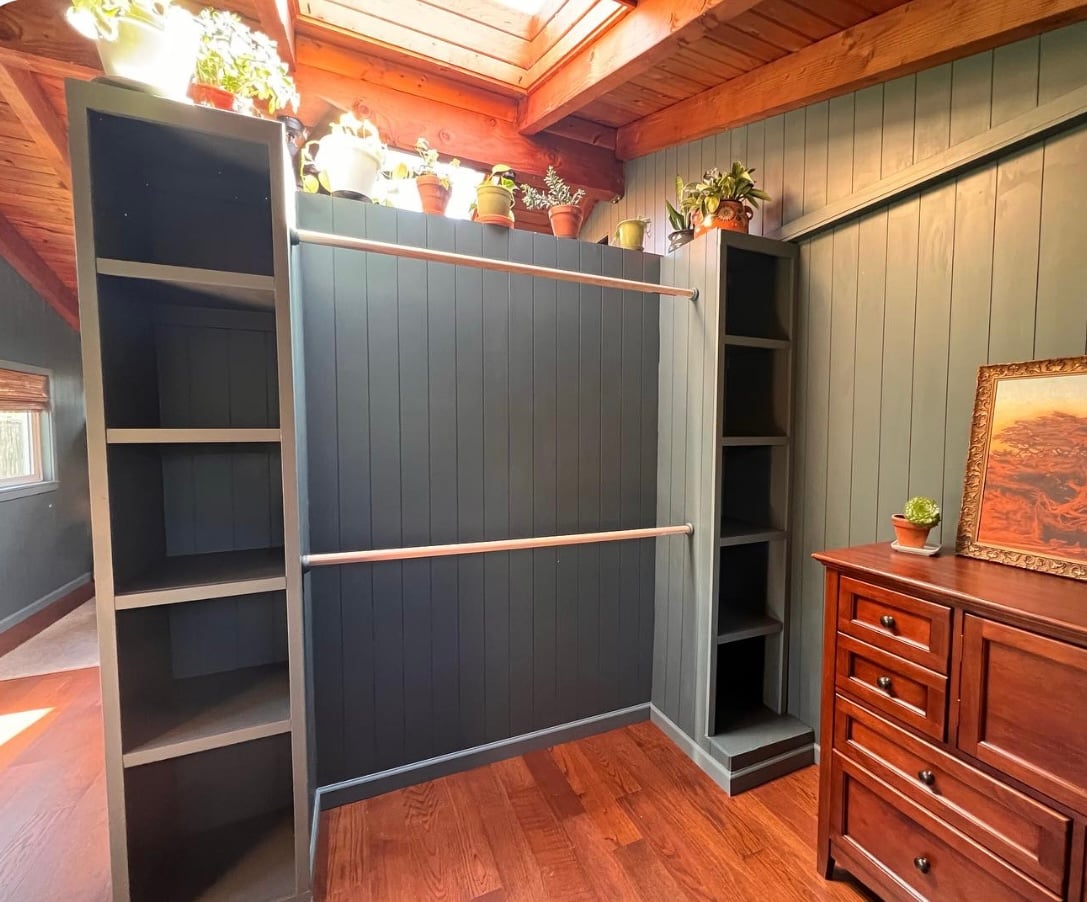
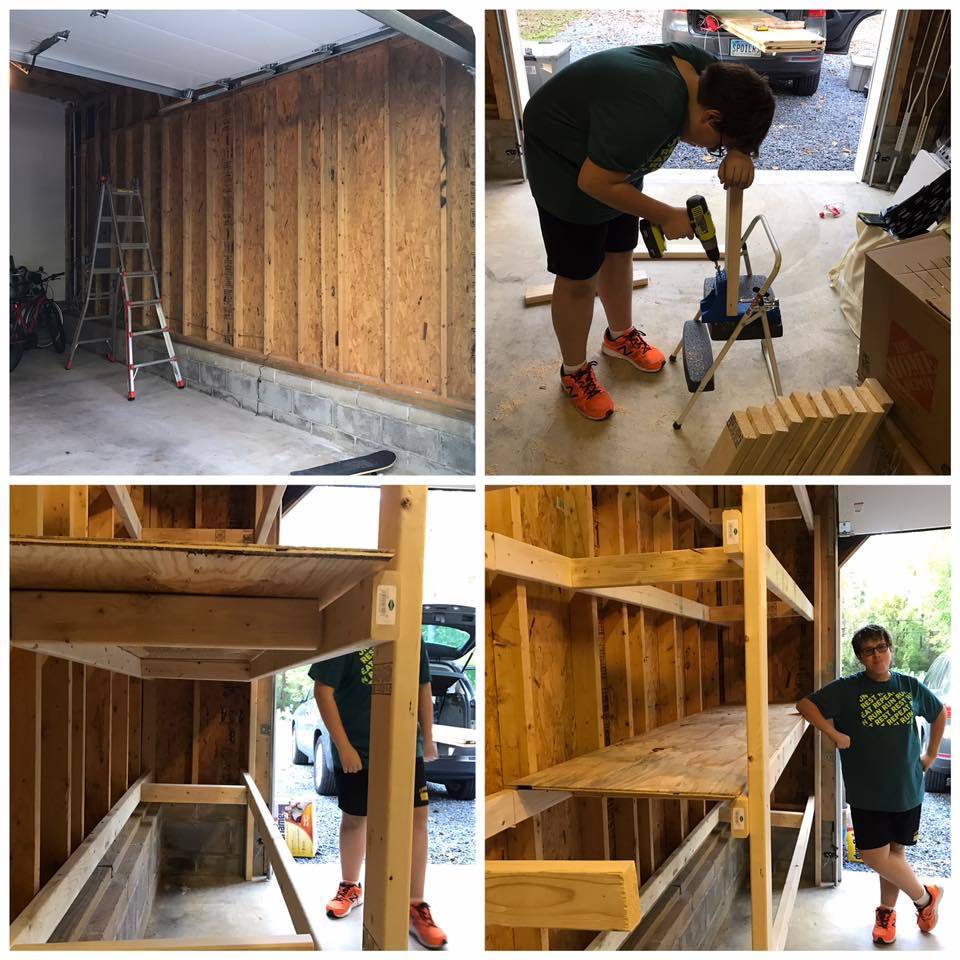
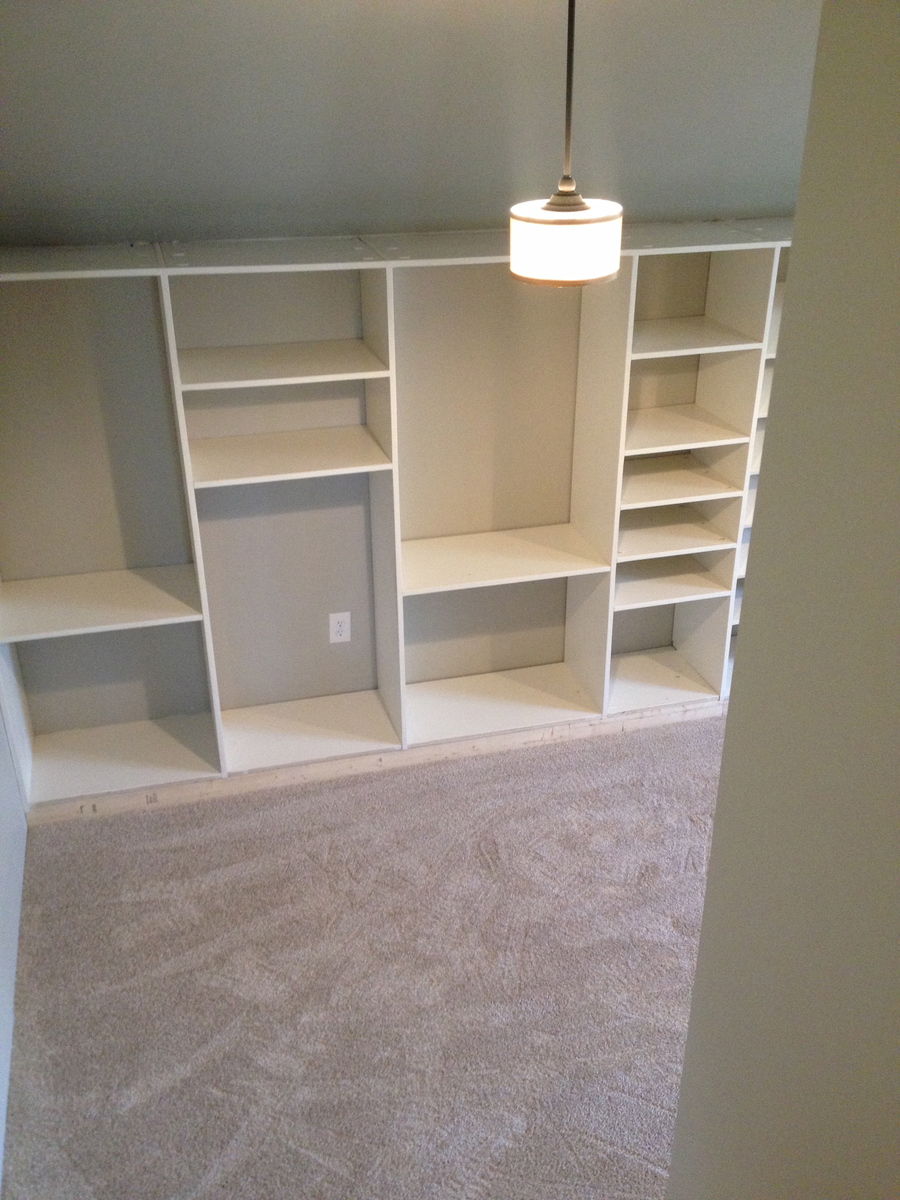
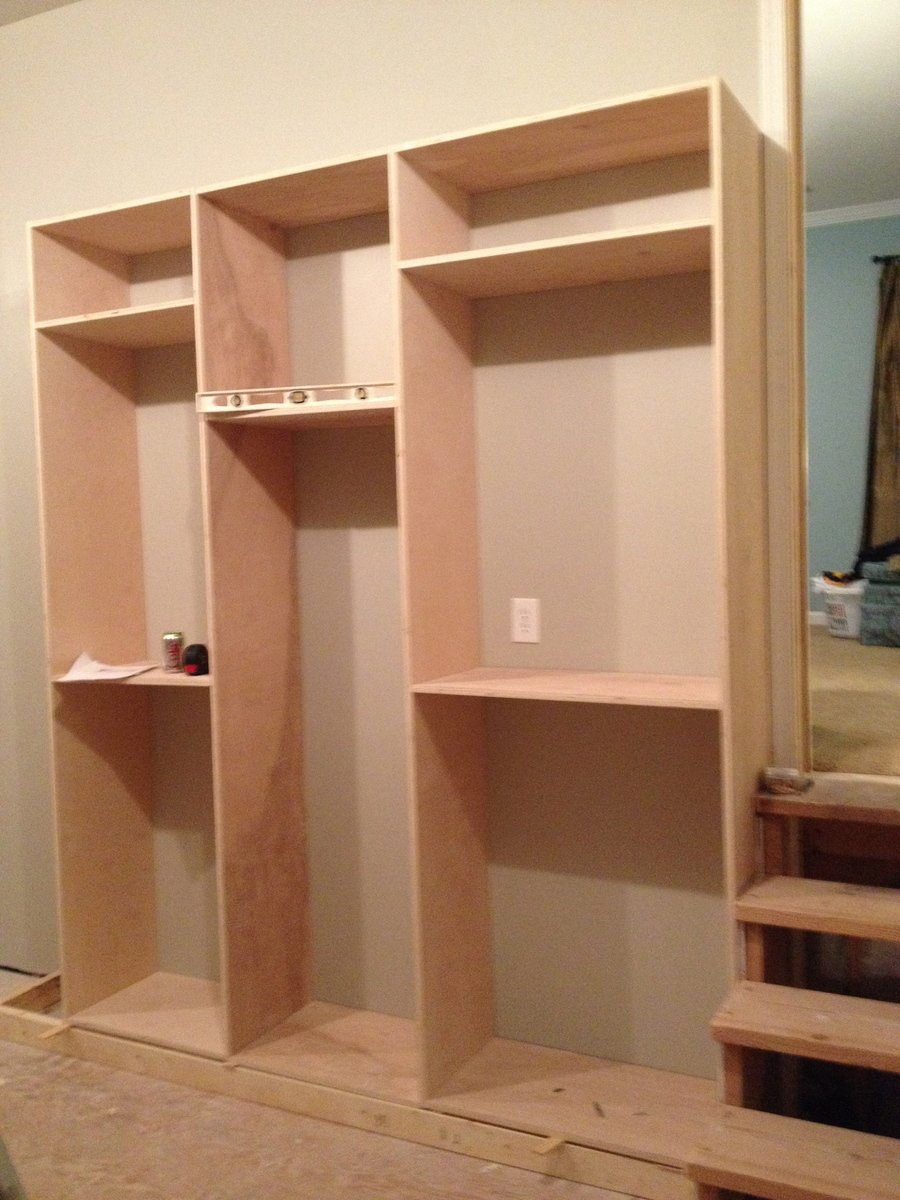
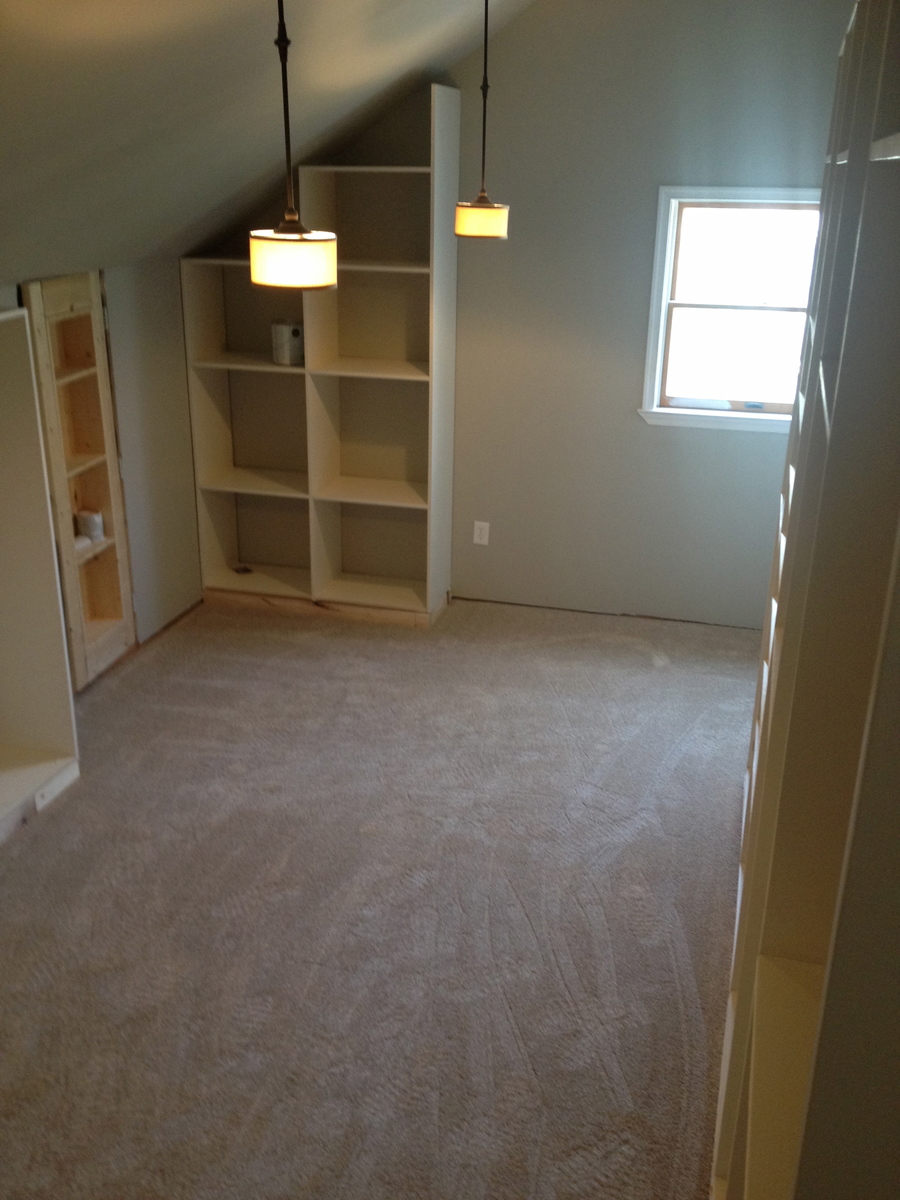
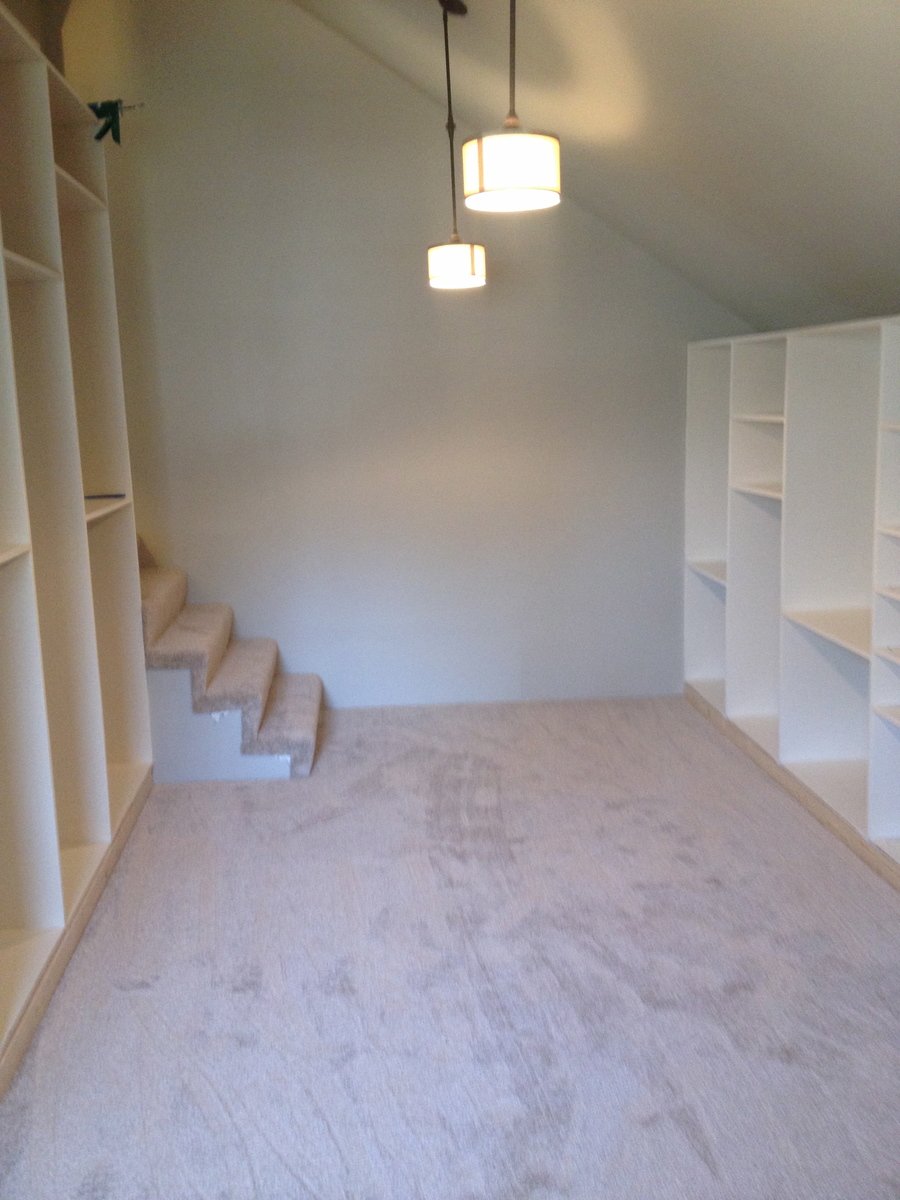
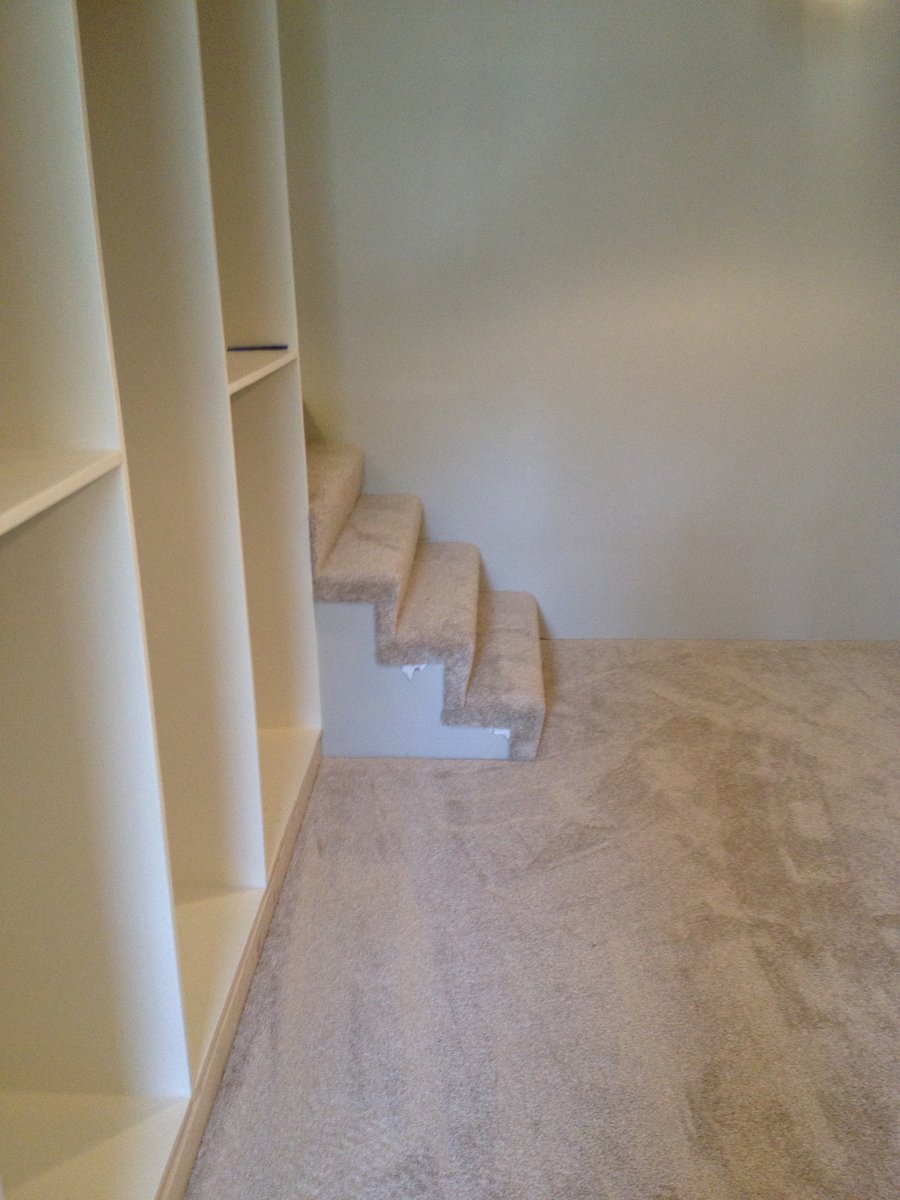
We used an unfinished attic space above our garage that was connected to our bedroom to make a walk-in closet with great shelving. This project took a lot of time but we are so happy with the results! There is a side for my husband and a side for me. Although it is hard to see we also incorporated a small door/bookshelf into the room to allow us access to attic storage space.


I washed the plans for the farmhouse table in hot water!
I modeled this kids table off the farmhouse table and then made the chairs out of 3/4" plywood with bright colours.

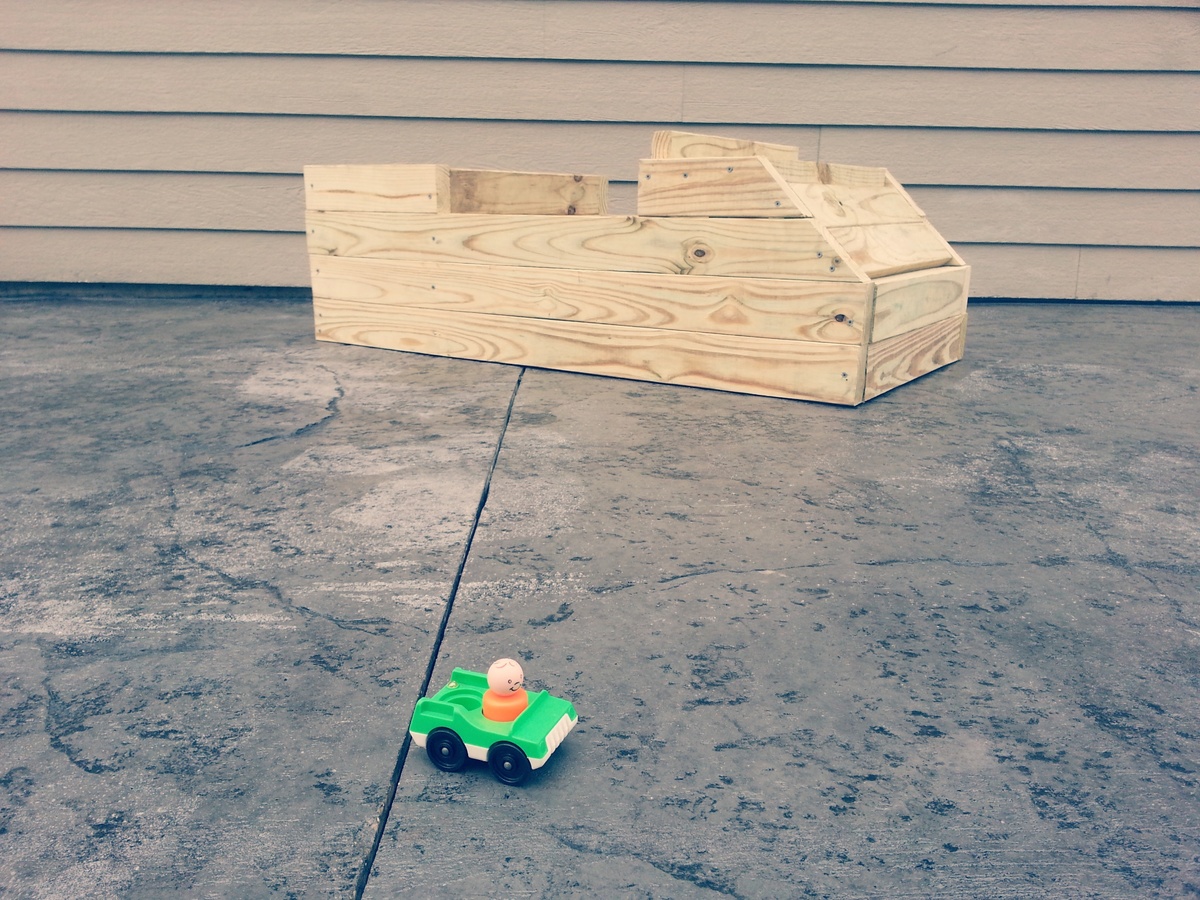
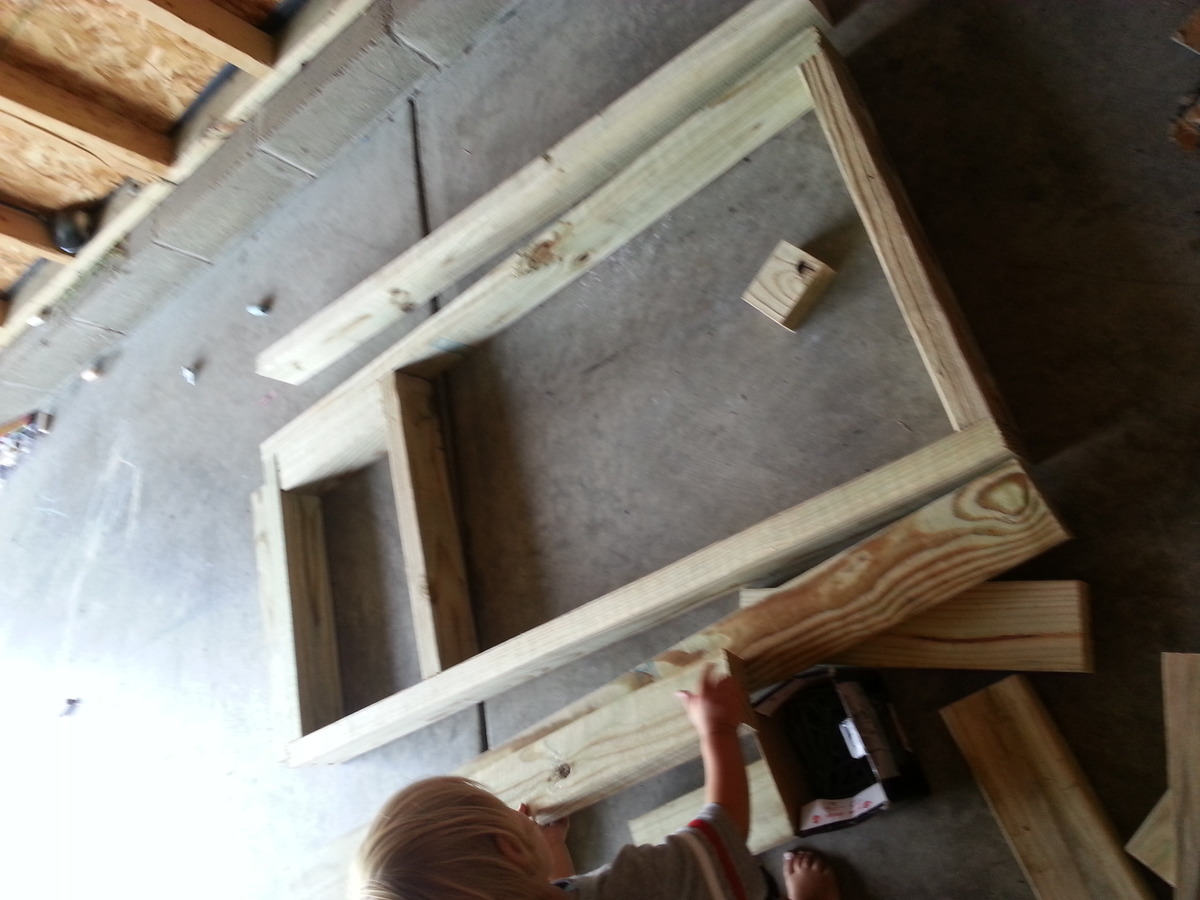
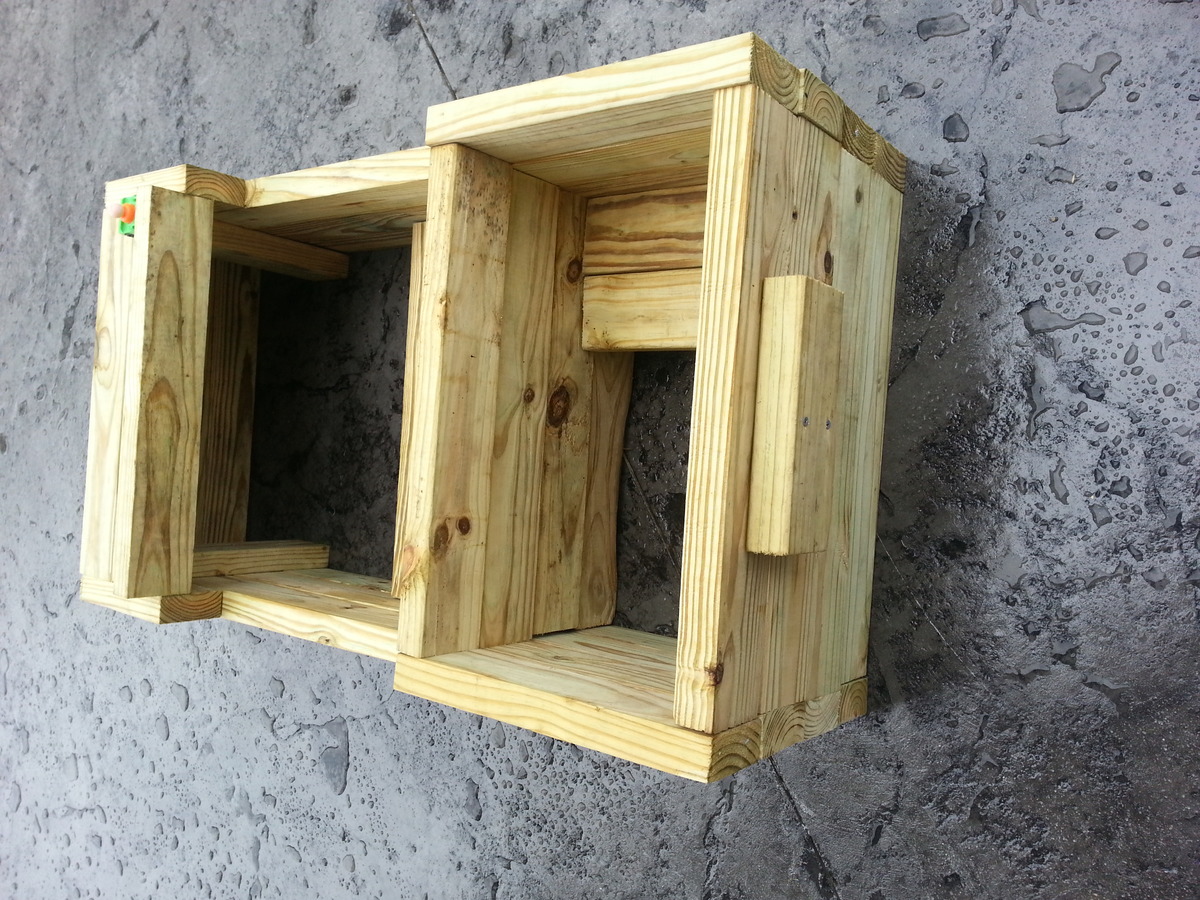
I think I'm the first one to use this plan. I am a newbie so maybe I made it harder on myself but I diverted a little bit. I did not have 4 inch screws that would work with the treated lumber, and they were going to cost me a very pretty penny to get. I did have a box of 3 inch treated wood screws leftover from when we made the floating bunk beds » {LOVE THOSE} so instead of building each side, I had to build it level by level,attach them all together inside once I was finished. I use some leftover pieces to add a little seat in the trunk and a license plate. you also might have a few scrap pieces that you could use for rear view mirrors and headlights, but I would like to keep this simple and chic. I have a small wood slat piece that I will use for a grill on the front { from an old wooden toddler bed rail} so his car will look just like the tiny Fisher Price one he plays with! I'm still searching for a free steering wheel off an old toy or perhaps I will use my husband's 2.5lb free weight. I think it is perfect if I can figure out how to attach it... and how to get away from my husband ;)
Wed, 07/10/2013 - 14:01
this is my first solo project. I had the store do most of the major cuts so that was a definite time saver. I only had to do my angle cuts and kept on my leftover pieces to do my modifications. this will sit outdoors so I had to spring for the treated lumber. since I built it level by level I had to secure it inside. all except the last trunk level were secured under the hood out of the way. securing the final level of the trunk gave me the idea to use a "license plate" instead of just a random piece of wood.I can't wait to put it in the play driveway to add to his big outdoor play house! thank you for an excellent easy to follow plan. maybe now I can get a plan for a matching gas pump?? :-)
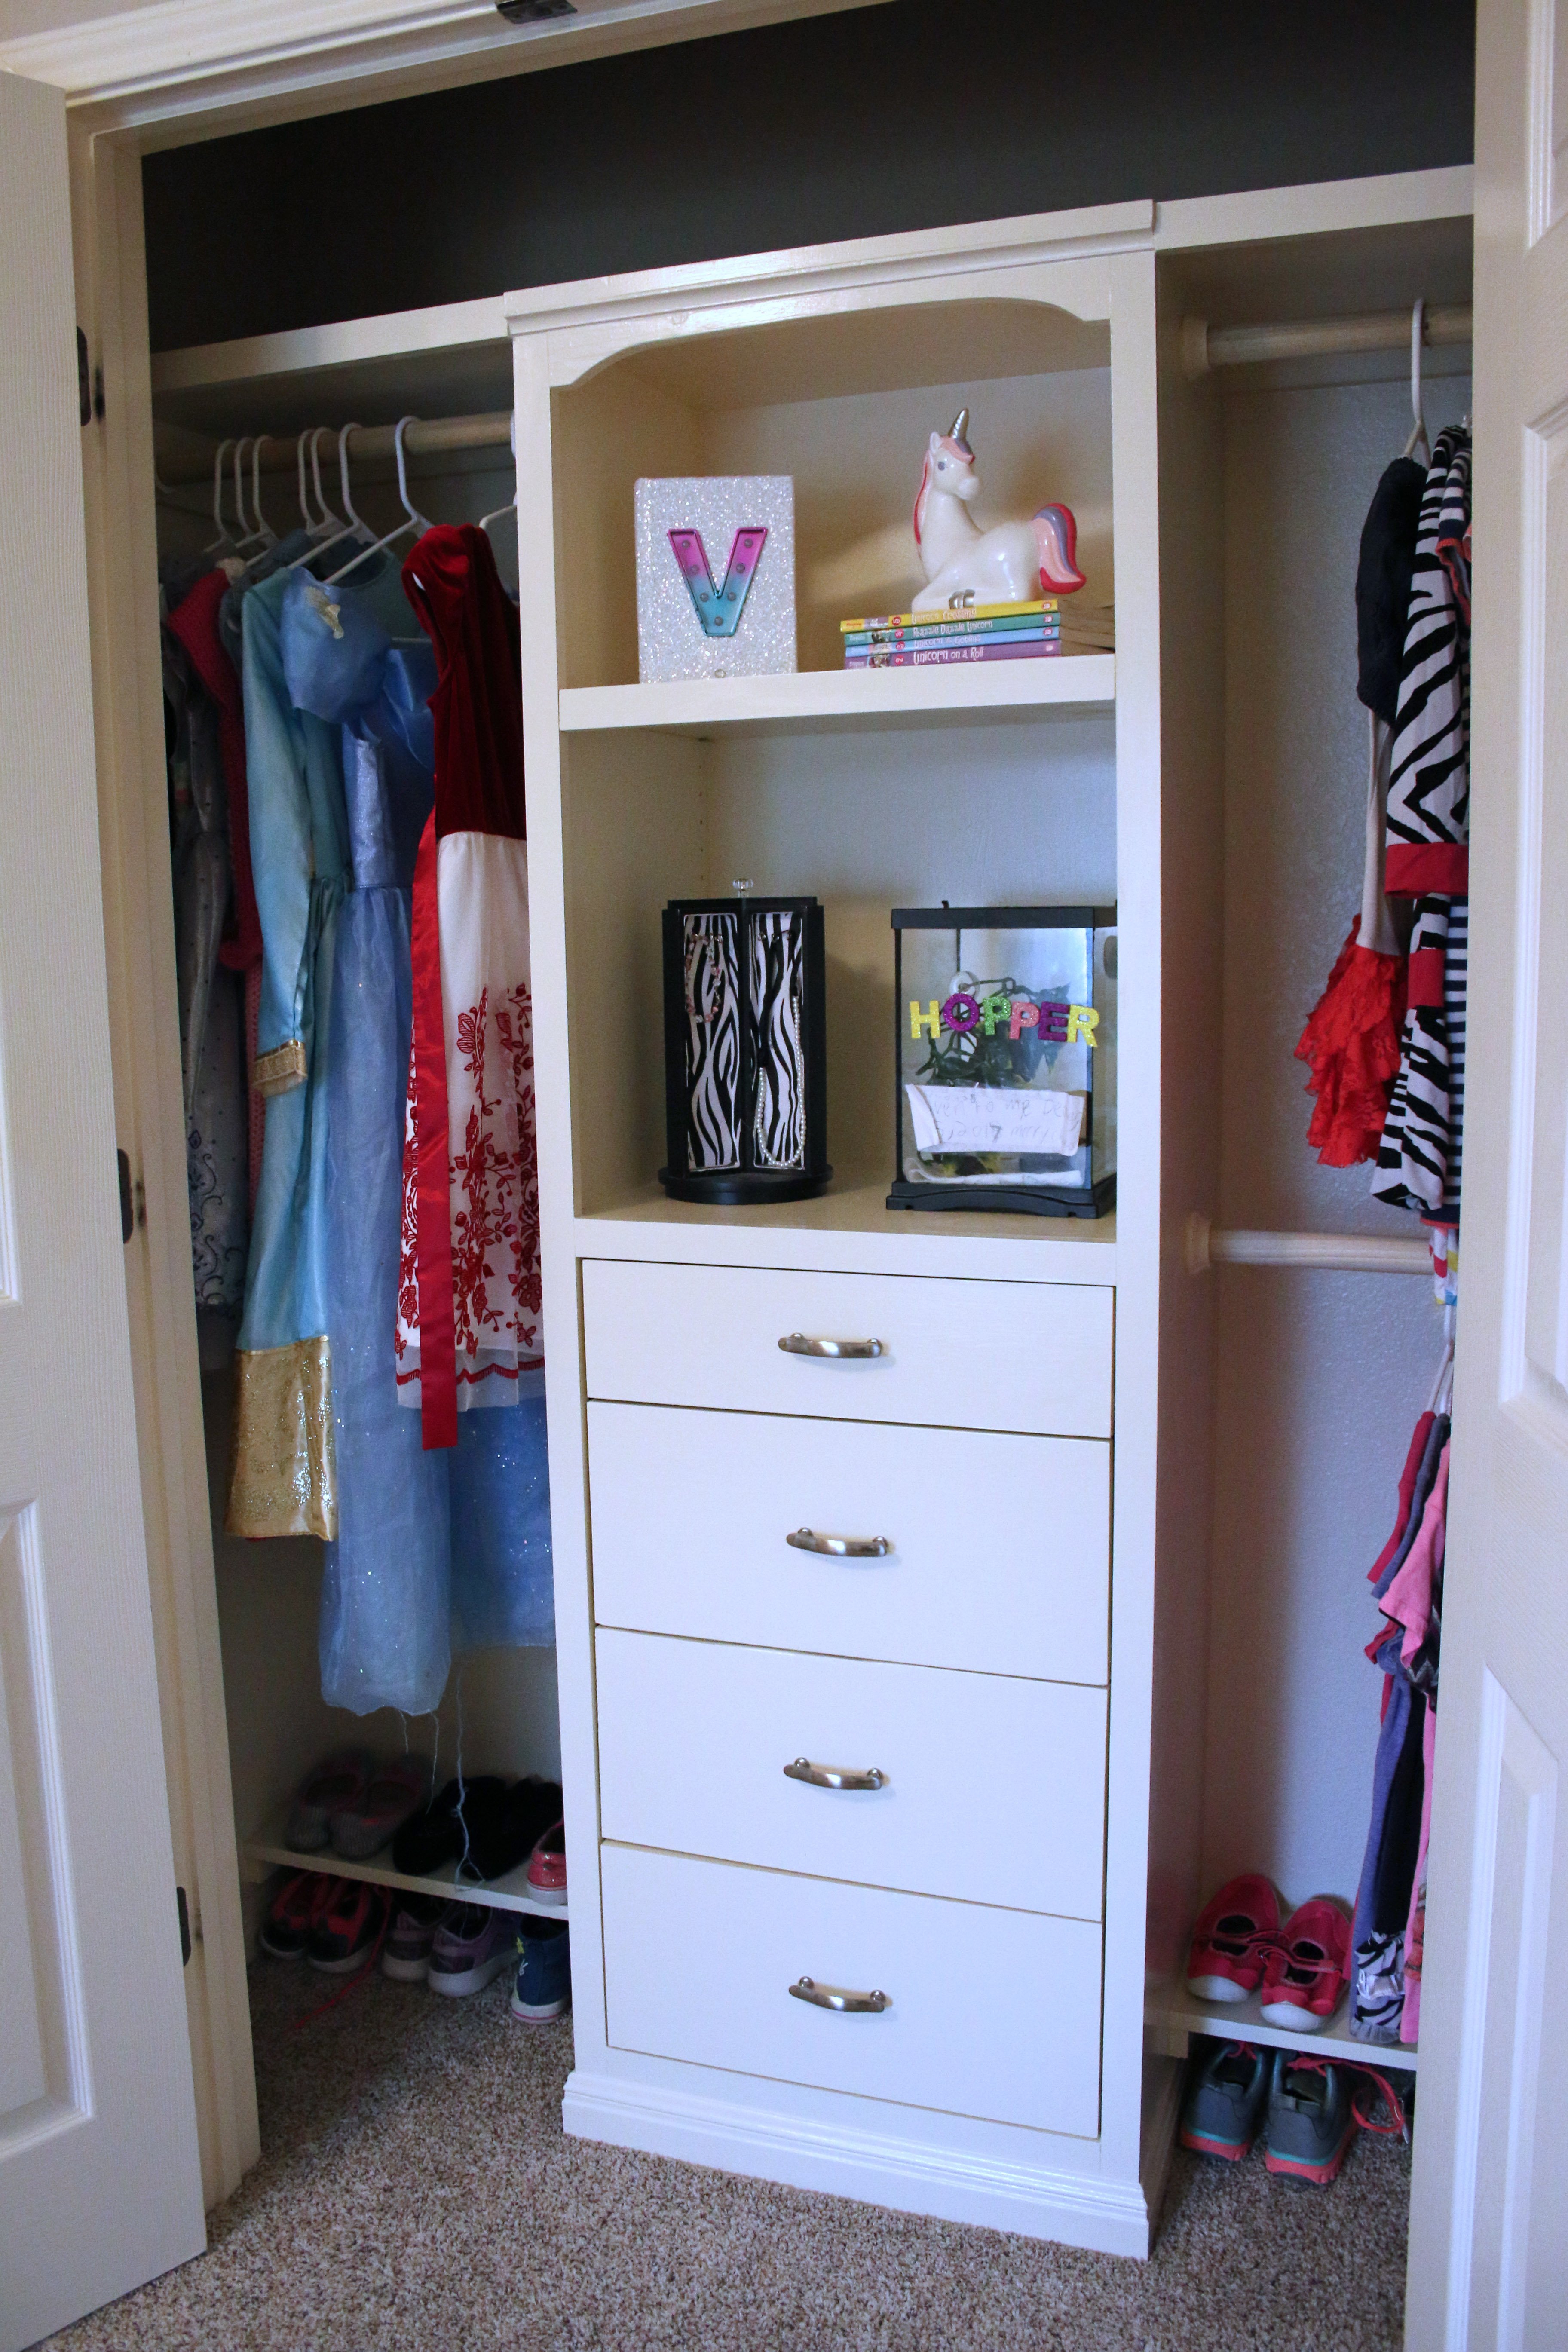
My daughter's room needed more storage and the closet was the perfect place to add some! Visit the blog link for more pictures.
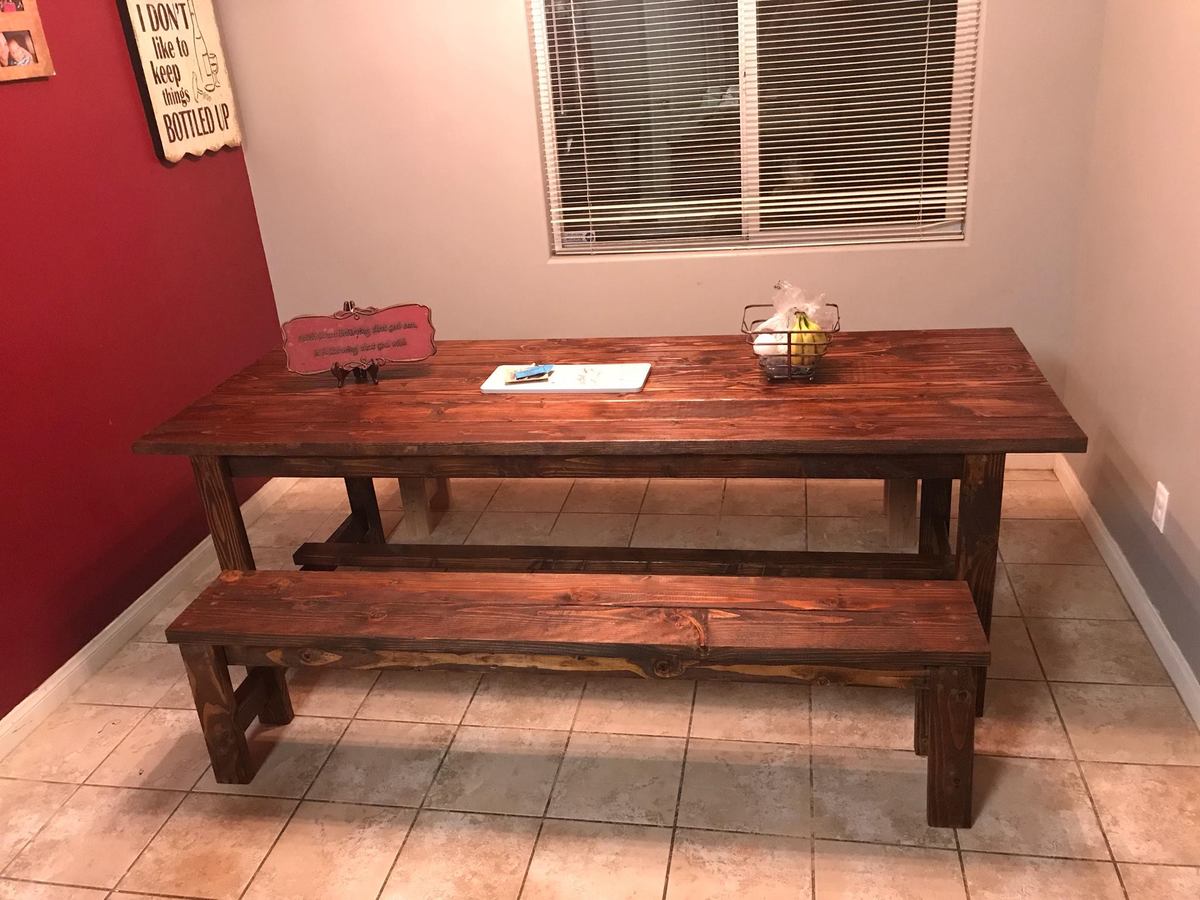
I love this table and bench set! Very easy to build and didn't take too much time. We made it a family build. My kids helped put together the benches and table. My wife and kids did all the staining.