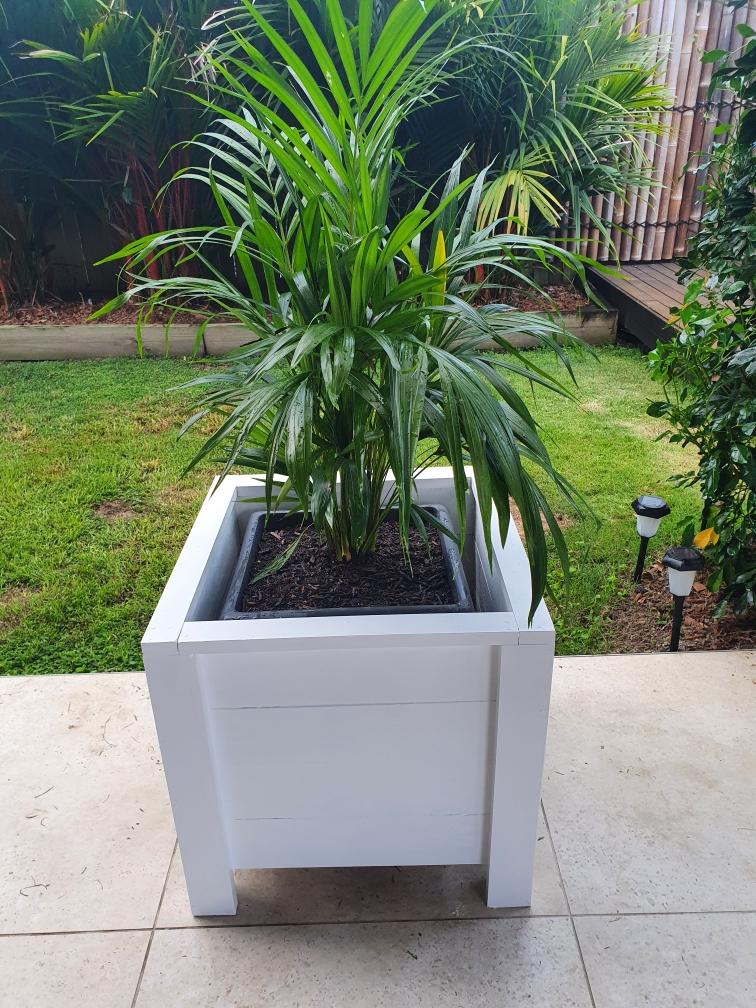
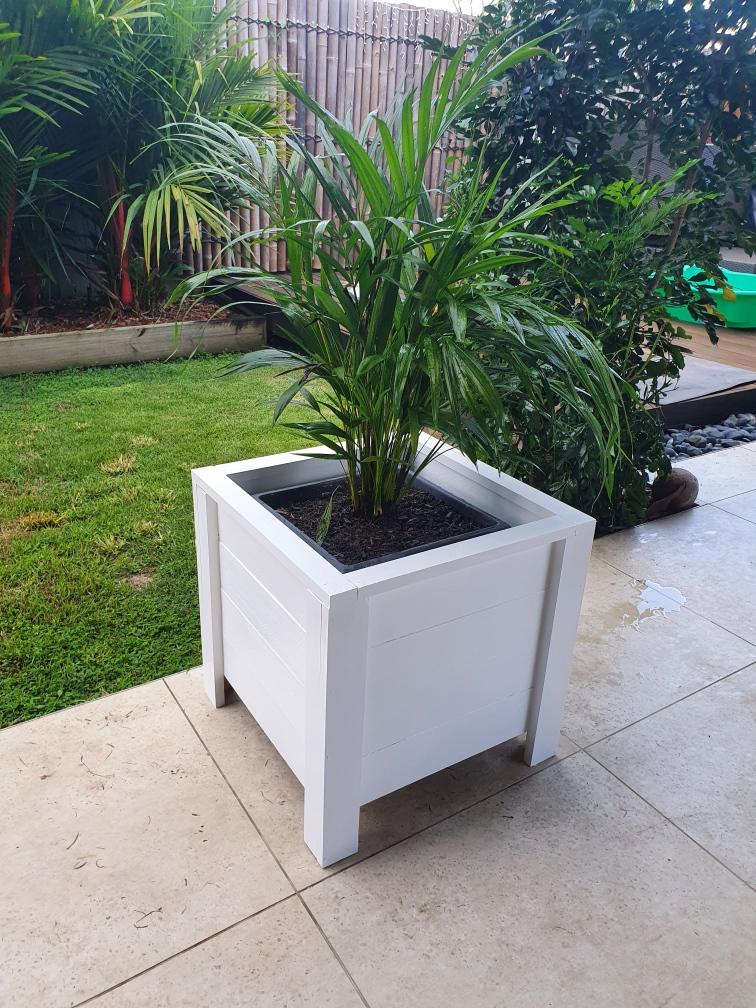
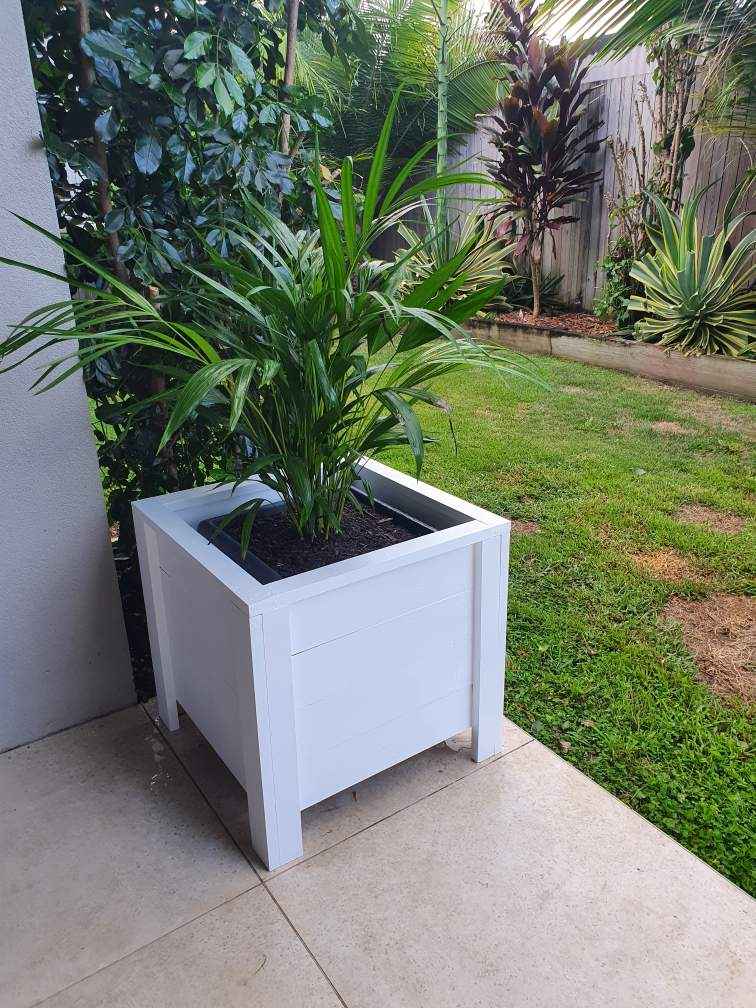
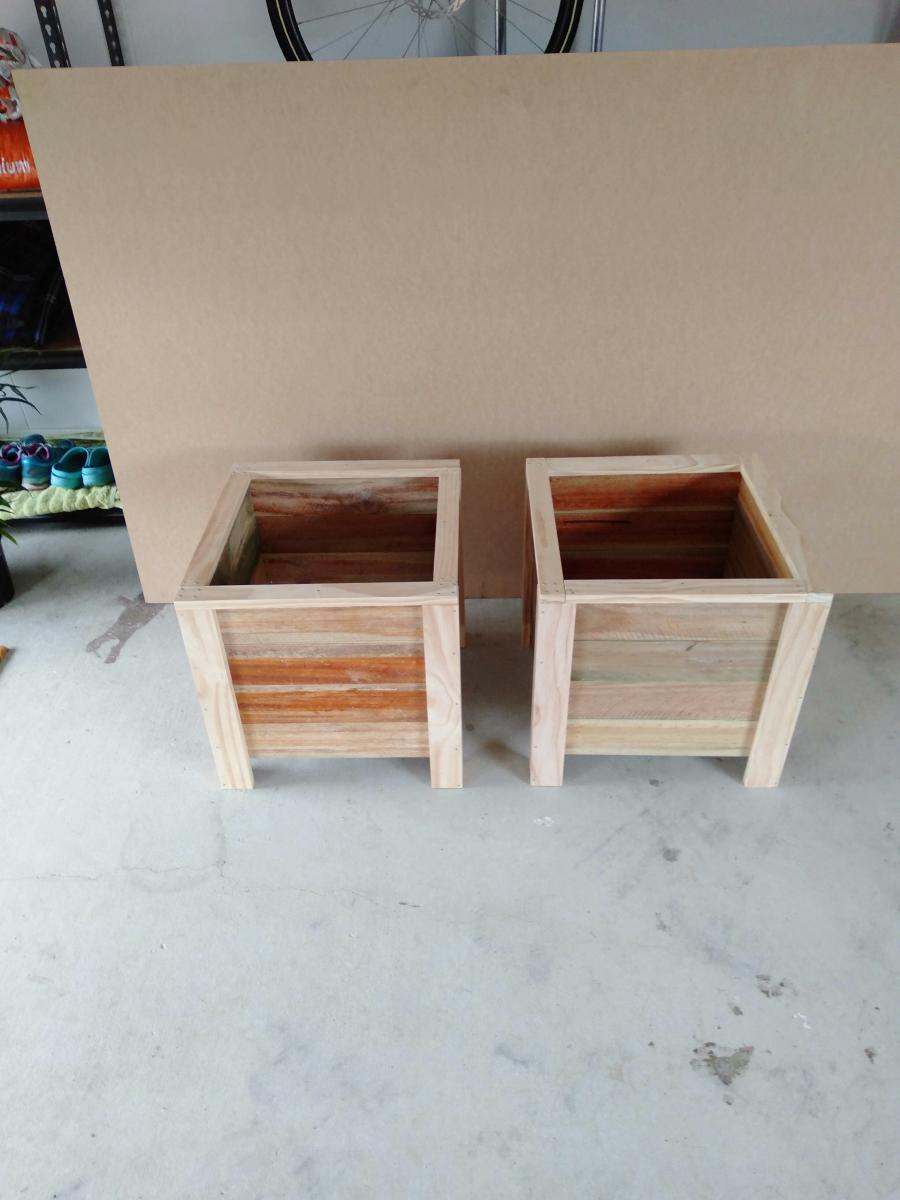
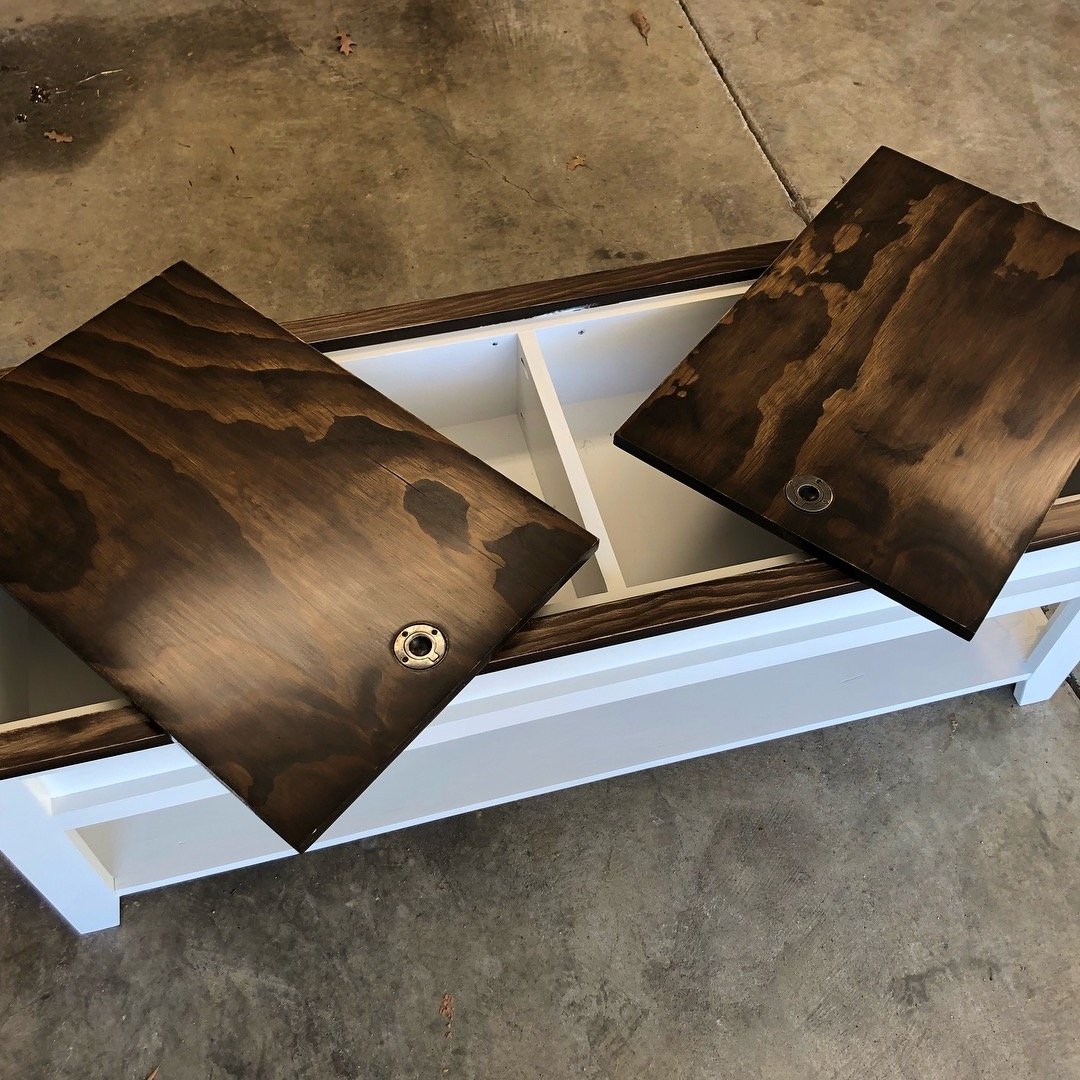
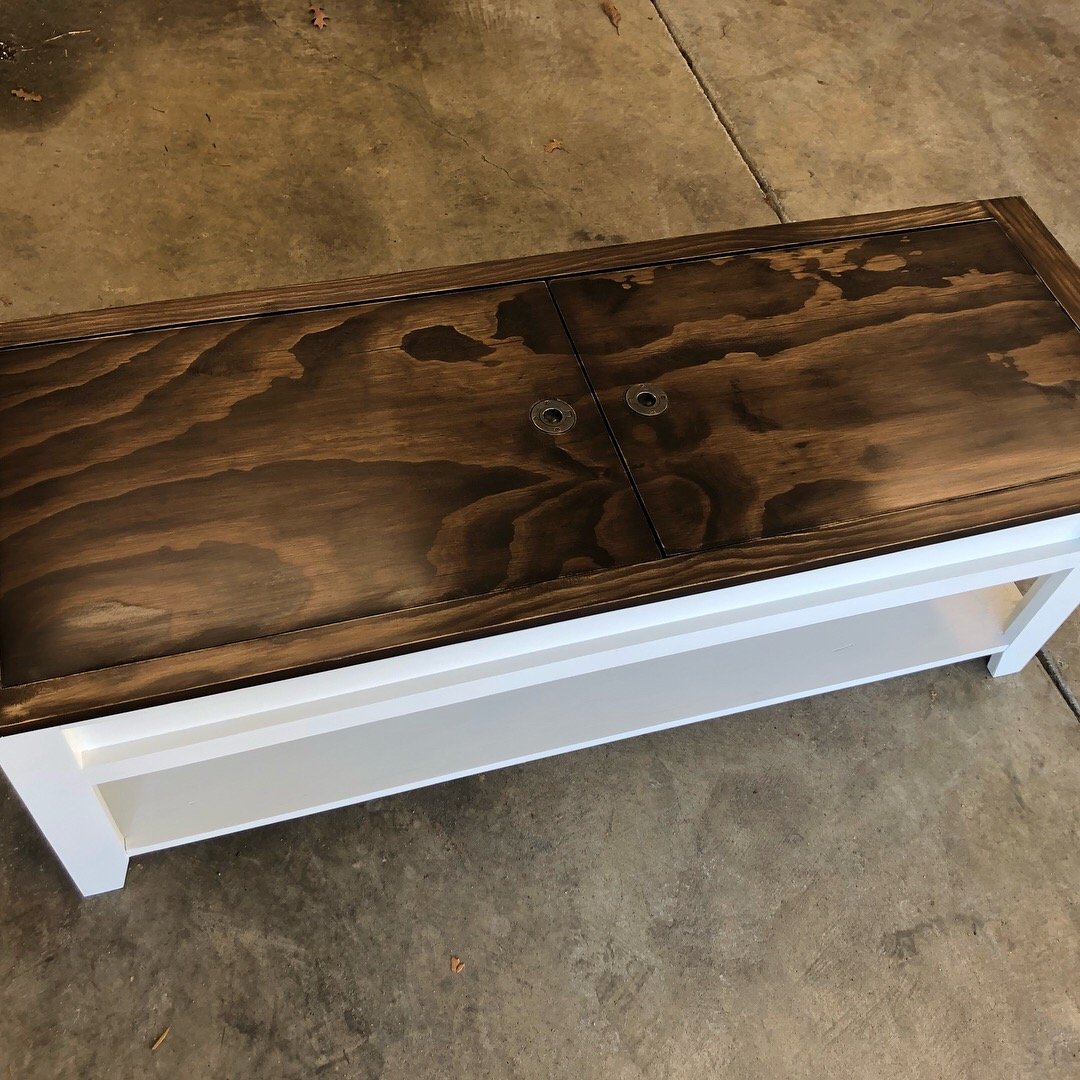
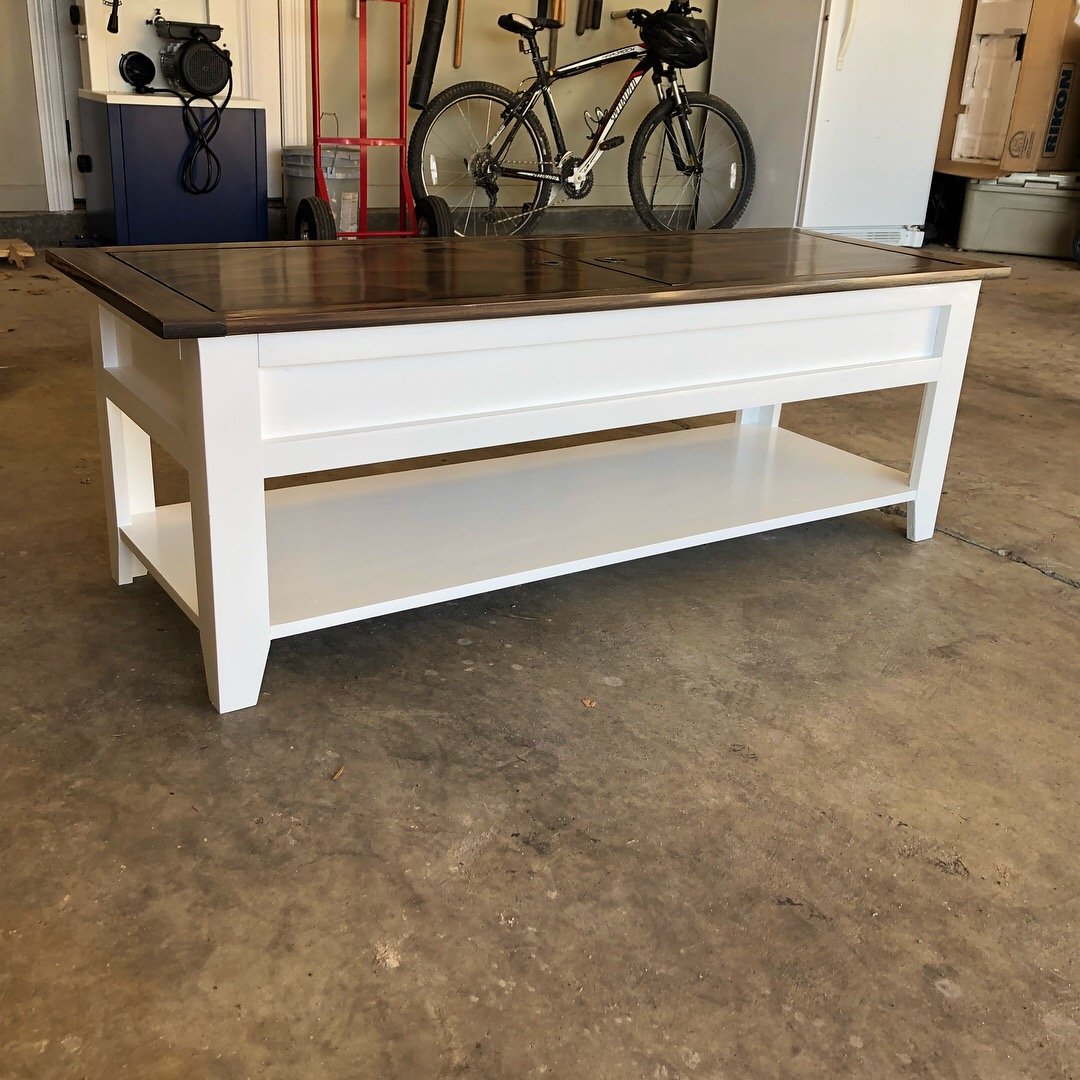
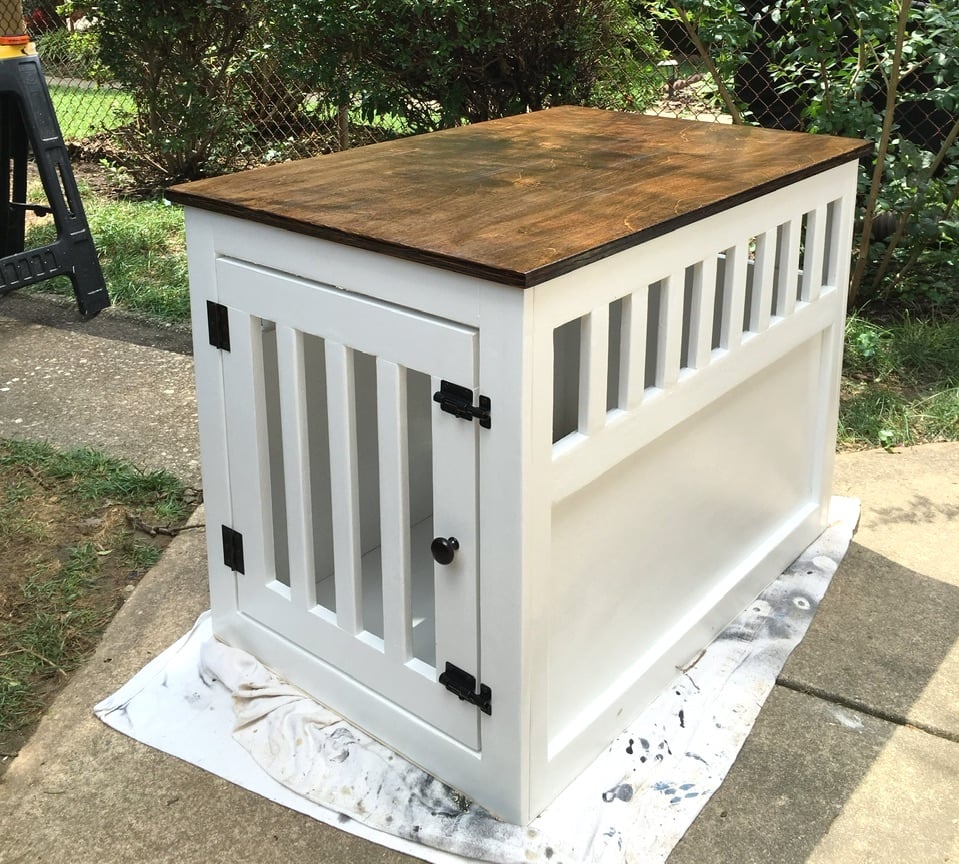
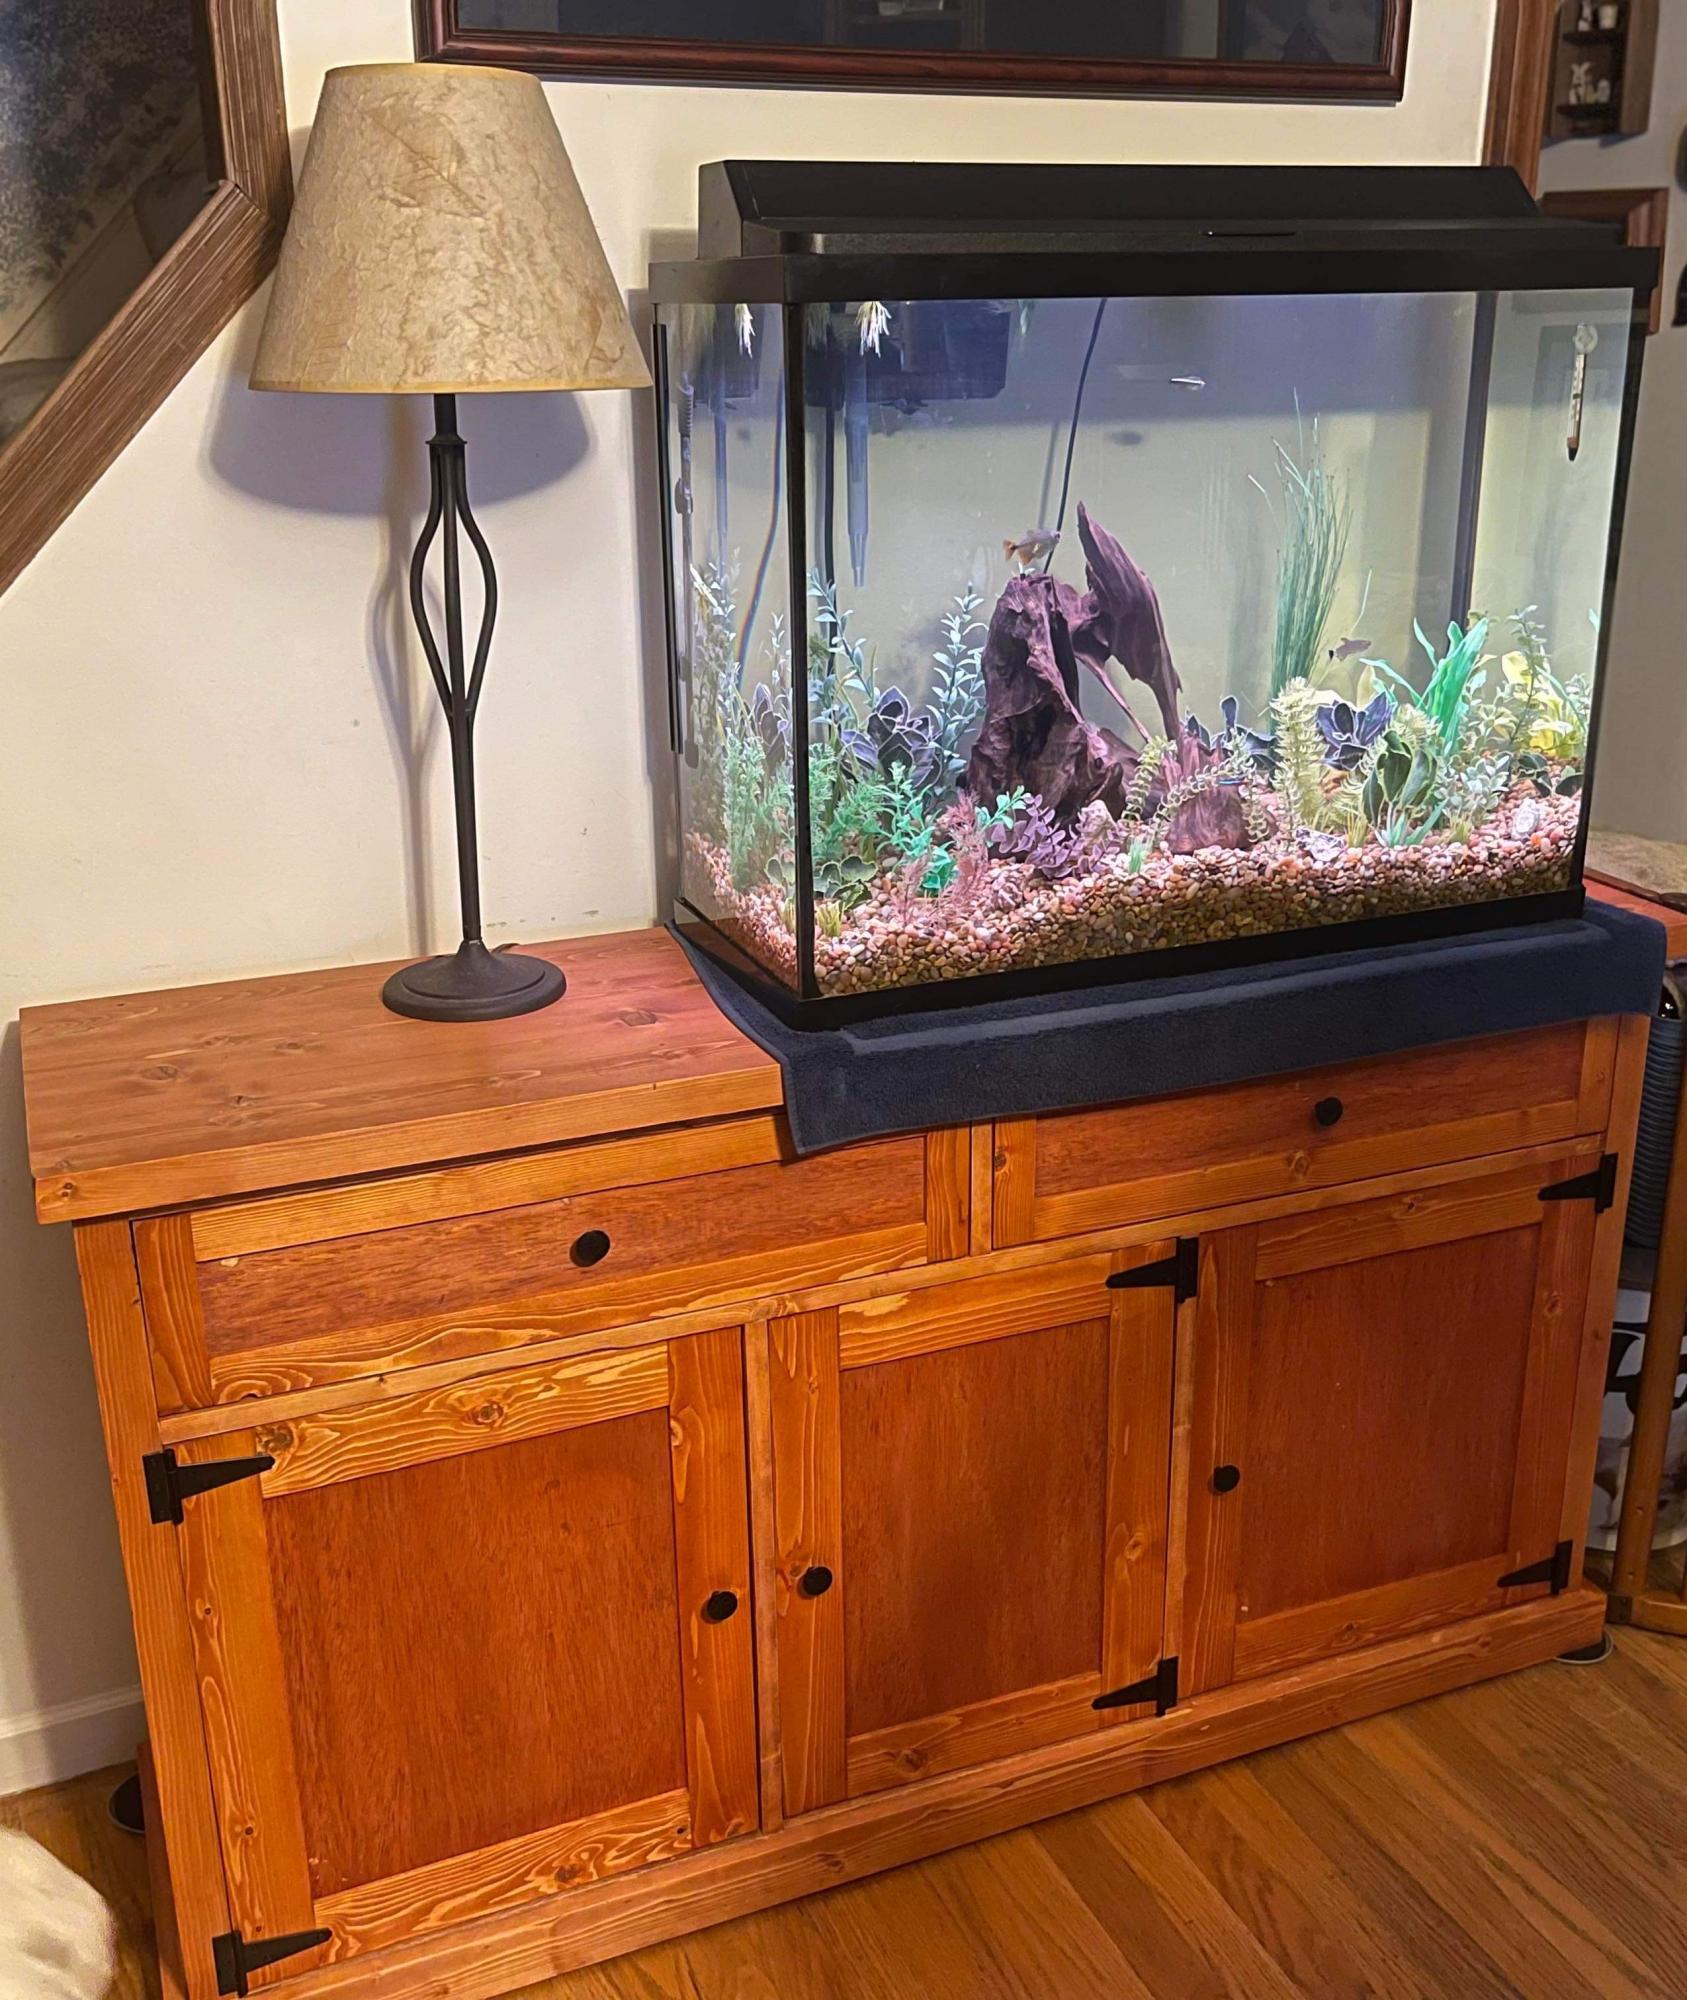
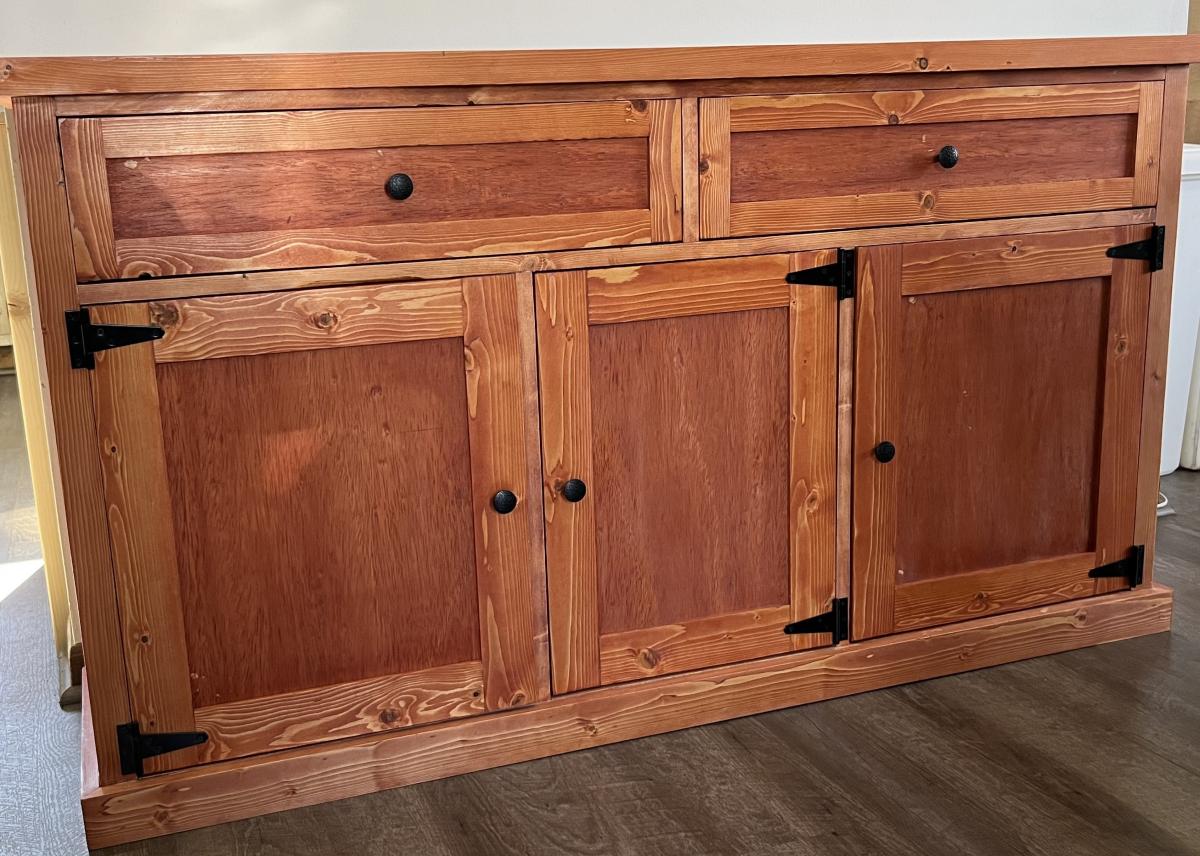
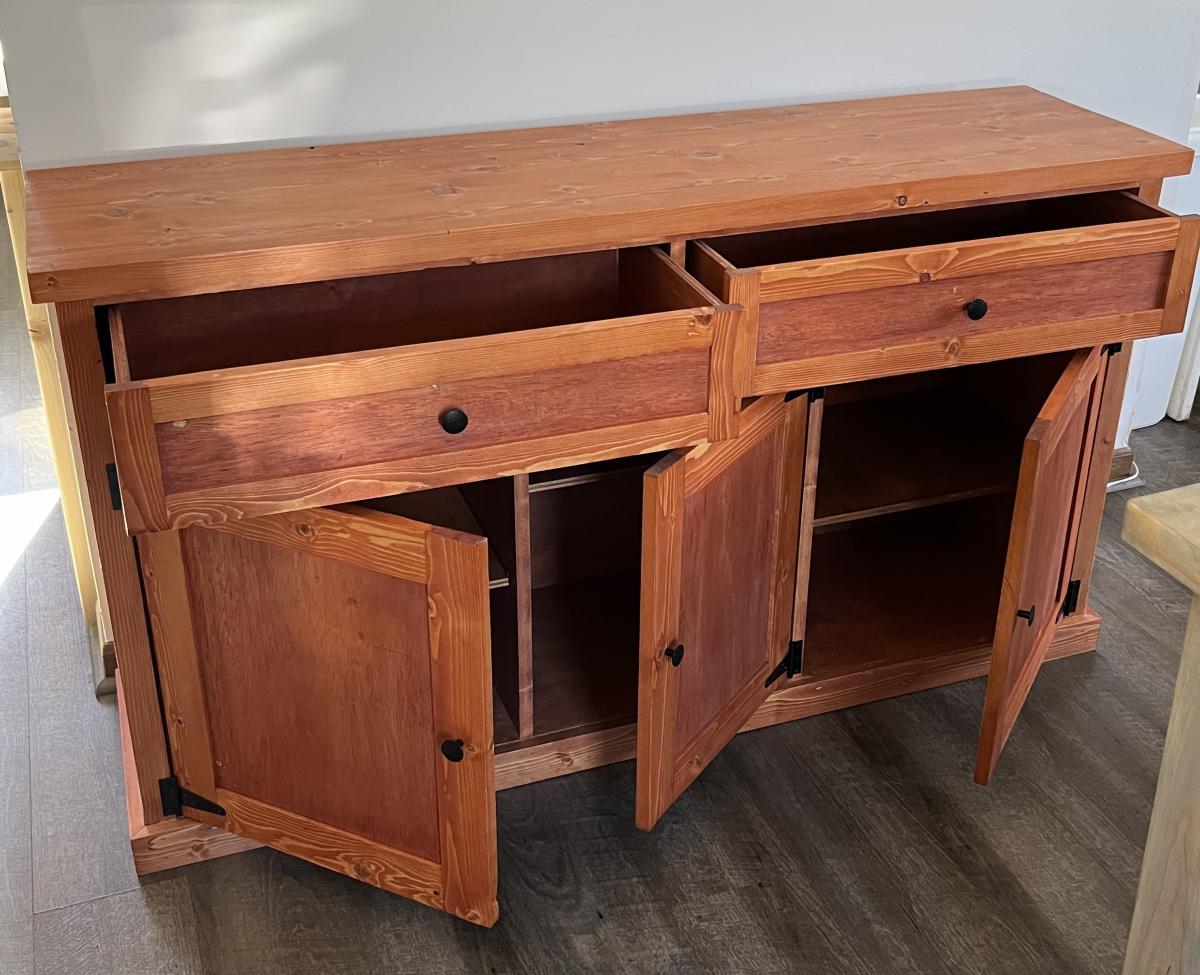
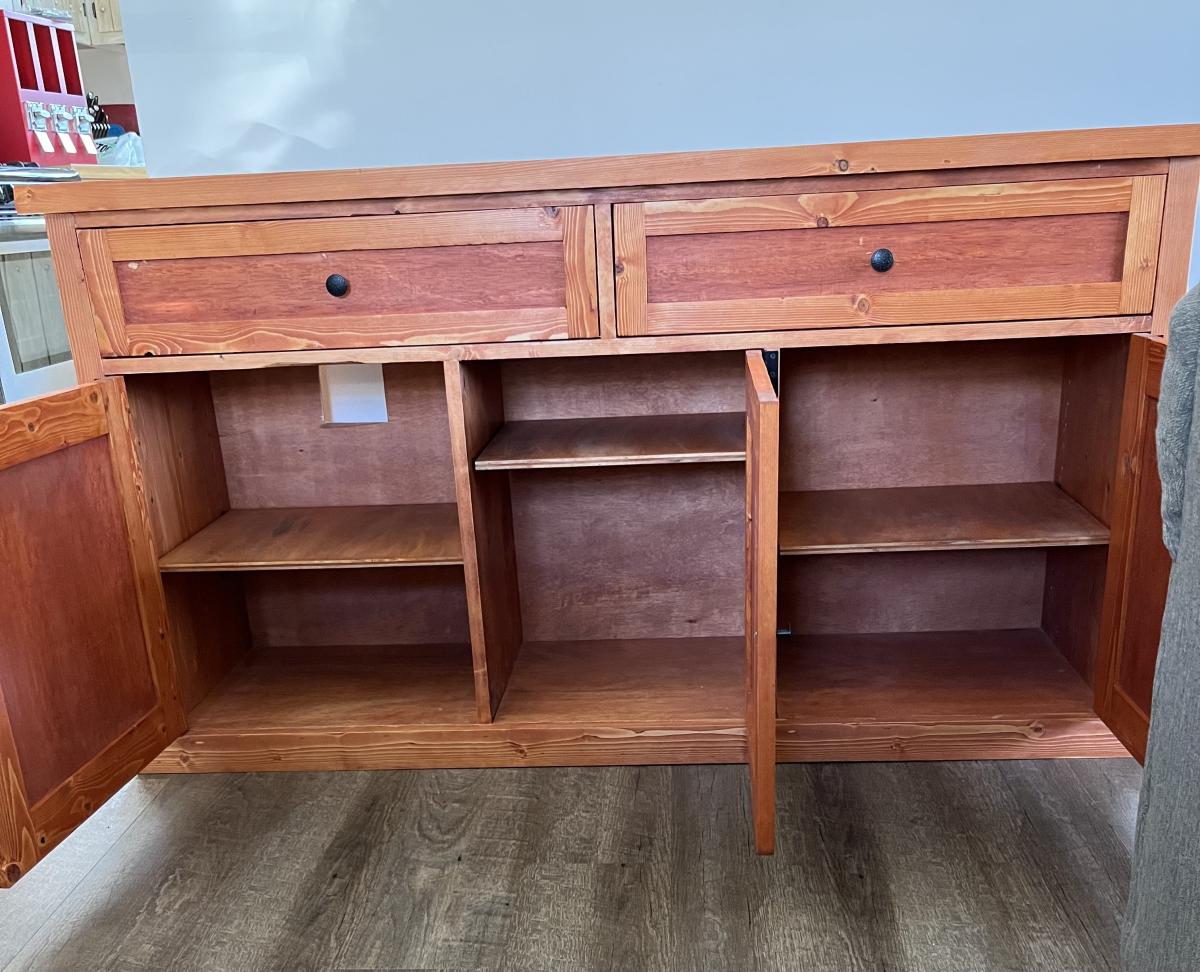
Community Brag Posts

Modern Toy Box

Submitted by Anonymous (not verified) on Sun, 03/19/2017 - 14:32

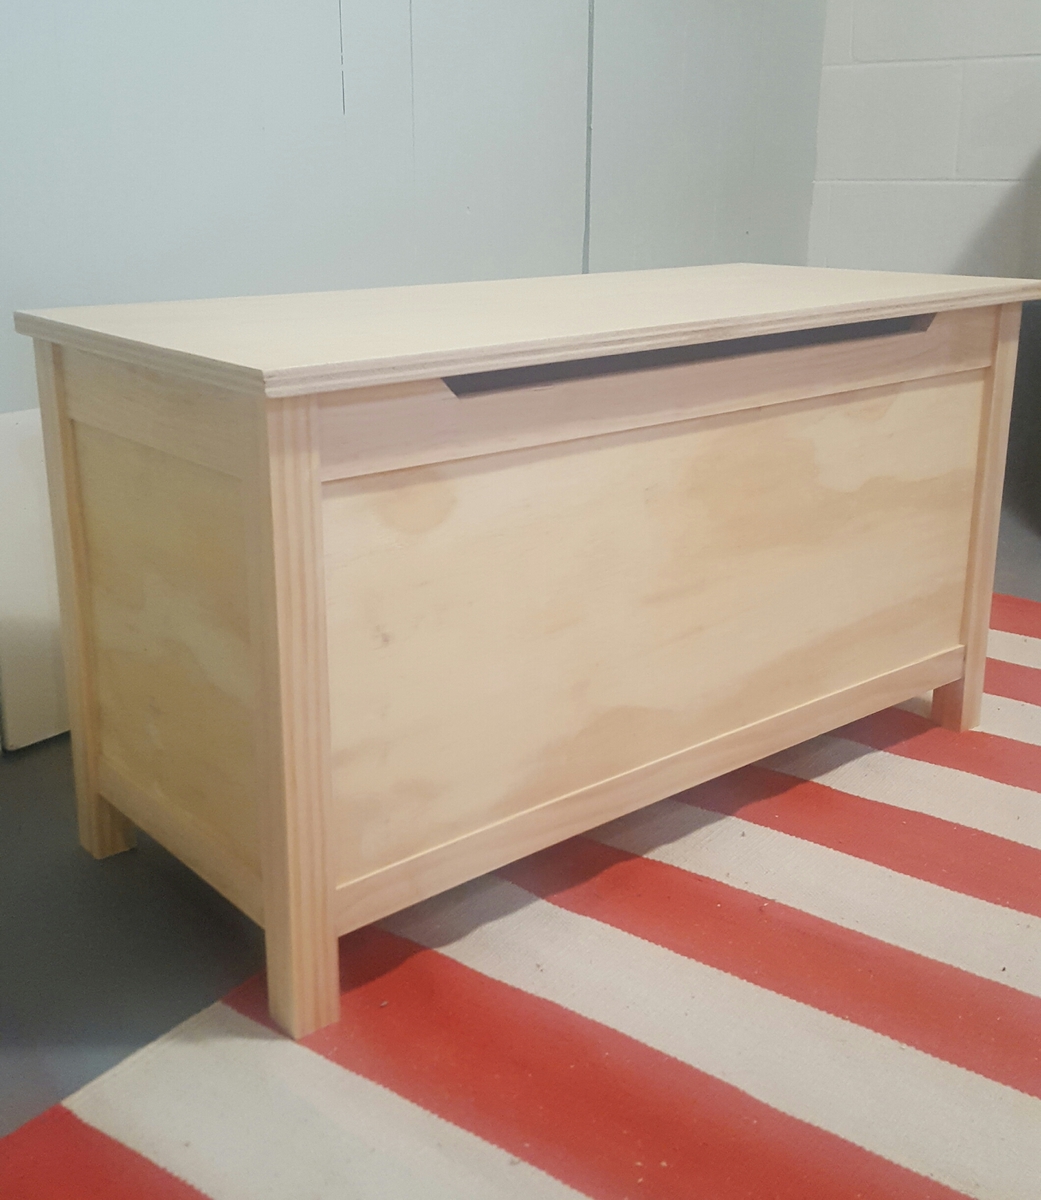
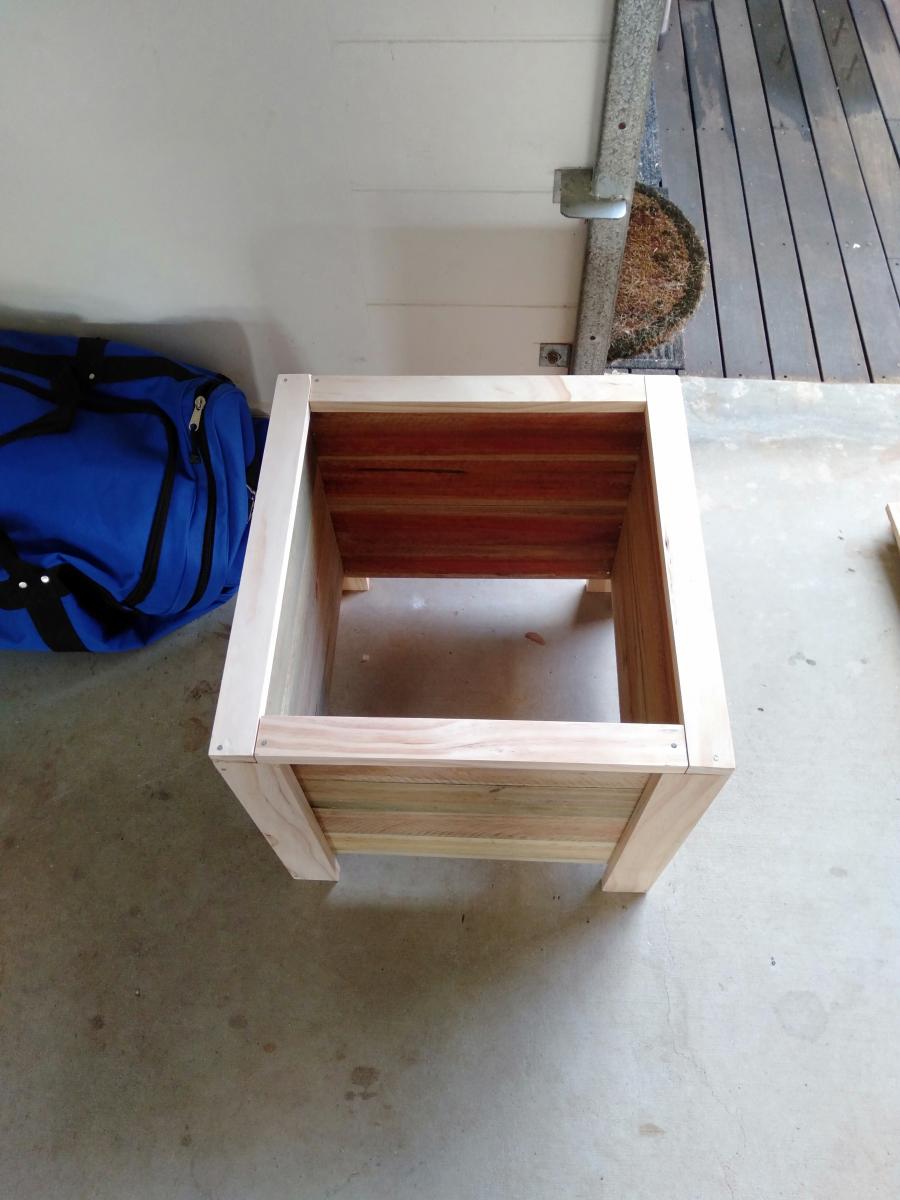
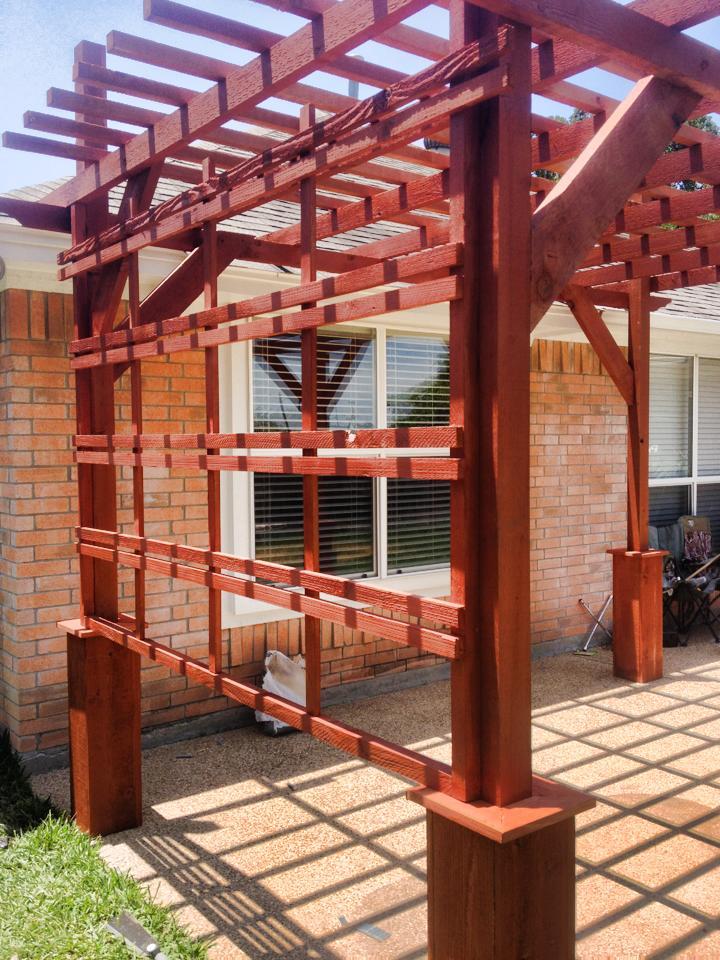
I had a wonderful time making this toy box and learning new techniques. Having access to a table saw really made this project turn out awesome. I was able to get 1/4" shims made that allowed for easy, precise offsets. The family just loved it!

Built from Plan(s)
Estimated Cost
$100
Estimated Time Investment
Weekend Project (10-20 Hours)
Finish Used
ProClassic white paint
Recommended Skill Level
Intermediate

Planter Boxes

Submitted by Doc54 on Tue, 03/09/2021 - 22:31

Hi,
I made these planter boxes from Ana's plans. The plans made it an easy project and we also decided to paint them white.

Cheap and very effective in the garden.

Thanks Ana...

Estimated Cost
Approx. AUD $40 per box
Estimated Time Investment
Afternoon Project (3-6 Hours)
Finish Used
We simply used an outddoor paint - low sheen - white and applied 3 coats to each box.
Recommended Skill Level
Beginner

Comments

Farmhouse Table

Fun and challenging build, be sure to square the edges of lumber before assembly to get a better fit

Built from Plan(s)
Estimated Time Investment
Week Long Project (20 Hours or More)
Recommended Skill Level
Intermediate

Comments

Mega work bench with miter station

Submitted by Anonymous (not verified) on Mon, 10/04/2021 - 16:51

When I was 8 months pregnant and going through my “nesting phase” I knew I needed to get my garage organized. Prior to building this, my tools were all over the place. To try to get it done before the baby came, I called my dad to help me out, and we built it together in just a couple days. It was a weekend I will never forget and I smile every time I walk into my shop knowing we did it together.

Comments

Pergola

Submitted by dekew on Fri, 06/07/2013 - 13:33

Built this great pergola from Anna's Weatherly Pergola Plan. I am very pleased on how it turned out. This was a fairly simple build and I added a few of my own touches to it. I used Red Cedar as my wood of choice. I also added a great Olympic Stain + Sealer to help keep it looking brandnew. I hope y'all enjoy the pictures.

Built from Plan(s)
Estimated Cost
$650
Estimated Time Investment
Weekend Project (10-20 Hours)
Finish Used
Olympic Stain+Sealer 704 Redwood

Pieces where first cut to size then sprayed with a Graco TrueCoat Plus. After drying the pergola was assempled.
Recommended Skill Level
Intermediate

Comments

dwm22

Thu, 06/27/2013 - 15:33

I like the red color and the added touches (lights, bird feeder, and "wall"). I finished mine in May and like the idea of adding small lights for the evenings. Well done!

jbayer80

Sun, 04/13/2014 - 11:17

I just wanted to say that 4th picture is so cool looking. Love the dark clouds and blue sky. Very nice pergola, by the way.

Bookshelf Hidden Doors Over Closet

Submitted by Anonymous (not verified) on Mon, 10/23/2017 - 10:13

Hidden door bookshelves hide a furnace closet.  Built by Kraig Faulkner

Built from Plan(s)
Recommended Skill Level
Advanced

Comments

charkue

Thu, 09/17/2020 - 08:01

I'm currently working on a basement renovation project. I'm probably going to incorporate a feature like this for my mechanicals, too.

One important safety note for anyone who wants to do this: It's recommended that your furnace be a minimum of 30" away from any combustible materials. That includes walls and partitions. The image of this project displayed is right next to the furnace, which is not a good idea.

Modern Slat Top Outdoor Wood Bench

Submitted by ckaye on Sun, 07/07/2013 - 18:38

We wanted an outdoor bench for our front entrance way, this one is just what we were looking for! Thank you for the plans.

Estimated Time Investment
Day Project (6-9 Hours)
Finish Used
2" x 6" Spruce Black Stain
Recommended Skill Level
Beginner

Comments

beardjulie

Wed, 05/04/2016 - 10:01

I am really a novice. The plans say that the 1x4's should be 18-1/2" high? But the measurement of the vertical legs are 14", and the horizontal piece is 4" high, which adds to 18". It all looks flush in the photo. Could you explain what I am missing? Thank you so much!

In reply to by beardjulie

Rudystawarek

Wed, 05/04/2016 - 11:30

So from what i see in the plans Each 1x4 board is to be cut at 18" and the 2x4 is to be cut at 14-1/2". Cutting the 2x4 at 14-1/2" will insure the 1x4 and 2x4 are fluish for the end product. It doesnt seem to add up given the demensional names of the lumber hahaha however the actual width of a 2x4 (the one the will be going horizontal) is acutally 3-1/2". so then you cut you 2x4 leg piece at 14-1/2" and then lay the horizontal 2x4 on top the total height will be 18" and should be flush with your 1x4 that is cut at 18"

beardjulie

Fri, 05/27/2016 - 14:04

That is too funny! That is a dead give away that I'm new at this! Thanks you!

beardjulie

Fri, 05/27/2016 - 14:04

That is too funny! That is a dead give away that I'm new at this! Thanks you!

Platform Outdoor Sectional

We made our sectional higher off of the ground than the original plan by replacing the single 2x4 base with stacked 2x6s, stained it black and used cushions from Target that we managed to get at 50% off. It fits beautifully in our screen porch and has made what was a waste of space into an outdoor living room. Thanks for the great plans!

Estimated Time Investment
Weekend Project (10-20 Hours)
Finish Used
Olympic Maximum Stain and Sealant
Recommended Skill Level
Beginner

Comments

lscrandall

Sun, 07/14/2013 - 08:21

I love what you did with the plan. When we do our Pergola on our patio - we are going to change to this type of furniture or a new farm house table. I love the paint color ideas and the adjustments all for such a great price! Great job!

DIY PLANTER BOXES WITH PALLET WOOD

We picked up a couple 14.9" square plastic garden planters from Home Depot and ended up creating some wood planter boxes from pallet wood for them to sit in. 

I didn't add up the cost of these boxes, because we had most of the wood and only needed a few pieces, but I'd say they were definitely less than $10 a box. 

We altered our dimensions to fit our HD planters so they would slip in for a snug fit and made the legs flush with the top of our sides. We build a simple frame for the top, which allowed the lip of our HD planters to sit firmly on top. 

Something I didn't do, but wish I did: fill in the cracks with wood filler.  There were a couple places that really could have used it, but I was in a rush and decided to skip it.  They turned out great, but could have been even better had I taken an extra 30 minutes.  On an off weekend, we are going to use wood filler in the seams, sand them down, and do a second coat of white paint. 

Can't wait to plant these with some mums for Fall! :)

Built from Plan(s)
Estimated Cost
$20 total for 2 boxes.
Estimated Time Investment
Day Project (6-9 Hours)
Finish Used
White Semi-Gloss outdoor paint
Recommended Skill Level
Beginner

Dog Kennels

Submitted by Anonymous (not verified) on Sun, 04/24/2022 - 10:20

Here's some photos of customer products I have built, over the past 2 years.


by Bob

Outdoor Chairs

Submitted by Anonymous (not verified) on Sat, 07/16/2022 - 17:45

Brightly Painted chairs are popular here. I made two unpainted chairs in an afternoon. I would paint the pieces before putting them together if I made them again. Very comfortable!

Comments

Living Room Storage Table

Submitted by dritcheson on Sat, 11/10/2018 - 19:11

First furniture project.  Storage table for my daughter and her husband.

Estimated Time Investment
Week Long Project (20 Hours or More)
Finish Used
Valspar Oil Based Paint, Minwax Dark Walnut Gel Stain and Minwax Wipe On Poly
Recommended Skill Level
Intermediate

Large Wood Pet Kennel End Table

Thanks for the plans!

Built from Plan(s)

Comments

Rustic X Kitchen Island - Double

Submitted by Anonymous (not verified) on Mon, 01/14/2019 - 01:54

I followed the plans except for the top, I used a 2x12, 2x4 and 2x12 pocket holes together.


Burnt the wood with a torch and stained over.

Thanks for the plans!


Questions? [email protected]

Built from Plan(s)
Estimated Cost
200$
Estimated Time Investment
Weekend Project (10-20 Hours)
Finish Used
Minwax provincial and topcoat polyurethane and mineral spirits 75/25 mix
Recommended Skill Level
Intermediate

Anthropologie Style Farmhouse Table

My husband built the table and benches and I applied the finish. It pretty much took us most of two weekends, but was well worth it. We learned that we should have used kiln dried wood for the table top, since ours warped pretty significantly. We will most likely replace the planks on top of the table in the near future. Also, the plans for the length of the bench don't allow for the benches to be pushed in under the table. The supports get in the way (make sure your measure!). I used Minwax Ebony stain and wiped it off quickly after applying it, so that the wood would show through. I also used a satin finish to keep true to the vintage look, yet give the table some protection from the elements.

Estimated Cost
140.00 for both the table and benches
Estimated Time Investment
Weekend Project (10-20 Hours)
Finish Used
Minwax - Ebony
Recommended Skill Level
Intermediate

Washer Dryer Pedestals Bases

This pedestal base for the washer and dryer really created the perfect opportunity to organize and declutter our tiny laundry room. Had to resize it a bit to fit the space but it turned out perfect! I added a super easy top for an even counter space and bought some stock laundry room cabinets to sit in the back for extra storage. Such an upgrade!

Toddler size loft bed

Submitted by jlandr on Tue, 02/28/2012 - 23:20

I built this loft bed for my daughter who is 3. It is built like the loft bed but the height of the fort bed since she is still little. The first night we were worried that she would somehow roll out since the mattress is thicker than I had realized making the side rails shorter, however she has not had any problems. I used 1x2s and a few 1x3s since that is what I had in the shop. If I were to do it again I would use more 1x3s for support or add plywood like the Fort bed.

Estimated Cost
$50 to $100, the lumber was purchased for another project that never made it out of design phase. Not sure how much we paid for it.
Estimated Time Investment
Weekend Project (10-20 Hours)
Finish Used
Spray lacquer. Only one coat. We should have used more coats and sanded it down more, especially the edges around the top of the ladder, I've noticed that it is a little sharper than I had intended. My husband is not a very patient man and we tried to build this with the 3 year old and 4 month old in the shop with us. It started out good but quickly became a bad situation because I had already taken her old bed out of the room and we needed to finish this one. Oops! I got a little excited!
Recommended Skill Level
Intermediate

Comments

leah47 (not verified)

Mon, 10/22/2012 - 13:35

I love this bed but I need it in a size that would fit a toddler sized mattress. This looks like it is toddler sized but are the plans for a twin?

leah47 (not verified)

Mon, 10/22/2012 - 13:53

Is there a plan that includes toddler dimensions for this bed. It appears the one pictured is a toddler bed but the plans seem to be for a twin.

leah47 (not verified)

Mon, 10/22/2012 - 13:54

SO sorry about the four posts... didn't see it go through so I tried too many times :(

How to Build a Fireplace Mantel and Surround

Submitted by MillerMade on Thu, 03/24/2016 - 09:05

The Custom Built-ins started out with lots of research, and like many DIY project we looked to Pinterest and Houzz for inspiration. A lot of love and time went into this project. I can't stress enough how important research is. This process is often over looked because DIYers just want to get to the building process as quickly as possible, but trust me when I say doing solid research will save you a lot of stress and time when it comes to building.


Estimated Cost
$4,000-$6,000
Estimated Time Investment
Week Long Project (20 Hours or More)
Finish Used
White Paint
Recommended Skill Level
Advanced

Fish Tank Console

Submitted by Anonymous (not verified) on Mon, 07/24/2023 - 10:30

fish tank console

I designed and build this cabinet that is being used to hold a fish tank. It’s made from 2”x6s” for the sides and top and most of the rest of it is made from 3/4” plywood with extra support underneath to account for the extra weight of the tank with water. The stain is gunstock and looks absolutely amazing! The black hardware really makes it pop. (My new favorite combo)Thanks for taking a look and have a great day!

Jake from Jake N’ Jill’s Woodshop LLC 

4x4 Truss Table and Benches

Submitted by Anonymous (not verified) on Sun, 11/24/2019 - 12:41

Modified so that it could fit 12 people comfortably.

Estimated Time Investment
Week Long Project (20 Hours or More)
Recommended Skill Level
Intermediate

Comments

Seasonal And Holiday
Back