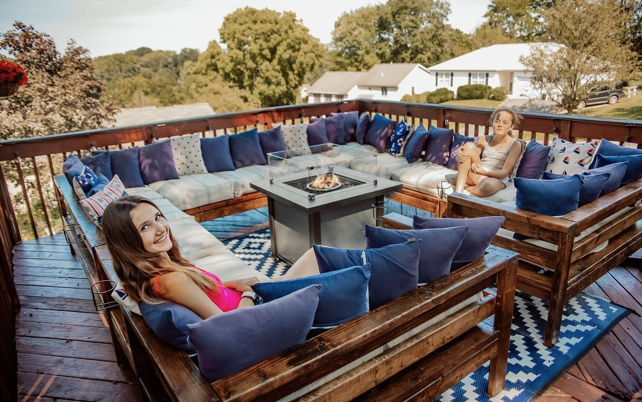
Outdoor U-Shape Sectional

Outdoor Sectional

Outdoor Sectional

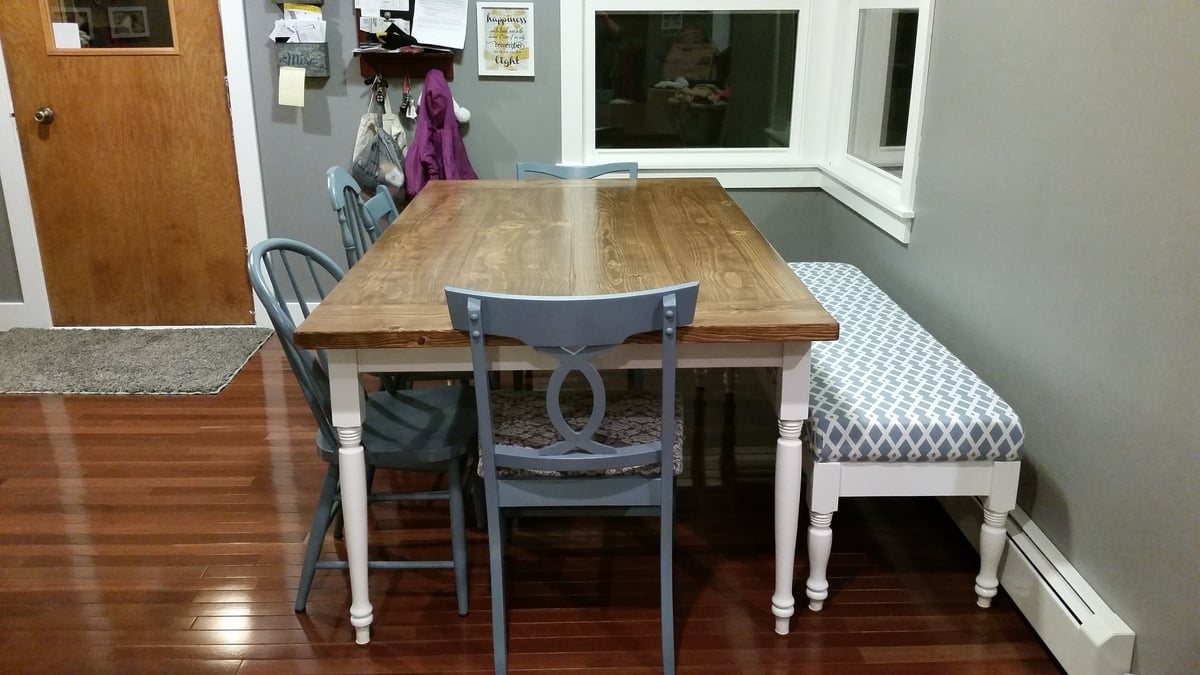
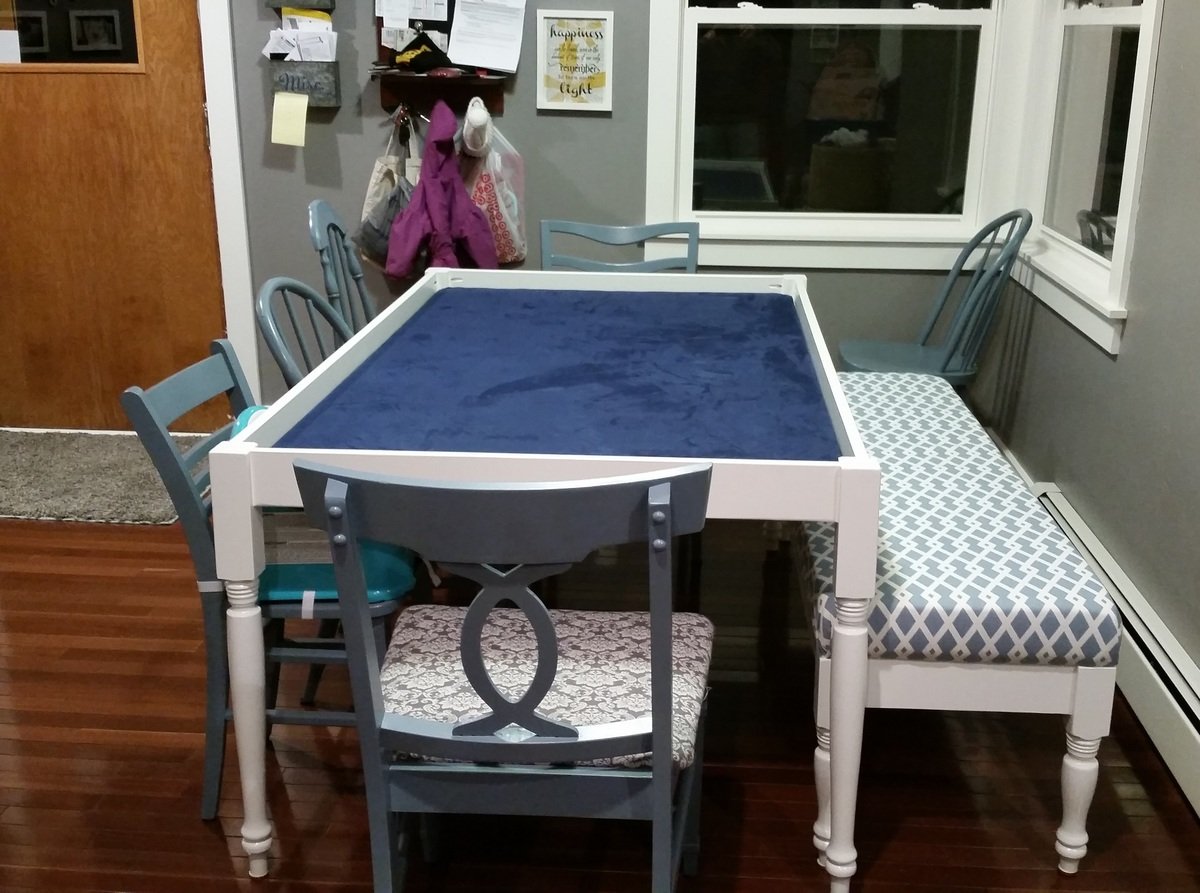
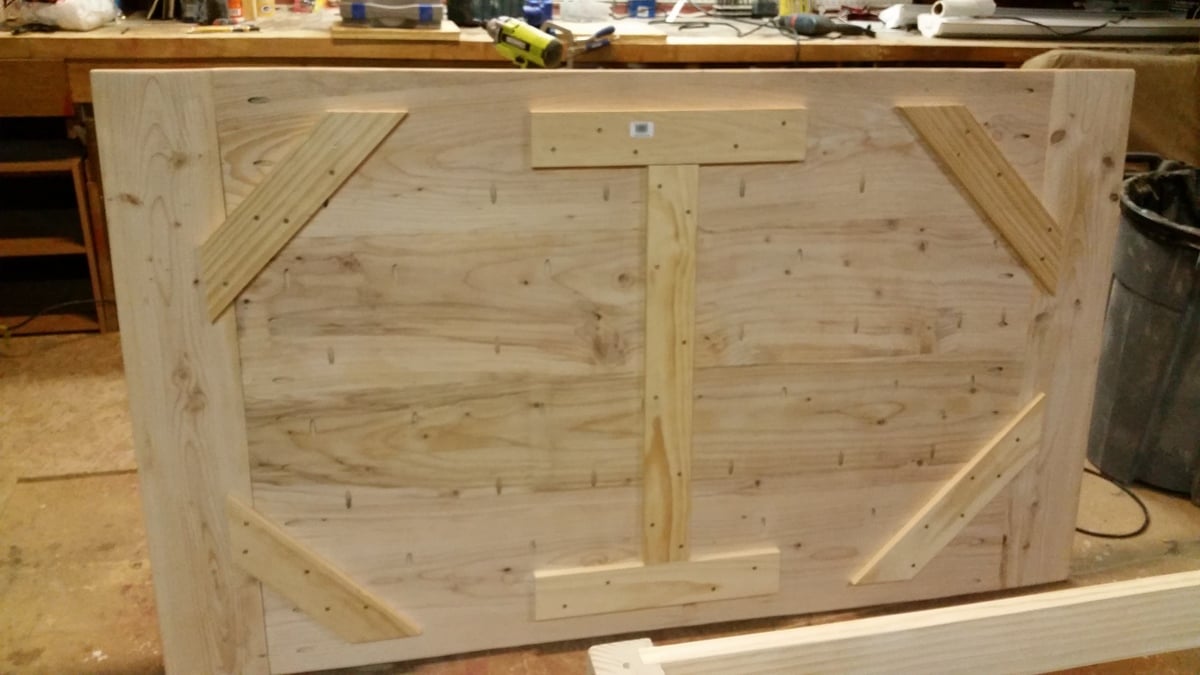
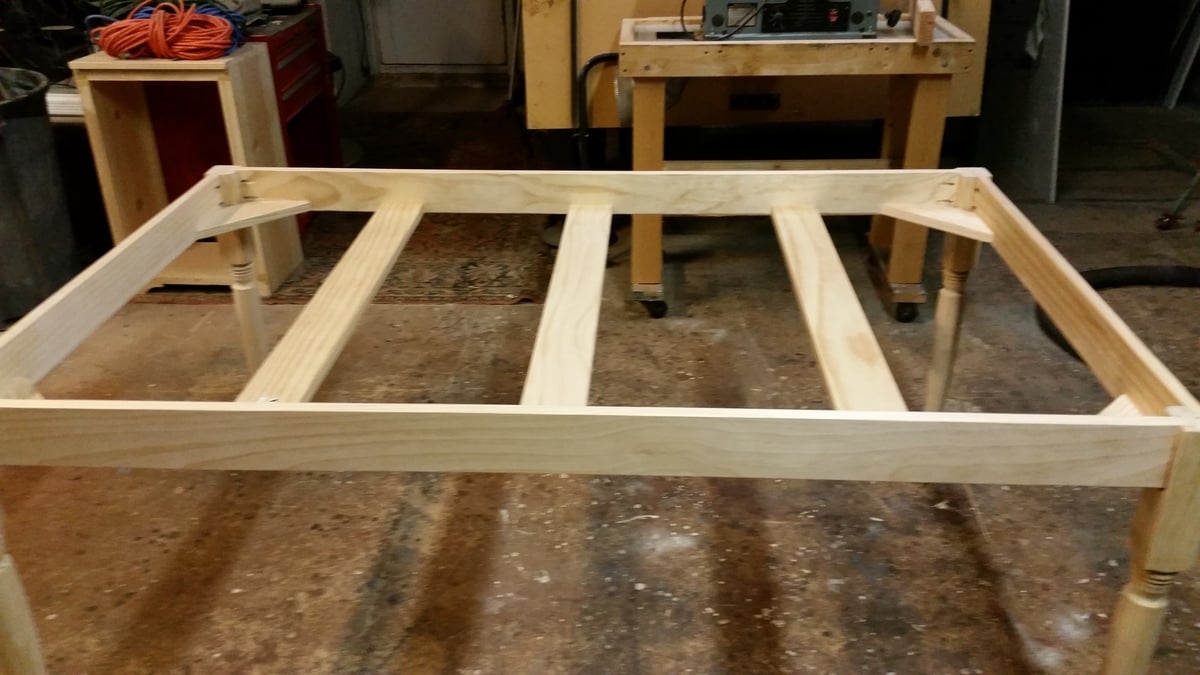
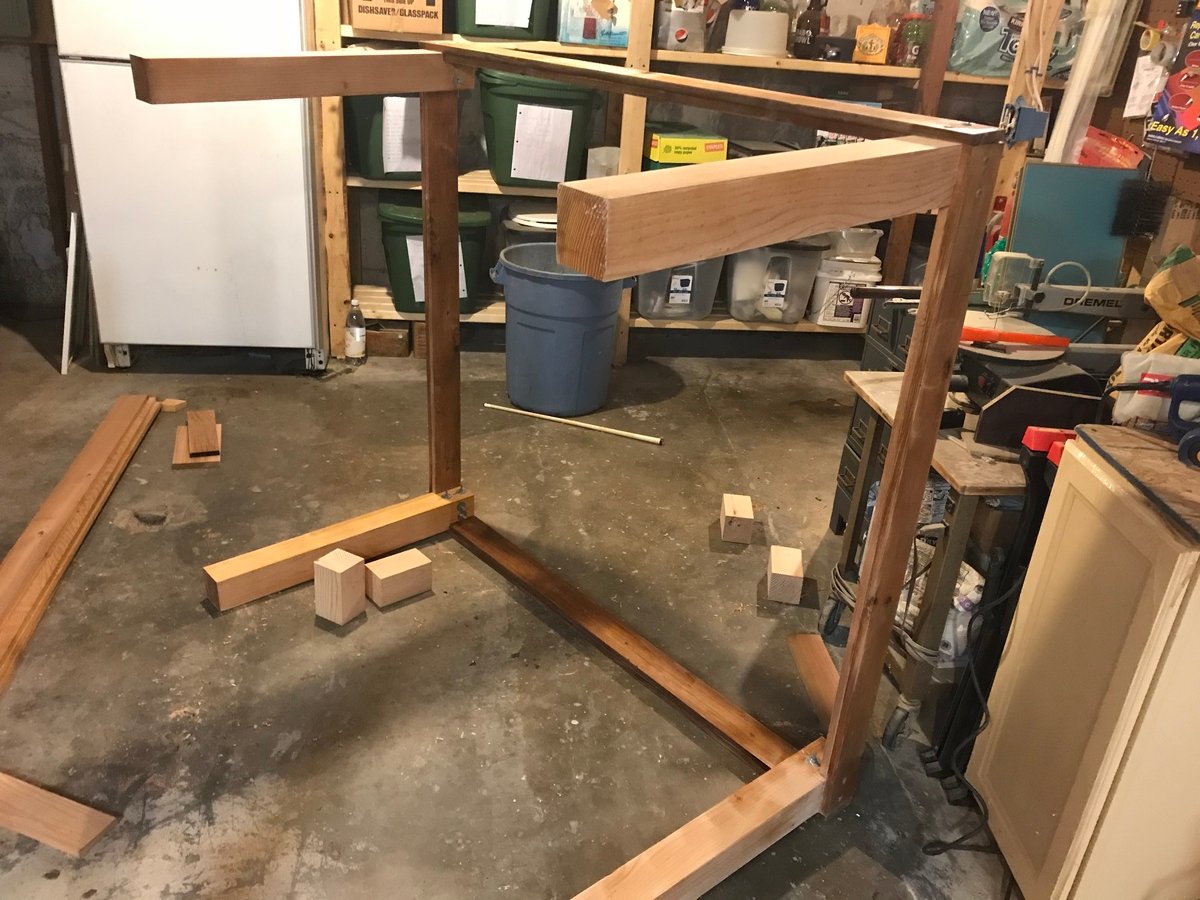
My wife and I were looking for a new dining table, the one we had was a bar height which worked well for our daughters high chair, but she was going to be transitioning to a booster seat . We shopped around and had sticker shock at the cost of a dining room set. We enjoy playing board games and I had been looking into possible buying a board gaming table, but those more expensive and some had long lead times as well. I tossed out the idea that I could make our table and my wife agreed but gave me a deadline. I had built a few smaller pieces before but nothing like this. I based my plans off the farmhouse table for the top and used store bought legs. The top needed to be sturdy since it is not attached to the base, I did add blocking on the back so the top doesn’t move around and it is heavy enough that it doesn’t flip up if you lean on it. I moved the typical supports down to the bottom of the side rails and added a ¾” piece of MDF that I had for the gaming top. We used spray adhesive to attach some batting and used blue suede for the gaming surface since we are fans of Doctor Who. I added handles to the top on the inside to help when it is moved off the table for gaming. I built the bench too and made it so we could slide it under the table to save on space when we did not need it. The other chairs are hand me downs and Salvation Army finds that we spray painted. The only addition that I have to make is to build some sort of cup holders.

Tue, 04/26/2016 - 19:43
this is awesome! I hope to build a board game coffee table. I love your idea of the table top.

In reply to this is awesome! I hope to by handmadewithash
Tue, 05/03/2016 - 08:59
I like your Star Wars marquee, I might have to clear some wall space for that.
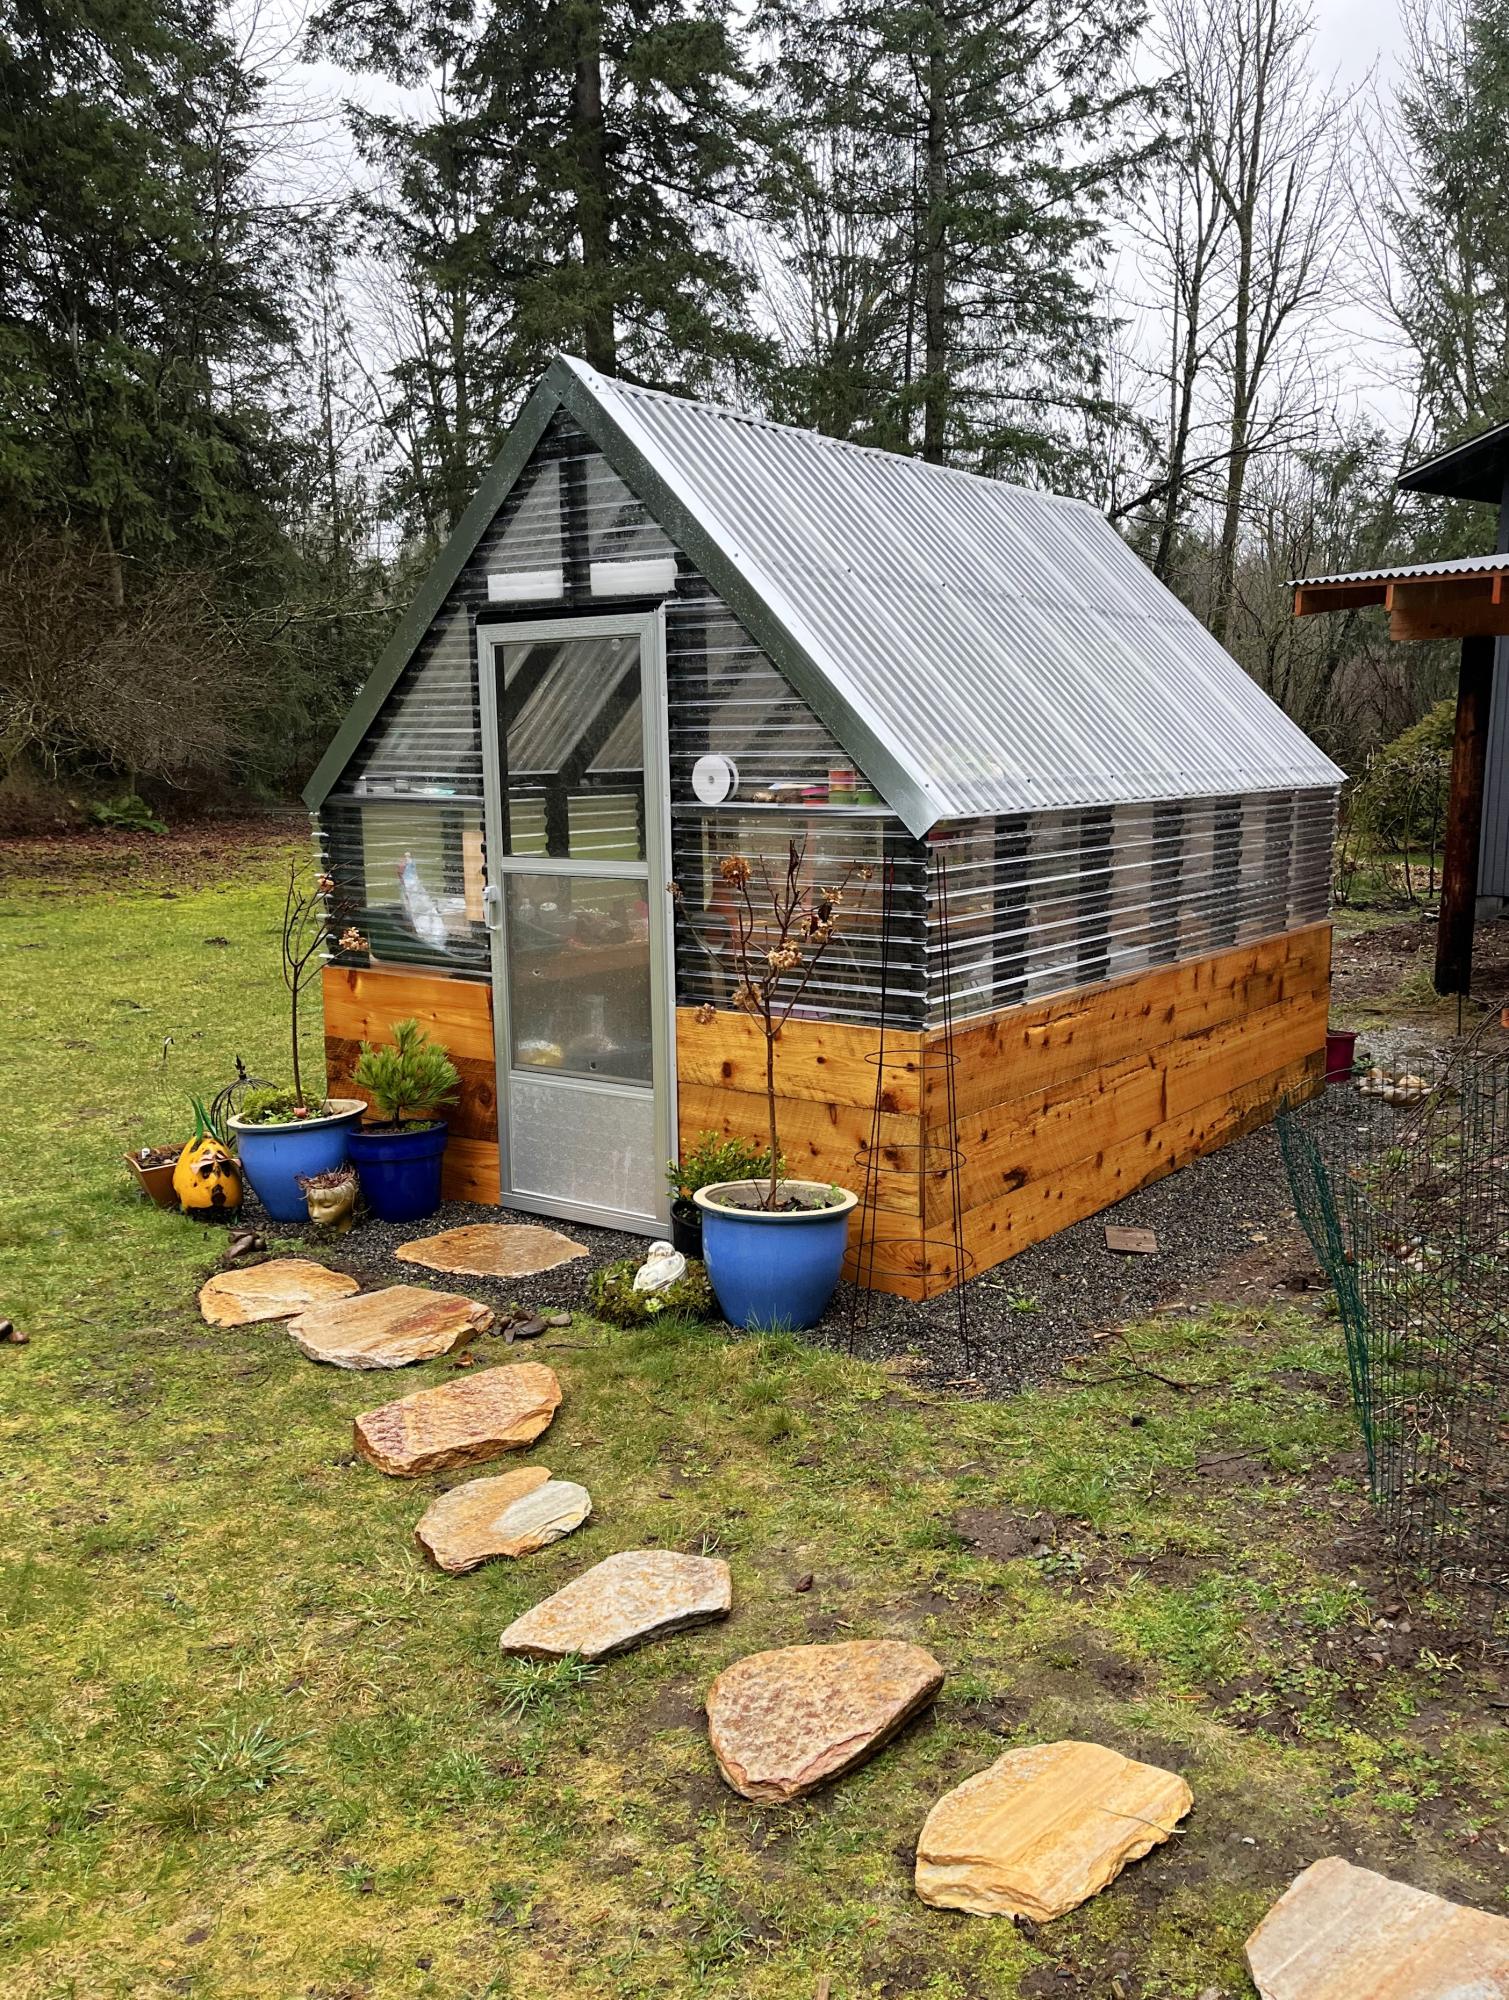
Best looking greenhouse and great size!
Mary McLachlan
DIY Outdoor Wood Chairs
by Tara

I showed my wife the Laundry Dresser featured on Ana White's website and she asked if I could make one for her, but not quite so tall. I also turned the orientation to fit our laundry room space. I used primarily oak from recycled pallets to build the Laundry Basket Dresser. She wanted a work space on top, so folded laundry, empty baskets, etc. all have a temporary resting place depending on the day. From start to finish, it took me about 6 hours. She plans to stain the piece at some point, but its already in use, so I'm not 100% sure that will ever happen until we move or something. ;-) Great idea and laundry room organization!


Sat, 09/08/2012 - 17:39
Great job on this!! I love the open sides!! Thanks for sharing. :-)
Mon, 09/10/2012 - 10:22
I love the open sides, plus it makes it much more feasible to build with scraps repurposed wood, which I love. Thanks for the inspriation
Sun, 10/19/2014 - 06:16
I have a pallet sitting against the garage that would be perfect for this
Looks fab, great job.
Fri, 01/09/2015 - 12:27
Hi, I really like this project but was curious what size laundry basket you are using in the project?
Sun, 06/14/2015 - 20:16
Soooo I made this according to the measurements and no laundry basket I find fit. Kind of dissapointed in the fact that this cool thing I just built doesn't have any baskets that will fit it. Any advice on finding a basket that fits?
Fri, 07/10/2015 - 20:14
Same here. No basket fits. Did you ever find one?
Fri, 07/10/2015 - 20:56
I think the idea is to build it to fit the baskets you have or buy some and build around them.

We went off the Farmhouse table and bench design but had to customize the length of the table and bench so that it fit in our kitchen space. The table was our first ever project and we made a few mistakes but learned from them and built the bench and are hoping to move up to the Farmhouse bed and then the fullstorage bed.

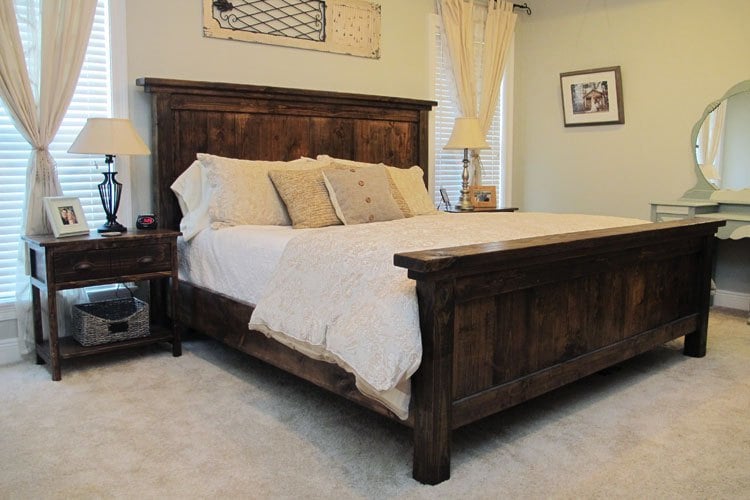
We built this Farmhouse Bed in 1 weekend for less than $200!

Fri, 02/20/2015 - 19:26
Beautiful! Both the bed and bedside table turned out great!
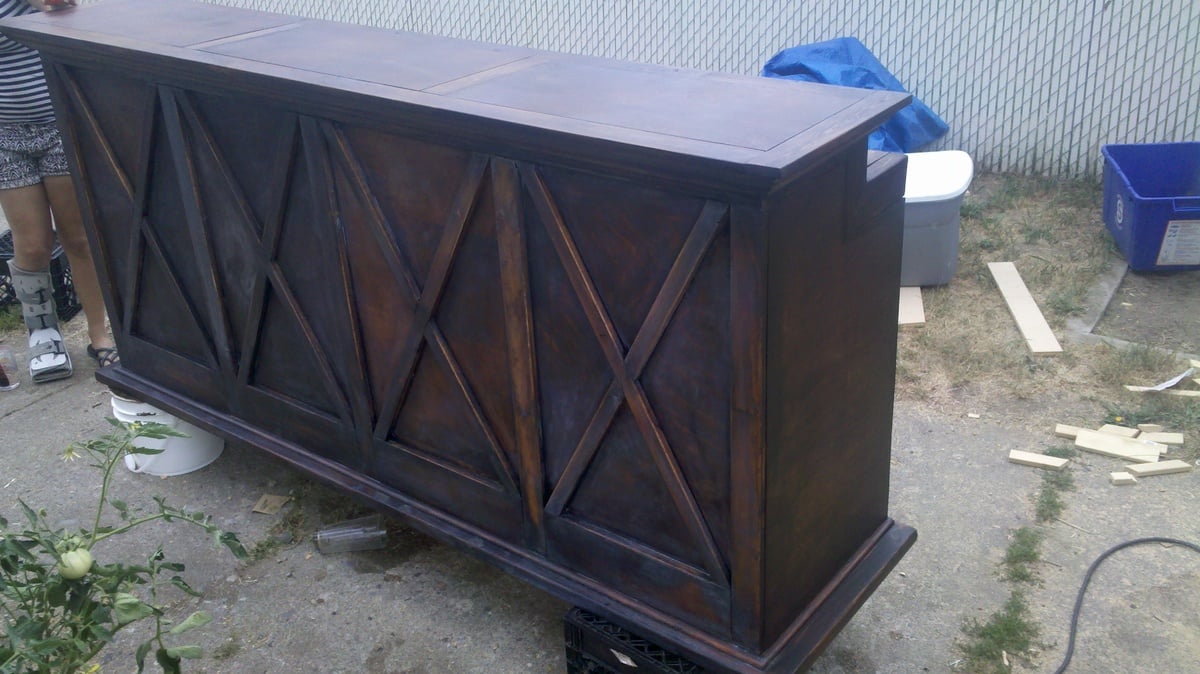
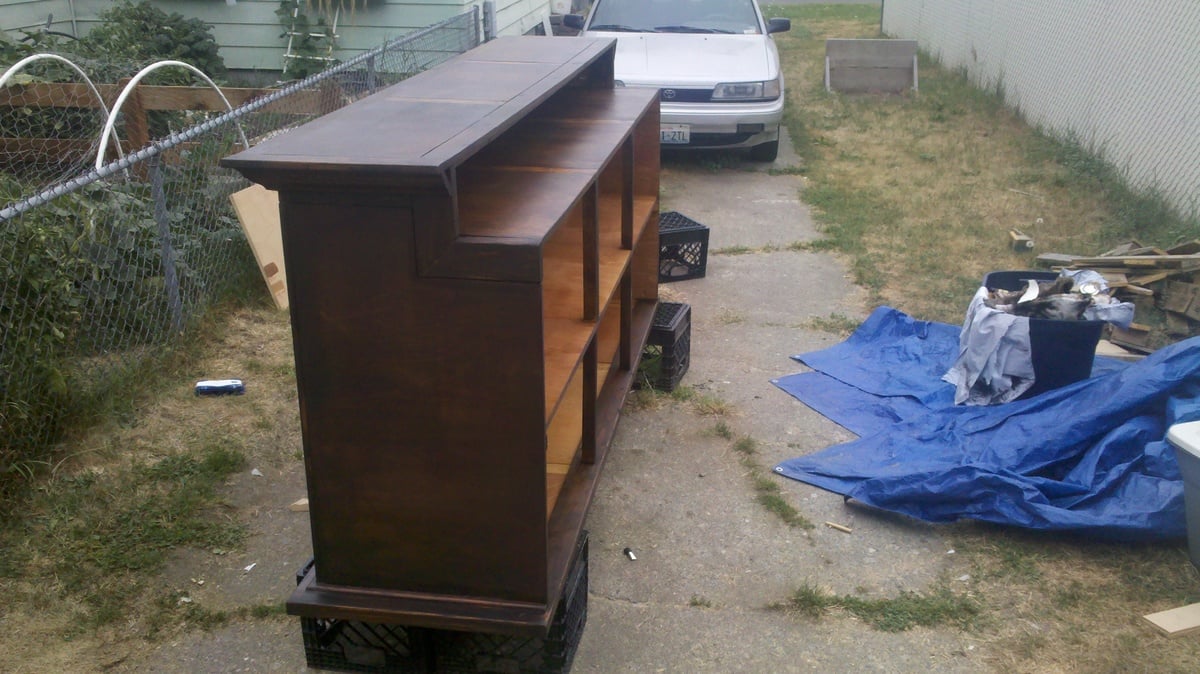
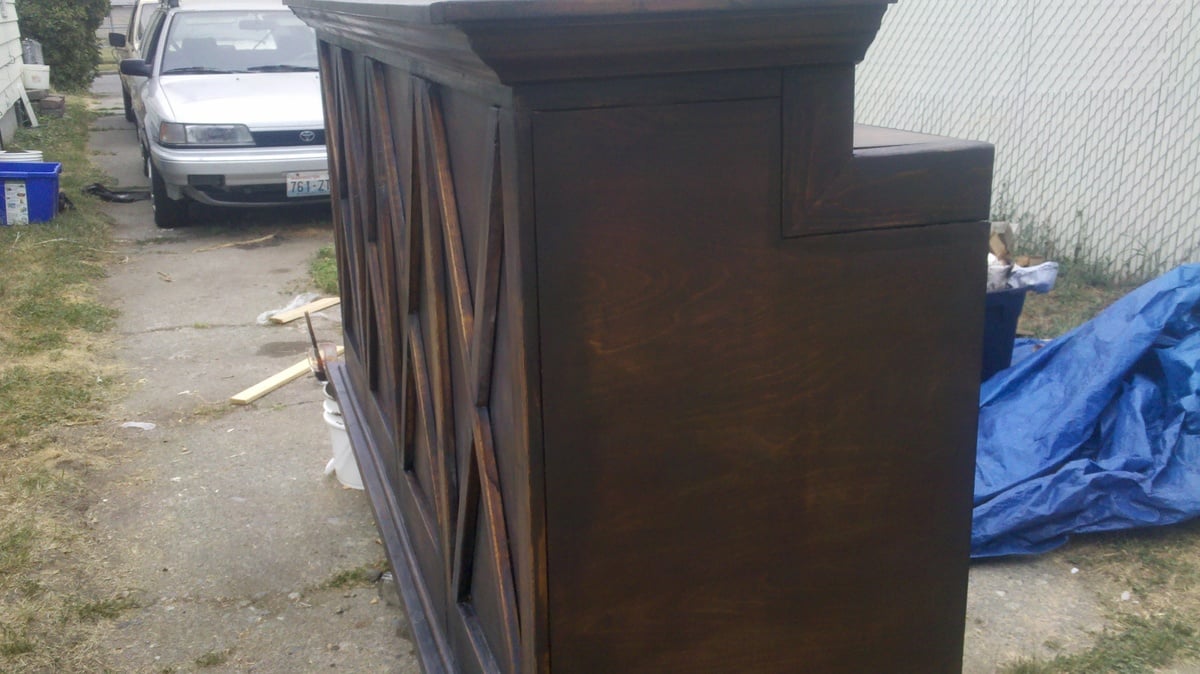
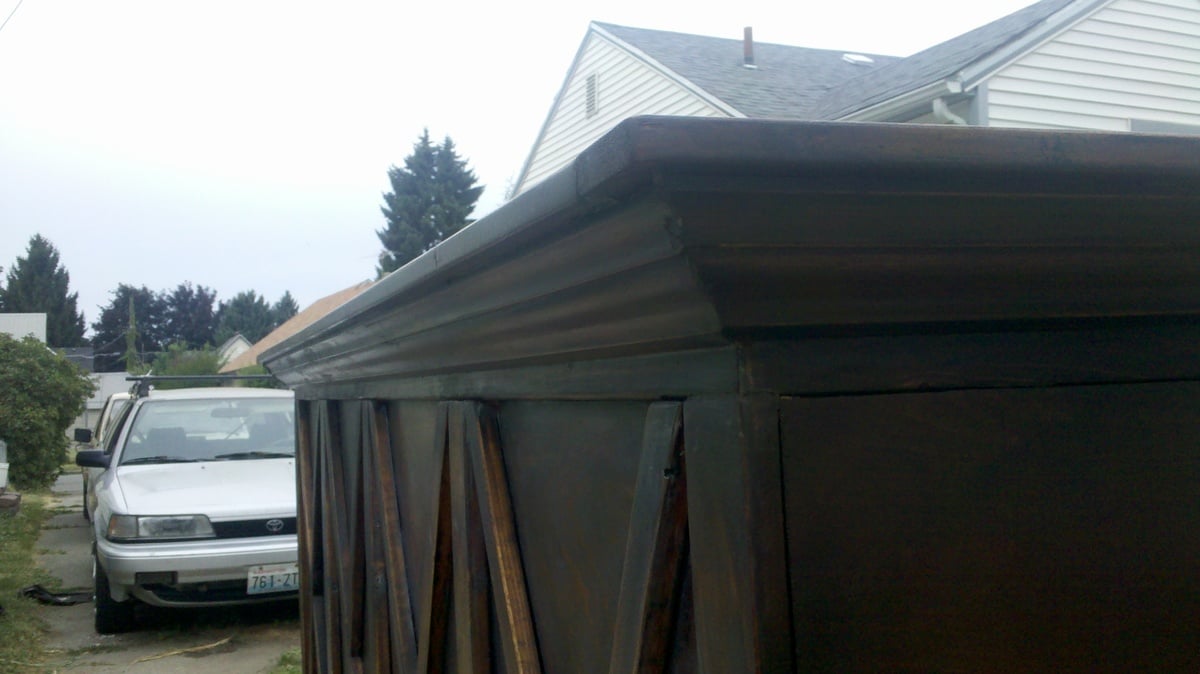
This is our first original design! We had a request for a custom bar/retail counter for my mother in law's children's re-sale store and this is what we came up with! After we found a ridiculously awesome deal on 3/4 inch hardwood plywood (the only down side was that it was already cut into 2ft by 4ft pieces) we quickly got to work. Using our trusty Kreg Jig we turned 4 pieces of plywood into one large piece to create the front of the bar. From there we attached 1x3s and 1x2s to cover any seams that were caused by the different plywood pieces.
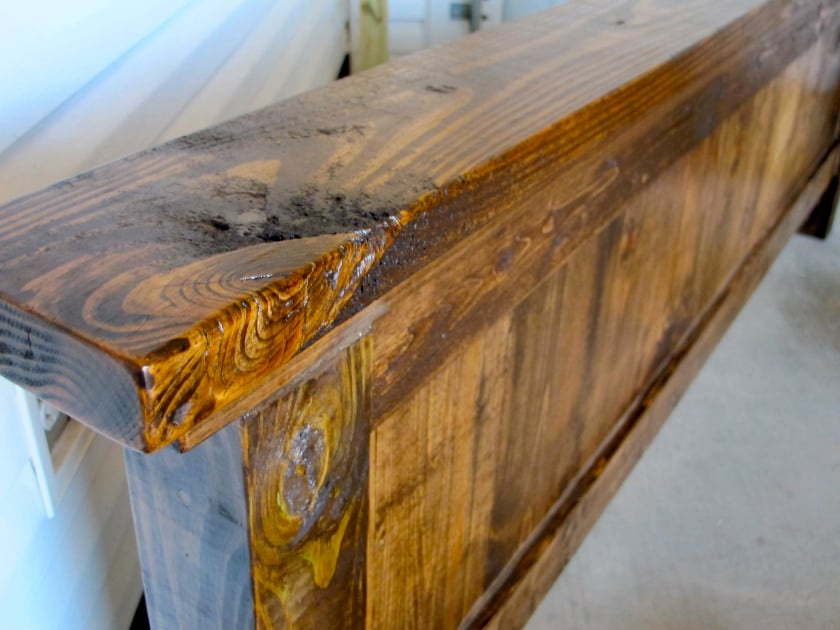
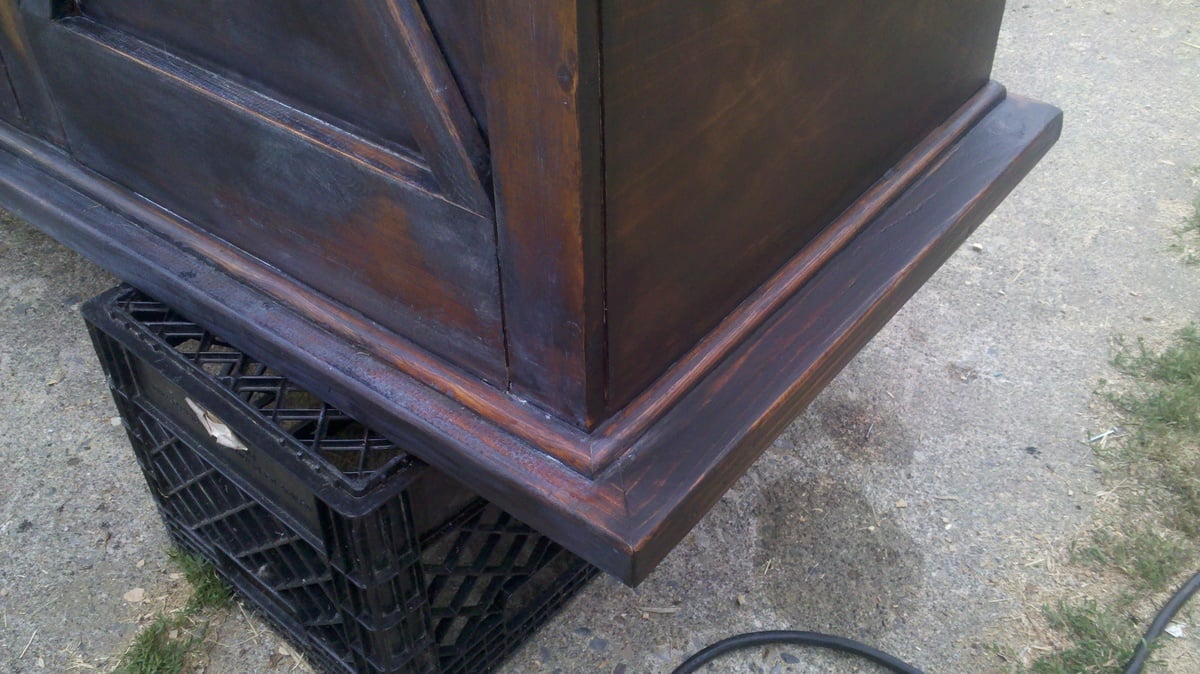
The finish was kind of a struggle but I love how it turned out in the end. It looks like the piece was made 100 years ago and definitely has a lot of soul. I started with Early American but it made the wood too red. So from there, I layered on Kona stain, lime wax, and dark wax and this is how it turned out! Which was not exactly what I was going for, but I LOVE it!
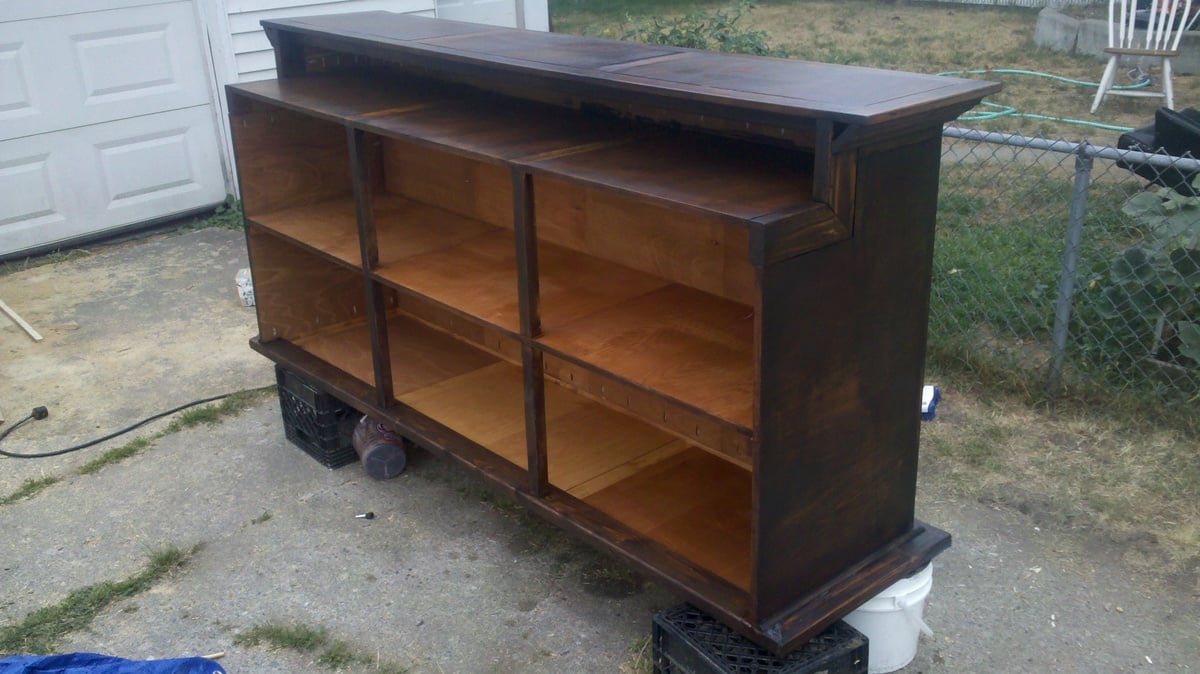
We are so happy with how it turned out. It is being picked up by its new owner tonight and I'm soooo sorry to see it go. We're happy that the piece will be functioning beautifully in the store with TONS of storage in the back. We're very proud of this one.
oh and it cost us about $130 for all lumber and finish materials.

Thu, 08/15/2019 - 12:41
Wow!!! This is amazing! I'd love to draw up plans if you are open to that!
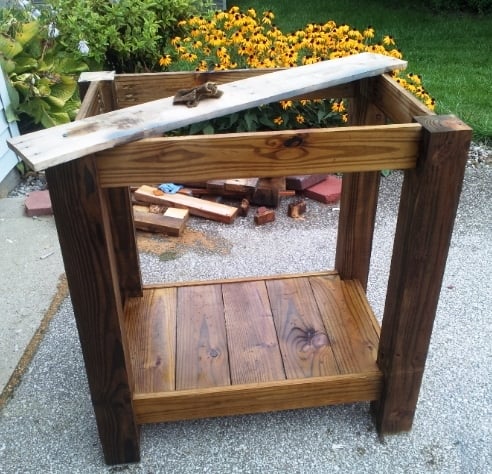
Modifications to the simple outdoor table plan thanks to Finn’s dad.
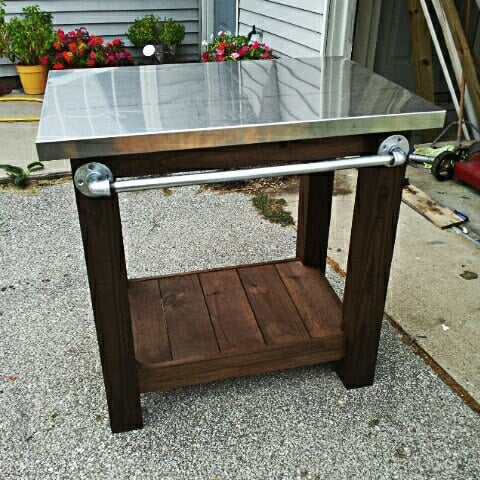
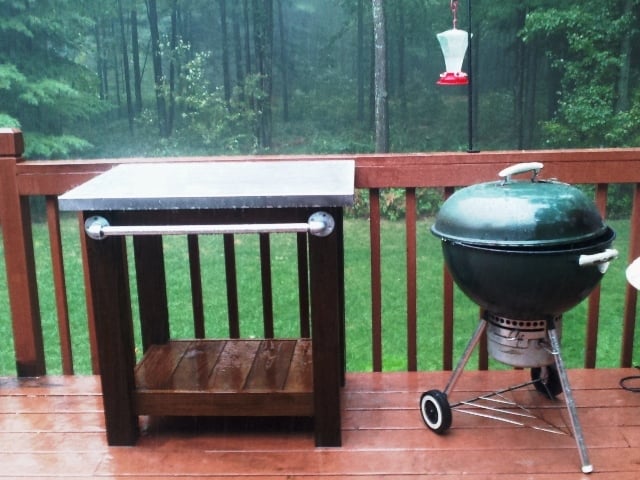
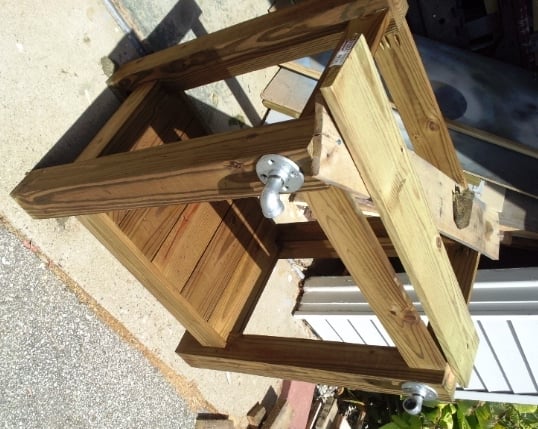
I made this table to go next to an outdoor grill to be used as a food prep area or just a surface for holding ingredients (instead of using the deck railing!). The top is stainless steel which fits tightly over 2 3/4" pieces of plywood laminated together. The bar/handle in front is made out of galvanized pipe. All wood was treated.
Legs - 4x4 posts
Bottom shelf - 1x6's
Sides - 1x4's
Top - 2 pieces of 3/4" plywood laminated together with a stainless steel top (custom fit) over top
Towel bar - galvanized pipe (cut and threaded to size at Lowe's), floor flanges and 90 degree elbows
Thu, 05/15/2014 - 10:33
Sorry about the late reply! Yes, I just gave my dimensions to a local steel supplier and they made the top. I think I have about $40 into the stainless. They didn't weld the corners but I've never had an issue with them.

Sat, 04/26/2014 - 15:41
I too would like to know your source for the sheet metal.

In reply to Stainless steel sheet metal by Pursuit of Handyness
Thu, 05/15/2014 - 10:35
I just found a local steel supplier, told them what I need and they formed the top. It cost me around $40 (without welding of the corners). I took a fine grit sandpaper to it afterward to scuff it up so it didn't look so bright.
Wed, 04/30/2014 - 12:55
I would like to know are there any plans available to make this table? I am very impressed of its design.
In reply to Grill table with stainless steel top by AMR4412
Thu, 05/15/2014 - 10:46
No...I didn't have any plans when I built it but it's a very simple concept. I chose to use all treated wood since I knew it would be sitting outside unprotected. However, my 4x4 posts weren't square so this caused a lot of problems and everything was built to fit. I believe I just used 4x4's, 1X6s (for the bottom shelf) and 1x4s for the sides (top and bottom). For the top, I just laminated 2 pieces of 3/4" plywood together to bulk it up and then had the stainless top built to fit. It fit perfectly so I didn't glue it to the plywood. This makes it easy to remove and clean, if necessary. For the galvanized pipe (towel bar), I bought it at Lowe's and had them cut/thread it to fit my dimensions.
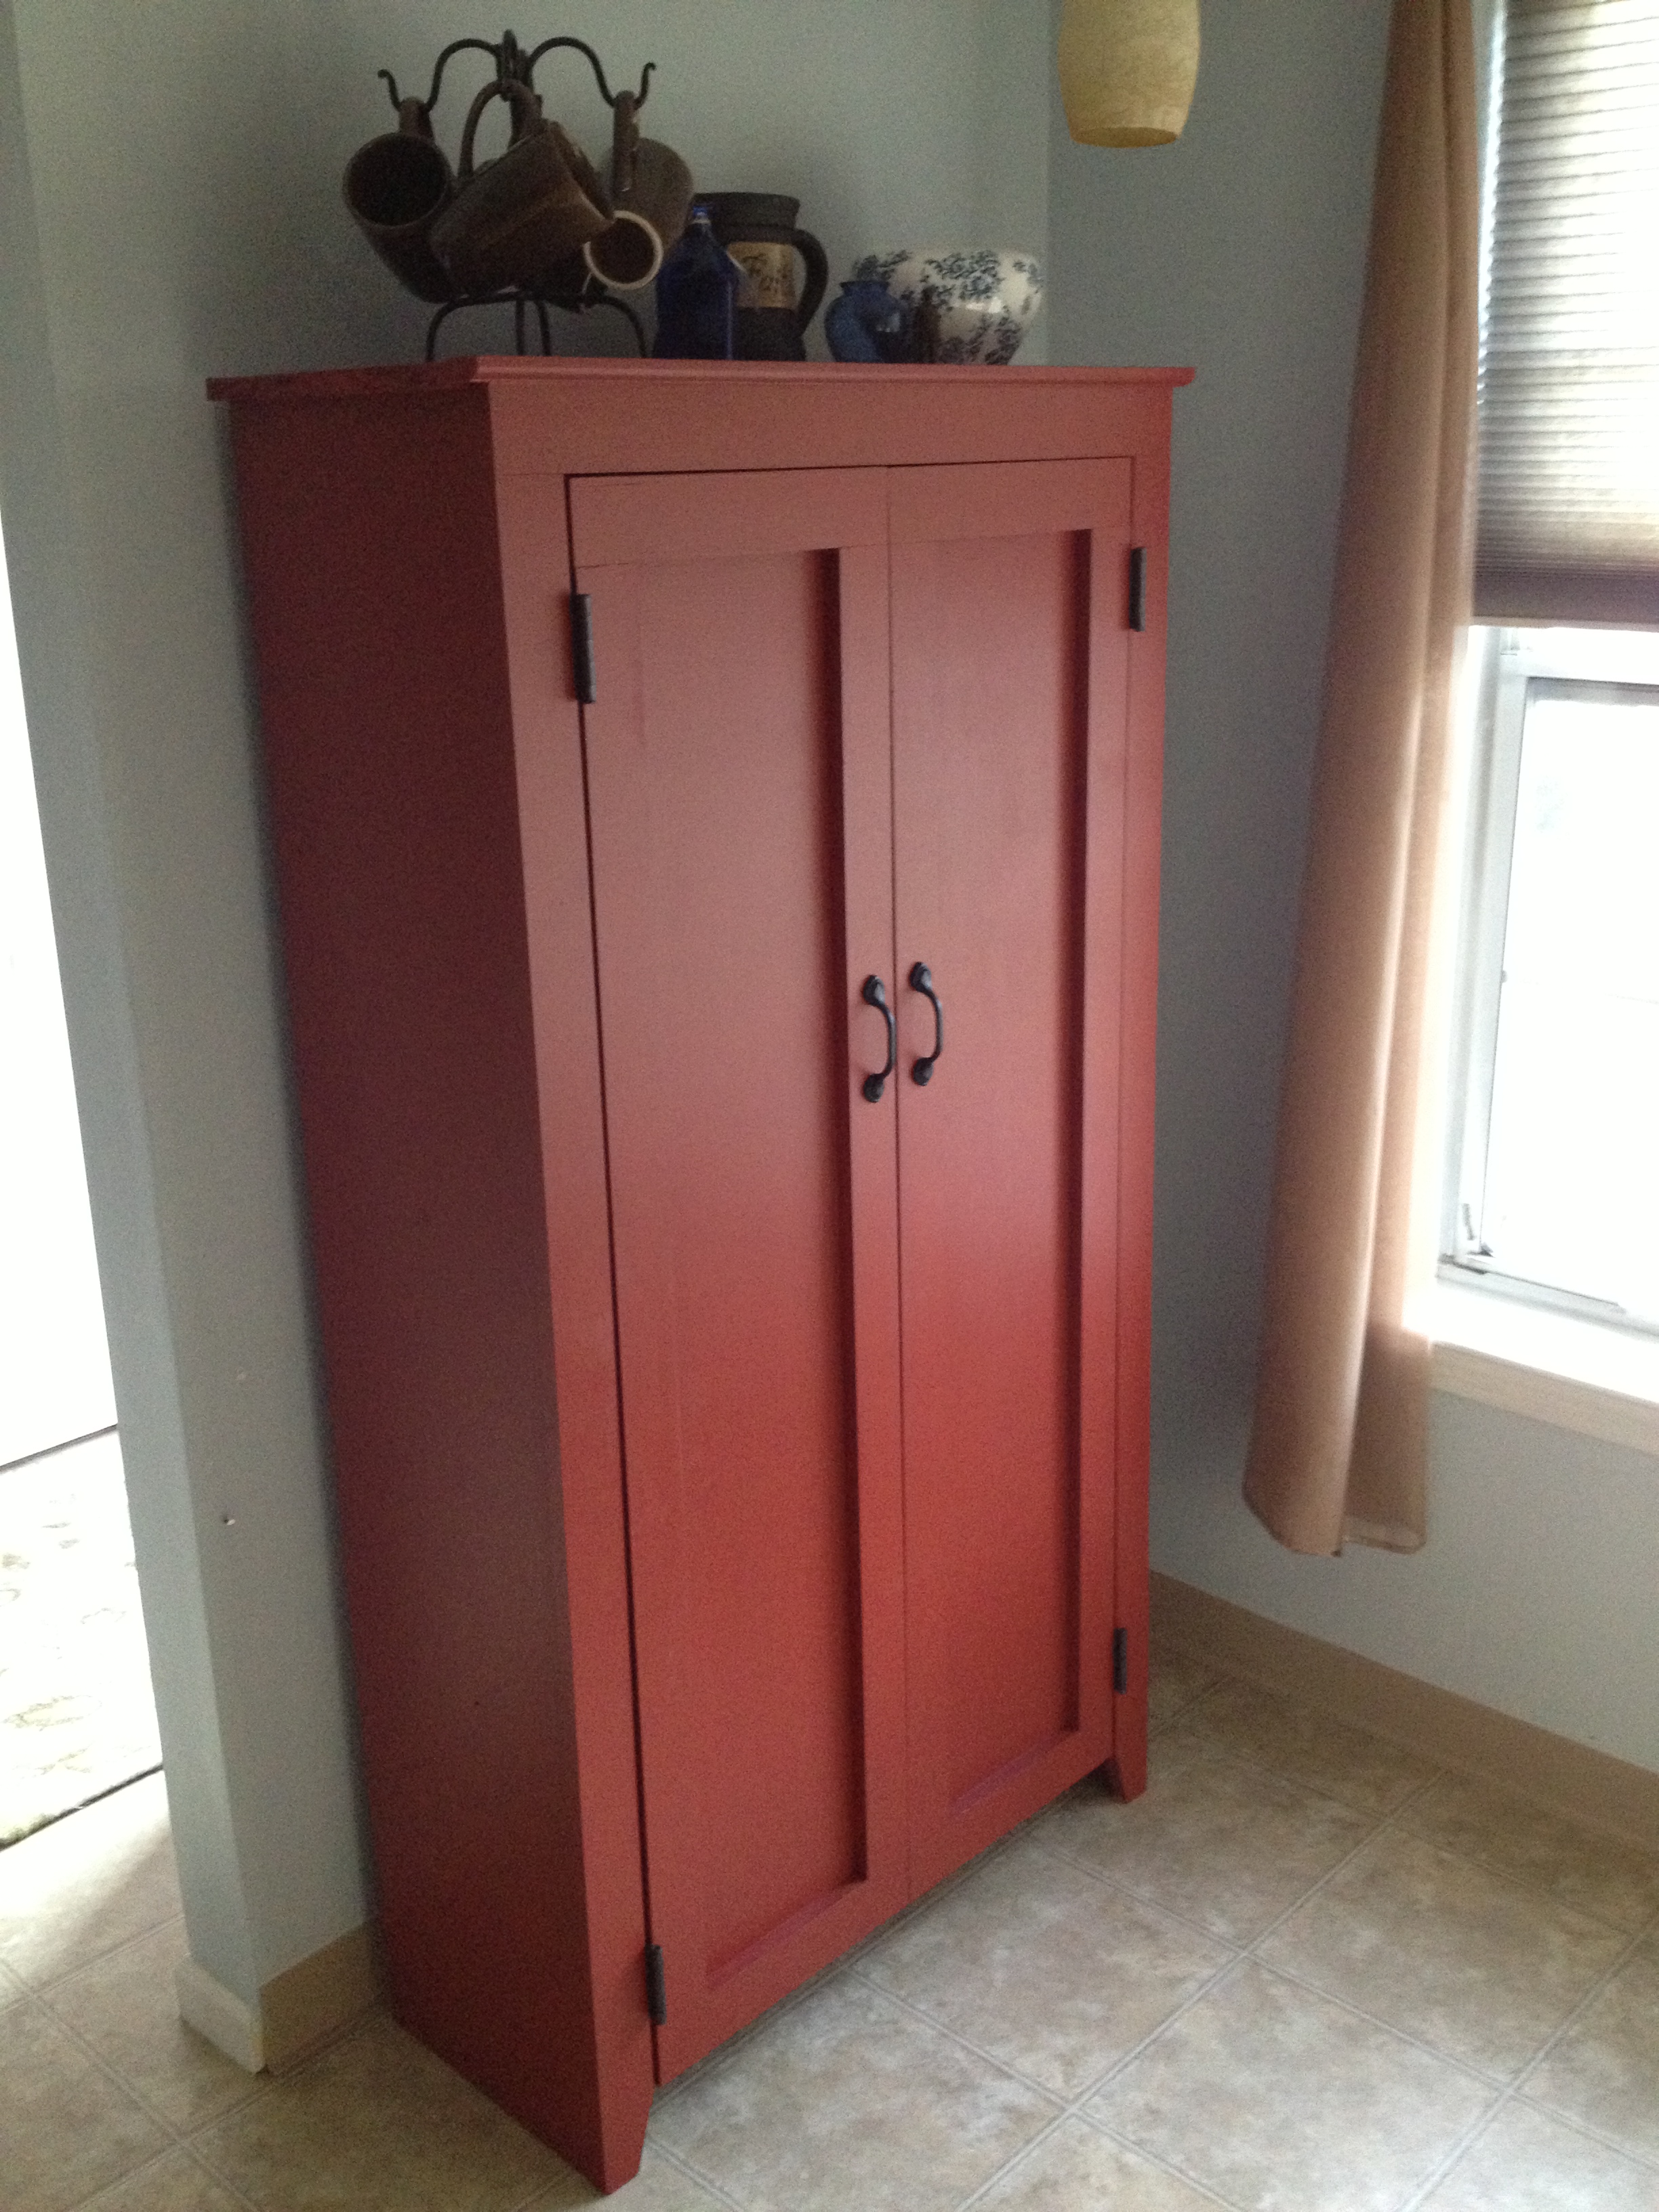
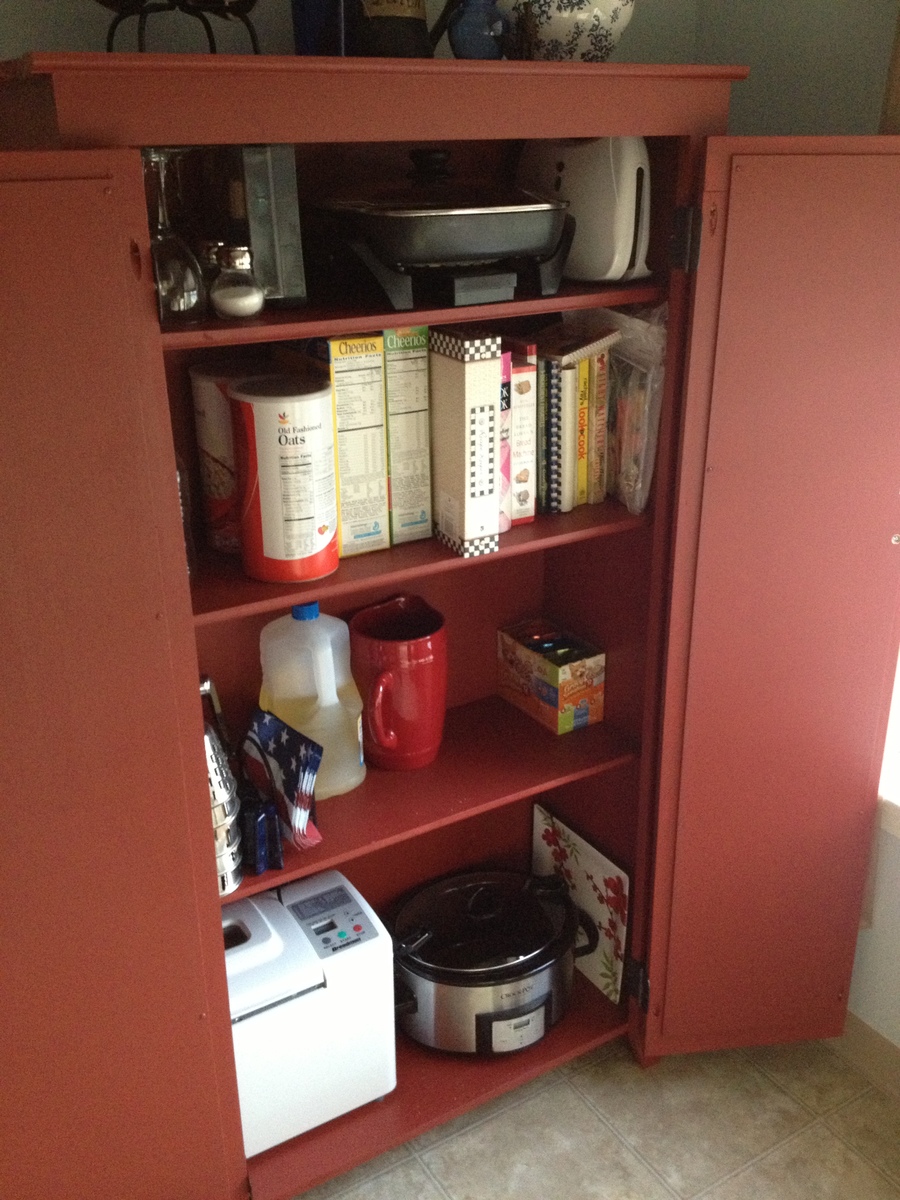
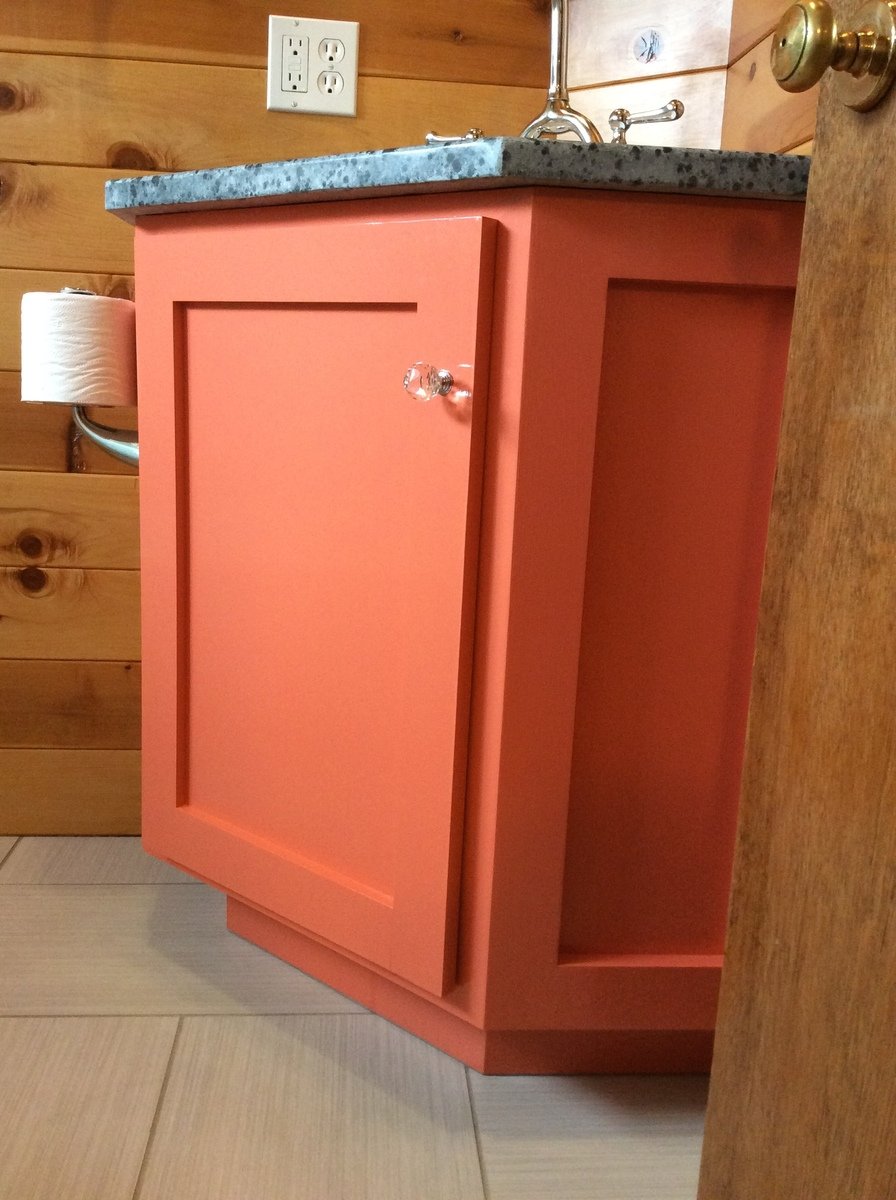
My wife and I needed space in our kitchen to store various items. This cabinet works perfectly for that purpose.
Fri, 09/27/2013 - 21:17
That paint colour is beautiful. As is the pantry, very well done. I wish you could find out the name and brand of the colour. It is stunning.
Fri, 09/27/2013 - 21:17
That paint colour is beautiful. As is the pantry, very well done. I wish you could find out the name and brand of the colour. It is stunning.
Mon, 09/30/2013 - 05:30
I believe this was the color. Red Brick S-H-170 by Behr. Hope that helps.
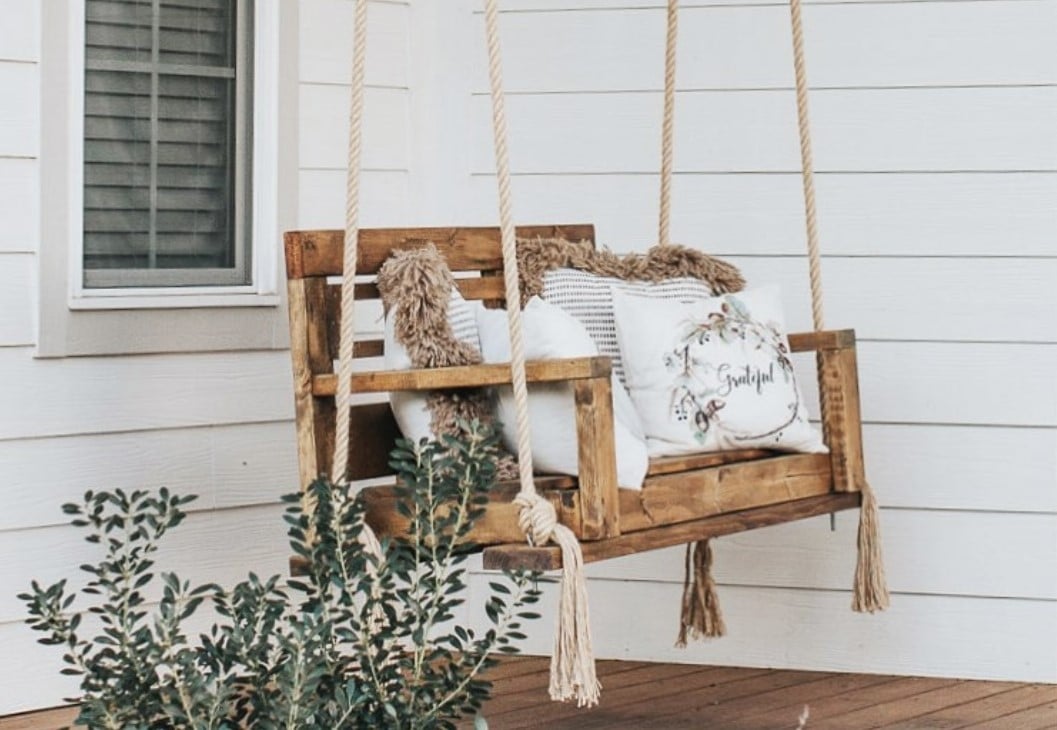
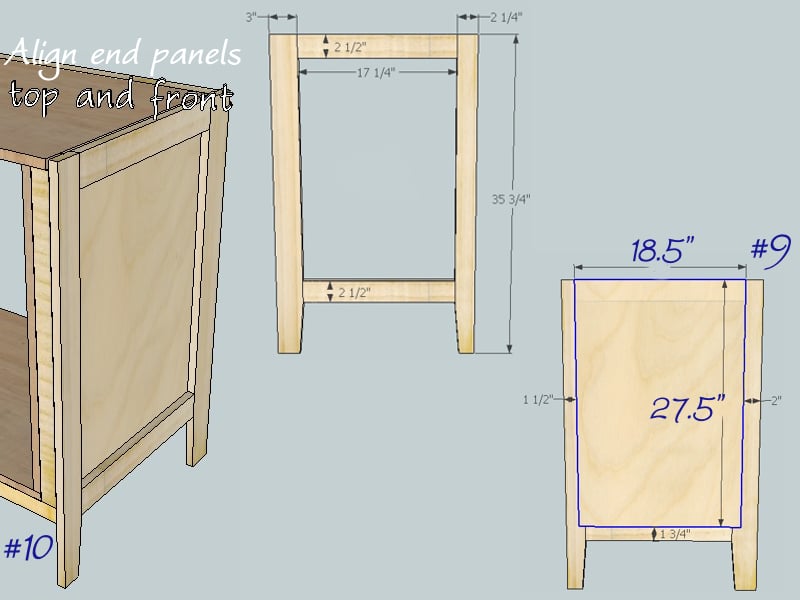
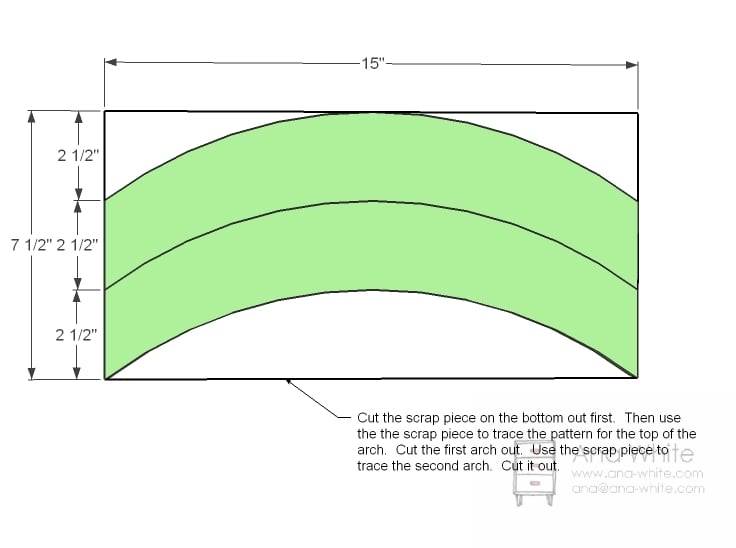
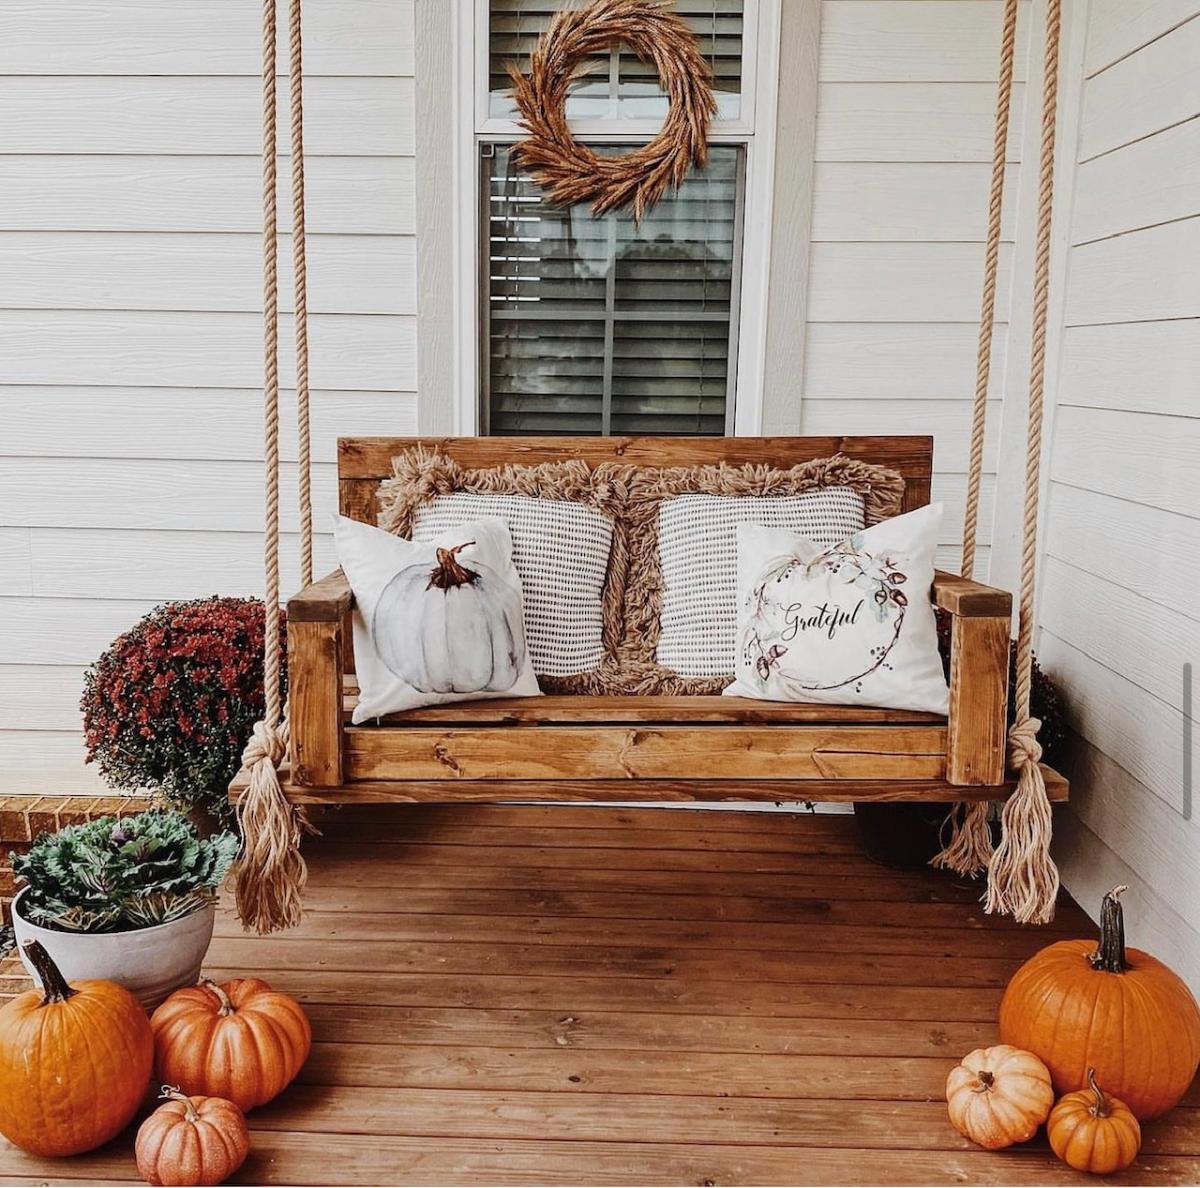
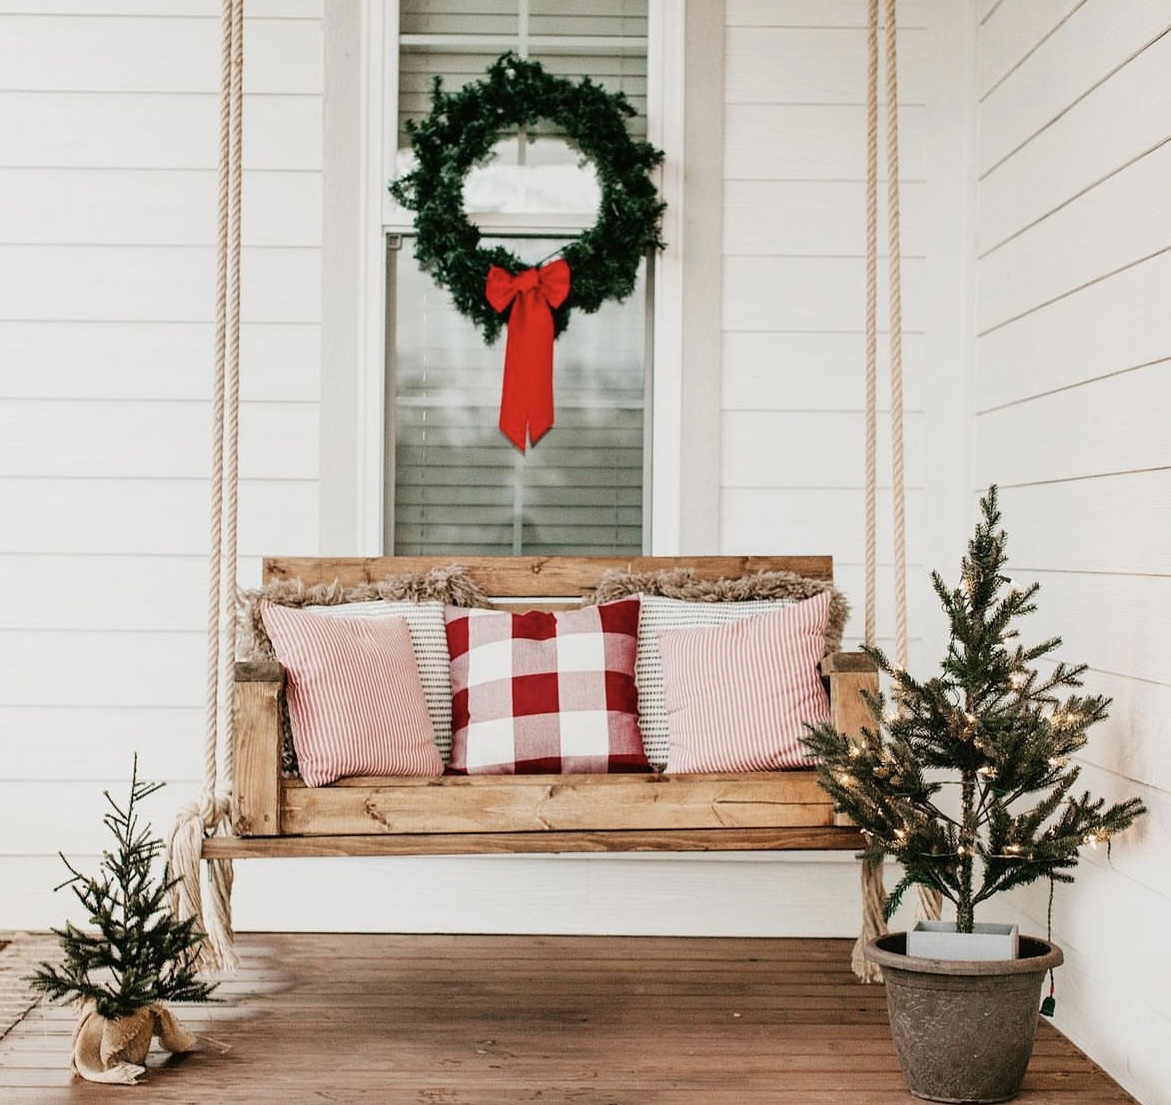
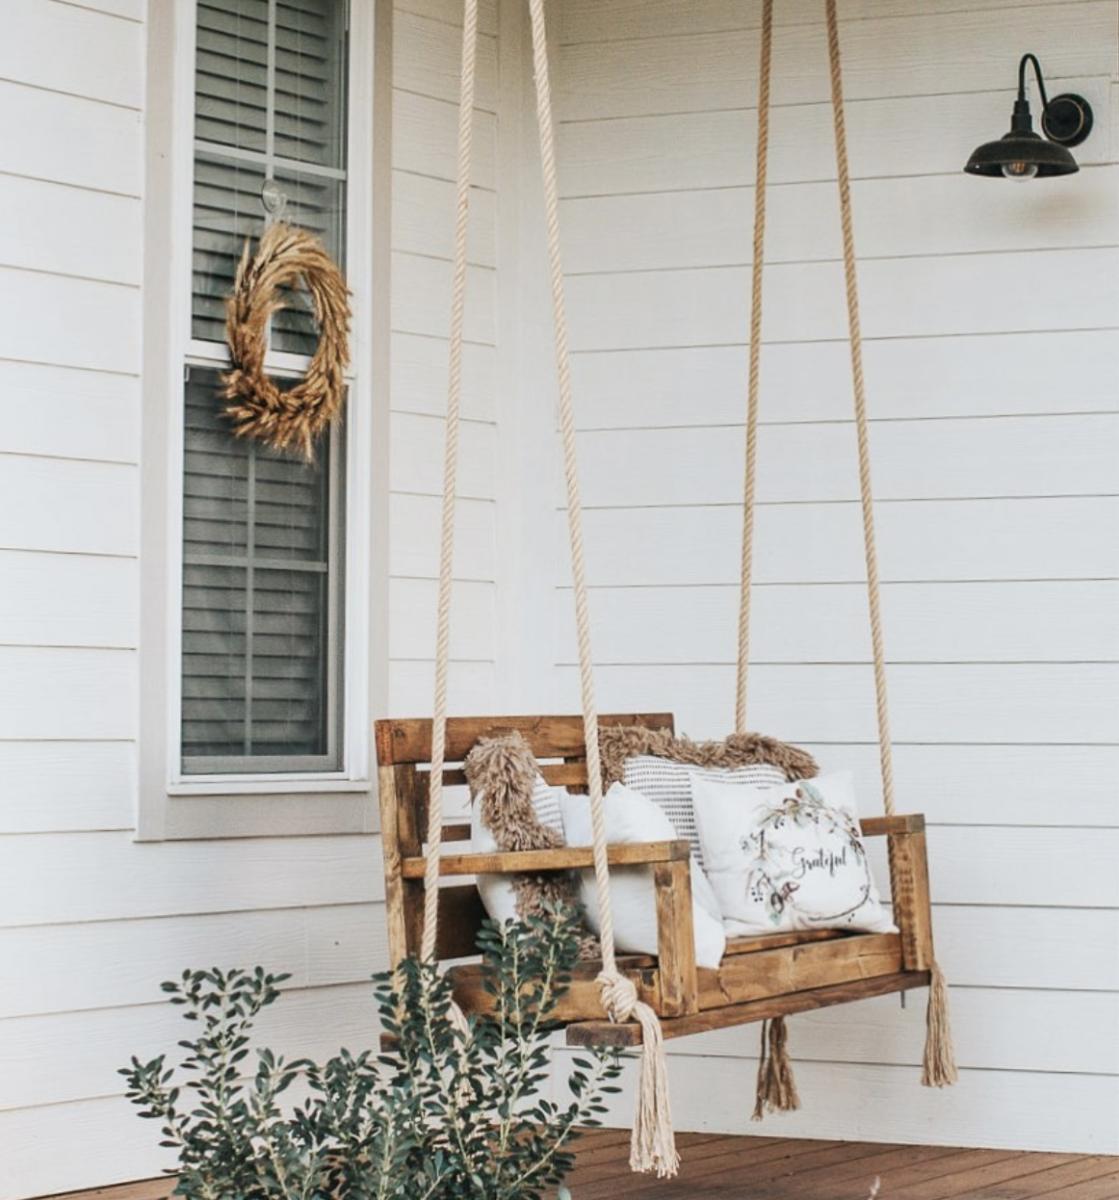
DIY Porch Swing - Perfect for any season!
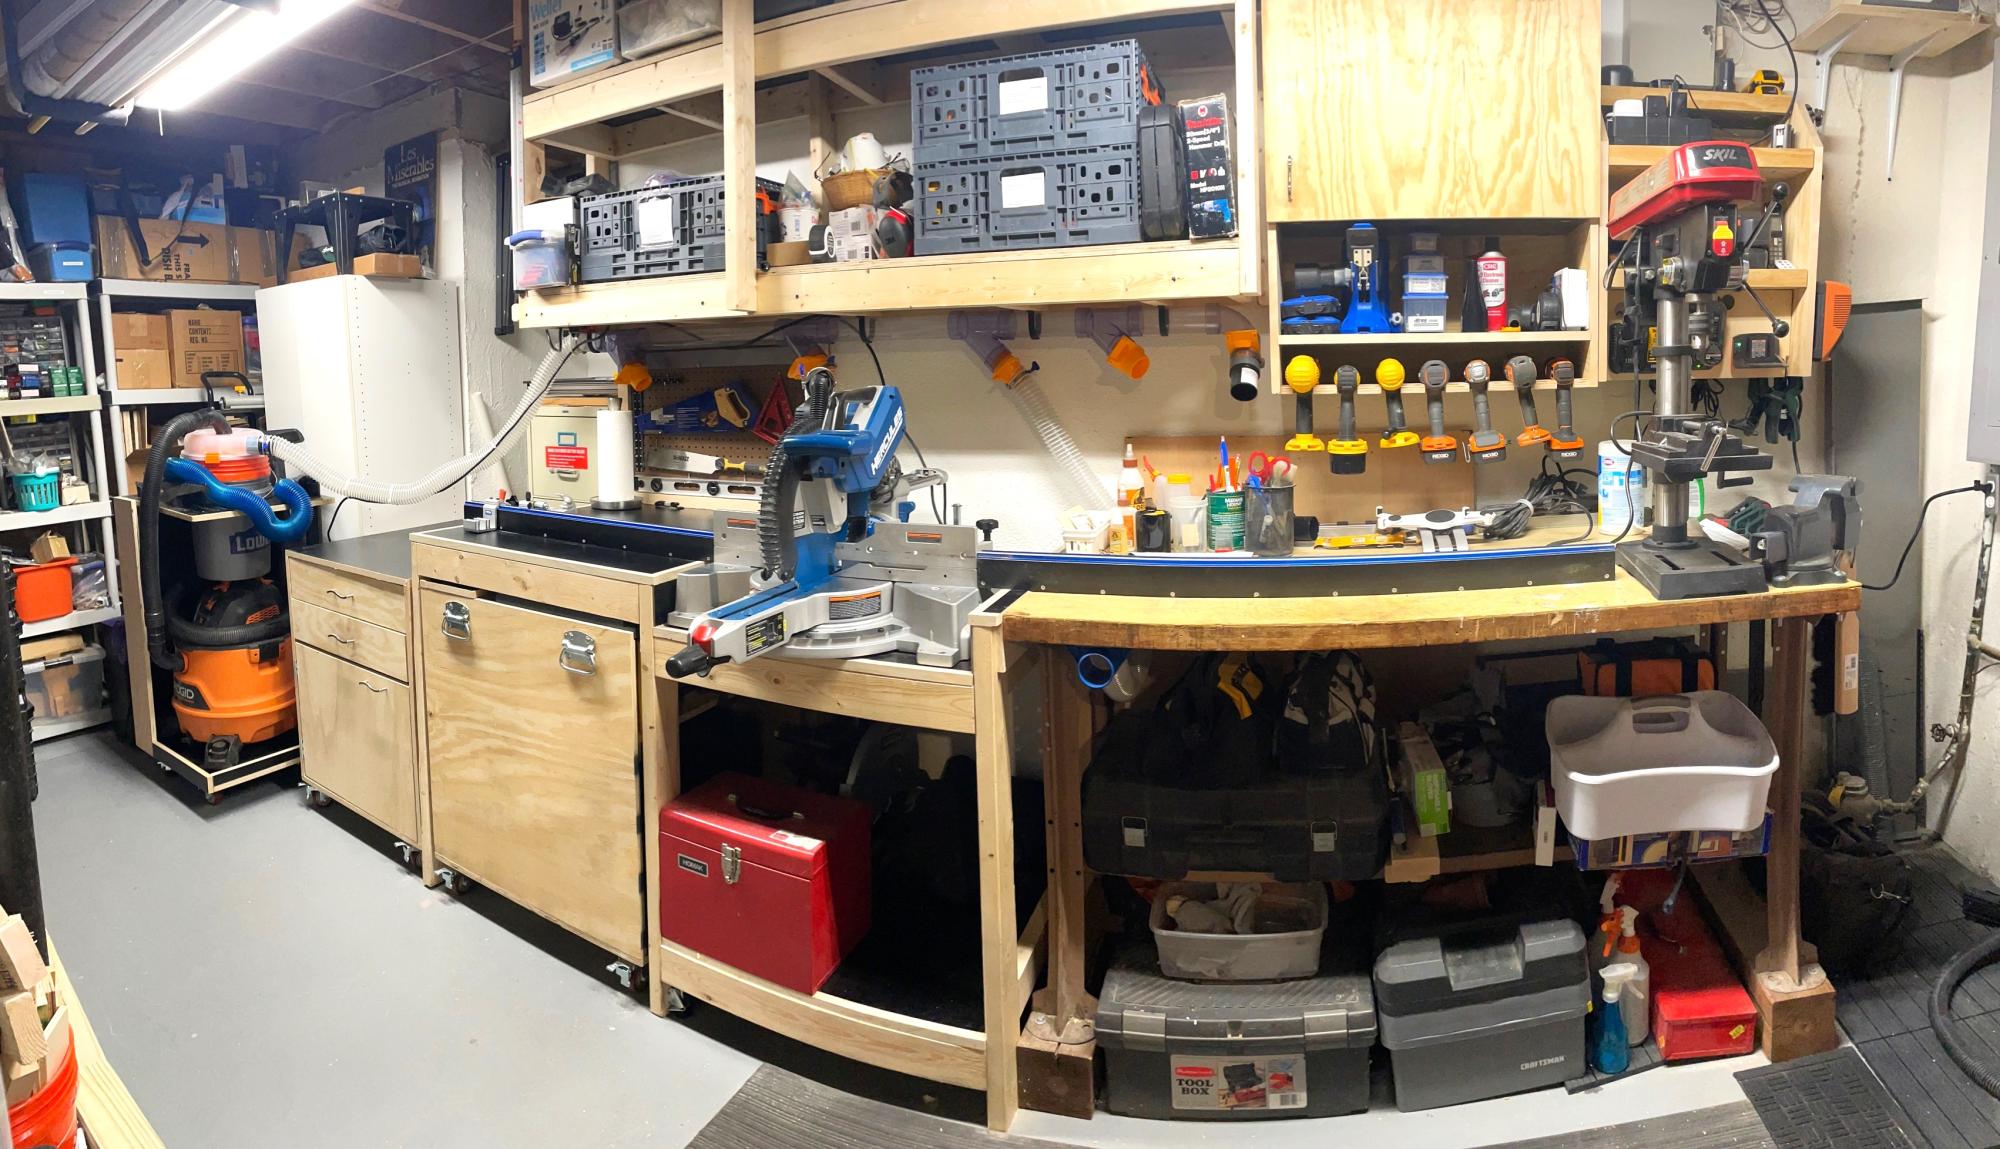
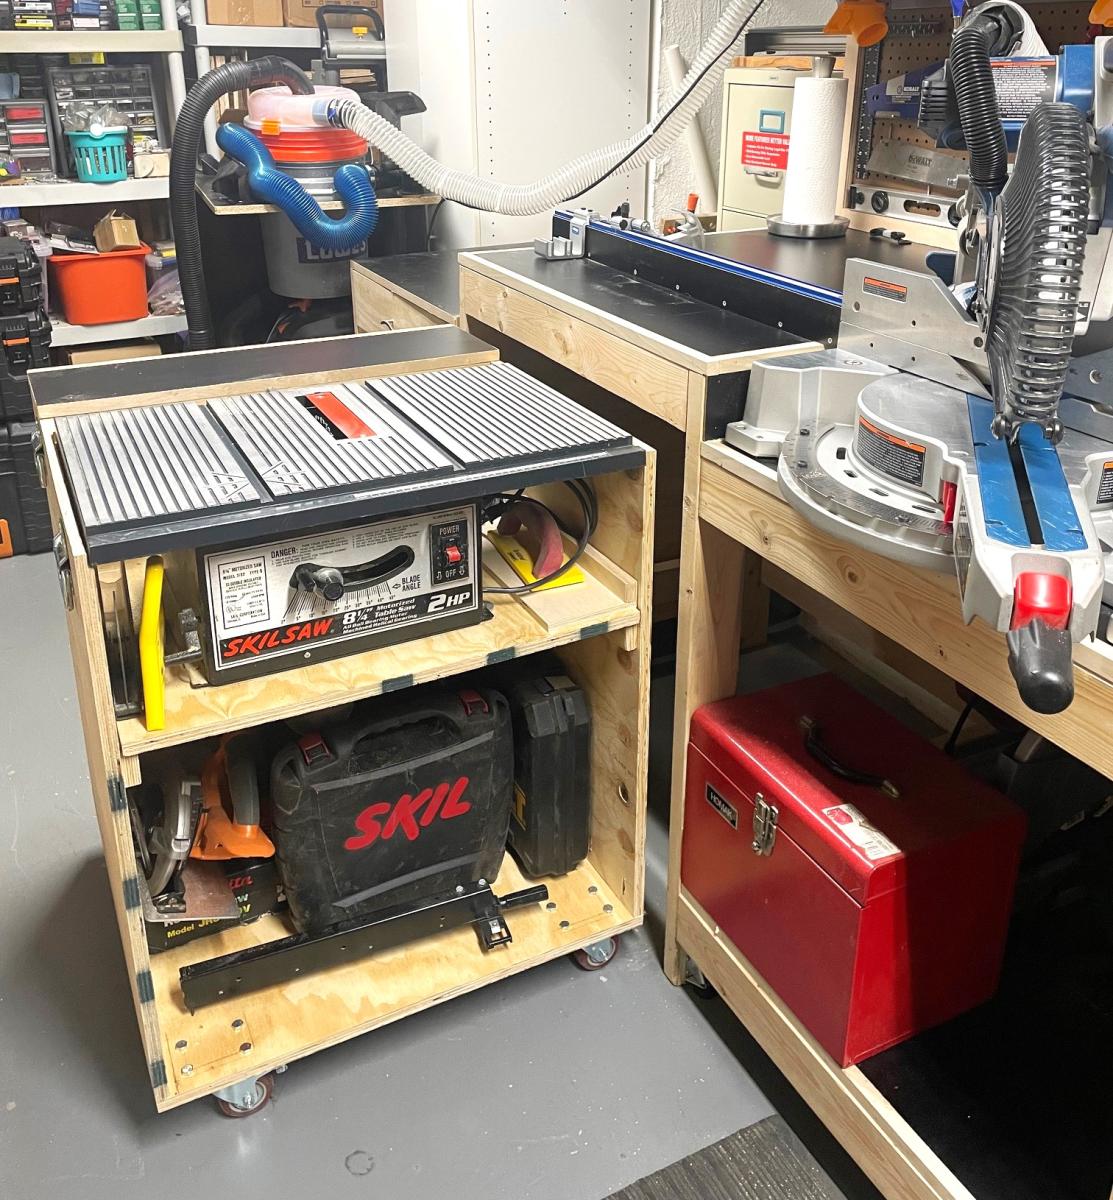
 I was looking for a way to better organize my basement workshop. After looking at your Ultimate Workbench / Miter Station project, I became both inspired and motivated to organize my workshop bench equipment and power tools. I was tired of moving equipment around in my small shop area to use it and the amount of time required to clean up the saw dust during and after project work.
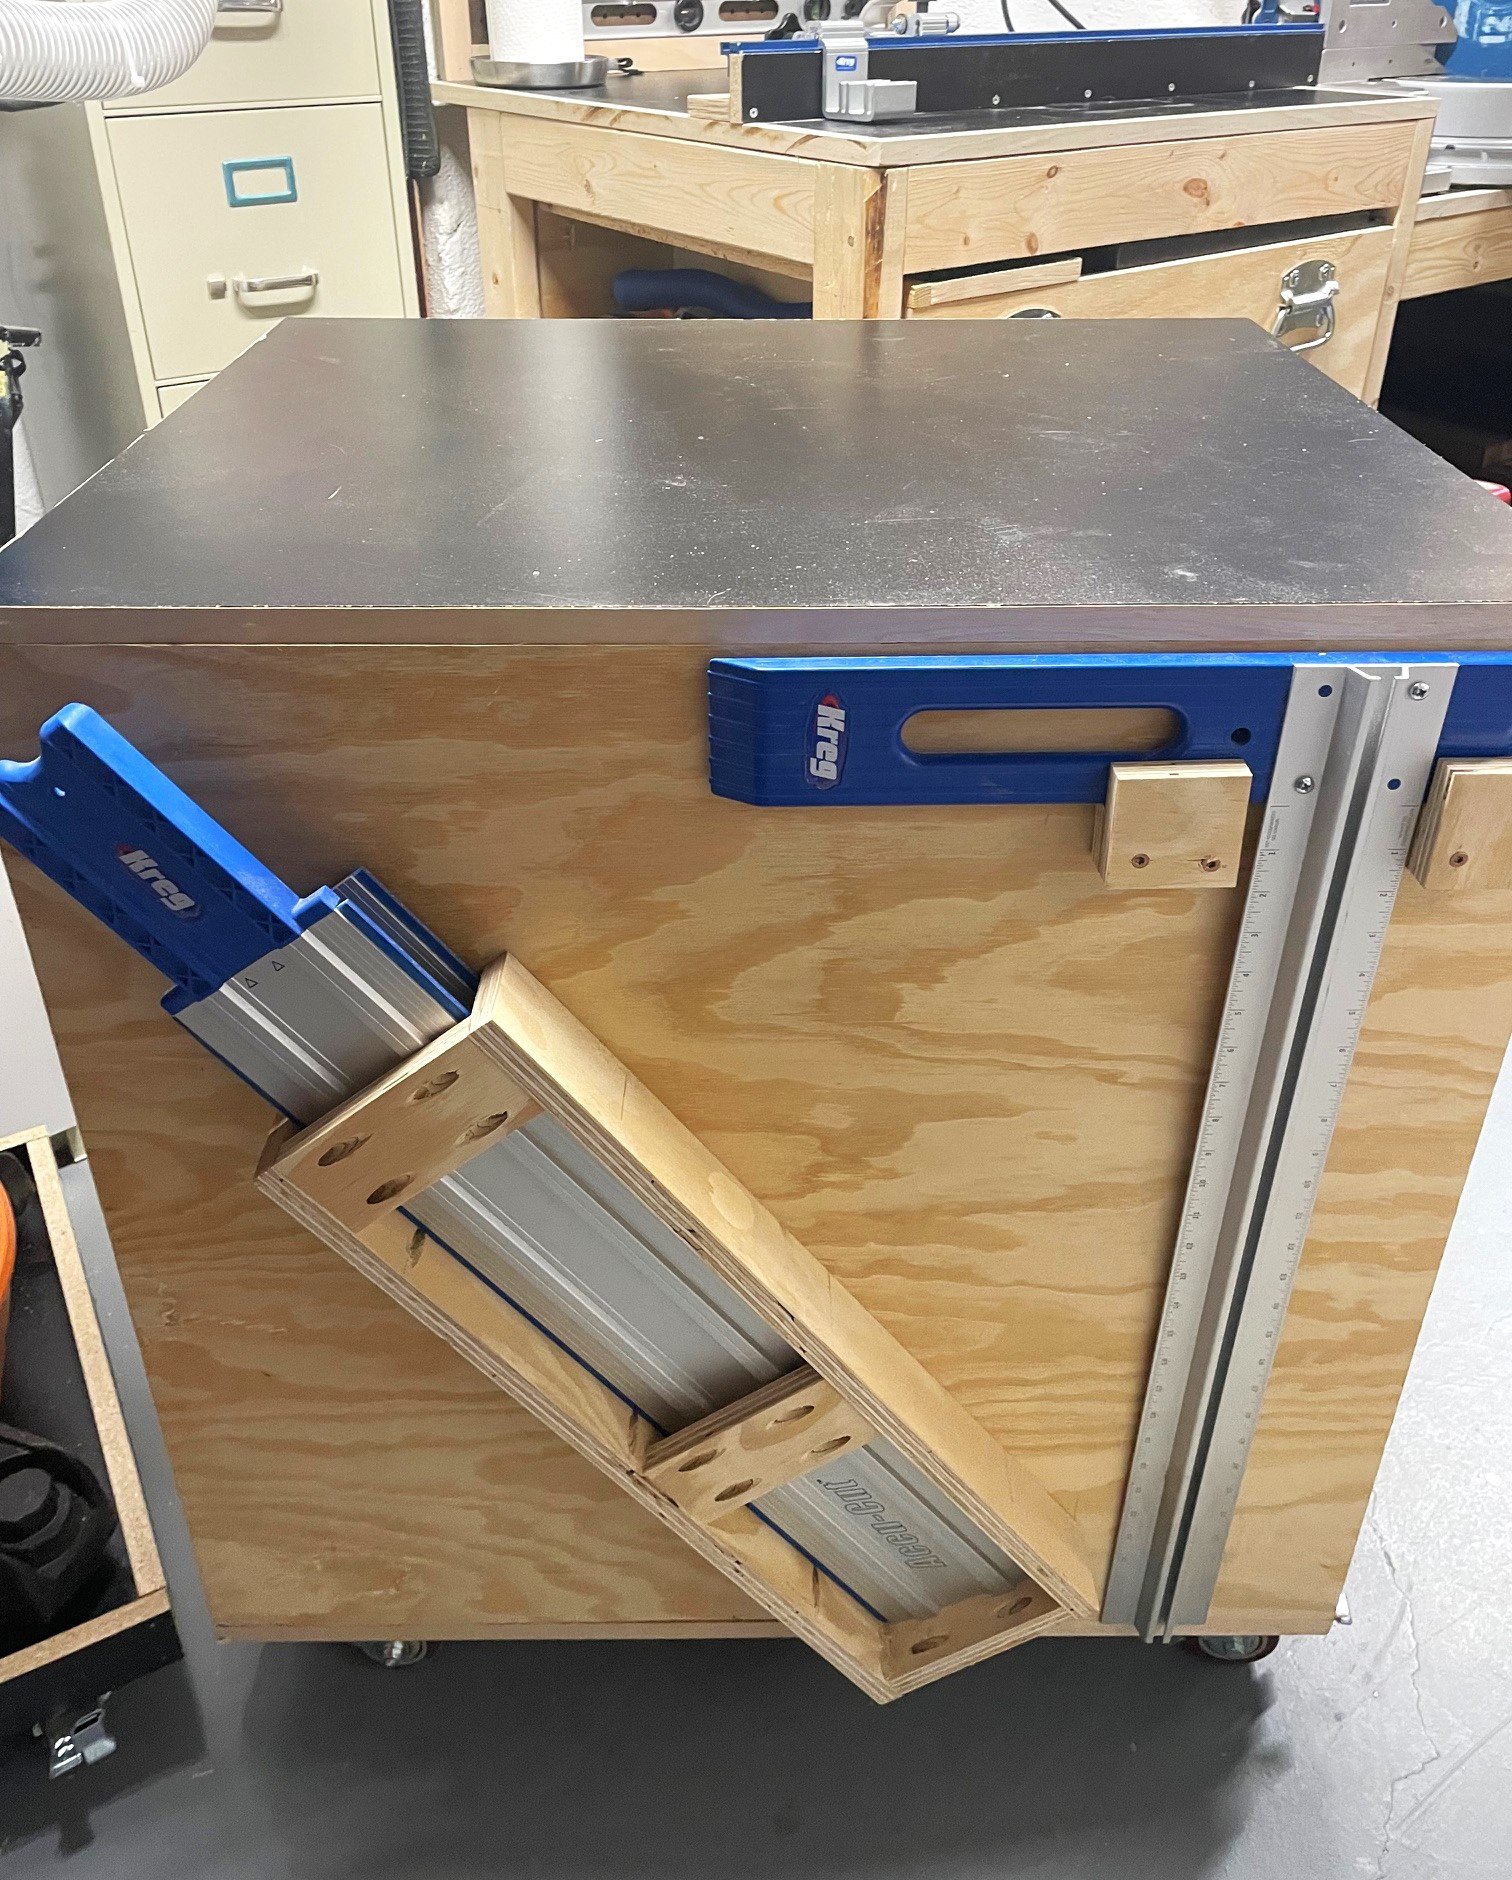
I modified your plans to allow me to incorporate the use of a solid maple shop table that I have had for over 30 years and provide a means to have my main benchtop equipment (miter saw, table saw, and drill press) be readily available for use. I substituted the 3/4 inch plywood top with a 3/4 melamine top with a popular edge trim to allow the workpieces to freely move through the miter saw, table saw and assembly stations. In addition, I added a removable miter saw fence using the Kreg Precision Trak system to facilitate miter saw work setup and to make multiple repeatable cuts. I made the fence easy to remove and store by using 5/16-16 inserts on both the work surfaces and on the he overhead material storage rack allowing full use of the workbench surface.
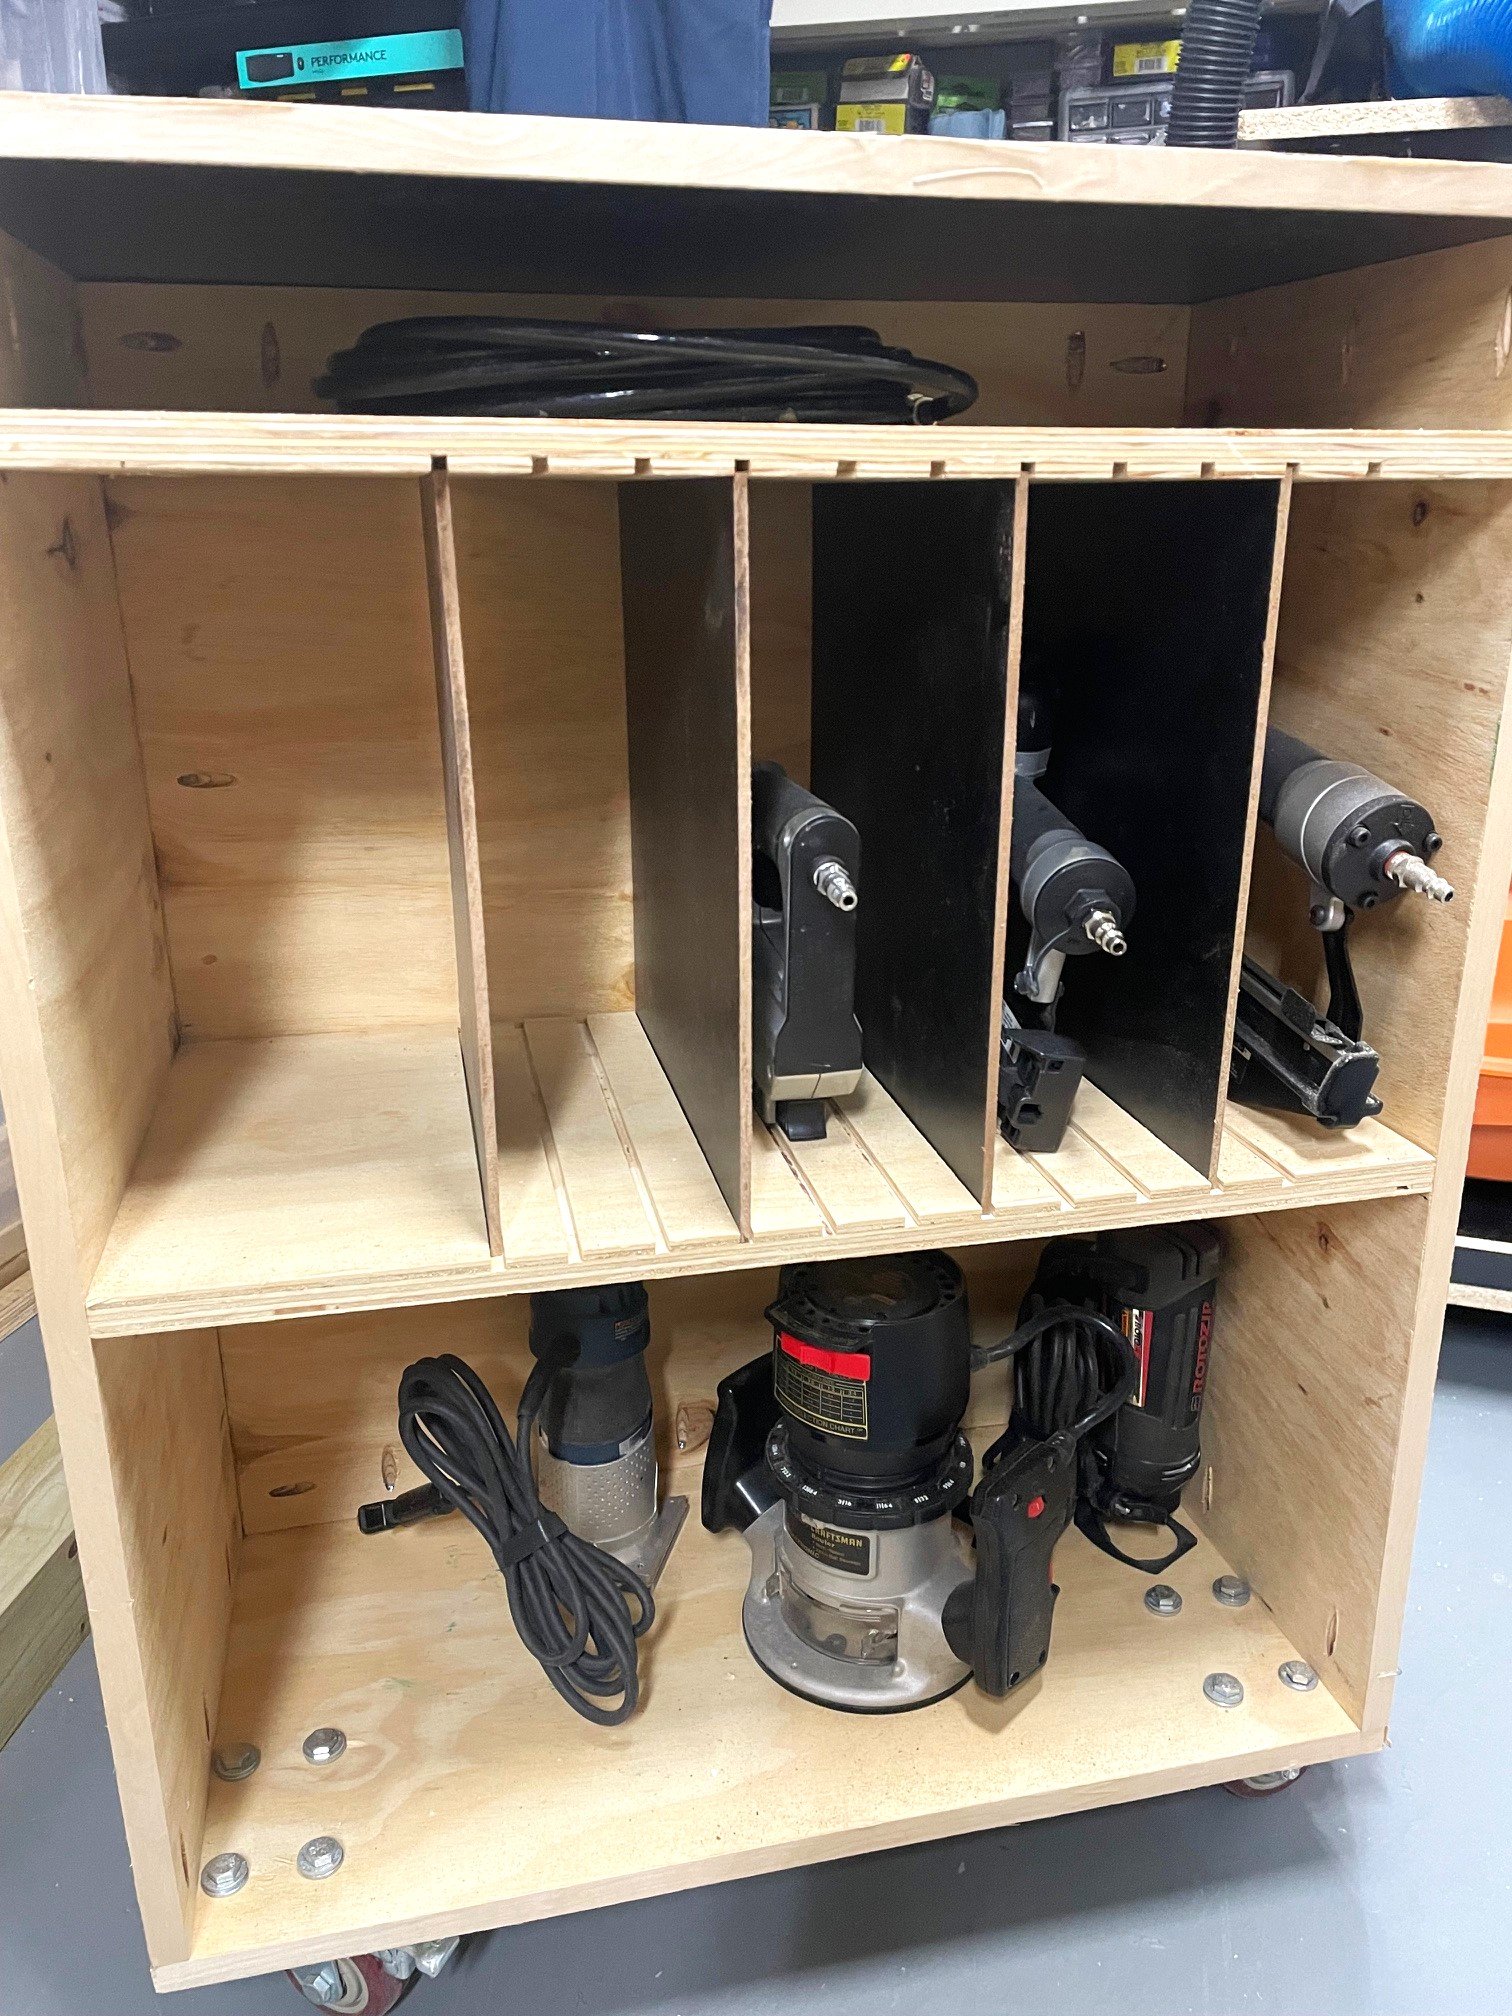
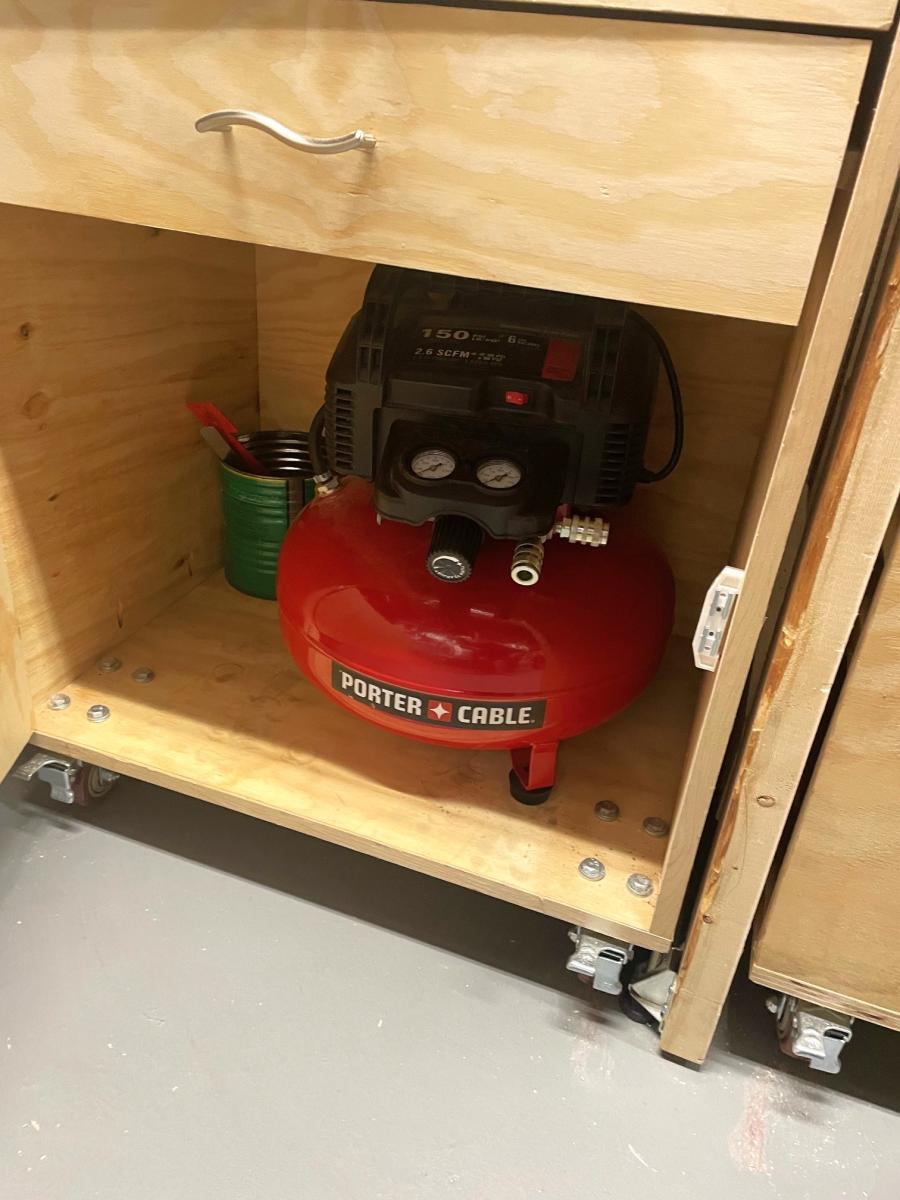
I also incorporated a separate rolling cart that served as an assembly table, table saw outfeed table, shop air compressor and pneumatic nail gun storage, router and router accessory storage and Kreg Cutting Guide Storage.
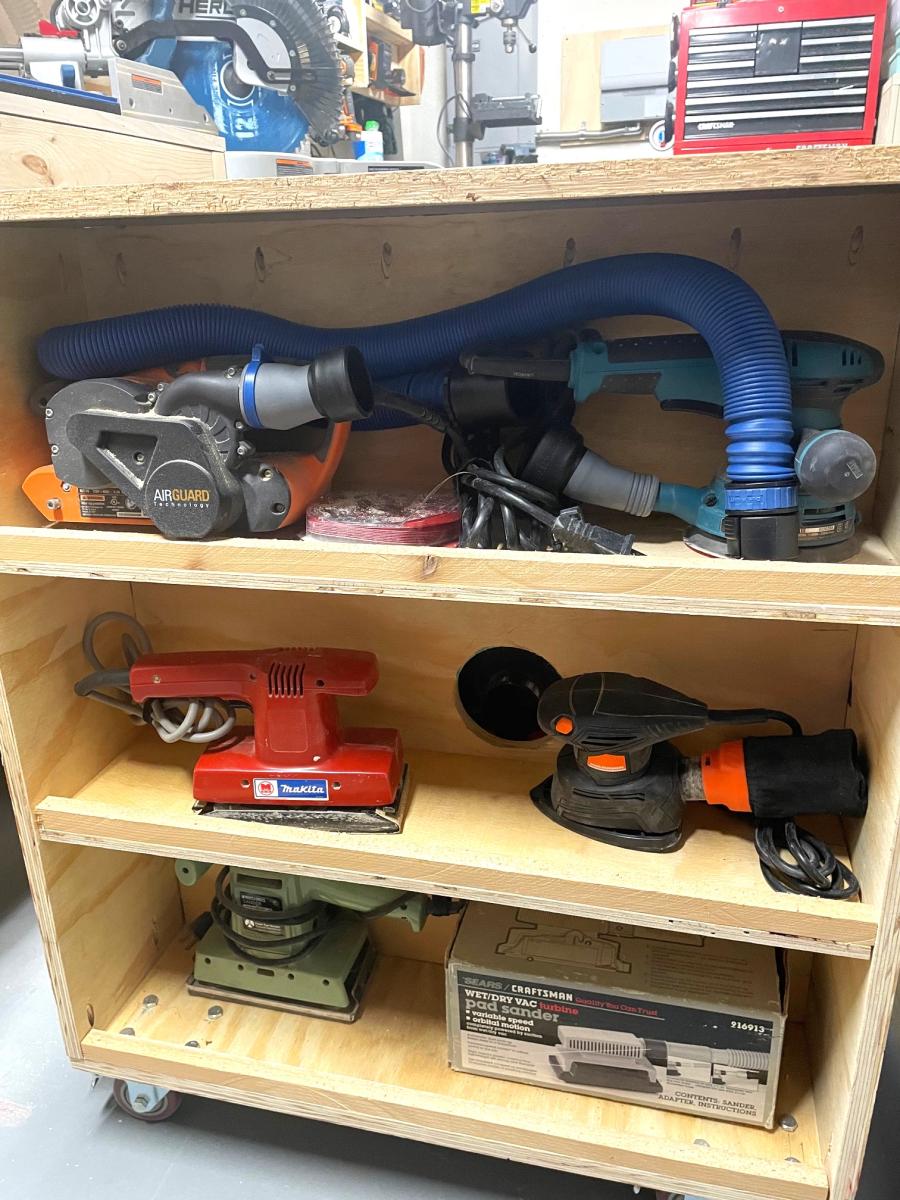
I wanted to have ready access to my cordless tools, so I built a separate wall mounted cabinet that holds my drills, impact tools and drill bits. Of course, that lead me to build a wall mounted battery charging station to consolidate and organize all the different battery chargers and spare batteries. Tried to make all things Easy to See, Easy to Get and Easy to Return.
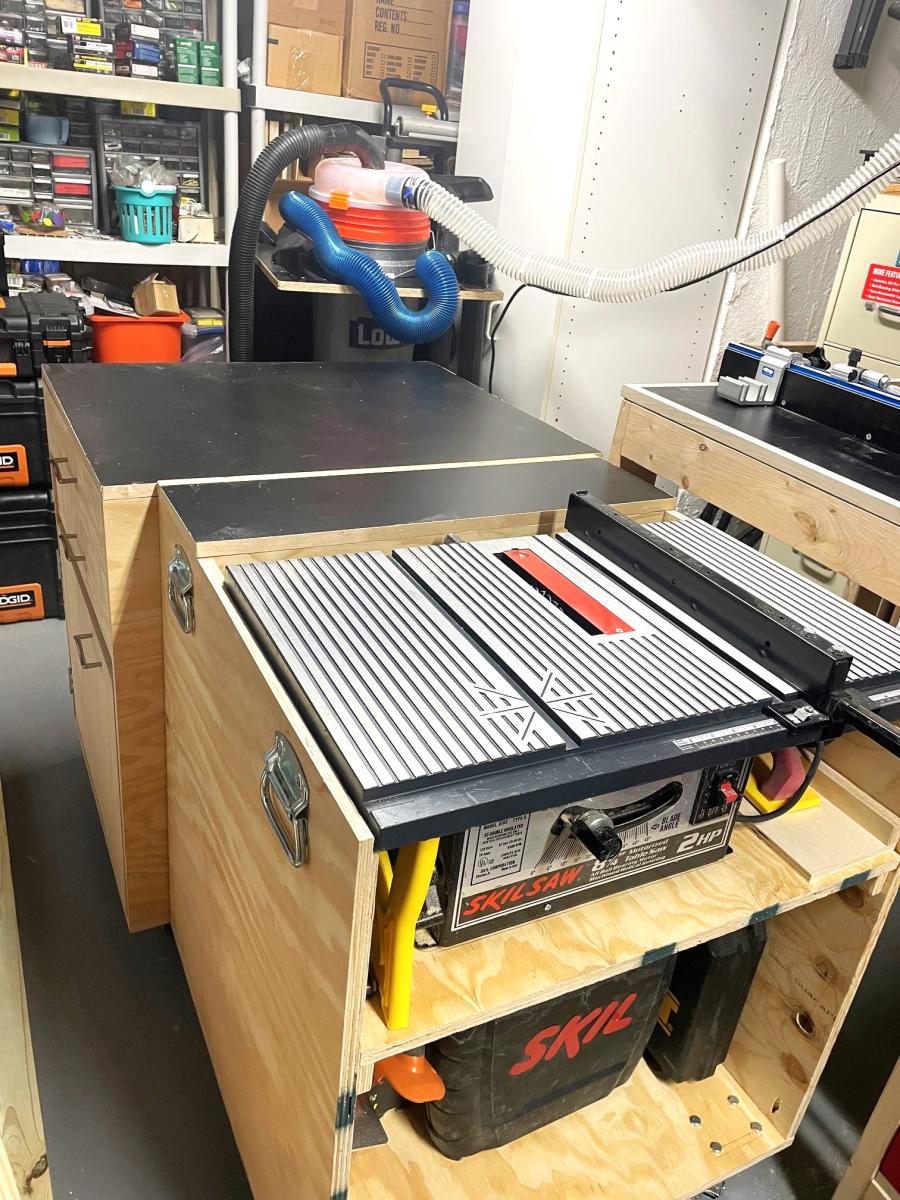
Finally, I spent quite a bit of time researching how to design and add a dust collection system. I ultimately went with a simple, but effective system that incorporated the use of a Dust Deputy Pro, 14 Gallon Rigid Shop Vacuum, Powertec 2 1/2 inch Clear PVC tubing, Blast Gates, Flexible Hose along with Dust Rite Hose and adapters to connect my portable wood working tools. The dust collection components work work well together capturing about 85% of the generated saw dust, but I want to give a special shout out to Shop Nation which supplied a custom 3D printed dust collection adapter for my Hercules Miter saw. It is really amazing how much of saw dust generated by the miter saw is now being channeled directly to the dust collection system.
I now smile every time I enter my workshop :)
Ray K


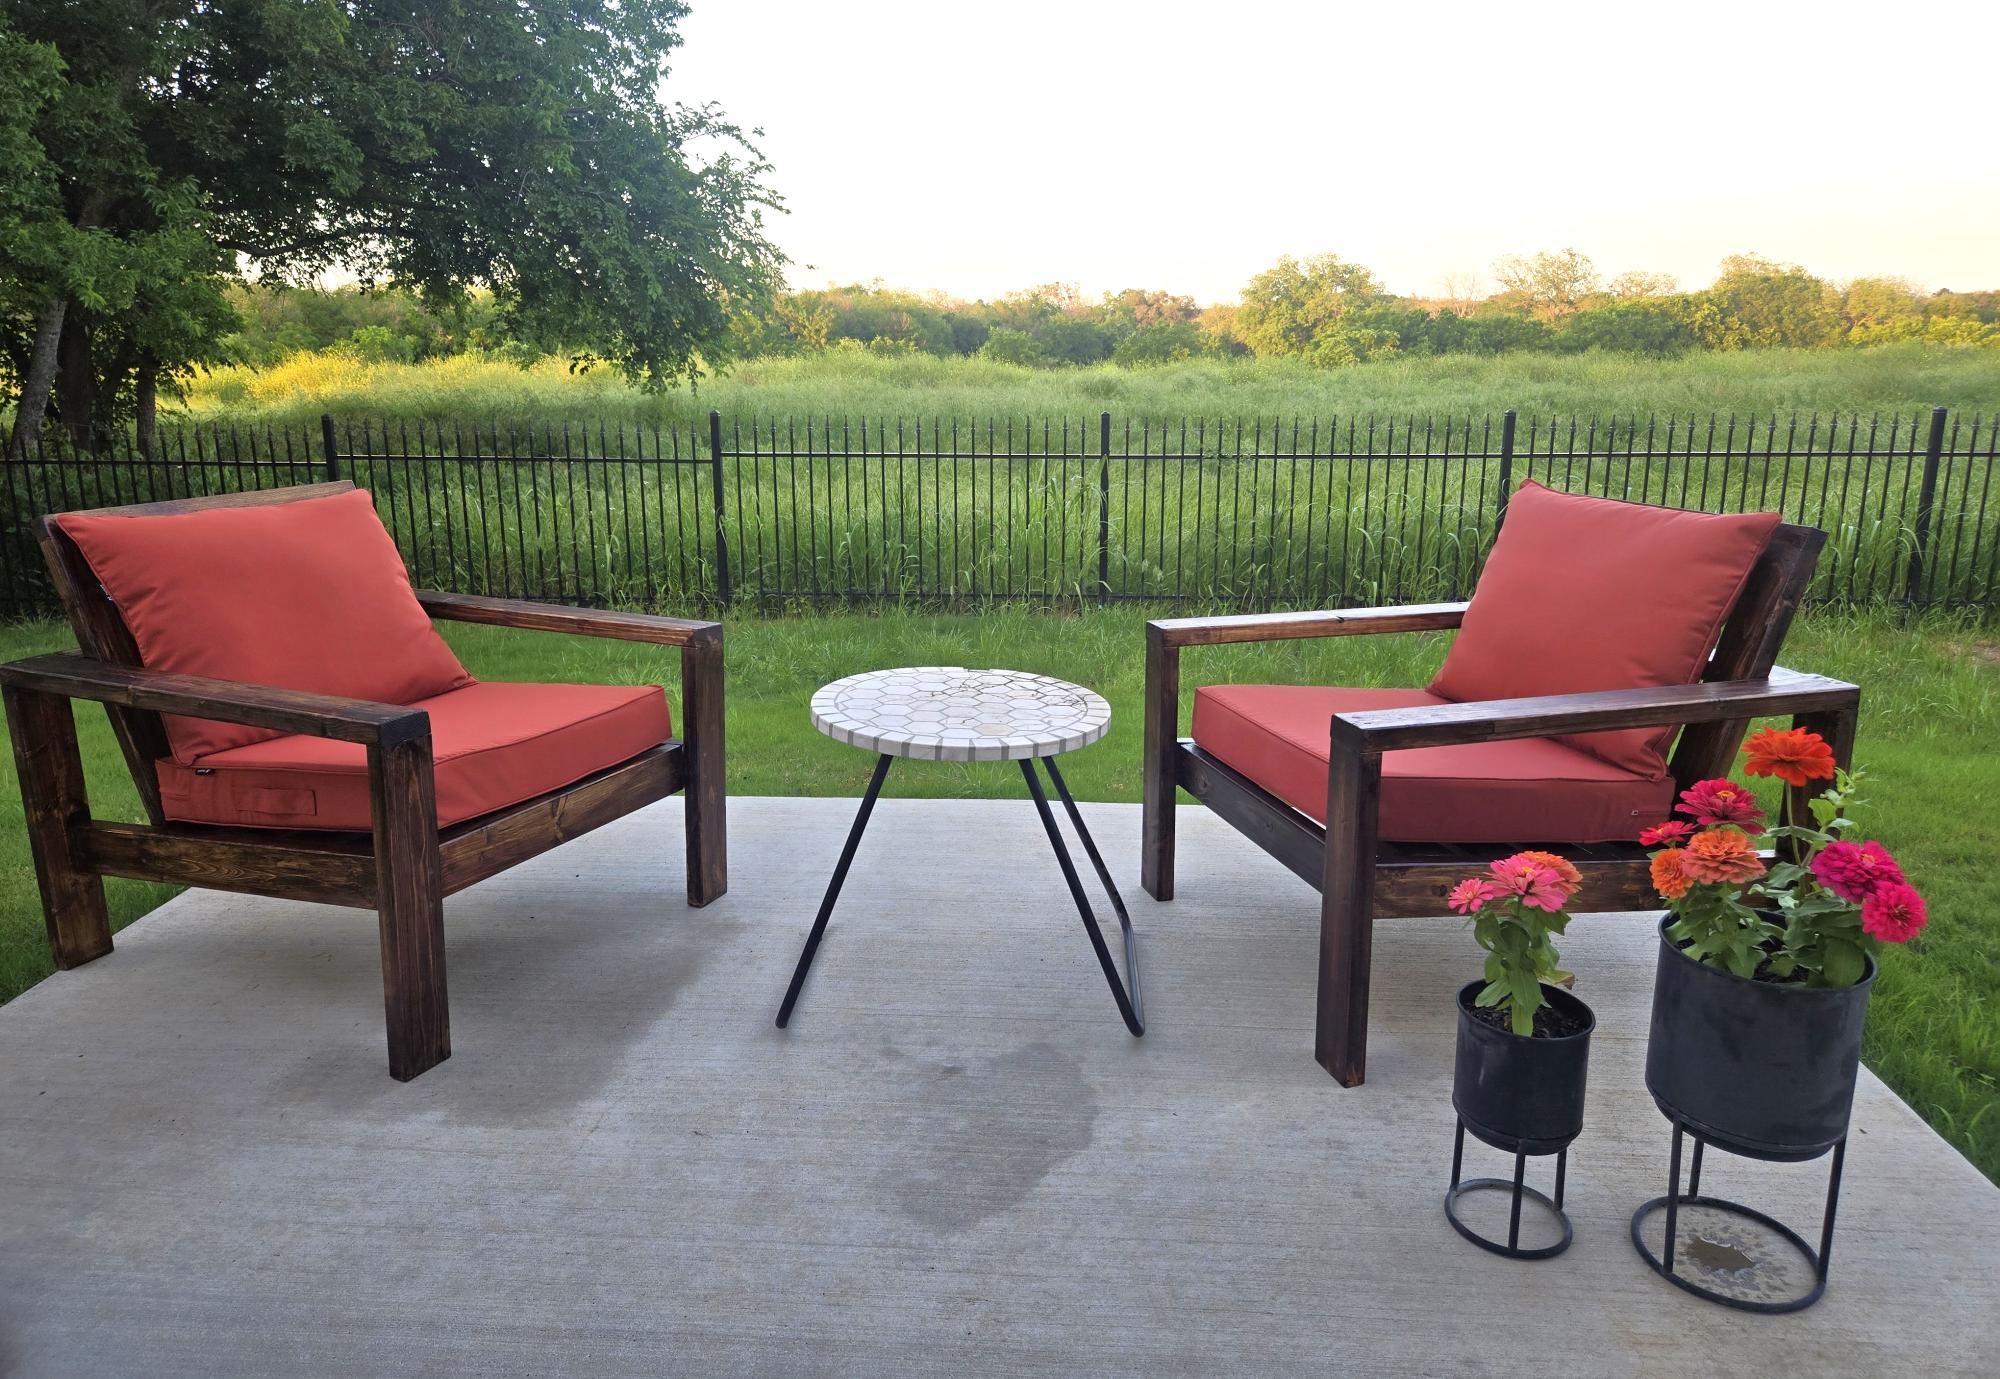
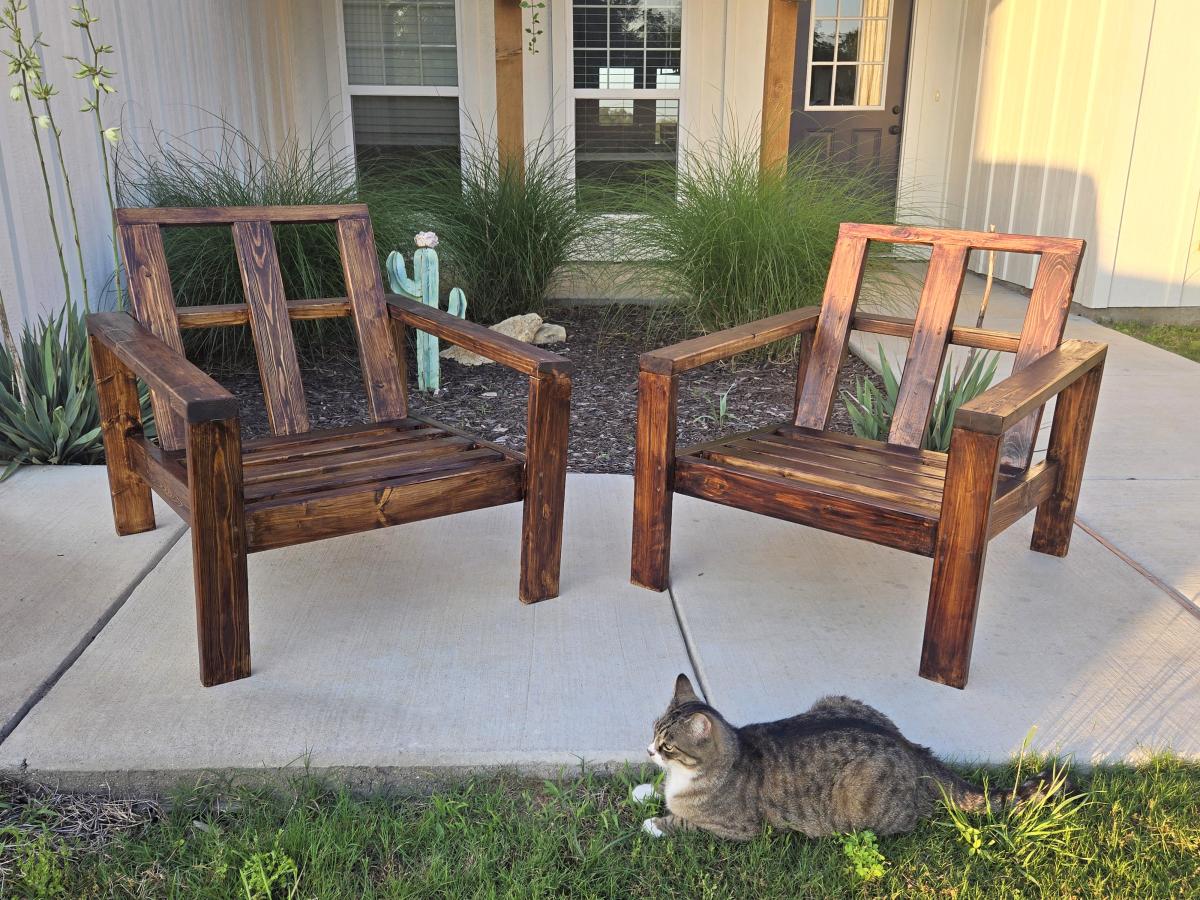
I made this in an afternoon. Loved this project. It is made with 2x4's using a Kregs Jig and mitre saw (plus additional tools like a drill and square). This was my frist time using the Kregs Jig and I am sold!!
The free plans were taken from another website. They are very detailed and there is even a video (I recommend it as he gives a great tip for making sure the back stays equal/level to each other before putting the back on). Even though you can build this by yourself, I did have help for the heavier sides once they were assembled. I plan to build the additional side table soon and finish them both with sanding and staining when the weather seems less iffy for rain.
If you are looking for a good beginner project that doesn't take forever or have complicated steps, this is your project.
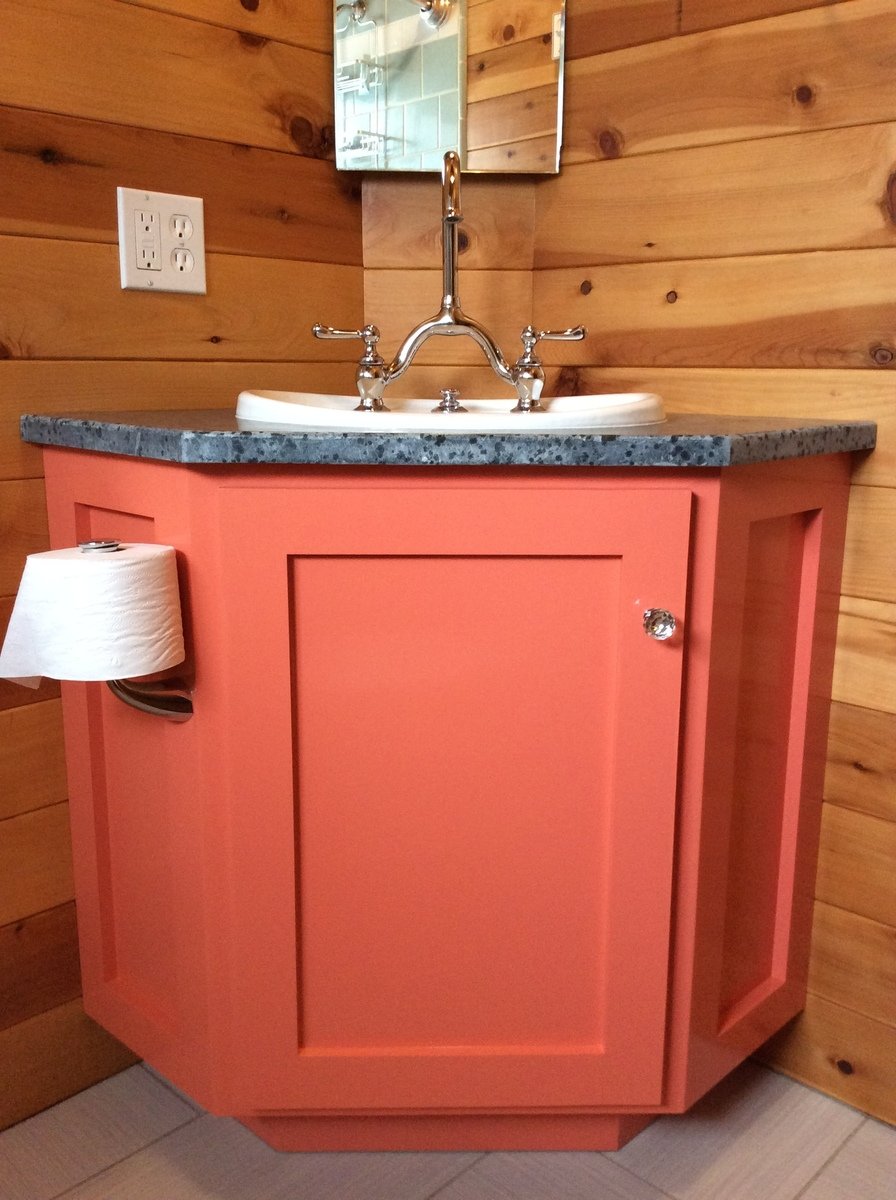
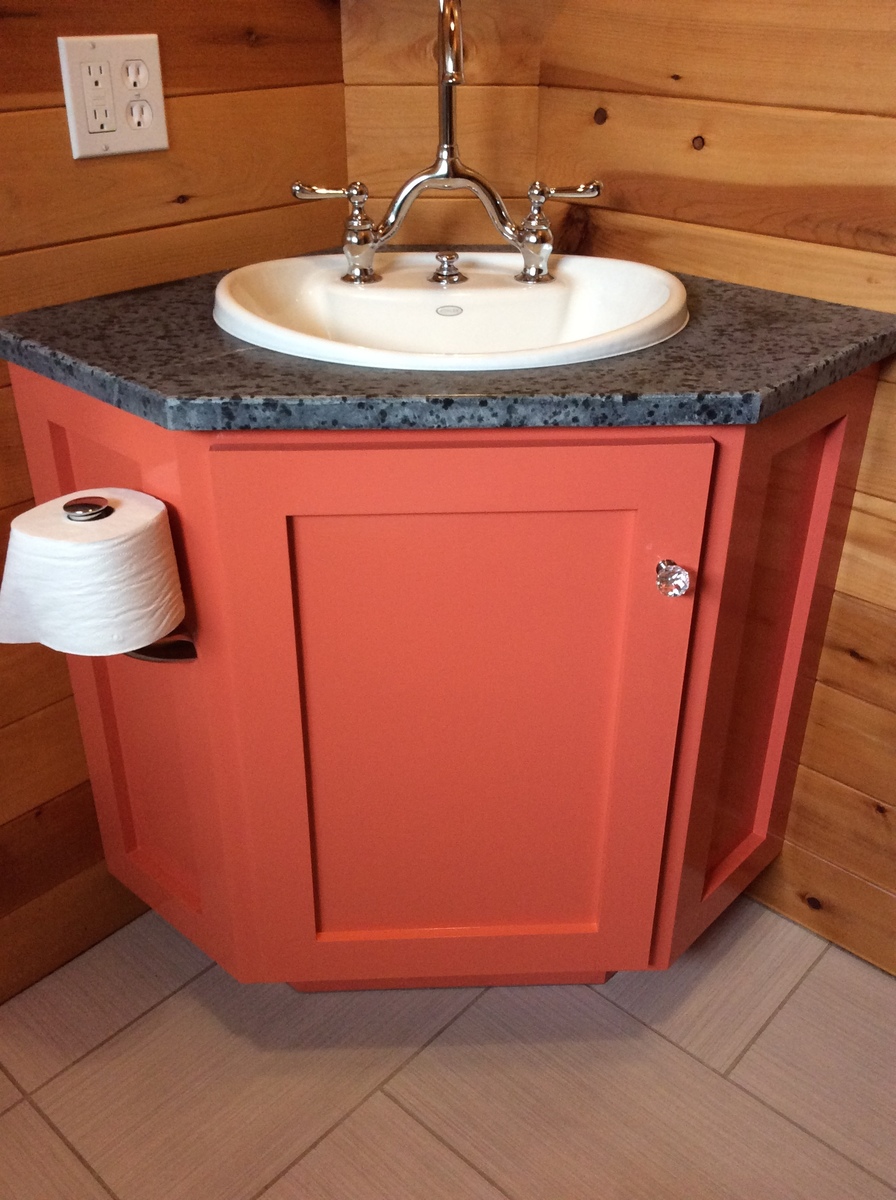
This project started because a corner bathroom vanity that fit my space requirements and budget did not exist. A plan specific to what I exactly needed also did not exist. After combing through what plans I found online, the Wall Kitchen Corner Cabinet best matched what I wanted. I modified it with the Momplex Sink Base Kitchen Cabinet in order to turn it into a sink base.
But, there was a problem. I hadn't actually built anything before. In order to get at least one project under my belt, I built the Vintage Step Stool. It turned out great, so I figured I was ready to go! Strangely enough, after spending about $100 and several weekends picking away at this project, it was done! It looked great, even. Then, I moved the vanity into the bathroom and realized that, while it may have looked great, it wasn't very square. Lesson learned was that this is a two person project. It is too difficult to keep things square and screw at the same time when there is only one person.
At this point, everyone was tired of having to use the kitchen sink to brush their teeth and wash their hands, so we needed to get this project done. $100 later, we had more material. Since I had figured out what needed to be done with the first vanity, let's call it our prototype, the second vanity went together REALLY quickly.
Within a few hours, it was pieced together. Since it was going to be painted, we used Bondo to cover up our imperfections. Yes, of course there were imperfections. While much better than the prototype, it still was only my third woodworking project. Sanding, caulking, and priming took another hour or so. A few coats of the finish paint went on, followed by a couple more coats of a clear sealer, and it was done.
We moved it into place, screwed it to the wall, put the soapstone countertop on along with the sink and faucet, and it truly was complete. Sink is Kohler, faucet came from our local Habitat for Humanity store and I'm not sure what brand it is, and the soapstone came from soapstones.com. If we had oiled the soapstone with mineral oil, it would be a very dark gray.


Very simple to make and looks very nice.
Wed, 11/11/2020 - 08:38
This was a fun, easy project. I built two of them. The pickets that I used were 3-1/3” wide. I used five per panel resulting in an 18” (vs. 17”) wide panel.
For those who have difficulty sourcing cedar locally, check out this link for a fence panel kit sold by Home Depot: https://www.homedepot.com/p/Outdoor-Essentials-3-1-2-ft-x-8-ft-Western-…
~$80 with free delivery. Just enough for two planters. I ripped one of the 2x4s down to make two 2x2s for the legs. The other 2x2 I ripped down to make more 1x4s. Since these ended up being 1/4” wider than the pickets in the kit, I used them as the bottom cross pieces on the panels.
They look great and my spouse loves them!
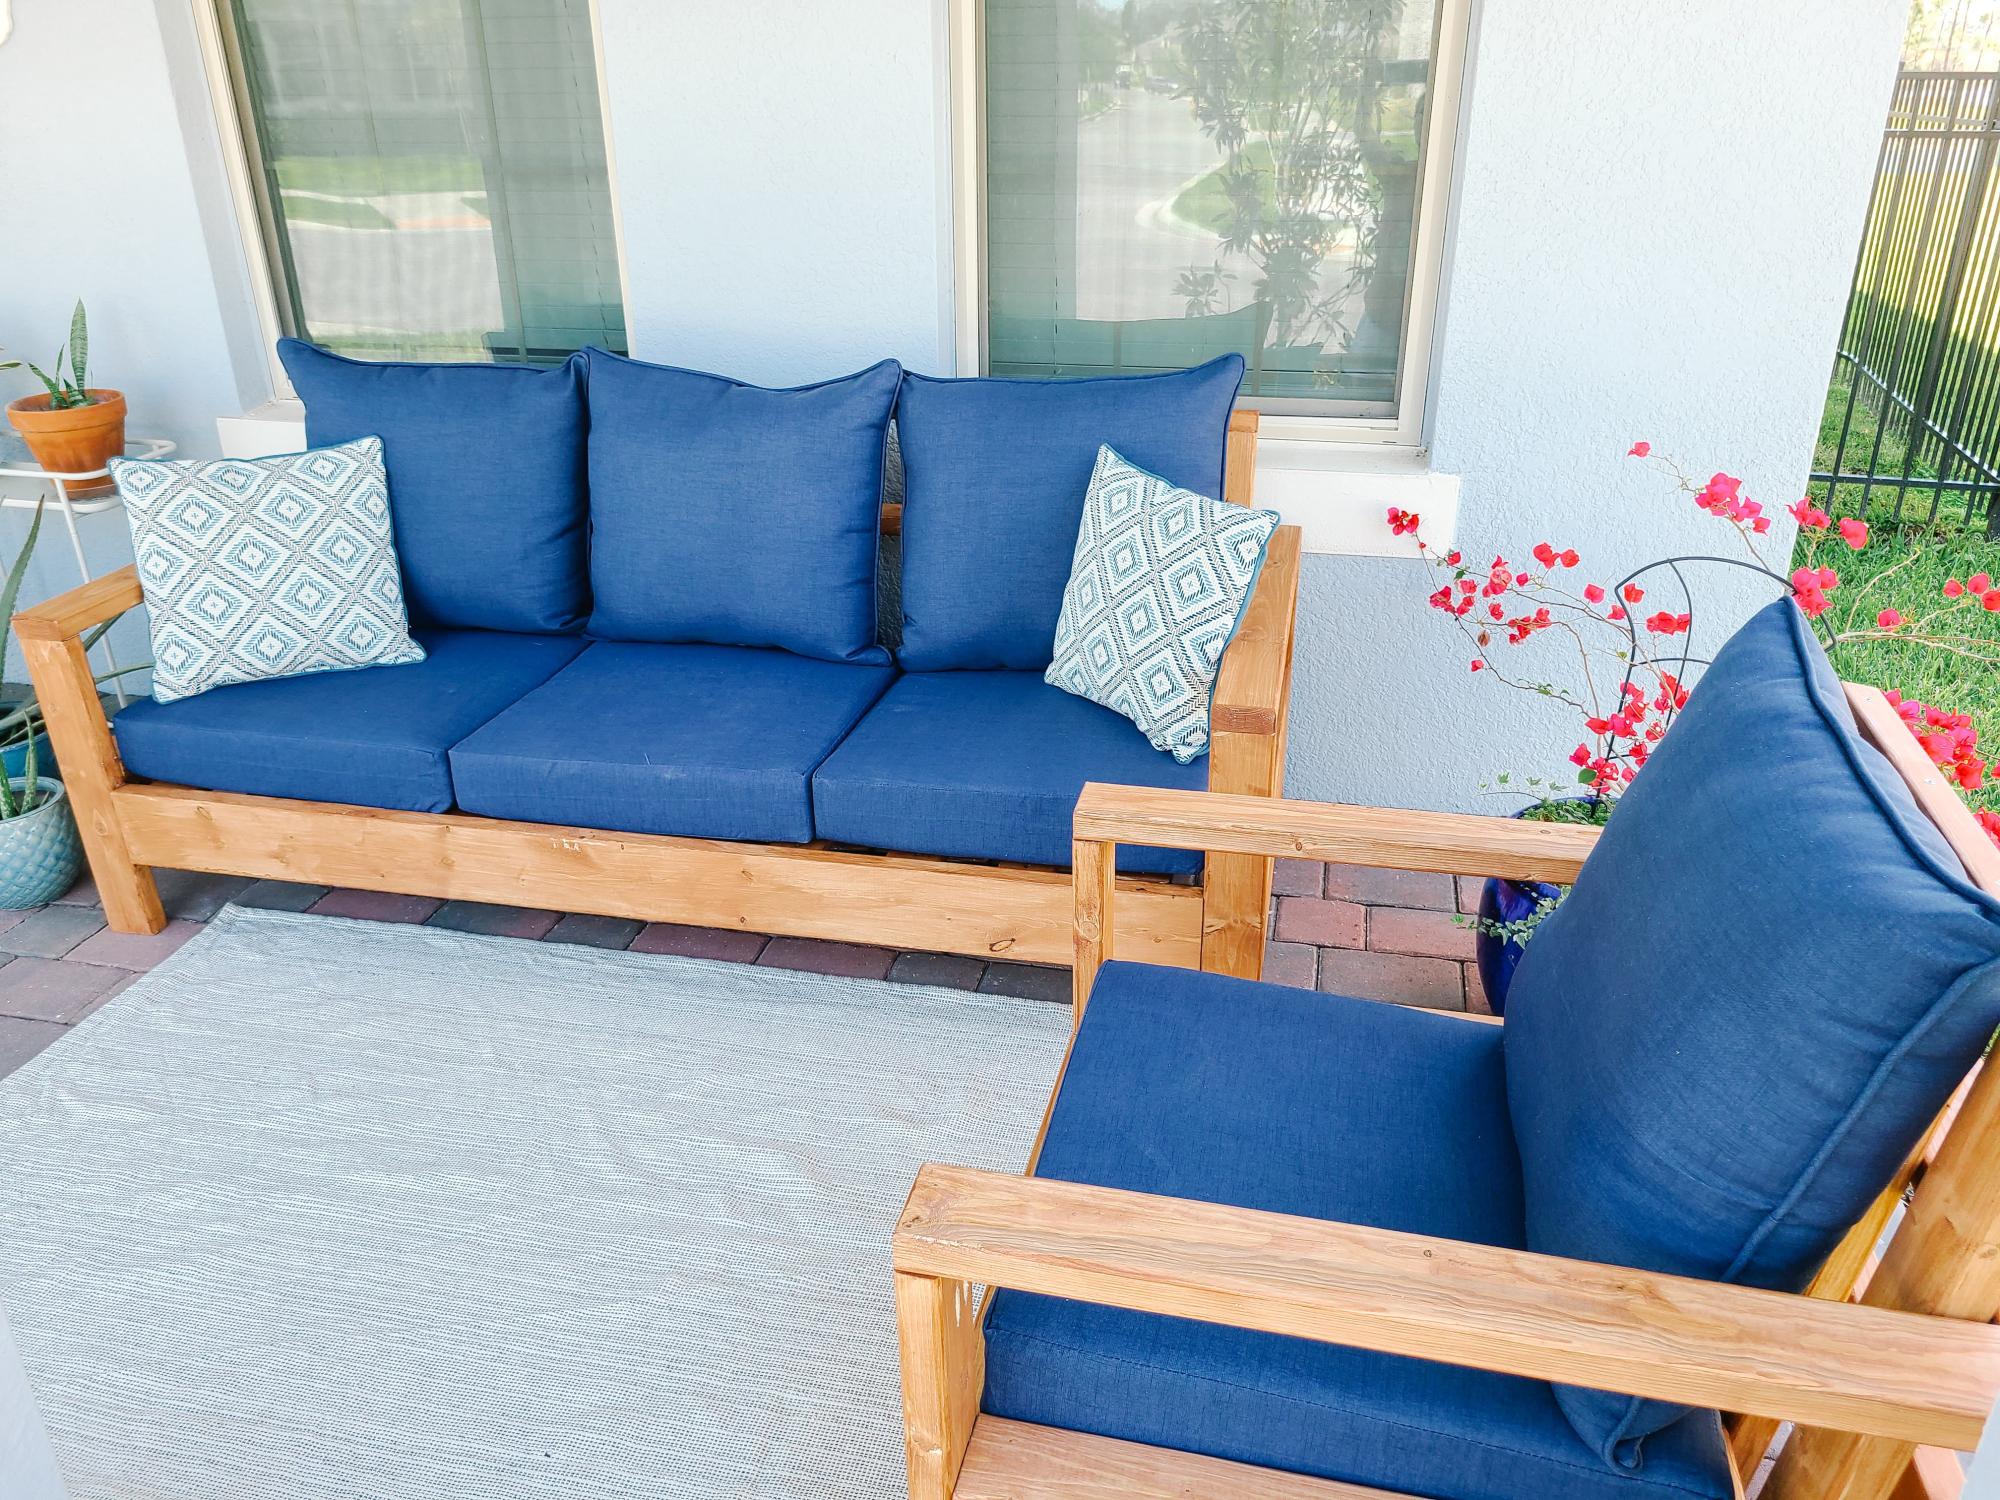
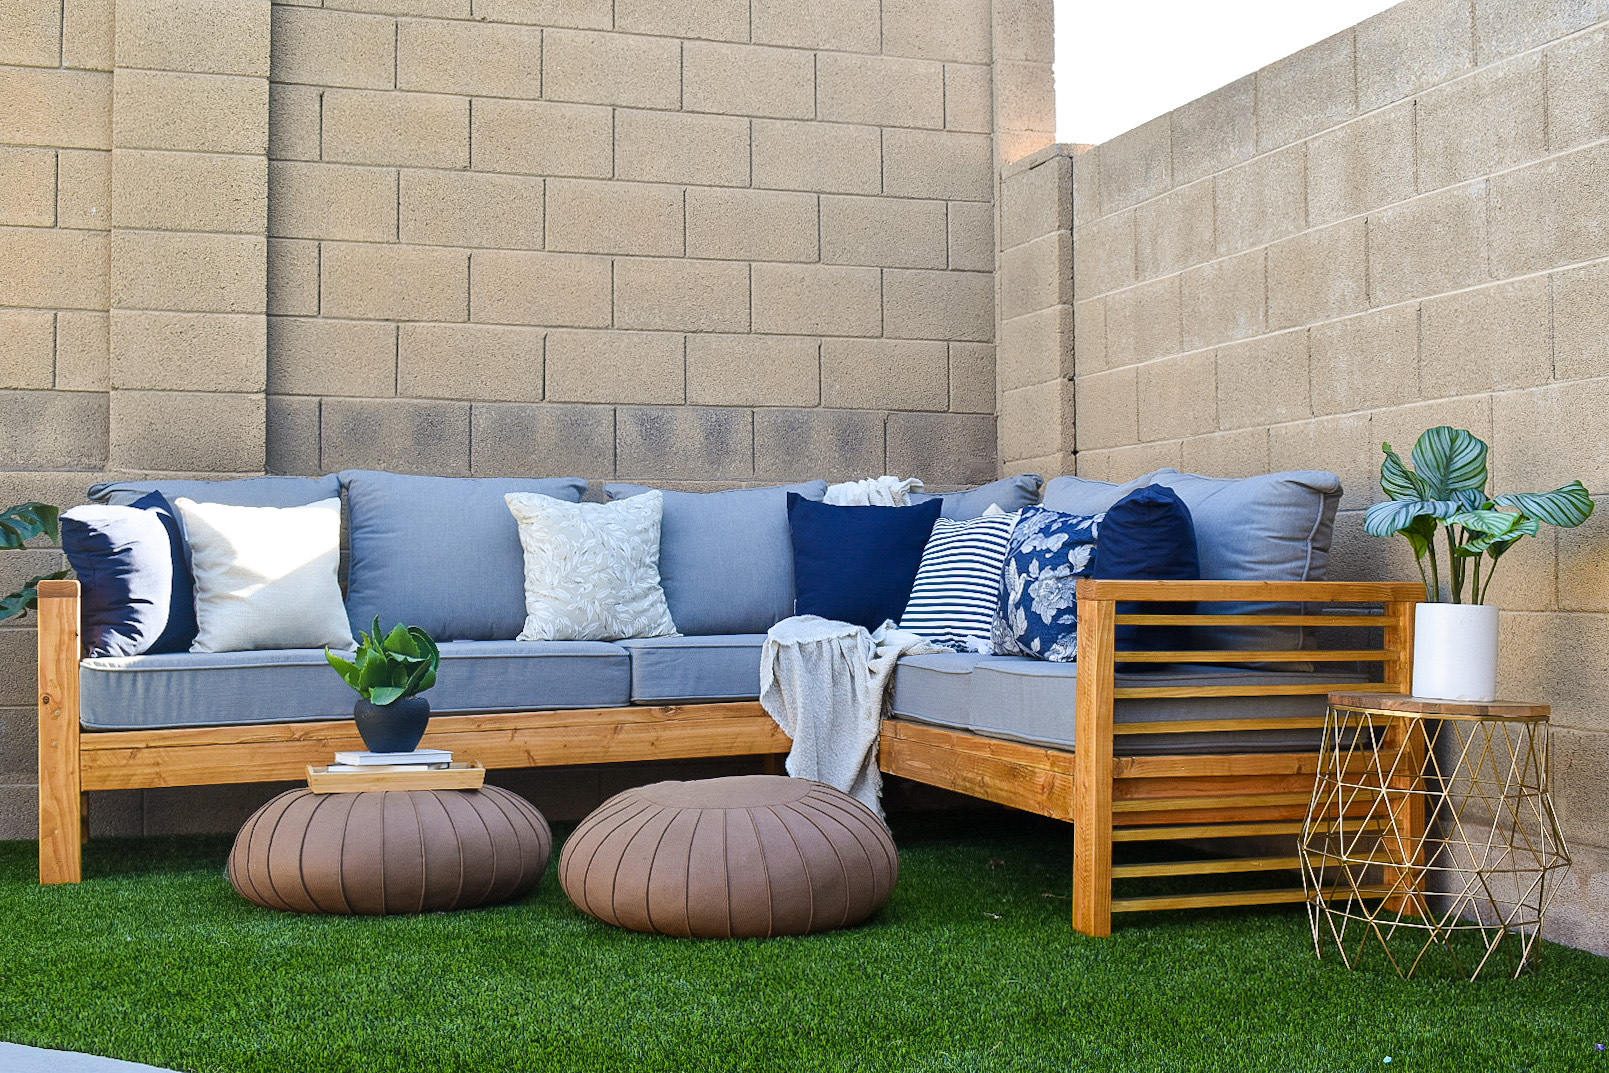
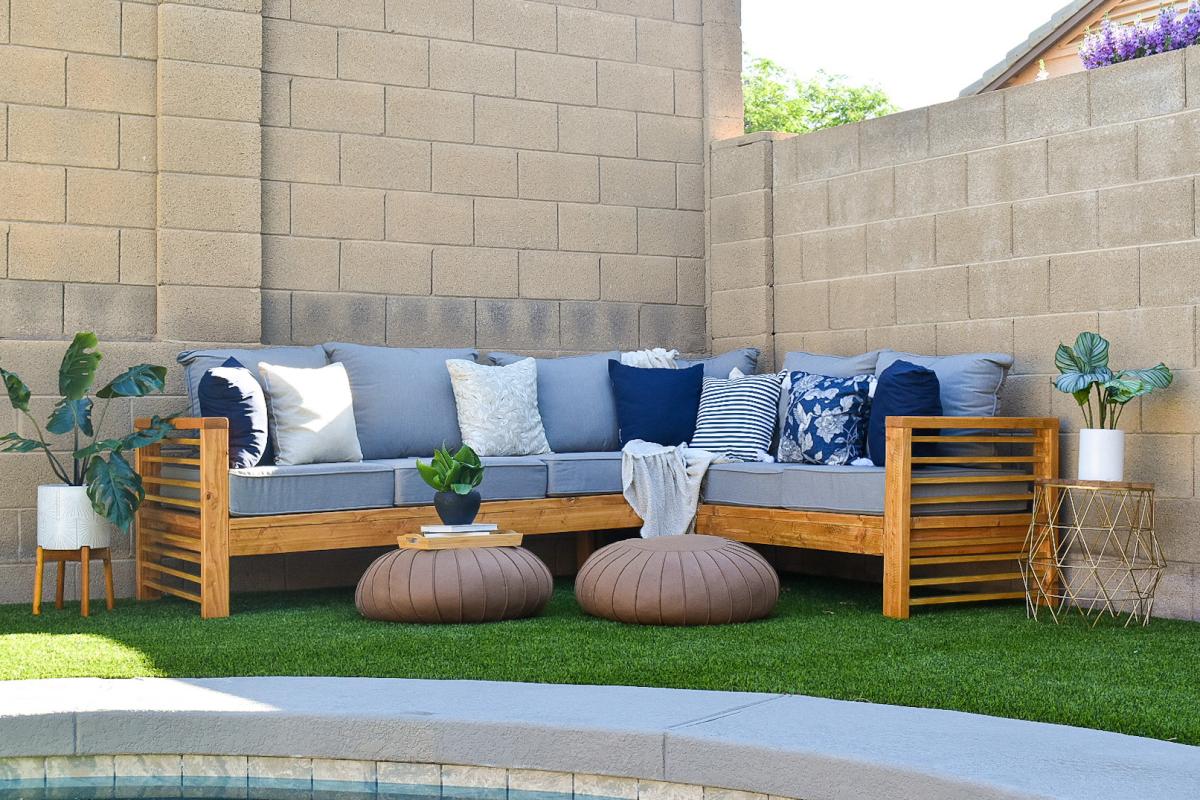
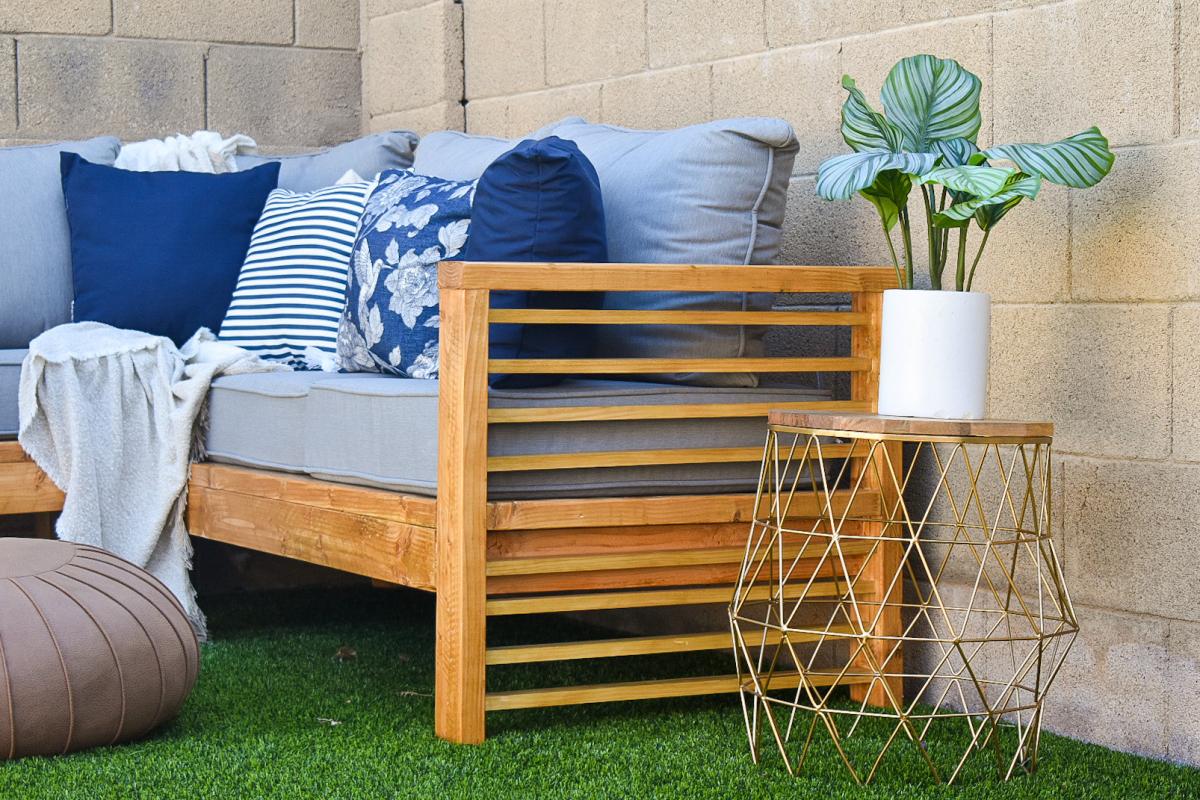
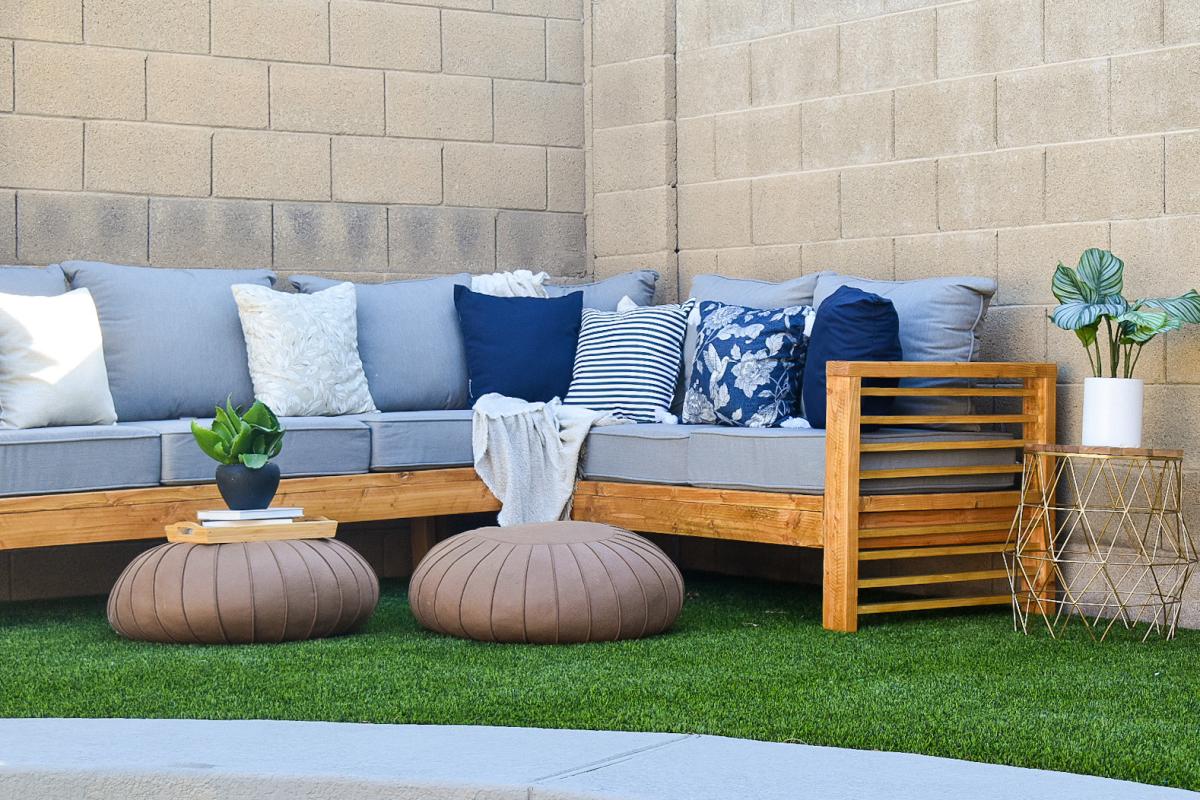
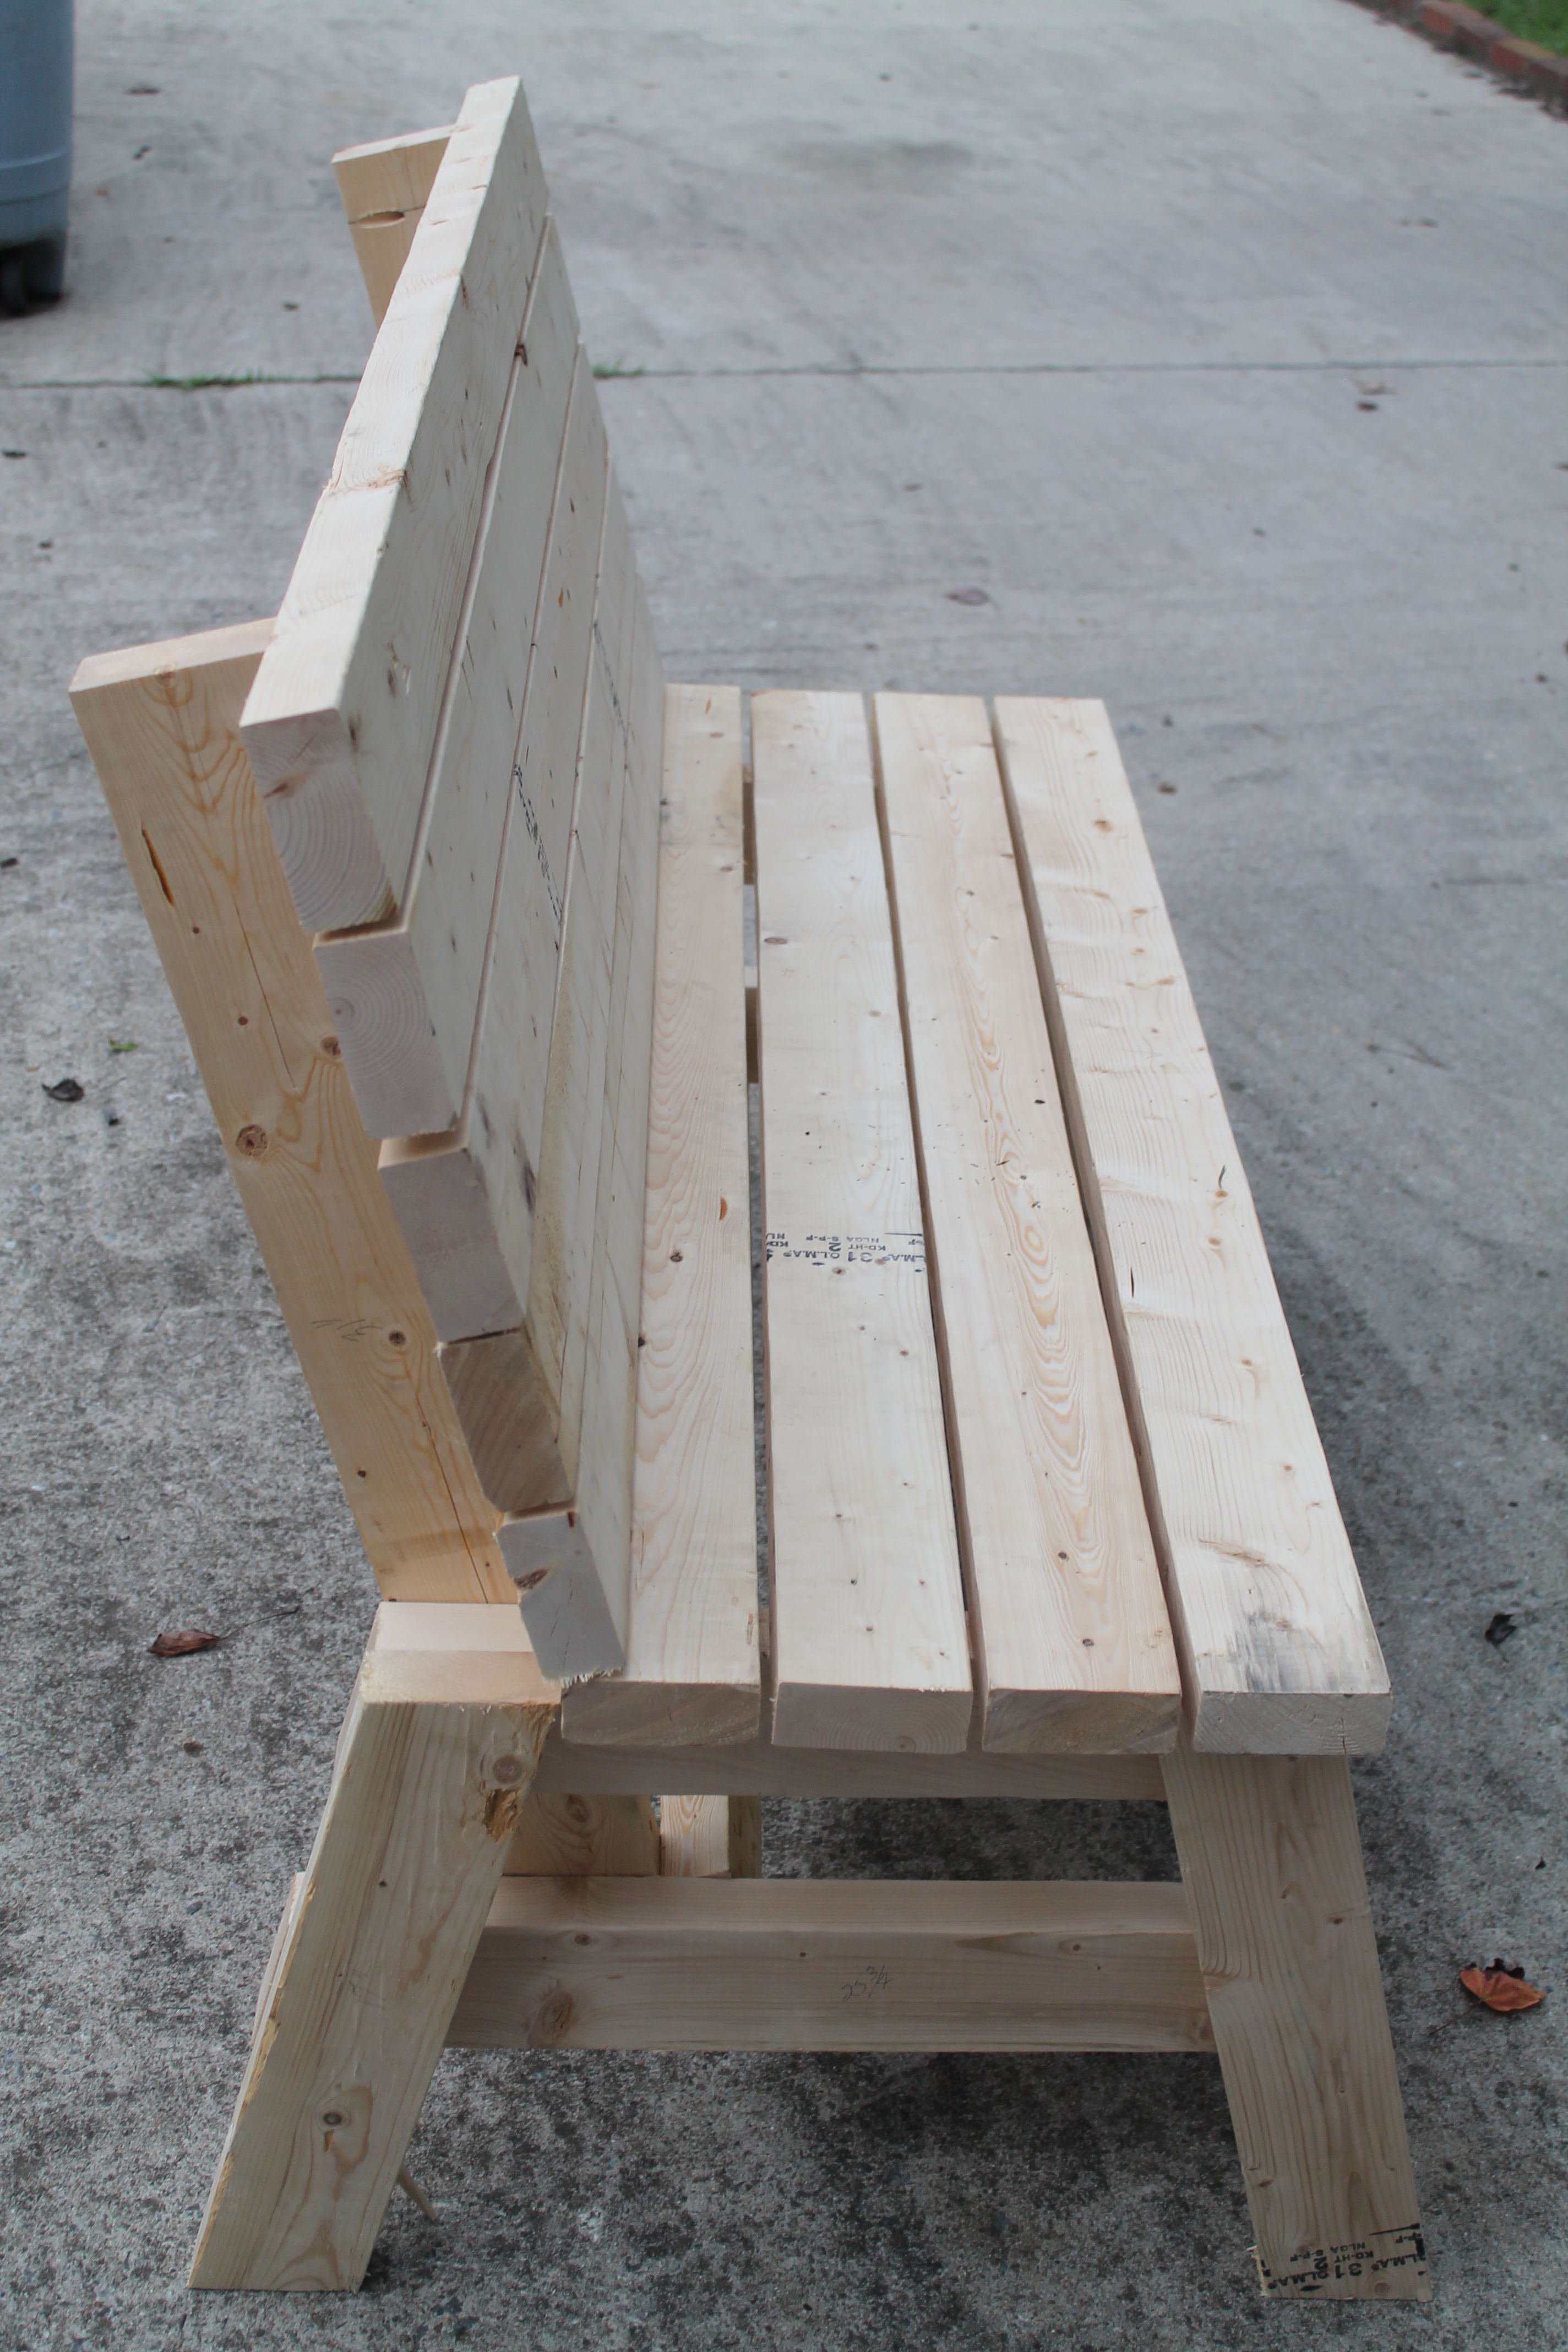
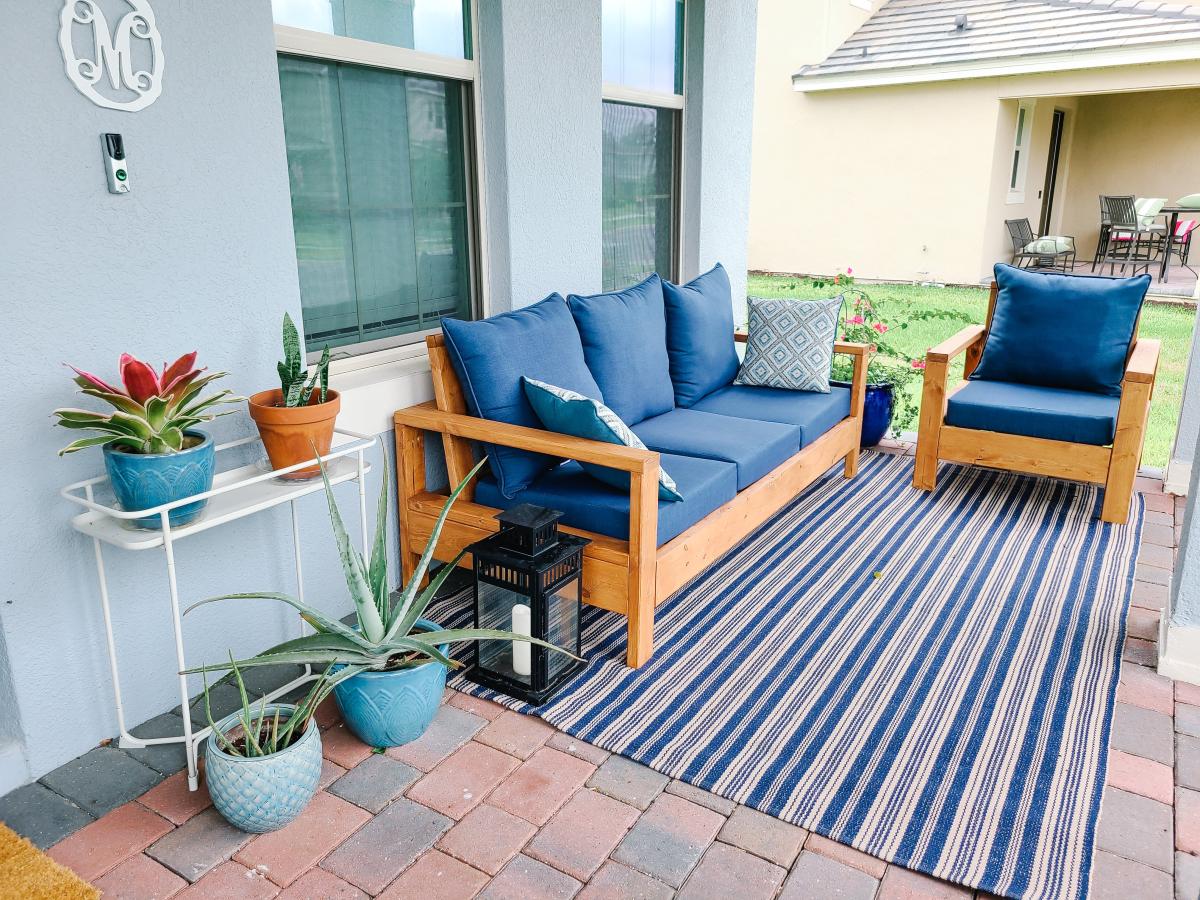
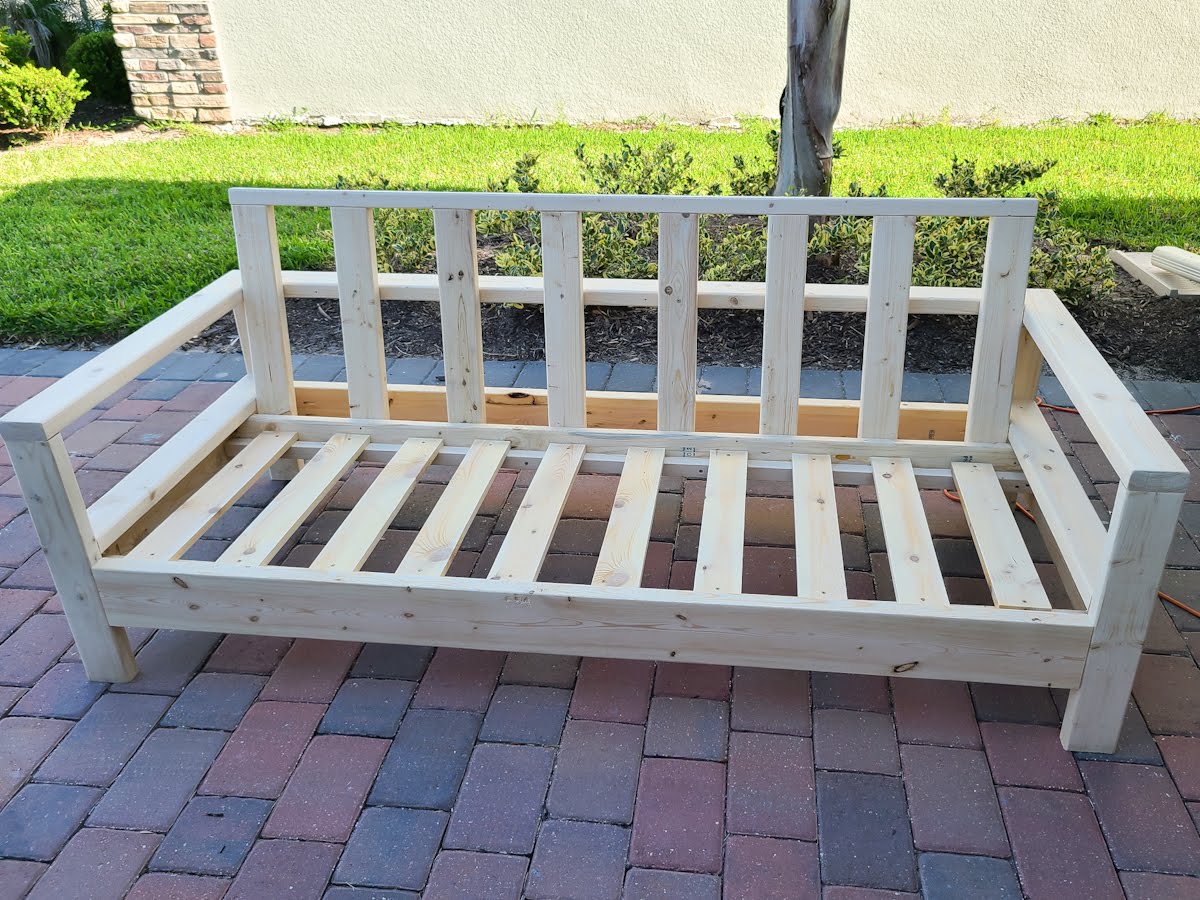
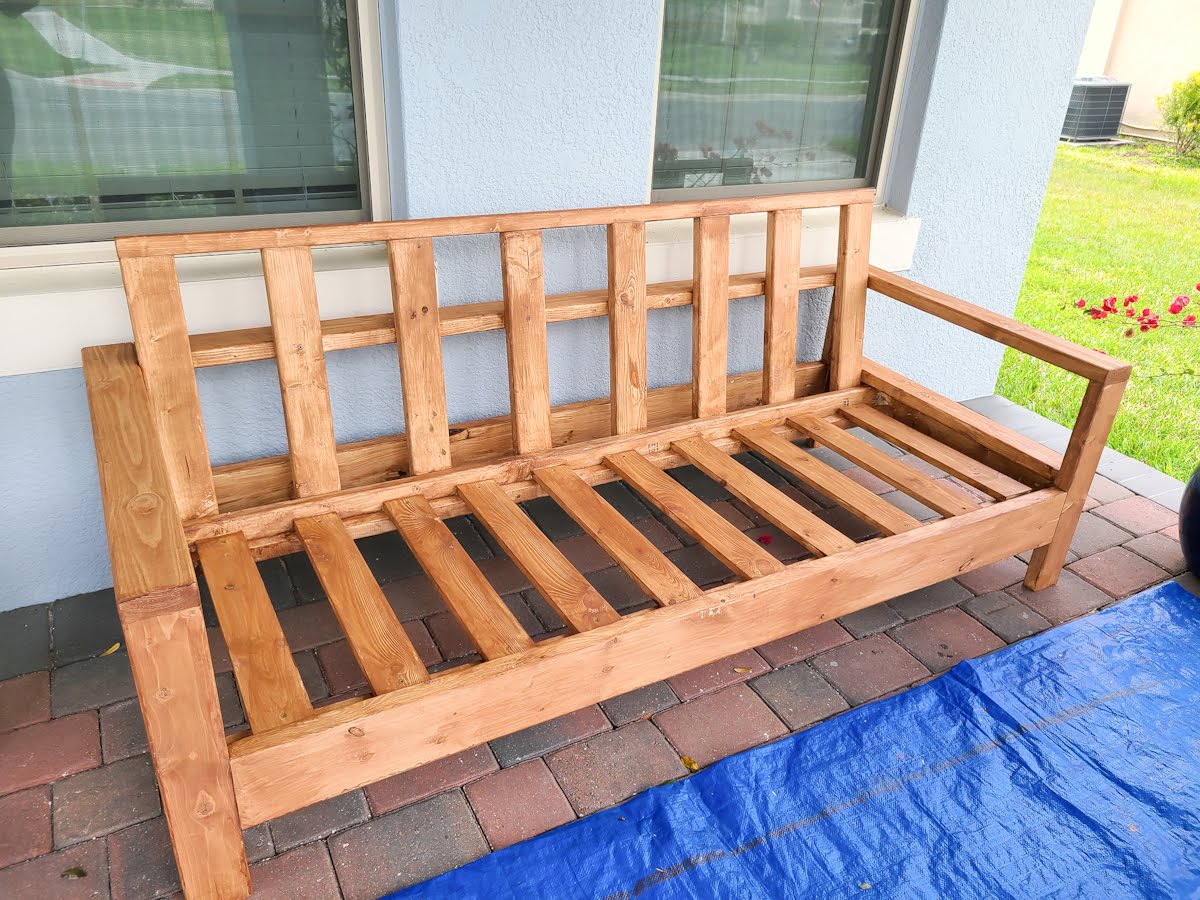
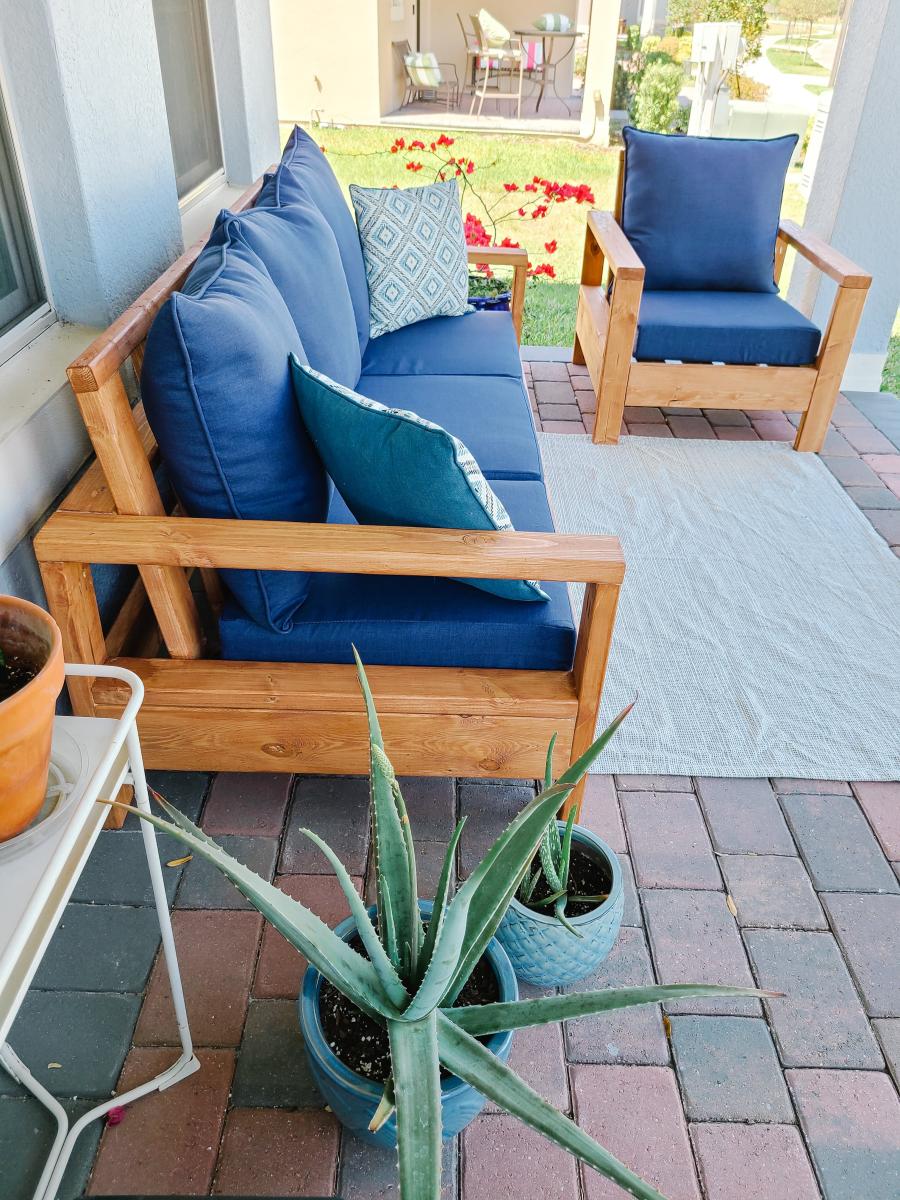
OK, I think this build may be my biggest project yet! It is definitely the heaviest. With the strong winds we can get here in Florida we needed substantial outdoor furniture.
I did make some modifications along the way measurement-wise so the sofa would fit my front porch better. All in all, this took 2 full days. I built the sofa first, stained it the next day and then decided (due to trying to get stain in all the nooks and crannies) to stain the chair pieces first before putting it together.
I am so happy with the results and so far, almost a year later, this furniture looks great and hasn't moved an inch in any of the thunderstorms we've had! Thank you Ana!!

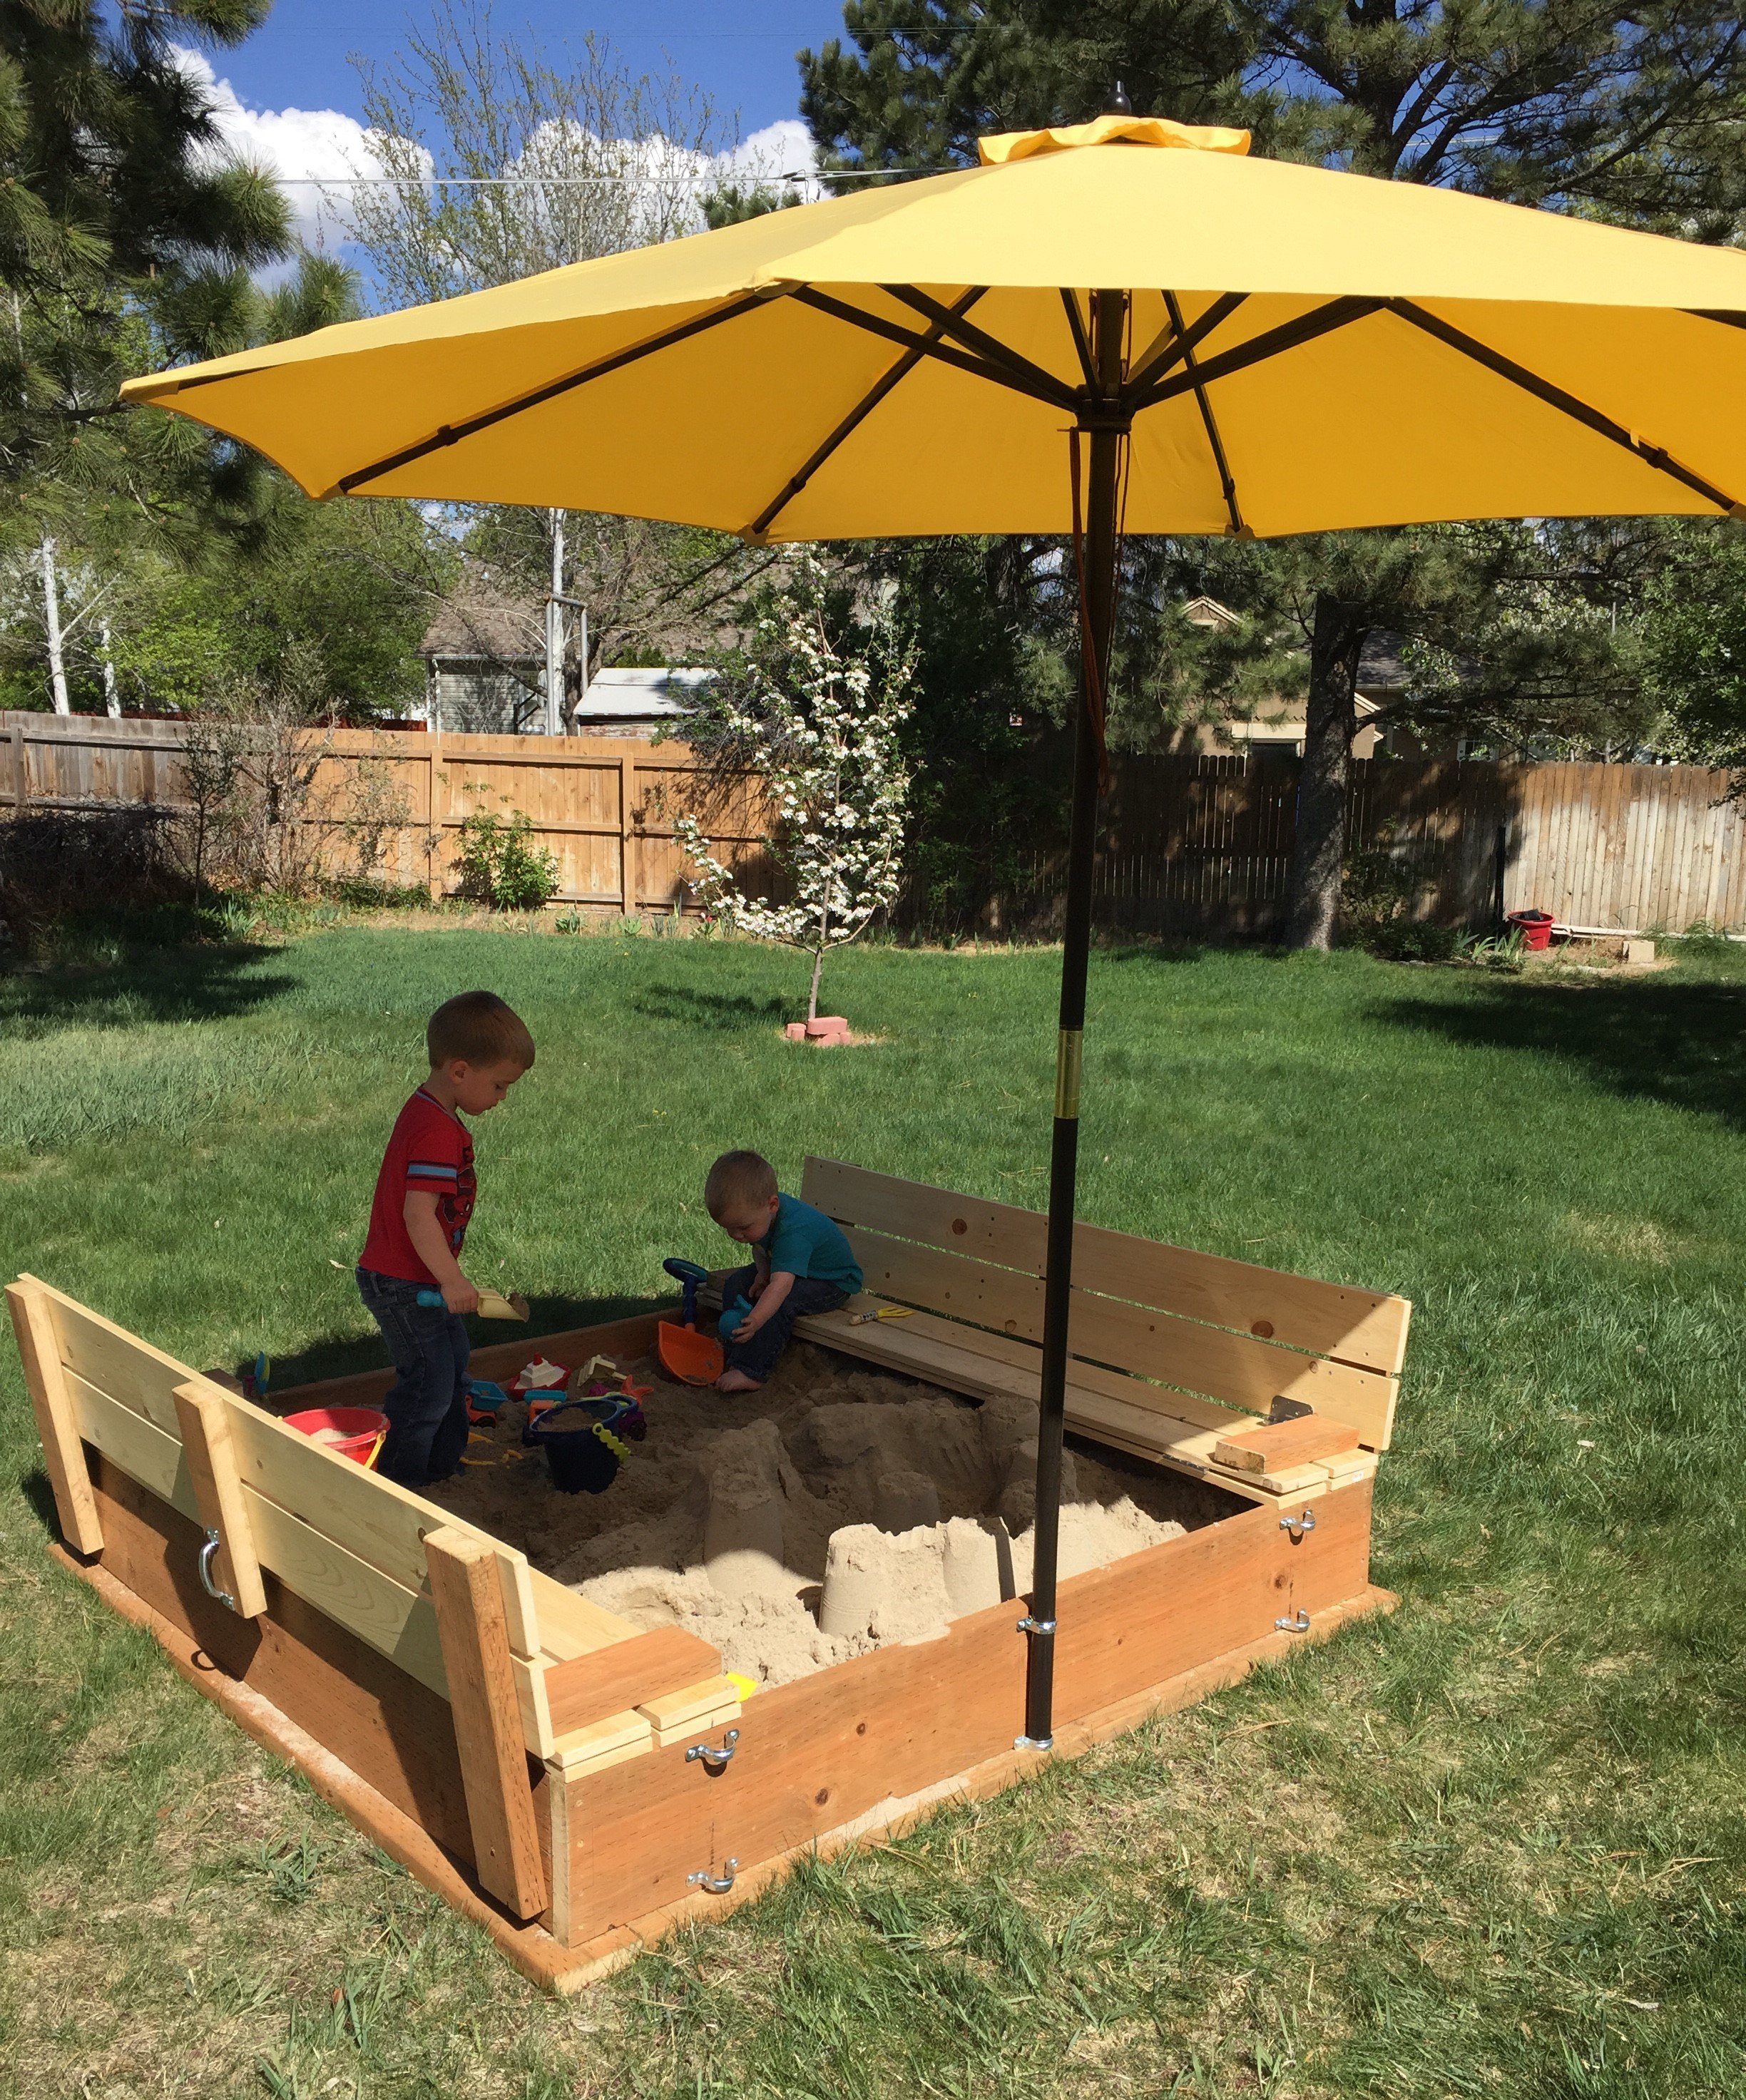
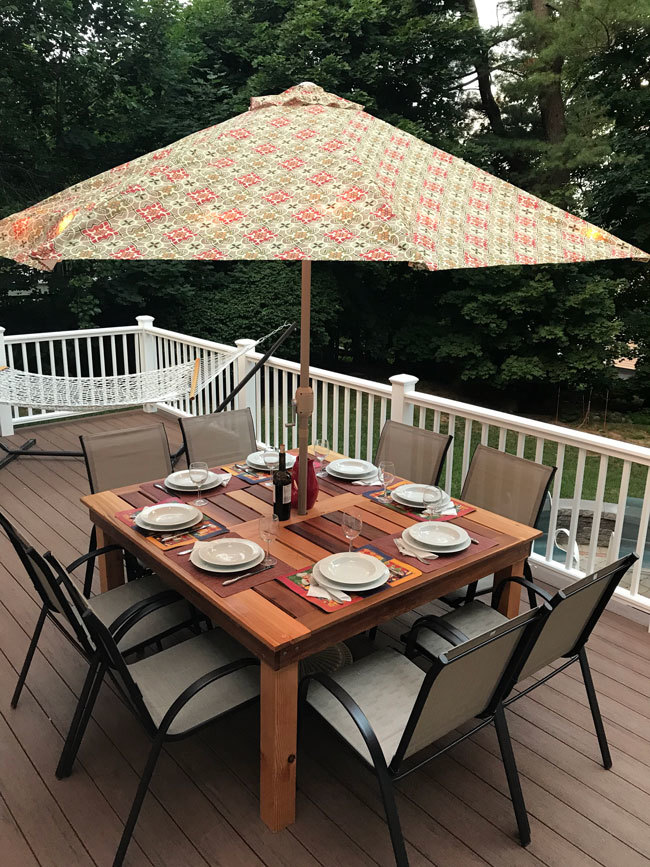
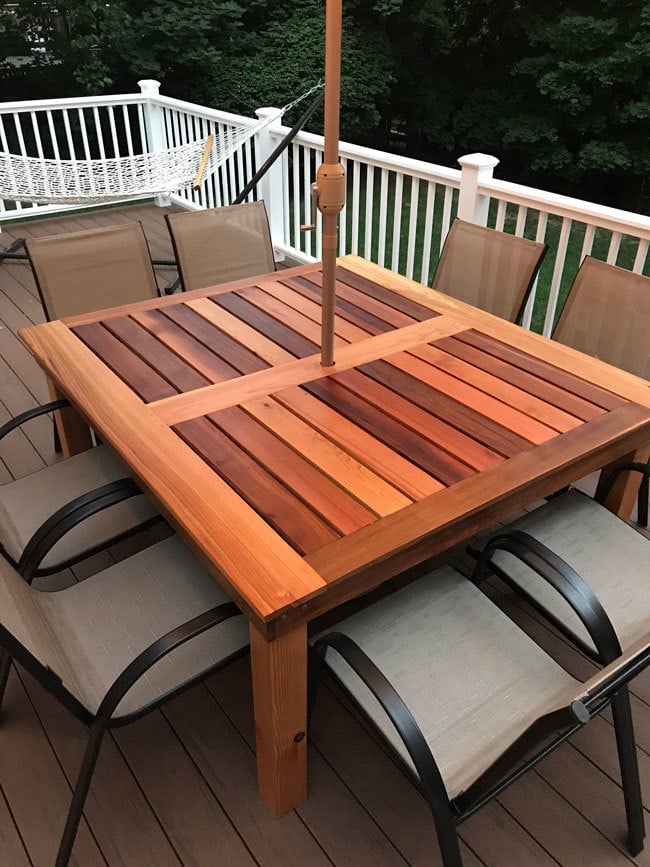
I found these plans online and was just waiting for the kids' grandpa to come out and build it. Could be built in one afternoon (depending on how many trips to your local Home Depot, and availability of the correct tools)
Modifications from original plan:
6x6 instead of 4x4
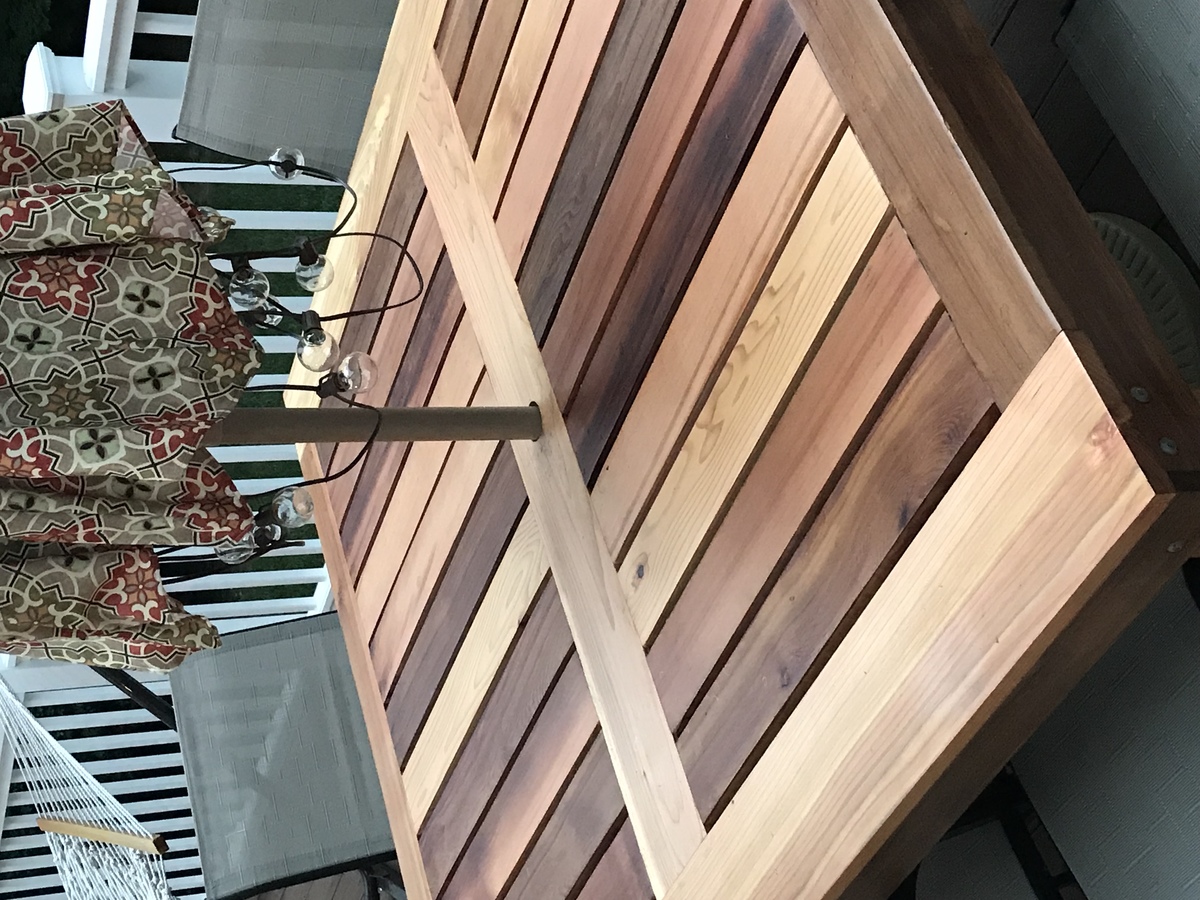
Brackets to hold patio umbrella for shade
Added seat gussets for additional support
Added "wooden flange" around bottom of box to run lawnmower on
One additional center back support on each bench
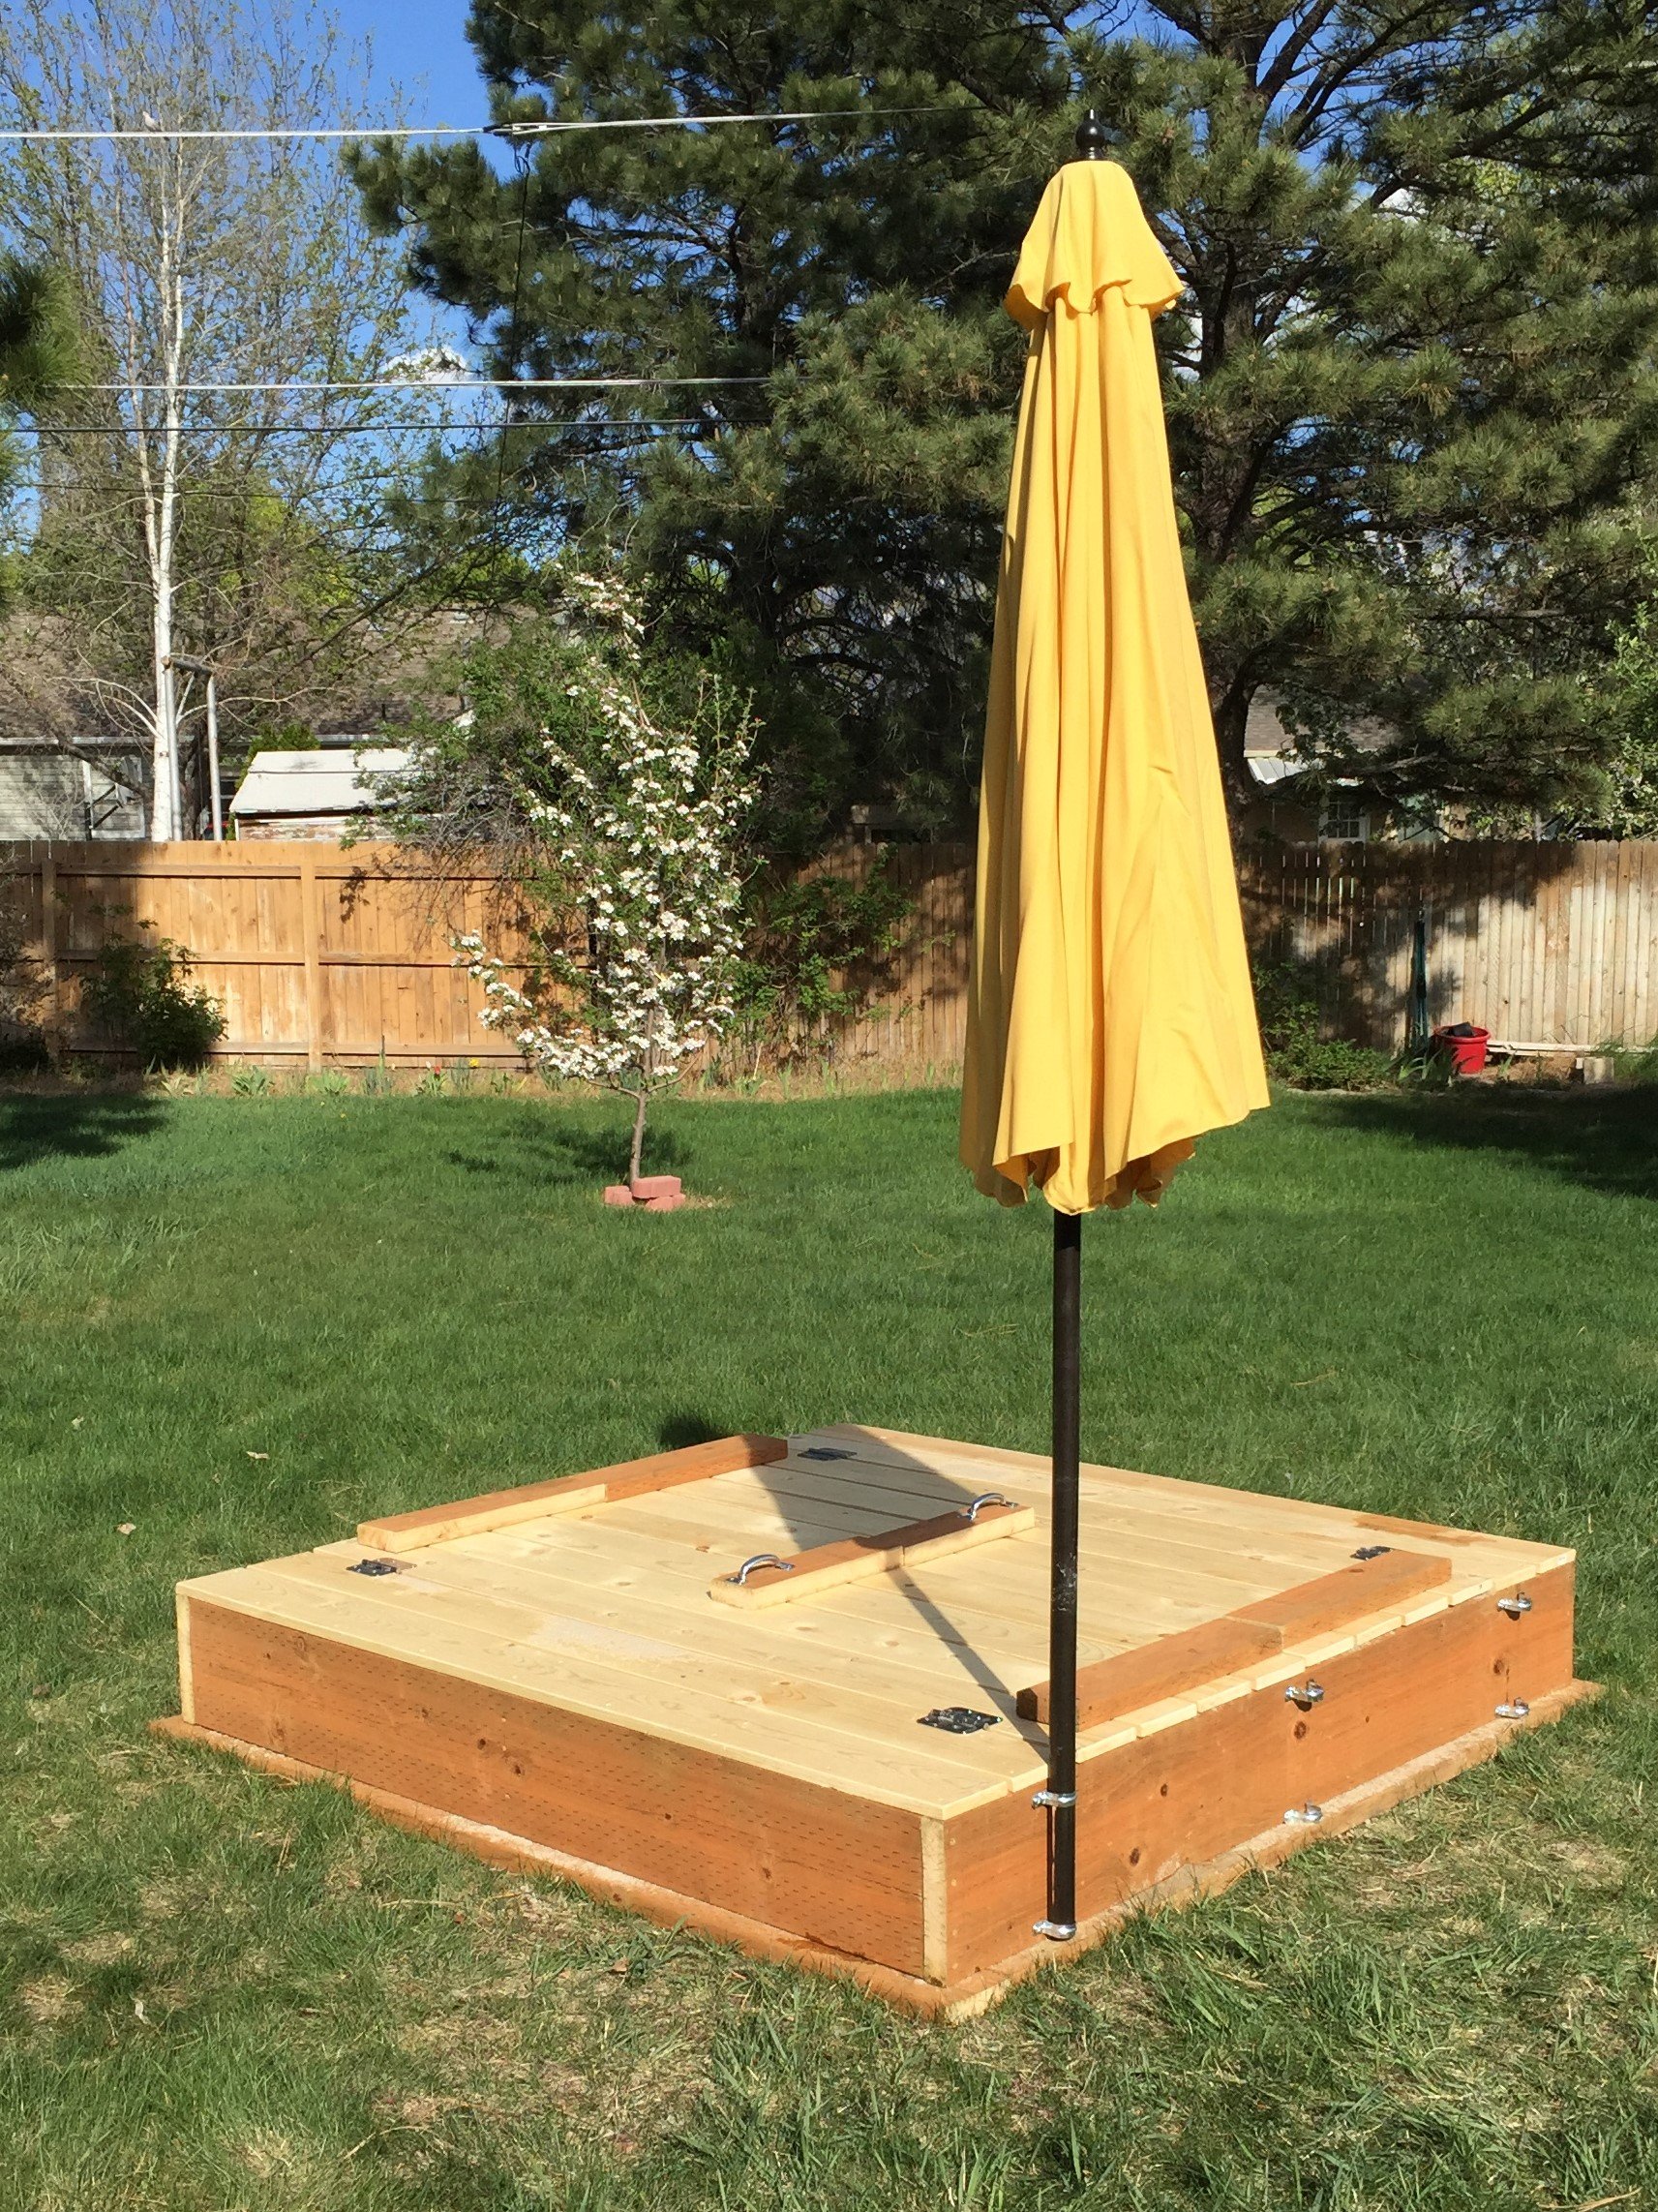
One centered handle (instead of a handle on each end)
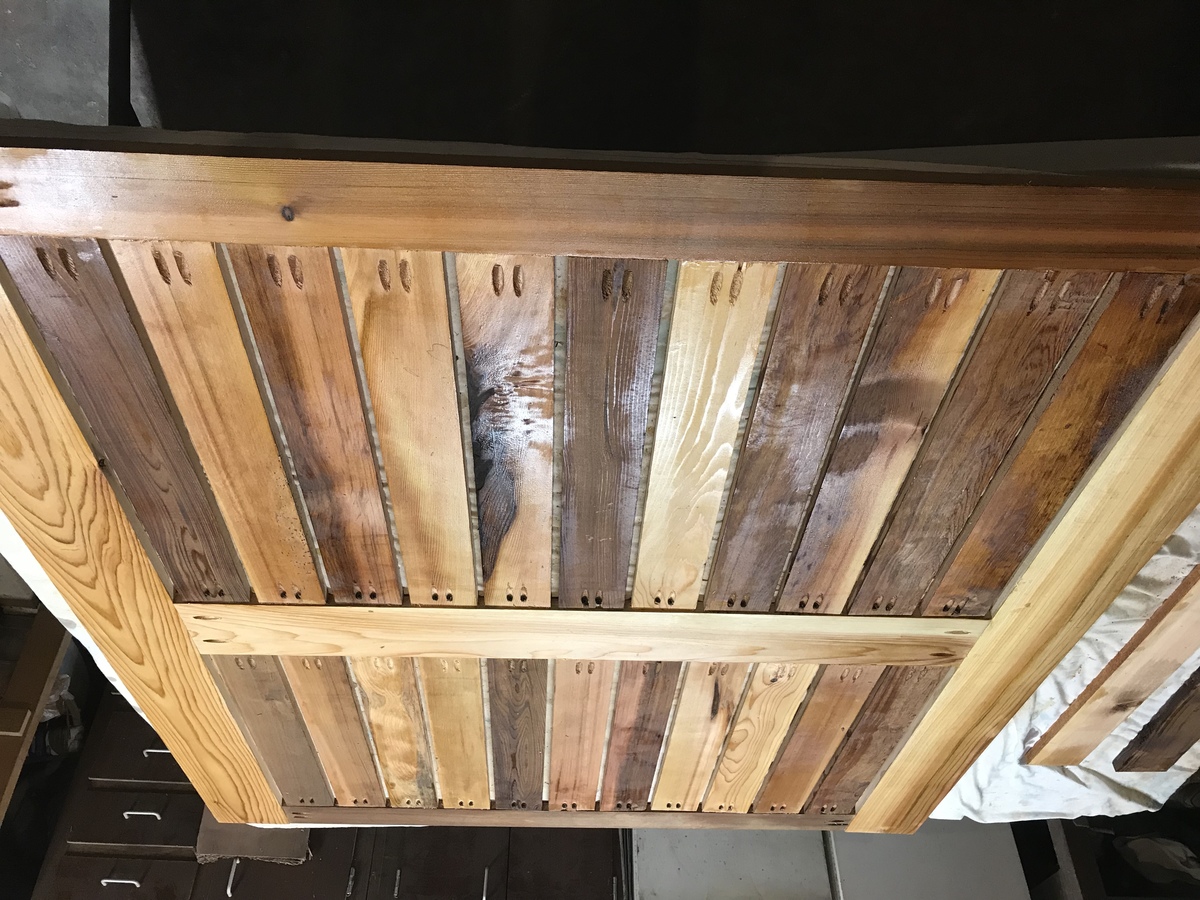
Stapled landscape weed barrier fabric onto the bottom
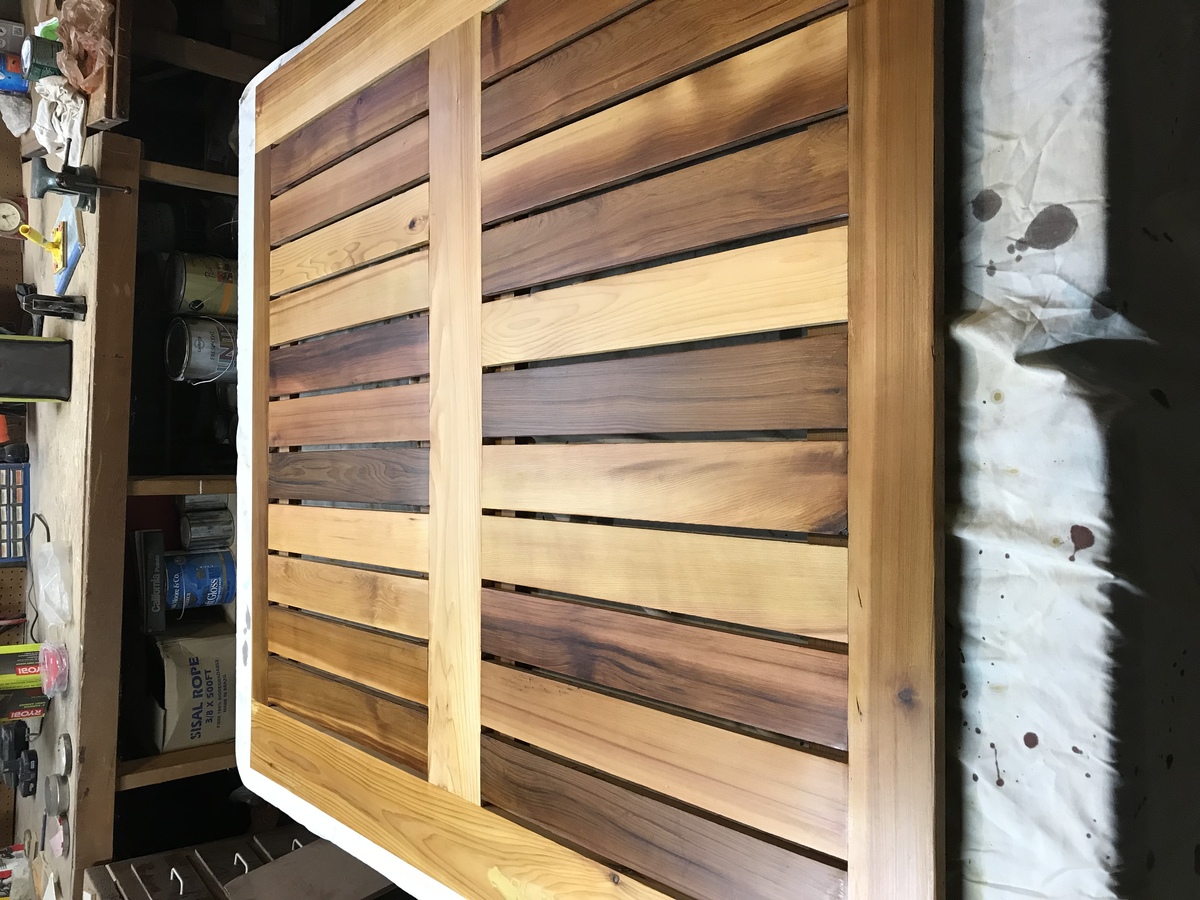
Sanded all exposed edges
Materials:
4@2x10x8'
12@1x6x6'
2@2x6x12'
8 hinges
2 handles
3 1/2" decking screws (for attaching 2"x boards)
1 5/8" decking screws (for attaching 1"x boards)
2+ 1 1/4" 2-hole straps for metal conduit (for attaching patio umbrella*)
*Our patio umbrella pole was 1 1/2" diameter, but 1 1/2" straps had too much play, so we used 1 1/4" straps and misc flat washers to adjust the snugness to the pole
Cut lengths:
2@2x10 cut to 72" (long sides of the box)
2@2x10 cut to 69" (short sides of the box)
Cut one each of the following out of a 12 footer:
2@2x6 cut to 75" (long side "flange")
2@2x6 cut to 64" (short side "flange")
No cuts were made to the 12 1x6's
Used one leftover 2' from the 2x8x10's ripped in half cut to 11.5" for arm rests
Used two leftover 2' sections from the 2x8x10's ripped in half cut to 21" for back supports
Used the last 2' cutoff to make two seat gussets (cut about 9 1/2" off and then ripped it at 45 degrees)
Used the remaining piece (ripped in half length-ways) to attach to the center of the backrest for additional support and as the attachment point for our handles
We decided to do one handle in the center of the backrest so one reasonably strong adult could open the lid
The bottom "flange" was assembled with the box upside down. Basically a 2x6 screwed to the bottom edge of the box allowing 1 1/2" overhang all the way around
After making cuts, but before assembly, we recommend using a quarter-sheet pad sander (or similar) with 60 grit paper to break all of the edges and round over any ends or corners that will be in contact with sandbox users
Followed other general assembly instructions
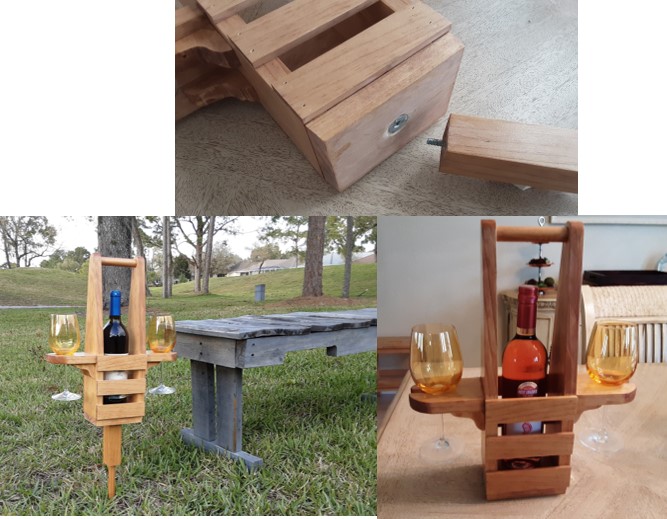
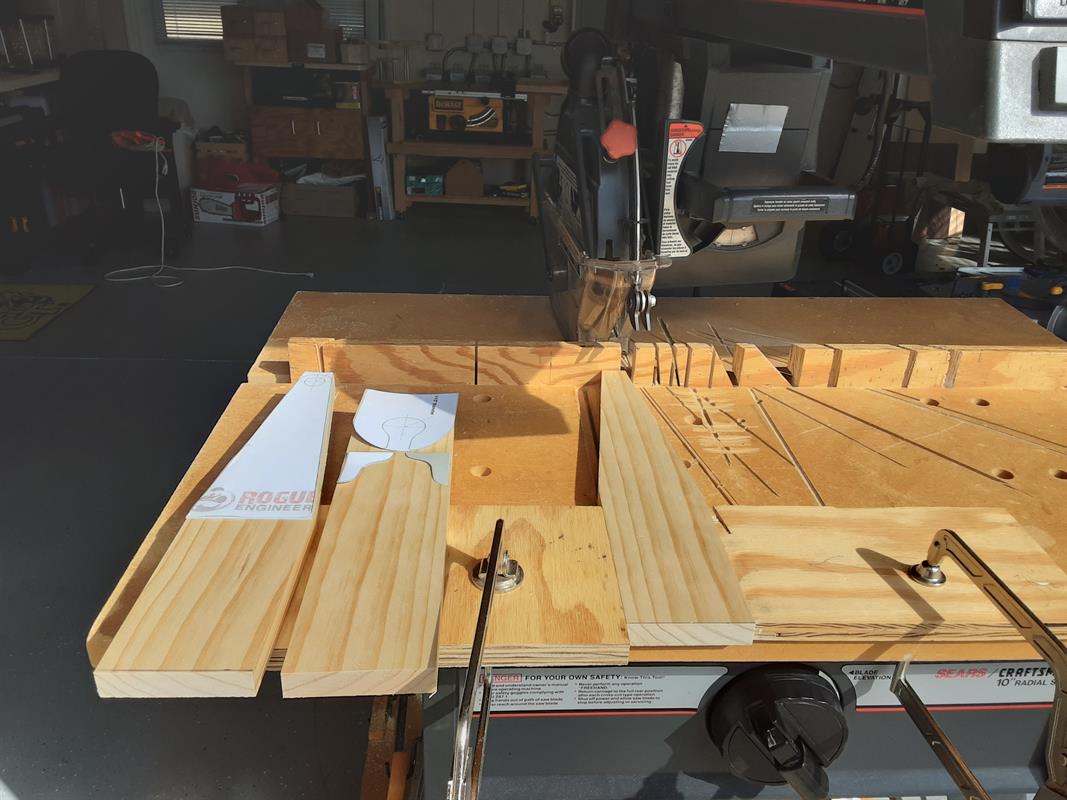
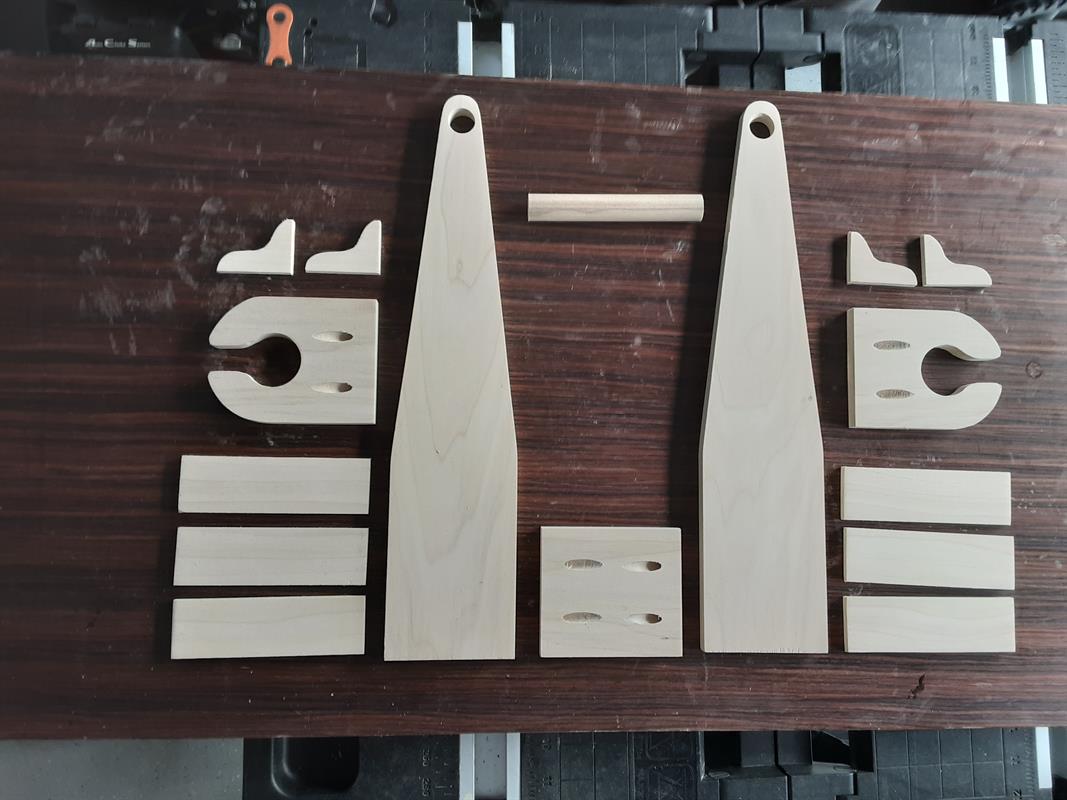
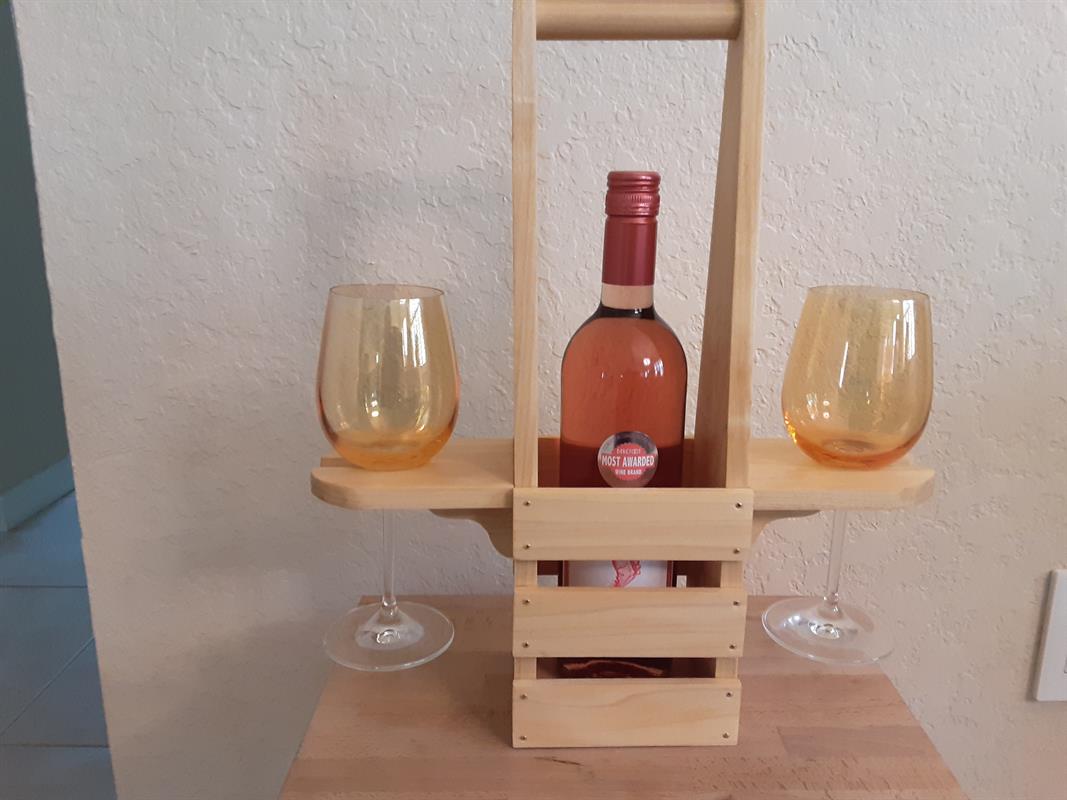
Built a number of wine caddies with/without the stake. Stake useful for an outdoor environment, yet not useful for an indoor table top setting. Provided a simple alteration by inserting a t-nut into the bottom of the caddy & a hanger bolt screwed into top of stake. Simply screw in stake as needed.

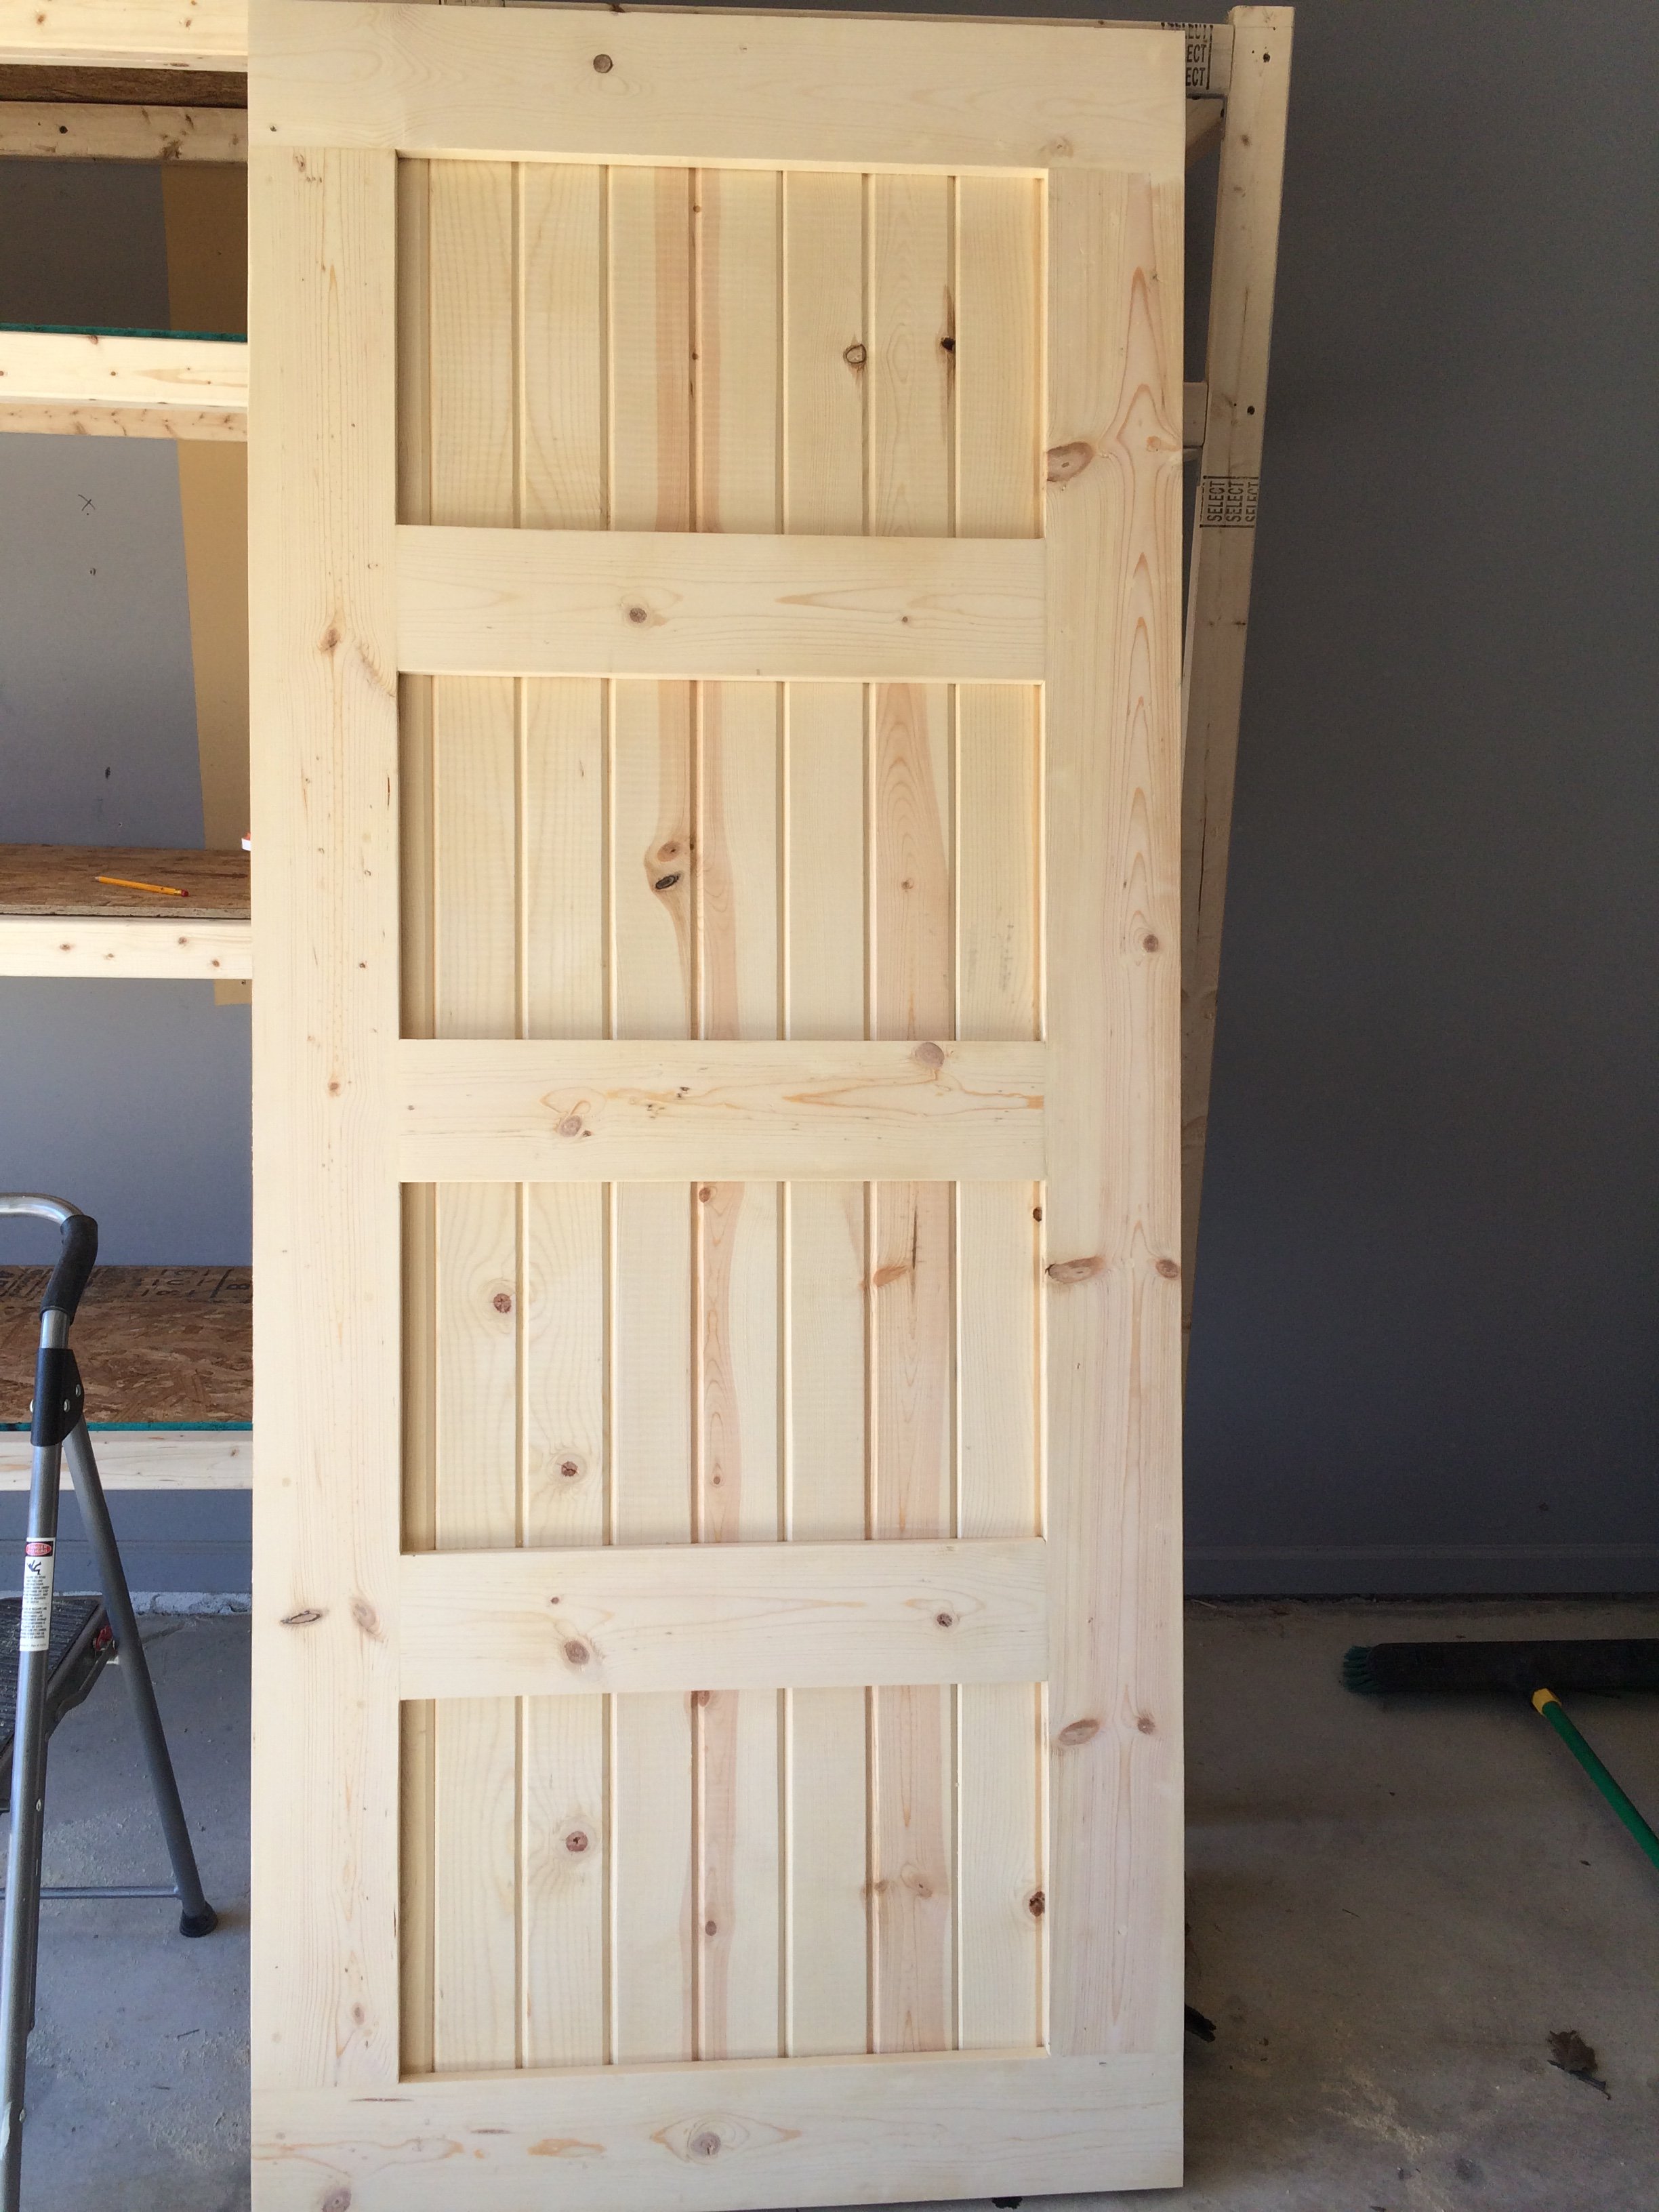
Created this door with pine wood tongue and groove lumber and pine wood planks. Purchase barn door hardware / track from Jet.com and door handles from Hobby Lobby.
This replaced my Master bath door and I think came out pretty good. Thank you for the ideas!!! Jeff M. Brownstown, Mi