Community Brag Posts

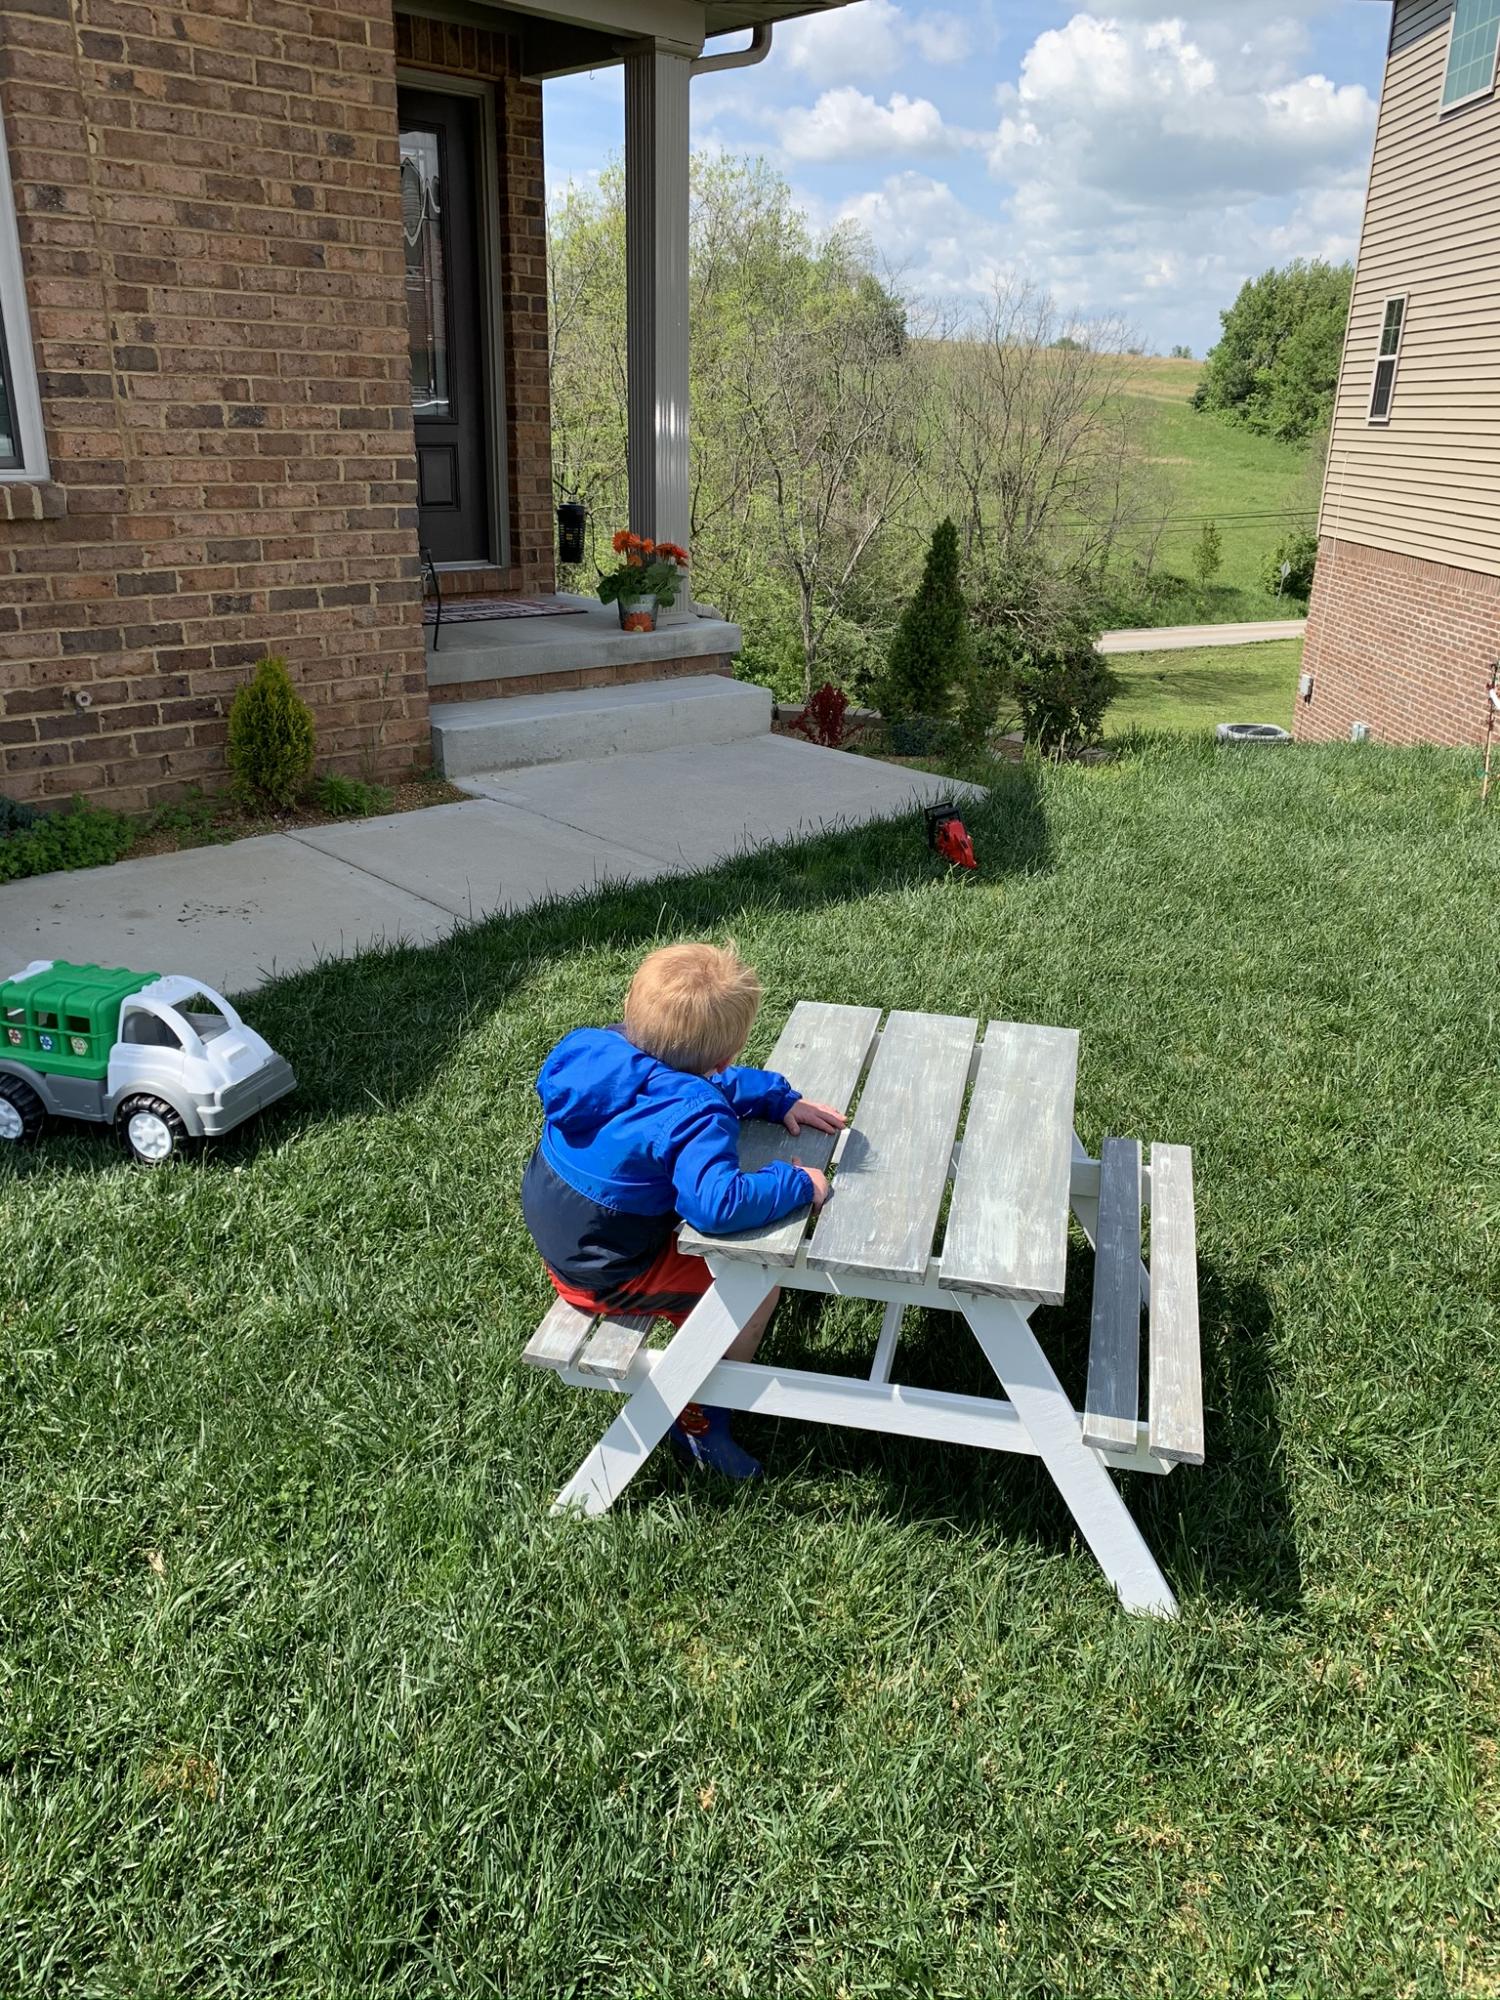
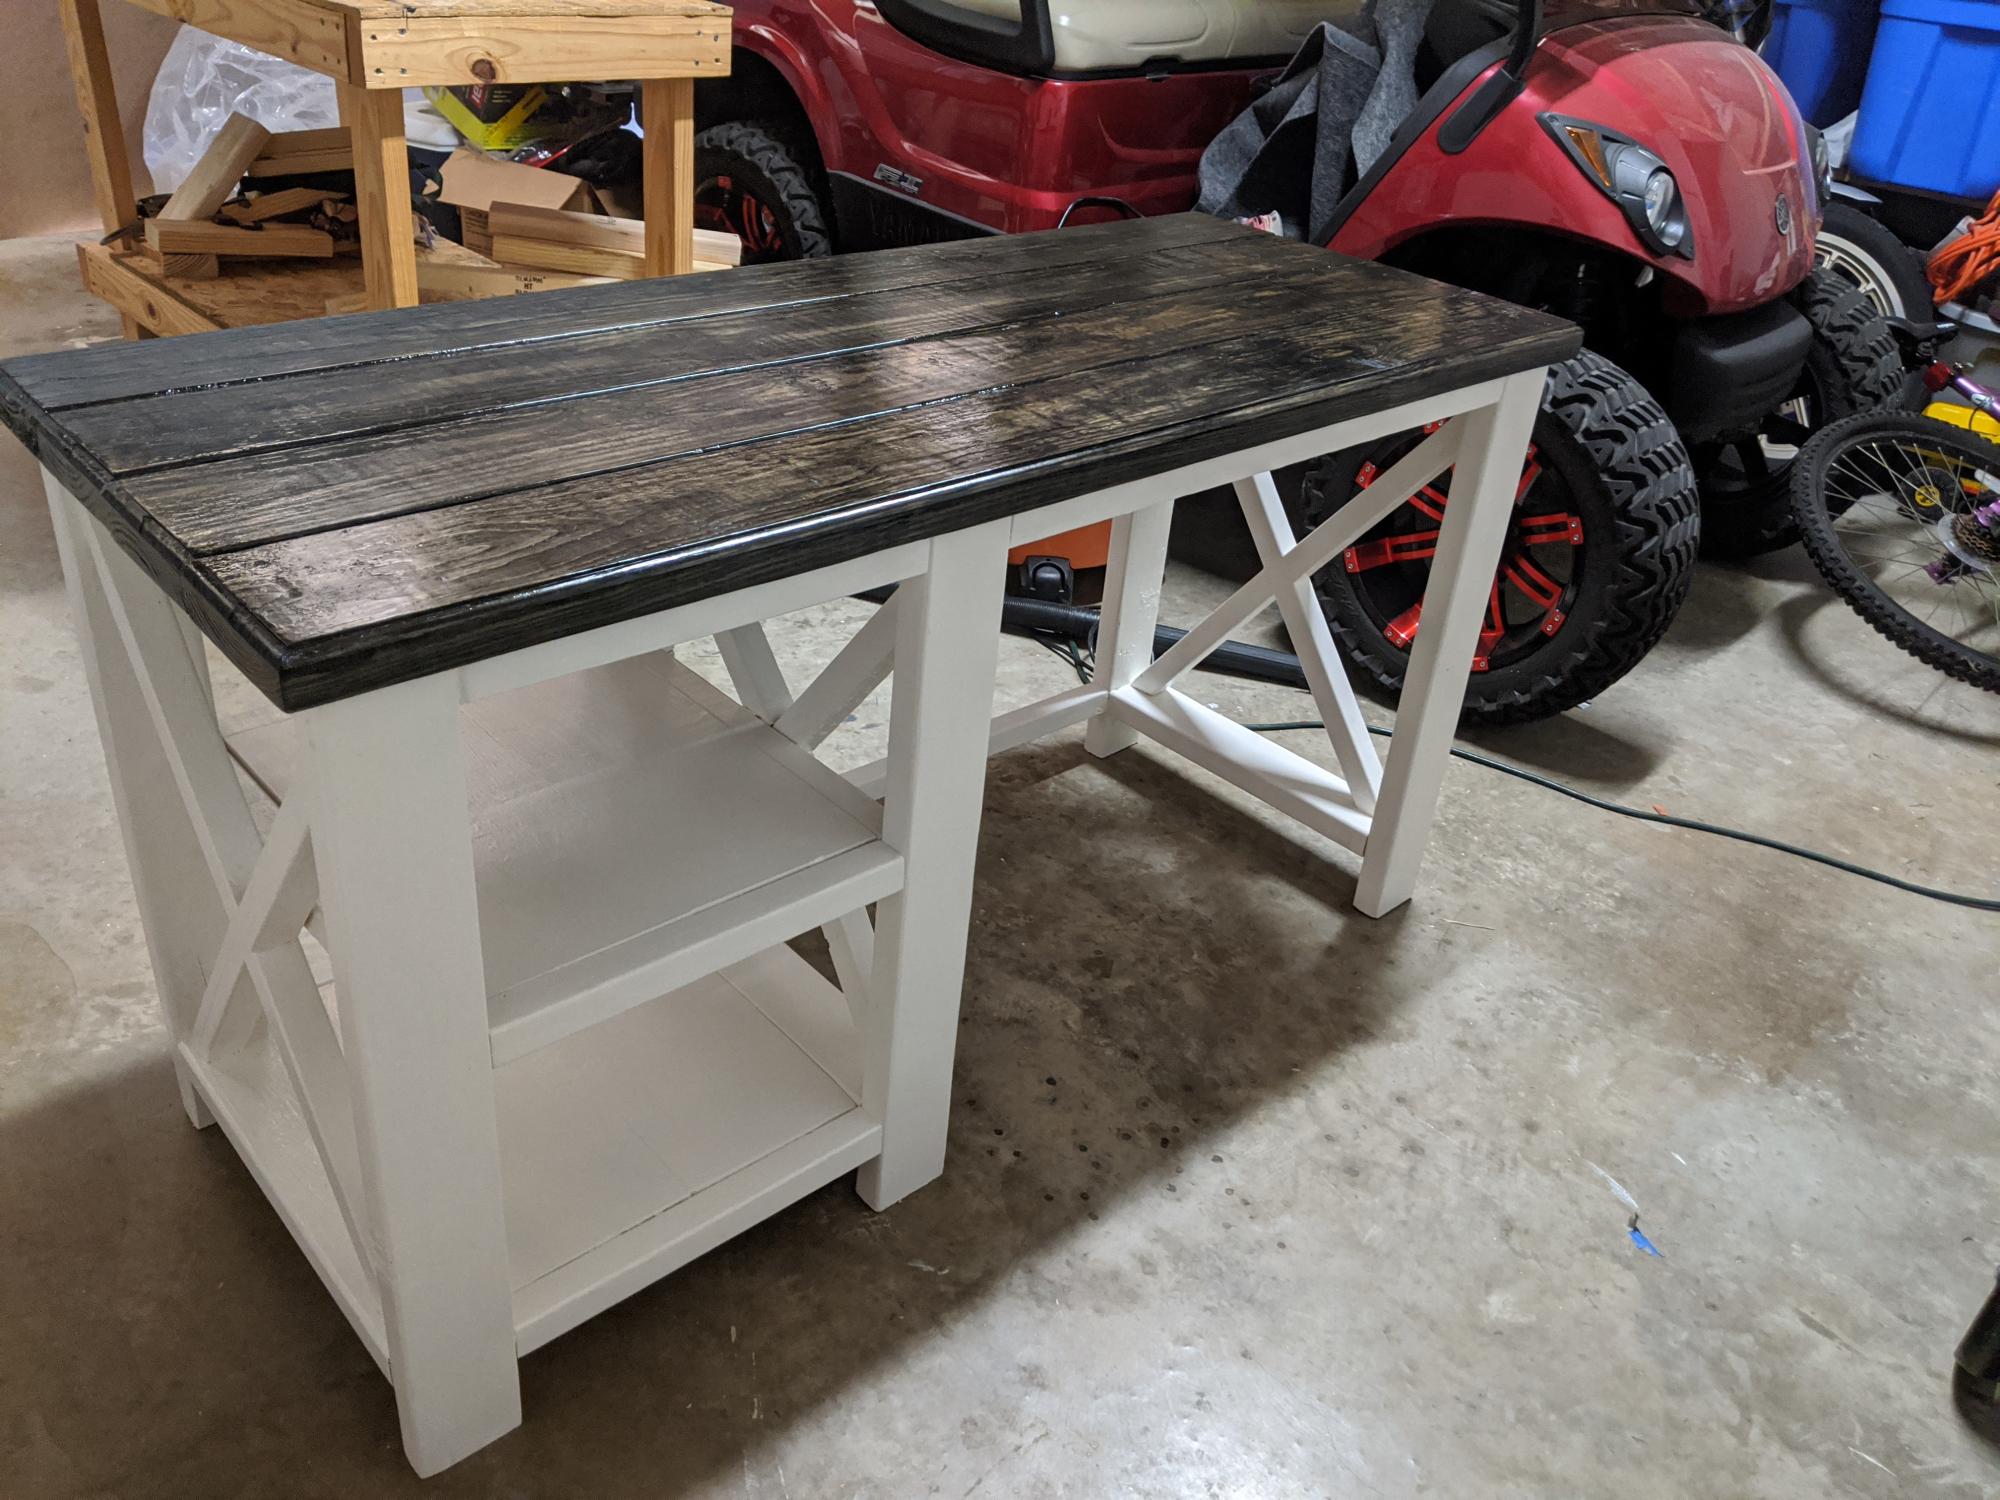
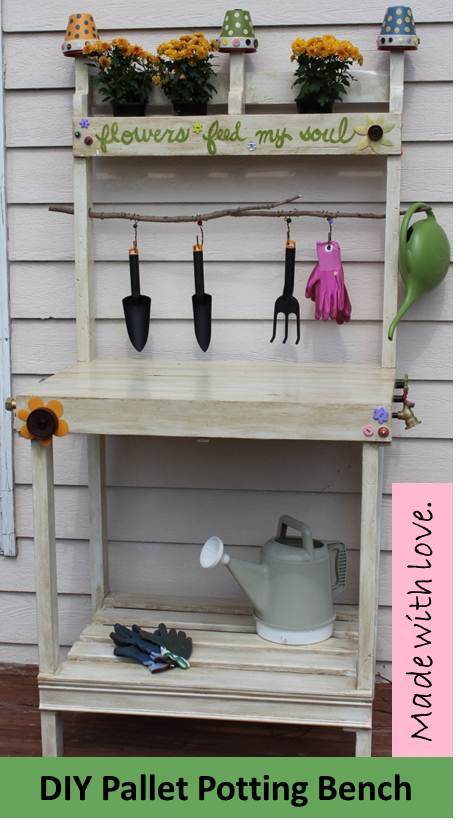
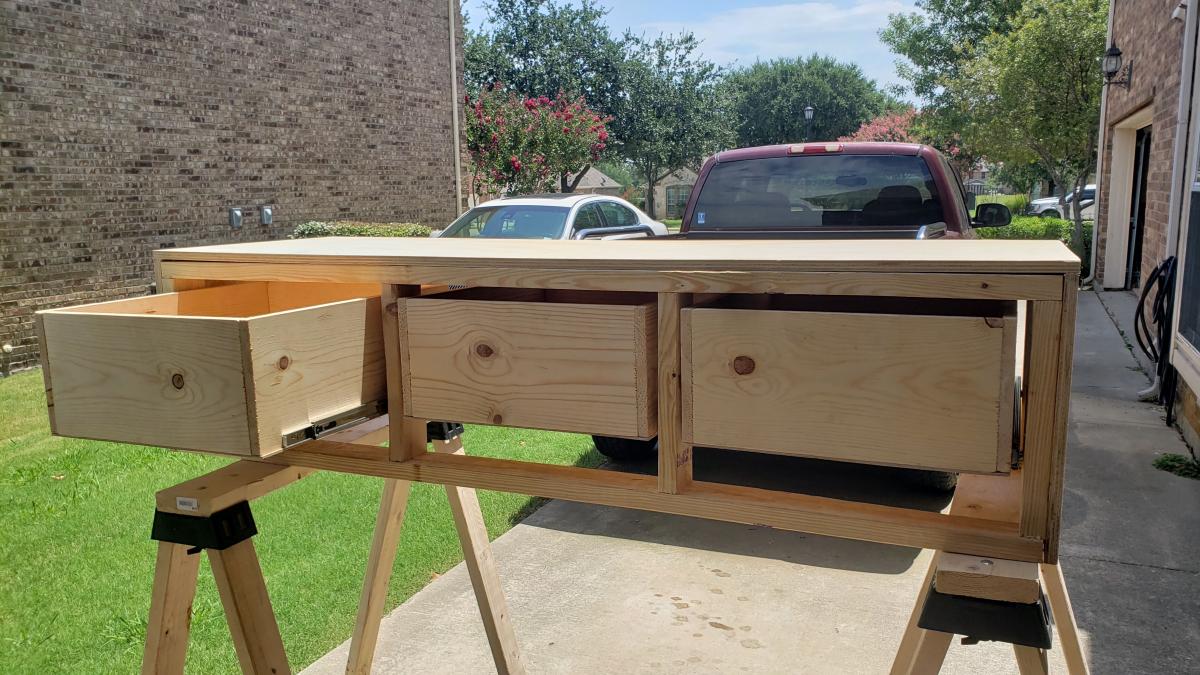
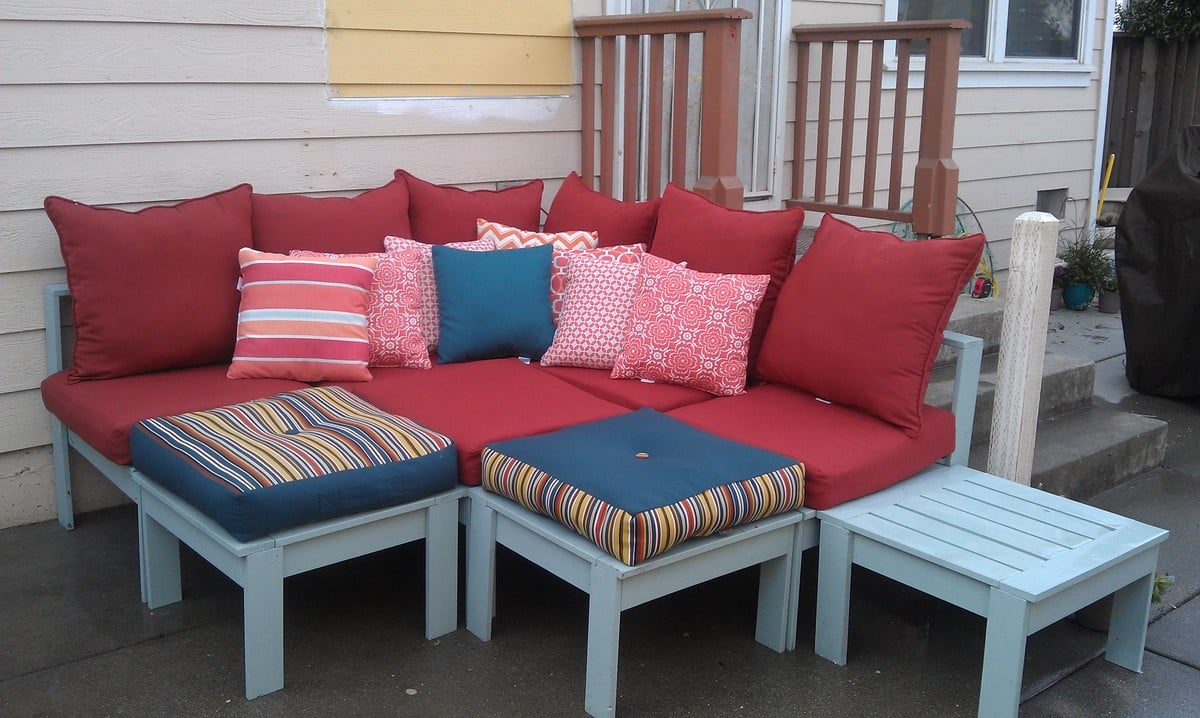
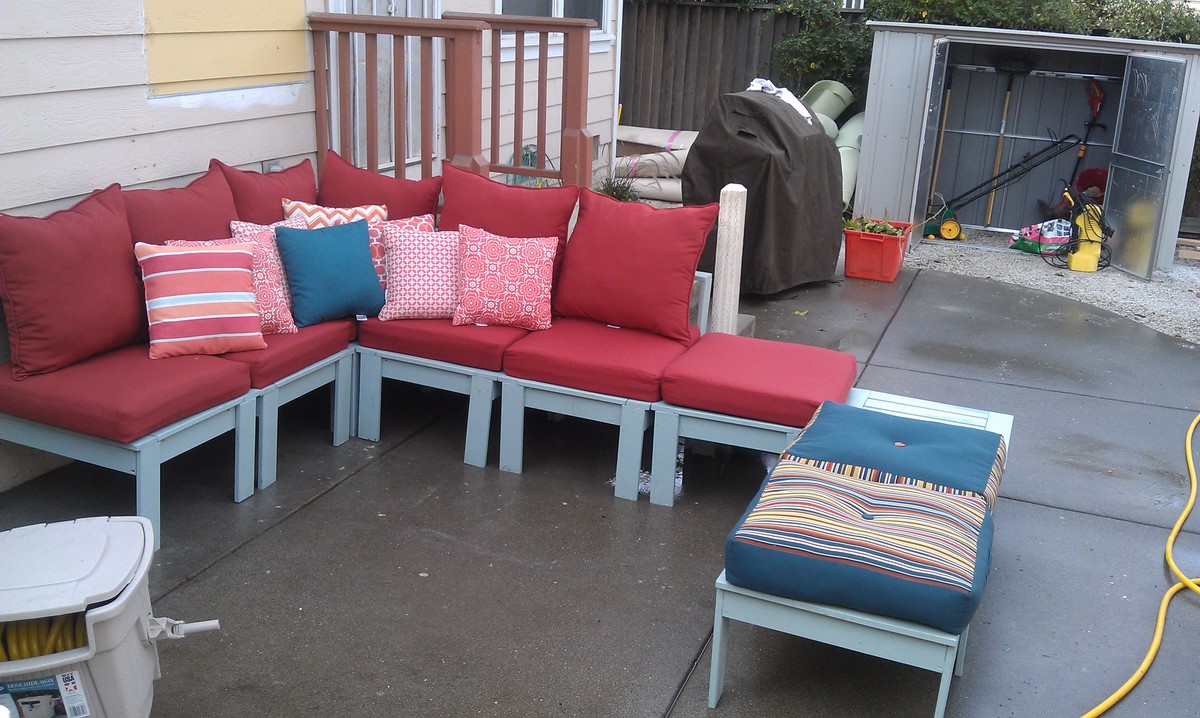
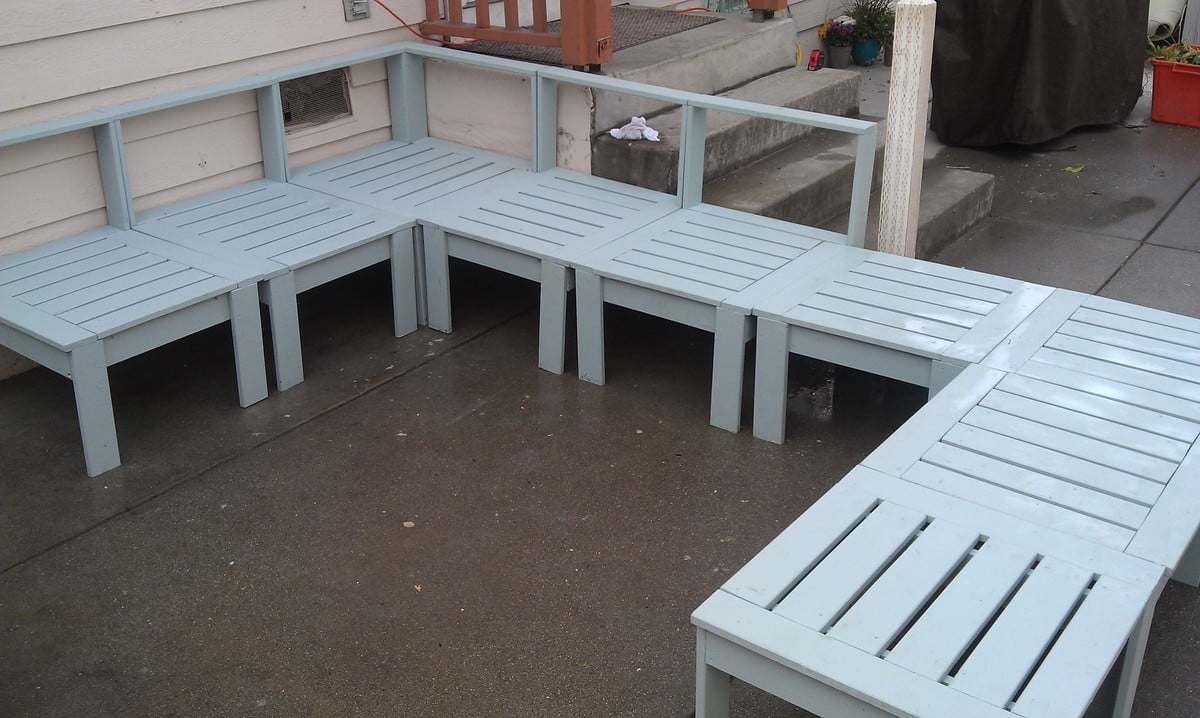
Bright Potting Bench

Submitted by Anonymous (not verified) on Wed, 07/08/2020 - 15:37

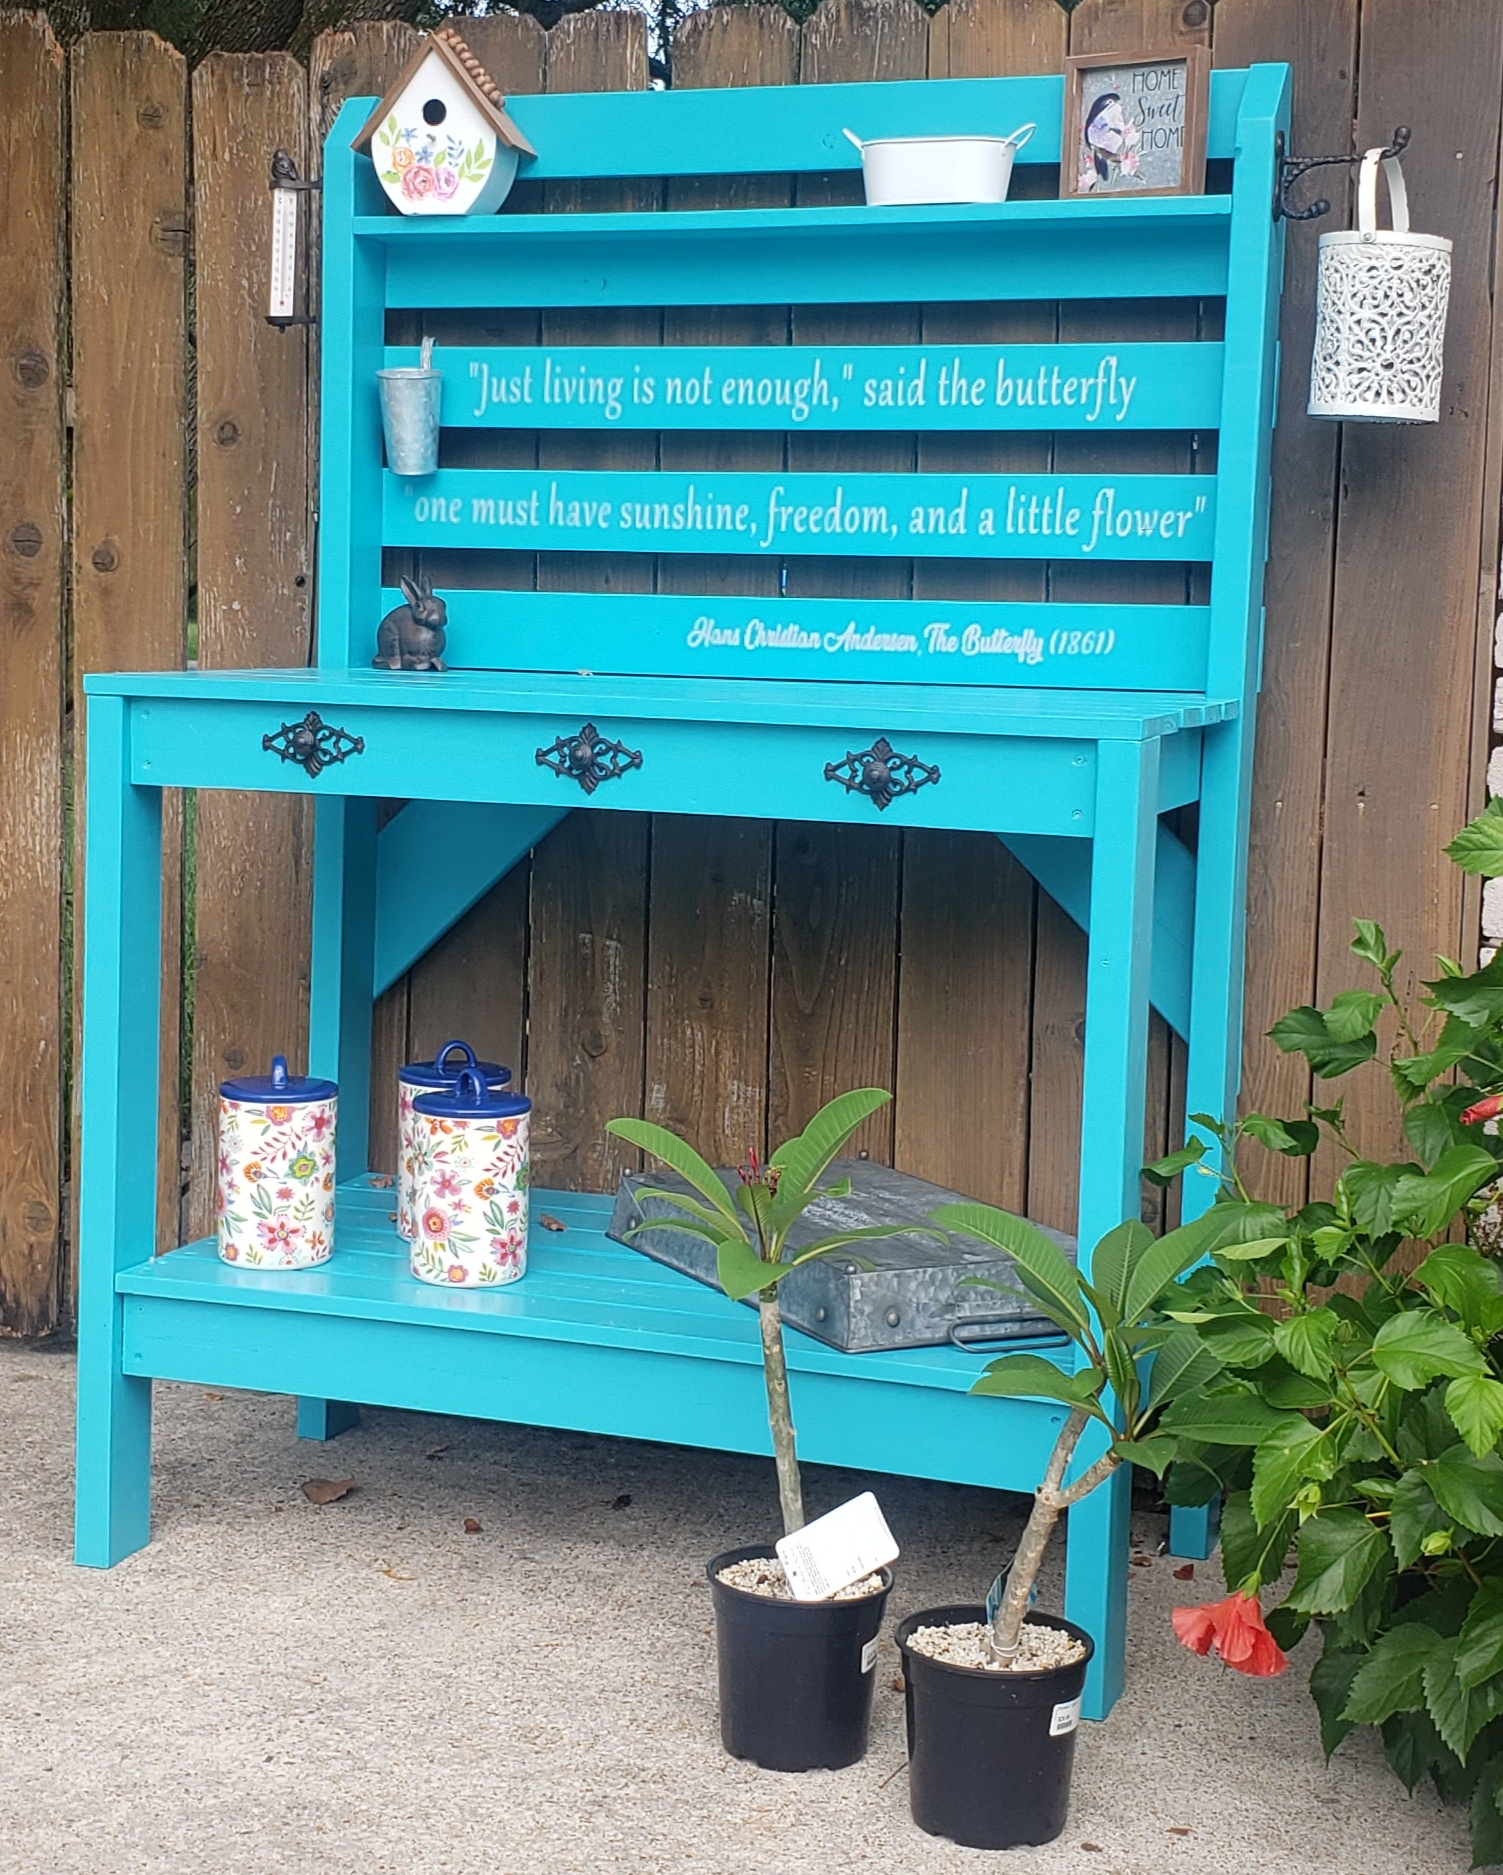
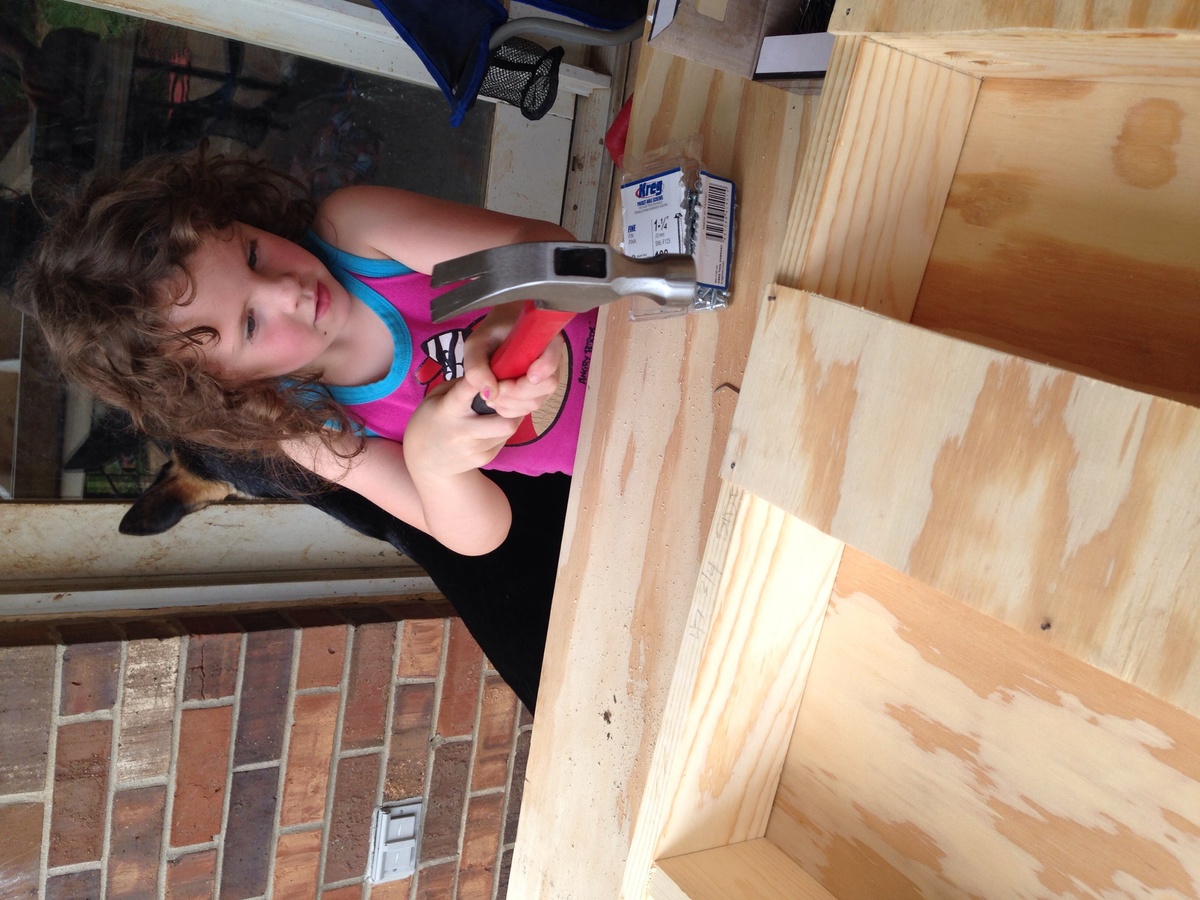
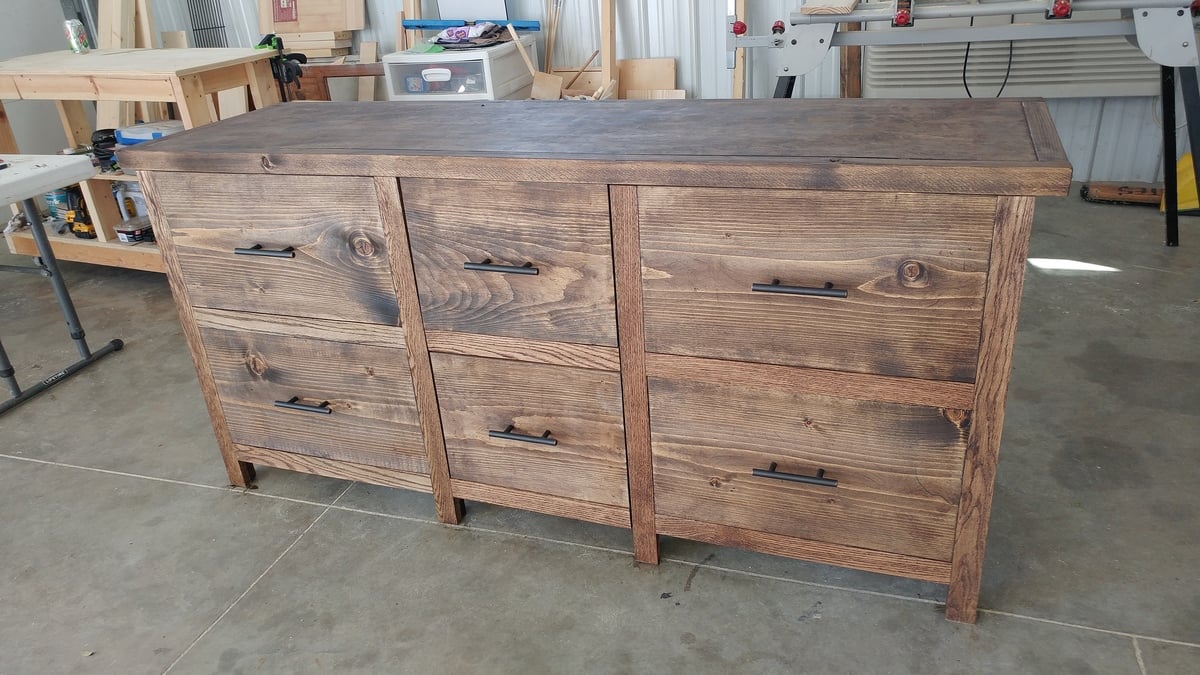
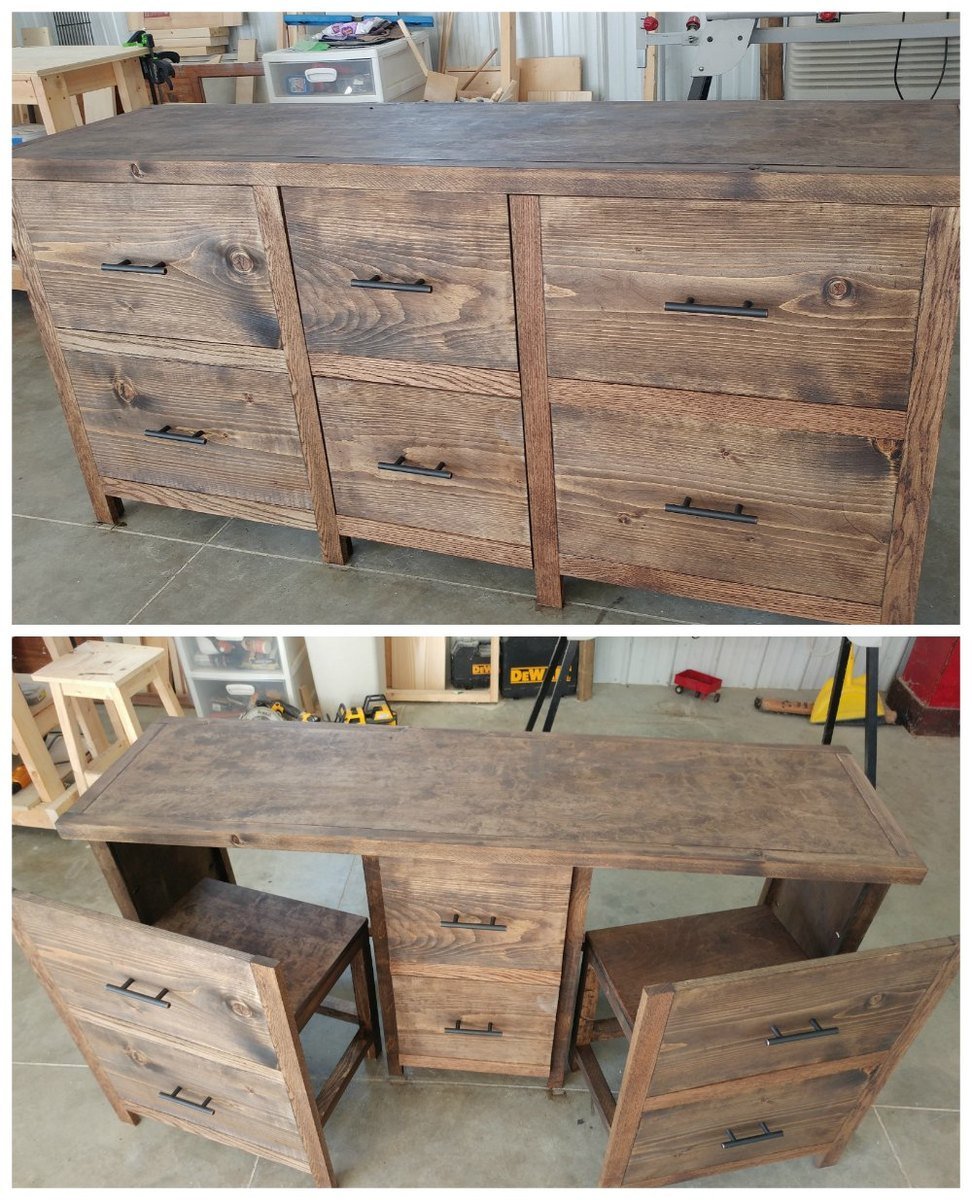
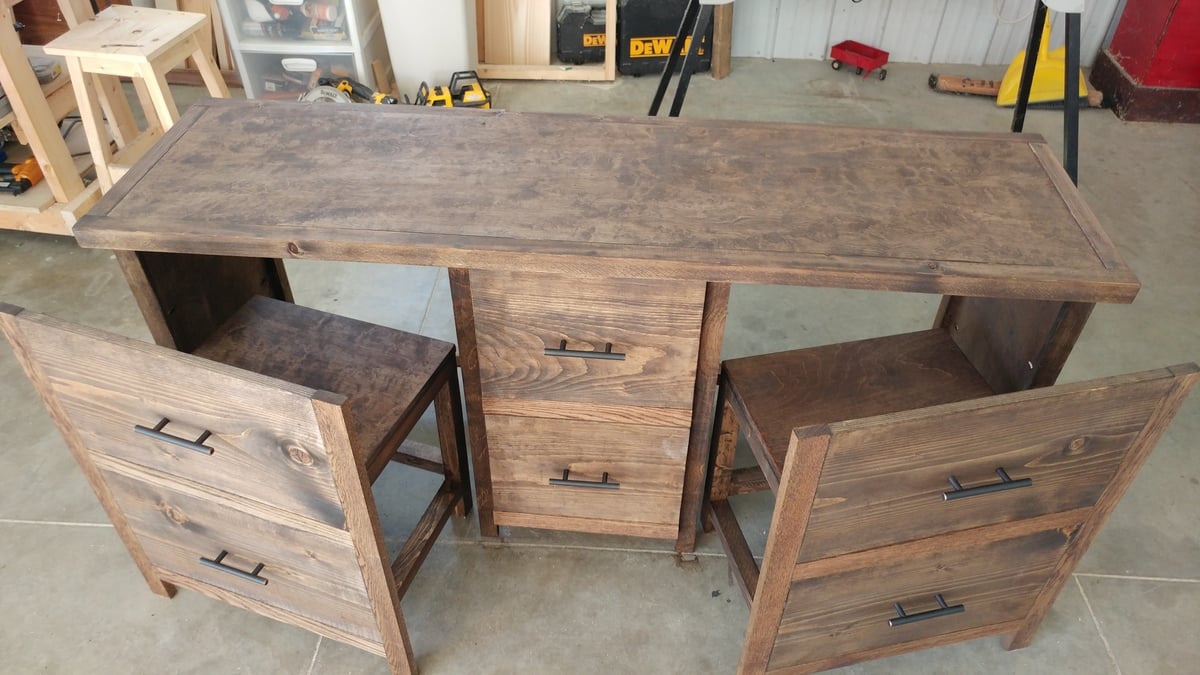
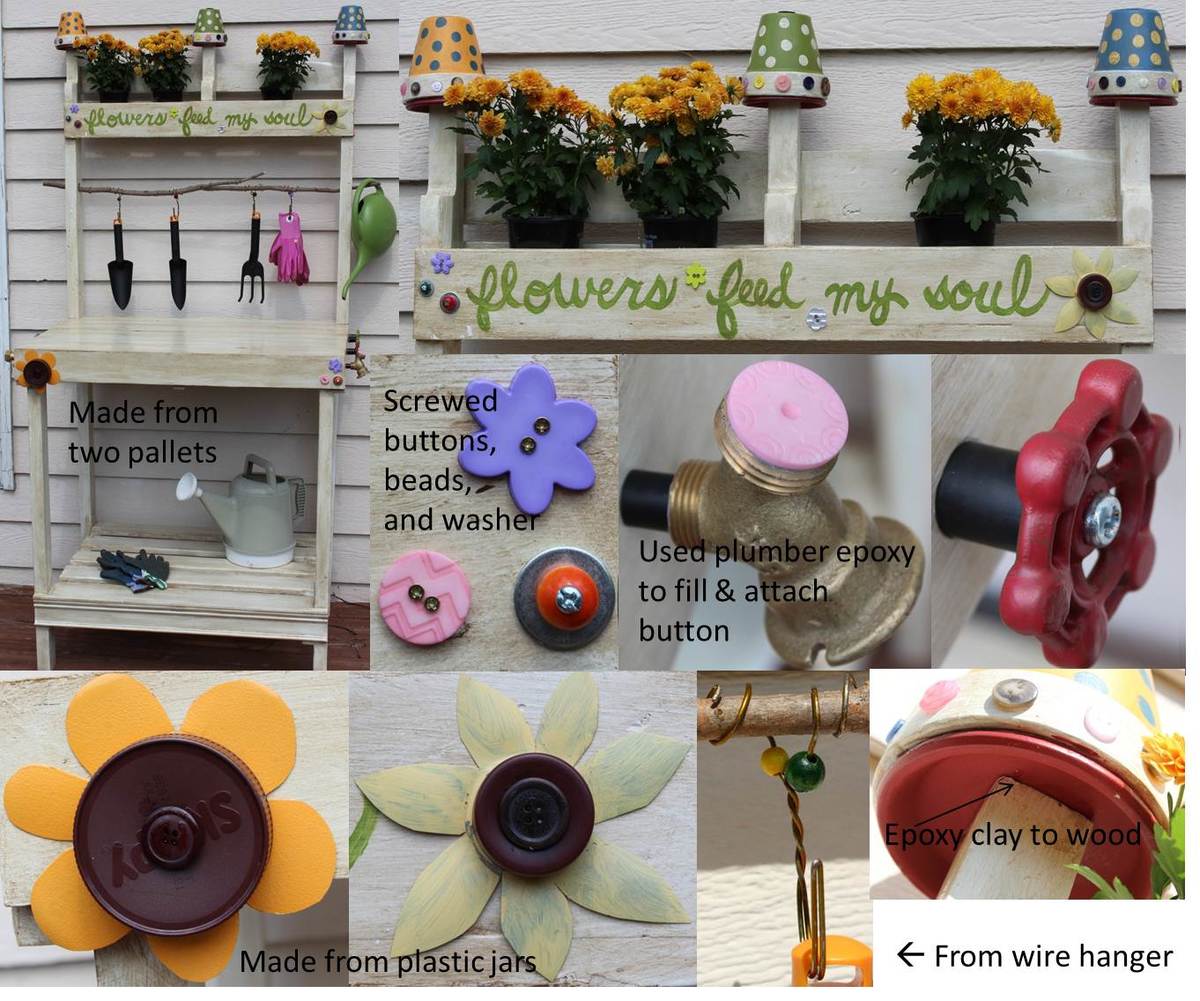
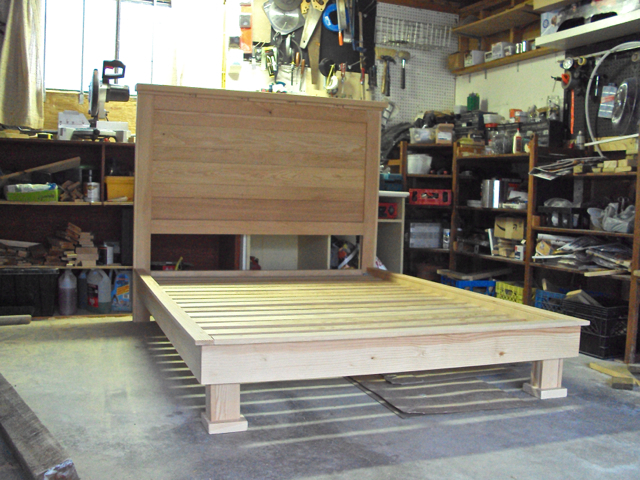
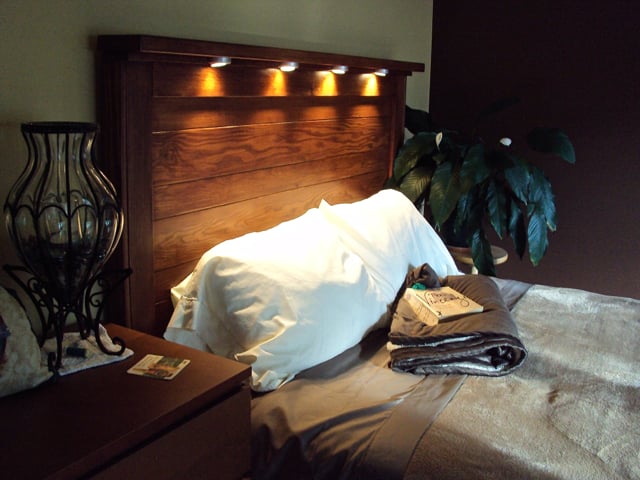
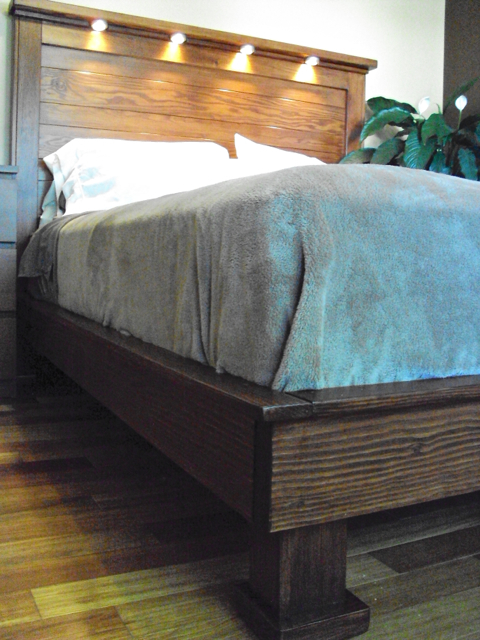
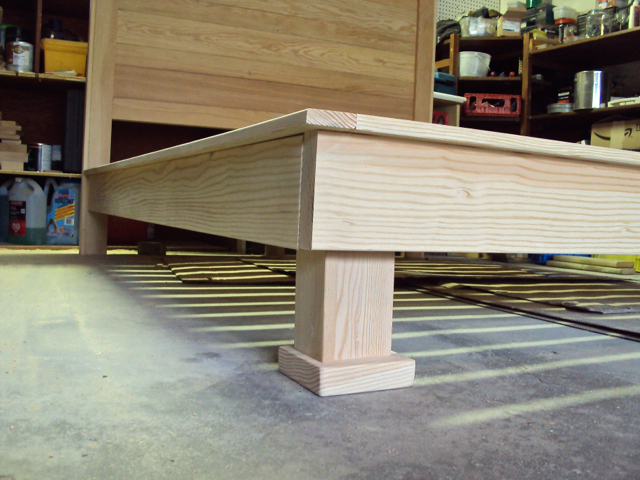
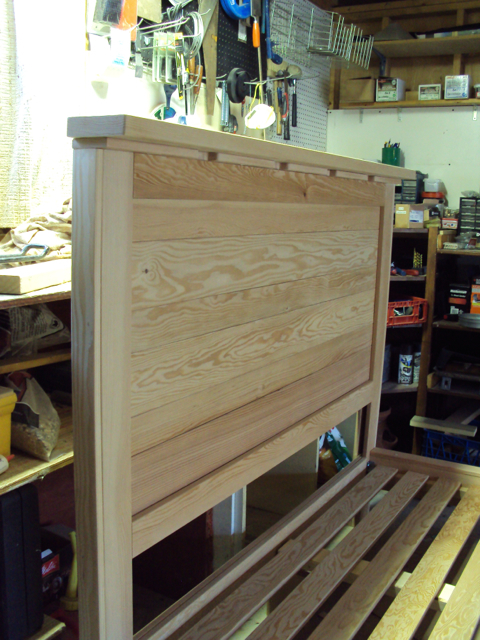
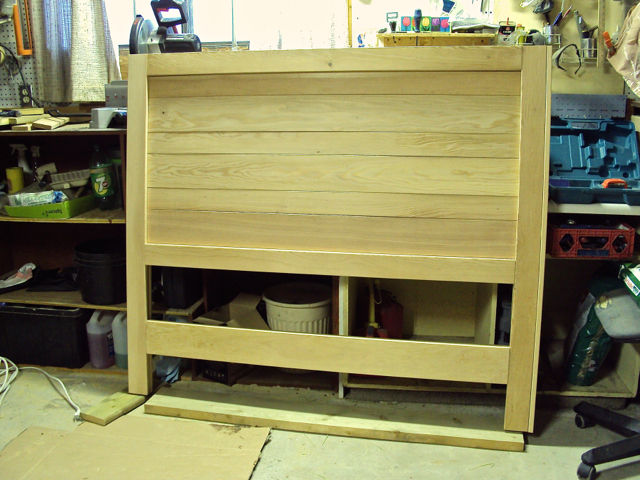
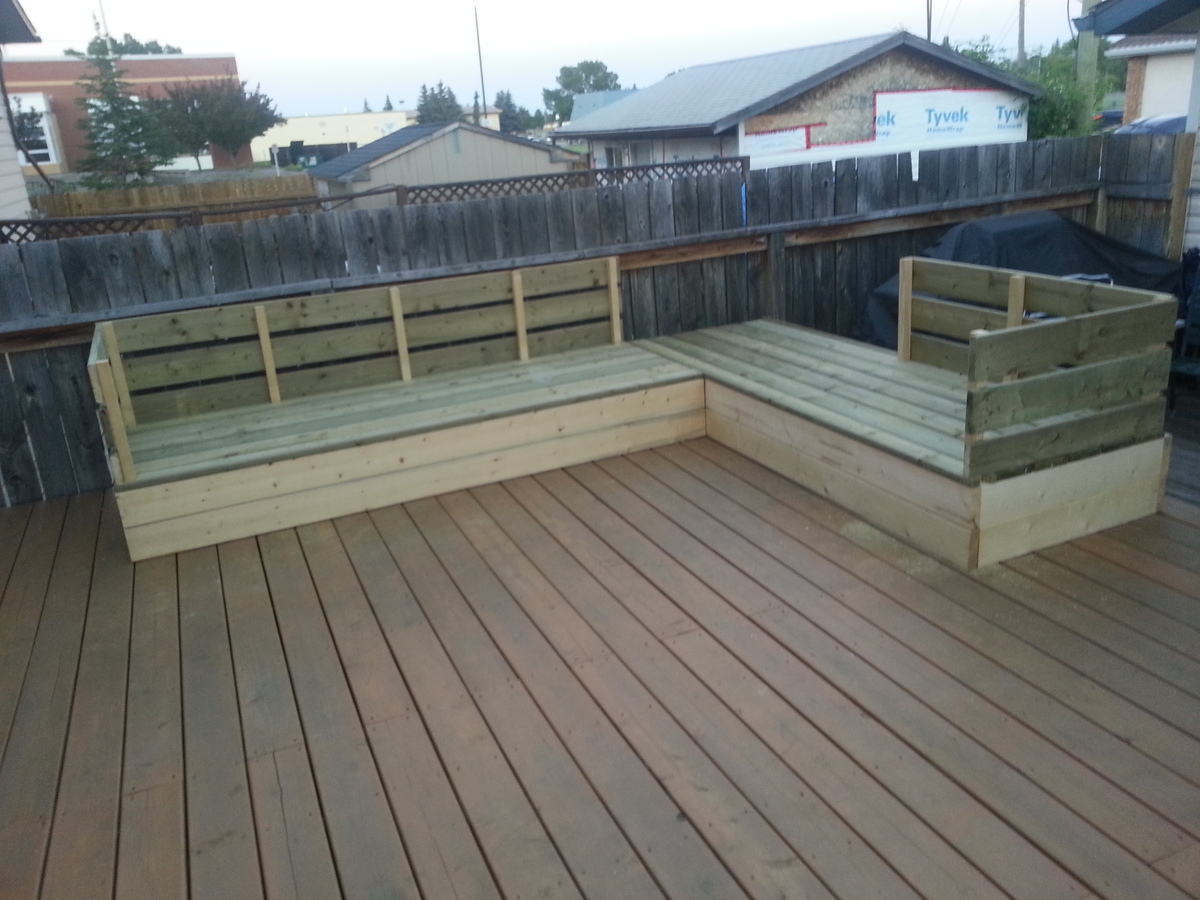
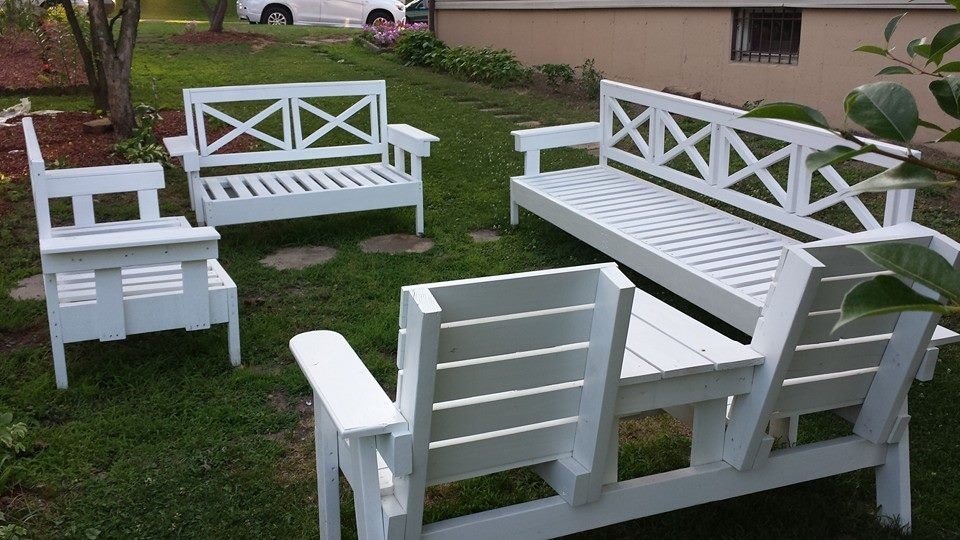
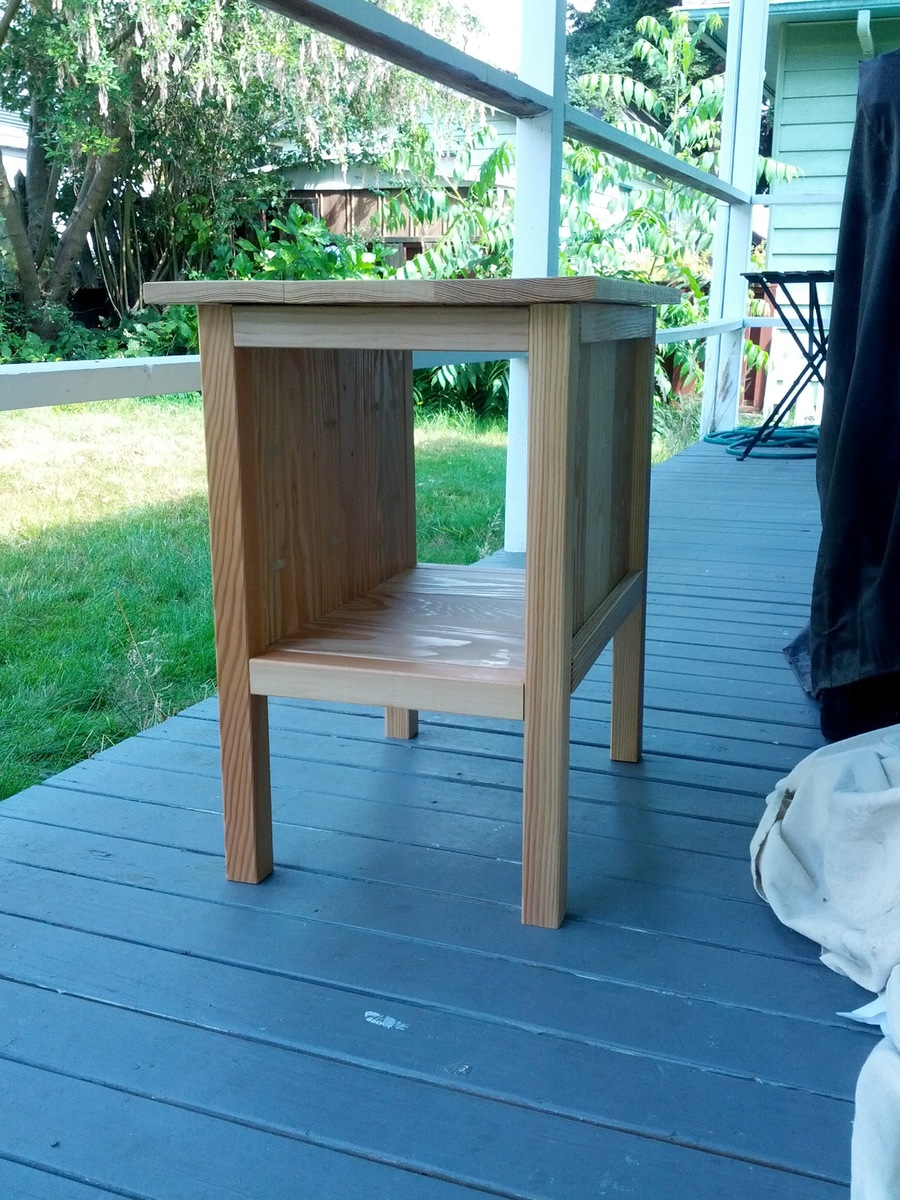
This was my first Ana White build and I love it! Built all by myself in 4.5 hours. Decided to paint it to match the plaster in our pool since it will be located close by. I am very pleased with how quickly it came together and how sturdy it is. I did an an additional 2x4 brace in the center of each top to help keep the 1x4's straight and hopefully prevent sagging.

Estimated Cost
$100
Estimated Time Investment
Afternoon Project (3-6 Hours)
Finish Used
Exterior grade latex paint.
Recommended Skill Level
Beginner

Girly Girl Doll Bed

This was a quick and easy project we made with all the scrap wood in the garage. It went together in a few hours, and made a great gift for one of my daughter's friends. It was so much cuter than any of the American Girl doll beds at the store, and WAY cheaper, too.

Estimated Time Investment
An Hour or Two (0-2 Hours)
Recommended Skill Level
Starter Project

Comments

First project: Kid's Ladder Bookshelf

Submitted by Ashcooper on Fri, 07/04/2014 - 13:10

This was our first family project. My husband has built a lot of things, but I've been so inspired I wanted to start building things too! Our two older kids were involved as much as possible (hence the very orange color) and we had a lot of fun. I definitely need some practice cutting straight lines haha, but practice makes perfect! My kids love to read and it is eye-catching as it is functional!

Built from Plan(s)
Estimated Cost
$50
Estimated Time Investment
Afternoon Project (3-6 Hours)
Finish Used
Primer and Flat paint
Recommended Skill Level
Starter Project

Hidden Desk

Submitted by Anonymous (not verified) on Sat, 10/08/2016 - 12:24

I shrunk the size and dumbed down the plans to fit my skill level.

Built from Plan(s)
Estimated Cost
175
Estimated Time Investment
Weekend Project (10-20 Hours)
Finish Used
Walnut
Recommended Skill Level
Intermediate

Comments

Texastia

Mon, 10/10/2016 - 09:08

I love what you did! It looks so great! I prefer this style, which is more simplistic than the other. Great work!!


Jessi_ites

Tue, 10/11/2016 - 14:56

Thanks! I wish I would of set up an account before I posted so I could get notifications.  I honestly didn't think anyone would notice it :)

Jessi_ites

Tue, 10/11/2016 - 14:58

I am so excited that people noticed this :)  Is there any way of putting this under my account?  I didnt make an account until today and I would like to get notifications.   I have my project on my facebook page and can prove that I made it with other pictures. Thanks!

crstorm

Mon, 01/20/2020 - 07:44

I would love to see this in a farm-house (rather than rustic) aesthetic along with drawers under the seats for extra storage. Maybe on casters with a fold up extension on the other side? So many ideas running through my head with this!

Toddler Picnic Table

Submitted by boneill on Thu, 07/09/2020 - 05:02

My son loves this table . Great size and super lightweight

Built from Plan(s)
Estimated Cost
$35.00
Estimated Time Investment
Day Project (6-9 Hours)
Finish Used
Satin white paint , top/benches custom color - special walnut stained then dry brush over with white paint for barnwood style type look
Recommended Skill Level
Beginner

Refinished Chifferobe

This is a poplar (yellow tulip) chifferobe I purchased off of Craigslist for $40. I included some before and after photos. It was in sad shape. Much of the veneer was broken or coming off. My wife wanted me to add shelves inside. I began stripping off the old finish using liquid stripped and by sanding. I removed the old veneer by using a very hot steam iron and a putty knife. I ordered up the new veneer from veneersupplies.com and new hardware from Kennedy Hardware.

I built the new shelves using 1/2" poplar. I then began putting on the new veneer. I used 22 mil. paperback veneer and contact cement. If you have never replaced veneer spend $10 and get a veneer cutter and another $10 and purchase a scraper. They make the job much easier.

I then began applying the stain which is Minwax Aged Oak gel stain. I had a challenge with trying to match the stain. The old veneer was tough to match the stain with the new veneer. Father time adds his patina so I had to darken the stain. I used Minwax Jacobean stain. I think I got it too dark but since it is completed I like the contrast. I went ahead and purchased some 1/2" rope trim (poplar) and a poplar applique to add to the door. Since the mirror was broken I decided to go ahead and fabricate new back splashes for the chifferobe. I found these on Ebay. A gentleman had bought out these from an out of business pool table company. They are poplar and once I cut them down they really seemed to match. I will use the mirror frame for a later project to make a photo frame.

My wife and I had wanted to put this into our bedroom for extra storage. We didn't realize that we couldn't get it into the bedroom due to a narrow hallway. It ended up in the kitchen/dining room as a buffet. The funny thing was that it looks like it belongs there now.

The whole project cost me around $150 and took approximately 40 hours to complete.

Estimated Cost
$150
Estimated Time Investment
Week Long Project (20 Hours or More)
Finish Used
2-3 coats of Minwax aged oak gel stain. I used 2 coats of a mix of the aged oak and Minwax Jacobean liquid stain for the new veneer. I think I mixed it too dark.

I applied the stain with a brush. I wiped it down after 10-15 minutes using a cotton rag. I applied 3-5 coats of Minwax fast drying polyurethane and sanded with 320 grit sandpaper between coats.

When replacing veneer on parts of a project, remember that new veneer will stain differently than antique veneer. I have used a product called wood-ager in the past and it helps somewhat in matching color but it seems to cause air bubbles in the veneer. Those can be taken out with a hot, dry iron.
Recommended Skill Level
Intermediate

Farmhouse Bar Table

Submitted by Anonymous (not verified) on Tue, 10/11/2016 - 18:18

I made several changes to the original Ana White plan. I wanted to build a bar height table for my husband's man cave. I left the length at 5ft long, but instead of dinner table height, I raised it to be a bar top. It perfectly accomodates typical bar height stools, as seen in the picture. 


www.withlovefromgablog.blogspot.com

Estimated Cost
$100
Estimated Time Investment
Day Project (6-9 Hours)
Recommended Skill Level
Beginner

Rustic X Desk

Submitted by Anonymous (not verified) on Fri, 07/10/2020 - 18:14

The only modification was I used 1x8's instead of the 1x10's on the plan and I also routered the edge of the top, first time attempting this.

Built from Plan(s)
Estimated Cost
$70
Estimated Time Investment
Day Project (6-9 Hours)
Finish Used
Minwax black stain and white paint
Recommended Skill Level
Intermediate

Cute DIY Pallet Potting Bench

Submitted by shampbel on Wed, 09/12/2012 - 20:33

Made from 2 pallets, 2 x 6 x 8, leftover trim from my house, wood branch from my backyard. Attached shelf with pocket holes.

Accents:
-Handpainted lettering; painted prior to glazing entire piece
-Finials made from 4.25 inch spray painted and glazed clay pots and saucers coated with Valspar clear finish and attached together with epoxy; buttons attached to pots with E6000 adhesive
-Buttons attached mostly with small screws; a few with holes too small for screws were attached with epoxy
-Plastic flowers made from mayo and water bottles and lids; sanded, primed, spray painted, coated with Valspar clear coating; attached with screws
-Faucet knobs sanded, spray painted, glazed and attached with screws
-Plumbing pipe filled with plumber epoxy puttty; insert screw into putty before it hardened, then screwed into wood
-Gardening tool hooks made from pant wire hangers with a few beads attached; wire simply wrapped around tree branch

Not sure that I will use pallet wood again since difficult to pull apart pallets, uneven and some split boards could not be used, and required tons of sanding for those boards that could be used. I think I paid more for orbital sanding pads than the cost of buying new wood. Will use pallet wood for other non-furniture projects not requiring a perfect finish.

Estimated Cost
$40.00
Estimated Time Investment
Week Long Project (20 Hours or More)
Finish Used
Kids distressed with hammers, sanded with 80 grit, Kilz Primer (1 coat), Sherwin Williams Exterior White Latex Paint (1 coat), Behr Glaze tinted with Brown Latex, Spar Urethane (3 coats)
Recommended Skill Level
Beginner

Platform Bed with Light up Headboard

Submitted by bjcanada on Wed, 07/09/2014 - 11:36

I combined the Reclaimed-Wood Headboard with the Hailey Platform Bed patterns, both found here on Ana's website to make my queen-sized bed. Alterations to the general instructions include: A 1x6 was sandwiched into the lower portion of the headboard to create the head of the bed platform (same as the panel pieces of the headboard). Another 1x6 was fastened from the back, the same as the other trim pieces. 4 holes for the light wires were chiseled out of the top trim, then a 2x6 was fastened across the top of the headboard to allow more room for the mounting of the lights. (these last 2 pieces flush to the back of the headboard instead of centered.) So the project was not too top-heavy I added a 2x6 center leg to the headboard. For even more stability I added a 4 x 4 leg to the center support of the bed portion. The lights are LED (Ikea) and the wires are fastened to the back of the headboard to keep them safe from pets, etc. The corners of the platform bed are held together with screwed-in knock-down hardware (Lee-Valley). Dis-assembly was important to me, so the bed could be moved from the garage to the house! I am not an experienced wood worker by any means, nor am I particularly fast. The plans I downloaded from this site were very detailed. The project was both fun and full-filling!

light up headboard

Estimated Time Investment
Week Long Project (20 Hours or More)
Finish Used
Cabot Stain + Sealer, Colour: Autumn Glow, Finish: Satin
Recommended Skill Level
Beginner

Comments

bjcanada

Wed, 07/09/2014 - 20:44

The only wood cheaper than hemlock is pine! : ) I bought the wood at Windsor Plywood in Calgary, Alberta, Canada. It took the stain very well and I am very pleased with my choice. It is a softer wood than some, sands down very easily.

Mudroom Bench and hutch

Submitted by Anonymous (not verified) on Mon, 07/13/2020 - 17:41

I really liked the mudroom bench, so we created our own version. Thank you!

Built from Plan(s)
Estimated Cost
$500
Estimated Time Investment
Week Long Project (20 Hours or More)
Finish Used
Paint
Recommended Skill Level
Intermediate

reclaimed wood headboard

This was our first project.. it was a good one to start off with because it was pretty easy. Our bed is king size. Our boards weren't perfectly flat so we had to screw a few braces in the back with some scrap wood we had left over.

Estimated Cost
maybe $130.. i can't remember exactly
Estimated Time Investment
Weekend Project (10-20 Hours)
Finish Used
minwax dark walnut stain
Recommended Skill Level
Beginner

Outdoor Platform Sectional

The only real change I made to Ana's plan was switching out the 2x6 board for 1x6. I still used 2x6 boards for my base, but went with the 1x6 for my decking boards, and top backing boards. My reasoning for this was to reduce weight. Other than that I increased the size of the base by adding another 2x6 on top (basically doubling up the base height). This made the sectional the perfect height, in my opinion. The plan Ana offered was pretty straight forward, and I love the size of the sectional itself. Very happy with how it turned out.
Cost Breakdown:
Lumber : $200
Screws: $20 (I used anti rust deck screws)
Stain: $35 (I used a semi-solid stain in a drift wood grey)
Cushions: approx $500 (when I started this project I had no idea cushions were so expensive)

Estimated Time Investment
Weekend Project (10-20 Hours)
Recommended Skill Level
Beginner

Comments

Pursuit of Handyness

Sun, 07/13/2014 - 09:35

Looks Great. Don't you love how Ana's plans are so customizable. I'd like to build something similar but I'm aware that cushions are pricey. Where did you find yours? What do you think of the quality?

White King Size Storage Bed

Submitted by Anonymous (not verified) on Tue, 10/18/2016 - 06:04

Took be about 2.5 weeks to build this bed, working evenings and a couple full days on the weekend. I HIGHLY recommend getting a Kreg Jig. It made life so much easier.

To go from a queen to a king, simply add 16" to all of the width pieces. All of the length pieces will be the same for a queen and king.


I added one 2x2 support beam down the middle of the bed, with two 16 3/4 inch legs attached to it, for added support.  I screwed the slats into all 3 of the 2x2 support beams.

The drawers are the trickiest part. Make sure you follow the plan in order, waiting to install the drawers until after you have screwed the storage bins to the headboard and footboard.


Estimated Cost
$400 for everything (wood, paint, screws, drawer slides, etc.)
Estimated Time Investment
Week Long Project (20 Hours or More)
Finish Used
white Olympic One semi-gloss paint
Miniwax polyurethane
Recommended Skill Level
Intermediate

Farmhouse End Table

Take a deep breath in... then out. Relax as the warm water soothes your muscles. Then look at this freaking amazing end table I made! And this was only my third project ever! Great plans and easy to make.

***Only necessary change to plans was for the decorative Xs. The 2x2s must for the decorative Xs on the small version of the end table must be AT LEAST 25" not 22" as the plans call for. The 22" 2x2 did not reach diagonally (especially when making miter cuts).

I used pre-conditioner on the pine/douglas fir wood before applying the stain.

Built from Plan(s)
Estimated Cost
$30-$40 including wood, screws, pre-conditioner, and stain
Estimated Time Investment
Afternoon Project (3-6 Hours)
Finish Used
- Zar brand Grey Cashmere
- Minwax pre-conditioner
Recommended Skill Level
Beginner

Weatherly sectional

Submitted by JoseO1998 on Tue, 07/15/2014 - 02:18

First I built the 3 weatherly style sectional, then I added the two-seat bench with table in between to square off a seating area in our yard... Family and friends loved them for 4th of July and I really appreciate the plans!!! Thx Ana White ;)

Built from Plan(s)
Estimated Time Investment
Week Long Project (20 Hours or More)
Finish Used
Outdoor white paint
Recommended Skill Level
Intermediate

Comments

MarieCorbin

Mon, 05/11/2015 - 05:45

I love how you did the arms on your version. I was thinking of building this set, but wanted more traditional arms you could actually rest you arm on or set a cup on. Your finished product looks awesome!

Adirondack Charis

Submitted by djp33d on Fri, 10/21/2016 - 14:54

Connected Adirondack Chairs from Spring of 2015

Estimated Cost
Used reclaimed pallets and two boxes of screws. So really only cost were the screws.
Estimated Time Investment
Day Project (6-9 Hours)
Recommended Skill Level
Intermediate

Comments

Tidy Up End Table

Submitted by ethidda on Wed, 09/19/2012 - 11:41

A simple Tidy Up end table. It was super easy to make, and fit between my desk and the day bed perfectly.

Built from Plan(s)
Estimated Cost
$20
Estimated Time Investment
Afternoon Project (3-6 Hours)
Finish Used
"Danish Oil" without any stain, two coats.
Recommended Skill Level
Starter Project

Walkin Closet for my Wife

Submitted by Indy69 on Mon, 10/24/2016 - 09:52

I built this closet system based on the plans here.  So easy and so basic, just putting them all together to make a very nice looking closet setup.  I used 12 sheets of birch plywood, and premium select 1x2 pine.  All stained in Minwax Jacobean and satin clear througout with semi-gloss clear on the drawer fronts.

For the rods, I used chainlink top bars, which cost $6 for a 10' piece, and used #0000 steel wool to buff them out and then polished them.  For the 45 degree corners, I used 1" electrical conduit, and placed two 45 degree bend in each piece, and again steel wool and polished them as well. 

For the drawers, I used soft-close slides.  When using these, I highly recommend installing the rear brackets as well, as they make installation so much easier.  16 pairs of soft-close drawer slides with brackets cost $120 for all of them on Amazon.


Estimated Cost
Under $1,000
Estimated Time Investment
Week Long Project (20 Hours or More)
Finish Used
Minwax Jacobean in satin and semi-gloss
Recommended Skill Level
Intermediate

Comments

My 17 year old stole my project!

Submitted by Bonnaroo on Sun, 09/23/2012 - 13:23

This project started off as a way for me to get some much needed "me" time and create a sense of accomplishment. However, after purchasing the wood & cutting it into lengths, my "Lego Maniac" 17 year old son decided he wanted to take over! He begged me to let him assemble the units. Since he single-handedly assembled our IKEA kitchen remodel, I decided to let him have his way.

We spent one day painting the cut pieces. I think it looks nicer having them painted first and patching up holes, rather than deal with drips and such with the numerous spaces and sections. We had a wonderful time chatting the whole day and painting. O.K., this is just as good for the soul as "me" time.

That evening, after the paint had dried, we couldn't help ourselves...we NEEDED to assemble one section. So we started with the corner unit. And after one major "re-do", we had it figured out. My son, Jacob, ran with it from there and he and his cousin finished it, wood patched, sanded, and re-painted.

All told, it took him (us) about 3 days to complete. We found the cushions at Lowe's and the entire project cost us about $500.00! HUGE savings and some serious mother-son time!

Sense of accomplishment doubled!

Estimated Cost
$500.00
Estimated Time Investment
Week Long Project (20 Hours or More)
Finish Used
flat paint in Robin's Egg Blue
Recommended Skill Level
Beginner

Comments