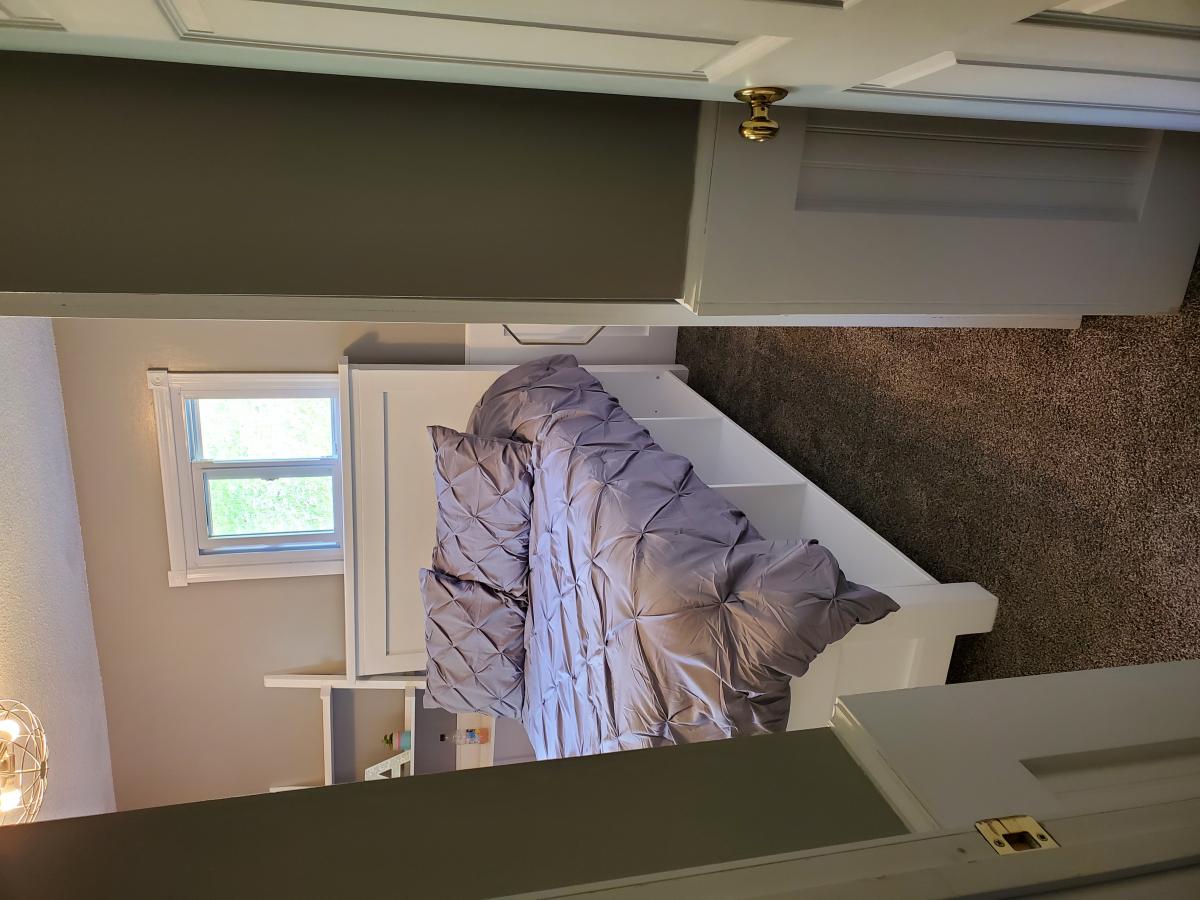
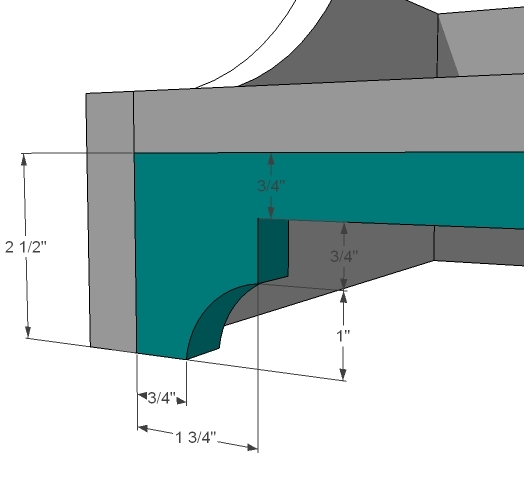
Closet Drawer Tower
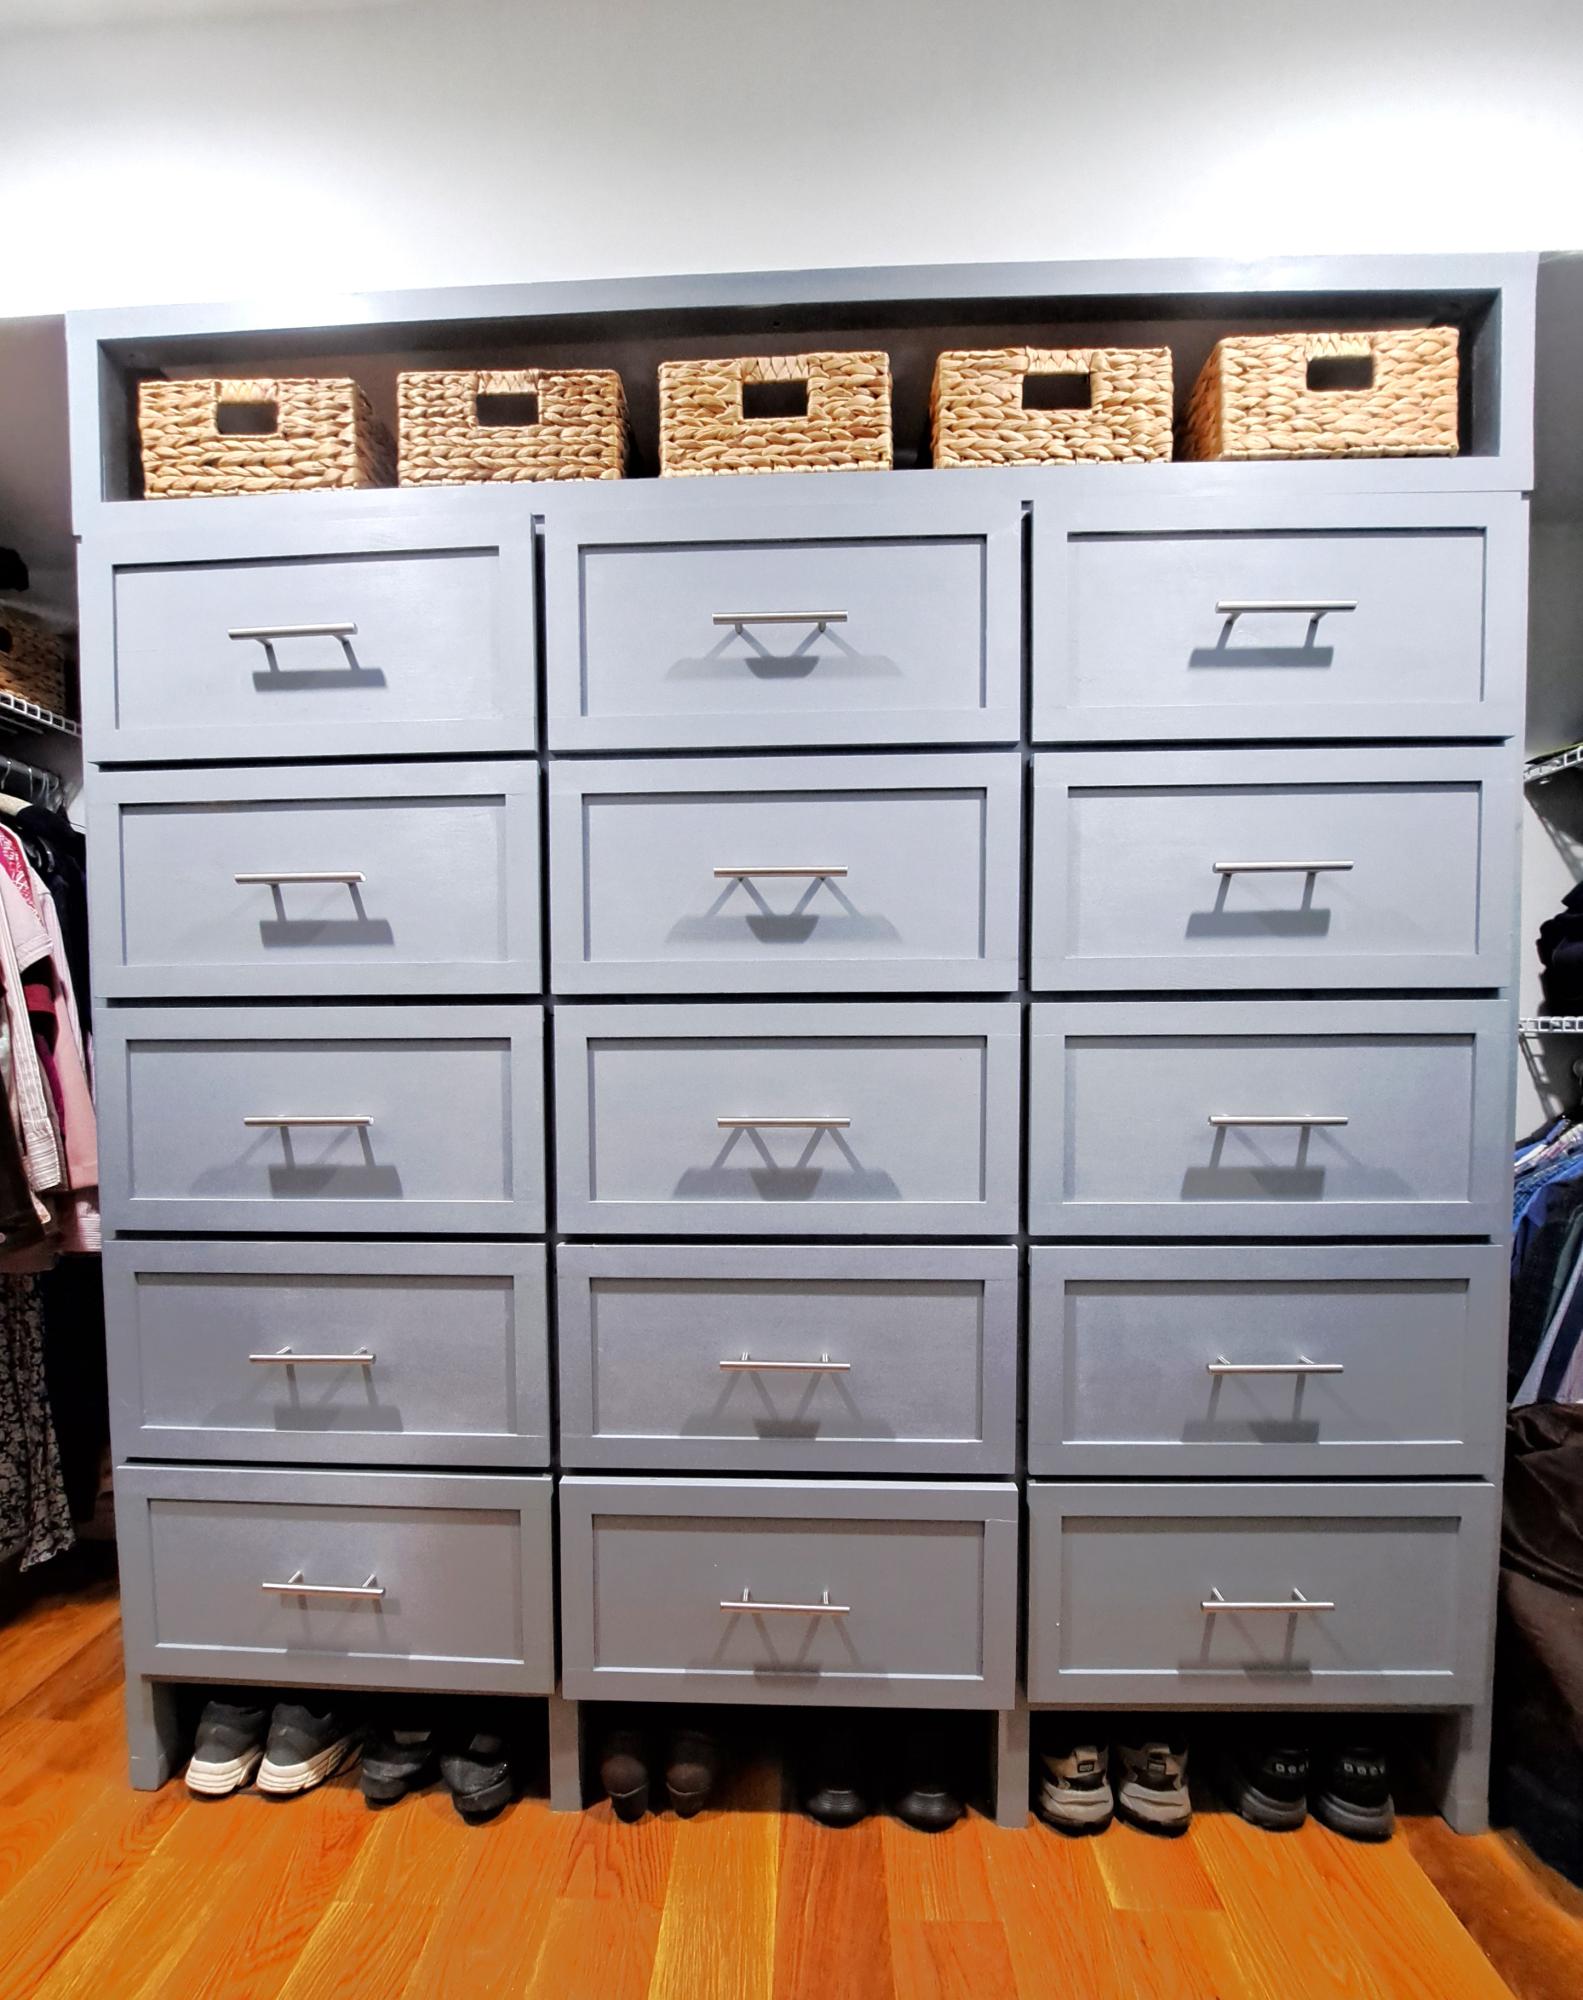
Using Ana's methods of drawer construction - 15 Drawers in the Primary Bedroom Closet - with tote storage above and shoe storage under.
Phil F. *Ana's secret drawer slide trick for full extension drawer slides
Using Ana's methods of drawer construction - 15 Drawers in the Primary Bedroom Closet - with tote storage above and shoe storage under.
Phil F. *Ana's secret drawer slide trick for full extension drawer slides
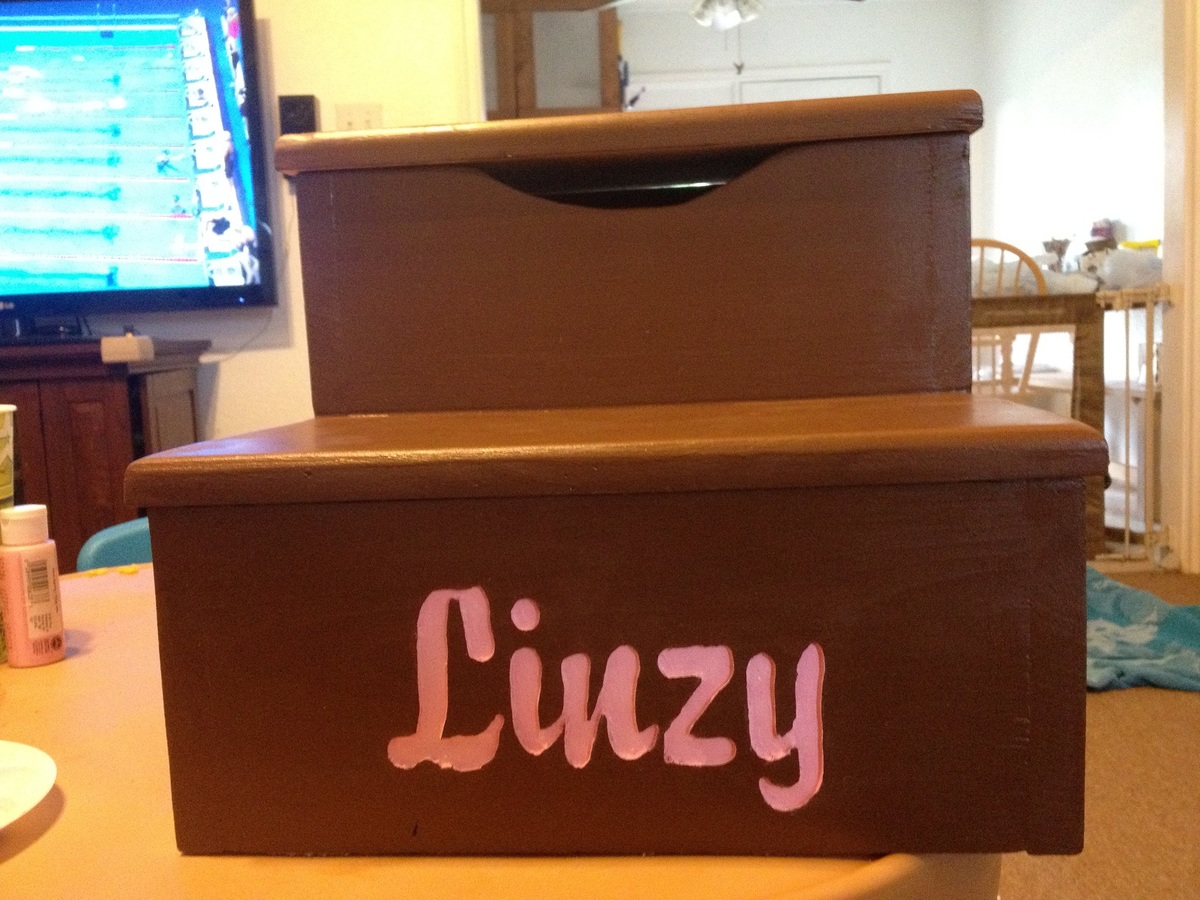
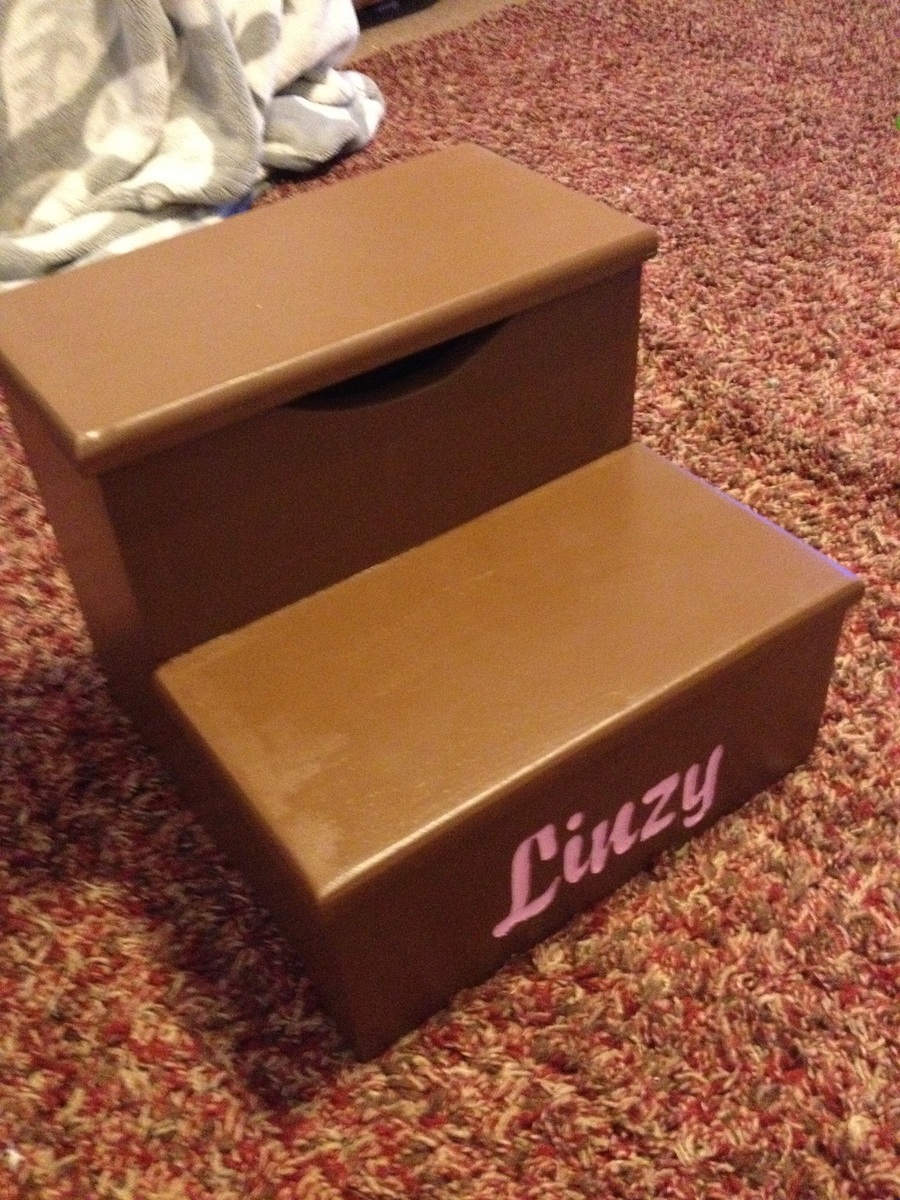
I built the entire project to plan.. I did however engrave my daughters name instead of painting it on.. I think it gives a little more personal touch..
Fri, 03/29/2013 - 16:18
I was curious as to what tool/s you used to complete the engravement, this is a nice touch and I would like to do this for mine as well.
This was my first major woodworking project, and I am so pleased with it! I have been looking for a piece of furniture like this and couldn't find something that I liked and could afford. I spent about $180 in lumber, and also took Ana's advice and invested in a Kreg Jig. I HIGHLY recommend this! It is expensive ($100) but so worth it. I had to learn a few things along the way, and had encountered some obstacles, but in the end I am very pleased with the project. A few things I learned on my first project:
1. Exact cuts are SO important. Every 1/8" matters. It was helpful to do as many cuts as possible at the lumber store.
2. Ana mentions this in her beginners section, but it bears repeating: wood glue will repel stain. Be sure to wipe away ALL residue of wood glue before staining, and be sure to give extra sanding attention to areas that had wood glue. Otherwise you will have a white spot in the midst of your stain.
3. On this plan in particular there is one change that I recommend. Do not add the wrap around trip on the top and bottom until AFTER you have put the plywood backing on in the last step. The reason is that the plywood adds another 3/4 inch, and so there was a gap between the edge of the trip and the back on the furniture. I redid it on the top because it was so noticeable.
Wed, 04/30/2014 - 11:14
This is gorgeous! You did a great job! I want to make this but I have no place to put it in my tiny apartment. Someday…
Built this table for my niece 3 years ago which she still wont let go of even though its getting small for her.. I mostly had all the materials needed minus paint which i got from home depot. Pretty straight forward project that i got done in a few hours. She was 3 at the time and is now 6 and still has the table which she still uses and has.

Floating Shelves
I live in Japan right now and my wife and daughters went to the states to visit family for 3 weeks. I decided to make a few projects. I went to my local home improvement store (HOMES), which is a combo of Lowes, Walmart, a pet store, and a furniture store rolled into one crazy store. I purchased the wood for about 11000 yen, paint for 1080 yen, hinges 800 yen, and door knobs for 2880 yen. Grand total of basically $200. I found that it is not cheap to buy supplies over here. I modified the plan and made 16 "drawers" instead of 20 due to the height of the space where I am putting the table. I used the plan for finishing with the distressed coffee stain. I really like it in our room.
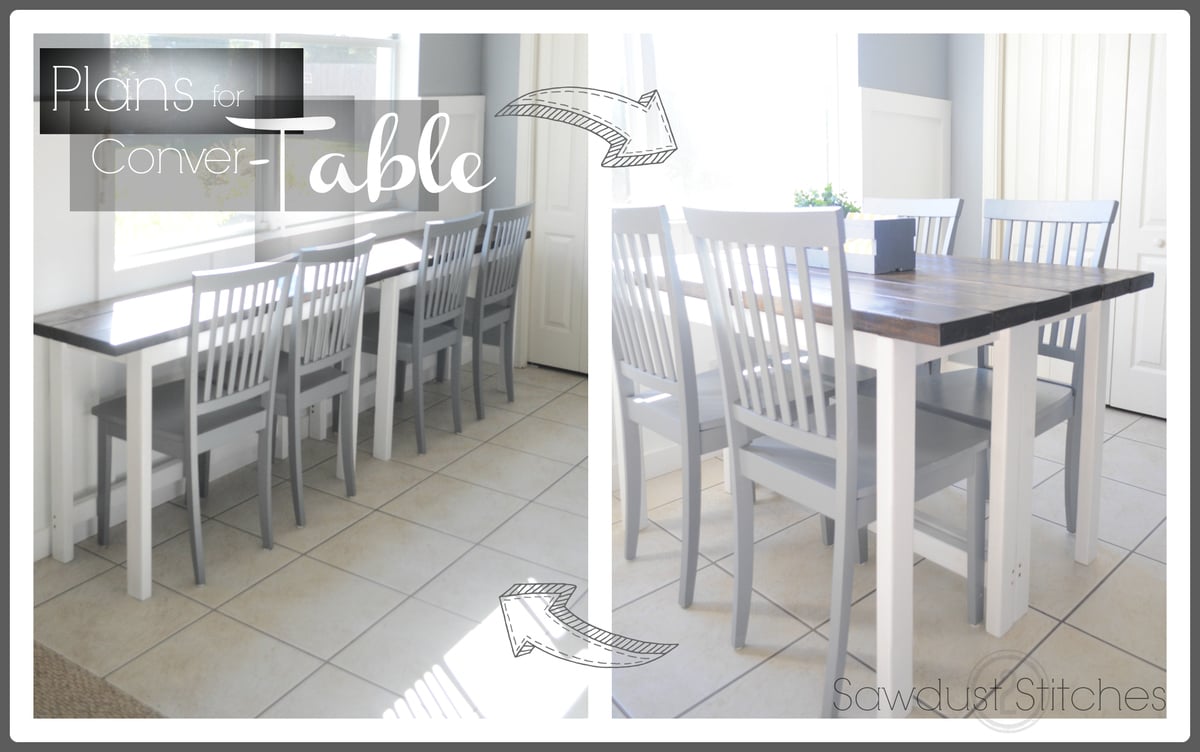
A table of my own design, that can can be pulled apart in order to save floor space, and create work space.
Had an awesome time building this! Very little modification from original plans. Used Thompsons water seal, Desert Brown.
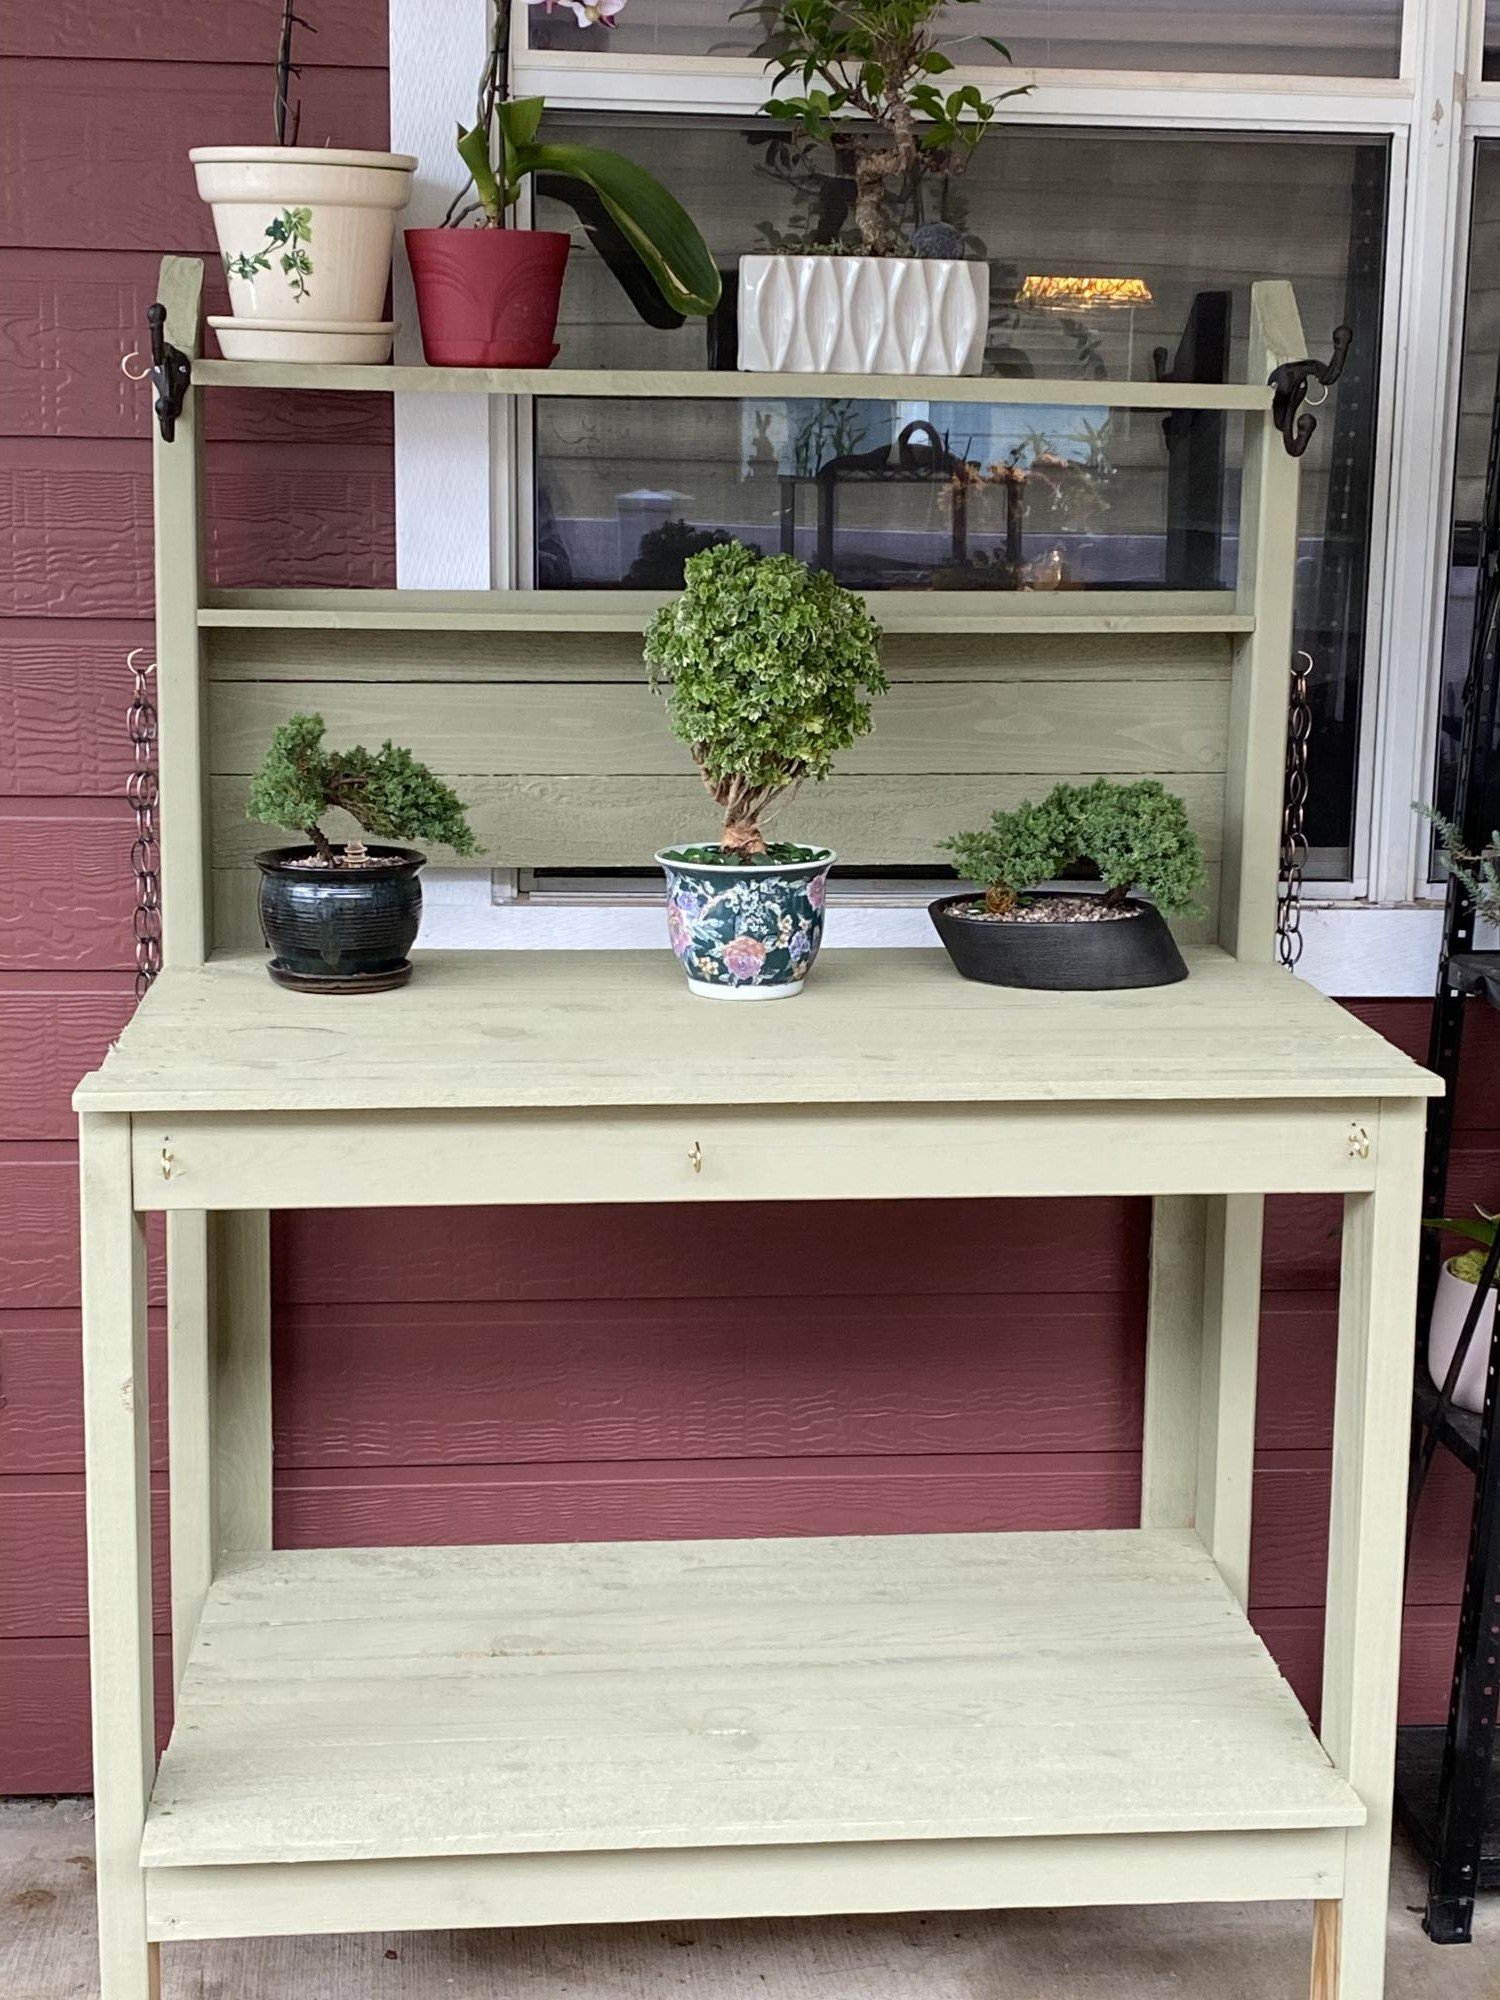
My first attempt at a potting bench! Not quite exactly to plan, but it came out exactly as I hoped!
Thanks Ana!!
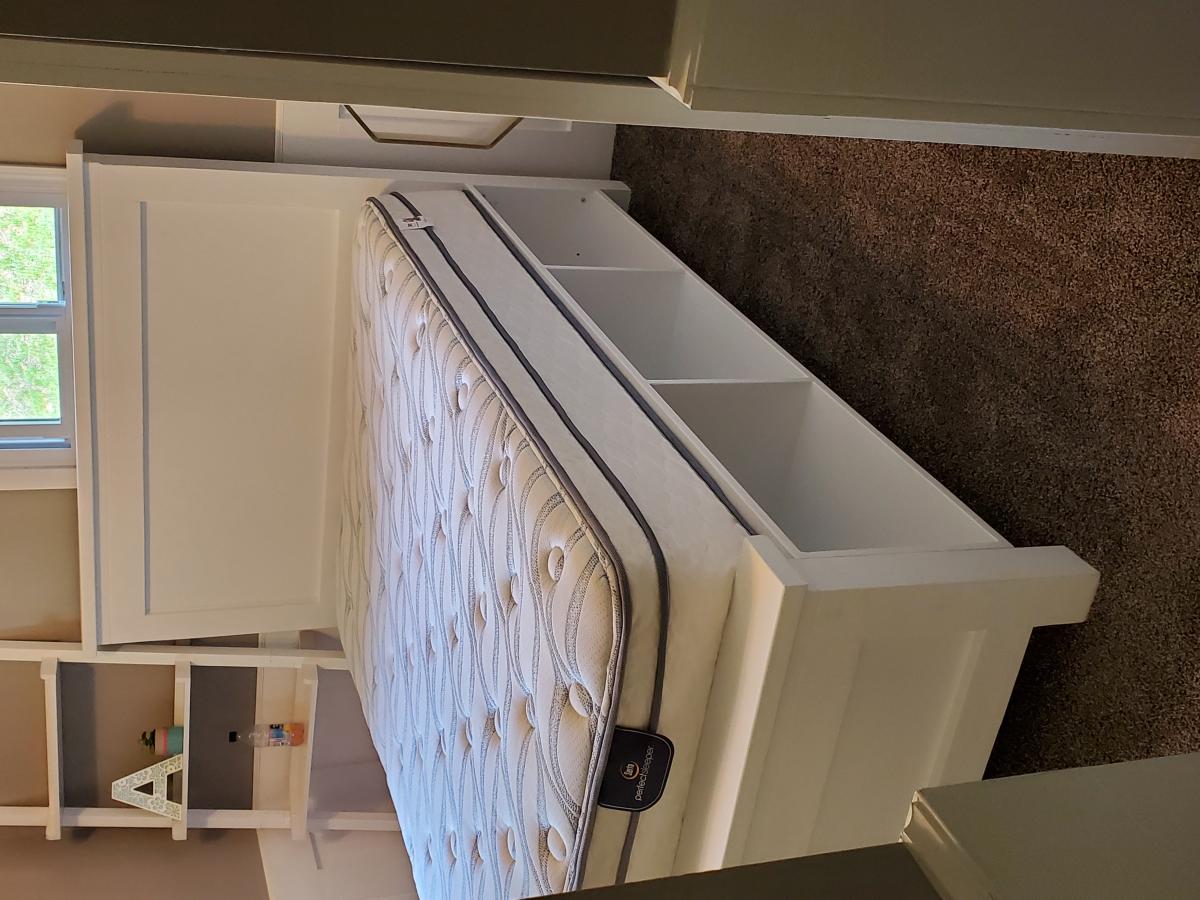
Twin Floating Bed

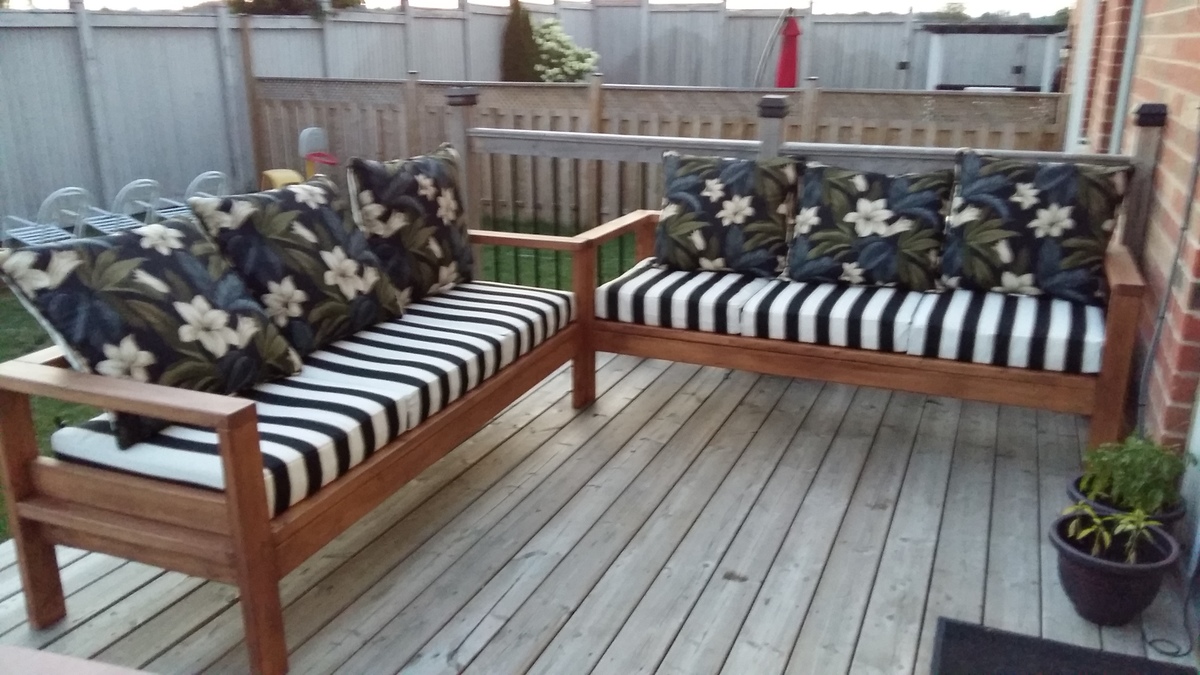
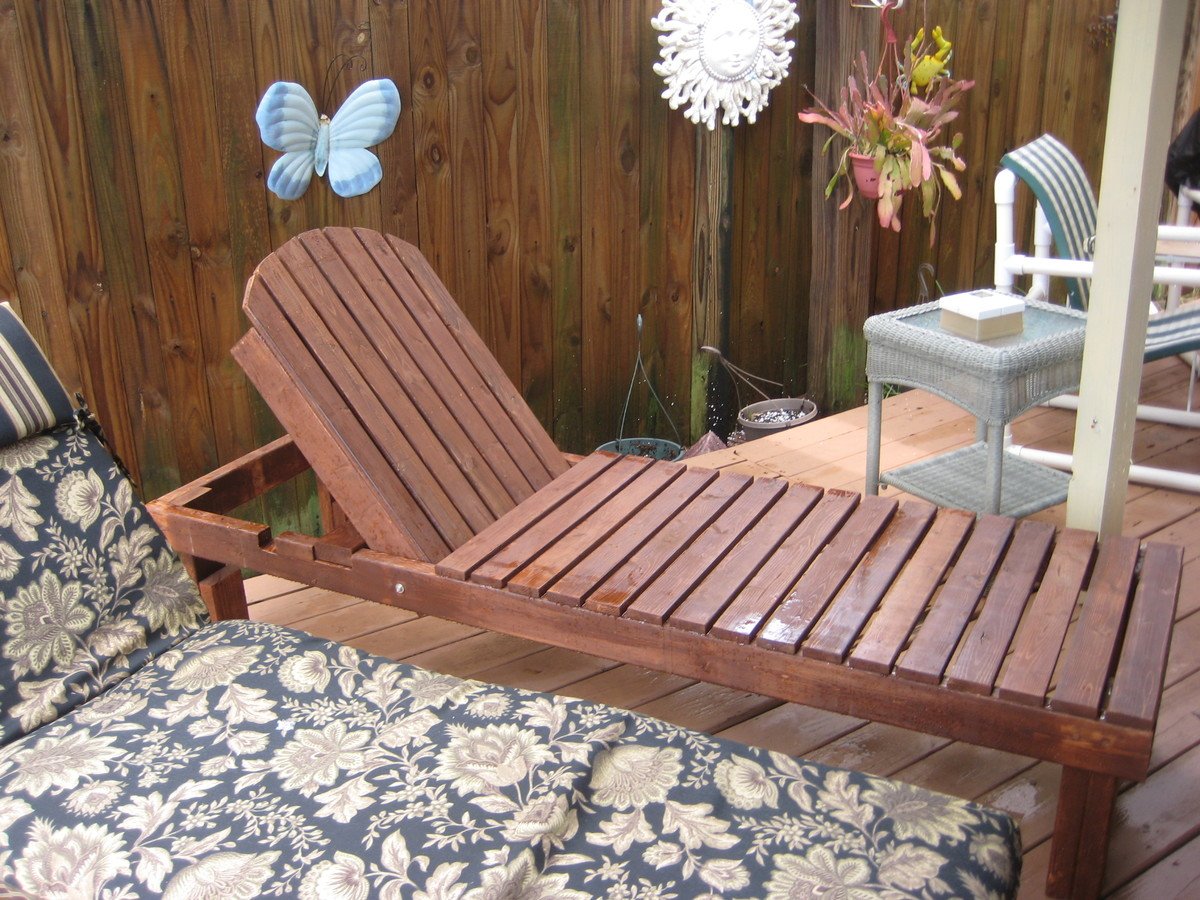
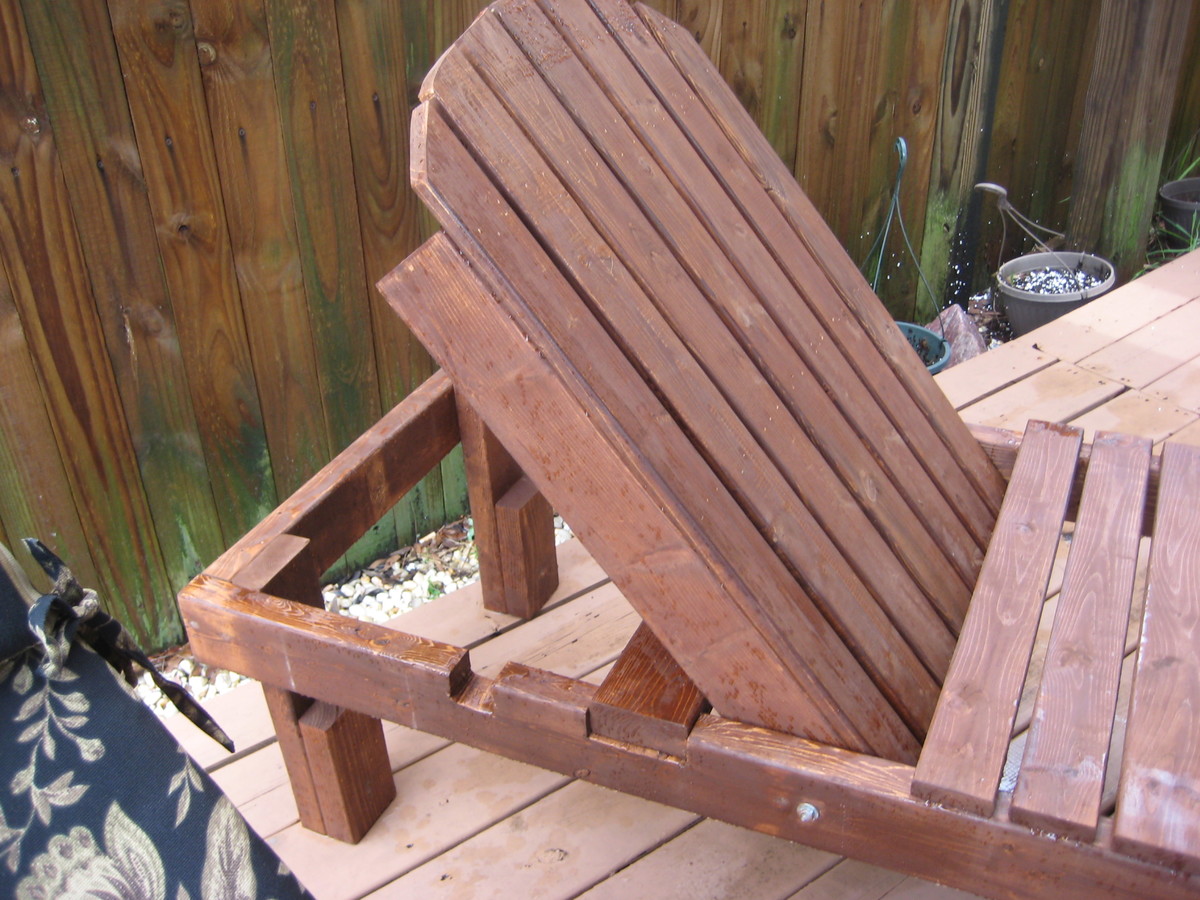
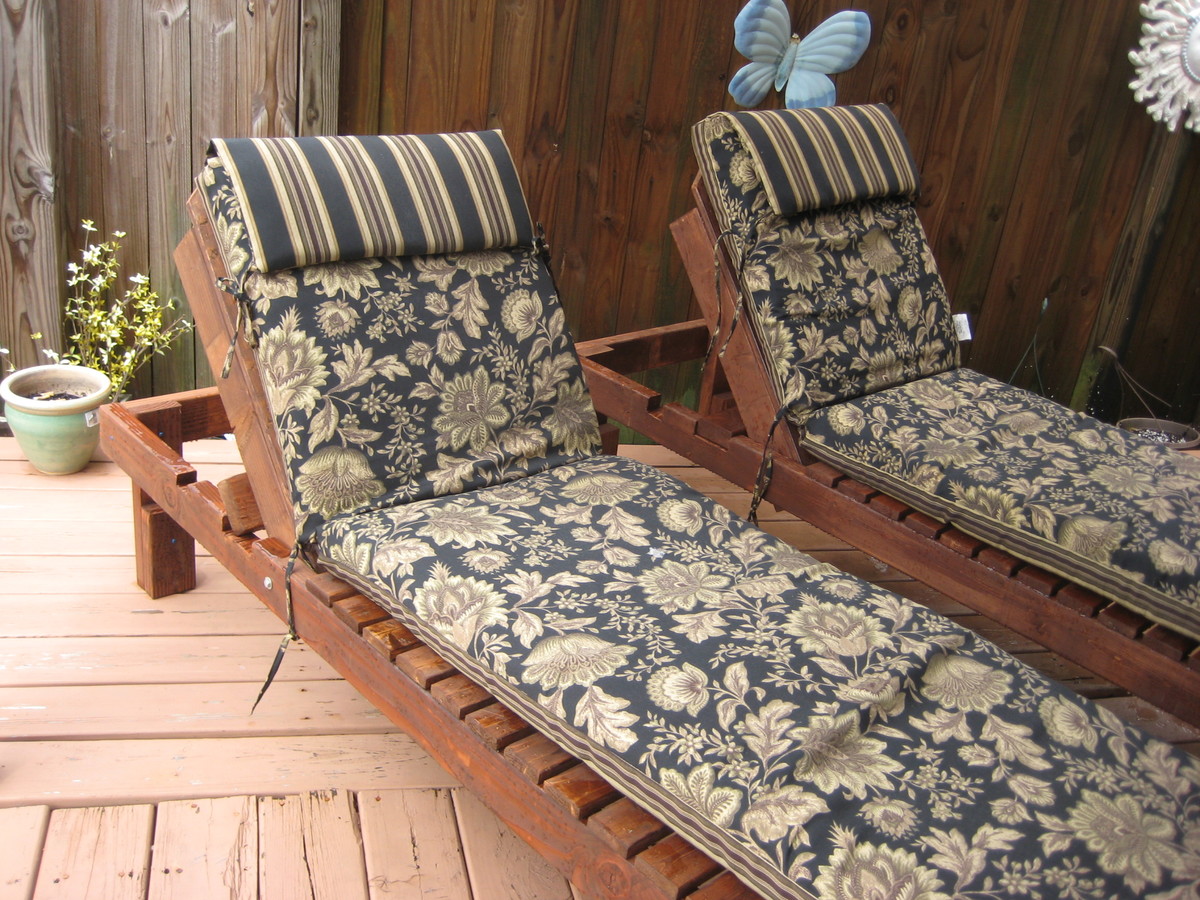
Love these outdoor Chaise Lounges. They are very sturdy and comfortable. I am hoping to make a loveseat and tables to match. Makes a perfect patio sent for my back porch and pool!
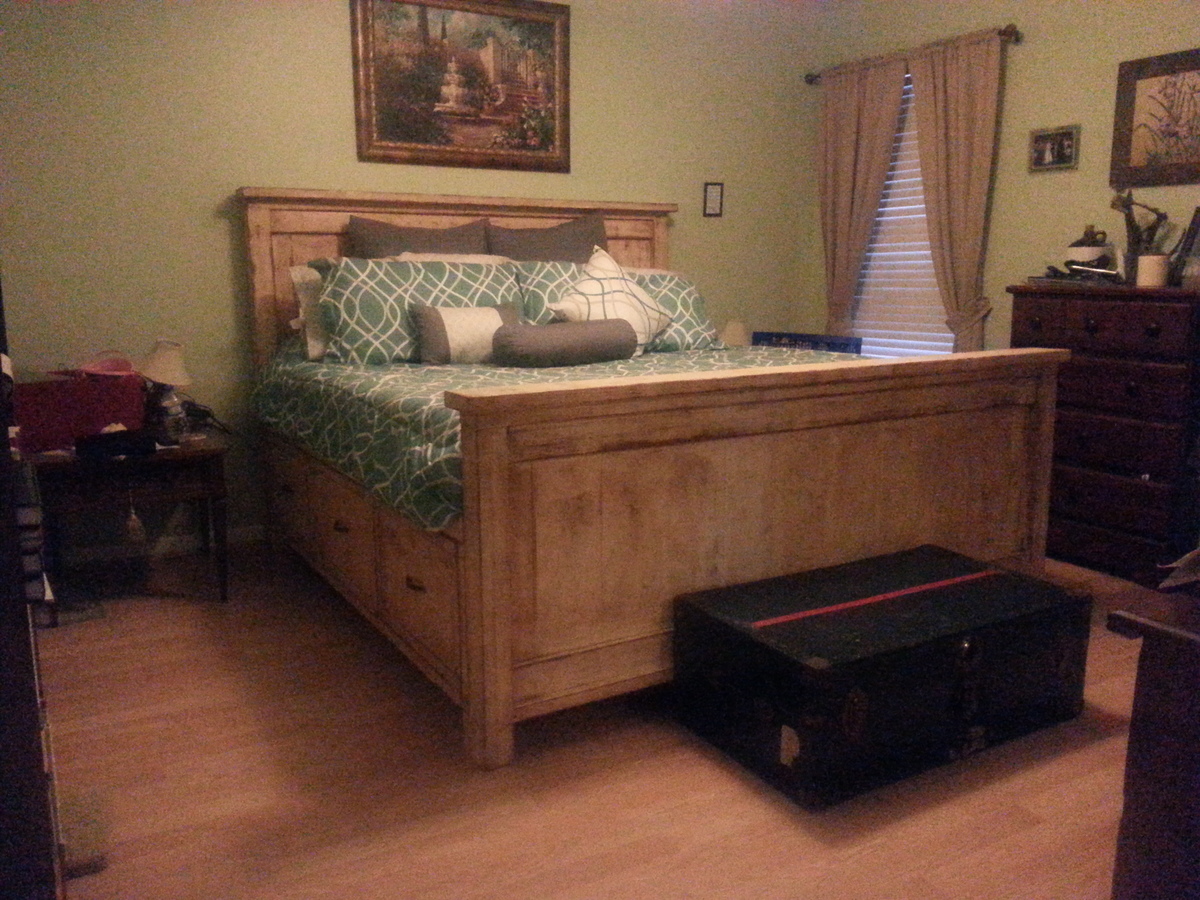
This is my biggest project to date; I put it together with a few modifications to the plans on this website (as I'm sure everyone does!) It will be my wife and my bed for quite some time and hopefully I can pass it along in the future. Seems sturdy as a rock and the additional storage will benefit us as our home has minimal closet space. The finish is a waxed-stained-sanded painted surface.
I broke this project into 3 phases: headboard, benches, and footboard. Juggling two kids and a wife, its hard to be able focus completely on a project without some (often welcome) interruptions.
One final note: this website introduced me to and this project confirmed that my favorite tool in my tool shed is the Kreg Pocket hole Jig; bought it thinking I would use it on a buffett table I built and have used it on every project since!


Wed, 12/24/2014 - 07:17
Could you tell me what modifications you made to the original plans?
Tue, 12/10/2019 - 21:03
I'm also interested in the modifications! I wanted to make the footboard taller, like yours is.
Shortened to 5ft length.
I used a lot of extra screws in the legs for additional supports, and filled all the gaps and screws with wood filler. I also used electric planer on top to flatten surface and then sand, sand, sand.

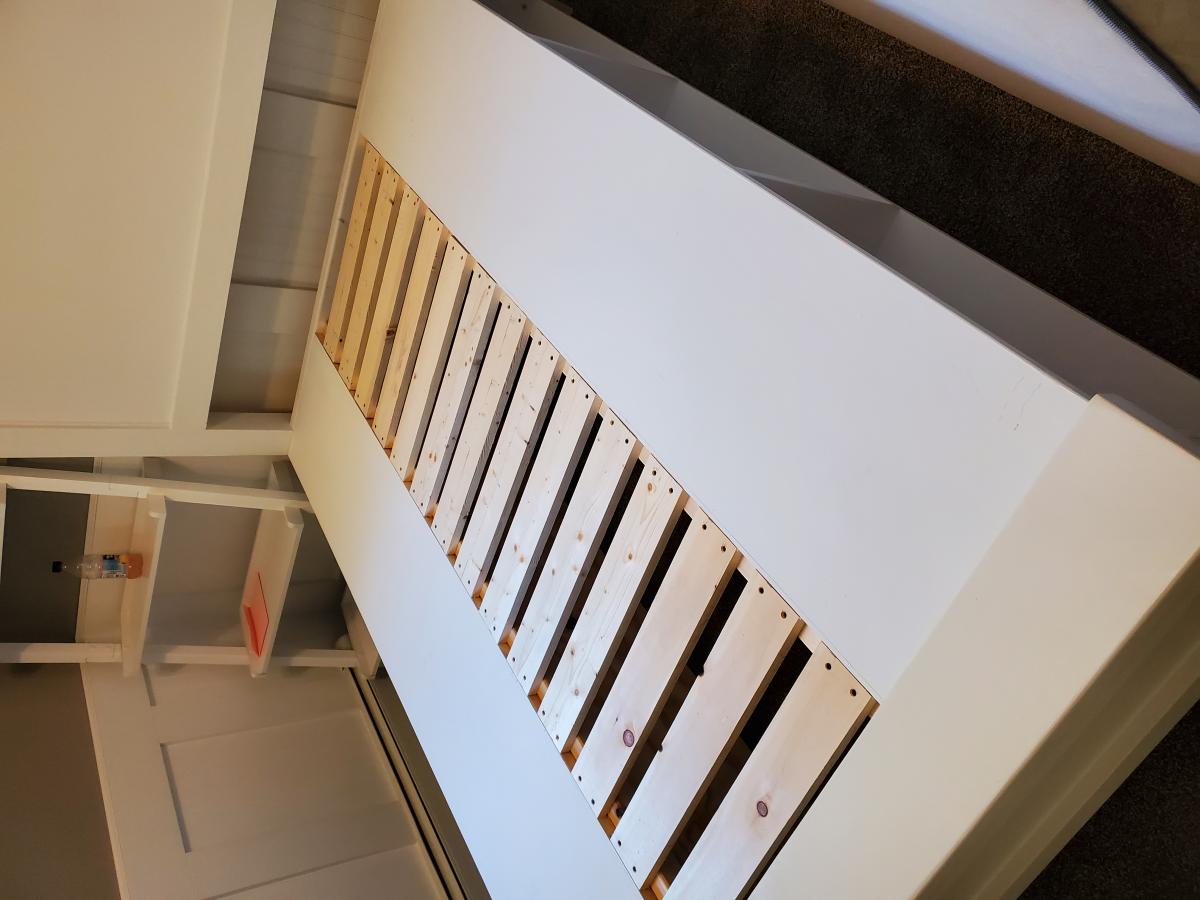
I built this bed for my daughters newly remodeled bedroom. It was overall pretty simple build. The plans were simple and easy to follow. I did add some center supports on the storage boxes under the center slats for added strength.
This was a new project idea my wife wanted me to do. It was relatively simple to follow. I felt it turned out pretty good. I've always felt that Ana's plans were well thought out and simple to follow. Even for a beginner like me.
Robert Gilliam

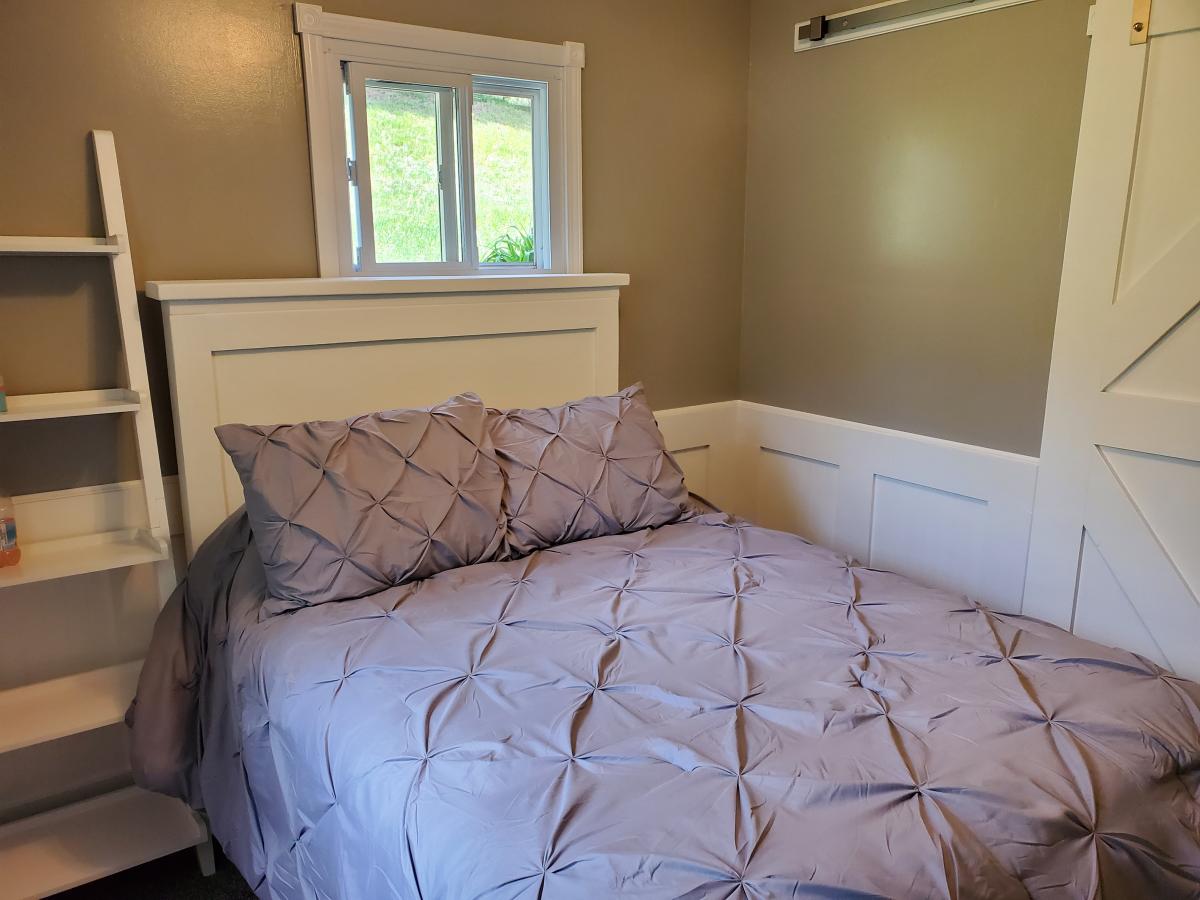
Just finished this Twin Size Simple Bed direct from the Ana White plans. This is my first project that I've completed, and it went well! The plans were great, and my only advice would be to take your time. I know that some people don't like to paint the wood, but this white just fit the room perfectly. As a side-note, this bed is SOLID and very heavy! Amazing what a difference real wood is to the stuff you get at the furniture store.
Wed, 07/25/2012 - 12:49
I am looking into making this bed but into a bunkbed, but I am afraid of doing a bad paint job....any suggestions?? Should I paint prior to putting together? Thank you your detoured out GREAT!!!
Thu, 07/26/2012 - 05:20
Hi Amie! After putting this all together and then sanding and painting, I think this time around (I'm making a 2nd one), I'll cut the pieces according to the cut list, then sand and paint the pieces before putting them together. The painting wasn't too bad to do after putting it together, but the sanding was difficult with some of the angles on the head and footboard. I'll update this after I do it this other way..good luck with your project!! It's very satisfying to see the finished result after you finish!
Sun, 01/06/2013 - 13:35
I just priced this out and the lumber comes to $130 for decent pine...
Sun, 01/06/2013 - 16:00
Hi Ahab.. One thing I've figured out from reading posts is that the cost of lumber (and pine) varies widely across regions. Each store also has different grades of lumber available. If you take the time to go through lumber piles and choose boards that are straight you can save a fair chunk of change. Just my 2 cents.. Good luck with your project though!
Thu, 12/18/2014 - 16:36
I have a question on how the rails connect to the head and foot board. I think the original plans have you make a box out of 2x2's, Do the 2x2's just screw to the headboard and footboard? This seems like the easiest, unless you want to take it apart and move it! Anyone have ant thoughts on this?
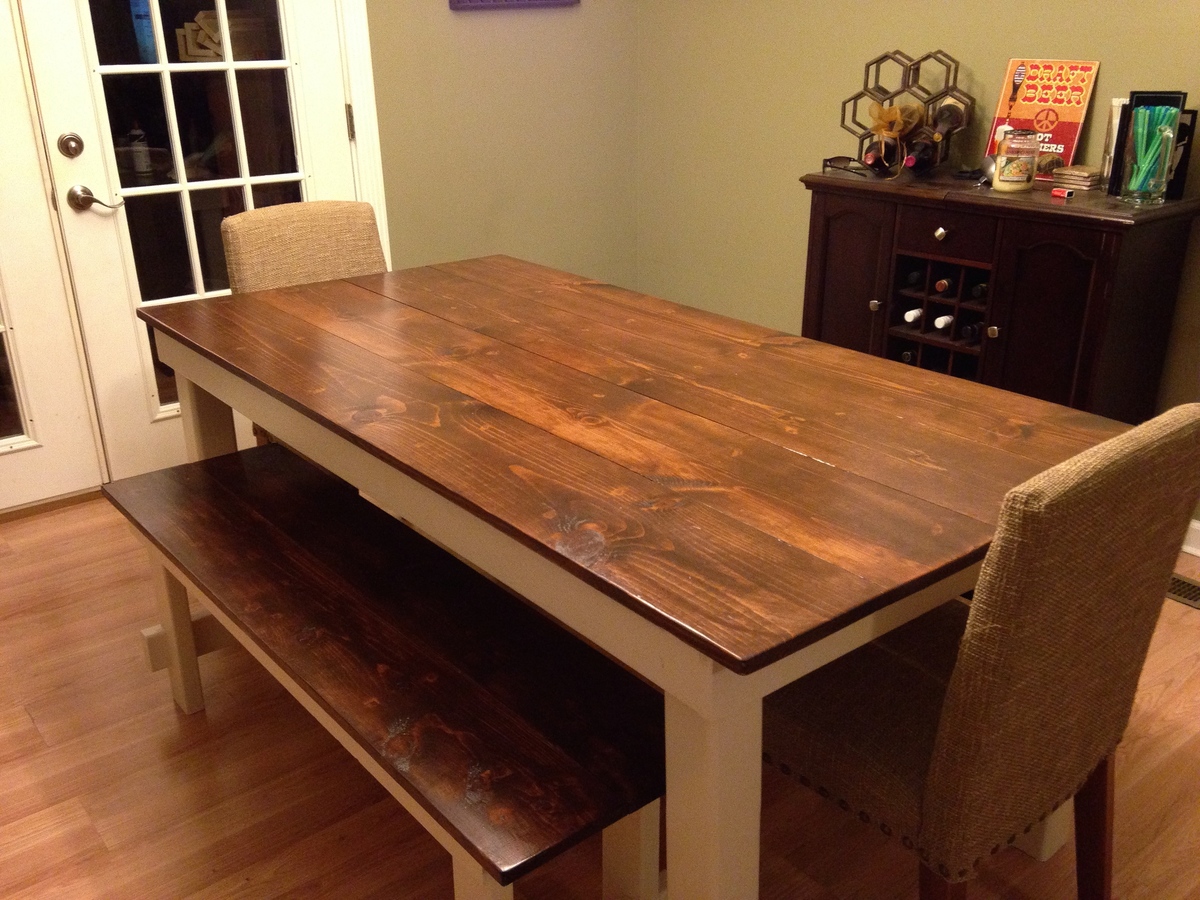
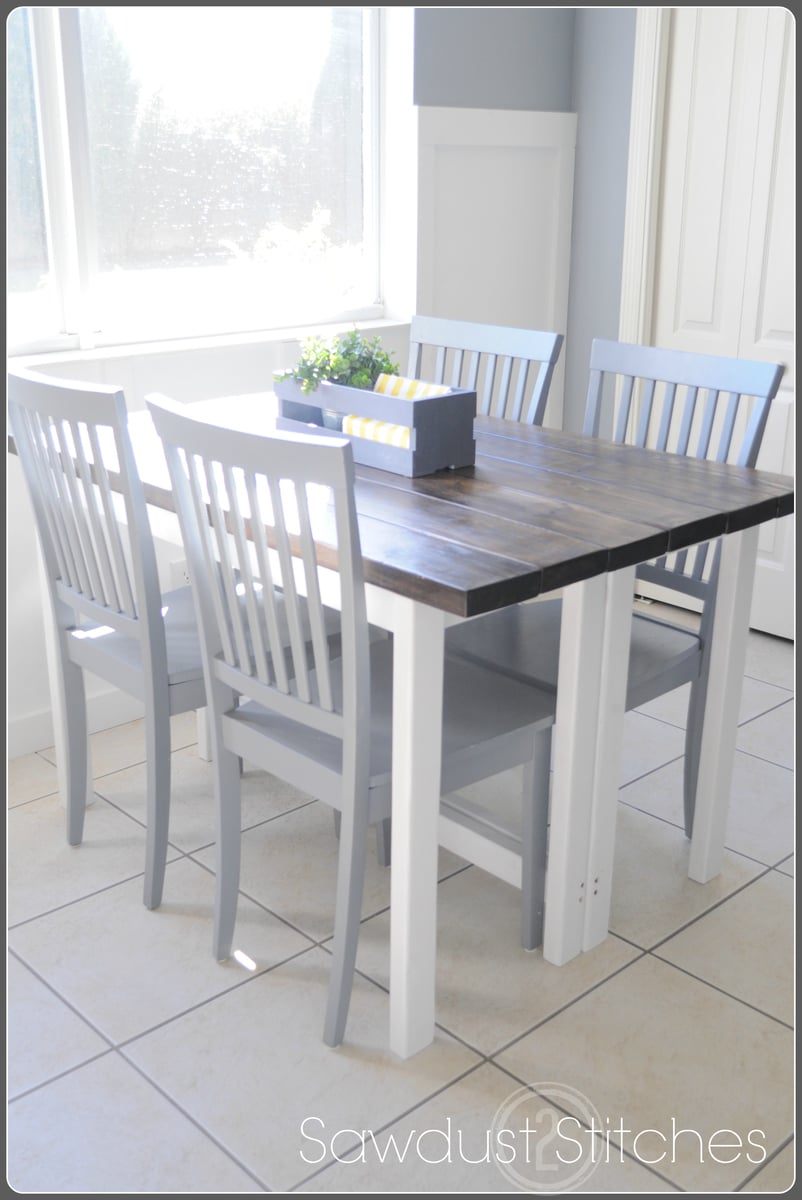
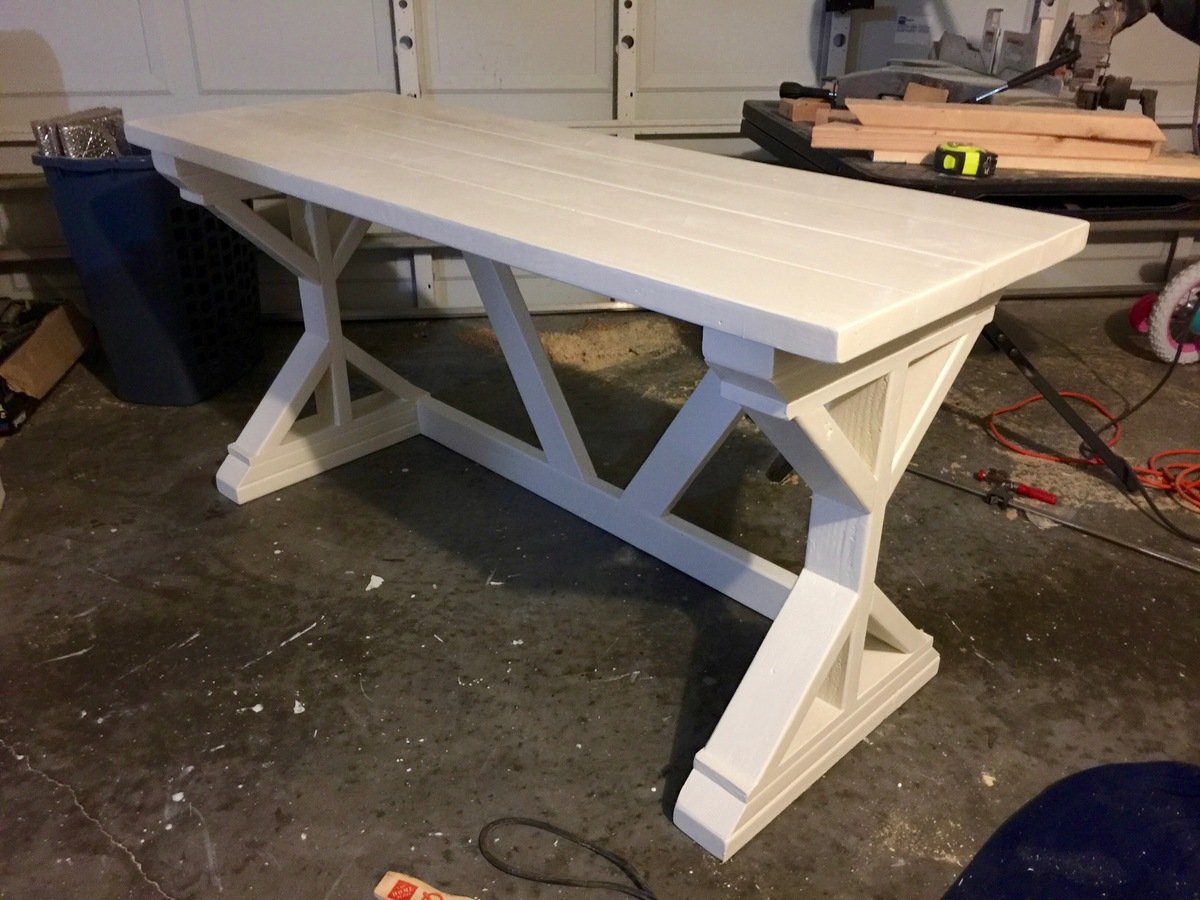
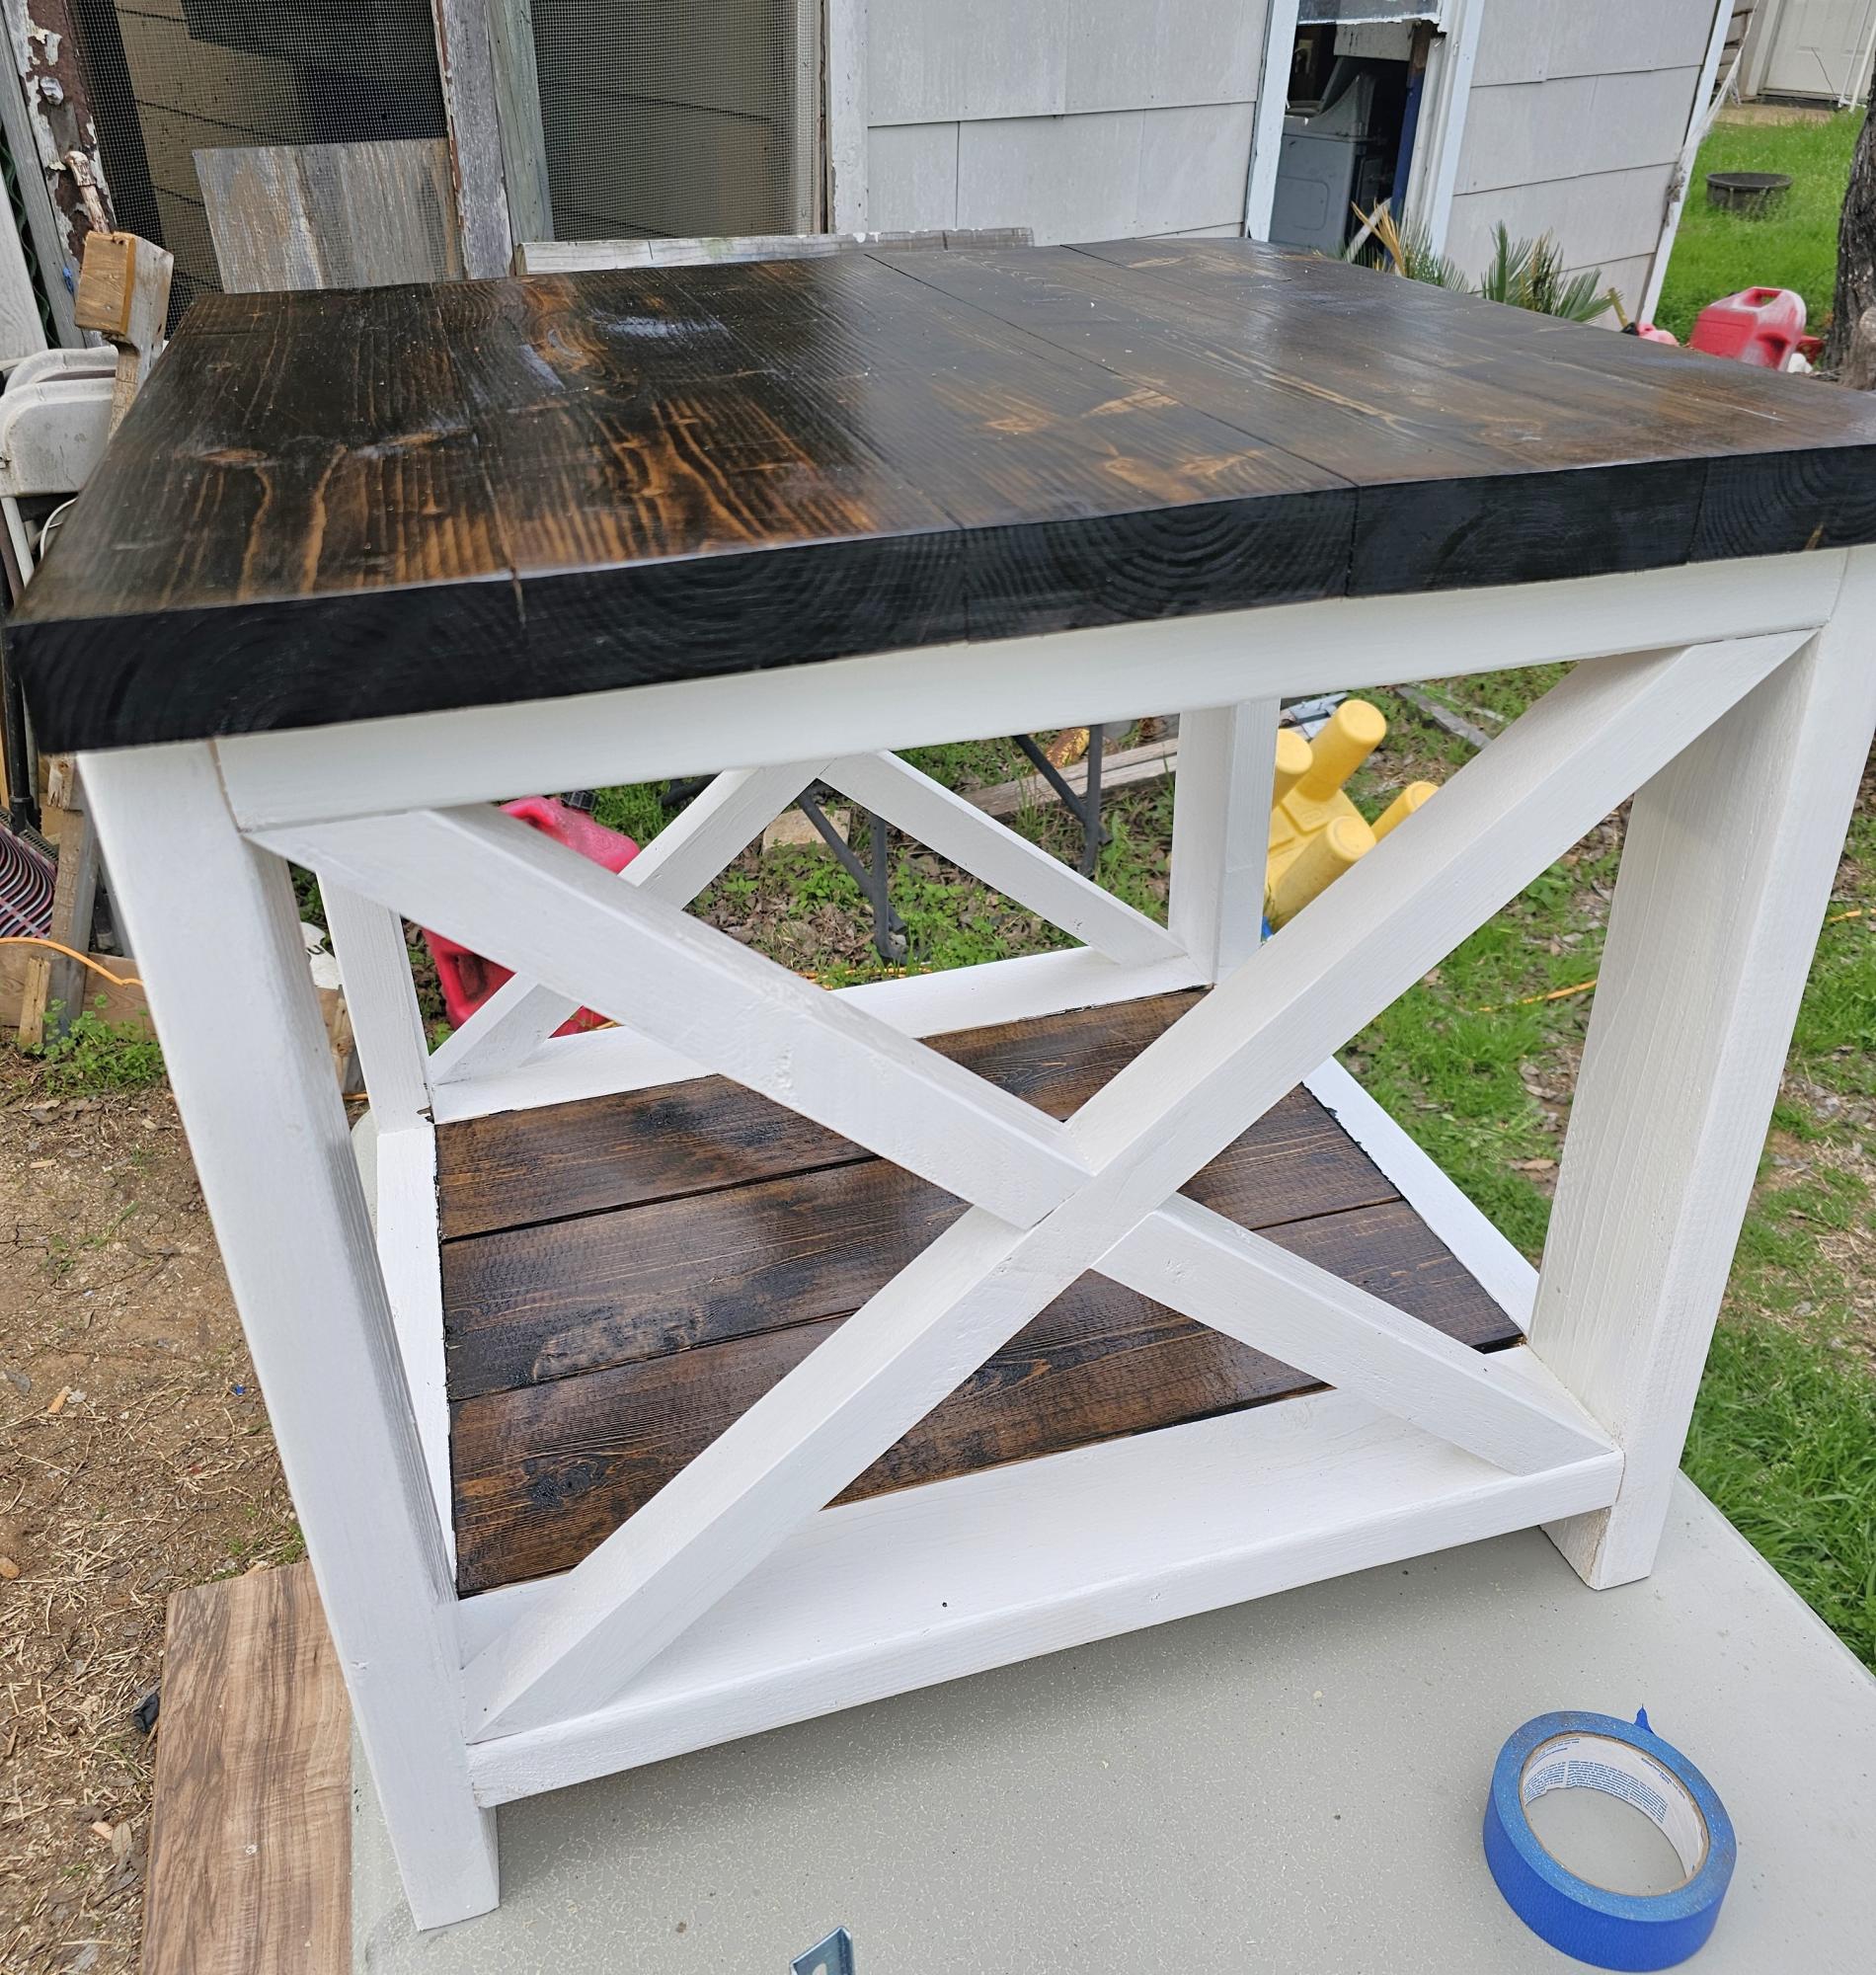
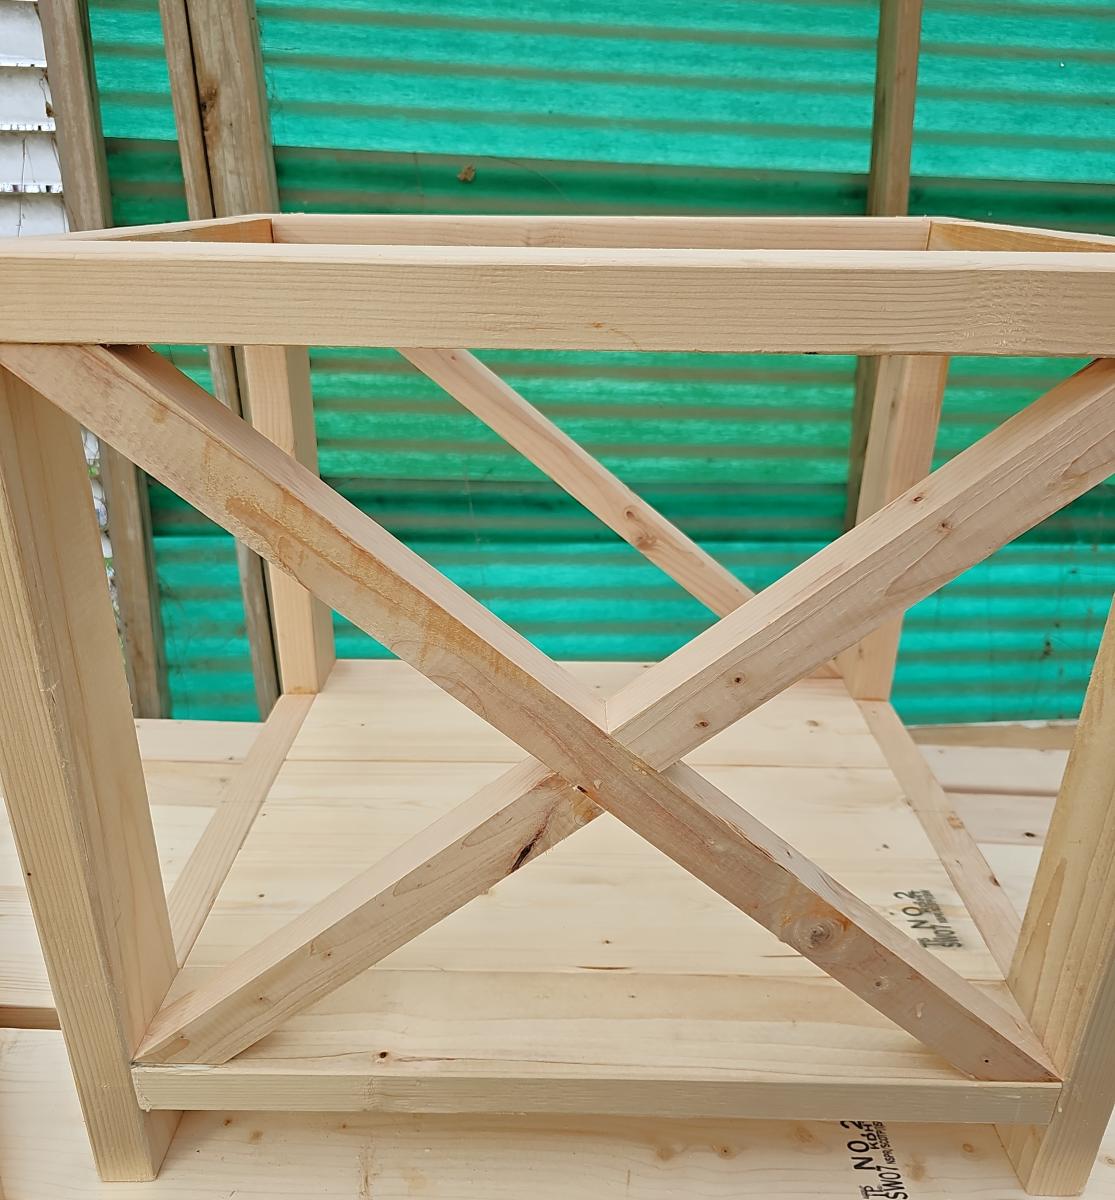
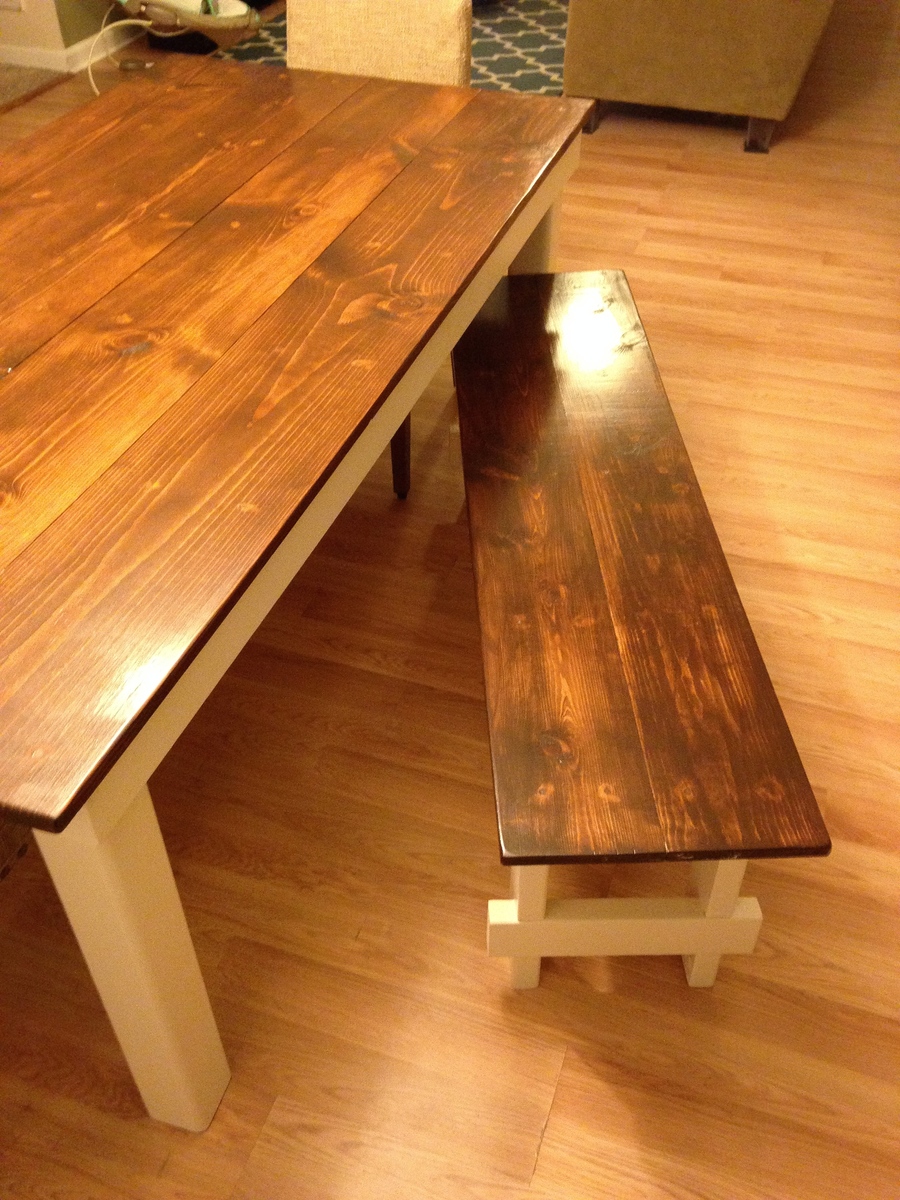
I wanted a farmhouse table look, but no too county. I think that this table accomplished that.
I debated a while with staining the entire table or staining the top and painting the legs. I'm really glad that I decided to paint the legs. I think it turn out great.
This was my first DIY wood project. I'm pretty much addicted now. Every time my wife wants to get a new piece of furniture, I always tell her that I can probably build it.

Octagon table for dining room
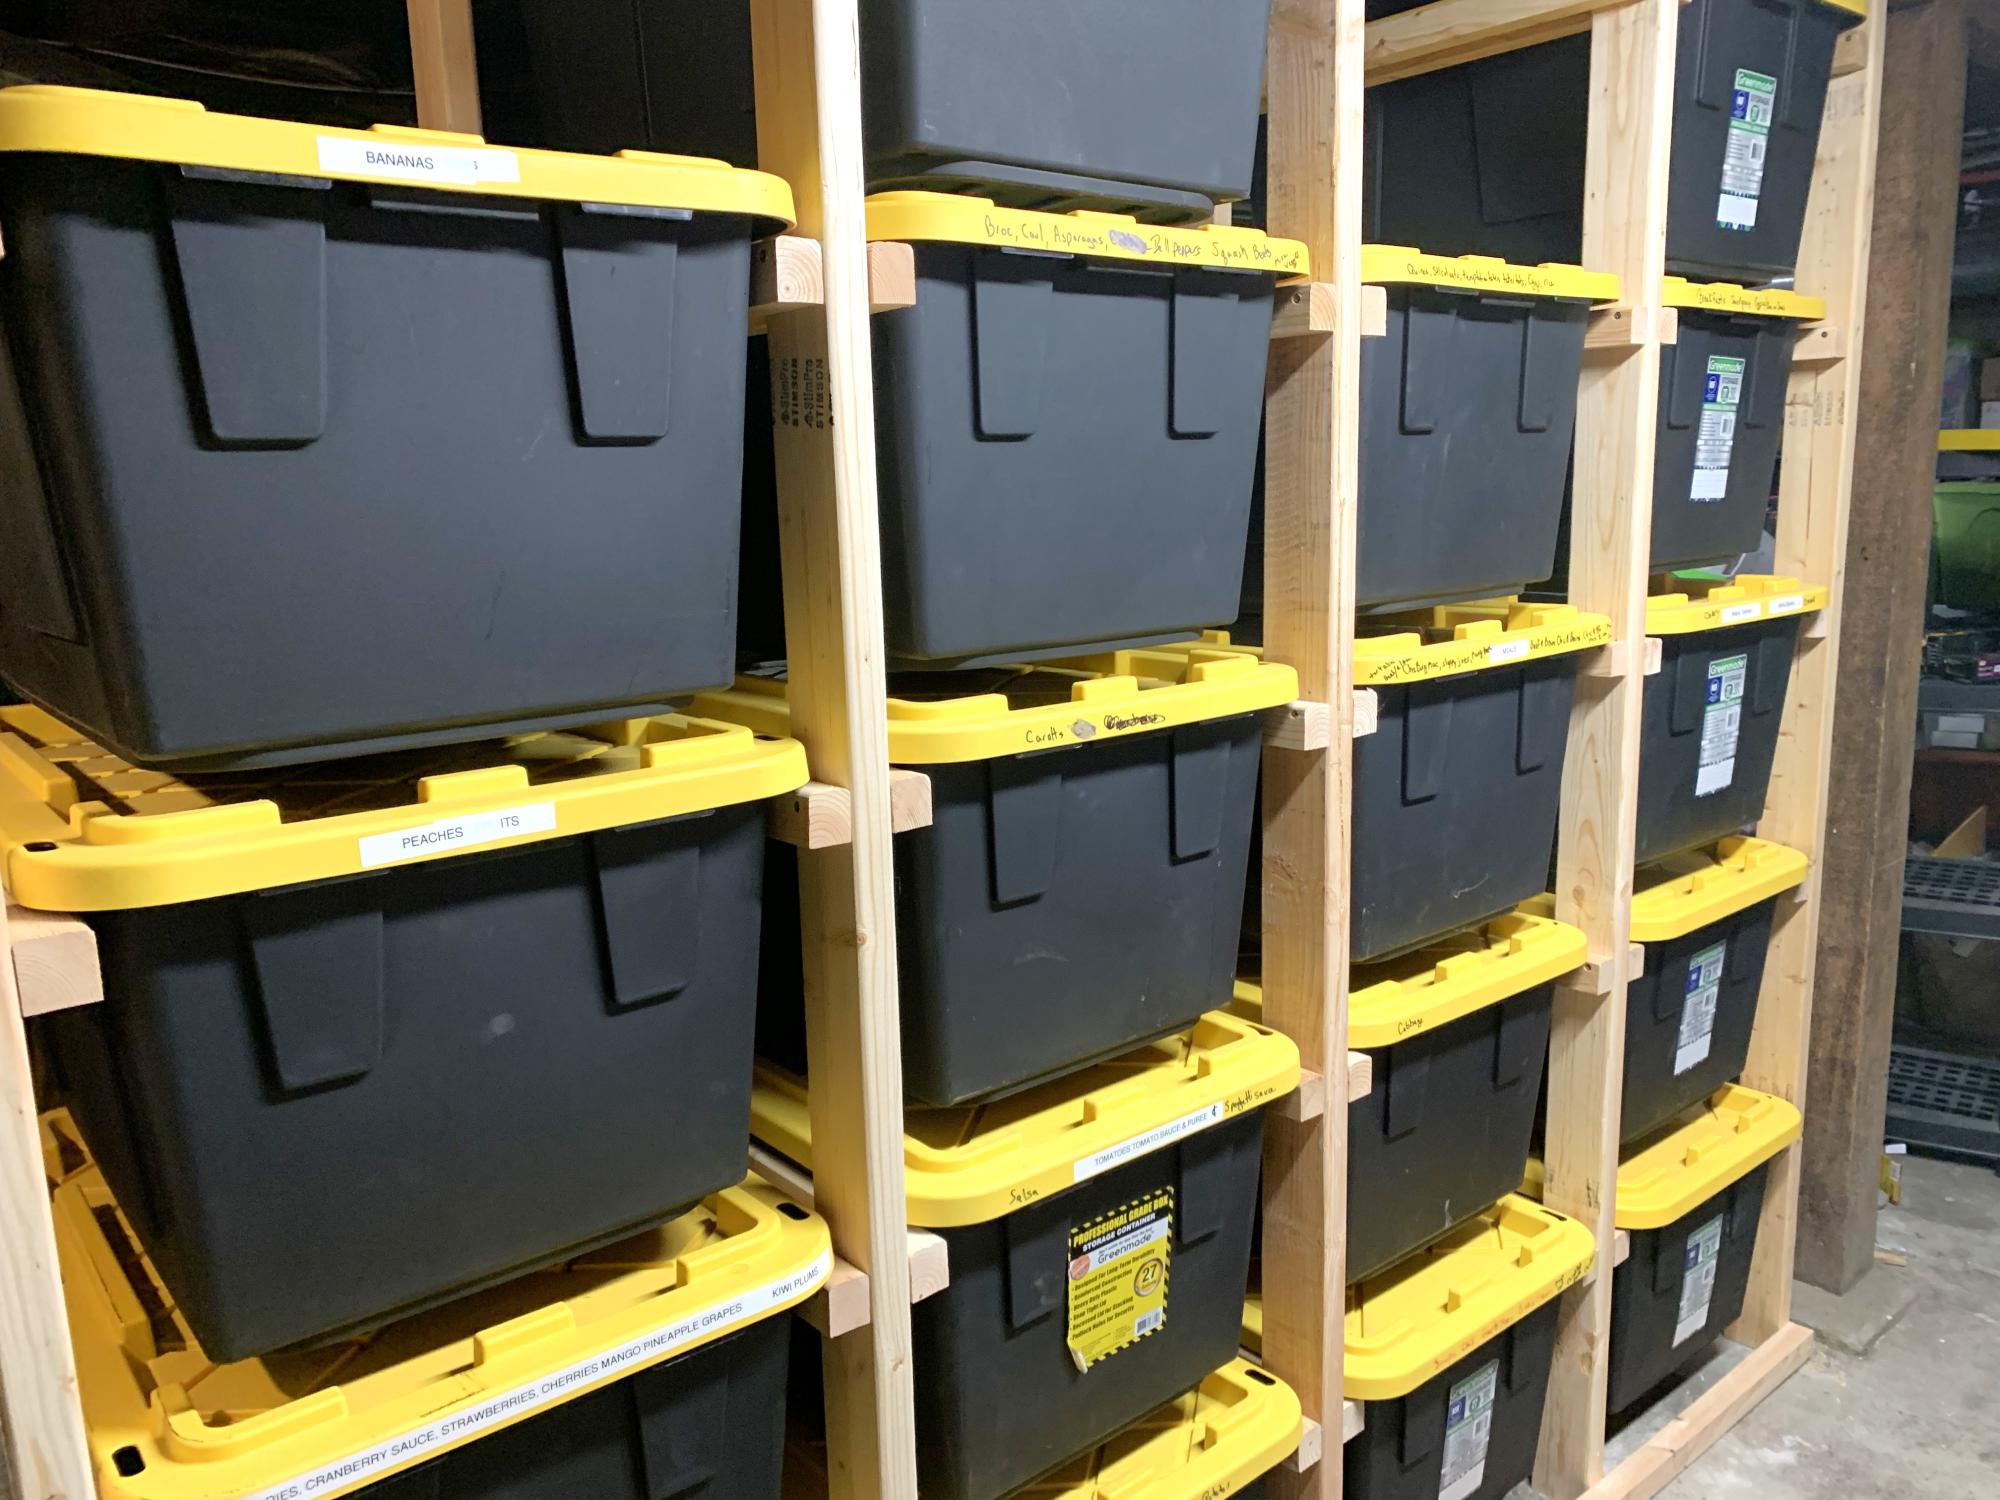
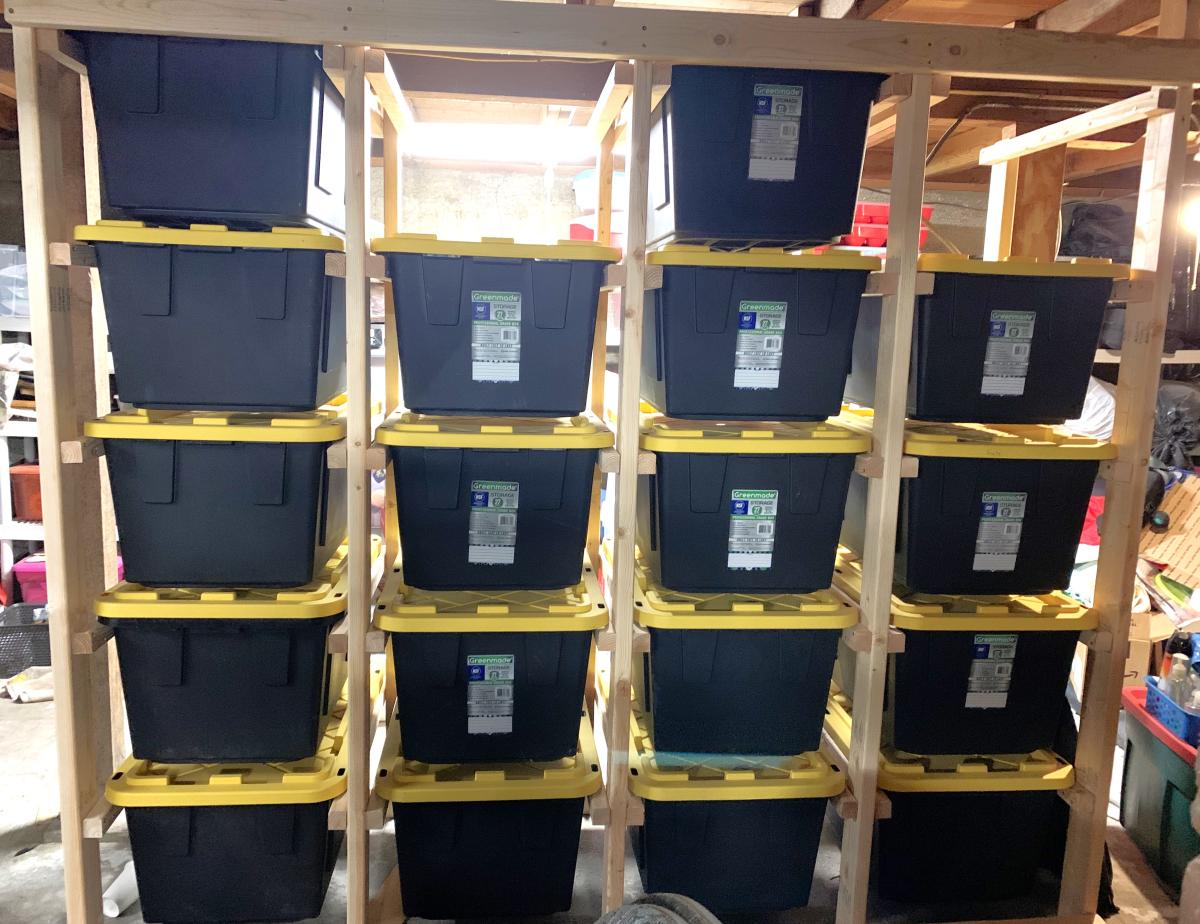
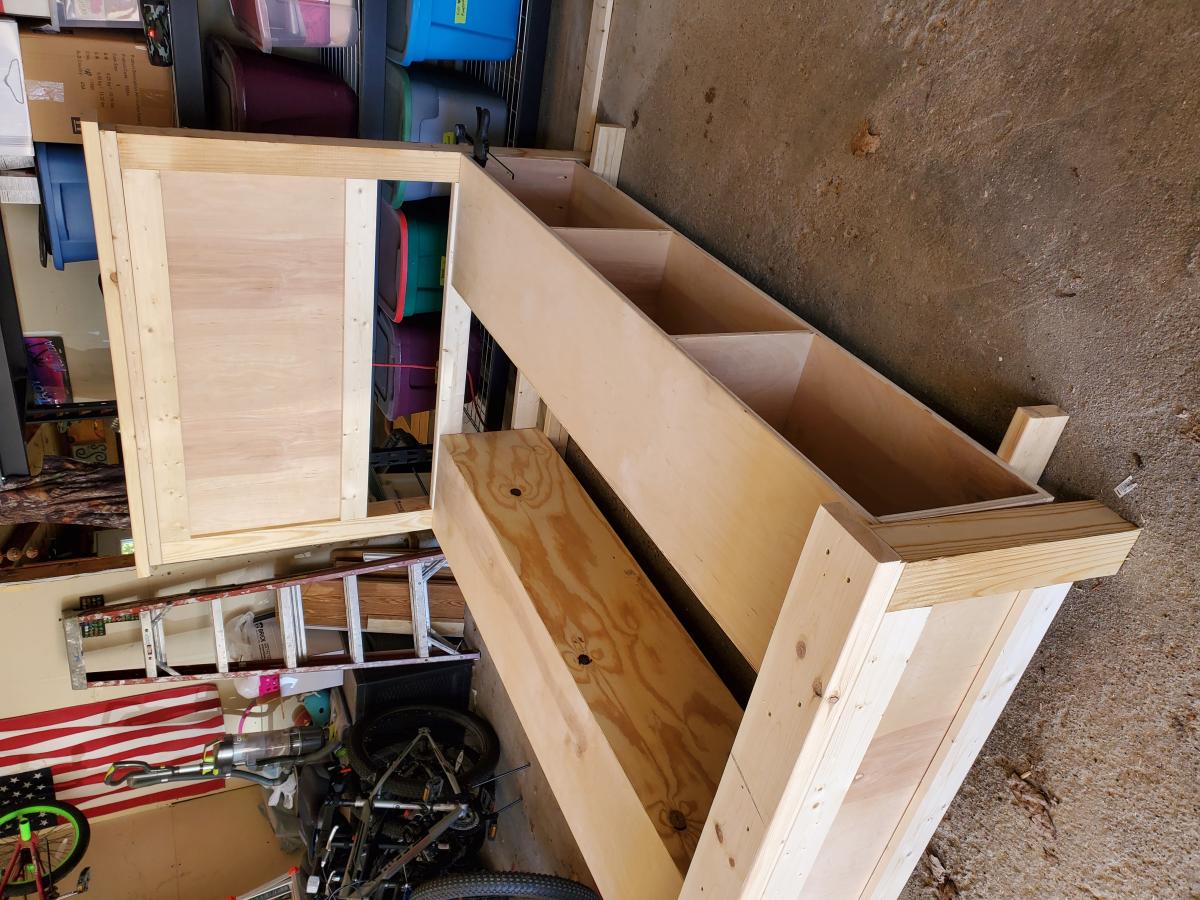
storage for totes - can be made to accommodate any size totes - just adjust the measurements basically it is "ladders " 2x4s for legs 2x2s for "runs" 2x4s across the bottom & top this is in a basement with short ceilings so if you have a taller space you can go taller or you can go shorter.