Community Brag Posts

Farmhouse Bed

Submitted by mwg10 on Mon, 01/15/2018 - 07:57

I made a few modifications. 

I used shiplap instead of tongue and groove, raised the footboard by adding an extra 2 x 6 & used jacobean stain.

Thanks Ana for putting the plans and video on your site.


Built from Plan(s)
Estimated Time Investment
Weekend Project (10-20 Hours)
Finish Used
minwax jacobean
Recommended Skill Level
Beginner

Hall Tree with Drawers using a combination of 2 plans

Submitted by Anonymous (not verified) on Fri, 12/31/2021 - 19:40

We had an empty area at the bottom of our stairs that was just calling for a hall tree. I love watching and learning from Anna's videos. I really liked 2 of her plans: the Farmhouse Hall Tree and the Mudroom Bench with Easy Drawers. I decided to combine them to make my own unique hall tree. Our teenage daughter used the "window panes" in the back to paint a Japanese Maple tree. I think it turned out beautifully. This is the first of Anna's plans that I've used, but I plan to use many more! Thank you, Anna for your amazing videos and desire to share your knowledge. We appreciate it so much!

Comments

10 Dollar Ledge Shelves

Submitted by ValGal222 on Wed, 05/11/2011 - 20:40

Thanks Ana, I no longer "Think I Can"- I KNOW I CAN! : )

Estimated Time Investment
Afternoon Project (3-6 Hours)
Finish Used
None yet, need feedback on what color...
Recommended Skill Level
Starter Project

Red Hen Home's Modified Providence Bench

This is a slightly modified version of the Providence Bench. I used 1x wood rather than 2x wood, so the legs are slightly longer to make the bench come out to the same height. Made this to match a planked-top table. More photos on my blog: http://redhenhome.blogspot.com/2013/07/the-other-solomon-table-bench.ht…

Built from Plan(s)
Estimated Cost
50
Estimated Time Investment
An Hour or Two (0-2 Hours)
Finish Used
Custom mix of Minwax Weathered Oak and Antique Walnut stain, followed by hand-rubbed polyurethane.
Recommended Skill Level
Beginner

Comments

JW

Thu, 09/12/2013 - 05:46

I like the planked top! Great job on the finish - it's rustic without being overdone. It's one of the things i love about pottery barn furniture.

What is the hand-rubbed polyurethane? Is that just the wipe-on stuff I keep seeing at the store? Was it easy to use?

Quick basement shelves

Submitted by Panda on Thu, 01/18/2018 - 14:22

What a great project! This is my first Ana White project and definitely won't be my last!


I modified the garage plans to fit our basement. We have two beams the shelves needed to fit between, so I made the length 10' and bought 2x4s at 10'. Otherwise, I didn't do any modifications.


The wood was cut at the store for the lengths needed, making it super easy to come home and assemble! We secured the shelves to the basement supports and along the back wall. It's pretty secure and stable.


Overall this probably took a few hours (we took a break while constructing it). Next time I would make the shelves a bit deeper. 17" was fine, but a few more inches would have made the bins fit a bit better.


I am looking forward to making more!

Estimated Cost
$140
Estimated Time Investment
Afternoon Project (3-6 Hours)
Recommended Skill Level
Beginner

Bench

Had a small bench that the previous owners of our house left. It was all made from 1x. Wanted something a little beefier to match the bed I built. So came up with this bench. Made from all pine.

Comments

Cottage End Table in Oak

Submitted by JanMarie63 on Mon, 07/06/2015 - 06:48

I loved making this Ana White's Narrow Cottage End Table plan after seeing it here on a search. I made it for my mother's 83rd birthday. She asked for oak and a light stain (Rust Oleum's Summer Oak Stain). Used three coats of wipe on Poly and one coat of Johnson's paste wax on the top. I bought the blue knob at Cost Plus World Market. The project took me two days. Will difinitely make another one but in pine this time.

Estimated Cost
$40, plus scrap wood on hand
Estimated Time Investment
Weekend Project (10-20 Hours)
Finish Used
Rust Oleum Summer Oak Stain, Minwax Wipe-on Poly (3 coats), Johnson Paste wax final coat for table top.
Recommended Skill Level
Intermediate

Comments

She Shed - Guest Room, Craft Room, Office

Submitted by Chriss45 on Tue, 01/23/2018 - 08:18

I needed an office and also a guest room so i built a she shed and all the furniture.

Recommended Skill Level
Advanced

Comments

junesummer21

Thu, 01/25/2018 - 06:27

I love your murphy bed idea and would love to have plans for it. I too am looking for a guest bedroom and craft area and I know this would work in my space.

Chriss45

Mon, 02/05/2018 - 16:20

I didnt really have a plan when I was building my Murphy bed, I can do a sketchup plan for you if you would like. I used boat chair swivels instead of hinges and there is a YouTube video on how to do this. 

Chris

Nurserene62

Thu, 06/24/2021 - 23:11

Hi Chris! I would love to have a copy of the sketch up of this. I have a small she shed/guest cottage I would live to duplicate this in. Thanks in advance.

cgself12

Mon, 11/08/2021 - 14:18

Hi Chris!
I know I'm coming late to this party but I just found your shed and I adore it. You did an amazing job and I cannot express how impressed I am! I would also like a sketchup plan of both the murphy bed and the adjoining side cabinets. Great job!

Kim Daigle

Thu, 06/06/2019 - 10:59

I absolutely love everything about this she shed!!  I would be interested in a sketch up of the murphy bed as well as the cabinets next to it.  I would at least like to know what the dimensions of it all is.  You did an amazing job!  It's so beautiful!

mcocooper11

Tue, 06/25/2019 - 15:14

Me too!! I built a horizontal Murphy bed so I have that part done but I would like to see the plans for the cabinets on either side with the pull out desk!

so very cute!

Factory Cart Coffee Table

This was my first project, so it took me a while to make since I had to figure out what I was doing. But, it was so much fun and I'm excited to make more!

Built from Plan(s)
Estimated Time Investment
Week Long Project (20 Hours or More)
Finish Used
Minwax Red Mahogany, Minwax rub-on poly
Recommended Skill Level
Beginner

Bunk and loft beds

I designed and built these beds with the help of my husband and daughter. We spent about $350 on the materials and about 4 days in the Texas heat to build it. My kiddos absolutely love them, especially my 7yr. old. His is the loft bed with a ladder system and a bookshelf, and area to play underneath. The bunk bed is for my 18yr. old and my 14yr. old, so it had to be extra sturdy. We built everything out of 2x6s except the bookshelf. It was built from 1x12s and plywood.

Estimated Cost
350
Estimated Time Investment
Week Long Project (20 Hours or More)
Finish Used
Ebony stain
Recommended Skill Level
Intermediate

Comments

Queen size storage bed

We made this storage bed for our teenage daughter. She helped! She picked out the stain, comforter, and went through different plans with me to make it her own. She learned how to use a miter saw, sander, etc. and it was a great bonding experience. It's a few different plans, and we had to make modifications, but it is immensely better quality than store bought furniture we purchased a few years ago (it's falling apart!) and it has sentimental value. We are proud of the furniture, but even more proud of our daughter. :-)

Estimated Time Investment
Week Long Project (20 Hours or More)
Finish Used
Charcoal Grey
Recommended Skill Level
Beginner

Gallery-style ledge

Submitted by seesaw on Sat, 05/21/2011 - 10:21

This was a super easy and quick project. I actually lengthened it to 36 inches. I can't decide whether I need two ledges or not, but it won't take long if I need another one! My only suggestion- VERY straight boards are a must!

Built from Plan(s)
Estimated Cost
$4.00
Estimated Time Investment
An Hour or Two (0-2 Hours)
Finish Used
Minwax natural oak
Recommended Skill Level
Starter Project

2 couches and tables

Submitted by Polysoup on Sun, 07/14/2013 - 07:40

I bought two sets of Restoration Hardware cushions on clearance and they worked out great. I had to adjust the measurements a little bit but that went pretty quickly. I came up with a plan for the tables to match the couches.

The tables are both 30x30. This way I can use them as 2 tables, one large table, ottomans or seating.

I LOVE the cushions. They are 6.5 inches thick and were dry 3 hrs after a rainstorm. There was no way I could have sewn something cheaper.

Thanks for the plans Ana!

Estimated Cost
$250 each (including cushions) Tables - $30 each
Estimated Time Investment
Week Long Project (20 Hours or More)
Finish Used
White Sherwin Williams paint (forget the exact name) and a stain for the cedar details
Recommended Skill Level
Intermediate

Comments

Blue Shocked Sideboard

Submitted by joshwgnr on Sun, 07/12/2015 - 08:17

One of the most rewarding, yet frustrating projects done to date.

A project completed over the course of several weeks challenging the limited tool set available.

In the end, the cost of new tools and frustration of assembly was all worth it!

Built from Plan(s)
Estimated Cost
Material Cost ~$600

Hardware, hinges, and slides add up quickly.
Estimated Time Investment
Week Long Project (20 Hours or More)
Finish Used
Espresso stain for exterior, Blue paint interior
Recommended Skill Level
Intermediate

Art Center / Work Dest

Girls table was too small, especially when they have friends over. We have a little nook that this will slide right into in the living/dining room. The bottom has drawers, they just were not completed when i took the pictures.

Estimated Cost
100
Estimated Time Investment
Weekend Project (10-20 Hours)
Finish Used
Minwax - American Chestnut
Recommended Skill Level
Beginner

First Furniture Build

Submitted by Jeffmb on Thu, 02/03/2022 - 14:23

My first indoor furniture project - the Rustic X coffee table. I added a lift top to store remotes etc and use as a laptop table. Fairly easy build I only had trouble aligning the "x's". I used of the shelf dimensional lumber but I might try this one again using different wood and a lighter finish.

Built from Plan(s)

Comments

Library Book Cart ( A smaller version)

Submitted by nanpannapa on Tue, 05/24/2011 - 13:22

I built a smaller version..THank you so much Ana for the plan. This one is only 2 ft tall and 22.5 inches wide..Perfect size for my 2 year old.
I added a hook to hang my daughter's doodle and on the other side, I added an aluminum tin(wrapped in a scrapbook paper sealed with mod podge) so she can put her magnetic letters/numbers on there. Added this little crayon holder as well. :-)

Built from Plan(s)
Estimated Cost
20
Estimated Time Investment
Afternoon Project (3-6 Hours)
Finish Used
Left over satin paint. Scrapbook paper, Mod Podge
Recommended Skill Level
Starter Project

Our First Project: A CA Mudroom

Submitted by jcablopez on Tue, 07/16/2013 - 11:28

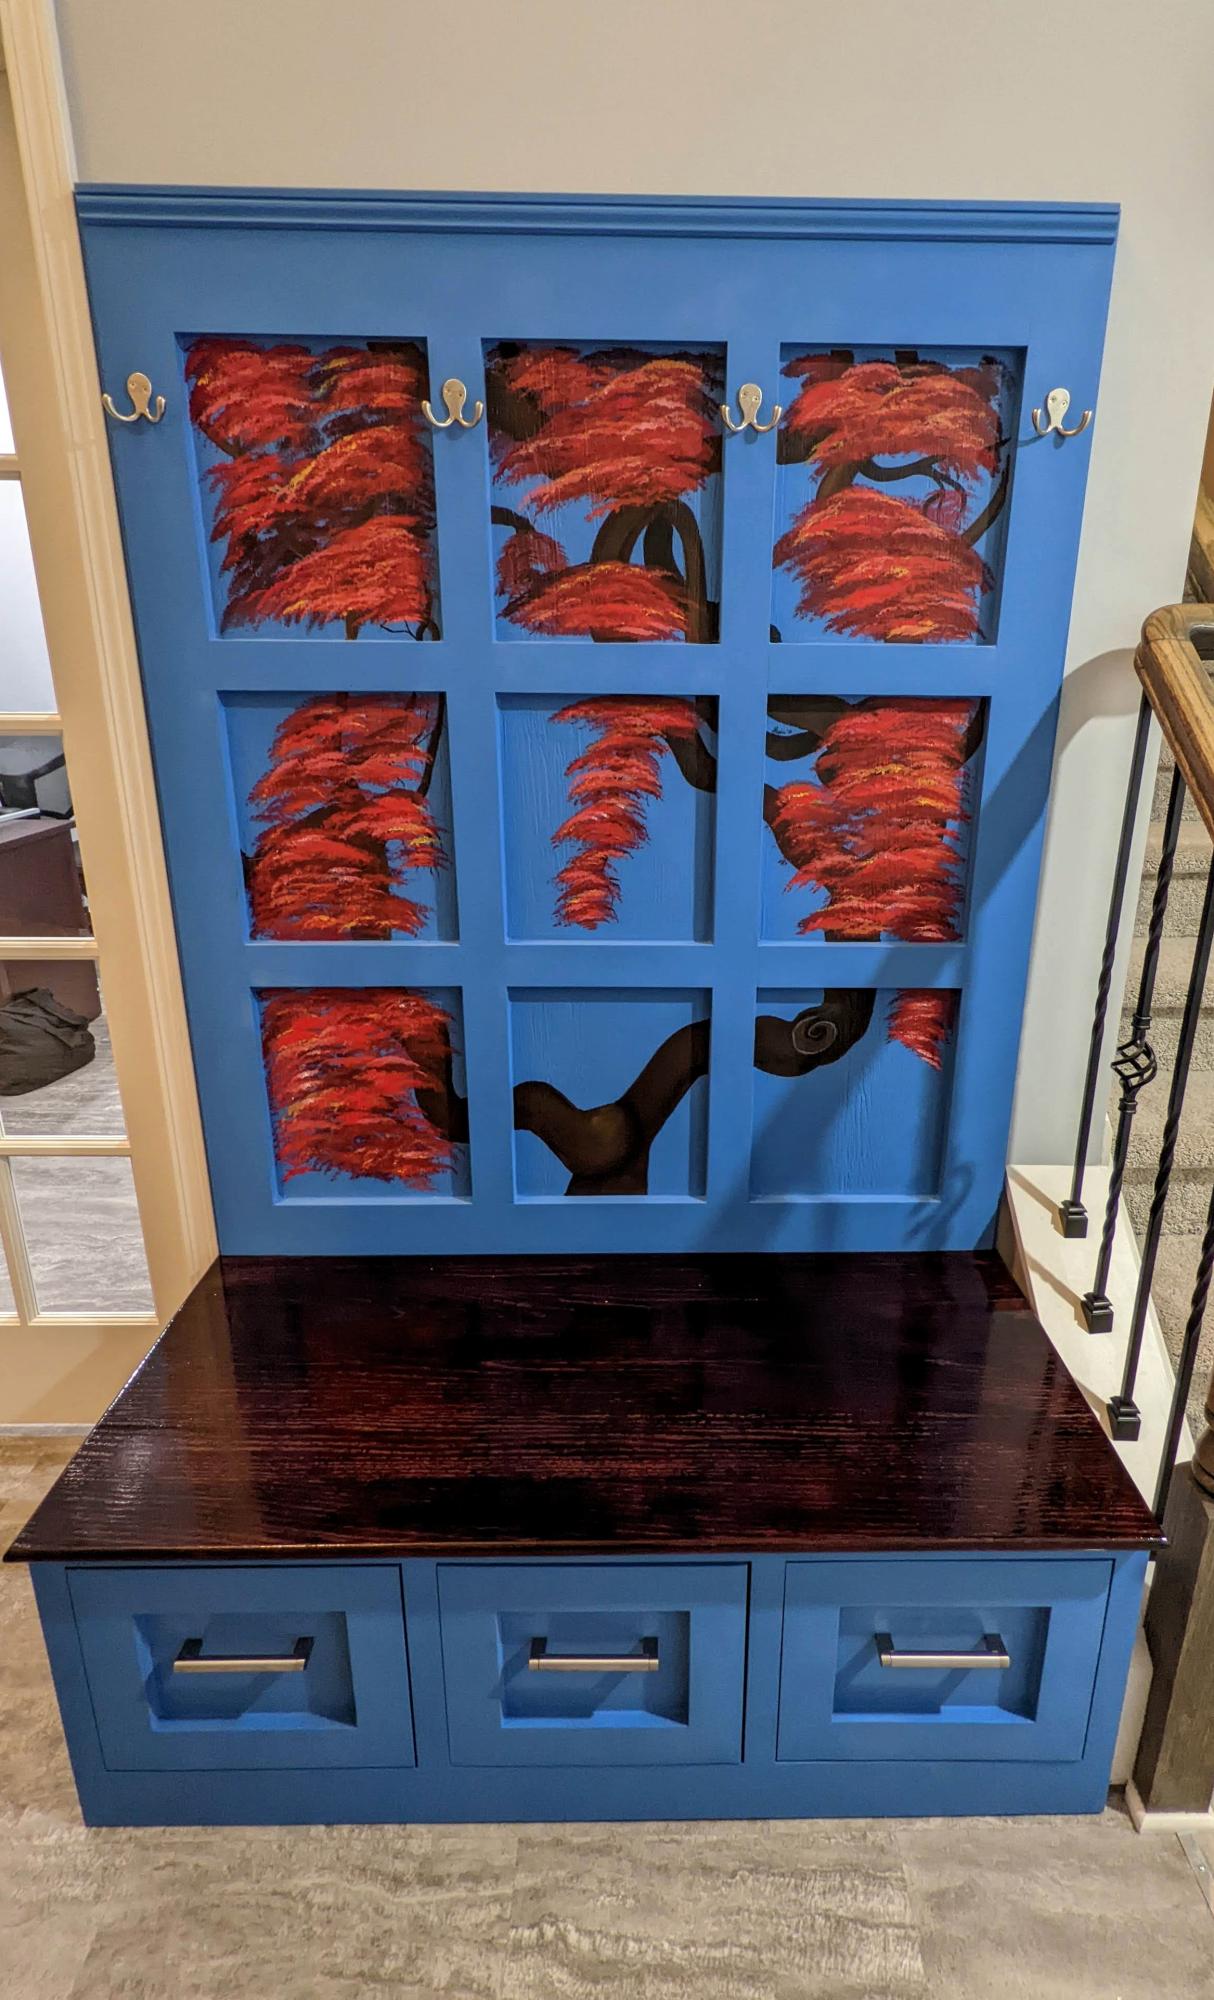
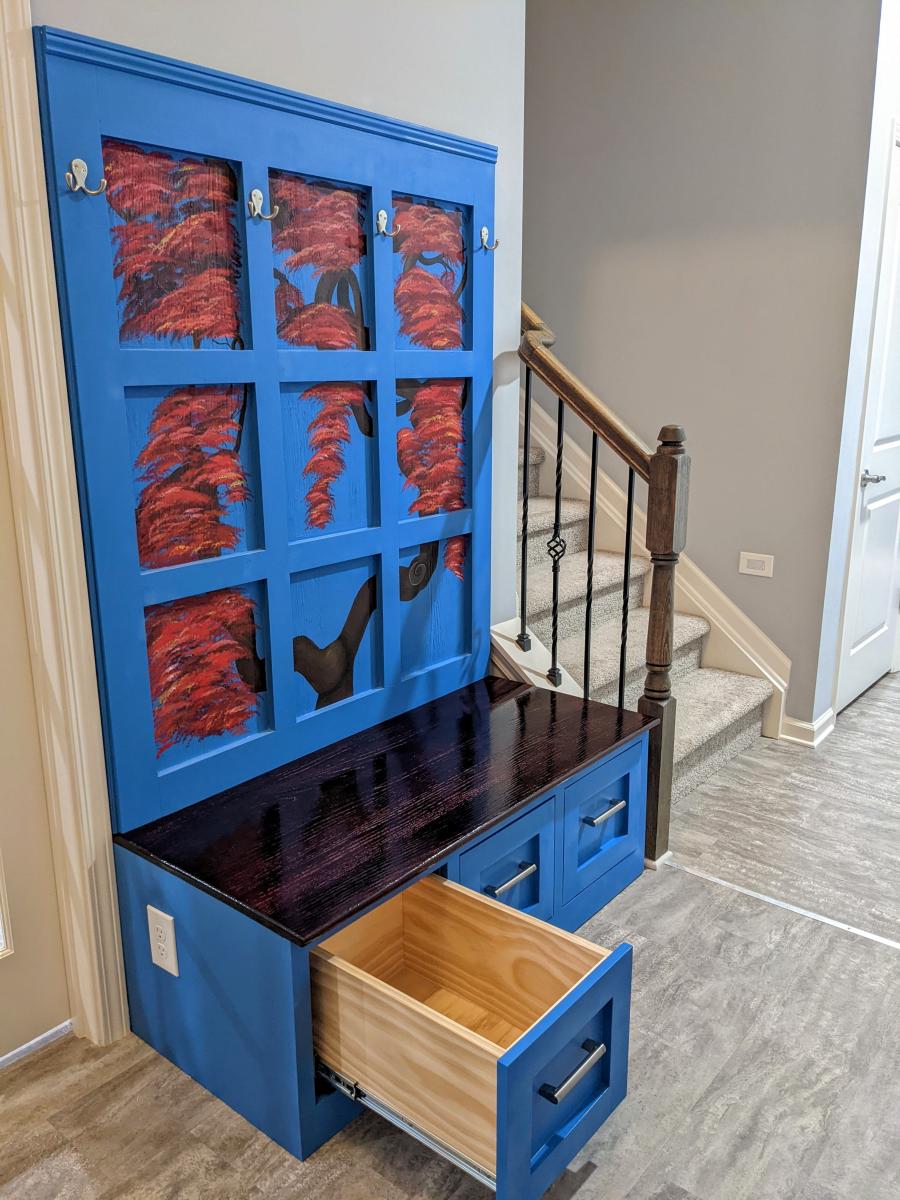
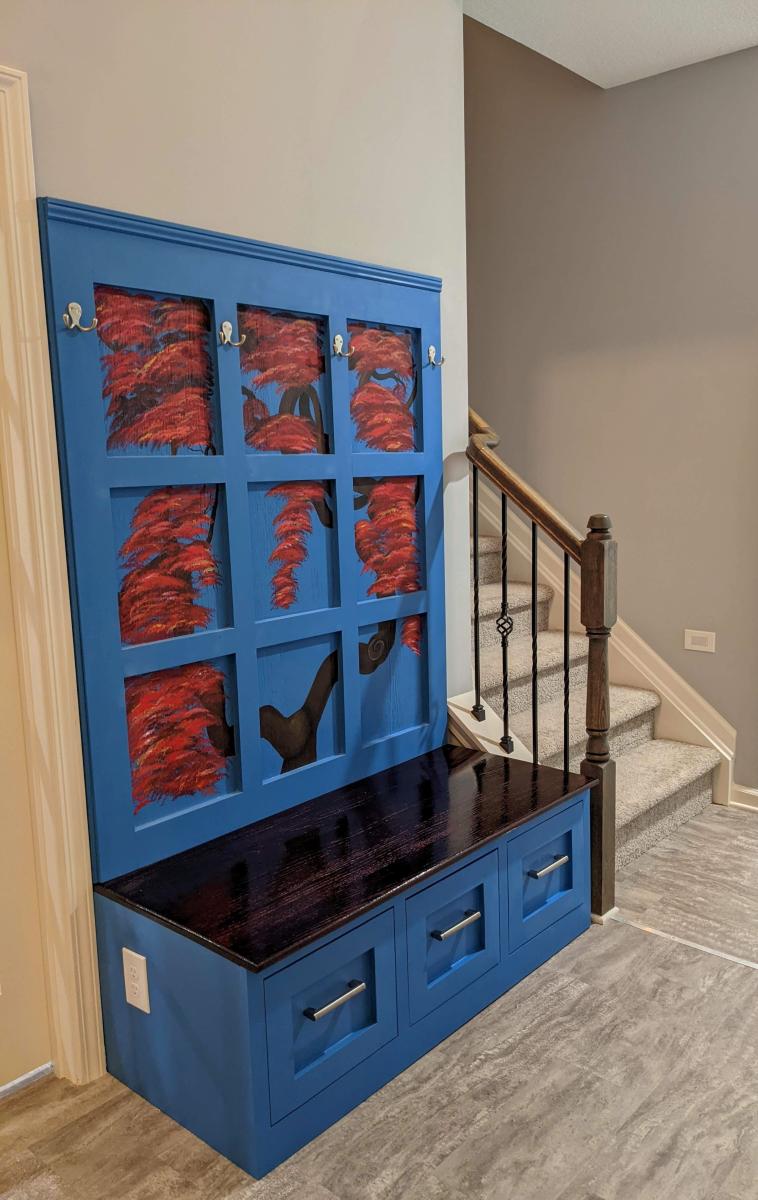
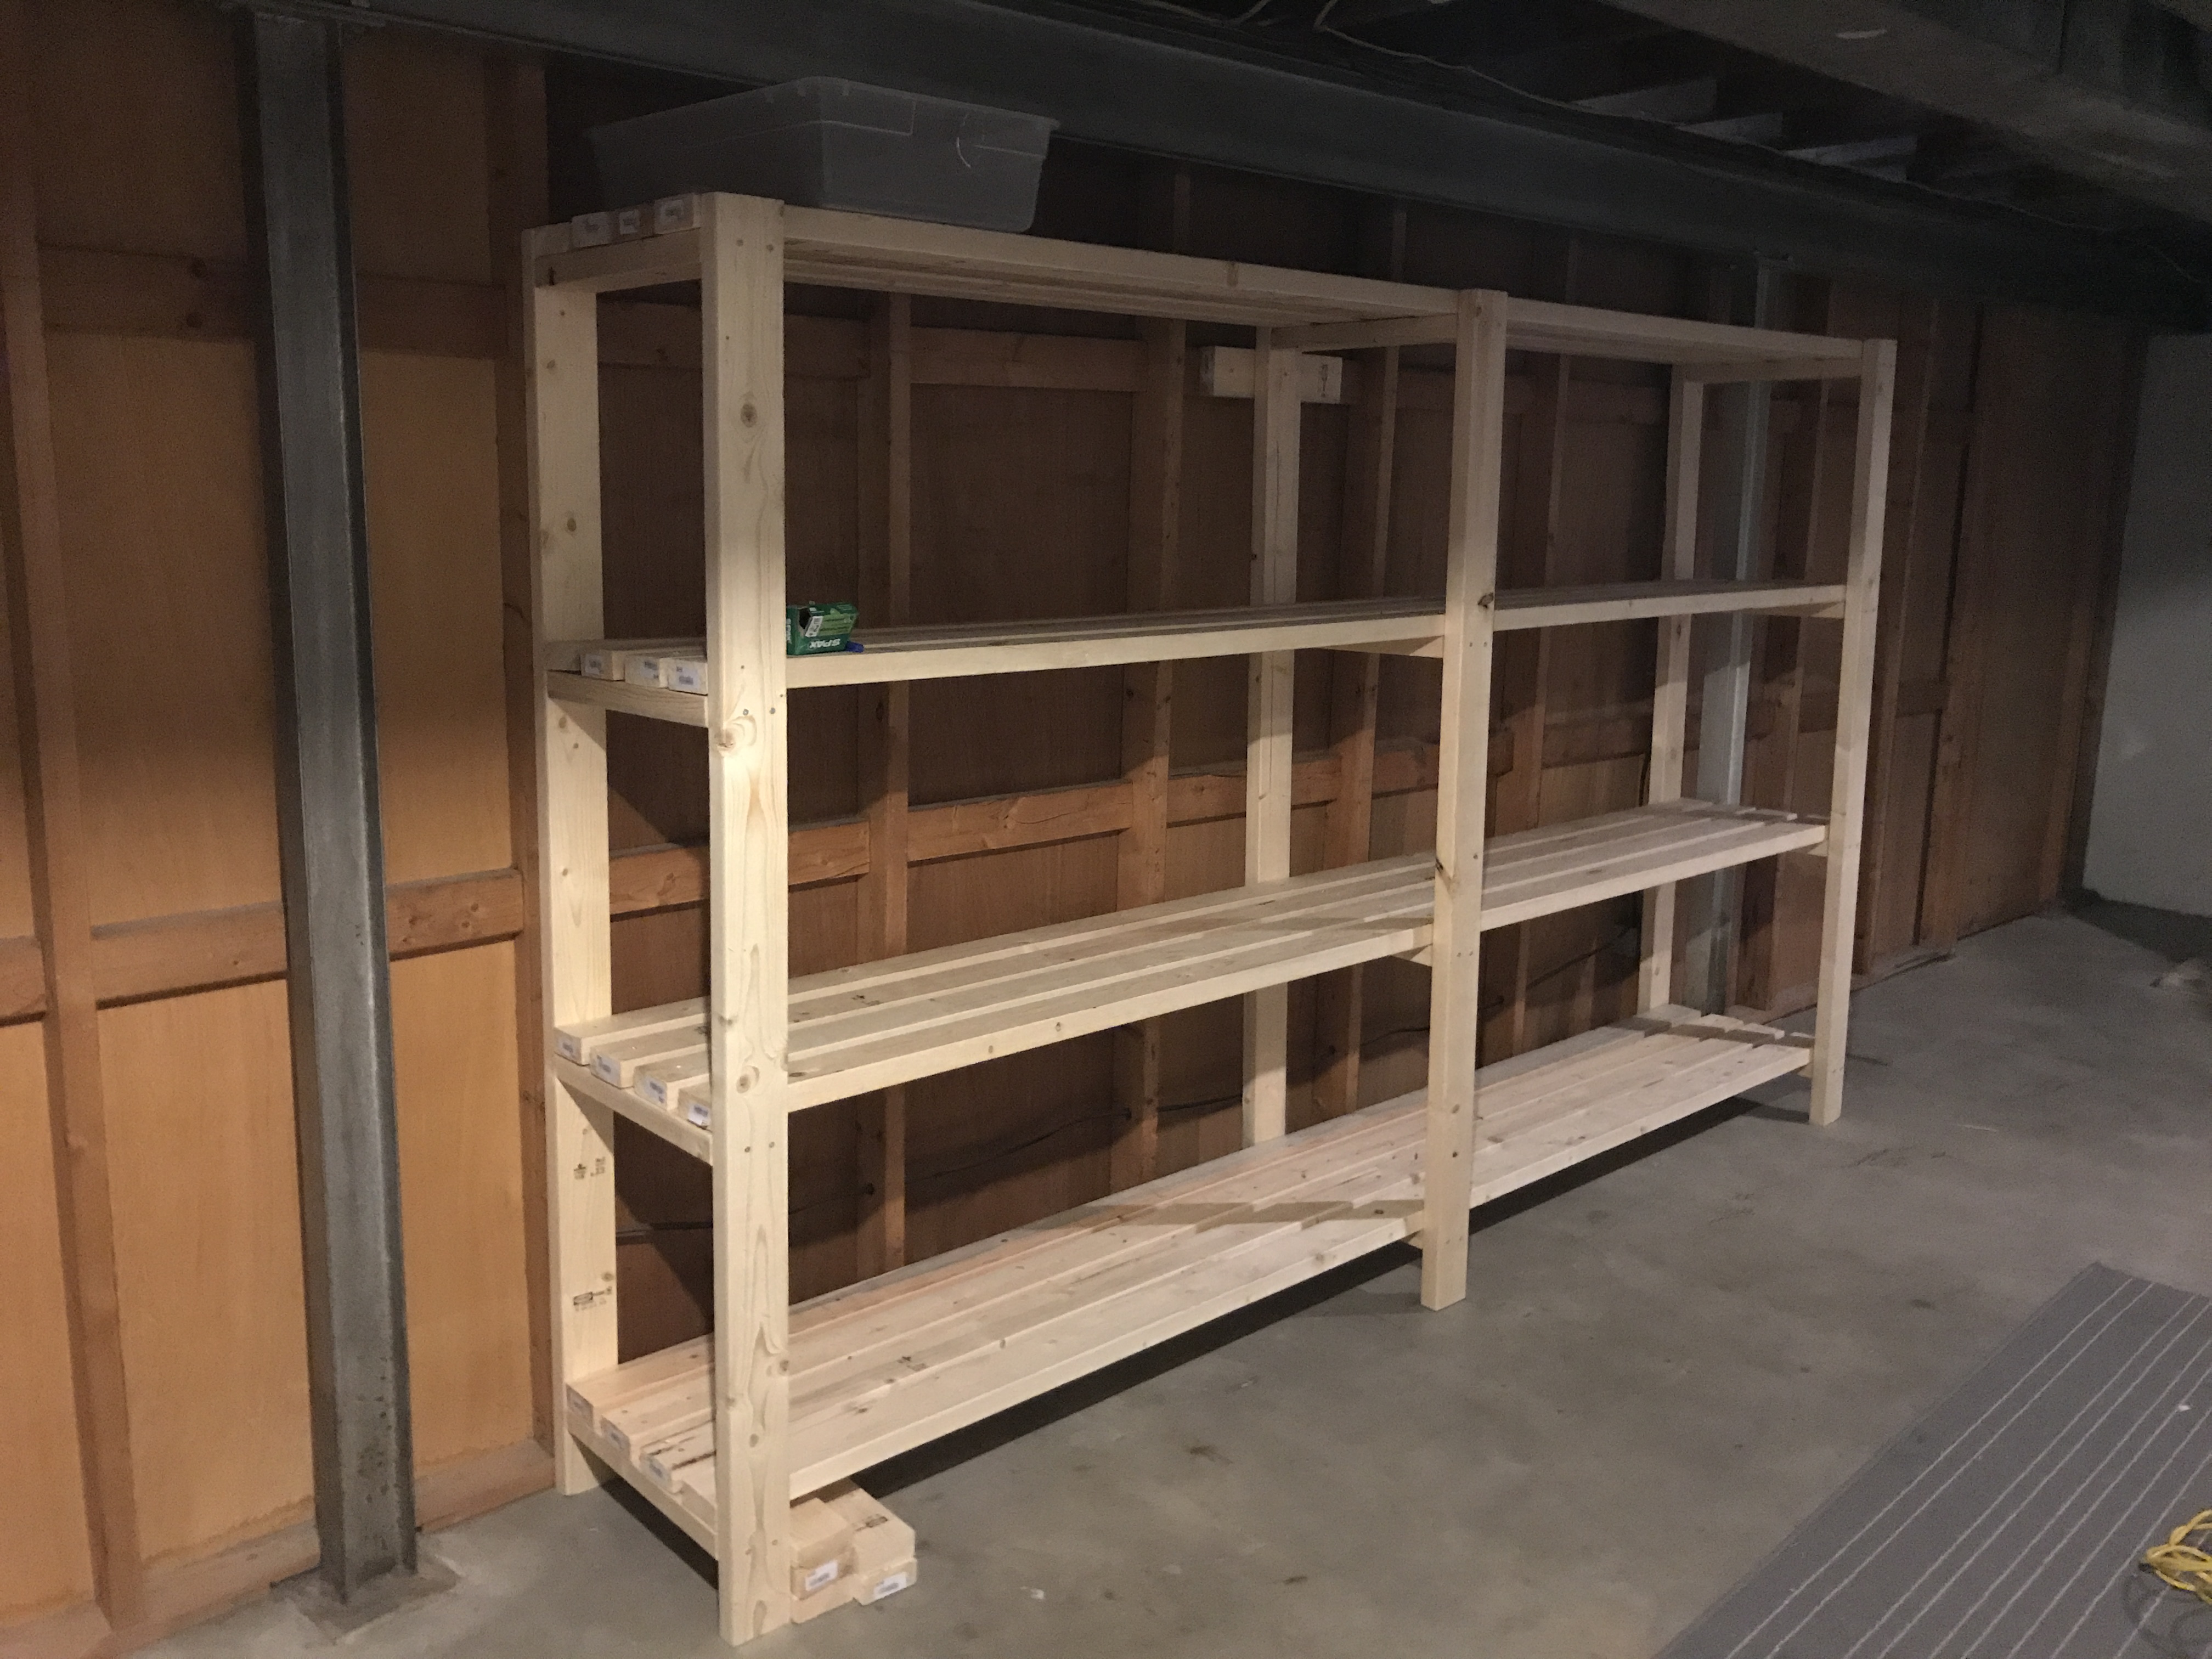
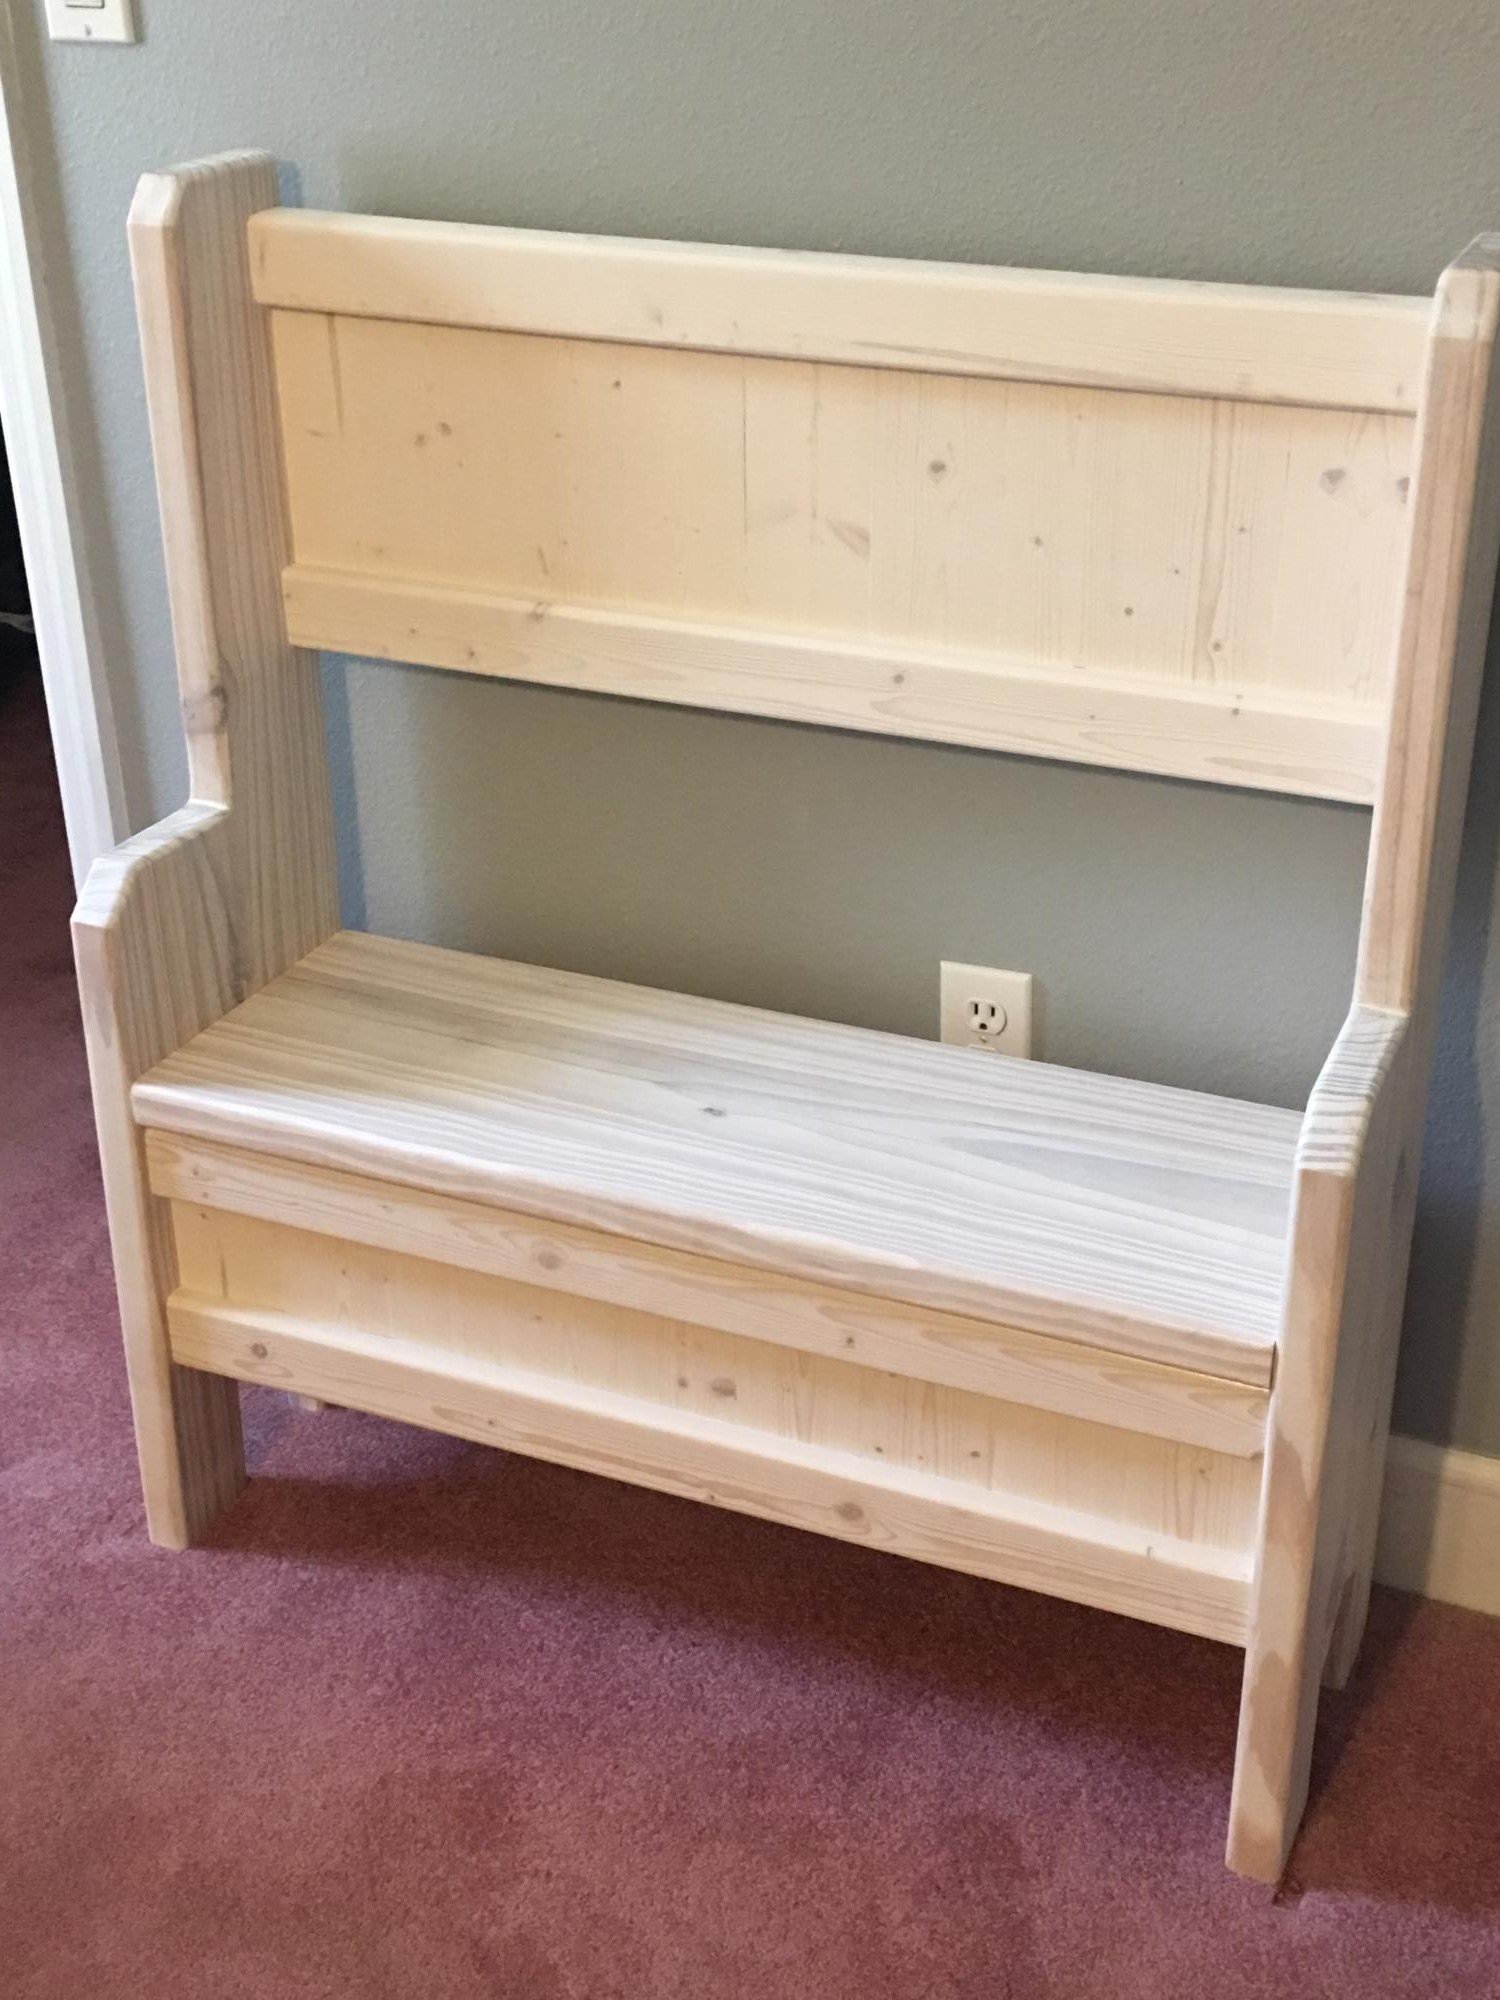
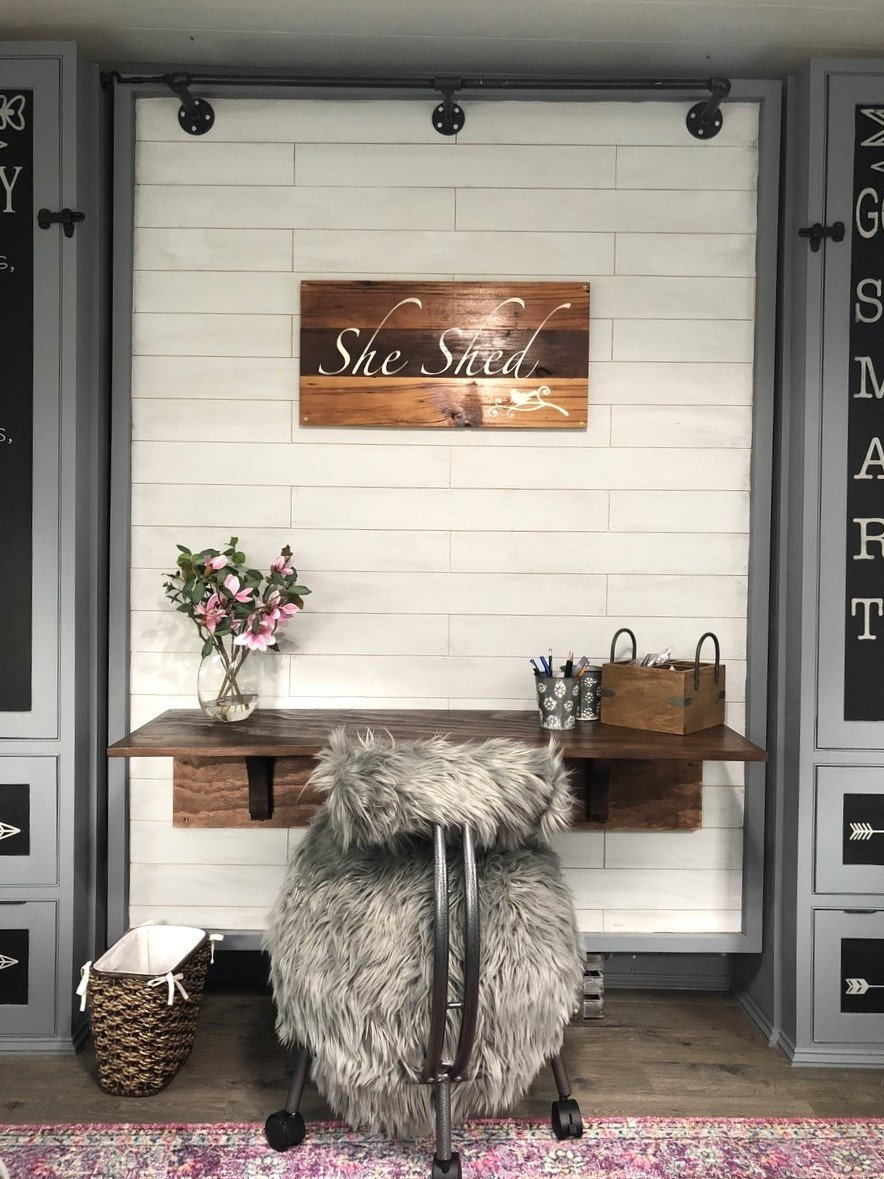
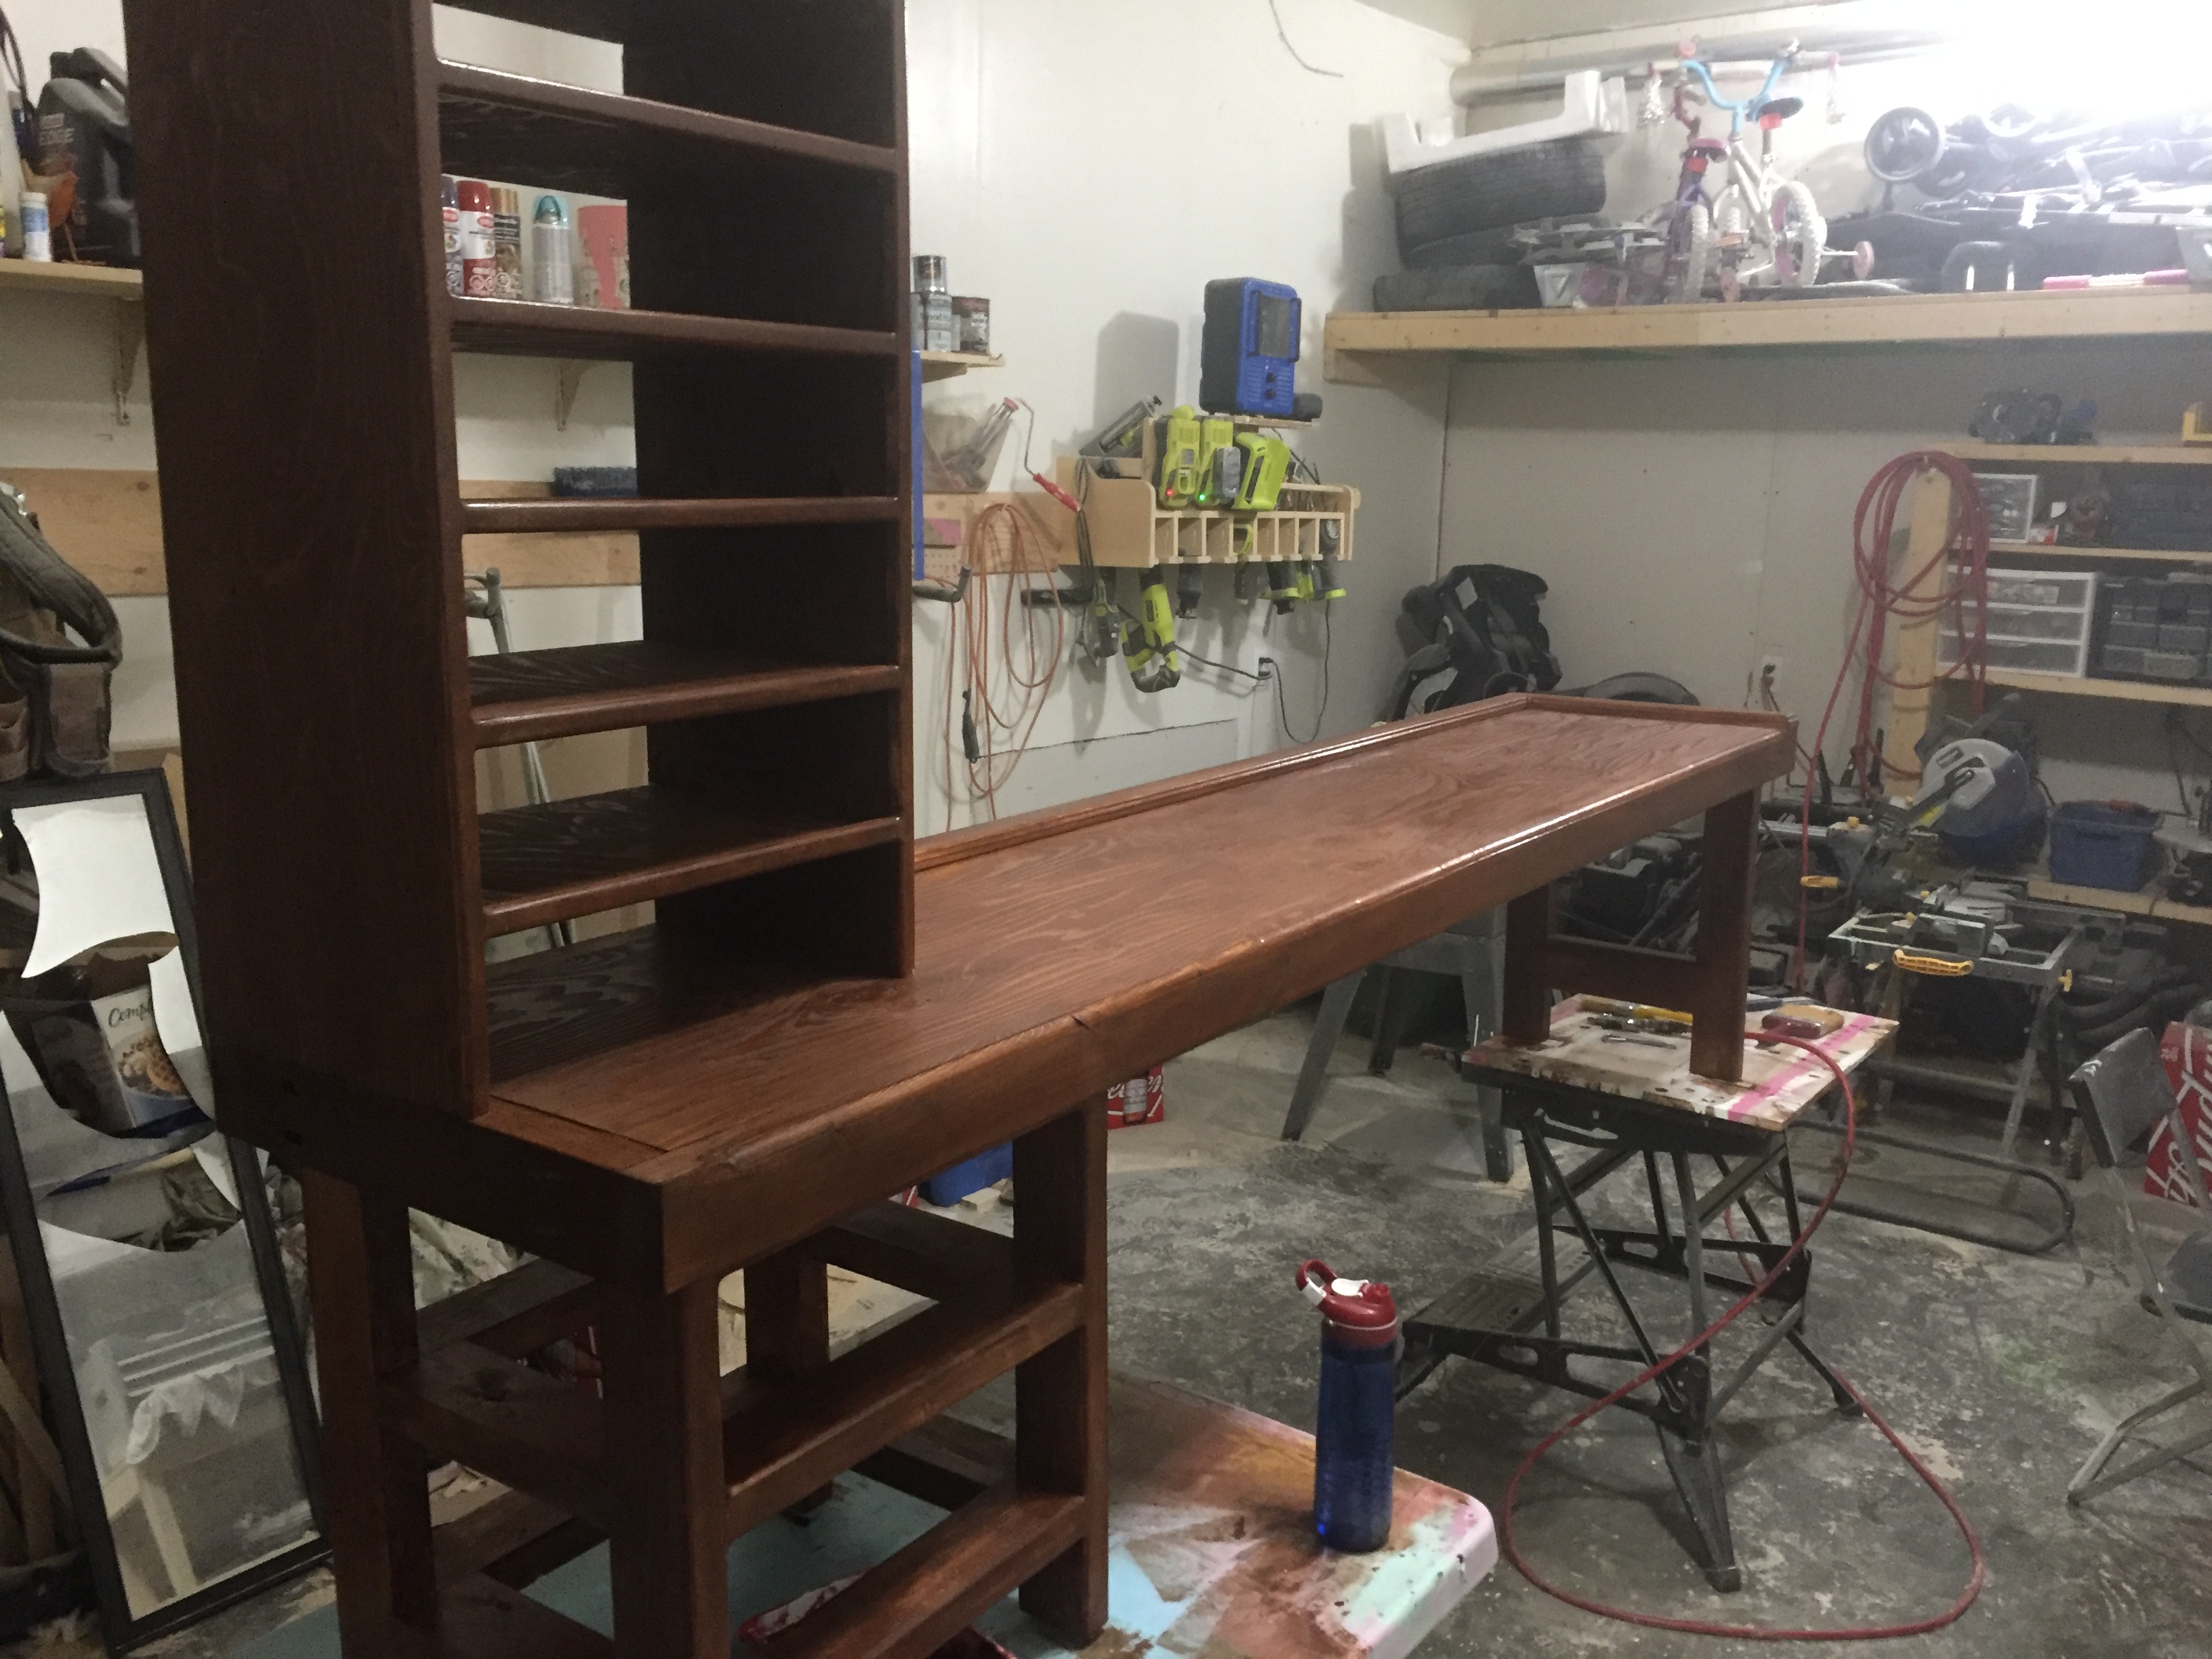
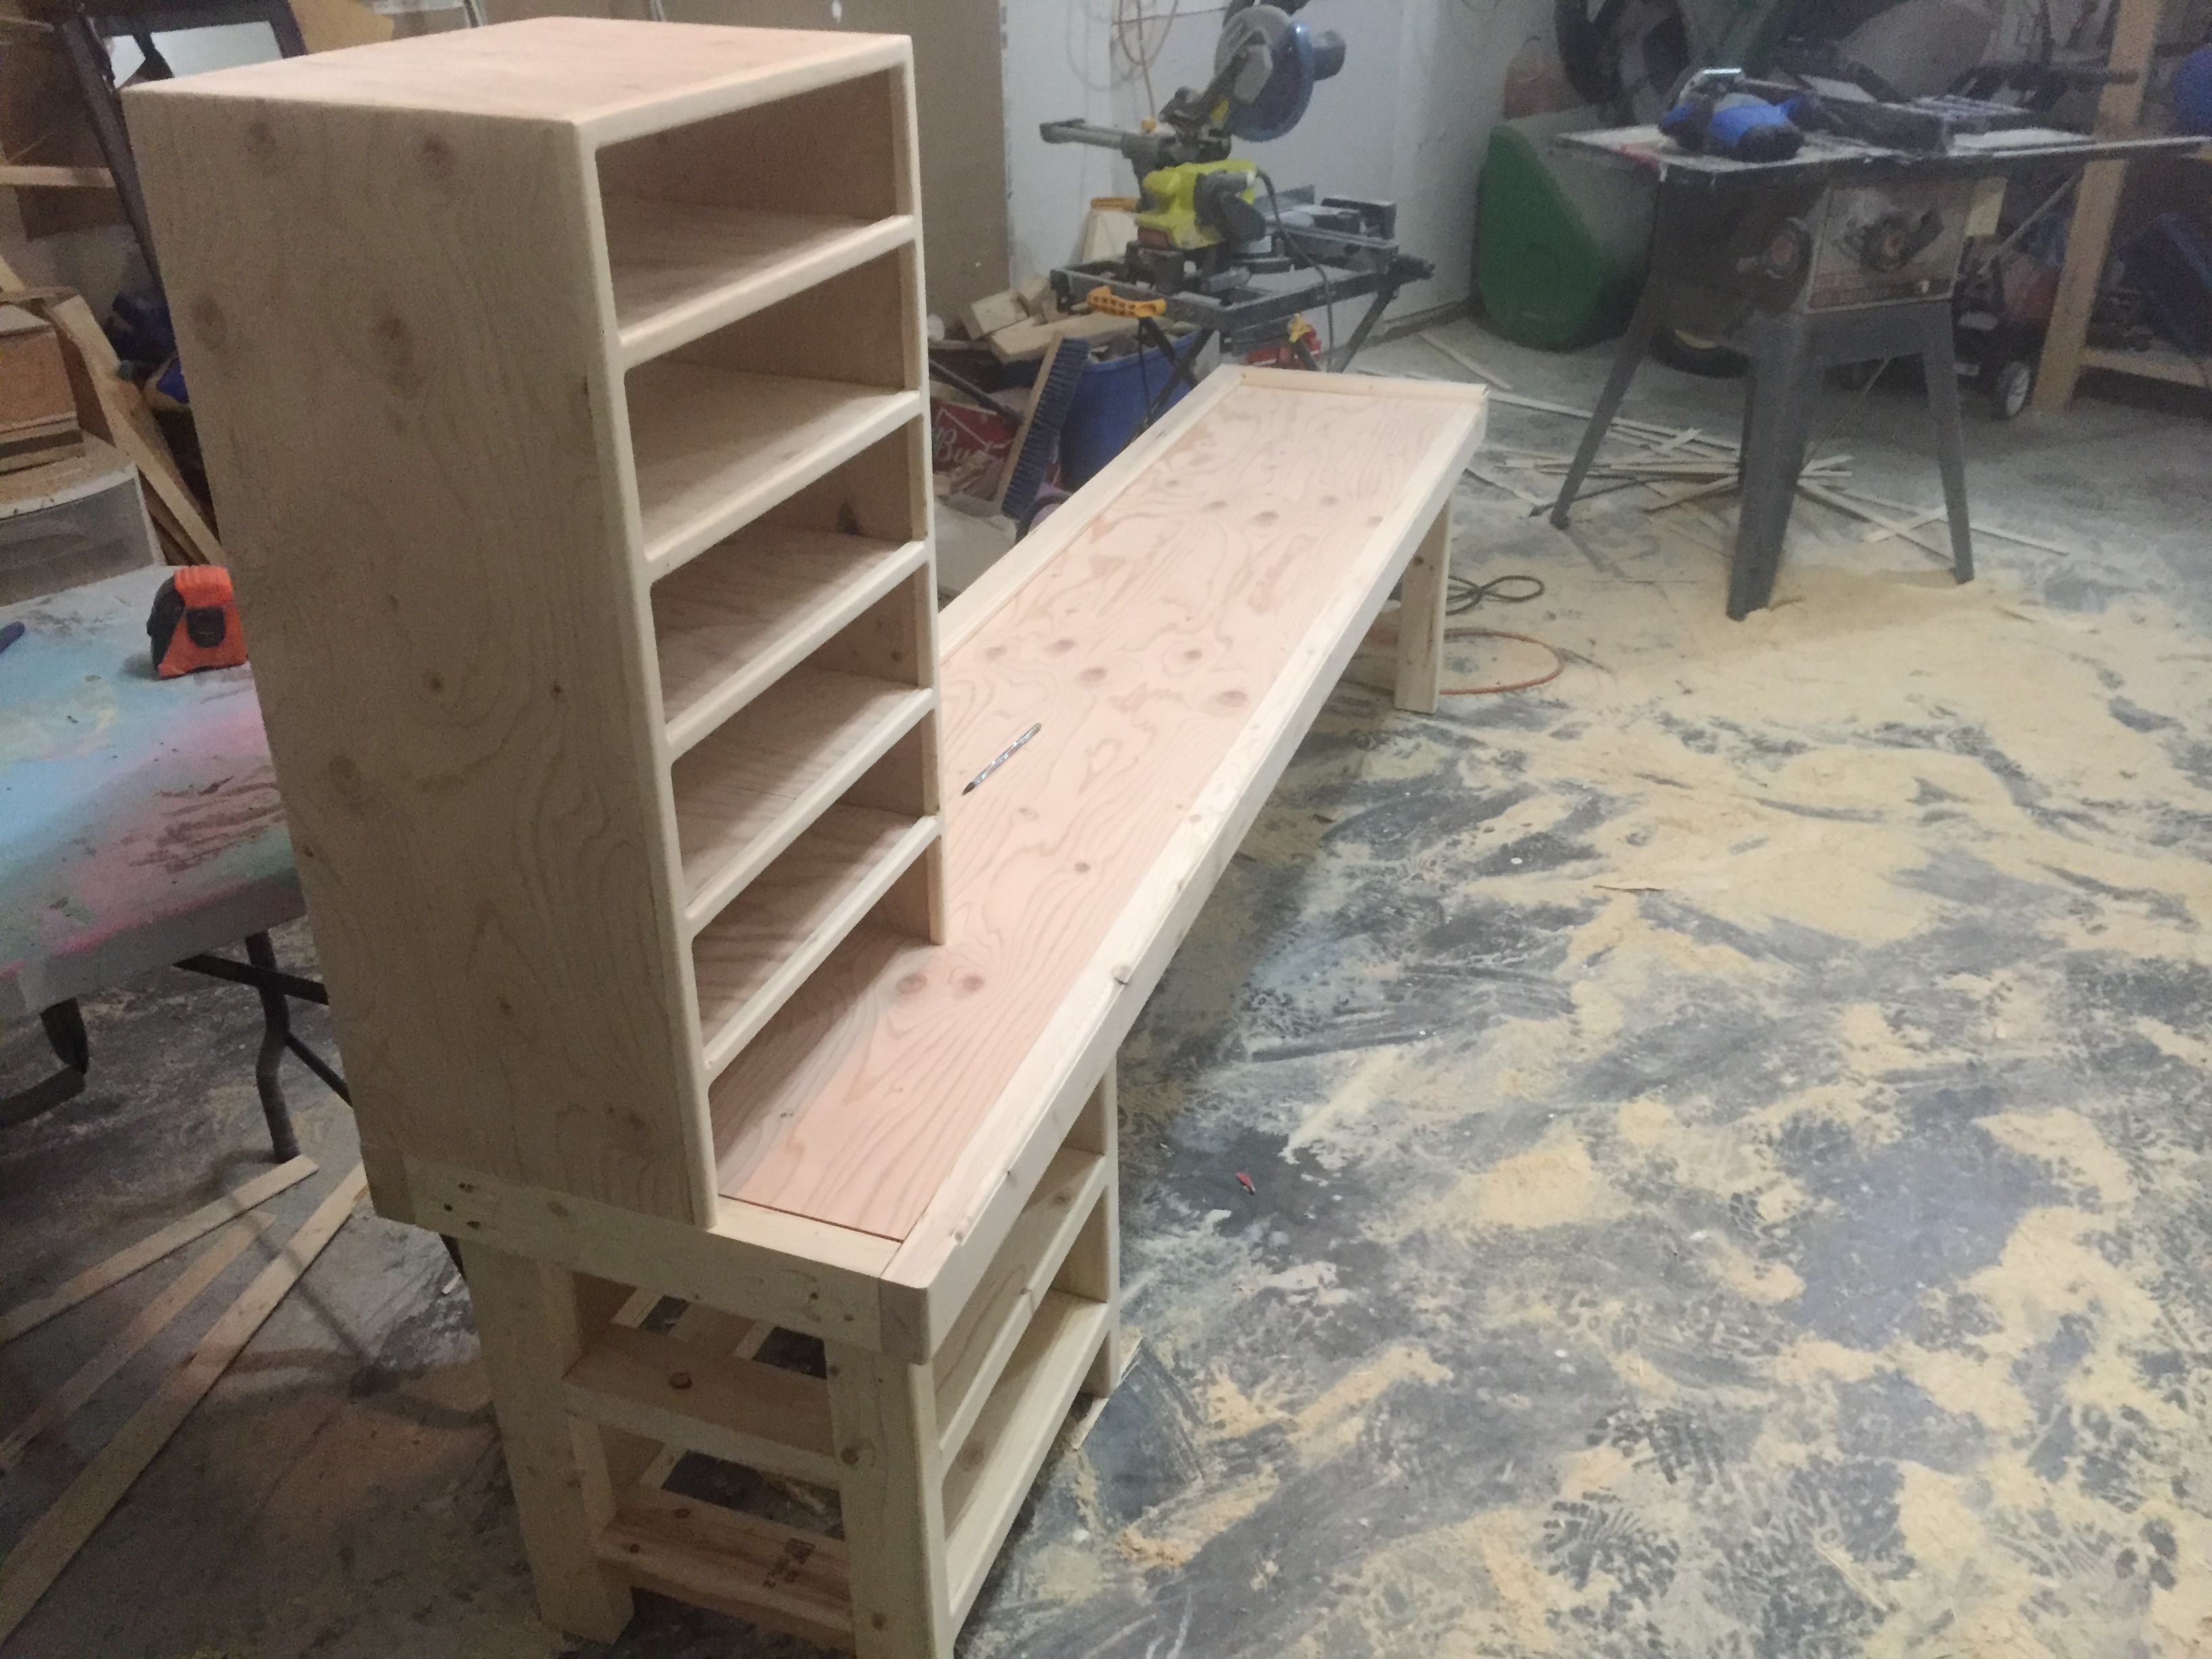
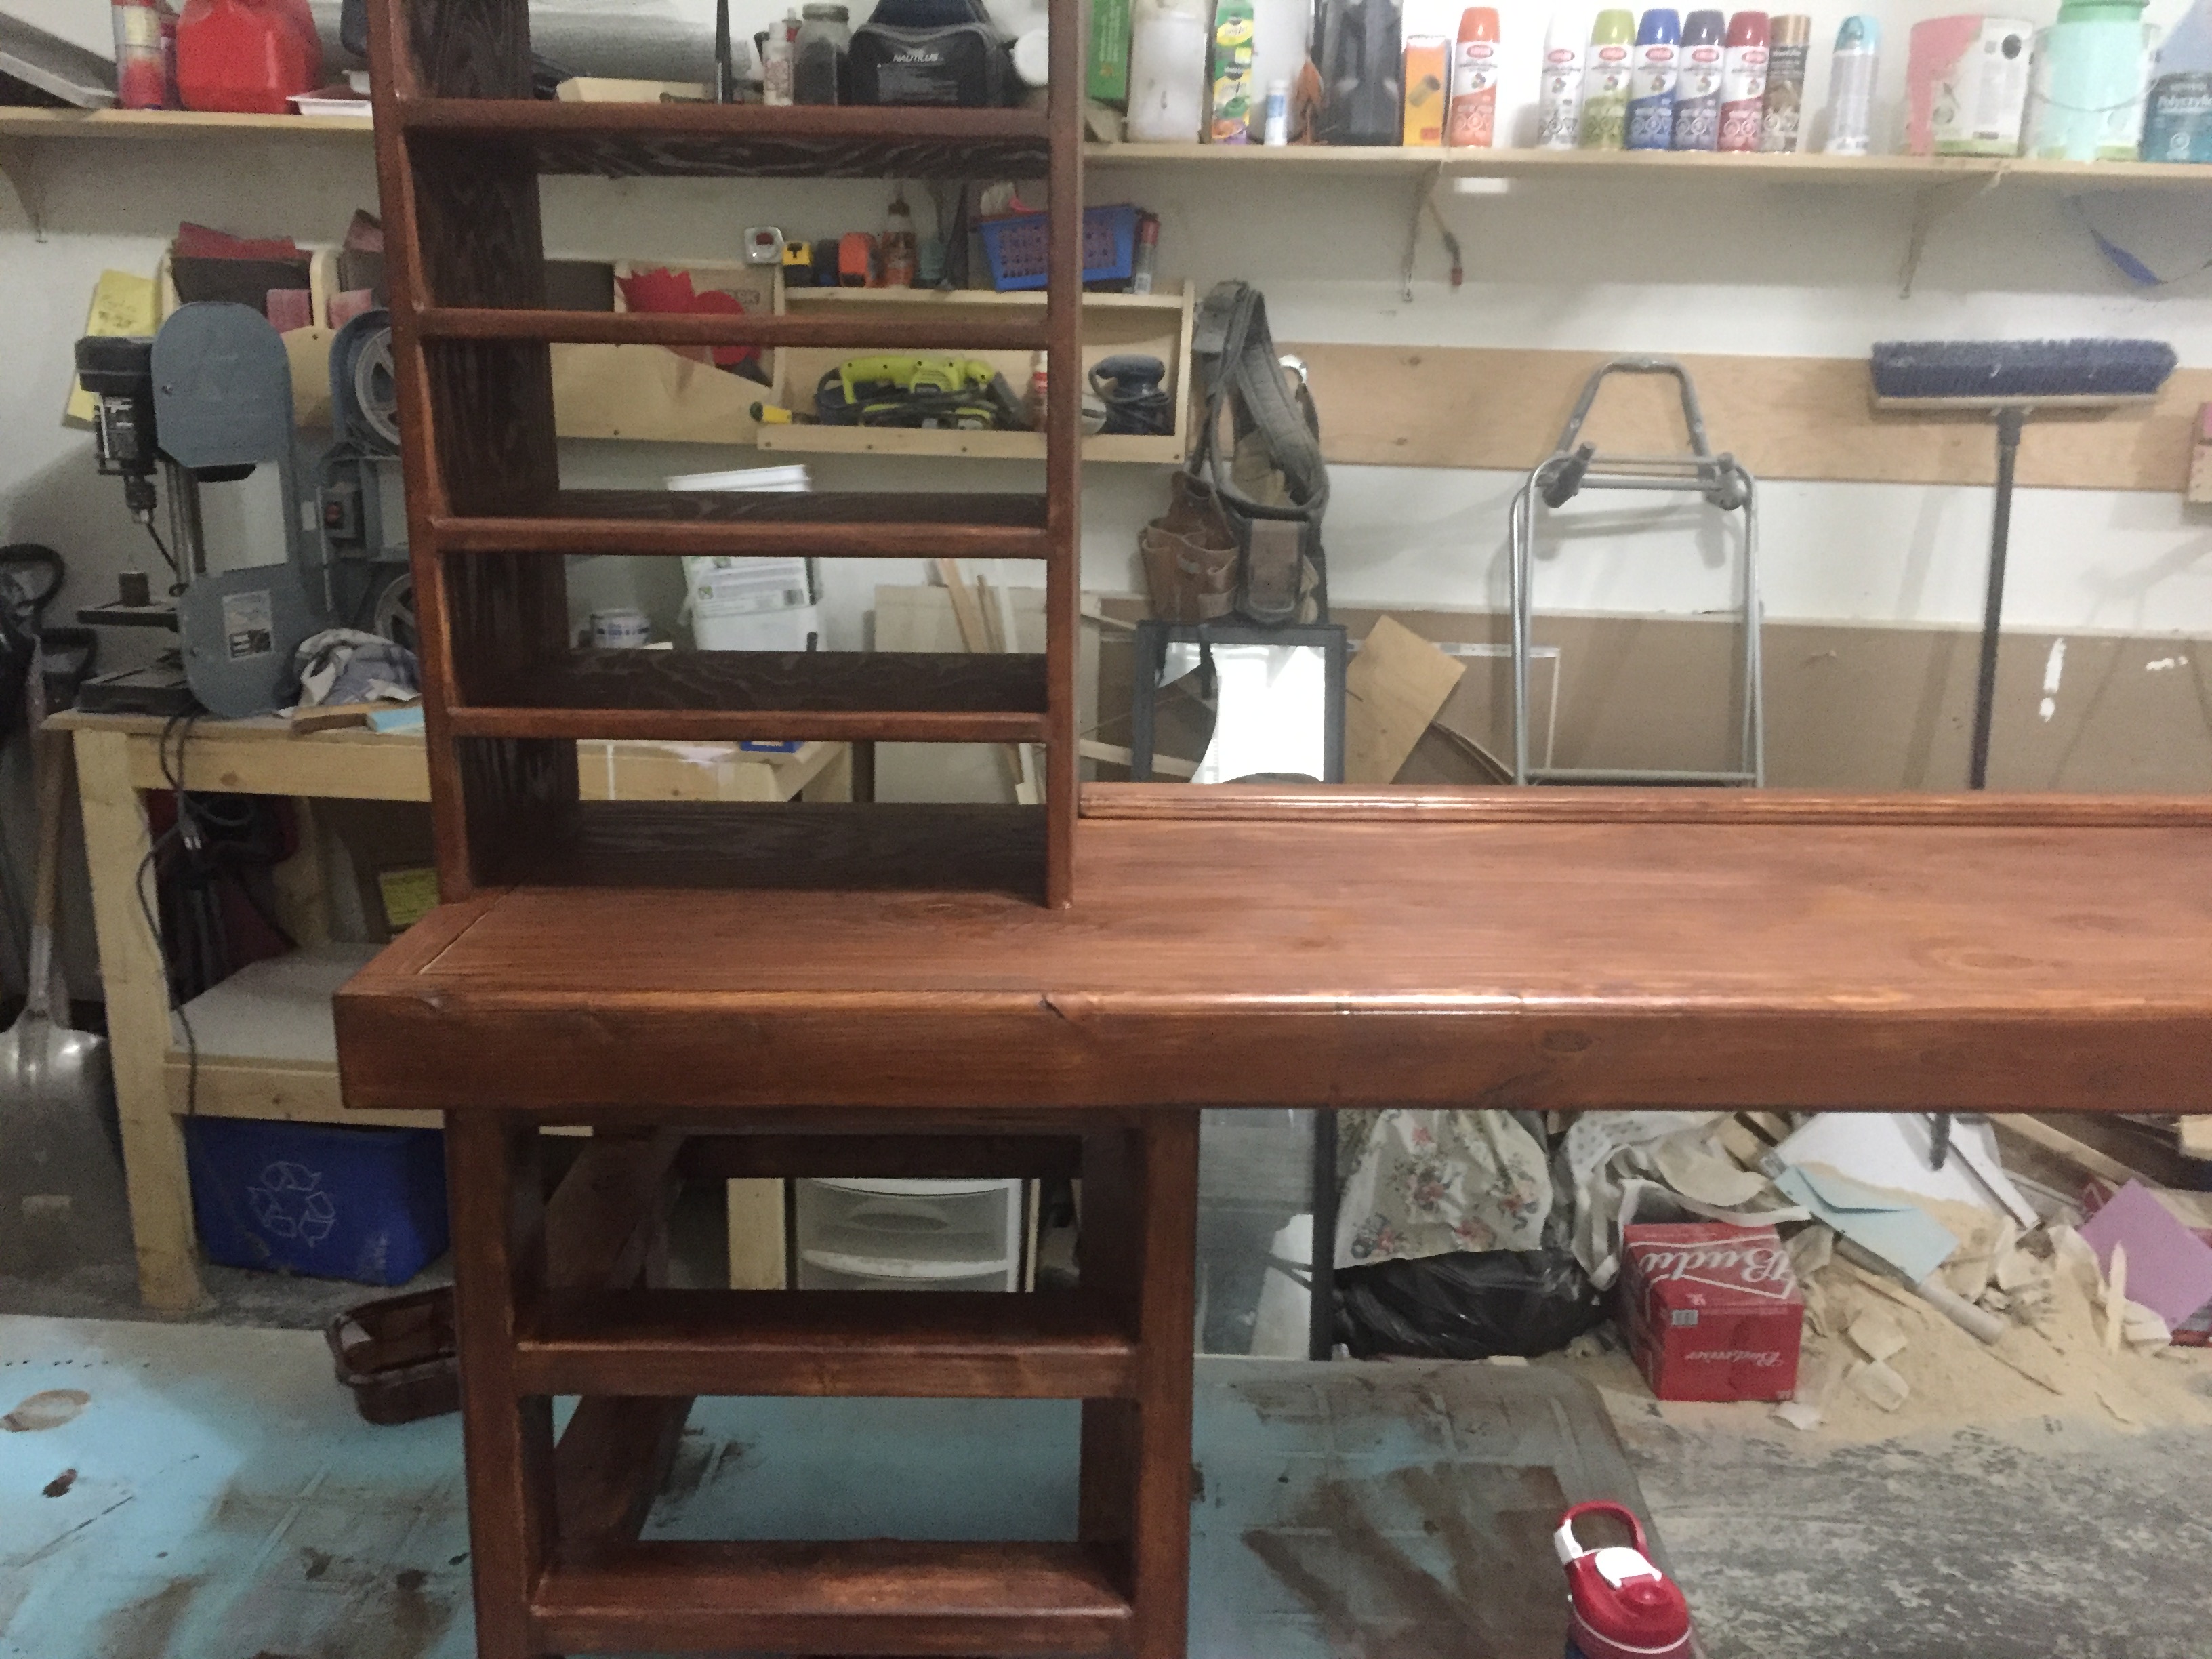
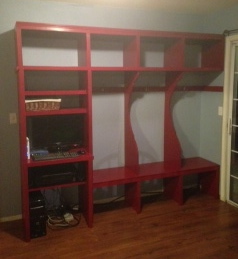
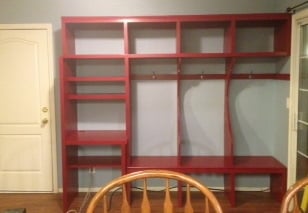
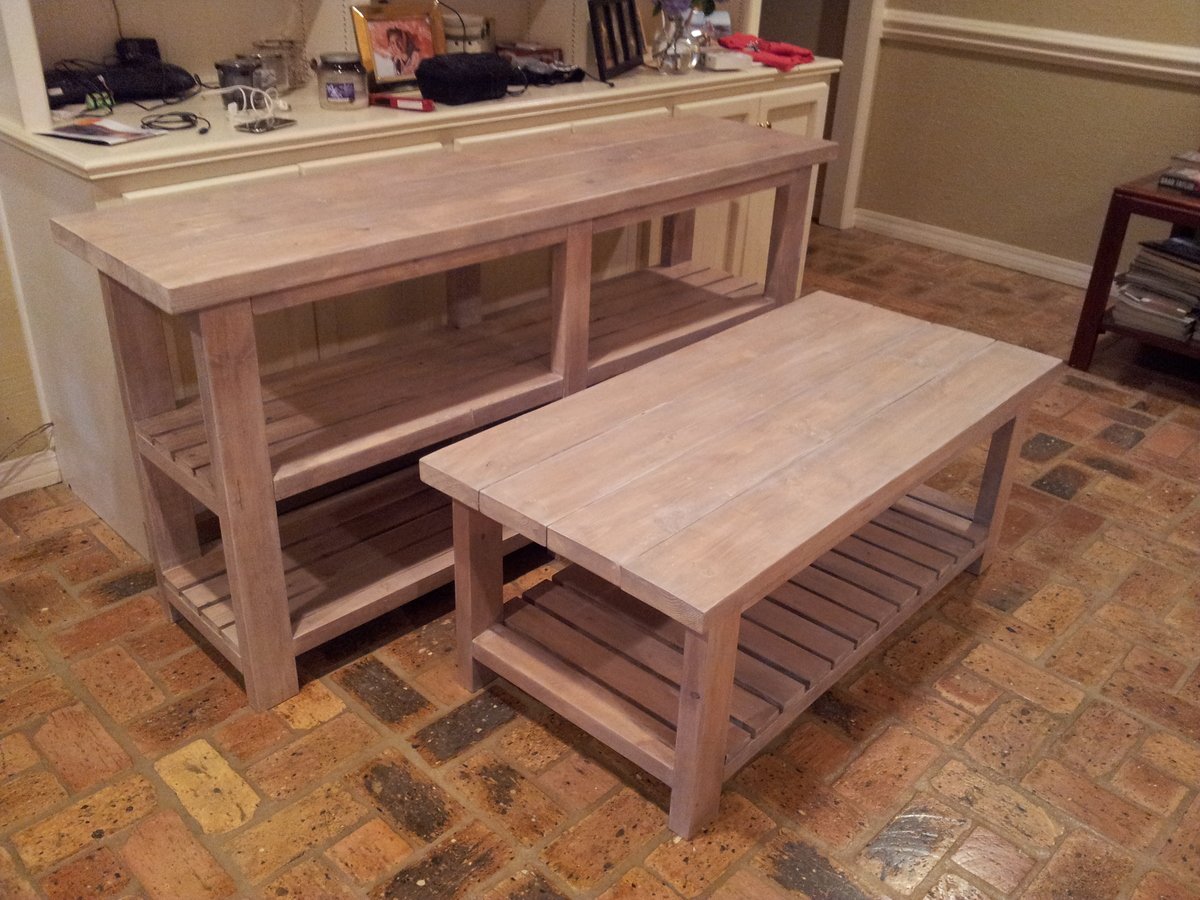
I've been looking for a storage solution for the area next to the driveway we use as our main entrance. The area opens to the kitchen, dining, and living rooms. We had a computer desk here, but it just ended up piled with junk all the time and backpacks and jackets ended up on the floor.

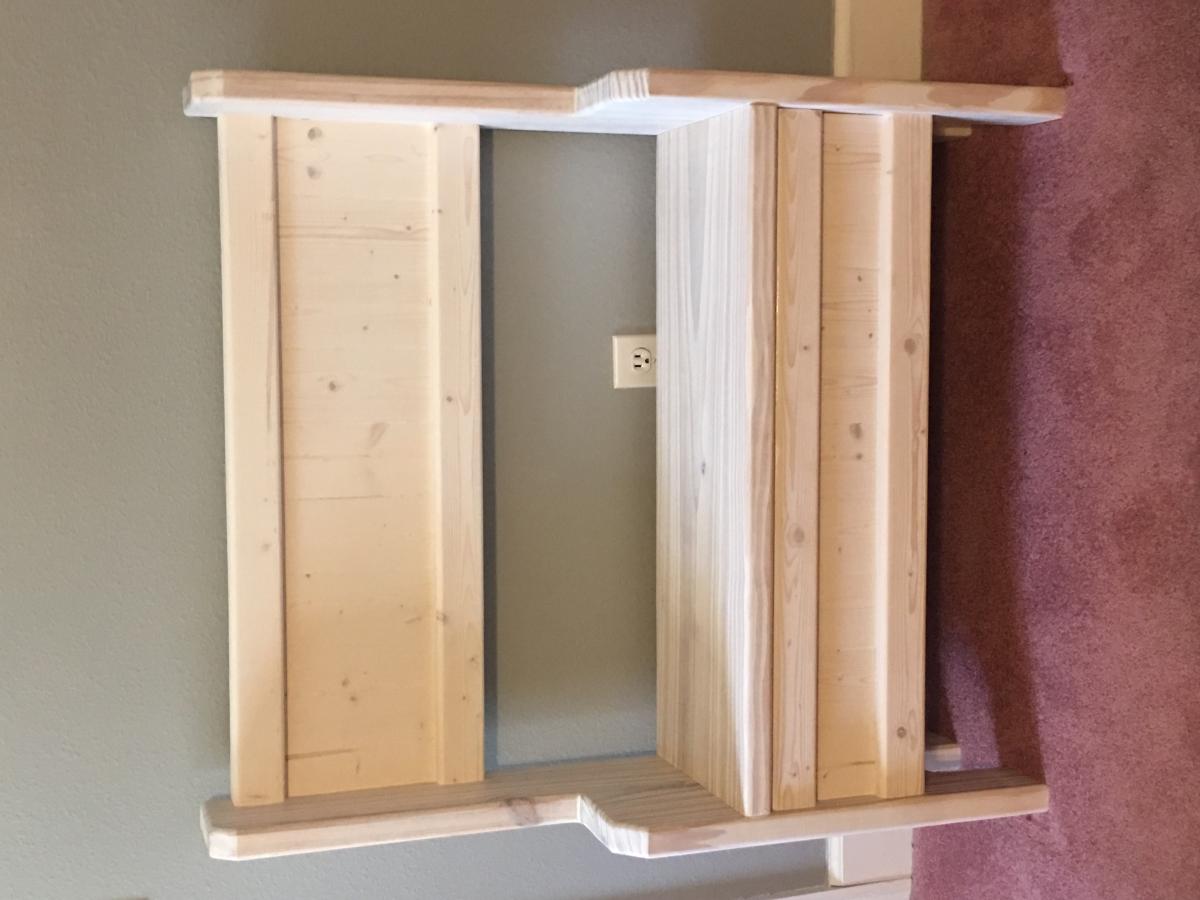
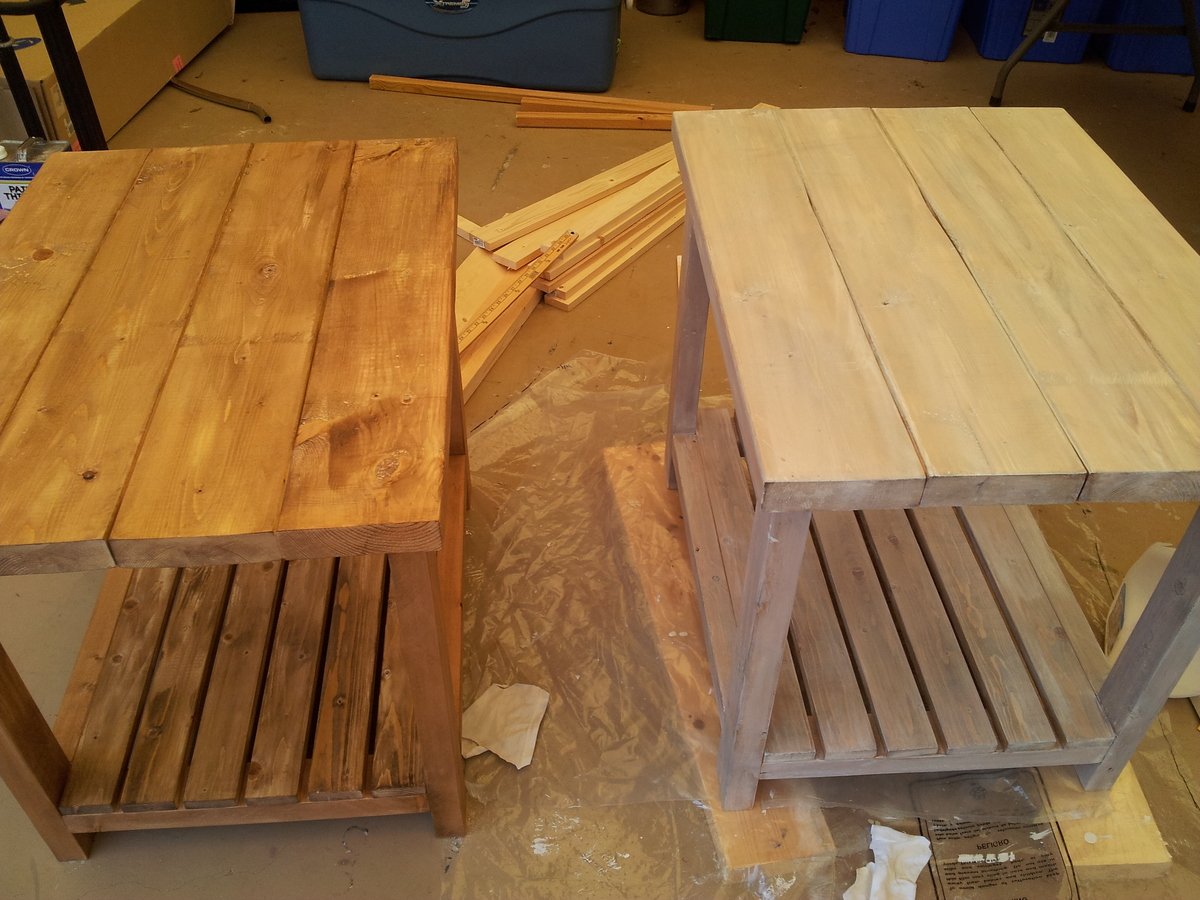
I fell in love with the smiling mud room plans as soon as I saw them, but it took a while to convince my husband we should try to build it. I used the Smiling Mud Room plans and modified to add the computer desk section since we couldn't move our internet cable. It didn't have to be really big since we don't use the desktop computer very often.

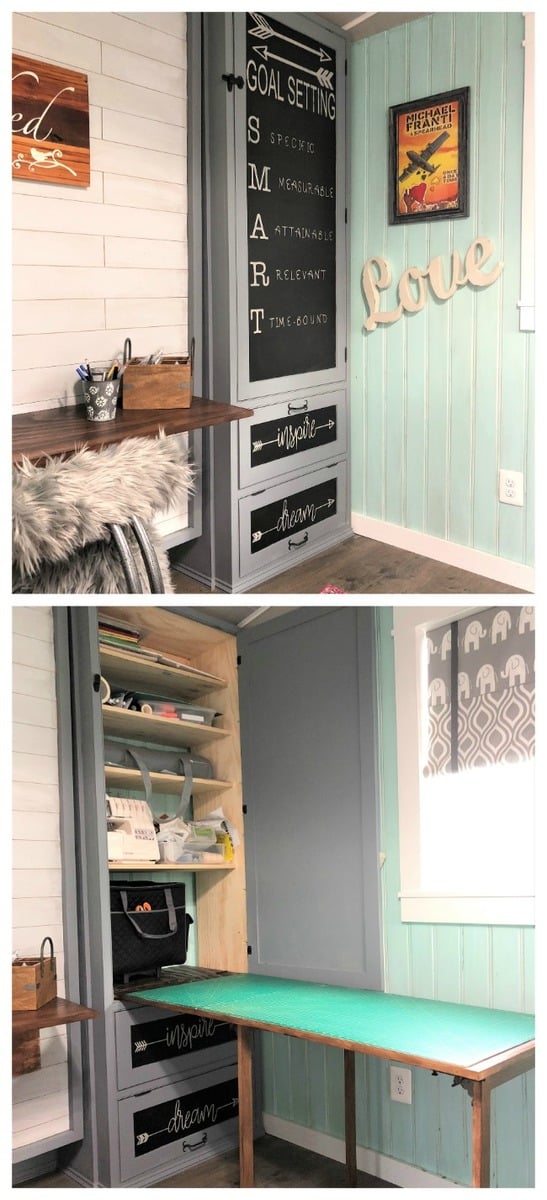
I still need to find baskets for the shelves and I'm planning to make a fabric skirt to cover the computer and cords. My kids already got out their old backpacks to test it out, so hopefully they'll use it!

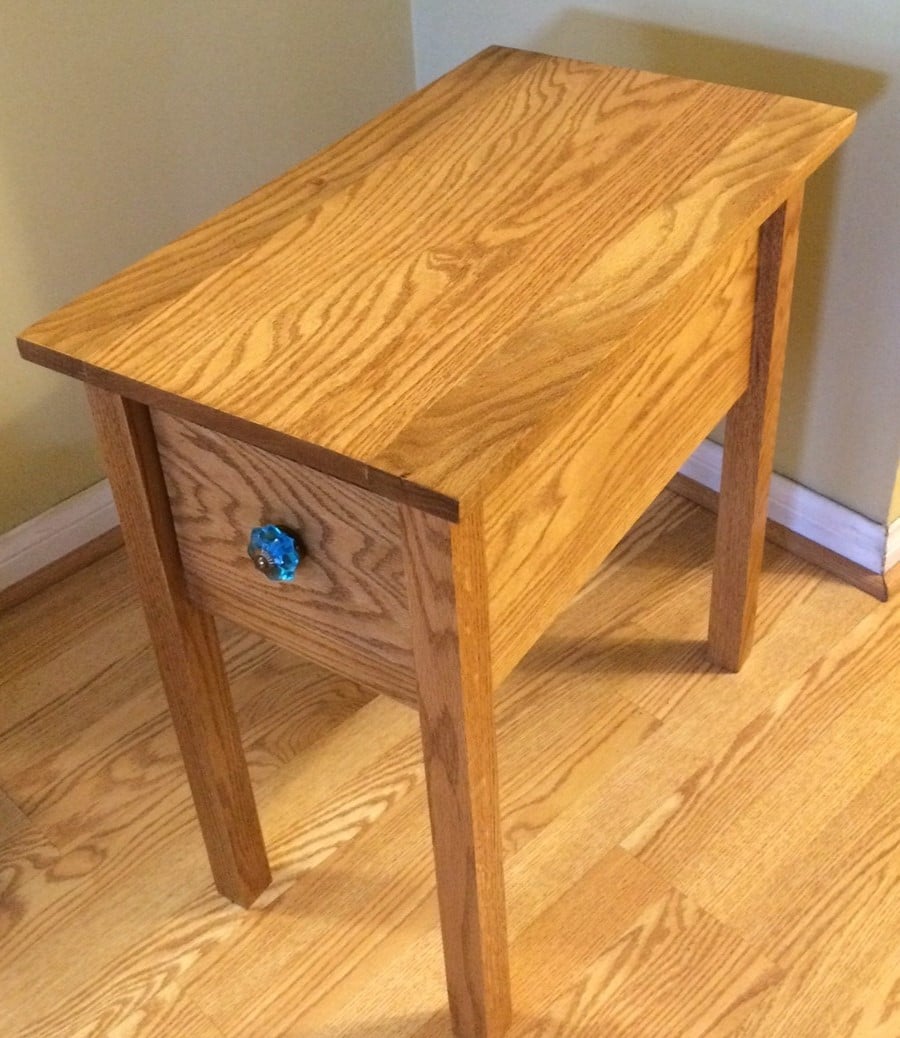
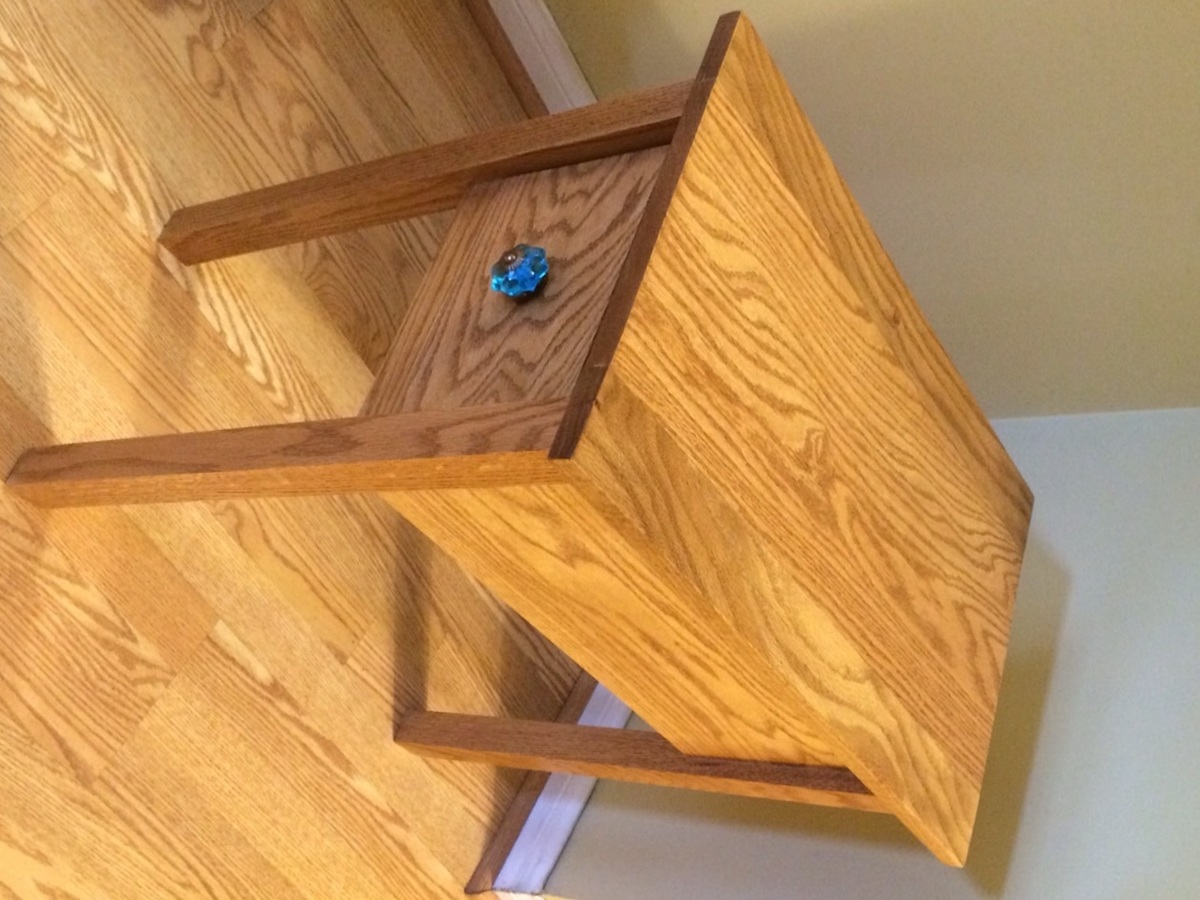
We bought the Kreg jig as recommended and now my husband is planning lots of new projects just so he can use it.

Built from Plan(s)
Estimated Time Investment
Weekend Project (10-20 Hours)
Finish Used
I used a tinted primer and Valspar Signature semi-gloss paint in Posh Red. It took 1 coat of primer and 2 coats of paint. The plywood took the paint better than the pine, so some of the trim got 3 coats.
Recommended Skill Level
Intermediate

Rustic X Console, Coffee and End Tables

Submitted by deblynn42 on Thu, 07/16/2015 - 12:29

I modified the Rustic X plans by removing the X's on the sides and using 1x3in slats on the shelf.  They were made for a beach condo so I wanted a more open look.  I wanted a white washed finish and after trying several ideas from the internet I came up with this process:  First, I used rags to rub on Minwax Special Walnut stain as lightly as I could.  Second, I diluted latex satin white paint, at least 50-50, and brushed it on a small area and immediately wiped it off with a clean rag.  I used Minwax Polycrylic as my protective layer.

Estimated Time Investment
Week Long Project (20 Hours or More)
Finish Used
Minwax Special Walnut stain, white latex satin paint, Minwax Polycrylic Clear Satin
Recommended Skill Level
Intermediate

Comments

amati5

Mon, 07/20/2015 - 10:28

What kind of joint did you use?  I don't see any holes or screws and very nice looking finish.

deblynn42

Mon, 07/20/2015 - 14:57

The Rustix X plans use the hidden pocket screws using the Kreg Jig tool.  It really makes a strong joint.  All the hidden pockets are on the underside of the trim pieces.   The top and slats are screwed on with normal wood screws, again from the underside.

Farmhouse king

Submitted by Chrisdiana on Sun, 02/04/2018 - 15:14

Followed Ana's plans as directed but made the headboard four inches shorter by shortening the legs only on the headboard.  We used low profile boxsprings (2 twin XL @ 5 inches thick) and king size memory foam mattress which was 10 inches high.  The clearance at the bottom of the side rails is 6 and one half inches high.  Total cost of lumbar was about $300. We had stain on hand. Kreg jig screws brings the total to about $315.

Estimated Cost
$315
Estimated Time Investment
Weekend Project (10-20 Hours)
Finish Used
Miniwax ebony stain, and satin polyurethane.
Recommended Skill Level
Intermediate