Community Brag Posts

Four station desk (PB inspired)

Submitted by monty742 on Sun, 03/15/2015 - 08:58

I really liked the PB mega desk, but I didn't want to spend $1600 on it.  After seeing someone's post here (a couple years ago...) asking for plans on that desk, I decided to do it myself.  I took these two plans and made 4 base units.  They are 18" square at the top and 34" tall.  I used 2 IKEA table tops connected underneath for the top, to make a total height of 36" - counter stool height.  I constructed them a little differently than the plans, but no matter how you make them, the idea is the same.  The plan is to take them apart and make 2 desks once everyone is too old and cool to do homework/artwork together.

Estimated Cost
$500
Estimated Time Investment
Week Long Project (20 Hours or More)
Finish Used
Kitchen and Bath finish paint (2 coats) - it's a little shinier than eggshell (I only used it because I had 2 or 3 gallons extra at home :) then 2 coats acrylic top coat matte finish.
Recommended Skill Level
Intermediate

Comments

monty742

Sat, 08/15/2015 - 04:33

Just seeing your comment...sorry for the delay!  I got the stools and the light fixture at a Ballard Backroom (outlet) store near me.  3 of the stools ended up being about $40 each with the sale they had at the time, and the 4th was $60? - bought at a later time than the first 3.

AlisaH

Wed, 11/04/2015 - 07:40

How did you connect the table tops from the bottom so that the tables were secure together? I'm curious what's the best way to do this. Since two of the four seats will be where the seam is, I want to make sure I secure it properly so it's not wobbly. Thanks so much.


monty742

Sat, 01/09/2016 - 05:06

I'm just seeing these latest comments for the first time, so you may have long finished this project already!  The tops were surprisingly sturdy but I did reinforce them.  I placed the tops on the floor upside down and screwed some metal brackets (about 12" long each) across the joint in four places.  I just screwed them in through holes already in the brackets.  This wasn't the most stable because those tops are particle board and don't hold screws very well...  But since it was already pretty sturdy, I figured it would do.  It has been fine, even with standing on the top (kids who get up there and me hanging the light fixture above).

Once the tops were joined, I placed the bases so there was about a 1" overhang on the top.  To hold the top in place, I used small pieces of wood screwed to the underside of the top at the inside corner to act as a placement stop.  The top is pretty big and heavy even though they are IKEA tops, so they don't have a tendency to move or slide at all anyway.  I'm going to try to figure out how to post another picture of the braces and corner stops...we'll see if I can do it!  Let me know if you have any more questions...again, sorry I didn't see this in a more timely manner!

Pmprdwife

Sat, 01/02/2016 - 05:55

Is the photo above the Pottery Barn version or your product result?  I'm trying to figure out the dimensions for the drawer and shelf configurations.  Thanks!  BTW, I'm totally addicted to your style and personality...my husband loves the productivity inspiration I've received. :-)


monty742

Sat, 01/09/2016 - 10:17

Hi!

I'm glad you like the desk!  The one in the picture is the one I built, not the pottery barn one!  My dimensions were a good bit different than the PB desk - square bases instead of rectangular and counter stool height instead of desk/table height.  So, I have no idea if I have my plans for this anymore, so I went and measured it again for you!  

So each base is 18" x 18" square and 34" high so that with the 2" top the total height is 36".


Each base was made of oak plywood that made with 3 sides, a top and a bottom.  All edges were rabbit joints (3/8" deep in thickness of boards and probably 3/8" wide - not 100% on width of rabbits).  It's kind of a pain to do rabbit joints if you don't have a dado blade for your table saw, so you could use pocket hole screws instead.  I glued and nailed these joints with a finish nailer, I believe.  

I figured a diagram with measurements would be easier than trying to write descriptions...so I'm adding another pic with the dimensions outlined.  Drawing is NOT to scale, so sorry about that!  I really need to learn to use SketchUp.  Let me know if you have any questions!  

Monty742

monty742

Sat, 01/09/2016 - 07:57

Hi!

I'm glad you like the desk!  The one in the picture is the one I built, not the pottery barn one!  My dimensions were a good bit different than the PB desk - square bases instead of rectangular and counter stool height instead of desk/table height.  So, I have no idea if I have my plans for this anymore, so I went and measured it again for you!  

So each base is 18" x 18" square and 34" high so that with the 2" top the total height is 36".


Each base was made of oak plywood that made with 3 sides, a top and a bottom.  All edges were rabbit joints (3/8" deep in thickness of boards and probably 3/8" wide - not 100% on width of rabbits).  It's kind of a pain to do rabbit joints if you don't have a dado blade for your table saw, so you could use pocket hole screws instead.  I glued and nailed these joints with a finish nailer, I believe.  

I figured a diagram with measurements would be easier than trying to write descriptions...so I'm adding another pic with the dimensions outlined.  Drawing is NOT to scale, so sorry about that!  I really need to learn to use SketchUp.  Let me know if you have any questions!  

monty742

Thu, 07/28/2016 - 14:13

No you can't buy them from Ikea.  I bought the table tops from Ikea, but I built the bases.  The dimensions for the bases are in one of the additional pictures with the post if you want to see them!

treverandamber

Mon, 10/10/2016 - 07:41

What are the total dimensions of the table top? Thinking of building something like this, but want to make sure it will fit in my space.

Simgre81

Thu, 12/28/2017 - 07:00

Are these just slide in drawers, or did you use some sort of hardware to have them slide in and out?

Cedar Outdoor Dining Table and Benches

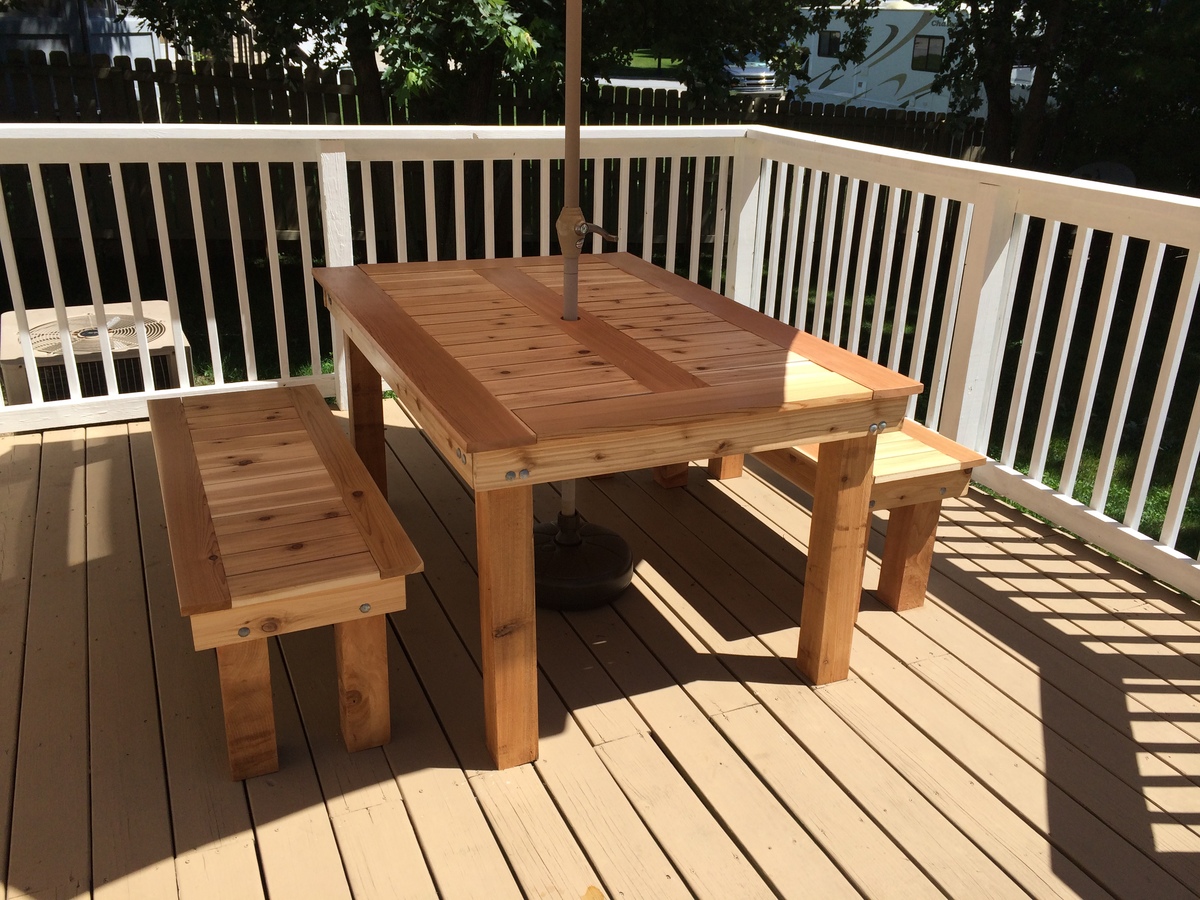
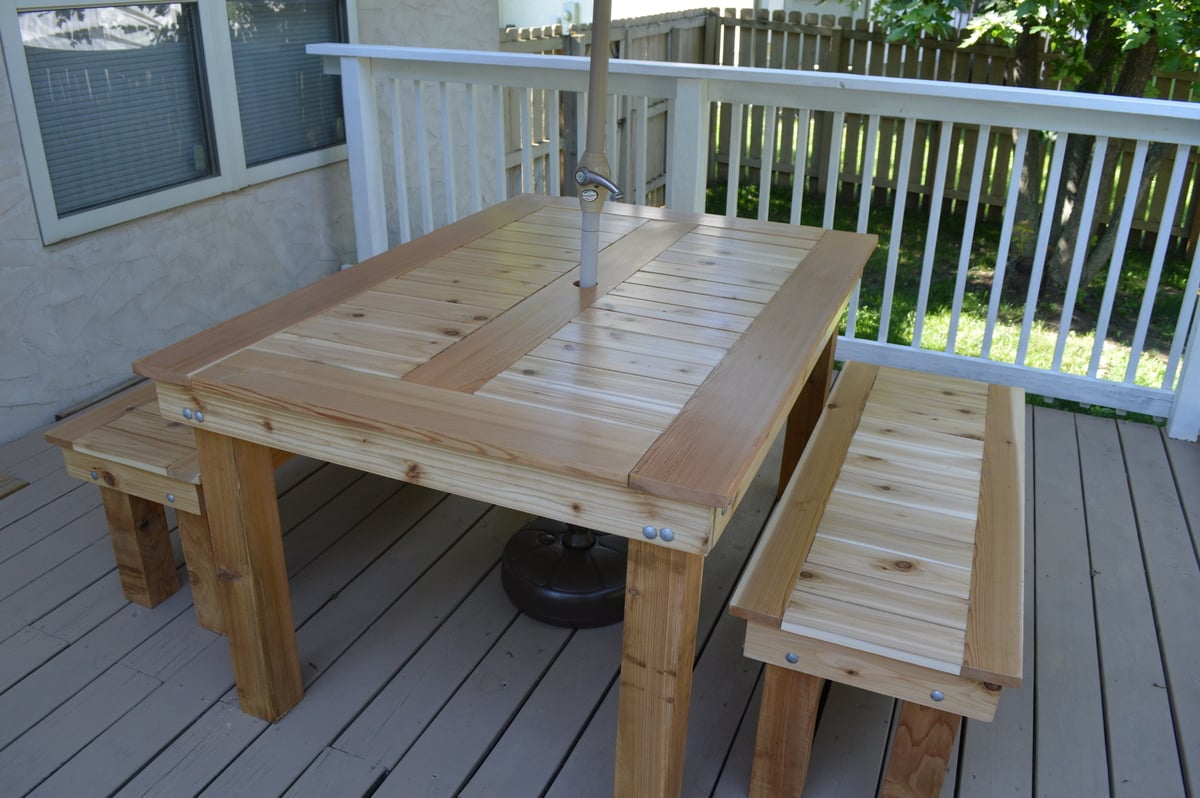
My wife and I loved the version that Finns-Dad made but we wanted it to be rectangular. The top is 1x6s around the edges with 1x4s in between. The frame is 1x4s. The bench tops are all 1x4s with 4x4 legs. There are 3/8 inch lag bolts in the legs. We did 4 coats of the urethane.

This was my first major project, and while there are many things that I would do differently if given the opportunity, we're still very pleased with it.

Built from Plan(s)
Estimated Cost
$350
Estimated Time Investment
Weekend Project (10-20 Hours)
Finish Used
Rust-Oleum Varathane Classic Clear Water Based Outdoor Spar Urethane Semi Gloss
Recommended Skill Level
Beginner

Comments

Bike Storage

Submitted by vendo on Wed, 10/13/2021 - 10:10

I live in a smaller rental with limited garage space, so I needed a place for my kids bikes. This is what I came up with. It required minimal screw holes in the treated fence posts and I attached a rail system(rubbermaid fasttrak) for the bikes to hang from. I used Ana's easy shelves plan for the upright supports and then just added some corrugated roofing and cedar fence pickets (which I had on hand) to finish off the top.

Tool Caddy

Submitted by docbromo on Thu, 01/20/2022 - 15:21

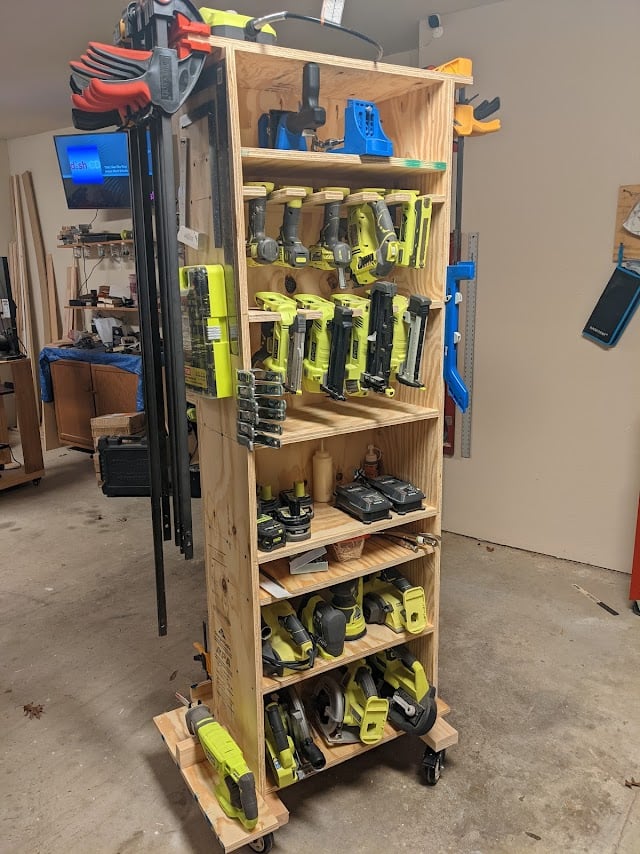
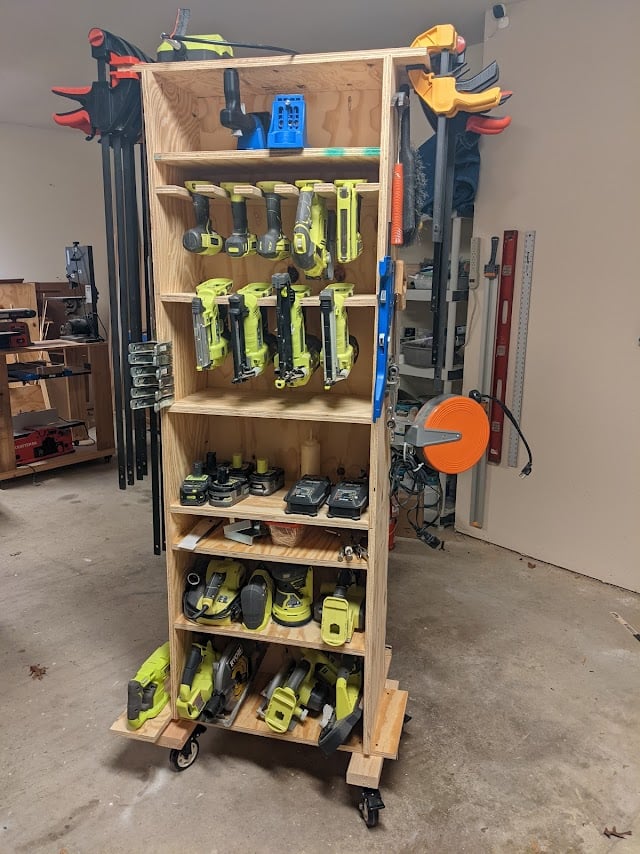
I repurpose furniture as a hobby and I got tired of having my tools hanging on a wall on the other side of the garage so I bult this rolling tool caddy. It is made out of 3/4" plywood, a couple of 2x4's and some heavy-duty casters. I built one about 3 years ago and realized that there were some things I wanted to do differently so I sold it and bult this one. My wife gave me a subscription to SketchUp and I had fun drawing it up and tweaking it. I left an over hang of 3" on both sides so I could store my clamps. I also attached an electrical cord reel on the right side and reversed the ends so the male end can plug into the wall and I can roll the unit across the room allowing me to be able to charge my batteries. The back side has a 44 drawer storage organizer and also a few shelves for additional tools like a router and a multi-tool. I'm not nearly the craftsman many of you are and I'm sure you could do a much better job. I didn't build it to look pretty but to be functional and it works for me.

Comments

Jayp413

Fri, 01/21/2022 - 09:16

I really like this idea. I have my tools hung up neat all around the garage, but I keep walking back and forth for tools and batteries. It would be great to roll this over to a project and have everything you need right there. Nice work. I will modify one for my needs.

BigMacQue

Fri, 01/21/2022 - 10:06

there are some very thoughtful features on this, notably the wings at the top and the bottom for clamps and extra tools and the different shelf heights. Well done! I'm going to build one just like it and a power strip for battery storage.

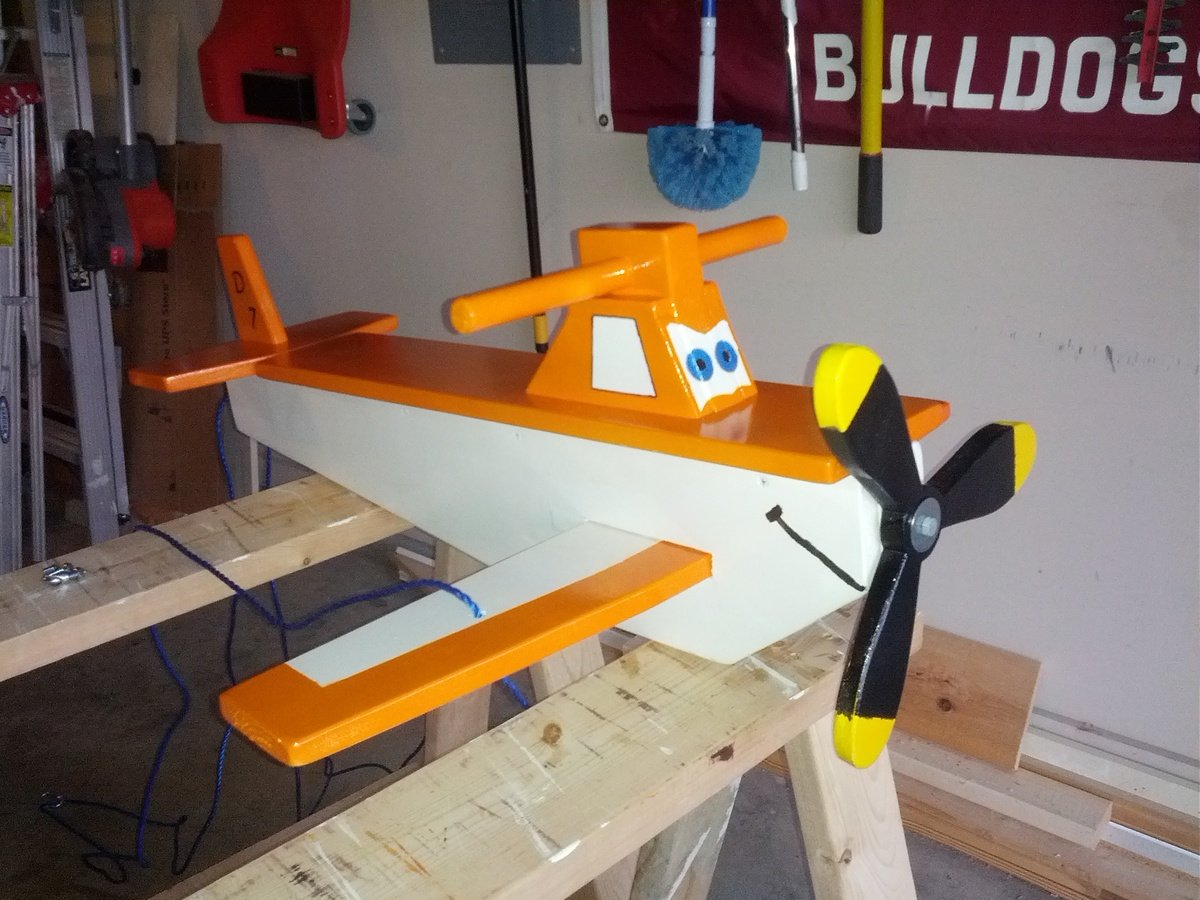
child's airplane swing

Thank you for the great idea!

I built this for my nephew's birthday.

I took the child's airplane swing and modified it to look like the character from Disney's Planes.

Built from Plan(s)
Estimated Cost
$40
Estimated Time Investment
Weekend Project (10-20 Hours)
Recommended Skill Level
Intermediate

Comments

JoanneS

Sun, 08/11/2013 - 05:55

This is soooo cute, your nephew is going to love it!! I love how you gave it a Disney character's face!

Drop Leaf Mobile Kitchen Island

Submitted by jkjackson on Sun, 03/14/2021 - 11:19

This was born out of the need for more counter space in our galley kitchen. We don't have the space to add an island. Especially around the holidays, it would be great to have extra space for making cookies, serving big meals, etc. I used Ana's Small Kitchen Island Prep Cart plans for inspiration. I adapted the dimensions to fit at the end of our counters when not in use and added a drop leaf to give us almost 4 additional feet of butcher block counter top when we need it. I used scrap lumber that I had for the cabinet and had an extra drawer handle that matches our kitchen cabinets but bought the butcher block, locking casters, drawer slide and hardware for the legs. Also, the weight of the butcher block makes it want to tip when it's away from the cabinet with the drop leaf down so I added a lead counter weight inside the drawer.

Estimated Cost
$150-200
Estimated Time Investment
Weekend Project (10-20 Hours)
Finish Used
Behr paint for the cabinet, food grade mineral oil and cutting board wax for the butcher block
Recommended Skill Level
Advanced

Comments

jkjackson

Sat, 07/24/2021 - 16:59

Sure! I used a 4 foot butcher block and cut it down. The horizontal part is 13 1/2" and the drop leaf part is 32 1/8" attached with a piano hinge. The legs need to be cut and hinged to fit when folded up. This one is made so that the drop leaf fits right under the overhang of the kitchen countertop that it is next to so it's snug against the cabinet and not an issue but, if you want it to be freestanding, the weight of the butcher block will pull it over if you don't weight the cabinet down with something as well. I got a 5 pound lead bar from Amazon in case we need to use it somewhere else. I hope that helps! Let me know if you have any other questions.

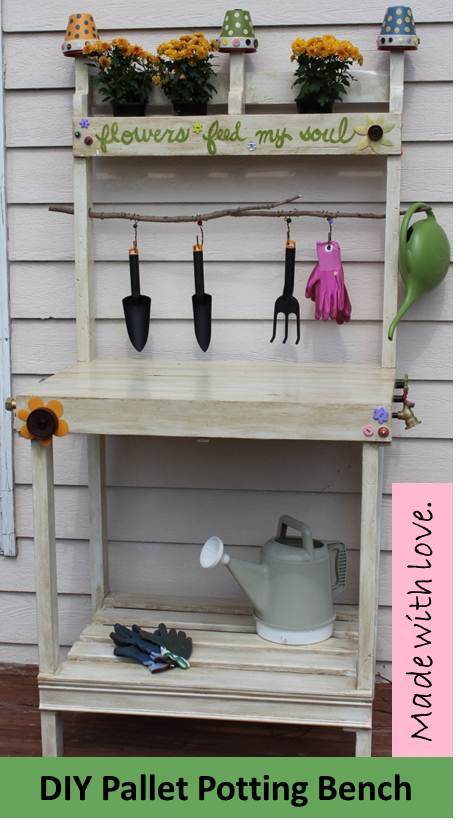
Cute DIY Pallet Potting Bench

Submitted by shampbel on Wed, 09/12/2012 - 20:33

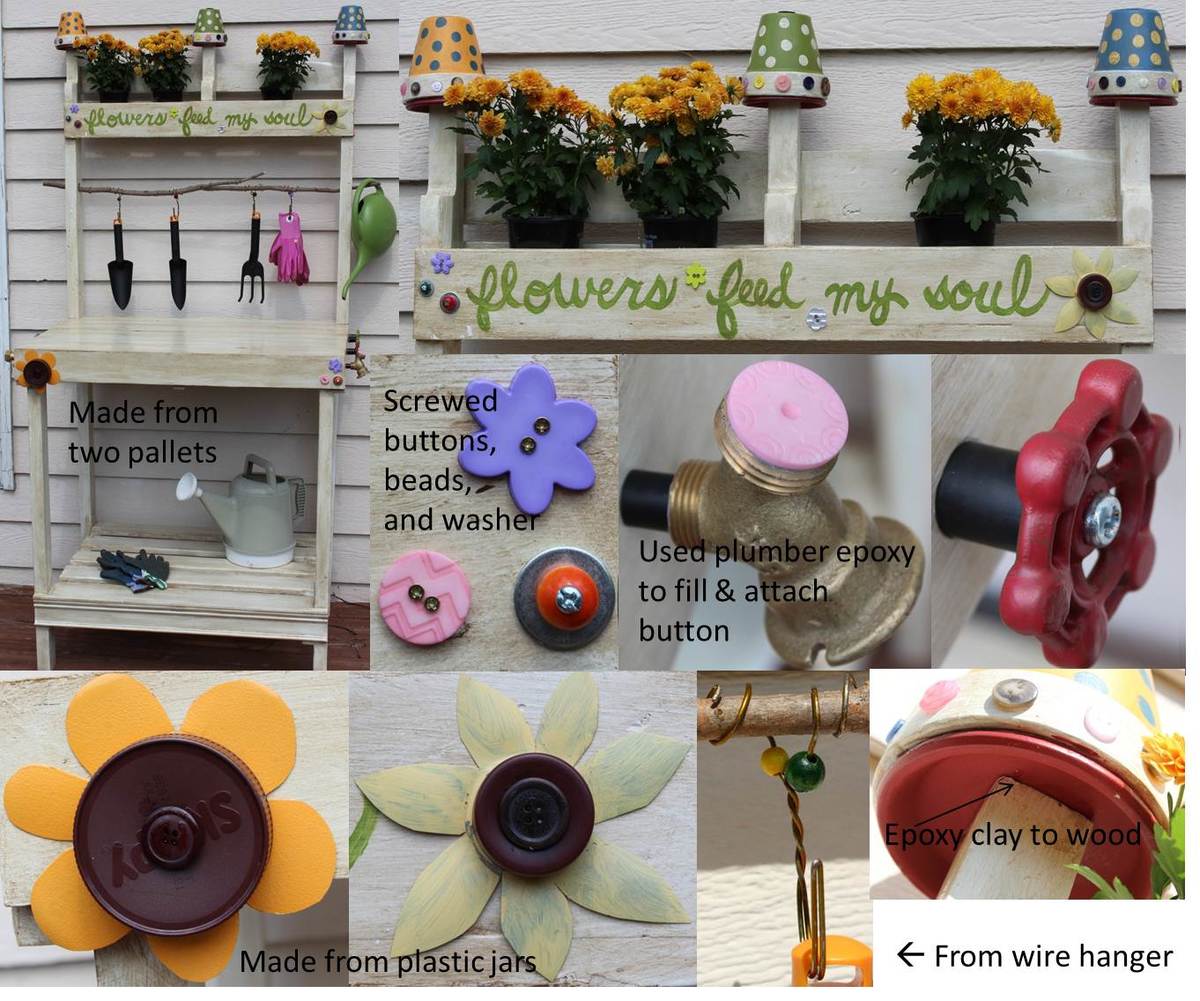
Made from 2 pallets, 2 x 6 x 8, leftover trim from my house, wood branch from my backyard. Attached shelf with pocket holes.

Accents:
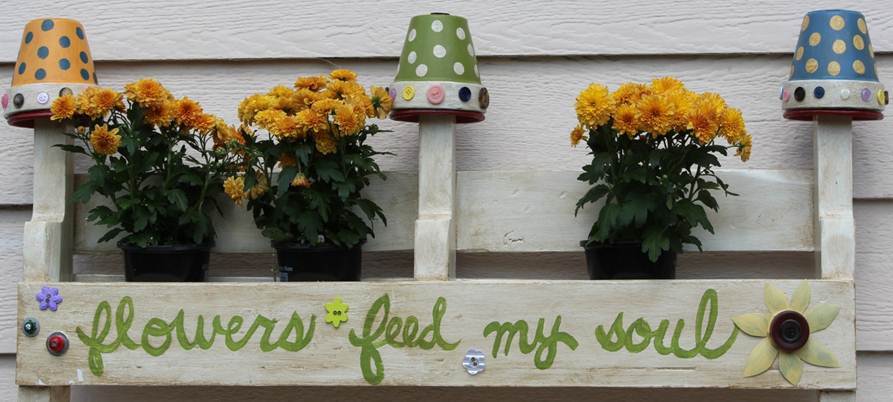
-Handpainted lettering; painted prior to glazing entire piece
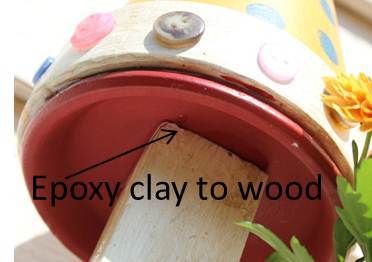
-Finials made from 4.25 inch spray painted and glazed clay pots and saucers coated with Valspar clear finish and attached together with epoxy; buttons attached to pots with E6000 adhesive
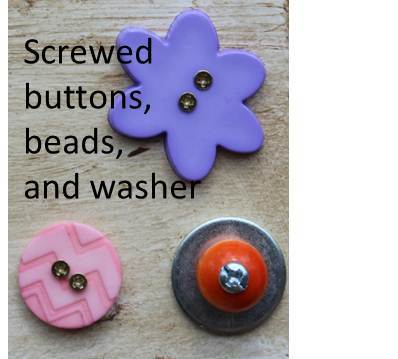
-Buttons attached mostly with small screws; a few with holes too small for screws were attached with epoxy
-Plastic flowers made from mayo and water bottles and lids; sanded, primed, spray painted, coated with Valspar clear coating; attached with screws
-Faucet knobs sanded, spray painted, glazed and attached with screws
-Plumbing pipe filled with plumber epoxy puttty; insert screw into putty before it hardened, then screwed into wood
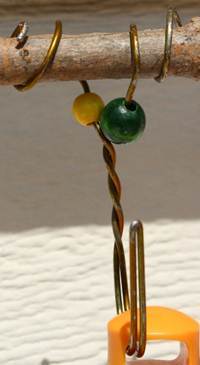
-Gardening tool hooks made from pant wire hangers with a few beads attached; wire simply wrapped around tree branch

Not sure that I will use pallet wood again since difficult to pull apart pallets, uneven and some split boards could not be used, and required tons of sanding for those boards that could be used. I think I paid more for orbital sanding pads than the cost of buying new wood. Will use pallet wood for other non-furniture projects not requiring a perfect finish.

Estimated Cost
$40.00
Estimated Time Investment
Week Long Project (20 Hours or More)
Finish Used
Kids distressed with hammers, sanded with 80 grit, Kilz Primer (1 coat), Sherwin Williams Exterior White Latex Paint (1 coat), Behr Glaze tinted with Brown Latex, Spar Urethane (3 coats)
Recommended Skill Level
Beginner

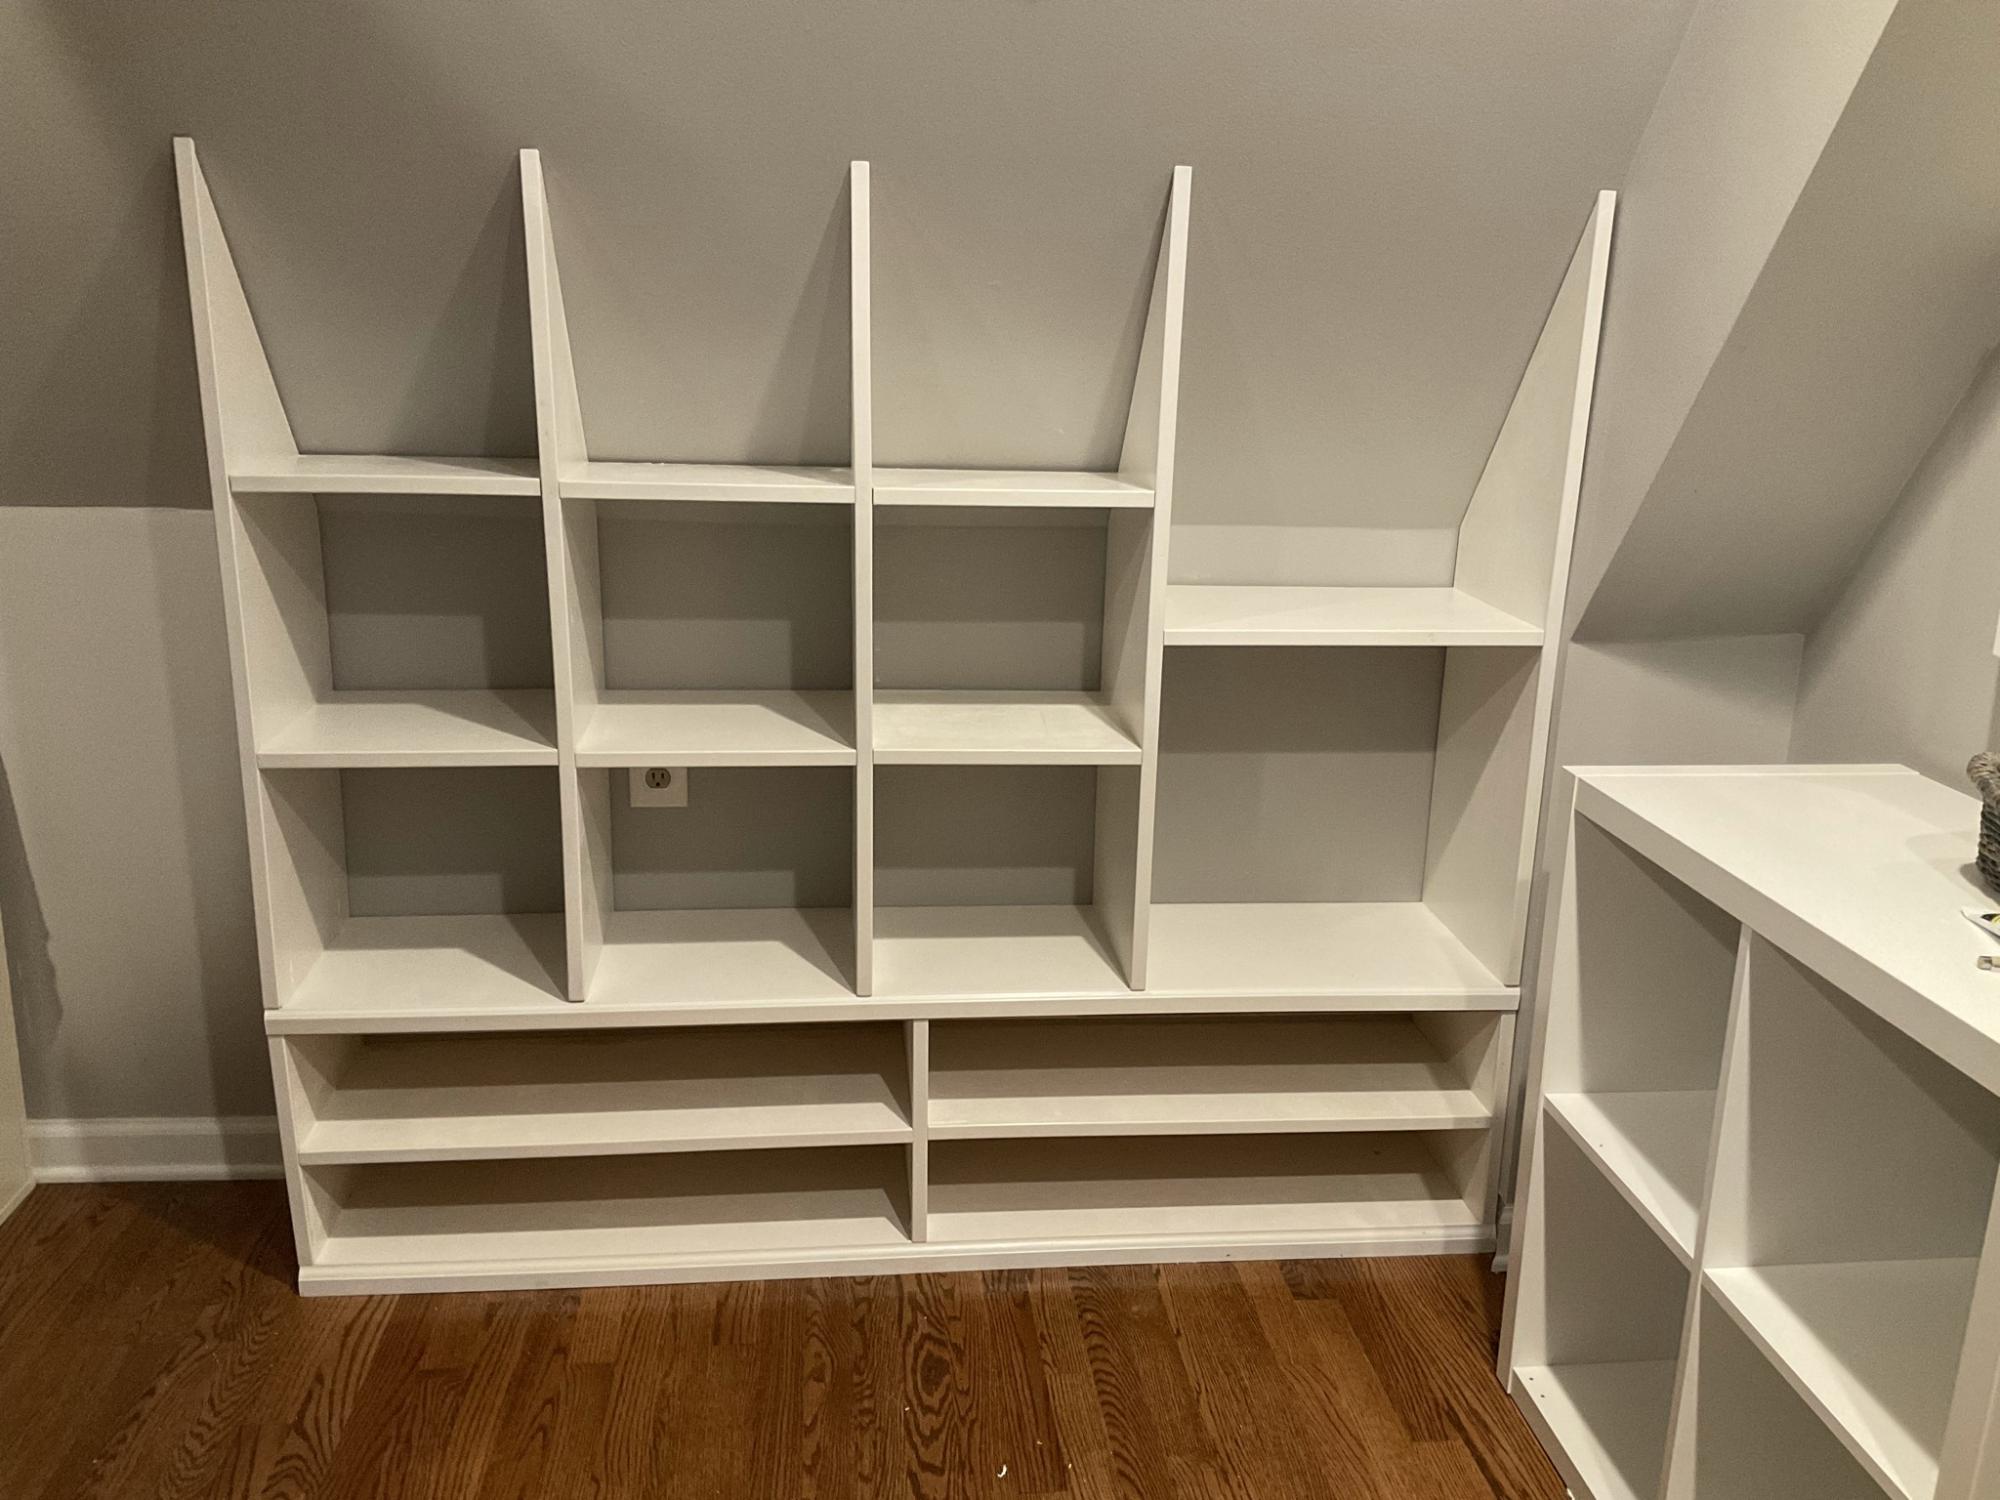
Closet shelving for sloped ceiling.

Submitted by kellystern on Mon, 01/09/2023 - 16:22

I used Ana’s Shelf Help Configurator to build these shelves for a deeply sloped ceiling. None of those well known Closet Organizer Companies could come up with a decent plan for this closet and they charge a small fortune.

Comments

Trash / Recycling Cabinet

Submitted by Anonymous (not verified) on Tue, 07/27/2021 - 11:21

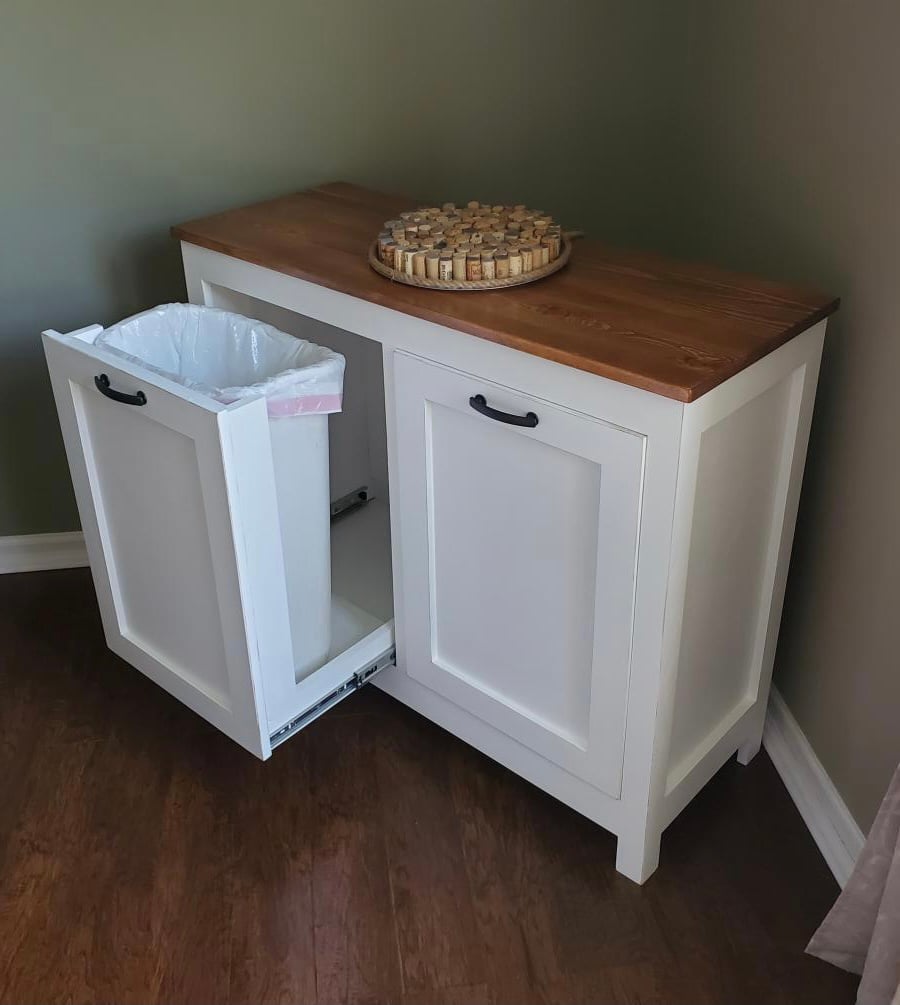
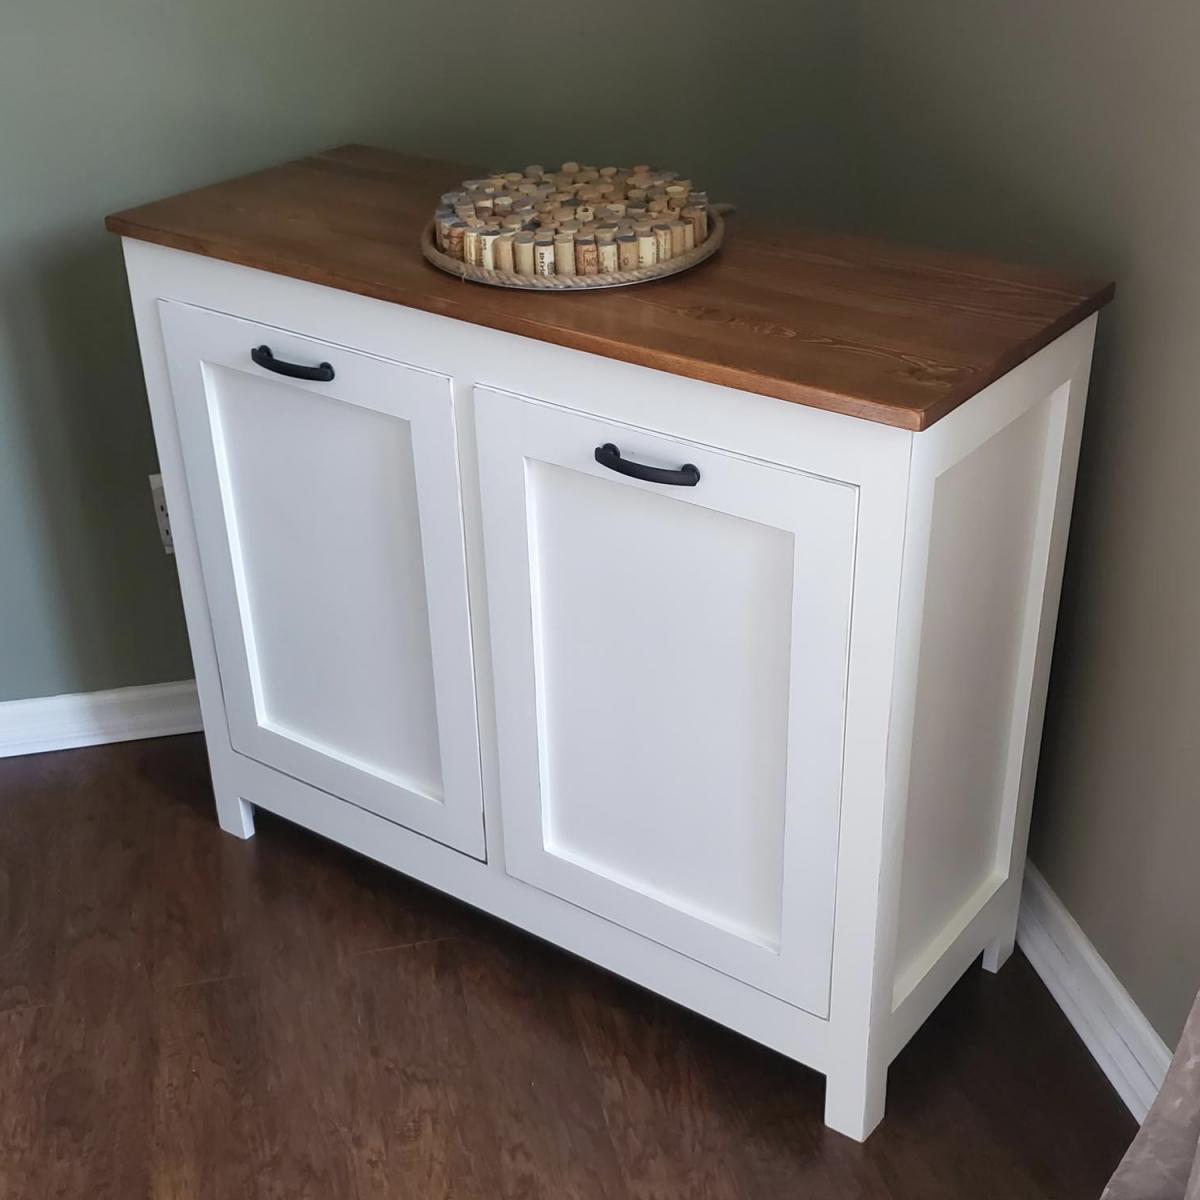
This was a build I was able to check off my Honey-do List. We use it as a Trash / Recycling Cabinet. Basic cabinet build with tray drawers for the trash cans.

Estimated Time Investment
Weekend Project (10-20 Hours)
Recommended Skill Level
Intermediate

Comments

Planter Porch Steps

Submitted by kstarbird on Thu, 12/26/2019 - 15:06

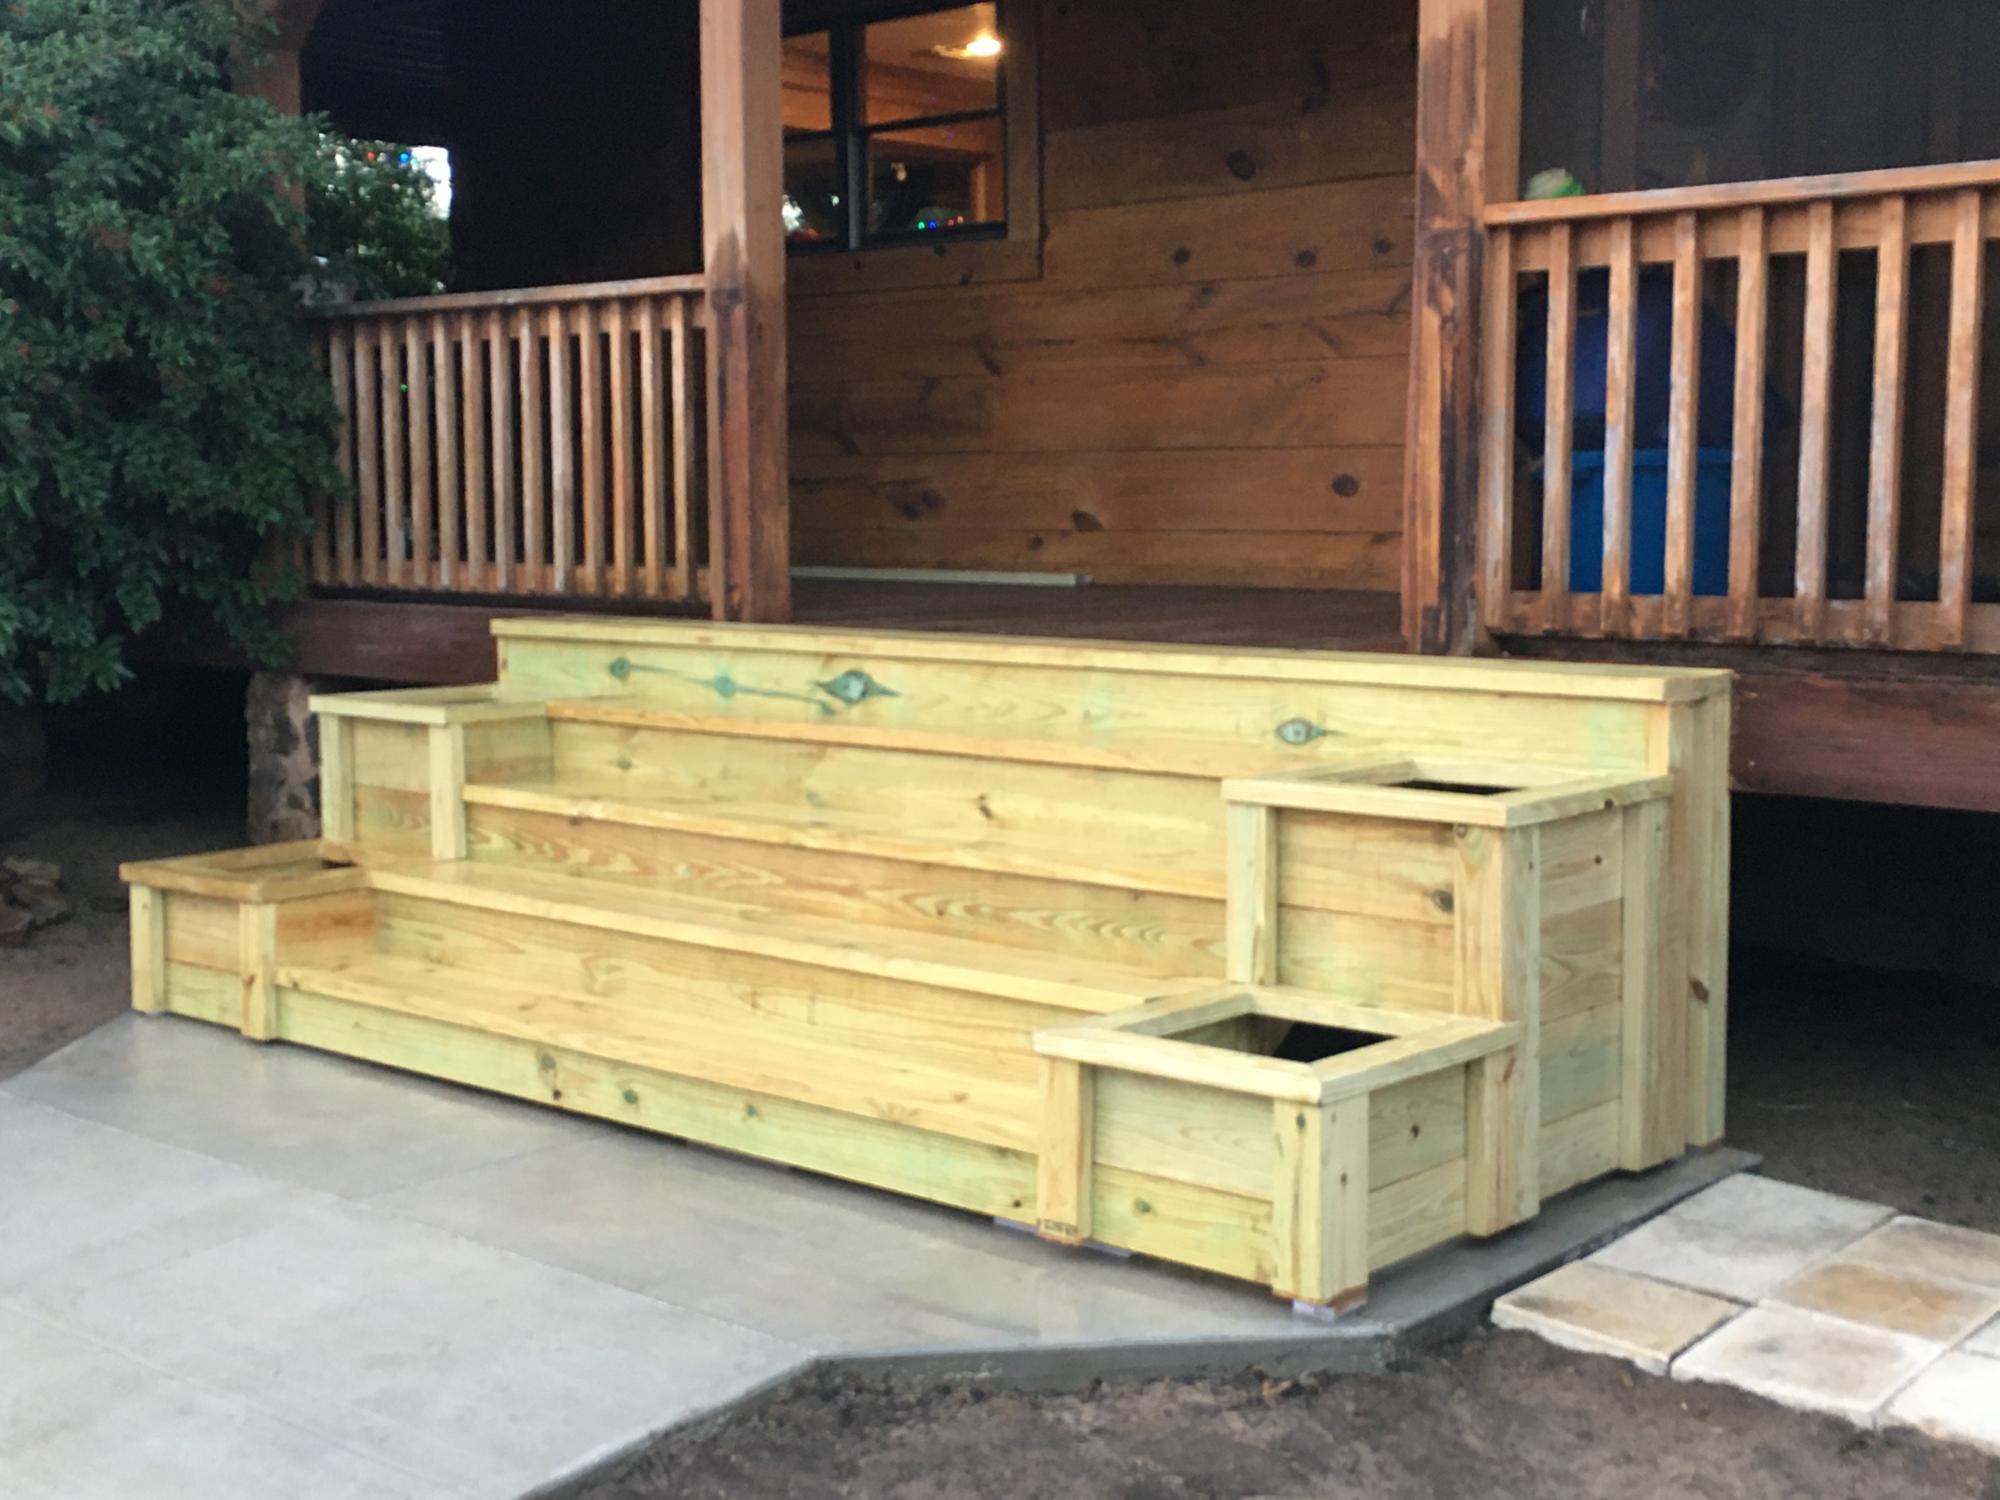
Plan modified to be built on stringers due to hight. 

Finish Used
Pending

Comments

Seasonal And Holiday

Paper Roll Dispenser

Submitted by vendo on Wed, 11/17/2021 - 10:44

This took me about 20 minutes! I love the look of it and that it can just be left out when the kids aren't doing art. A great little item to add to keep the kids busy and inspired. I made a couple of mods from the plan. I used glue and nails instead of pocket holes and I did that bottom board flat instead of on it's side. I also used a little bigger dowel, and bought two rolls of paper on Amazon for $14.I'm giving this to my daughter for her birthday with some fun art supplies, so I think it's a great gift idea for any occasion for those crafty people out there!

Built from Plan(s)

Comments

Monika

Tue, 04/02/2024 - 06:09

Sometimes, when working with papers, you might need to convert file formats, right? So, I recently came across this website https://pdfflex.com/webp-to-png It's super handy for converting. It's been a real time-saver for me, especially when I need to tweak documents for printing or sharing. I'd desided to share in case it helps someone else out there too!

Shoe dresser

Submitted by RoseOfShaz on Thu, 07/04/2013 - 15:26

I didn't build this shoe dresser because I particularly needed one, but it looked so lovely that I couldn't resist.

- I modified the plans by building 3 bins instead of 2 so it could hold more shoes.
- I decided against the dowel stick and opted for hinges instead, which were surprisingly not too difficult to assemble. I found that I didn't even need the magnets after installing the hinges as the doors stay closed.
- I used 7" chains on both sides of each bin instead of a belt to make it extra sturdy.
- I added two back legs.

Et voila! This is the end result. I'm very pleased.

PS. Those flopping bins are a pain when you're trying to build!! An extra pair of hands is definitely recommended.

Built from Plan(s)
Estimated Cost
$150 (with extra bin)
Estimated Time Investment
Weekend Project (10-20 Hours)
Finish Used
Walnut (can't remember the exact name of the stain, but it's the one Shanty 2 Chic always uses!)
Recommended Skill Level
Intermediate

Comments

SoCaliforniaMel

Fri, 07/05/2013 - 22:49

Pretty :) Good Job. Now if I only had the space for one thats 10 rows high :P I like the stain color too. Shanty 2 Chic always uses Rust-o-leum. I think its called dark walnut. Dont quote me though. I love the stain and spray paint combo colors they use.
~Melody

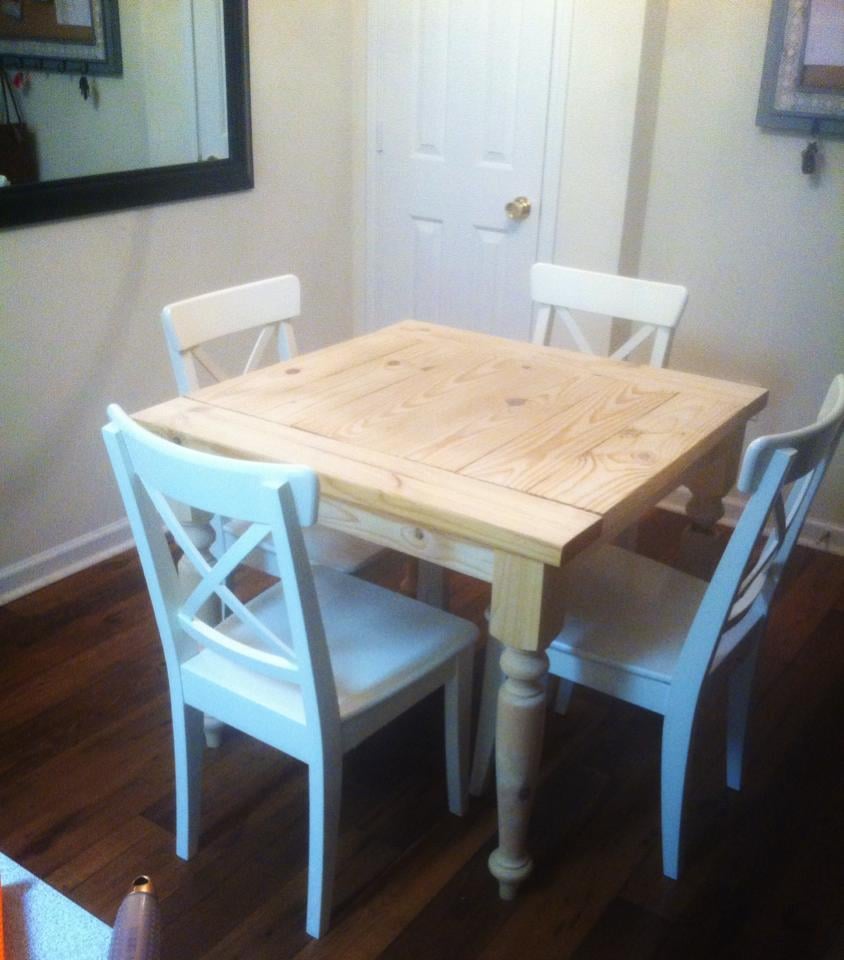
Square Turned Leg Farmhouse Kitchen Table

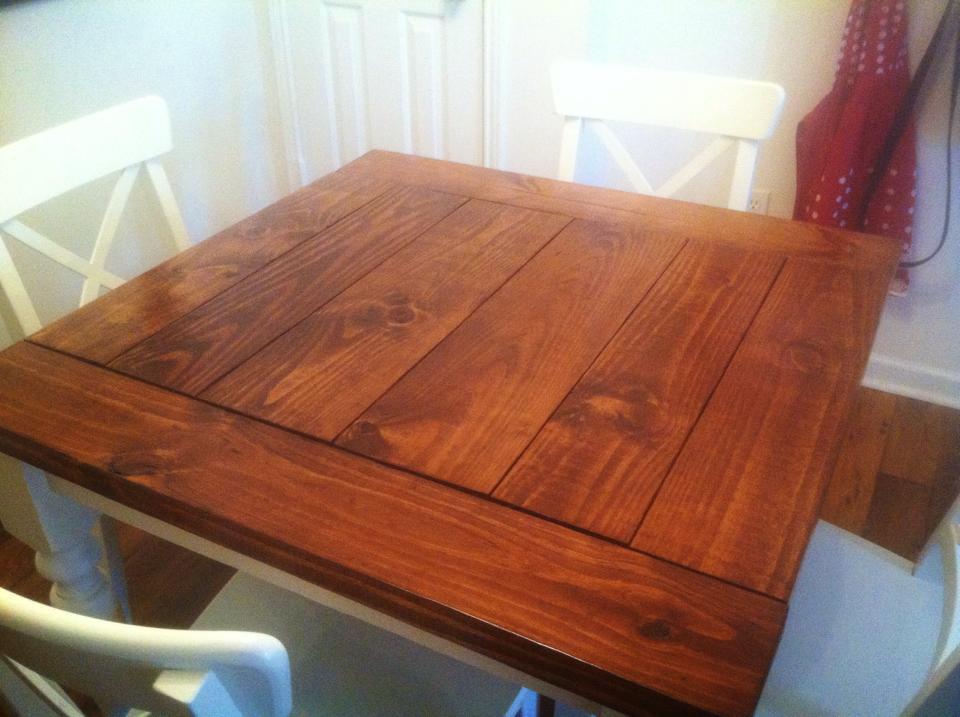
I had to do a 3ftx3ft square table since our eating area in the apartment isn't big enough for a dining table, but I really like how it turned out :) I also added breadboard ends because I can't stand how the cut ends look. I got the legs from osborne wood

Built from Plan(s)
Estimated Cost
$160
Estimated Time Investment
Weekend Project (10-20 Hours)
Finish Used
Minwax English Chestnut, Antique Beige Paint, and Helmsman Clearcoat
Recommended Skill Level
Beginner

Comments

DIY PLANTER BOXES WITH PALLET WOOD

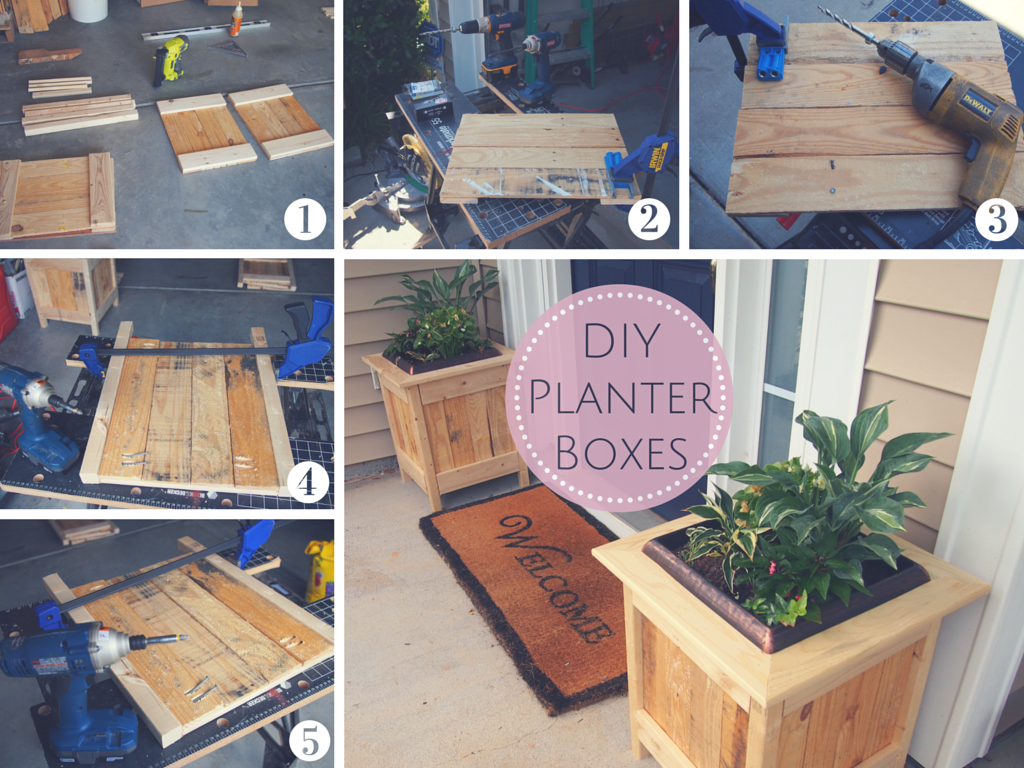
We picked up a couple 14.9" square plastic garden planters from Home Depot and ended up creating some wood planter boxes from pallet wood for them to sit in. 

I didn't add up the cost of these boxes, because we had most of the wood and only needed a few pieces, but I'd say they were definitely less than $10 a box. 

We altered our dimensions to fit our HD planters so they would slip in for a snug fit and made the legs flush with the top of our sides. We build a simple frame for the top, which allowed the lip of our HD planters to sit firmly on top. 

Something I didn't do, but wish I did: fill in the cracks with wood filler.  There were a couple places that really could have used it, but I was in a rush and decided to skip it.  They turned out great, but could have been even better had I taken an extra 30 minutes.  On an off weekend, we are going to use wood filler in the seams, sand them down, and do a second coat of white paint. 
Can't wait to plant these with some mums for Fall! :)

Built from Plan(s)
Estimated Cost
$20 total for 2 boxes.
Estimated Time Investment
Day Project (6-9 Hours)
Finish Used
White Semi-Gloss outdoor paint
Recommended Skill Level
Beginner

Sturdy Workbench Sink

Submitted by Anonymous (not verified) on Mon, 05/01/2023 - 09:57

Used sturdy workbench plans with 2x6 cedar top for outdoor sink. Turned out much better than I expected!!

Built from Plan(s)

Comments

Modern Adirondack Chair, Super Sized

Submitted by Anonymous (not verified) on Fri, 08/21/2020 - 10:39

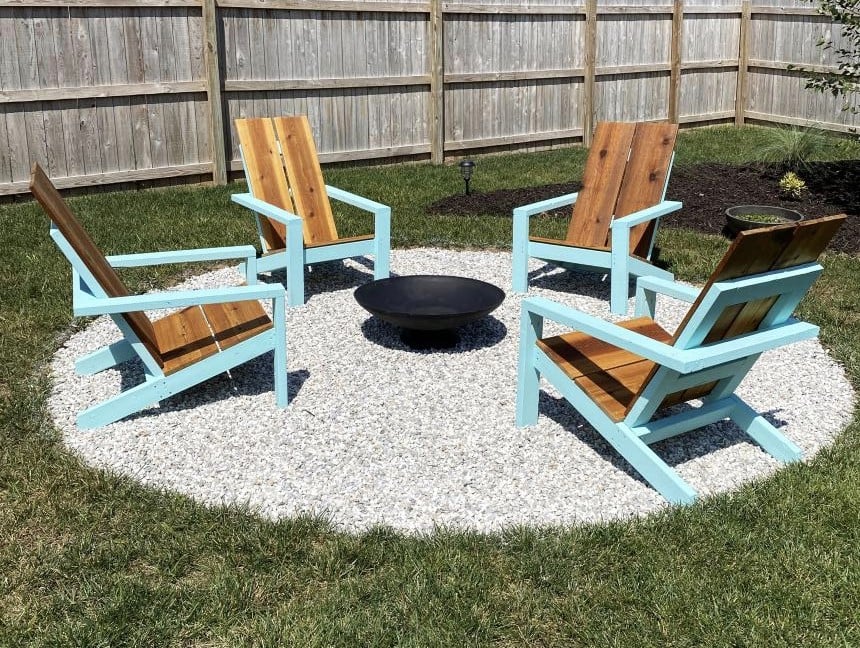
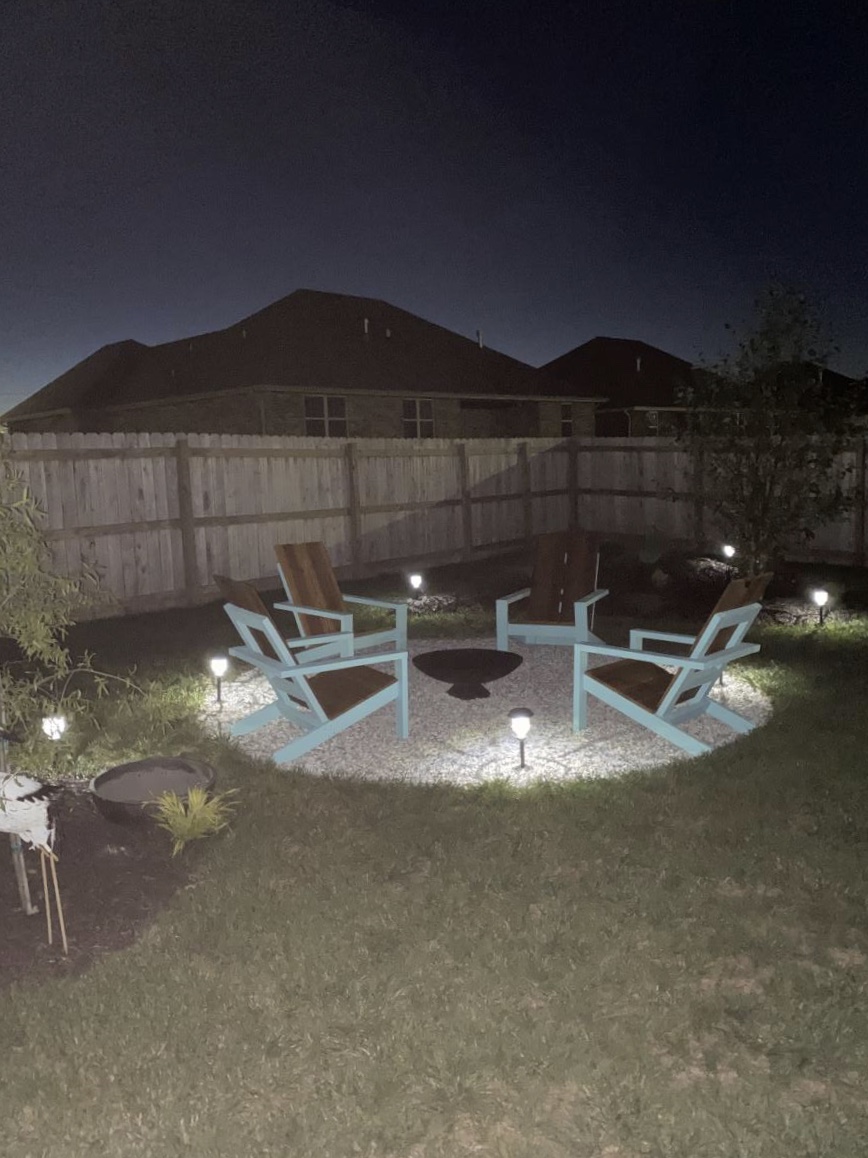
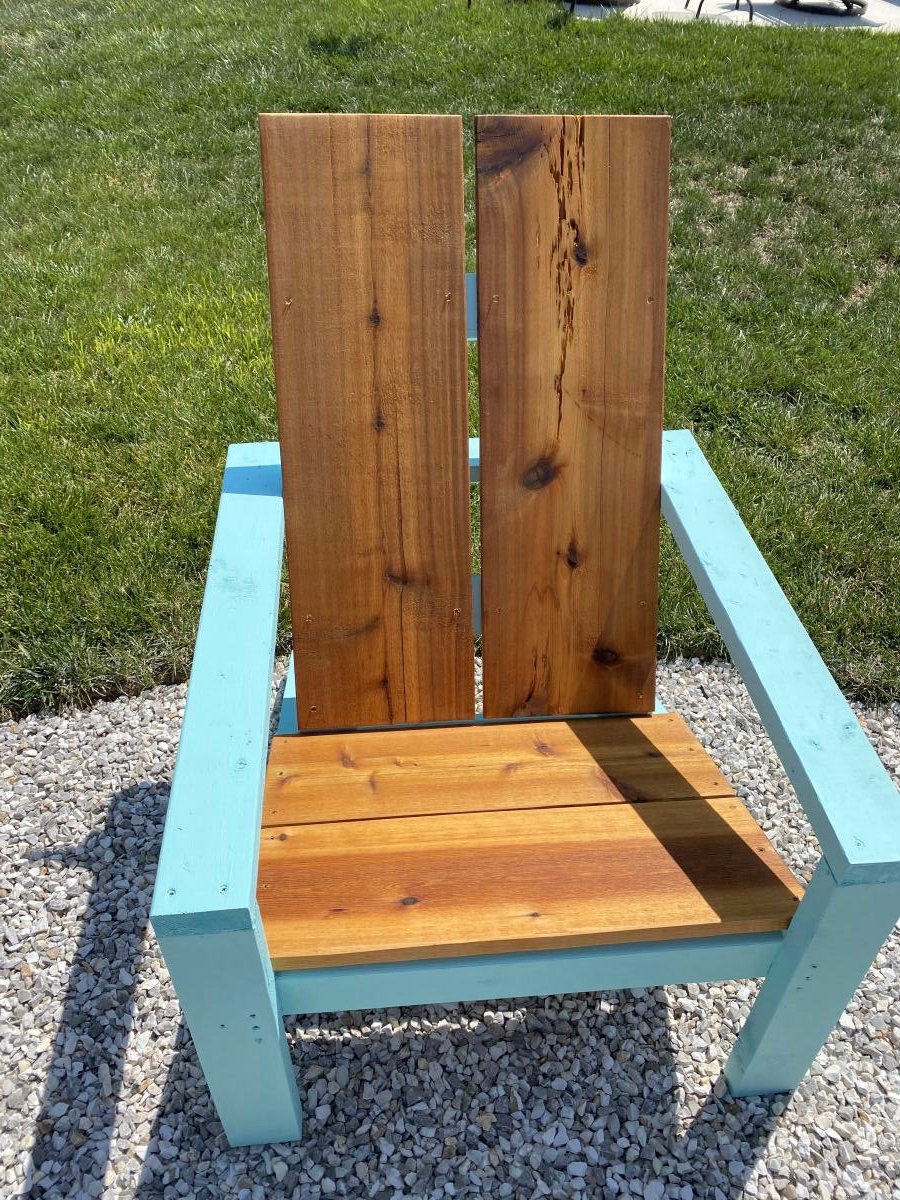
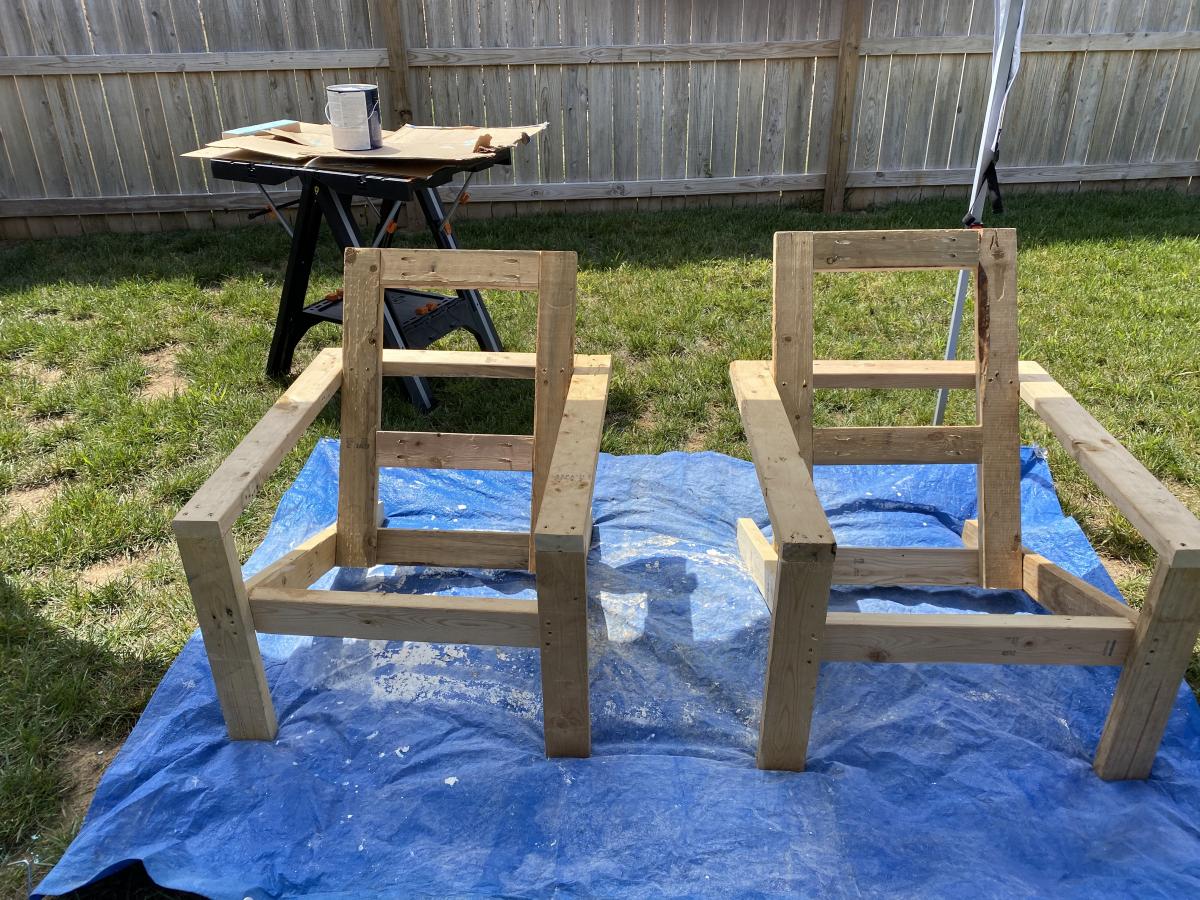
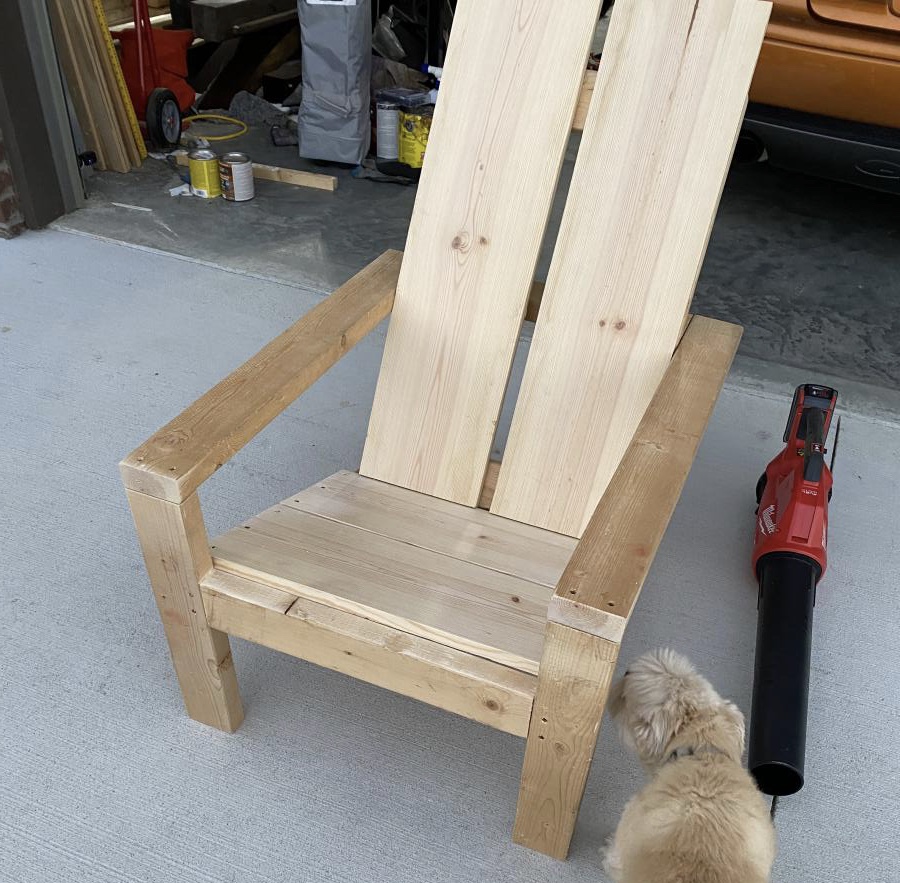
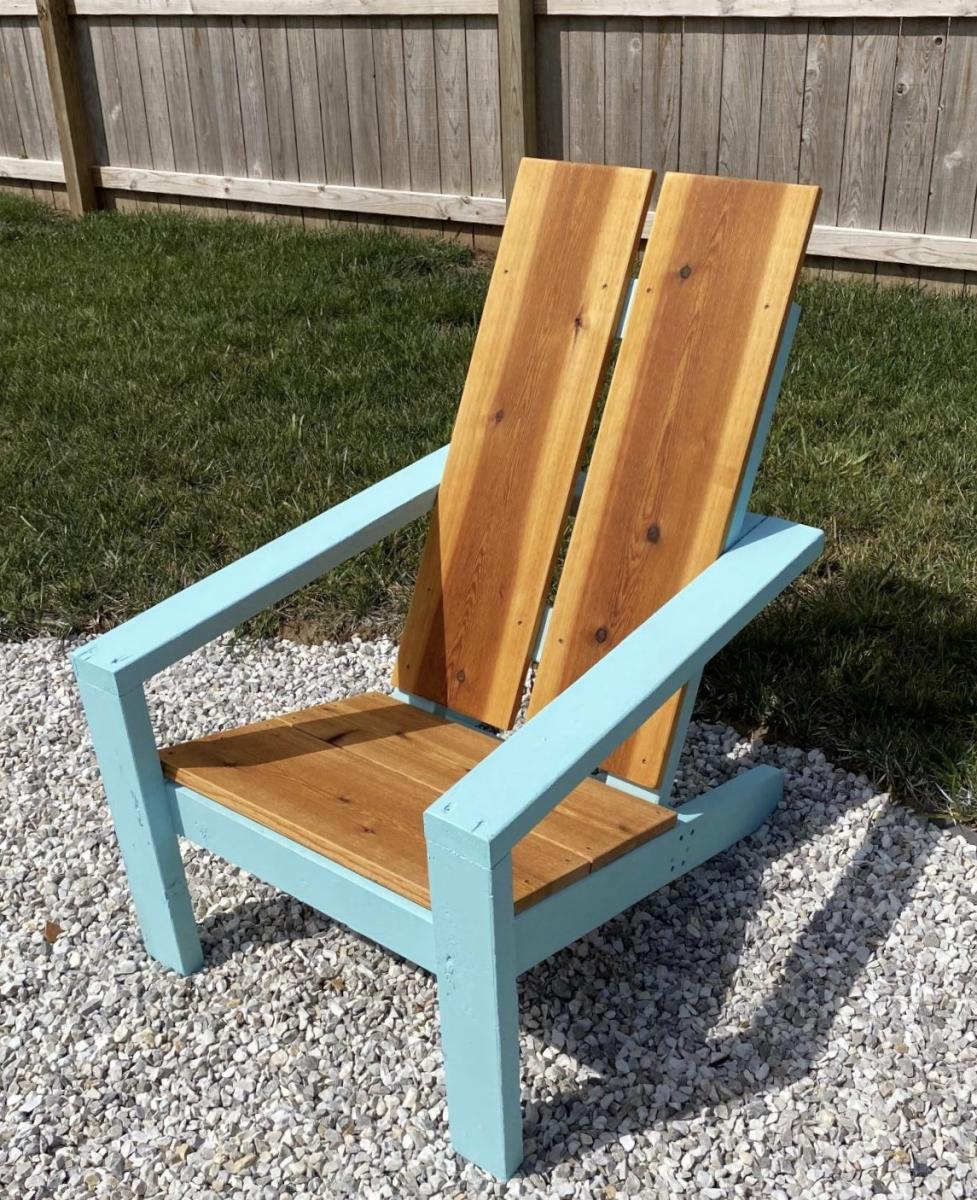
Am a big fan of Ana's work, and have used several of her plans in prior builds including the more traditional Adirondack chairs. Those stayed with my old house, and I wanted something different for my new house. Really liked her Modern Adirondack design with the floating arm rest. However, plans are like recipes to me--a guideline. I wanted the back boards to run up and down, and I am a bit more robust than the lovely and petite Ms. White, so they would need to be wider after I built the first one at 19 1/2" wide per plan. The next three I made 22" wide and that worked well without throwing off the geometry and angles of the other parts. Since I ran the backboards up and down, I needed some cross beams for stability and to give an attachment point for the middle of the boards. Cut some 2x4s at 15" wide, drilled pocket holes in both ends, and attached in between the back supports with the pockets facing up to be hidden by the back boards. All of the 2x4s were leftover cut-offs from the houses being built in my neighborhood. Since the frames were free, I splurged and went with cedar boards for the backs and bottoms. With the wider frames, I had to use 1x12s ripped down to 10 3/4" to get the right look (about a board's width in between). Needed some color, so I painted the frames Teal Seaglass from Menards. Cedar was stained with a natural deck stain from Sherwin Williams. I experimented with salt paint (mixing unsanded grout with the paint) to give a heavily textured and weathered finish but this was unecessary--the wood was distressed enough and I am a terrible painter. It also toned down the color so I skipped that step and just went with 2 coats of plain paint. It looks like outdoor furniture should up close. As always, am pleased with Ana's plans. Thank you for doing all the hard work!

Estimated Cost
about $200 for all 4 chairs due to cedar and paint
Estimated Time Investment
Weekend Project (10-20 Hours)
Finish Used
Paint - Pittsburgh matte exterior with Dutch Boy coloring Teal Seaglass
Stain - Sherwin Williams Superdeck stain, Natural finish
Recommended Skill Level
Starter Project

Comments

Seasonal And Holiday

Pantry Wall

Submitted by amiles573 on Tue, 03/28/2017 - 13:41

I modified the origianl plans by making the cabinet taller.  I also built 2 cabinets and trimmed them both together to make it appear as if it is 1 giant cabient.  It measure over 7 feet tall and just over 6 feet wide.  I did add an additional 1x2 brace in the center of the cabinet to help support.  I also cut an additional 1x4 to use a brace when anchoring it to the wall.  I also chose to add an additional 2 trim pieces to each door because they are much taller than the original plan doors.  

Built from Plan(s)
Estimated Cost
$400
Estimated Time Investment
Weekend Project (10-20 Hours)
Finish Used
Varathane Stain, Weathered Grey
15 7/8" center to center cabinet pulls
Fully Inset, Frameless Hinges
Recommended Skill Level
Beginner

Comments

Laundry Basket Rack

This was a great last minute Christmas gift. Took me a little over two hours. Made completely out if pallet wood.

Comments