Search Results
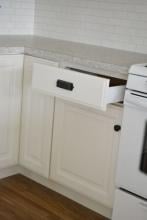
… nails and glue, keeping outside edges and top edges flush. … Install drawer slide cabinet member on the shorter 2x4s. Make sure the two drawer slides are installed exactly the same location so your drawer slides evenly. The front of the drawer slide (wheel side) is …
Read More
Project Plan

… Favorite because it's super easy and inexpensive, but you get a nice drawer that will hold up to everyday kitchen use. I use the Metabox drawer side/slides by Blum (this post is not sponsored by Blum - they … them off Amazon for around $7 - pretty comparable to most standard drawer slides, but with the Metabox, you get the sides too. They come …
Read More
Blog Post

… ole hammer. You can use the scraps from the back as your door and drawer face rails and stiles. … 1×2 Inner Boards. Begin by building the top drawer divider system by fastening the blue, green and pink boards … Drawers Because these drawers are so small, I have decided to not add drawer slides to the drawers. If you would like to add drawer slides, …
Read More
Project Plan

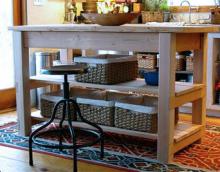
… For a good tutorial on putting a drawer together and the recommended slides, please see this wood kitchen cabinet organizer drawer plan. … Please read through the entire plan and all comments … width of you 1x8s. With a 7 1/4" wide 1x8, you will be able to have drawer faces with 1/8" gaps around all sides. Attach the 2x2 drawer …
Read More
Project Plan
… side apron to the spacers.Keep top edges flush. Check for square. … Drawer Housing. As shown above, build the drawer housing. Start by fastening the back apron to the drawer housing sides. Use the measurements above to guide you. Then …
Read More
Project Plan
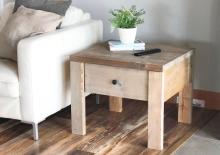
… over years of use. For the Momplex white kitchen, we decided to use a drawer side/slide combo system, call Metabox drawers by Blum. They were pretty much the same price as a standard drawer slide set, but you get the drawer SIDES out of the deal too ... These are the exact slides we ended …
Read More
Blog Post
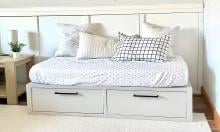
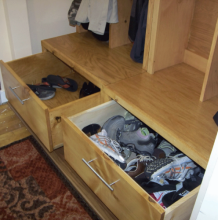
… before glue dries. … Attach the 2x4 blocking inside the bed for the drawer slides. The center leg does not get attached at this step. … … Draw a line inset 1" from the front of the 2x4s. Separate out the drawer slides into the cabinet member and the drawer member. Attach the drawer slide cabinet member to the 2x4s, with …
Read More
Project Plan
… the cubby area with 1-1/4" pocket hole screws. … These are for your drawer guides. Use either 1 1/4" screws or nails to attach to the sides … … Now the header. Attach to the center divider as well. … And now the drawer trim. You will need to either use pocket holes from the back or … in place with glue and finish nails. … You will need to build two drawer boxes as shown above. Build the drawer boxes and attach 1/4" …
Read More
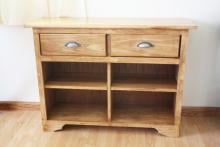
Project Plan
… it is CRUCIAL to be absolutely square with all of your cuts. The drawer and the bench must be perfectly square or the drawer will not slide correctly. Make sure you cut your plywood square. … J (shown in blue above). … Place the fronts and the back in the drawer, as shown above in green, boards K. Use the 2″ nails to nail …
Read More
Project Plan