
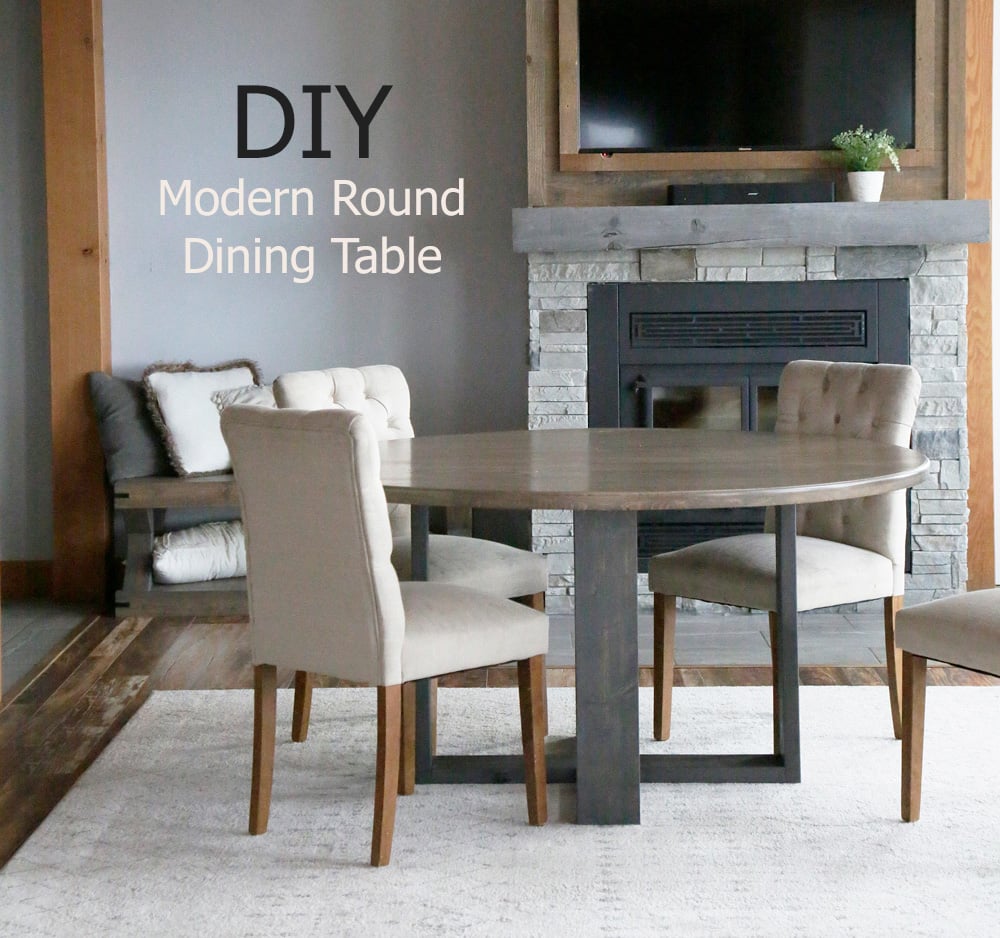
Free plans for round table top building in sizes from 24" to 72"
I love round tables - they are so comfortable, sensible, and beautiful! But making the round table tops do take a little more figuring than a rectangle or square shape - so I took the time to create patterns for round table tops in sizes 24", 30", 42", 48", 54", 60" and 72" and am sharing my round table top patterns and plans for free in this post!
The patterns include diagrams for each size, step by step instruction, and even a video tutorial. I use a circular saw and homemade jig to cut the round shape - in this video I show how.
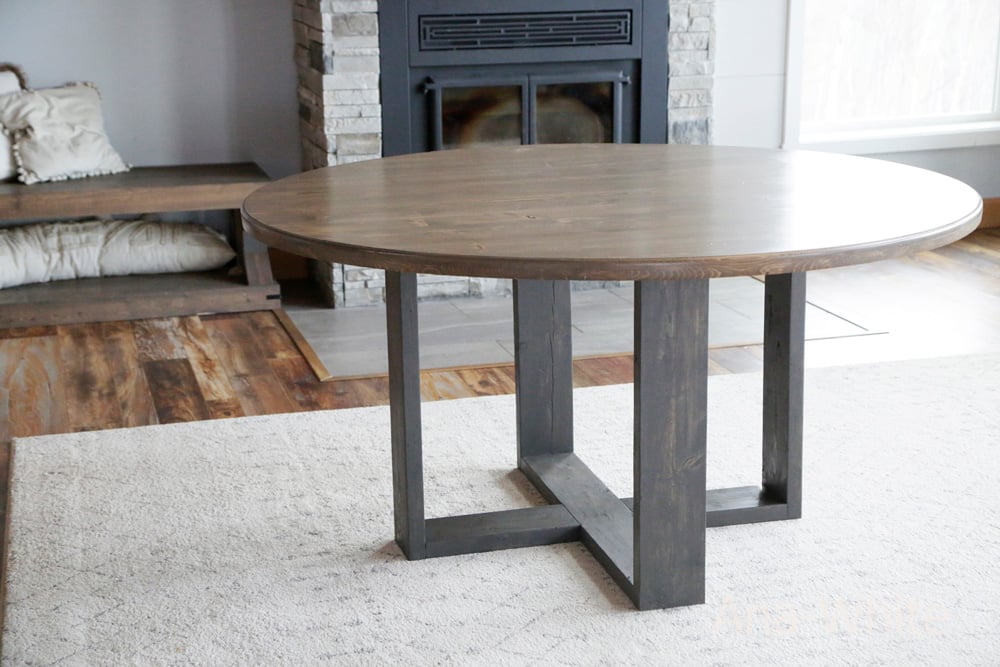
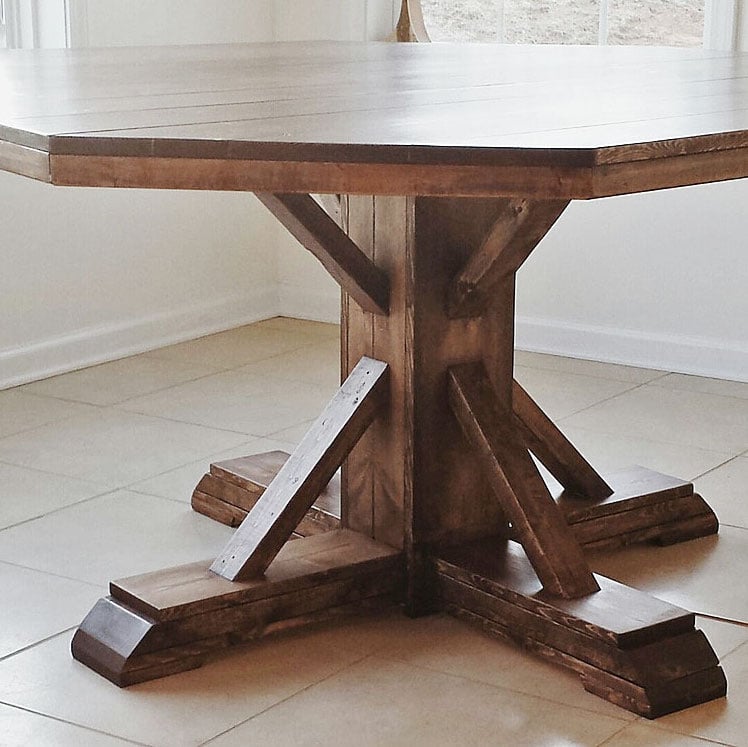
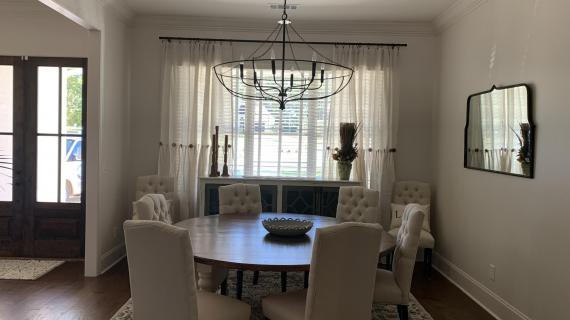
We switched over to a round dining table a couple of years ago, and we have LOVED it. Not only does it feel cozy and comfortable with just our family of five, but it's easy to squeeze in 8-10 around it for gatherings. It is truly so versatile!
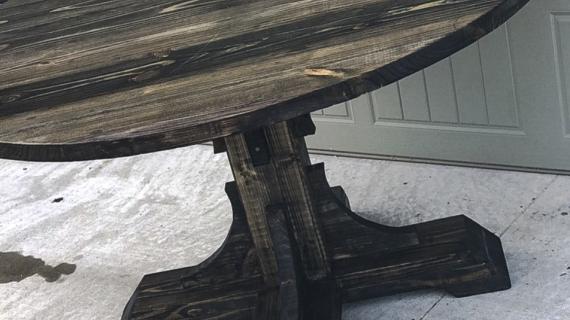
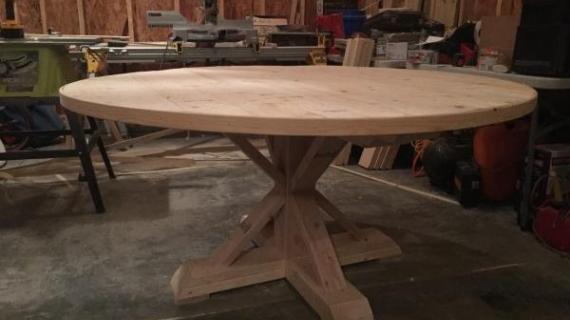
We built our own round table top, and it has held up extremely well over the last several of years, despite heavy use from a family that lives, works and homeschools on this very table. The photo in this post was taken after FIVE YEARS of use - it still looks brand new!
My method of building round table tops has held up well, and I'm confident to recommend it.
Video Tutorial - Watch Us Build This Round Tabletop
Here's how to build your own round table top.
How to Make the Circle Jig for Cutting Circles with a Circular Saw
Want to make the jig for cutting circles with a circular saw? Here's the free plans and video tutorial.
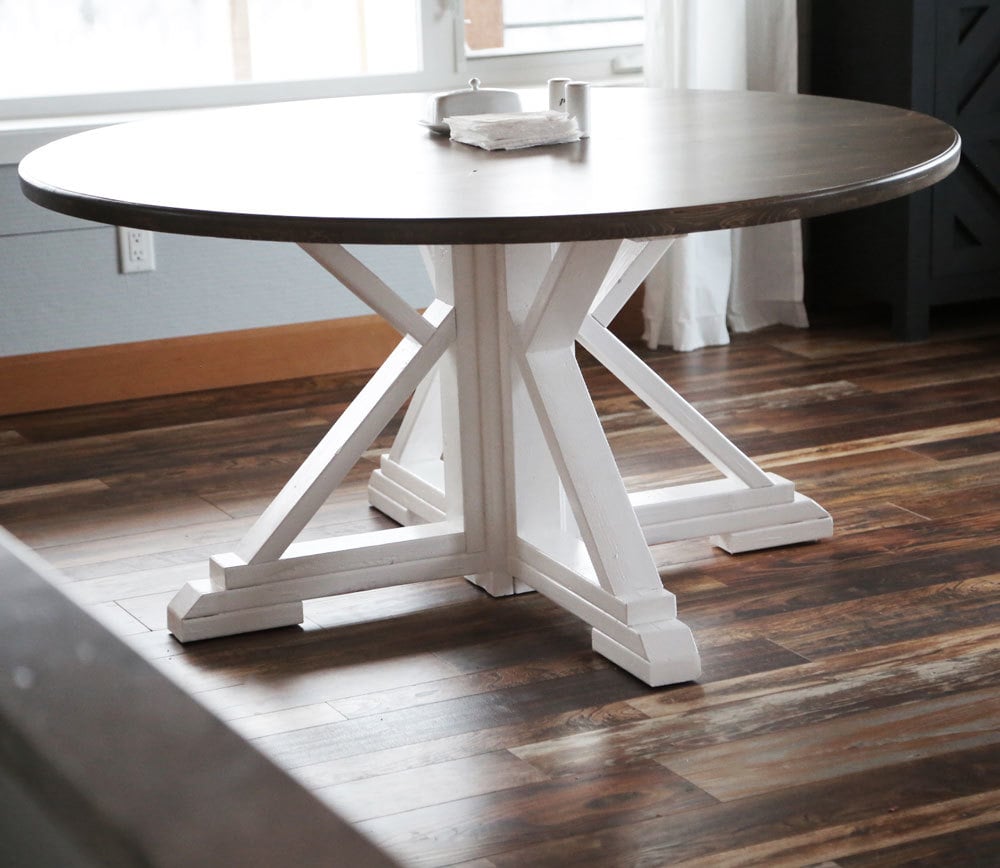
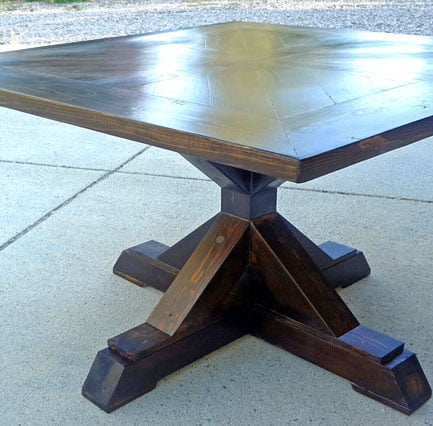
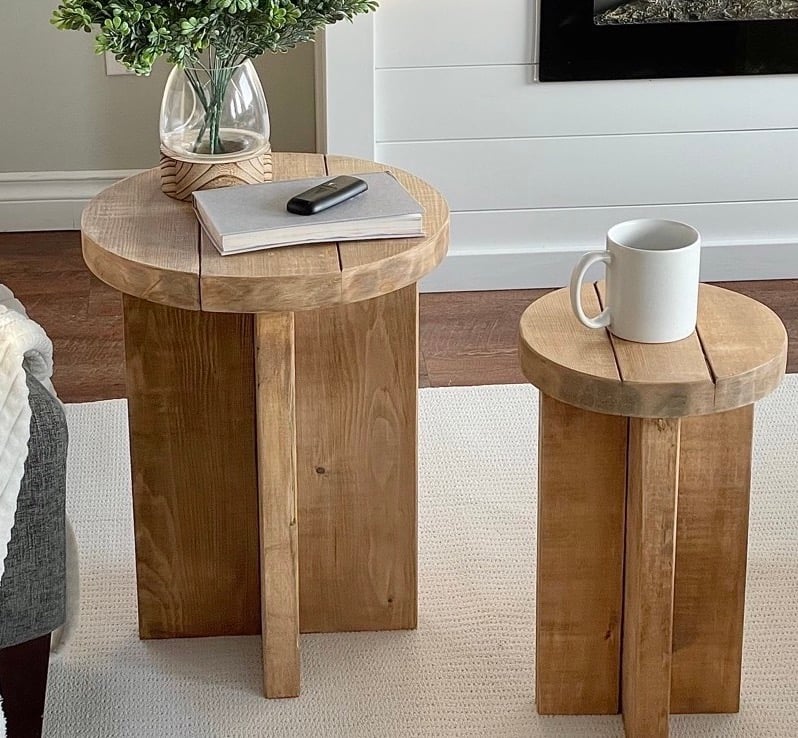
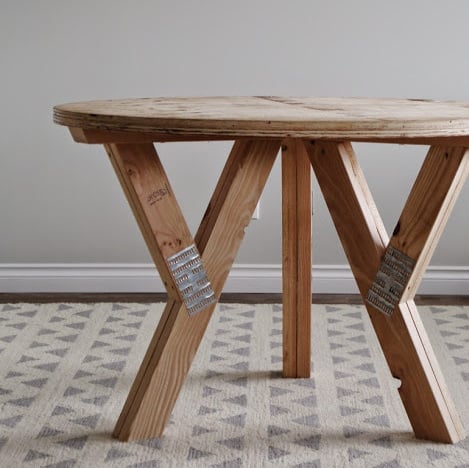
Free Plans for Round Dining Table Bases to Match
This post is for the tabletop. You can get creative with a base, or use one of my free patterns. I have many dining table base plans - I keep the top and switch out the base when I want to update my dining room.
Click on any of the base images below to get the free plans.
How Big Does the Base Need to Be?
Generally speaking, the dining table base should be at least half the diameter of the table top.
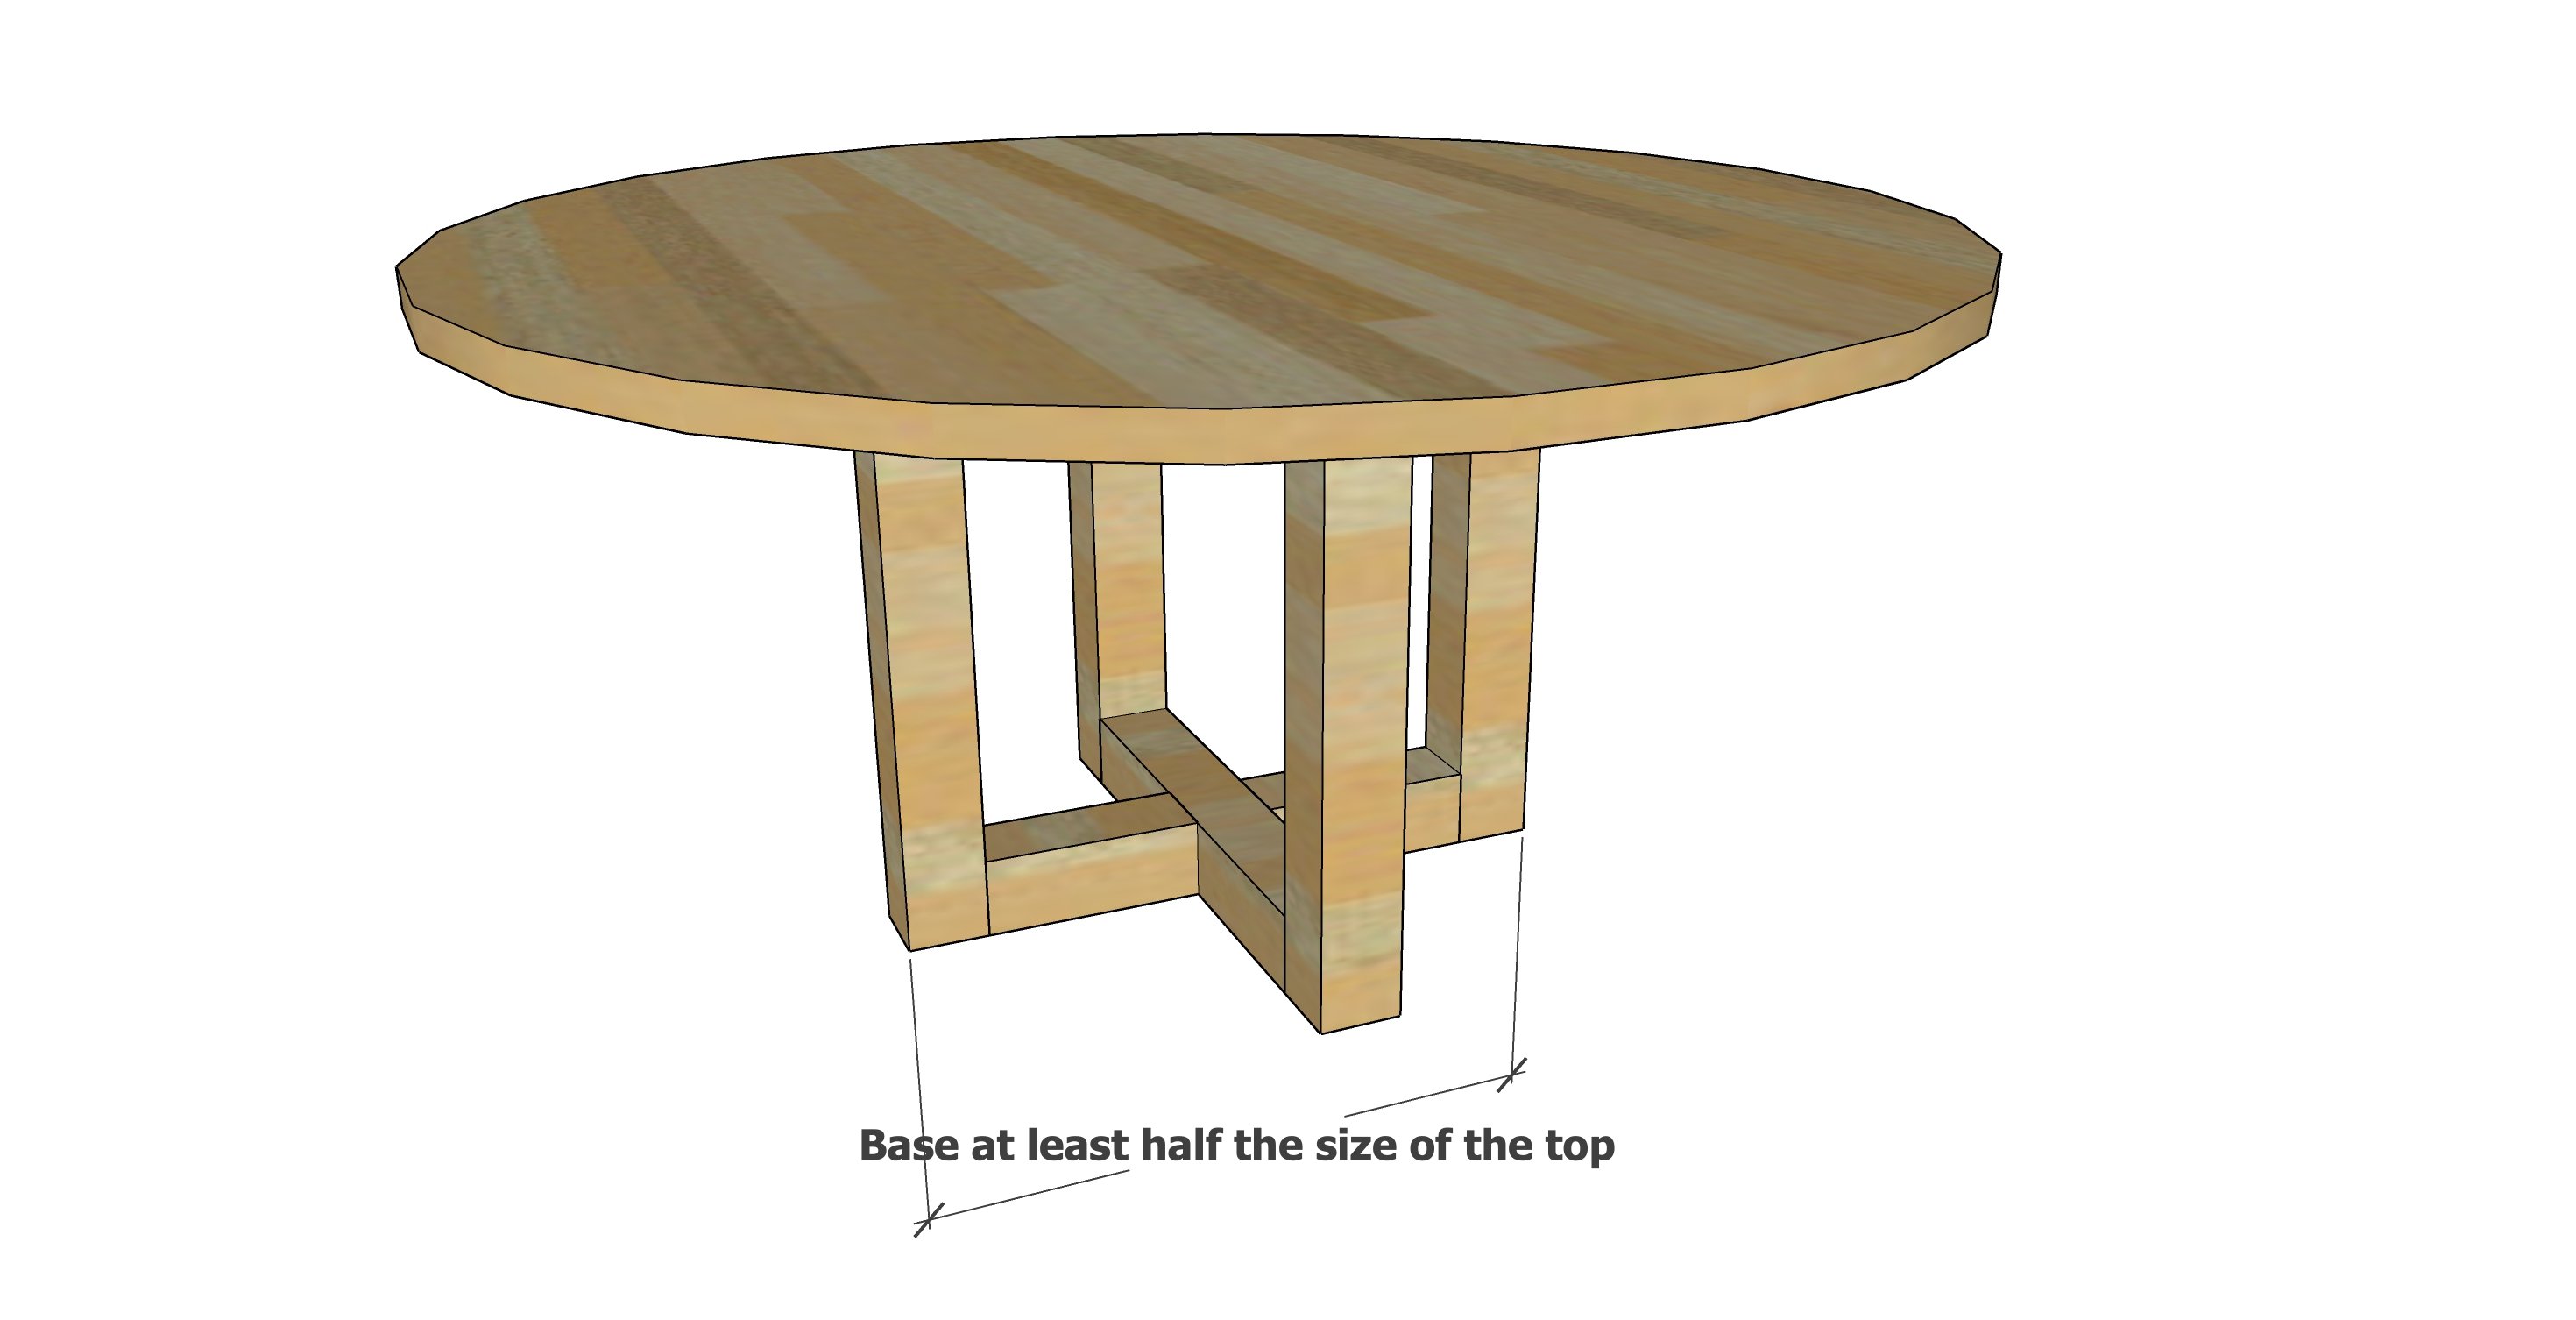
So for a 60" top, the base needs to be a minimum of 30" in spread to keep the table from tipping on the base.
What Size Round Table Top Should I Choose?
Not sure what size table to choose? Consider the size of your space and the number of seats you will need when determining the perfect size round table to build.
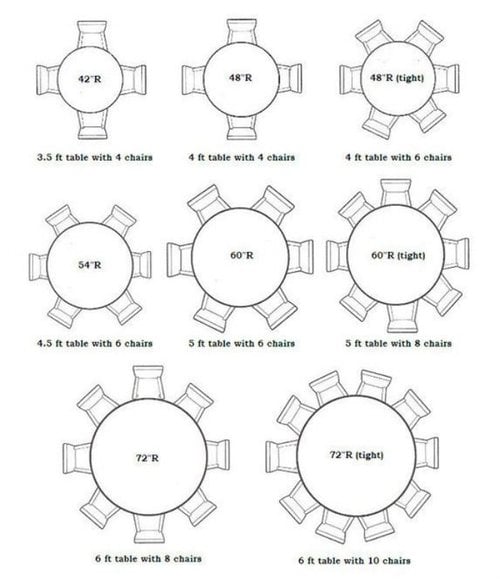
- You'll need extra room around the table for chairs and to move around the table.
- You can save space with a built in bench or banquette.
- Big table tops get really big in the center - it can be hard to reach the middle or pass the peas. I have a 60" tabletop and it's pretty big, I wouldn't recommend any bigger if you play board games on the table top.
Patterns for Different Sized Round Table Tops
Once you've determined the perfect size round table top to build, here's my free patterns to make it easy to build!
Use the pattern to determine your shopping and cut lists. Scroll all the way down for the step by step process for building your own round table tops.
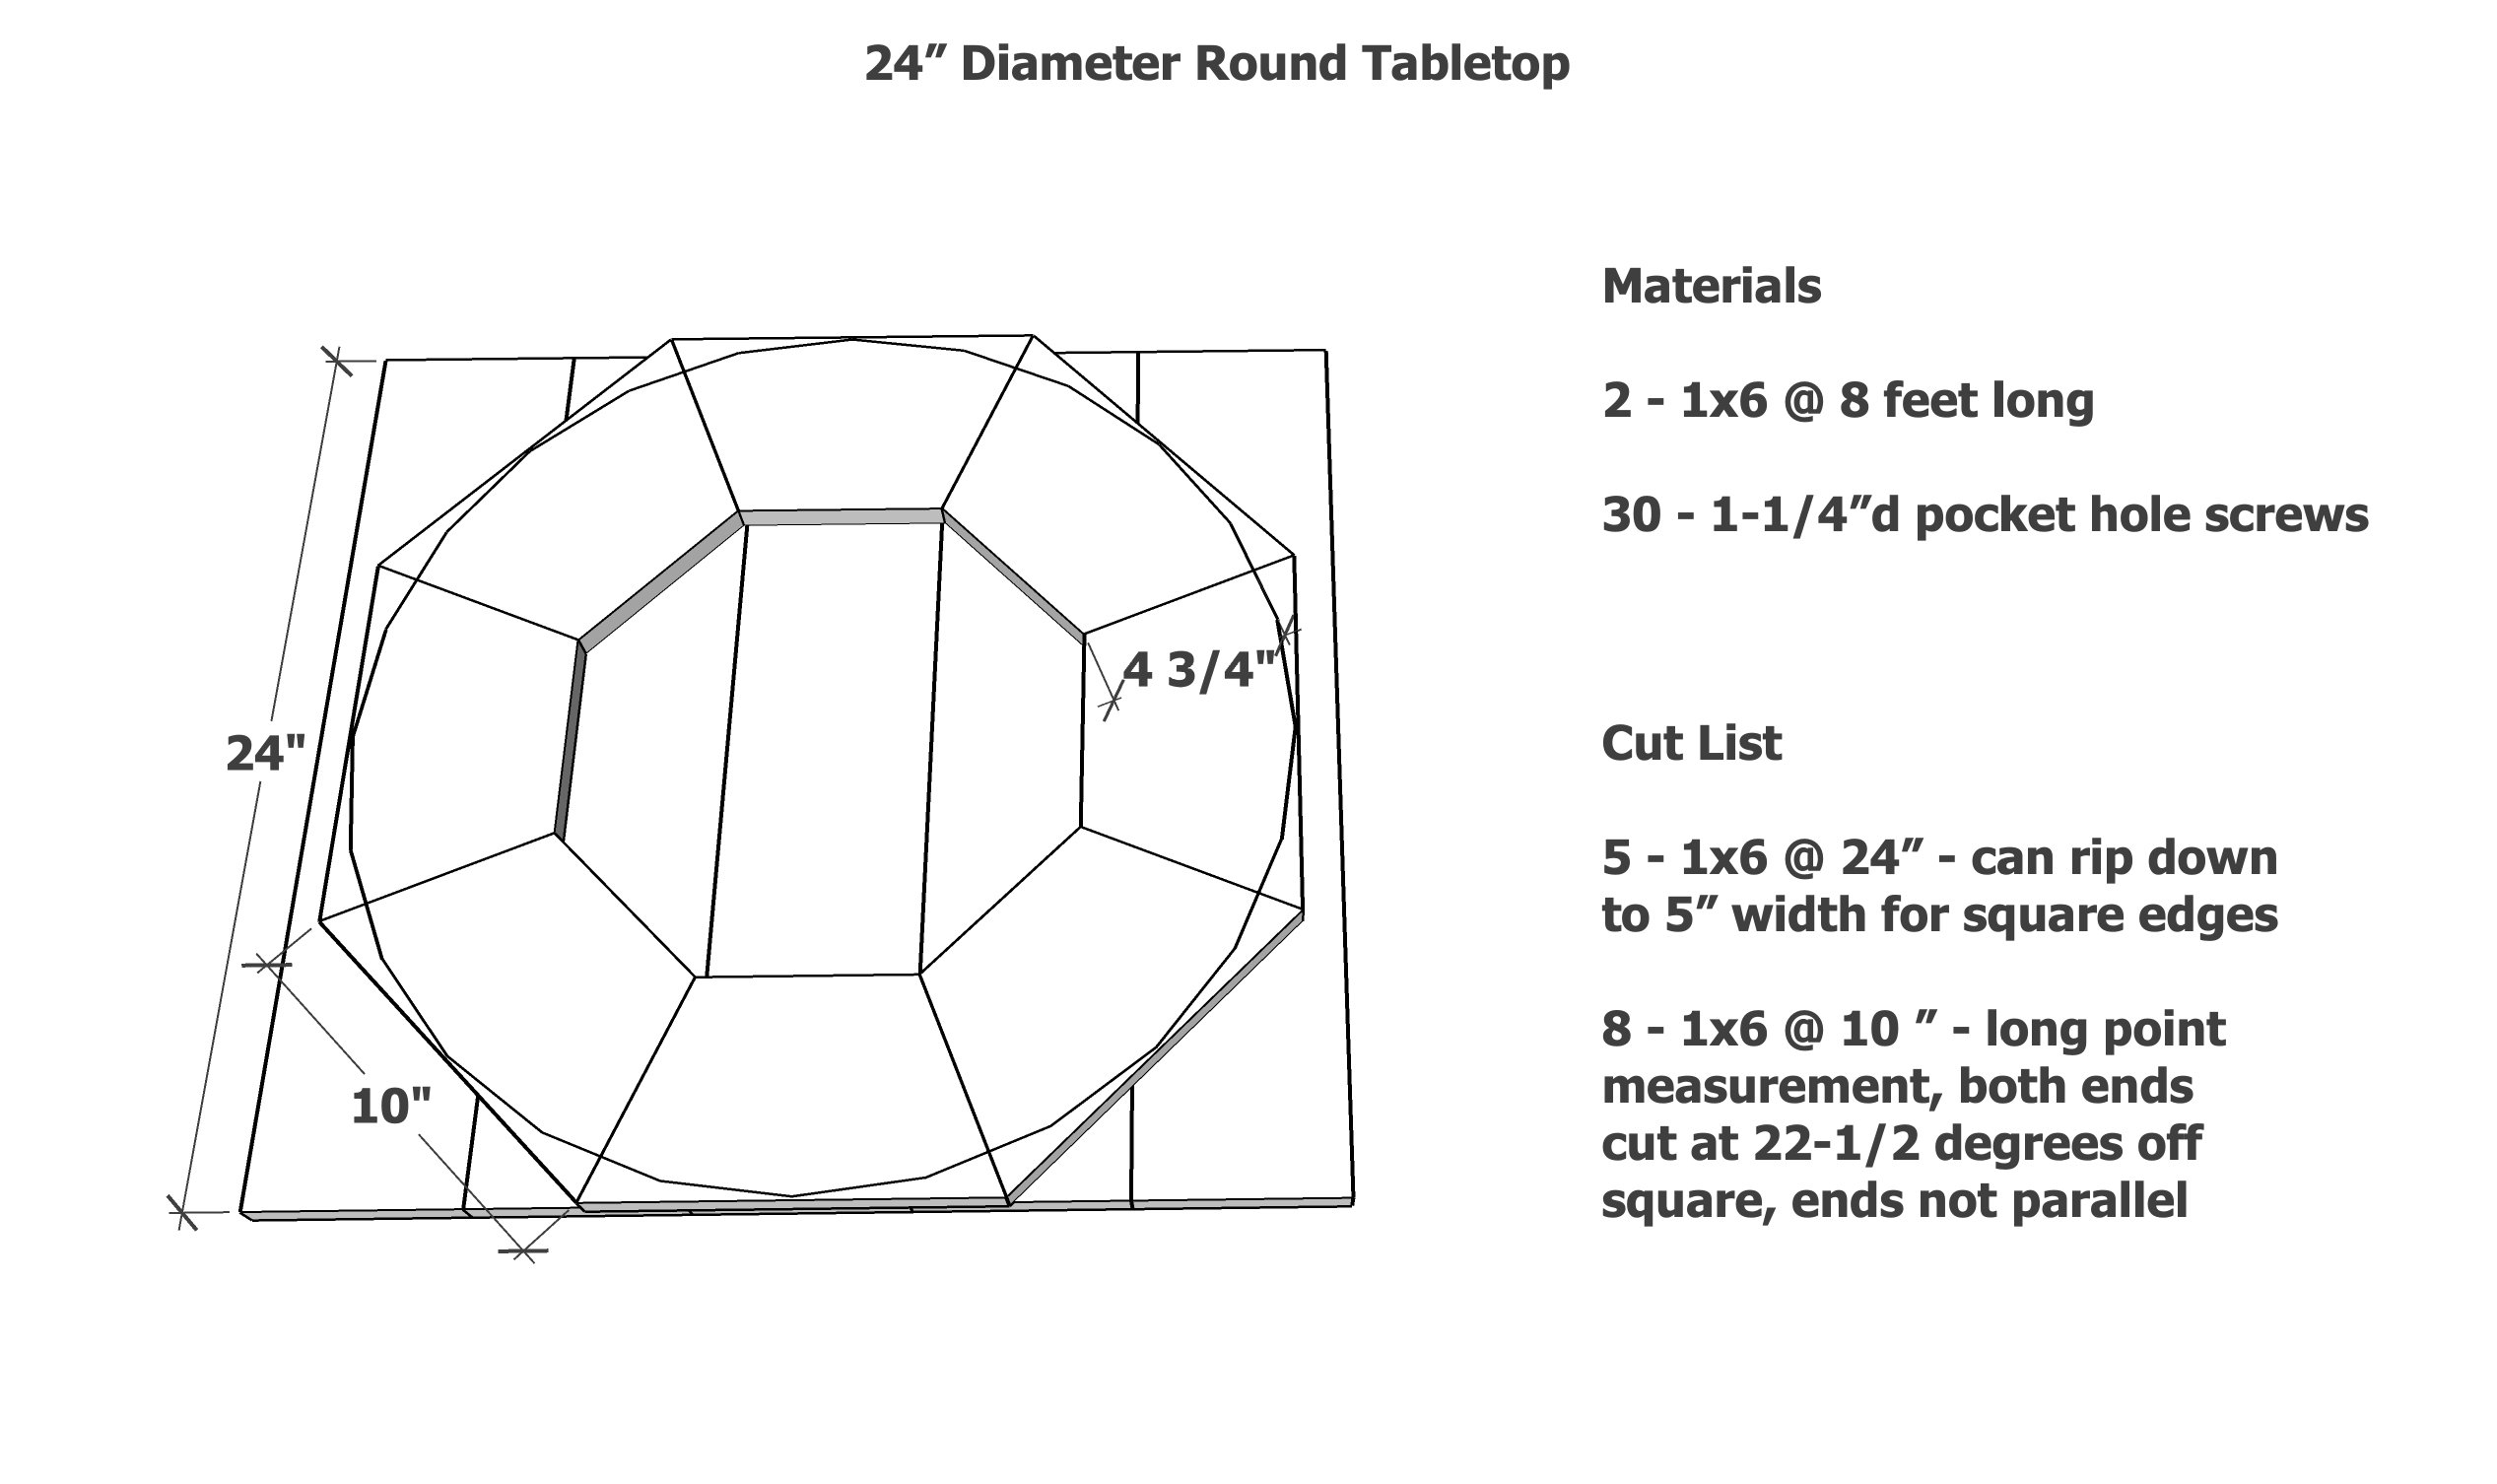
24 Round Table Top Free Pattern
The 24 round table top is great as a bistro table, end table top, or small coffee table or even a nightstand.
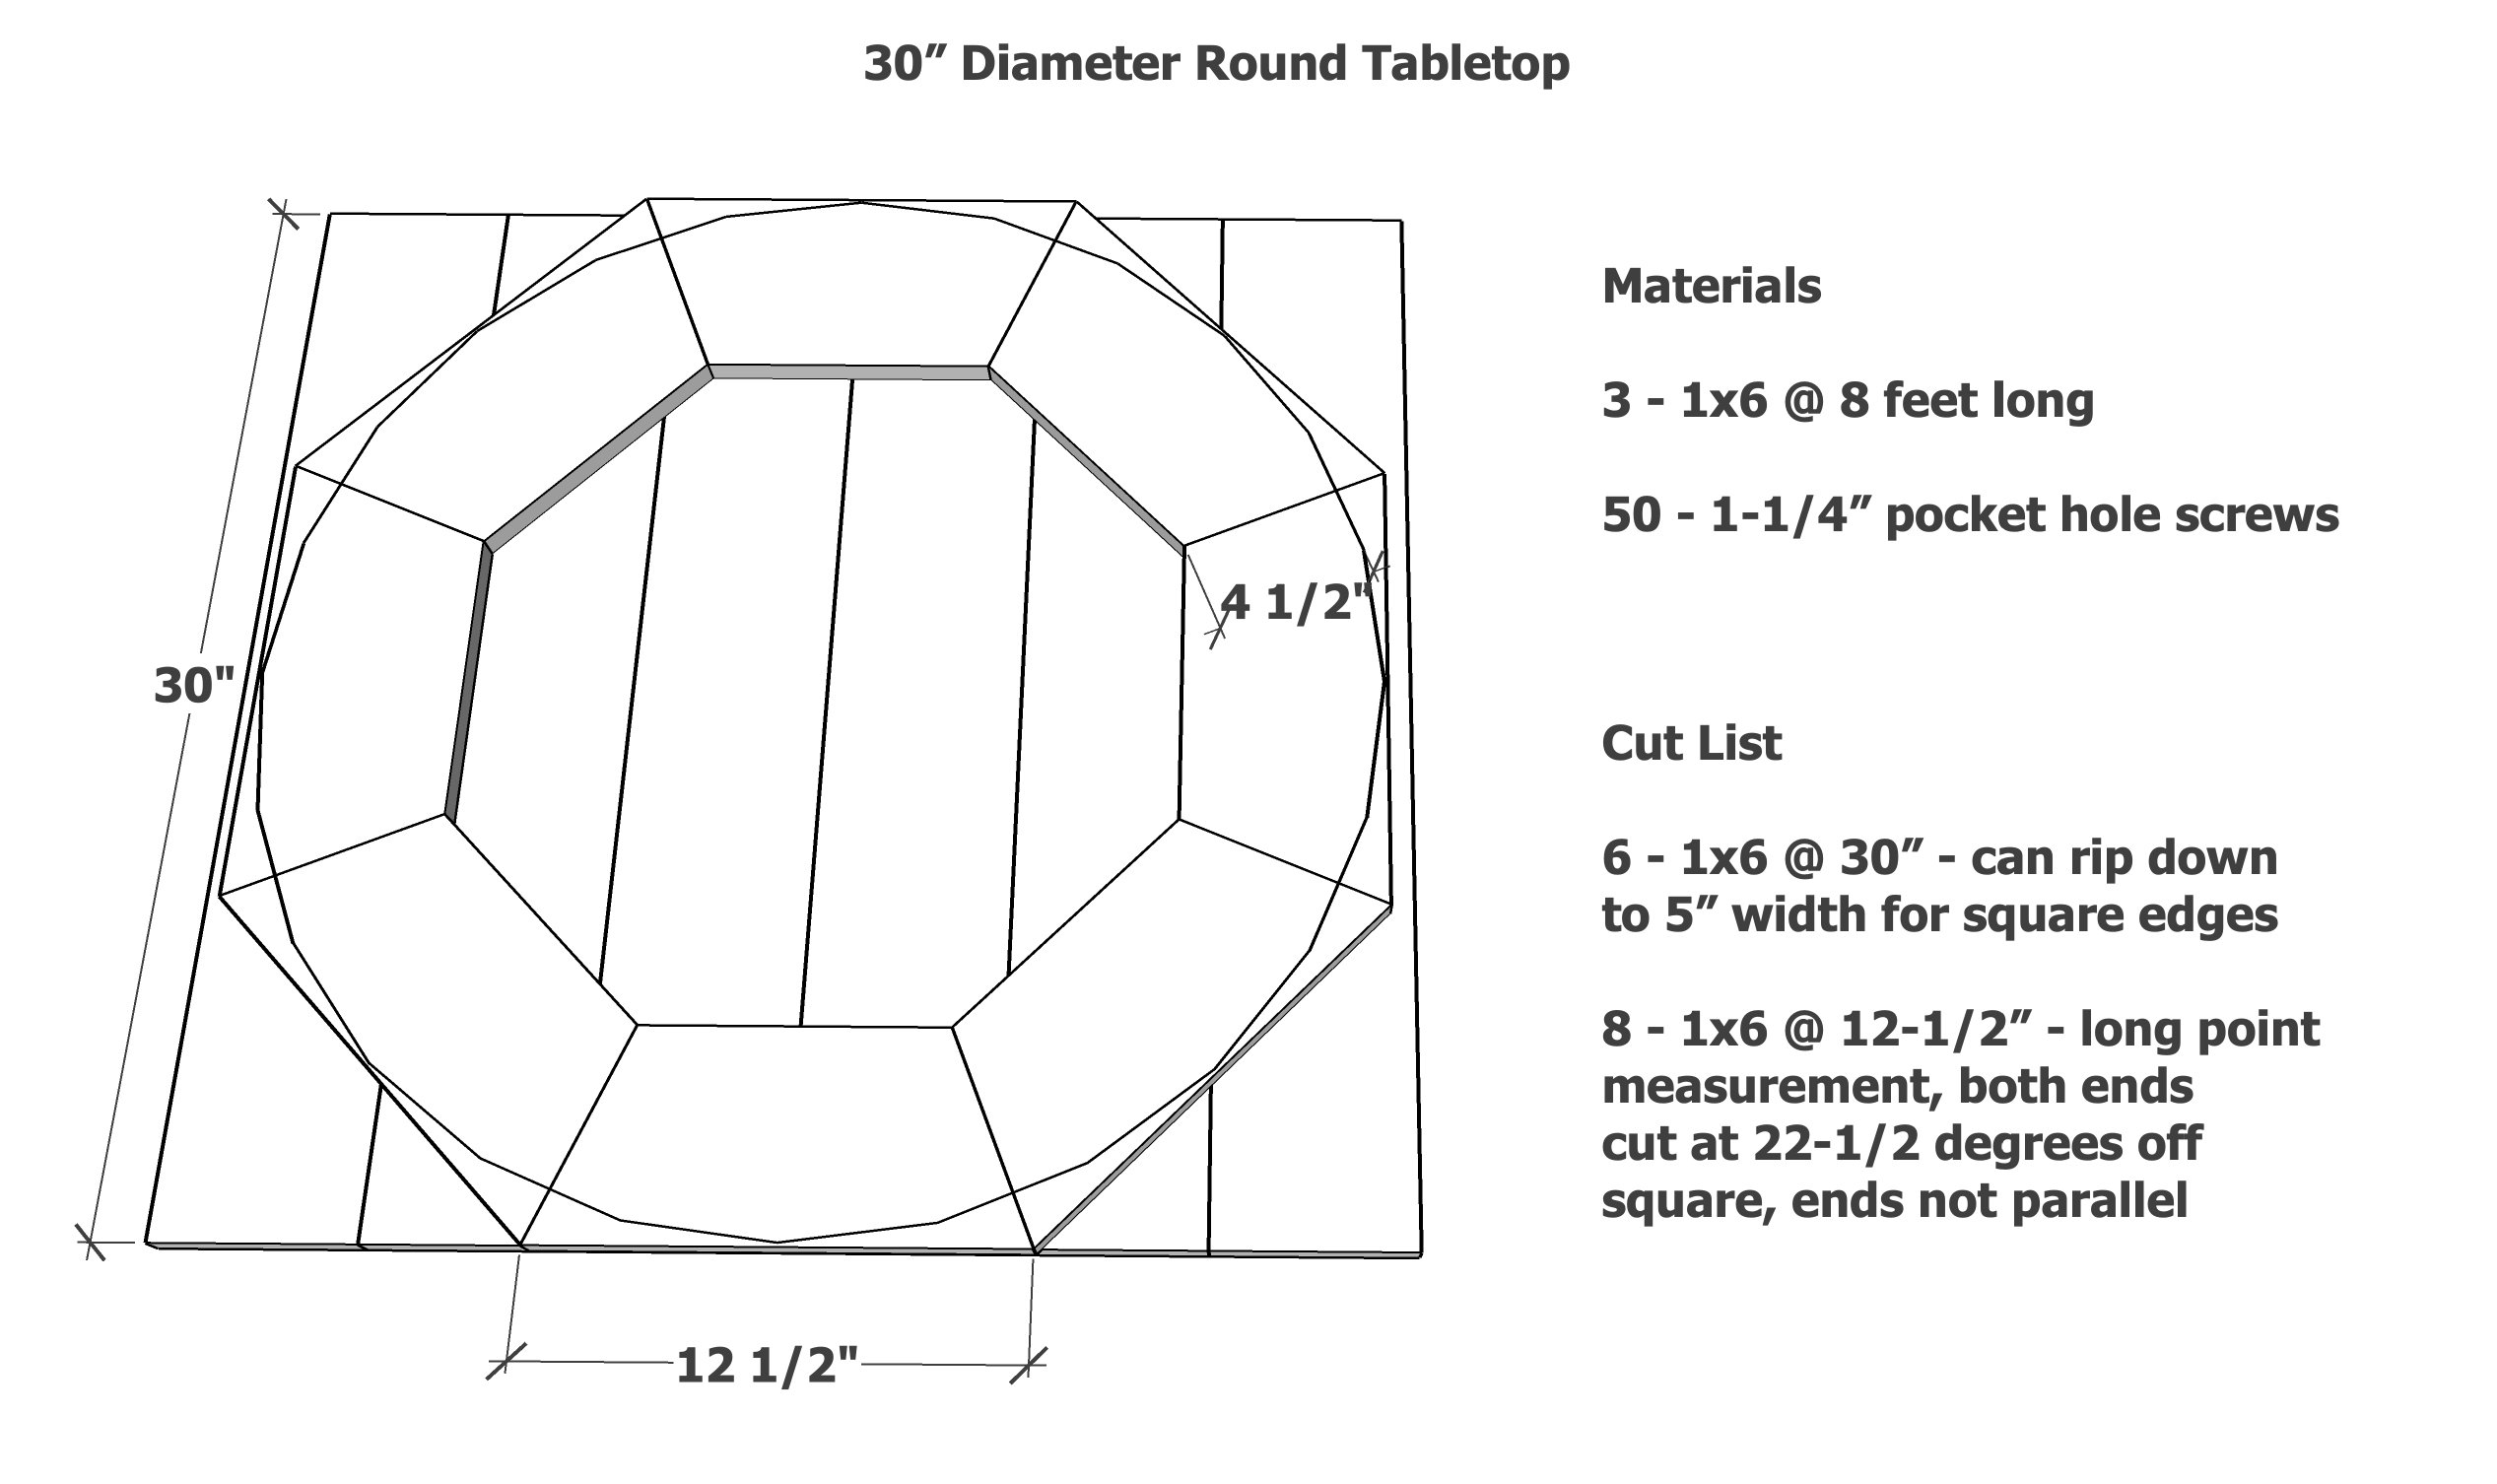
30 Round Table Top Free Pattern
The 30" is still a bistro size - I do love this size though! It is so cozy. Try pairing two together with a long banquette for a restaurant feel at home, or with a banquette and two chairs in a breakfast nook. 30" is also a great size for a small coffee table paired with a sectional, or a kids play table.
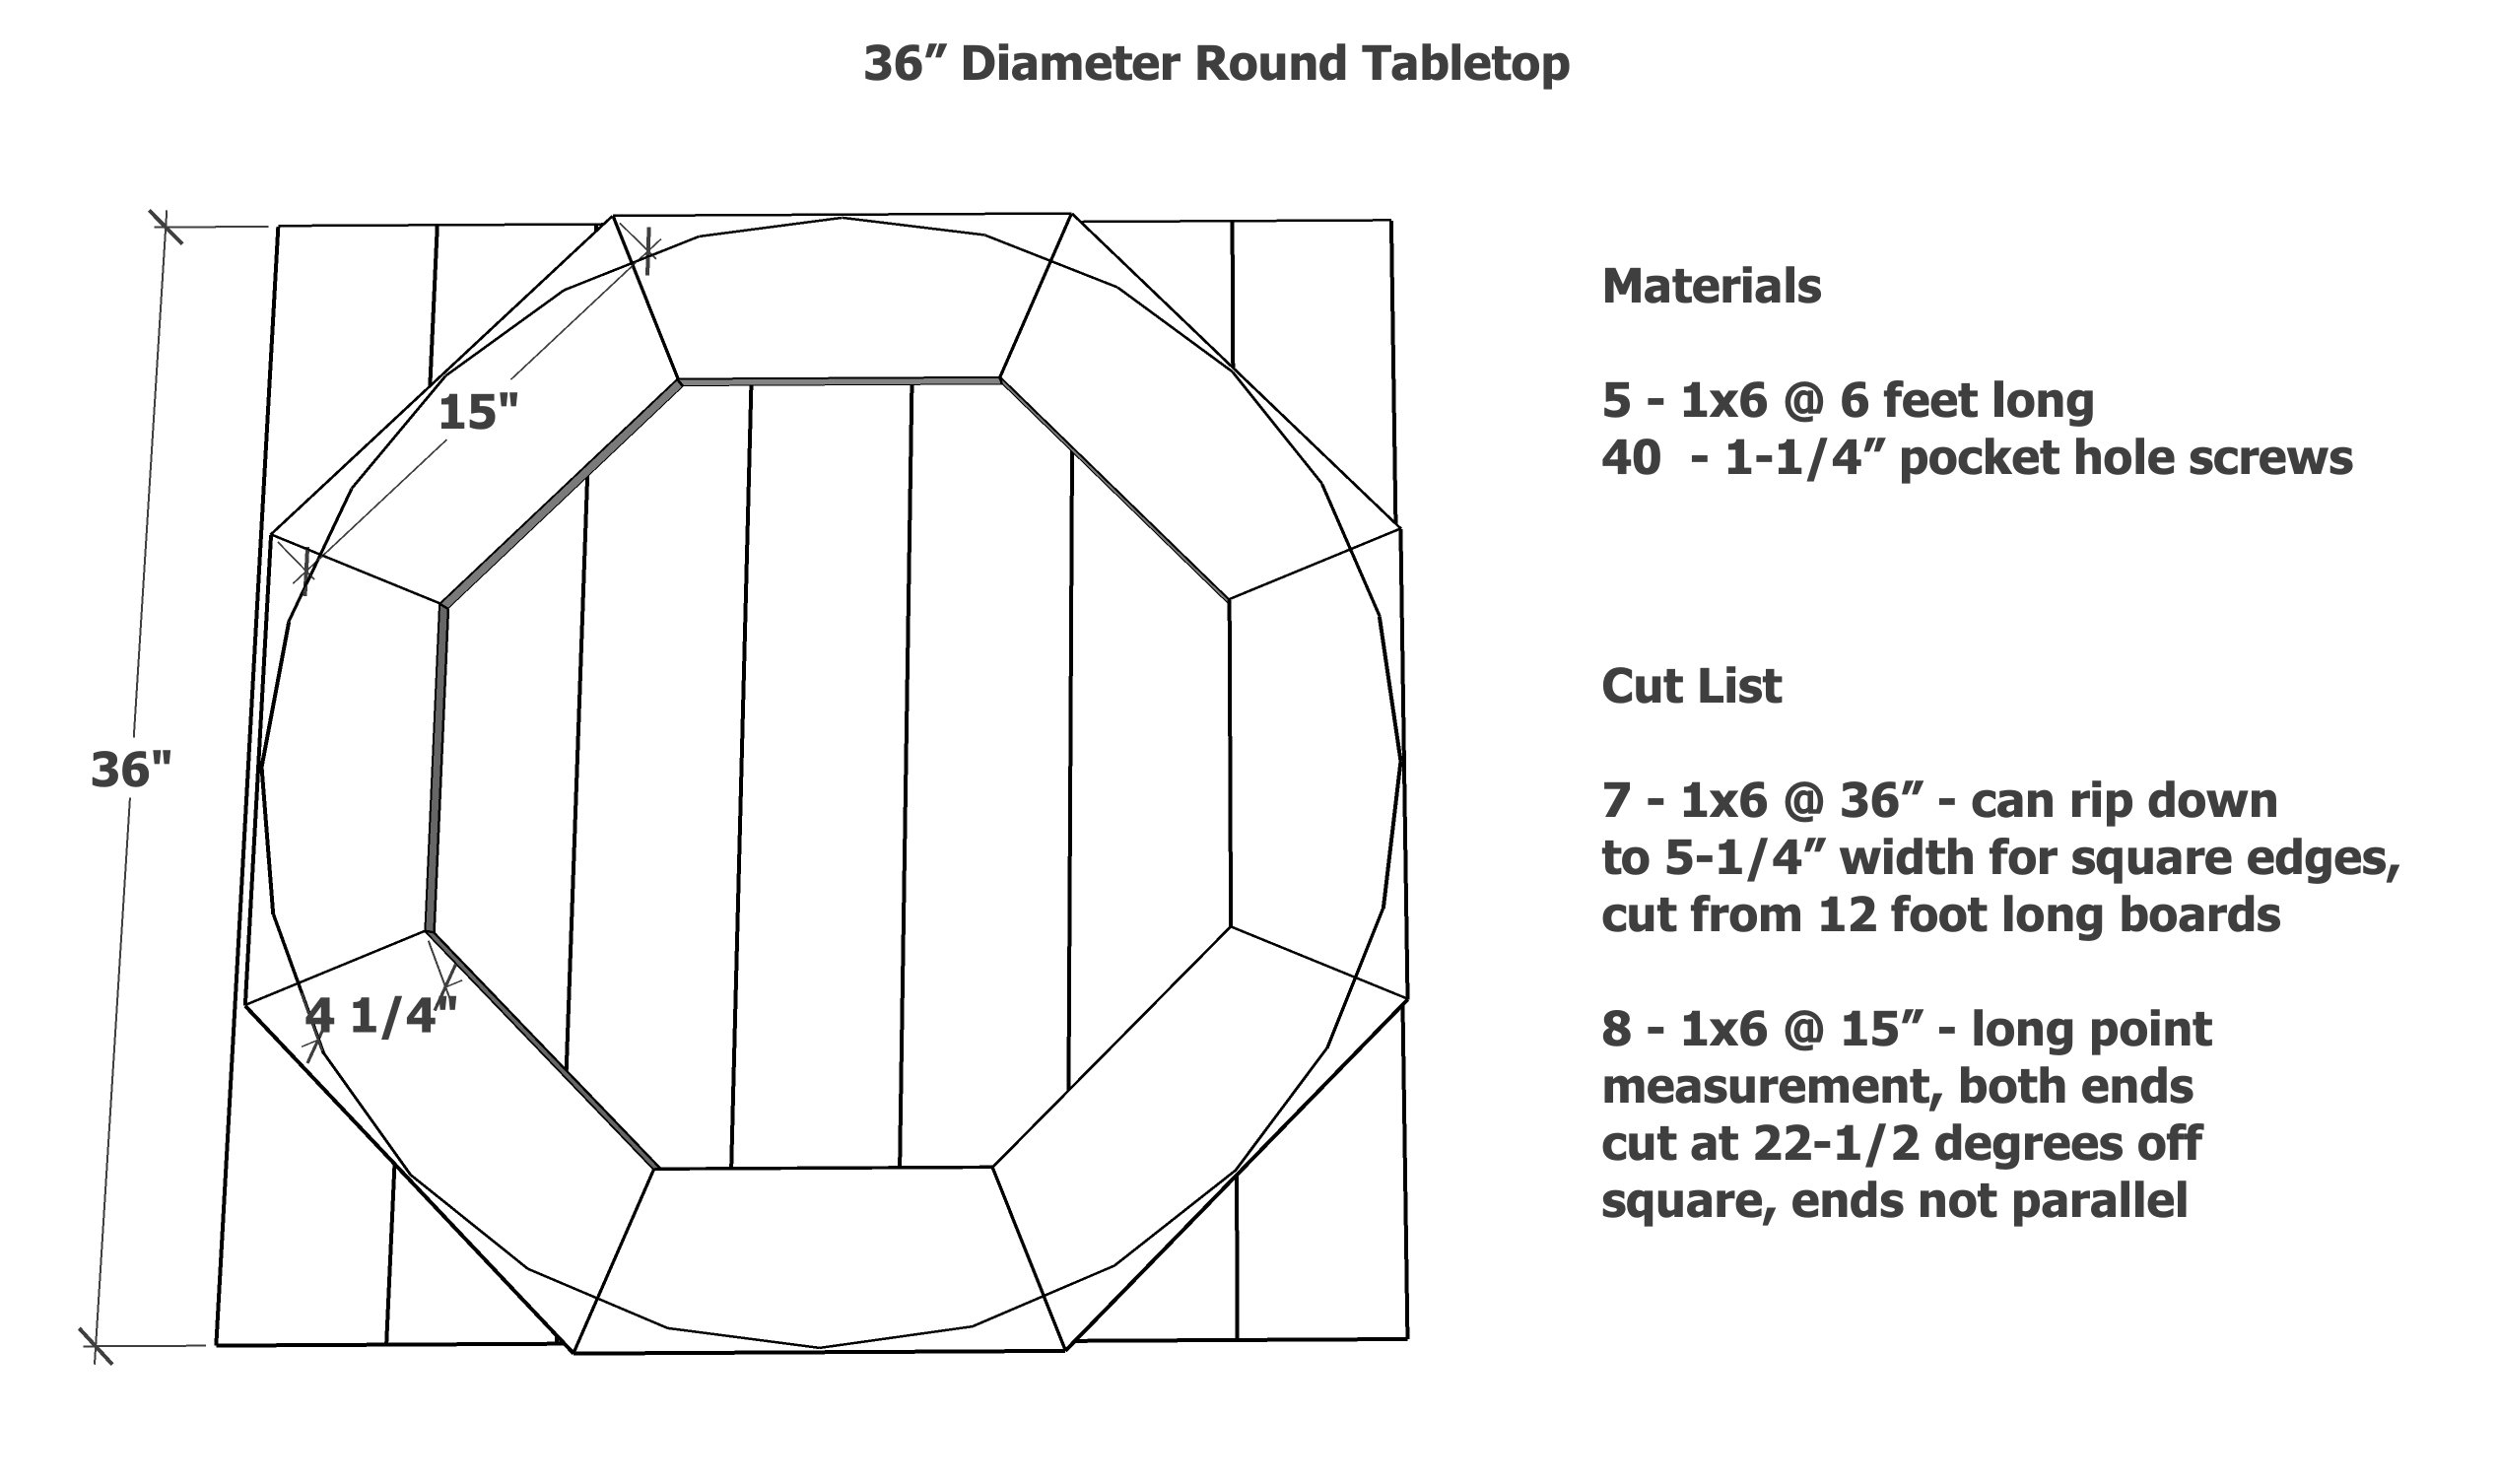
36 Round Table Top Free Pattern
A 36 round table top create quite a bit more space than the 30" - but still on the small size. We love the 36" as a coffee table, bistro table, high top table, paired with a banquette in a breakfast nook, or as a kids activity table.
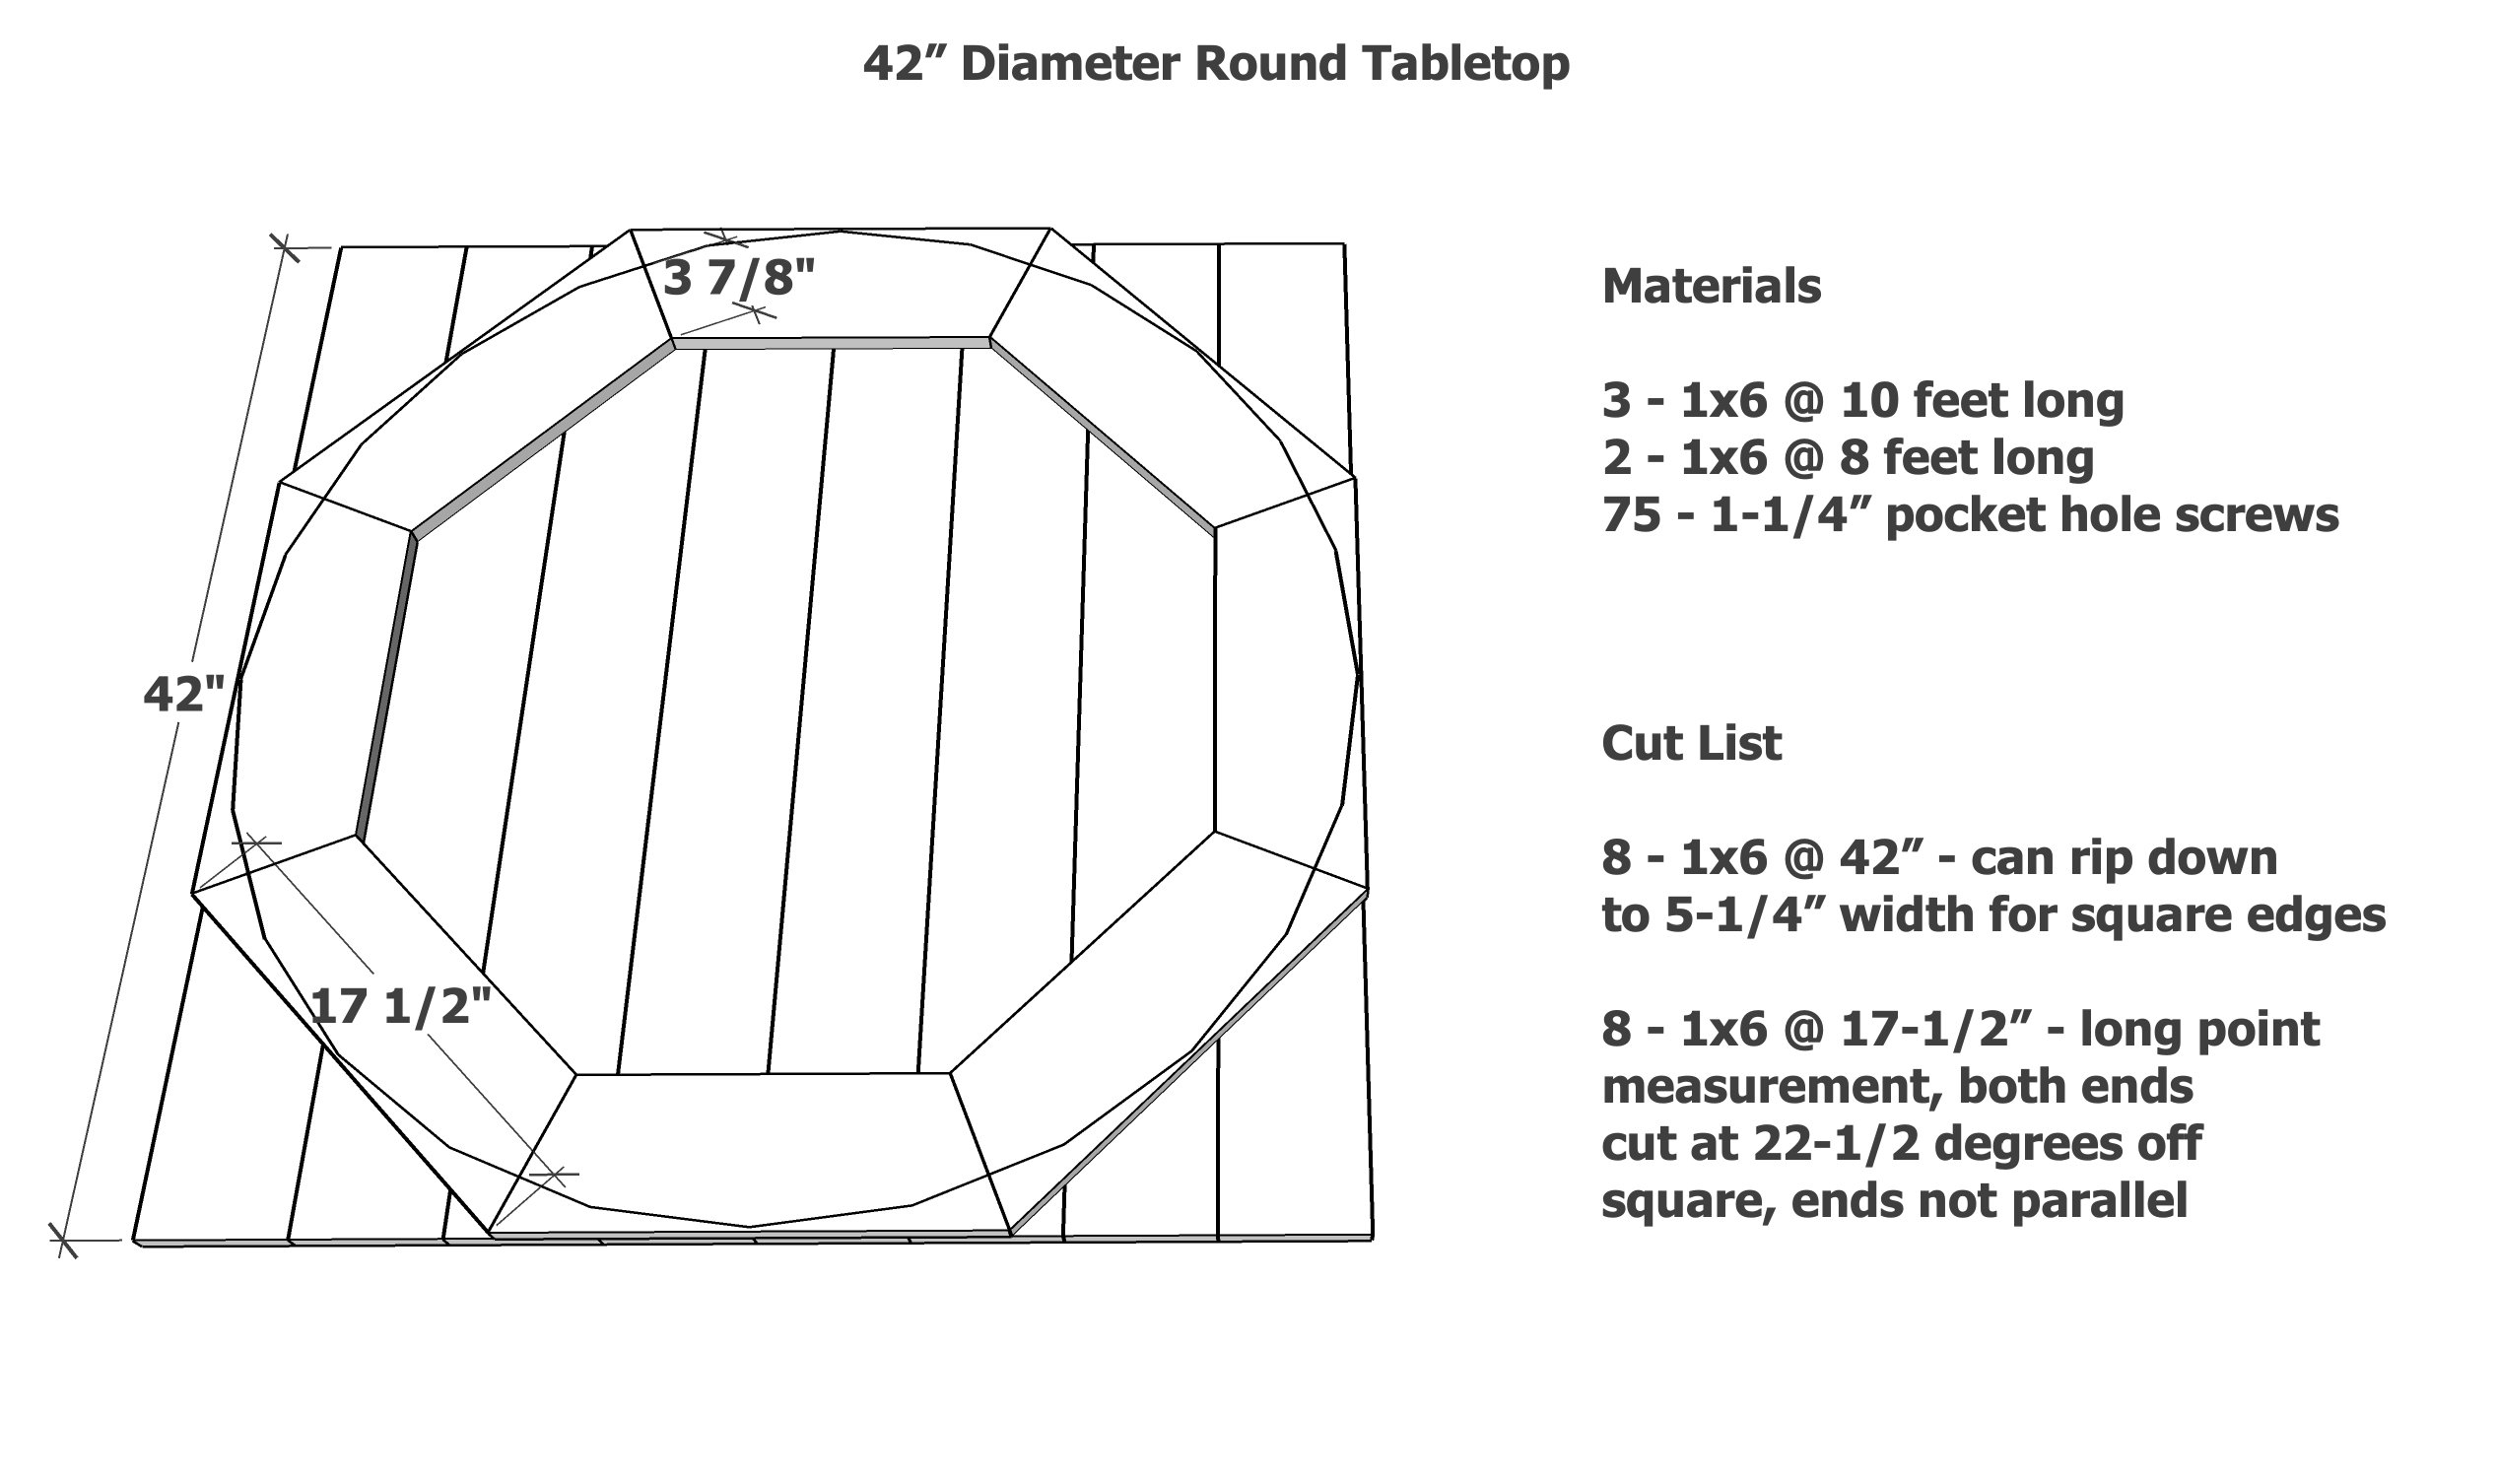
42 Round Table Top Free Pattern
The 42 round table top is big enough to seat a small family and is perfect in a breakfast nook. If you are looking for a larger round coffee table, the 42 round table top is a great choice.
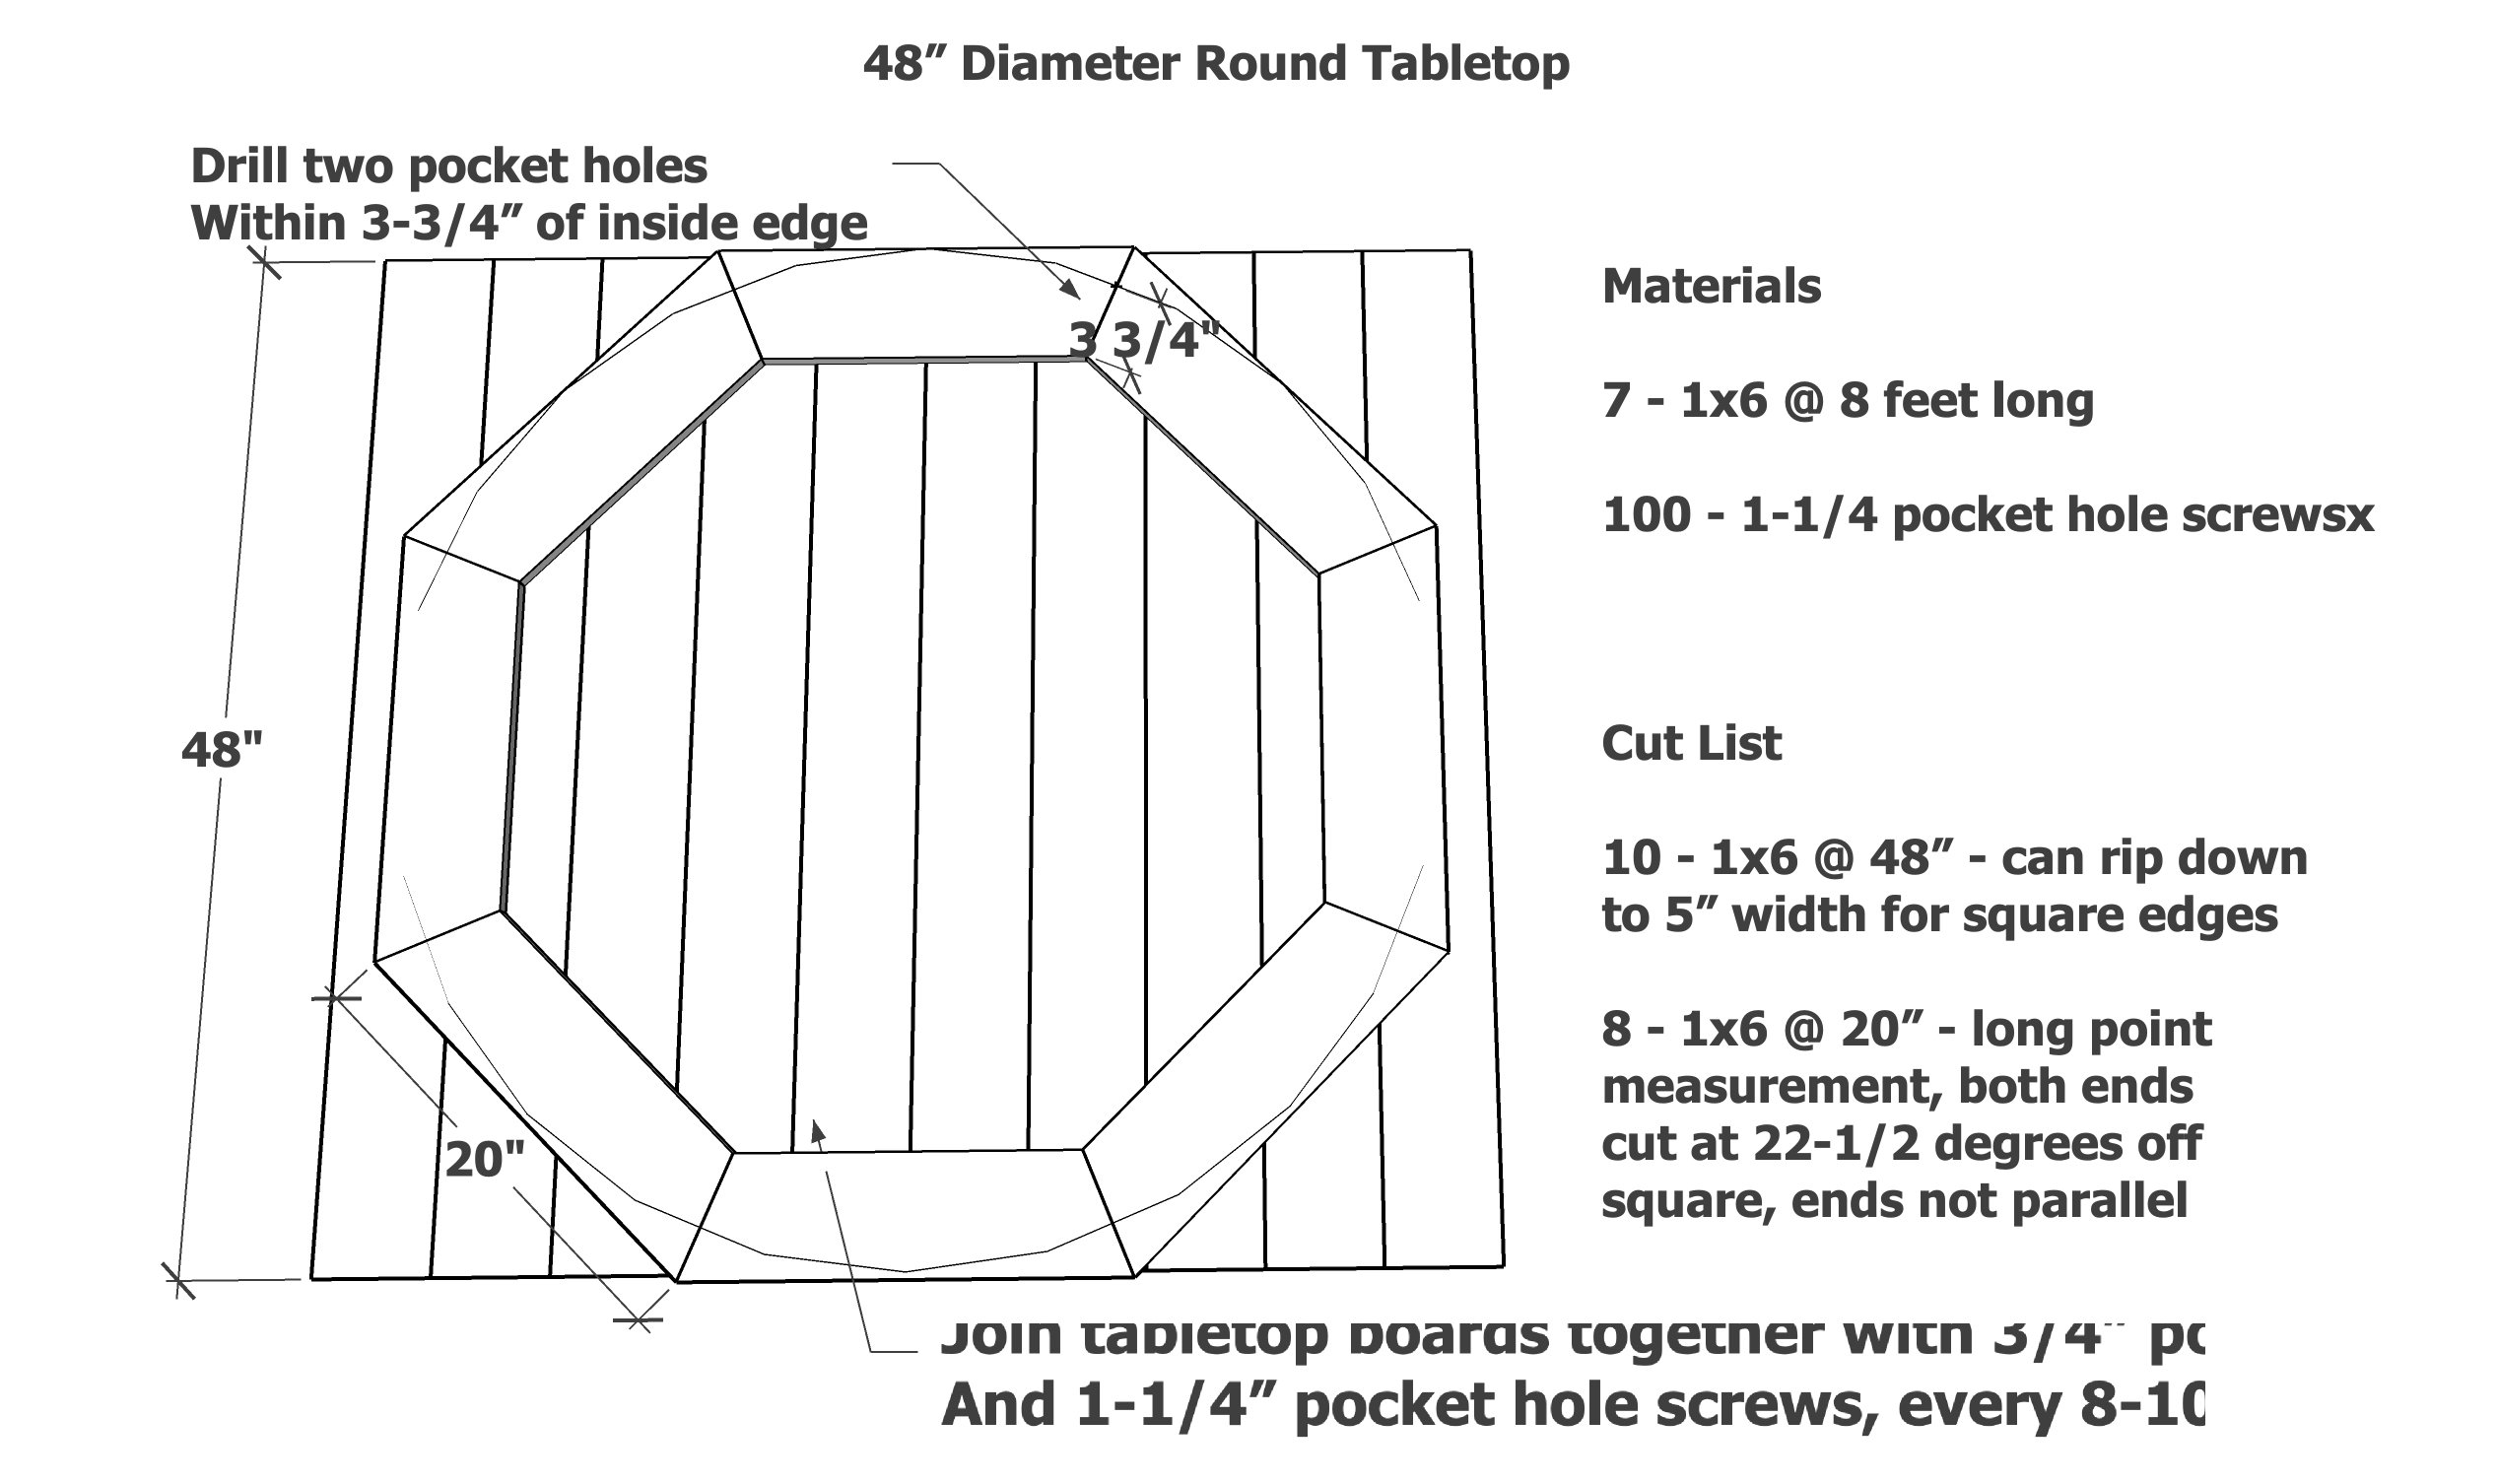
48 Round Table Top Free Pattern
A 48 round table top is a standard tabletop size for a small family. We love this as a main table in a breakfast area, or even in a smaller dining room.
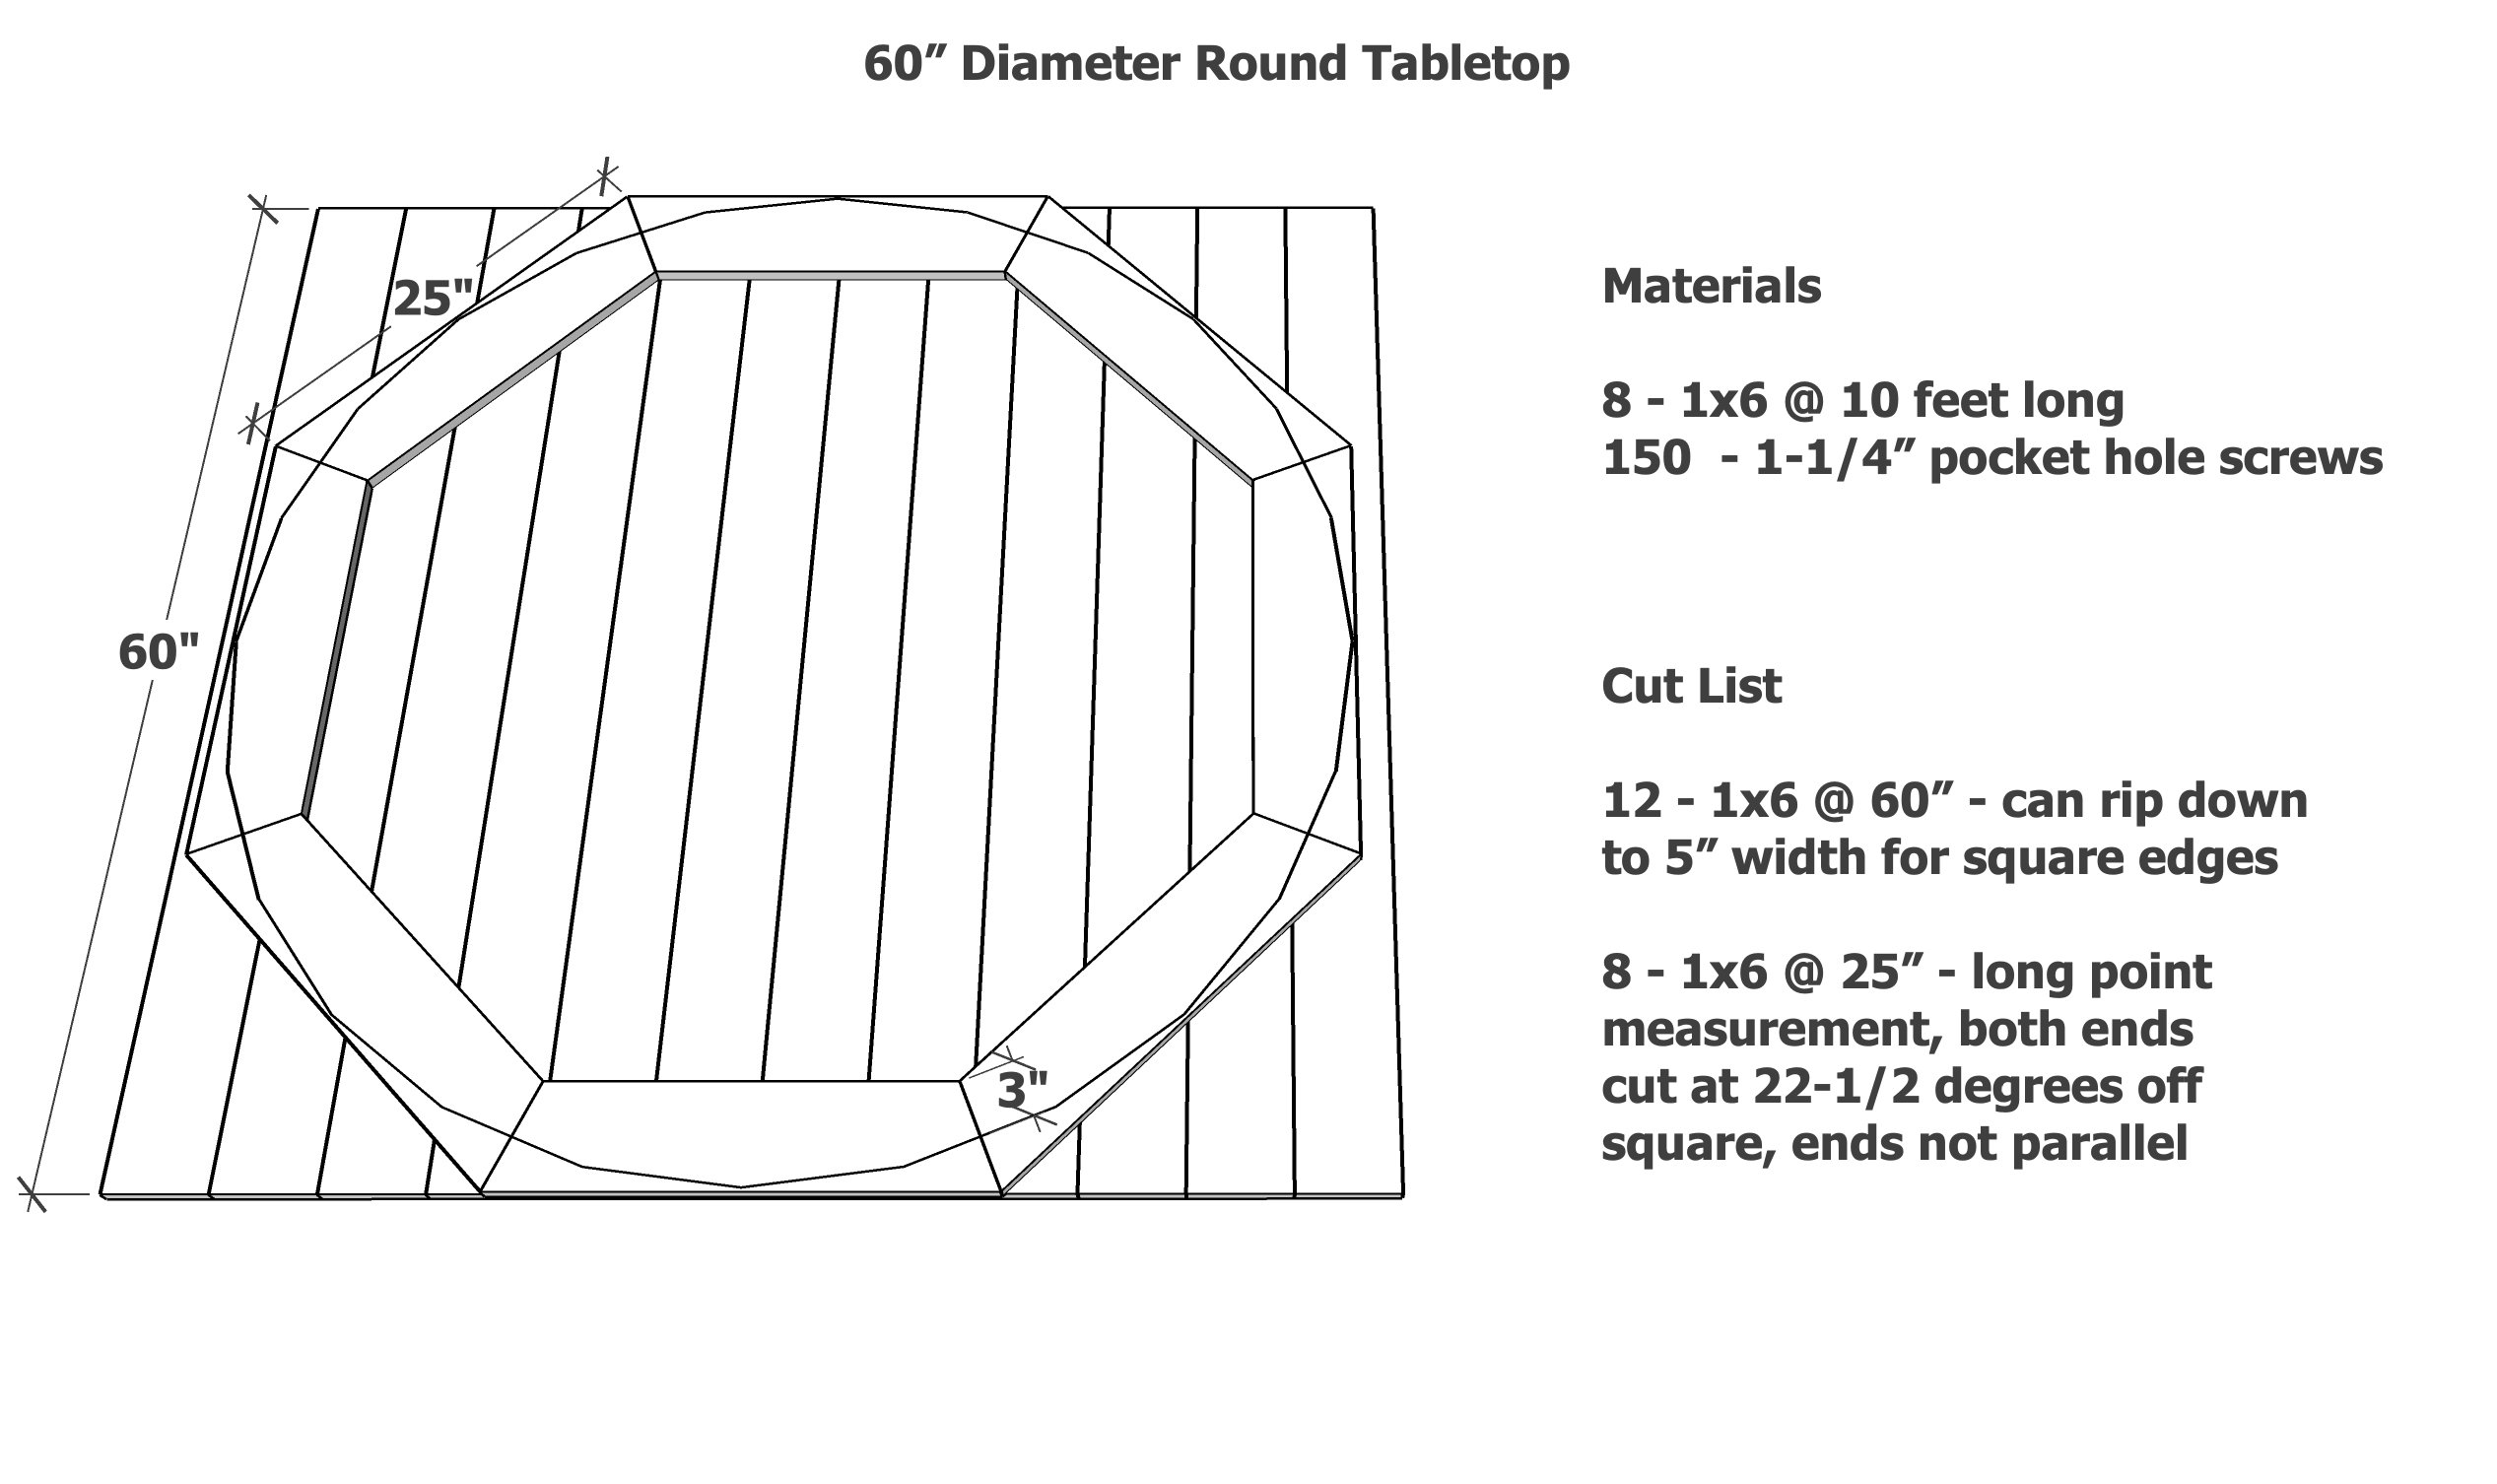
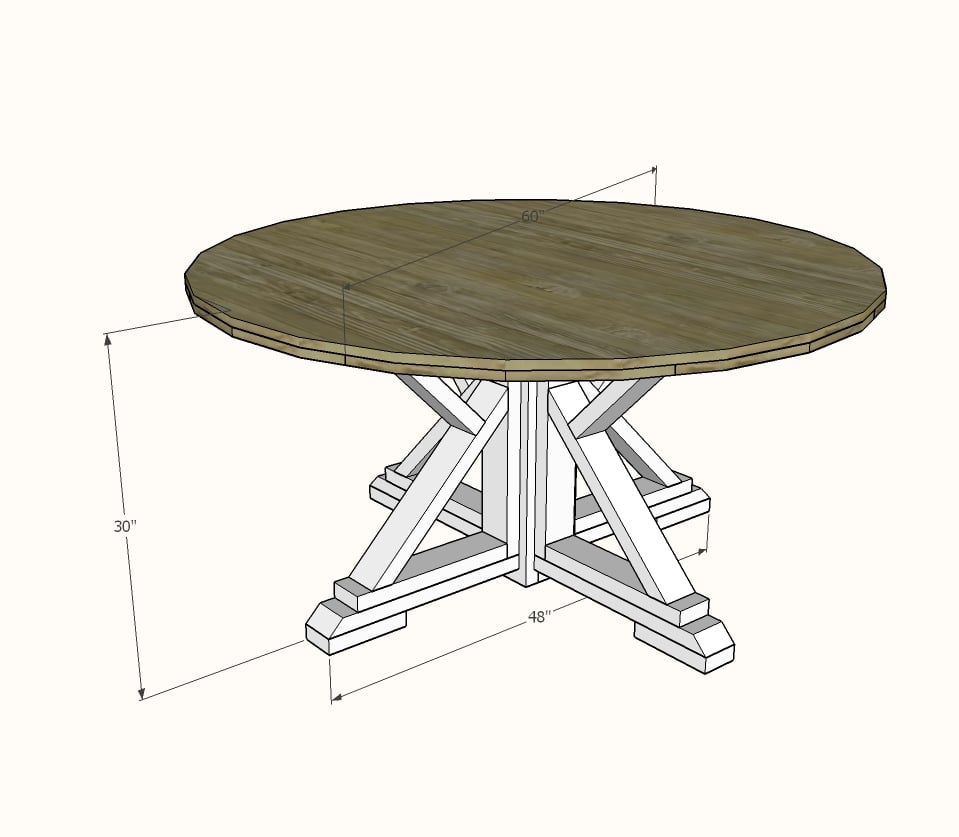
60 Round Table Top Free Pattern
I have the 60 round table top. It is still a good size, and adds the benefit of being able to expand to 8 seats when needed. I have this size and keep a few extra chairs around for when guests join us for meals. The downside when getting this big is it becomes harder to wipe clean, harder to vacuum underneath, and it's on the big size for card games and board games.
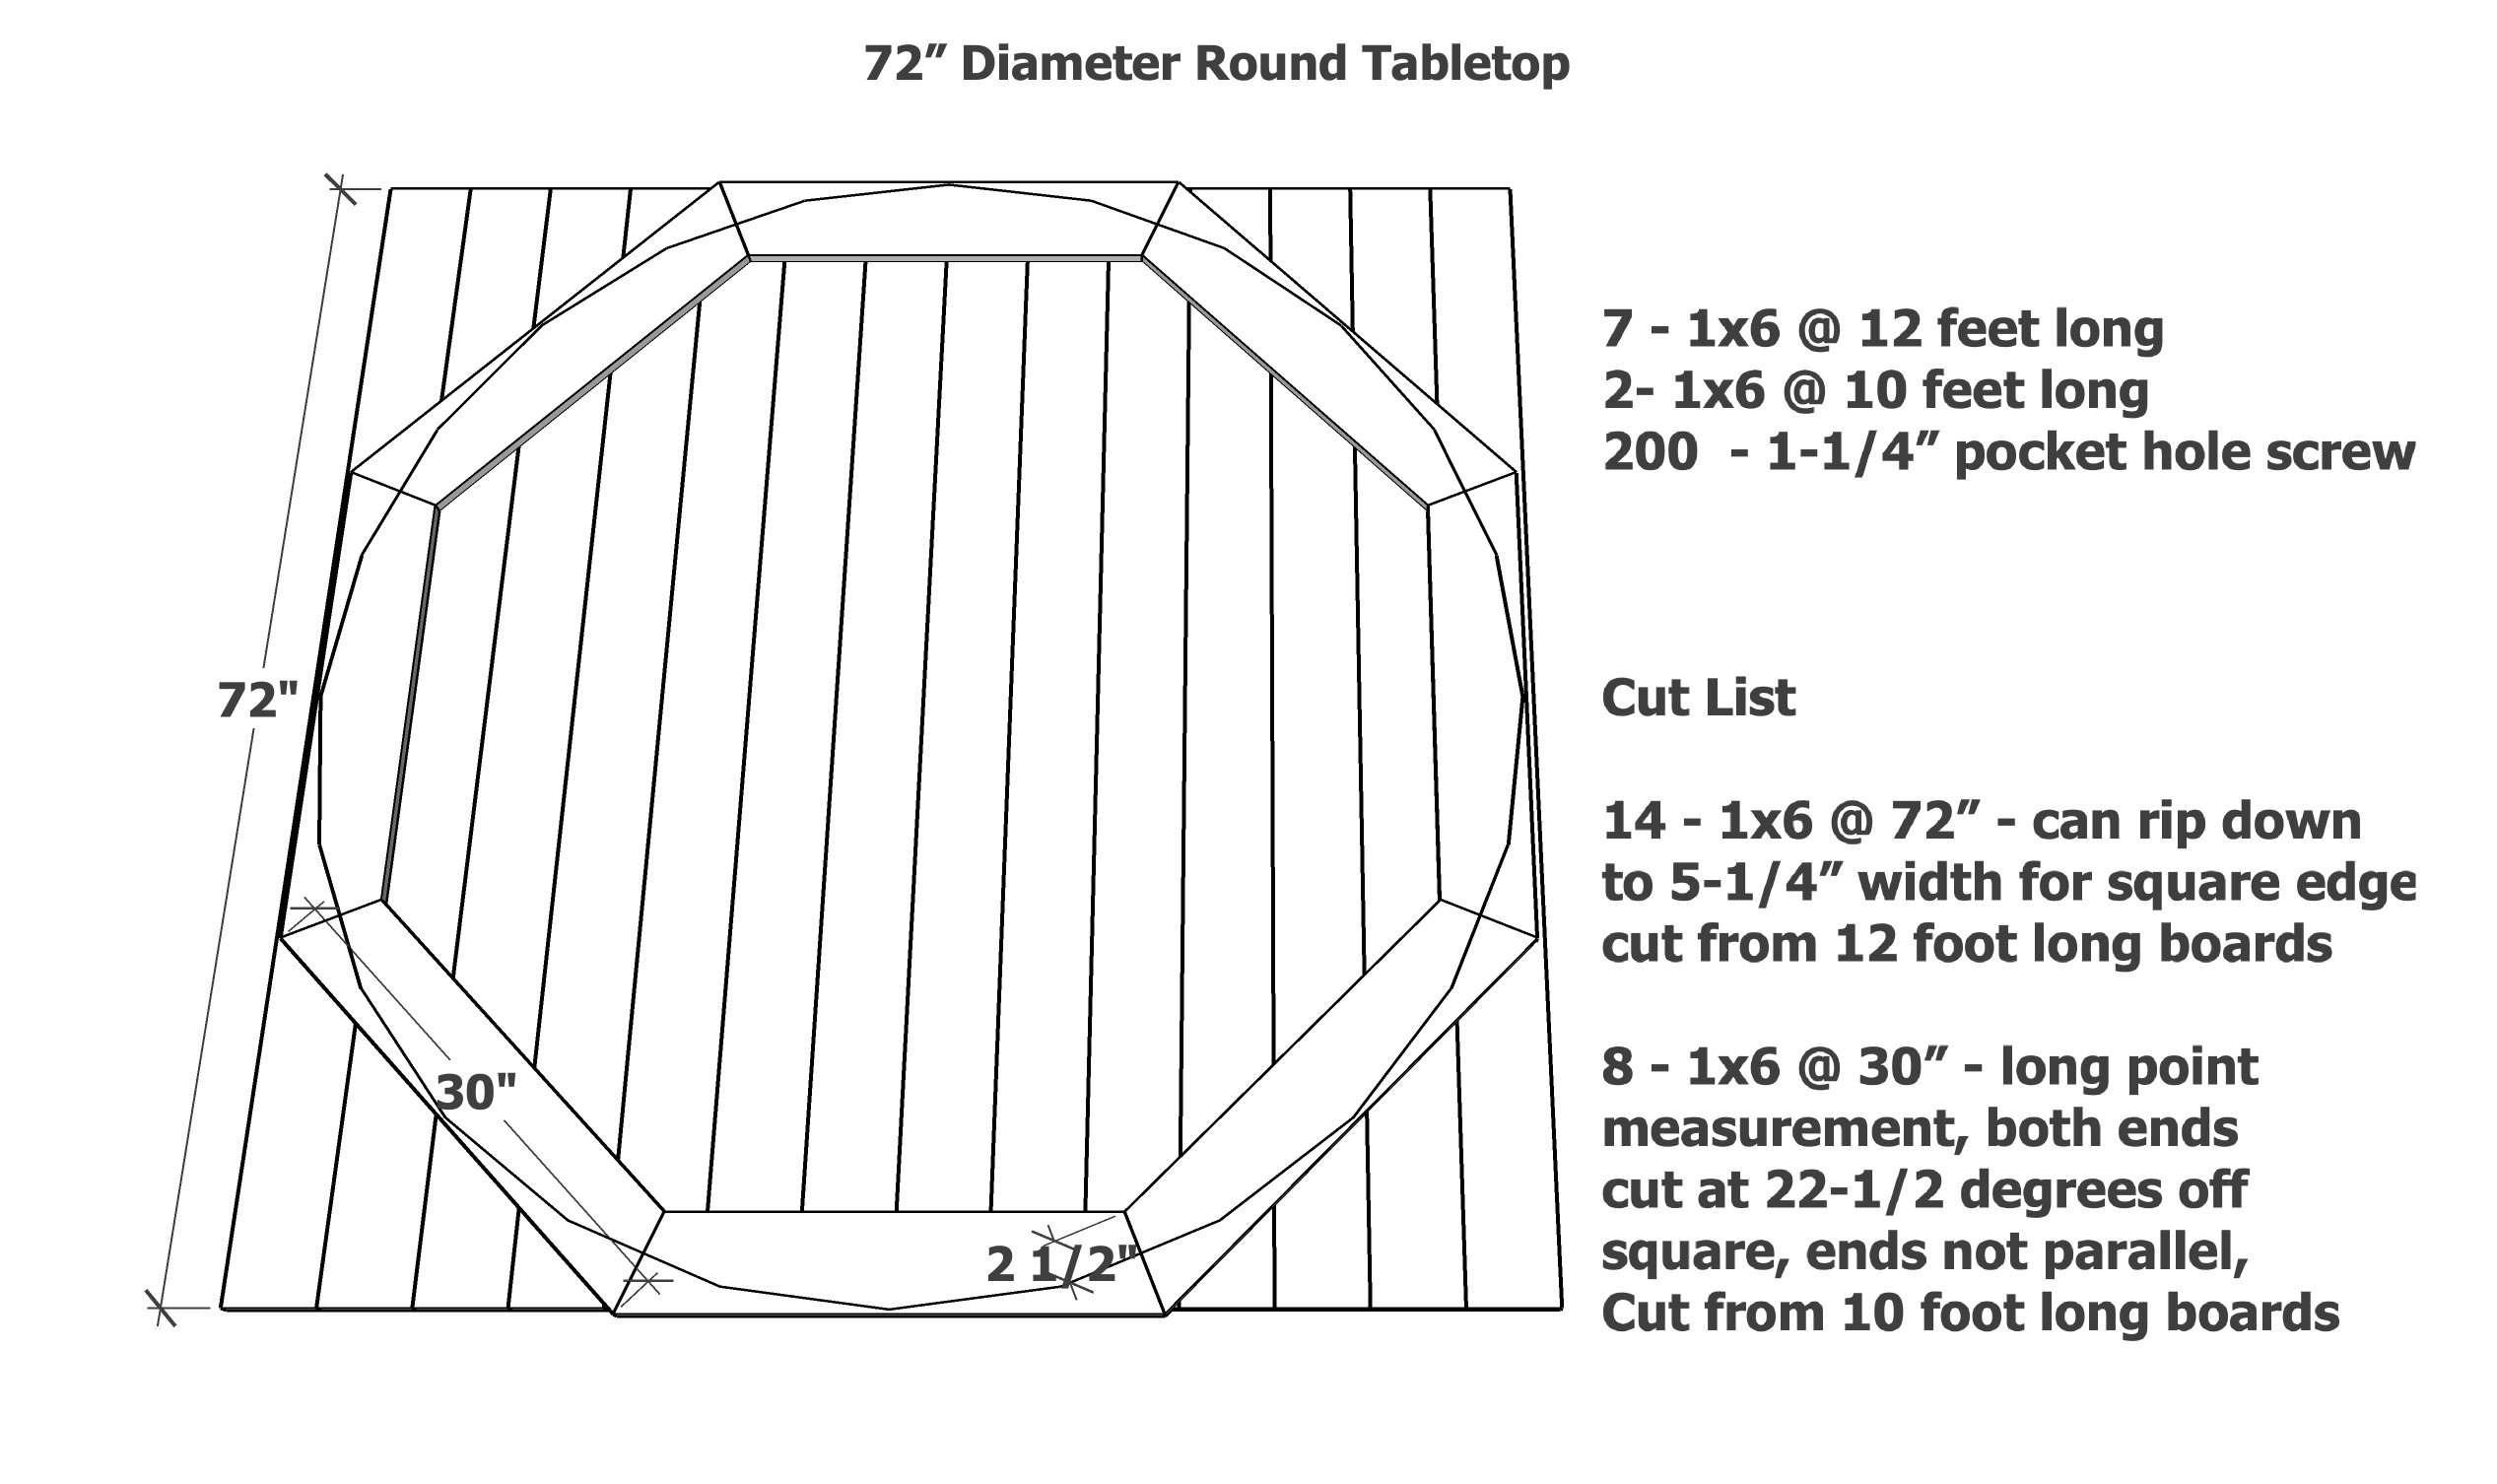
72 Round Table Top Free Pattern
If you have a large, square formal dining room, a 72" table would be amazing. I would not recommend going this grand in a breakfast nook or informal dining space, as it may loose the cozy factor - but for large spaces, this would be a dream size.
Figuring Length of Octagon Long Point Cuts for Any Diameter
I put together patterns for the most standard sized round table tops. But what happens if you want a custom size? Here's how you can figure how long to cut the octagon pieces underneath.
Multiple the desired diameter of your table x .41666667 = long point to long point measurement, both ends are cut at 22-1/2 degrees off square
Then you can cut and build the octagon base, and then use it to cut and build the tabletop boards.
Step-By-Step, How to Build a Round Table Top
Use the free patterns in different sizes to determine your materials needed and your cut list. Then follow the steps below to build your own round table top.
Pin For Later!
Preparation
For shopping list, please see the image with pattern in desired size. Pattern images can be downloaded by right clicking.
For cut list, please see the pattern image.
It is recommended to first cut the octagon pieces out first, and attach together.
Then cut the tabletop pieces so they cover the octagon pieces - this may save you some board feet on the end pieces. This also allows for cuts that may be short to be placed on the edges.


For long term durability and more professional results, I recommend using a pocket hole joinery system for wood joints. Here is a video with tips for using a pocket hole jig:
Instructions
Step 1
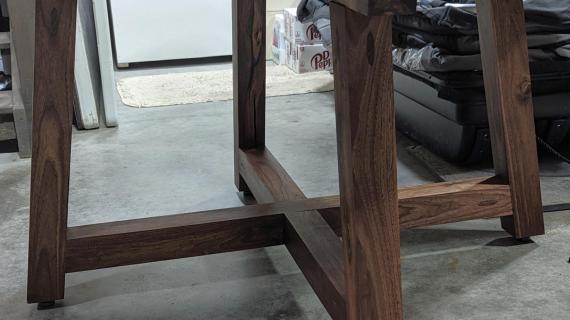
Build the Under Frame
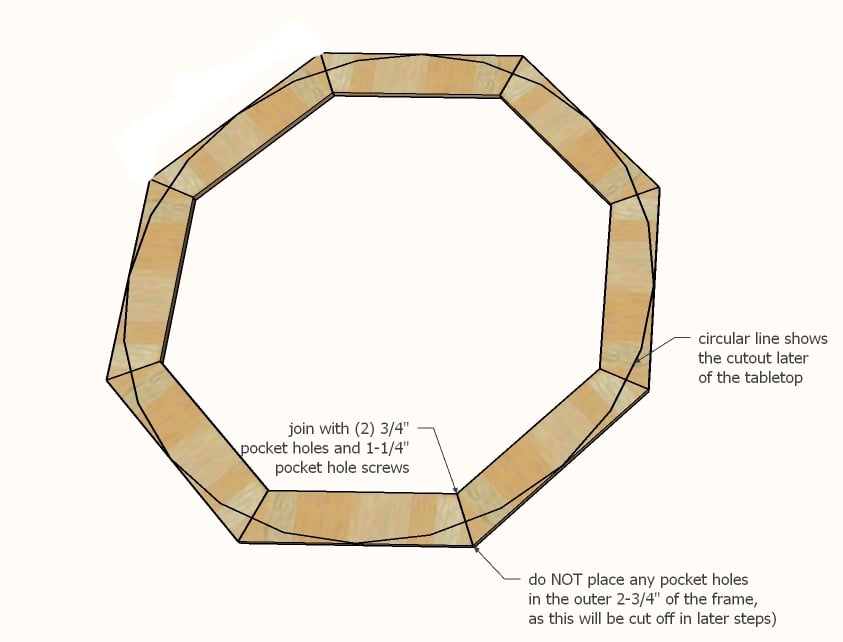
Set your compound miter saw to a 22-1/2 degree angle. Cut out all the frame boards. You can flip the board after cutting to use the previously cut angle pieces as your new angle cut.
Drill two 3/4" pocket holes on ONE end of each of the frame boards, keeping the pocket holes within the circle so they won't show when the excess is cut off in later steps.
Attach with glue and 1-1/4" pocket hole screws to form a giant ring.
Step 2
Building the Tabletop
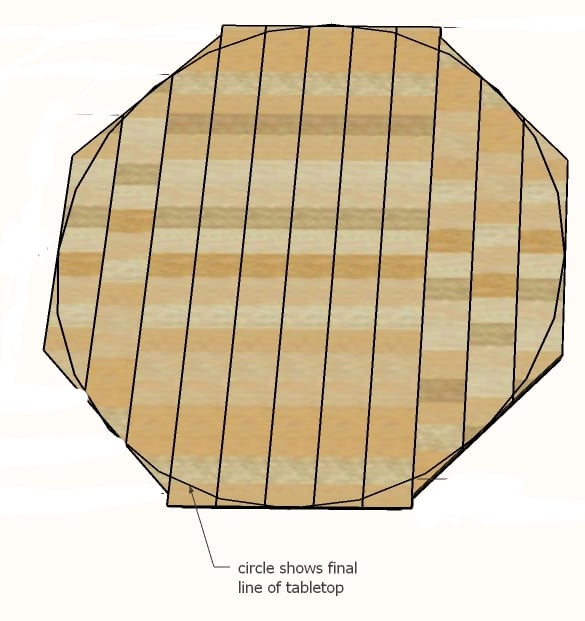
Cut the tabletop boards and and layout, matching centers. You can cut the outer pieces at 45 degrees to save some board feet as shown in the diagram.
Mark pocket holes about every 8" and drill 3/4" pocket holes.
Attach the boards together, matching centers, working from one side to the other. Clamp each joint as you attach.
For this large of a tabletop, if you don't have a worktable that will fit it, two sawhorses with a piece of 3/4" plywood or 2x4s layed flat on top will support it.
Glue the tabletop to the frame. I also recommend 1-1/4" screws to further secure the frame to the tabletop. Avoid placing any screws in areas that will be cut off.
Step 3
There are two different ways to cut the circle on the tabletop that I frequently use - and my favorite is actually a combination of the two. I like to use the circular saw to cut a rough circle, and then finish with a router bit for a nice edge.
Here is a great tutorial on cutting round tabletops with a router.
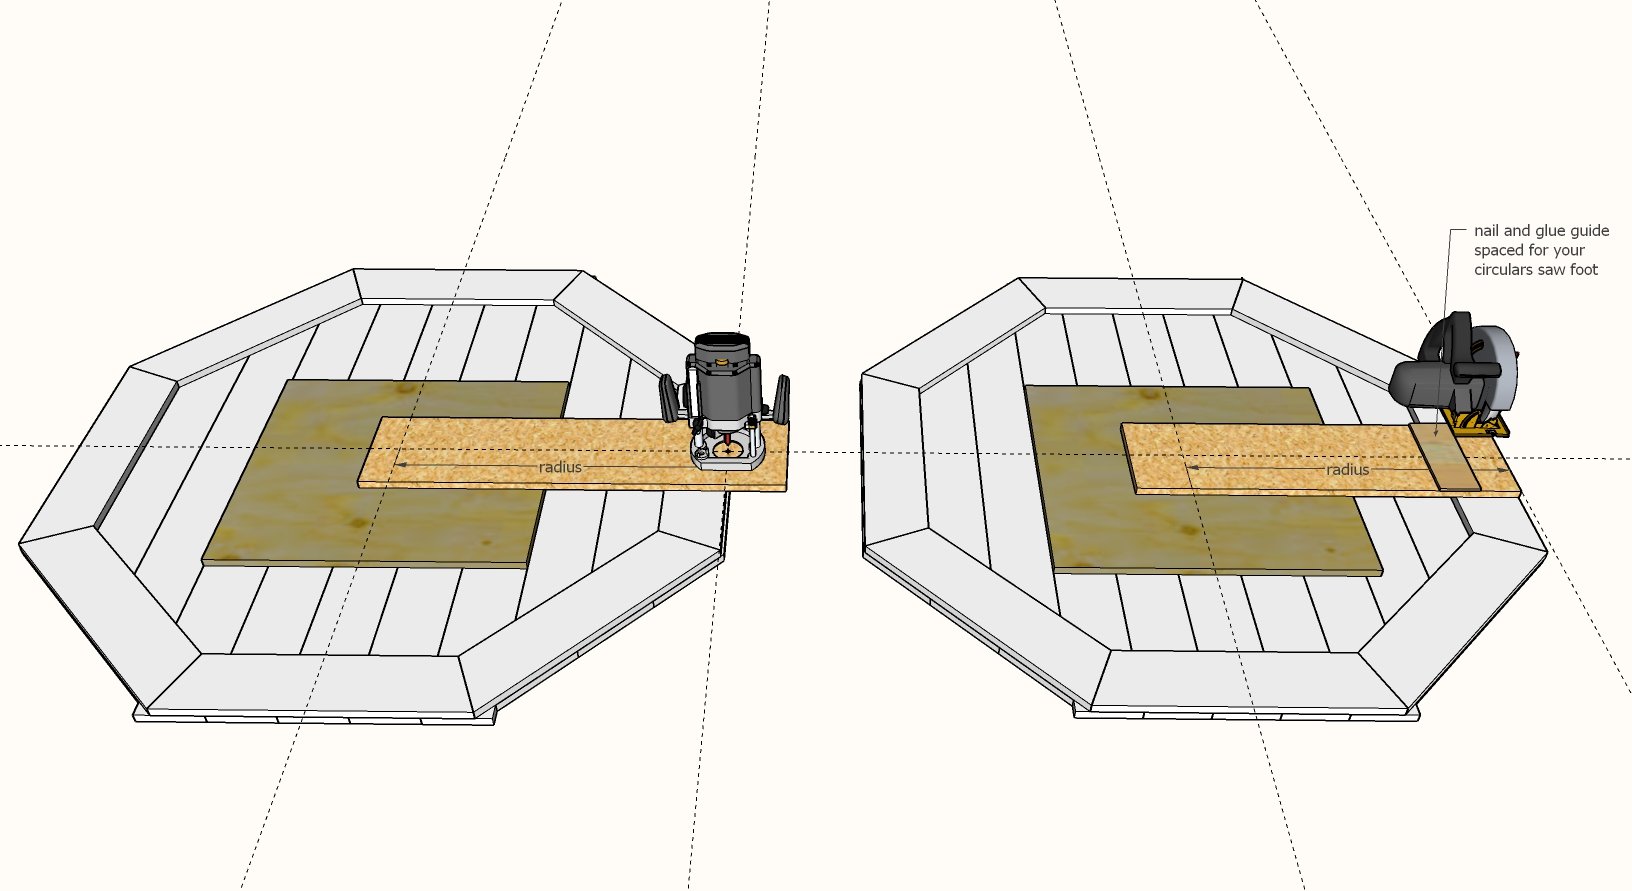
Here is how we cut our round table with a circular saw.
The basic steps to build the jig:
- Take a scrap strip of plywood (can be 1/4" or 1/2" thickness) about 8-12" wide and cut it to at least your table radius length, plus 10"
- Attach a 1x2 to the top of the plywood, set in about 2", with brad nails and glue.
- Run your circular saw along the 1x2 to trim the plywood down so it matches the foot of your circular saw.
- Then measure from the cut edge inward the desired radius of your tabletop and drill a pilot hole through.
- Use the pilot hole to attach to the underside of the tabletop in the exact center. 1x blocking will be needed to elevate the center point so it's the same as the 1x6 octagon boards.
The basic steps to use the circle cutting jig:
- Set the circular saw blade to a depth about 1/4" past the thickness of the tabletop.
- Run the circular saw down the 1x2 to cut off excess
- Rotate the jig and repeat, until the table is a circle - depending on how big, this may be dozens of cuts.
- If possible, attach the circle saw to the jig and run it completely around the tabletop for a smooth finish.
I don't like to leave square edges on round dining tables, because it is easy for the wood to break off with a knife edge. So I like to use an ogee bit or a roundover bit in the router to clean it up, just letting the router bit follow the circle cut edge.
Step 4

For added strength inside the tabletop, we added 3/4" plywood. This also give us something to attach the base to.
Step 5
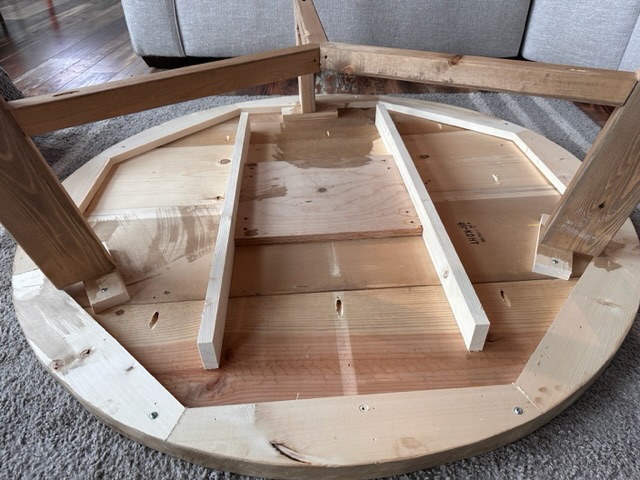
For tabletops without any center support, adding 1x3 boards as shown with pocket holes may be needed to keep the center of the tabletop from sagging.
Then I work up in grit to 220 - or until the tabletop is very smooth.
I always add at least two coats of clear coat, with a very light sanding in between for durability. We did three coats.
Three coats of Vartathane Crystal Clear in satin

Comments
zlillymp
Sat, 09/19/2020 - 17:17
Question
Do you have plans for the bench in the background?
vdonato1122
Tue, 01/26/2021 - 10:12
Do you have the plans for…
Do you have the plans for the base?