DIY Dog Crate Console
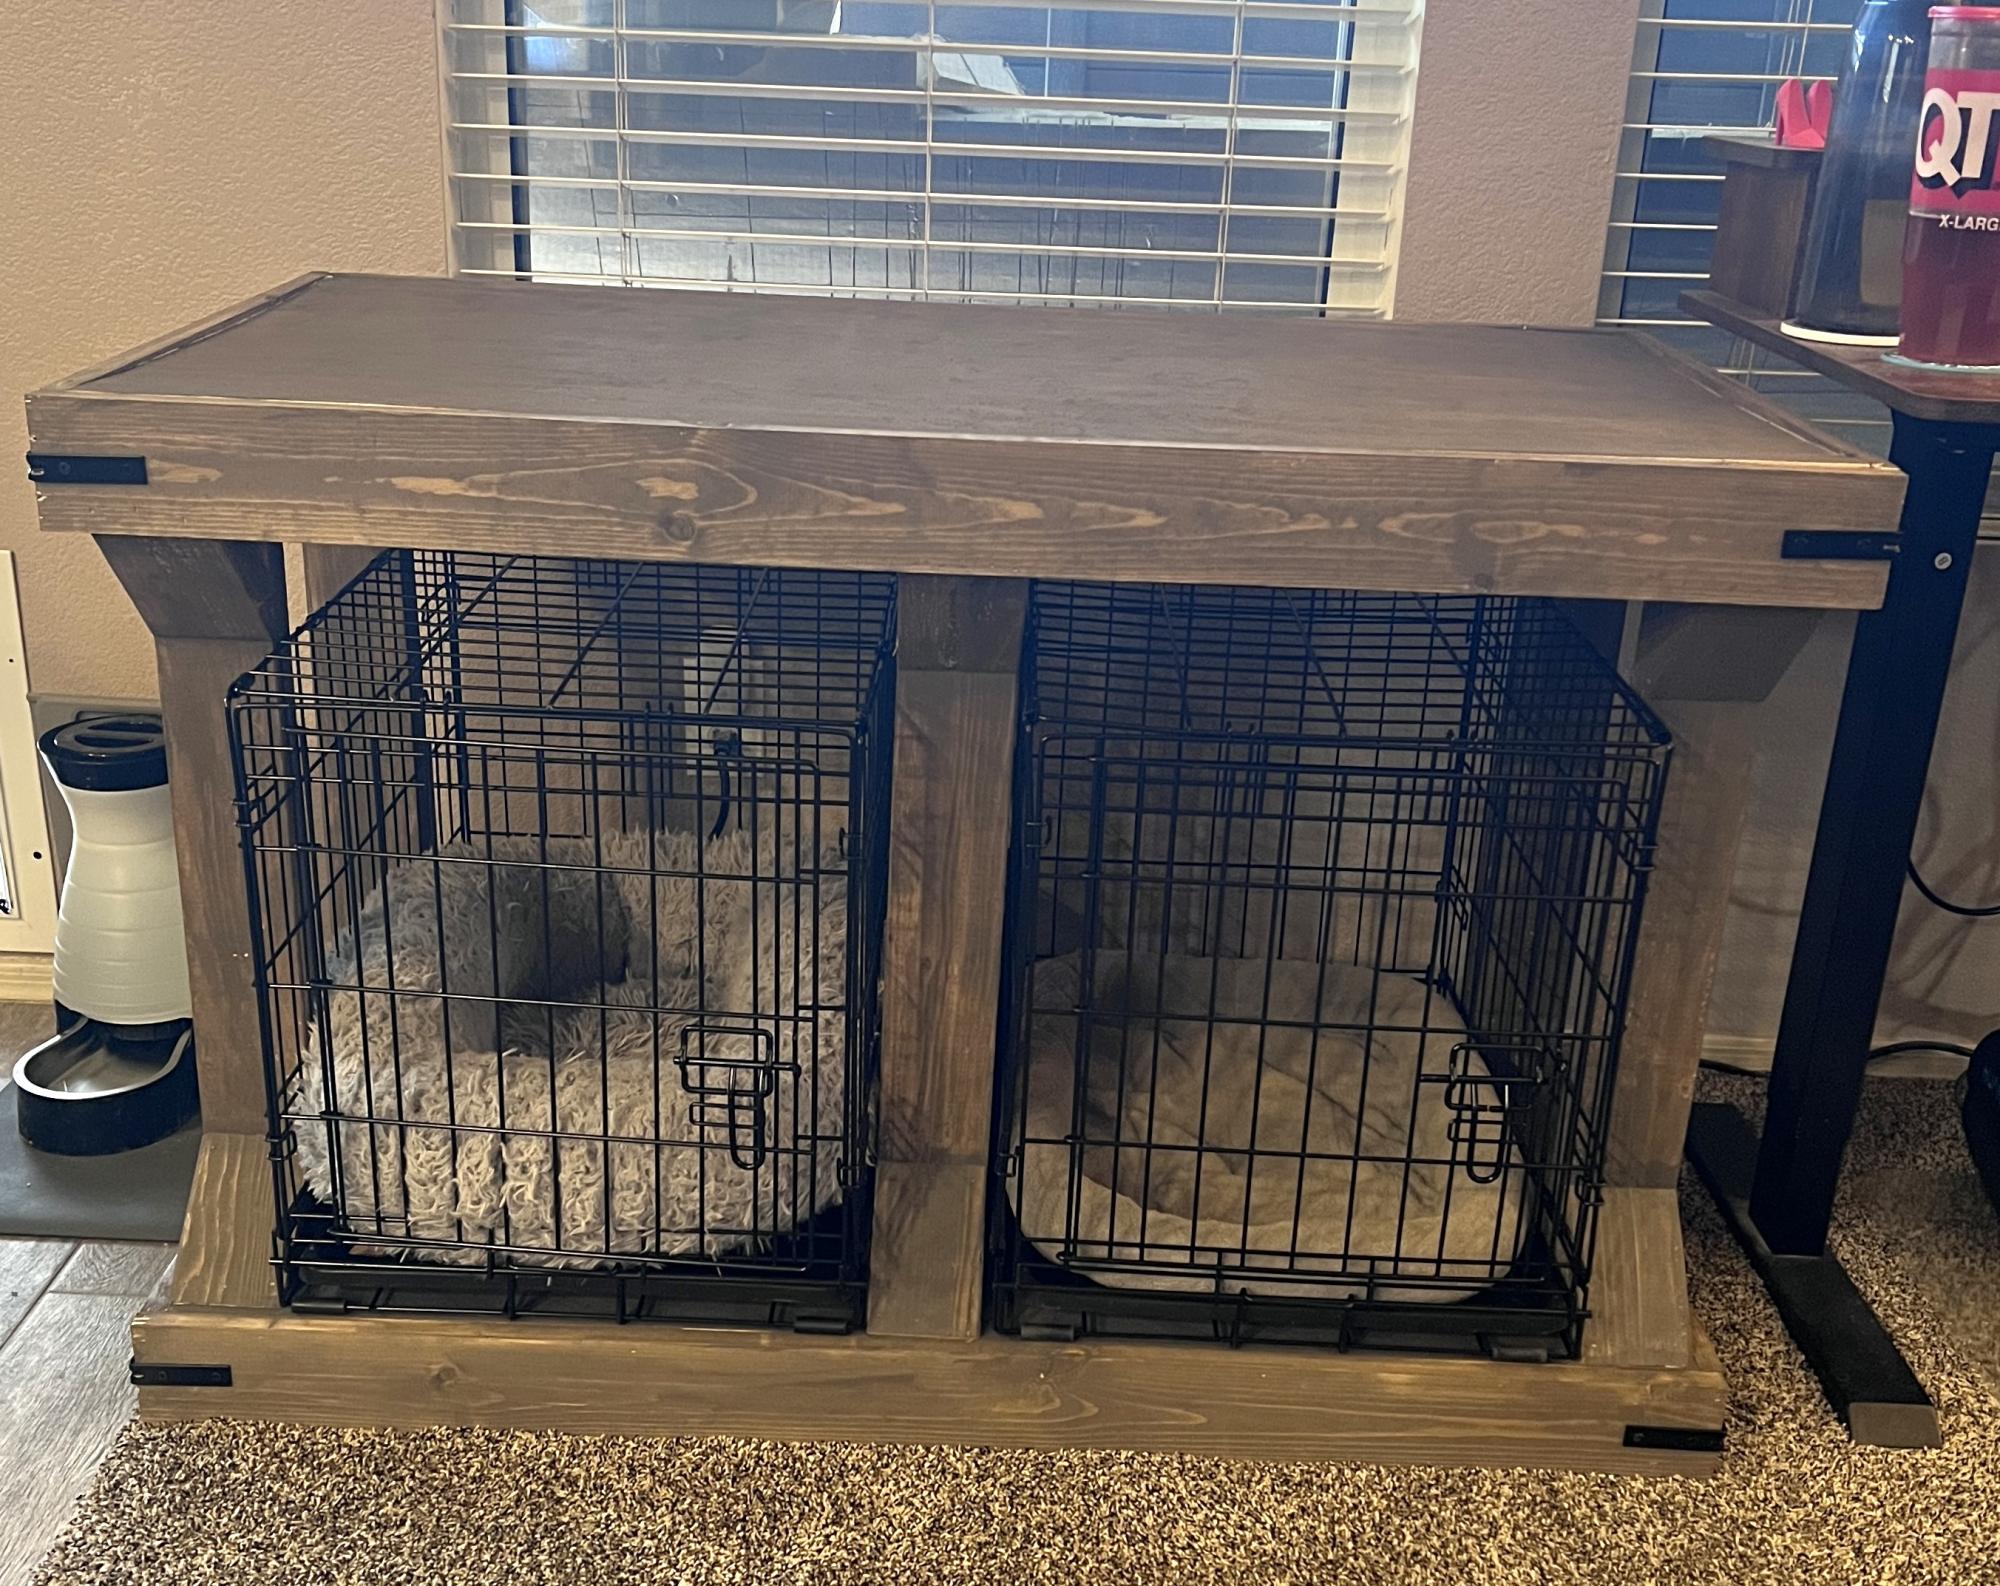
Dog Console from Modern Farmhouse Console.
Marivic Ferguson
Built from Plan(s)
Dog Console from Modern Farmhouse Console.
Marivic Ferguson
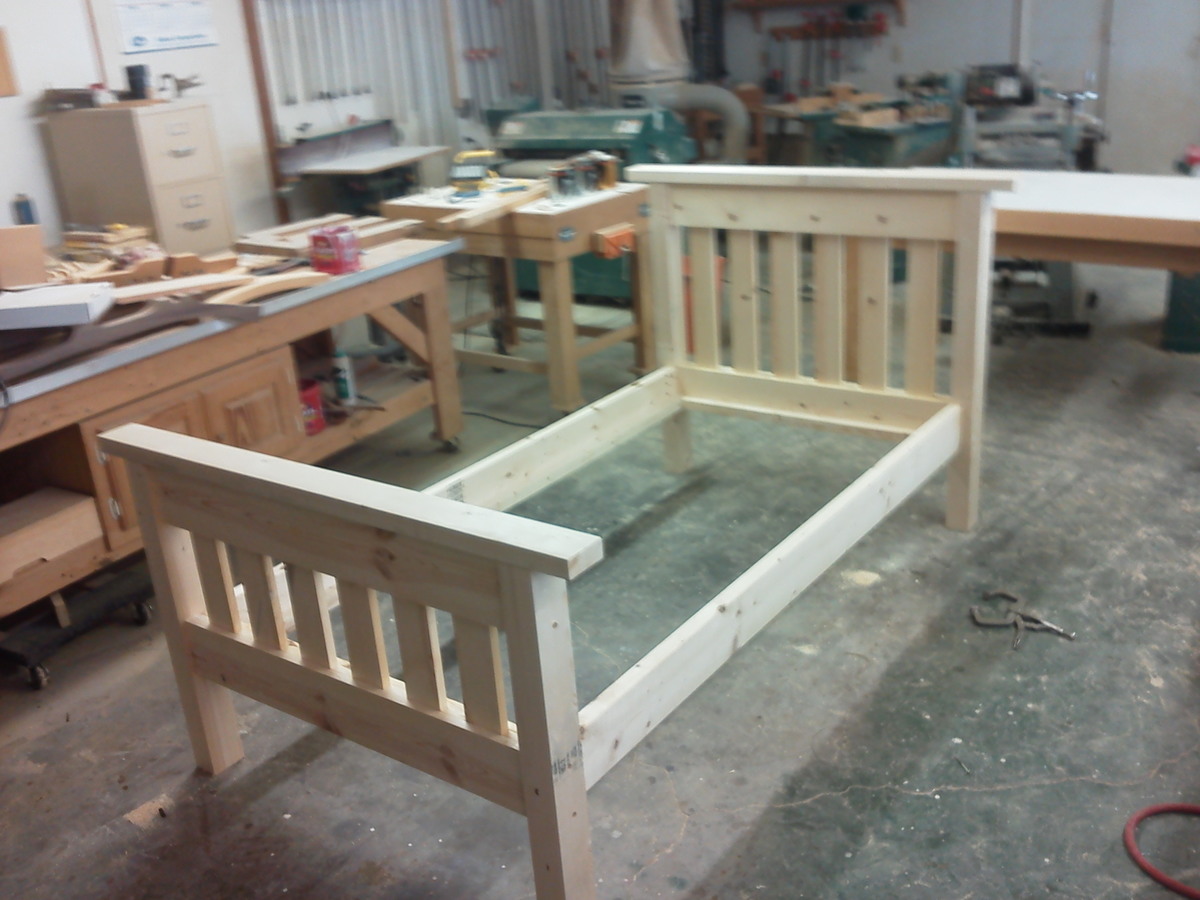
This project took me about 10 hours. I enjoyed every minute of it! I built this bed for my son. I looked at other plans but you had to pay for them and they weren't as good as these. It's good to no that there is people like Ana that is still willing to help people. Thanks for the plans


Tue, 07/05/2016 - 10:59
Hello,
I've been on this website trying to find the plans for the Simple Bed Plan. I have seen many beds made; however, I don't see the cutting list (supply list) of the materials needed. Can you please help me with the supply list? My hubby and I are going to attempt to make this over the winter for a 3rd birthday present for my son. I would really appreciate the list so that we know what materials to purchase. Thank you in advance for your help with this issue.
Sincere thanks,
The Maynors
Sat, 01/19/2019 - 12:38
I am trying to build the Twin over the full bunk beds that stack. When looking at the site it says to use the Simple Bed Plans. When I look at the simple bed plans I get 3 pictures and that is it. I don't get a supply list or any kind of dimensions for the bed. Could you please point me in the right direction. I need to build the twin over the full bunk bed for family coming to my home in early March.
Thanks
Gary Dalton
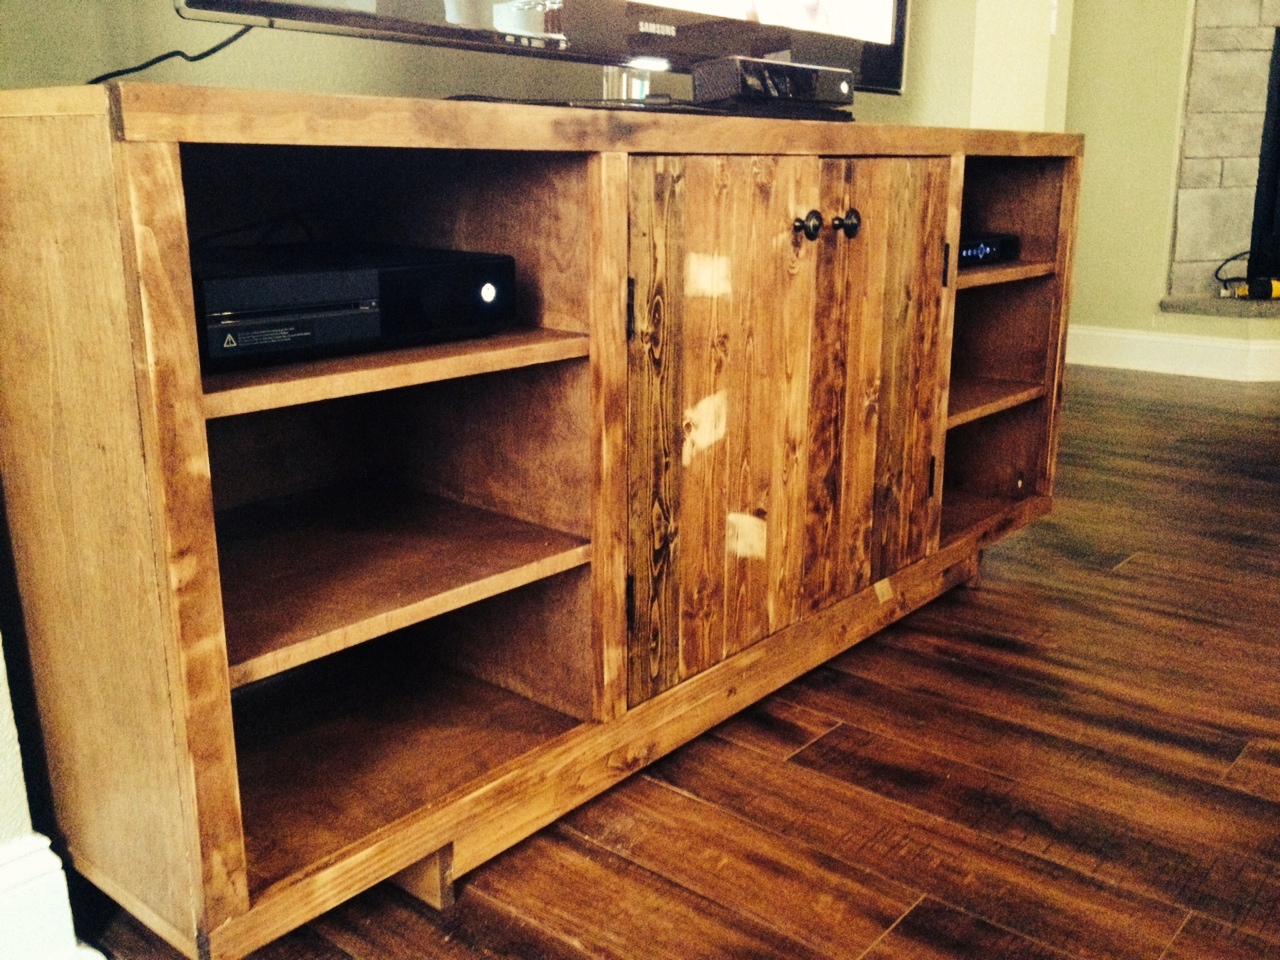
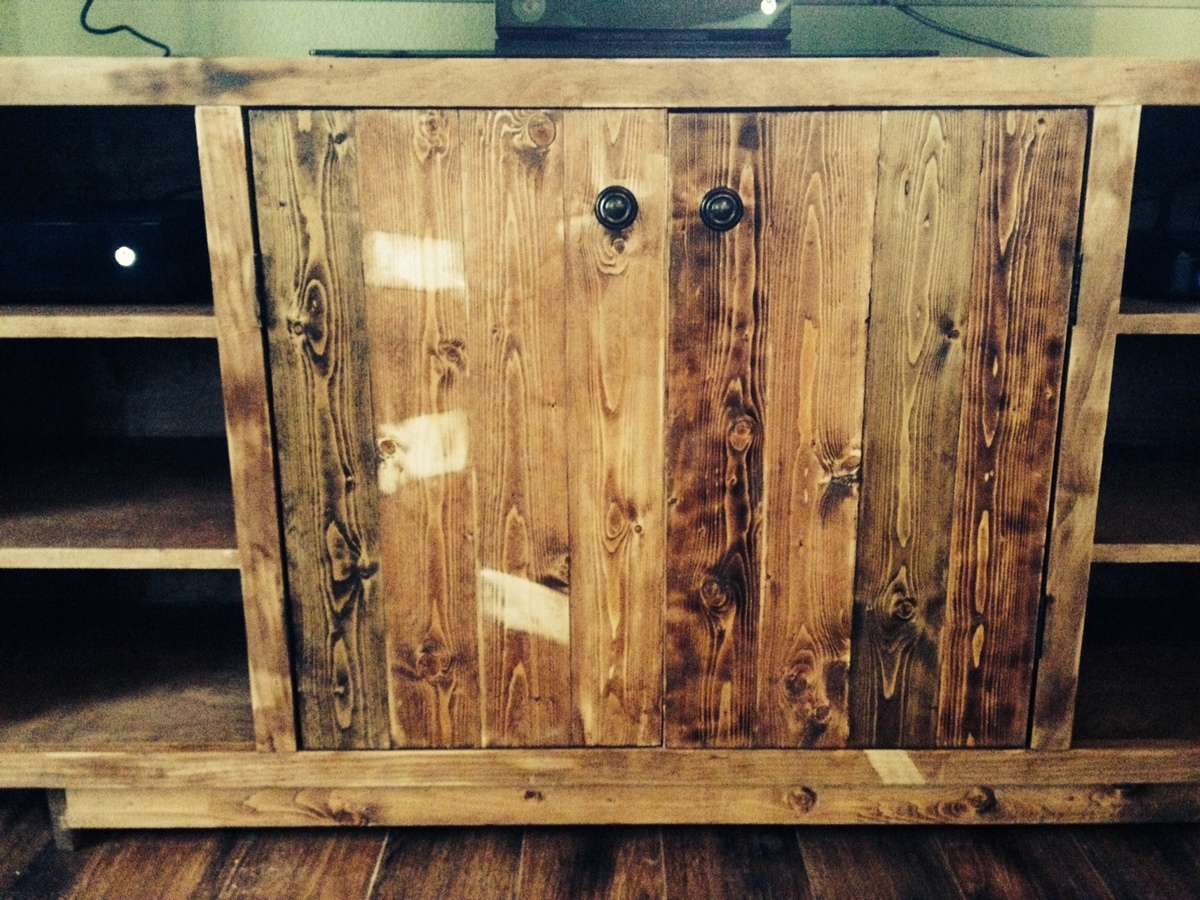
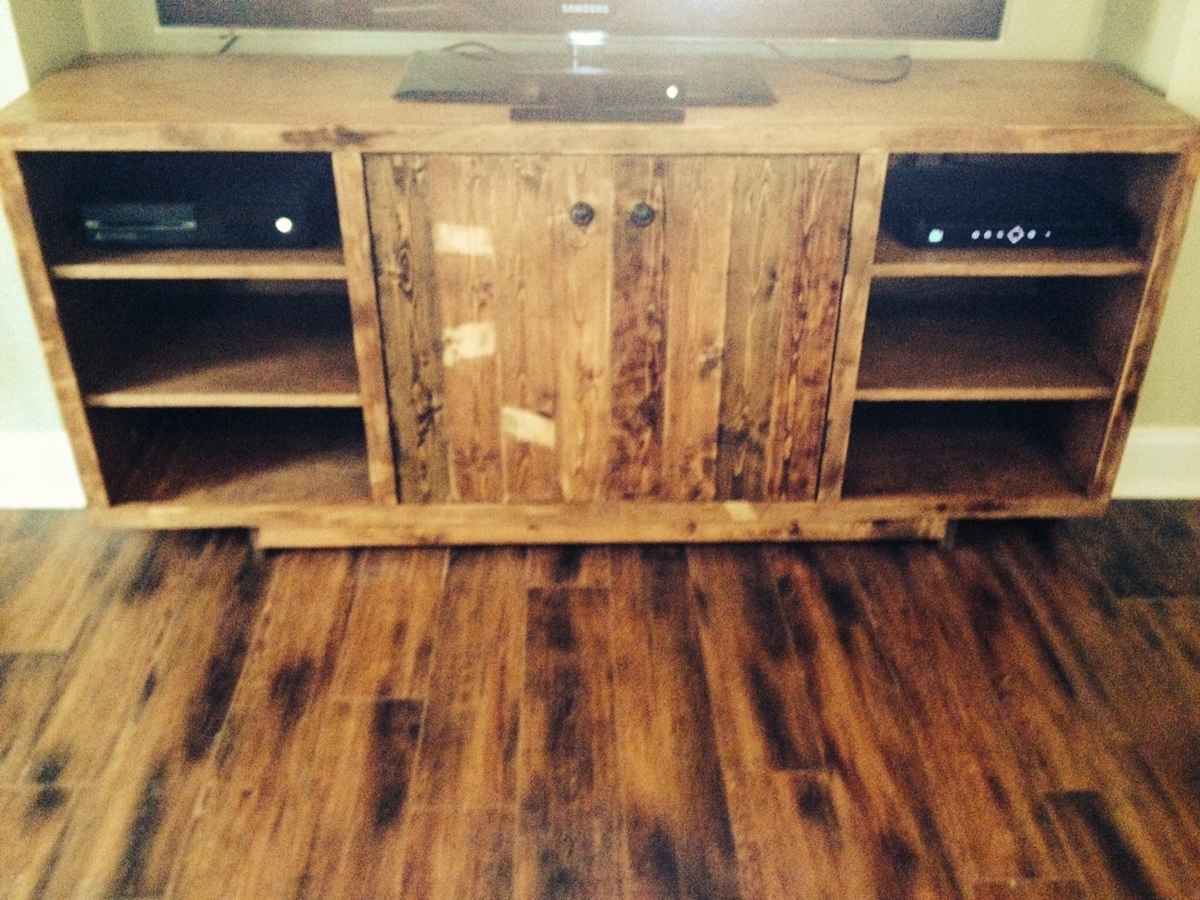
I altered the plans to fit the space where it would be going. I extended the length and added another side of shelves. I also reduced the size of the doors a little and made the base a little shorter to reduce overall height. This project required and extra sheet of plywood to complete. I used the Purebond birch from Home Depot and whitewood for the face frame and doors. I liked the finish in the original plan so I tried to make it look similar. I used different shades of brown and also scorched some boards of the door and some areas of the face frame with a torch. For the light areas on the door and frame I just taped off and sanded down. I worked on it when I had some spare time but this project could be completed in a weekend including the finish.

I built this queen size farmhouse bed using Ana's Plan. I wanted hidden under bed storage so I did alter that part of the plans. The box is pretty heavy so i added foot supports to carry the weight. I have access to the storage on both sides of the bed. I have built another version of this bed where i added gas springs to help lift the bed for access but i chose not to do it on this one. As an added feature, i also built a matching doll house bed. I love this bed, and it turned out beautiful.


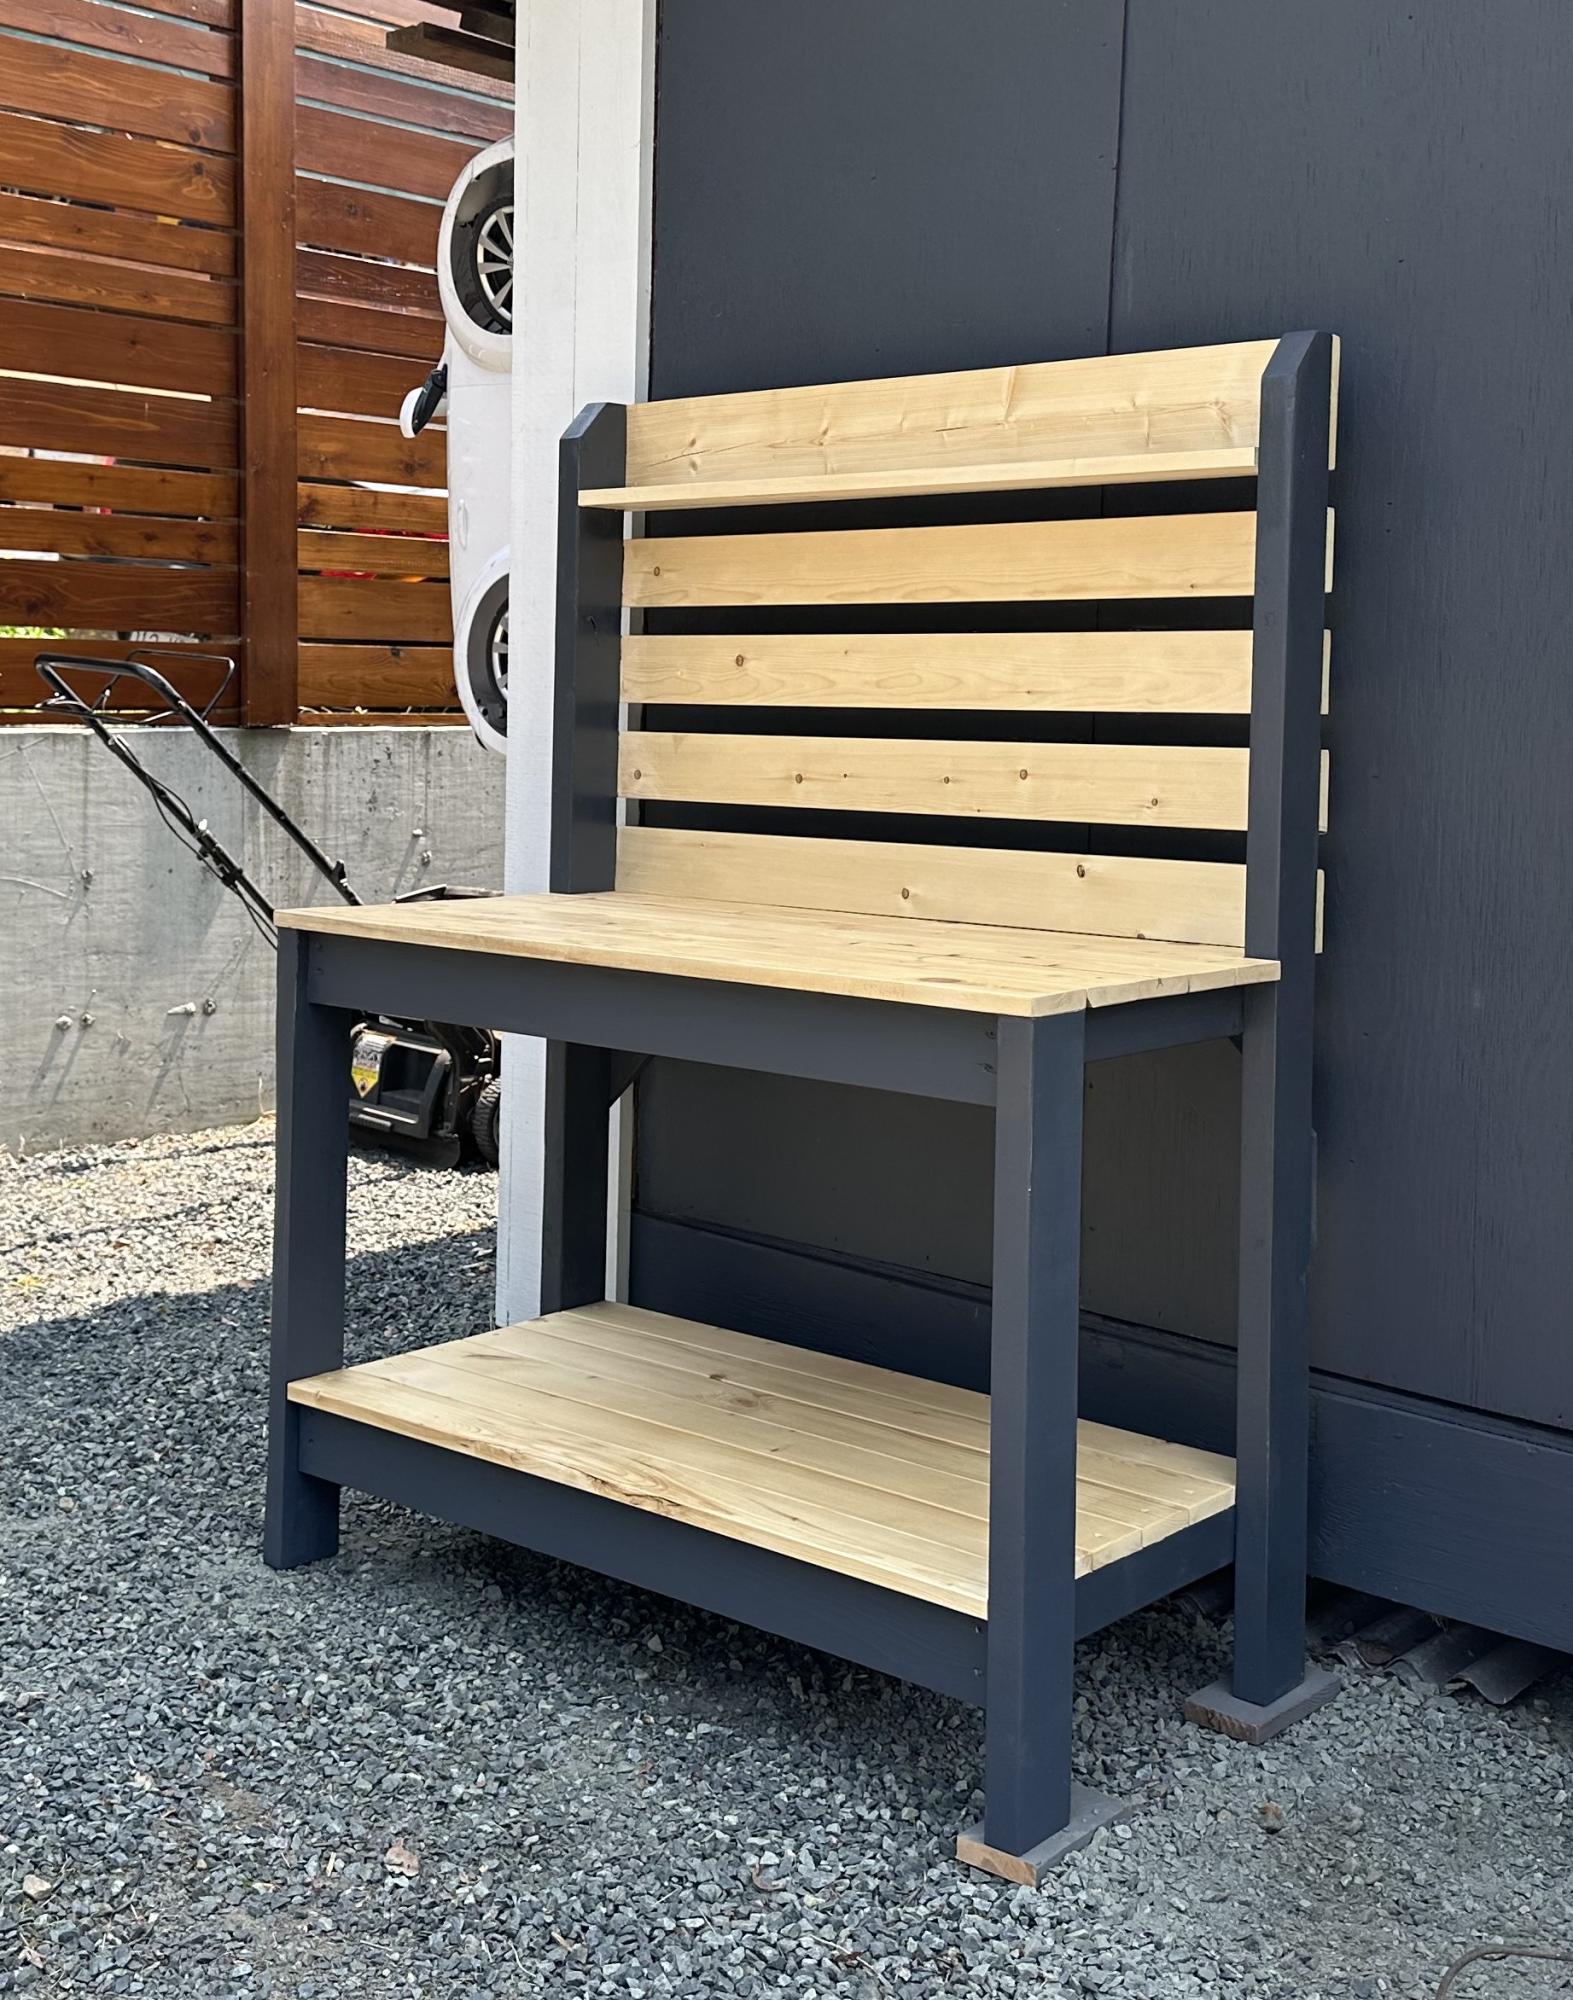
I was tired of having potting plants and soil stacked up at the end of my driveway taking away from the aesthetic of the gardens so I built myself a potting stand. I love the two tone although I wish I decided on the colours prior to assembling. It would have saved me a lot of masking.
Mary Wikene
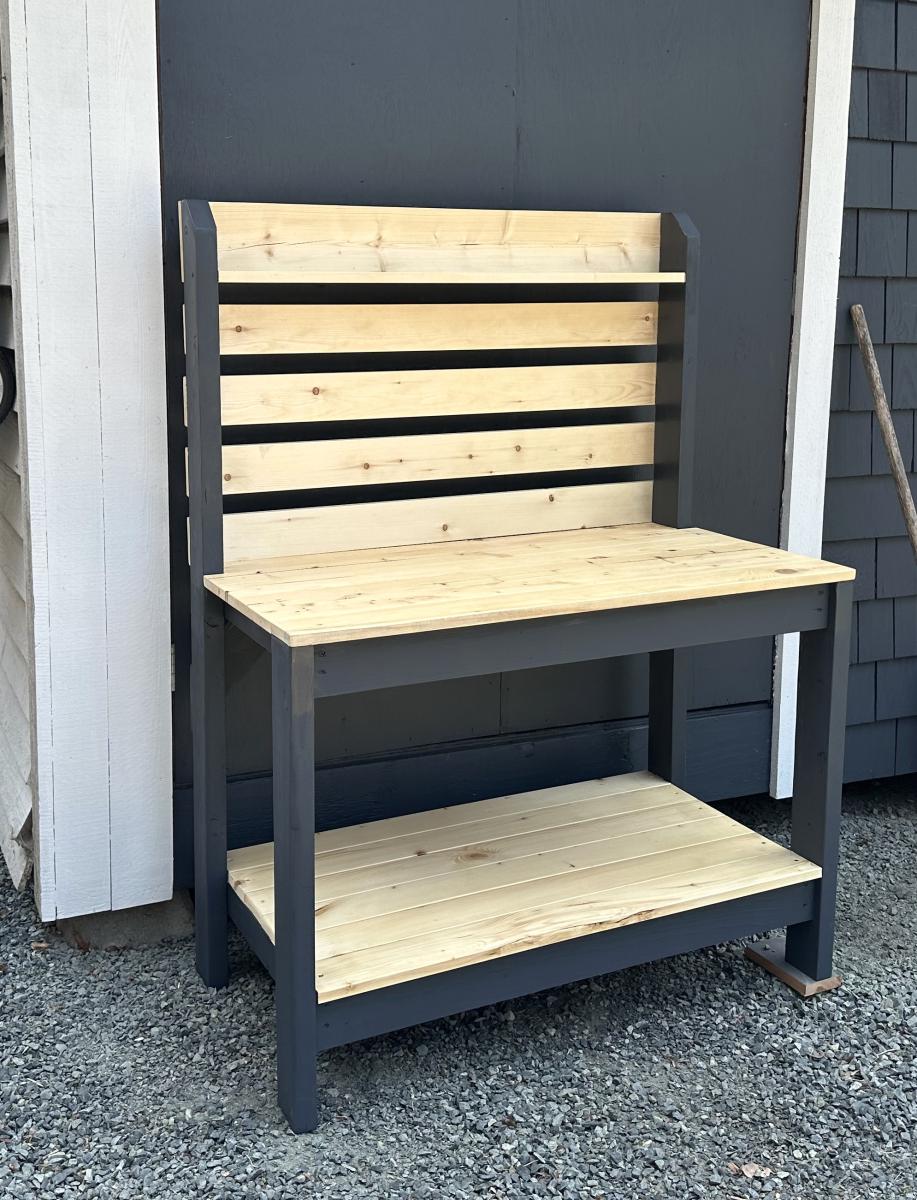

Inspired by Ana!

Thu, 04/05/2012 - 14:01
The bed has two matresses, the blocks are there to keep the matresses in place.
Tue, 04/17/2012 - 11:21
Now this is my kind of project! Looks easy but polished. Do you have plans for this?
Tue, 04/17/2012 - 12:03
Platform bed measures:
- Deck: 18x120 mm, width = matress width + 10 cm, length = matress length + 5 cm.
- Headboard: Height 80 cm, width = matress width + 10 cm.
- Beams bed: 36x150 mm, length = matress length - 5 cm.
- Beams headboard: 36x150 mm, height = headboard height - 5 cm.
Thu, 04/11/2013 - 23:04
I would love to make this but I would require plans in order to build it. So if there is any way I could get plans you would make me quite happy.
Fri, 01/15/2016 - 17:11
It looks simple enough, but the headboard looks like it may be tilted. Can you provide instructions on the attachment of that? Thank you

I based my work bench on the "sturdy workbench" plan. I made my top using two sheets of blonde 3/4 inch plywood. I glued/screwed and clamped two 3' x 6' sheets together (had the store cut 4x8 sheet to my dimensions). I didn't stain it but did coat with 3 coats of poly. The legs and supports are 2x4s (i think i used 7 though some was left over scrap) and the shelves were built from scrap MDF I had left over from a previous project. I designed my top to hang over at least two inches (longer in some areas depending on where the supports line up) to make clamping easier and it sits 37" from the floor. I wanted to ensure i had adequate space for my shopvac and air compressor so I lowered the base from the original design to avoid making the workbench too tall. This work bench is a very good size for my needs and extremely sturdy!


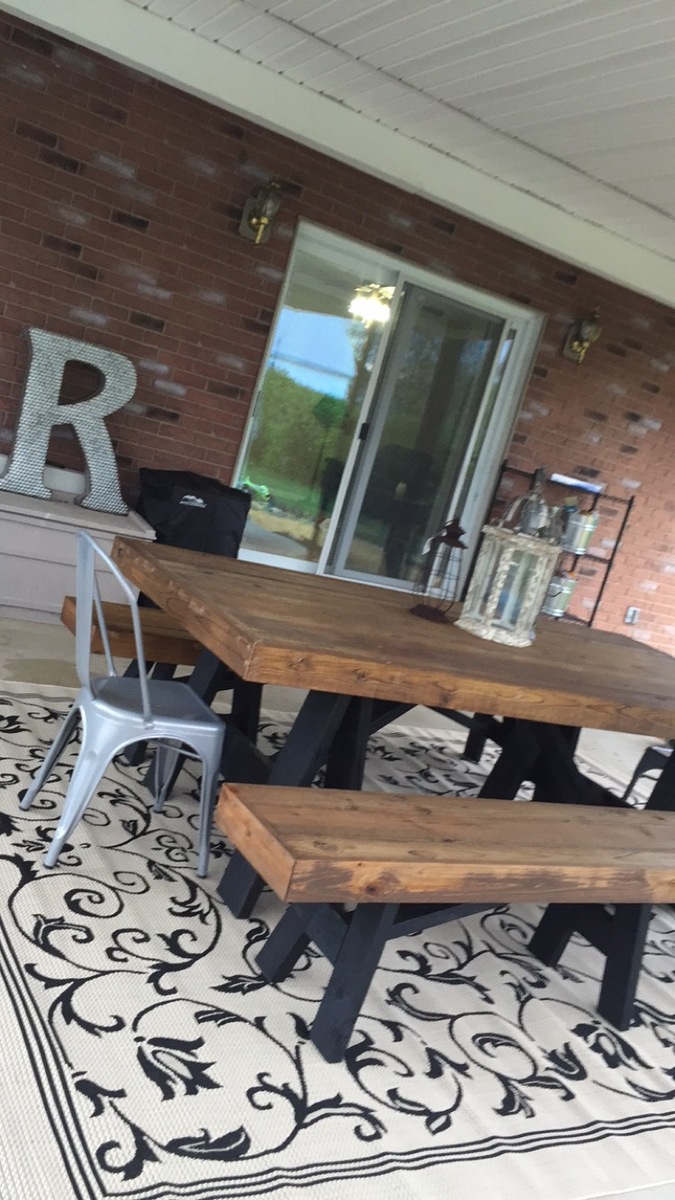
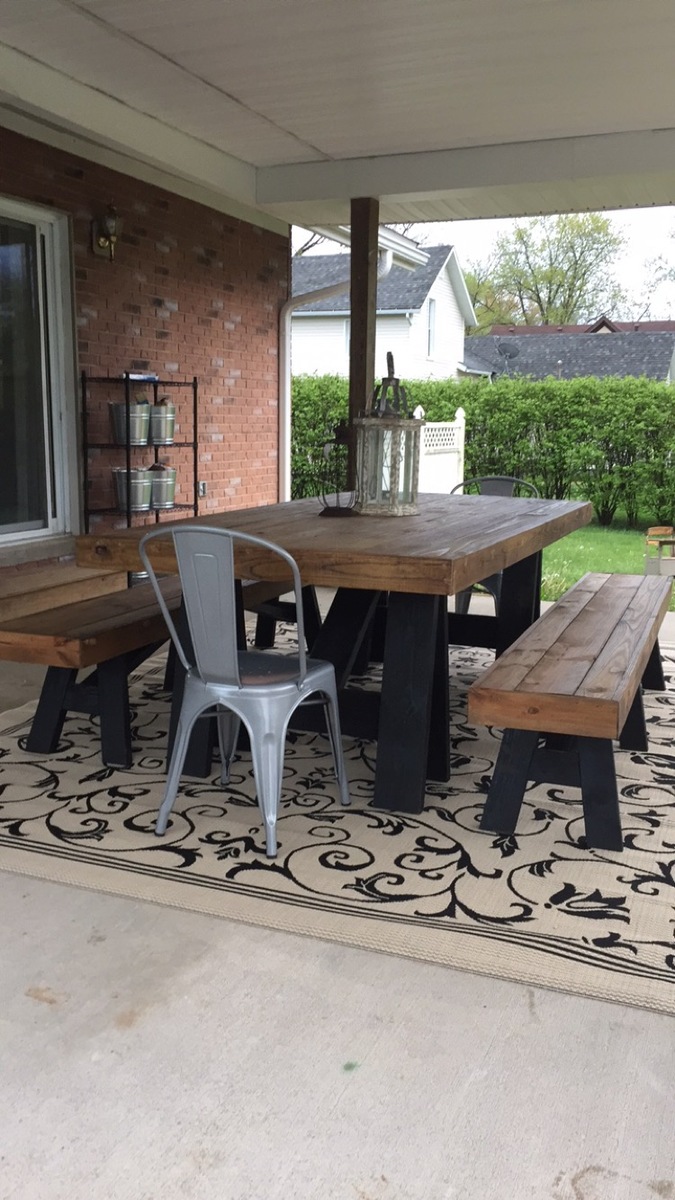
I wanted a really long table for my dining room to use at family gatherings so I can host more dinners. This table is 9 feet long and has plenty of space for our needs. I used knotty pine and finished it with Minwax Espresso wood stain. I then added 1 coat of polyurethane as I didn't want the table to appear shiny but still wanted some protection in case of spills.
This project was definitely a labour of love but I'm thrilled with the results.


I used the basic design for this bed but altered it quite a lot to make the joins stronger, the edges smoother and the whole thing generally easier to take apart and put back together.
I used beech wood and completed the project at a woodworking club, so it's quite hard to estimate the time taken, as I only did it one evening a week and spent most of the time bringing the wood out, putting it away and clearing up each time I was there!
I am still undecided whether to give it an oil finish or to paint it white with chestnut wood stain on the headboard and footboard tops.


I built the sofa and loveseat from 2X4's and used 1X4's for the top of the coffee table. I used standard patio cushions for the sofa and cut the tops off to use at the side for arm rests.
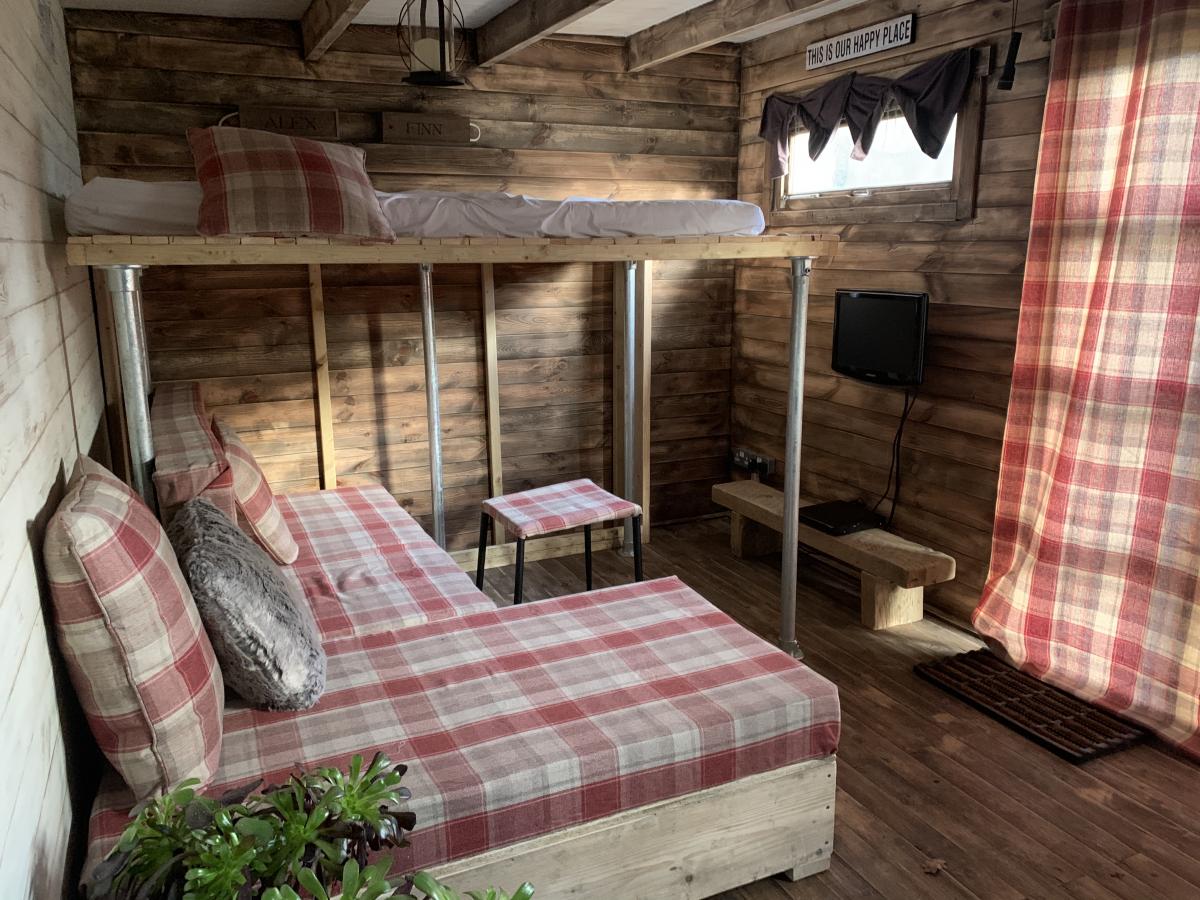
Always wanted an Alpine lodge, we live in London so a Garden cabin for the kids (and Dad) will have to do!
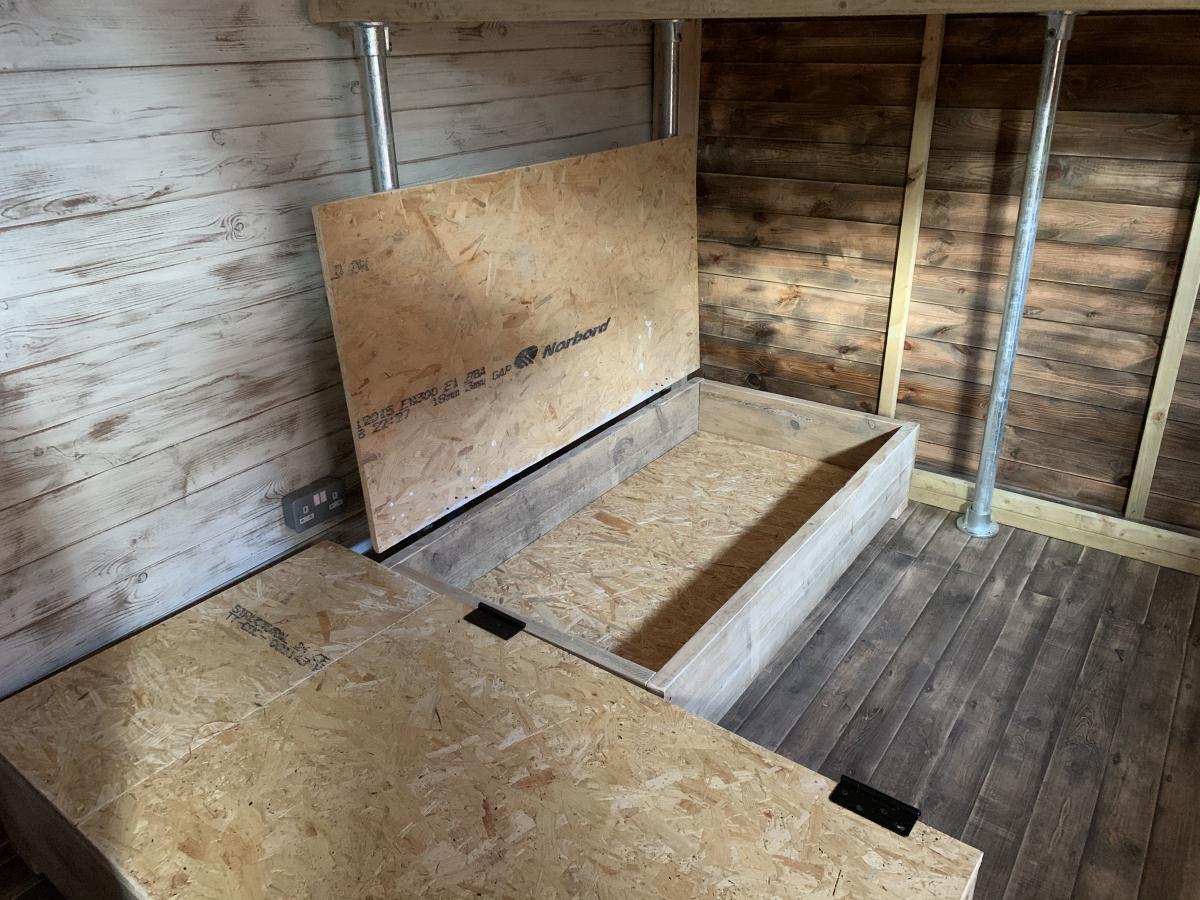
flip up bed and storage cabinet (for mattress)
sofa bed, foam cushions with leftover curtains
mini storage boxes from wine boxes
inspired by tiny house (especially the sofa!)
Still more to do. Desk on its way and bulk head lights fitted soon.
no real plans just rough sketches and trial and error
Reclaimed wood projects.
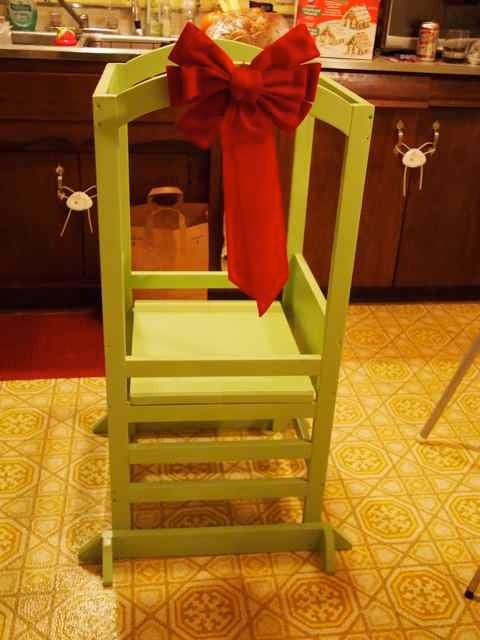
We decided to make a helping tower for my little guy for Christmas after I saw it on Pinterest. The curves were not the easiest, but I think they turned out fine. He's just finally starting to use it more as a helping tool rather than a playing platform. Definitely happy that it keeps him from standing on the chairs.
Thank you so much for this plan. I love this site!
Sat, 07/14/2012 - 13:57
Beautiful! Love the colour too. I will be attempting this as a beginner project myself: fingers crossed!
Sat, 07/14/2012 - 13:58
Beautiful! Love the colour too. I will be attempting this as a beginner project myself: fingers crossed!
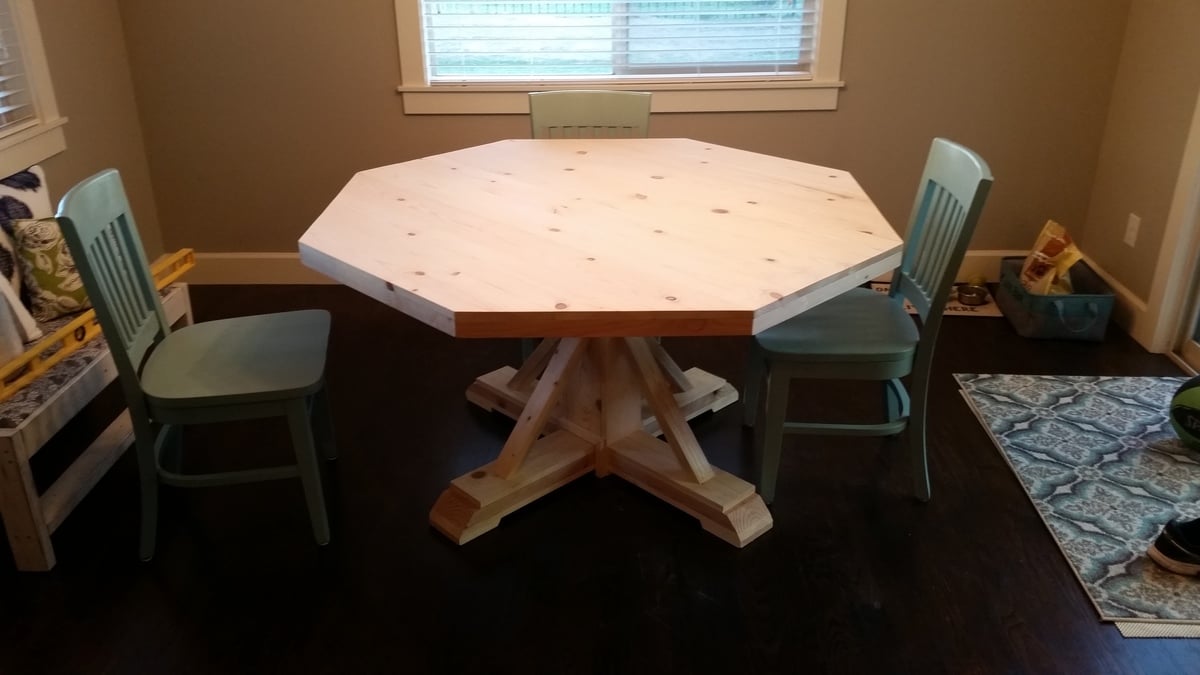
We wanted to build a new kitchen table for the home we moved into. I had just bought a new table saw and needed a project. We searched through a lot of plans and settled on the Benchmark Octagon Table that Ana White had. My 14 y/o son and I built this over a few nights in our garage and my wife did the finishing. We were thrilled how it turned out. It comfortably seats 8 adults (yes we have had 8 adults at it). My wife and I always sit in the bench that is pictured and we easily eat side by side on one end. It is a great project. I would recommend being very careful attaching the table top support to the base column and also reinforcing the joints of the diagonal upper and lower supports to keep the table top from twisting easily. All in all a fantastic project and people are shocked when I tell them my son and I built it, particularly from off the shelf pine.

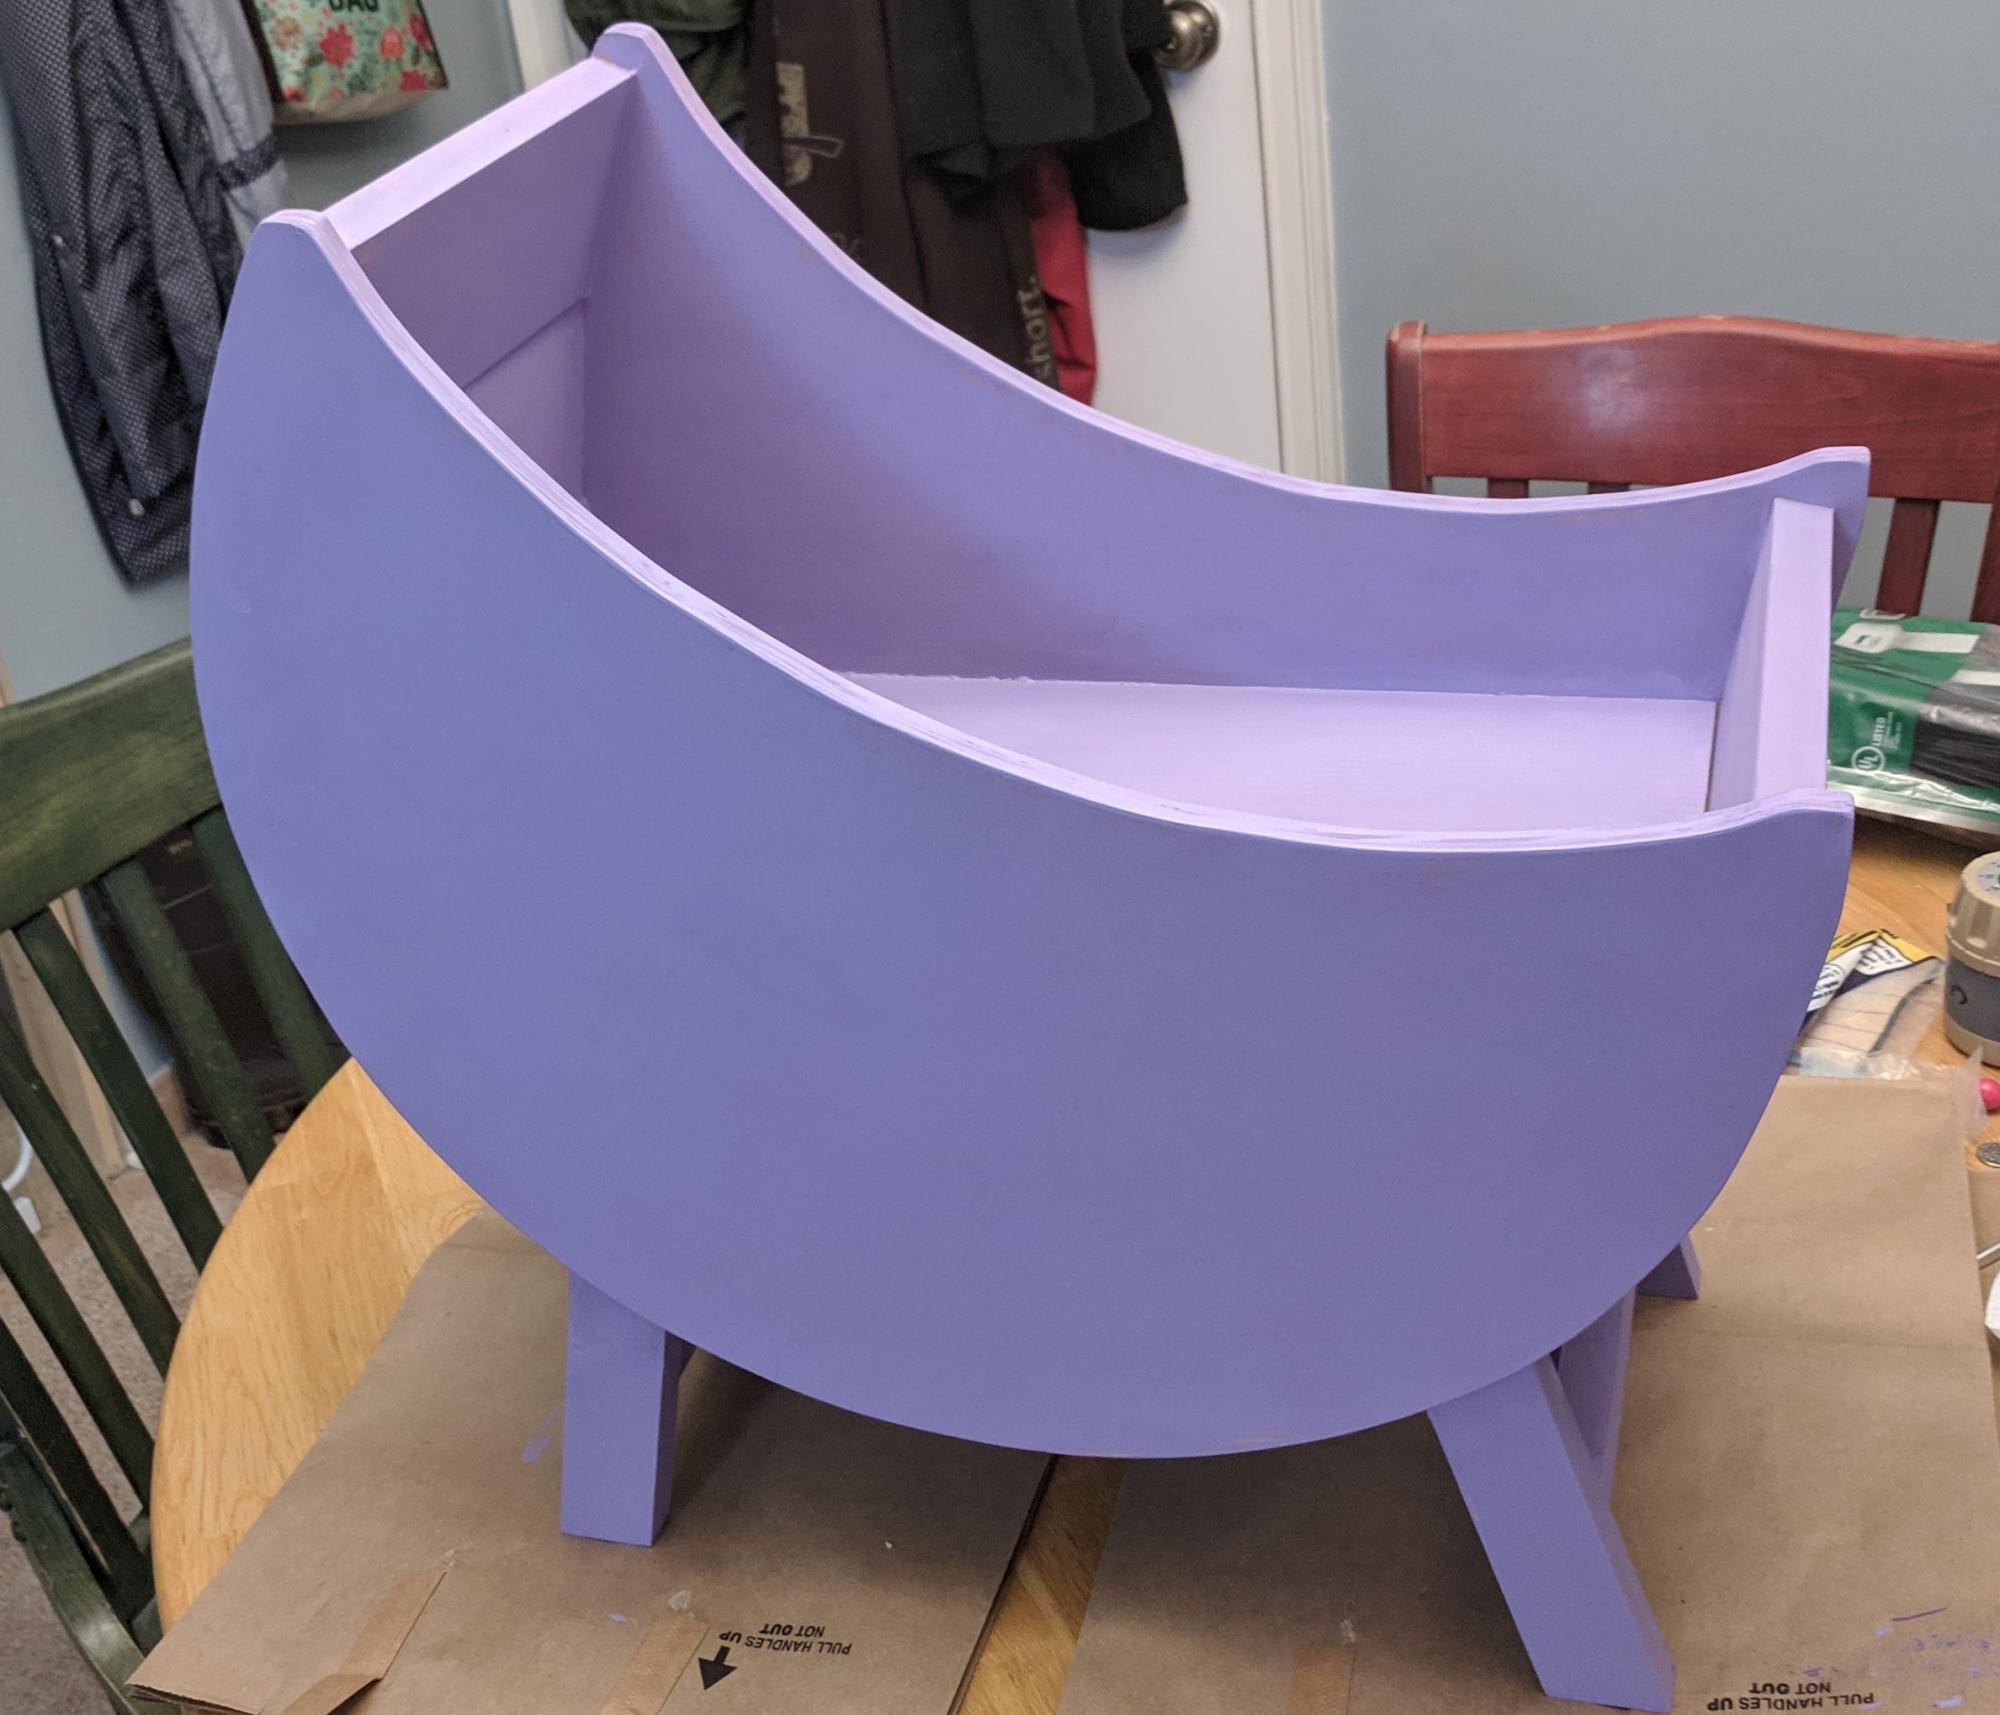
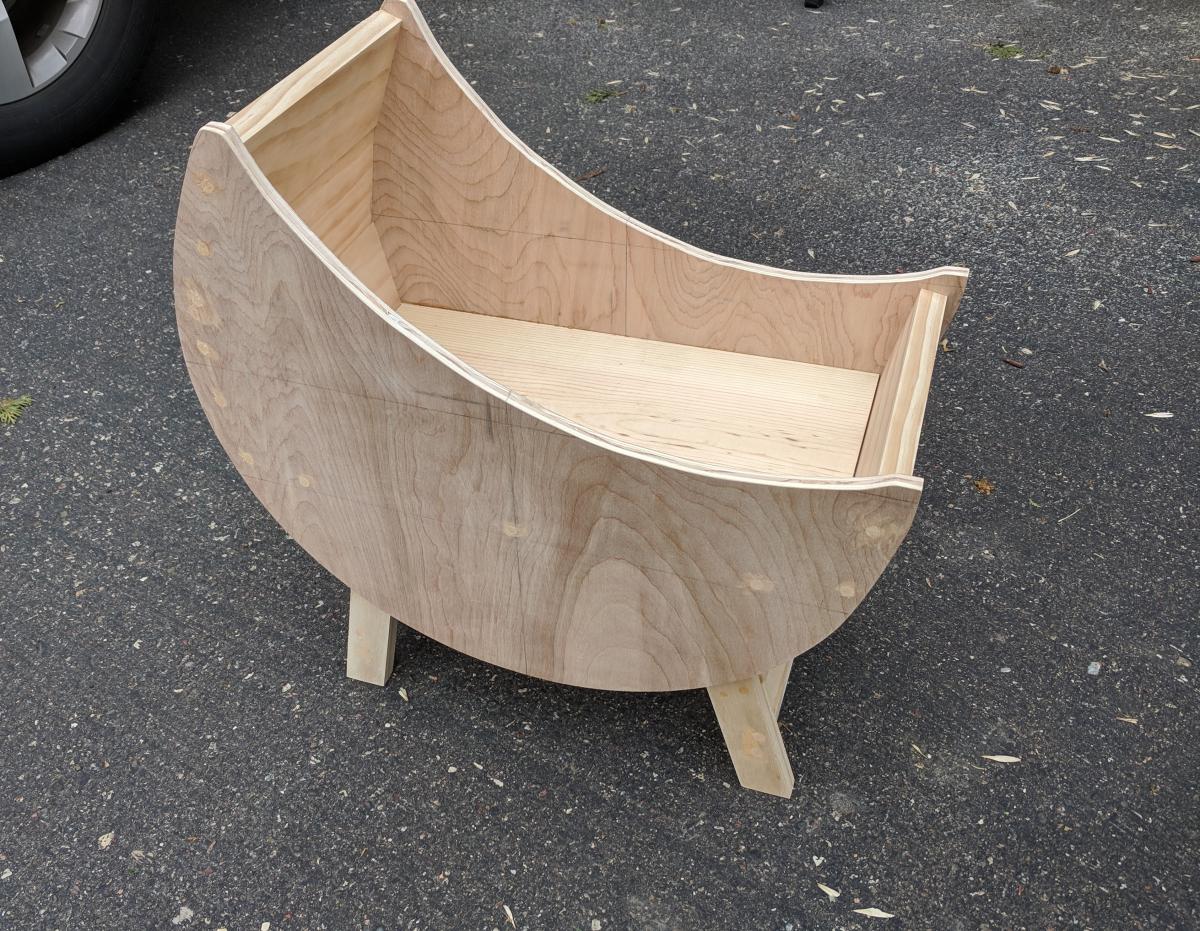
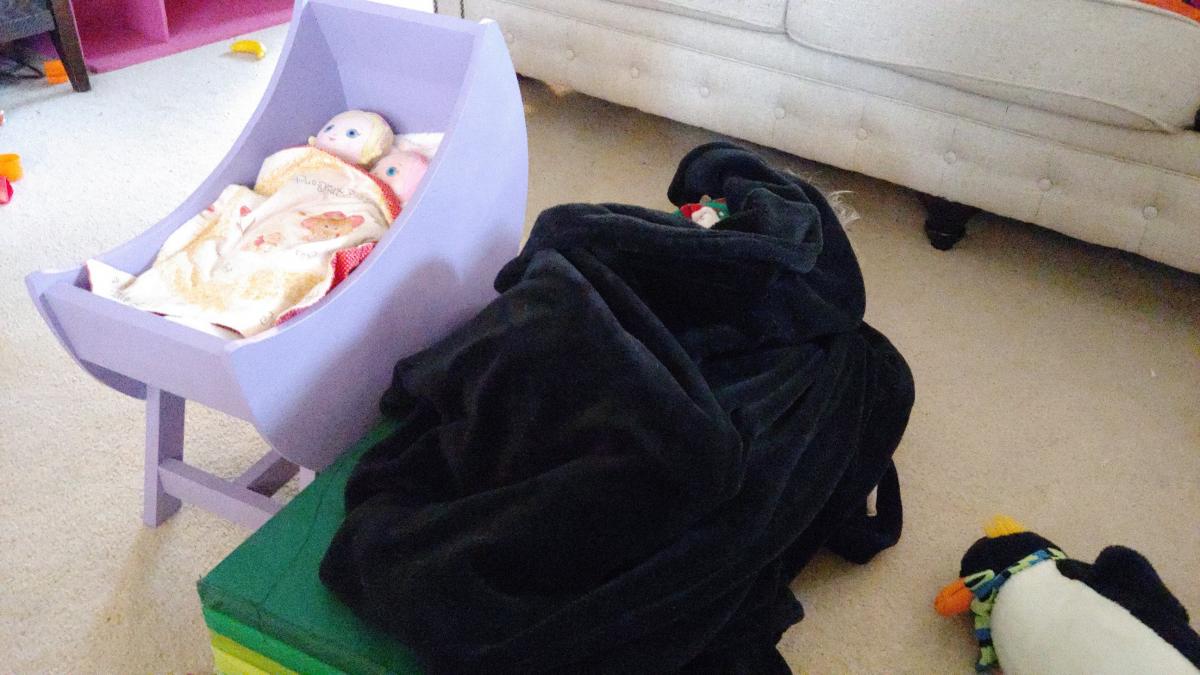
My daughter-in-law asked me if I could build a doll crib for my granddaughter. I had no idea how to do that, so of course I said "Absolutely!" Then I immediately came to the Ana White site!!
I found a few options and checked with my daughter-in-law to see what style she wanted. She chose the "Baby Doll Furniture Moon Bassinet" and said that it needed to be "lavander".
As usual, Ana's plans made me look like a hero! My granddaughter liked it so much she insisted on sleeping on the floor next to it during her nap!
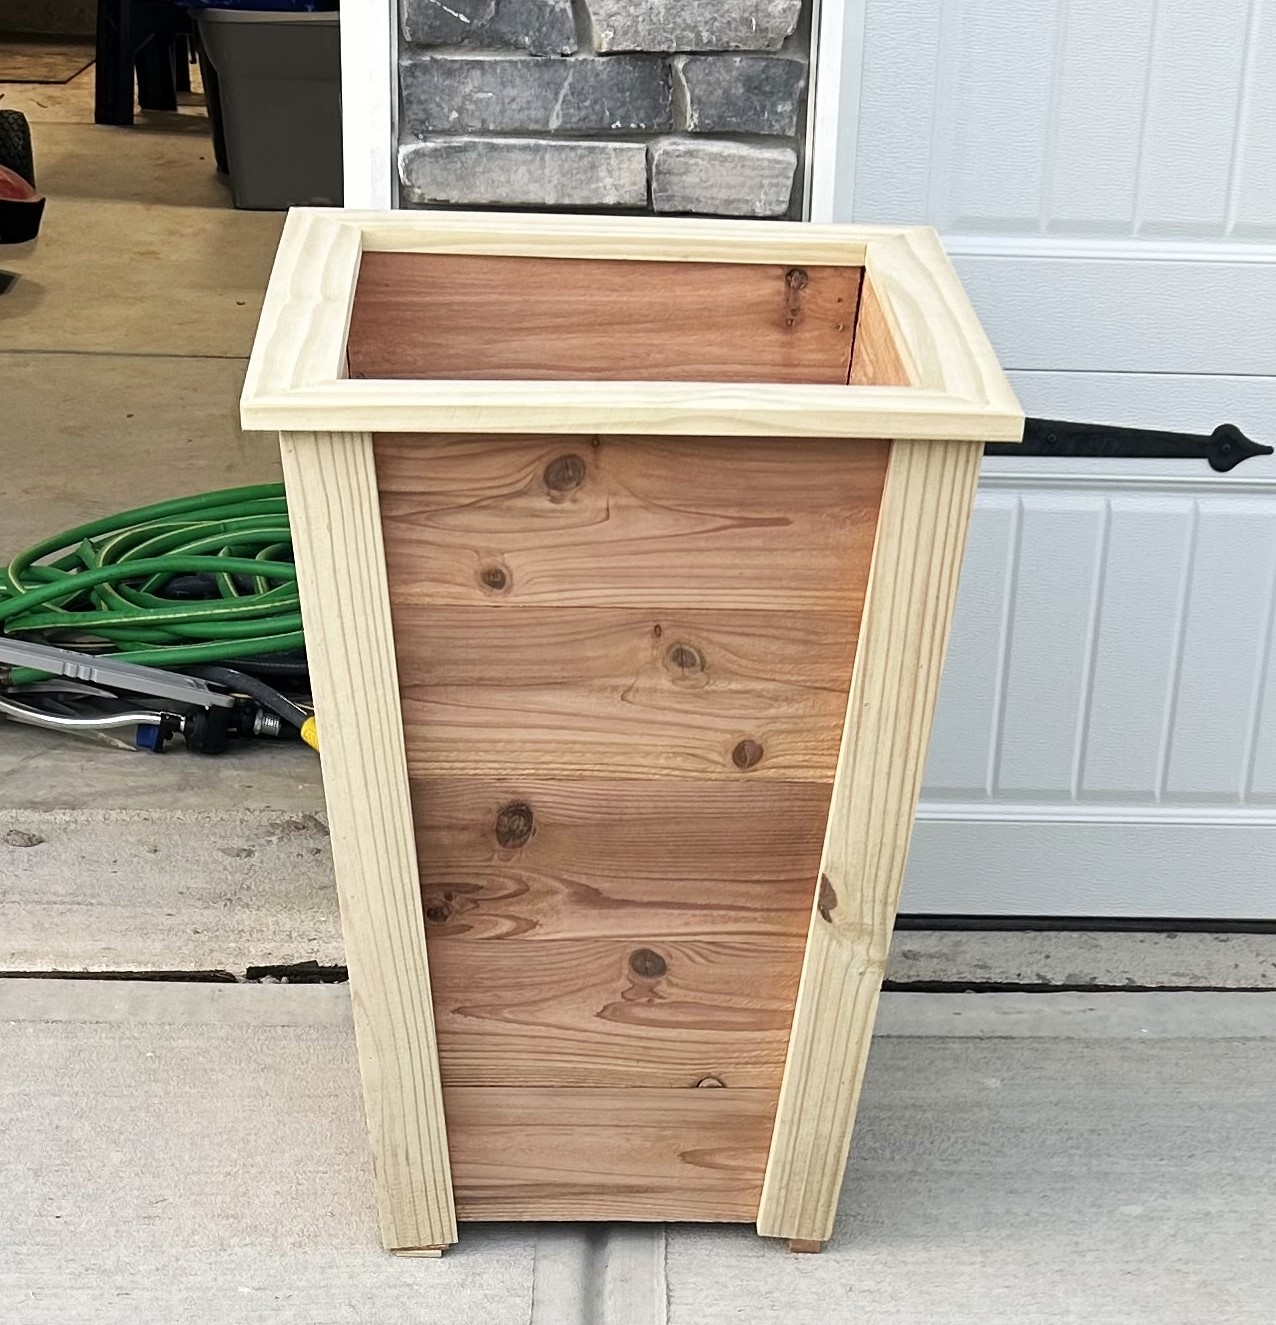
Made a tall wood planter from cedar and pine fence posts using Ana’s plans this weekend! Modified slightly and added a frame around top to give it a more finished look.
Awesome plans! Thanks Ana.
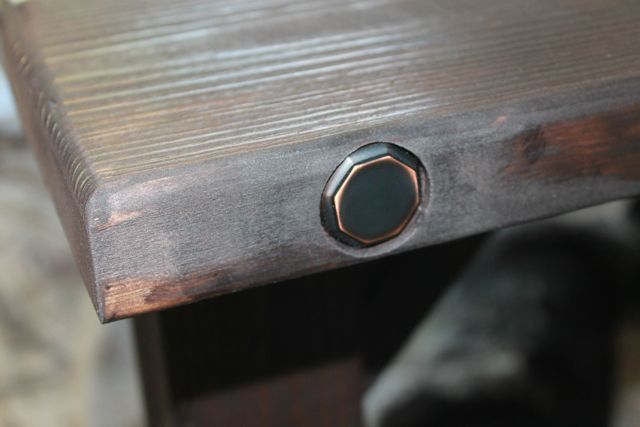
Here's a small tutorial on how to add simple metal accents to furniture. We used something as simple as door knobs at your local home improvement store to make it happen!
Check out the tutorial here http://sawgrasshome.com/?p=1443
Wed, 03/25/2015 - 11:26
Hello,
I am very interested in this tutorial, "Add Metal Accents to Furniture", but it appears that the link provided, is a dead link. Do you happen to remember anything about this tutorial? Thank you!
Wed, 03/25/2015 - 11:25
Hello, I am very interested in this tutorial, "Add Metal Accents to Furniture", but it appears that the link provided, is a dead link. Can you please assist me in finding the direct link to this tutorial? Thank you!
Wed, 03/25/2015 - 11:25
You can email me at [email protected]

Wed, 06/02/2021 - 05:31
By the way, how do you do the initial analysis of the alloys to determine which metal is best to take?

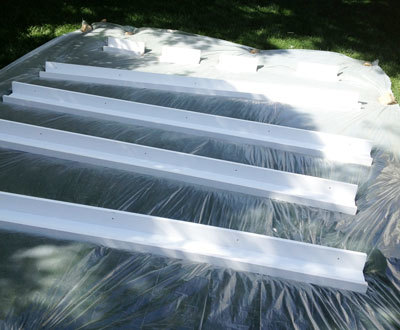
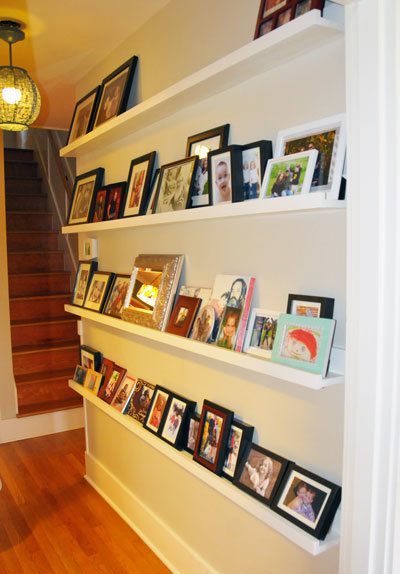
I think I get more compliments on these galley shelves/picture ledges than anything else I’ve made, and these were probably the easiest things to make!
It cost me about $25 a piece but they were nearly 8 feet long each. I used a paint sprayer to paint them, WAY easier than brushing on the paint! watch for drips though (my first time using a sprayer, treat it like spray paint, light easy coats!)

I challenged my husband who is new to any woodworking project to make me this table! That he did!!