Community Brag Posts
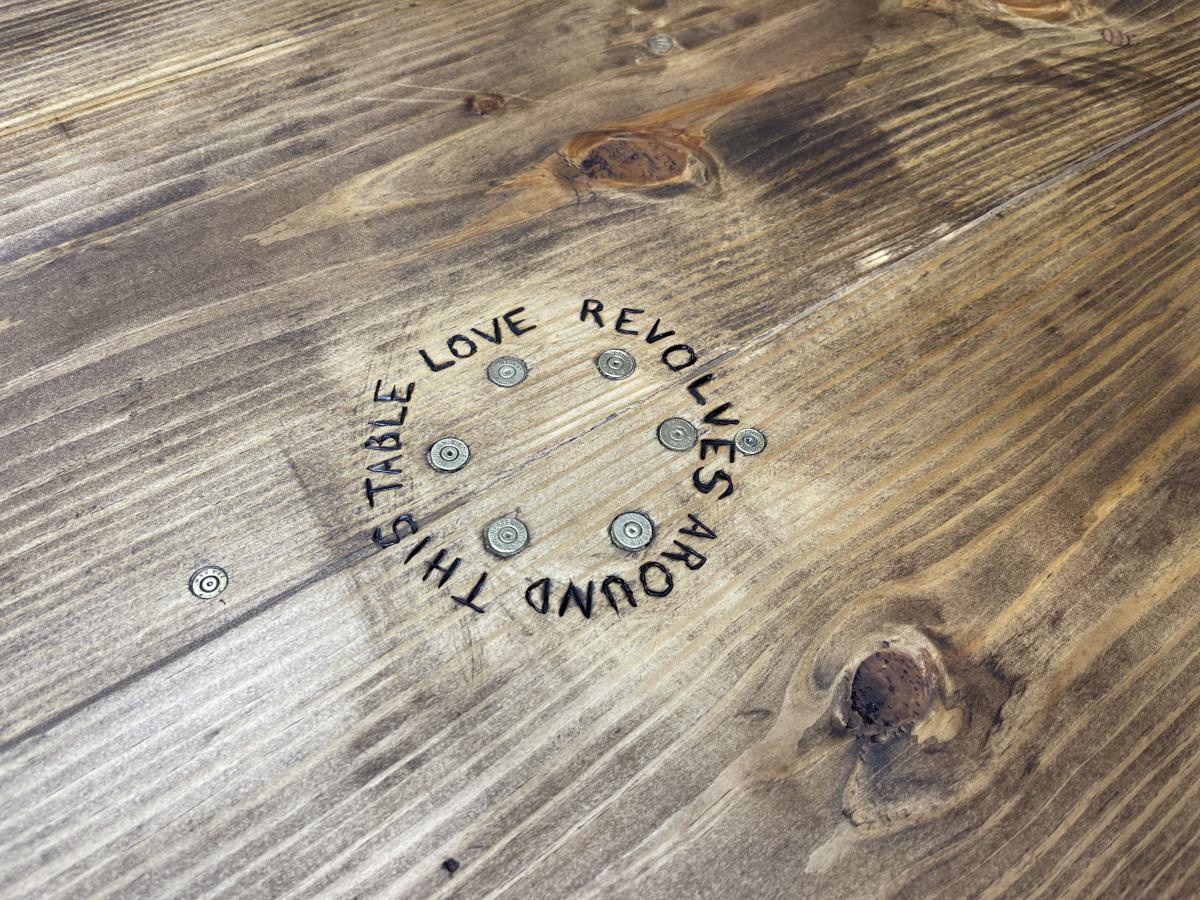
4x4 Truss Beam Table
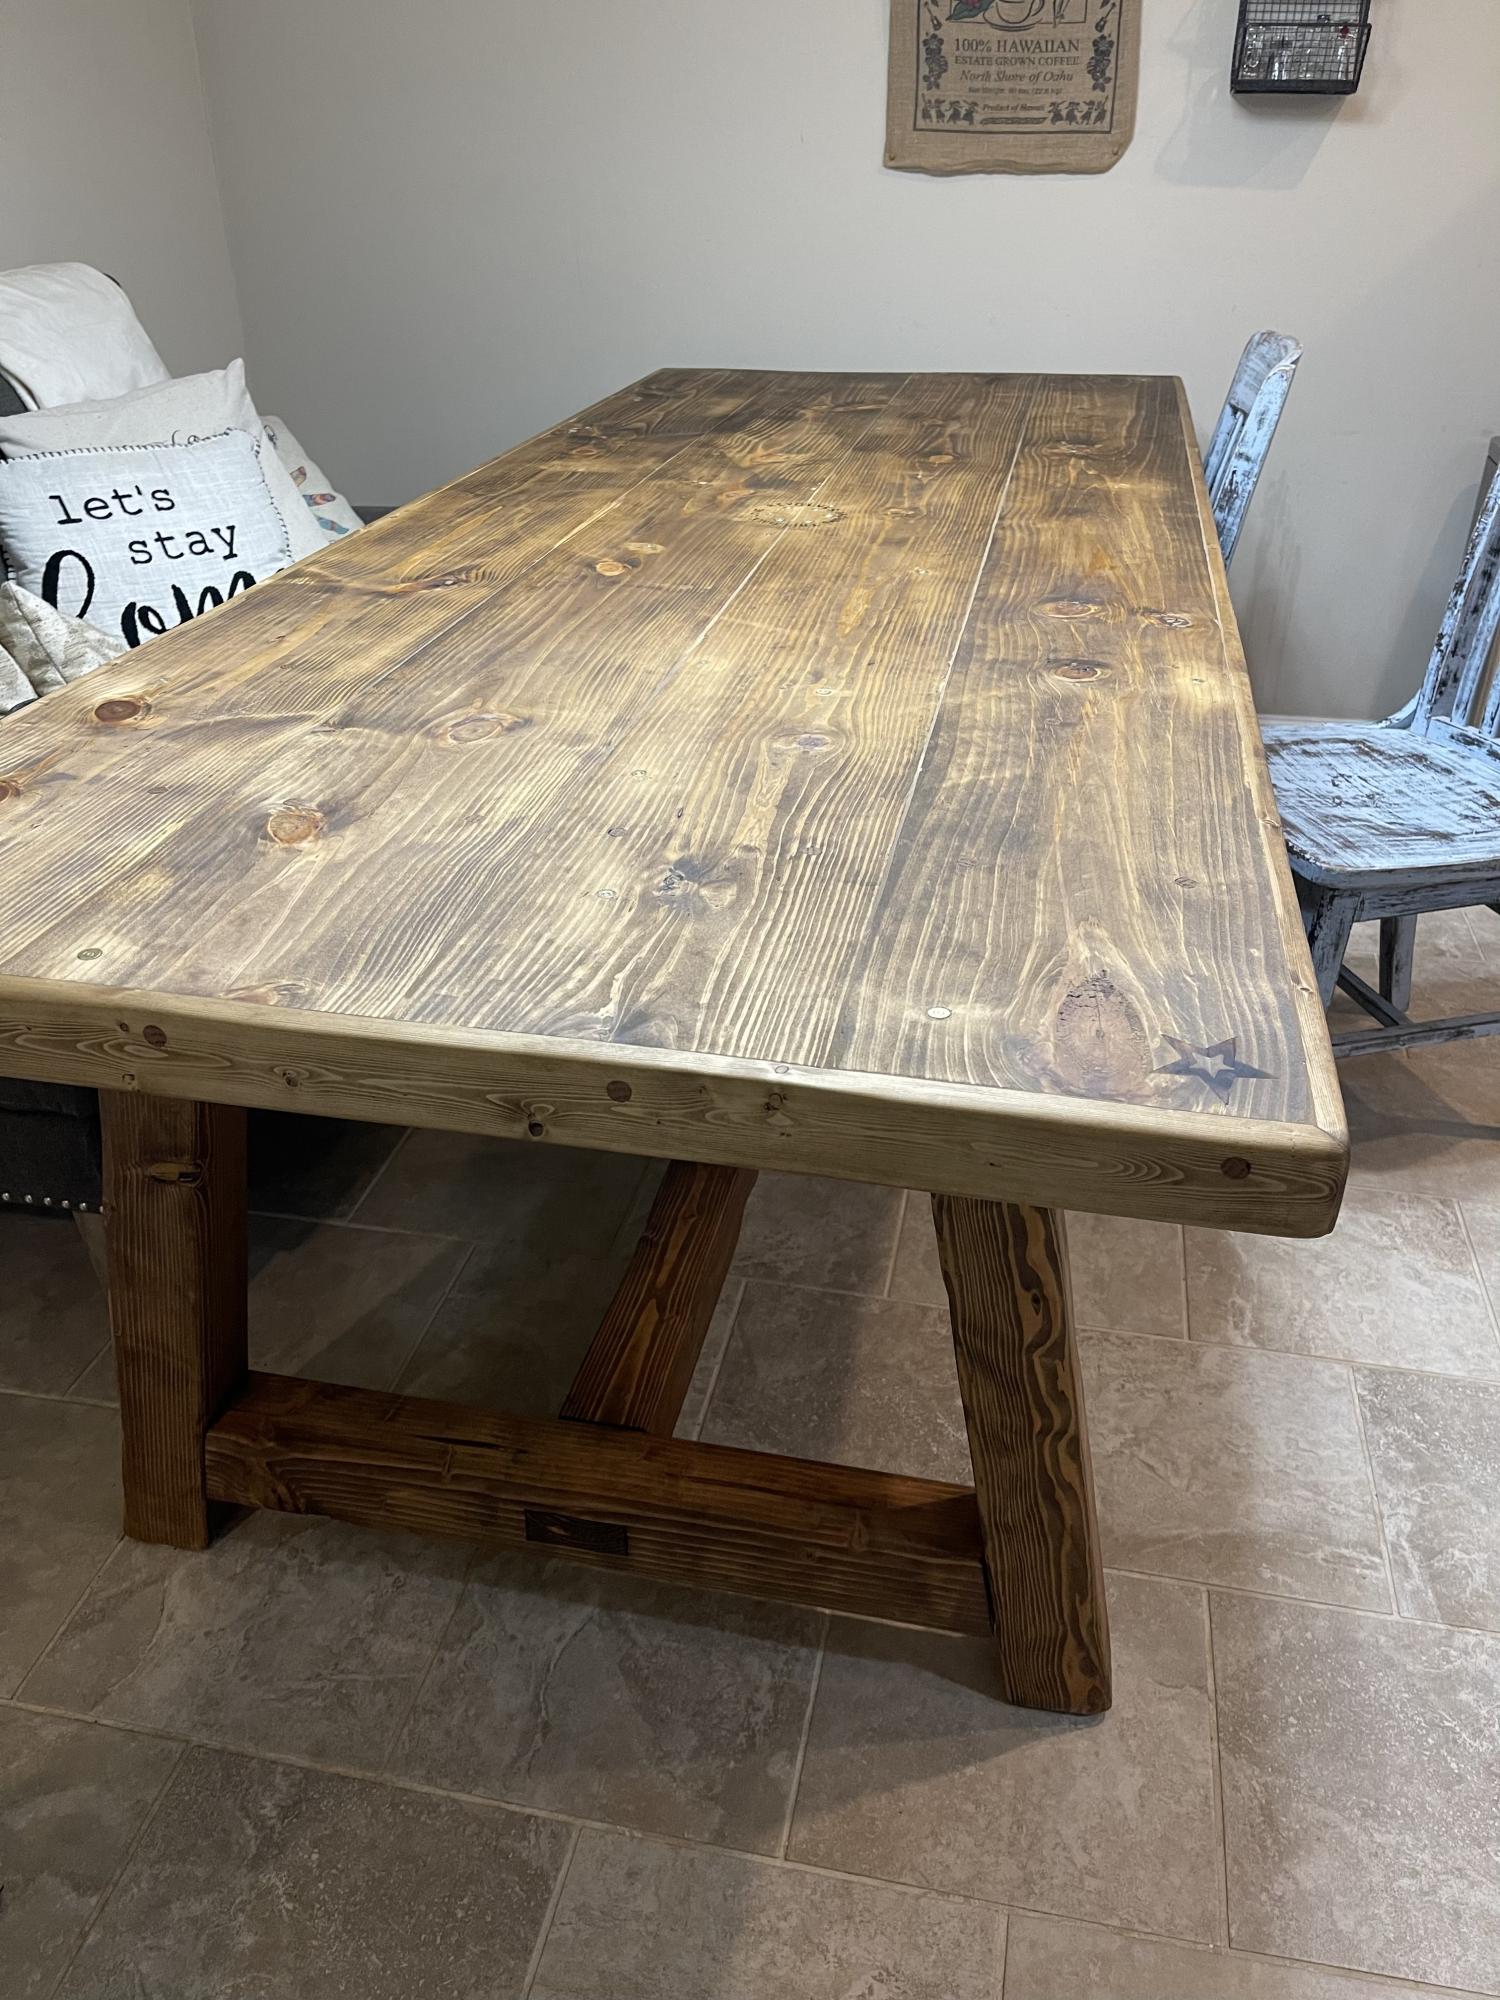
We stuck with th original plans, but instead of making table ends, we did full 2x10x8 boards and capped it with 1/3’s. We filled in the gaps in the wood with stainable wood filler. We also used a 1/2@ Forstner bit and recessed the screws and used wooden dowels to cover the screw holes. It gives it a beautiful finish. We also enjoy our pew pews, so we recessed .40, .45, .223, and .22 empty shells into the table. My husband wood burnt a message in the center of the table, then we sealed it all with one step minwax finish in mission oak.
Built from Plan(s)
Comments
Ten dollar ledges with reclaimed wood

I love how this project turned out. My neighbor is a collector of of old pallets/fences. Now he is trying to clear his yard. I just had to pull out the old nails, cut and nail. The wood was perfectly weathered.
Built from Plan(s)
Estimated Cost
FREE!
Estimated Time Investment
An Hour or Two (0-2 Hours)
Finish Used
none
Recommended Skill Level
Starter Project
Comments

Fri, 10/21/2011 - 18:58
Those are some incredibly
Those are some incredibly straight bits of pallet wood, my jealousy level is high.
Rustic X Kitchen Island
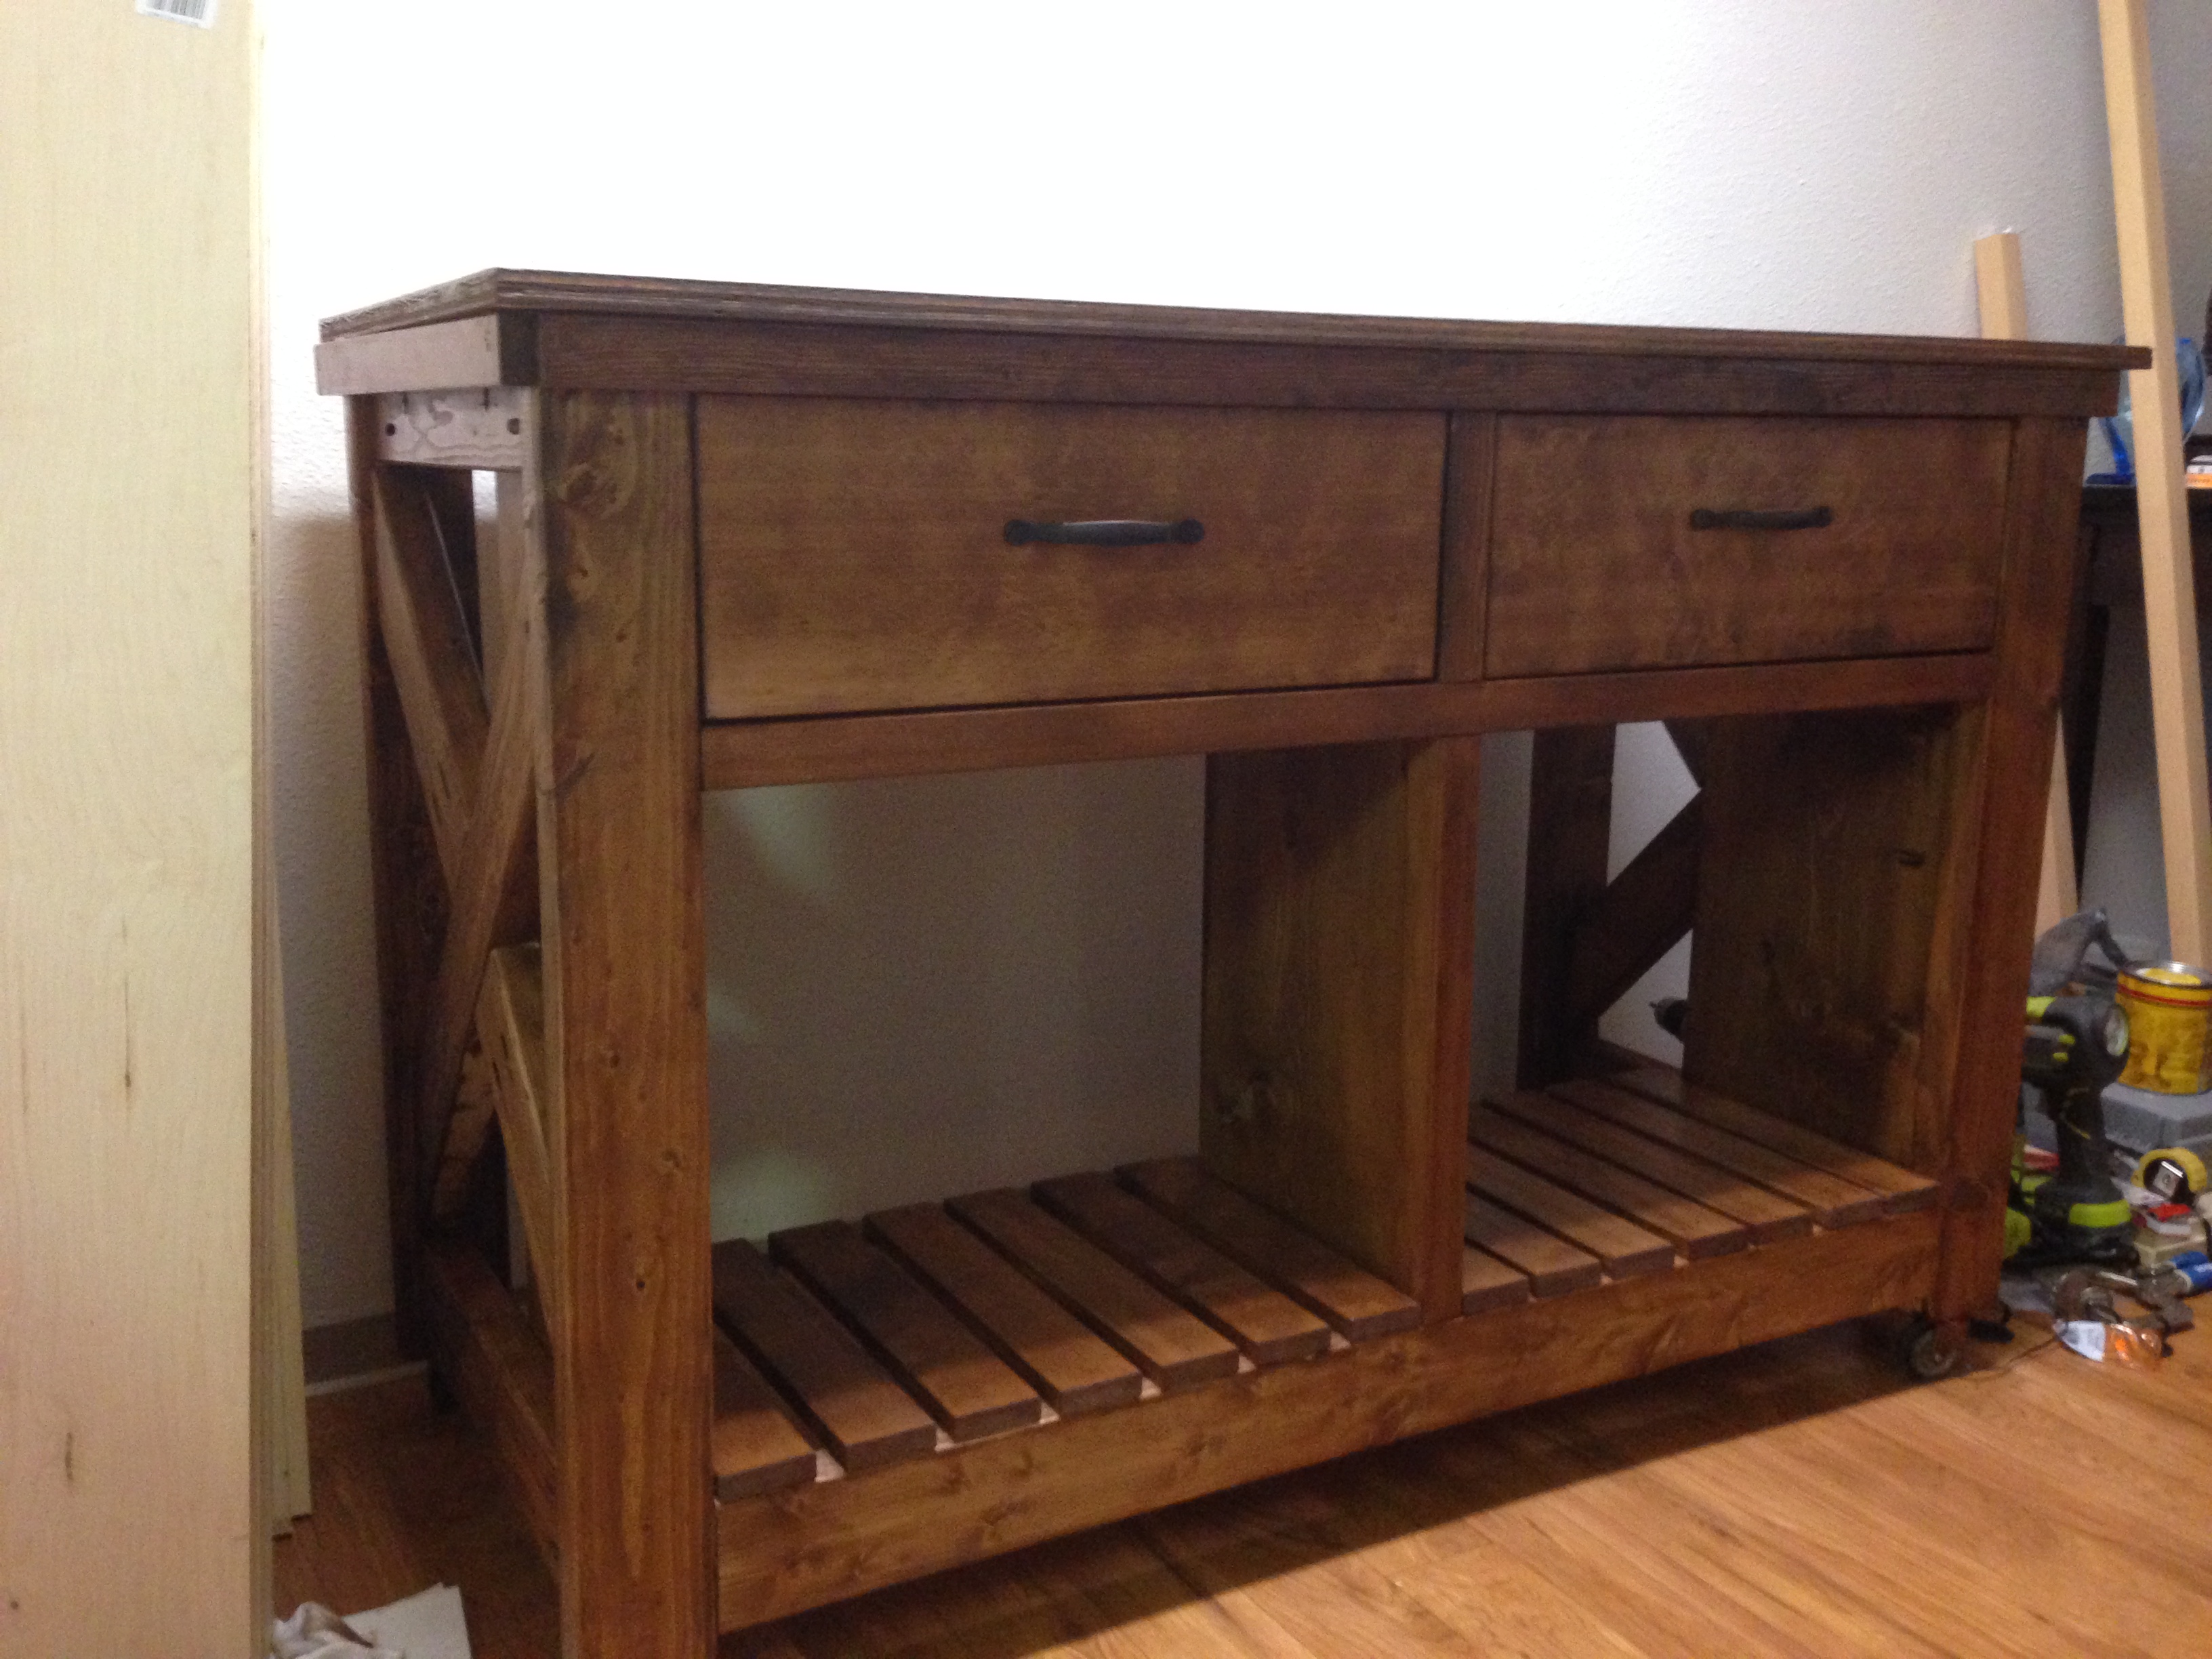
This is the first time I've built something. My wife found this site on Pinterest, and made hints about wanting a kitchen island. Our apartment has maybe 3 feet of useable counter space, so I thought this would be nice to have. Ignore the tools in the picture, I literally just finished it and just put stain on it. Overall, I think it came out pretty good, and I really like the design of it. This site is pretty awesome. I've already picked out my next two projects from here. Thanks Ana!
Kyle
Built from Plan(s)
Estimated Cost
$185
Estimated Time Investment
Weekend Project (10-20 Hours)
Finish Used
Miniwax Pre-stain/Miniwax English Chestnut/Miniwax Polyurethane Clear Semi-gloss
I only used one coat for everything except the top, I applied 2 coats of stain on the top. I applied fairly generously and within 2 minutes I used a sock to wipe what I just applied to ensure an even finish. After 2 hours I applied a second coat to the top, and in the same manner I used a sock to remove excess. I applied 1 coat of poly on everything except the top, where again I put on 2 coats.
I only used one coat for everything except the top, I applied 2 coats of stain on the top. I applied fairly generously and within 2 minutes I used a sock to wipe what I just applied to ensure an even finish. After 2 hours I applied a second coat to the top, and in the same manner I used a sock to remove excess. I applied 1 coat of poly on everything except the top, where again I put on 2 coats.
Recommended Skill Level
Intermediate
Comments
Farmhouse King Bed

I made this Farmhouse bed frame for my king sized sleep number bed. It is a little wide but overall I am very happy with it. I also made the nightstands from the Kentwood plans. The handles are diamond willow that I picked from the Northwood of Wisconsin.

Built from Plan(s)
Finish Used
Have not finished it yet
Recommended Skill Level
Intermediate
Comments
Wed, 12/28/2016 - 19:28
Very cool, I really like the
Very cool, I really like the handles from foraged wood. Strikes me as something perfect for a cabin in the woods.
Modern Park Bench

This was my husbands's 1st Ana White project
Built from Plan(s)
Estimated Time Investment
Afternoon Project (3-6 Hours)
Finish Used
White Chalk Paint
Recommended Skill Level
Beginner
Barnwood Electric Fireplace Surround
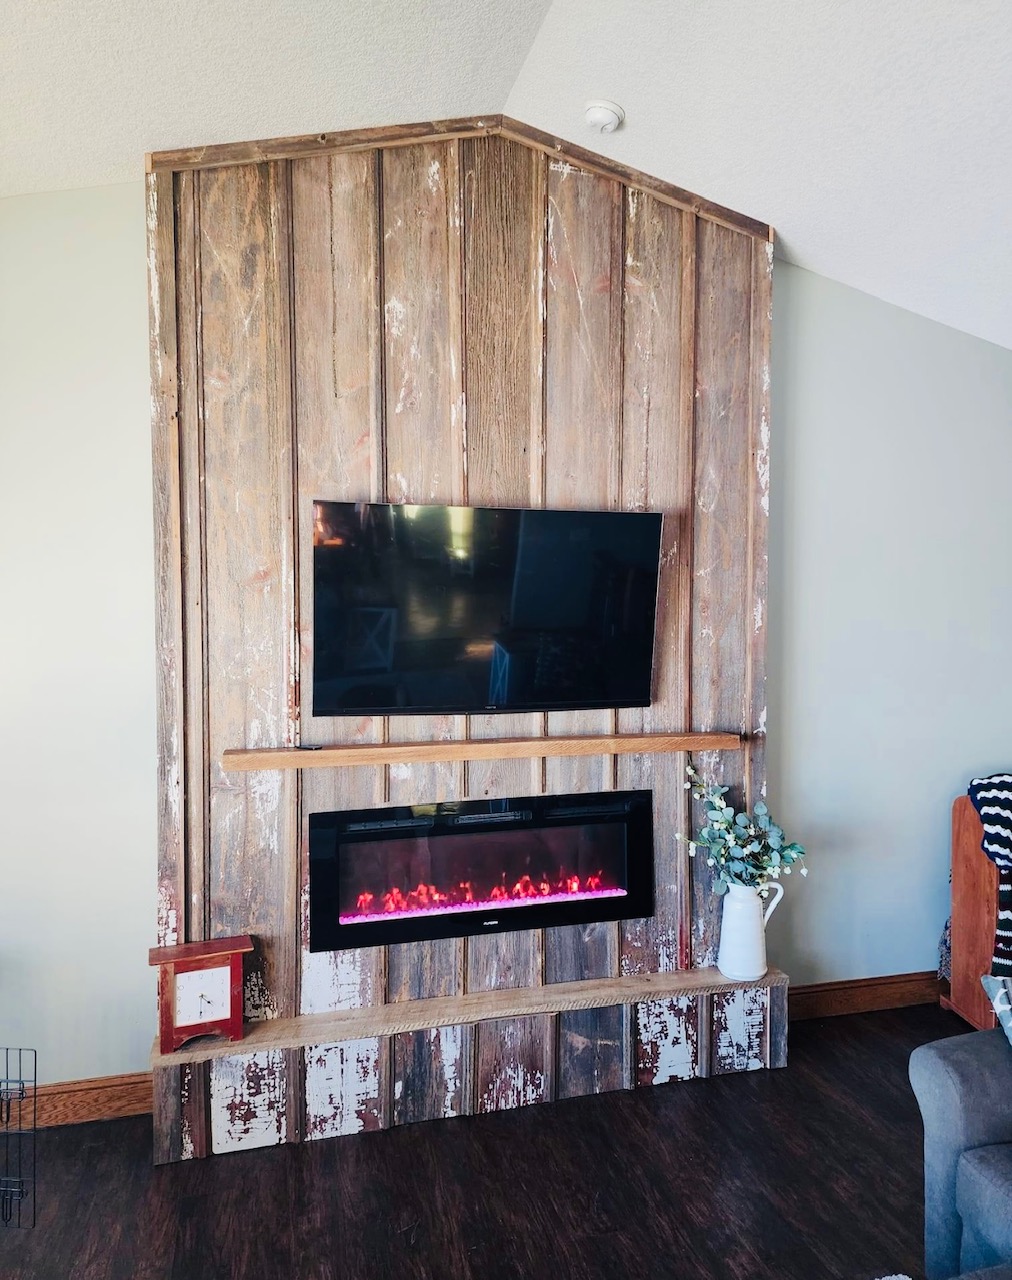
Gorgeous Barnwood Fireplace Surround by Scott Snyder
Built from Plan(s)
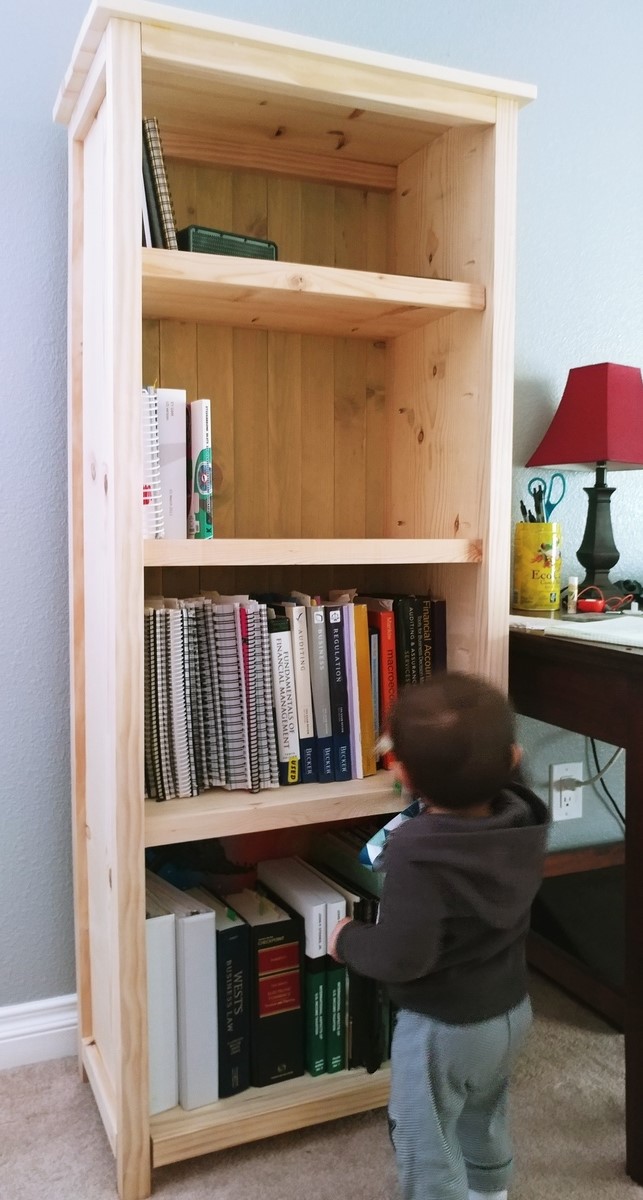
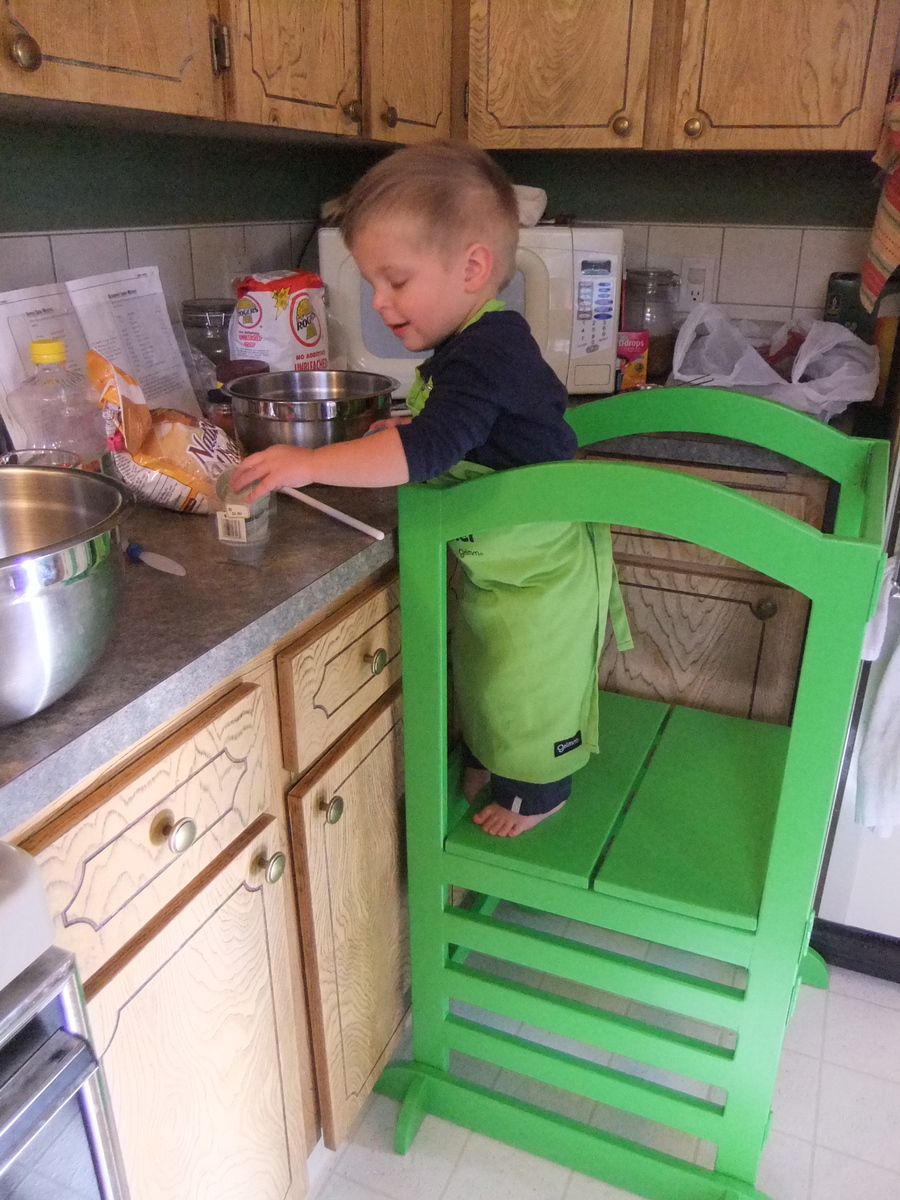
My Big and Small Helper

This was my first real woodworking project and I loved it! I had a big helper (my Dad), who has a full woodworking shop teach me how to use the different tools and assist with building. It took a while longer than the plans say because we did some extras like powersanding and rounding off all the edges on each piece before assembling it. My Dad was very picky about it having a polished look! Plus, I insisted on my Dad teaching me, not doing everything for me. We also predrilled and glued on 16 hinges so it would fold. That definitely took four hands to do and the majority of the time.
My 'small' helper (our last name is Small) and son Dominic is almost two and loves using it. In hindsight, I would have made it a couple inches less wide overall to fit better in our kitchen that has limited counter space. And would have painted it prior to screwing the sides together with the hinges to make it easier to paint. However, I built it at my Dad's over the weekend, then painted it later. I chose the bright green colour so it would be playful and gender neutral to pass on once we no longer need it.
Thanks for the inspiration and great plans! I will be back for more projects!!!!
Built from Plan(s)
Estimated Cost
$40 for wood etc, $52 for paint
Estimated Time Investment
Weekend Project (10-20 Hours)
Finish Used
One coat of Benjamin Moore Multi-Purpose Latex Primer in Paradise Green. And two coats of Benjamin Moore Advance Waterborne Interior Alkyd in Pearl finish in Paradise Green. Both are low VOC and low odour.
Recommended Skill Level
Intermediate
Love my new media cabinet
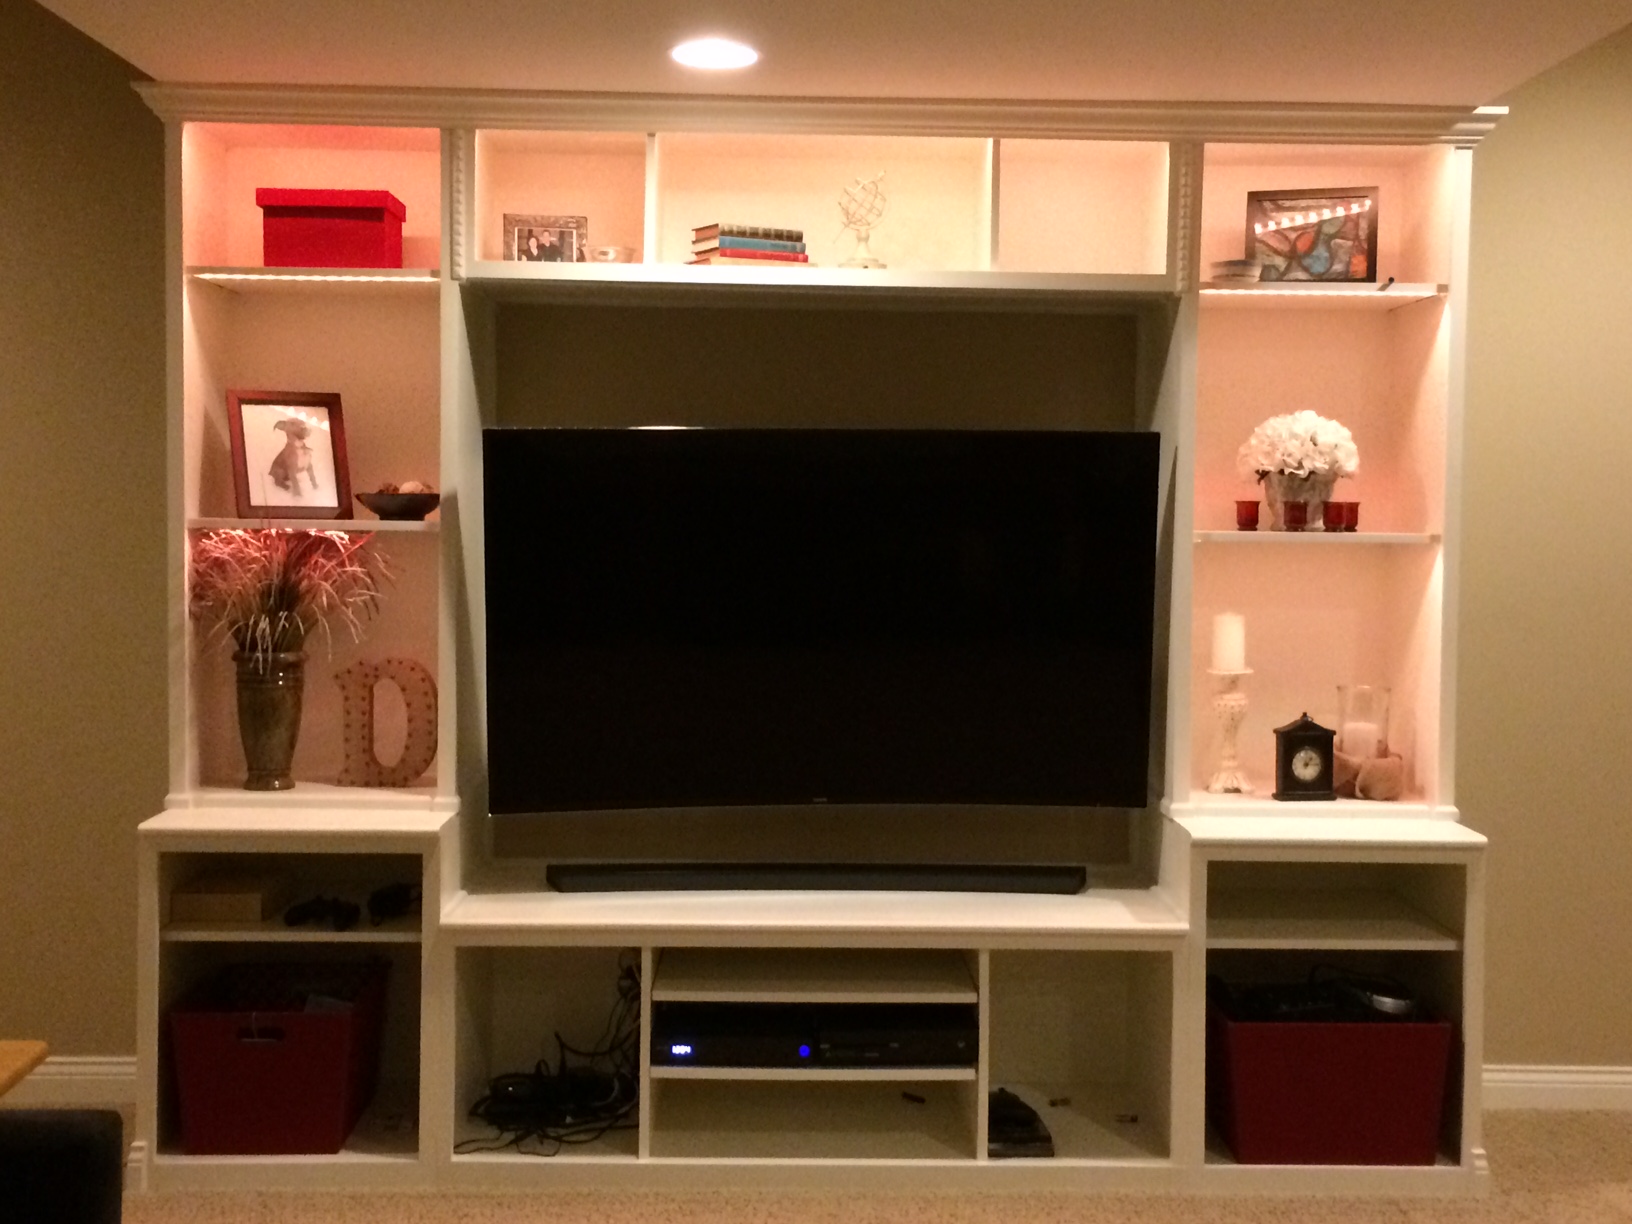
Enjoyed making this project. Instructions were great. Very happy with the results.
Built from Plan(s)
Estimated Time Investment
Week Long Project (20 Hours or More)
Finish Used
Off white semi gloss paint
Recommended Skill Level
Intermediate
Bedside End Table
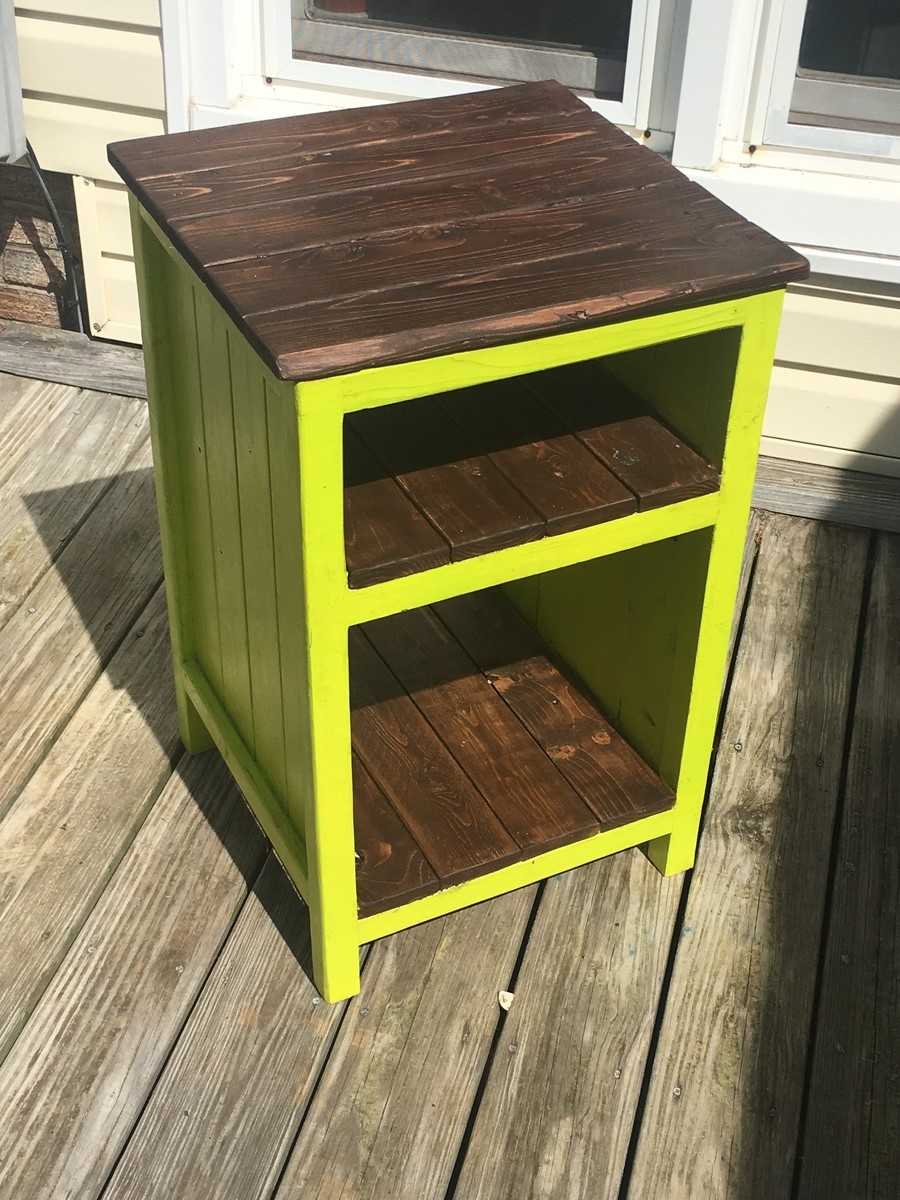
I actually used the “Bedside End Table” brag plans. This is my first project using plans from this site, I’m pretty happy with it:)
Built from Plan(s)
Estimated Time Investment
Weekend Project (10-20 Hours)
Finish Used
Varathane stain, wipe on poly, rustoleum paint
Recommended Skill Level
Beginner
Easy Build Wood King Headboard
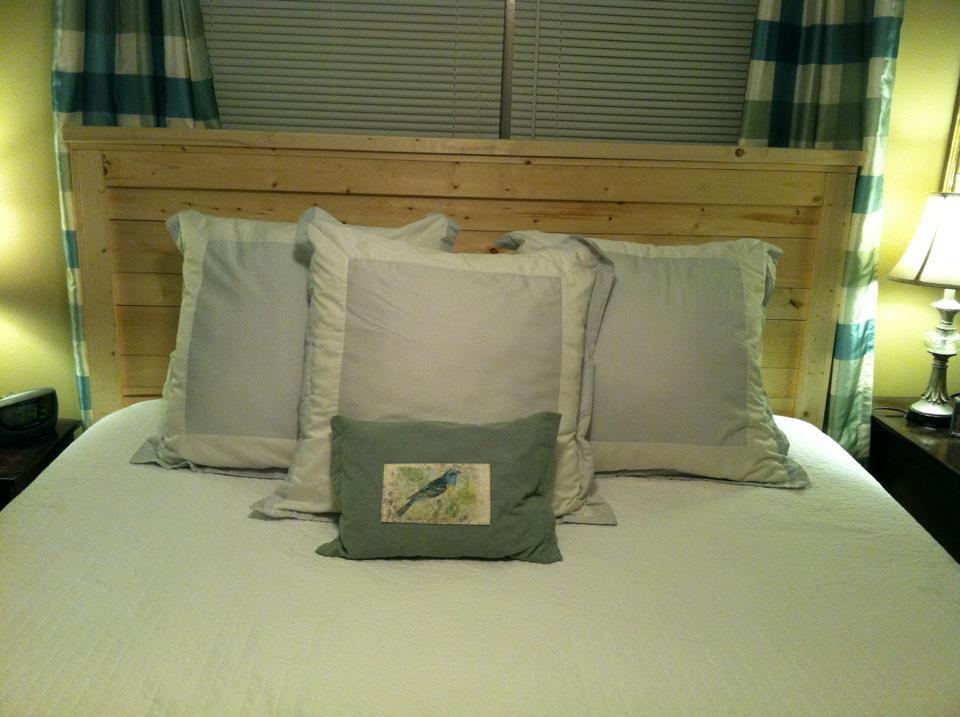
I am in love with this project. My husband built this for my birthday this afternoon. It was an easy project for his first time. We haven't finished it yet. I would like for him to put a 2x6 on the top to give it some visual weight. The only problem i am having is I don't know how to finish it. What would you suggest? We like the beachy distressed look so I am thinking whitewash. Anyway, I love it! I told my husband that he was in trouble now because now I am going to give hime tons of projects to build for me.
Built from Plan(s)
Estimated Cost
135.00
Estimated Time Investment
Afternoon Project (3-6 Hours)
Finish Used
Unfinished at this point. We are undecided on finish. We might dark stain and then whitewash, or a turquoise wash, with Annie Sloan Chalk Paint and then waxing.
Recommended Skill Level
Beginner
Comments
Sun, 10/30/2011 - 08:48
Looks great! I love the
Looks great! I love the beachy look too. You could also do a yellowish stain (golden pine? it might be called) and then distress it and rub over with a darker stain for a different beach look.
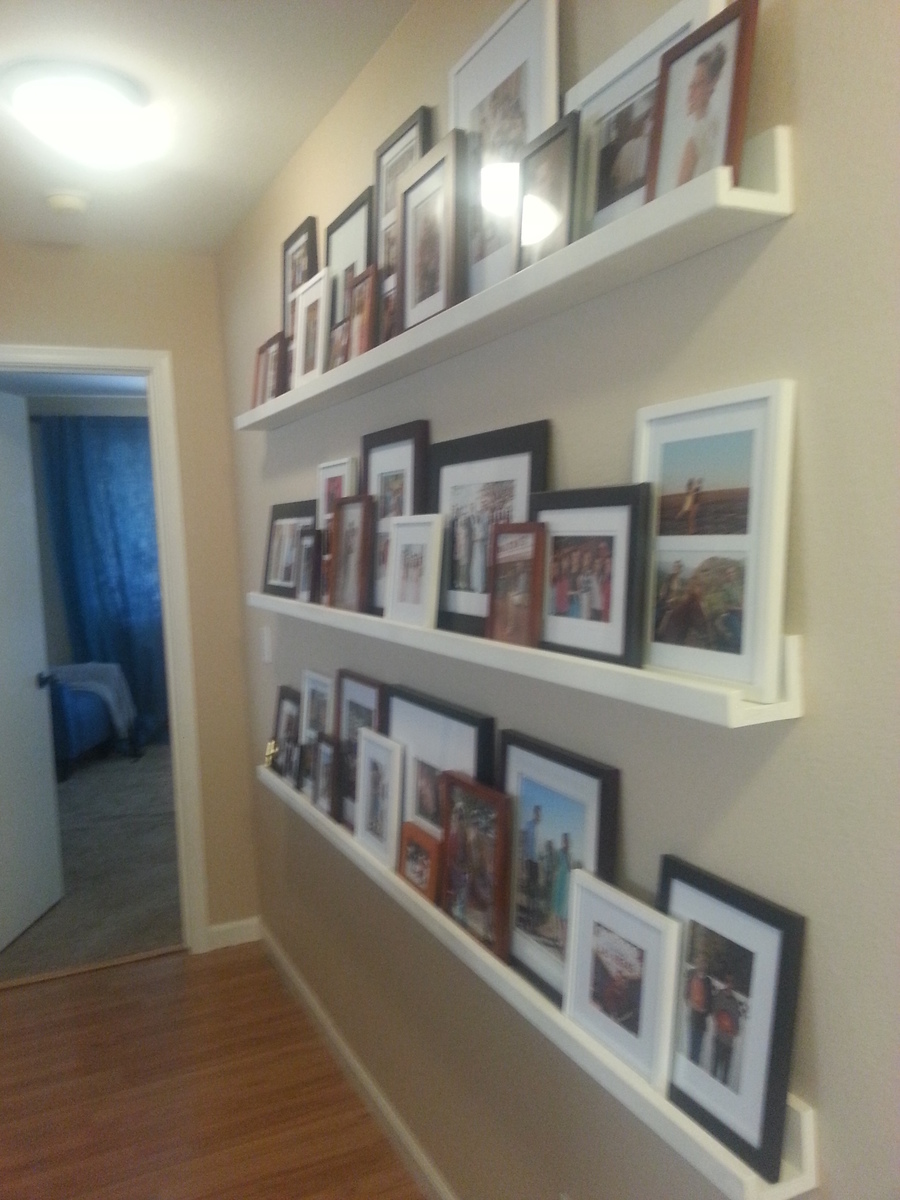
Photo Gallery Made Easy!
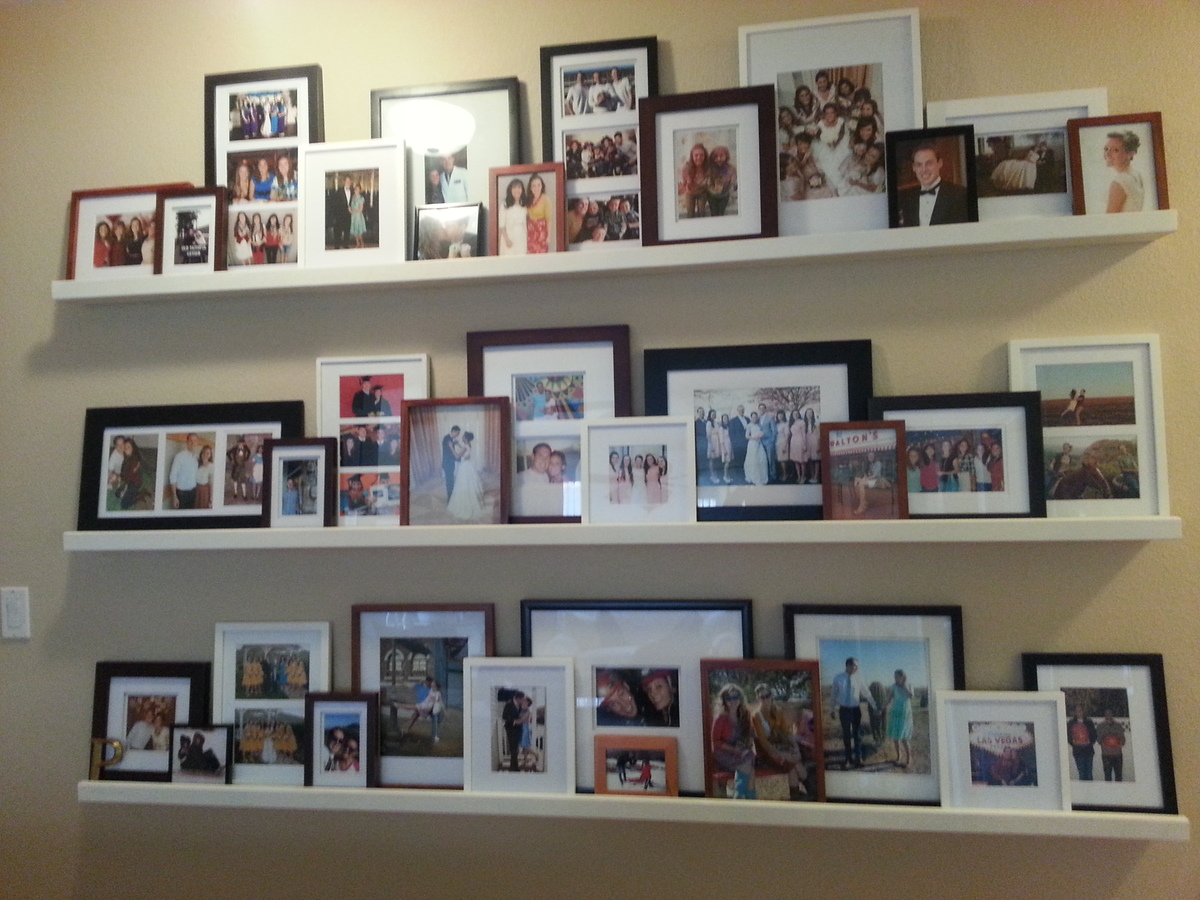
I love my new photo ledges. I had a huge space on my wall and these ledges are perfect. The ledges were so easy to make. I got a kreg jig for my birthday (I never thought I would ask for a tool for a birthday present) and I have gotten so much use out of it. I saw similar ledges at pottery barn for 10 times the cost of this DIY project. I saved so much with these ledges. The kreg jig has already paid for itself. The ledges make it super easy to switch out photos and I love being able to display so many fun photos. Everyone who sees these ledges loves them!! This was my first project. Thanks Ana for the great plans!
Estimated Cost
$50
Estimated Time Investment
Afternoon Project (3-6 Hours)
Finish Used
White gloss spray praint
Recommended Skill Level
Starter Project
Comments

Mon, 10/21/2013 - 12:51
Picture Frames
I might spray paint all the picture frames white or an oil rubbed bronze in the future...I'm not sure yet. Opinions?

Mon, 10/21/2013 - 18:27
Beautiful gallery!
Your gallery looks beautiful! Great job on your first project, congratulations!
(ps- I think the oil rubbed bronze would look super on the picture frames.)
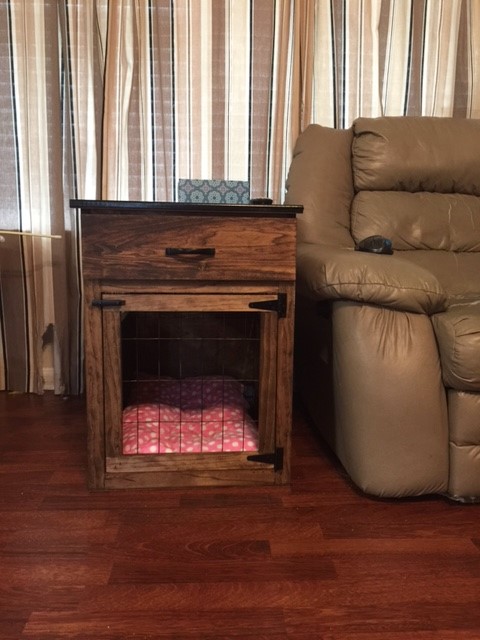
Smaller Dog Crate with a drawer!
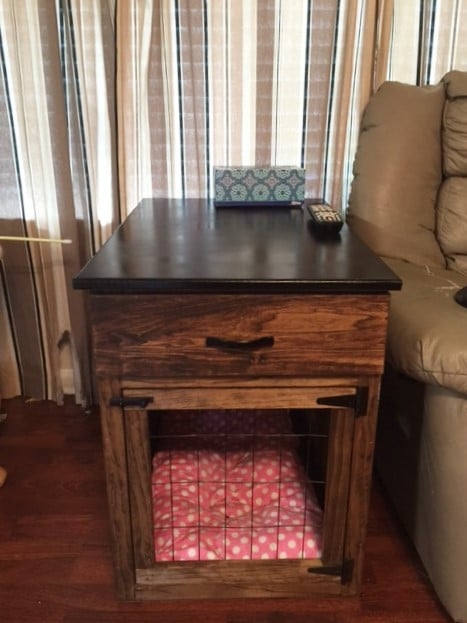
You may remember my green stratton day beds that I built a long time ago- finally I have another project to post- I am soo happy I found Ana White's website. We just got back from a 2.5 week vacation in Israel and my dogs were staying with my sister. She told me they had been sleeping in the same kennel together instead of separately. Their kennels are too small so I decided to build them one using wood I already had. But since they are small dogs, I decided to size it down- but I wanted it end table height- so I built a smaller kennel- 20"H x 19"W x 28"D. but... I added a drawer to the top to bring it to the right height. You can read all about it on my blog- link below.
Built from Plan(s)
Estimated Cost
$35 - for drawer pull, stain, drawer slides, and hinge hardware- I had the 2x2s and plywood in my stash
Estimated Time Investment
Weekend Project (10-20 Hours)
Finish Used
Provincial stain
Recommended Skill Level
Intermediate
Comments
clara table
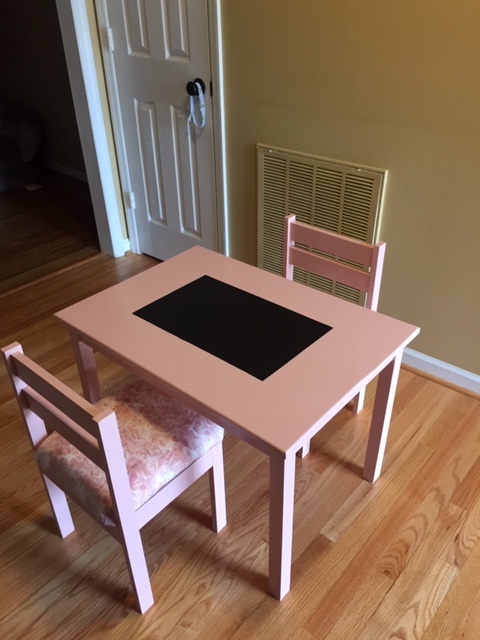
Not bad for my first project!! I decided to upholster the chairs so i used a solid piece of wood for the foundation of my seat and also decided I was going to use chalkboard paint I had left over
Built from Plan(s)
Estimated Time Investment
Weekend Project (10-20 Hours)
Recommended Skill Level
Starter Project
Comments
Sun, 04/21/2019 - 03:34
clara table and stackable chairs
Turned out pretty good if I do say so myself

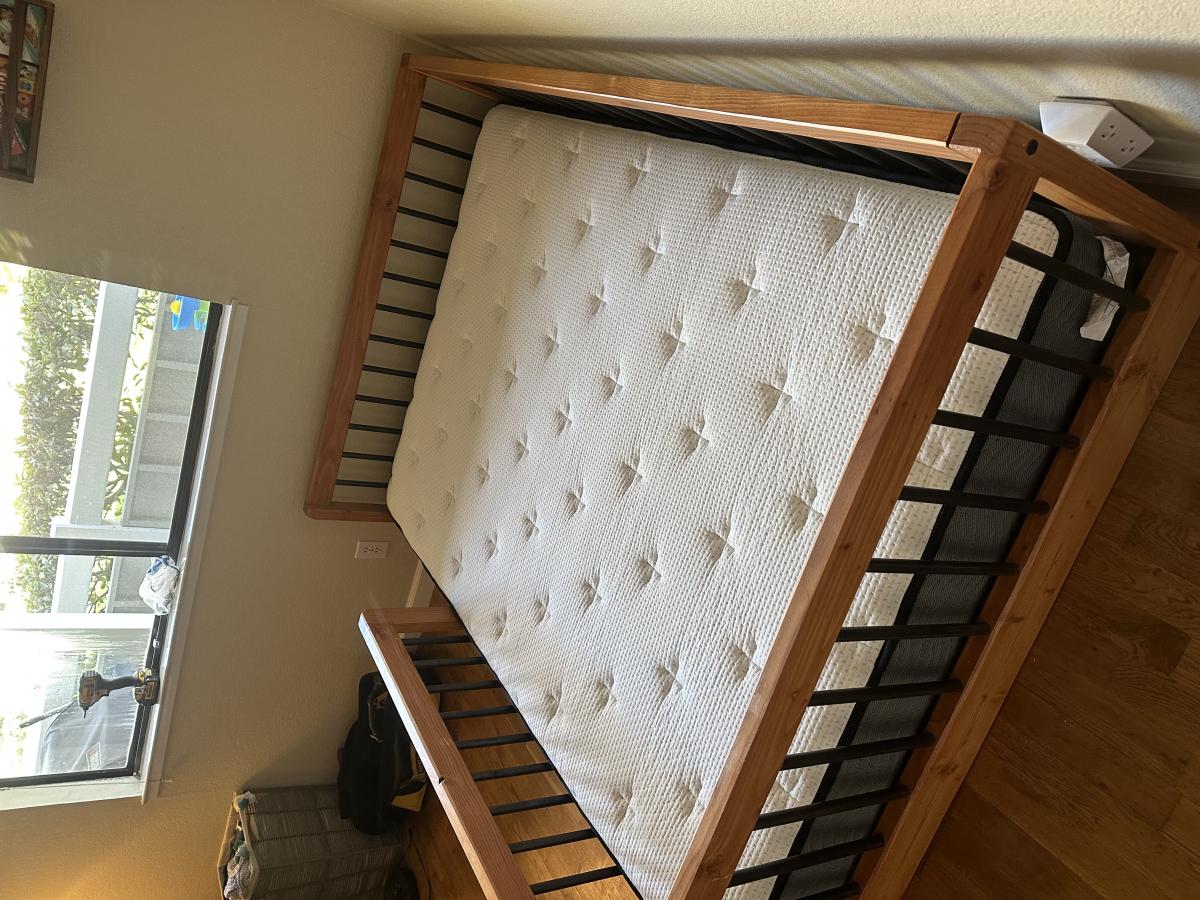
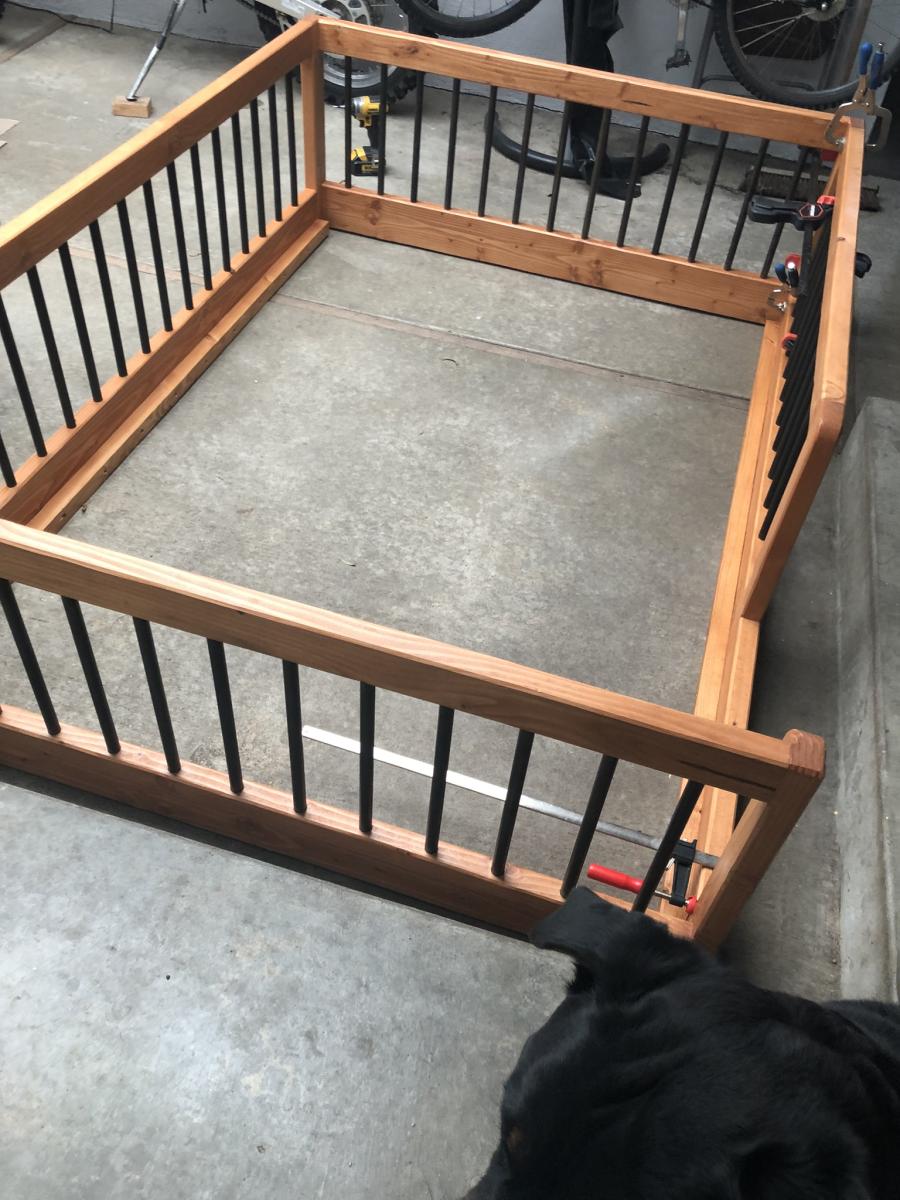
Montessori bed
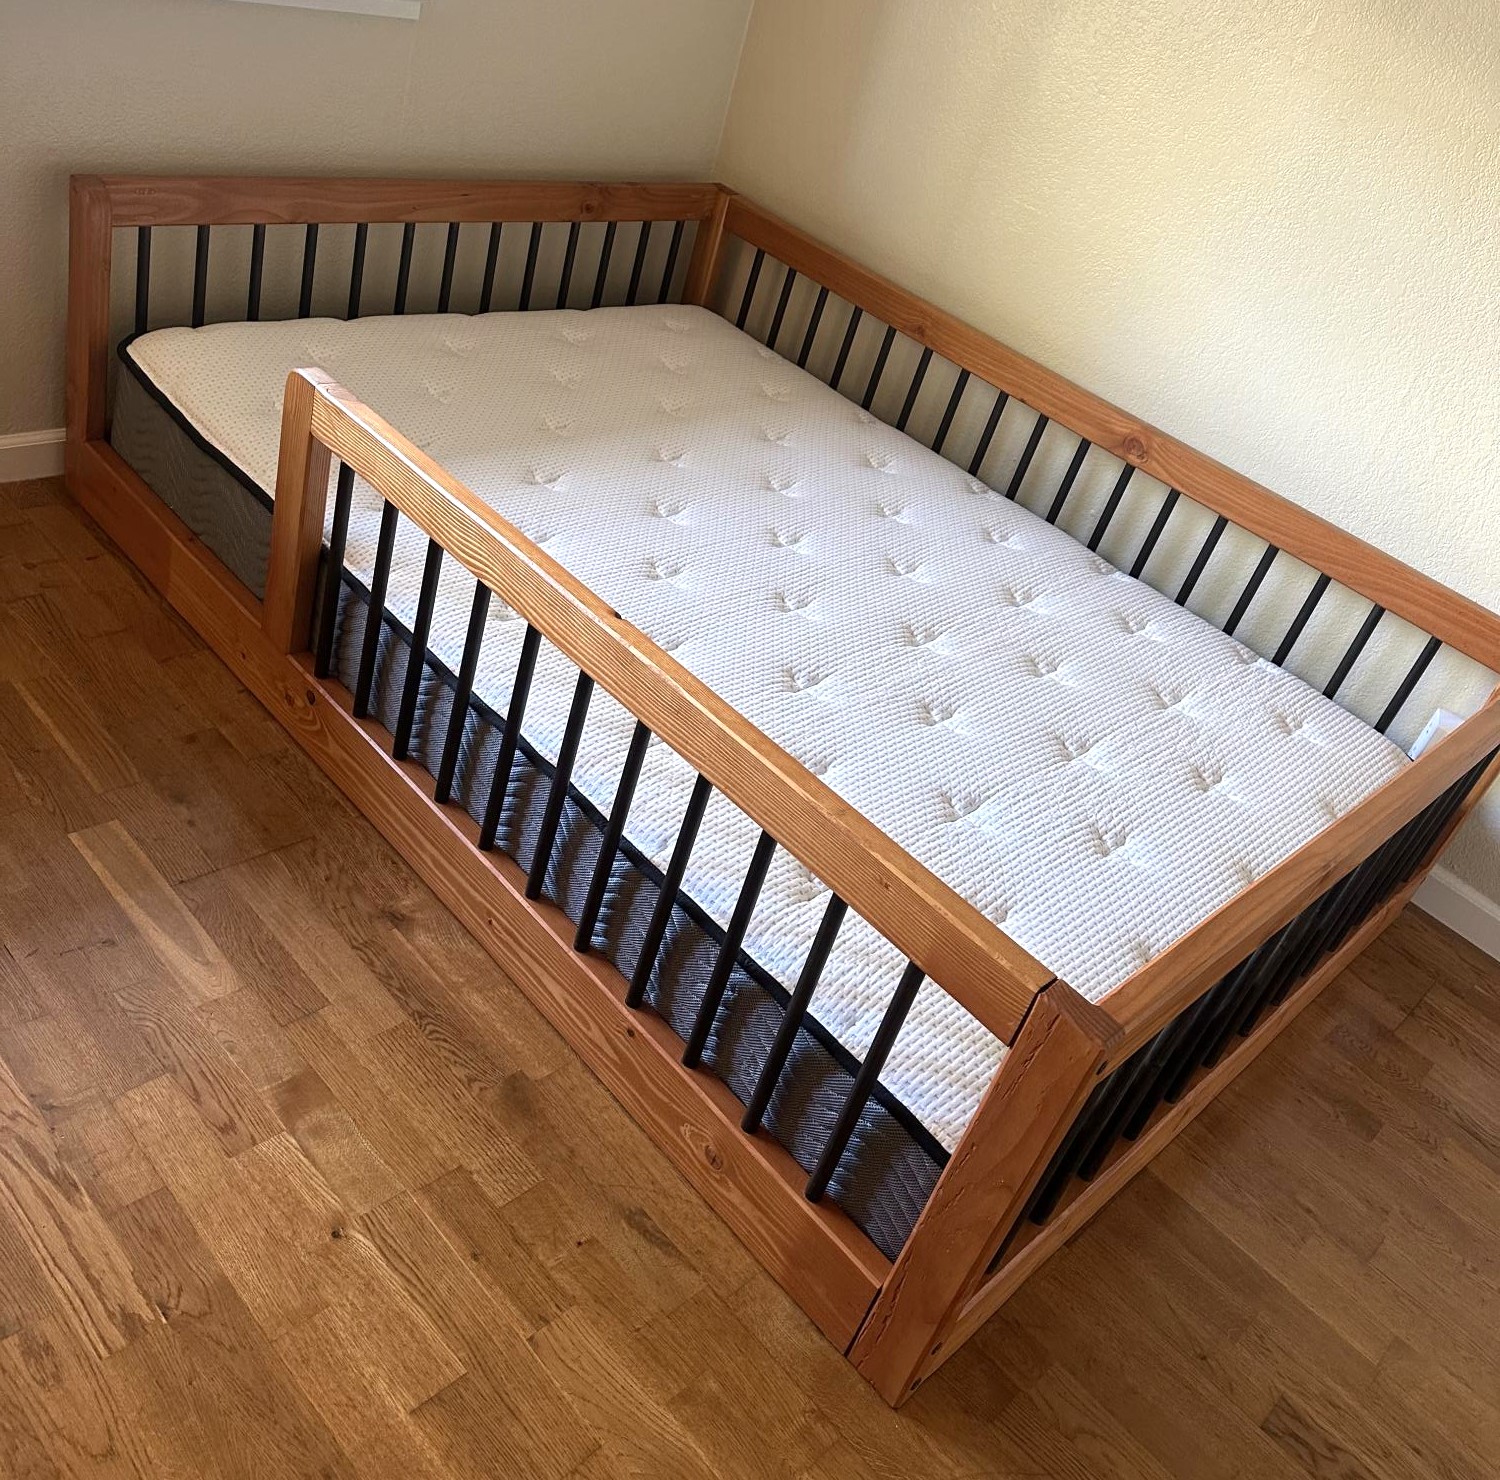
A Montessori (full size) bed made for my grandson Jack’s 1st Birthday.
Comments
Thread Holder and Photo Scrapbook Holder
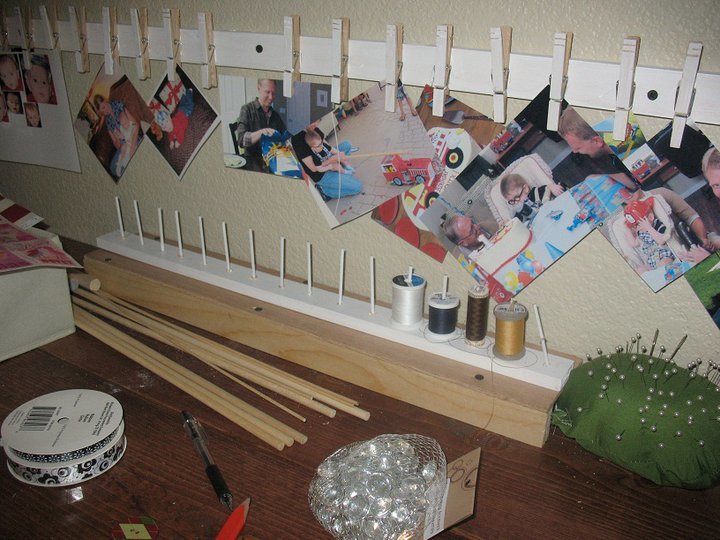
I love this even though I did not take the time to cut the dowels properly. I needed something for my sewing thread. Just a plain board and some dowels thin enough for the spools. Drill some holes in the board and glue in the dowels. I also made the picture holder for scrapbooking. I got the idea from the Ruler Clip Art Rails on this site. Thanks!
Built from Plan(s)
Estimated Time Investment
An Hour or Two (0-2 Hours)
Recommended Skill Level
Starter Project
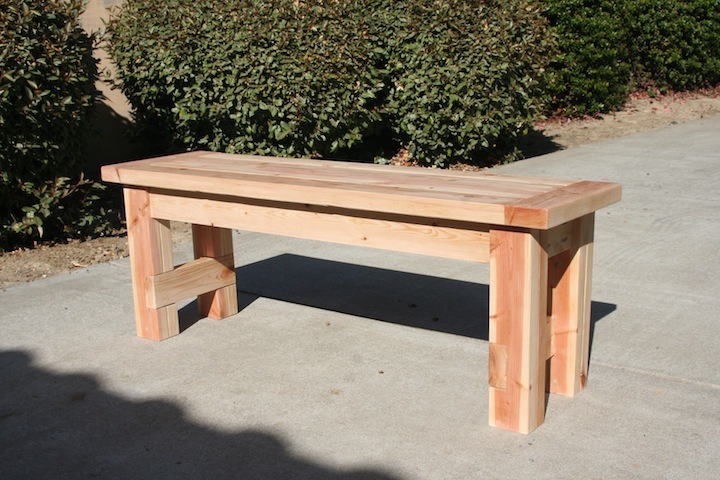
Farmhouse Bench
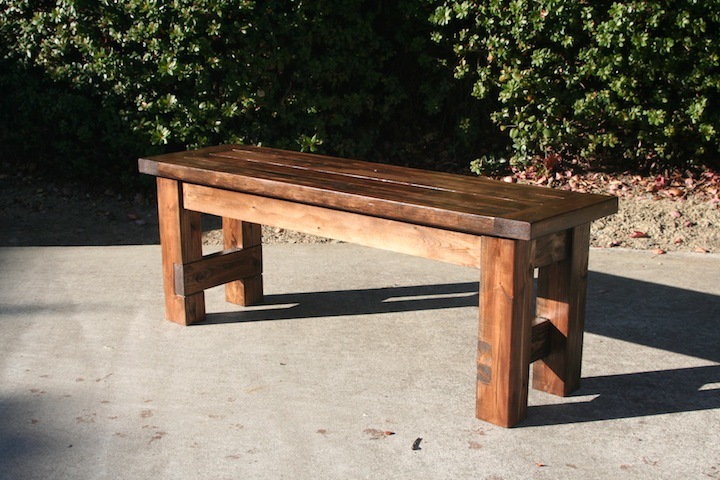
First time building furniture. This turned out much better than I thought. After this I probably could've build the farmhouse table myself instead of paying way too much for my wood dining table. Only if I have found Ana's site sooner. :)
Having a Kreg jig also made the whole process much easier.
Built from Plan(s)
Estimated Cost
$40 without the stain
Estimated Time Investment
Day Project (6-9 Hours)
Finish Used
Rustoleum Kona and Minwax pre-stain conditioner and semi-gloss poly
Recommended Skill Level
Beginner
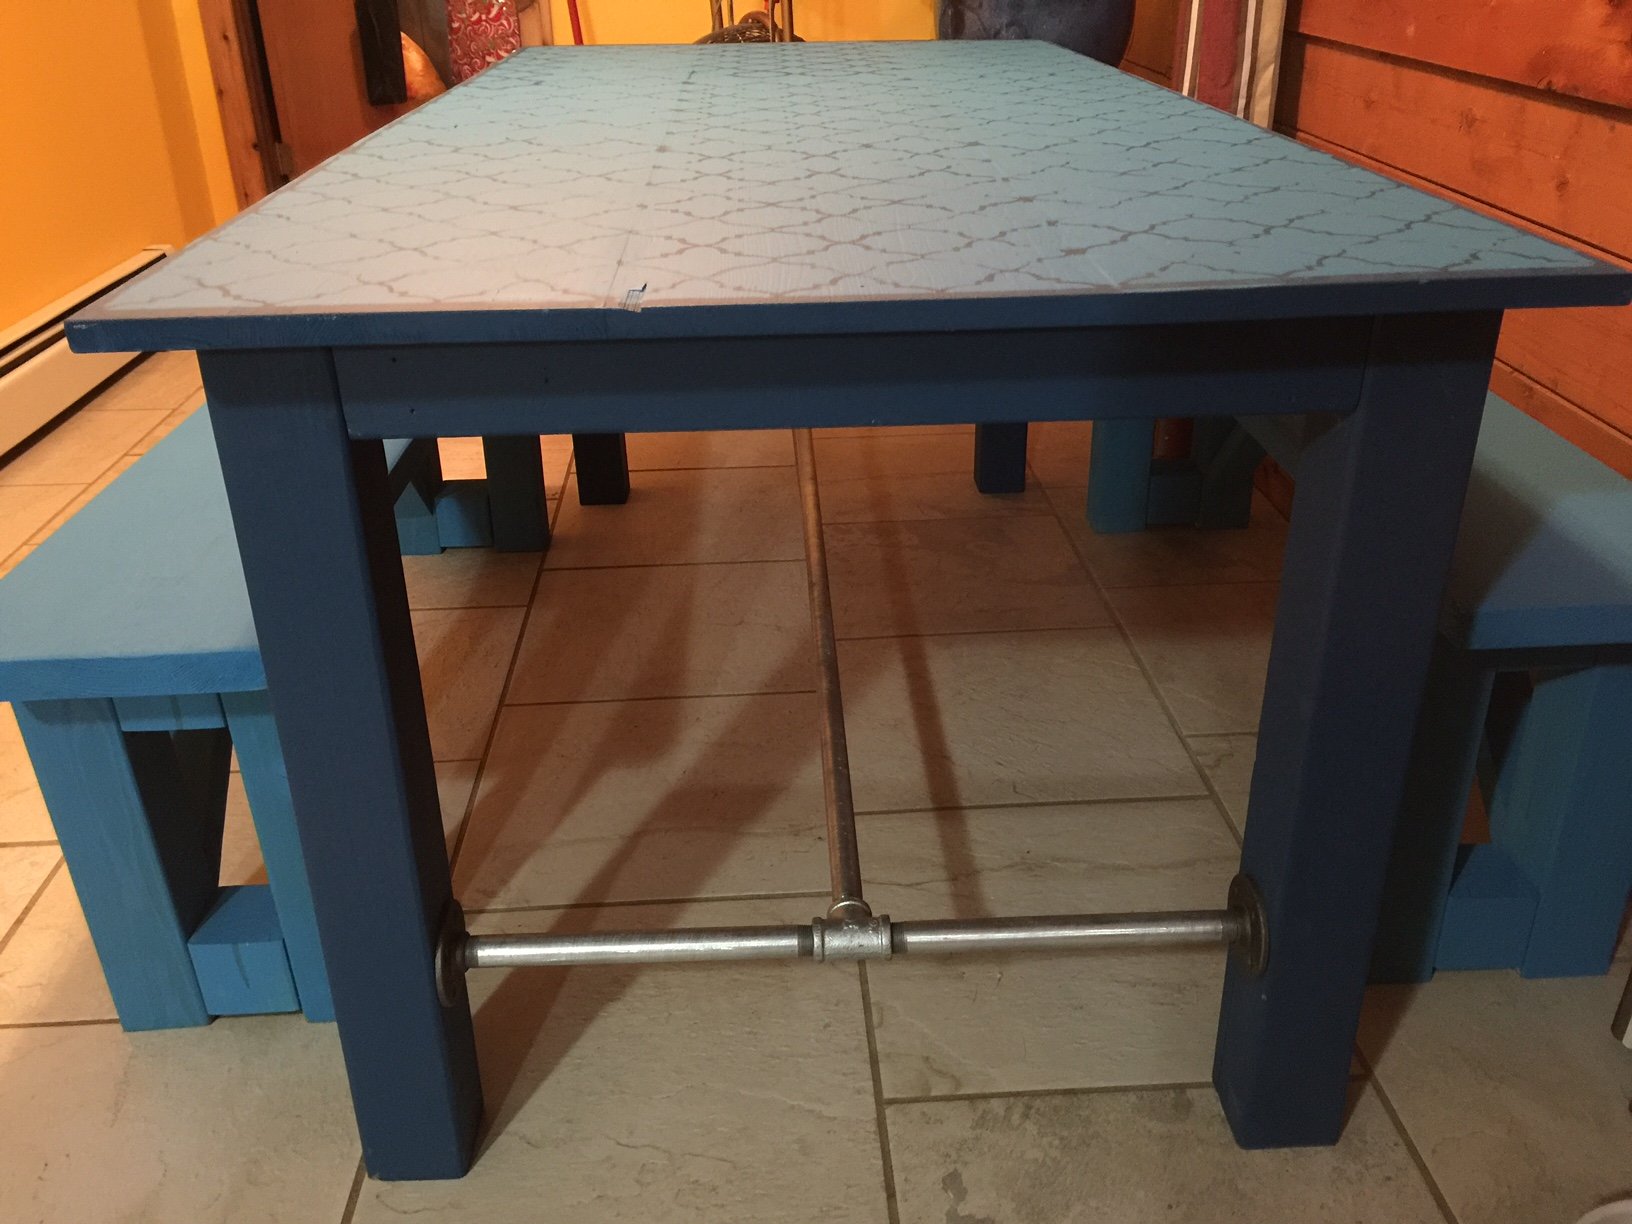
Modern Farm Table with a Twist
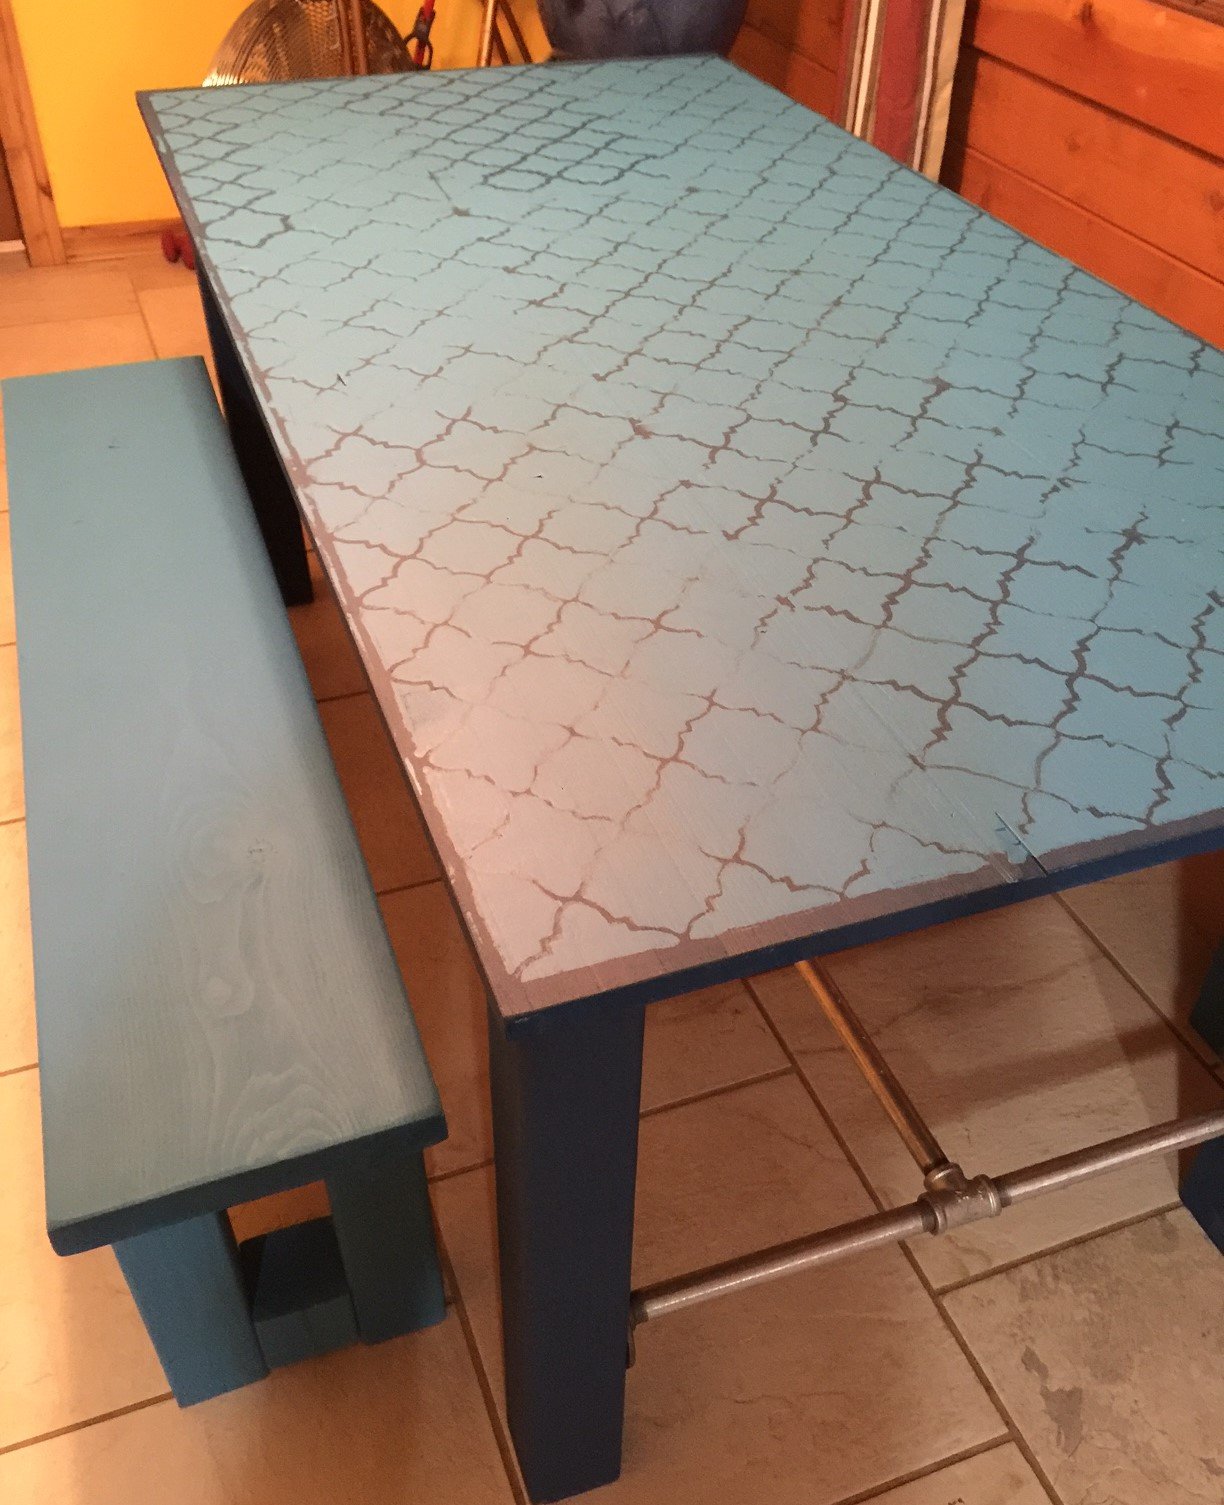
We wanted to build a farm table with benches to accommodate a few more people in the same space. This plan was easy to use. We modified a couple of the supports to metal piping to change the look up. We also painted the table and used a stencil to create a old world feel to it. It was a very fun project!
Built from Plan(s)
Estimated Cost
$200
Estimated Time Investment
Weekend Project (10-20 Hours)
Finish Used
1 Qt Carribean Sea from Glidden
1 Qt Galapagos from Behr
Minwax Polycrylic Semi-Gloss Finish
Tile stencil for table top
1 Qt Galapagos from Behr
Minwax Polycrylic Semi-Gloss Finish
Tile stencil for table top
Recommended Skill Level
Beginner
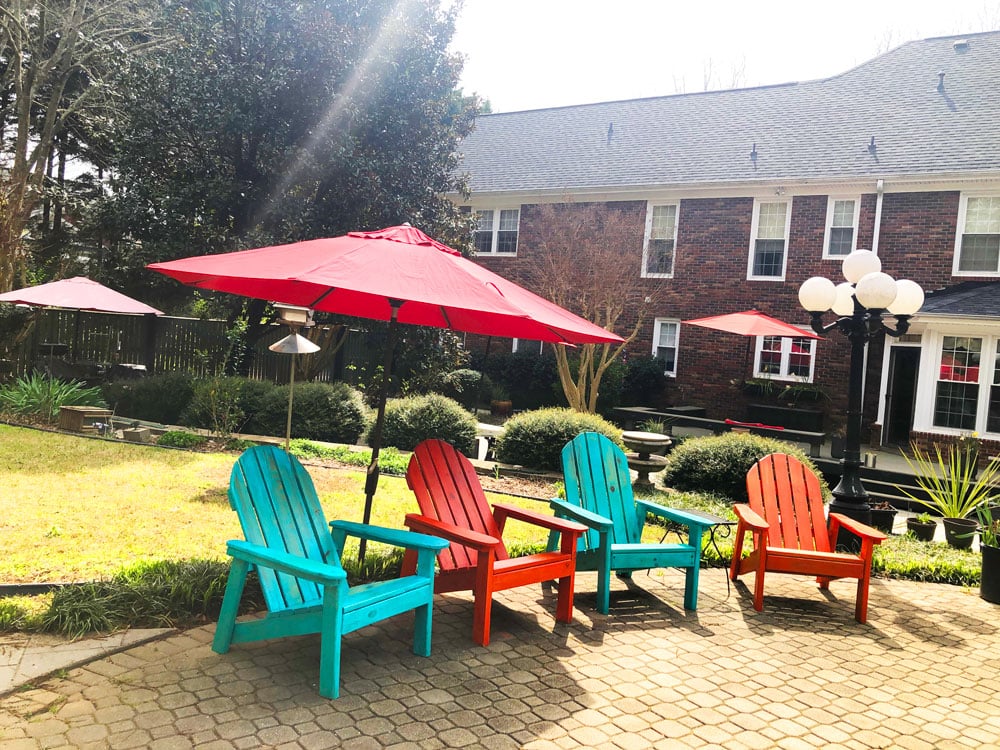
Adirondack chairs
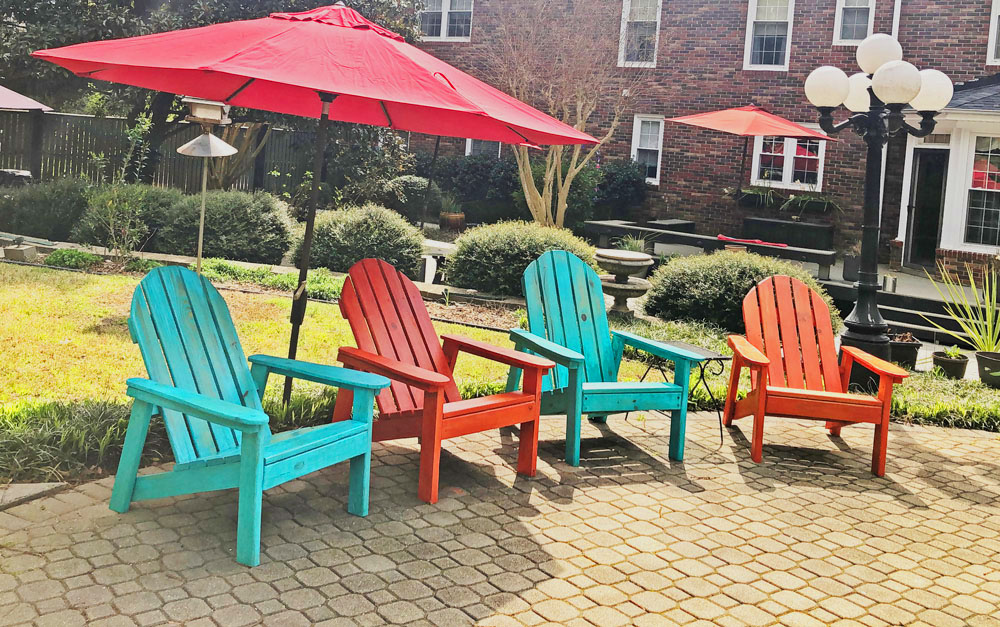
Adirondack chairs from your plans. My husband added some rounding on the arms and back. We wanted them to look like well weathered beach chairs. To get that effect we used milk paint which lets the grain show through.
The best addition are the two wooden wheels on the back leg of the chairs, I can now easily move them around my patio.


Built from Plan(s)
Estimated Cost
$ 30 per chair
Estimated Time Investment
Weekend Project (10-20 Hours)
Finish Used
Milk paint
Recommended Skill Level
Intermediate
Comments

Mon, 05/06/2019 - 11:10
What a gorgeous seating area…
What a gorgeous seating area and what a seal! Love the wheels too!
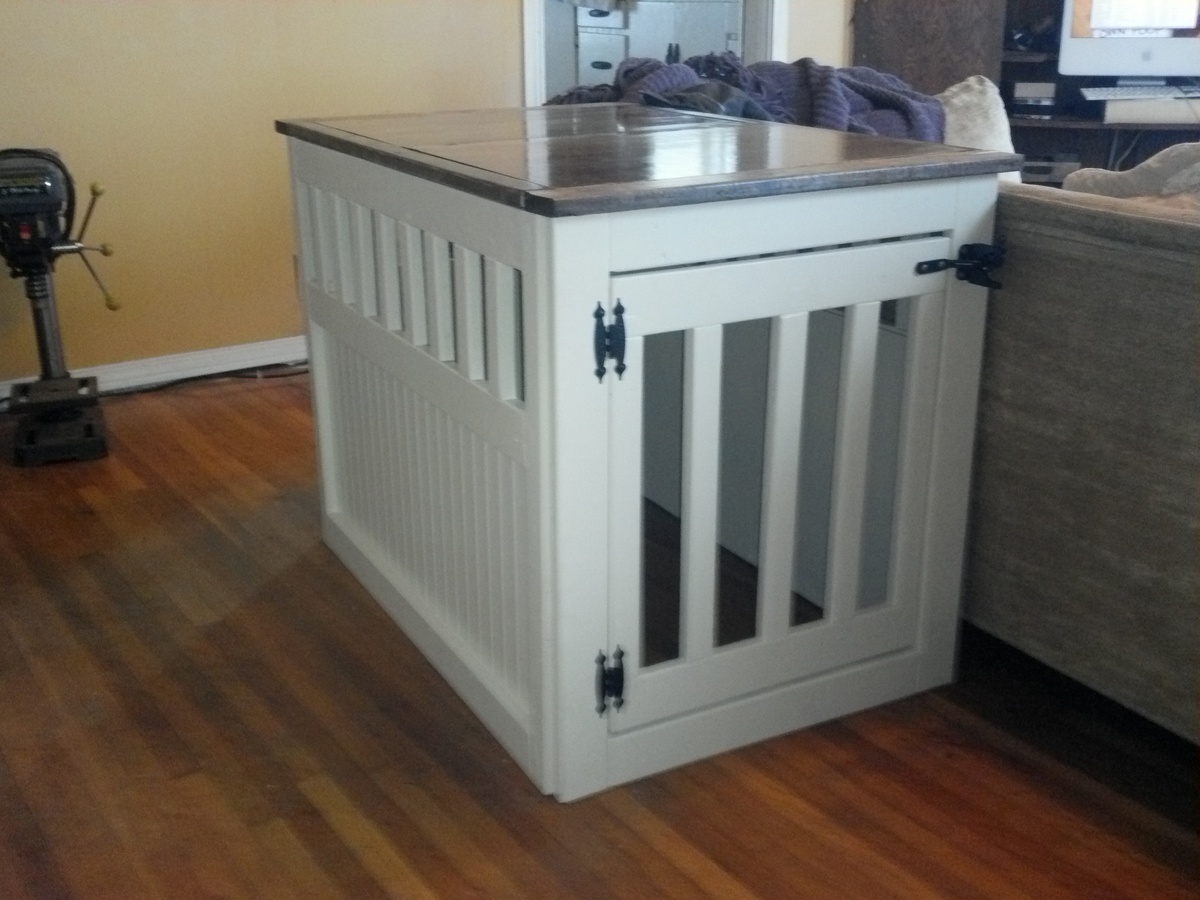
Dog Kennel End Table for Donation
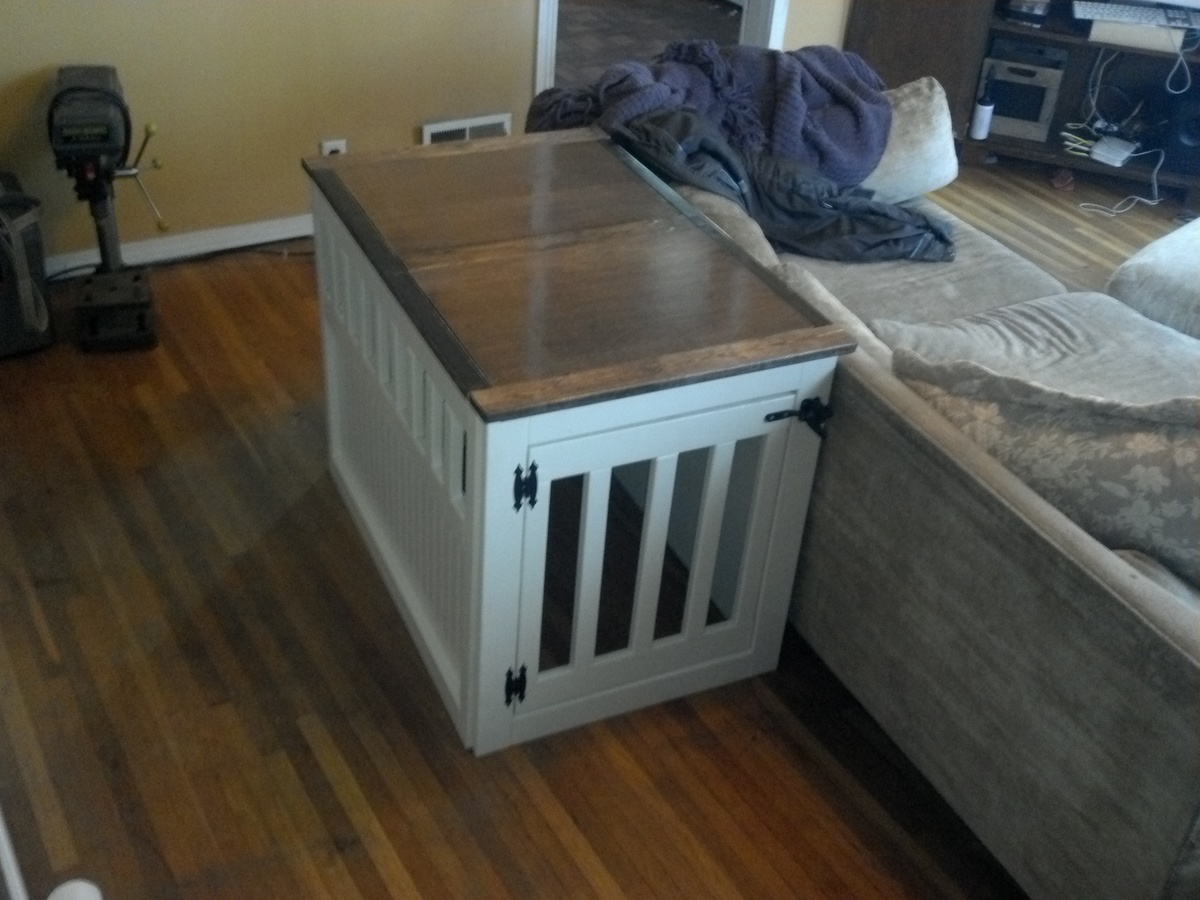
We built this dog kennel as a donation to a fundraiser for our favorite dog rescue. It was auctioned off at the silent auction and all the money went to the dogs! :)
We used cheap furring strips for the majority of the project. We also had some leftover beadboard so we used that for the sides & back panel. We painted the base antique white and made a nice top out of some scrap lumber & old hardwood plywood. It took about an afternoon to assemble but another few days to sand and paint. We finished it while all 4 sides were separate to make it easier and it was still a pain to paint. This would be a great project to have a paint sprayer because it is sooo hard to avoid drips with this design.
The whole piece cost us almost nothing to make and we love how it turned out. We need to make ourselves one for our dogs!
The best part of this project was seeing it go home to someone who loves it and all the profits go to the Basset Hound Rescue!
Thanks Ana for the plans we couldn't have done it without you!
Built from Plan(s)
Estimated Time Investment
Week Long Project (20 Hours or More)
Finish Used
Antique white for body and custom mix of stains for the top (basically the last of a couple different cans of stain) followed by a glossy poly.
Recommended Skill Level
Intermediate
Comments
Fri, 12/06/2013 - 03:51
I'm working on this project
I'm working on this project right now and this is my first time building anything. How did you attach the 4 walls together and how do you screw the top portion on? Please help me, I would so grateful!!! [email protected]
Planked top Coffee Table with recycled legs
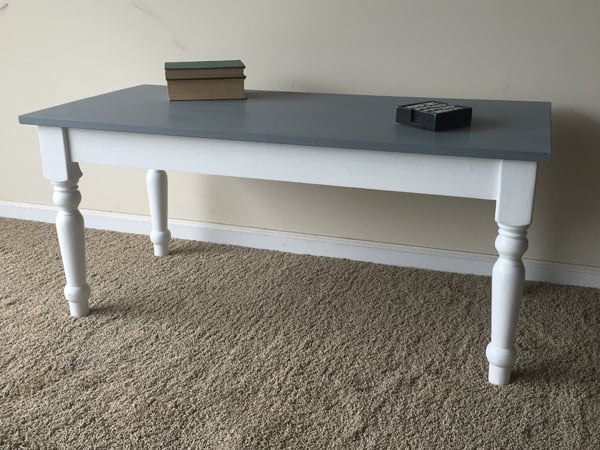
I found an old coffee table with stained legs for $10 on one of those app "for sale" sites. Sanded them down and with two pieces of 1 by 4 for the apron and 2 pieces of 1 by 6 for the top made this table. Apron is No2 whitewood and Top is select pine. Top was stained in a dark color (Varathane Kona) and then painted gray and sanded back to show some of grain and stain through. Total cost of new table about $60 (most expensive part was the select pine for the top at around $35)


Estimated Time Investment
Day Project (6-9 Hours)
Finish Used
Extra bright white and then gray for the top.
Recommended Skill Level
Beginner